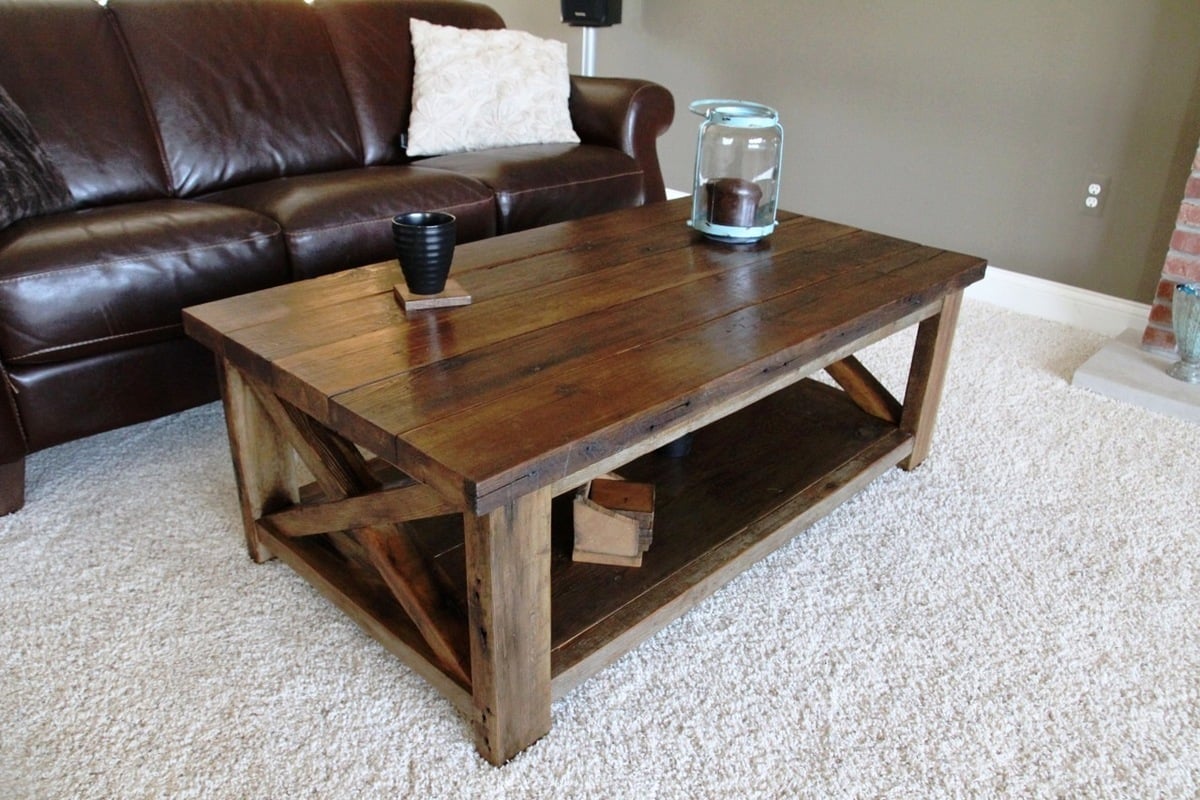
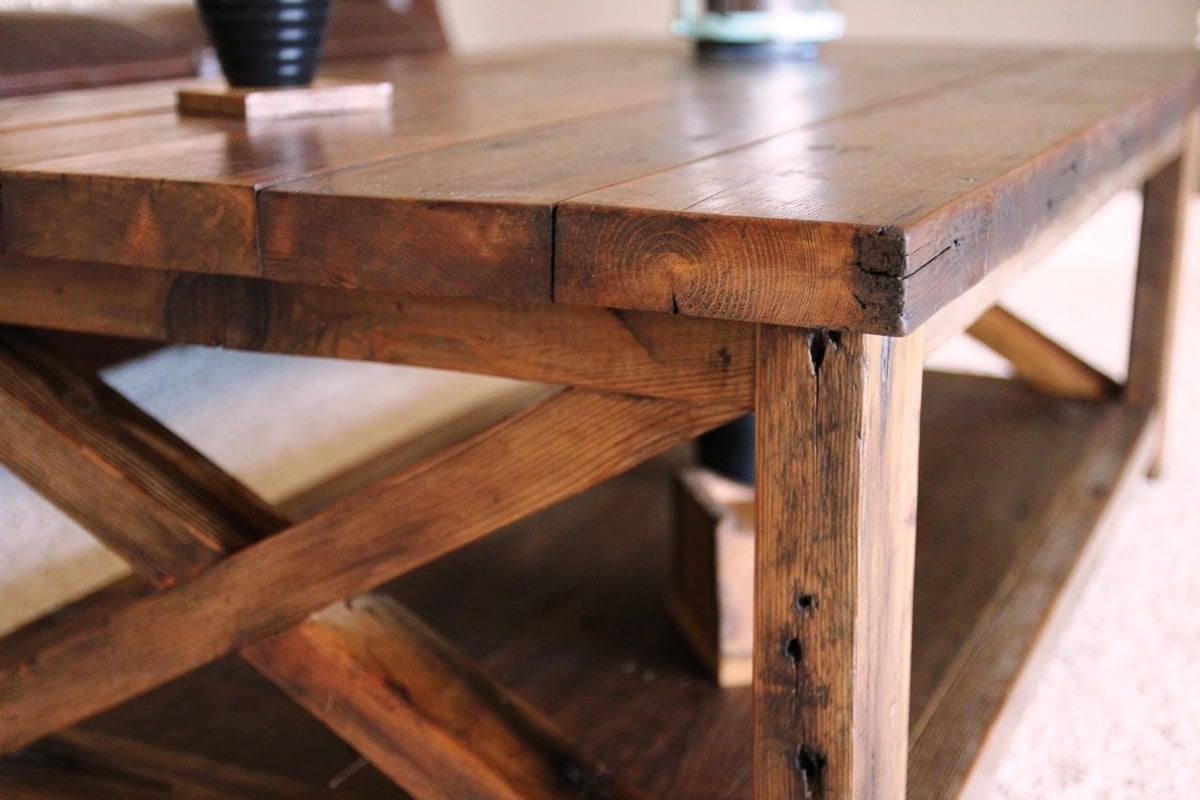
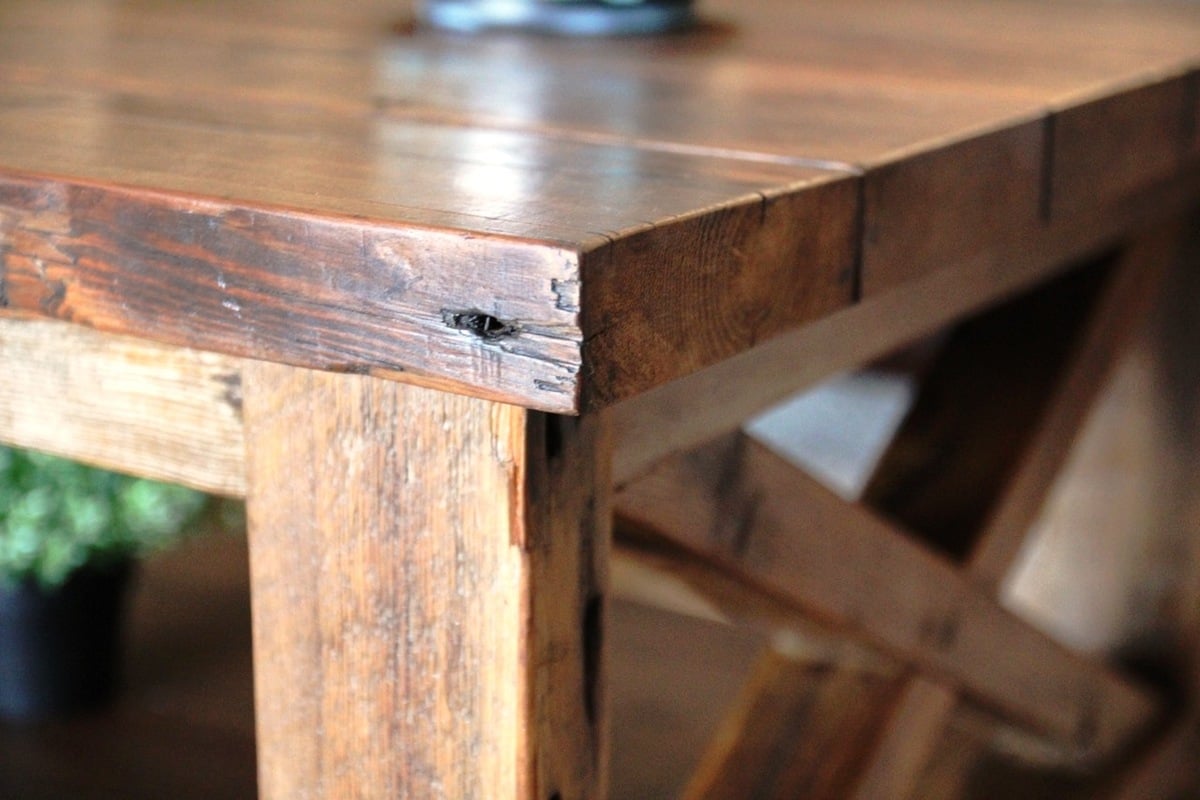
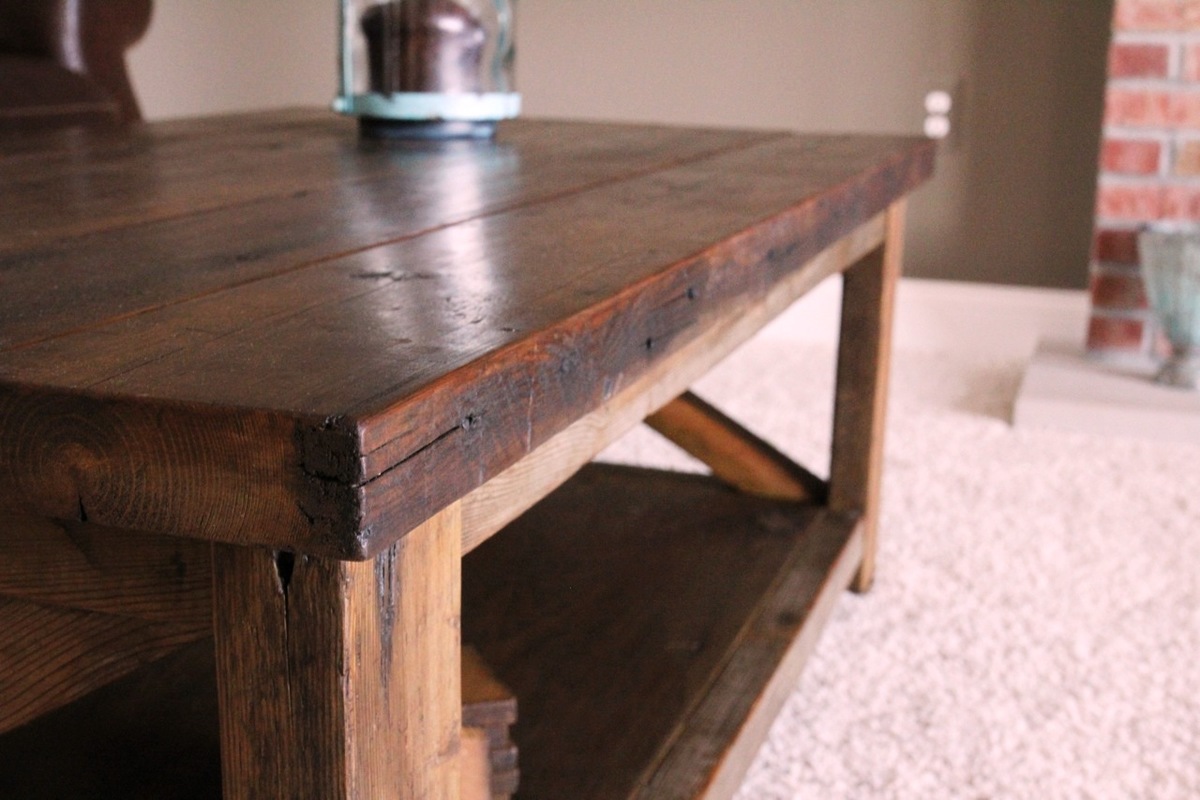
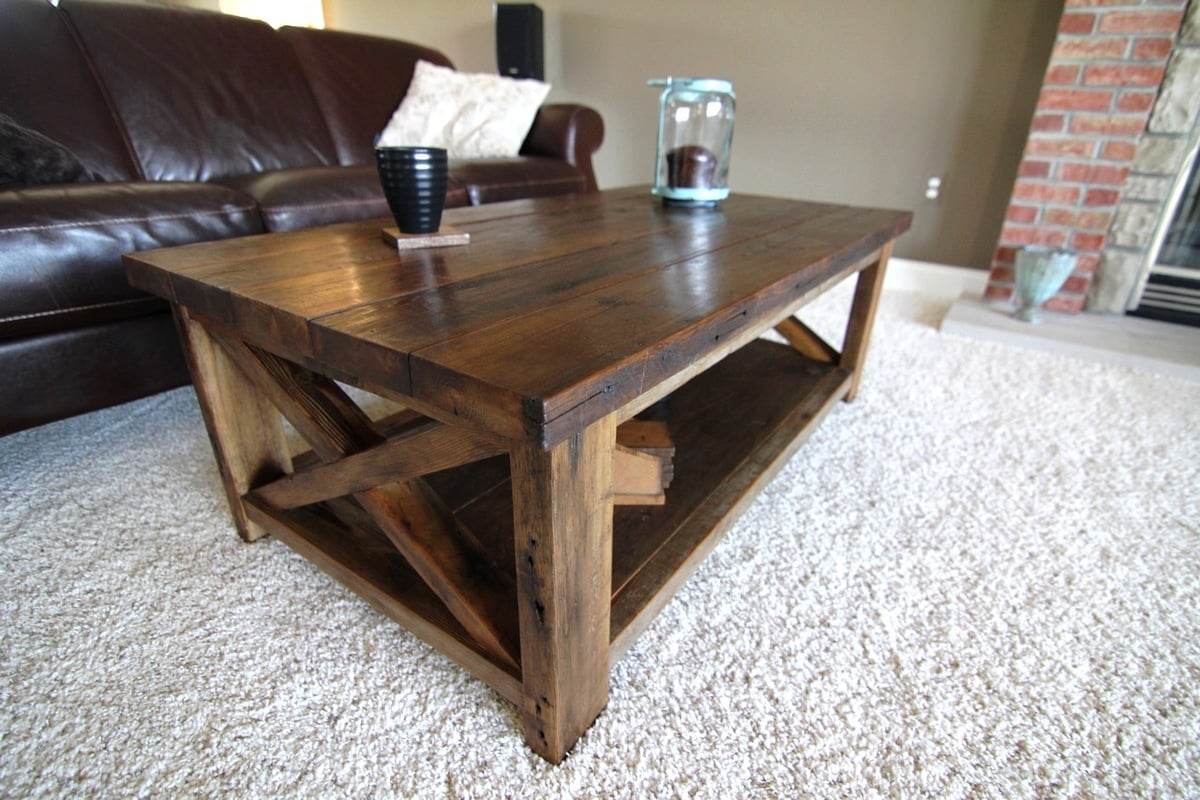
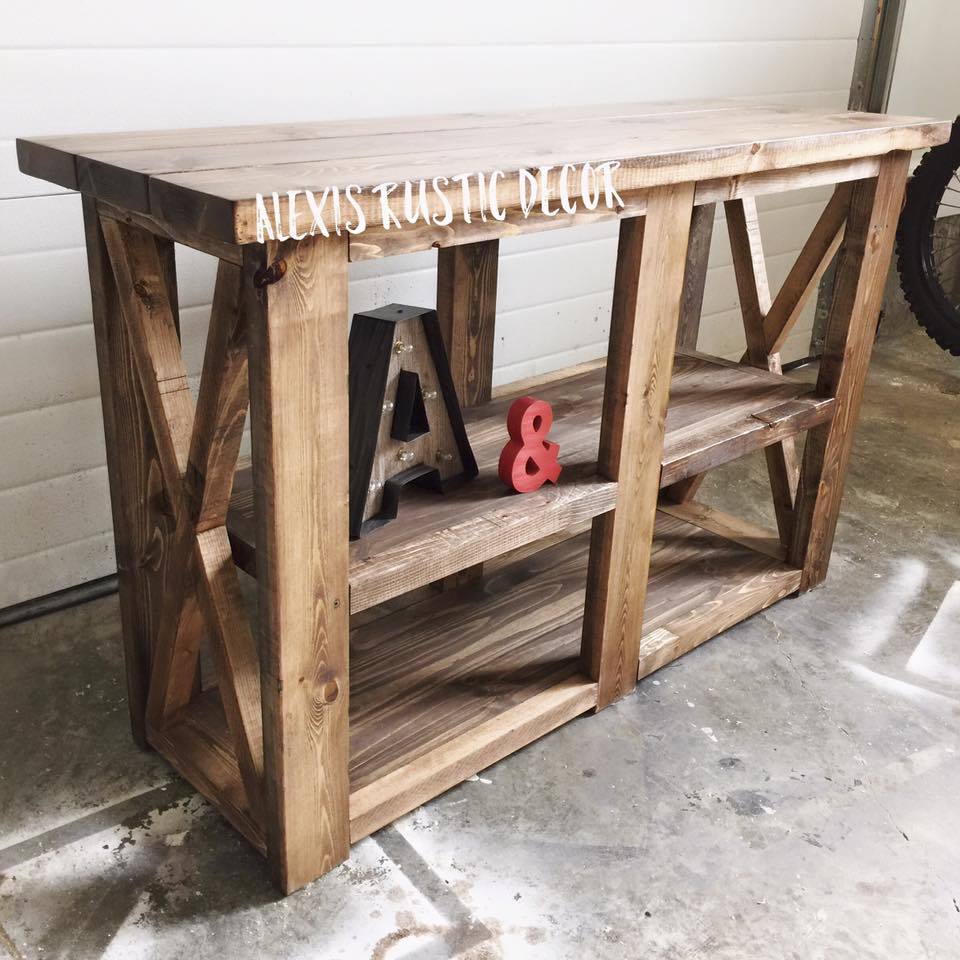
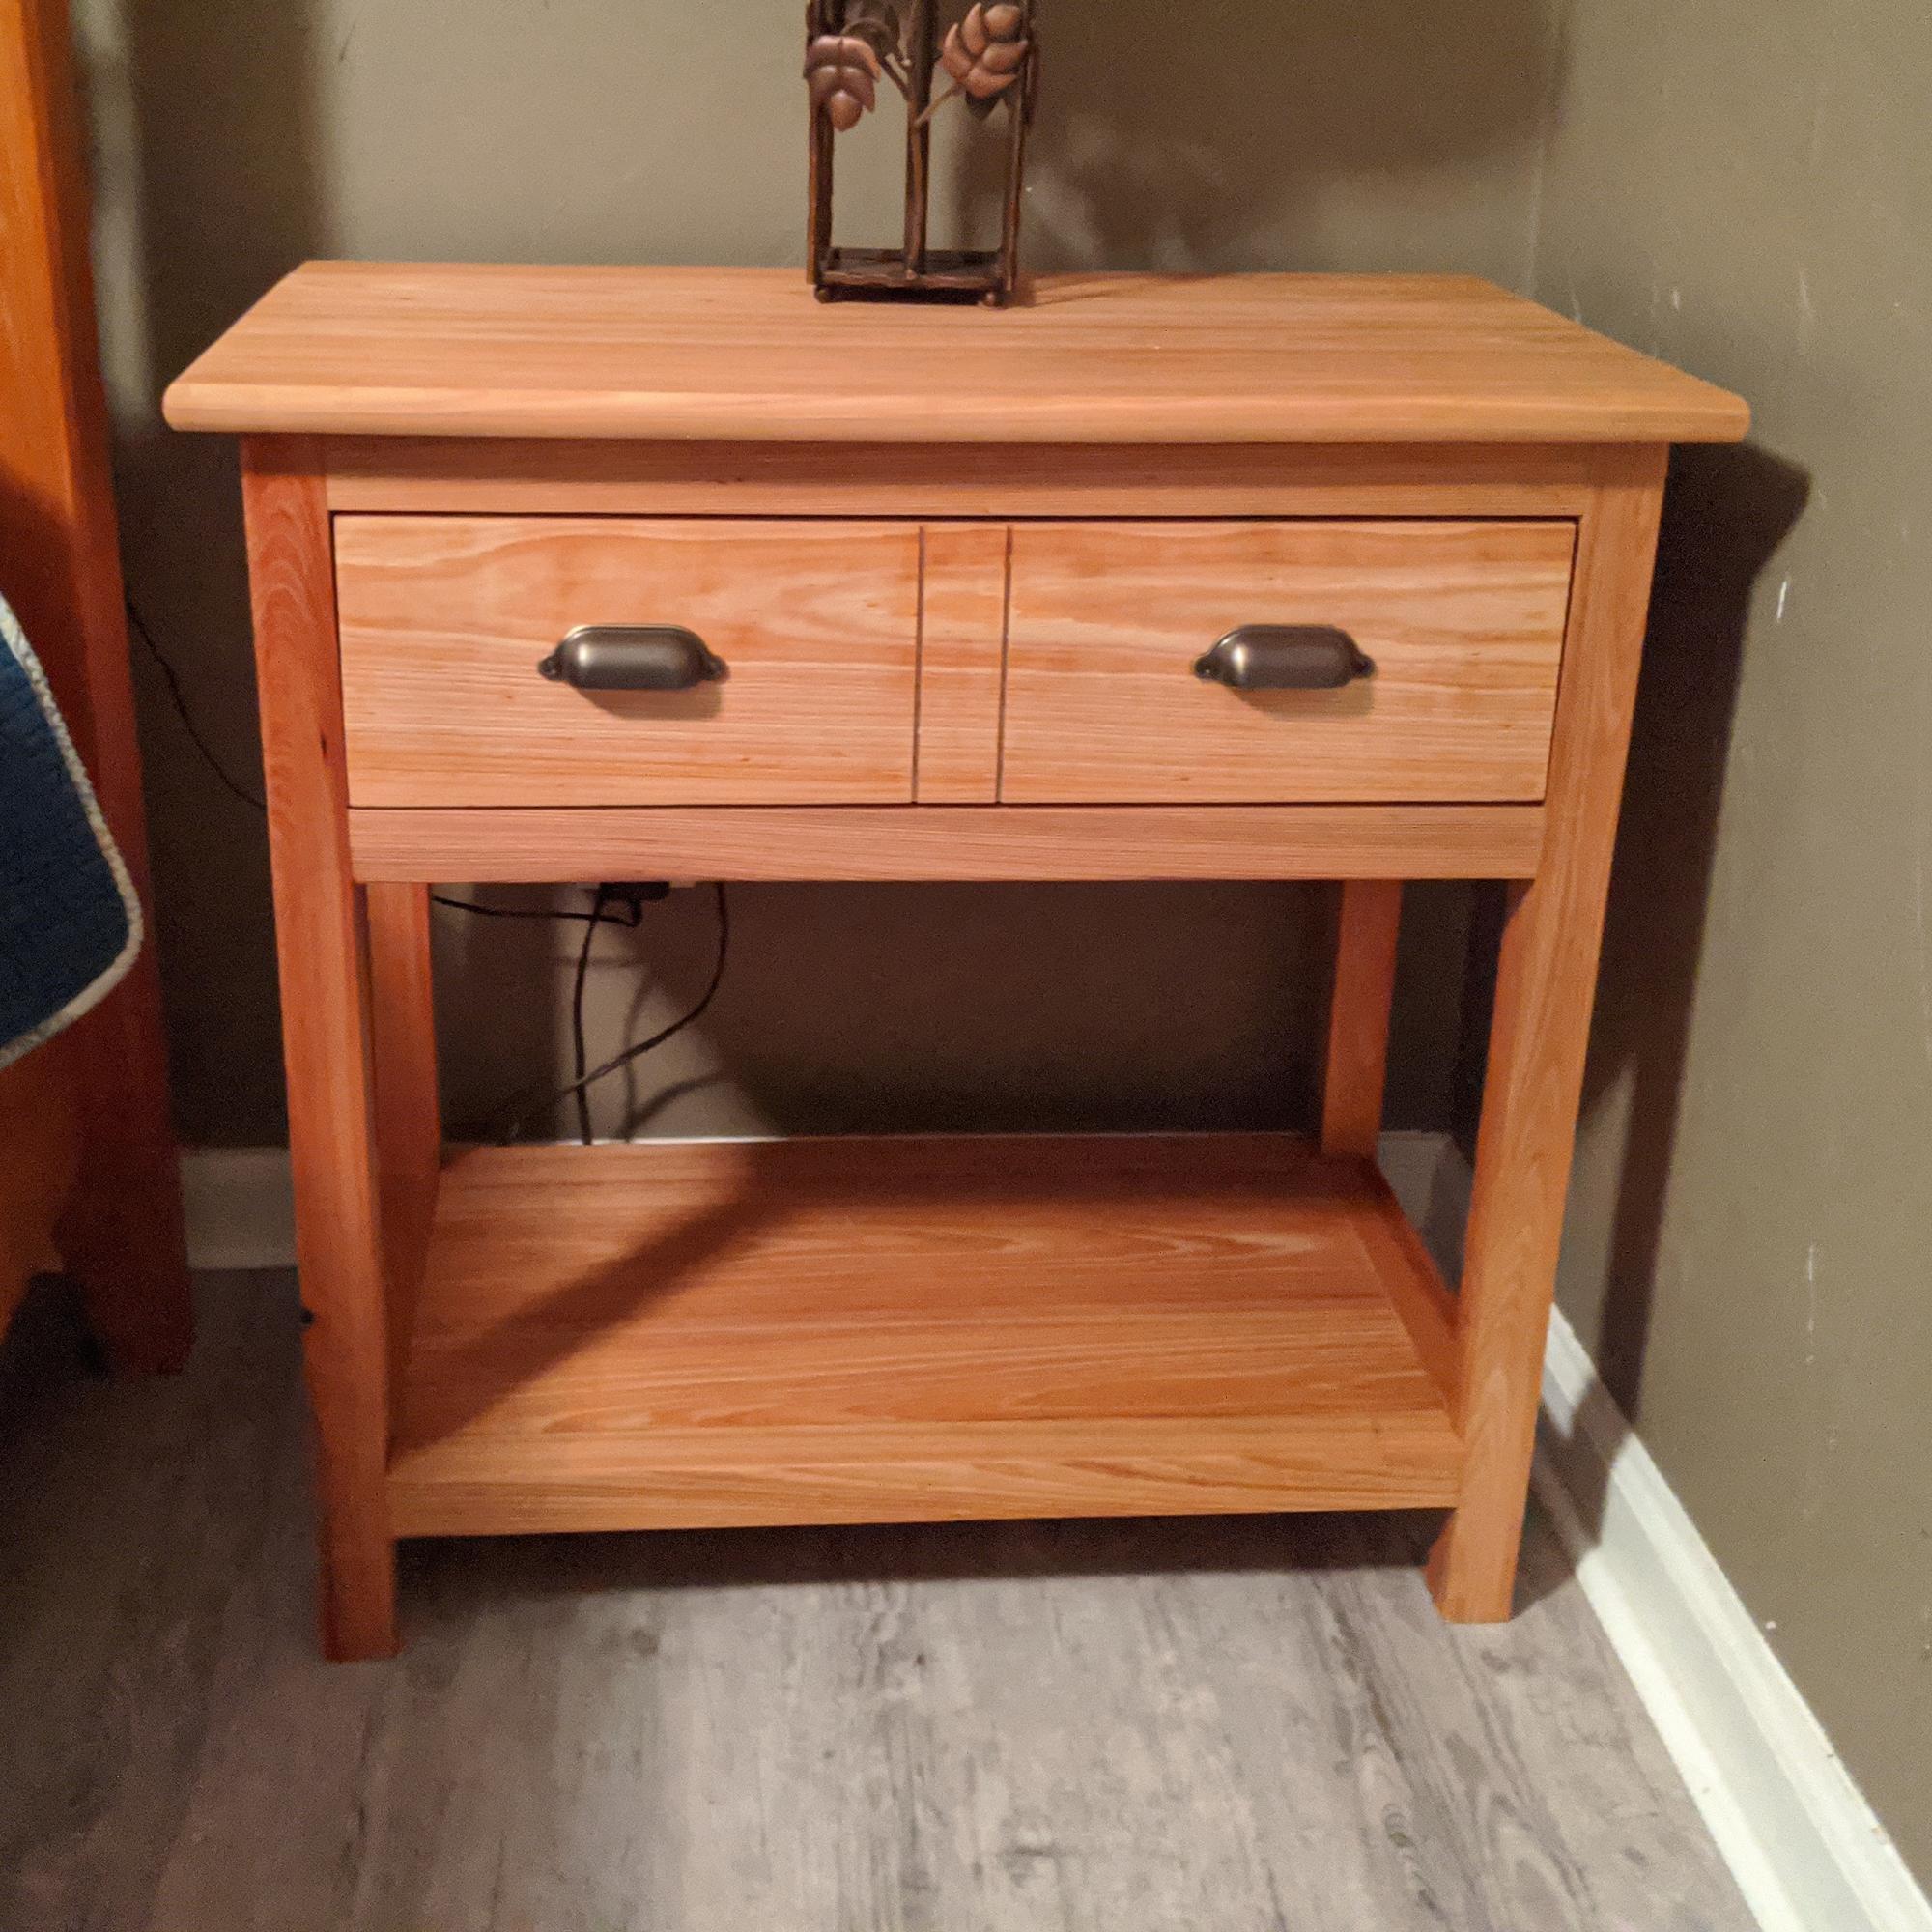
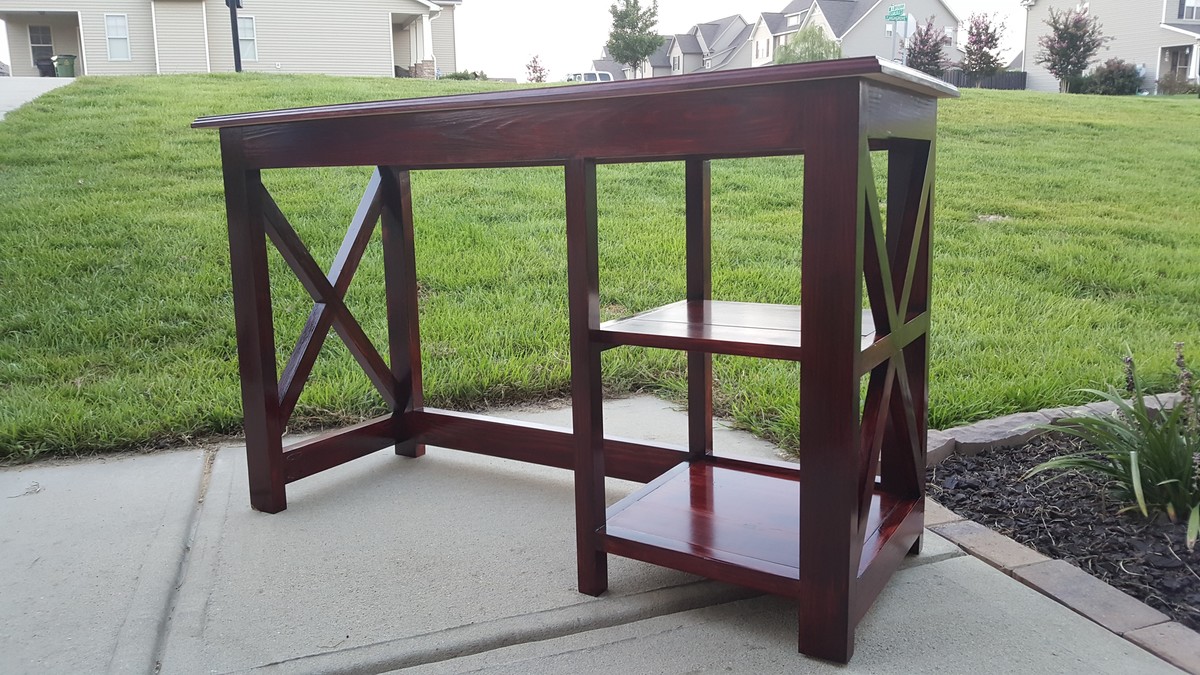
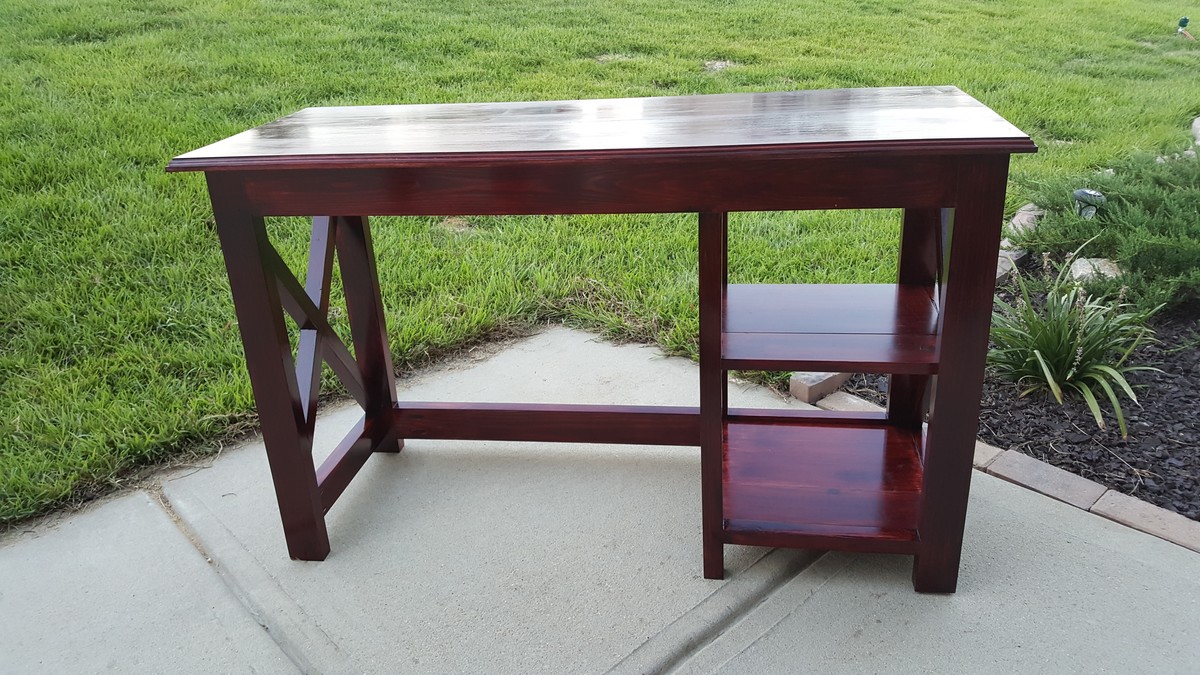
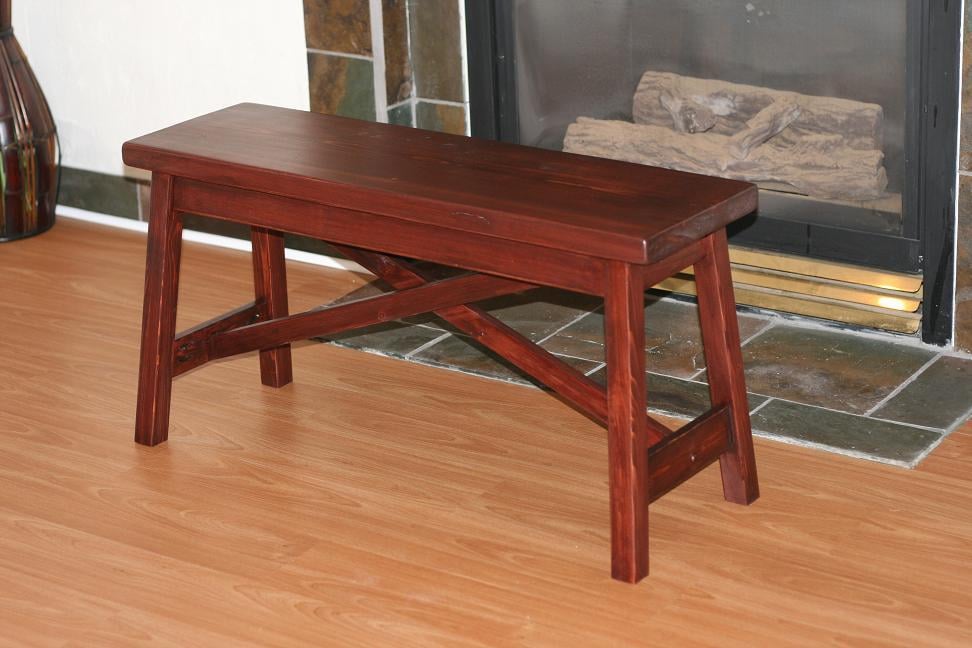
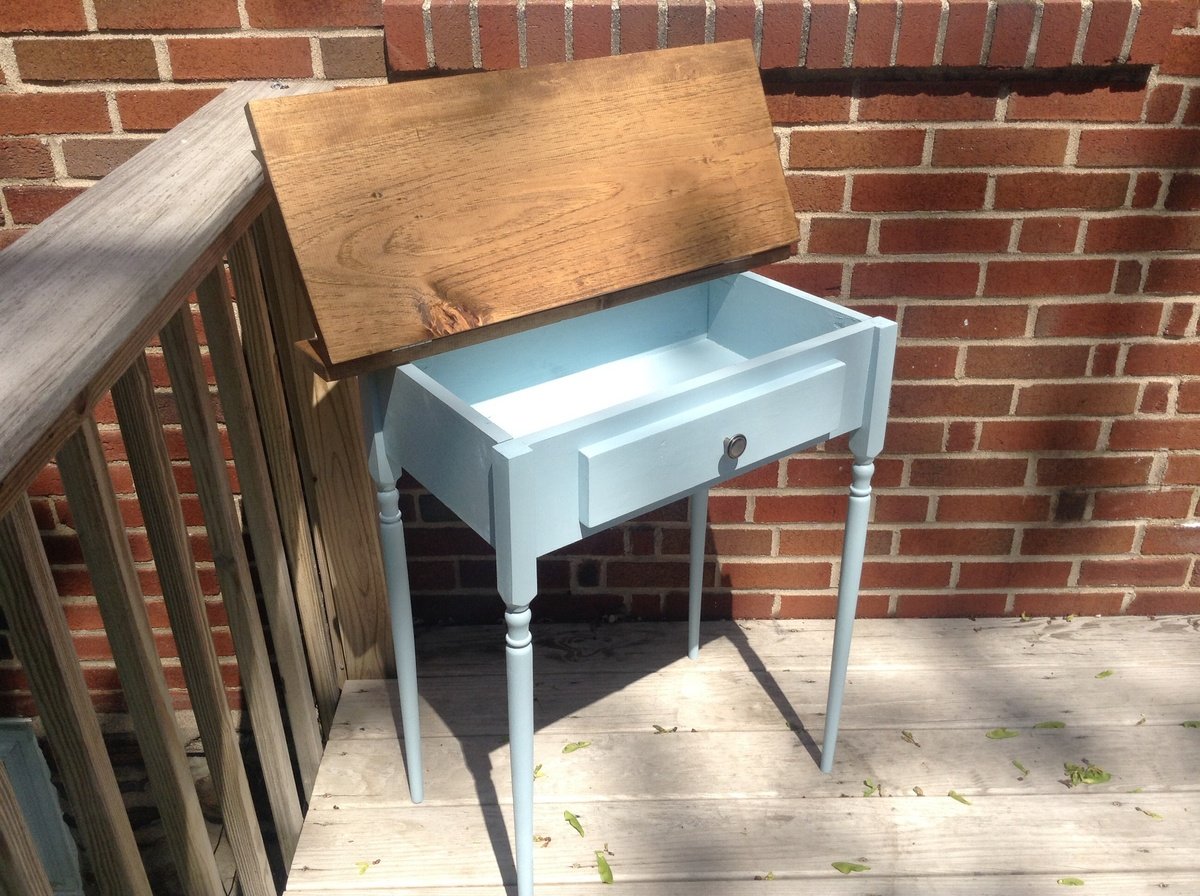
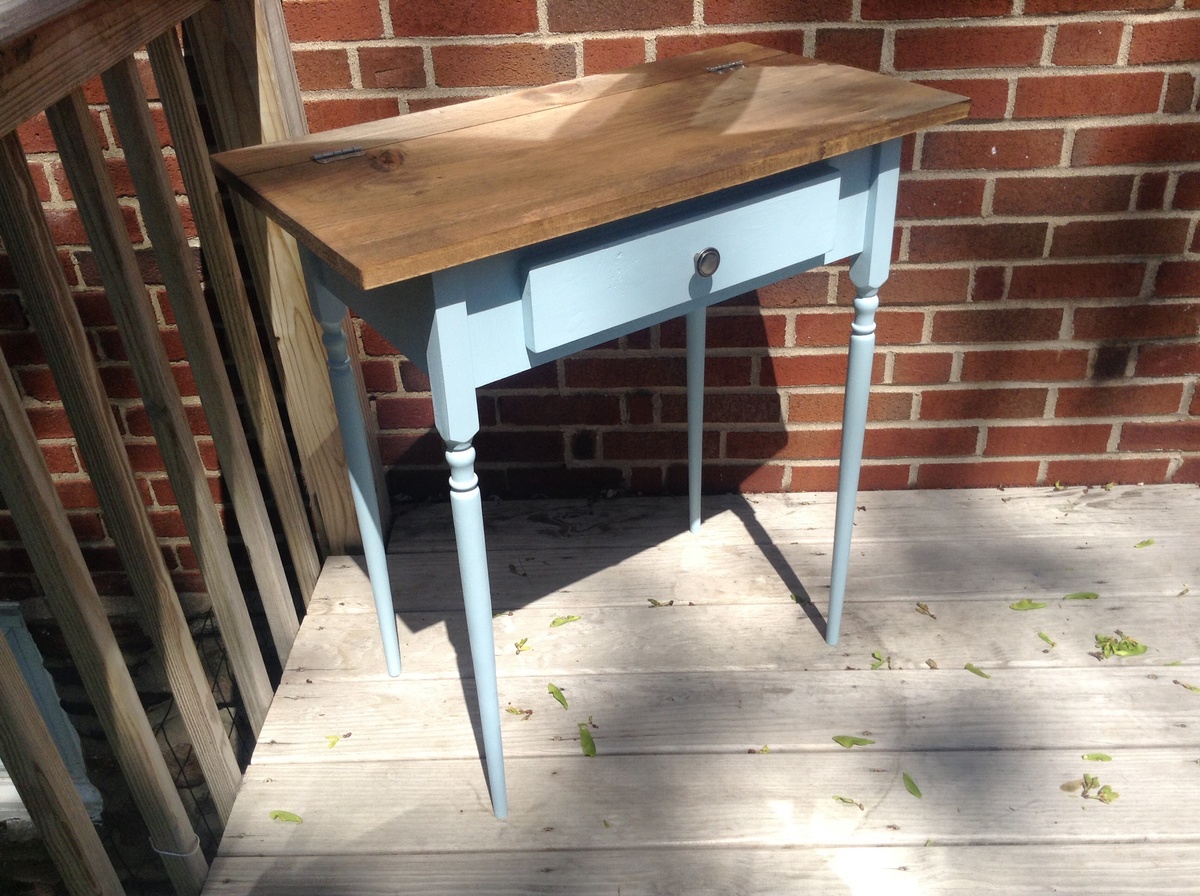
Community Brag Posts

$10 Ledges Shelves... Favorite Project!

I love how these turned out! I did use my Kreg Jig to attach my back and bottom boards, but you could easily pre-drill and use regular screws. You can see a full tutorial at http://www.shanty-2-chic.com/2012/01/20-shelves-anyone-can-build.html !!

Built from Plan(s)
Estimated Cost
$10
Estimated Time Investment
An Hour or Two (0-2 Hours)
Finish Used
Rust-Oleum Wood Care stain in Dark Walnut
Recommended Skill Level
Starter Project

Comments

veggie storage

Submitted by tjhead on Thu, 03/24/2016 - 10:08

I loved this plan.  It was my first build from Ana White plans and a true jumping off point for my imagination.  I used pine boards, matte red underneath and semi-gloss white top coat.  Steel wool was my tool for the distressing.

Built from Plan(s)
Estimated Time Investment
Day Project (6-9 Hours)
Finish Used
Matte red undercoat and semi-gloss white
Recommended Skill Level
Beginner

DIY Outdoor Furniture Set

Submitted by Anonymous (not verified) on Fri, 08/04/2023 - 11:32

Loving this furniture! We modified it slightly by raising the height of the couches. Added some height and a slight tilt in the back. The chairs are super comfortable as the plans are done. We used 6” 25x25 cushions. We plan on staining soon.

Jaime Sallis


Seasonal And Holiday

Rustic Console Project

Submitted by Anonymous (not verified) on Wed, 04/06/2016 - 07:31

This was my first project building something from this site. I absolutely love it! We didnt add the X's because the miter saw was at my dad's house, which I was kind of sad about, but I think it still looks good. Not too bad for mine and my husbands first build! 

Built from Plan(s)
Estimated Cost
$75
Estimated Time Investment
Weekend Project (10-20 Hours)
Finish Used
Minwax Jacobean
Recommended Skill Level
Beginner

Farmhouse King Bed Frame

Since developing a love for woodworking I’ve began building things for other people. This particular bed frame I built for a couple who are rebuilding their home after it unfortunately burned down. It’s a beautiful farmhouse home out in the country, and this bed frame fits perfectly in their new home.

Estimated Cost
$250
Estimated Time Investment
Weekend Project (10-20 Hours)
Finish Used
I used minwax pre-stain to prepare the wood. I then stained it using special walnut by Varathane (got it from The Home Depot). Finally, I finished it using a clear satin polyurethane by Minwax.
Recommended Skill Level
Beginner

Modified L Shaped Desk

This was my first woodworking project in a couple years. I modified the size to make it about 60" on each side. Now that  I am working from home now due to COVID-19 for the foreseeable future this has been perfect to use in order to have two monitors and enough room on the sides for other work. 

Estimated Cost
70
Recommended Skill Level
Beginner

Comments

DIY Kids Farmhouse Desk

Submitted by Anonymous (not verified) on Mon, 01/15/2024 - 18:10

Thank you so much for your design plans for the Brookstone desk! Made it a tad smaller to fit my daughter's needs but overall kept with the same design as yours. White paint used on the bottom with an antique white stain and poly used on top.

Chad H

Built from Plan(s)
Seasonal And Holiday

Wranglerstar Greenhouse

Thank you Ana for the excellent plans. We have been talking about this for months and are excited finally have a greenhouse. We live in the mountains and this will help extend our growing season. Please tell Ram thank you from the Wranglerlerstar family.

Built from Plan(s)
Estimated Cost
$750
Estimated Time Investment
Week Long Project (20 Hours or More)
Finish Used
stain
Recommended Skill Level
Advanced

Comments

jnow8687

Sat, 08/31/2019 - 12:34

Did you extend the base height? I want a greenhouse to enclose trees that do not do well in the winter and I think I would like to raise the base height a foot or so.

Modern Adirondack Chair, Super Sized

Submitted by Anonymous (not verified) on Fri, 08/21/2020 - 10:39

Am a big fan of Ana's work, and have used several of her plans in prior builds including the more traditional Adirondack chairs. Those stayed with my old house, and I wanted something different for my new house. Really liked her Modern Adirondack design with the floating arm rest. However, plans are like recipes to me--a guideline. I wanted the back boards to run up and down, and I am a bit more robust than the lovely and petite Ms. White, so they would need to be wider after I built the first one at 19 1/2" wide per plan. The next three I made 22" wide and that worked well without throwing off the geometry and angles of the other parts. Since I ran the backboards up and down, I needed some cross beams for stability and to give an attachment point for the middle of the boards. Cut some 2x4s at 15" wide, drilled pocket holes in both ends, and attached in between the back supports with the pockets facing up to be hidden by the back boards. All of the 2x4s were leftover cut-offs from the houses being built in my neighborhood. Since the frames were free, I splurged and went with cedar boards for the backs and bottoms. With the wider frames, I had to use 1x12s ripped down to 10 3/4" to get the right look (about a board's width in between). Needed some color, so I painted the frames Teal Seaglass from Menards. Cedar was stained with a natural deck stain from Sherwin Williams. I experimented with salt paint (mixing unsanded grout with the paint) to give a heavily textured and weathered finish but this was unecessary--the wood was distressed enough and I am a terrible painter. It also toned down the color so I skipped that step and just went with 2 coats of plain paint. It looks like outdoor furniture should up close. As always, am pleased with Ana's plans. Thank you for doing all the hard work!

Estimated Cost
about $200 for all 4 chairs due to cedar and paint
Estimated Time Investment
Weekend Project (10-20 Hours)
Finish Used
Paint - Pittsburgh matte exterior with Dutch Boy coloring Teal Seaglass
Stain - Sherwin Williams Superdeck stain, Natural finish
Recommended Skill Level
Starter Project

Comments

Seasonal And Holiday

Stain & Paint Finish

Submitted by ajstormy85 on Sun, 08/24/2014 - 18:19

Did the multi-finish on the step stool. On the steps, I used the Minwax Pre-Stain Conditioner, followed by Minwax 'Early American' stain and then Minwax clear gloss polyurethane. The rest of the stool was painted with DIY chalk paint. The paint is 1 cup flat paint (Valspar Jungle Thicket) mixed with 1/3 cup plaster of paris and 1/3 cup water. The chalk paint portion was finished with the Minwax Finishing Paste Wax and gave the flat paint look a nice sheen.

Finish Used
Minwax products (pre-stain conditioner, Early American stain, clear gloss polyurethane; DIY chalk paint (1 cup flat paint, 1/3 cup plaster of paris, 1/3 cup water); Minwax finishing paste wax on chalk paint part
Recommended Skill Level
Beginner

Play Deck and Swing

Submitted by lervy on Wed, 09/03/2014 - 02:23

Play Deck and Swing

Estimated Cost
£700
Estimated Time Investment
Week Long Project (20 Hours or More)
Finish Used
Ronseal Country Oak Fence Stain
Recommended Skill Level
Intermediate

Comments

booksnotbombs

Wed, 09/03/2014 - 07:35

You have a BEAUTIFUL view from your yard! Just curious, where do you live? I assumed somewhere in Europe due to the currency. The play area looks fantastic. What lucky kiddos!

Seasonal And Holiday

My First Project - Lukes Bed

Submitted by dabb03 on Sat, 10/11/2014 - 13:38

I made this bed for my son Luke's for 4th birthday. This project was a first for me and I loved doing it. I modified the stairs as I wasn't crazy about how shallow the steps were and how high the rise was. I have 4 stairs instead of 3 and they stick out about 4 inches from the front of the bed. The bottom step is a small toy box and the top 3 are all drawers. I also added a slide. The slide design was the biggest challenge as I couldn't find a set of plans that I liked. I ended up tracing the shape from an outdoor playset that we have. I then created a template and used a router to cut 1/4" grooves into the left and right hand sides. With help, We slid a 1/8" of wood into the grooves. The wood was from home depot, slick on one side. I think it was a Hardboard tempered panel, but I don't remember for sure. The entire project probably took 60-70 hours. The bed itself was about 30-35. The other time was the stairs with drawers and the slide. A good chunk of the remaining time was spent in planning and figuring out the slide and adjusting the drawers. This being my first project, I spent a lot of time just figuring things out. I had never used a router before. I had never drilled pocket holes before. This project opened my eyes to a whole new world.

Estimated Cost
$650
Estimated Time Investment
Week Long Project (20 Hours or More)
Finish Used
We used stain and "Candy Sticks" The Candy Sticks are giant stickers that photographers use for interesting backgrounds.
Recommended Skill Level
Beginner

Comments

Storage step stool

I made this step stool in around four days. It took longer because of the five coats of paint. It has two coats of paint and three coats of finish. It should stand up to many years of use. With the storage area empty, the lid dropping closed can be somewhat loud. I added felt bumpers underneath the top step to dampen the sound. It's light enough for my 18-month old to push around.

The jigsaw cuts weren't always perfect. I filled any gaps and countersunk screws with wood filler. I used a mouse sander to smooth everything out after screwing it all together. The longest part was the painting. I painted every surface, hidden or not, to protect the wood and hopefully make it last forever.

I didn't list an estimated cost because I had to purchase several tools, including a jigsaw, sander, and countersink bits. It was probably user error, but the countersink drill bit was a pain to use. The locking nut couldn't be tightened enough to keep the adjustable drill bit in place.

Built from Plan(s)
Estimated Time Investment
Weekend Project (10-20 Hours)
Finish Used
Two coats of Minwax Polycrylic over two coats of Behr Premium Plus Ultra semi-gloss paint (color: Old Fashioned Pink).
Recommended Skill Level
Beginner

Adirondack chair from Pallets

Submitted by Anonymous (not verified) on Fri, 03/24/2017 - 19:42

I decided to try and use the plans on Ana's site but with a twist. I wanted to limit myself to using only pallets. I think it turned out great! I can't upload all the photos because they exceed the maximum size limit. If I was able to you could see how each chair is slightly different and has a lot of character. I finished them with a waterproofing oil which I highly recommend over other finishes. 

Estimated Cost
$10 for screws.
Estimated Time Investment
Afternoon Project (3-6 Hours)
Finish Used
Cabot oil
Recommended Skill Level
Beginner

Comments

Slatted double vanity - FINALLY finished!

I was a bit over my head with this one but I am so far very happy with the project. It is not quite finished. The marble was installed last week and we are awating the plumber to come back to hook up the sinks. I will install the second slatted shelf once the plumbing is in. Will post finished pictures soon. The mirror is made from 6x6 posts from the lumber yard. We had a friend cut them to size using a band saw. We made the mirror frame based on a picture I found on Houzz.com. The mirror glass was something I picked up off of craigslist for next to nothing and removed from the original frame. It is HEAVY (~200lbs) and attached to the wall with metal brackets. We purchased the sinks/faucets on ebay. 


Estimated Cost
For the vanity alone: $200-250
Estimated Time Investment
Weekend Project (10-20 Hours)
Finish Used
I used Hilary's vinegar/steel wool solution to age the wood, then sanded and finished with the vermont natural coatings polywhey in satin.
Recommended Skill Level
Intermediate

Comments

Square Picnic Table Project

This was a great summer project. The table looks great and it was any easy build. Doesn’t get any better than this. I added a hole in the center of the table for my umbrella and used the longer screws for more frame stability.

Built from Plan(s)
Estimated Cost
$200.00
Estimated Time Investment
Day Project (6-9 Hours)
Finish Used
Used semi transparent cedar tone stain. Lightly sanded edges and surfaces. Applied stain with a brush before assembly.

Comments

Seasonal And Holiday

Slide out spice drawers

Submitted by AndyH on Sun, 03/22/2015 - 14:44

Slide out spice drawers.  Simple build from 1 piece of 1 by 3 and 1/4 inch plywood for base.


Estimated Time Investment
An Hour or Two (0-2 Hours)
Finish Used
Just Matte poly for a clear finish.
Recommended Skill Level
Beginner

Comments

Simple Outhouse

I built this outhouse to go with a dry cabin I'm working on, and also as an emergency backup for my house. I used treated lumber on the base/deck and splurged on T-111 for the siding. I wanted to use greenhouse polycarbonate for the roof, but found a piece of metal roofing in my shed that was exactly the right size so I used that instead. I thought about doing a fancy cutout on the door but ended up going with a half moon because it was easy. I'm thinking about cutting out stars of different sizes all over the rest of the door to let in more light. I'll trim and stain it next summer.

Built from Plan(s)
Estimated Cost
$450 - I used T-111 which is $40/sheet here in Alaska. I also used treated lumber where recommended and stainless steel screws.
Estimated Time Investment
Weekend Project (10-20 Hours)
Recommended Skill Level
Beginner

Comments

CH

Mon, 01/13/2020 - 15:25

WHAT HAPPENS TO THE 'STUFF' THAT YOU DEPOSIT IN THE TOILET?  I DIDN'T READ ANYTHING ABOUT DIGGING A PIT/TREATMENTS, ETC.  PLEASE LET ME KNOW.  THANK YOU!  CH.

Modish Adirondack Chair

Submitted by imatt86 on Sun, 04/17/2011 - 09:07

I built this in an afternoon and painted the next day. It was quite fun. BIG TIP!!! Paint BEFORE you build!

Built from Plan(s)
Estimated Cost
$60
Estimated Time Investment
Afternoon Project (3-6 Hours)
Finish Used
Primer + Paint all in one
Recommended Skill Level
Beginner

Clubhouse based on Ana's Plan

Submitted by MattSl on Tue, 05/03/2011 - 09:18

I used Ana's plan as a base.

I changed it from 8x8 to 8x12, made the 4x4x8's to 4x4x10' for a higher main platform and swing platform, and added a 12' long monkey bar set to the other side. Also, an 8' climbing wall and a plank walkway to accompany the two slides.

For the clubhouse, I used Hardiplank 4x8 sheets for the siding and an EZ-Framer kit for the structure itself.

The slides I purchased from Lowes, monkey bars from Amazon, and the swing frame braces from Amazon as well. The swing kits I got from ebay.

Estimated Cost
1500
Estimated Time Investment
Week Long Project (20 Hours or More)
Recommended Skill Level
Intermediate
Seasonal And Holiday

Rustic X beach beverage center

Submitted by one wolf on Tue, 09/08/2015 - 06:52

We used old dock wood for the surface of our X table for a nice beach house beverage center (sand bar!).  We adjusted the size to fit our space (a little longer and wider) and used additional studs for the shelves instead of 1" shelving, glued and PH/PS together.  To cut the X pieces I just held the 1x1 on the end of the table where it goes and marked the lines. Then I clamped a guide board at the correct angle on the table saw to make all the cuts, starting a bit long and shaving off until it just fit.  


With all the pocket holes and screws I wouldn't consider this a beginner project. Some additional steps and pictures in your description would help also.  End result is really nice.


Built from Plan(s)
Estimated Cost
$50
Estimated Time Investment
Weekend Project (10-20 Hours)
Finish Used
Patina wood from an old dock for the surface and the base is painted flat gray.
Recommended Skill Level
Intermediate

Comments

Back