Community Brag Posts
Our Toy Box
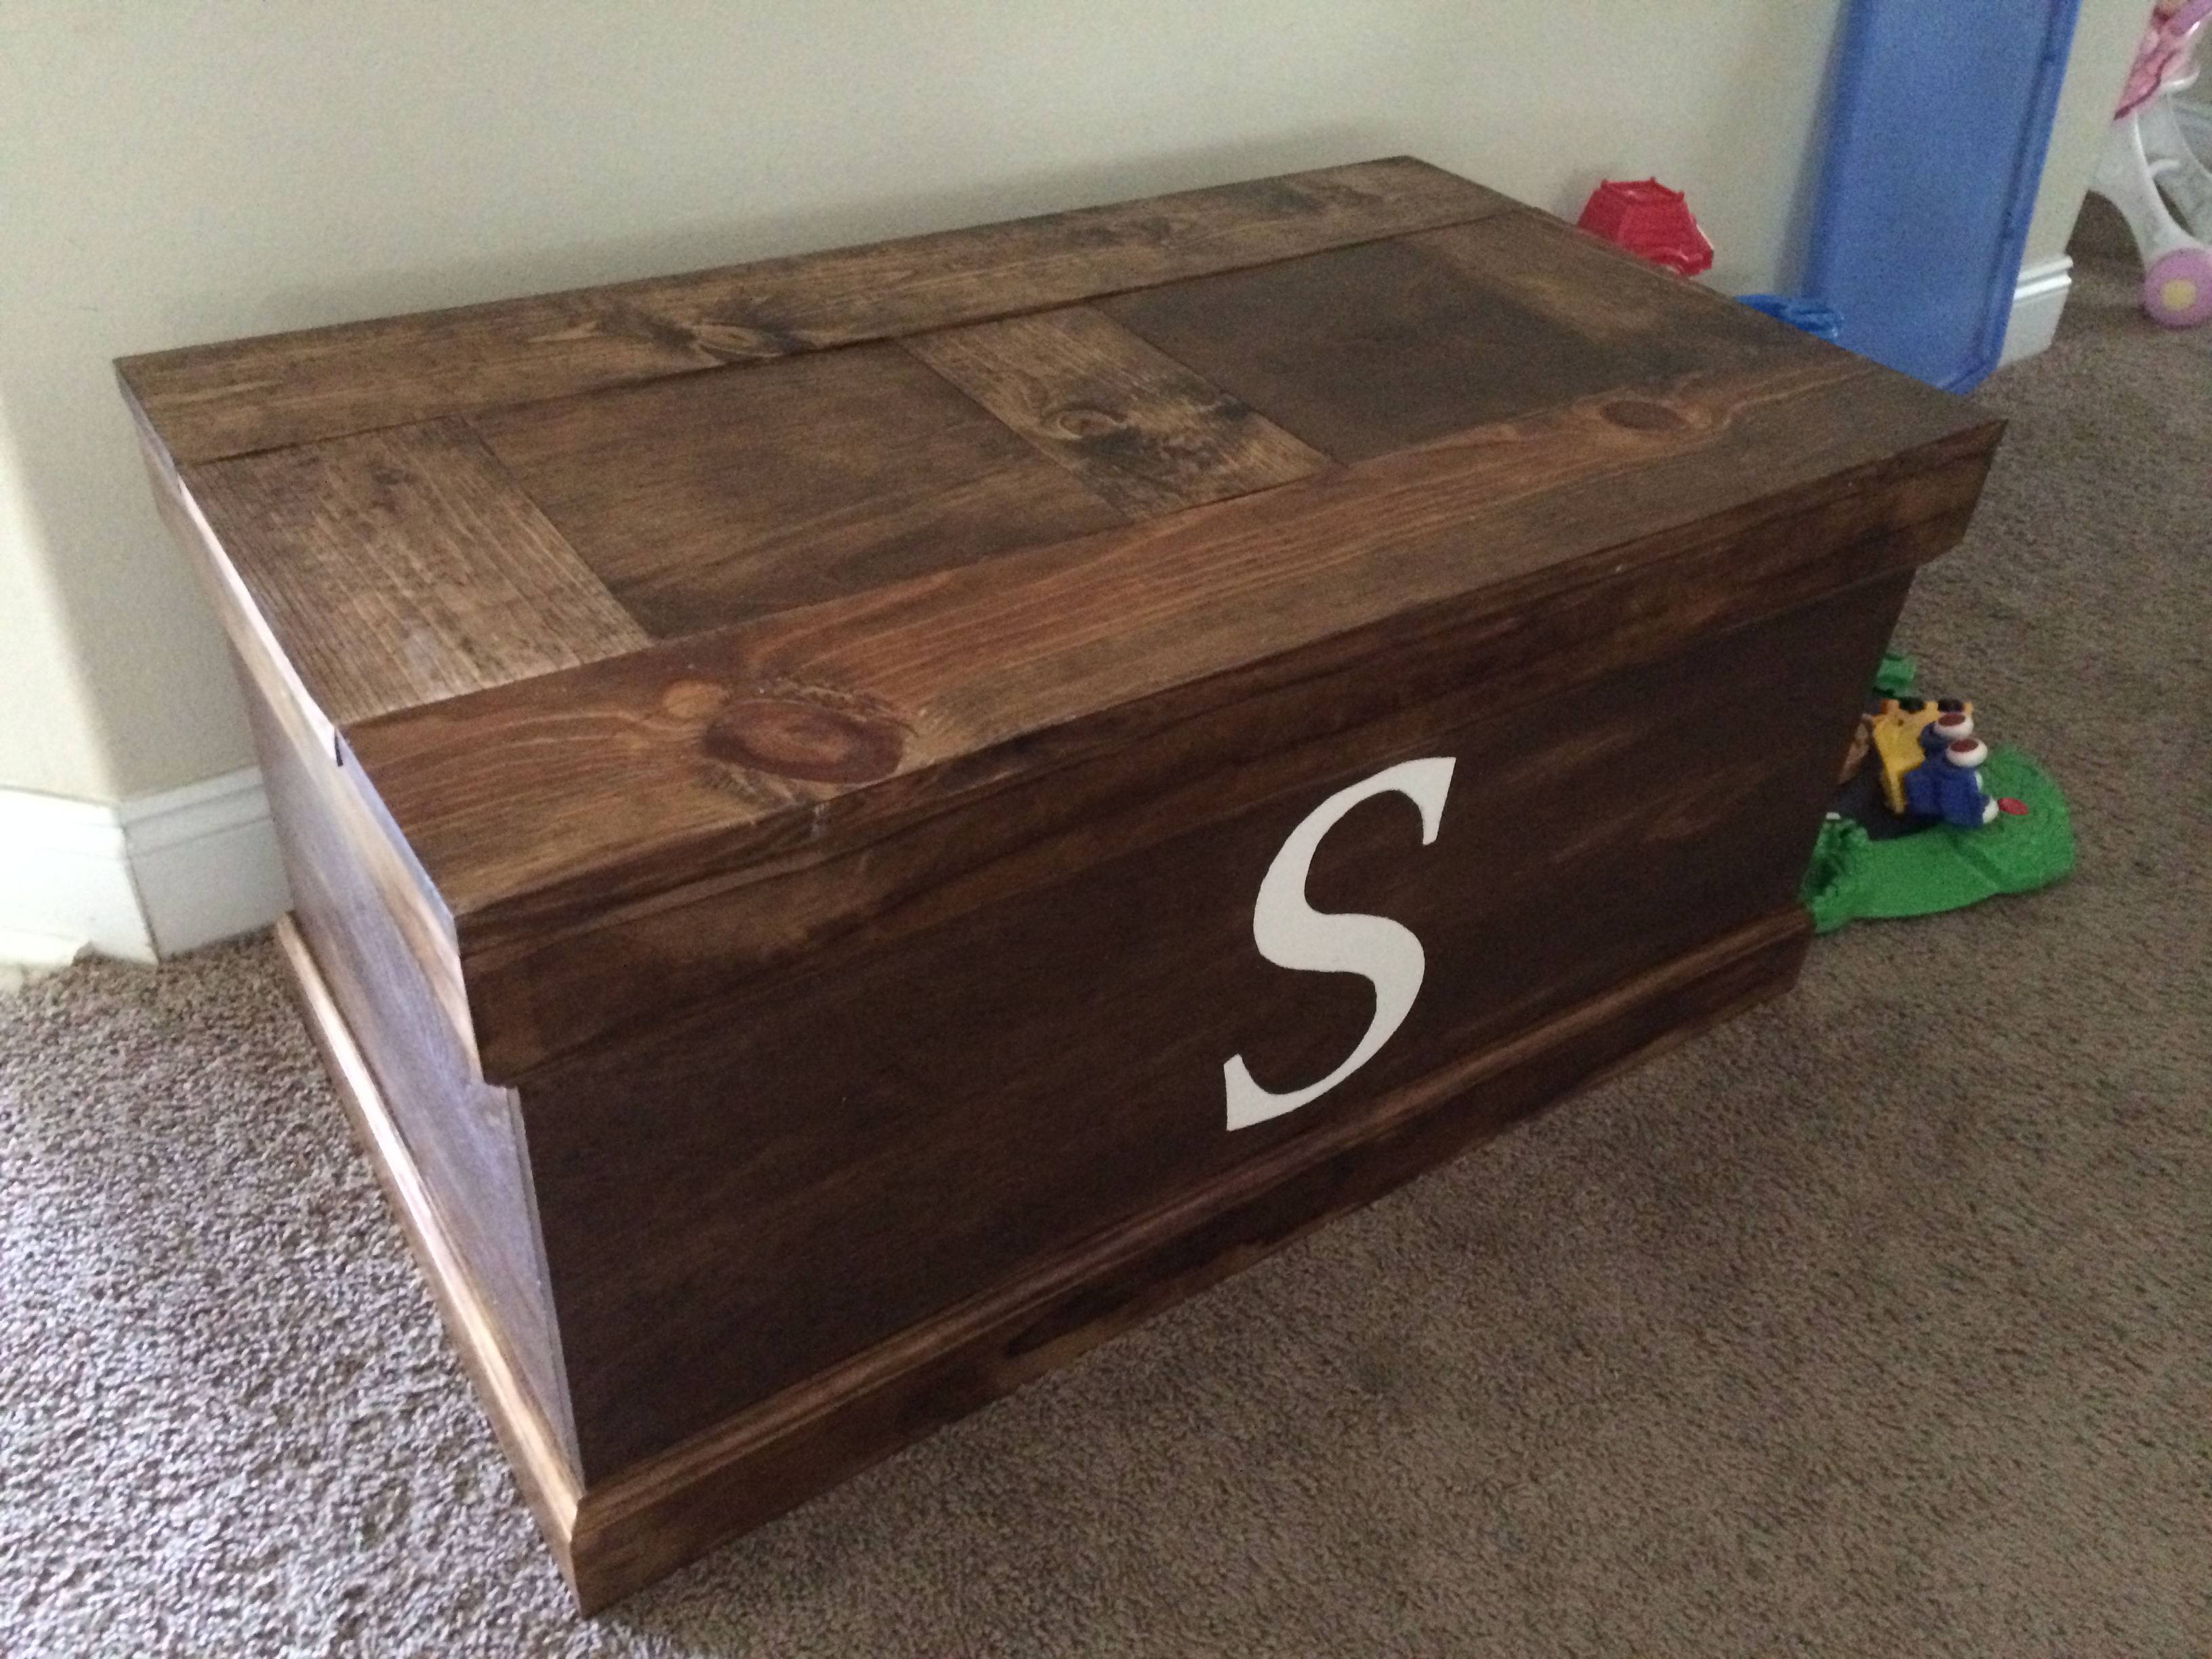
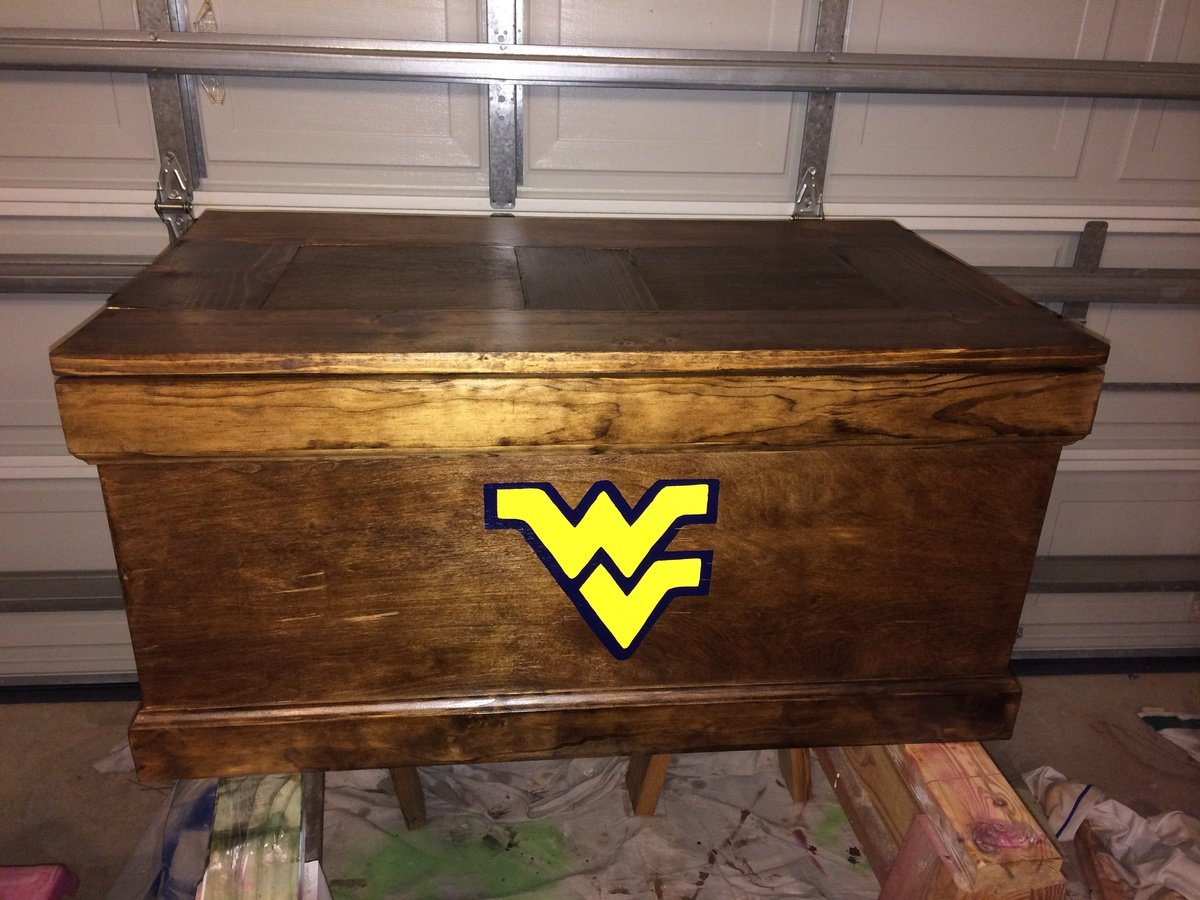
Toy box for our kids that someday will become a blanket box or something else around the house. Customized with the S for our last name. Use a piano hinge and folding lid support on one side. Made another for our friends with the West Virginia logo.
Built from Plan(s)
Estimated Time Investment
Day Project (6-9 Hours)
Finish Used
Provincial minwax stain, rustoleum spray paint for the S, and polycrylic clear coat.
Recommended Skill Level
Intermediate
Comments

Thu, 04/16/2015 - 08:37
soft stay hinges
Hello, I just built this same trunk and it turned out great. However, I had a hard time finding a set of soft stay support hinges for the inside. Did you install any and if you did could you tell me what kind (brand) and also a picture of how your hinges look on the back of the trunk and when it is open. That would be great. I went to the original site and asked but they don't respond.
Laundry Basket Tower
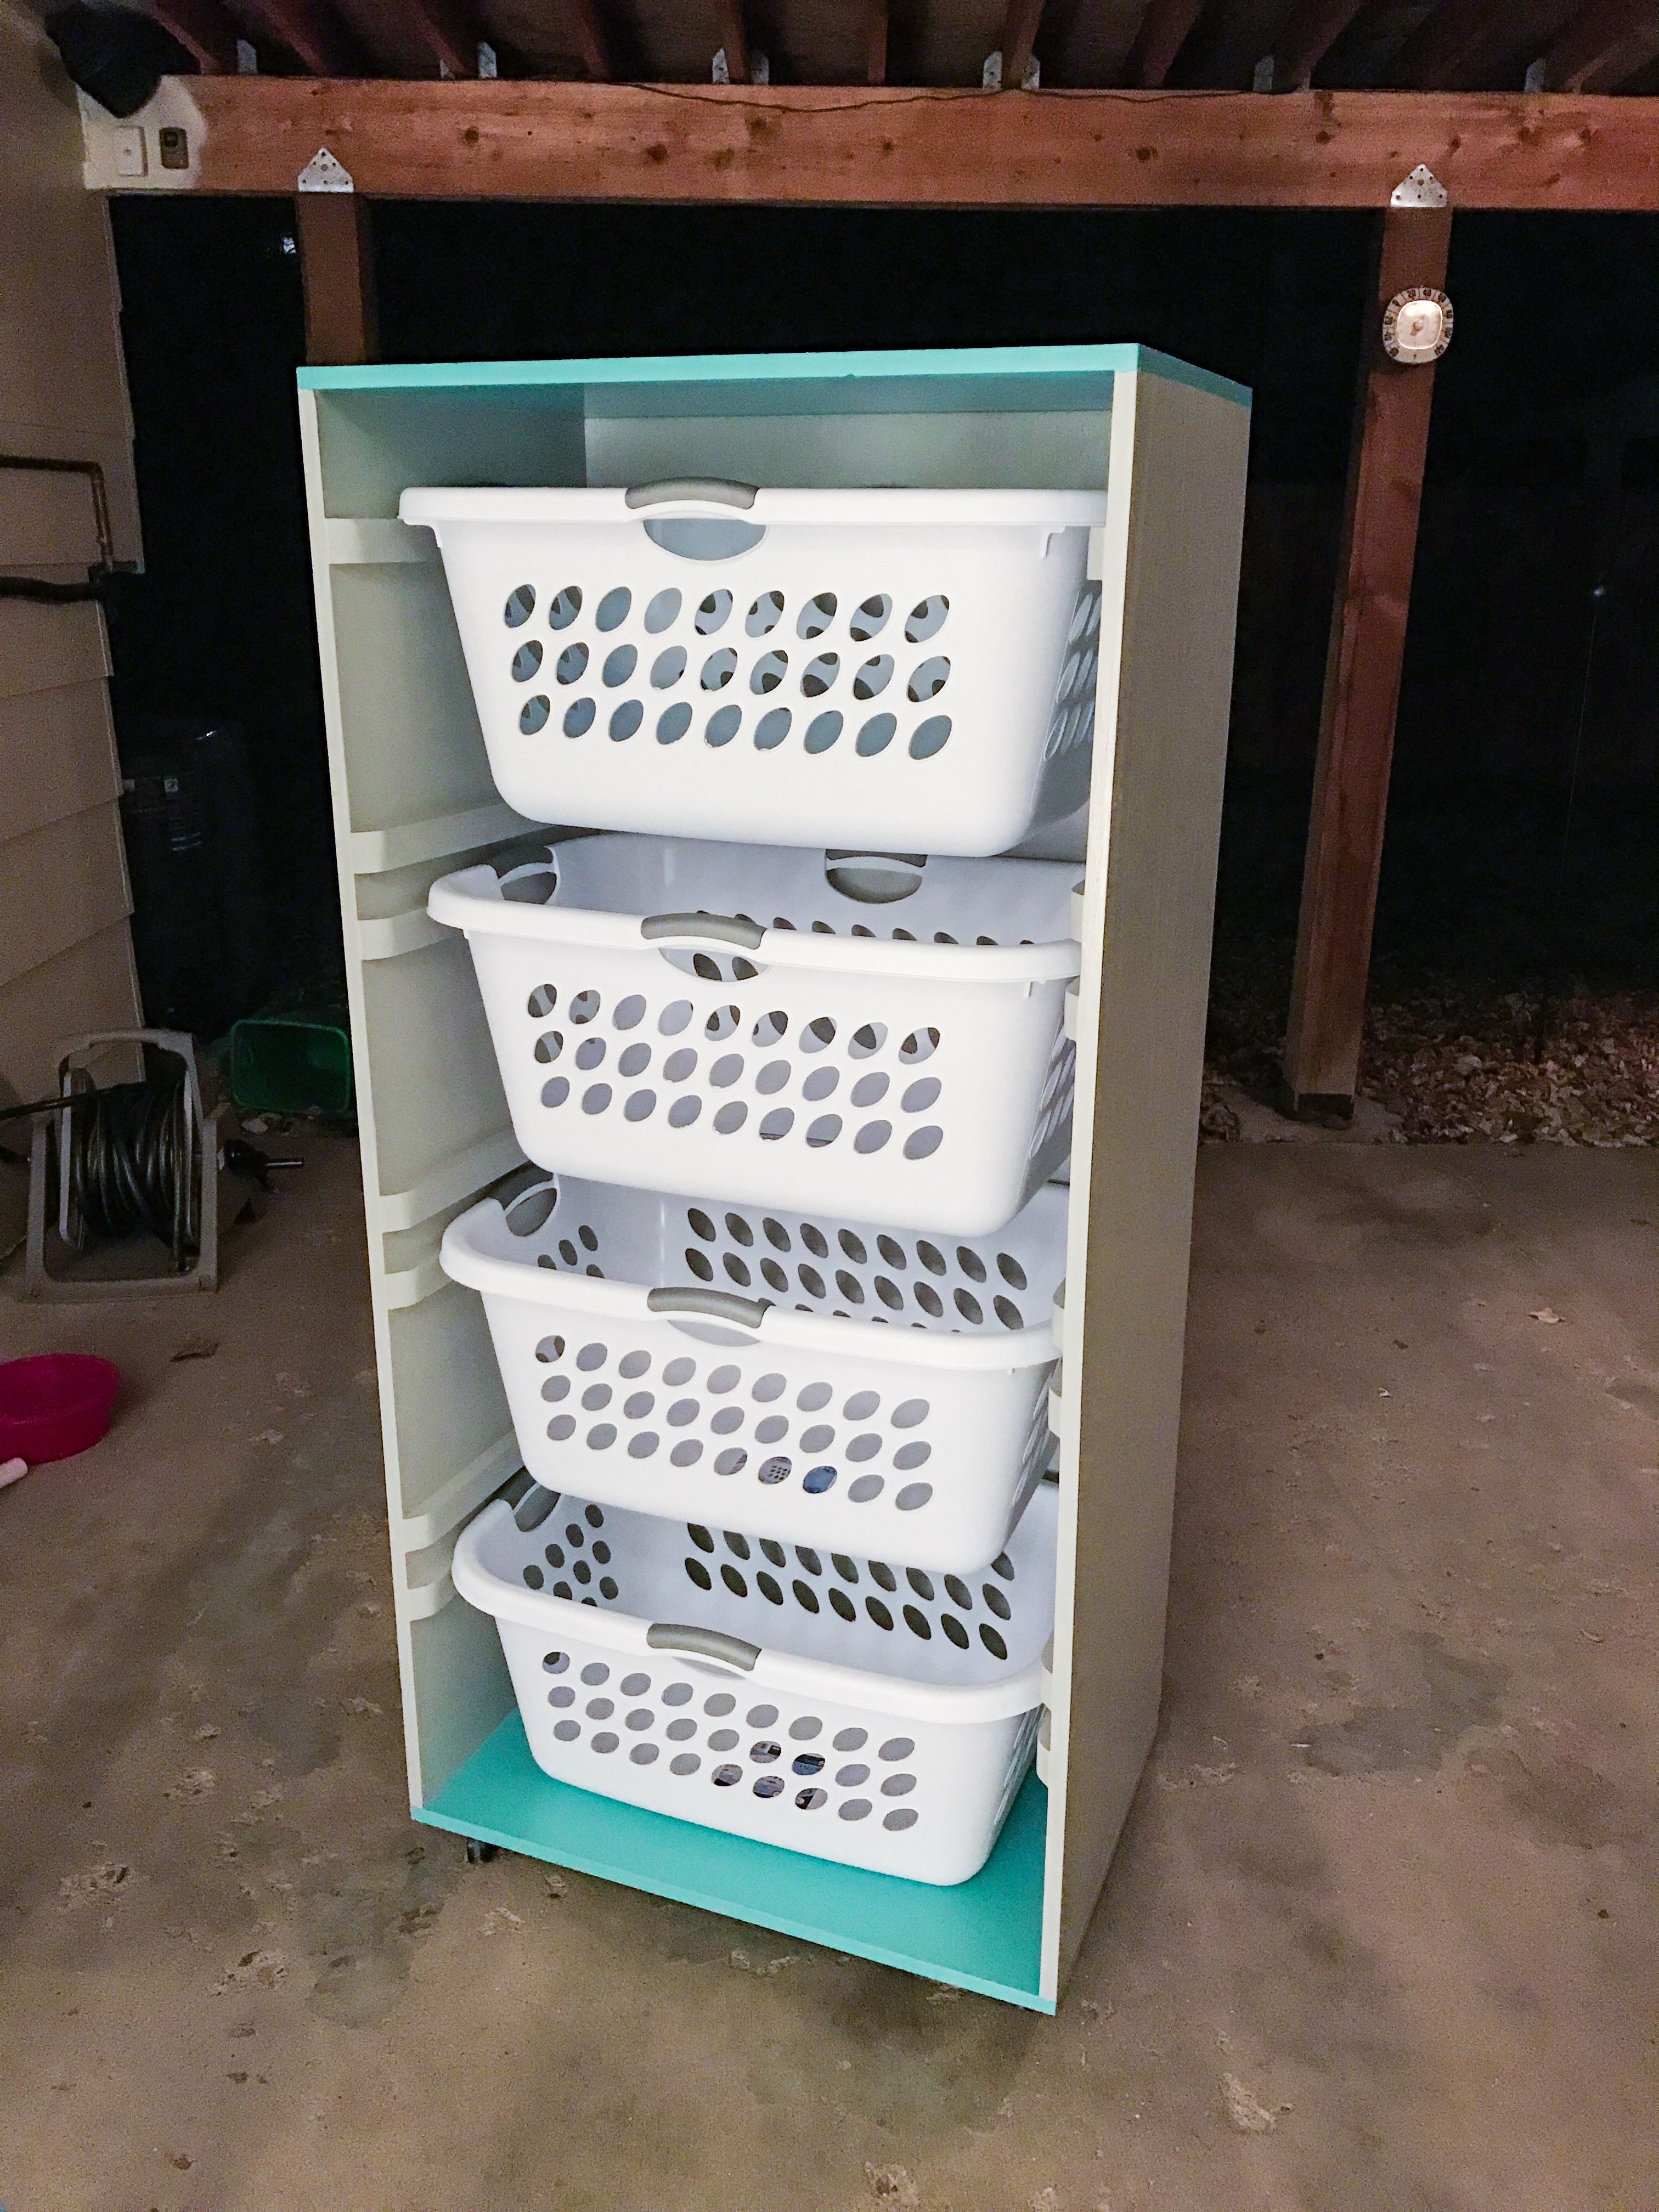
I built this for our laundry sorting needs using the Brook 4 tall and lengthwise plan. I modified the plan to take the baskets width wise, added a little more distance between baskets, and added guide rails above each basket (except the top one) to allow them to be partial pulled out without flipping out. I also beveled and slightly rounded the front of the guide rails just for looks. I think it turned out pretty good for my first woodworking project.
Built from Plan(s)
Estimated Time Investment
Weekend Project (10-20 Hours)
Recommended Skill Level
Beginner
Pardon Tower Desk
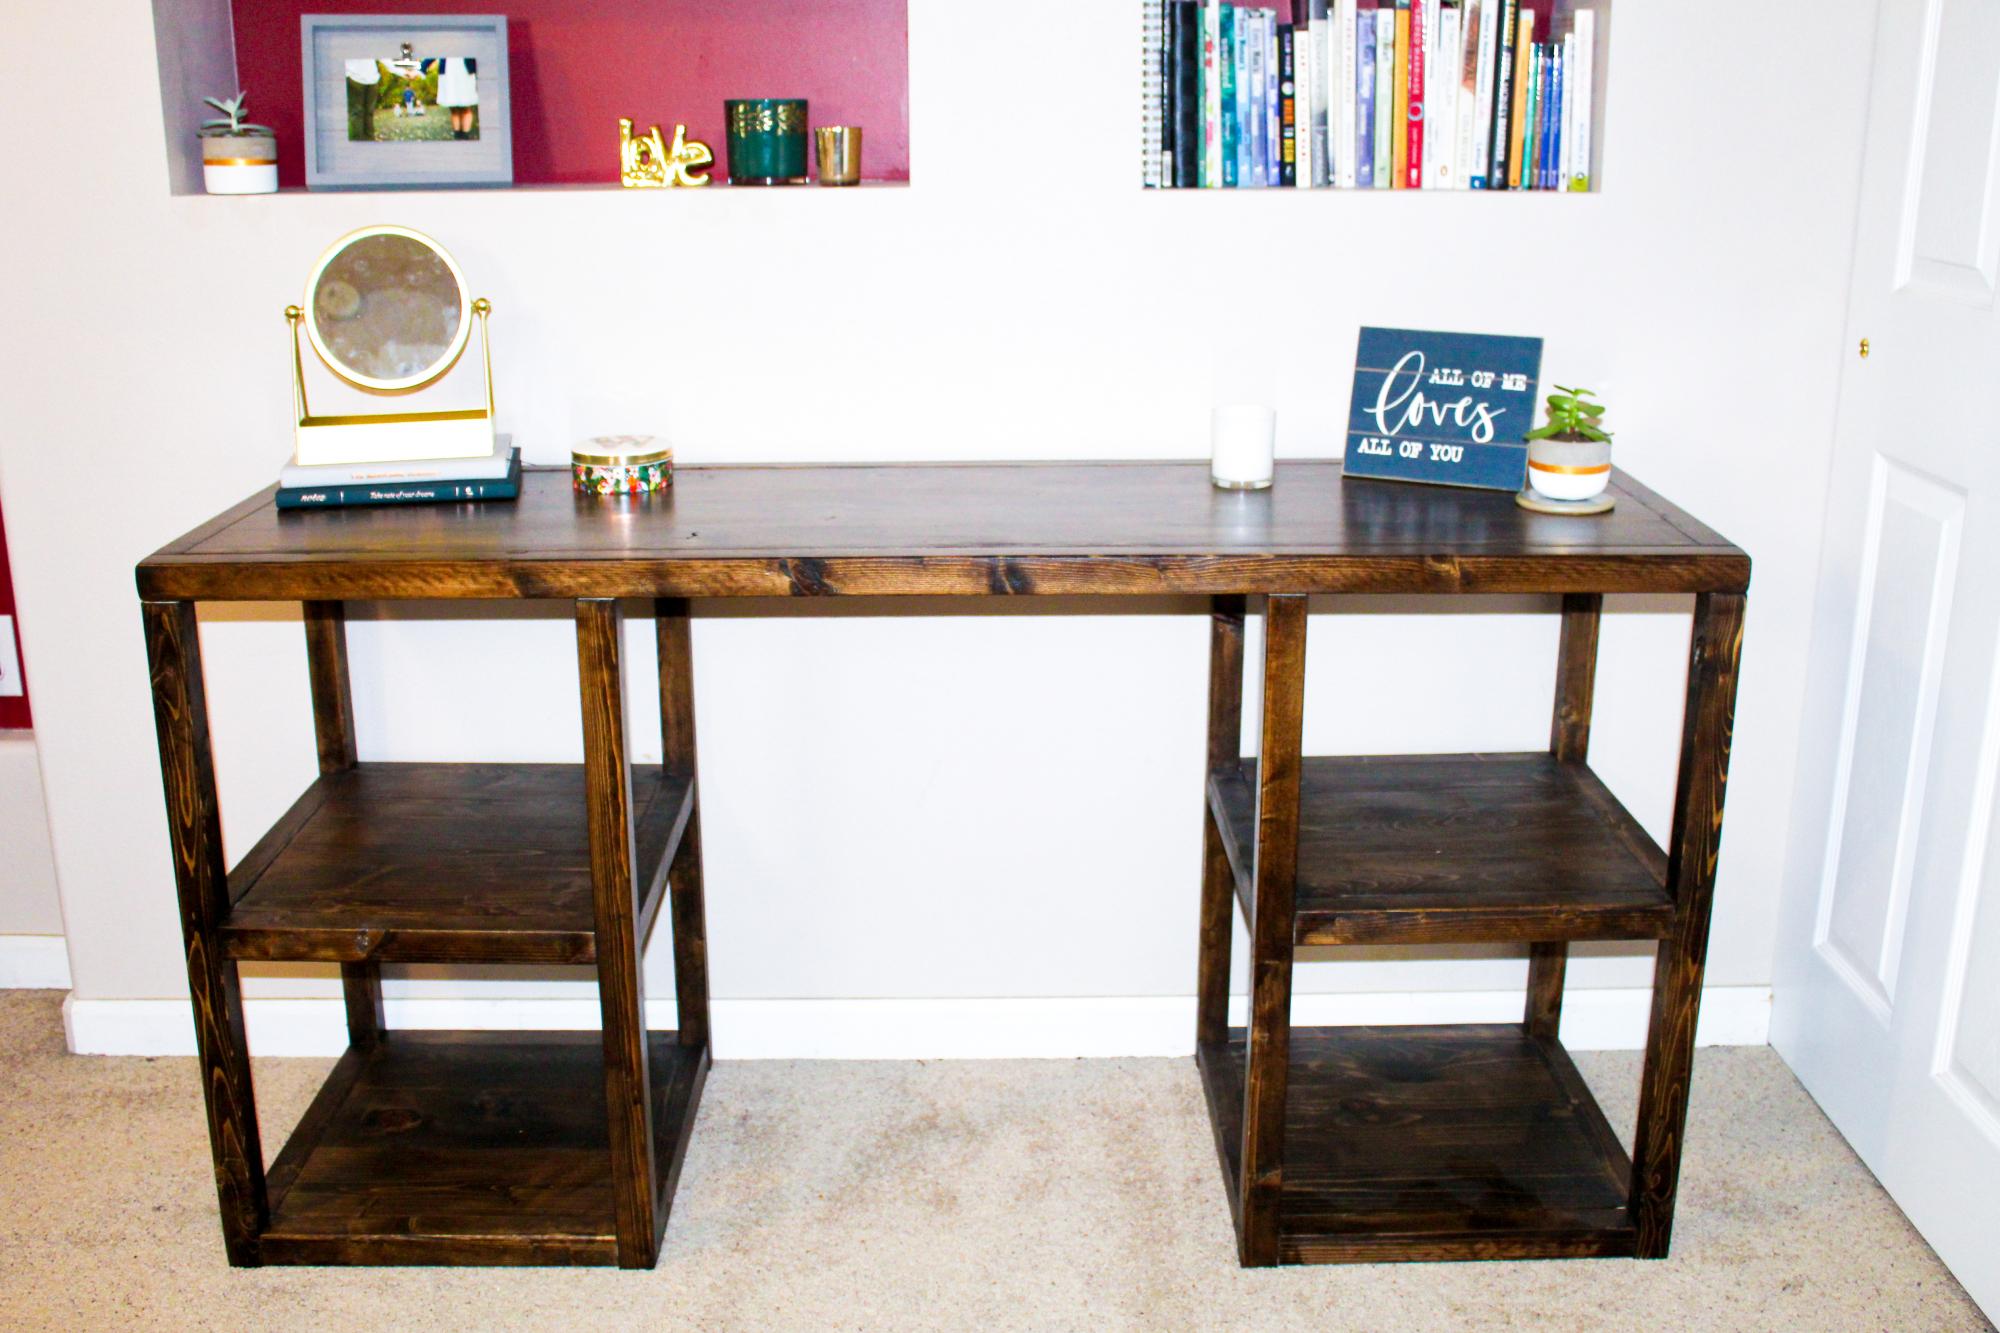
Built this desk for my wife a couple months back. Love how it turned out, plans were a huge help as I am new to woodworking.
Built from Plan(s)
Estimated Time Investment
Day Project (6-9 Hours)
Finish Used
Minwax Dark Walnut, Minwax One Coat Polyurethane
Recommended Skill Level
Beginner
Stained Planter Box
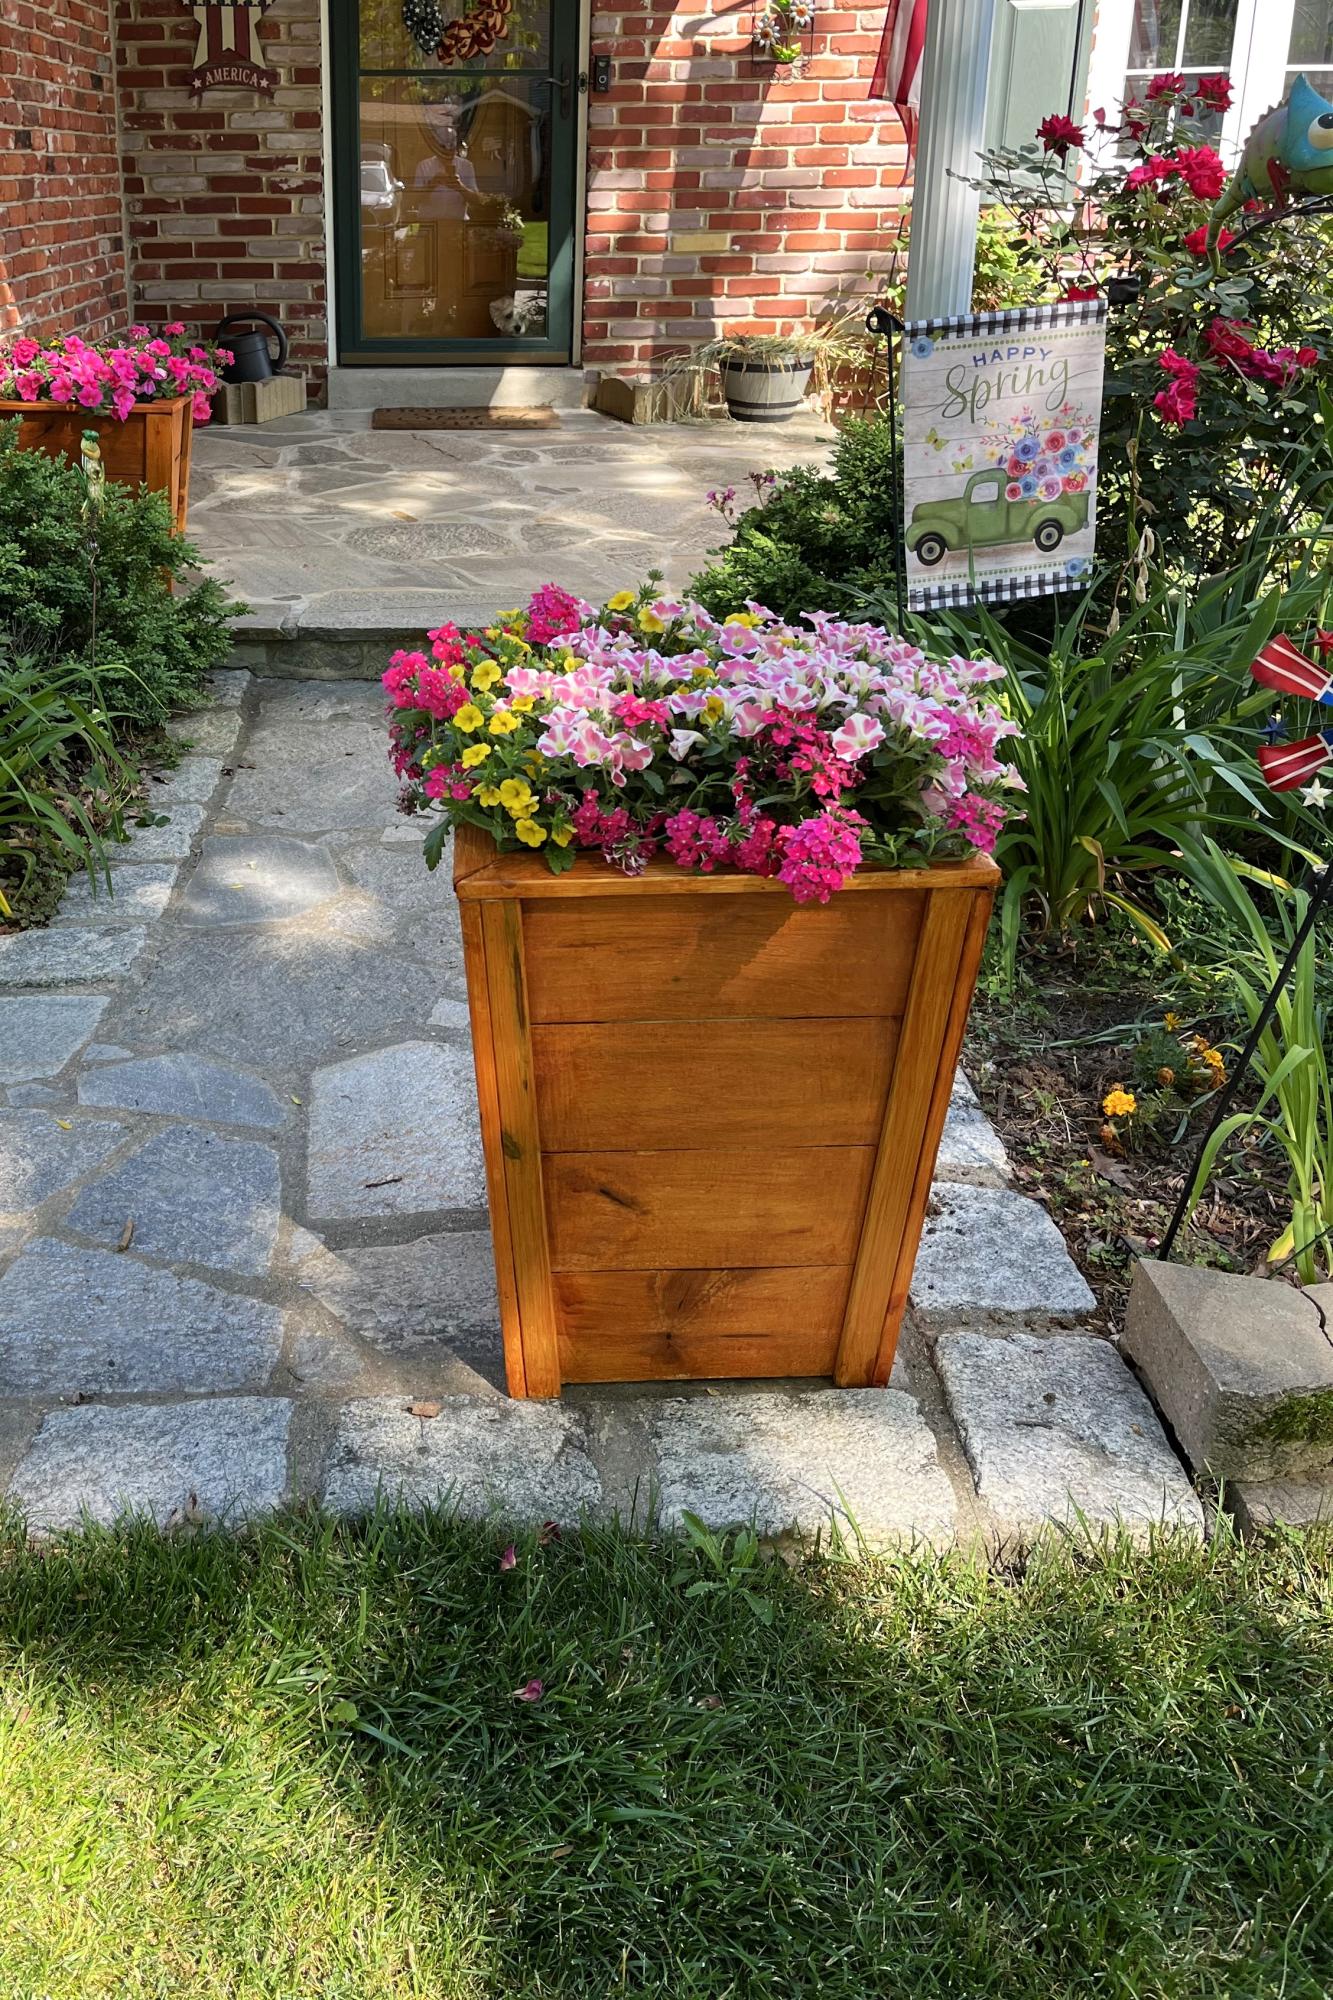
Made the planter boxes. Very easy and the stain makes them look great.
Bruce Gay
Built from Plan(s)
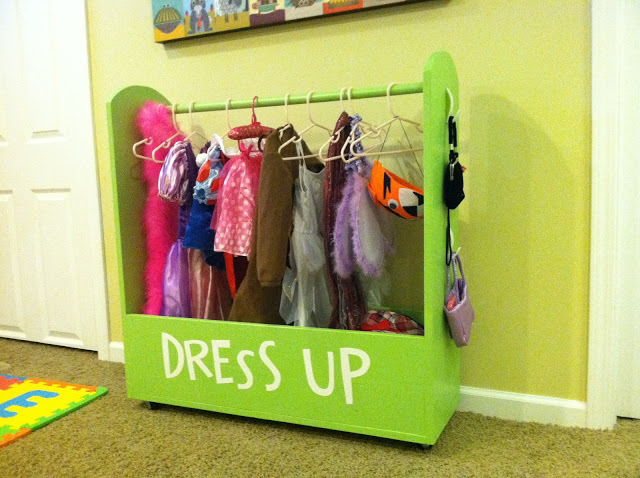
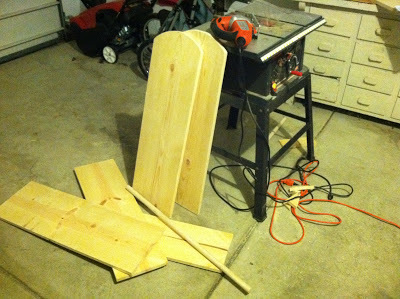
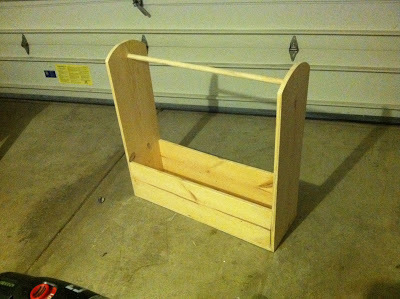
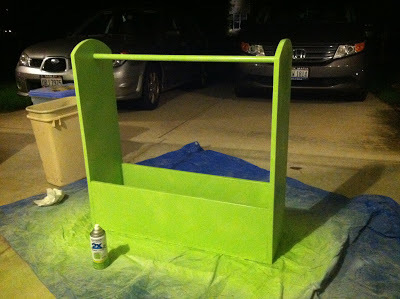
Dress Up Station
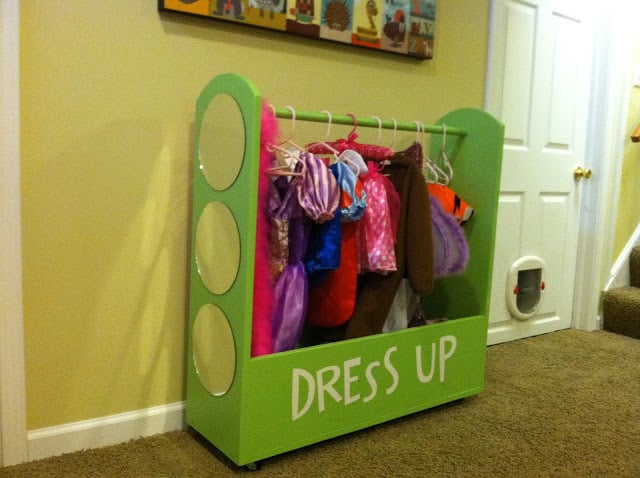
I came across your plans Ana for this dress up Station. My Daughters 2nd birthday was this month and I thought this would be a perfect gift. Your plans were so easy to follow and it came out perfect...she loved it! I'll definitely be back for more do-it-yourself projects from you.
Thanks so much for the inspiration!
Estimated Cost
$50
Estimated Time Investment
Weekend Project (10-20 Hours)
Finish Used
Spray on Primer and 2 coats of Spray Paint (Apple Green)
Recommended Skill Level
Beginner
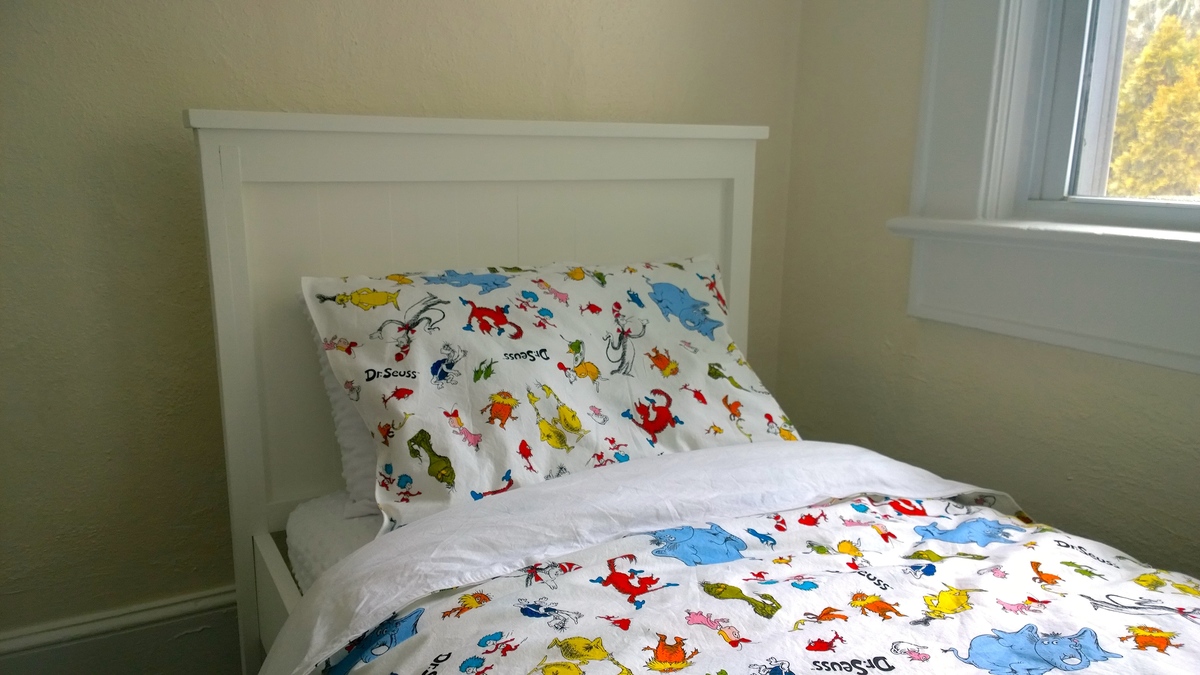
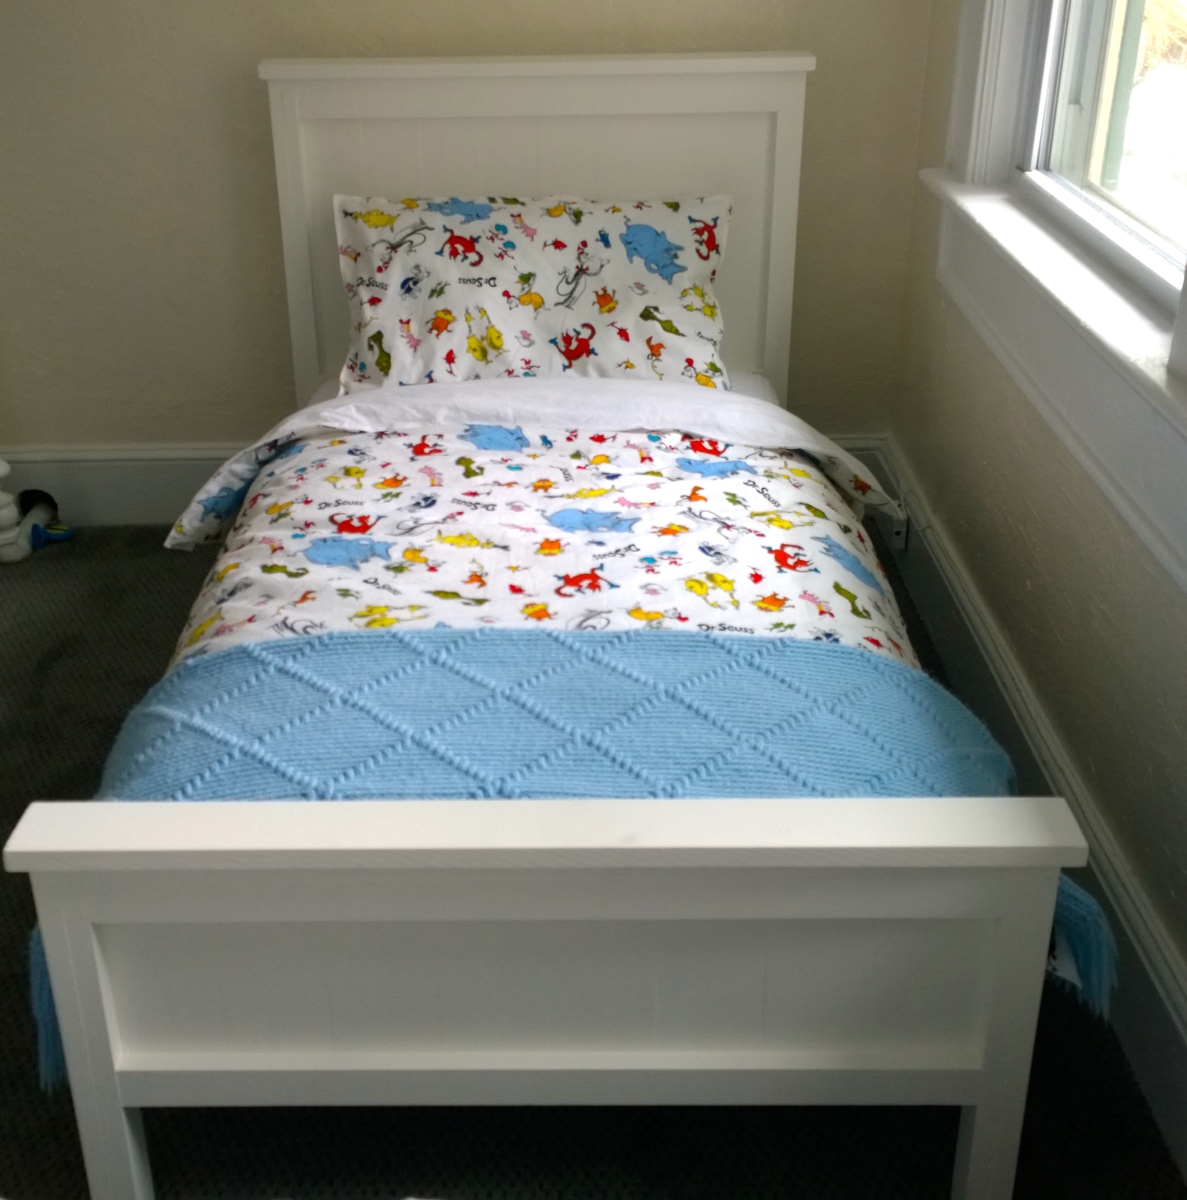
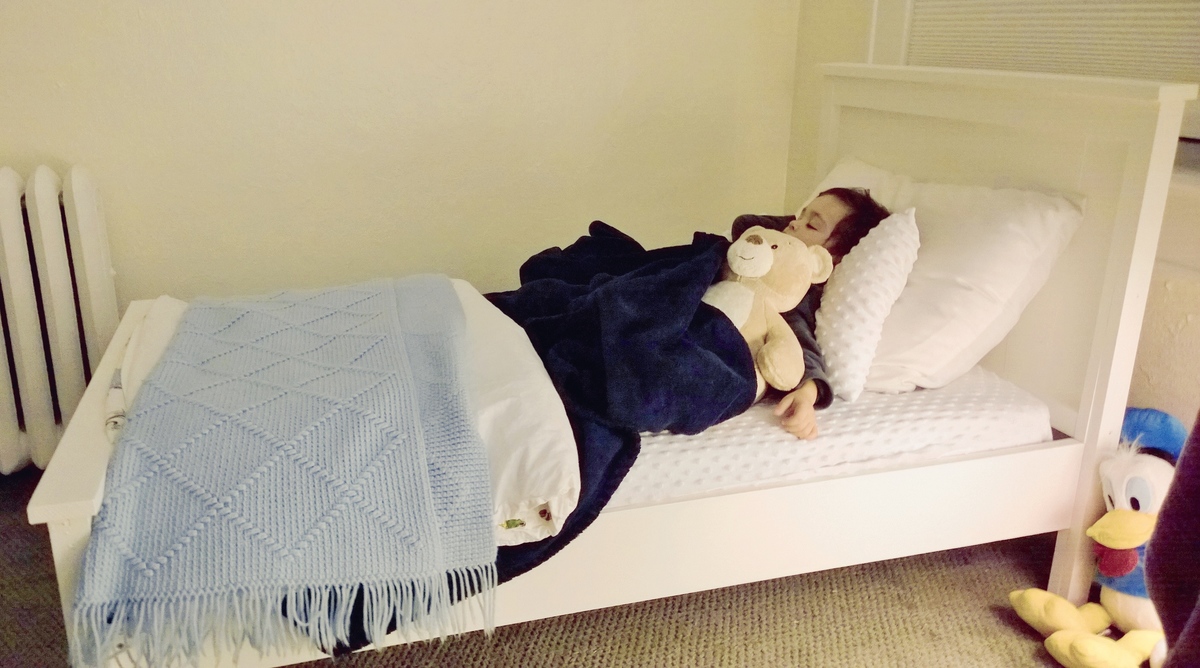
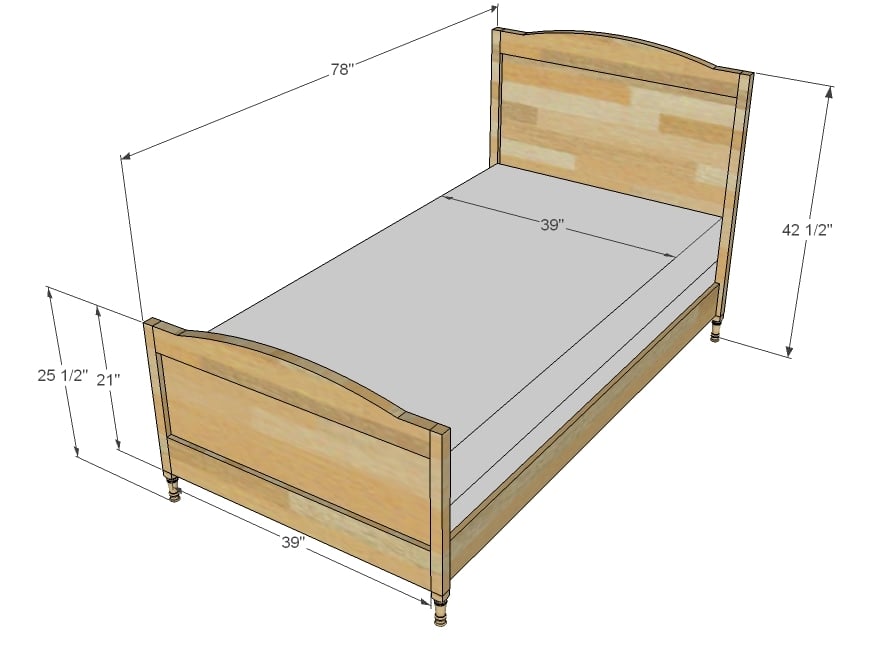
Toddler Farmhouse Bed
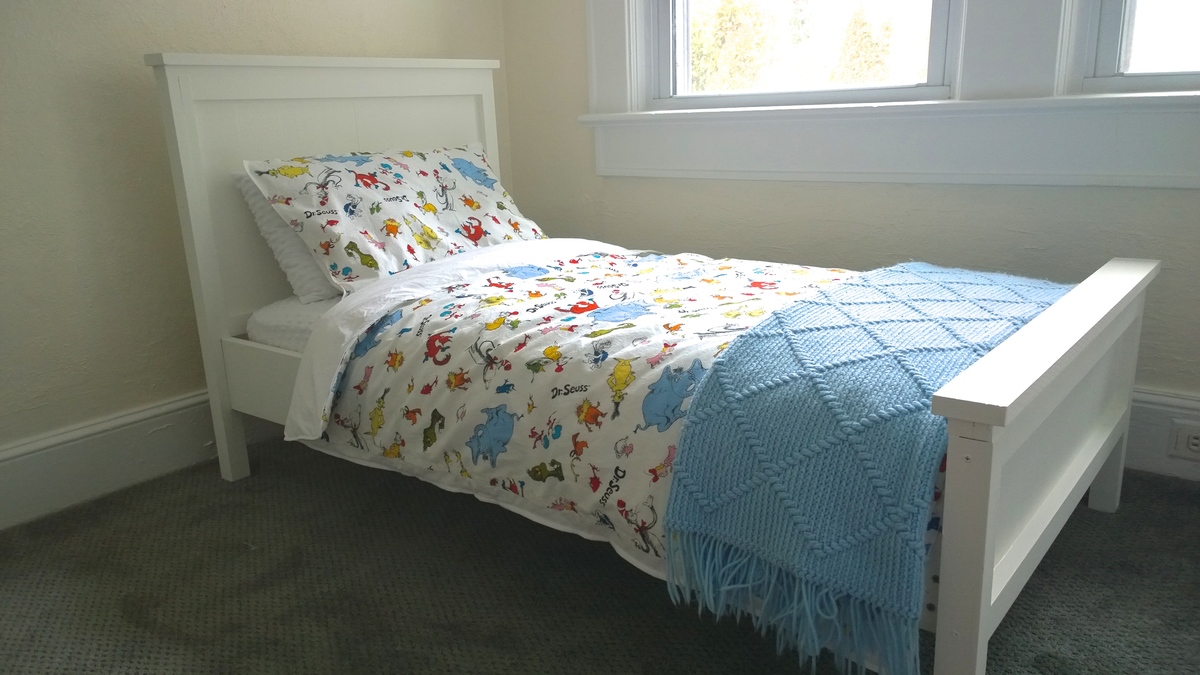
I gotta be honest, I'm kind in love with the farmhouse collection and when i saw this little bed i knew i had to build it for my 2years old and he loves it. It is so perfect for him, not too big and not too small. The bed was very easy to build, affordable and very strong ( trust me, my son makes me lay down there with him sometimes so he can go to sleep) . I changed the plans for a 28" wide crib mattress after reading all the comments, but it was really easy to do. I'm very happy how it came out.
Thank you Ana for sharing all the amazing plans with us and i'm looking forward to start building more furniture soon, my to-do-list is just getting longer and longer lol.
Thank You Ana XOXOXO
Estimated Time Investment
An Hour or Two (0-2 Hours)
Recommended Skill Level
Starter Project
Comments
Wed, 08/06/2014 - 07:17
It's beautiful. :) You did a
It's beautiful. :) You did a great job! I love the comforter.
In reply to It's beautiful. :) You did a by booksnotbombs
Wed, 08/06/2014 - 17:43
Thank you @booknotbombs
Thank you, i was looking for a Dr Seuss bedding and i saw this fabric, i made it myself, i think it looks nice.
American Girl Doll Horse Stable built for two
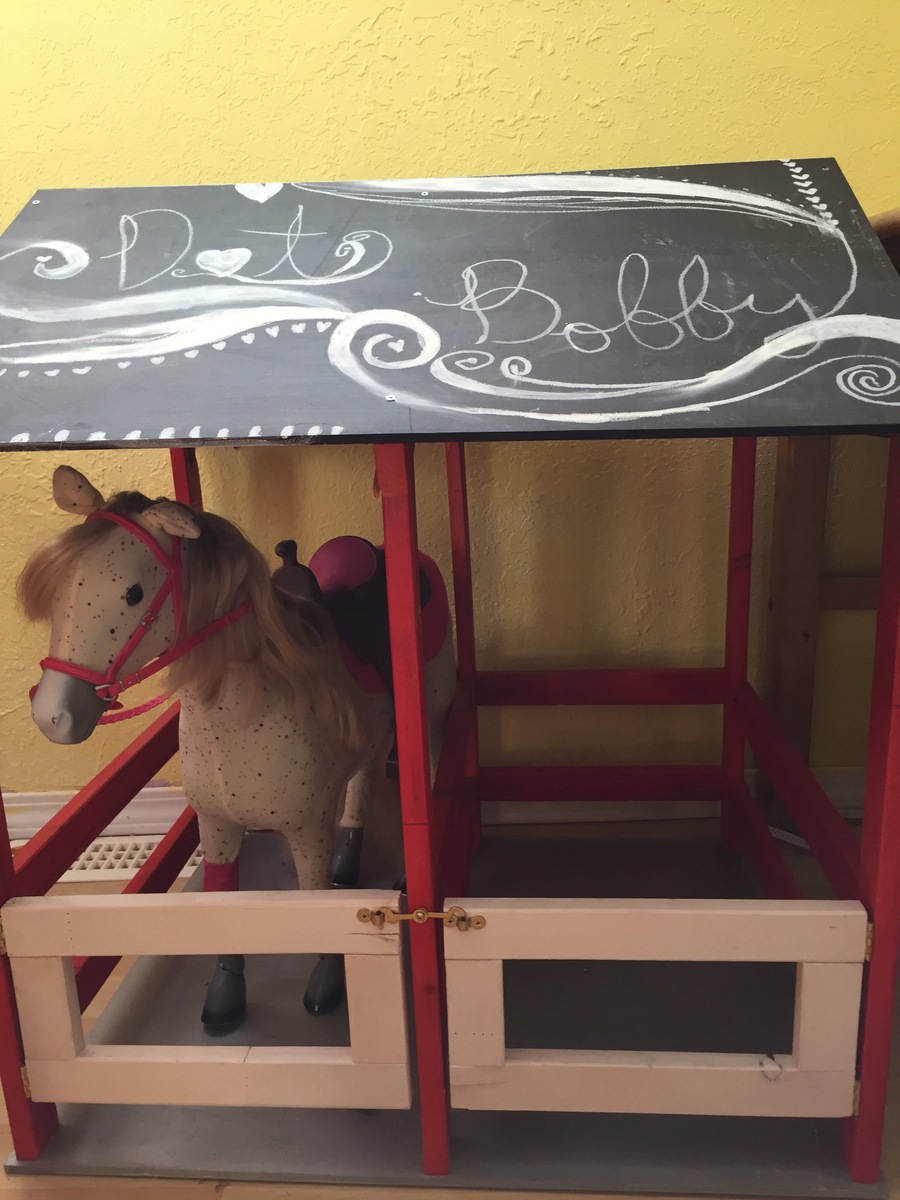
My husband made this for my daughter and her friend to have stables at each house for their horses. We painted the roof with blackboard paint to making decorating fun and creative.
Built from Plan(s)
Estimated Time Investment
Weekend Project (10-20 Hours)
Recommended Skill Level
Beginner
Comments
Truss farm bench/Honey pine stain
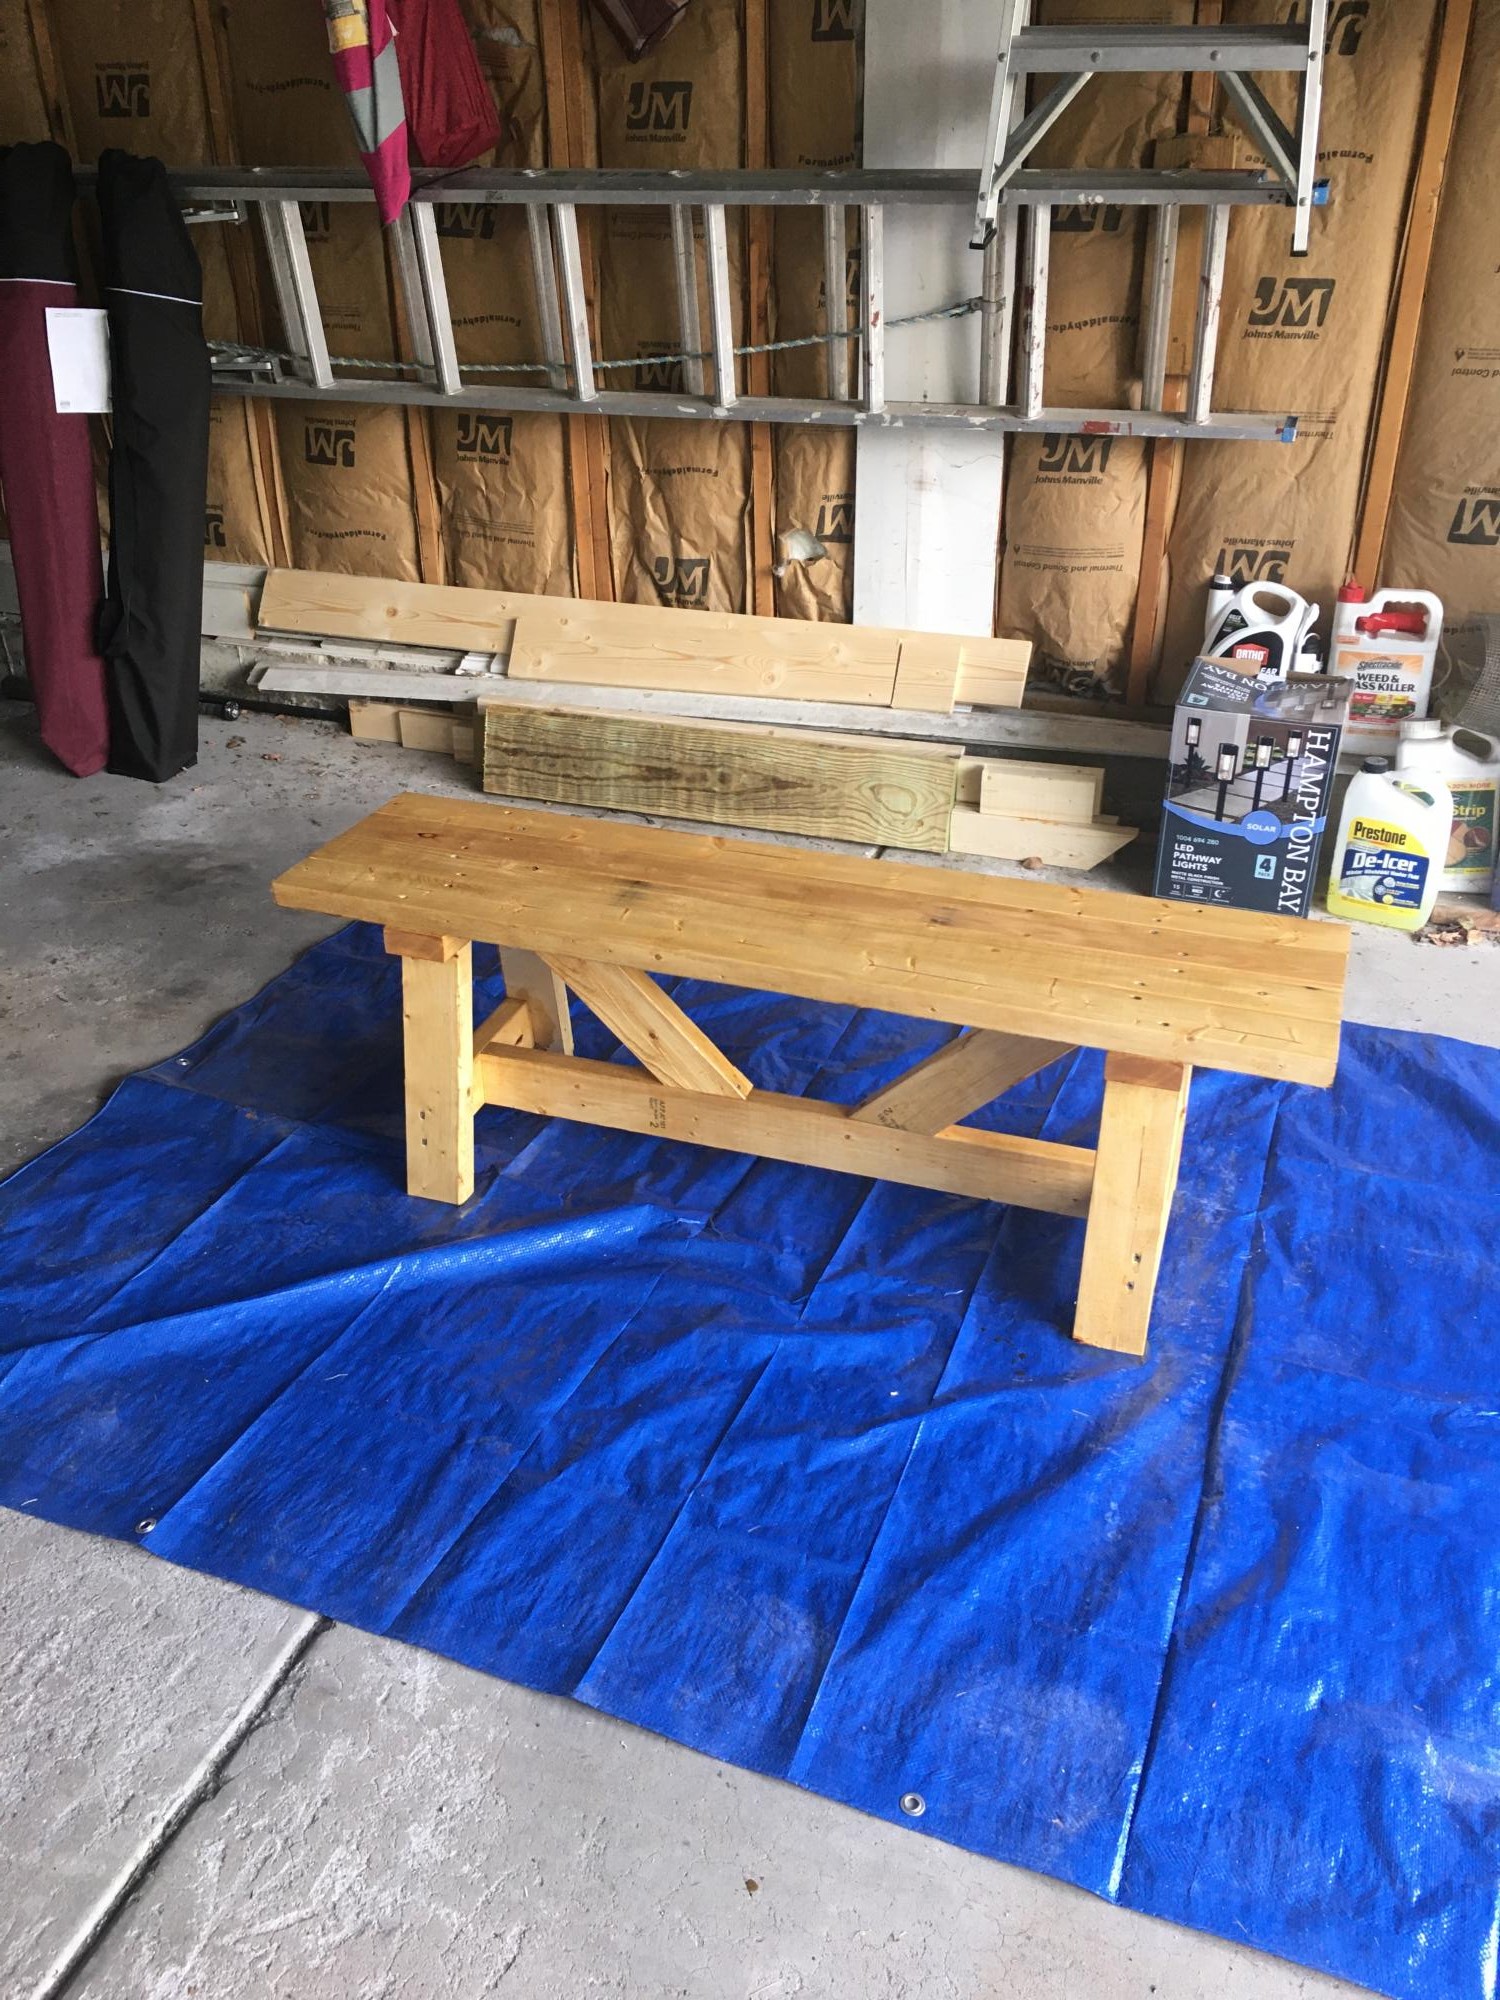
Second project after newly discovering Ana’s site
Built from Plan(s)
Estimated Cost
$35
Estimated Time Investment
Afternoon Project (3-6 Hours)
Finish Used
Minwax honey pine
Recommended Skill Level
Beginner
DIY Outdoor Wood Sectional

Had to adapt sizes slightly as timber in the UK is sold in metres, not feet -so the lengths are slightly shorter but really pleased with the result!
Tracey317
Built from Plan(s)
Loft Bed

This project took a little more time than expected. Being new at this I'm definitely not efficient yet. Sanding and staining took the longest. Though the plans said to put it together in the room then sand and stain, we chose to stain it outside then put it together, so to avoid the mess in the room (renting and couldn't risk it!). That worked well for us. We also added 5 inches to the height so some day it could be converted into a full bunk bed. For some joints we should have used 2" screws rather than the 2 1/2" suggested in the plans, some of the screws went all the way through to the other side. We used key hole plates to attach the stairs to the platform to make it easy to take apart and put together. We also adde 45 degree braces to support the extra height and an extra brace around 3 sides of the bottom which will one day be the frame for the bottom bunk. It worked really well. The boys love it!
Estimated Cost
$100
Estimated Time Investment
Week Long Project (20 Hours or More)
Finish Used
Minwax 2 in one Bombay Mahogany
Recommended Skill Level
Beginner
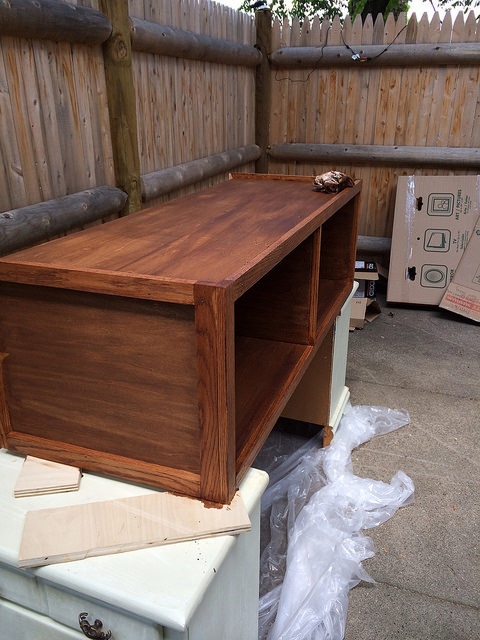
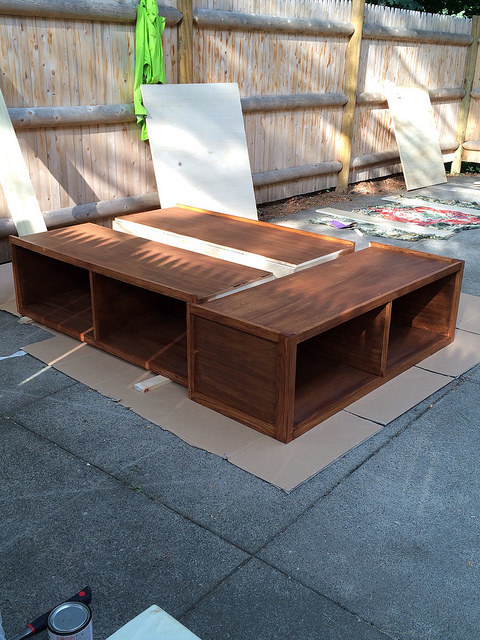
Storage Bed Success!
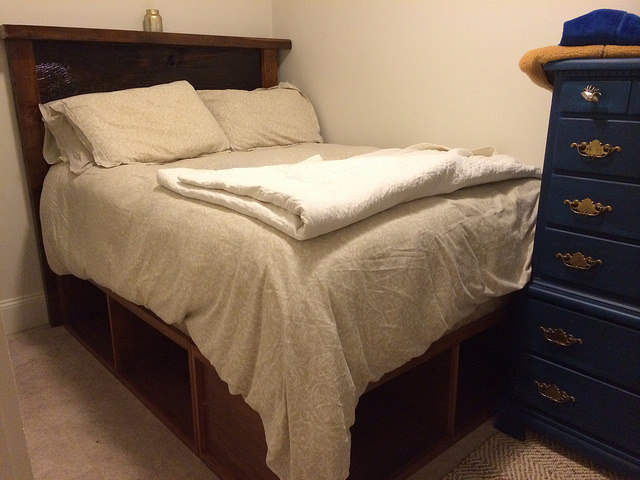
I took Ana's awesome queen-sized storage bed plans and jut made a couple minor tweaks for my full. Our bedroom is TINY, so I wanted queen (or king) sized drawers/cubbies, which means I kept 20" depth. The side boxes run 53" in length, 54" for the end. I used poplar ply for the boxes, red oak for the trim, and I stained everything with a Varathane Early American wood stain, followed by a couple coats of polycrylic. It came out beautifully, and I love how easy it is to move around and set up.
For the final step, I'm still debating adding drawers or doors, which would hinge on the bottom and secure with cabinet magnets. I'm leaning toward the latter just because our bedroom is so small it will make accessibility a bit easier.
Built from Plan(s)
Estimated Cost
$350
Estimated Time Investment
Weekend Project (10-20 Hours)
Finish Used
Varathane Early American; Minwax Polycrylic
Recommended Skill Level
Intermediate
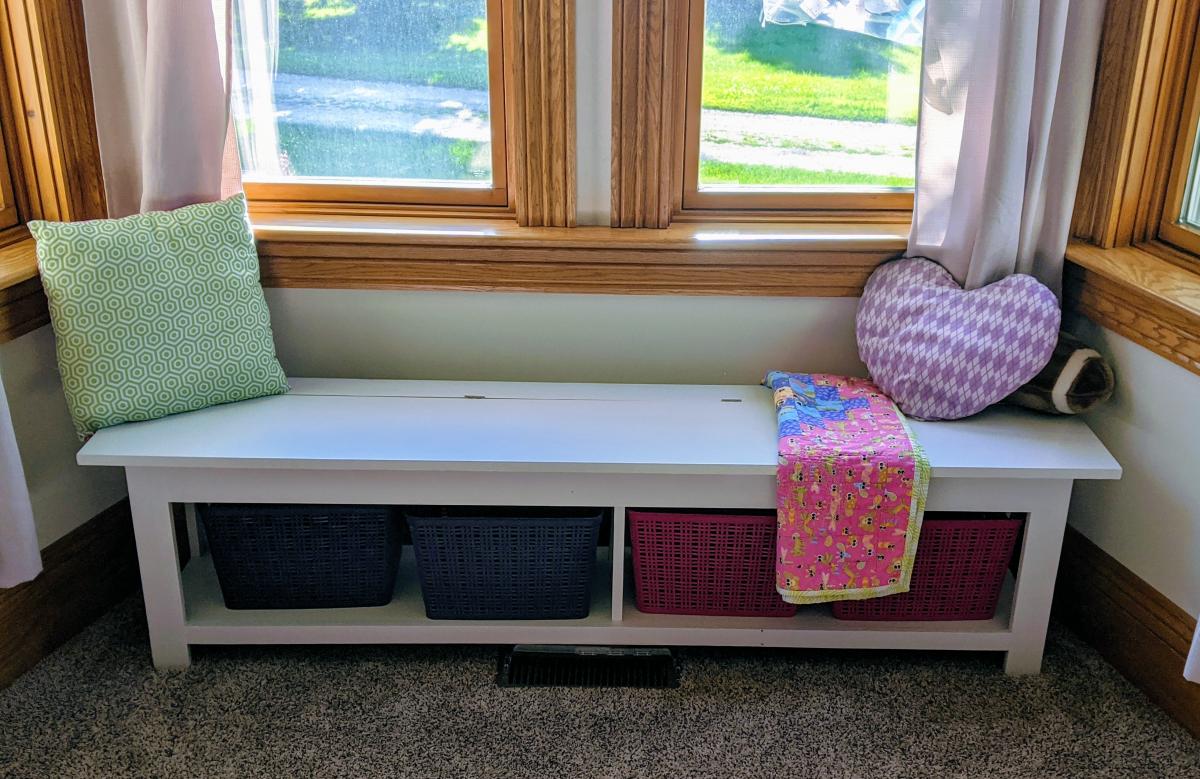
Window Seat
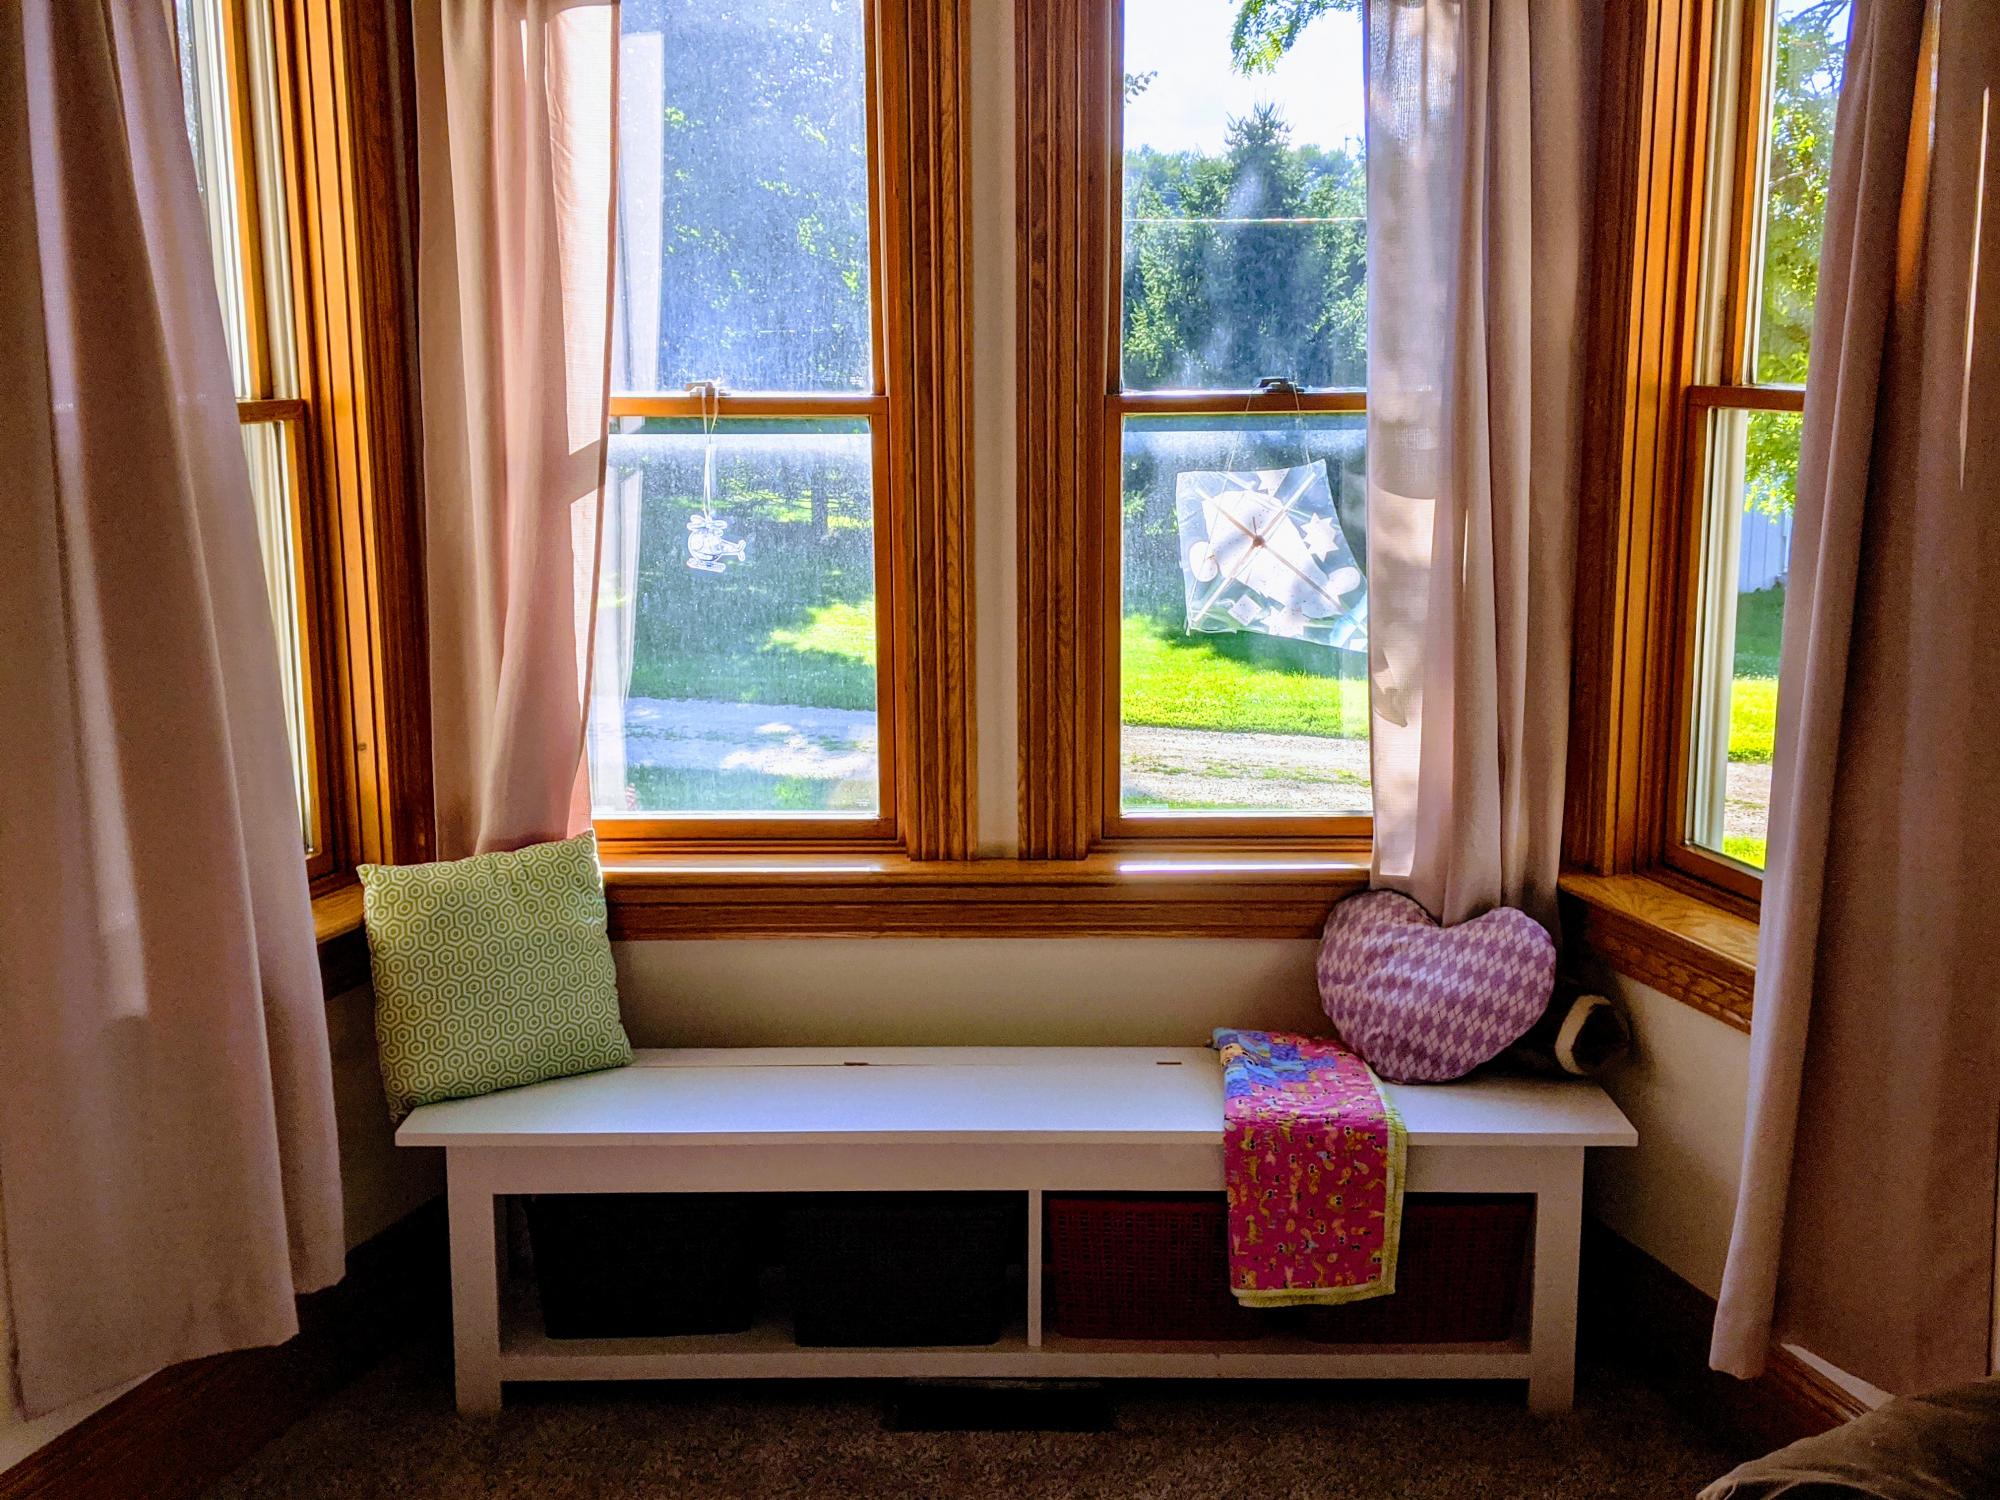
My daughter turned 5 in July. She loves twirly dresses, unicorns, and building. Her current project is a full size airplane made from wood. She is certainly ambitious. For her birthday, she received all kinds of building toys (Legos, knex, etc.) and quickly got to work, creating masterpiece after masterpiece. Like every 5 year old, dismantling a masterpiece is unthinkable. So, she has taken it upon herself to display her projects on every available surface, despite its intended function (i.e., my desk). We needed something that she could use to build, store, and display her projects that wasn't in the way and didn't disrupt our everyday routines (Mama's gotta work!).
Enter, this window seat. I've been wanting to build one for years but never really found a plan I liked. This is exactly what I was looking for, as it has enough building space and storage space to meet our needs. Maybe one day i'll get to use it as a window seat!
I used the flip top storage bench plan and modified the length to fit our windows. The lid is 69" wide and the base is 64.5". I added some supports in the middle, as well. I painted the inside storage space purple to give it a kid friendly touch. I also added lid supports on both sides to prevent pinched fingers.
Estimated Cost
$100?
Estimated Time Investment
Day Project (6-9 Hours)
Finish Used
White paint with purple paint in the storage area. Sealed with mod podge hard coat. 😁
Recommended Skill Level
Intermediate
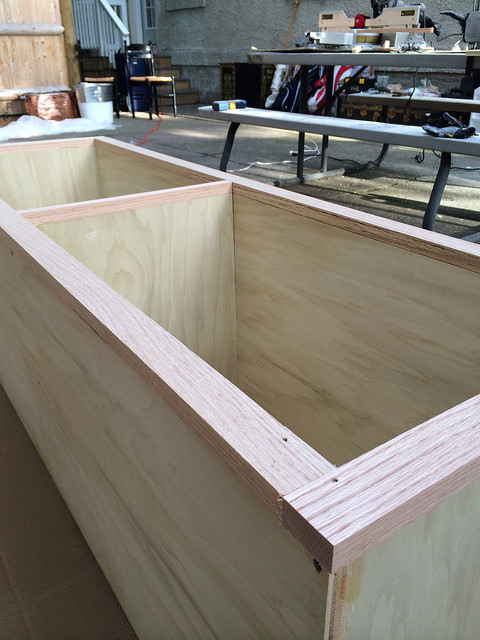
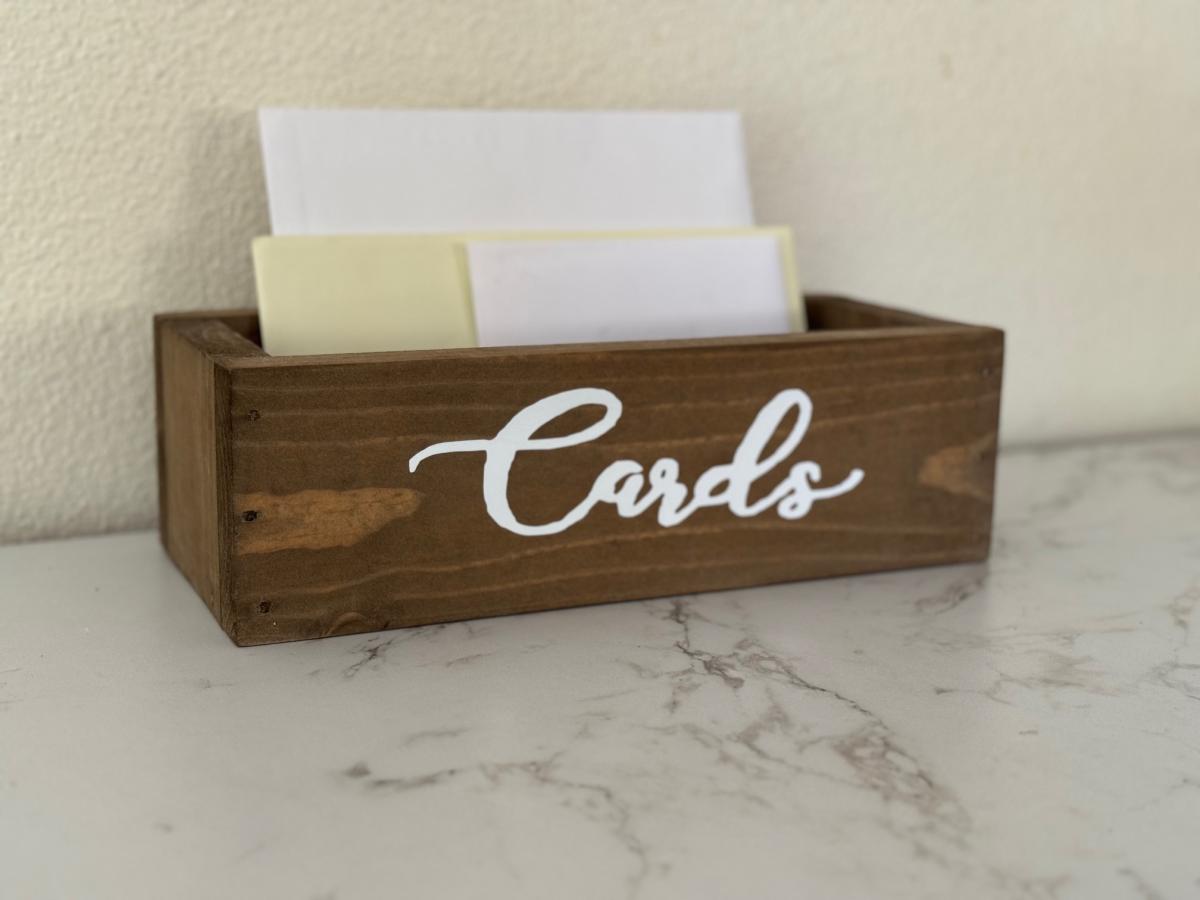
DIY Wood Event Planning Projects
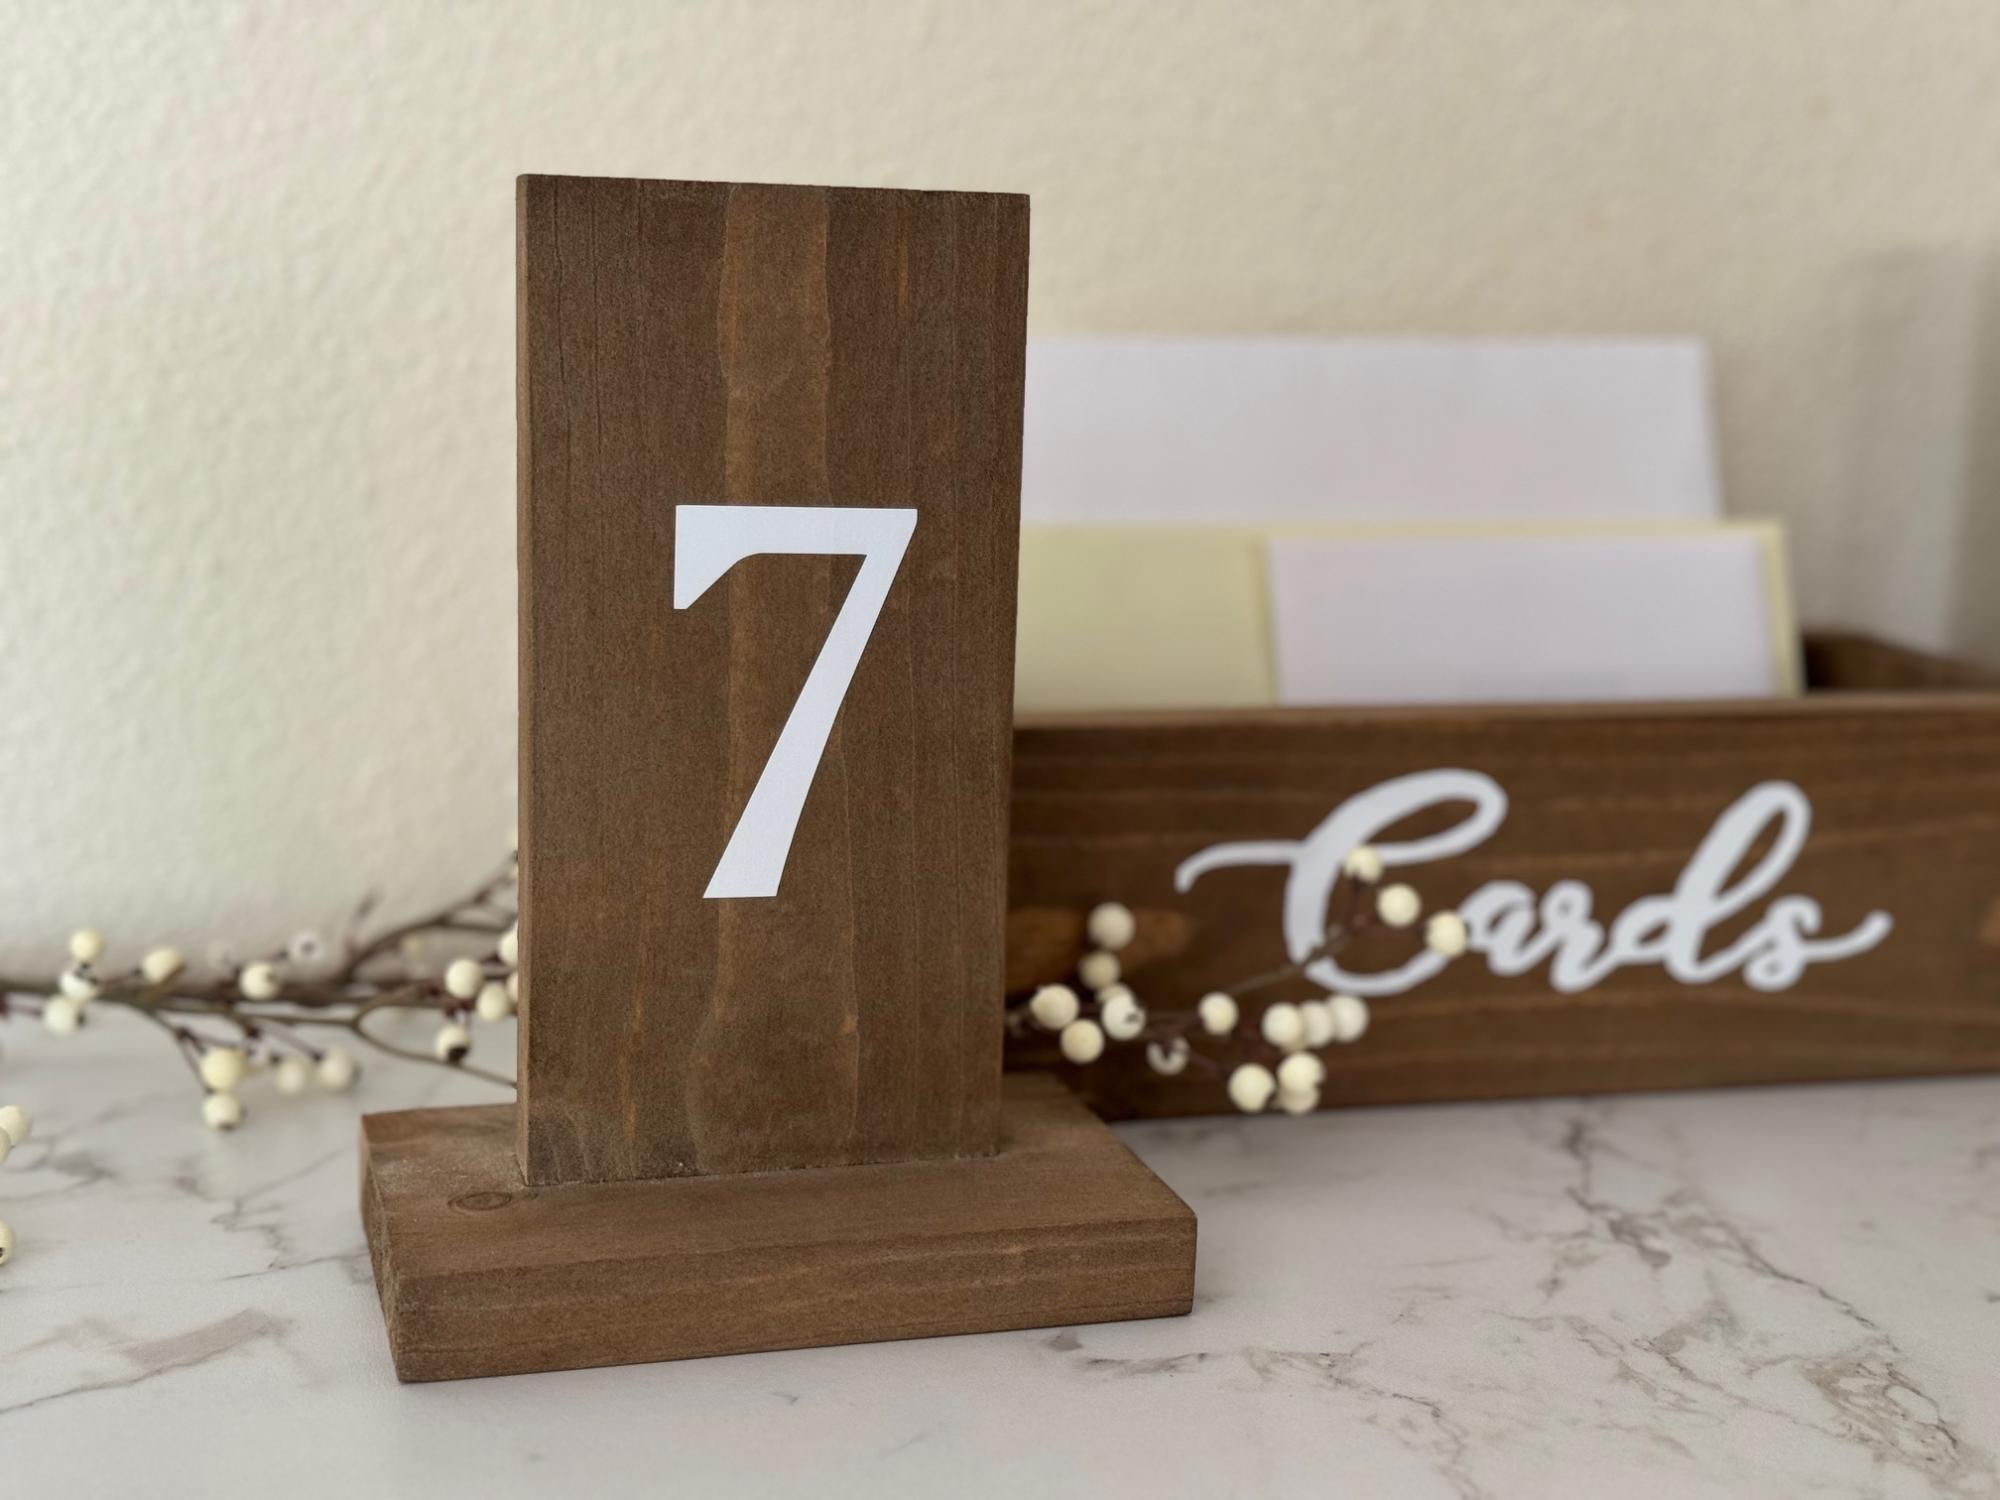
I built these easy diy wood table numbers and card box for a large birthday celebration. I had a friend make the vinyl lettering, very simple projects that were a great additon!

Built from Plan(s)
Simple and Elegant Stool
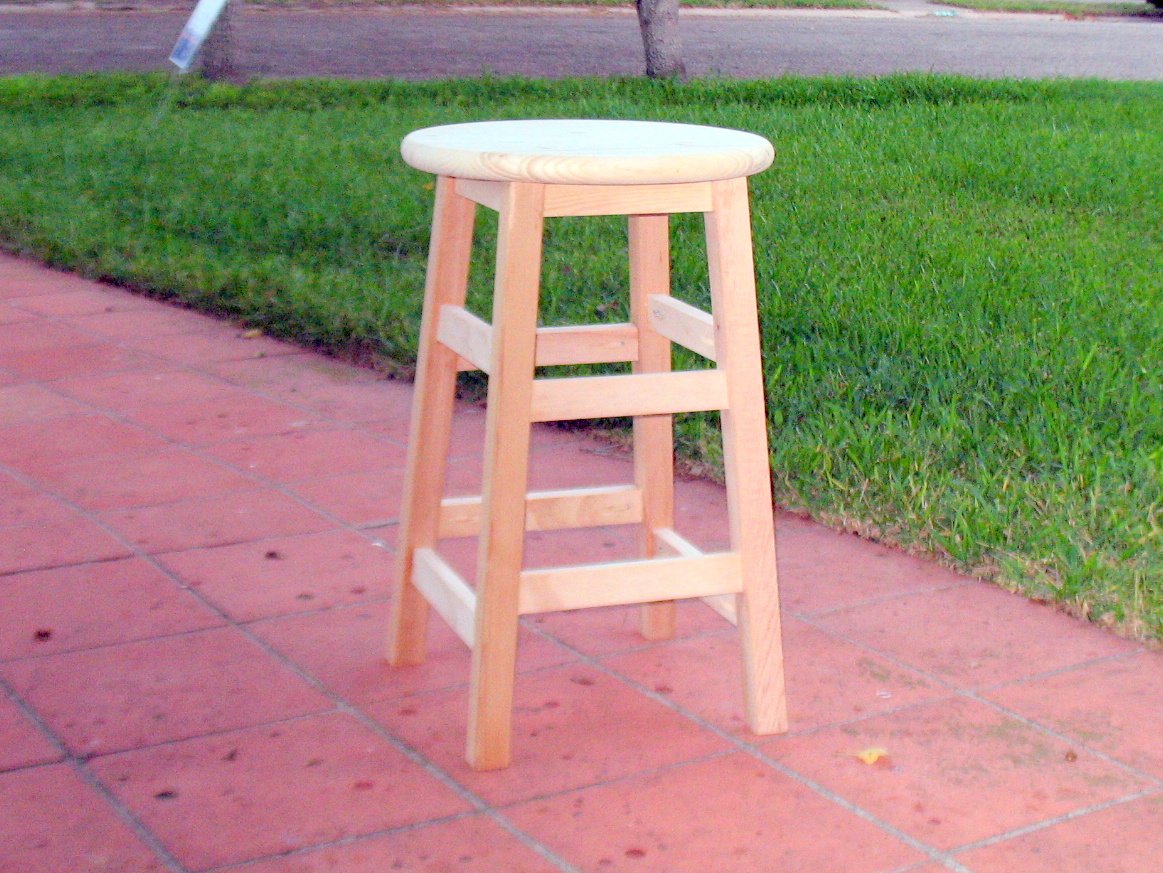
This is the second of the Simplest Stool design I retrieved from Ana's site and built. I love the stool for its ease of construction and beautiful lines. Get your measurements spot on and it goes together in a flash. I did use a 15 inch diameter project round for the seat. I built it upon the request of a friend so they have to finish it. Lots of PHs in this small stool so I wish that Kreg or someone would produce PH inserts that easily fit where you have 11/4 inch ph screws.
Built from Plan(s)
Estimated Cost
Seat $7.50, Legs $4, 1x2 $6 plus misc or about $20 or a little less.
Estimated Time Investment
Afternoon Project (3-6 Hours)
Finish Used
None, but if I were to do it I would paint the support a white satin and stain the seat a semi-dark gunstock or a really nice golden oak. Do them separately and then make the attachment.
Recommended Skill Level
Beginner
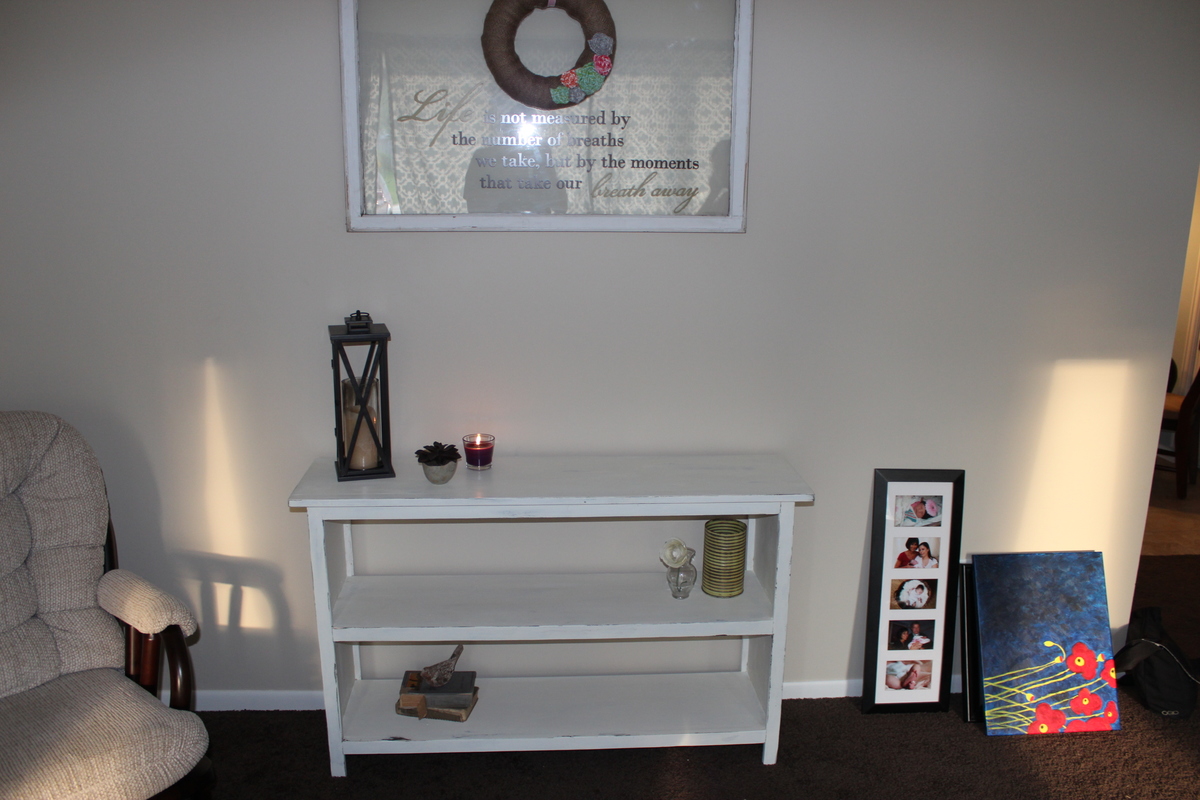
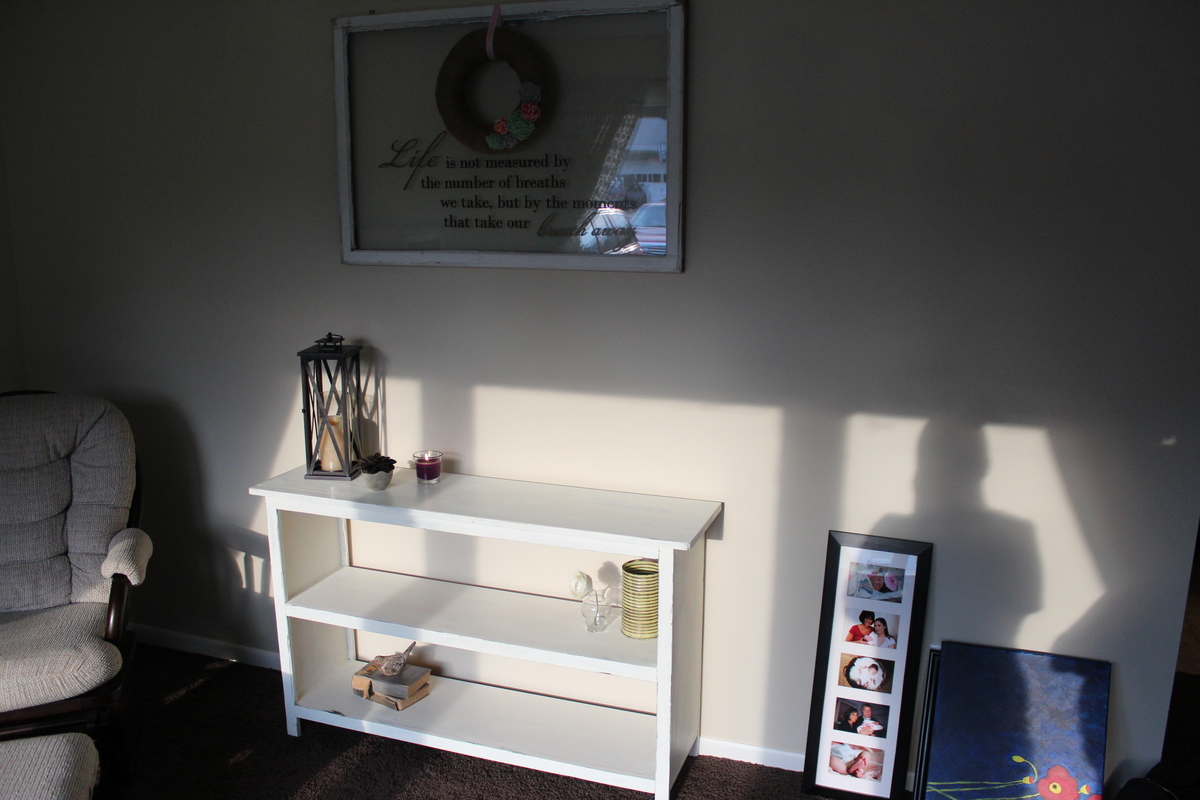
Great project!
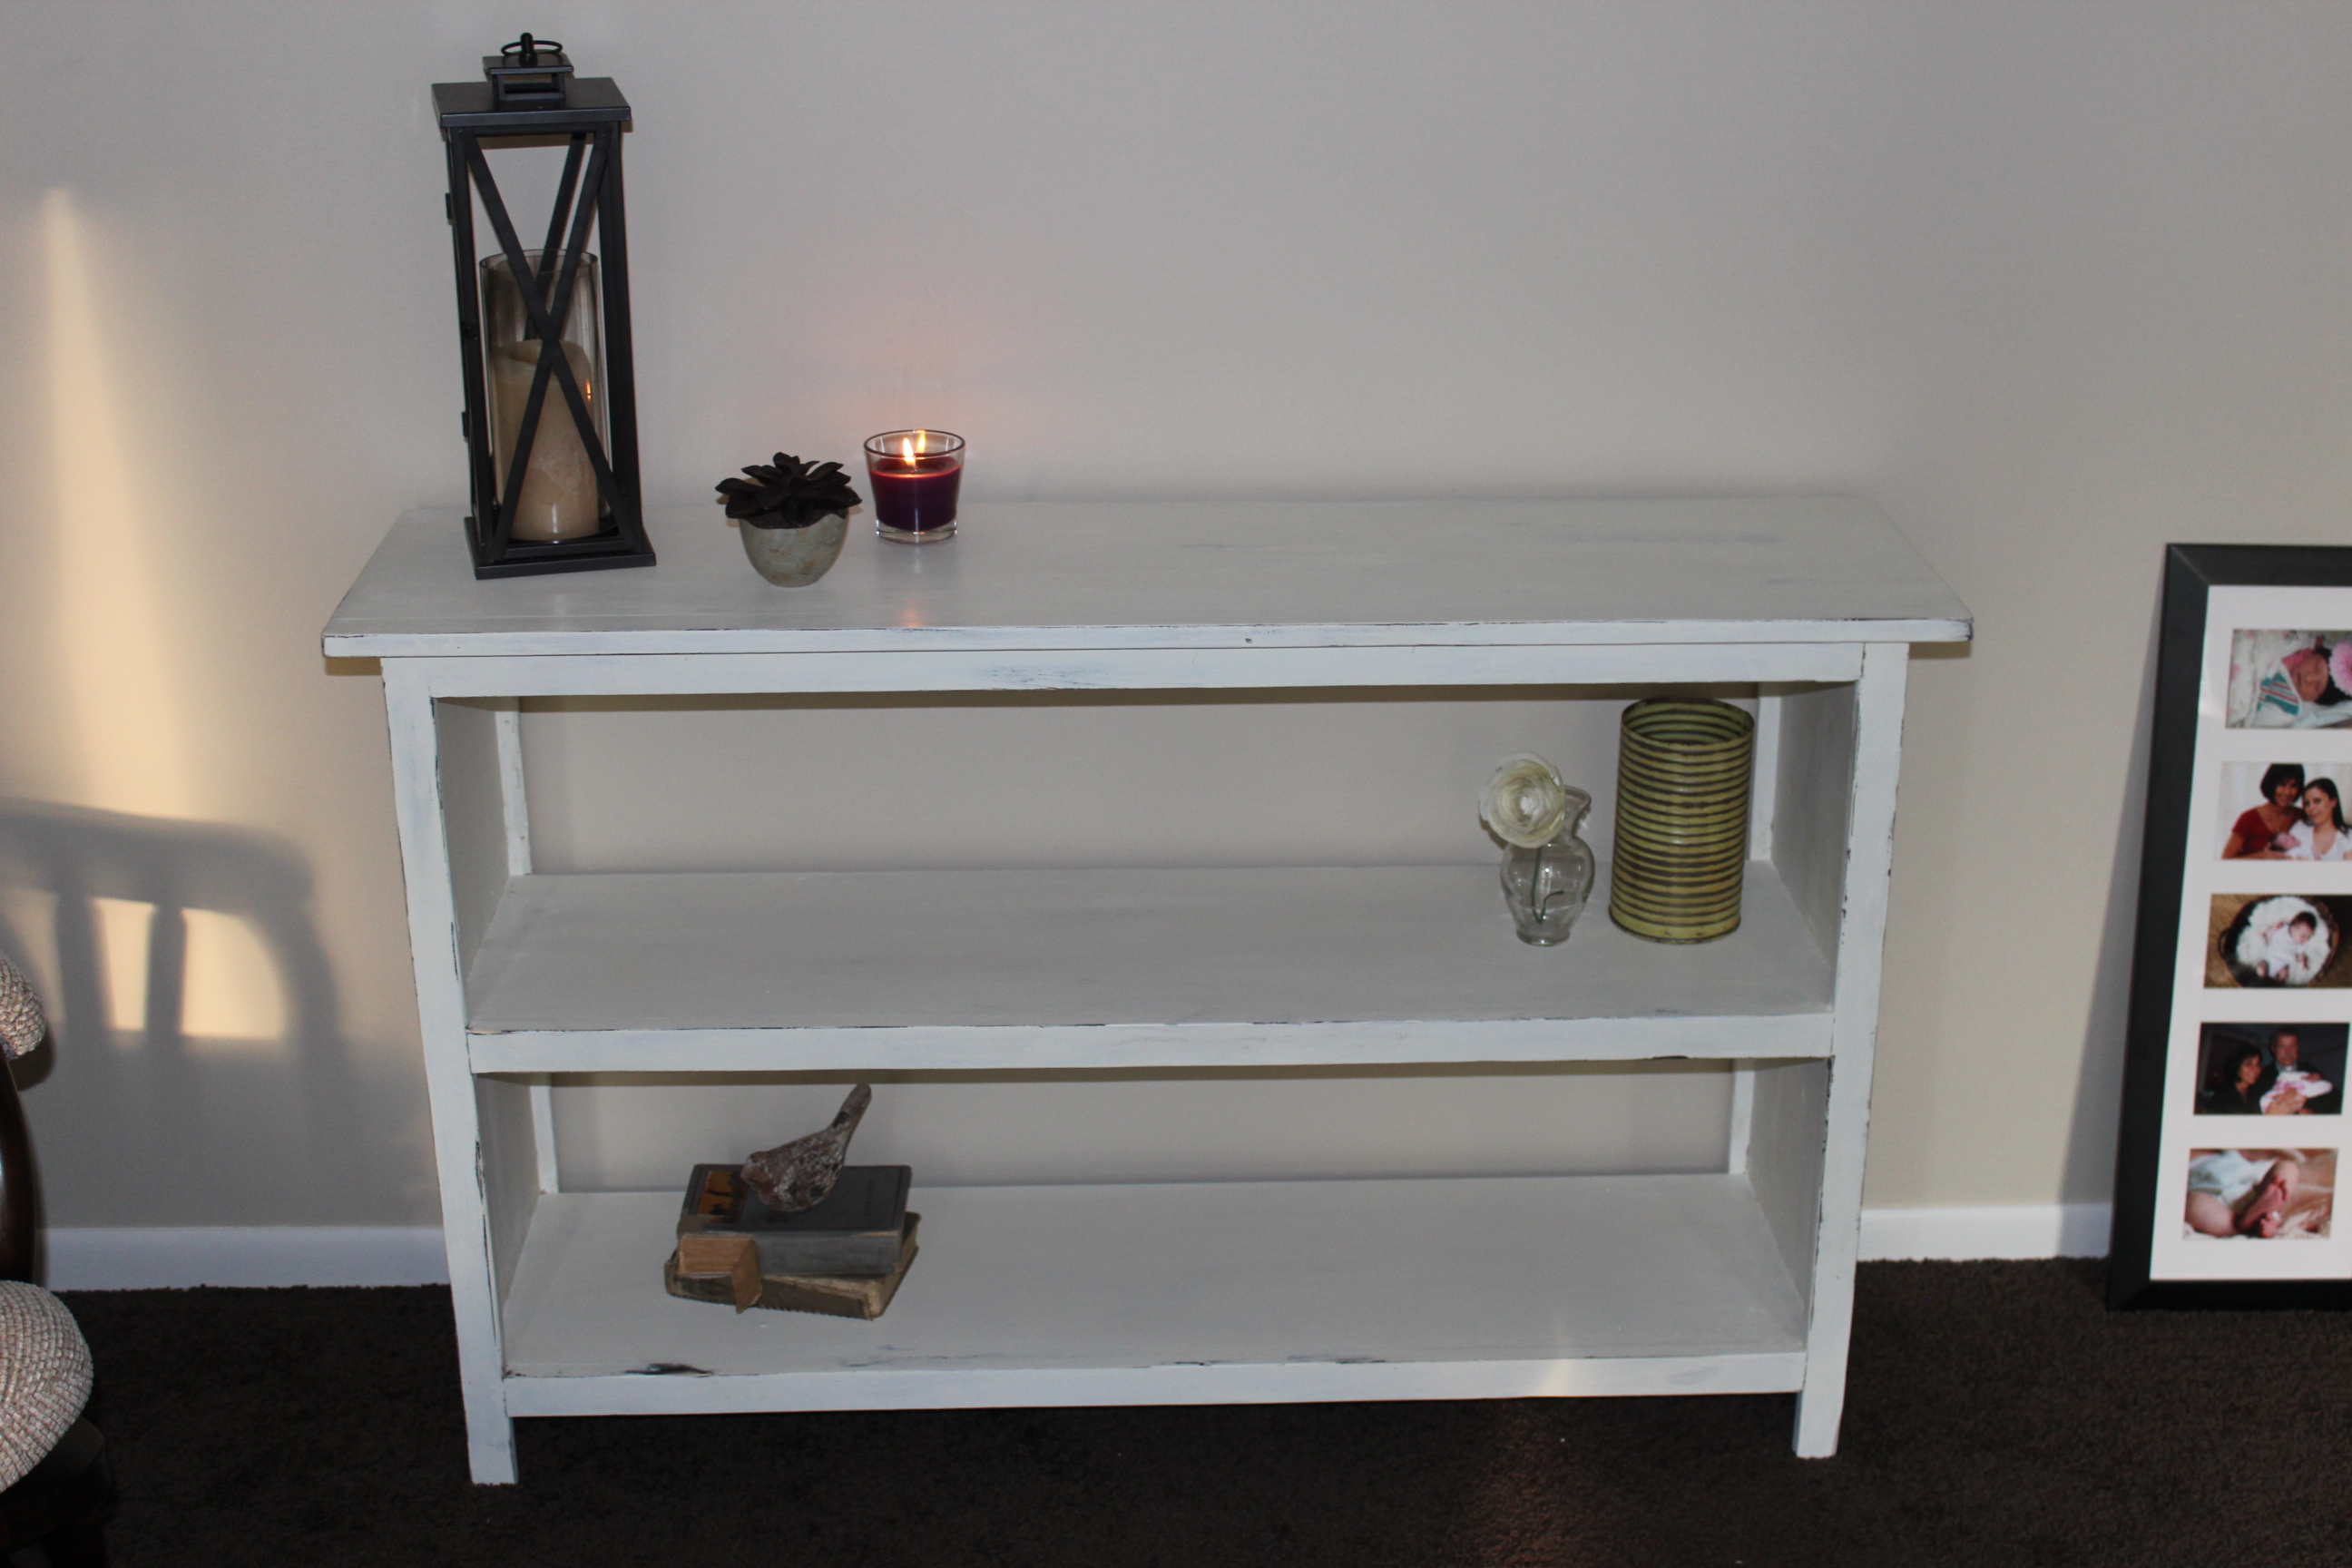
This is an extremely easy project and great for beginners. The step by step guide was spot on. I would only suggest that if you are having your local home goods store do the cutting to make sure they cut according to the guide given or you will end up with only enough "correct cuts" to make one shelf.
I applied a dark brown base coat and then a nice coat of DIY chalk paint (off white). I distressed the edges and a couple of spots on the top shelf and topped it off with clear paste wax. Looks great in the living room.
Thank you for the plans!
Built from Plan(s)
Estimated Cost
$35
Estimated Time Investment
Afternoon Project (3-6 Hours)
Finish Used
DIY Chalk Paint (Distressed) with clear paste wax
Recommended Skill Level
Beginner
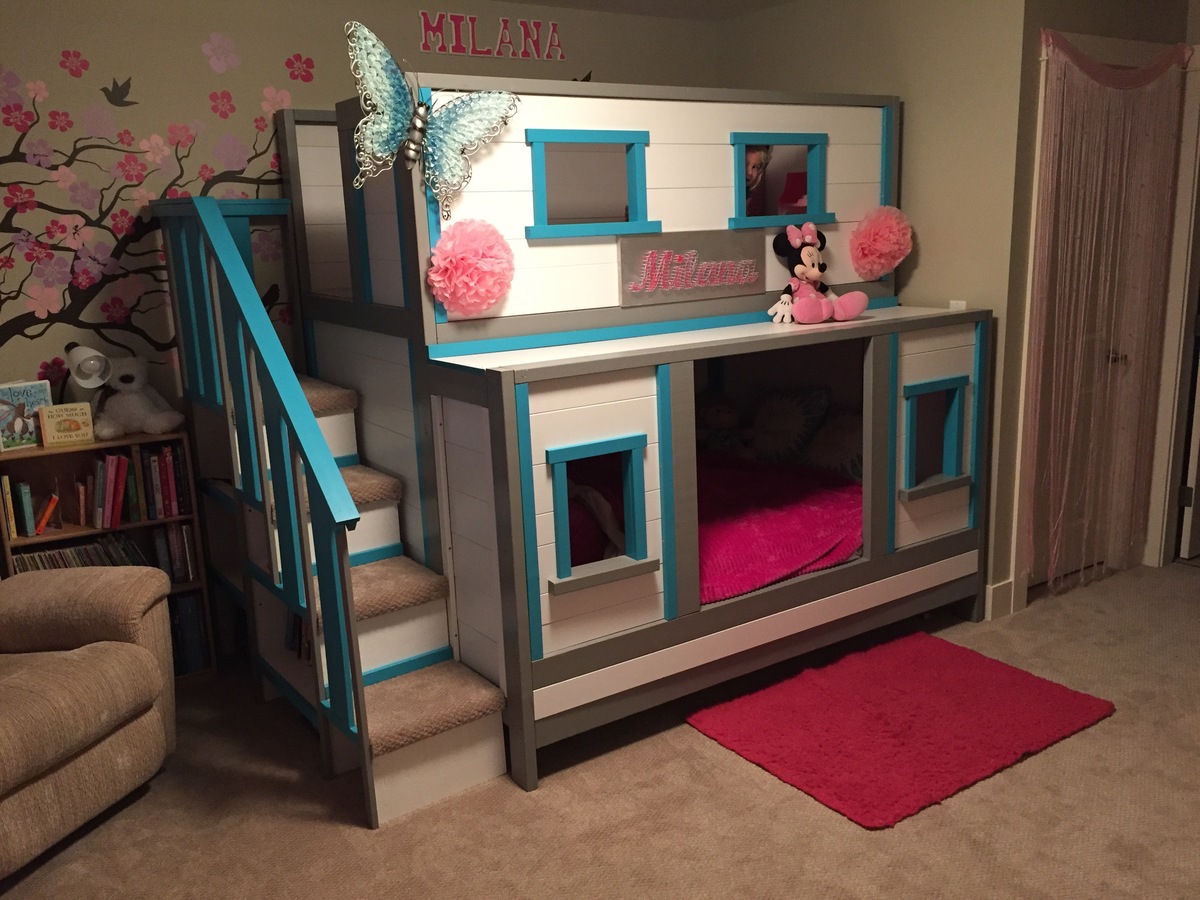
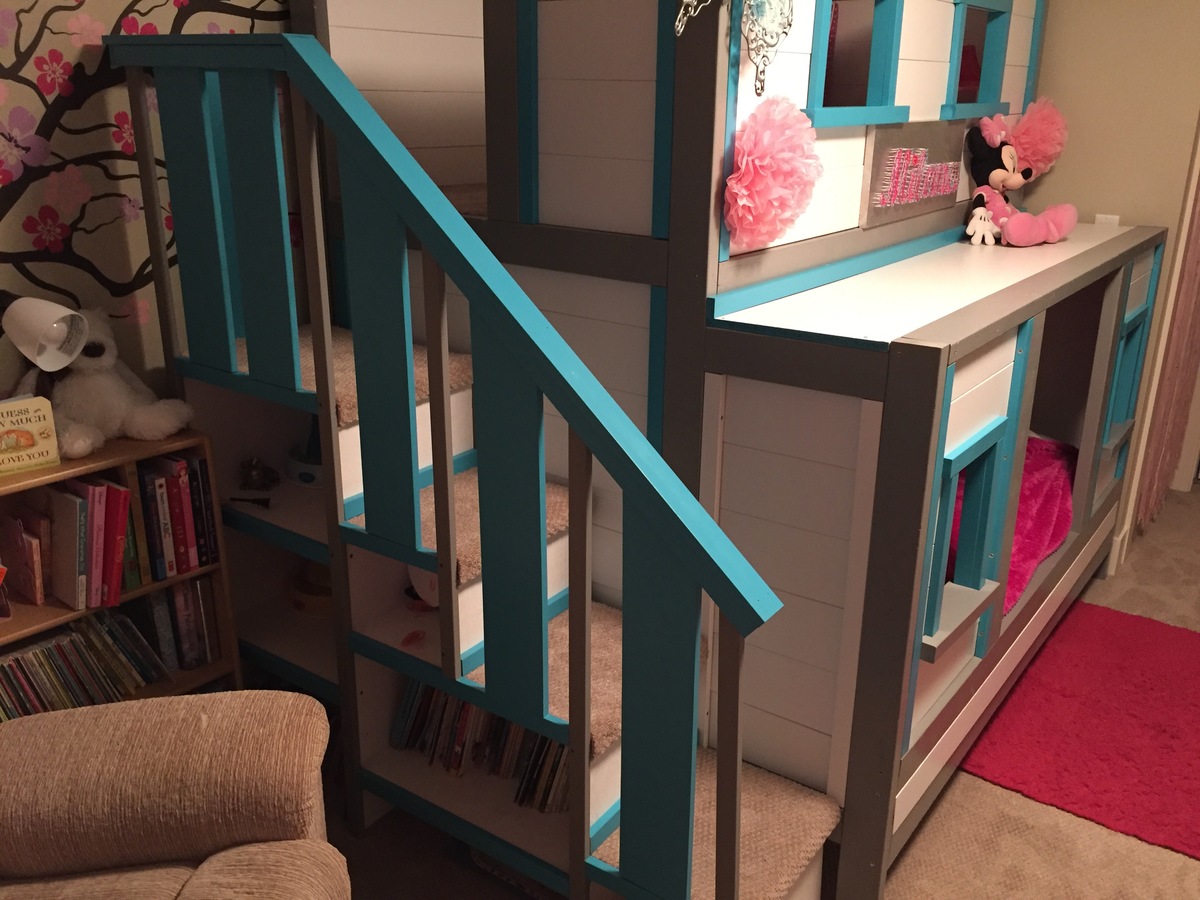
Sweet Pea Bed
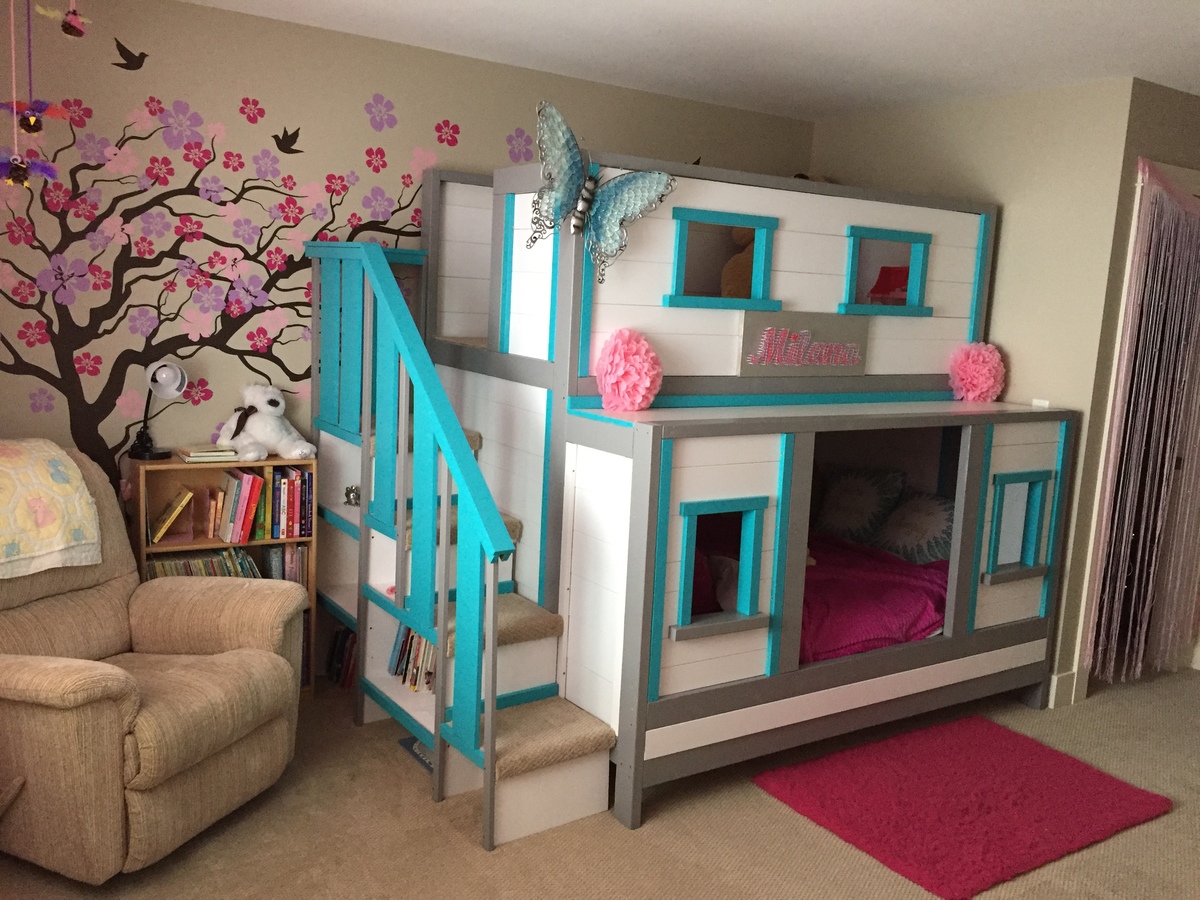
This project cost us about $850CAN and took us around a week (5ish hours a day) to complete. My husband and I are definitely not carpenters so it's not perfect but it's pretty amazing :)
we made several alterations to the plans including making the bottom bunk larger to accommodate a double/full size mattress. We also made the "door" to the bottom bed larger with an opening of 30". Another alteration was we dropped the mattress cleats to 9" off the ground so that the mattress dat down in the bed. The bed is for our 2 year old so we thought she would have trouble getting in if it was much higher. This eliminated the storage area underneath but she has a large closets so we didn't think it would be an issue.
The plans were great and pretty easy to follow. We are over the moon with how it all turned out!


Built from Plan(s)
Estimated Cost
$850
Estimated Time Investment
Week Long Project (20 Hours or More)
Recommended Skill Level
Intermediate
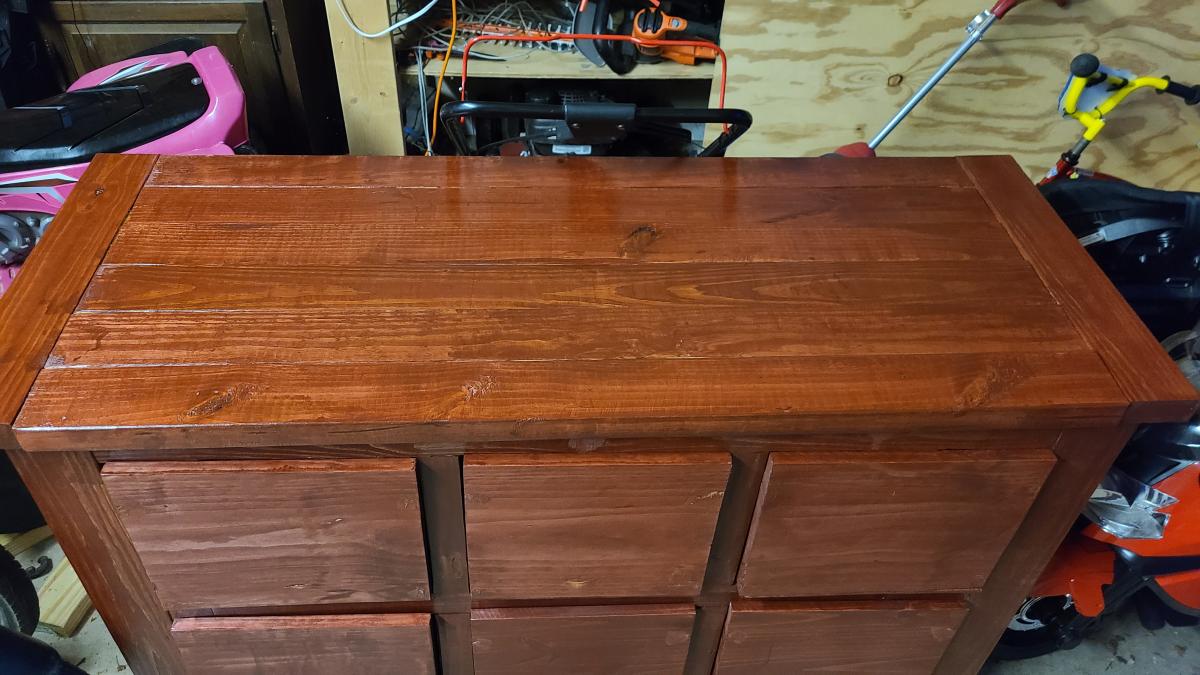
dumpster dresser
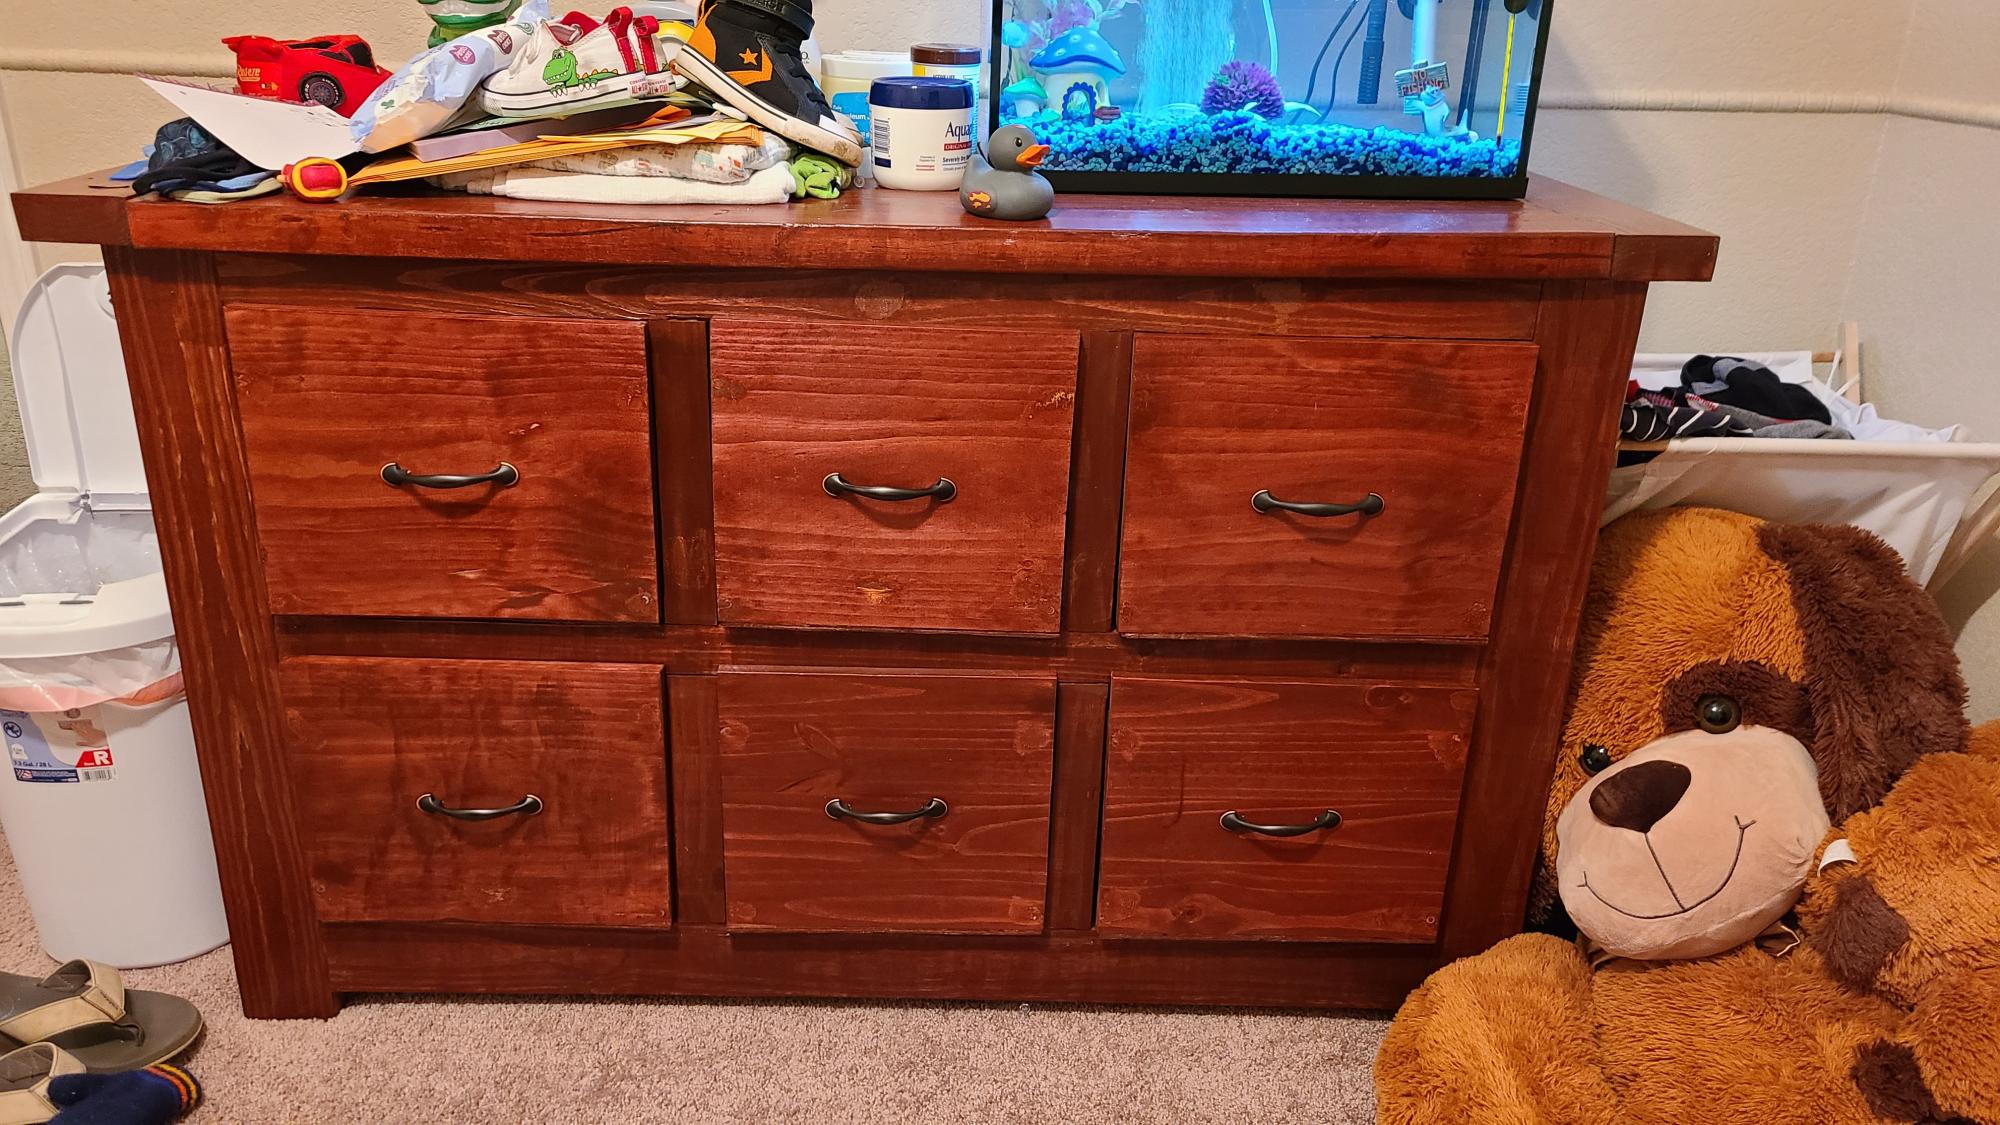
I had left over lumber from a fence that I put up. The kiddo needed to have a big boy dresser. Made this with all treated 2x4s. I cut all of the inside supports to dimension from the 2x4s. Only wood that I needed to buy was for the drawers.
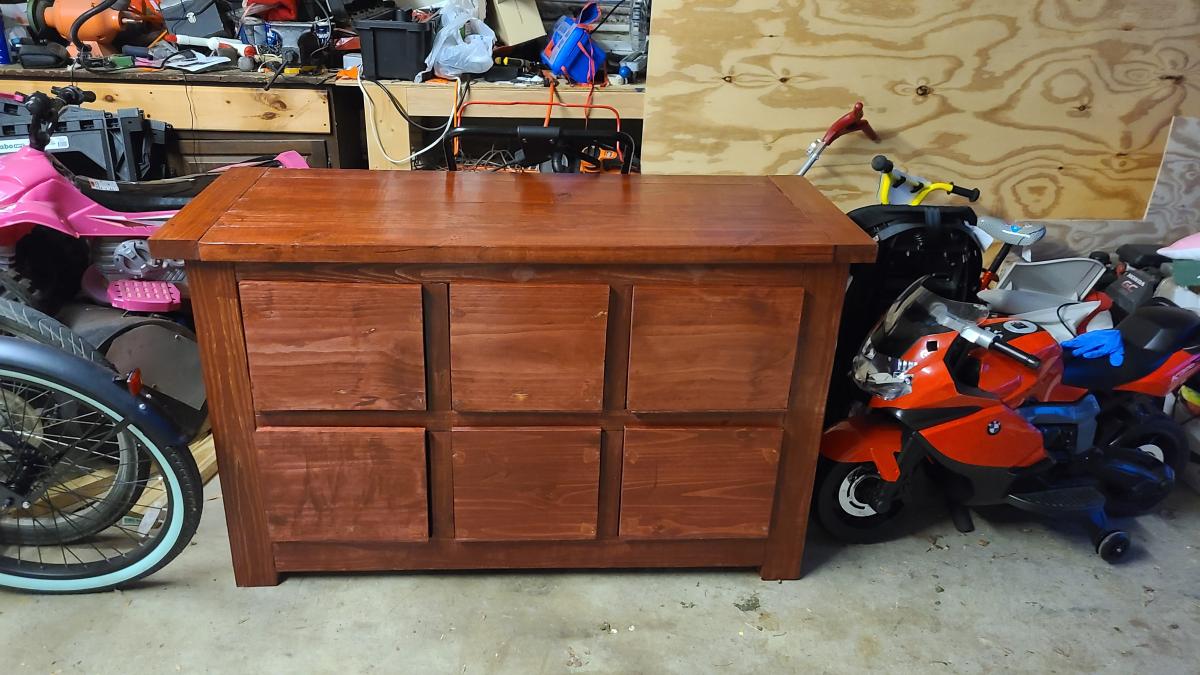
Estimated Cost
150
Estimated Time Investment
Weekend Project (10-20 Hours)
Recommended Skill Level
Intermediate
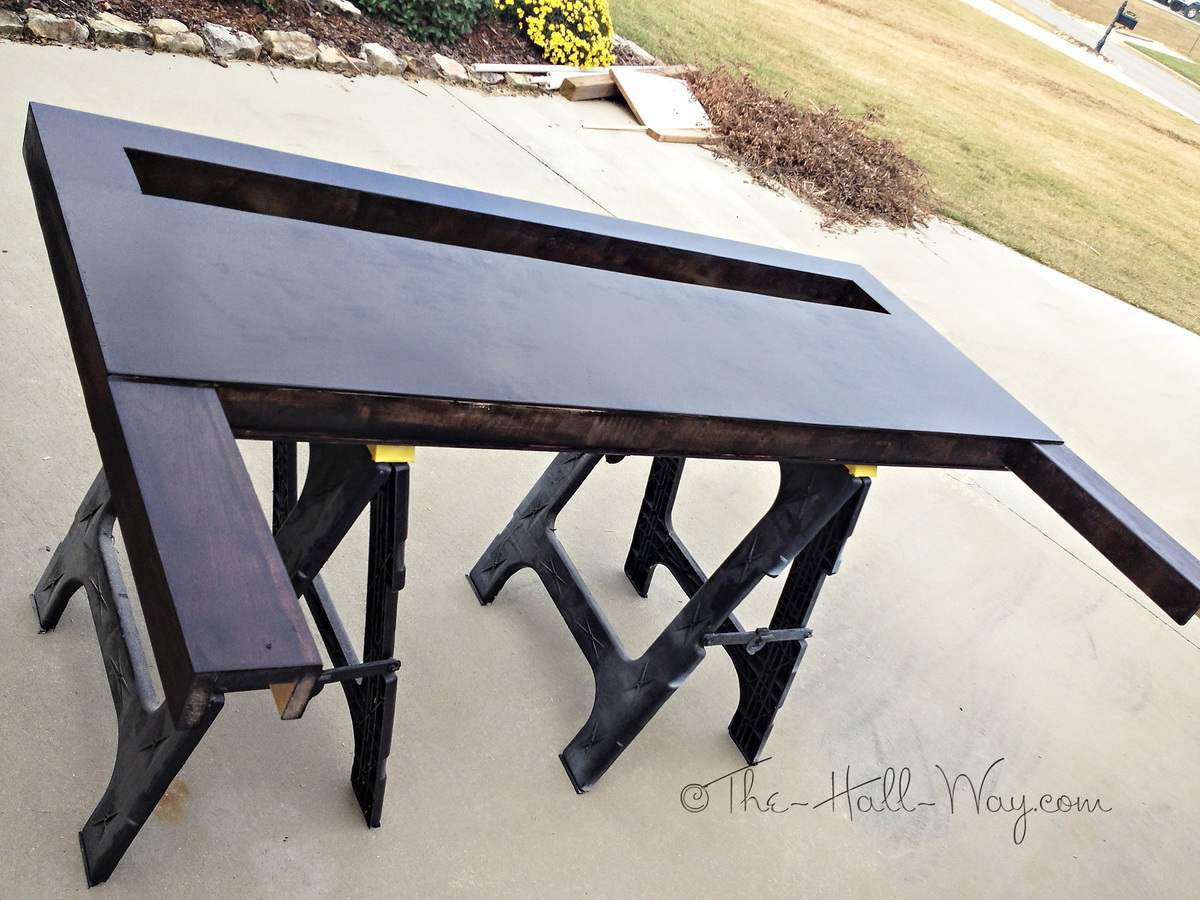
Farmhouse X Desk
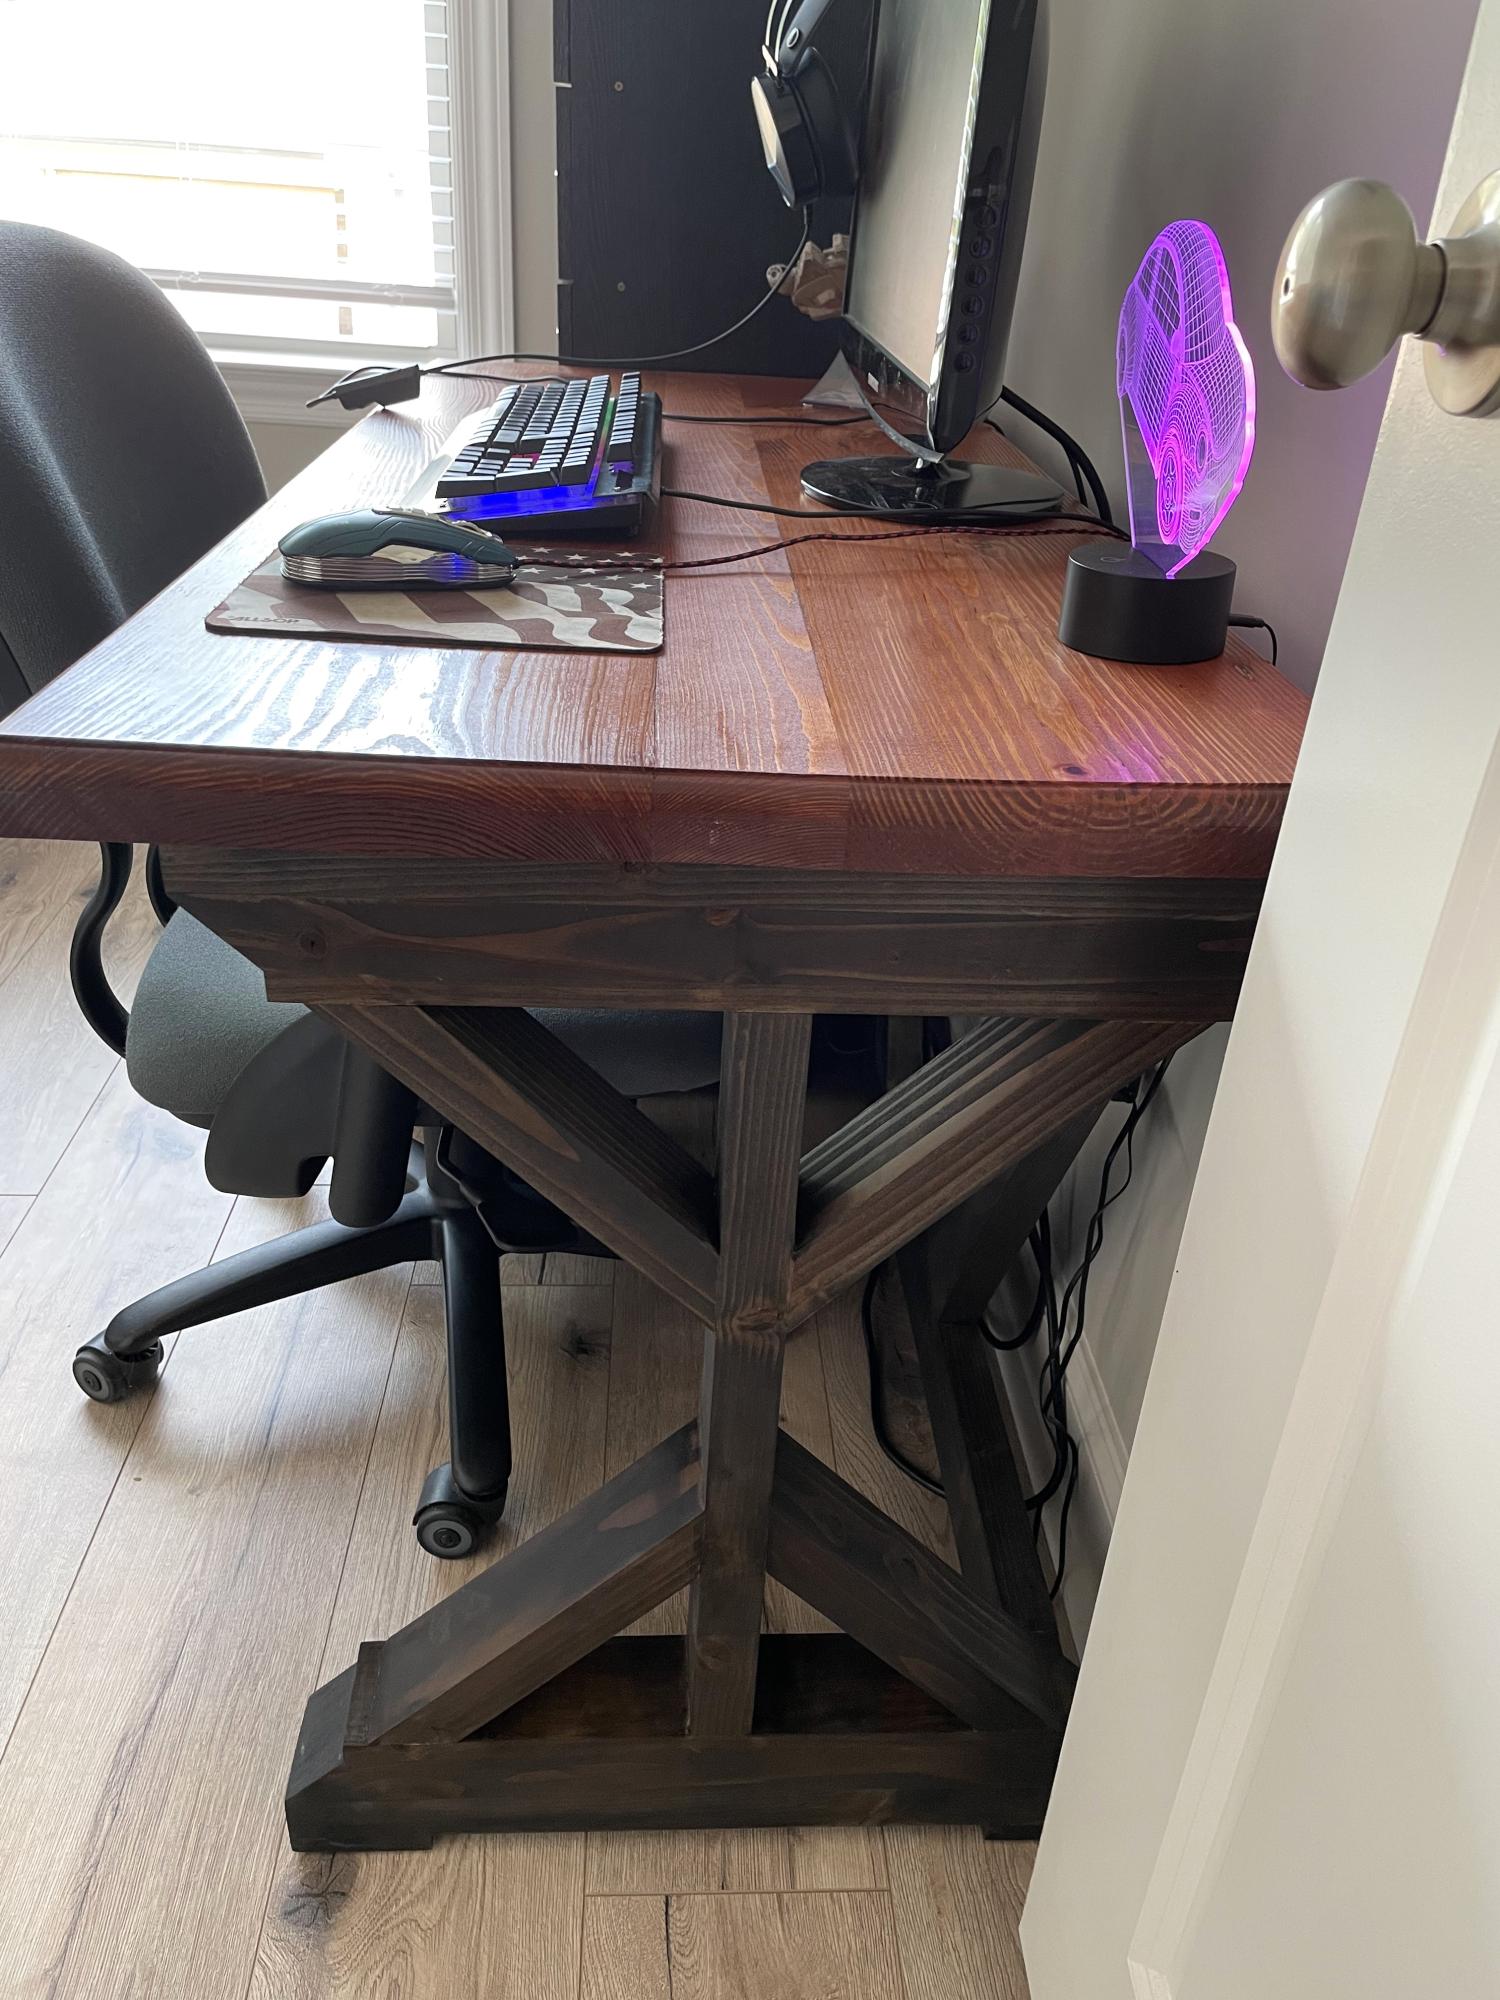
We changed the design a little bit. We used dowels to hold almost all of it together. Then we joined the top and used figure eight fasteners to account for wood movement. My nephew loves it, we think it looks great in his room.
Dave Jacobs and Vaz Franchuk
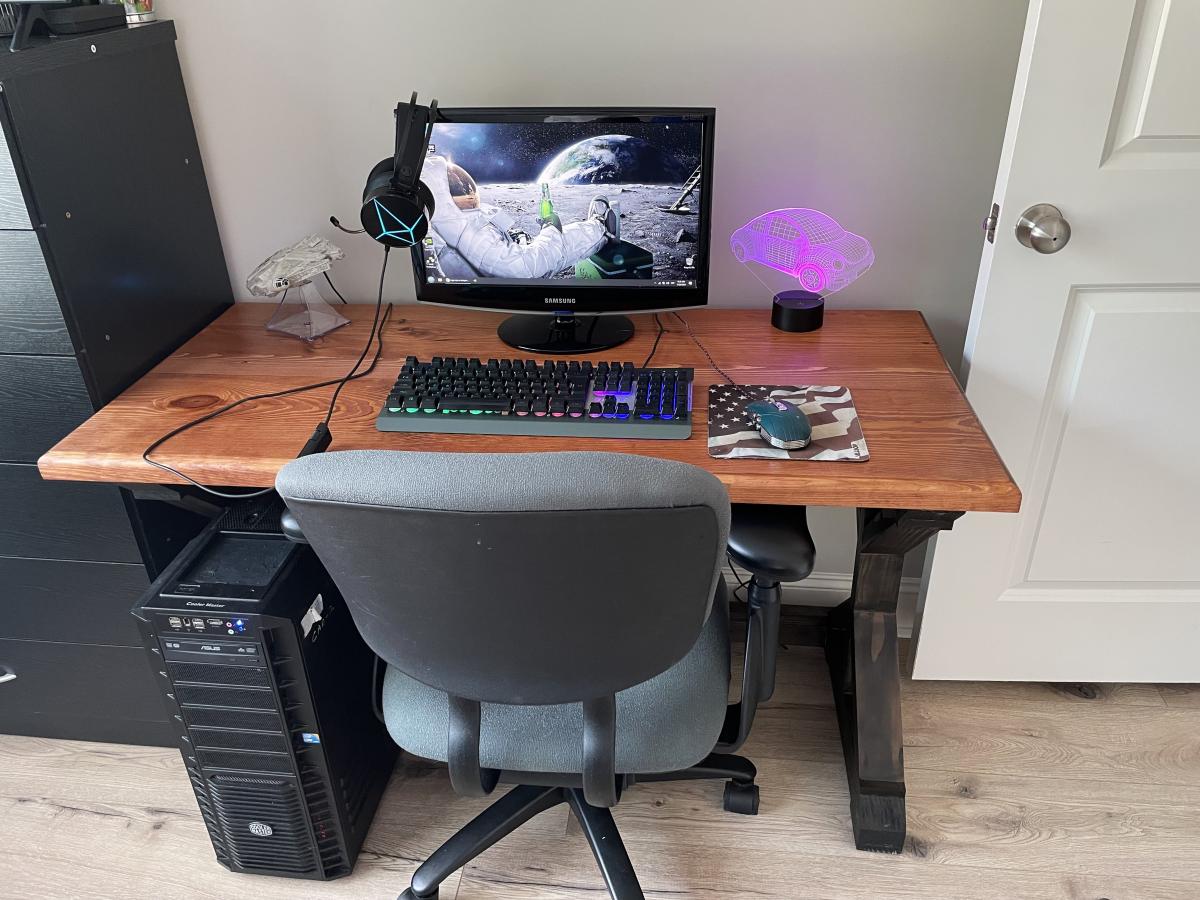

Built from Plan(s)
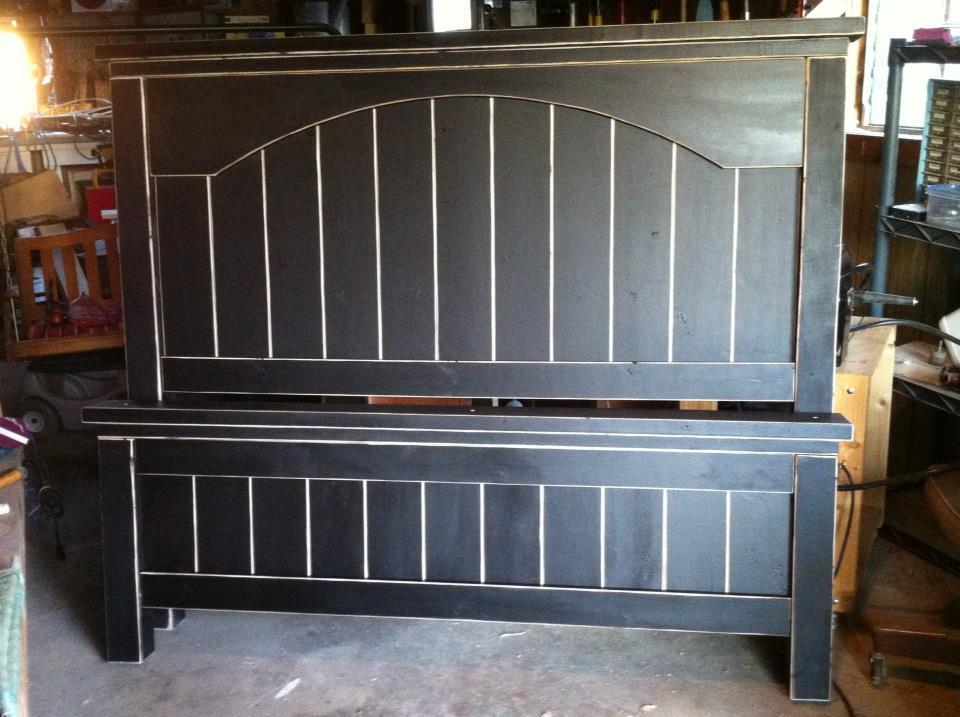
Chunky Leg Bed

I built this bed for my sister's new house. I used aspen for the visible boards and furring strips and regular lumber for the rest. The only change from the original plan is that I used 1x6s for the legs so it would sit higher off the floor.
I painted it with Rustoleum Painter's Touch Metallic in Oil Rubbed Bronze and I really like how it turned out. I didn't use any primer, so you can almost see the wood grain which gives it the illusion of being stained. It also has a metallic sheen in the right light, but it's very subtle. The only downside is the metallic gives it a rough texture. I contemplated putting a couple coats of poly over it, which I may do later.
*Picture was taken with her old full size mattress
Built from Plan(s)
Estimated Cost
~$200 including headboard
Estimated Time Investment
Day Project (6-9 Hours)
Finish Used
Rustoleum Painter's Touch Metallic in Oil Rubbed Bronze
Recommended Skill Level
Intermediate


Comments
SZahn (not verified)
Thu, 10/11/2012 - 13:37
WOW!!!
That looks wonderful!! I love the finish!!! I would love to see a few more pictures as this is one beautiful build. What color paint did you use? Keep up the excellent work, your providing inspiration!
SZahn (not verified)
Thu, 10/11/2012 - 13:37
WOW!!!
That looks wonderful!! I love the finish!!! I would love to see a few more pictures as this is one beautiful build. What color paint did you use? Keep up the excellent work, your providing inspiration!
ltodd
Sun, 10/14/2012 - 19:20
farmhouse bed
Thank you. I used Rust-Oleum flat black oil enamel. I have not actually attached it to the bed frame yet. When I do, I will add some more photos.