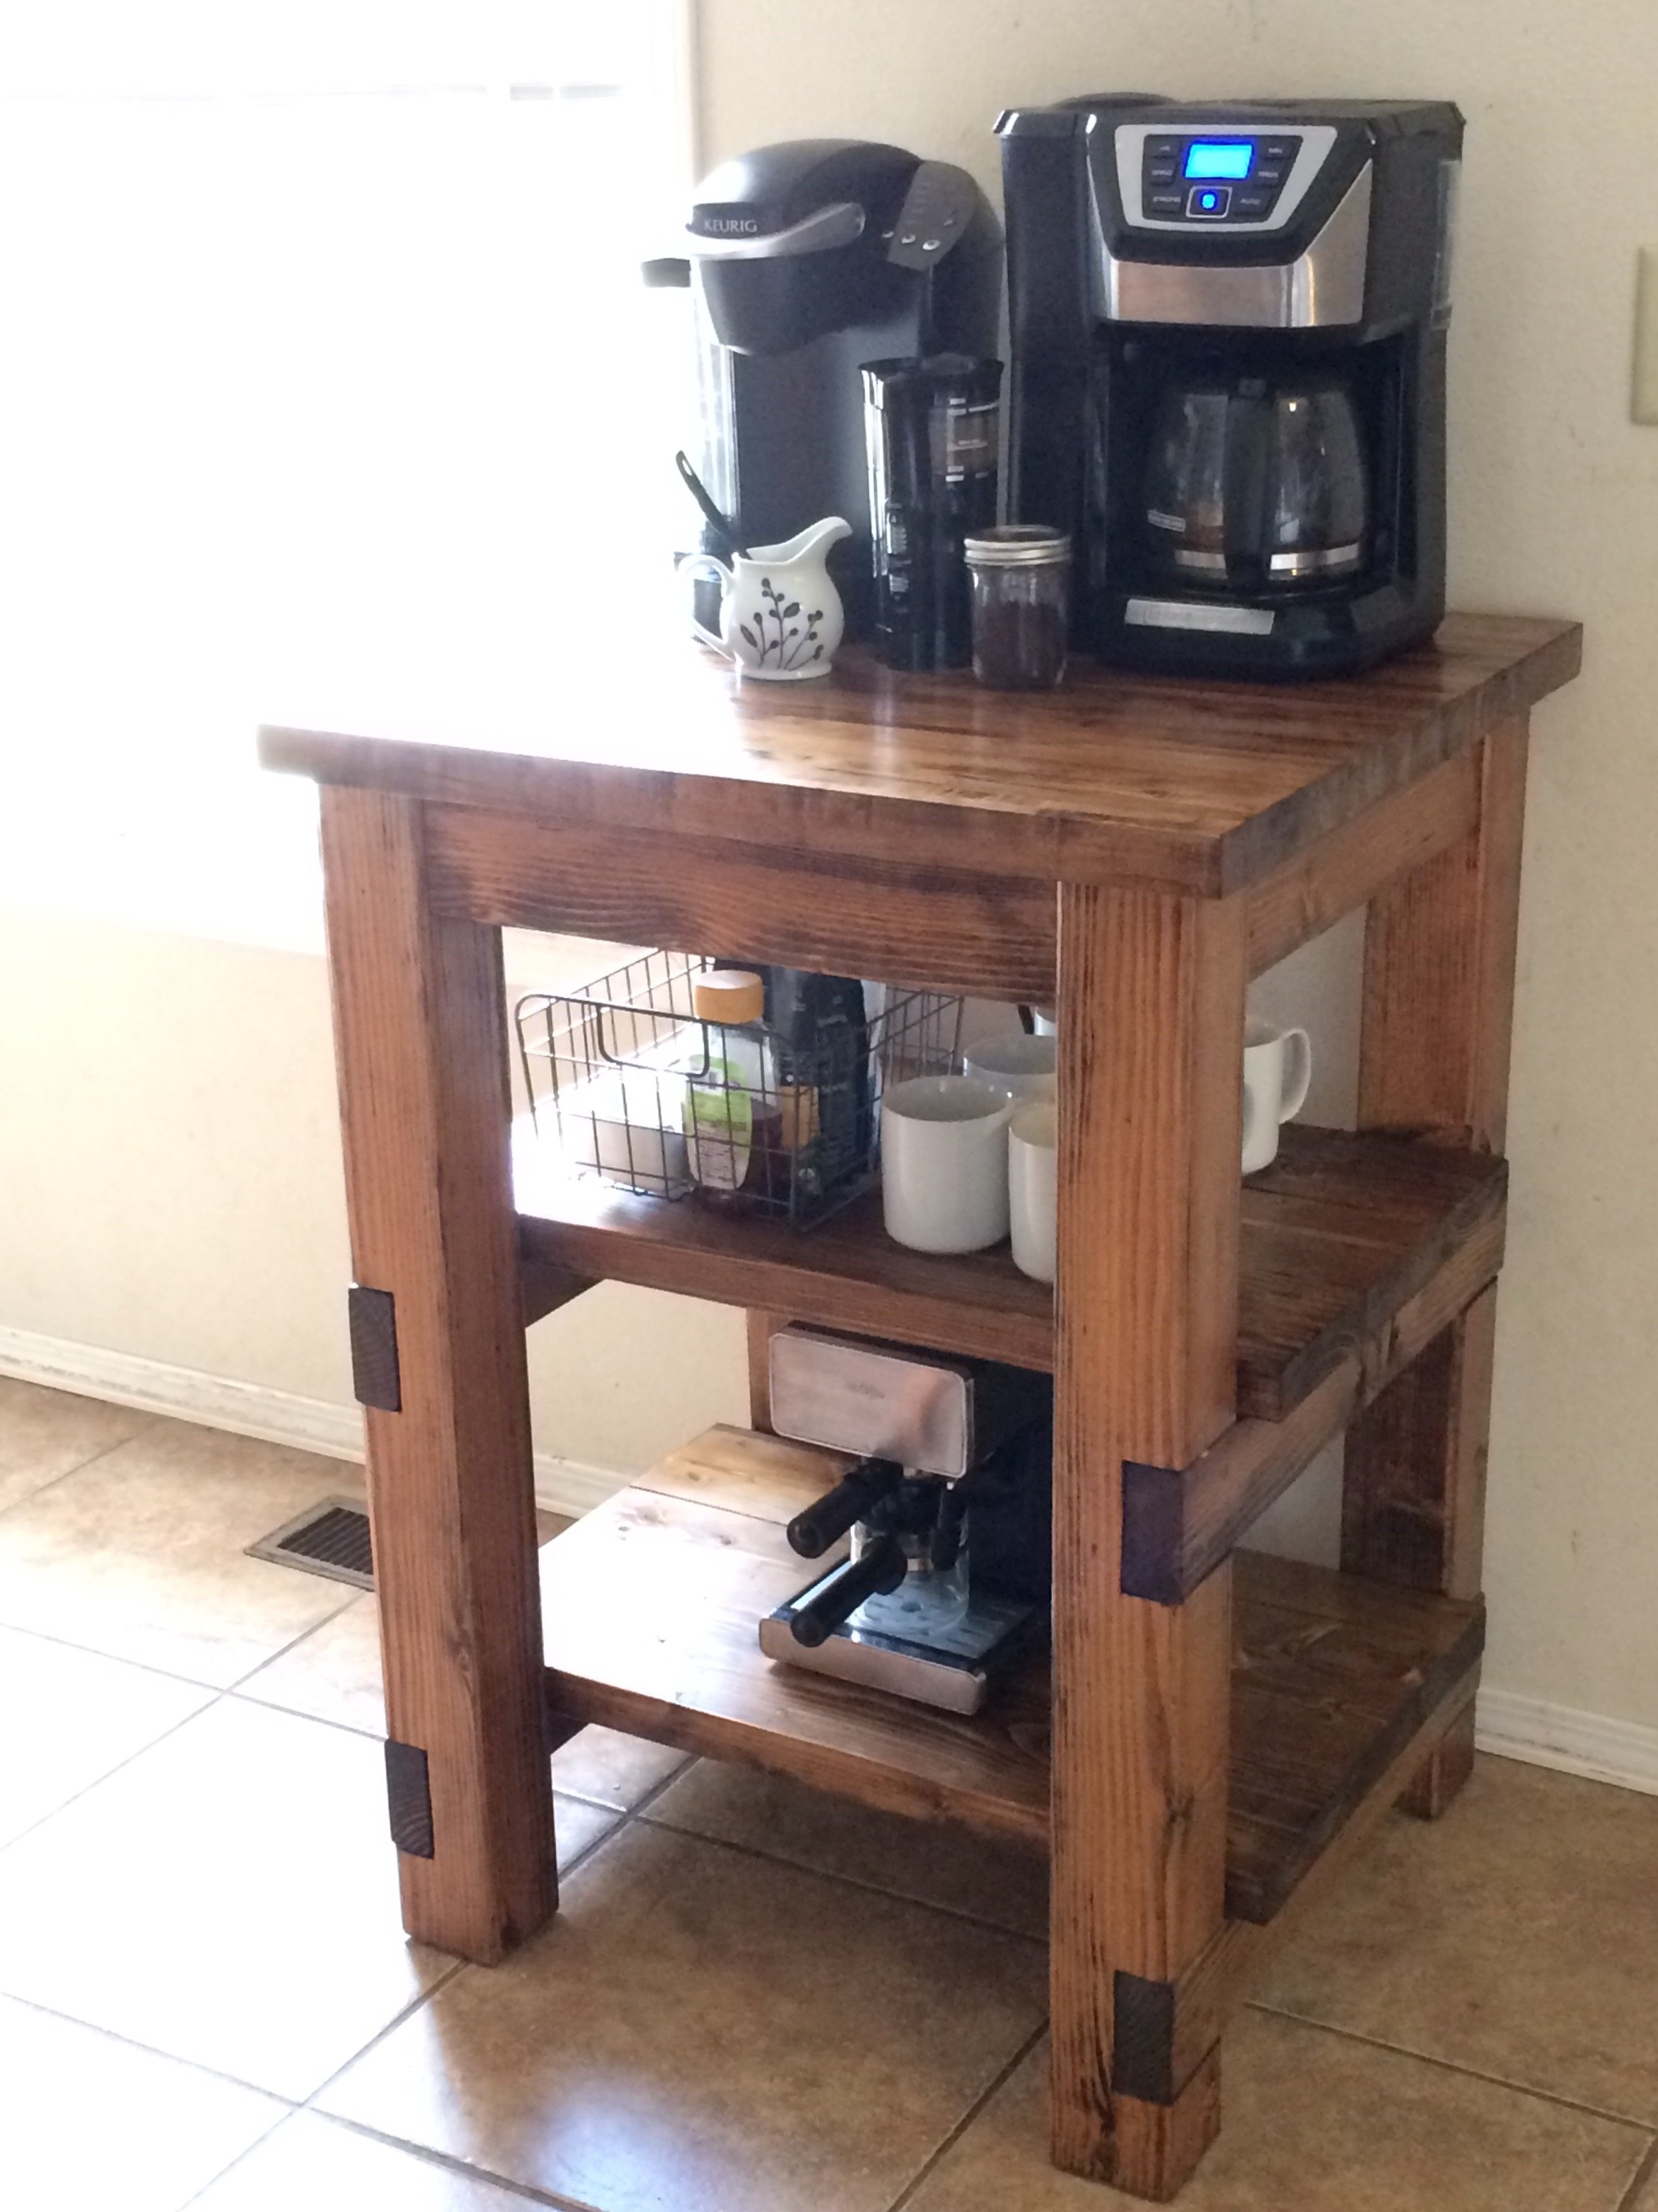
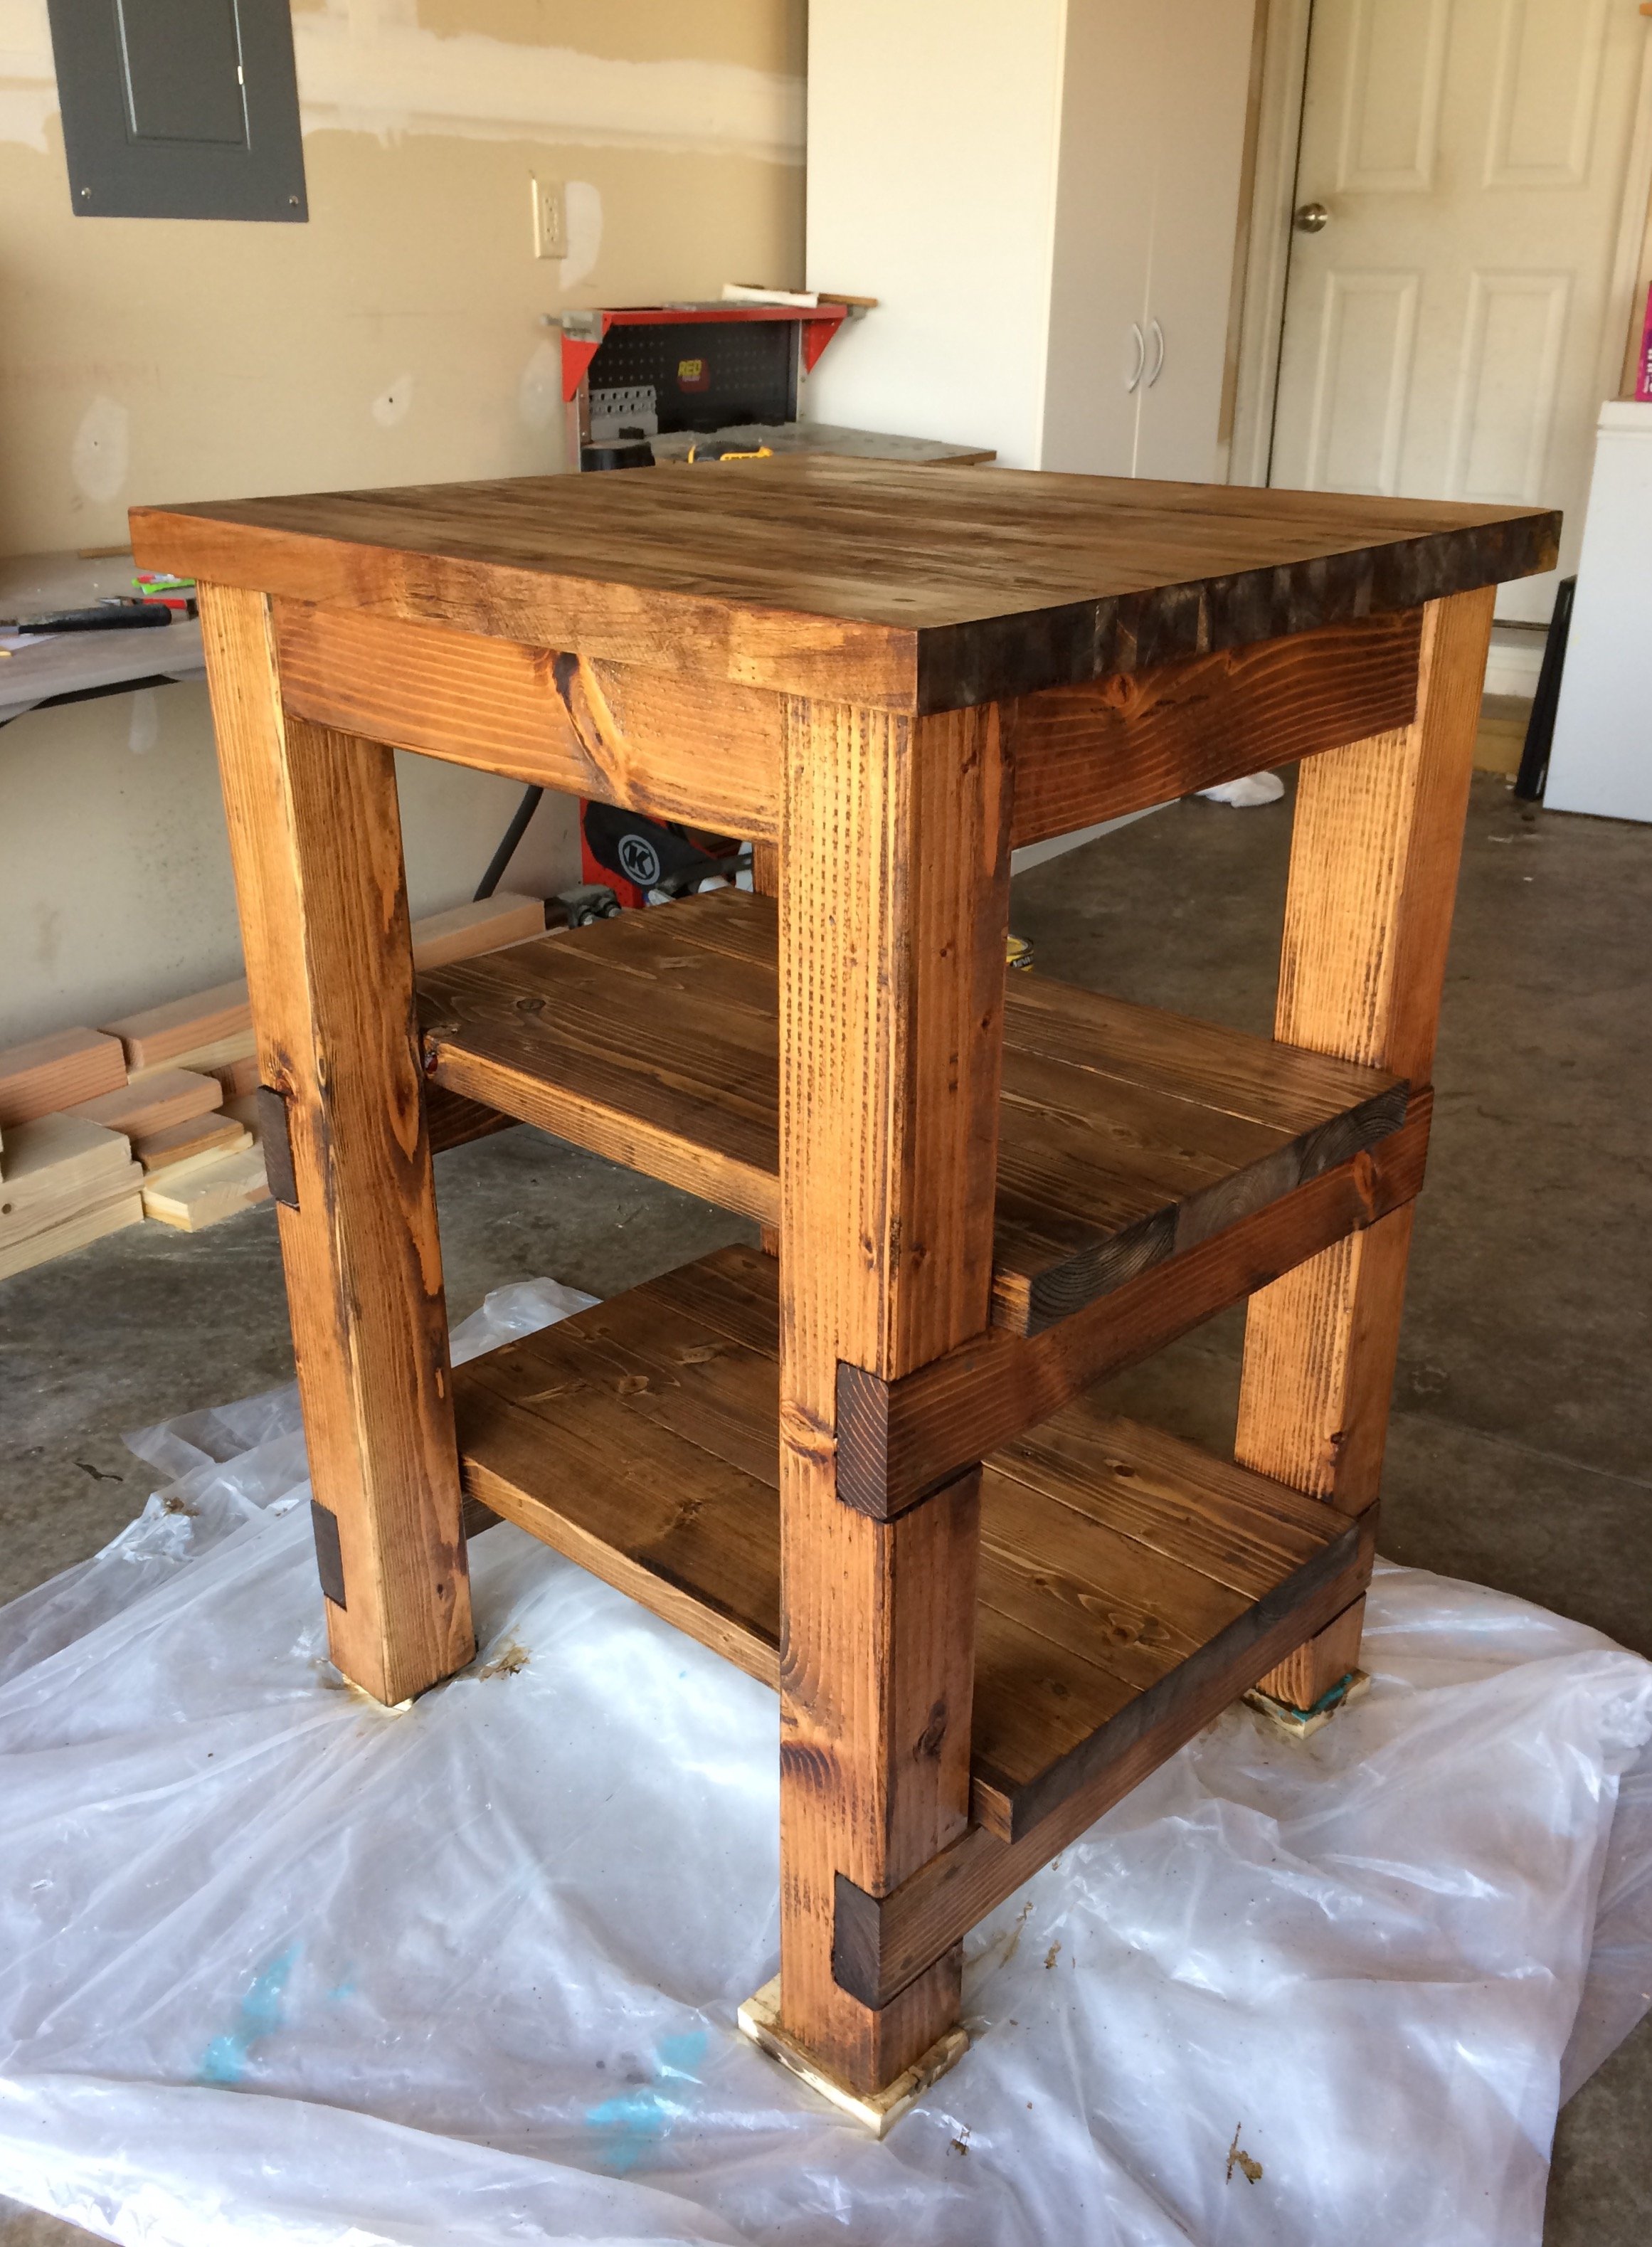
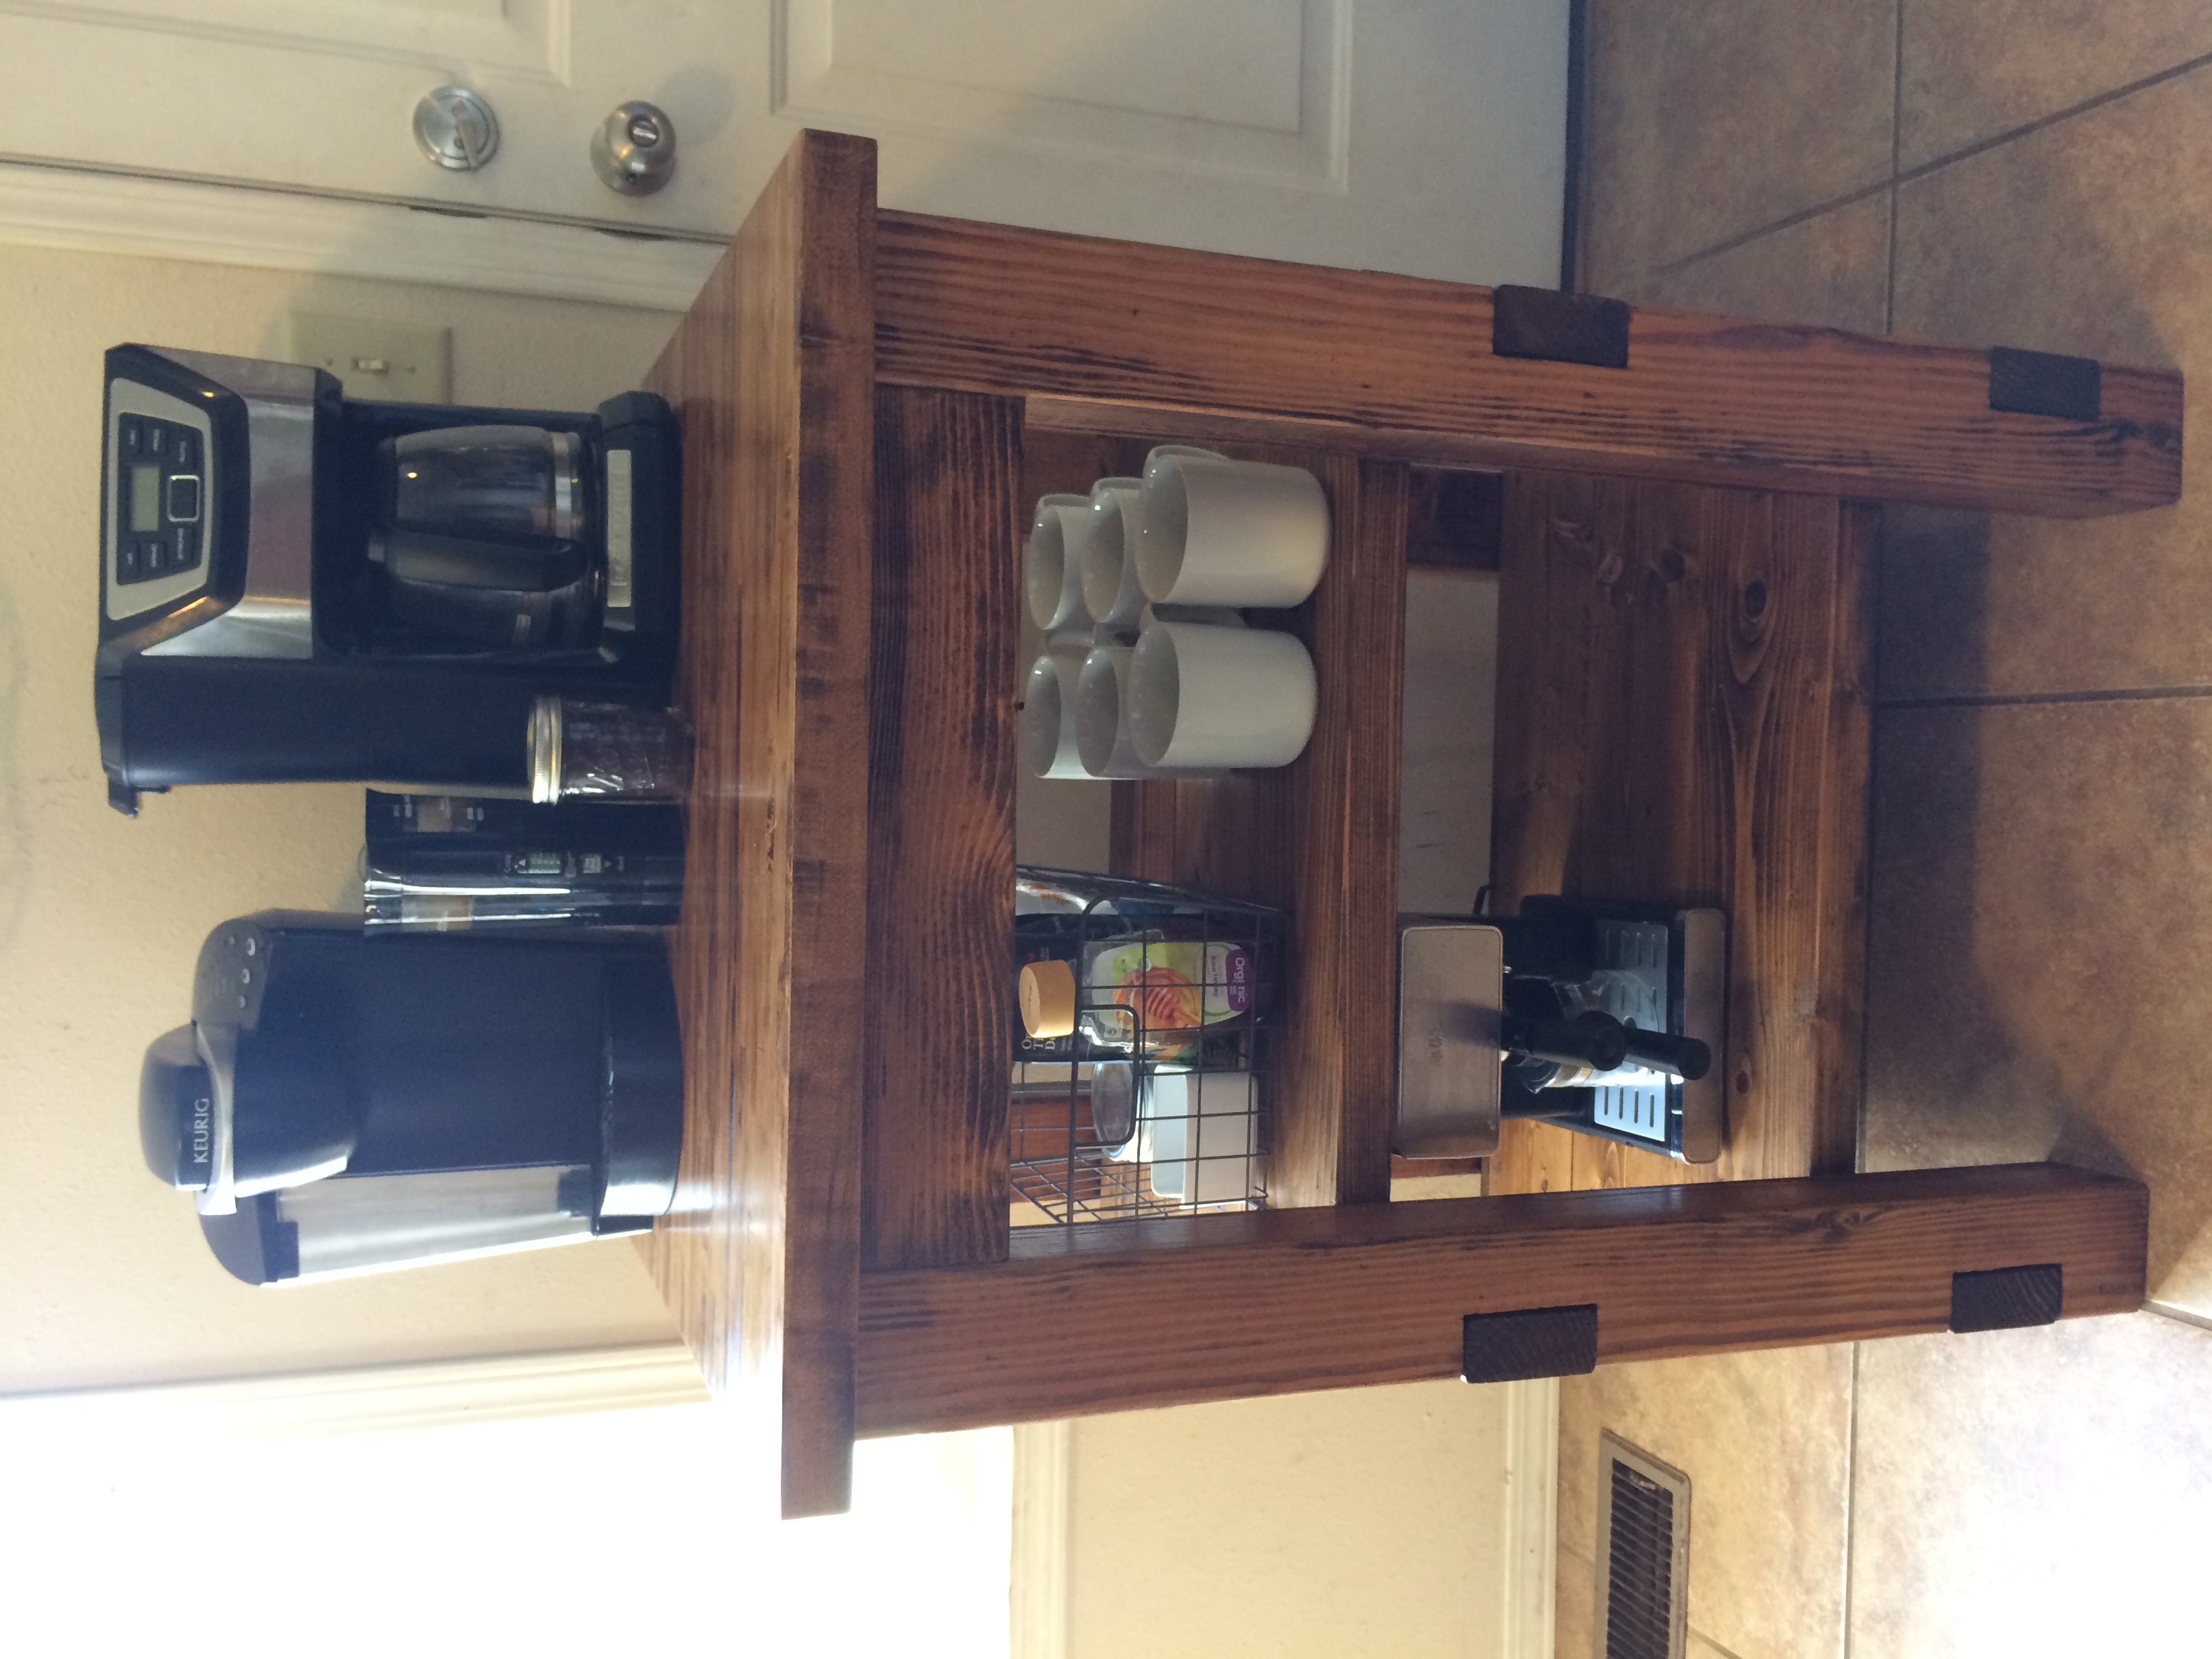
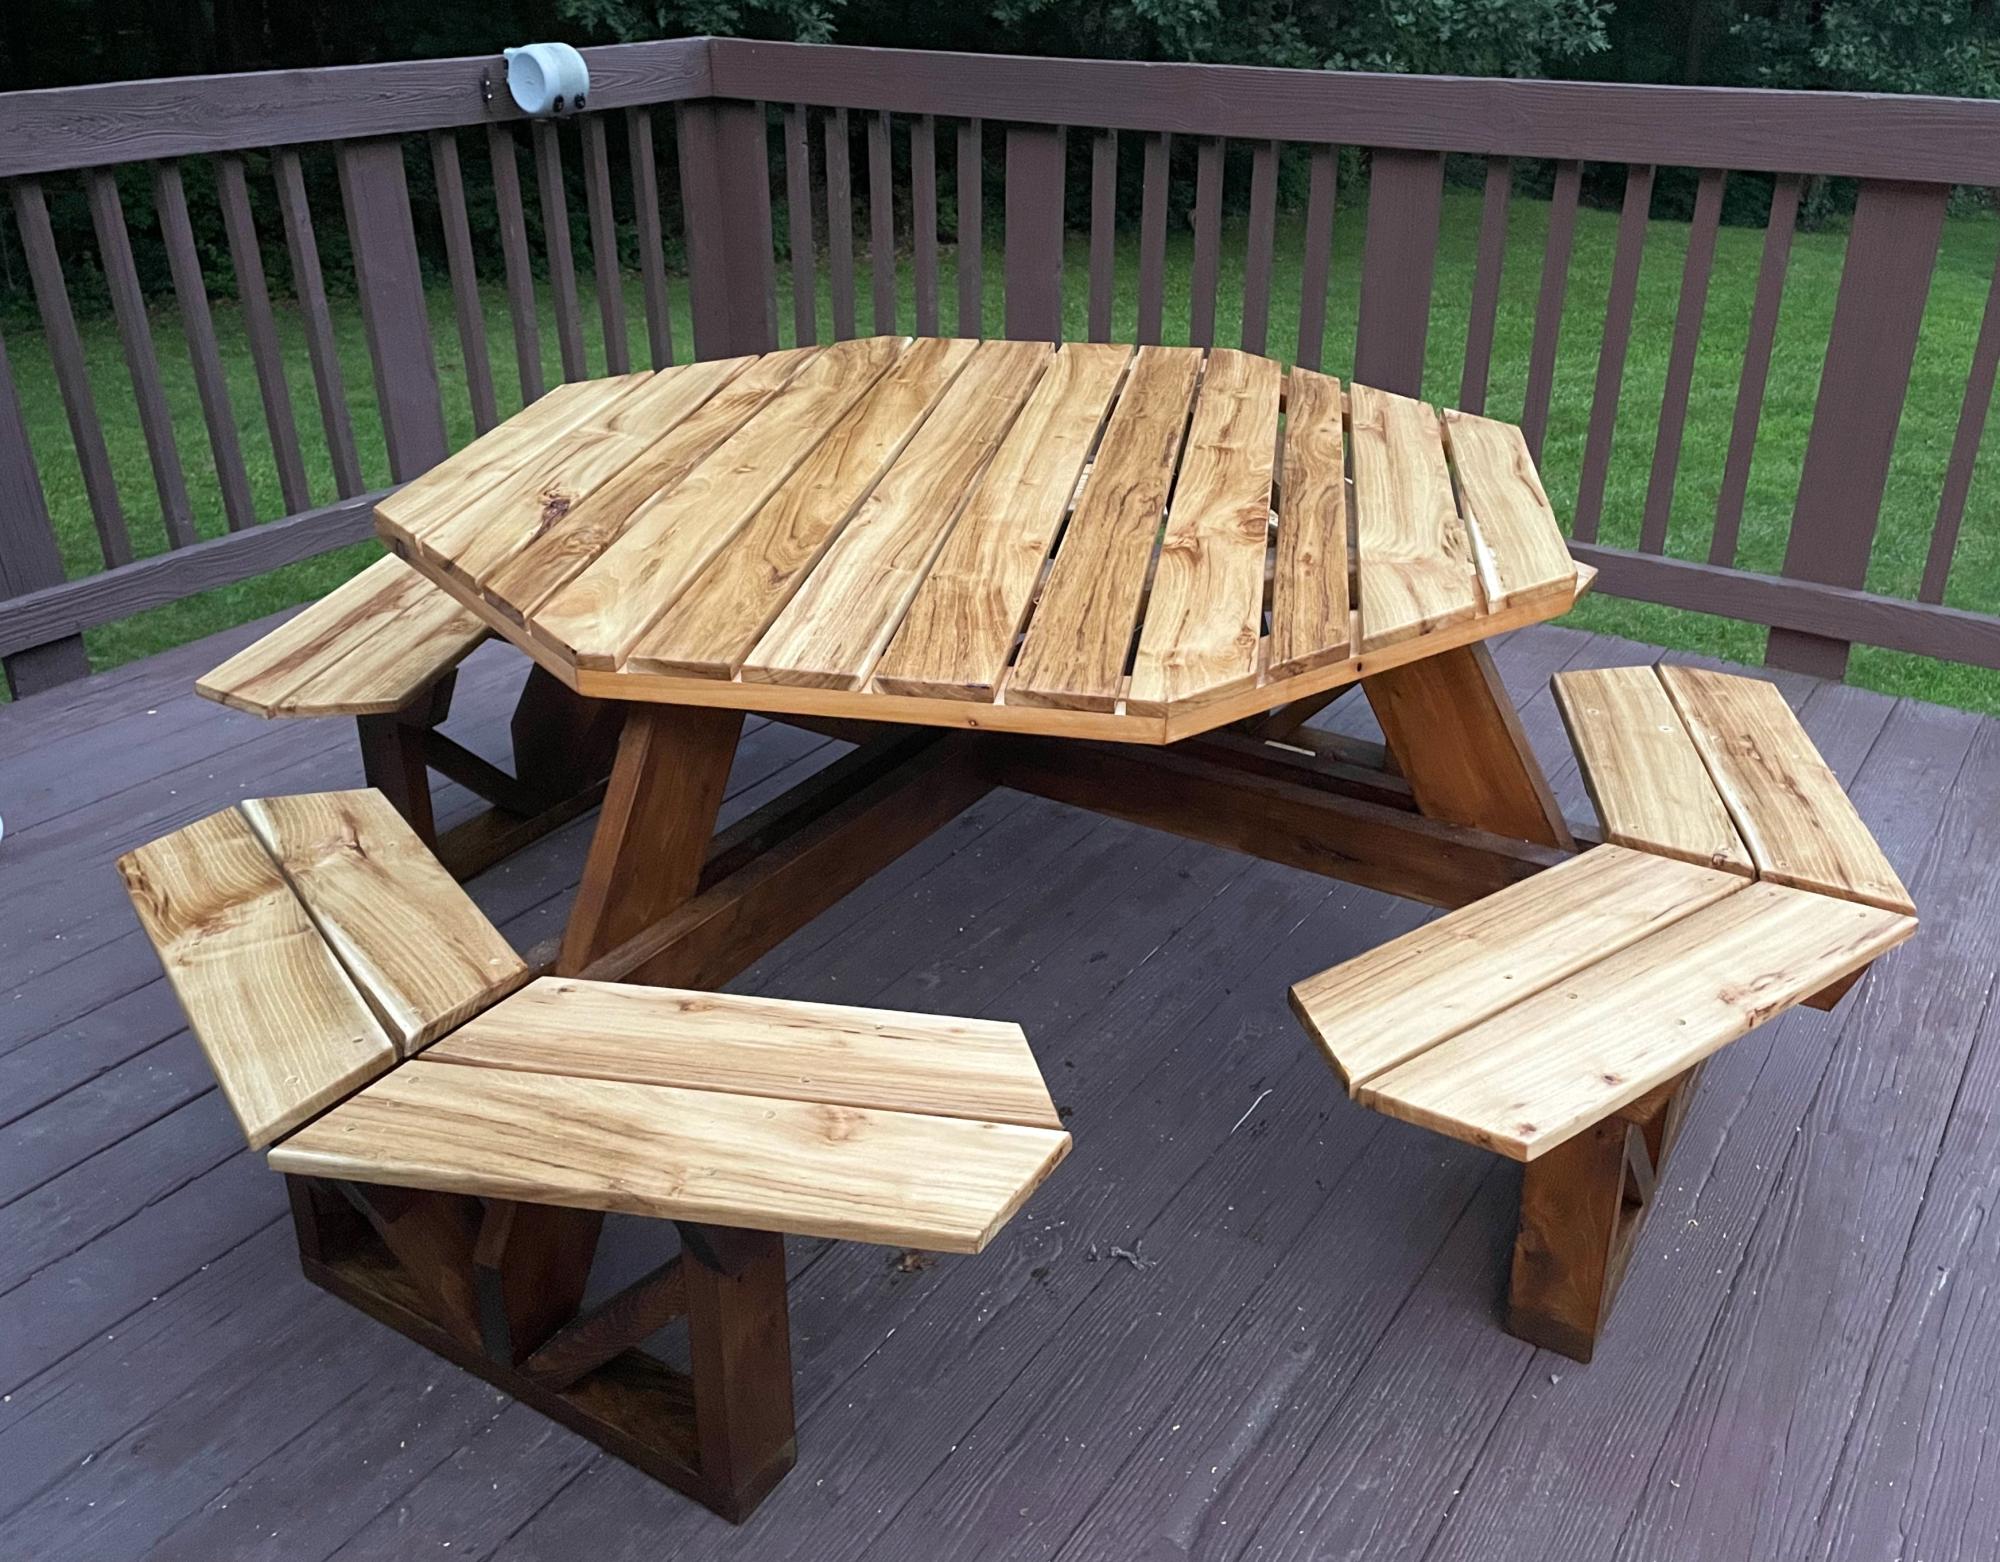
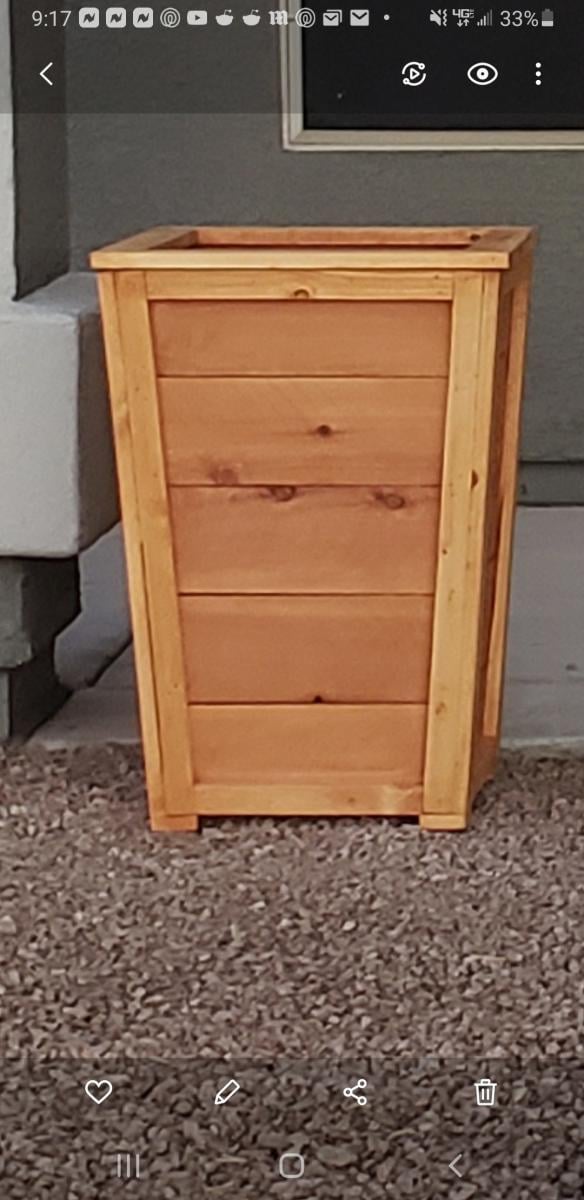
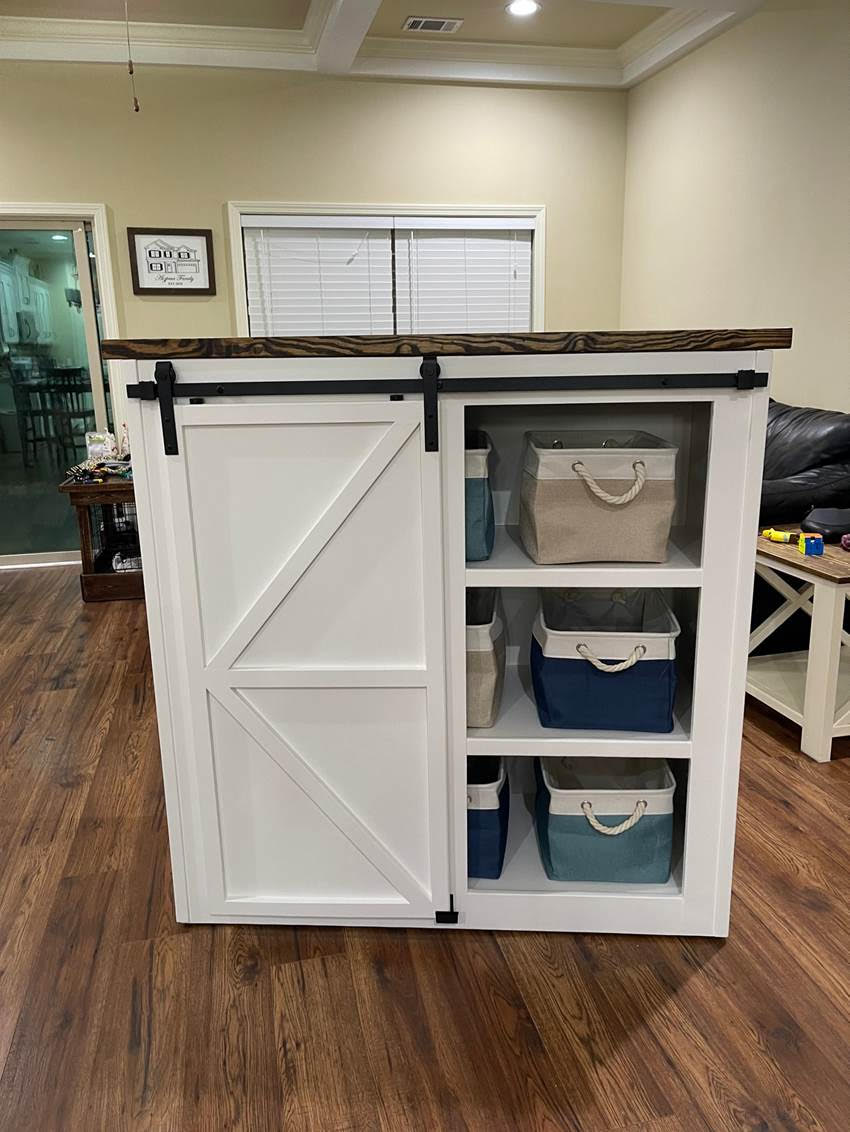
Community Brag Posts

Farmhouse Small End Table

Submitted by mpjacob08 on Mon, 05/25/2020 - 09:33

My 2nd ever build! Made to match farmhouse beginner coffee table. This is the smaller size posted. So Easy! Thank you for the plan and for the videos. I love them and am learning so much!

Built from Plan(s)
Estimated Time Investment
Afternoon Project (3-6 Hours)
Finish Used
Varathane golden oak stain, spray shellac, Varathane water based polyurethane
Recommended Skill Level
Beginner

Modern Adirondack Chair

Submitted by dijonaise on Fri, 06/19/2020 - 05:49

My little quarantine project all started with a three foot circle in the back corner of my yard and turned into this. After finishing the structure, we were looking at different furniture and considered either going on the cheap ($20 plastic chairs) or the expensive route ($1200) for this same setup. That was when I came across your site Ana. Your amazing plans and community's brag posts gave me the confidence to give it a go and we could not be happier with the result.

The chairs and tables went together super easy as everyone had mentioned. I sanded everything before cutting and then just sanded the cut ends. I did not have the stain on hand (not did we know the color) so we waited until after assembly to stain, which ended up not being too bad, just a lot of little nooks and crannies to get into. I used a small foam pad to get in between the boards.

Overall, I would say that the build, from start (rough lumber) to finish (sanded and assembled) took me about 2-3 hours per chair, and about the same to do two coats of stain on top and one on the underside, bringing the total time per chair to about 5 hours.

Now on to the landscaping... ;) I am also planning to build some planters to hold posts to hold some string lights around the perimeter. Boy how these little projects have a domino effect...but in the end, there is nothing better than sitting back and enjoying the fruits of your labor.

Estimated Cost
$40/ chair and $10/table. Total Project (including fasteners and stain): ~$300
Estimated Time Investment
Weekend Project (10-20 Hours)
Finish Used
SW6965 - Hyper Blue Solid Deck Stain
Recommended Skill Level
Beginner

Farmhouse Headboard

Submitted by jlsurber on Wed, 08/22/2012 - 11:57

When we moved into our new house, we quickly realized the boxsprings for our queen-sized bed were not going to fit up the stairs. So while hubby was busy with his own projects, I made a 2x4 bed frame at 16-1/2" off the ground and built the farmhouse headboard. We like to use the end of the bed for sitting and putting on socks and shoes, so I did not build the coordinating footboard.

I absolutely love the way it turned out and have received so many wonderful compliments. Take about an ego boost!

Cutting took about 1 hour (first use of a radial saw) and assembly took another hour. I applied 1 coat of Minwax Red Oak stain and 2 coats of Minwax semi-gloss polyeurethane sealer.

Estimated Cost
$100
Estimated Time Investment
Weekend Project (10-20 Hours)
Finish Used
Minwax Red Oak and semi-gloss polyeurethane
Recommended Skill Level
Beginner

Comments

Farmhouse Bench in 1 day

Submitted by vickitee on Wed, 06/25/2014 - 08:27

This was my first build from your site! Farmhouse bench.
I was a little confused with the miter saw instructions "bevel cut at a 10 degree angle off center". I had to google to figure out what you meant. In the end the bench looks awsome and I feel very empowered with my tools.
(still need to stain the finished project, bought all the wood and built in 1 day)
Thank you Ana for sharing your plans!! I love your site and I love my Kreg Jig!
Vicki
(Canada)

Estimated Time Investment
Day Project (6-9 Hours)
Finish Used
going to use walnut stain.
Recommended Skill Level
Beginner

Comments

Narrow Sewing Table

Submitted by WeezyWorks on Tue, 09/11/2012 - 18:06

Ive been looking for a sewing table to fit my space. but found none for less than $500 and they were quite small. I found a post at quiltedcupcake.com that linked me to another blog, linking me here. I modified the plan to be about 2 feet wide and cut a hole to fit my sewing machine. There is a support in the bottom to hold my machine level with the tabletop. When I make this in the future, I will splurge on a fine hardwood. This plan was easy to build and looks great! Just what I was looking for :D

Estimated Cost
$125
Estimated Time Investment
Weekend Project (10-20 Hours)
Finish Used
Dark stain and satin polyurethane
Recommended Skill Level
Beginner

Comments

tommirhea

Fri, 09/14/2012 - 09:45

I'm jealous of your organization! I've had a folding table for my sewing table since I started sewing :(

tommirhea

Sun, 09/16/2012 - 10:11

Now, I've just got to make it! I love to free motion quilt and that would make it easier. With each baby I've had my quilting space has diminished (of course it's worth it) but now I think I will reclaim some space ;)

small pantry

Submitted by Kyafata on Sun, 08/16/2020 - 16:39

A quick pantry idea using 4 - 1x12x6'. 2 for sides 2 cut into 24" shelves. Start with basic box and then fill in shelves where you need them. Used 4" 2x4 scraps for feet. Put together with screws and nails will eventually add back panels to keep it square.

Estimated Cost
$75
Estimated Time Investment
Weekend Project (10-20 Hours)
Finish Used
painted with semi-gloss , went in kitchen
Recommended Skill Level
Beginner

Sewing cart/table

Submitted by luxonagel on Mon, 08/17/2020 - 09:08

Love this plan! I used locking hinges instead of legs because it will overlap a bed in our guest room when in use. The hinges are rated for 250lbs and have held both of my sewing machines with no issues. I placed the middle shelf to fit my machines on the lower and standard fabric storage cubes on the upper. A metal adhesive measuring tape was added to the edge for convenience. This table will also be used as a buffet for family/group gatherings.

Built from Plan(s)
Estimated Cost
$75
Estimated Time Investment
Afternoon Project (3-6 Hours)
Finish Used
Sherwin-Williams Duration in Snowbound (7004)
Recommended Skill Level
Beginner

Comments

Akroezen

Wed, 12/02/2020 - 09:09

Hi! I need my sewing cart to be used without legs as well and have search everywhere for an appropriate hinge. Could you share with me what type & size you used? Did you change the sizes of the top to accommodate at all? Thanks!

Simple Outdoor Chairs for the Firepit

Submitted by Retta on Fri, 10/03/2014 - 19:27

I used Ana's plan and made ten of these for our firepit area.  The only thing that I changed was the back brace pieces....I couldn't get 1x2s so just used 2x2's.  

Built from Plan(s)
Estimated Cost
$300 including paint
Estimated Time Investment
Week Long Project (20 Hours or More)
Finish Used
Exterior paint.
Recommended Skill Level
Intermediate

Board game cabinet / charging station

Submitted by Anonymous (not verified) on Mon, 02/06/2017 - 11:44

After Xmas I decided we needed a better place to keep our growing collection of board games. I made mine a bit deeper to fit our longer board games. Also, put a 3rd door on it. We also needed a central place to charge our phones and tablets. Paired with the top of the bedside charging table this cabinet is the perfect solution. Thank you!

Estimated Time Investment
Week Long Project (20 Hours or More)
Finish Used
Valspar Satin Paint
Recommended Skill Level
Intermediate

Entry shelf modified to a bathroom shelf

Submitted by Anonymous (not verified) on Wed, 02/15/2017 - 19:10

This was so fun, used contact paper on the back plywood and it turned out really well.

Estimated Cost
Less than $75
Estimated Time Investment
Weekend Project (10-20 Hours)
Finish Used
White satin paint from behr
I sanded between coats and used a fine bristle brush.
Recommended Skill Level
Beginner

Rustic X Desk

Submitted by CarolinaL on Wed, 11/18/2020 - 14:48

I finally got tired of my computer set up being on my sewing table. I will be working from home for quite some time and I'm so glad I finally have a designated desk for work.

This desk came out perfect. It's not too difficult but the X did take some time to get right. Used Ana's video instructions.

Built from Plan(s)
Estimated Cost
$60
Estimated Time Investment
Weekend Project (10-20 Hours)
Finish Used
Minwax Provincial for the top
White satin paint for the base.
Recommended Skill Level
Intermediate

Comments

Lumber Scrap wood portable Cart

Submitted by Kingspiper on Fri, 03/31/2017 - 13:03

Cut-off lumber cart on heavy duty 3 inch locking swivel casters.  Used 3/4 copper pipe and 3/4 plywood with a couple of pine wood scraps.  Keeps things neat and clean. :)

Estimated Cost
125.00
Estimated Time Investment
Weekend Project (10-20 Hours)
Finish Used
Dark walnut stain and plain walnut oil
Recommended Skill Level
Beginner

Comments

Weatherly Sectional

Submitted by Anonymous (not verified) on Mon, 05/22/2017 - 20:08

Ana's plans are so easy to follow. This sectional was a breeze to build.

Built from Plan(s)
Estimated Cost
$120 lumber and materials $400 cushions
Estimated Time Investment
Weekend Project (10-20 Hours)
Finish Used
Glidden outdoor paint.
Recommended Skill Level
Intermediate
Seasonal And Holiday

Face frame cabinets with shaker doors and metabox drawers, swedish drying cabinet

Submitted by sylvialh on Fri, 08/27/2021 - 05:37

My first projec twith drawers! the metabox drawers were definetly easy to make and use and work beautifully.

I made the carcase using plywood and did 1x2 poplar for the face frame. Shaker doors are 1x3 poplar and sureply underlayment for the inserts.

cabinet doors were finished using BIN primer (2 coats with sanding) and then Benjamin Moore Advance cabinet paint in High gloss silver satin. Interiors were finished using leftover / mistints, and I still need to do some filling and sanding on the insides of the doors (I have to take them down to do a final coat but am waiting until I have finished the other set of doors)

the upper cabinet is a dish drying cupboard so I omitted the bottom plywood piece and instead used 1x3 on the front and back so the bottom would be open. then I made the shelves using 1x2 and dowel (paint the dowel first before cutting!!). This thing is a dream to do dishes in!

Used Kreg pocket screws, Kreg jig for the euro hinges (1 1/4 and 1/3" overlay), and also a kreg jig for the shelf pins. Metabox hinges for the drawers. Still trying to decide on handle hardware so I'm using painters tape at the moment.

Countertops are concrete using Rapidset mortar mix and the michael builds method (linked below).

Planters are just a small poplar shelf using leftover 1x3 with metal terra cotta pot hooks attached to the front. I lined the pots at the bottom with plastic yogourt tubs with holes in the bottom so the cutlery doesn't chip the pots. Those also drain onto the drain rack below. everything is painted the same colour although I used high gloss for the door fronts, so the shelvings behind the pots matches the wall perfectly and sort of dissappears into the walls to highlight the terracotta.

sink is a "new" vintage ceramic sink that I found on FB marketplace for 50$!!! had never been installed and didn't even have the holes bored out. unfortunately the drain holes were very deep and requied some macgyvering but luckily my husband had a great attitude about it and managed to make it work with a lot of googling for odd sized drain bins. Props to husband for doing all the plumbing on this bad boy, including moving over our RO system from the other side of the kitchen and installing a new hose bib under the sink for the other side of the house (why not?!).

I learned so much from this project! Including to store your poplar inside and on the flat surface or it will warp and your doors will not be flush. luckily it only affected one door but it is still super annoying.

thank you ana for everythign! loved the comment "Get on board with these euro hinges!" you are so right they are so forgiving!!

Comments

Ana White Admin

Fri, 08/27/2021 - 08:31

Love the integrated flower pots and the dish rack is so cool! Thank you for sharing, I can tell a lot of work went into it!

Double Pedestal Farmhouse Table (8 feet)

Built from the Triple Pedestal Farmhouse Table plans. Had to size down the plans a little bit to fit into my dining room. Created three pedestal legs but only ended up using two on the final table. Took about 16 hours from start to finish. All of the wood is pine except for the top, which is Poplar. Made a couple of mistakes along the way but am very happy with the way everything turned out. Feel free to ask questions and I will do my best to answer them. Happy Building!

Built from Plan(s)
Estimated Cost
$175
Estimated Time Investment
Weekend Project (10-20 Hours)
Finish Used
English Chestnut. Stained once and waited 7 minutes to wipe off. Two coats of Clear Satin Polyurethane.
Recommended Skill Level
Intermediate

Comments

Open bench and hutch

Submitted by Beginner52 on Mon, 10/04/2021 - 05:21

Thanks Anna for the inspiration. My bench is 12 feet long.

Comments

Chicken coop and run

Submitted by Anonymous (not verified) on Tue, 10/05/2021 - 11:01

I followed the Shed Coop Plans to make this chicken coop and designed my own run. Because I wanted to view the chickens coming in and out of the coop, I moved the chicken door to the front and built a little covered area to shelter the coop door so I did not have to have the entire run extend over the front. I also made the access to the layer boxes be accessible from the front rather than the top so that my kids could more easily access the egg boxes. I thought these were great plans to follow and easy to adapt to fit what I wanted in a coop. I also ended up adding a lean-to storage on the back with an inside access so I could easily refill their feed.

Built from Plan(s)

Comments

Seasonal And Holiday
Back