Community Brag Posts
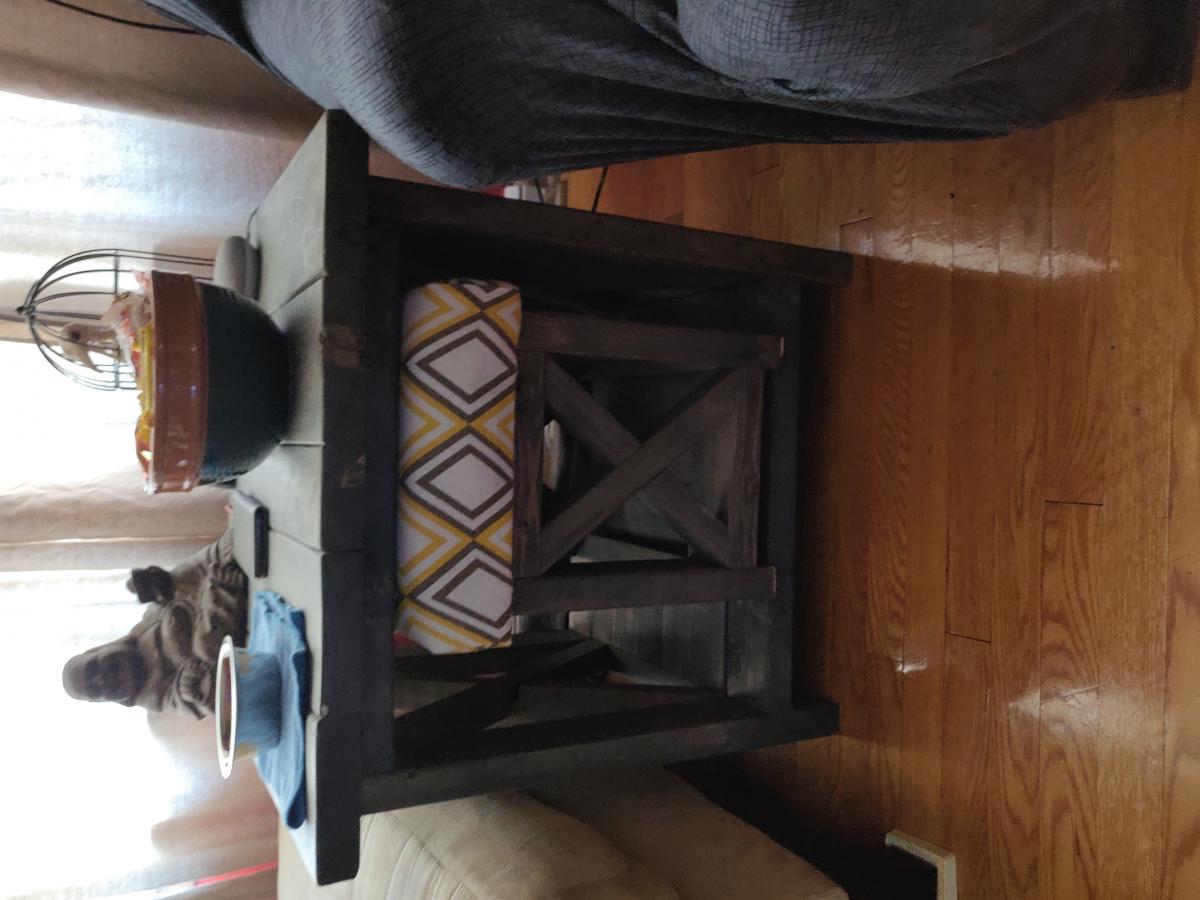
Footstool
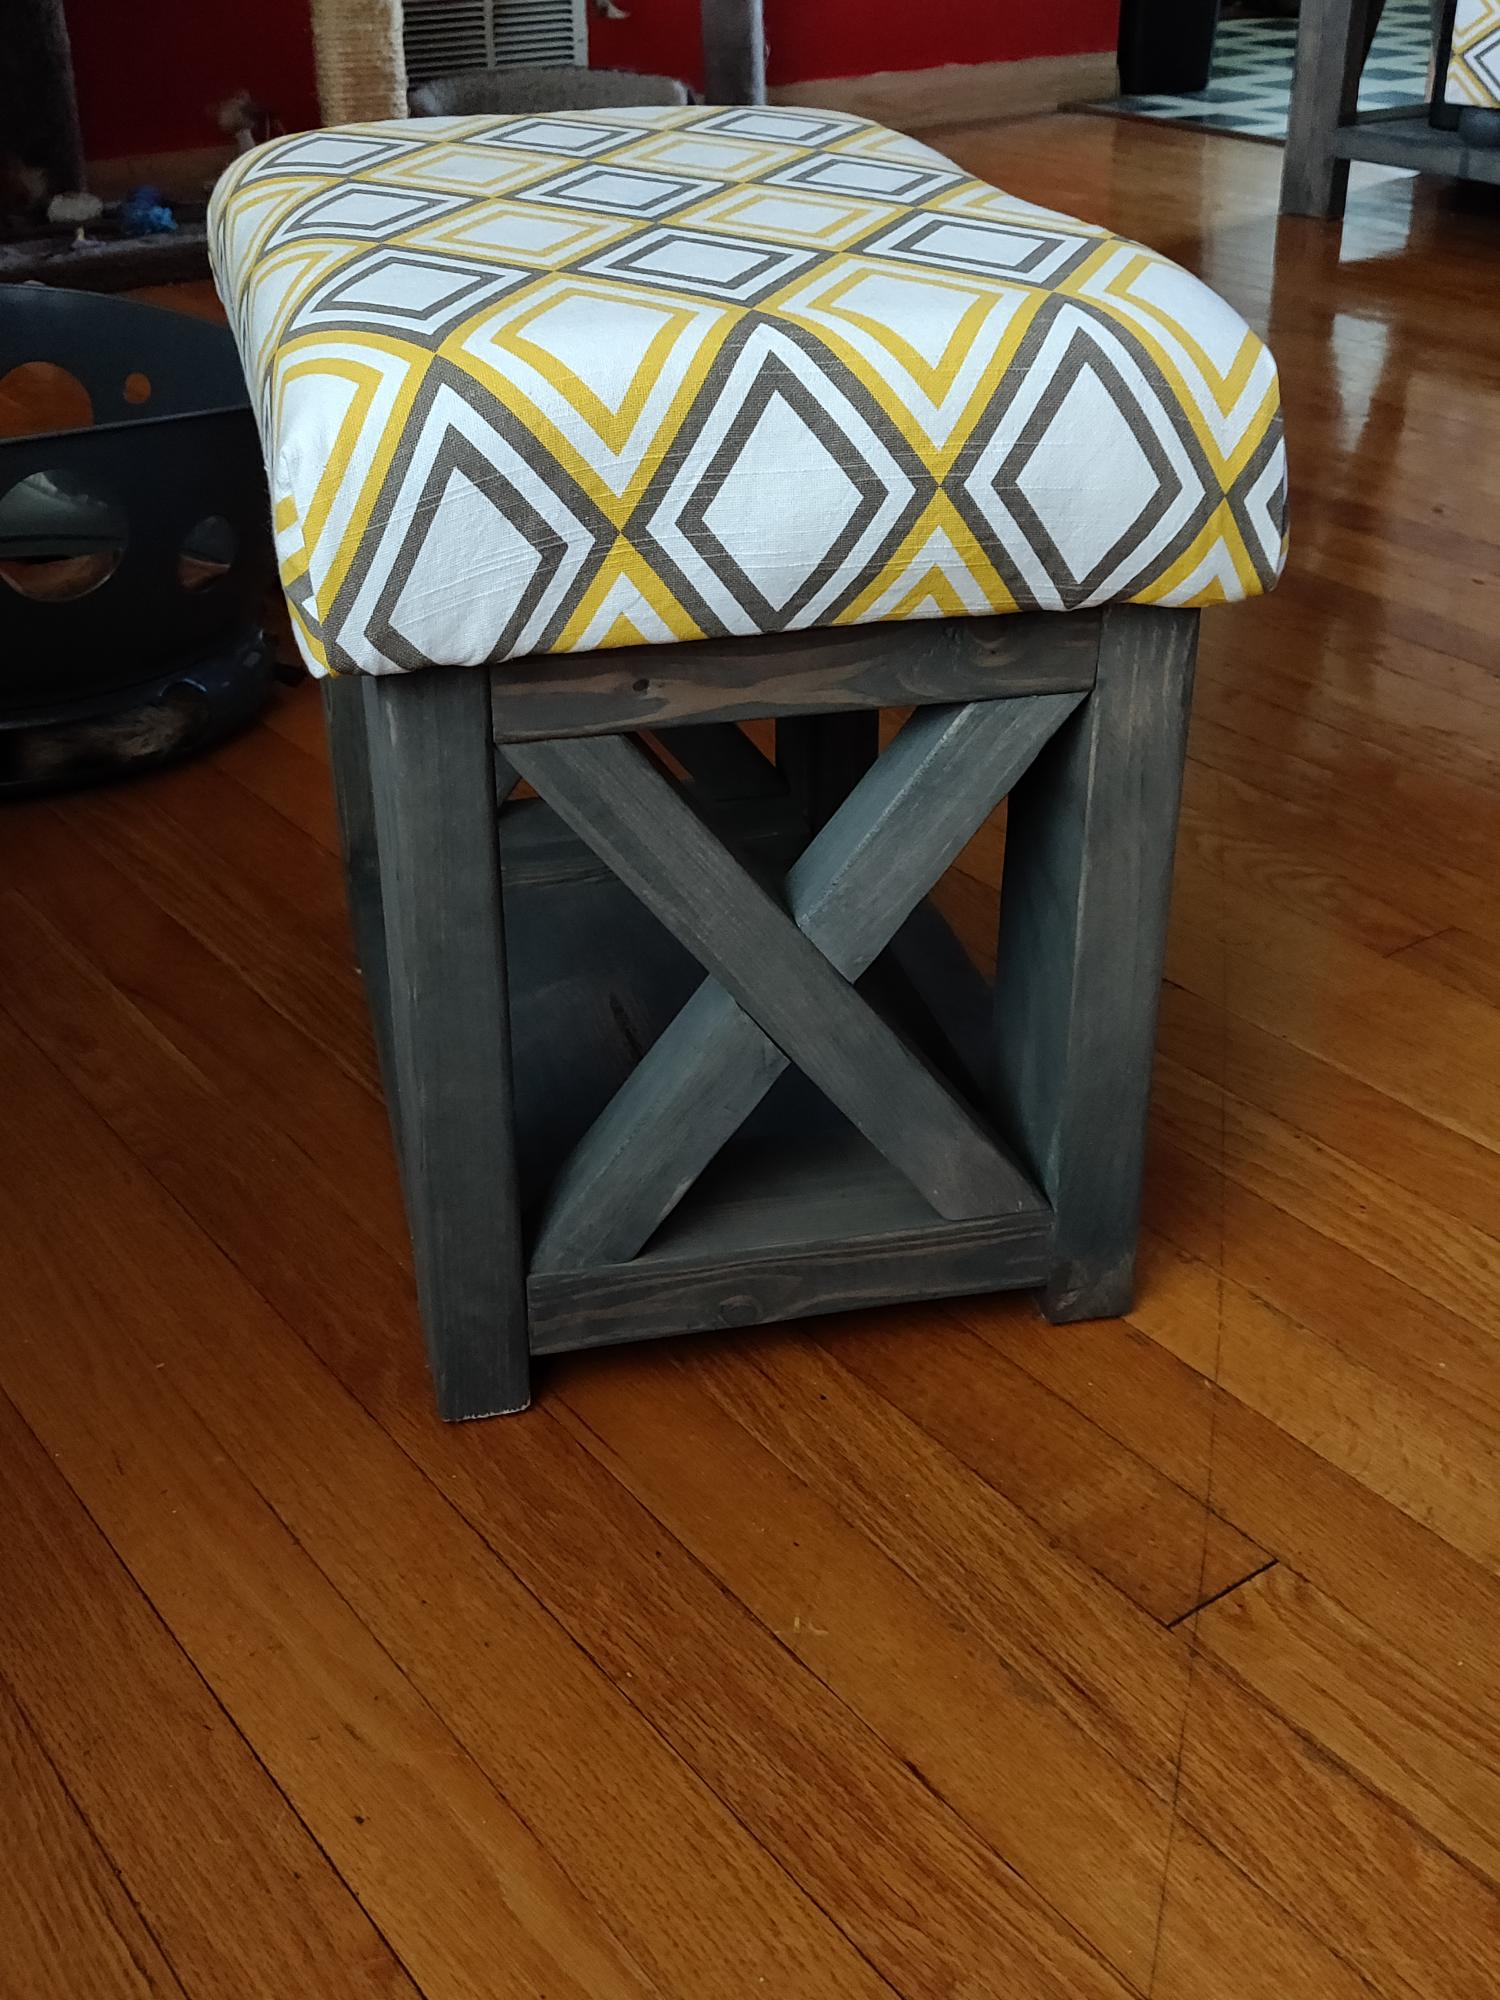
Made a footstool by modifying the rustic X end table plans. I used all scrap wood, foam, and fabric from my various stashes so this was free for me to make. Also, on all of my x tables, I use a dado blade so the exes are intact and not cut and screwed.
Built from Plan(s)
Estimated Cost
$0
Estimated Time Investment
Afternoon Project (3-6 Hours)
Finish Used
Charcoal grey stain
Comments
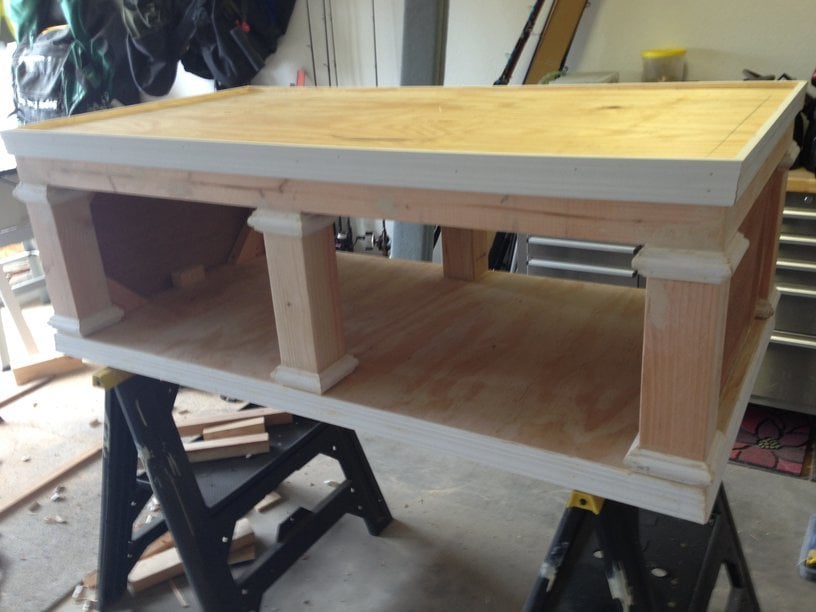
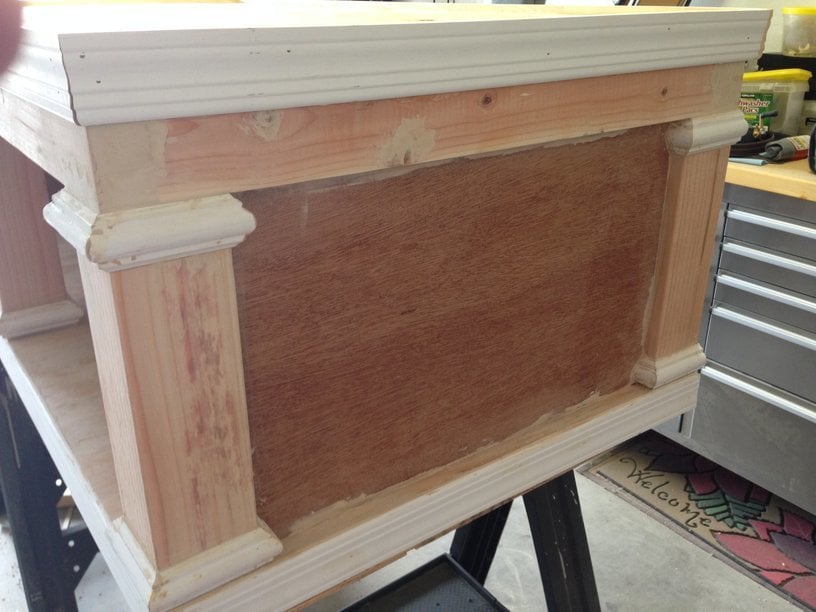
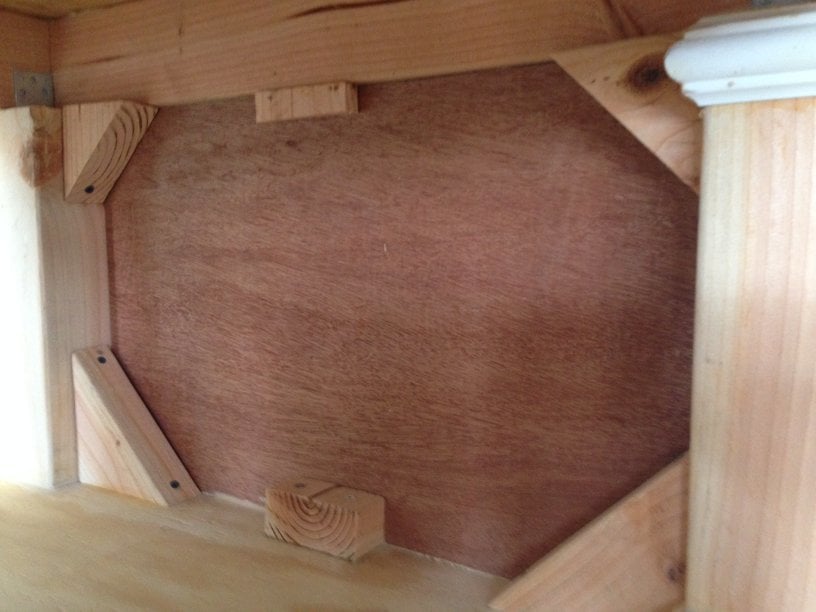
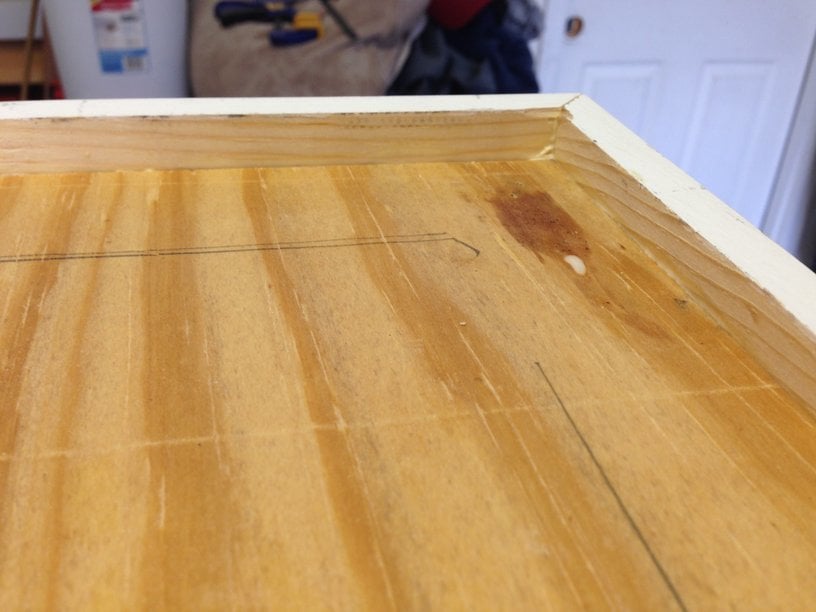
Ryan's Washer/Dryer Pedestal
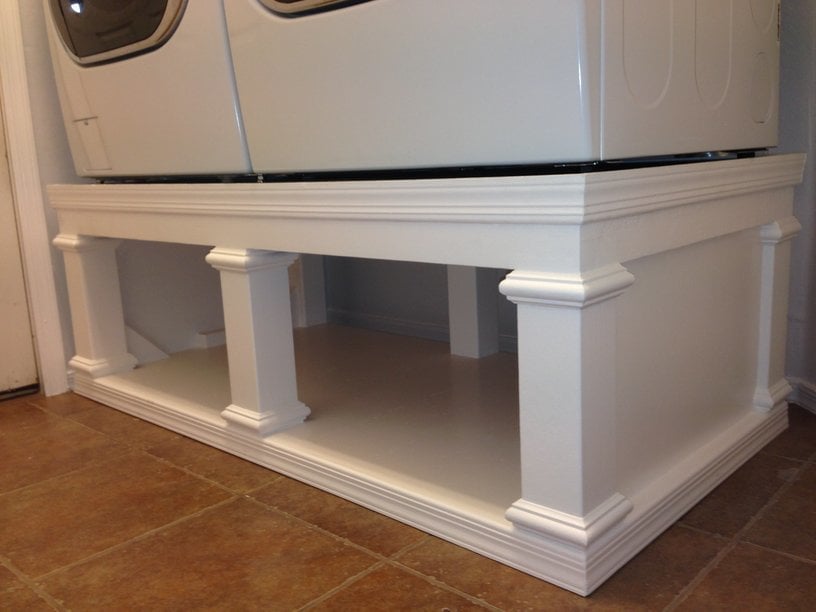
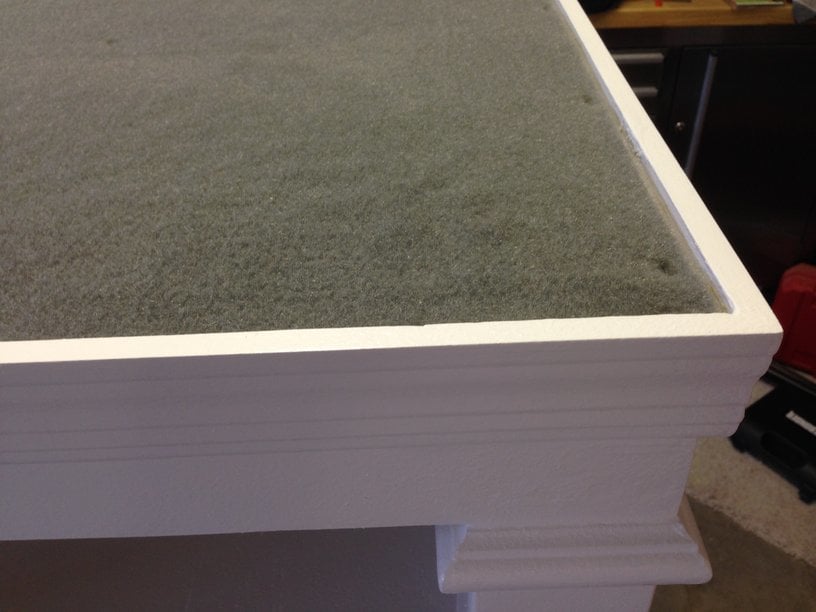
I loved this design. I couldn't believe that they wanted to charge me almost $600 for the pedestals for the washer/dryer set that I bought on black friday, so I decided to give this project a go. I basically used the same construction plans from Sausha's project, but I dressed mine up a bit. First, I chose a bit larger trim for the tops and bottoms of the posts. Then, I bought some 2" baseboards and did the top and bottom with baseboards. On the bottom, I had to use my tablesaw to trim off about 1/2" because I used 1x1" boards on the bottom so that I could have more space for baskets. Then, on the top, I inverted the baseboard and allowed it to overlap a bit so that if it were to vibrate, the washer/dryer could not fall off the edge. I also added some fabric on the top (stuff that I use to cover the bunk boards on my boat trailer...kind of like a very thick and durable felt material) to cut down on vibration and also keep the units in place. Finally, I added sides by using wedge trusses on the inside of my side posts and then I put a 1/8" piece of plywood over top and nailed/glued it to the trusses.
It turned out great. Thanks for the plans Sausha!
Built from Plan(s)
Estimated Cost
$125
Estimated Time Investment
Weekend Project (10-20 Hours)
Finish Used
paint
Recommended Skill Level
Intermediate
Comments

In reply to Nice Detail by earthbybike
Mon, 12/08/2014 - 11:42
Thanks. Yeah, I thought that
Thanks. Yeah, I thought that it did really dress things up. I really like the way it turned out.
Mon, 12/21/2015 - 17:38
Question...
Did you use sanded plywood? Did you use any veneers for the exposed 2x4's to get a smooth finish or did you paint right on it?
lastly, what is the name of the trim you put on the 4x4s? I've hard a hard time finding it. Thank you!
Mon, 12/21/2015 - 17:44
One more question
Did you plane the 2x4s? Because they look really straight.
In reply to Question... by Zlk200
Wed, 06/29/2016 - 13:59
Sorry for the super delayed
Sorry for the super delayed response. I didn't realize this question was here. I did not plane anything. I did sand the surfaces a bit, but I didn't get too crazy. I put 3 thick coats of paint on it which made it pretty smooth. If you look very closely in person, you can still see a bit of wood grain, but it is only noticable if you really get down and look. I did use a lot of wood putty to fill all of the gaps and crevaces and then I sanded those parts pretty well.
With regard to the trim, the top literally just standard baseboard material turned upside down, and then the little trim on the tops and bottoms of the 4x4s is just another standard strip of moulding that I got from Lowes. I think they call it "Chair Rail" moulding. Its the stuff that you put down if you are doing some sort of paint separation or wainscoting.
http://www.lowes.com/pd/1-625-in-x-12-ft-Mdf-Chair-Rail/3403018
I used woodglue on all of the moulding and tacked it on with a nail gun. Then I filled all of the nail holes with wood putty and also use the putty to fill gaps where the corners came together to make that look smooth.
I hope that helps...you are probably already done with your project by now, but I figured that I would answer anyway. :)
Shabby Chic Farmhouse Bed
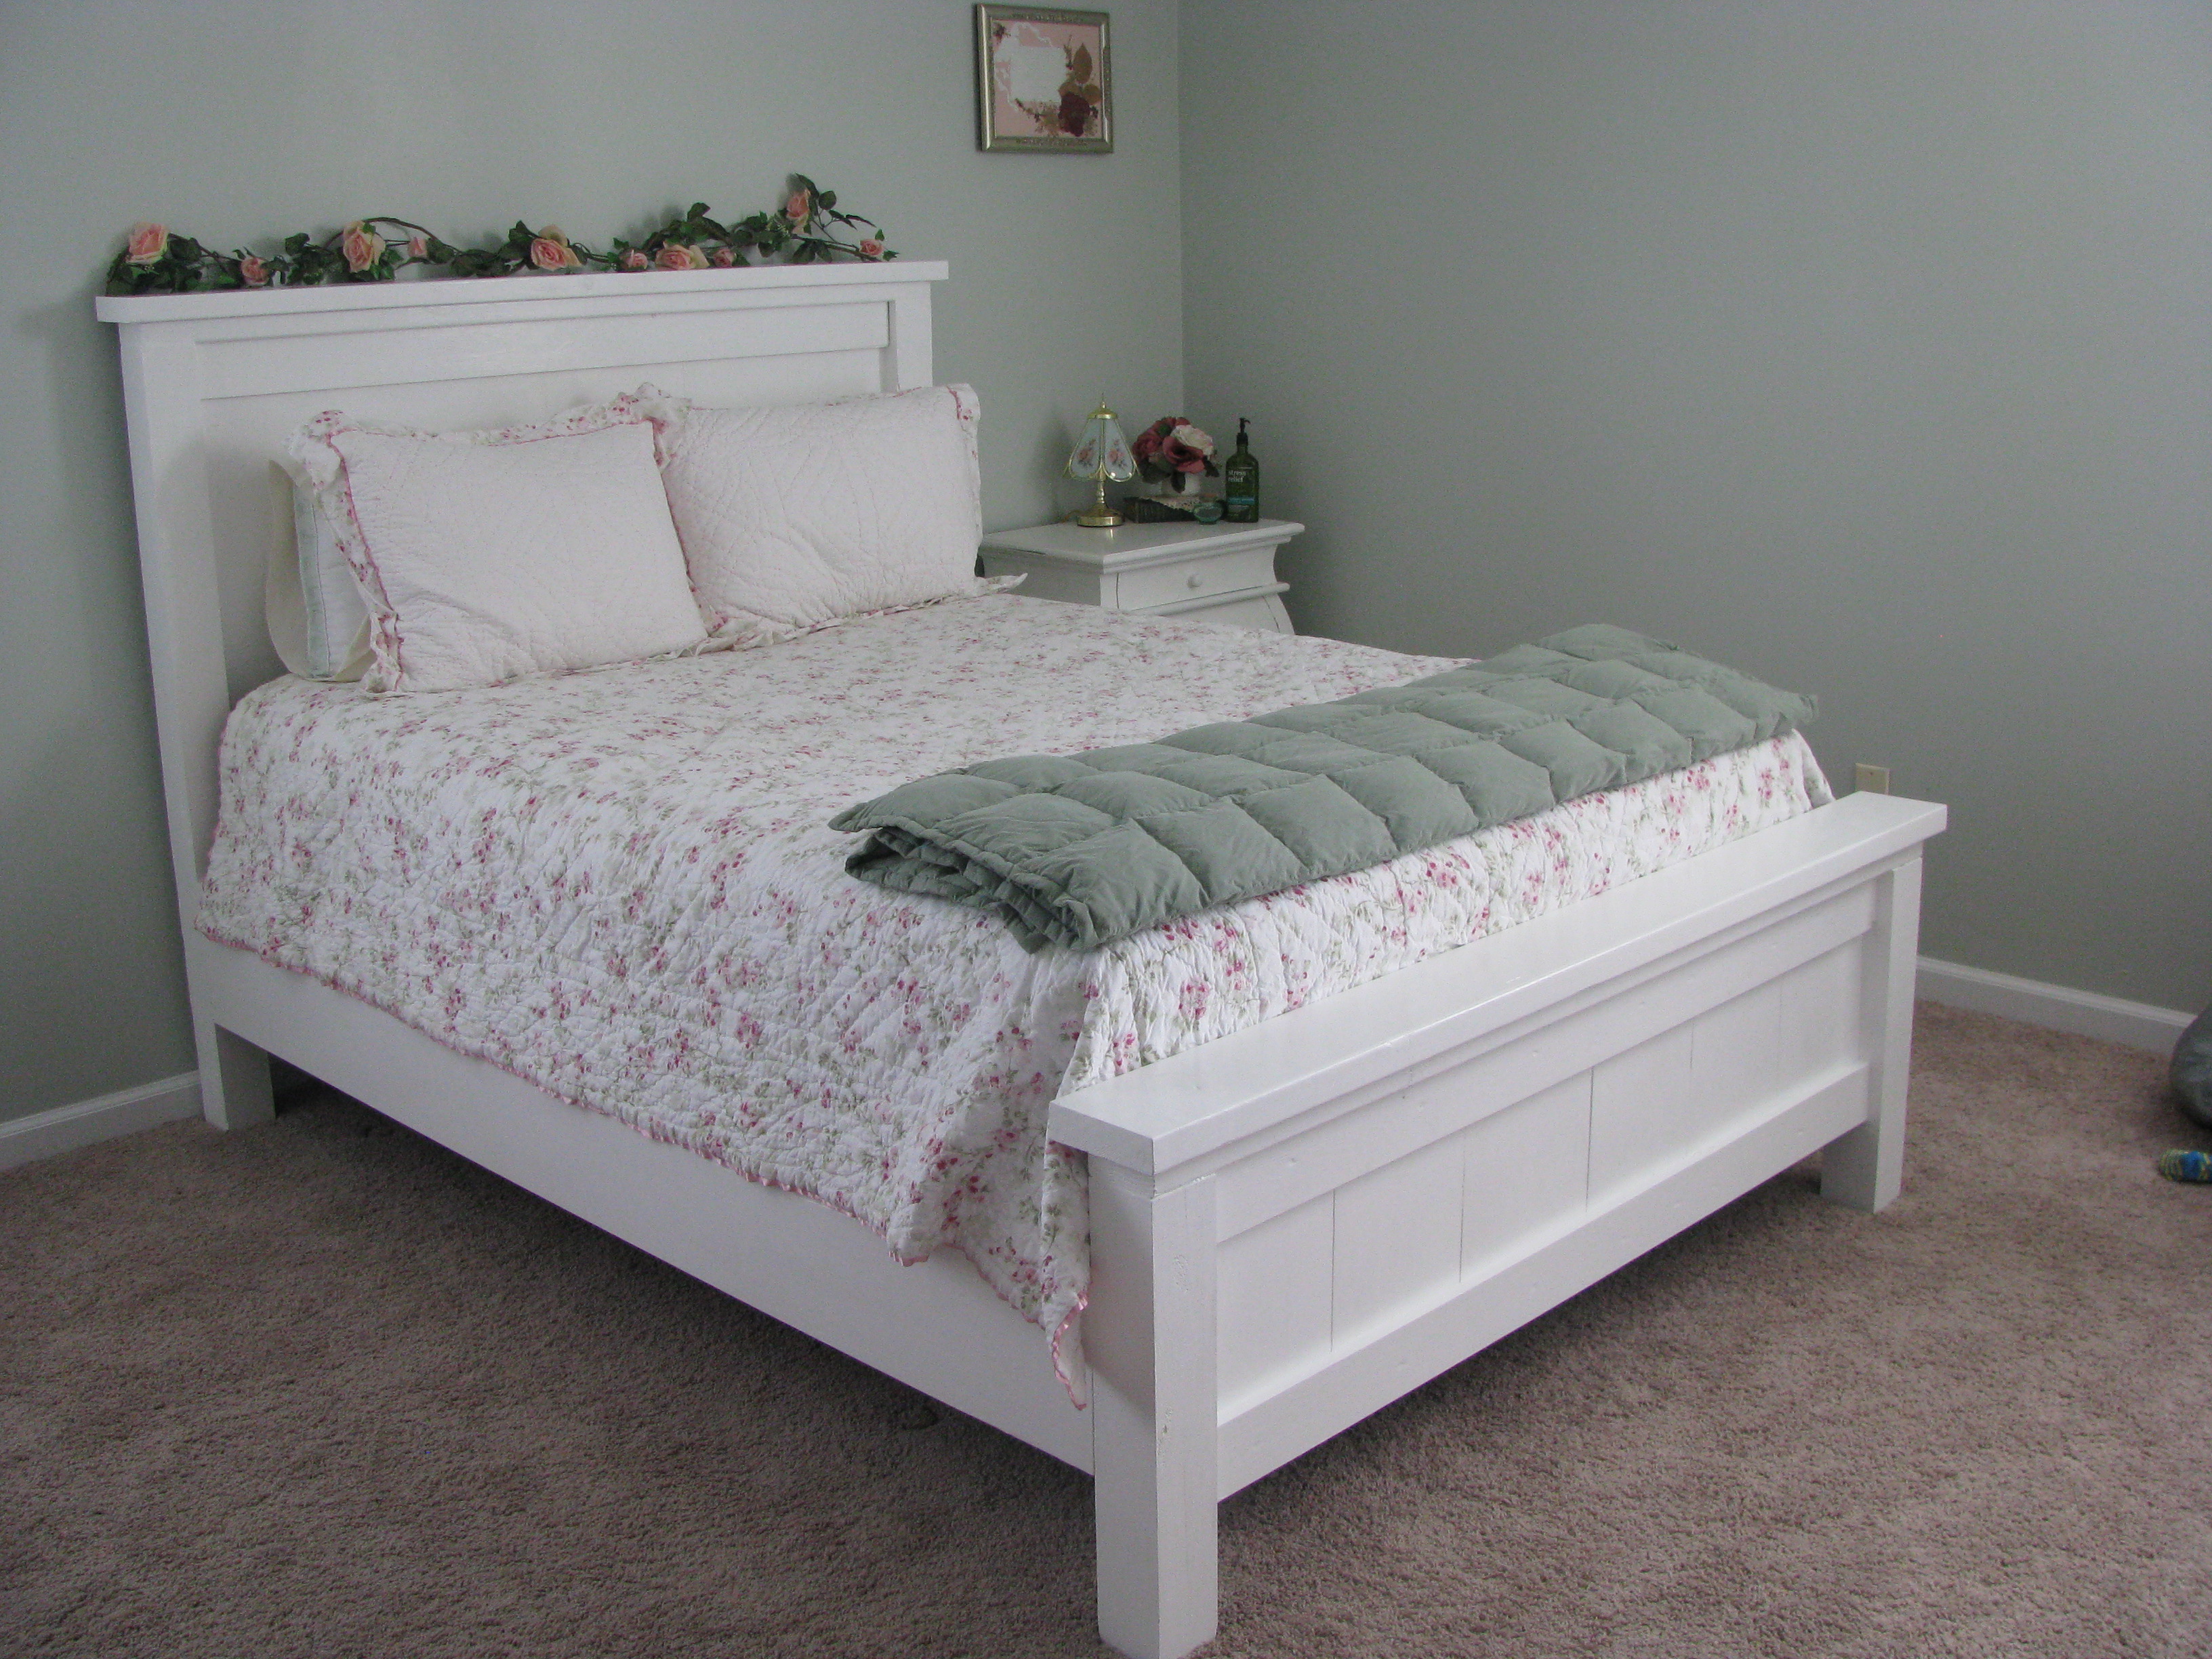
This was our first major project, so we learned a lot while we were doing it. We painted our bed white, and rather than using metal bed rails (which no one seemed to sell), we improvised and fastened 2x4s to the inside of our side rails. Then we cut slats to rest on the 2x4s and run the width of the bed. The 2x4s lend great stability to the side rails, and are much less costly, not to mention easier to obtain. ($10 vs. $75) This bed is sturdy and solid. I think we will be handing it down to our grandchildren in fifty years!
Recommended Skill Level
Beginner
A-Frame Chicken Coop - Easy to Clean

Thanks for the free plans. I did have to make modifications for the doors. i hid the hinges to give it a clean look. i used cedar for the trim and Plywood Siding Panel T1-11 4 IN OC (Common: 19/32 in. x 4 ft. x 8 ft.; Actual: 0.563 in. x 48 in. x 96 in.) for the doors. i used a metal flashing for the roof so it will vent.


Built from Plan(s)
Estimated Cost
$250
Estimated Time Investment
Week Long Project (20 Hours or More)
Finish Used
BEHR Transparent waterproofing finish (Cedar Natural Tone) NO 501
Recommended Skill Level
Intermediate
Side Street Bunks Twin Over Full Modification
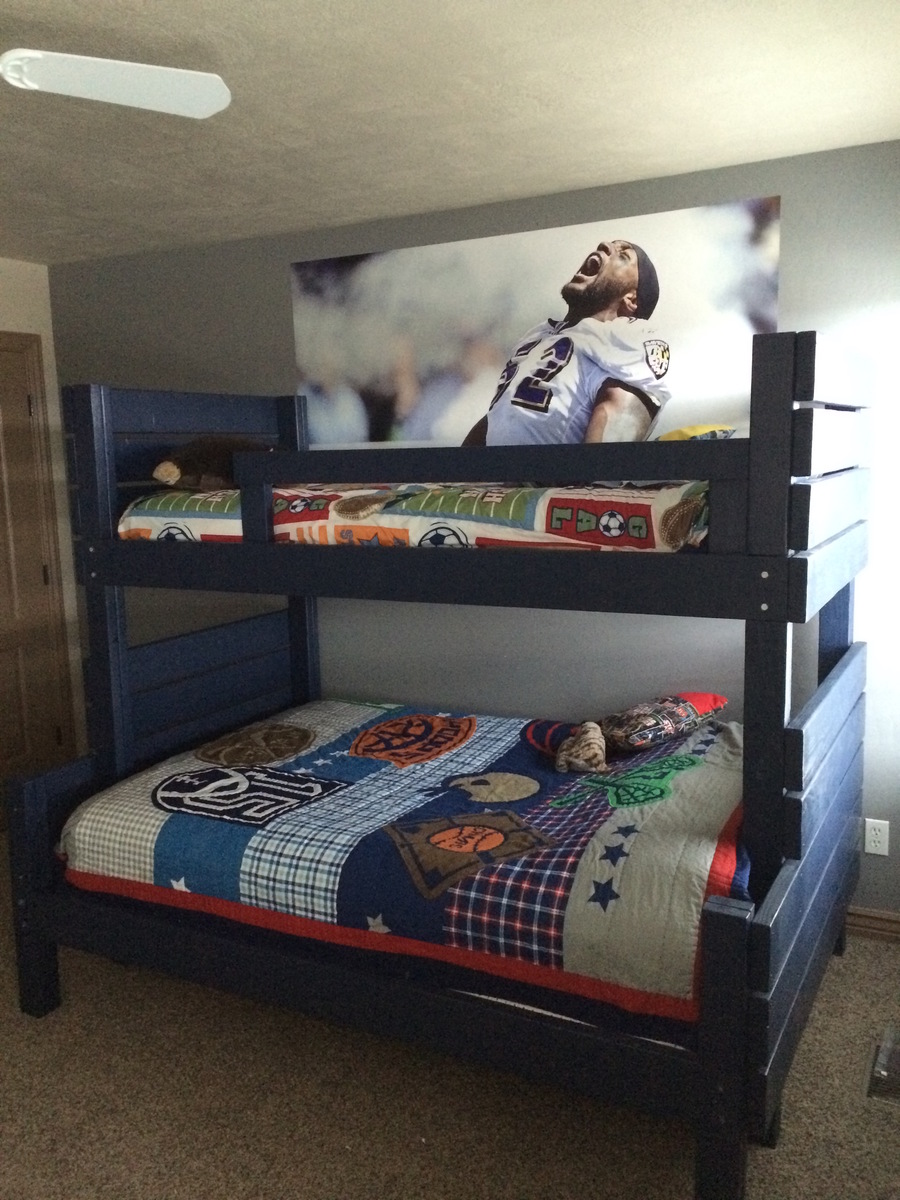
I needed a good sturdy bunk bed for my boys and I didn't want to spend a bunch of money. Every bunk bed I looked at seemed to wobble and cost a fortune so I ventured off to make my own! I came across the Side Street Bunk plans and did a little modifiying to make them work with the mattresses we had. I absolutley LOVE the way they turned out and my boys are so excited to finally have their bunk beds! Thanks Ana!
Built from Plan(s)
Estimated Cost
$165
Estimated Time Investment
Weekend Project (10-20 Hours)
Finish Used
Semi-gloss paint
Recommended Skill Level
Beginner
Comments

Chair Build with Loveseat Modification
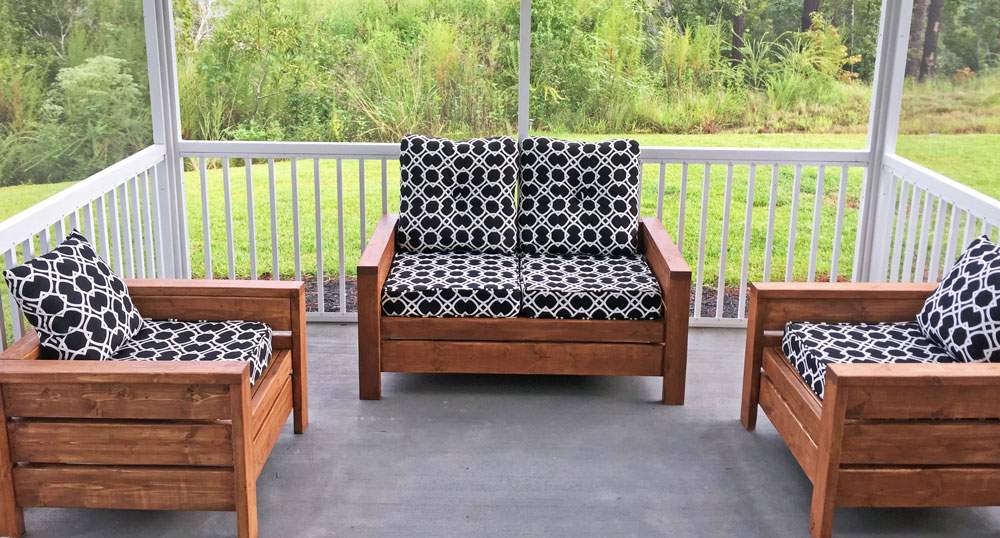
Built the 2 chairs according to the plans, and then modified it for a bench that's 48" (our cushions are 23.5 x 23.5). Worked really well!

Built from Plan(s)
Estimated Time Investment
Weekend Project (10-20 Hours)
Recommended Skill Level
Beginner
Comments
Bookshelf Hidden Doors Over Closet

Hidden door bookshelves hide a furnace closet. Built by Kraig Faulkner
Built from Plan(s)
Recommended Skill Level
Advanced
Comments
Thu, 01/23/2020 - 07:05
Great idea! Do the…
Great idea! Do the bookshelves swing freely when weighed down with books? What type of hinges did you use?
Thu, 09/17/2020 - 08:01
Looks Awesome + Safety Note
I'm currently working on a basement renovation project. I'm probably going to incorporate a feature like this for my mechanicals, too.
One important safety note for anyone who wants to do this: It's recommended that your furnace be a minimum of 30" away from any combustible materials. That includes walls and partitions. The image of this project displayed is right next to the furnace, which is not a good idea.
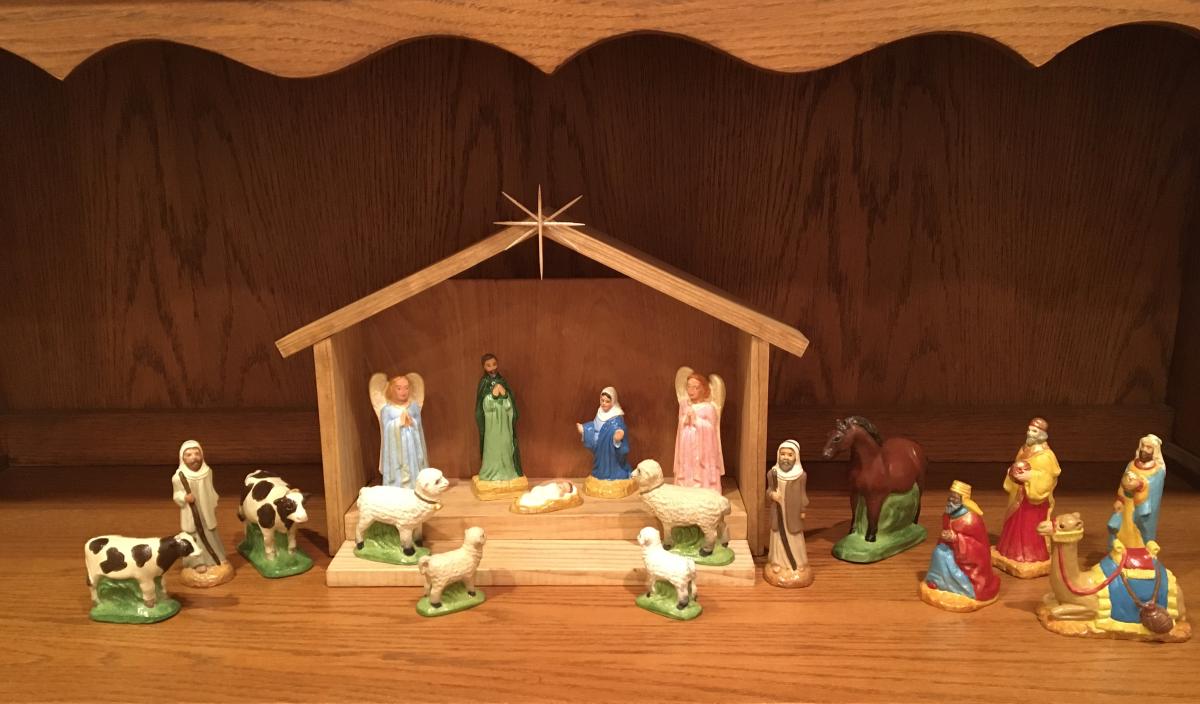
Nativity stable
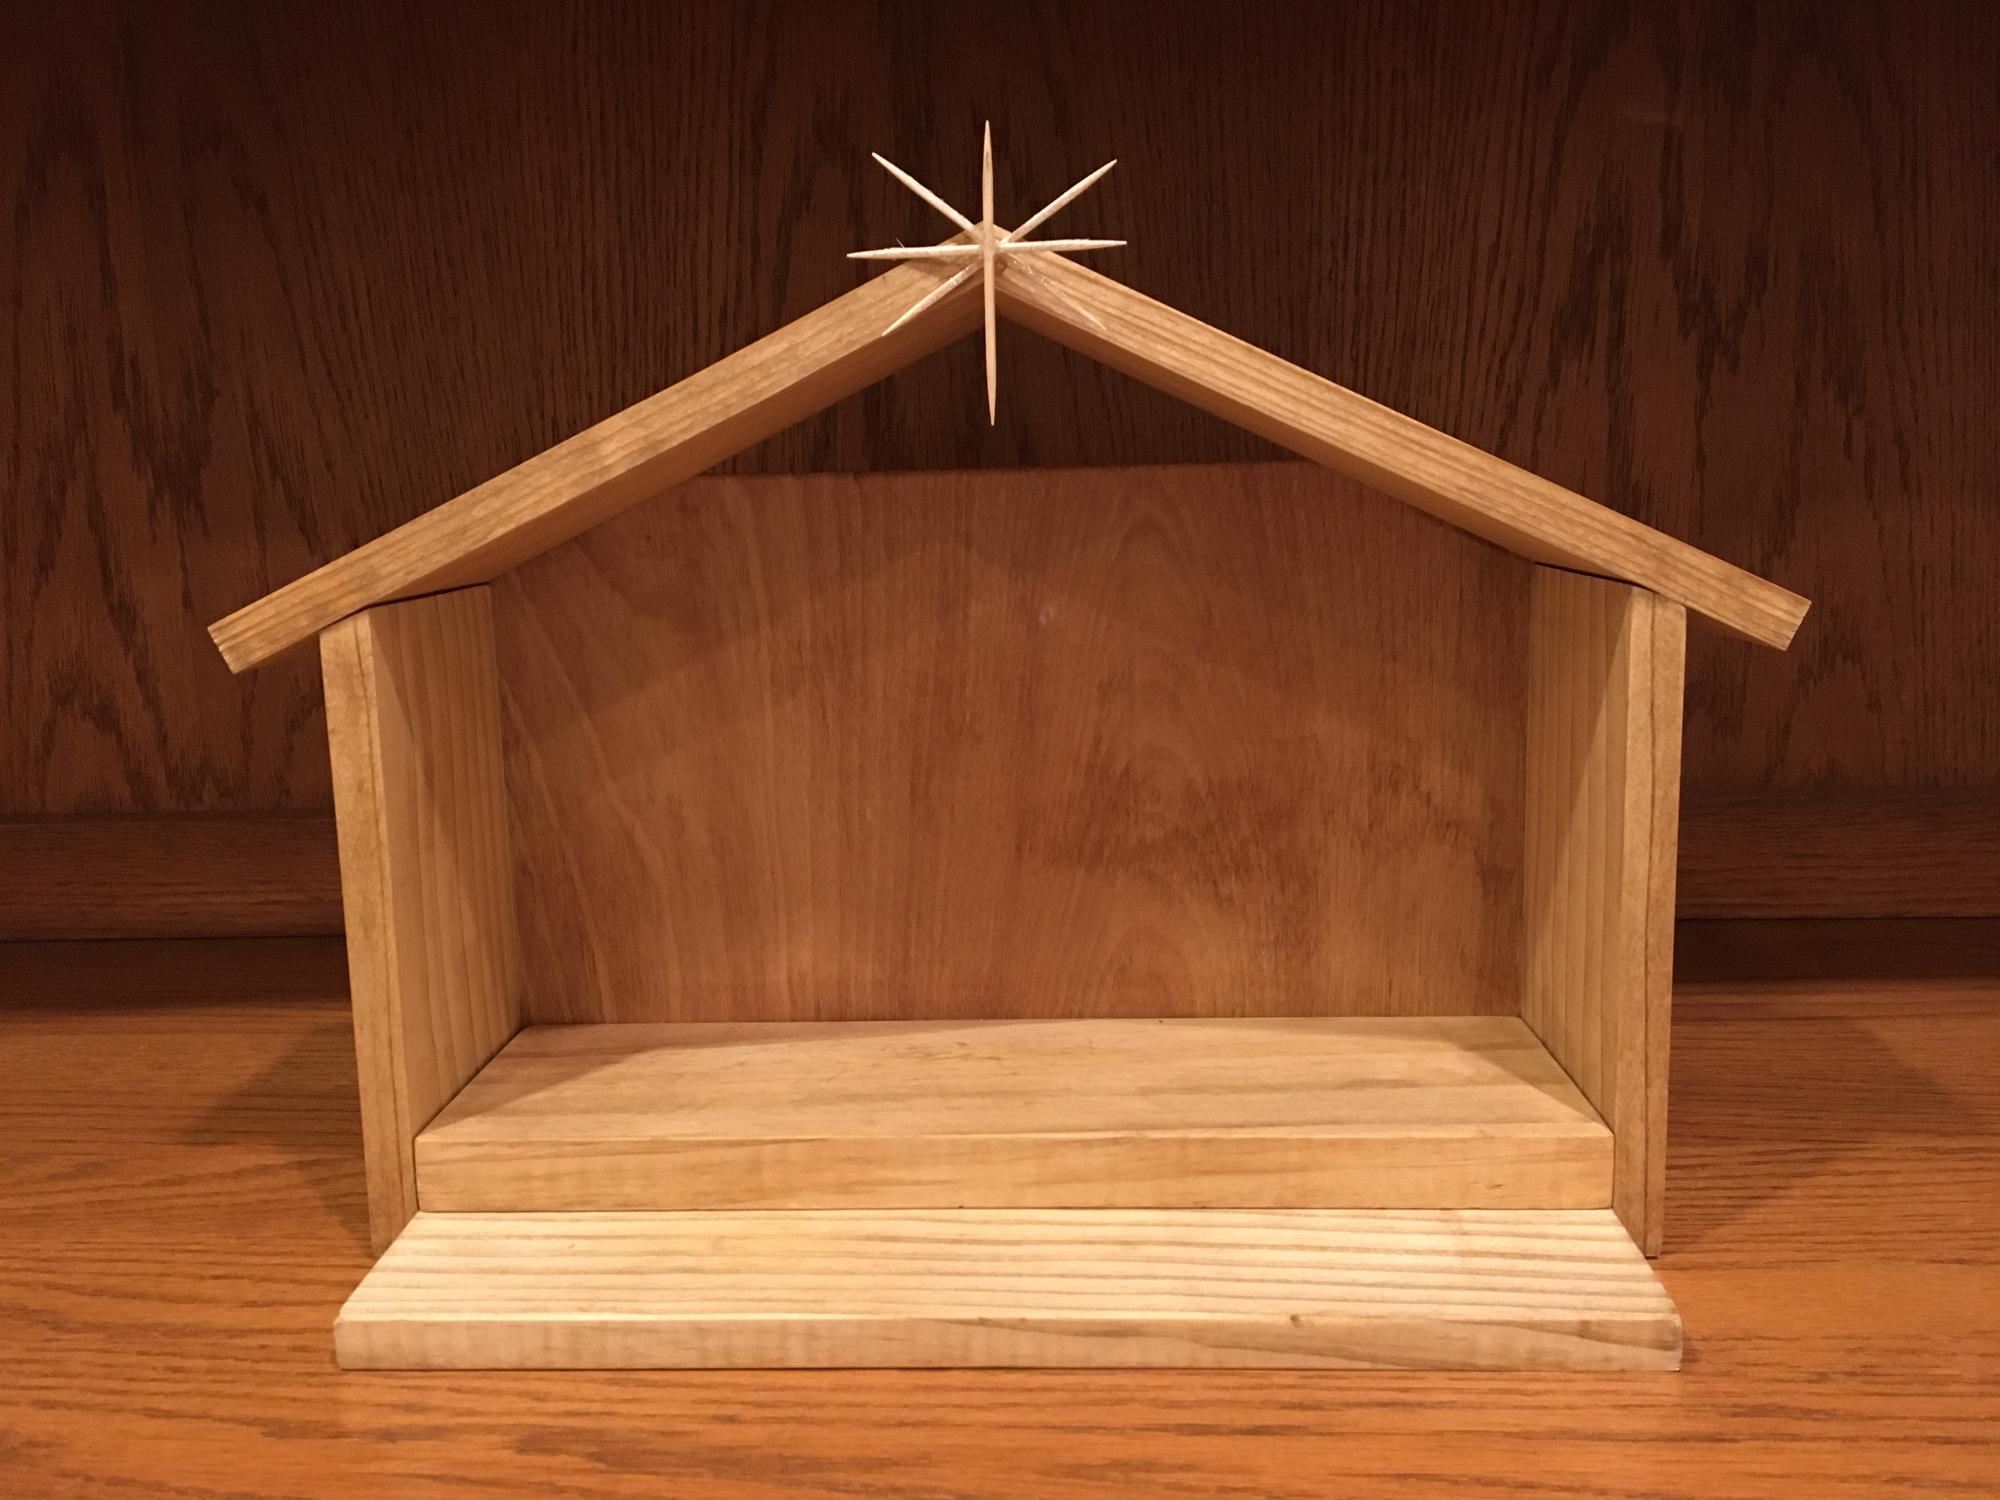
Stable made from scrap wood I had on hand (plus a few toothpicks).
Built from Plan(s)
Comments
Mon, 11/29/2021 - 05:42
Lovely manger!
Awesome use of material, it looks great! Thank you for sharing, God Bless~
Sturdy Work Bench - First project completed!
My first project from Ana's website! I figured in order to make more furniture I'm going to need a sturdy work bench to help me along the way. I cut my legs at 36" instead of 33". The 3 added inches brings it to a standard kitchen countertop height (I think, at least mine is). Thanks for the inspiration and plan pericles49!
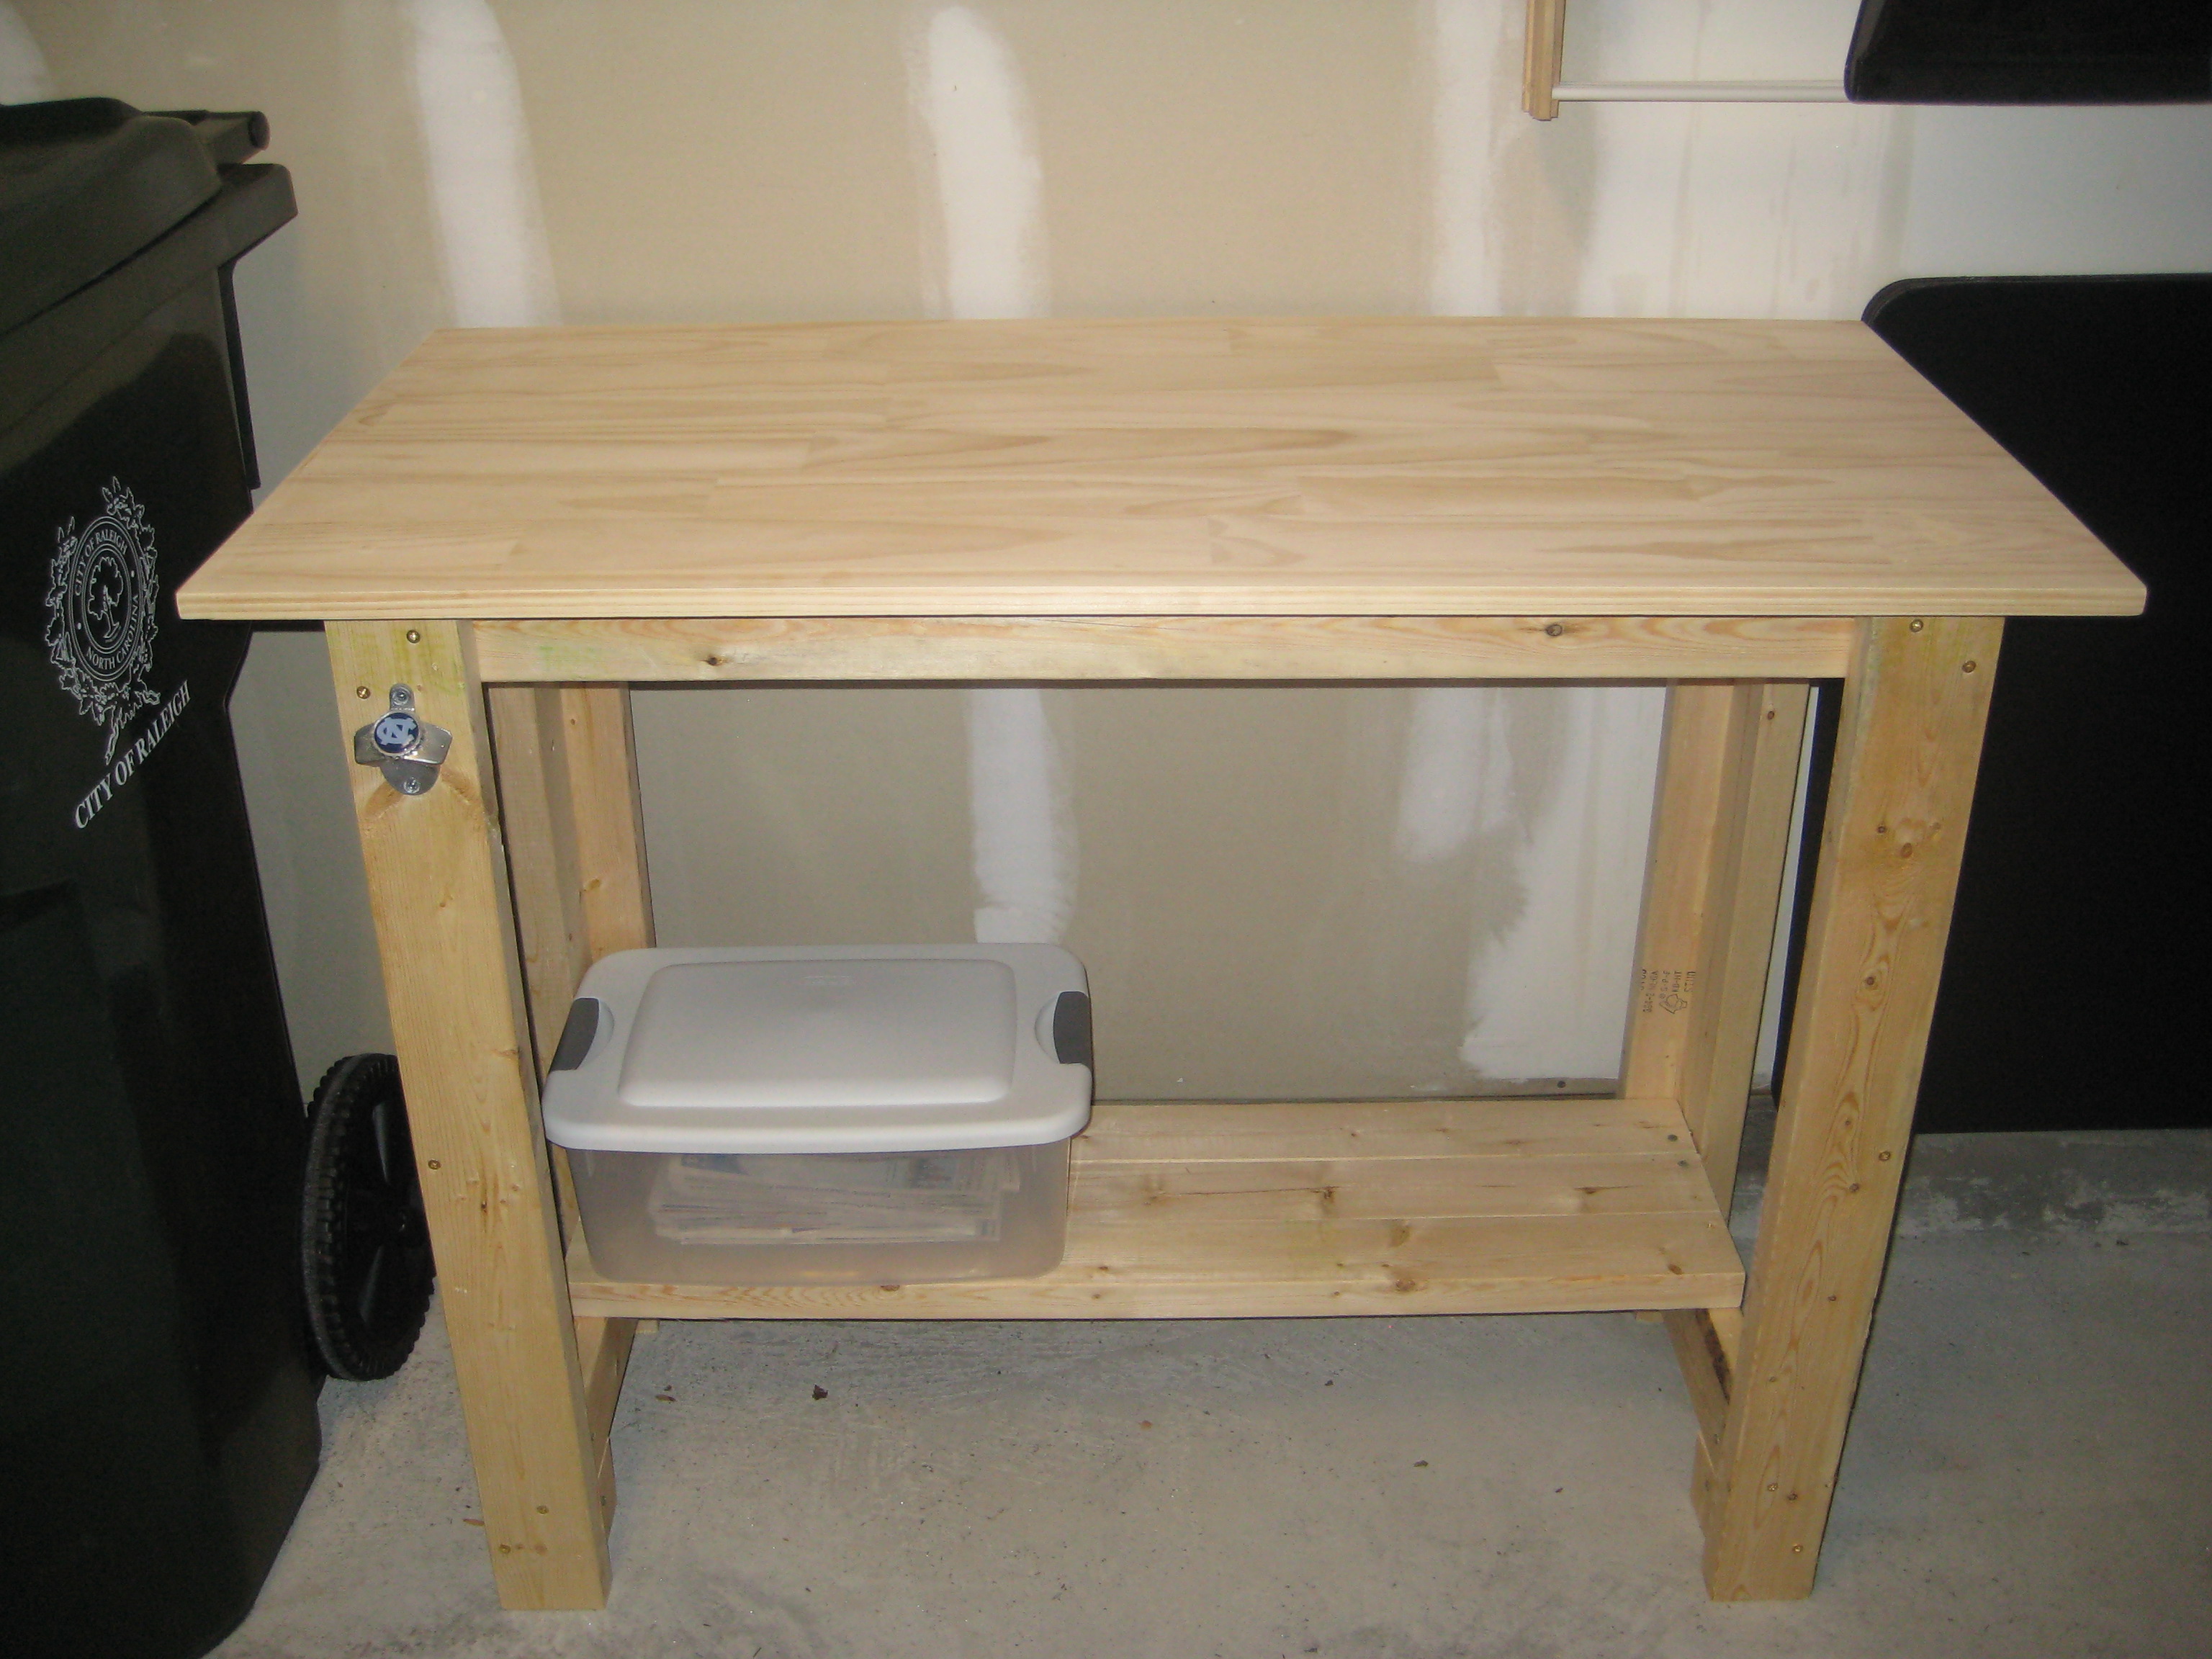
Built from Plan(s)
Estimated Cost
$65
Estimated Time Investment
Day Project (6-9 Hours)
Finish Used
Water based clear semi-gloss polyurethane.
Recommended Skill Level
Beginner
Barn Door Cabinet
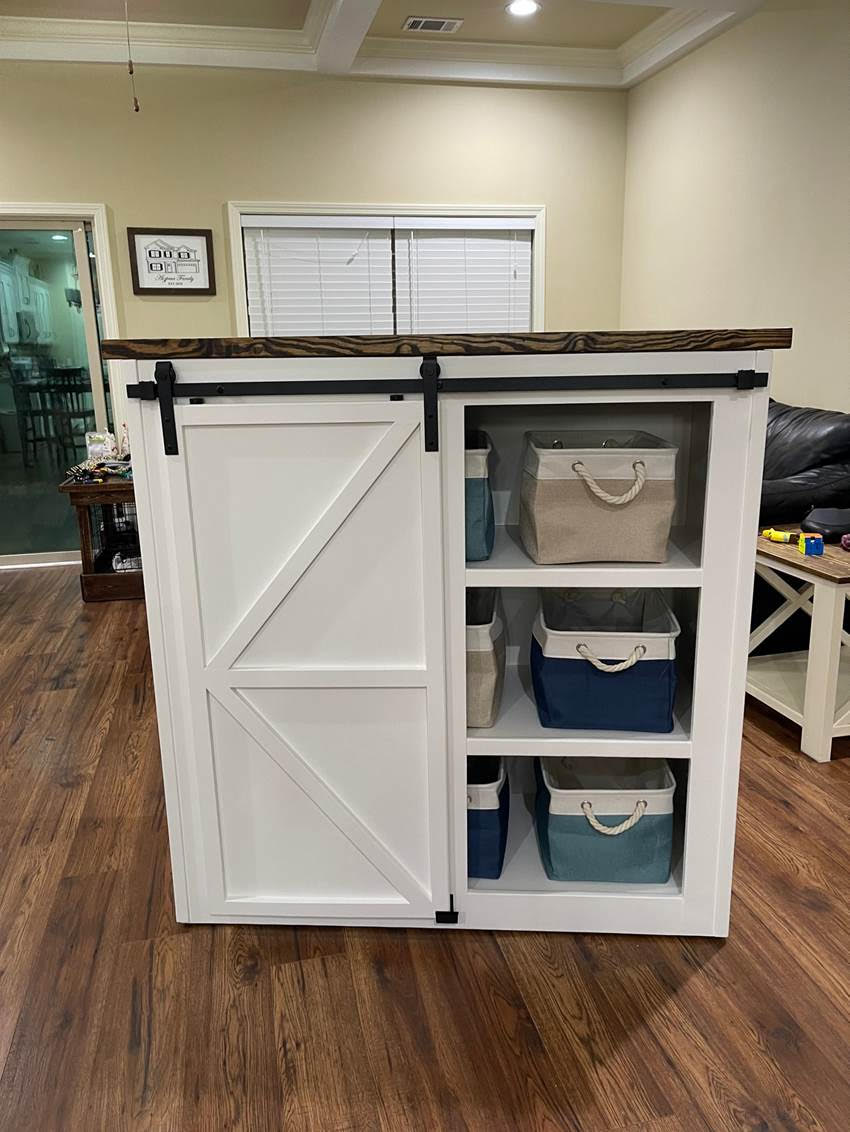
Barn door storage cabinet by Greg!
Built from Plan(s)
Simple 2x4 potting bench modified to include antique window.
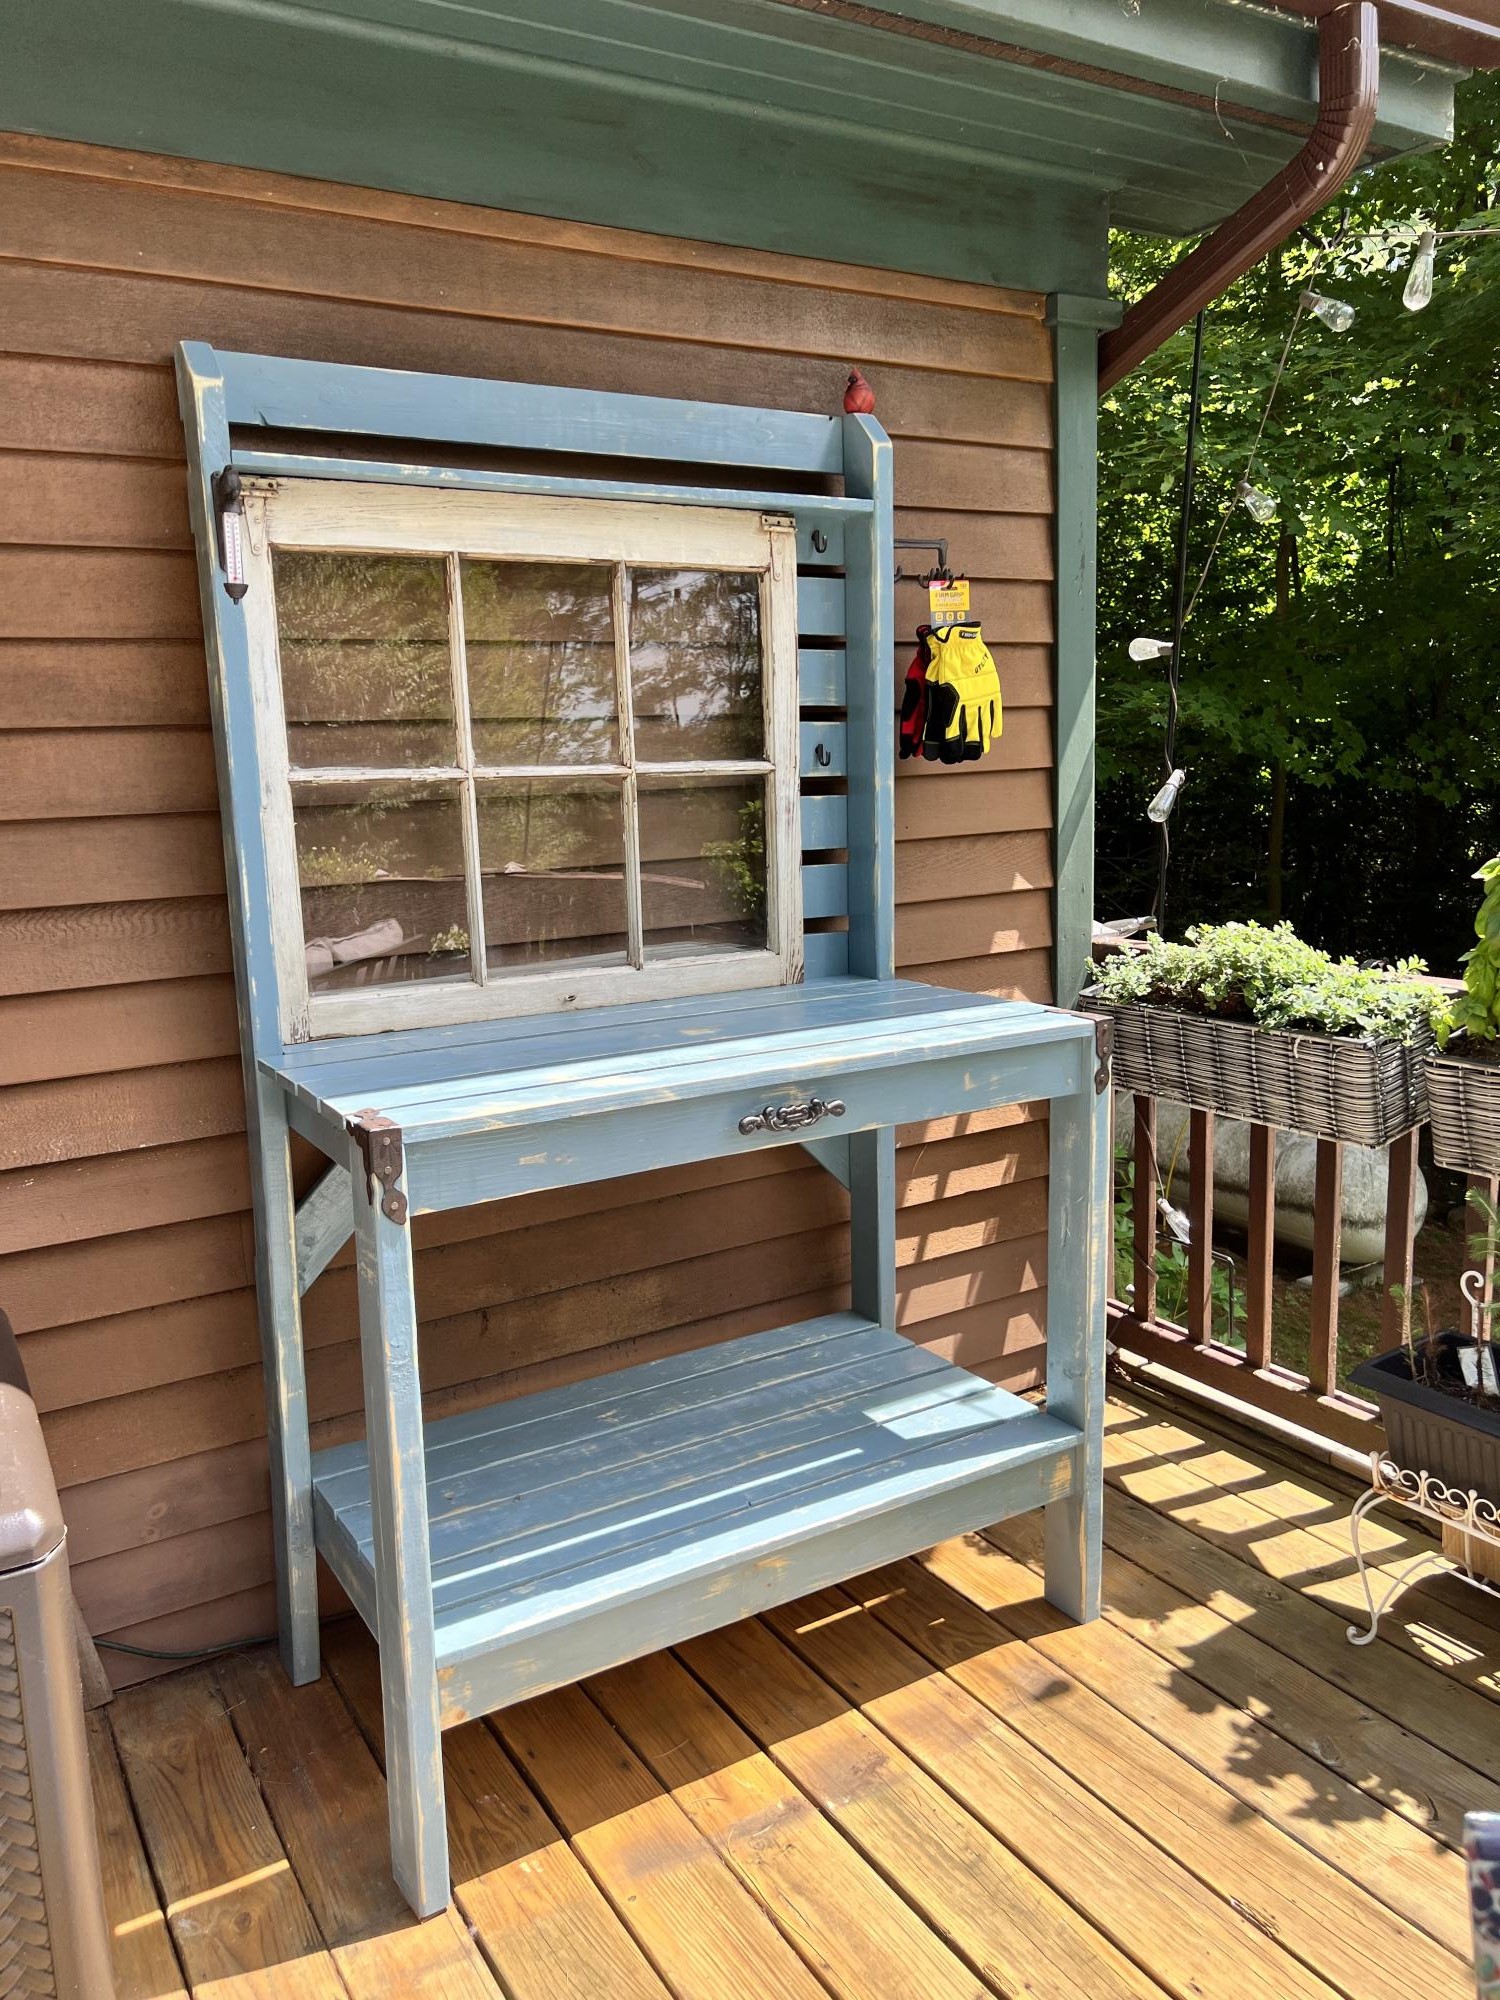
I made this for my mom for her birthday. I just modified the measurements to accommodate the window and added some cool hardware.
Built from Plan(s)
Comments
Picture ledge
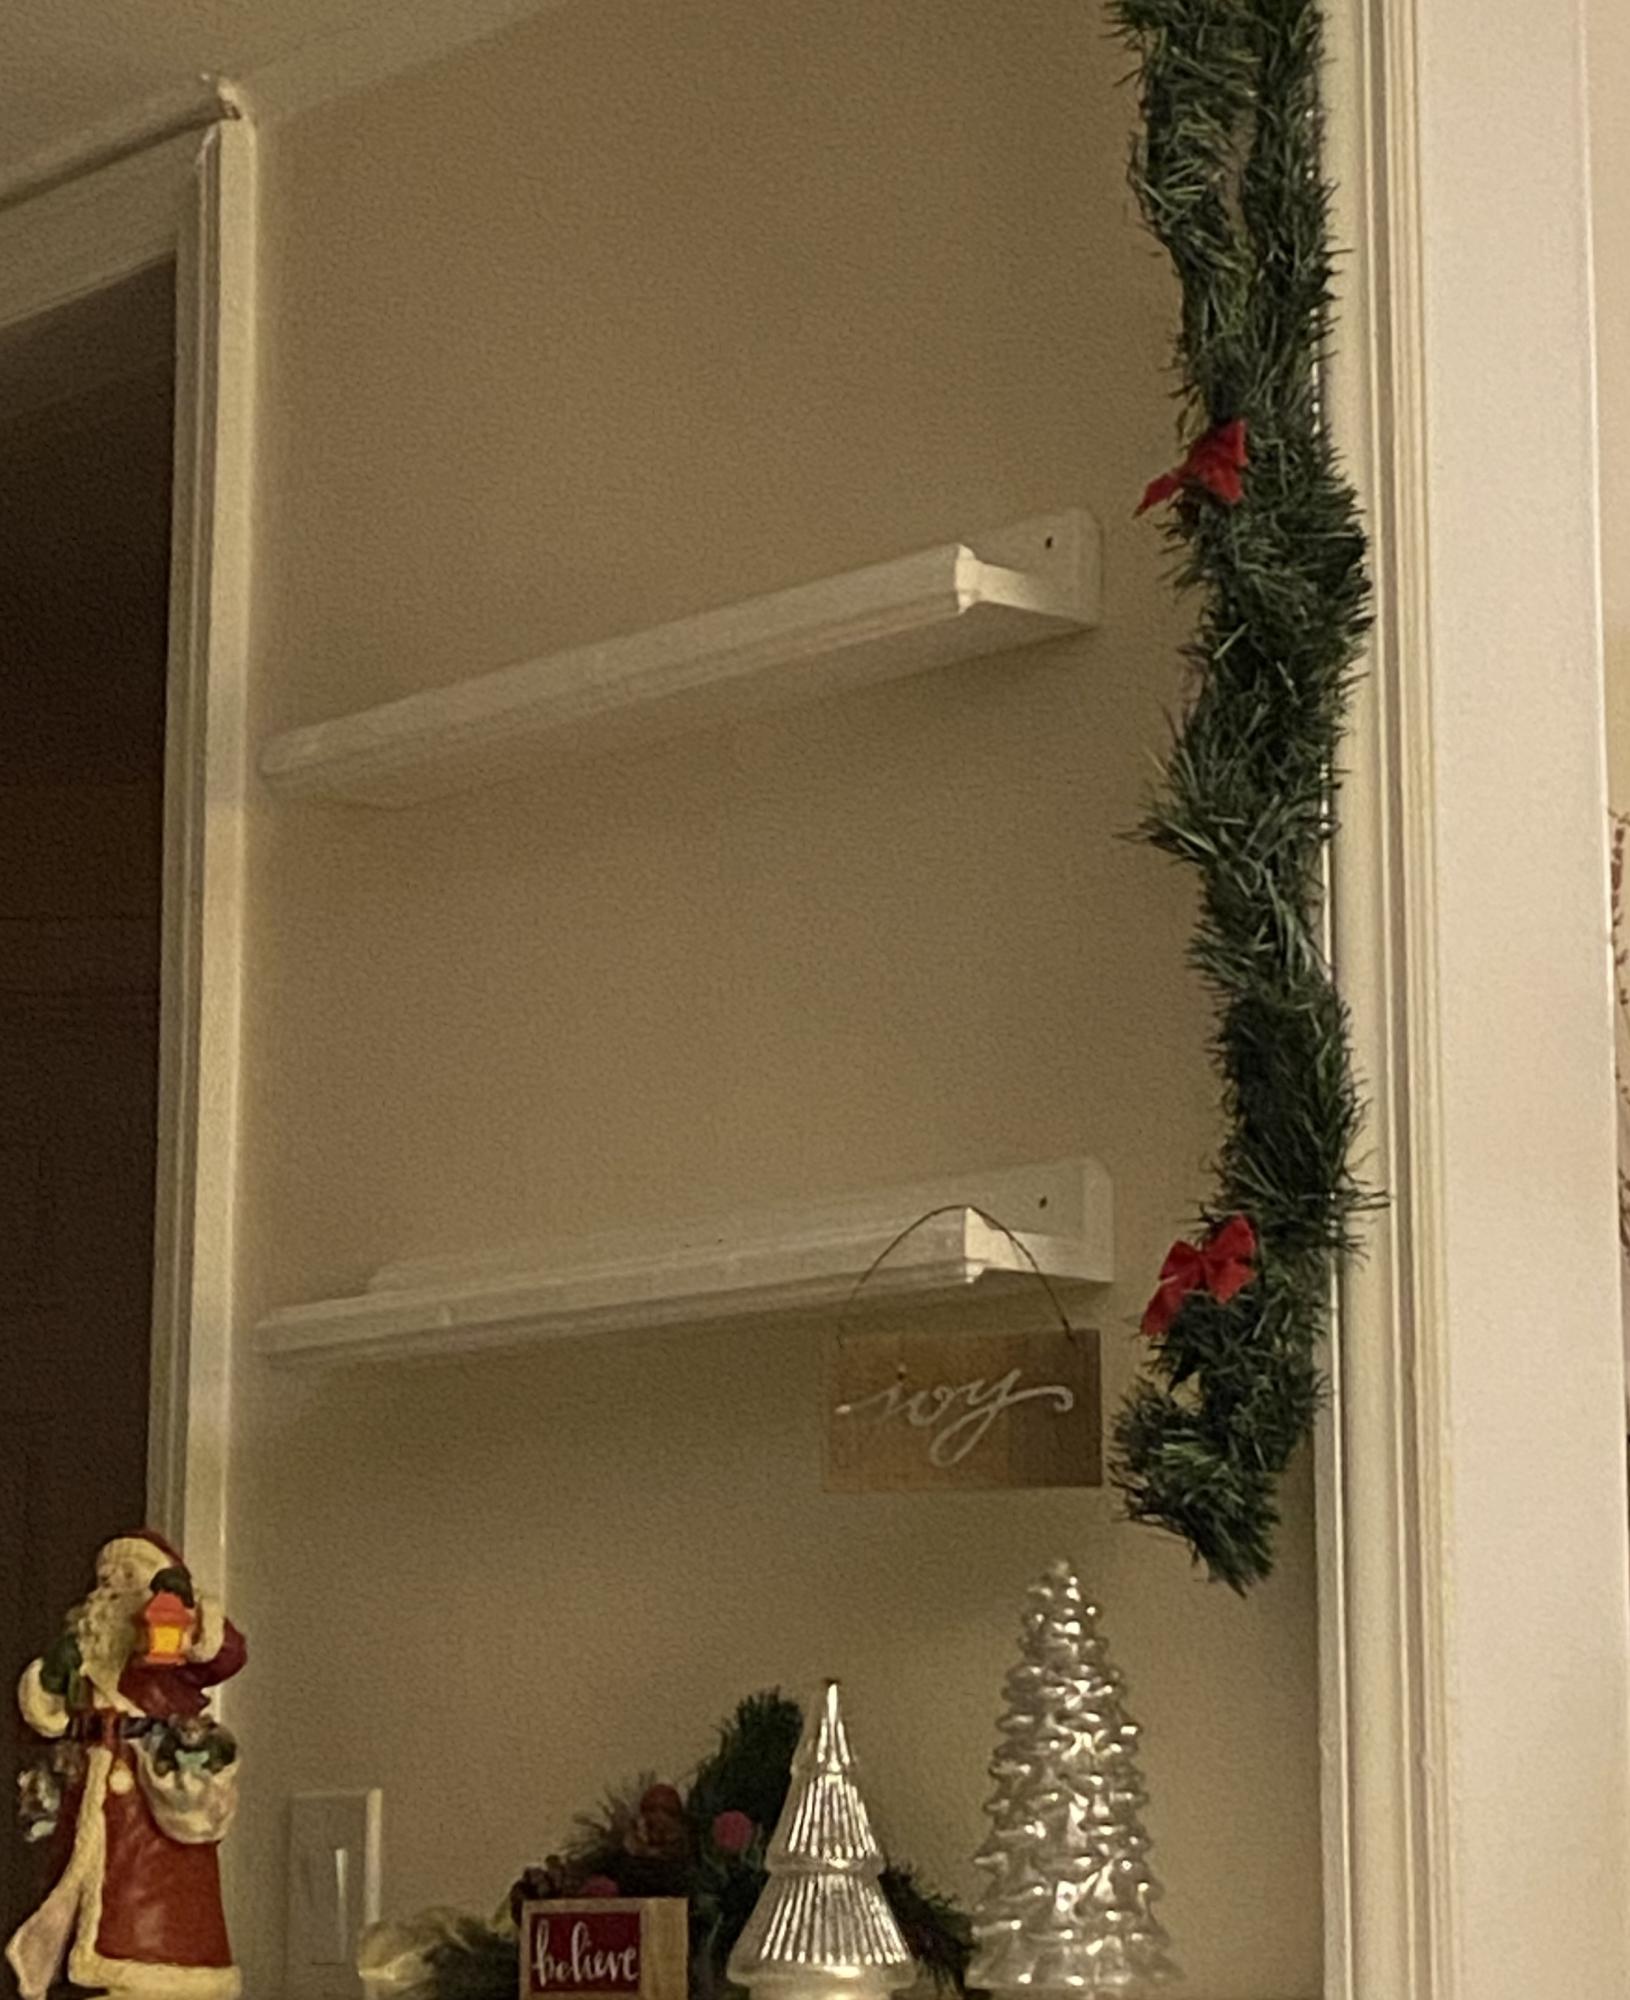
I used my router and router Ed the edges. Love this!!
Built from Plan(s)
Comments
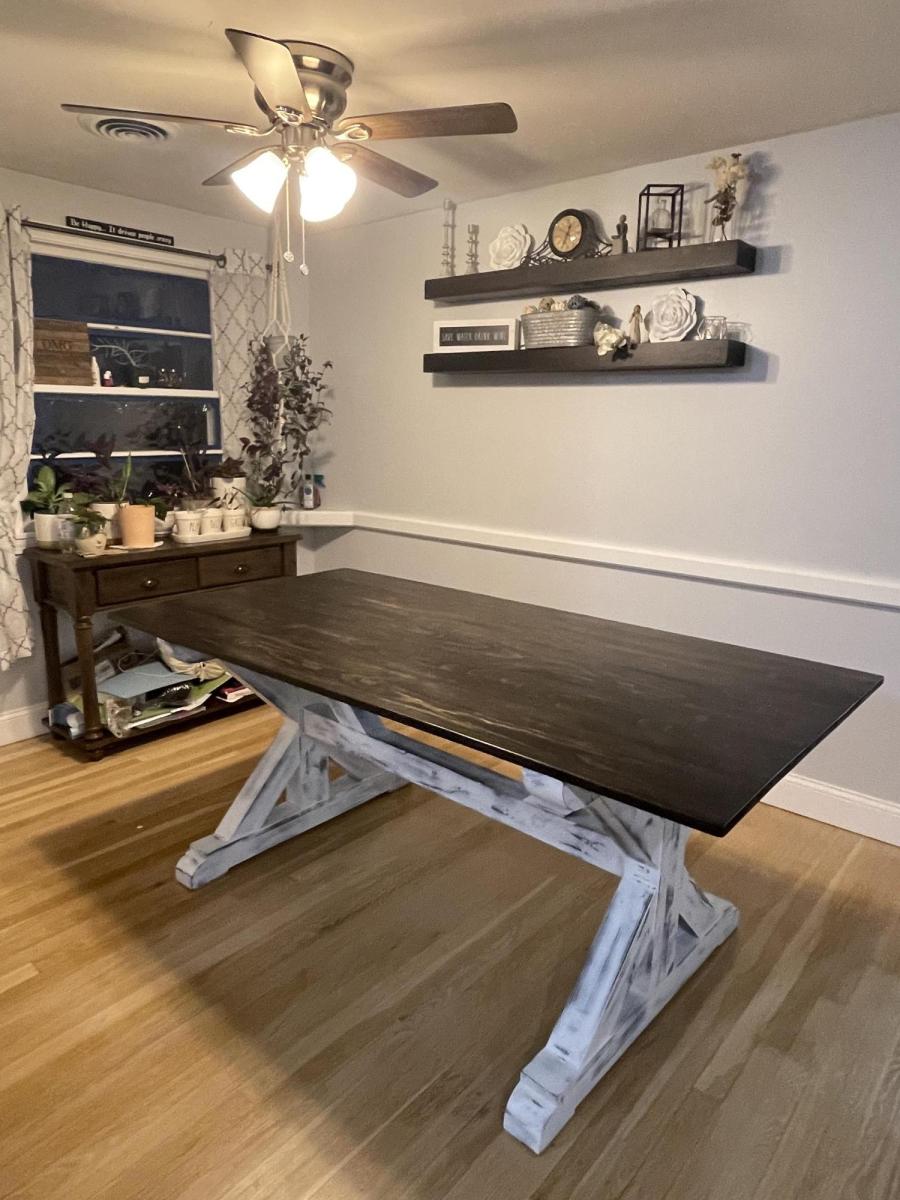
DIY farmhouse table
A farmhouse table I built based on one of your inspiration projects! All by hand and chiseled myself 😍

Built from Plan(s)
Comments
Thu, 12/29/2022 - 11:13
Gorgeous dining table!
Thank you for sharing, such a beautiful handmade piece!
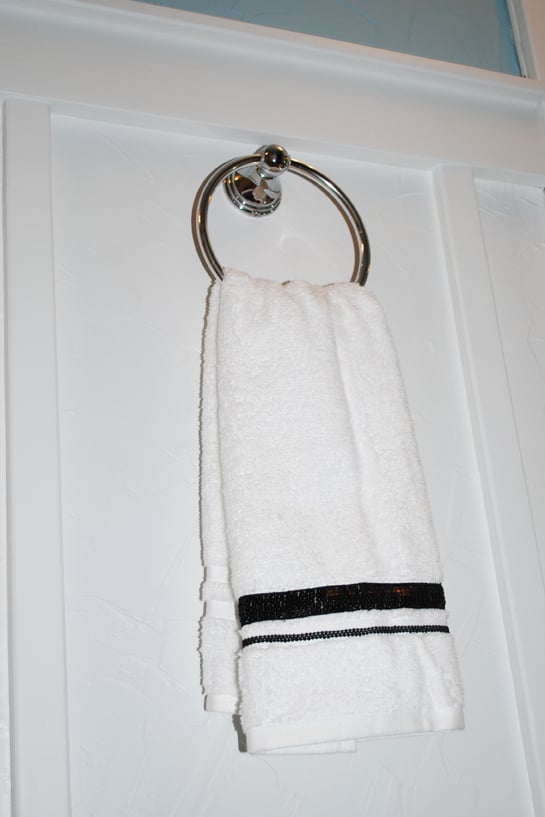
Board and Batten Bathroom
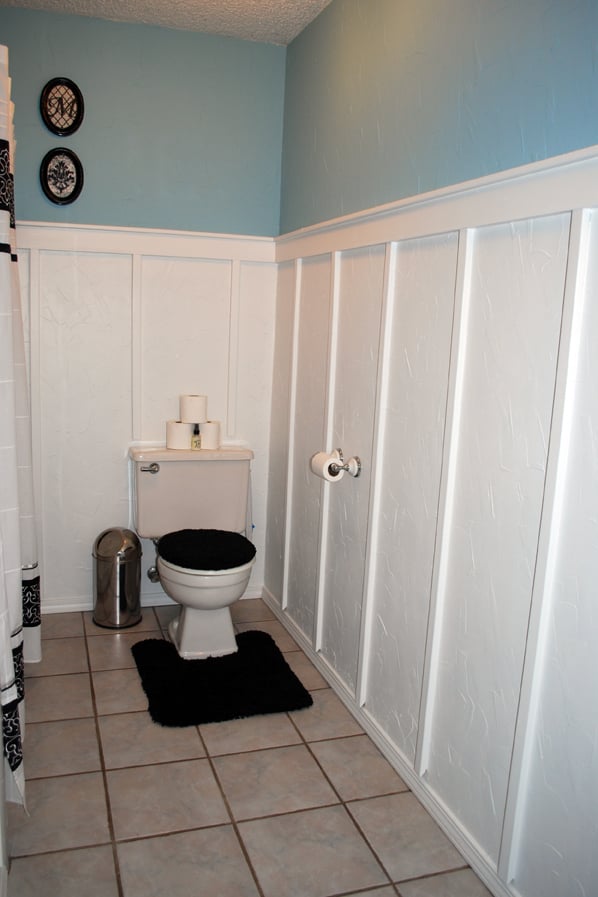
My first project with raw wood and power tools! All I have is a circular saw and electric sander, but it went really well. It took about 3 days because I couldn't work straight through (silly life and all it's appointments!). Thanks for laying out all the prep work with your instructions, Ana!! My next project is a cubby shelf for towels.

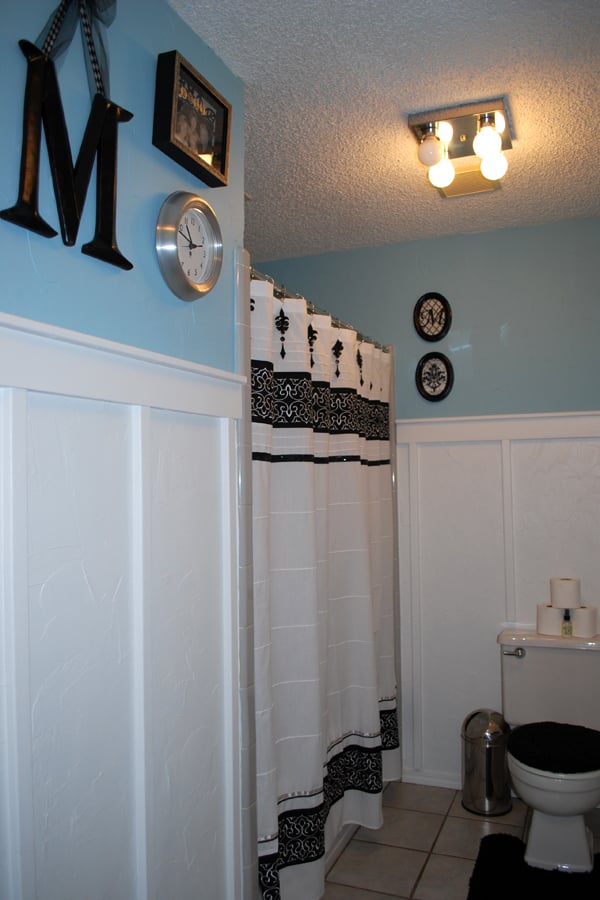

Estimated Cost
$76
Estimated Time Investment
Weekend Project (10-20 Hours)
Finish Used
Satin Finish Latex paint by Valspar. Upper wall color is Valspar High Noon in Flat Enamel finish.
Recommended Skill Level
Starter Project
Comments
Tue, 10/11/2011 - 21:29
Beautiful transformation
What a nice change! Great job. You should be proud of yourself!
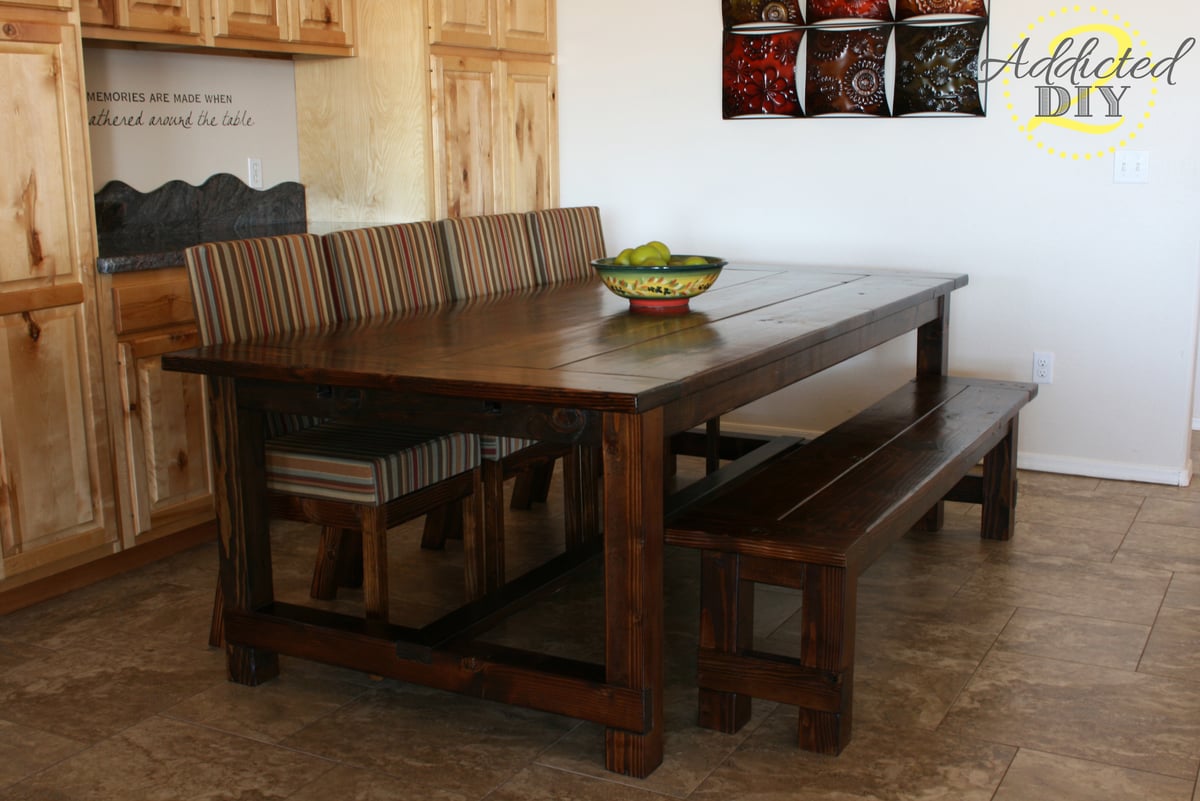
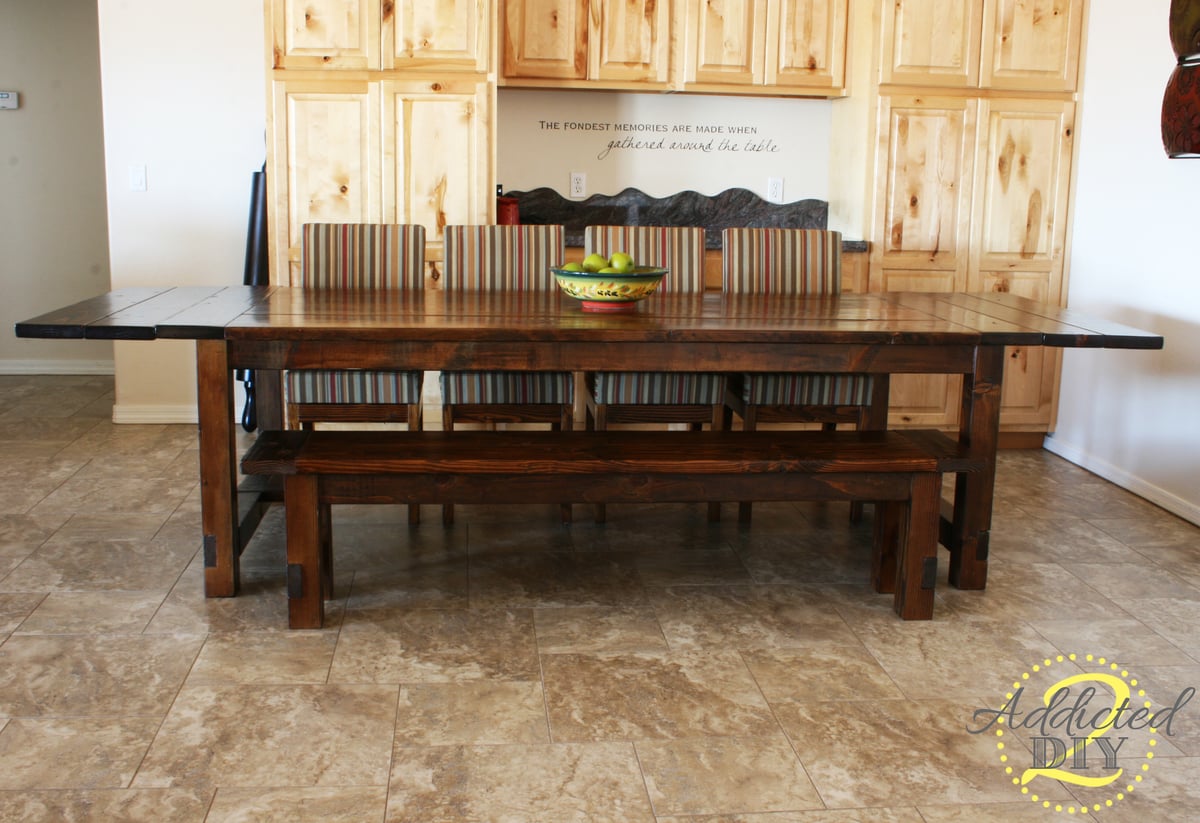
DIY Farmhouse Table with Extensions
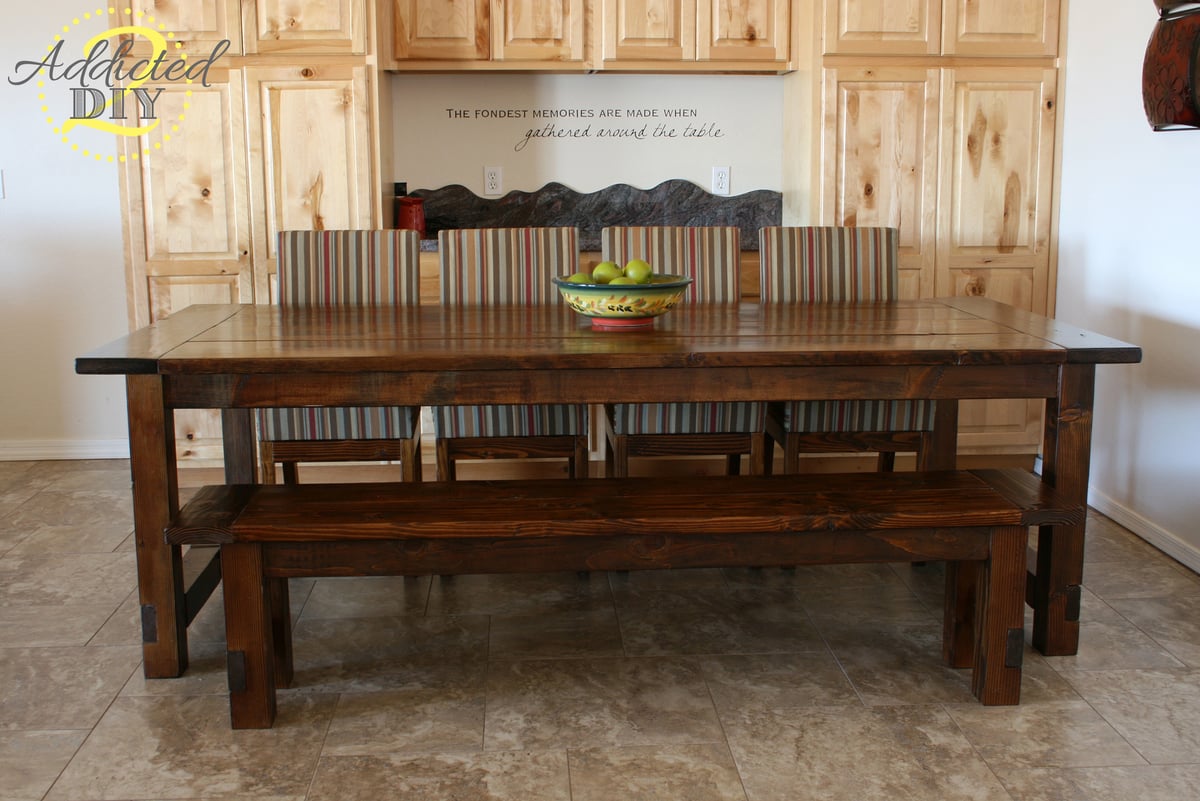
We built this farmhouse table a few months ago and absolutely love it. We modified the plans a bit based on another brag post and went with a replica of the Restoration Hardware table. I also built the chairs for the table based on the Parsons chair plans

Built from Plan(s)
Estimated Cost
$300+
Estimated Time Investment
Week Long Project (20 Hours or More)
Finish Used
Minwax Provincial
Minwax Polycrylic in Satin
Minwax Polycrylic in Satin
Recommended Skill Level
Intermediate
Comments

Tue, 11/05/2013 - 17:59
Impressed!
Really nice job! This was quite an accomplishment, especially given that you guys did additional chairs (that look fantastic). Also, great job documenting on your blog.
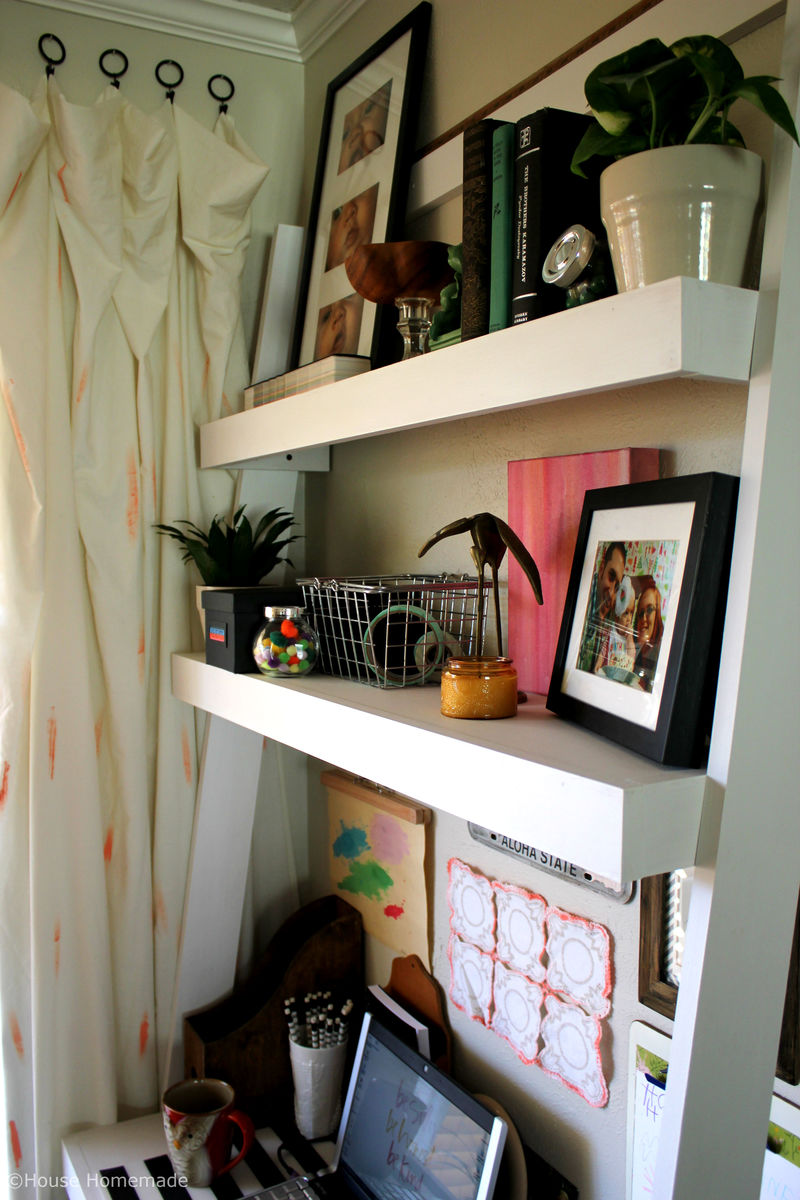
HouseHomemade.us
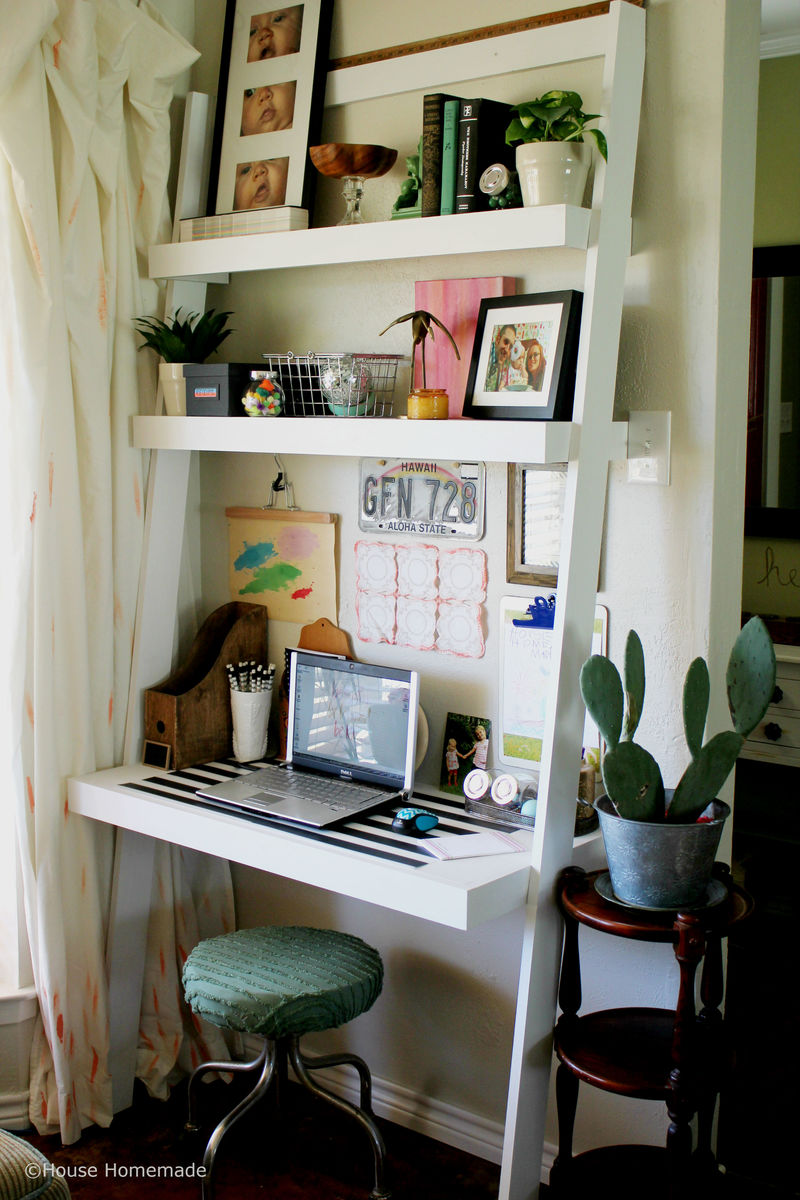
We had a great time making this desk! I was so thankful for the inspiration and now I have a new favorite spot in our home.
Built from Plan(s)
Estimated Time Investment
Day Project (6-9 Hours)
Finish Used
paint
Recommended Skill Level
Intermediate
Comments
Stocking Holder
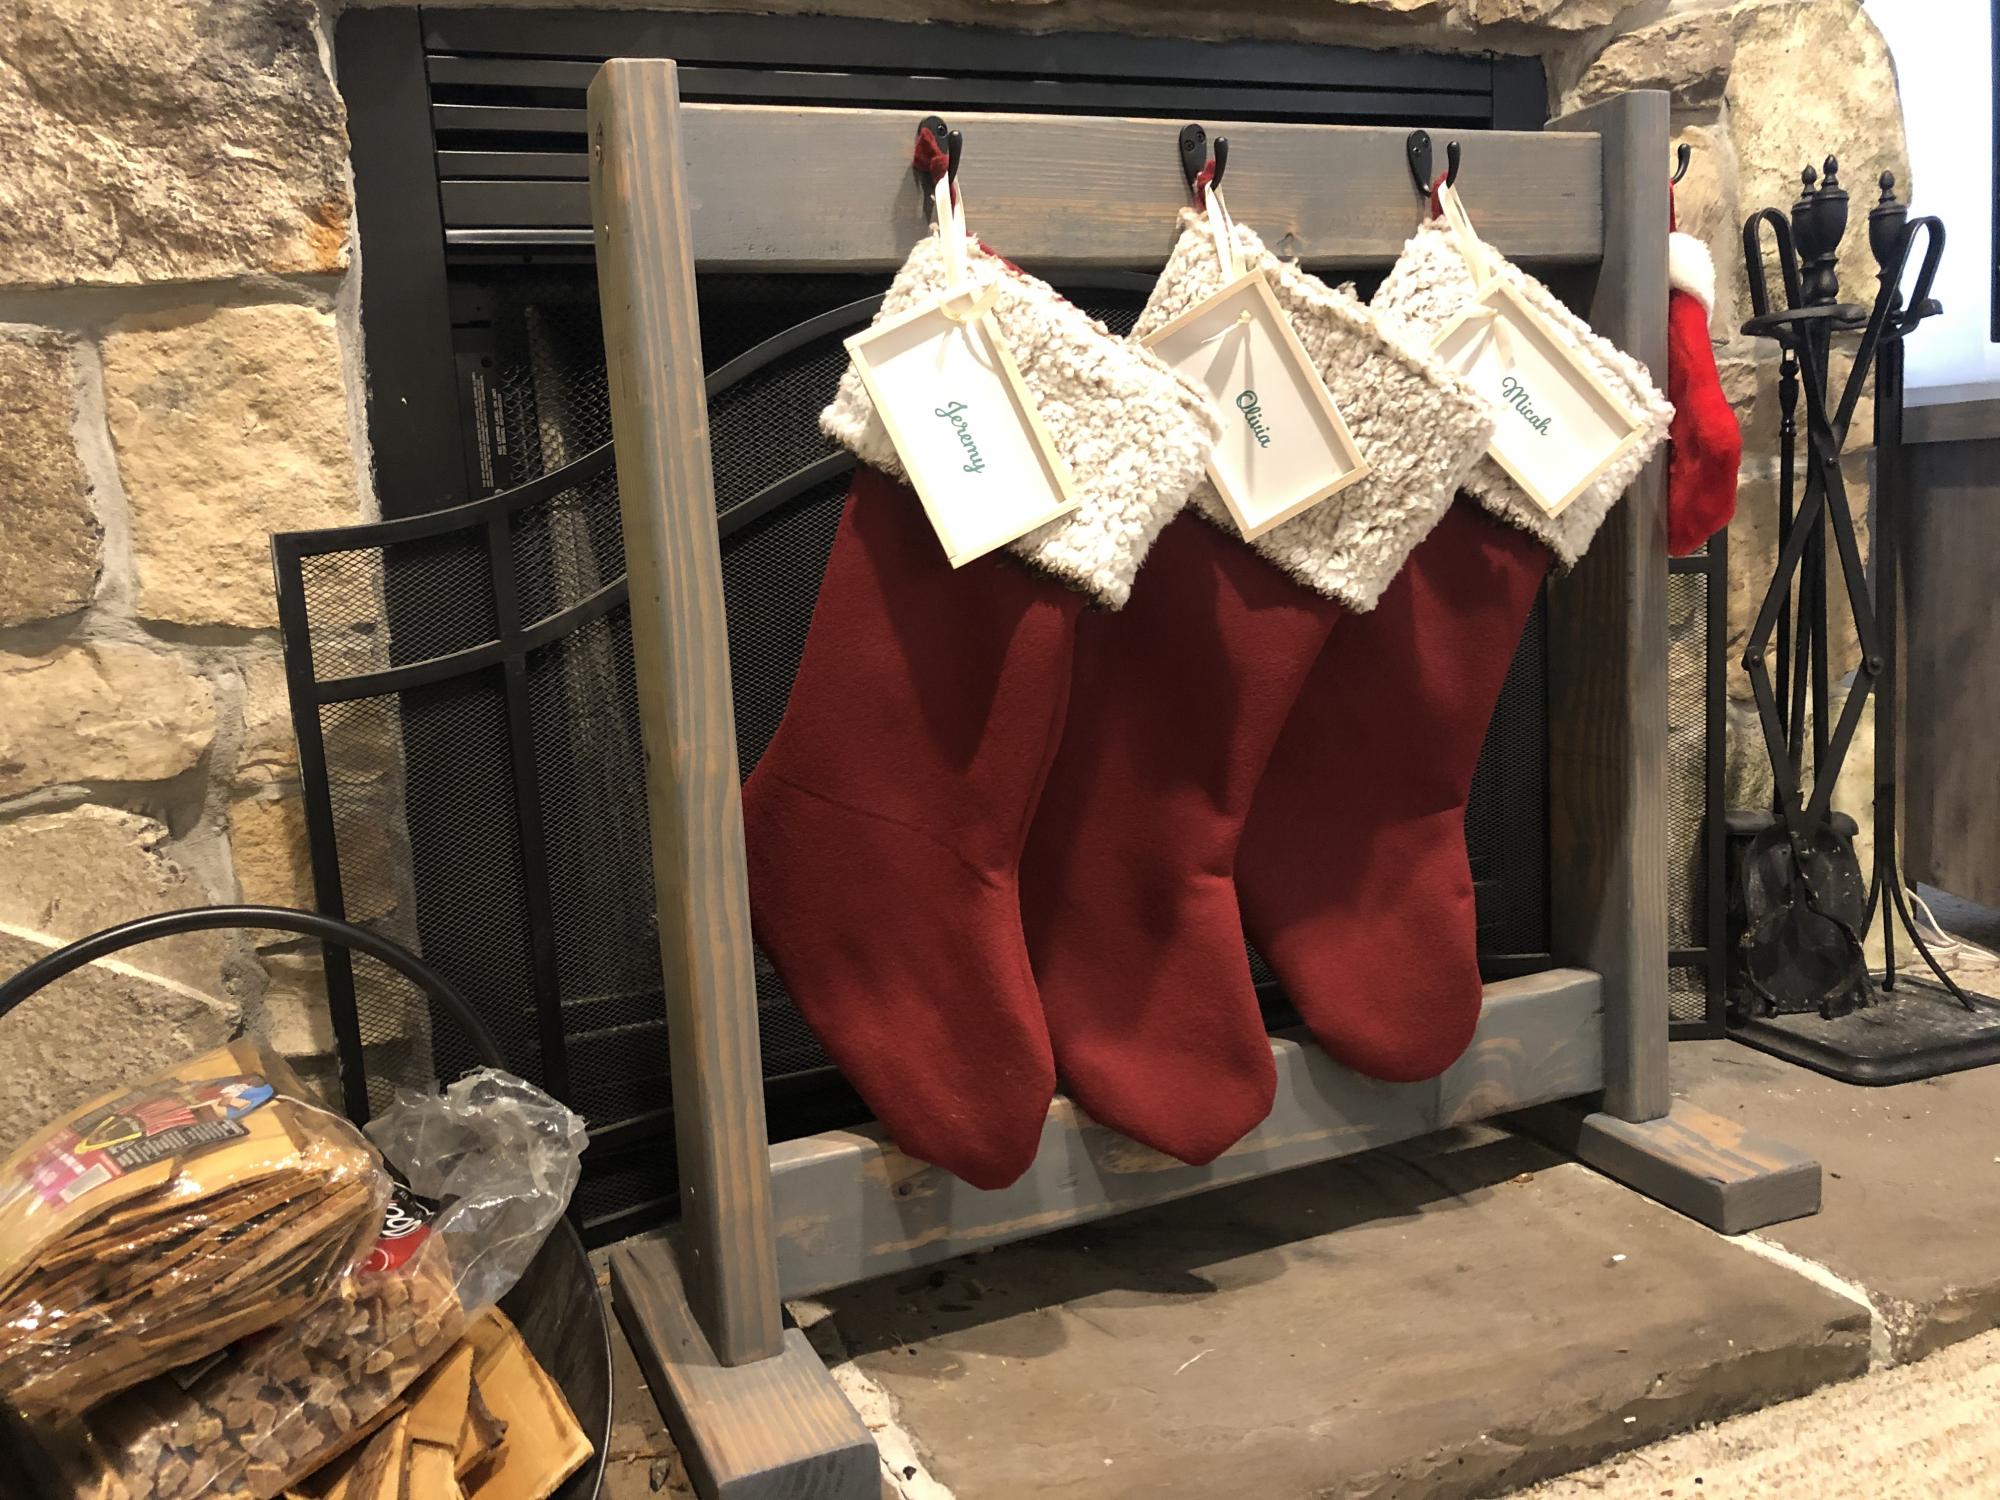
We usually place our stockings on the mantle. Last year, a full stocking fell down and toppled some of our nativity.
This year we used up some of our scrap pieces to build the stocking holder. We also made the stockings.
Absolutely love it! Super easy to scale down to our family of three (+one on the end for our dog 😂). It’ll be nice to double as a winter coat drying rack.
Built from Plan(s)
Estimated Cost
$0
Estimated Time Investment
An Hour or Two (0-2 Hours)
Finish Used
Weathered Grey
Recommended Skill Level
Starter Project
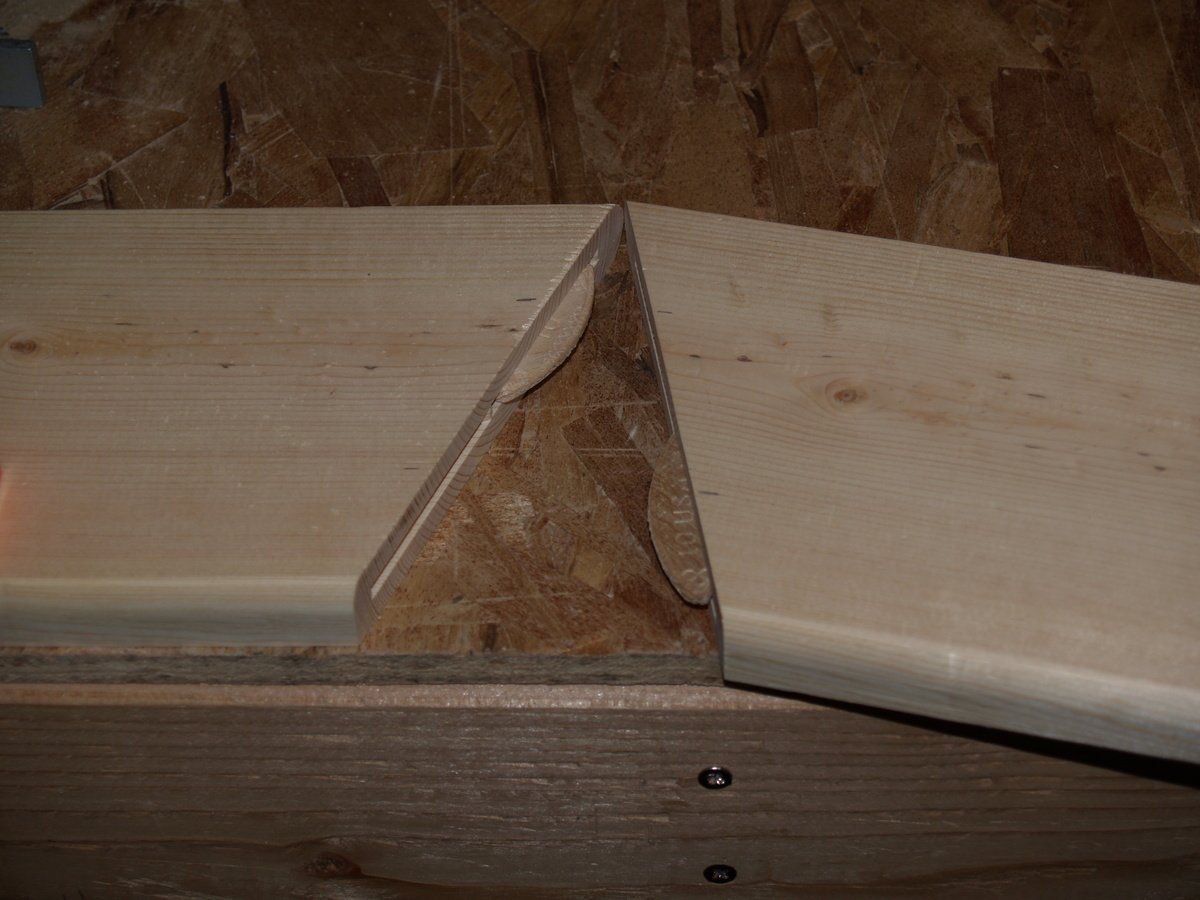
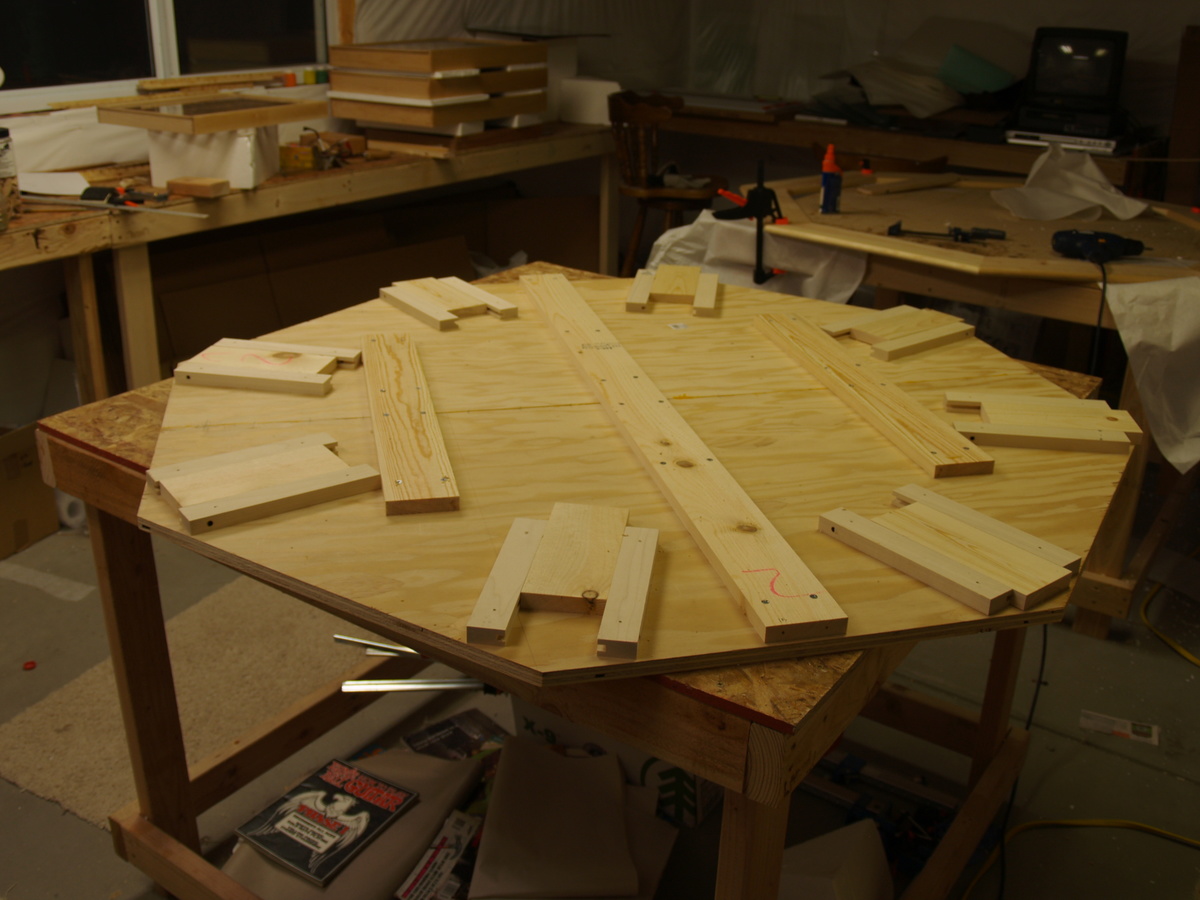
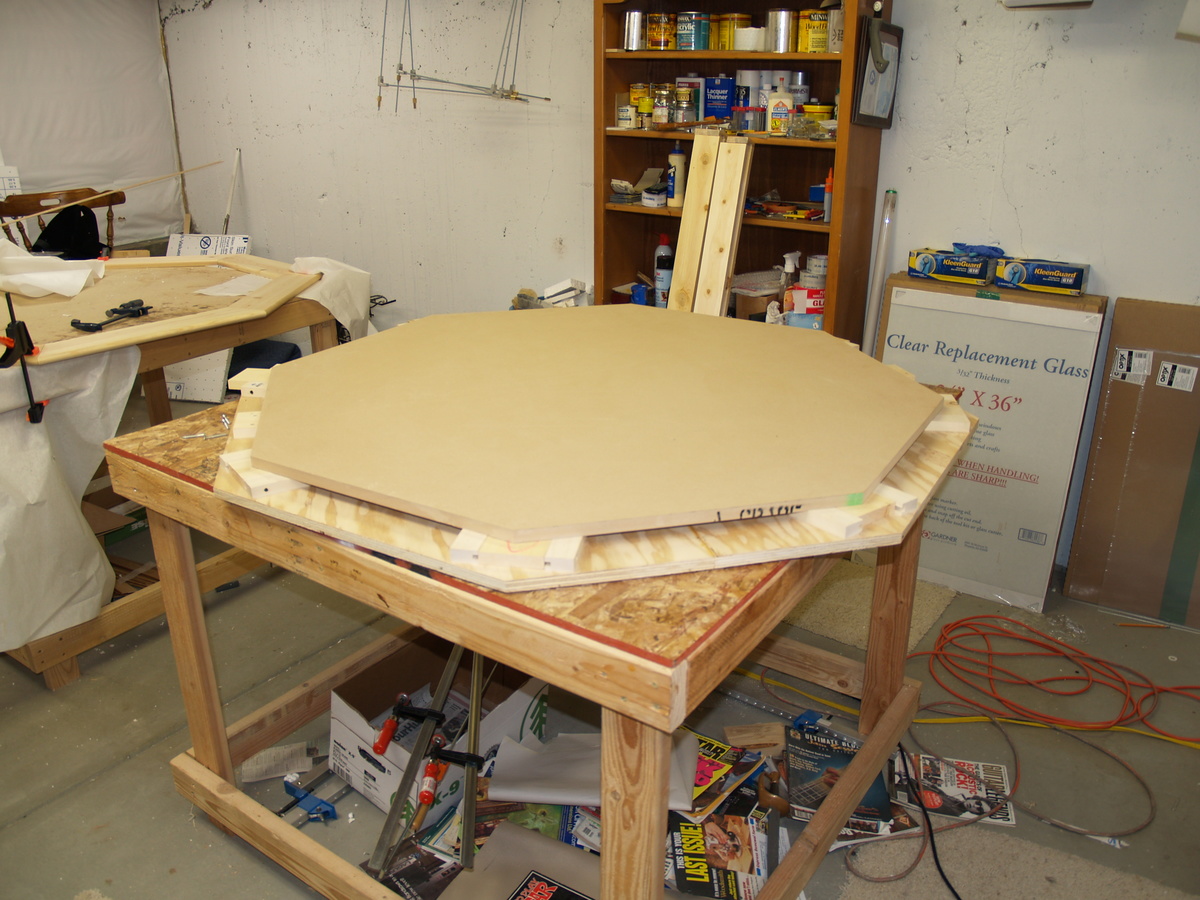
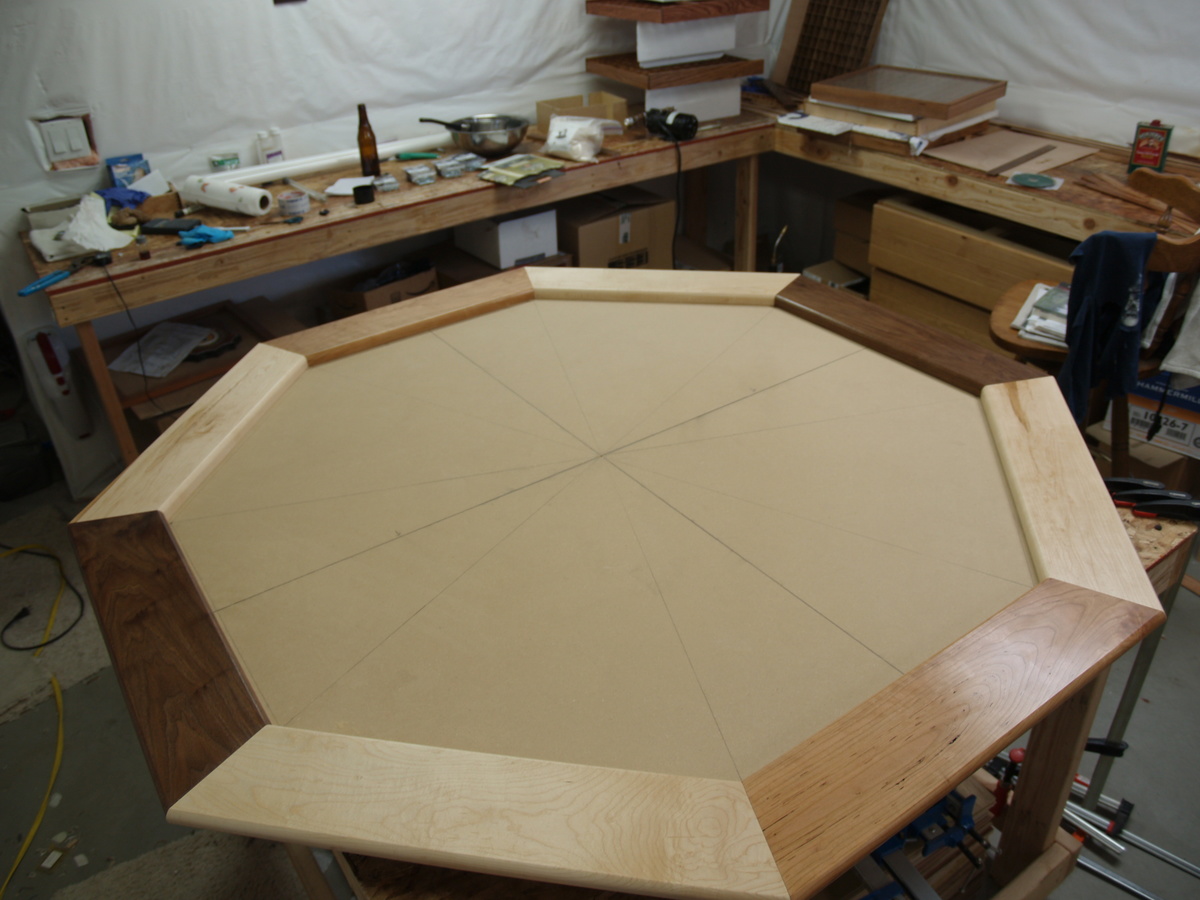
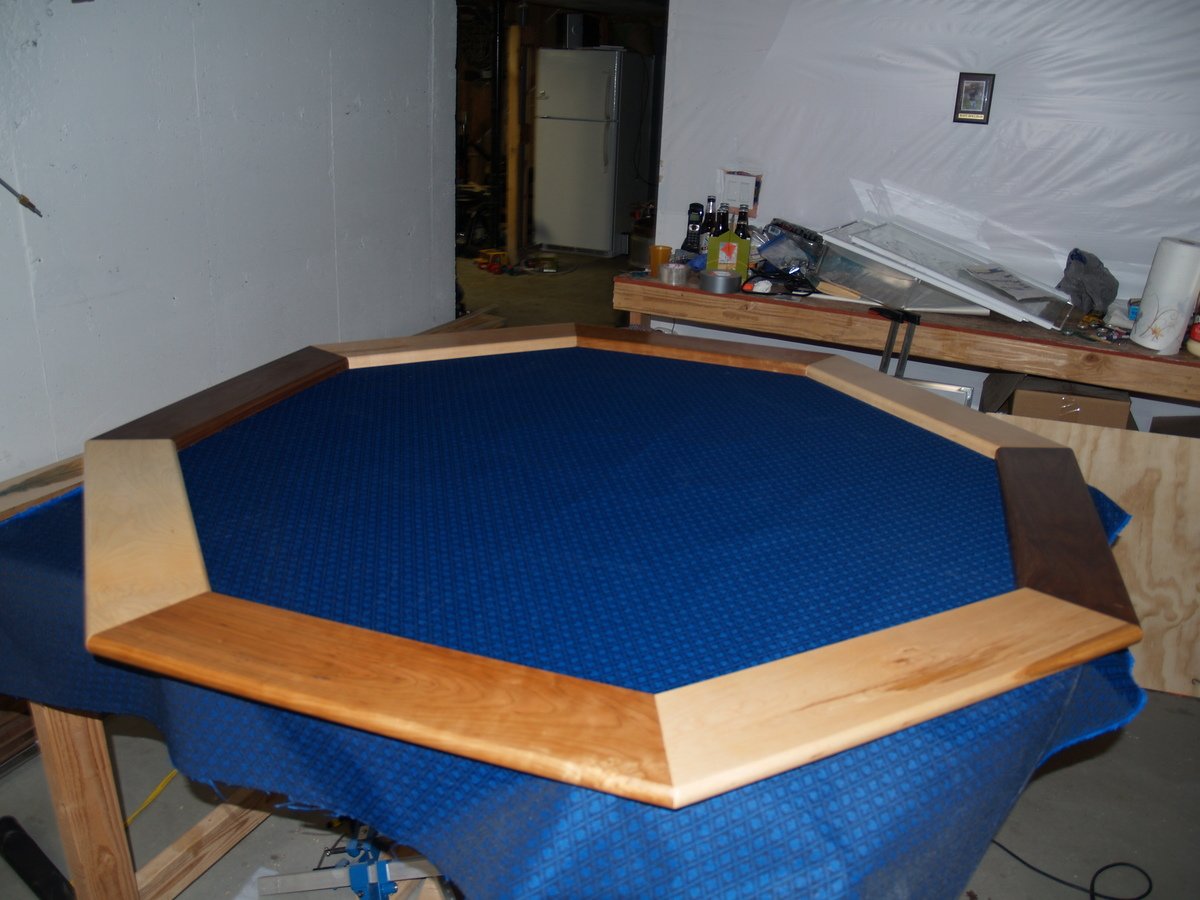
Poker table with hiding beverage holder

*I did not have any plans to work from*
the cost really depends on how much you can get your wood for. I had a lot left over from previous projects, so $500 is only a low guess.
This is the second of 3 poker tables built.
Each side is 24"
the table measures 58" across
Some of the accompanying photos of the build were from my first table, but thought they might help.
I purchased a foam pad and "speed cloth" from a local poker supply store. The slide away bev. holders are kept in place with rare earth magnets
If you need any specifics, I'll try to help
Estimated Cost
500+
Estimated Time Investment
Week Long Project (20 Hours or More)
Finish Used
tung oil-
start with a 50/50 mix of turpentine and tung oil and rub into the wood. It will dry fast and absorb quickly. Wipe off excess after 15 minutes (if any). Allow 24 hours between coats. Sand with 220 grit and rub in tung oil with a few drops of japan drier. I add 1ml of japan drier to 40ml of tung oil. Allow oil to sit for 15-20 minutes before wiping off oil. Buff with cloth and allow another 24hrs. Sand with 0000 steel wool and repeat application process. Continue everyday until the desired finish achieved
start with a 50/50 mix of turpentine and tung oil and rub into the wood. It will dry fast and absorb quickly. Wipe off excess after 15 minutes (if any). Allow 24 hours between coats. Sand with 220 grit and rub in tung oil with a few drops of japan drier. I add 1ml of japan drier to 40ml of tung oil. Allow oil to sit for 15-20 minutes before wiping off oil. Buff with cloth and allow another 24hrs. Sand with 0000 steel wool and repeat application process. Continue everyday until the desired finish achieved
Recommended Skill Level
Intermediate
Comments
Sun, 04/22/2012 - 20:59
I love this! This table is
I love this! This table is perfect for home games. Please post the plans.
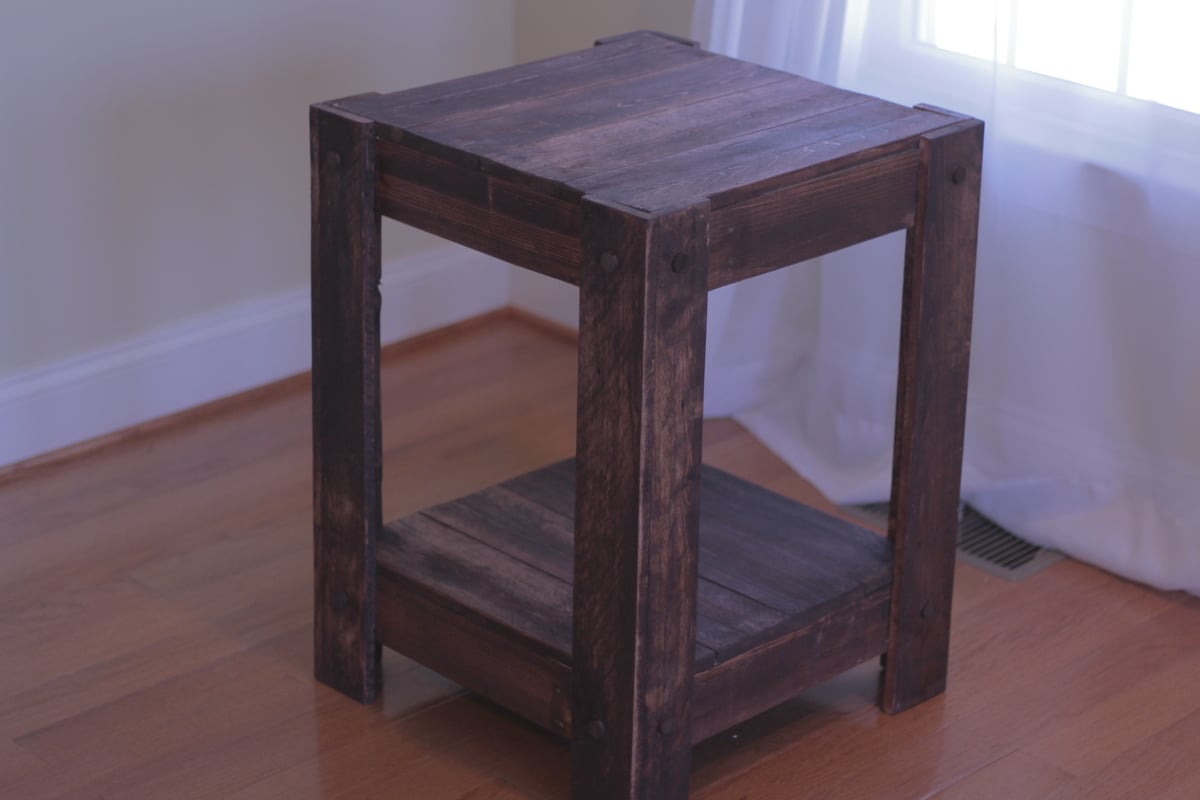
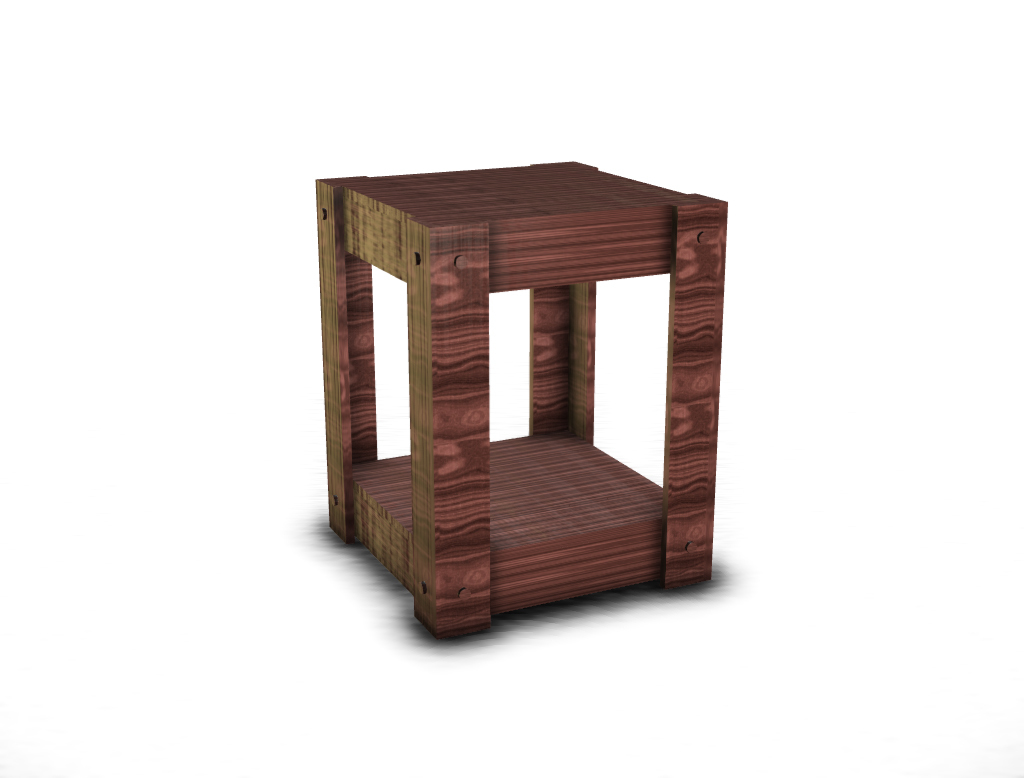
End table made from pallets (plans included)
Building an outside side table out of scrap pallets.
Video of the build:
https://www.youtube.com/watch?v=kVAYXVGiL_8
Drawing File
https://googledrive.com/host/0B21TbB8gGNQbX2dlNGdxR0NuOE0/end_table.pdf
Estimated Cost
$5 for stain and nails - free pallets
Estimated Time Investment
Day Project (6-9 Hours)
Finish Used
Red Oak
Recommended Skill Level
Starter Project
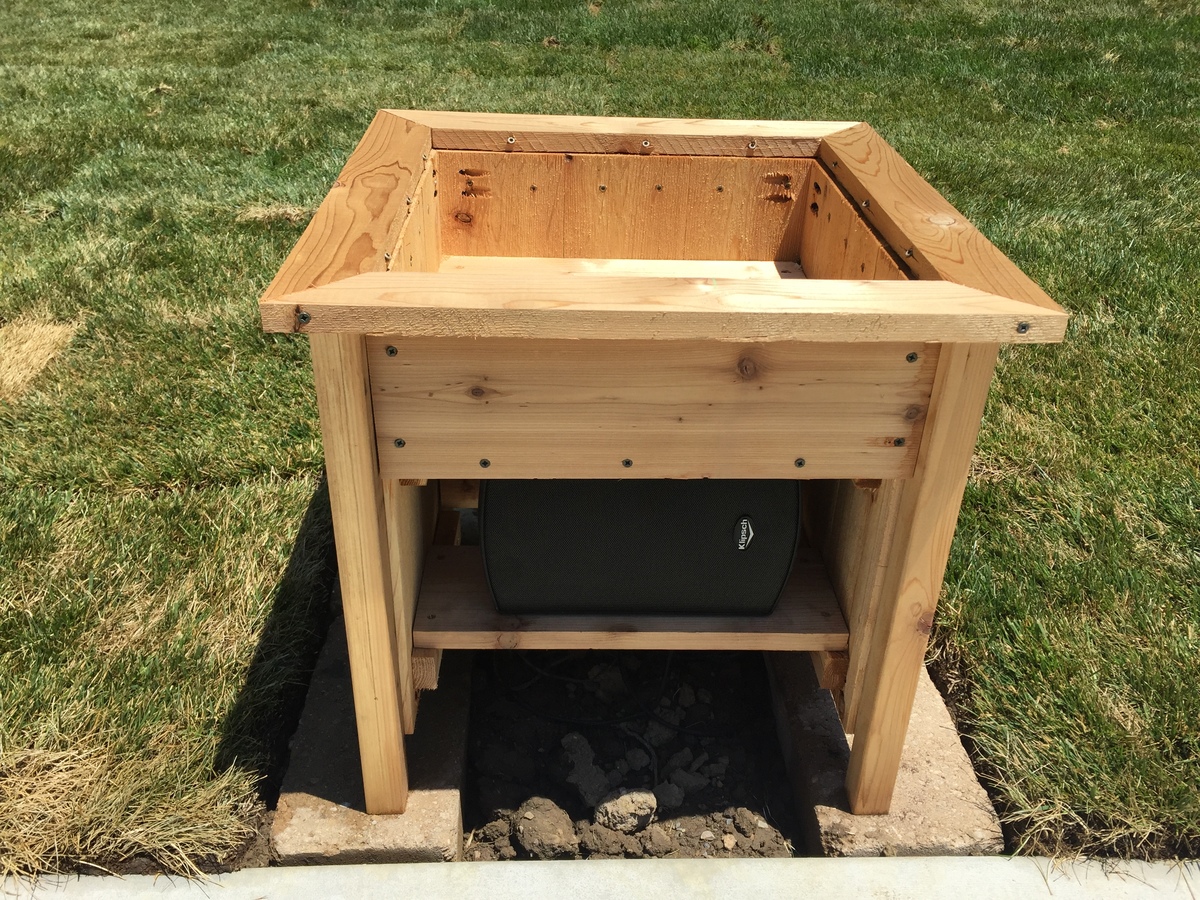
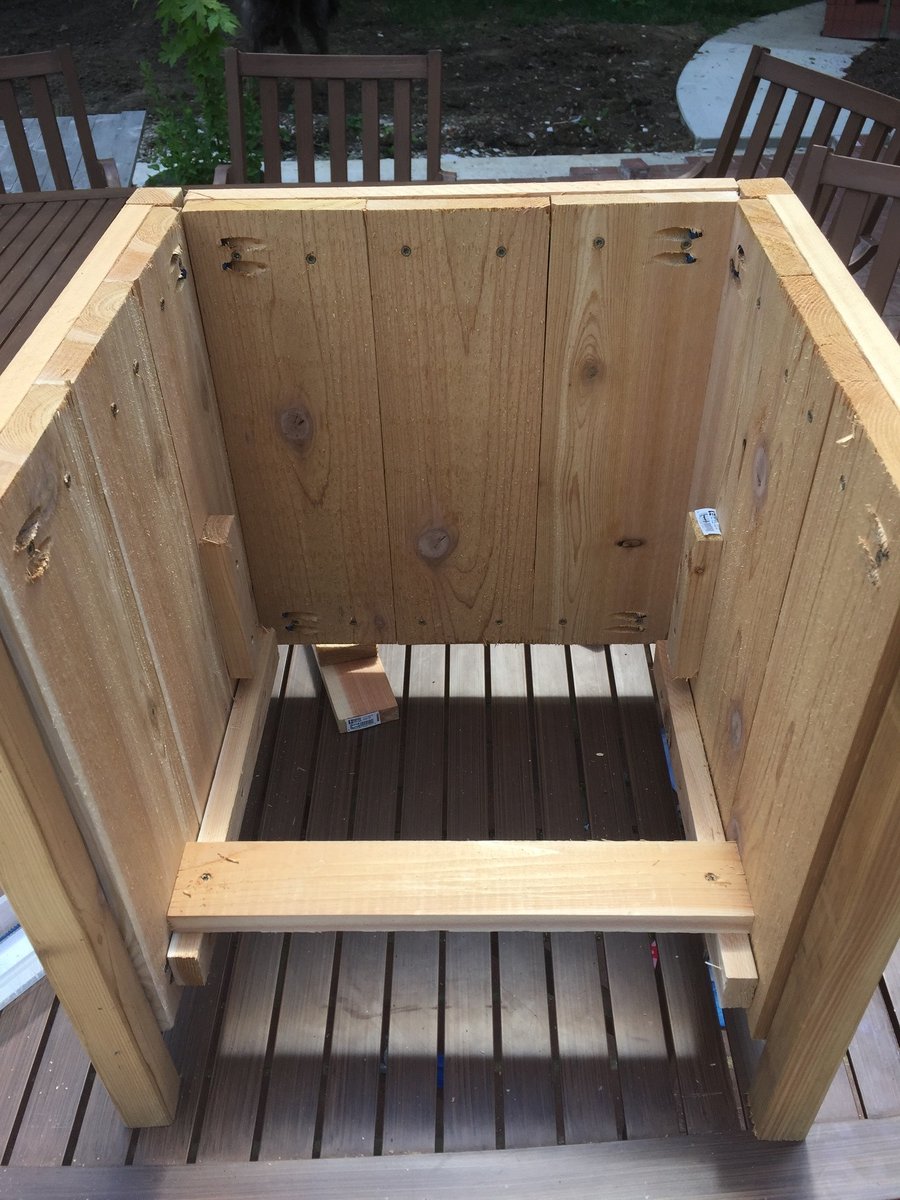
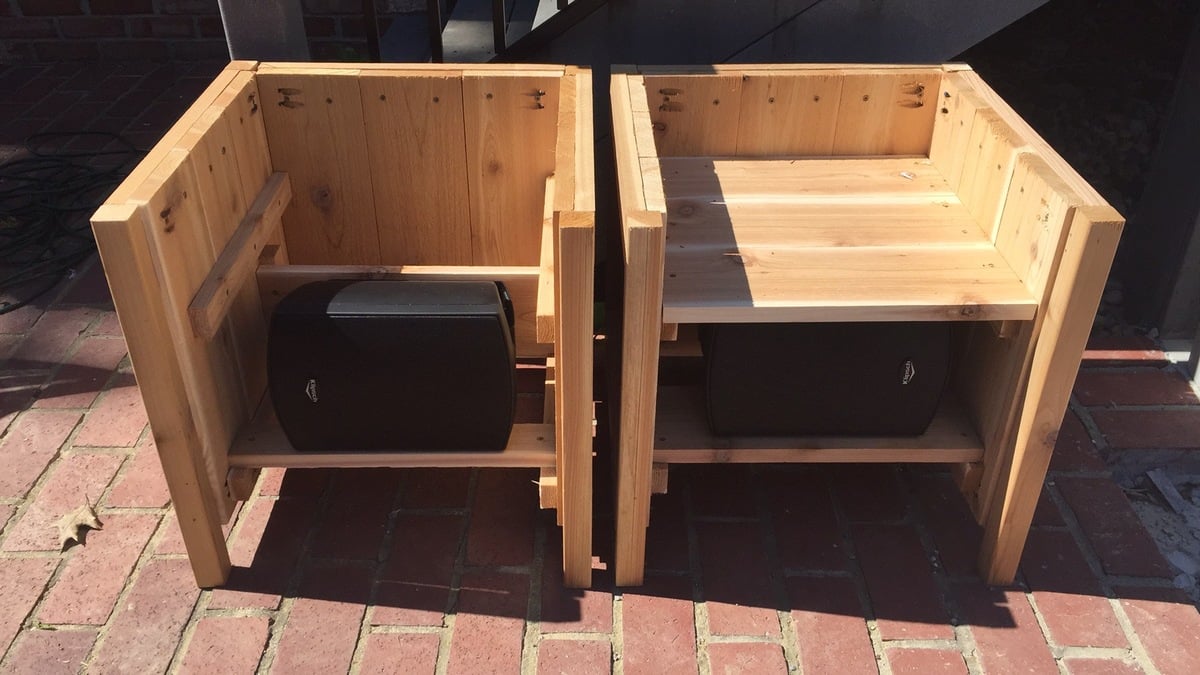
Cedar Planter Outdoor Speakers
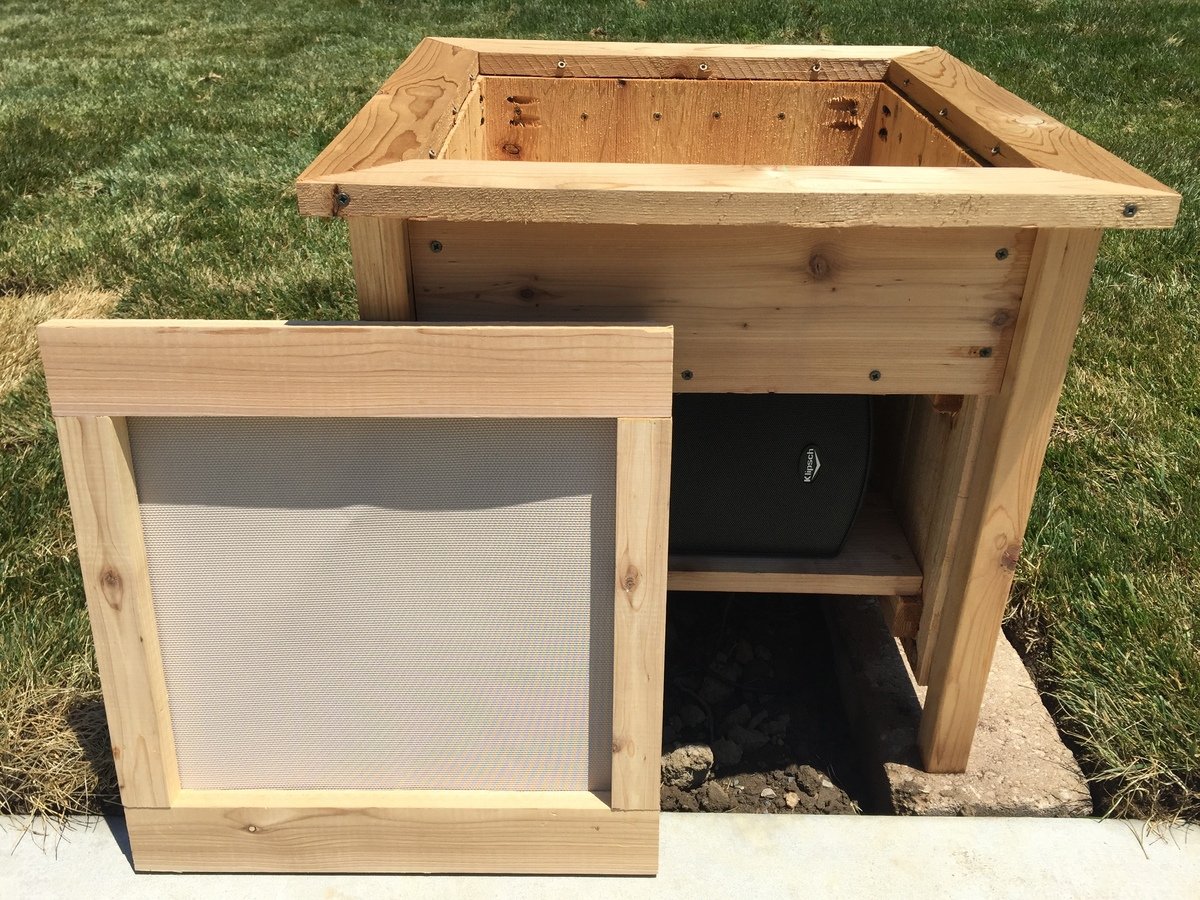
We just put in a pool and I needed something to hide a pair of outdoor speakers. I used Klipsh AW-525 speakers.
Basically I raised the bottom of the planter enough to fit the speaker under and had to add a few framing pieces to secure the speaker mount to. The mount attaches to a vertical board and the weight rests on a horizontal board. The wiring comes up from below.
The front panel uses vinyl mesh from Sailrite.com to hide the speaker but allow sound out. Imm planning to hang it with magnets if it doesn't distort sound too much.
Built from Plan(s)
Estimated Time Investment
Afternoon Project (3-6 Hours)
Recommended Skill Level
Beginner