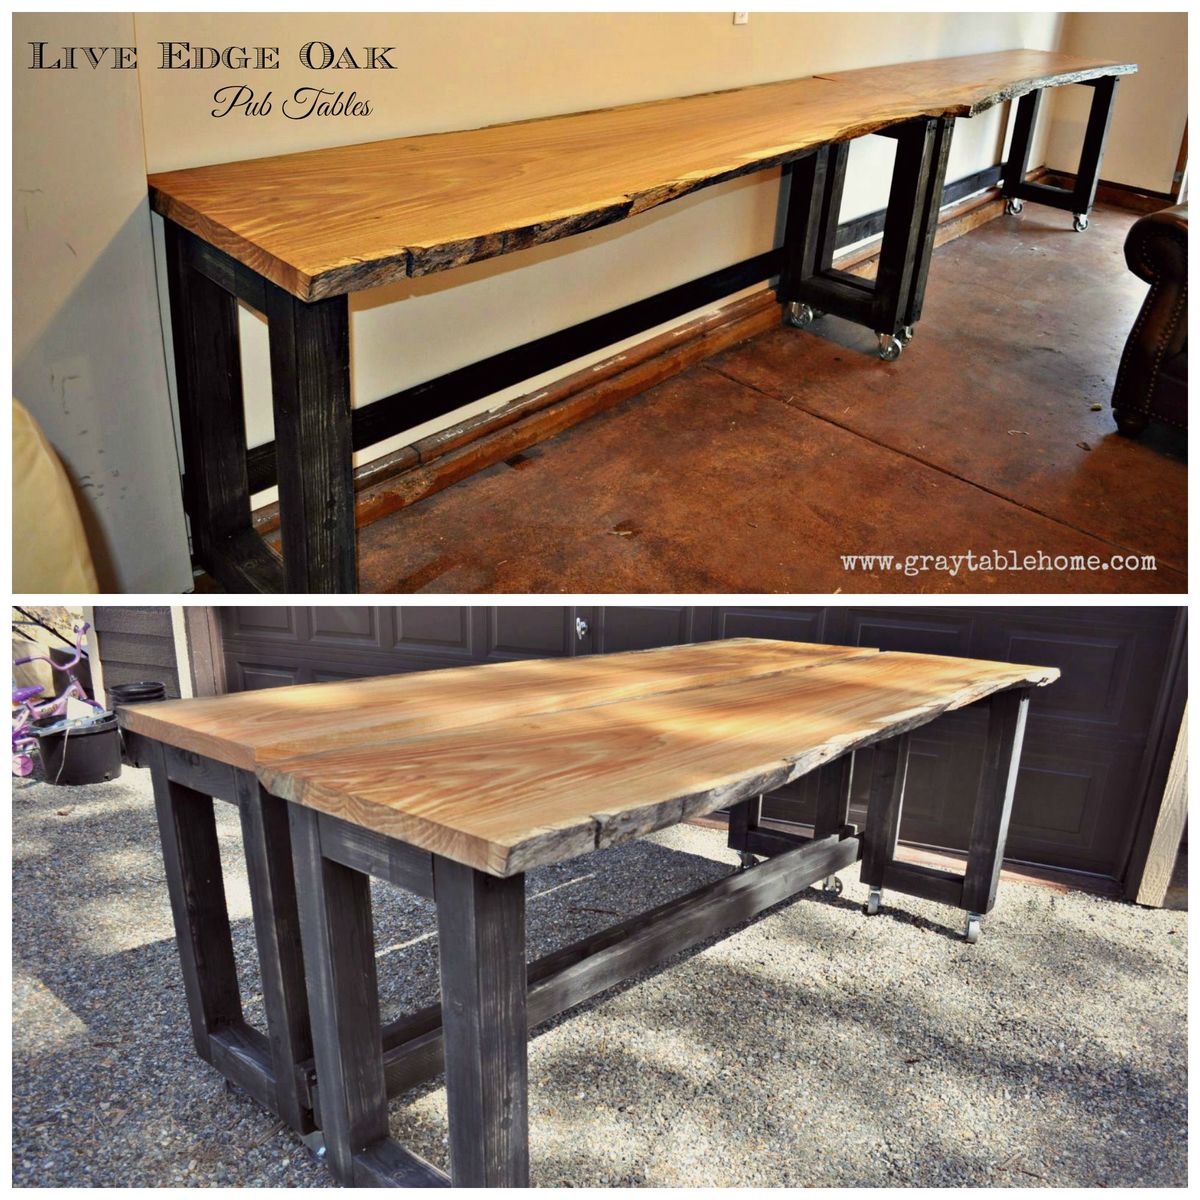
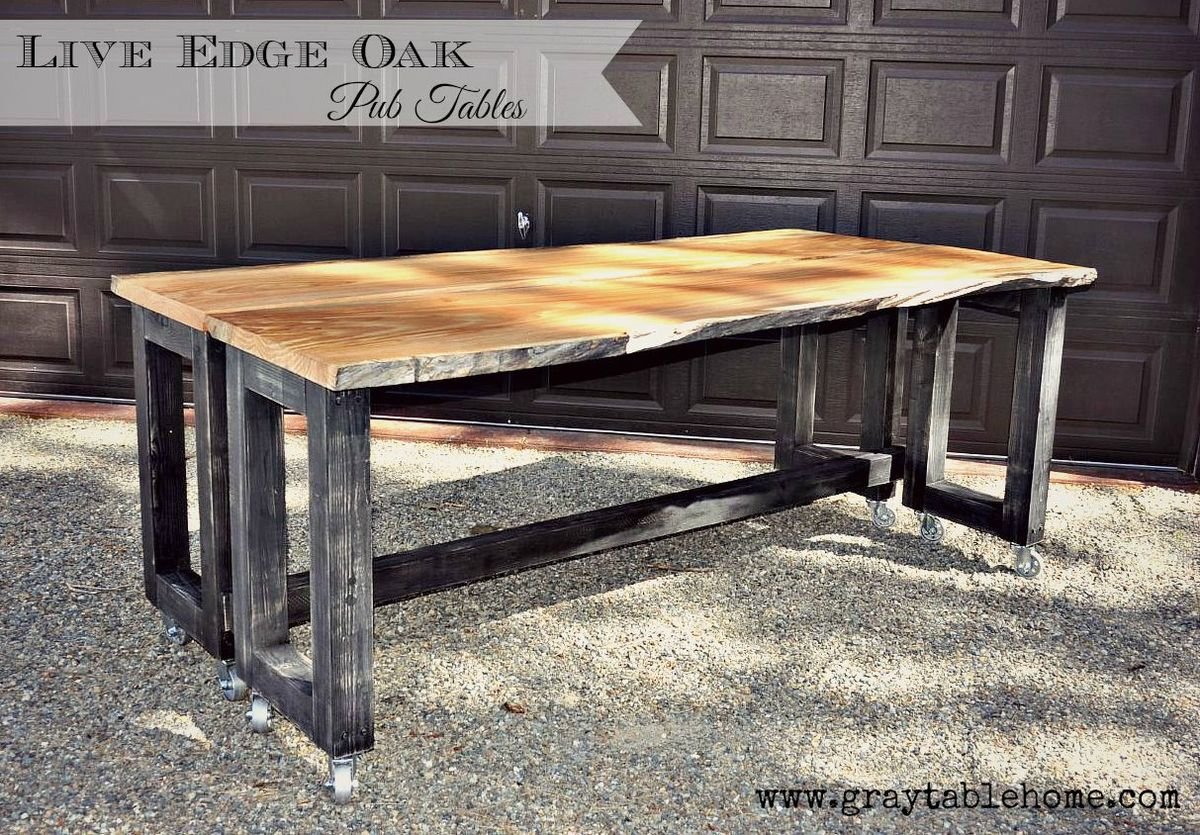
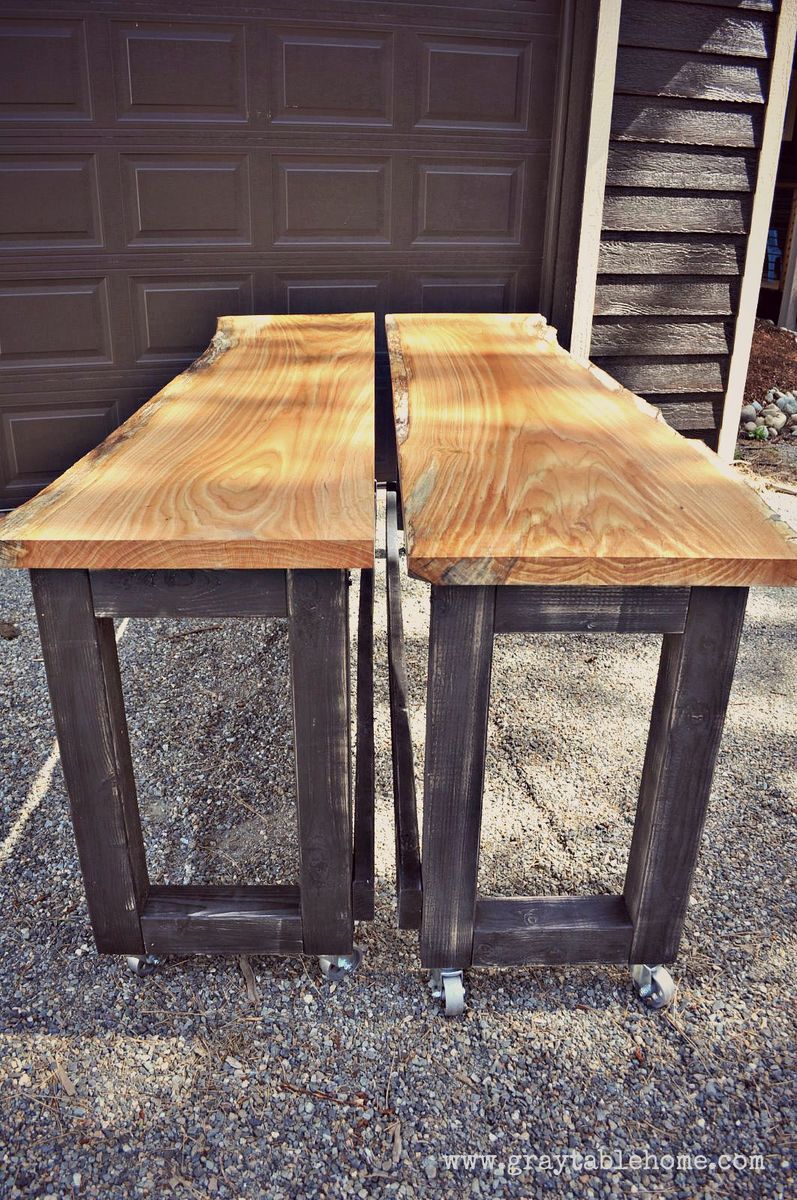
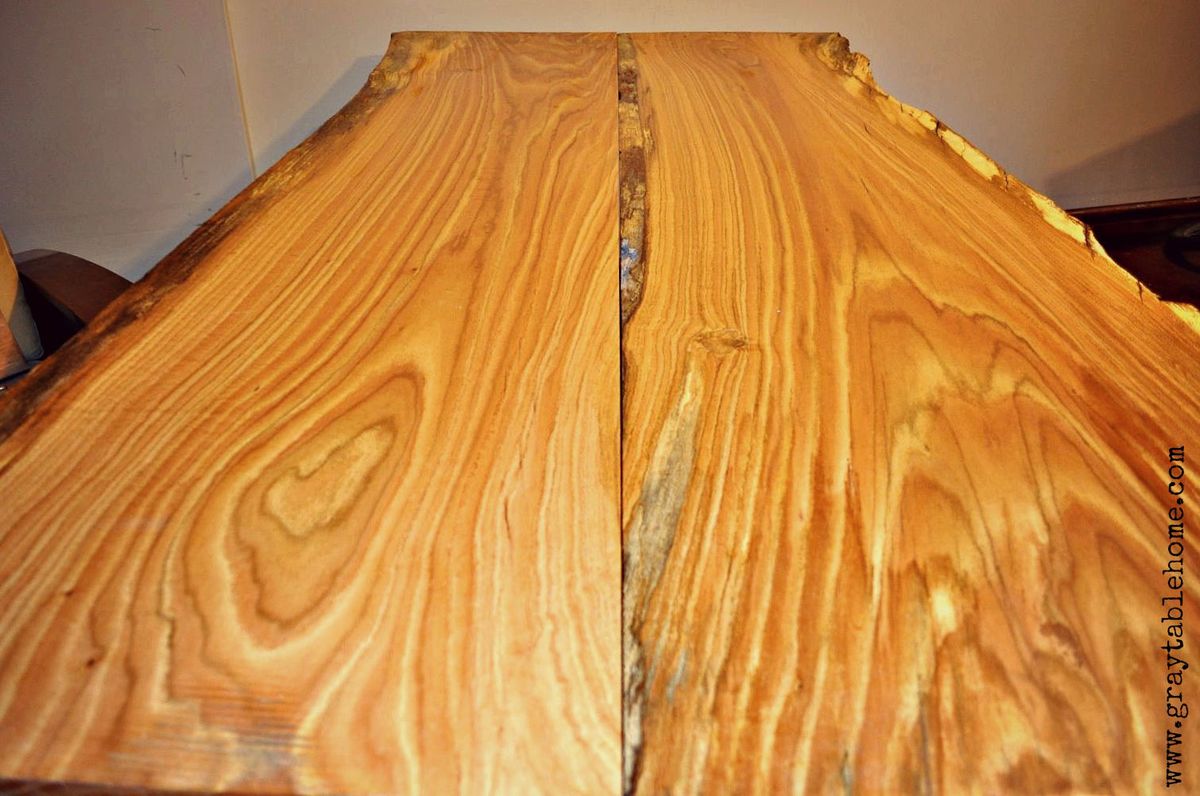
Community Brag Posts

Ledge Lovin'

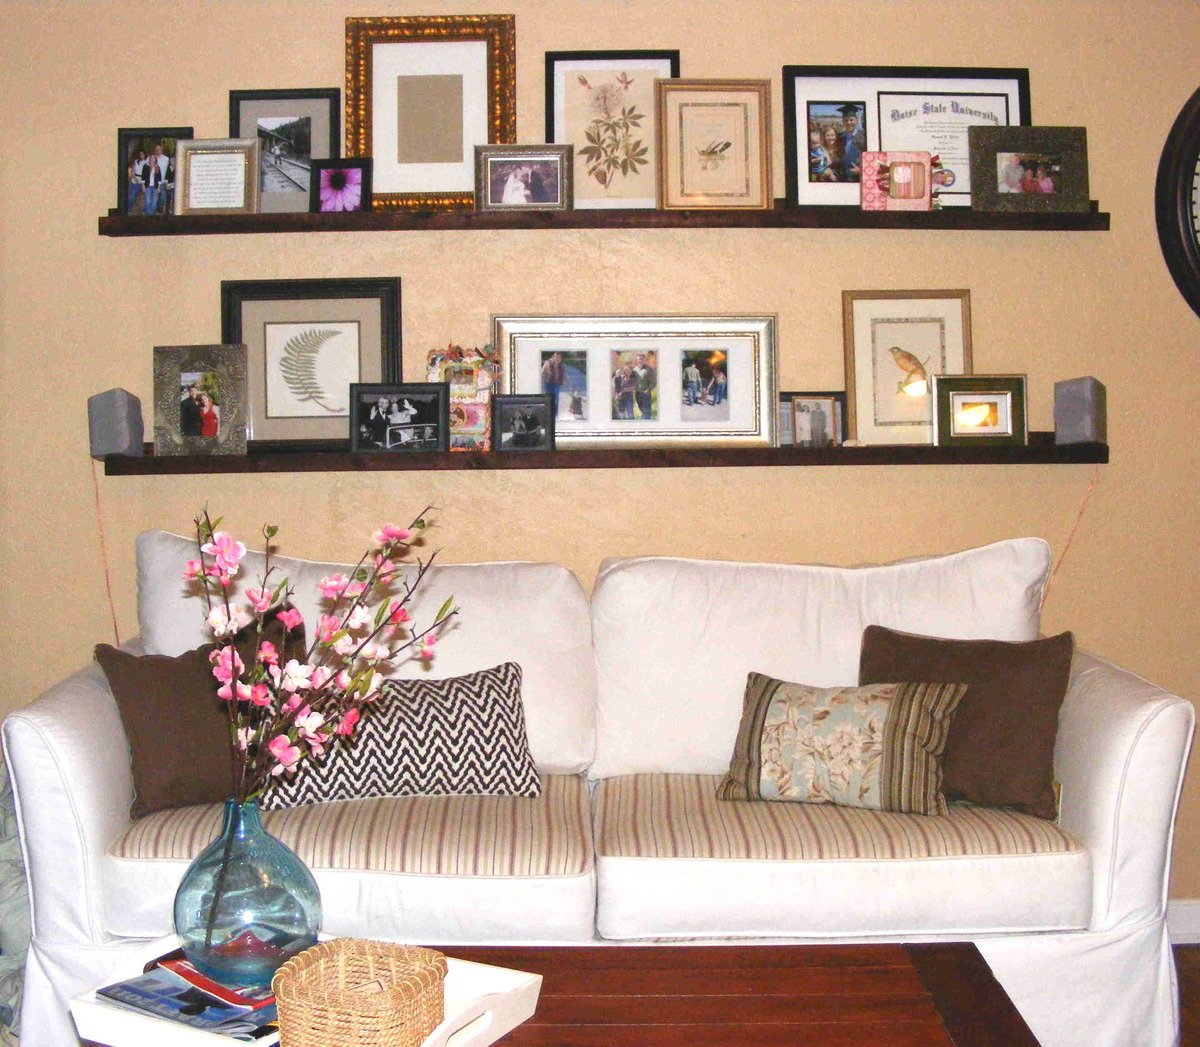
This was my first project from a list of many...so simple, it was perfect for getting started after a long winter's rest.

Thank you Ana for the plan! I really wanted the floating shelves from Pottery Barn, but they were super pricey. I searched out the fancy hardware that PB uses to mount them and it would have cost as much for the mounting hardware alone than to buy them finished from Pottery Barn.

These shelves were an easy solution for the same look, without the hassle of having to build a sleeve to fit over cleats like other more seamless designs.

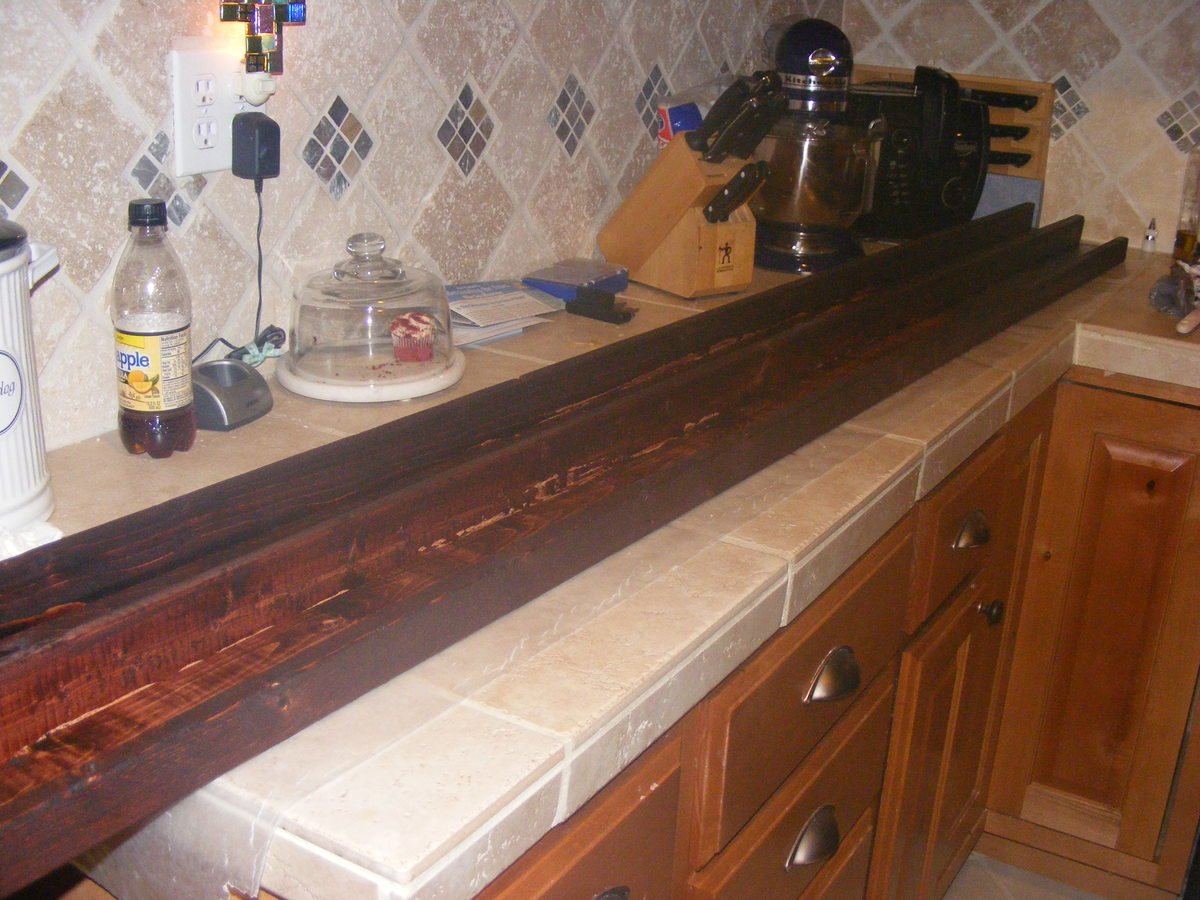
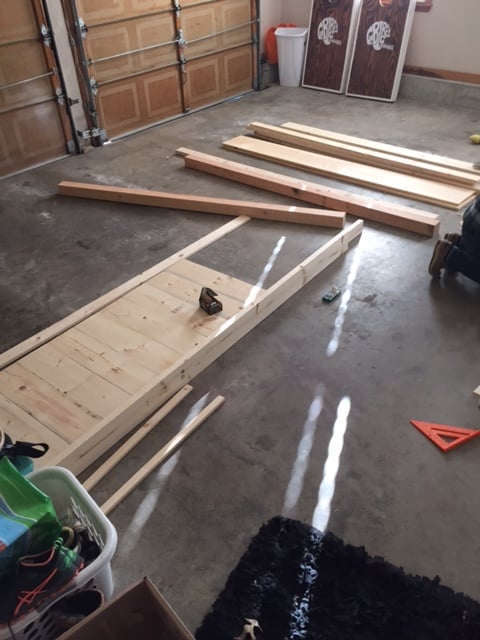
For my ledges, I chose to use 1x3s instead of 1x4s for the rear and base of the ledges. I didn't want them to protrude from the wall as far, nor did I want the rear of the ledges to be as visible (I'm wierded out by the contrast of the thick, dark line behind the pics. I would have chosen 1x2s for the back, but I didn't think it would be sturdy enough and it might be a little trickier to drill. I measured them to be a little smaller than the length of my sofa and they turned out just right. I built them in an hour or two and brought them in and stained them on my kitchen counter ( placed waxed paper underneath). It was February and too cold to do outside.

The best advice I have is to be really choosy about the lumber you buy. The "top choice," as they call it, should be renamed "crappiest choice." I guess that's what you get for cheap pine, right!

It fit just right for my budget and it was worth sifting through to make sure I wasn't getting a piece that was warped or twisted. I live in an old house and I'm sure the walls aren't exactly even (as you can see in the pic, the floor even slants a little to the right) but one of my ledges is not fully flush against the wall on one side because the board bows out a little (or maybe my wall bows in?).

Whatever. I'm thrilled with the look and love how I can display so many pics at one time. I'm thinking I want to put at least 4 pictures in each frame, and rotate them out seasonally. That way my display will go with the season. Yep, I'm a genius like that, hehe.

Built from Plan(s)
Estimated Cost
$15 w/ stain
Estimated Time Investment
An Hour or Two (0-2 Hours)
Finish Used
Red Mahogany stain from Minwax.
Recommended Skill Level
Starter Project

Swing and arbor

Weekend swing project

Recommended Skill Level
Beginner

Comments

Ana White

Tue, 05/07/2019 - 10:42

We don't currently have this plan available, although I'd be happy to draw it with the author's permission.

I have linked a few plans above that could be used to create this plan.  Just make sure you bury the arbor uprights underground on concrete pier posts or similar (like building a fence)

Wood Closet Shelving

Submitted by Anonymous (not verified) on Thu, 01/13/2022 - 09:01

My closet system is four separate units that I butted up together and attached to the wall with a "decorative" 2x4 railing around the entirety of the closet. The main unit looks the closest to the real design but is 8 feet long and 8 feet tall to avoid extra cutting of boards. The smaller unit only has one area for hanging up clothes and is around 5 feet long which is just the length of the wall. I also built a unit for holding sheets and towels and another for my wife's shoes.

The plans are really easy to follow but I would suggest a few things:
-Do stain and boards before cutting; this would have been a nightmare otherwise.
-If you use the metal clothing rods (if I could go back in time I would have used wooden dowels) make sure that you put those in before you attach any boards between the support structures. I ended up having a 35 inch gap instead of a 36 inch gap and it killed my momentum.
-I made mine 8 feet tall because it was less to cut and then re-stain; time wise it probably was a scratch cause I had to build it in place and at the end it was very tight to work in the space.

Built from Plan(s)

Comments

DIY Modern Rustic Outdoor Chair

Submitted by susanshamp on Fri, 07/10/2015 - 15:07

I made this outdoor chair by looking at a variety of plans and designs from Restoration Hardware and other stores. Check out more info on the project on my blog link. Thanks for looking!

Estimated Time Investment
Afternoon Project (3-6 Hours)
Recommended Skill Level
Beginner

Comments

DIY Convertible Bar / Pub Table

Submitted by susanshamp on Thu, 07/30/2015 - 16:38

This rustic modern version of a pub table has multiple uses - it can rest along a wall to make a 16 foot long bar, or rolled together to form an 8 foot long pub table. It is standard counter height 36" and will accomodate seating for 8-10 counter stools. If you don't have live edge wood slabs, you can also use construction lumber (2x8s or 2x12s) to achieve similar dimensions and versatile use in a more cost effective way.

Estimated Cost
Using construction lumber, approx. cost is $50 per table
Estimated Time Investment
Afternoon Project (3-6 Hours)
Finish Used
Poly on slabs, distressed black paint on base
Recommended Skill Level
Beginner

Comments

kev117s

Fri, 07/31/2015 - 04:10

Awesome idea! I think I will have to try for a dining table version of this table. Do you happen to have a way to lock the 2 pieces together? 

Twin Bed With Drawers

I built this twin bed with drawers for my daughter and I LOVE all the storage the drawers provide.  I slightly modified the plans it was based off of--you can find more info and see details from the build on my blog House Becoming Home.

Finish Used
paint
Recommended Skill Level
Intermediate

Comments

Baby Doll Crib and High Chair

Submitted by Anonymous (not verified) on Tue, 12/25/2018 - 20:06

Love getting to watch my daughter play with stuff that i made her.

Recommended Skill Level
Intermediate

Comments

Trofast Toy Storage Solution

Submitted by CassieD on Fri, 09/30/2011 - 17:27

I had been asked a few times for these plans, but as someone else posted a similar one, I'll just stick to a blog post for now and describe my differences. I made this shelving unit January 2010, just after I found out of I was pregnant with my third child, and it's been a lifesaver since then. I desperately needed a toy storage solution (and purging), as shown in the 'eek' kids closet below. I didn't like the shape of triangular Ikea ones, as they spanned more floor space than I cared to give up. Plus, I wanted a place to put *almost* all of my kids toys, so I wanted it to be tall. I'm so glad we did, since we've moved twice (also, 'eek') since than, and it's made packing and unpacking the kids toys super (SUPER) easy. At first, I was afraid that the kids would go crazy and just tear down every bin at once, but it hasn't happened yet. Unlike the other plan that was posted, I used white sliders that ikea sold. I'm not sure if they still sell, as I don't see them online. It cost an additional $24 (they were $1/2), but seemed worth the extra money. I didn't have a router and wasn't particularly confident with our table saw skills. Plus the Ikea version had some really thin areas that made me nervous that it would break easily. I tried to keep it easy and just had to line up and screw the sliders in. Now that I'm a little more confident with a table saw, I'd give the router style a-go. I used two sheets of cabinet grade plywood, each costing about $30. I ripped down some pine boards to cover the front edges, which made the unit look loads nicer. However, I wish I would have used maple, instead of pine as they got dented almost immediately. Not a big deal though. The three shelves were sort of an afterthought, but turned out to be great for puzzles and other type toys. I didn't use backing or cross supports initially, but put some in after we moved. You can see them in the last picture below. The heater in our temporary house caused the slightly-bent sides to become very bent sides. That caused the drawers would spontaneously fall out, which was always quite the shock and disappointment. I put in some supports in the back, which I wish I did initially as it would have made manufacturing easier. Also, If I were to go back, I would put one cross support in the front-middle, as the boards are so tall, it needs something to help maintain the shape in the front. I've found that even in a perfect fitting slider, really heavy buckets would bend just enough to flex out of them to crash... so don't plan on filling one of the large buckets with matchbox cars and sticking it on the top. Regardless, we've learned our lessons, made it work better, and has been a huge success in our house for a while now.

Estimated Time Investment
Weekend Project (10-20 Hours)
Recommended Skill Level
Intermediate

Comments

Supermom77 (not verified)

Sat, 10/01/2011 - 14:22

Great work. Love the colors. Do you have directions on training the kids to put the toys back?

In reply to by Supermom77 (not verified)

CassieD

Tue, 10/04/2011 - 19:42

Haha, I guess a little. Picking up when they aren't motivated is an ongoing battle. However, I did find having a specific place to put items with labels helped a lot, albeit with screaming. Actually the labels would probably be the best motivation of all of it.

The ideal is to have the kids only play with one bin at the time, but with more than one kid, that theory very quickly gets muddled... One child wants to play with one toy and one wants play with another, then "lego houses can't be broken down" and "polly pocket is using those blocks for the house" and so on. So it's more of a end-of-the-day(week/month/year haha) pick-up routine.

However, there seems to be a light at the end of the tunnel. My oldest (almost 6) seems to have caught on that the faster she picks up, the sooner she can move onto other activities besides playing (coloring, playdough, etc.), and is starting to pick up as soon as she's done without us even asking. I think getting an allowance has also helped with that.

That was way more than I thought I was going to comment, but I guess it goes to show you should never ask a Mom her opinion on something, unless your ready for a lecture :)

birdsandsoap

Thu, 10/13/2011 - 21:44

I love that your labels have pictures on them! I thought I should have done that way back when since my children are too young to read. Easy to find and easy to put away. Good job, Mom!

Planter step

I only needed one step up, but replacing the old, cracked, weird, faux concrete step with the new planter box worked great!

Estimated Cost
$86
Estimated Time Investment
Day Project (6-9 Hours)
Finish Used
Solid color exterior stain.
Recommended Skill Level
Intermediate

Comments

Seasonal And Holiday

Farmhouse King Bed

Submitted by gahan22 on Tue, 02/02/2016 - 10:36

This was our first ana white build. Bed build took one Saturday - to finish up took another week or so working nights - most of our time spent on getting the color we wanted and sanding and finishing. Building the 2x4 frame took more time than anticipated as well. We are super happy with how it turned out.

Estimated Cost
$250 for lumber, stain and lumber for bed frame. We used lag screws on the side and 2x4 hangers for the frame which increased costs.
Estimated Time Investment
Week Long Project (20 Hours or More)
Finish Used
Stain is two coats minwax dark mahogany plus classic grey over the top - wiped off and finished with minwax satin poly.
Recommended Skill Level
Starter Project

AWESOME Barbie Dollhouse

Submitted by Jules_F on Tue, 01/03/2012 - 11:36

My husband and I modified the lovely Miss Ana White's dollhouse bookshelf plans to create this awesome Barbie Dollhouse for our 2 and 4 year old daughters to Christmas. They love it, and I love that it will last for years! Thank you Ana, for your amazing talents and your giving heart...your sharing your talents means the world to me and my family!!

Built from Plan(s)
Estimated Time Investment
Weekend Project (10-20 Hours)
Recommended Skill Level
Beginner

Comments

Pam the Goatherd

Tue, 01/03/2012 - 20:50

I want one of those for my Barbie dolls, and I'm 52 years old!!! It's probably a good thing I don't have the room for this or I would make one just for me.

Breakfast bar with reclaimed top

Submitted by Anonymous (not verified) on Sat, 08/24/2019 - 19:36

Our son was moving into his first college apartment. The dining area is small and he thought a breakfast bar would be perfect in this spot. We built the base using Ana’s Counter Height Farmhouse Table for Four plans. We modified the plans to to fit the table top - which was originally the top of a desk. We purchased the desk at our local Habitat Restore. We planed to use the base of the desk for another project- so using the top for this breakfast bar was perfect! The breakfast bar was a perfect fit!

Estimated Cost
$35
Estimated Time Investment
Day Project (6-9 Hours)
Finish Used
Paint and poly on bass. Gunstock stain and poly on top.
Recommended Skill Level
Beginner

Patio Furniture in Progress

Submitted by lbrown on Thu, 01/05/2012 - 13:08

I built six armless and two corner sections of the outdoor sectional but now I need to paint it and make cushions. For more details: http://www.homeandawaywithlisa.com/blog/2012/1/5/patio-furniture-in-pro…

Estimated Time Investment
Weekend Project (10-20 Hours)
Recommended Skill Level
Intermediate

12ft farmhouse bench

I was asked to surprise someone with a 12 ft. bench. After searching and searching I found a plan I really liked, but I felt it just wasn’t enough. I modified the plans to give it a little more of a farmhouse look. I also had to double the size of the original plans.

Estimated Cost
$40
Estimated Time Investment
Afternoon Project (3-6 Hours)
Finish Used
I sanded with 220 grit sandpaper. I then added a coat of pre-stain. After letting it dry, I stained it with English Chestnut from Minwax, and I finished it by putting on a glossy coat of polyurethane.
Recommended Skill Level
Intermediate

16ft x 5ft farm table

Submitted by Anonymous (not verified) on Tue, 10/29/2019 - 18:43

This table was created using a variety of plans. It can seat up to 20 people comfortably. The table top was built with 5 pieces of 2x12. The legs were a combination of 4x4 posts and 2x6s. 2 coats of Minwax Weathered Gray was the stain and then 3 coats of varathane semi-gloss finish. We sanded between each coat of poly.

Estimated Cost
435.00
Estimated Time Investment
Weekend Project (10-20 Hours)
Finish Used
Varathane semi gloss poly
Recommended Skill Level
Intermediate
Seasonal And Holiday

DIY Raised Garden Planter on Casters

Submitted by Anonymous (not verified) on Sat, 07/15/2023 - 09:47

I saw your raised garden box and decided to make it for my wife so she could garden on our deck due to medical problems. She absolutely loved it.

The only thing I did different was I added casters to the legs so it can be moved easily on the deck.

Thank you very much for the idea and plans. We really enjoy them.
 

John Sterzick

Workbench

Submitted by jbknakal on Wed, 04/20/2016 - 05:36

I used melamine for the top and shelf to get a nice surface for working on

Estimated Cost
$70
Estimated Time Investment
Afternoon Project (3-6 Hours)
Recommended Skill Level
Starter Project

Glass Top Display Side Table

Submitted by Anonymous (not verified) on Tue, 09/19/2023 - 10:58

I made two of these side tables for my niece and her new husband as a house warming gift. I dropped the top down 1.25 inch and added a glass top so she could display items. They are going to be a surprise, so I left them bare. She can stain or paint them whatever color she wishes.

Donna Cox

Comments

Back