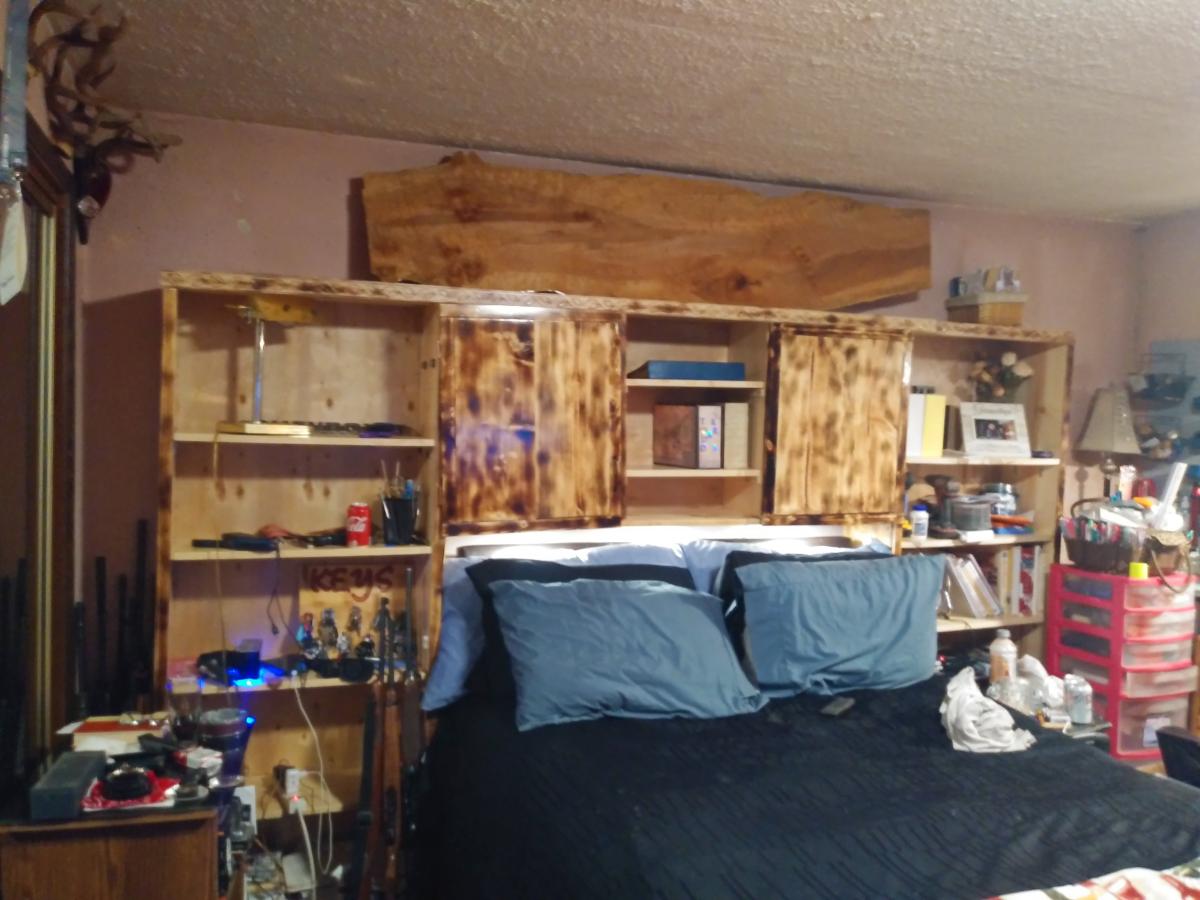
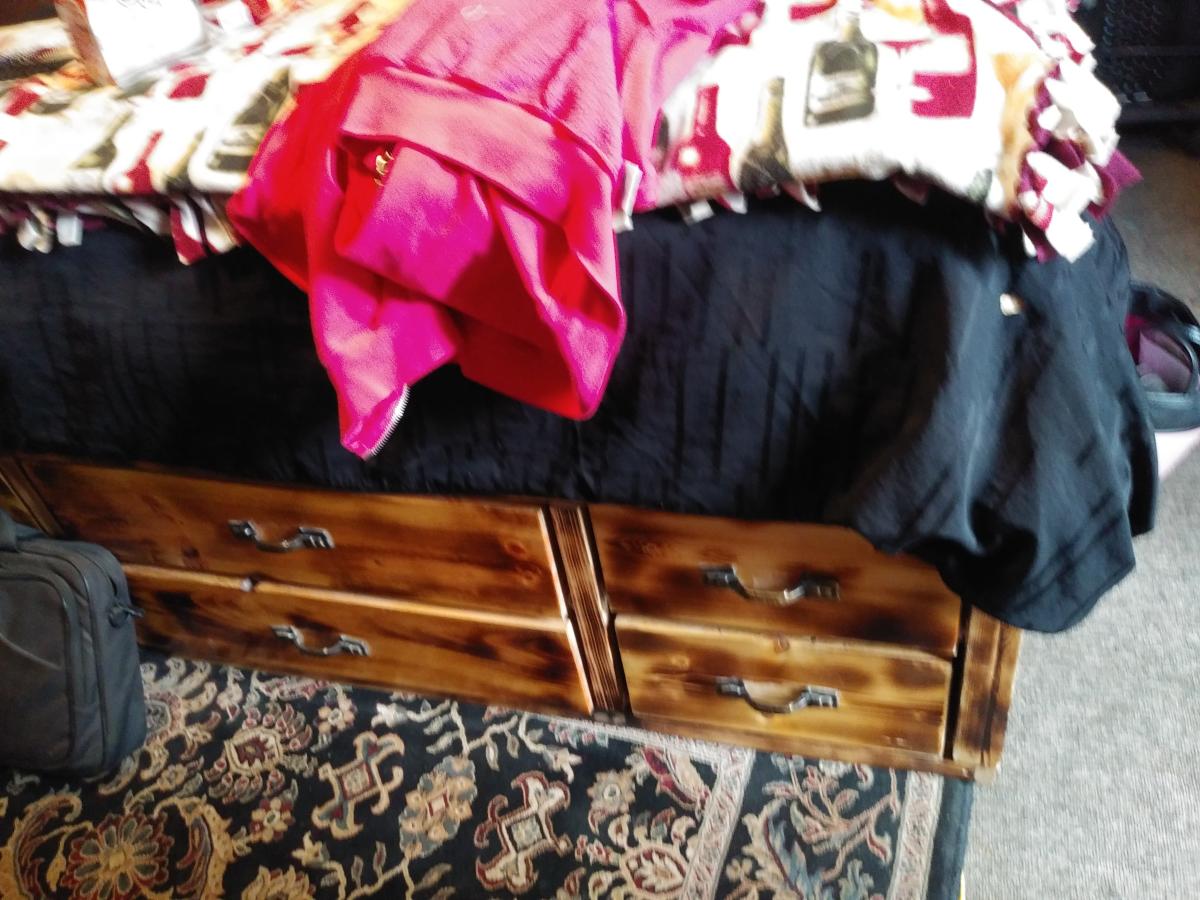
Bed+ entertainment center
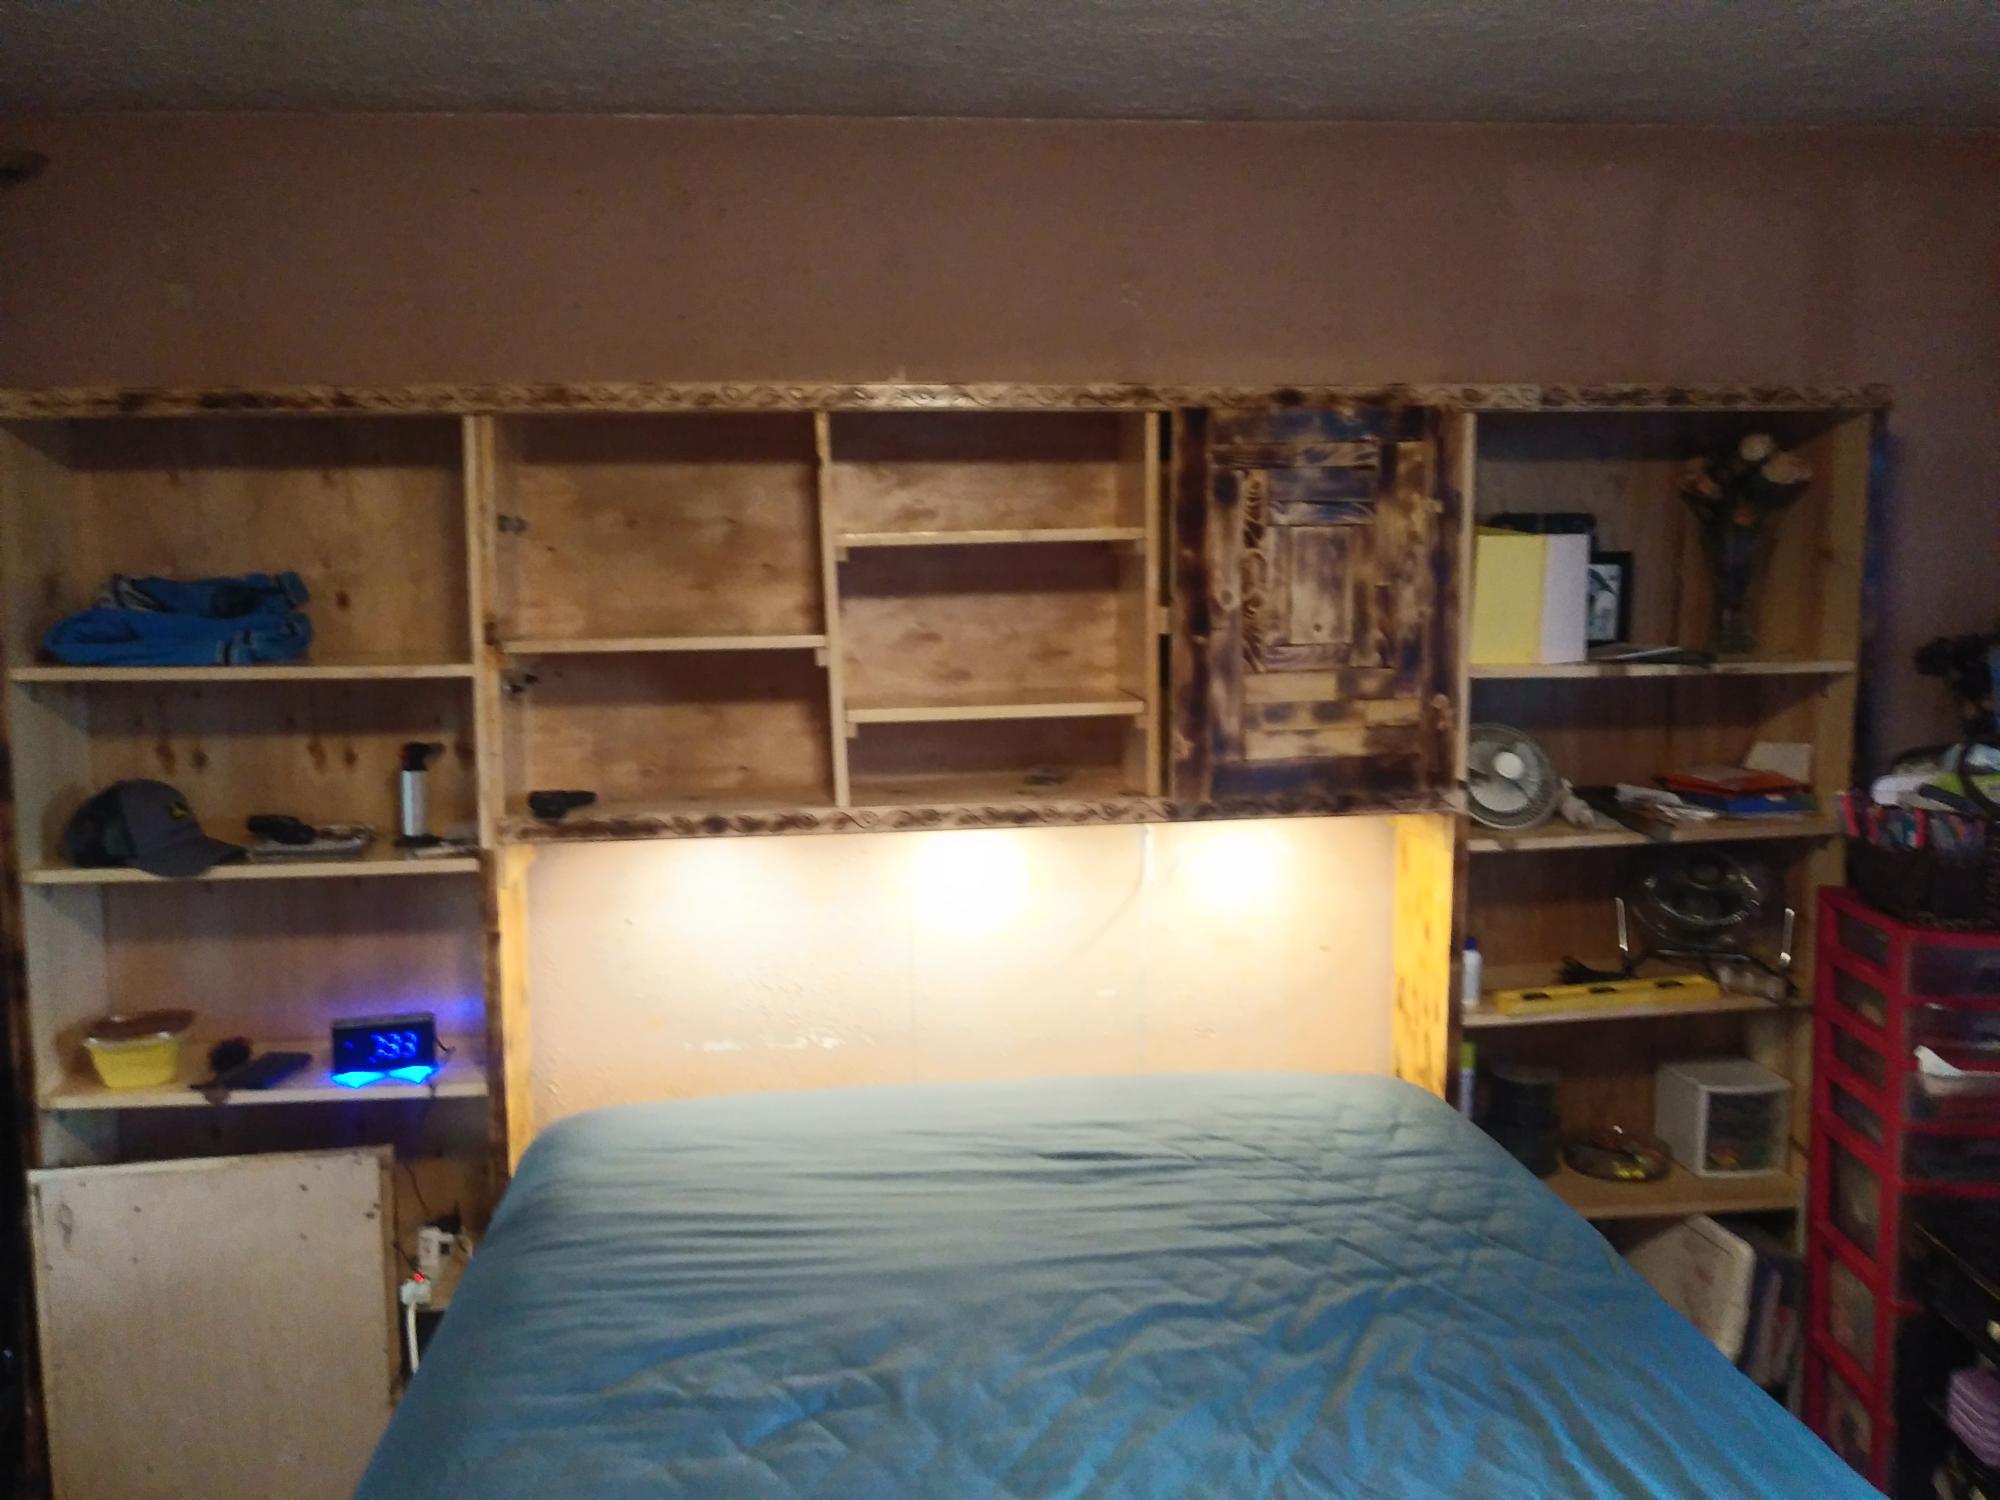
This is your storage bed and entertainment o r media center flipped upside down. I am self taught thanks to you. Thank you for making it easy to do and follow!
Built from Plan(s)
This is your storage bed and entertainment o r media center flipped upside down. I am self taught thanks to you. Thank you for making it easy to do and follow!
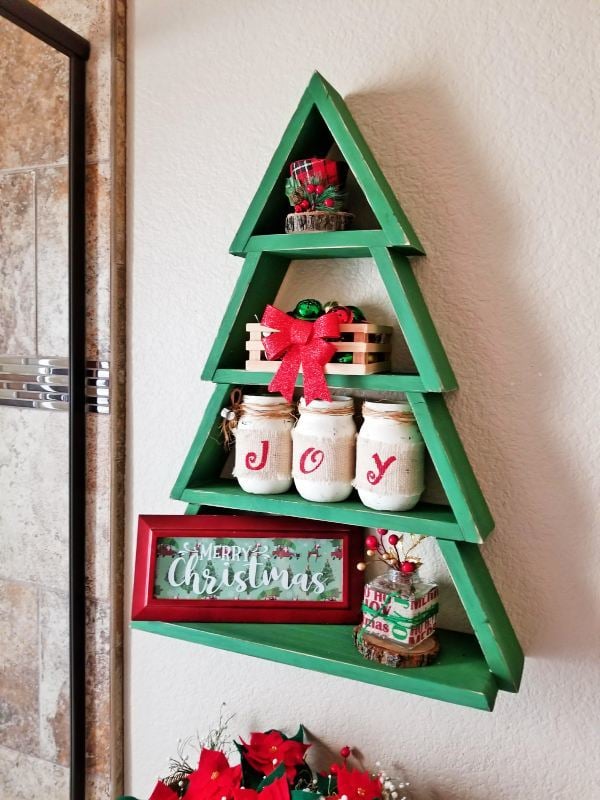
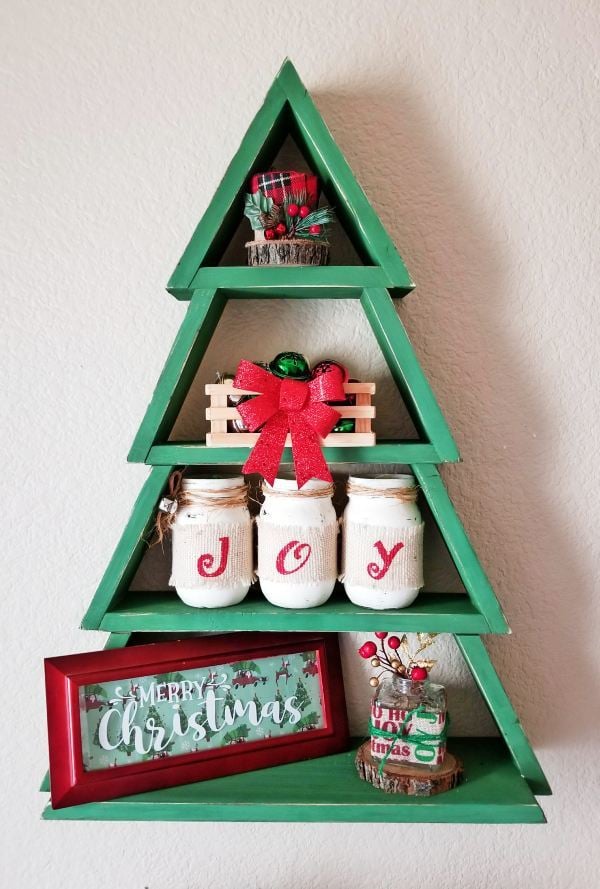
I made this easy and cheap Christmas tree wall shelf to add character to my guest bathroom. I went through all my wood stash and found enough wood to build this project with!
Make sure to pay attention to the long and short point directions in Ana's plans. Since I was hanging this above my toilet, I didn't need the hooks so I just omitted the bottom piece all together.
I ended up using wood glue and a nail gun to put everything together so it went really quickly.
I painted the whole tree with green chalk paint and distressed the edges with sandpaper. Hung it up with L brackets in a stud.
Fun and easy project! Thank you Ana!!

Mon, 11/05/2018 - 11:27
Super cute! I love the wider bottom shelf and the green paint!

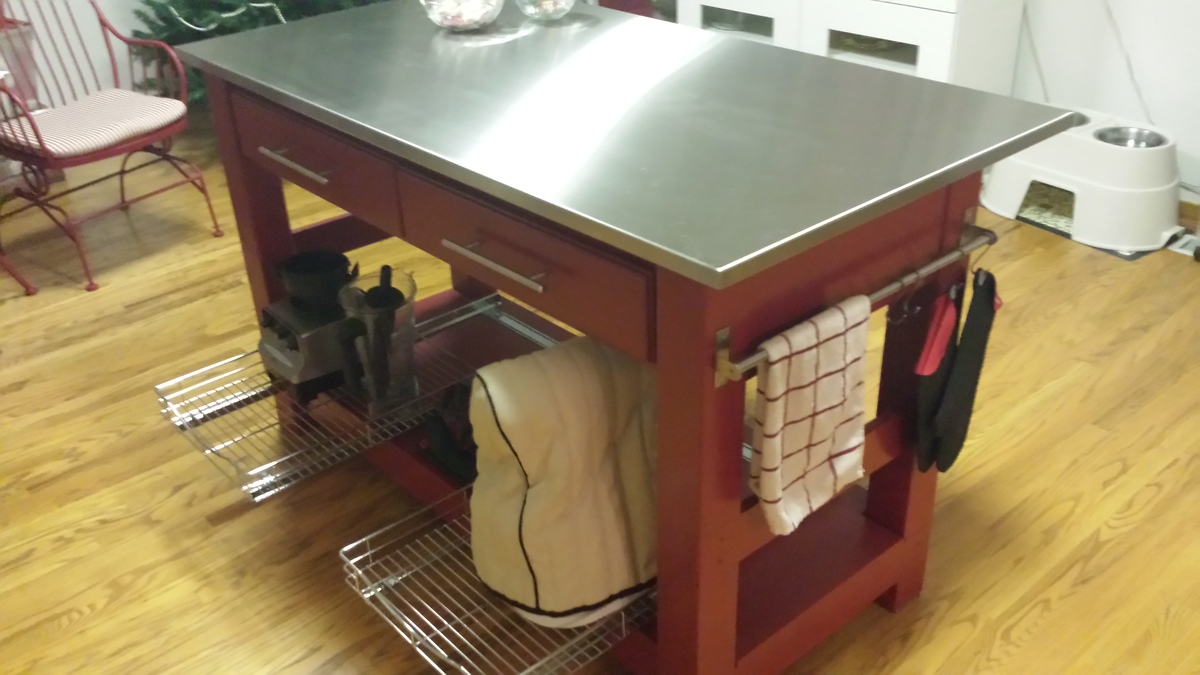
I really do enjoy my island. It has great storage and the added prep space has been wonderful. With the added counter space It has aloud me to make breads and pizzas and with the stainless steel top it is a breeze to clean. I really have enjoyed Ana's website with all the great plans and tips.
I enjoyed making this project! My wife loves the table and benches.
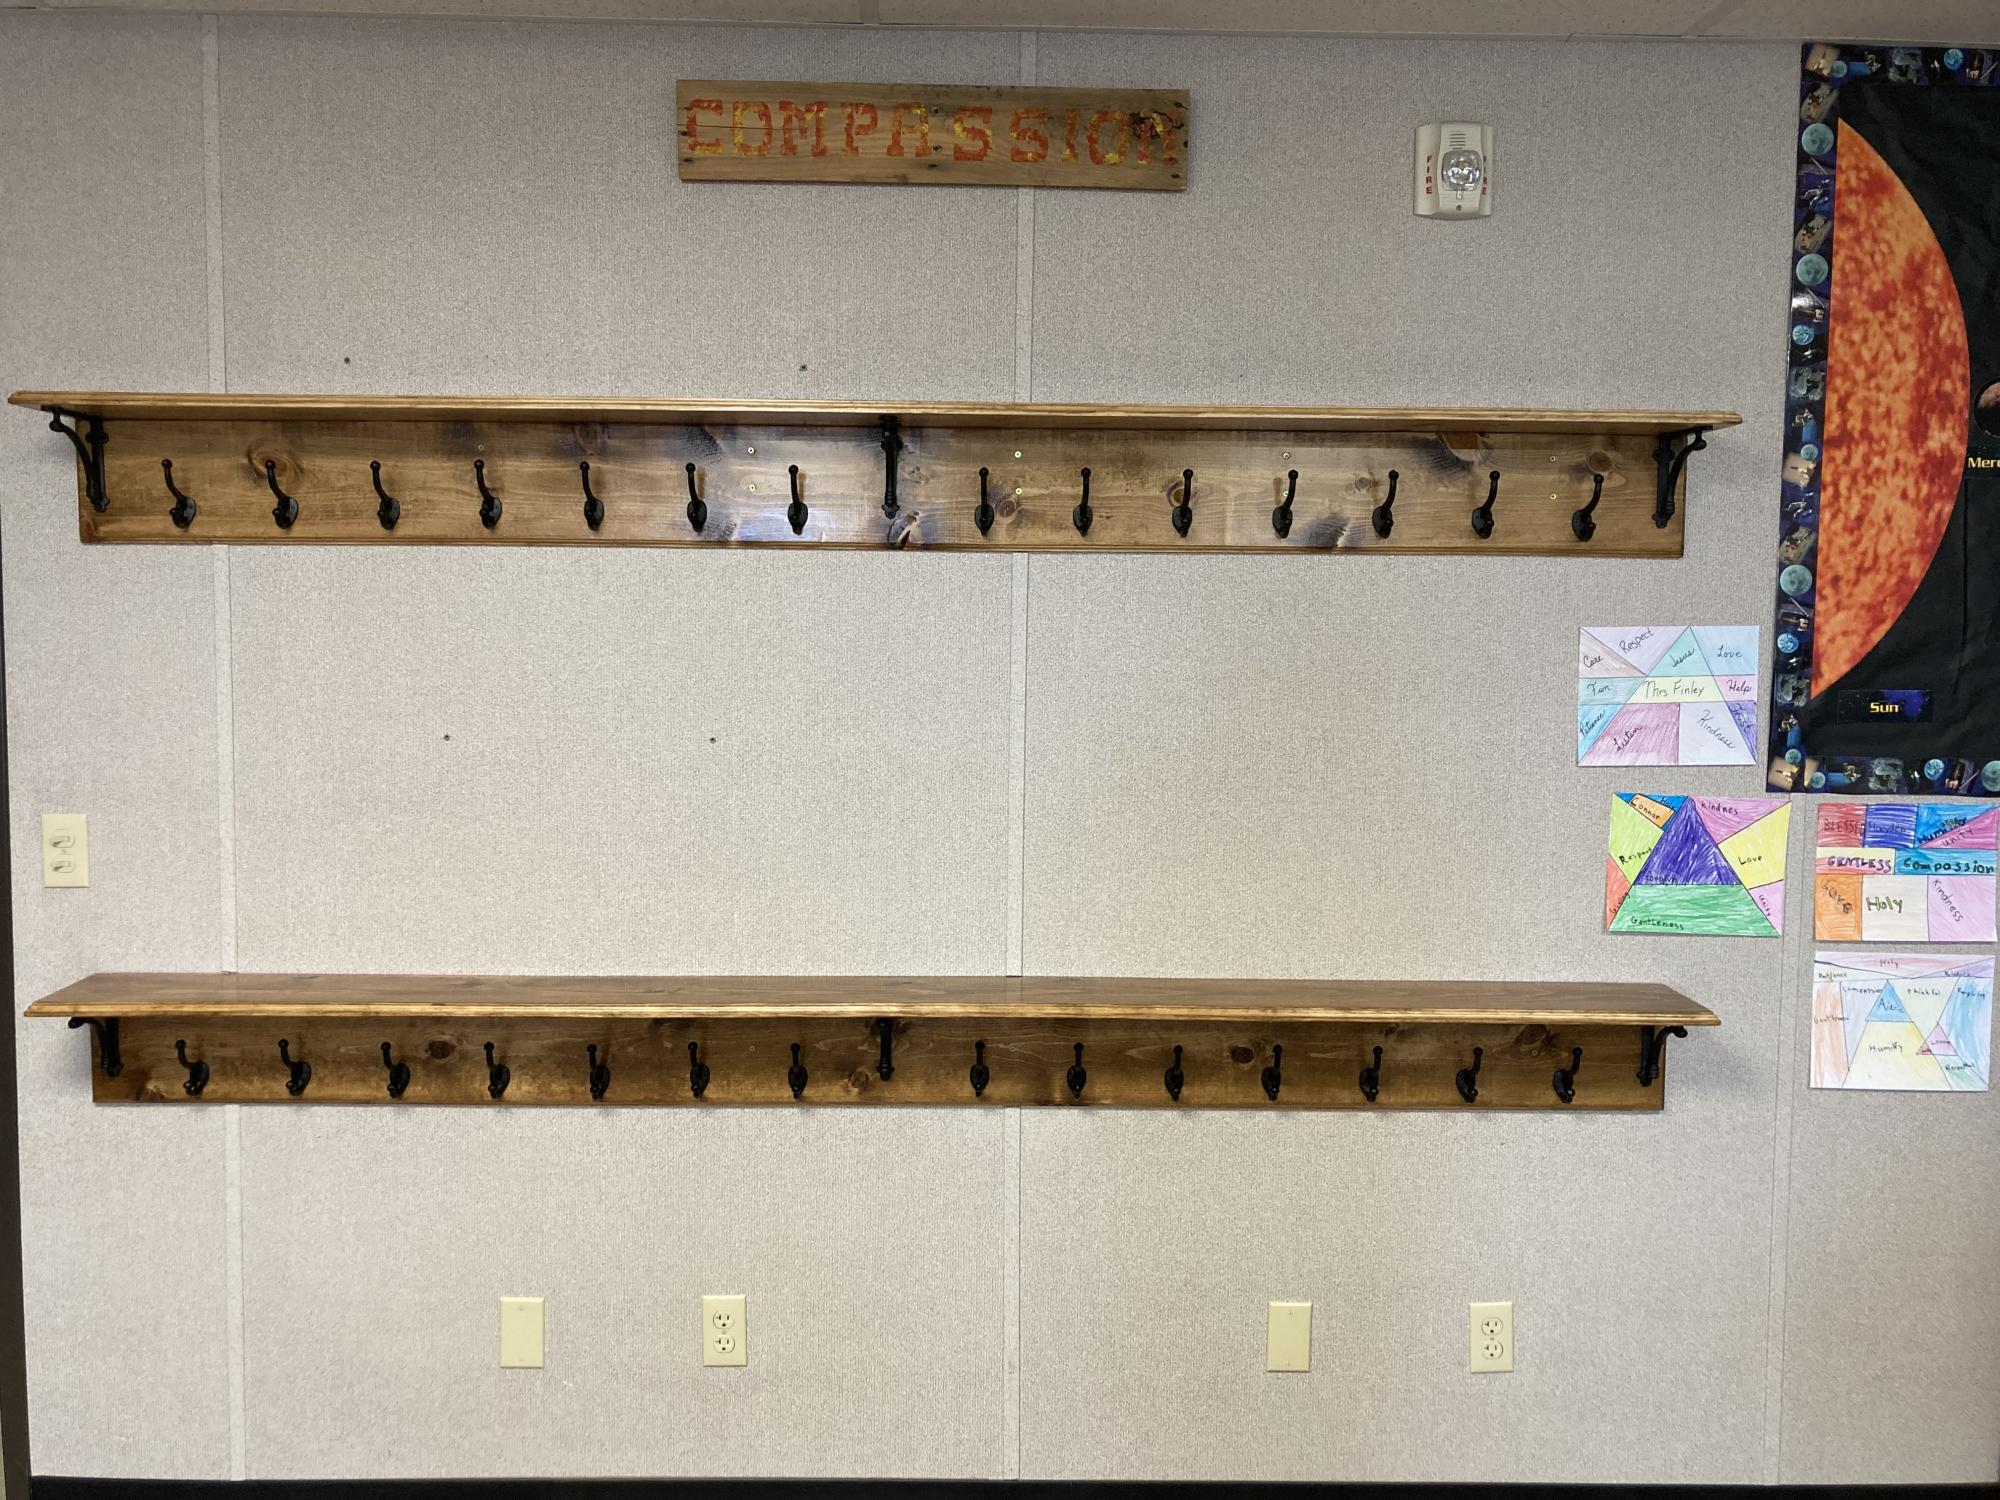
Dear Ana,
I was able to change classrooms and needed a place for my students to hang their backpack, lunch, coat, and snow gear. I used a combination of your ideas and created this. Each shelf is 8ft. Long with cast iron supports and coat hooks. The zinc hooks were too thin and we could bend them. The wood was sanded, stained with golden oak, and routed out the edges. I pocket holed every 8 inches and joined wall board to the shelf. The coat hooks are 6 inches apart. I cannot wait for the class to see it on Monday. Thank you Ana for all the ideas and making me feel comfortable to create on my own.
Blessings,
Jennifer
Sat, 08/20/2022 - 21:01
Thank you for sharing your projects, no doubt everybody is going to appreciate what you've built and use it everyday!
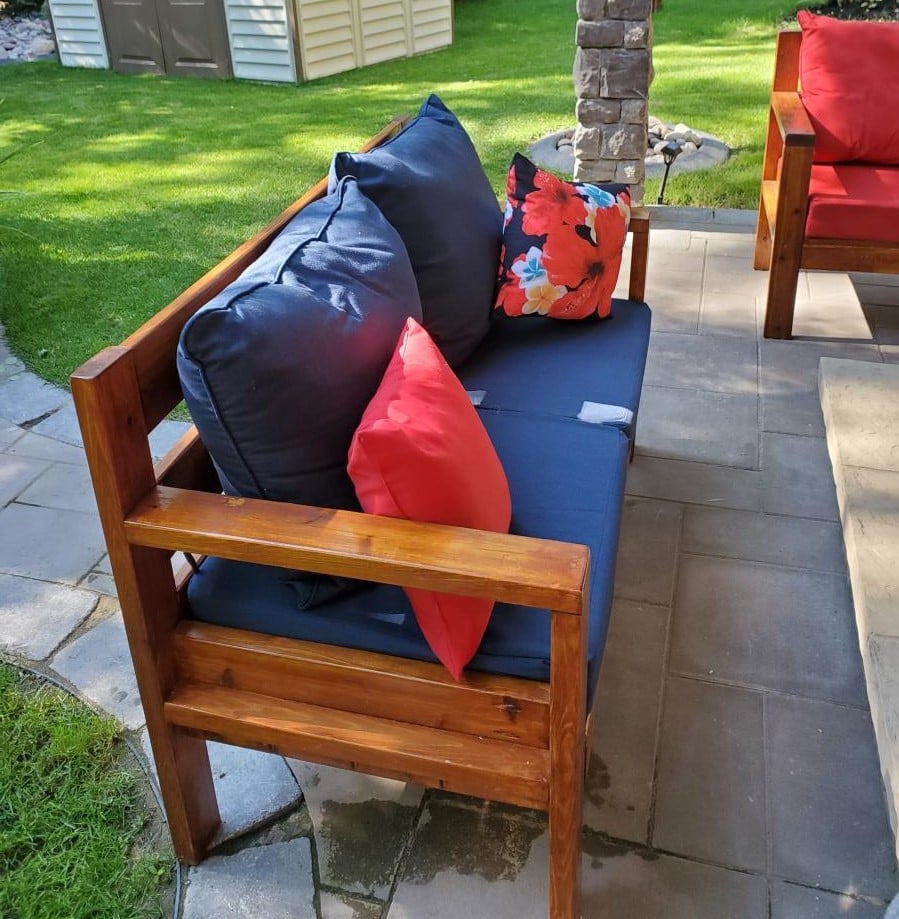
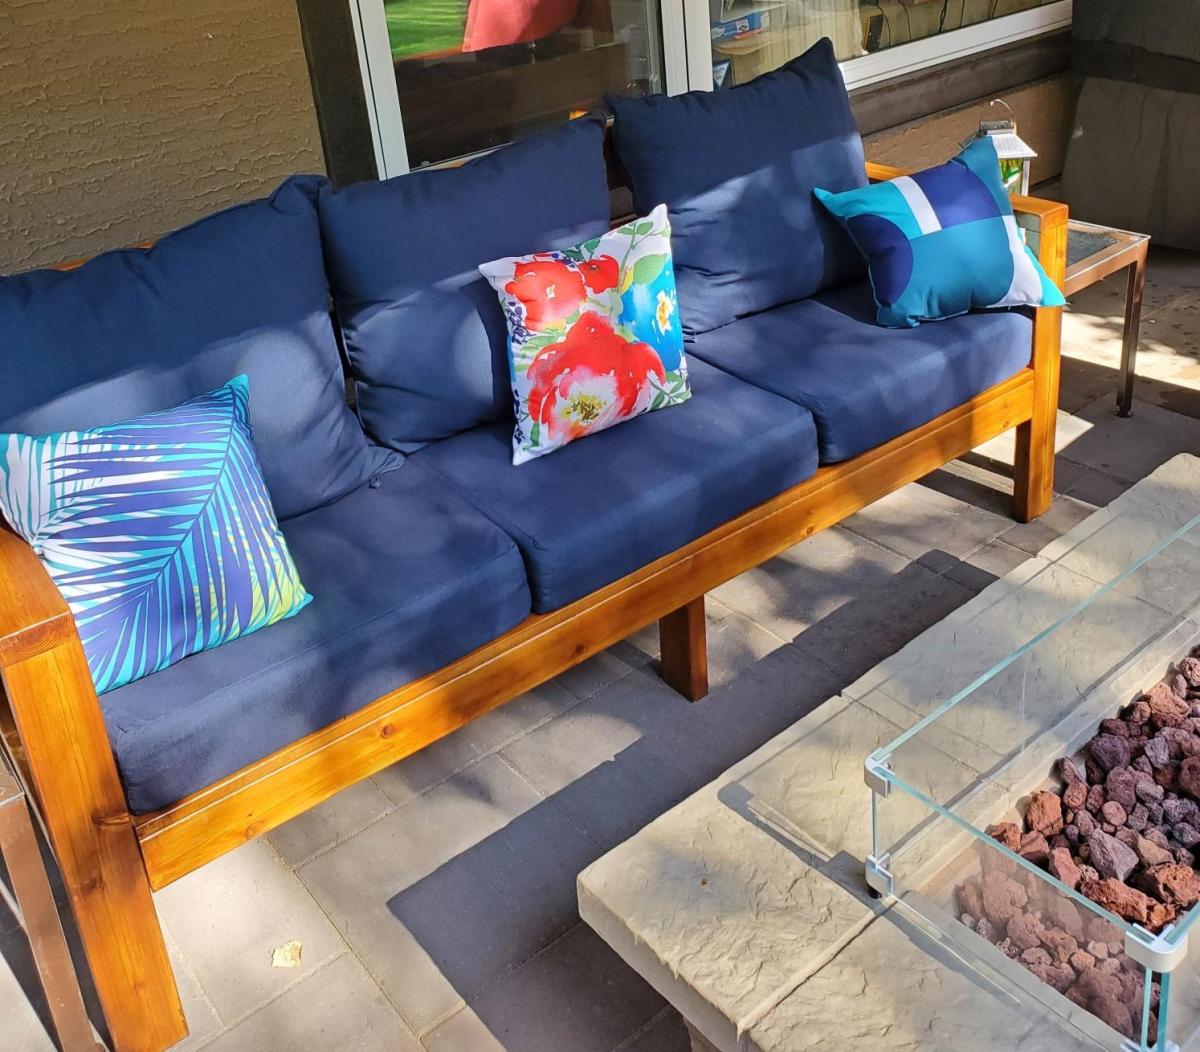
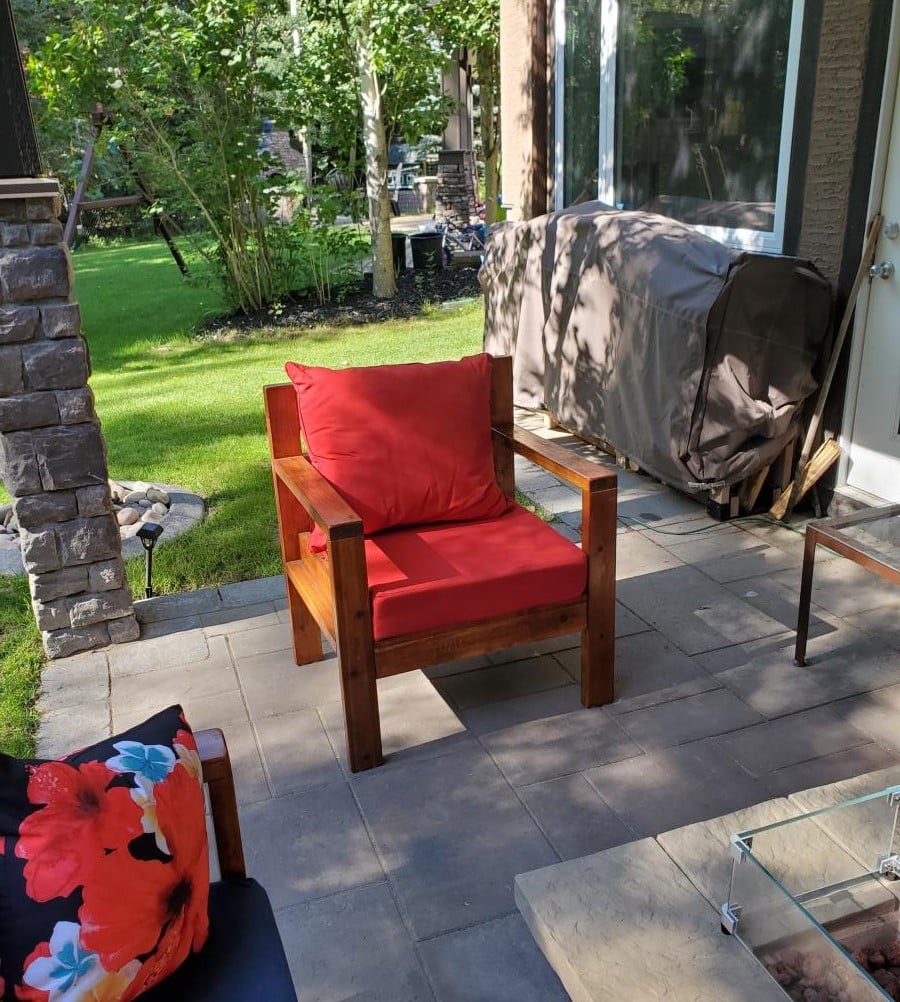
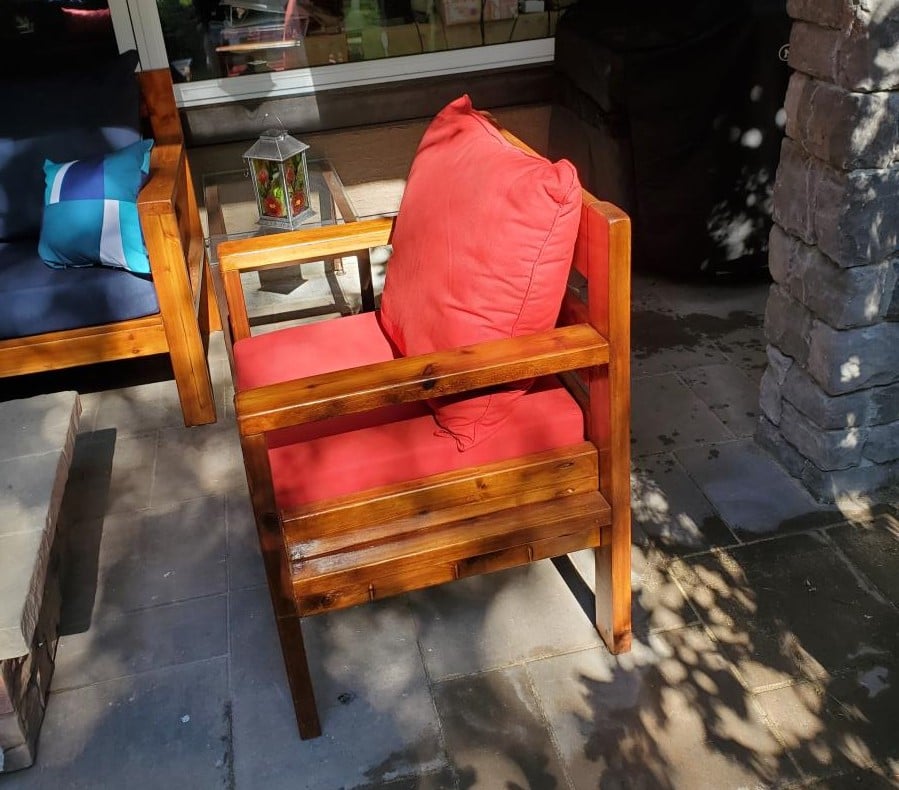
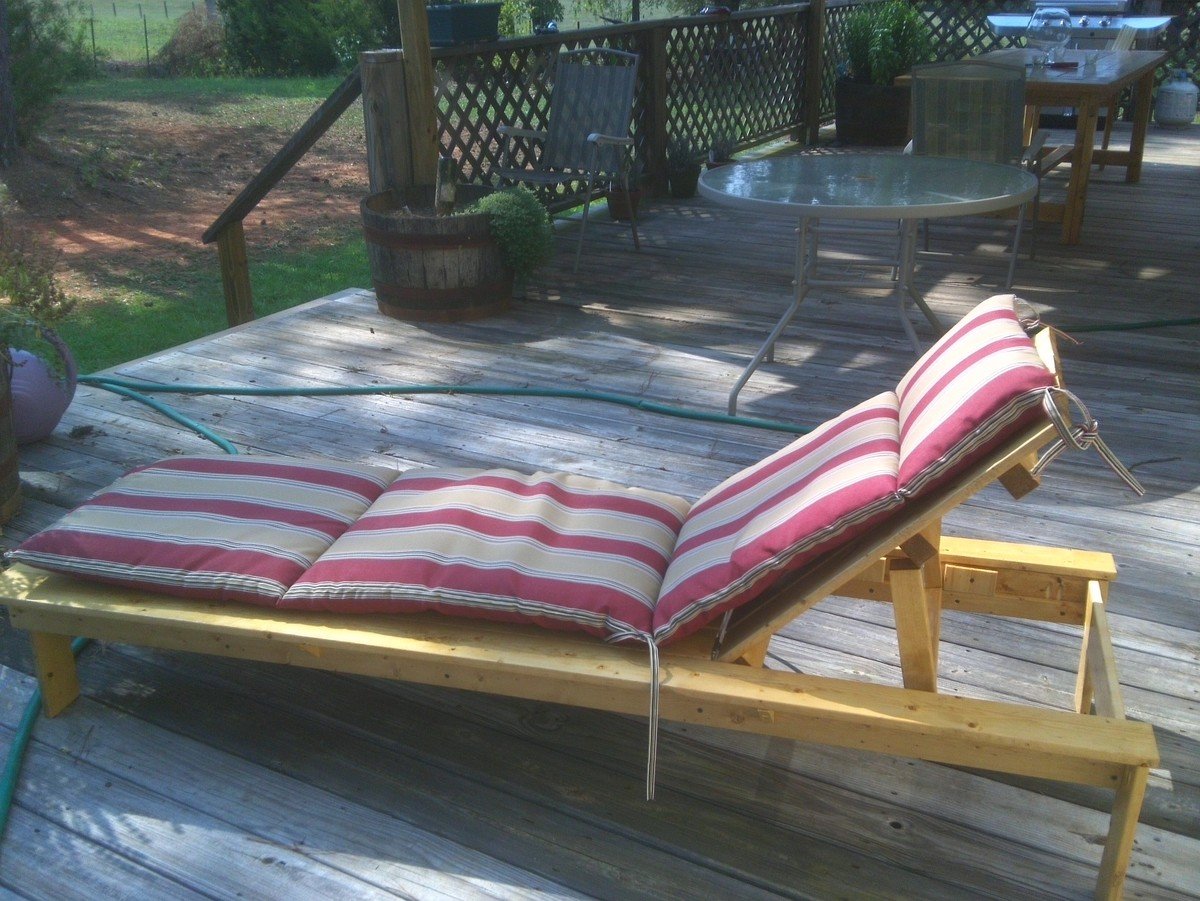
Based on Ana's 2x4 patio furniture blog and plan wirh some modifications.
Built all in cedar.
Seats are 1x6.
Seat back height is at 36"
Backs are 1x6 .
Cushions are from Home Depot:
Bozanto Sunbrella Deep Seating Cushions
24" x 24" seats with 6" thickness
Back cushions are at least 6" thick.
2200 UV hour fade life.
Aceent cushion are from Lowes.
Stain is Cabot Gold Sunlit Walnut put on with 2 coats.
Covers are custom ordered from Covers and all. Www.coversandall.ca
Estimated all in cost lumber, supplies, stain, covers - $2,500.
Much cheaper less than half than the retail cost for similar quality patio furniture.
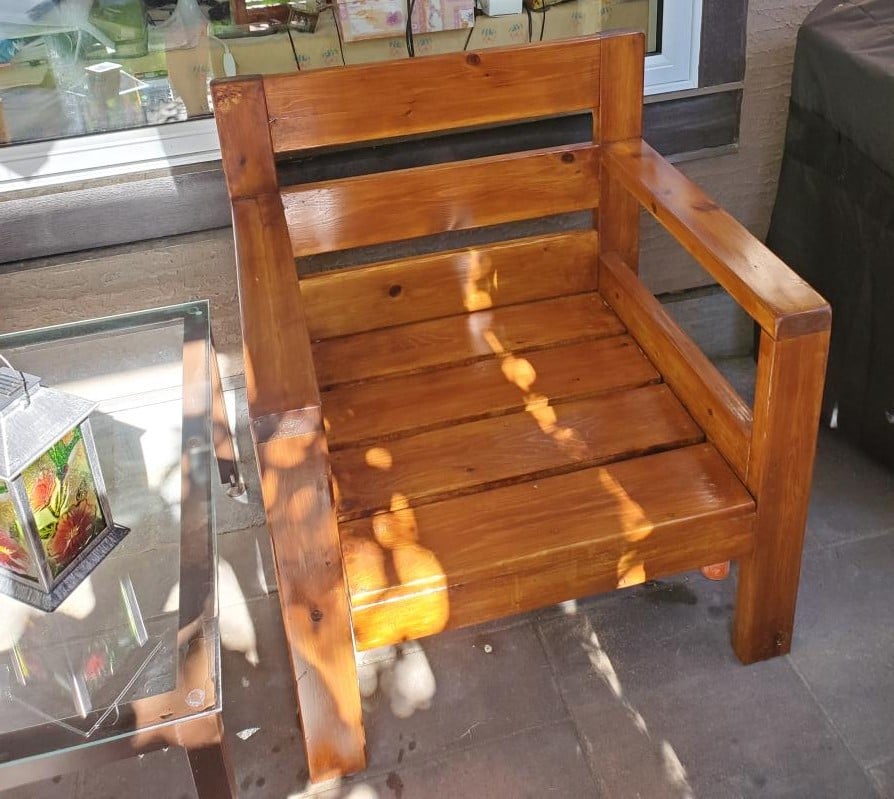
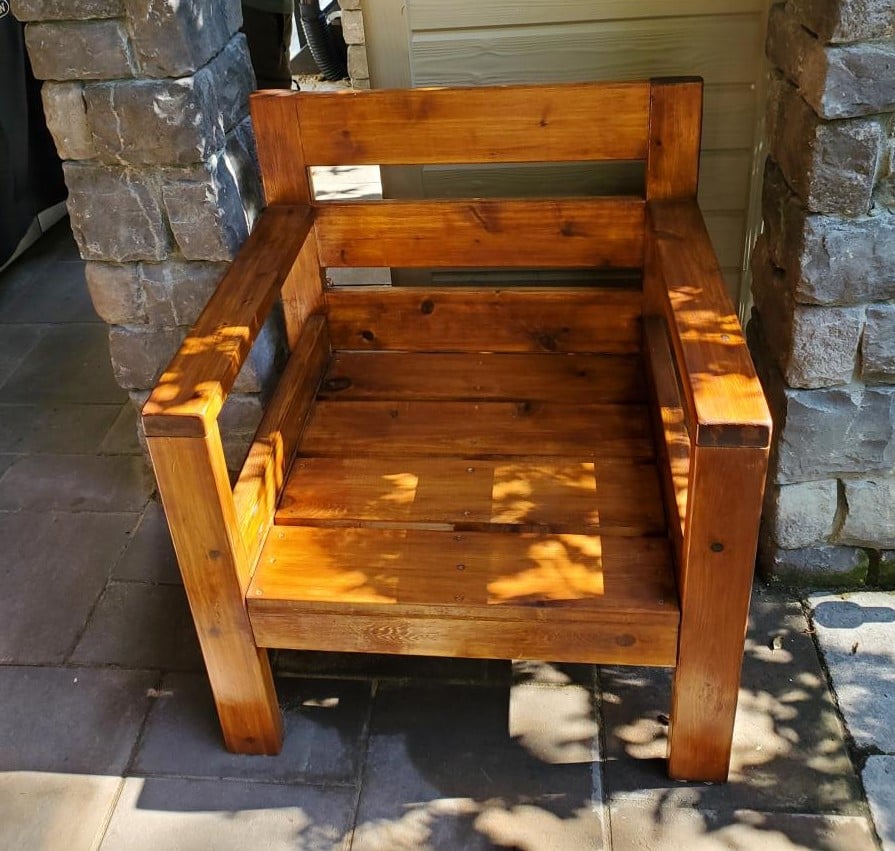
This was my second project from the site. I wanted somewhere to read my book on the back deck. This chair is perfect. When I get tired of reading I can lay it down and take a nap. It is very sturdy and easy to put together. I do recommend using pocket holes to assemble it. I found it much easier.
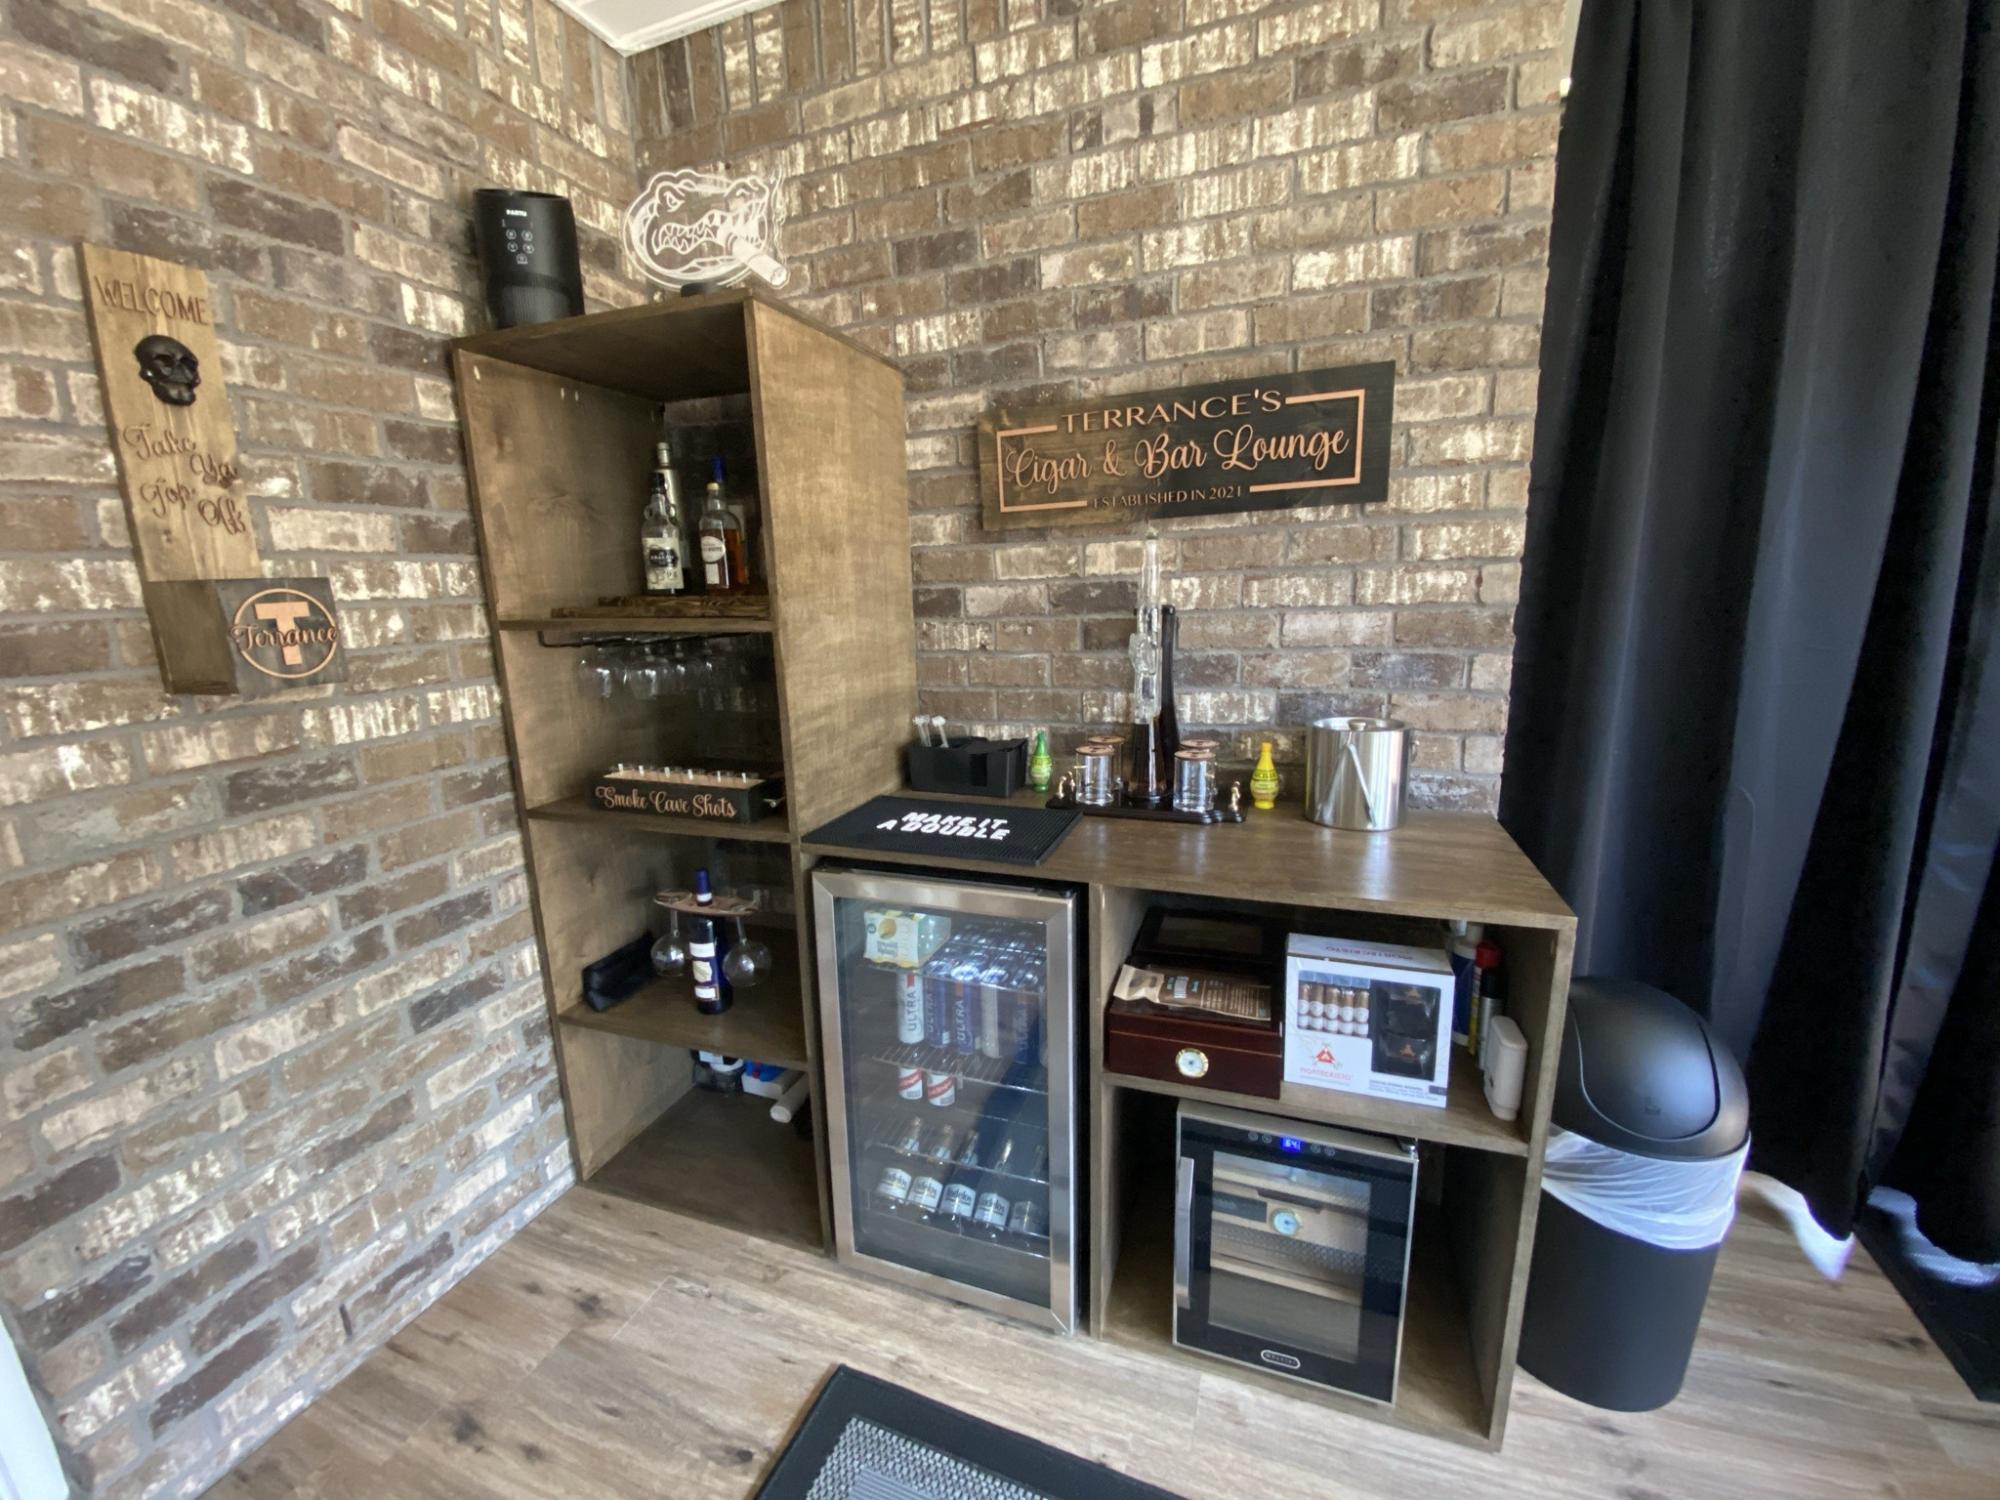
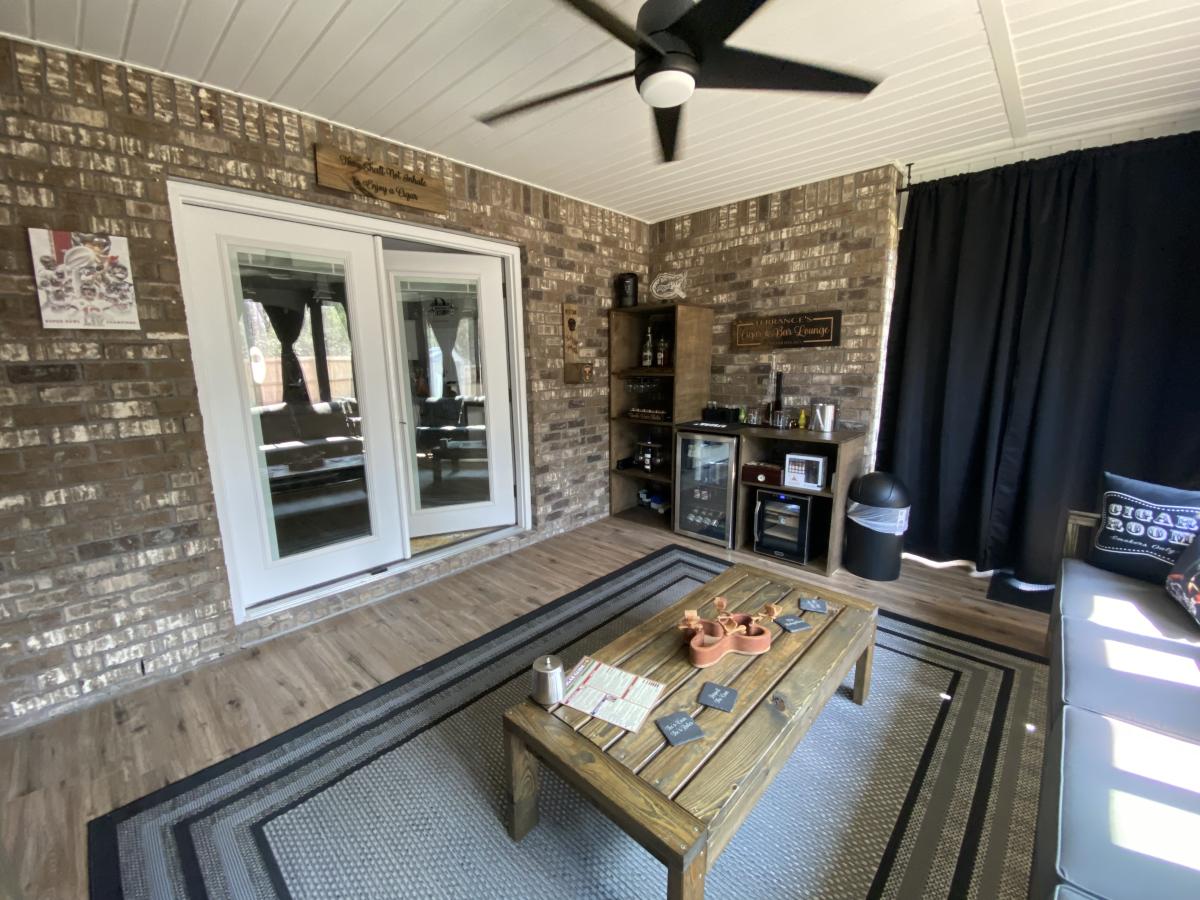
Resized the sectional to fit on our patio for my husband’s man cave! Also built the table and bar area using Ana White’s wood ordering system.
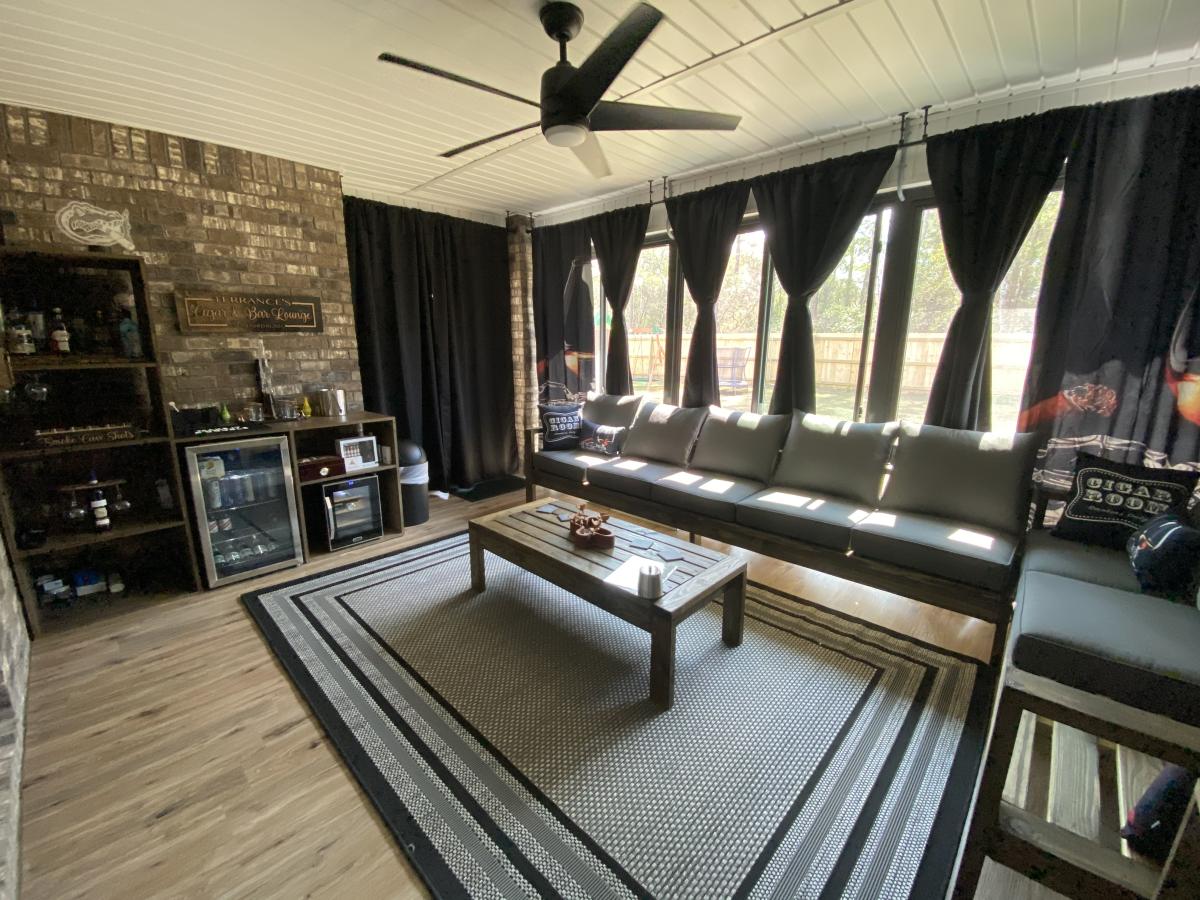
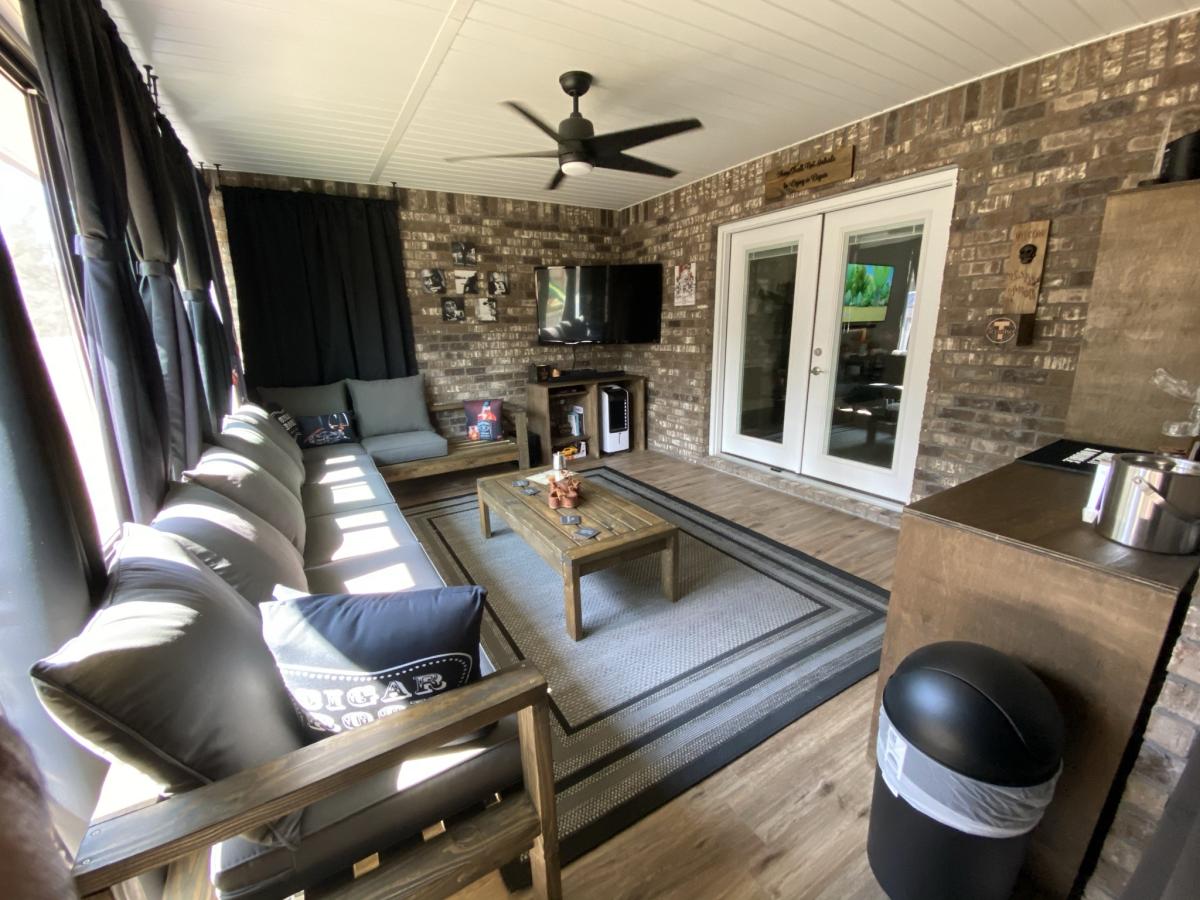
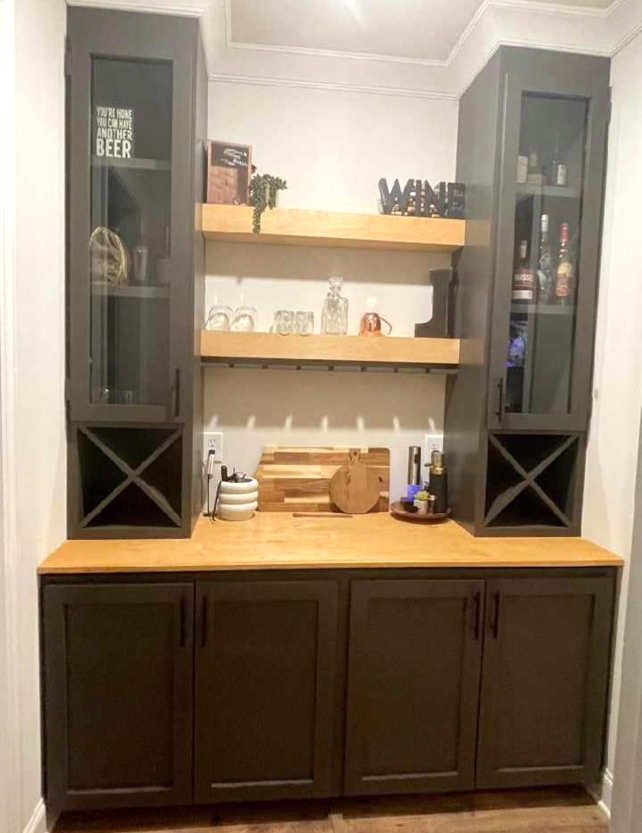
DIY Dry Bar by Brian Pettibone
Plans linked to help others achieve a similar build
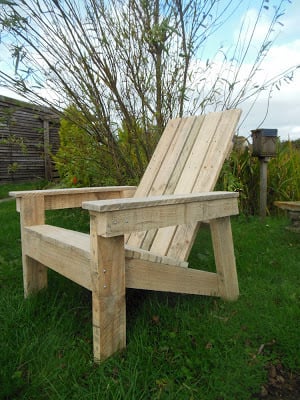
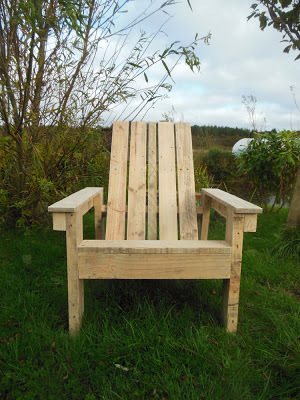
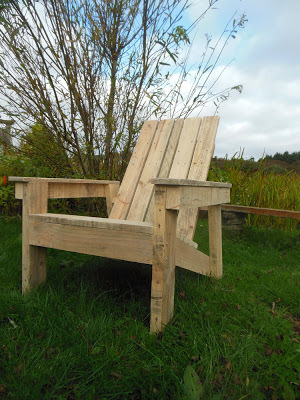
I've wanted to have a go at an Adirondack chair for ages but never had the wood available - I refuse to buy wood for ANY project so I had to wait until some came along. We had heaps of pallets delivered FOC so I dismantled them and had the perfect sized wood for the chair.
Because I used pallet wood there's the odd nail hole etc but each piece was sanded down with various grit strengths until I had the wood as good as it was possible to get it.
I did have trouble with the plans because some of the dimensions did not fit for the size of wood they stated to use but no one else has said they had any problems so I'm guessing the issue was down to me and not the plans. The main sticking point for me was that I had to use a 2" batten in the centre back because the dimensions given for the stringers did not allow for the right number of 4" wood to be used.
This project was the practice run though and so I will make some more with a few minor adjustments to the dimensions. I would also recommend counter sinking the screws (I pre drilled also which makes for an easier finish) and next time I will give each piece one coat of paint/stain/finish before assembling - these images show my unpainted chair and painting in between all the slats was tedious.
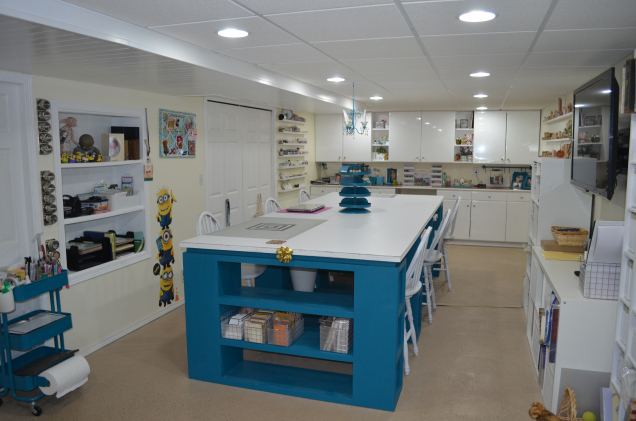
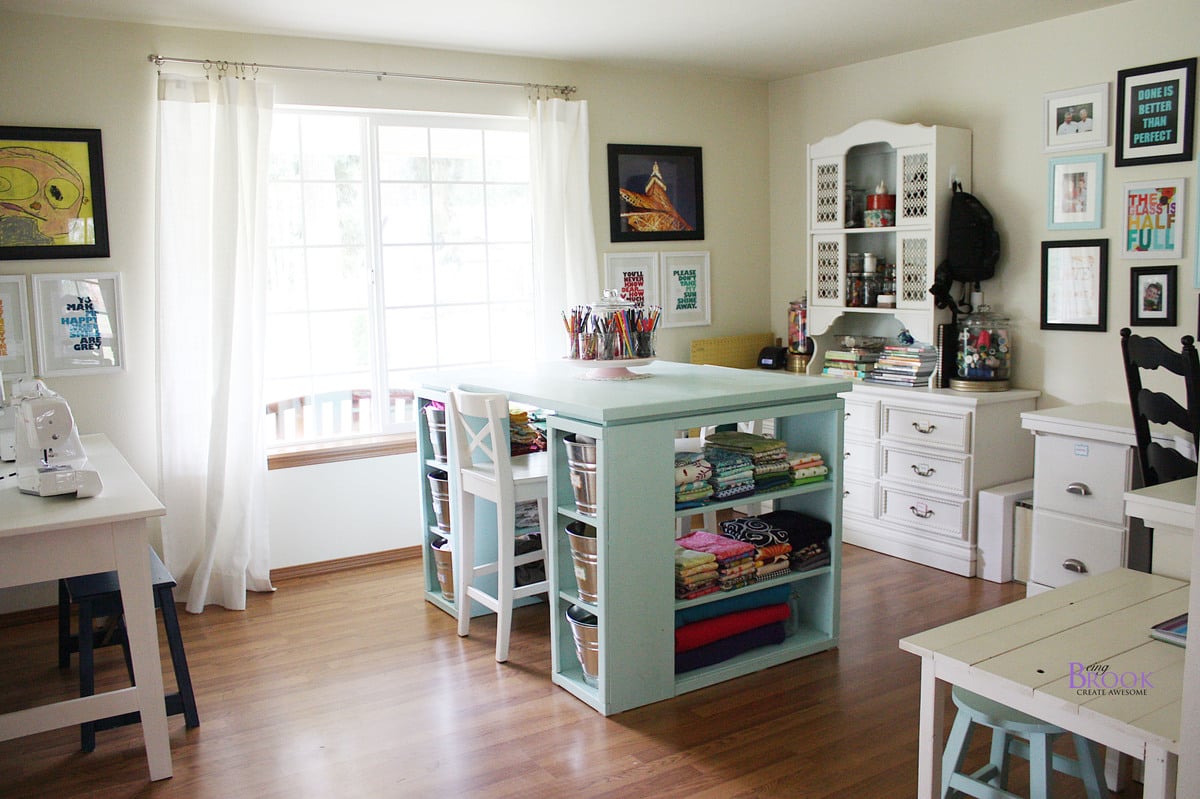
My husband used the directions for the Modern Craft Table as a guide, only making it MUCH bigger to fit in my craft room. It came out beautifully!
More photos and details at https://inkitall.wordpress.com/2016/01/03/my-craft-room/
Not as easy at it seems... but also, this was one of my very first woodworking projects.
Tue, 06/11/2019 - 09:25
This is an amazing first project! I love how it fits perfect in your space and the color. What a beautiful floor too.
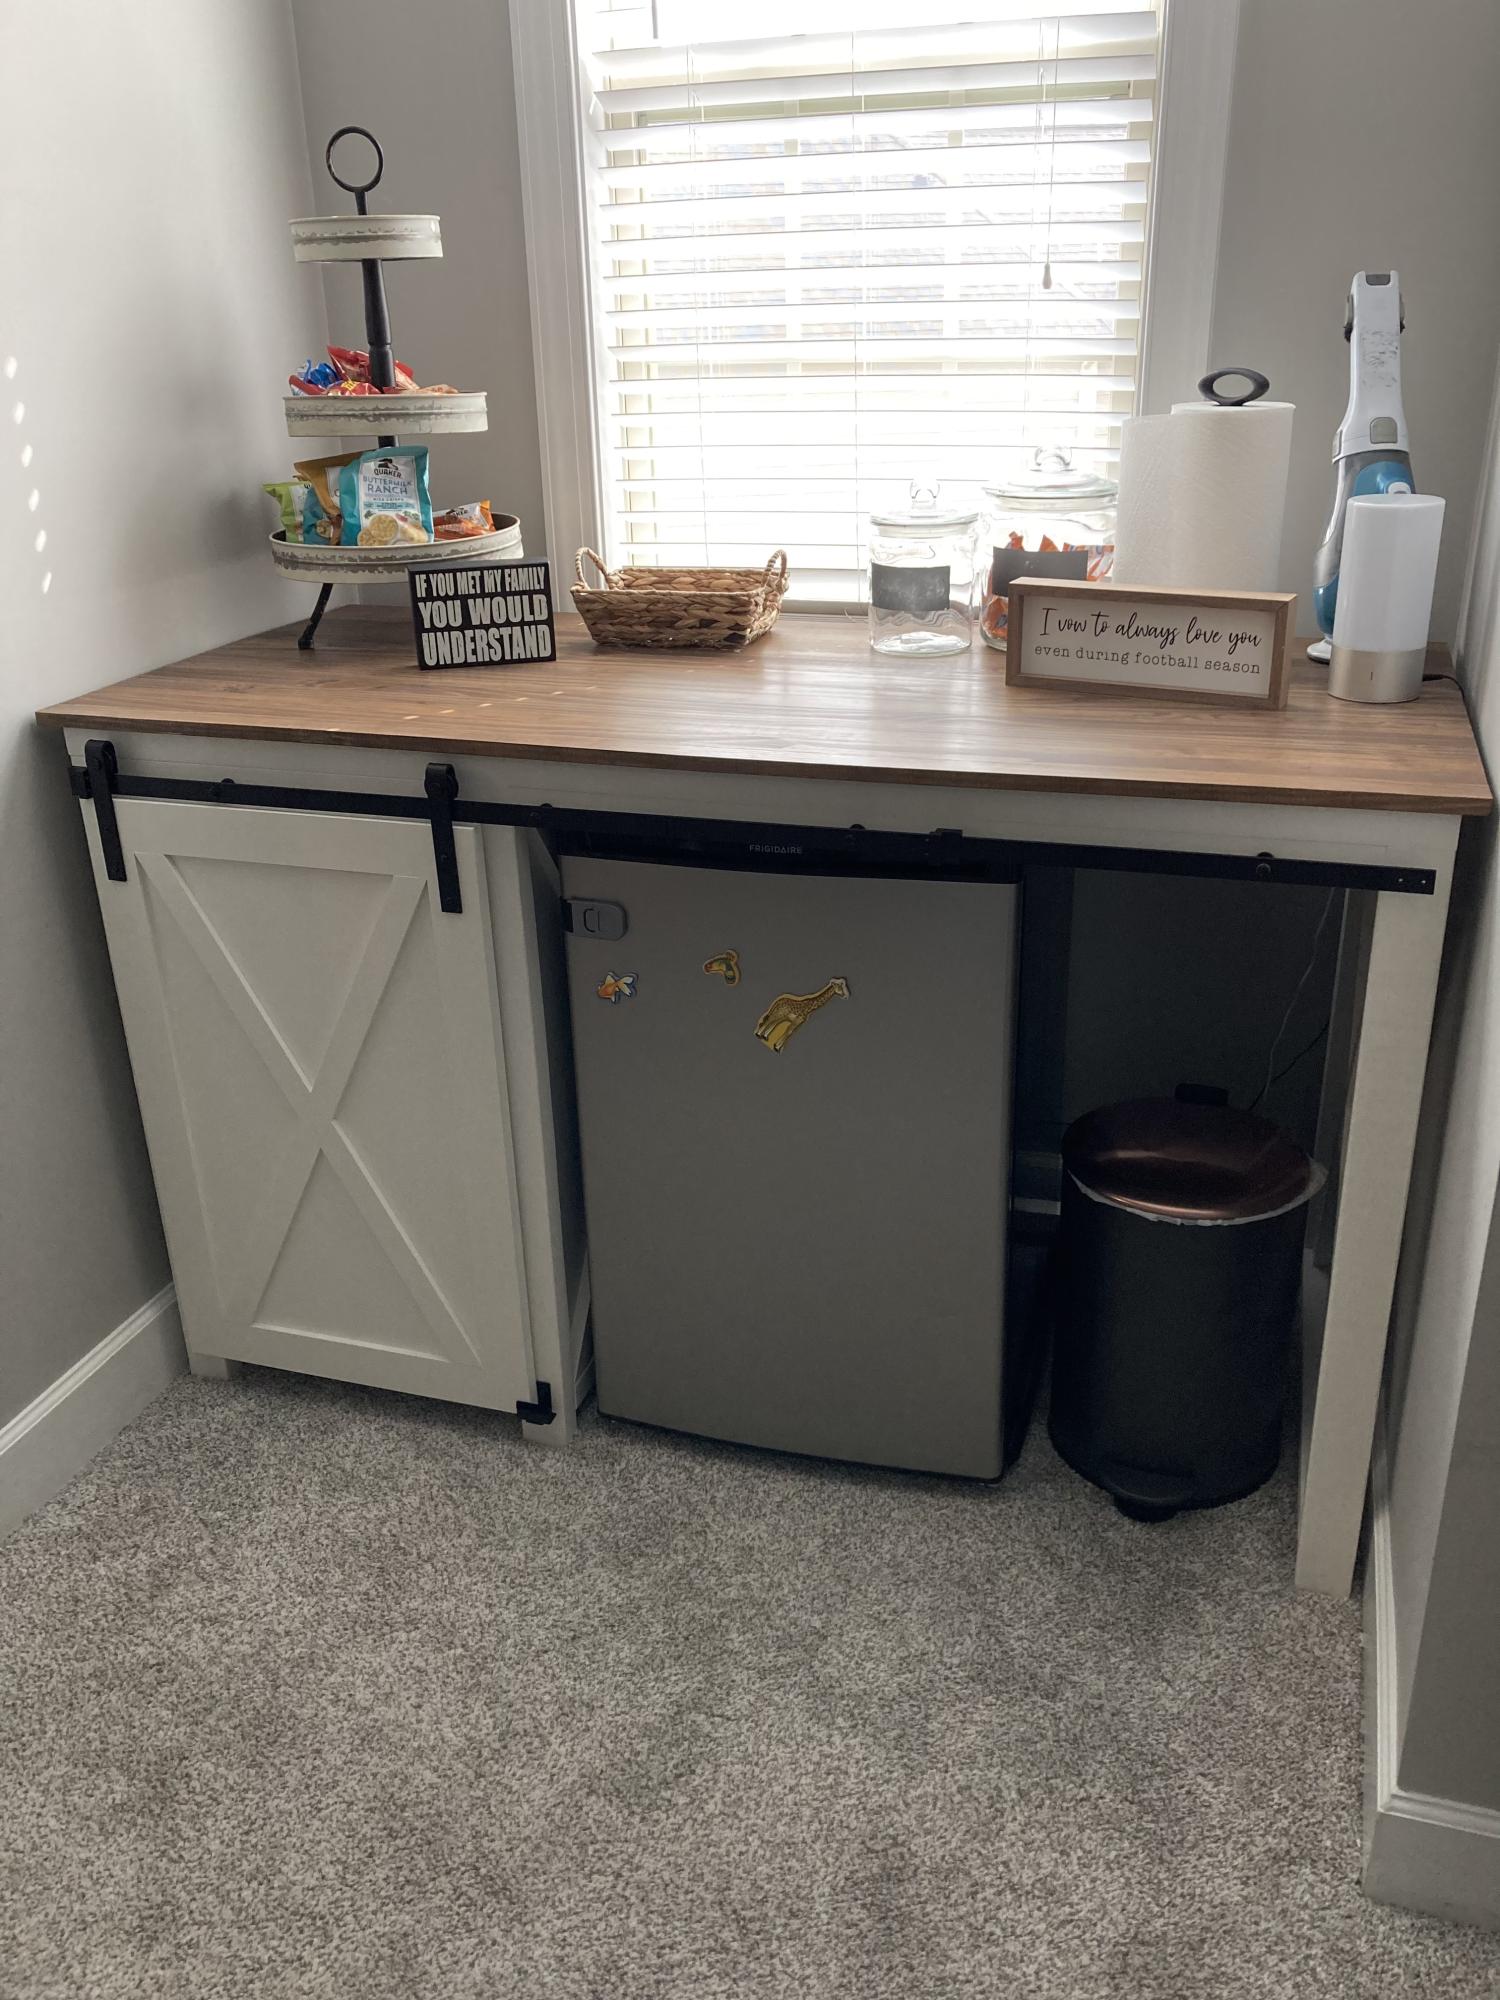
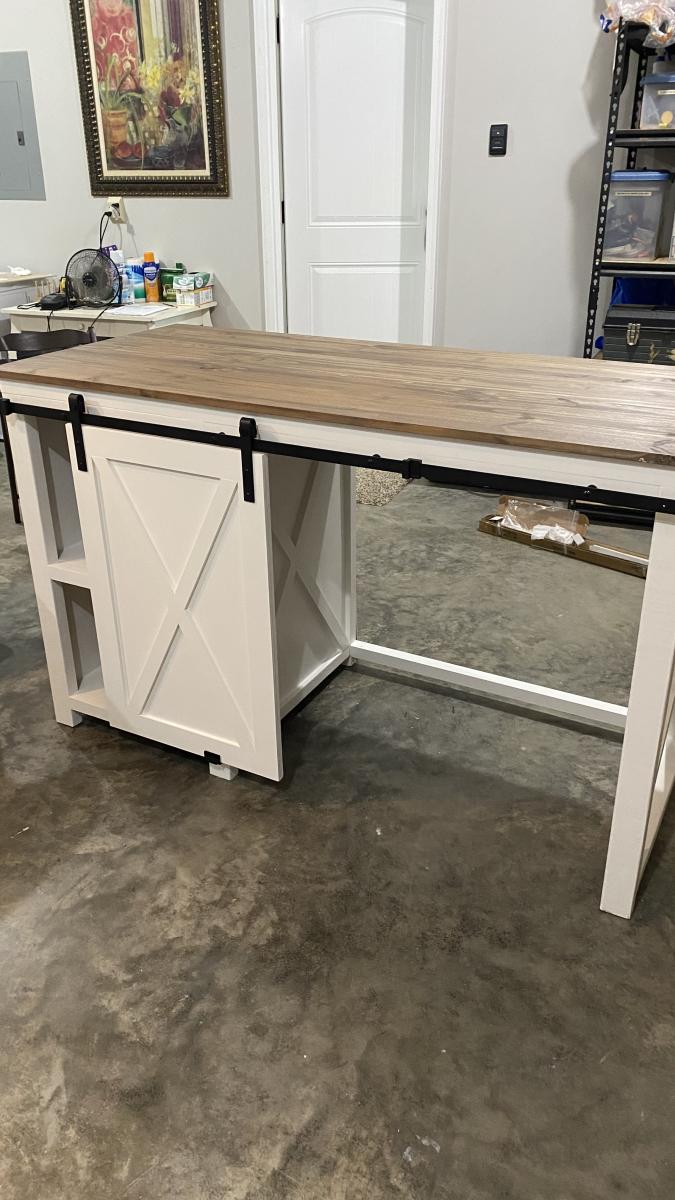
Our son and his wife wanted a snack cabinet in their bonus room dormer. My husband and I used your Farmhouse Desk plan and tweaked it with your Barn Door Cabinet plan. They love it! It was a first cabinet build for us and we were proud! You are our go to for ideas and plans. Thank you!

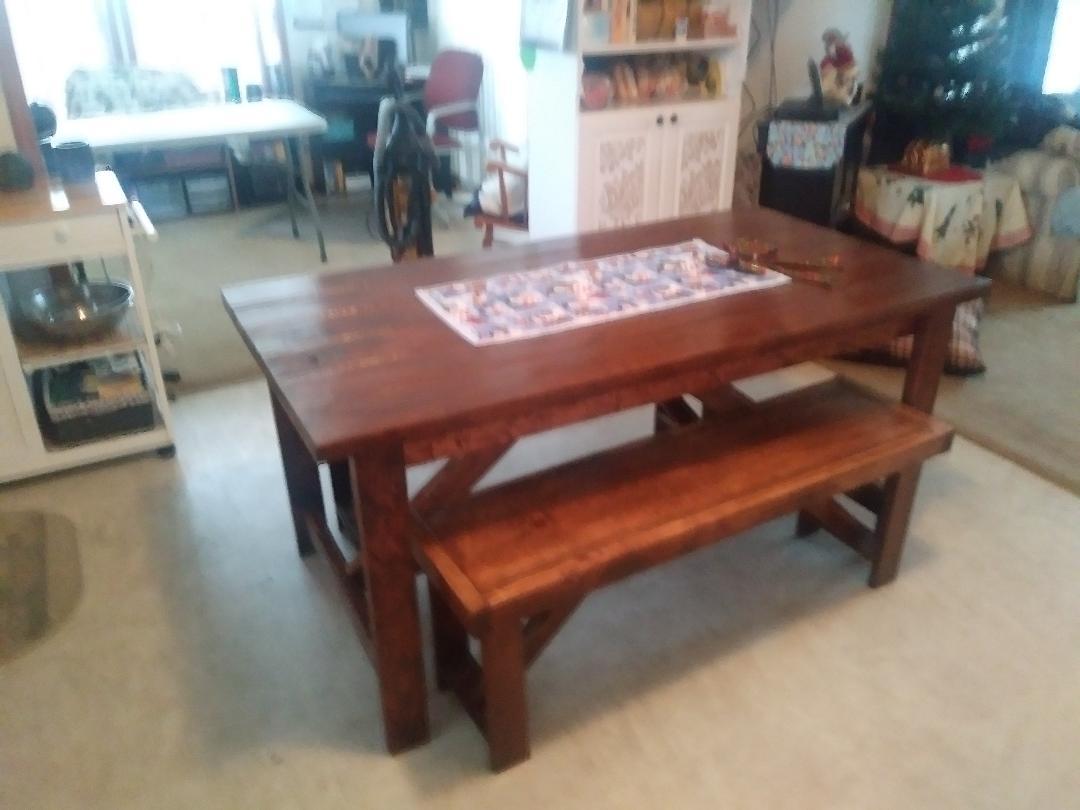
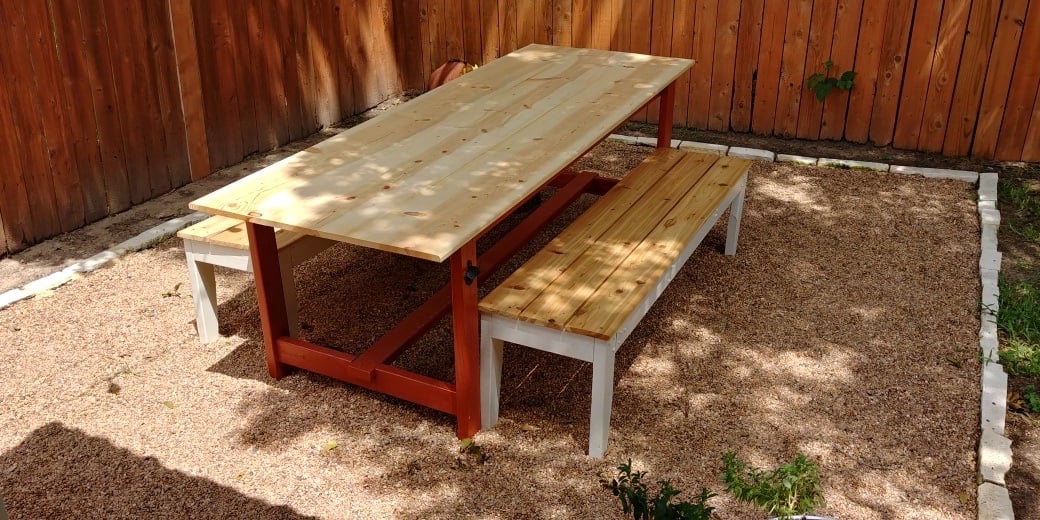
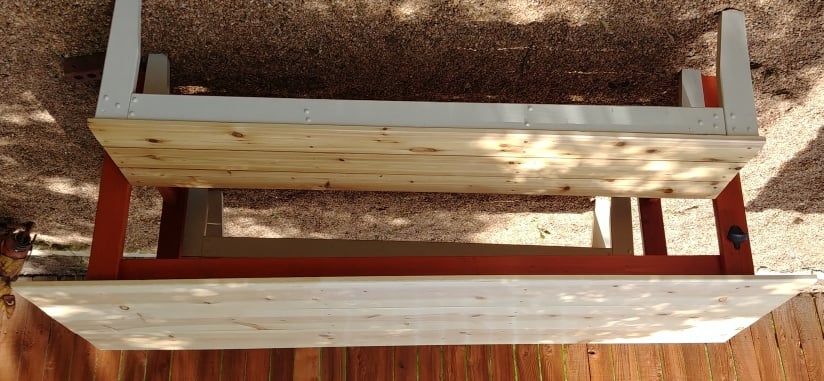
This table was for my wife's birthday present. I followed/modified the simple and pocket hole farmhouse table plans. The table top is 1x12 pine as I couldn't find any cedar that wasn't cupped or warped after several weeks looking and wanted a wider board top. Then we used the easiest padded bench plans, adding height as suggested to the legs and using 3 cedar 1x6's for seats. All tops were sanded and sealed before 4 coats of marine spar poly were used.
Thanks for the plans, Ana.
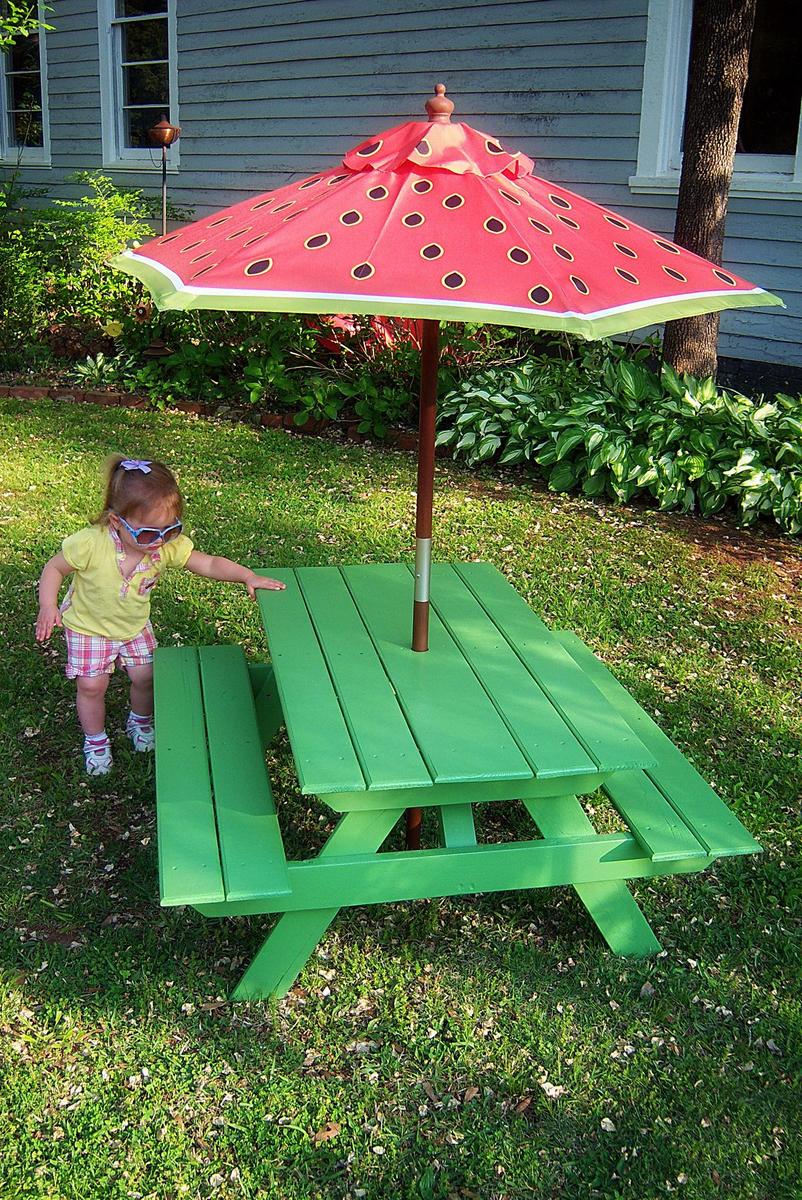
My daughter was given this umbrella at Christmas, but needed a table to go with it. Ana's plans for the preschool sized picnic table worked perfectly. I built it using one standard sized shipping pallet and even got to try out my new router! Thanks Ana!
Tue, 04/04/2023 - 13:58
Looks like the perfect solution, love the fun finish! Thanks for sharing.

I only needed one step up, but replacing the old, cracked, weird, faux concrete step with the new planter box worked great!
Fri, 07/12/2019 - 19:36
This is perfect for your front door ! Love how you tied it in with your house colors.
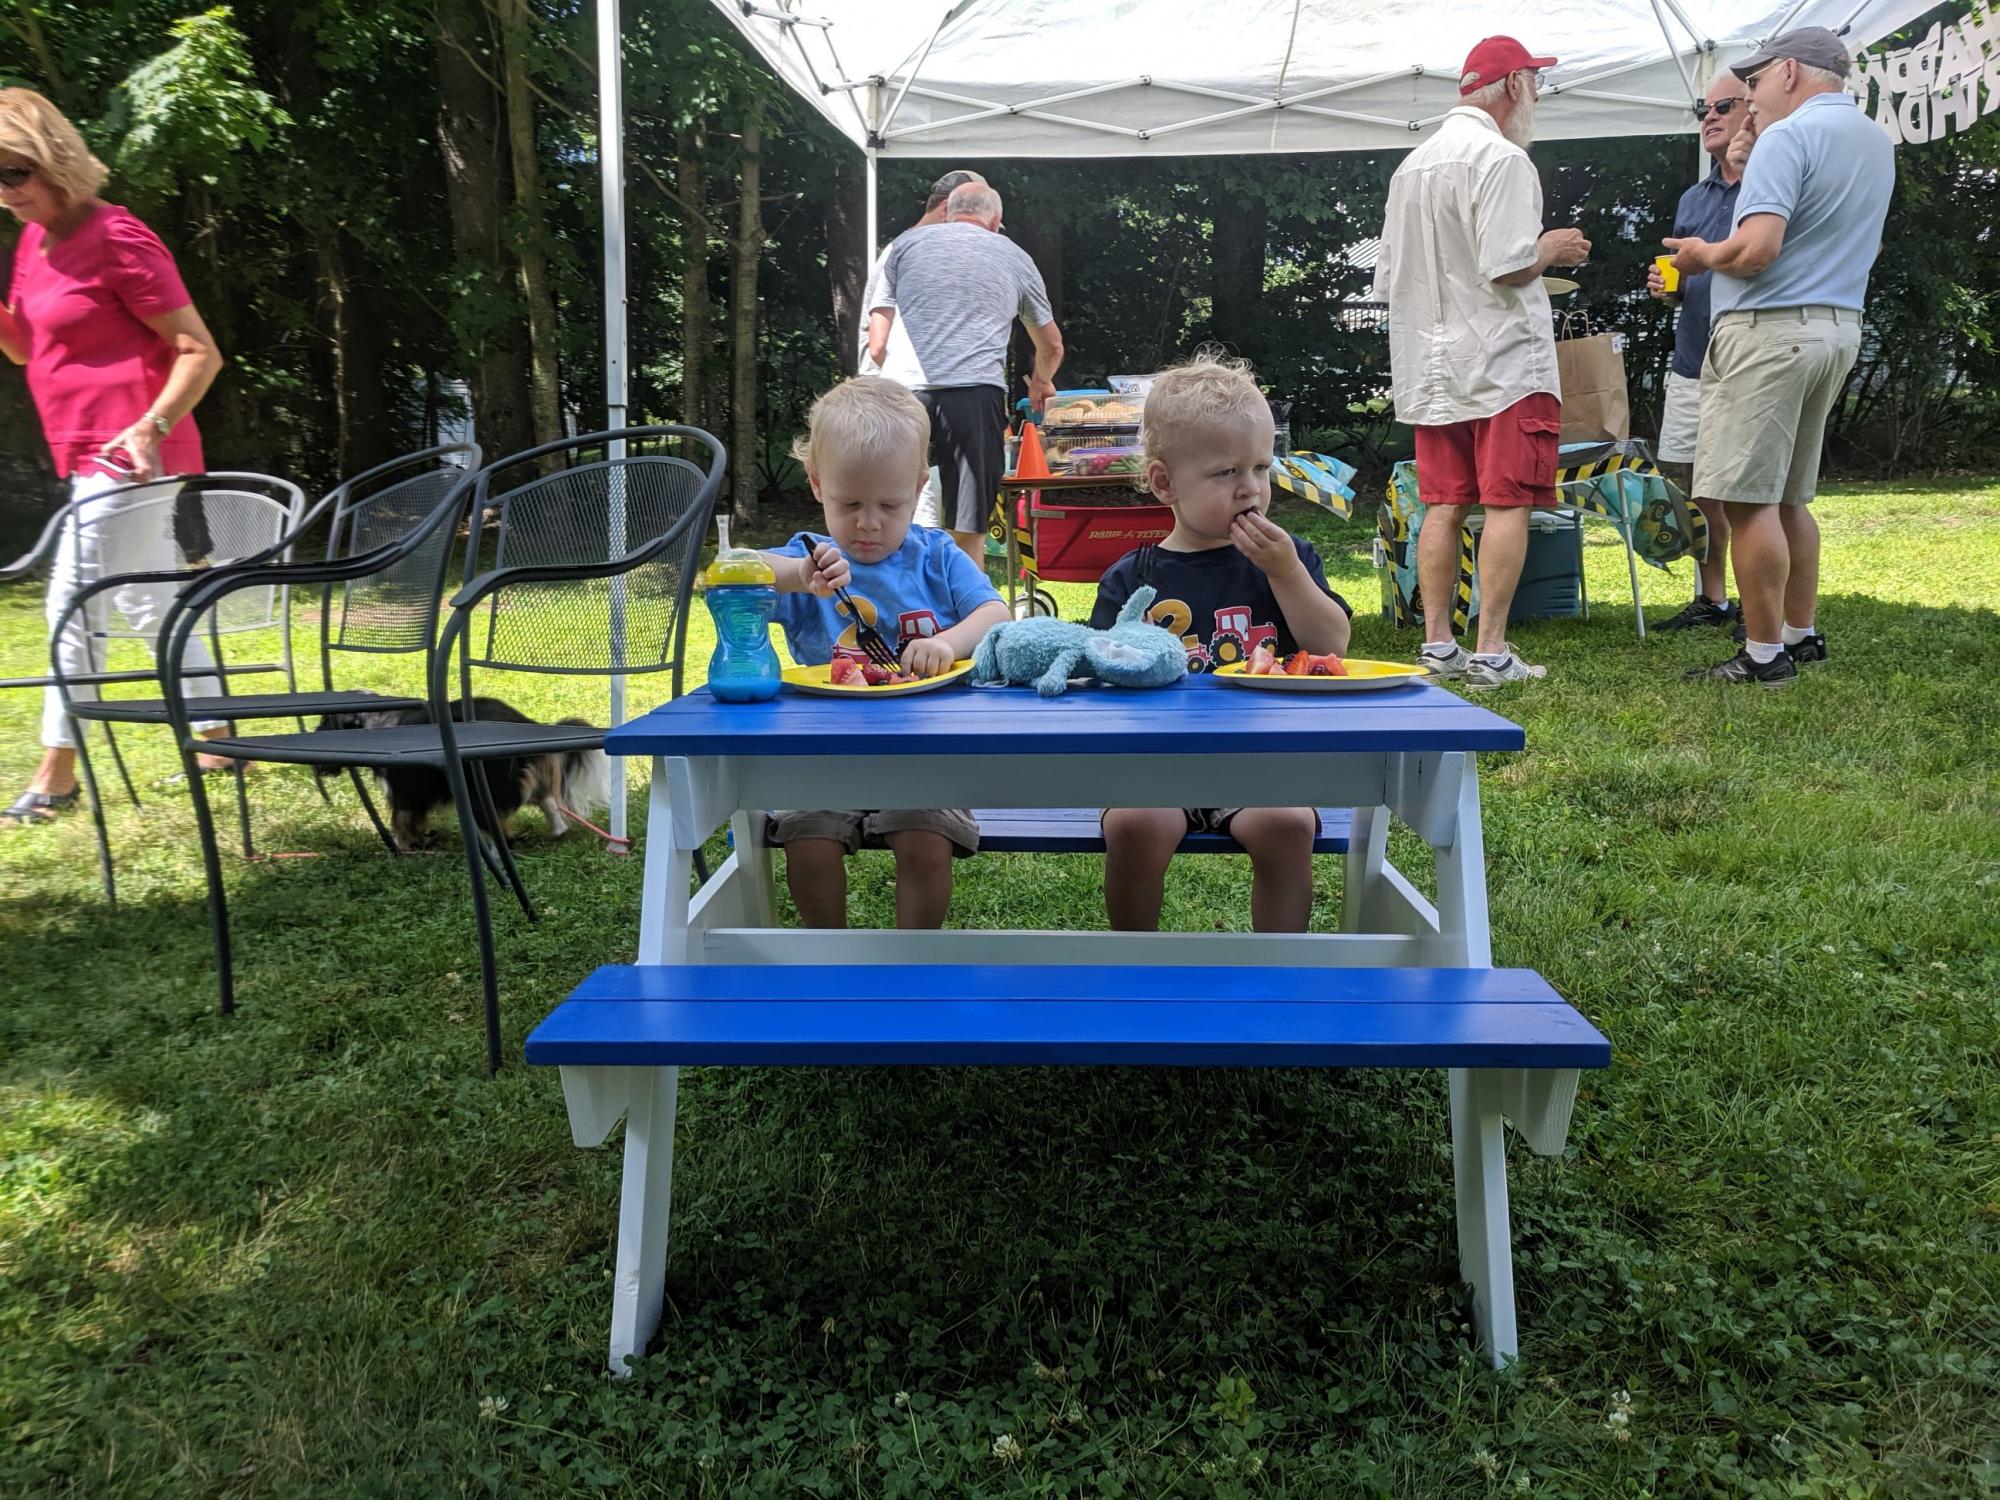
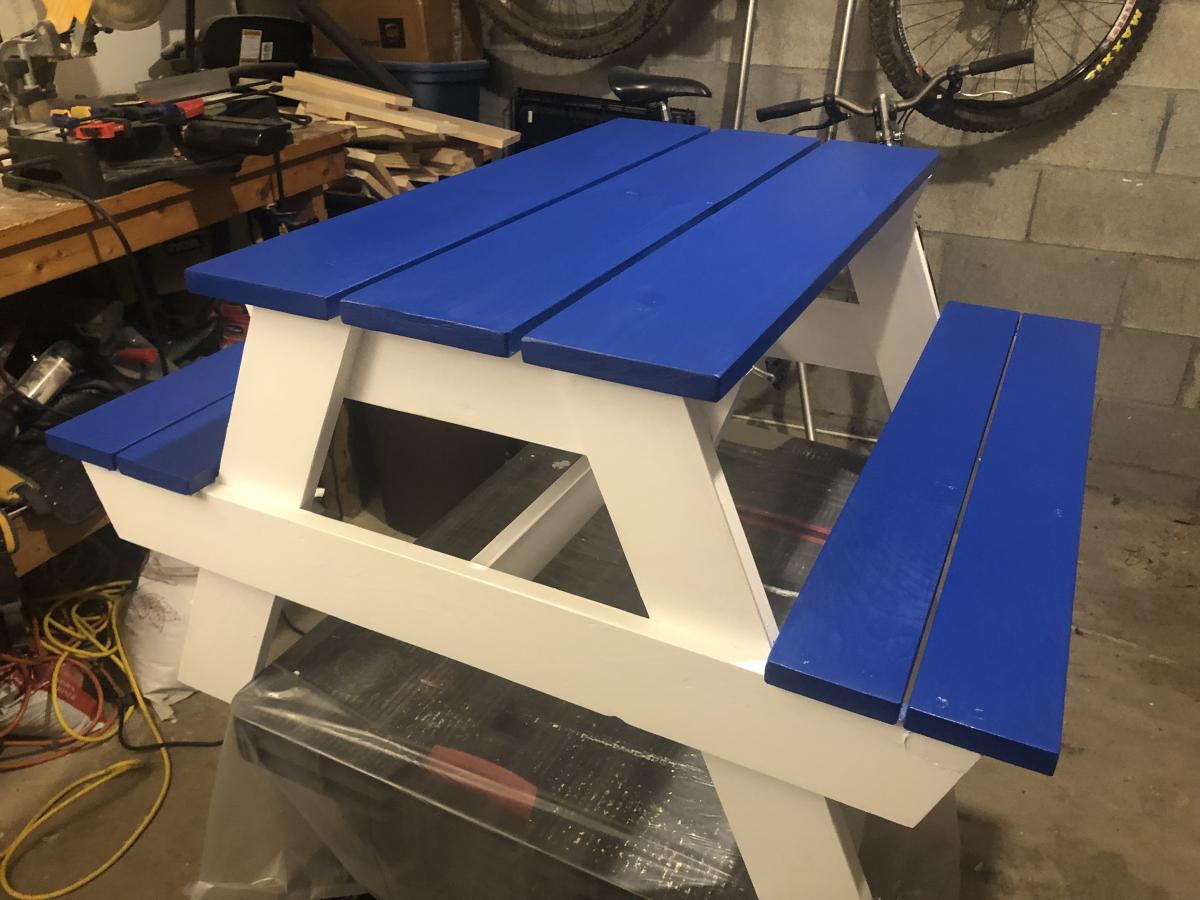
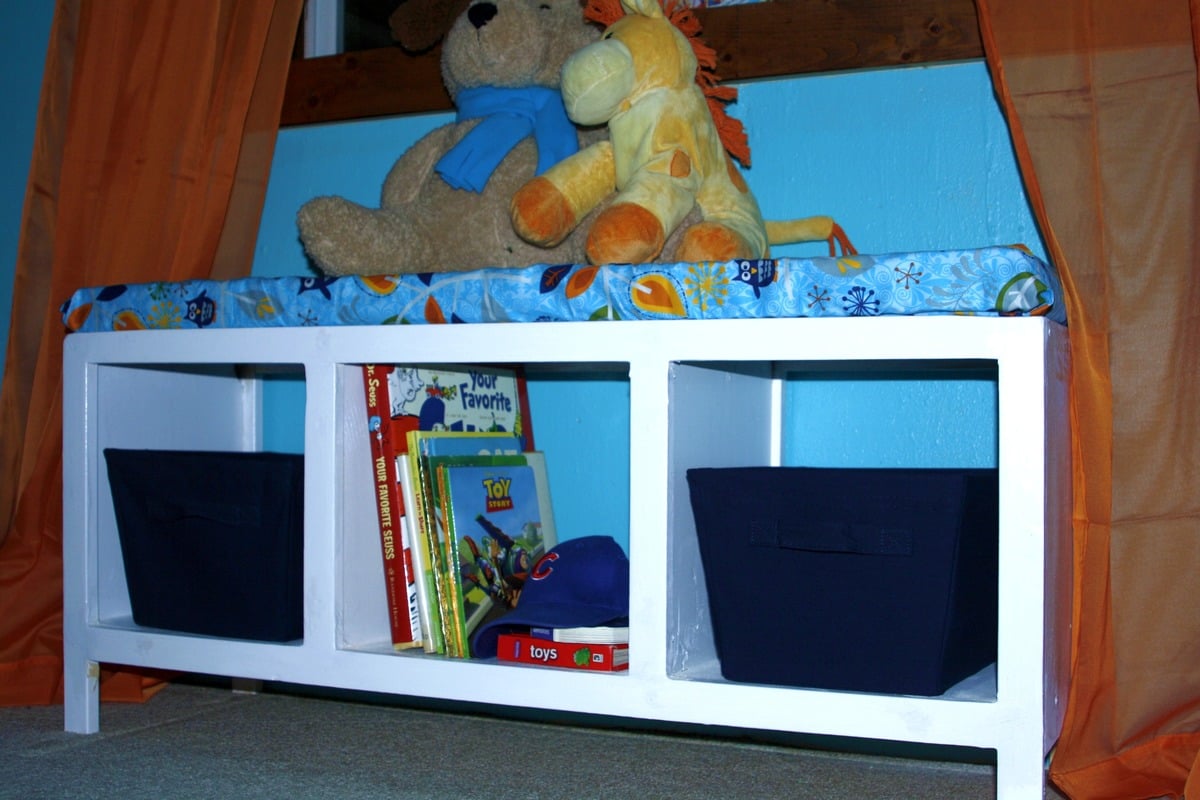
This was a really fun build. The bottom side boards were put on the outside instead of the inside (this was an accident) but it still seems very sturdy. Perfect for 2-5 years old.
Fri, 07/19/2019 - 16:01
Super cute! I don't think it matters if it's on the inside or out, looks awesome to me!
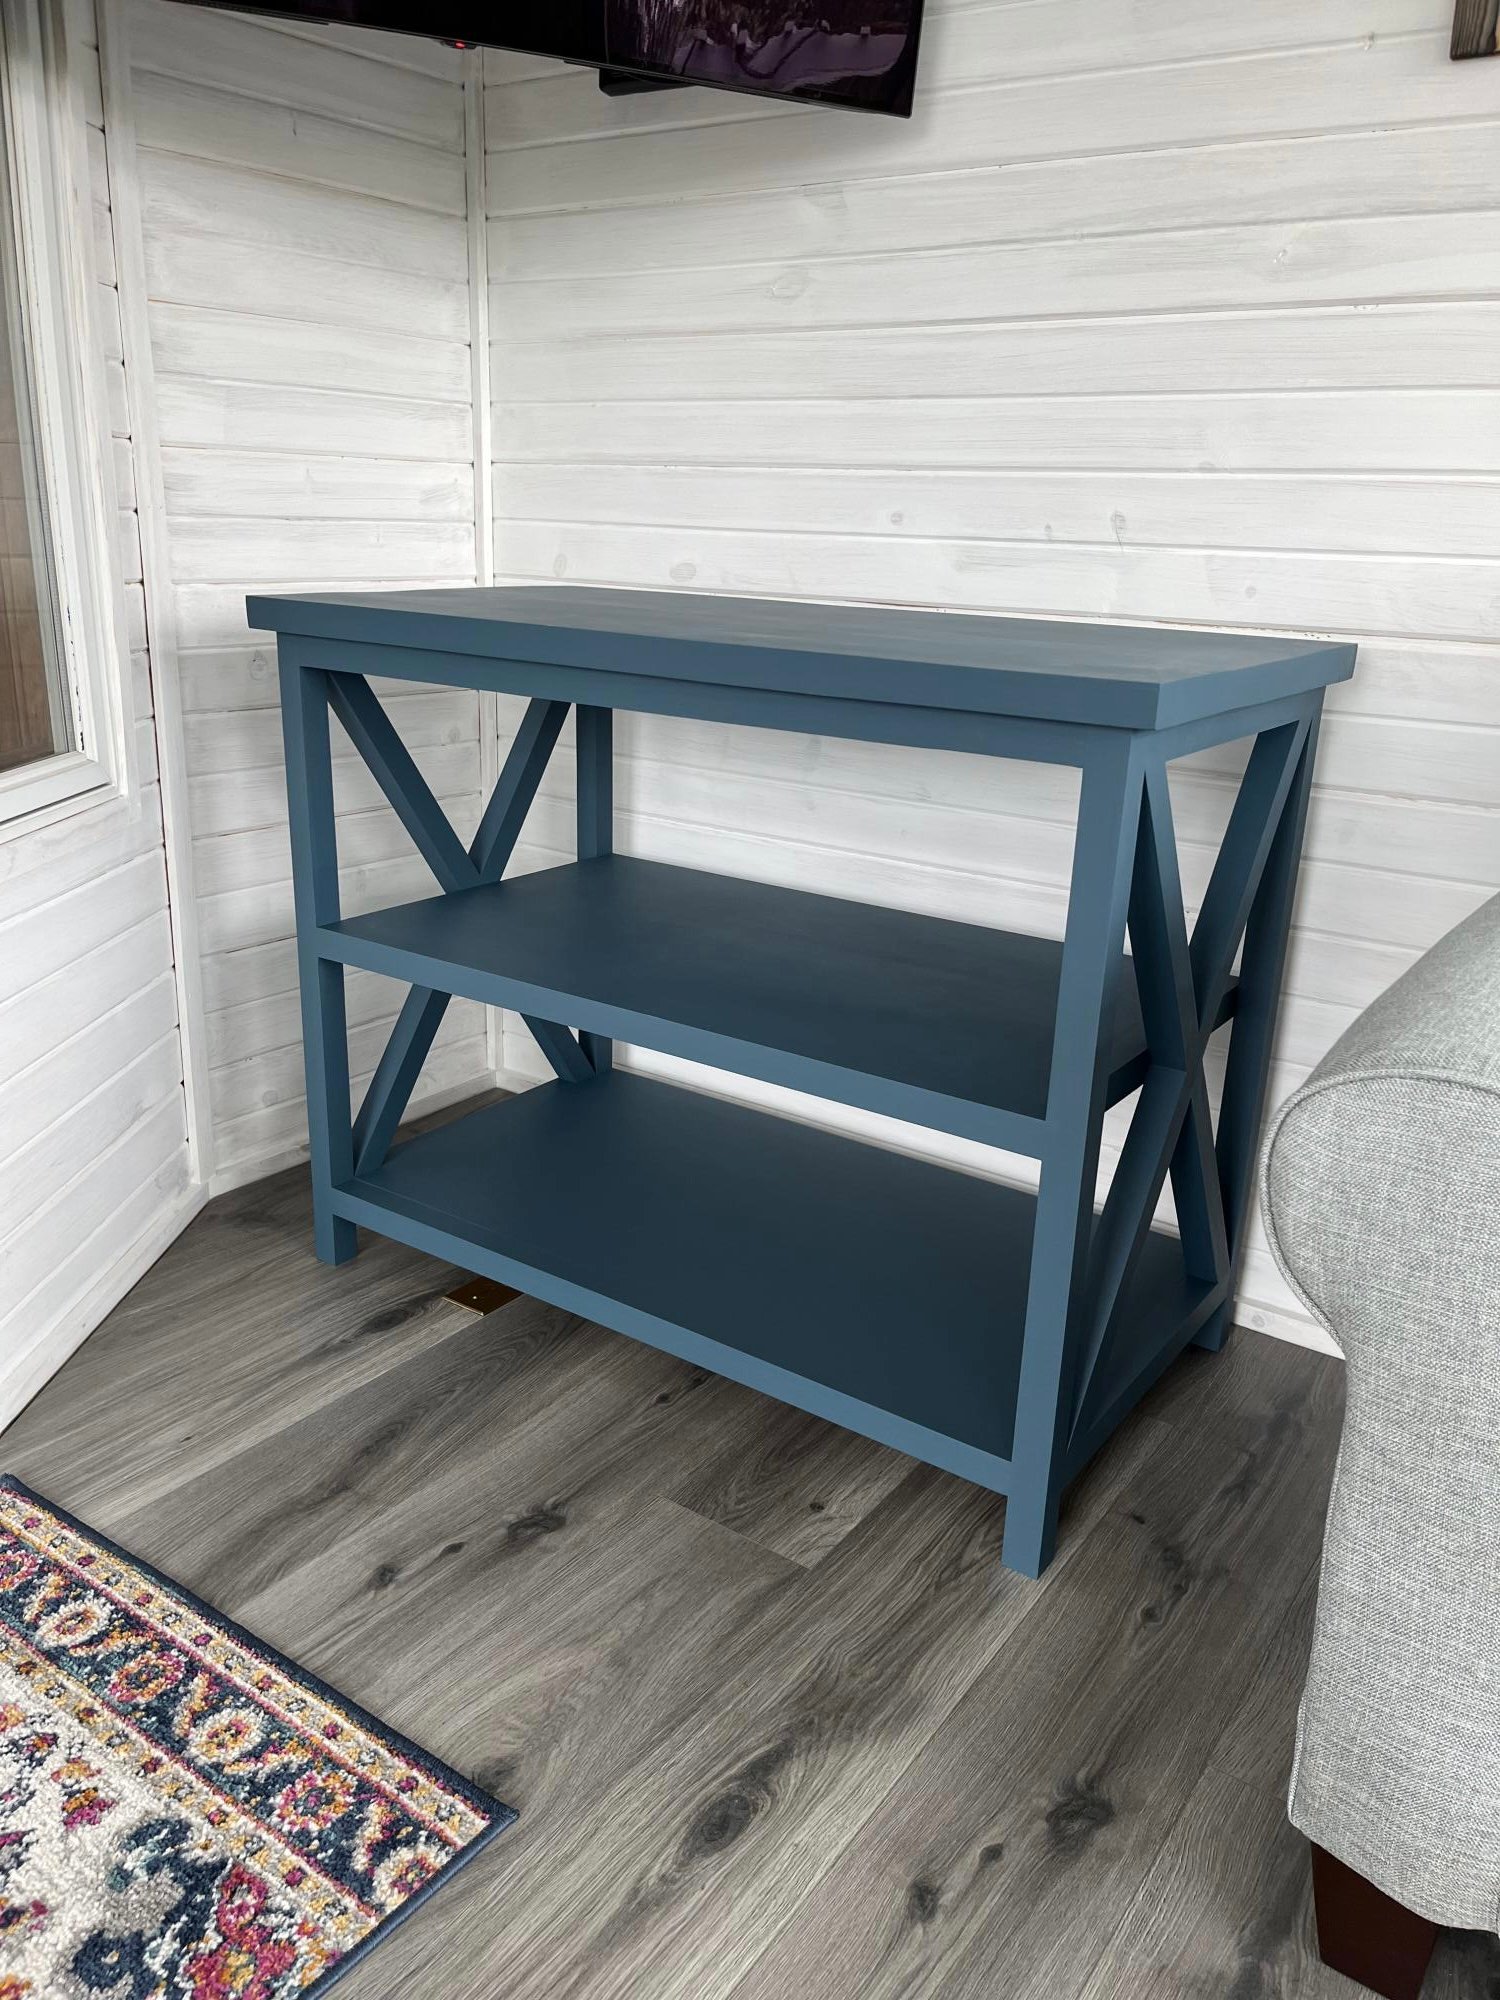
Built this from Ana White plans. Love how it looks in our four season room.

Fri, 04/21/2023 - 10:20
Gorgeous build and finish, well done! Thank you so much for sharing.

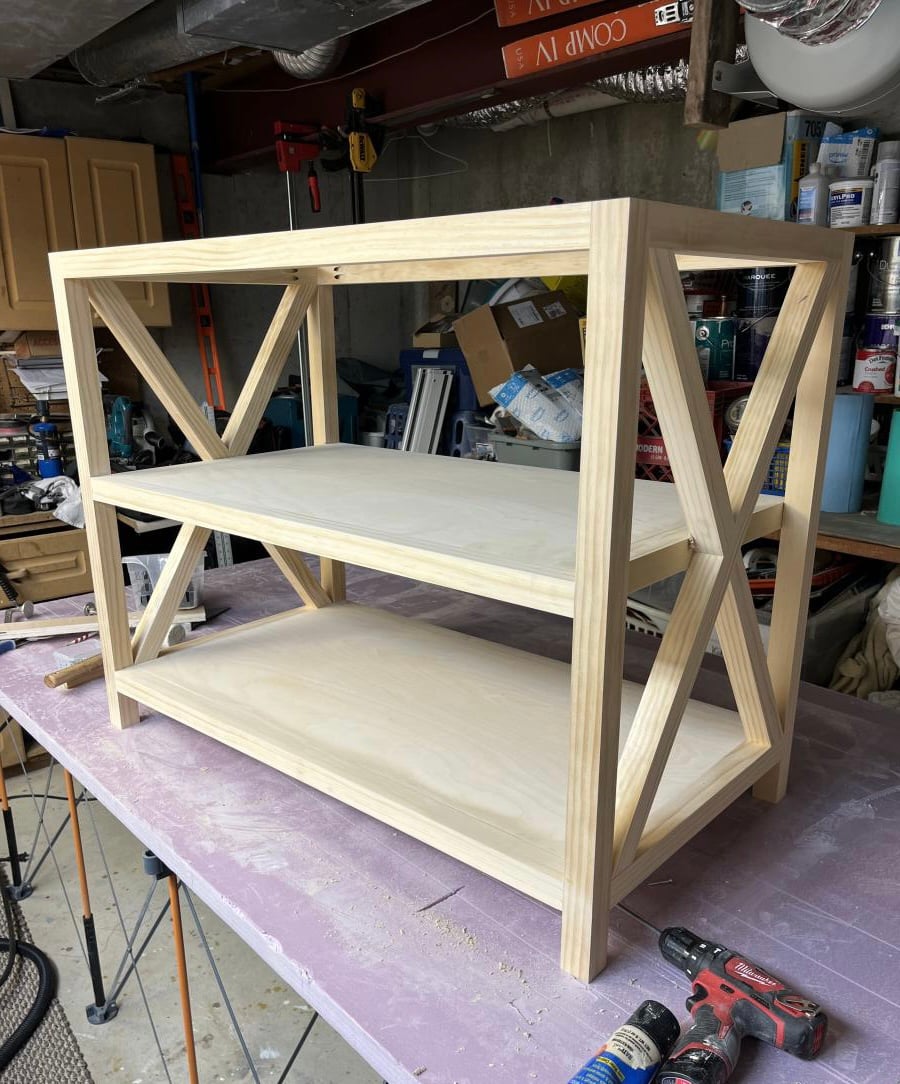
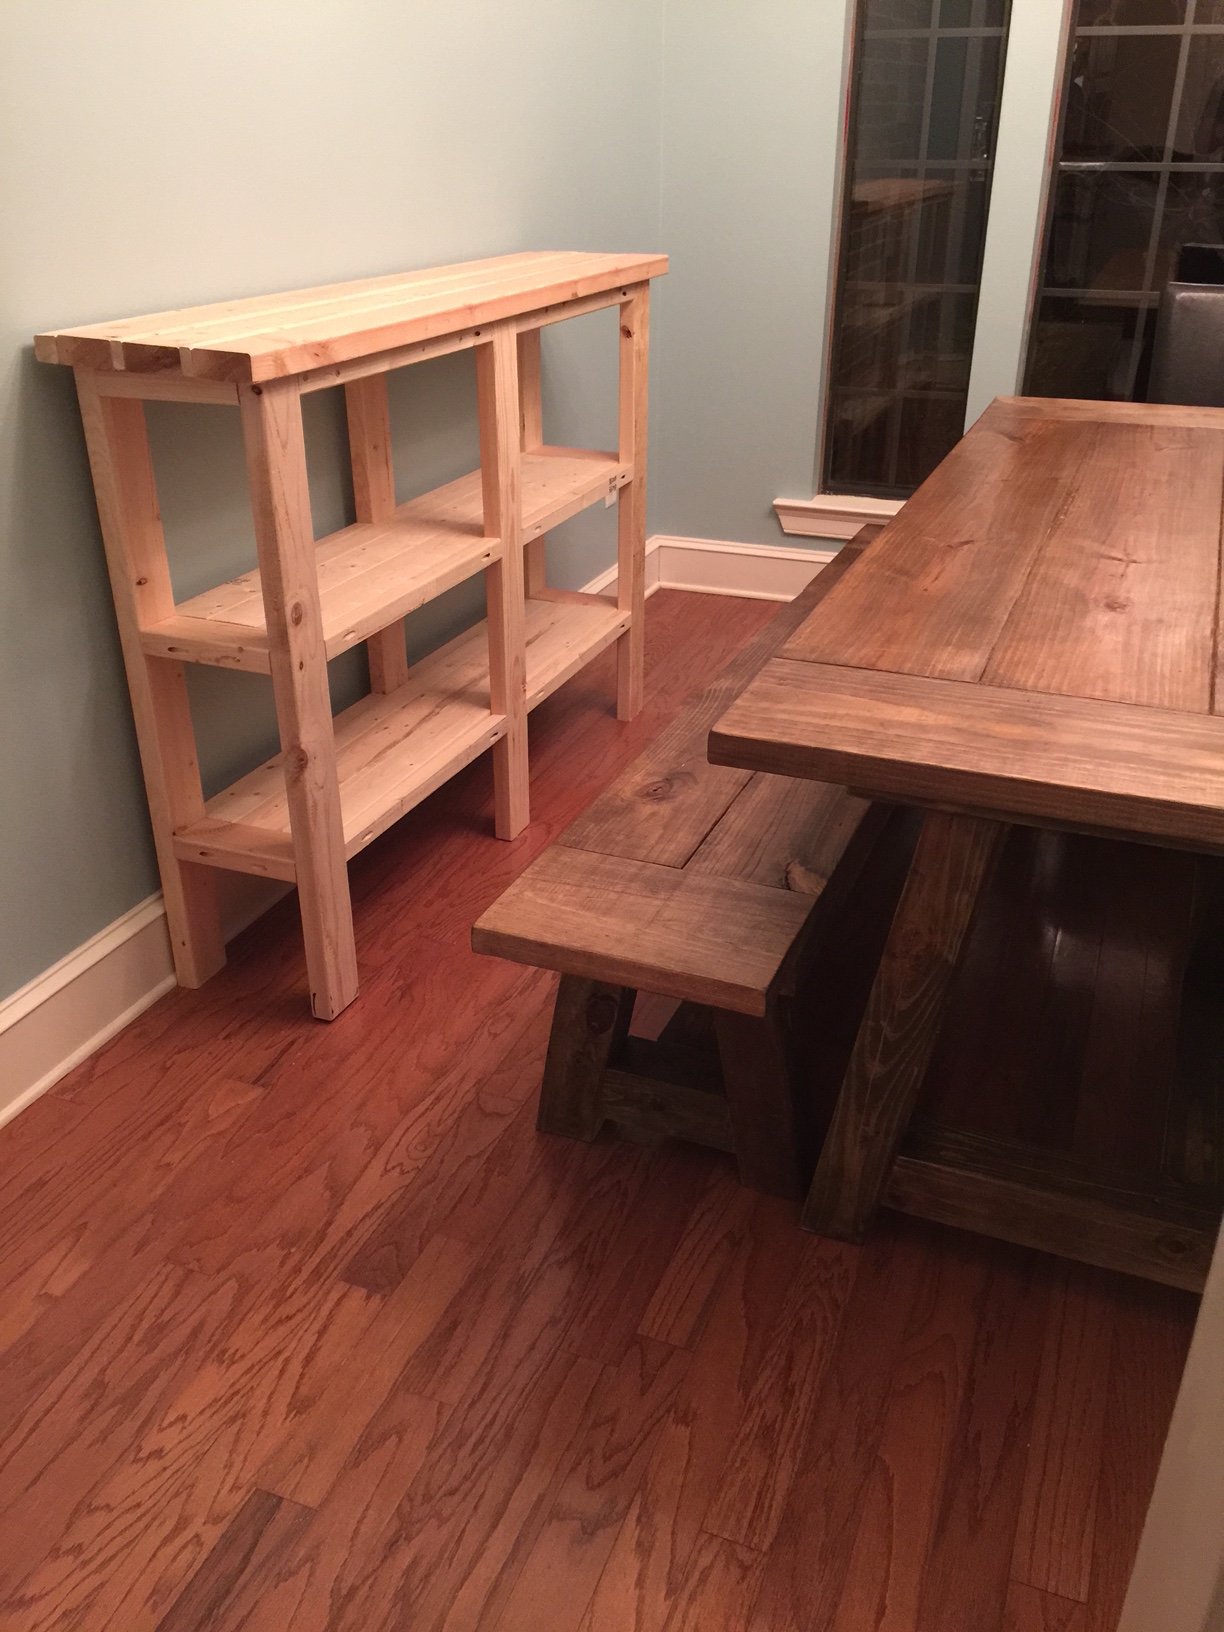
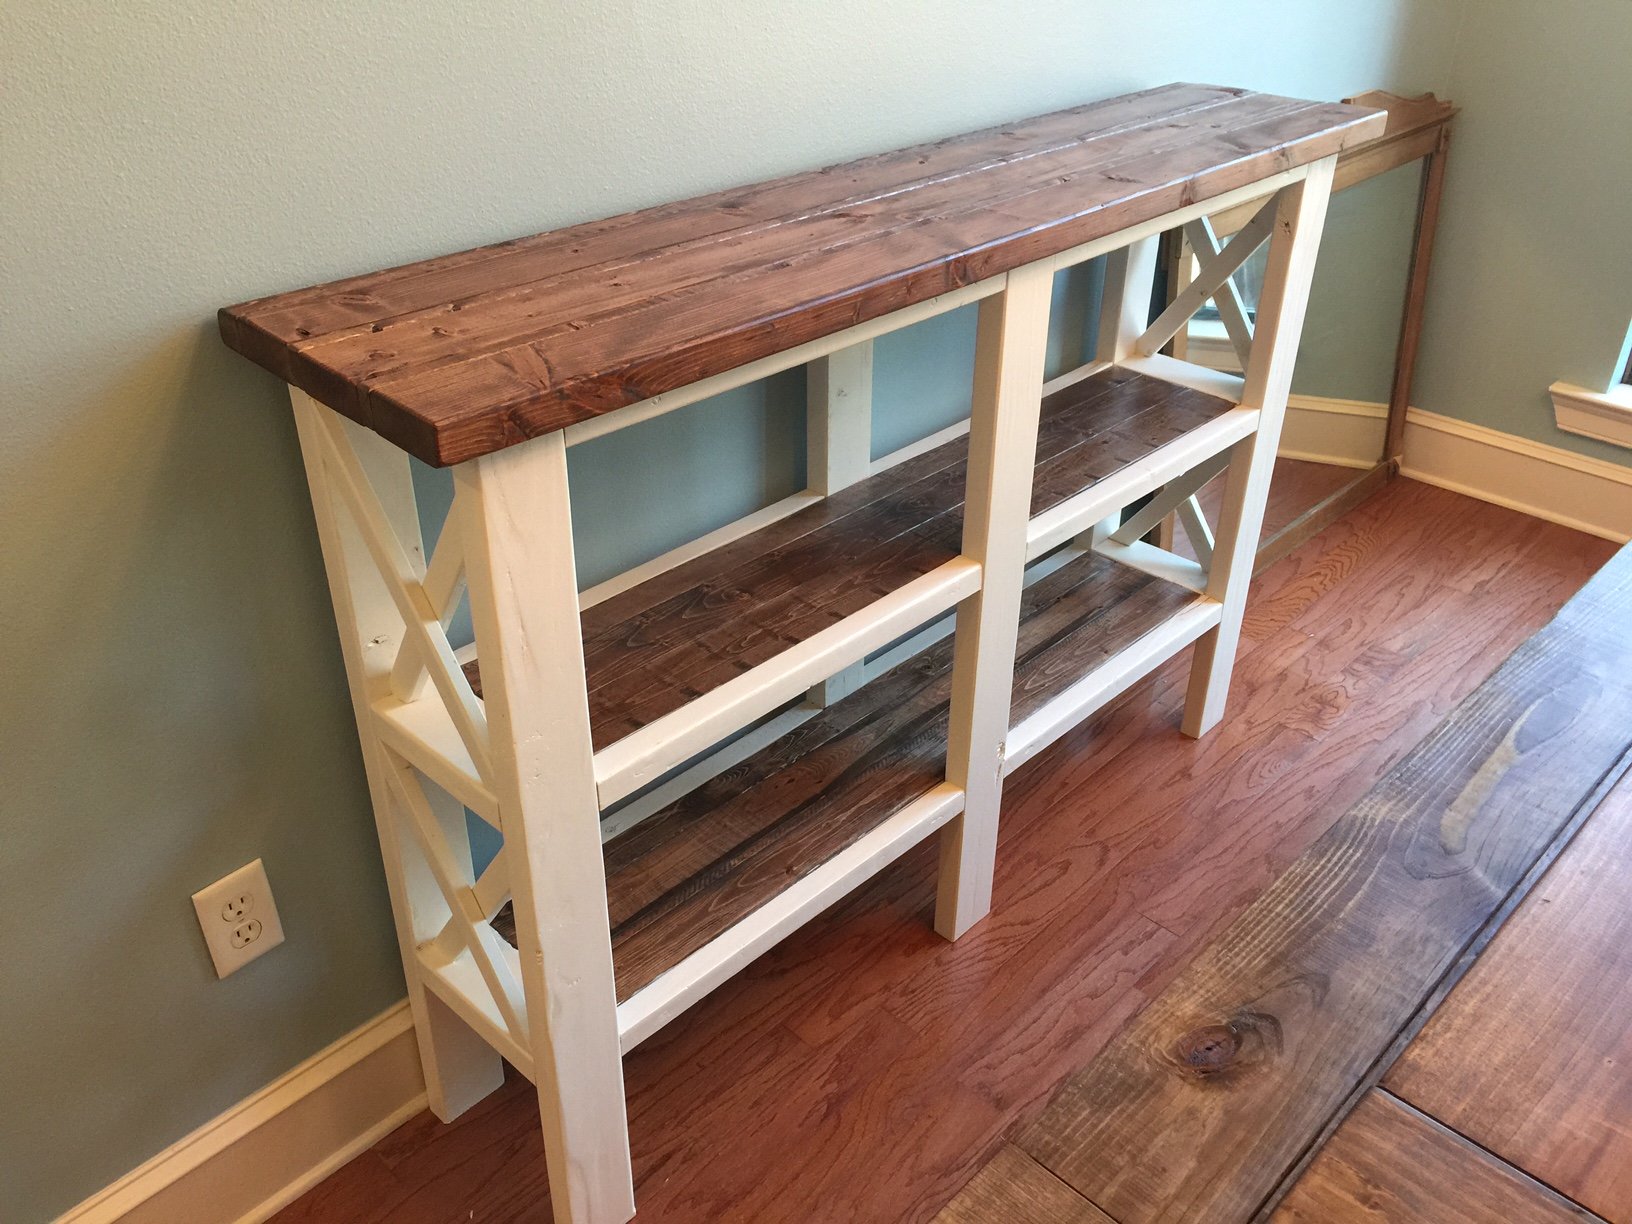
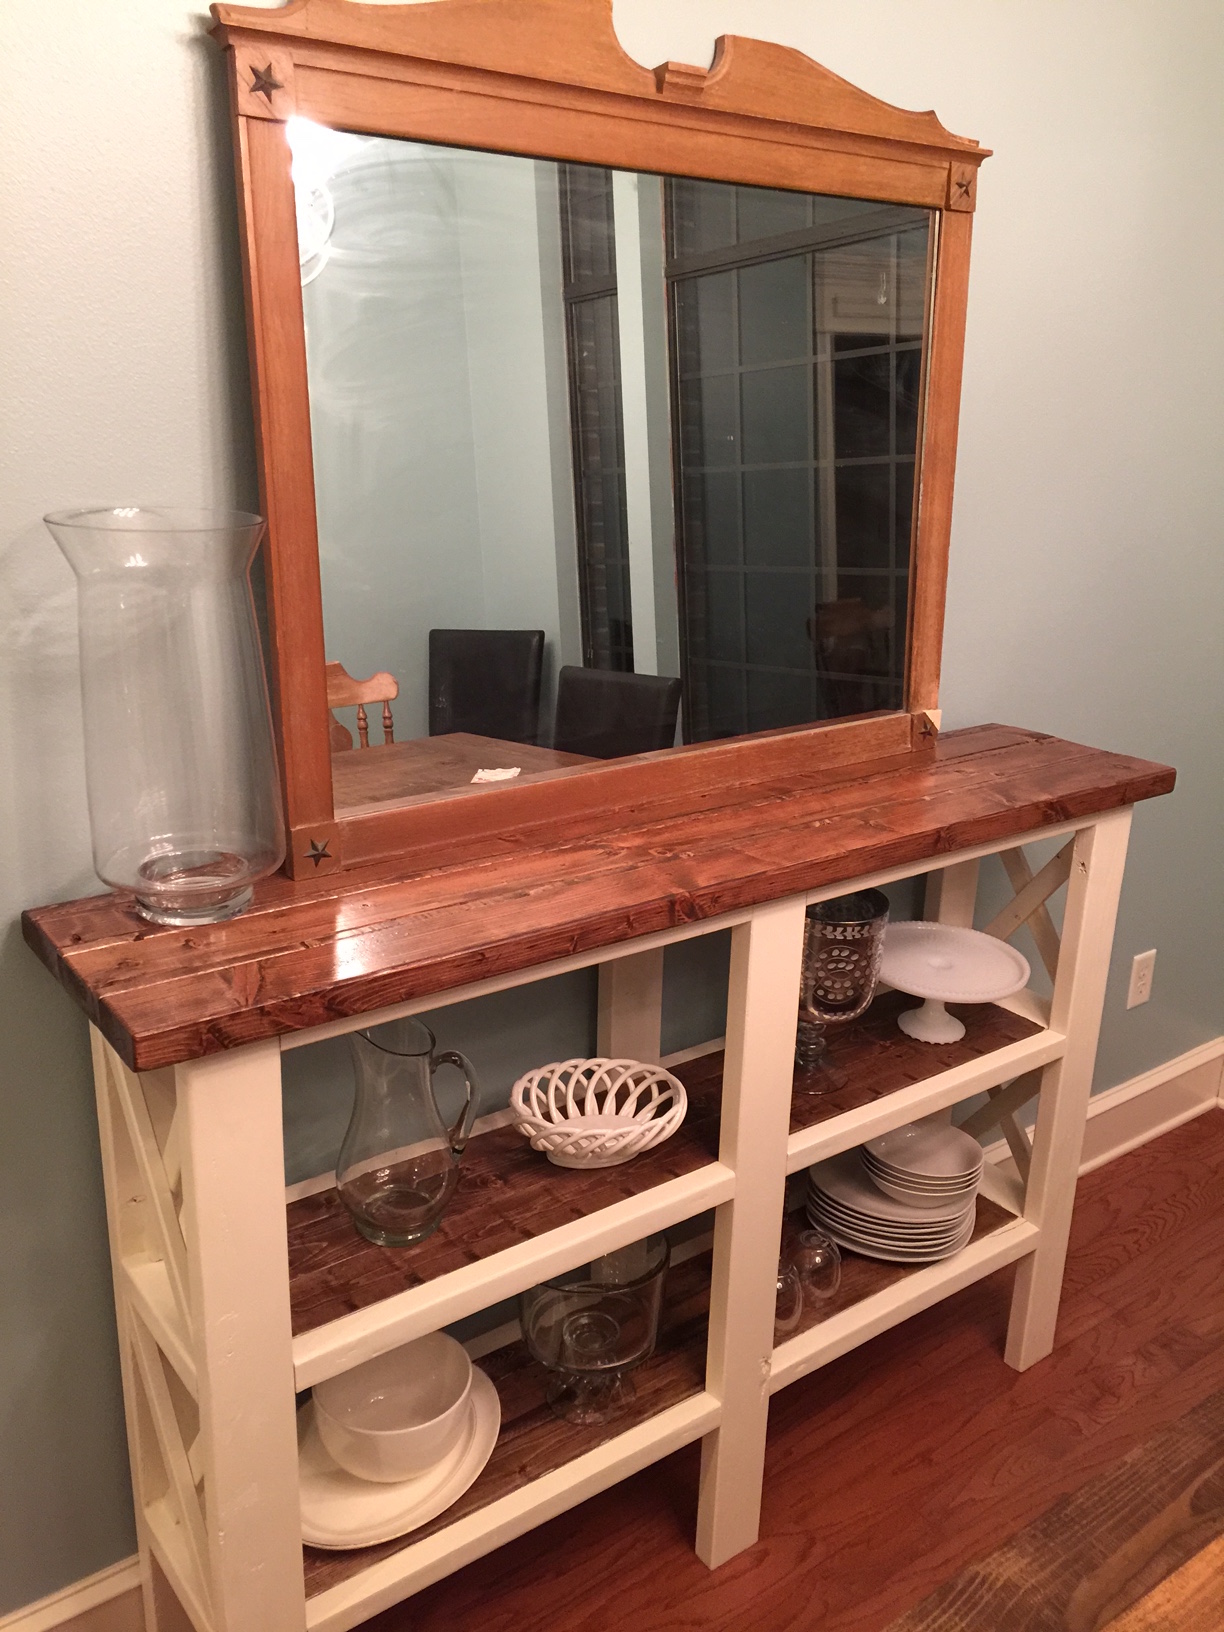
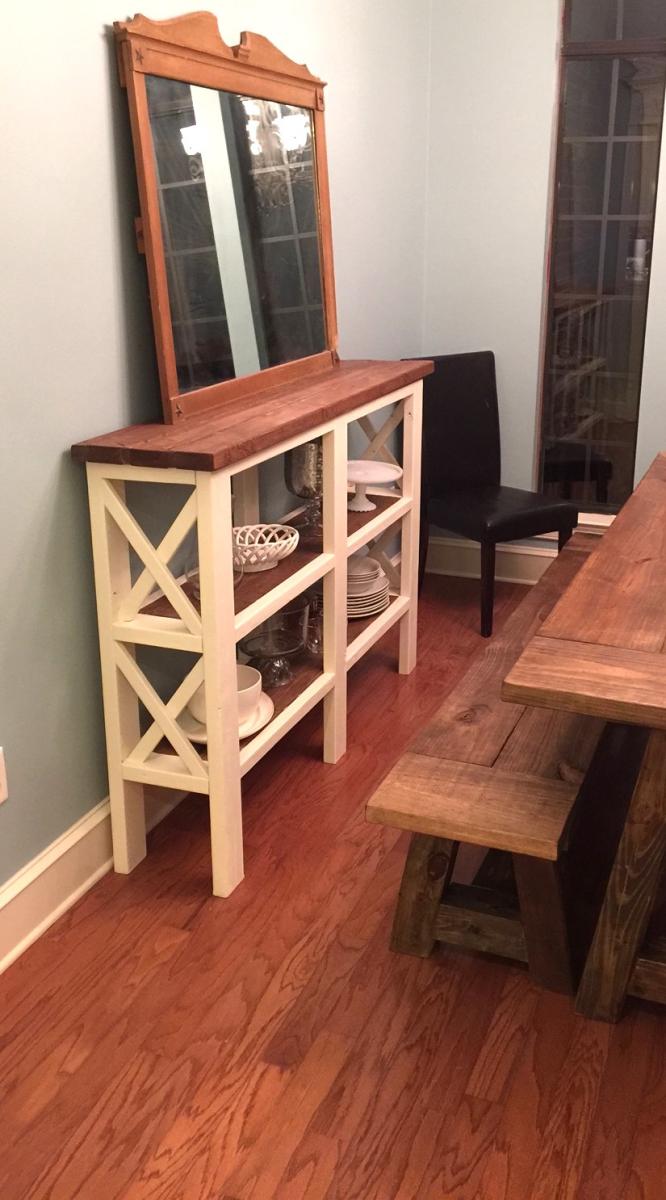
Needed to add a buffet console to the empty wall in our formal dining room.
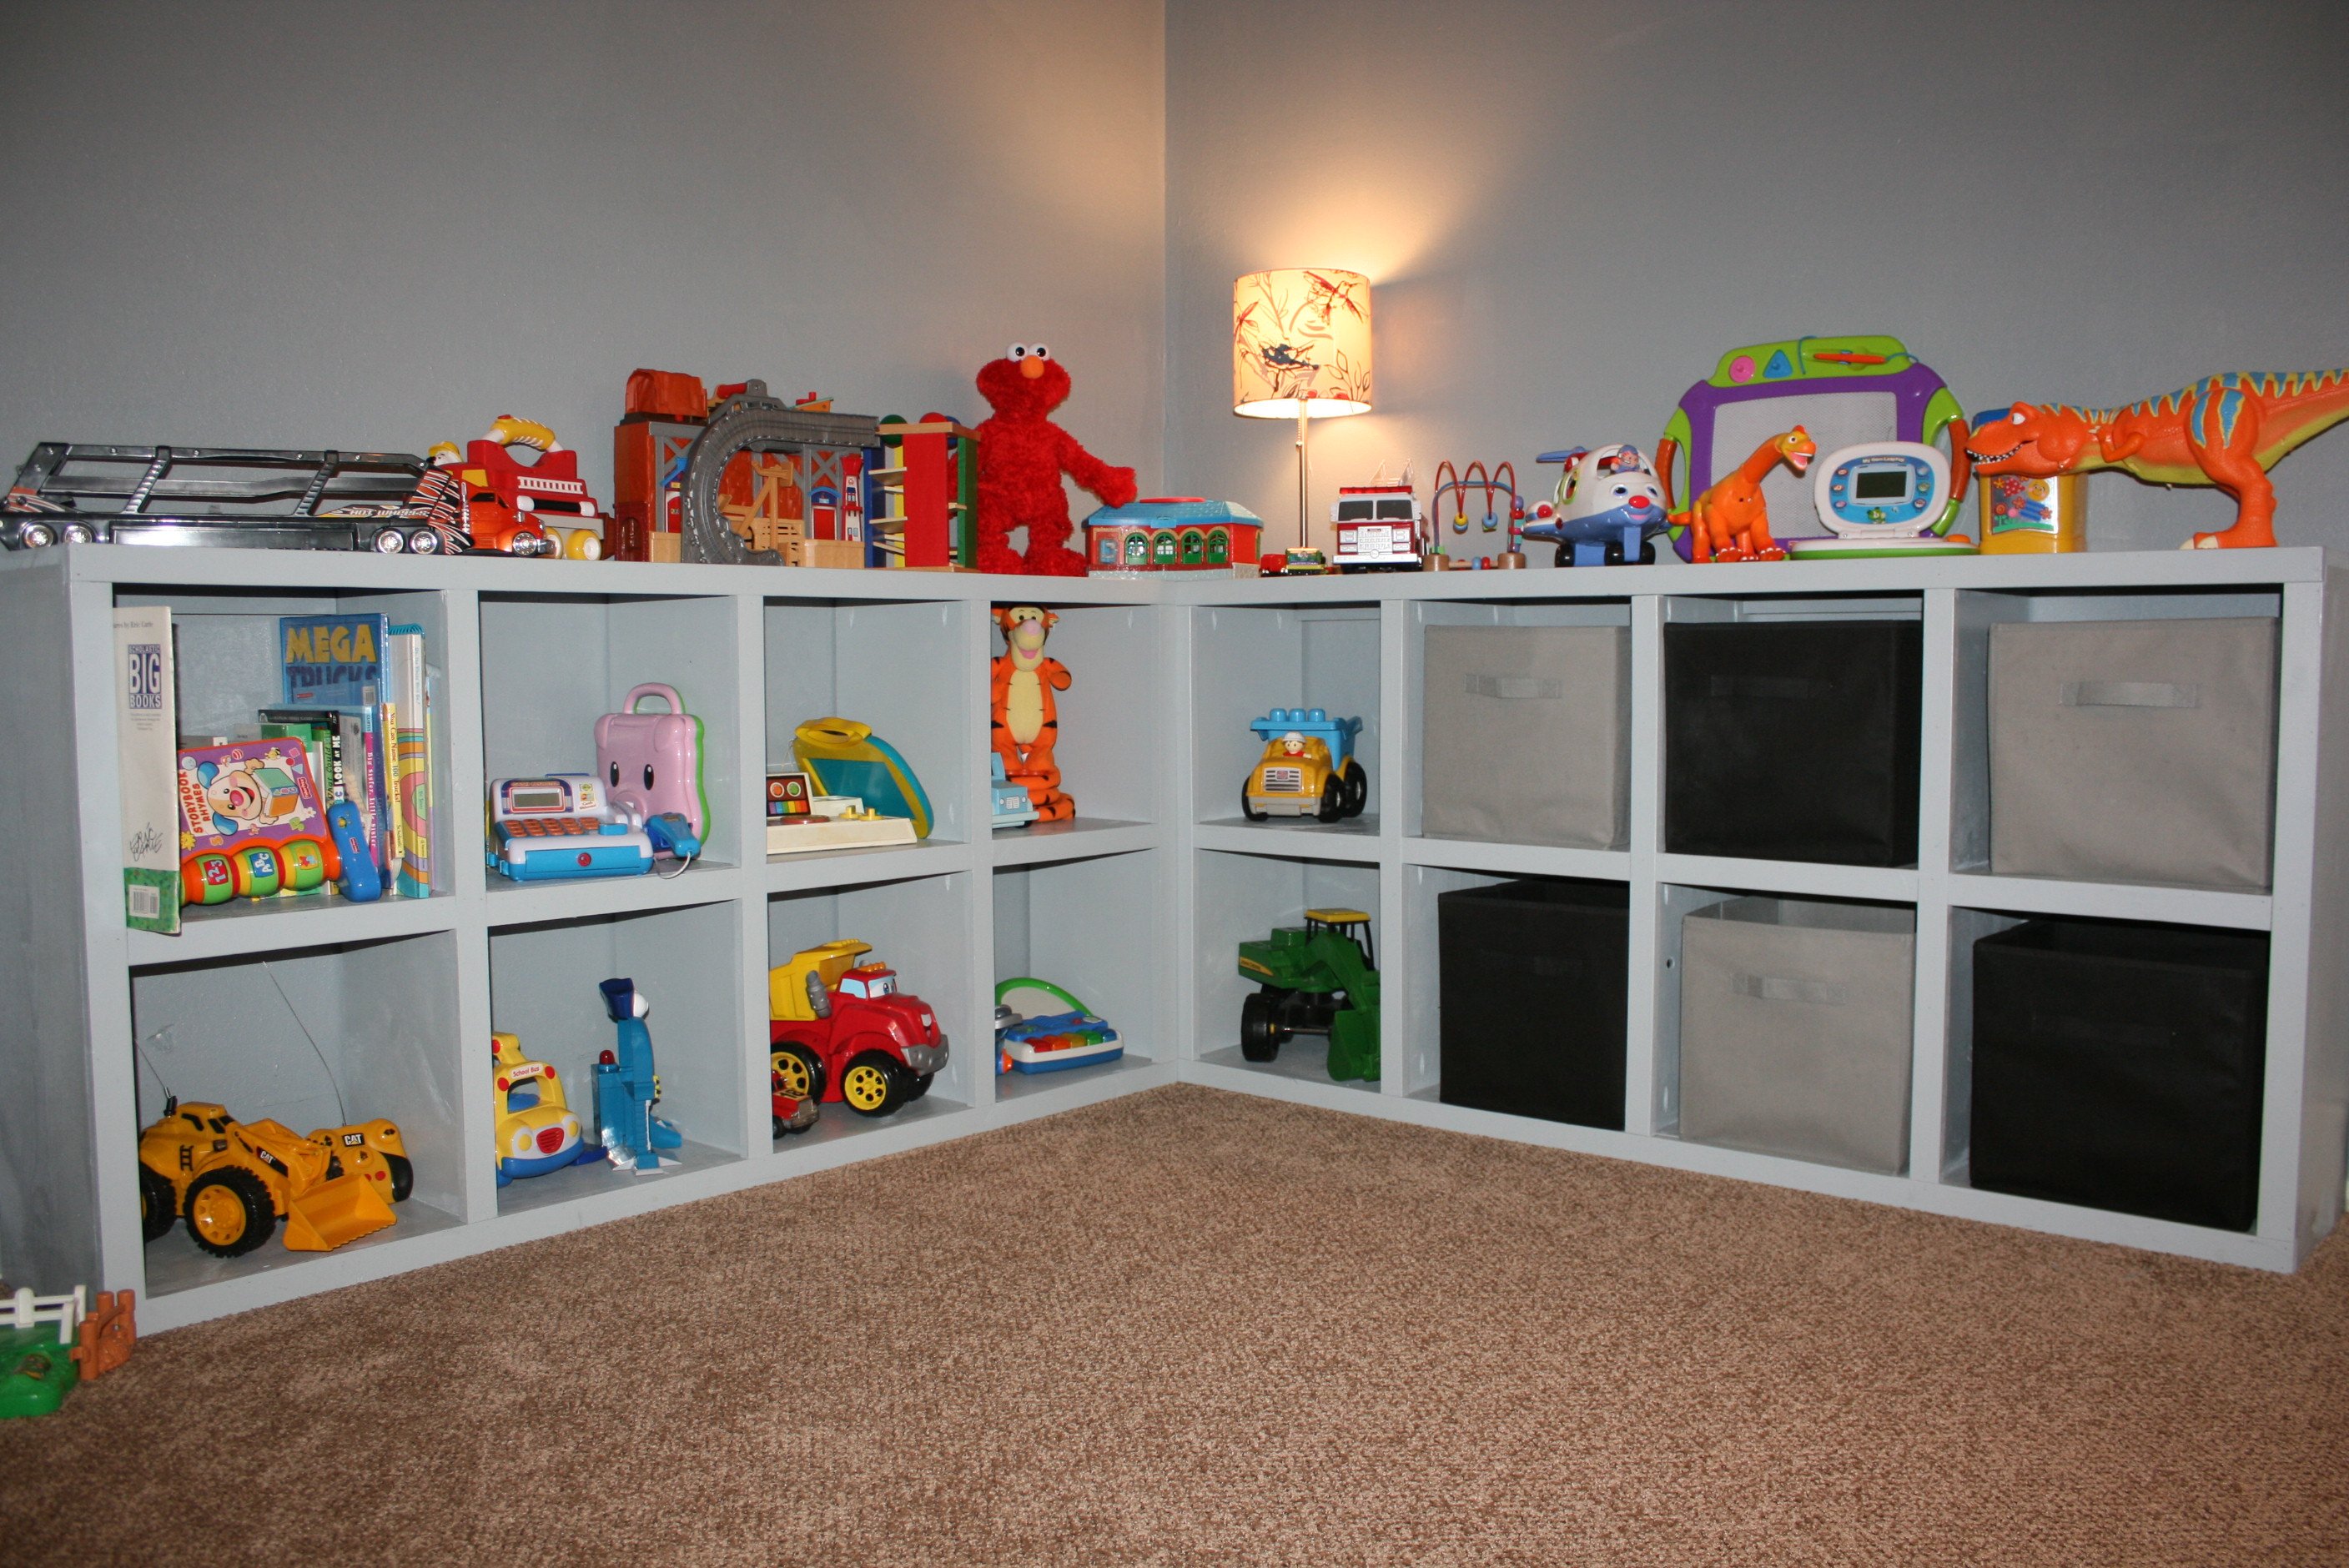
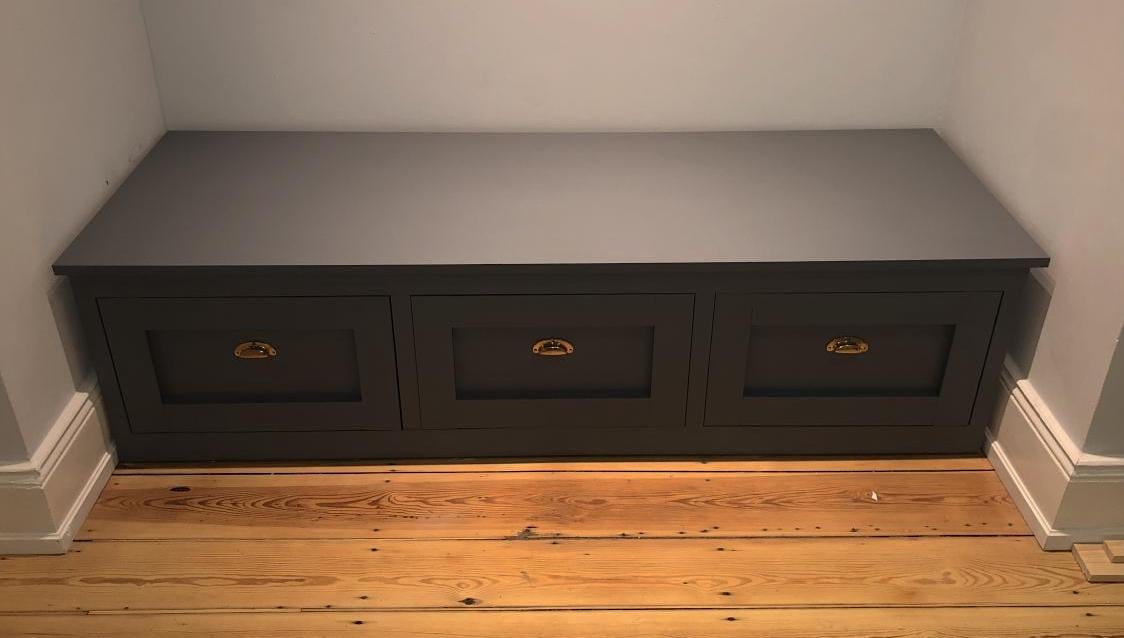
After our basement remodel I decided we needed some storage for our growing collection of of toys.
This project went together much more quickly than I expected. I am so happy with the results.
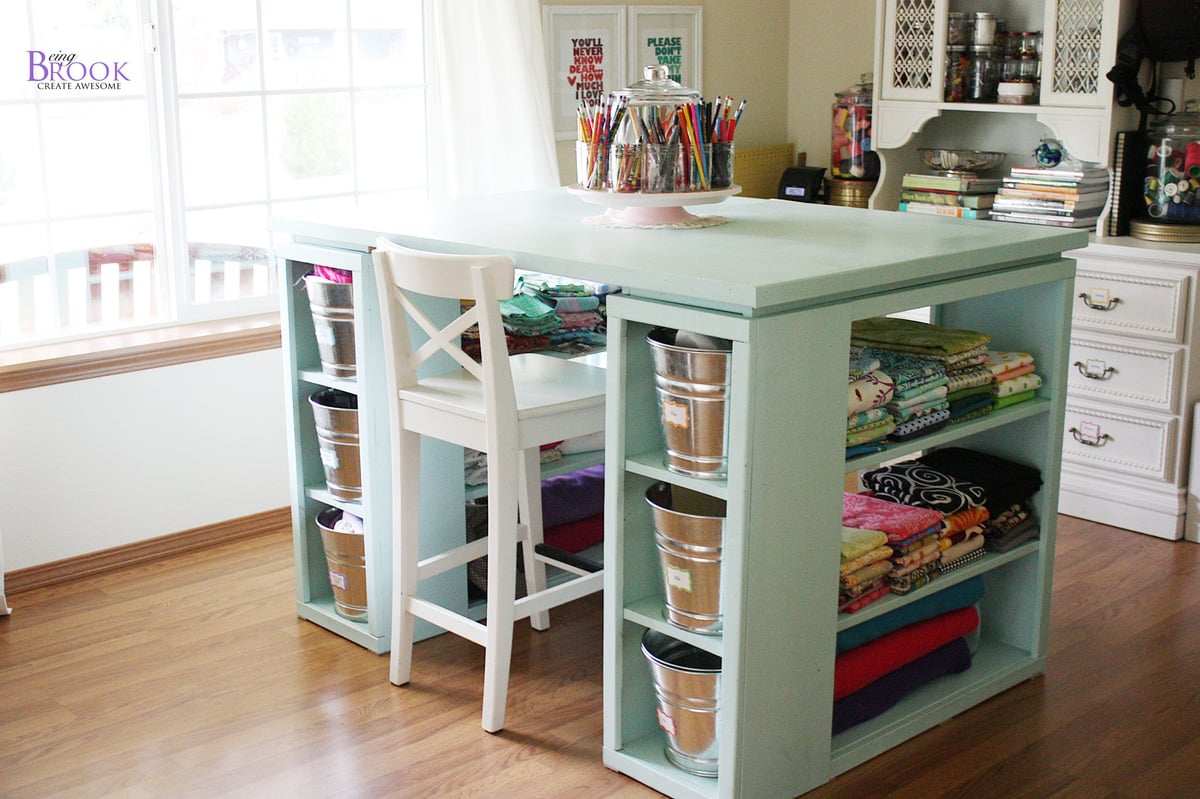
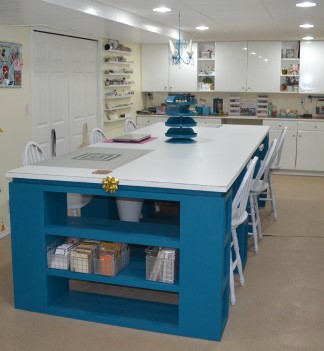
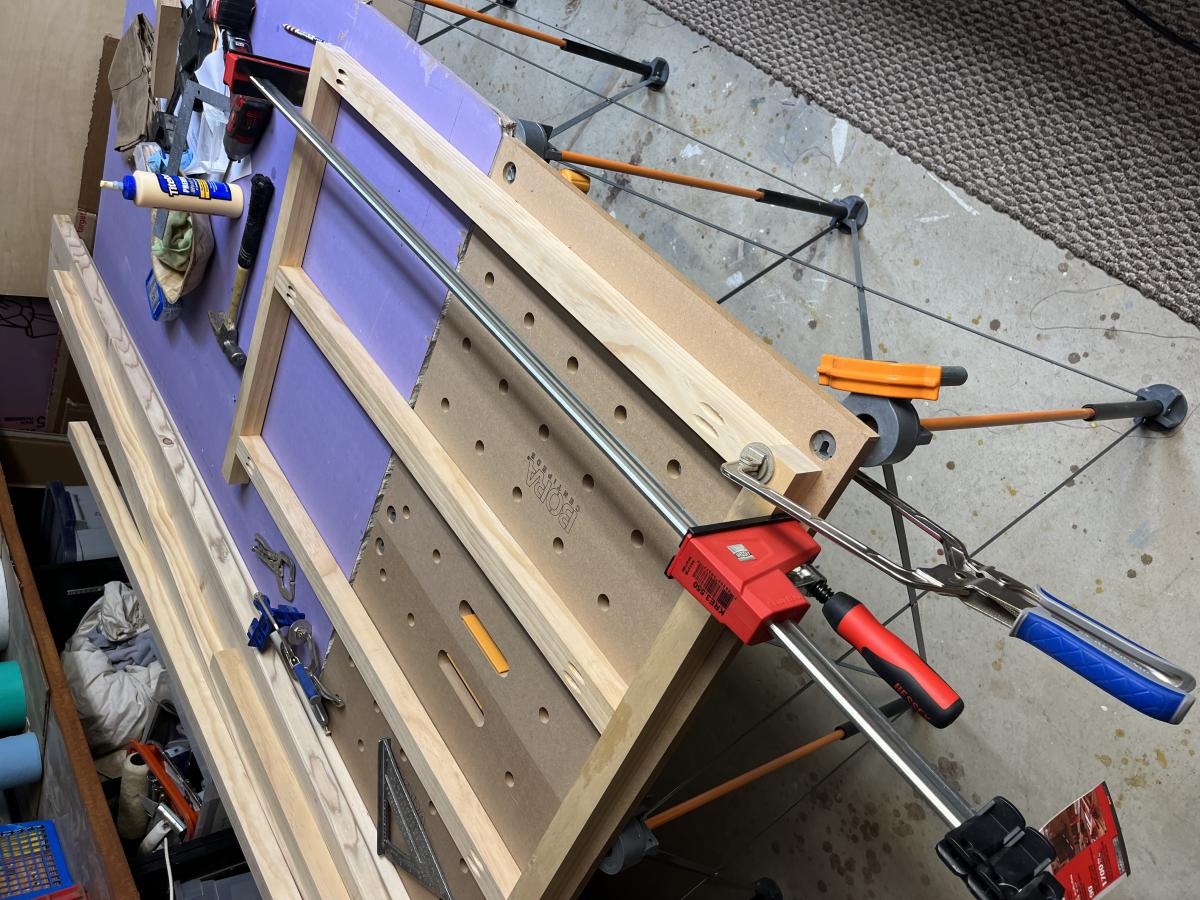
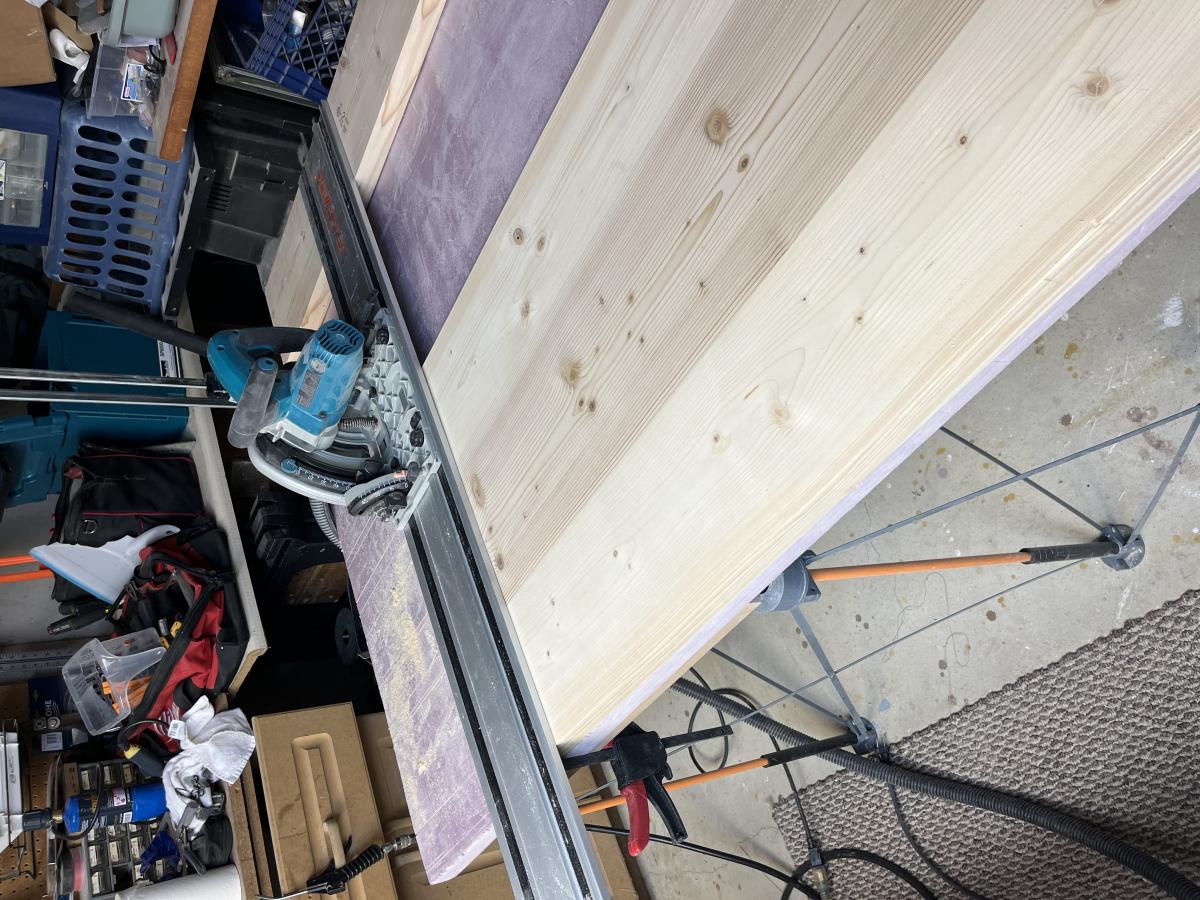
Love the Modern Craft Table! It has lots of storage space and tons of workspace on top. We used pine for the shelves and plywood for the top and edged the top with pine.
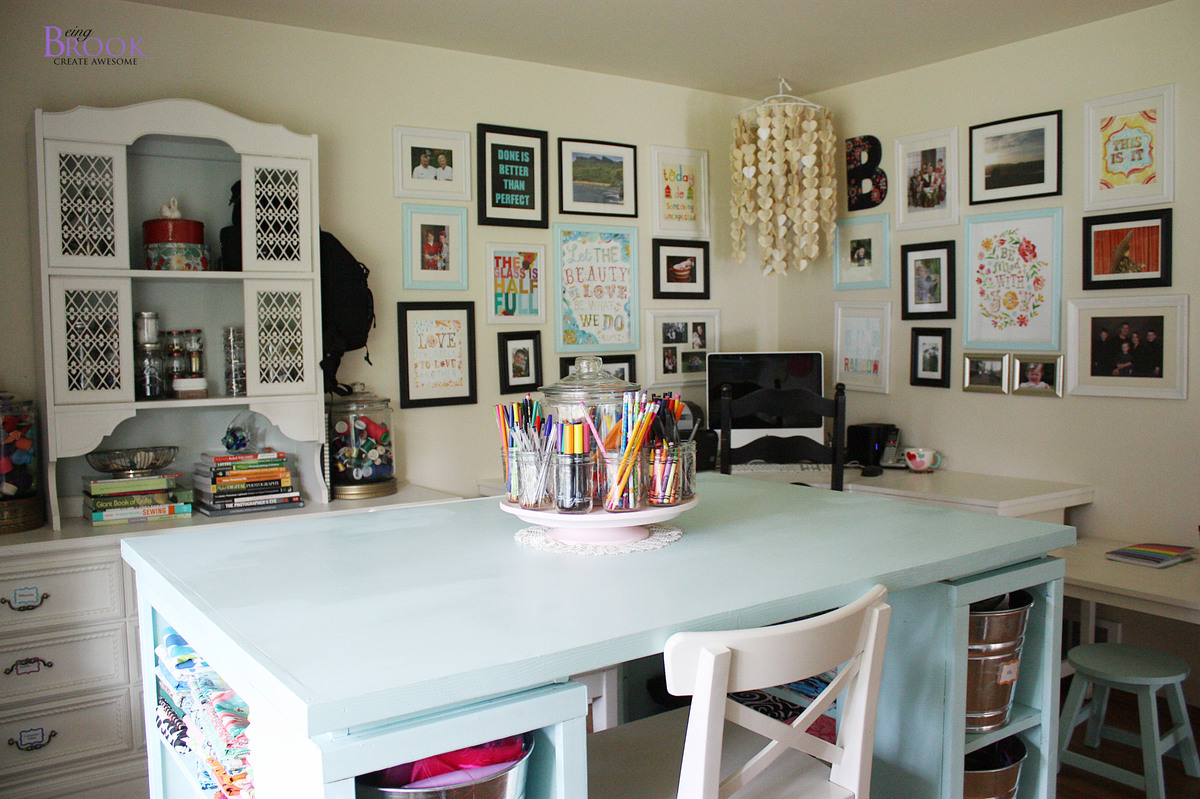
There is a spot for two counter stools at the opposite ends of the table which is perfect to give kids their own spot to craft/color.
Sun, 01/15/2012 - 20:10
I love this table but I wonder how do you use it to sew with? or do you sew on this table?
Sun, 01/15/2012 - 21:57
Brook, wow!!! This table is simply amazing! Thank you for sharing such beautiful photos too!
Mon, 01/16/2012 - 10:03
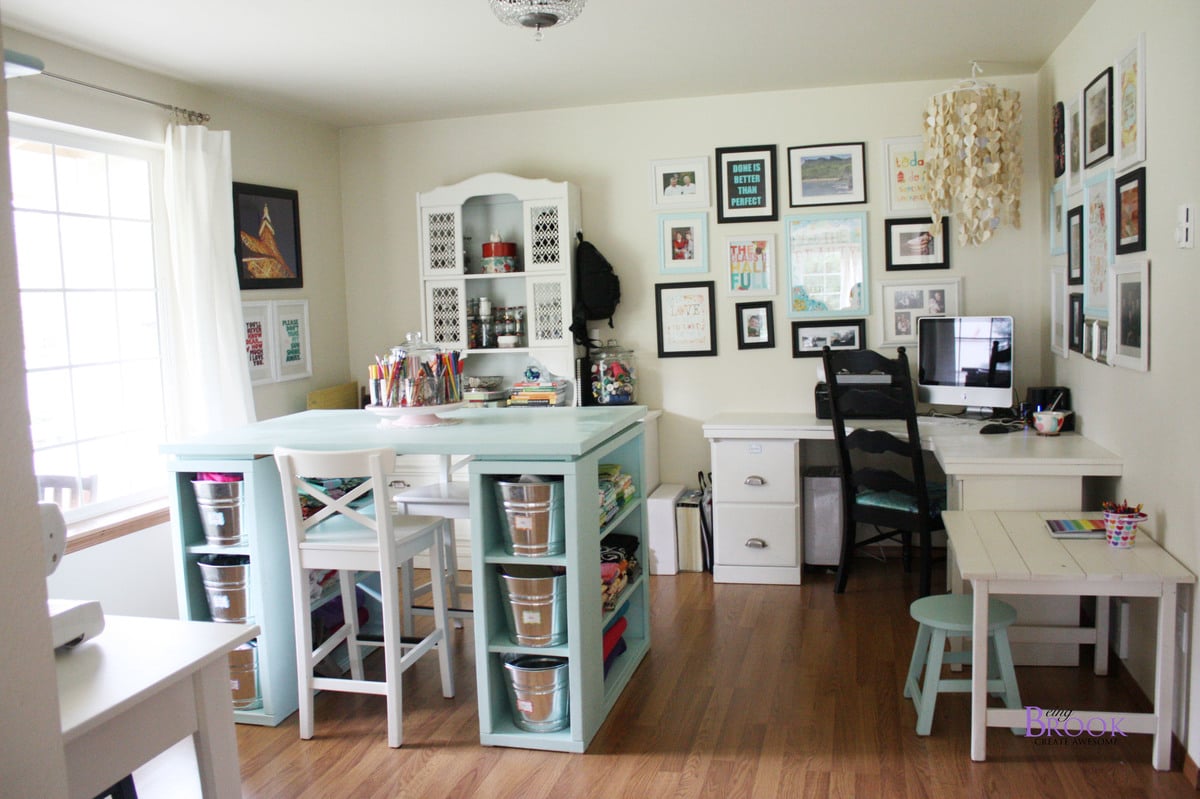
the whole room is beautifull. how many of the other pieces of furniture were built using Anna's plans?
Mon, 01/16/2012 - 10:03
the whole room is beautifull. how many of the other pieces of furniture were built using Anna's plans?

In reply to looks great by Guest (not verified)
Mon, 01/16/2012 - 20:49
Everything but the dresser/hutch and barstools we built using Ana-White plans!
Mon, 01/16/2012 - 12:06
This table is fabulous and I'm really in love with the color! Thank you for sharing. So many new ideas for my room now!
Mon, 01/16/2012 - 12:06
This table is fabulous and I'm really in love with the color! Thank you for sharing. So many new ideas for my room now!

Mon, 01/16/2012 - 17:32
You won't believe this...but today I was shopping for the wood to make the Modular Craft Table, but I did not buy the wood because I was trying to tweek the plans to change the "cubbies" and size. So, I came back to this sight and here is this craft table that would be much better. I want to make it table height rather than counter height so I can sit down and sew at it. I also want to be able to drop the back 12 inches of the table if I do not need it and so it will fit better in my room, wheels on the bottom to pull it out easily so I can extend the 12 inch table when needed. I love what you have done!
Tue, 01/17/2012 - 11:36
You did a fantastic job on this project! Love the way it looks and the color!
Great job!
Sat, 01/21/2012 - 07:00
I love this table, but I can't seem to find the directions to make it. Can you point me in the right direction to find it?
Wed, 01/25/2012 - 17:24
Is there a reason you can't sew on this (from what I gathered from a previous comment)? I want to build something for my wife's craft room and love this, but she will need to sew as well. Help?
Wed, 01/25/2012 - 17:32
Joe,
It would be hard to sew at this table because the table is counter height. You wouldn't be able to reach the foot peddle to run your sewing machine. You could alter the plans to fit a spot that could hold the peddle foot. I sew on a different table in my craft room and use this for cutting fabric and general crafts.
Brook
Wed, 01/25/2012 - 19:26
at one time I had my sewing machine in a spot that was counter height. I used a wood box to put the foot peddle on. One of anna's steep stool plans or the bathroom platform for kids plan might be good to build with this. It was also nice when I was sewing small pieces that needed lots of ironing to stand and sew at the counter.
Wed, 02/01/2012 - 14:25
I have a modern sewing machine (within last 5 years) and I routinely sew at counter height with no problem. I prefer it because it really helps my back. I cannot wait to make this!
Fri, 02/24/2012 - 22:36
Joe,
I think it would work to mount the foot pedal on the inside of the shelf area. She would use her lower outer thigh to depress the pedal while seated.
Tue, 05/08/2012 - 07:47
I love this table! I'm with Brook and don't sew on mine. Height issue is easily worked around - main issue is usually back support. Sewing at a huge workstation tends to leave you feeling unsupported and sitting on a stool (I have a nice wide comfy one from Target) leaves your back unsupported so you usually slouch (bad! bad!). I sew at my smaller desk in a good supporting chair and use my table for everything else. I use this table for a true work area including cutting. I have an Accuquilt Studio and that sucker is HUGE and heavy!
Mon, 11/12/2012 - 11:22
I just talked my fiance' into building this for me to use as a desk. I need a desk for my work from home position where I can store everything as well as have a large area to spread things out. I loved this the moment I saw it and talked him into building it for me. Can't wait to post the pictures when it is finished.
Thu, 02/28/2013 - 16:15
My husband made this FABULOUS Craft Table for me last weekend, it turned out PERFECT! Thank you so much for posting this with such detailed directions....
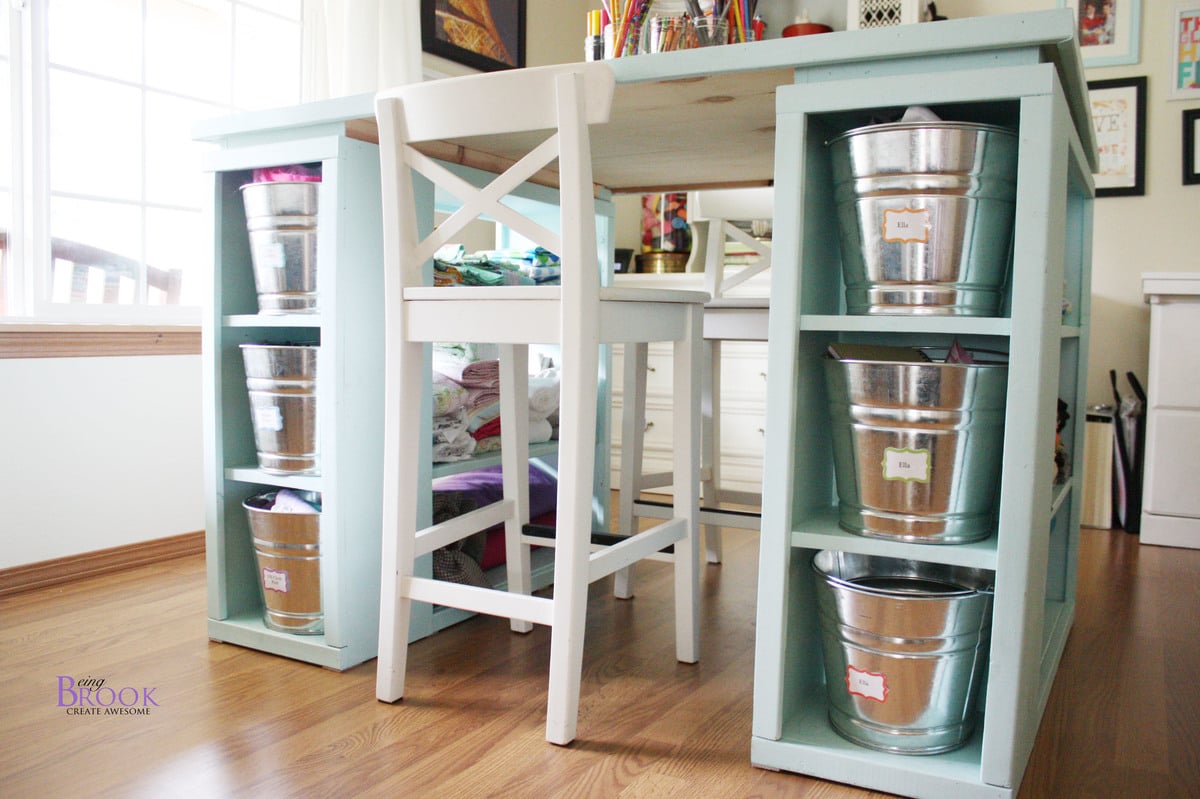
What do you have in your galvanized pails? What do the labels say?
Thank you!
Comments
Ana White Admin
Thu, 04/07/2022 - 20:46
Awesome!
Way to go, so much storage! Thank you for sharing:)