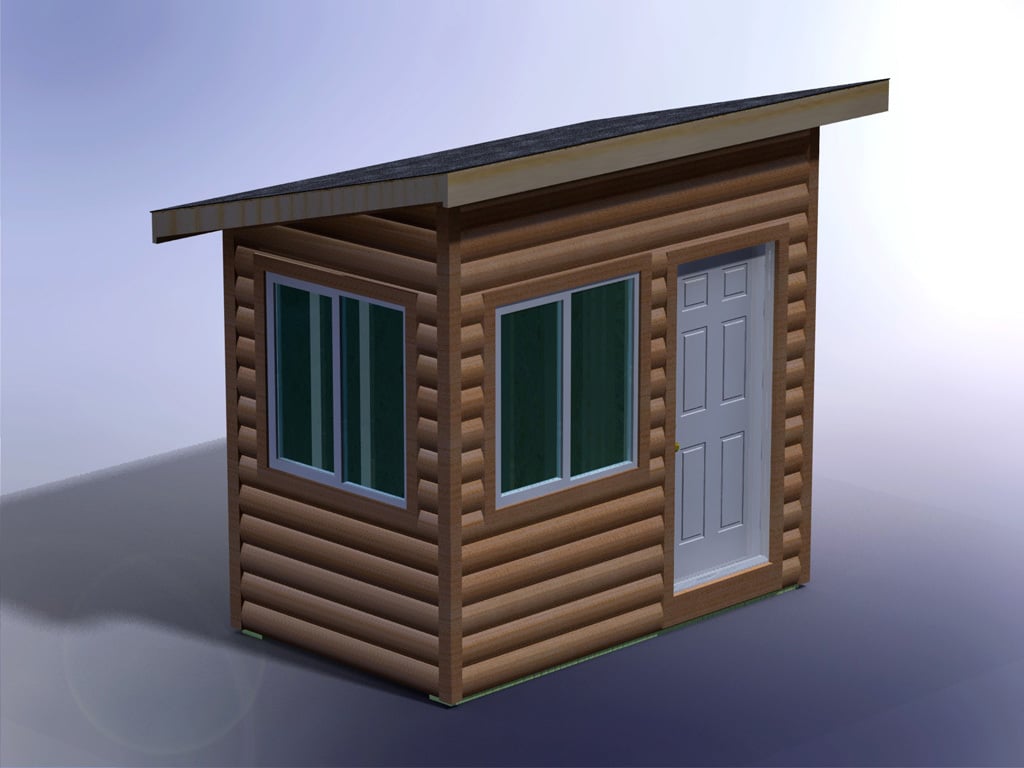
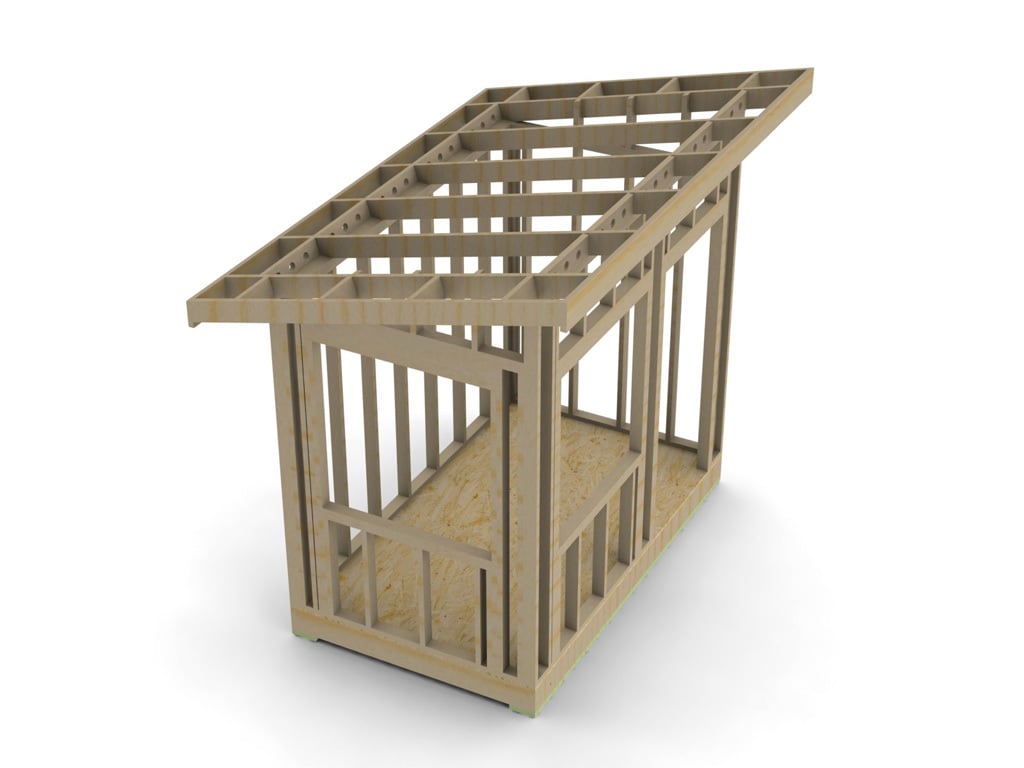
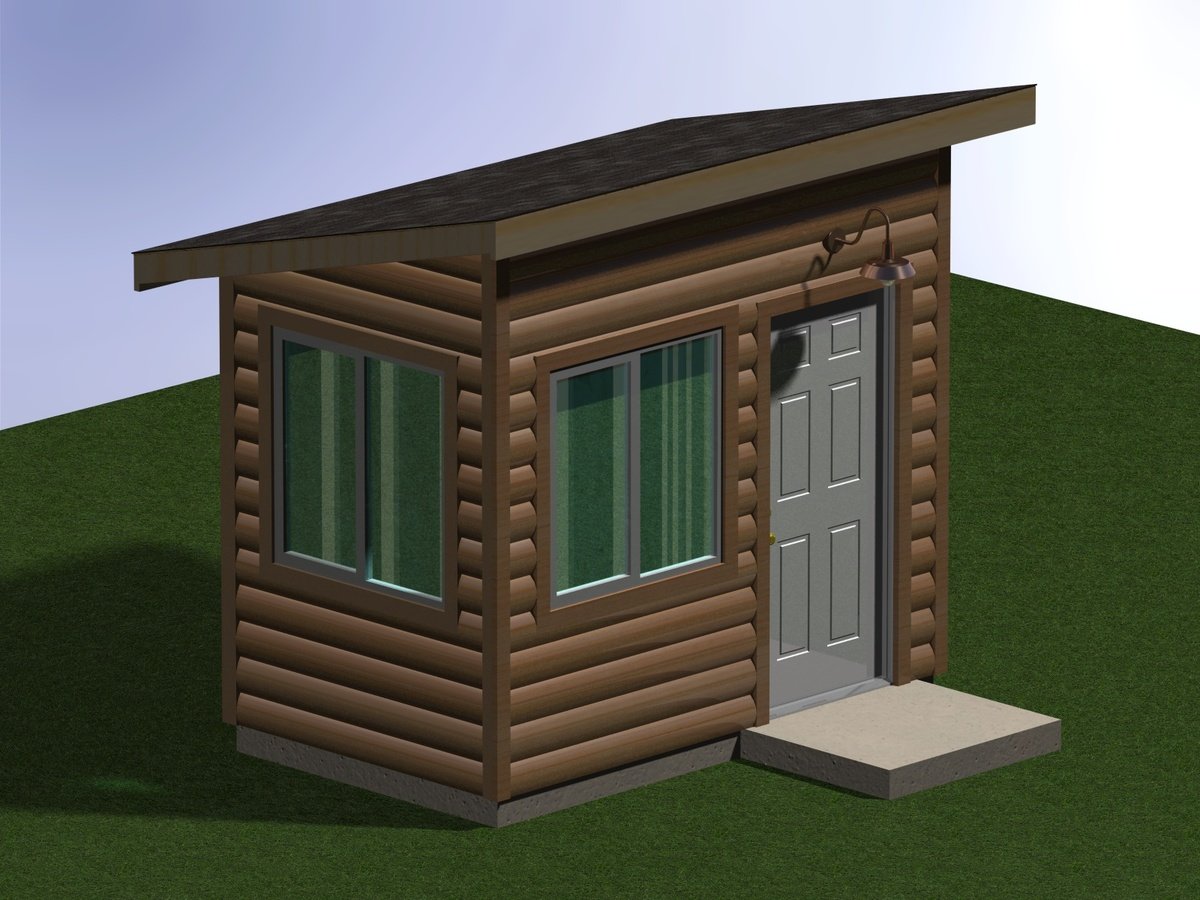
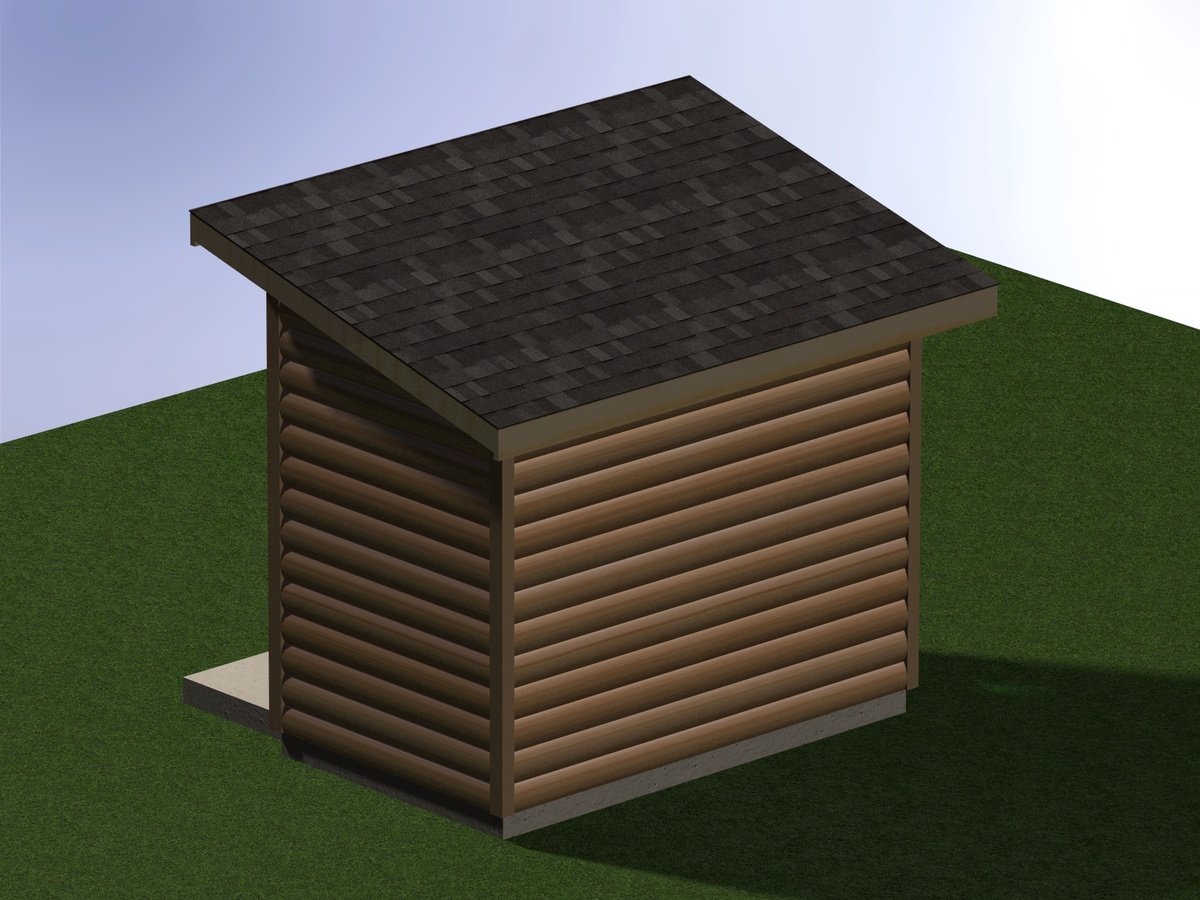
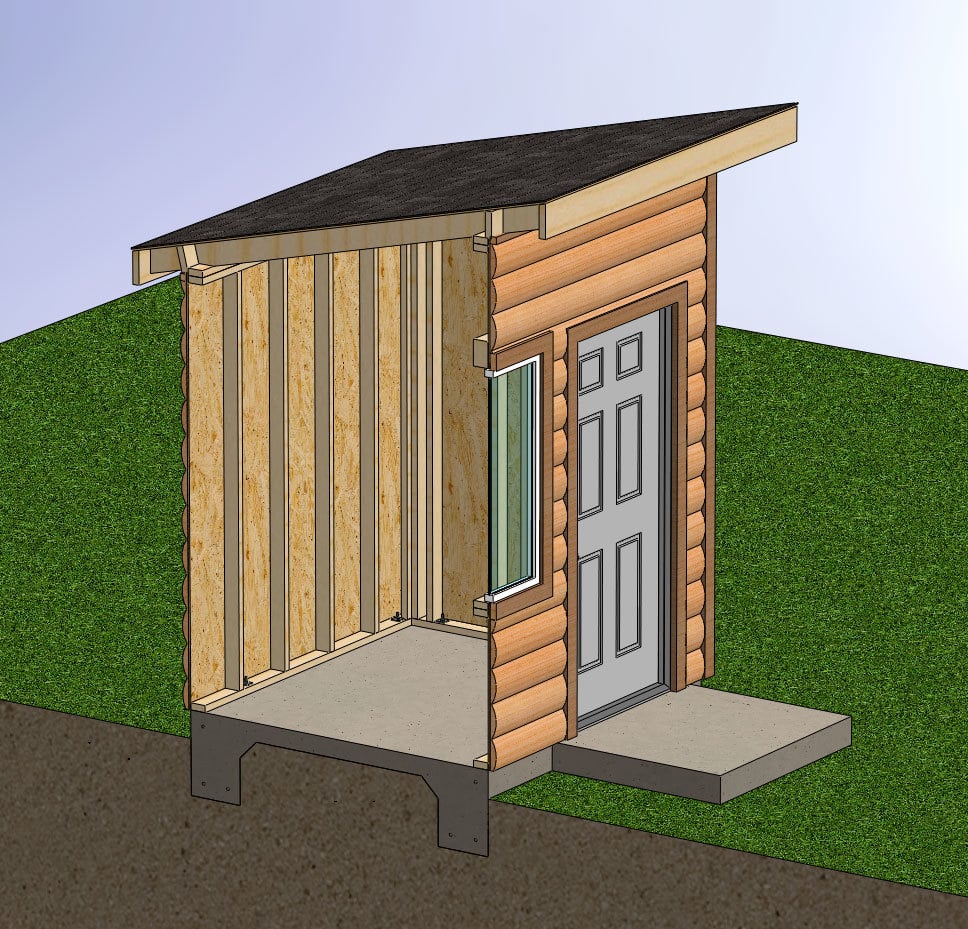
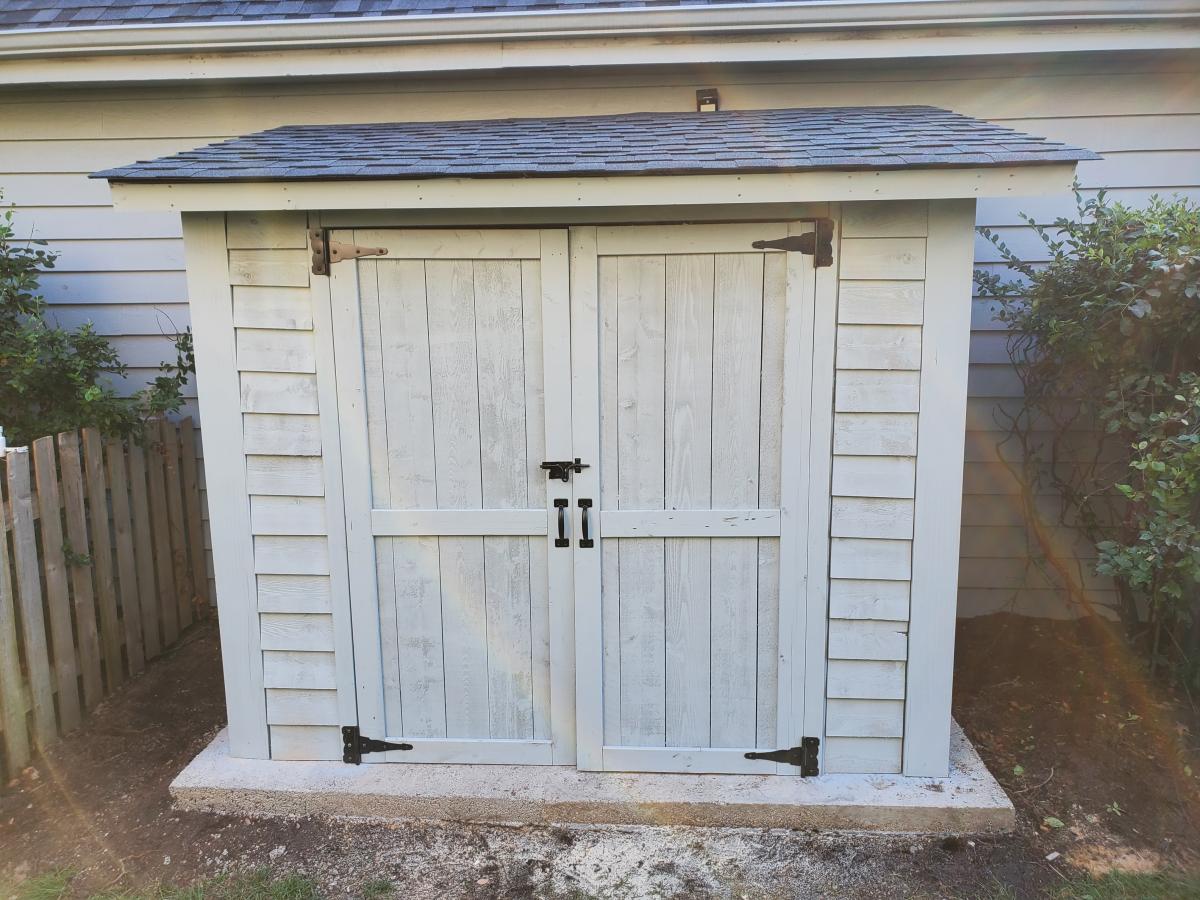
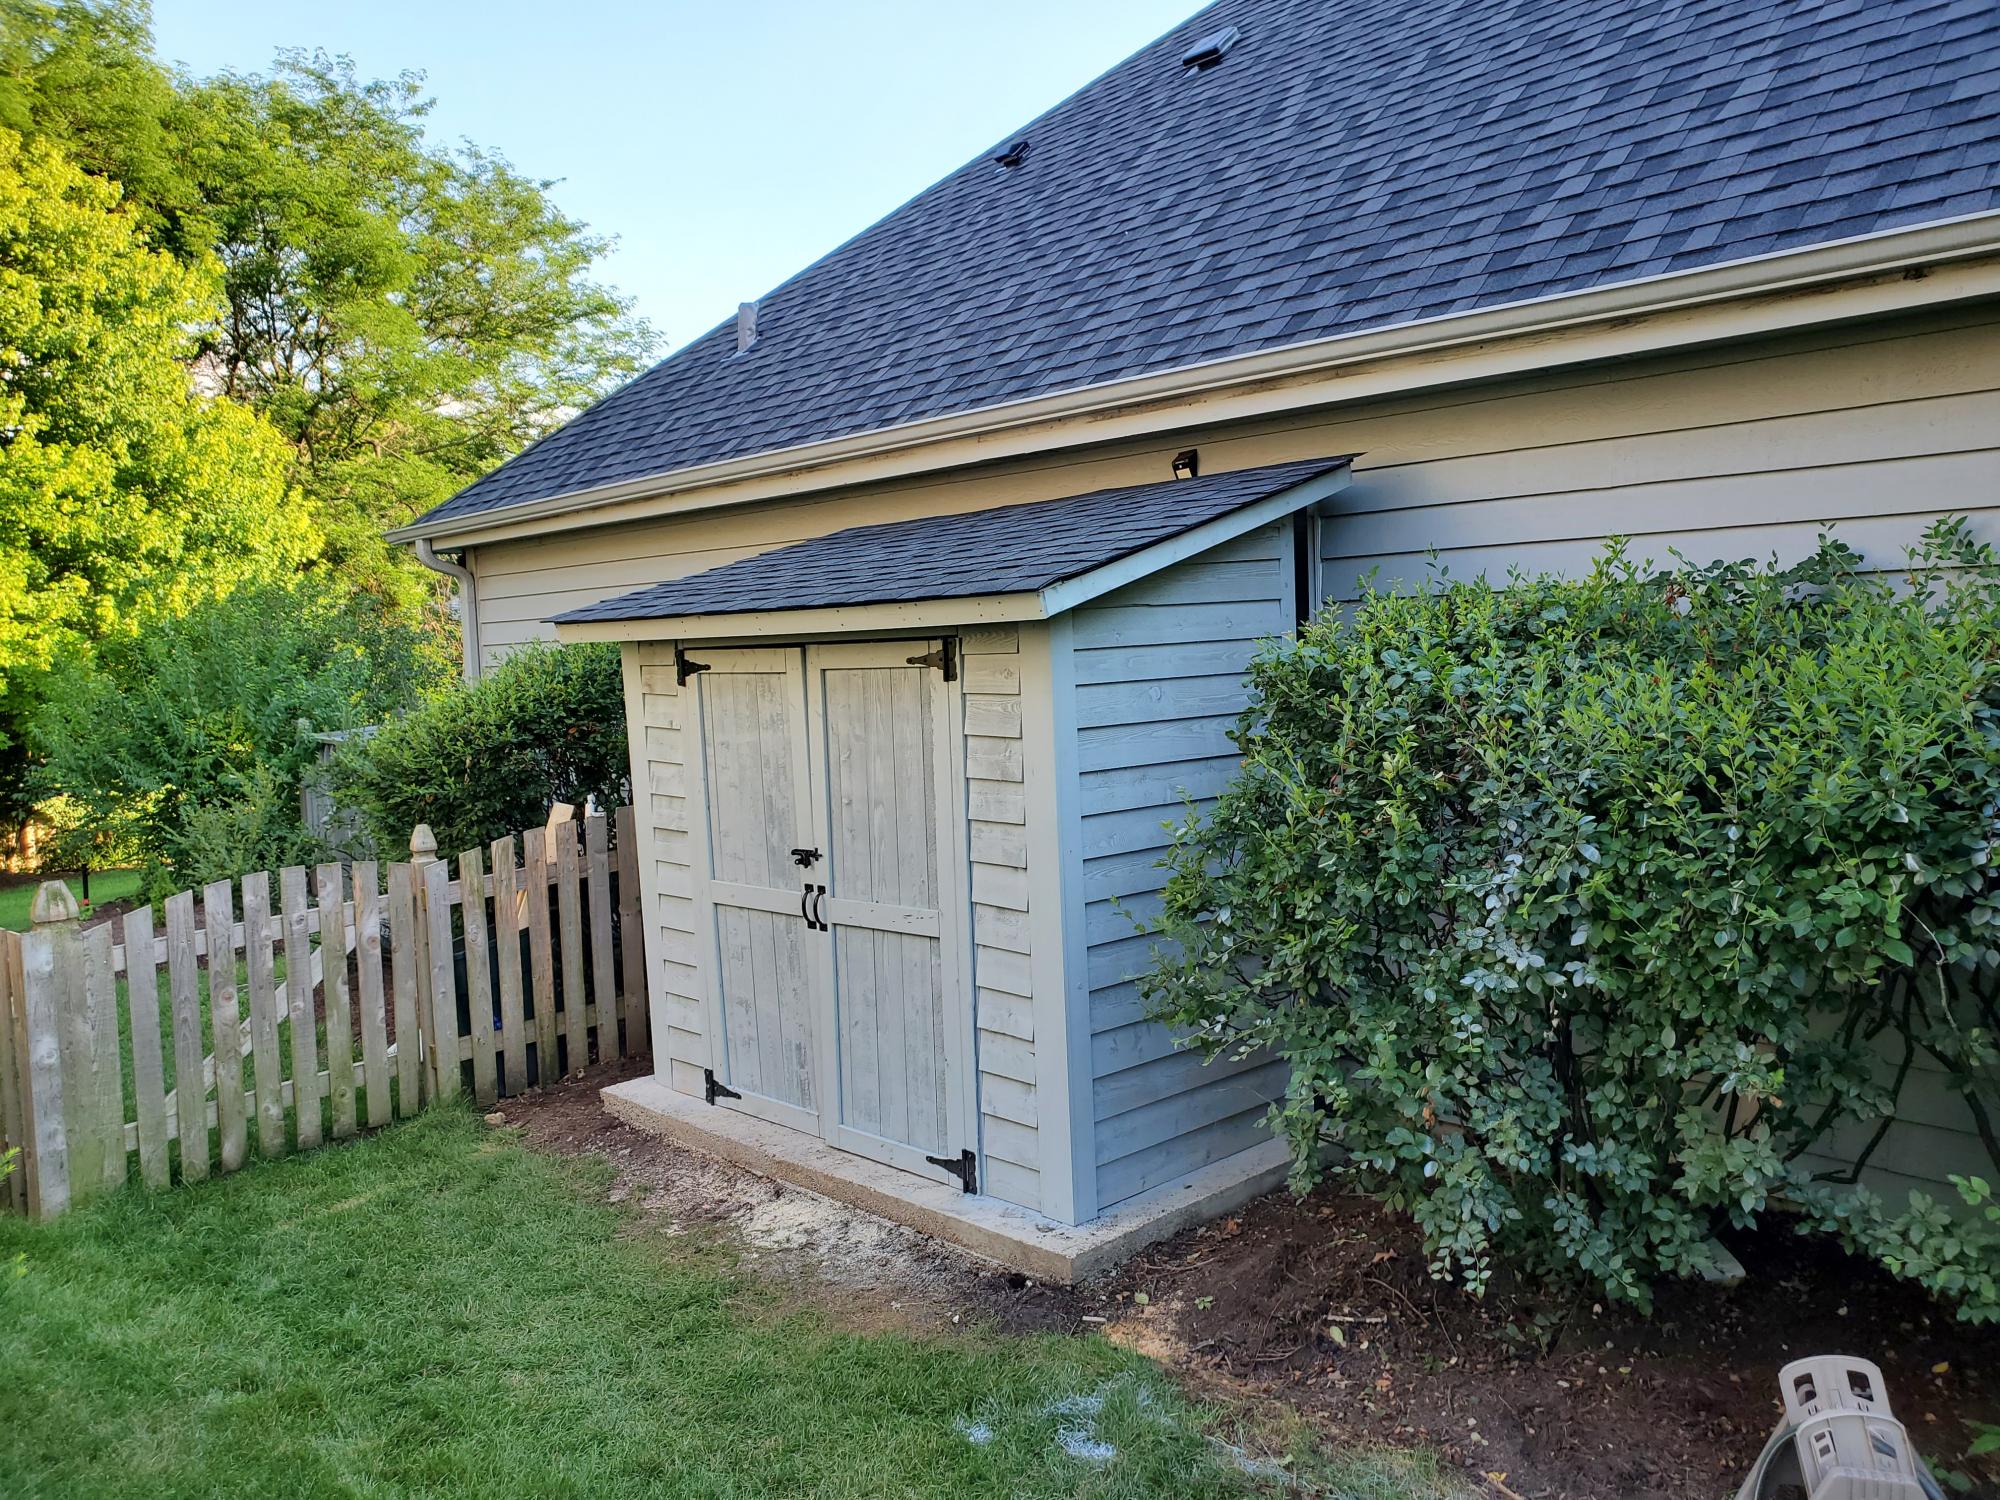
Tall Bedroom Dresser
![](/sites/default/files/20180712_104939.jpg)
Had a blast with this project and am getting more confident with drawer slides. I built a matching dresser that is much shorter and wider. It can be found here: http://www.ana-white.com/2018/08/DIY_furniture/bedroom-dresser
![](/sites/default/files/20180712_104955.jpg)
Had a blast with this project and am getting more confident with drawer slides. I built a matching dresser that is much shorter and wider. It can be found here: http://www.ana-white.com/2018/08/DIY_furniture/bedroom-dresser
I really wanted to put a barn door in my husband's home office, but have you looked at the prices of the kits? No way was I going to spend that for a door. So I decided to fabricate it myself. For the rail hardware- I used a 72" steel rod, copper pipe fittings, and lag screws. For the door hardware, I used 12"ish, long pieces of steel, pulleys, and carriage bolts.
The door itself is made from plywood siding, 1 x 4's, 1 x 6's, and 1 x 3's. The entire door and hardware cost around $80 to make myself. It's functional and looks amazing! The entire tutorial is up on my blog!
Beginner here and I enjoyed this one quite a bit. I played with the angle of the back and finally perfected it on chair three and four. I put the last bottom slat a little closer to the front to create more of a back angle. I also added a third back support position of the bottom slats are essential for comfort so you’re not sitting on a slat. My cushions need to be a bit thicker because you can definitely feel it. Overall, I enjoyed this project. Longest part was making all the cuts, and then painting because I use the sprayer and had to clean it. Thanks Anna!
I made these boxes for my daughters for Christmas. I used maple, and I rabbeted the drawers and backs so that the plywood would sit flush. On the first box, I attempted to join with dowels, but as a novice, that didn't work well, and I converted to a few countersunk screws. On the second box, I used glue and nails as the plan suggested, which was much better. Installing the box hinges and lock was the most finicky part of the project.
Wed, 12/02/2015 - 16:51
Thanks so much. This is high praise from a master builder. Thank you for the plans. Yvonne
My son saw this project and wanted a rocketship. I was also tired of piling up his books on the floor. The only wood I bought for it was 1/4" ply for the back as I used leftover 3/4" plywood for the bookcase itself. Fairly easy with a Kreg, it just took a little while to finish all of the painting.
Entire wall fireplace built-in!
The house is 48" high and 36" wide and 28" deep. It has 3 floors with a total of 10 rooms. Floors were made to look like hardwood floors and stained. Was fun to build and my granddaughter cried when she saw it. Due to the size of it, I installed wheels on it also. I made it from a picture on Ana White of Kidkraft Chic Dollhouse 2011-12-06 Paint all your pieces before you assemble. It makes it a lot easier than trying to paint afterwards.
My bed frame dimensions were 76 wide by 80 length. So that is the inside demension after assembly. My headboard posts were cut to 54" and footboard posts were cut to 24". Headboard panels are 31.5" (14- 6" boards) and footboard panels are 15.5" (14- 6" boards). My posts were made from combining two 2x4s together. I plan on mounting the metal bed frame to the inside of the bed rails. I enjoyed this project greatly.
I’m in love with how well this bed turned out. Modified by using a 2x4 for middle support and 1x4’s for slats. It was less money and felt better for support.
my wife and I had our first son, Mason, over the summer and I was in love with the idea of building his crib. It was a lot more work than I had anticipated but it was well worth the hard work. it came out beautifully. I made a 2X4 spacer that we can remove as he gets older to lower the mattress height. i used all pine lumber for the crib.
I love this workbench! I added casters so I can move it around the garage, outside, wherever it's needed. I just took 4 inches off the bottom of the legs. My hubby is admiring my handy work and planning on making one for himself.
Wed, 01/25/2023 - 14:31
Love this with the casters! So beautiful. I'm new here and wondering at what point you took 4 inches off the legs. Did you build the table and then just cut off the legs? Or did you adjust the measurements of the cuts? Thanks in advance! :)
Mon, 01/30/2023 - 02:32
The overall height of a 4-inch caster wheel is a little over 5 inches with the mounting bracket, so that also needs to be taken in to consideration. 2nd photo shows the overall dimensions, but to me the bracket and brake area appear to be a bit more than 1.03 inches. https://amzn.to/3DkMKzB
I think the best bet would be to have and measure the overall wheel height, prior to measuring and cutting the lumber.
I have a small kitchen. I found this plan on Ana's site to turn it into a pantry shelf. Initially, I was going to have wheels. That way, I could roll it to sweep. I took measurements to match the height of my upper cabinets and width so my door would clear. I put this shelf up to the side on my fridge. I didn't account for the height difference adding wheels. I still can add wheels if I change my mind. I did differing spacing, considering spices and cereal boxes and items between. I haven't quite figured out the end placement for items. I also am considering appliances to be placed on the bottom. I purchased baskets and spice drawers so I can visually organize and see what works. I used odd and end prices of wood and adjusted the measurements to fit my space. I love my corner 2x4s! They are dark and once planes, have these dark brown ribbons revealing the growth rings. We think they might be brown treated boards. Some of the shelves have a darker brown edge, 5 total. I purposely wanted the dark edge facing out. But I didn't have enough so I used different looking boards (same thickness) and played around with assign them their spot. My friend had copper pipes laying around, so I used those in the back to stop my items from falling off the backside. I polyurethaned to keep the natural wood colors. I really love it and am excited to do more projects!!
Used Anna’s cup tree plans for this project. Thank you Anna!
I’ve also successfully built a few of your beds. Your plans are always straightforward and easy to follow.
What you do is so appreciated!!!
Angel
Sun, 03/12/2023 - 22:11
Attempted to submit while logged in, but could not. Thank you
My husband built this conversation set during covid. Since then he has built so much stuff for our yard. More pics to follow.
Twin beds - adapted from a queen bed Ana White plan.
My father in law and I built this kitchen set for my two daughters, ages 3 yrs and 9 months. It was so fun to work with my father in law. I have built a few things before (table, chairs, doll bed, etc.) but nothing of this quality or magnitude. He is a great woodworker and knows how to do all the neat finishing touches that just make the project look really professional. I learned a ton working with him and had a blast!
I was inspired by Ana's kitchen sets and used a combo of then and the Lowes plans and I was very happy with how it turned out. I changed a few things: put two doors under the sink, made "gas" burners instead of "electric", used half the sink cabinet top for the sink and left the other half for counter space, added a clock to the stove, made the oven door open down.
The sink is a food service warming pan 1/4 size and the faucet came from Wal-Mart for $10. I will probably replace it with a nicer one from the ReStore when I get a chance
Break down of costs:
Lumber: $100
Hinges and pulls: $40
Paint and primer: $45
Burners: $20
Sink: $24
Mon, 12/26/2011 - 12:33
What a beautiful kitchen! I love the burners! And the warming drawer! Thank you for sharing.
Mon, 12/26/2011 - 13:09
Holy cow! Fantastic job! You guys really pulled it together and I really love the creative use of hardware, etc.
Wed, 12/28/2011 - 07:50
Thanks guys! Only problem is that my girls use it so much, I only get a chance to play with it when they go to bed! :)
Wed, 02/29/2012 - 10:03
Sorry I didn't see your comment sooner - I made the burners with craft wood circles and squares and 1/2 inch pieces of wood. I notched the ends over the circle with a chisel.
Bougth some furniture but no bookcase . So I started to make it myself; first time ever I worked with wood.
I used the plans of Channing bookcase but modified them a bit.
It fits completely with the other furniture: same color and structure , but most important, 5 times cheaper.
Thanks Ana White
I had inherited some bed frame wood from our local Re-store and have been working it into projects here and there. We needed some actual night stands and I loved the look of the Reclaimed Look Wood Nightstand, but they were a little too tall for our bed. The height of the original plan is 28" and I ended up taking out one drawer for a total height of 20". I also found two sets of drawer slides at the Re-store and decided that an open shelf on the bottom would better suit our needs, so I crossed the reclaimed plan with the farmhouse plan to create a shelf on the bottom. The bottom is built the same way that the sides are, but attached so that the 2x2 is on the underside.
I didn't have enough wood from the bed frame to make two full tables, so I used Douglas fir 2x2's for the legs (the best the local big box home improvement had that day for my price) and white board for the table tops and every other board for the sides and shelves. This was my second real building project, so they were really easy to put together, but it was a lesson in making everything super square because of the drawer slides. The finish I used also goes great with a 130 year old dresser that you can see a bit of next to the finish table. The wood only needed one coat to reach the color closest to that dresser and it hid the fact that I used three different types of wood in this project. Overall they are just what we needed in this space. The bed frame is IKEA, but I am thinking about making the Reclaimed Look Bed Frame to match the tables in the future.
Wanted to make a Day bed for my daughter. Found the plans and found to be very affordable. Had a great time building it, and the reaction to my daughter when it was finished was the best
Fri, 02/24/2012 - 09:56
This looks great. I was just wondering how much did you end up spending on materials for this project?
I had always wanted a kitchen island and saw this project. Seeing that the plans were well written I decided to tackle it. In addition I made a few small modifications to enhance the style of the island. These included using 4x4's on the corners and a IKEA butcher block top. The top allows for a larger surface area to work with and more space to sit under. The stools in the picture are from World Market and they were the perfect pair for the island. The island is great for family gatherings or just sitting with your morning coffee. I had family over for Thanksgiving and received lots of compliments. Thank you Ana!
Mon, 12/02/2013 - 21:39
Marvelous job on the island! The baskets are the perfect finishing touch!
Val
artsybuildinglady.blogspot.ca
Tue, 12/03/2013 - 17:43
I love how this looks. This is actually next on my list of projects, thanks for the inspiration!
Comments
arensj3
Mon, 08/03/2020 - 18:42
Tall dresser
Do it!
arensj3
Mon, 08/03/2020 - 18:44
Couldn’t find the plans
I must be missing the link to the plans for the dresser. Sorry, could you help me find the plans?
laughablenewsc…
Wed, 09/30/2020 - 17:13
I would also like the plans?…
I would also like the plans?? Any help finding the link?
Dseitz555
Mon, 12/28/2020 - 11:12
Plans for Tall Bedroom Dresser
Are the plans available for this piece? Its beautiful! If so, please let me know.
hutchingslv
Thu, 08/12/2021 - 15:35
Plans for tall dresser
Any way to get a copy of these plans? I really like the look and want to give it a shot. Have to make a few of these if all goes well for all my boys.
Thanks