Memorial flag case
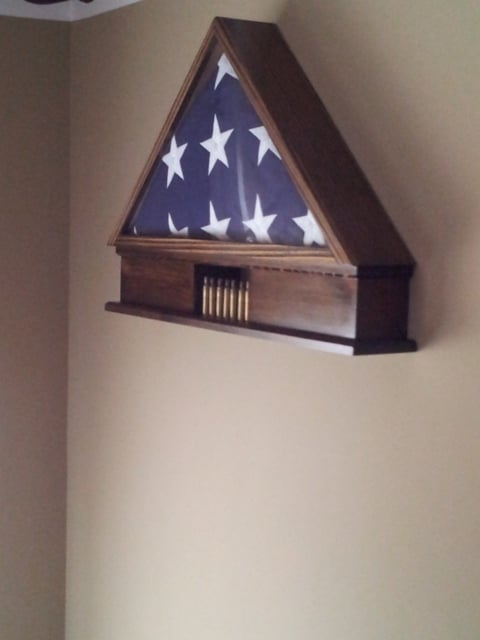
I built this case for my Grandma when my Grampa died. I wanted to be able to display the shells as well. The design is a combination of a few I saw and like different aspects of.

I built this case for my Grandma when my Grampa died. I wanted to be able to display the shells as well. The design is a combination of a few I saw and like different aspects of.
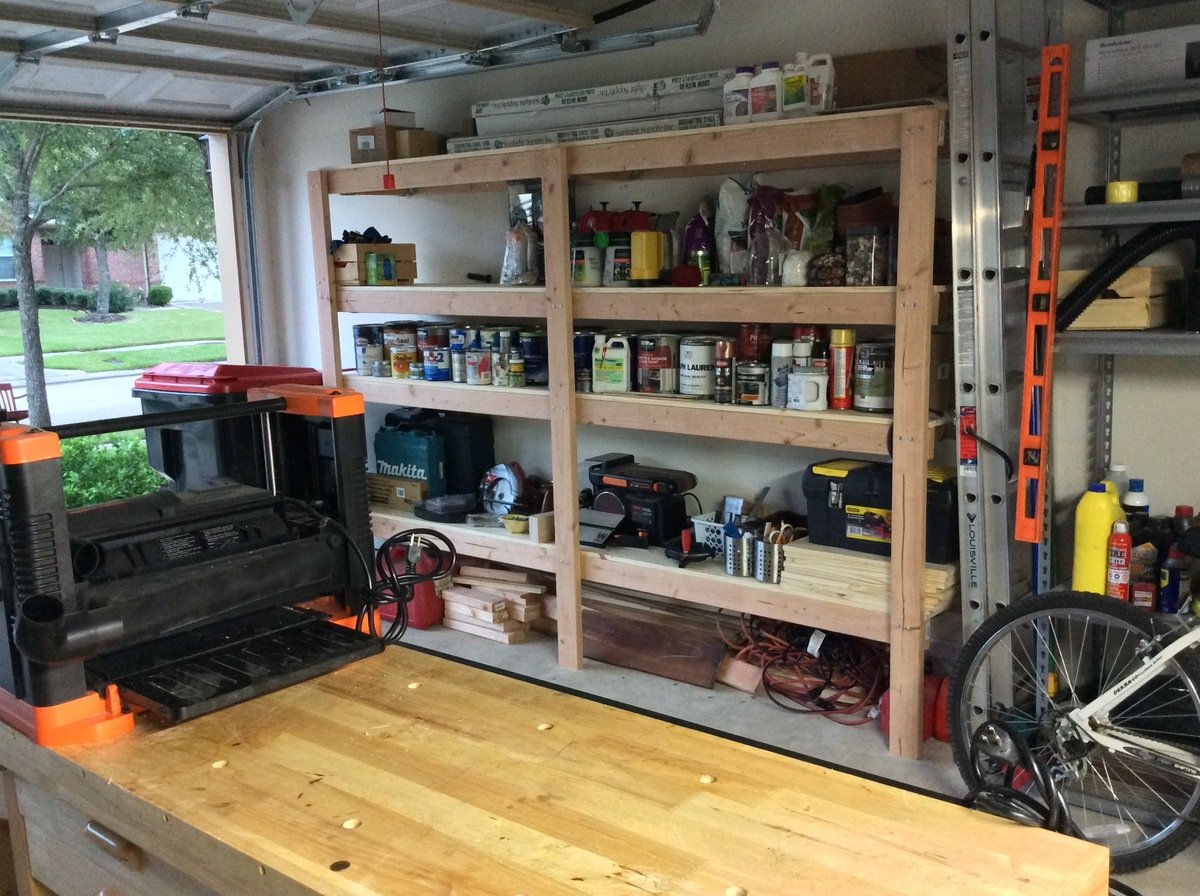
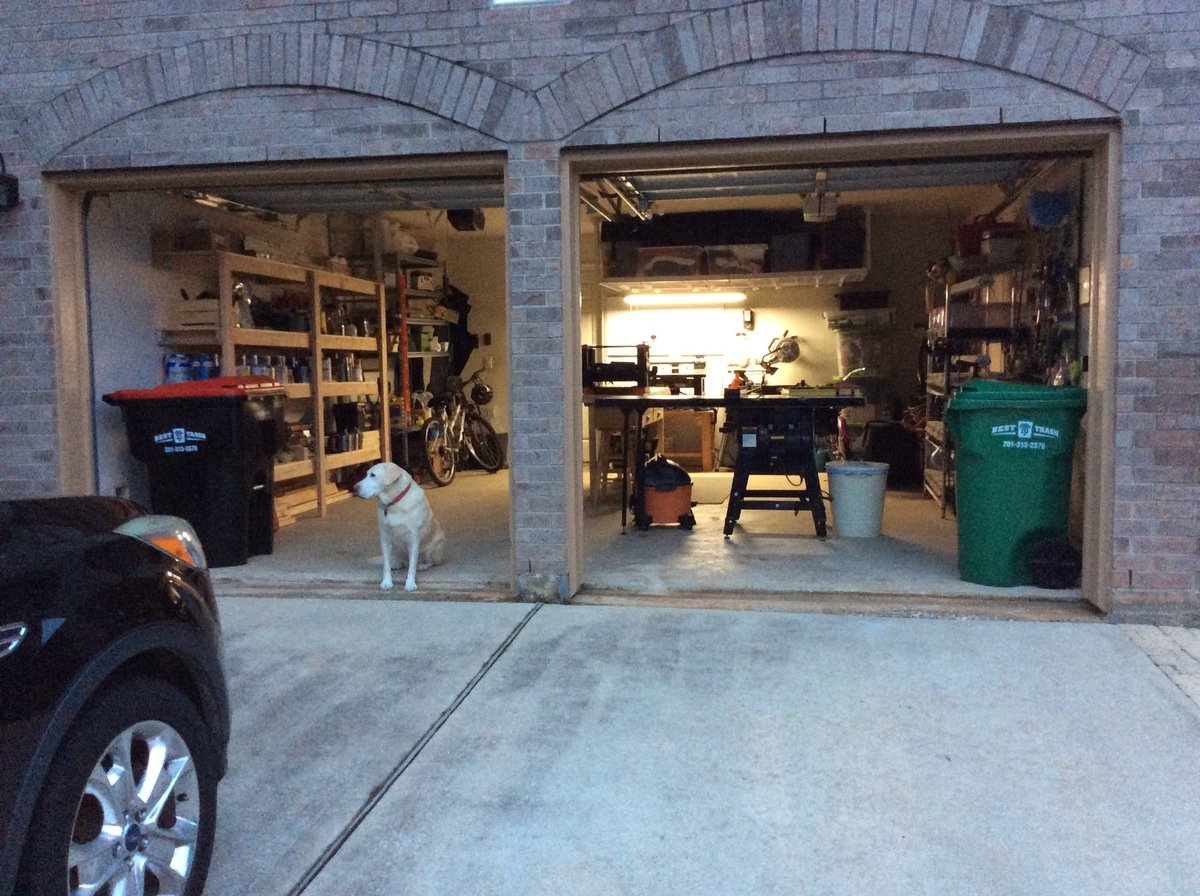
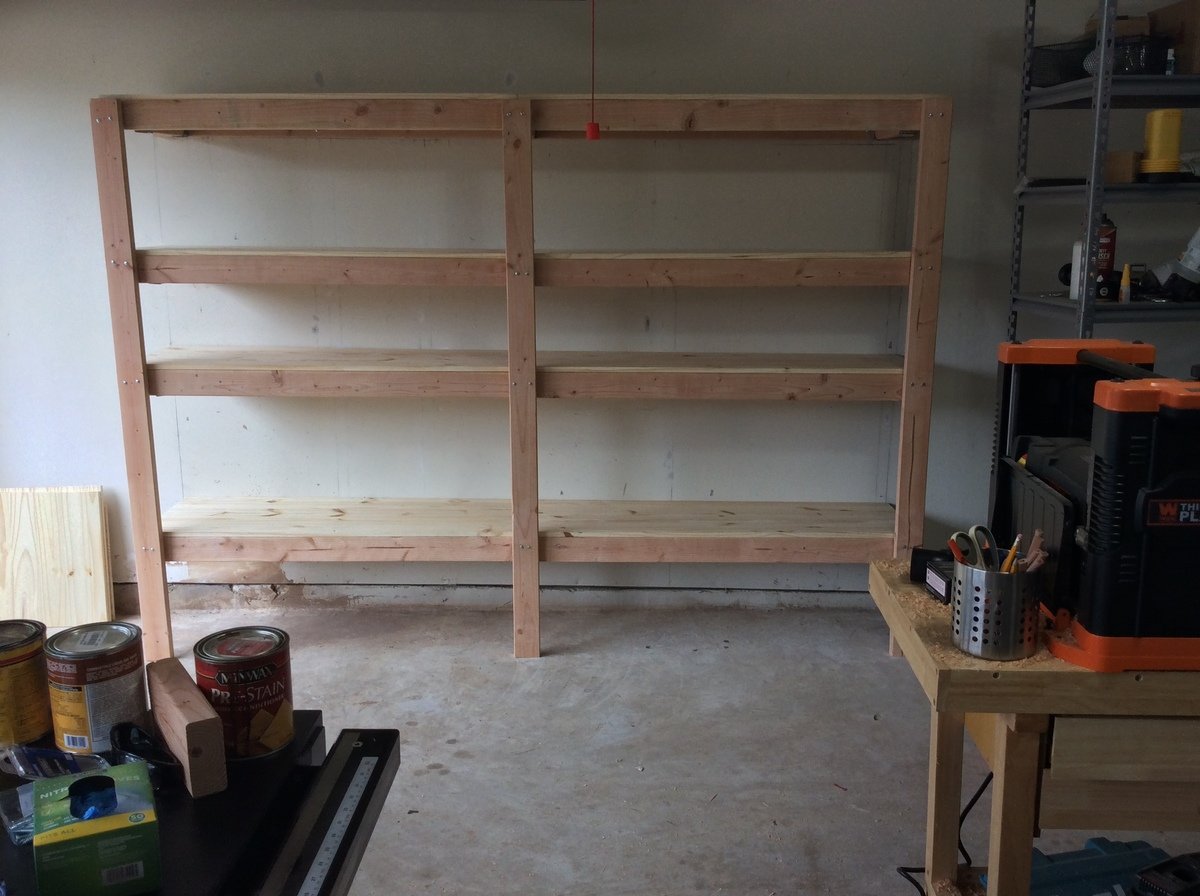
This was a pretty easy project, but I had to adjust the vertical legs to accommodate the sloping garage floor. I drew a horizontal line for the top edge then measured to the floor at the spacing I wanted the vertical legs. I used these measurements to cut the three vertical legs. It’s level and straight, even though my garage is sloped.
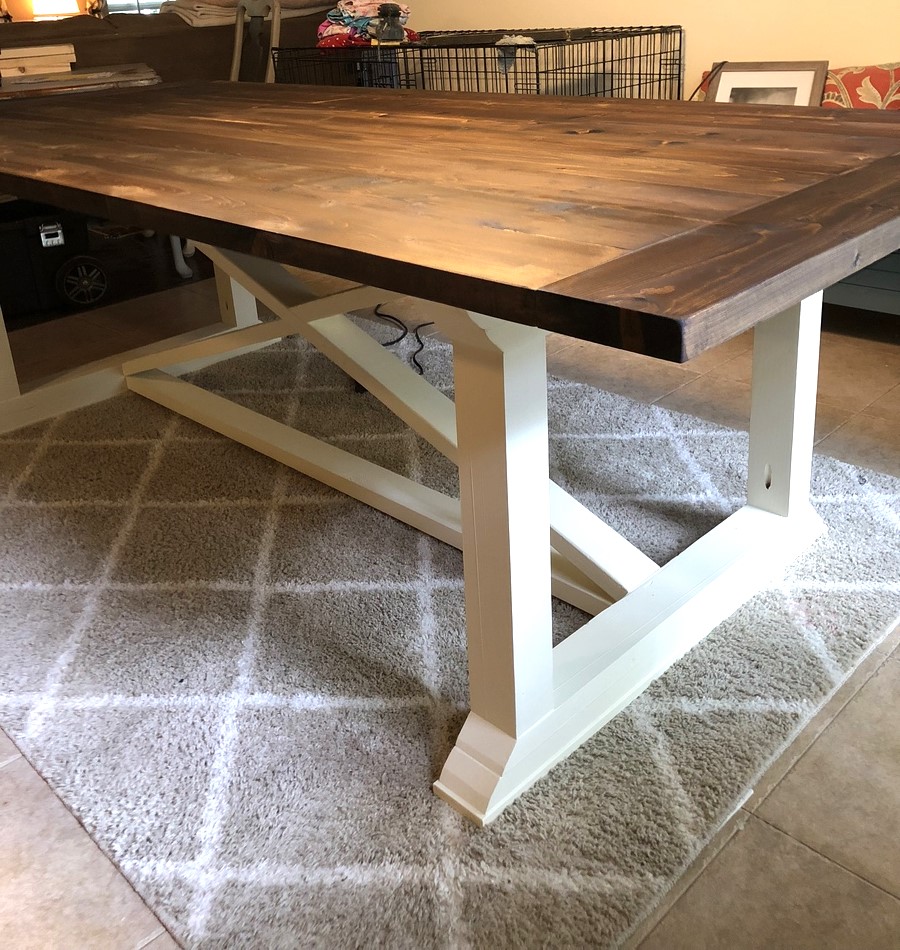
built from Ana White plans for my son and daughter in law
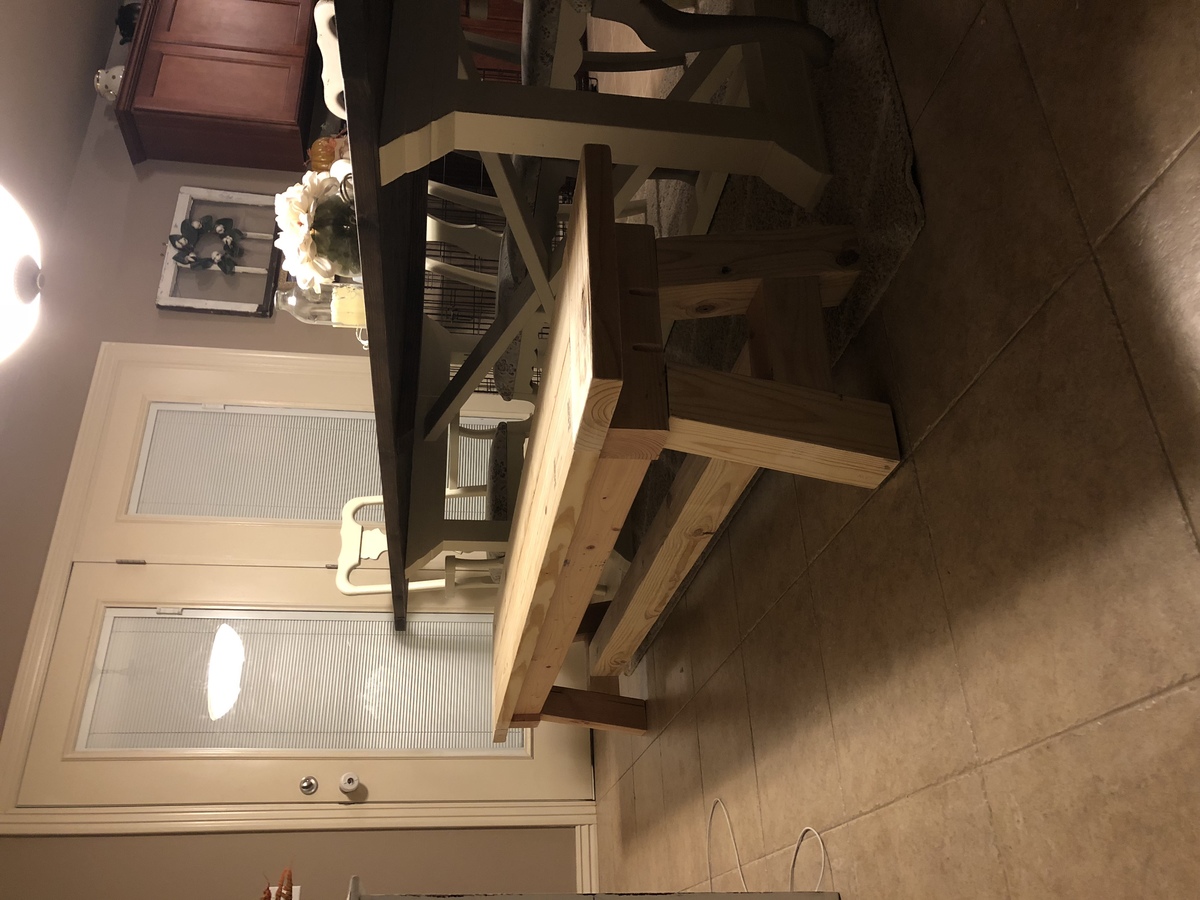
Everyone gets projects from Ana-White plans for Christmas this year.
I can't wait to give them away.

"I don’t consider ourselves experts at all and your plan was so easy to follow. We can’t wait to introduce our chicks when they’re old enough to transfer outside."

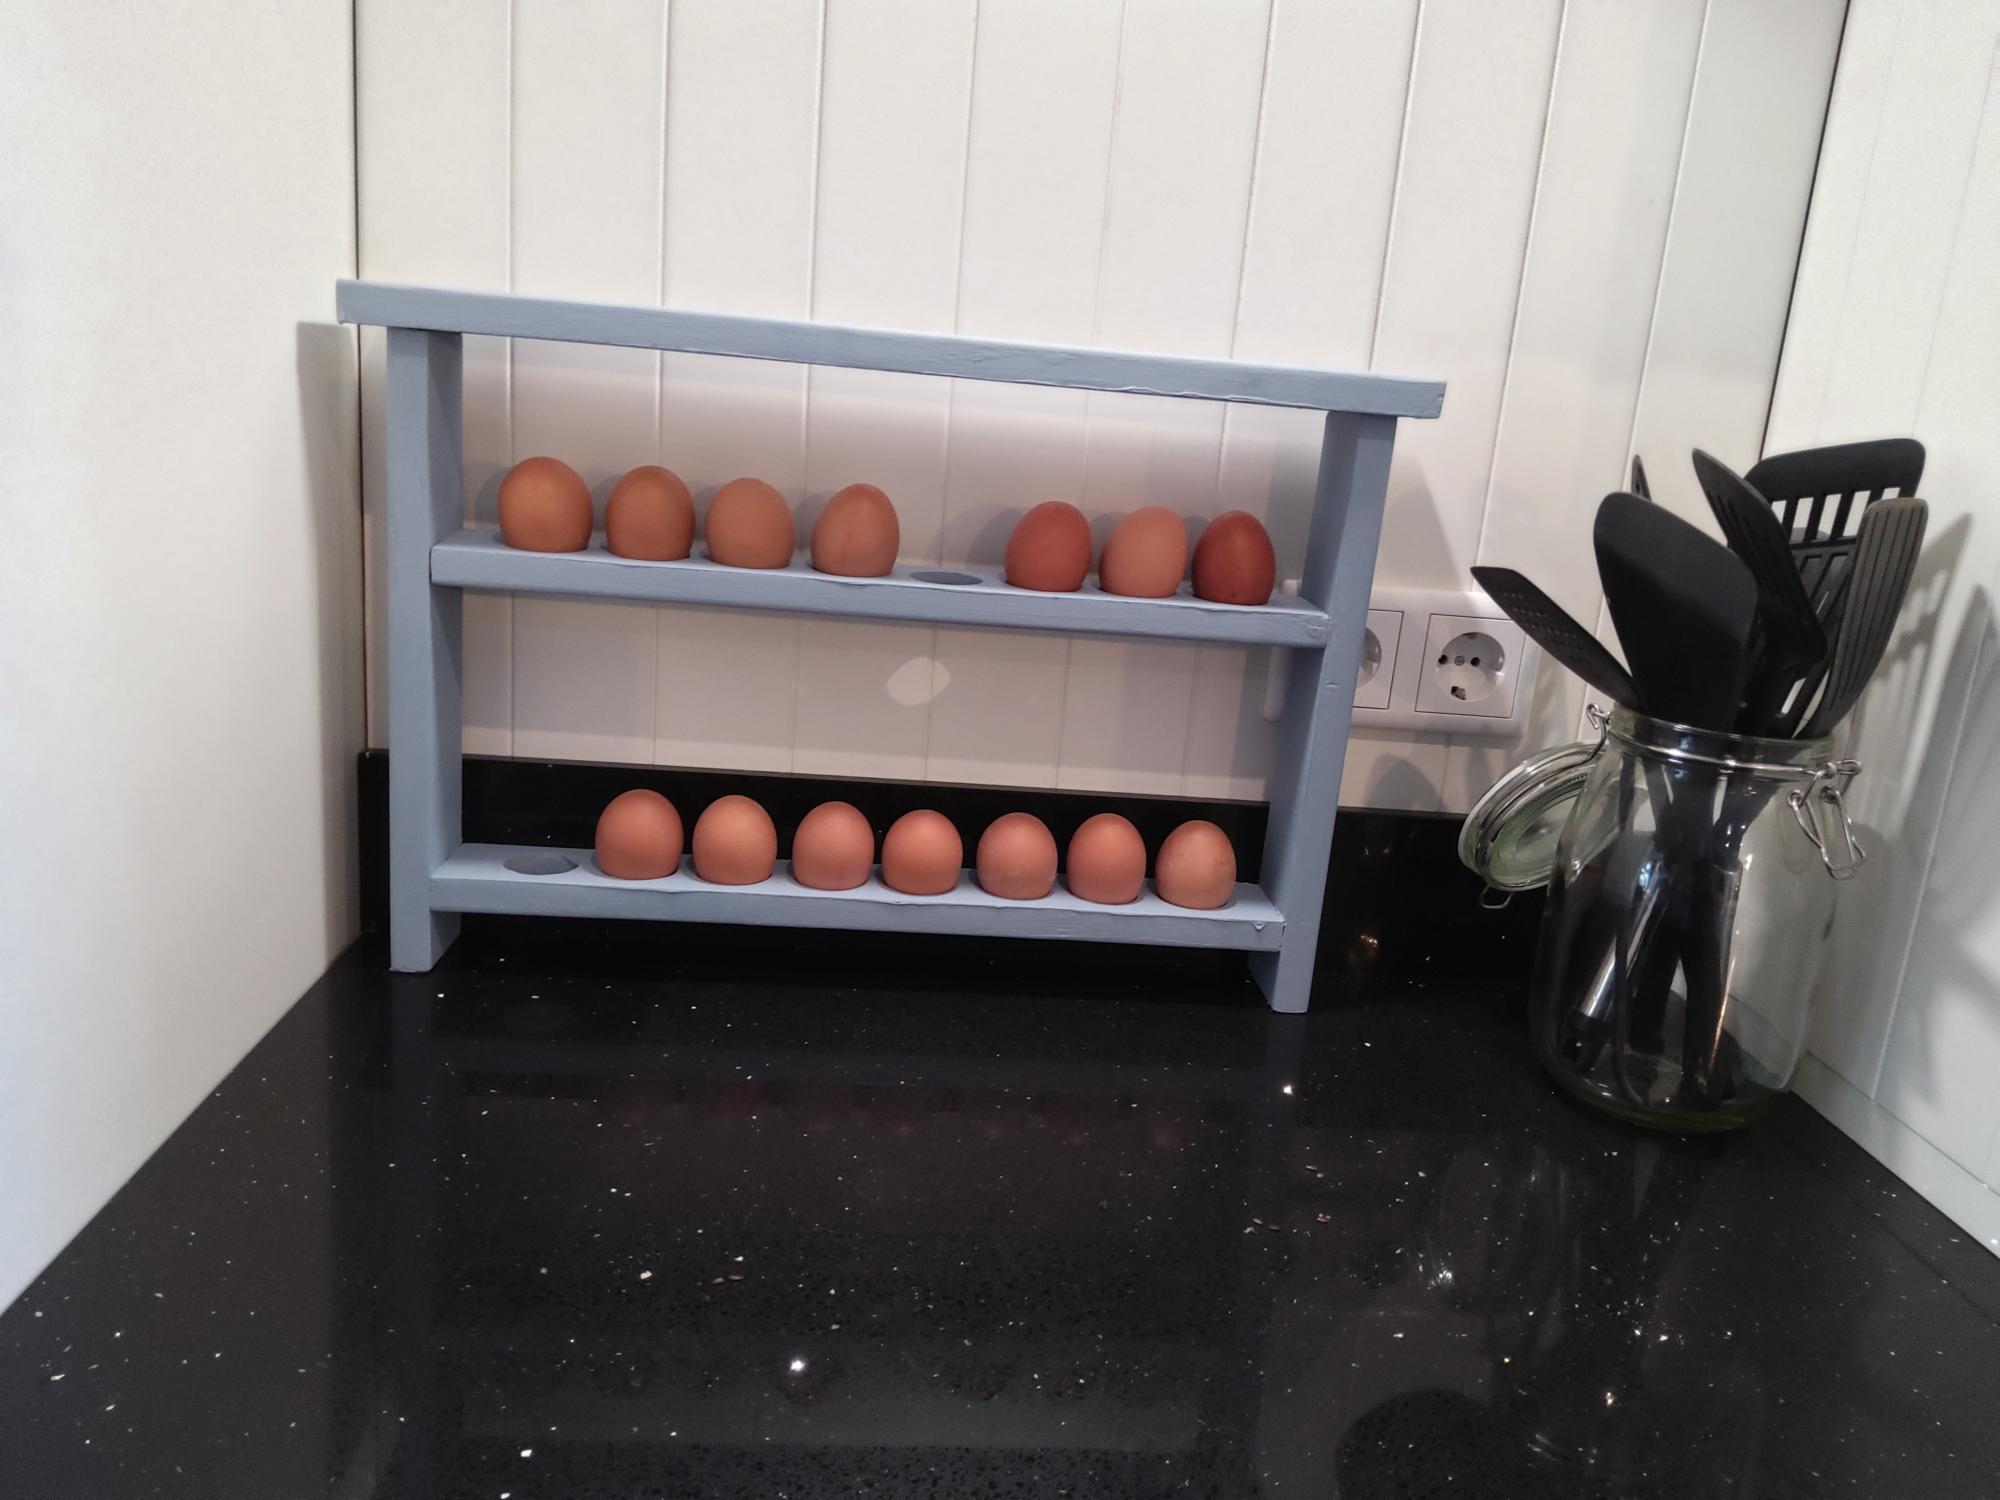
Hi all,
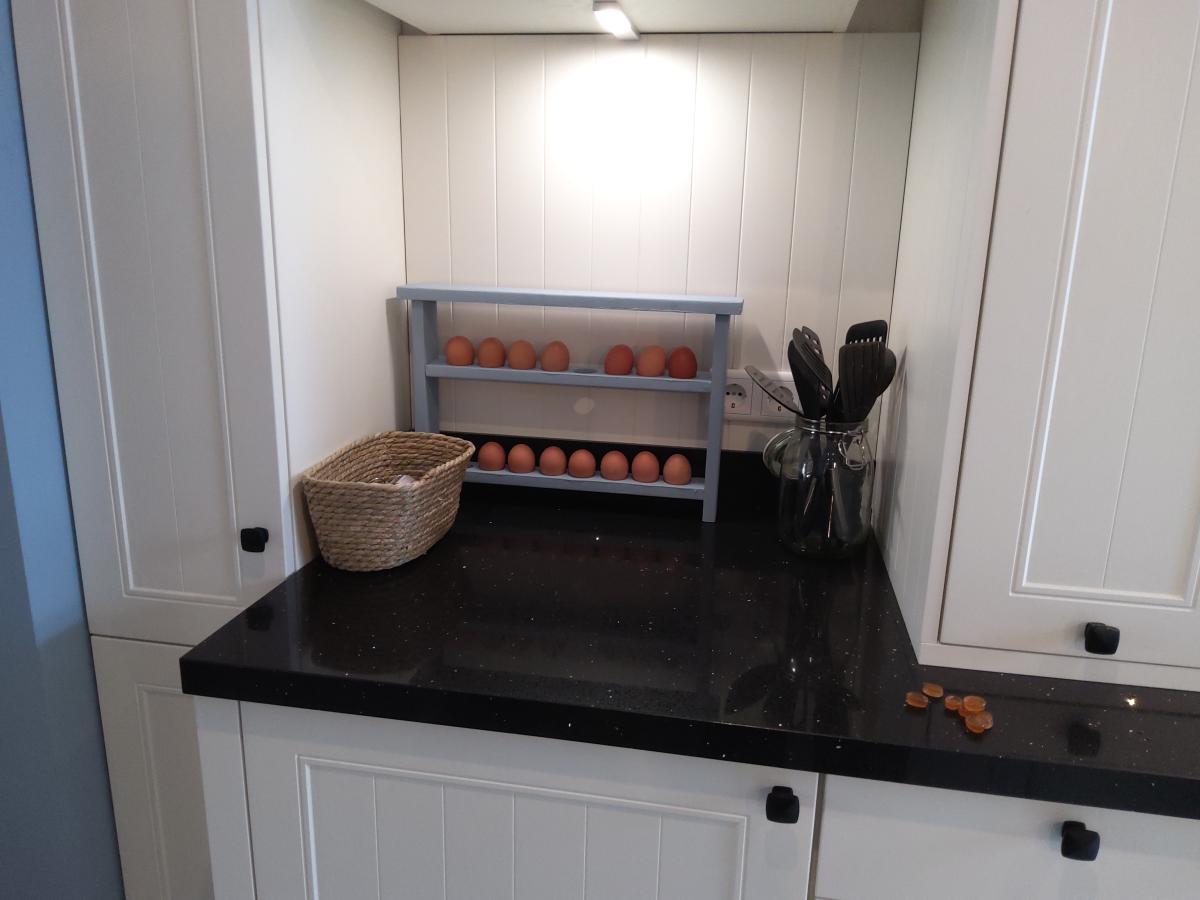
I made the wooden egg holder for our brand new kitchen. I altered the size because there's just the two of us here since our son moved out. It was a very easy beginner project and lots of fun to build by myself. If you're a beginner like me it can be overwhelming to start, but if I can do it you can do it too! Just go for it. I'm looking forward to build a next project with one of Ana's plans.
Wed, 04/12/2023 - 15:56
Way to go and love the color choice! Happy building.
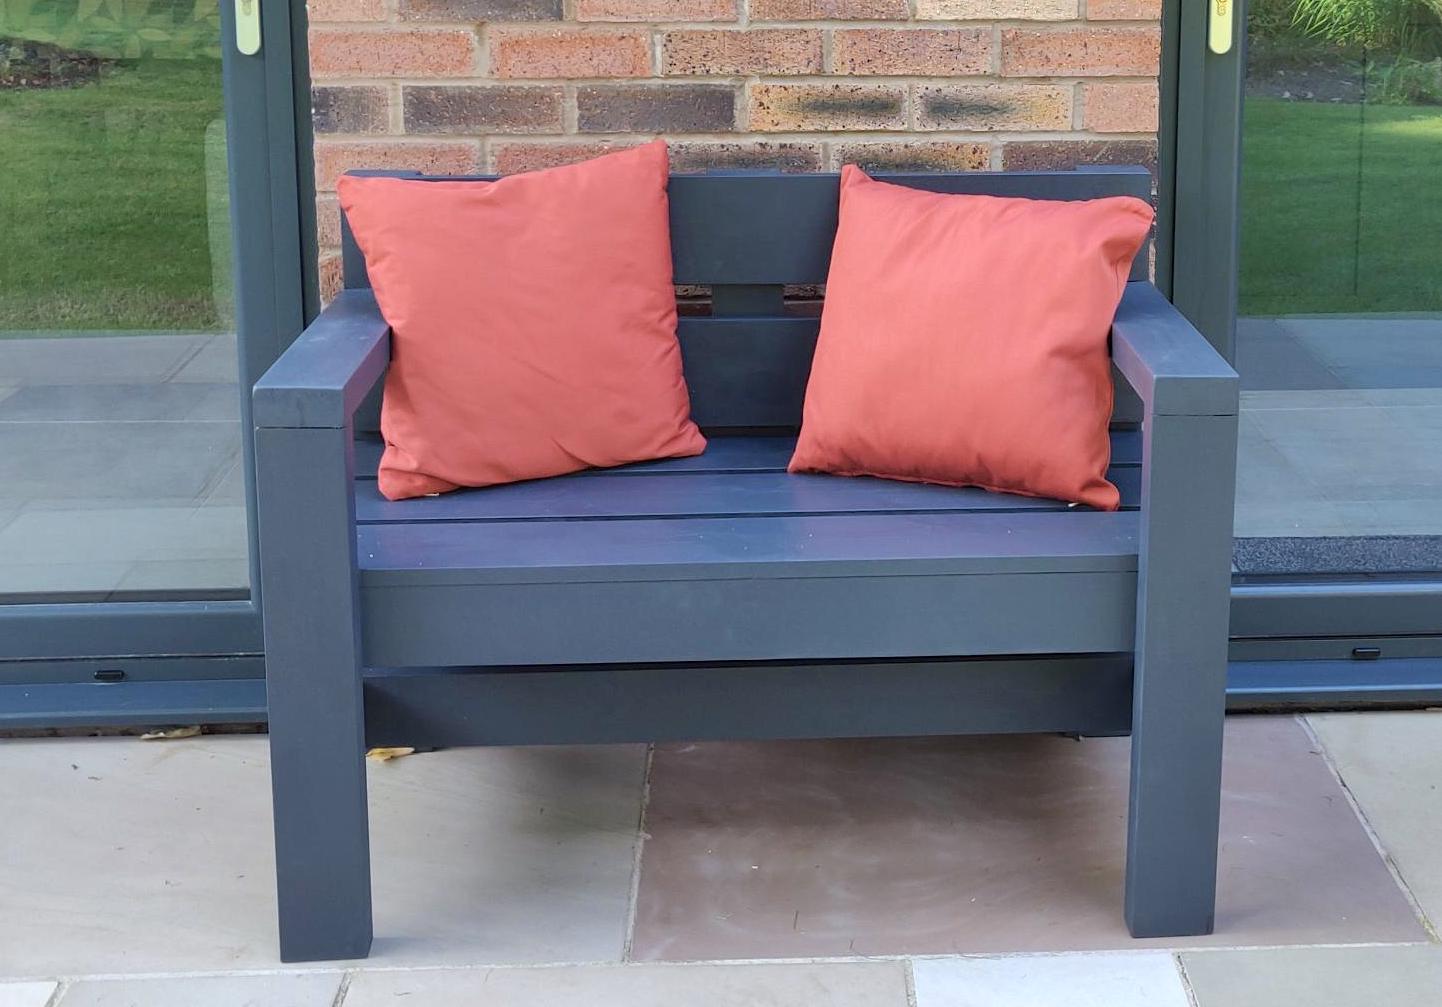
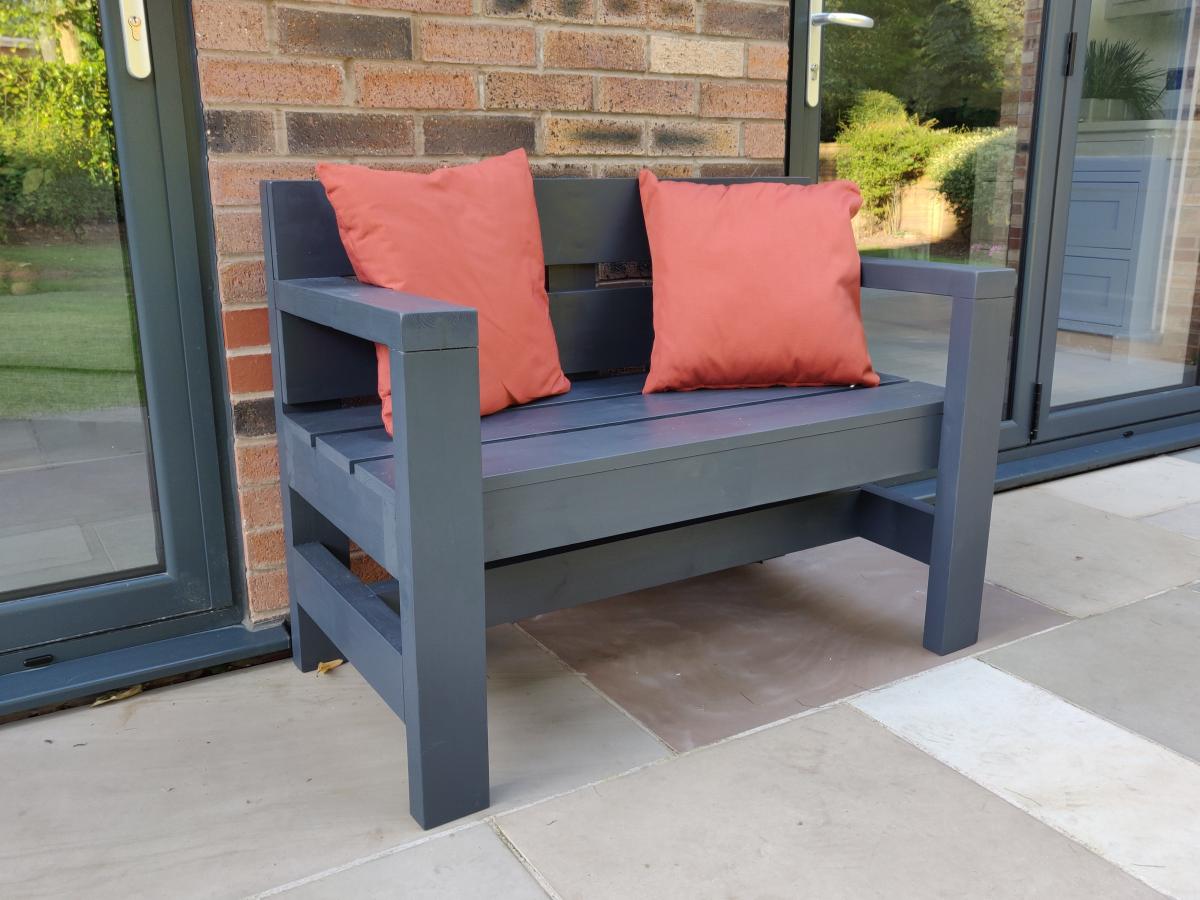
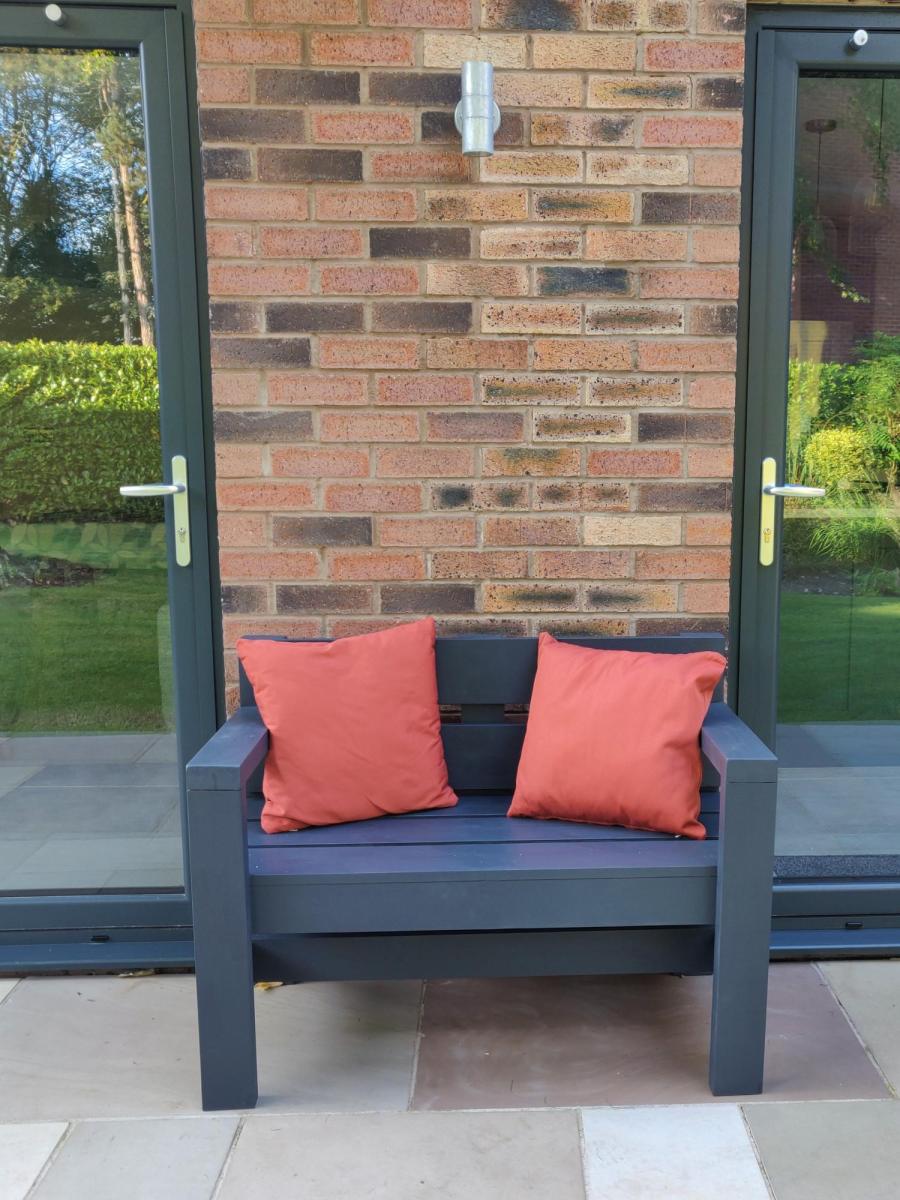
I needed a replacement outdoor bench to fit a small space between two door openings. Reduced the length of the Modern Park Bench to about 44". Also reduced the depth by removing one of the seat planks to retain a sense of proportion.
Had some issues with some of my 2x4s being a bit twisted which impacted the overall build quality but I'm happy with the end result considering the price/time invested.
Tip: spend some time in the lumber yard picking out your own wood - I wish I had.

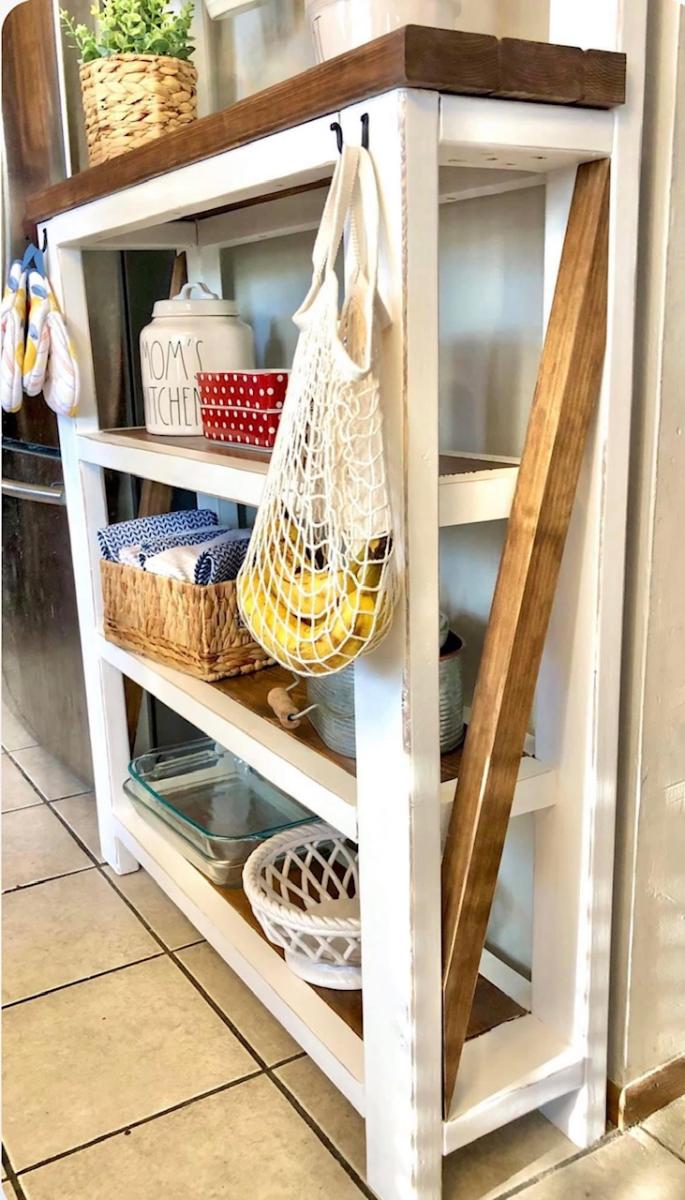
Thanks to you we were able to build my mom a shelf for her kitchen with a combination of two of your plans! My mom loved the top of the “Farmhouse Potting Bench” but also wanted shelves like the “Rustic X Console Table”. We combined the two and adjusted measurements to fit our wall space. We didn’t do a complete X on the side because we wanted it with one slant, but loved how it turned out over all!
Kayla


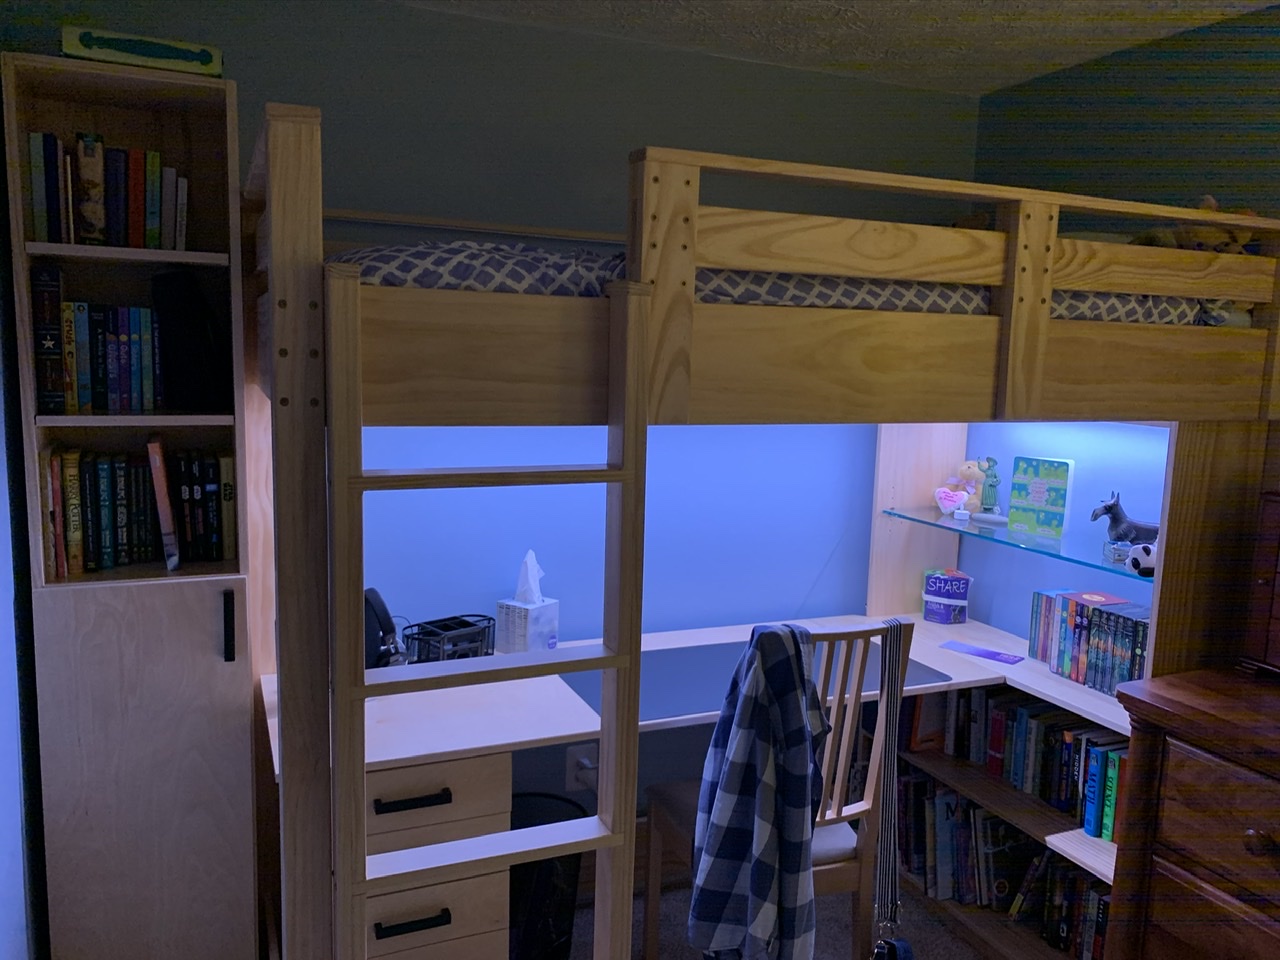
My daughter desperately needed a new loft bed for her small bedroom as she became a teenager. After looking a long time, I finally decided to take the plunge and make something custom after we couldn’t find a bed that met her needs (she’s VERY tall for her age). Thank you for posting the loft bed and bookshelf plans to this site, as they were great to work from and customize! This is my first woodworking project of any kind, and it came out great with these plans.
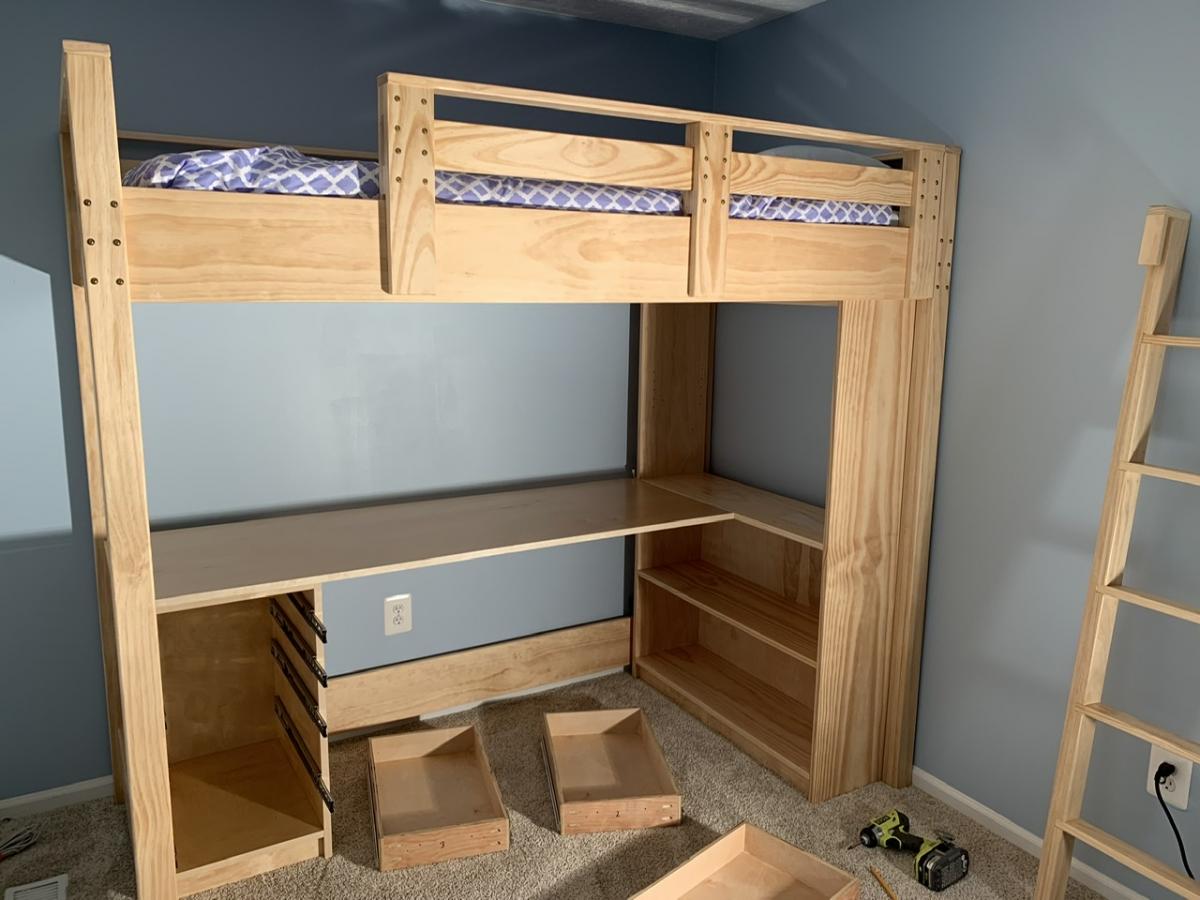
We followed the Loft Bed and Loft Bed Bookshelf plans pretty closely, but we did make some changes as we went...
First, we tweaked the guard rail design to make it removable by adding back vertical posts. This way, the front and back posts slide over the front rail and it no longer needs to be screwed in place. This is a nice tight grip for safety, but it’s much easier to make the bed by removing the guard rail and dealing with the mattress. If you do this, just make sure the back vertical posts are shorter than the front ones to make room for the cleats and slats on the inside of the rail! This also means the top of the rail is made with a 1x3 instead of the 1x2 in the instructions.
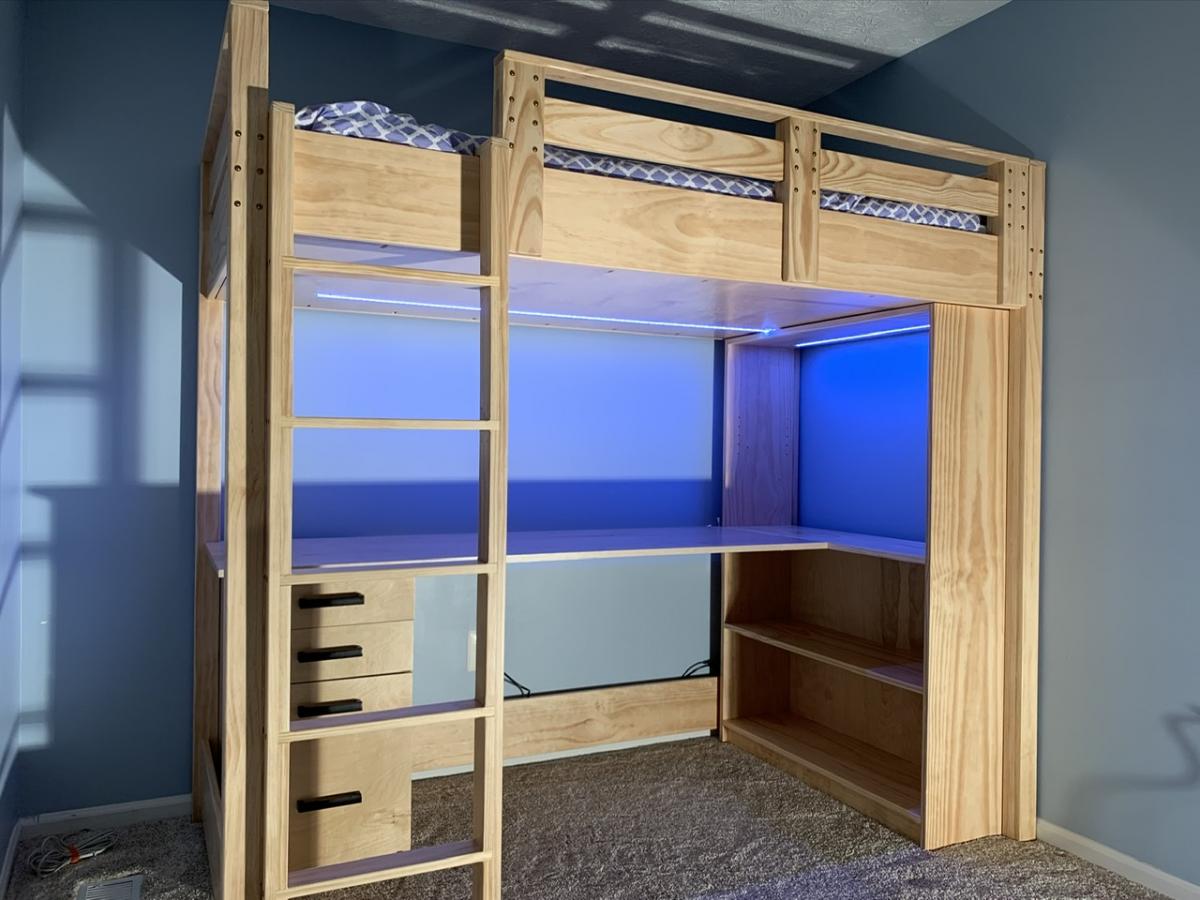
We also decided to use a vertical ladder design rather than an angled ladder. We did this for space considerations in the room; it’s a bit harder to get up the ladder, but not that much. This also helped avoid any weird angle cuts with my basic tools. We also made the ladder about 3” wider than the one called for in the plans.
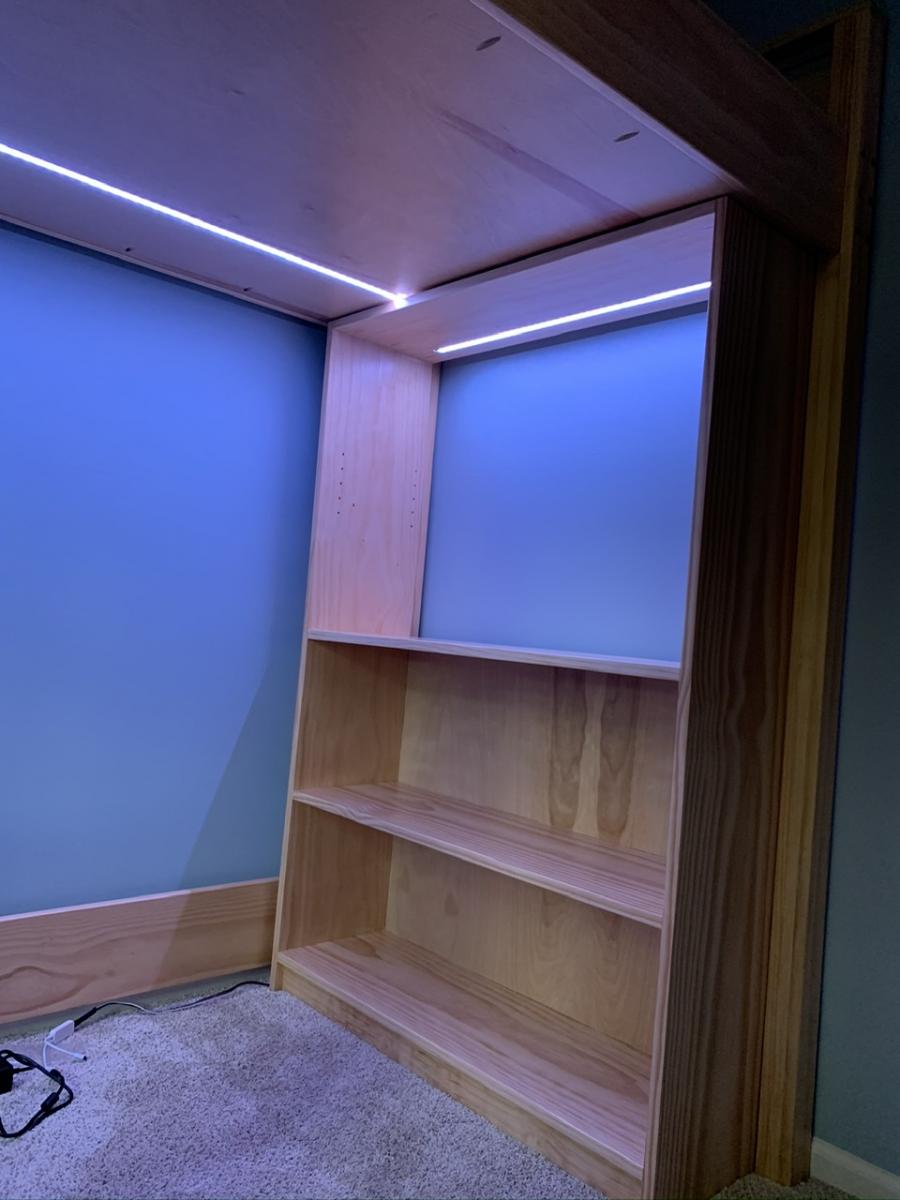
One of my favorite features was adding a 3/4” plywood “ceiling” above the desk. We did this by moving the long side cleats upward by 3/4” of an inch in the plans, and using pocket holes roughly every 10 inches around the perimeter of the plywood. We used this to hide the bottom of the mattress and all the bedding from view when sitting at the desk. It also provides for LED strip lighting above the desk, which is installed by routing out a pathway in the board and installing the lights within an aluminum channel for heat dissipation and to allow installation of a plastic diffuser over the lights. The wiring for the lights lives in the ~1.5” gap between the board and the slats thanks to the 1 x 2 cleats.
In the shelving, we made the upper shelf in the wide bookcase adjustable with the help of a Kreg shelf pin jig. We also ordered a 3/8” tempered glass shelf for this area to let more of the LED light strip we installed in the top of this shelf shine down as well. Again, this was installed in a routed-out pathway that holds an aluminum channel, and the wiring goes up through both the bookcase top and the plywood bed “ceiling” panel to join into the power. We got the strip lights, aluminum channel with diffusers, power supply, and controller from Amazon.
To get power to the LED lights, I routed out a channel for 5-conductor wire in the middle board of a rear leg assembly. Before gluing up the leg, I coated the wire with silicone spray to avoid the glue adhering to it so I could slide the wire around as needed. With a little bit of chiseling, this wire is able to come out of the slide-in joints for the upper and lower wide rails on the back of the bed. On the top, these wires go into a splitter and then to the two sets of LED light strips. On the bottom, the wires to into the LED controller which is mounted to a scrap board along with the power supply that stands on end in the 3/4” gap between the back side wall of the bookshelf and the bottom bed rail.
We created a custom-designed file drawer unit as the pedestal for the desk opposite the wide bookshelf. This was modeled roughly after Ikea Alex drawers with three narrow drawers and one file drawer. The carcass is about 14 1/2” wide by 21 3/4” deep by 29 1/4” tall and made of 3/4” plywood. The drawer boxes are approximately 12” wide by 20” long made of 1/2” plywood with 3/4” plywood fronts. We used full-extension soft-close drawer slides and positioned the cabinet so they have nearly full extension behind the ladder. Four wooden dowels are used on the top corners to align and secure this end of the desk surface.
Speaking of the desk, it is a piece of 3/4” plywood approximately 24” deep by 64” long. One end rests on the file drawer cabinet, and the other end is flush with the middle shelf of the bookcase and attached using two 6” by 5” 14-gauge galvanized T-straps usually used in framing applications. These are screwed upwards into the bottom of the desk and shelf from below, and are holding up quite well. This avoids the need for desk legs by the bookshelf.
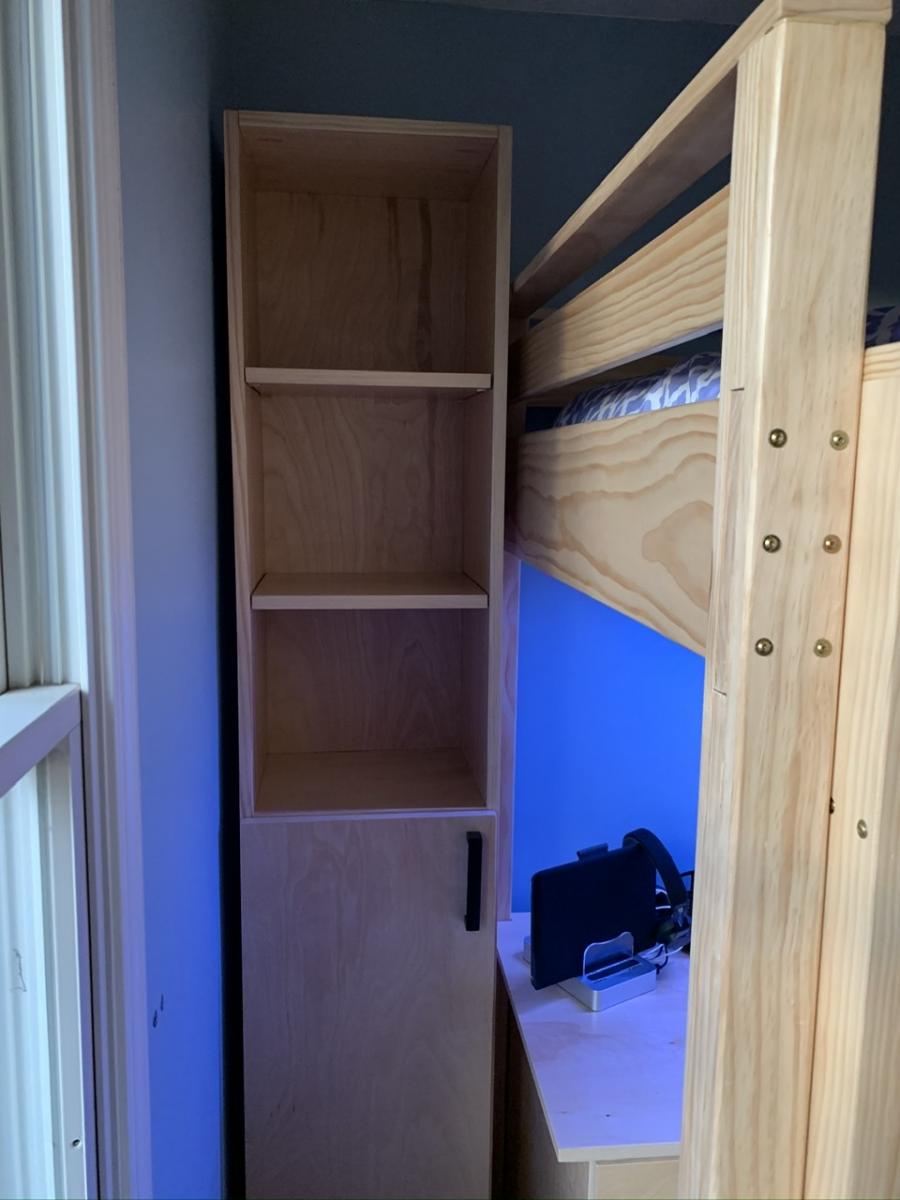
We then adapted the techniques used for the wide bookshelf to build a narrow bookcase (79” tall, 14 1/2” wide) out of two more 10-foot long 1x12 boards. This bookcase sits between the end of the bed and the corner of the room to finish out the look and provide more storage. The top, middle, and bottom shelves are fixed and there are a total of four adjustable shelves (two in the top half, two in the bottom half). We also cut a door and installed it using a pair of full-overlay euro hinges. With these dimensions, the tall bookcase is also capable of working with 11” x 11” x 11” storage cubes just like the wide bookshelf.
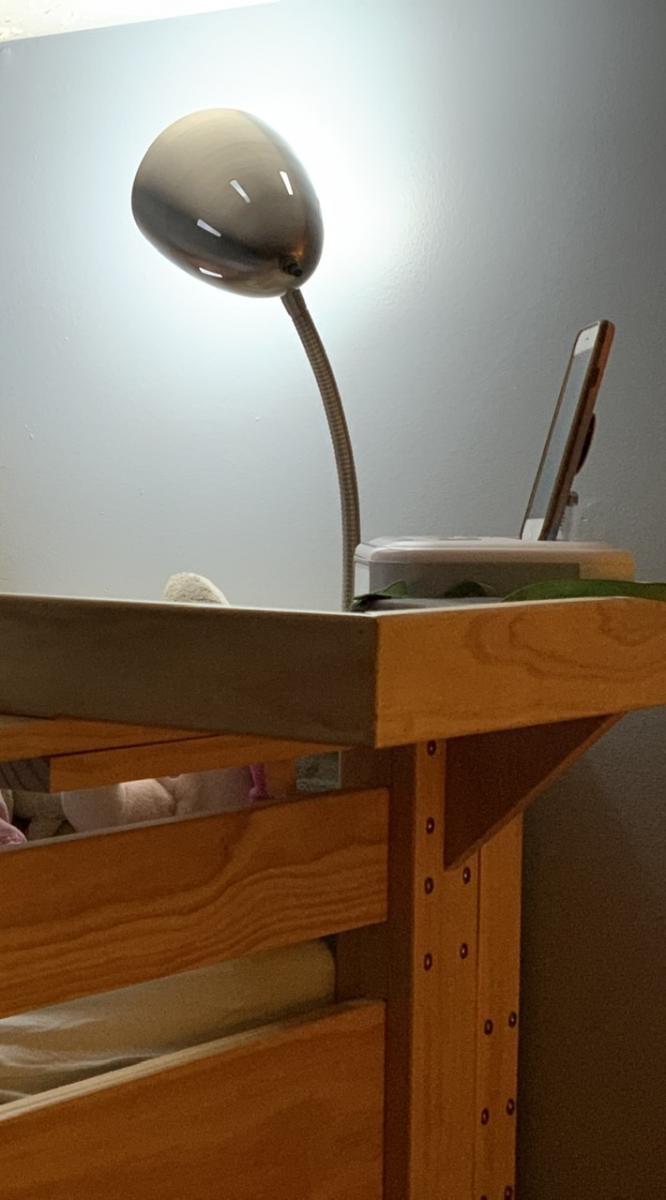
The finishing touch was to create a shelf that attaches to the guard rail and provides a place for my daughter’s alarm clock to sit and be within easy reach. This shelf is made around a piece of the scrap 3/4” plywood that is approximately 21” long and 9” deep. I used leftover 1x3 pine that I glued and nailed to the outside perimeter of the plywood flush with the bottom to hide the layers in the plywood while providing walls around the shelf. I also glued and screwed another 1x3 piece to the front of the plywood, this time flush with the top, as the first piece of a U-shaped grip to slide over the top of the guard rail. Another 1x3 scrap was then positioned, glued, and brad nailed to this front piece to finish the grip. I then cut a triangular piece of wood from a 1x6 to provide additional support under the shelf against one of the vertical pieces of the guard rail. This piece is held in place with counter-sunk screws that go through the top of the plywood shelf down into E-Z Lok threaded inserts in the top of the triangular wood support. The whole shelf assembly is only attached to the guard rail so that I can still easily remove the rail to change bedding on the mattress.
The whole project is constructed out of Home Depot select pine boards and birch plywood. Throughout construction, I used a 3/16” round-over bit in a router to eliminate sharp corners pretty much everywhere on the bed itself (legs, rails, ladder, etc.). I didn’t use this on the bookshelves, the file drawers, or the desk. Edge banding was used to hide any exposed plywood edges. I used 200-grit sanding discs and an orbital sander to sand the various pieces during construction and before finishing. The entire thing is finished with two or three coats of Minwax Polycrylic water-based polyurethane, sanding between coats, which gives this a nice smooth finish and lets the richness of the wood grain come through.
Hopefully the pictures I’ve posted can help understand the write-up on modifications to the project. I enjoyed building this a lot, and my daughter really loves what this did to her room to make it much more usable! That was worth all the effort and time right there.
Ana, thanks a million for the plans!!
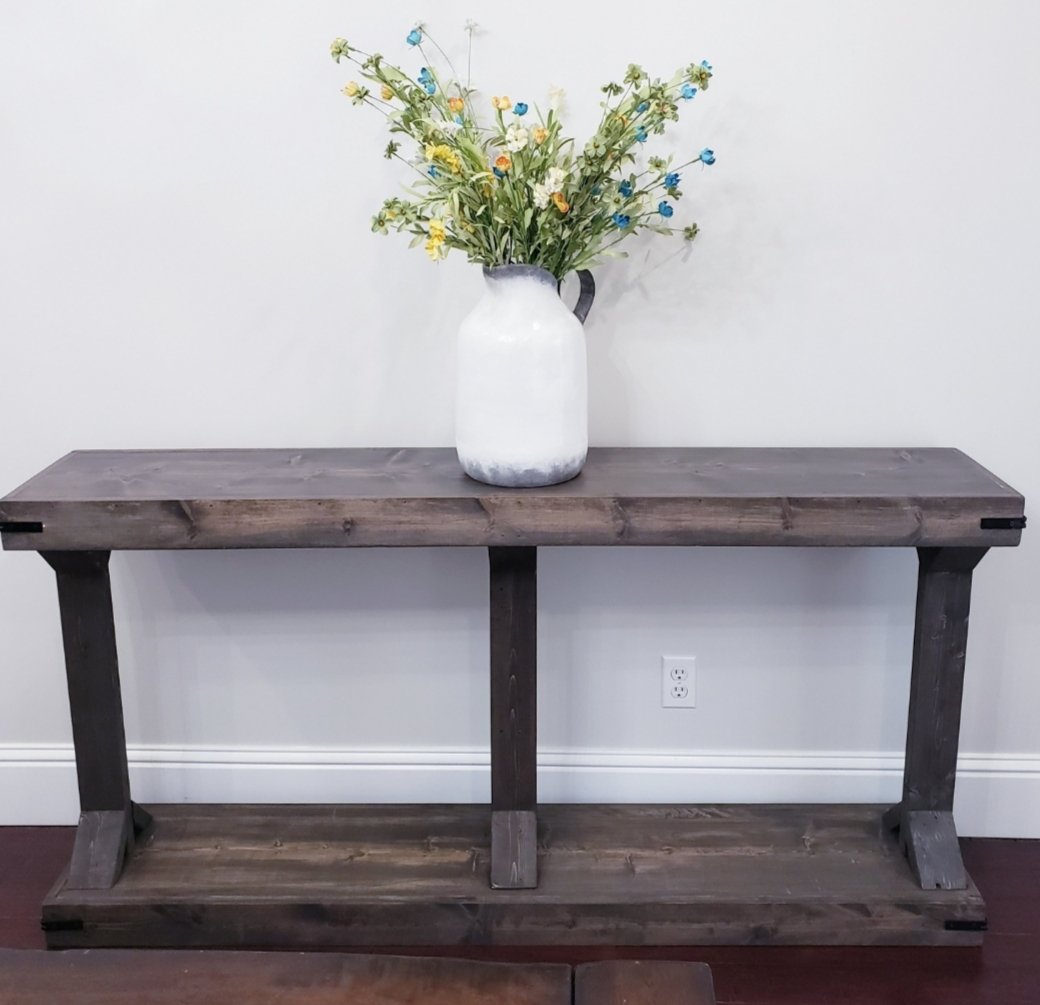
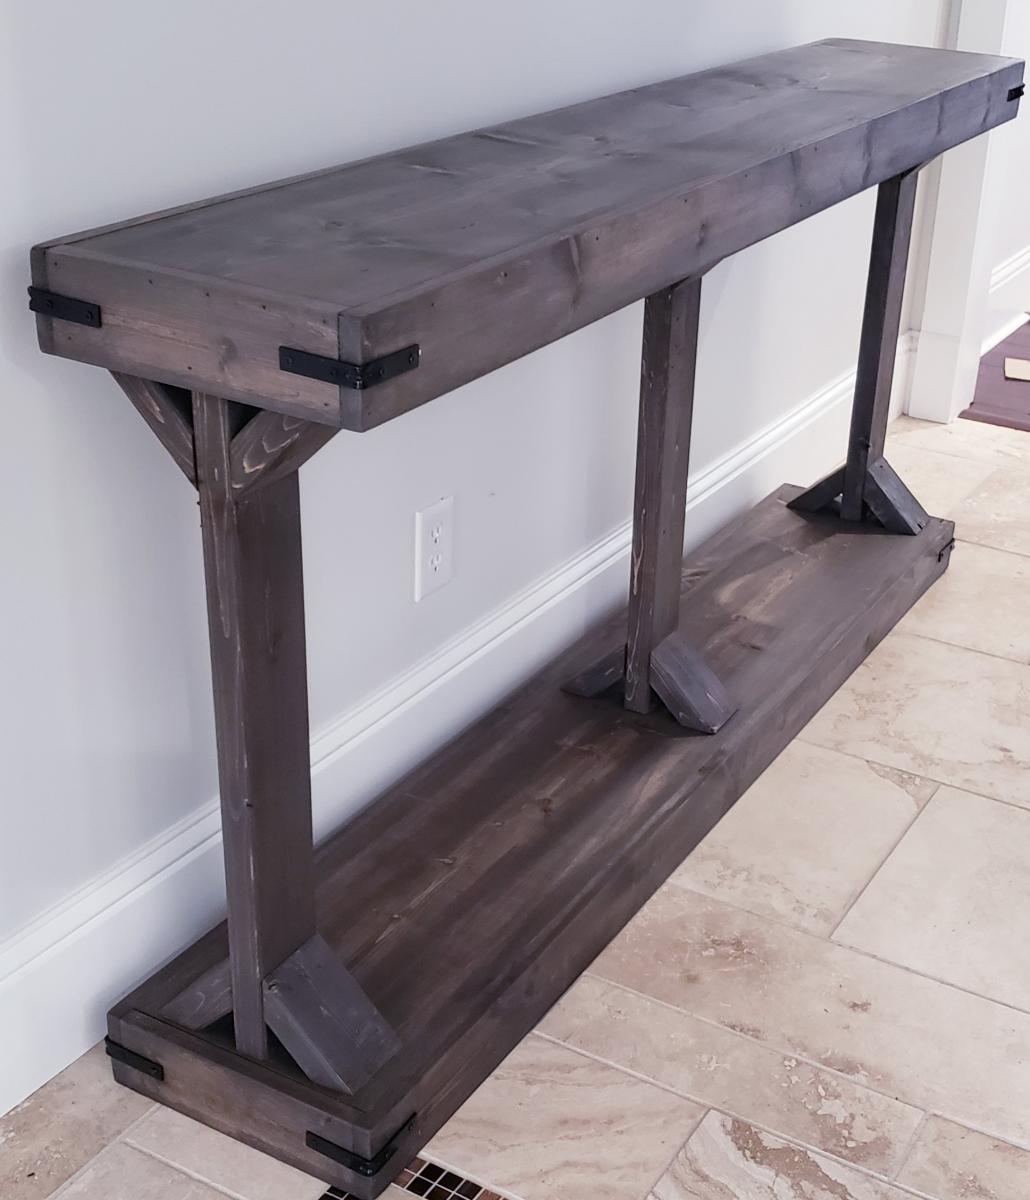
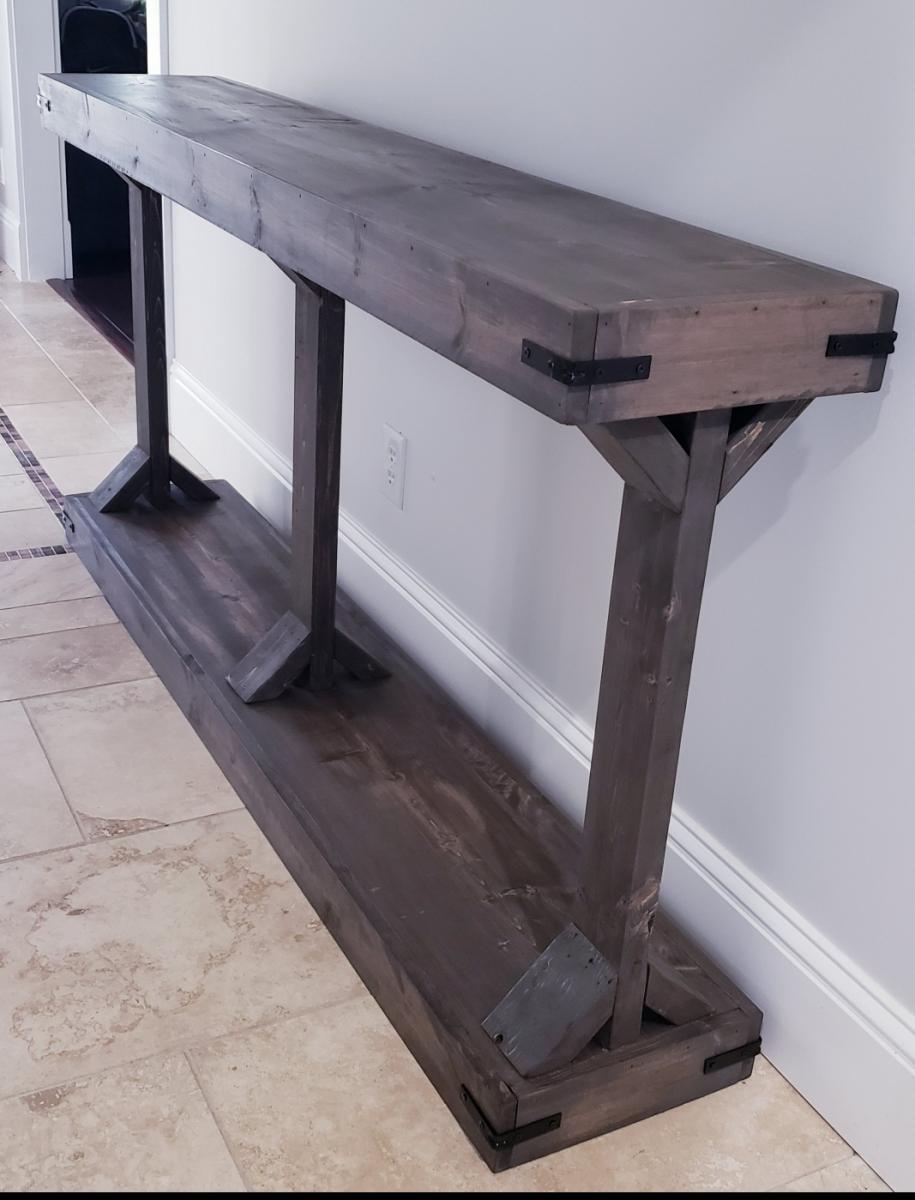
This is a beautiful console table built using the Narrow Console Table (Modern Farmhouse) plan. This is modified to be slightly wider, longer, and taller than the original plan. The dimensions are 68" long, 34" high, and 12.75" wide. The plan was very easy to follow and it was simple to adjust the measurements.
I used Varathane Dark Walnut Stain and once that was dry, I went over that lightly with Varathane Classic Gray stain. The final finish is Minwax Dark Wax and buffed.
More photos available on my facebook wood shop page at the link below.
Thu, 12/05/2019 - 12:06
Beautiful! I really like the finish you did on this table, thanks for sharing the details. I may need to try this myself.
Tue, 02/02/2021 - 19:09
Great color. I have never gone over color 1 with color 2 - I will now try it. Great look!
Tue, 02/02/2021 - 19:13
How do you wipe paint 2 over paint 1? Do you use a cotton cloth?
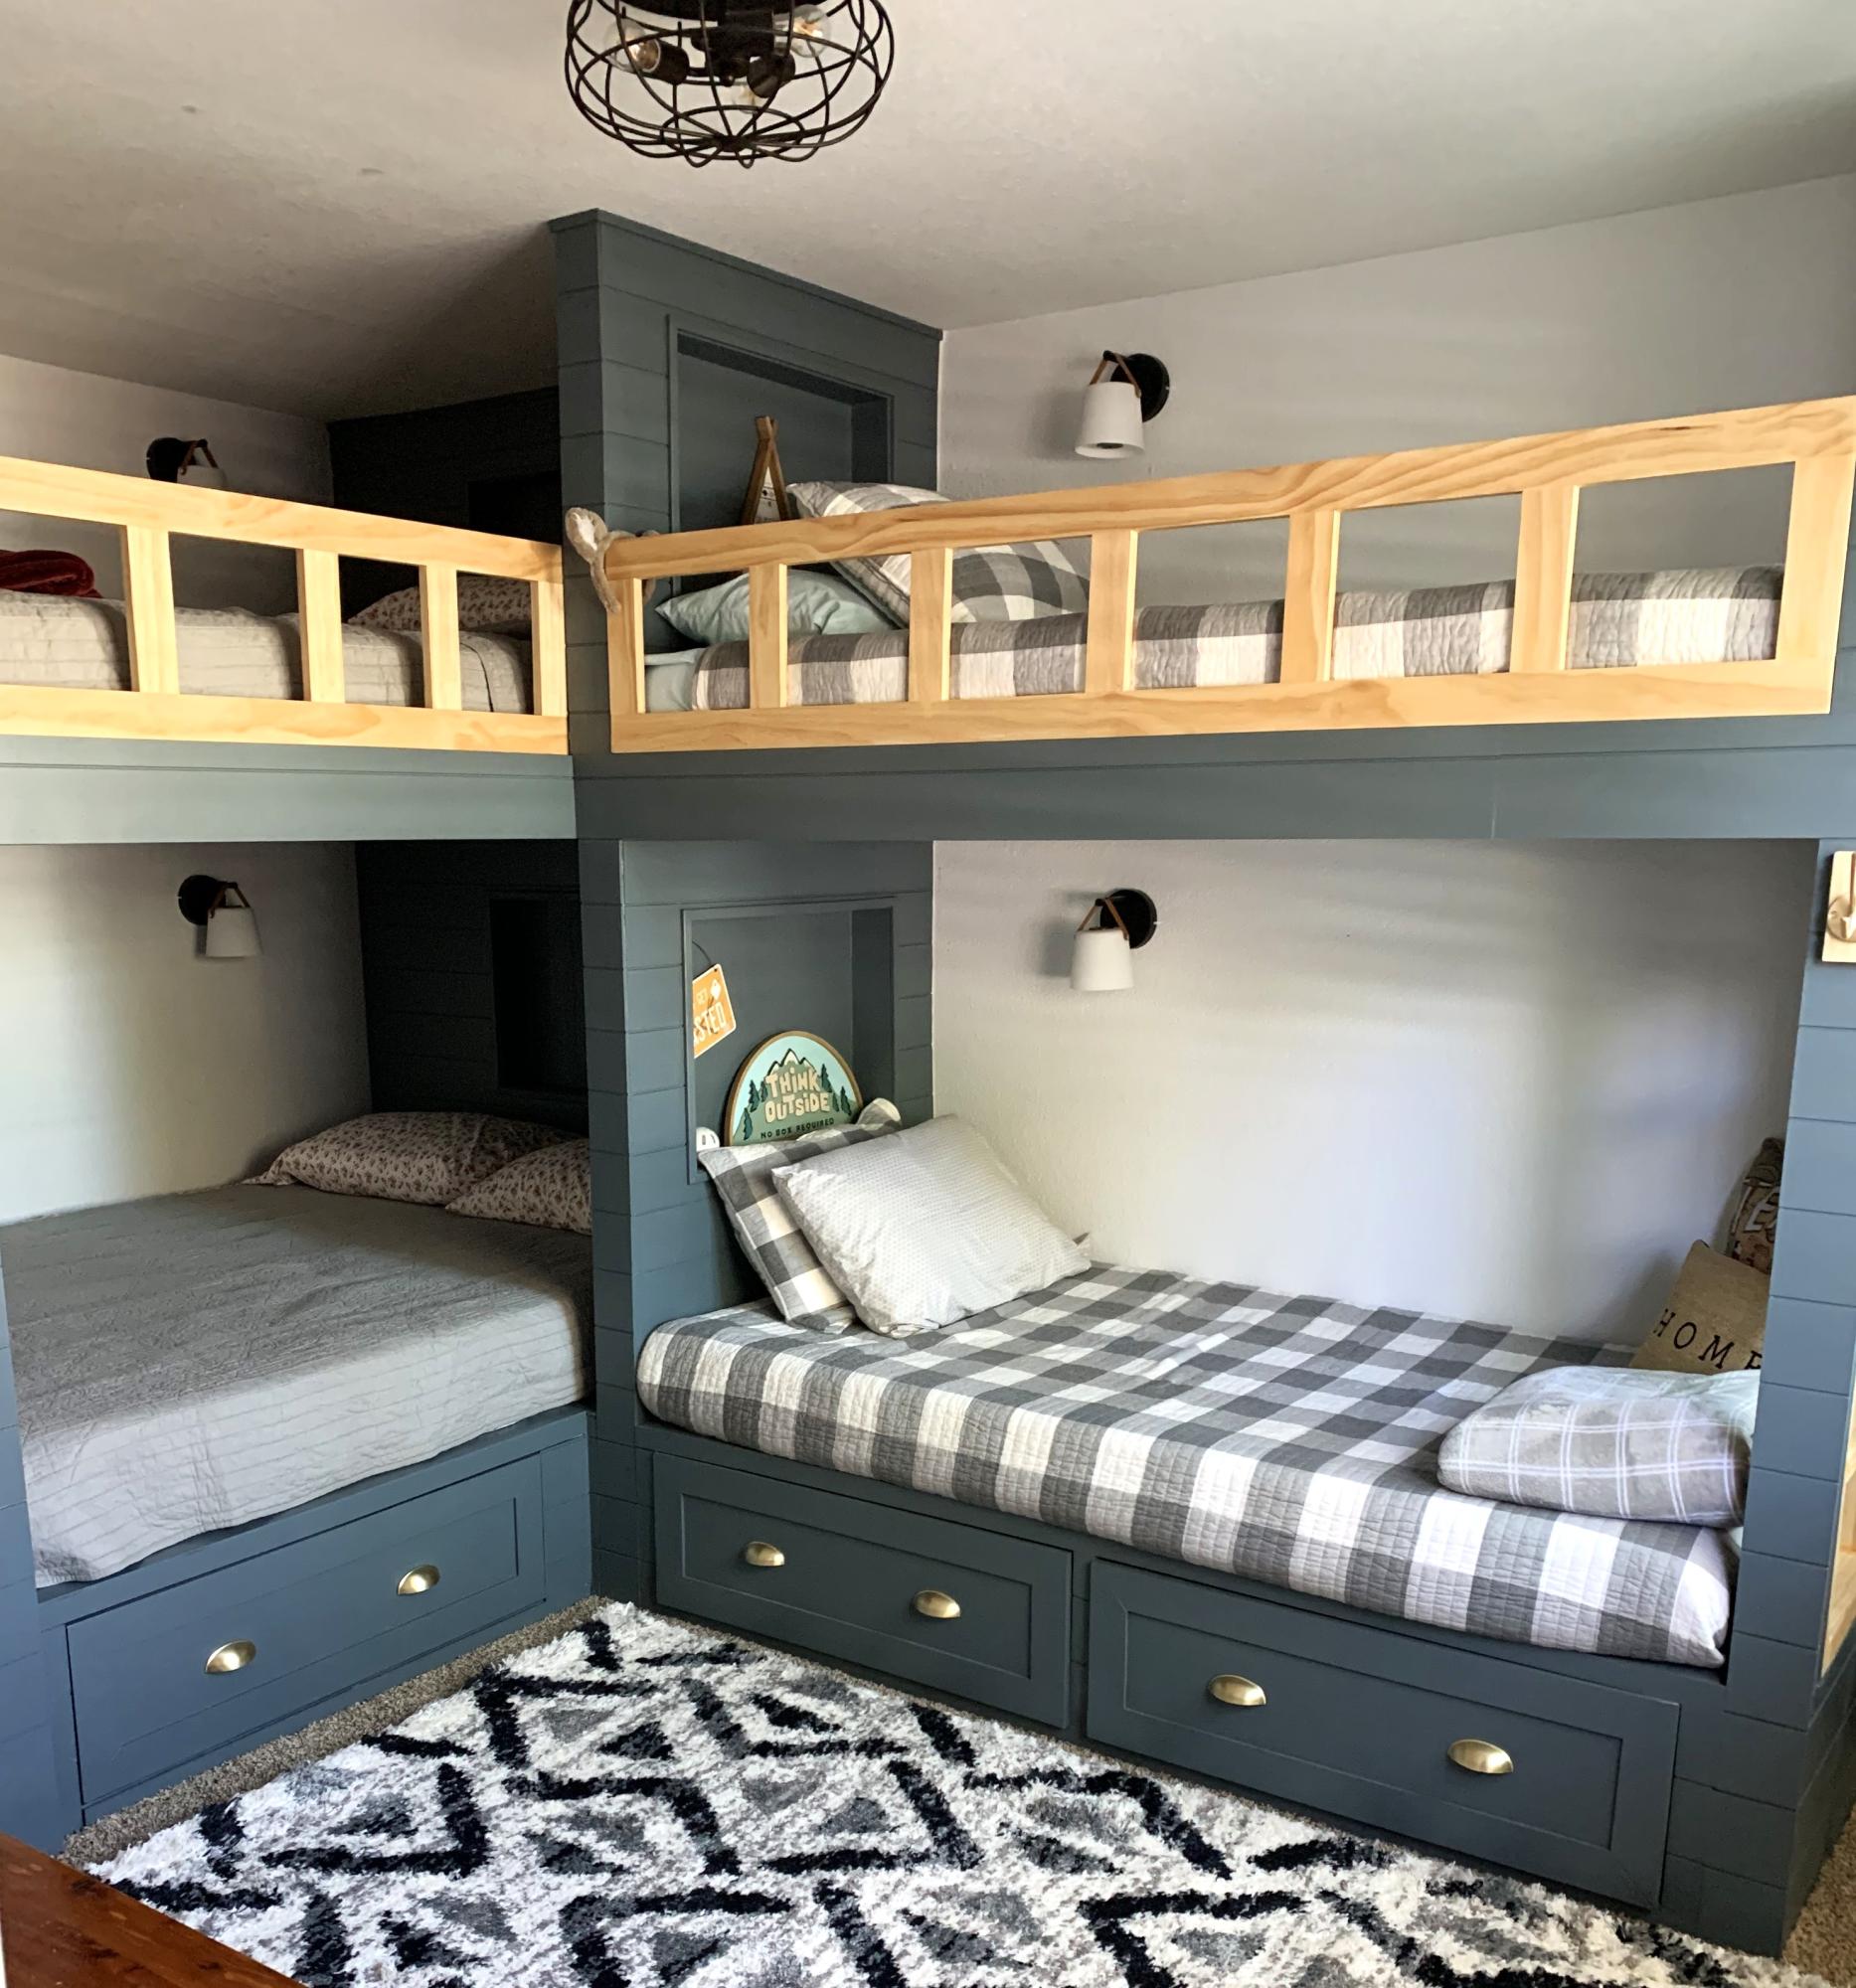
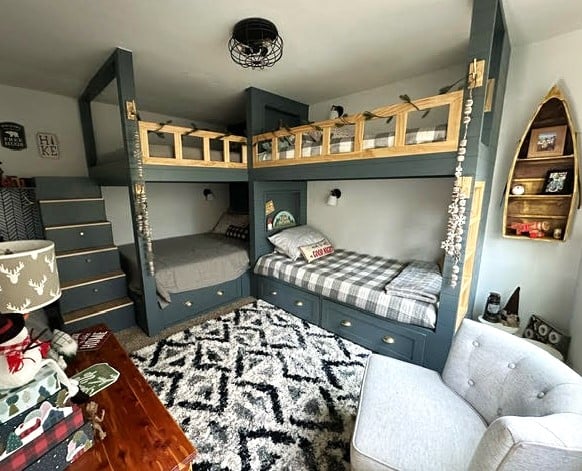
The queen and twin bases were base on your twin bed with storage. Pretty easy to do. This is my first time doing anything this big. I live in a four season resort town and needed beds for heads for ski season.
Debbi H - IG - callintn
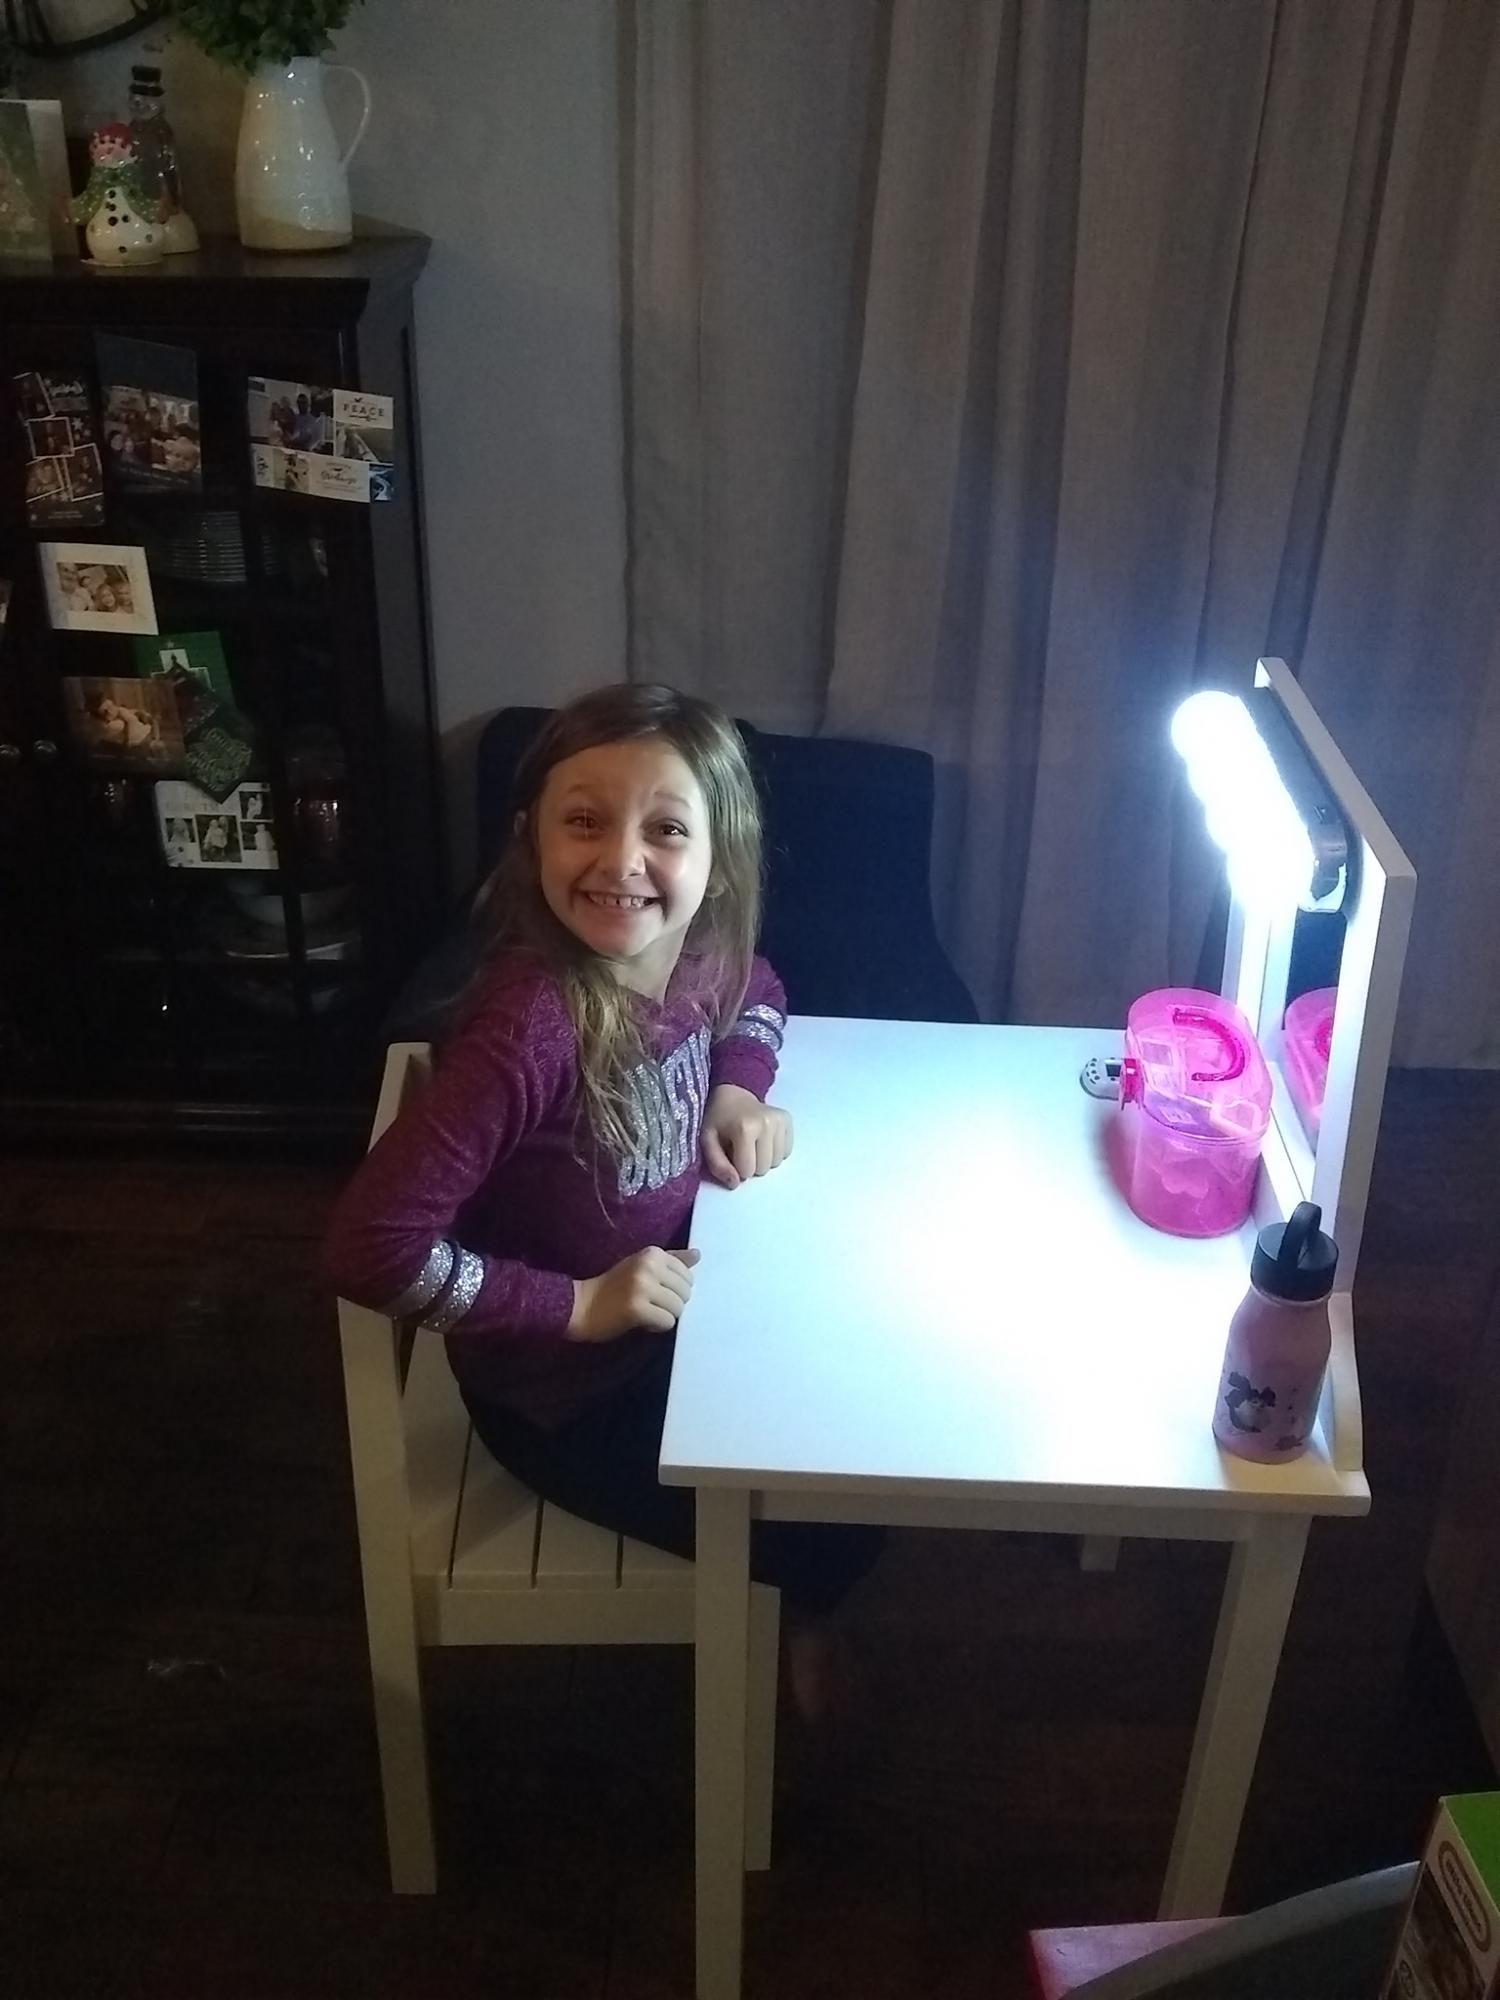
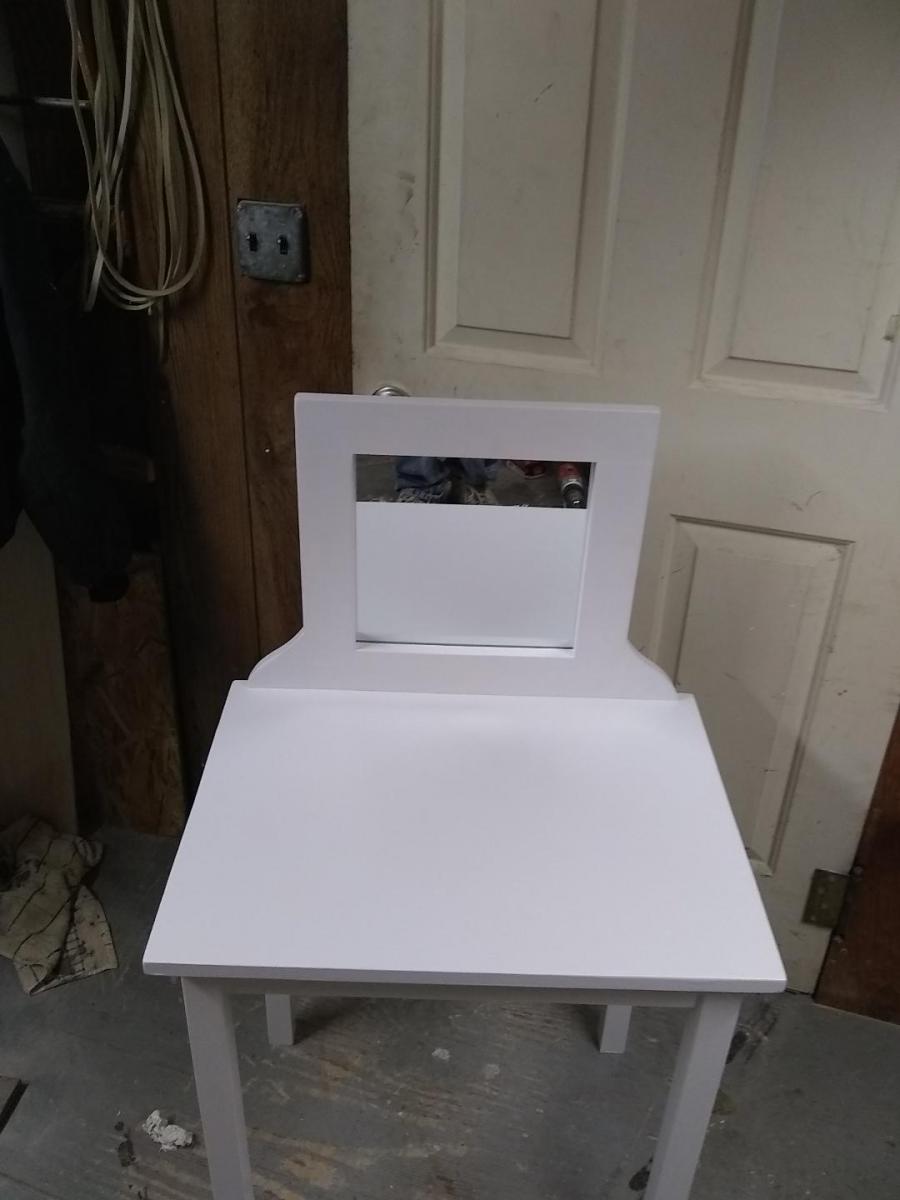
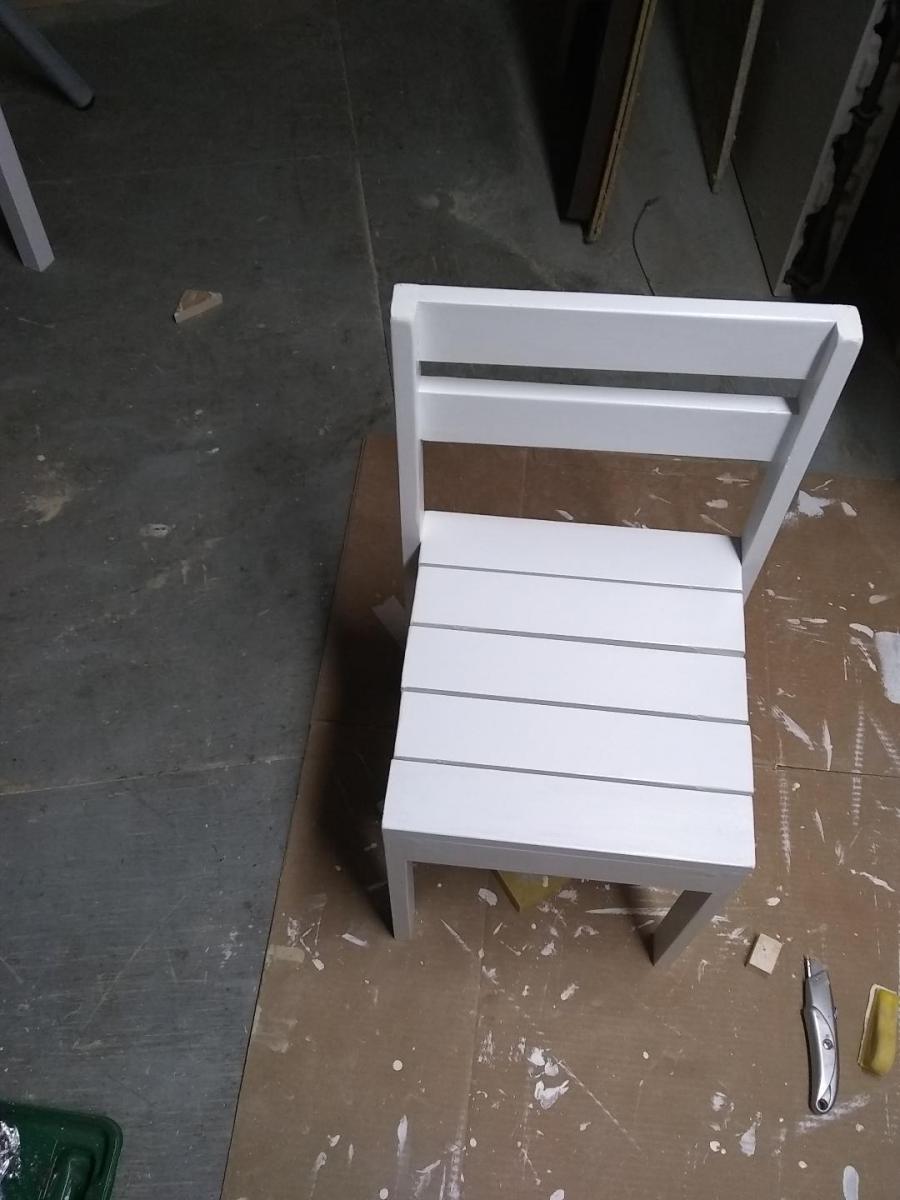
I built this for my 7 year old niece. She out grew her cheap plastic one. Her mother asked for white. I decided to modify the kids play table and made own my own mirror frame. I used the 4$ stackable chair plan. Chair height 15in and table top 25in. The table sixe 24w x18deep.She has room to grow. I used l L brackets on the back keep the mirror in place. If she grows up you can take mirror off and a have table she can use for anything. I had to finish it off with $10 battery powered vanity light from Amazon. I painted it all satin white, I used glitter I put in the paint for the mirror frame. My niece just loved it and so did her parents.
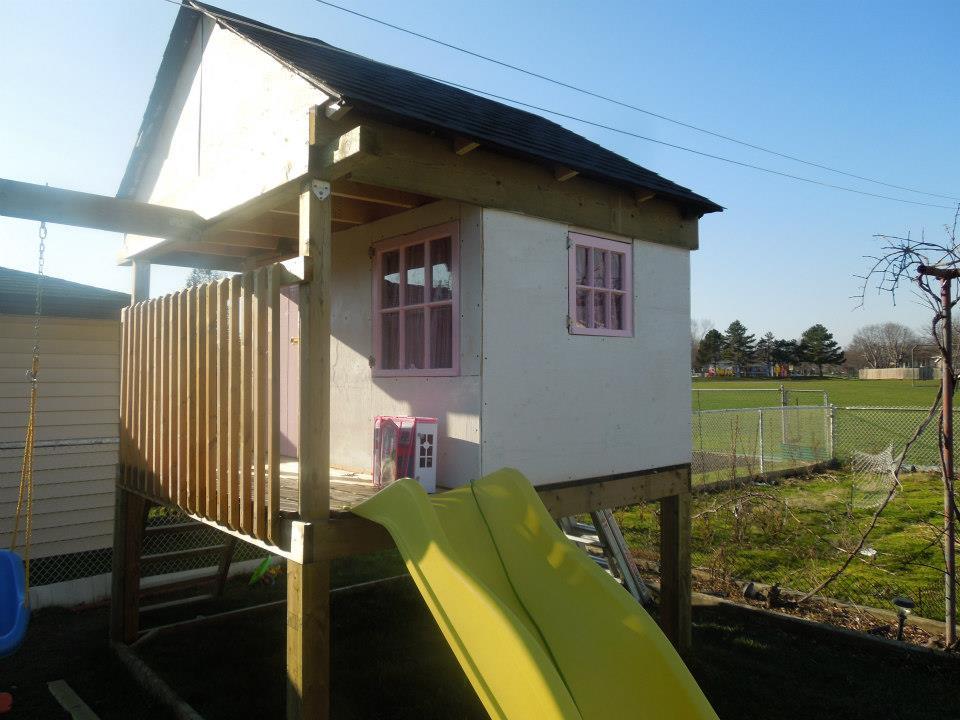
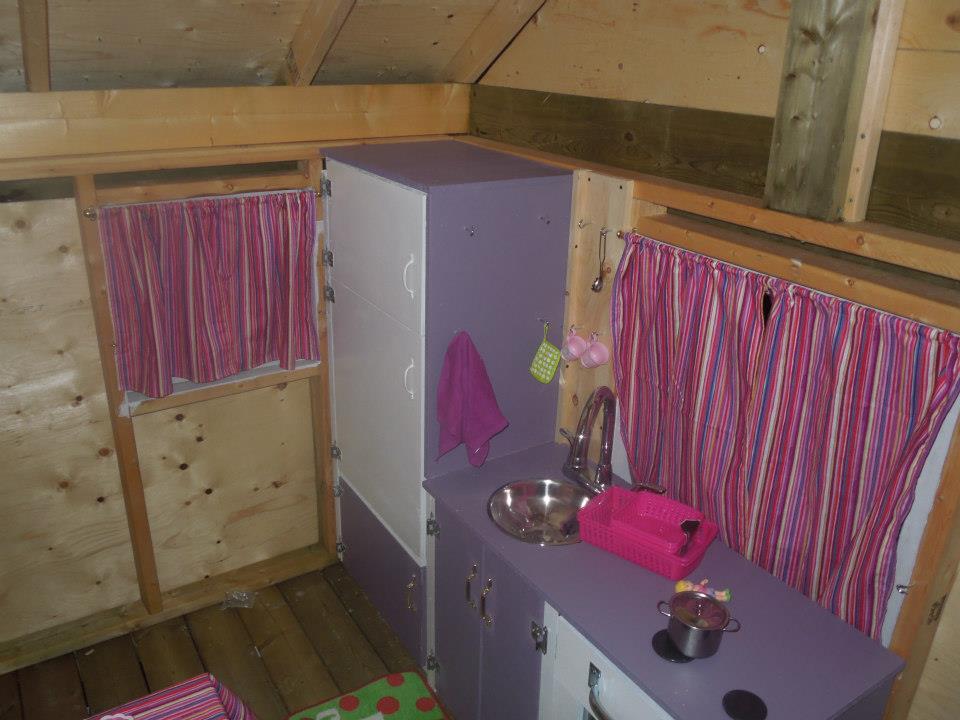
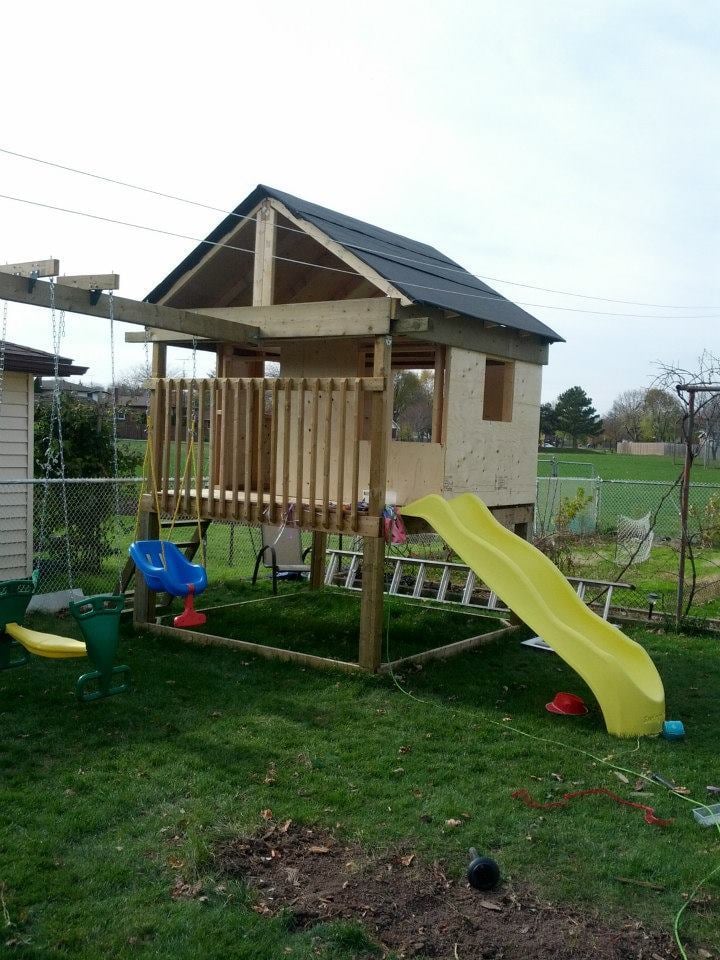
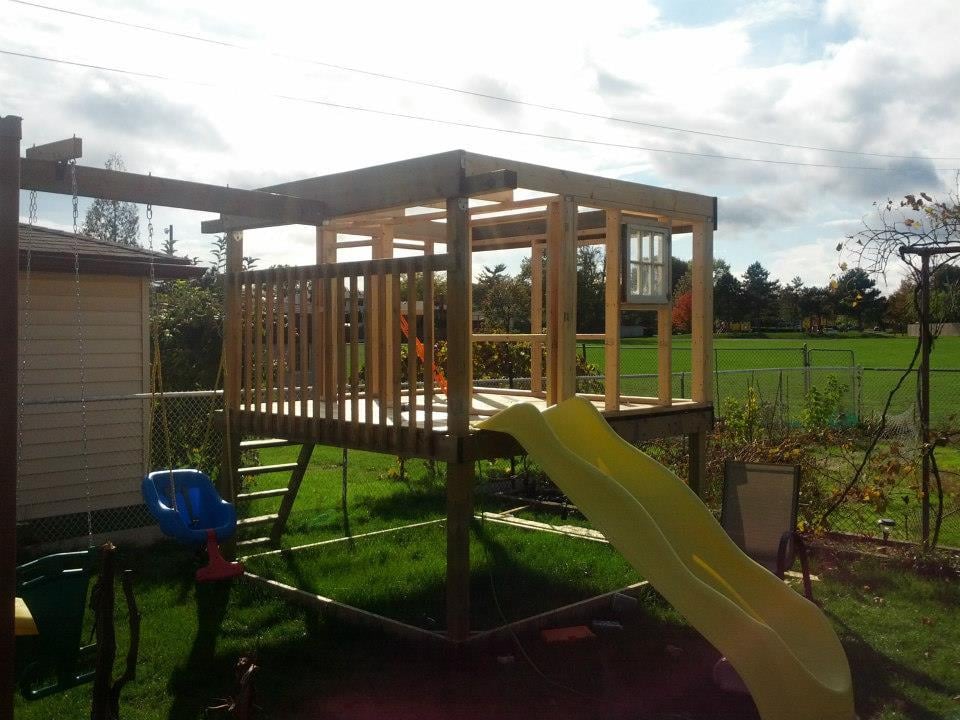
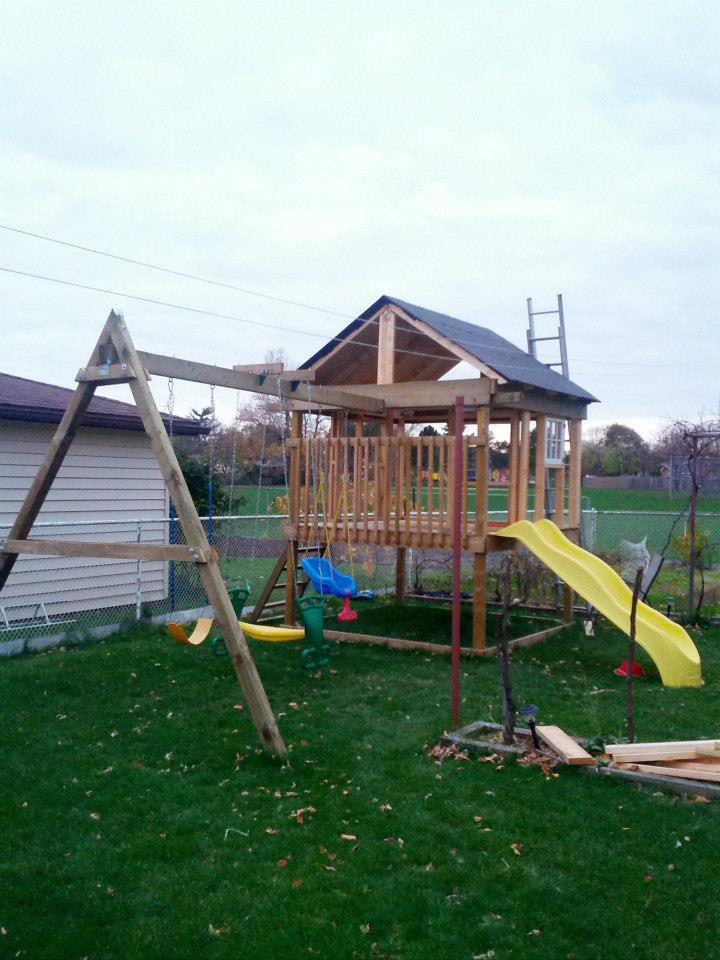
I combined a few different plans here, mostly the Playhouse deck, swingset.
I haven't finished it yet, this spring I want to finish the exterior as it's just primed plywood right now. Still going to add a window above the balcony (there is a loft up there).
I insulated the roof/ceiling and will insulate the walls when we finish it. In the bottom we'll be putting in a sandbox with a cover that folds up into benches.
It was a fun project and should give our girls many years of fun.
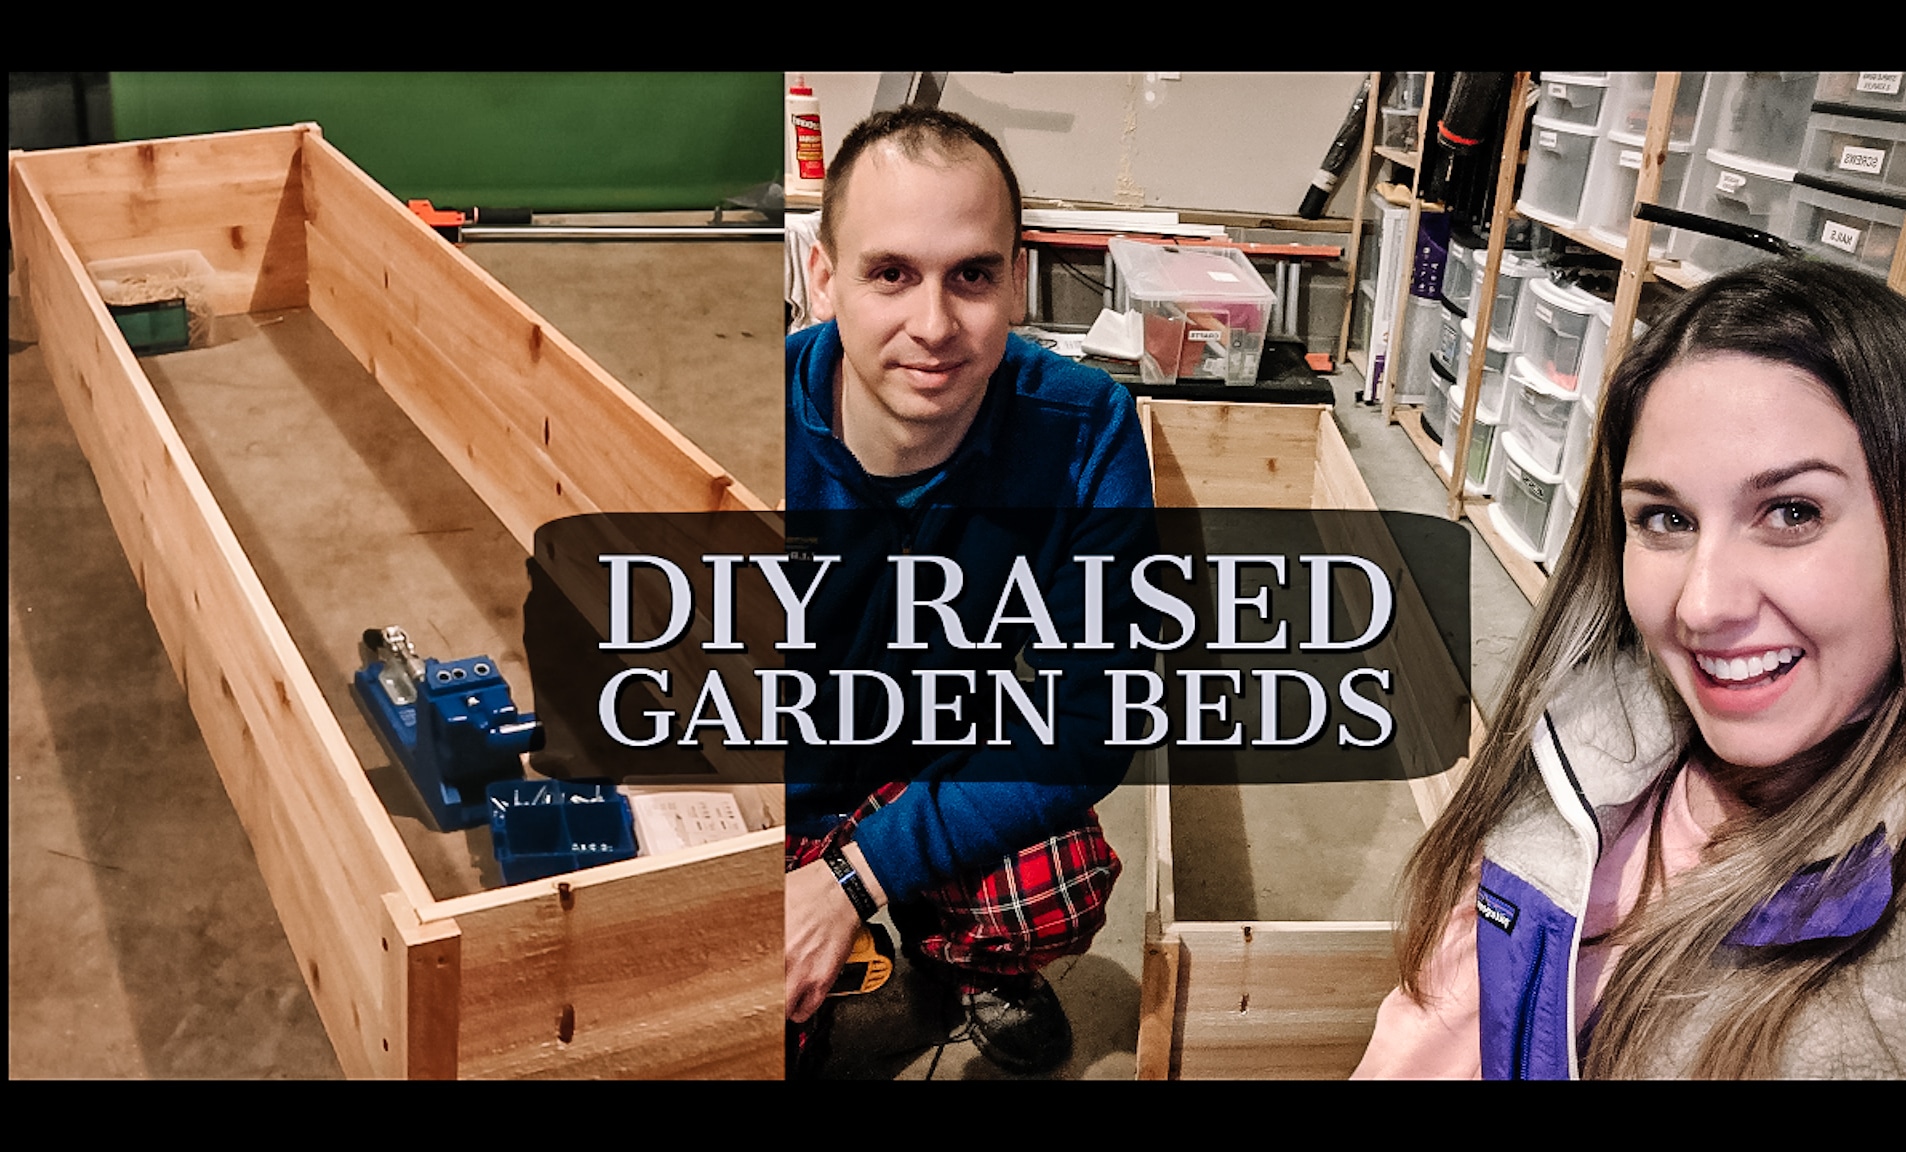
We made two $10 raised beds last weekend and can't wait to get them in the yard!
The cedar fence pickets ended up costing us about $15 per bed with another $15 for screws, so total cost was about $30 per bed.
We found it tricky to do the 1x2 pieces in the order recommended and when we make these again, will form the full box and then add on the 1x2s for support.
We made a YouTube video detailing the process - hope you'll check it out!
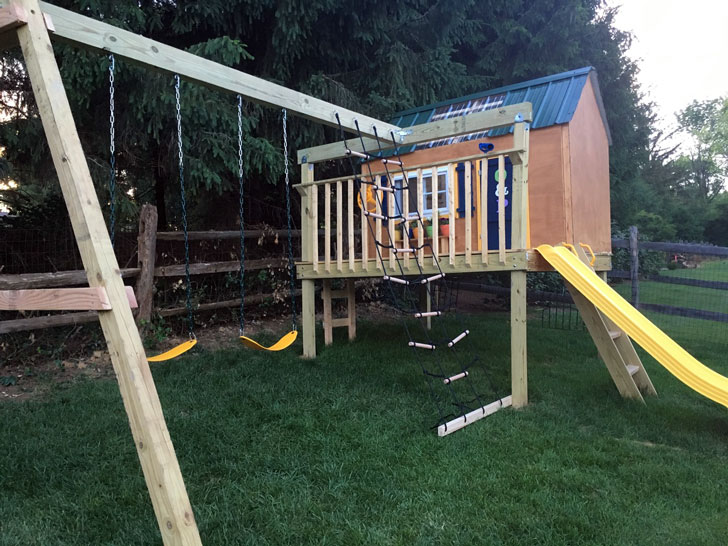
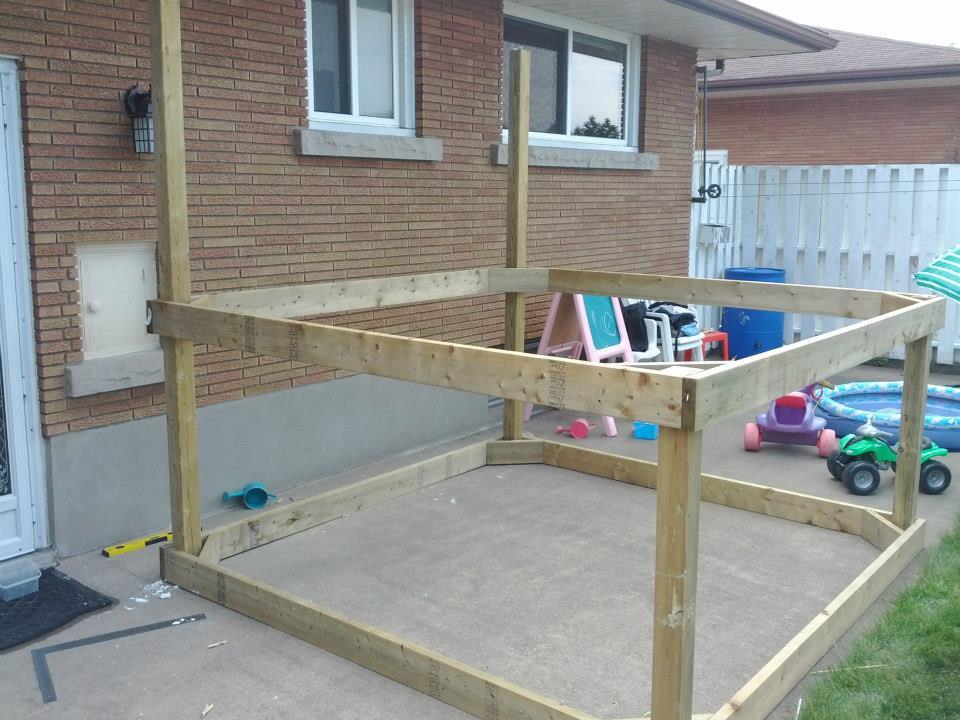
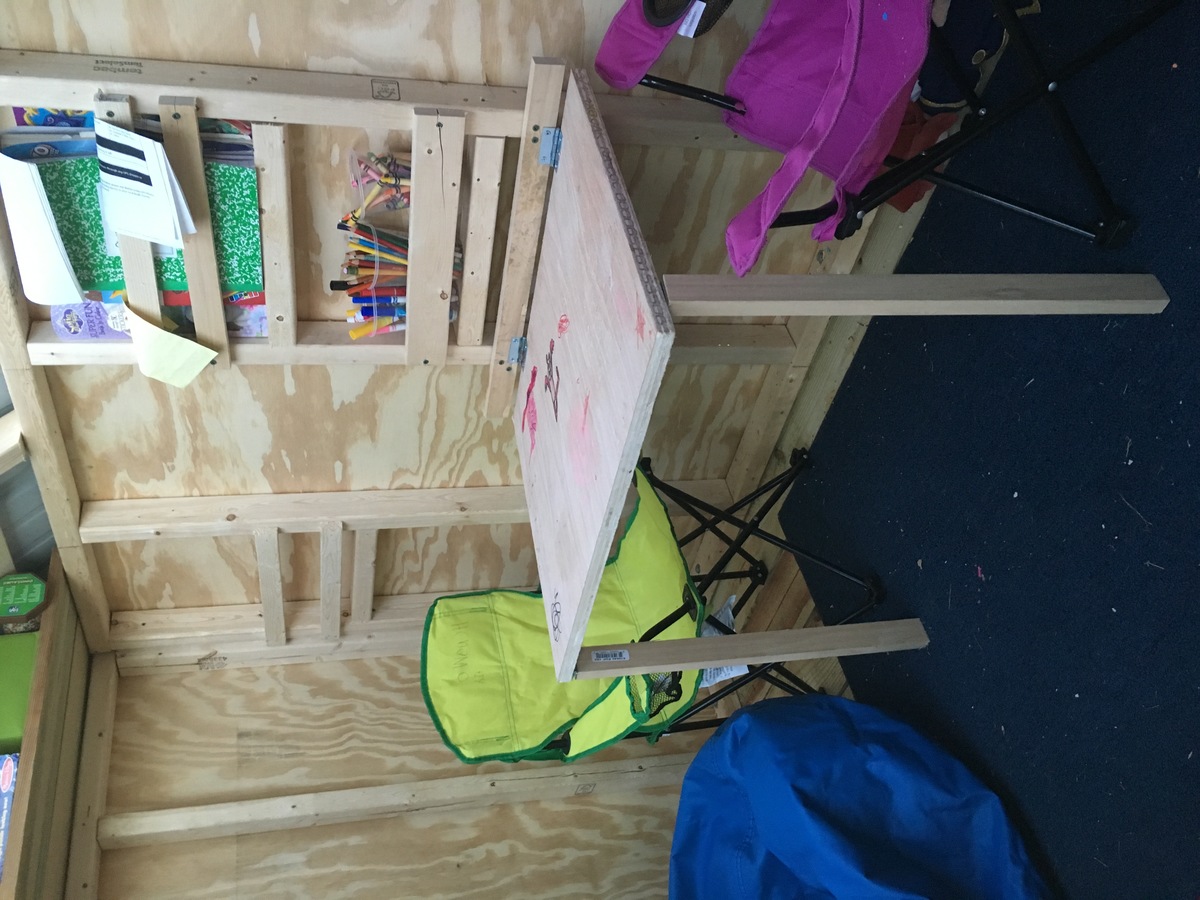
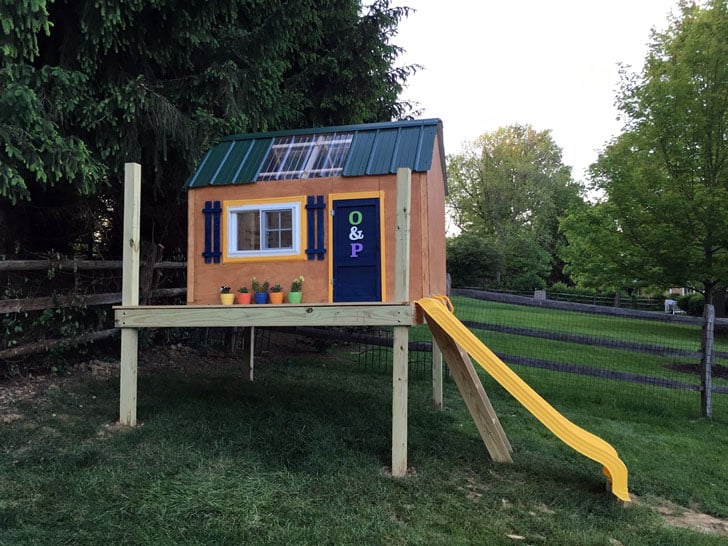
We really enjoyed building this playhouse swing set for our kids. We have a decent slope to our backyard, so we needed to sink our posts, which required a bit more work thank Ana's plans. We also used a real window (my dad just happened to have in his garage) instead of the 3 open aired windows Ana's plans called for. Inside we built a fold under table, shelf, and a chalkboard for thier entertainment.
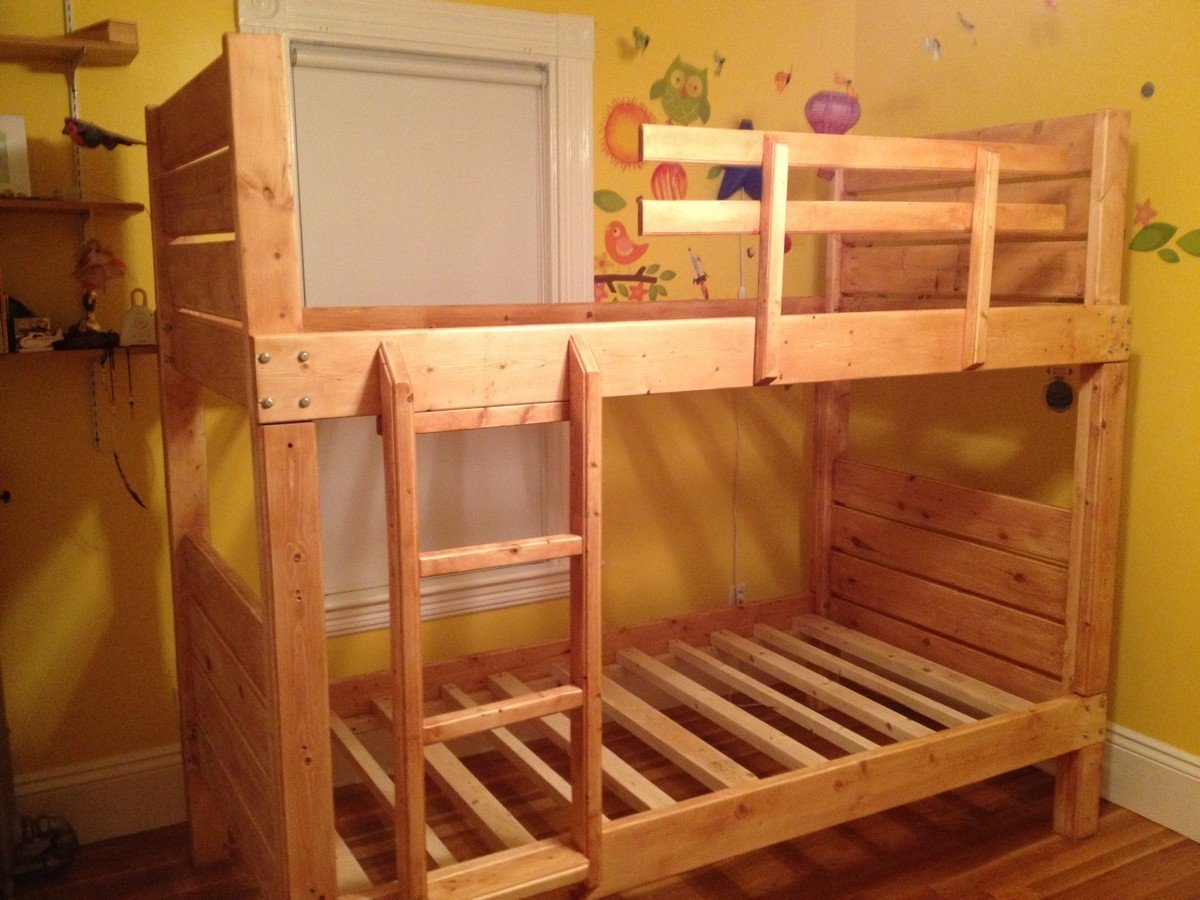
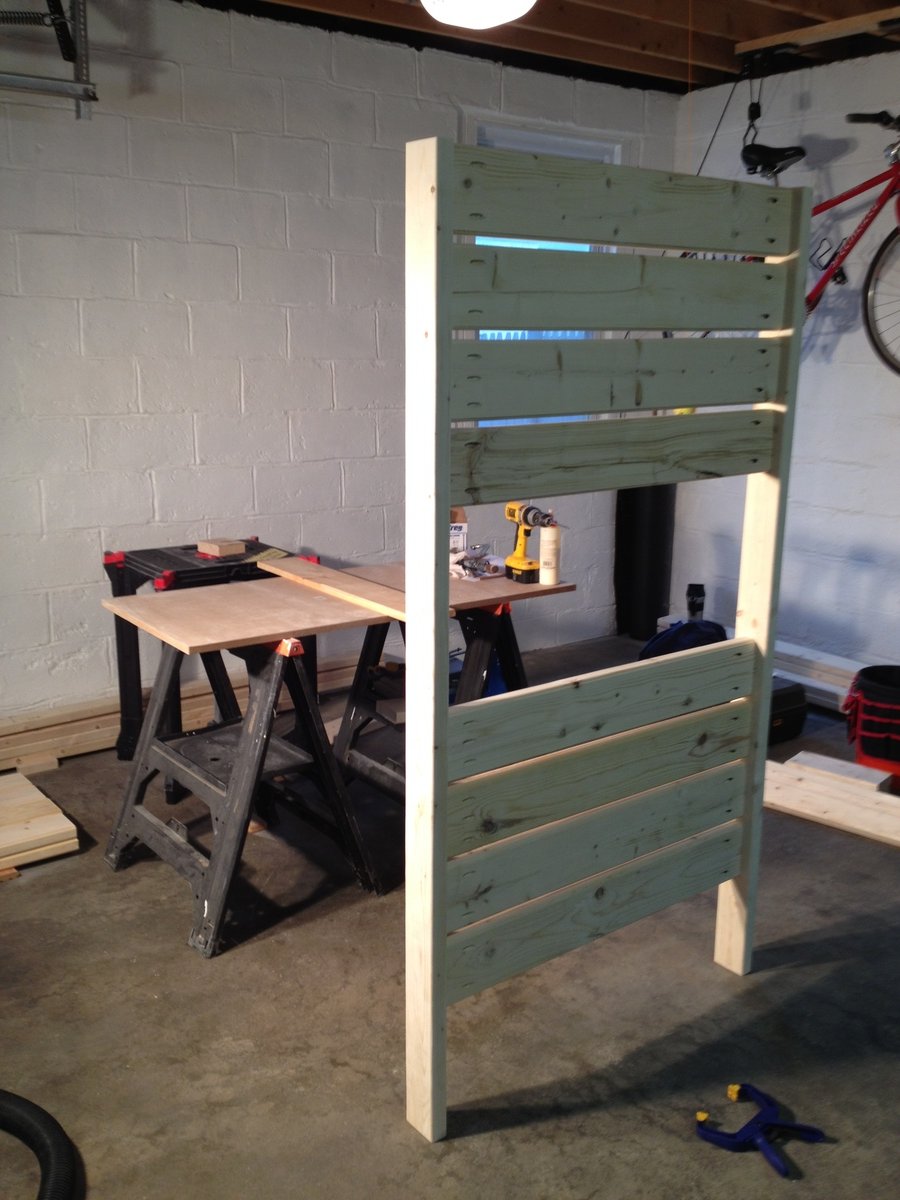
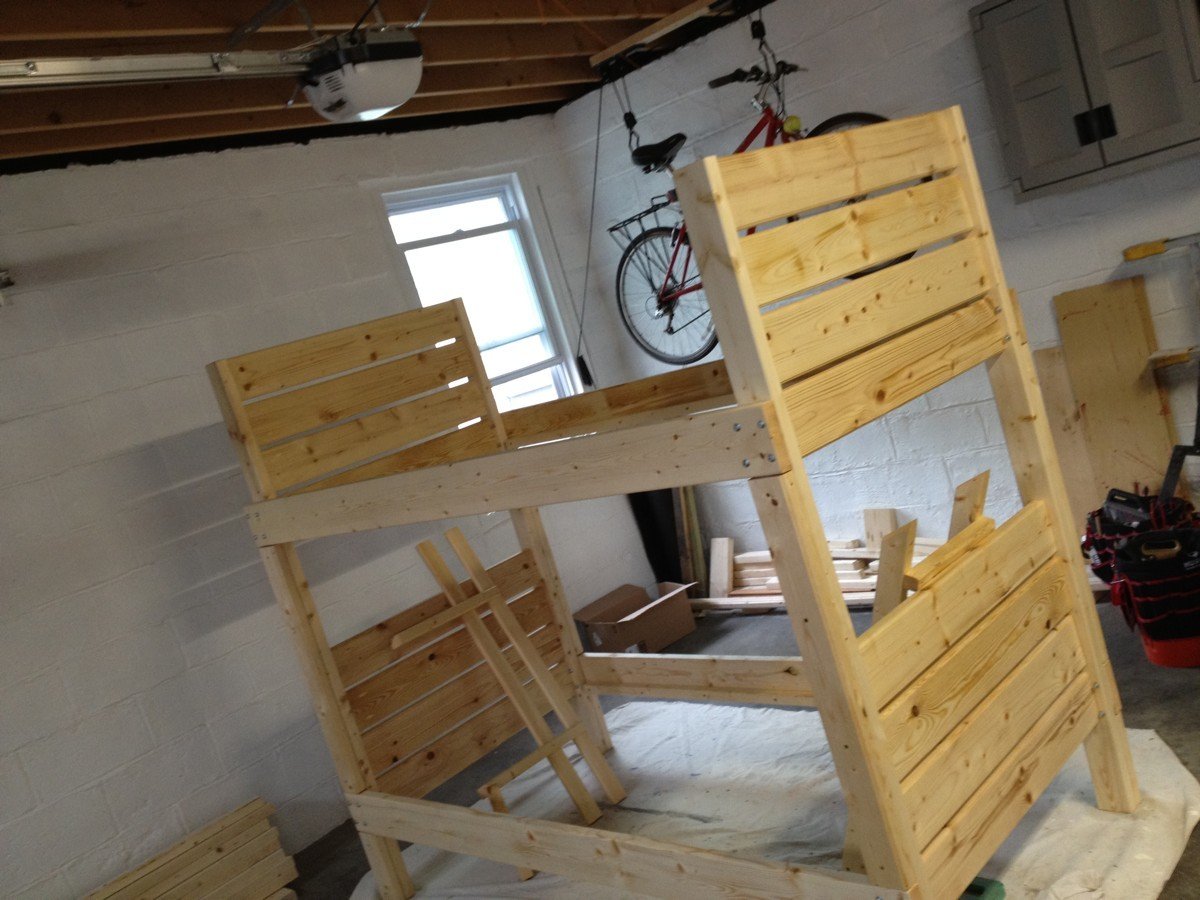
We were shopping for bunk beds for our 5 and 3-year-old kids, and everything I saw was overpriced, mass produced junk. I'm not kidding - we were looking at $800-$2000 for anything that appeared to be remotely stable, let alone well-designed.
Naturally, I started searching for plans (it's the right thing to do), and naturally, I found my way to Ana White. This project began in earnest when I found the Side Street Bunk Bed plans here:
http://ana-white.com/2012/03/plans/side-street-bunk-beds
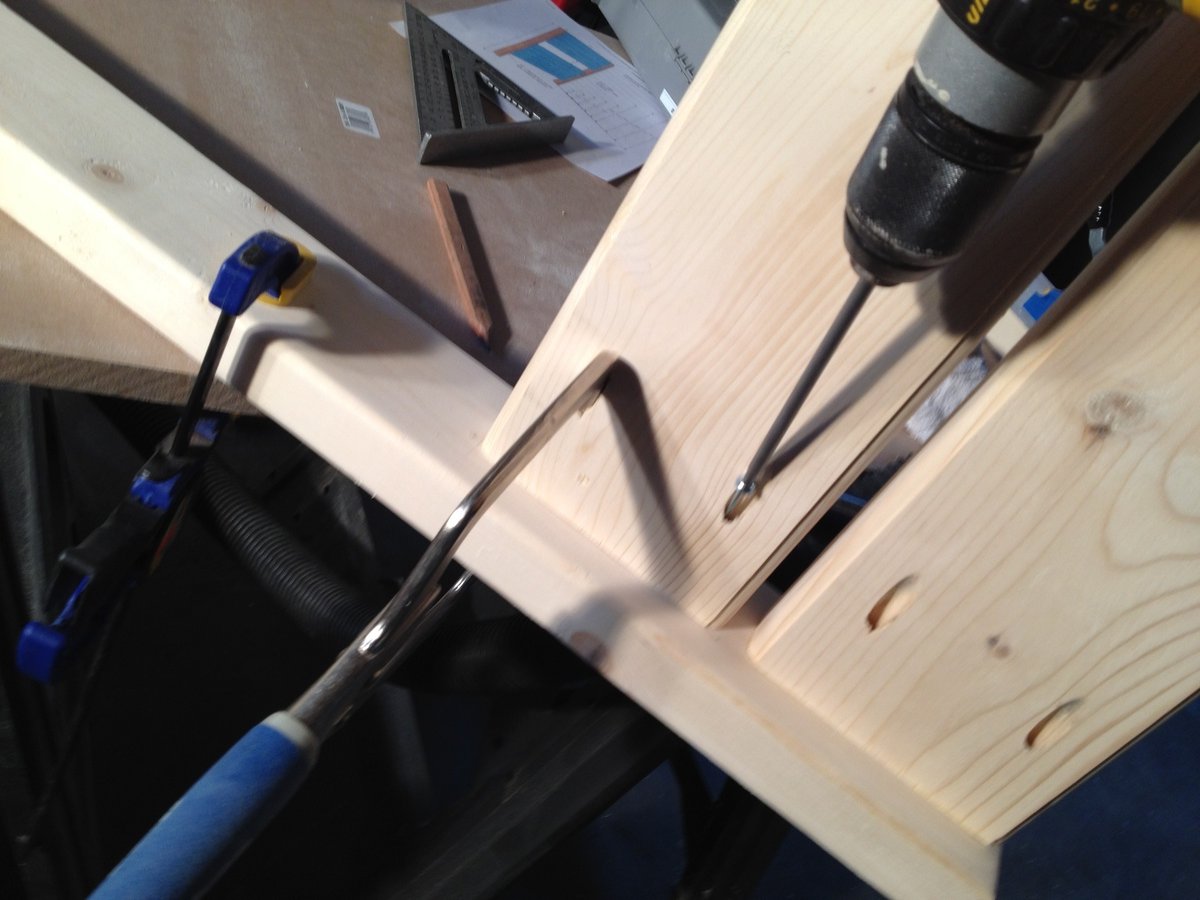
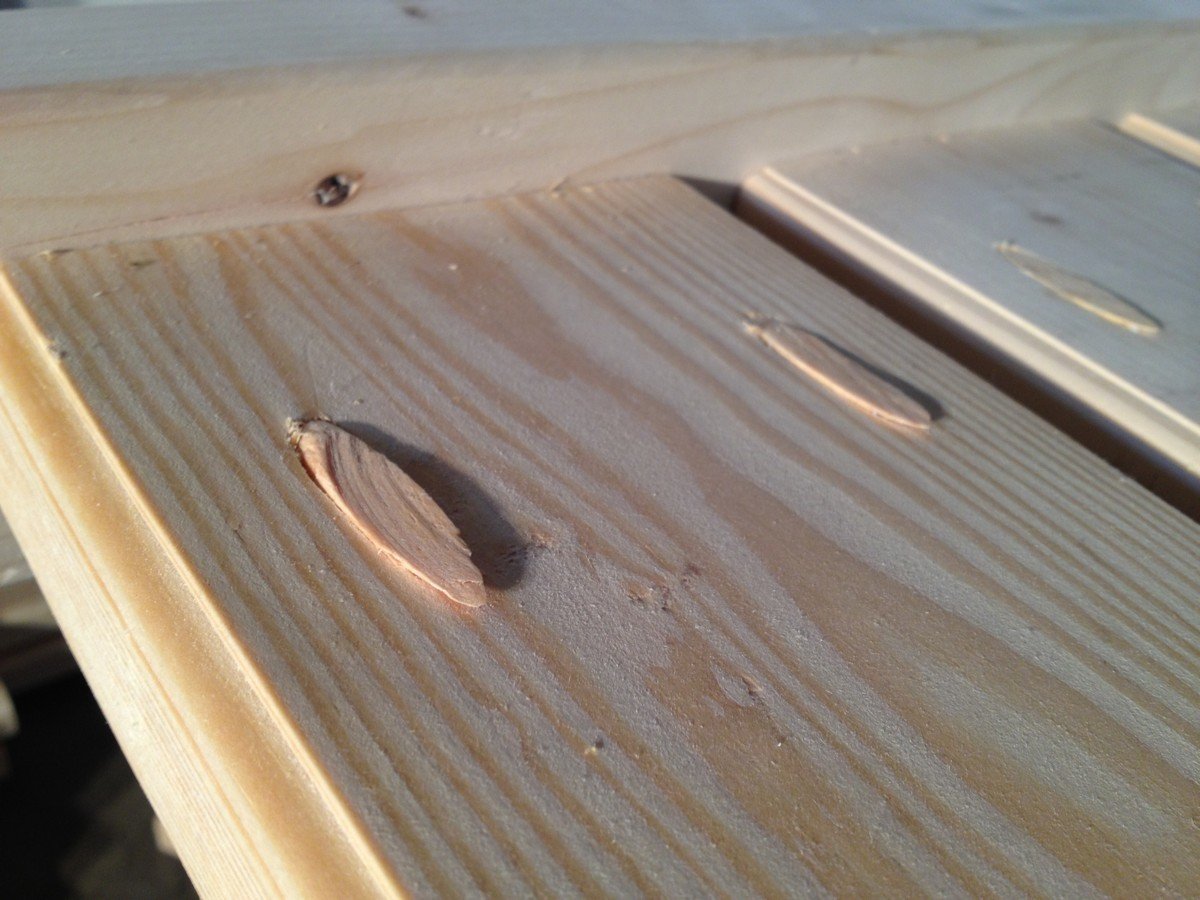
I figured I'd give it my own twist. I needed to practice using my DeWalt compact router (and the new trim router table my wife had given me months before), and any excuse to bust out my Kreg Jig is fine by me. I also had different ideas for the ladder and guard rails...so I printed out the plans, sketched out my variations, and proceeded to suffer through the indignity of lumber shopping at Home Depot.
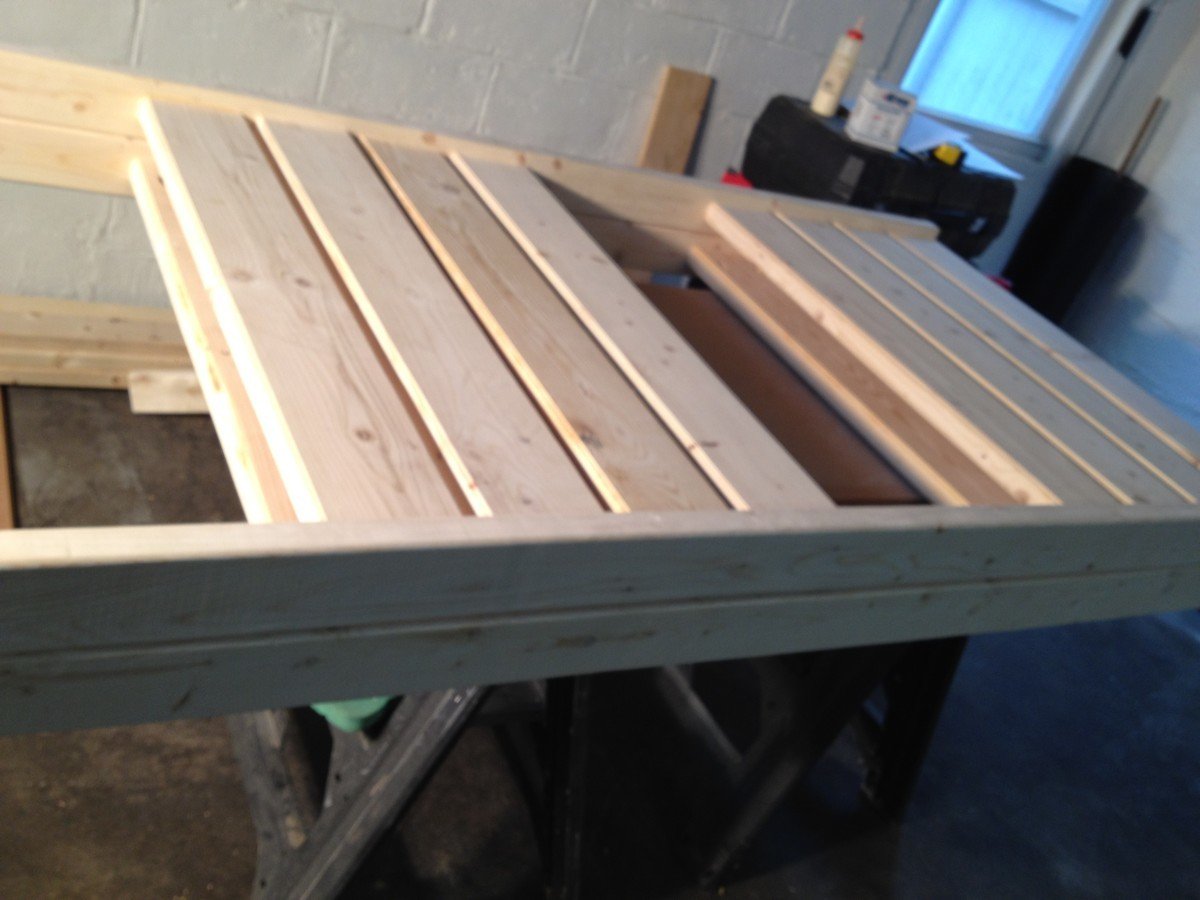
I know what you're thinking - WHY would anyone even bother trying to find a straight board in THAT place? Well believe me, I suffered for the convenience of driving to the HD two miles from my house. I had to work each and every board like crazy, but eventually I got em all into fine shape. Wood wants to be good, even the crap they sell at HD.
About halfway through the build, I started to worry that what i was building was TOO sturdy - total overkill. But now that it's in use, I can tell you I'm glad I built with these plans. I can still climb up on top of the bed with both my kids if I want to and this thing doesn't budge. Not an inch. Not a creak. SOLID. Exactly what any parent wants.
Not a lot of complex tools involved here; my trusty Delta chop saw, my DeWalt 18v cordless drill, a DeWalt palm sander ( I spent hours with this), the Kreg Jig and a couple of clamps (of course), and the DeWalt Compact Router and table. The router really made a difference in the overall design – and I wasn't afraid of screwing up the lousy lumber I was working with. In the end, it all finished rather nicely.
I treated every piece with Minwax wood conditioner, then a single coat of Minway Polyshade in Pecan. Nothing fancy, but after sanding it down and giving it a polish, I gotta say it looks just as good as your average IKEA finish. Not bad at all.
This is the largest piece of functional furniture I've ever built, and my kids LOVE it. They talked about it for days after, and you can't buy that on Amazon. It was a real confidence builder, and I'm PSYCHED to move on to some nicer lumber and more complex projects!
Thu, 05/24/2012 - 09:42
That is really lovely. You should be proud and how wonderful that you created this experience for your boys instead. No doubt you have inspired and impressed them. Way to go.
Sat, 07/14/2012 - 16:01
Great job. We just bought the wood to make the same bunk bed. Would you mind sharing your dimensions/cut list for the ladder on your bunk bed? We would like to build the same ladder instead of the one that goes out to the floor.
Thanks.
This was my first project. I used wainscoting for the door backing. I was happy with it for a first project.
Built one for my niece, my daughter's is next!

We loved this greenhouse plan from AnaWhite and wanted to be able to grow in 3 seasons so we modified the design to include humidity & temperature control & 18" deep elevated cedar beds inside with 4x4 posts for support and trellis option. We added electricity in order to have a lighted workspace and the ability to put in a circulating fan to control mold and fungus. We added 2 work tables (2x2') on the inside of the door left and right side door in order to do seed trays & store supplies. This was a wonderful project for my husband and my plants inside are doing incredibly well compared to my outside garden beds here in zone 5. Products used:
Foundation
We had a landscape company come and scape/dig a platform and then fill/compact with crushed rock
My husband then used rebar driven into a 4x4 frame in order to secure the frame to the ground and create a base upon which to build the greenhouse
Active ventilation
AC Infinity Cloudline T8 Inline duct fan
Air king range hood wall cap 8" on the bottom outside of the greenhouse wall for air intake + flex 8" duct to the fan itself
Shelter logic autovent automatic shelter vent kits (1 on each side of the front wall) in order to allow air intake from the bottom back of the greenhouse under the elevated beds to flow to the front of the greenhouse and out
Circulating fan- Hurricane wall mount fan 16" - this fan has 3 speeds with tilt function and small mounting bracket
Soil - sourced 3 yards of 50/50 loam/compost from local landscaping supply
60% loam
30% organic compost
10% organic topsoil + perlite
Soil beds
-cedar frame 2 feet wide along sides, 3 feet wide on the back wall
-galvanized metal roofing with holes drilled into it for drainage
-landscape cloth lined


Wed, 09/09/2020 - 13:09
Thanks for that update! I was wondering how to vent this project, as Green houses need the ventilation. Good to know dollar amount also. Great photos.
Wed, 09/09/2020 - 13:09
Thanks for that update! I was wondering how to vent this project, as Green houses need the ventilation. Good to know dollar amount also. Great photos.
Wed, 09/09/2020 - 13:09
Thanks for that update! I was wondering how to vent this project, as Green houses need the ventilation. Good to know dollar amount also. Great photos.
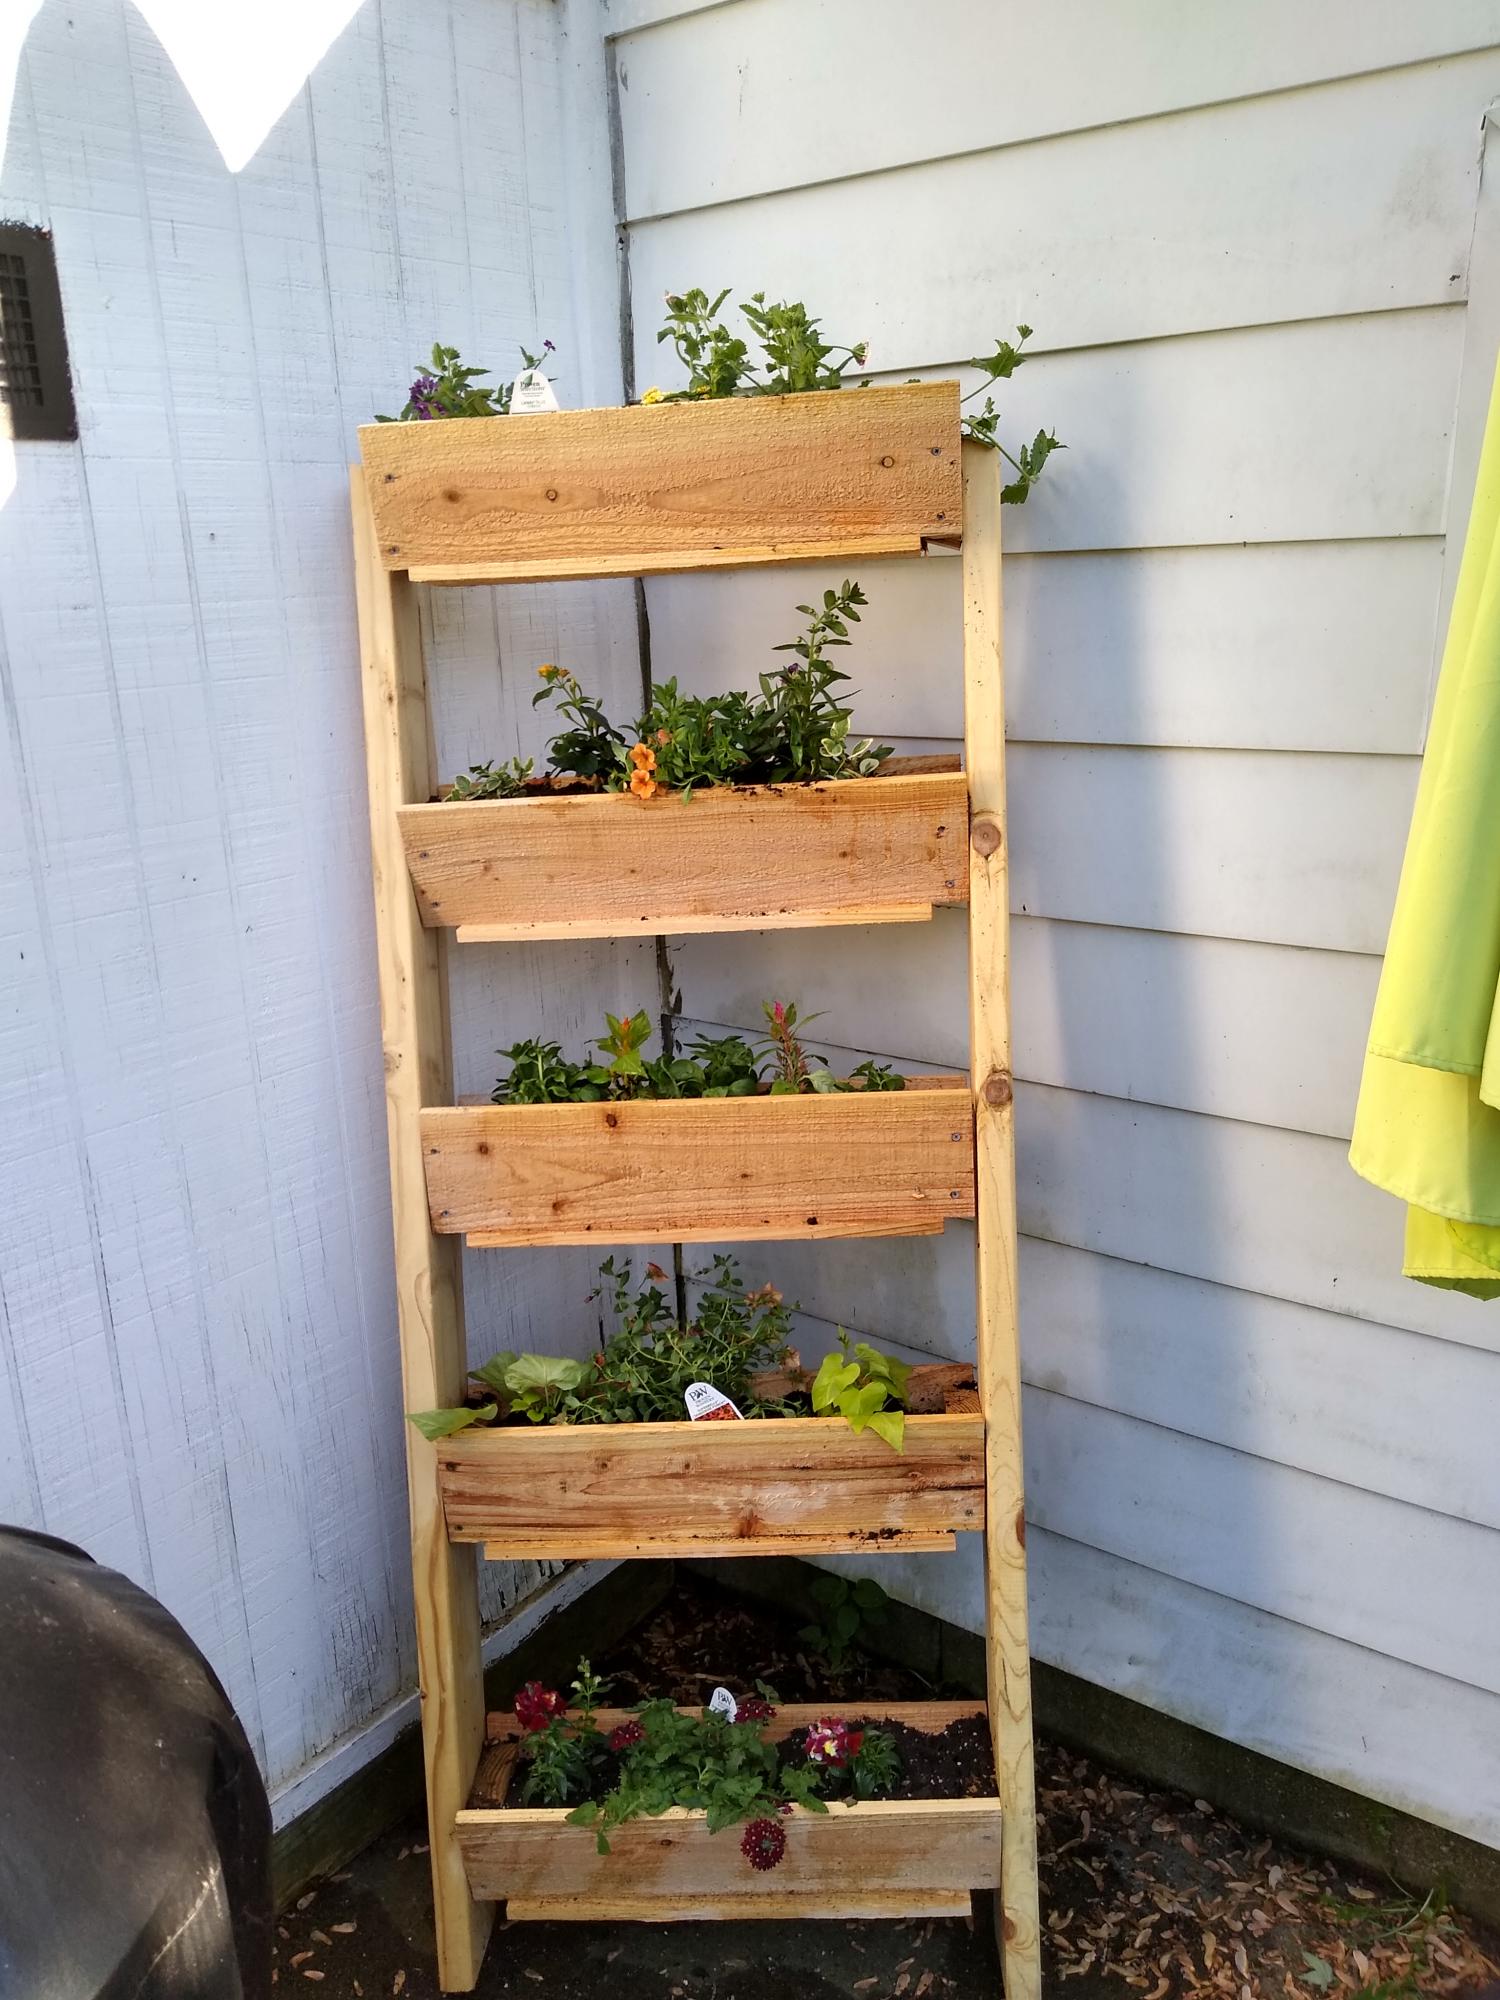
Flower box ! Easy to do.
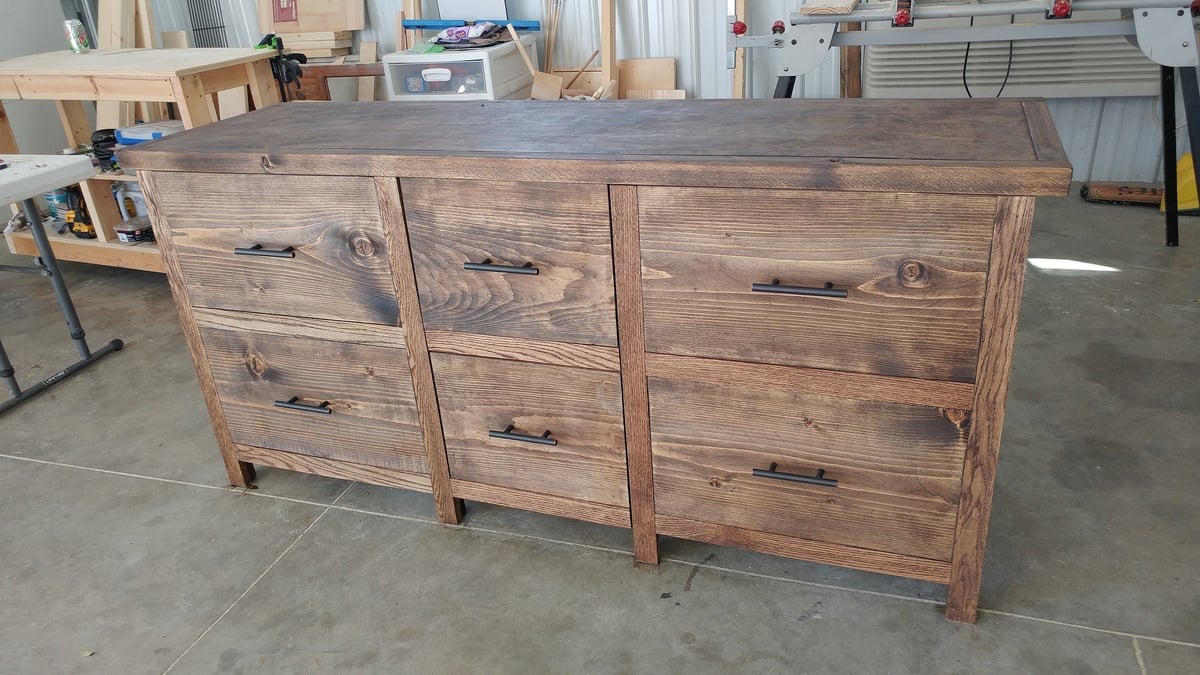
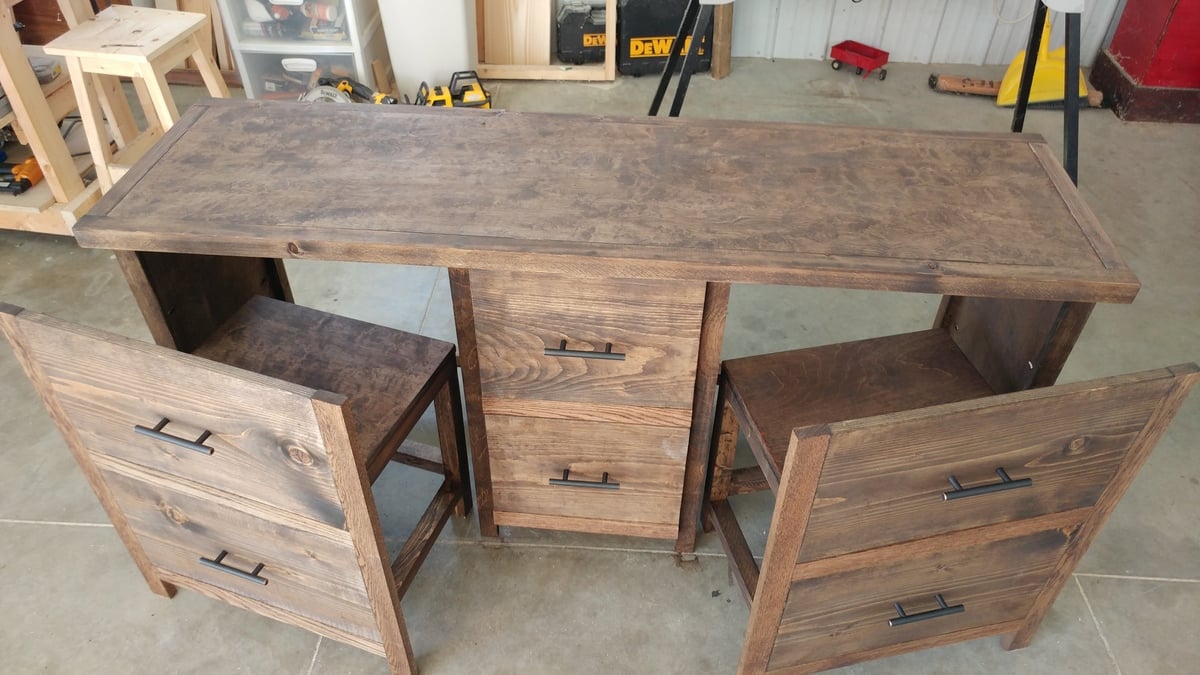
I shrunk the size and dumbed down the plans to fit my skill level.

Mon, 10/10/2016 - 09:08
I love what you did! It looks so great! I prefer this style, which is more simplistic than the other. Great work!!
Mon, 10/10/2016 - 10:28
Love how this turned out - the simpler drawers is just as (if not more) beautiful!
Tue, 10/11/2016 - 14:56
Thanks! I wish I would of set up an account before I posted so I could get notifications. I honestly didn't think anyone would notice it :)
Tue, 10/11/2016 - 14:58
I am so excited that people noticed this :) Is there any way of putting this under my account? I didnt make an account until today and I would like to get notifications. I have my project on my facebook page and can prove that I made it with other pictures. Thanks!
Mon, 01/20/2020 - 07:44
I would love to see this in a farm-house (rather than rustic) aesthetic along with drawers under the seats for extra storage. Maybe on casters with a fold up extension on the other side? So many ideas running through my head with this!
Comments
Ana White Admin
Thu, 10/08/2015 - 12:46
Lovely Tribute
Thanks for sharing your wonderful project!
DIYDex
Sat, 08/31/2024 - 15:26
Beautiful, tasteful flag and shell display!
This is exactly what I was looking for. Are the plans available?