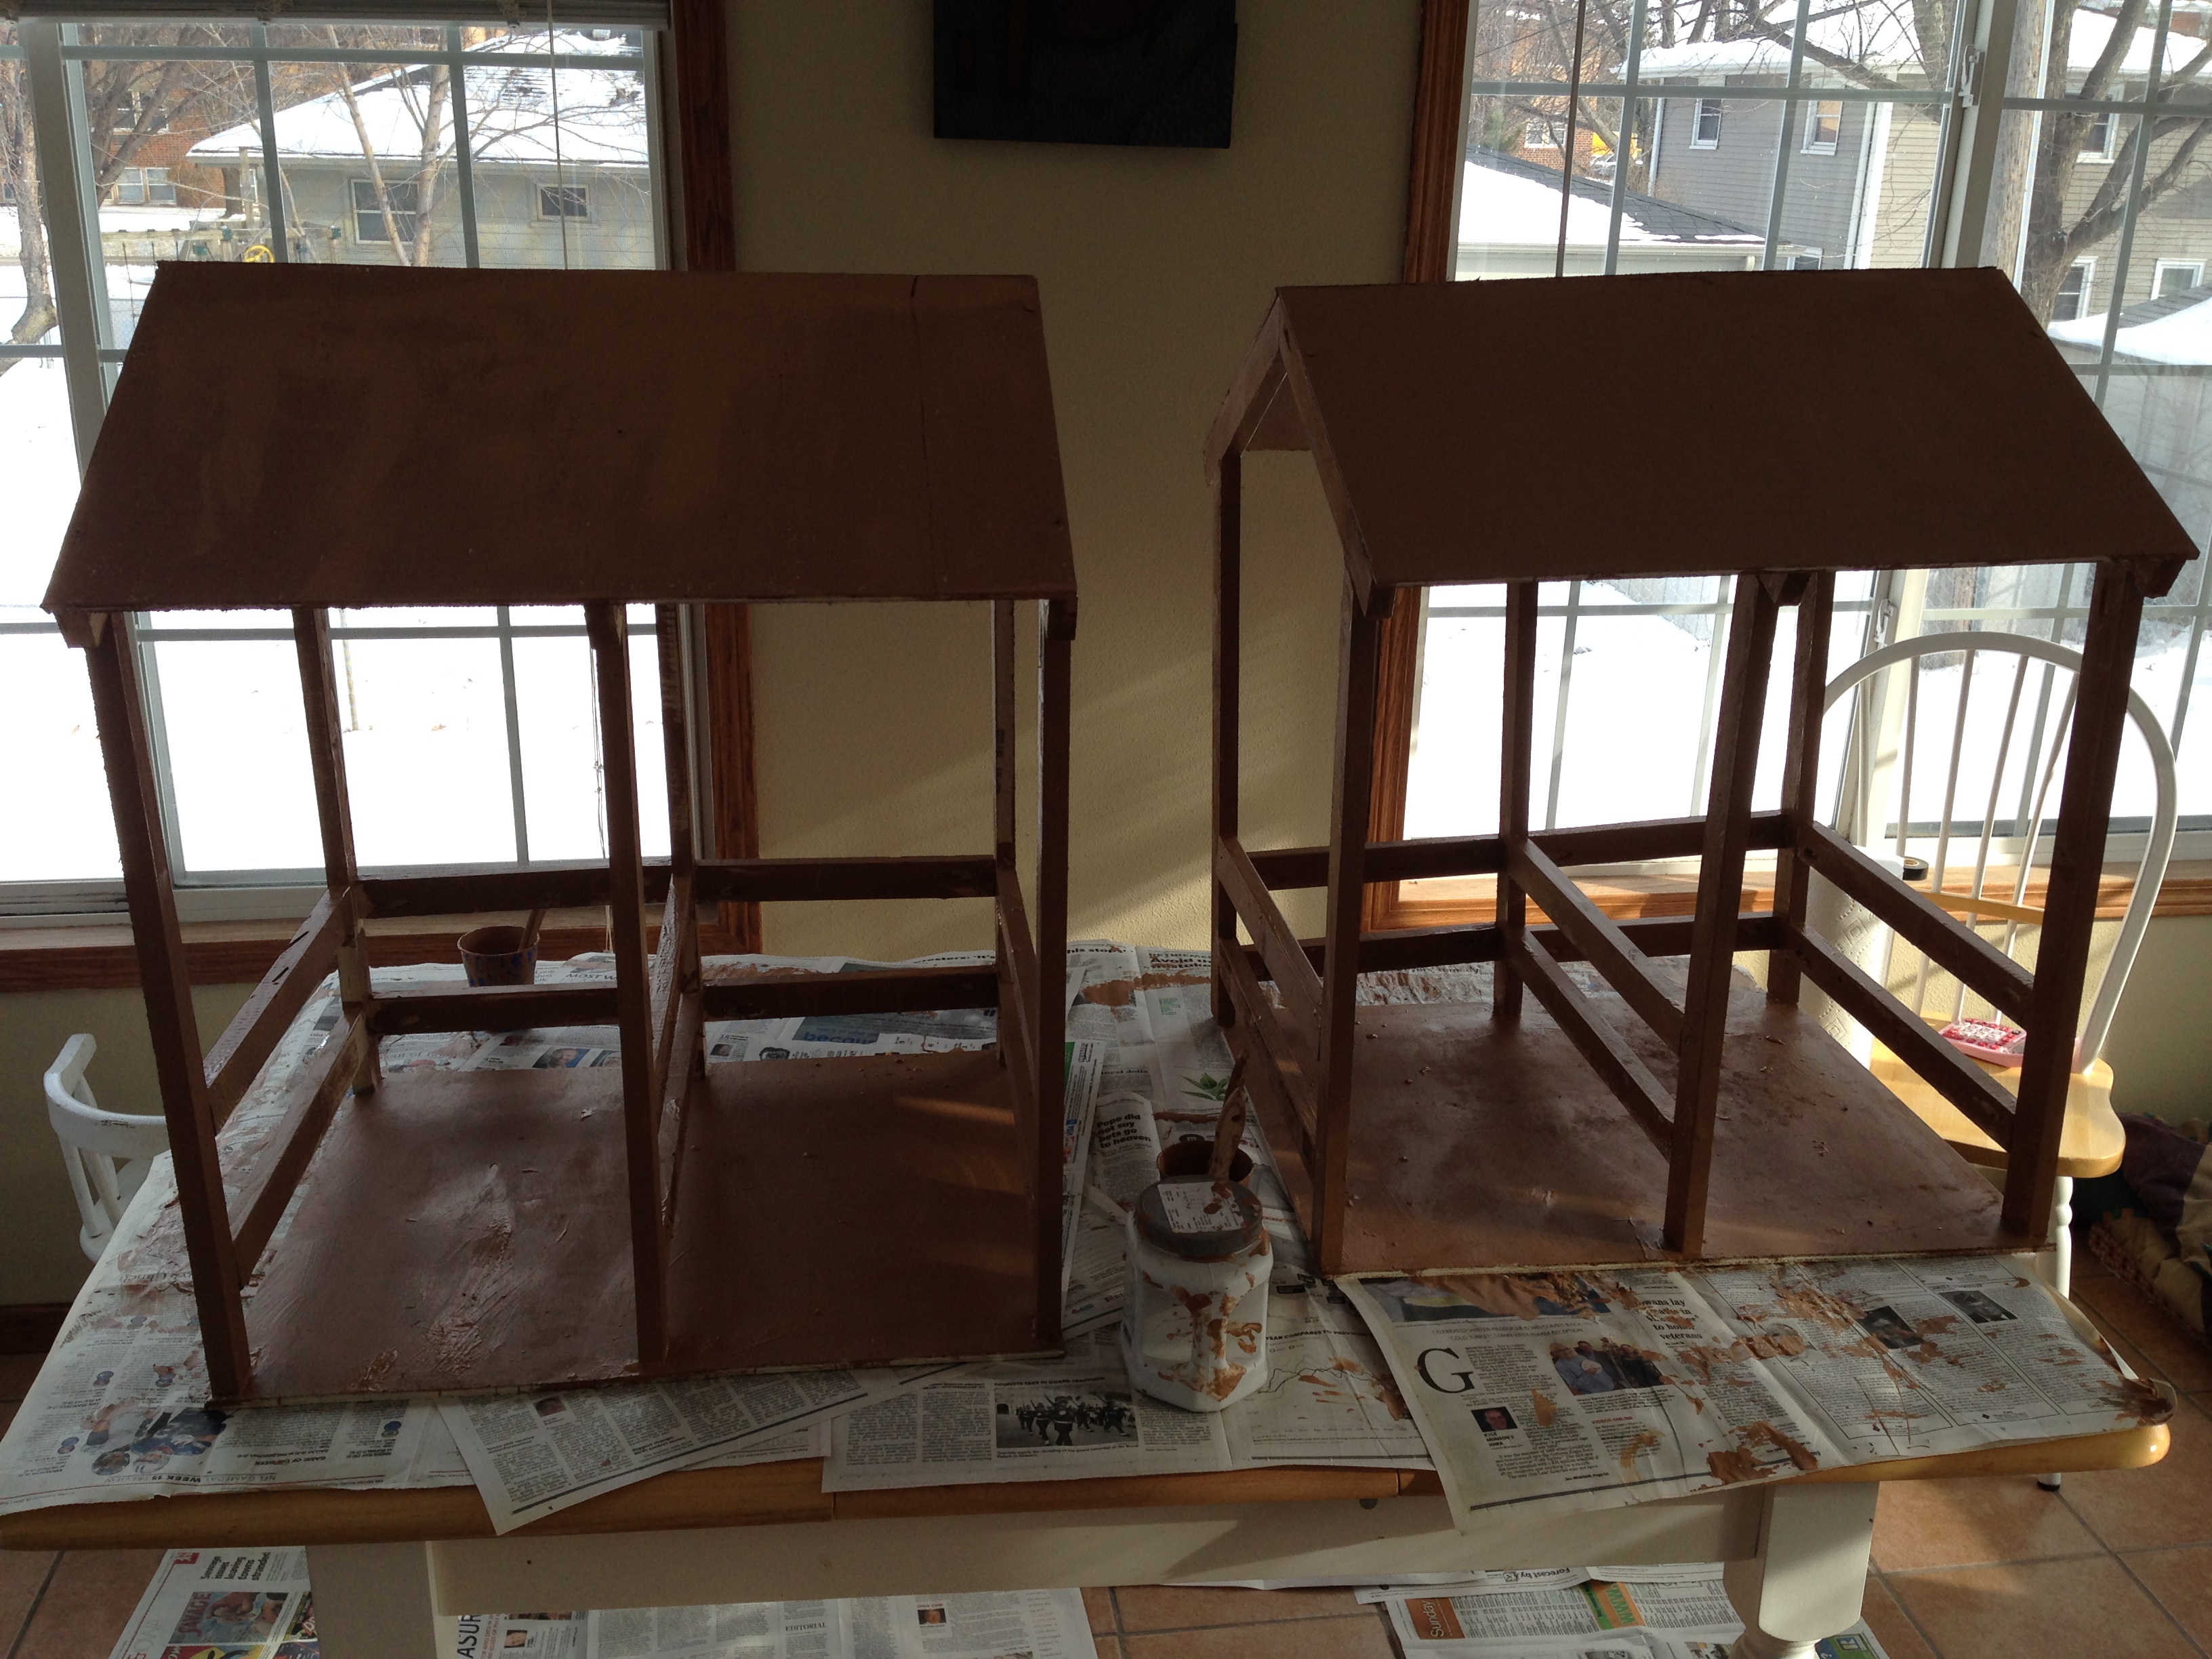
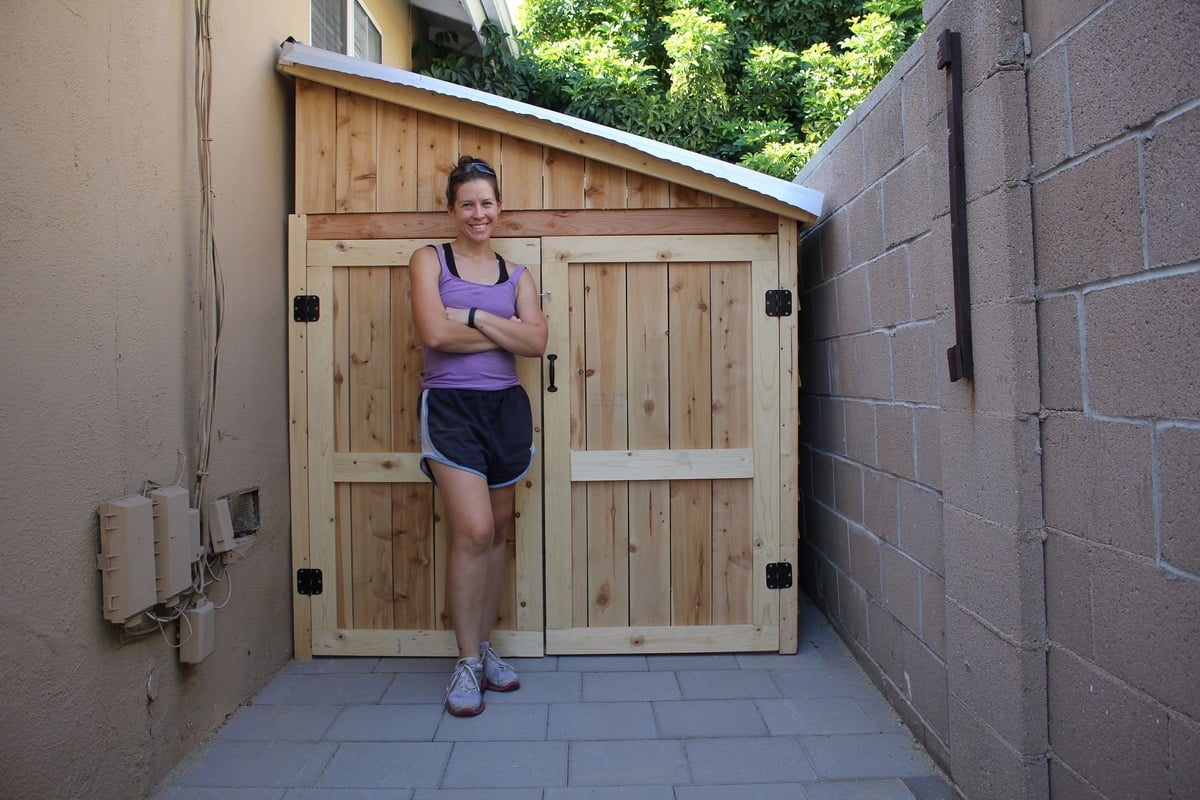
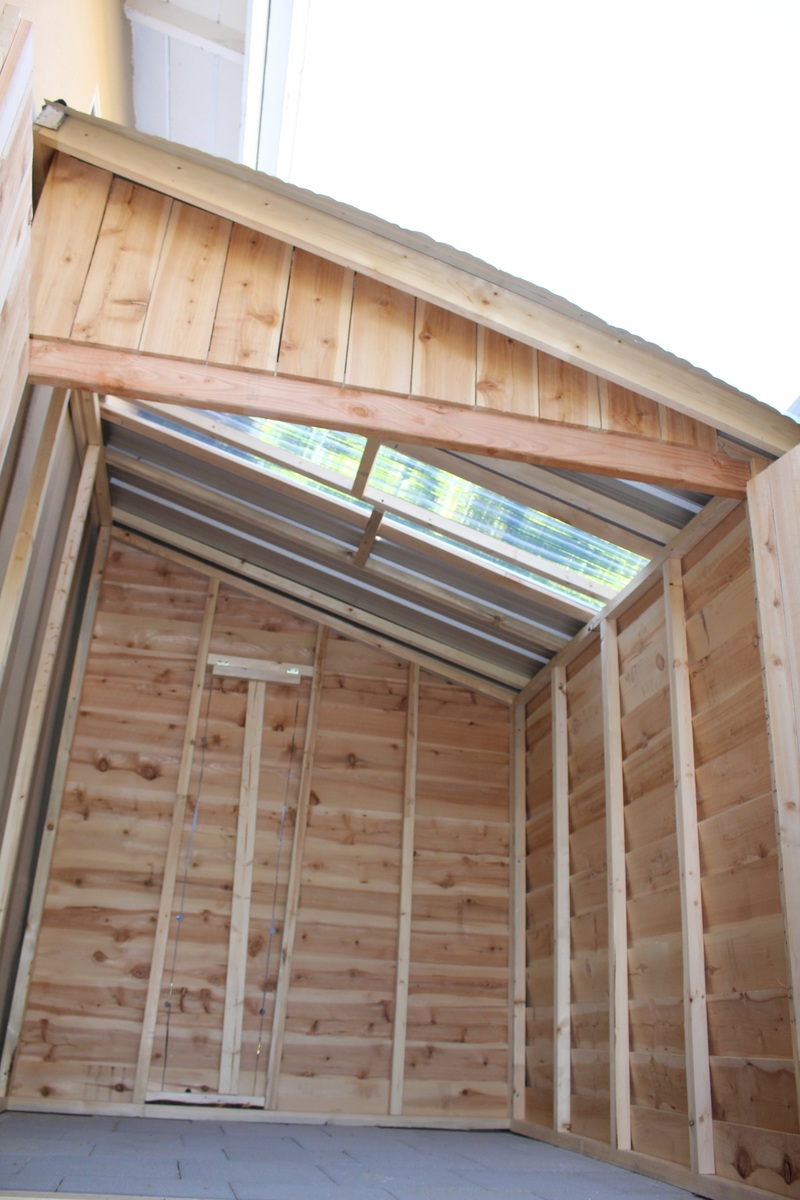
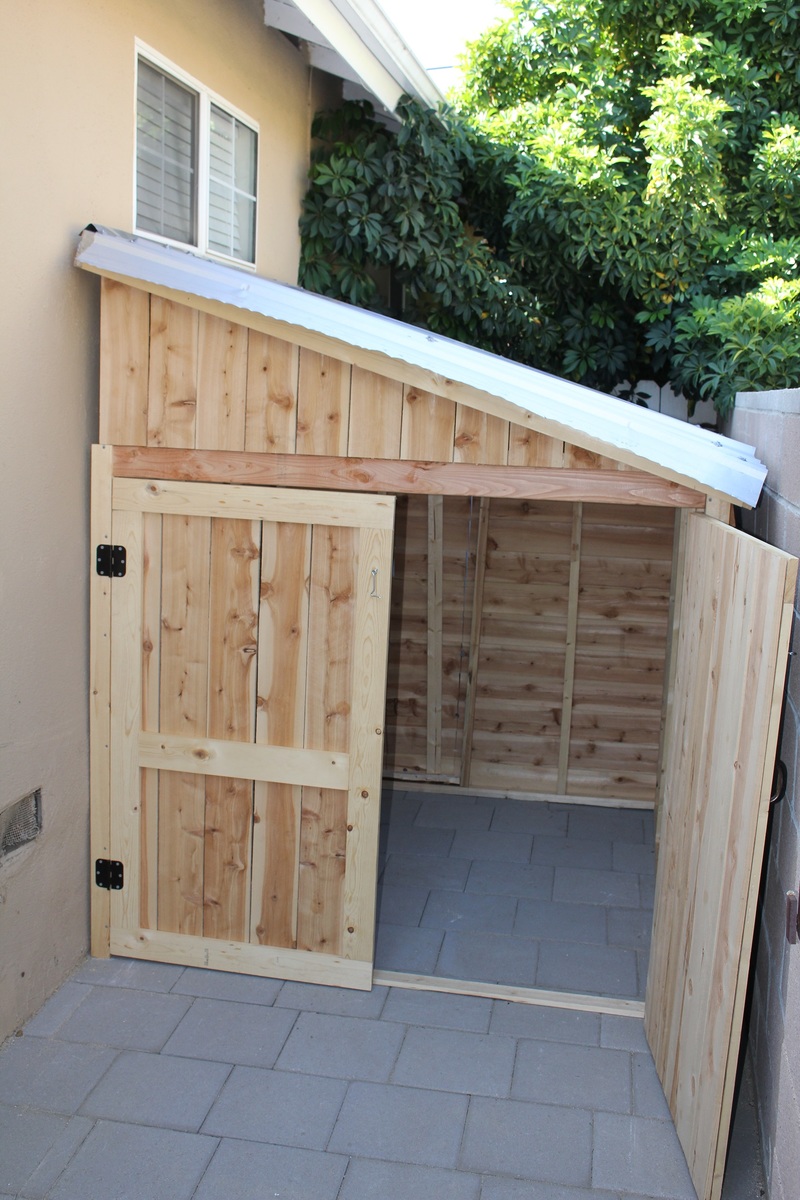
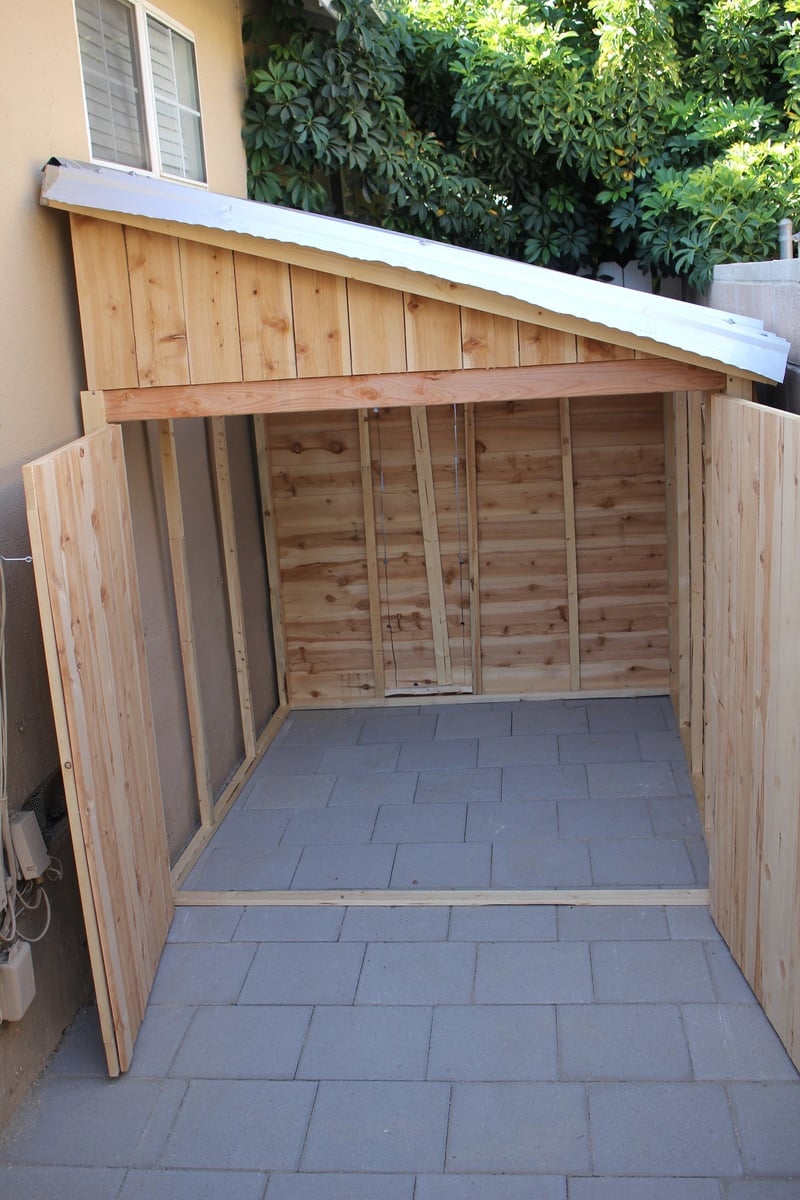
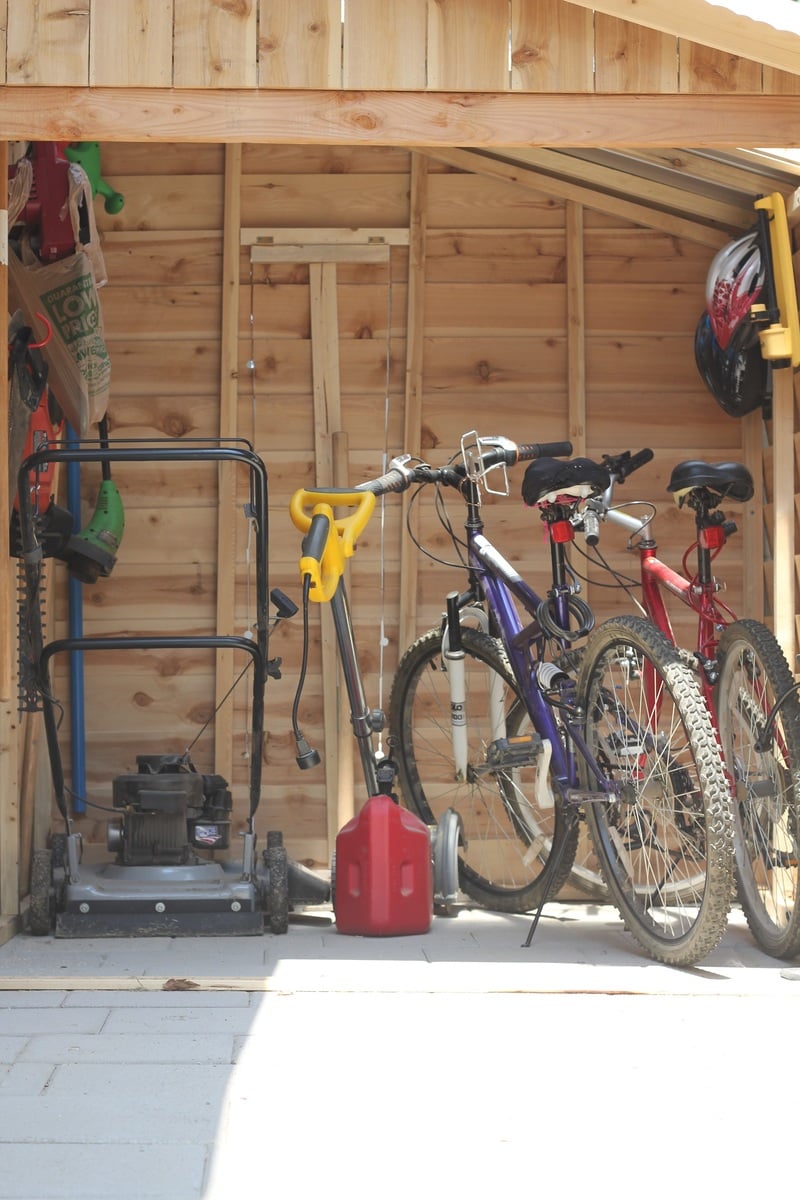
Needed a shed to store bikes and mowers, etc, so I'd have more room in the woodshop : ) I made a lot of modifications to the plan to fit my space and make it much larger. The completed size is 7 foot tall at the peak, 6 feet deep and 5.5 feet wide. I made it as a 3 sided shed, using the wall as the 4th to save on cost, increase air flow, and make the exterior house wall accessible. I also made an egress in the back of the shed in order to get behind the shed if needed.
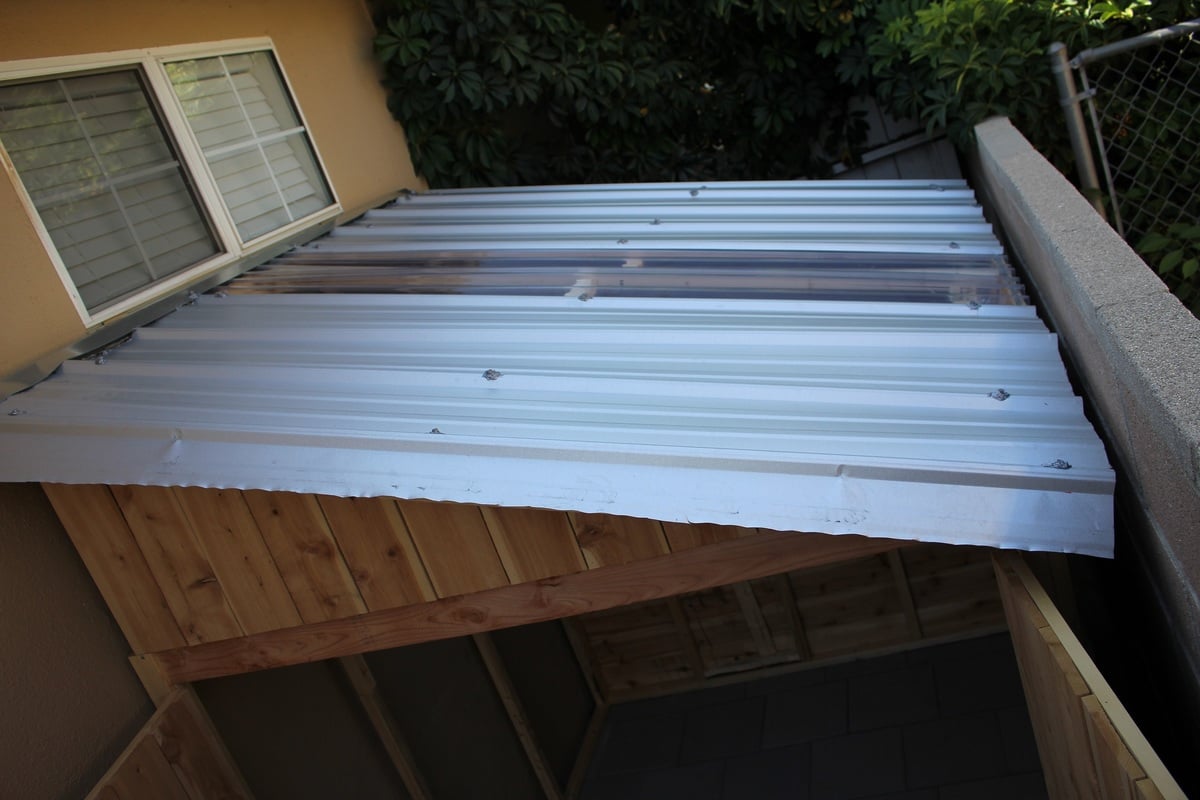
Instead of roofing shingles, I opted for ribbed metal sheets and one clear sheet in the middle to make a skylight, so there would be light in the shed. This is my favorite part of the project. It was a huge pain to attach the roofing from a ladder with very limited access, but it looks great and I love the light coming in. We have very little rain in CA, so I'll have to wait until winter/rainy season in order to test out its waterproofing.
Since the shed sits between the house and the neighbors block wall fence, and I wanted to use as much of the space as I could, I decided to design the shed to have the side wall against the house rather than the back wall, as shown in the plan. This took a large amount of modifications, but with careful planning and measuring, it can be done. This also meant blocking off access to behind the shed, so I cut an egress in the back wall and added hinges so you can lift the back cut out panel, and rest it on a stop block attached to the fence behind it in order to have access. That's what woodworking is about- problem solving. Love it.
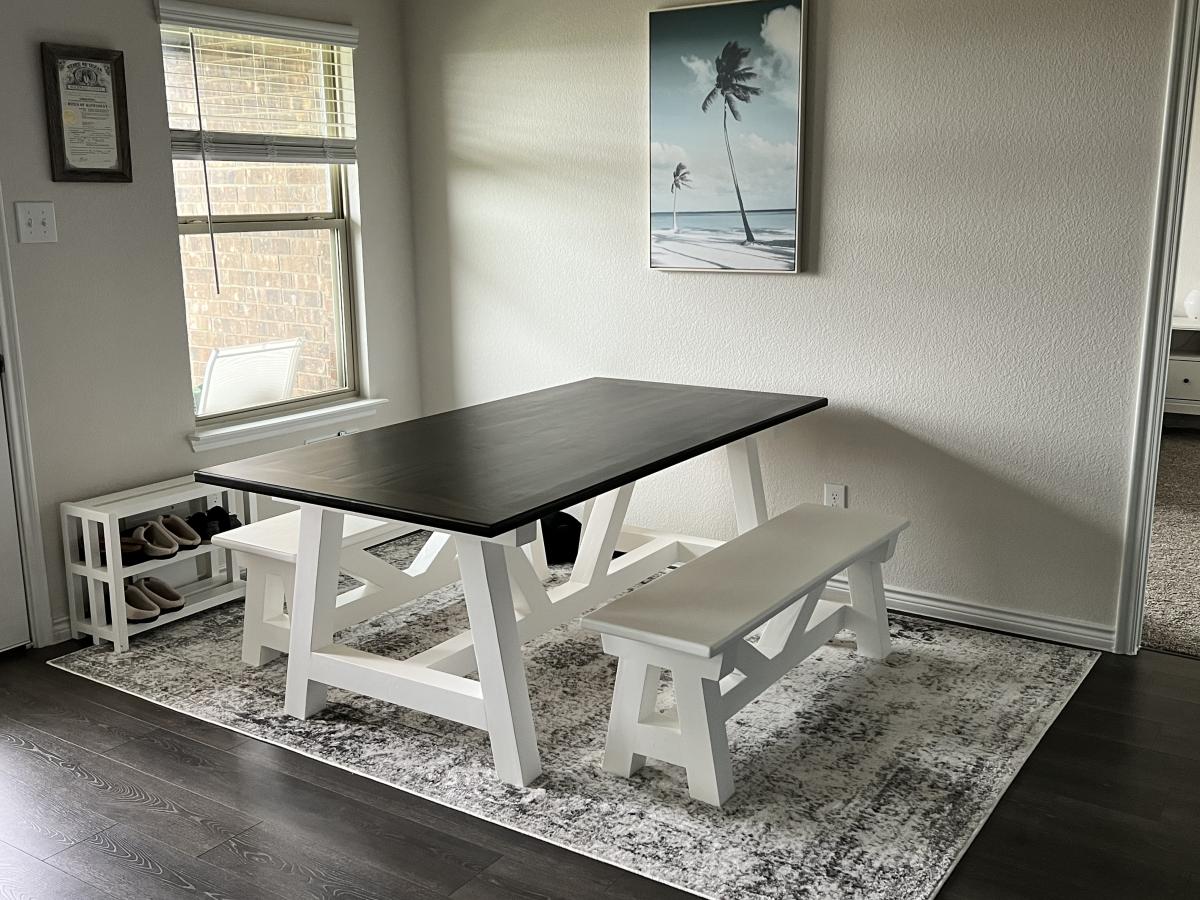
As you can see by the full shed picture, it fits a large amount of stuff- 2 adult bikes, mower, edger, trimmer, chainsaw, hedge trimmer, garden tools, shovels, etc, with plenty of room for more. I now have a free corner in my garage that I've already filled with a DIY rolling workbench and more pegboard space for tool hanging. Woodshop increased space= happy Brittany.
I should also mention that building the frame and adding the pickets was quite a quick and easy job. The hardest and most time consuming part was the roof (I didn't have metal cutting tools), rolling each very heavy wall to the site (I was alone) and the previous 2 weeks in which I built the paver patio the shed sits on. Hard work, but worth it. I love it!