Community Brag Posts

Toybox chest turned window seat

I've tried this before as a gift for a friend's new baby. I then wanted to do one for myself but change the measurements somewhat. This is 45" long and the same width as the original. I reduced the height to account for the 3" foam cushion. Besides that it's pretty much the same as the toy chest plan.

Building and sanding took about 3 days working after work only. Painting took the longest time.

Estimated Cost
$90 including foam and upholstery
Estimated Time Investment
Weekend Project (10-20 Hours)
Finish Used
Primer followed by white paint in semi gloss
Recommended Skill Level
Beginner

Grandma's Library

Submitted by mweir on Sun, 09/16/2012 - 16:51

We combined two projects into one area to create a wonderful spot for reading to the grand kids.

Built from Plan(s)
Estimated Cost
$ 30.00
Estimated Time Investment
Day Project (6-9 Hours)
Finish Used
White paint for the book shelf and a light blue, with black lettering for the sign.
Recommended Skill Level
Beginner

My work table

Submitted by ewebrat on Fri, 07/24/2020 - 13:19

Started to renovate hubby’s bathroom, got annoyed with lack of space on his work bench, built my own. Since this pic, I’ve added locking casters, a power bar up one leg, and a plain metal tool holder on one side. Still have some thoughts rattling around in my head about various other upgrades. Super plans, easy one-woman job.

Estimated Cost
$100
Estimated Time Investment
Afternoon Project (3-6 Hours)
Finish Used
No finish. I want to add a 1/4 or 1/2 MDD top, but that’s the only not-naked original wood.
Recommended Skill Level
Beginner

Modified Simple Rolling Bar Cart

I honestly think Ana is a mind reader. Whenever I need plans for a particular piece of furniture, they magically appear on her site. Of course if she was a true mind reader, everything will be exactly as I need it requiring no modifications. That's what makes her plans so amazing. I can build bigger and better because I've learned to modify her plans to fit my current needs.

This Cart was no exception. I had to make mine a few inches deeper and change the height of the legs and it was a piece of cake. I put this together in less than 2 hours and finishing was easy too.

I did a blog post all about what I did differently including how I constructed a towel bar instead of the pipe. Check it out at www.thepursuitofhandyness.com

Built from Plan(s)
Estimated Cost
$25 Depending upon the type of casters used
Estimated Time Investment
Afternoon Project (3-6 Hours)
Finish Used
Oil Based Primer & Rustoleum Painters Touch Spray Paint in Paprika Satin
Recommended Skill Level
Starter Project

Fancy X Farmhouse with umbrella

I built this for use as an outdoor patio table suitable for an umbrella by eliminating the center truss below the table. Instead, I used my Kreg Jig to join the two sets of legs with 2 2x4s each set about 6 inches off center directly under table top. (See picture). I used Douglas Fir for most of this build. I also added a 1x2 cap to the bread board ends of the table top to help stabilize it against warping. I secured the table top to the frame with countersunk screws under glued wood plugs since I needed to allow a gap between boards for water drainage. I used the Varathane wood weathering product to soften the “new wood” look. I helped preserve the wood with a coat of Benjamin Moore’s clear Arborcoat. This acrylic product will allow the wood to continue to gray naturally. I recommend this as an intermediate project due to the awkwardness of joining the 45 degree angle cuts. Having a second set of hands here would have been very helpful.

Built from Plan(s)
Estimated Cost
$150
Estimated Time Investment
Day Project (6-9 Hours)
Finish Used
Varathane wood weathering
Benjamin Moore Arborcoat clear

Applied with foam brushes.
Recommended Skill Level
Intermediate

Read the Contract before Signing

Submitted by Jake on Sat, 11/03/2012 - 19:11

The wonderful wife wanted a corner cupboard so I built the one you see in the pictures. Before I go further I would like to warn anyone attempting this project to please follow the instructions in the plan. I didn't and built the frame first but quickly discovered that it is the back and shelves that determine the final dimensions of the frame. I got lucky and the fit was ok. Here are a few things that I did:

1. I filled in the rough joints made by the plywood sides meeting the front frame and back by gluing in 1/4" round dowels. Looks pretty good.

2. With help from Habitat for Humanity ReStore I found the 1/2" thick stone to fill the void made by the door frames. Looks pretty good I must say.

3. I have a trademark called a "Conversation Starter" in many of my projects. Another name is called a mistake or oversight. Look closely and you will see that I grouted in one of the four stone sections upside down and the center jewel is out of place.

4. I could not find decent hardware locally so I went to Kennedy Hardware in Zionsville, Indiana and found the black cast iron hinges and clasp.

5. I did not read the contract with my wife and discovered that I now must repaint the entire dining room to match the corner cupboard. Read before Signing.

Building the cupboard was a fun project that will test all of your abilities and patience. Just remember follow the instructions and keep it square and level in all dimensions.

Built from Plan(s)
Estimated Cost
I think I spent close to $200 because the hardware was $30 and the stone for the doors was $24 and I bought the higher grade pine for the cupboard and door frames.
Estimated Time Investment
Week Long Project (20 Hours or More)
Finish Used
Three coats of Behr Pearl White (it contains primer) with lots of sanding pre-paint and light sanding between the first two coats. I found that using the foam brush for the last coat keeps the brush marks to a minimum.
Recommended Skill Level
Intermediate

Comments

Juanita_r

Sat, 11/03/2012 - 23:53

I love it, looks great. I'm sure you wife is very happy with her new piece of furniture (& getting the room painted). Remember ... happy wife, happy life ;)

Jake

Mon, 11/19/2012 - 17:33

Juanita I need for you to explain to me the female mind. We have only been married for 45 years and I still do not understand. The corner cupboard became paint the dining room. I did that. Next the floor needed upgraded so I am almost finished laying a new oak floor. As I neared the end I have been informed that the wallpaper needs to be changed. So the $150 corner cupboard has become the $1000 room makeover. I should have seen it coming!

Jamaunzie

Sat, 04/13/2013 - 13:39

Well Jake first let me say very nice job. My wife had mention wanting a Corner Cabinet for one of the bed rooms and pointed this one out. ( I was unable to keep her off this site after I finished the hutch ) I was looking at it and then read what all you had to do afterwards LOL. So I am going to get it in writting that I get to build my workbench for the shop, after this build. Again Nice Work

X - Farm House Table

I modified this plan just a little on the ends, and I can not tell you how pleased I am with it! I did run into some issues with lining the boards up properly due to imperfections (and not laying the boards out ahead of time in the store because I was rushing at closing time), but in the end, I decided to add a wood filler in between the boards and everyone just raves over it. I could not imagine it having come out better. I would not do it any other way. 

Thank you Ana!! 

PS... I have a wonderful idea for a loft bed, but the plans are not provided. I know you would do it justice.. how do I submit the photo????

Built from Plan(s)
Estimated Time Investment
Day Project (6-9 Hours)
Finish Used
Satin, Custom mixed stain, stainable wood filler, sander.

Recommended Skill Level
Intermediate

Comments

jeffross

Sun, 01/07/2018 - 07:22

My appologies if I'm missing it but are there build plans for this table.  I would really like to build this for a friend but I'm not sure my skills will enable me to free style this. Thanks in Advance.  Jeff

cjtrunk21

Fri, 05/29/2020 - 11:50

Did plans over get posted for this table? Love the design. Thanks.

Sliding "barn" door from reclaimed pallet wood

I saw many different sliding door projects online, so I did my own spin on one. I was able to get several old pallets for free (pine and oak). I went to Lowes and bought a few 2x3s which I used as the frame, and the track hardware which was only $13! Most doors I see are mounted from the wall, but since I have 7' ceilings downstairs I mounted mine from the ceiling. This project only took about 4 hours total and cost about $40 when you figure in costs for screws, stain, etc. The most difficult part was taking apart the pallets. Using a reciprocating saw with a 12'' demolition blade is the best way to take them apart. Thanks for the idea Ana.

Estimated Cost
$40
Estimated Time Investment
Afternoon Project (3-6 Hours)
Finish Used
Minwax Dark Walnut
Recommended Skill Level
Beginner

Comments

BREATHESMILEBE

Mon, 05/13/2013 - 20:00

Hi!!
This looks so awesome! I came across this and was hoping to repeat it. You mention that you found the door hanging hardware at Lowes for $13. I can't seem to find it. Do you happen to remember the name of it? I'm entering "hanging door hardware" into Lowes and Home Depot and can't seem to find any hanging door hardware at all. I'd appreciate the help. Thanks!
Tina

4x4 truss beam table

Submitted by Moody on Tue, 10/28/2014 - 05:33

This table was so much fun to make. I couldn't use an 8 foot table so this is 5 ft. My table top has some blemishes that I could have tried to fix but at the time I just wanted to see it done. I think using better than big box store wood would have been a great start. The table is so sturdy. The bench was harder though because it had a wobble that just wouldn't be fixed. 


I used pine for the top and Douglas fir for the legs. I used minwax wood conditioner, minwax early american stain, then minwax red oak stain for a couple of minutes then wiped off. Then topped with 4 coats of poly. 

Estimated Cost
$150
Estimated Time Investment
Weekend Project (10-20 Hours)
Finish Used
Minwax early american and red oak. Semi-gloss polyurethane.
Recommended Skill Level
Beginner

Industrial Shelf Unit - Basement Storage

Submitted by zakdat on Mon, 02/20/2017 - 07:39

With six people in our household, we were in desperate need of easily accessed storage for our off season clothes/gear.  This ended up being a perfect solution.  We customized shelf heights to fit the bins that we use for storage as well as made an area for our cat box (at the bottom right).  It's such a relief to finally have everything tucked away but easy to get at when we need it. 

Built from Plan(s)
Estimated Cost
$300 Canadian
Estimated Time Investment
Weekend Project (10-20 Hours)
Finish Used
Minwax Puritan Pine
Recommended Skill Level
Intermediate

Comments

Farmhouse Table/Bench and Floating Shelves

Submitted by Al_on_Rose on Mon, 12/14/2020 - 14:09

My daughter wanted to create the Farmhouse look for her New England home. Had so much fun building the Table, Bench and Floating shelves. The Plans were perfect, and of course customizable (she wanted it a little shorter). My next project is a real workbench for my garage. I think the only issue is the New Jersey winters.

Estimated Cost
$250
Estimated Time Investment
Weekend Project (10-20 Hours)
Finish Used
Early American Stain
Recommended Skill Level
Intermediate

Comments

Barn Door Bookcase/Pantry

Submitted by Anonymous (not verified) on Sun, 12/20/2020 - 15:31

Despite relatively high ceilings, we have a small, pantryless kitchen and needed more shelf space. Couldn't be happier with how this turned out. Besides taking off 2 inches in width to make sure it would fit in the space, I followed the measurements exactly.

Made just one modification with the instructions involving the face frame. I first assembled it together per the instructions, but it was just not lining up with the carcass well at all when I went to attach it. Before the glue got too dry, I made the quick decision to take the face frame apart and just apply the individual pieces of it one at a time to the carcass. I figured this could maybe leave some very small gaps where the face frame pieces joined each other, but that seemed better than what it would look like leaving it as is, with almost no section flush with the carcass. This ended up being the absolutely right choice. Everything was very very close to flush and there ended up being virtually no gaps. If I ever built again, I would do the same and attach each piece like that.

My only other struggle was at the very end attaching the barn door hardware. Nothing wrong with the hardware or the instructions, I just ended up installing the rail too high up on my first attempt. Because this piece has a top that slightly overhangs and gives that nice little lip, it means there is a maximum height which you can't go above when installing the rail hardware. If you go too high, like I did, the rollers that are attached to the door will physically not fit on the rail, b/c that lip will be in the way. This might be very obvious to most people but I thought I'd mention it. Once things clicked, I just had to get some new measurements and redrill the holes a bit lower(but not too low b/c then you will have a gap!).

I decided to leave the door natural wood after seeing someone else's finished piece posted here and given how dark my stain was, I also left the plywood back panel natural. It's still a bit light now and it may even take 2 or 3 years, but I know pine can do a decent job darkening up.

Lastly, I did put a whole quart of satin polyurethane on this over 5 coats. Each coat but the last was cut with %50-%25 paint thinner applied with a foam brush. Yes it did take a long time but seeing it up close, it was absolutely worth it. I would recommend it for anyone making this project.

Built from Plan(s)
Estimated Cost
$350
Estimated Time Investment
Weekend Project (10-20 Hours)
Finish Used
Varathane wood stain mix. Half "weathered gray" half "Carbon Gray." Five coats Minwax satin polyurethane.
Recommended Skill Level
Intermediate

Comments

Woven Back Bench

This took approximately a week to build, but was fairly simple.  Drew arm rests freehand and applied 3 - 4 coats of Helmsmen.

Built from Plan(s)
Estimated Cost
$20
Estimated Time Investment
Week Long Project (20 Hours or More)
Finish Used
Helmsmen (3-4) coats
Recommended Skill Level
Beginner

Comments

earthbybike

Sat, 12/06/2014 - 12:27

I built this at the local college woodshop and I am very happy with how it turned out. Our comminity is so very lucky to have a community college that has a wood shop and a huge spray booth. (Wood Shop 1 & 2 as well as Cabinet Building 1 & 2)

Seasonal And Holiday

Large Entertainment Center

Submitted by rmseama on Sun, 01/24/2021 - 17:28

My Biggest build so far. We have a large living room and needed something large for that wall. I really had fun on this one. It took longer than I wanted but in the end, I’m really proud I finished. This was my first time to use the router and learned how build shaker style doors. -Instagram.com/theorthfam

Estimated Cost
1000
Estimated Time Investment
Week Long Project (20 Hours or More)
Recommended Skill Level
Intermediate

Rolling C-Table

Submitted by JessKrev on Sat, 12/27/2014 - 18:57

I built this for my sister in law this Christmas from Ana's plans.  I can't wait to make a second one for myself!  The overall build was easy and I would consider myself a beginner level.  Sadly, I didn't get a picture of the final product before I gifted it, but I distressed it to allow some forgiveness in the white paint detials and hand-painted decal on the top.  It turned out great and they loved it!  

Finish Used
Minwax Polyshades in Espresso. The details are simply acrylic paint in an off white.
Recommended Skill Level
Beginner

Comments

Scrappy armoire

Submitted by Triskelle on Sun, 03/26/2017 - 22:13

Made this out of a ton of scrap wood I had laying around. On the downside it made the project more difficult, but on the upside all I had to buy was hinges and handles...

Built from Plan(s)
Estimated Cost
$20
Estimated Time Investment
Day Project (6-9 Hours)
Finish Used
Some off white paint I had lying around
Recommended Skill Level
Beginner

Craft table for 6 year old

Submitted by Anonymous (not verified) on Tue, 04/25/2017 - 09:37

Since my daughter turned 5, she has joined the ranks of those children (un)fortunate enough to have 2 bedrooms to furnish. In approaching her 6th birthday I asked her mother if there was anything she needed for her new room at her house, and she suggested a new table to do colouring/craft etc at. I was actually searching to buy a table and chairs, and was decidedly underwhelmed by the selection and the quality/cost ratio on offer. 


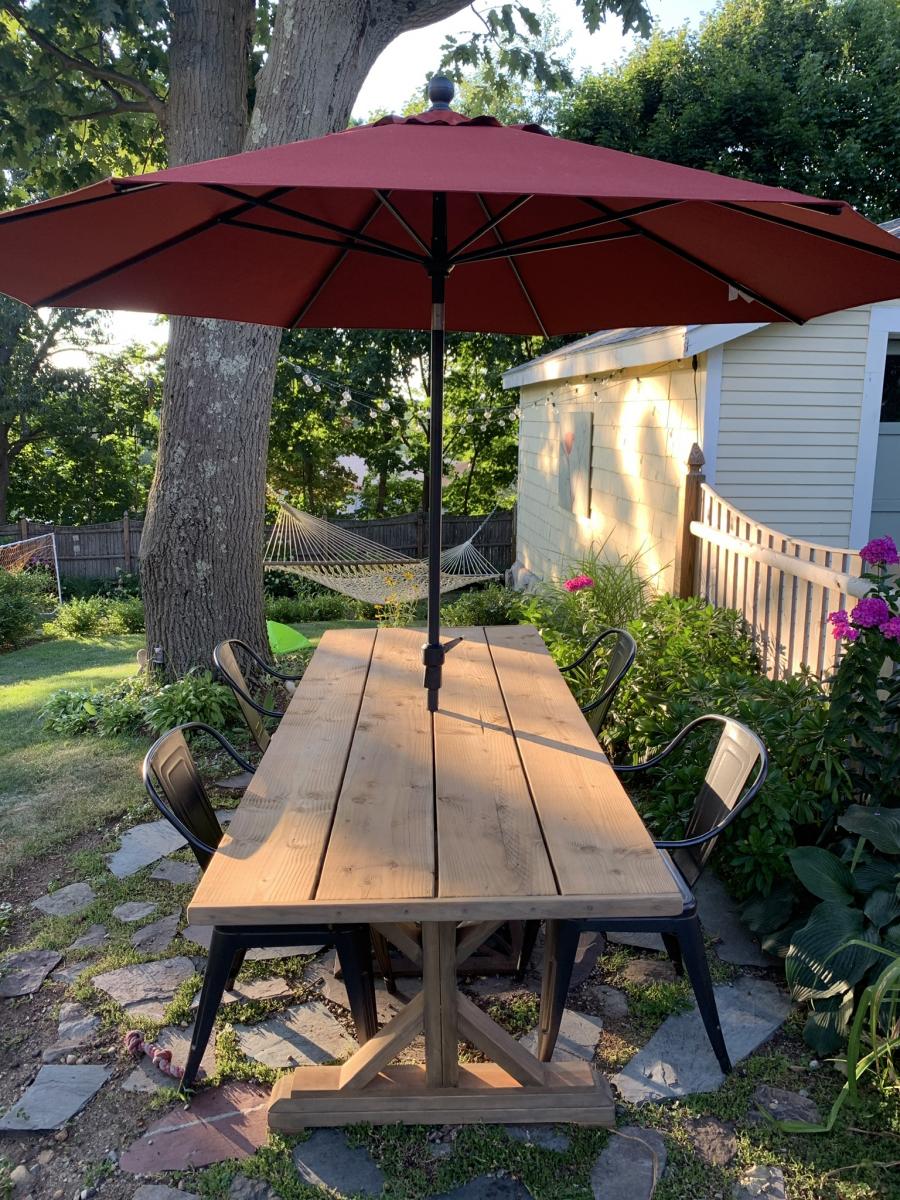
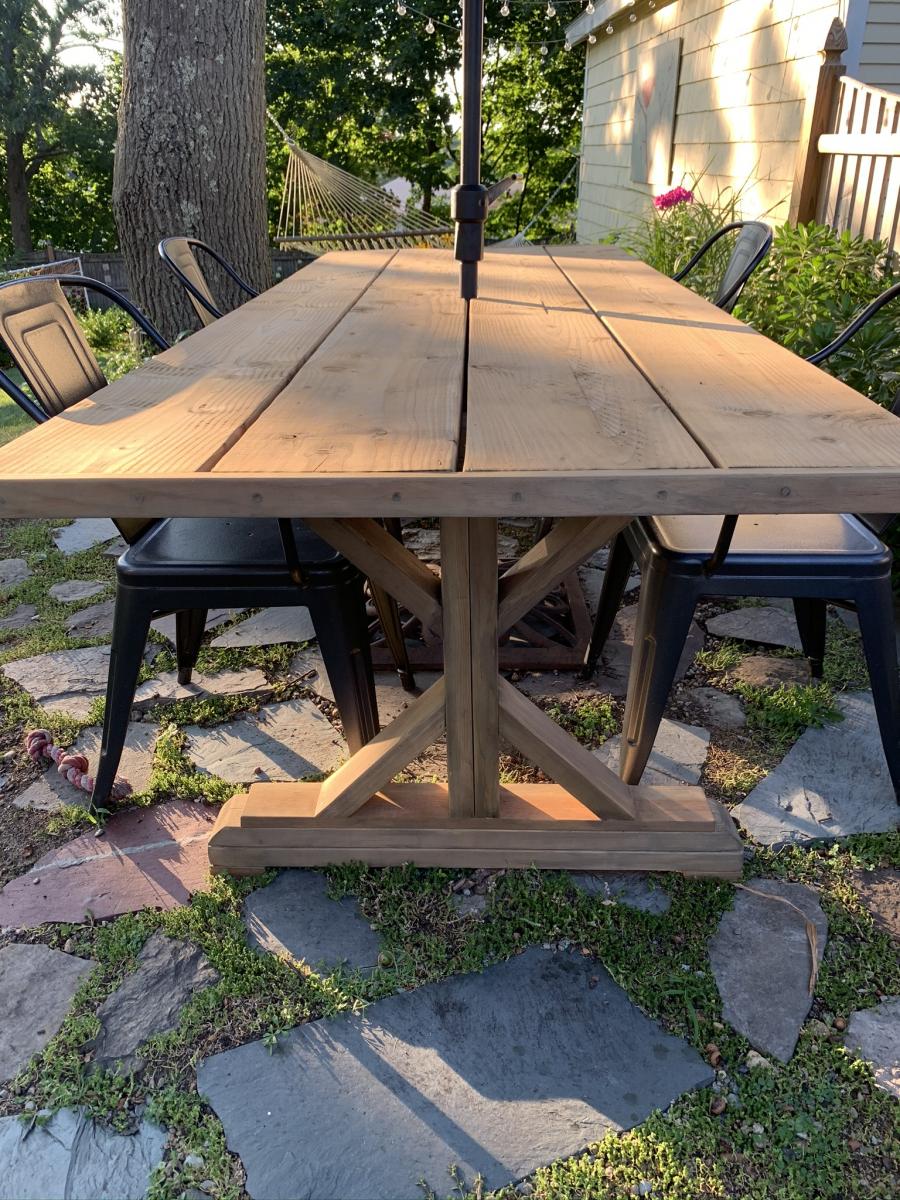
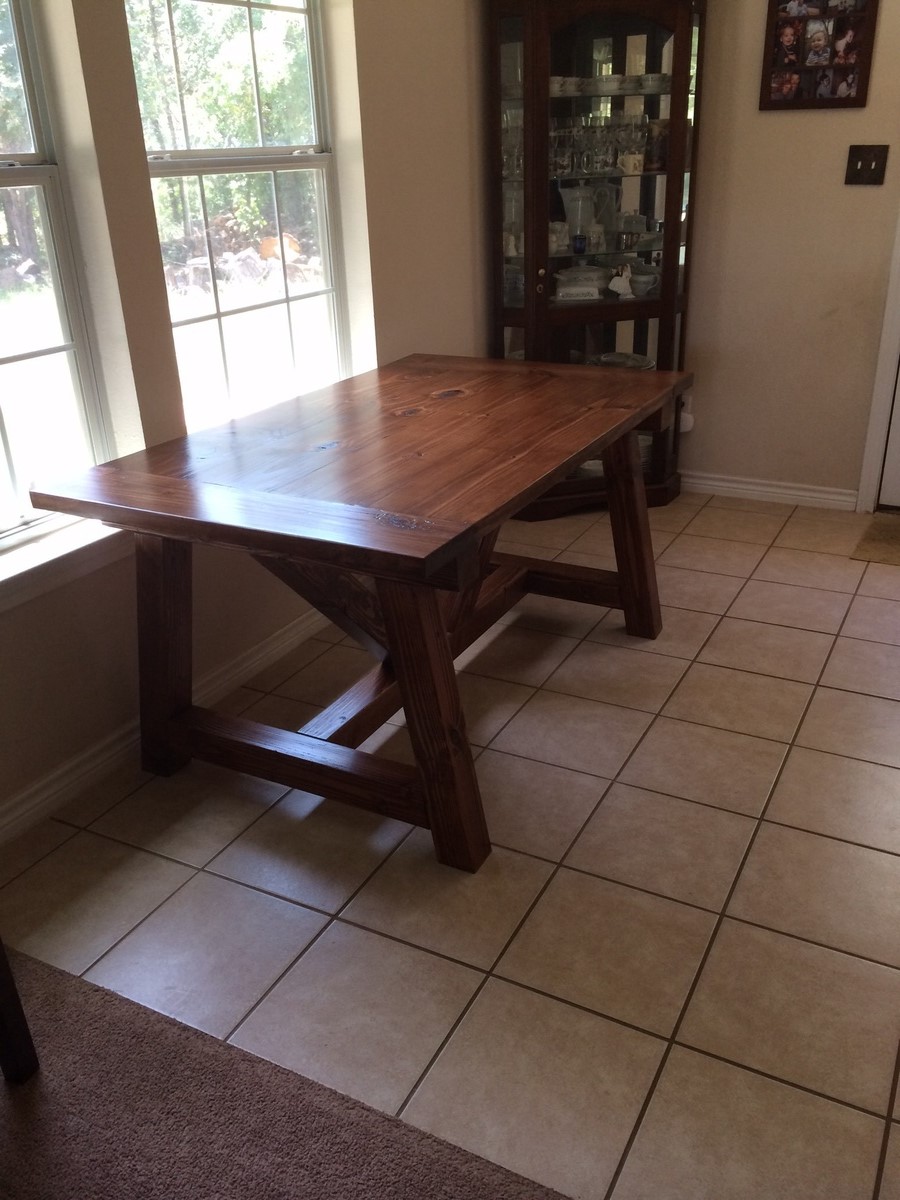
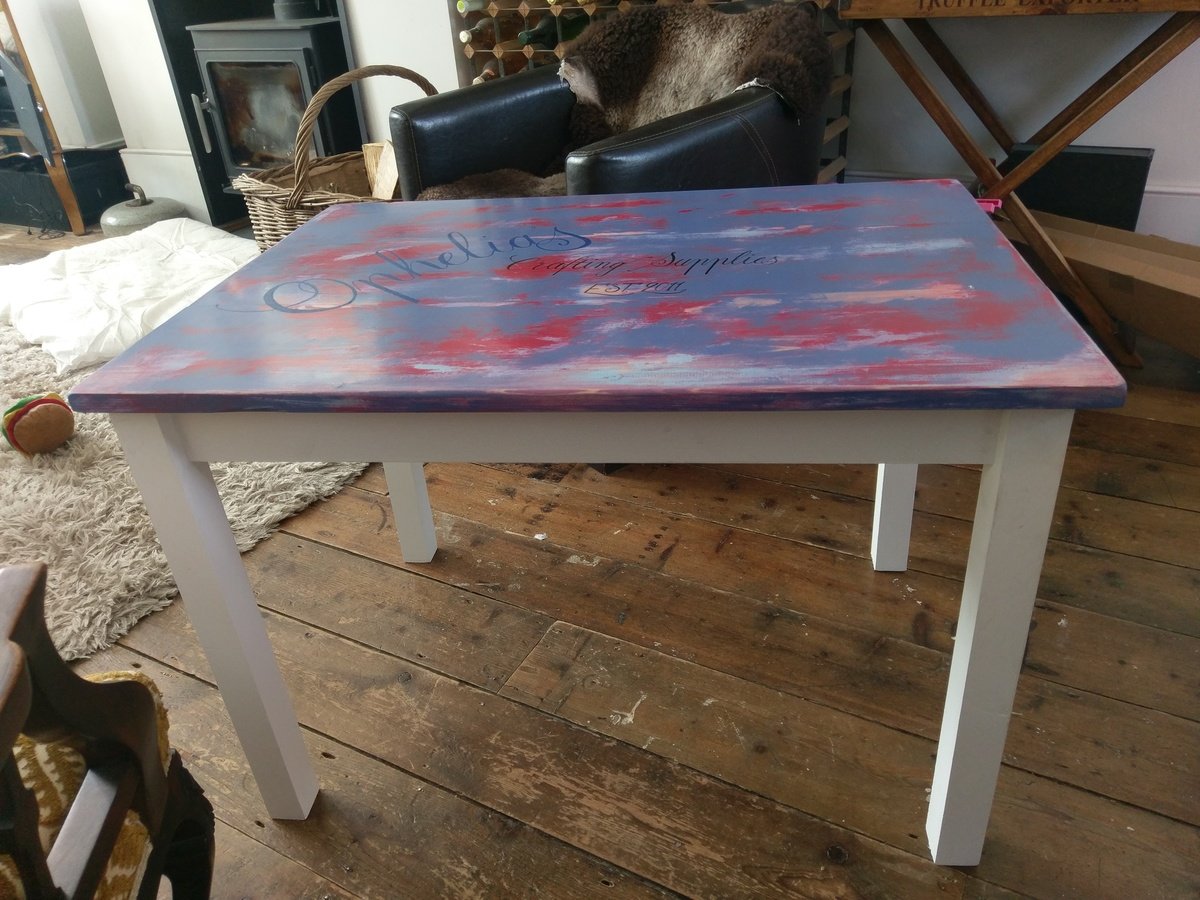
Thankfully I stumbled across the plans for the Clara Table, and it was precisely what I was after. I have made various tables before, for garden and dining, and have always gone with reclaimed wood and a rustic style, but for this I did just use the plans as-is, and I bought new pine timber purely for the convenience of it. 


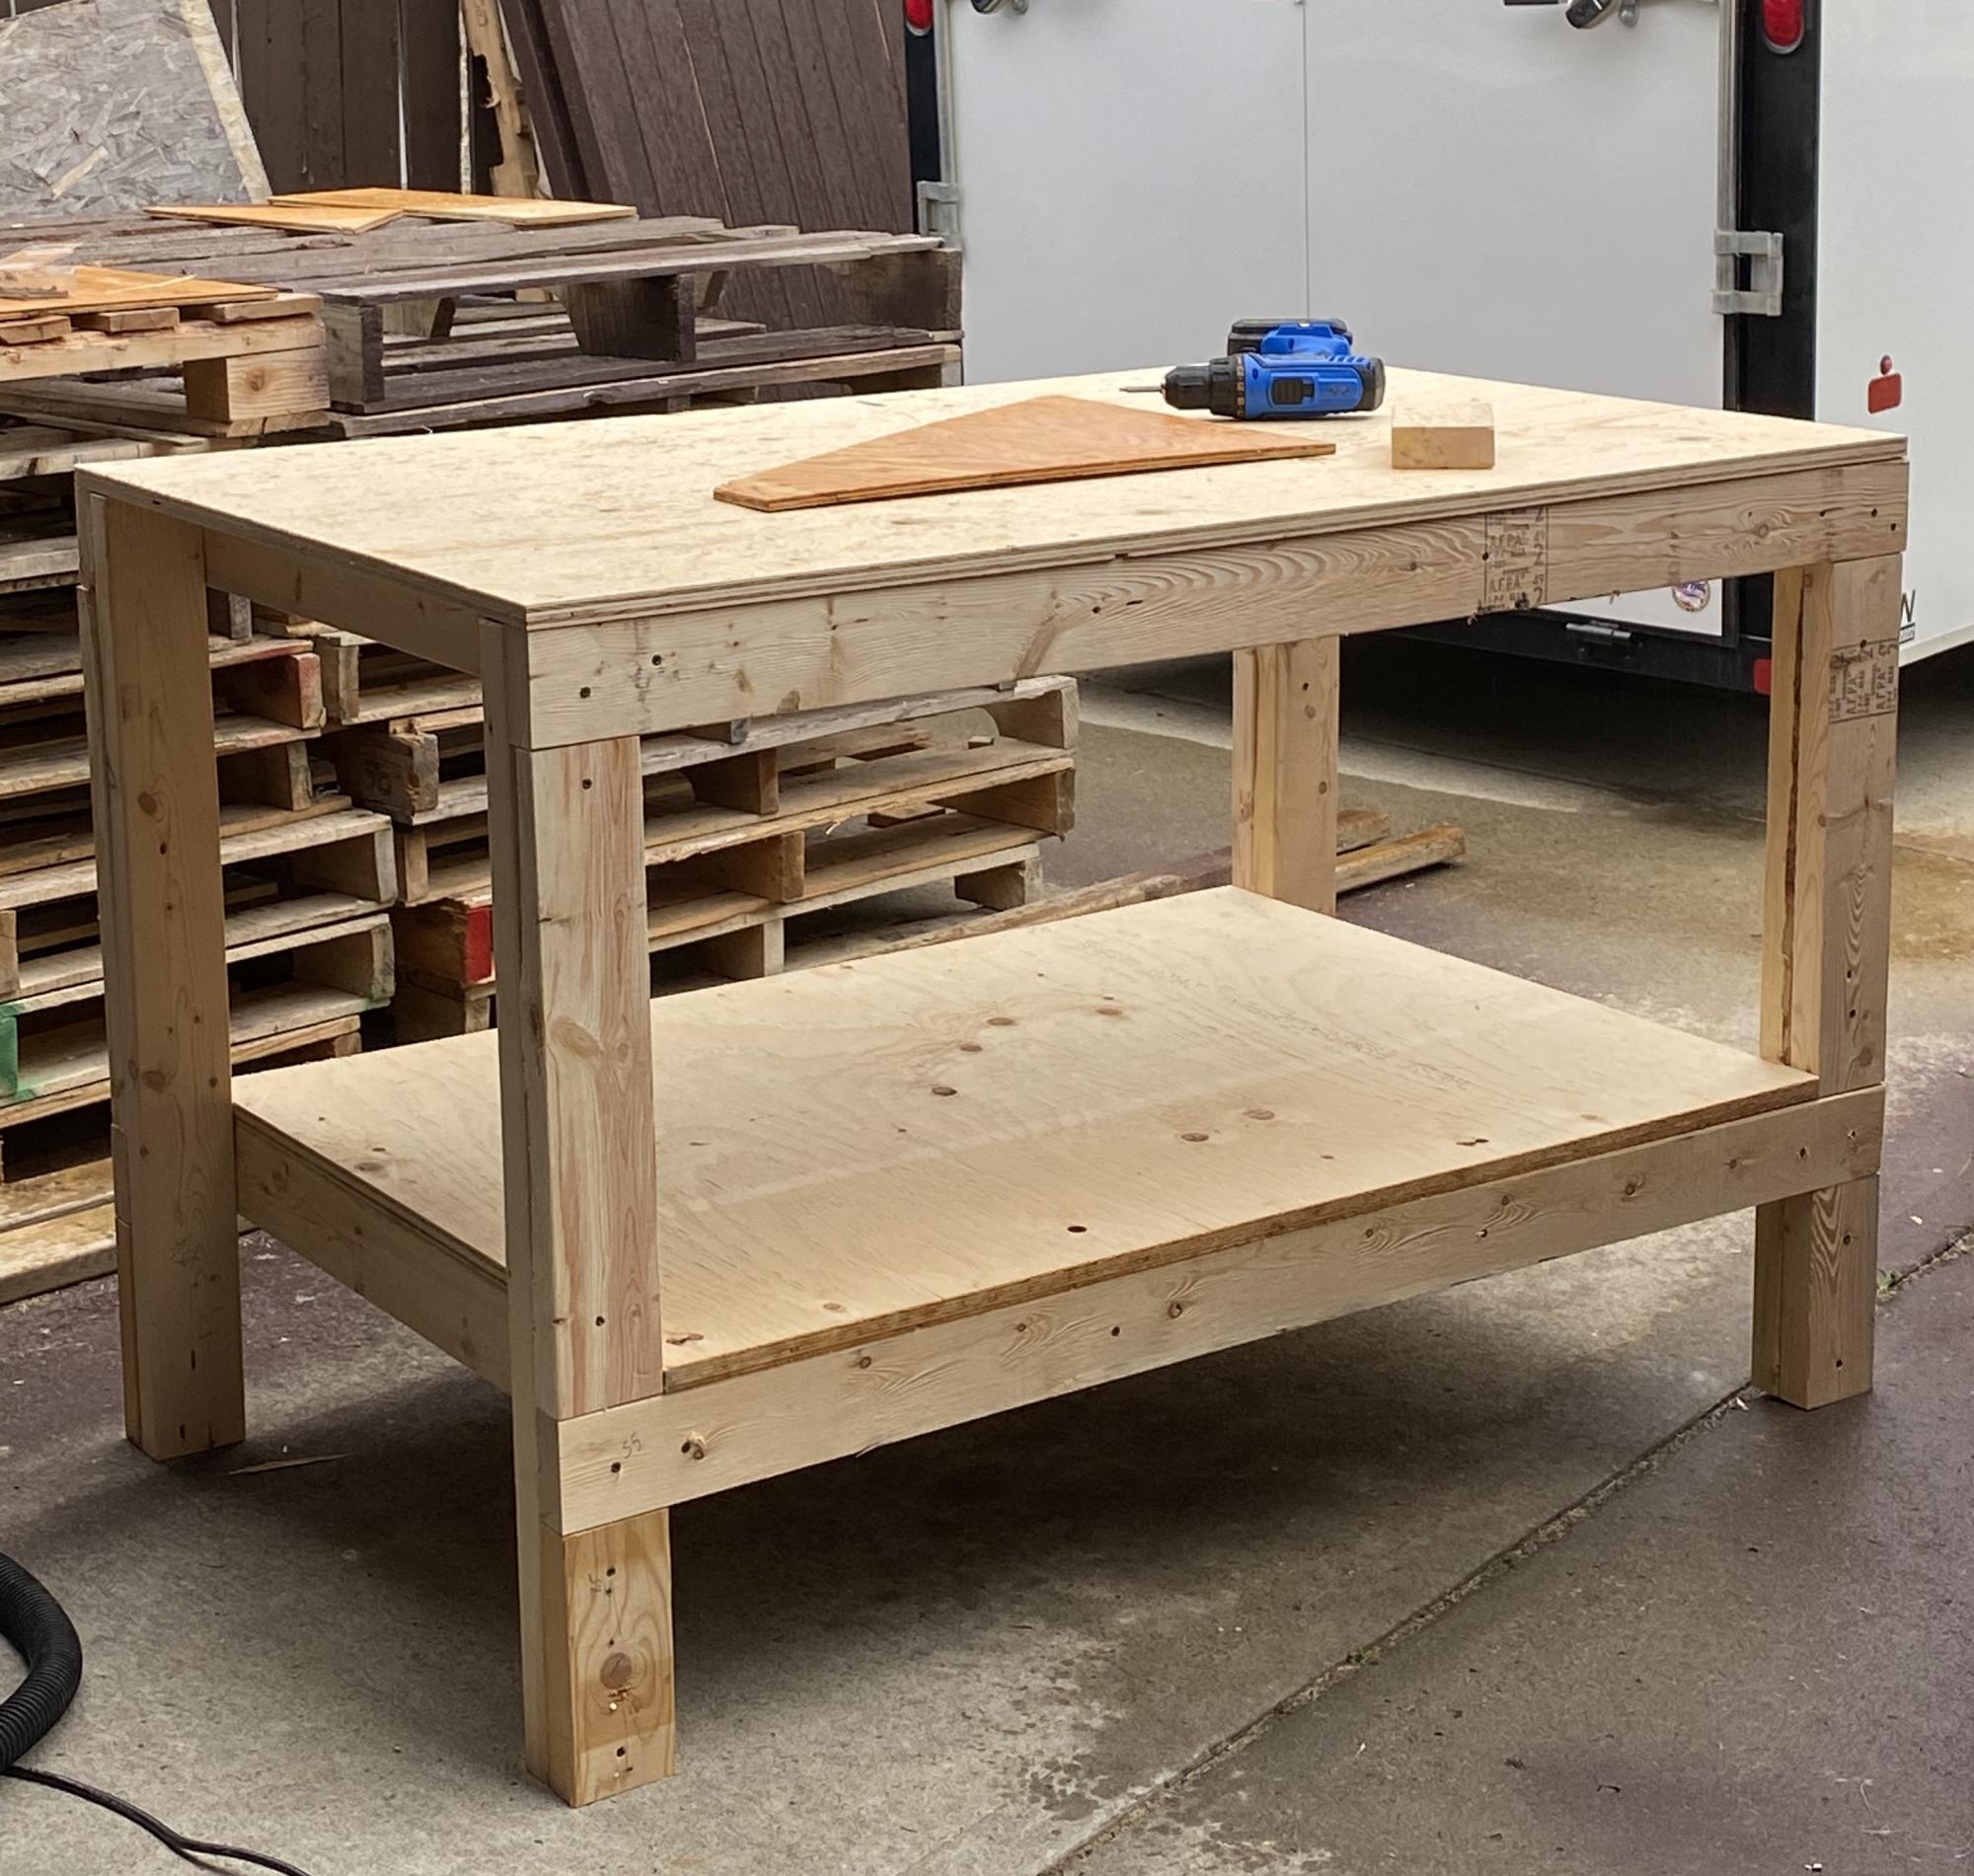
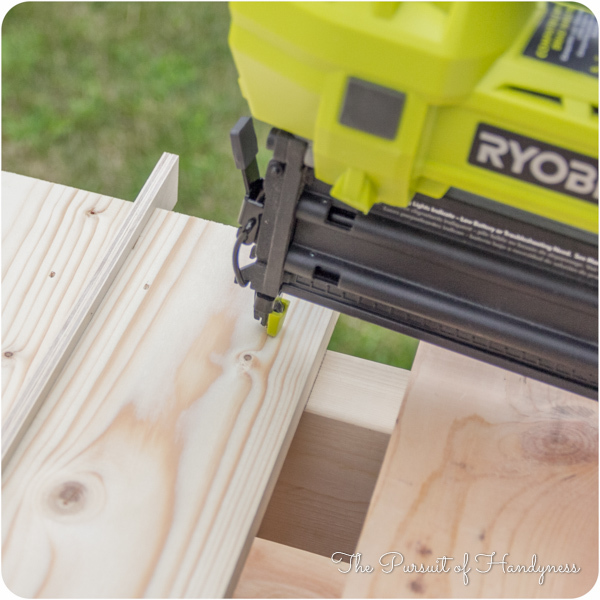
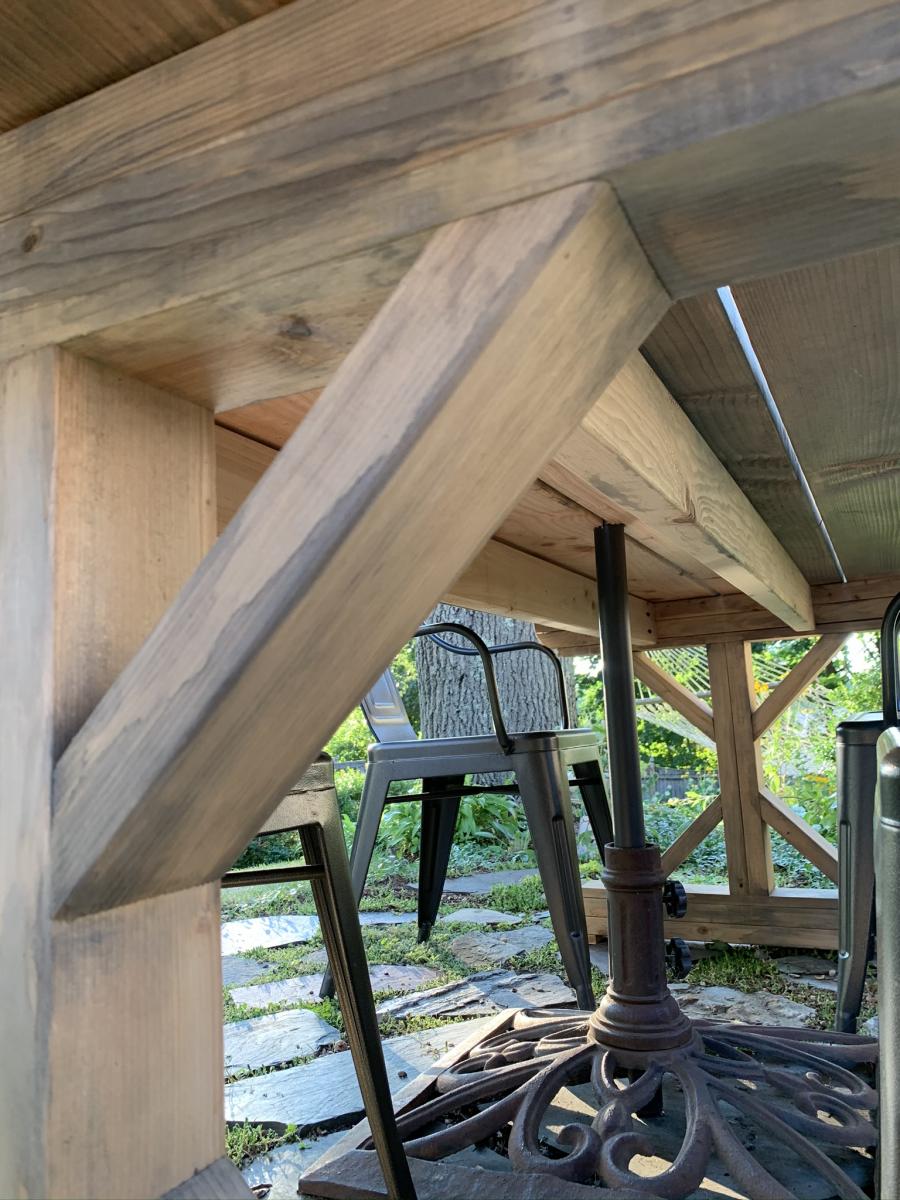
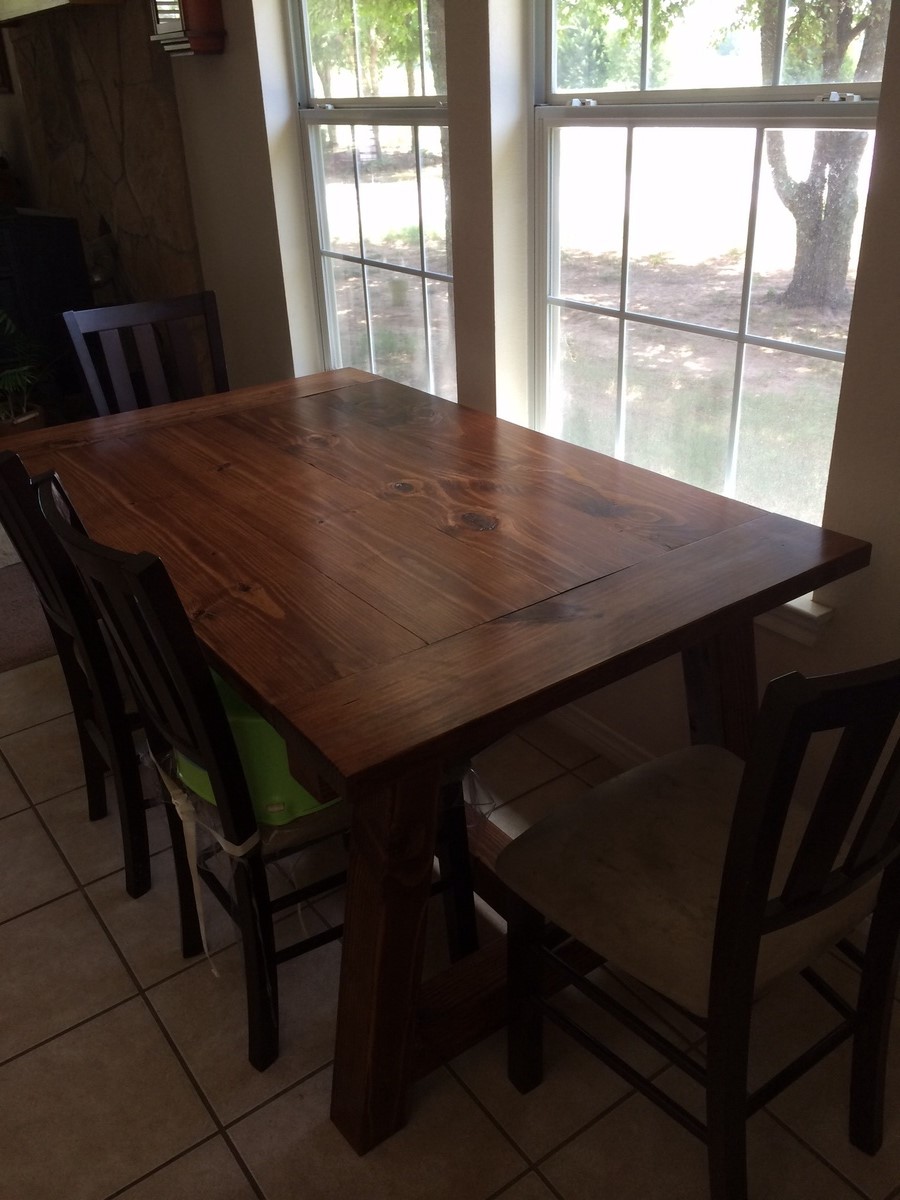
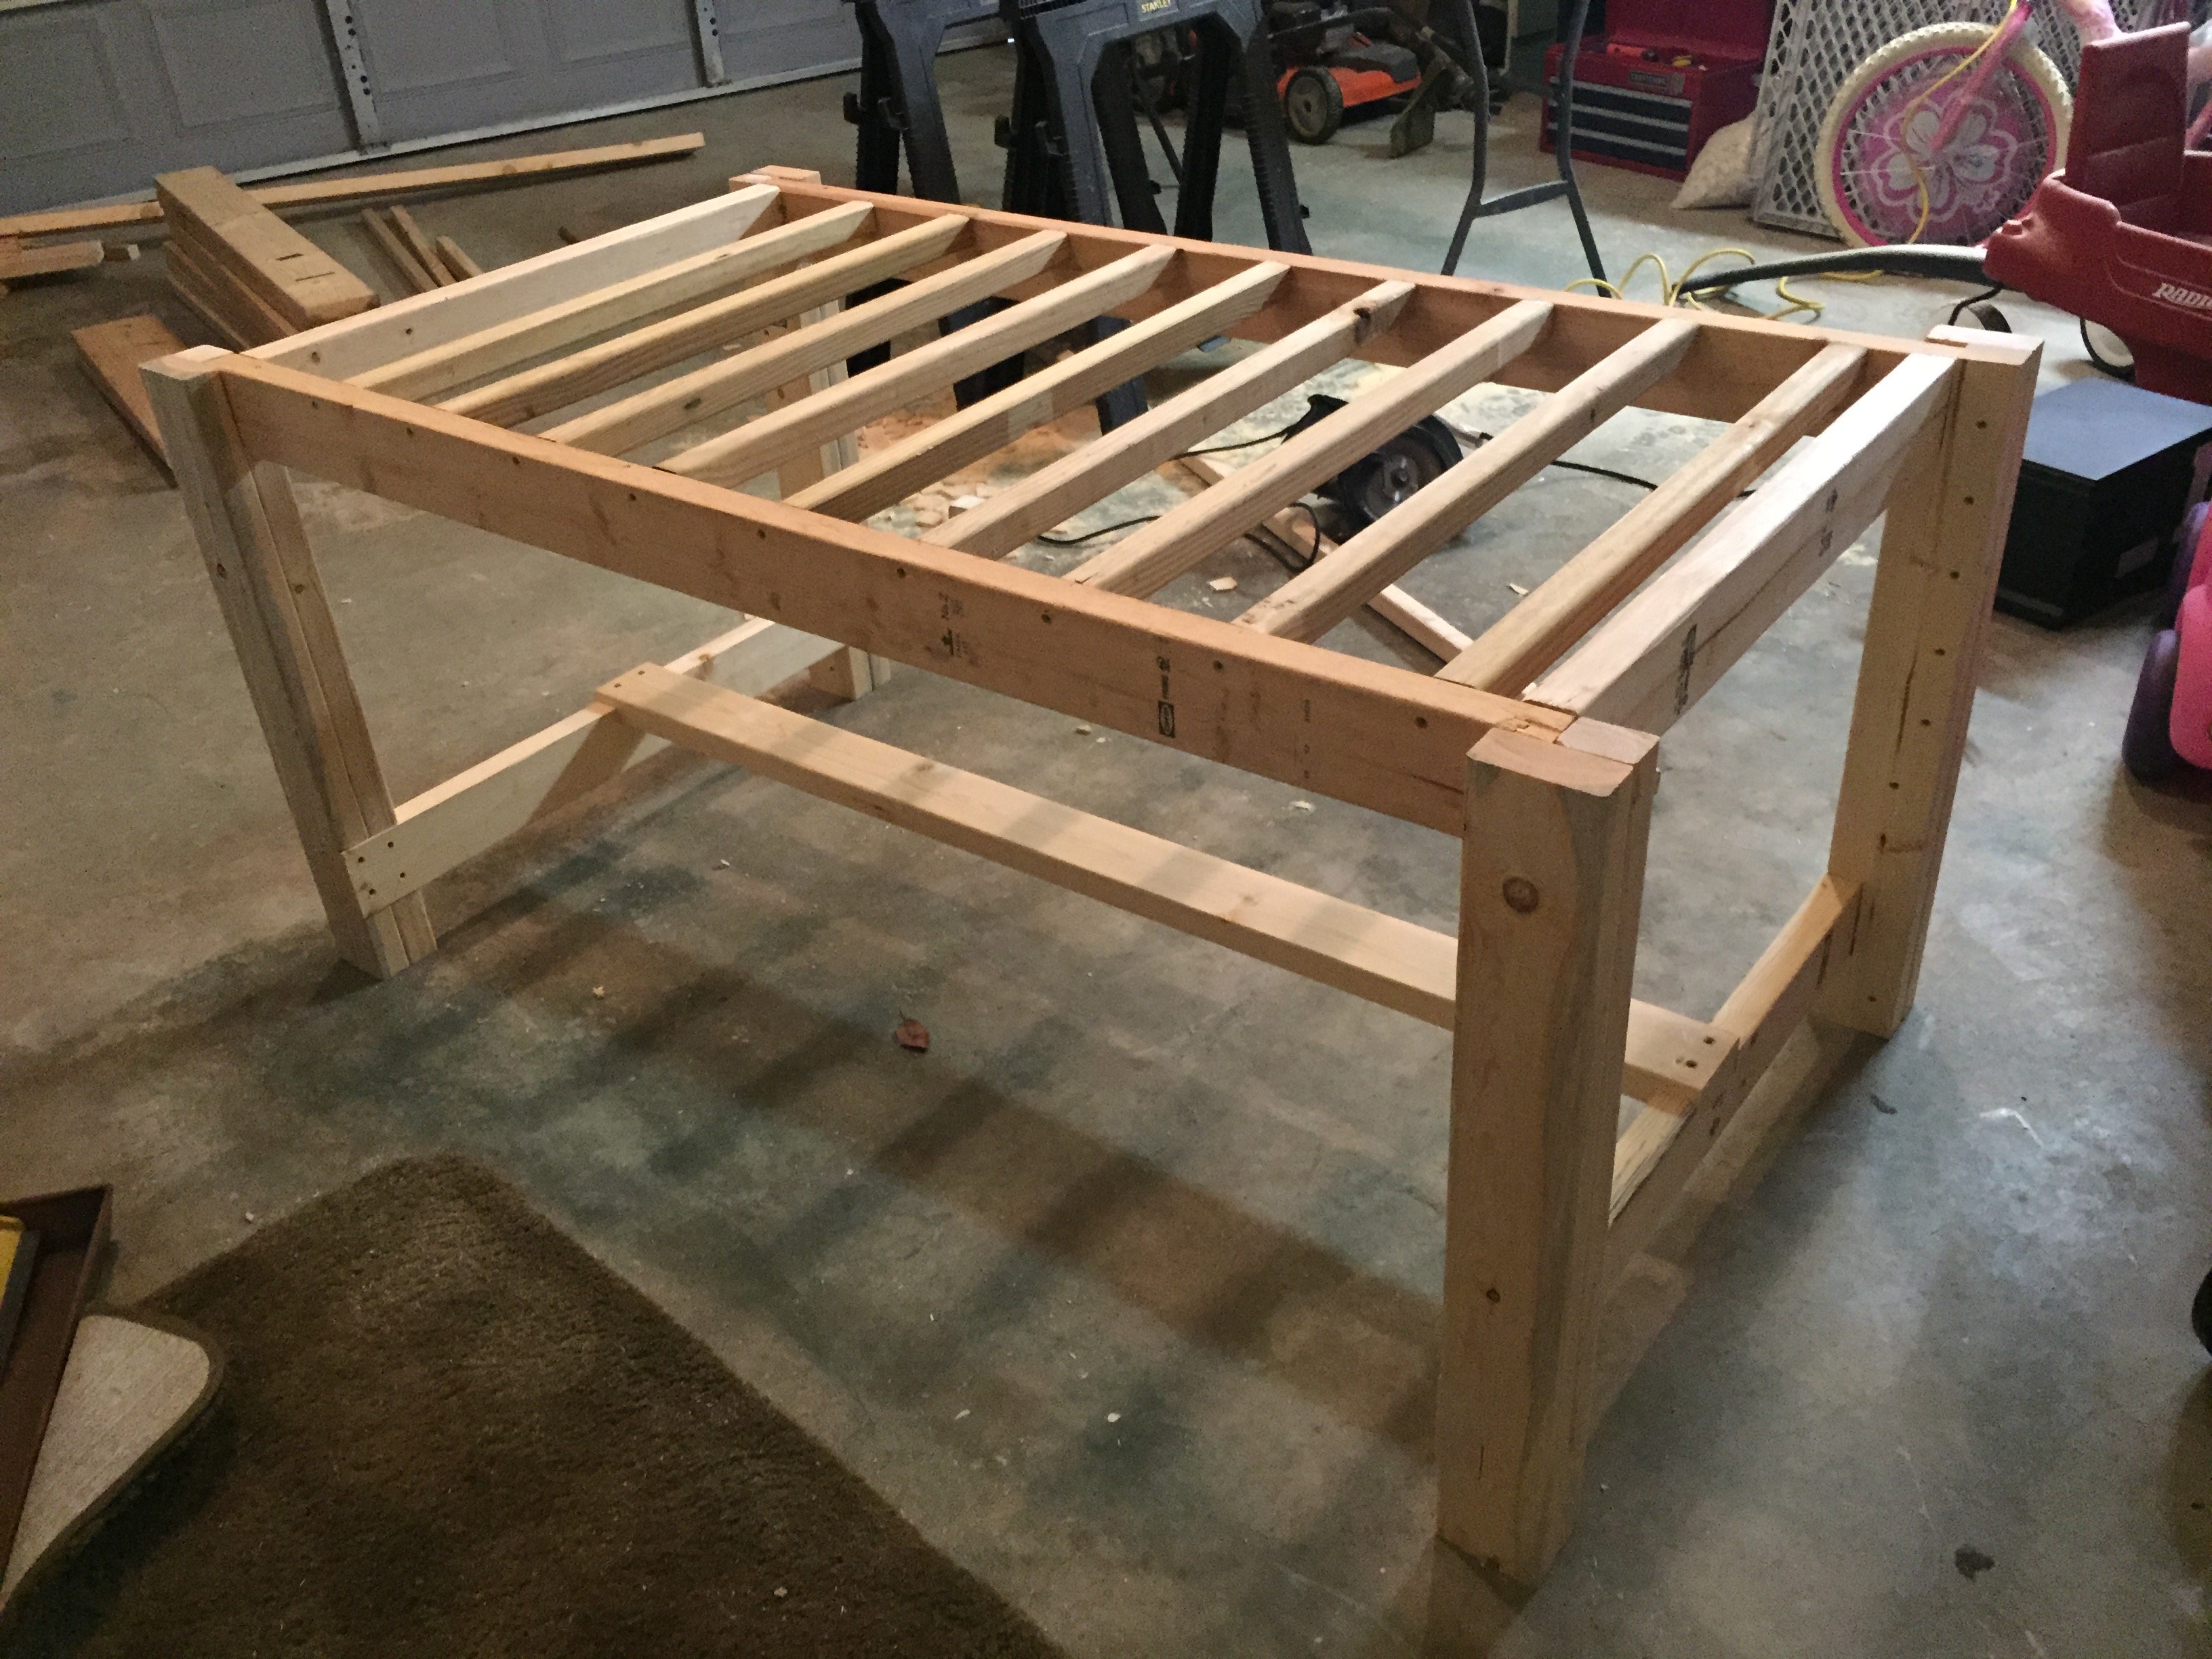
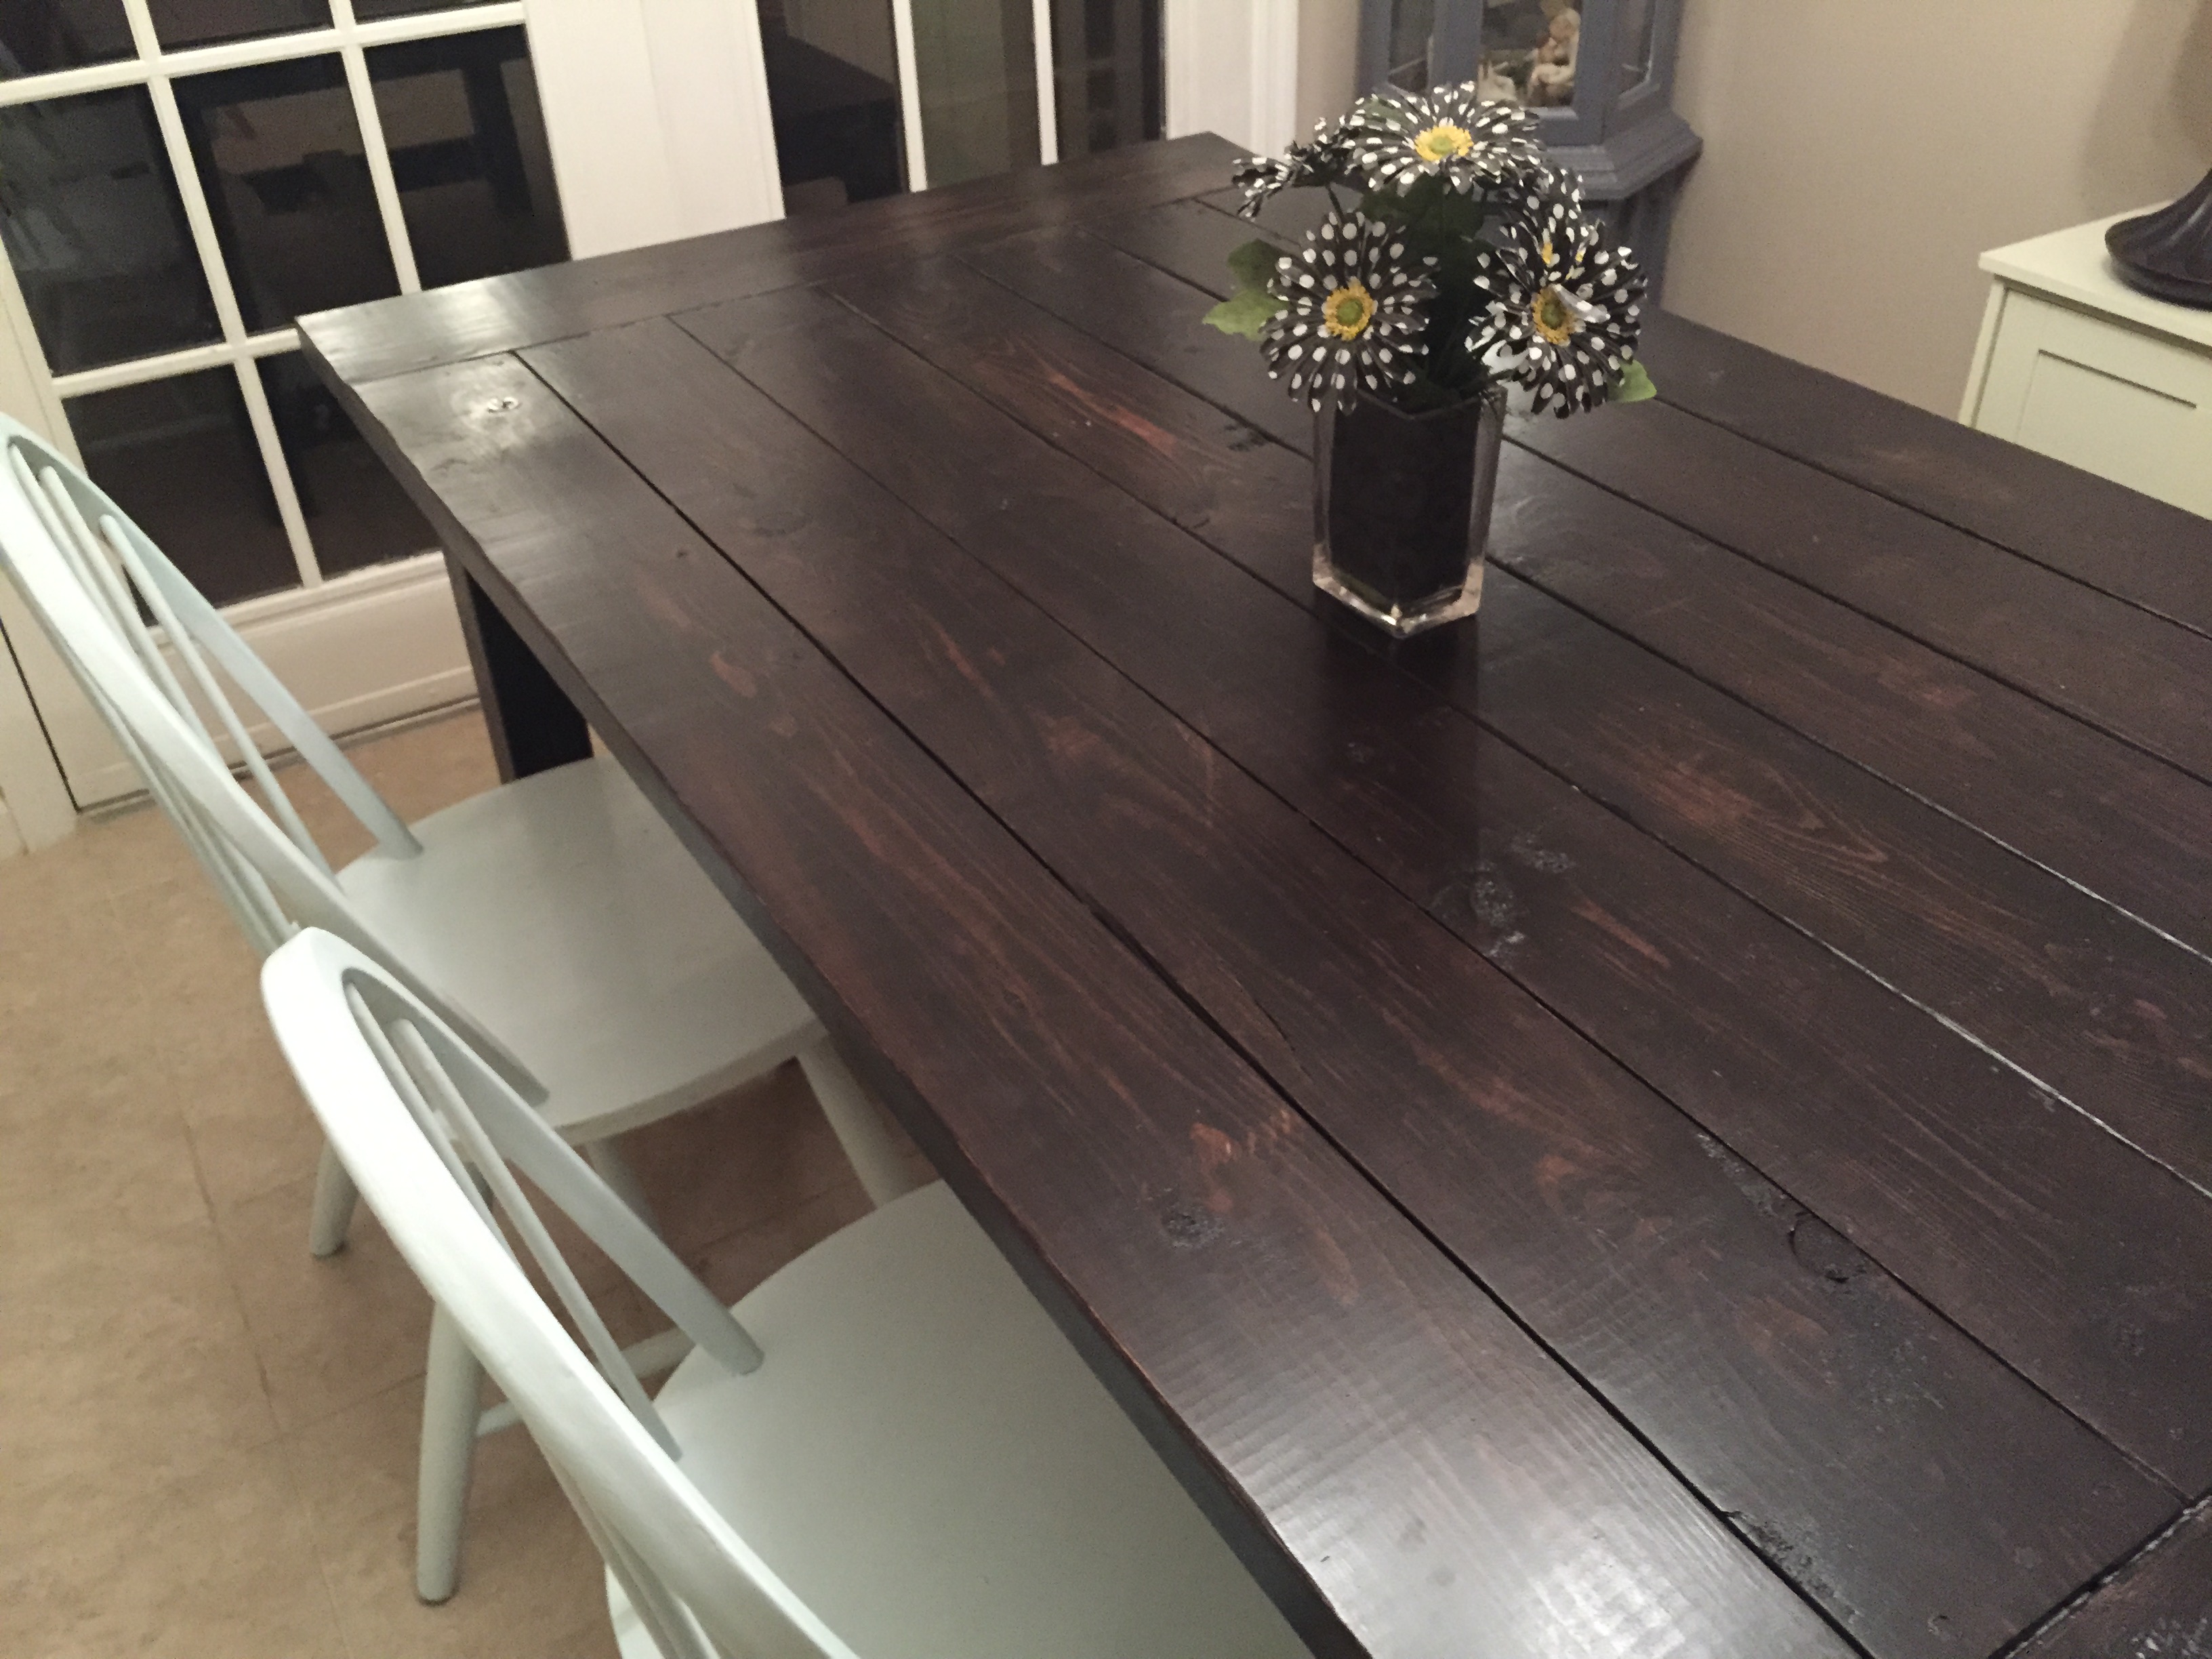
The table is simple to build, I already had a pocket hole jig, and the table itself took about 90minutes to build. Most of this time was spent sanding off the foaming glue I decided to use between the planks used for the top. If you are considering using this sort of glue, or indeed any glue, I'd say it isn't necessary. I had neverade a table top of this construction before, and went for the belt and braces approach. In my opinion it's totally unnecessary, doesn't add much security, but adds plenty of time to the project. If you really want, I'd go for bog standard wood glue, but by the time you screw it onto the legs, it's solid as a rock anyway.


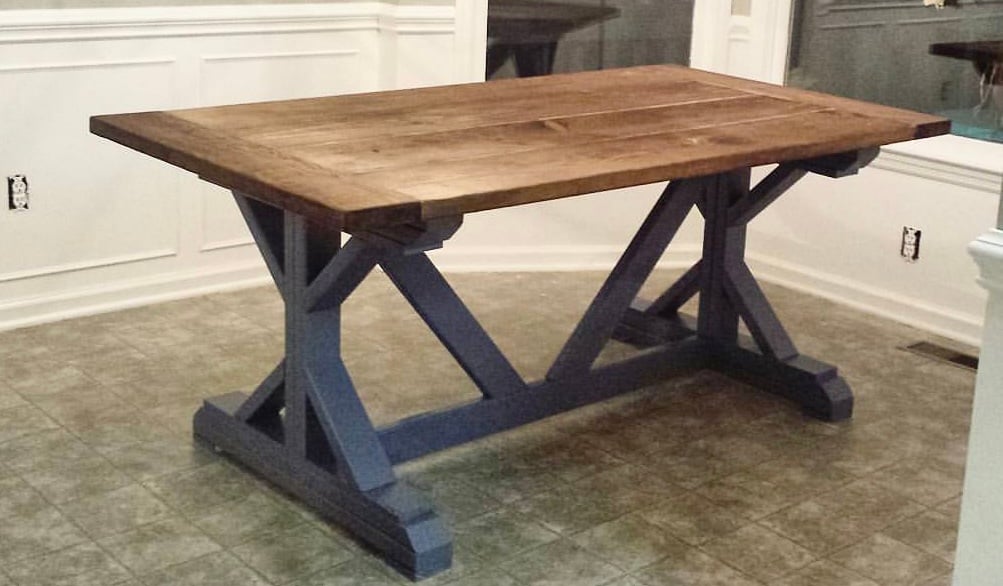
It is mentioned to set the aprons back a way, to avoid splitting the legs. I did this, by using an off-cut of the 3x1 as a spacer on the face of the aprons as I screwed them in. Worked a treat, set the aprons back, but not all the way, and gives the illusion of a little more heft to the dimensions.


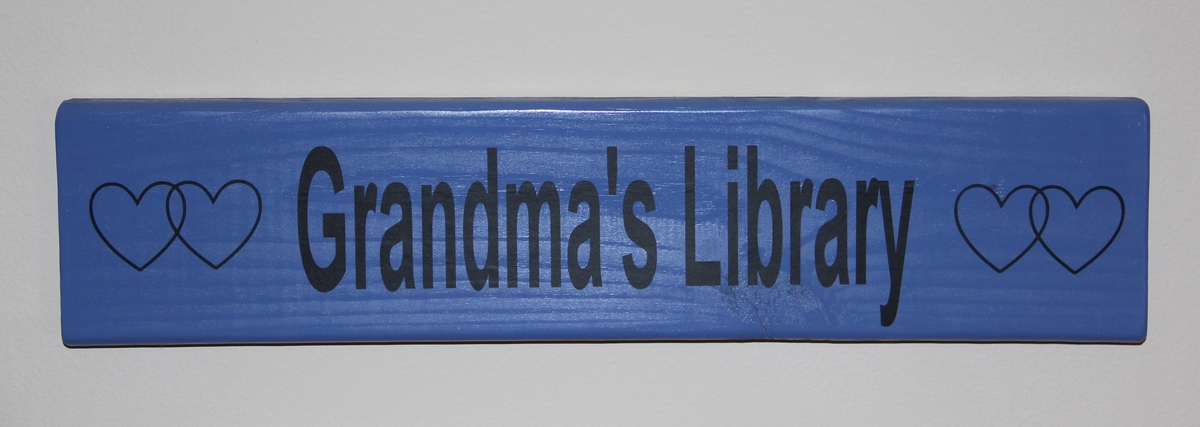
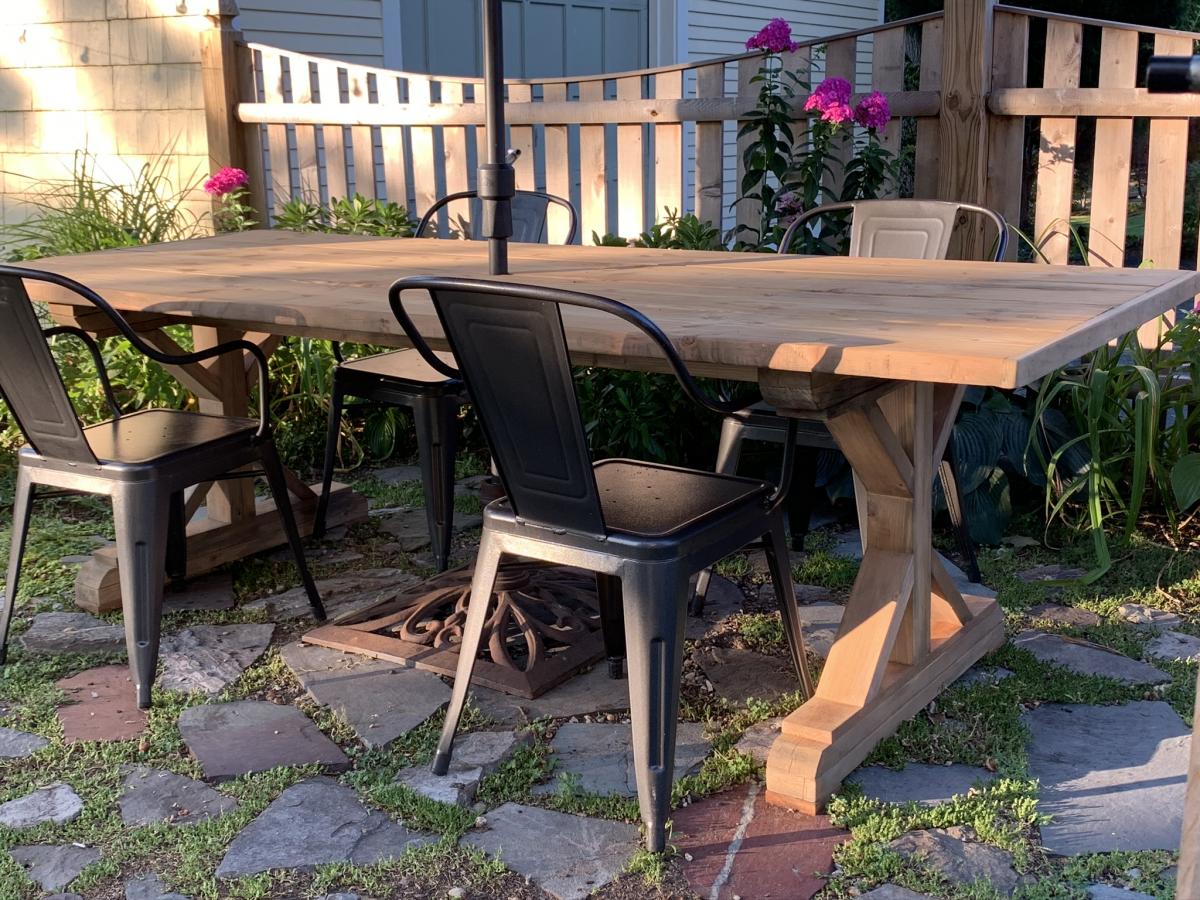
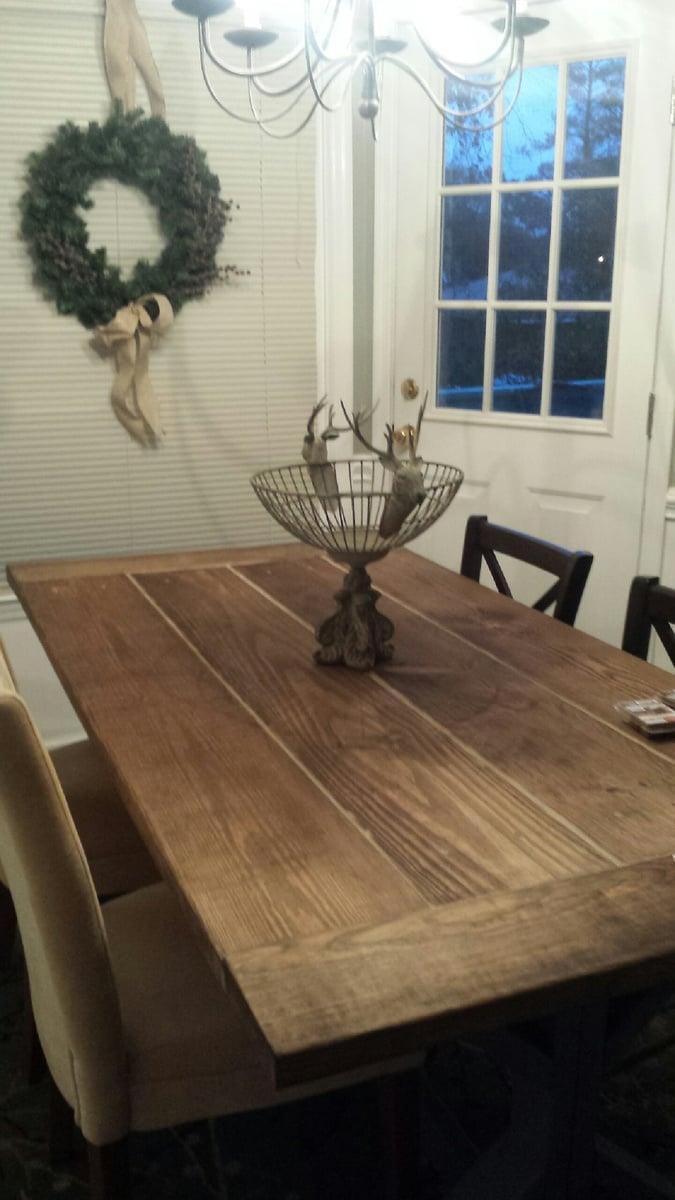
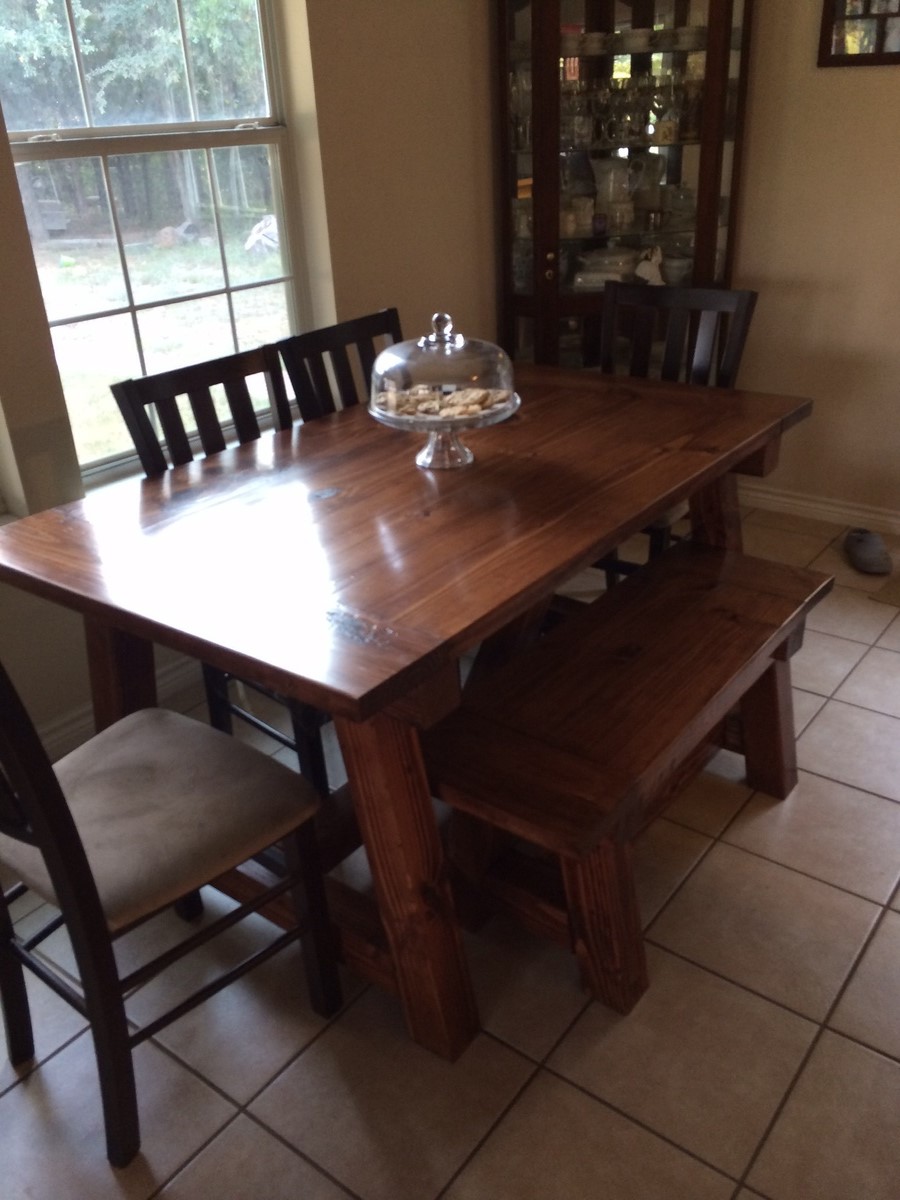
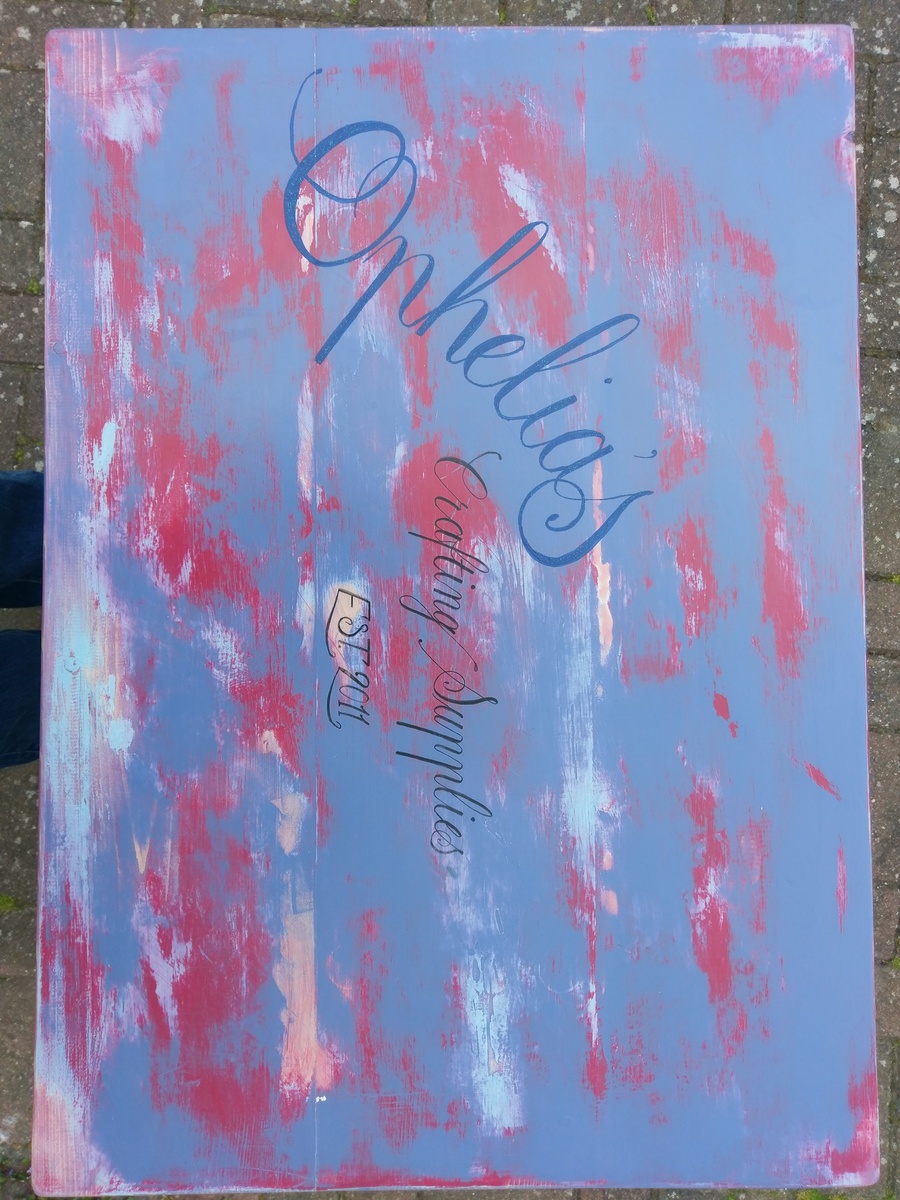
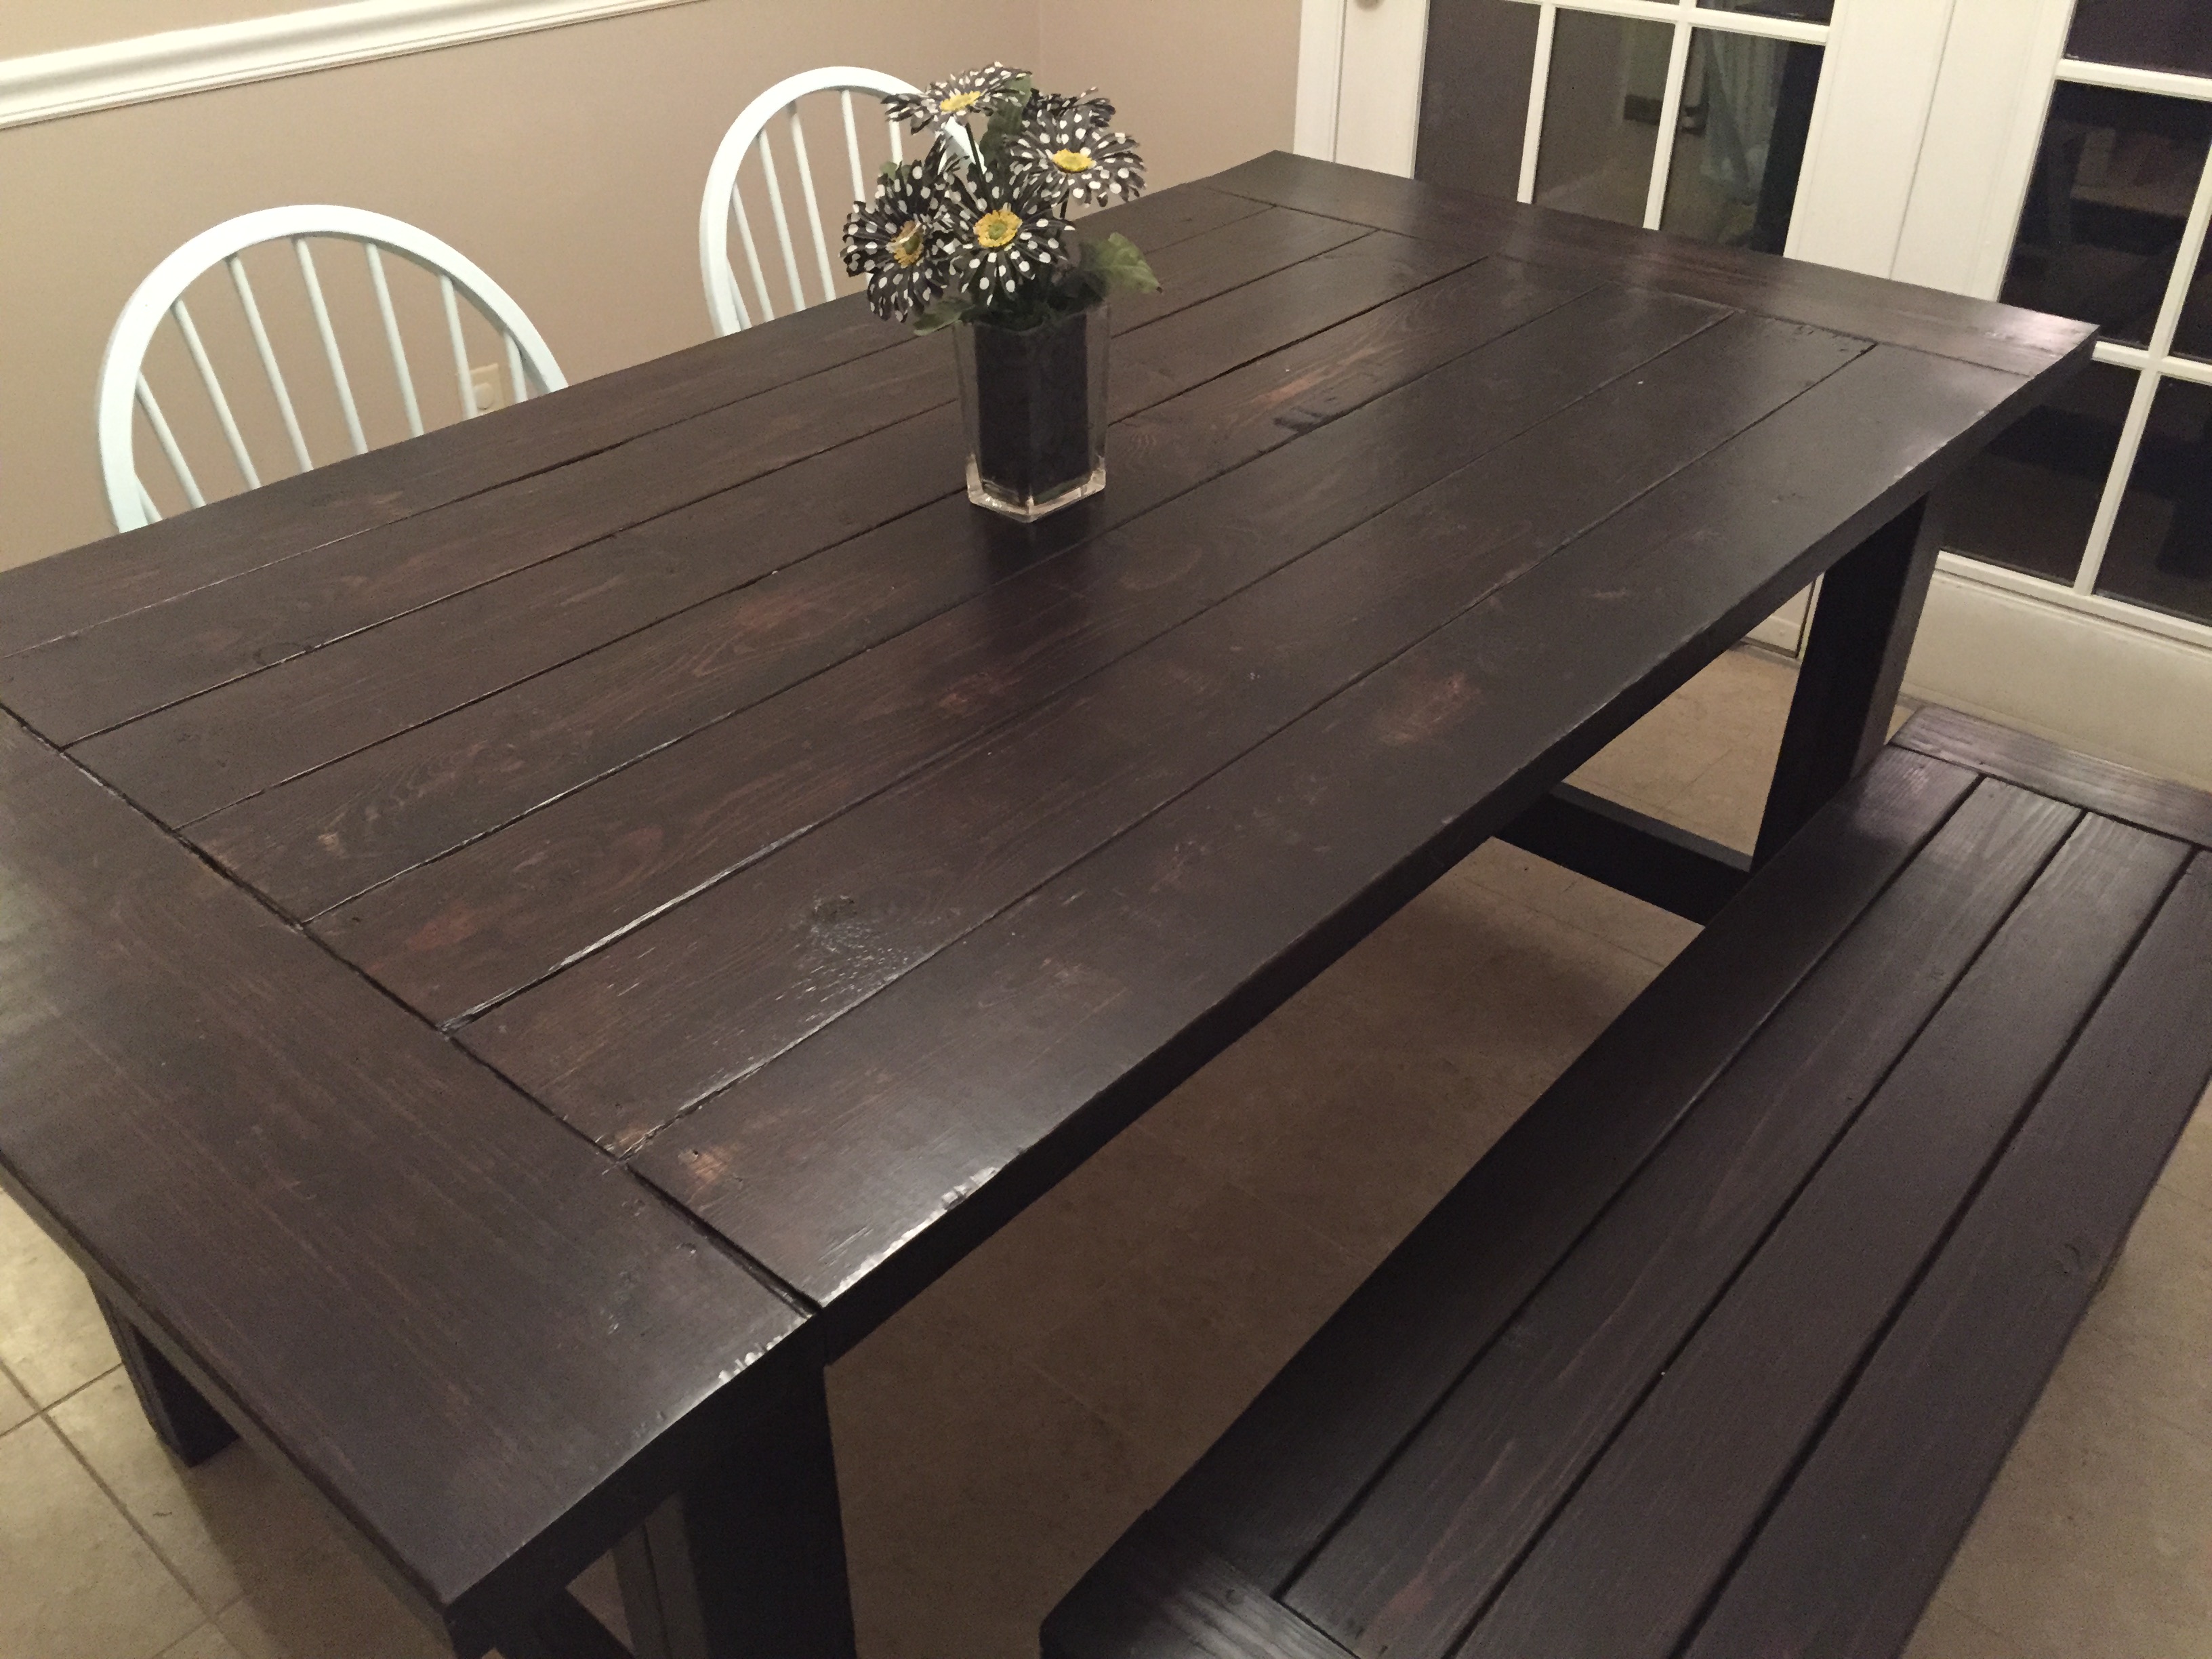
I then painted the top with chalk based emulsion, distressed and did the signwriting to personalise it, finished it with wax and my daughter was more delighted than I ever thought any child could be by having a table daddy made for her birthday, and at a fraction of the cost of a shop bought one of far lower quality.


Am.so.pleased I stayed on this website, and have already lined up the matching chairs for her as my next project!


Thank you for inspiring me to get back to making things again...it's been a while!


The timber cost me about £20, and the biggest expense was all the paint tester pots for the top!

Built from Plan(s)
Estimated Cost
Wood - £20 from timber merchant
Finish - £30 on various tester pots of paint, beeswax and another 2 days of literally watching paint dry!
Estimated Time Investment
An Hour or Two (0-2 Hours)
Finish Used
Base - off white chalk based furniture paint (already had in the shed!)

Top - various chalk based emulsions, wet distressed, signwriting in tombo brush marker for the black, and chalk emulsion with added sparkle for the blue, painted with narrow flat ferrule brush.

Adding the glitter to the paint was a mistake really...was a nice idea, but made the paint very difficult to get clean lines with on the scale I did it. Also, required a huge amount of wax and polishing until the bumps weren't raised anymore.

Bees wax to protect and finish
Recommended Skill Level
Beginner

Successful First Project

Submitted by 505dannyp on Fri, 01/30/2015 - 19:27

My first real furniture DIY project.  My wife has been asking for a farmhouse table for a couple of years and I found Ana's site 3 weeks ago.  By reading the plans the project seemed simple enough to give it a try.  I modified the plans to shorten the table to 72" to fit in our dining room.  I bought lumber from Lowe's and lumber costs for the table was approx $65 and the bench was right around $20.  My wife loves it and I have had multiple requests to make more tables for other family members.  The project took a week to complete working a few hours each evening after work.  Stained with Rust-Oleum Ultimate in Kona and 4 coats of a Rust-Oleum Polyurethane in Satin finish. A big thanks to Ana for the free plans and for my new hobby of furniture making!    *EDIT*  The table and bench are not as dark as the pictures show. 

Estimated Cost
$100 - $120
Estimated Time Investment
Weekend Project (10-20 Hours)
Recommended Skill Level
Beginner

Wood and Upholstered Bed - King

Submitted by carriesty on Tue, 02/03/2015 - 14:20

My dream bed is finally done. Blood, sweat and tears.....not really, but after making a few mistakes along the way, I can finally say it's done. I am happy to report that it only cost $300 -- a whooping $ 1895 savings from Restoration Hardware's Maison Bed Collection.  I am in love with my new chic bed. I will be posting my tutorial for the Chestwick Bed - King size - very soon. In the meantime, thanks for looking.

Estimated Cost
$300
Estimated Time Investment
Week Long Project (20 Hours or More)
Finish Used
Paint and wax combination
Recommended Skill Level
Intermediate

Comments

suschen

Wed, 02/04/2015 - 08:19

This looks amazing! I love it more than the RH Maison Bed. Great job. Tutorial please?