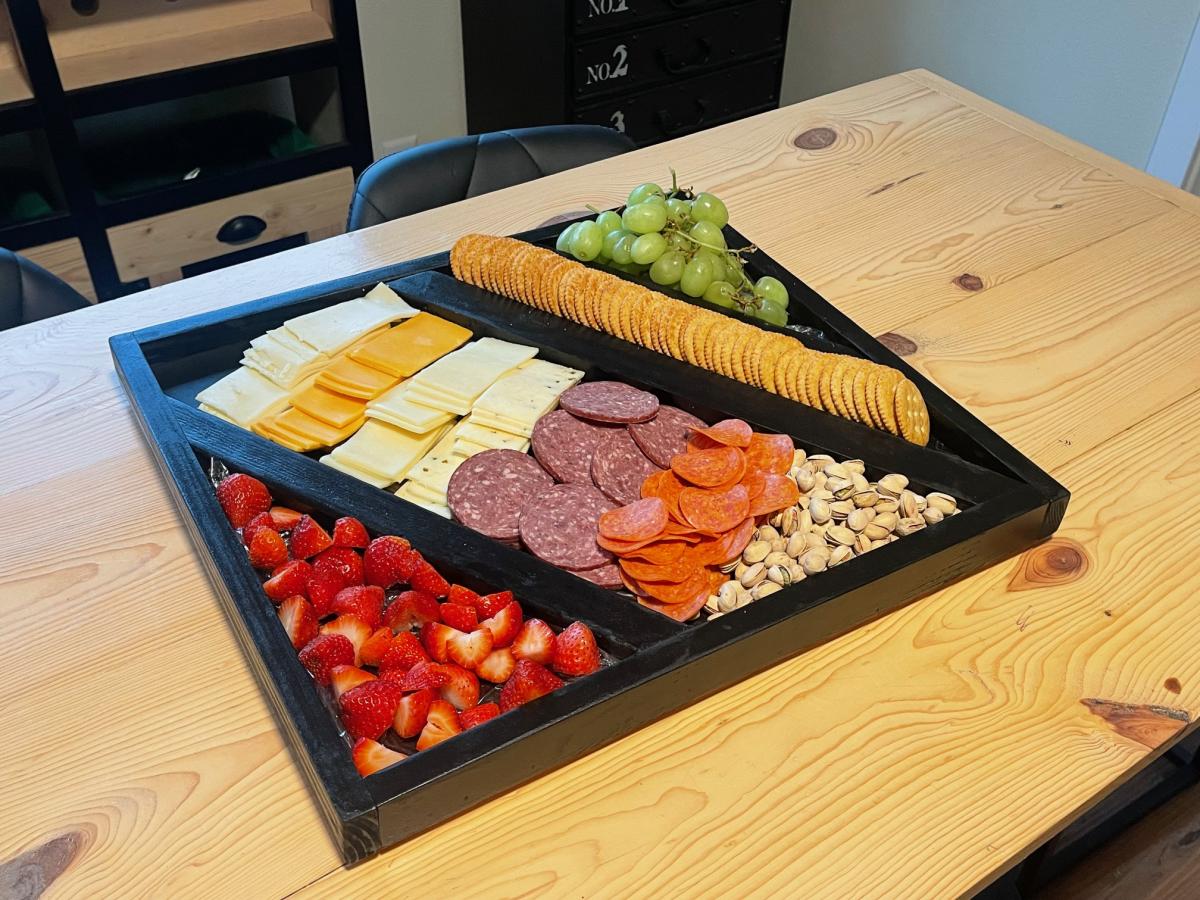
Lazy Susan Charcuterie Board

I built this using scrap lumber and Ana's charcuterie plans. I decided to make it a bit smaller and added this lazy susan hardware, love the outcome!

Built from Plan(s)
Seasonal And Holiday
I built this using scrap lumber and Ana's charcuterie plans. I decided to make it a bit smaller and added this lazy susan hardware, love the outcome!
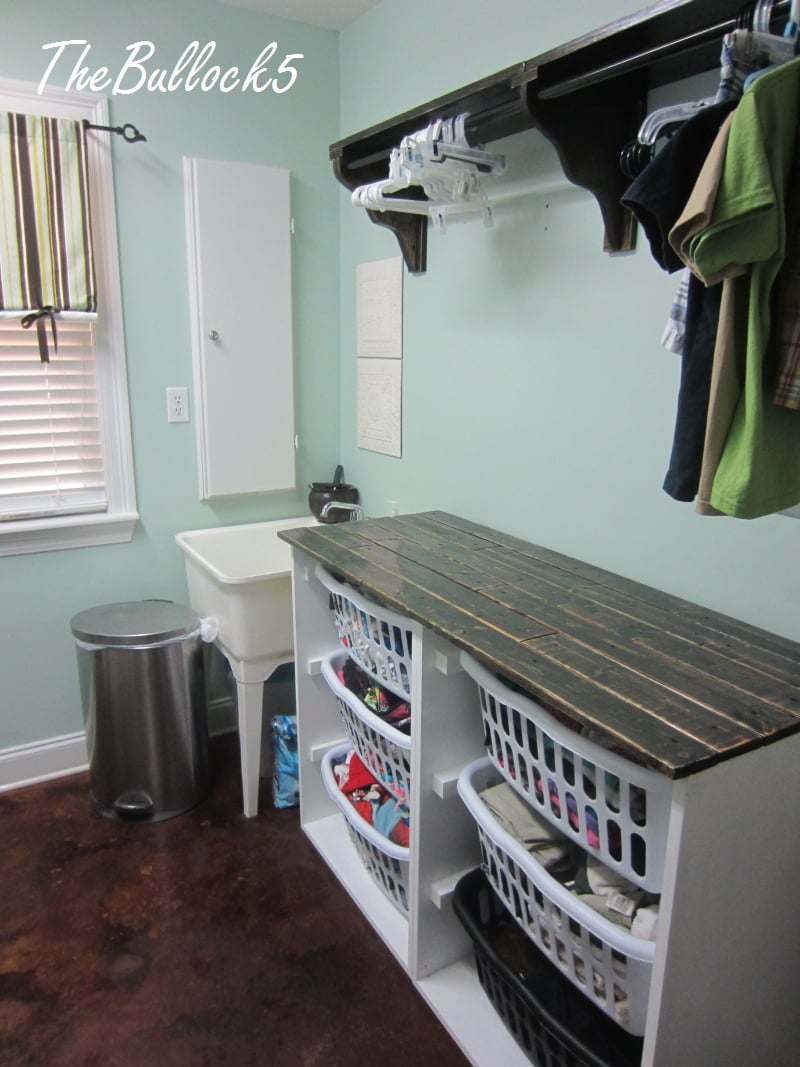
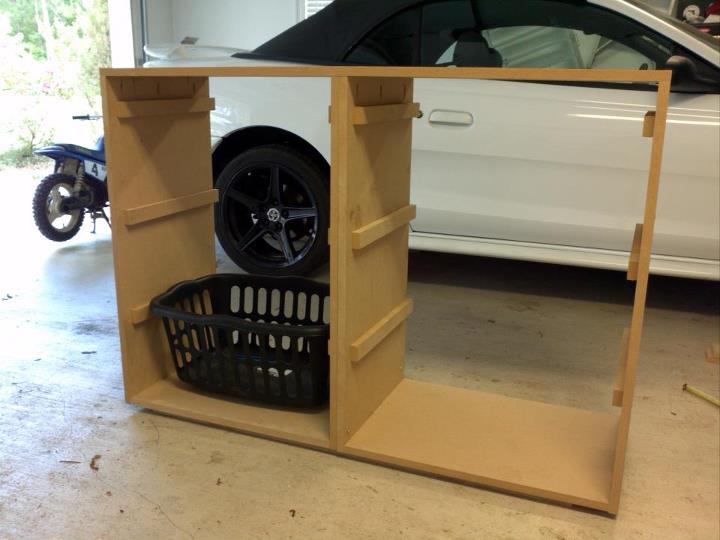
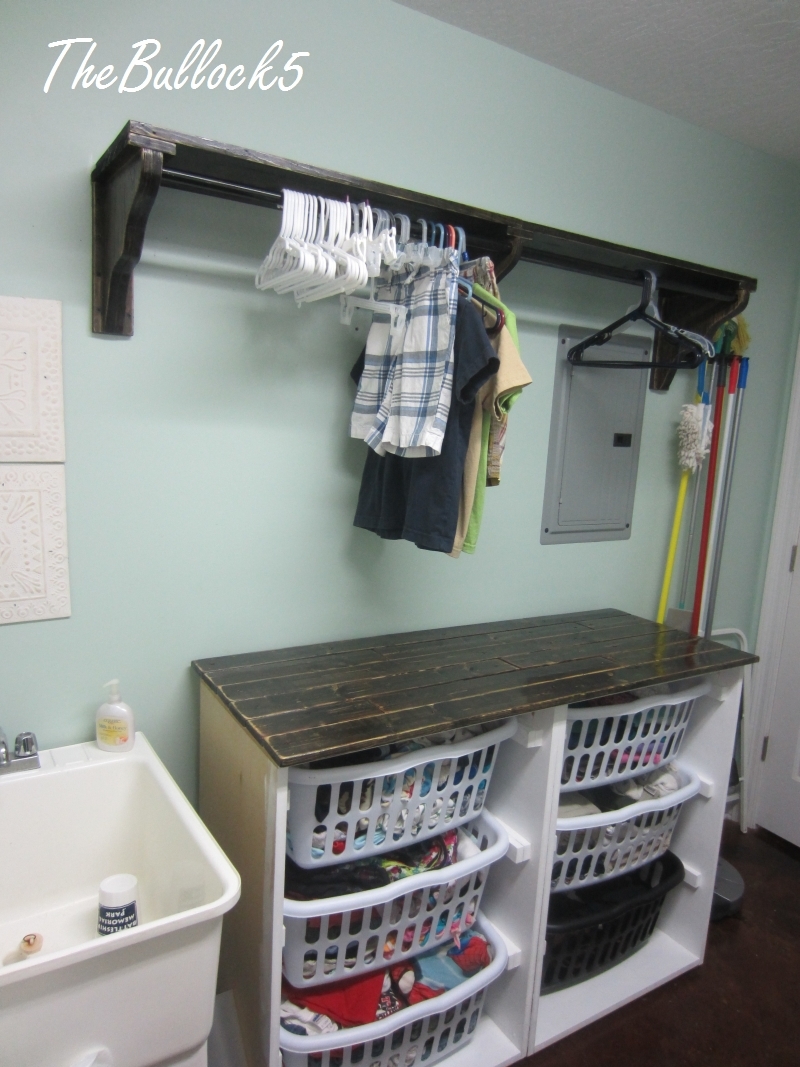
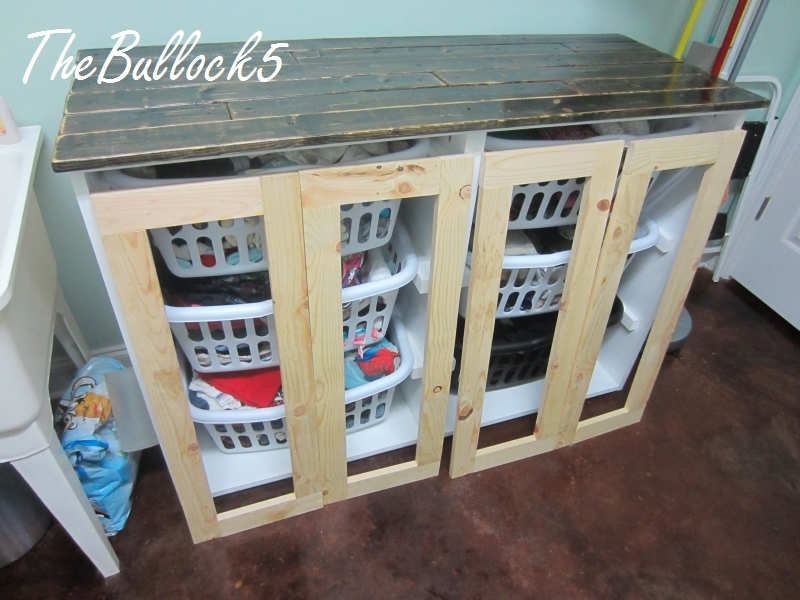
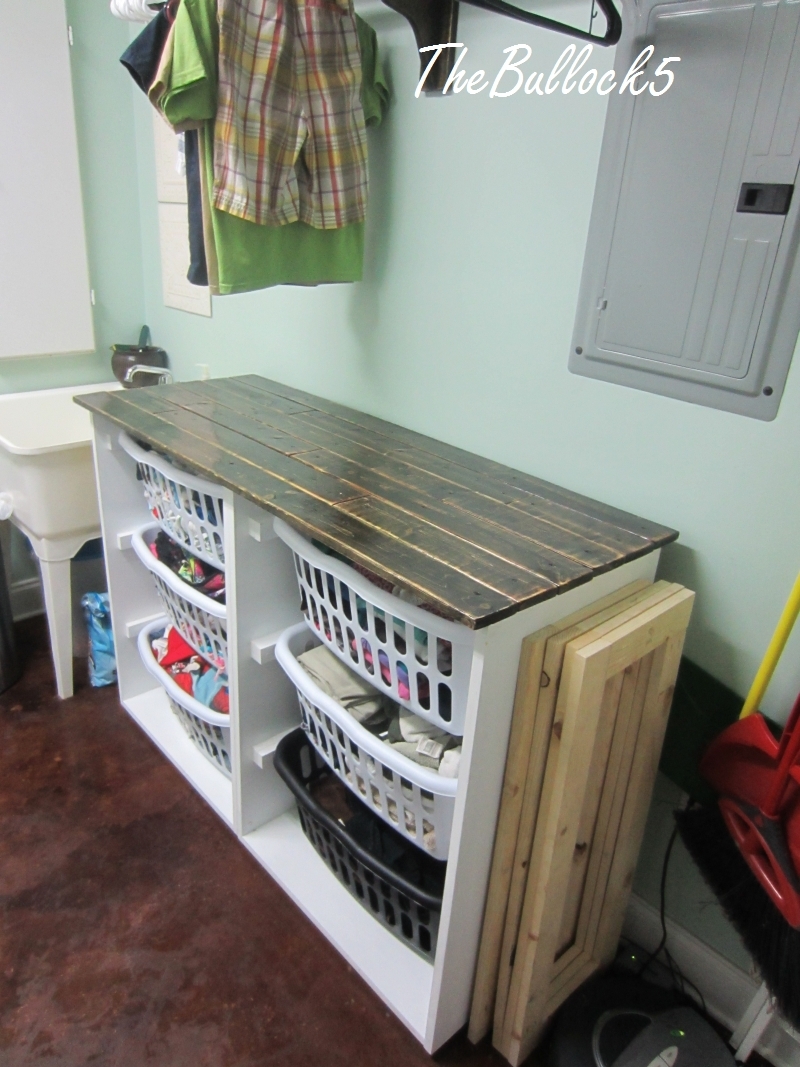
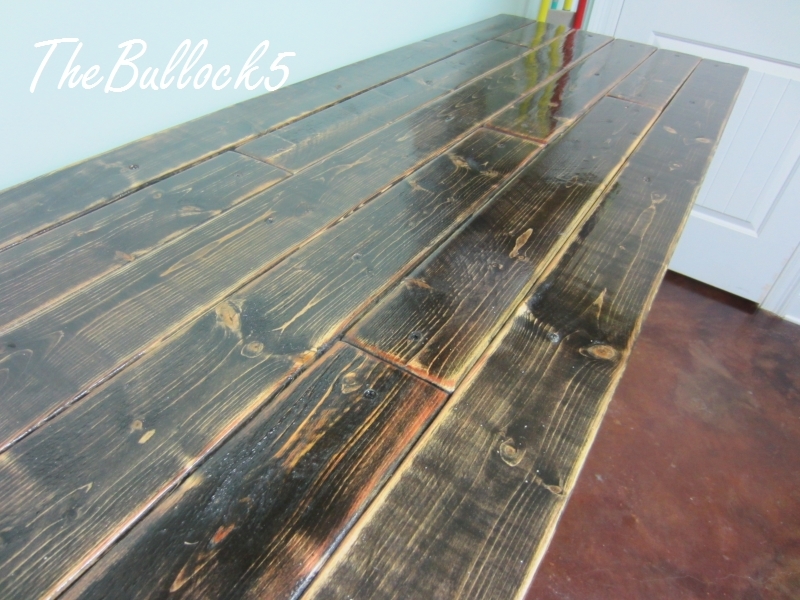
more details on my blog. I built 2 of the laundry dressers. adjusted the placement of my baskets due to restrictions in the overall height of my unit (I have a ironing board cabinet built into 1 wall that I still wanted to be able to open and use :) I used MDF, but it was a bear to work with and next time I would spend the extra $$ on birch. i painte the bottom in a semi gloss. and plan to add the doors (which will have a beadboard backing) they will be painted white with a dark walnut glaze. The top and shelf /brackets are all done in a distressed finish with ebony and mahogany stain mixed then 2 coats of poly very sturdy even filled!
Fri, 06/26/2015 - 00:00
I have been wanting to make the laundry basket dresser but am holding off because we are moving. What color did you us on the walls, I love it.
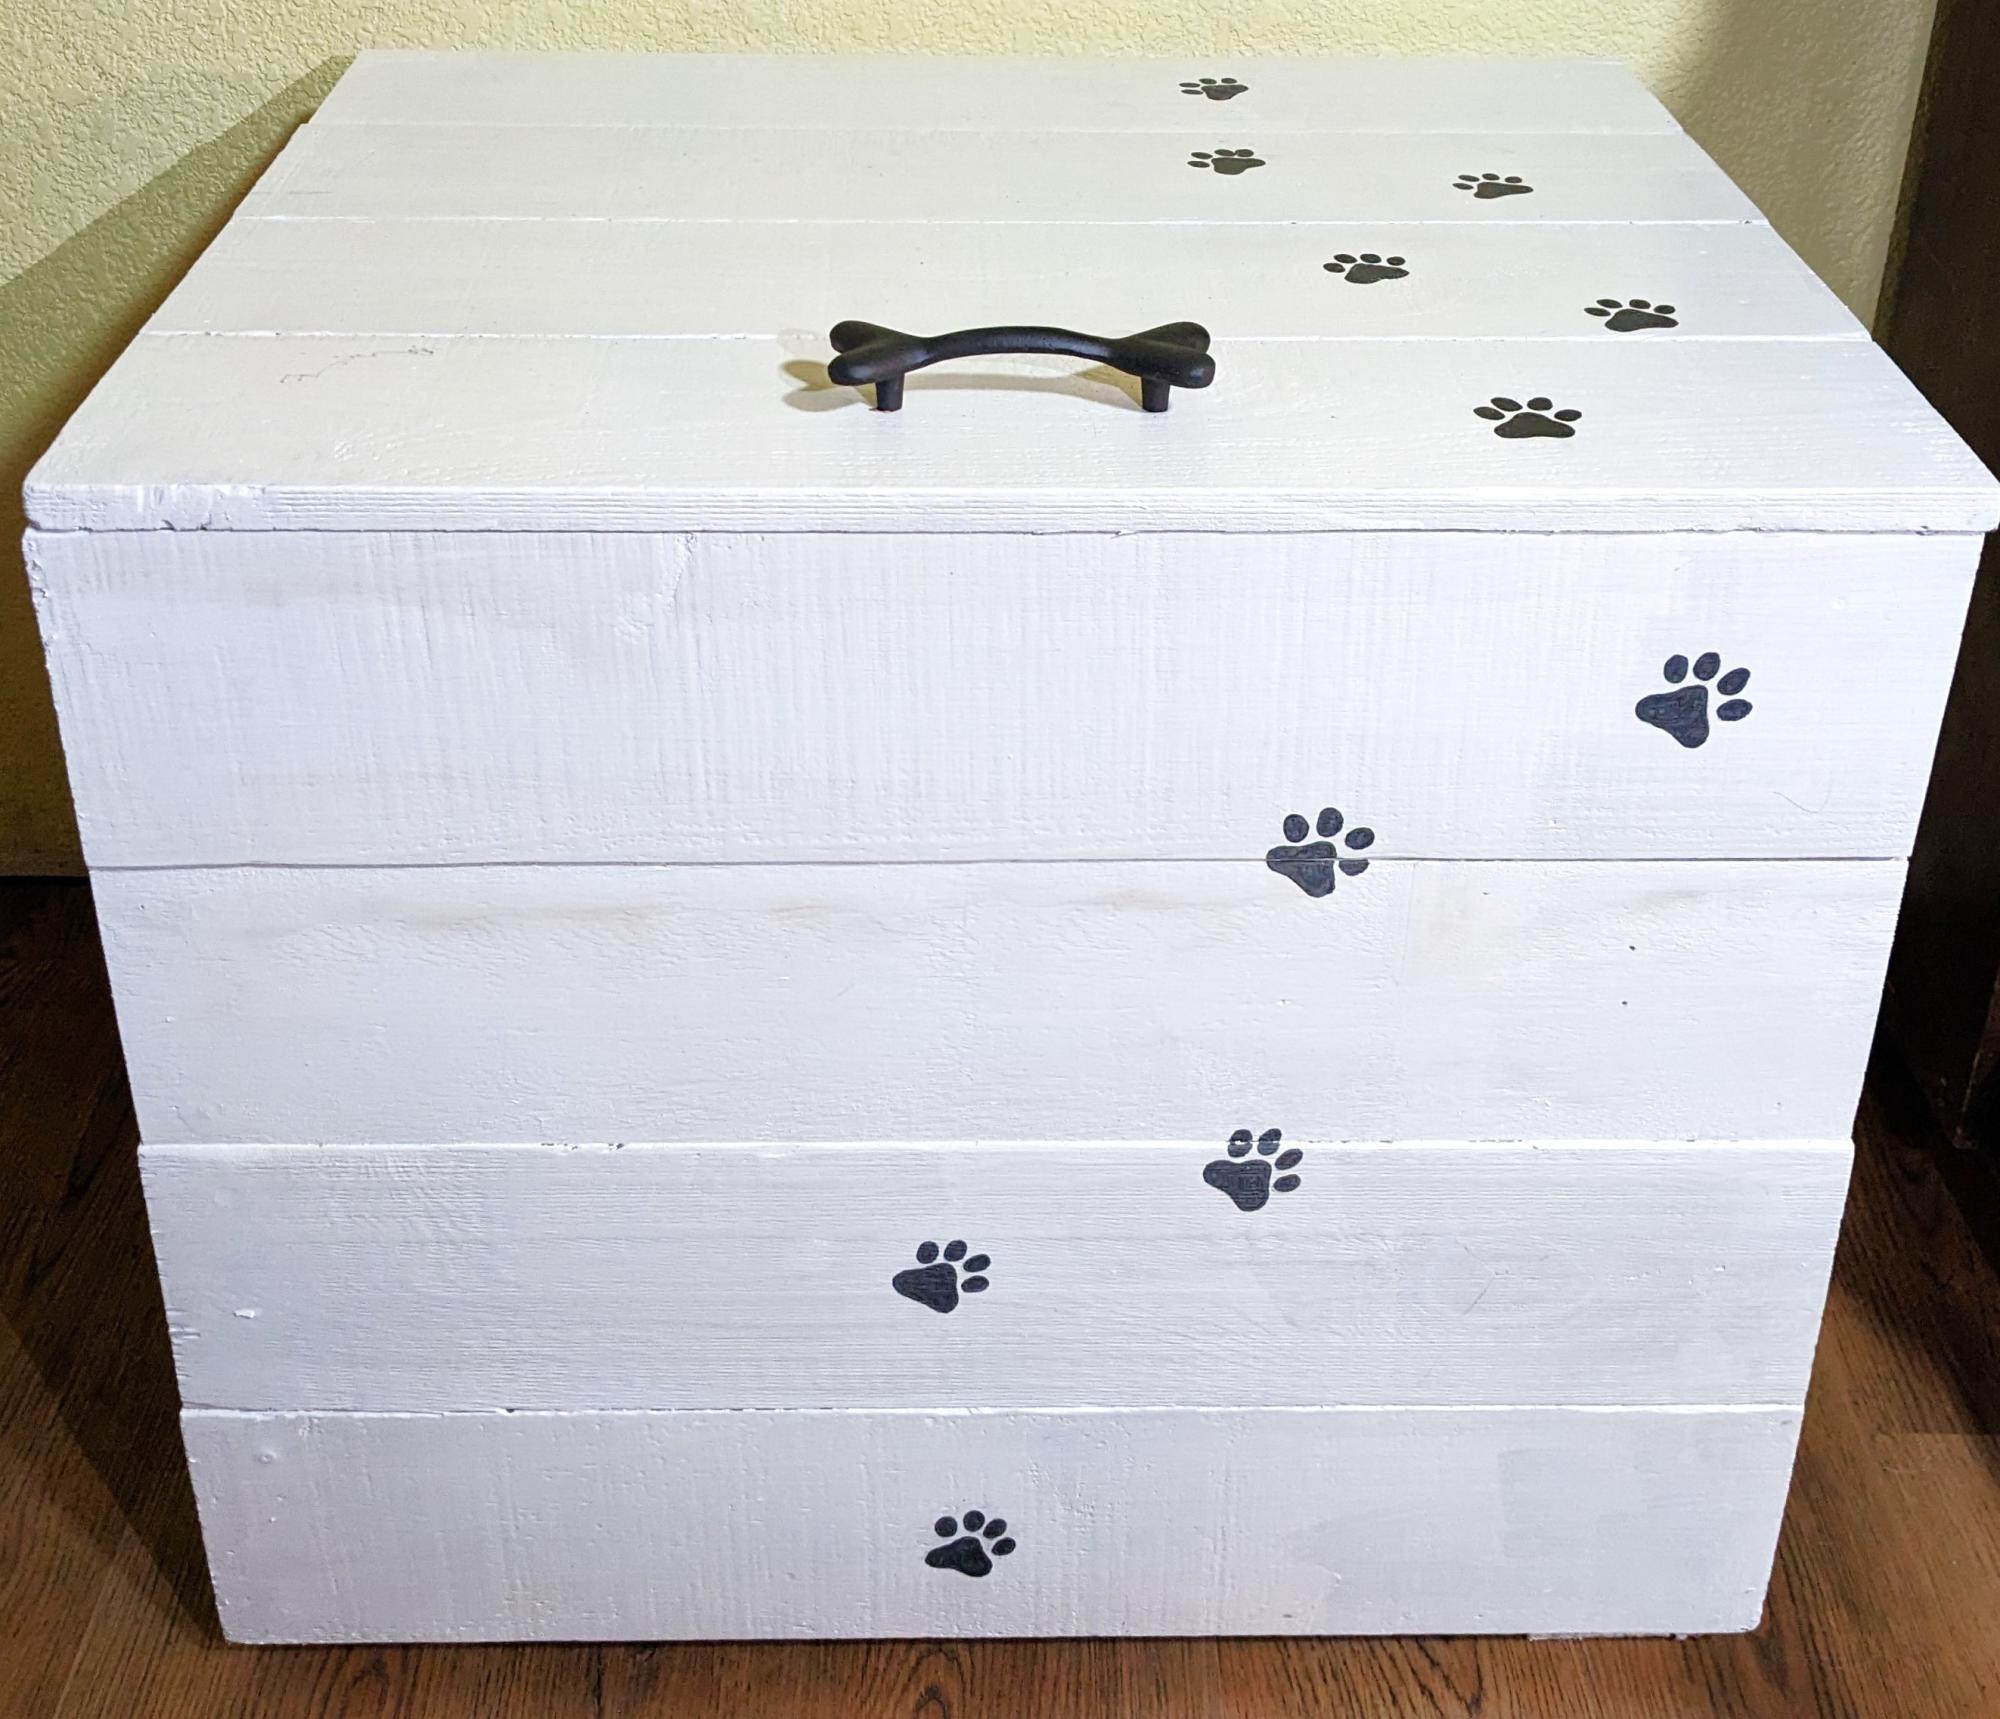
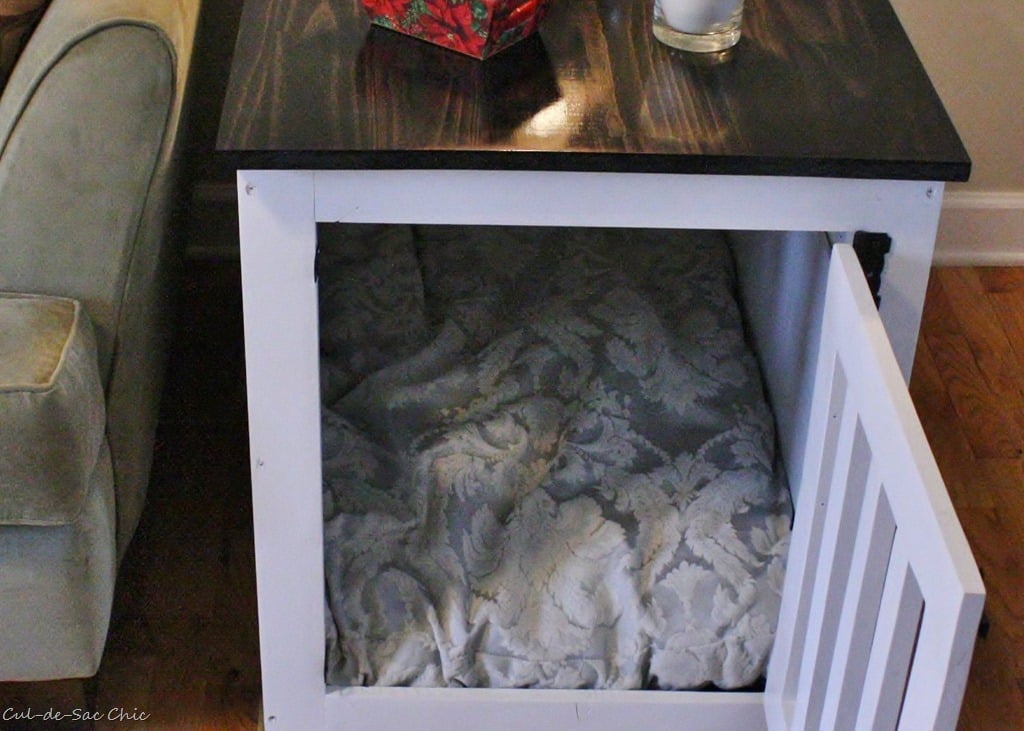
I've been searching for a pet food bin for a while now, and started looking for something cuter than an ugly plastic bin. I found a few things on Etsy but none were big enough and also cost a lot of $$$. I took the Modern Cedar Outdoor Storage Bench plans, and modified the size to fit large bags of dog and cat food from Costco, or pet food bins. I'm 55 years old and have fixed things around the house, but this was my first time building something.
I am so happy with how this turned out! I found the dog bone handle online and my daughter painted the paw prints. Way cuter than what I found online and I built it using reclaimed wood I had laying around - my only cost was the handle. Thanks Ana!
Heather Durand https://www.facebook.com/pinkprincesshc


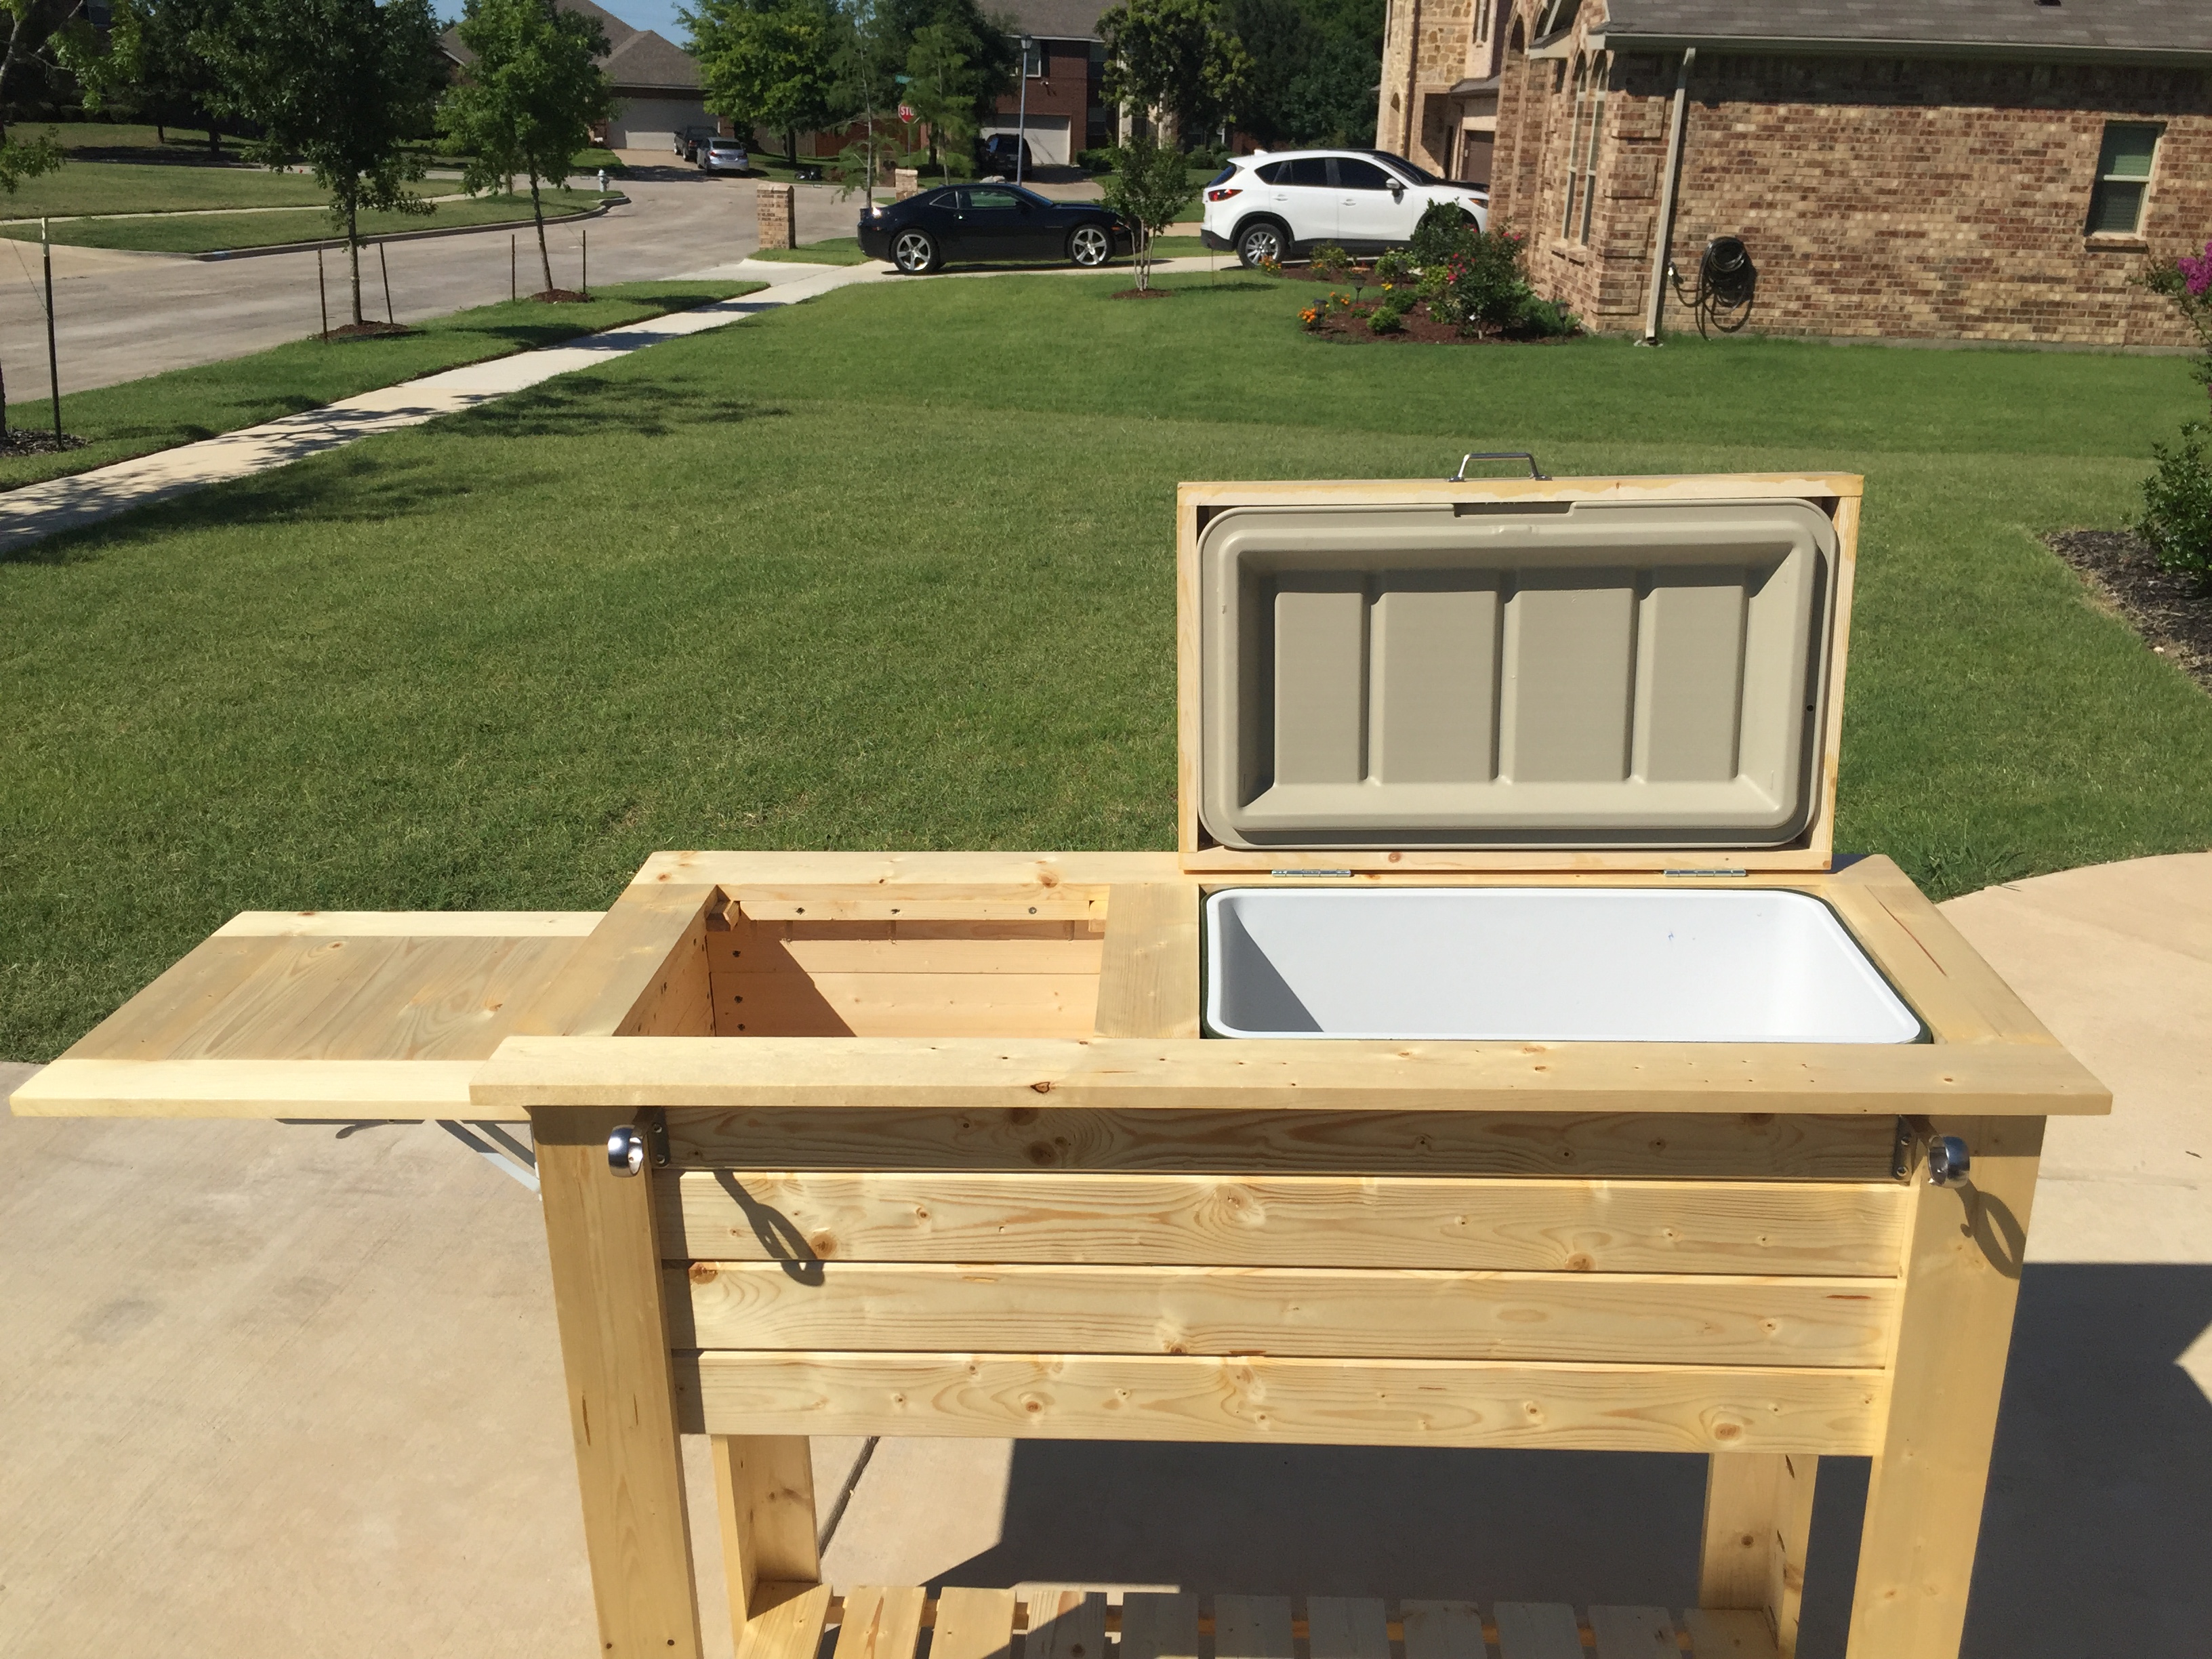
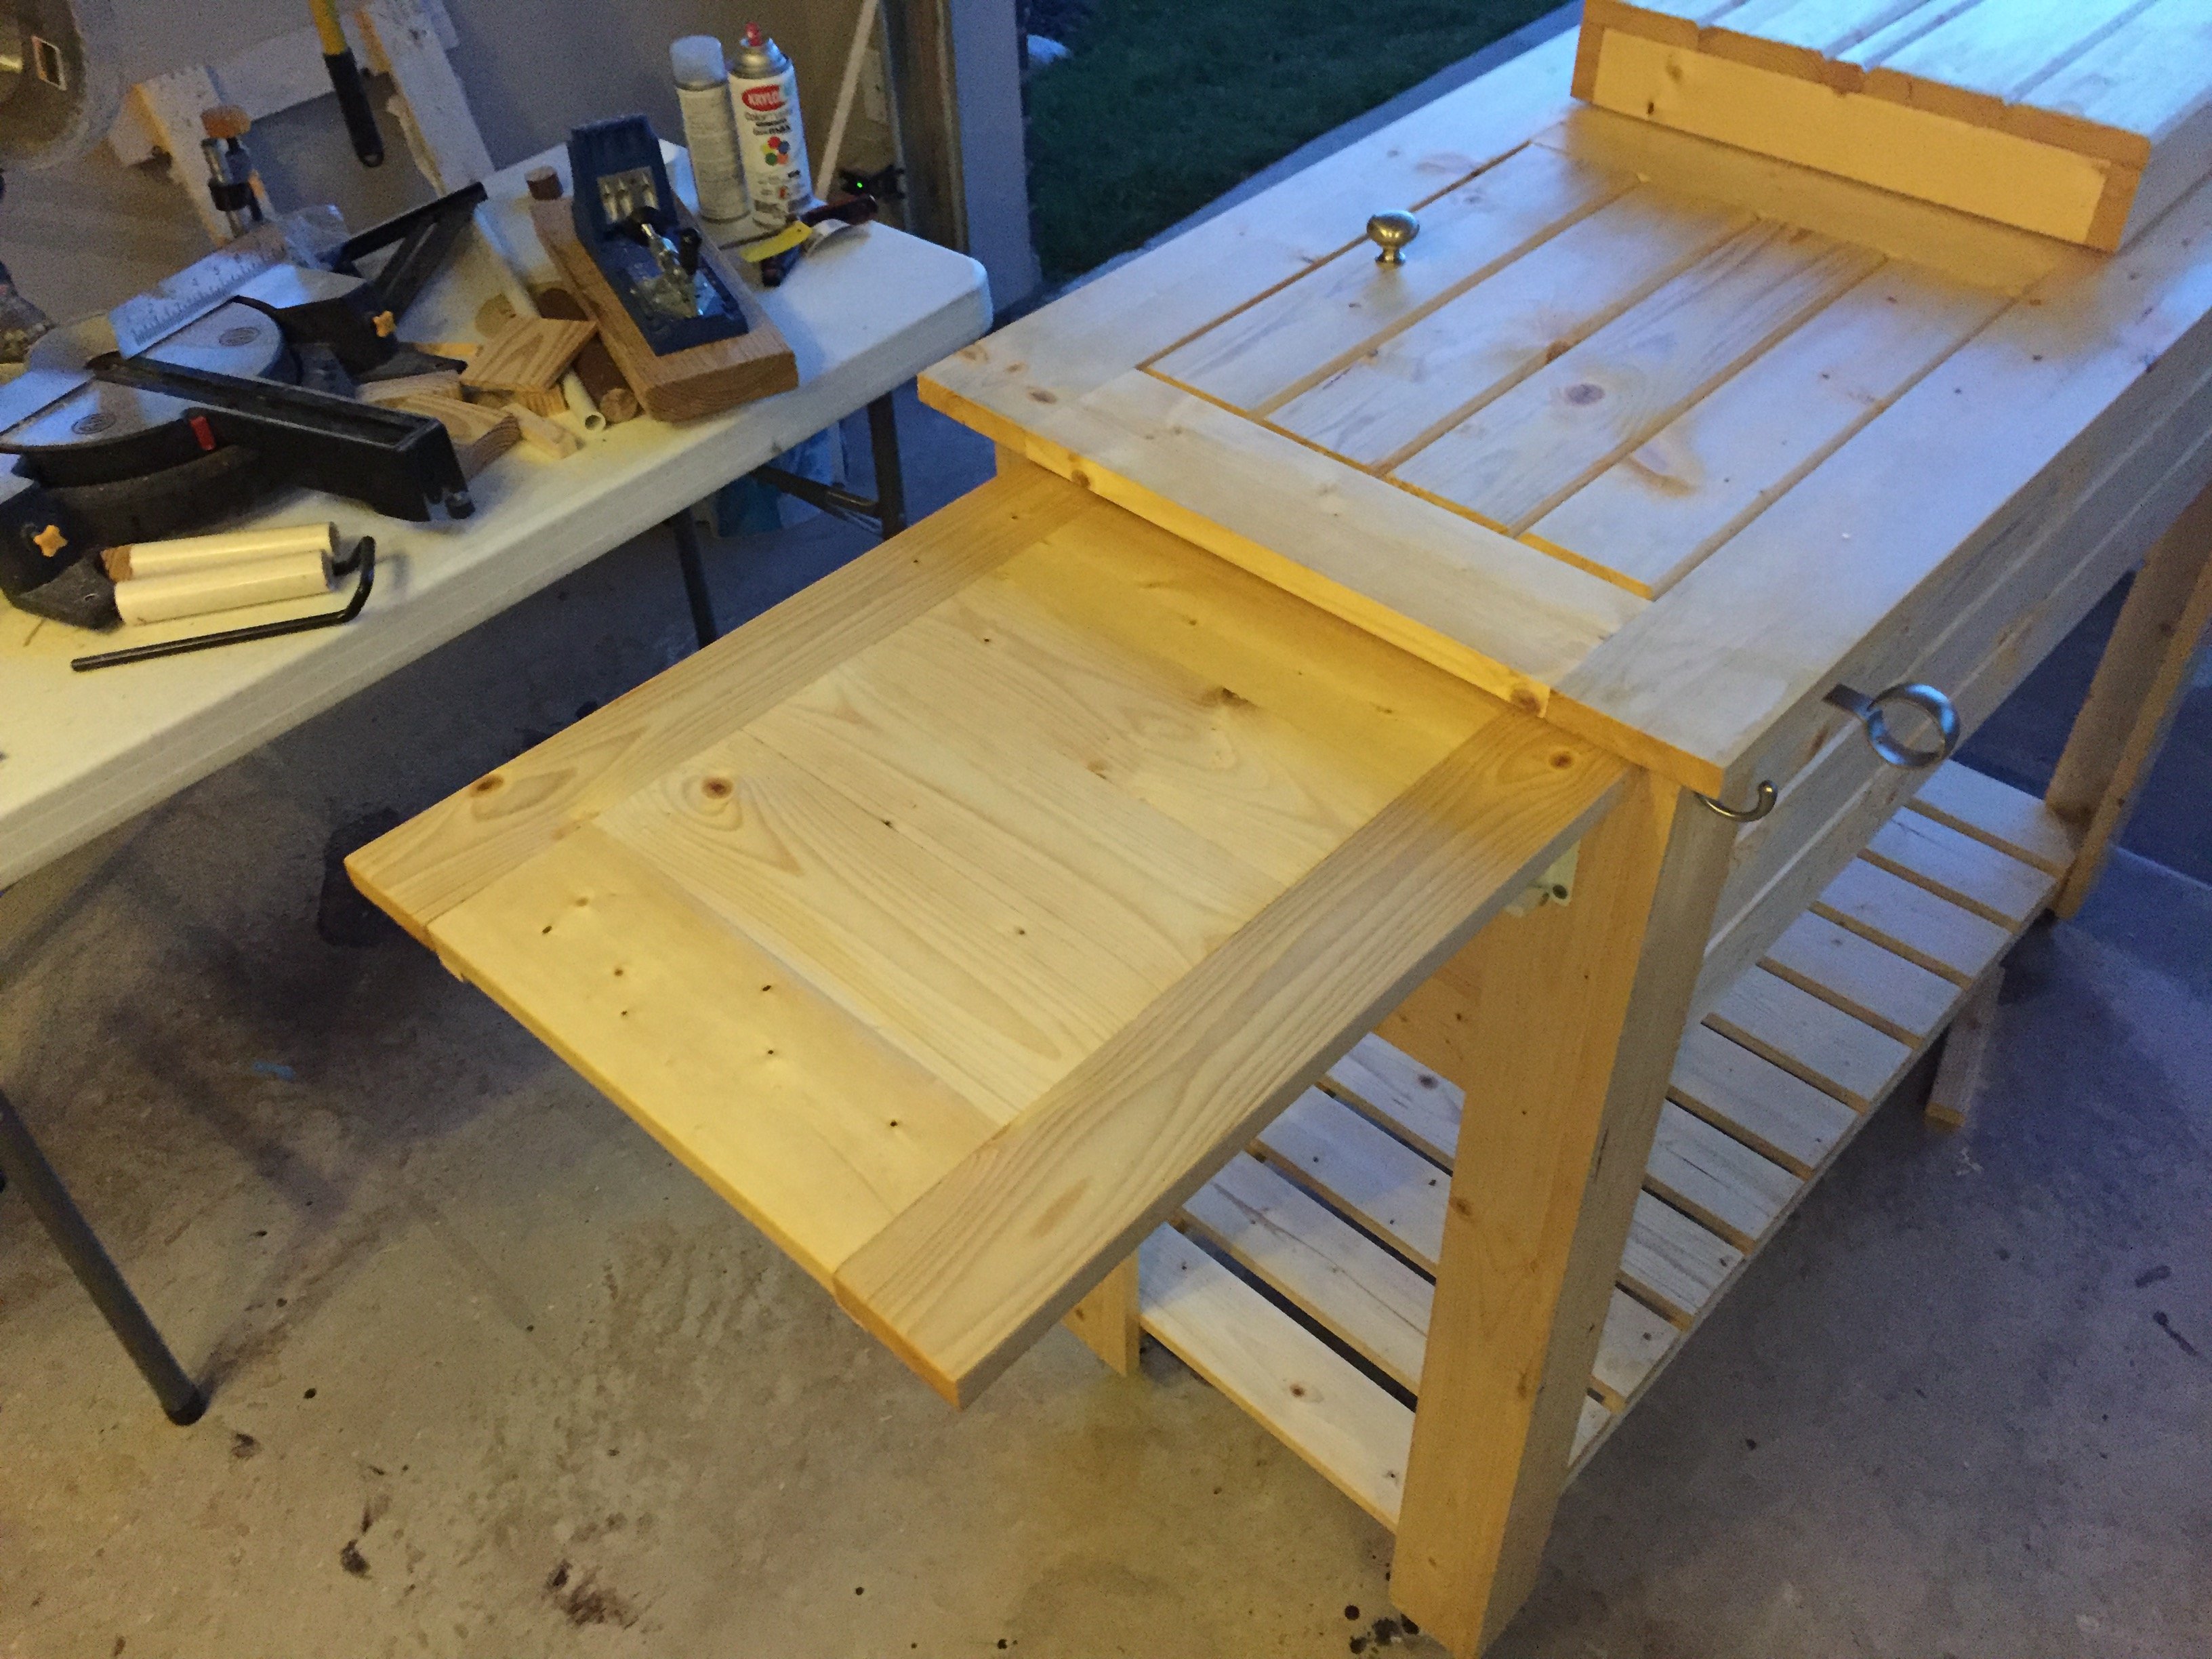
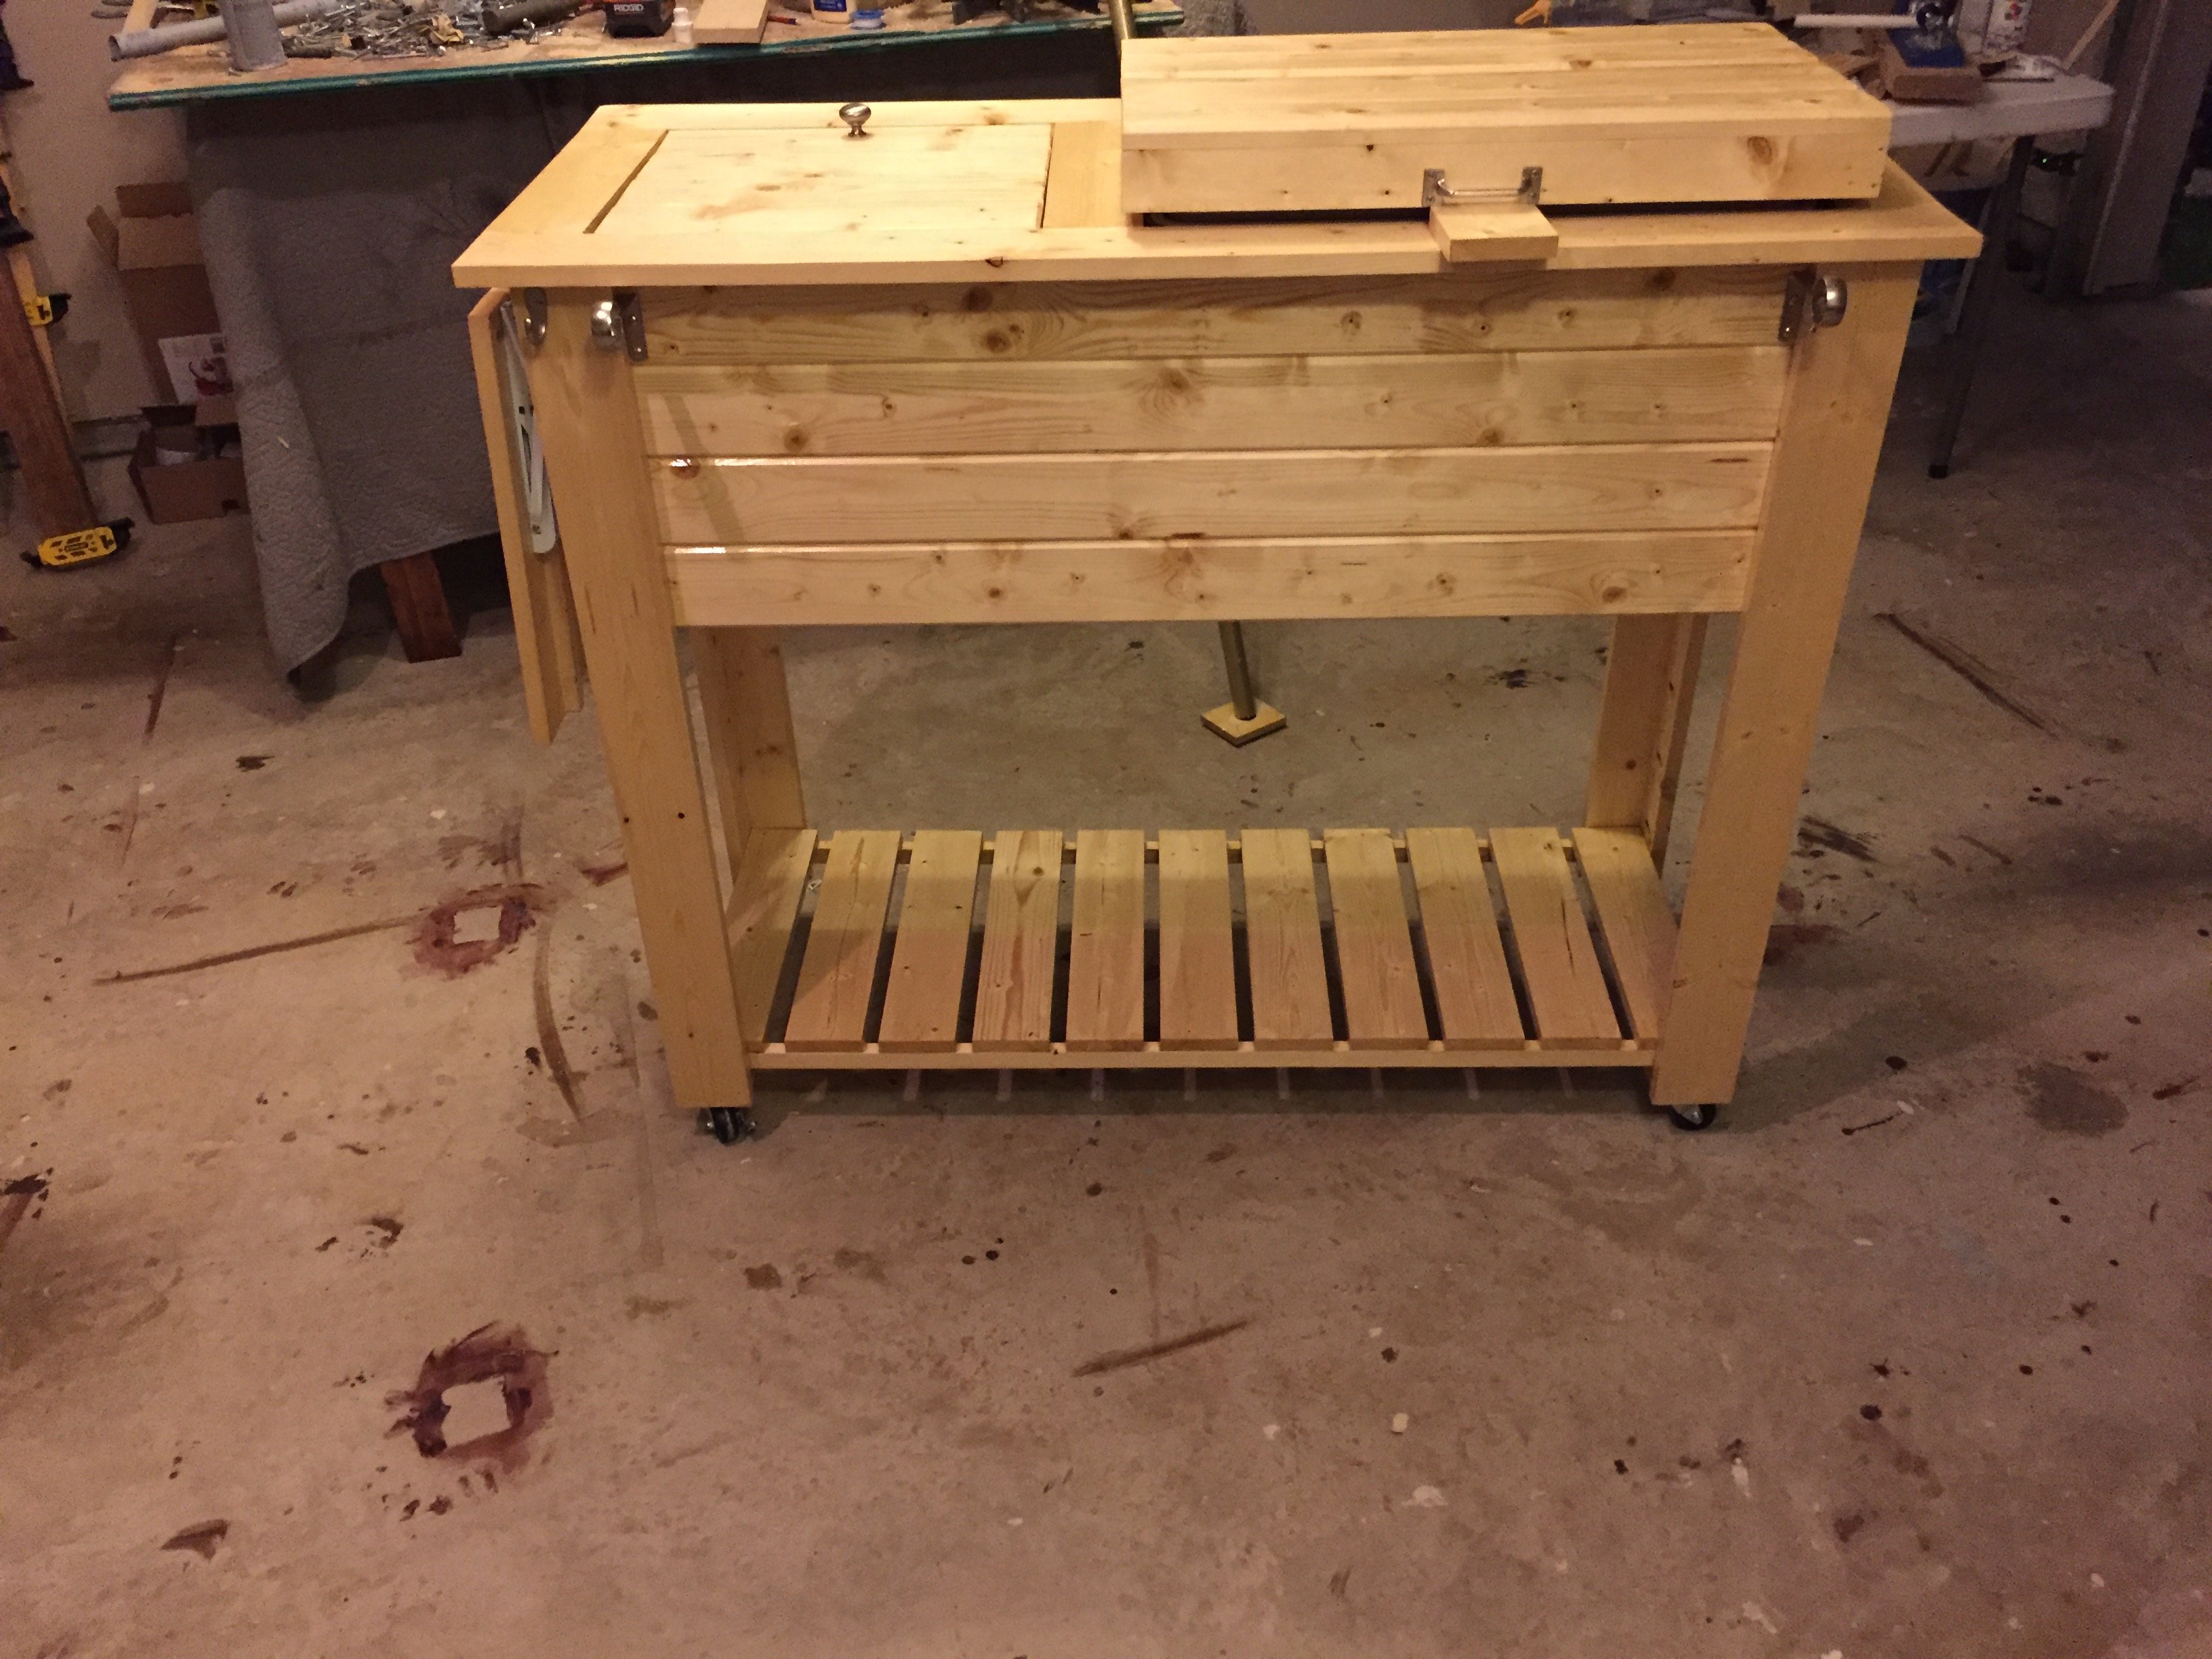
Grill station

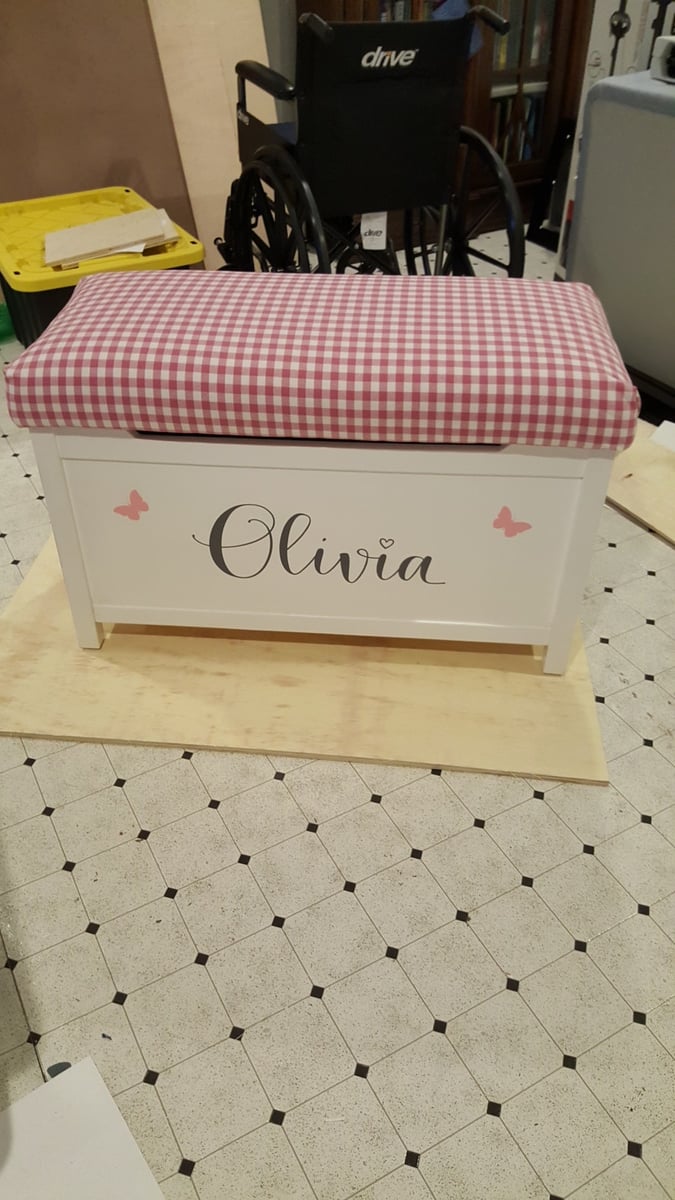
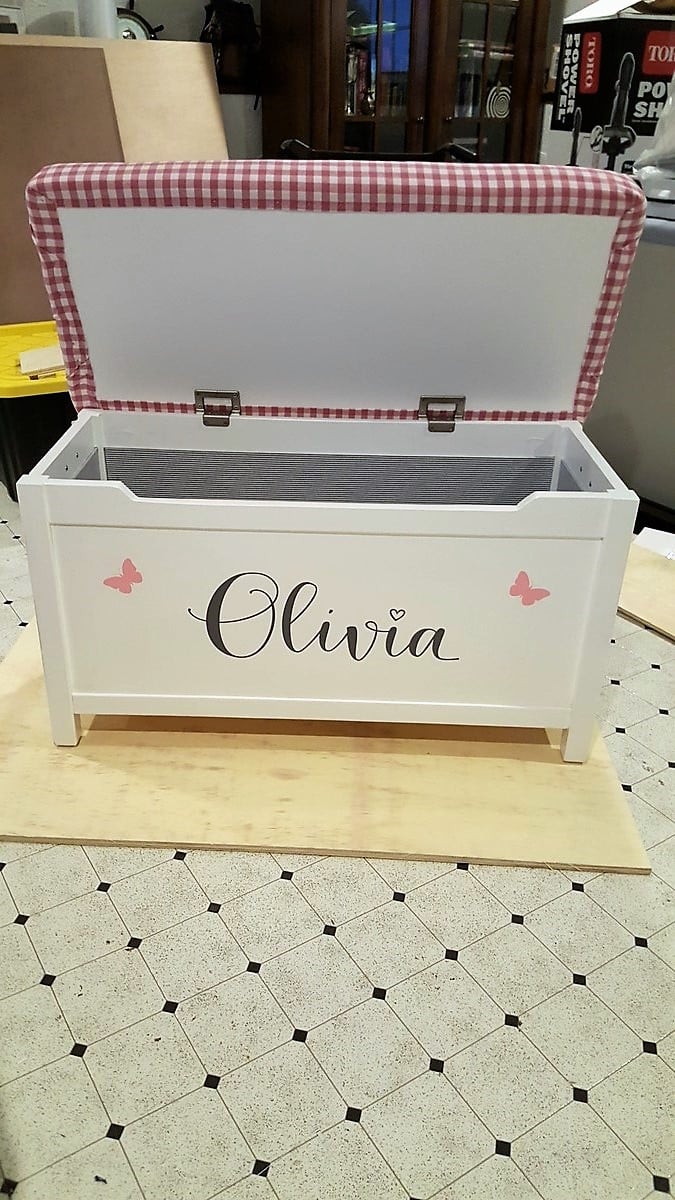
Thanks for the great plans! I built this toy box with my dad for my soon-to-be niece.
We followed the plans closely, but added four additional parts:
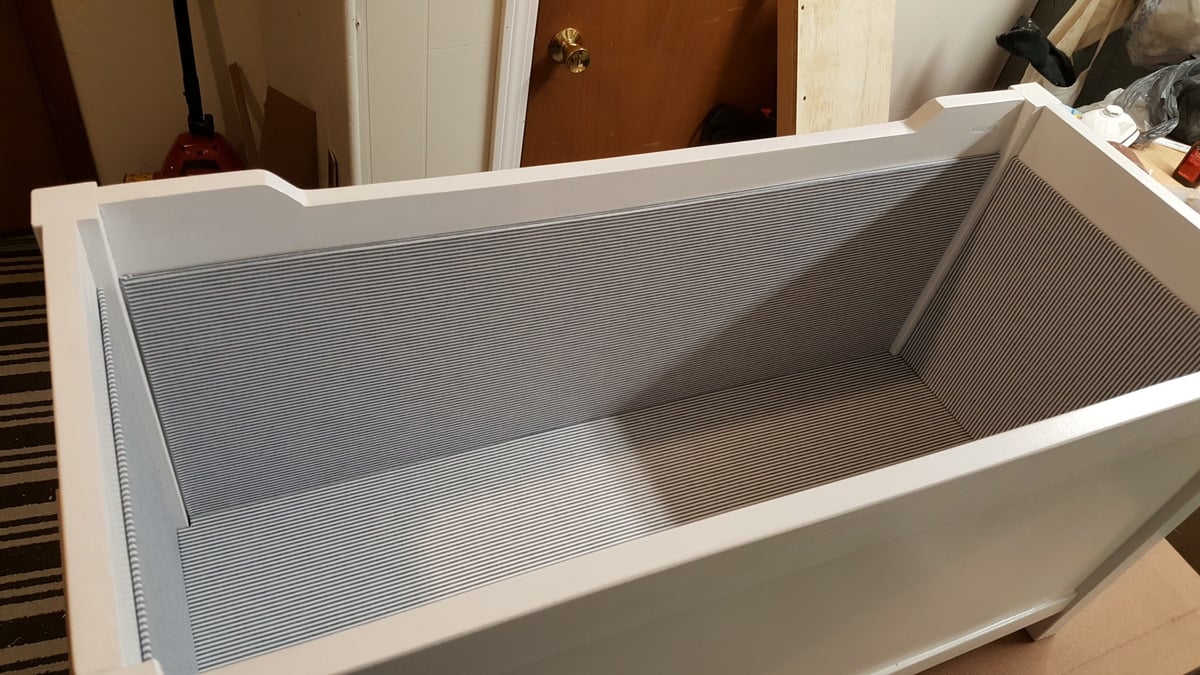
1) Added 3 inch foam, batting, and fabric on the top of the toybox
2) Lined the interior. We used 1/8 inch harboard. We cut the harboard to size, used spray adhesive to attach the fabric to the harboard, and then attached the hardboard to the toy box with loctite adhesive.
3) Added two handles to the side
4) Used a vinyl sticker pruchased from Etsy with my neice's name on the front
We used semi-gloss paint and finished the toy box with sem-glass polycrylic (brushed on, not the spray can).
Enjoy!
Best,
Mike

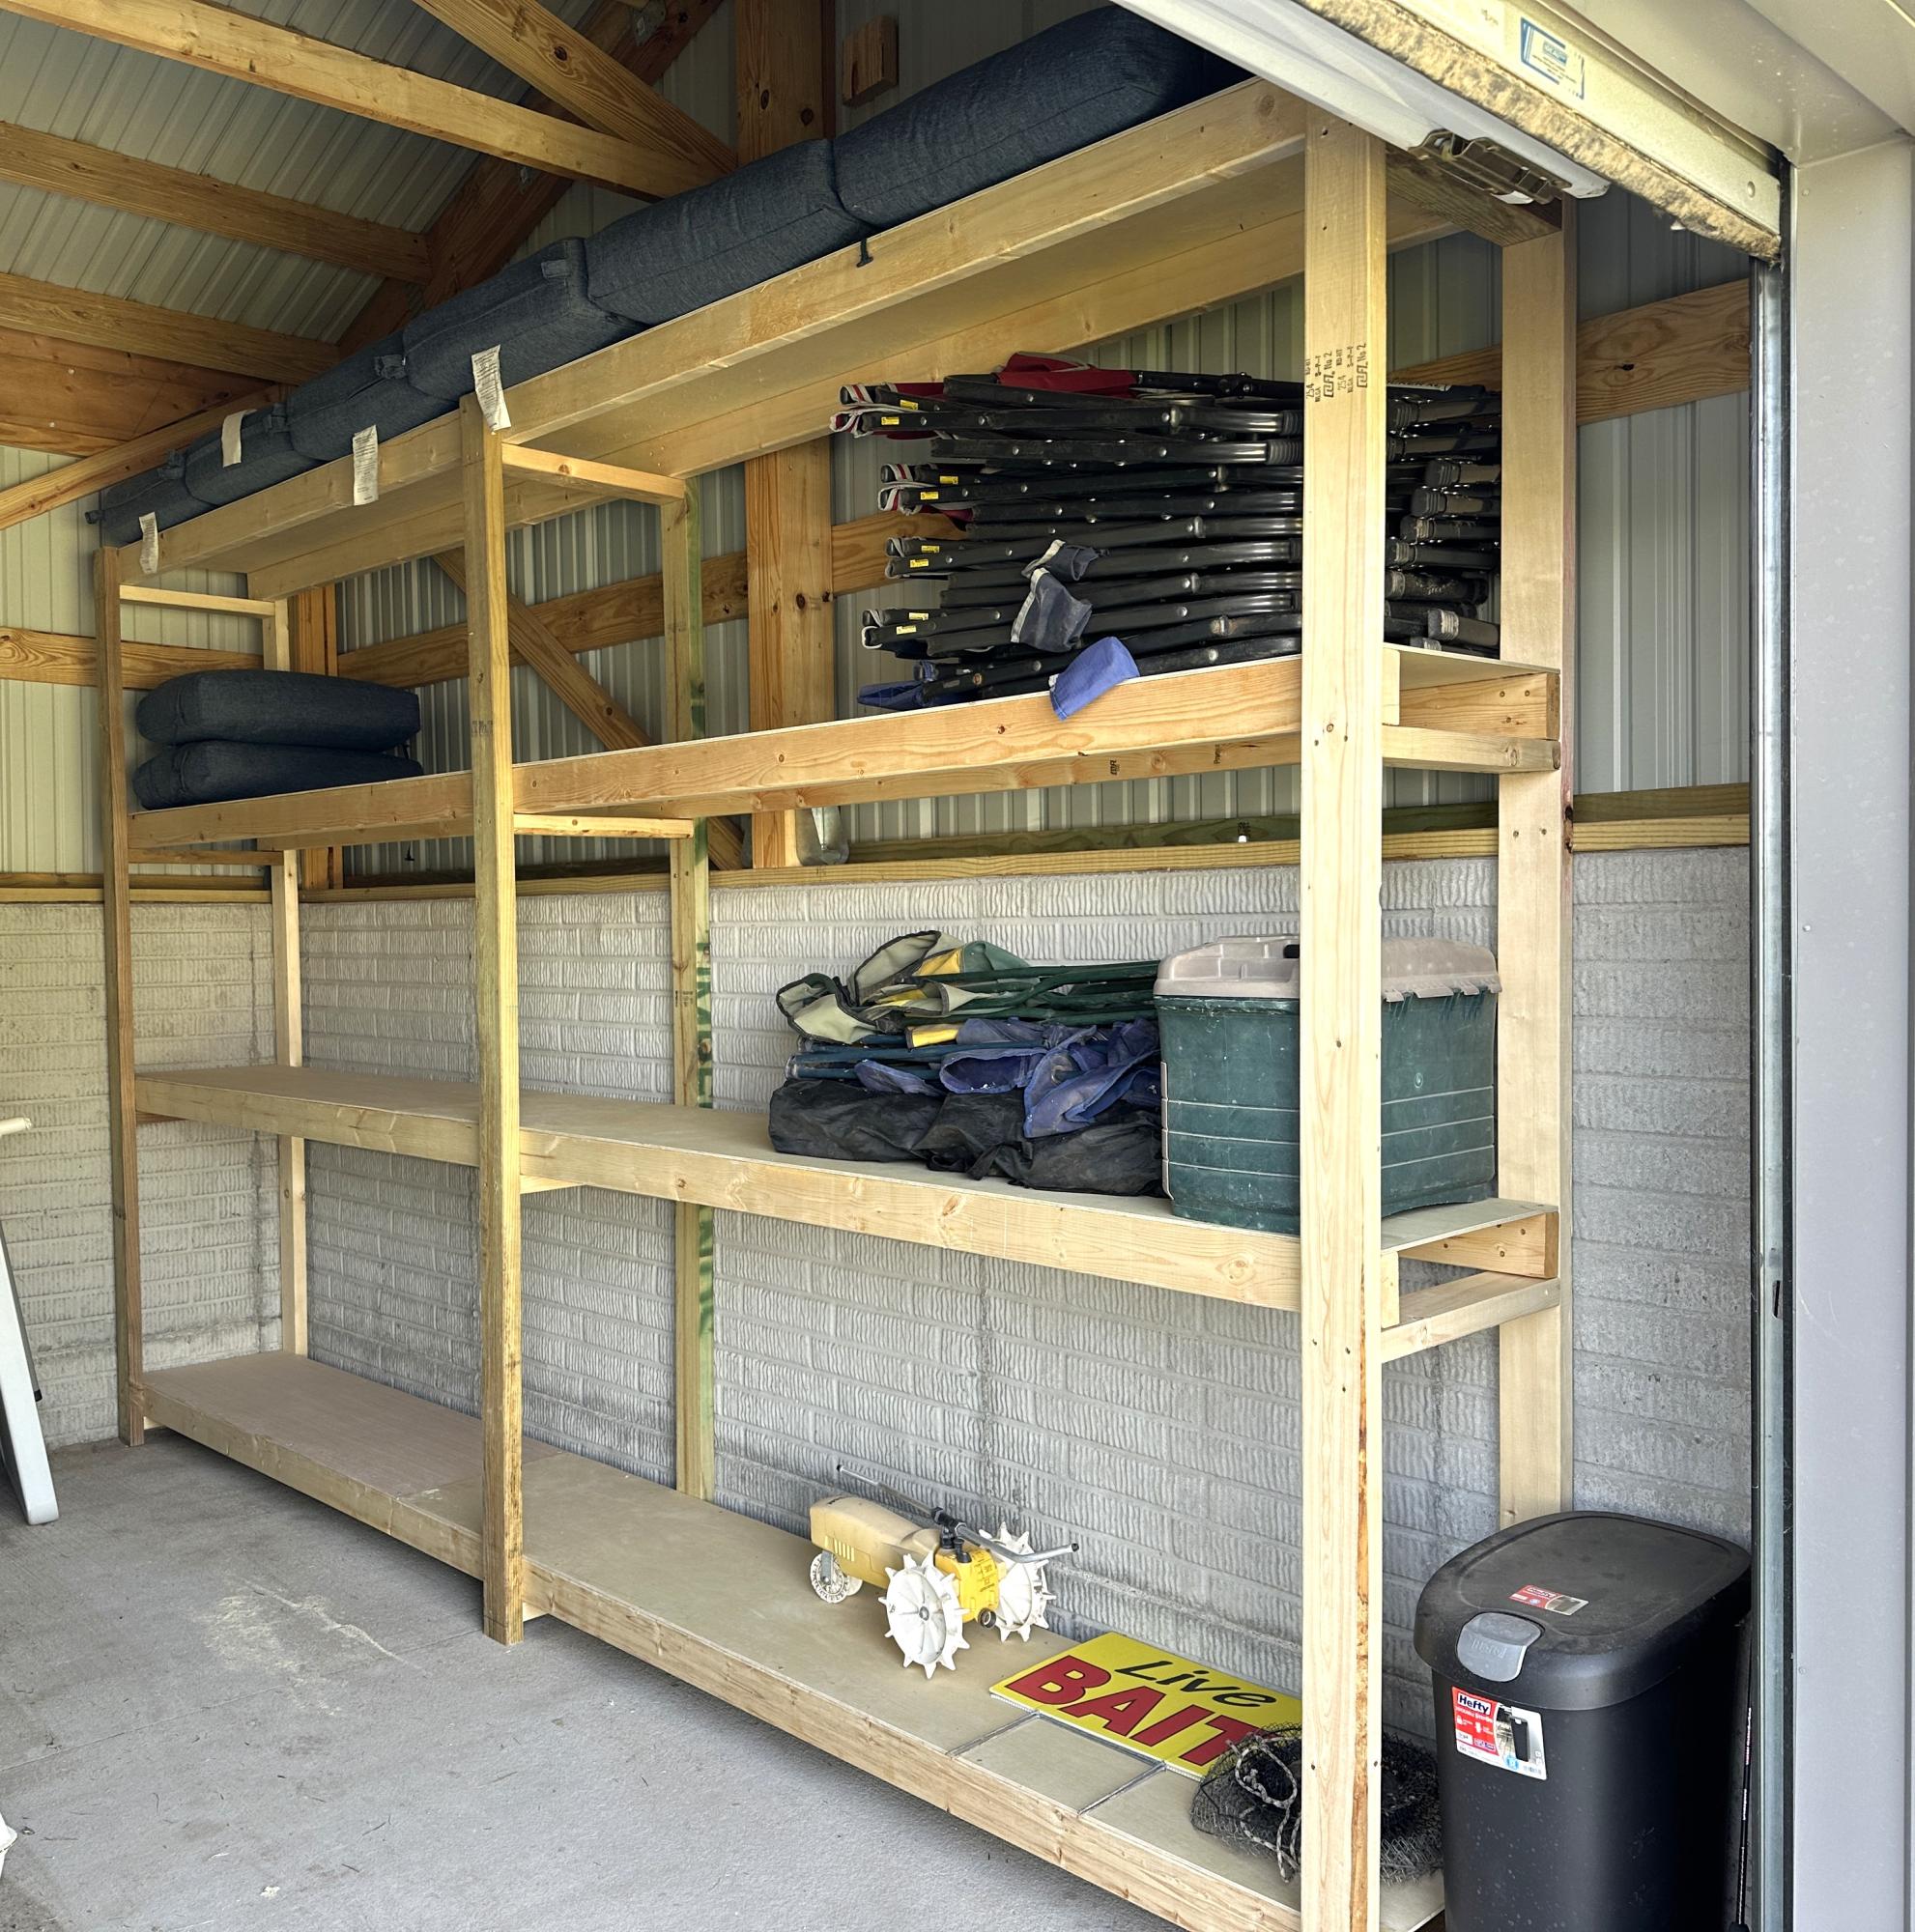
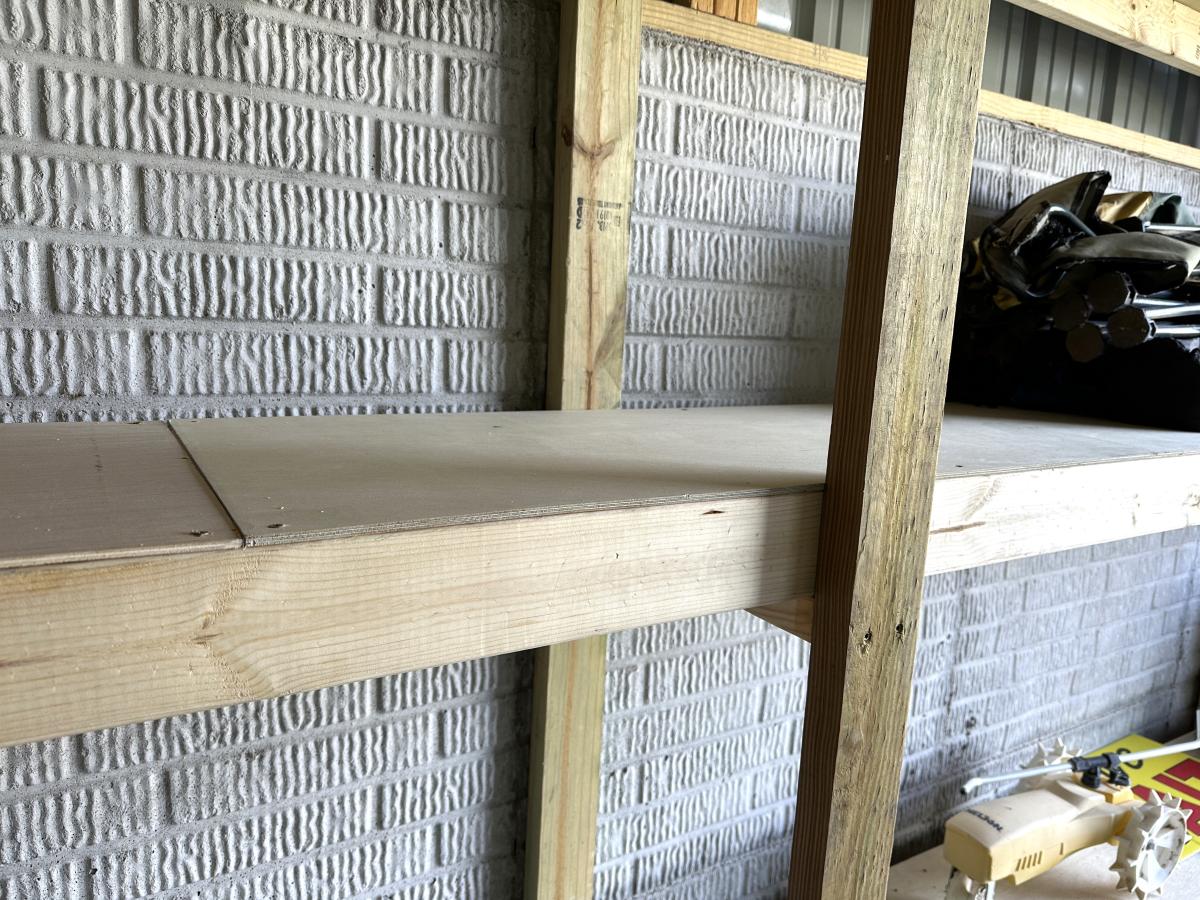
This is a combination of the Ultimate Garage Shelving Plans (https://www.ana-white.com/woodworking-projects/ultimate-garage-shelving…) and the Best DIY Garage Shelves (https://www.ana-white.com/woodworking-projects/best-diy-garage-shelves-…). We mostly followed the Ultimate plans but didn't add the metal supports. Instead, we had shorter spans and were able to attach the shelves to the upper part of our metal storage shed. Simple plans, easy to understand, took a weekend for two adults to complete.
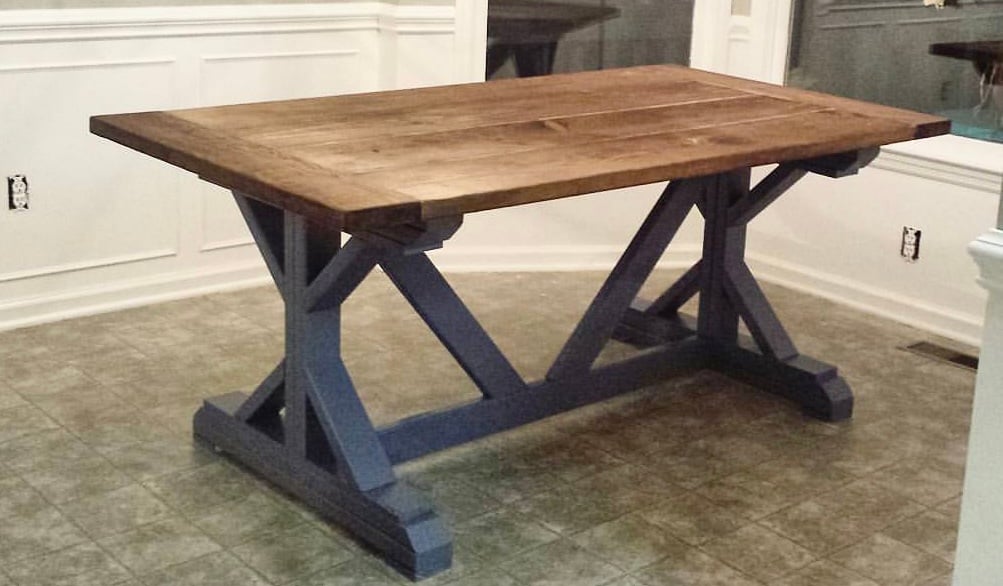
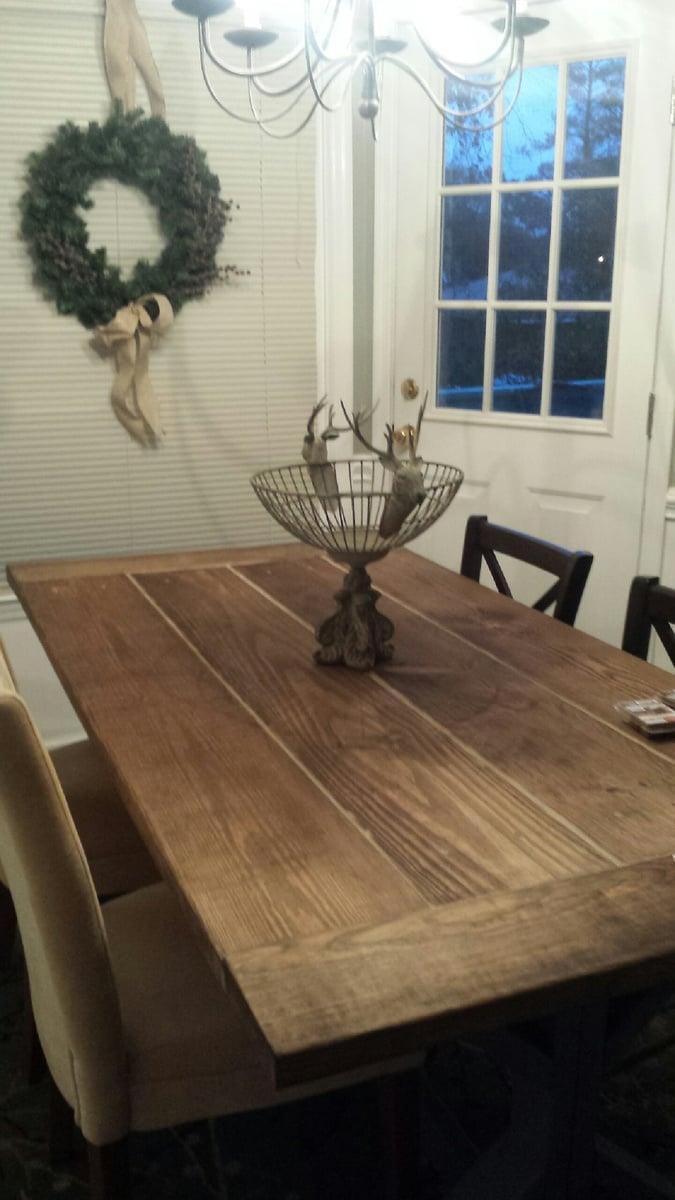
I modified this plan just a little on the ends, and I can not tell you how pleased I am with it! I did run into some issues with lining the boards up properly due to imperfections (and not laying the boards out ahead of time in the store because I was rushing at closing time), but in the end, I decided to add a wood filler in between the boards and everyone just raves over it. I could not imagine it having come out better. I would not do it any other way.
Thank you Ana!!
PS... I have a wonderful idea for a loft bed, but the plans are not provided. I know you would do it justice.. how do I submit the photo????
Tue, 07/30/2019 - 08:01
Jeff,
I do apologize for not having seen your comment! I will work on plans as soon as possible and let you know when they are available. Thank you! :)
Sat, 05/30/2020 - 07:34
I also liked this table but never found the plans for it. I did find a very similar table with plans at:
https://www.shanty-2-chic.com/2012/06/fancy-x-farmhouse-table.html
Looks like just the bottom of the legs are different...

I built a breakfast bar into an existing wall shared between our kitchen and living room. I built it on the taller side of average since I wanted to have room to install new electrical outlets above the counter on the kitchen side. After the project was done we went to buy bar stools to use with the new bar and found that even the "tall" stools were too short to work. Research into extra tall stools showed that what we needed was going to $400-600 each! Luckily my wife found these stools on your site and we were able to make three of them for around $115. Also, they are much sturdier than anything we looked at to buy.

Mon, 01/28/2013 - 20:40
I really like the crisp black and white. Looks great!

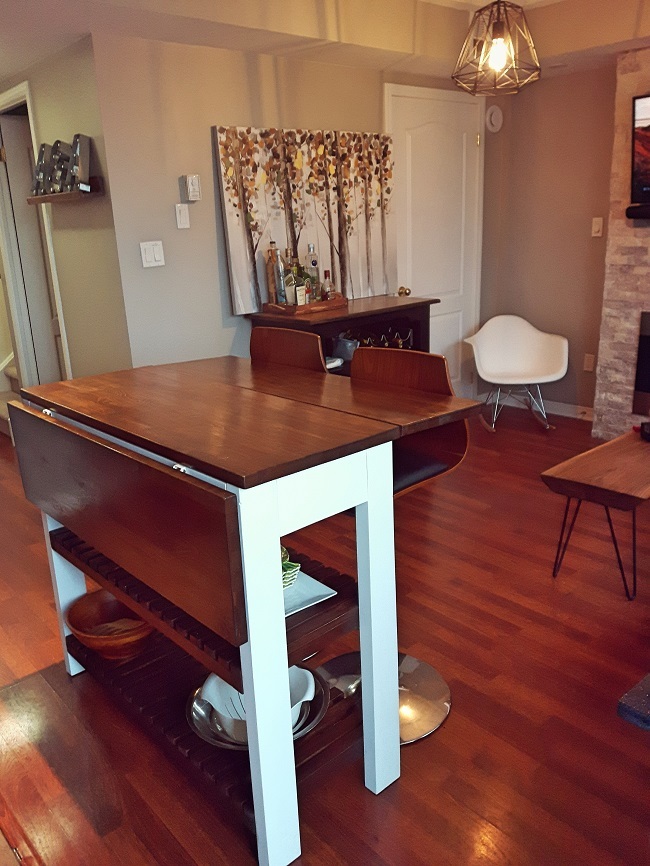
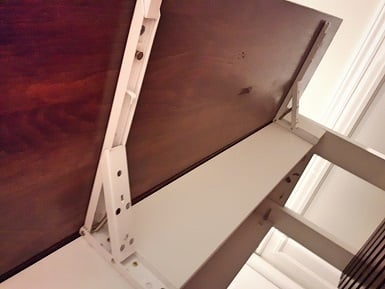
When I recently moved into a space with a kitchen and living room attached, I quickly realized that I wouldn't have room for a full size dinner table. I had seen extendable kitchen tables but none fit the bill, I was looking for something more compact. I also liked the idea of a bar / island with storage underneath, and I had noticed some had a drop leaf on 1 side which would be useful – but why not have 2 leafs for more dining space? When I decided to build my own table to fit these requirements it was difficult to find any plans out there, especially with drop leafs. Through lots of experimenting and research I finally built what I had envisioned: a kitchen island / bar with cart storage and two folding table leafs which expand to about 31/2 feet squared of eating / drinking area. I went through this trial and error process so you don’t have to, find more pictures and instructions here: http://bacheloronabudget.com/diy-drop-leaf-kitchen-island-cart/
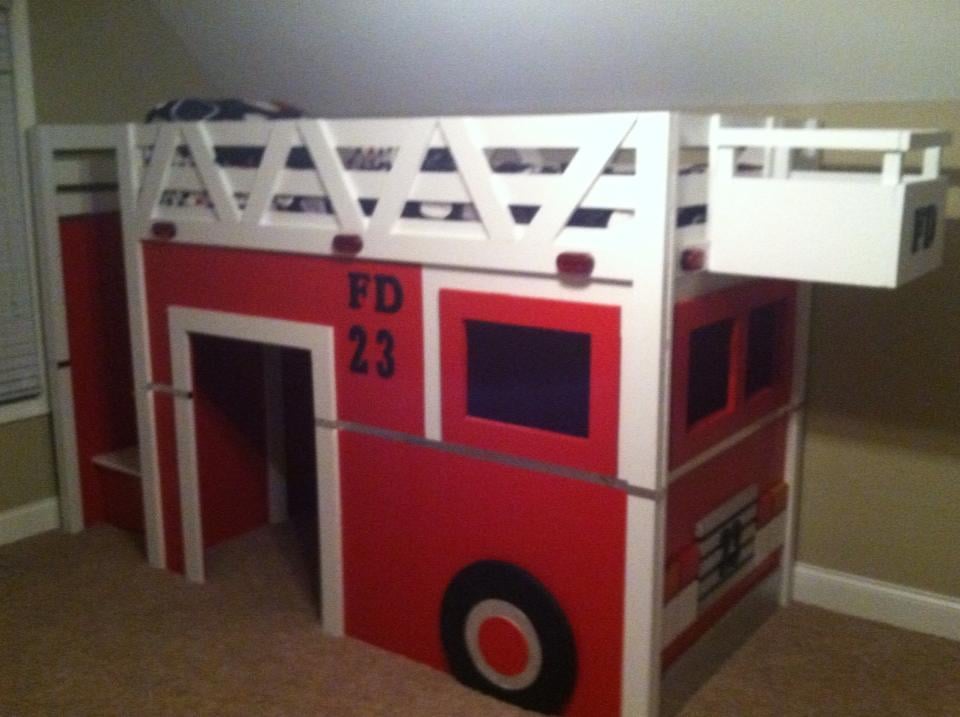
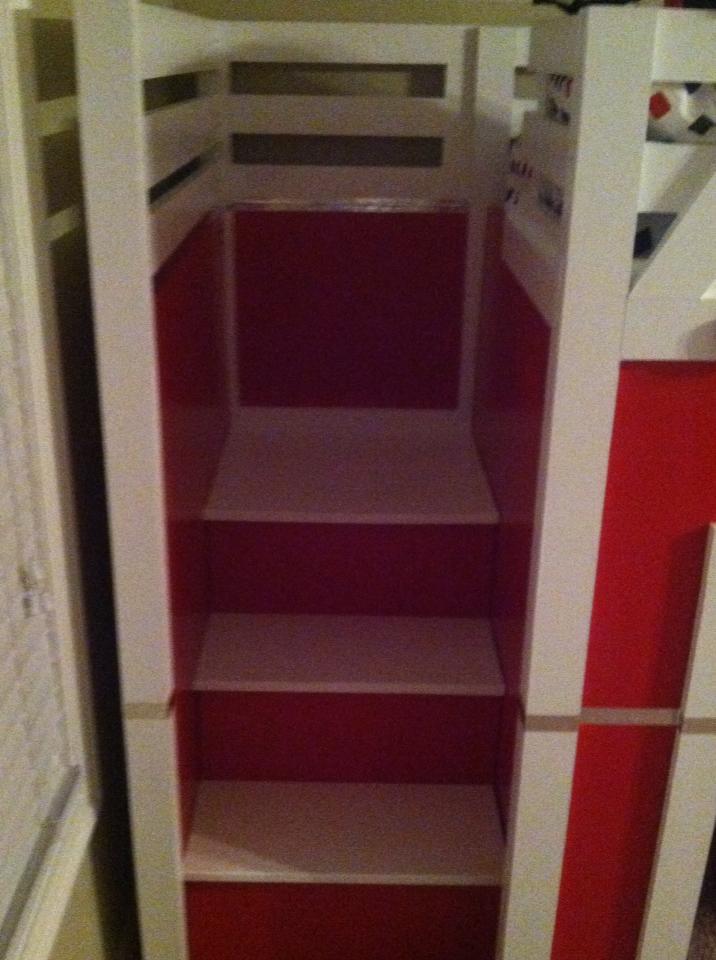
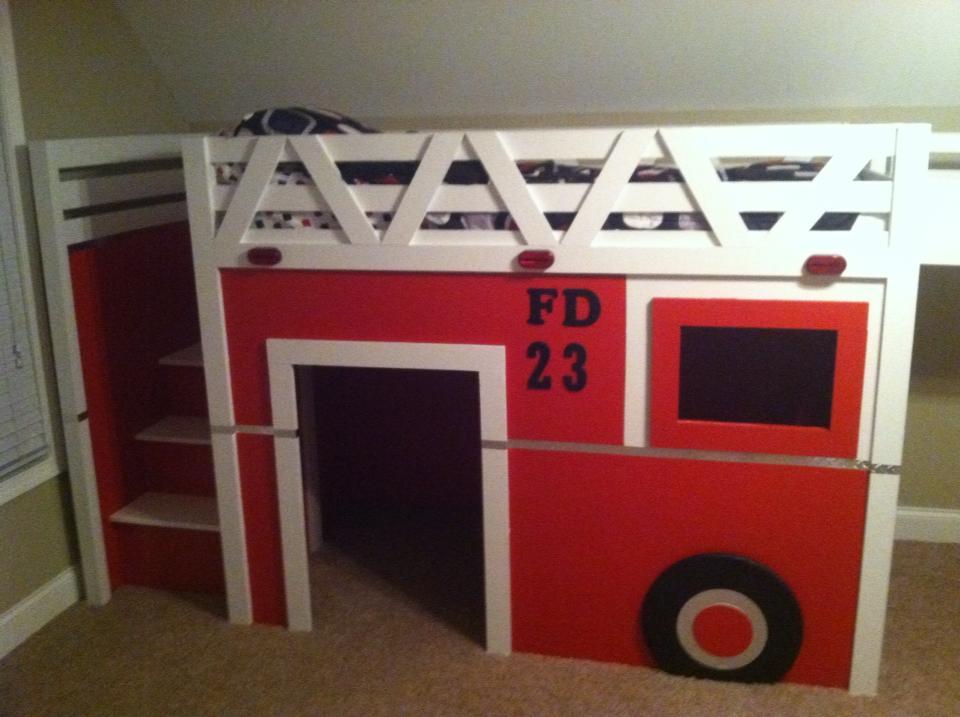
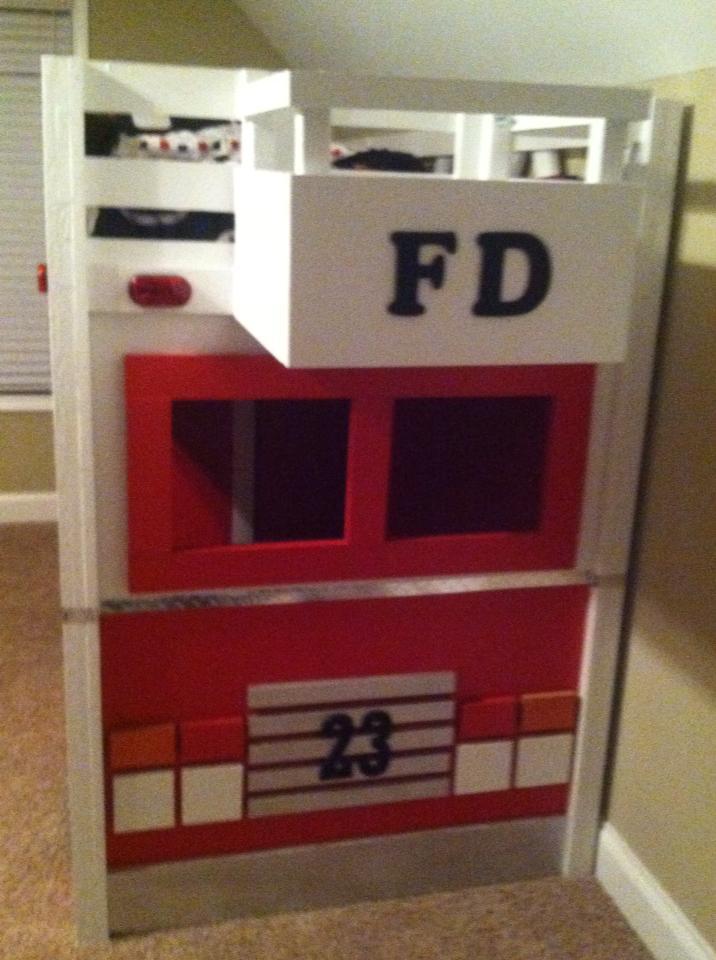
I have always been interested in some kind of projects and just to see what I can do with my hands. I am a father of 3 and hardly have the time to sit down must less pull off a huge project but I set aside some time and worked on this late at night after the kiddos went to bed. I came across this site when my wife was on pintrest one night and have been hooked ever since. I was at work one day and saw all these different projects that I wanted to do and that's when I ran across this bed and I could not wait to start working on it. I called my wife and sent pictures of the plans and said meet me at Lowes we got a project to work on lol. I had a blast working on this and yes I did run into a few problems here and there but overall it came out great. When I went in I originally was going to follow plans to a T but decided that I would make changes here and there as I went. Due to height contstrictions in my son's room I lowered the overall height by two inches which worked out perfect. I did build the steps but I also made the back where it would come apart for east movement. I only used actual pine boards on the steps and the rest is 3/4" MDF board. I ripped everything on a table saw to exact width and length and drilled all my holes with a Kreg Jig. Alot of people are afraid to use MDF but believe me I could shake that bed as hard as I can and it doesn't even budge one bit. It is heavy duty built for a monkey child like I have. The project overall took around 30 hours from start to finish. My only suggestion would be to paint every step of the way instead of waiting to paint until the end like I did. If you have any questions about the build feel free to ask and I will help out the best I can. Thanks Ana for the plans and thanks to atouchofarkansas for the original inspiration for you guys have gave my son years worth of enjoyment. Can't wait for the next project to start.

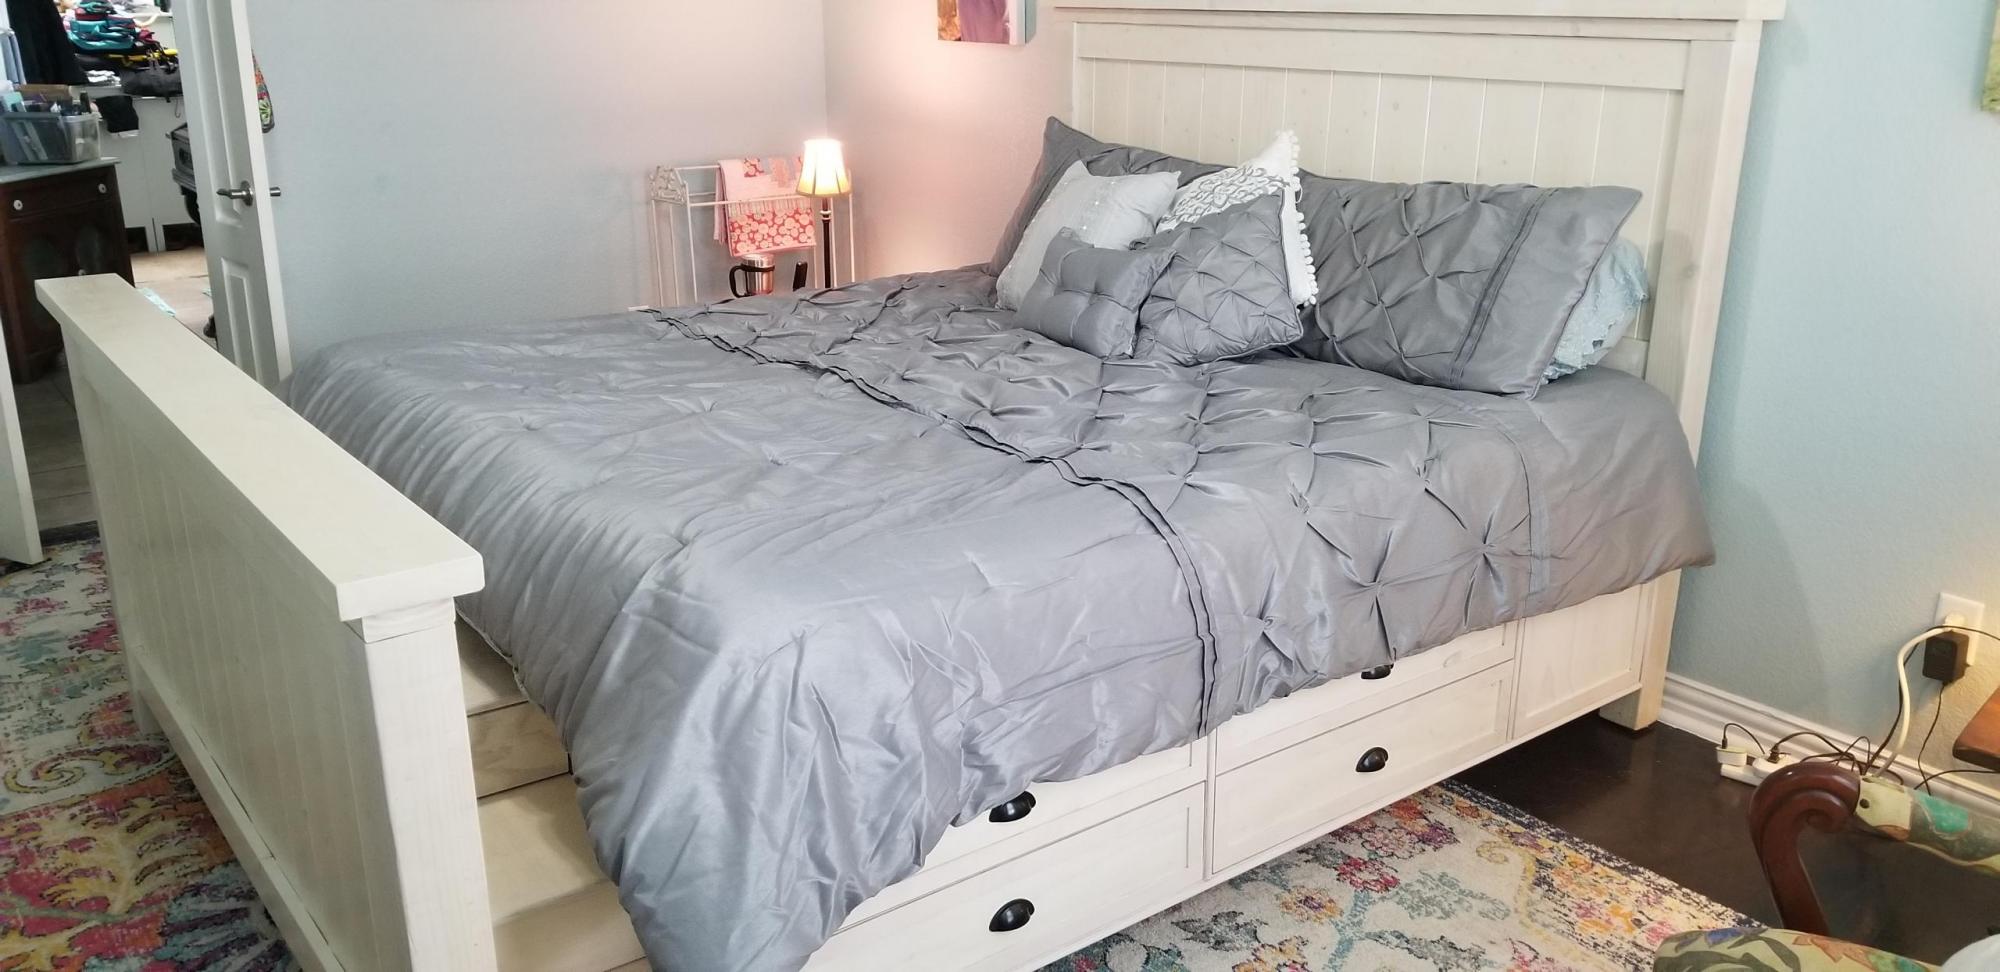
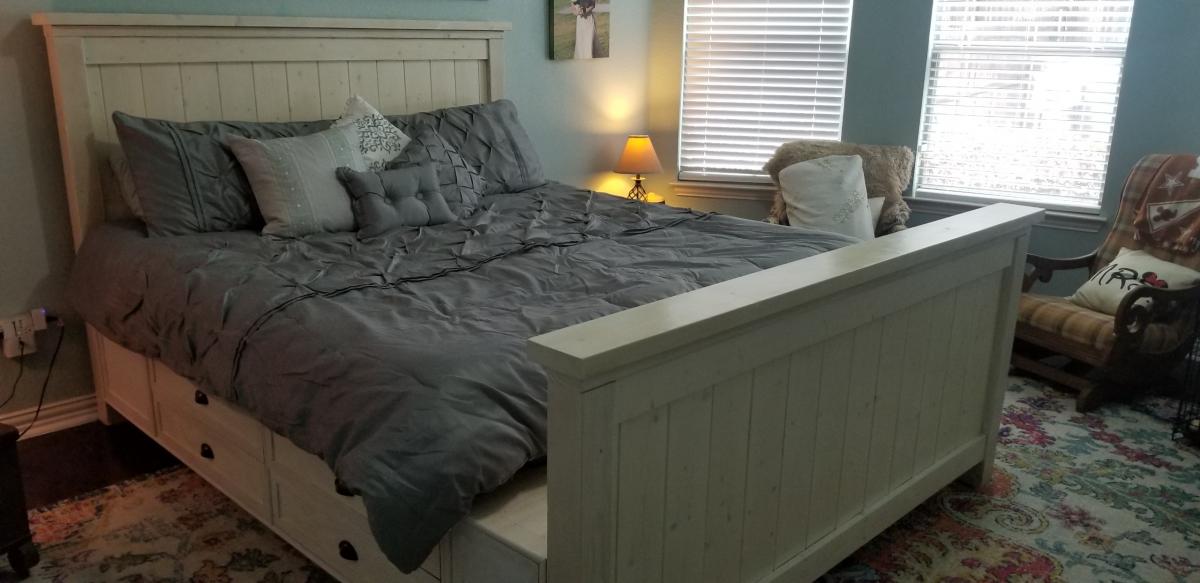
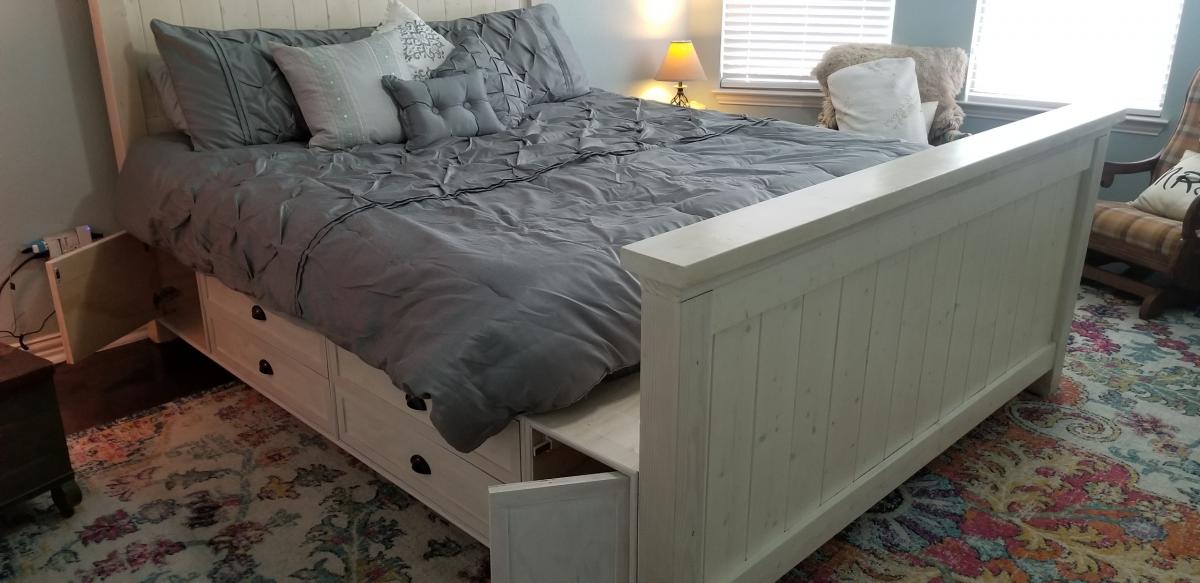
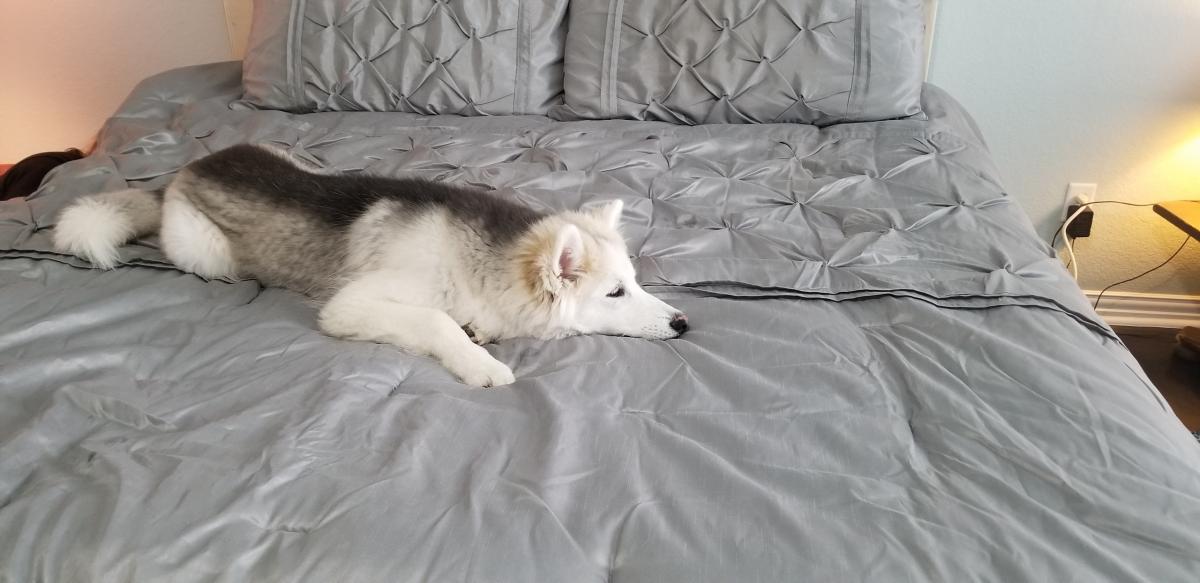
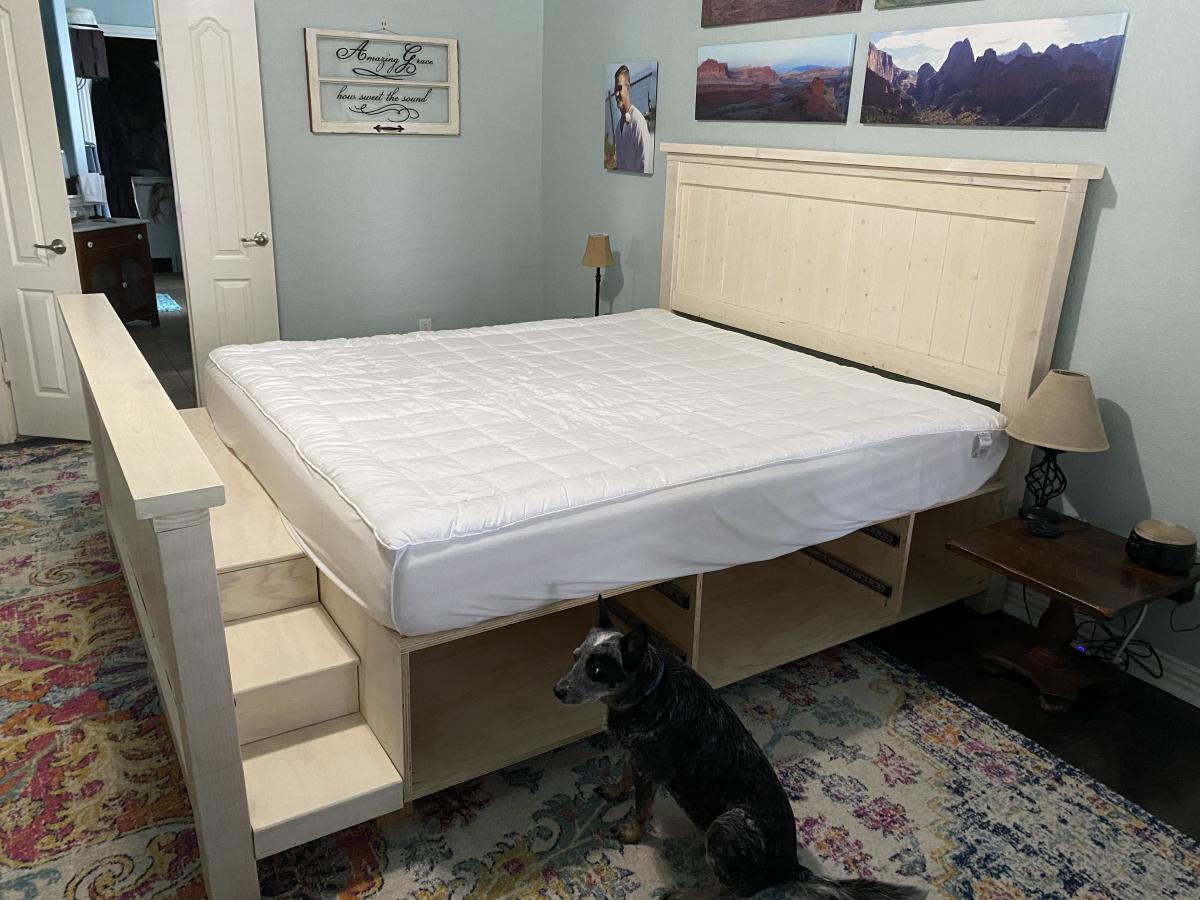
We have a frosty faced blind girl and an aging tri-pawed that we wanted to be able to continue snuggling with us so we adapted the Farmhouse Bed with Storage to make it a king size. We made the drawer boxes deeper which allowed us to get rid of our dresser to create more space in our room. And we added a flight of stairs for the pups.

Fri, 12/30/2022 - 07:53
This is exactly what I’m looking for! Perfect for our dogs. Although, I wonder if a ramp would work or if it would be too steep? Hmmm

I followed the instructions at 517 creations to make this: http://517creations.blogspot.com/2011/04/ruler-growth-chart-pottery-bar…. It was relatively quick and easy project that I made to chart my daughter's growth on her second birthday (and our little ones' future birthdays). I printed the numbers off my computer, made an indent with ball point-pen and then traced with a paint marker. It took a little patience and concentration, but I drew the lines and numbers without barely making a smudge.

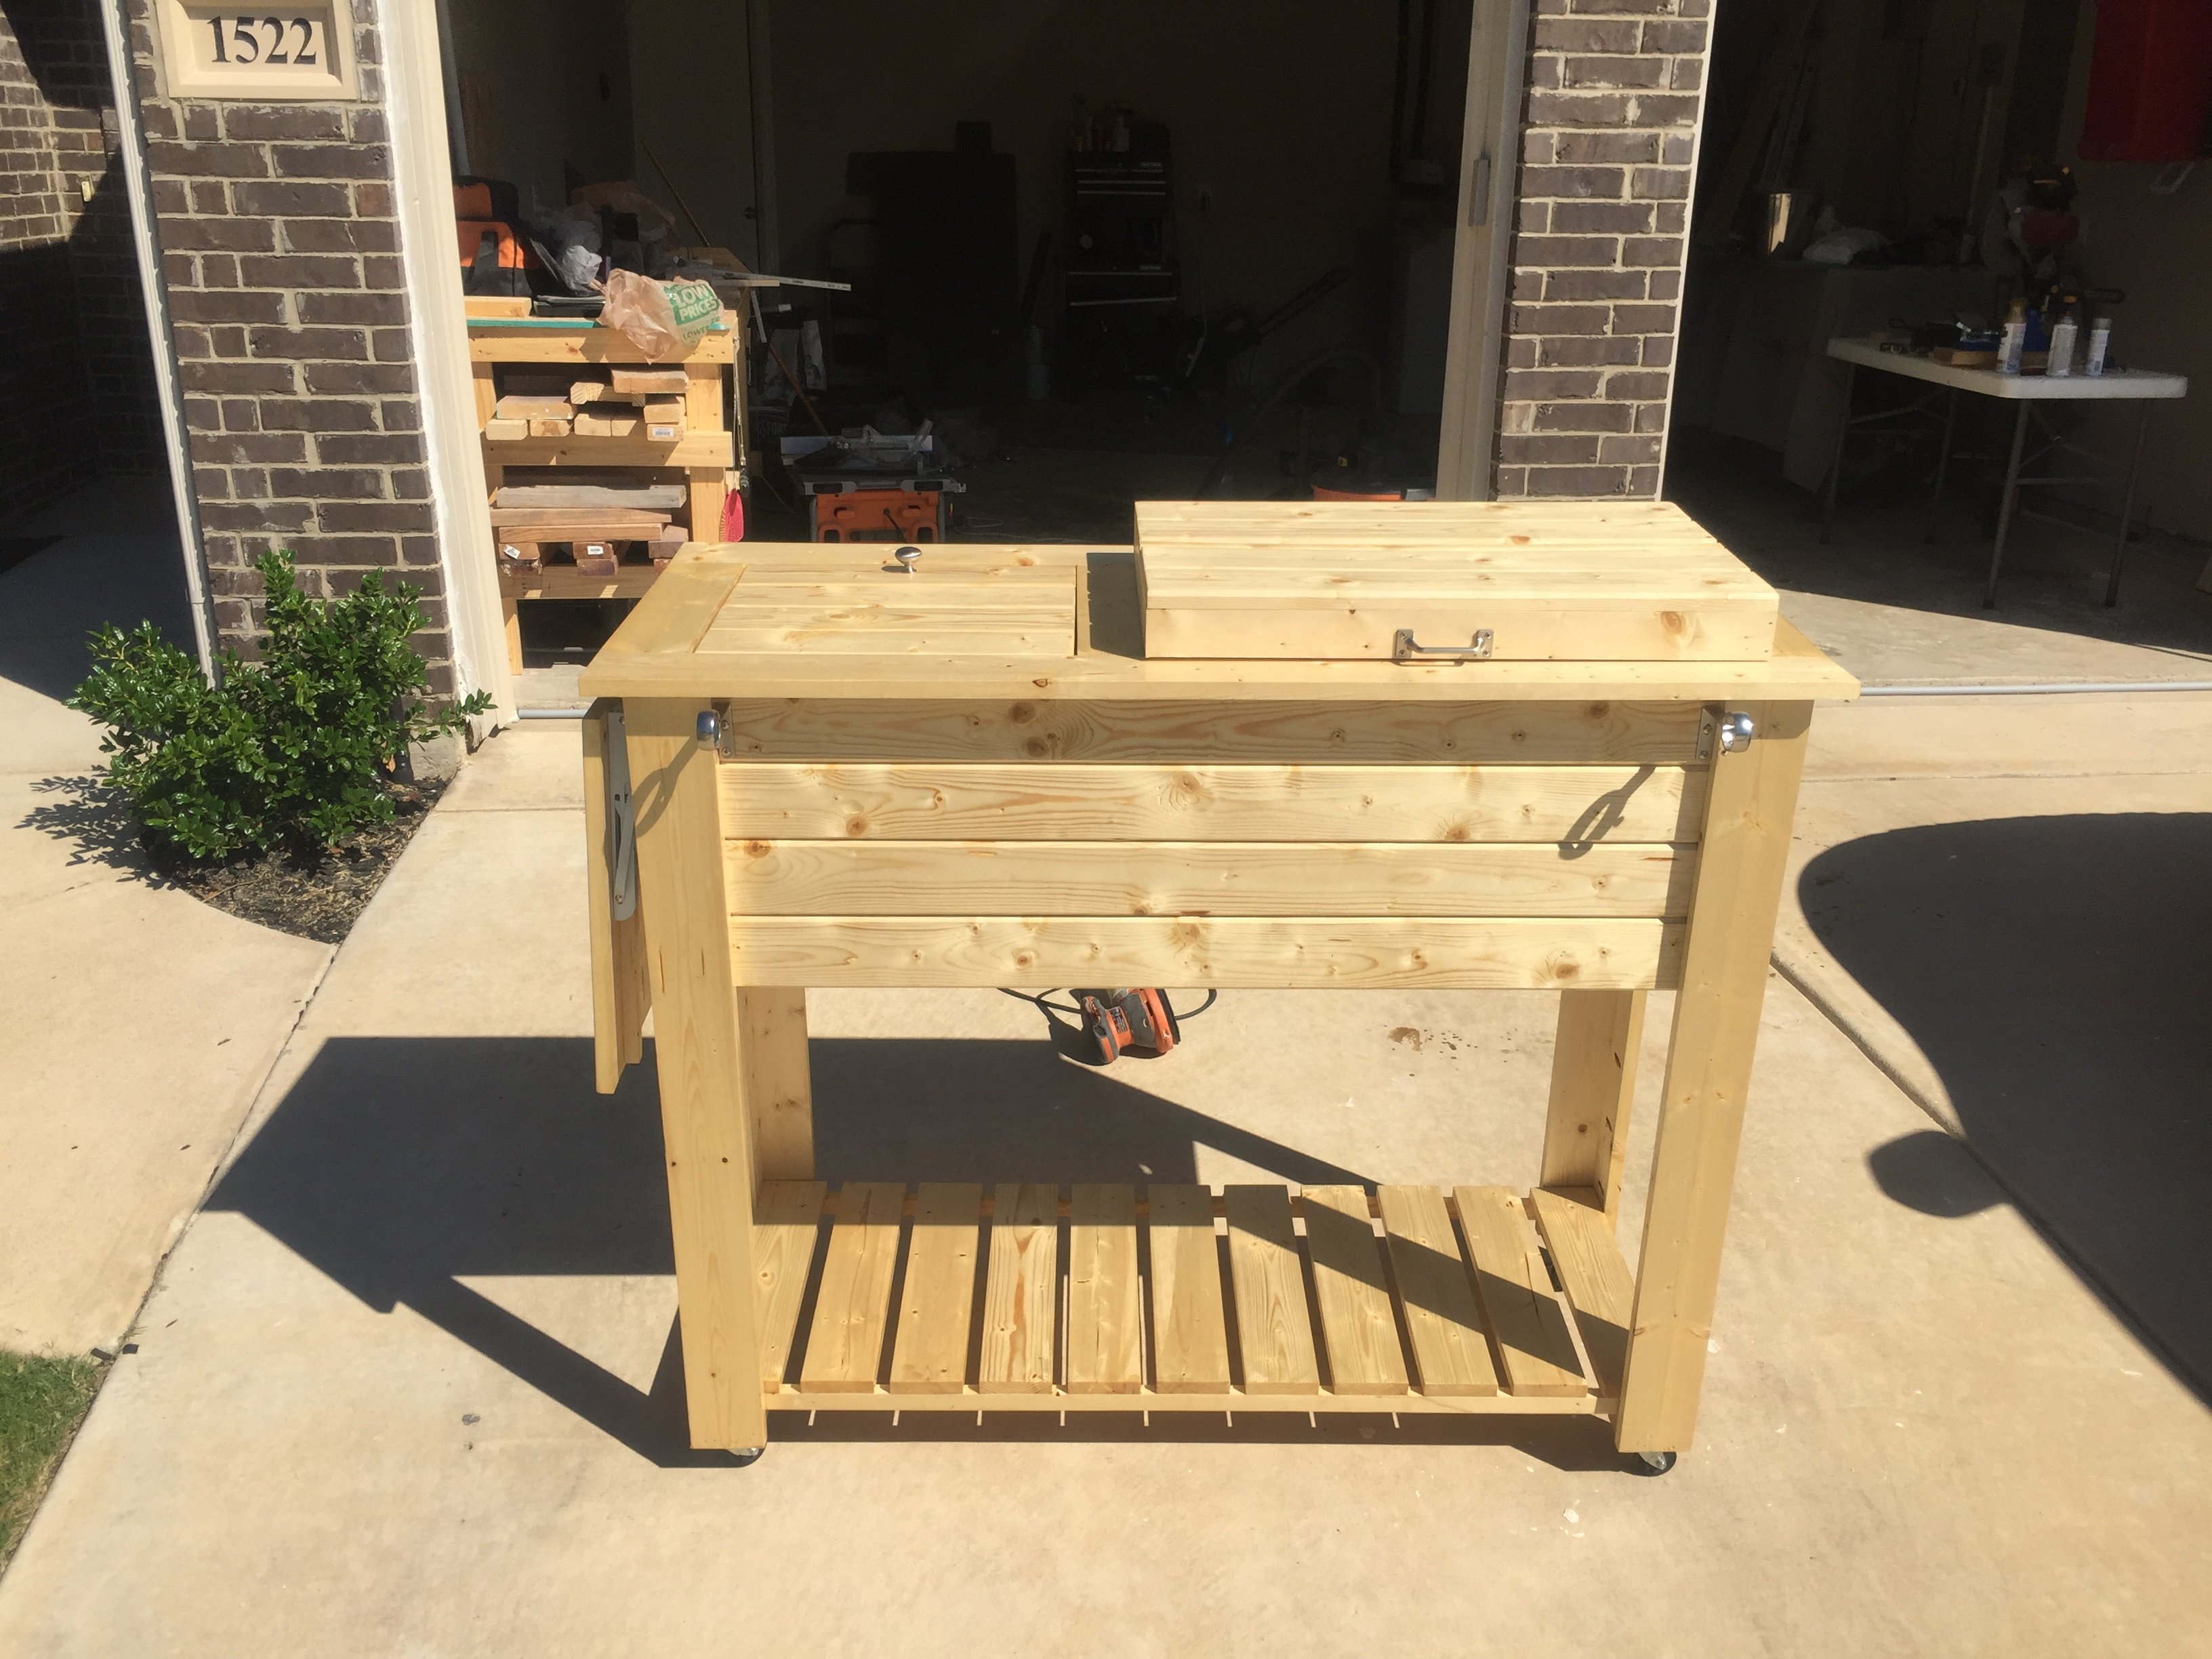
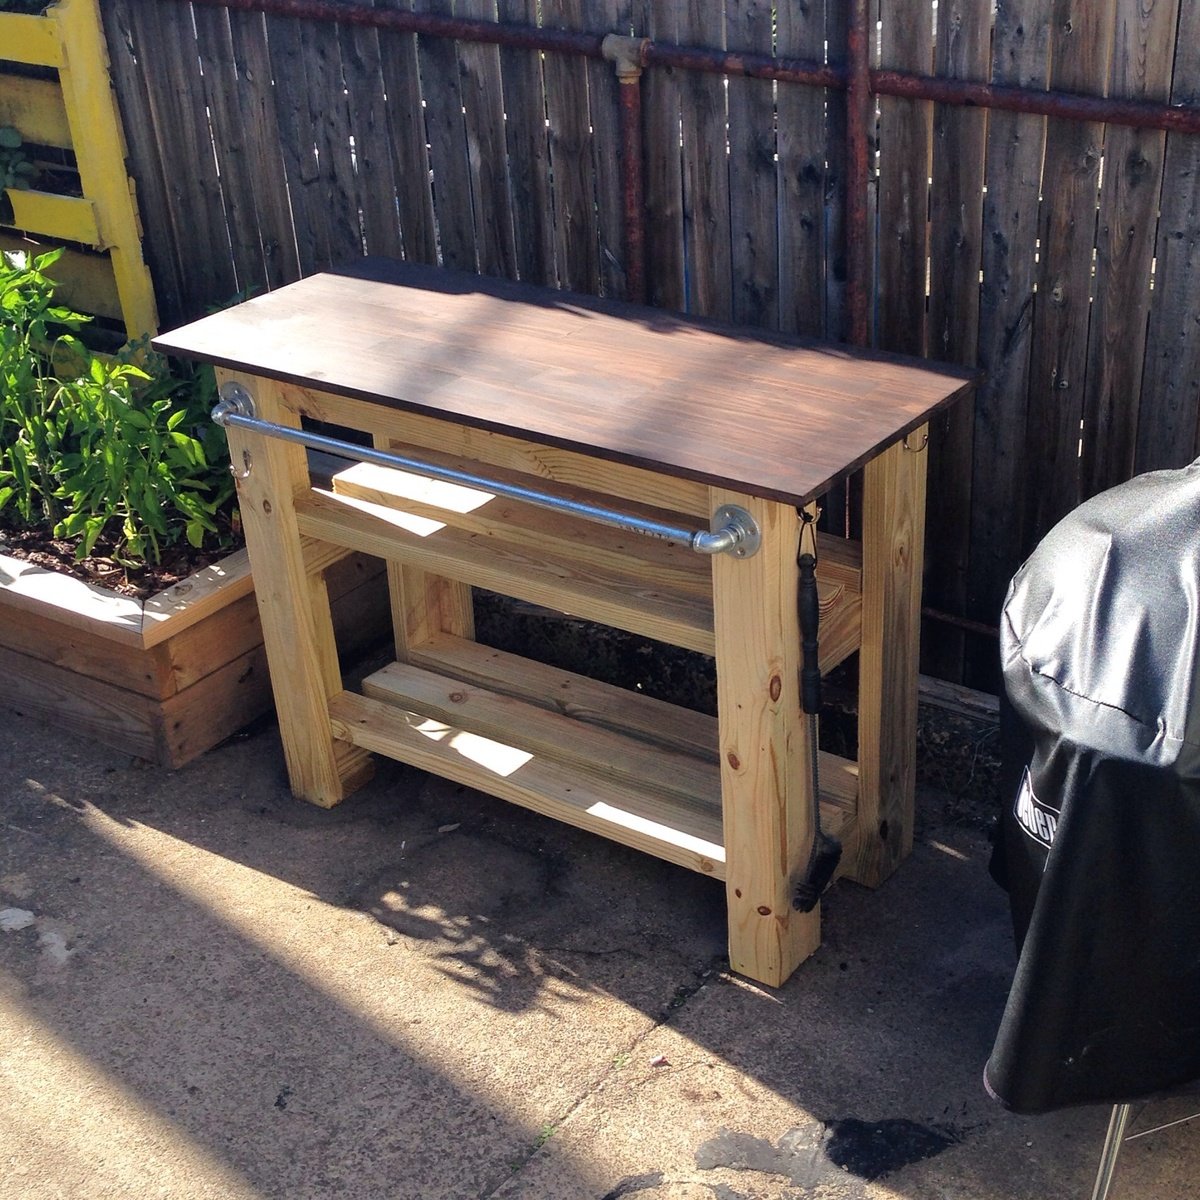
Great project! I'm new to wood working and have been looking for simple but challenging builds. Needless to say this fit the bill... This grill cart was a great starter build and ultimately became a Father's Day gift! My Pops loved it!
I did add a couple of custom pieces: a foldable table top extension and towel bar... things Dad will undoubtedly need as he's an outdoorsman who loves to BBQ!
Thanks for the idea/design plans!


We bought a vacation home that has such a small kitchen. I knew we needed more storage. So I checked out Ana's plans and made this bad boy based on the Simplest Armoire plans.
The home is in the mountain/lakes area of northern New Hampshire, so I wanted to bring the outside colors in. I used Valspar Cabin Red paint and the Valspar Antiquing glaze over the top after distressing it a bit.


I built a ton of these as Christmas gifts and they were a huge hit! I used 2x3's and made them in different heights. Thanks, Ana!
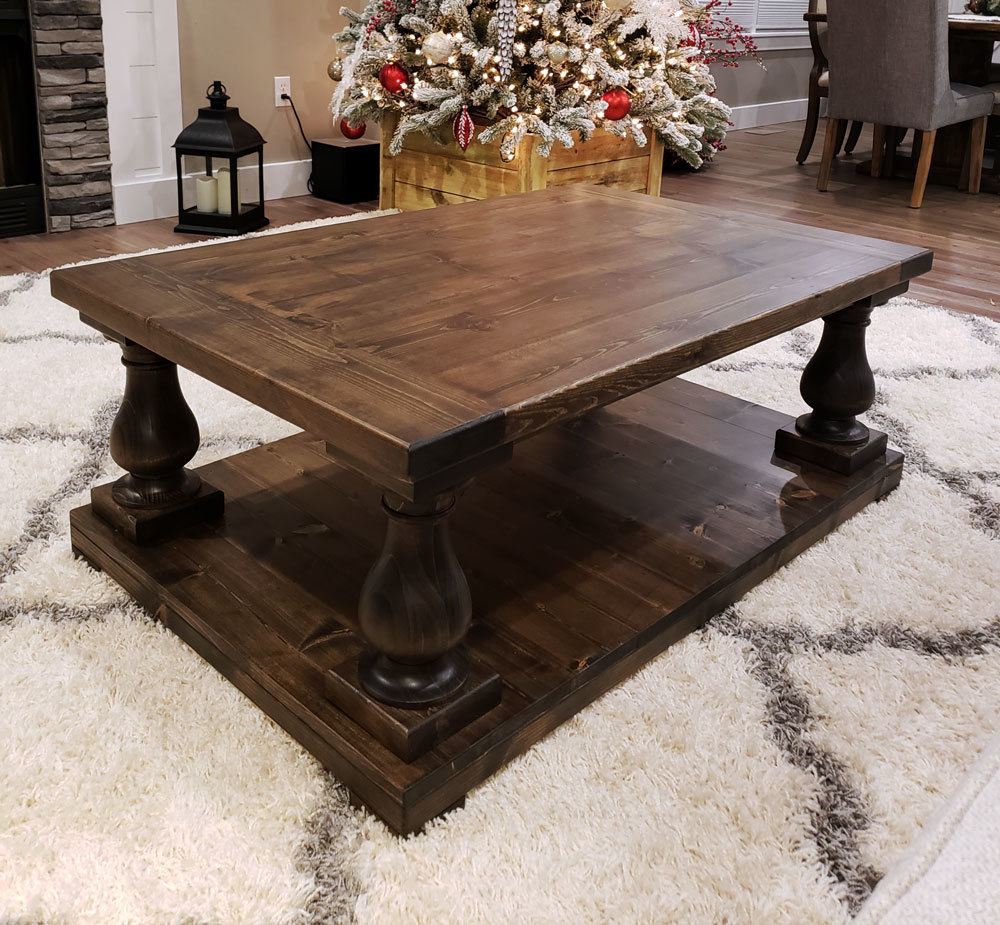
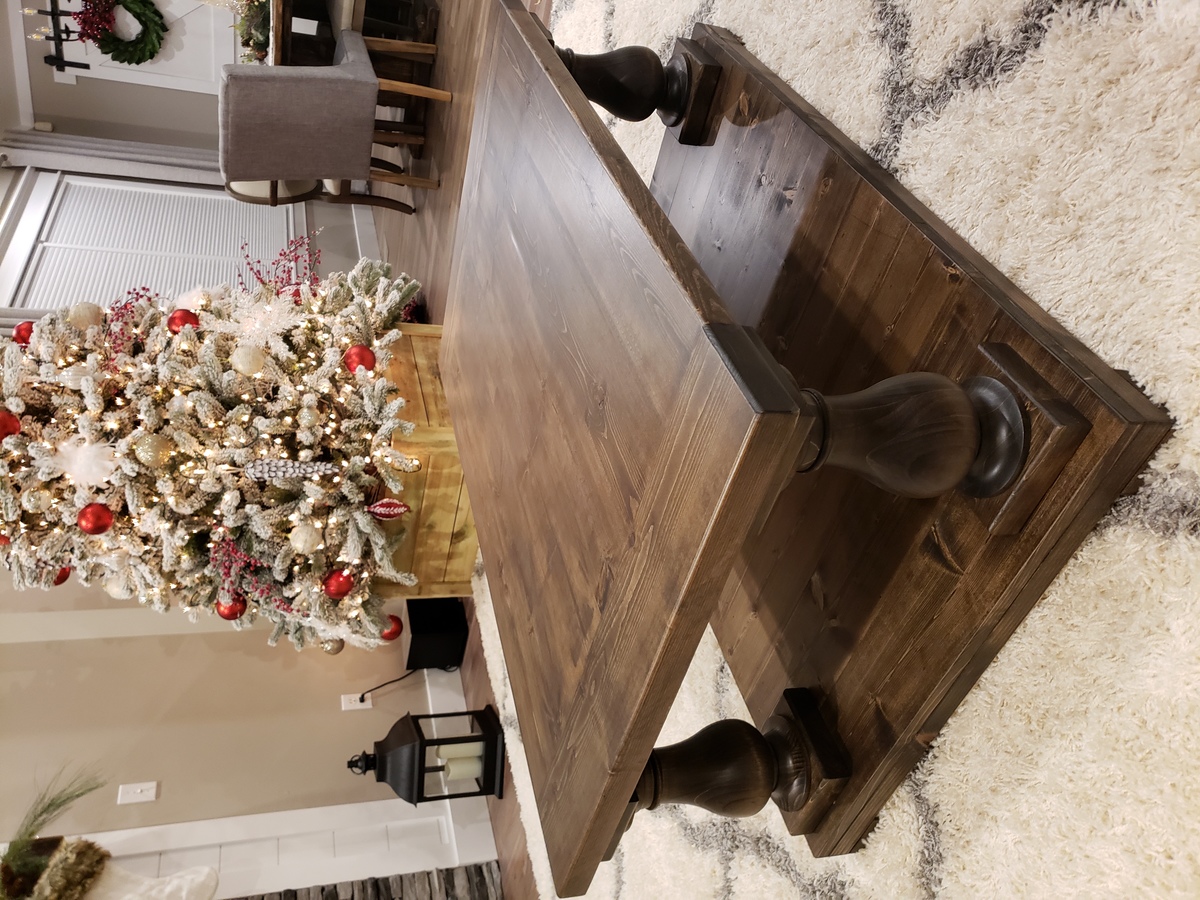
My husband made this for me for Christmas. He changed the size a bit but overall stuck to the plans. He used Jacobean stain by Varathane and 3 coats of matte poly by Varathane as well. He used an HVLP sprayer to apply the poly and I think that made a huge difference in the smoothness.
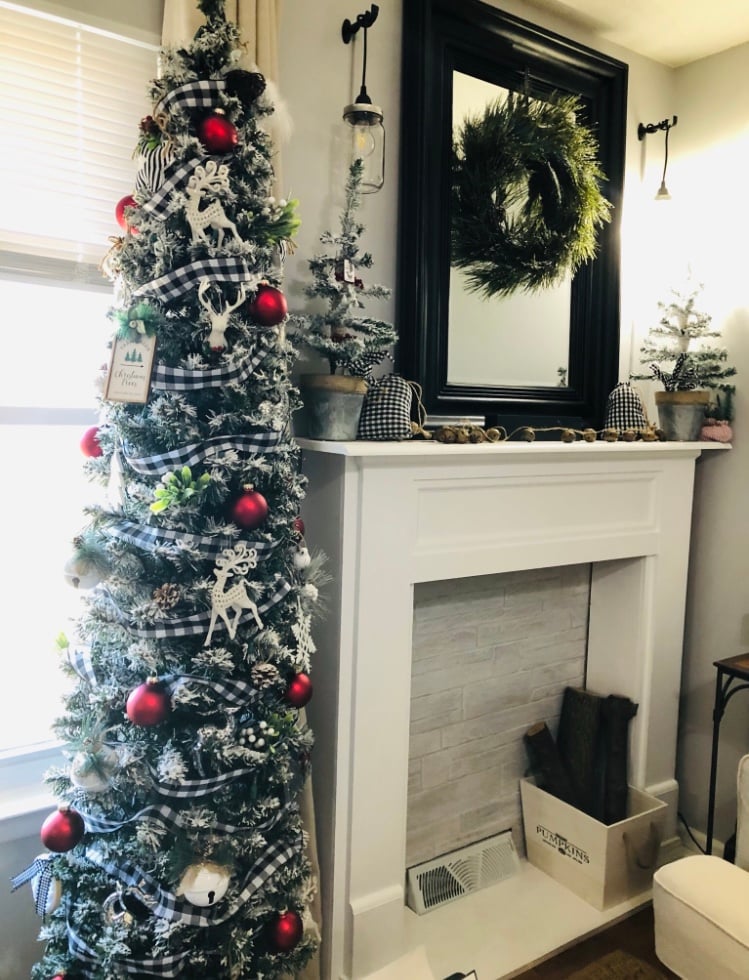
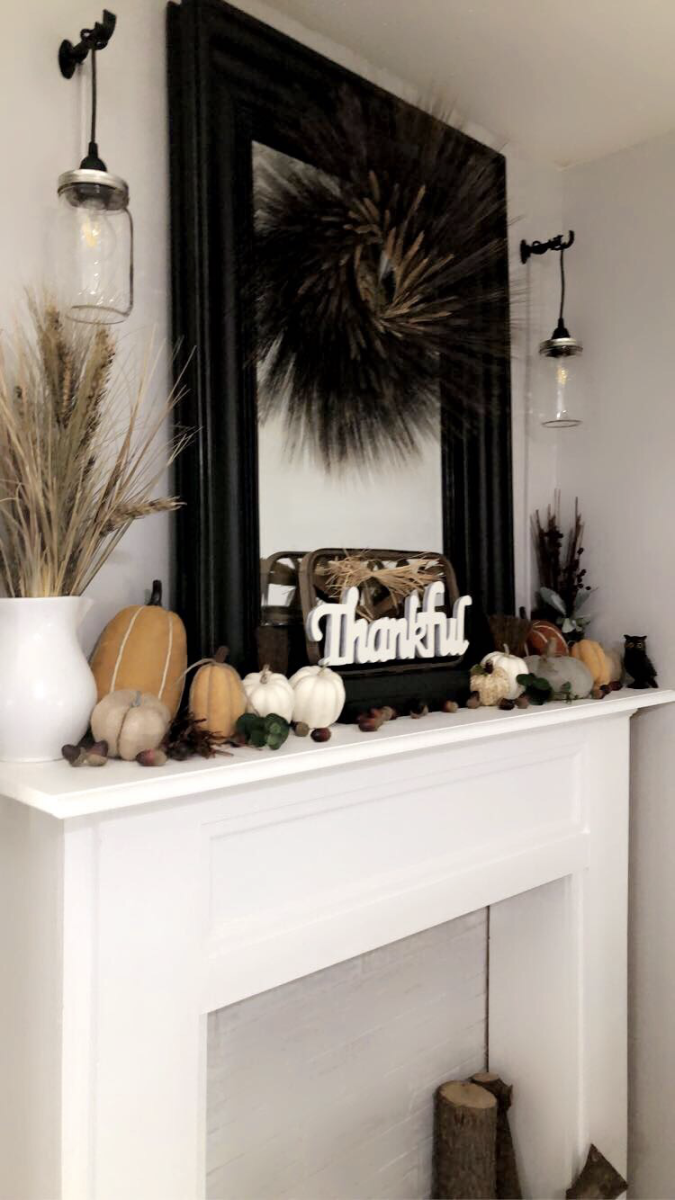
Small space faux fireplace. Thank you for the plans for the faux fireplace. Easy to make and has been used for every holiday.
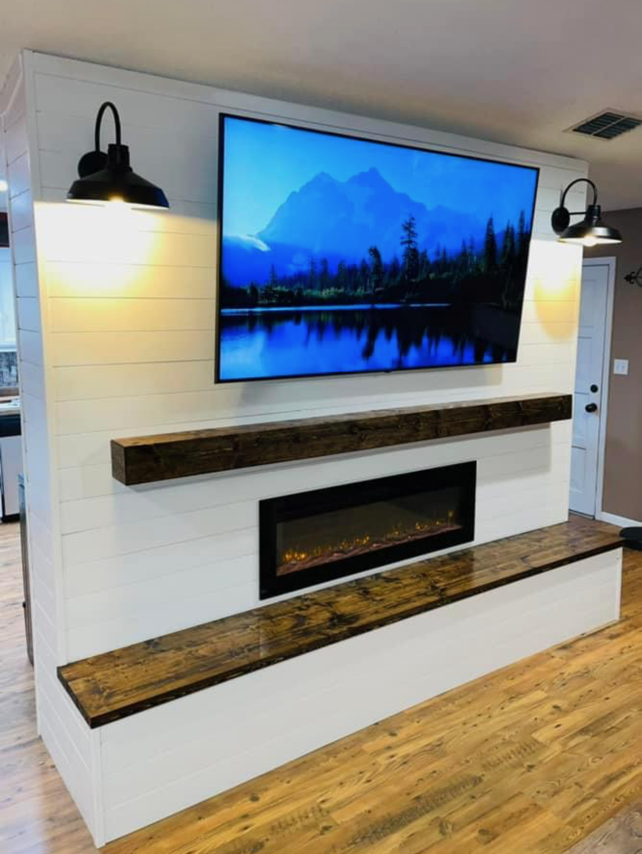
Here is my version of the shiplap fireplace wall finished up!
Shared by Cass Griffin
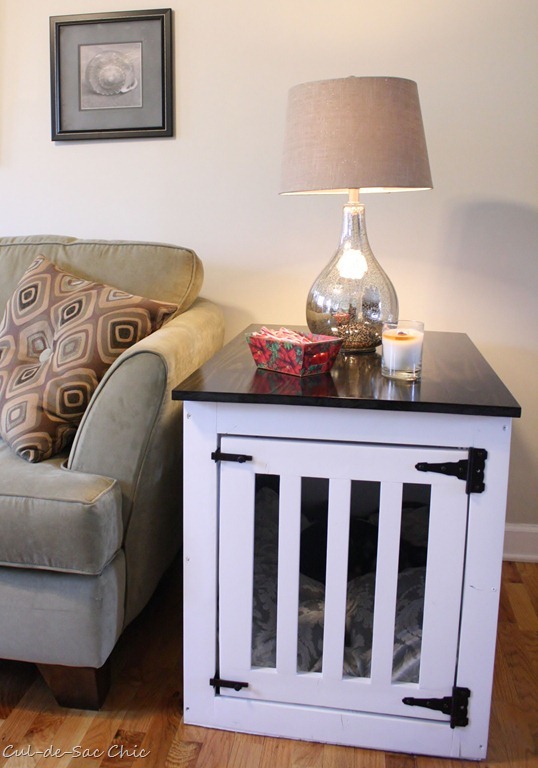
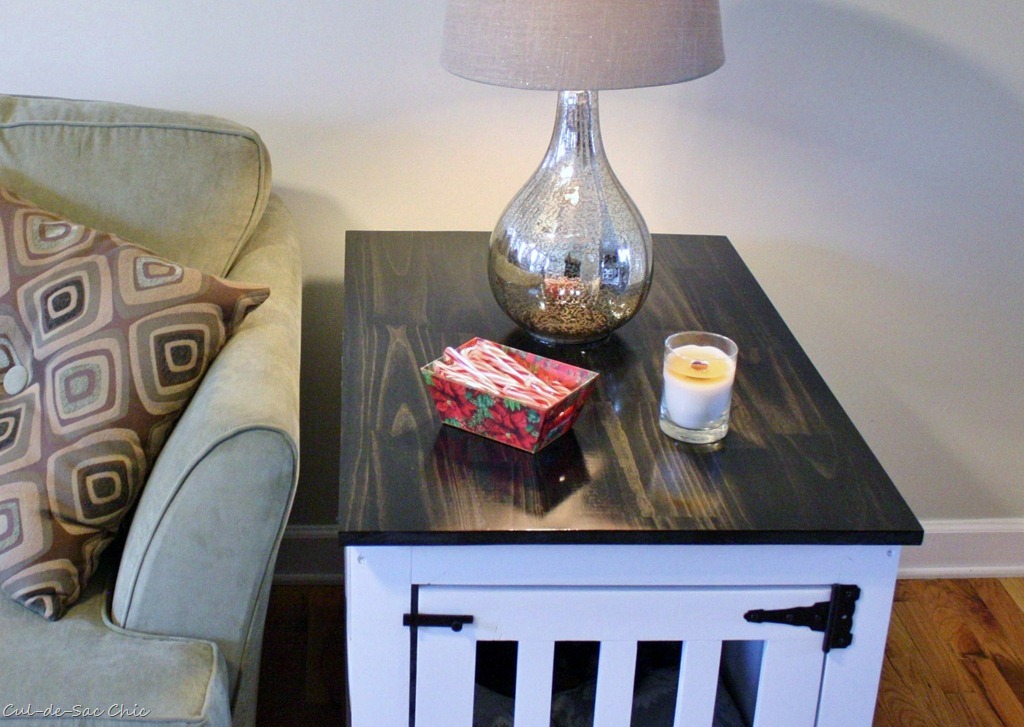
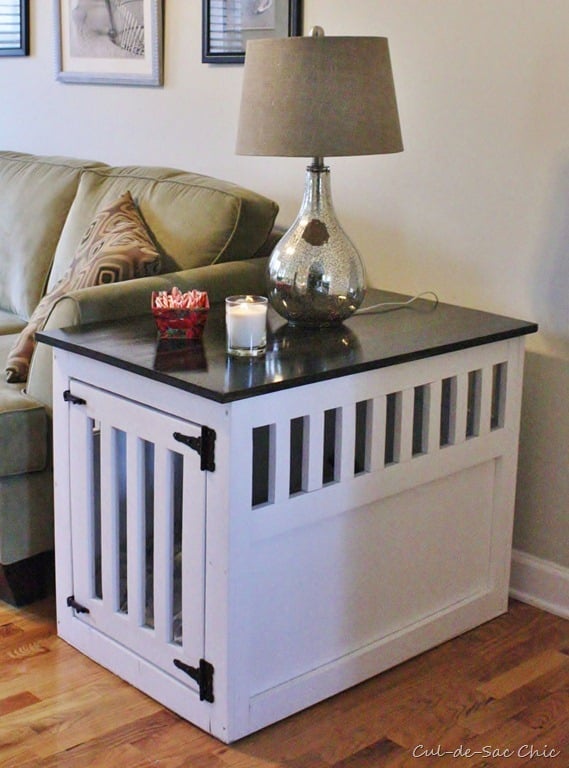
I love this project. My dogs Goldie and Chloe love their new house. They are sisters who just have to sleep with each other. They had their own metal crates but when Chloe was a puppy she would always go in with Goldie and they would snuggle. It was a tight fit for them as Chloe got older but they still had to snuggle. Now they are in heaven with their new bedding and house.
Thu, 02/09/2012 - 09:42
This is beautiful! Trying to convince my husband that we should do this so I can get that grey plastic dog crate out of our living room. Maybe this will show him how much better it would be to build one.

In reply to Plans by Guest (not verified)
Wed, 02/22/2012 - 16:34
Click above where it says "From plans" - that is a link.
Thu, 07/03/2014 - 12:43
Your post inspired me to pursue this project with some left over walnut and it turned out great! I think my post is on page 10 if you're curious. Thanks.
Thu, 07/31/2014 - 03:41
I'm going to try to make mine larger as my fur baby is Grt Dane/Lab mix & needs a bit more room. My idea is to put it at end of my king size bed like you would a cedar chest/hope chest. Wish me luck!
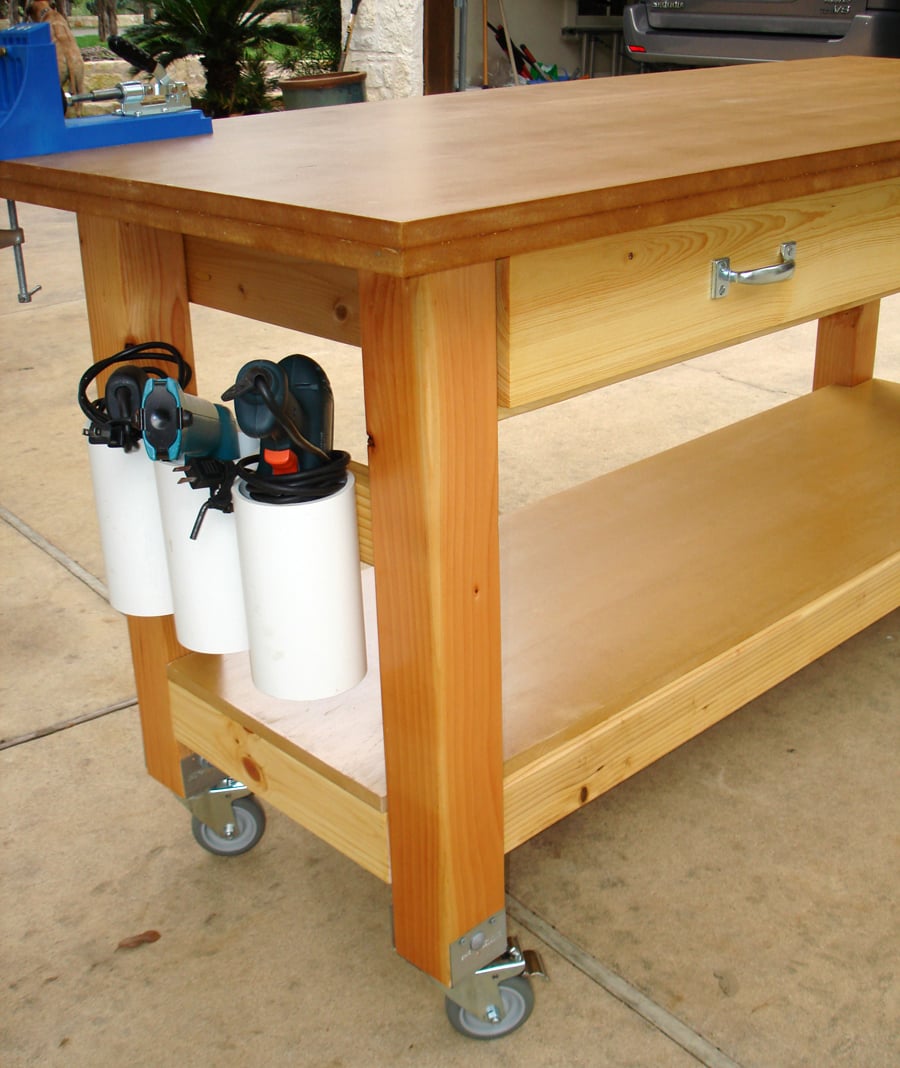
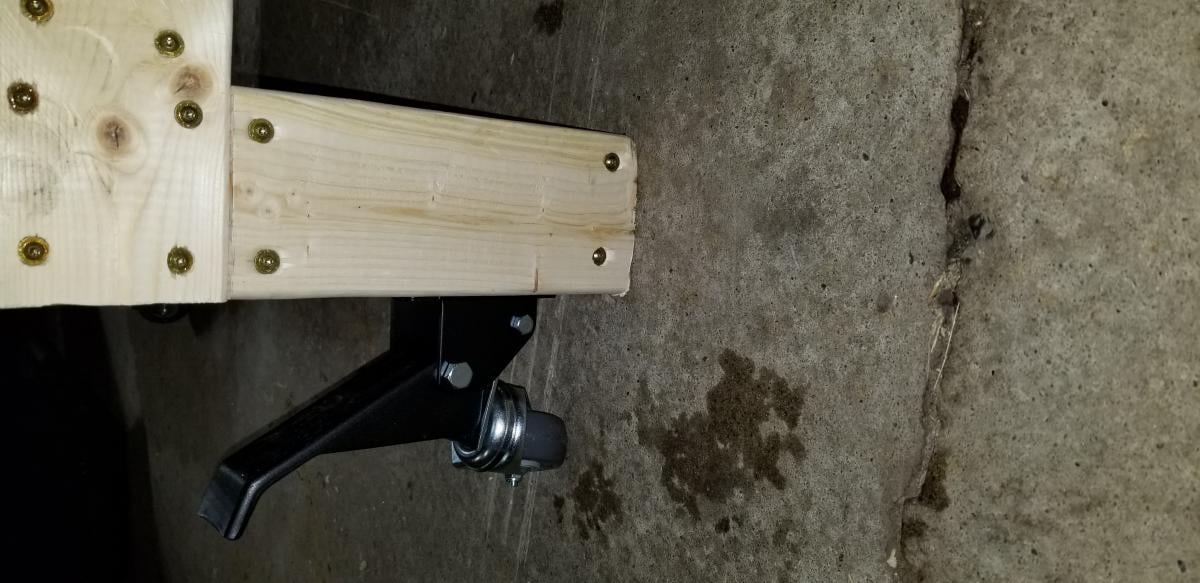
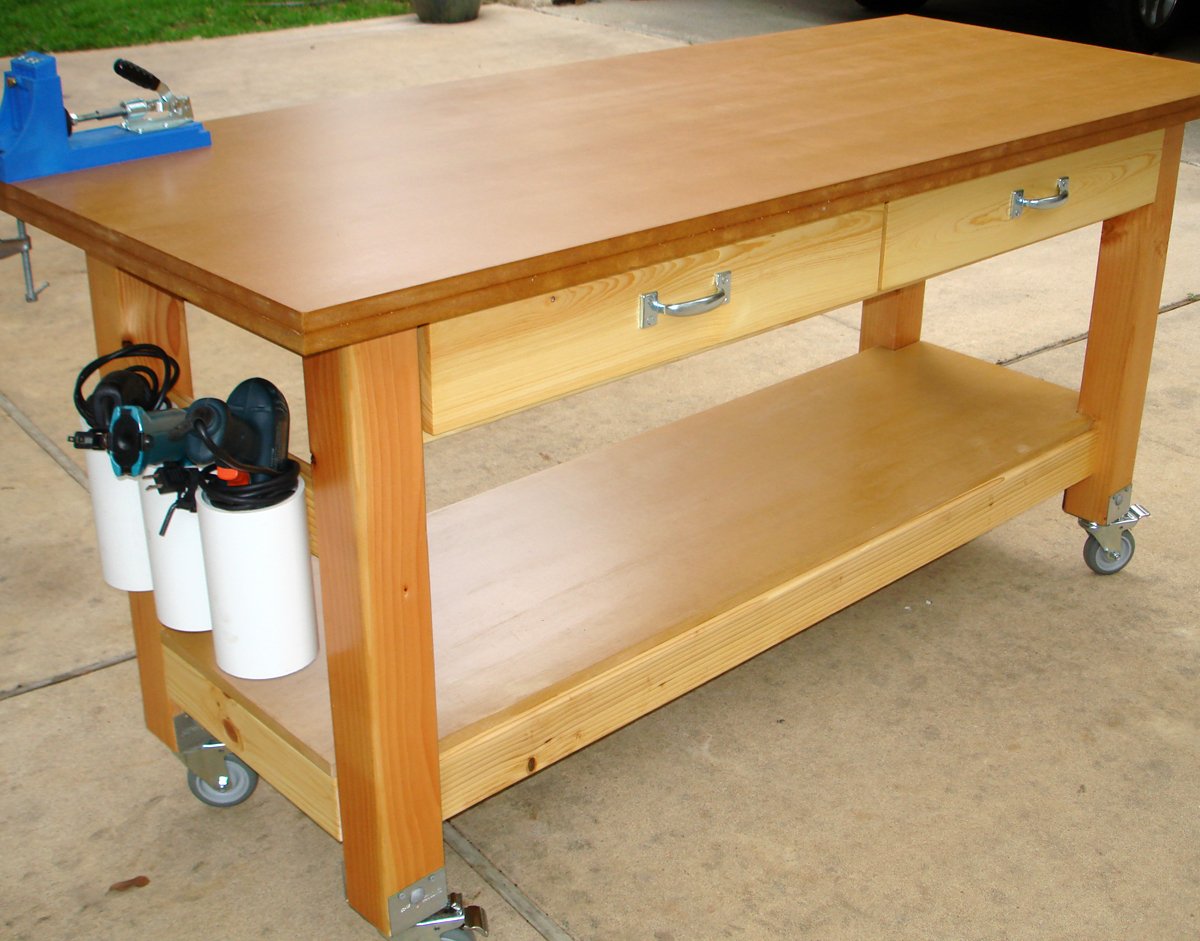
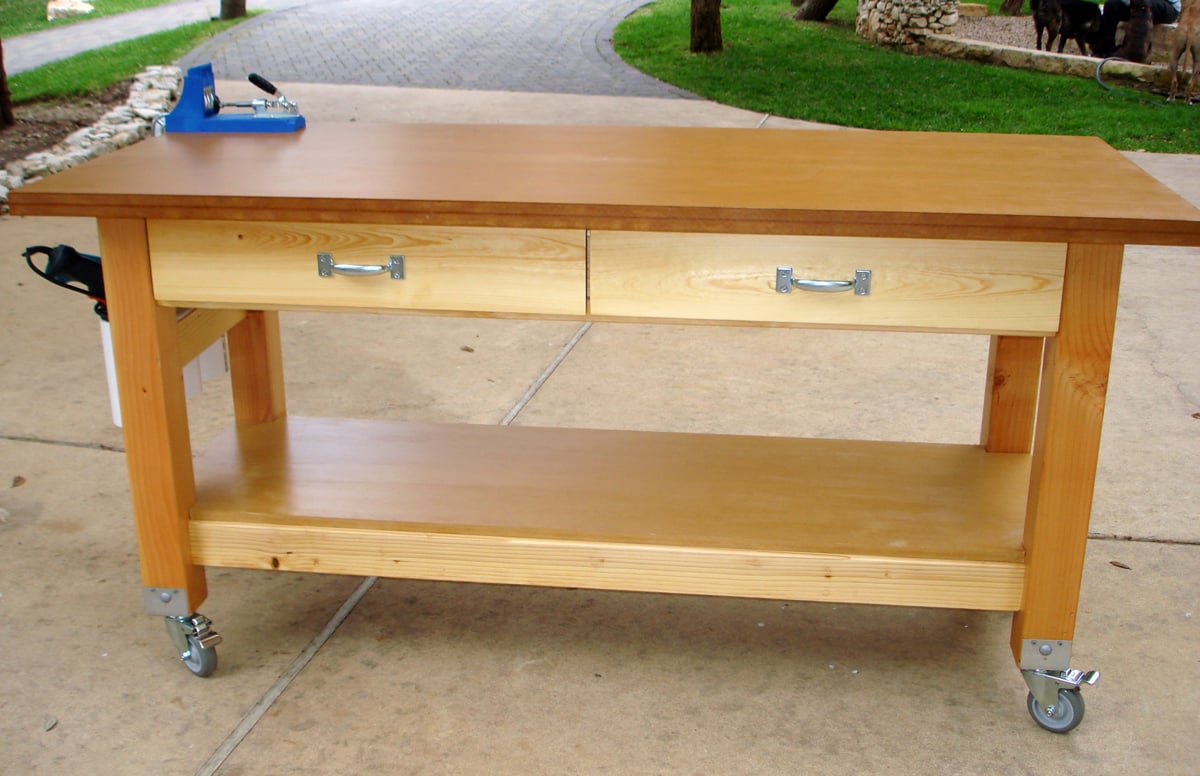
Given that I work out of my garage, I desperately needed a rolling workbench in order to roll out, make the sawdust mess, and roll back in. I had already made Michaela's island for another purpose inside my house, and I loved the sturdiness of the 4x4 posts as legs. I had industrial-type locking castors, but they only screwed in with a threaded post. Thanks to my engineer dad, he determined the best way to attach a screw-in castor to the bottom of the 4x4 (and did all that work for me!).
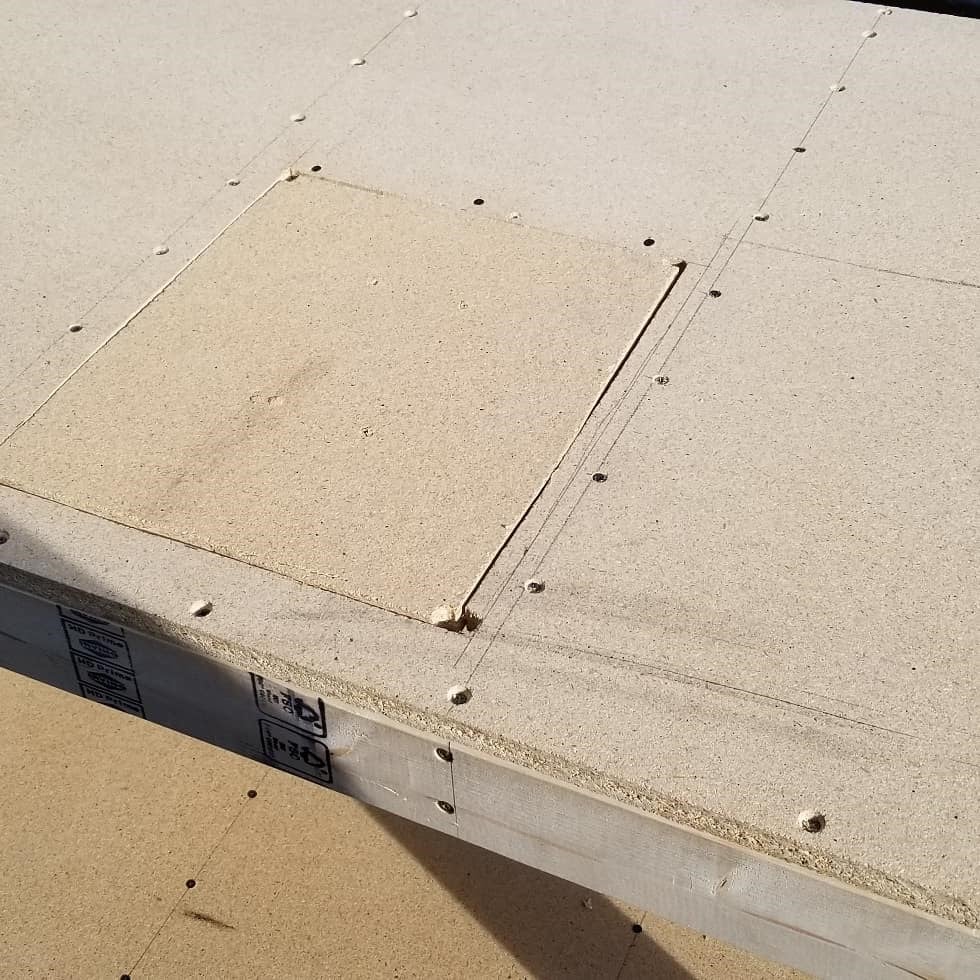
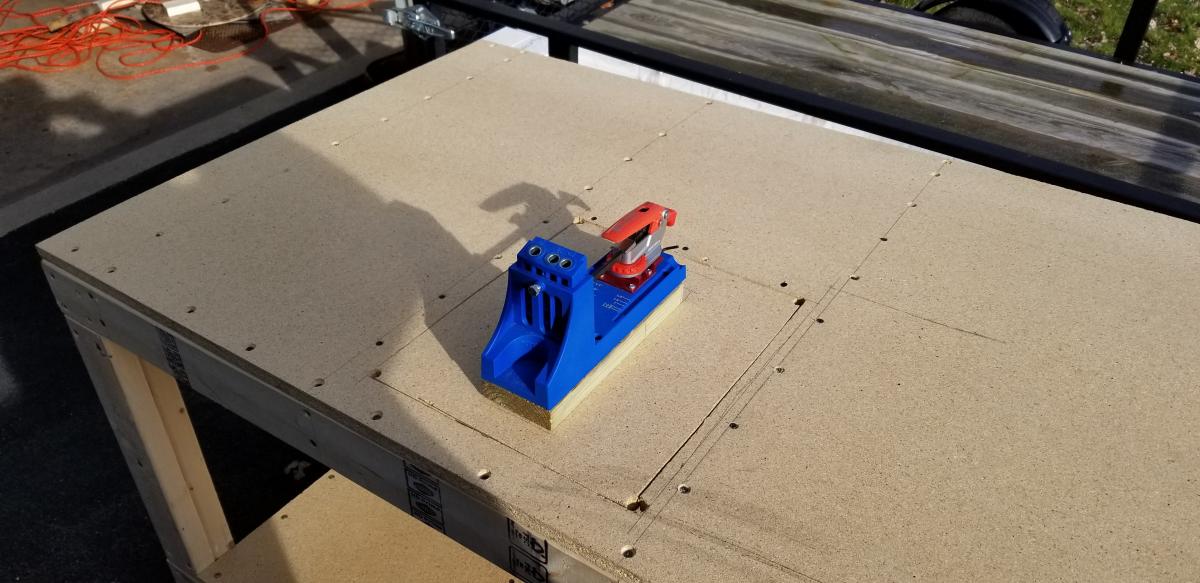
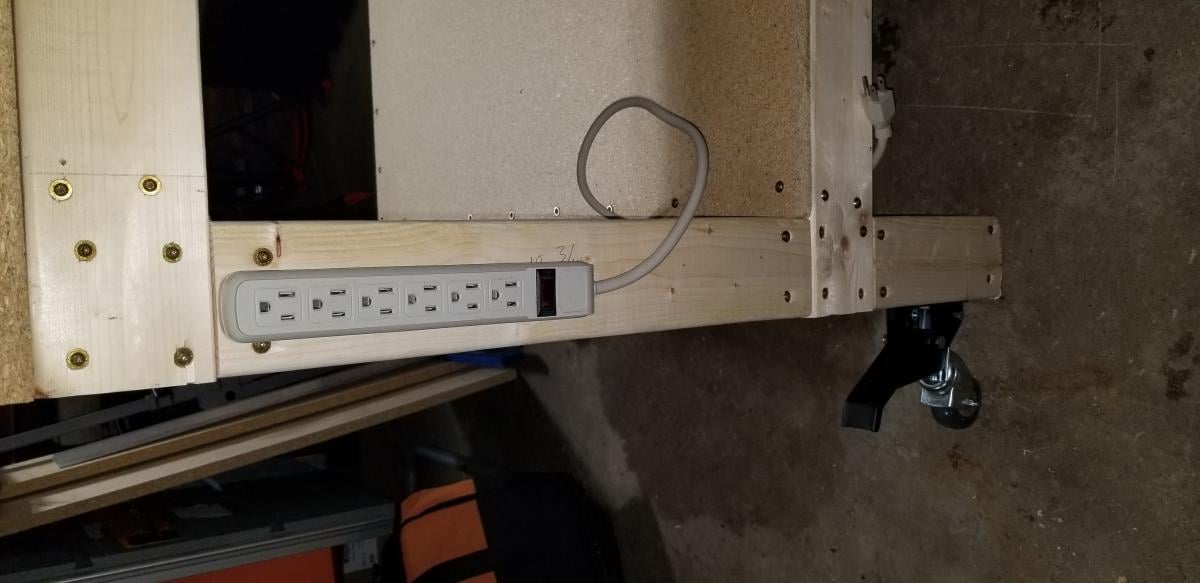
The size is modified from Michaela's original plan to include a 3 1/2" overhang all the way around for easy clamping (and top is 6' x 2.5'). I also cut a 2' piece of PVC pipe into 3 sections and attached for my drill storage. I put full-extension glides on the drawers and made some dividers from scrap wood.


Sun, 03/18/2012 - 18:21
This workbench is just outstanding!!! I want! Great job!
Mon, 03/19/2012 - 11:51
This would be the perfect workbench for my small shop/garage. Would love a full write up on how to create it. Great work.
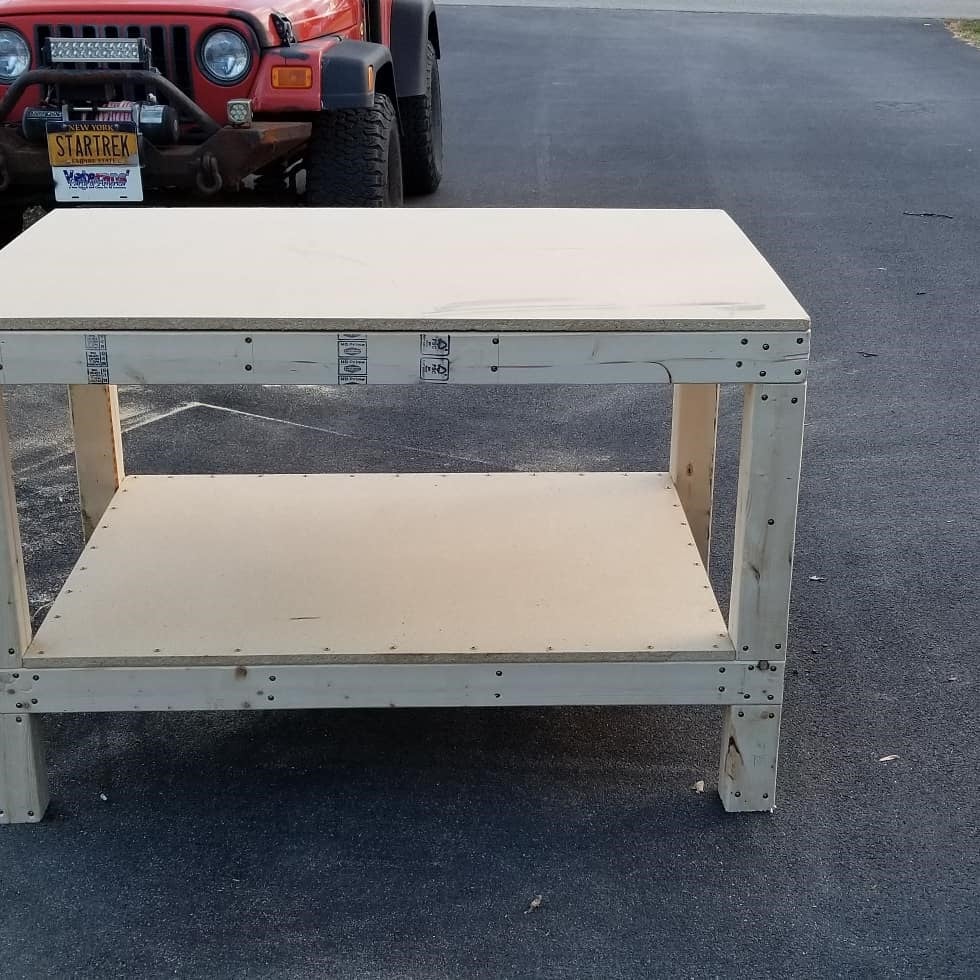
Built this for my garage shop in a day. Added a cutout for my Kreg Pocket Hole Jig, a power strip and casters for ease of movement.