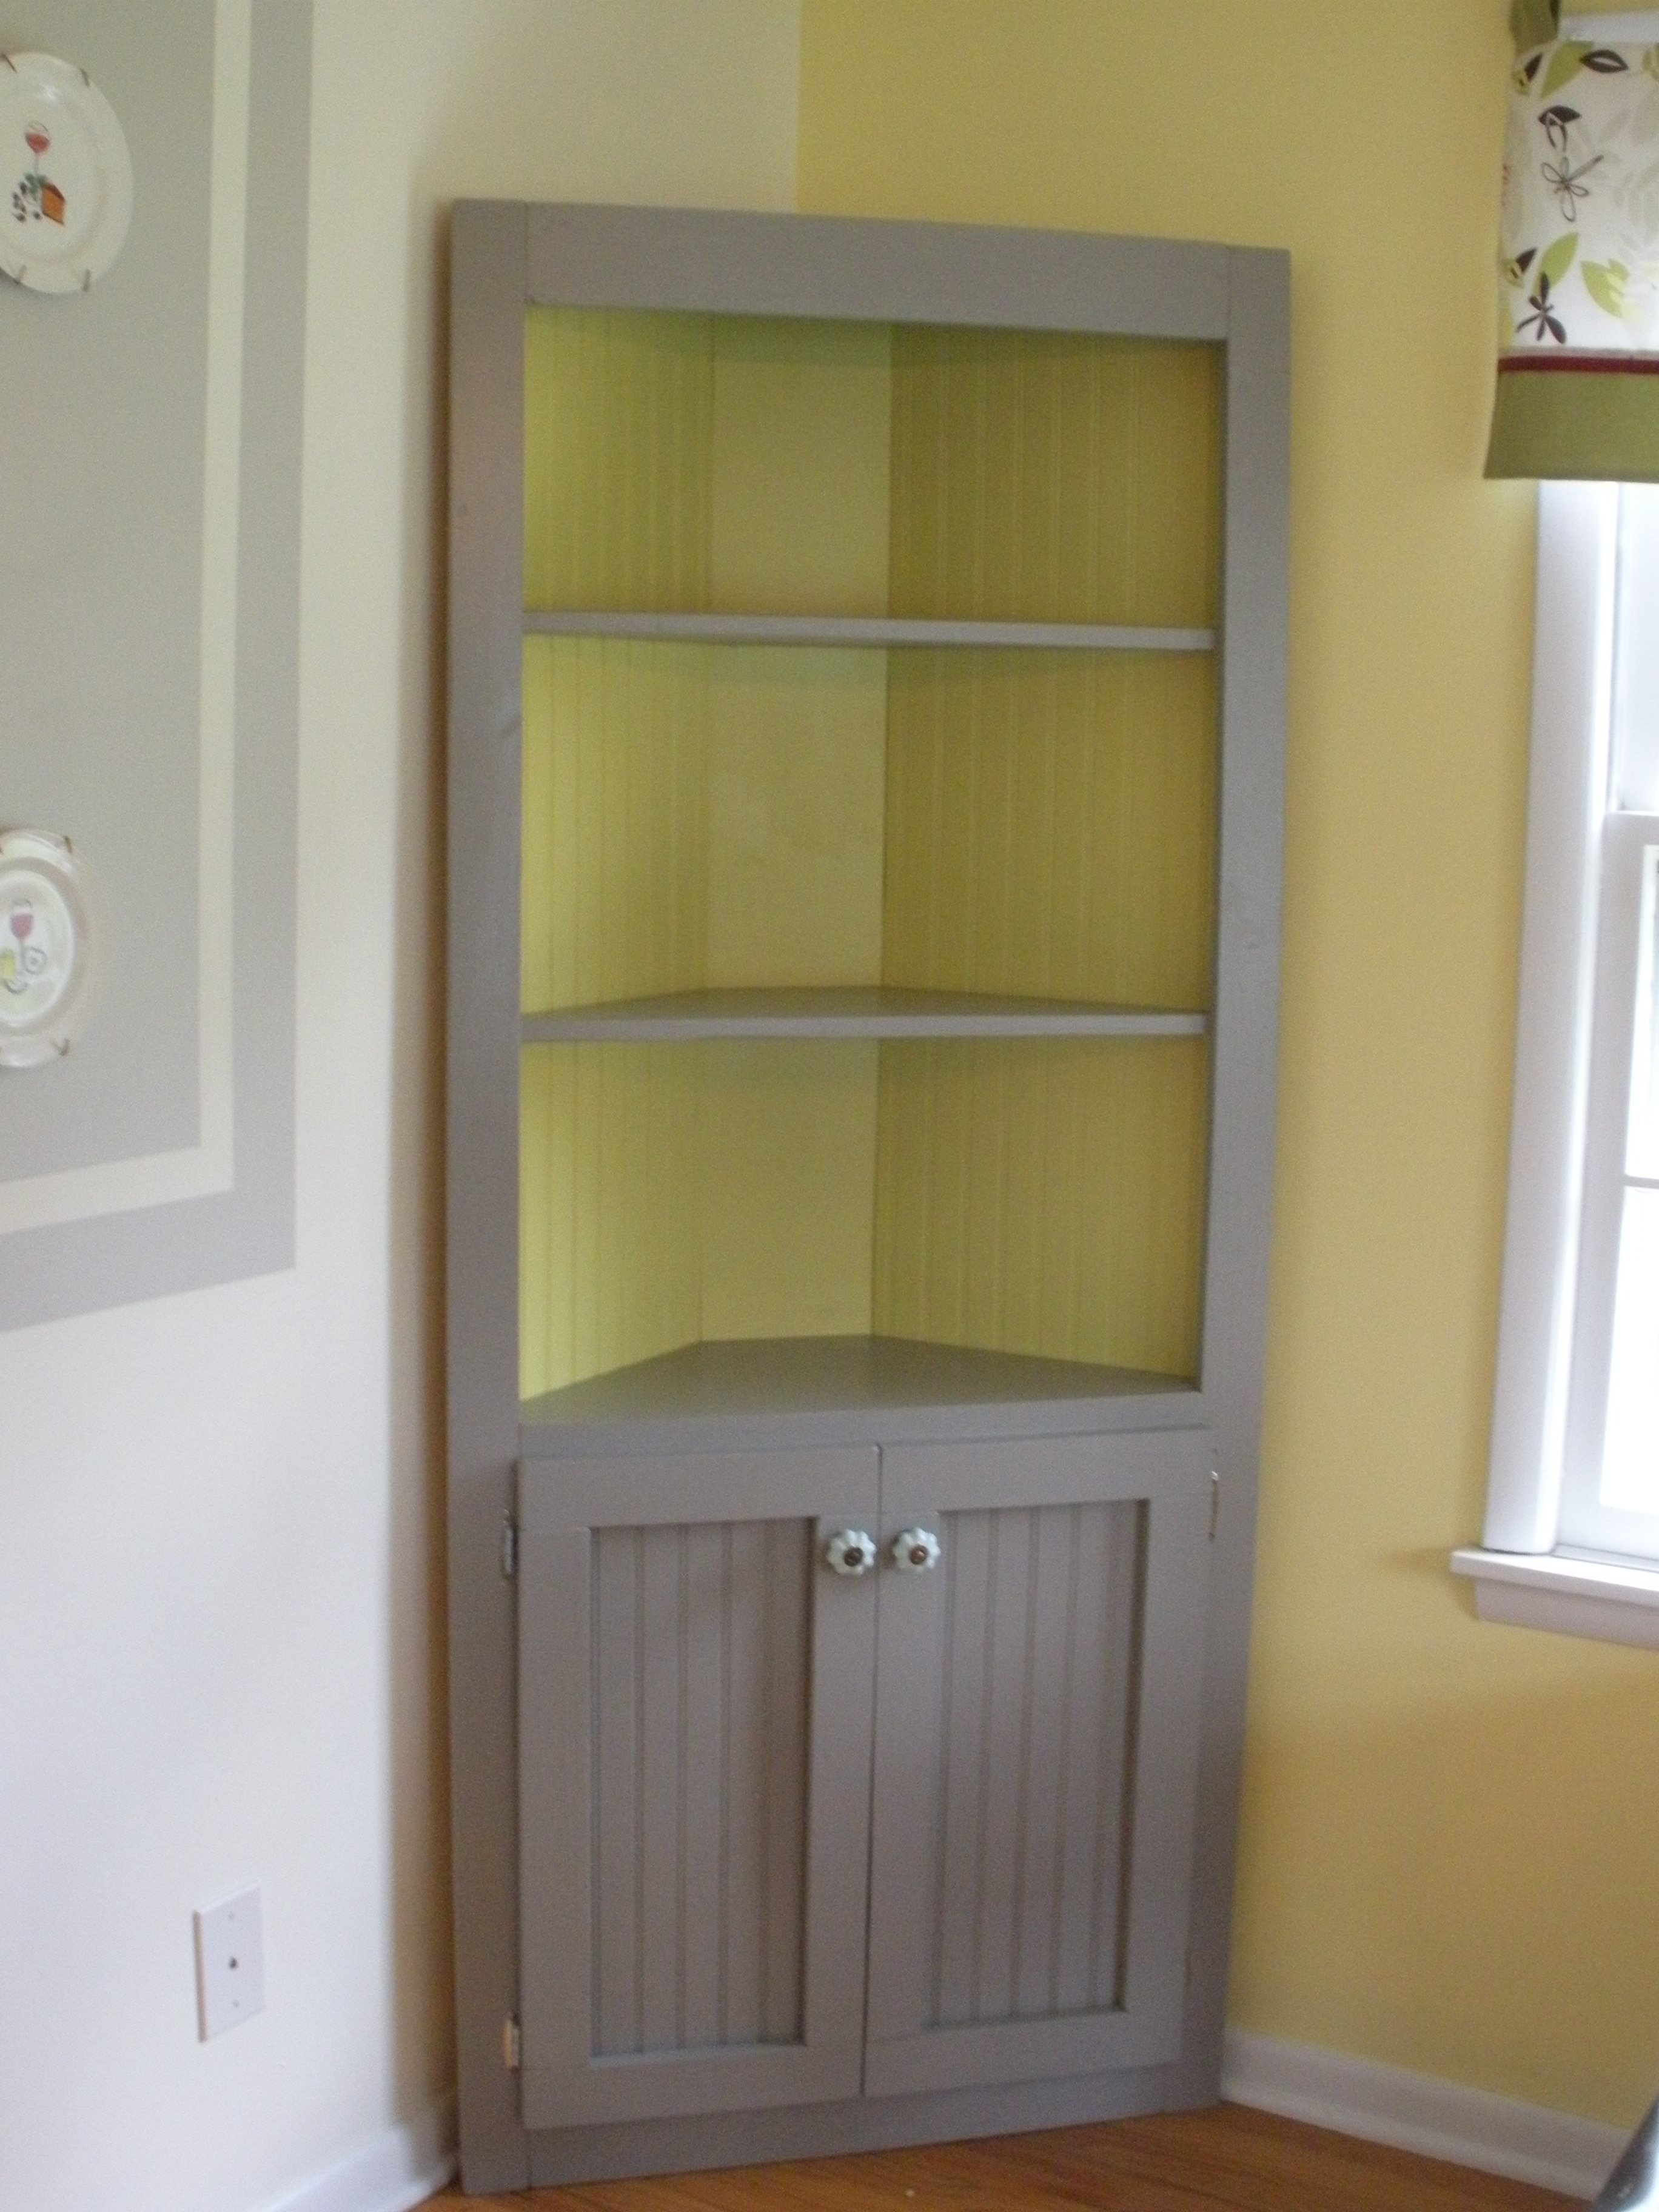
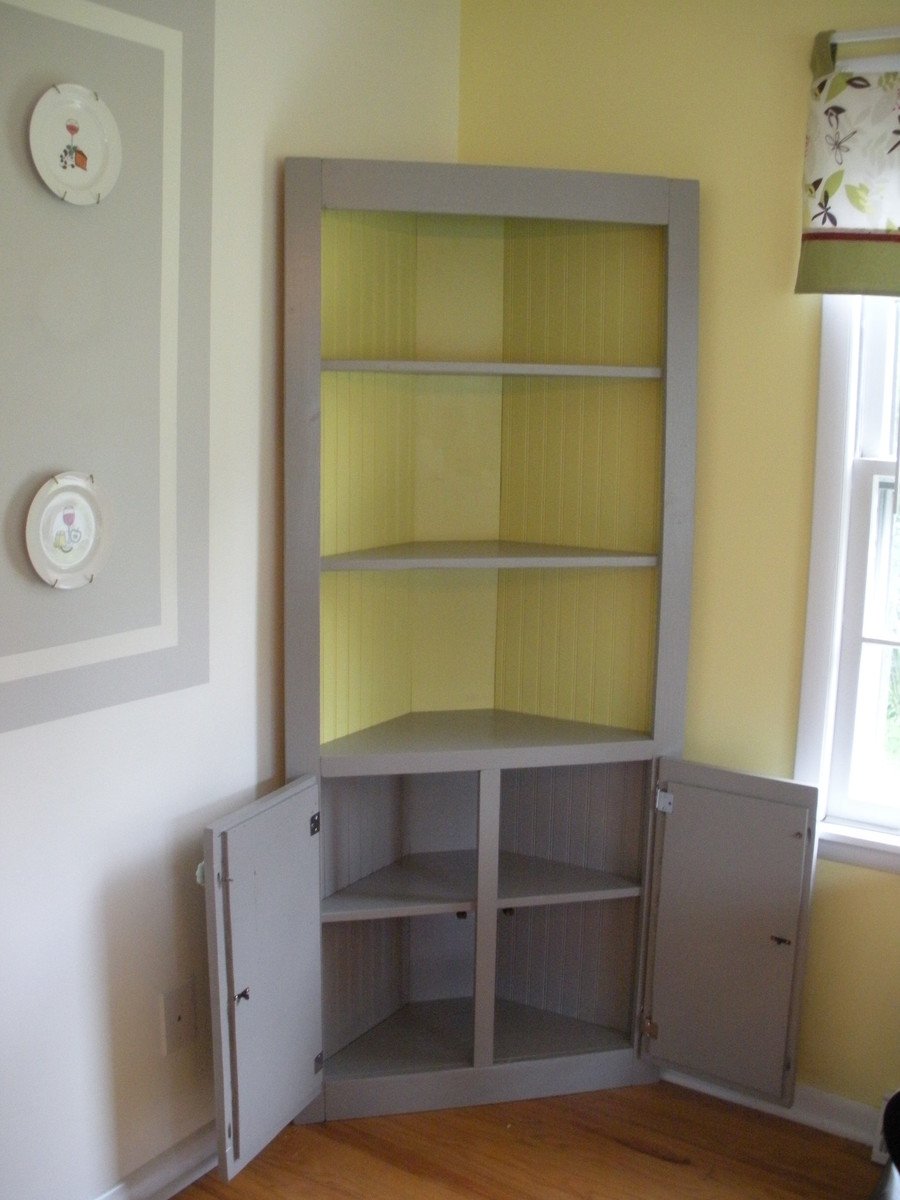
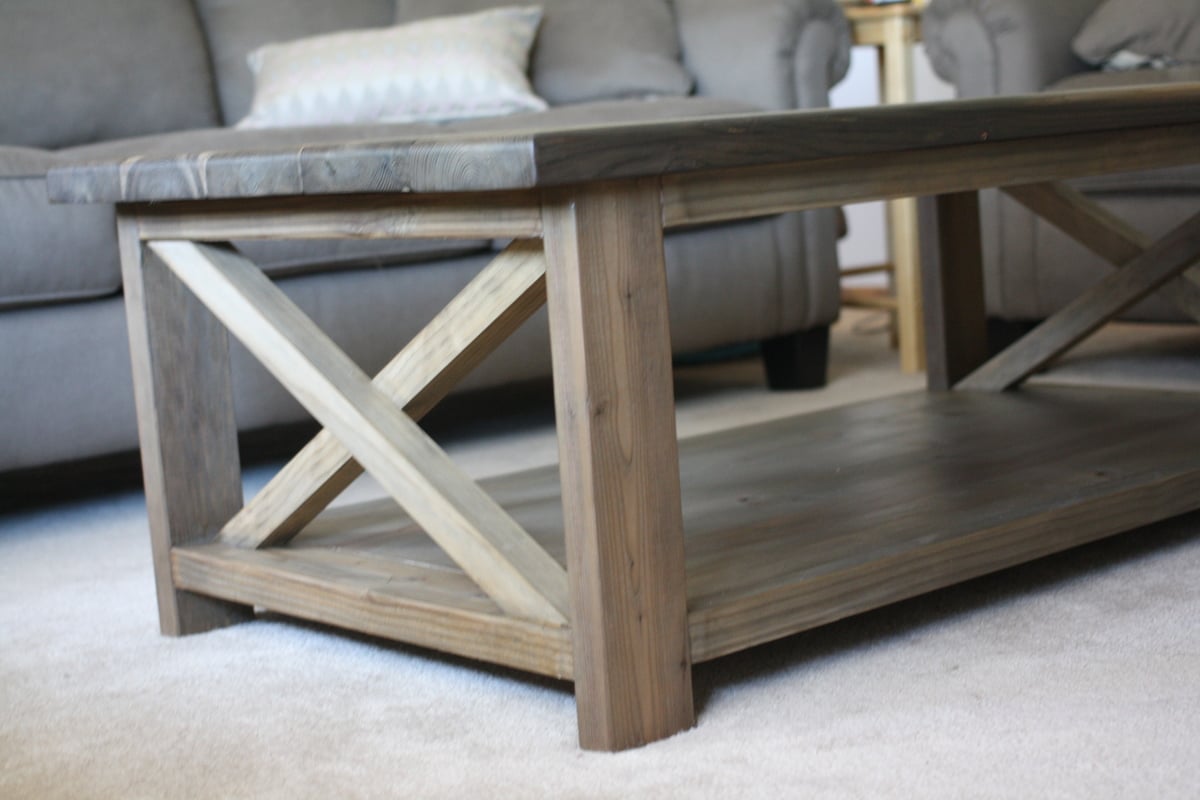
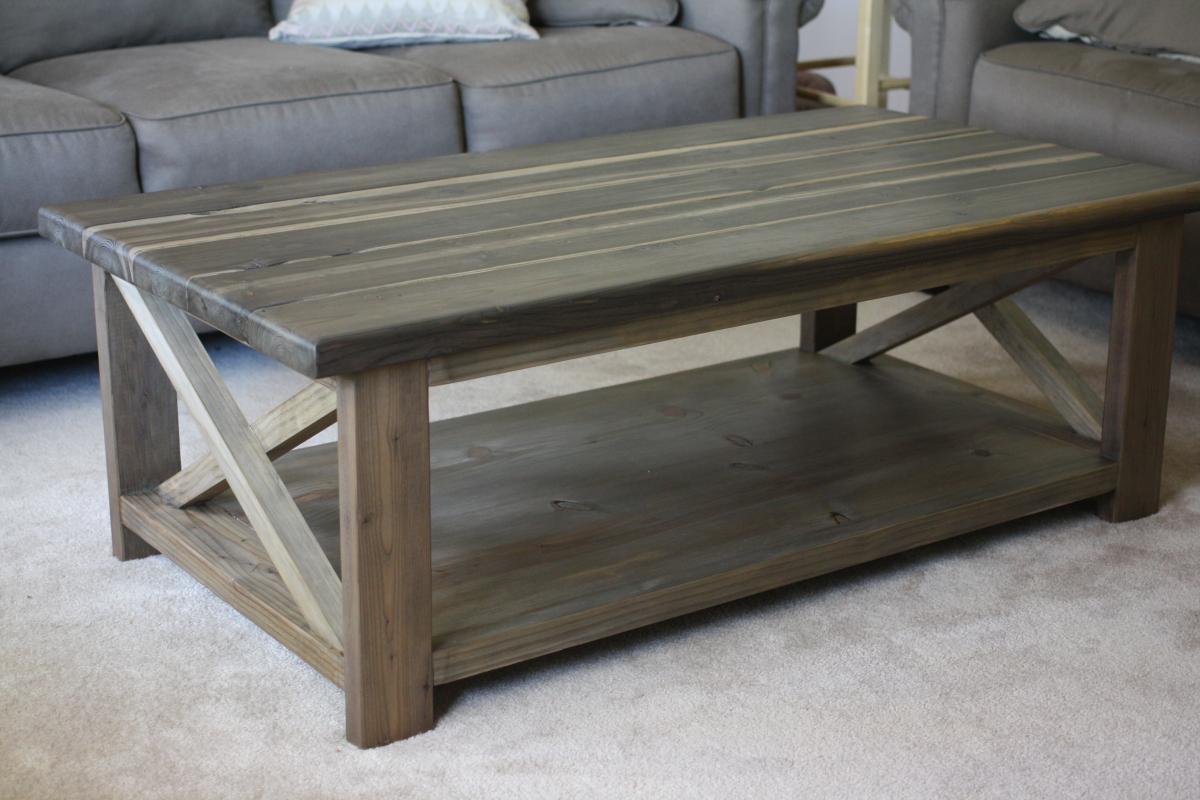
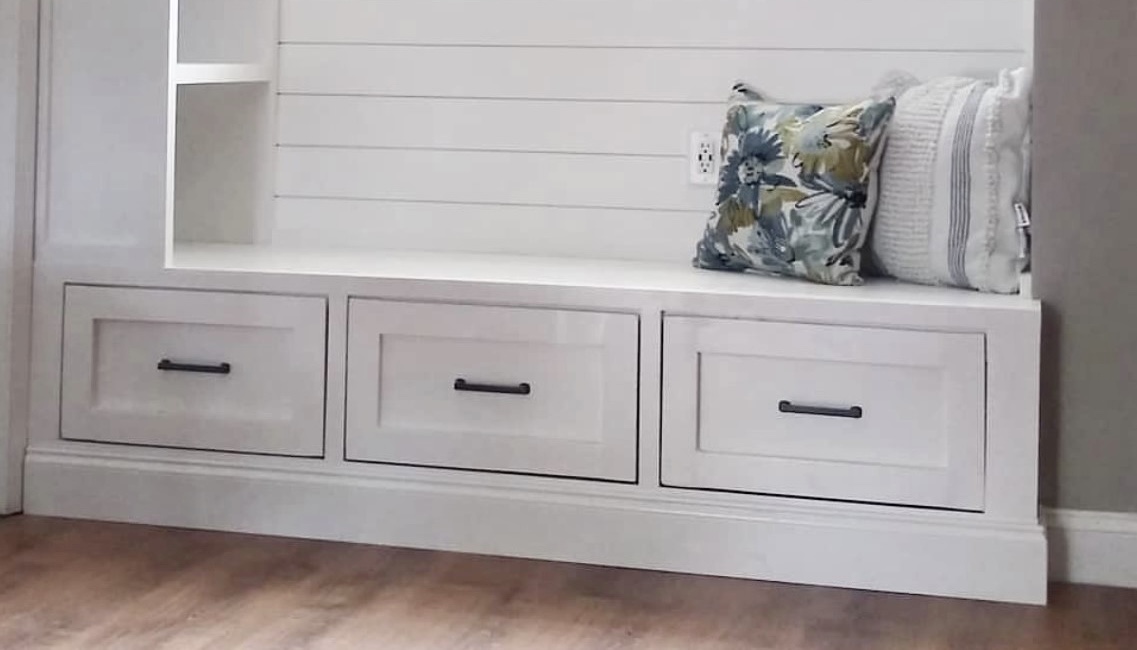
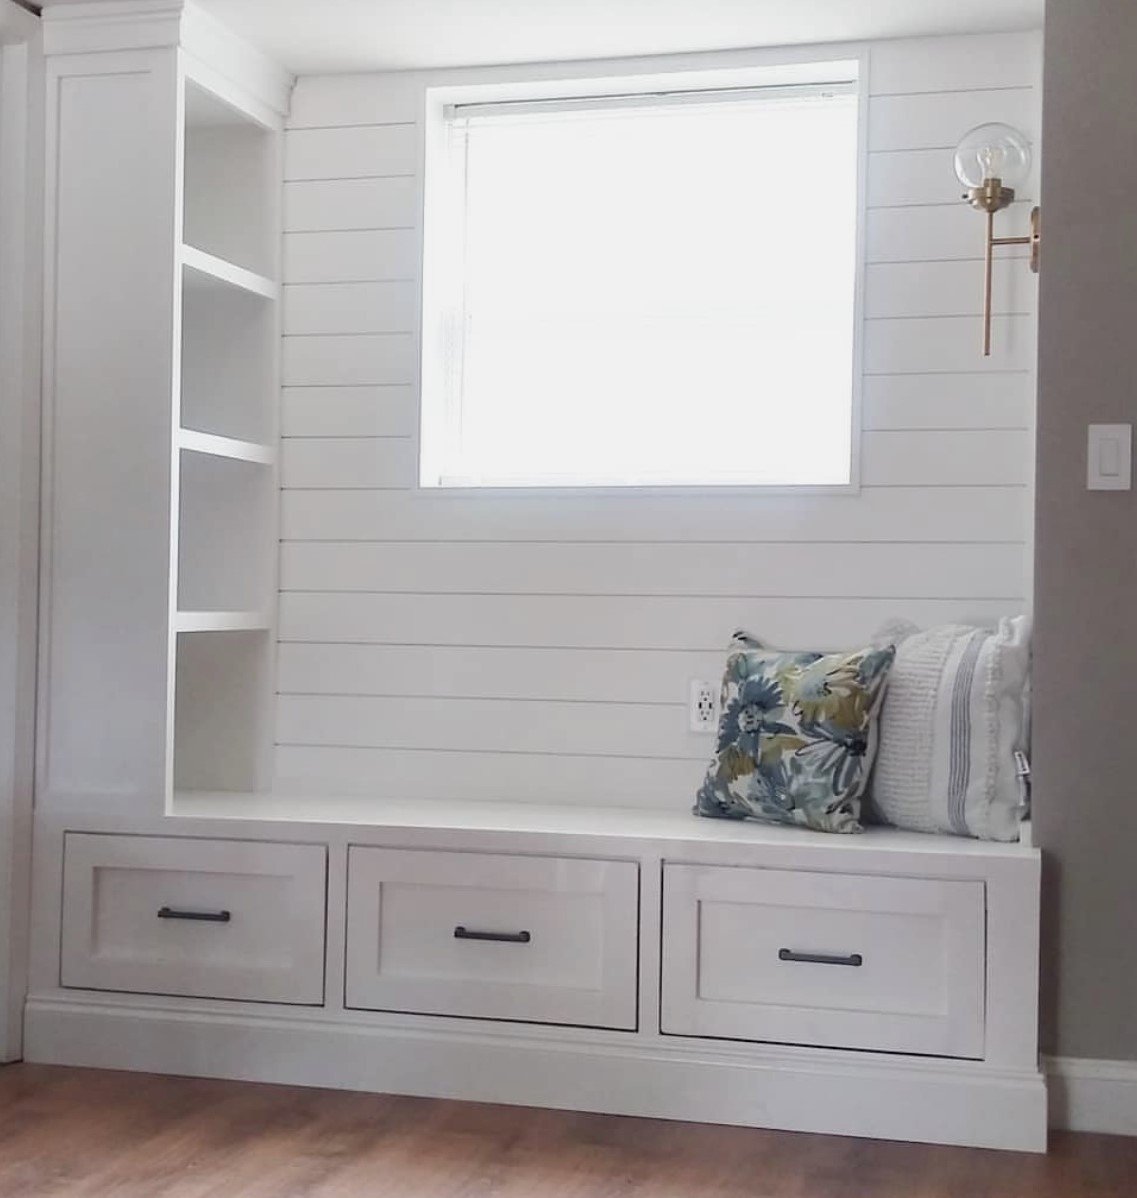
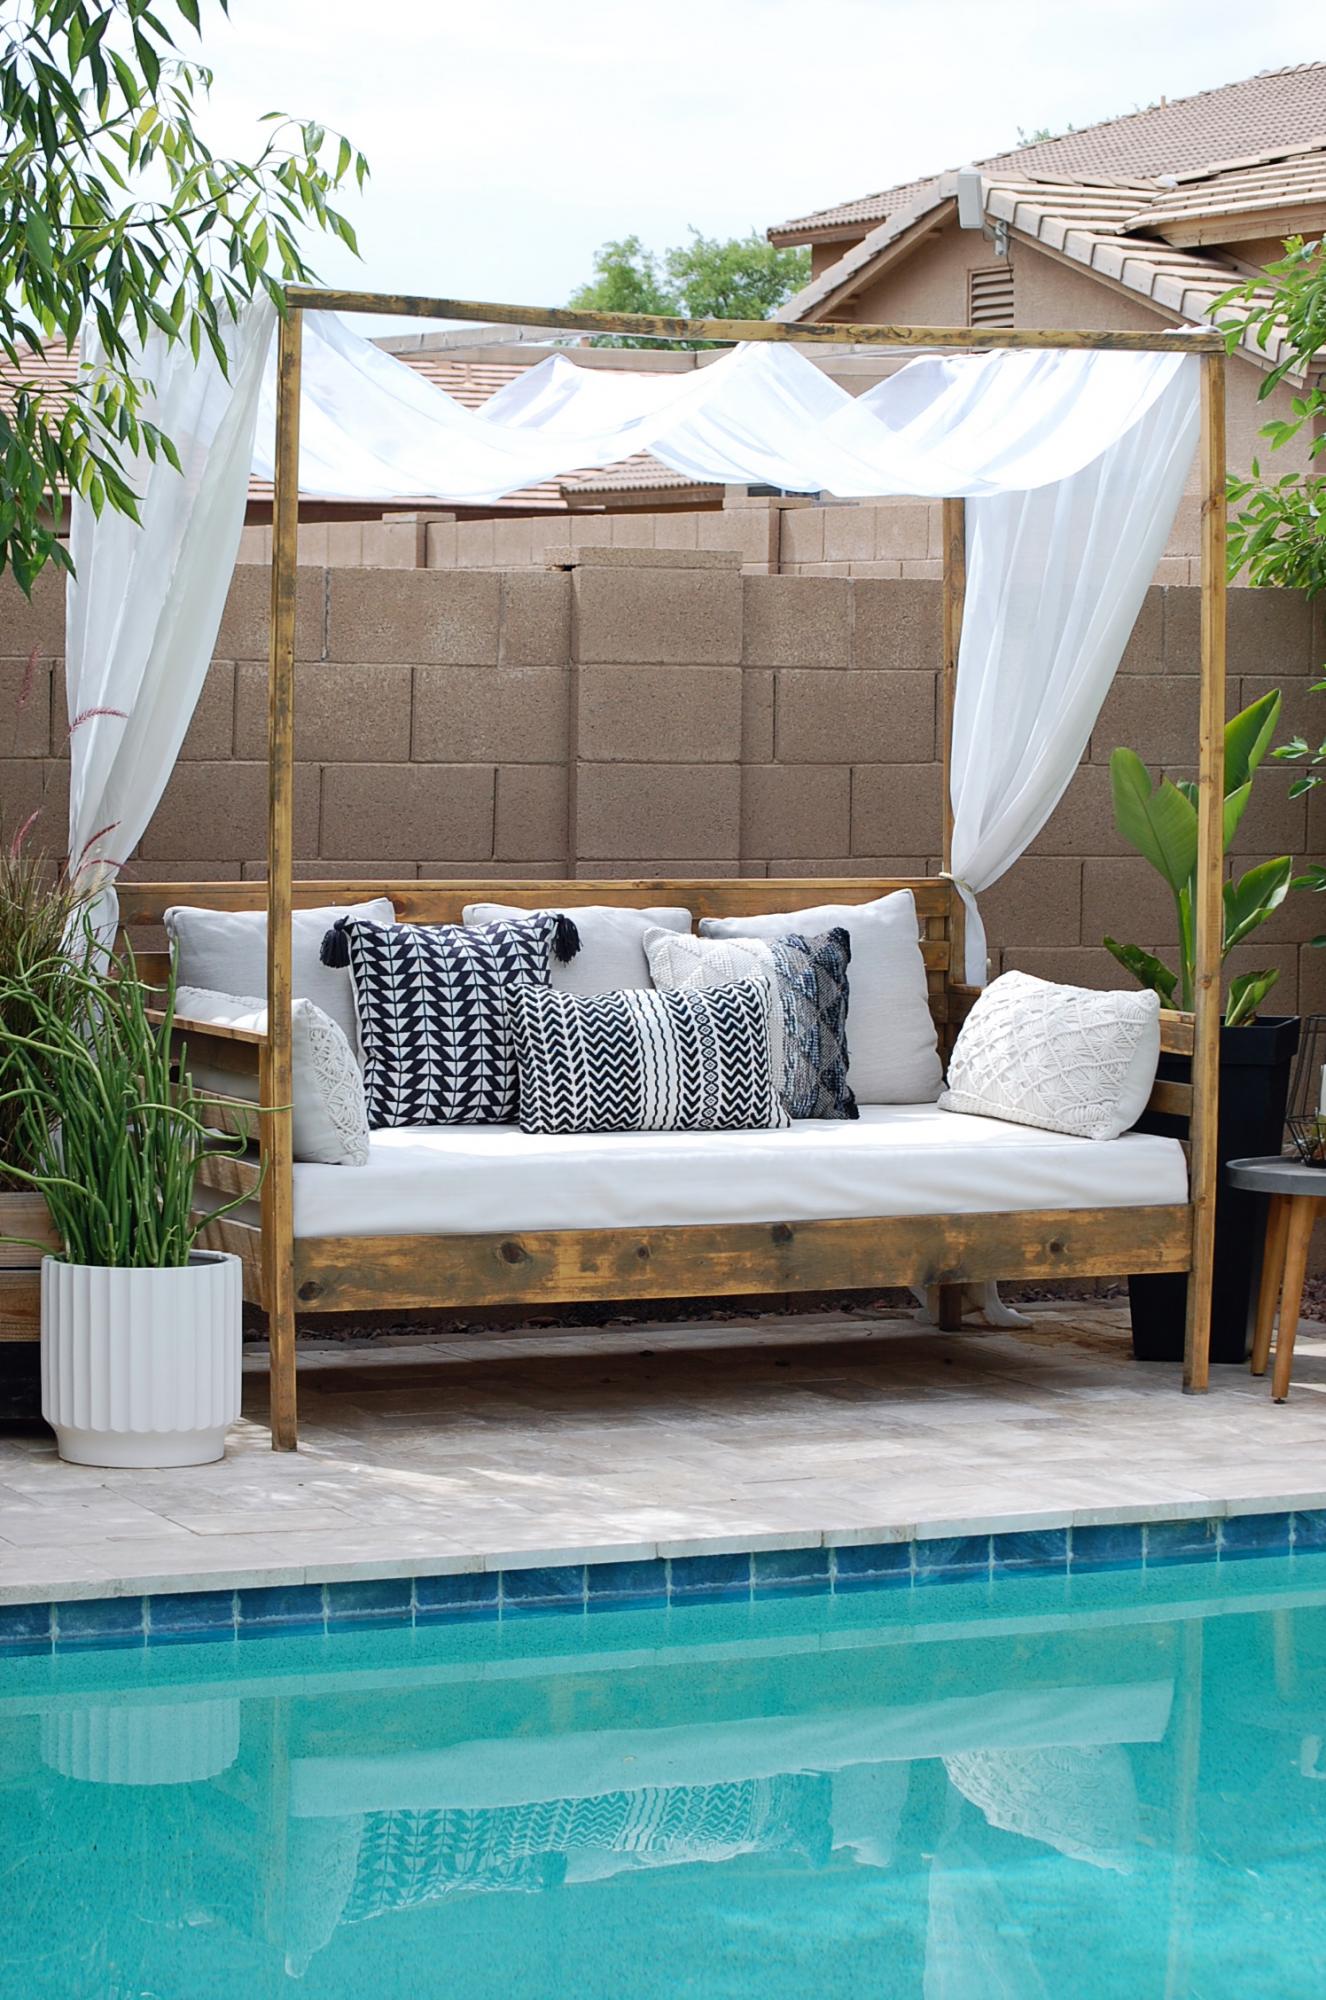
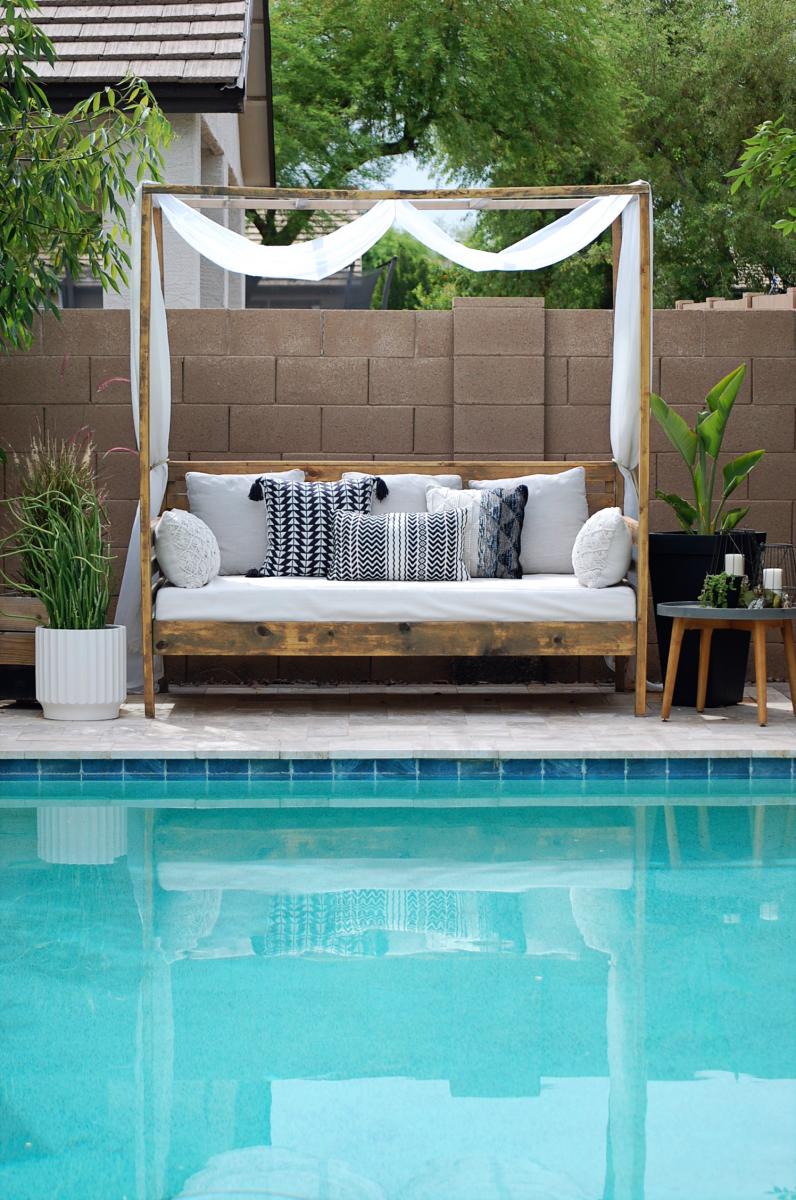
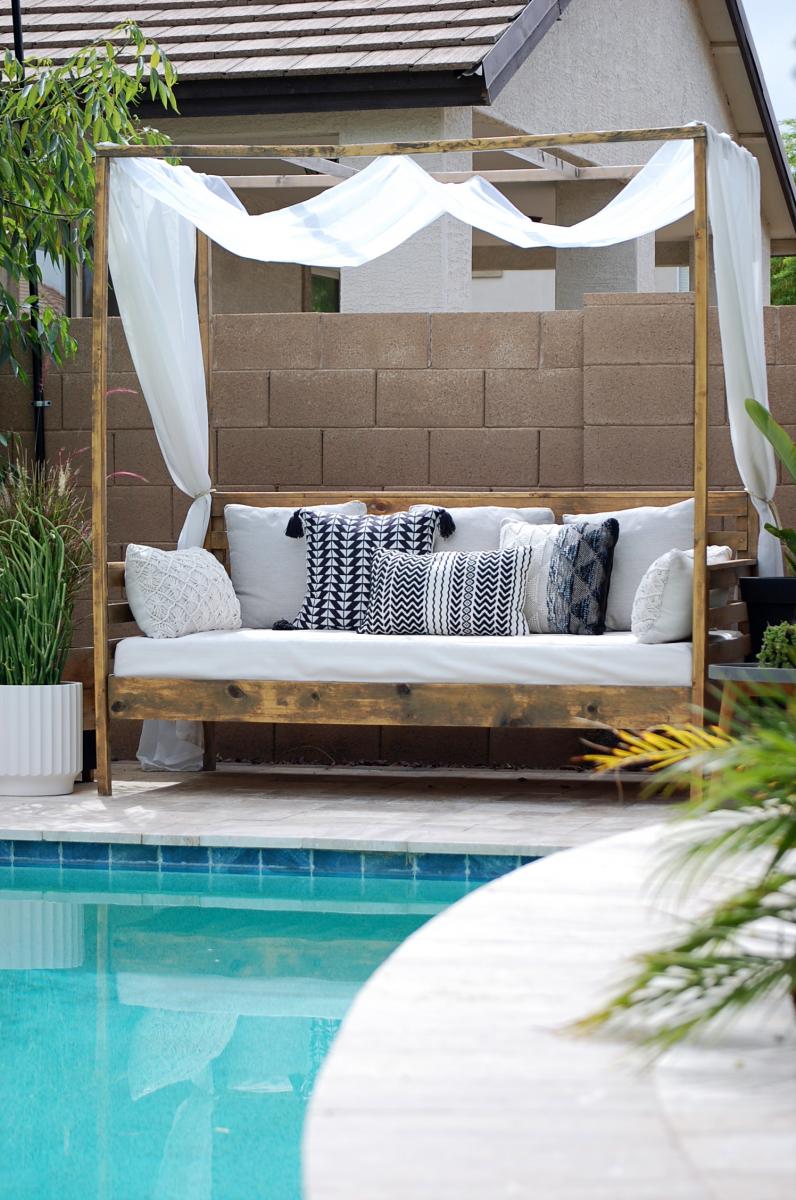
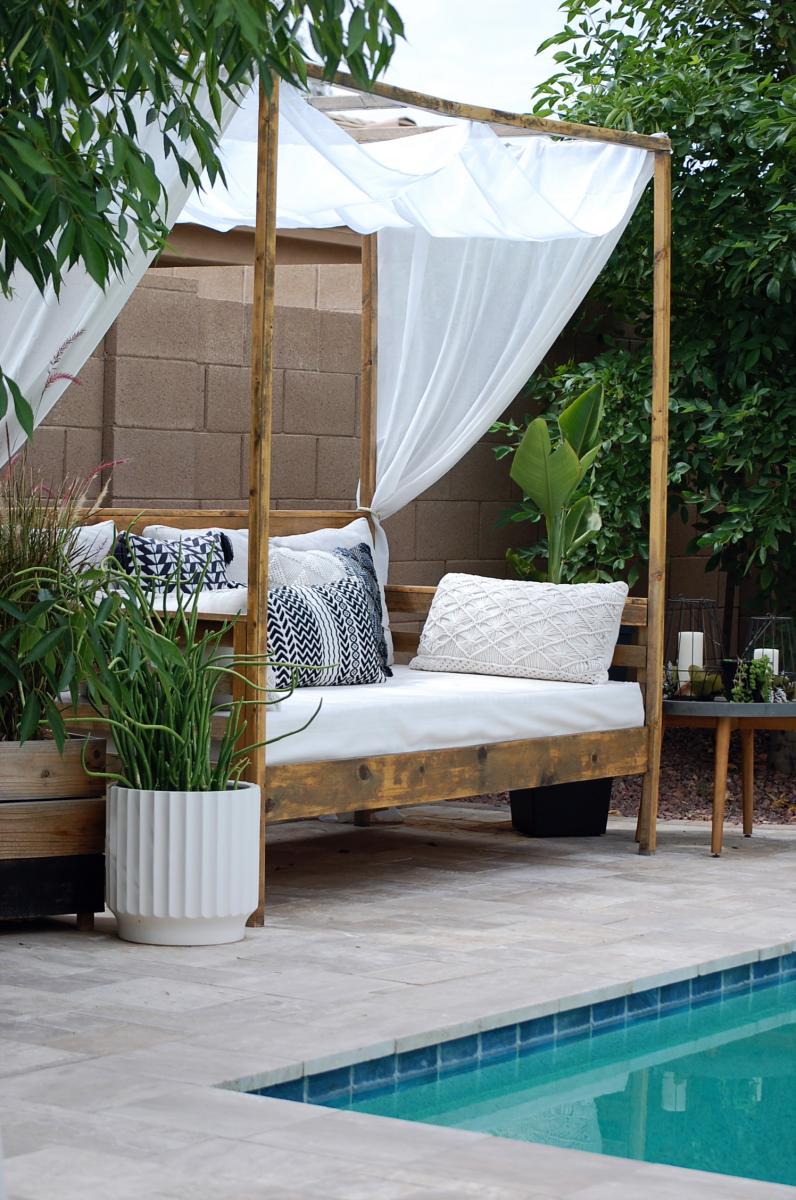
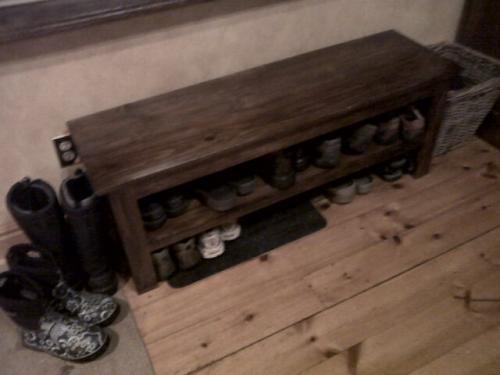
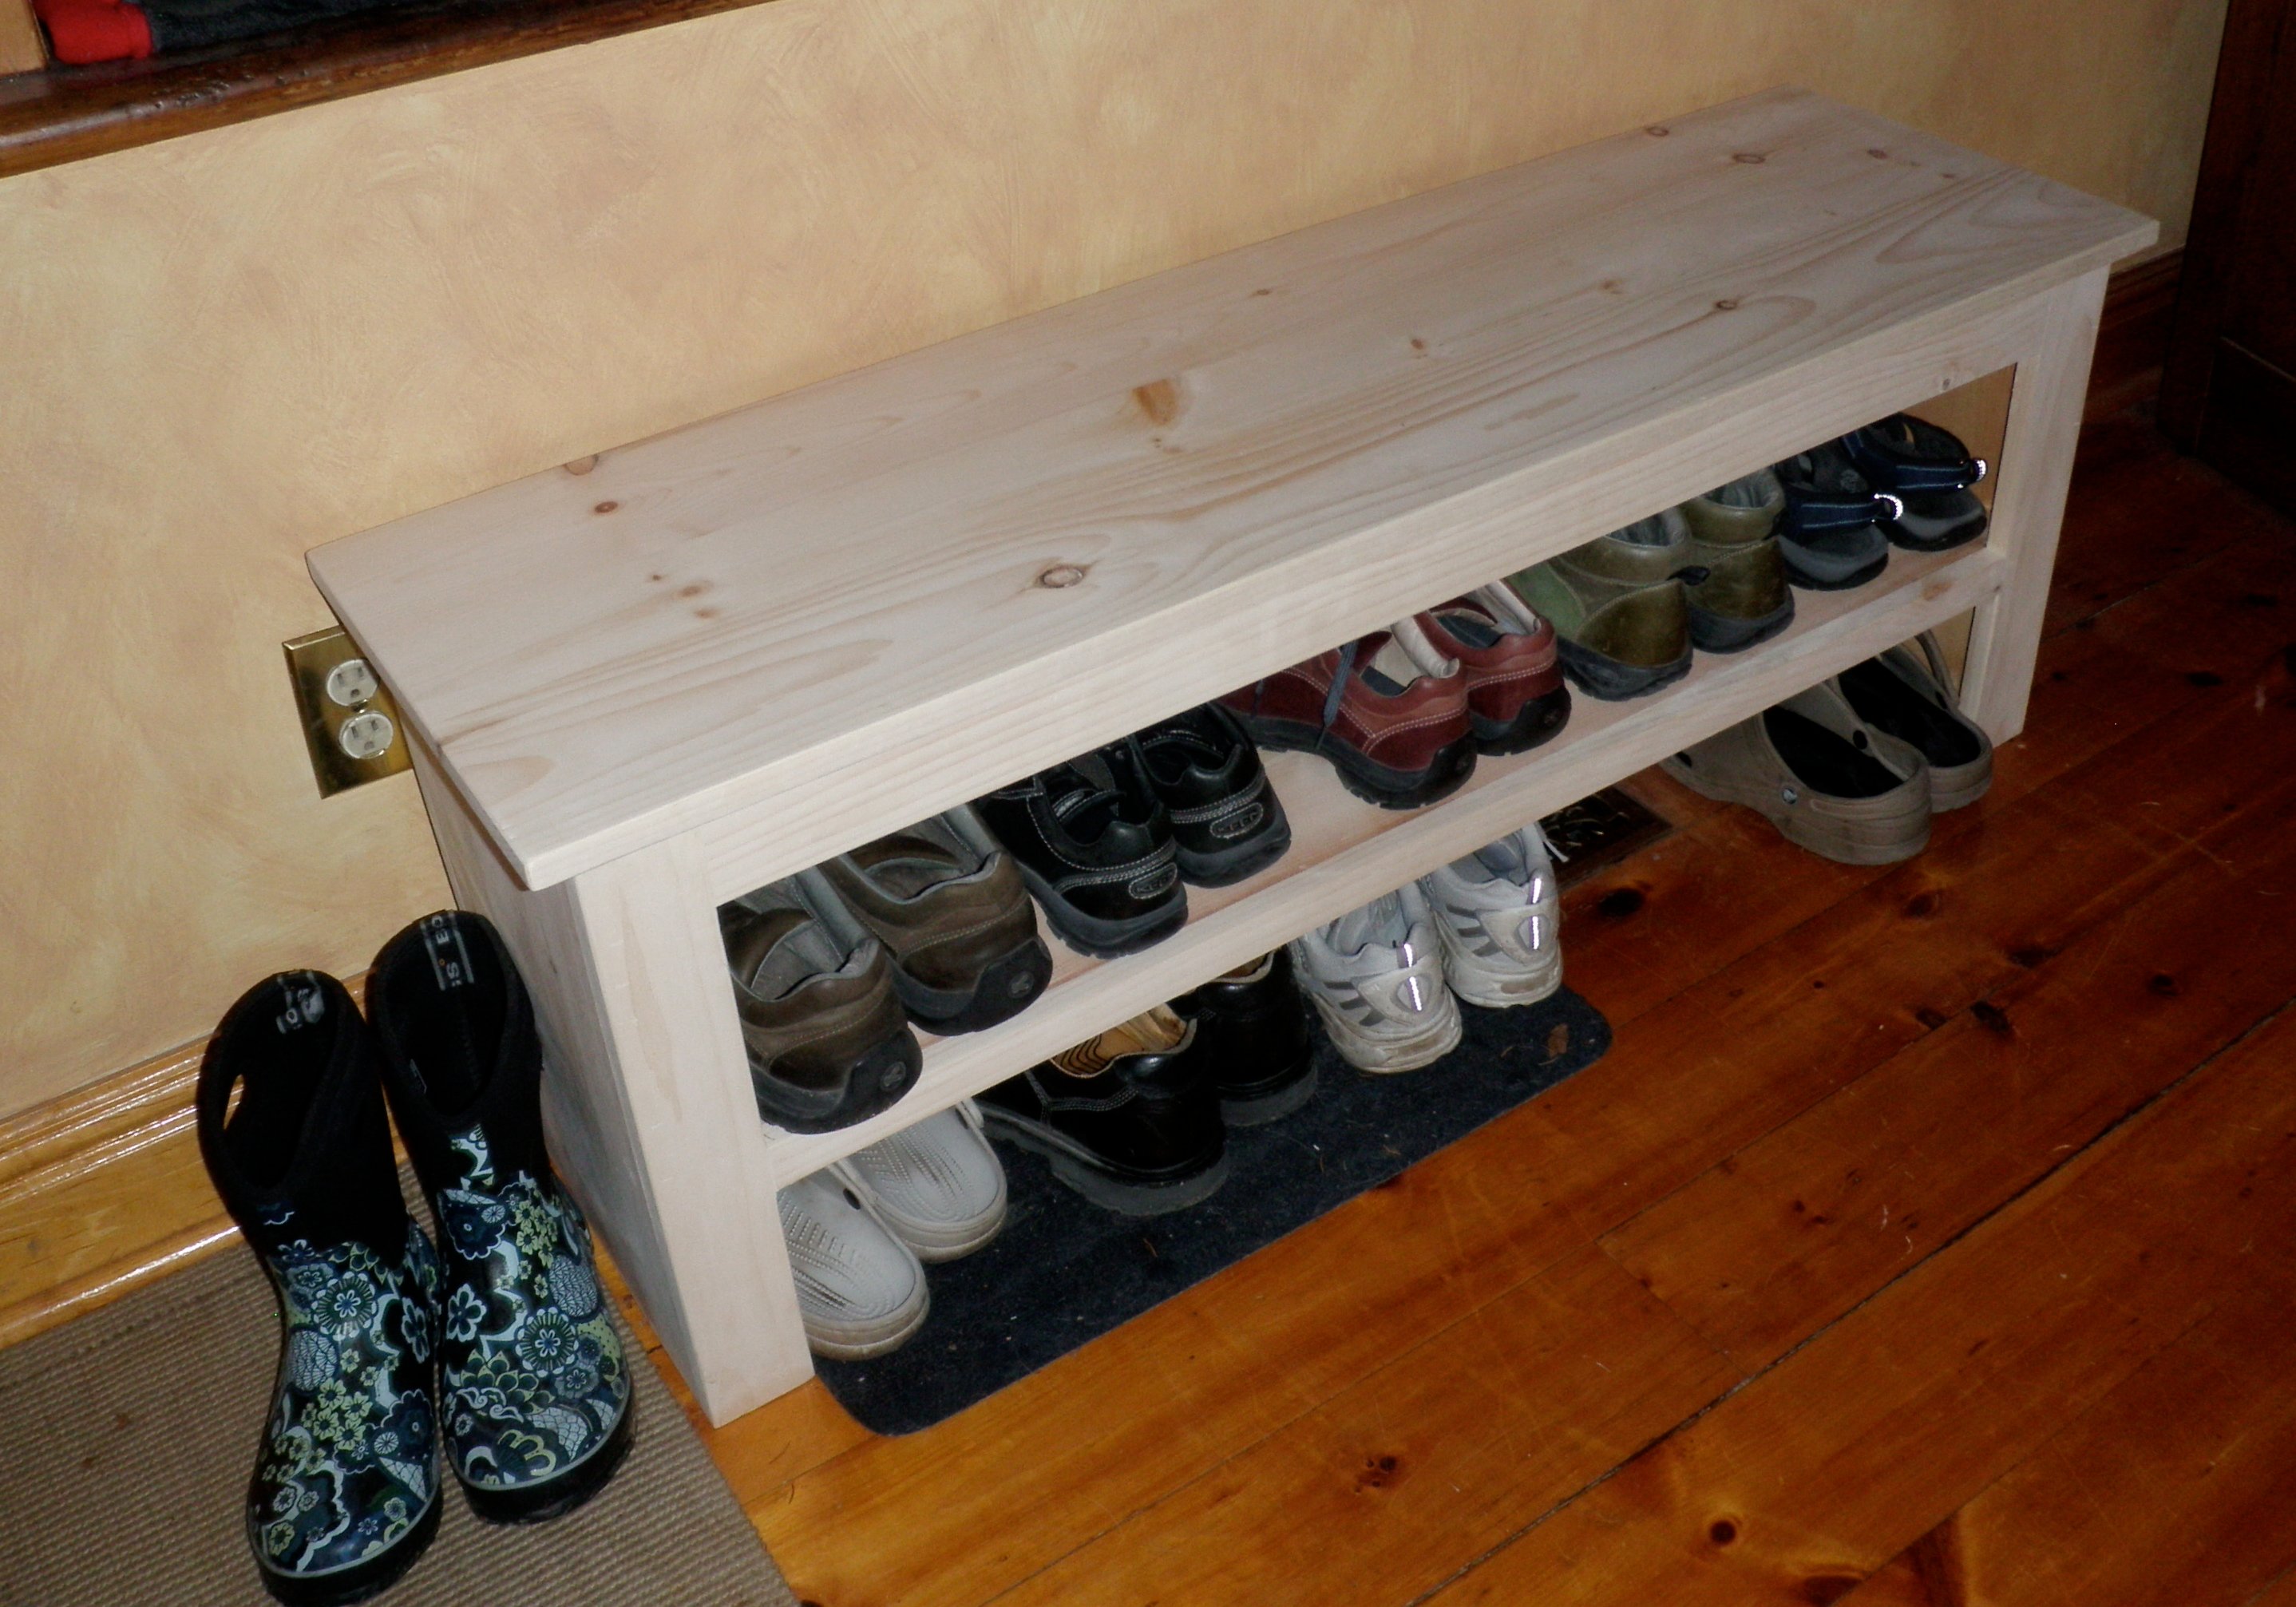
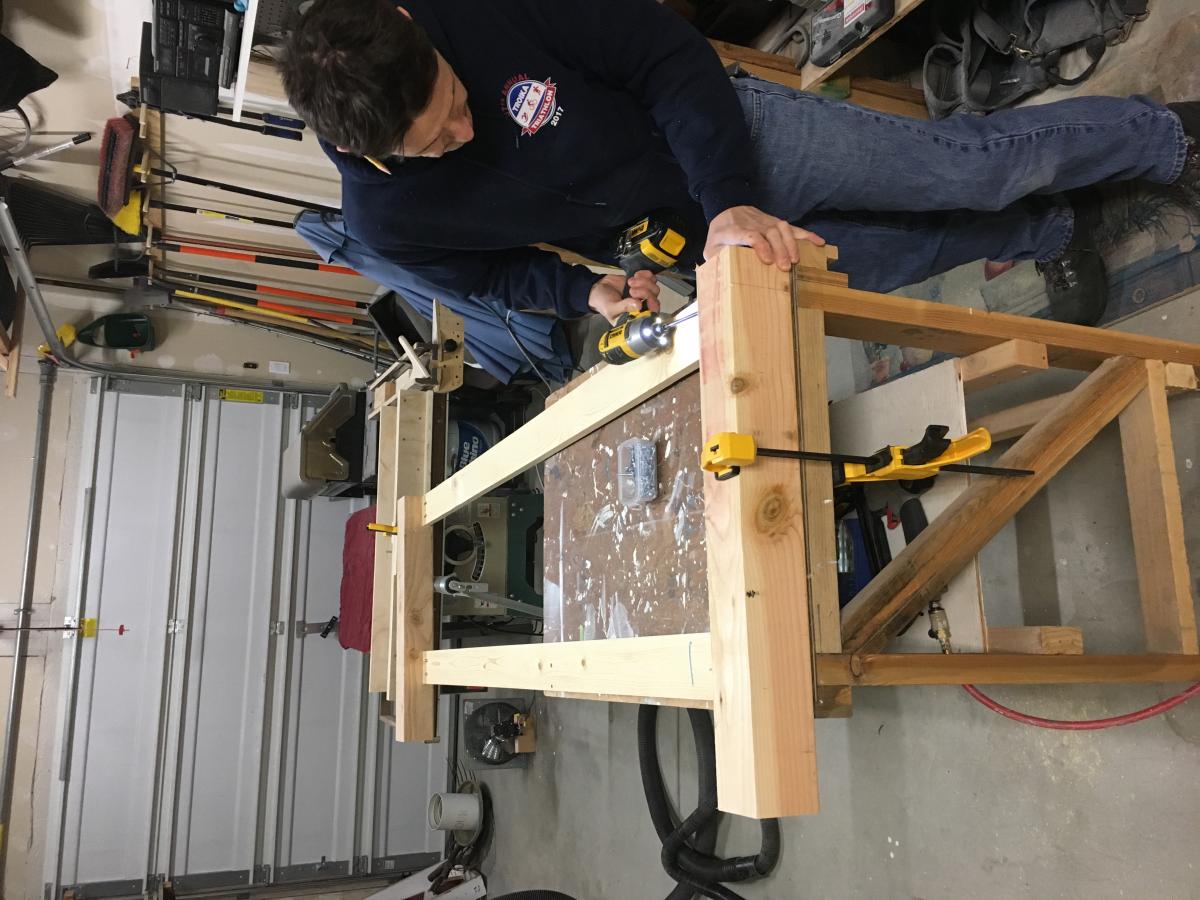
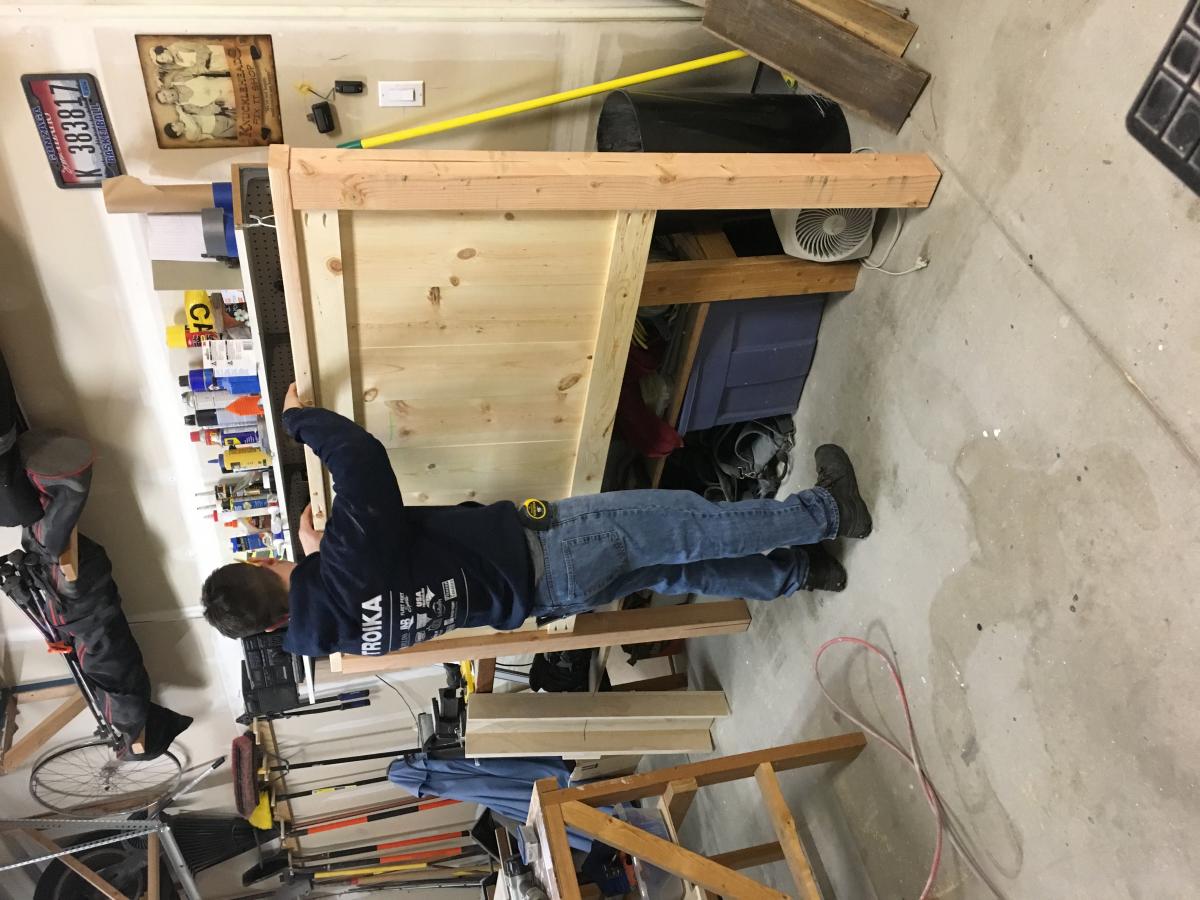
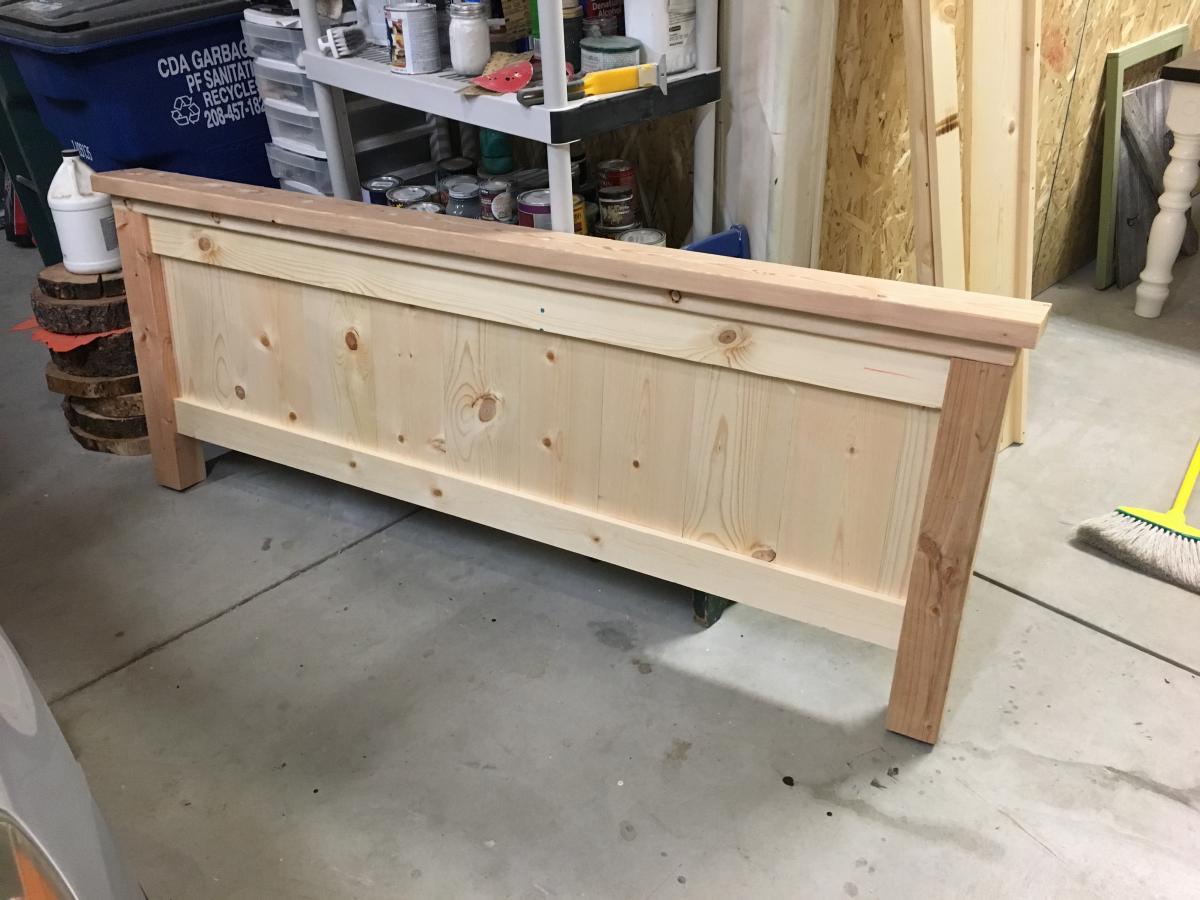
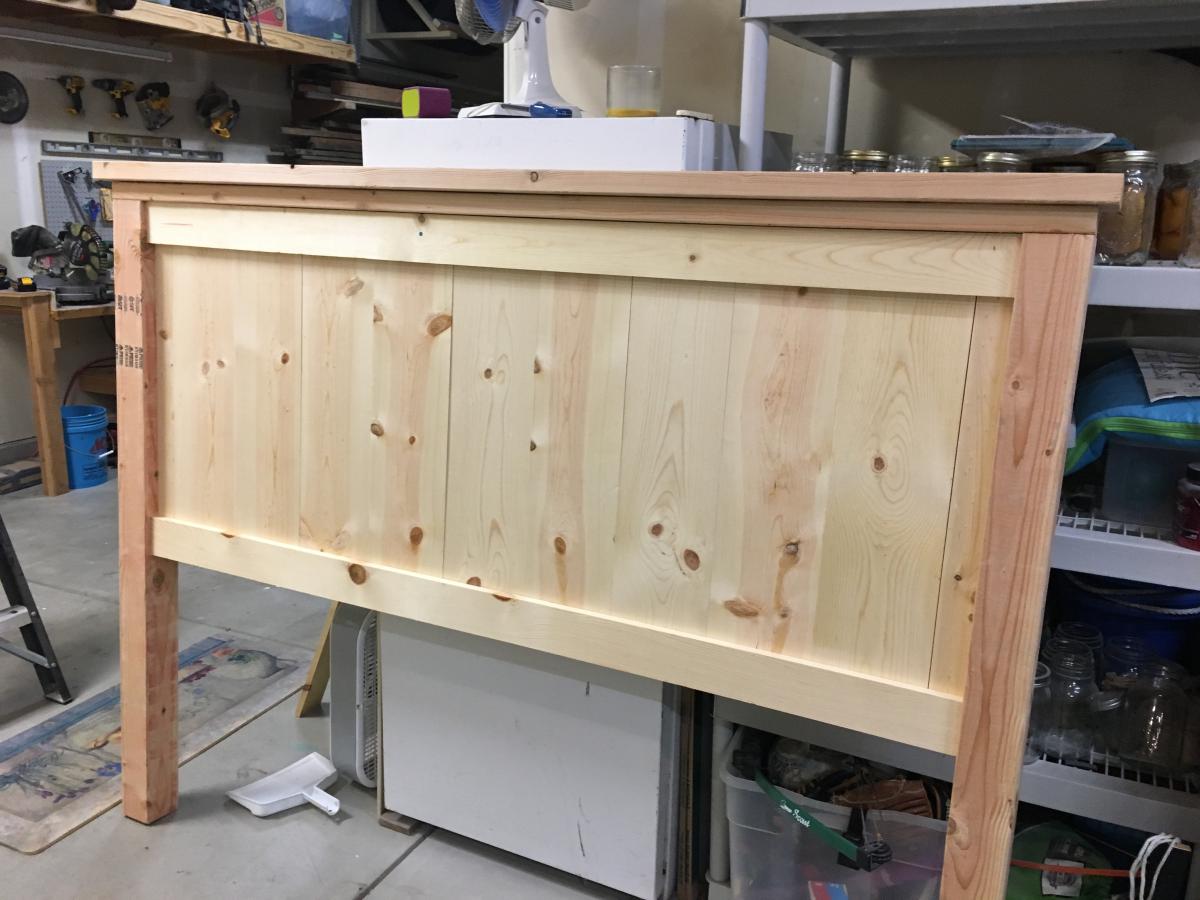
Community Brag Posts

Simple Shower Stool

Submitted by lbrown on Sat, 02/18/2012 - 11:43

I love my 3' x 5' shower and with all that space I thought that having a little spot to sit down would be really nice. After looking around online and at some stores I couldn't find anything that I liked that was also reasonably priced so in the end I decided to make my own.

For details about how I built it check out my blog: http://www.homeandawaywithlisa.com/blog/2012/2/18/simple-diy-shower-sto…

Estimated Cost
Under $20
Estimated Time Investment
An Hour or Two (0-2 Hours)
Finish Used
I used a dark grey spray paint primer on the stool first before applying two light coats of black spray paint.
Recommended Skill Level
Starter Project

Comments

lbrown

Wed, 02/22/2012 - 17:17

Cedar would definitely be a great option. For the finish I used Rustoleum outdoor spray paint which is supposed to stand up to the elements. I figured that would help it stand up to the water in the shower.

Benchwright Dining Table

This was my first project and I completed it all by myself! I think it came out well :) My husband did not like the original table despite my love of it. I asked him if I made the table if I could then have it. So what started out as a dare (my husband thought I would not be able to do it) became a reality. I am really excited to tackle more projects and have gathered quite a few upcoming projects to complete.
I did a slight variation of the plans, I used 2x6s for the top and 4x4s for the legs. I located a planer and was able to remove the rounded edges of the boards. I wanted the thickness of the PB table so the thicker boards were my choice. I also used a solid welding bar threaded on both ends for the rod.

Estimated Cost
100.00
Estimated Time Investment
Weekend Project (10-20 Hours)
Finish Used
Minwax Red Mahogany satin finish polyurethane
Recommended Skill Level
Intermediate

Comments

Adam Martin

Mon, 06/09/2014 - 23:04

I like your version of this!

How did you attach the table top to the leg supports? Or aka, what does the underneath of the table look like? And how did you attach the breadboards to the long boards of the tabletop?

My email is [email protected], since that is probable faster than commenting back and forth on here.

MrsCoreyOrvold

Thu, 01/01/2015 - 21:12

To get the wider top I glued two 2x6 together than planed them so they look like one solid piece. I didn't really follow any plans just kept building a little at a time. I don't really think you can mess anything up if you just keep doing a little at a time. Let me know if you have any other questions! Love to help :) Happy building!

Garden Tool Storage Rack

Submitted by kwildman on Tue, 04/28/2020 - 20:45

This isn't an Ana White plan but I've learned so much from this site that I designed and built this garden tool rack. Its pine 2x4 construction. I love it!

It is 84" tall x 72" long x 26 wide (opening) and 48"wide for garden tool hangers.

Estimated Cost
100
Estimated Time Investment
Afternoon Project (3-6 Hours)
Finish Used
No finish
Recommended Skill Level
Beginner

Comments

Farmhouse table, table extension, and bench

My wife and I recently built this farmhouse table with her grandpa. It was a lot of fun and we are really happy with how it turned out. The table is 80 inches long, 43 1/2 inches wide, and 31 inches tall. The extensions are 15 inches long and 43/1/2 inches wide, and the bench is 61 inches long, 15 inches wide, and 19 1/2 inches tall. 

It tooks us about 4 weekends (around 32 hours) to finish the project and the included rebuilding the base of the table after our first one cracked. 

We modified the plans a bit. We used 4x4s instead of glued together 2x4s for the legs on the table and bench. 

We also used the plans on this blog (http://tommyandellie.com/?p=2582) as a guide. 

This was the first time my wife and I have tired a DIY project and we had a ton of fun. Her grandpa had some experience with wood working and had all of the tools we needed but you can certainly do this without any extensive wood working experience. 


Sorry for the duplicate post. This is my first time on the website and the first time I posted it came across as 'guest'

Estimated Cost
$350
Estimated Time Investment
Week Long Project (20 Hours or More)
Finish Used
We put on one coat of minwax pre-stain wood conditioner. Then we added two coats of stain of a custom mixed stain from Sherman Williams. We started with the Wood Classic Rustic Gray. The store then tinted the stain until we found the color that we liked. Note - the table looks grayer in person than it does in some of the photos. Finally we applied 3 coats of minwax water based oil modified semi-gloss polyurethane.
Recommended Skill Level
Starter Project

Comments

Sports Cards Sorting & Storage Cabinet

So... I am a pretty dedicated baseball card collector as well as a new found hobbiest in wood building. It's been an ongoing issue in my household with my baseball cards and boxes cluttering up our dining room. I decided to resolve the issue while still being able to keep my cards in the same room with even easier access without being an eye sore! This just might have saved my marriage! I searched for months for plans for some sort of baseball card cabinet but they just did not exist. The closest I could find for what I was looking for was a storage bench plan here on Ana White. I liked the idea of a top opening for hidden storage. It was too small for what I needed. I then came across plans on another site for an aquarium stand cabinet. I figured the combination of these two projects was what I was looking for. After a week of planing and drafting and 3 weeks of construction/finishing in the little spare time I have, I created what you see. People in the card collecting forums I'm a member of are begging for plans or for me to build them one! Problem is, this is the first thing I have built following my own design and plans. I could pass these on but no one in their right mind would be able to follow my scratches on paper but myself! I'm extremely proud of the outcome but am looking for a way to come up with plans I can share! Hope you all like, and if I can come up with a way to make follow able plans I will share! This was all assembled using the kreg jig system, wood filler to hide the knots and lines where the wood joined and lots of sanding!

Estimated Cost
$300
Estimated Time Investment
Week Long Project (20 Hours or More)
Finish Used
Valspar Black satin interior high def paint, wood conditioner & gunstock color stain
Recommended Skill Level
Intermediate

Comments

CSaintD

Tue, 05/27/2014 - 08:38

Nicely done! How did you make the top? Is that a project board? It's very smooth.
I believe Ana uses "Sketchup" which is a google program to do her designs.

BadgerBen82

Tue, 05/27/2014 - 17:37

The top was a 24x72 edge glued alpine board I found at lowes. Just cut it to size and a little extra sanding. Awesome cut of wood and for only $37.

Jessee

Mon, 10/12/2015 - 17:19

Would you be willing to share some basic dimensions such overall size width, depth, and height and door measurements to get an idea?

Rustic X Kitchen Island with 4x4 Legs

Submitted by Rich2727 on Fri, 06/20/2014 - 10:52

In order to make this island a little beafier I used 4x4 wood for the X as well as the the top and bottom braces. Top is made up of glued up 1x3 maple wood. It looked really good raw, but decided to stain it to give a more uniform look. I bought the rustic handles and the bottle opener on Amazon.com. I used lag bolts and washers for the finishing accents...similar to the pottery barn island. Painted them with Rustoleum oil bronzed paint and then dabbed it with a paper towel to give it a rougher finish to it and then sprayed the casters as well. This was a fun project and are getting a lot of use out of it. Thanks goes to Anna for the plans and inspiration for this island. Rich

Built from Plan(s)
Estimated Cost
$300
Estimated Time Investment
Week Long Project (20 Hours or More)
Recommended Skill Level
Intermediate

Comments

Mriddle

Fri, 06/20/2014 - 11:44

i keep debating if i should do this, you did a great job. i like the 4x4 sides.

Susan Hubbard

Sun, 06/22/2014 - 08:25

Rich, I love the changes you made with the 4x4's. You made a gorgeous piece of furniture! Can you share with me where/how you attached the drawer/shelf sides? I'd like to follow how you made this, but can't tell from the pictures. On the original they look inset from the 2x4's, but your space is taken up by 4x4's. Would you mind sharing??? Thanks!

Rich2727

Mon, 06/23/2014 - 16:36

So, I ripped the 4x4 cross pieces down by 1/2" so that the side panels would rest inside the rectangle and flush with the 4x4 frame and up against the X.

Did that make sense?

Susan Hubbard

Mon, 06/23/2014 - 18:28

That's what I thought, but I wanted to make sure. I'm going to make one similar to yours :)

Susan Hubbard

Mon, 06/23/2014 - 18:28

That's what I thought, but I wanted to make sure. I'm going to make one similar to yours :)

Beautiful steps

Directions worked like a charm, thank you, Ana for what you do!

Comments

small pantry

Submitted by Kyafata on Sun, 08/16/2020 - 16:39

A quick pantry idea using 4 - 1x12x6'. 2 for sides 2 cut into 24" shelves. Start with basic box and then fill in shelves where you need them. Used 4" 2x4 scraps for feet. Put together with screws and nails will eventually add back panels to keep it square.

Estimated Cost
$75
Estimated Time Investment
Weekend Project (10-20 Hours)
Finish Used
painted with semi-gloss , went in kitchen
Recommended Skill Level
Beginner

Sewing cart/table

Submitted by luxonagel on Mon, 08/17/2020 - 09:08

Love this plan! I used locking hinges instead of legs because it will overlap a bed in our guest room when in use. The hinges are rated for 250lbs and have held both of my sewing machines with no issues. I placed the middle shelf to fit my machines on the lower and standard fabric storage cubes on the upper. A metal adhesive measuring tape was added to the edge for convenience. This table will also be used as a buffet for family/group gatherings.

Built from Plan(s)
Estimated Cost
$75
Estimated Time Investment
Afternoon Project (3-6 Hours)
Finish Used
Sherwin-Williams Duration in Snowbound (7004)
Recommended Skill Level
Beginner

Comments

Akroezen

Wed, 12/02/2020 - 09:09

Hi! I need my sewing cart to be used without legs as well and have search everywhere for an appropriate hinge. Could you share with me what type & size you used? Did you change the sizes of the top to accommodate at all? Thanks!

Entry shelf modified to a bathroom shelf

Submitted by Anonymous (not verified) on Wed, 02/15/2017 - 19:10

This was so fun, used contact paper on the back plywood and it turned out really well.

Estimated Cost
Less than $75
Estimated Time Investment
Weekend Project (10-20 Hours)
Finish Used
White satin paint from behr
I sanded between coats and used a fine bristle brush.
Recommended Skill Level
Beginner

Lumber Scrap wood portable Cart

Submitted by Kingspiper on Fri, 03/31/2017 - 13:03

Cut-off lumber cart on heavy duty 3 inch locking swivel casters.  Used 3/4 copper pipe and 3/4 plywood with a couple of pine wood scraps.  Keeps things neat and clean. :)

Estimated Cost
125.00
Estimated Time Investment
Weekend Project (10-20 Hours)
Finish Used
Dark walnut stain and plain walnut oil
Recommended Skill Level
Beginner

Comments

Kitty Outhouse

My first Ana White project. Built Ana’s awesome small cedar shed as an outhouse for our many cats. The have access to it from inside the house. Great way to keep litter boxes and the mess out of the house. It is stand alone, and attached to the house, in front of a bedroom window. There are two ‘entrances’ as well as two, one-way, escape hatches, if a cat in the outhouse is interrupted by another cat (I.e. a male cat comes in and the female feels trapped) they can exit to the outside (one way so no critters can come inside!). Ana has easy to build plans, great site! I plan on making the square table just posted today for my newly refurbished deck. Keep in mind, my estimated costs and time reflect a LOT of additional features on the inside. The shed itself, very easy, simple, inexpensive. Very little waste with Ana’s projects as well.

Built from Plan(s)
Estimated Cost
$500
Estimated Time Investment
Week Long Project (20 Hours or More)
Finish Used
No finish, at least not yet.
Recommended Skill Level
Intermediate

Comments

Weatherly Sectional

Submitted by Anonymous (not verified) on Mon, 05/22/2017 - 20:08

Ana's plans are so easy to follow. This sectional was a breeze to build.

Built from Plan(s)
Estimated Cost
$120 lumber and materials $400 cushions
Estimated Time Investment
Weekend Project (10-20 Hours)
Finish Used
Glidden outdoor paint.
Recommended Skill Level
Intermediate
Seasonal And Holiday

Double Pedestal Farmhouse Table (8 feet)

Built from the Triple Pedestal Farmhouse Table plans. Had to size down the plans a little bit to fit into my dining room. Created three pedestal legs but only ended up using two on the final table. Took about 16 hours from start to finish. All of the wood is pine except for the top, which is Poplar. Made a couple of mistakes along the way but am very happy with the way everything turned out. Feel free to ask questions and I will do my best to answer them. Happy Building!

Built from Plan(s)
Estimated Cost
$175
Estimated Time Investment
Weekend Project (10-20 Hours)
Finish Used
English Chestnut. Stained once and waited 7 minutes to wipe off. Two coats of Clear Satin Polyurethane.
Recommended Skill Level
Intermediate

Comments

Open bench and hutch

Submitted by Beginner52 on Mon, 10/04/2021 - 05:21

Thanks Anna for the inspiration. My bench is 12 feet long.

Comments

Twin Platform Bed with Hairpin Legs

Submitted by Anonymous (not verified) on Mon, 10/04/2021 - 17:40

I used untreated 2” x 6” boards, mitered the corners and stained with Minwax Early American.
The 14” golden hairpin legs are from Amazon however, after I built the bed, I realized the mattress on the trundle was getting caught on the angles of the legs so I’ve ordered straight legs as replacements. It should take care of the issue. Lesson learned! 🤣 Overall, I built it myself, it’s very sturdy and she loves it! Thanks Anna for the plans!!!

Comments