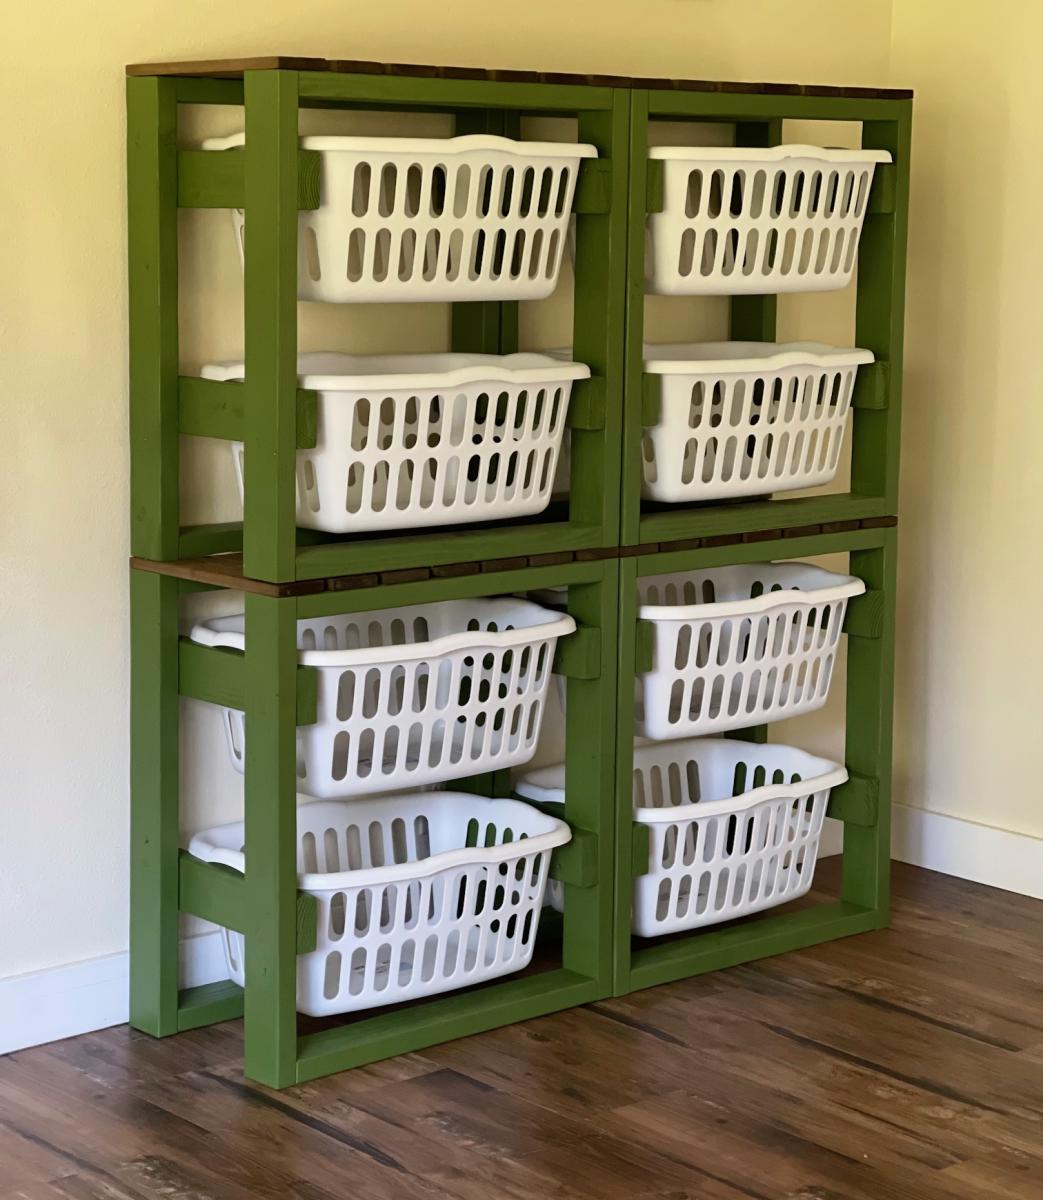
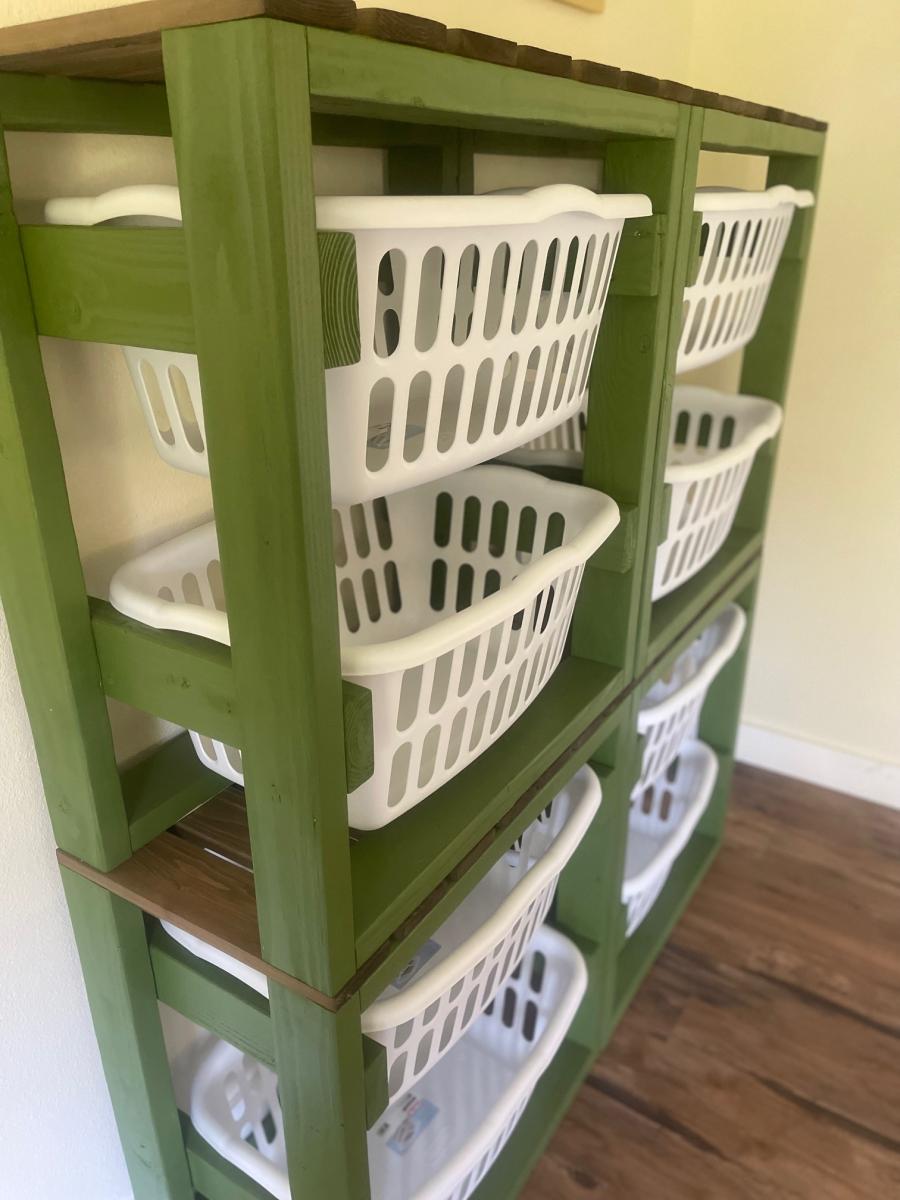
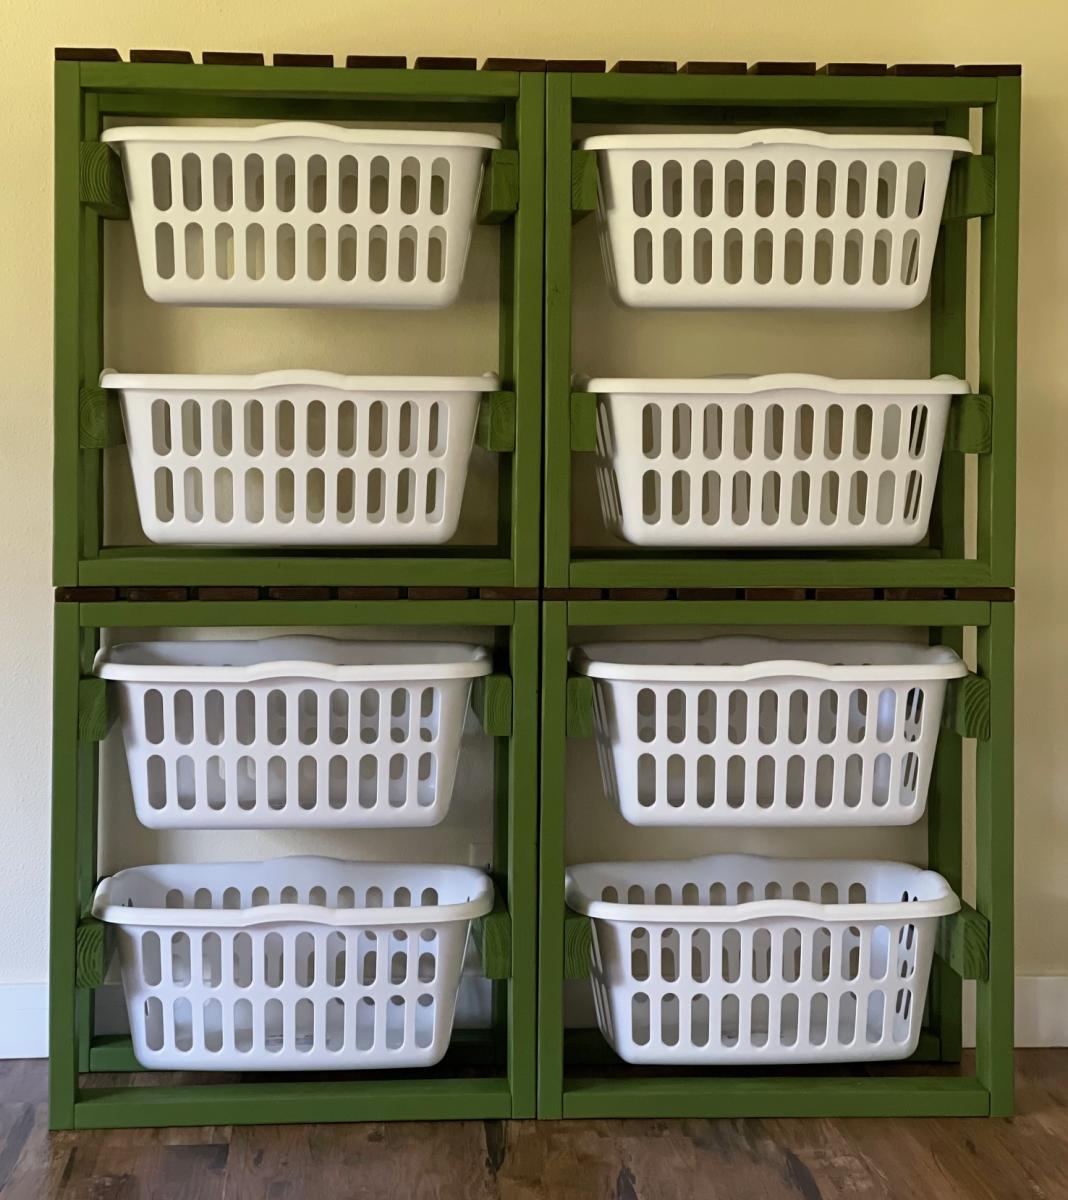
Stackable Laundry Basket Organizers

I like that these simple laundry basket holders can be used as a single, side by side or stacked.

Built from Plan(s)
I like that these simple laundry basket holders can be used as a single, side by side or stacked.
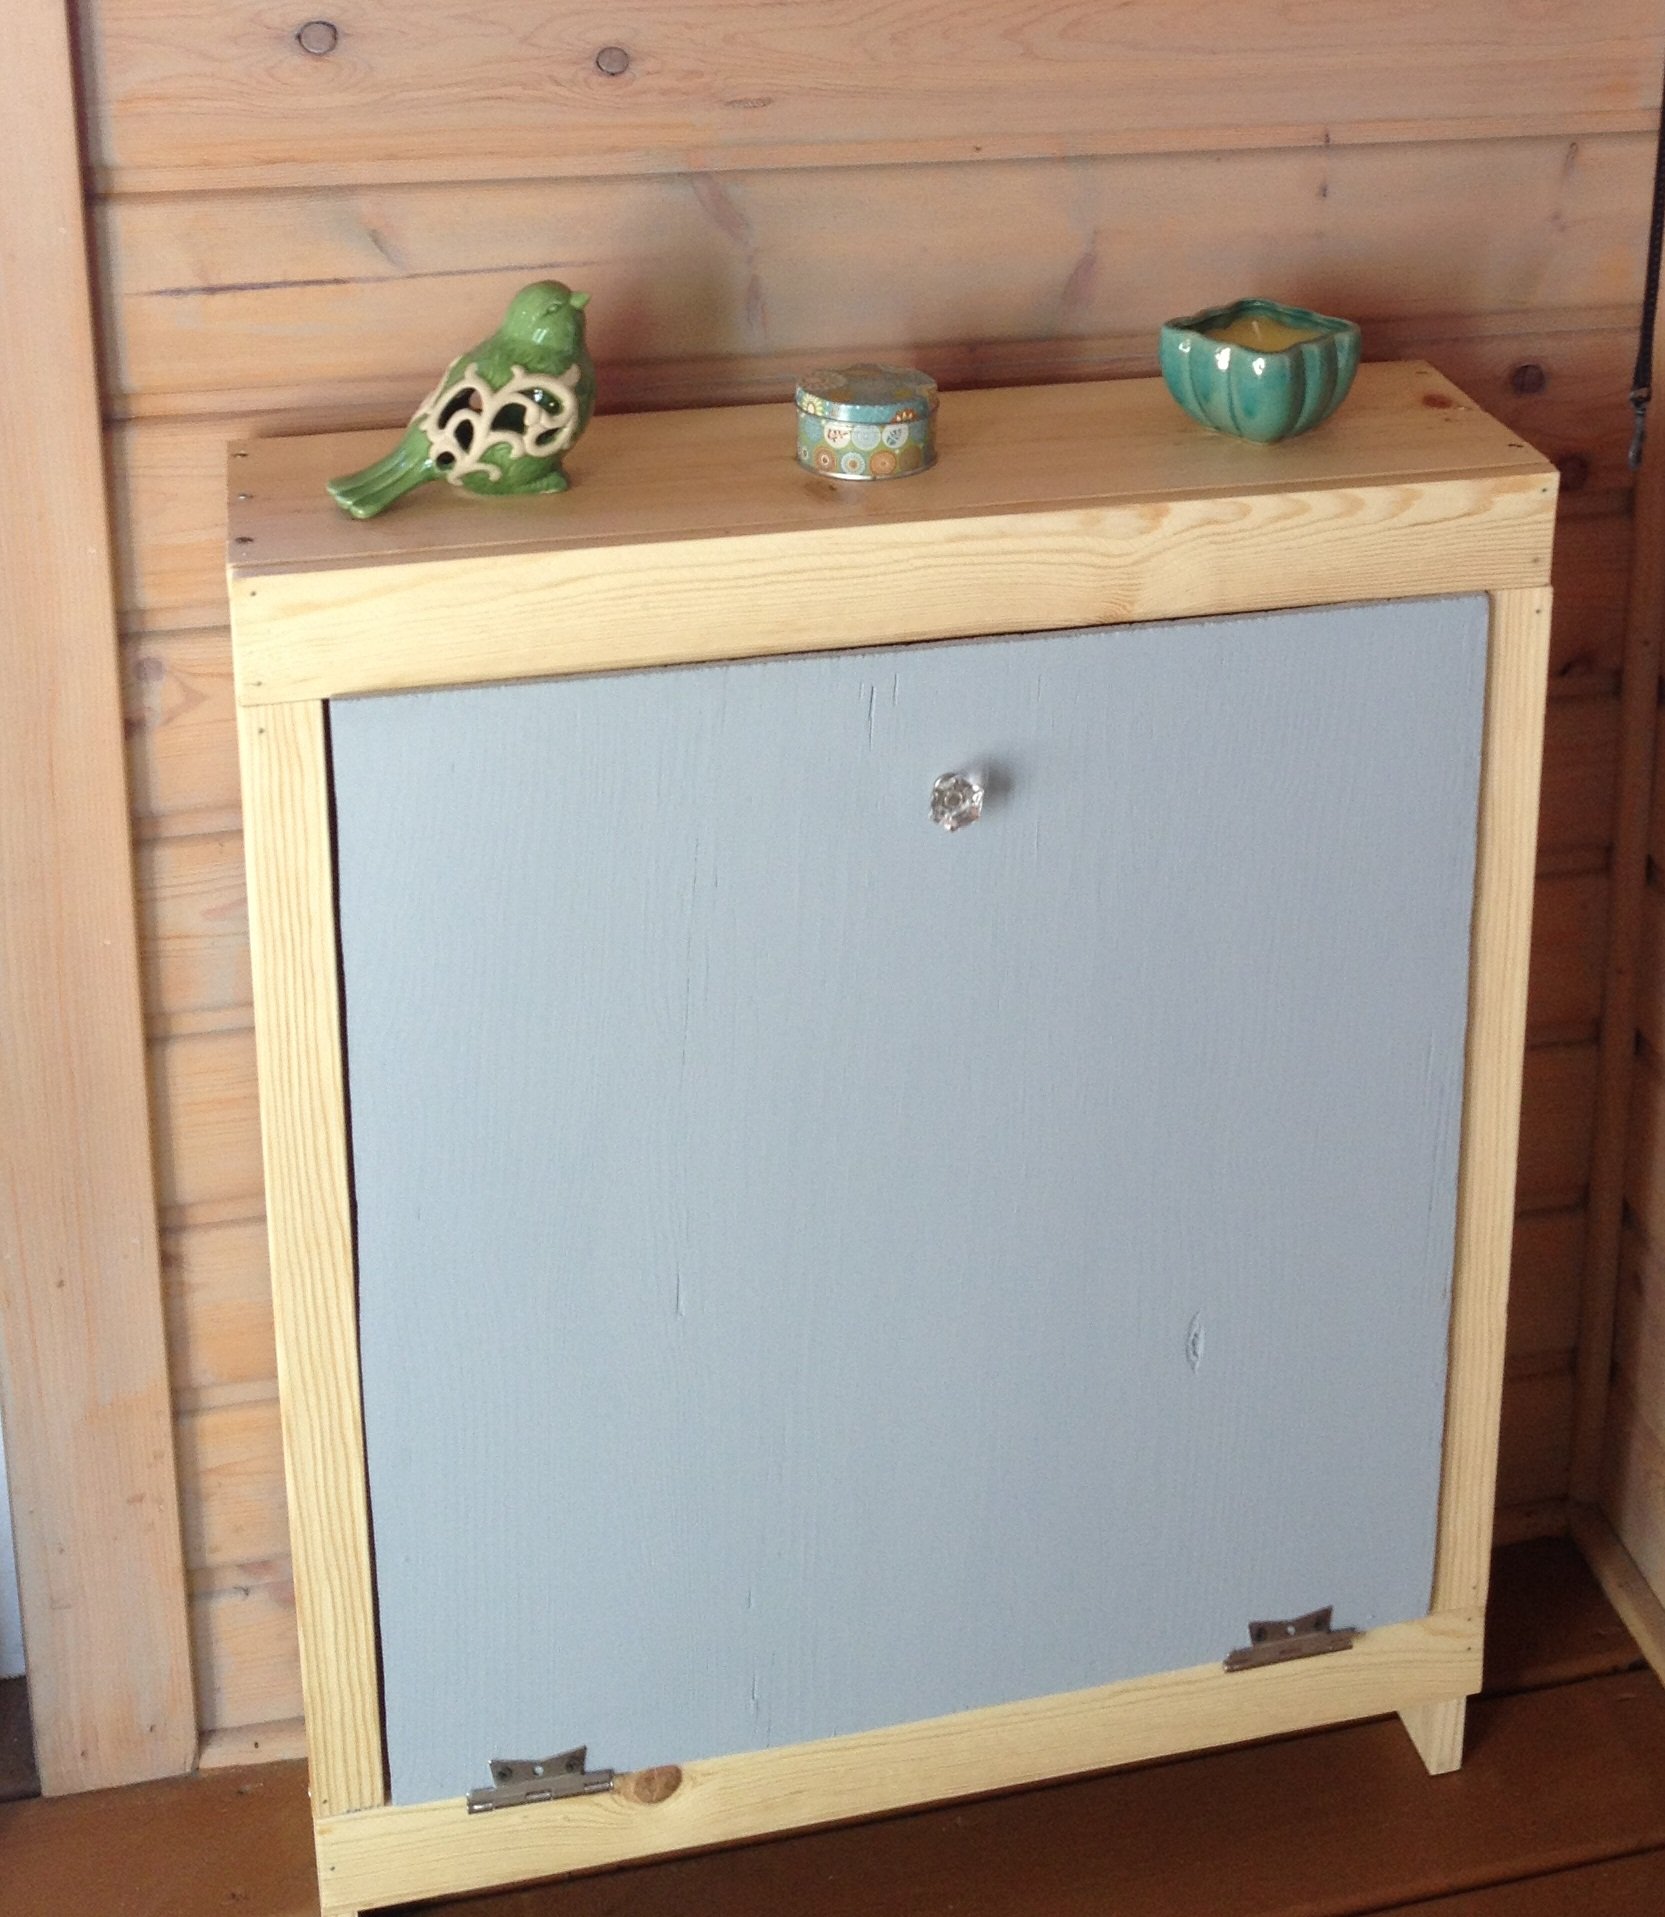
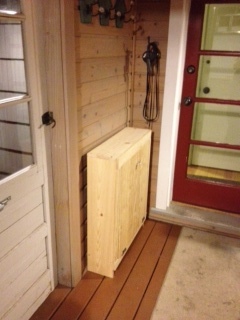
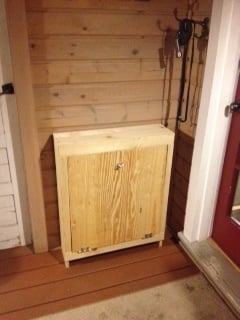
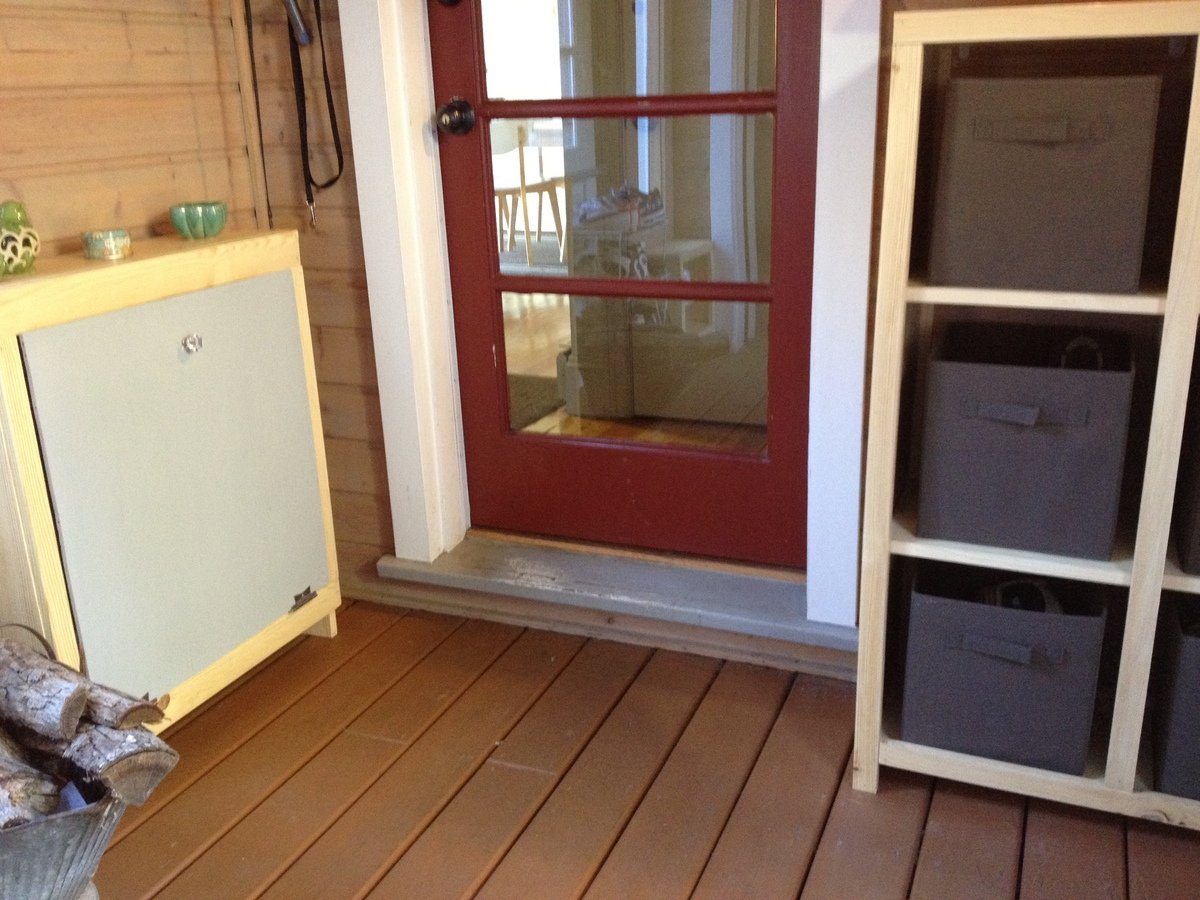
Second wood project overall. First with a power-saw. Just found Ana-White - love it and thanks for sharing it all! I had to change the dimensions of this one to fit the space we needed it for. It holds two paper bags side by side to hold all of our recycling. So much neater then our plastic bin we had.
Looking forward to the next project...

Sun, 11/29/2015 - 11:57
The bottom looks different as well. I'm trying to avoid having to use a jig saw for the bottom. Would you mind sharing if and what modifications you made to the bottom? Great work!
Cara
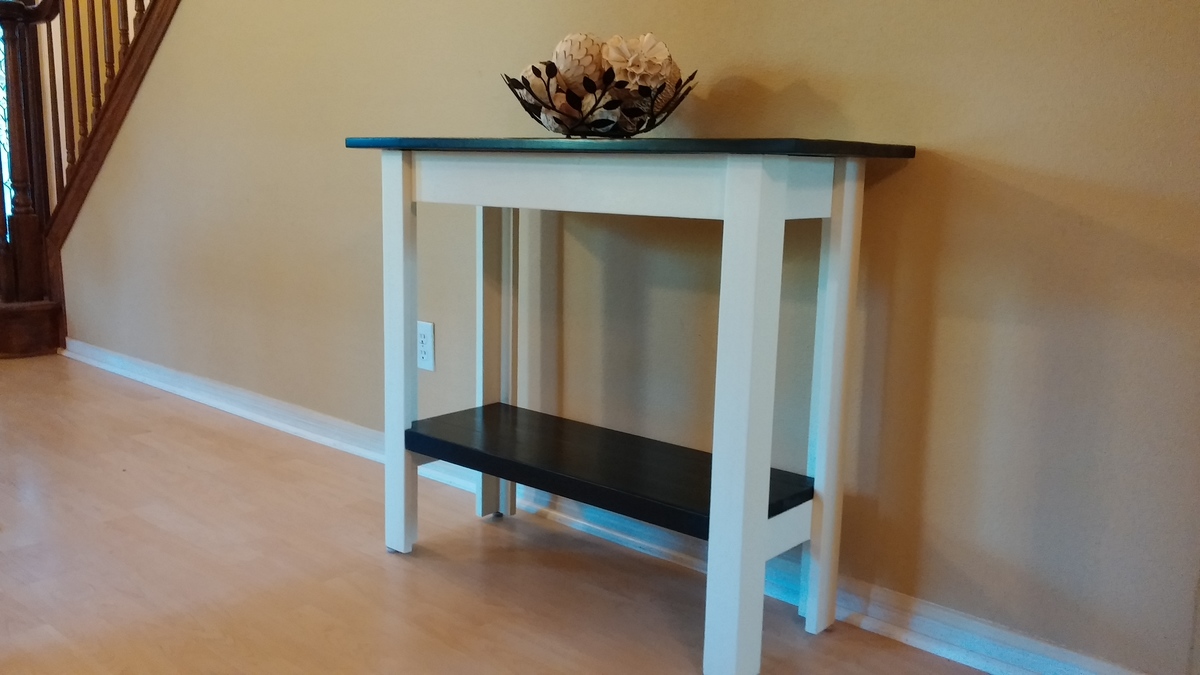
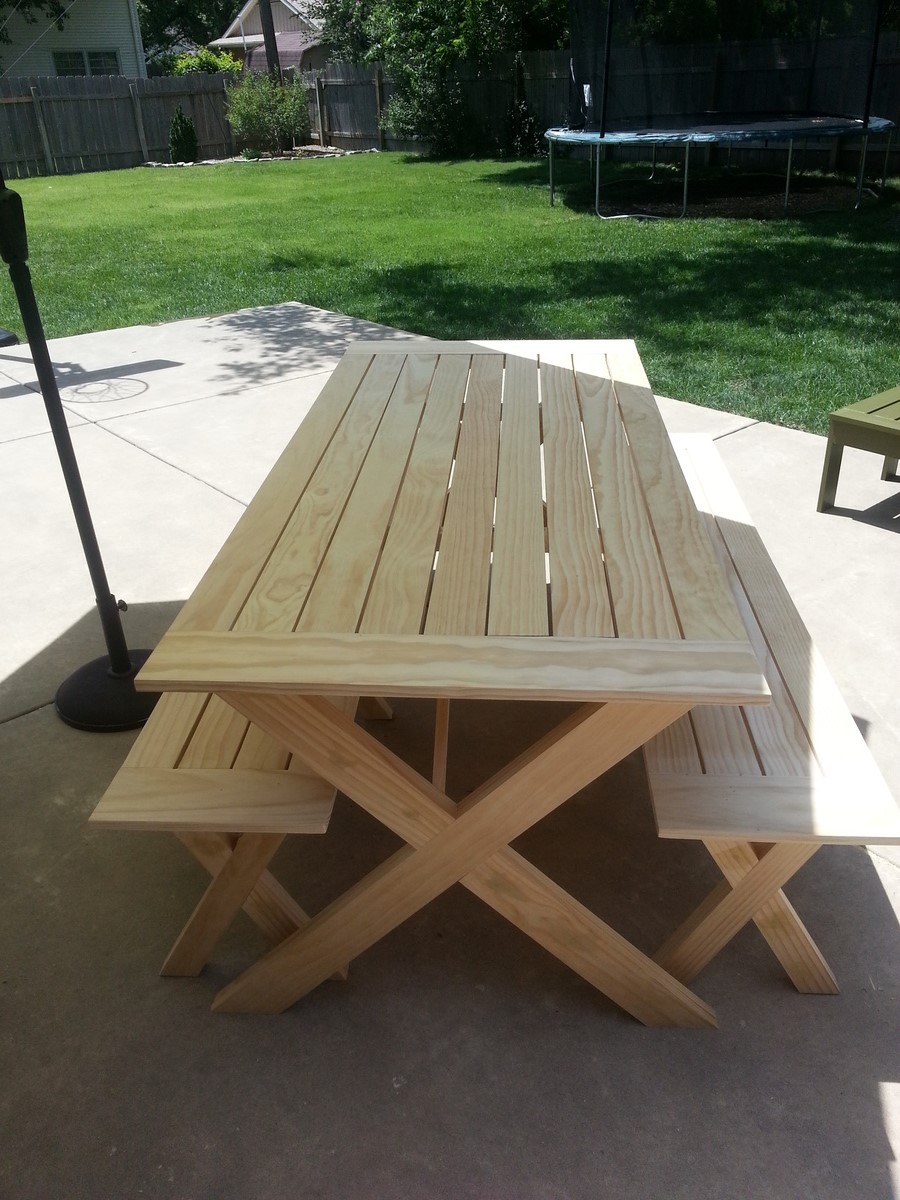
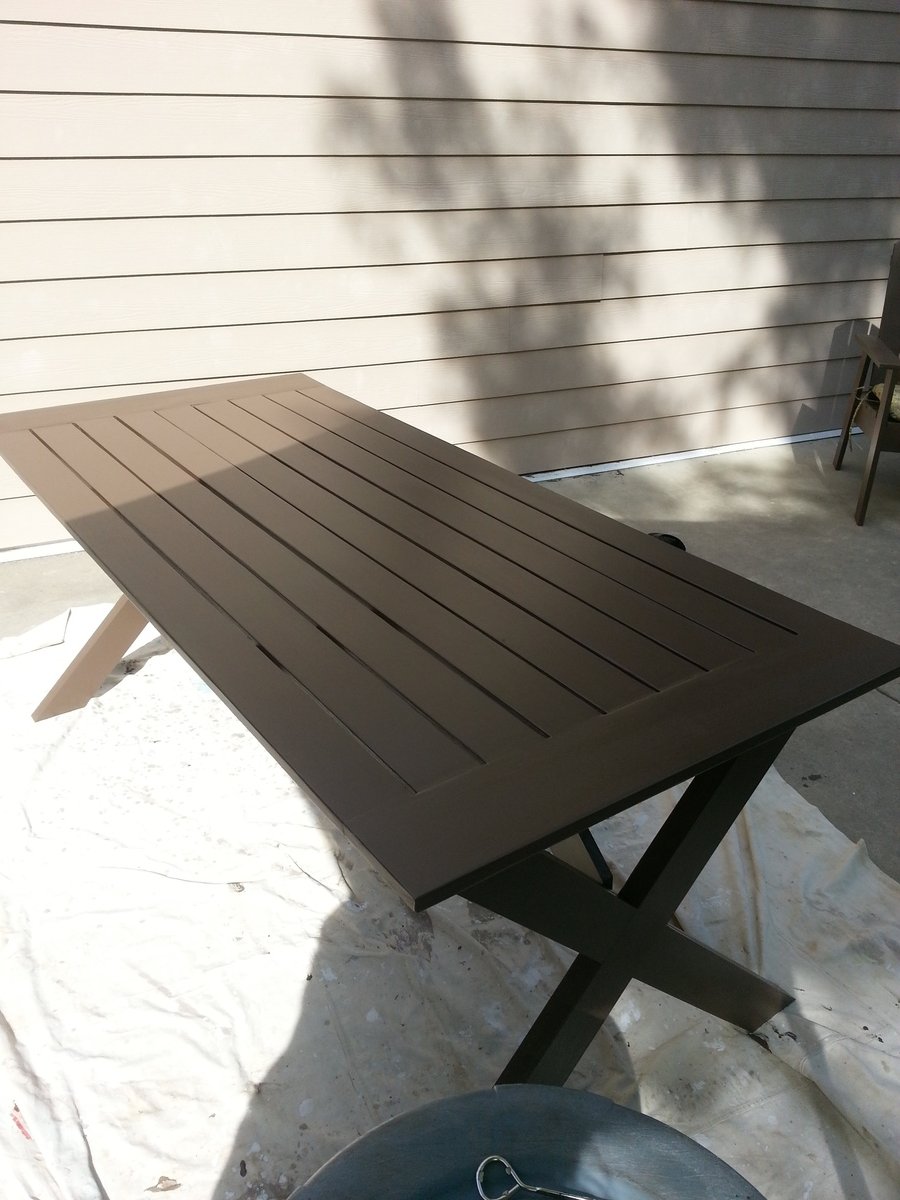
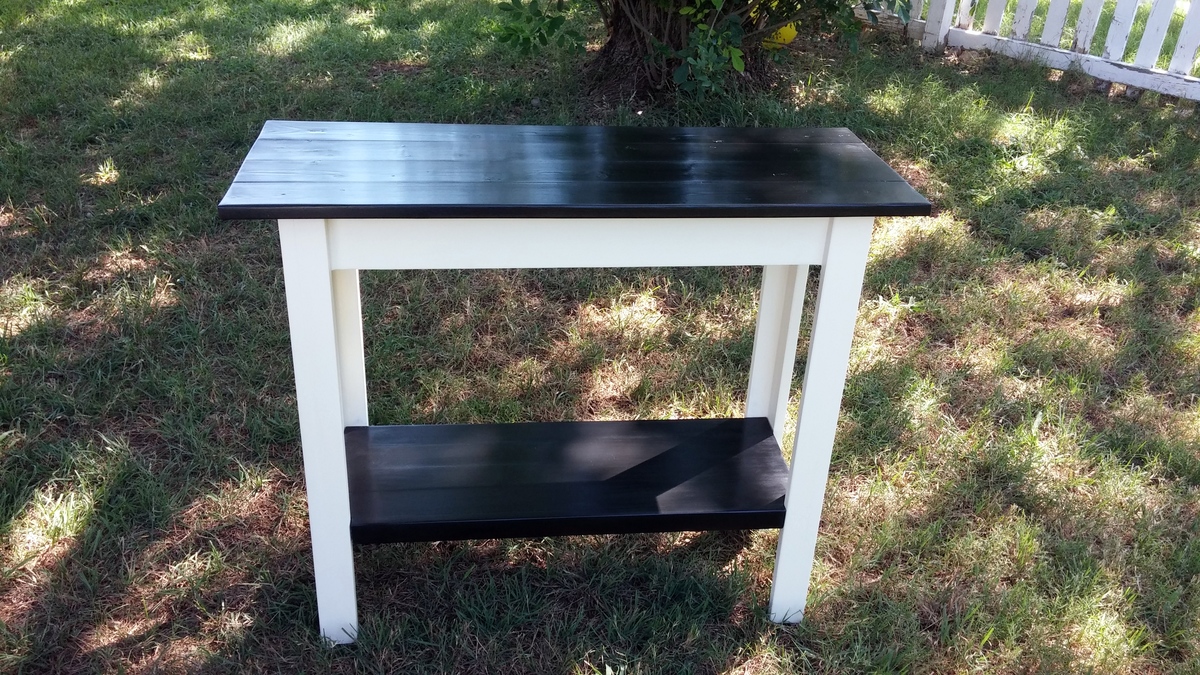
This project was very simple but an excellent experience. With a lot of patience on the finishing, it turned out absolutely beautiful too! The wood cost was higher because Home Depot was out of several of the size boards in the cheap pine and I didn't want to wait till I found them to start. I began the project with our trusty circular saw, but was quickly frustrated trying to get nice square cuts (and even lengths) so back to Home Depot we went. We came home with more wood, a 12" Sliding Compound Miter Saw and a Kreg Jig, which increased my cost just a tiny bit. But boy was I a happy girl! Especially since they are all mine (maybe I'll share w/the hubby and kiddo)! :o) After that, it went together very quickly. I added a 1" apron on the bottom shelf which hid the bracer - just tapped it in with the finishing nails. I also added screw-in padded feet, which means it sits nice and even and I don't have to worry about it scratching the floor (or the bottom of the table getting damaged). The only thing I did not enjoy was filling in all the pocket holes from the Kreg, which took forever. I definitely learned how important pocket hole placement is, as I ended up having to paint the legs instead of staining them (as originally planned) so I could hide all the huge holes. But it turned out better than expected so I'm happy this happened. I also recommend attaching the top, the top bracers and the bottom shelf after sanding and filling all the holes if using a Kreg. I actually attached both the top and the bottom shelf after I'd stained and painted. This allowed me to get in all the crevices and kept the stain out of the paint and the paint out of the stain! A few touch ups once I attached the top and put in the bottom shelf and voila! Sealed it with the wax and am thrilled with the finished product. And the best part is, my son is finally interested in building and even started his own table! Thanks to Ana's site, our build list is growing every day! There are just not enough (cool) hours in the day to build during our 100 degree Central Texas summer!
Sun, 07/13/2014 - 21:15
It is beautiful!! That extra time taken in finishing definitely shows. :)
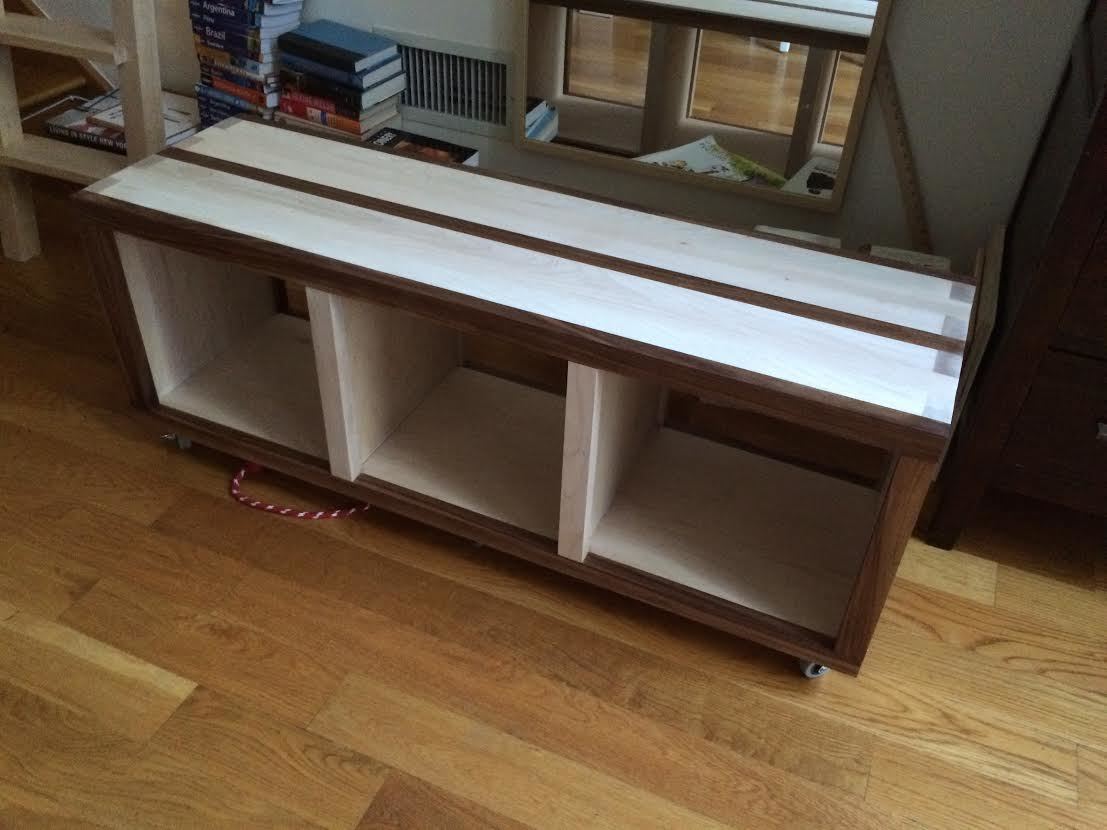
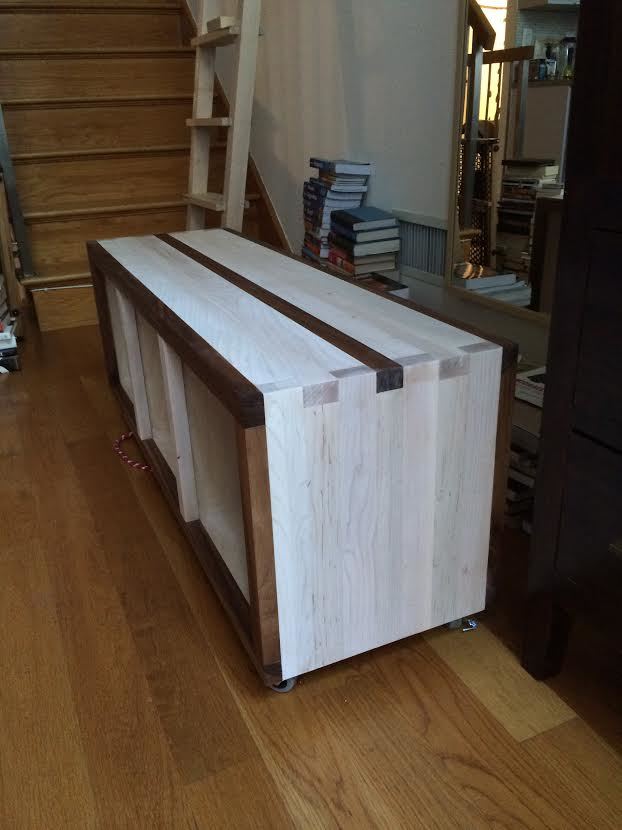
I loved these rolling cubby plans, so I used them to build one of my own! I needed a bench that could "nest" itself within some open shelves, but be pulled out to provide additional table seating.
I built this one from maple and walnut, because I like the bright, white color of maple against the brownish/gray of walnut. I very much dislike shiny or dark woods, so I went for an ultra matte wax finish. I used a liming wax for the maple to keep it bright and white (maple tends to go yellow when finished with a "clear" or "natural" finisher), and a clear wax for the walnut.
I found some non-marking casters on Amazon, but that was the tricky part. The bench needed to be high enough to create ample storage, yet not too tall that it was uncomfortable to sit on. SO I went with s smaller caster, but needed to use six to support the weight of the bench and three occupants. Final bench dimensions are 19" H x 47" W x 17 " D.
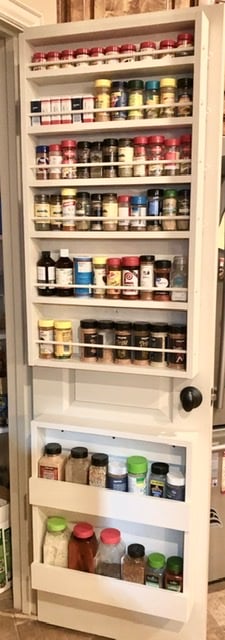
This is a great project to clear up space in the pantry. I followed the Ana-White plans for the upper rack and then decided I needed more space for my larger Costco spices. For this I followed the plans for the top 23” but with 2 shelves. I gave myself extra depth by using 1x4’s instead of dowels. I work very slowly, so both portions took me about a day apiece with sanding, painting, etc. My favorite tool is now the Kreg jig. Totally worth the $40.
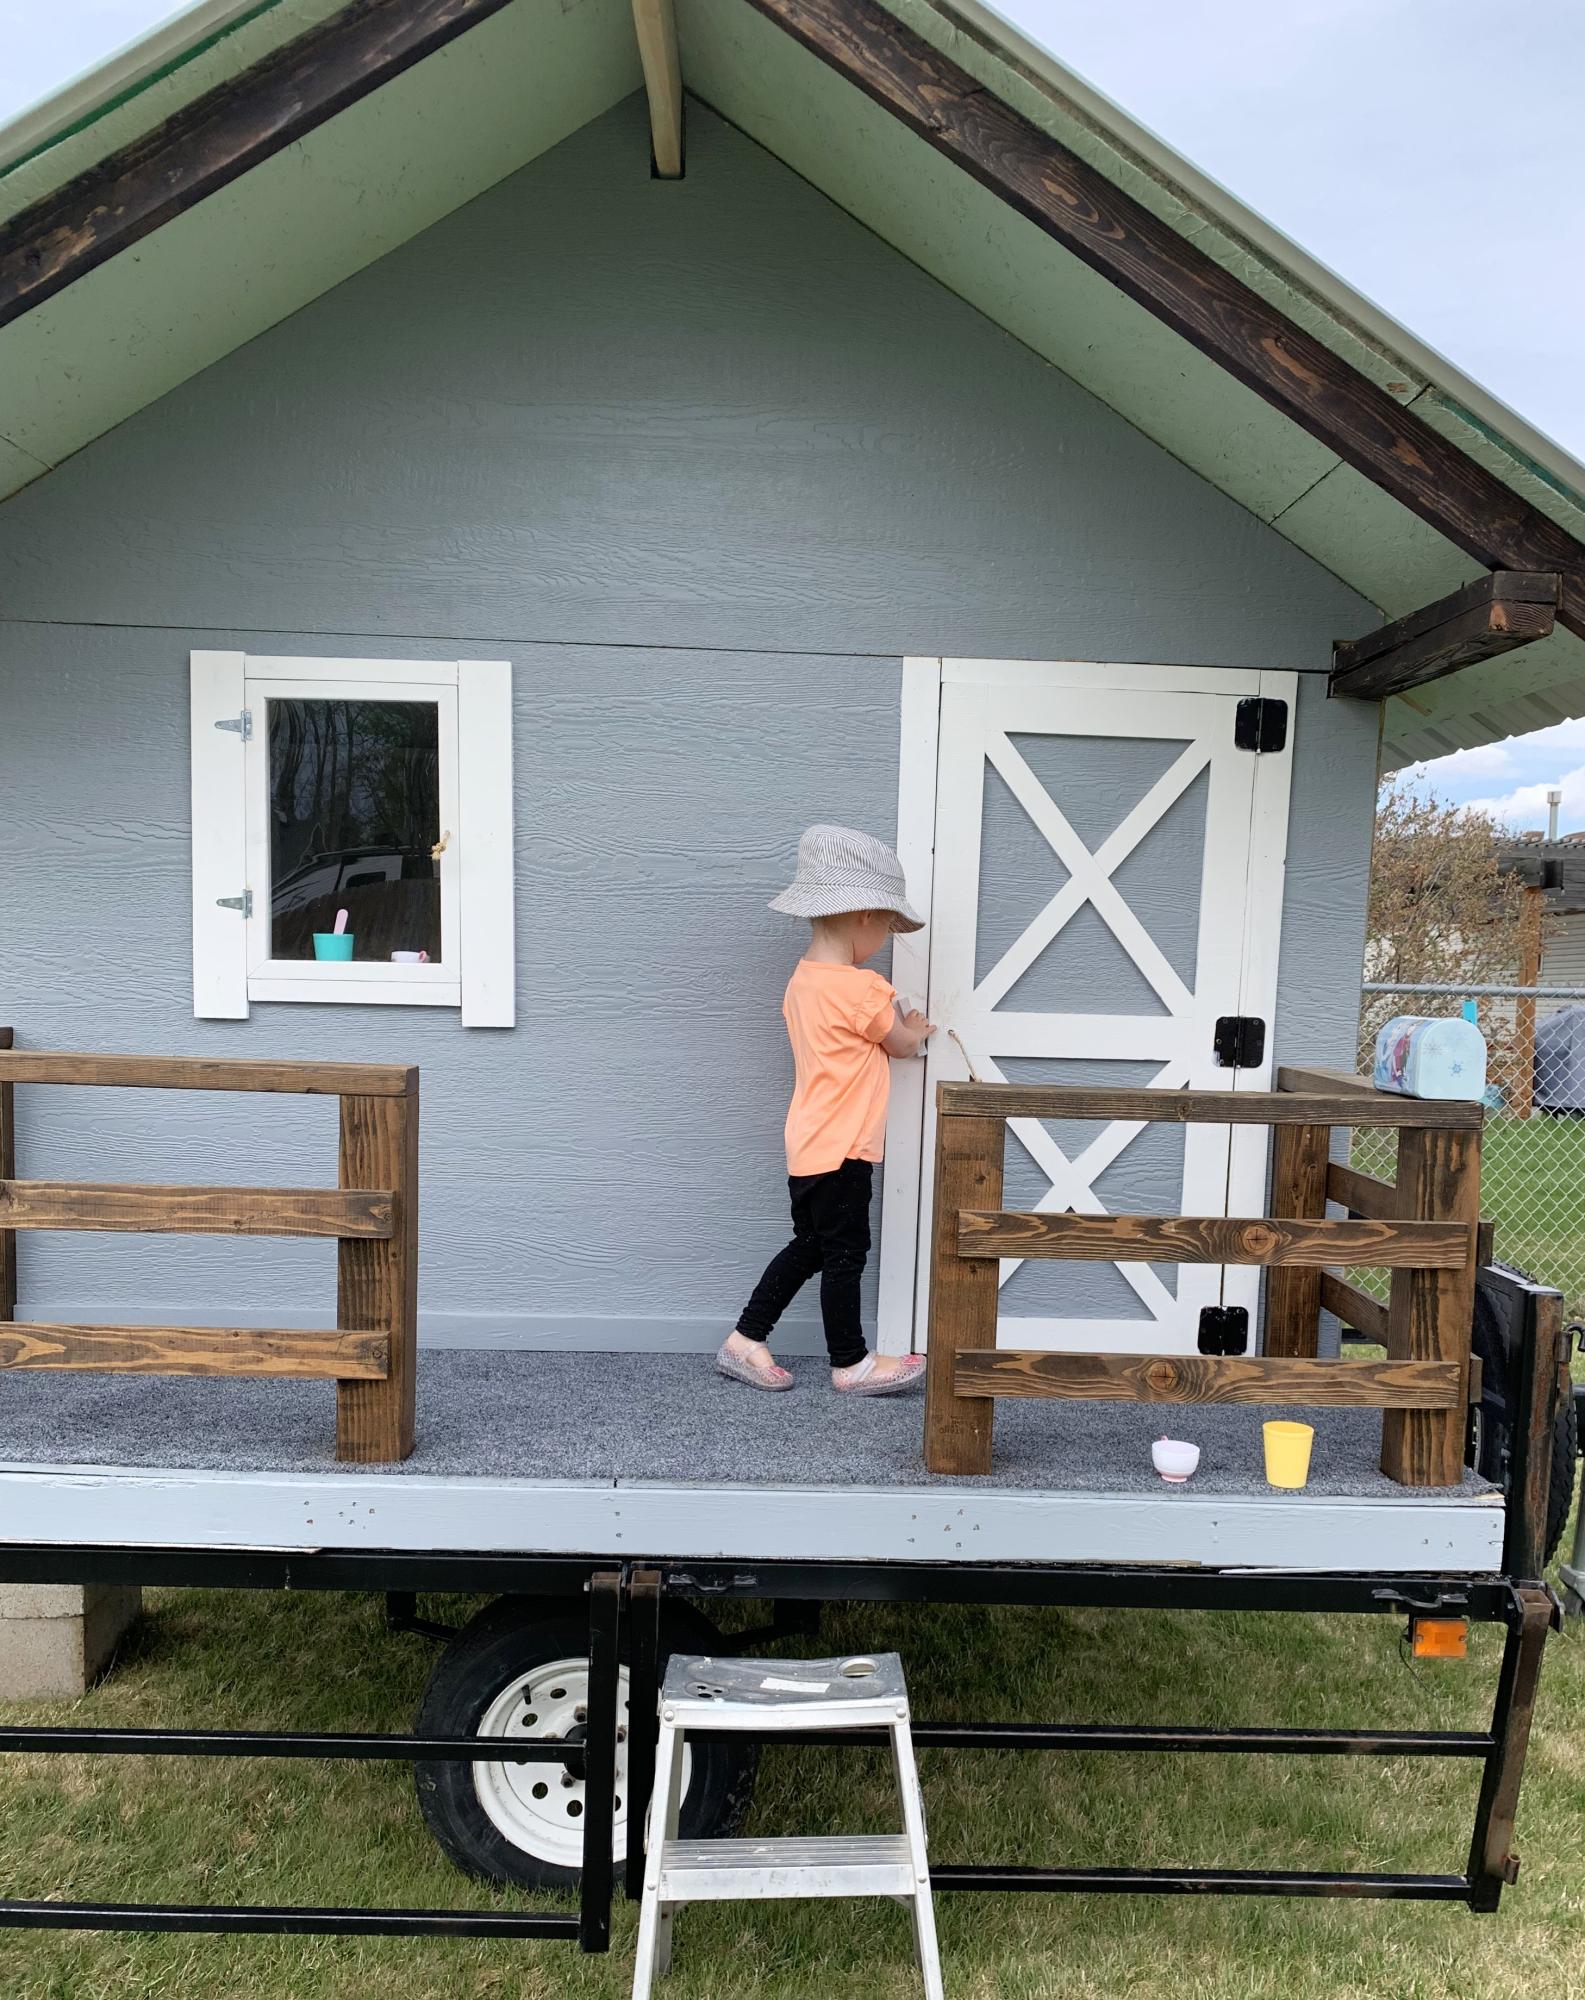
I had just retired and wanted to make a playhouse for my 2 year old grand-daughter. I always wanted one as a kid and wanted to build one for my kids but never found the time.
This was made mostly out of scrap wood that couldn’t be used to build a house and I was lucky enough to get permission to take whatever I needed. Learned a lot doing it. Thanks to my boyfriend for letting me borrow his nailer.
Cindy
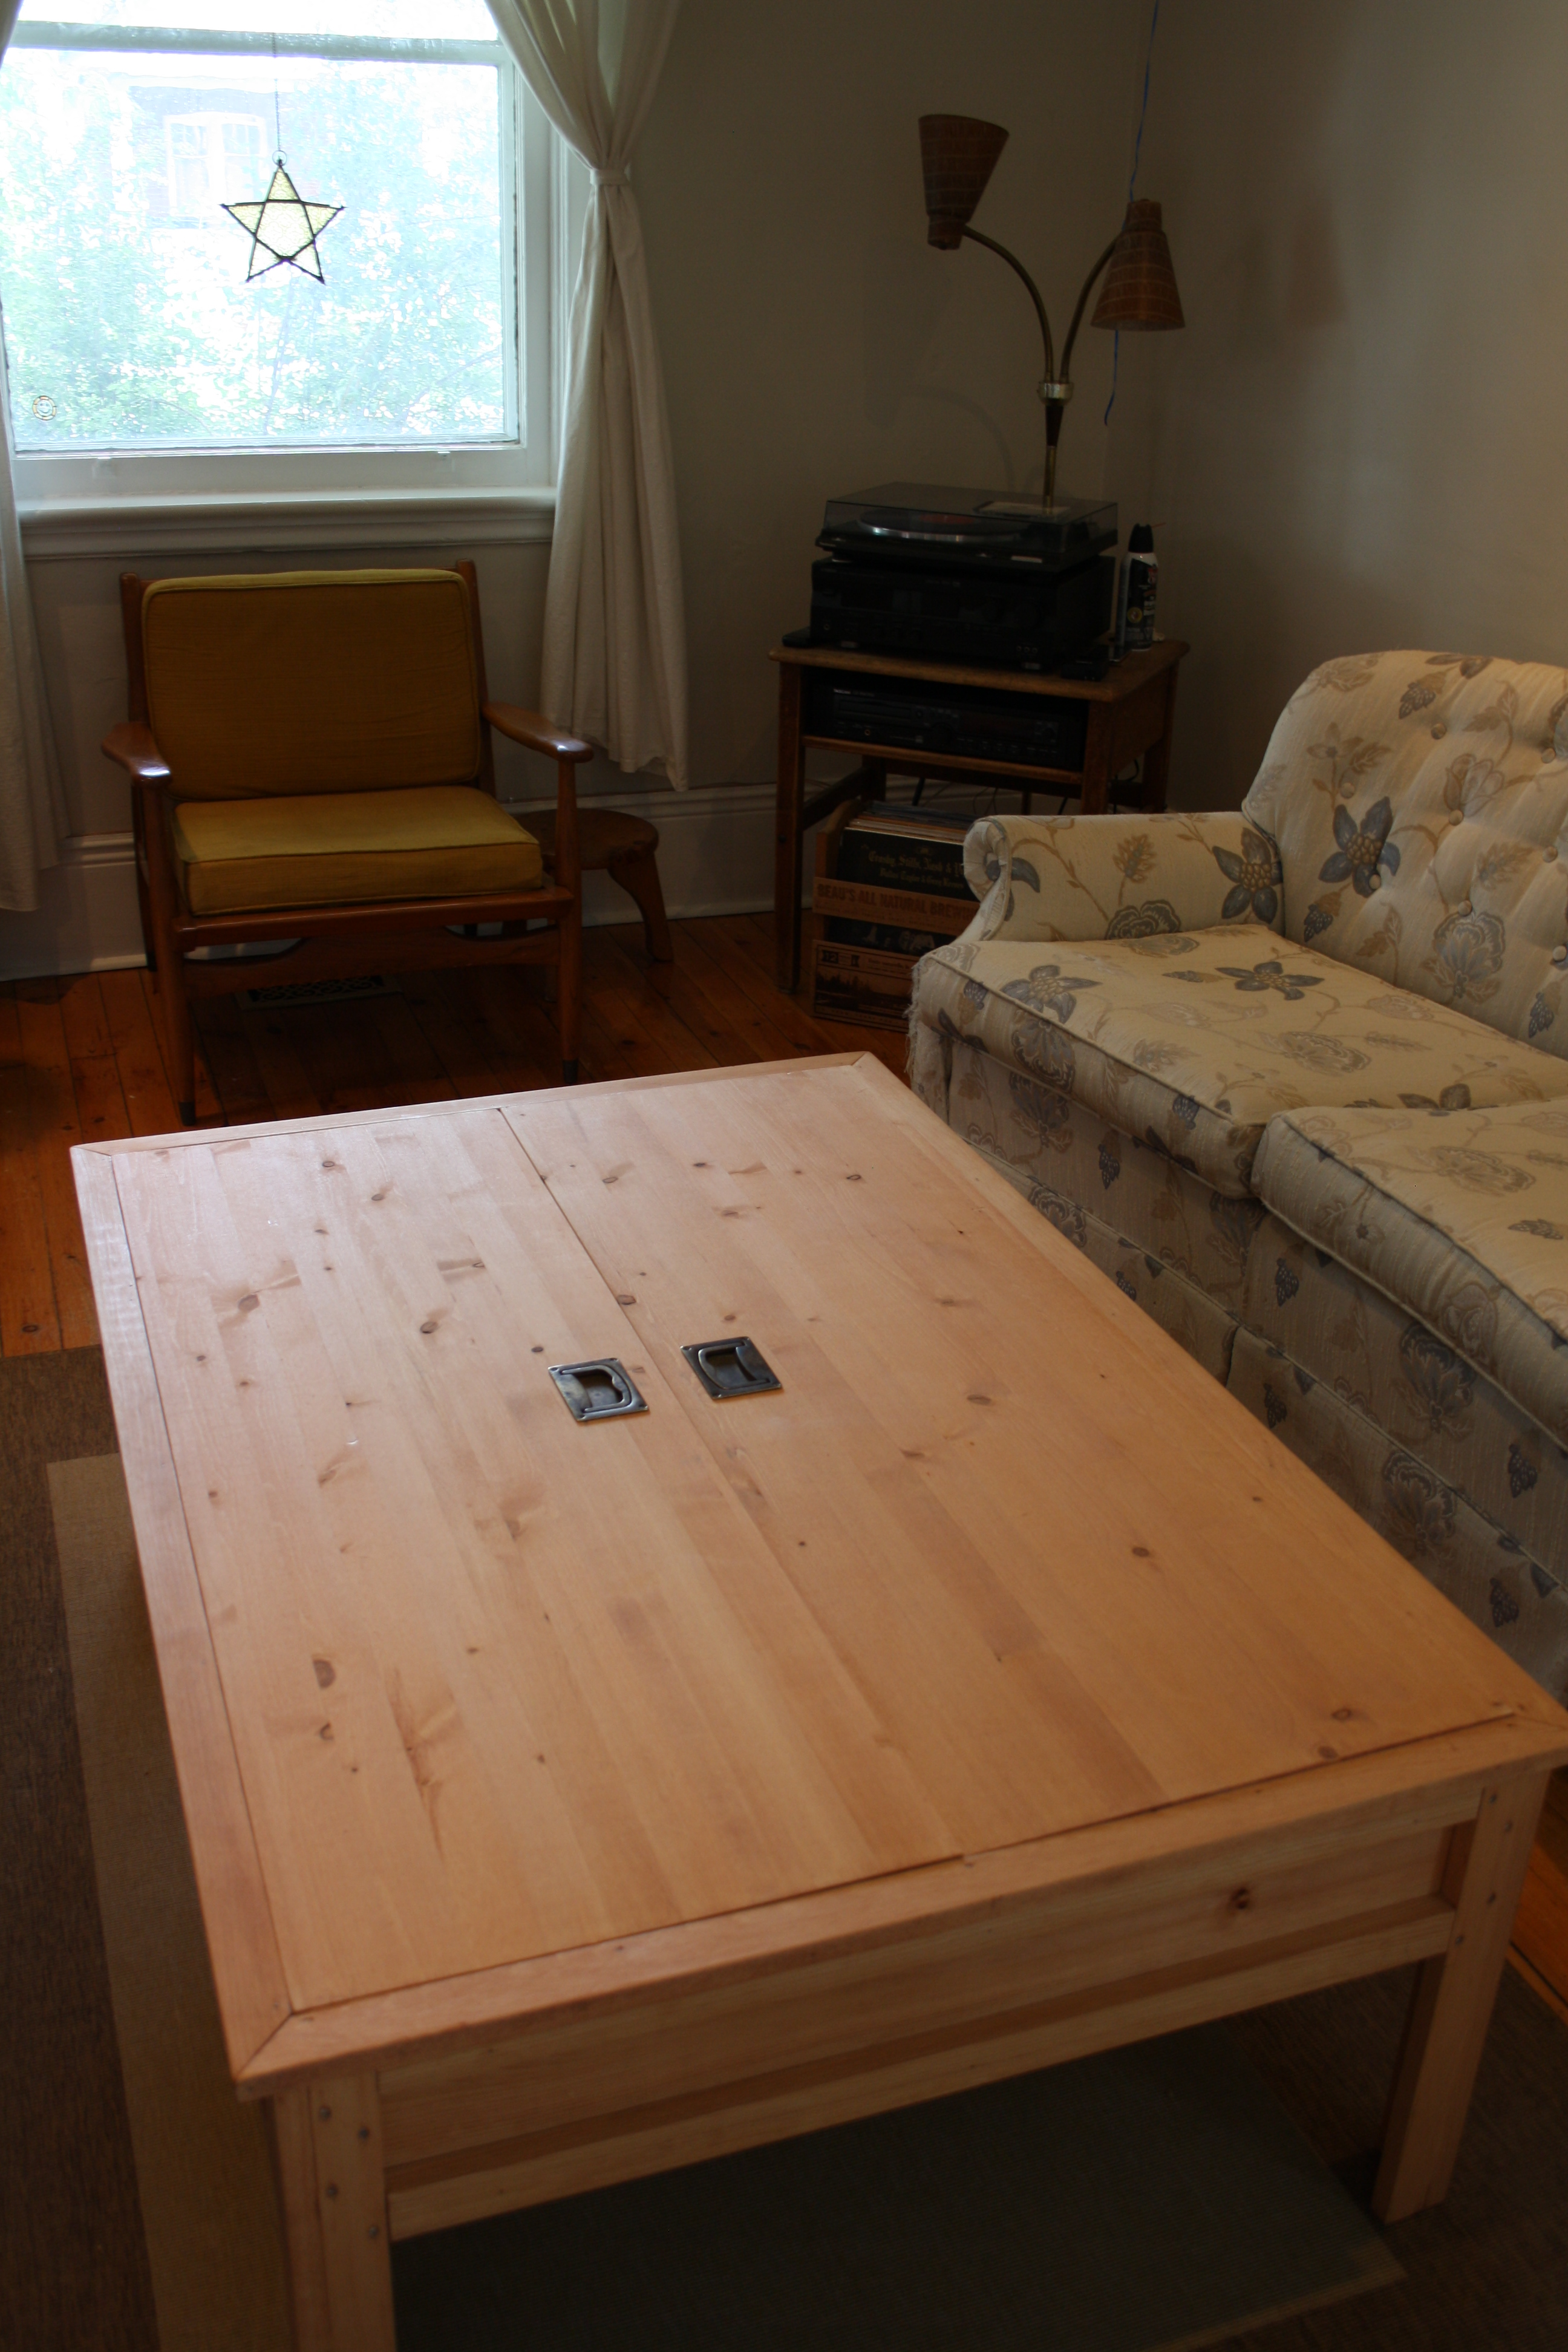
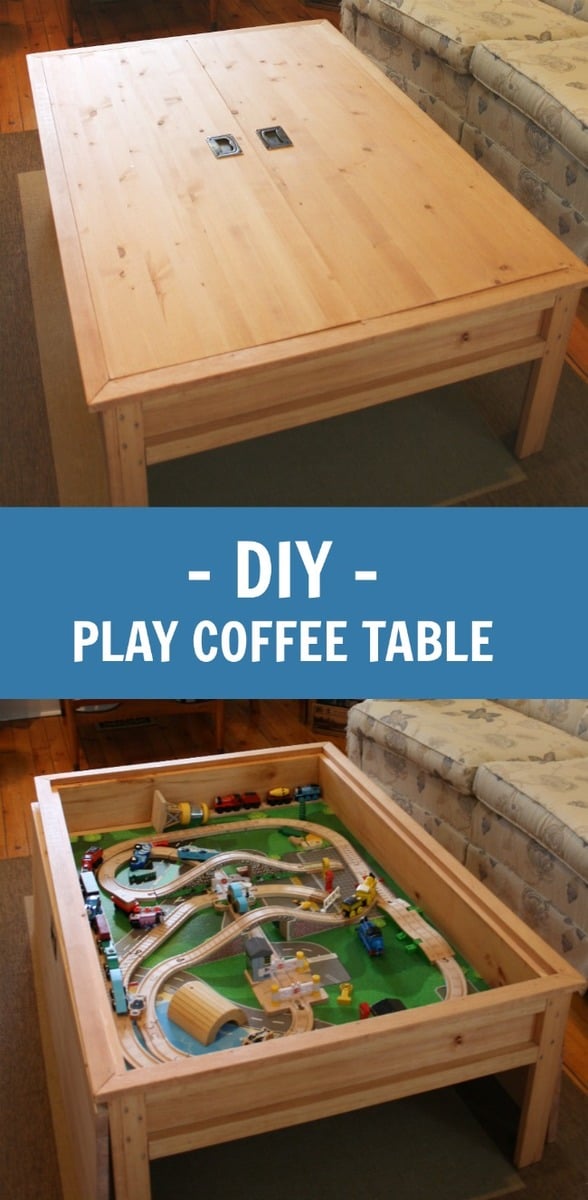
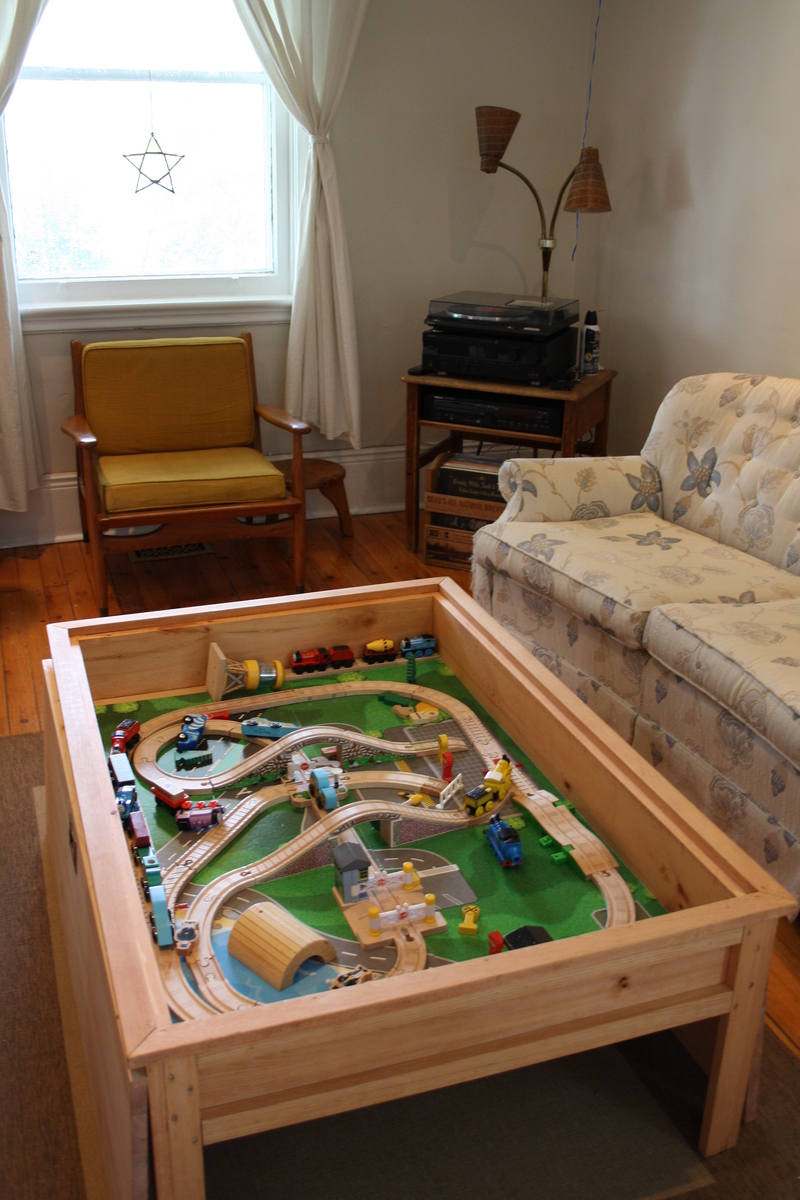
I was planning to make a train table trundle for my son's bed, but once I saw this plan everything changed. I'm so SO happy with it. Modifications: 1) We took off the bottom shelf because hubby likes to stretch his long legs out underneath. 2) We used laminated pine project panels for the top, they cost more, but they were already the correct size, and the finished look of the top would be nicer. We altered the design to make the panels go lengthwise. So far so good, neither have bowed whatsoever. 3) we used inset handles from Lee Valley with an antiqued finish. I had yet to lacquer this when I took the photo because we couldn't wait to get the trains in there! I have since done 3 coats of minwax Poly to protect it from little hands, crayons, etc.... We're hoping this table will graduate cars, then to legos, and then....who knows!? Thanks to Ana and all the contributors here.
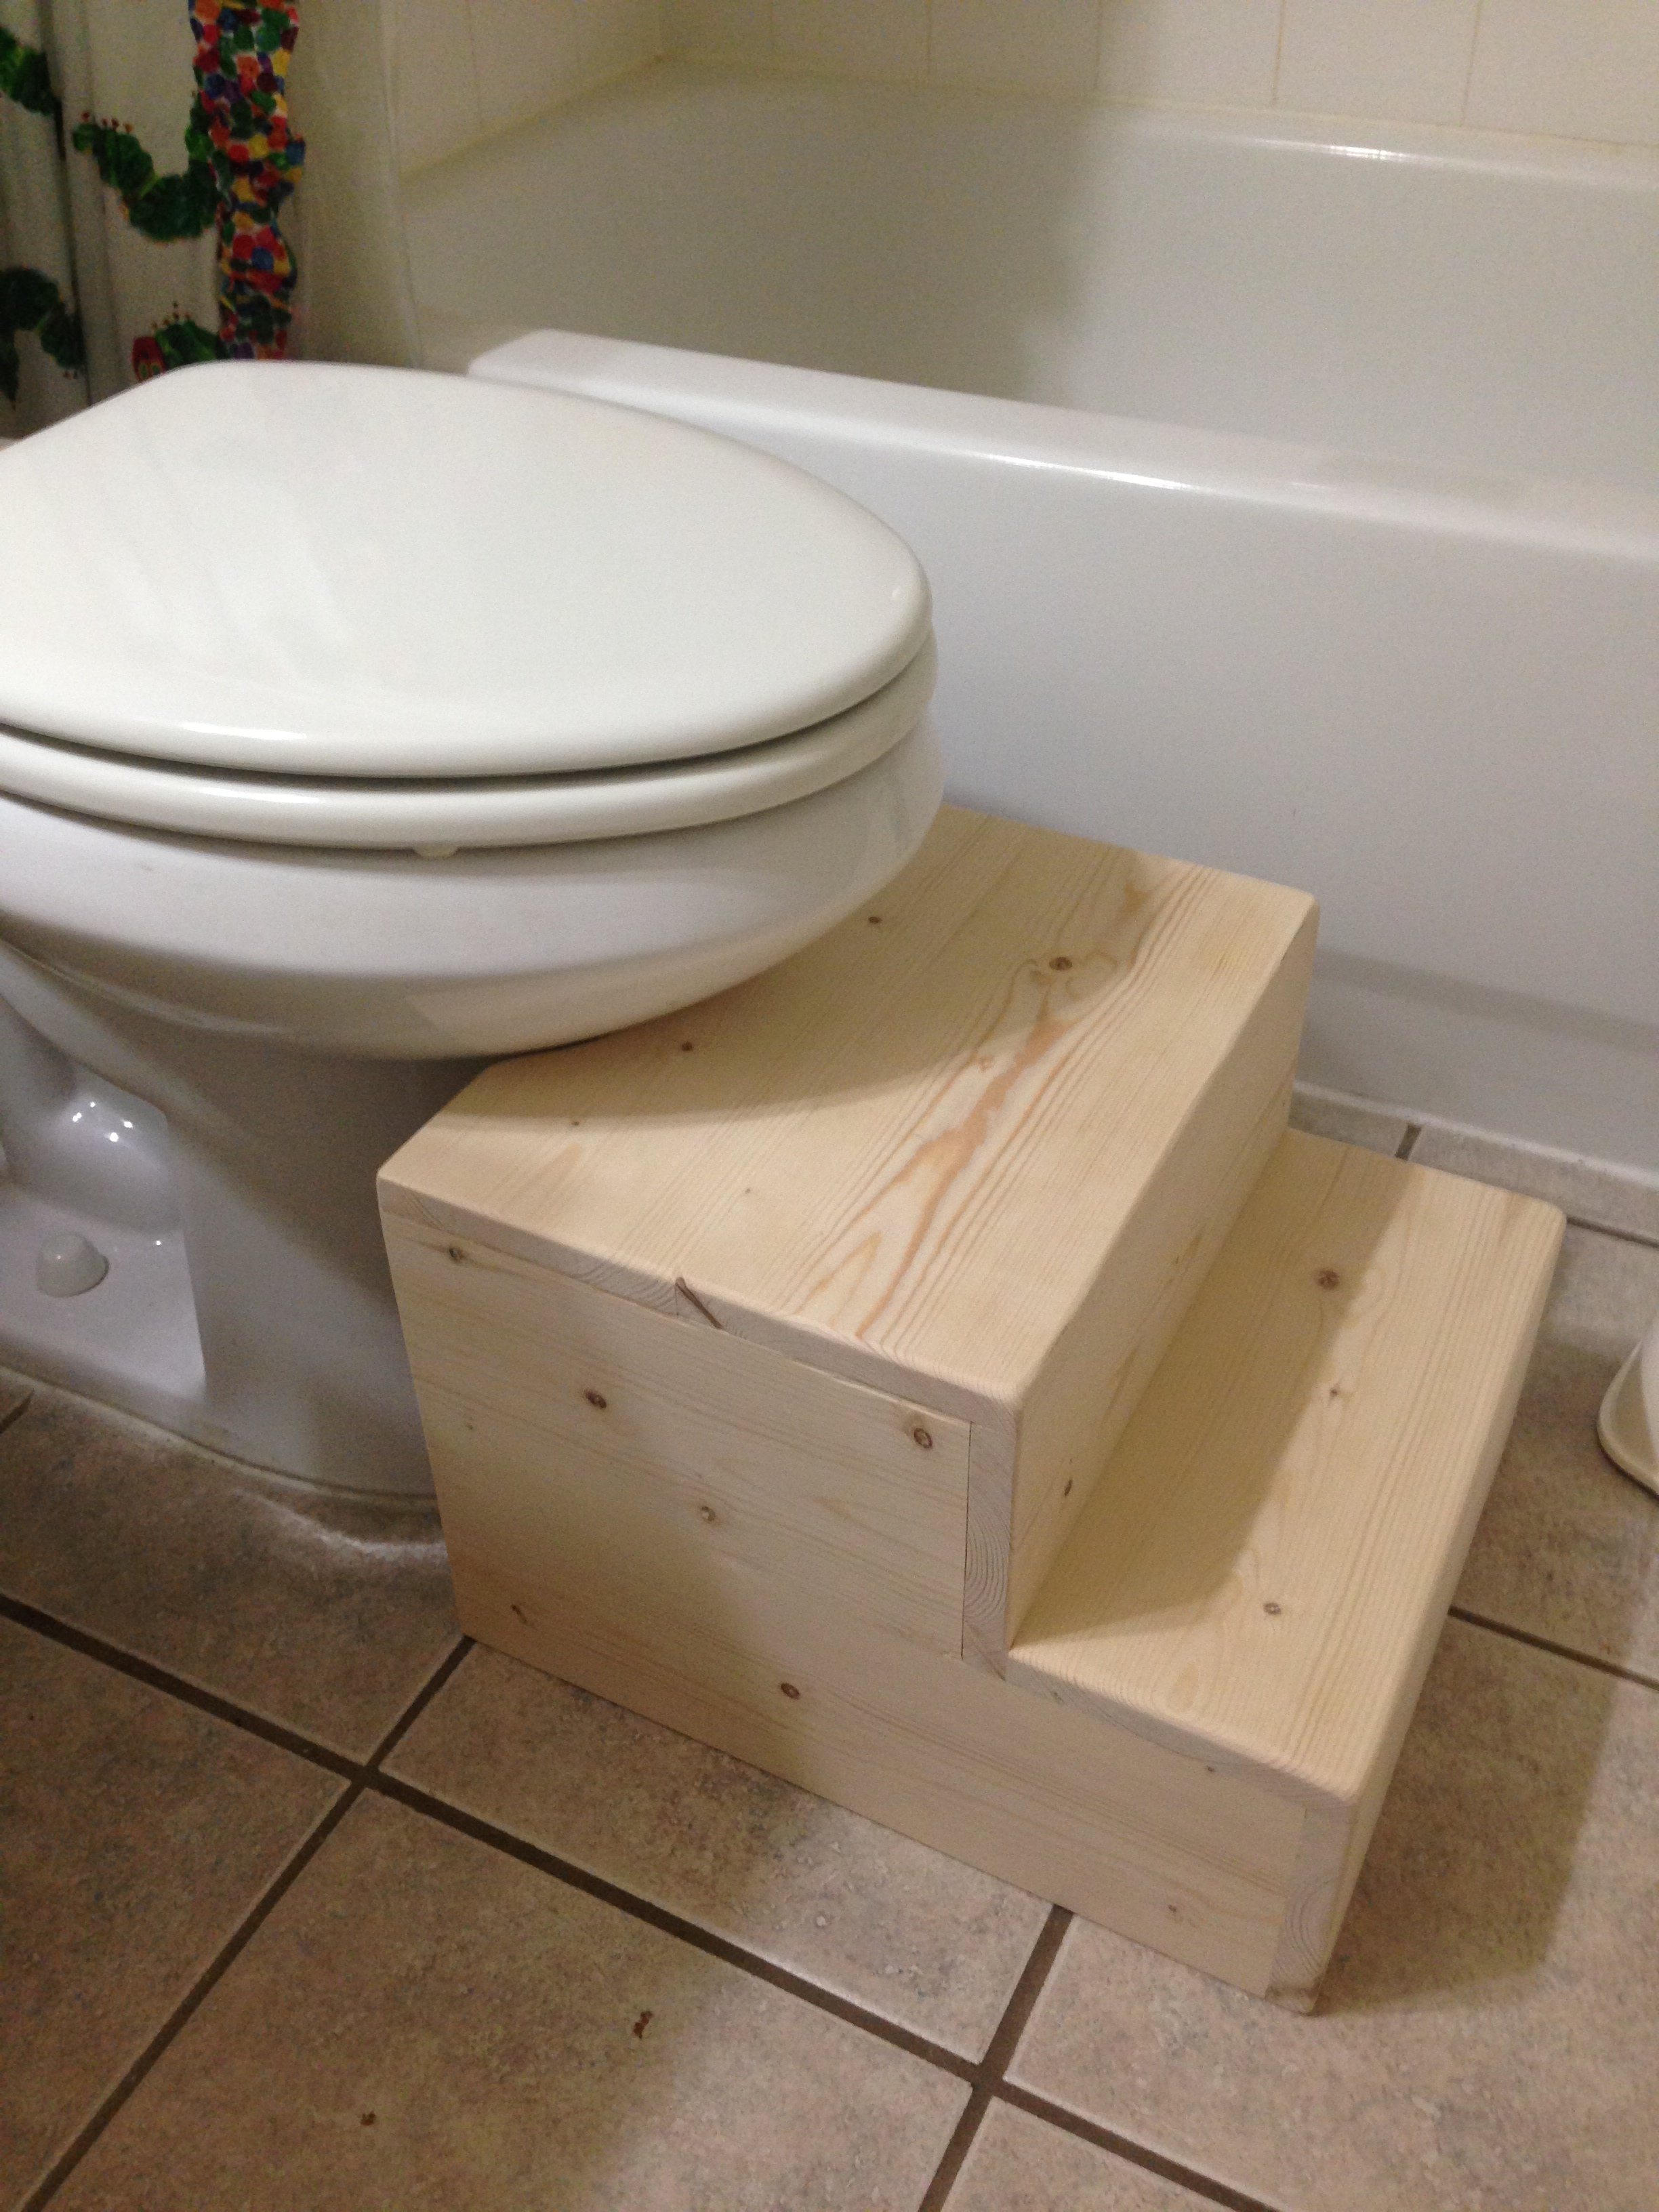
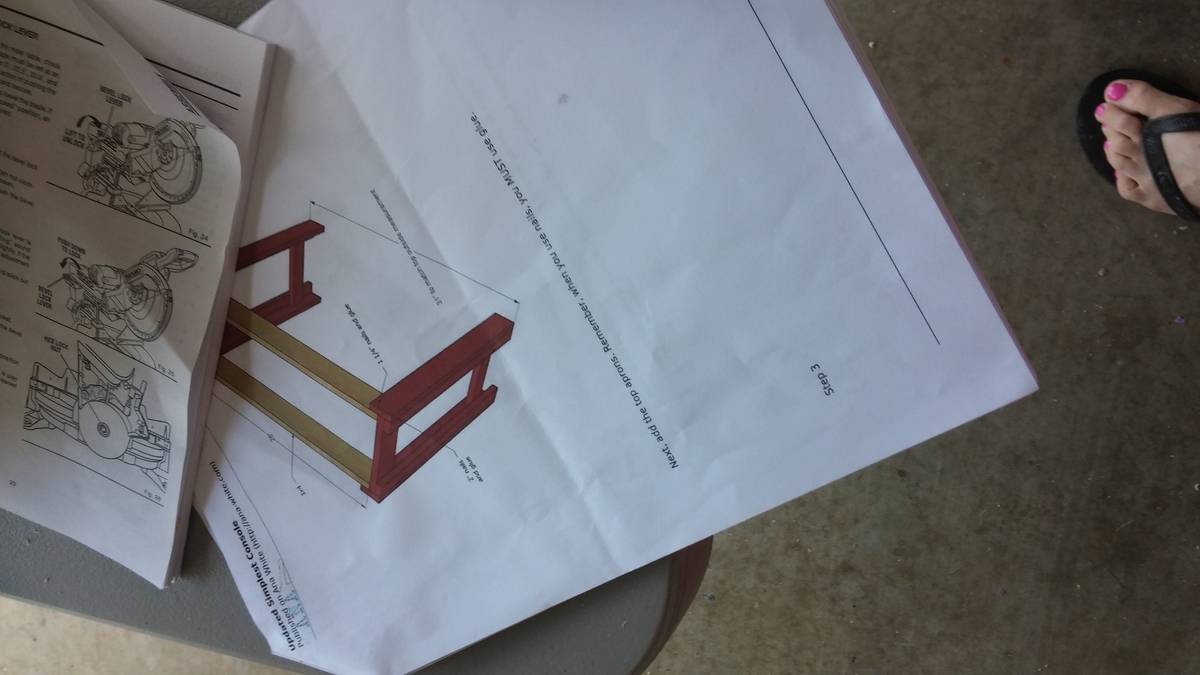
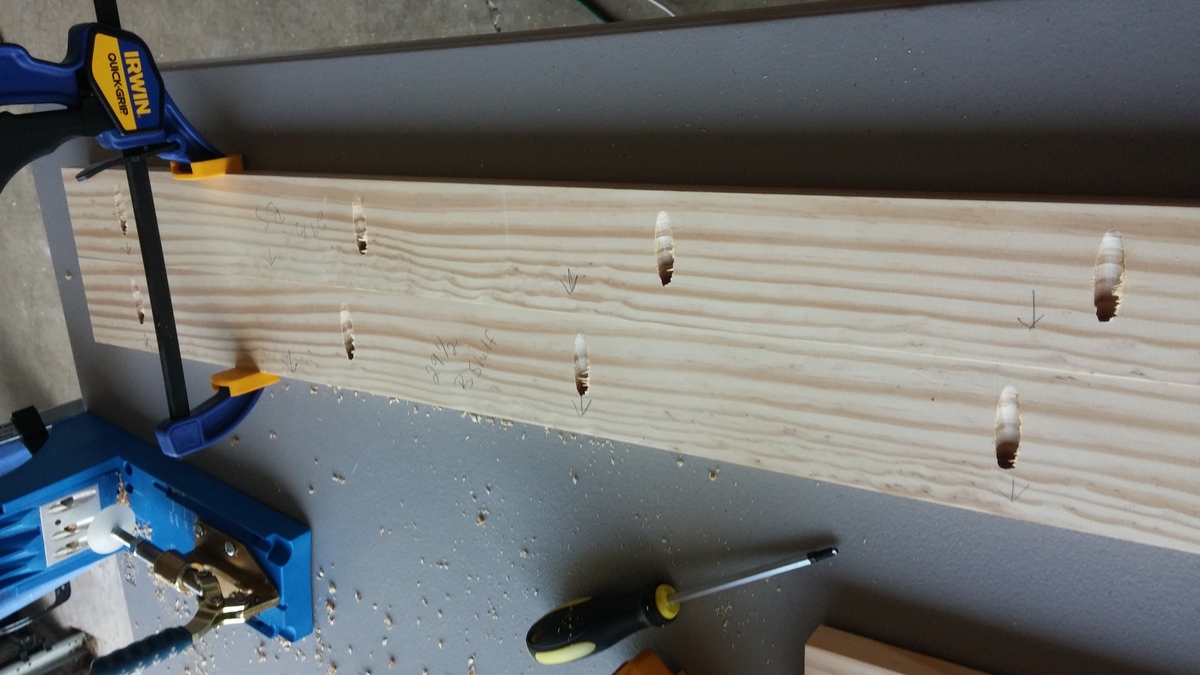
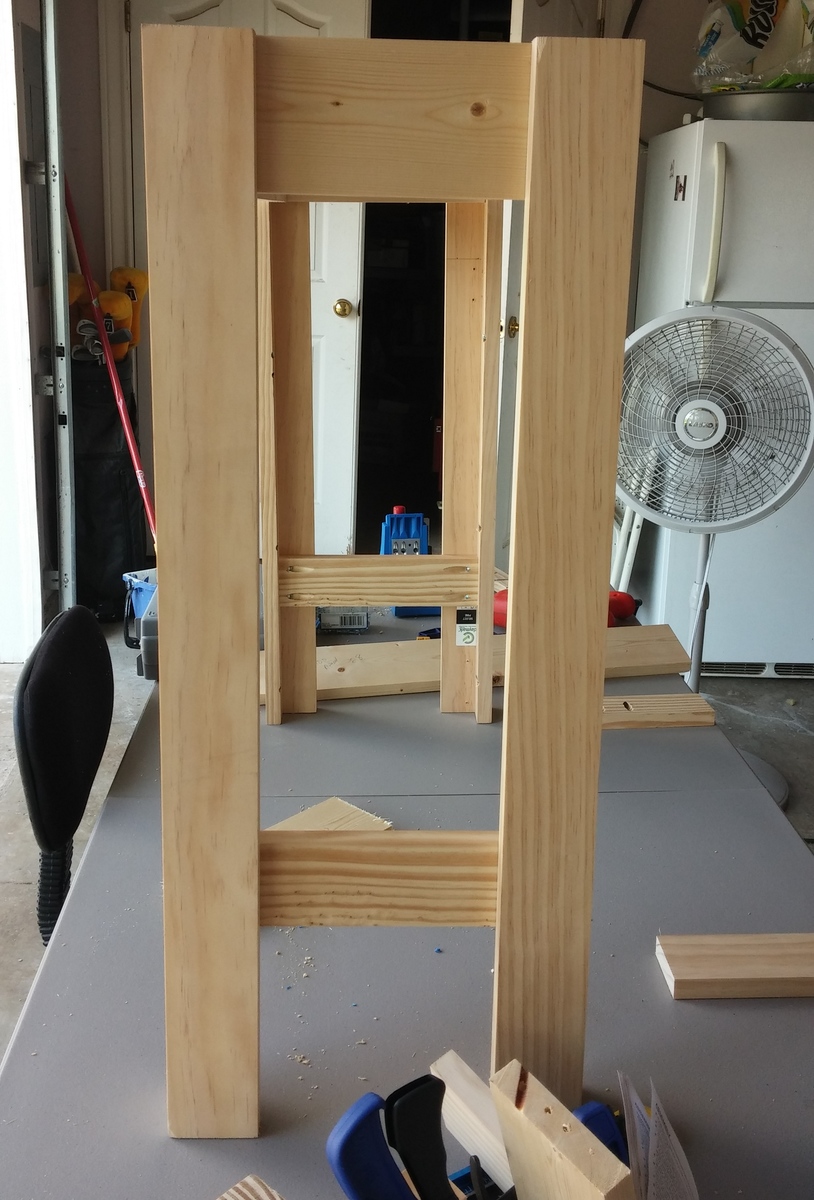
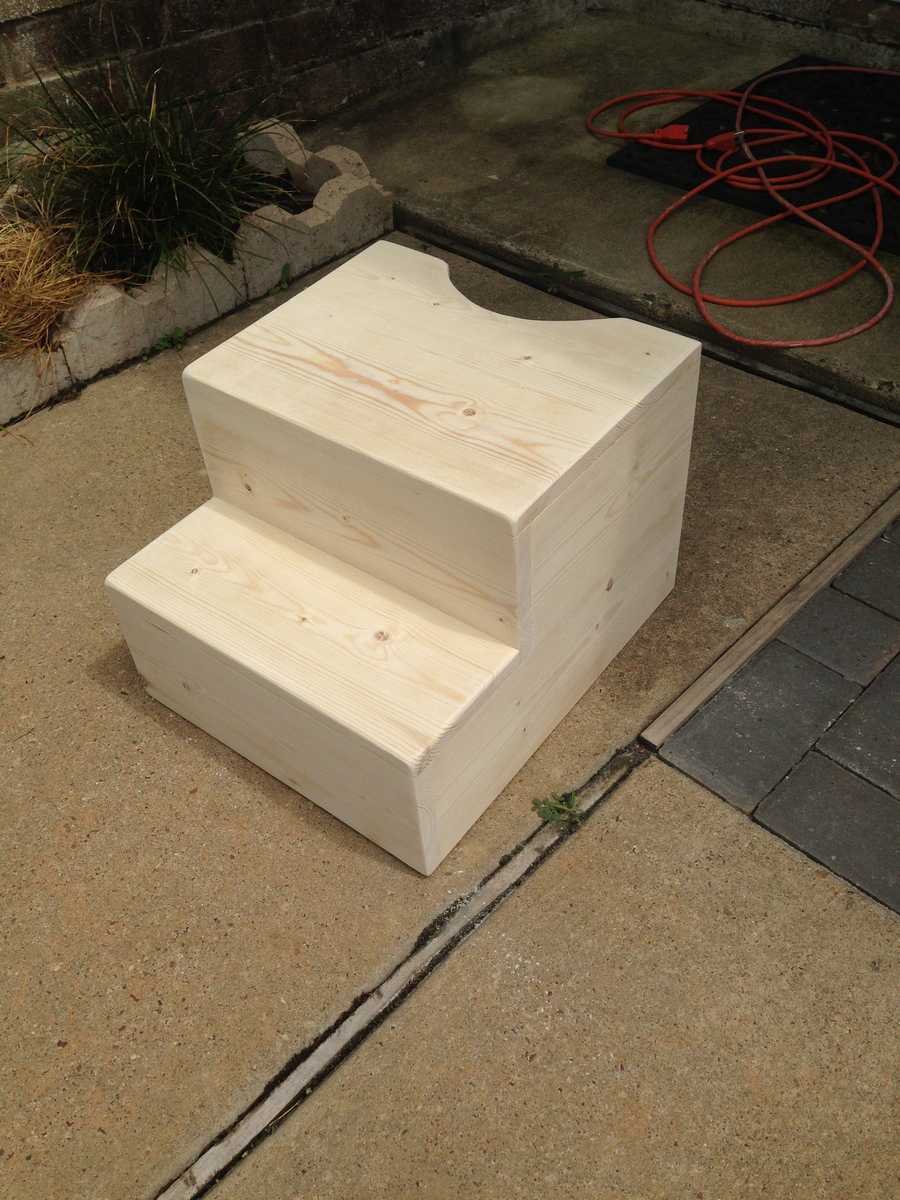
This was my first project at building some sort of furniture. we wanted a stool that really fits out toilet bowl shape, the height, etc. and 2x6's worked perfectly. I could have bought 2x12's for the sides, but it would have cost significantly more and with the inside support board it is plenty sturdy.
I bought 2# 2"x6"x6 foot coarse pine boards from Home Depot (not the expense Select Pine boards. They cost about $6 each. Then I bought a 100 count package of Kreg 1.25" coarse screws.
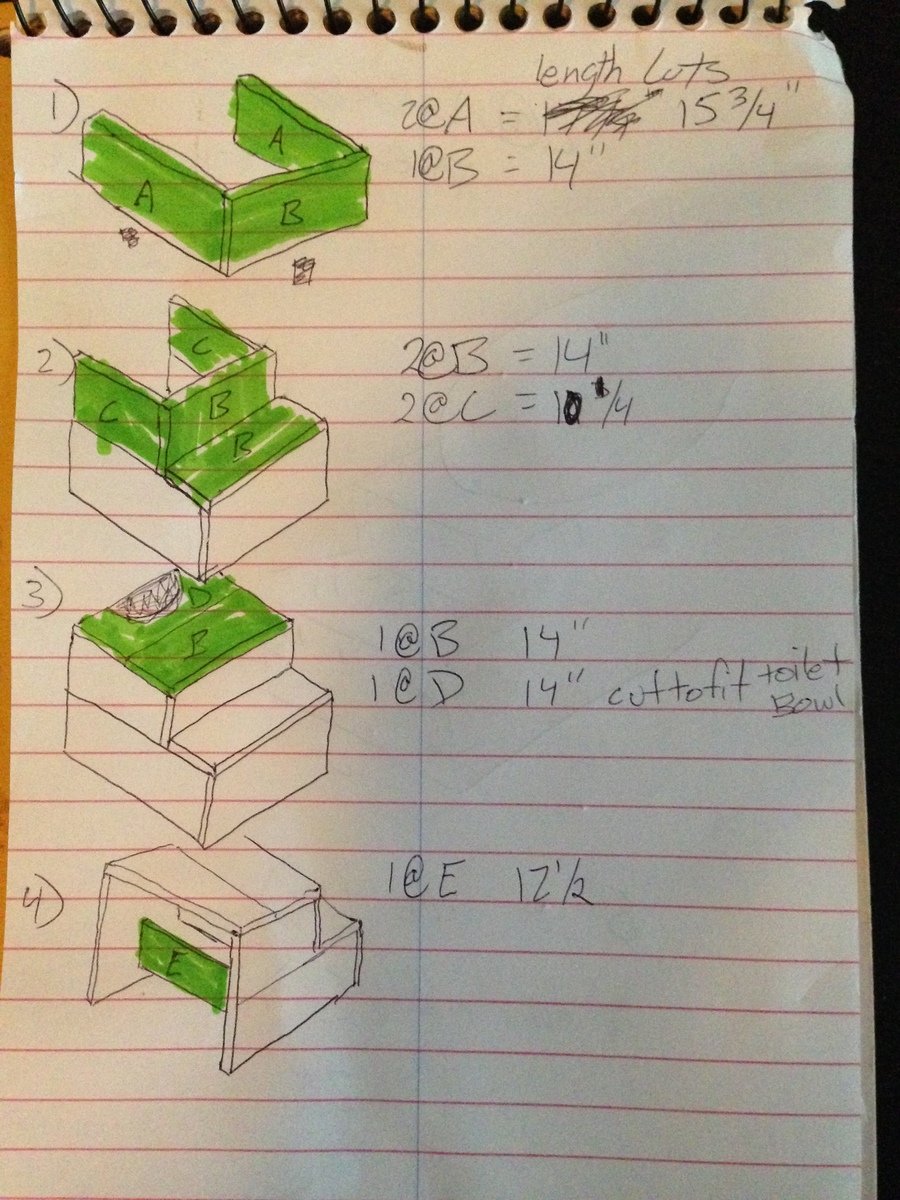
Cut lengths
2 @ 15 3/4" for lower sides
2 @ 10 1/4" for upper sides
5 @ 14" for steps and fronts
1 @ 12 1/2" for inside support
I used my Kreg Jig and connected all the pieces along with wood glue. I sanded the whole thing down after and tried to round/smooth the corners.

Tue, 03/01/2016 - 10:29
Does anybody have plans for a potty seat. I would like to build a childs chairs that has a ptty
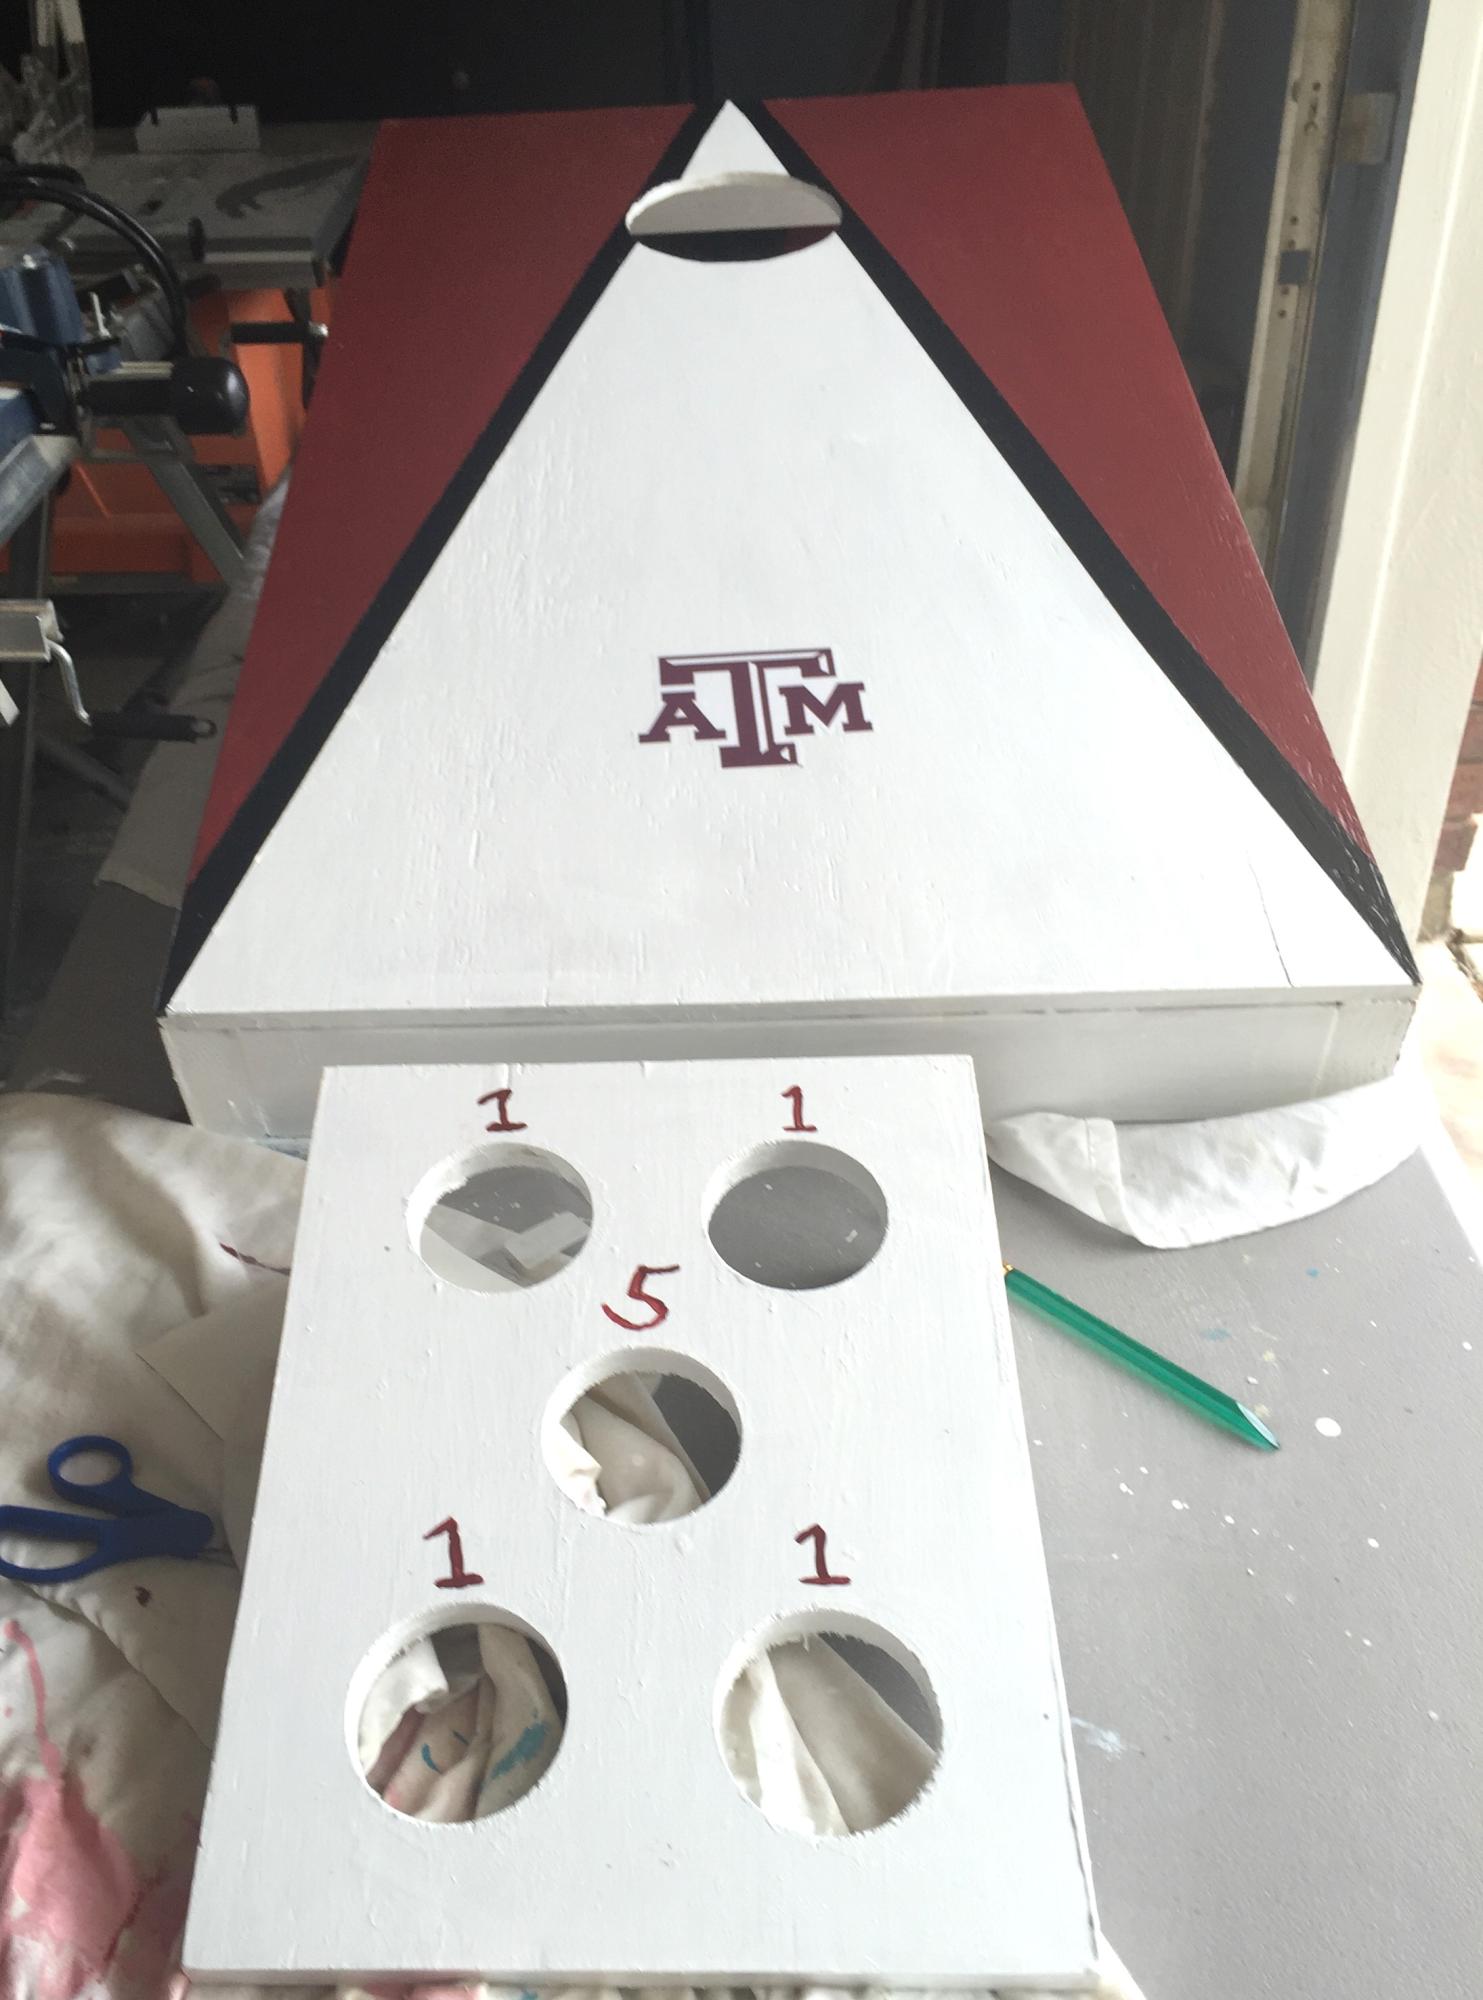
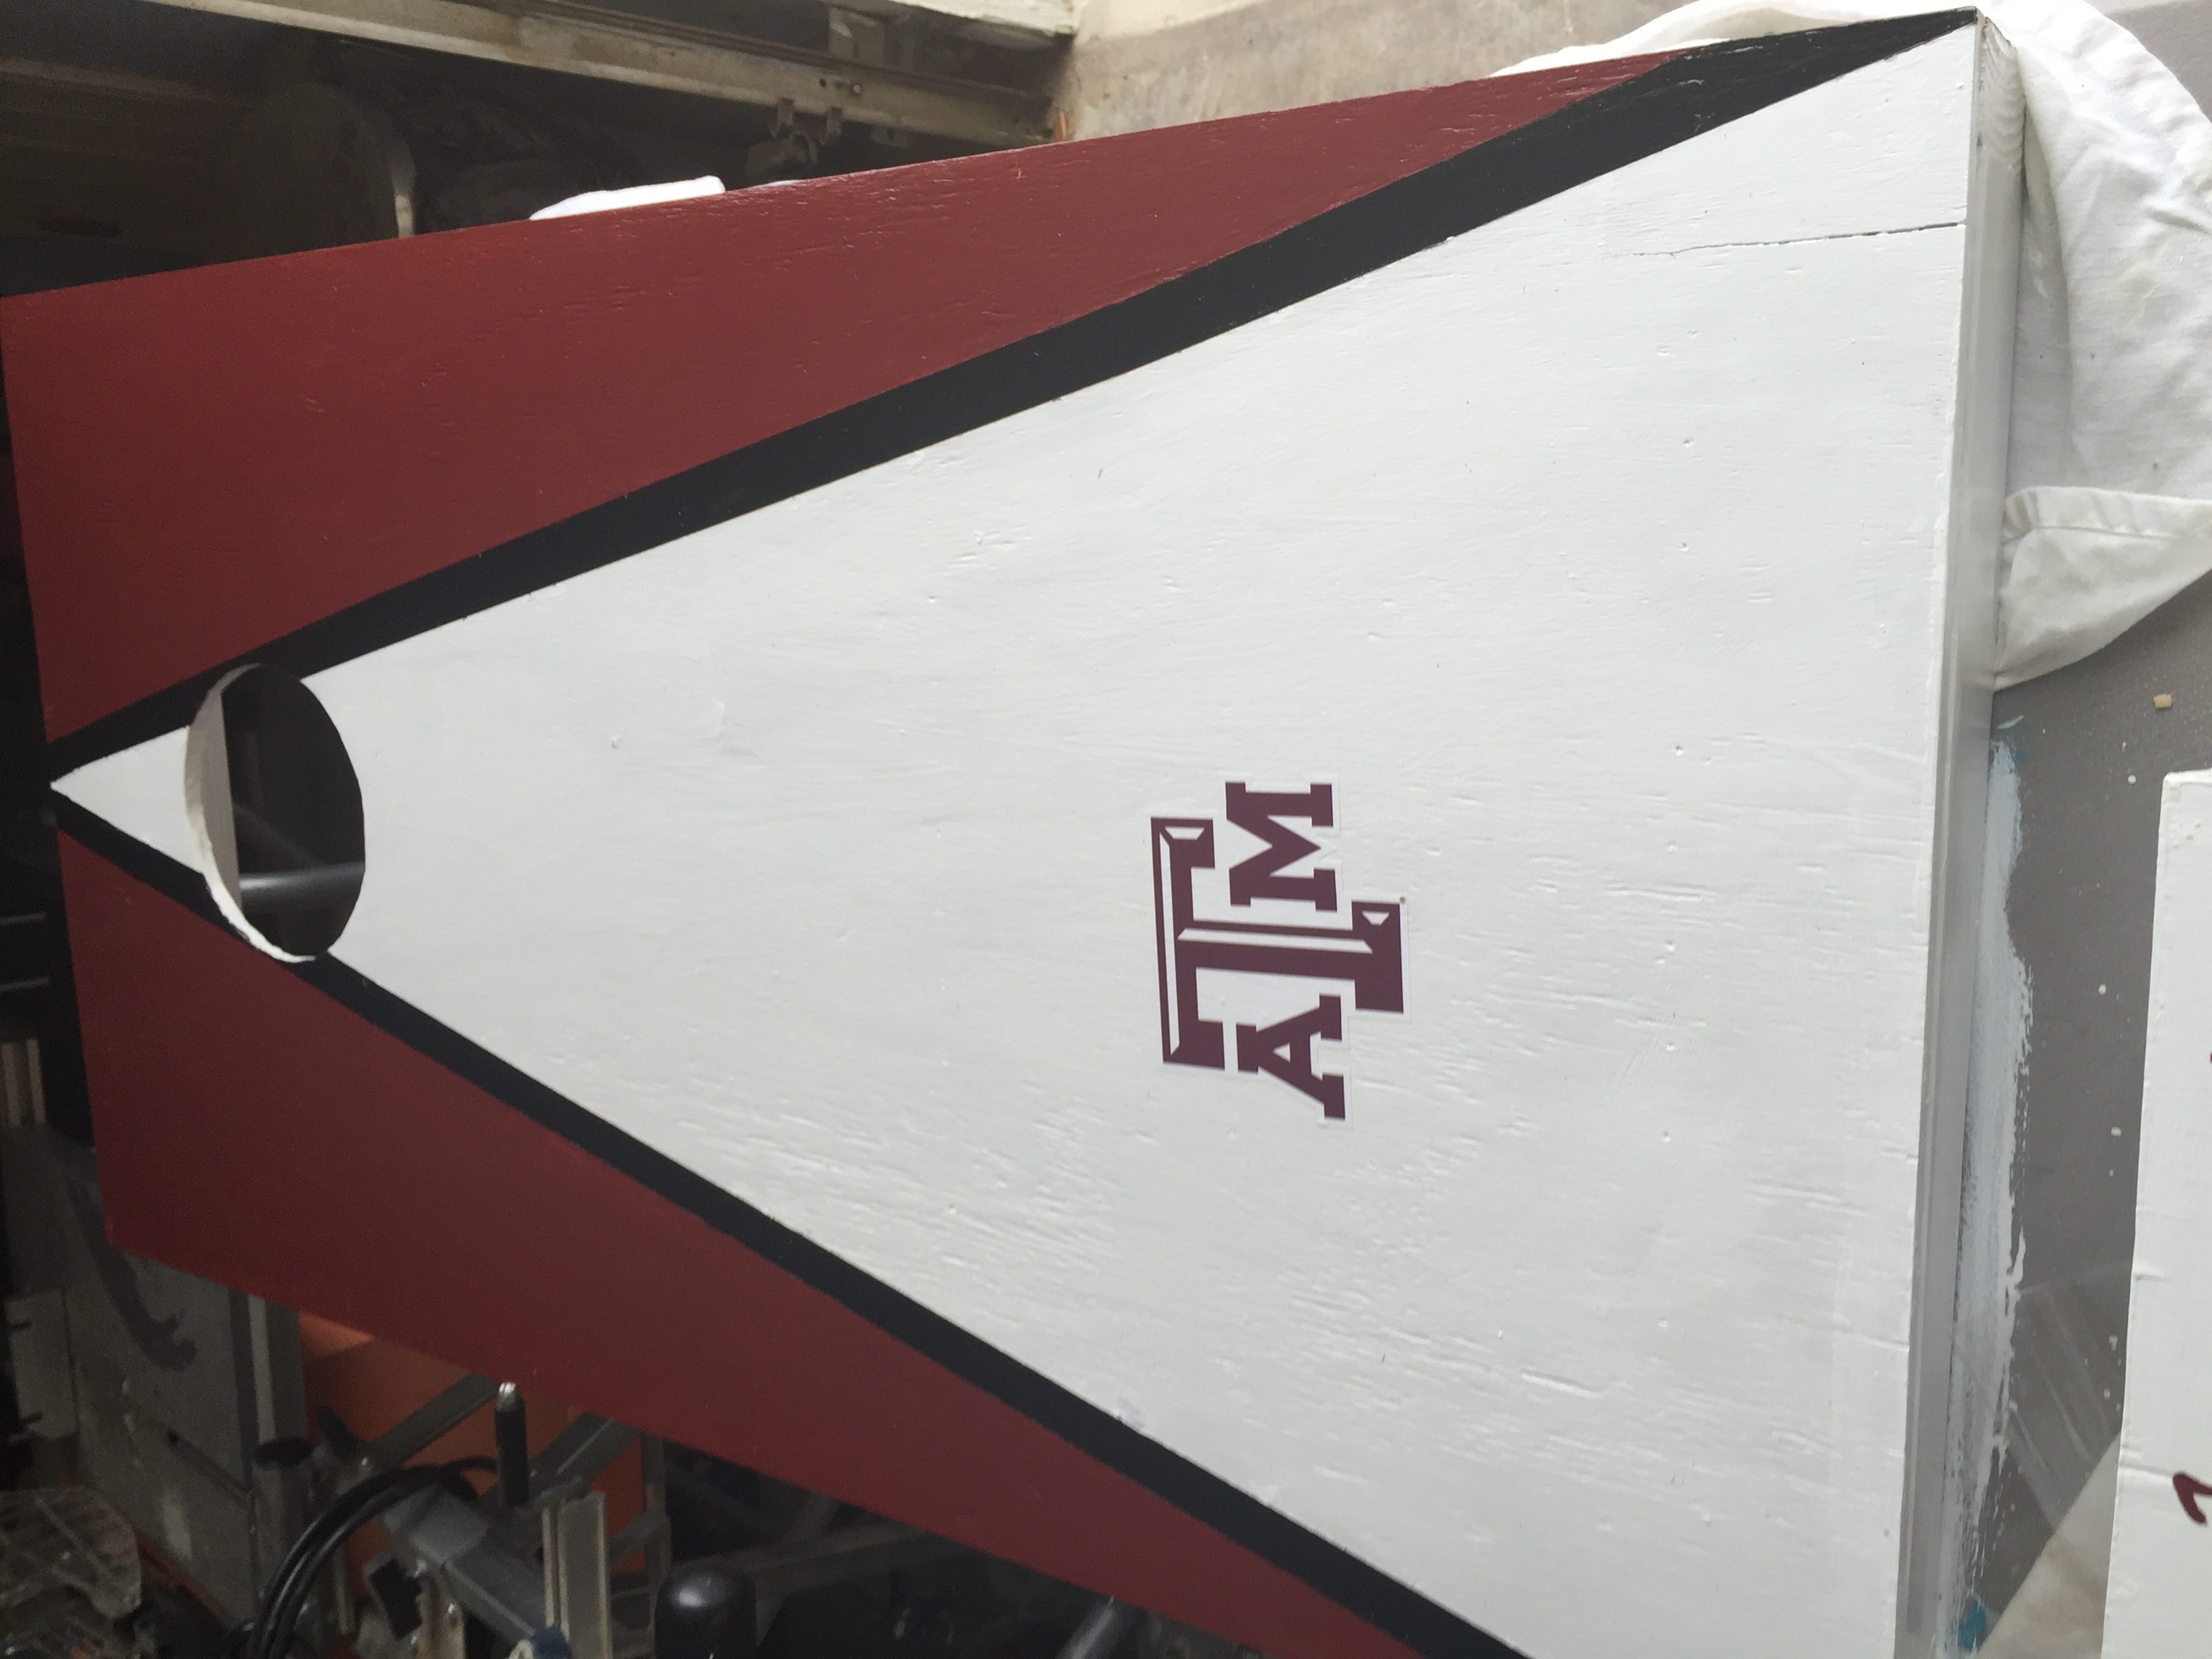
Built this for my son in law. Texas A@m cornhole game and a bonus washer game with the left overs

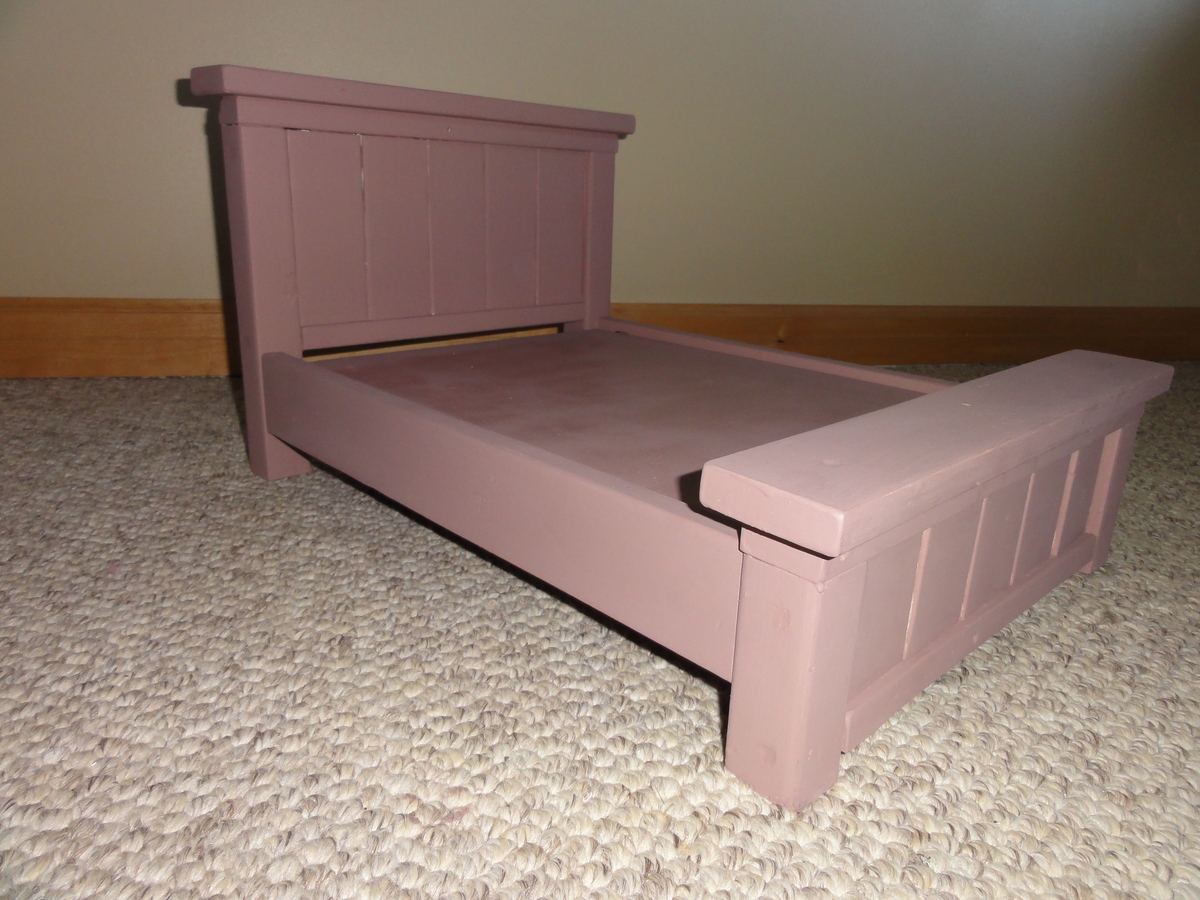
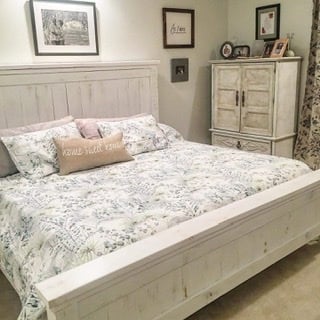
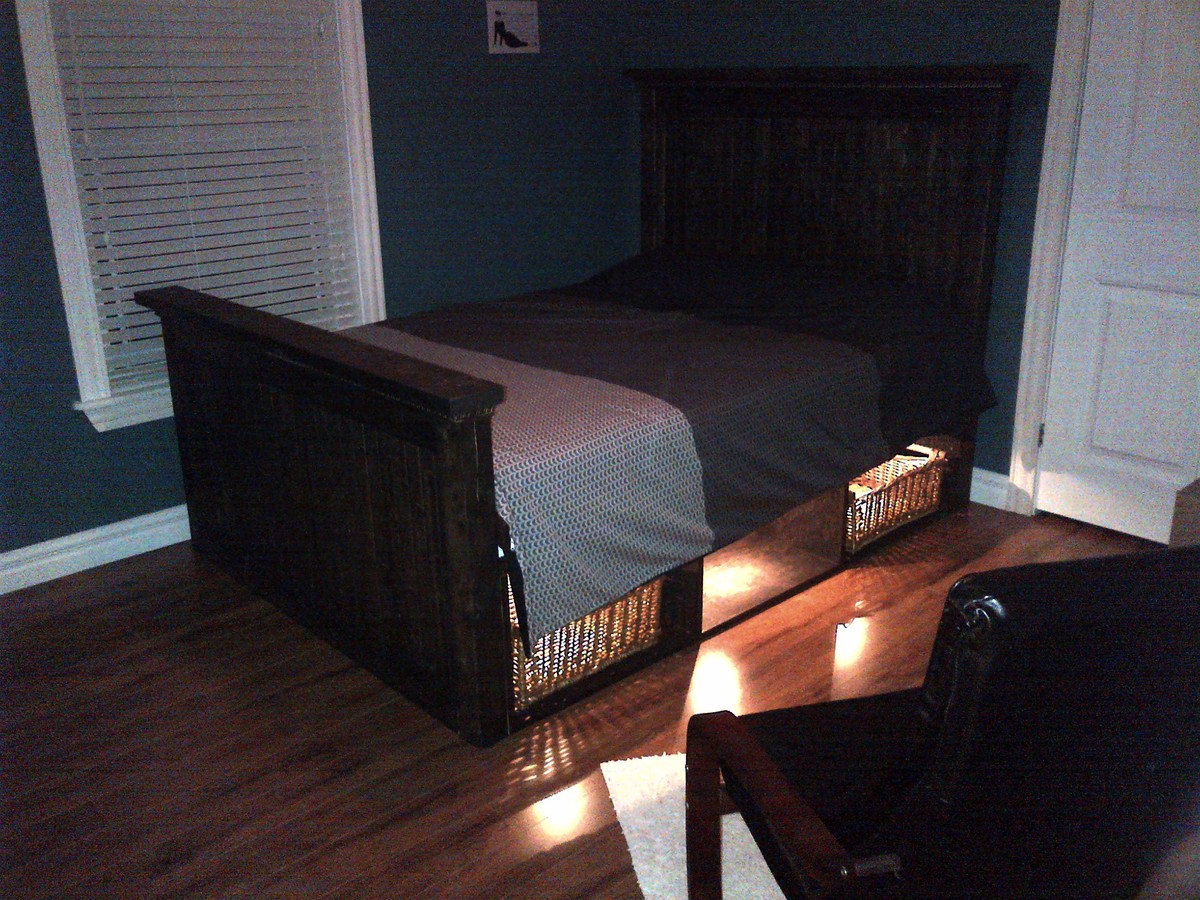
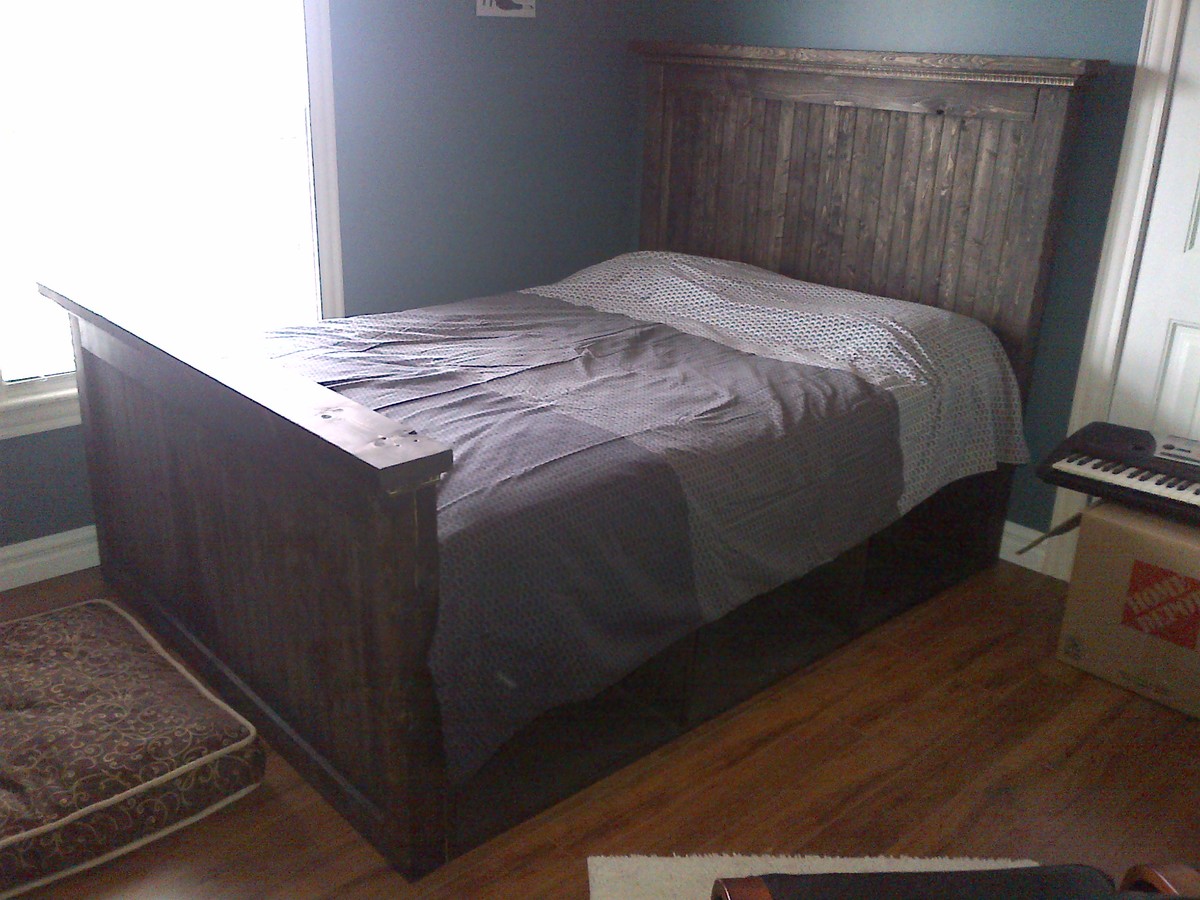
LOVED building this bed!! Been wanting a bed frame forever and came across this. I will say, the only thing I would change (if I build another) is using brackets to attach the support slats.. I wanted to cry when I had to drill through the front of the footboard 😂😂 and attaching them to the head of the bead proved challenging as well, just because the thing is so massive!! I’m fairly new at this, so, I must say... not too shabby!! Thank you Ana White!! You are my spirit animal❤️
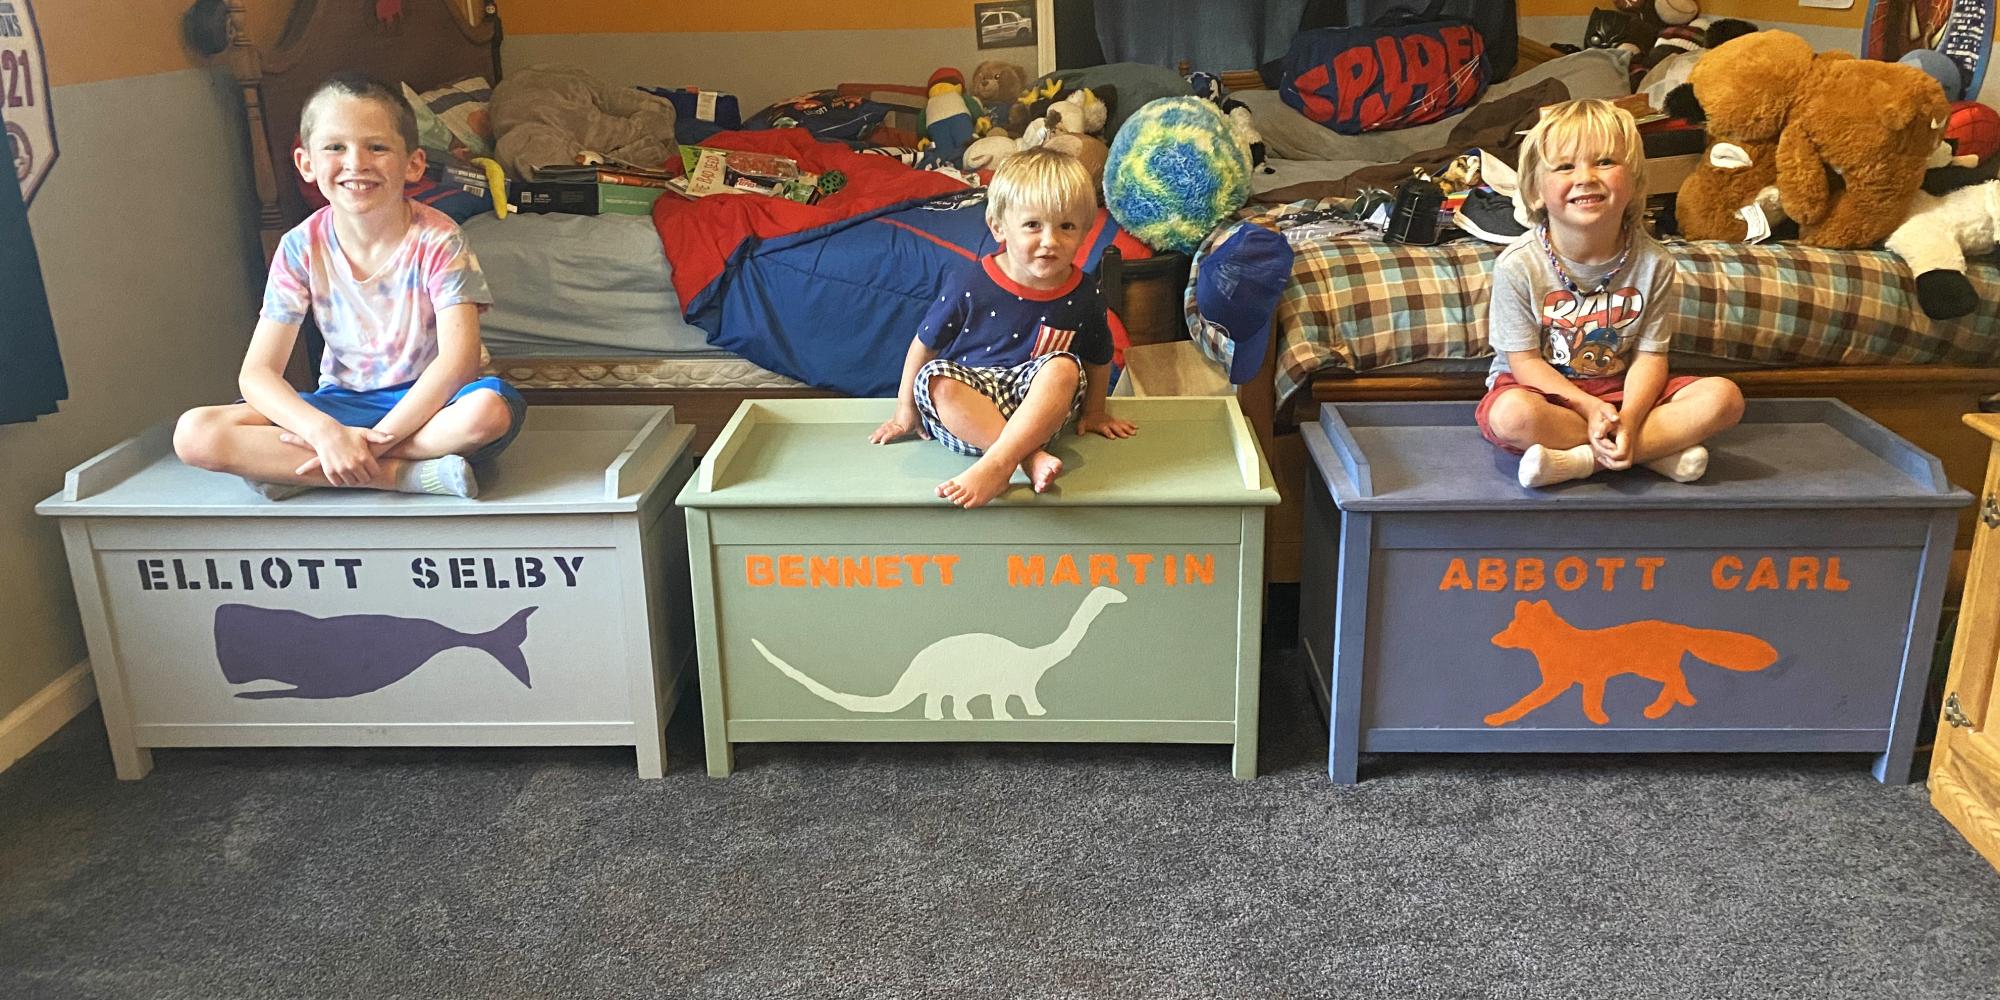
I found your toy box plans in 2016 when I was expecting our first son. We have now made all of our sons a toy box from the same plans. I build the boxes and wife does the painting and detailing.
Eric Reeners
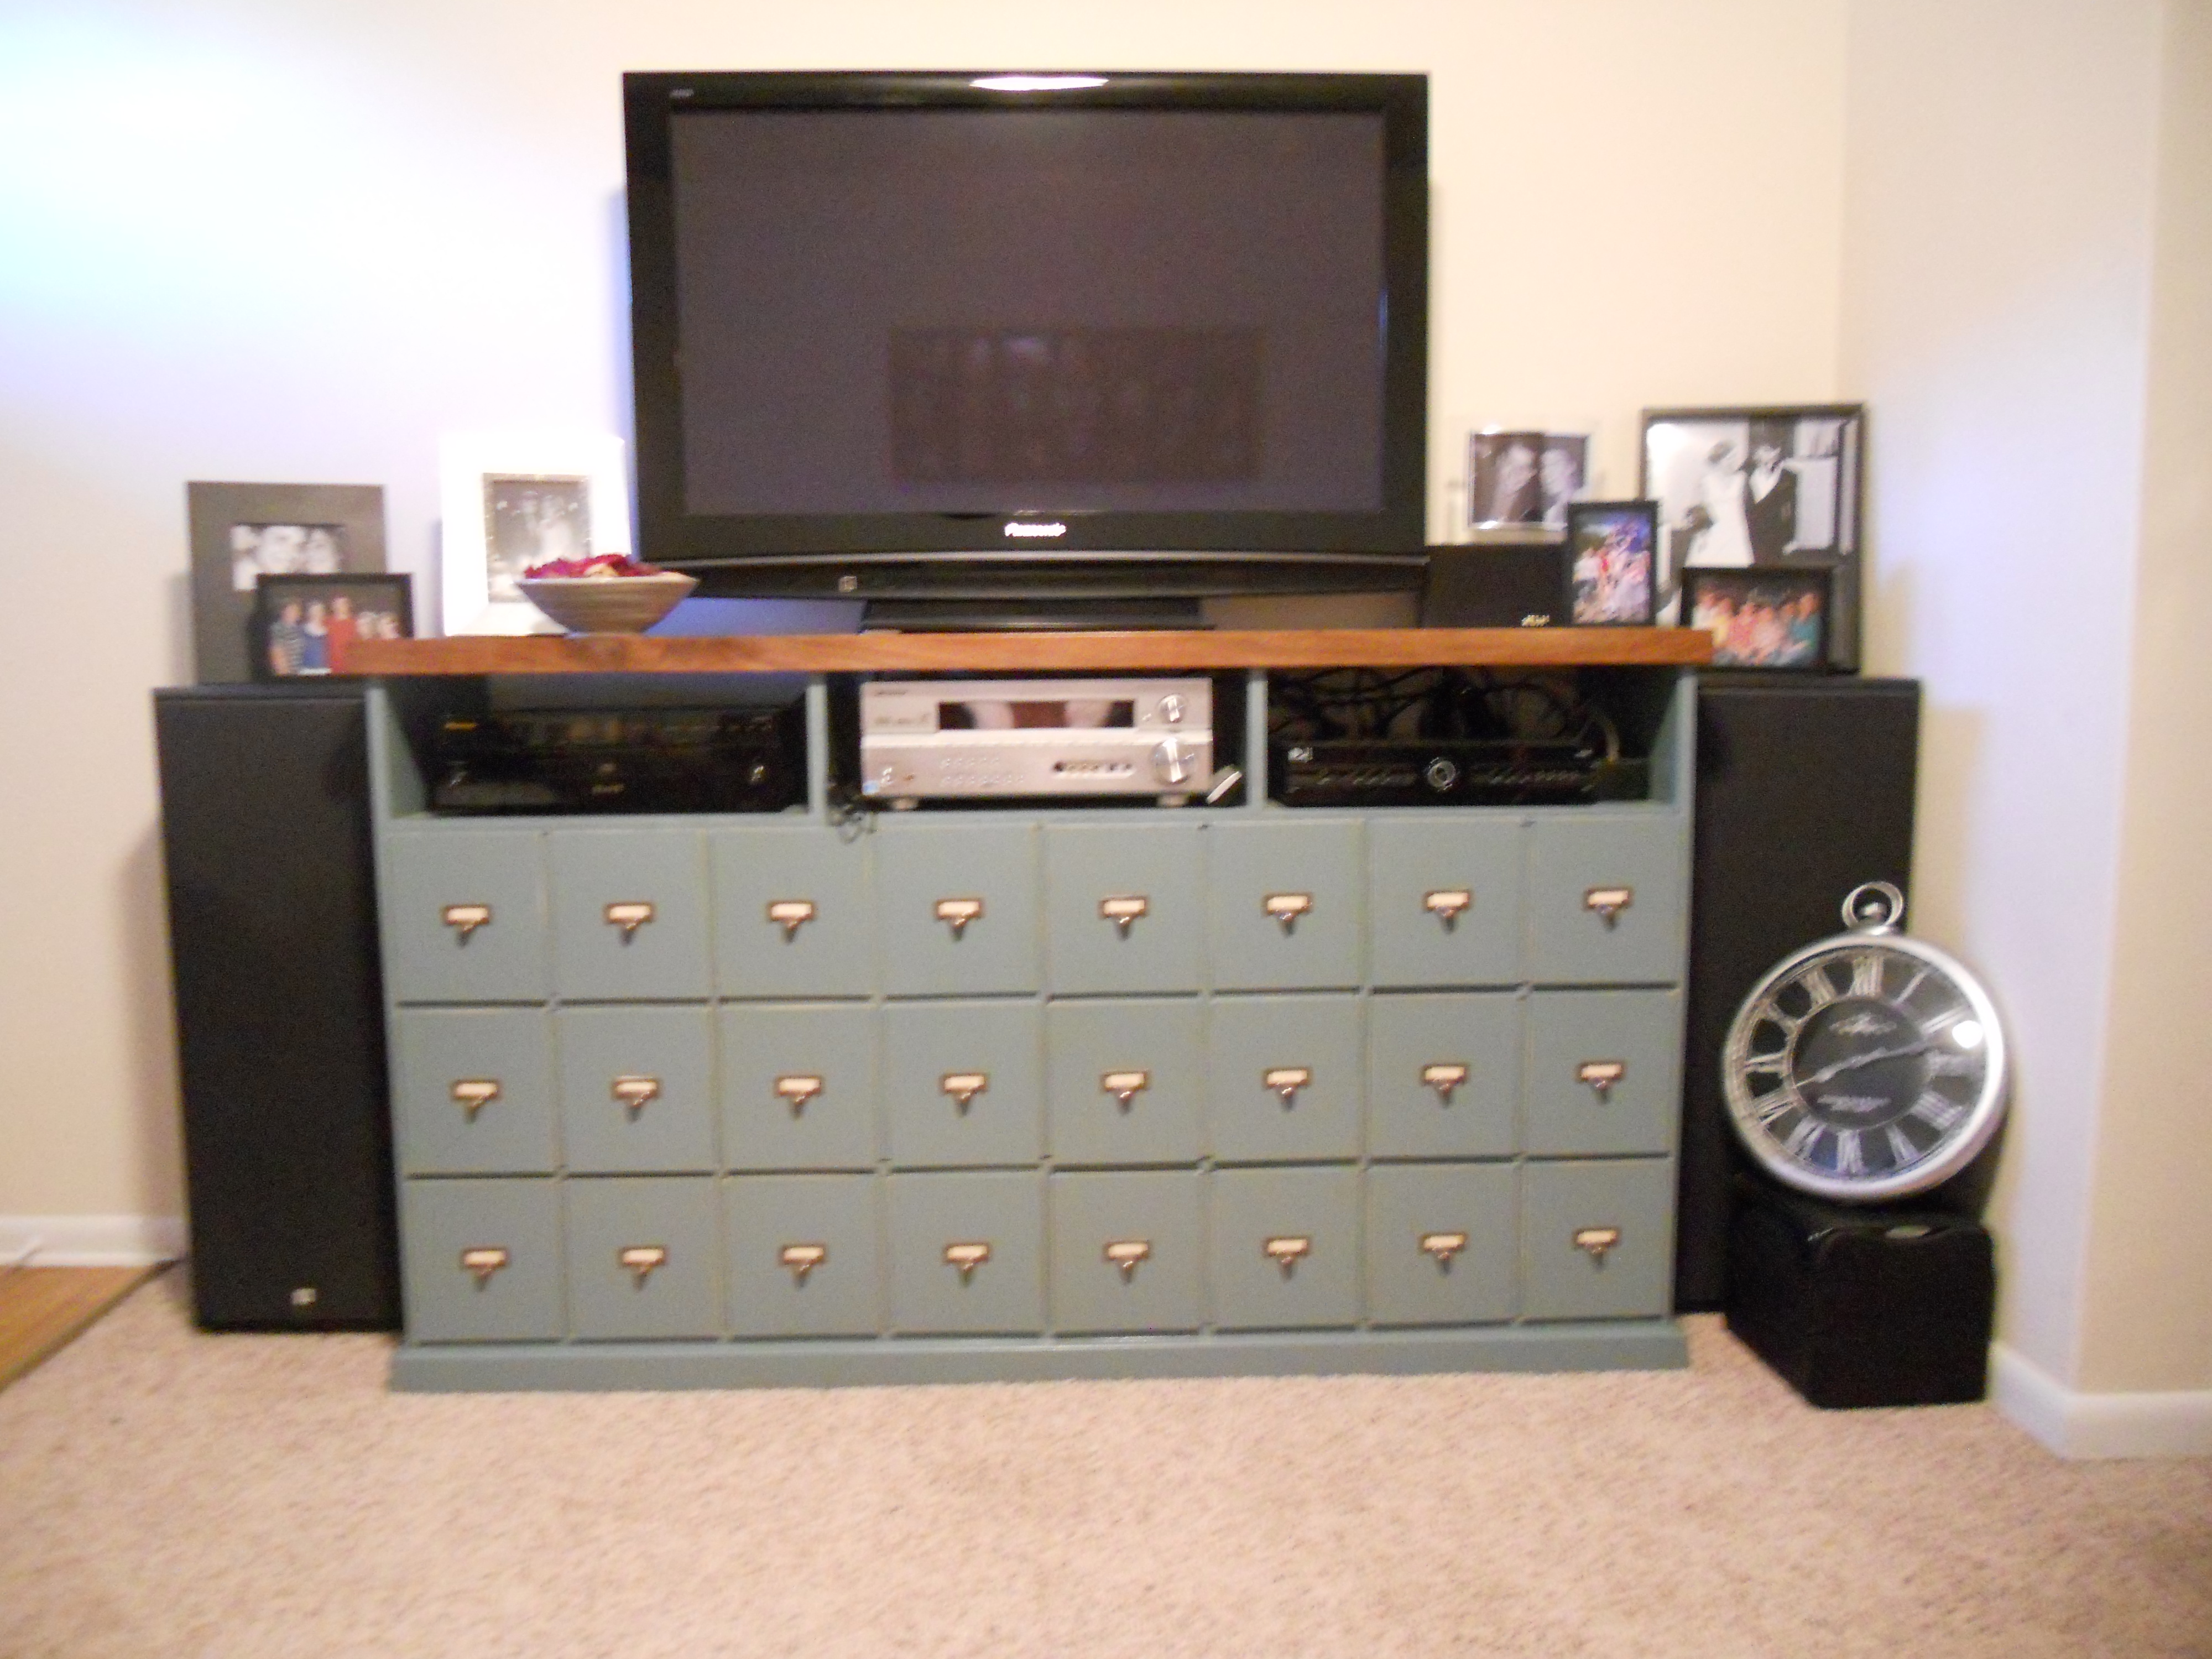
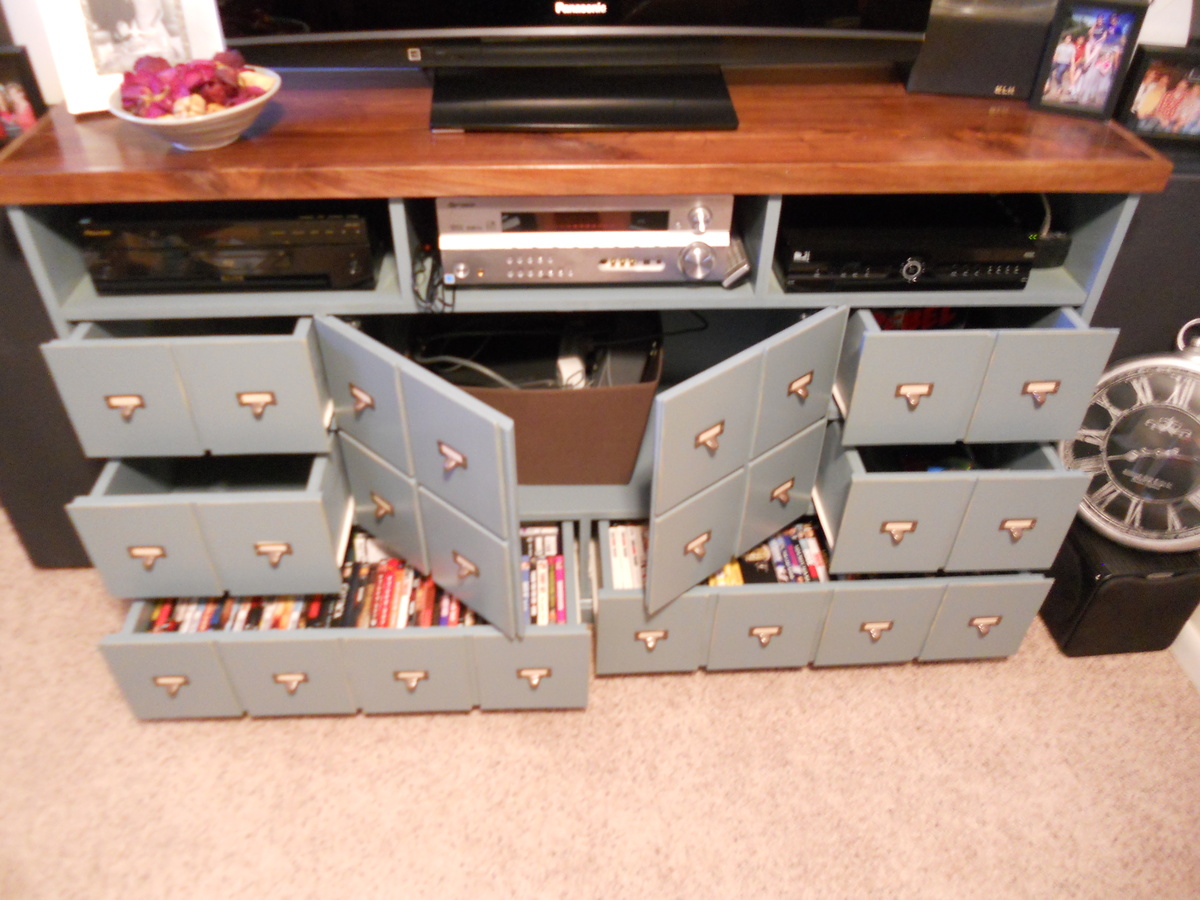
My husband and I decided to make an entertainment center from the Apothecary Console plans. We mostly followed the plans, but wanted it to be taller than the original in case we want to use it in a dining room as a buffet in the future. To do this we just added another level of drawers. I wanted the drawers on the bottom to be wider, so each of them is four false front's wide. The wood on top is walnut from some trees my dad cut down over 25 years ago. We wanted more of this to show than would have if we followed the original plan, so we put a two inch trim piece around it. I really wanted card catalogue drawer pulls but couldn't find any that were dark that were at all "cheap"...so I bought gold ones online and spray painted them with a "hammered" spray paint which worked really well.
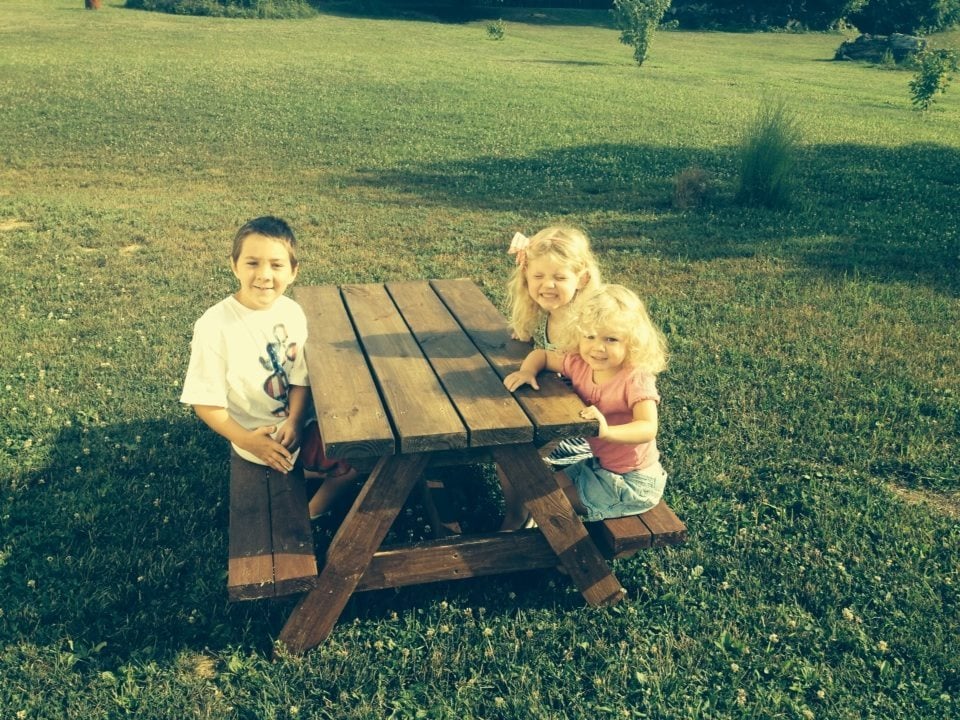
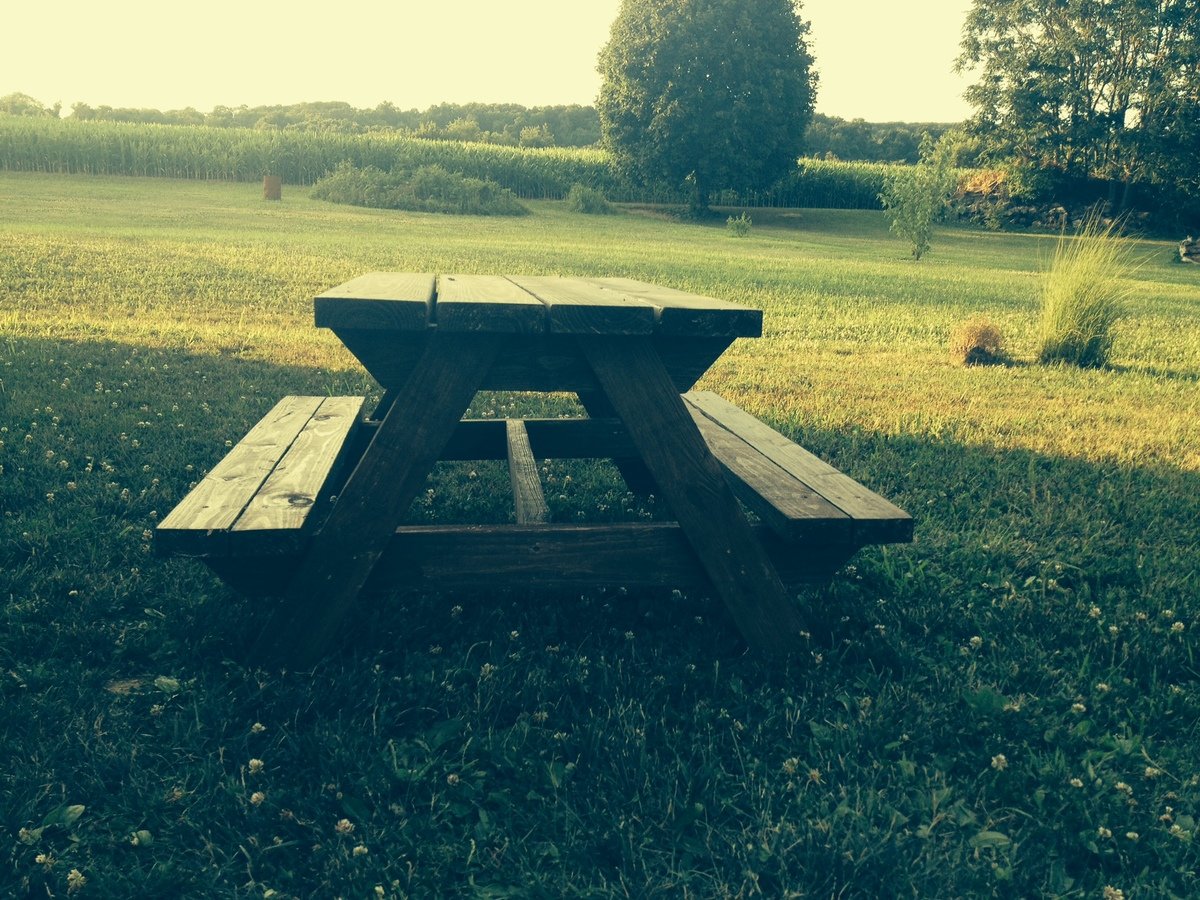
I built this table in one day by myself. Well, just me and these three kiddos. We were at Home Deopt selecting wood at 9am and by 7pm they were sitting on a finished table. Thank you so much for the easy to follow plans, Anna!

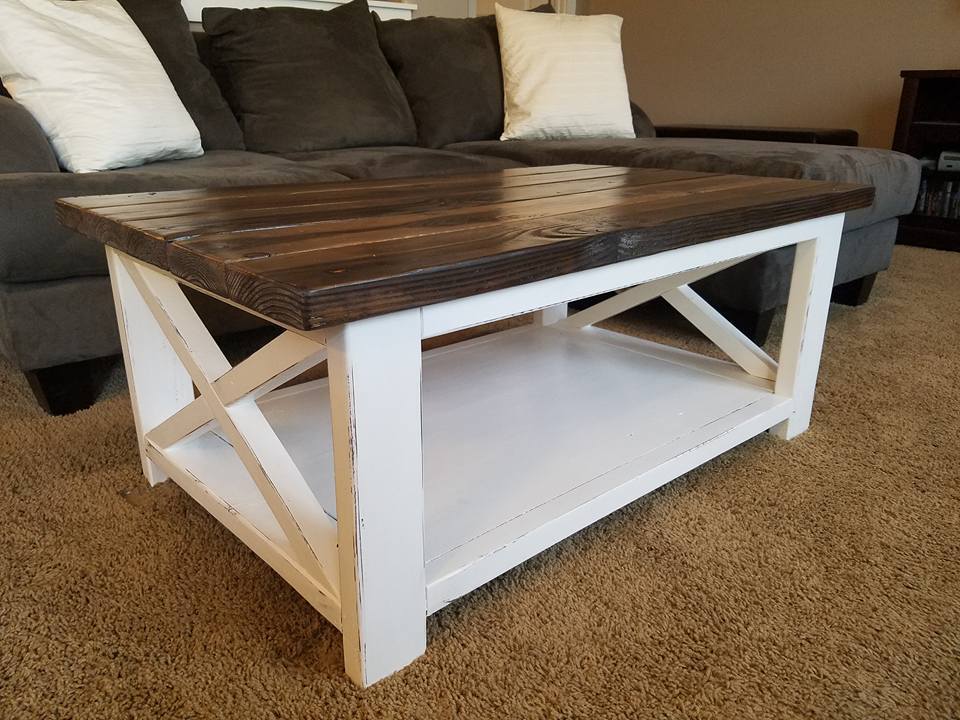
I had already built the Rustic X End Tables, and 3 years later I finally built the Rustic X Coffee Table to match! I shorted the length by 8" and coated the whole piece in a steel wool and vinegar solution. I then went back and used White Adirondack chalk paint by Folk Art for the base. I sanded the edges lightly for the distressing and put 3 coats of Minwax Matte Polyurethane over the entire piece for the top coat. I ended up putting 2 large wicker baskets underneath for extra storage and it is perfect!
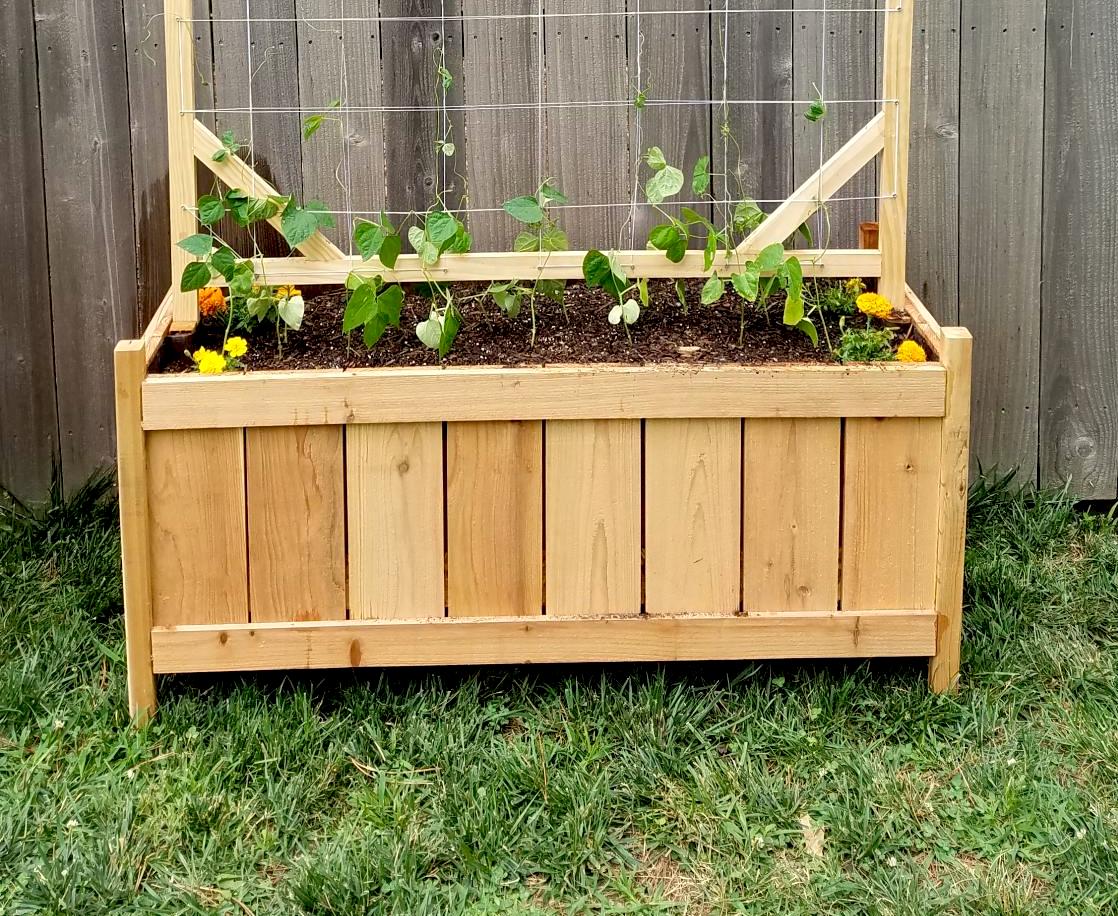
Increased width of box to 46" by using 8 fence boards instead of 3. put base at 12" down, lined box with landscaping fabric to hold dirt. Created trellis with 1x2 boards with 10" long corner braces, spaced screws 6" apart around edges and weaved cotton thread to create the trellis. Used 12" scraps of 2x2 to create a "slot" inside the center of the planter to support the trellis. Added container mix and green pole beans started in egg cartons earlier in the spring.
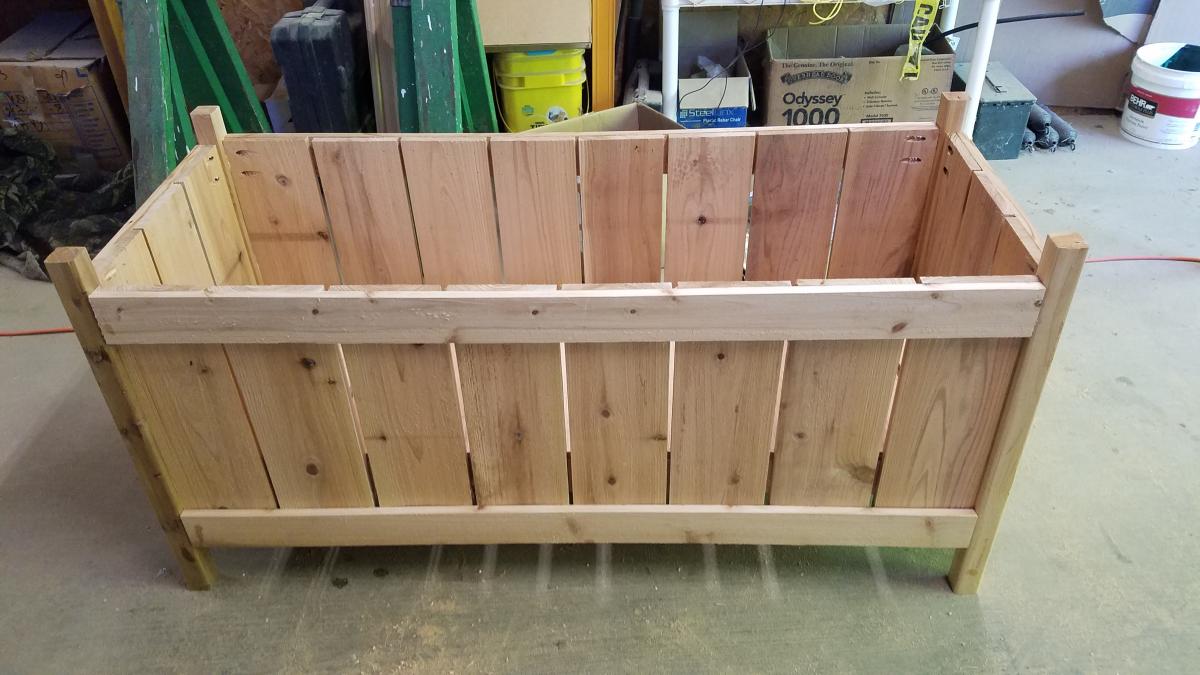
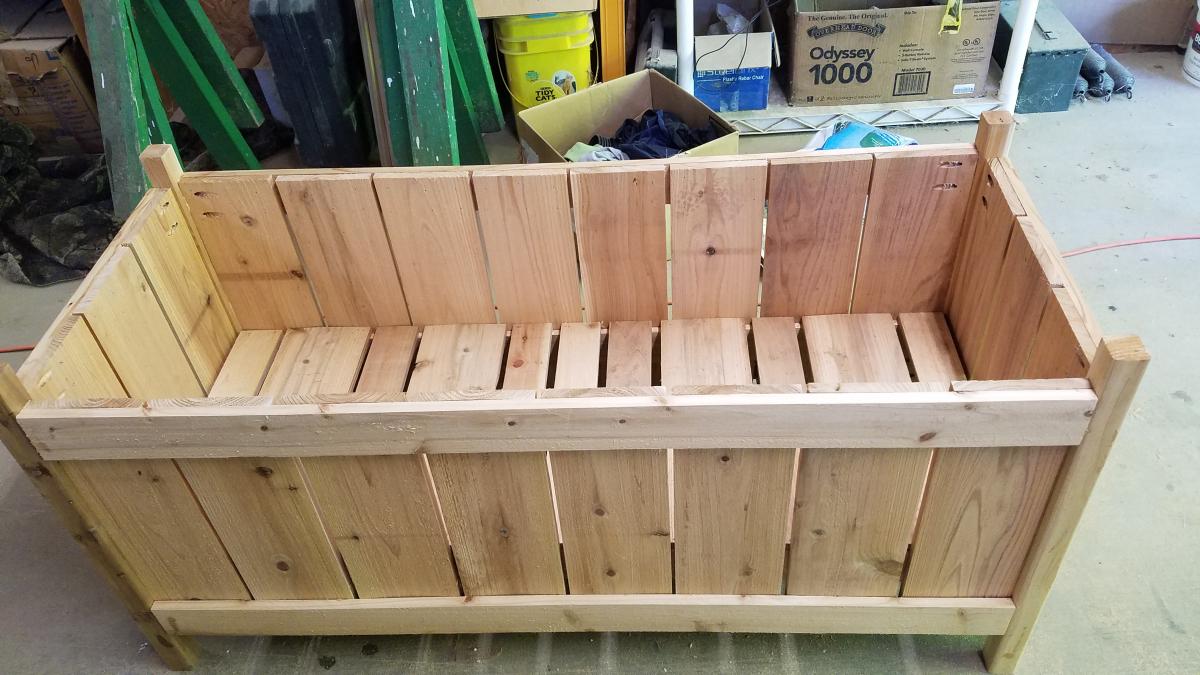
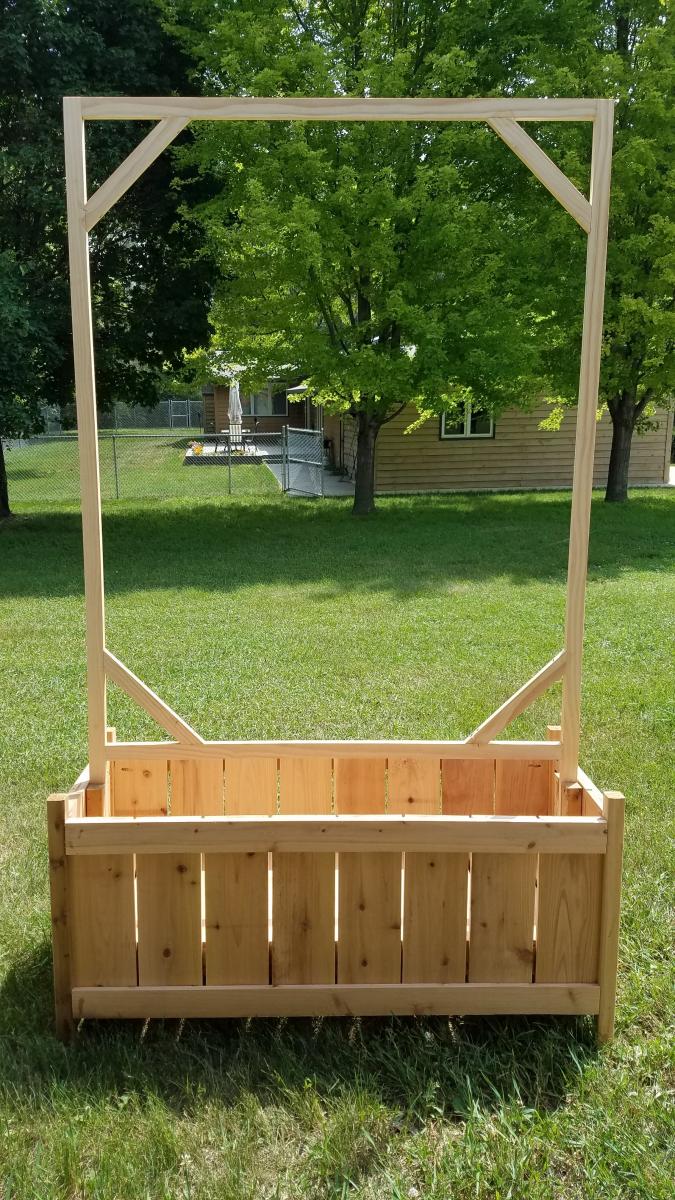
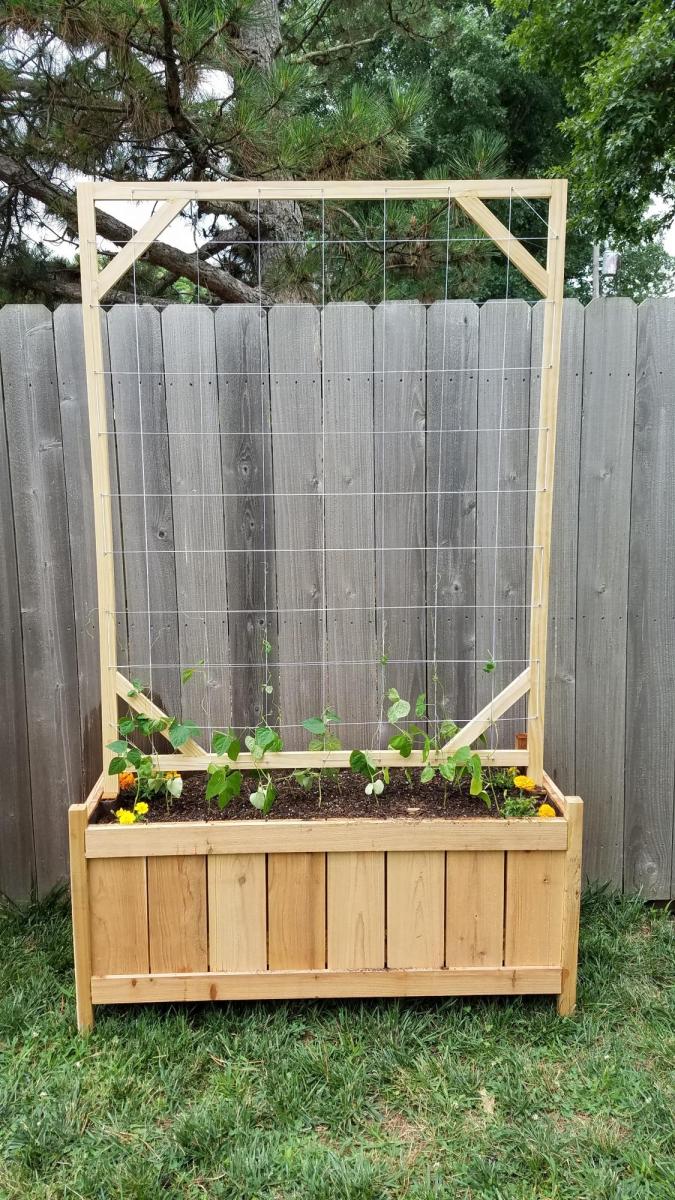
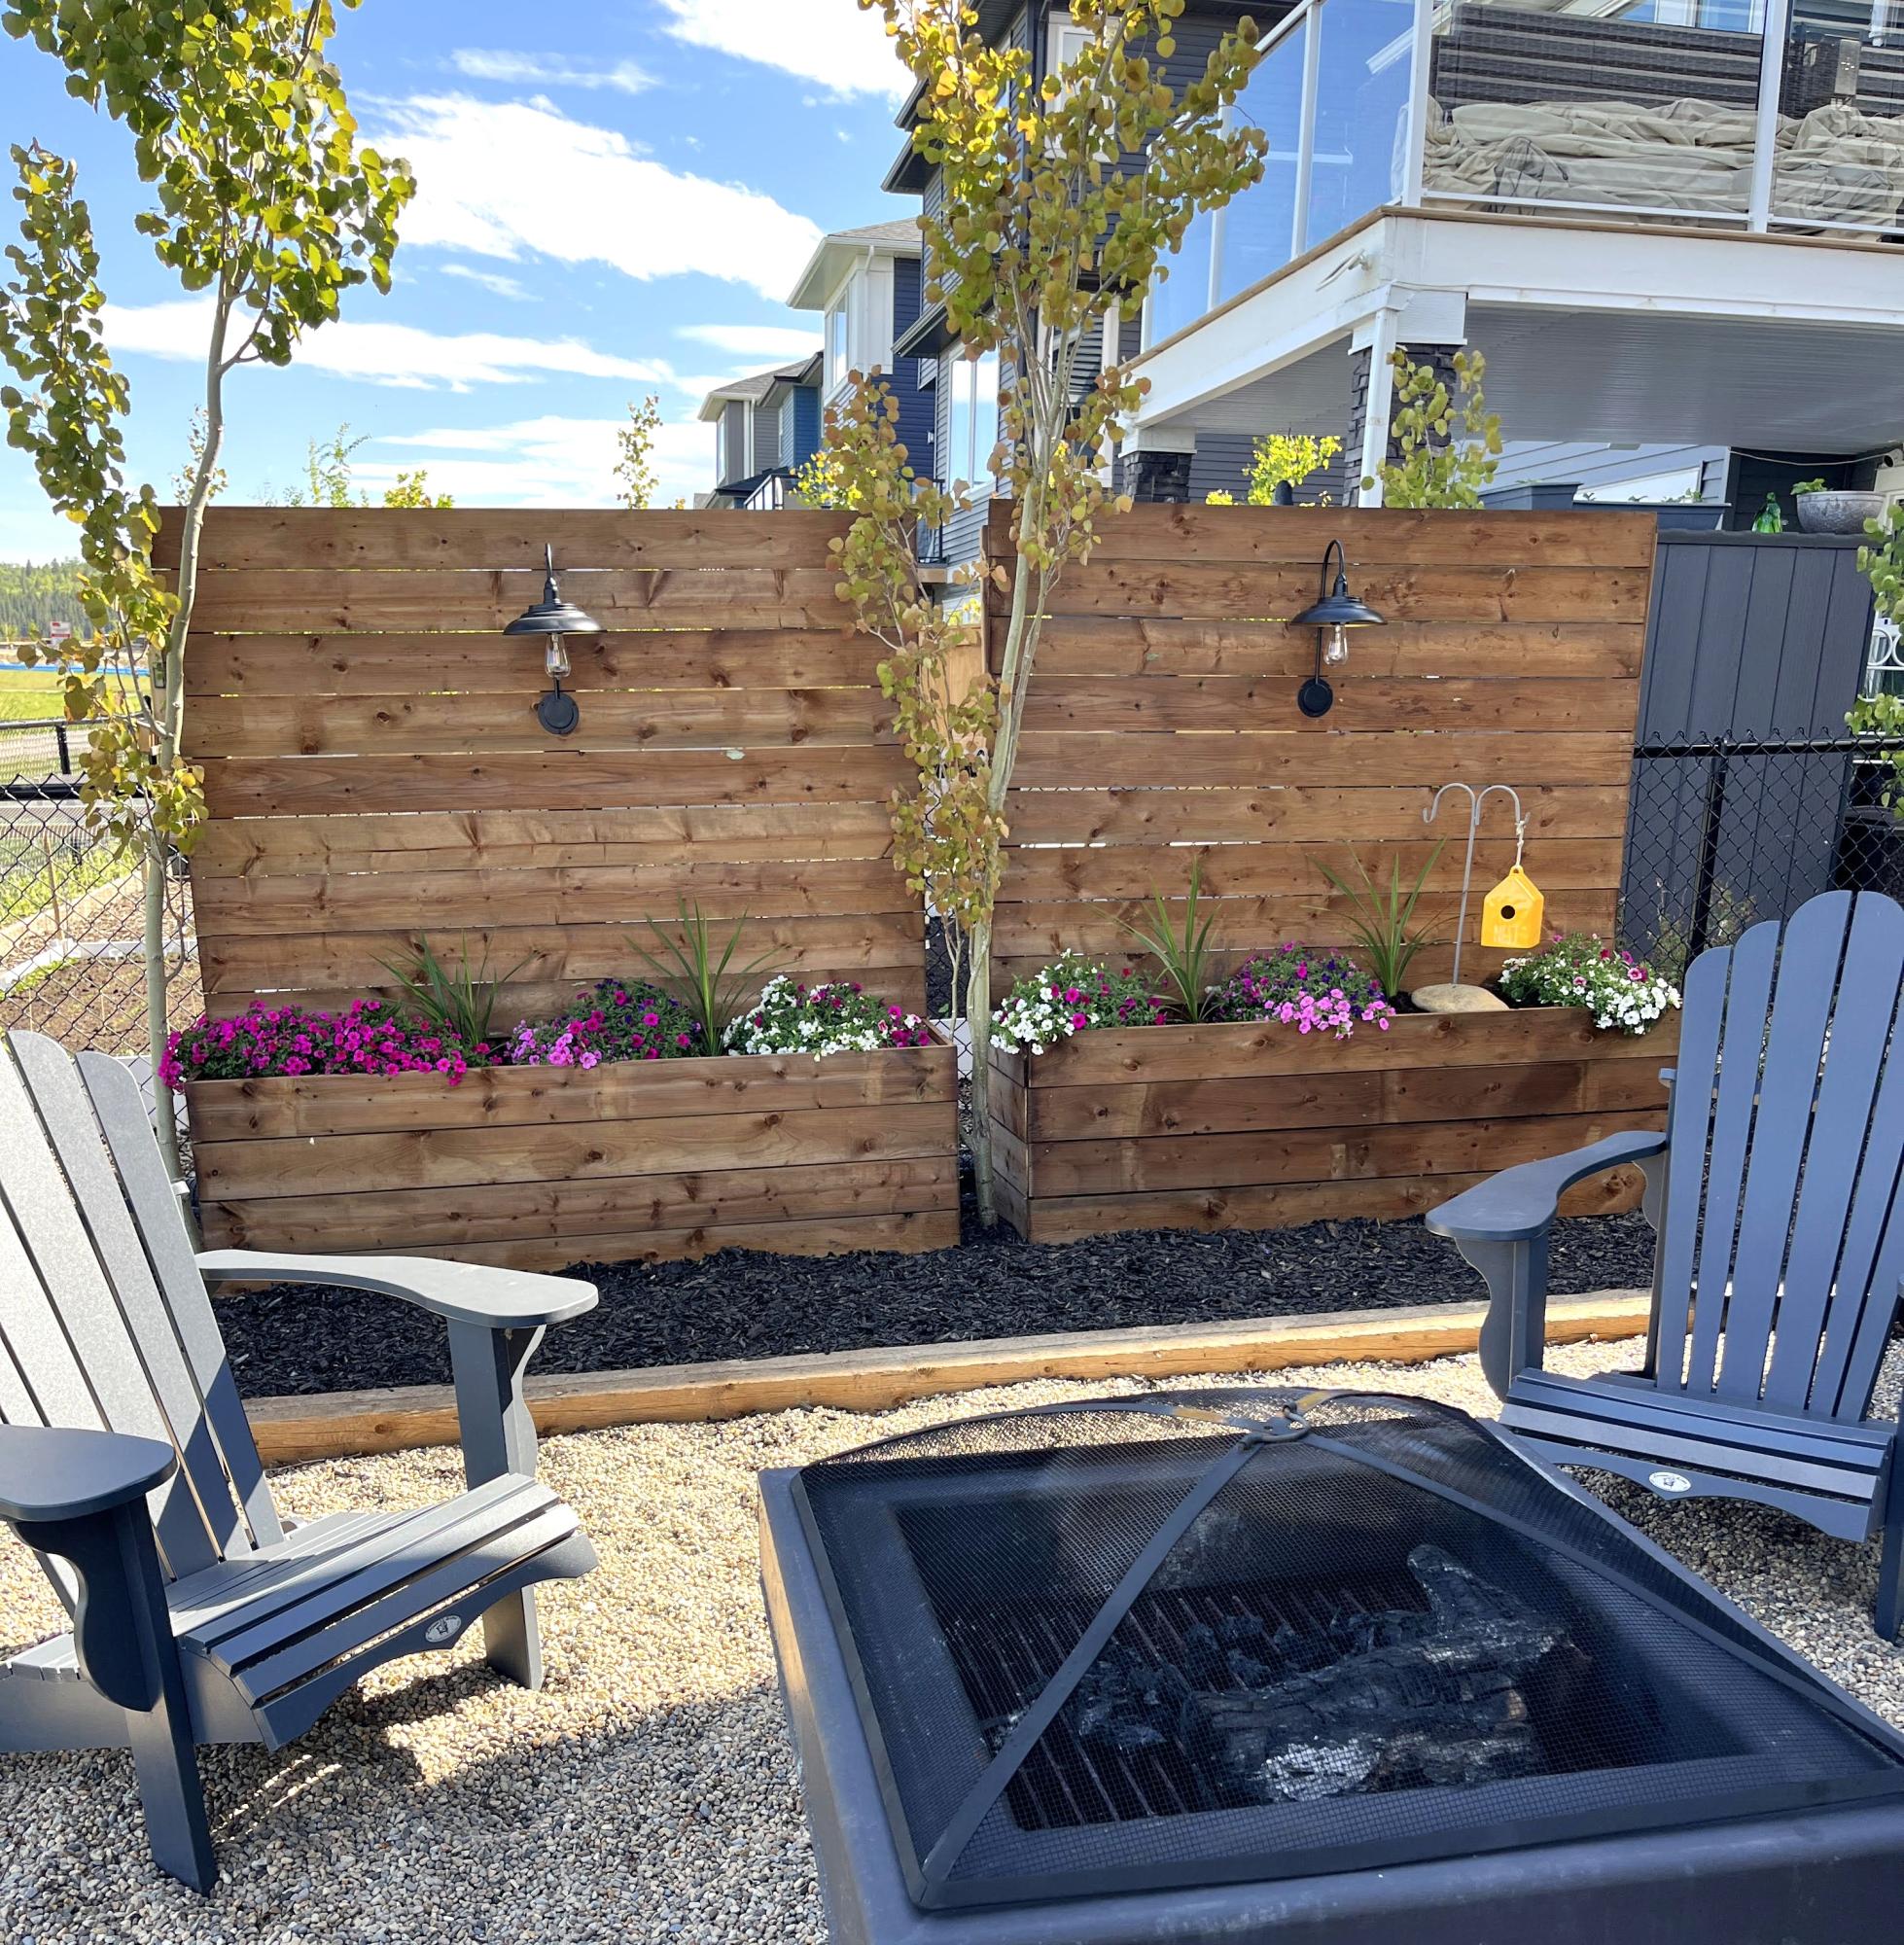
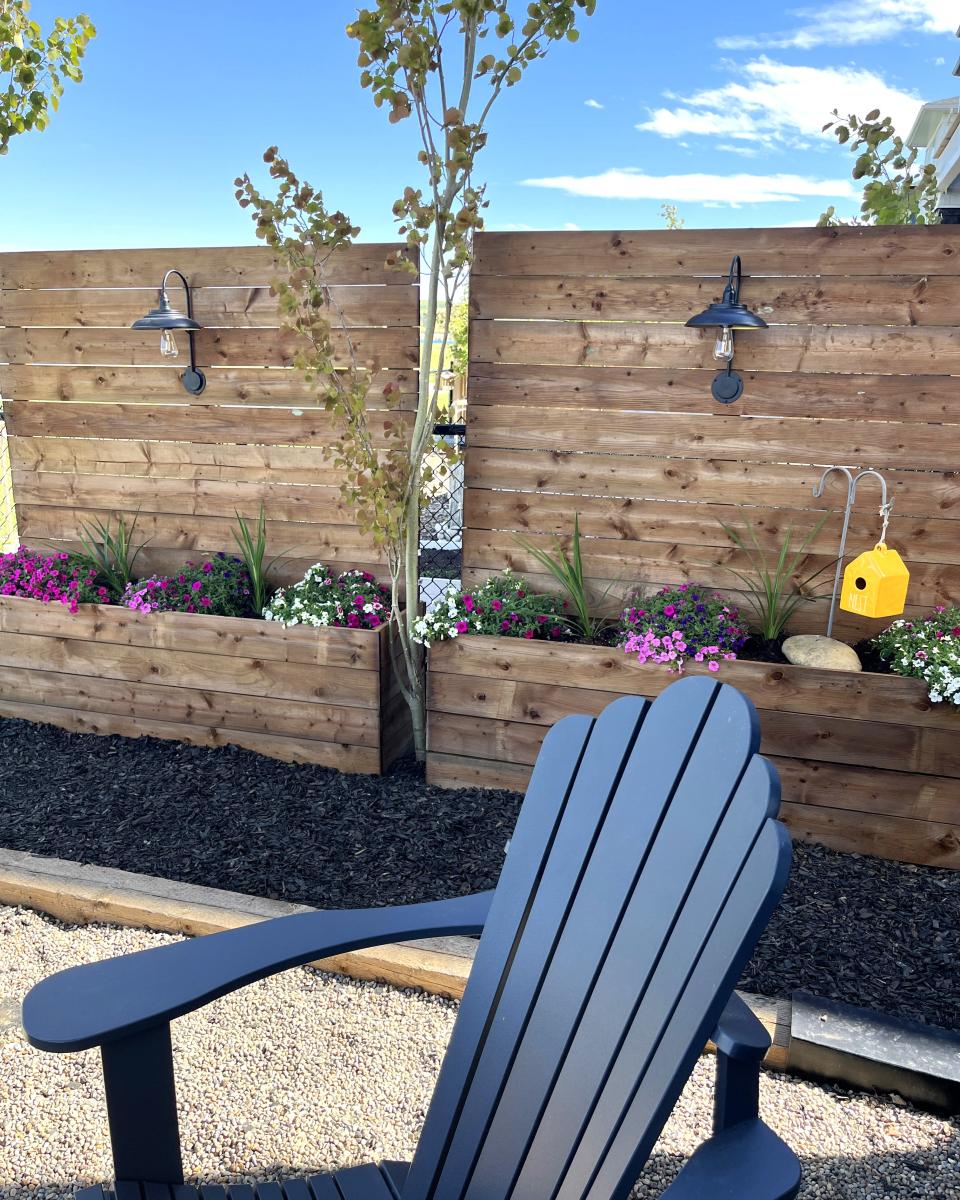
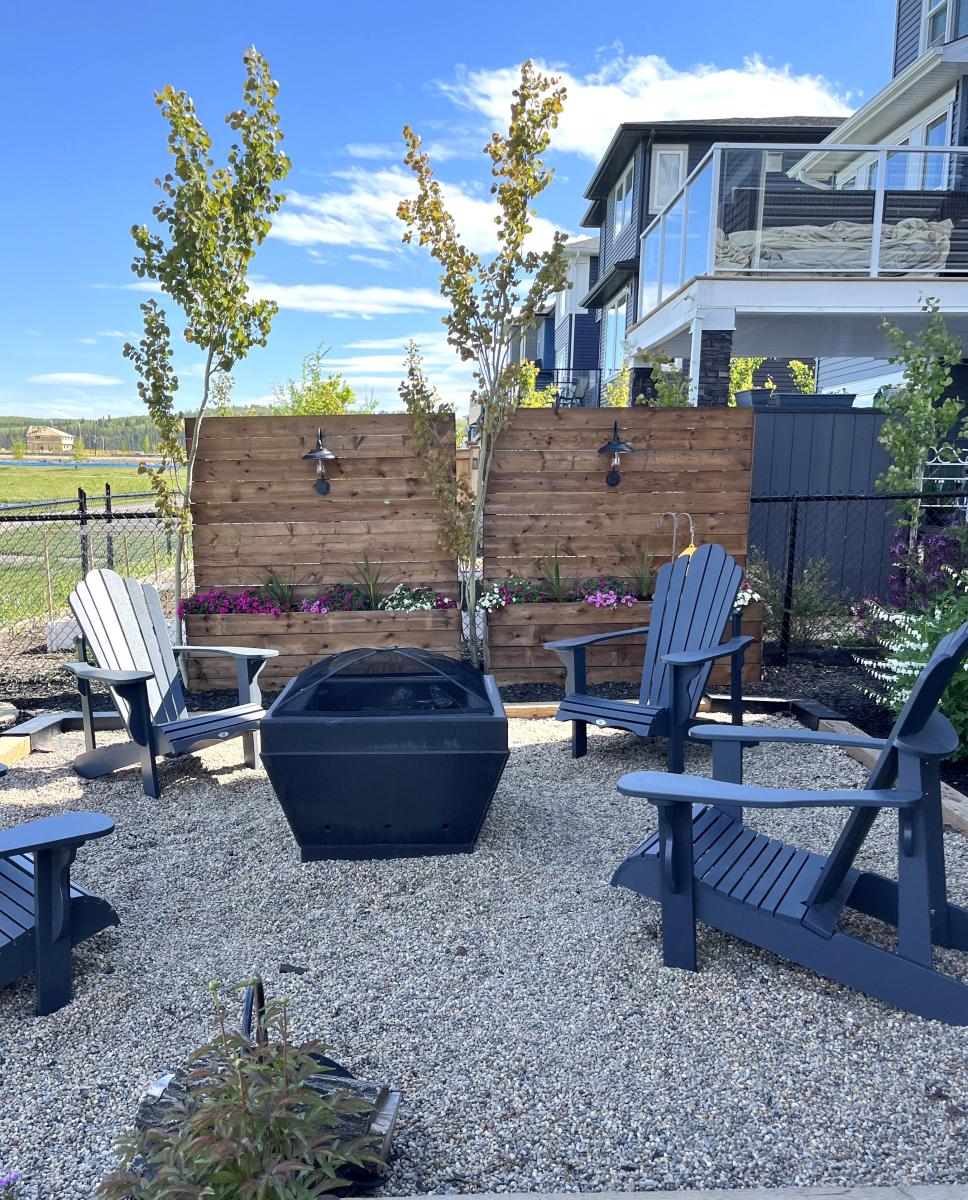
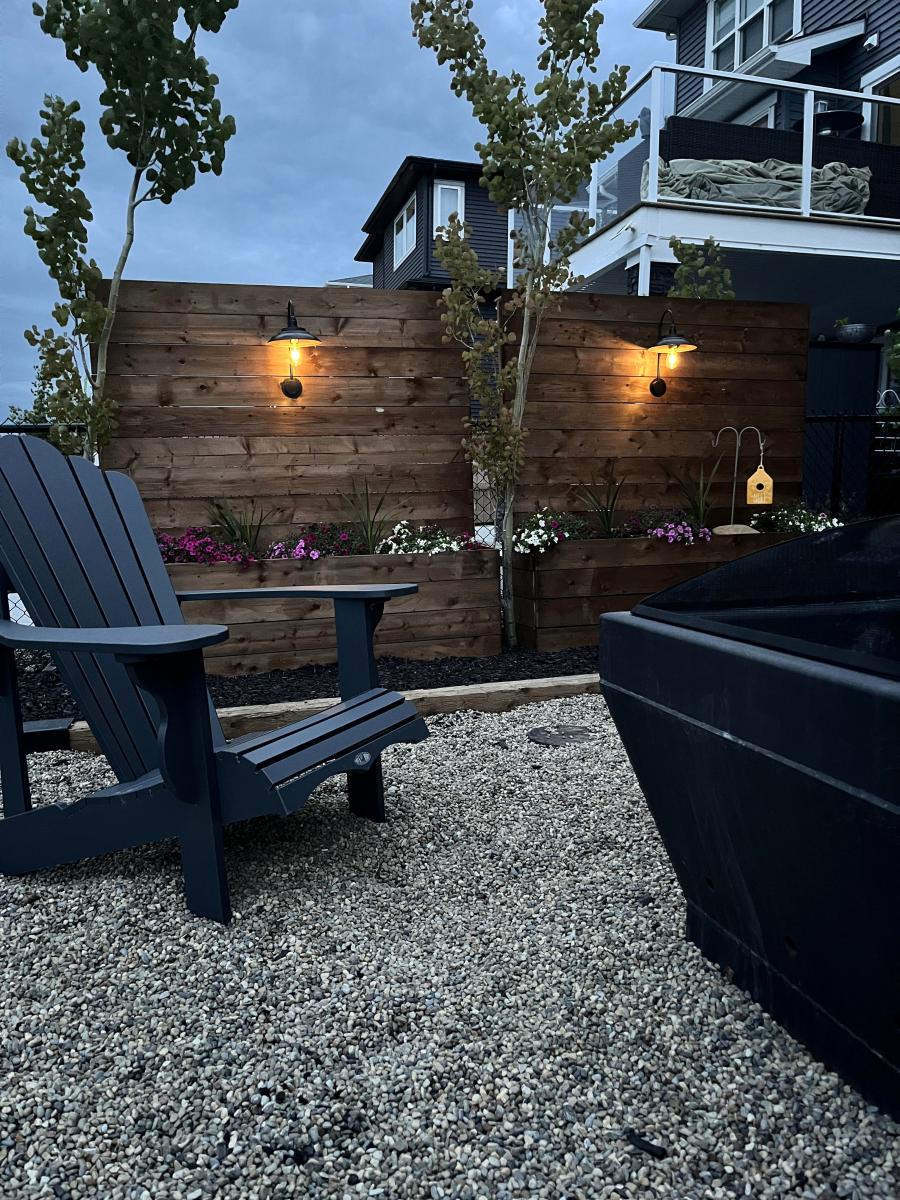
I needed a frugal solution to get a bit of privacy in our backyard. I didn’t want to dig post holes and all the premade solutions I found and liked were at least double the cost of this project. I used pretreated lumber which isn’t recommended for veggies/plants, but I knew I wasn’t going to plant veggies so I lined them with plastic and landscape fabric and made sure to add drainage holes. To reduce the amount of soil I needed in each I added some cutoffs of a tree my friend cut down in their yard. The whole thing came together in less than a day! The easy to follow free plans can be found @anawhitediy -highly recommend! (Thank you!!!) Very easy to follow and the shopping list and cut list were super helpful!
Jesi 🖤
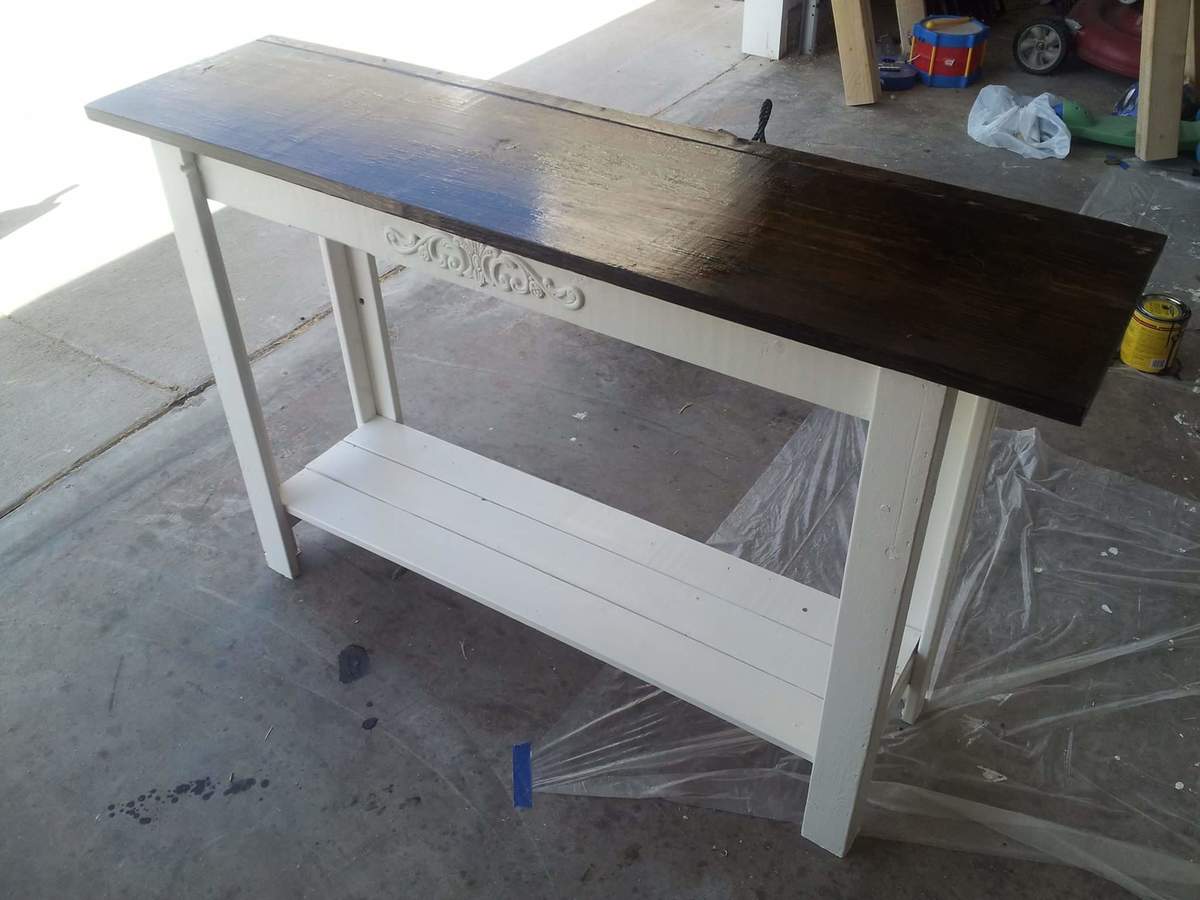
spare room home project

I used antique white paint for the bottom and dark walnut atain for the top. I added a appilque to make it look a little fancy.
I have too many scraps … and a granddaughter with a 2nd birthday coming up soon … so spent a couple hours cutting the pieces … took extra time since i was trying to make scraps work … but it still came together well. I had trouble making pocket screws work on this project … but the design makes it easy to bury and cover regular screws.