Little Cottage Loft Bed
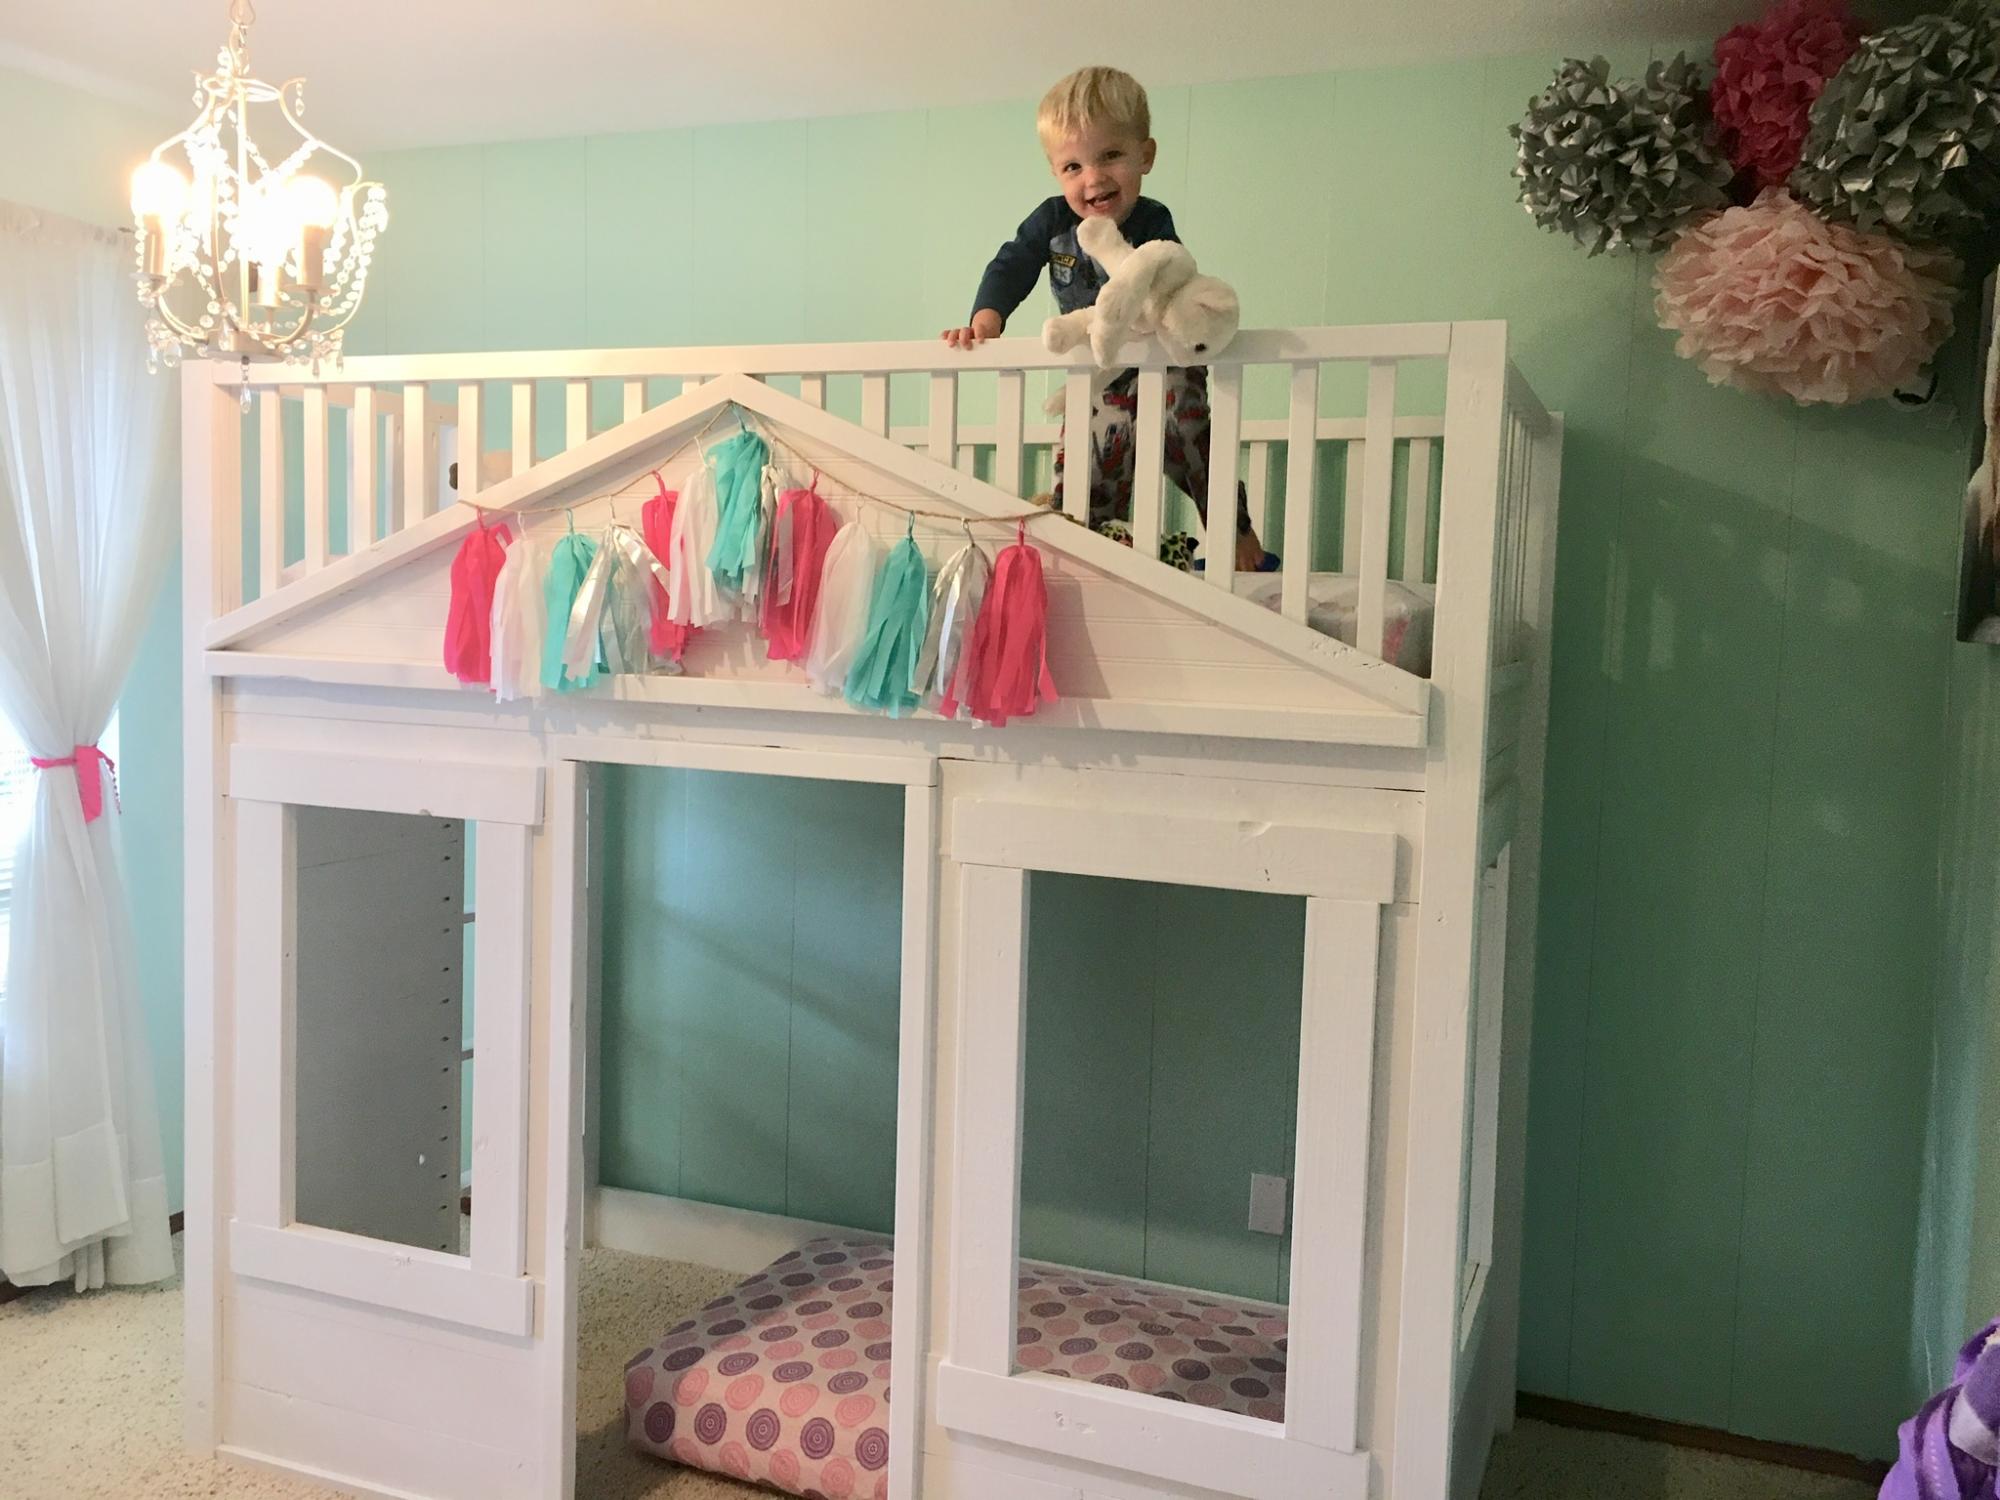
This was such a fun build. Thank you for the great plans. My daughter loves it
This was such a fun build. Thank you for the great plans. My daughter loves it

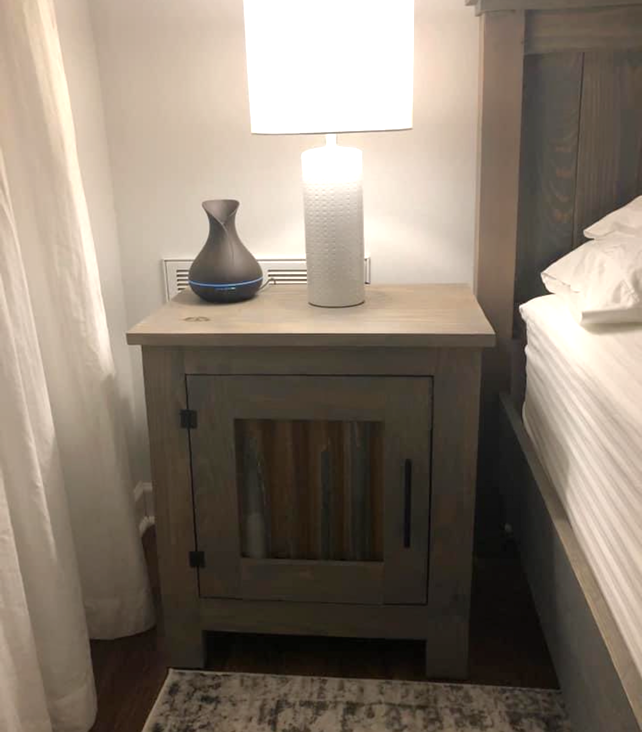
Bedroom DIY Suite
Paul Burdine
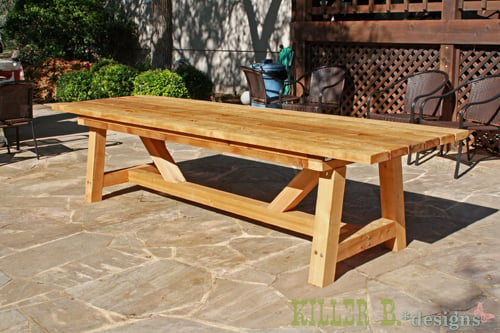
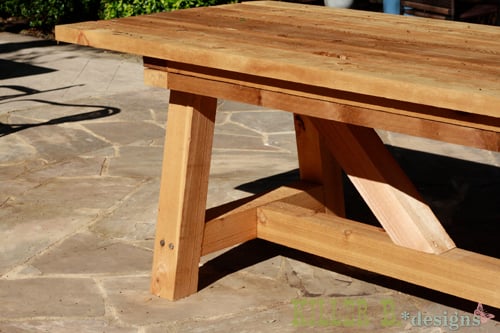
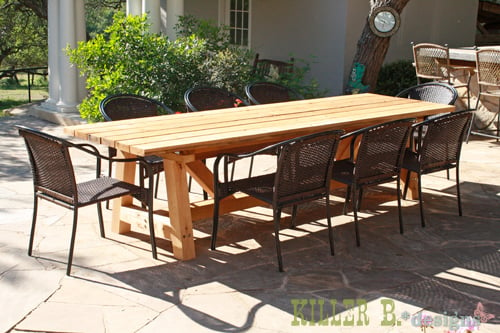
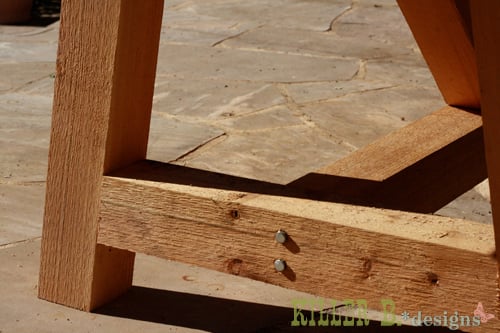
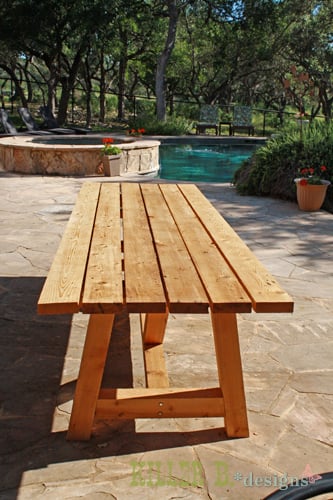
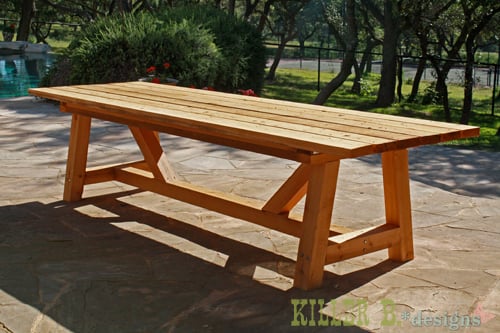
My mom was looking for a new outdoor table, and asked me to come up with something. I found the link for these plans (http://www.thedesignconfidential.com/2011/04/free-diy-furniture-plans-t…) to knock off Restoration Hardware's $4000 Provence Beam outdoor table. Overall I liked the plan, with the chunkier look of the 4x4's. But there were a lot of errors in the diagrams, and the finished height is 34" which is ridiculously tall for a table. So we took it apart and cut the legs back down to change the finished height to 30". We chose rough-cut cedar for it's look and outdoor properties, not wanting to use treated lumber for a dining table. We couldn't find 2x10's like the plan, so we substituted seven 2x6's just like Ana's plan, but left a 1/2" gap in between so water can drain and not pool on top and rot the wood. Also, since we were working with 4x4's for the legs, we chose heavy duty lag bolts instead of screws to join them together. I love the finished look they give. Overall it's a sturdy, yet lightweight table that my mom loves and has already used for entertaining!

Wed, 04/25/2012 - 10:02
Thanks Brook! It was so much fun to build. I put my dad and husband to work while I was the "project manager" ;)
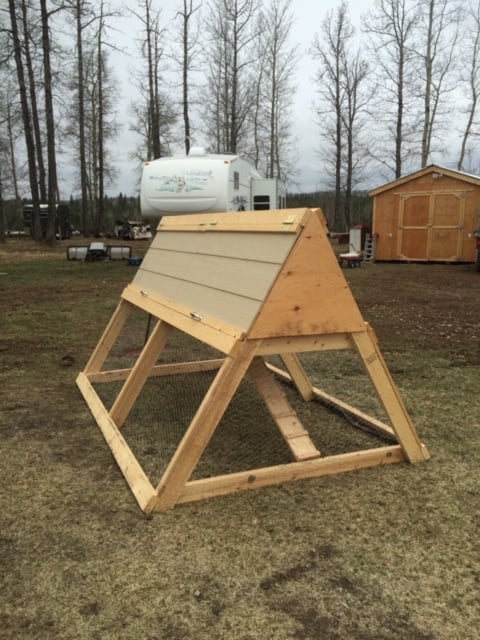
I built this chicken coop a few years ago for my cousin. I was happy with the plans, and the ease of the build, and she was happy at how easy it was to move. **This picture does not show the wheels installed.
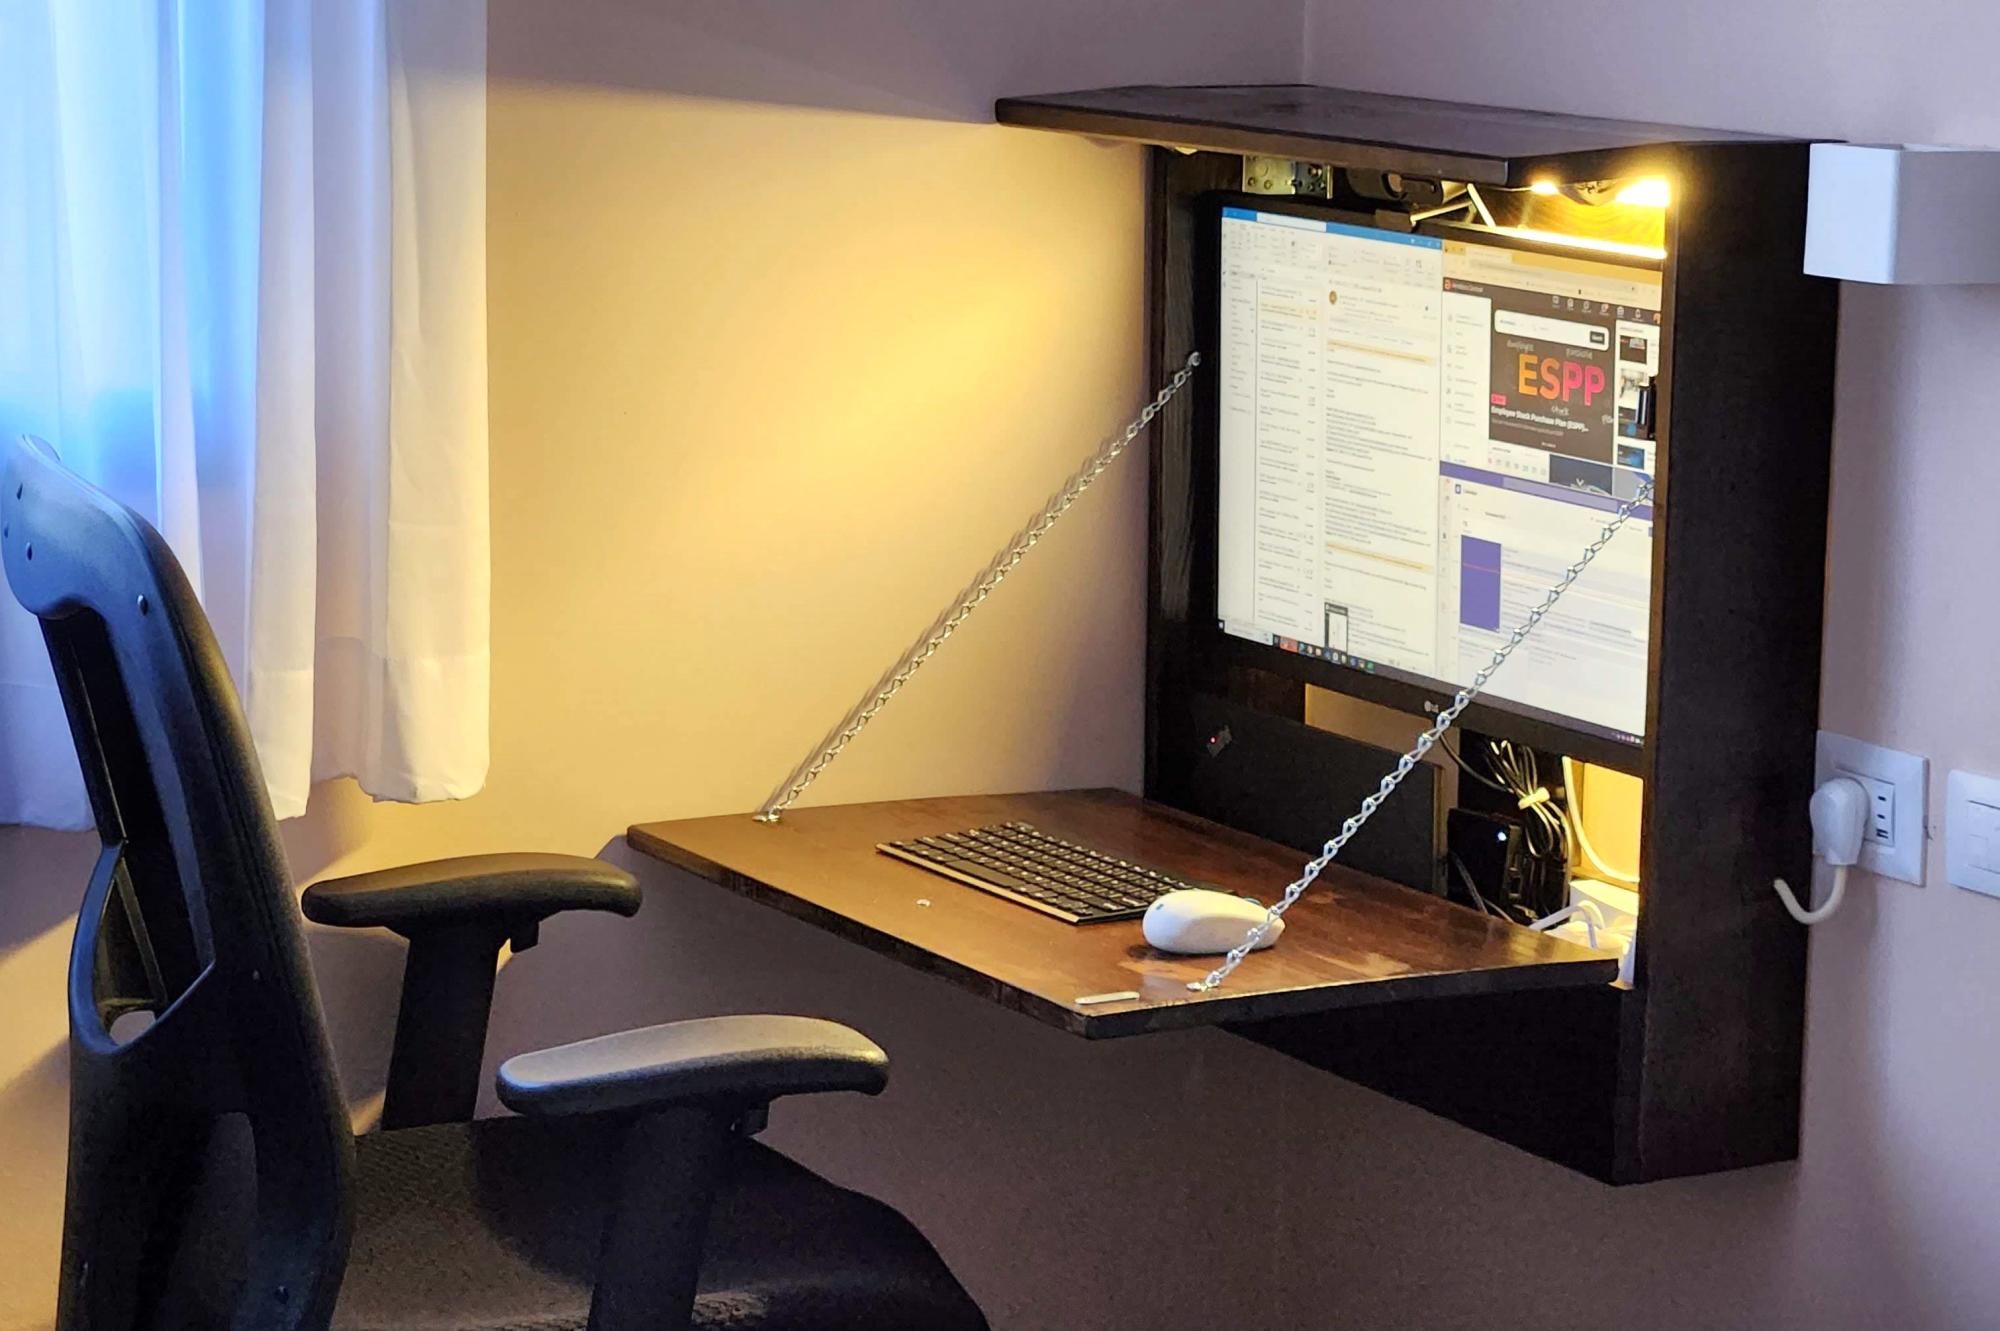
I built this fold-up desk, out of sheer necessity. It's rather unassuming when closed, yet fully functional when open, with built-in power outlets and light, a large screen, a nook for the laptop and the chargers, etc. It's tailored to my needs and specific size limitations, but I think you could make a great general plan of it for anyone needing a small-space hideaway desk.

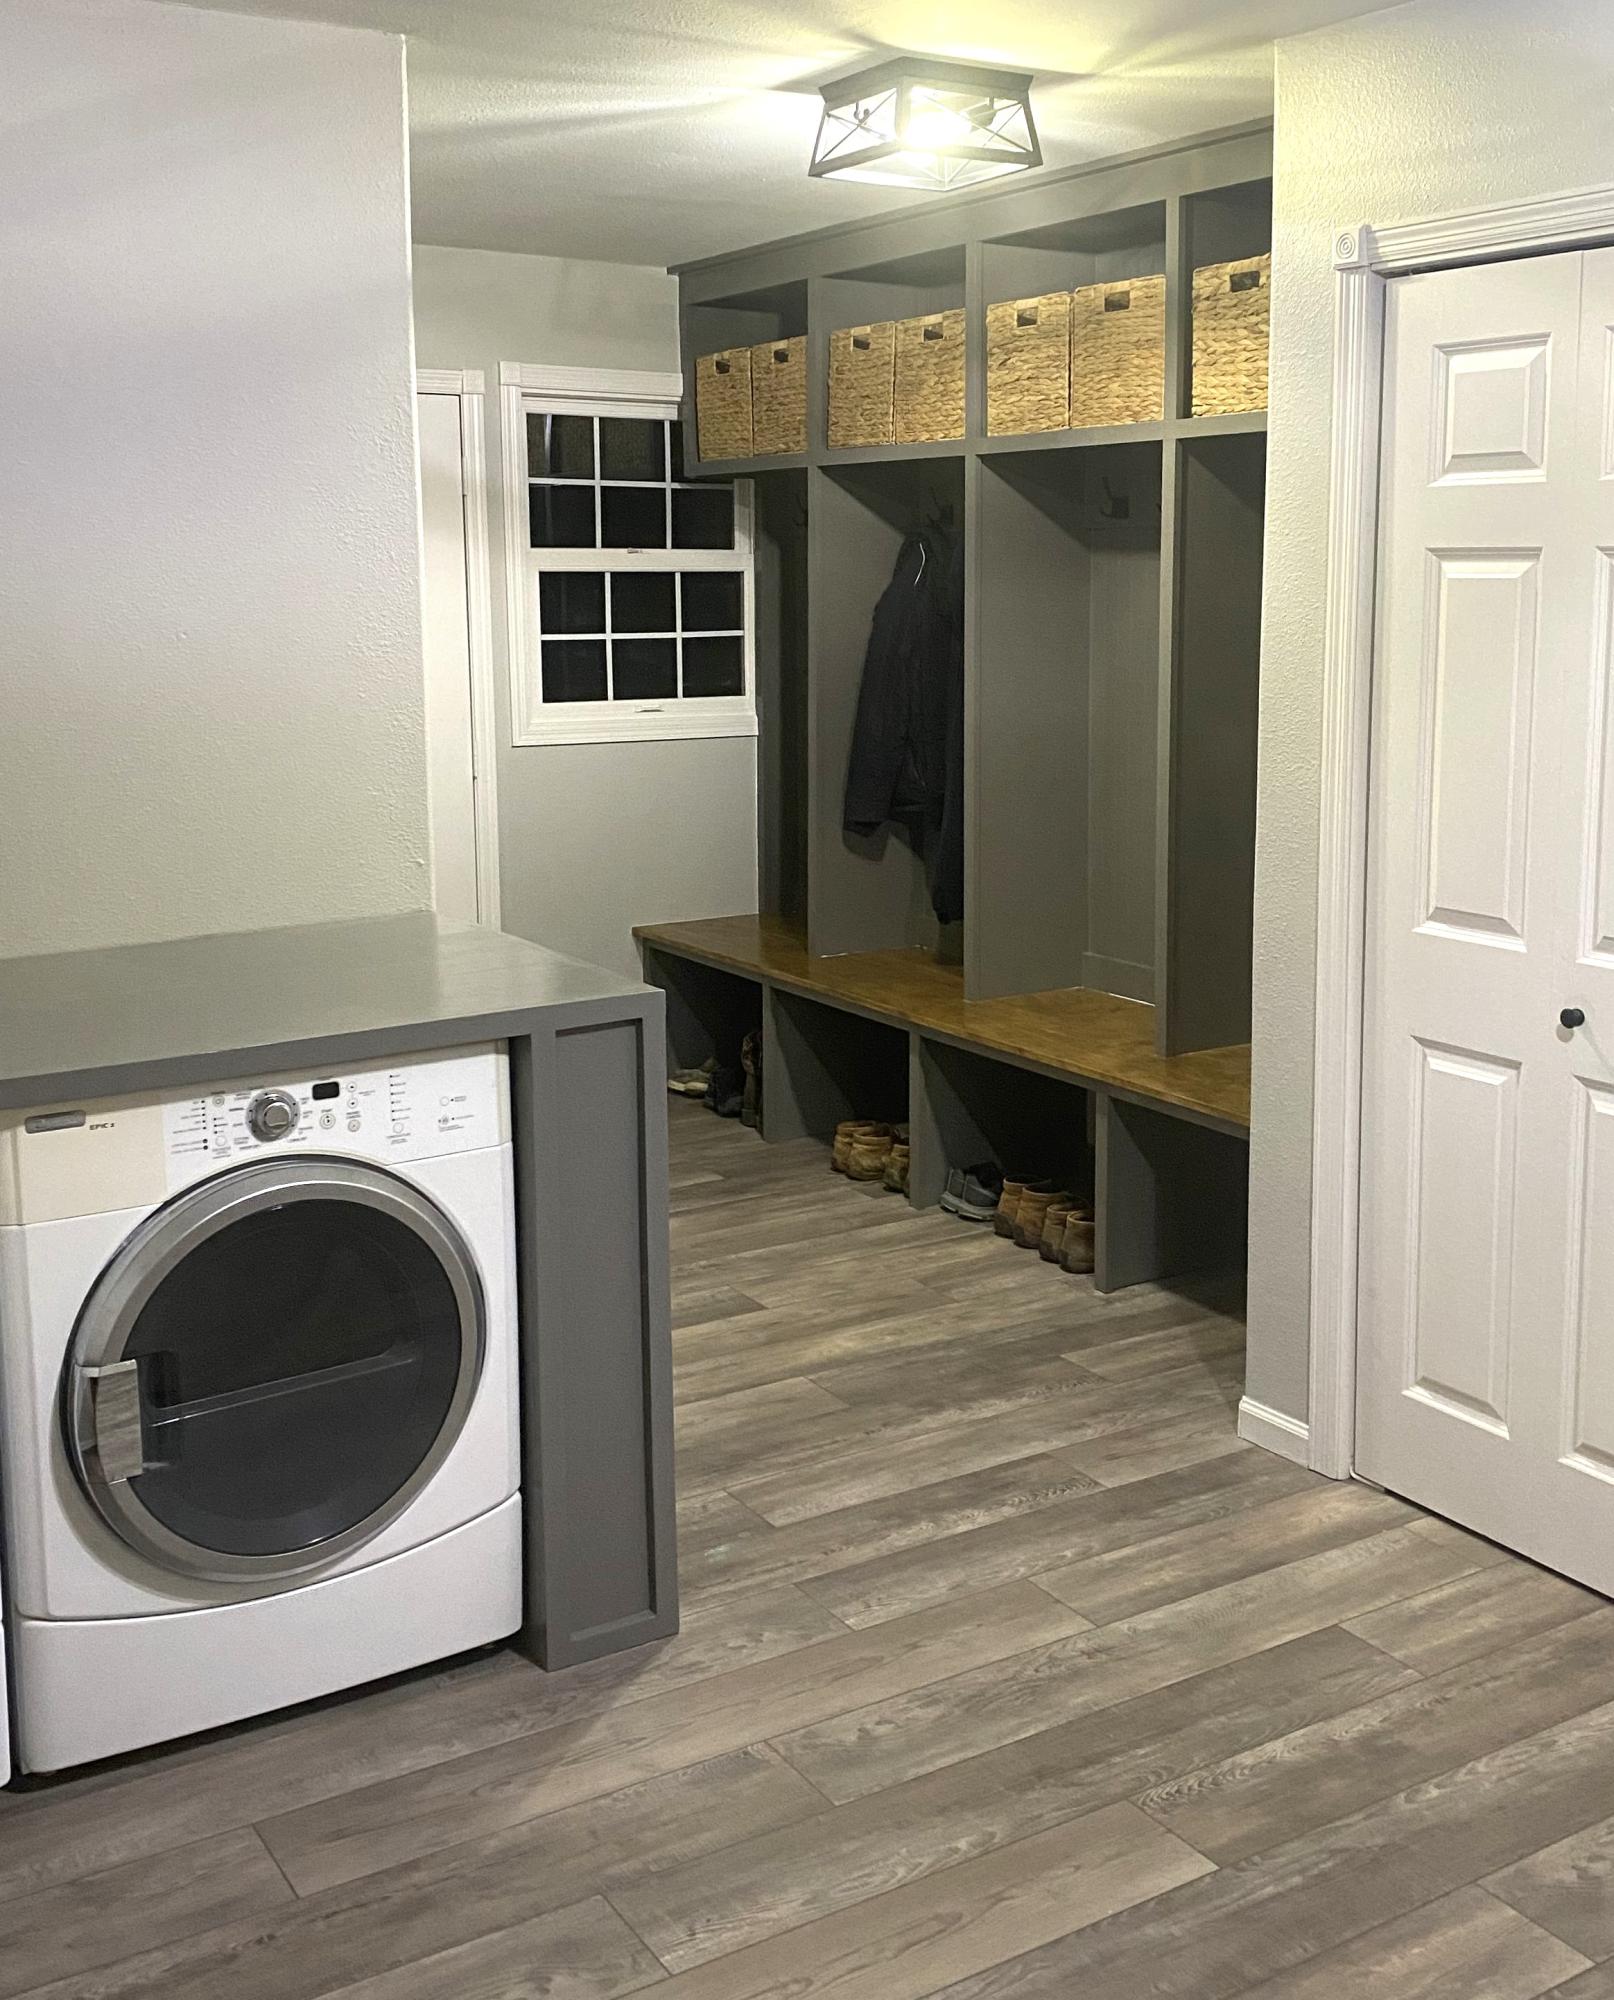
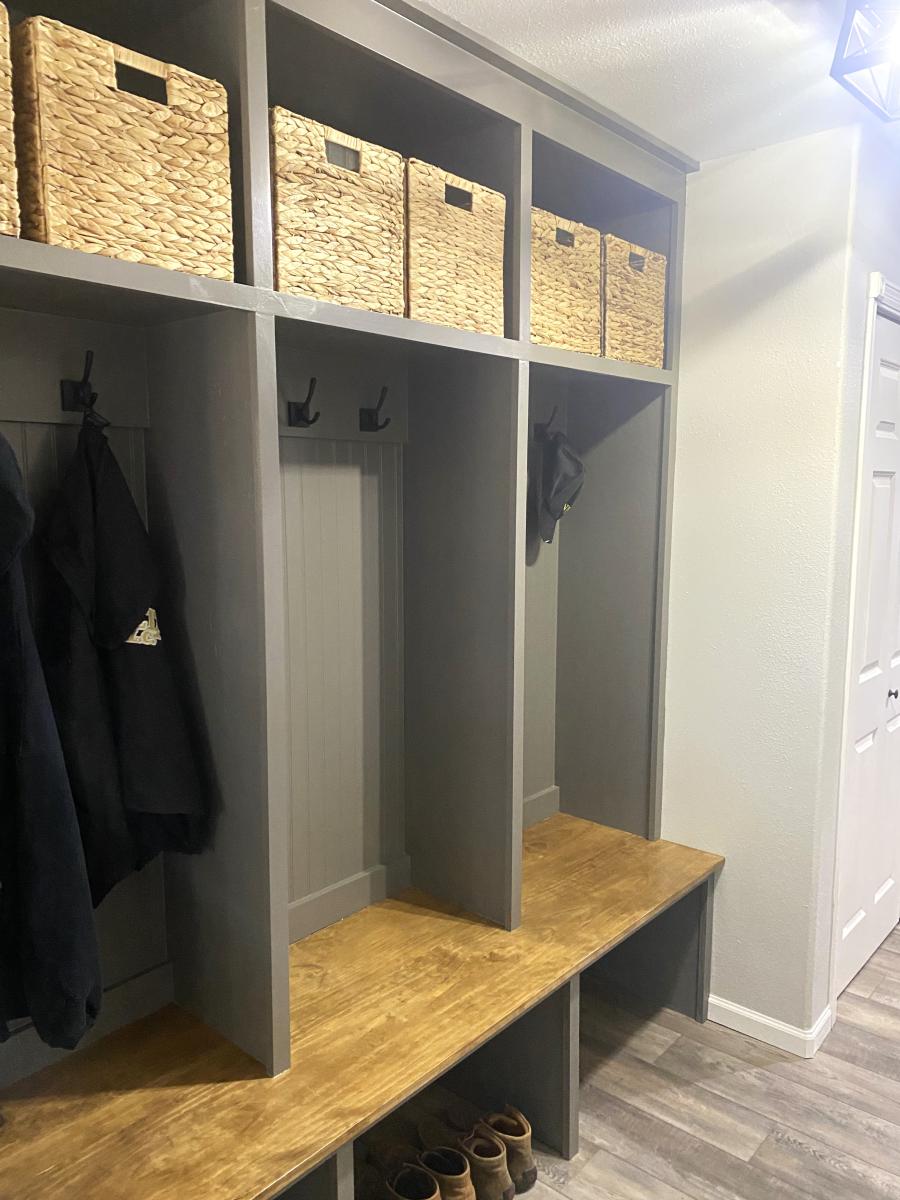
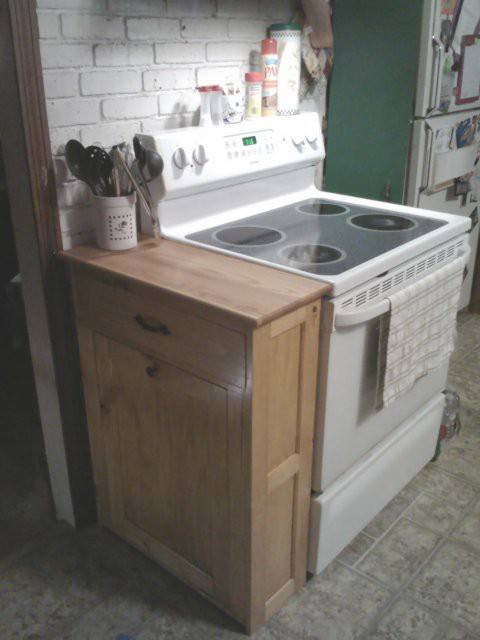
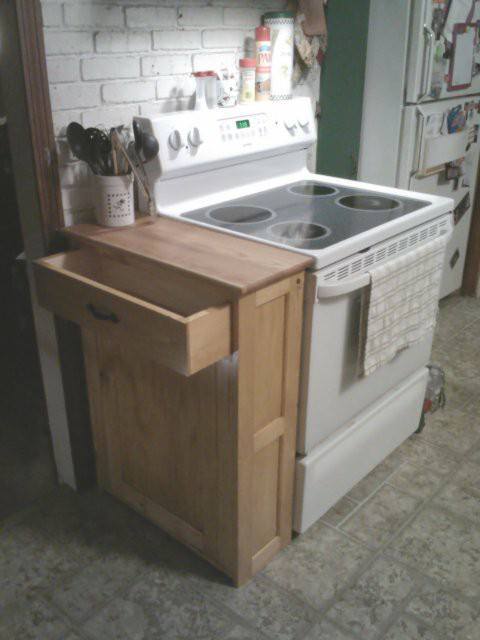
Laundry Mudroom Storage
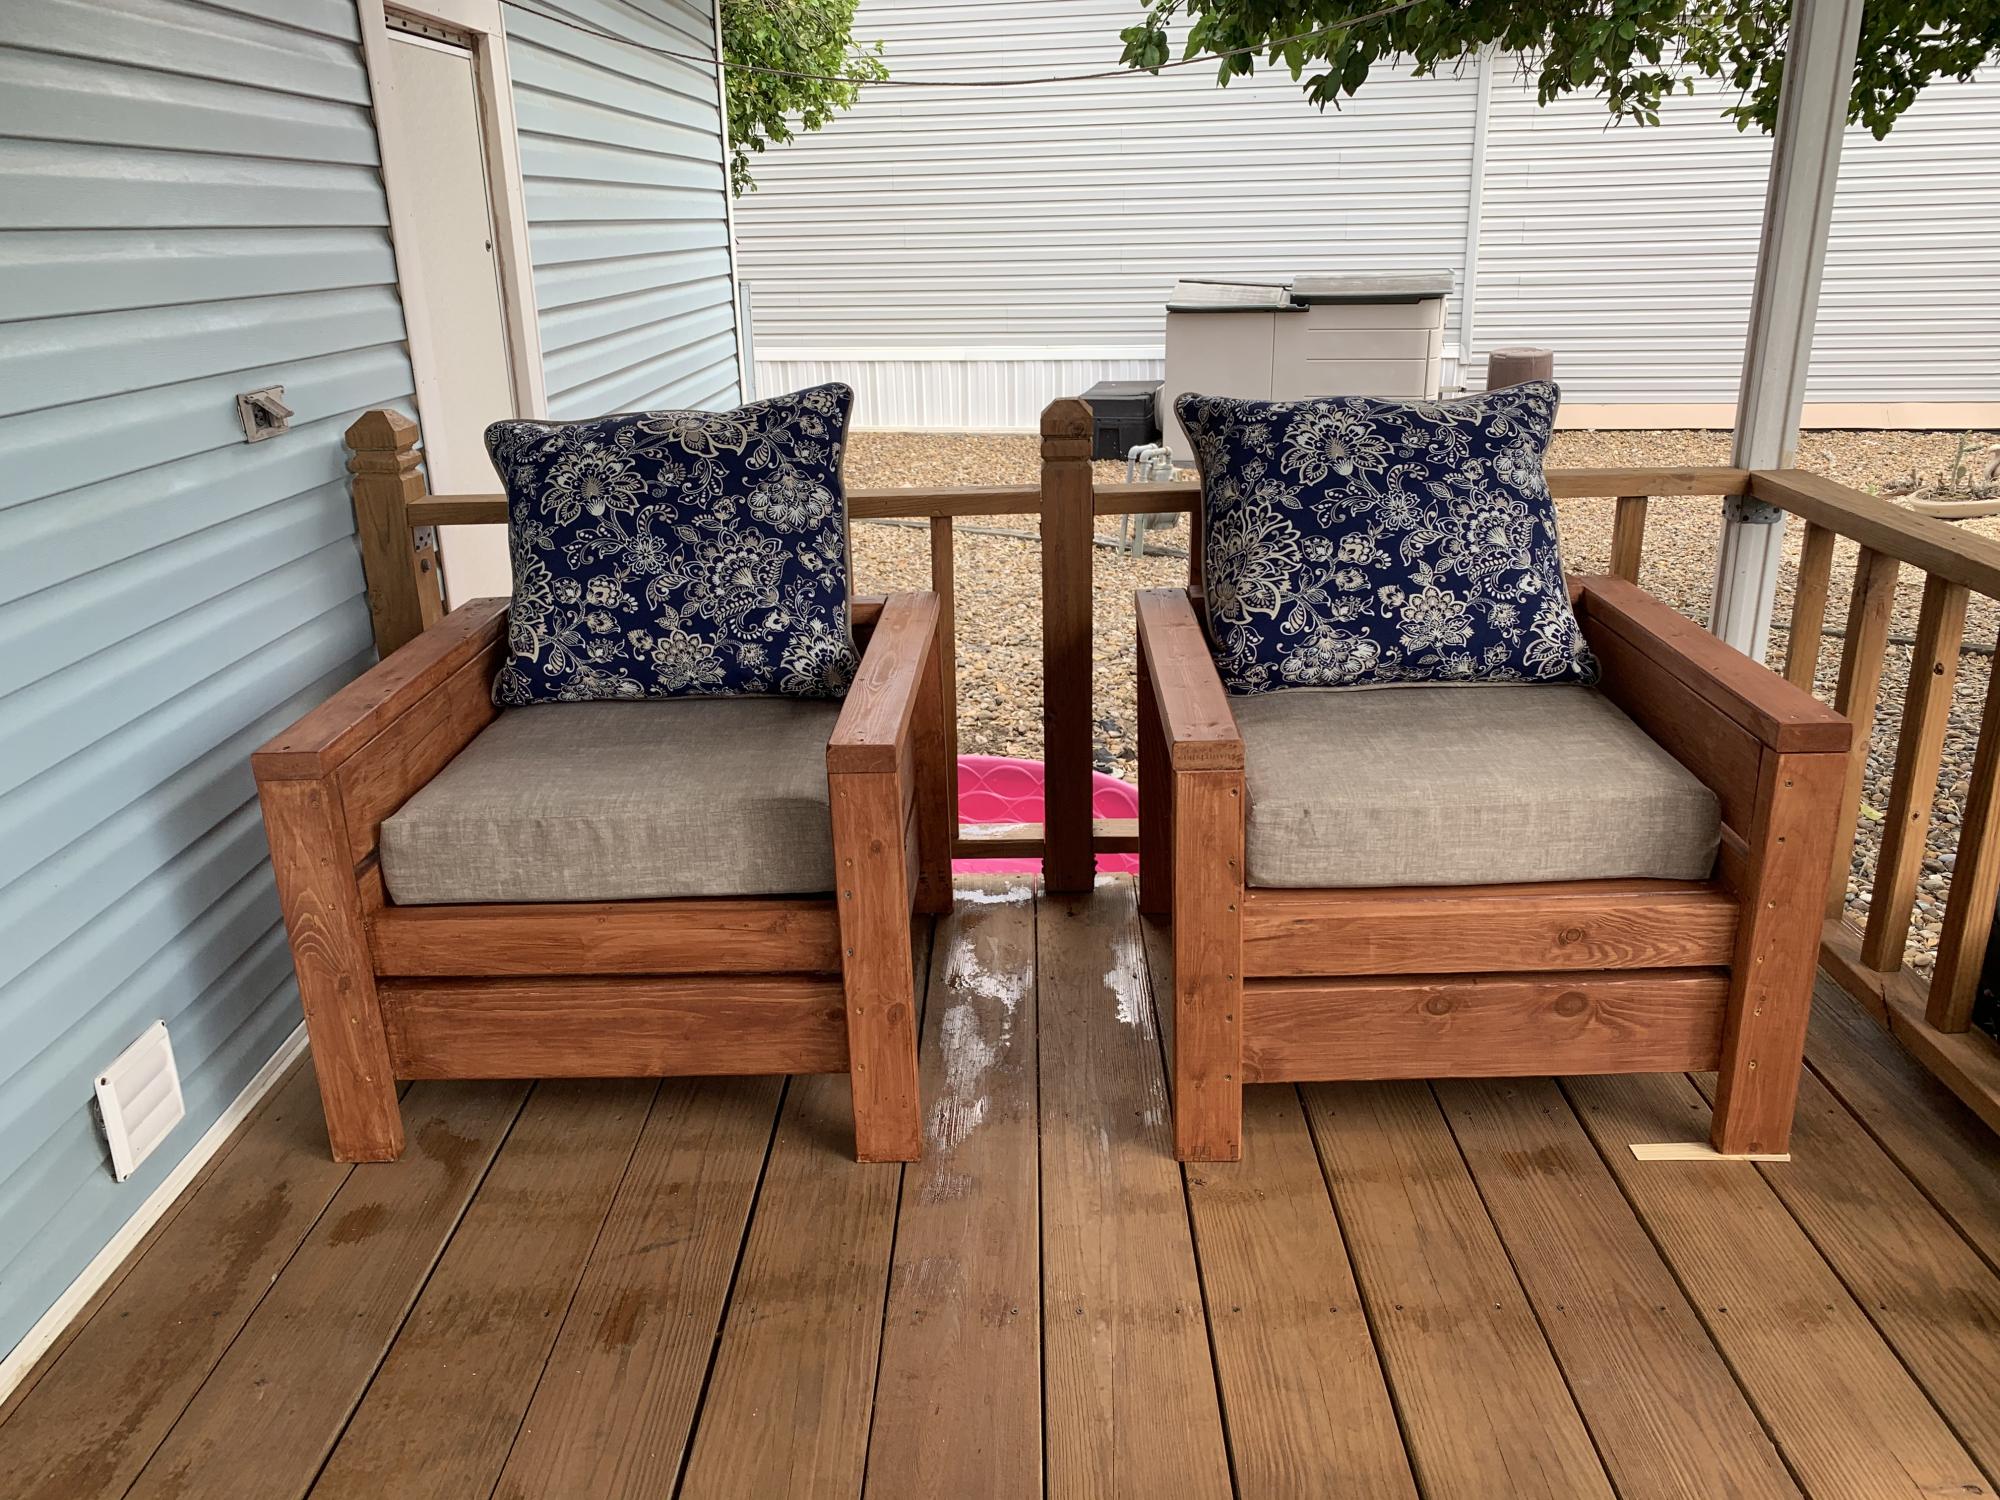
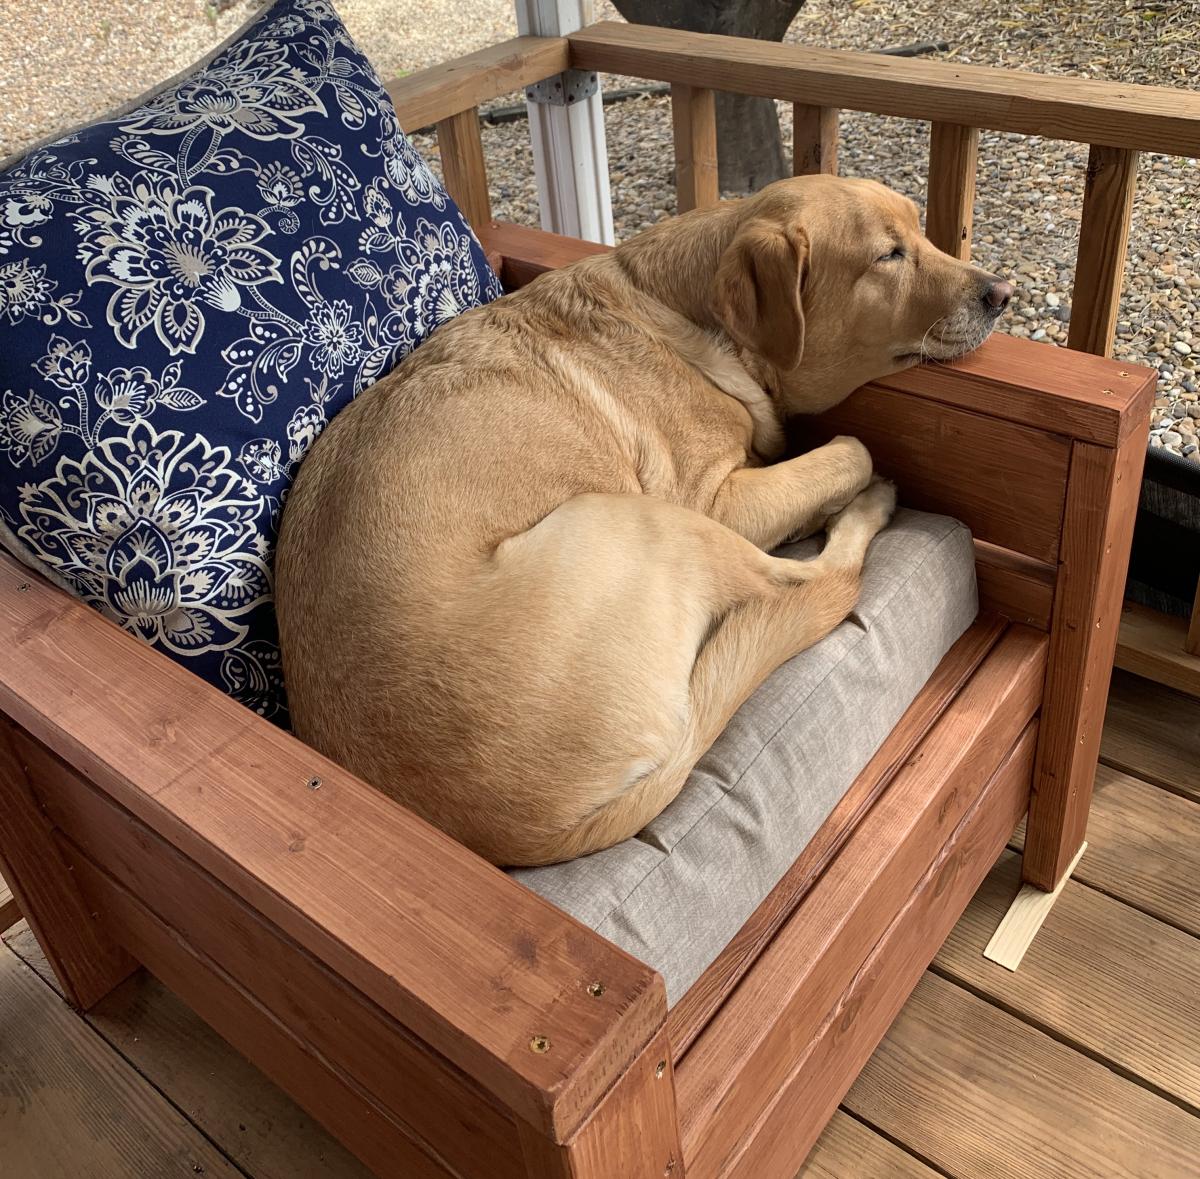
This was our first try at chairs and they came out super! Even our Yellow Lab, Cassie was pleased! We made a few mistakes on the first chair which were easily corrected. The only thing I would add to the buy list is a 2x2 .
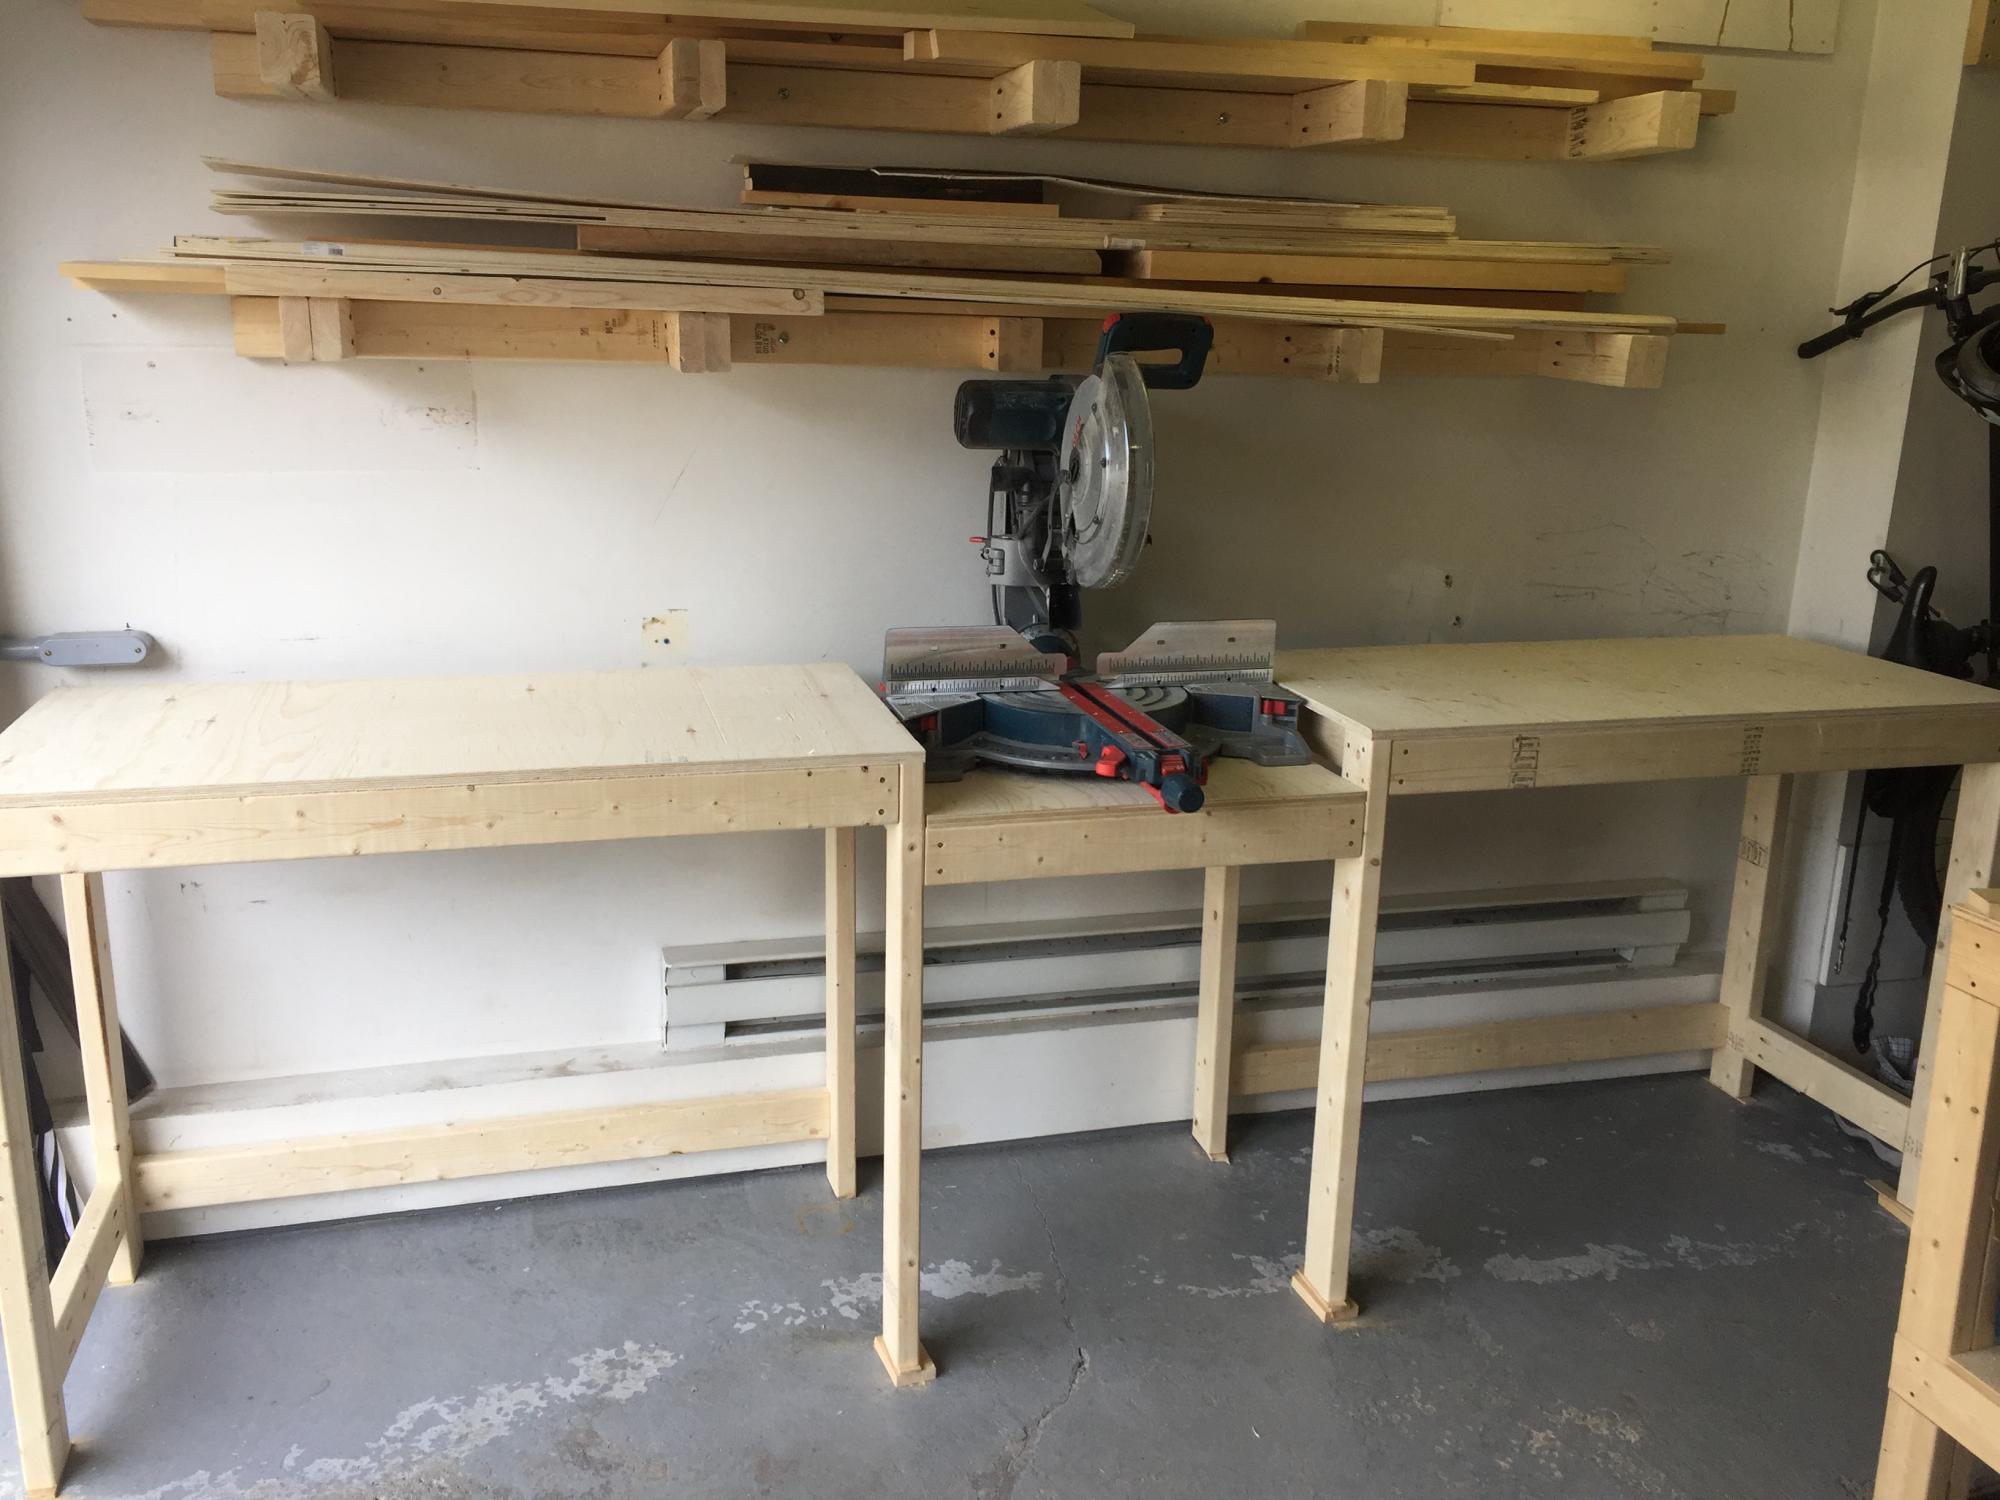
We built this workbench adapting Ana's plans. We did not build the carts yet.
It is very practical! We just love it!
I moved into a new house and needed a new chicken coop. I am retired and not a woodworker but these plans were easy to build. Thanks Ana.
Doug Lamm
I used wood from an older Ana white project of a loft bed my daughter had out grown. I liked the look of Ana's Mom bed but wanted storage so I modified the plans slightly. I will add drawers later.

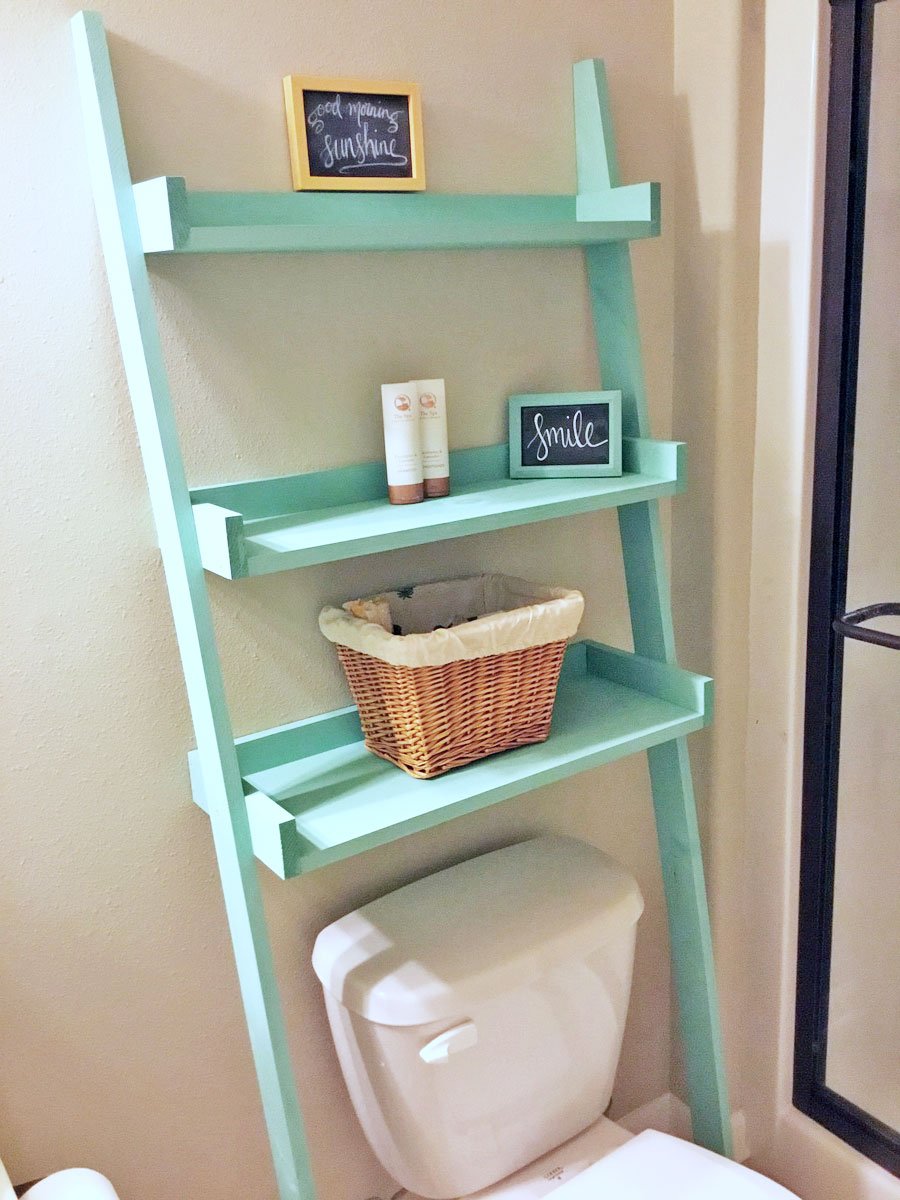
I saw this plan and immediately decided to make it! My mom had been telling me for a while I needed a shelf in the bathroom she uses while visiting. She was coming the next day so decided I needed to hustle to surprise her. I left the lumber store at 8pm and finished painting the assembled shelves by 11pm. The next morning I moved shelves to the bathroom and when she arrived later that day she was so surprised! She loved it! Thank you so much for the idea!

Wed, 06/19/2019 - 17:01
This is amazing! Three hours! I'd be surprised too!
Thank you so much for sharing a brag post, much appreciated!
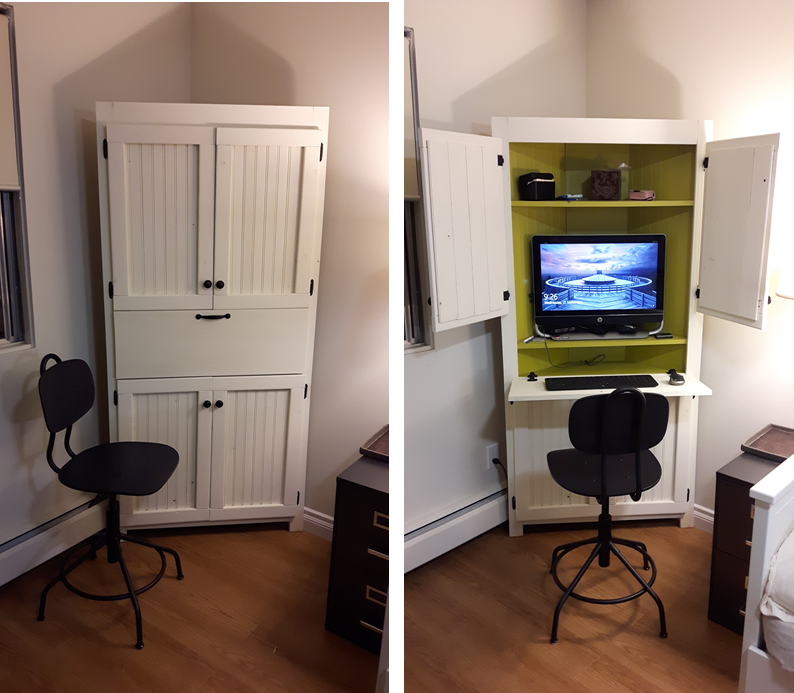
Flip down tray added for computer keyboard.
Wed, 12/27/2017 - 20:15
I love this, it is exactly what I am looking for! Is some type of extra support needed for the flip down tray for the keyboard ? If so, what would it be, or is there a special hinge I should look for?
Loved these plans! Was my first project I tackled trying my hand with a new hobby of wood working to stave off quarantine craziness :-) finished project looked awesome and got me started working on other plans on the site.
**note**
Side table was just sanded and refinished, wasn't built just tried to match.
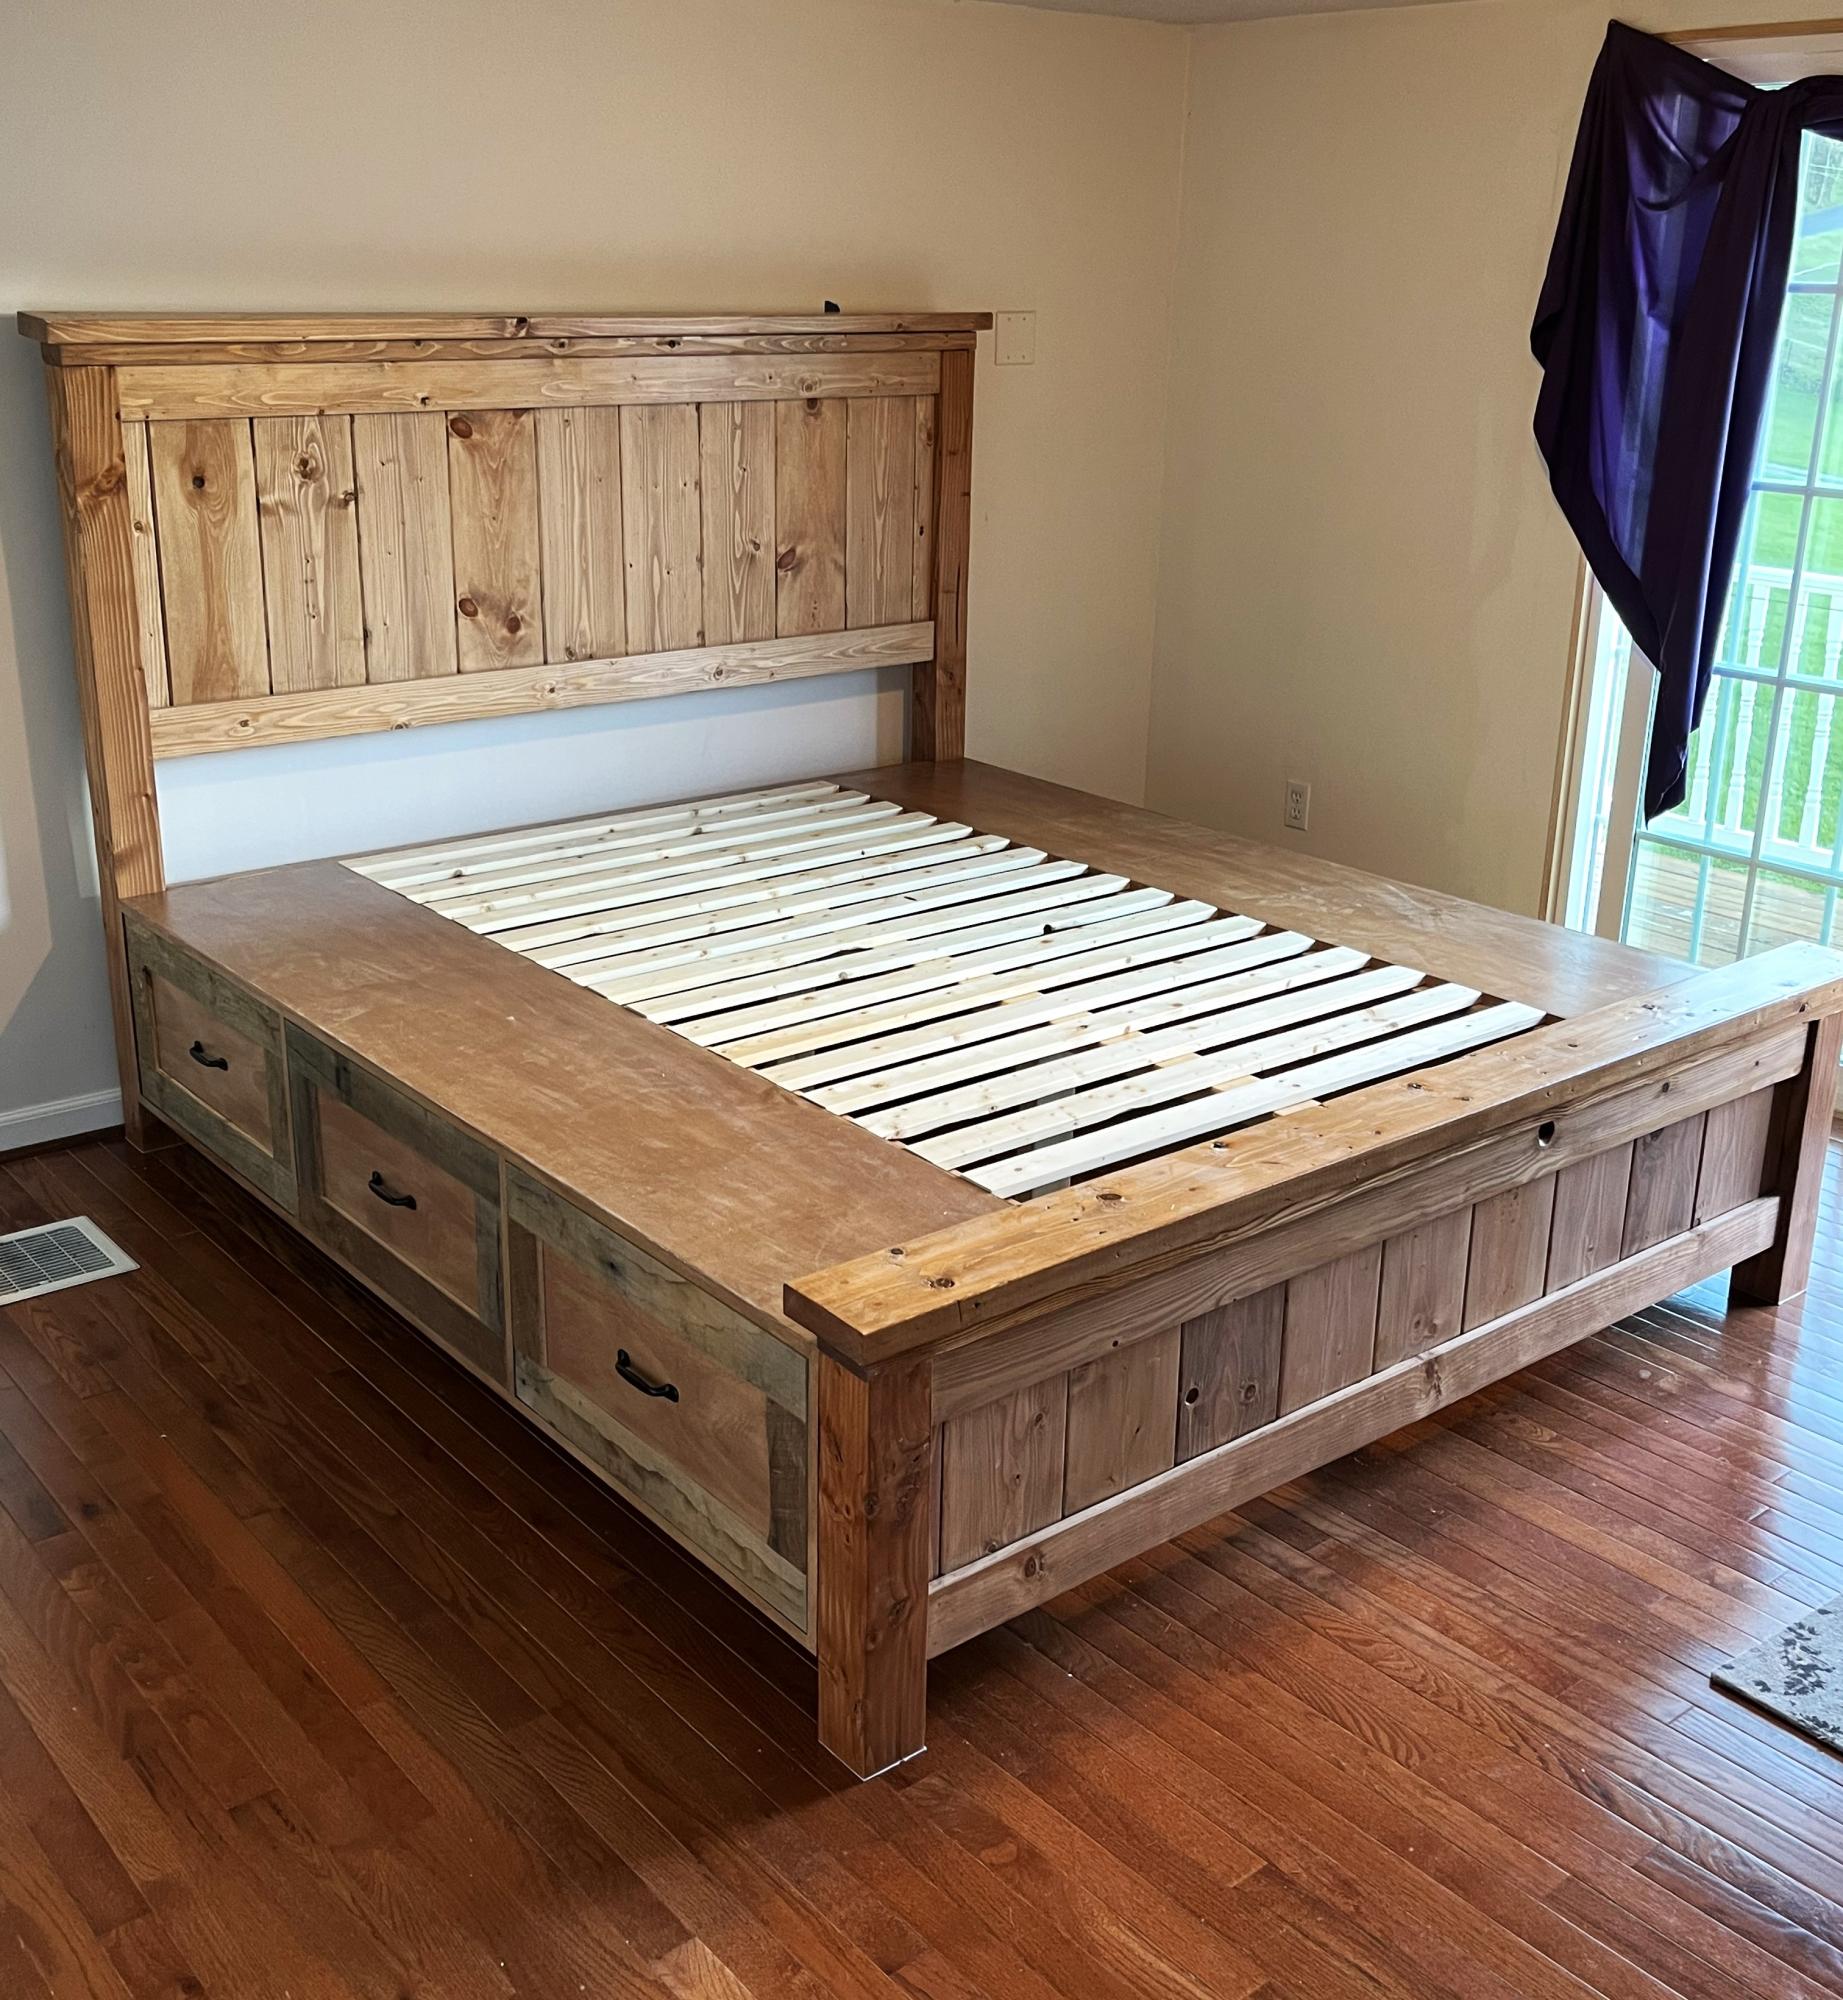
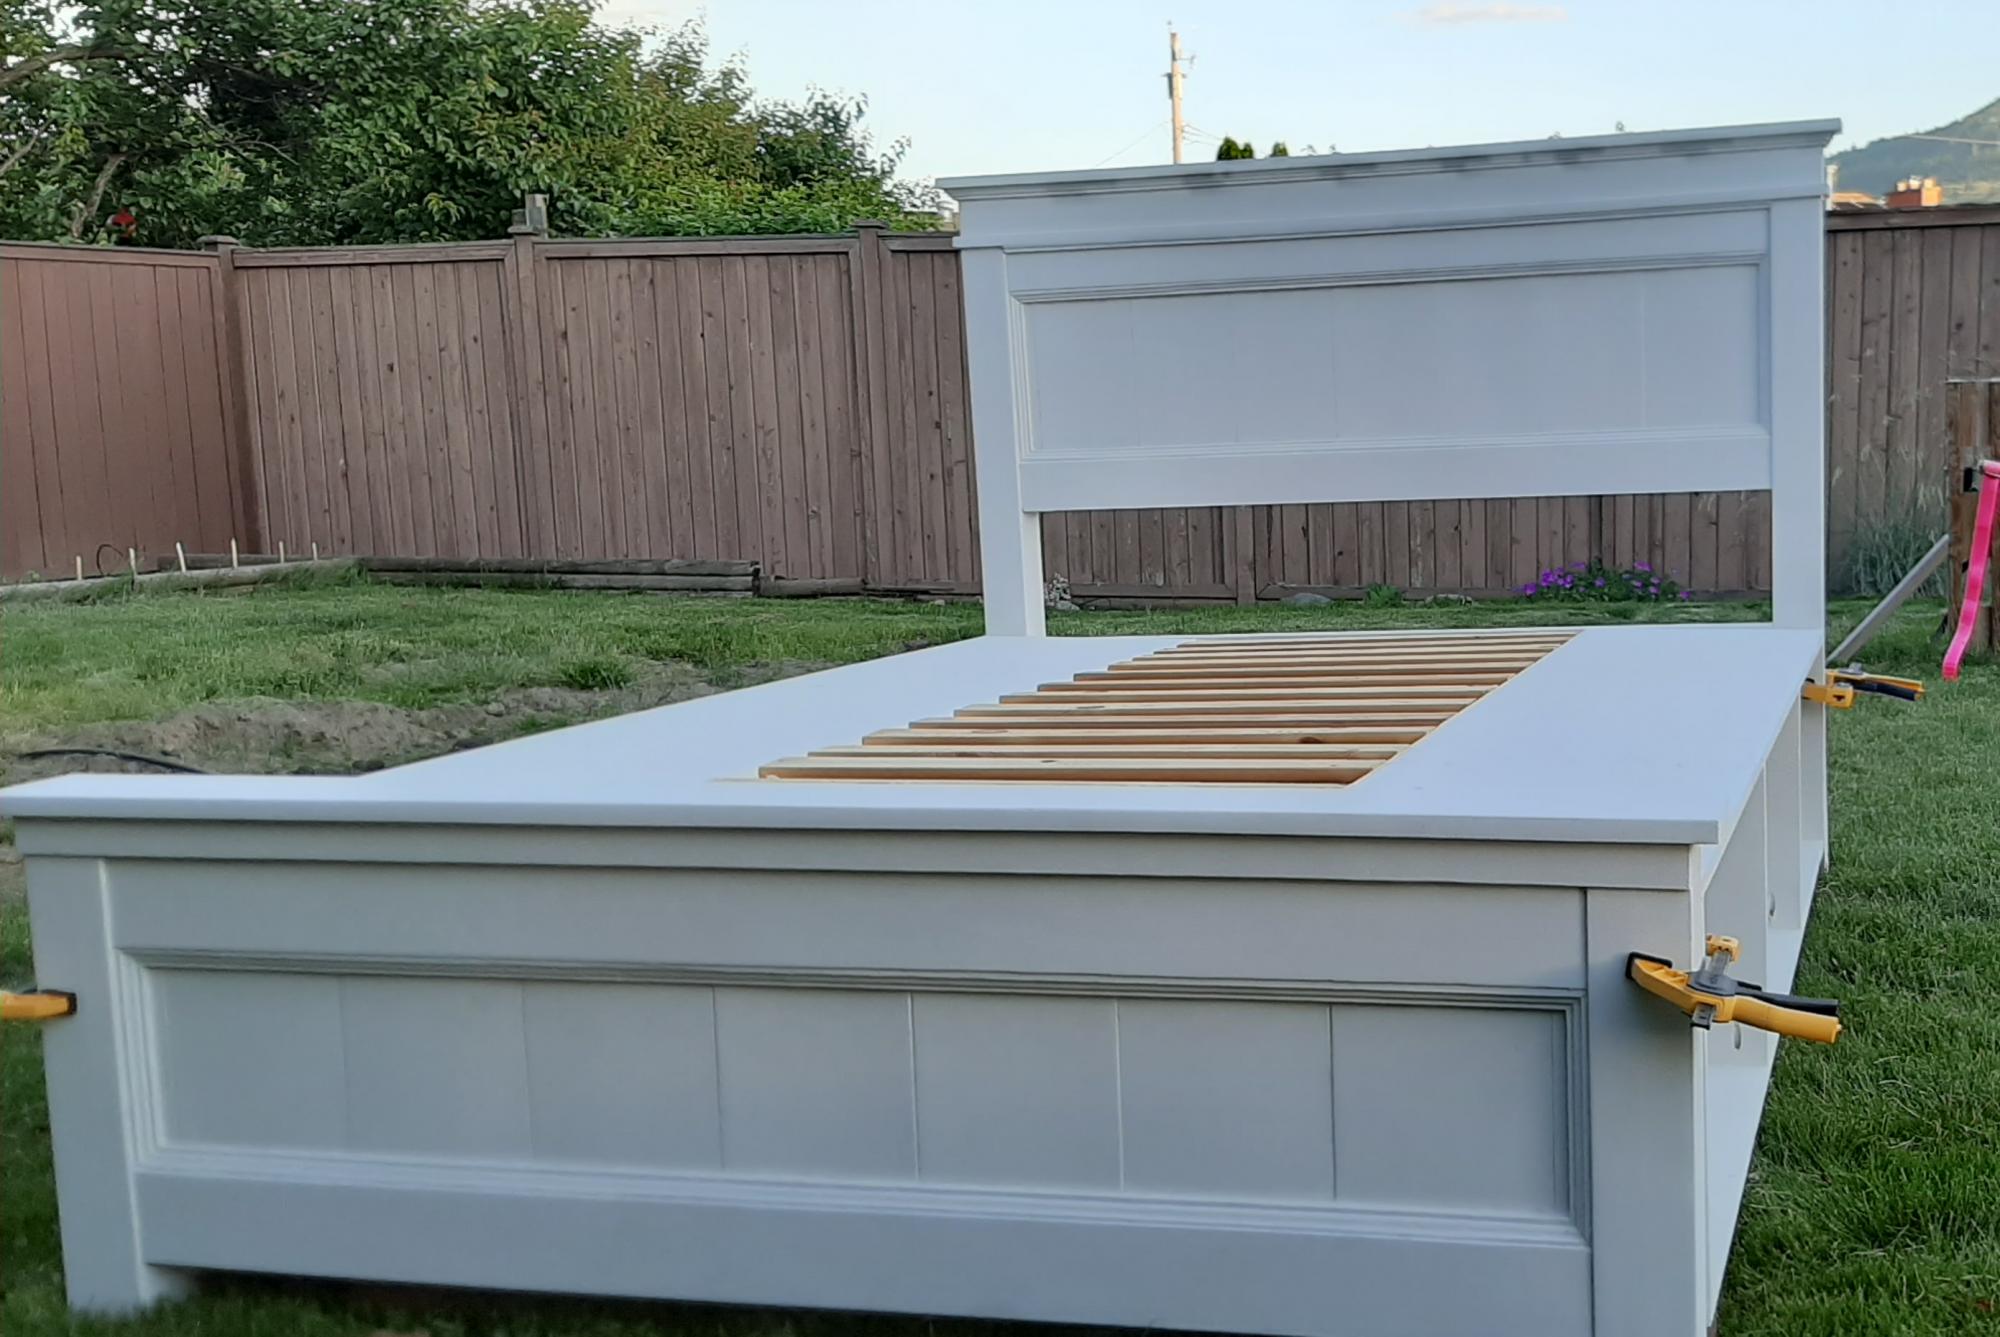
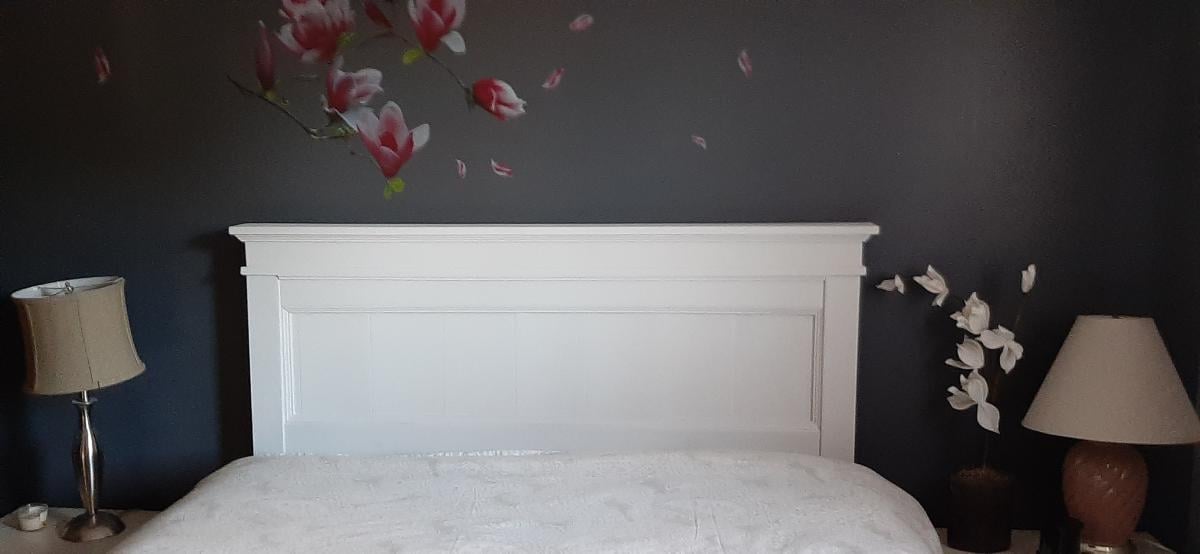
King size farm bed with storage, modified from queen bed plans. Used 1x10’s instead of a solid sheet of plywood and routed the slates to add some nice depth. Used reclaimed barn wood 1/4” for the border of the drawers.
Michael Gallatin
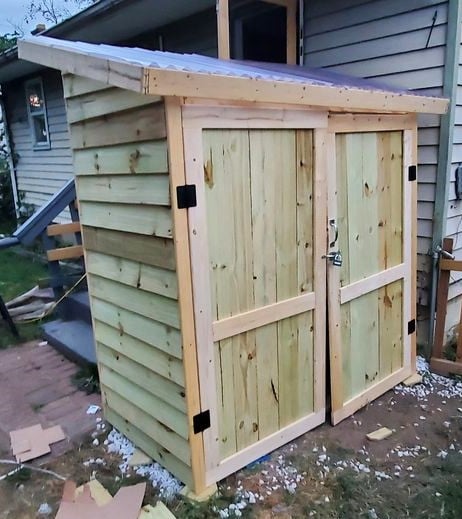
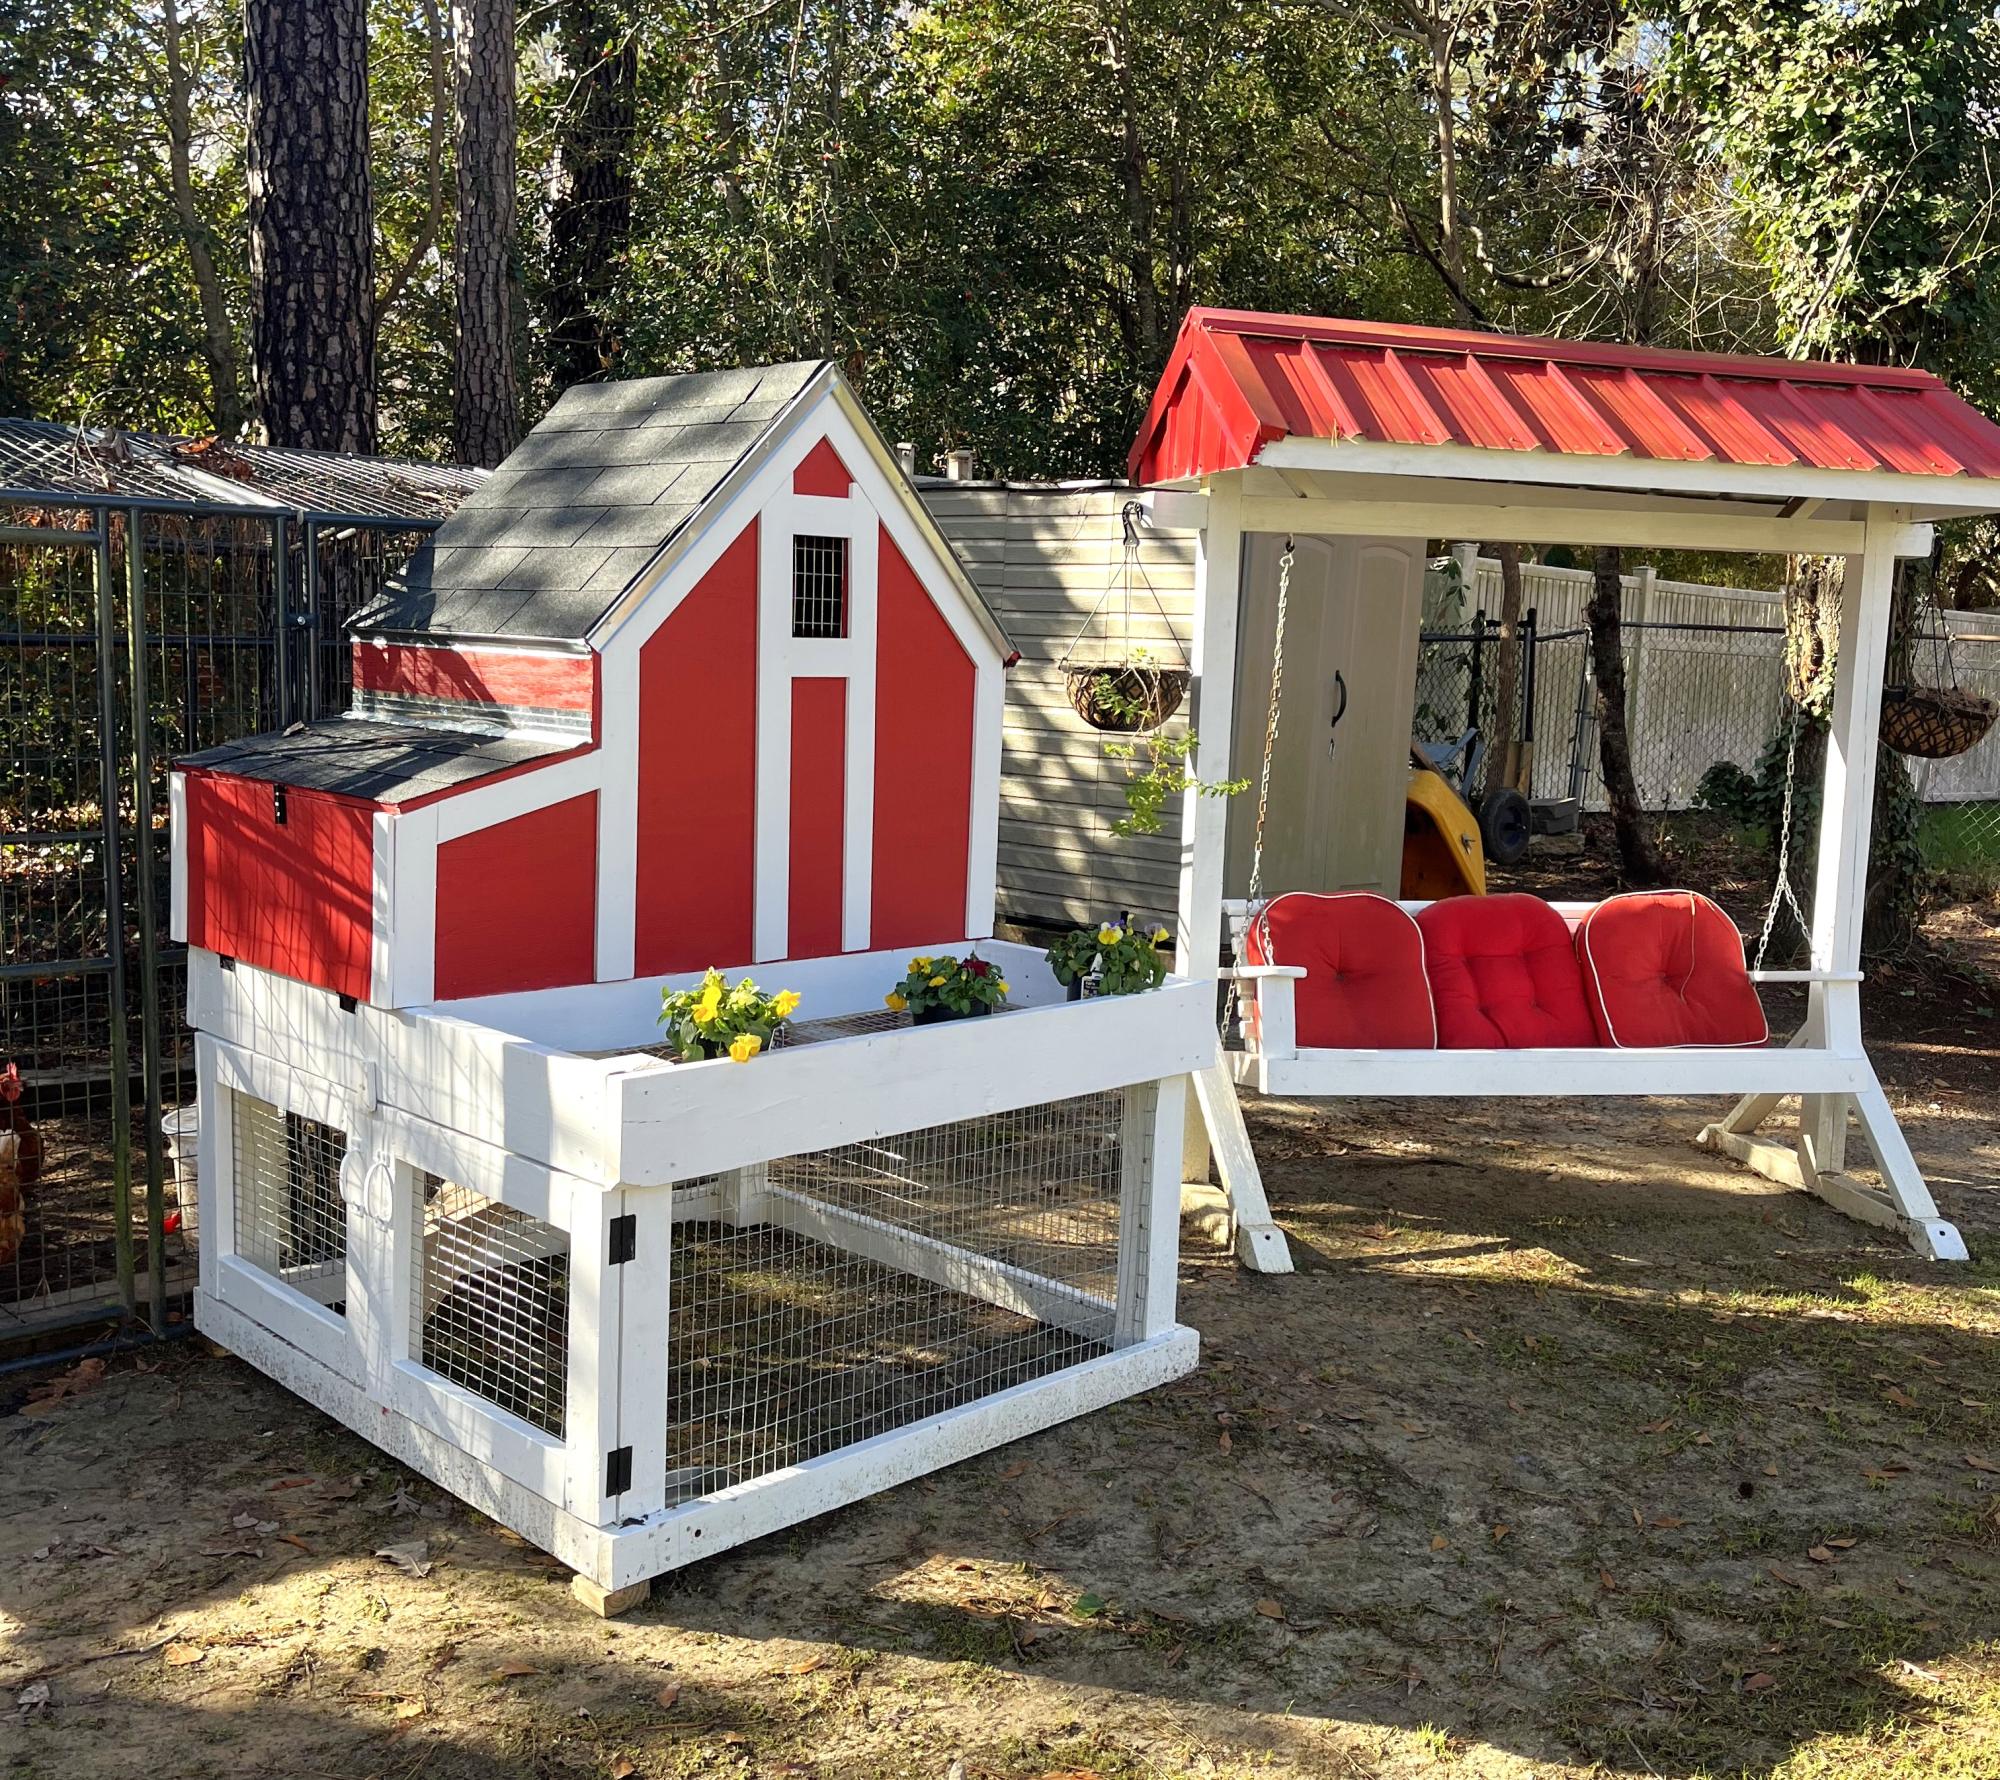
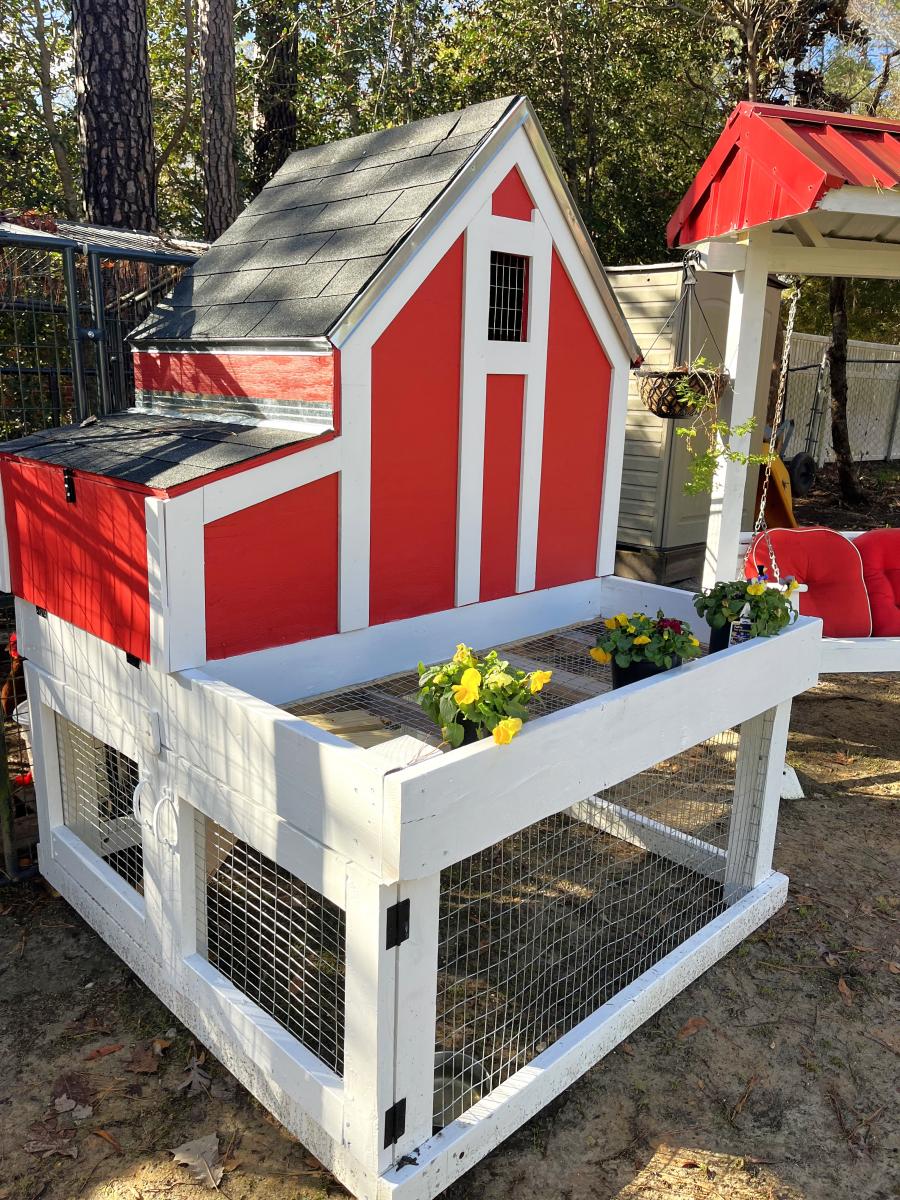
Took me a week to build but not bad for a one-legged man and no help. Instead of shingles I opted for corrugated pvc. Setting up shelves inside and going to build a bin for scrap lumber with scraps in the corner. I think I made some cutting errors on the doors there is a 1" gap between them. I put white marble stone down to keep it from setting directly on the dirt. - Edd
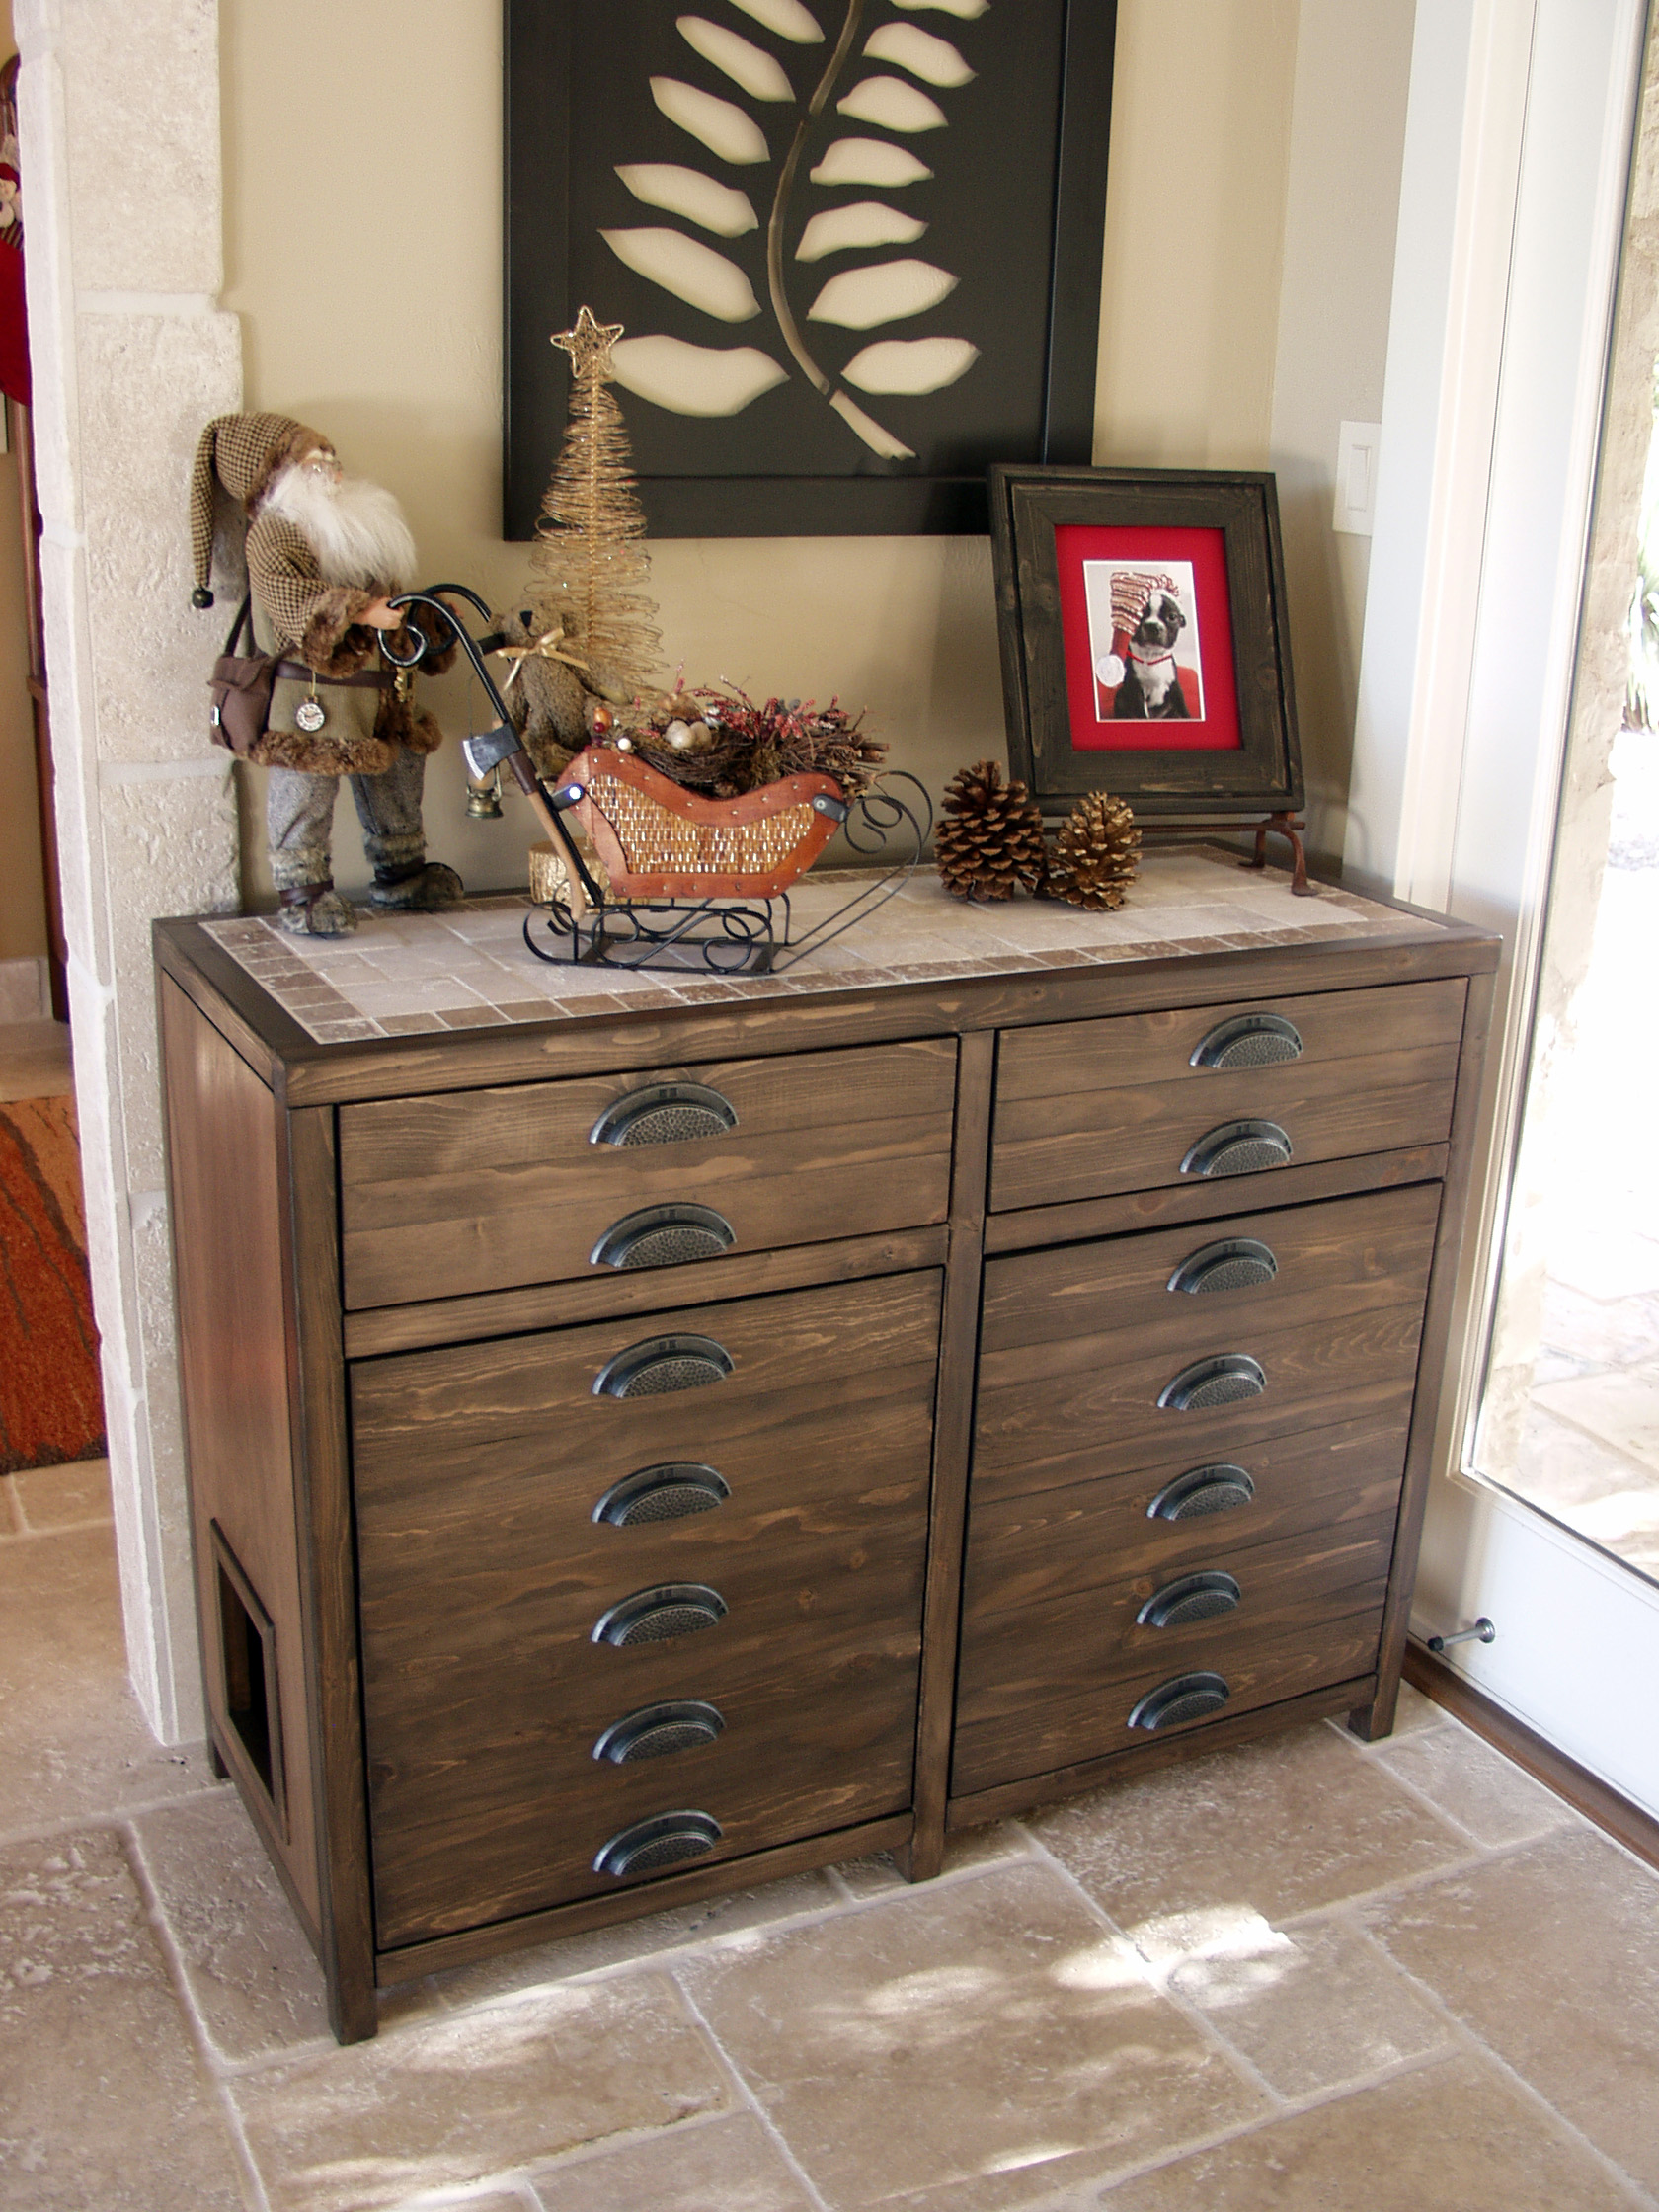
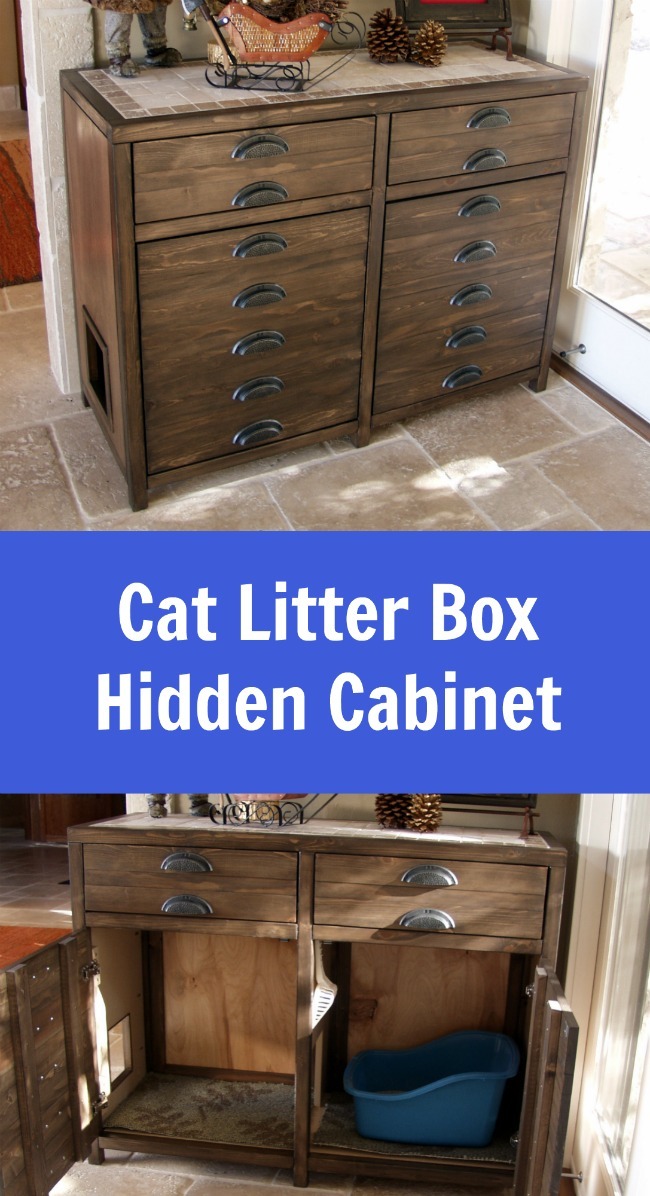
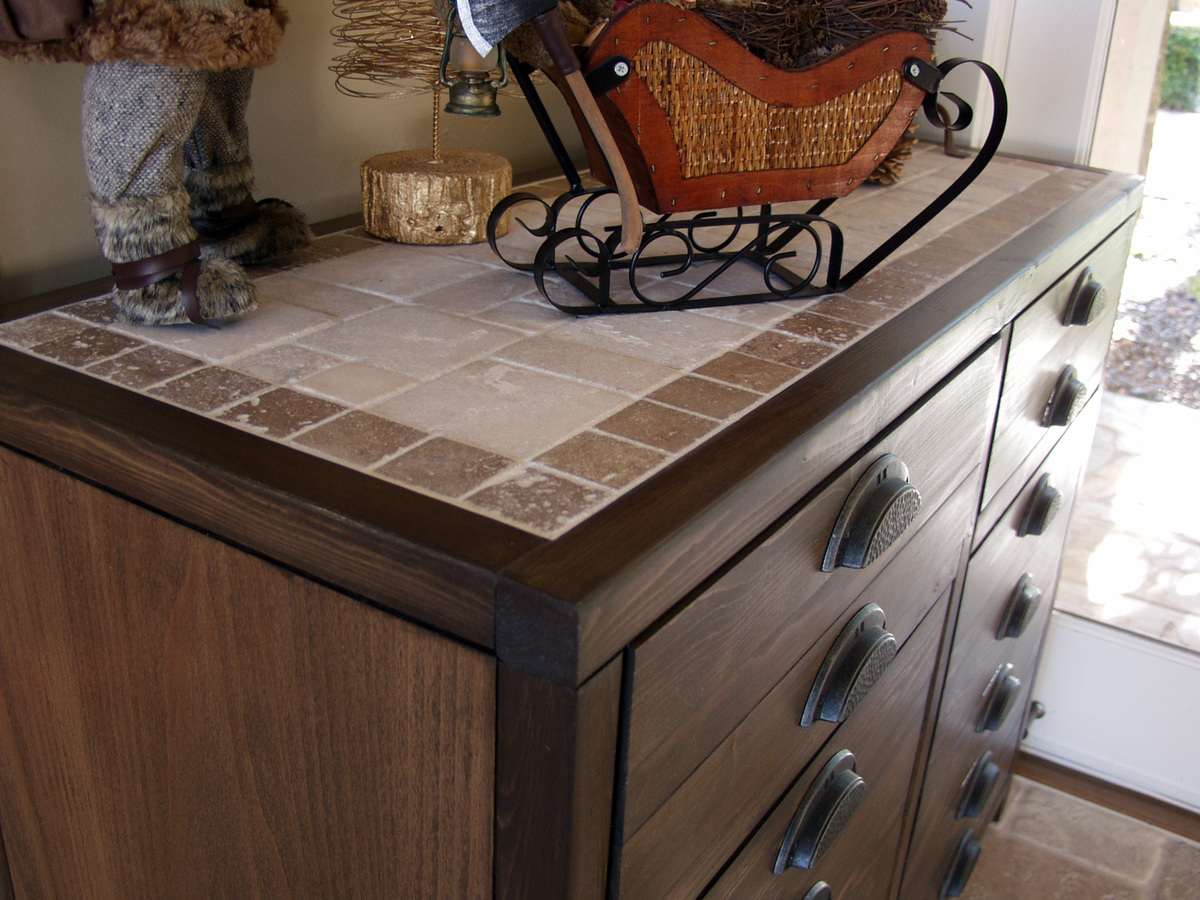
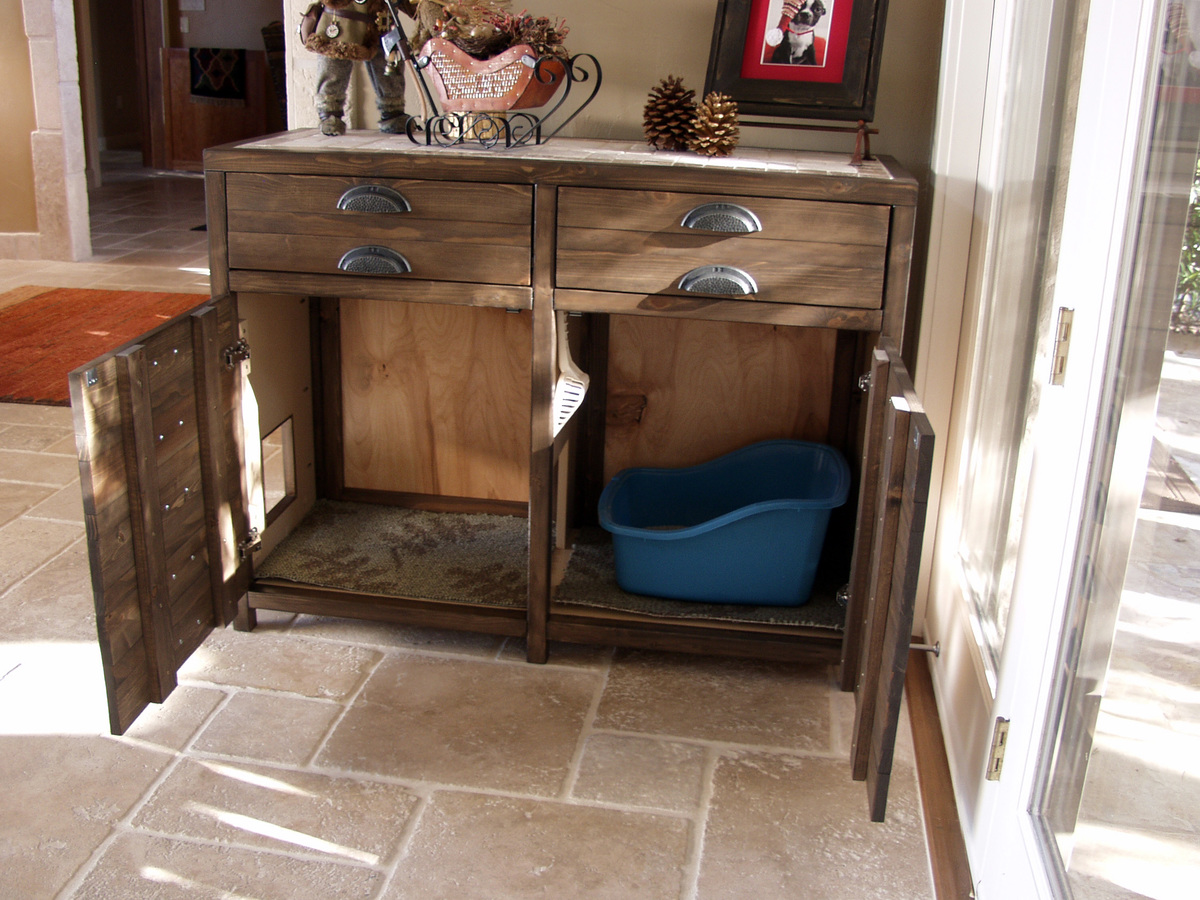
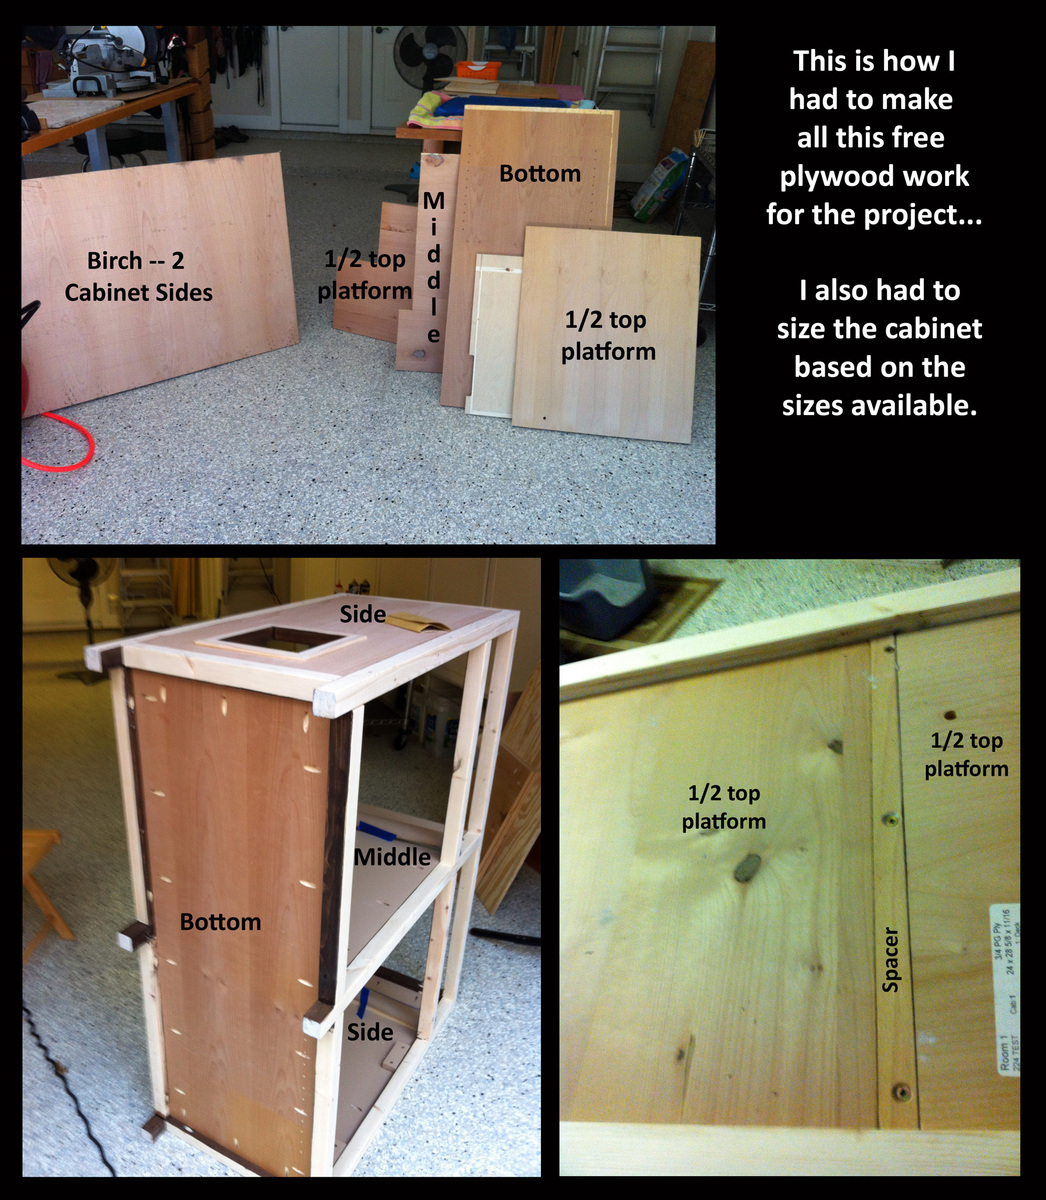
I had been wanting to build something to hide the litterbox for a long time. When I saw the Printer's Console plan, I knew this was the perfect plan for a cat litter box furniture. I loved that Jen Woodhouse's version was completely modified to her bar plan, so I thought I could modify for my litterbox idea. I modified the plans on size, as I was trying to use a bunch of mis-matched plywood. I also modified it to include a cat door, a cat passageway on interior panel, a vent on the back behind one of the drawers, and the stone top. I built a frame on the back to house the backing as an inset piece, as I didn't want it to be seen at all. I learned a very important lesson during this build. Not all 1x3s are created equal. Once I got my doors assembled, they were too big for the opening. I couldn't shave off the tiny amount needed, and couldn't make anything work short of starting over with 1x4s, sawing off a small amount, and cutting down the # of "drawers" (and handles). I wanted the inside to be fully finished (because cat pee on raw wood would not be good!). I had to finish certain "planes" prior to putting the thing together. I used kitchen and bath paint on the inside floor and sides for easy cleanup. The stone was carryover from construction on our house 12 years ago. The handles were an amazing deal @ $1.81/each .


Sun, 11/25/2012 - 09:51
That is a fantastic idea and the table top is beautiful.

Mon, 11/26/2012 - 09:38
That is the most beautiful litter box I have ever seen!
Mon, 06/17/2013 - 12:23
Love your use of the buffet. Our family has discussed making a piece of furniture like this for our smaller dog. Nice to see someone has done it! Our big dog has scheduled feedings but our little dog would prefer to be a free feeder. Poor thing chokes down his food in our pantry listening to our big dog breathing under the door waiting for him to finish. When he is done we open the door and the Big, greedy dog bolts in looking for left overs. A family member has to wait patiently for the little dog to finish so he can escape the pantry. I really don't want a doggy door in my pretty swinging bi-fold doors to my pantry which is also access to our kitchen.That would be a pain to have to keep closed all day. But this buffet idea is super cute! Thanks for the inspiration.
Fri, 01/09/2015 - 22:01
I know this is an old post, but I'll ask anyway
I love this piece and am in the planning stages for ours. Thank you for sharing!
I am Wondering how you went about the table top. Did you install a 3/4 ply on top but not flush, allowing room for mortar and tile? If so how much room did you allow for the tile/mortar? 1/2 inch? How did you keep the surface of the tile level and uniform? Lastly, did you seal the tile with anything when you finished?
Aesthetically, the tile top really sets this piece off and I really want to make my own.
Thanks
This was my first project using an Ana White plan....Modified it a bit...quite happy with how it came out...it was very low cost to make and a lot of fun.


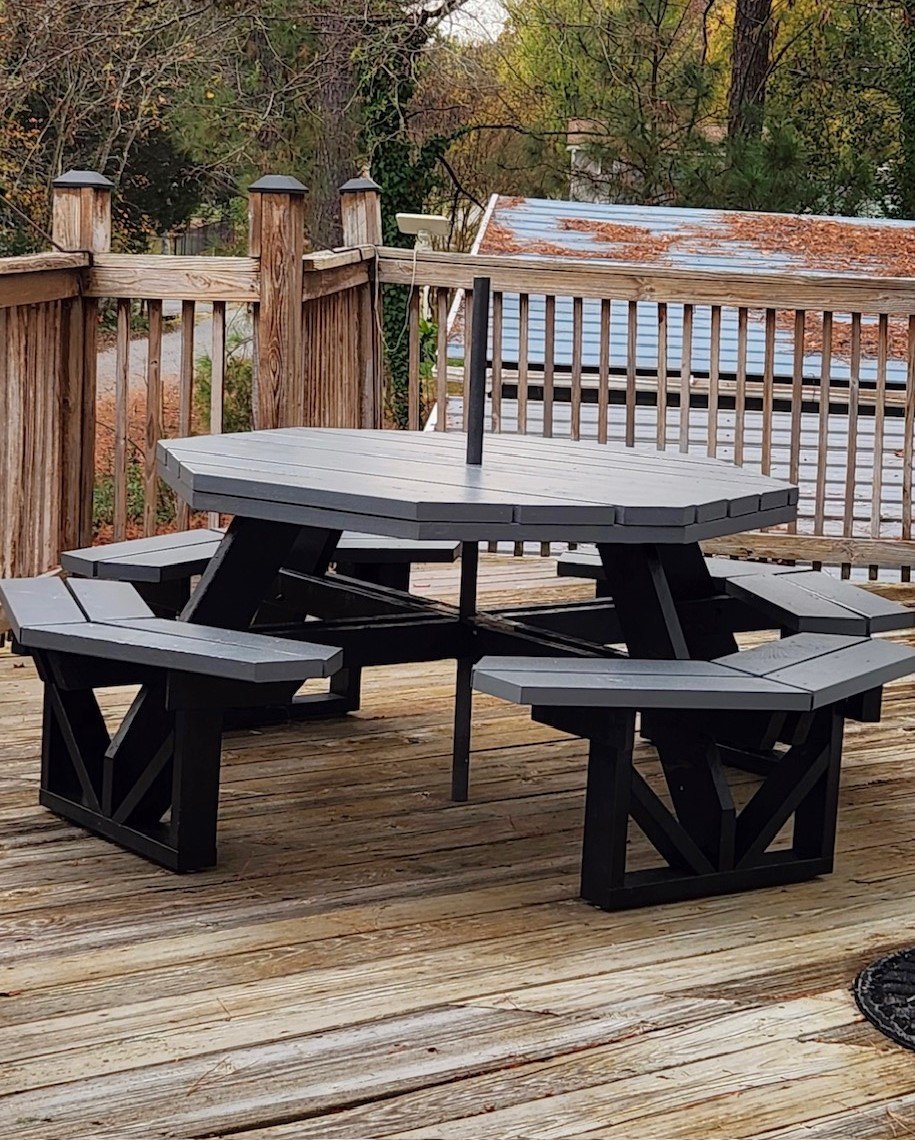
I built this Family Picnic Table for my brother and sister in law for their river house for Christmas.
I started this the first week of October this year. Cutting lumber, priming, painting and assembling at my home two hours away.
I disassembled it, loaded it on a trailer with my tools and drove it to their home. This is where I needed two people to help get everything up on the second floor deck.
The plans were great! I am placing a link to 2 photos of the finished product.
I told their kids to buy an umbrella for them for Christmas - Carlton Lowry
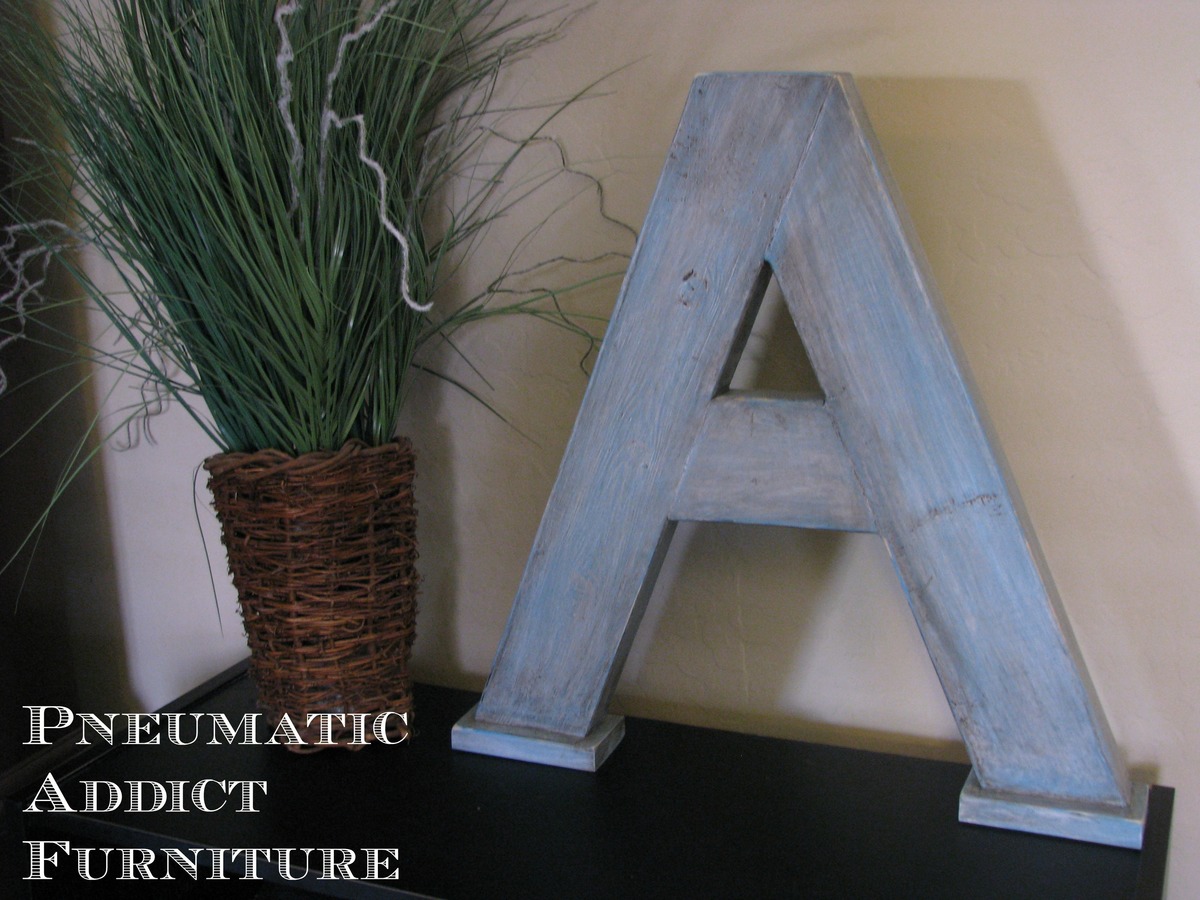
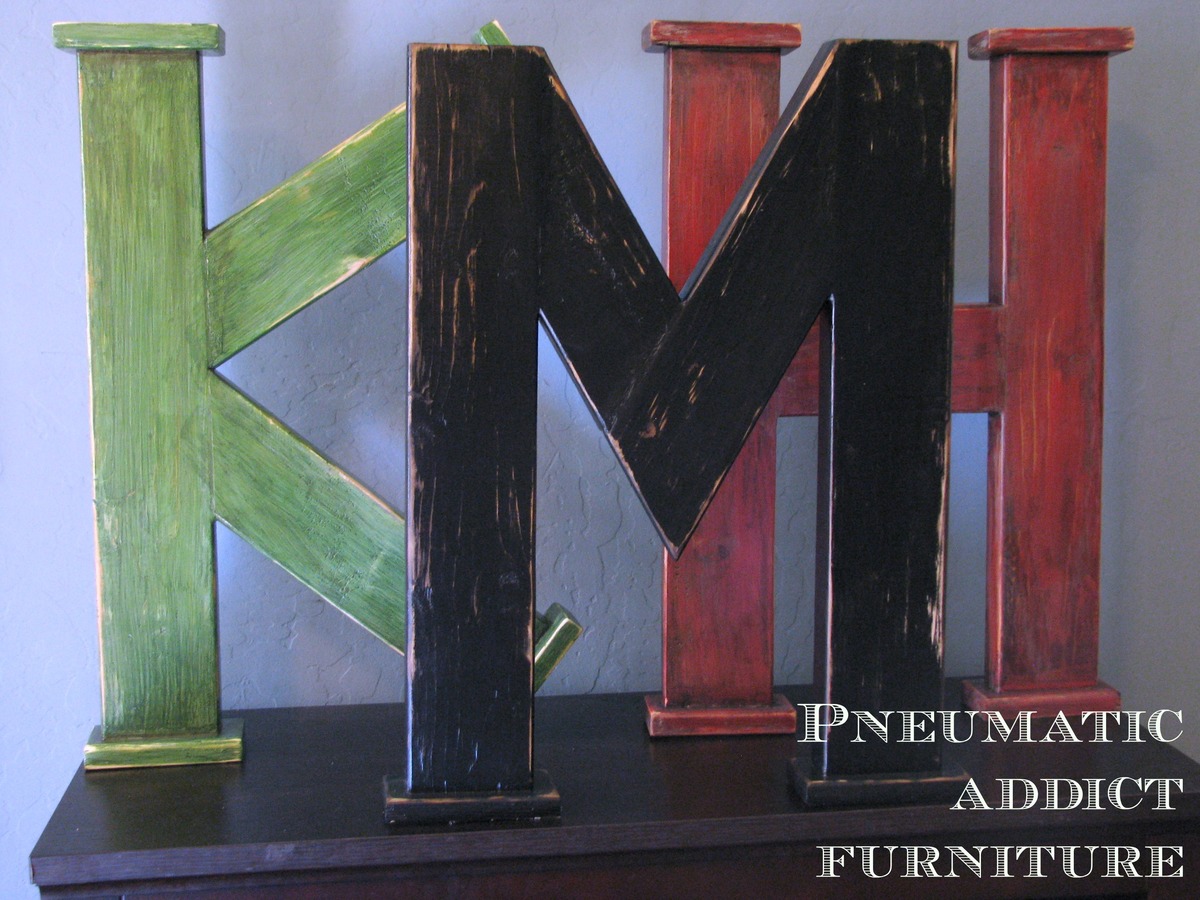
I've done a dozen or more of these letters now. Each letter has to be cut differently, but they are all made from 2x4s and pocket holed together using my Kreg Jig. I have also made some letters with curves (such as R, B, J, etc). I cut the curve out of a 2x10, left over stair stringer and then join it with some 2x4 for the rest of the piece. To make the base plates, I cut small blocks of 1x3 and rounded the edges with a palm sander. I used glue and finish nails to attach them. I have more projects like this on my blog http://pneumaticaddict.blogspot.com .

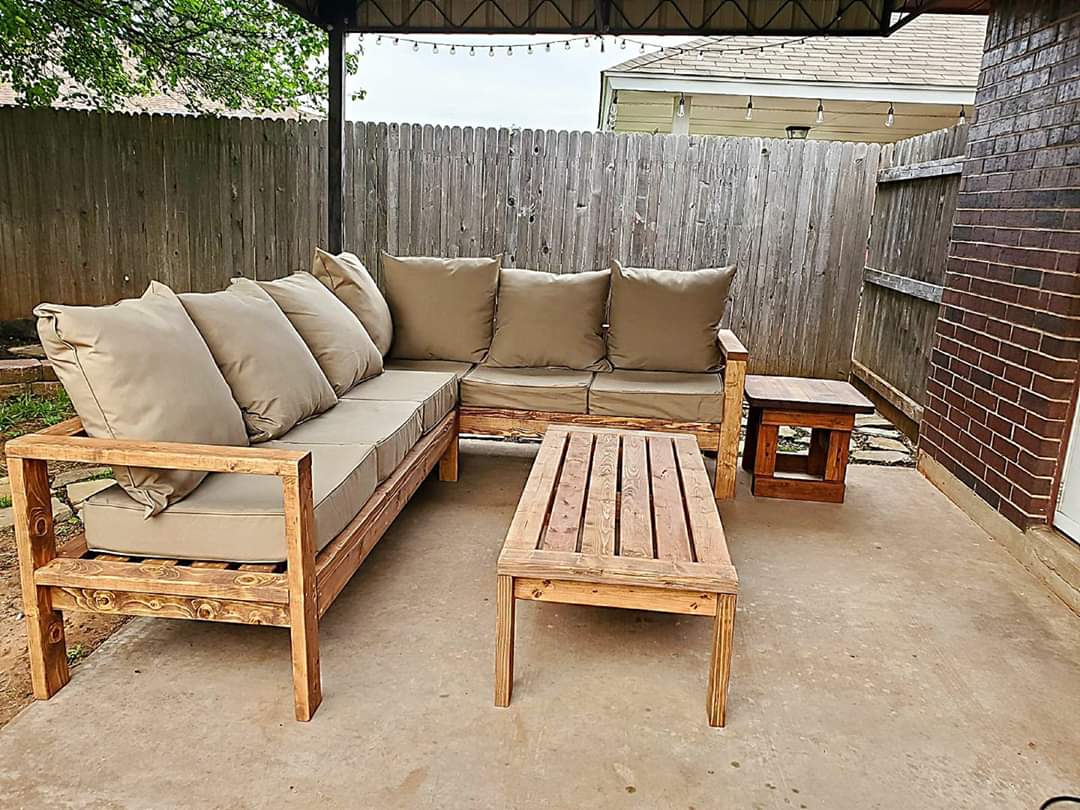
Super excited to be in this group! I’ve been building since 2022 from Ana’s plans. This is my fall project which is now living beside our fire pit. Next up- queen bed for my son! - Carla Hudecki on Facebook Community