Corner computer cabinet
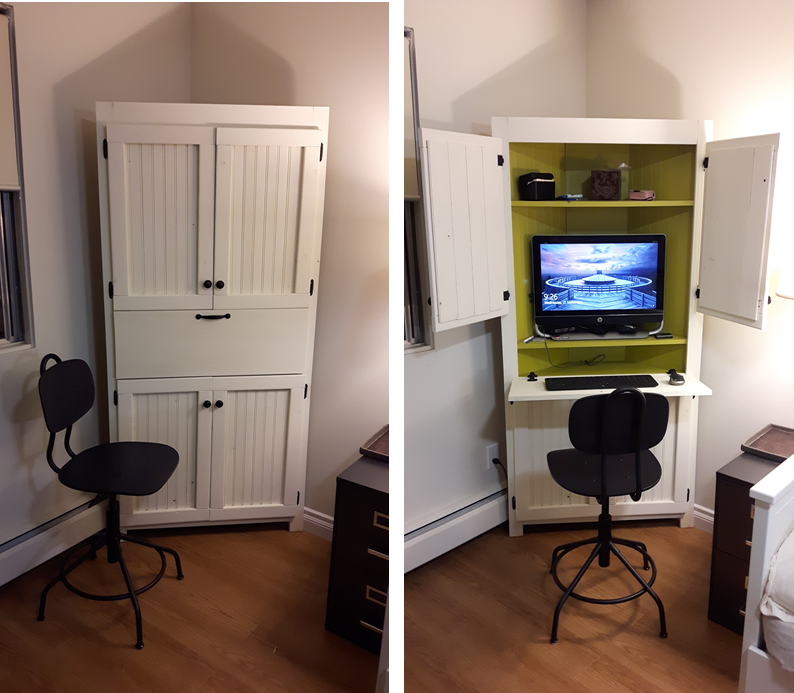
Flip down tray added for computer keyboard.
Built from Plan(s)
Recommended Skill Level
Beginner
Flip down tray added for computer keyboard.
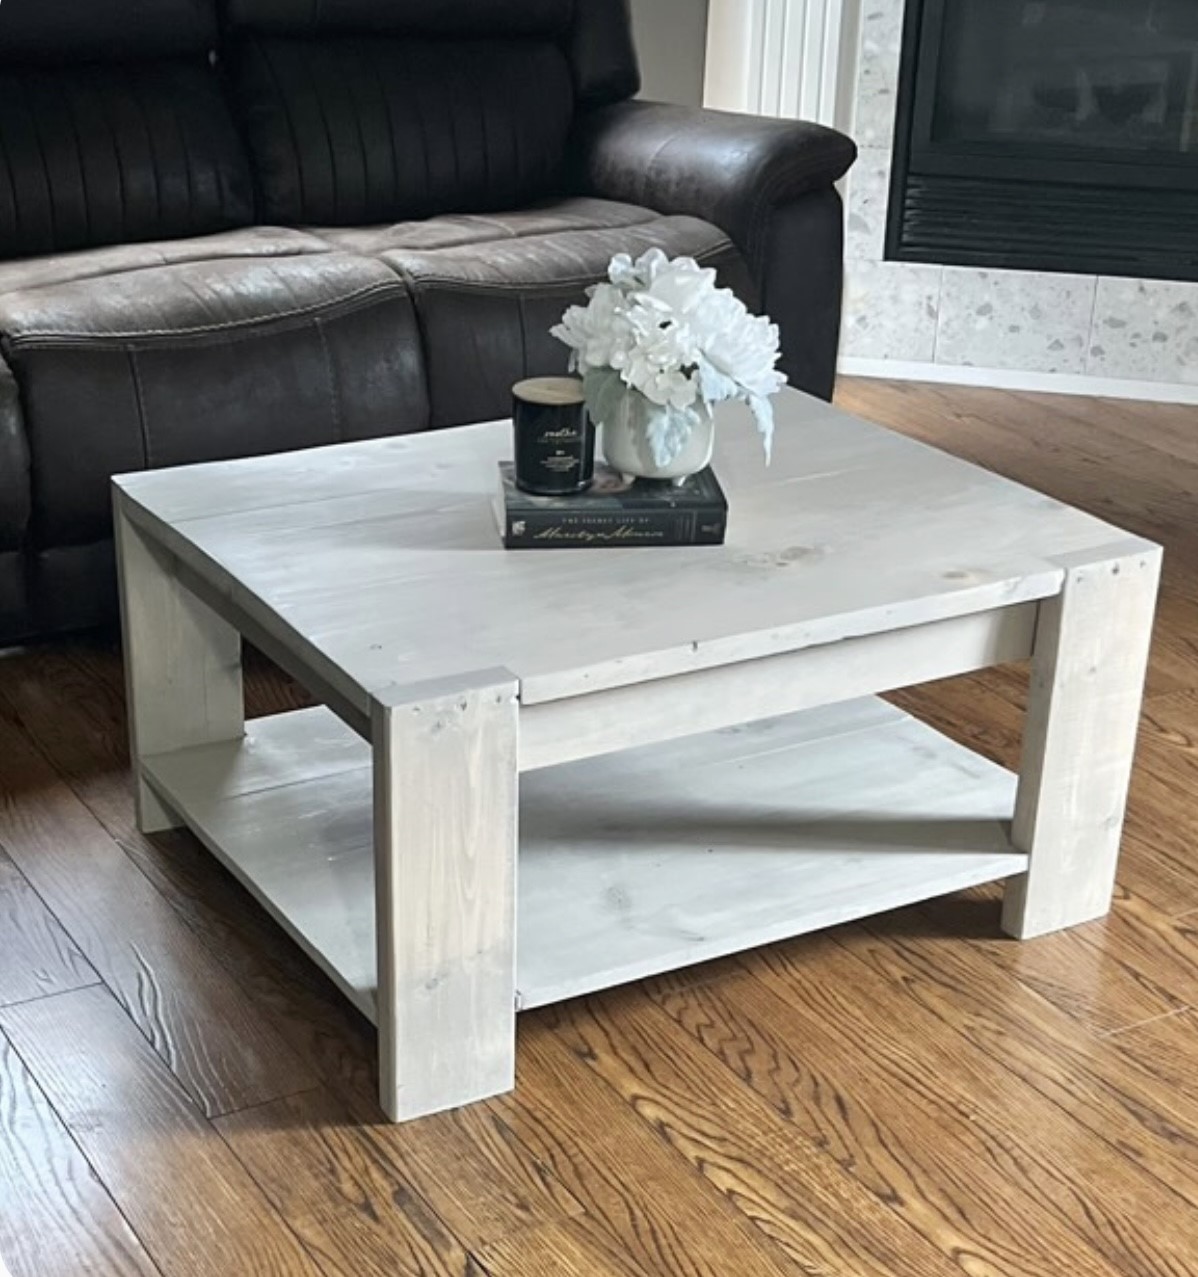
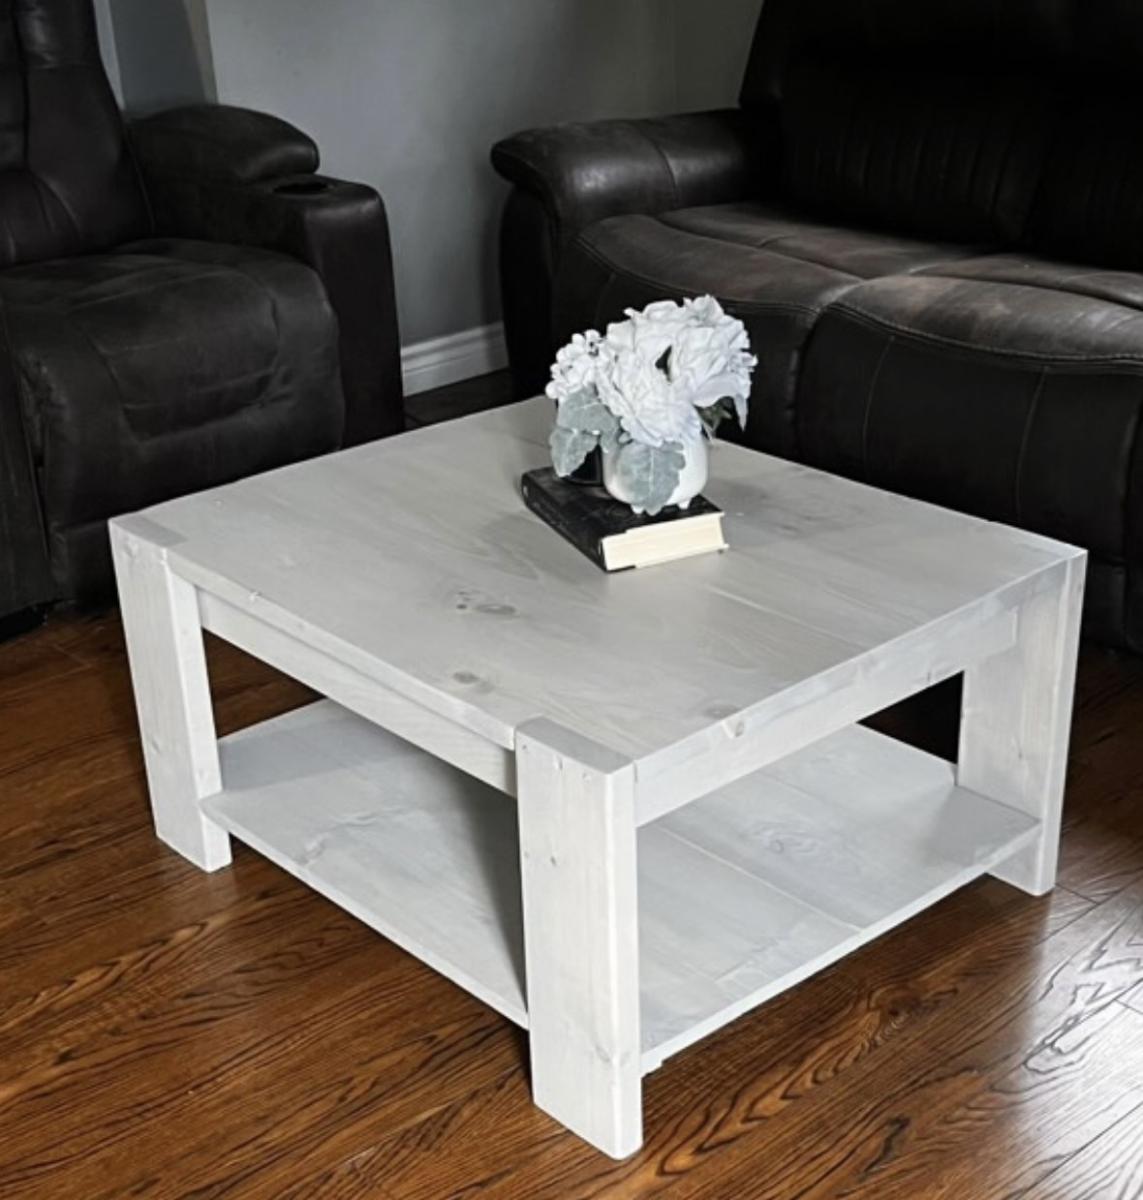
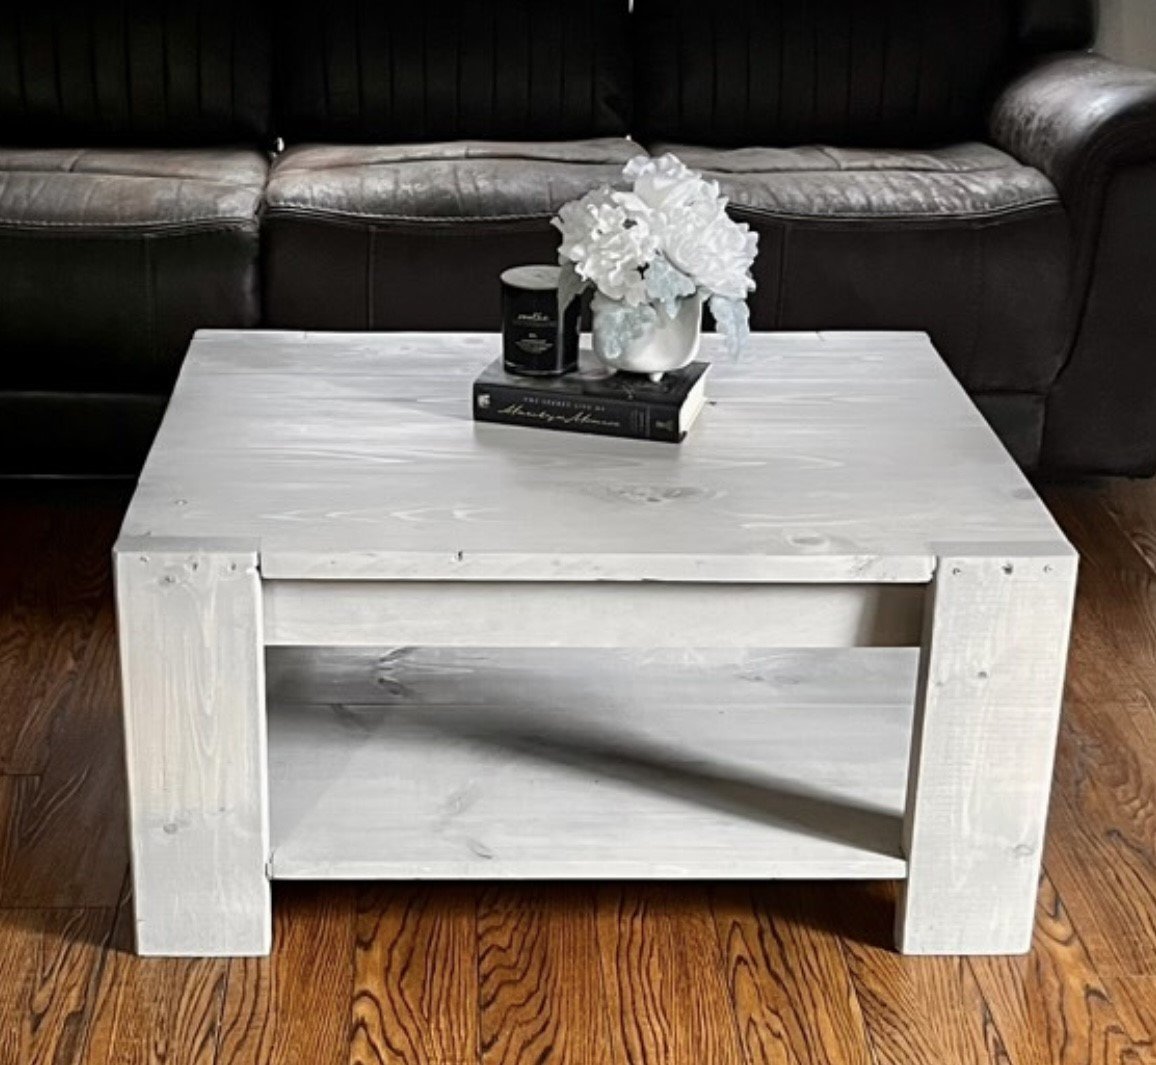
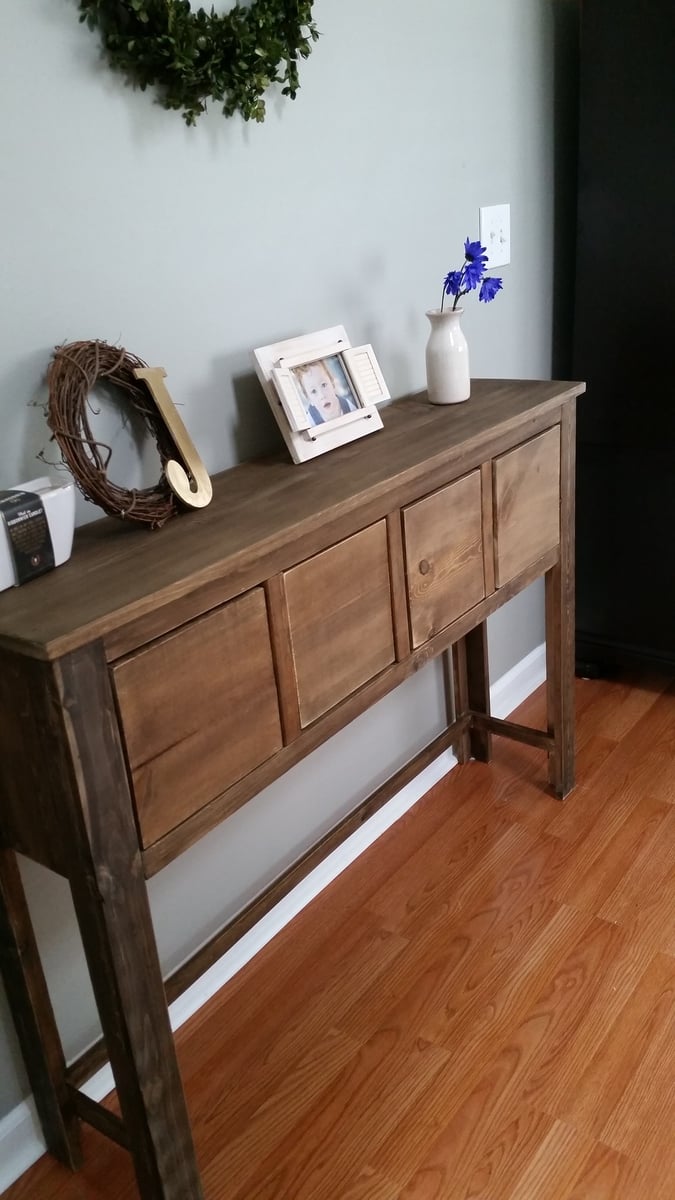
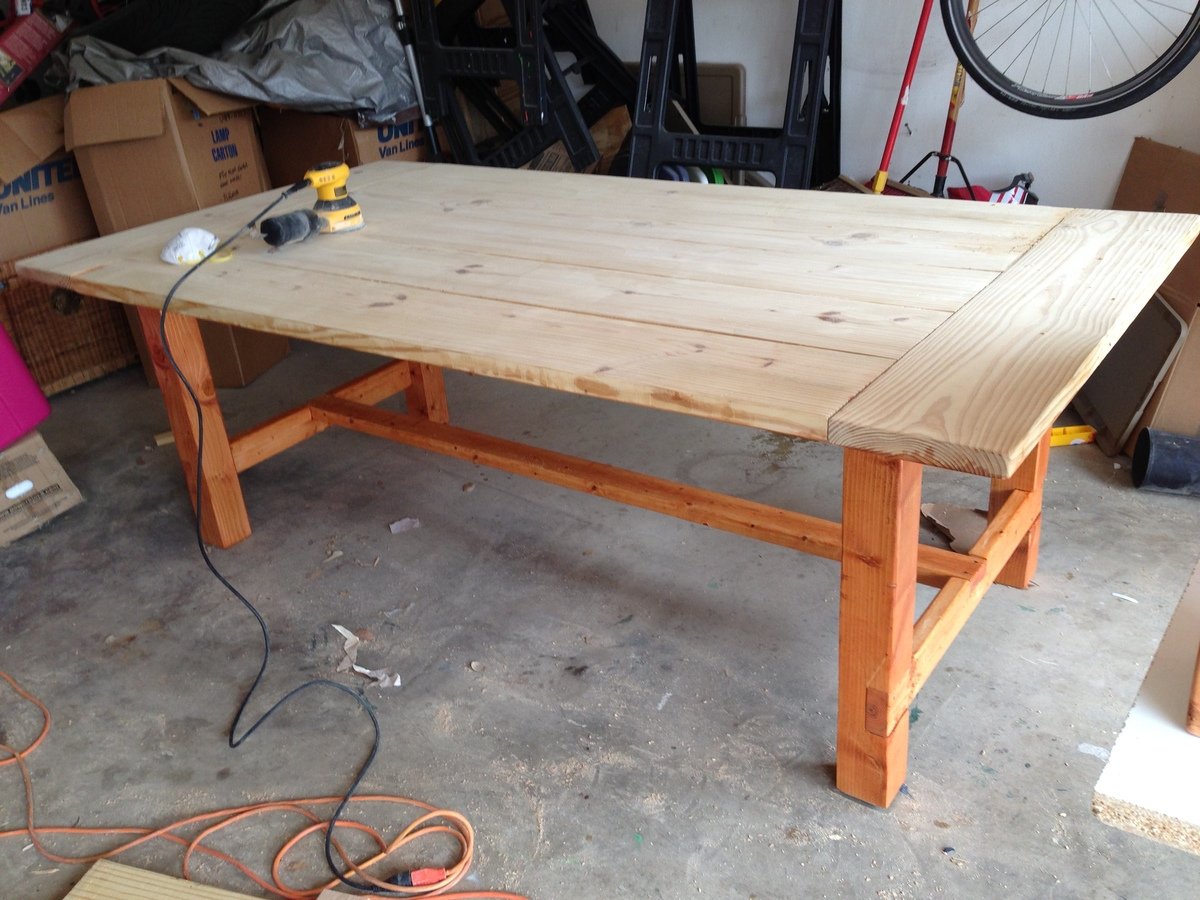
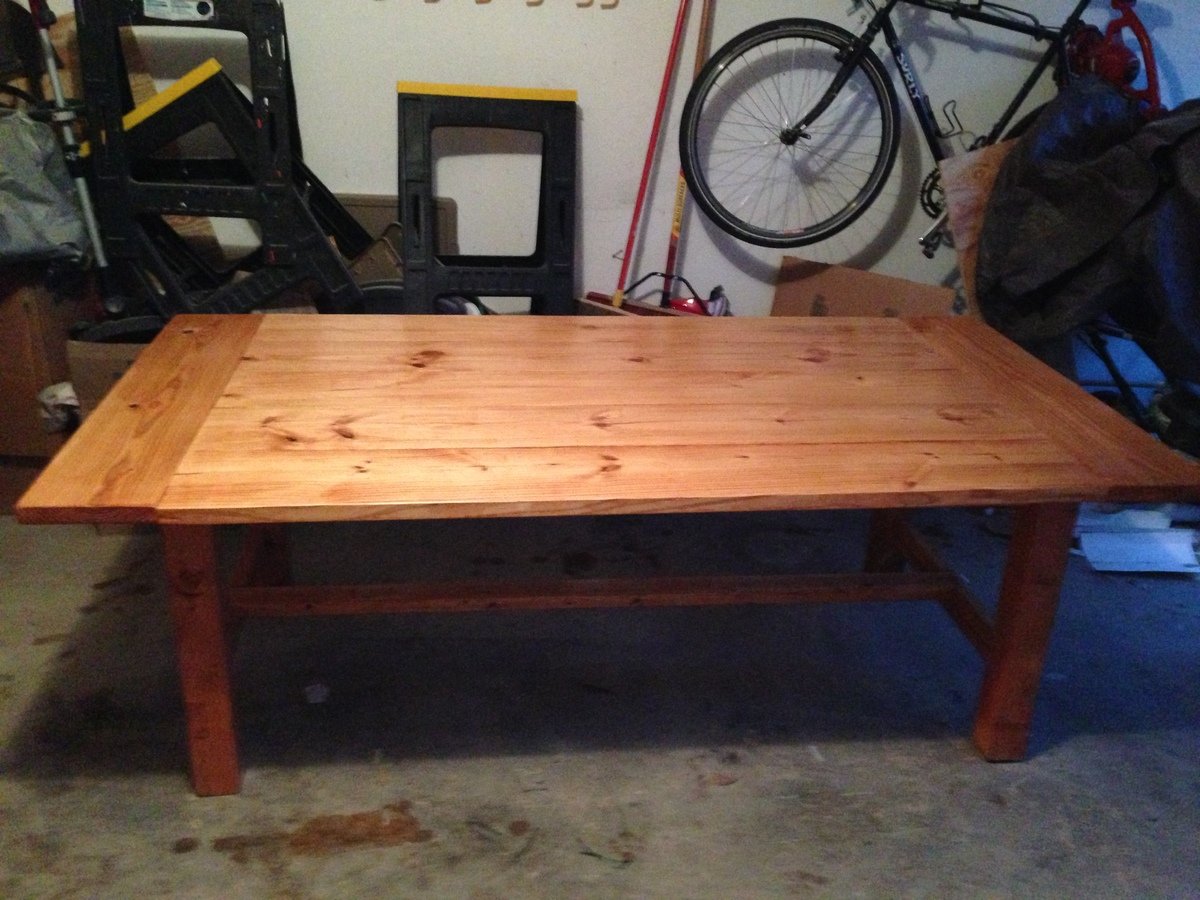
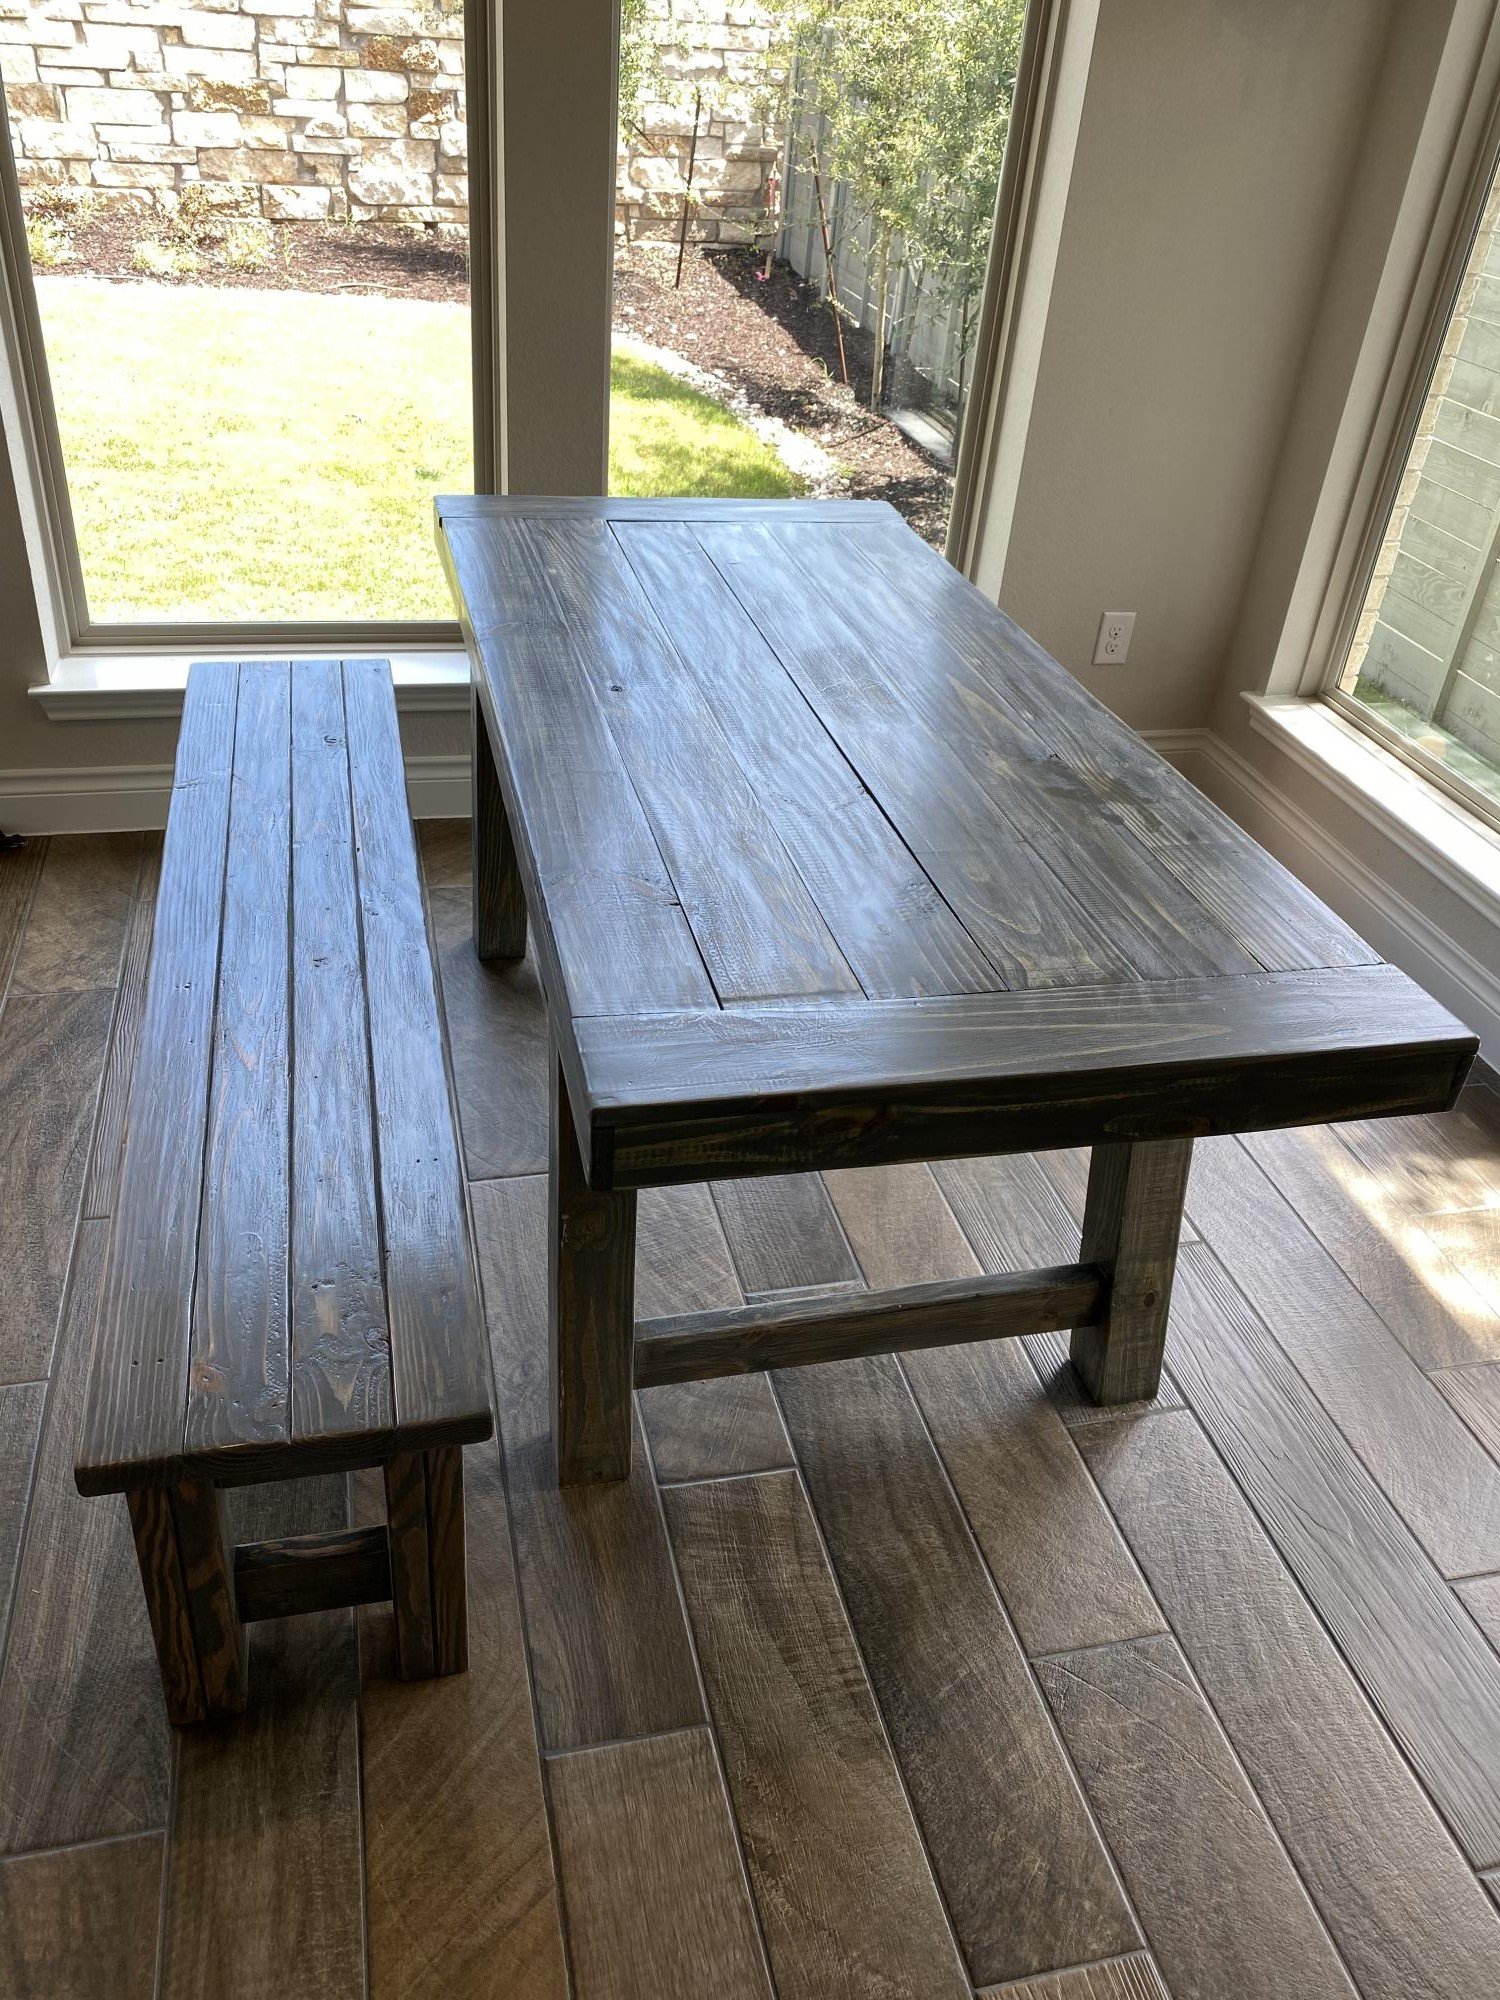
Got this chunky Leg table idea from the rockstar Ana White
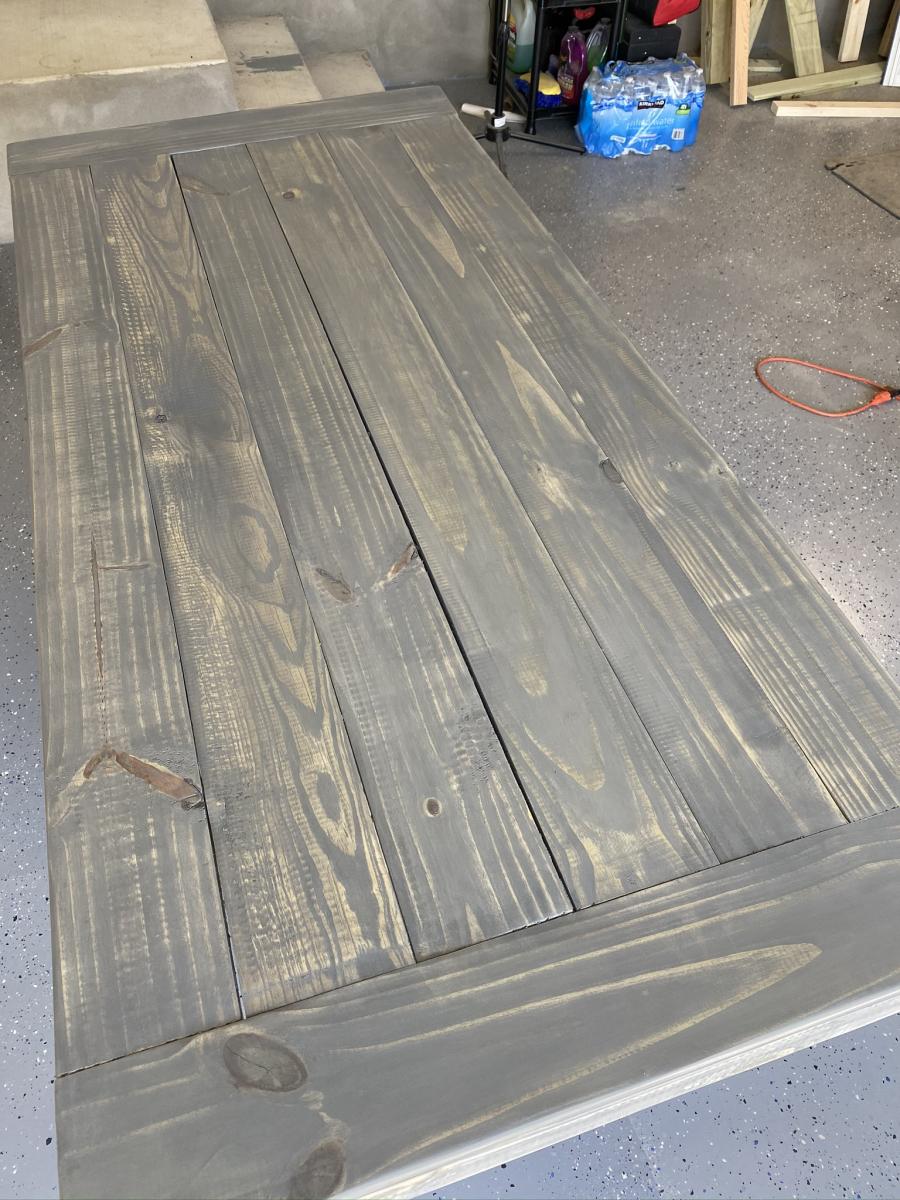
Stained in varathane sunbleached - by spicedwoods on Instagram
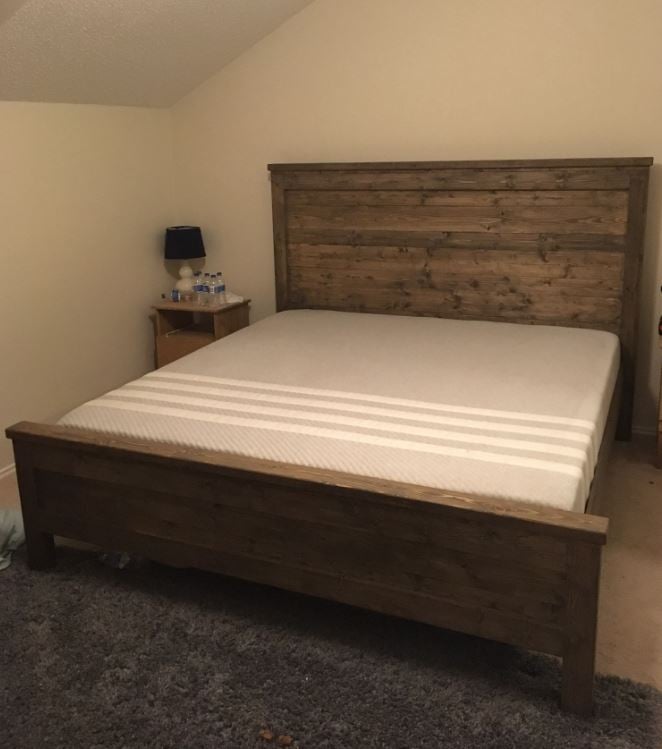
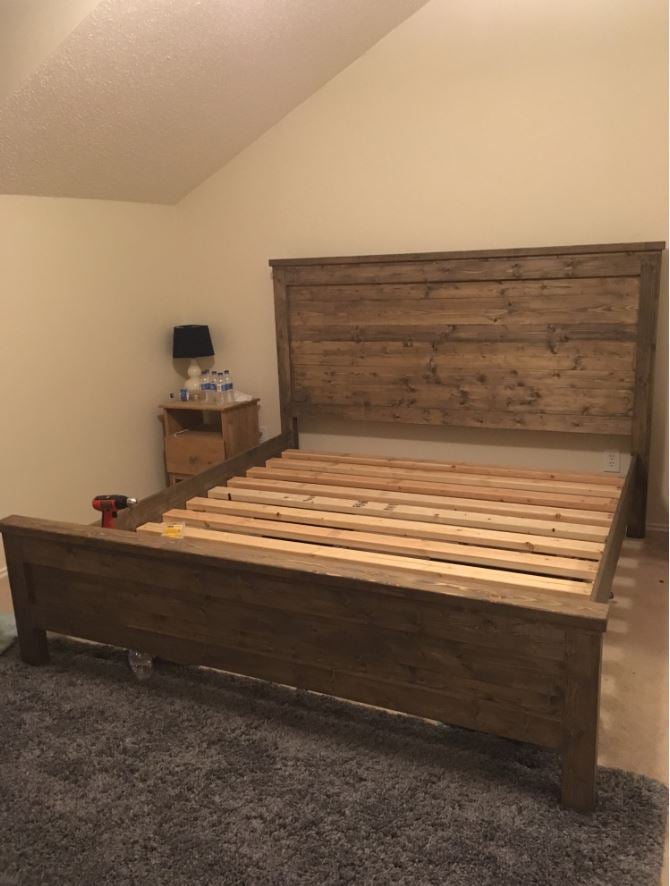
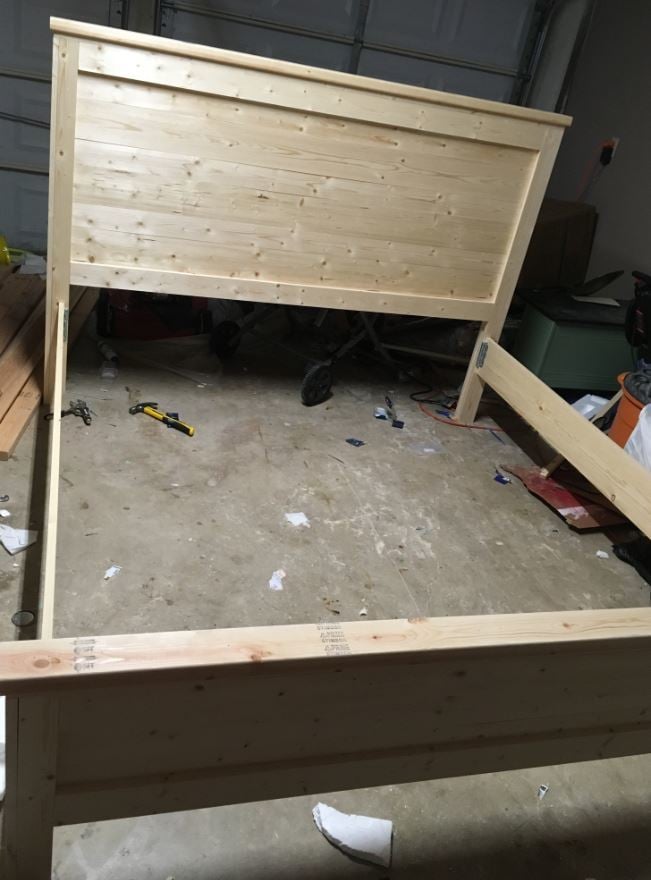
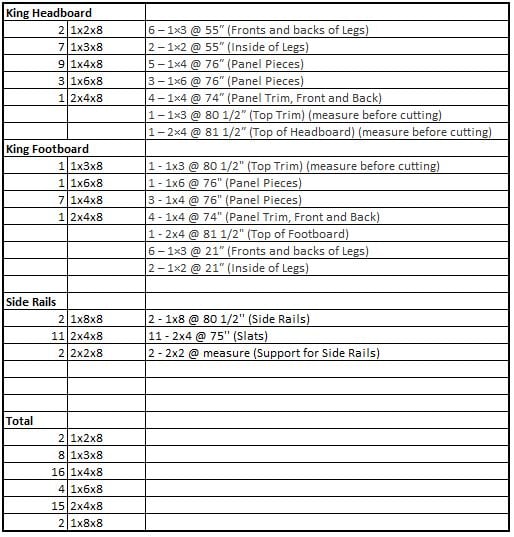
First of all, thank you to the site for this plan. The headboard specs were spot on. I was interested in making a footboard as well, and you actually will end up with a few scrap pieces that will help you build the footboard (the 1x3's and 1x2's). My footboard ended up being about 23 1/4" high. For reference, the mattress in the photo is 10". I included a picture of the total boards you will need to buy to do the headboard, footboard, and side rails (I used 8 inch boards for the side rails, not 10 inch, but those could be interchanged). One thing to note is the plan calls for pocket hole screws but these are not necessary. I used 2" brad nails, 1 1/4" brad nails, and 2" screws (for the slats and the support rails on the slats. You could use 2 1/2 inch for the slats but the support rails need 2".). Not included in the picture I included is another 2x4x8 that I bought that I placed three scrap 4x4 posts that I had under the middle of the slats for extra support. I also bought steel bed rail fasteners ($11.30 from Amazon) to attach the side rails to the headboard and footboard. They worked great and the bed is extremely sturdy. Can't budge it at all. I used the common whitewood boards from Home Depot, which are all the correct width - the fur boards are cheaper but are not the correct width, you would need to adjust the plans if you were to use those. Overall I am very pleased with the bed. Please ignore the half dozen water bottles in the photo.
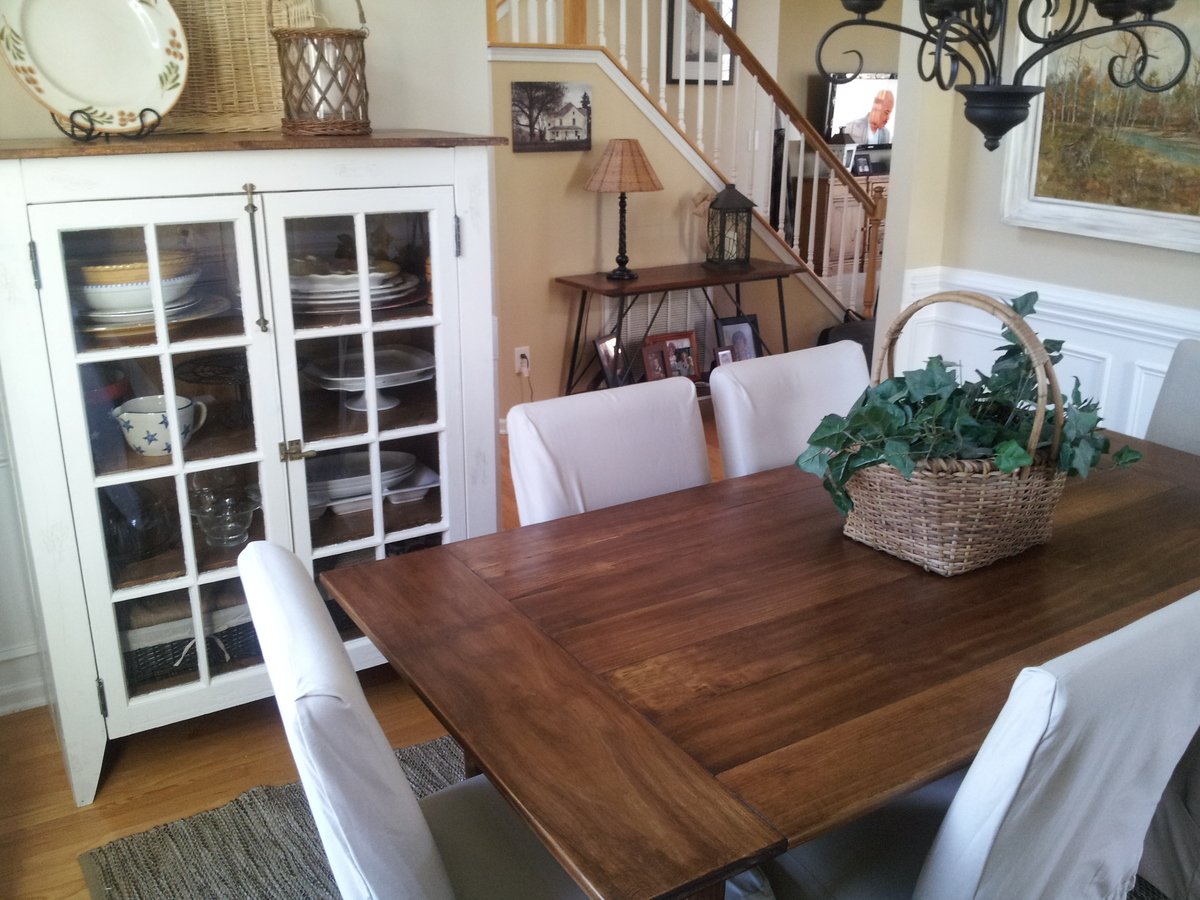
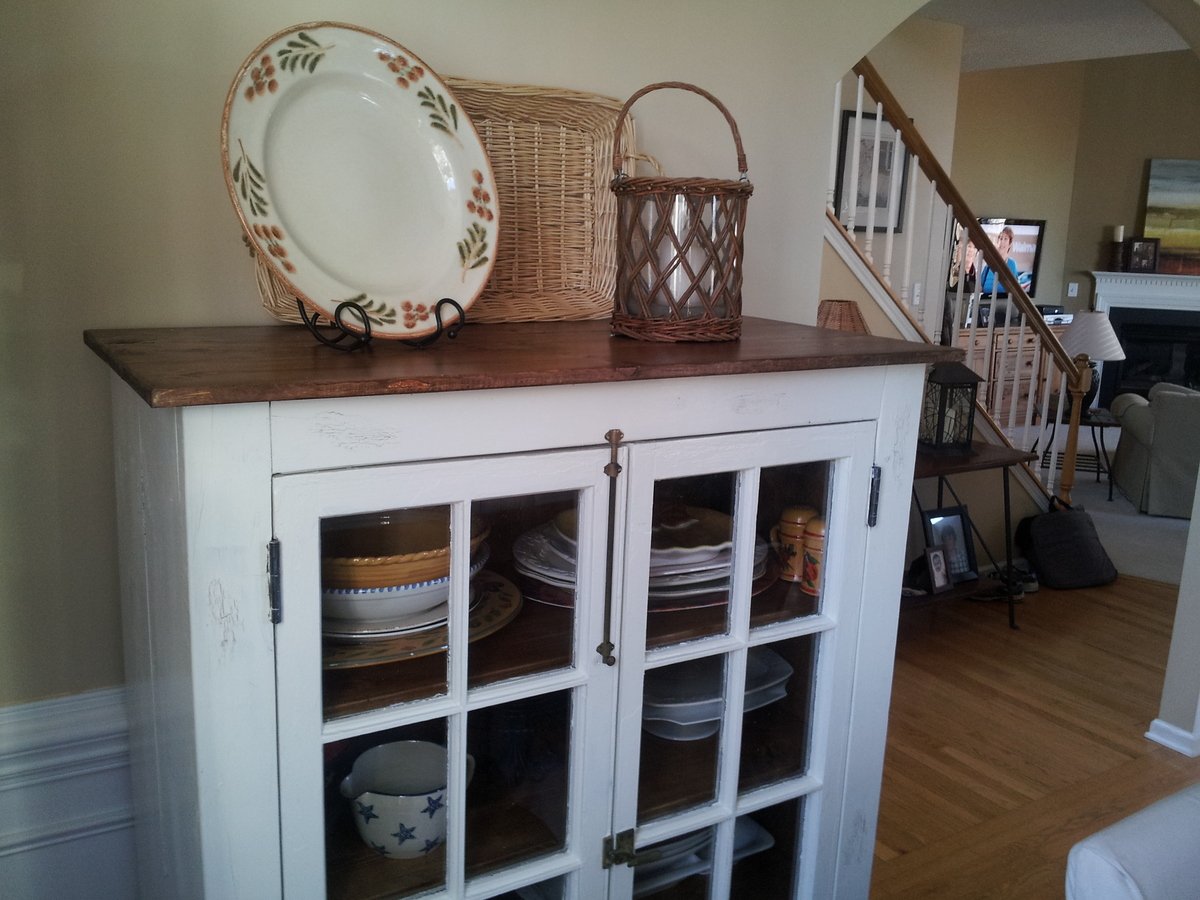
We found two old windows with the original hardware. They were covered with chipping lead based paint so we pulled off what paint we could (safely). We then painted them over with oil based Kilz before the final coat. We then built the cupboard from there. We decided to go with a more rustic look since the windows were still a little rough. We applied a crackle finish in a few spots using white glue to add to the rustic texture.
I changed the 1x12s to 1x10s because I needed it to be a bit narrower and I added s few inches to it's height also. I love it!
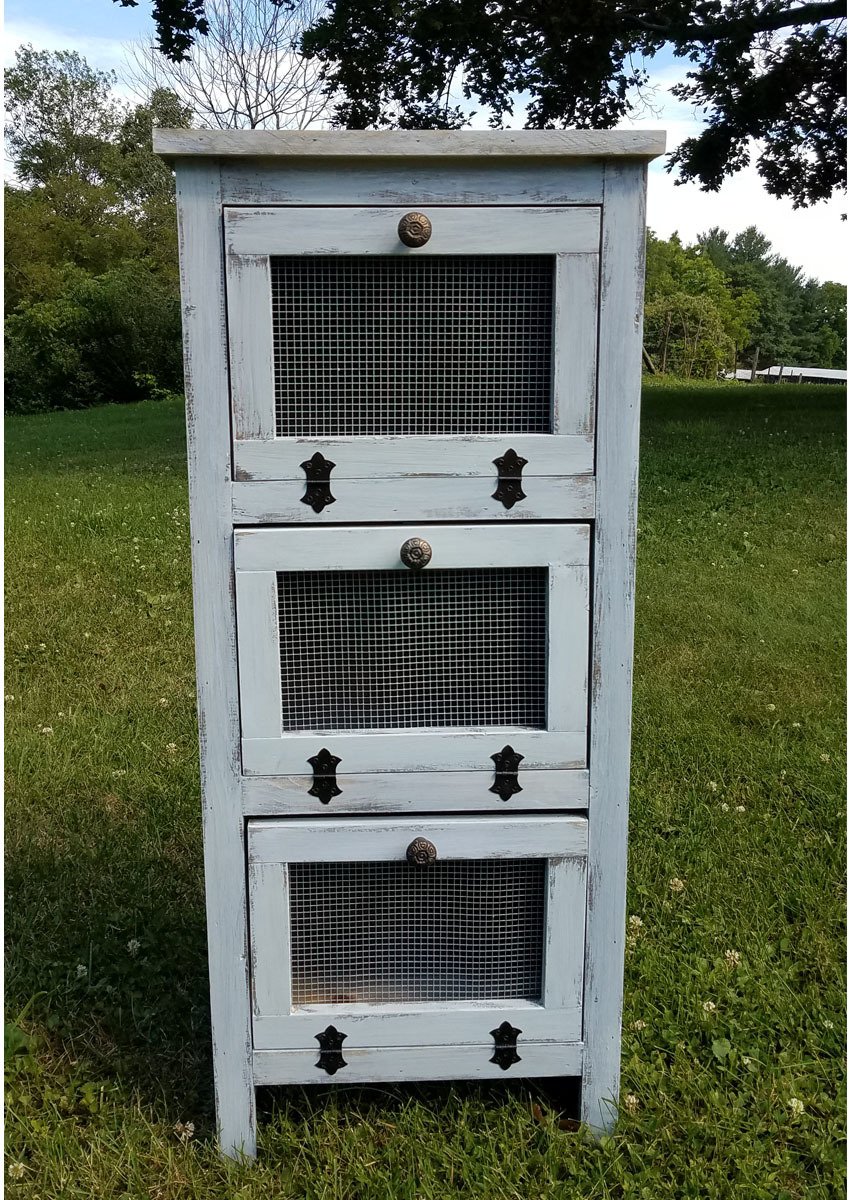
I followed the plans as written and my veggie bin came out looking awesome.
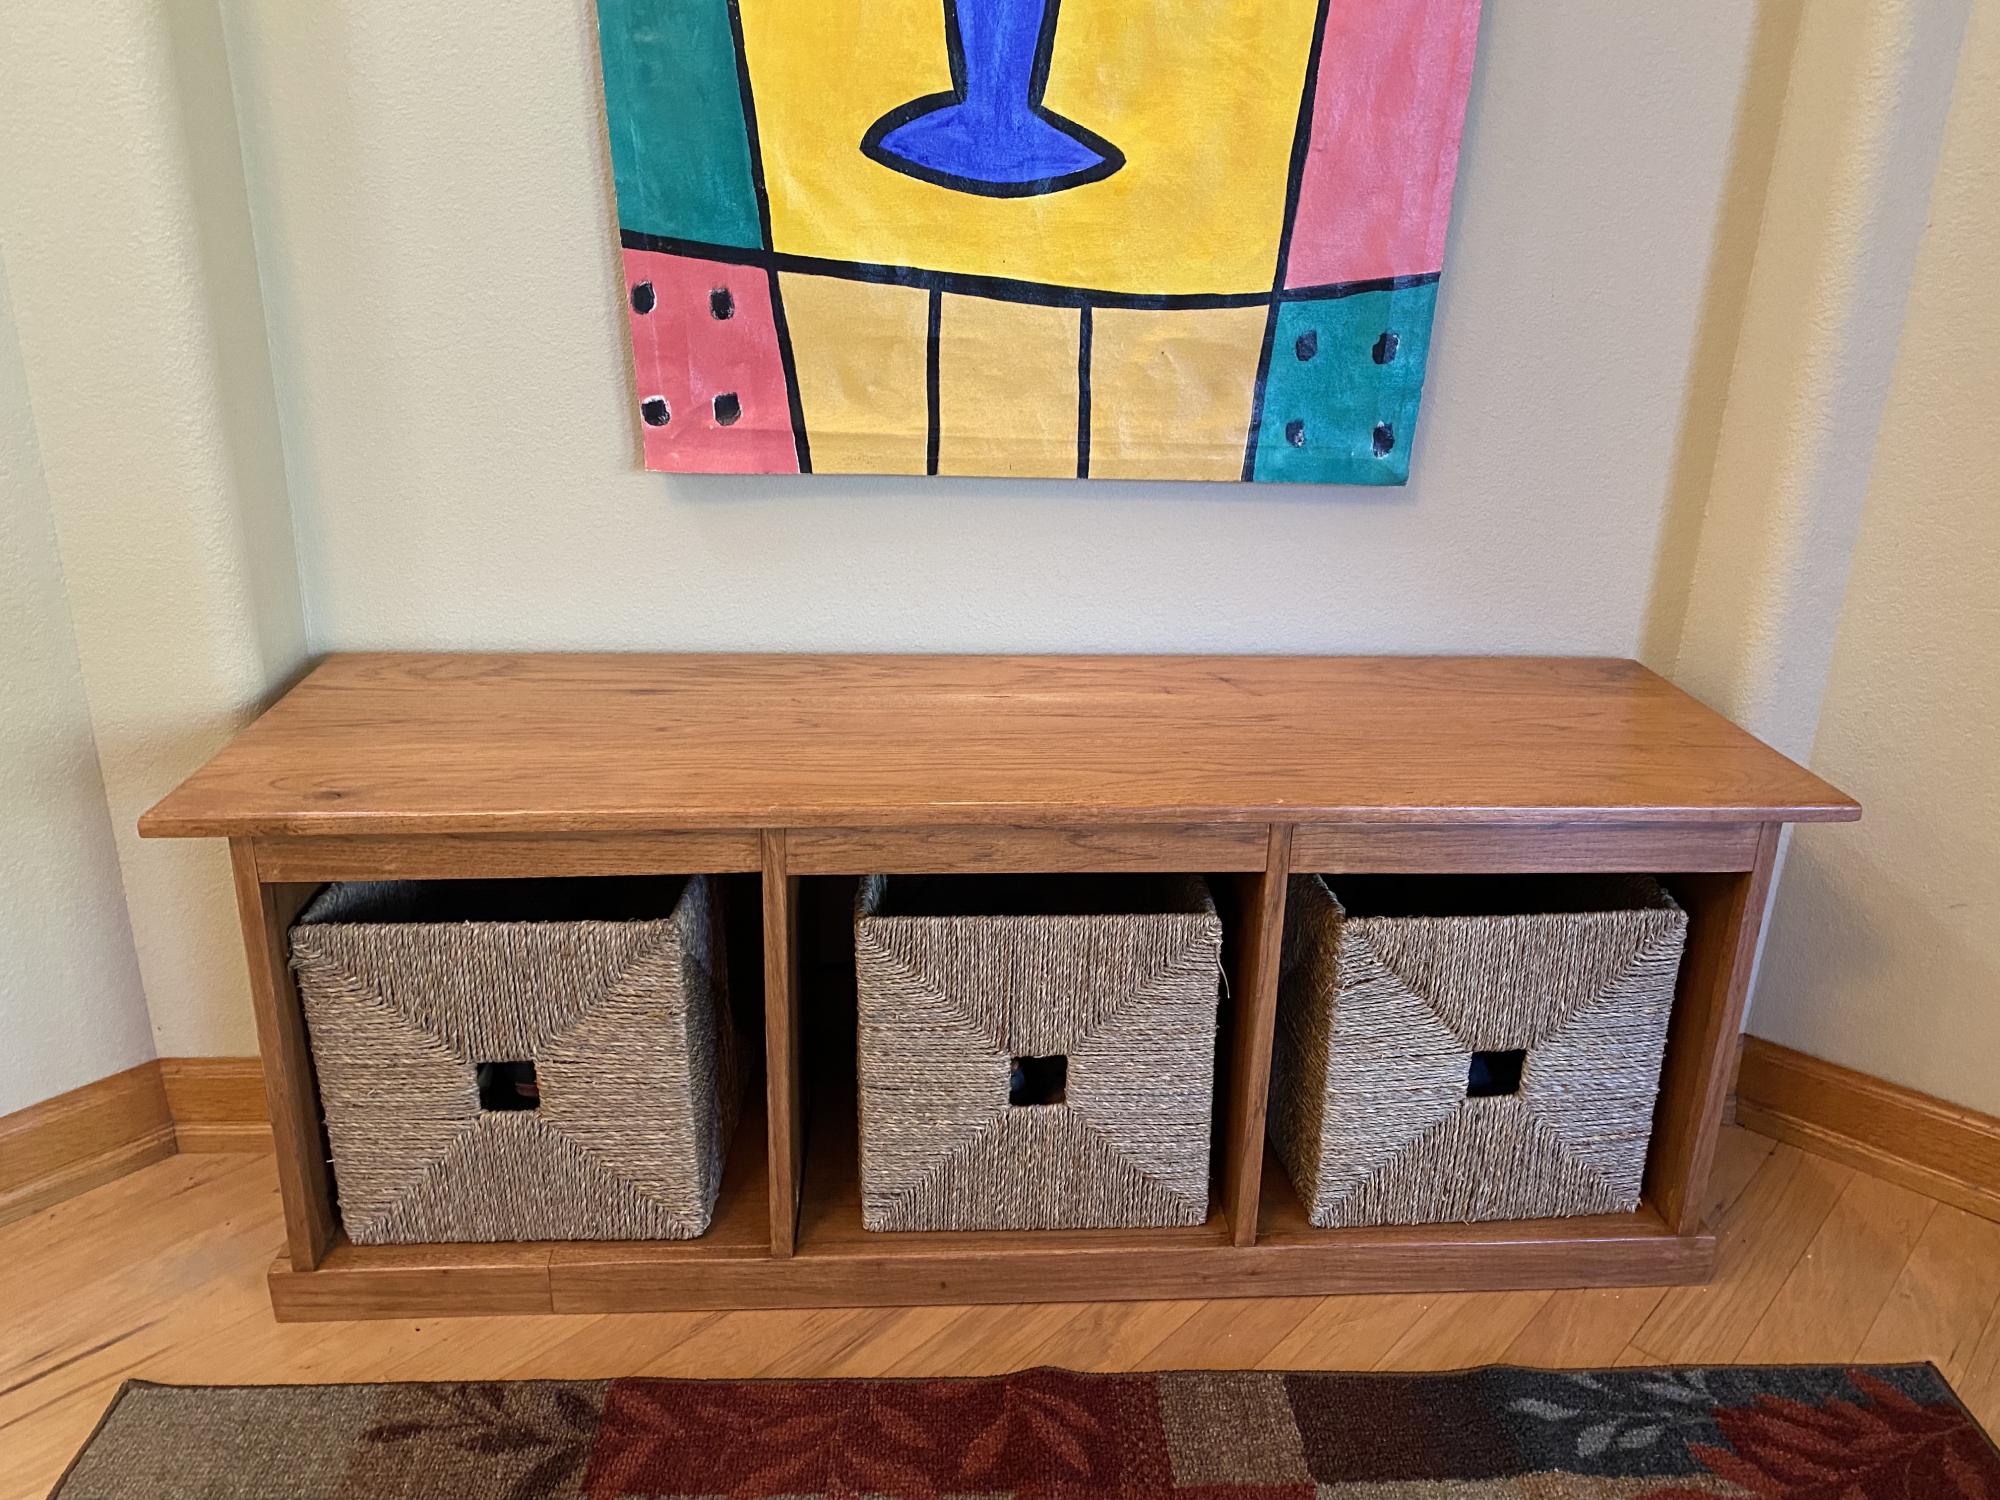
The Shelf Help app helped me customize this to my space, the plans were excellent. Thank you!
Sat, 10/23/2021 - 17:14
We are so happy you tried out Shelf Help! It looks amazing~

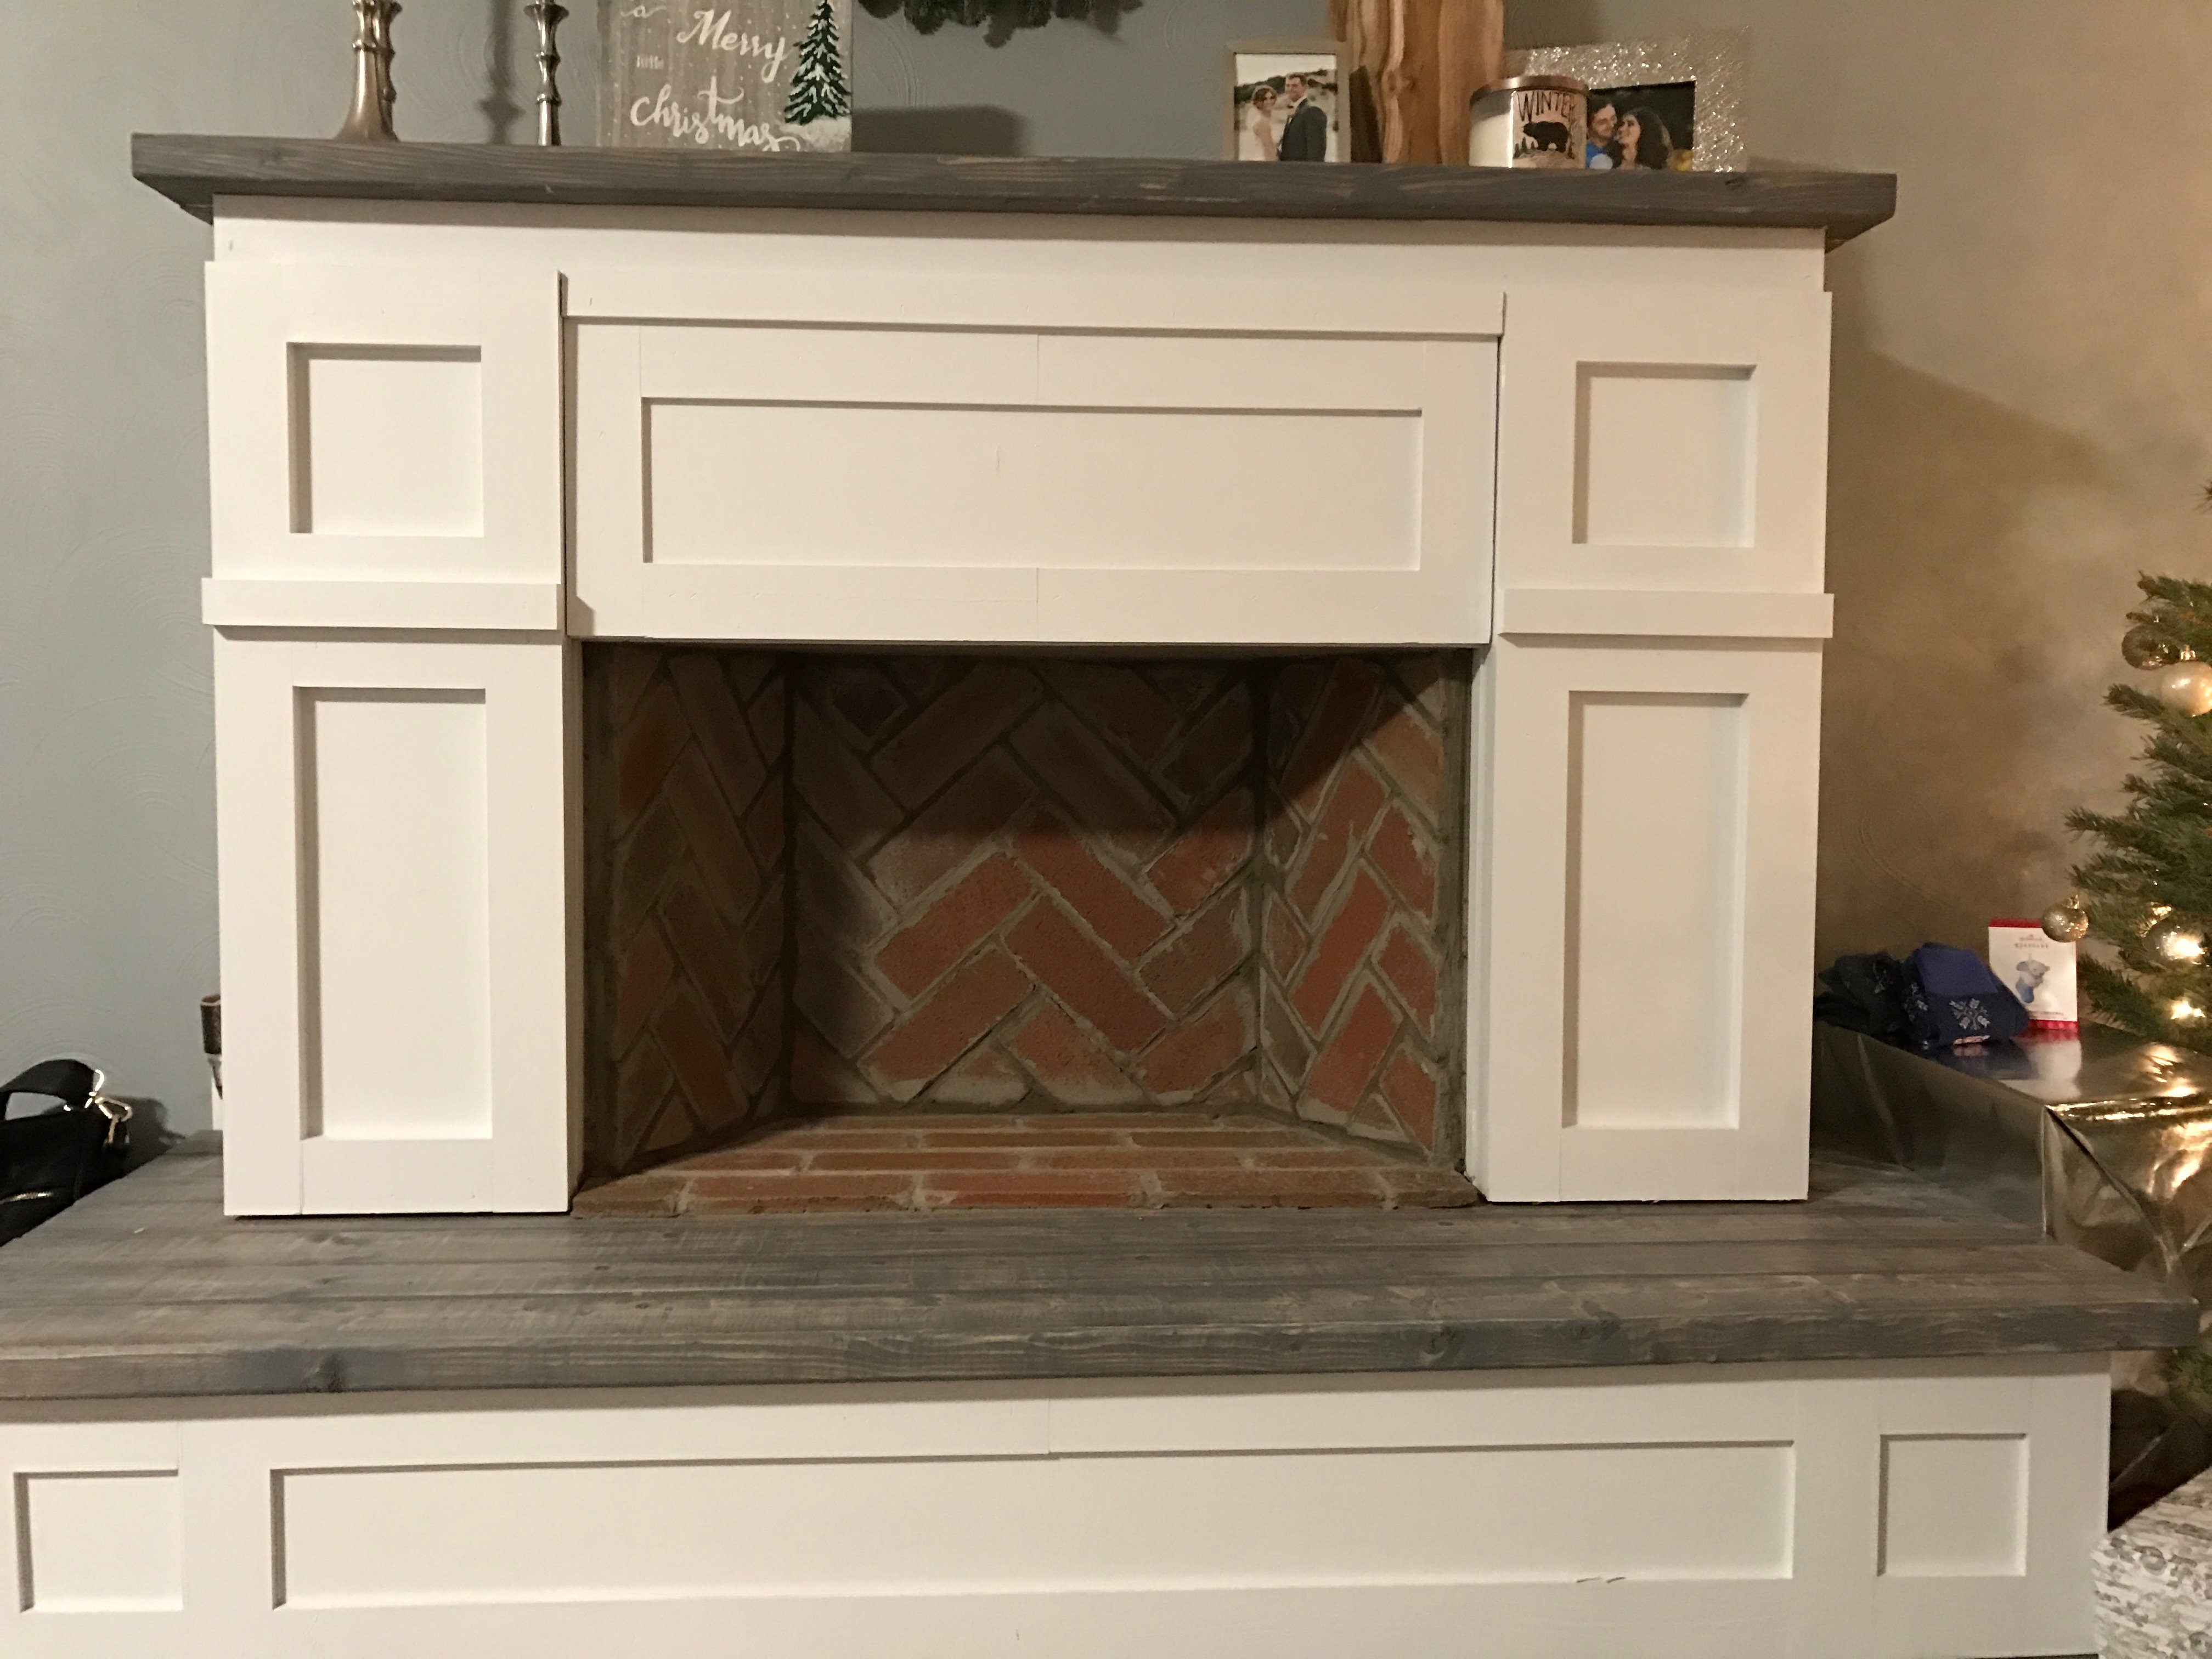
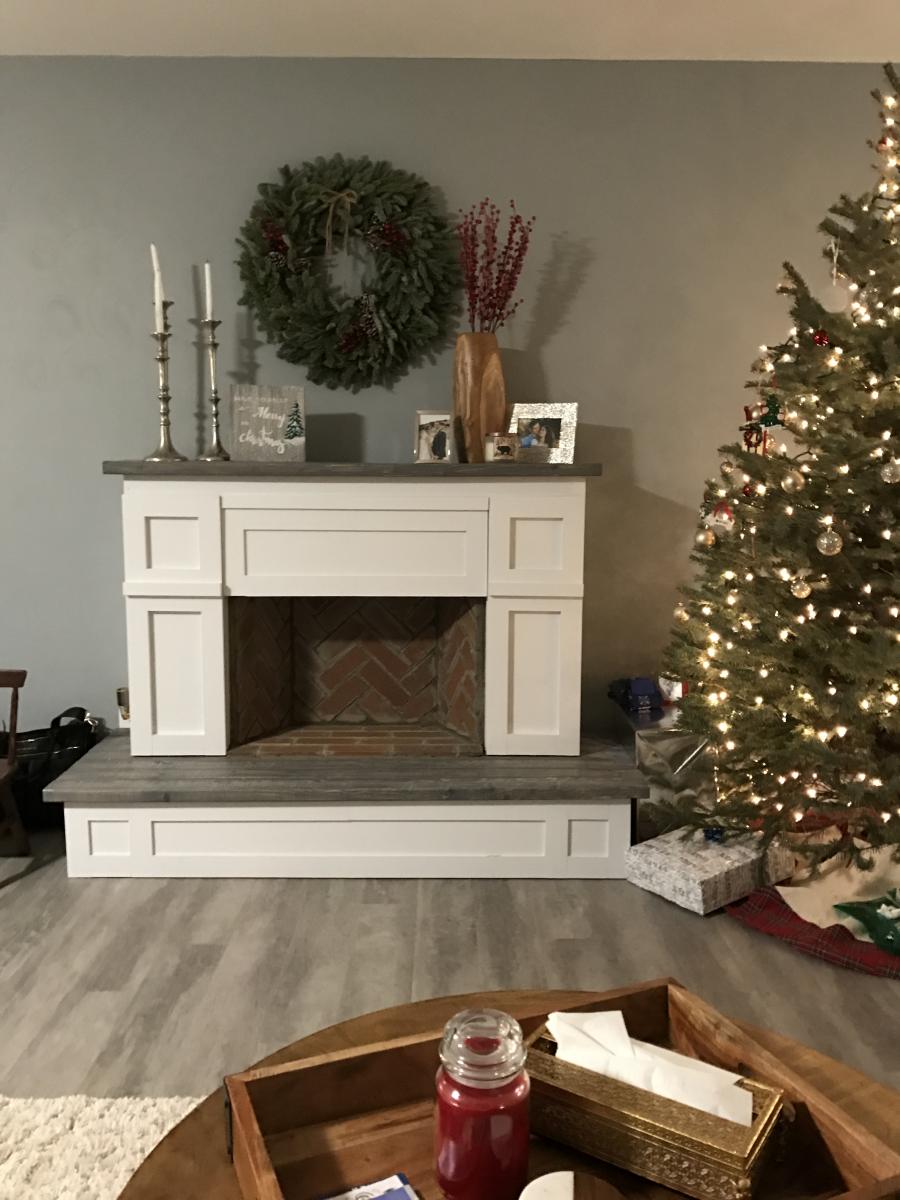
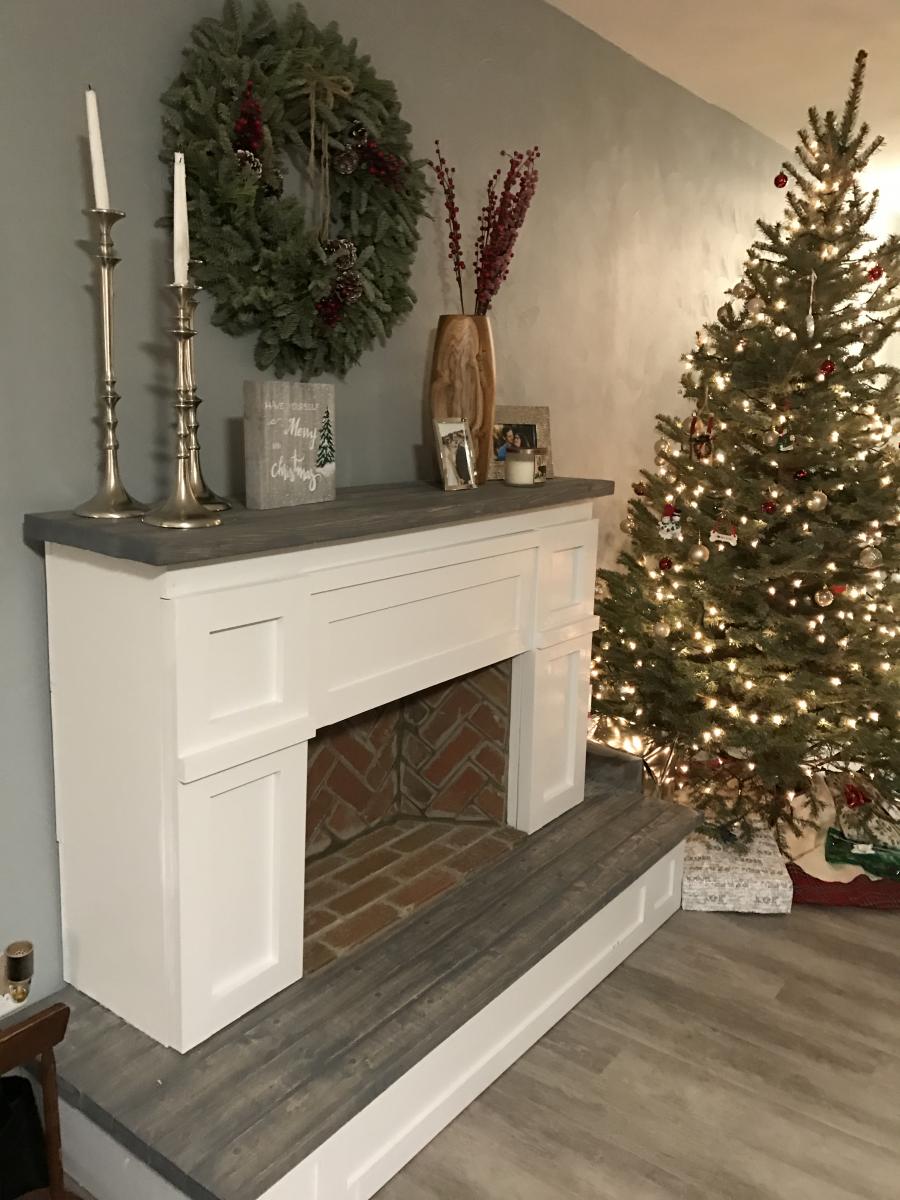
We made some modifications by adding a hearth for additional height (the room we have it in is very large and open) and joining 2x4s for the mantel and base which I stained grey for contrast. We decided to use thin brick for in the "firebox" to make it look more realistic. We also have a newborn and spent over two months putting it together a little at a time in our free moments so I'm not sure how long it would actually take to do at once, but cutting and putting up the brick was very time consuming.
Thu, 08/27/2020 - 11:16
This looks great! I'm actually in the middle of this build with the hearth as well. Couple questions....
How did you connect the two pieces? Also, did you connect to the wall? I'm assuming you didn't leave the 5 1/2 inch gap on the bottom of the fireplace and connected direct to the hearth. Let me know, thanks!
Mon, 10/26/2020 - 06:55
Absolutely beautiful and what i have been searching for!! Can you send me the plans for this?
Sat, 11/14/2020 - 21:06
Did you receive the plans? If so, can you please share!
Sat, 11/14/2020 - 21:06
Do you have the plans for creating this fireplace with a hearth? Would love to build over thanksgiving break!
Sat, 11/21/2020 - 21:16
Very nice fireplace would you happen to have the plans for it?
Thu, 04/01/2021 - 21:27
Would it be possible to send the plans for this beautiful faux fireplace?
Thank you for generously sharing these plans. My husband built this for our 9 year old. It's beautiful and perfect!
Thanks again!
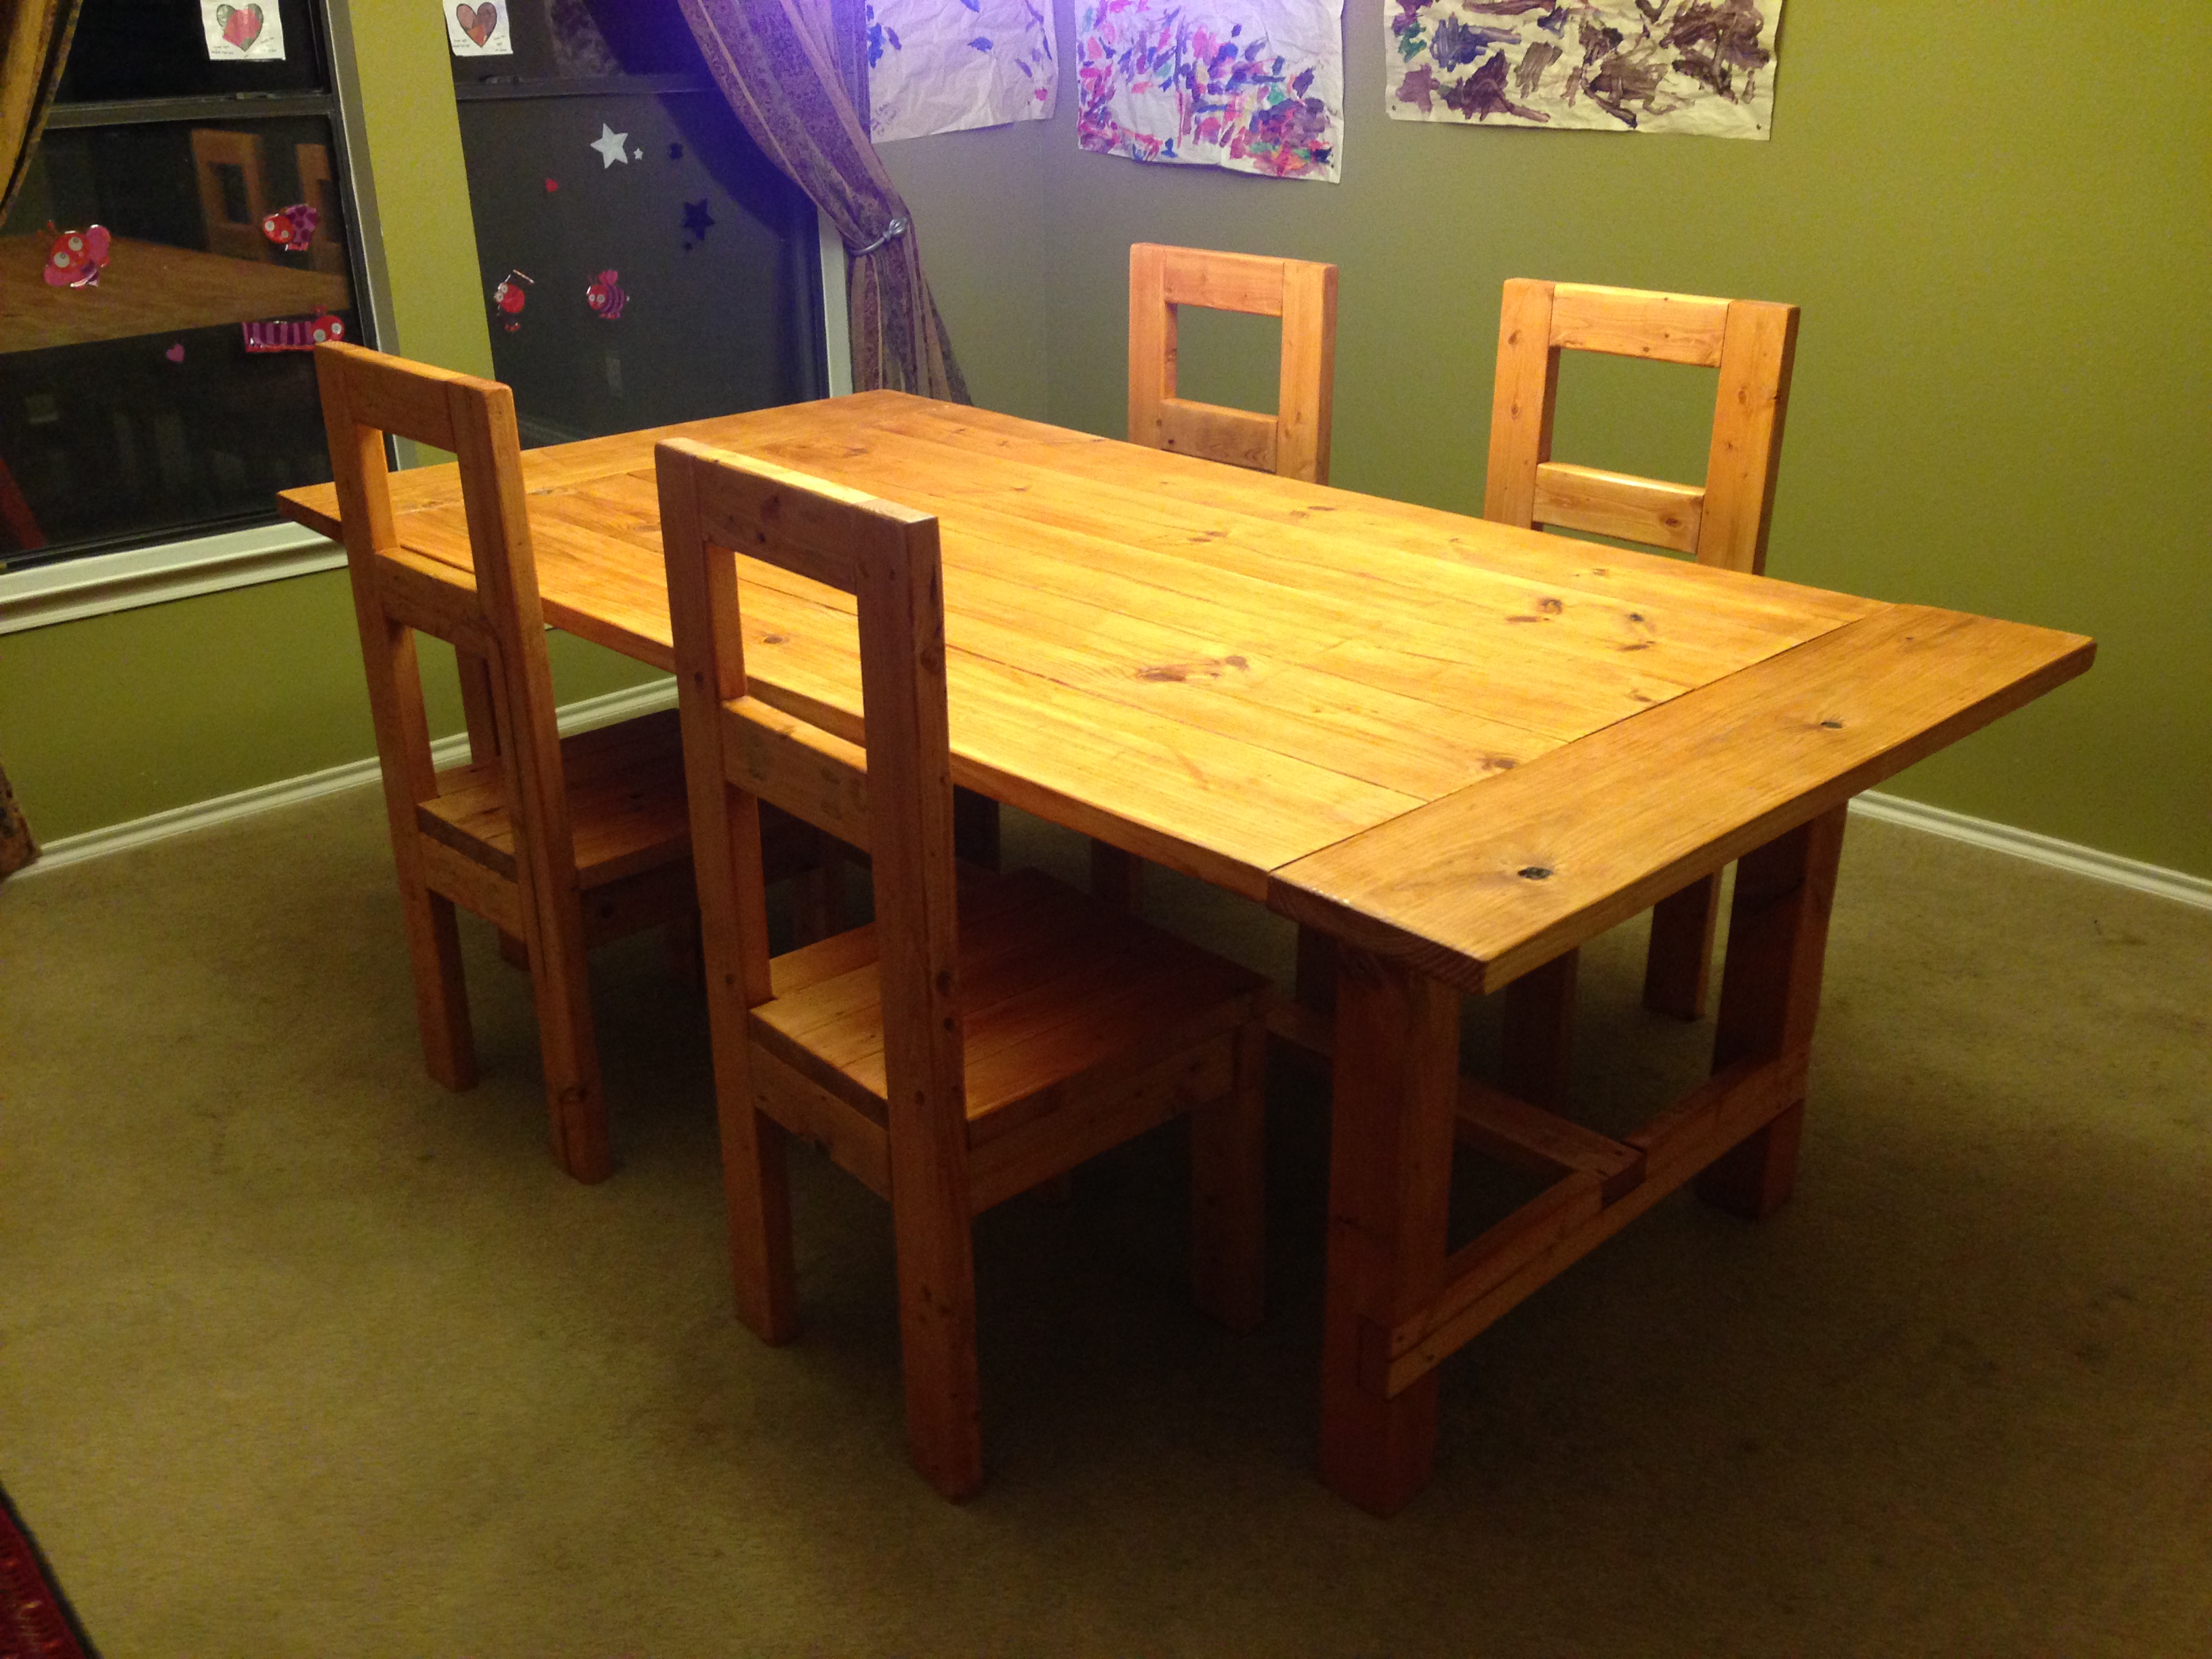
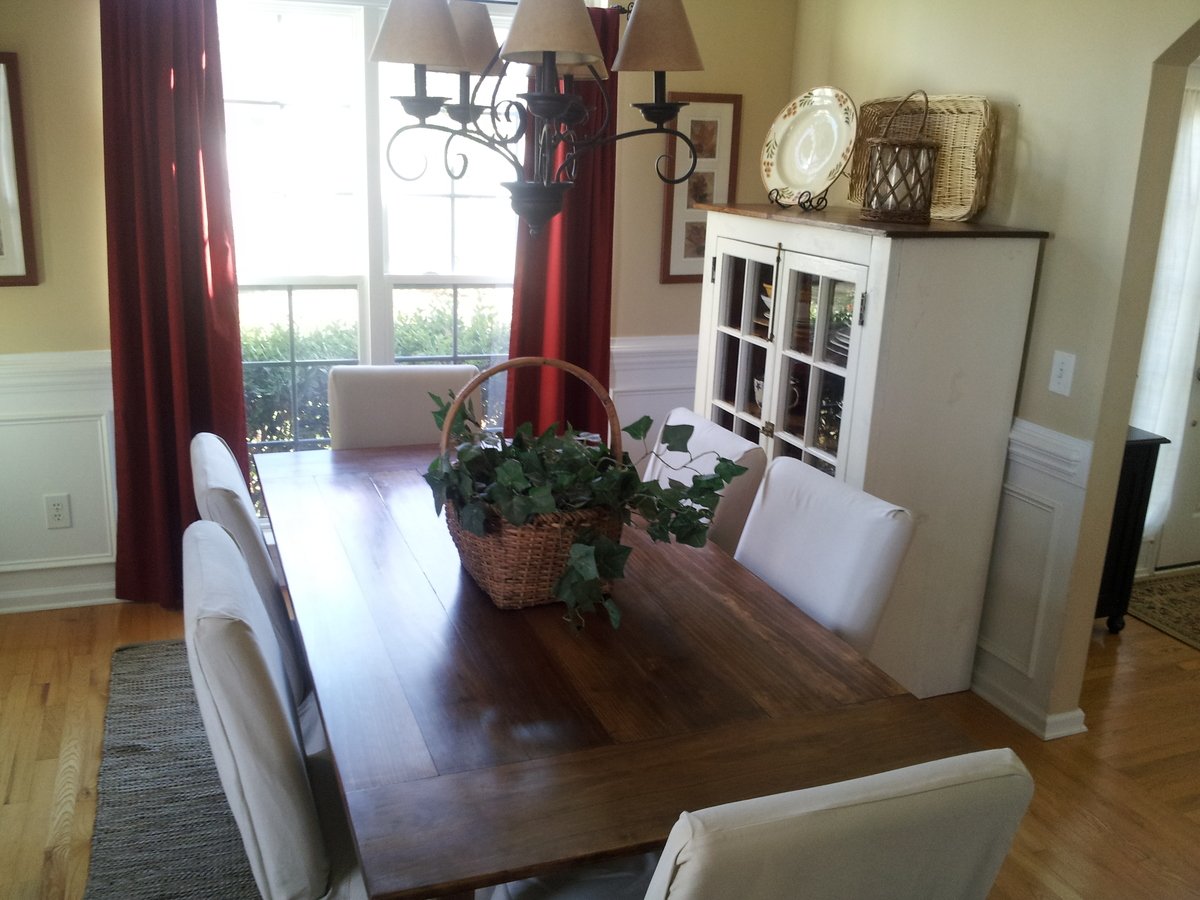
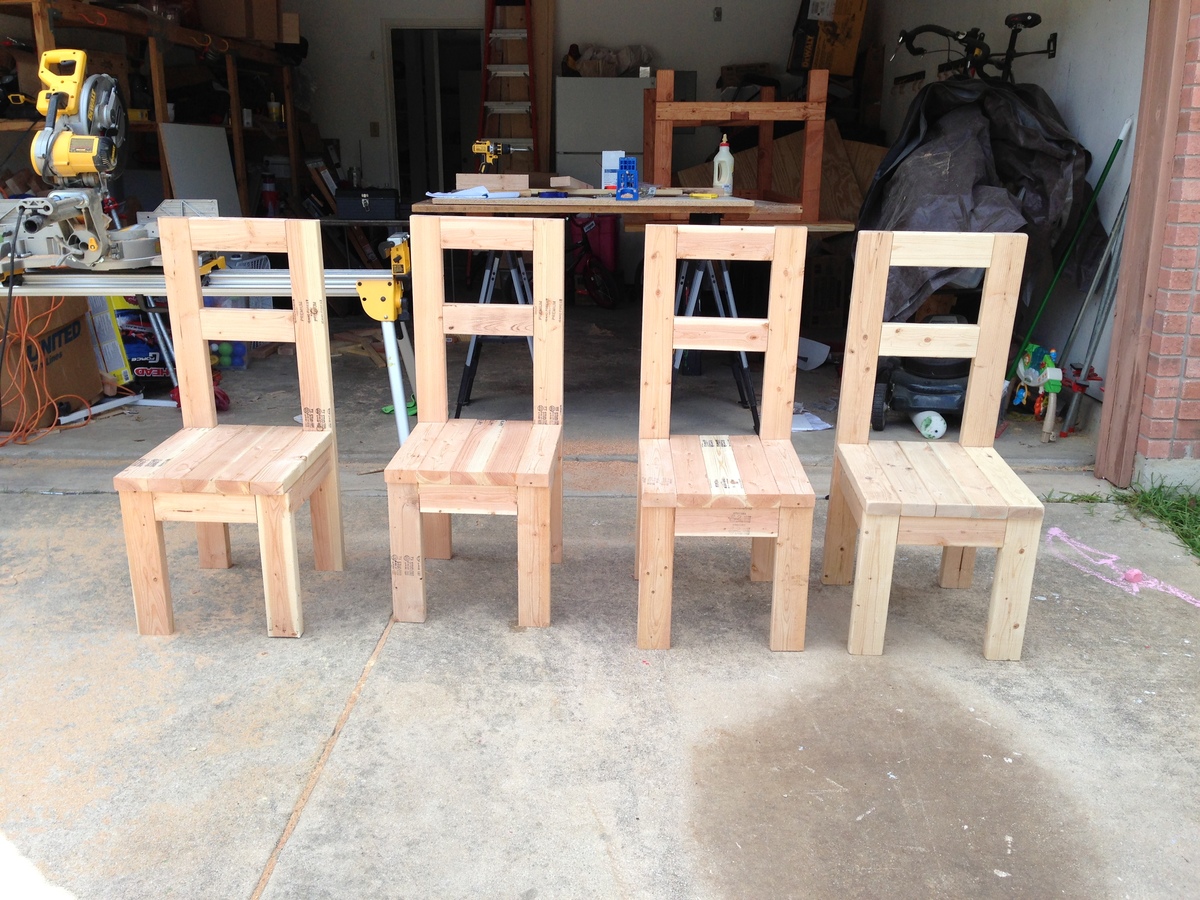
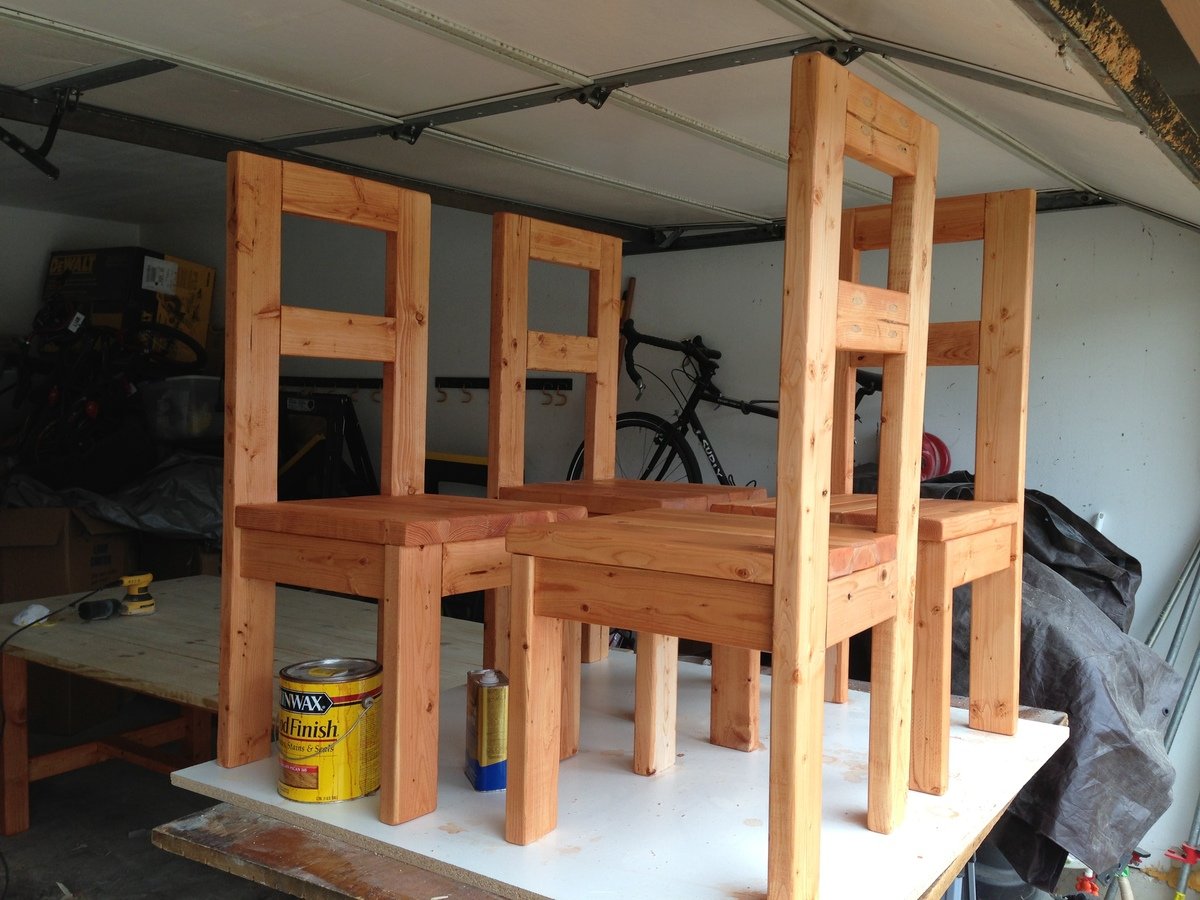
Modern Farmhouse Dining Room Table (with pocket hole) and 2x4 chairs with plans reposted from morelikehome.net.
Surfed the site for the right plans and dove right in. Thank you for the inspiration all!
Mon, 09/10/2018 - 11:05
I have clicked on the link the plans are not there.
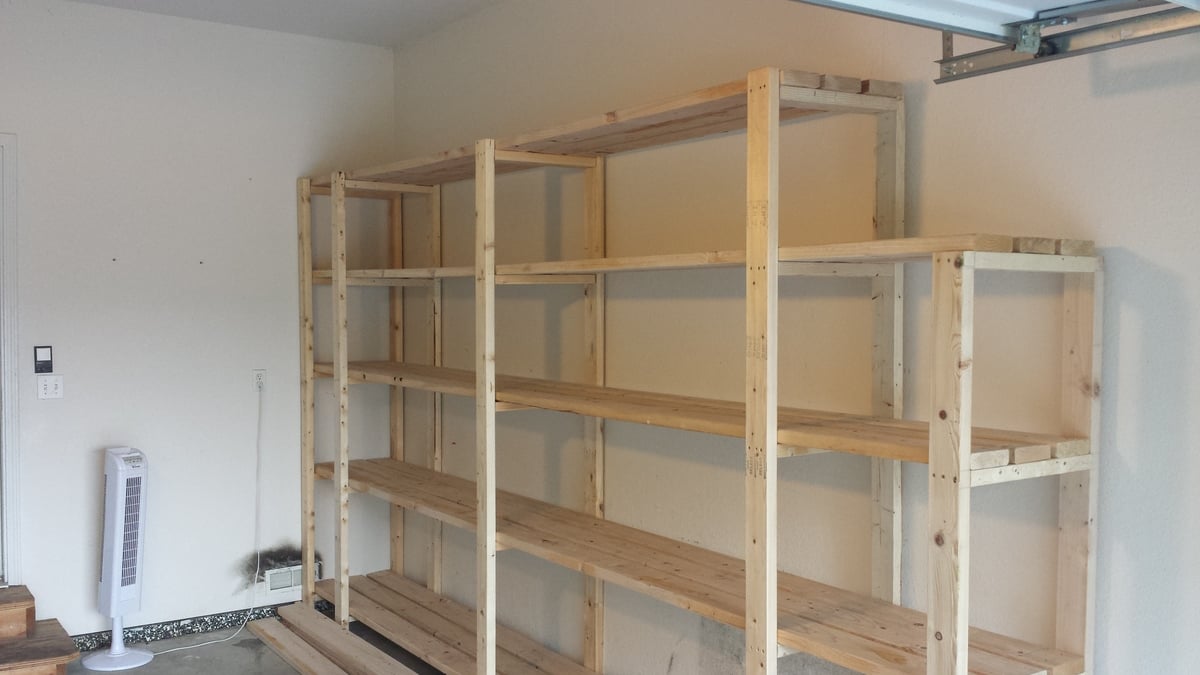
My father-in-law and I knocked this project out in about 5 hours including the trip to the lumber yard. You've got a great basic design here! A few modifications we made:
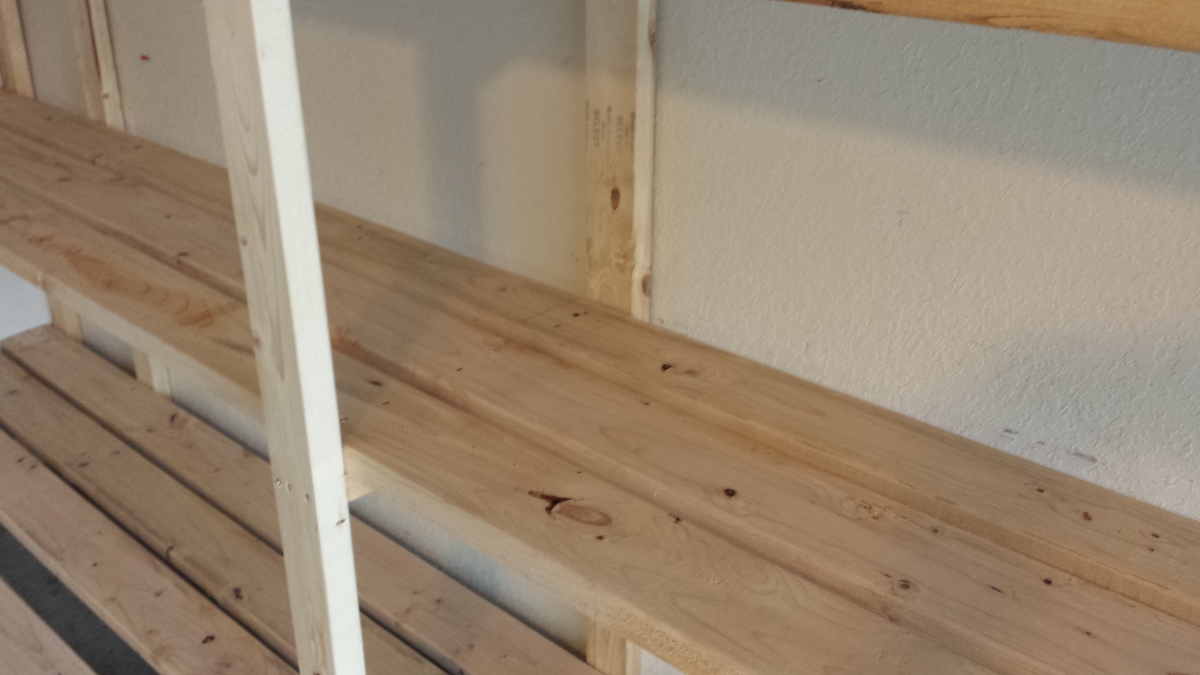
1. I thought the depth of the shelves in the original plan was a little too shallow so I used 3 2"X6"s instead of the 4 2"x4"s. That made the shelves 1 1/2" deeper. Although 2"x6"s are obviously more expensive, the overall cost for the project didn't change much because we only had to use 3 boards per shelf instead of 4. This also reduced the amount of screwing and made it easier to position the shelf boards without taking measurements since we only had one middle board to deal with (instead of 2 with the 2"x4"s). We just eyeballed the spacing of the middle shelf board as we worked.
2. Since our garage has a 10' ceiling, I decided to go 8' tall with the unit. This allowed us to add a 5th shelf.
3. Some oversized tubs can be 18-20" high or more so I varied the height of each shelf -- 24" at the bottom, then 20", 18" and 16". There's approx. 24" available between the top shelf and the ceiling.
4. Due to the position of the garage door track, I had to notch out a couple feet at one side. The end support piece is only 6' high.
5. Since many storage tubs can be 16-18" wide, I made sure that there was at least 54" between 3 of the vertical support structures. This will allow us to store 3 tubs side-by-side and maximize storage. You might notice that I have two vertical supports that appear to be very close together near the back wall. I did this so I would have something on that side to attach more shelving to on that short wall where the garage door opener is.
The only cuts we had to make for this entire project were for the 18 1/2" 'braces' or support pieces on the vertical ladder structures. The shelves are either 14' or 12' (top shelf only) and the vertical 2"x4"s are either 8' or 6'. Most lumber yards will carry these lengths in either 2"x4"s or 2"x6"s.
We didn't use any wood glue, and I admit this may come back to haunt me. However, to get a good fit and eliminate gaps, I used clamps I already owned to squeeze the boards together before adding the screws. Everything feels very solid and sturdy to me.
Because of the extra height compared with the original plan, I was worried about it possibly tipping over (we have a 10-year-old who likes to climb ![]() ) so I made sure that 3 of the supports are lined up with the wall studs. After leveling the entire unit, I plan to anchor it to the wall using 3 1/2" screws.
) so I made sure that 3 of the supports are lined up with the wall studs. After leveling the entire unit, I plan to anchor it to the wall using 3 1/2" screws.
So for about $187 in lumber and maybe $20 in construction screws, I've got 76 feet of STURDY shelving that should accommodate hundreds of pounds! Not a bad investment at all...

I had been thinking about making something to go with the nativity scene that I made a few years ago, and was so excited to see the plans for this stable this morning. It's less historically accurate, but much easier to build than a cave. =) I had cedar fence picket scraps laying around, so this project didn't cost me anything extra.
Just finished this beauty, entirely made with 2x4, plans were modify to match our outdoor sofa and coffee table. I think our best looking project so far ;) Thank you for inspiring me to build !!!

In reply to Very nice! by Ana White Admin
Tue, 03/01/2016 - 18:13
Little by little I am transforming my ugly concrete patio with no view in Zen garden...
Tue, 03/01/2016 - 18:15
Little by little I am transforming my ugly concrete patio with no view in a Zen garden...
Tue, 03/01/2016 - 18:16
Little by little I am transforming my ugly concrete patio with no view in a Zen garden...

Had tons of fun making this potting bench from Ana used a few different boards but, overall had a great time

I modified this chair with 2x4's as the base and 2x2 for decoration on arms, this is prior to sanding and finishing


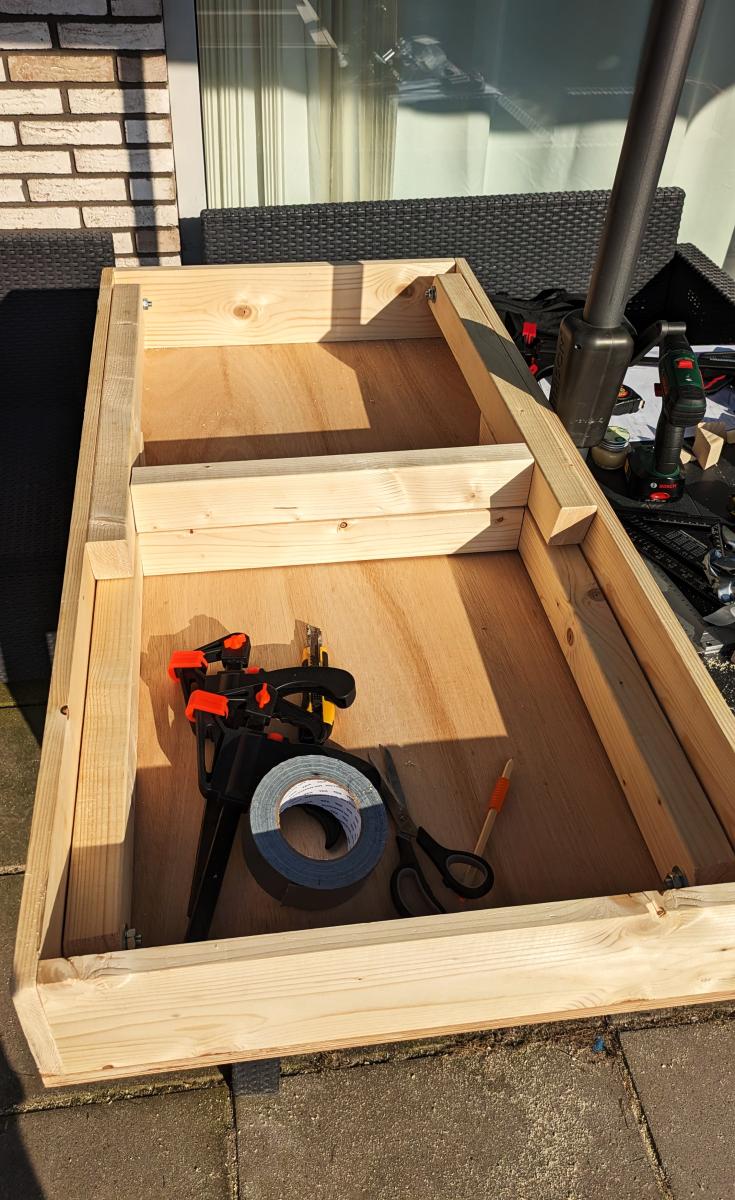
We've been desperate for more storage in our little house and this build really helped. The whole bench is 103“ wide and each drawer gives us 24"x17" of usable space. We had to do some custom shaping for the benchtop (two joined fir 2x12's) fit as the walls are not square but in the end we were really pleased.
The hardest part of the project was getting all of this built and in place while working around a busy family as this is our only meal space and the majority of cutting/forming was done either on the weekends or after bedtimes. If I were to do this again I'd prioritize sending the kids to grandparents for the weekend and know king everything except for paint out in one go.
We could have spent less time with the benchtop by using plywood like in the plans but we wanted the look of a separate benchtop. We may replace the fir with stained oak down the line but this should be plenty sturdy for the next several years.

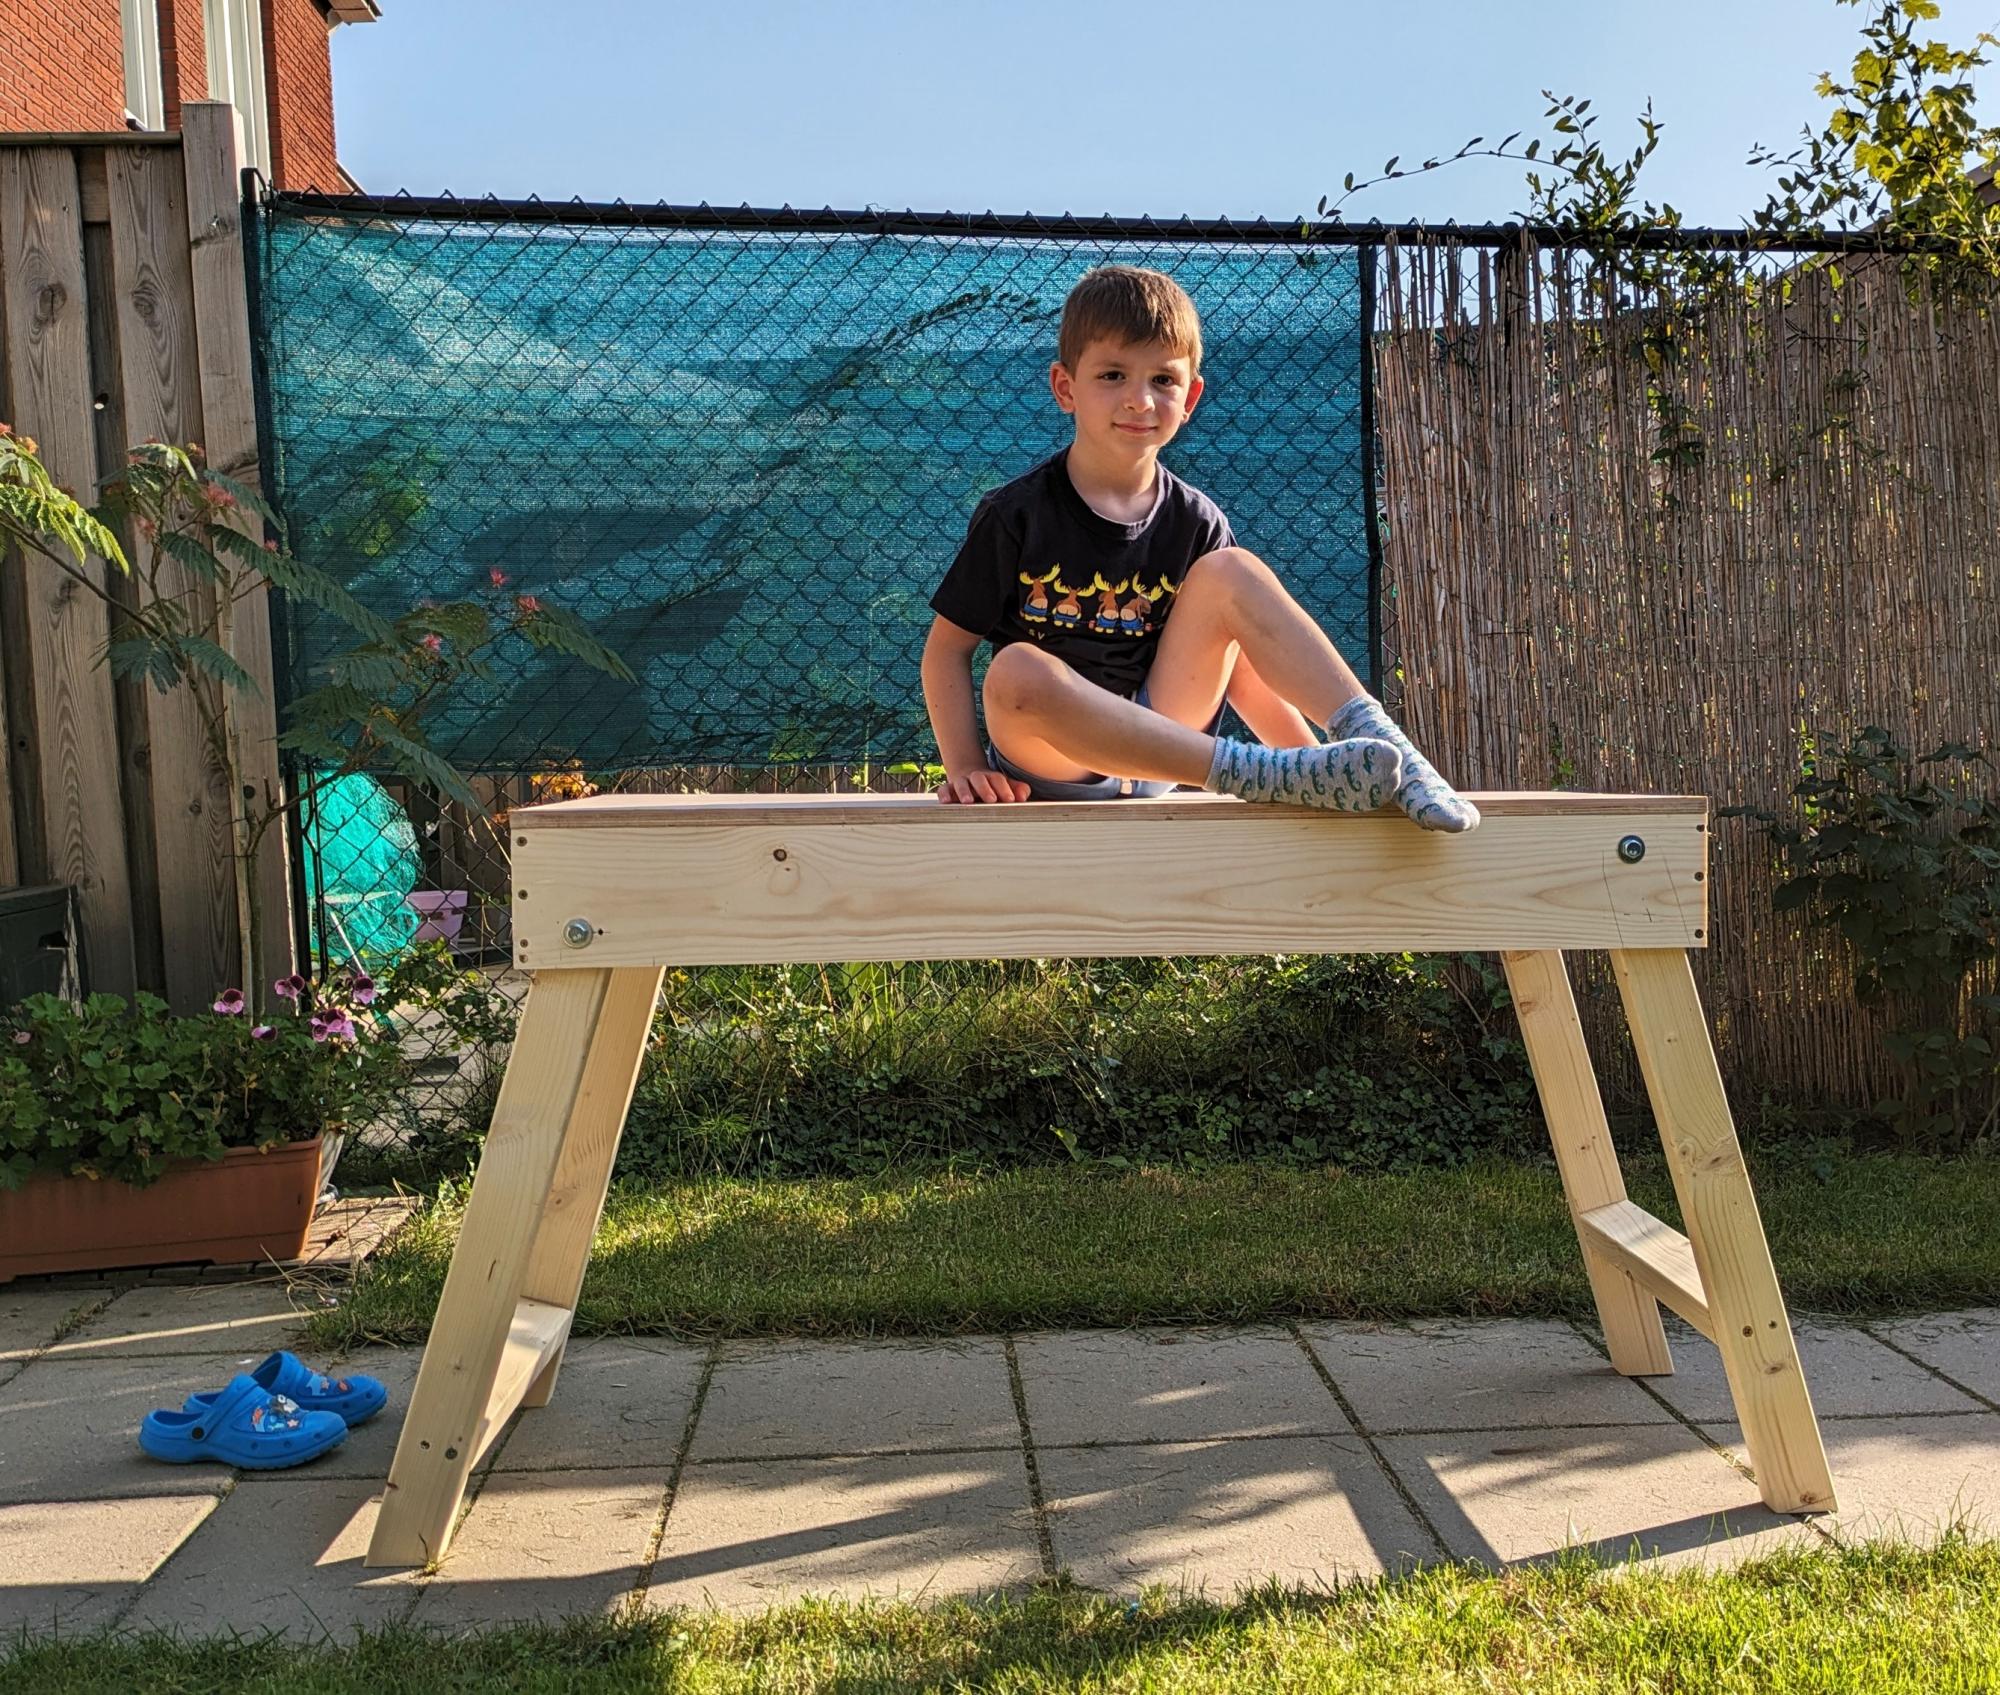
This is my very first project. I have no other tools yet besides the drill, so I had to make all the cuts with the hand saw, but it worked out well :) As I am in Europe, the imperial metrics mean nothing to me. The wood they sell here is of different sizes. That is overall not an issue, although I had a tough time calculating the holes for the legs. Luckily, only one error hole, and all came out level on the first try. No waste of wood! I also had a good helper.
Thank you, Ana
Ventsi
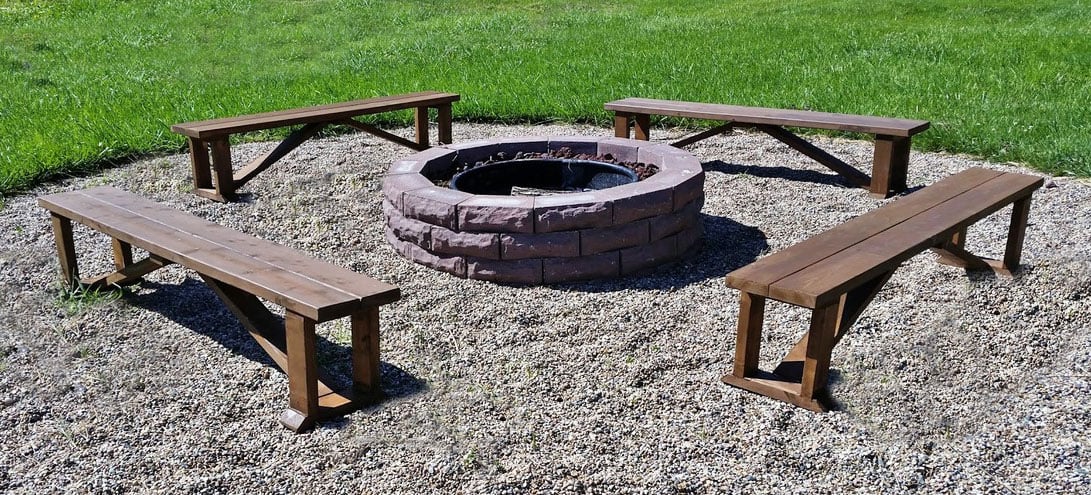
I built these benches out of cedar, which added considerable cost to the job. The total cost for four benches (including stain) was about $240. I used clear cedar and Sikkens outdoor stain in chocolate brown. I also modified the plans slightly to create stronger joints, using rabbet and mortise joints and Titebond III (waterproof) glue. This only slightly changed the dimensions, but I think it will make the benches last for years to come. It did add some time to the plans, as I think butt joints would've taken only 2-3 hours total before sand and finish.
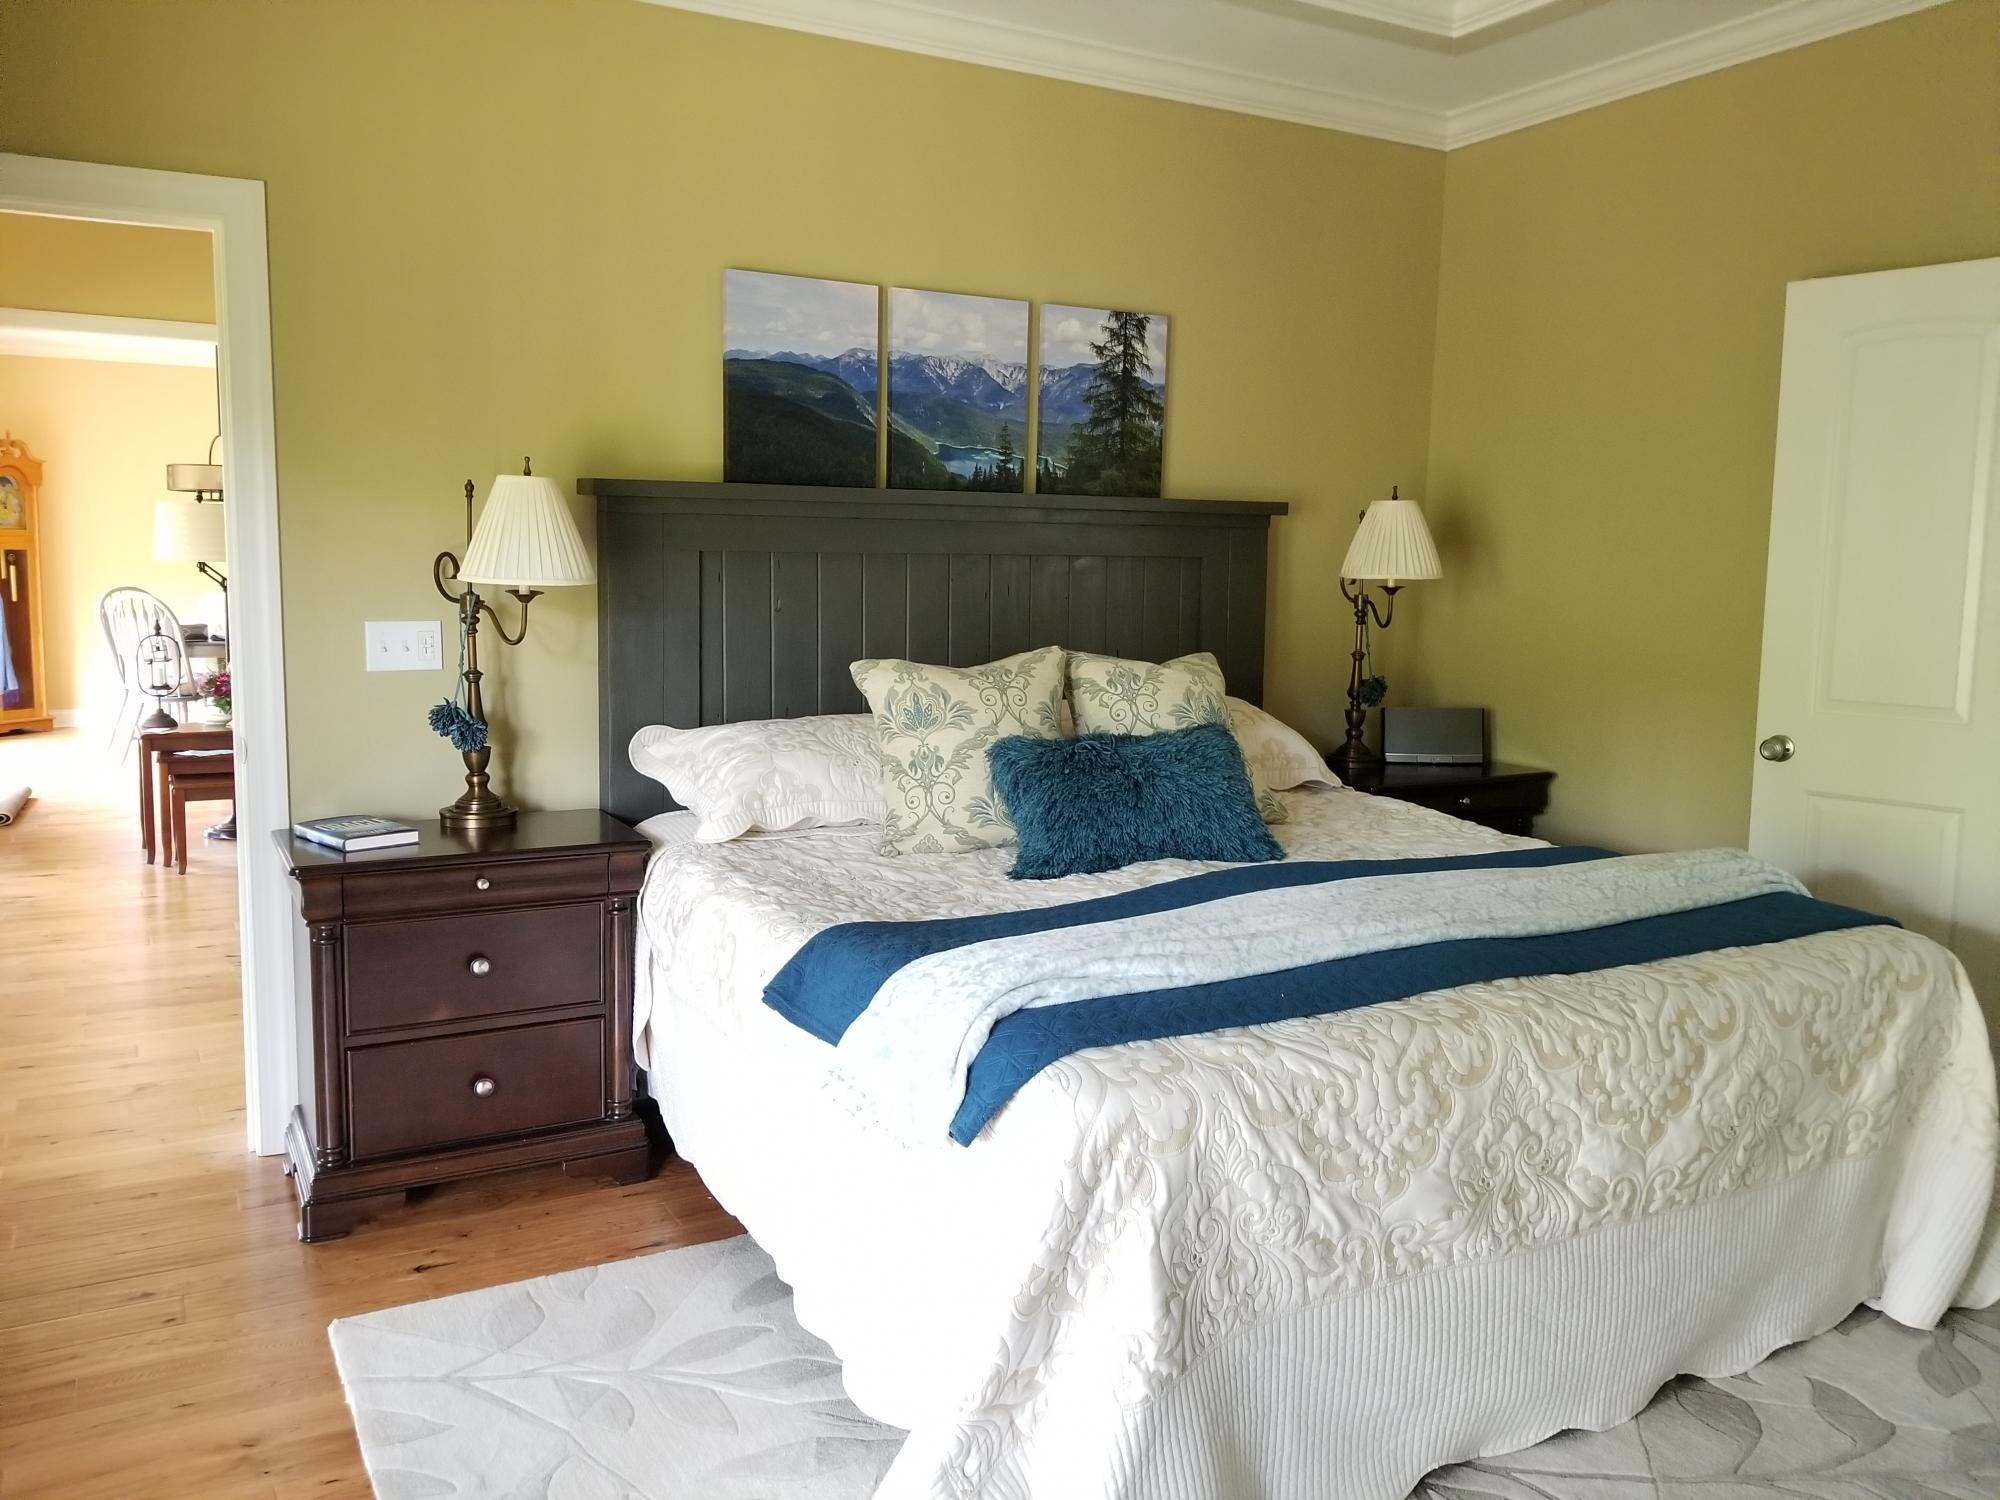
I used discarded lumber from when they built our house a few years ago for the support structure. I only needed the headboard for our new split king adjustable bed. There posts are 2 2x6s sistered together. The top shelf is a 2x6 and the insert is 1x6 tongue and groove (got the idea from the fancy farmhouse bed and loved it!) blue spruce flooring with worm holes. I love it, now to do a mashup of the two nightstands with a drawer and a door 😁Thanks Ana!!!
Ps, my hubby also bought me the Kreg electric pocket hole machine for mother's day for upcoming projects. I didn't even know that was a thing until i saw your video... It's awesome!!
Great plans and a great build. I used 4x4’s for the legs and decided to go with the Farmhouse Bench instead. The color I went with is Weathered Grey. I applied it with a brush and immediately wipes it off with a clean rag, then 2 coats of poly to finish it off.
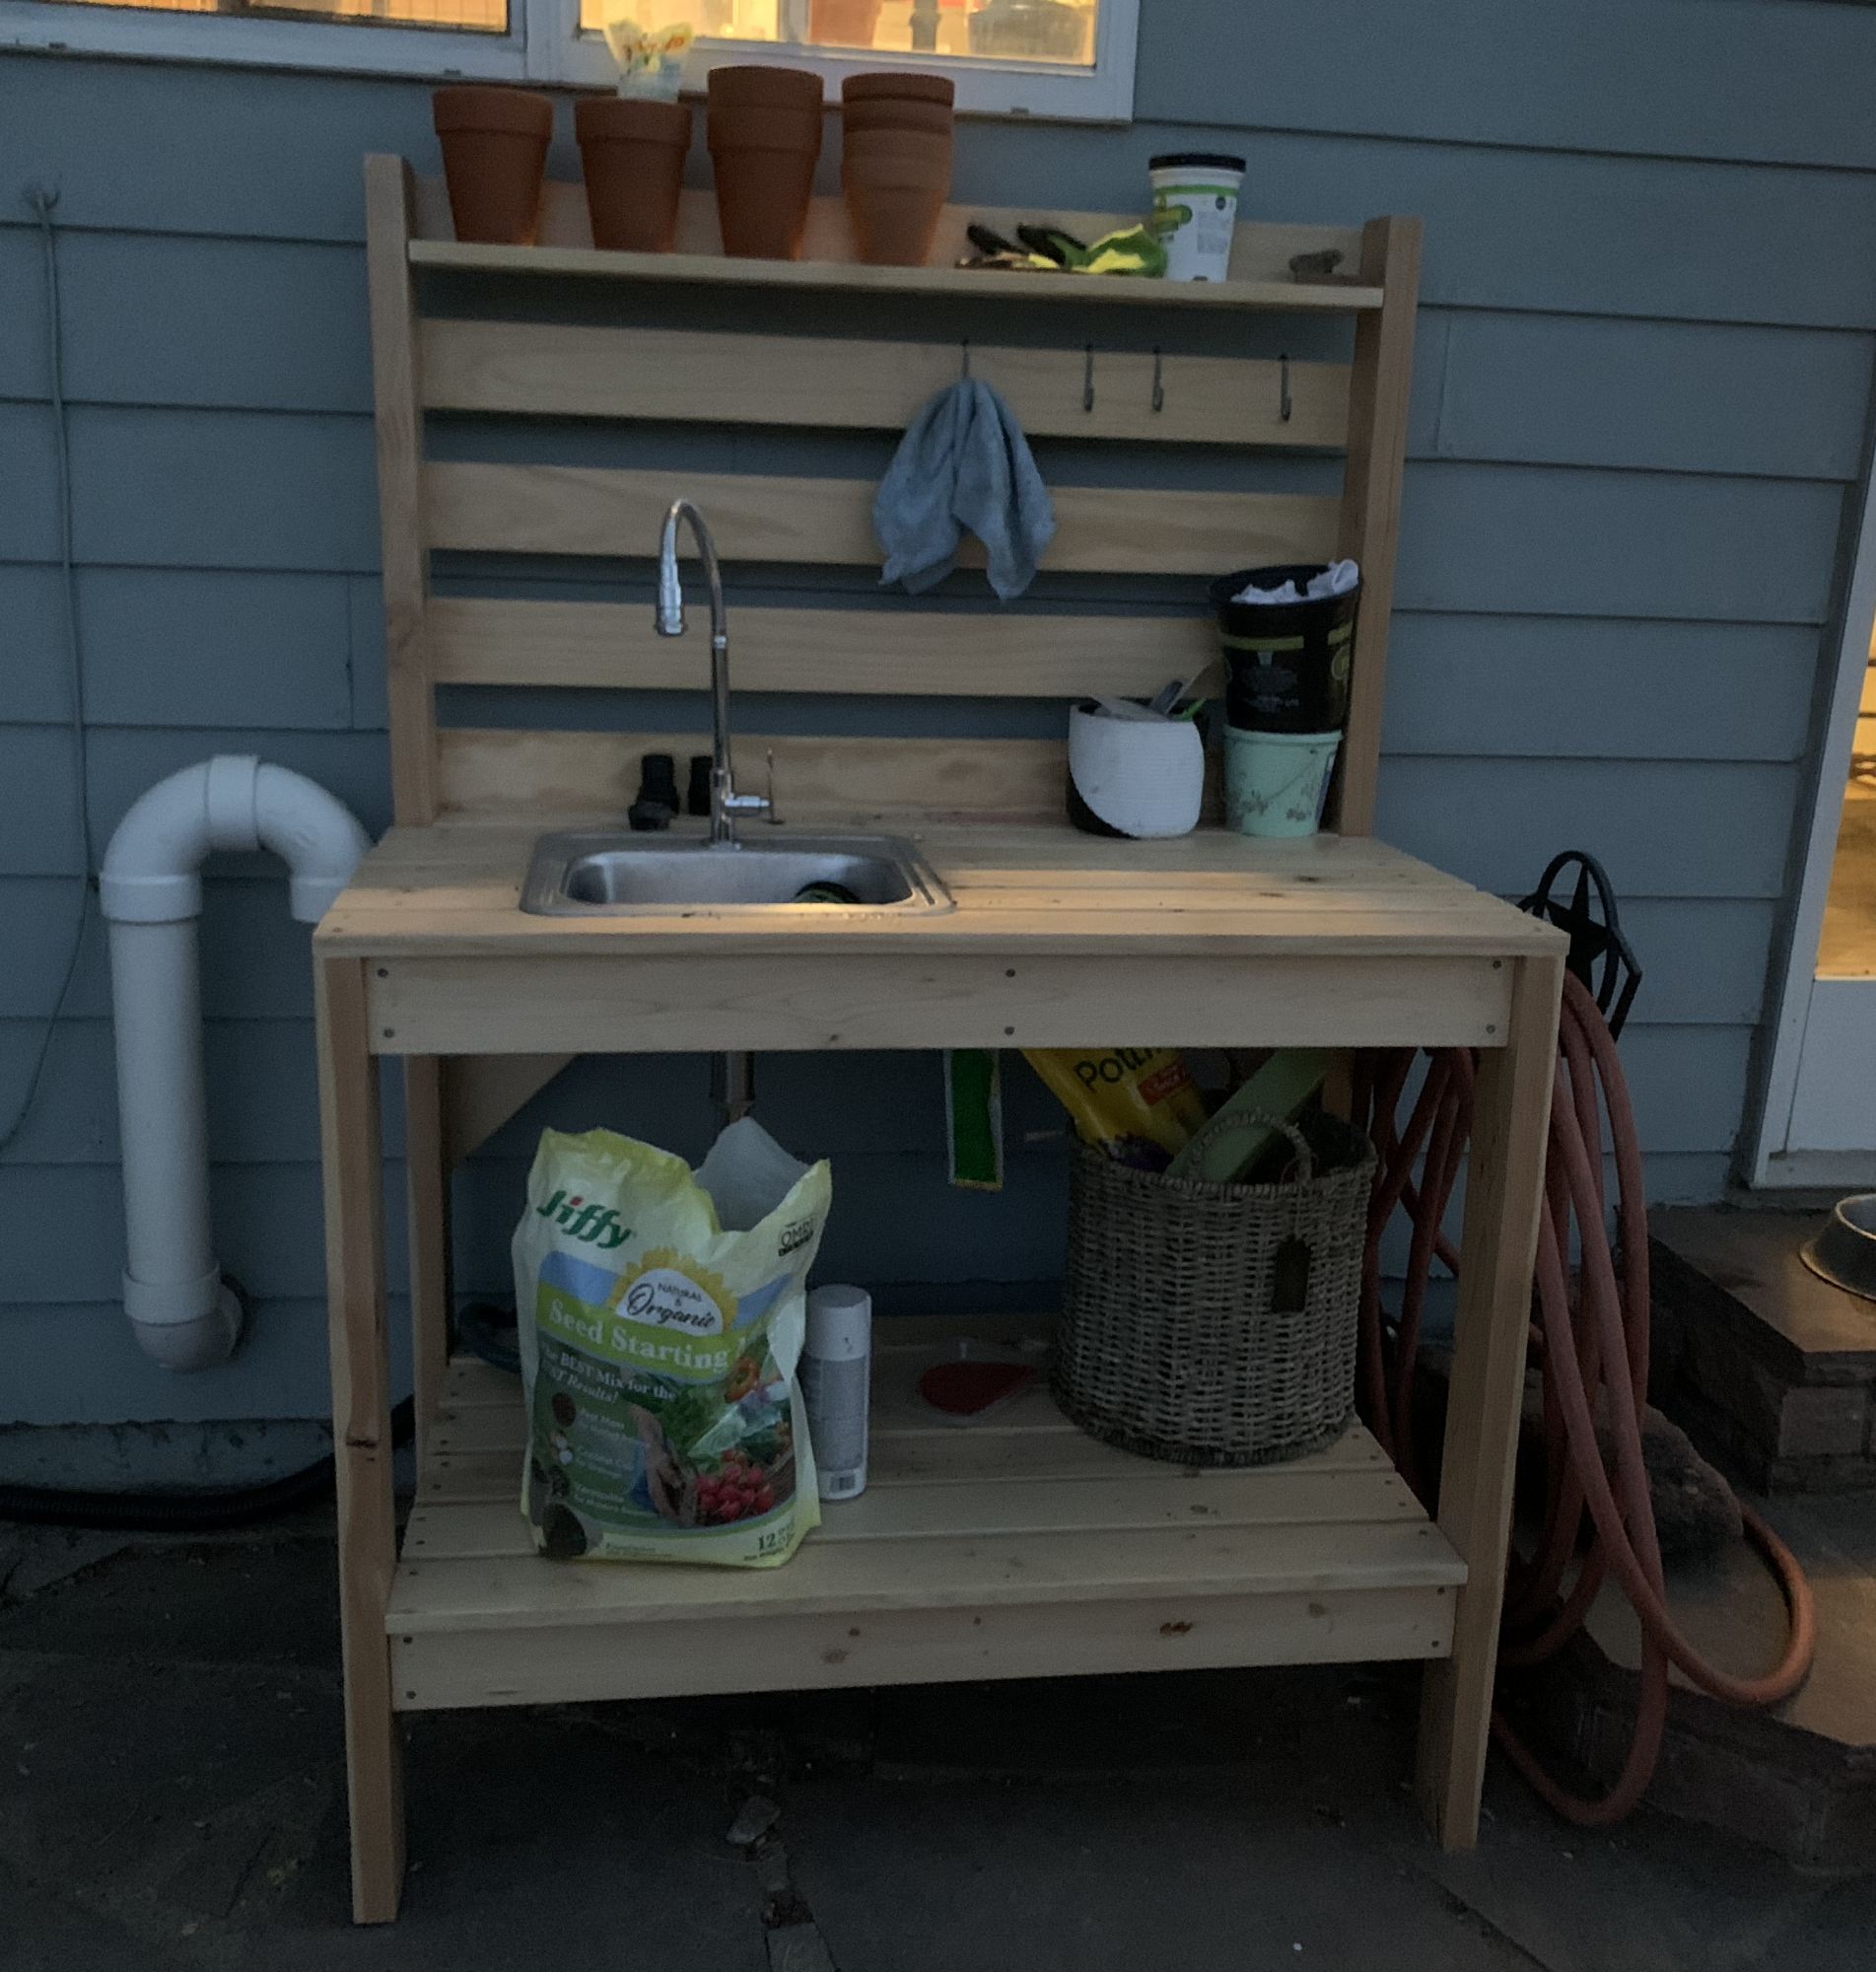
One of my first bigger projects. Added a sink by framing it out with 2x4s before adding the top on.


Comments
Ana White
Wed, 01/11/2017 - 12:03
This is amazing! Very
This is amazing! Very creative and useful!
shirleycanoe
Wed, 12/27/2017 - 20:15
Support for flip down tray for keyboard ?
I love this, it is exactly what I am looking for! Is some type of extra support needed for the flip down tray for the keyboard ? If so, what would it be, or is there a special hinge I should look for?