Community Brag Posts

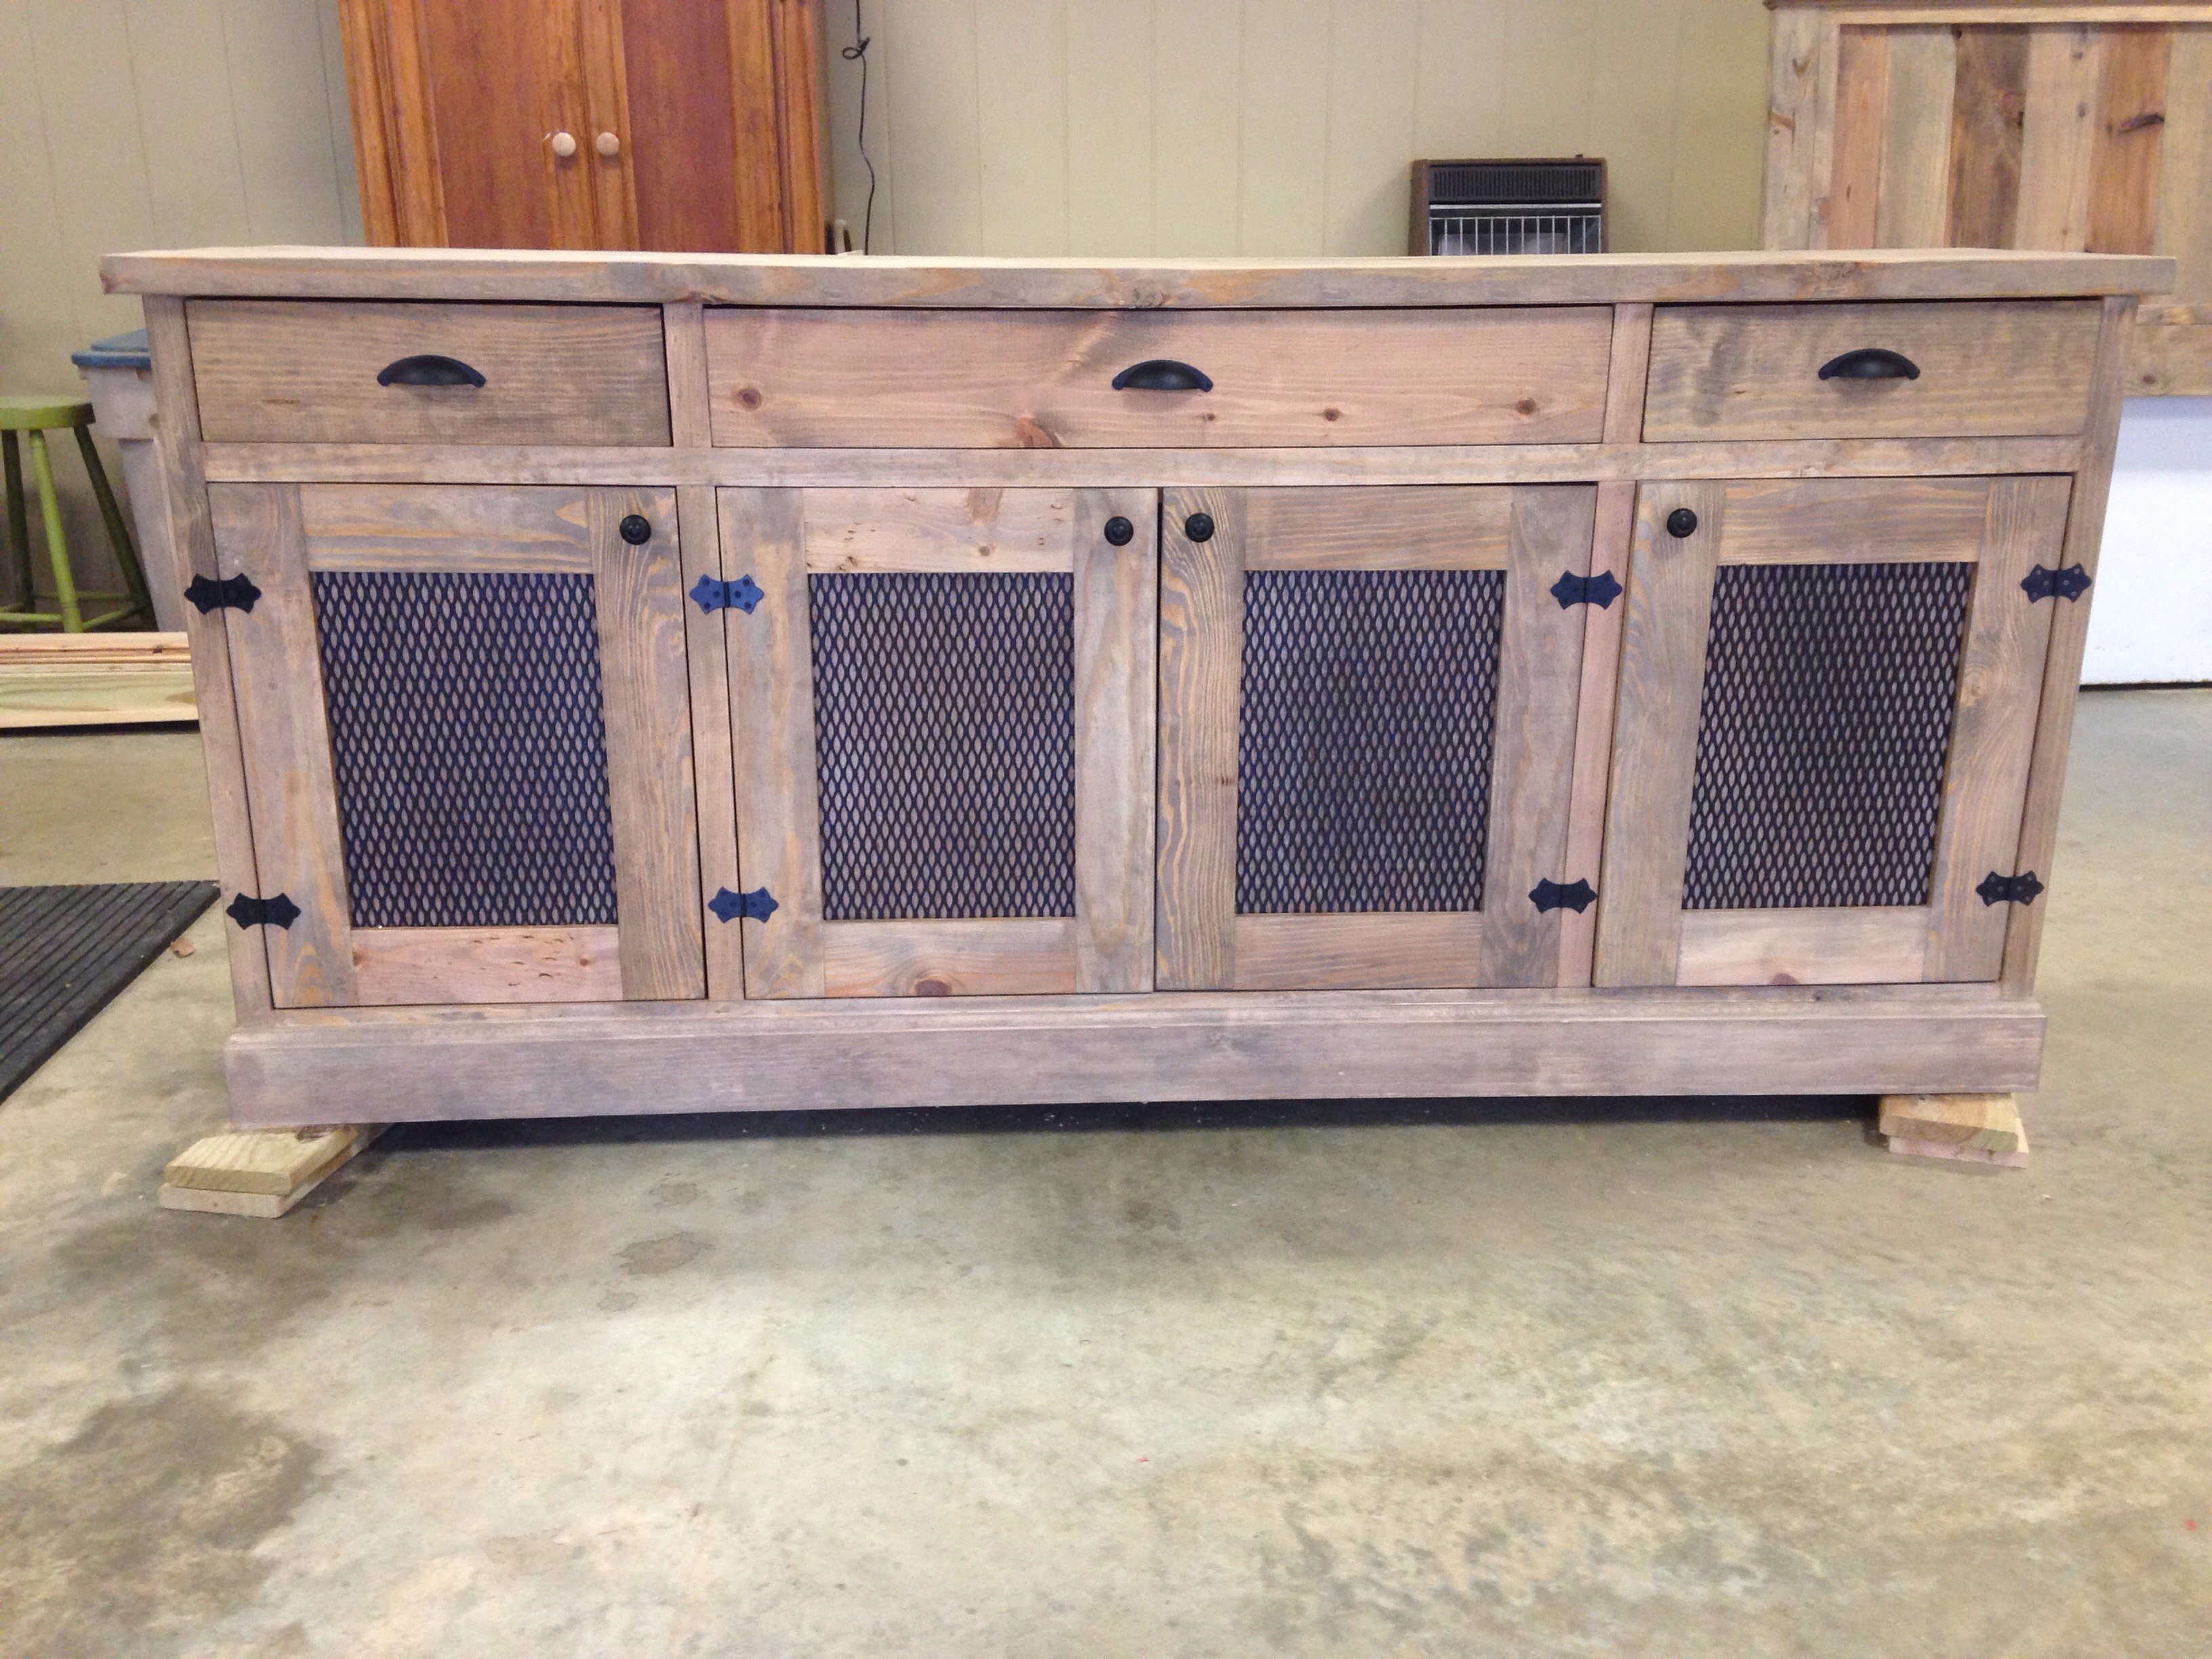
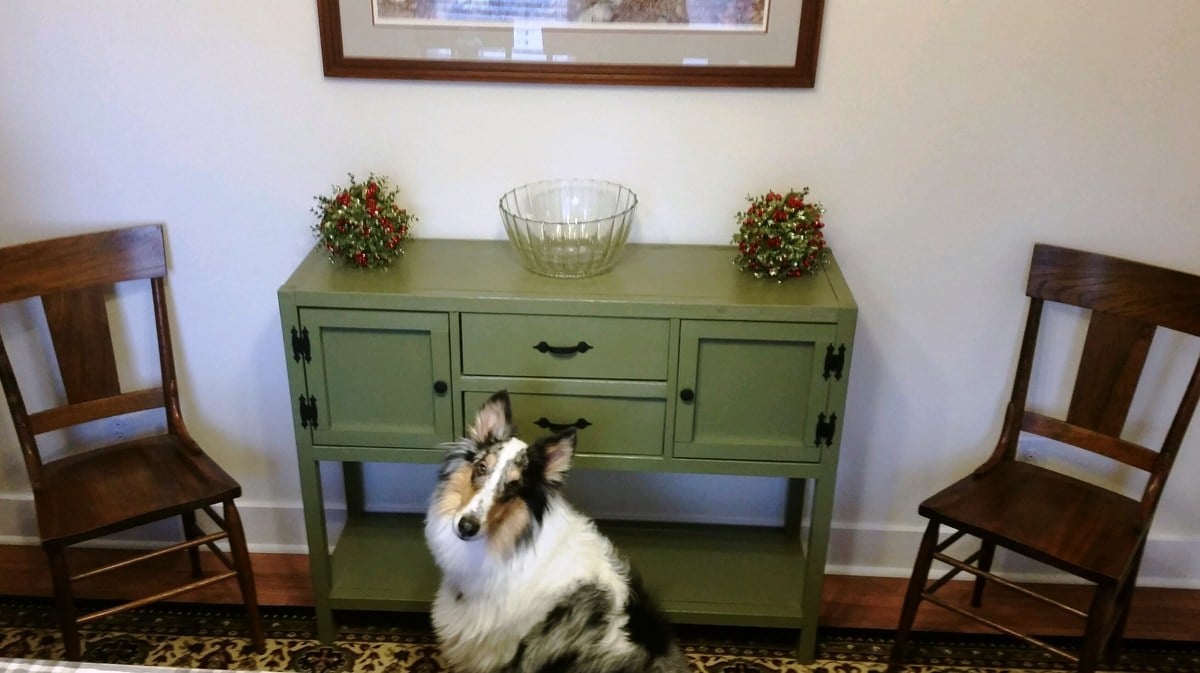
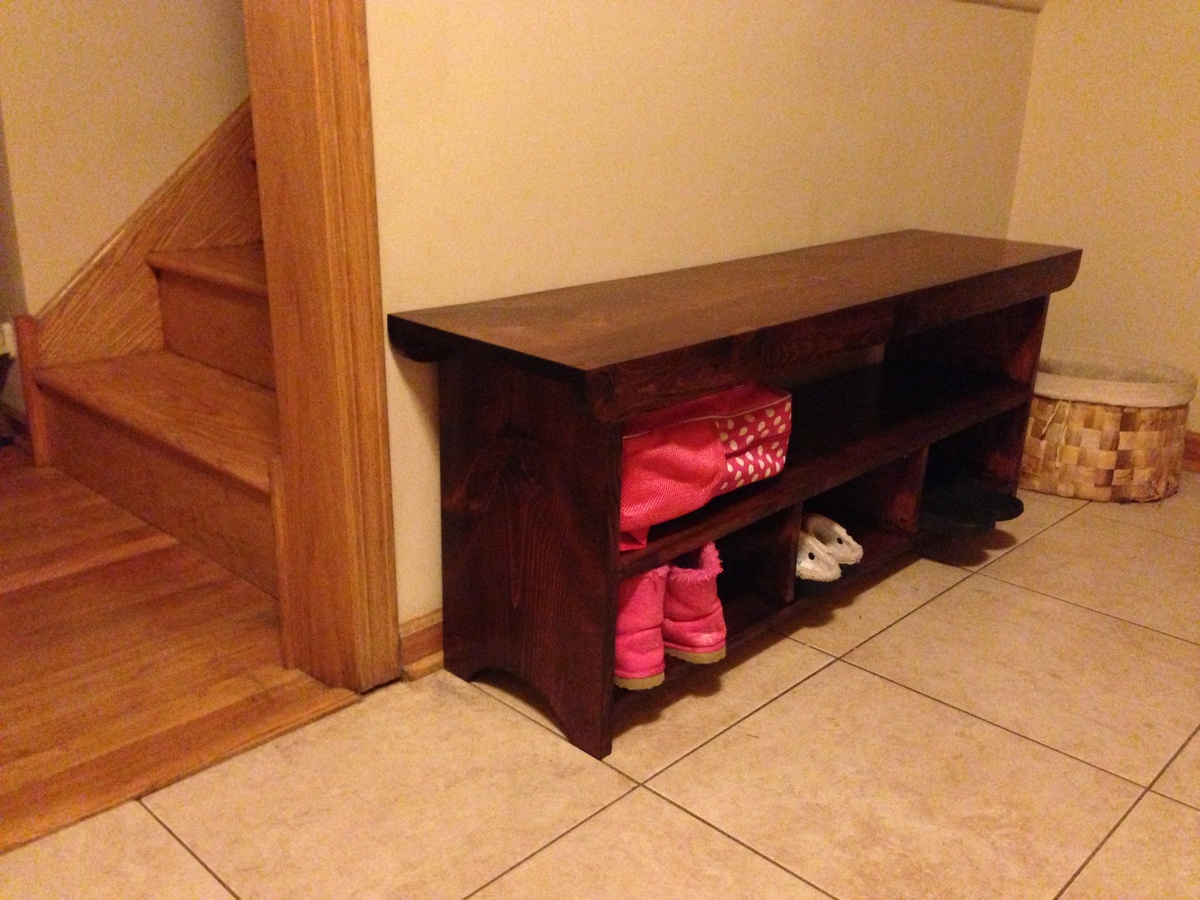
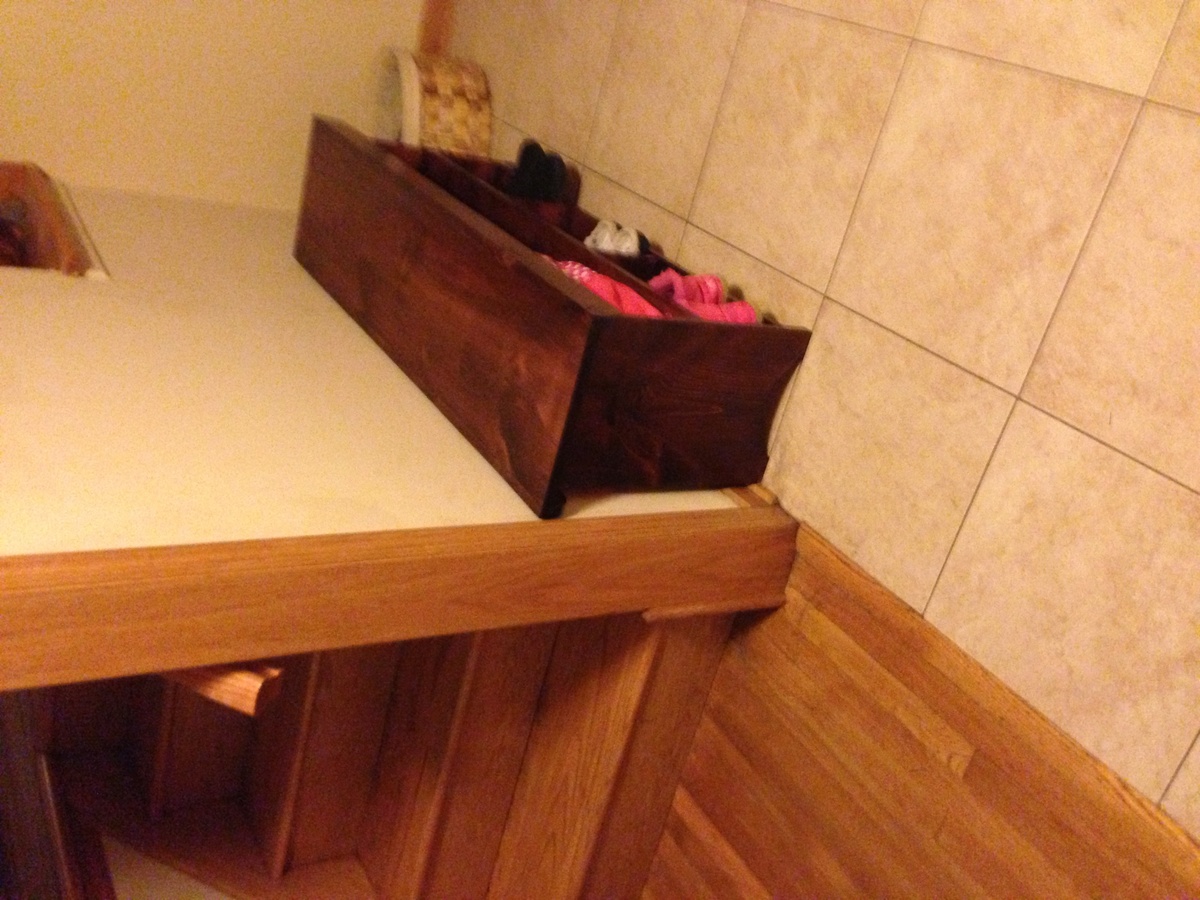
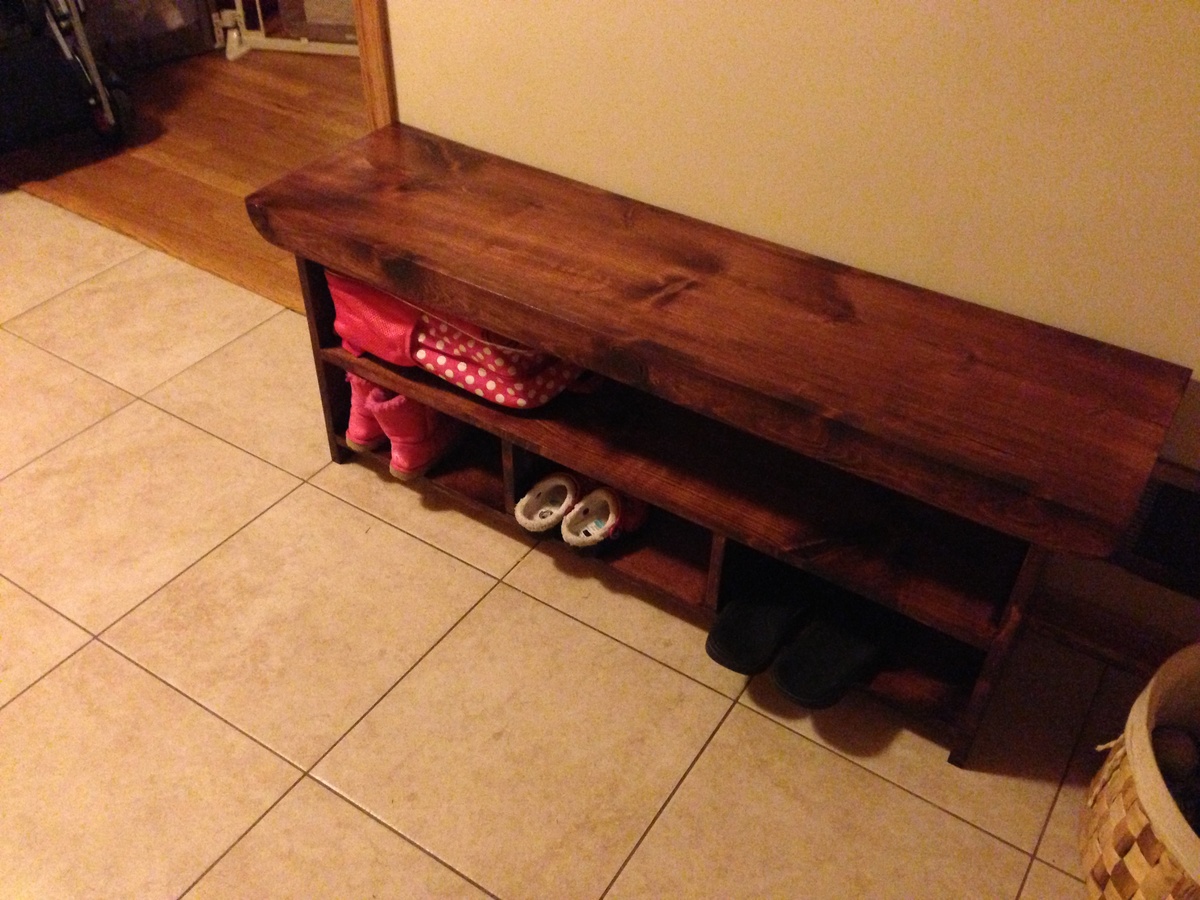
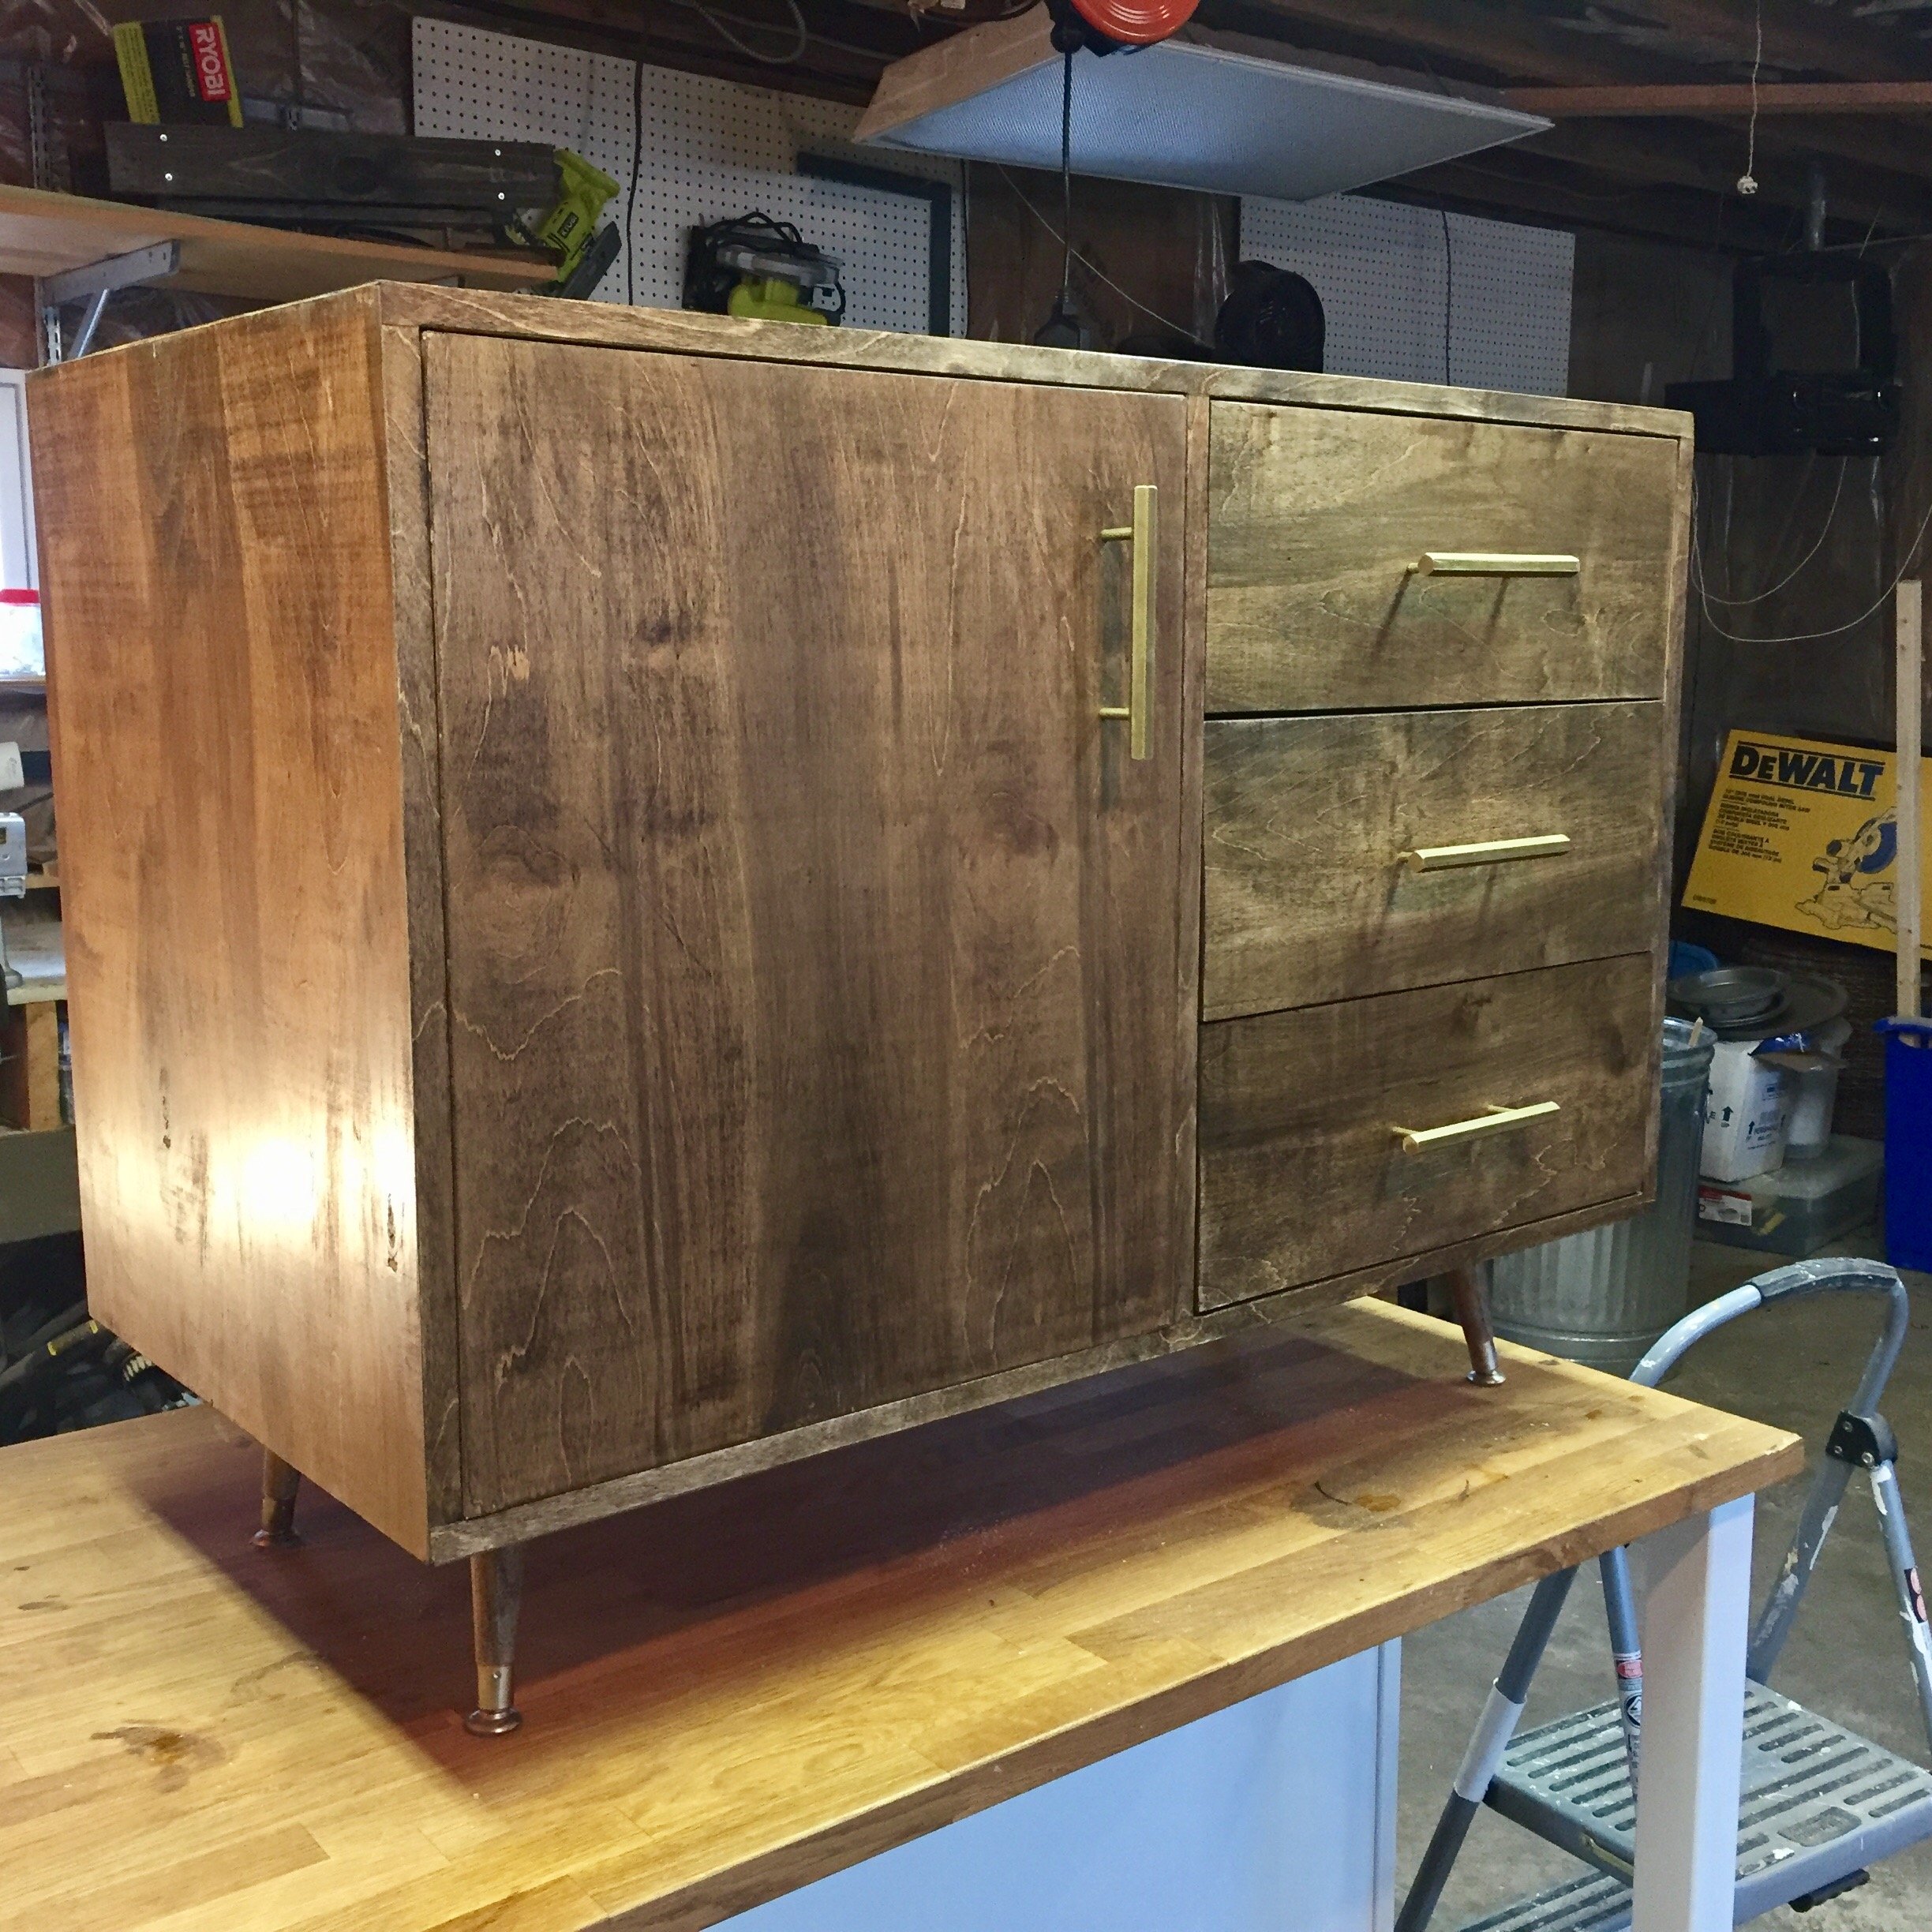
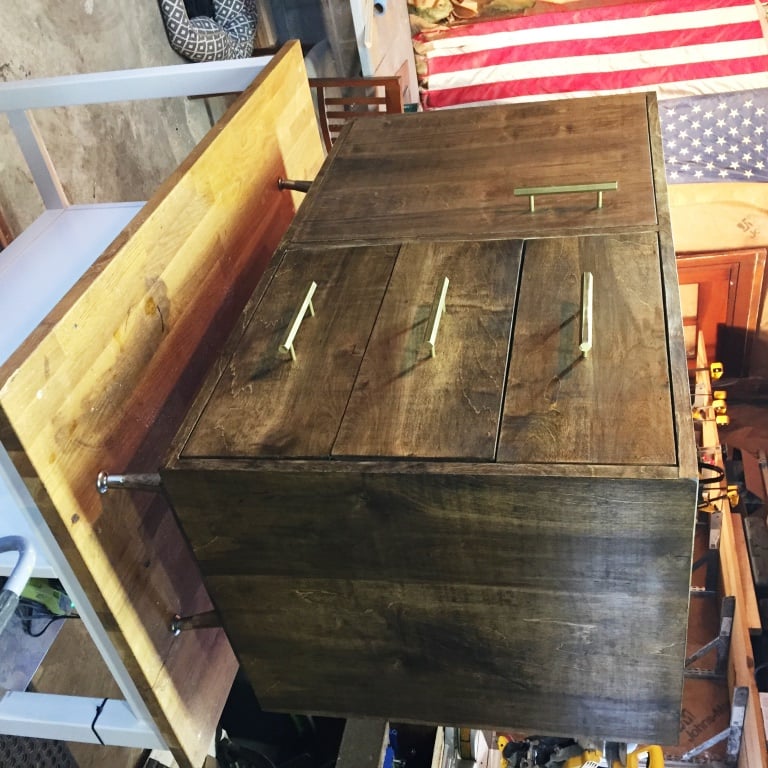
buffet/sideboard with expanded metal

Submitted by lworthy on Tue, 02/21/2017 - 14:40

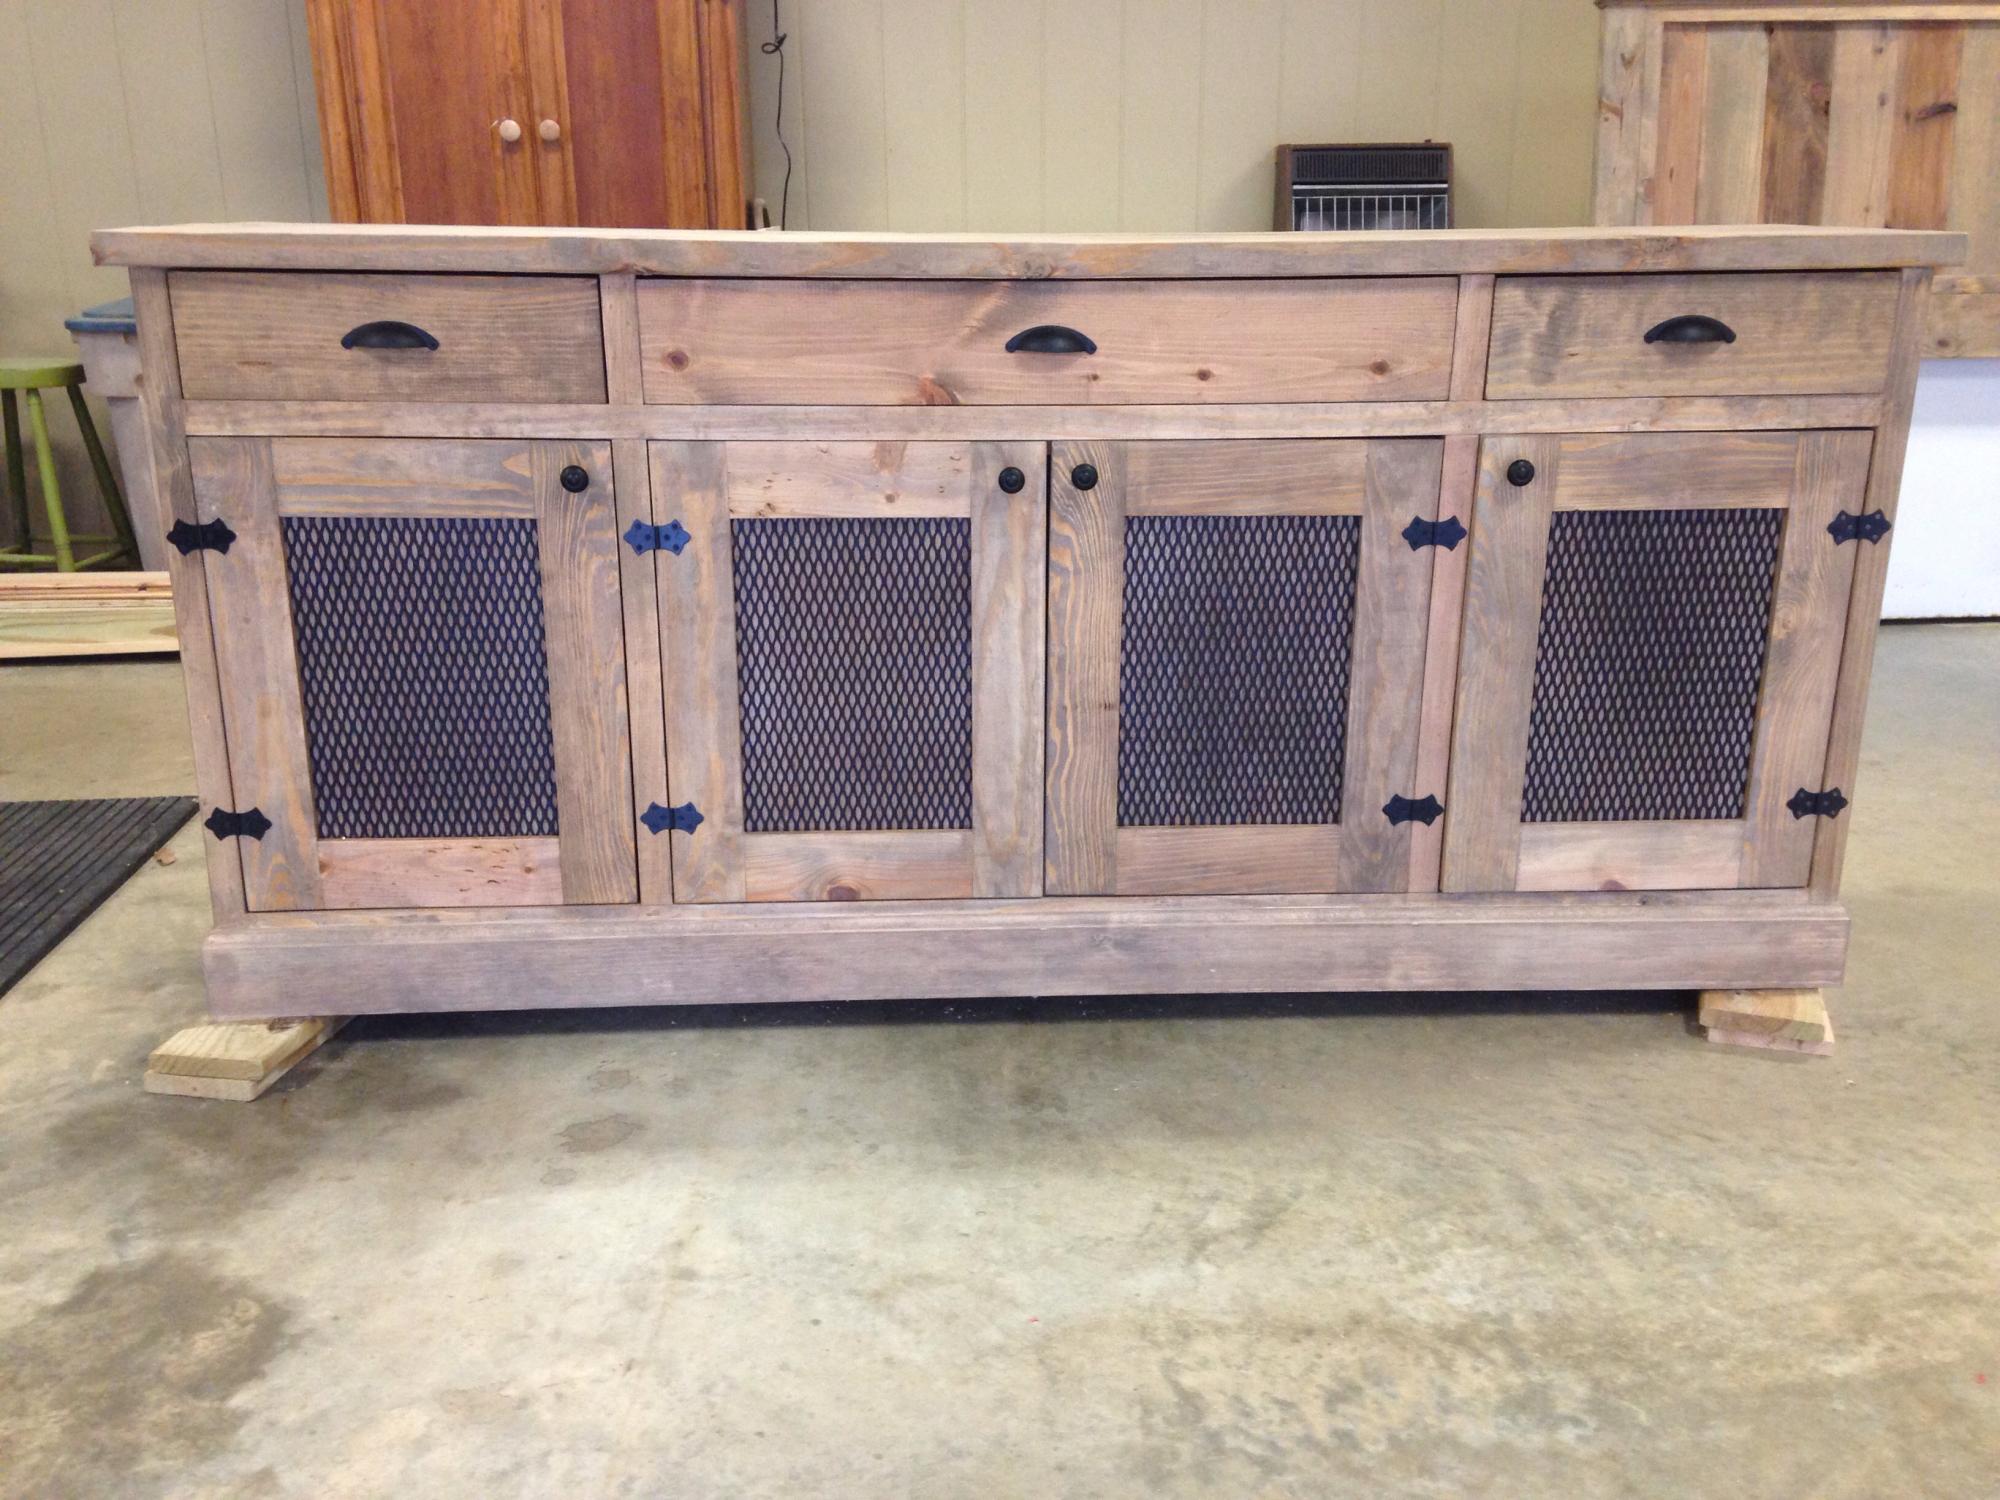
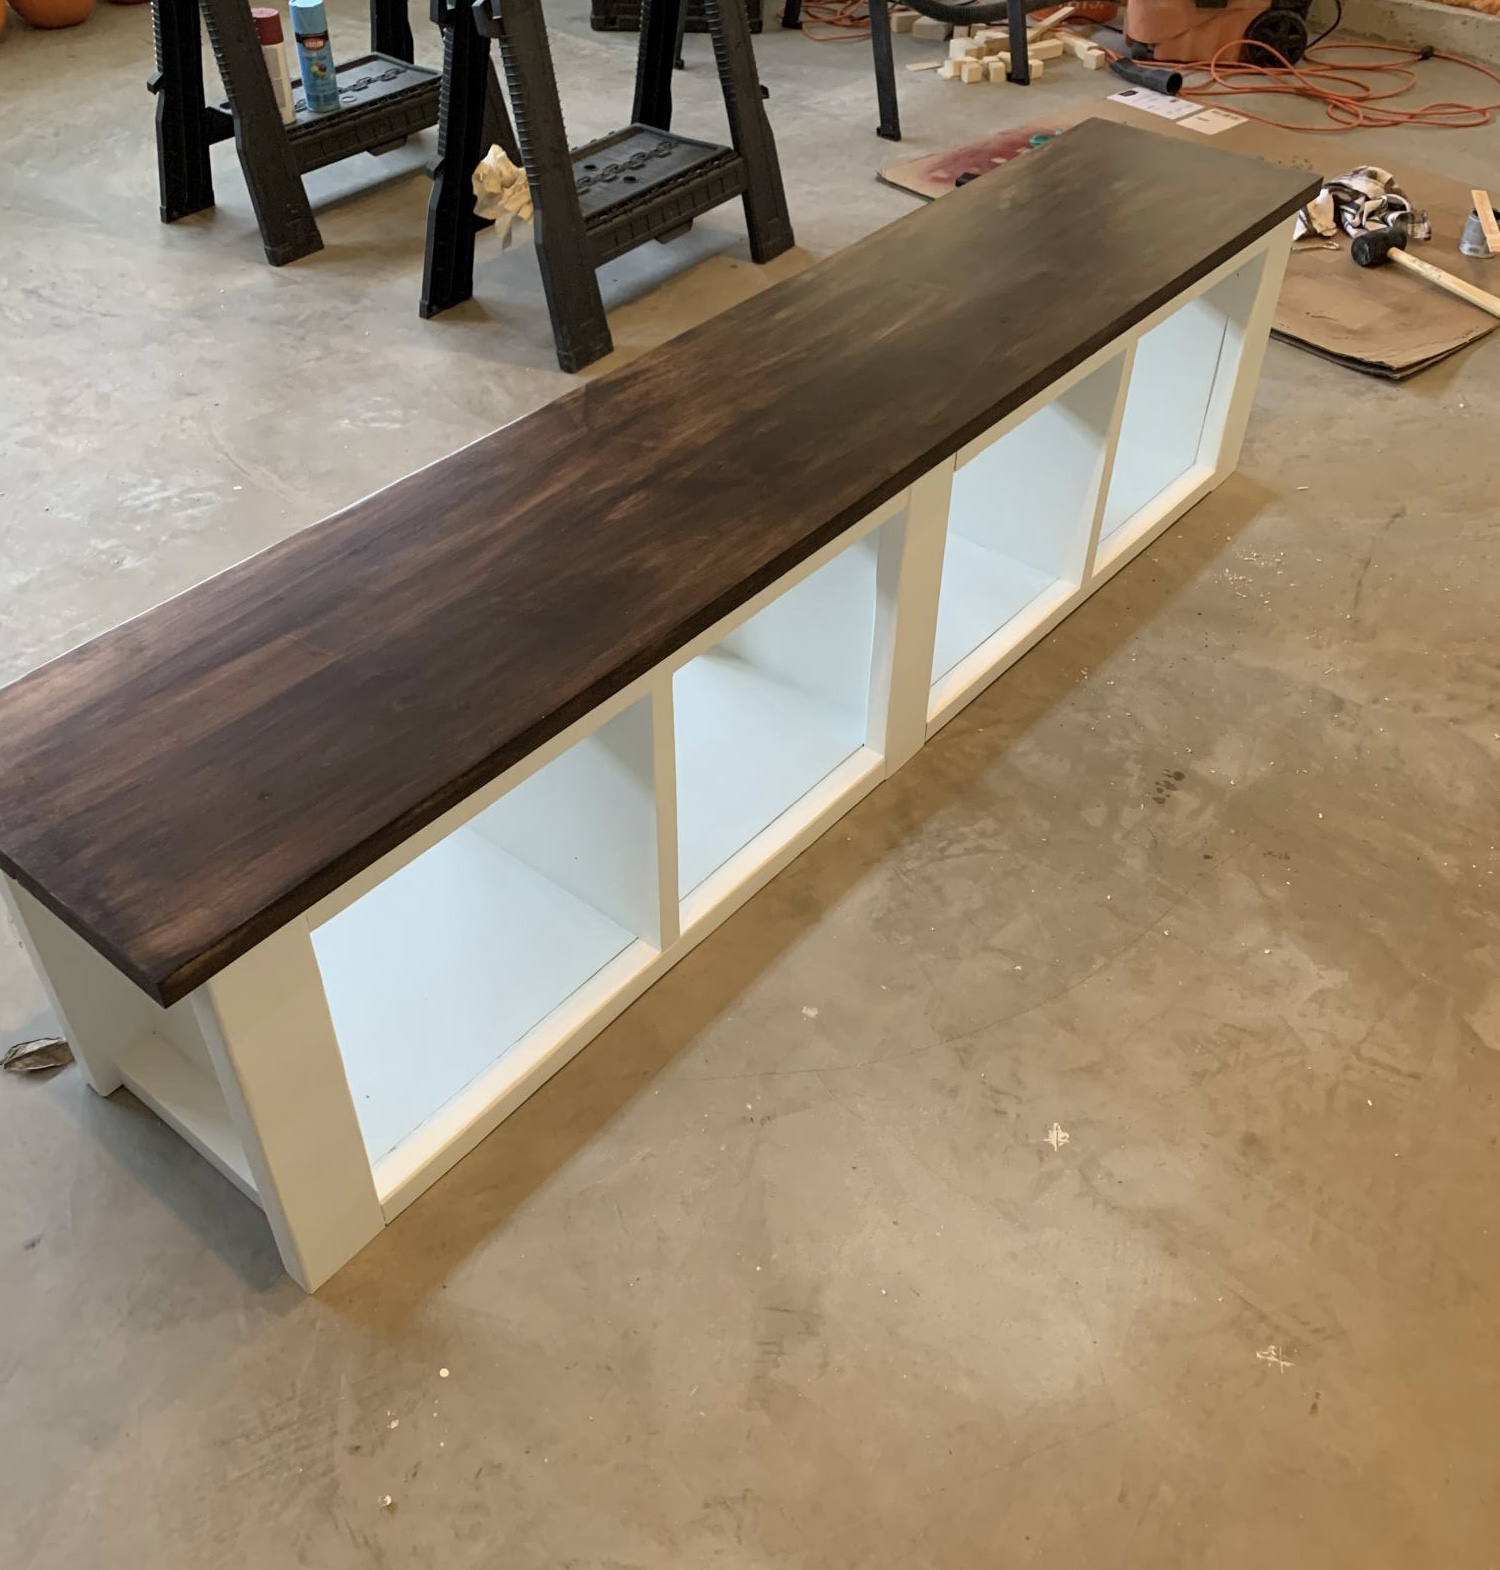
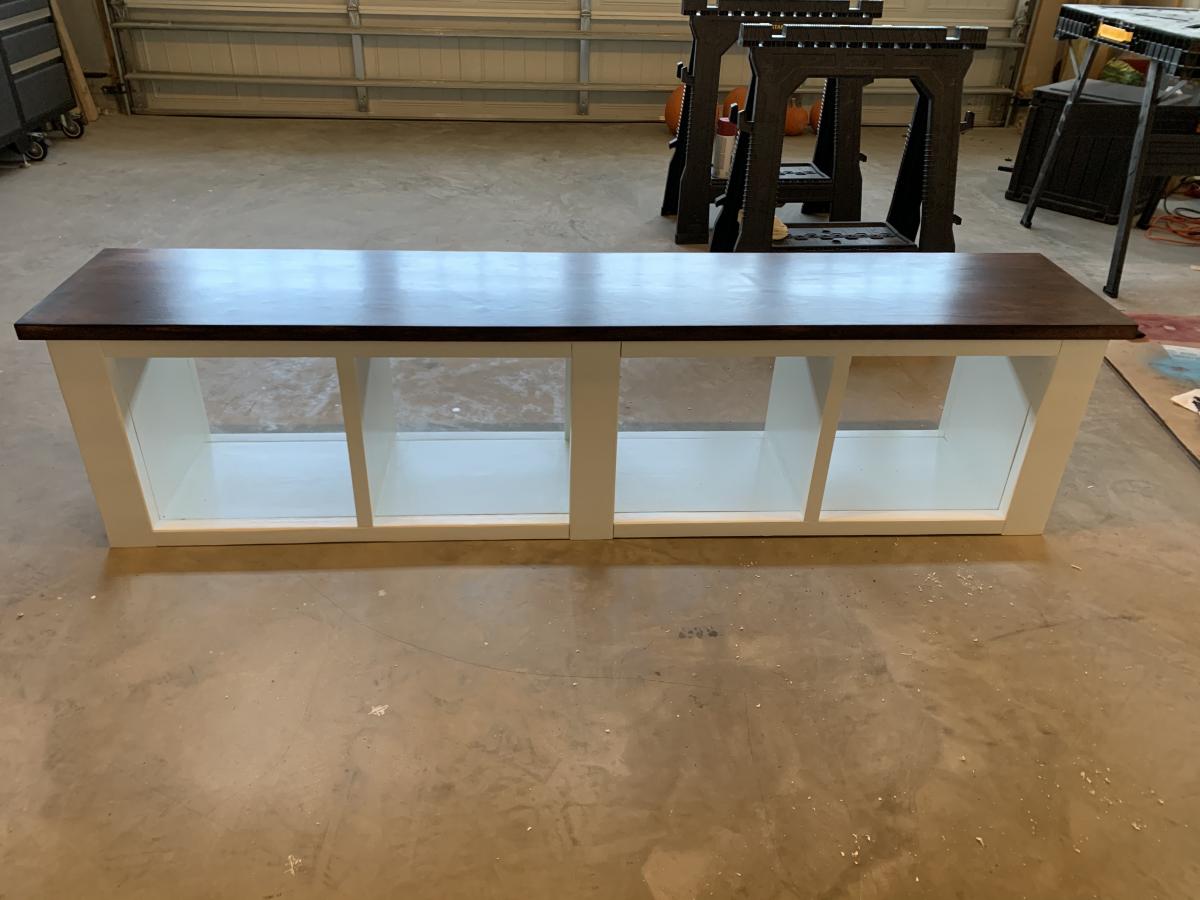
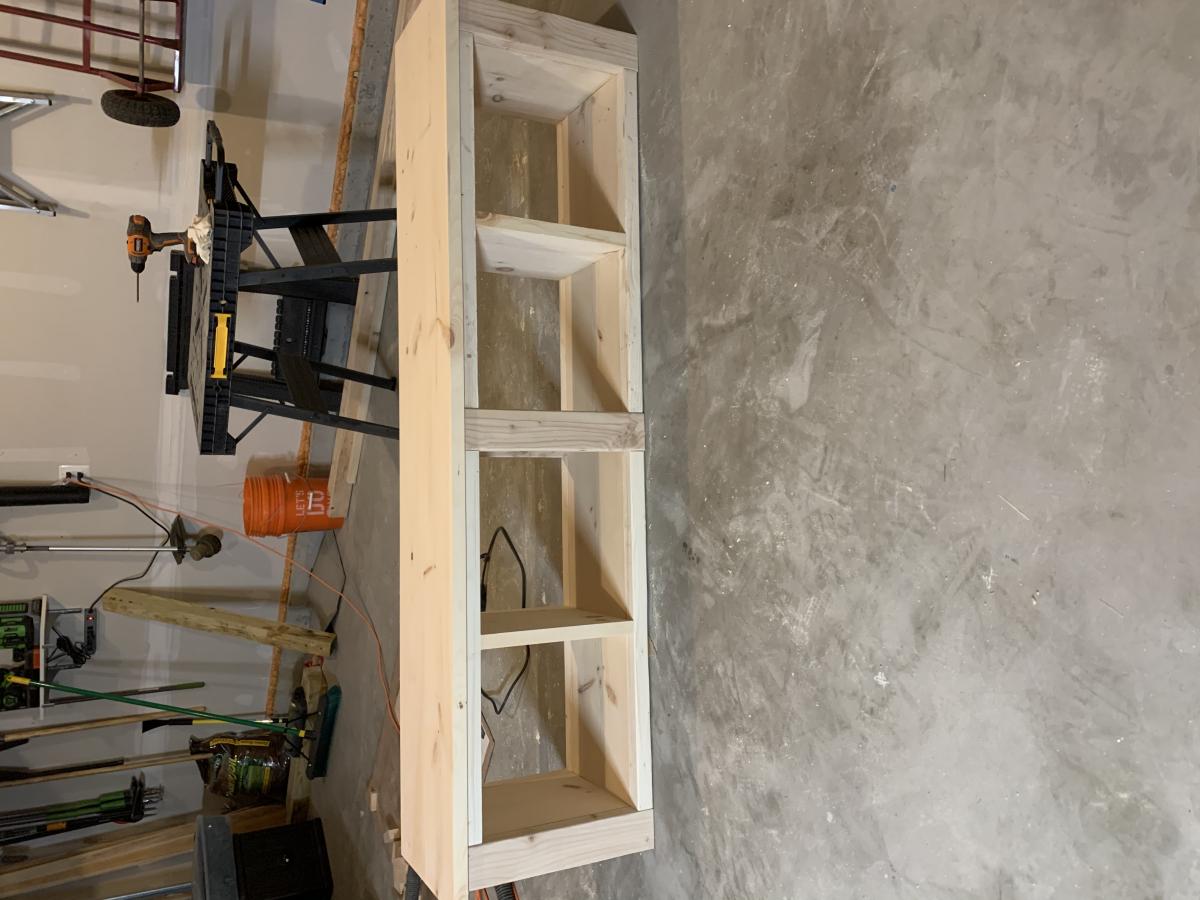
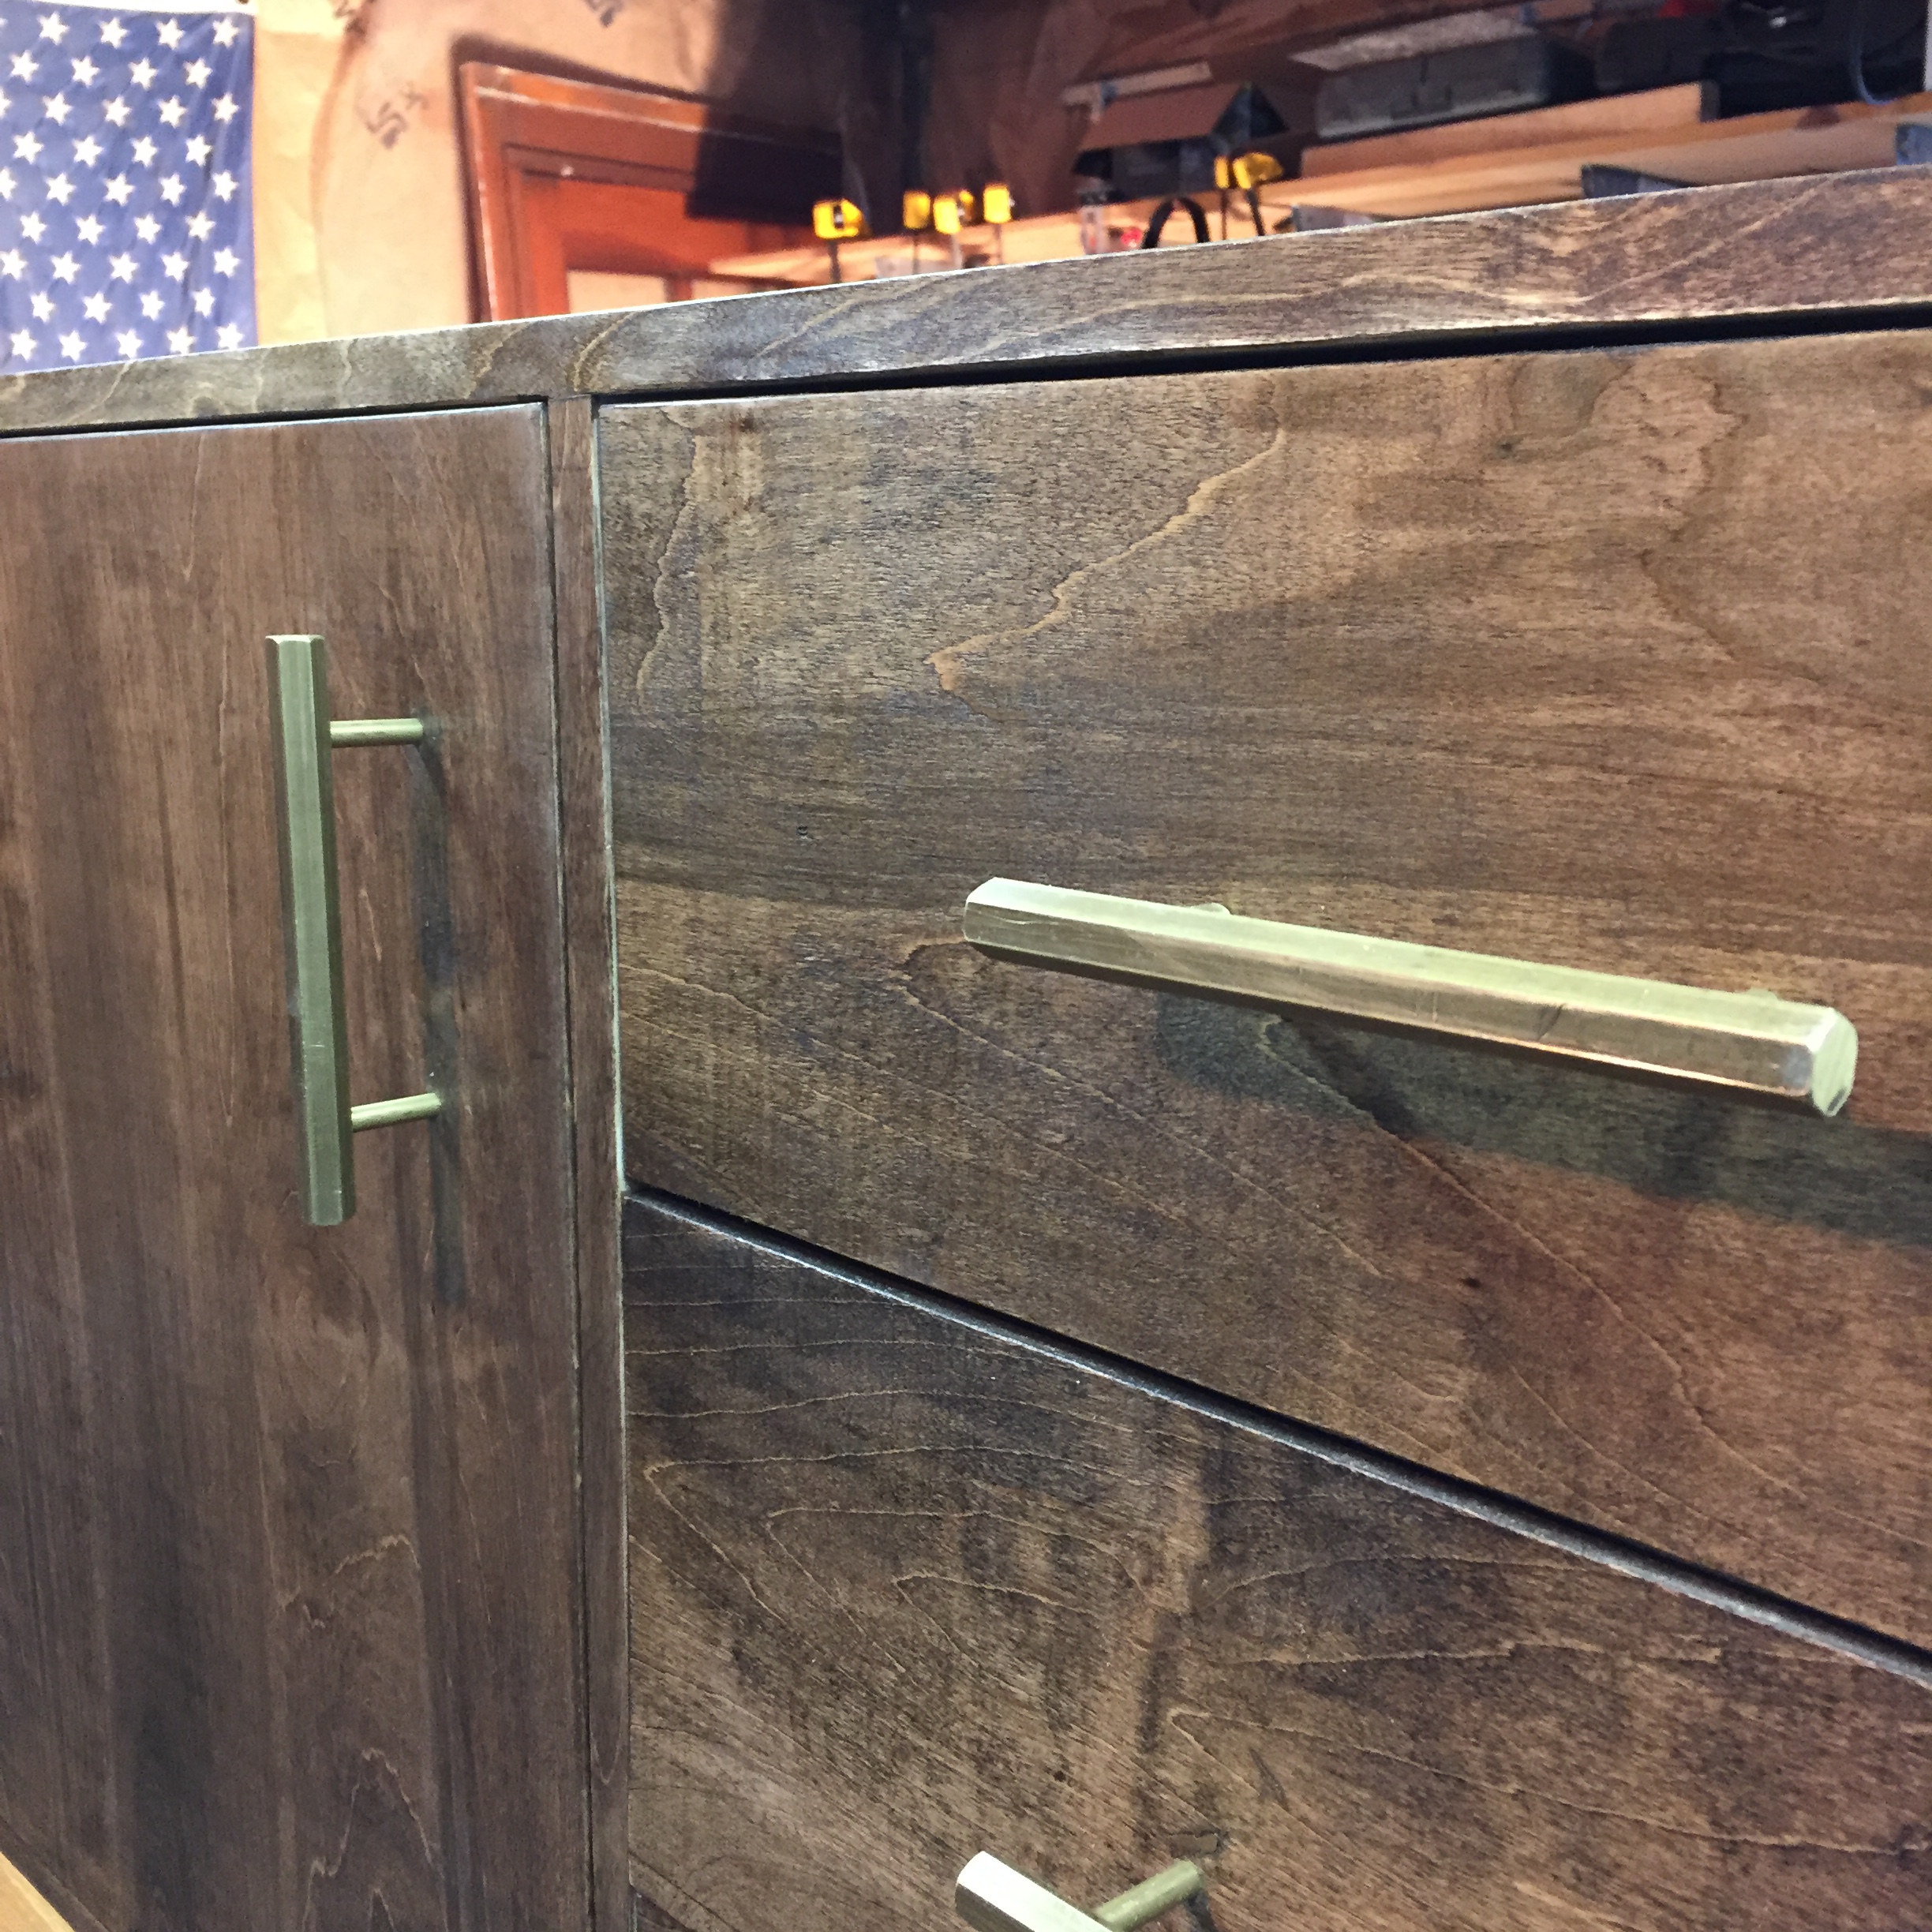
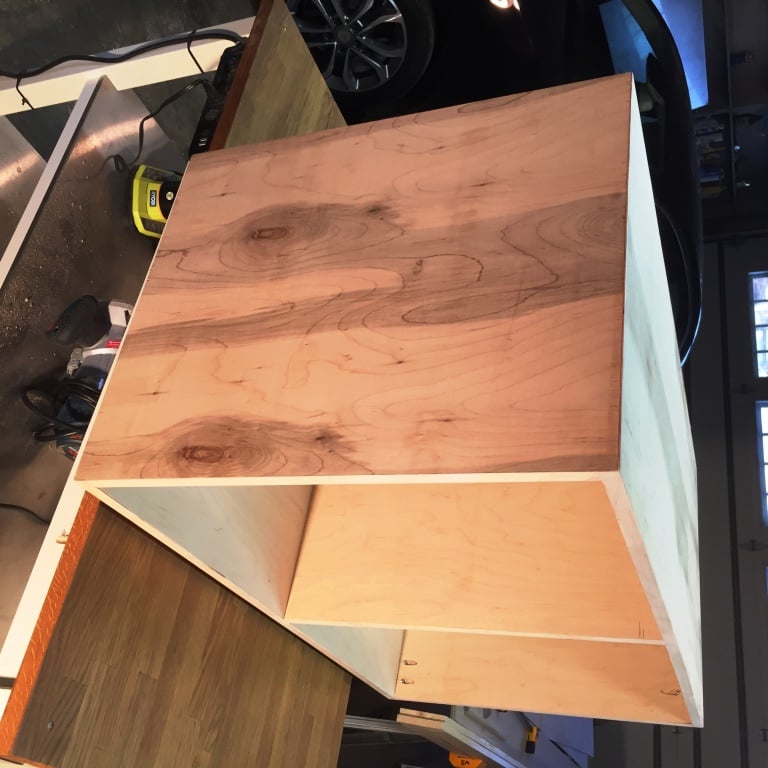
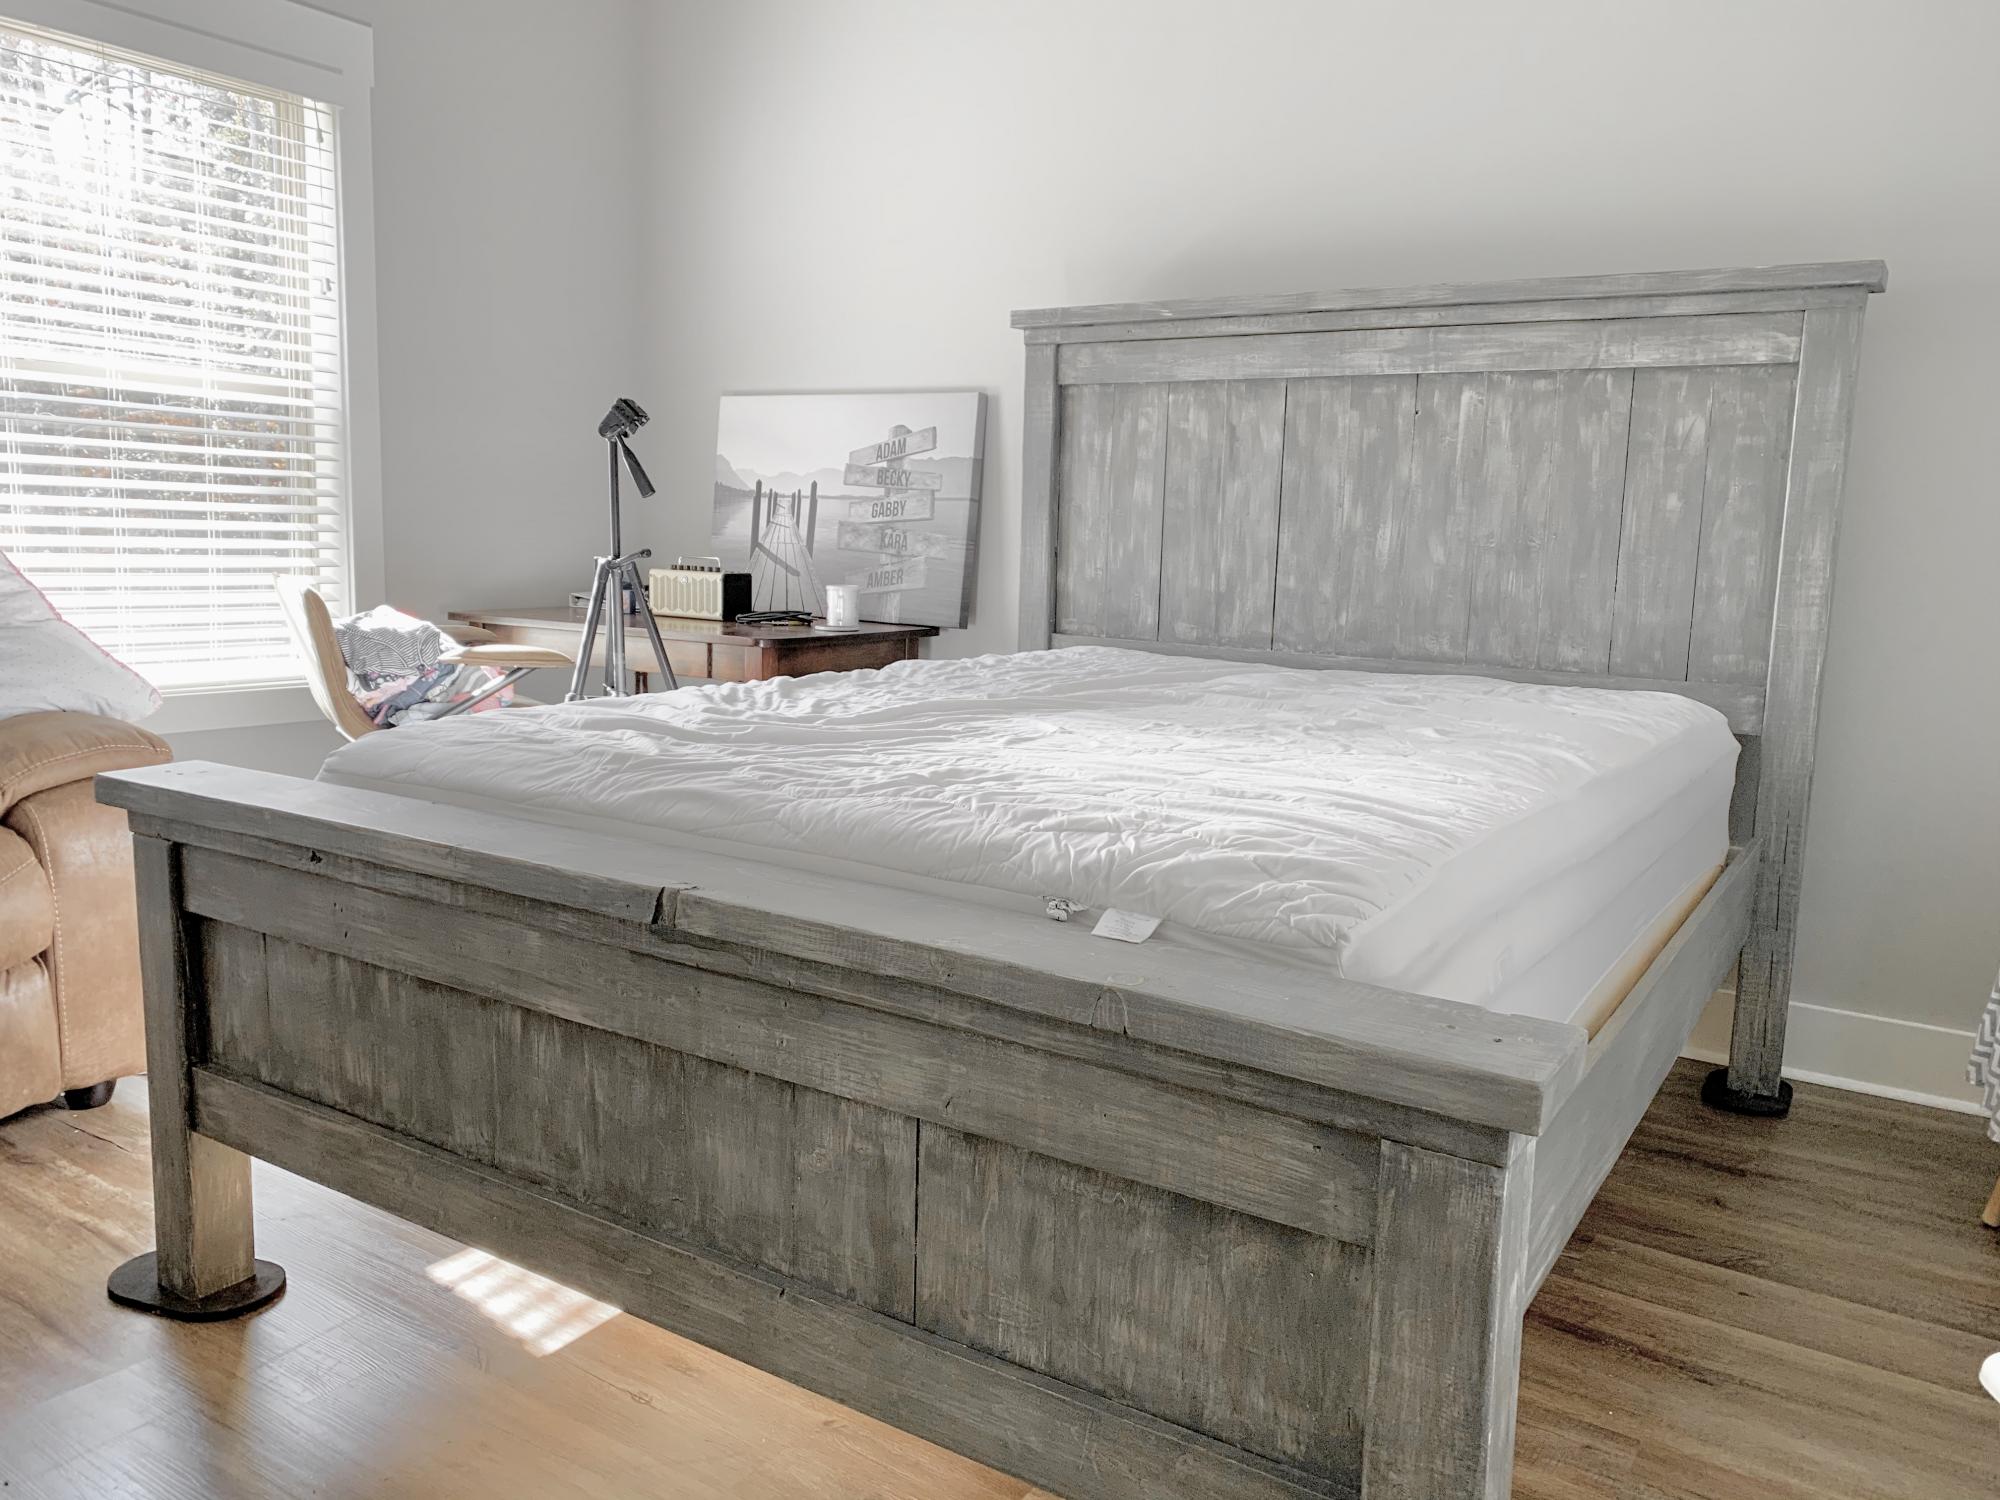
I really loved this plan of Ana's so I decided to build it for myself. I love the stain color on the one Mid Atlantic Rustic built and they were so kind to tell me the color and it turned out perfect! I will say if I ever built another I will make some adjustments with the doors and drawers and have them sitting on the outside of the facing. Those things were the devil for me!! I have only been building on my own for 6 months, so it was tricky for me. THE PIECE IS HUGE!!! I also added 2  2x4 supports under the bottom,

Happy Building

Built from Plan(s)
Estimated Time Investment
Weekend Project (10-20 Hours)
Finish Used
Minwax stain 2 step process
Recommended Skill Level
Intermediate

Comments

6 cube bookshelf

Submitted by lindsay on Thu, 01/24/2013 - 04:27

This was my first project that I've built and I feel really great about how it turned out!

Built from Plan(s)
Estimated Time Investment
Day Project (6-9 Hours)
Finish Used
White paint
Recommended Skill Level
Beginner

Comments

ACM

Thu, 01/24/2013 - 14:25

Great job! Your bookshelf looks solid and the color is crisp against the darker wall. Love the frames too!

Pedestals Modified

Submitted by cloerzel on Thu, 11/20/2014 - 05:34

Basically eliminated the bottom shelf to gain more space and built this as a "built-in". Fortunatley for us this room is the right size and we just screwed it into the wall studs.

Estimated Cost
Materials 37.00*
Paint 15.00
*I discovered that if you pick-out a piece of cabinet-grade plywood from Home Depot, and it has some flaws in it (peeling veneer), they will spray paint a purple stripe across it and you get it 70% off!!!
Since I was painting it anyways, that purple paint didn't matter. Thanks Home Depot!!!
Estimated Time Investment
Day Project (6-9 Hours)
Finish Used
Paint
Recommended Skill Level
Beginner

Comments

CSaintD

Thu, 11/20/2014 - 09:18

Thanks for the money saving tip on the plywood!

I have upper cabinets in my laundry room too and was wondering how to get a storage pedestal in there.  This is a great use of space.  Looks great too. Thanks!

Dimarc67

Tue, 03/24/2015 - 10:34

Did you also fasten ledger boards to the side walls for side support? Or is the rear ledger board and front legs enough to support the front corners?

Rainbow Poplar

Submitted by Anonymous (not verified) on Sat, 02/25/2017 - 05:07

My first woodworking project.  

The top is poplar and I had the local lumbar yard cut them to uniform thickness, planed and jointed.  That made a nice close connection when it came time to glue and screw. 

Also since it was not dimensional lumbar the boards are cut to actual size so mine is a few inches wider than the original plans. 

I needed to modify the plans in order to make the top removable so I fashioned 4 blocks and attached them to the insides of the apron, and used a spade bit to drill out a 7/8" hole.  Then attached 3/8" hanger bolts to the top and attached to the base with wingnuts and washers.  Worked like a charm!

I wanted to keep all the interesting variance in the top so it's just natural with Minwax Satin Poly.

Estimated Cost
$600
Estimated Time Investment
Week Long Project (20 Hours or More)
Finish Used
Minwax ebony stain with 2 coats poly for the base and all natural top with 3 coats poly.
Recommended Skill Level
Beginner

Entryway bench

Submitted by Anonymous (not verified) on Fri, 12/11/2020 - 06:58

Thanks Ana for all you do to help us find our inner wood worker. I took one of your designs and modified it slightly to build this entryway bench for my daughter as a Christmas gift and hopefully future keepsake for the grandkids.

Estimated Cost
>$100
Estimated Time Investment
Weekend Project (10-20 Hours)
Finish Used
White paint and Espresso stain.
Recommended Skill Level
Beginner

American Girl Doll Horse Stable

Submitted by Dantana1 on Sat, 01/26/2013 - 08:40

So.....my Daughter has this American Girl doll, and she loves it. Then she saves up $75 to buy this HUGE Horse...why? I have no idea, but she loves it.

At Christmas time, Ana White was so kind to post diagrams for building a Horse Stable and with a few minor changes (shingled roof, golden hooks, some stain) I built it with my new Kreg jig (that was my Christmas gift from Santa).

Hope you enjoy the pictures . . .

Ana - Thank you, I enjoy your site and you certainly will be hearing from me in the near future.

Thanks for all you do :-)

Estimated Cost
$40.00
Estimated Time Investment
Weekend Project (10-20 Hours)
Finish Used
Dark Chocolate Brown stain, shims for roof.
Recommended Skill Level
Beginner

Comments

dananryan

Sat, 01/26/2013 - 09:59

I love your modifications. What a great idea to use shims for the roof! I might have to copy this. Great job.

Ana White

Sat, 01/26/2013 - 10:15

Oh I love this!!!! I can't tell you how giddy up happy I am to see the horse stable! Love the roof and the gold hardware too - so cute! Thanks for sharing, truly made my day!

linseylouwho

Sat, 11/23/2013 - 19:18

Oh, I'm in love with the shingles!
My daughter is getting her third AG doll, Saige, for Christmas and my sisters are getting her the horse too. Well, you can't have a horse without a stable too, right?
I've got all the supplies to build the stable and now all I have left to figure out is how you attached the shims to the plywood for the roof. Any suggestions would be fantastic and much appreciated!

The Perfect Sideboard for Small Dining Room

Submitted by haydaze on Sun, 11/23/2014 - 13:10

I've been looking at all of these plans for awhile and finally decided to take the plunge. My son and I built the little Rhyan Console Table to use as a sideboard in my small-ish dining room. There's an 84" farm table, 8 chairs, and 2 corner cabinets. I hate to have to squeeze by people who are seated at the table, so I was looking for a narrow unit to use as a sideboard. We made the legs 4" taller than the plans called for to make it a better height for use as a sideboard. With Thanksgiving in just a few days, we put the hardware on today so it will be ready to put into service. We are already looking forward to our next project. 

Built from Plan(s)
Estimated Cost
$80
Estimated Time Investment
Afternoon Project (3-6 Hours)
Finish Used
Valspar Signature Eddie Bauer Home Craftsman Bungalow Bayleaf
Recommended Skill Level
Intermediate

Comments

My first Build

Submitted by Anonymous (not verified) on Mon, 12/14/2020 - 13:48

My first build. Toddler chair. Had to cut the legs from the original plans since my 2 year old nephew’s legs dangled and it was hard for him to climb on to. Loved it. Thanks Ana for the plans.

Garage Storage Tote Shelves

Submitted by vendo on Tue, 01/21/2025 - 14:03

I prepainted all of my 2x4's and then began cutting according to the formula cut list. Once it was all assembled, I did a light sanding and then touched it up with paint. This is a very easy build and I'm excited to get my basement organized! I am going to build one more for a total of 24 totes, I will update the brag post once both are done and set up. 


Seasonal And Holiday

Kid's Country Bench - stretched

Submitted by Bk32 on Sun, 01/27/2013 - 18:17

We needed a bench to hold shoes and bags on the foyer, and this plan fit the bill. I stretched the bench one foot so 3 kids could sit on it and to add one more cubby. I used pocket holes everywhere I could, so I had to modify the assembly order. We're excited to start using our new bench!

Built from Plan(s)
Estimated Time Investment
Weekend Project (10-20 Hours)
Finish Used
I started with minwax pretreatment and used minwax Red Mahogany stain. I finished with varathane tube water-based poly, since it didn't require sanding between coats.
Recommended Skill Level
Beginner

outdoor end table

Submitted by DanGraves on Wed, 11/26/2014 - 09:40

I made this using the kreg jig and cedar. 12x12 tile.

Estimated Cost
$45.00
Estimated Time Investment
Day Project (6-9 Hours)
Finish Used
Clear coat minwax
Recommended Skill Level
Beginner

Midcentury TV credenza

Since we needed some space to hide all of our not so midcentury technology gadgets I decided to try myself on this beautiful credenza.

Build was fairly straight forward. I cleaned  the looks up a little with using my router and cutting some dados for the divider and rabbets for the box itself. Worked out really well. Also I found some really nice hardware online but wasn’t willing to pay 20$ a piece for them so I made them myself. I think this brings the build to another level. For a finish I used dark walnut stain and 5 coats of arm-r-seal. Love that stuff…..super easy to use! Also I finished the finish with a coat of paste wax! Makes it super slick and gives the grain a little more depth!

Estimated Cost
100$
Estimated Time Investment
Weekend Project (10-20 Hours)
Finish Used
Black walnut stain
5 coats of arm-r-seal
1 coat of paste wax
Recommended Skill Level
Intermediate

Kitchen Island

Submitted by Kaunti on Sun, 12/20/2020 - 08:20

Built with Red oak had to glue to get 2 by 4, then minwax stain with red mahogany, top is maple center with mahogany and walnut strips around.

Built from Plan(s)
Estimated Cost
$500
Estimated Time Investment
Week Long Project (20 Hours or More)
Finish Used
Mimwax red mahogany and high gloss poly
Recommended Skill Level
Intermediate

Comments

Modern Farmhouse Furniture Set

Submitted by Anonymous (not verified) on Sat, 02/01/2025 - 09:04

Really enjoy your site and the inspiration it gives - thank you Ana.

Love the modern farmhouse take on the console and coffee tables. I mitred the table-top corner joints, hand planed the tops for a more 'contemporary' feel on this one (but love the rustic look too), and used pocket holes for the table top joints and extra stability in the legs. I finished these in Warm Graphite and beeswaxed them, all made from FSC pine, and will be moving on to 100% reclaimed pine for the next iteration (which is what I normally build with).

I make my pieces in the UK, where we can't get close to your timber prices unfortunately! Thanks again for the inspiration.

Seasonal And Holiday

Wood Tilt Out Trash Can

Submitted by woodknack on Tue, 01/29/2013 - 08:16

I was having trouble with my dogs getting into the trash. So I did a search for wooden trash cans and came up on Anna's site! That was just what I was looking for. The door was a little tricky. But now that I have done it I think the next one will go a lot easier!

Estimated Cost
$40.00 to build. I had poly already on hand.
Estimated Time Investment
Weekend Project (10-20 Hours)
Finish Used
I used minwax indoor/outdoor Helmsman spar urethane clear gloss. I had this left over from some ice traps I made.
Recommended Skill Level
Beginner

Comments

Farm house wall table

Submitted by Jdiazm73 on Sat, 11/29/2014 - 07:58

Farm table made fro 2x4 and 4x4 (can't find the original plan). The mirrow frame was also my first frame project. Thanks for the great plans!

Estimated Cost
$50
Estimated Time Investment
Afternoon Project (3-6 Hours)
Finish Used
Minwax dark walnut stain, clear mate finish, plus a coat of wax.
Recommended Skill Level
Beginner

Comments

blahbethany

Wed, 12/03/2014 - 11:58

Wow, I love it! I wish you still had the plans because I'm looking to build something almost exactly like this, just a tad longer!

Hello Kitty adirondack chair

Submitted by Frank Diaz on Sat, 03/04/2017 - 11:28

Built this using Anna's small chair plan and made some mods to make it appear more character like.

Estimated Time Investment
Day Project (6-9 Hours)
Finish Used
acrylic paint
Recommended Skill Level
Intermediate

Farmhouse Bed

Submitted by Anonymous (not verified) on Wed, 12/23/2020 - 11:24

Did the farmhouse bed and modified it just a bit to create 12” of space between the floor and bed to give us a bit of storage underneath.

Estimated Cost
$20”
Estimated Time Investment
Weekend Project (10-20 Hours)
Finish Used
2 coats Grey water based semi solid stain, white dry brush, 2 more coats of water based grey to blend the white in. Finished with 2 coats polycrylic matte water based.
Recommended Skill Level
Beginner

Comments

Email Me
Free Plans

Get new plans sent right to your inbox for free!

    We won't send you spam. Unsubscribe at any time.