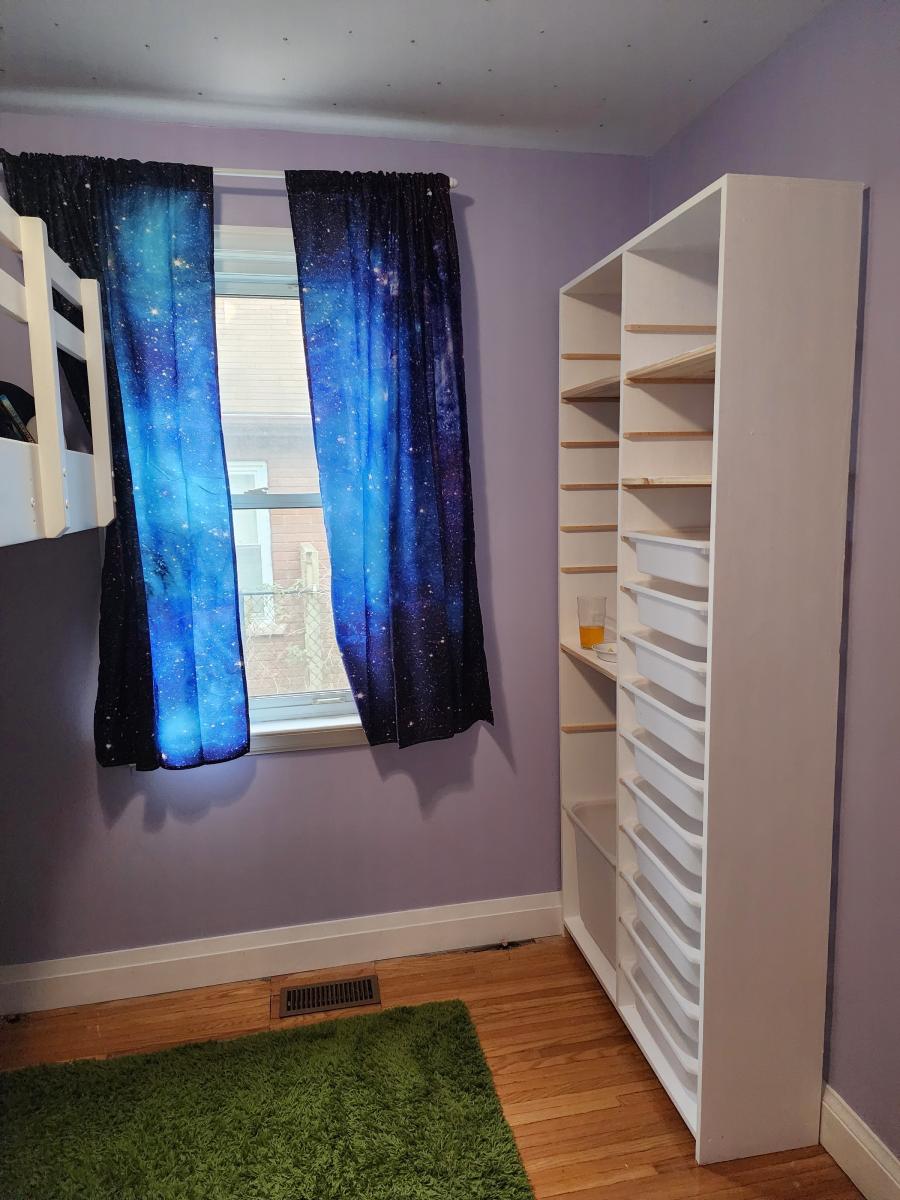
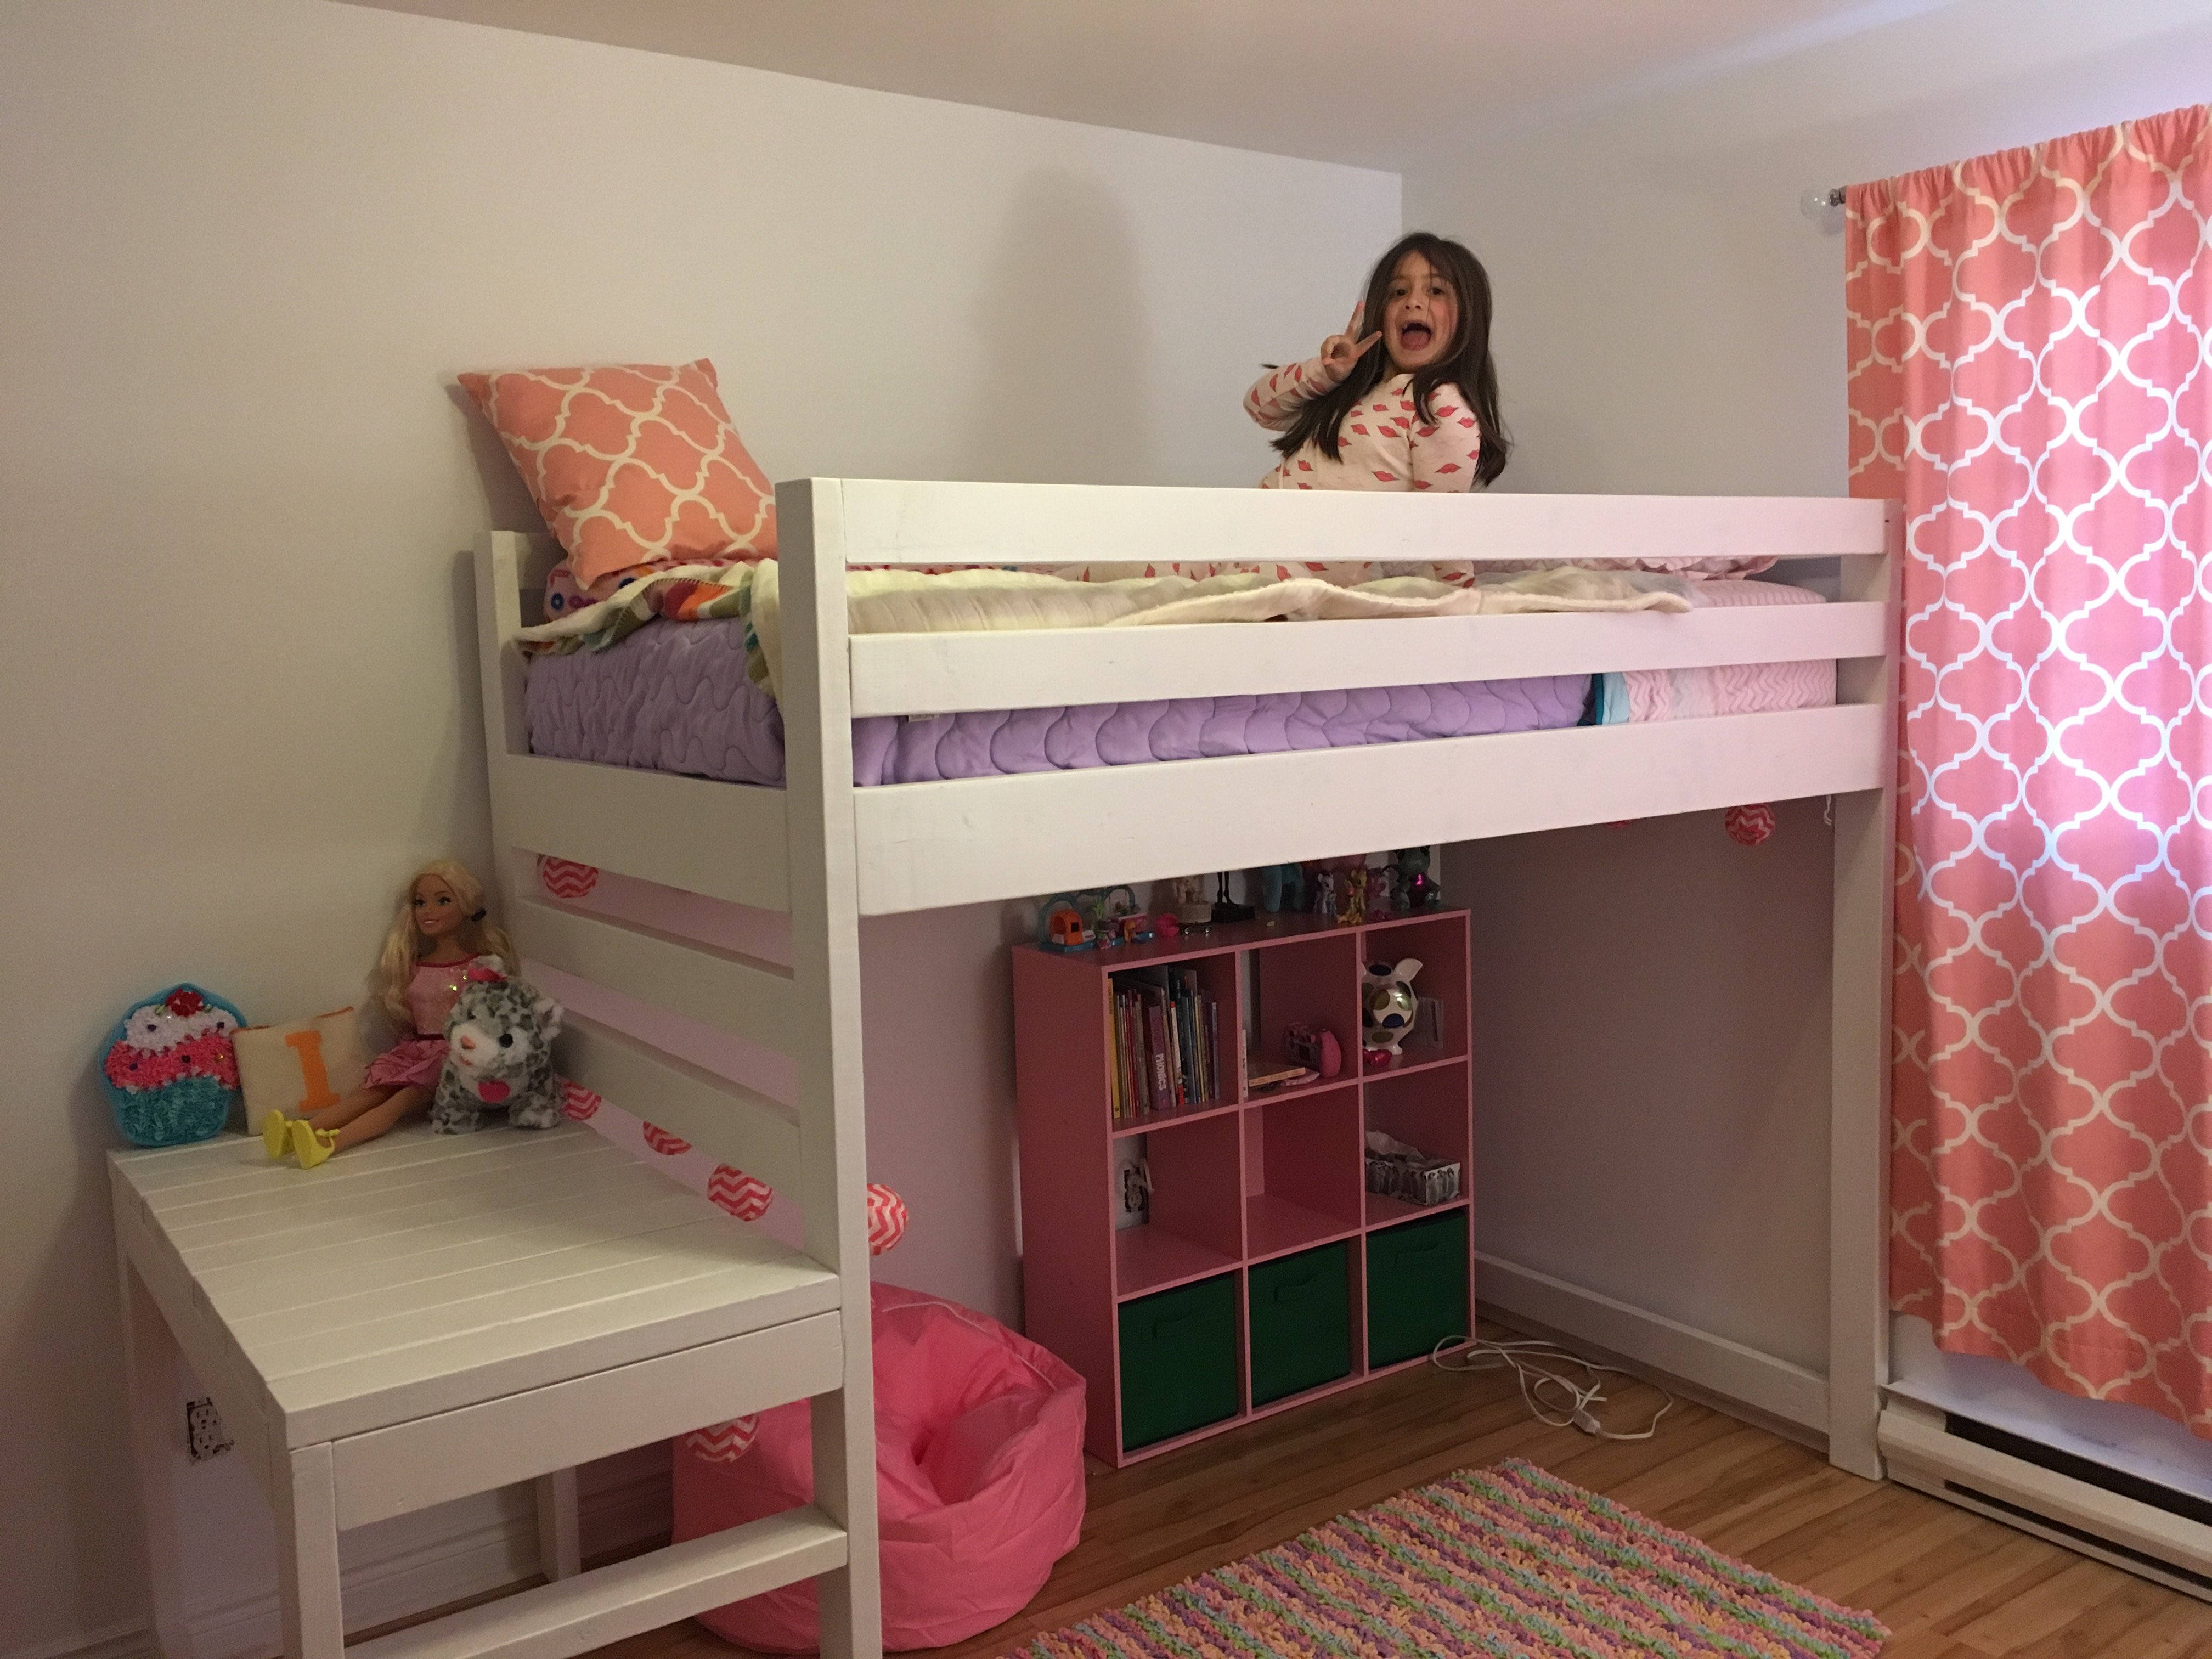
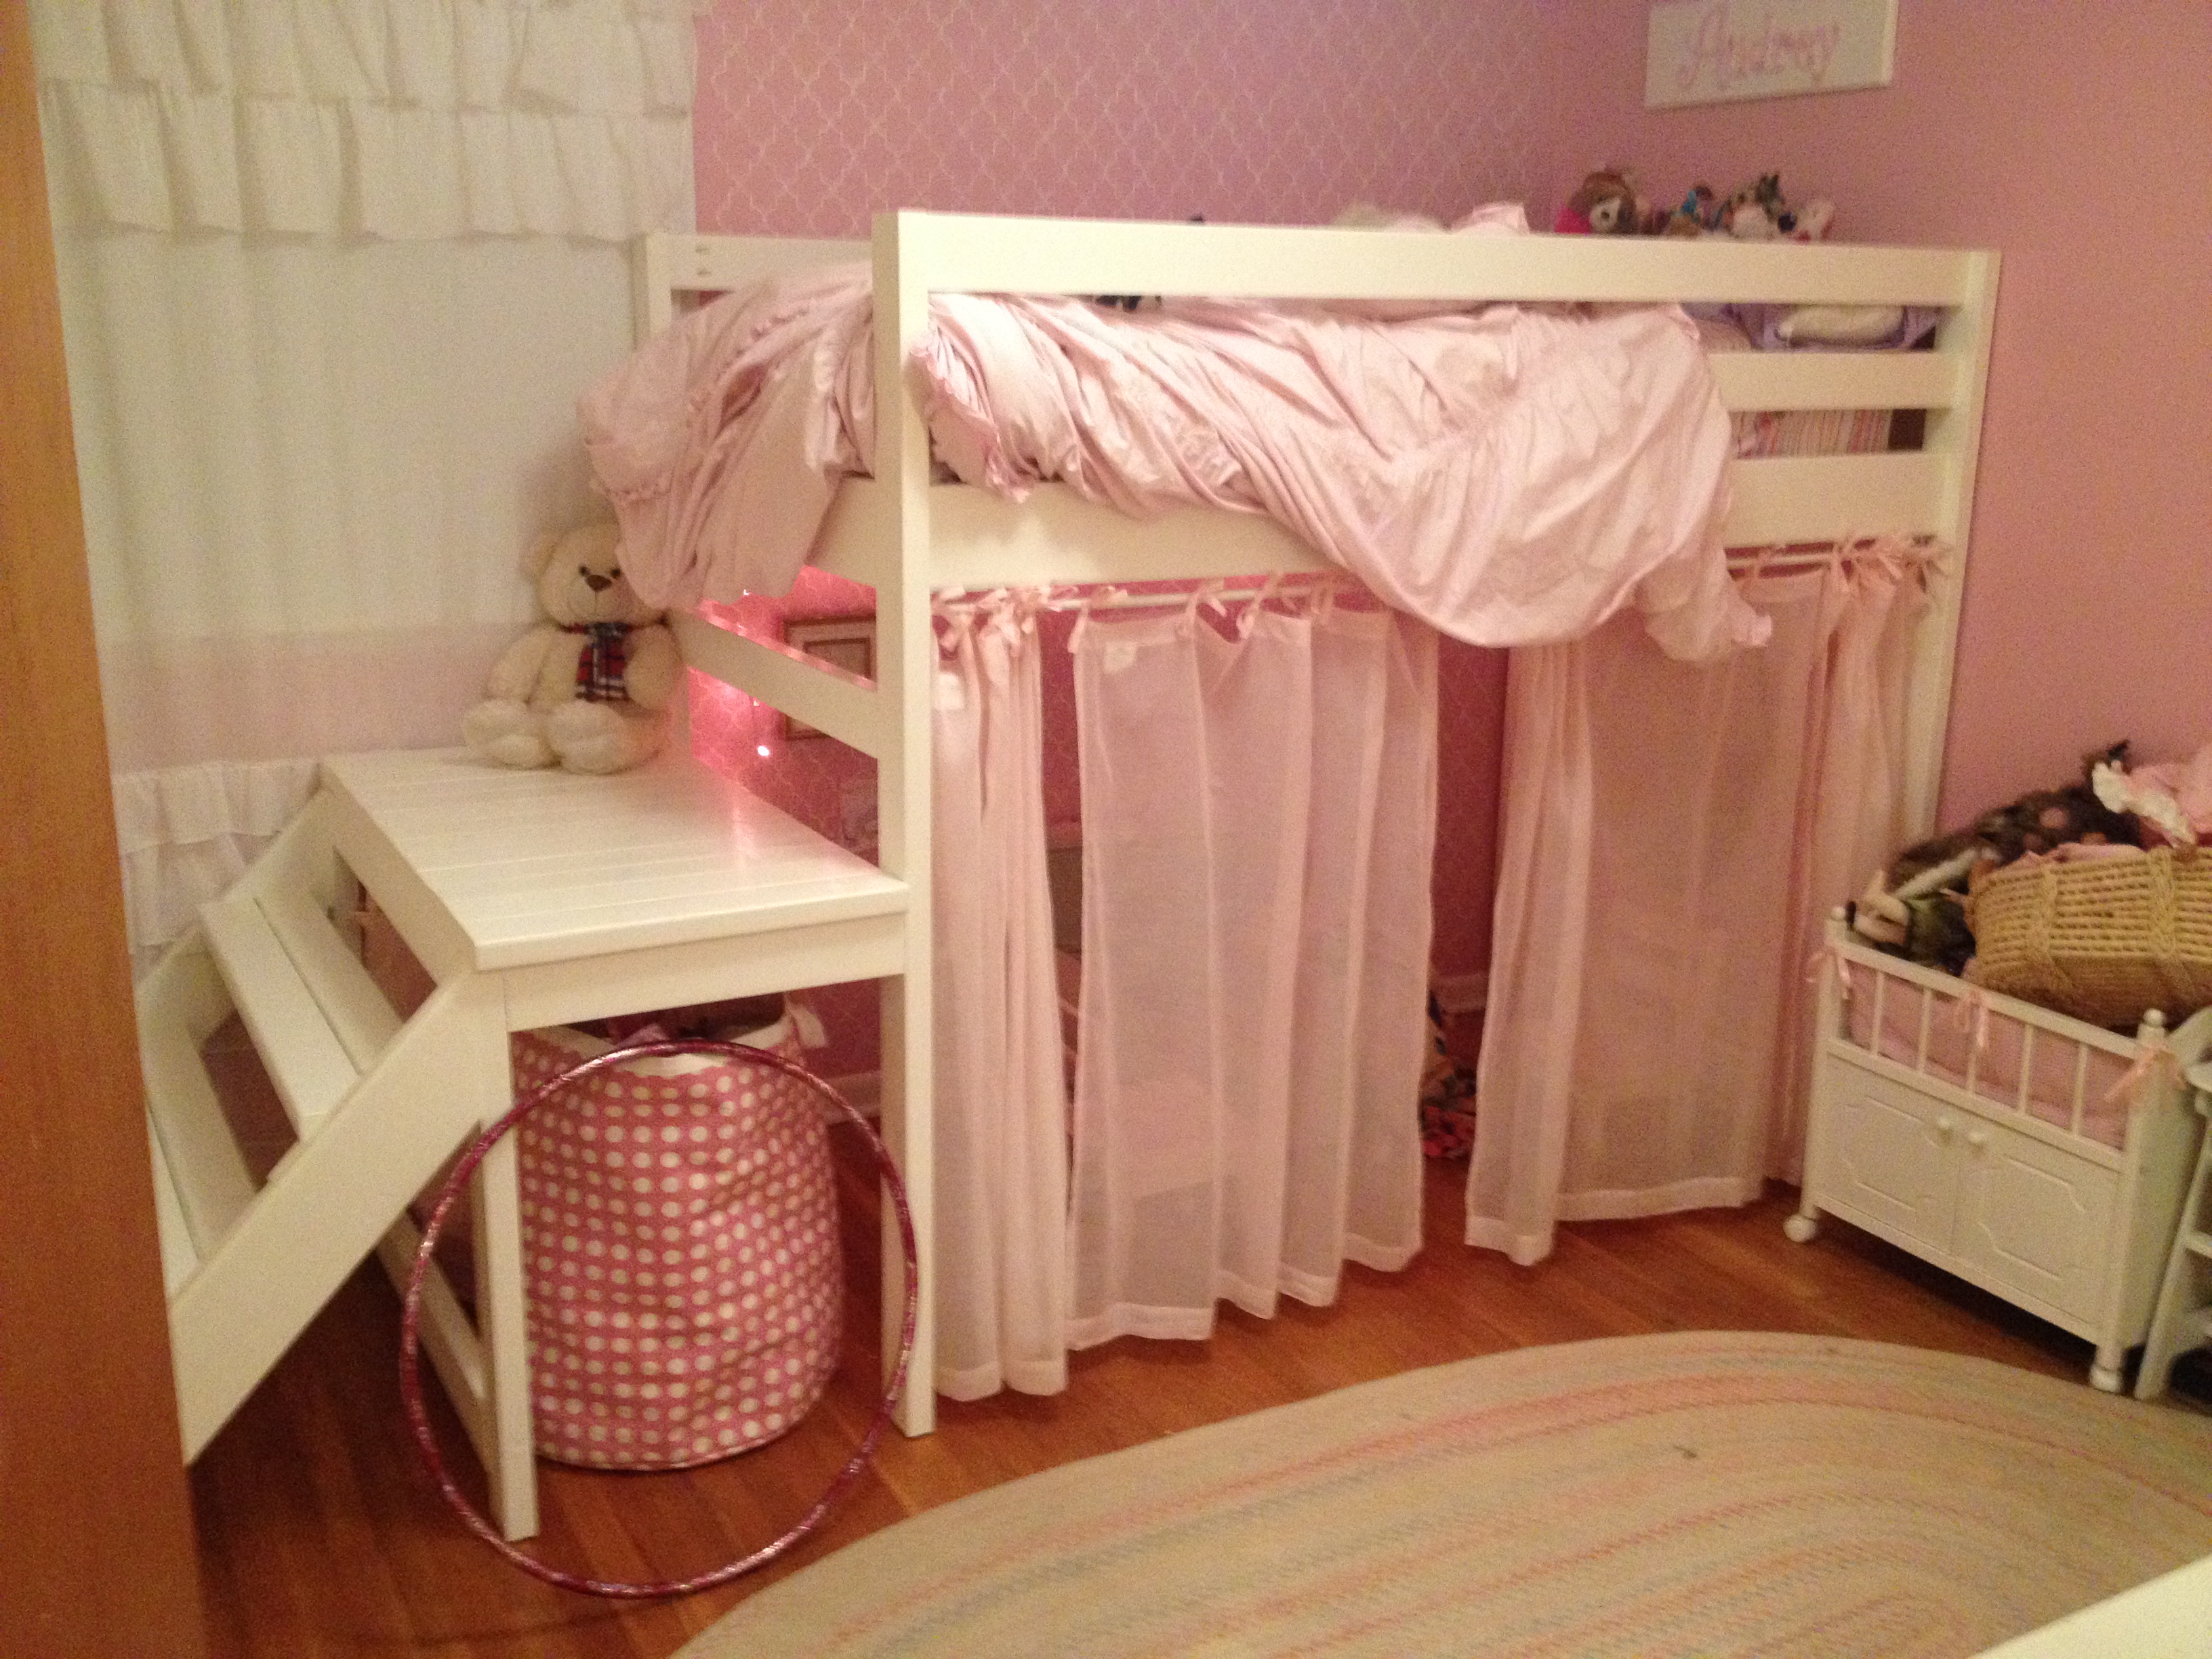
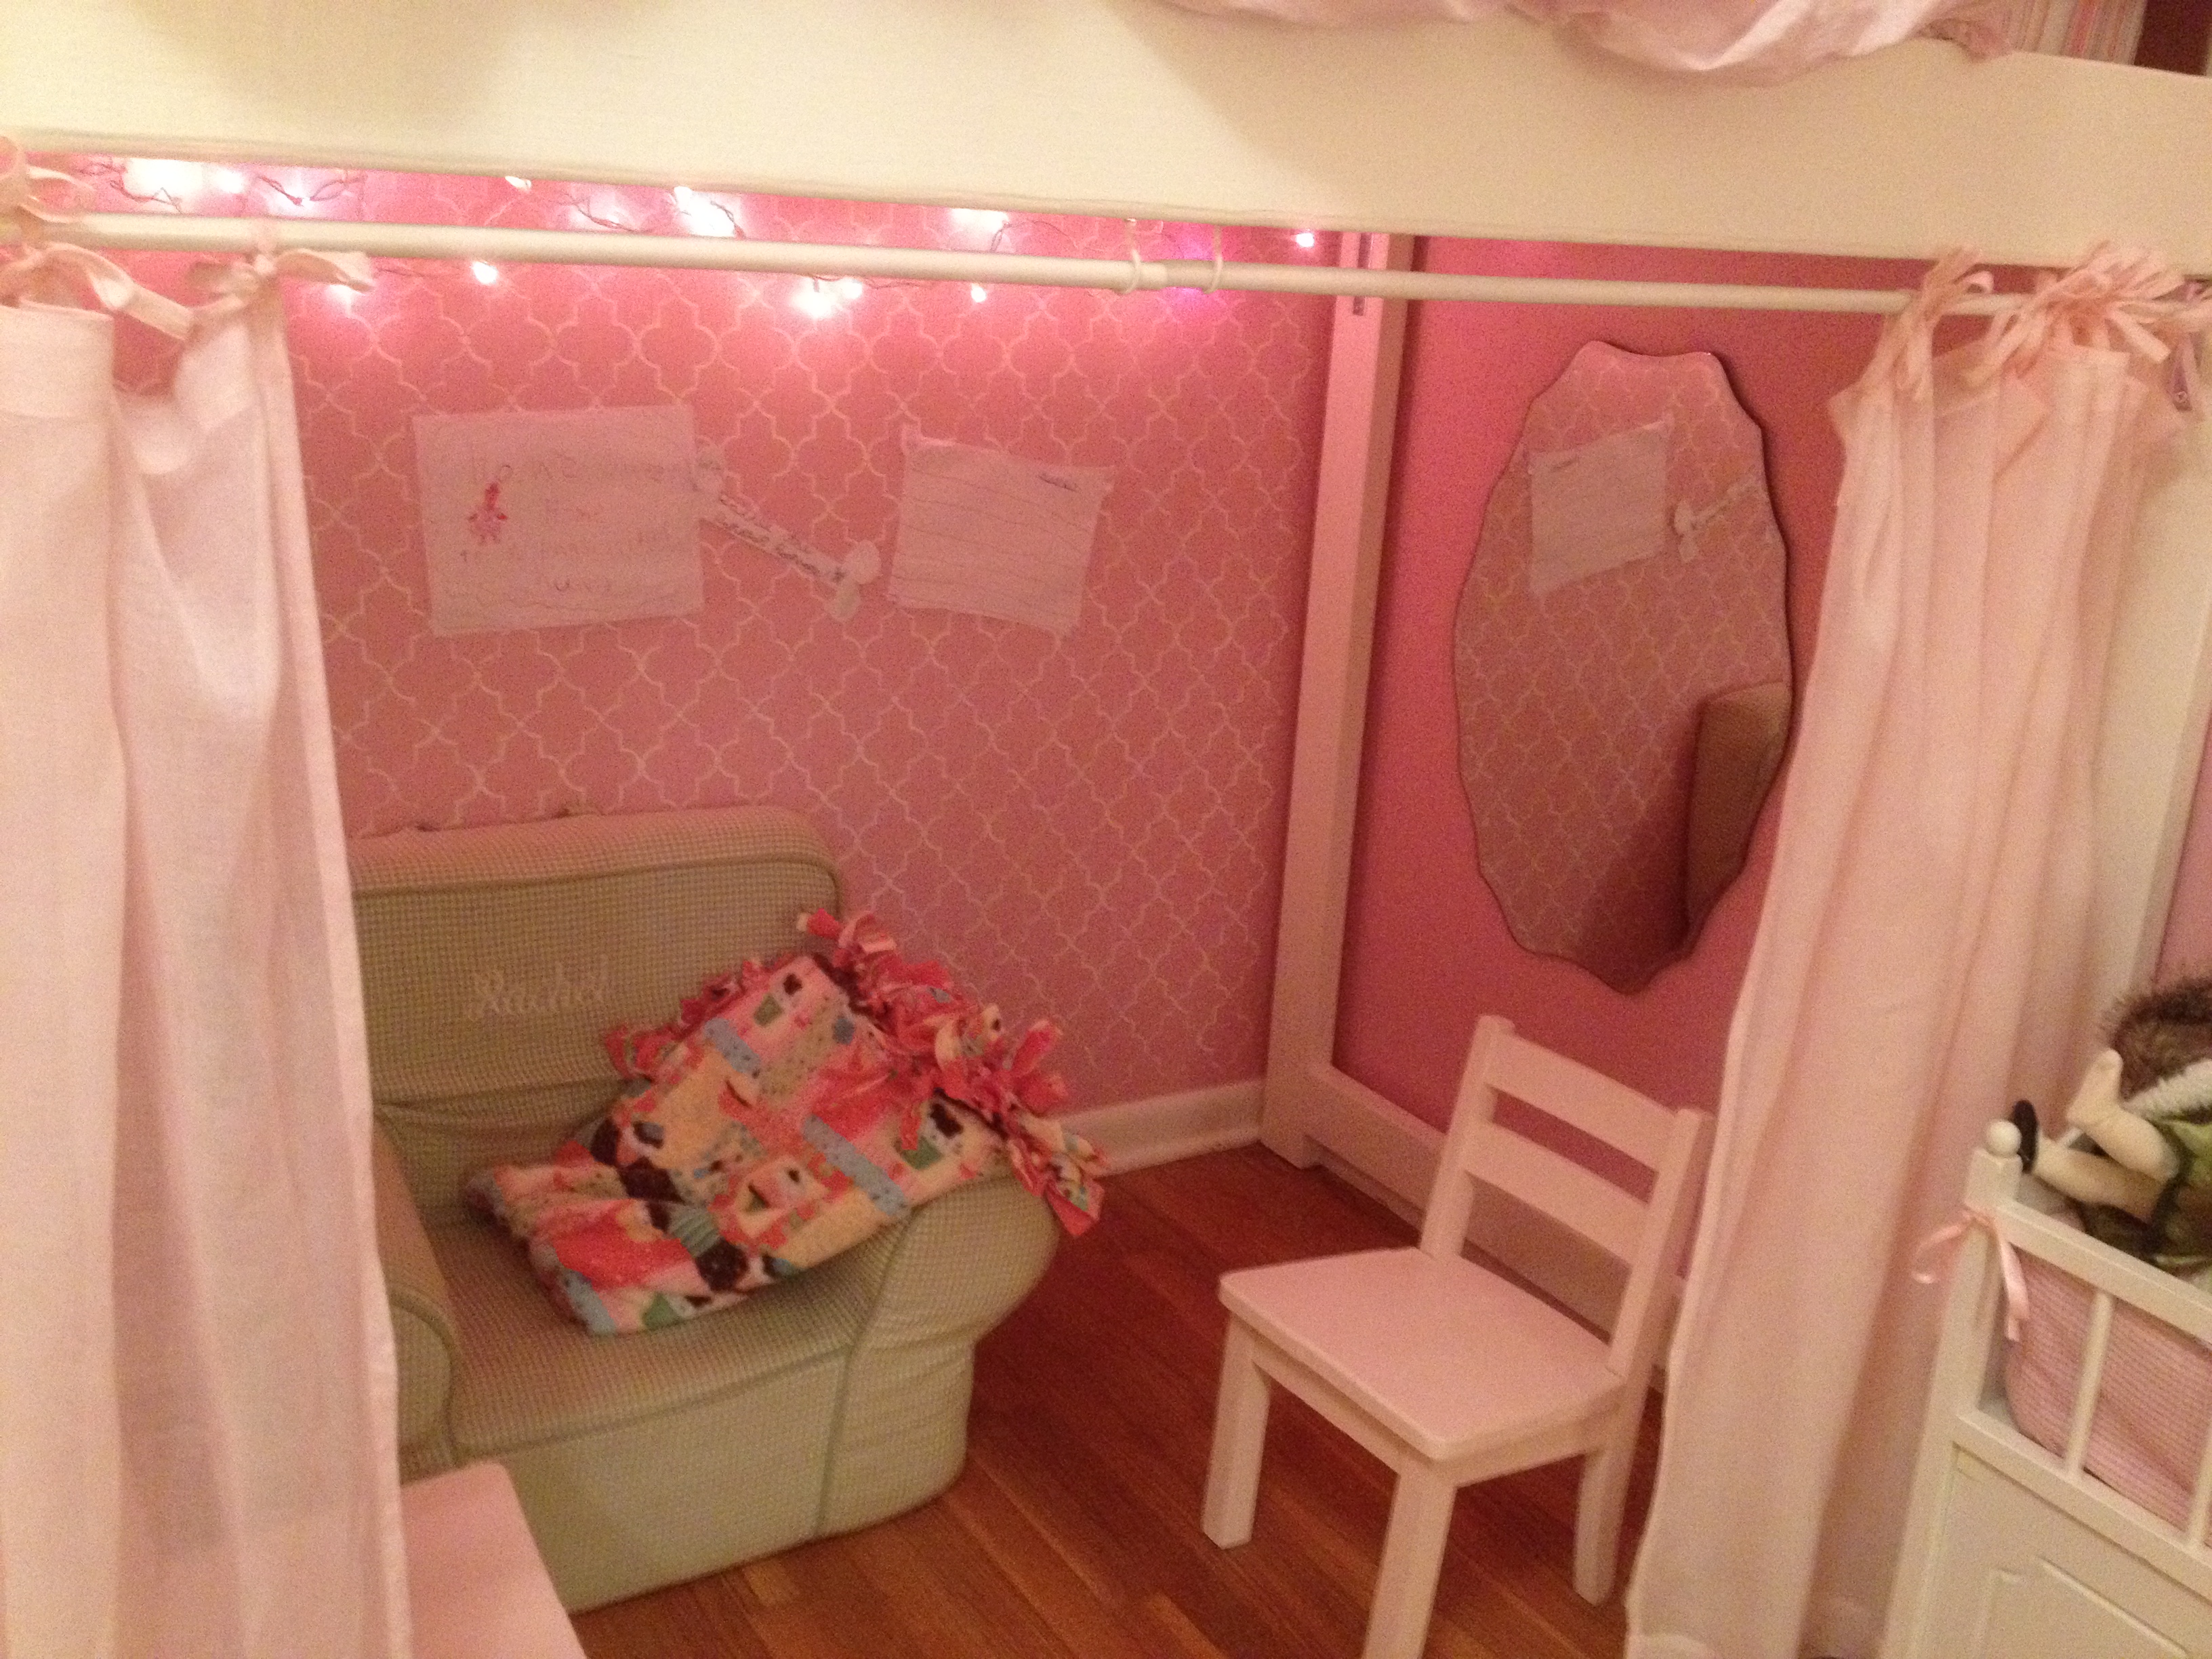
Wider Loft Bed with Storage
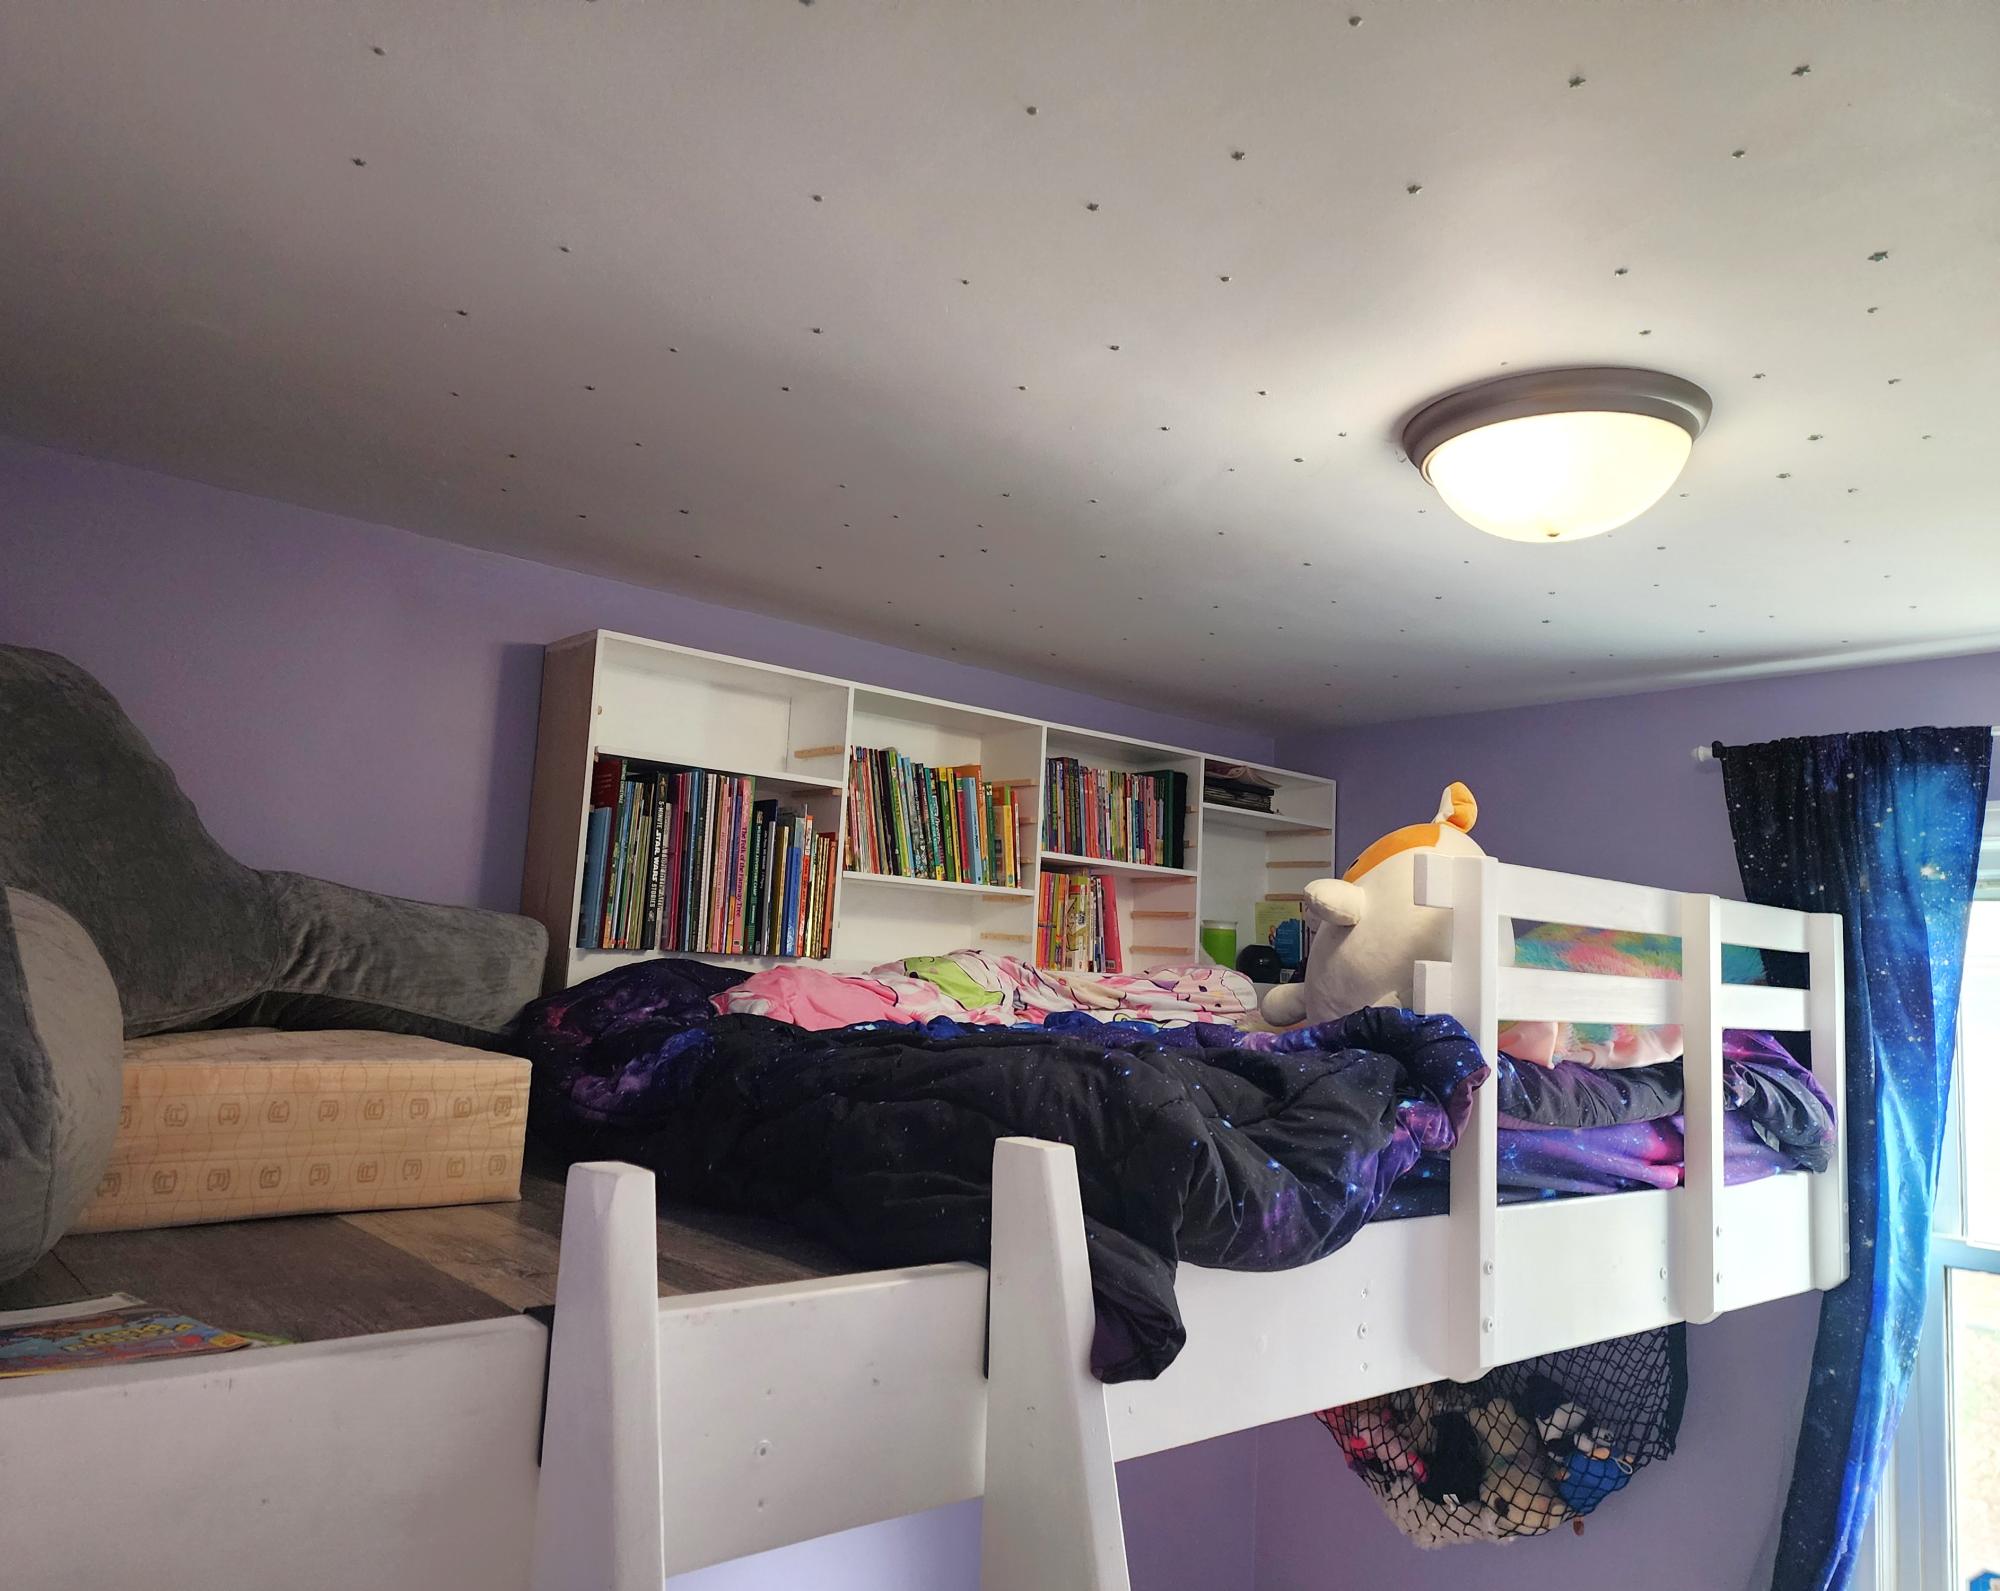
I built the loft platform wider than necessary so I could fit a narrow shelf beside it. - Meg
Built from Plan(s)
I built the loft platform wider than necessary so I could fit a narrow shelf beside it. - Meg
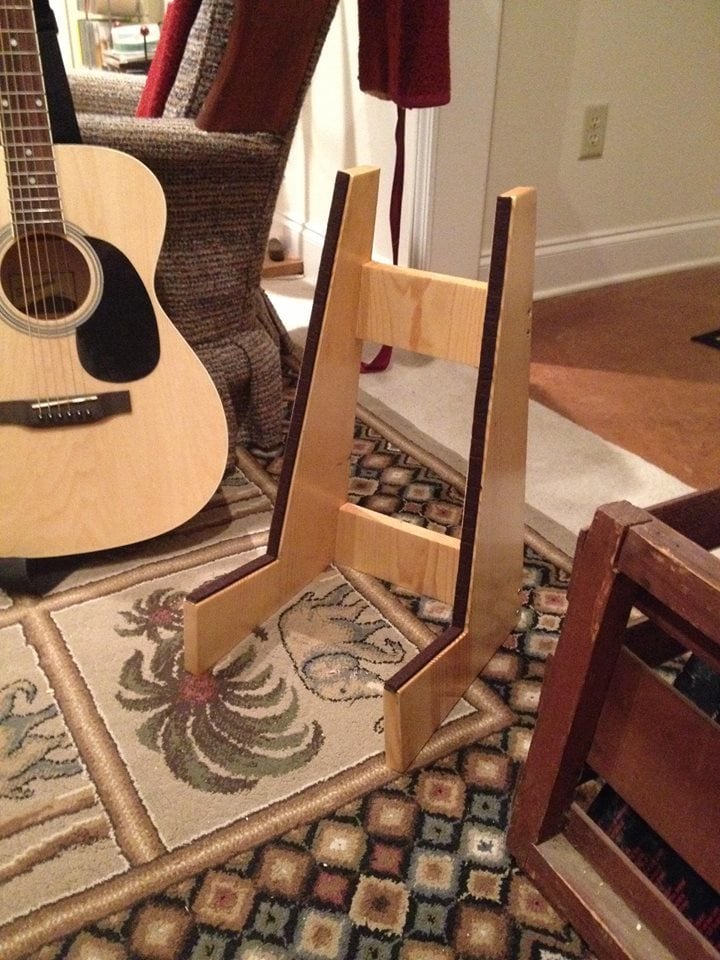
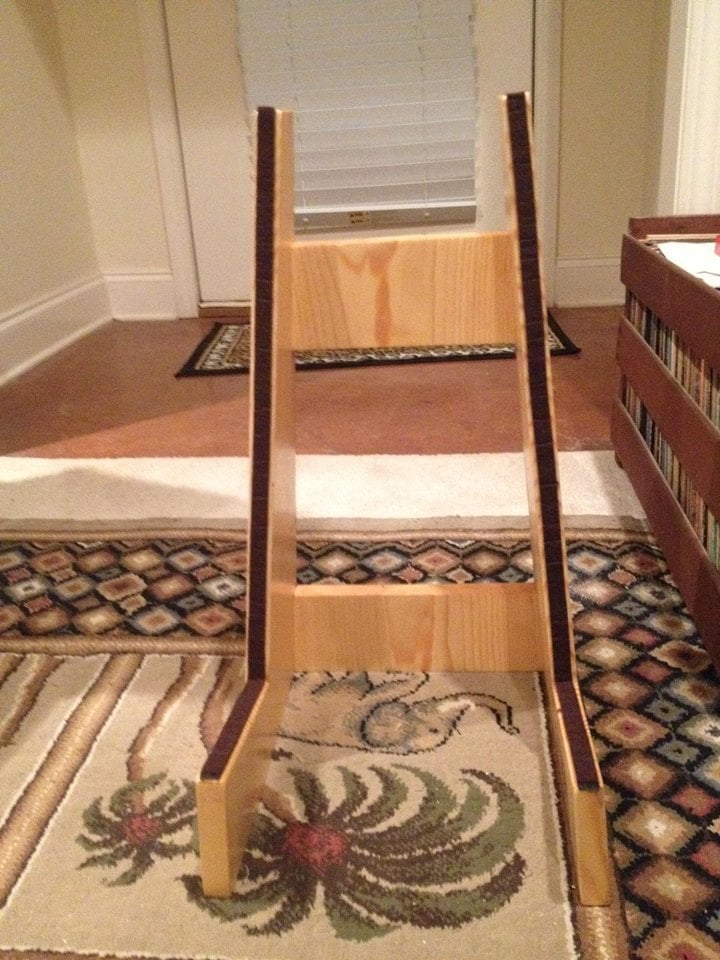
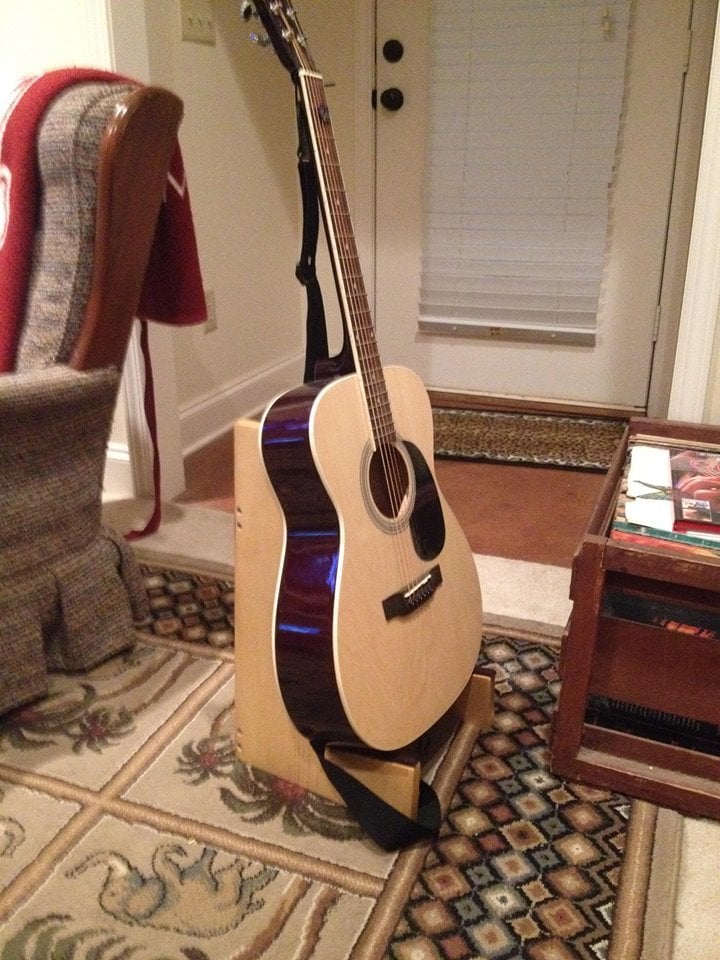
Built this guitar stand basically by using on-hand materials left over from another project. Used 1x12's; 18" tall fir for sides and back braces (cut at 5 degrees on each side). Added felt strips to protect the instrument.
Thu, 05/28/2020 - 17:37
Very nice and well designed. Thanks for some ideas!
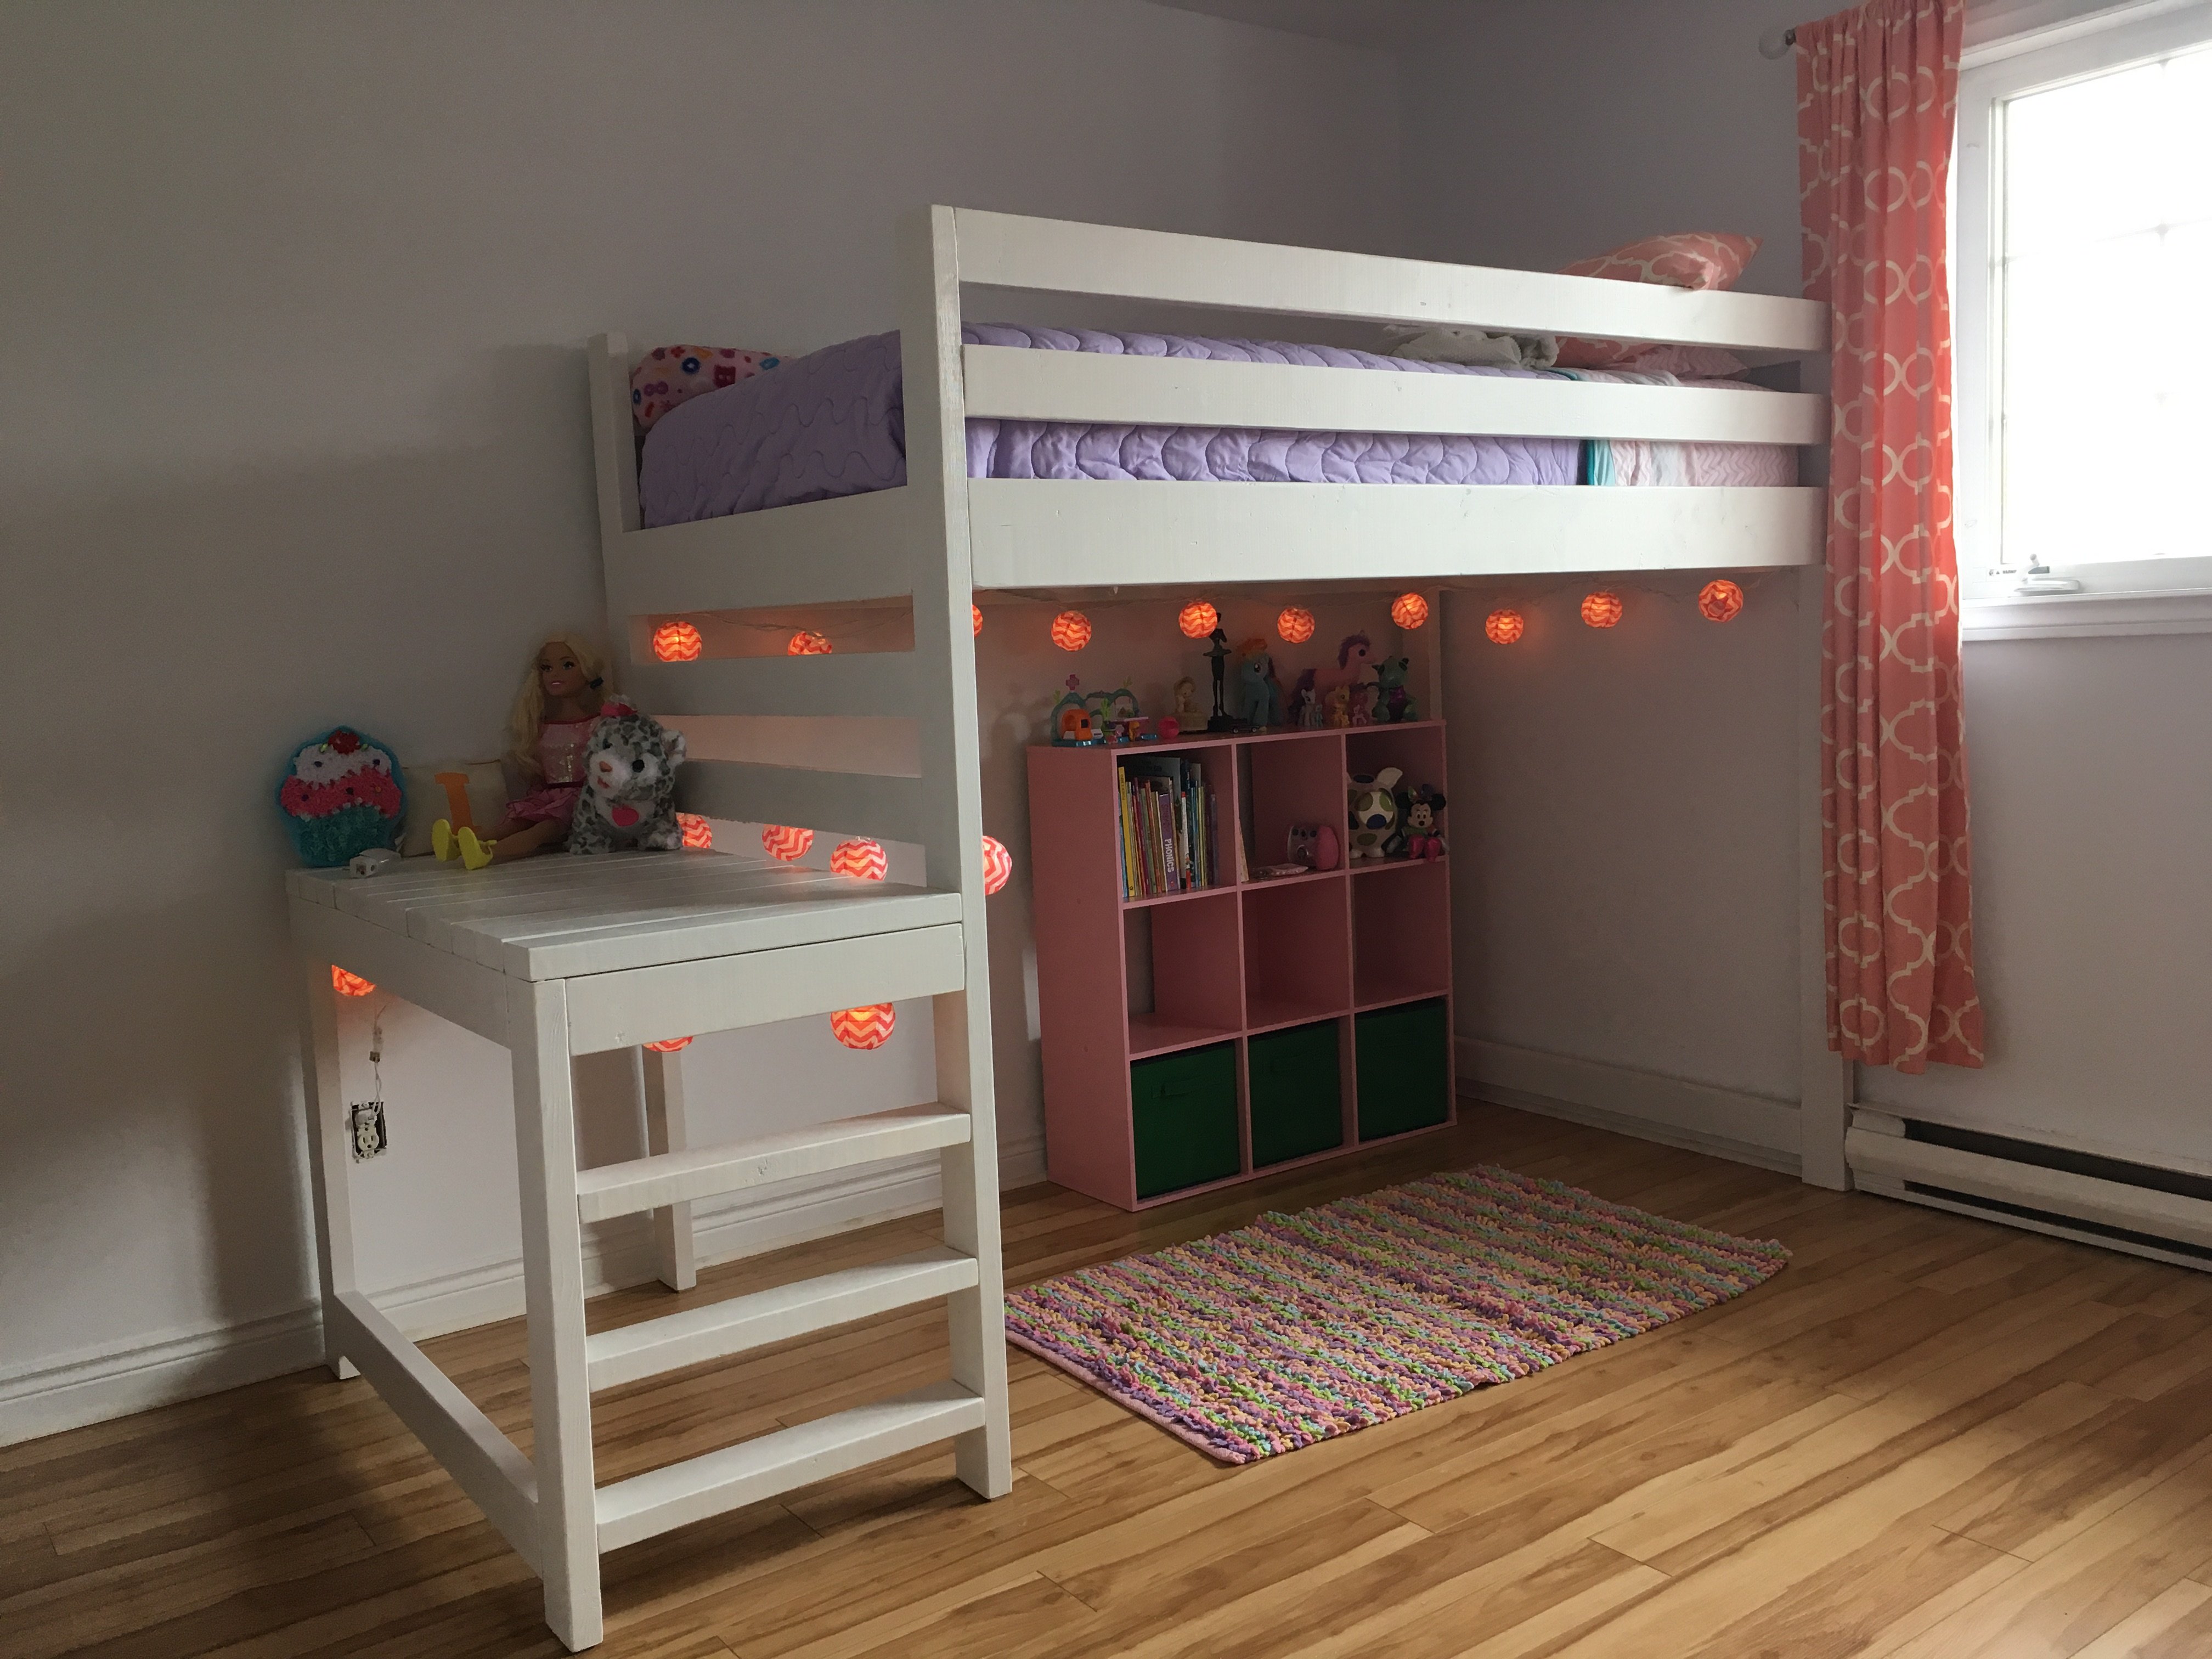
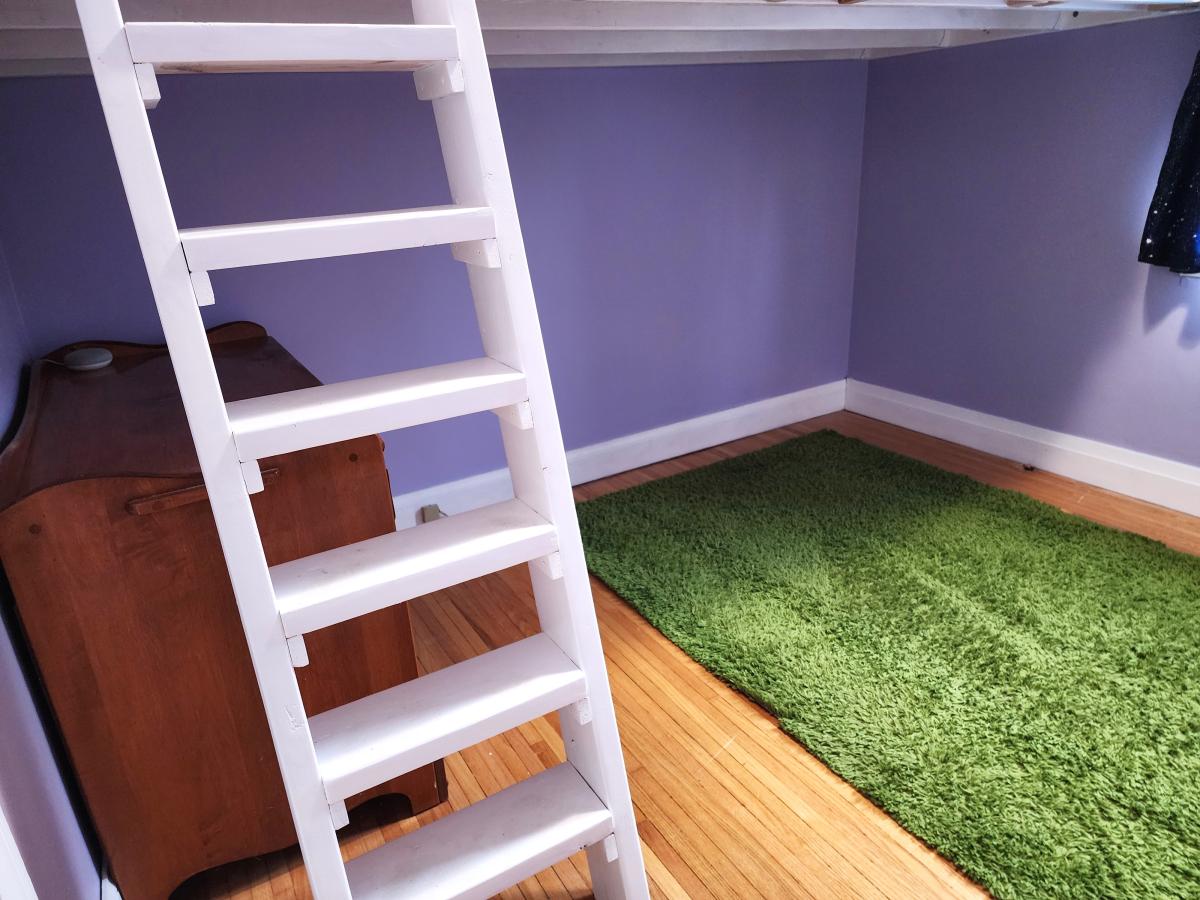
I fell in love with the loft bed but thought the stairs stuck out too far for my daughter's room so I revampd the plan just a bit to add three 'stairs' in the platform rather than the standard stairs in the plan.
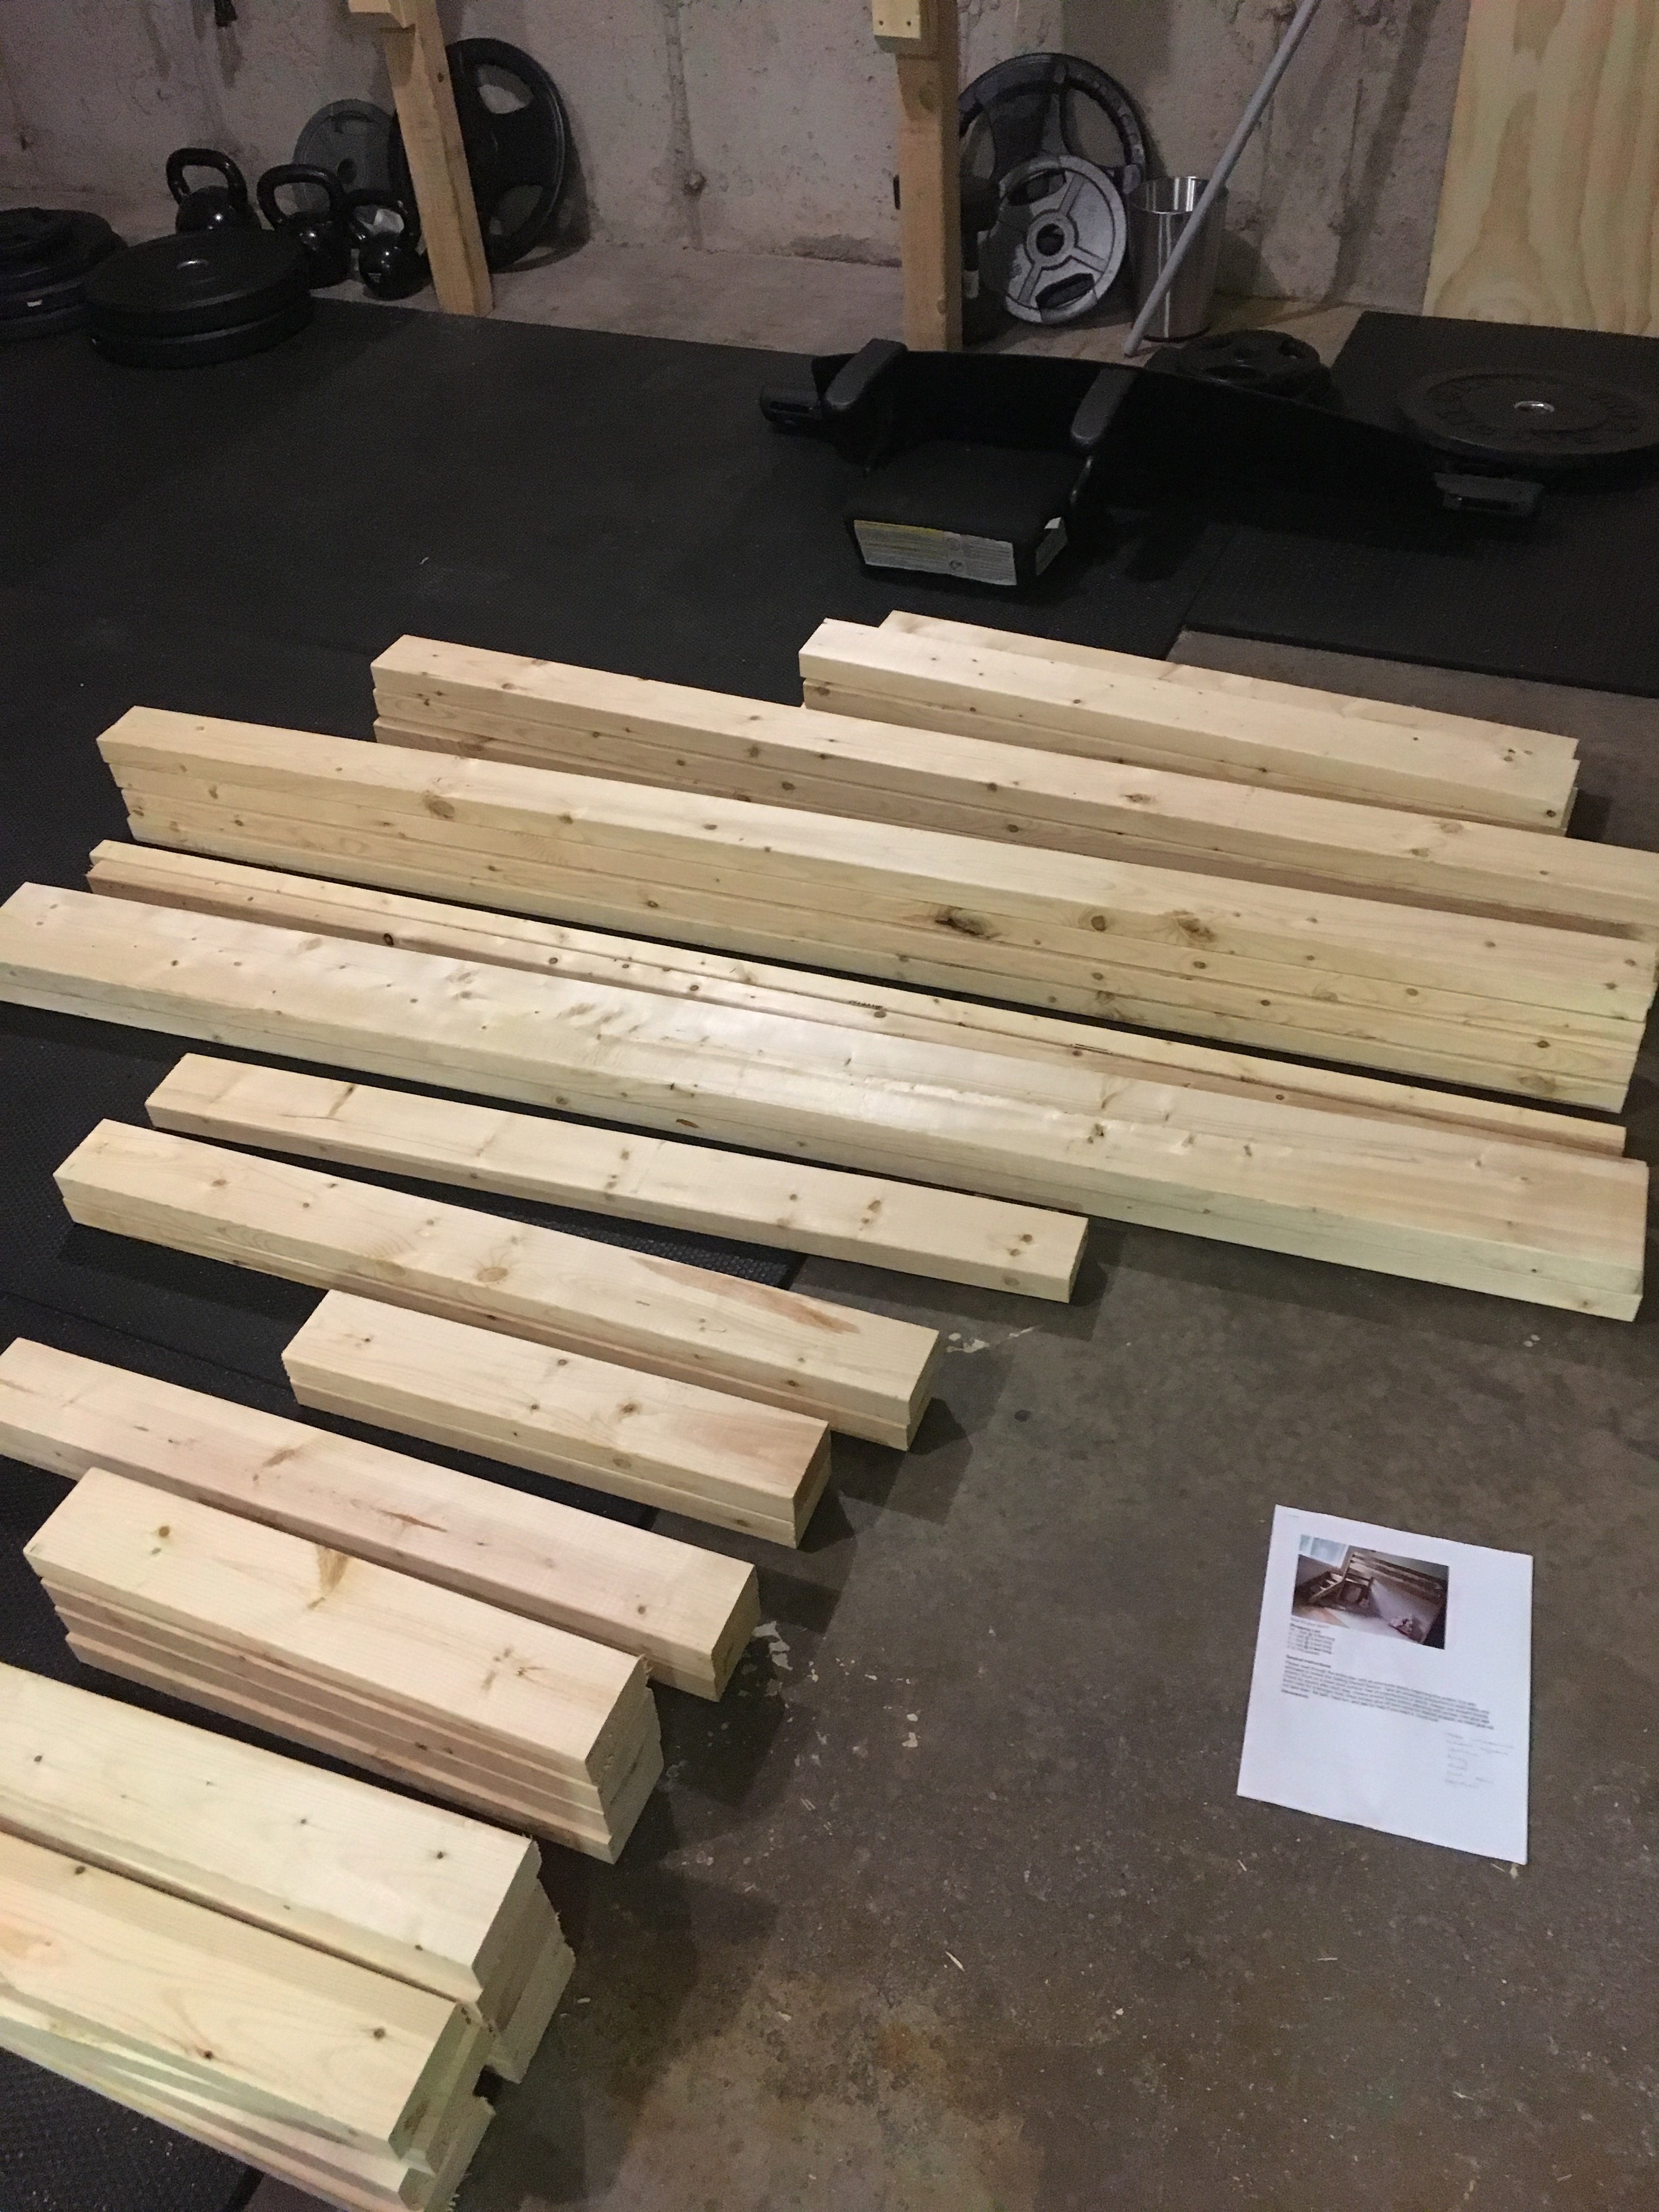
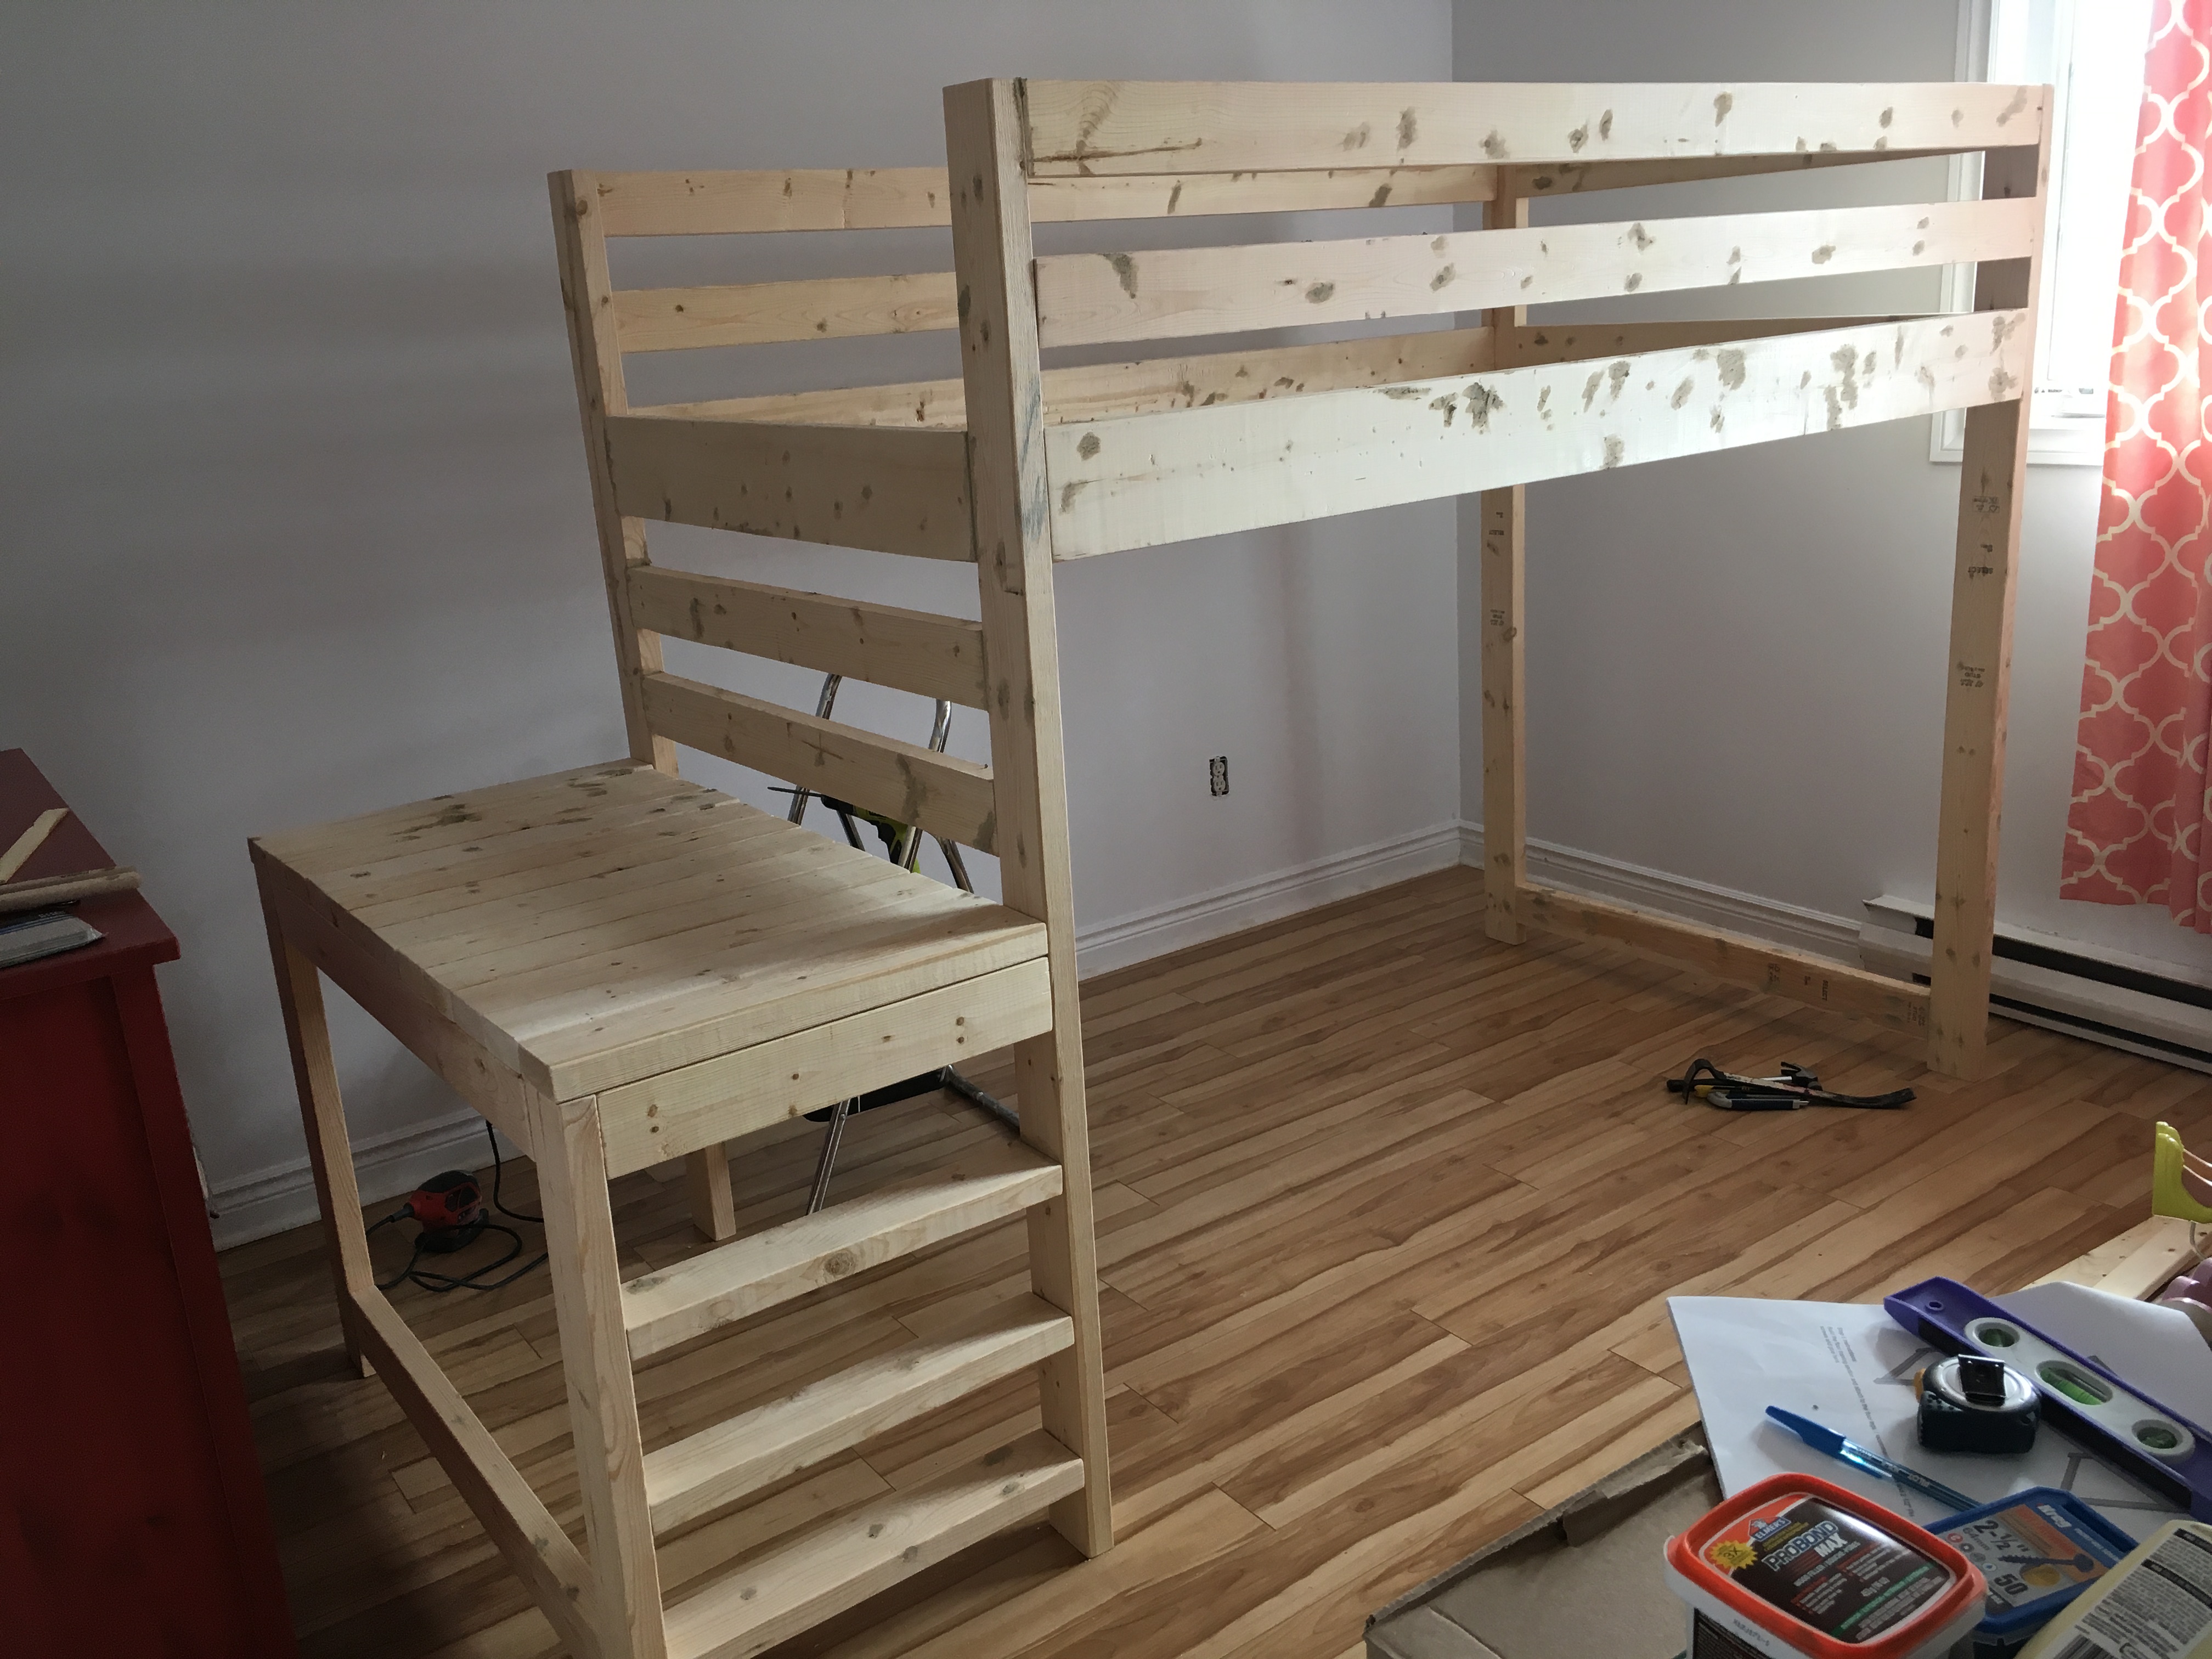
I got started on the project on a Friday night, got my cuts made, my pocket holes drilled and pieces sanded for an early start Saturday morning, everything went together like a dream - though it would have gone MUCH faster if I had had a second set of hands; I had to balance all of the long peices on other peices to try and get them attached and it took much longer than it had too!
It was all together, the holes filled and first coat of primer on by Saturday afternoon - I used Zinsser primer so the knot's did not bleed through. Sunday morning I was painting and it was in place and decorated by Sunday night!
Great, easy to follow plans (as always) Ana - thank you, I have one VERY happy daughter!
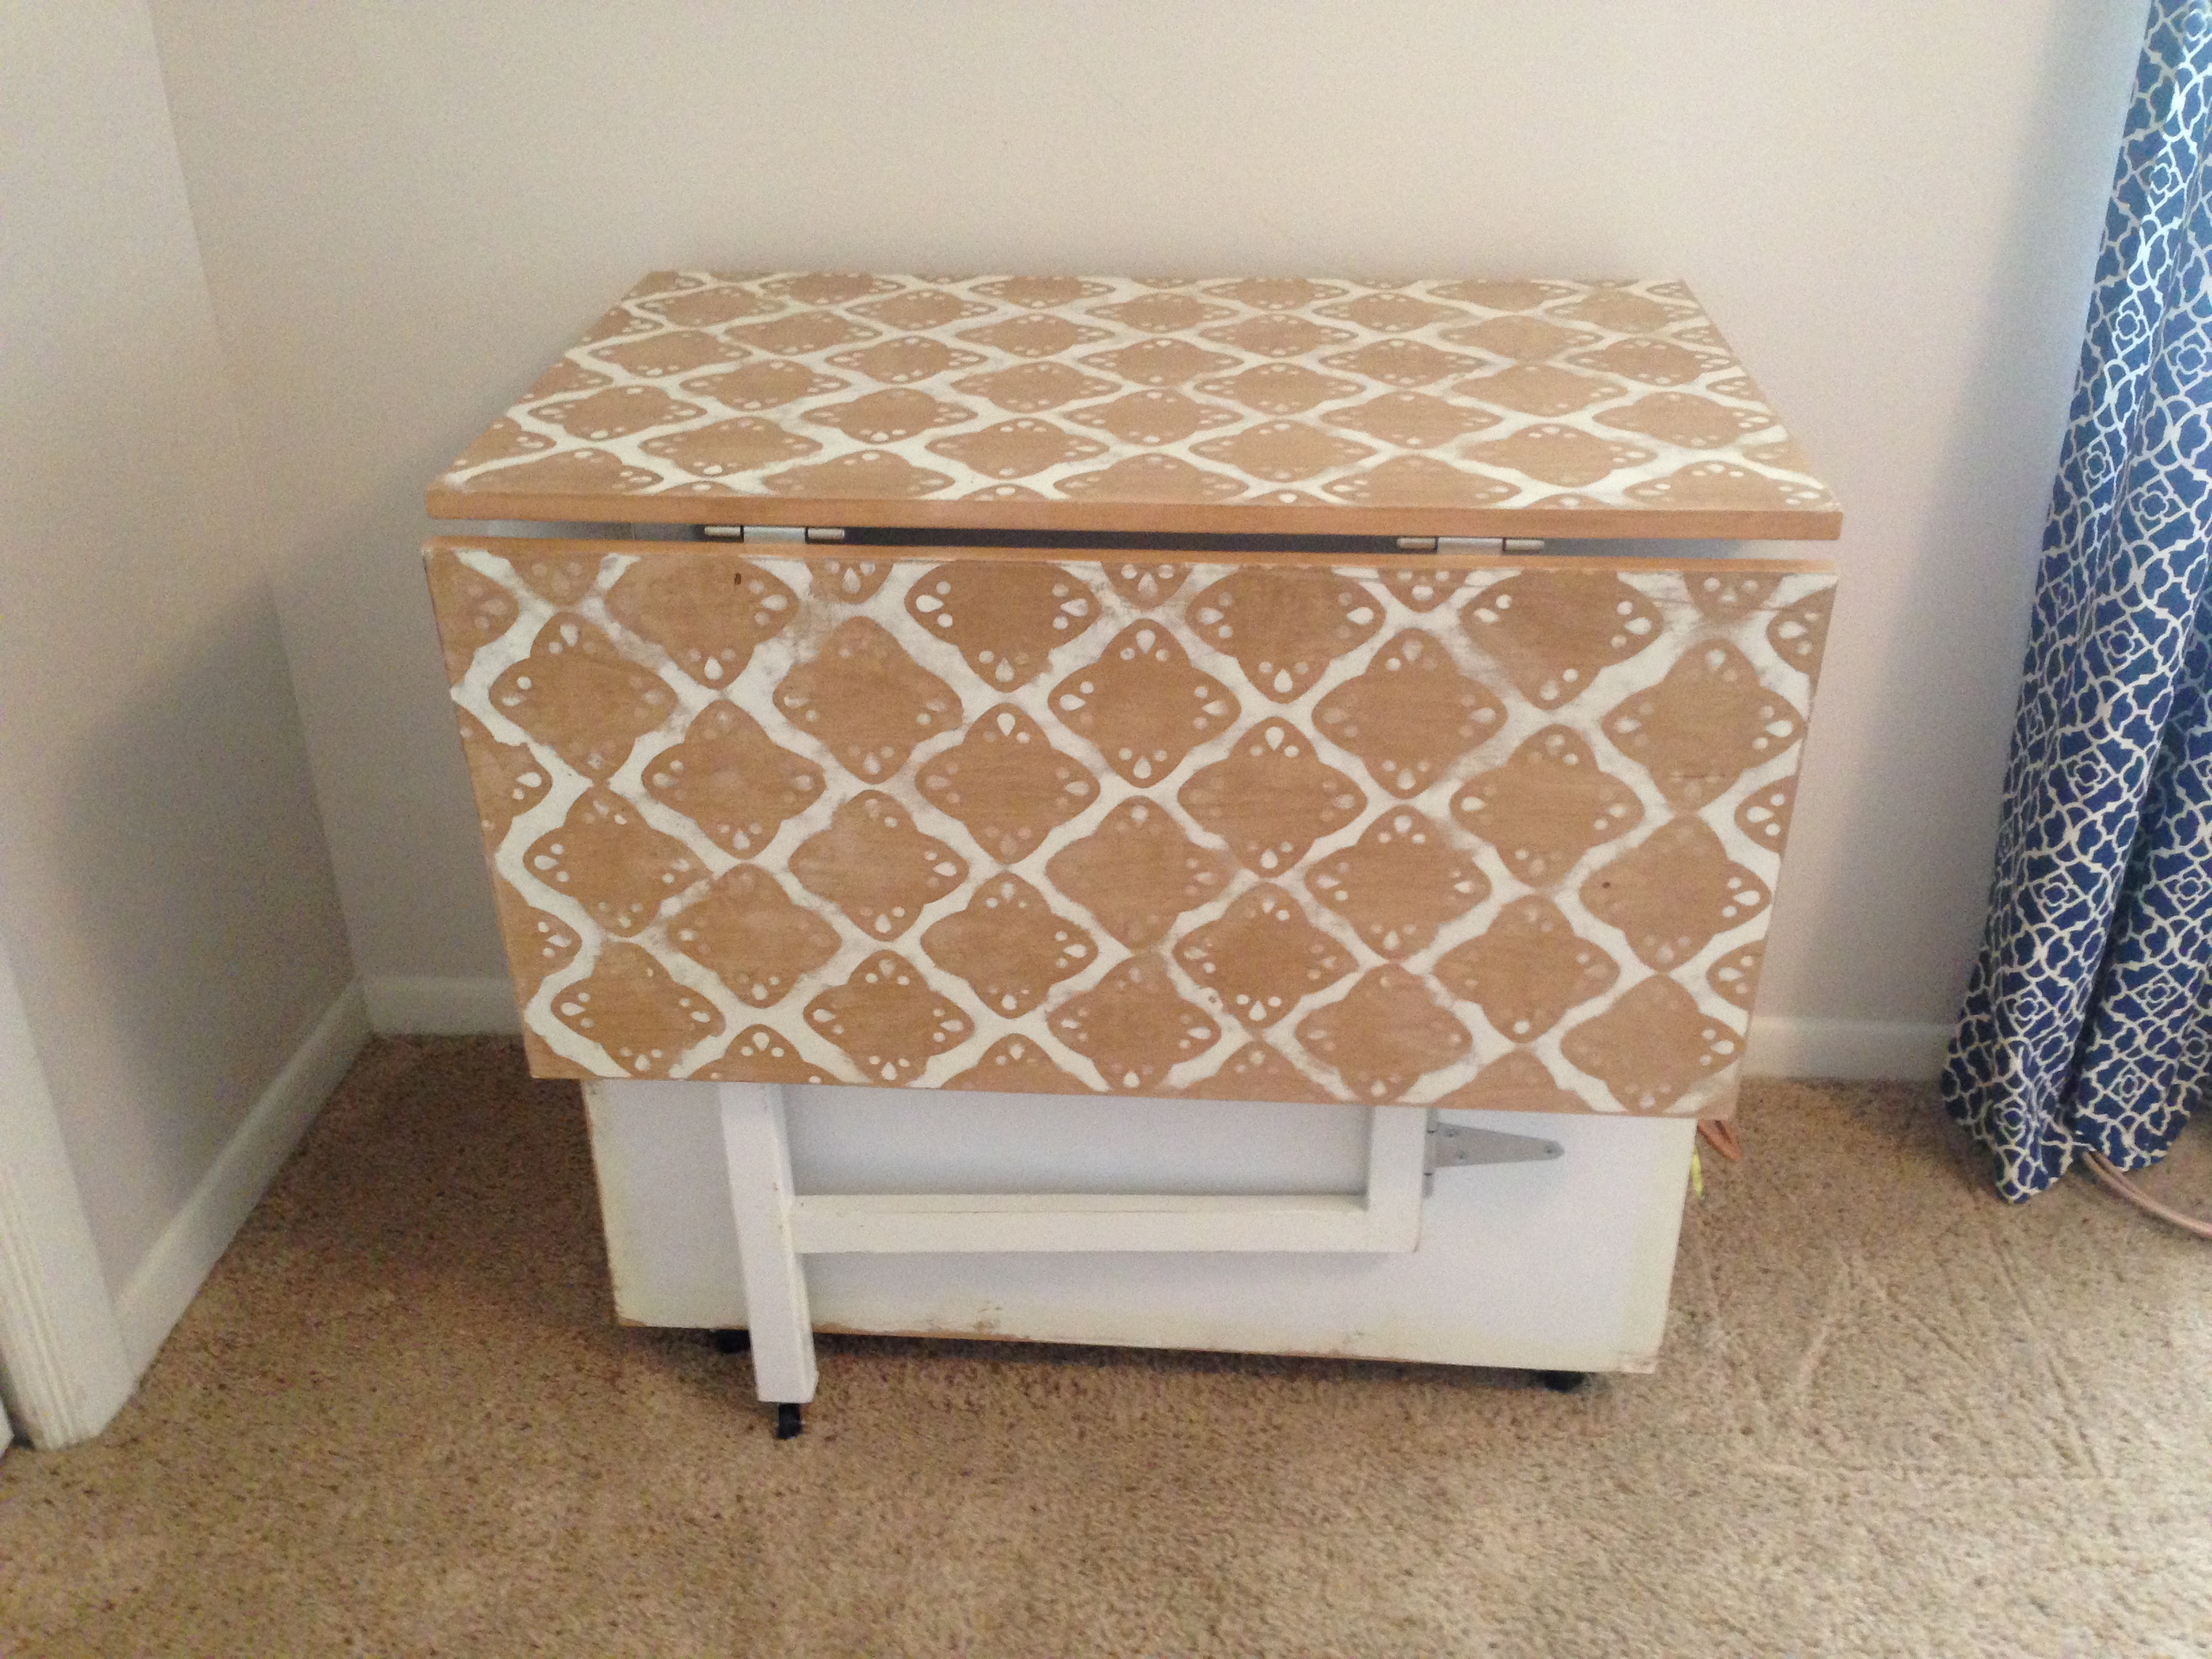
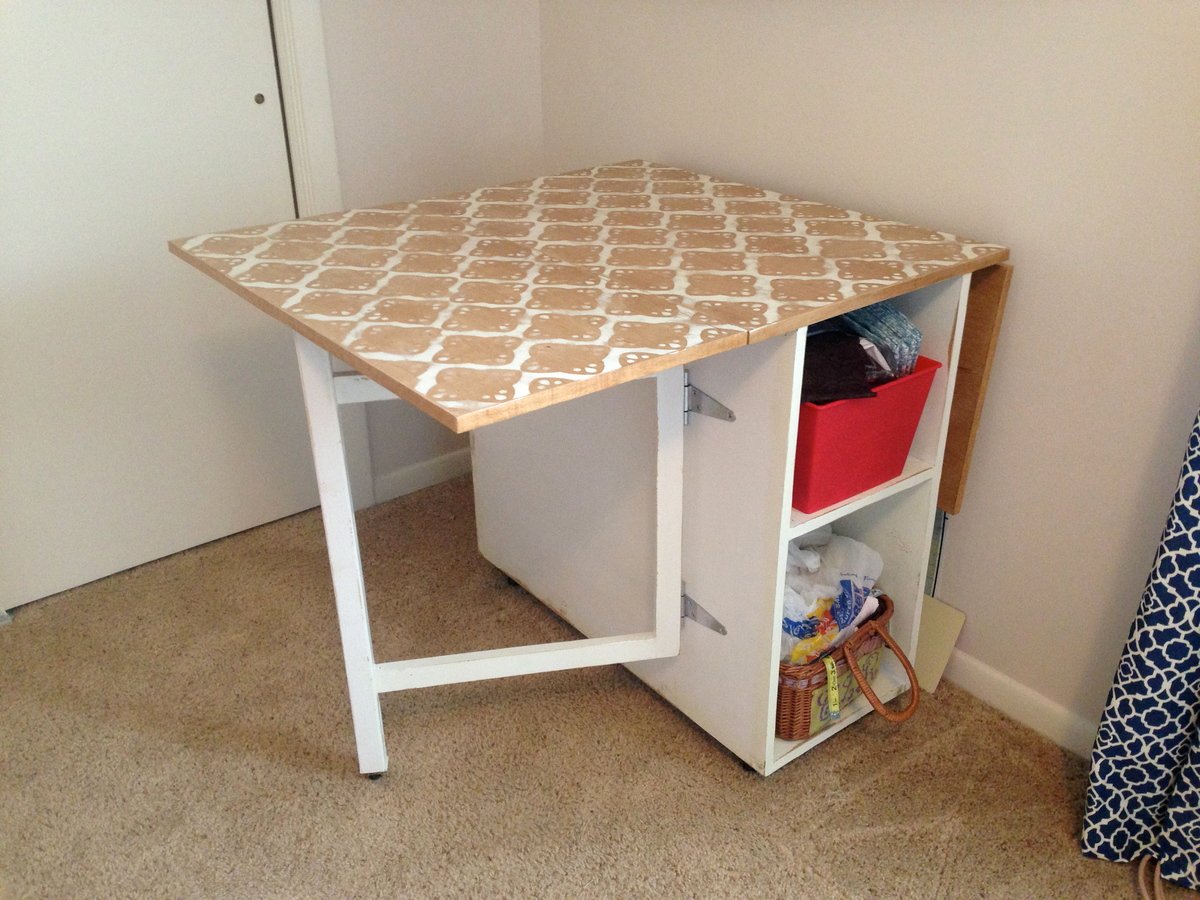
My husband and I built this table as our first project. We followed all of the dimensions from Ana's "Small Sewing Table" project here: http://ana-white.com/2010/10/plans/sewing-table-small-spaces?page=1 The only thing we changed was the size of the table top and the legs. We were worried about putting my heavy sewing machine on top of the leaf called for in the plan, so we created gate legs to support the leaves. Since the legs were going to be folded up in between the base and each leaf, we extended the center portion of the table top to accommodate the change. After it was assembled and stained, I decided that I didn't like the solid color, so I stenciled on a pattern with white latex enamel paint (what I had on hand) and continued to paint the base. After lightly scuffing it up with the sander, I layered 3 coats of poly on top. It has held up well, even after many large quilt projects! I just LOVE my sewing table!


Fri, 08/05/2016 - 13:41
Hi there. Could you please tell me what the brackets are you used with the gateleg? Do you remember where you got them? Thank you!!!
Fri, 05/26/2023 - 16:59
Hello I was wanting to know how to make the Gate-Legs for this project? Like the measurements and such. Thank you.
Sun, 05/12/2024 - 08:40
How heavy of sewing machine can this hold? My machine is 32 lbs. Would it be able to sit and be used on the “leaf” side of the table ?
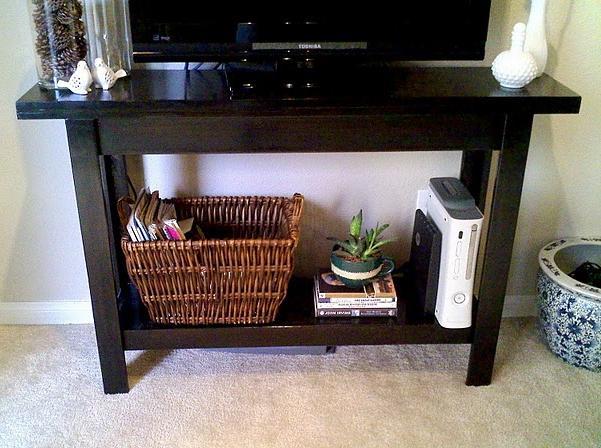
I just wanted to send in some photos of the simple, cheap, and easy console table that my father and I made a couple weeks ago. It only took us 3 1/2 hours to build, and your plans made it incredibly easy for beginning carpenters like us! We modified the plans slightly by adding a fully functionable shelf to the bottom, and used the Minwax stain in Ebony for a sleek Pottery Barn meets Cost Plus look. The total cost for this project was less than $50, and we still have leftover wood for future projects! Your tutorials are great, they make carpentry not-so-scary for beginners like us!! Thank you, thank you, thank you!! For more pictures, feel free to drop by my blog http://www.jamesandkelsey.com/ Thanks again!

I LOVE these plans. This was my first project, and although it was a big one to start with, the plans were easy to follow. If I can do it, anyone can. I added the rock wall. My kids and I love it. Total cost for me (including all lumber, nails, paint, slide, etc.) is about $850.
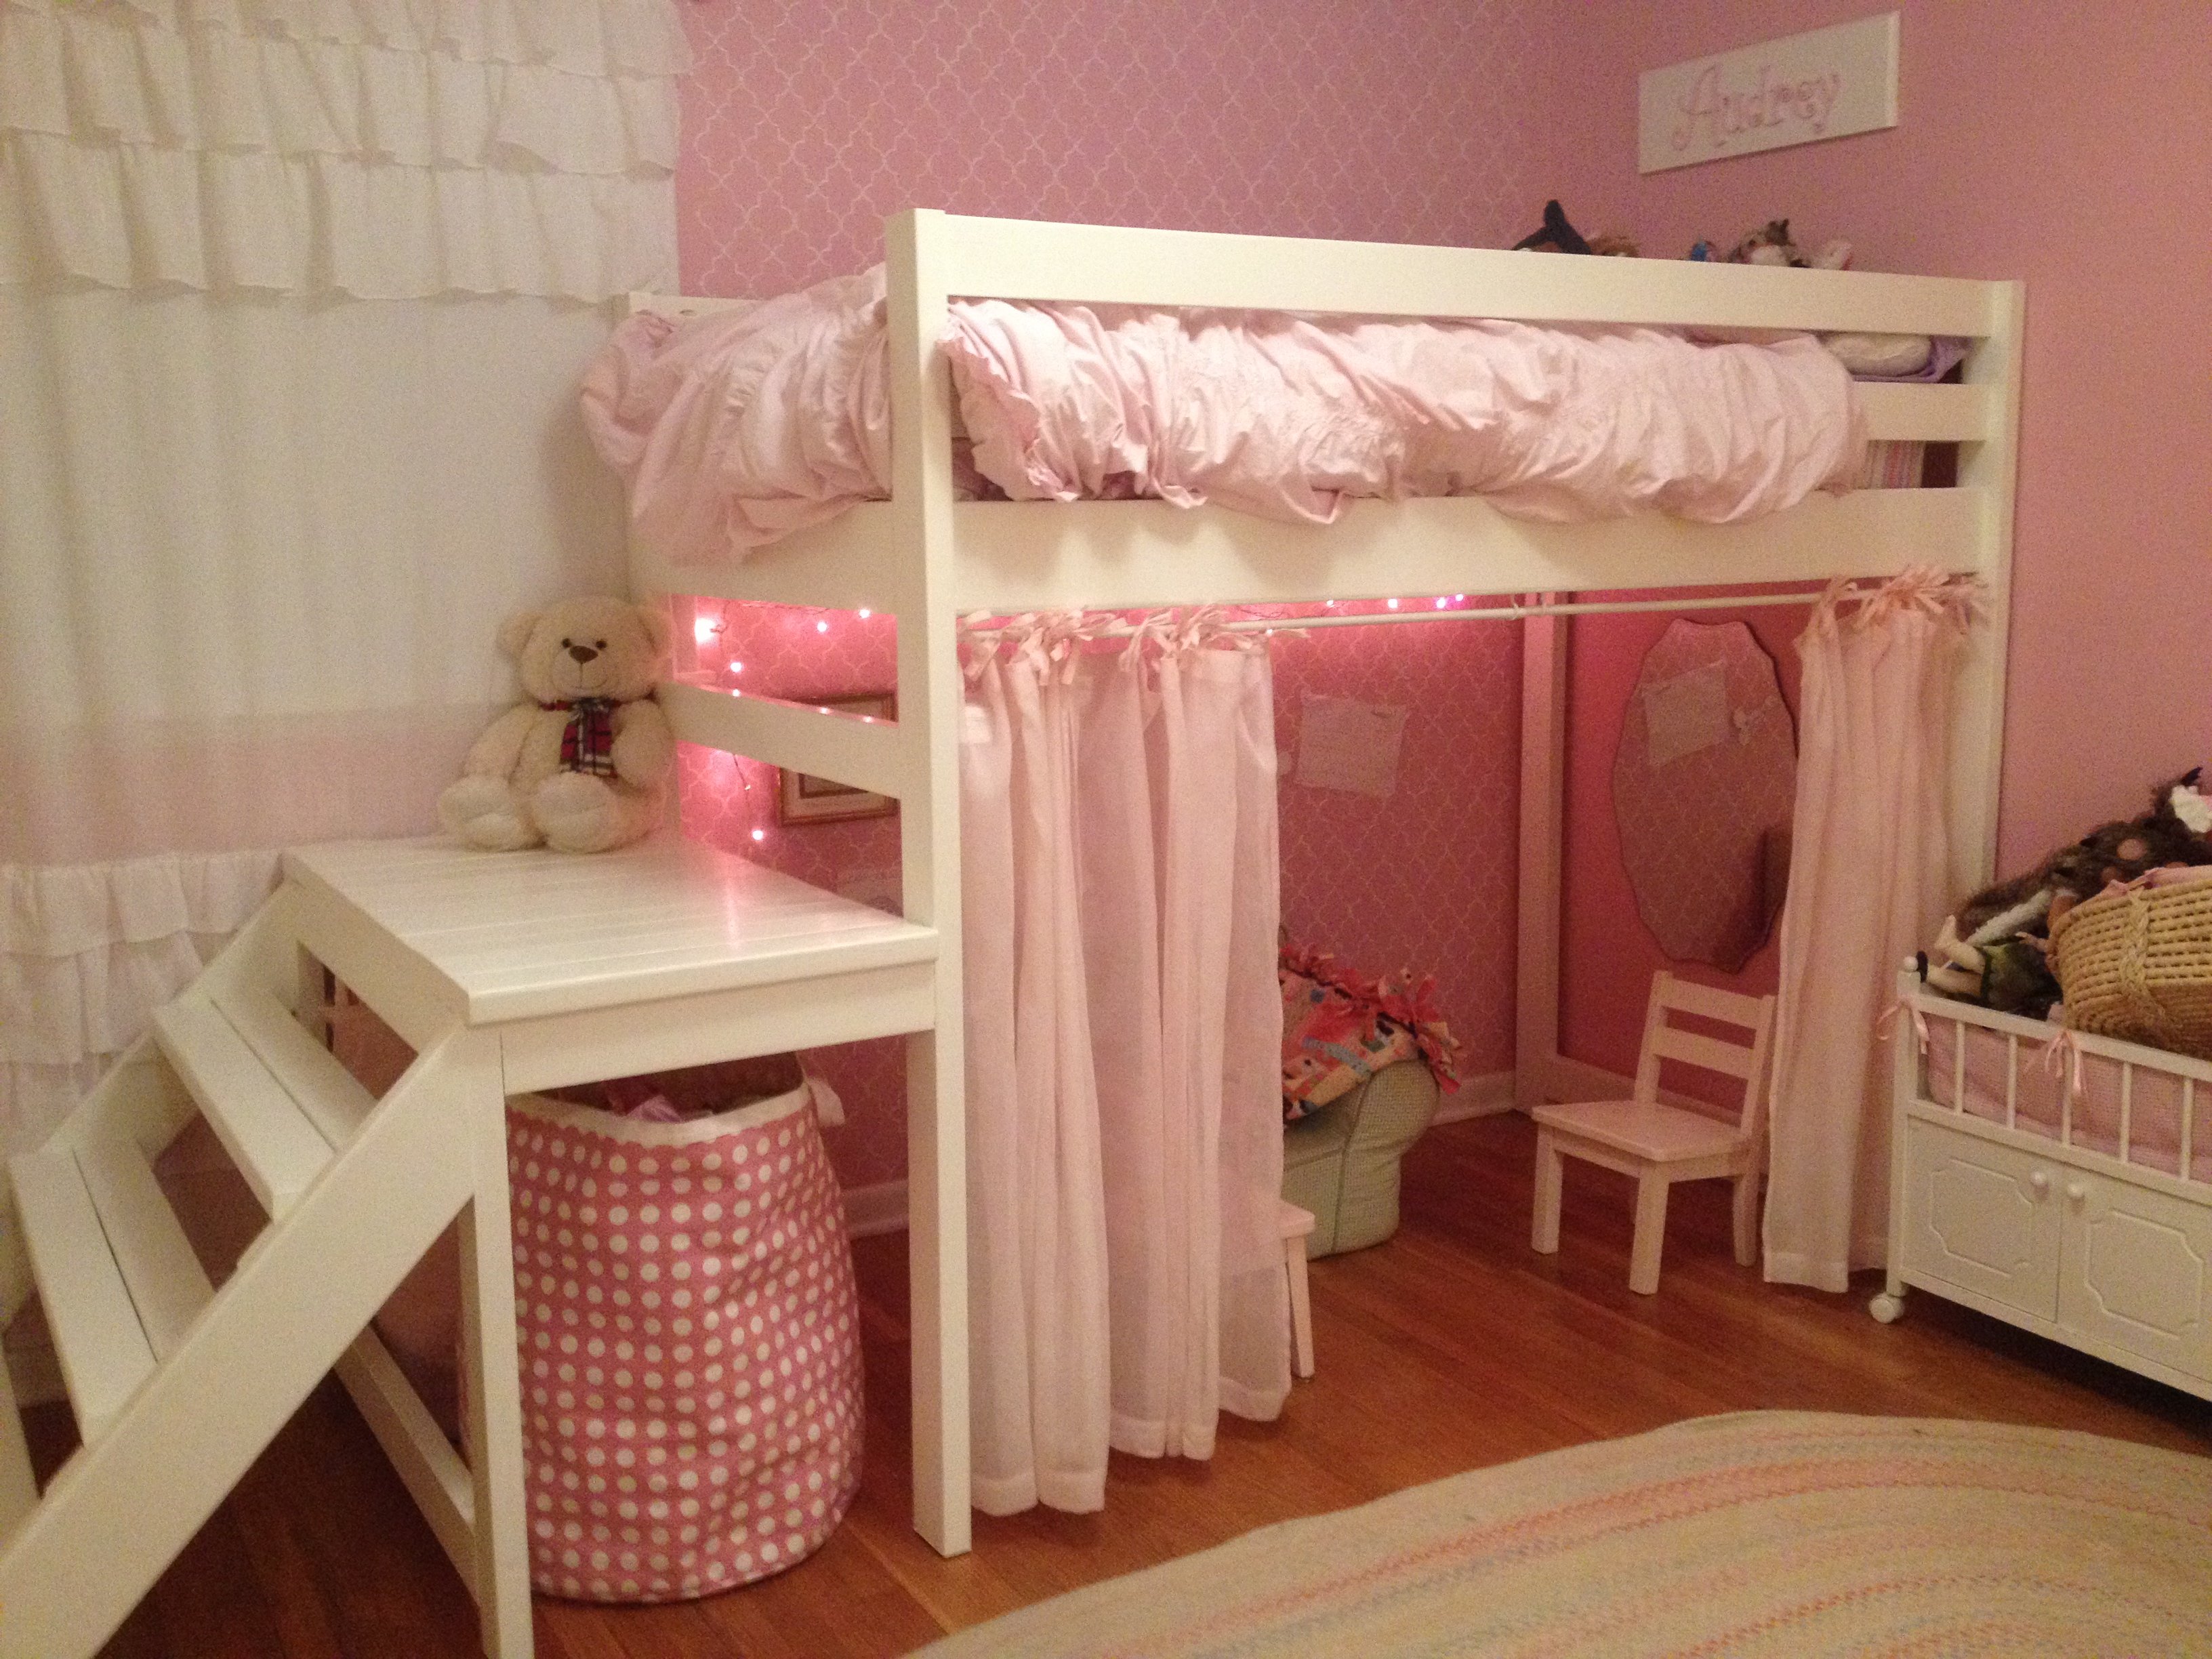
I built this for my little girl's room and she loves it! She loves the play area underneath especially. The build did not take that long, but the finishing (sanding and painting) took many hours. It is very sturdy. My girls sleep up there together all the time, and we have even had adults sleep up there. We didn't have a corner to put it in, so I built wider steps along the same wall as the bed.
Fri, 11/04/2016 - 00:39
Thank you! Sorry so late to reply, I am just now seeing this. It is a twin mattress.
Wed, 09/16/2020 - 19:25
I am interested in this design, but would like to have it with a full size mattress. How would I alter the plans? I would also like to have the stairs be storage drawers/stairs. Can you help me with this?
Thank you!
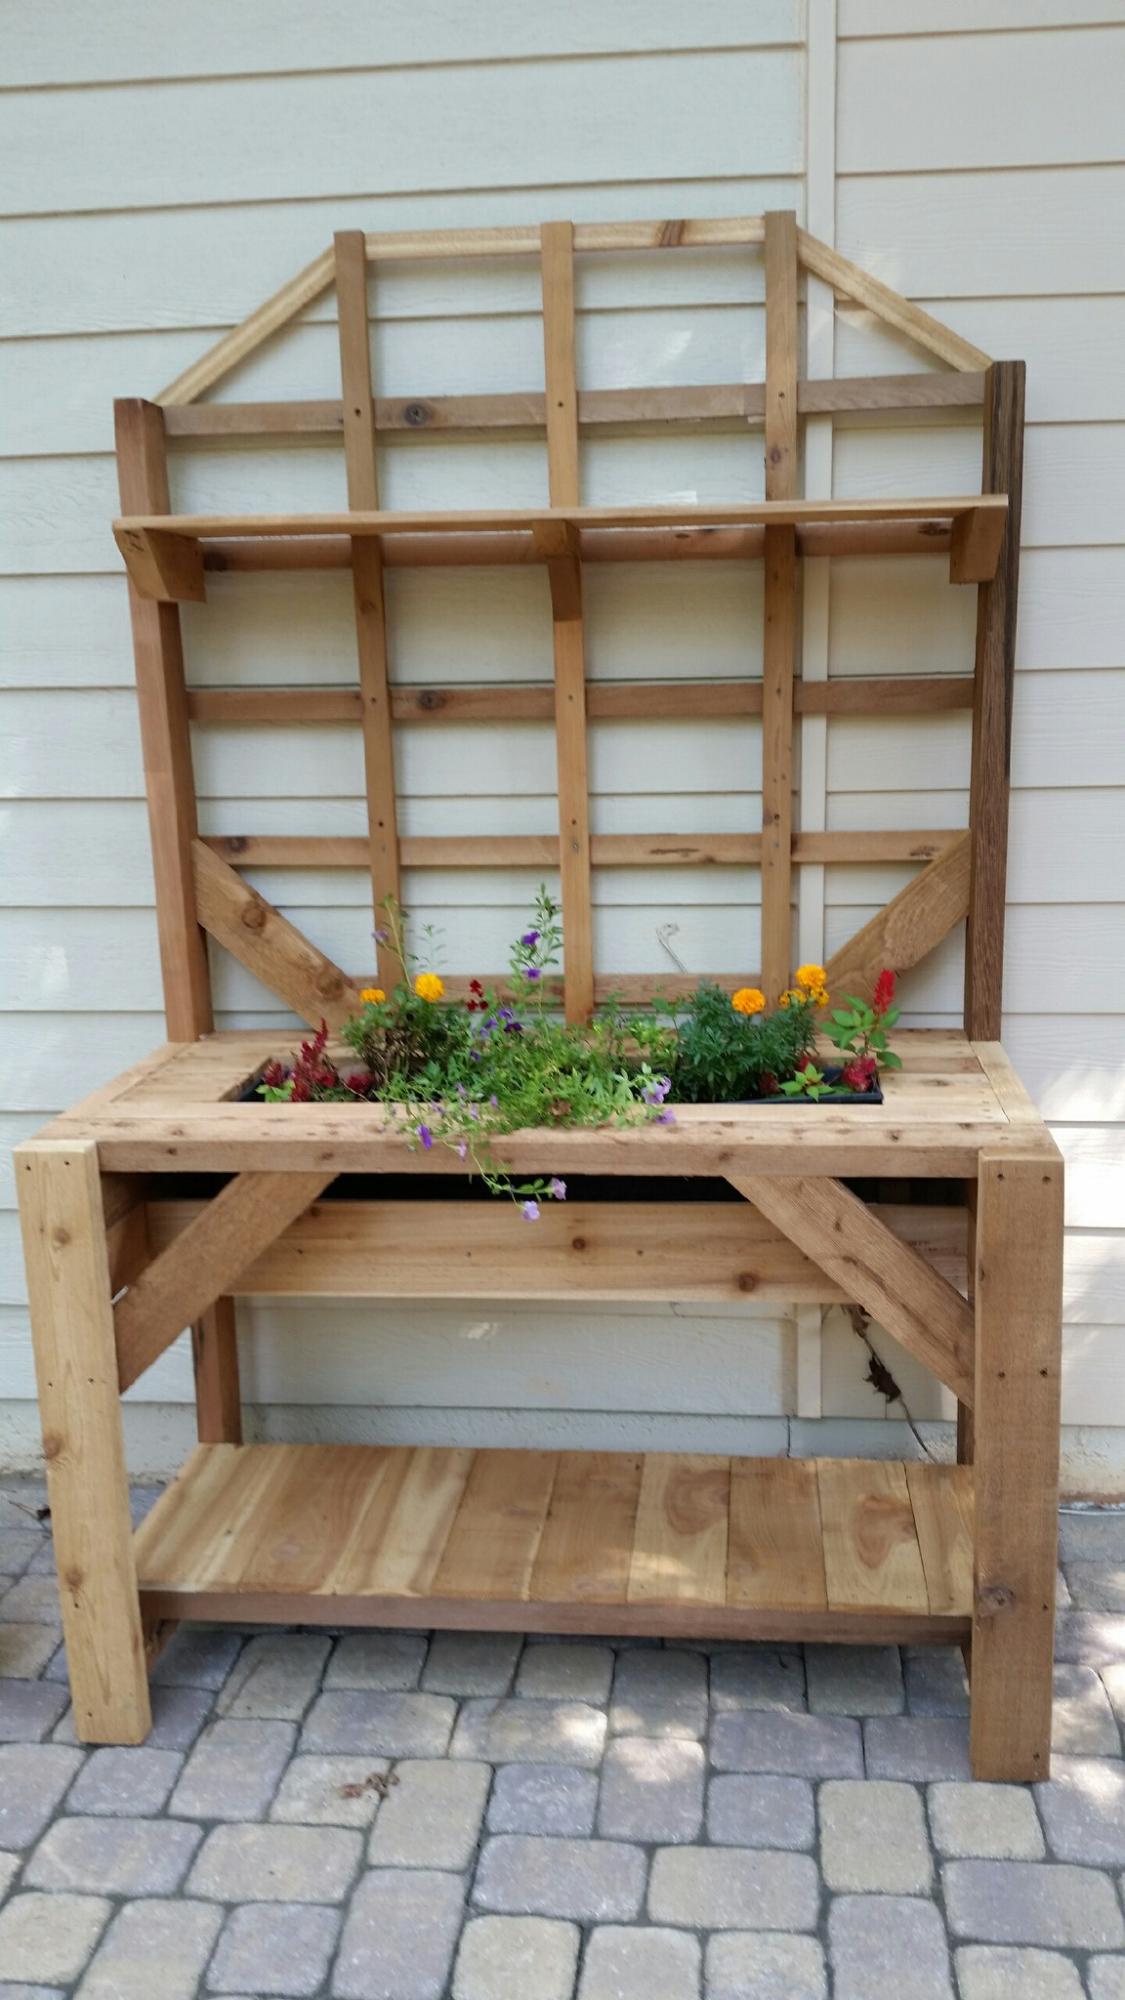
Cedar 4x4 and 2x4 frame, cedar fence wickets for the rest. Added - built around- a plastic planter box from big box store. Untreated, but good for covered outdoor area I think.
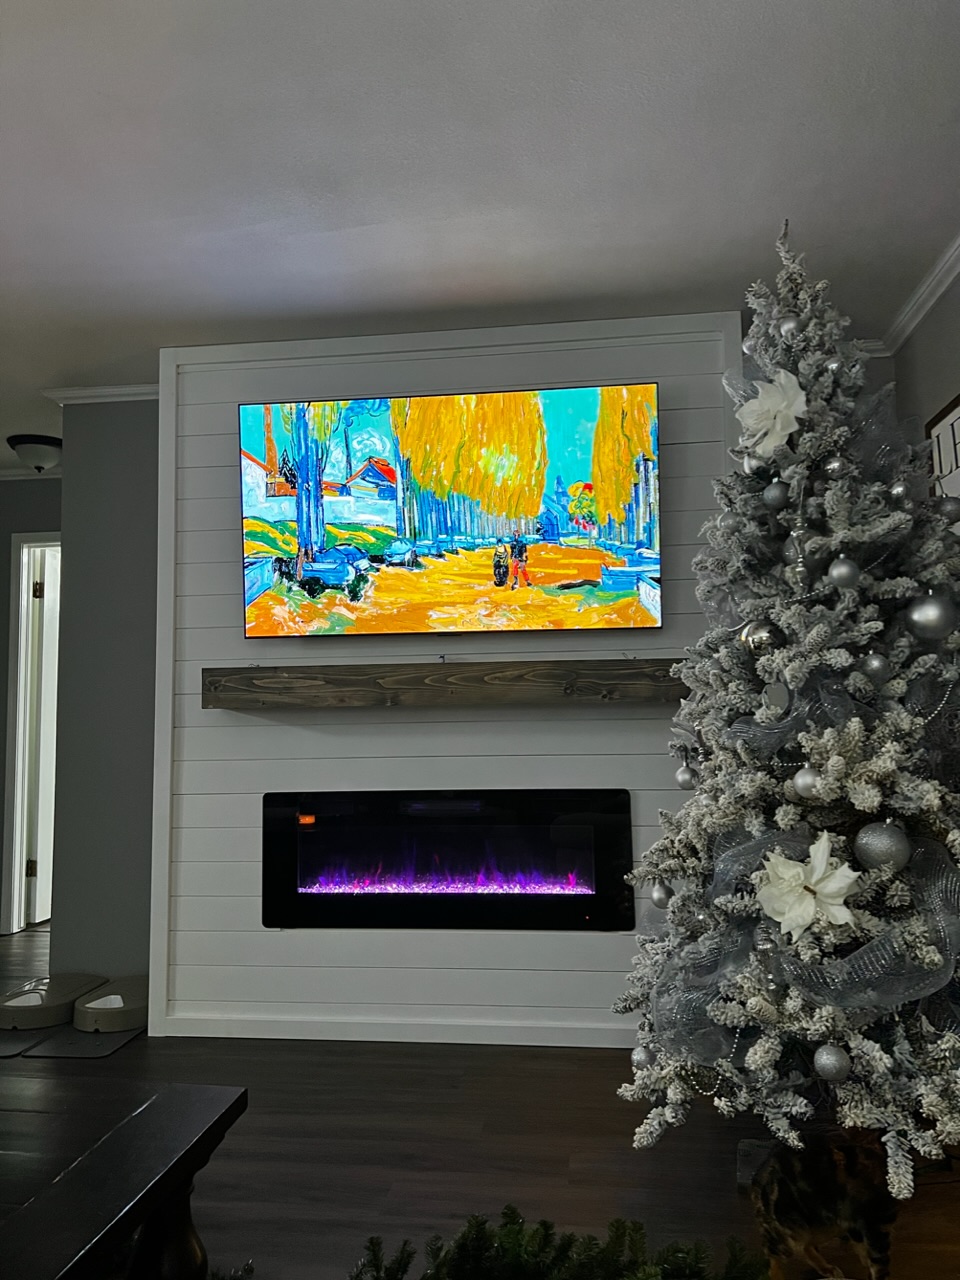
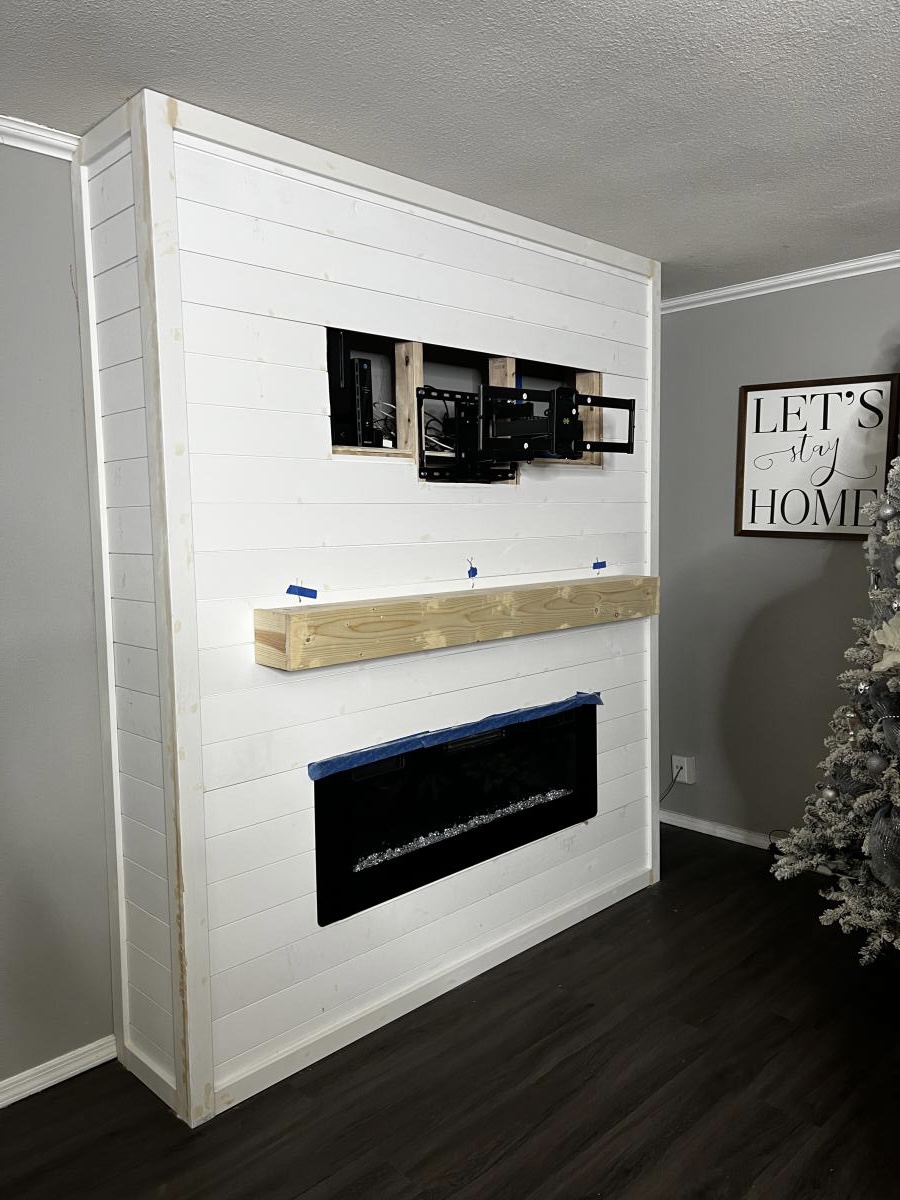
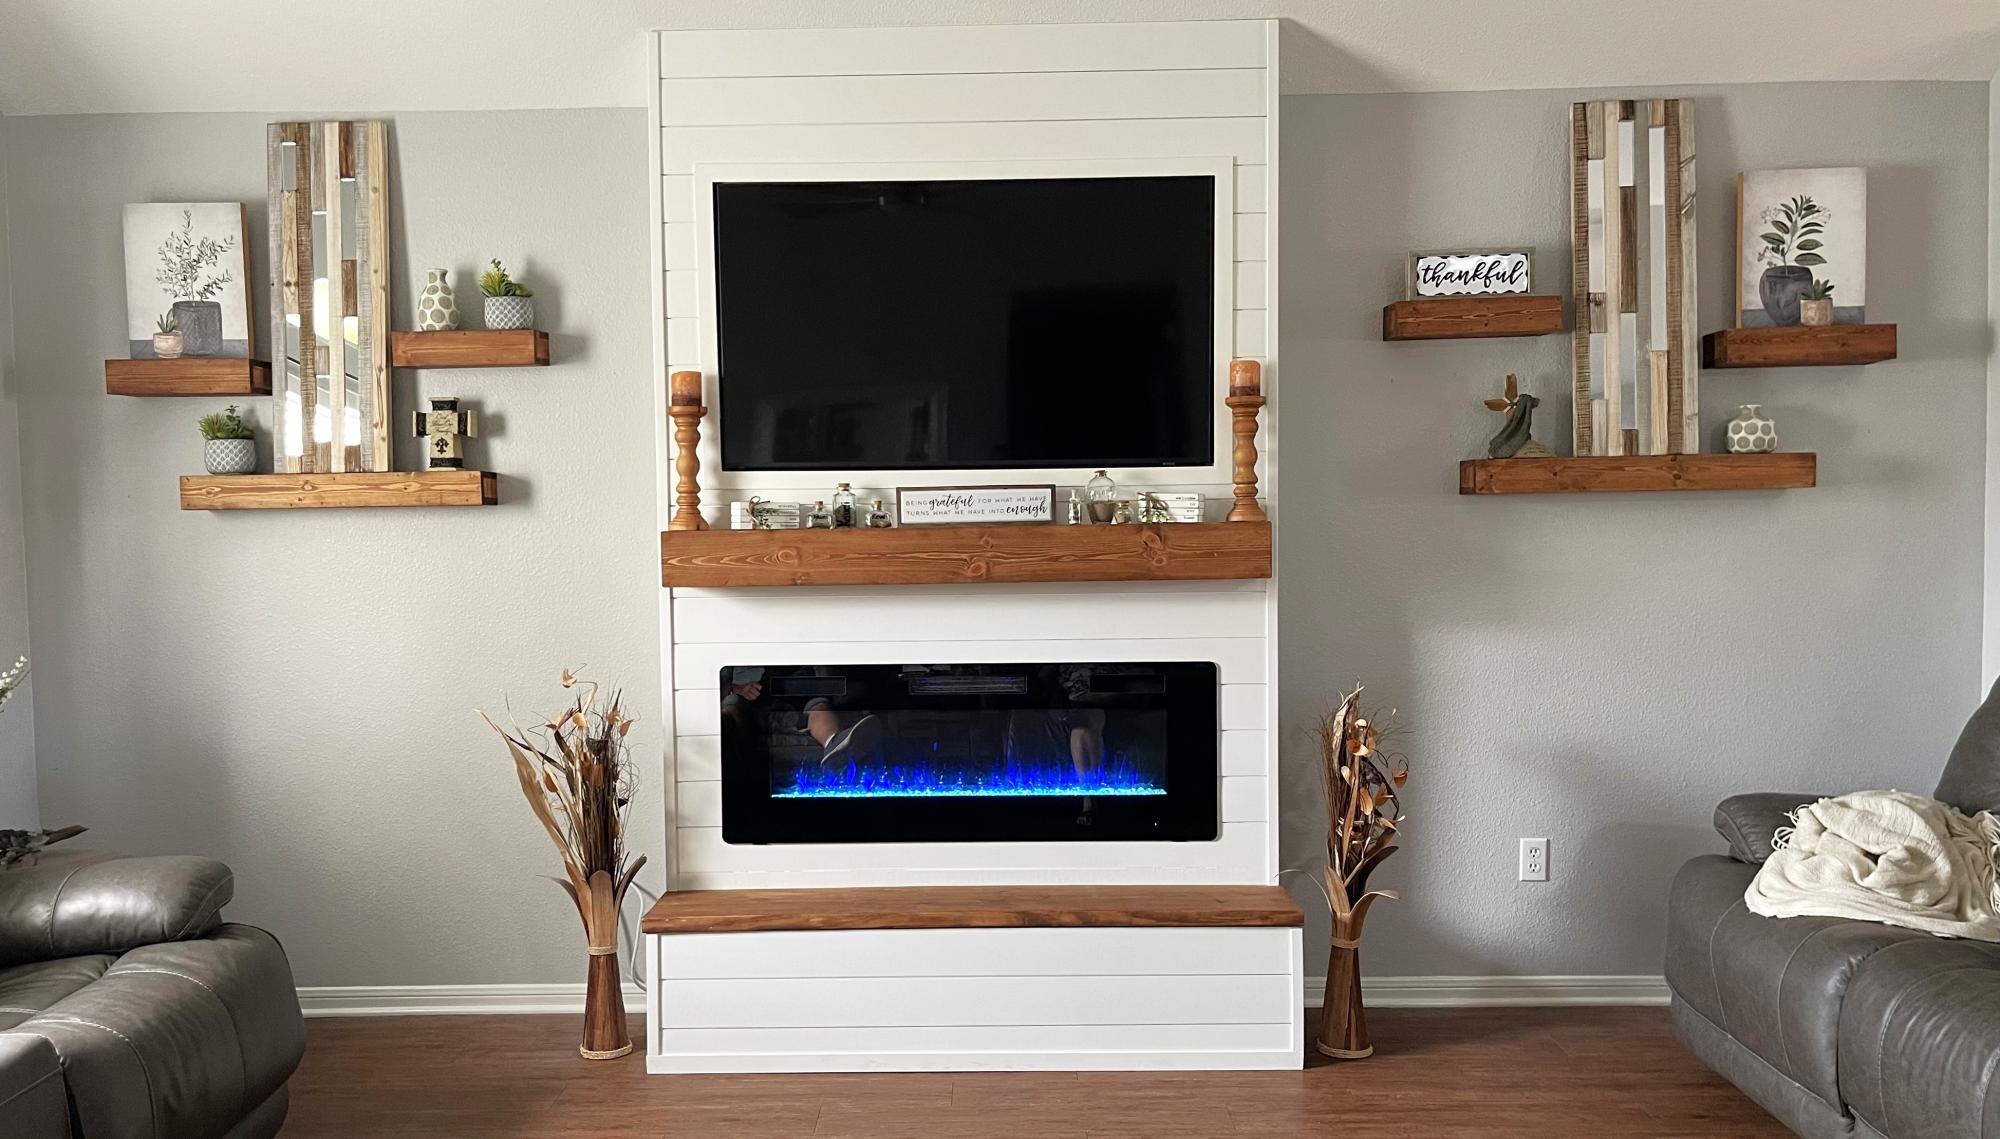
We did the Easiest Shiplap Fireplace in a weekend, thanks to Ana’s plans. I convinced my husband to help me build this by upgrading to a 65” tv and adjusting the dimensions. We also built a shelf behind the tv to hold our receiver and Xbox that is hidden when the tv is in place. Ana’s tutorial was amazingly and gave us the confidence to finally build something that’s been on our list for 2 years!
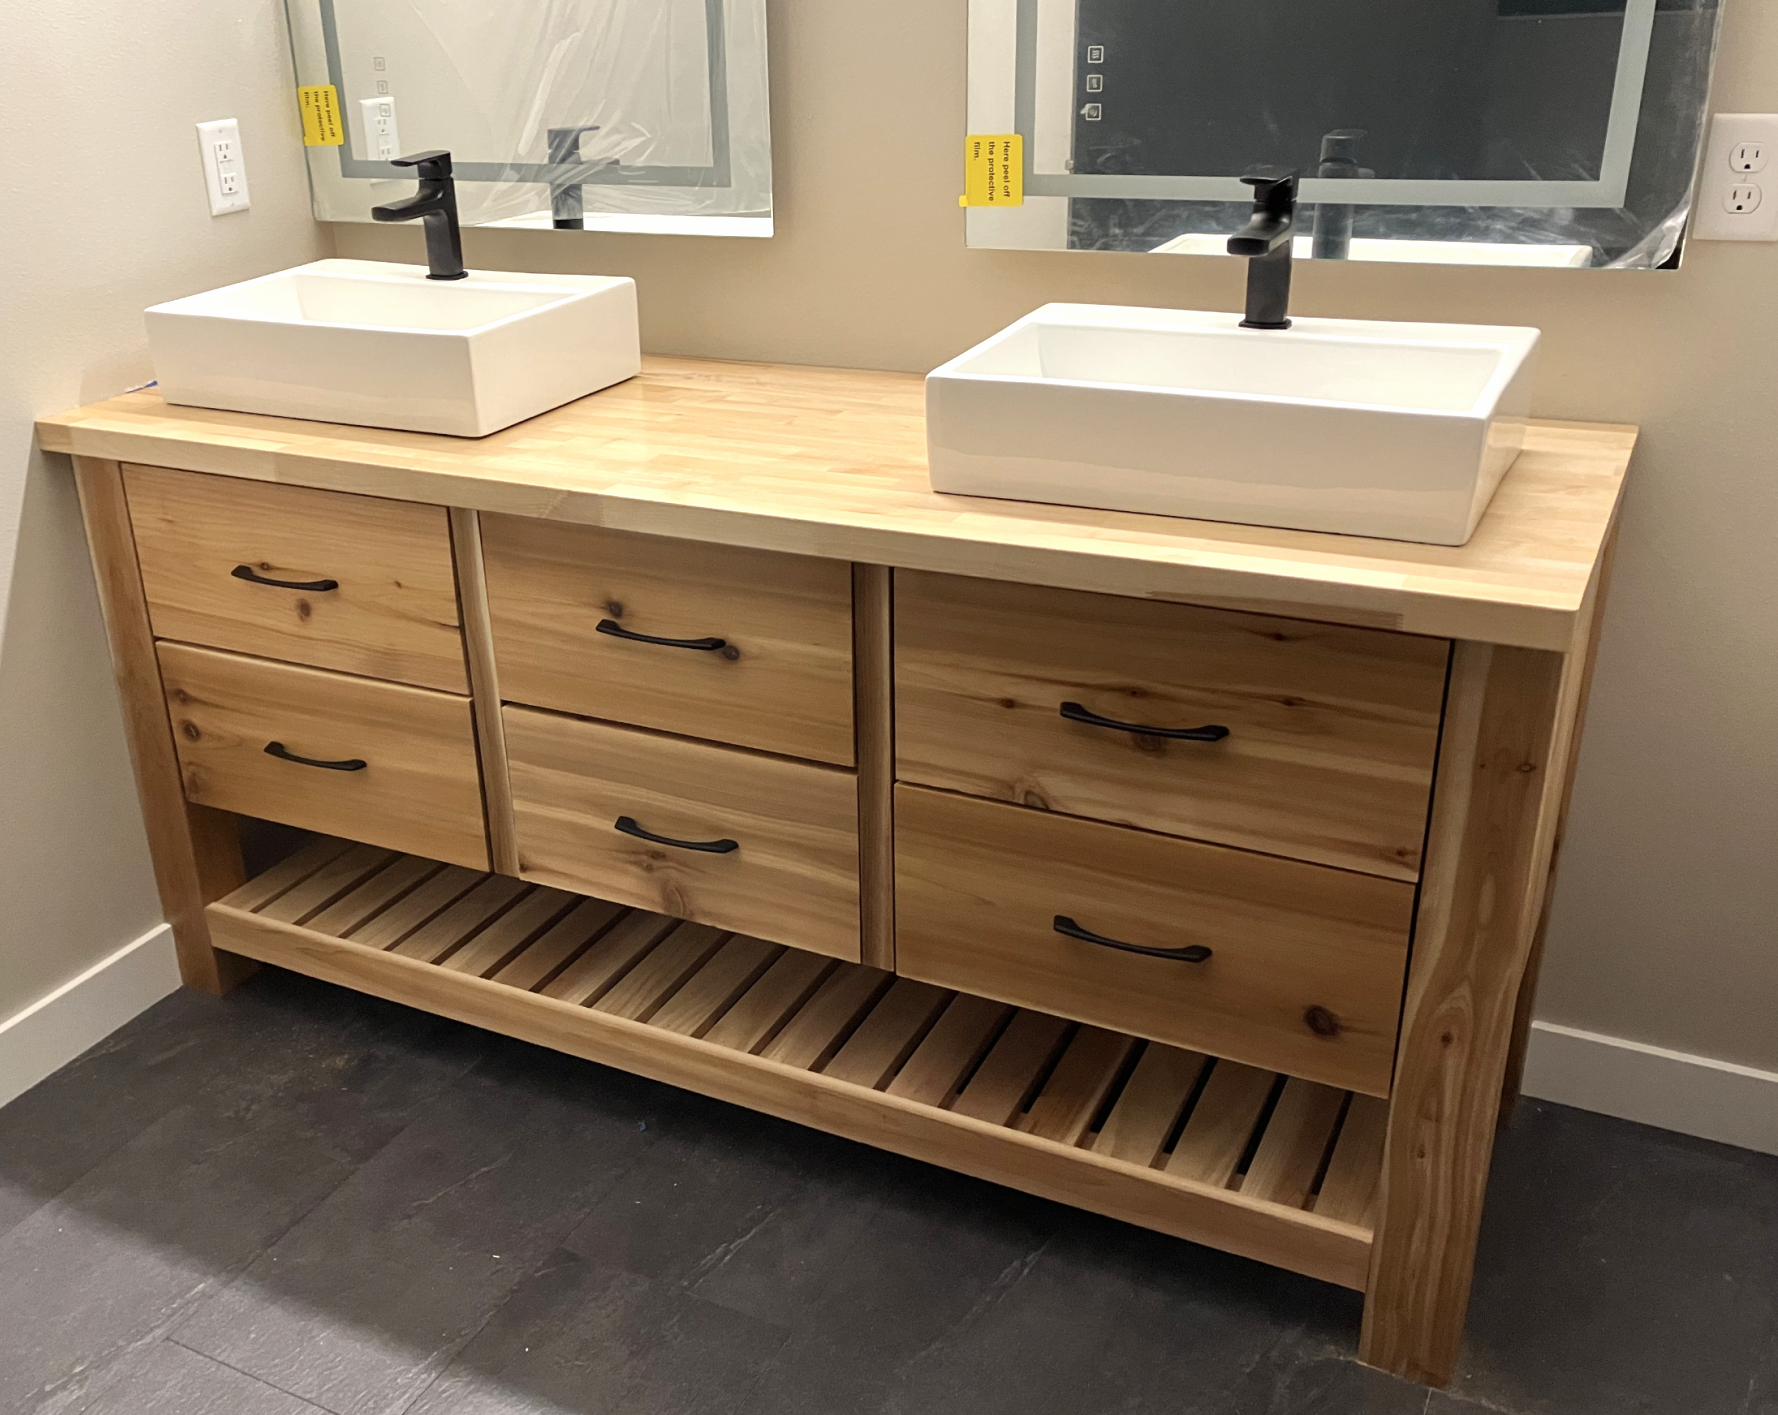
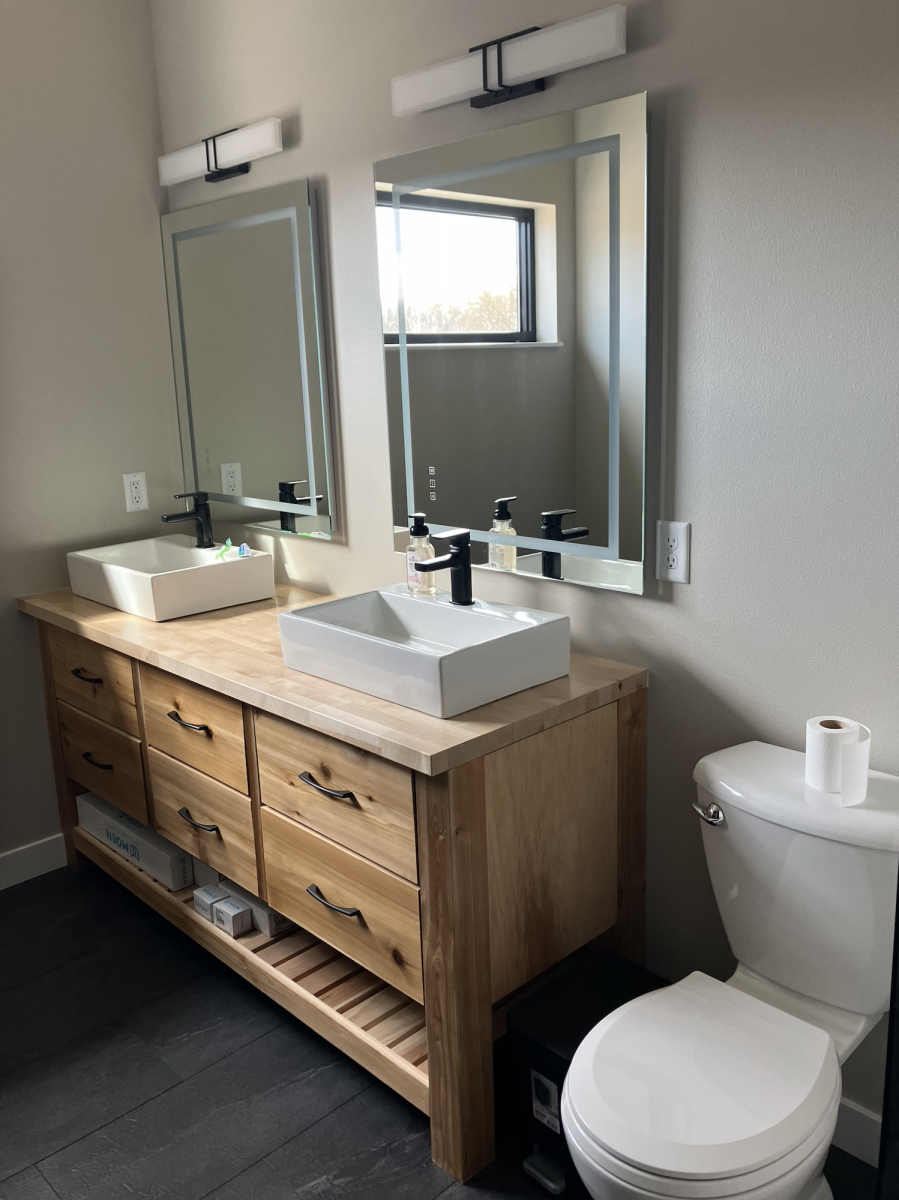
After looking at some terribly overpriced particle board vanities, I found the lovely Rustic Farmhouse Double Bath Vanity plans and decided to go for it. I think this vanity turned out much better than anything I could have bought with the same amount of money, and it will last much longer too!! Thanks Ana!!
Thu, 05/04/2023 - 10:26
Absolutely stunning, thank you for sharing your beautiful createion!
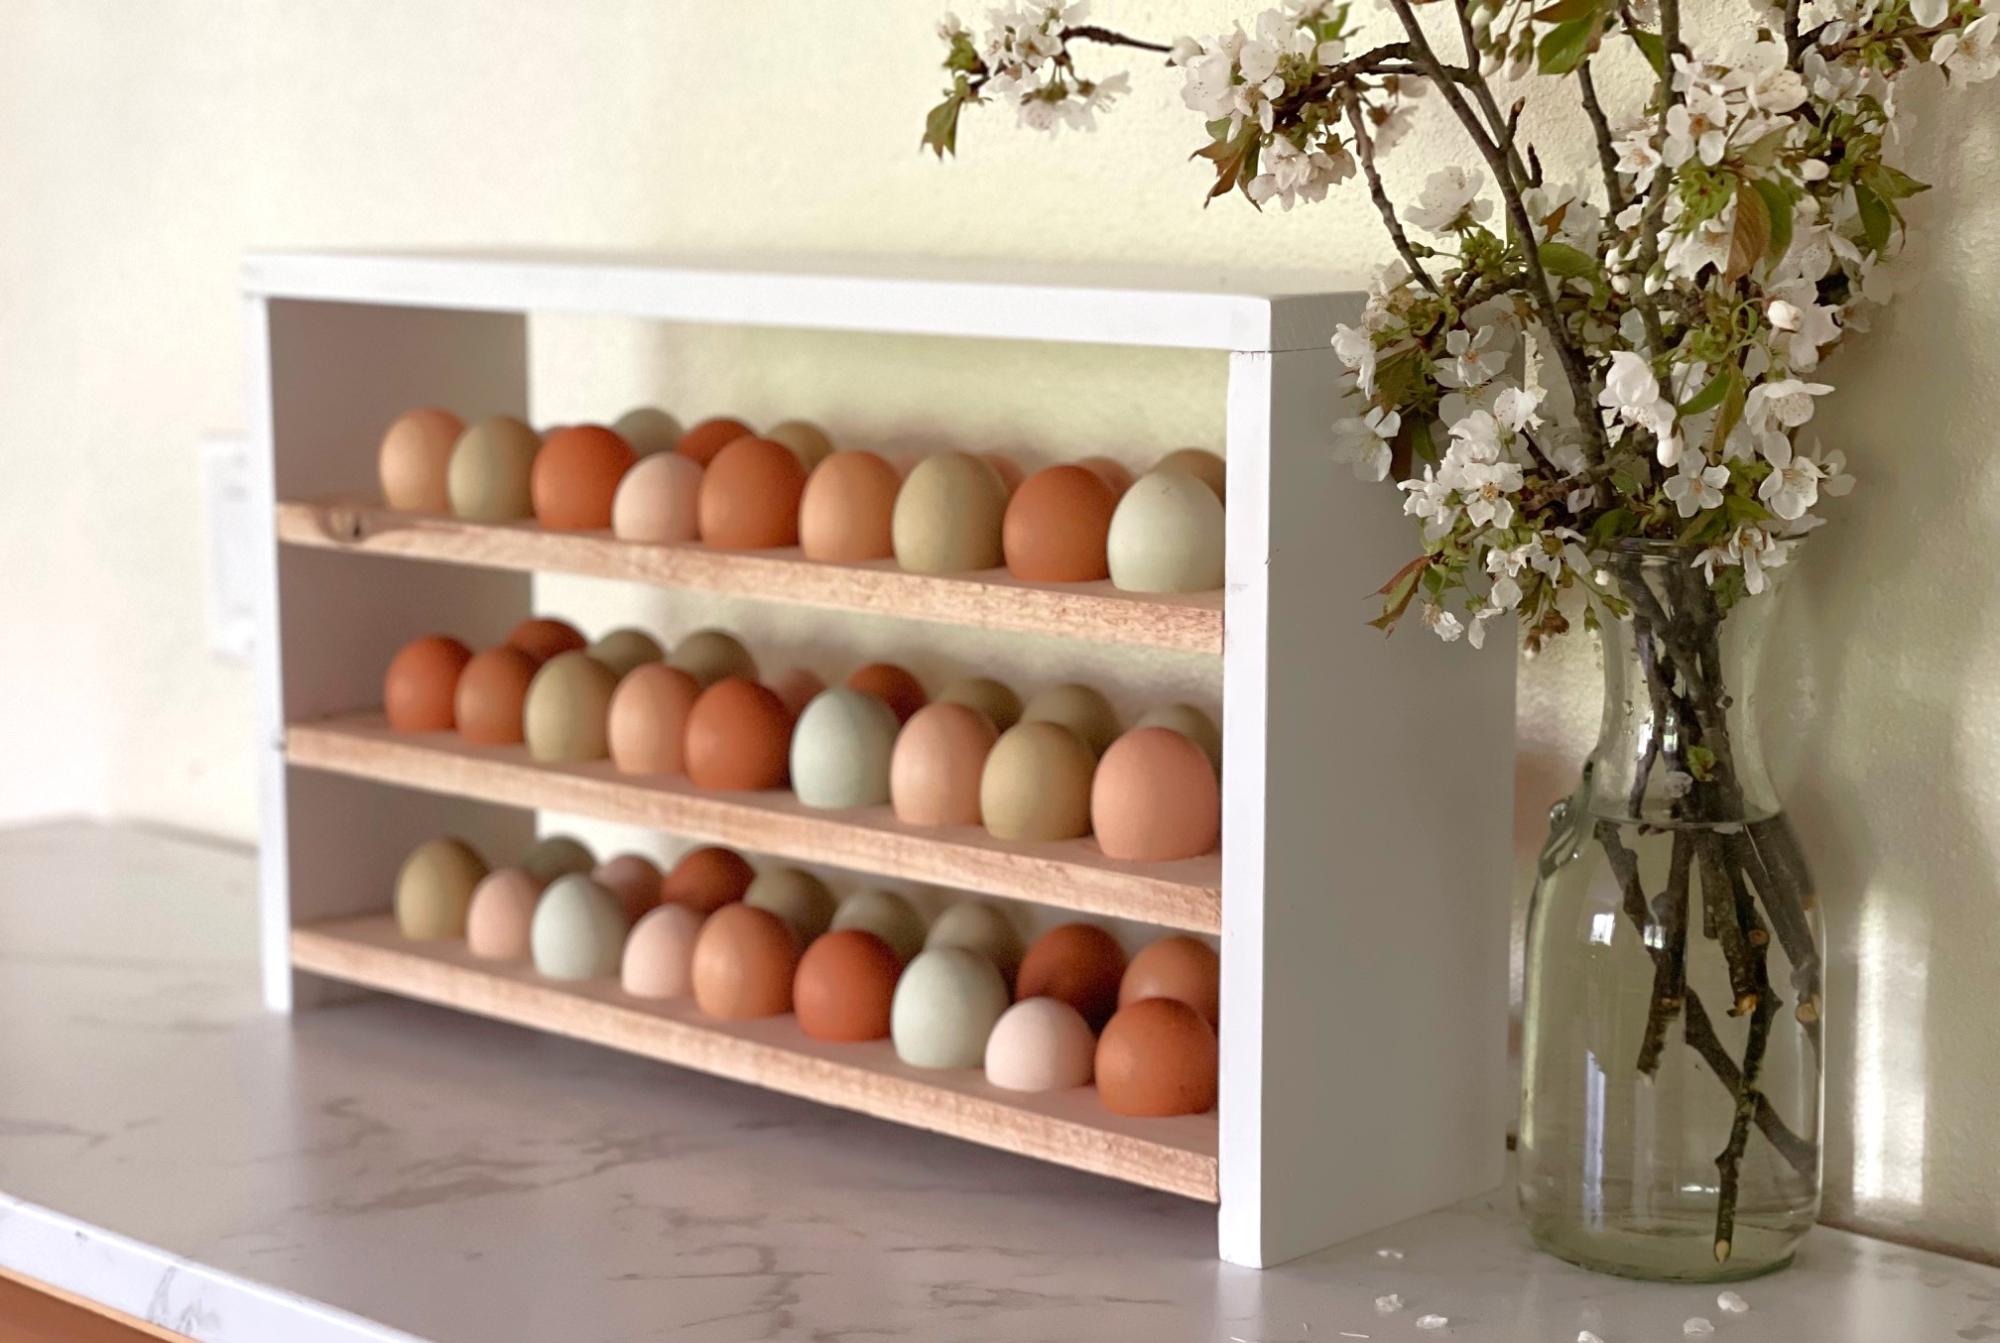
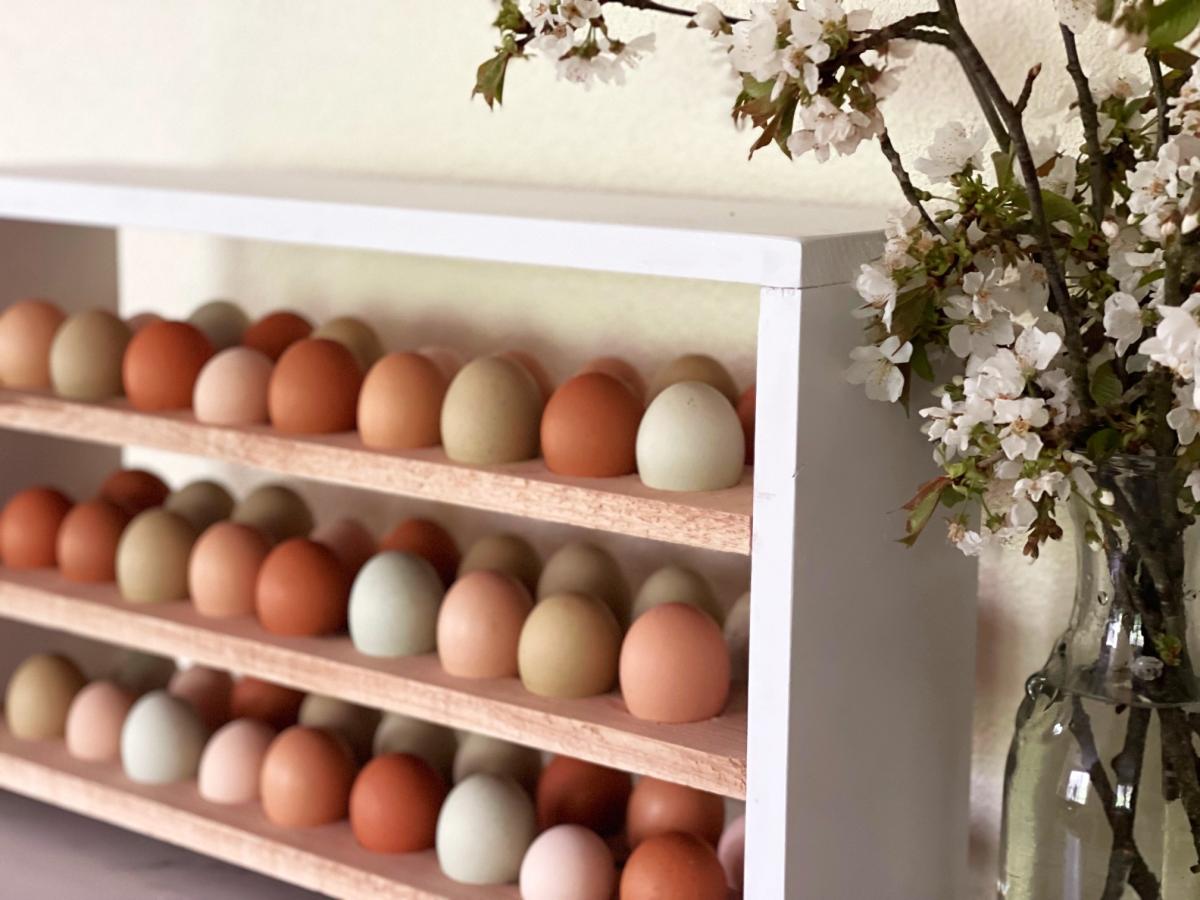
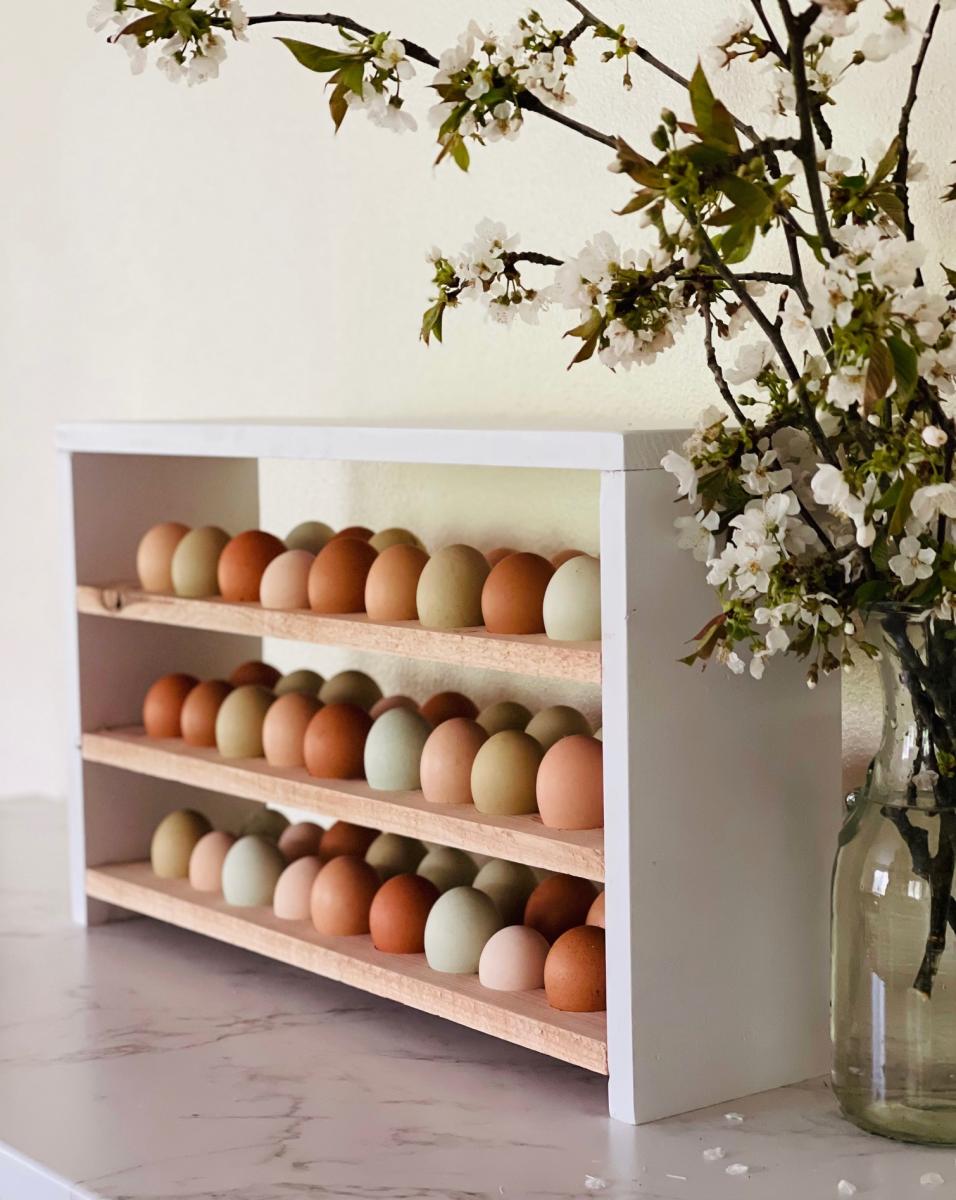
I used Ana's plans with modifications to hold 4 and a half dozen eggs. I love that it can sit on my counter and display those beautiful farm fresh eggs!
The fireplace wall and floating shelves I built for my sister.
Darla
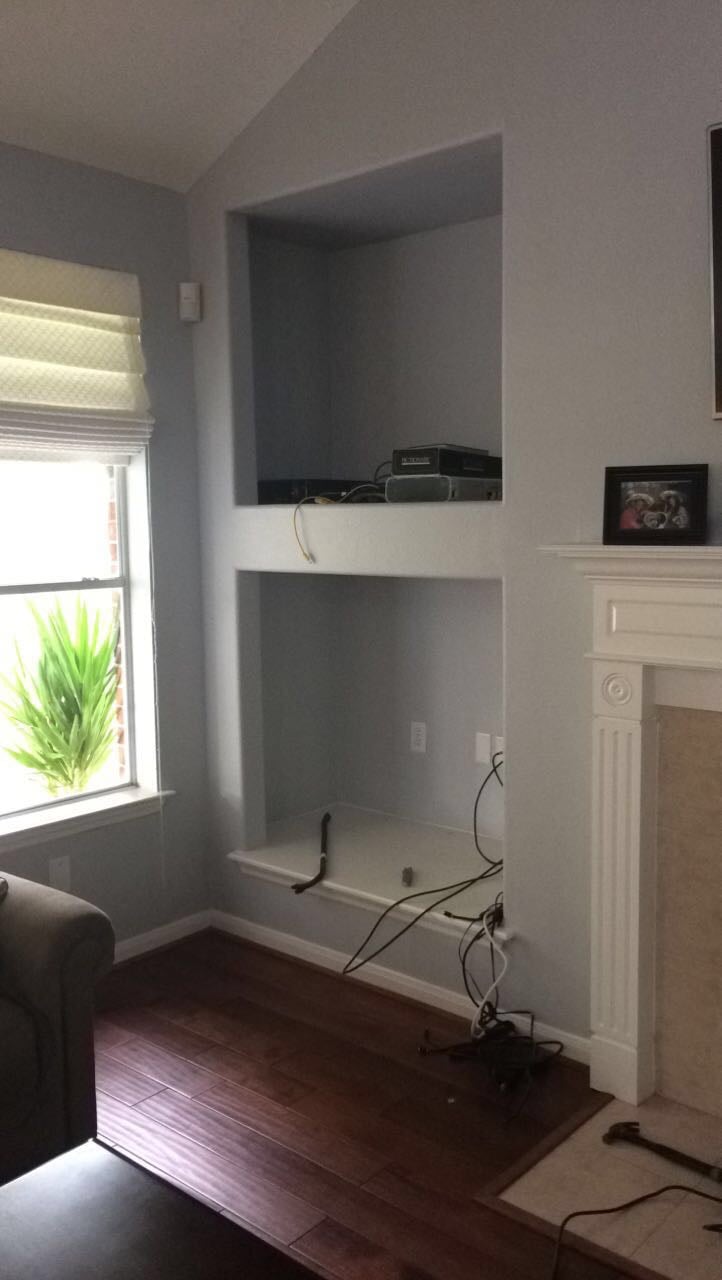
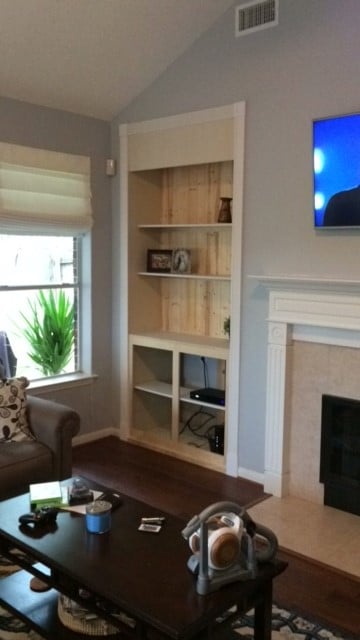
We bought this house about a year ago and we finally got around to removing this pointless niche! The center divider and bottom were removed. The cabinet and hutch were assembled seperately.
This is still a work of progress. I am looking for a nice decorative molding face for the top. If anyone has any suggestions please let me know! We will most likely paint it white to match the fireplace mantle.

My first Ana White project. Built Ana’s awesome small cedar shed as an outhouse for our many cats. The have access to it from inside the house. Great way to keep litter boxes and the mess out of the house. It is stand alone, and attached to the house, in front of a bedroom window. There are two ‘entrances’ as well as two, one-way, escape hatches, if a cat in the outhouse is interrupted by another cat (I.e. a male cat comes in and the female feels trapped) they can exit to the outside (one way so no critters can come inside!). Ana has easy to build plans, great site! I plan on making the square table just posted today for my newly refurbished deck. Keep in mind, my estimated costs and time reflect a LOT of additional features on the inside. The shed itself, very easy, simple, inexpensive. Very little waste with Ana’s projects as well.

Thu, 04/29/2021 - 09:06
Thank you for sharing, what a cool project!
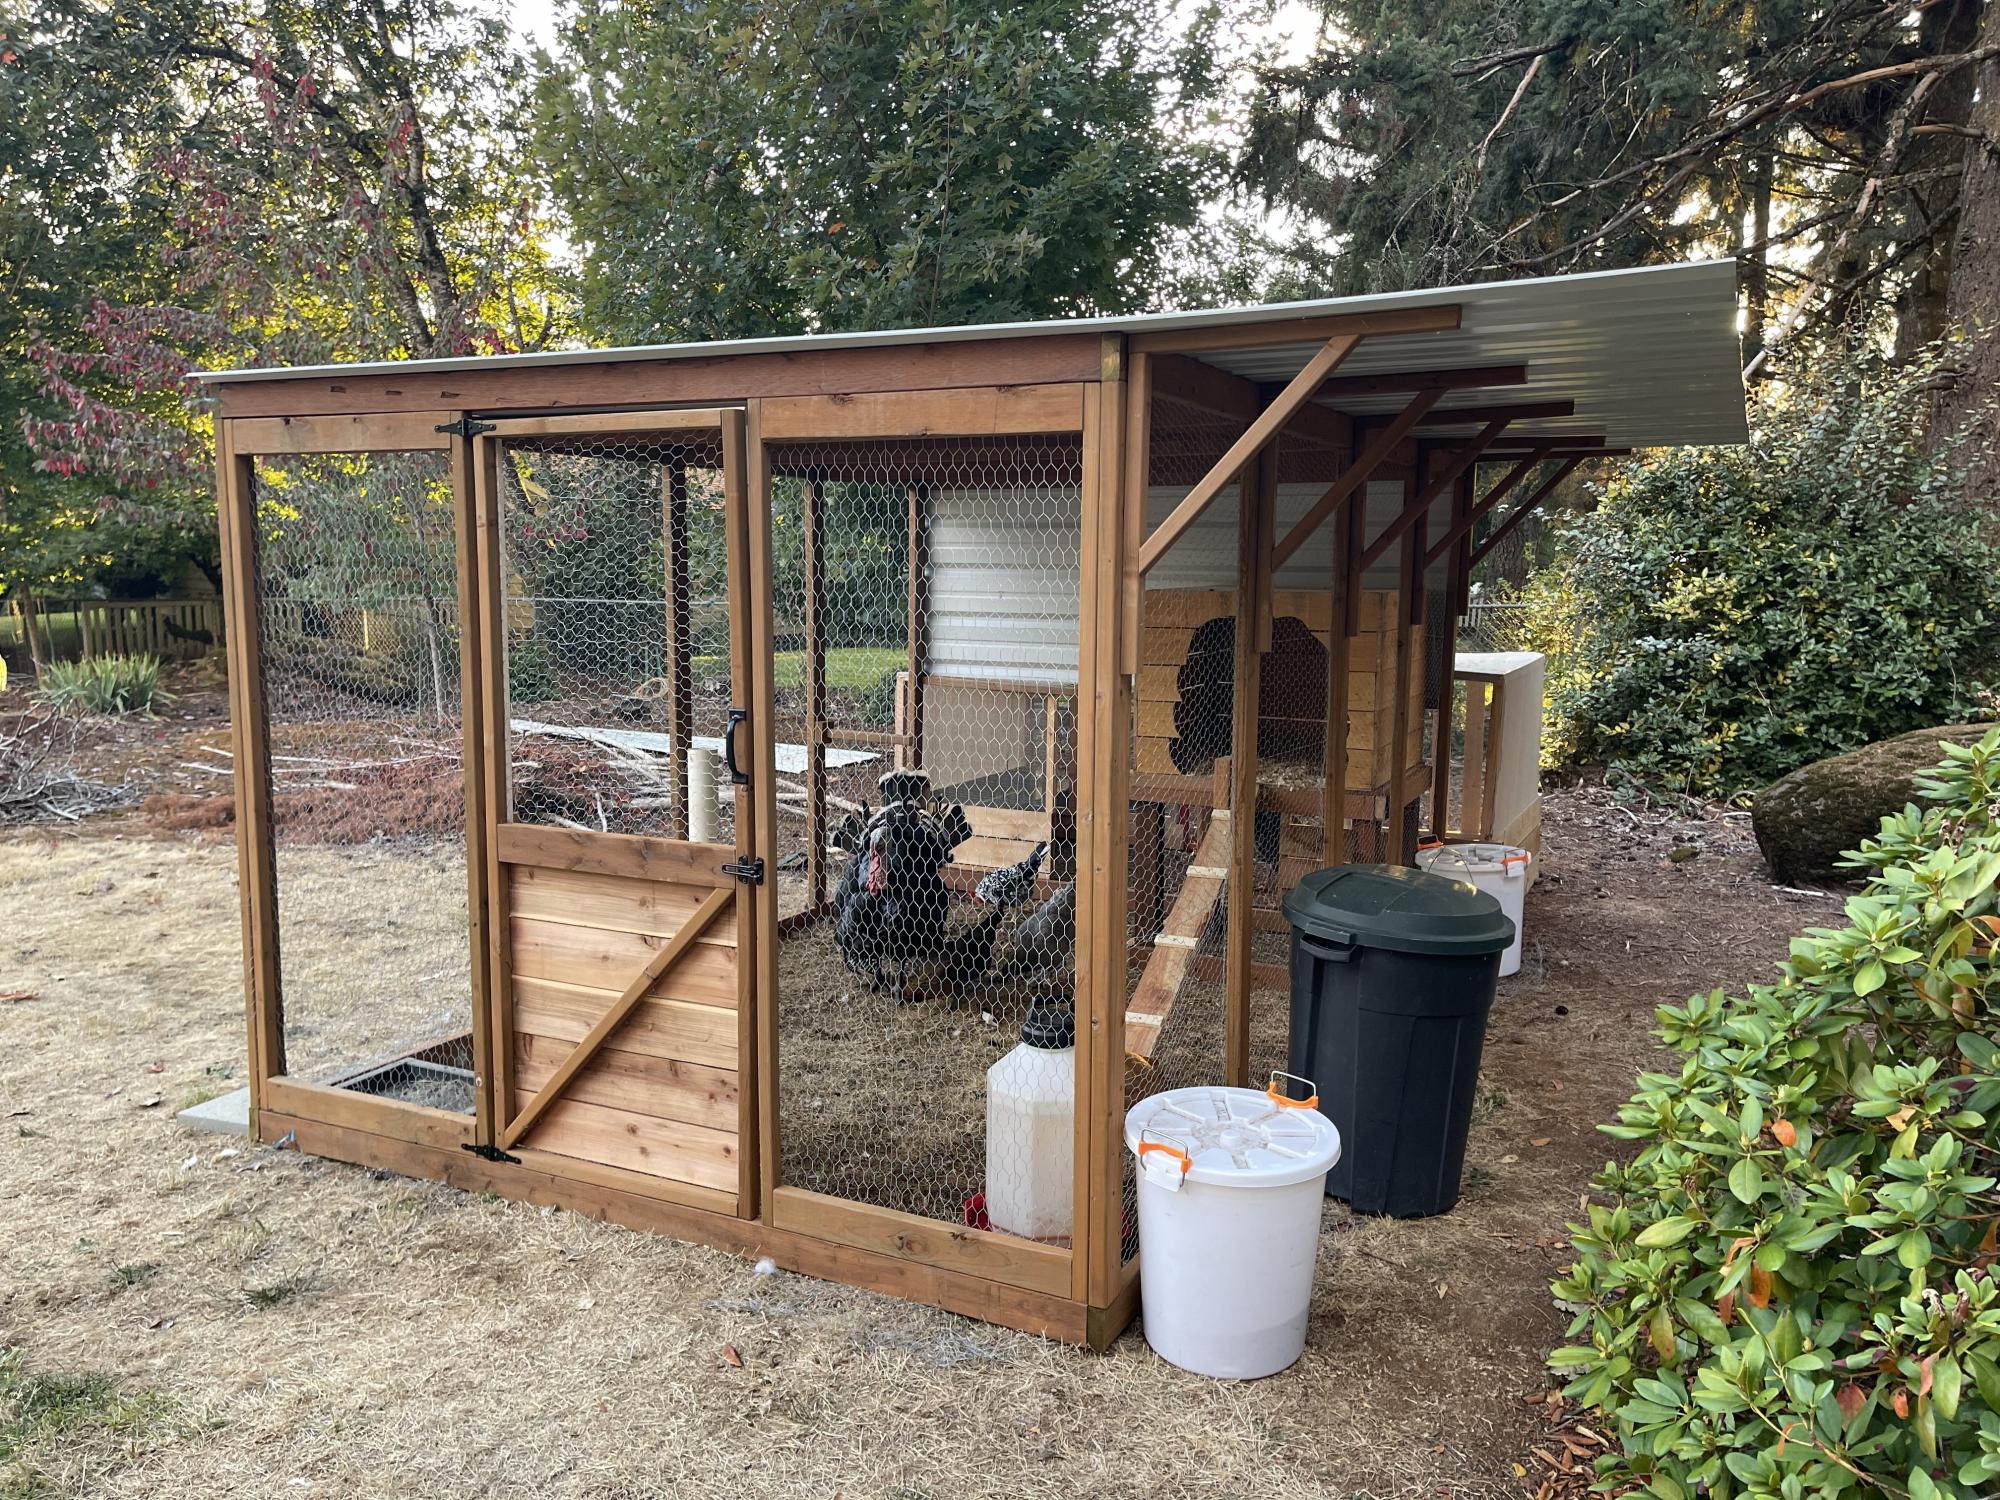
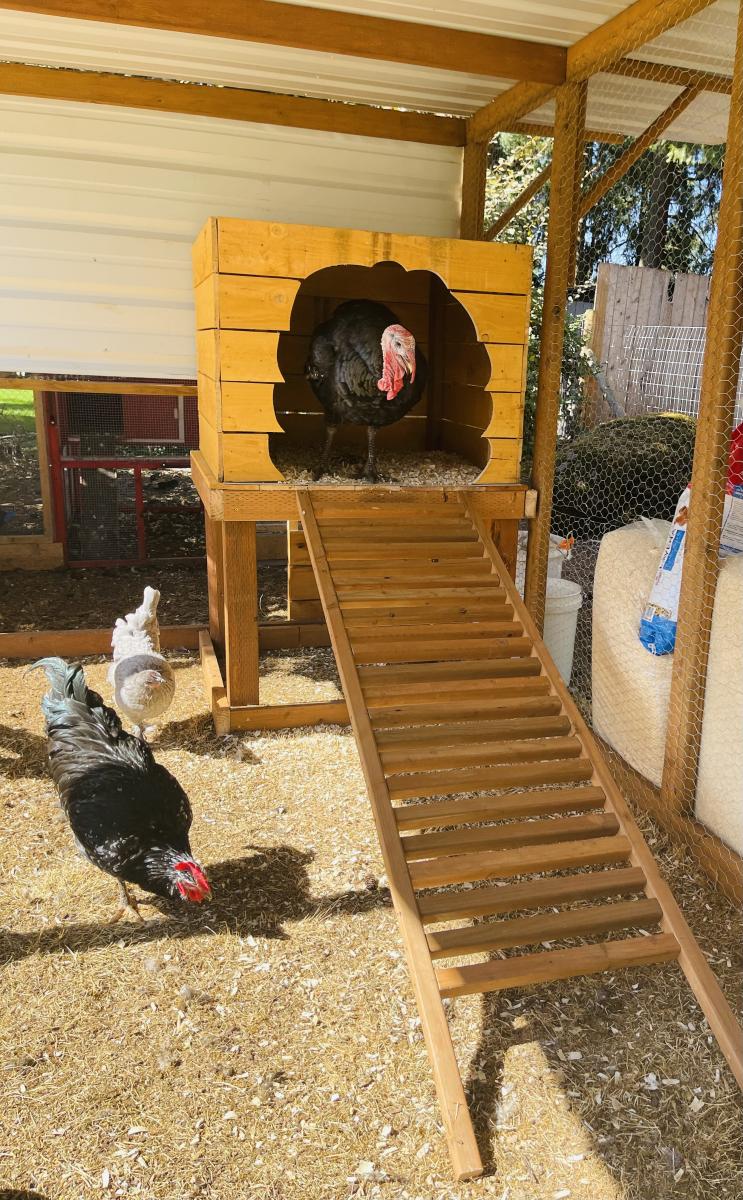
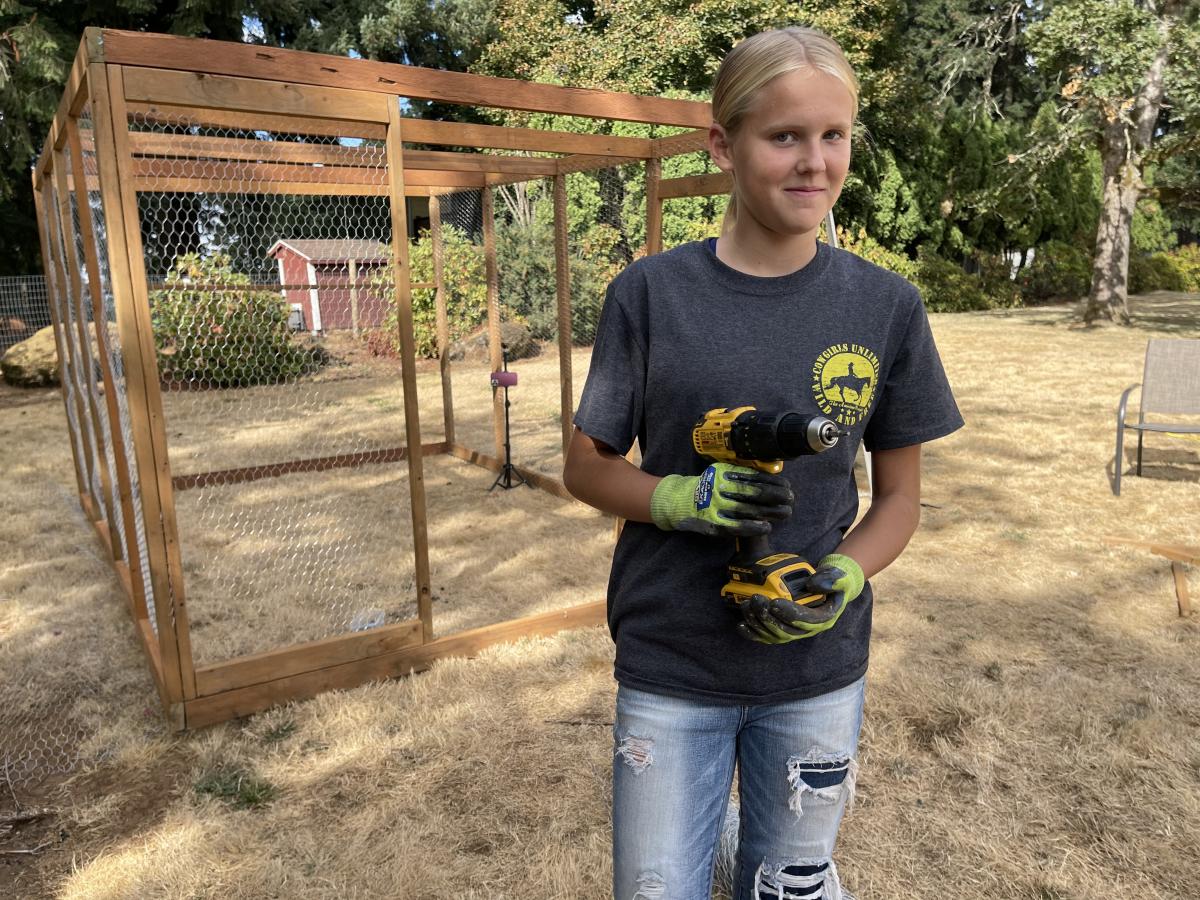
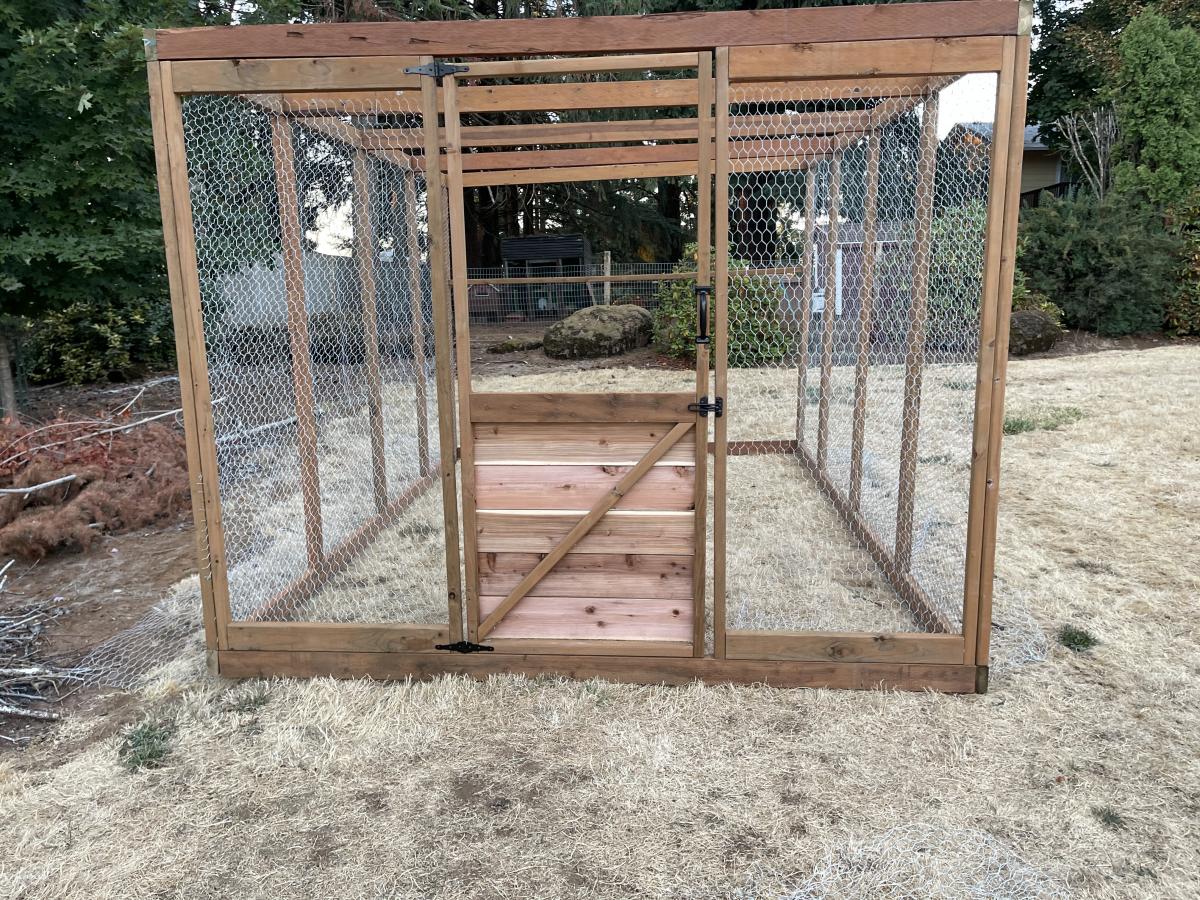
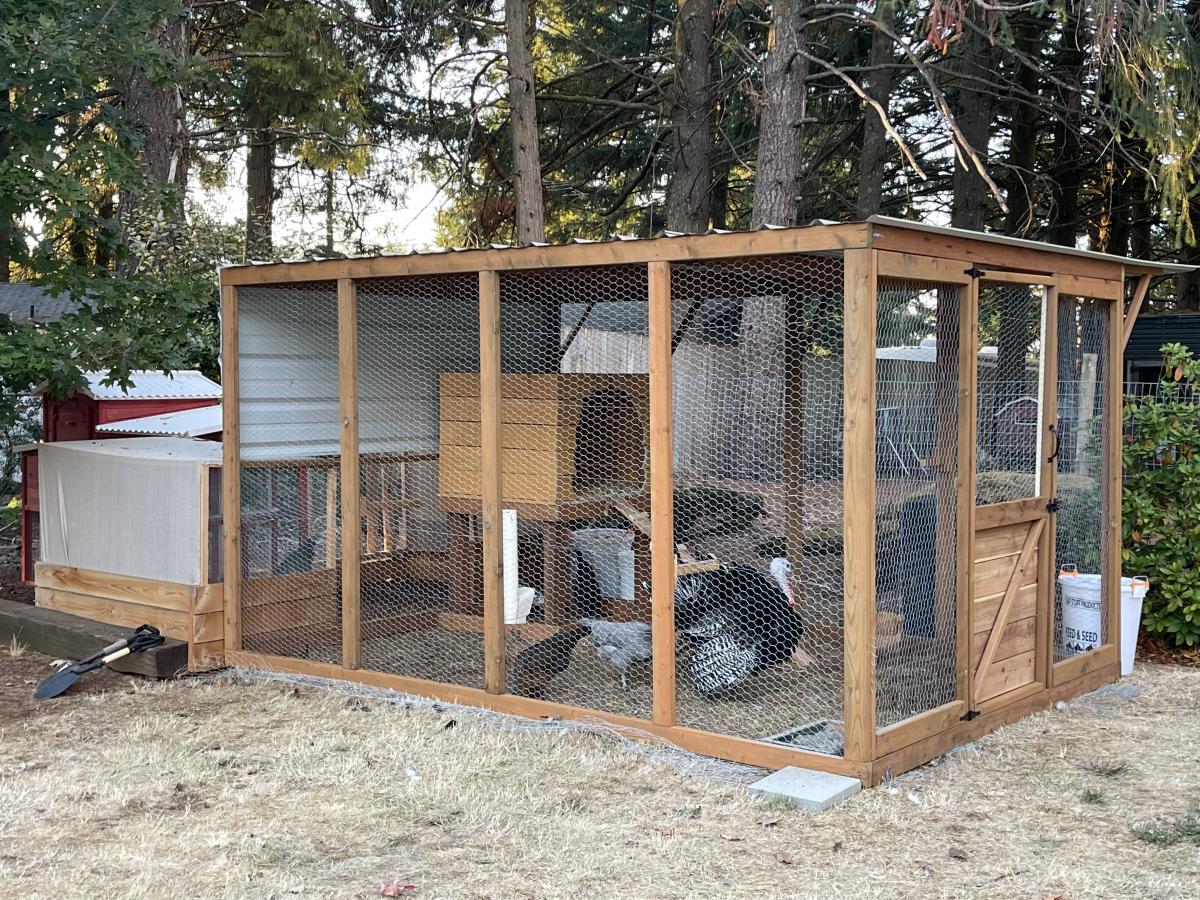
My daughter helped me build this enclosure. We used Ana's chicken run plan, but just made it taller so we could walk in easily. We added an overhang to store food and pellets under, for the supports we used Ana's easy shelves angle support plan, and finally we used the playhouse base plan for the base of turkeys house. All plans used are linked below. We ran the chicken wire out under the structure and still need to bring in some large rocks or pavers, but so far no issues with predators. Turkey was getting too big to fit in the smaller coop, so we decided to have fun with his house and used cedar fence pickets and some treated 2x4's, built a box and jig sawed the shape of a turkey. As you can see in the first photo the ladder for turkey wasn't big enough, all the other chickens were in his house, lol. So I beefed up the ladder and he happily can put himself up at night now:) Overall a super successful project, I wasn't sure what to do with the top and just at that point, the neighbor walked over and offered the metal, talk about a huge win and the perfect solution! We attached the run to the previous smaller structure and now they have so much more room and are laying like crazy:) Finally, I think this would make a great dog kennel as well...
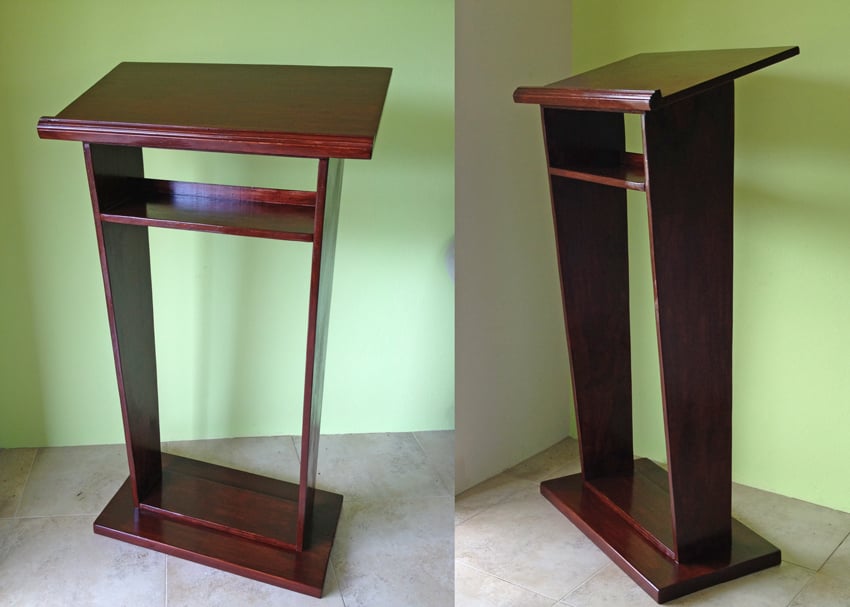
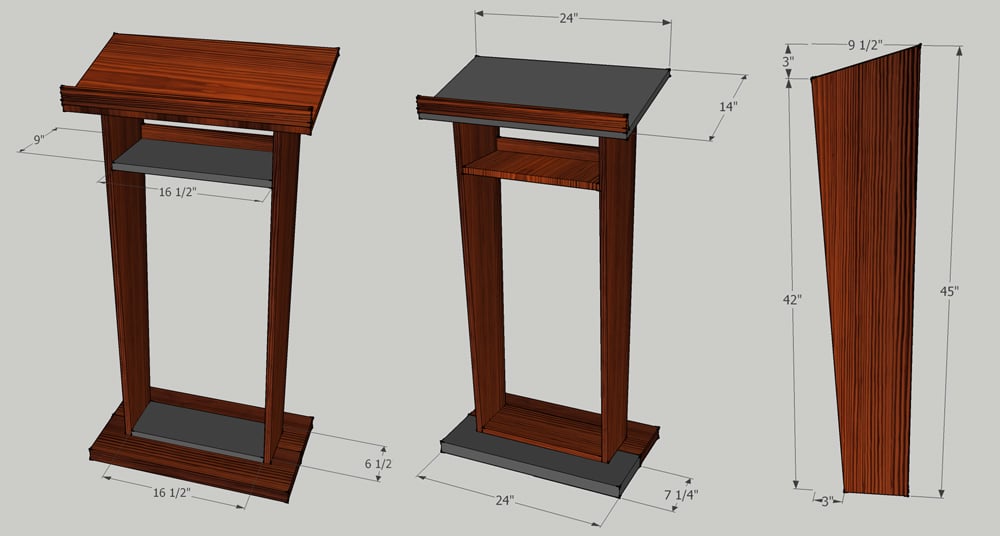
A good friend of mine, a pastor of a local church, asked me to build a pulpit for their recently finished church up in the countryside of Grenada. She showed me a picture of what she had in mind and based on that, I drew my own plan in SketchUp, and then built it out of Yellow Pine boards and Plywood.
Note to the dimensions:
After I drew the plan, and just when I was at the lumberyard to have the plywood and boards cut, I thought I might have had it estimated not wide enough, so I decided on the spot to make it 2" wider and the top panel 2" wider and deeper too. So if you'd like to build based on my plans, please consider if it's wide enough for your purposes.
This is what I used (corrected measurements here):
2x 2x8 26" long YP Boards (Base)
1x 18 1/2" x 6 1/2" Plywood (Base Support Panel)
1x 26" x 16" Plywood (Top)
1x 18 1/2" x 9" Plywood (Shelf Panel)
2x 45" x 9 1/2" Plywood (Side Panels ) - these are cut angled, see plans
1x 44 1/2" Wood Moulding (for the "stopper" on the top panel, and the "back" of the top shelf.


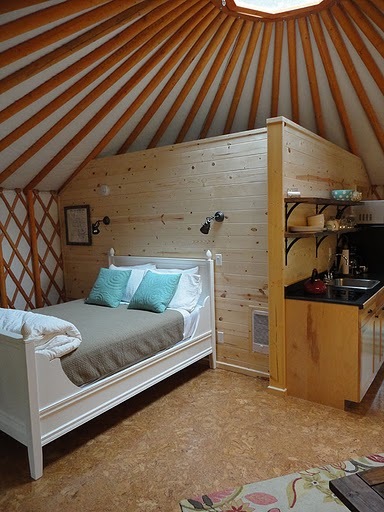
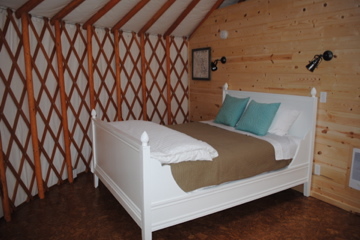
We made the Lydia bed for one of our yurts. This bed is a perfect fit for our beloved Betty yurt.This bed adds a touch of whimsy and femininity. Guests love this bed and comment how it adds to the experience of staying in a yurt.

In reply to yurt? by marlaandwilliam
Mon, 06/27/2011 - 13:41
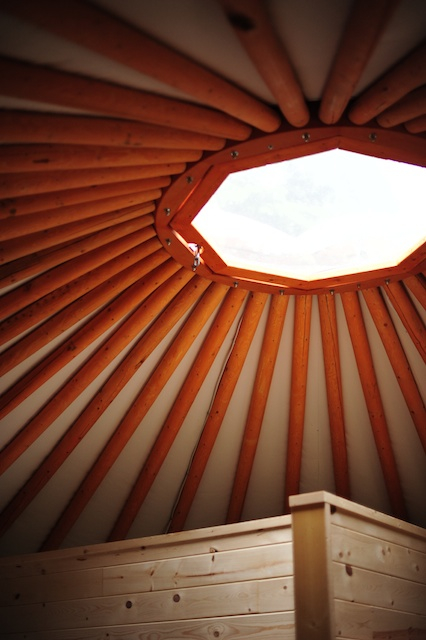
Yurts are traditional houses from Mongolia, Kazakhstan and has been the primary shelter for nomadic herdsman for centuries. These circular wooden dwellings were traditionally covered with felted wool and skins. As the nomads lives revolved around the rhythms of nature, the yurt’s design was portable and able to withstand high winds and extreme temperatures. Even today, many pastoral families in Mongolia still prefer life in a yurt.
The yurts we have are a modern version of this with full amenities of kitchen bathroom etc. We are located in the lake country of Northern Saskatchewan Canada. You can find more photos or information about yurts on our website http://florabora.ca.
Thank you for the question
Mon, 06/27/2011 - 14:39
I live in Colorado and we have Yurts here. Yurts in CO tend to be more rustic, sustainable, easy to build, and small space in the mountains typically. People usually stay in yurts when they're backpacking, skiing, etc. Rather than leaving the mountain and going back to town, the yurt system in CO allows you to keep your adventure going.
Here are some links if you're curious
http://www.parks.state.co.us/Reservations/YurtInformation/Pages/yurtinf…
http://www.coloradoyurt.com/yurts
PS: cool space and awesome build!
Fri, 09/23/2011 - 15:43
Just wanted to say I love yurts!!! I've been wanting one for a long time. love 'em
Wed, 10/07/2015 - 07:42
Seen this on pinterest and just had to say that Flora Bora is amazing, We stayed there a couple yrs ago and 100%enjoyed it. Such a welcoming family that owns Flora Bora too. They go above and beyond to make your stay a memorable one. Definetly recommend to anyone.
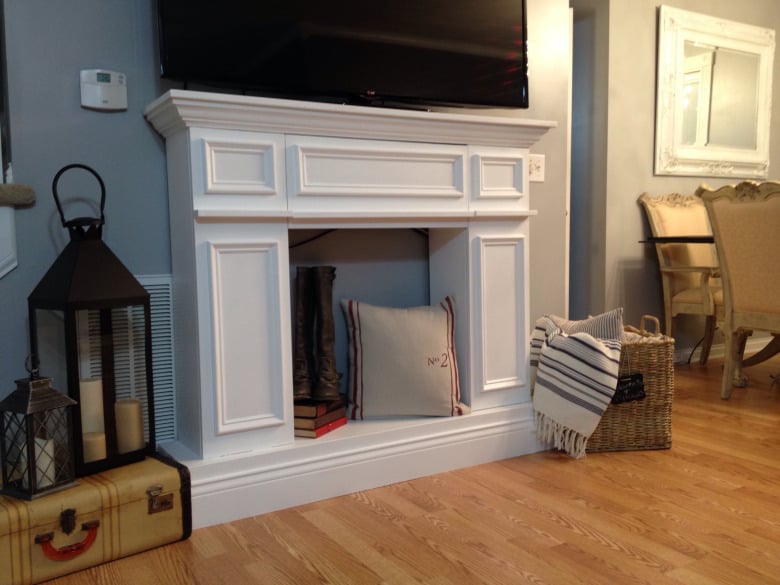
Modified from Ana White's Faux Fireplace with Hidden Storage Plan


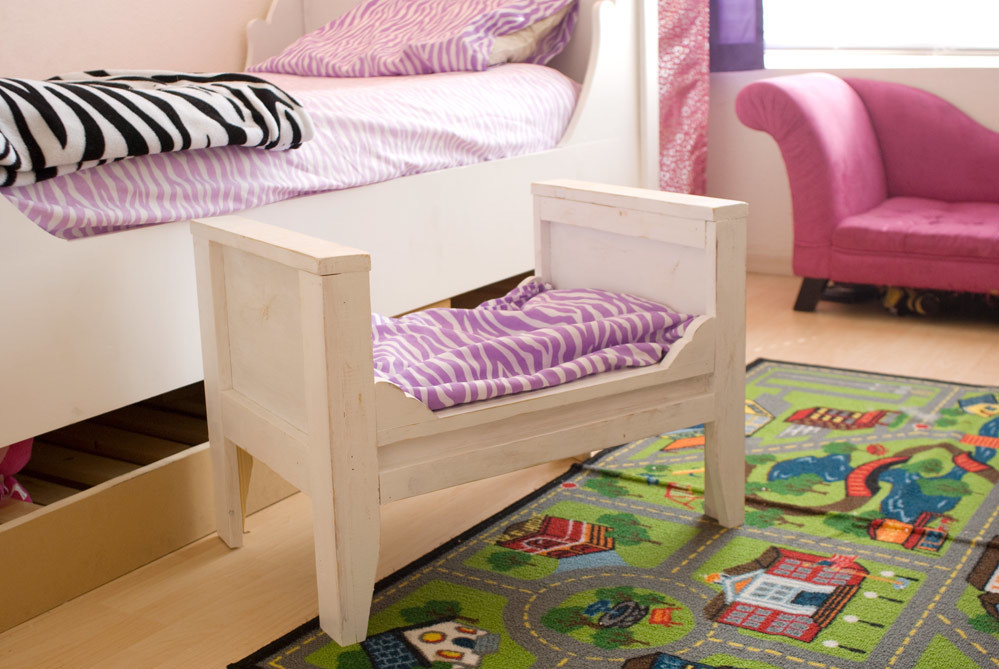
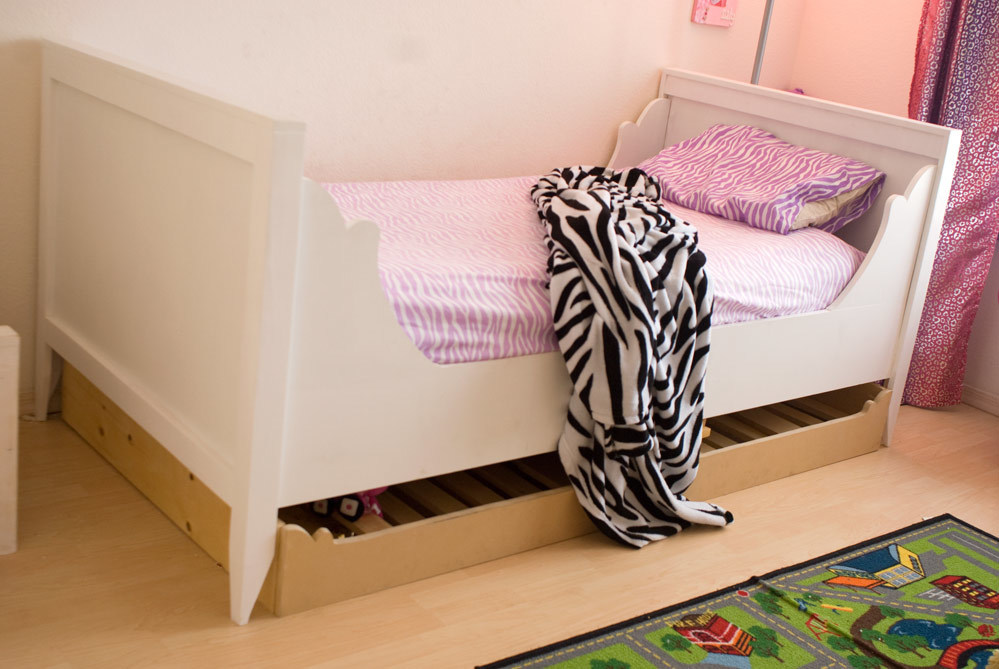
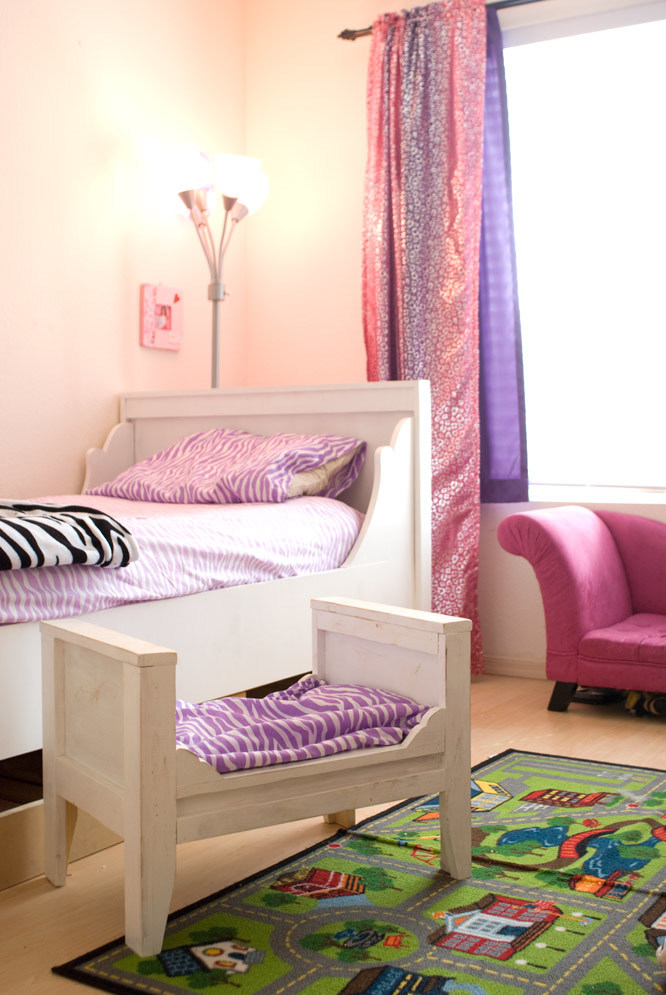
My oldest daughter was beyond needing a "big girl bed" - the poor thing couldn't "fit" in her toddler bed, and had to sleep curled up! So I had her help me pick out a bed, and she ended up asking for the Lydia bed (and she mimed that she wanted a trundle, since she didn't know what it was called!). The bed itself was a quick build, but then I lost steam when it came to doing the trundle. It came along a few weeks after the bed was in her room, but, as you can see, I still haven't painted it... or added a bed to it.... Then she wanted a bed for all of her Sonic dolls (I think she's kinda transitioning from being a tom-boy to being a girly-girl... she picked out everything in her room!)... So I built her a "matching" bed based on the farmhouse doll bed plans. Side note - I haven't cleaned her room in a while, so ignore the fact that the floor needs swept!
Mon, 10/03/2011 - 20:47
did you change the length between the posts in order to fit the trundle? on the page that she has to build a trundle it says to make sure there is 77" of clearance between each end.. not sure if I should leave it as is or adjust it for a trundle....

Thu, 10/06/2011 - 20:18
I increased the length to allow for the trundle, and there is a couple of inches between the mattress and the head/foot board. But her last bed had no room, so changing sheets was a "B". Now it's much easier :-)
I don't remember how much I increased the length, but it made the clearance 77".
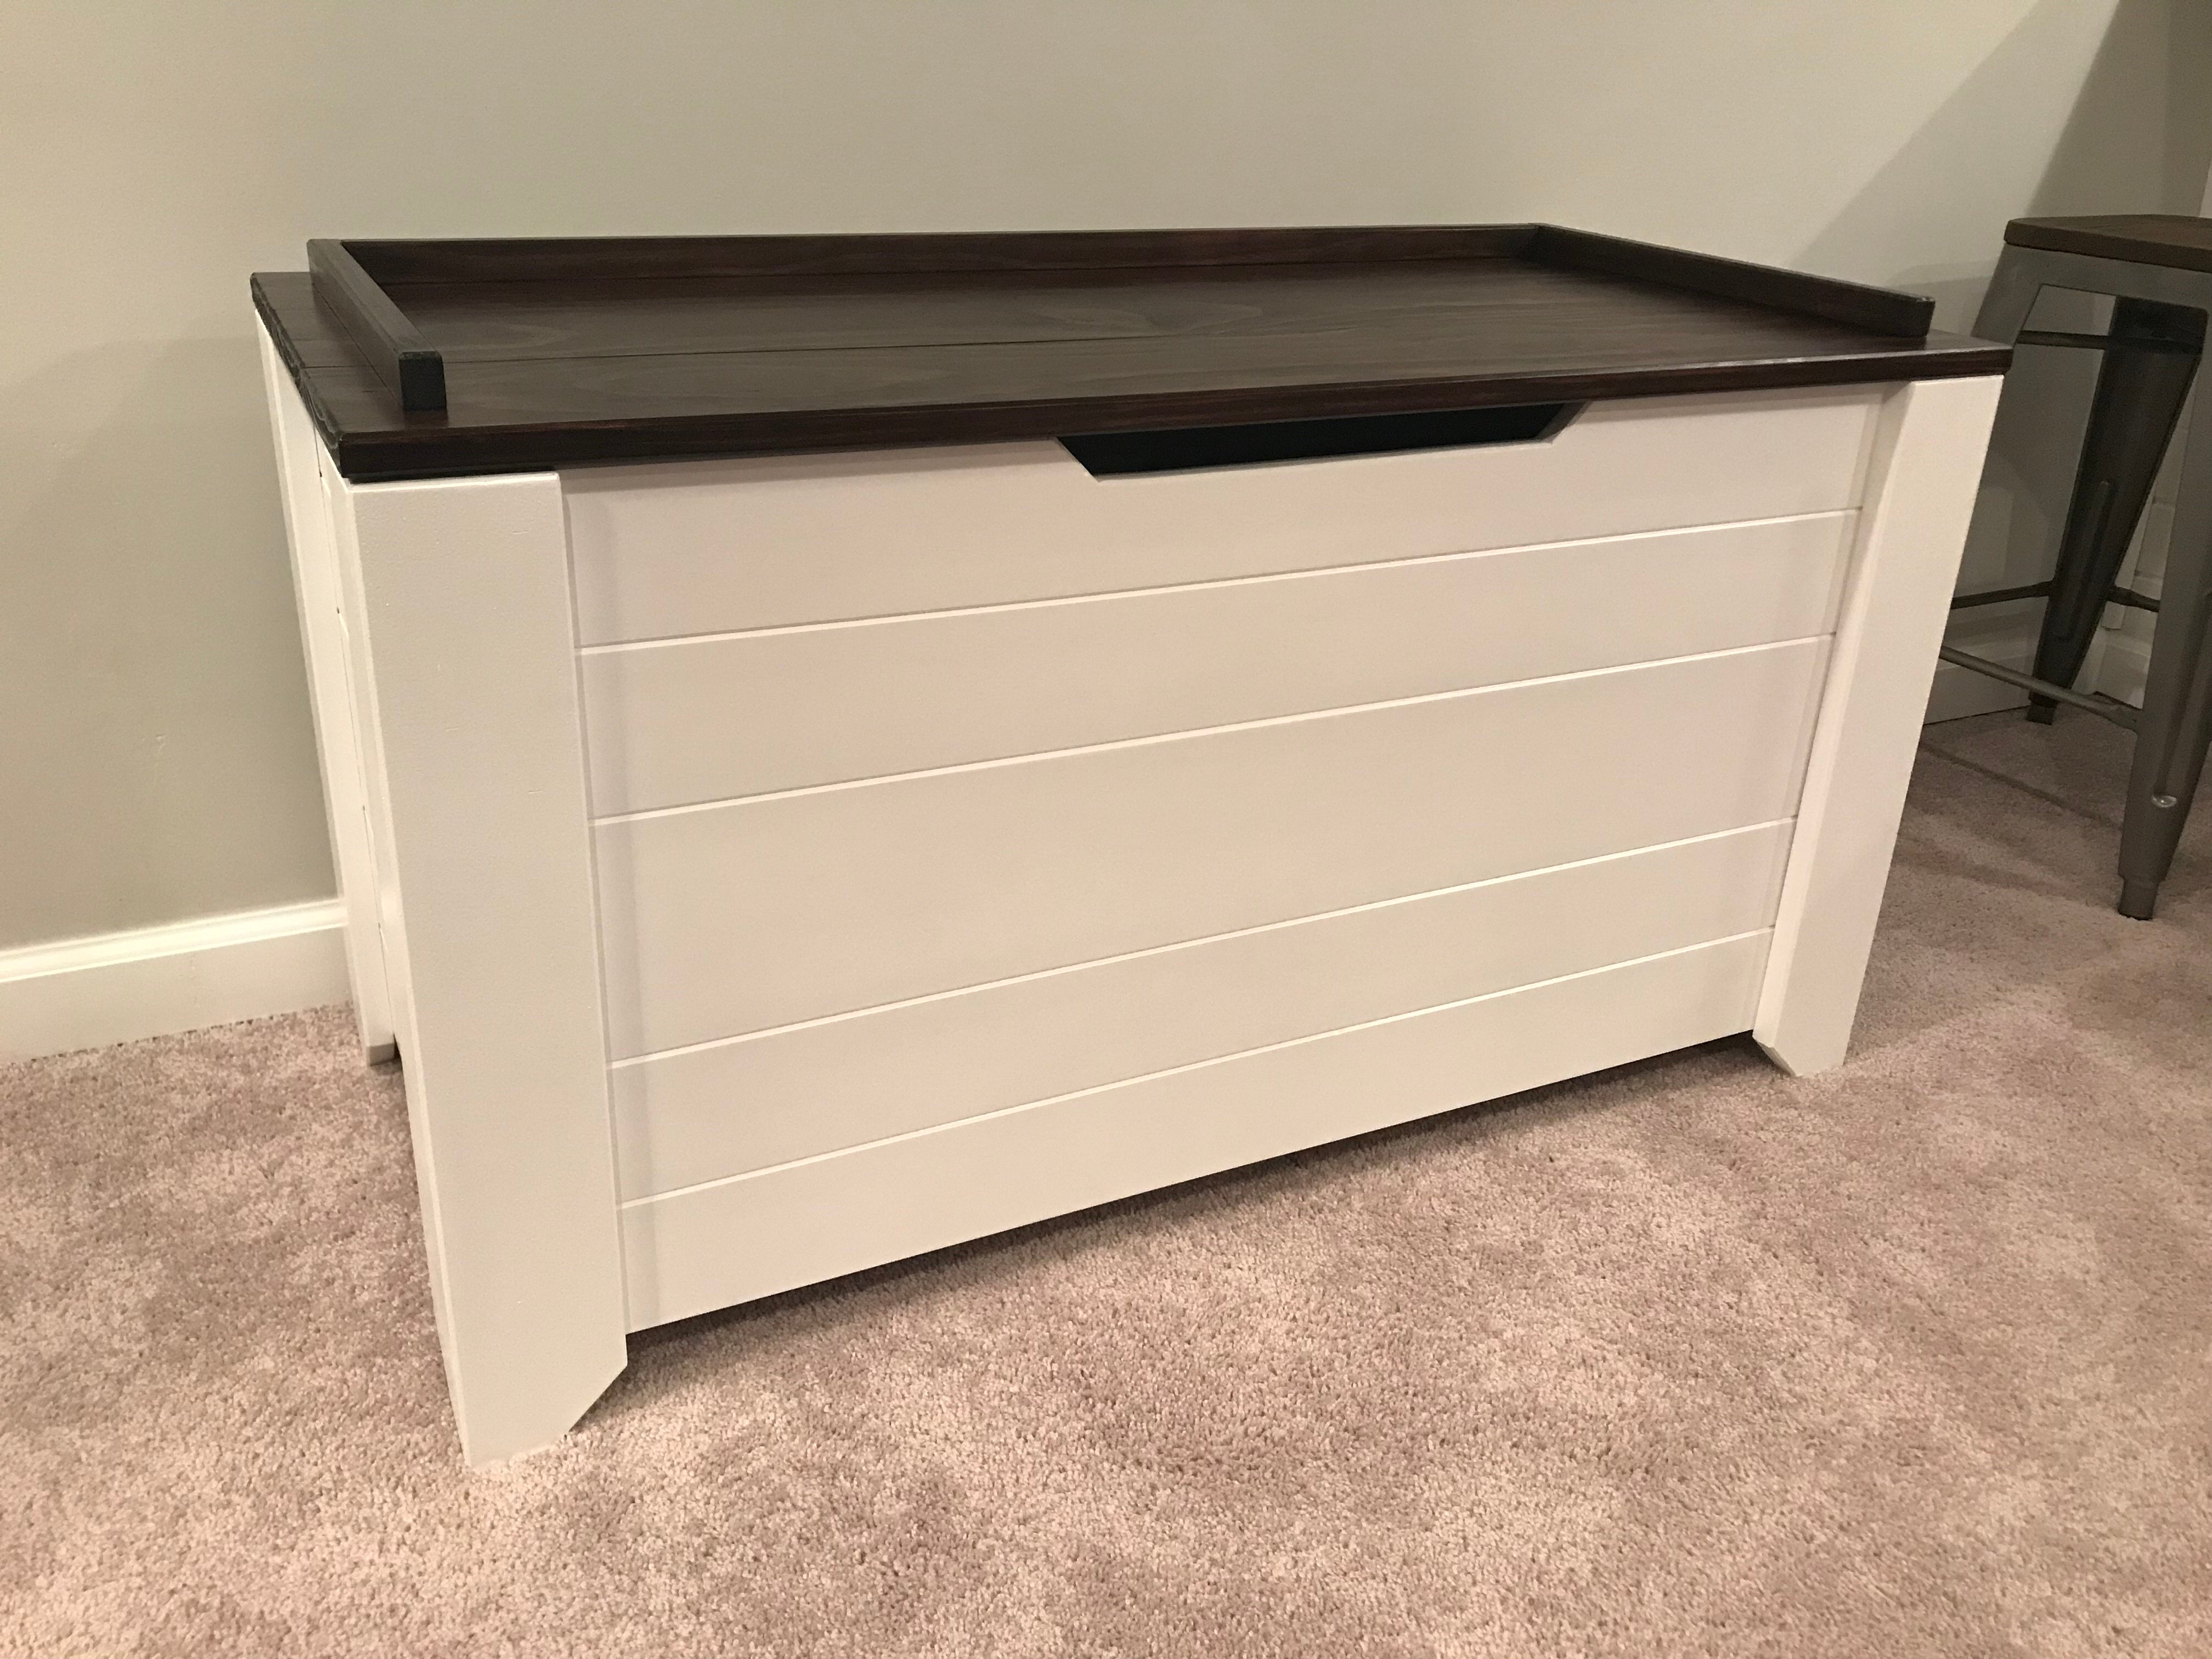
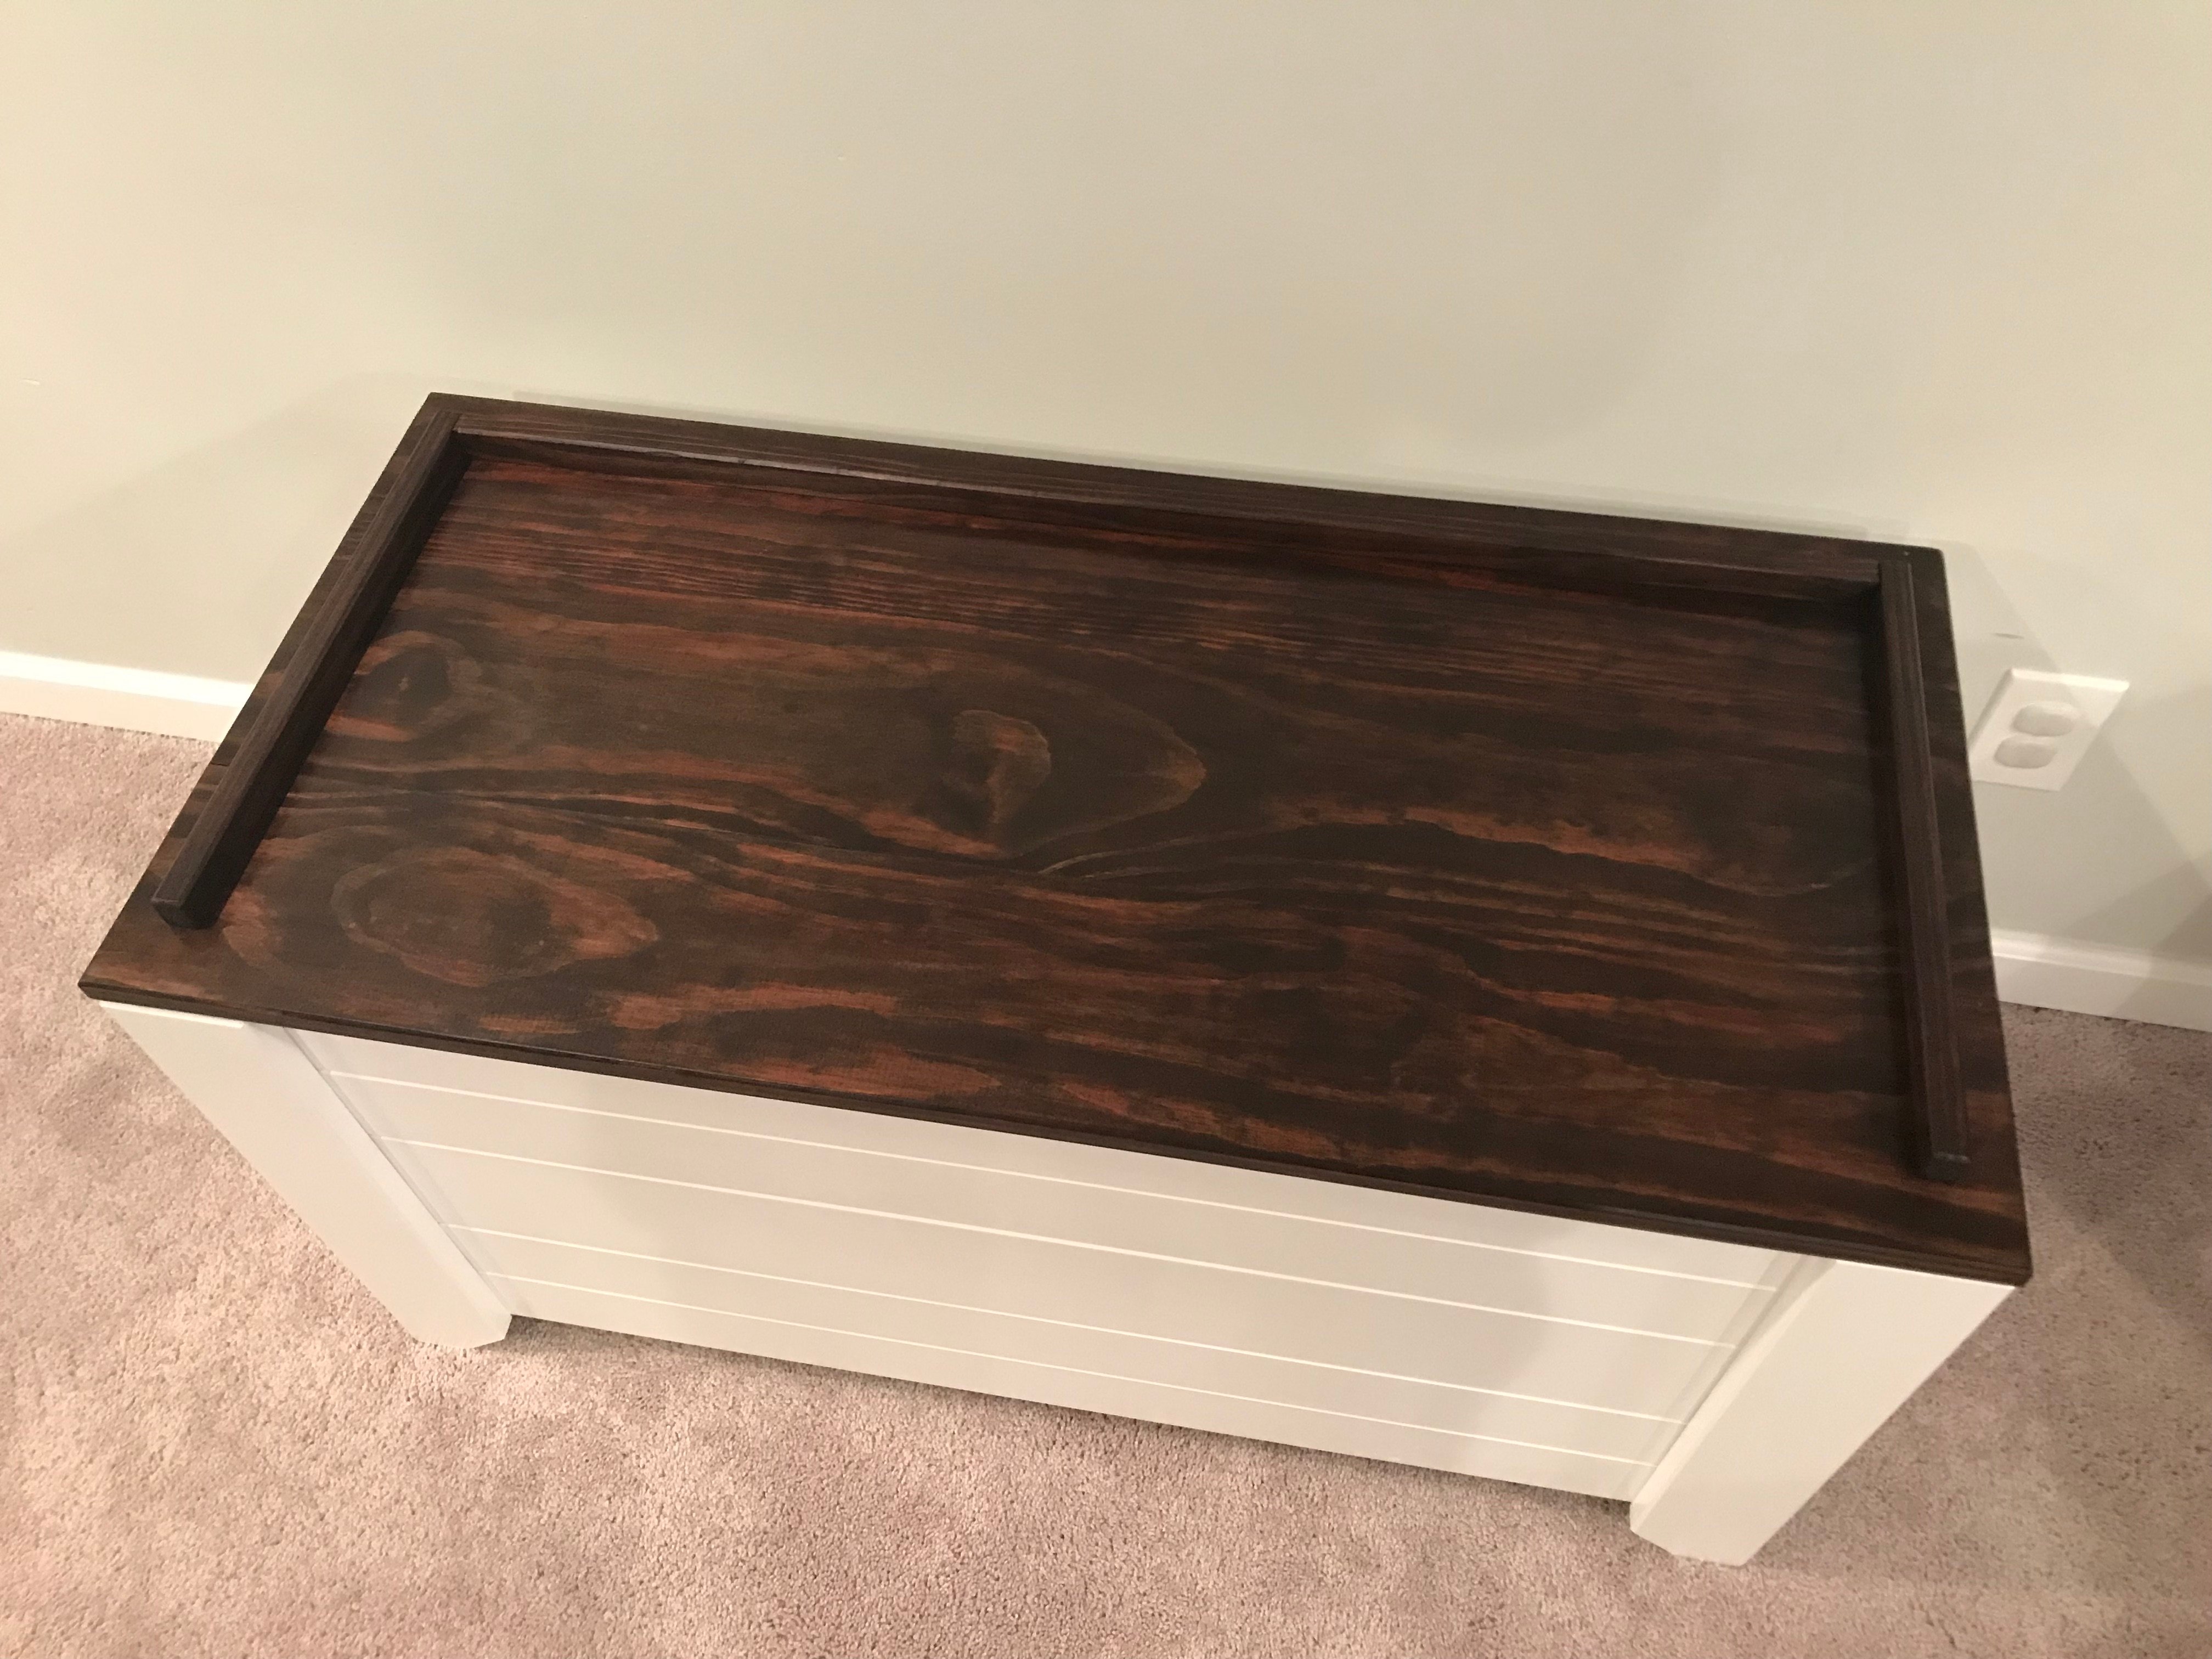
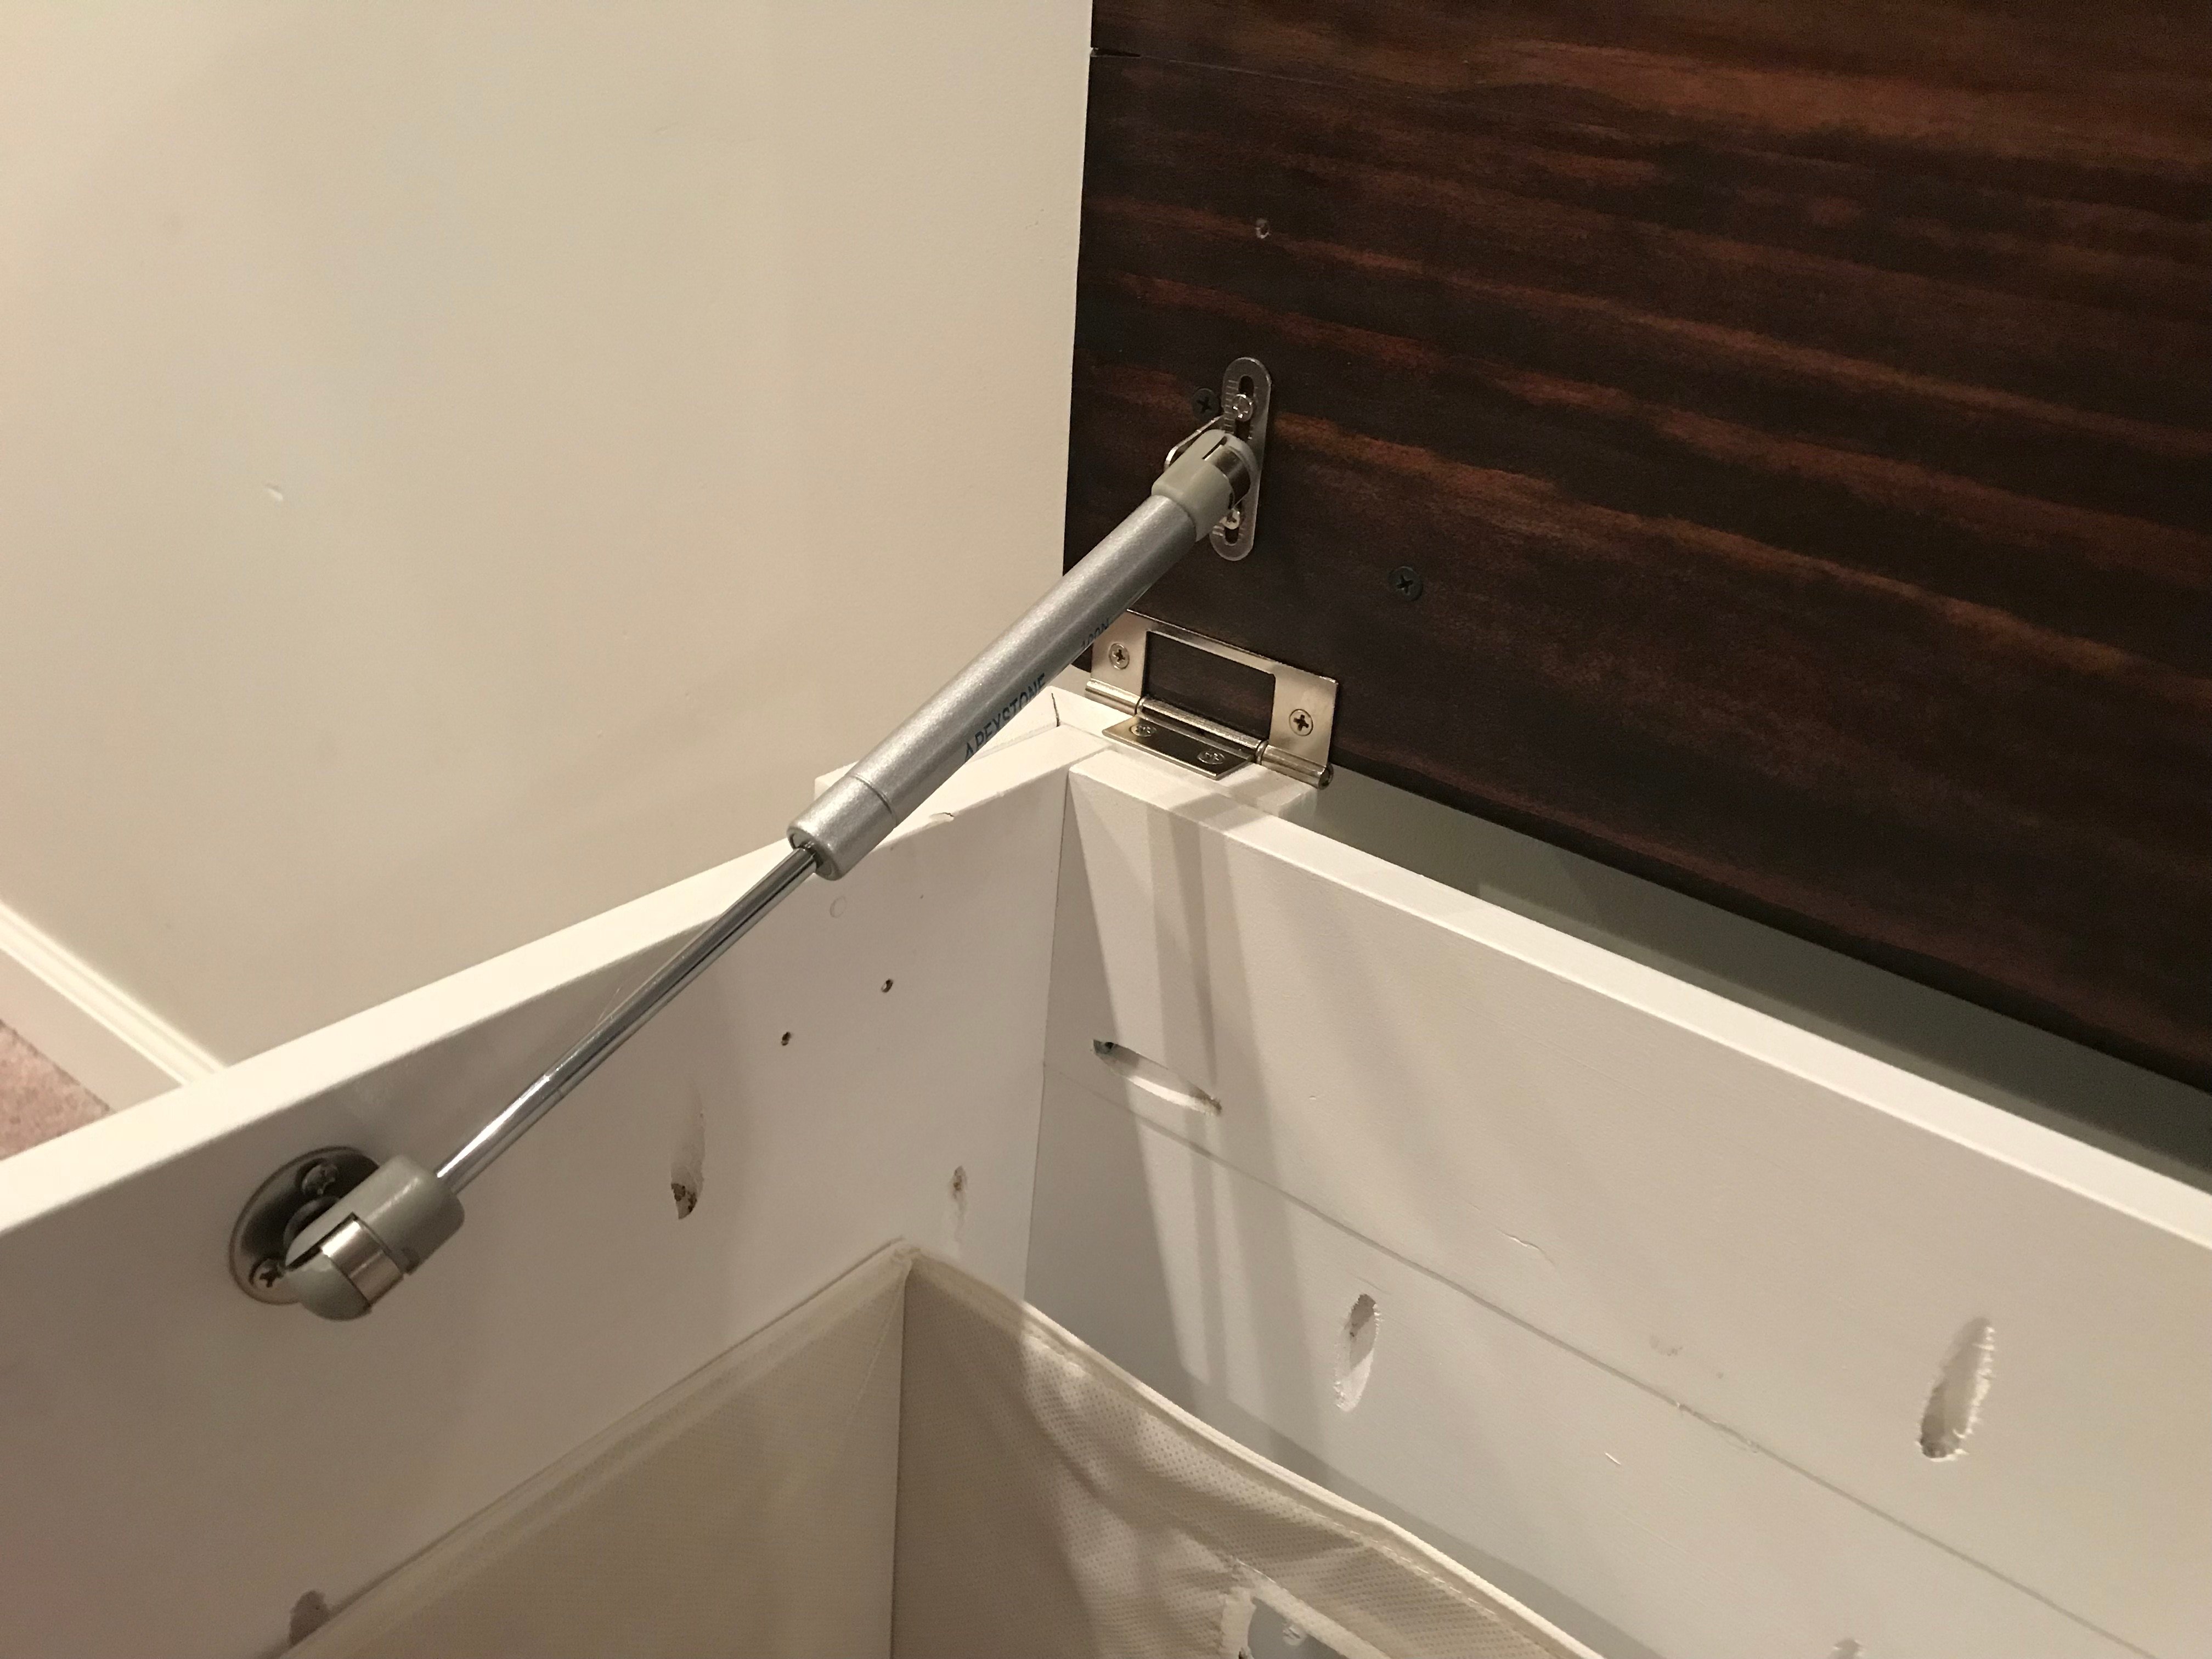
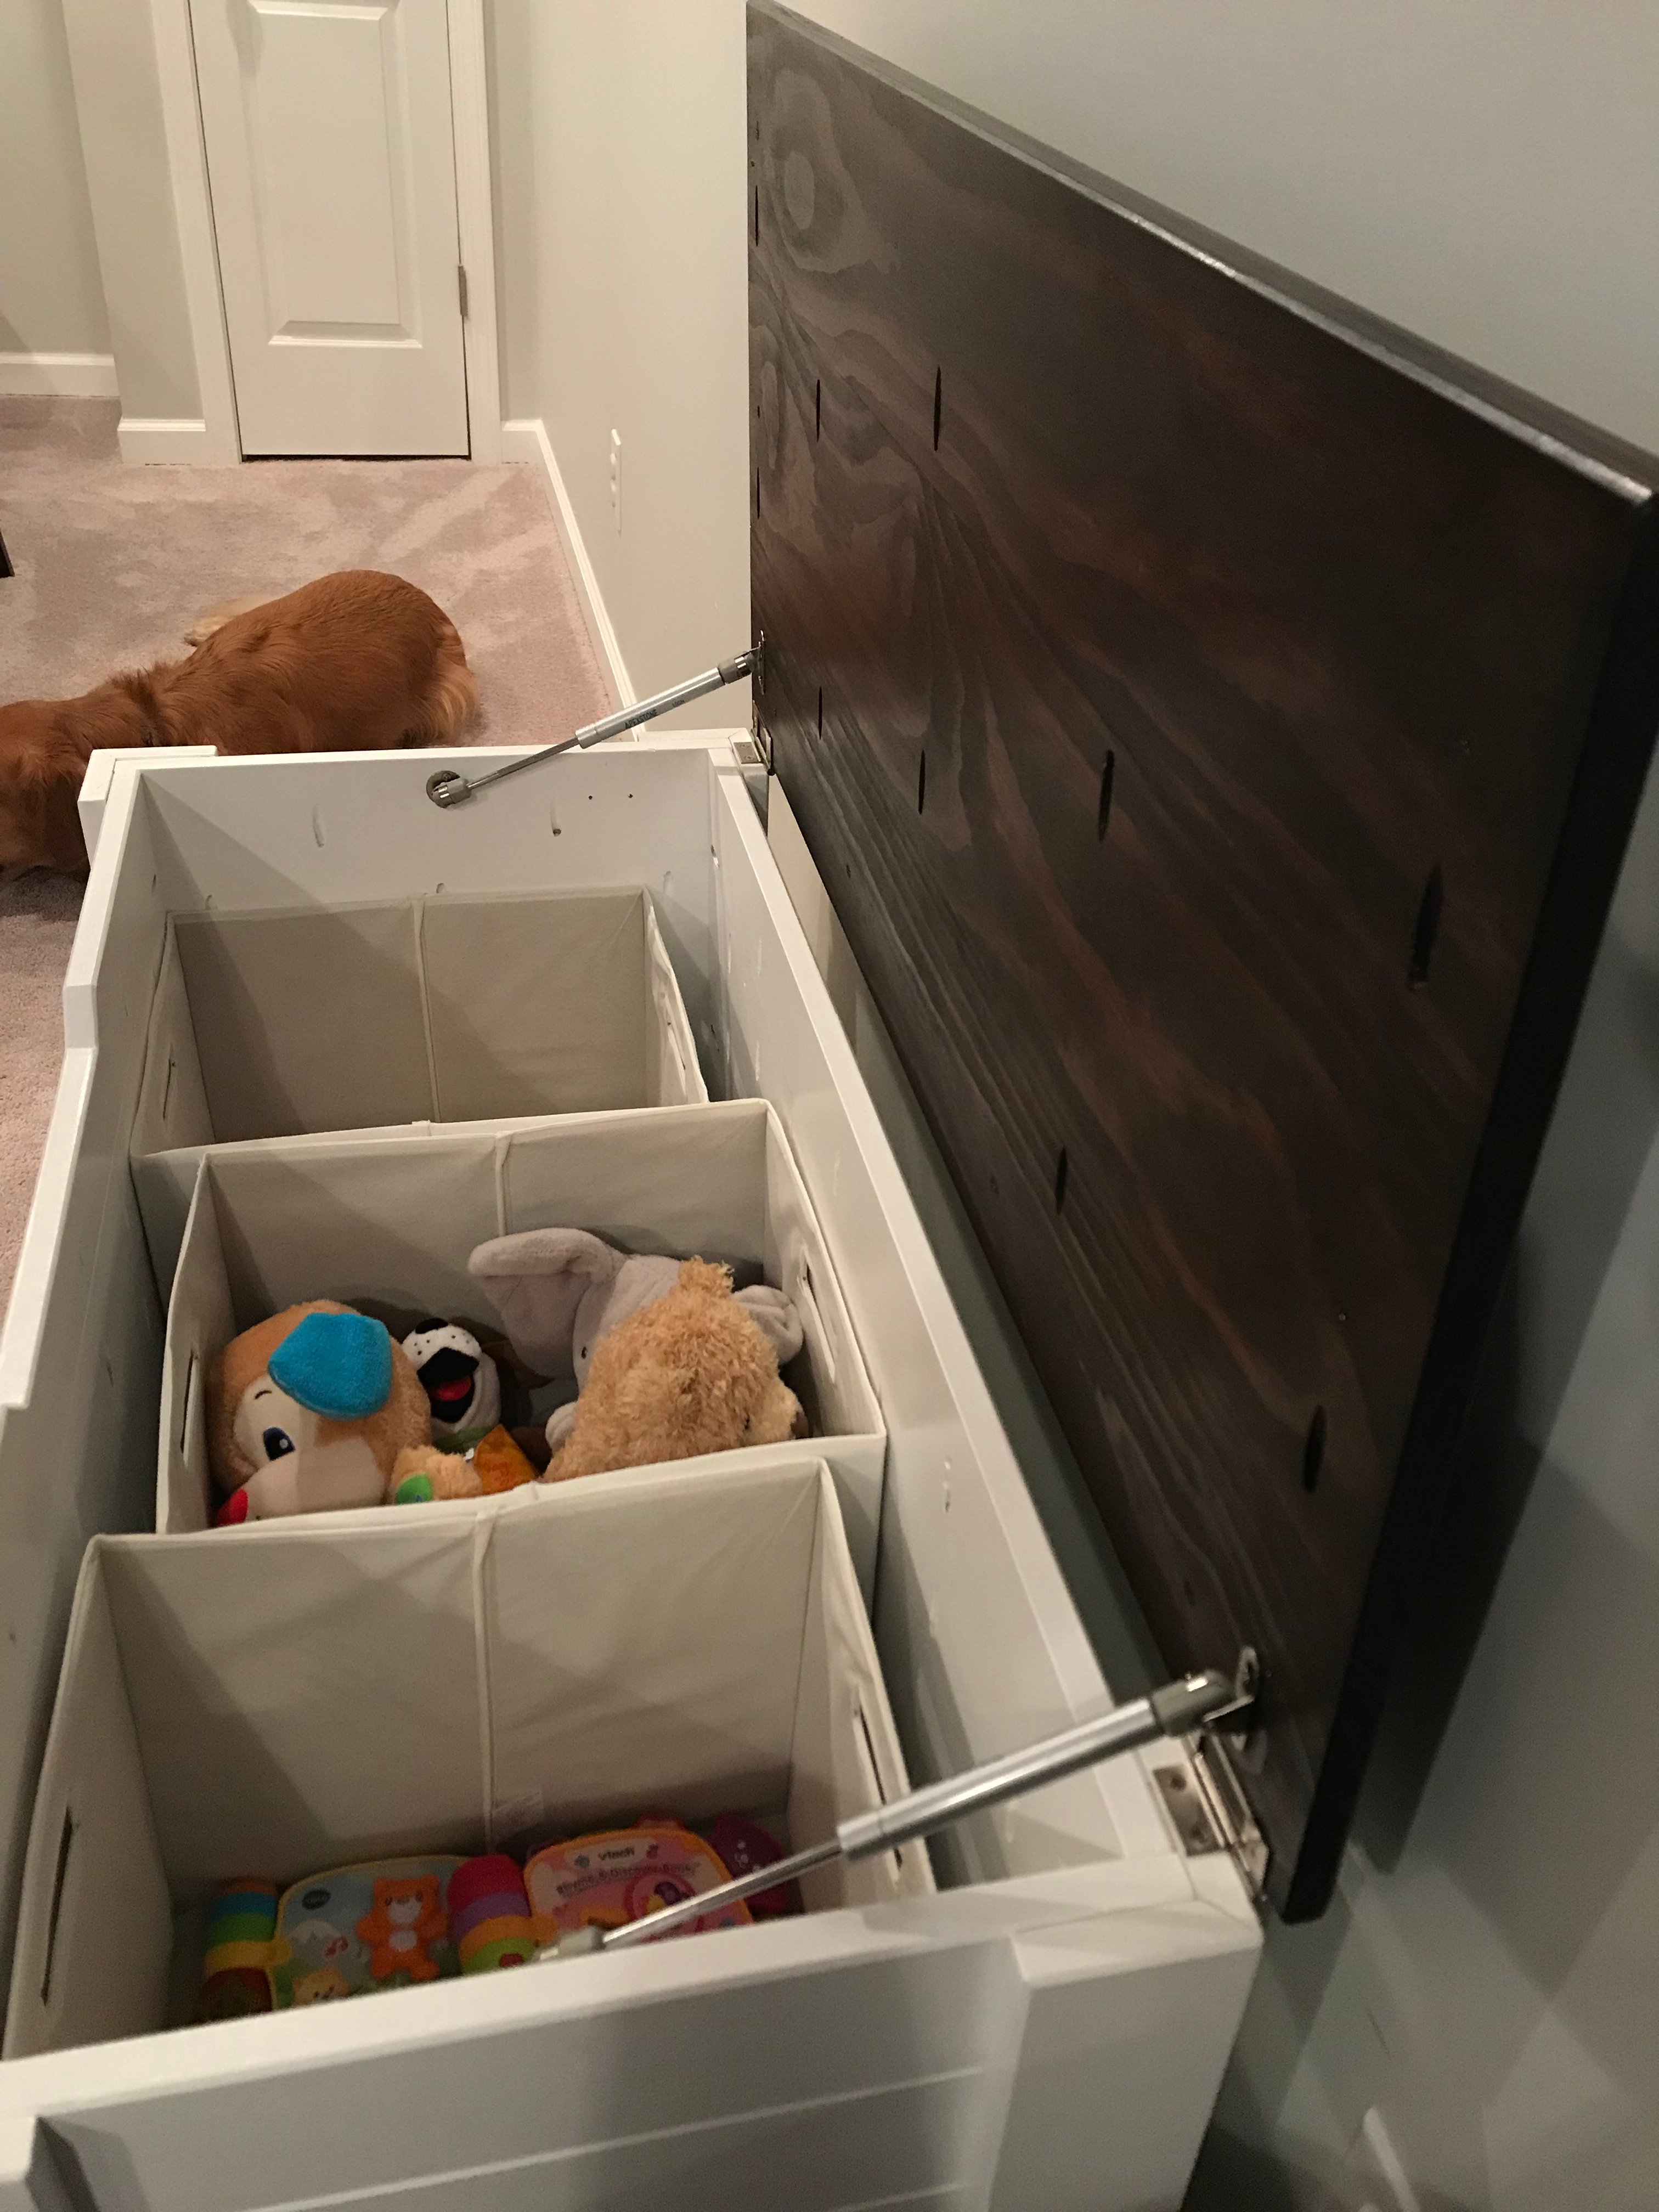
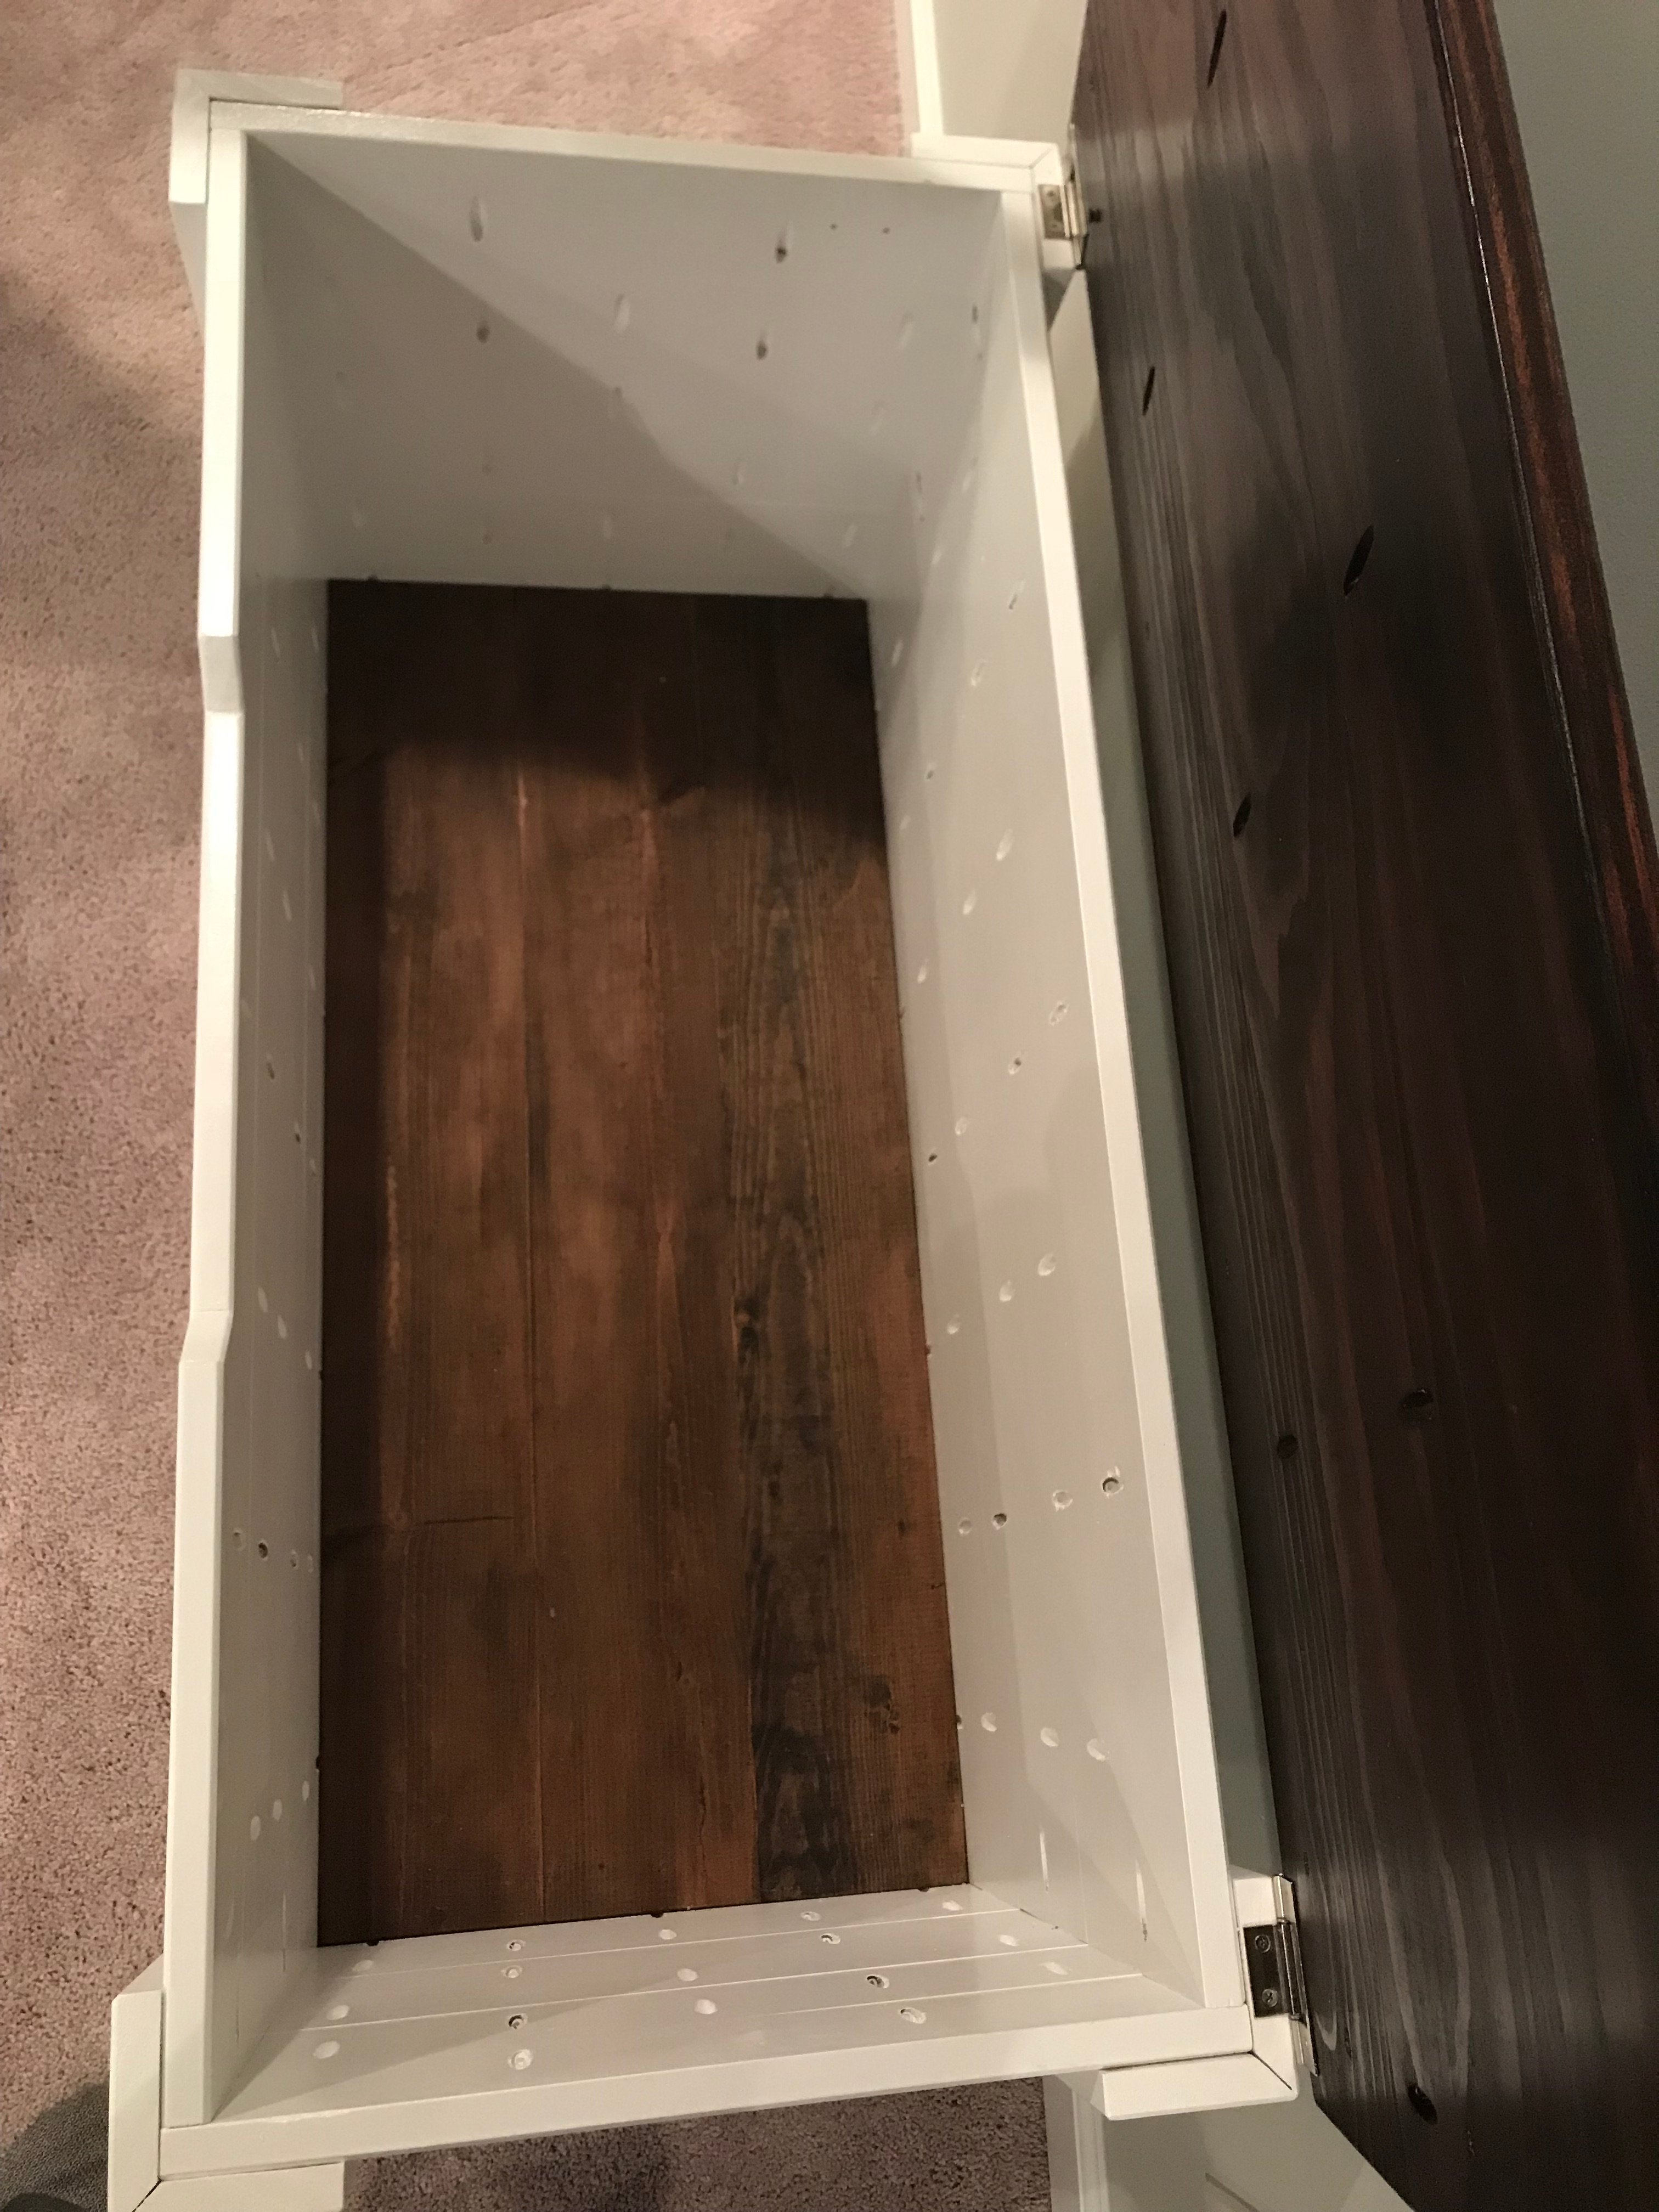
Picture of my own version of the Ana White Design linked here
http://www.ana-white.com/2017/01/DIY_furniture/farmhouse-style-toy-box-…
Added Gas Shocks from Amazon 100N/18lbs.