Community Brag Posts

Custom Dog Bath

Submitted by dananicb on Thu, 07/22/2021 - 07:21

Tego needed a raised dog bath. No, I needed a raised dog bath. Specifically, my knees needed a raised dog bath for Tego. So, after looking at Pinterest and Ana's plans, I decided what I really wanted to do was customize something to fit my needs (and knees) and build it myself. Overly ambitious for a first-time woodworking project, but hey, raise the bar.

I started by reading and rereading Ana's beginner's woodworking guide (very informative). I also learned so many other things along the way. There's a reason, besides looks, you need flat boards (they need to screw together tightly). Unfinished basement floors are so not level (especially near the walls). Screw lengths matter (need shorter ones for thinner boards). The big-box store doesn't make precise cuts (but they can make a lot). Planning for the finishes will save you time (know your basket sizes). Just to name a few.

It's going in an unfinished basement, so I wasn't going to tile and add glass doors. I wanted to keep it relatively simple, basic.

The stairs were the hardest to measure and build (math matters) - and I might re-do. I made the steps smaller, dog-sized, but she finds them awkward. I'd stick with typical riser heights, but it depends on the size of your dog.

Plumbing to link the tub drain to the utility sink drain was the most expensive. Probably I could have done it myself, but I decided not to learn both plumbing and woodworking for one project.

Overall, I'm pleased with the result - and Tego is learning to love it.

Estimated Cost
$250 in supplies (plus plumbing)
Estimated Time Investment
Week Long Project (20 Hours or More)
Finish Used
Exterior paint in semi gloss
Recommended Skill Level
Beginner

Comments

Timber Cabin Chicken Coop

Submitted by Julie101 on Thu, 12/02/2021 - 19:14

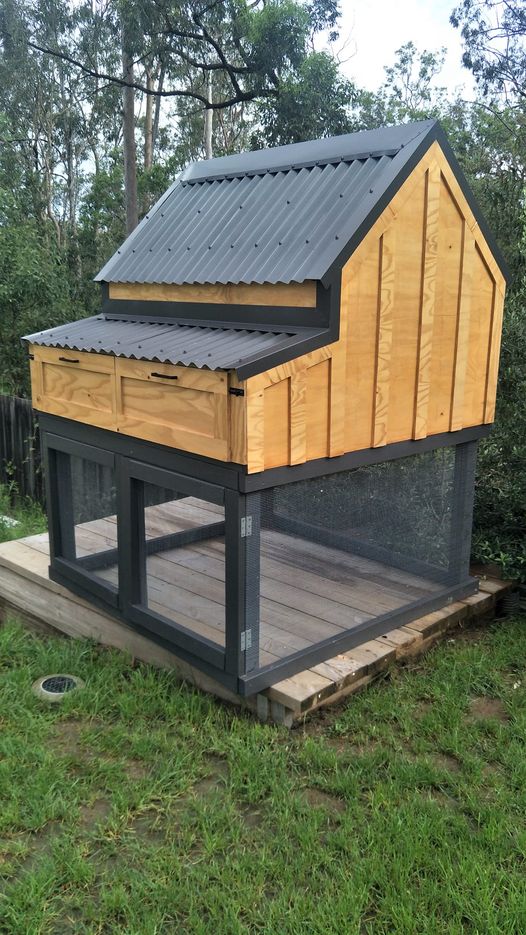
I had to convert all the measurements from inches to mm, but it was worth the brain drain. I didn't add the garden, but extended out the chicken coop. I am thrilled with the results! Thank you!

Comments

Ana White Admin

Fri, 12/03/2021 - 07:39

WOW, definitely worth the extra effort, just beautiful! I wish we could offer metric plans, may need to figure that out.

Seasonal And Holiday

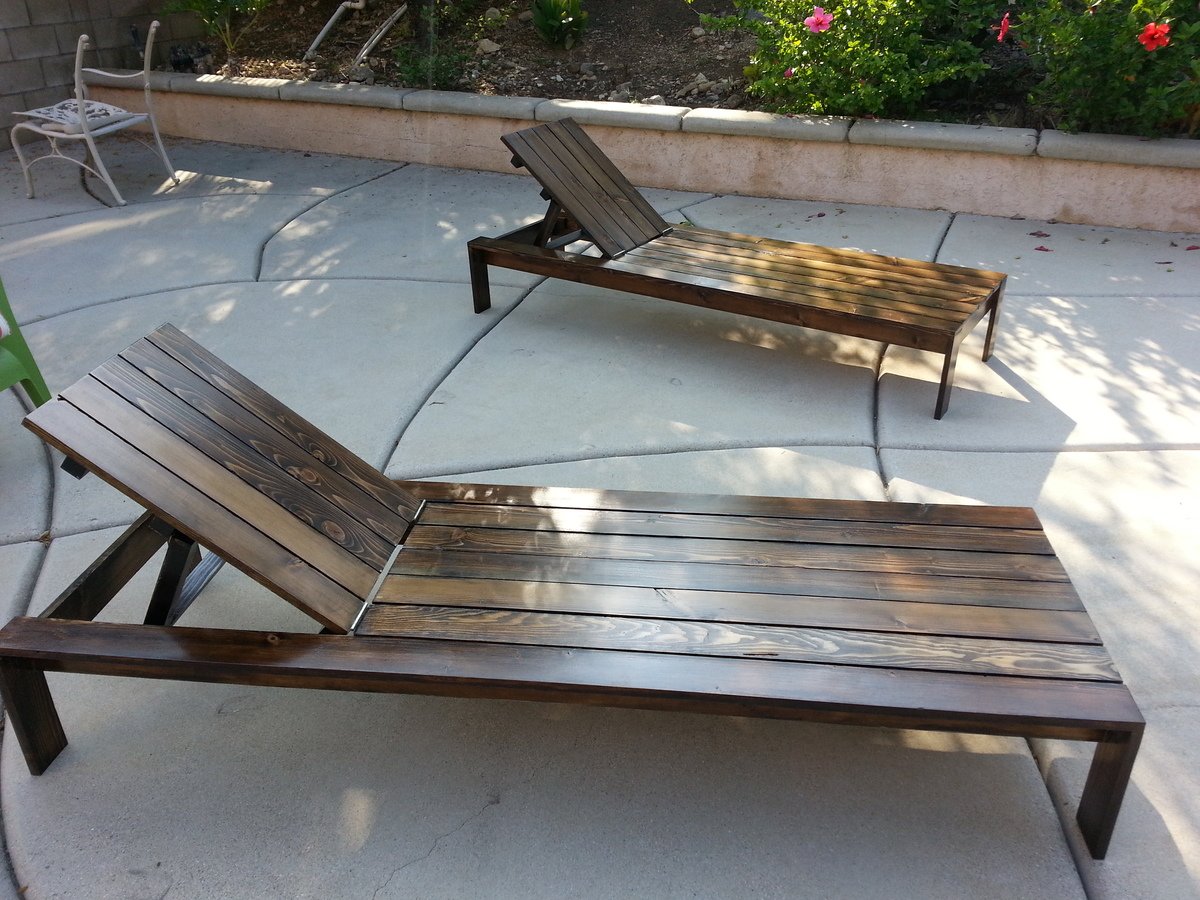
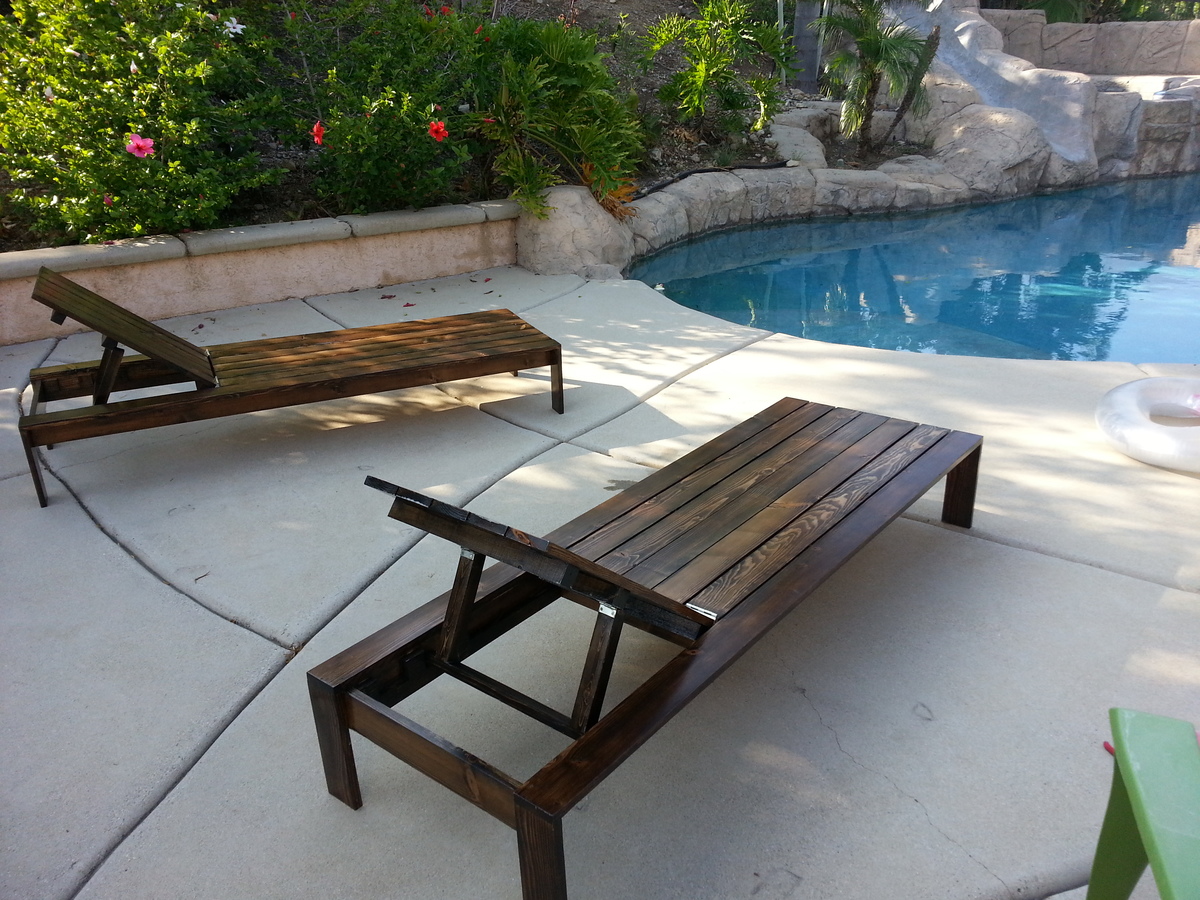
Pool Lounge Chairs

Submitted by Seth on Sun, 07/26/2015 - 16:25

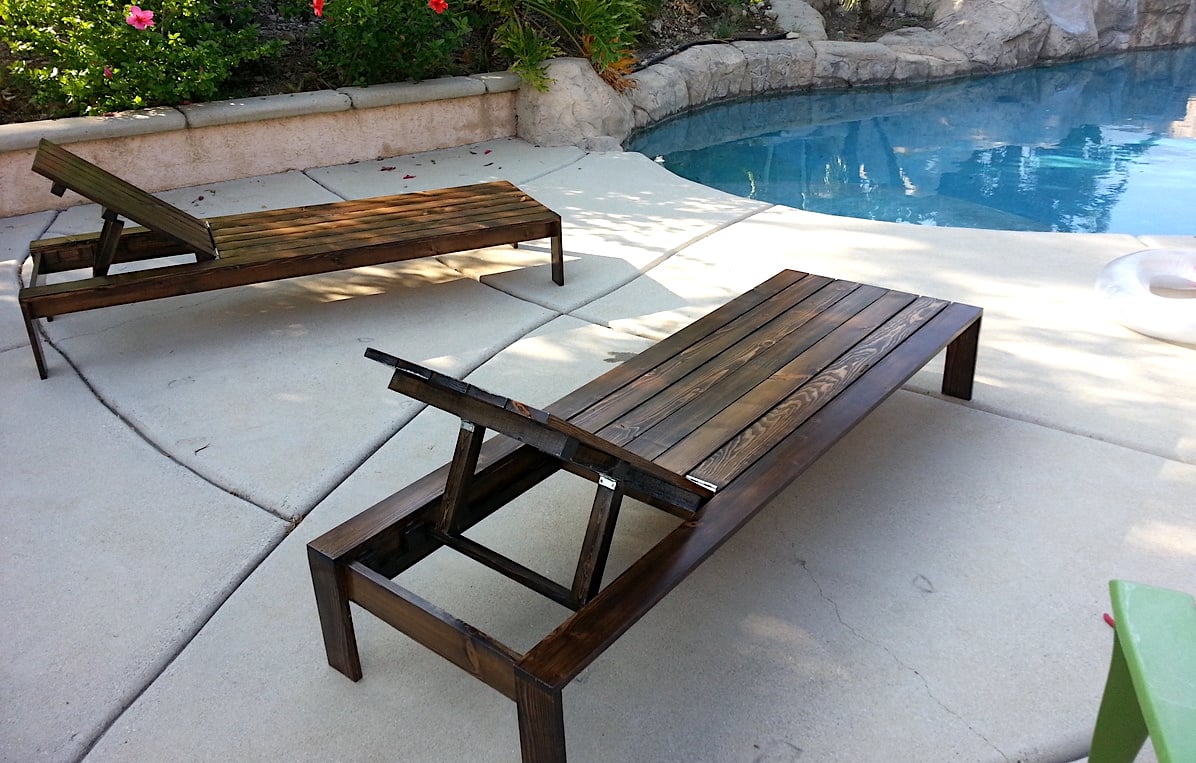
This was a fun and easy project for our pool area.  We have high winds and our store bought chairs did not last.  These loungers are sure to fare a bit better.

Estimated Cost
$60
Estimated Time Investment
Weekend Project (10-20 Hours)
Finish Used
Minwax Jacobean. We added three coats of gloss poly.
Recommended Skill Level
Beginner

Class/School Auction Projects

Submitted by jendon on Tue, 05/03/2022 - 15:32

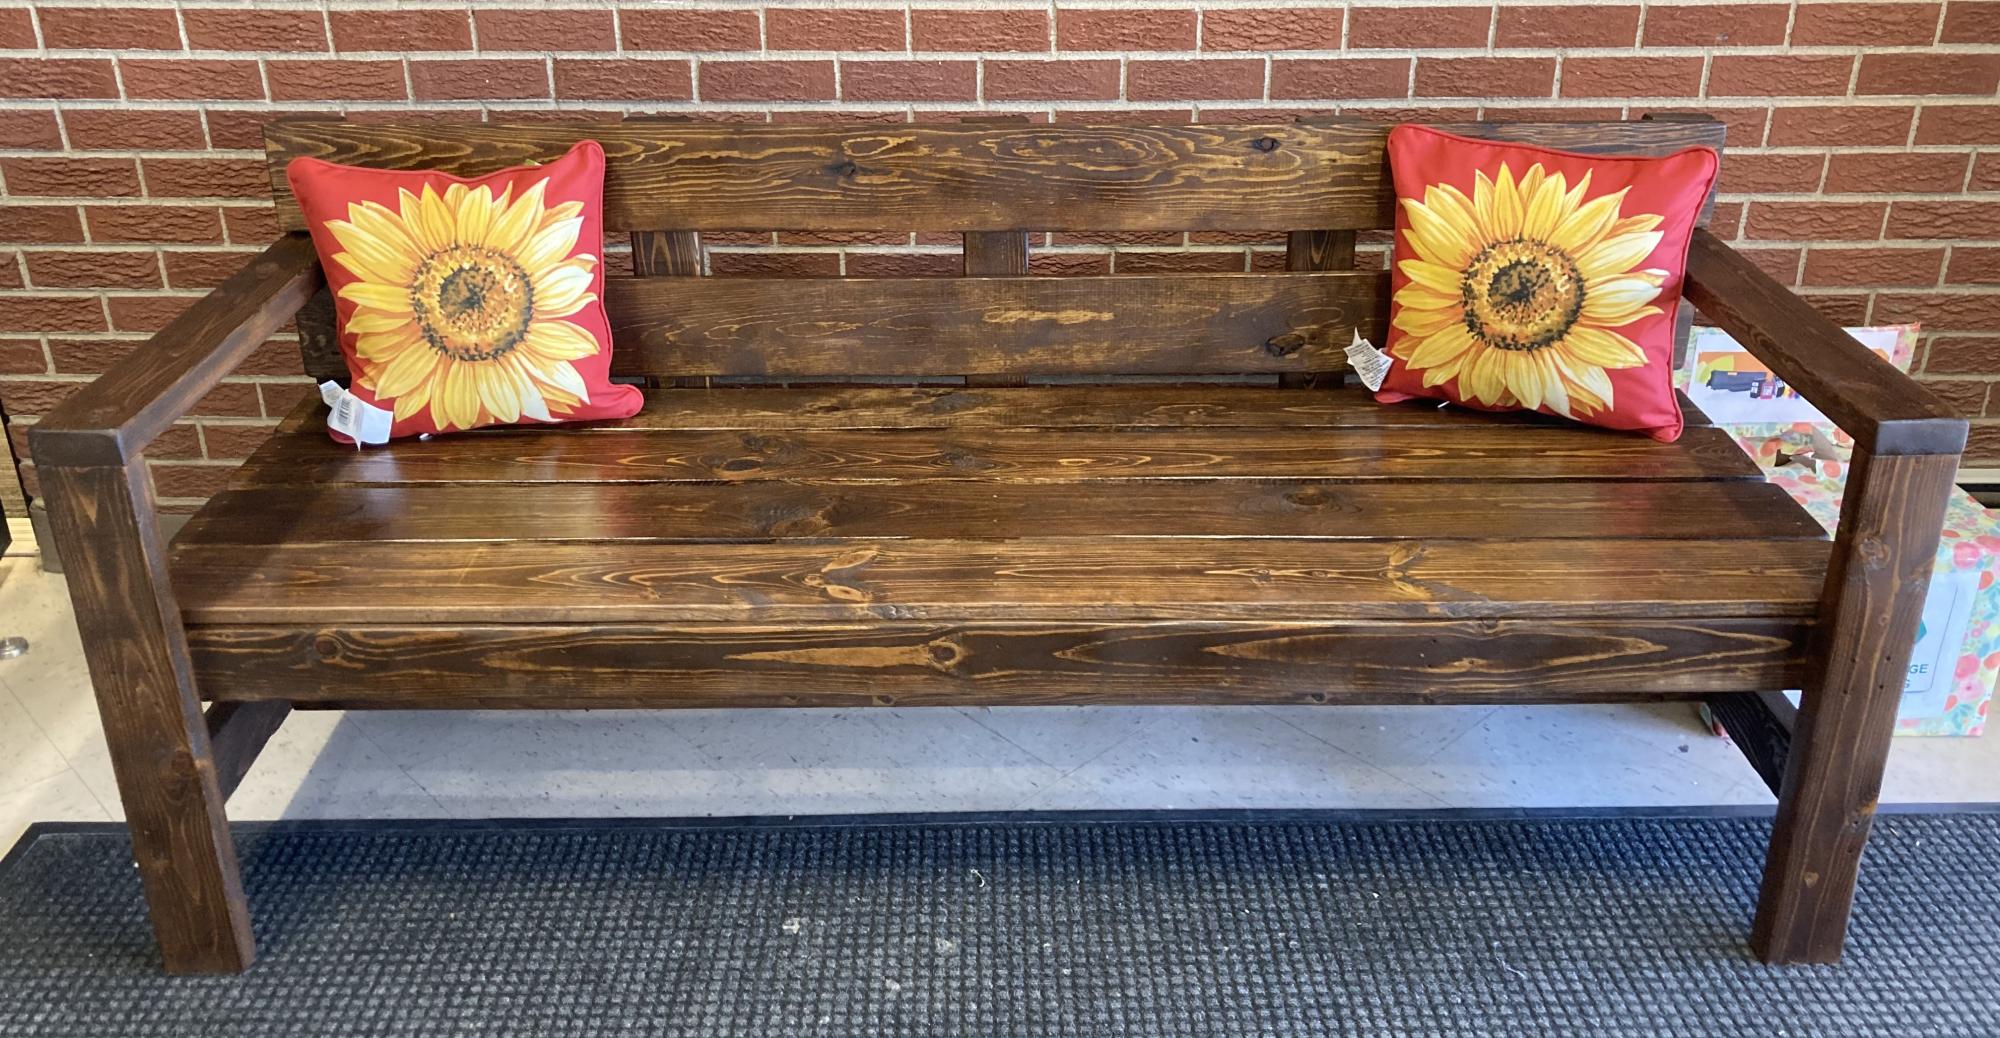
This year my 2nd-3rd class built the Modern Park bench for the school auction. They sanded, stained, and set the screw for the seat and back.
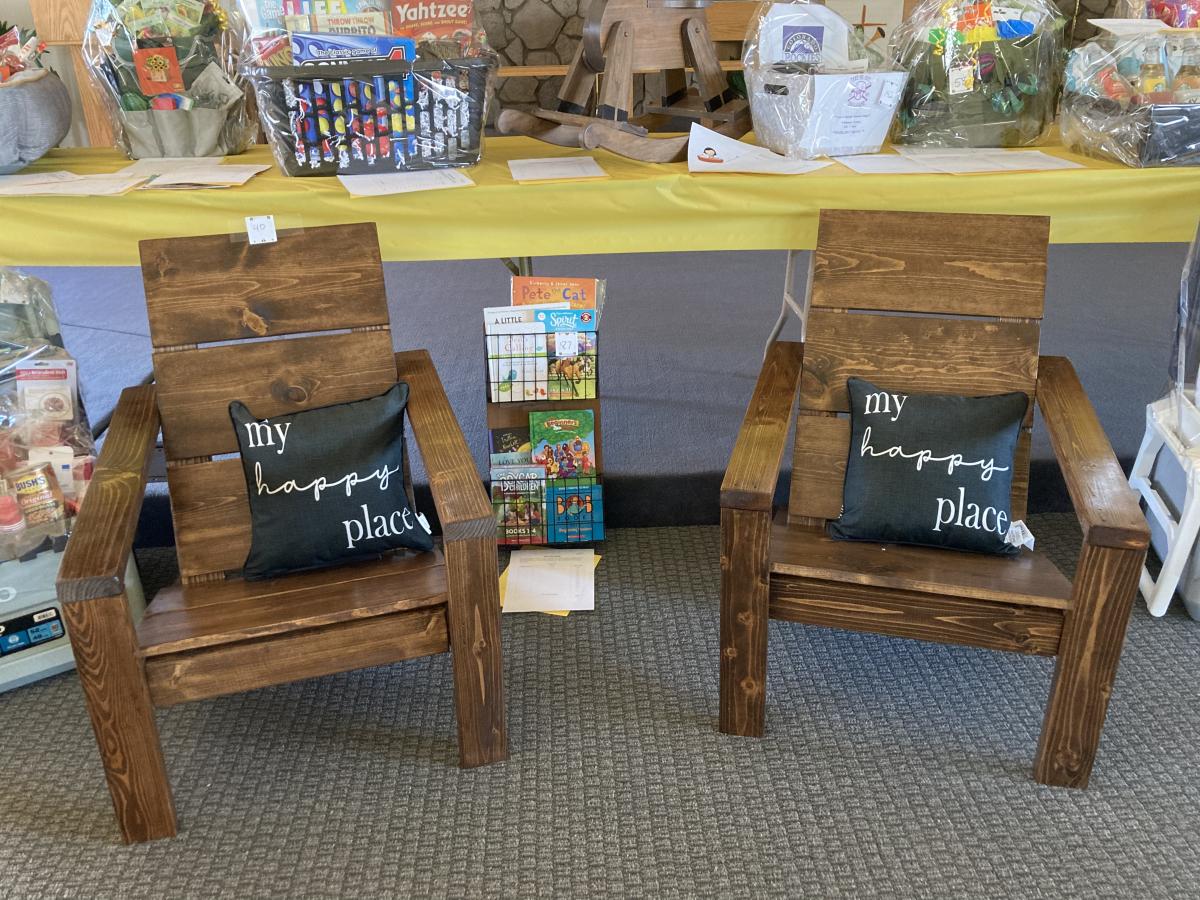
I also made two Adirondack chairs with matching stain.
Both projects had two coats of poly and really shined. They were a hit at the auction and the kids and families really appreciated the experience and final products.
Thank you Ana for making plans simple to follow and new skills learned each time.
Blessings,
Jennifer

Comments

jendon

Mon, 05/16/2022 - 18:33

My students really enjoyed it and many picked up a tool for the first time. I like planting seeds in their heart and mind for the future!! Blessings, Jennifer

jendon

Mon, 05/16/2022 - 18:33

My students really enjoyed it and many picked up a tool for the first time. I like planting seeds in their heart and mind for the future!! Blessings, Jennifer

Lisa's 2x4 couch

Submitted by Anonymous (not verified) on Wed, 01/11/2023 - 19:29

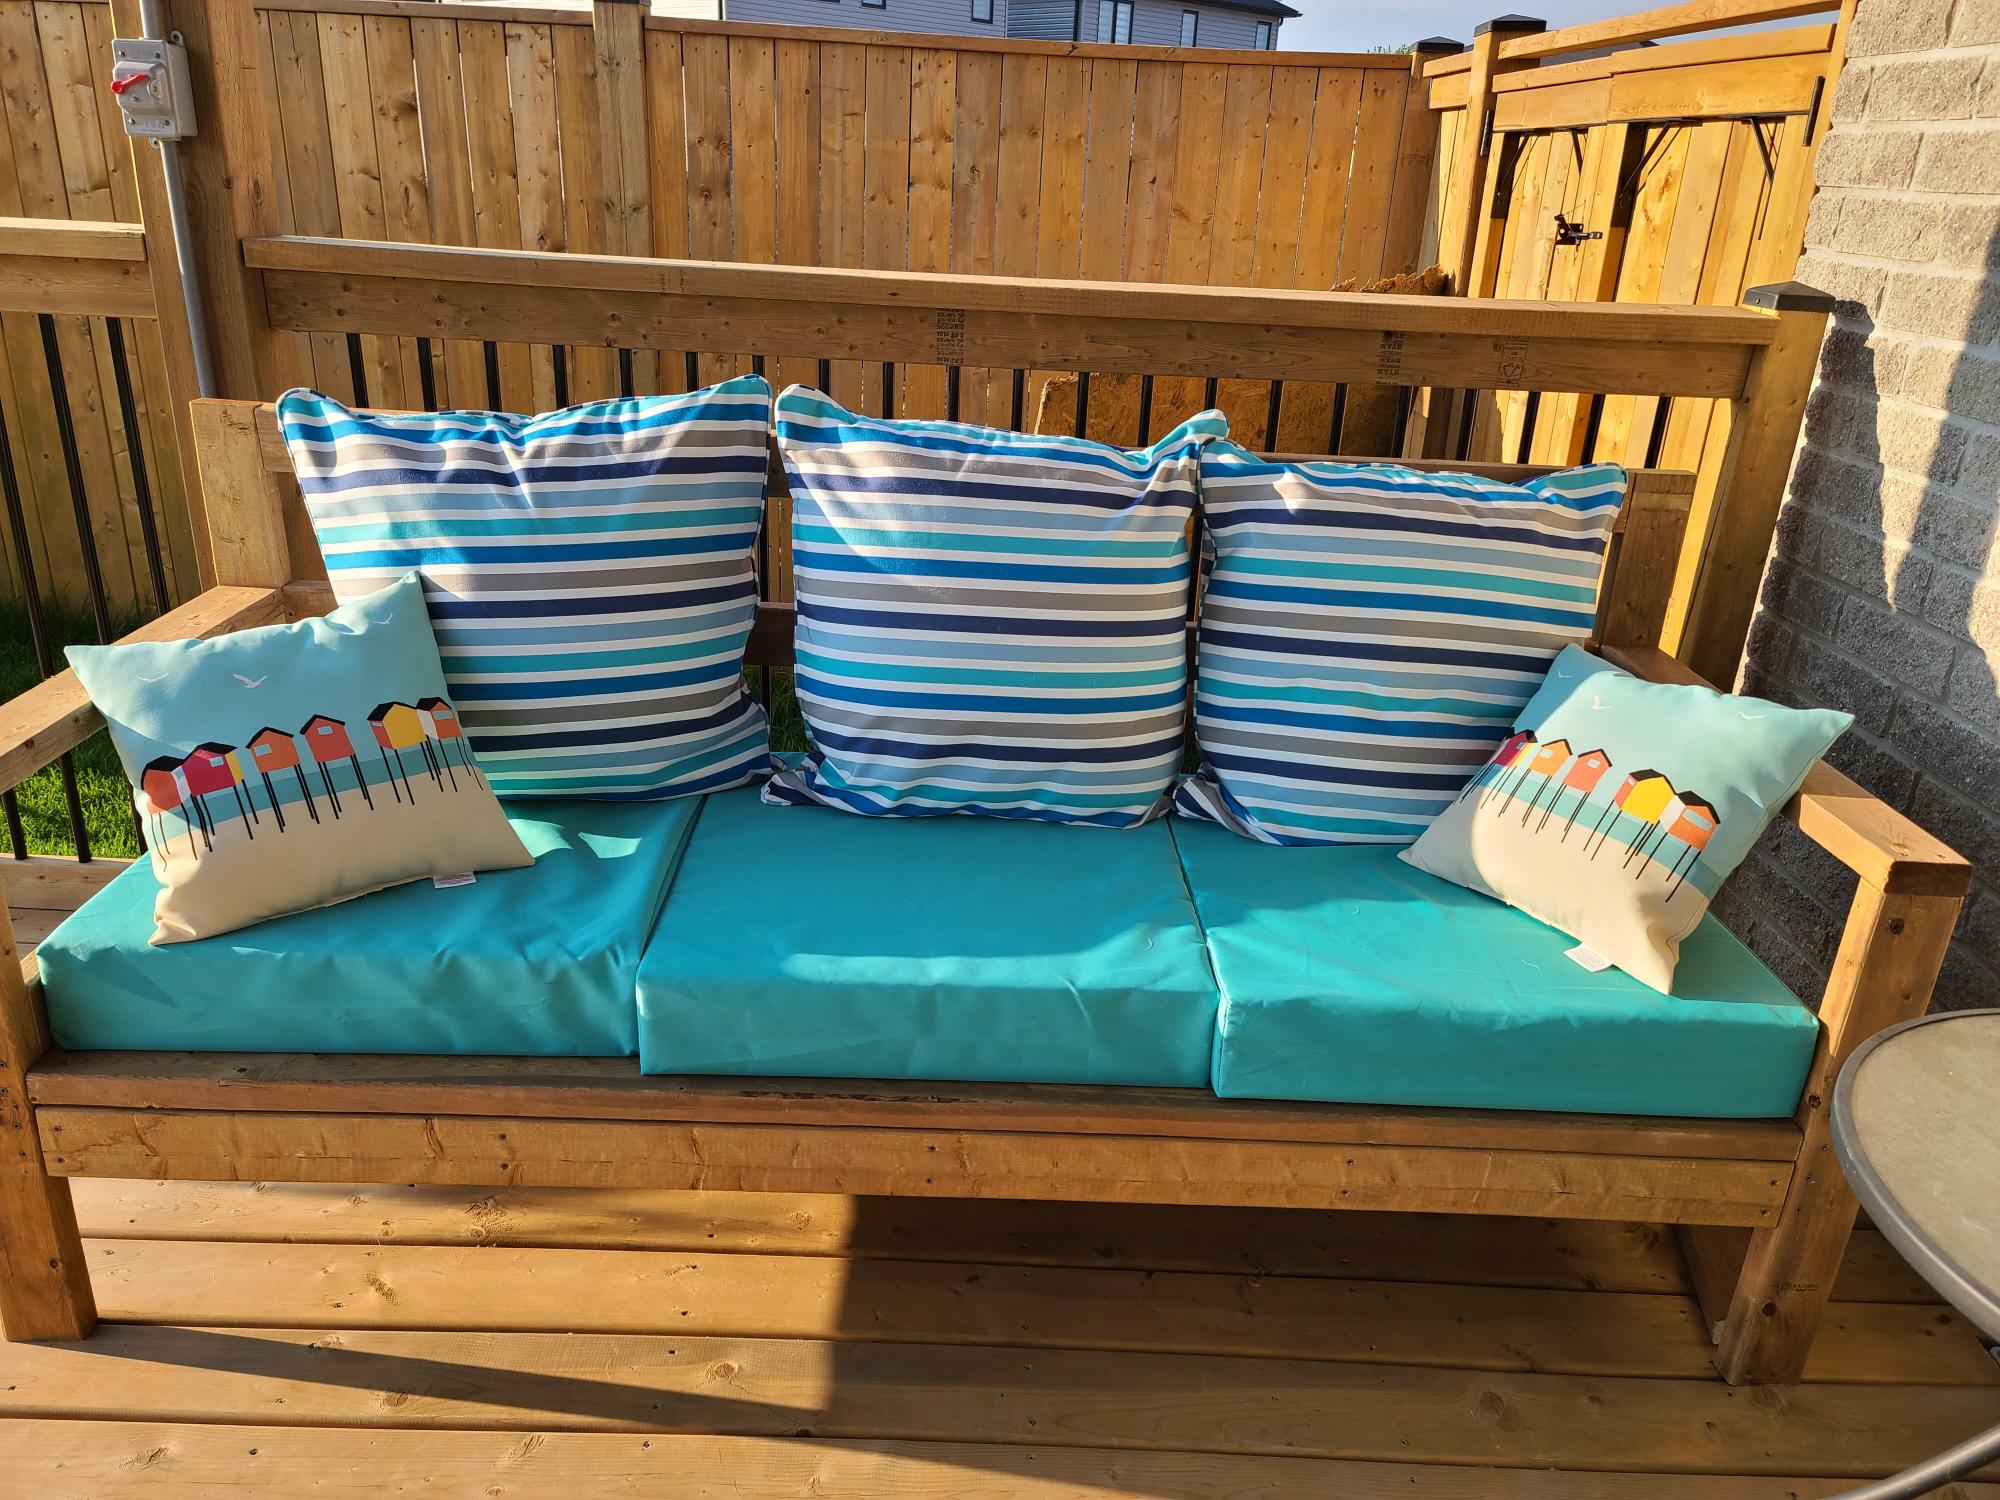
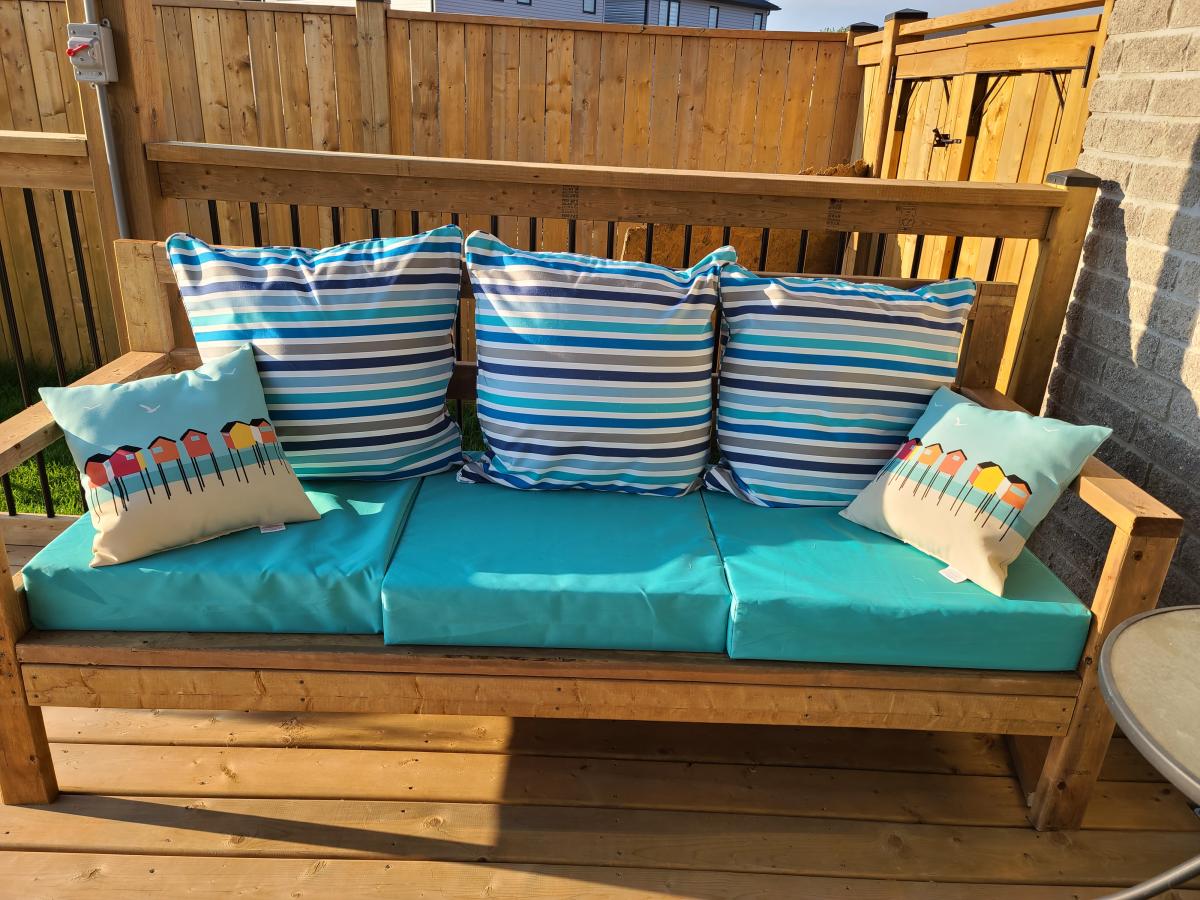
This was the first time I made a piece of furniture since I was in grade 8 shop class and it won't be the last. It was so kuch fun. I modified the plans slightly to have the back a bit higher. Love it!

Built from Plan(s)

My daughters platform bed

Submitted by Anonymous (not verified) on Sun, 03/24/2019 - 05:33

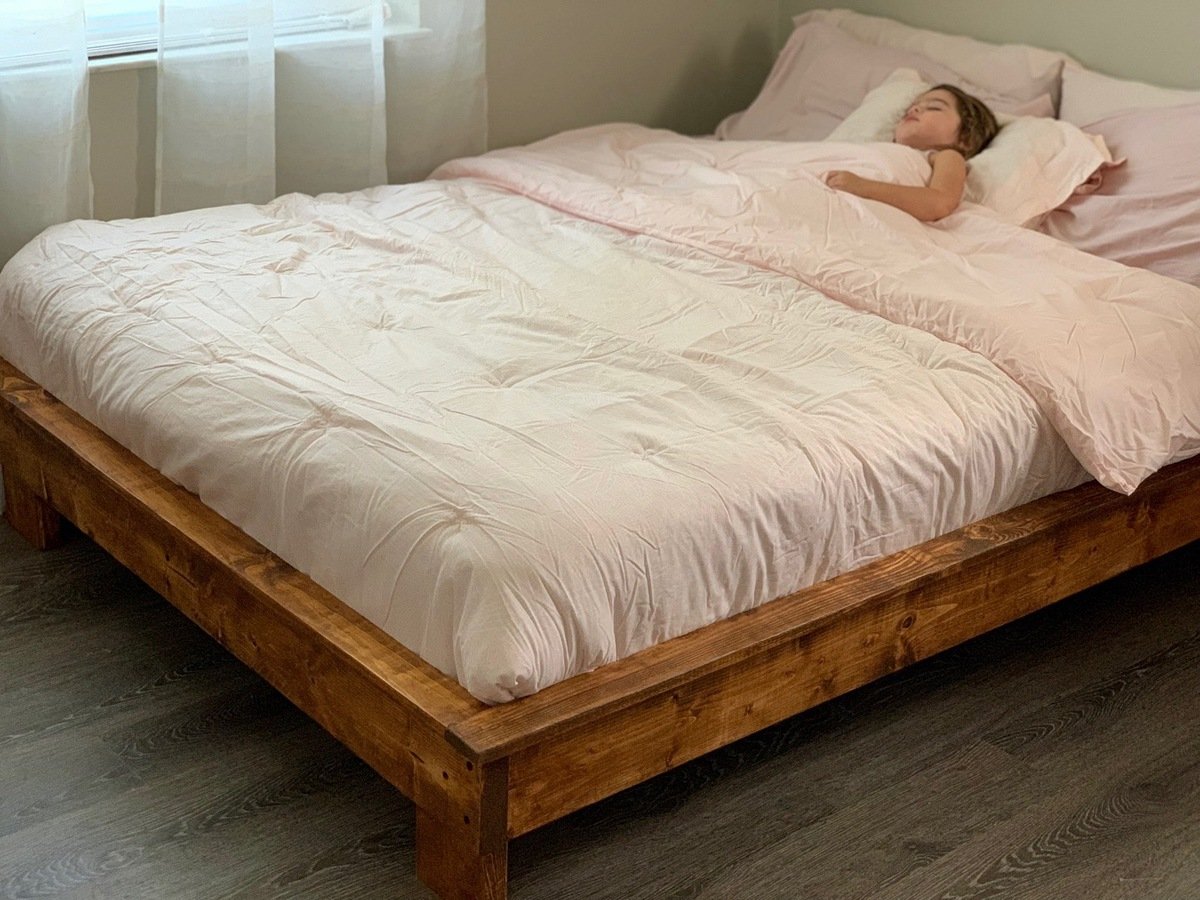
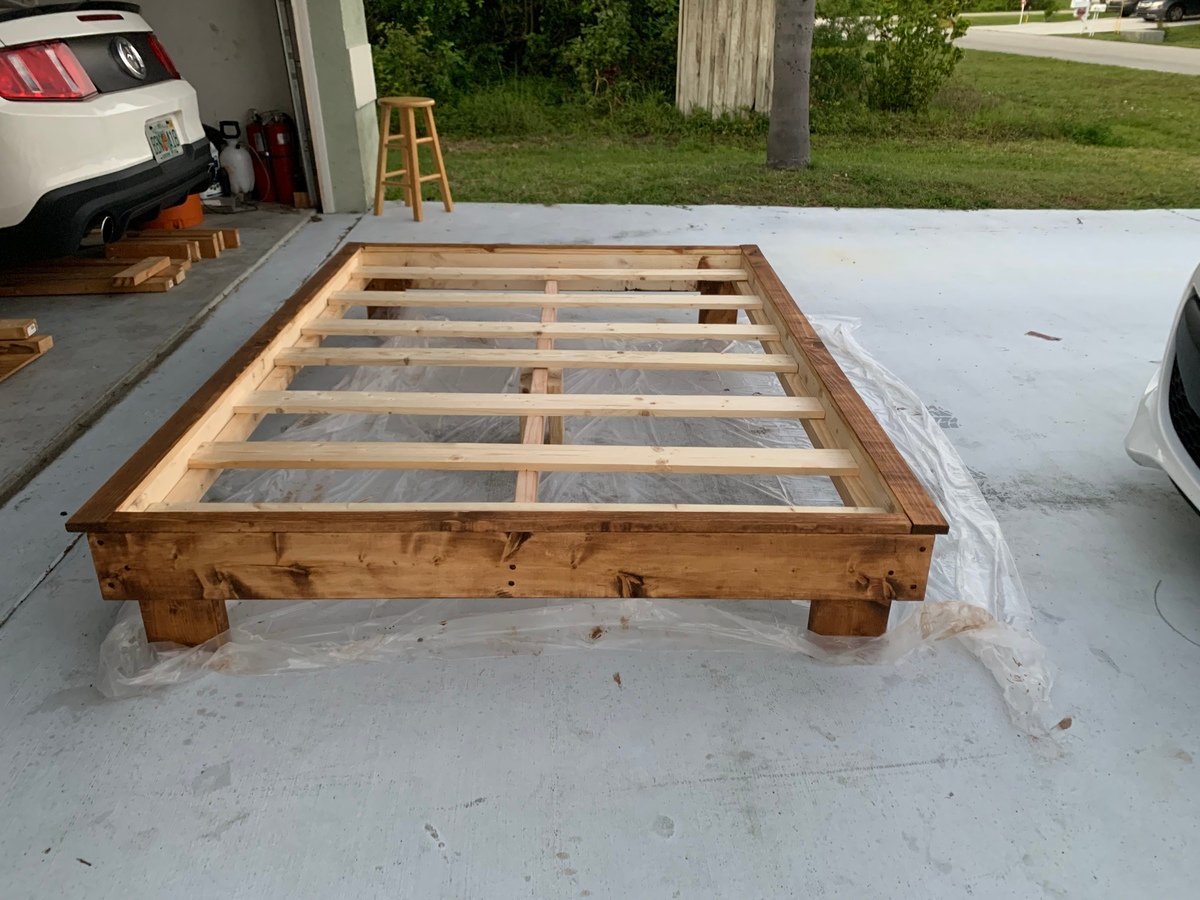
I’m in love with how well this bed turned out. Modified by using a 2x4 for middle support and 1x4’s for slats. It was less money and felt better for support. 

Built from Plan(s)
Estimated Cost
$150
Estimated Time Investment
Weekend Project (10-20 Hours)
Finish Used
Early American stain & matte poly
Recommended Skill Level
Beginner

Chicken Coop with run

Submitted by Anonymous (not verified) on Sun, 01/31/2016 - 19:36

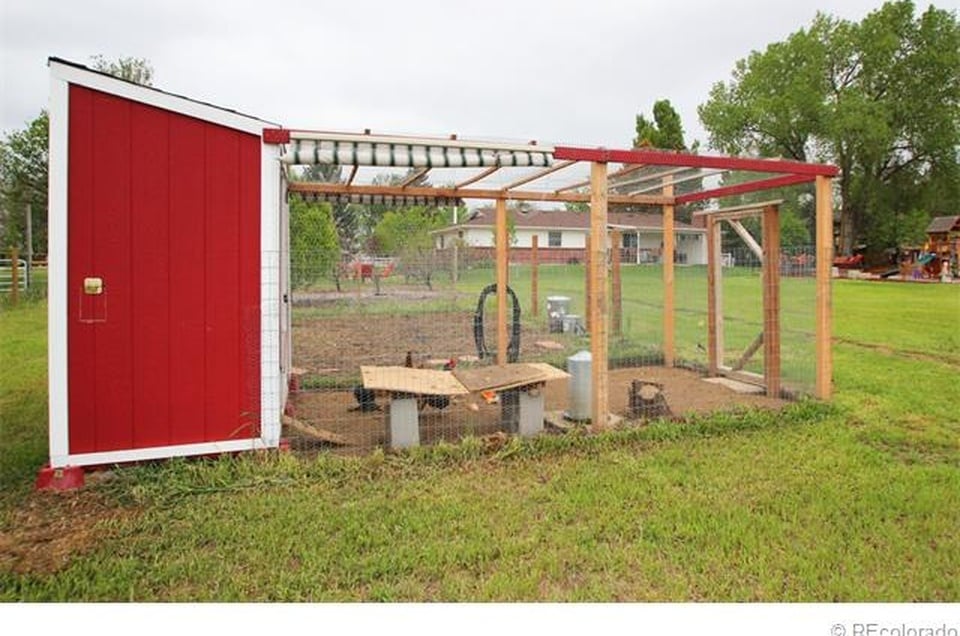
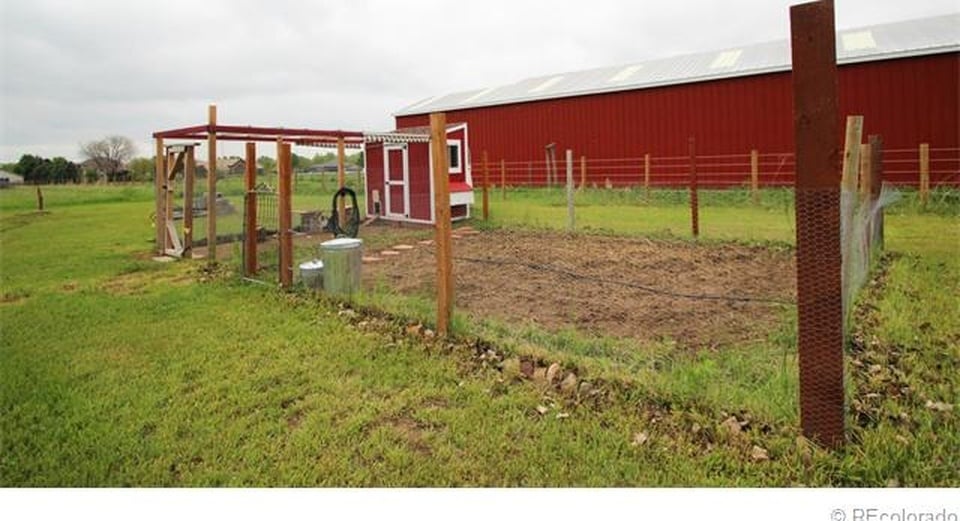
It took a while to come together and made several modifications but it is a great coop and was a major selling point of the house when we were relocated.  I had added a main tray under the roosts and a door to srape the poop out.  This made keeping the coop clean very easy.  

Built from Plan(s)
Estimated Cost
$800
Estimated Time Investment
Week Long Project (20 Hours or More)
Finish Used
Chicken Coop
Recommended Skill Level
Intermediate

DIY Can Good Storage

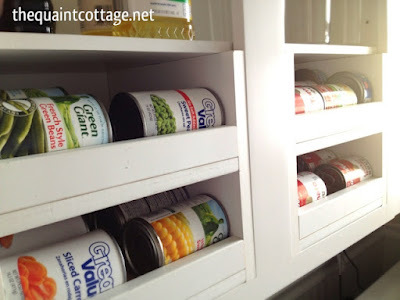
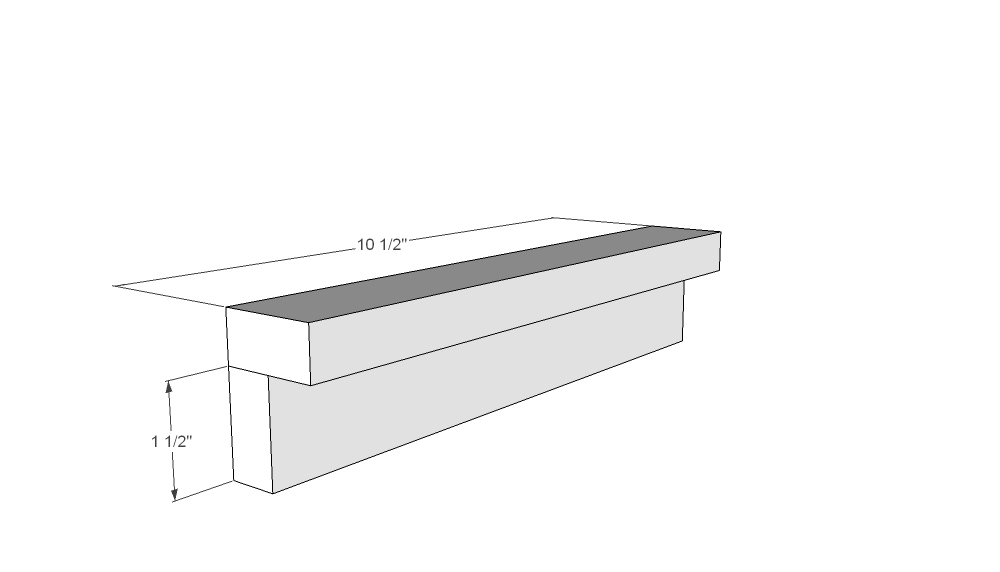
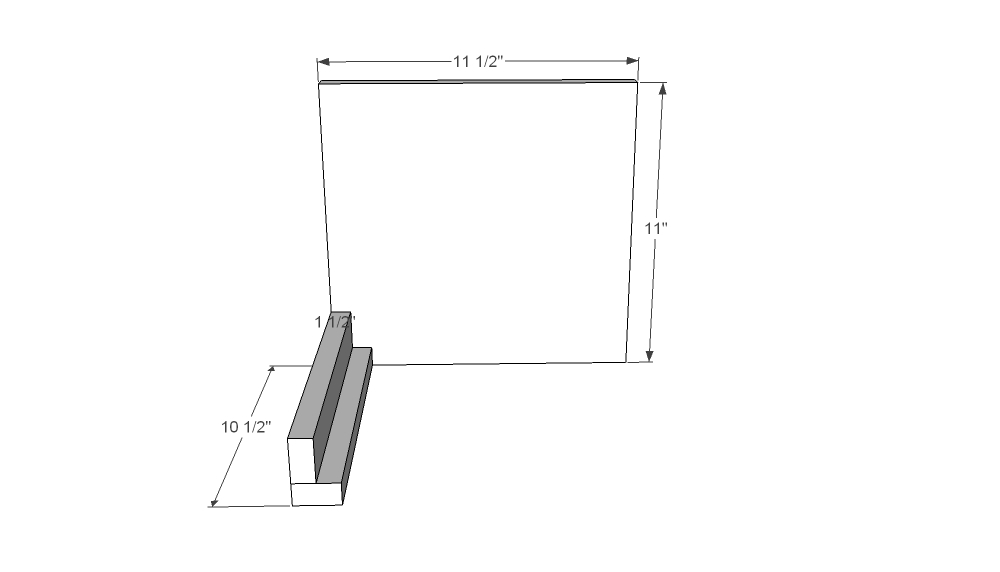
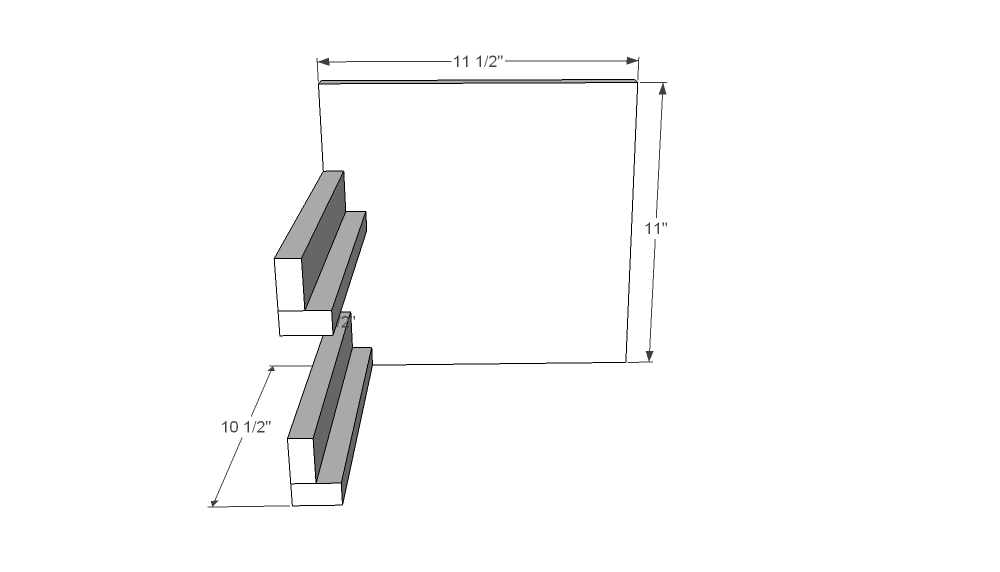
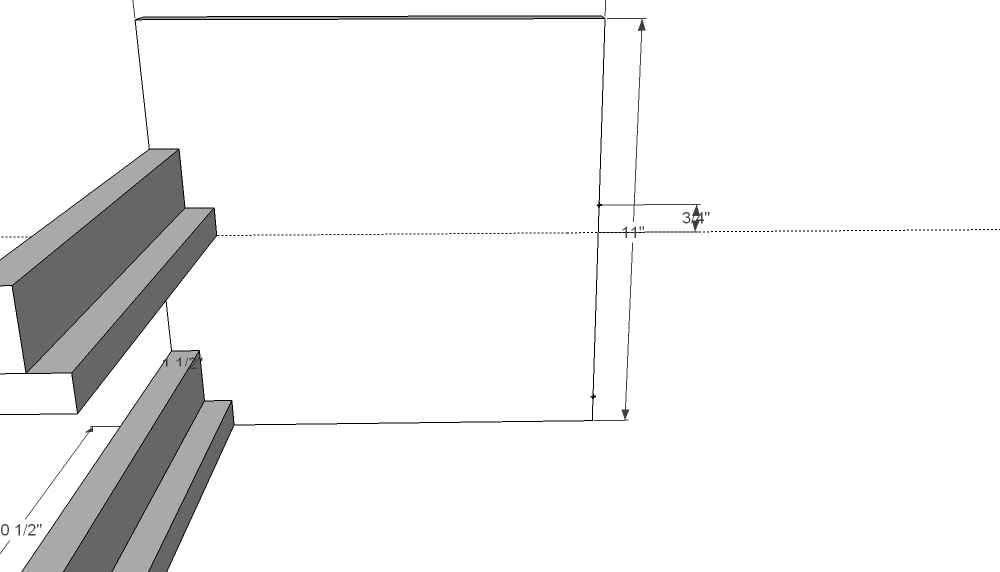
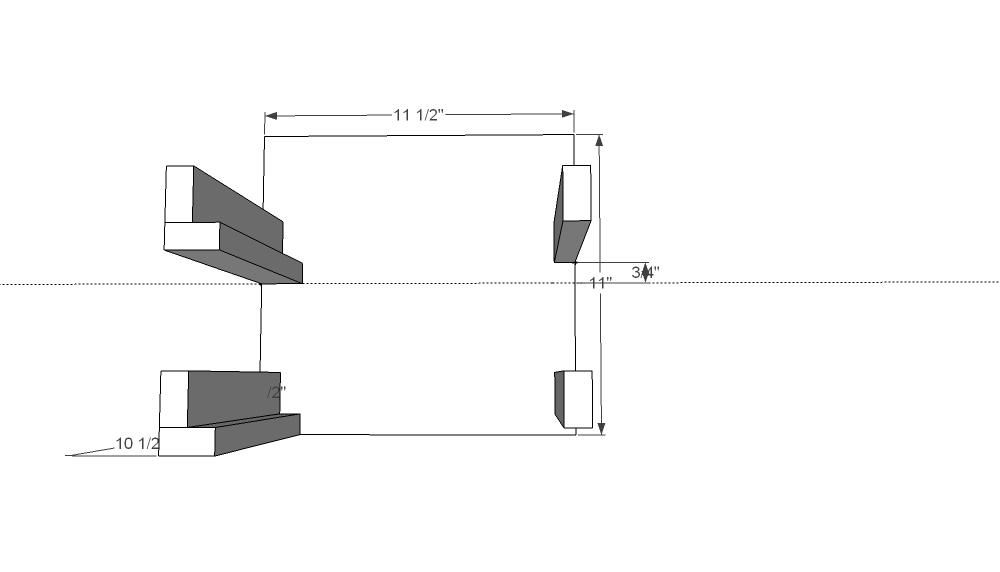
The can good organizers I found on line were metal and didn't fit the exact opening I needed. I built my own for much less than the metal ones (which were $36 each!). With this plan, you can build up to four of the size I made for under $36. See how they just blend into the cabinet and look like they are built in it? Here is the process. Step one: Cut the sides and the ledges. Step two: Attach pieces to the walls of the unit. Step three: Set the lauan onto the ledgers. See? I told you it was easy! I drew up a sketch of the size I used for my 12" opening with a cabinet depth of 11.5" (if you have doors, it will be a depth of 10.5-10.75"). The height of my can good holders are 11". Again, the plan can be adjusted to any size space, but I think if you go past three cans wide, you may want to use something more sturdy than the lauan. Additionally, if you make the unit taller and add shelves, make certain the cans will fit thru the opening, don't just measure with the can in place on the shelf. Cut list for 1 can good holder: 2 - 11"tall x 11.5"deep walls (the melamine is 11.75" deep, I had to trim mine down) If your doors are on your cabinets, your cuts will probably be between 10.5" and 10.75" 6 - 1x2" 10.5" strips 2 - 10.5x10.75" lauan cut for the shelf If your doors are on your cabinets, your cuts will probably by between 9.75" and 10" I used 1.25" finish nails, but you can use screws if you prefer. Wood glue, wood filler, etc. Cut 6 equal size 1x2 strips. 2 per ledge, one for the back support. The size of the opening subtract the width of the melamine walls (.75x2=1.5"). My opening was 12" and then I subtracted the 1.5" (for walls). Nail the bottom 1x2 to the end of the upright 1x2 as shown above to create the front ledge.  Flip the ledge over and attach the ledge to the front (finished) edge of the melamine. Make sure the bottom ledge is flush with the front and the bottom of the wall. Measure down 5.5" (halfway point) from the top and mark the edge of the wall. Attach the top ledge to the wall keeping the front of the ledge flush with the side wall front edge.  Find your center point again (5.5") and measure up toward the top .75" to create a bit of a roll for the cans to come forward when you remove one. Do the same for the bottom. Measure .75 up from the bottom and mark. Attach the back supports at the marks you made in the last step. Attach second wall and screw or nail supports and ledges. Once all the 1x2s are in place and secure, the lauan pieces will fit in place and stay with the weight of the cans. You can add glue to secure them, your preference. Then touch up the nail holes and slide into place. I hope this gave you a helpful way to store your can goods. Let me know if you have any questions. Happy building! Karen :)

Estimated Cost
About $36 for 4 units
Estimated Time Investment
An Hour or Two (0-2 Hours)
Recommended Skill Level
Starter Project

Sandpit with built in seats and lid - metric

Submitted by mrs_dt on Tue, 07/08/2014 - 01:49

This was our first build from this website and we are so pleased! Having seen very involved plans on an Australian website for a similar sandpit, I was so pleased to come across this version, with its far simpler design!
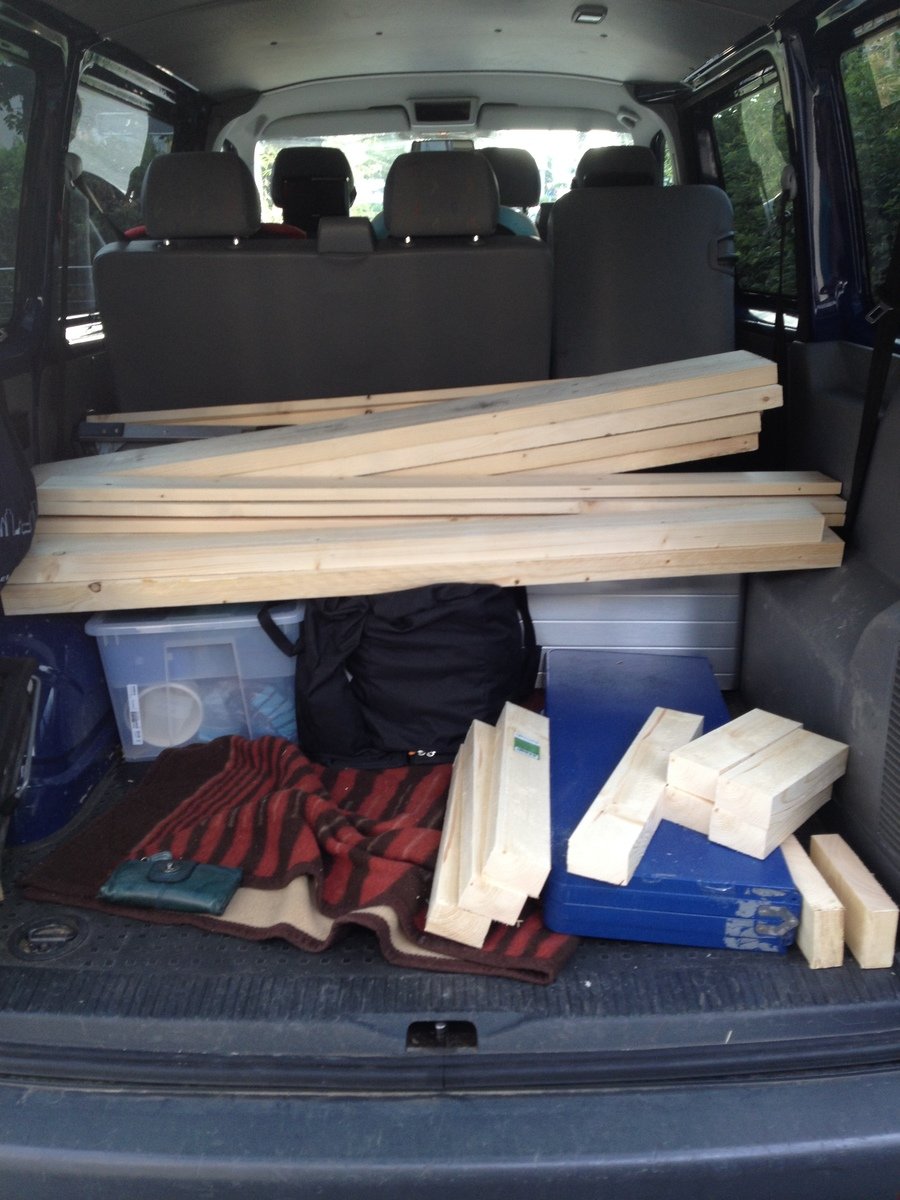
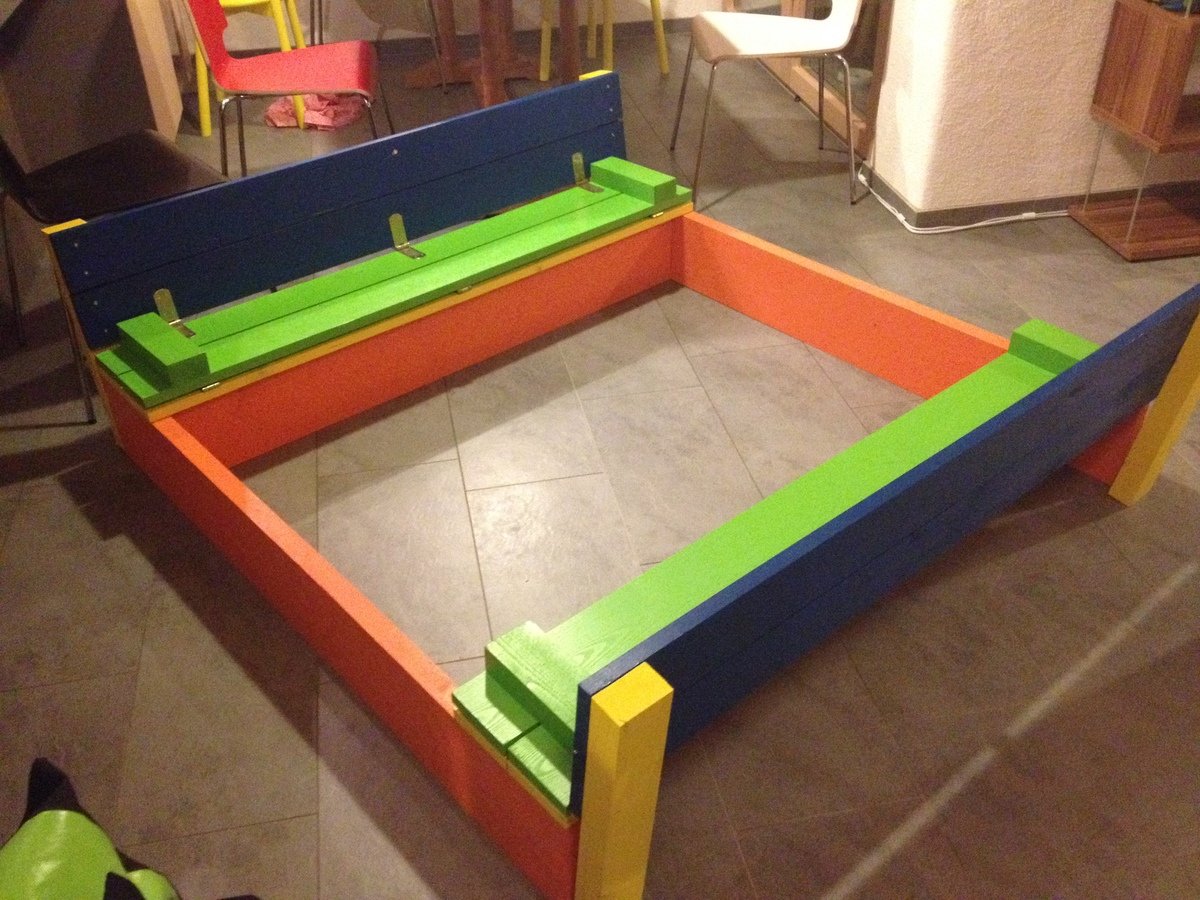
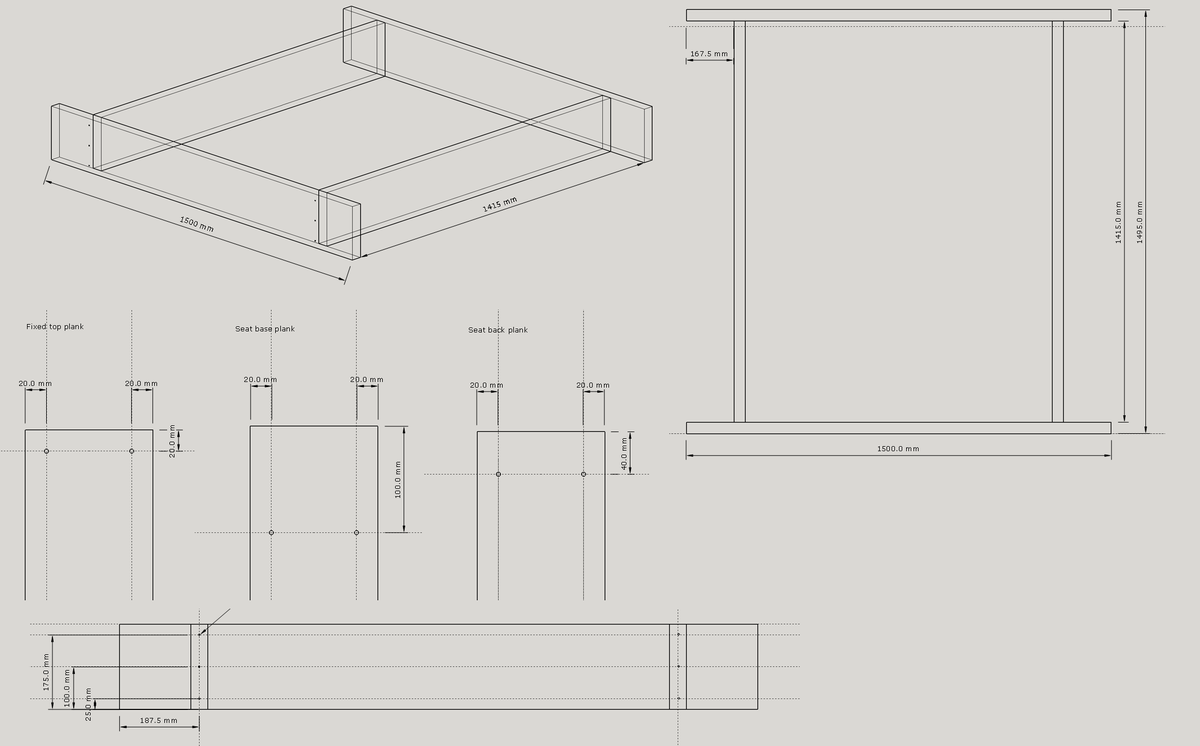
We wanted a slightly bigger sandpit, so I needed to do some modifications, and while I was enlarging it, I also converted to metric sizes, and designed specifically for the timber I knew I could buy locally (very obscure and inconsistent seeming German sizes). So the end result is a 1.5x1.5m sandpit, that has so far had 6 kids playing happily in it at once!
I've put in the drawings I used, and the cutting list for larger sizes in case anyone else is working in metric, or wants a bigger size!
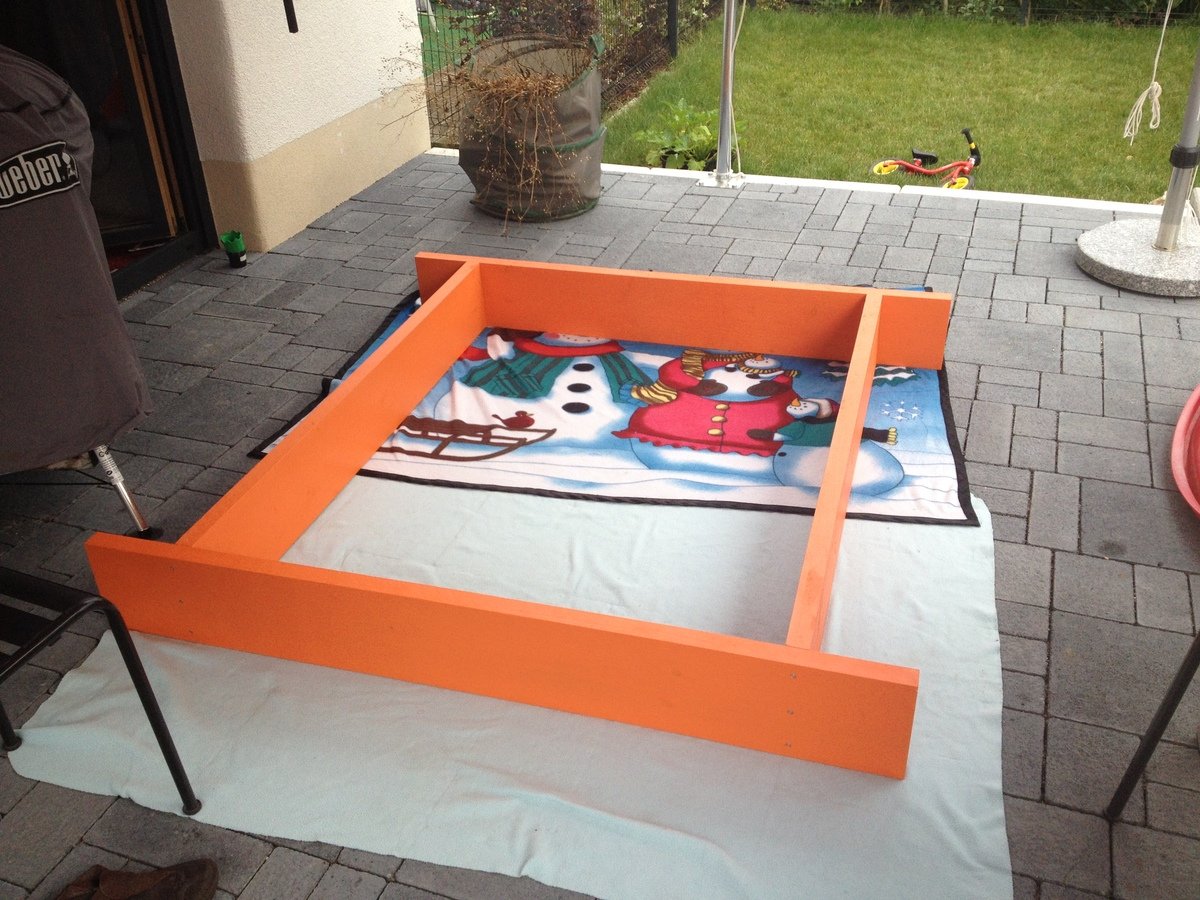
Our other modification was to offset the shorter sections of the base to run along the front plank of the bench seat - there were two main benefits for this - we need a lot less sand, as there is none wasted under the seat, and the seat is supported and can't bow downwards!
The dimensions and layout we used are in the images.

Supplies

Timber
2 - 200 x 40 x 3000mm
6 - 120 x 24 x 3000mm
1 - 80 x 50 x 3000mm

Hinges
12 - 140mm long (the original design had 8, we went with three per edge to allow for the extra width)

Self tapping decking screws
18 - 5 x 80
48 - 5 x 50
96 - 3 x 20 (or enough for your hinges, depending on the design)

Paint
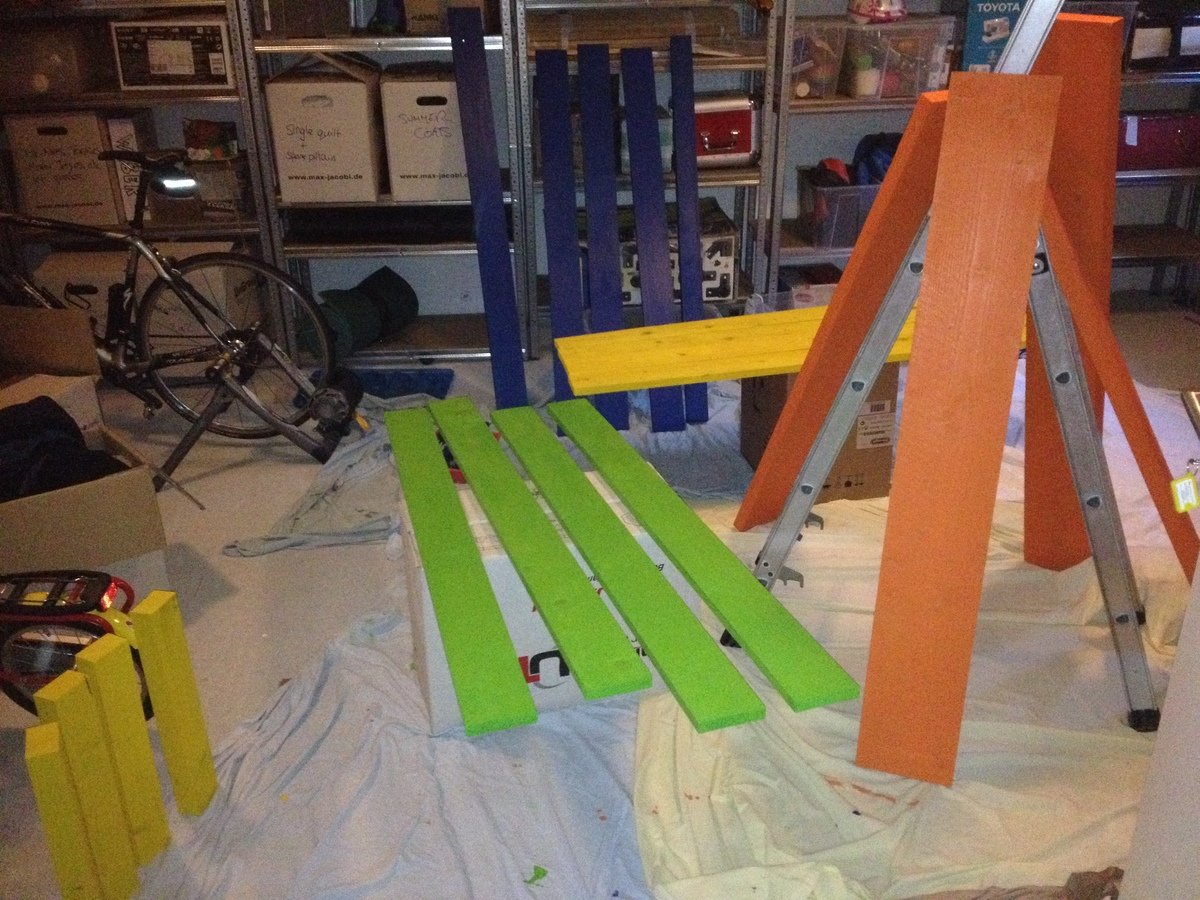
3 - 375ml PU Acrylic Paint, suitable for exterior use (top planks and seat supports)
1 - 750ml PU Acrylic Paint, suitable for exterior use (base)

Weed matting and staple gun

Sand
I calculated I would need 20 x 25kg bags - in the end we needed 11 - don't ask me where we went so wrong!

Cutting list

2 - 200 x 40 x 1500 (long sides of base)
2 - 200 x 40 x 1415 (short sides of base)

12 - 120 x 24 x 1495 (top slats - just under half a plank, to allow for waste)

4 - 80 x 50 x 245 (armrests / seat braces)
4 - 80 x 50 x 495 (back supports of seats)

I gladly paid 5 Euro for the wood to be cut in Hornbach - it should have been more than this, but the guy was generous!

12 hinges (the original design had 8, we went with three per edge to allow for the extra width)

On Sunday we had the idea, on Monday I drew up the plans, on Tuesday I went shopping! Once all our wood was home safely, we sanded it down - most edges weren't badly finished, but there were a few splinters that needed getting rid of!
The next two nights Mr W gallantly set to work with the paint brush. After two nights, the wood all had two good coats of paint and we were ready to start assembling on Friday.
I pre-drilled the base of the bench before the second coat of paint - three holes for each butt joint - with some careful measuring this made screwing the base together really easy!
The top planks were also pre drilled, but there unfortunately my tiredness made me make mistakes, and some had to be re-drilled! Spacing the planks out took a lot of time, but I am glad I made the effort. I used cereal box, and experimented with different numbers of layers - I knew I wanted a theoretical 5.4mm gap, but it took some time to get the right number of layers of carefully creased and concertinaed card!

Having got our spacing wedge sorted, we screwed the blue planks in place at either end of the base. We then assembled the green seat section, and the blue/yellow back rest. Following a tip from the comments section, we added the hinge to the seat/back combo first, as this ends up being on the underside. Once those two hinged sections were made, they were then laid in place on the base (card wedge spacers in place) and then the final hinges added. The final assembly took about 5 hours - but this was partly because we started outside, then had to move everything inside when a huge thunderstorm rolled in!

The next morning we got busy with the staple gun and tacked weed matting over the base, then it was hauled in to position and filled up! For us getting this done and dusted was important, otherwise it could have dragged on a lot, but we are terribly proud that it was done in less than a week from being fist conceived!
I hope the metric/enlarged plans are of use to someone else too. One other idea we had, which we didn't get round to building in, was a support bar to be fitted when you close the pit, so the kids can play on top as a stage when it is not being used for a sandpit!
Built from Plan(s)
Estimated Cost
150 EUR
Estimated Time Investment
Weekend Project (10-20 Hours)
Finish Used
Painted with two coats of Polyurethane Acrylic paint
Recommended Skill Level
Beginner

Porch Swing

Submitted by bbcarey on Tue, 10/23/2012 - 10:12

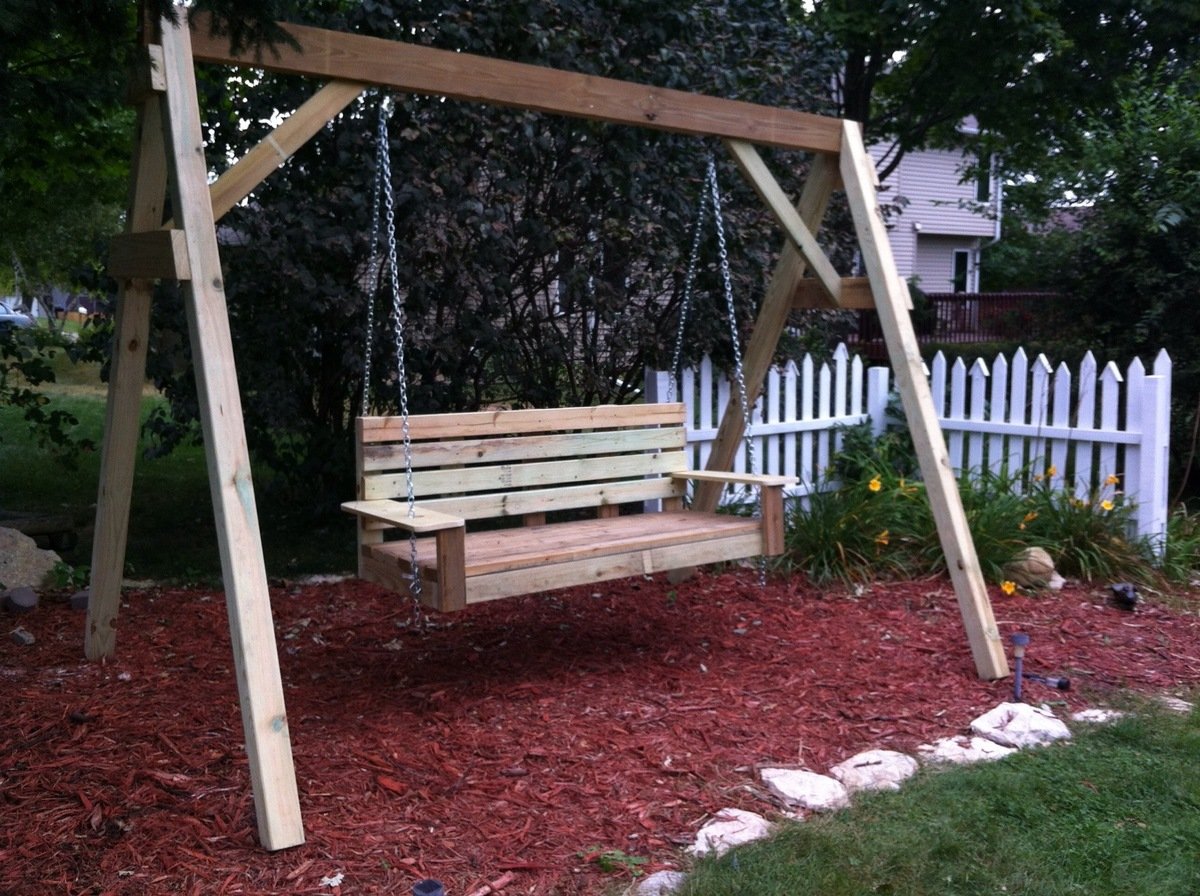
I wanted to make this porch swing ever since seeing it in the plan catalog (Large Modern Porch Swing). Just a matter of setting aside a weekend to get it done and then to find A frame to support it. I made the A-frame from a combination of this post:
http://www.buildeazy.com/newserve/swing_seat_support_dec07_1.html
and this one:
http://www.hgtv.com/home-improvement/custom-a-frame-childrens-swing-set…

I made the back a bit higher on our swing... and not quite as wide.

Reading several other blogs on this- I chose to attach the chains to the top back of the swing to keep it from tipping backwards...

Now just get to enjoy it!!

Built from Plan(s)
Estimated Cost
$50
Estimated Time Investment
Day Project (6-9 Hours)
Finish Used
Exterior Sealer/protector
Recommended Skill Level
Beginner

Comments

Firewood Shed

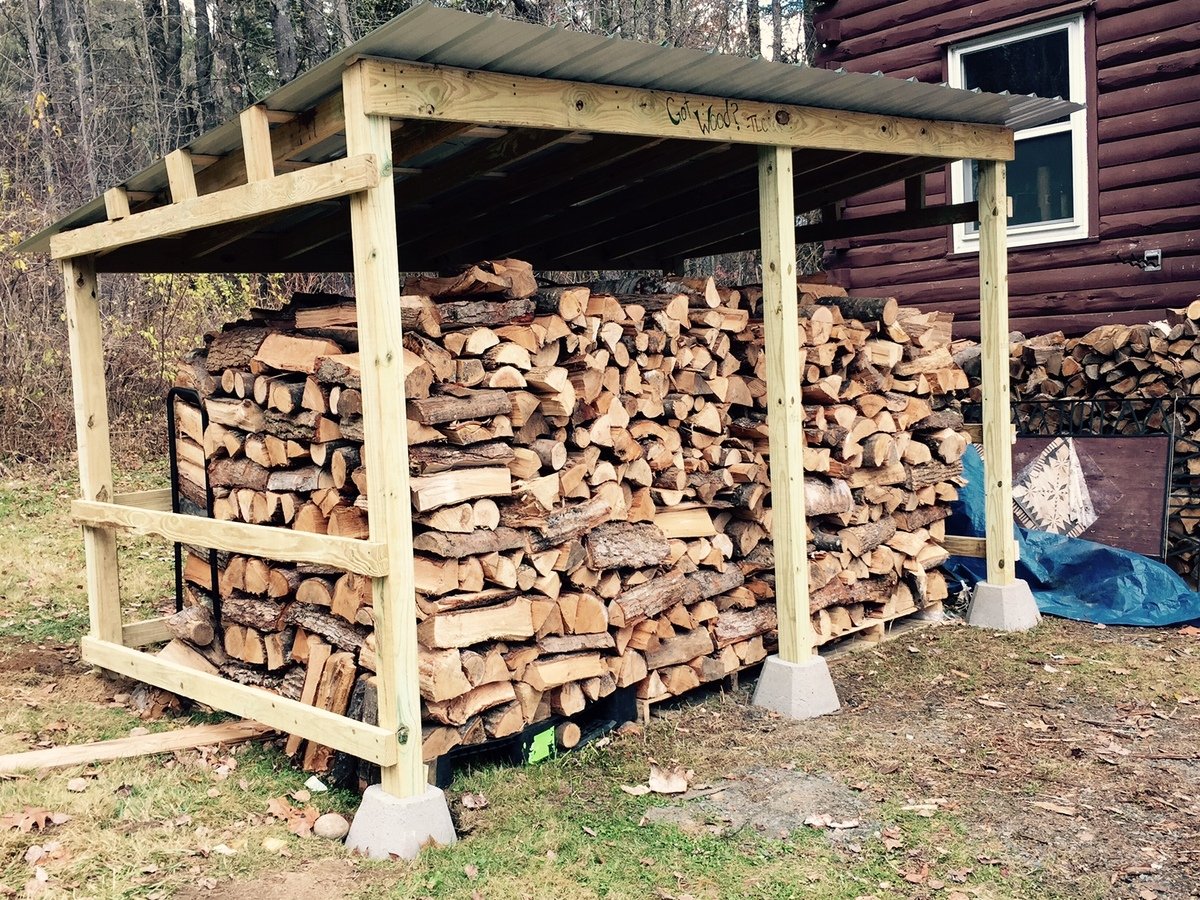
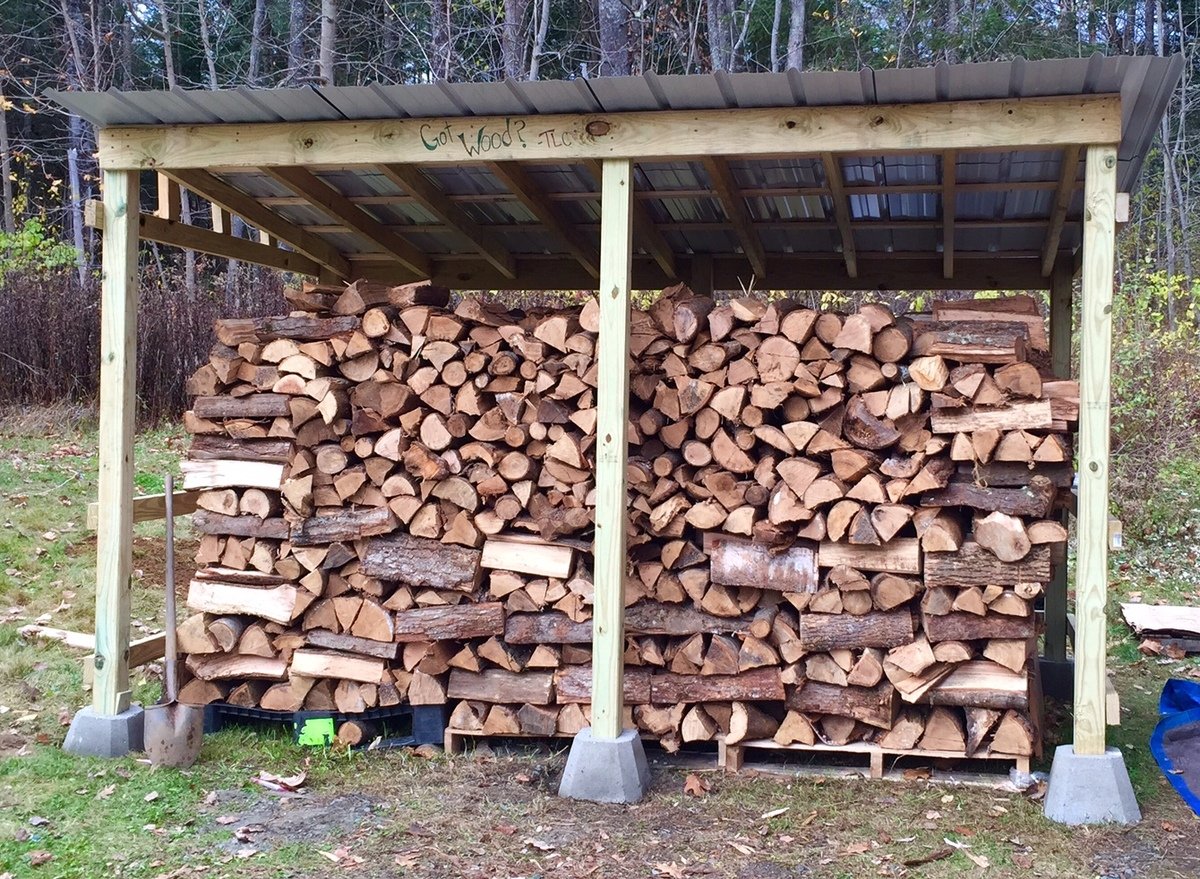
When I decided to build a woodshed I was freaked out because I've never done anything even remotely like this.  I struggle with precision and patience, which made this project seem overwhelming as I knew I had to do a lot of prep work to properly level the ground, measure the wood, learn how to operate a saw, calculate angles to cut, etc...  I did a lot of research online and found this simple blueprint a great starting point.   I made some adjustments since i needed a much bigger shed, it's 11.5' x 7' x 7'.  Also, I already had the wood resting on pallets so I just build this shed around the wood with no built in floor.  Overall, I'm thrilled with how it turned out!
Built from Plan(s)
Estimated Cost
$500
Estimated Time Investment
Weekend Project (10-20 Hours)
Recommended Skill Level
Beginner

Comments

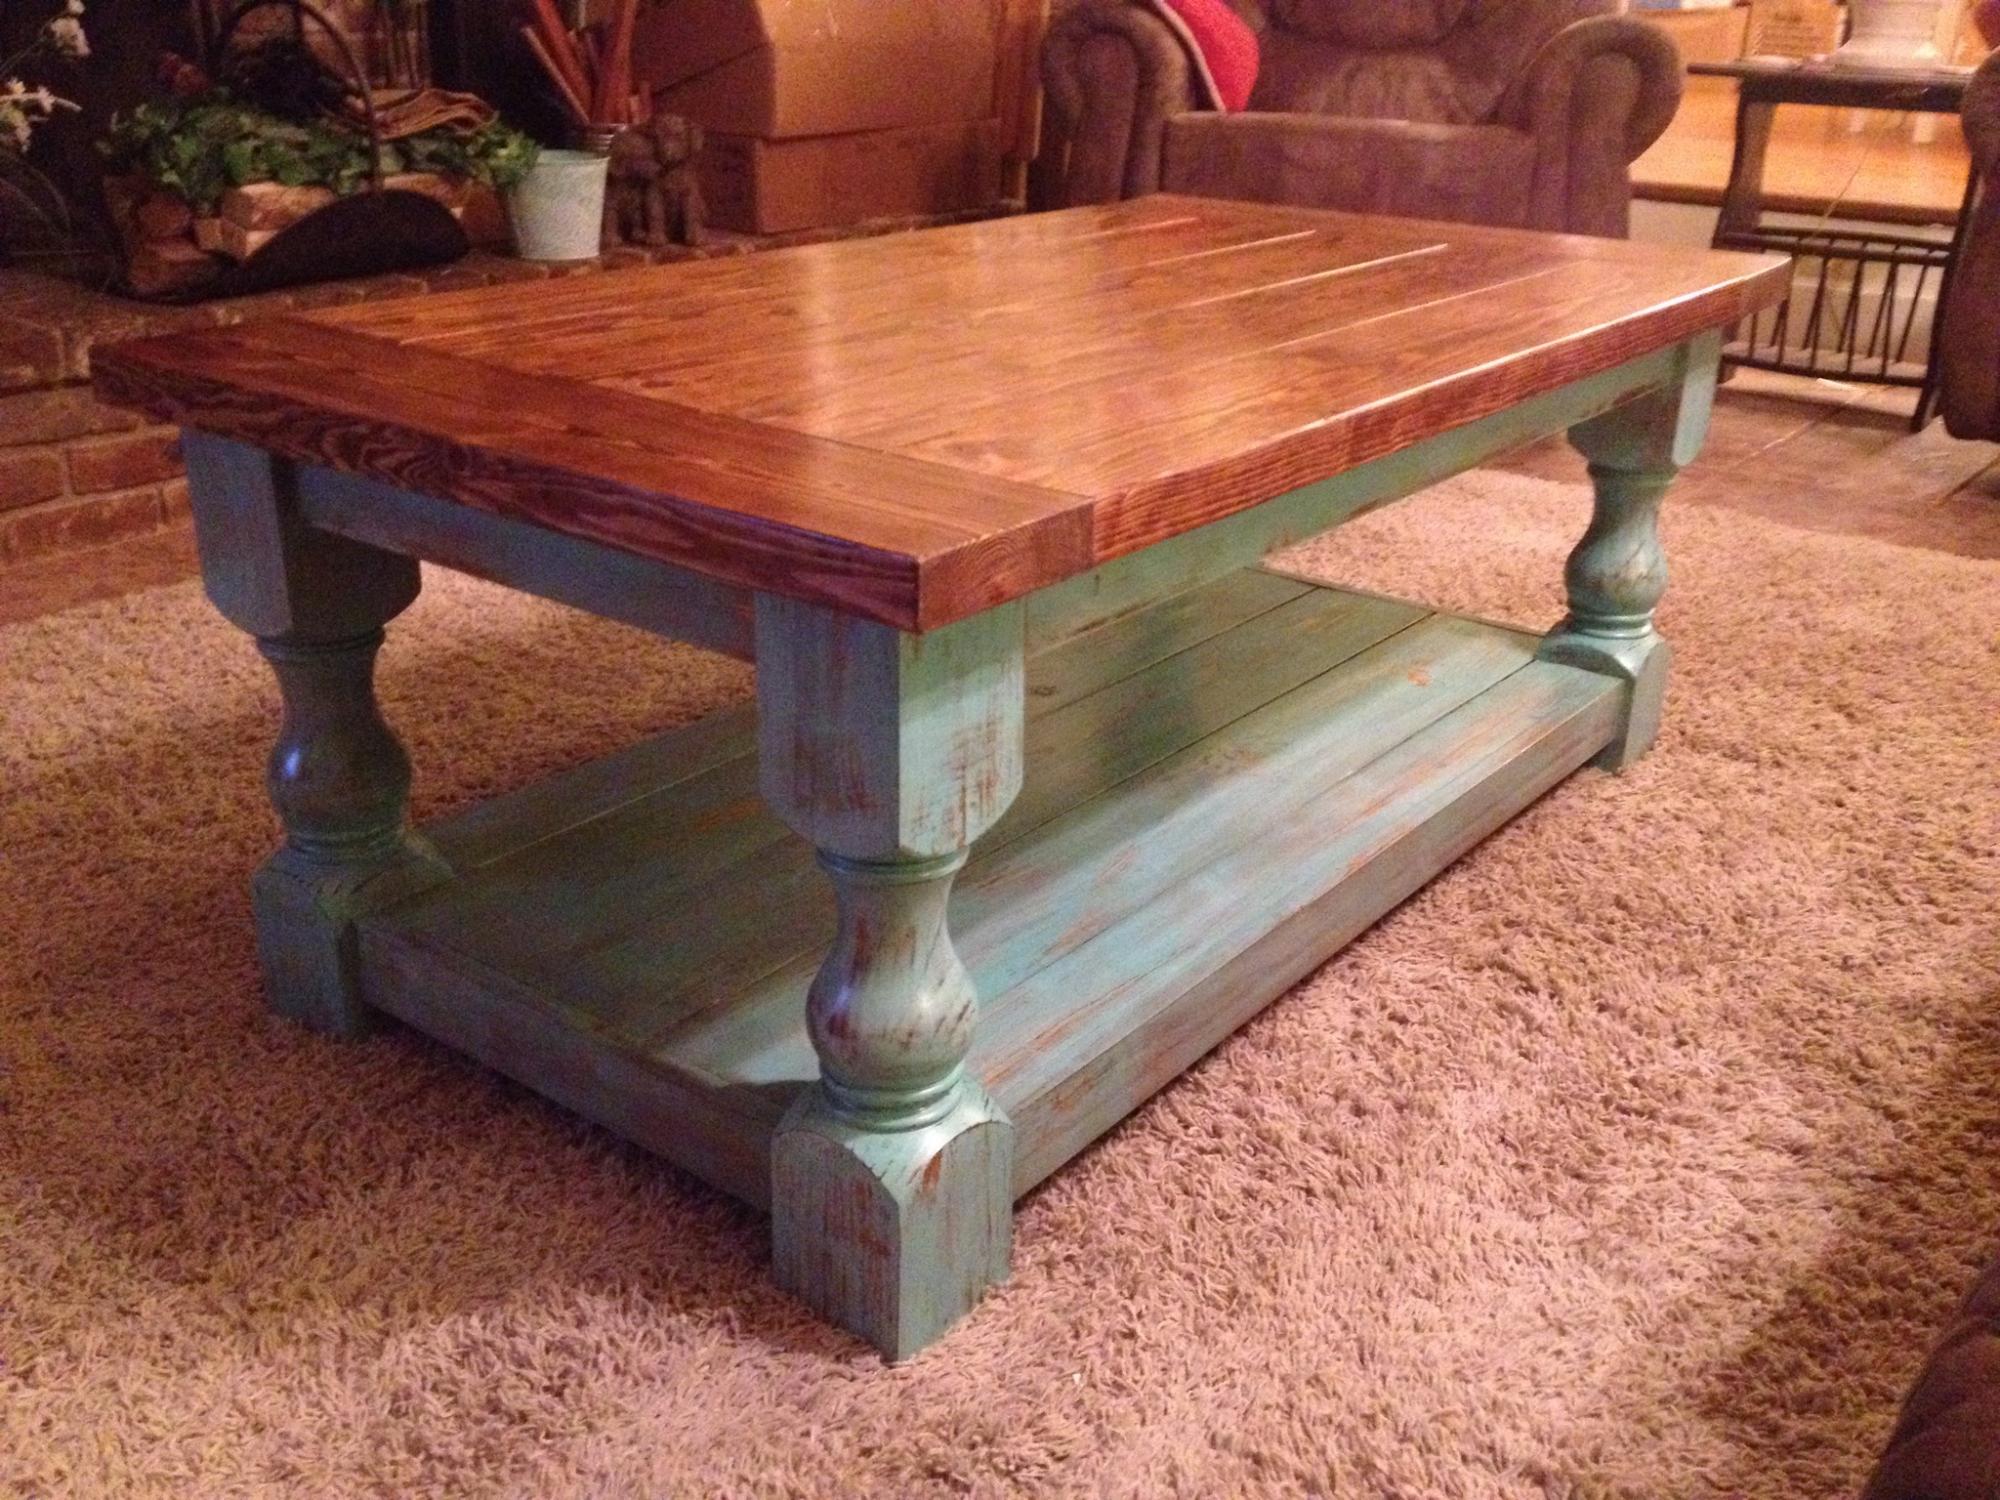
Corona Coffee Table

Submitted by scooper812 on Fri, 01/08/2021 - 23:31

I ran across this when looking for ideas for a coffee table. My wife wanted a rectangular table, rather than a square - simple adjustment. I ordered the legs from
Osborne - great selection and good service.

Built from Plan(s)
Estimated Cost
$150
Estimated Time Investment
Week Long Project (20 Hours or More)
Finish Used
Frame - Whitewash (white latex), whitewash (turquoise latex), distressed, dark walnut danish oil, polycrylic. Top - dark walnut danish oil and polycrylic.
Recommended Skill Level
Intermediate

Comments

My First Greenhouse

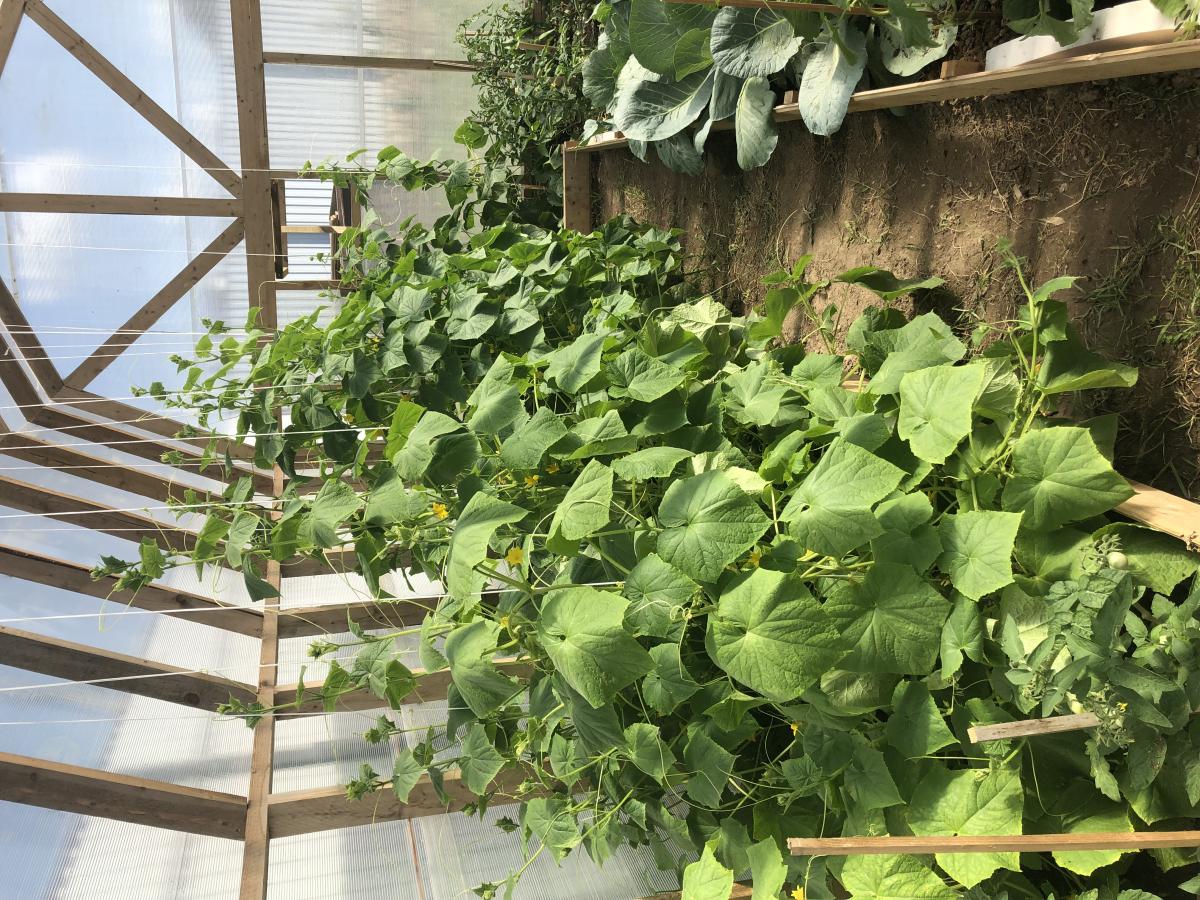
This was my first attempt at building a greenhouse. I wanted my cucumbers to be able t climb high so I made the house higher than the plans showed. It's also a little larger too. Since I am in Europe my dimensions are in meters. The overall size is 3 x 6 meters. I also built it on top of 100mm x 100mm lumber (the equivalent of 4x4's). It took 5 sheets of 6mm thick polycarbonate in 2 x 6 meters.

Built from Plan(s)
Estimated Time Investment
Week Long Project (20 Hours or More)
Recommended Skill Level
Intermediate

Comments

DIY Folding Workbench

Submitted by suzeet305 on Mon, 10/18/2021 - 18:32

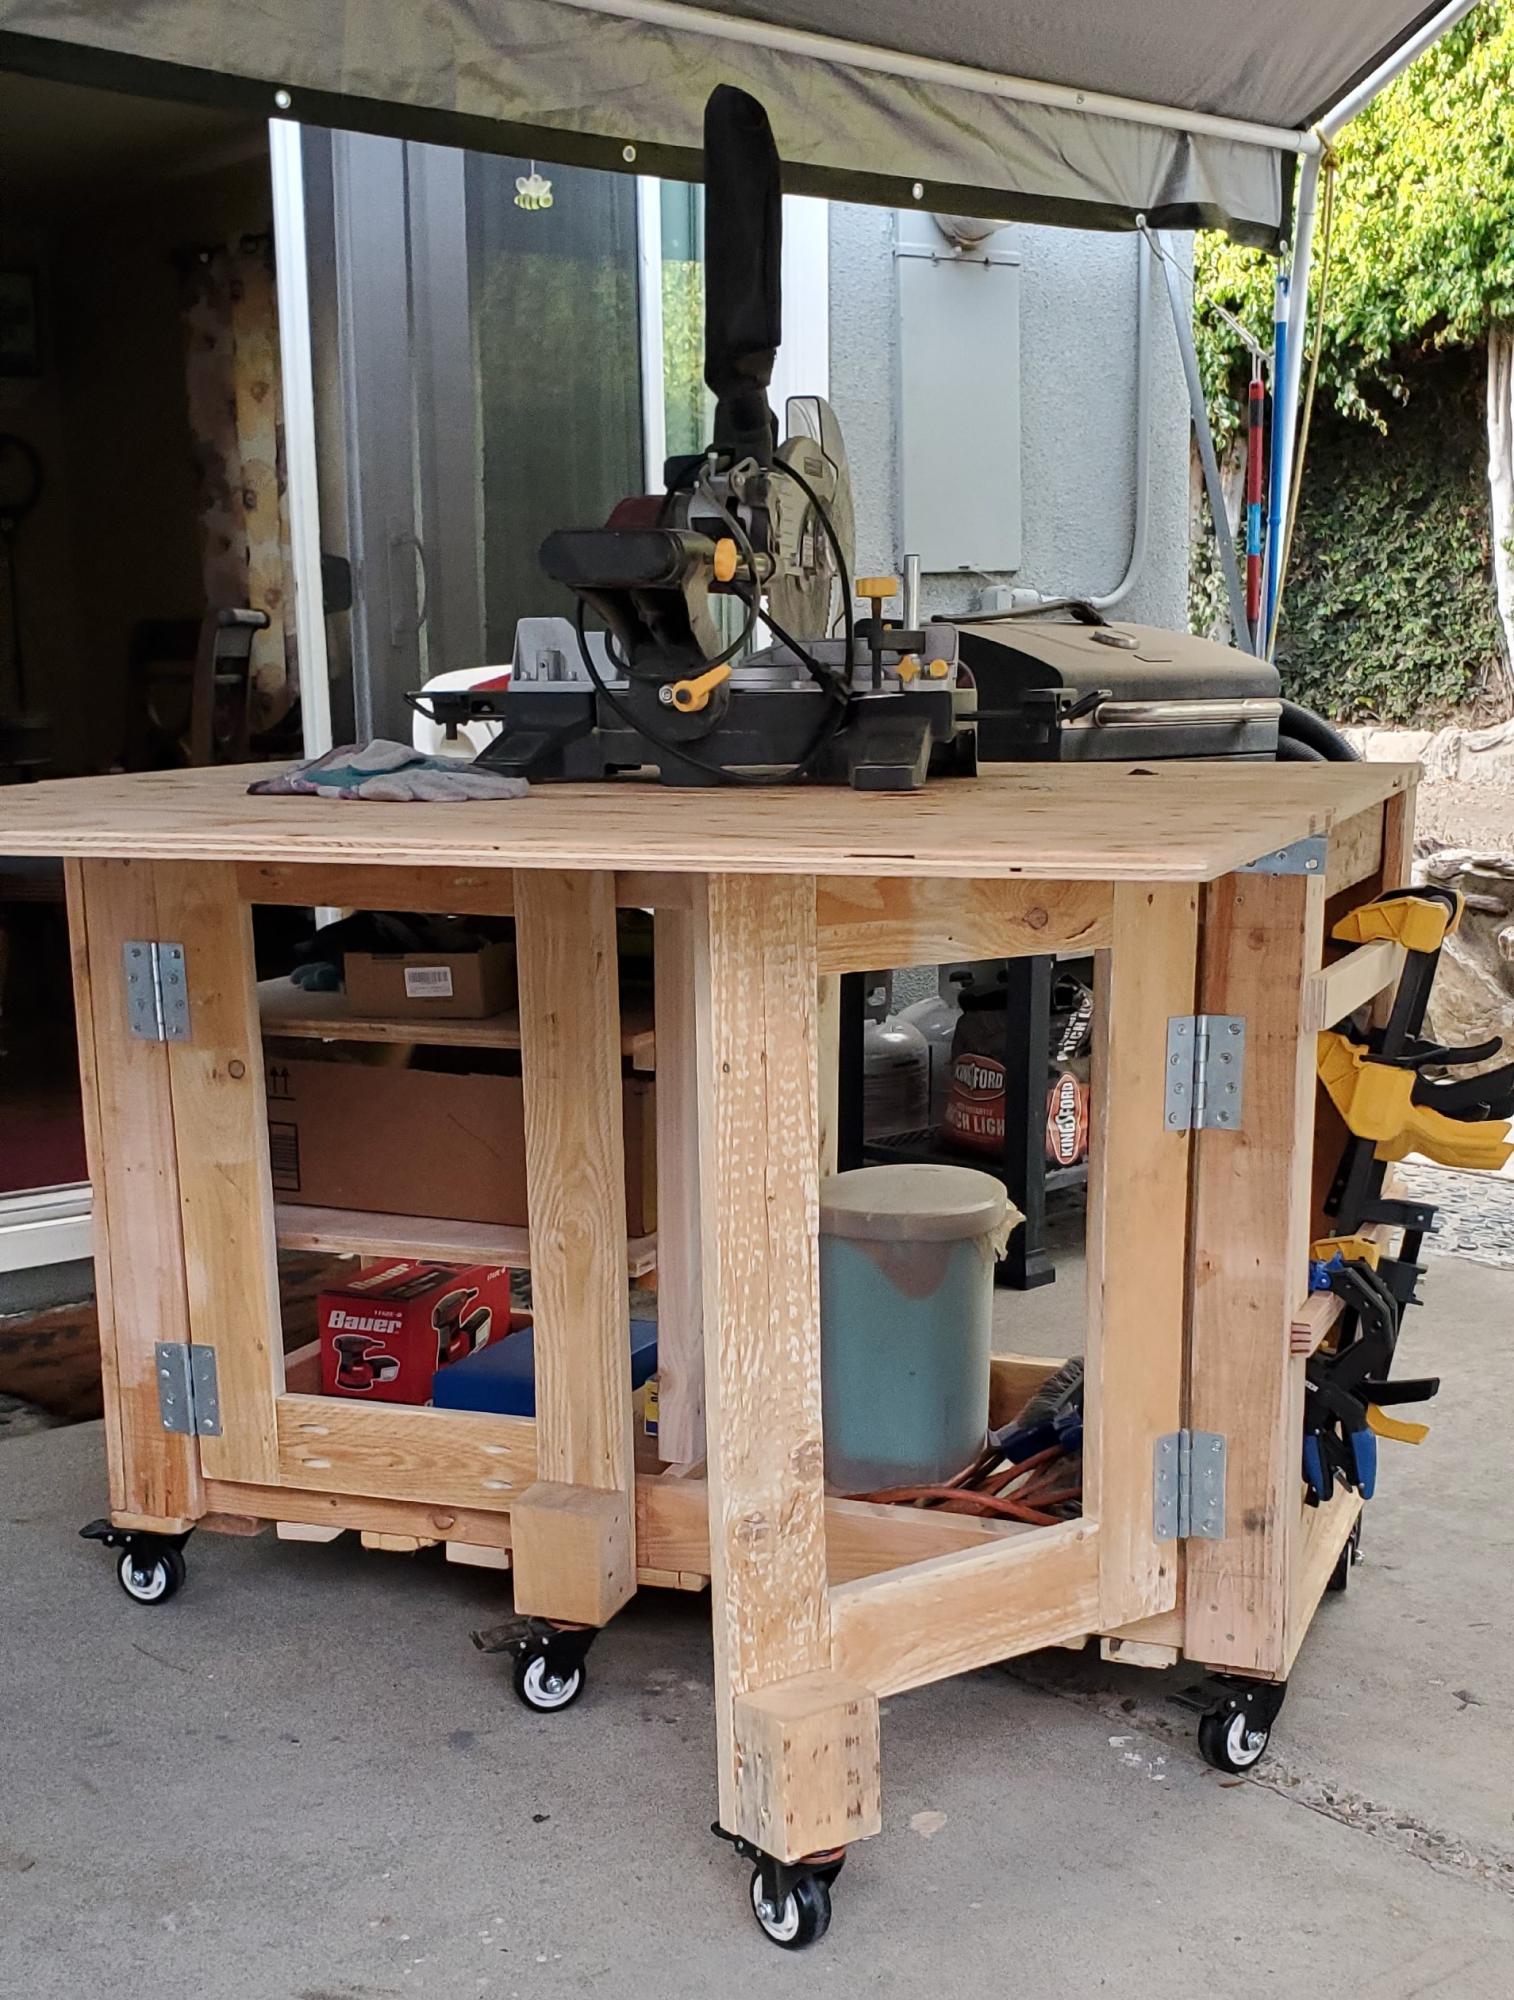
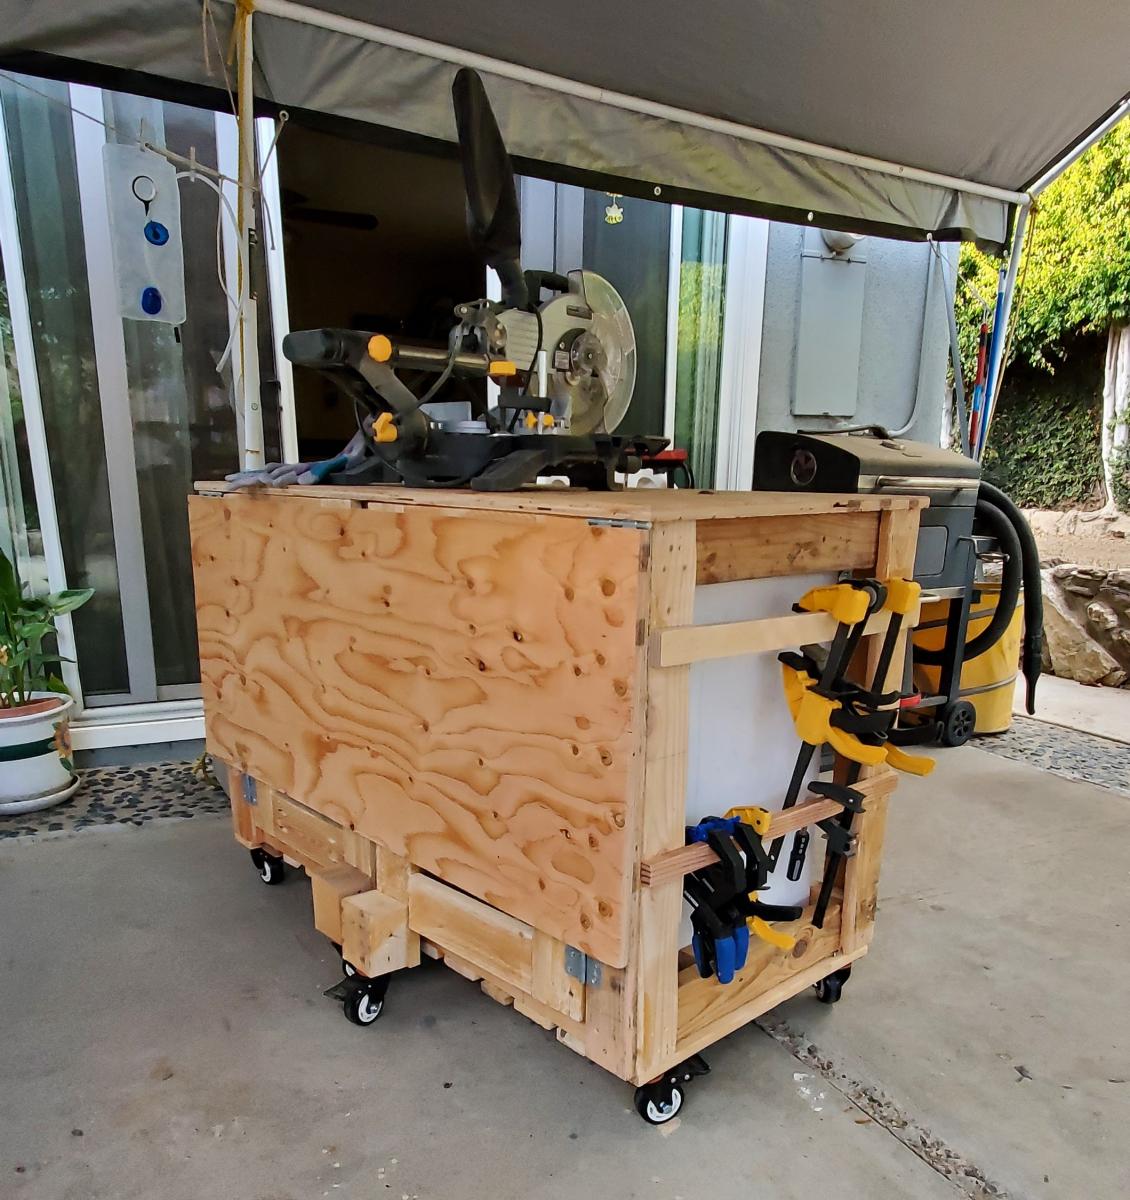
I'm a beginner DIYer and I knew one day I was going to have to make a workbench. I made mine 24x48 so I wanted a little more support to hold up the drop down leaf. I searched your site and found another plan with these gatelegs and knew this is what I wanted. I love the way it came out. What do you think?

Built from Plan(s)

Comments

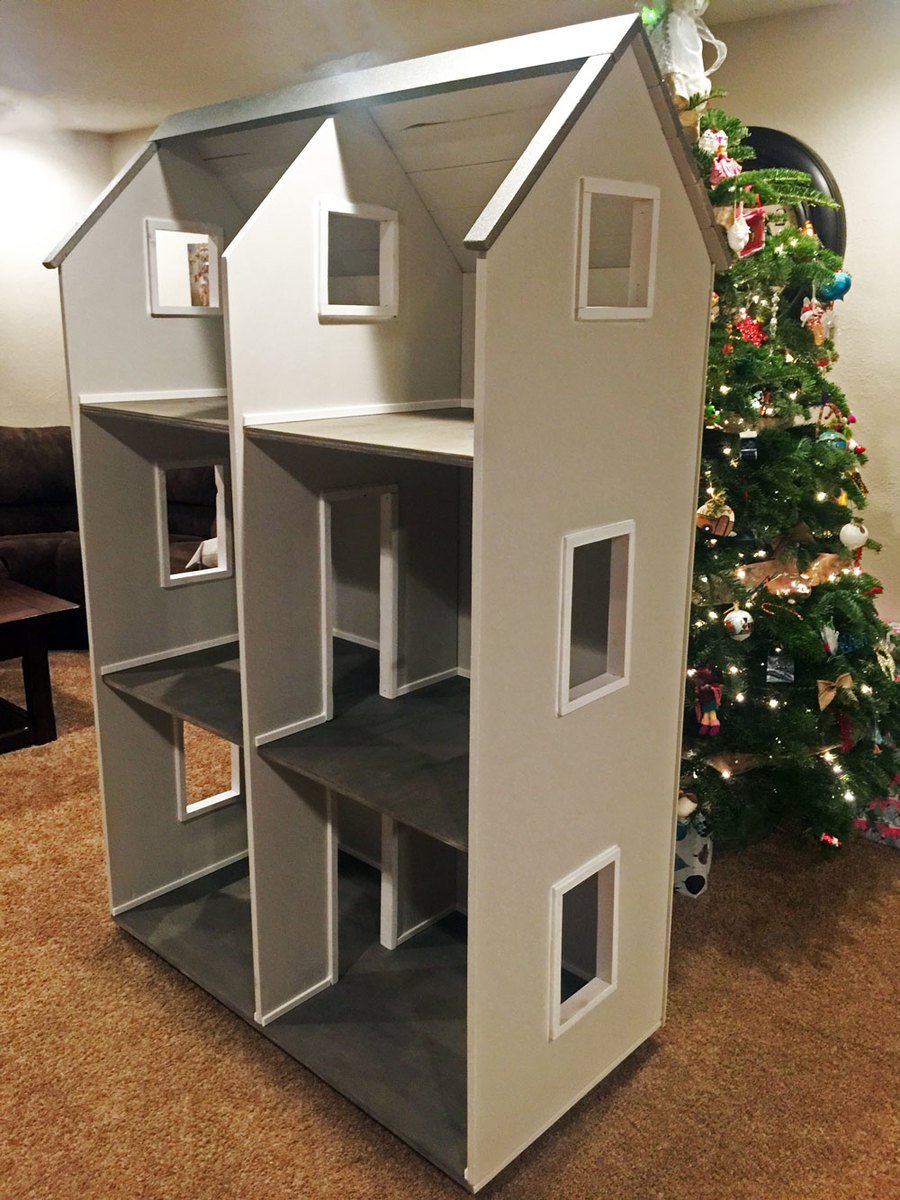
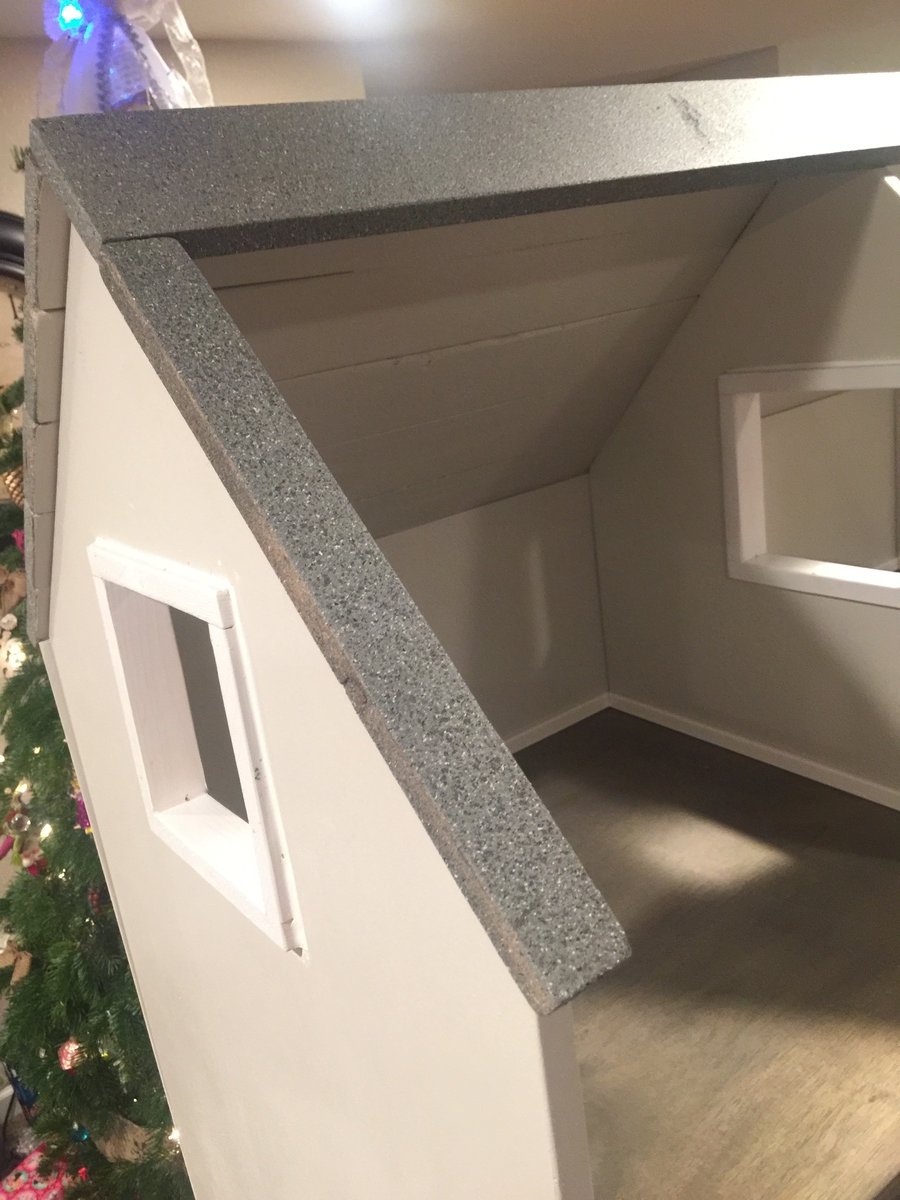
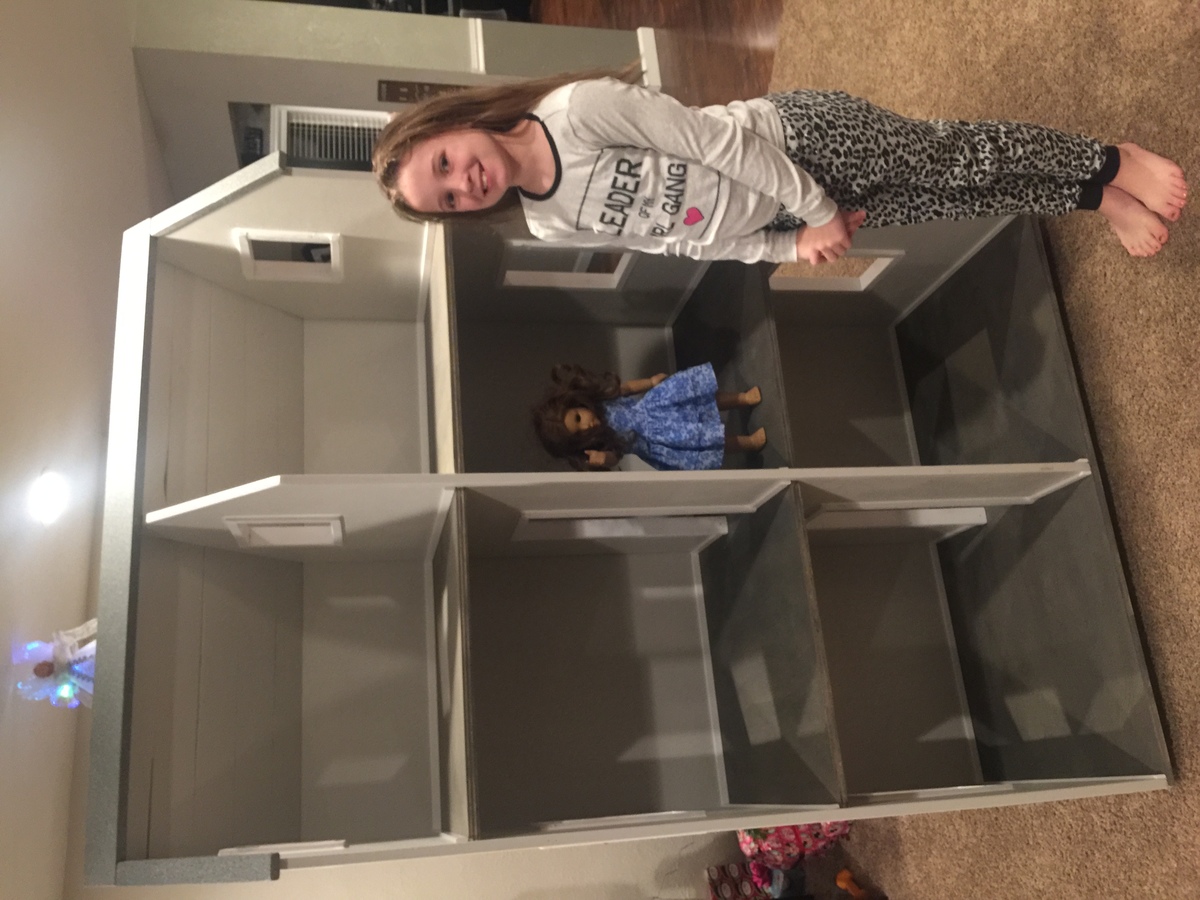
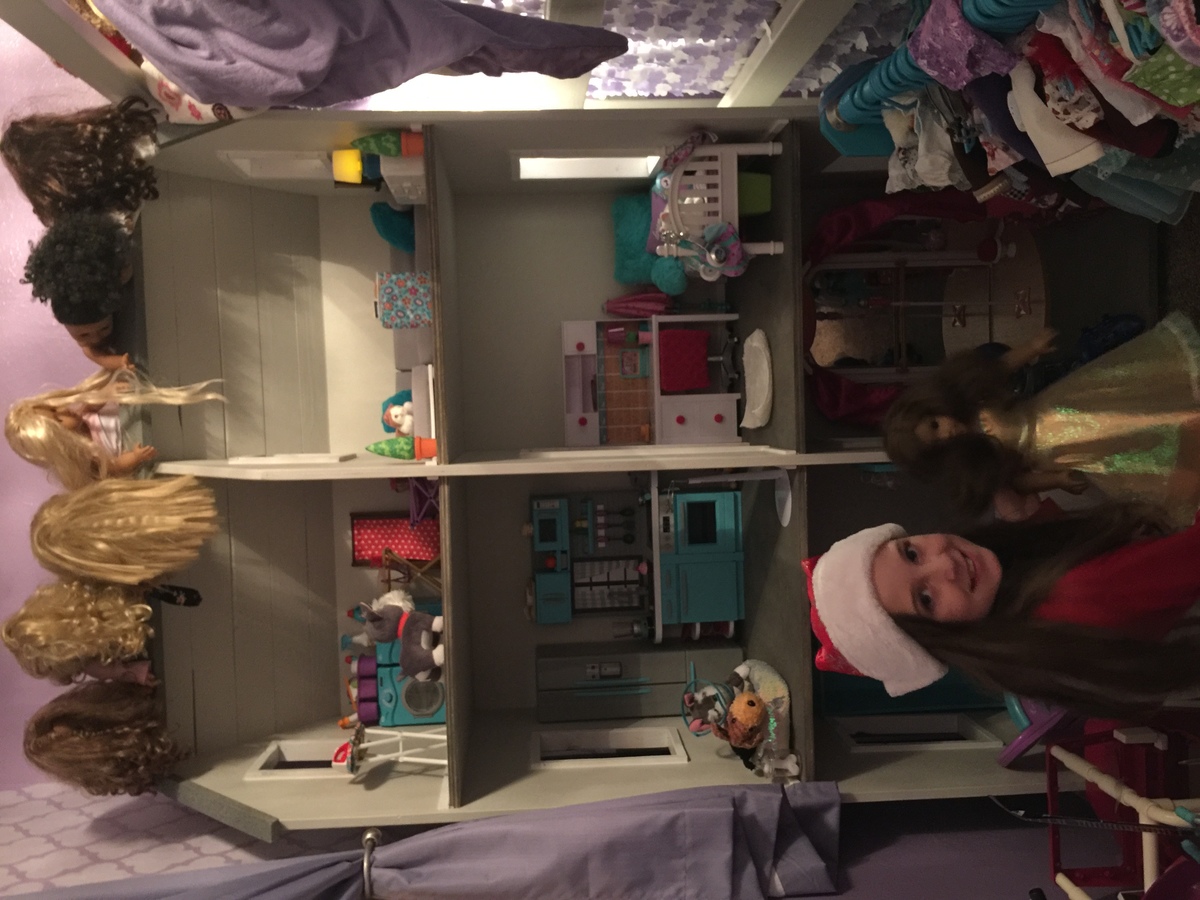
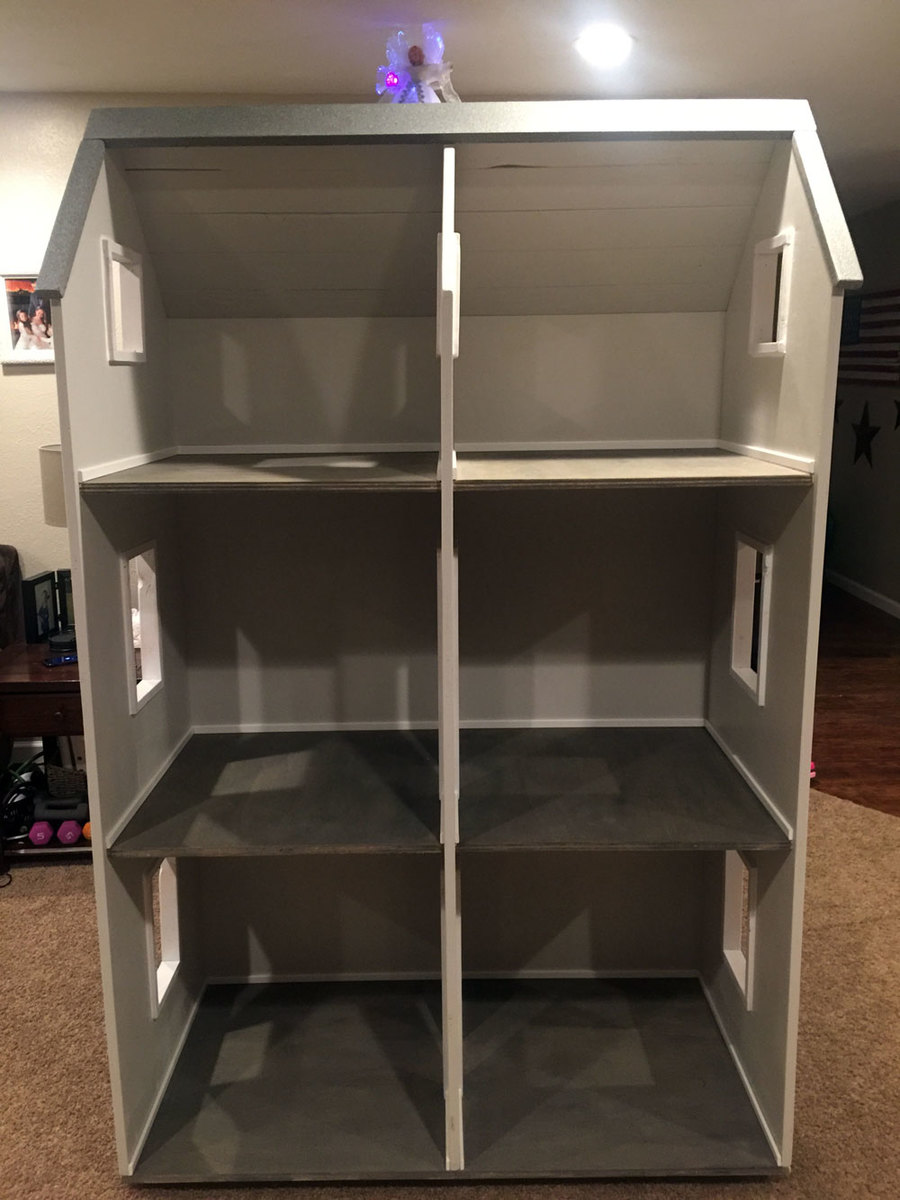
Three story doll house

Submitted by Anonymous (not verified) on Sun, 01/06/2019 - 13:53

I built this American girl doll house for my daughter. I wanted to give her something to keep her youth alive! 
Estimated Cost
$150-200
Estimated Time Investment
Weekend Project (10-20 Hours)
Finish Used
Light grey paint for all the walls and ceiling. Classic grey stain by Minwax for the floors. I also added baseboards to all the rooms with some small trim I found in the window trim section at Home Depot.
Recommended Skill Level
Intermediate

Comments

Tessa2009

Sun, 01/06/2019 - 21:46

Thanks Ana! This is her momma that built it for her. I wanted to tackle something on my own and challenge myself. Your plans were amazing to work with. Thanks for taking the time to make these plans so easy to understand and follow. She is very happy with the doll house! Happy New Year! -Abbey

Classic Adirondack Chairs - modified arms

Submitted by Anonymous (not verified) on Wed, 11/09/2022 - 19:53

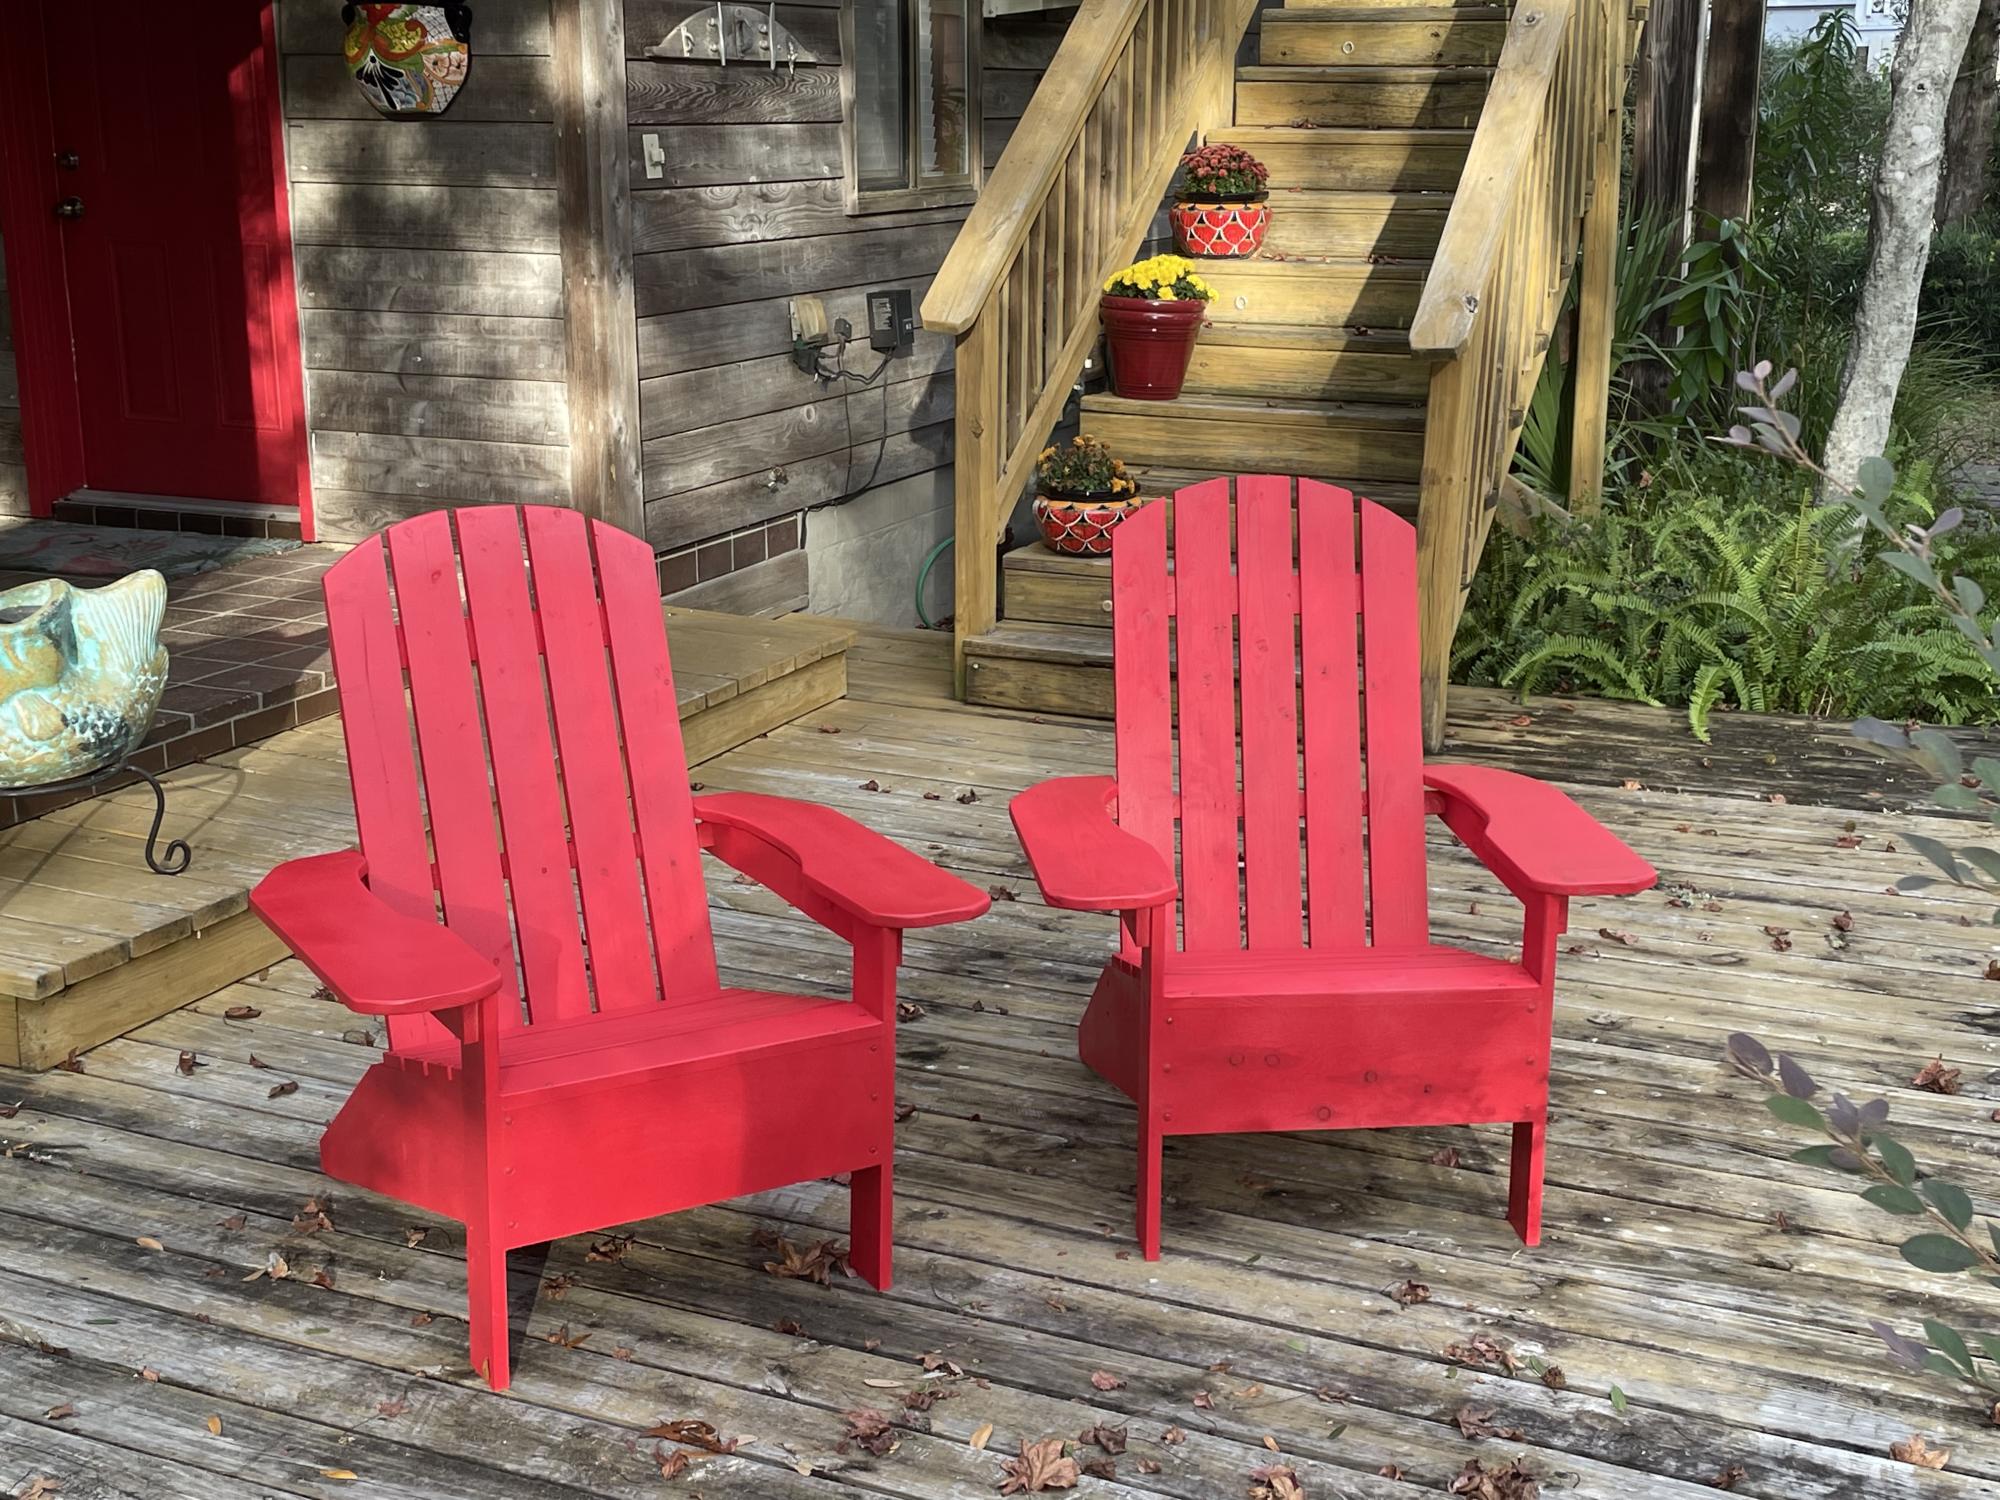
I used plans from the classic Adirondack chairs and modified the arms for a wider width to place cups/glasses on them. I also curved the top as well. It was a fun project and took about a day and a half, off and on. Thank you!

Built from Plan(s)

Comments

Garden Shed

Submitted by Deborah on Sat, 08/18/2012 - 23:01

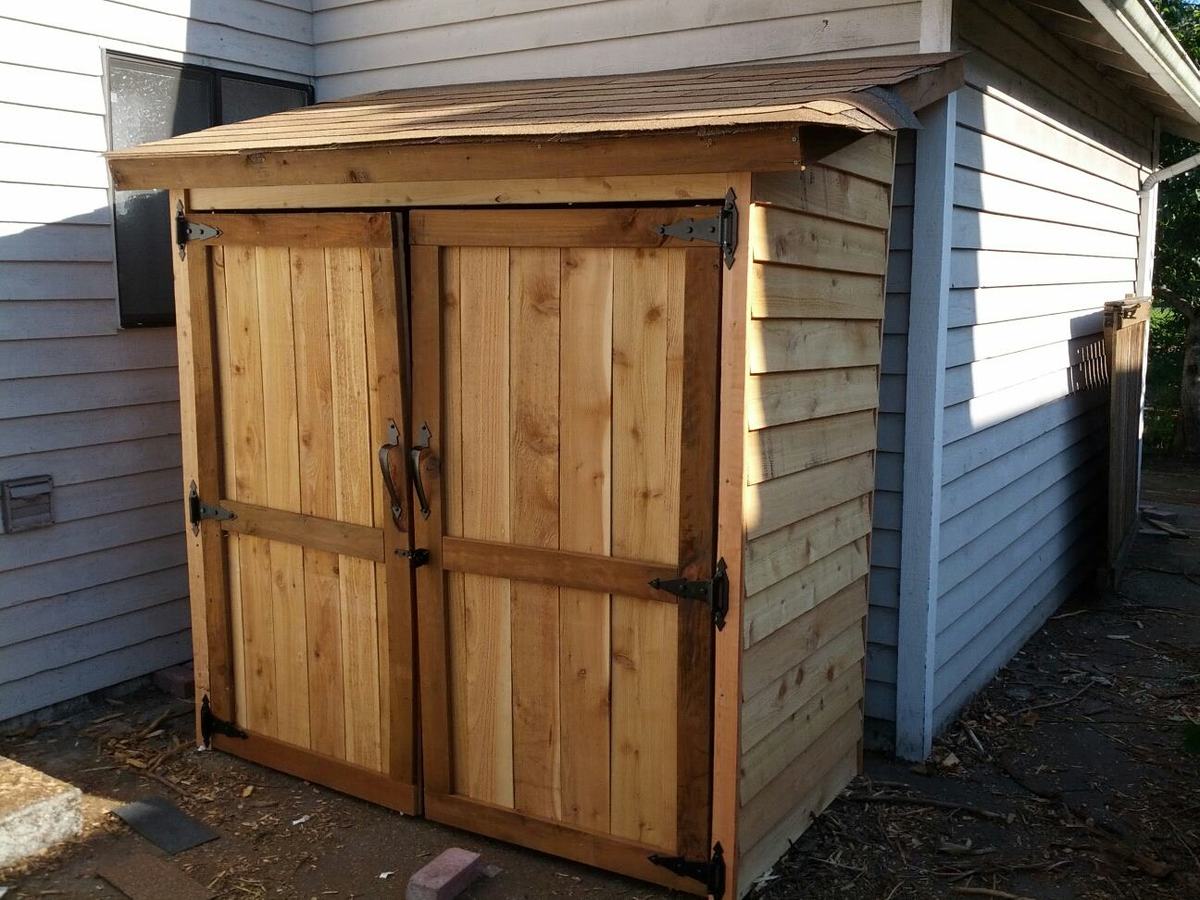
I have been dreaming about building so many things featured on this website, and I finally buckled down and built something. I figured that an outside garden shed would be a bit more forgiving than a project requiring a bit more precision, and from the picture, you can see that it's not perfect! I'm still working on trimming the shingles and I still have to stain/seal it. I've got to admit, when I first picked up the wood for the project at the store, I wondered what I had gotten myself into. But I just jumped in, and here it is.

Built from Plan(s)
Estimated Cost
$300
Estimated Time Investment
Weekend Project (10-20 Hours)
Finish Used
Plan to stain it with some sort of deck stain.
Recommended Skill Level
Beginner

Comments

Eric's Cedar Shed!!

Submitted by Anonymous (not verified) on Mon, 07/06/2020 - 21:35

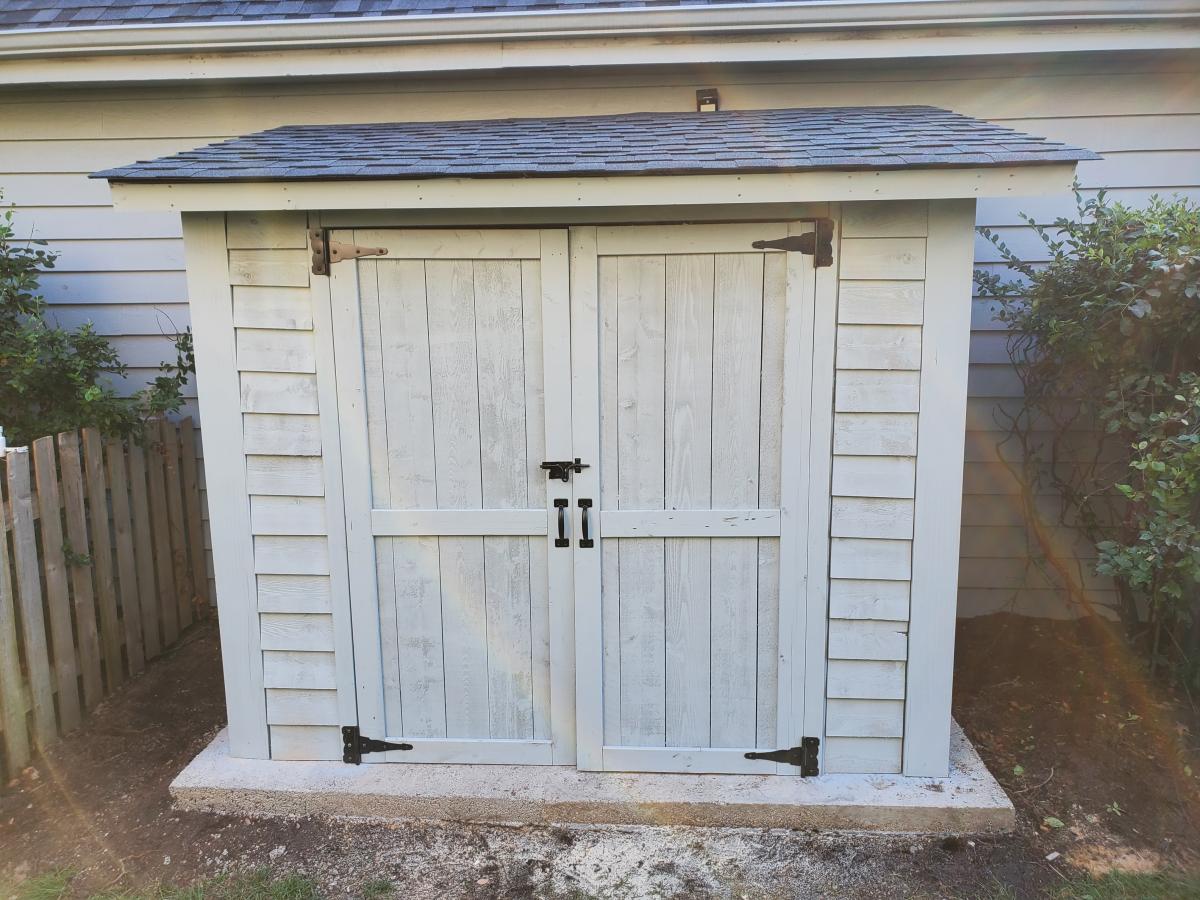
Thank you for the plans, shed turned out great! My association required me to match the siding color, roof color, and anchor to a concrete slab. So I poured 25 bags of 80lbs concrete to make a 9x5 slab. Redid the plans for an 8x4 shed, built the frame with 2x4s and not 2x2's, installed flashing, ice/water shield + felt + matching shingles since I'm near Chicago, and used a flexio finishing sprayer to paint the shed. Saved some $ by using 2 Redwood Grain Fiber siding panels for $22 each at HD.

All in all very happy with my shed and all my dangerous yard tools and woodworking tools can be put away from my toddler.

Built from Plan(s)
Estimated Cost
400
Estimated Time Investment
Weekend Project (10-20 Hours)
Finish Used
Behr Premium Plus exterior paint
Recommended Skill Level
Intermediate

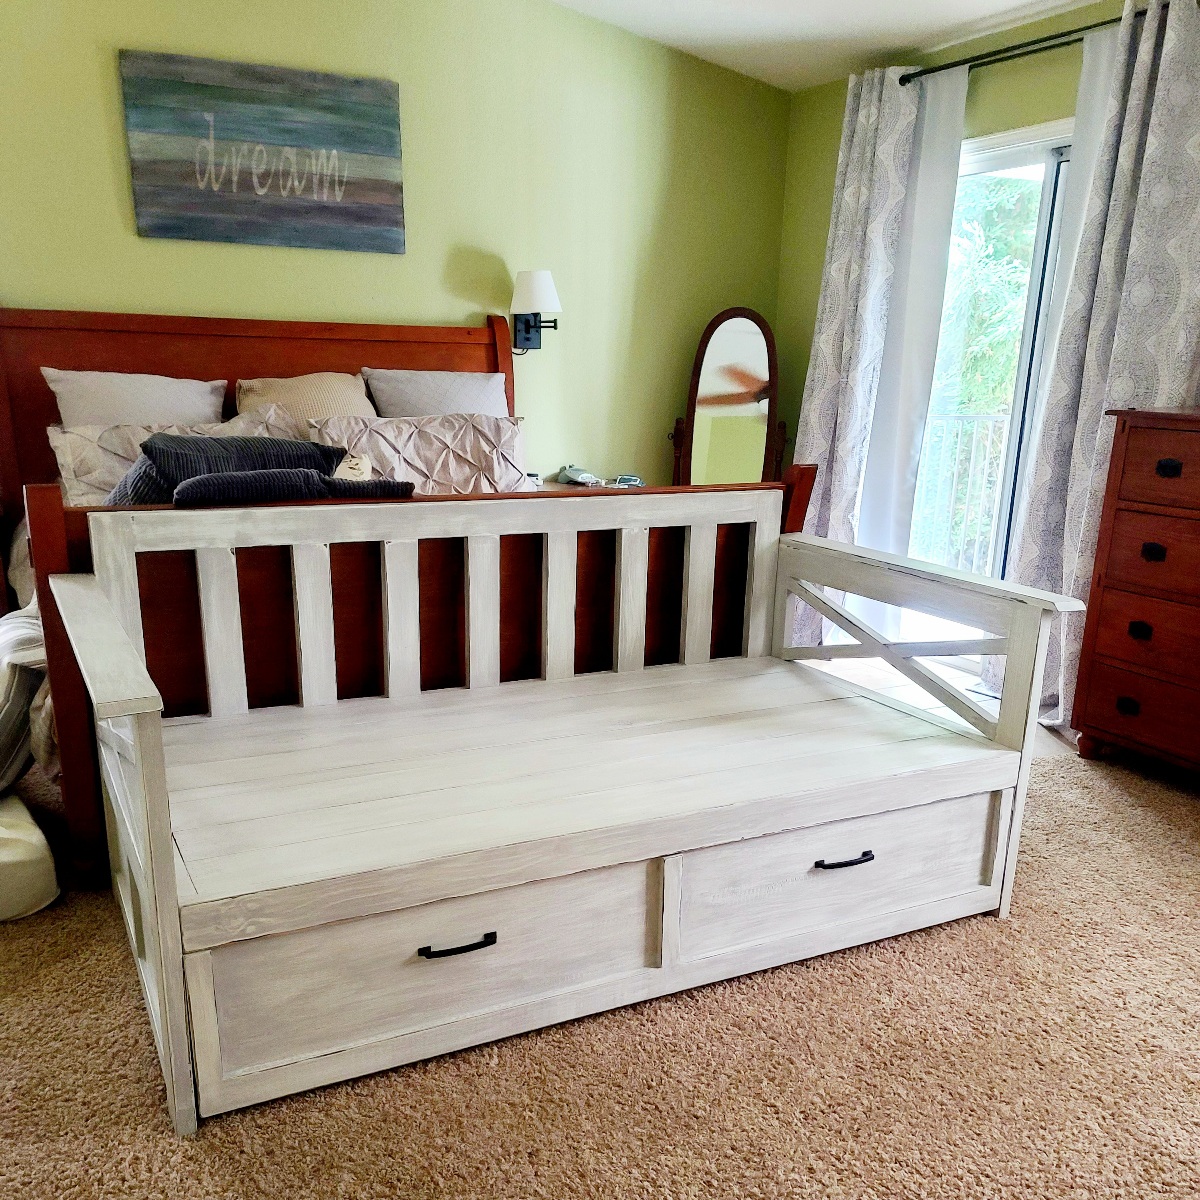
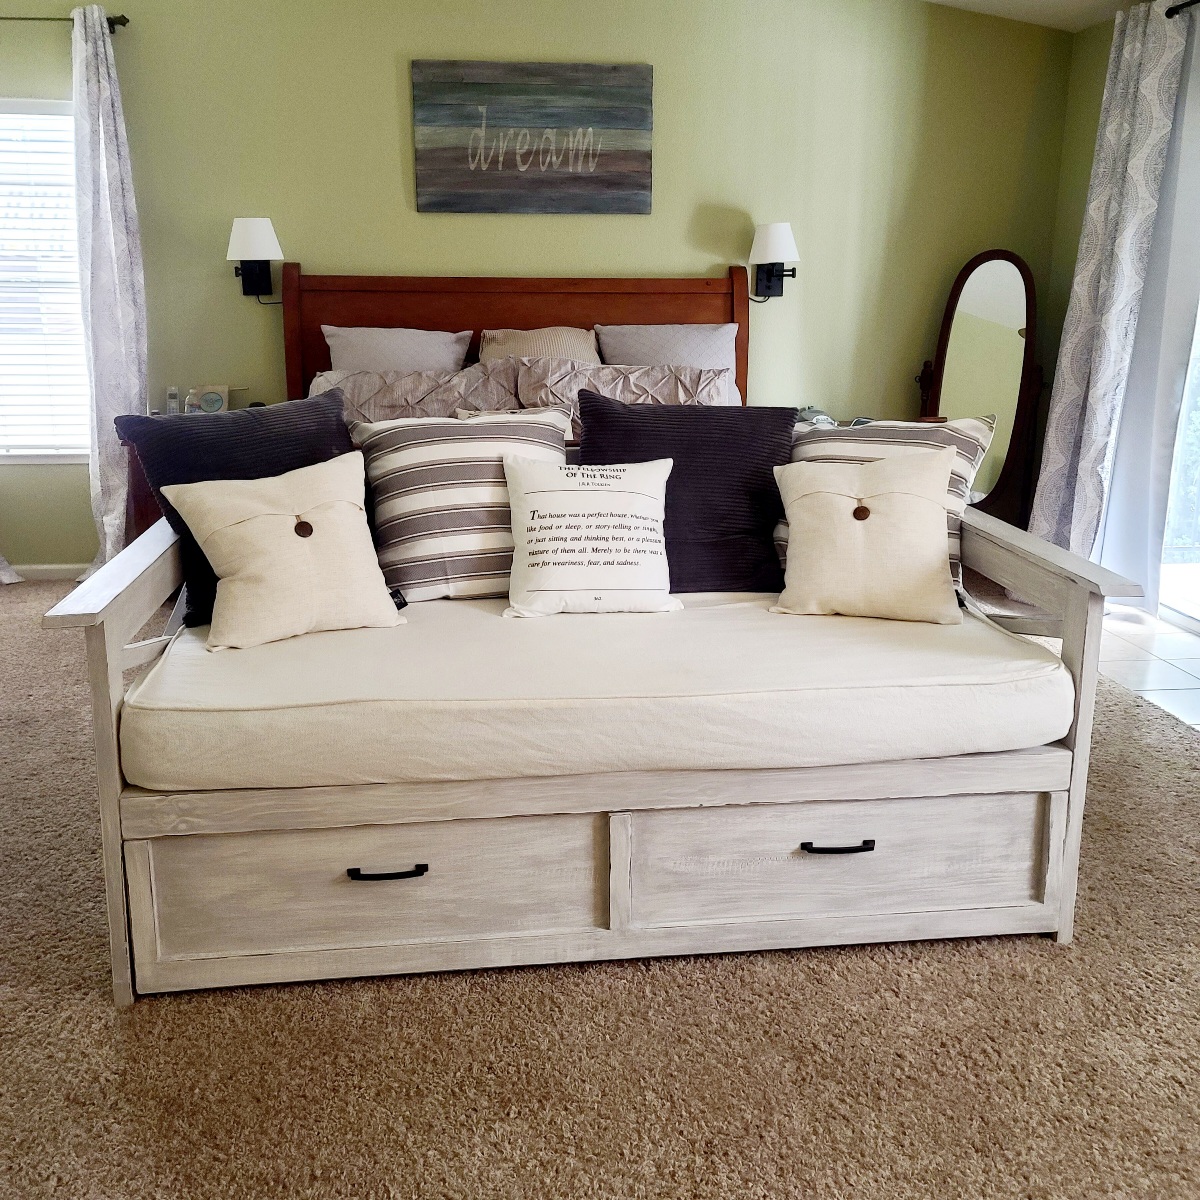
Daybed with Storage Trundle Drawer (Modified)

Submitted by Honeyb65 on Sat, 09/26/2020 - 10:05

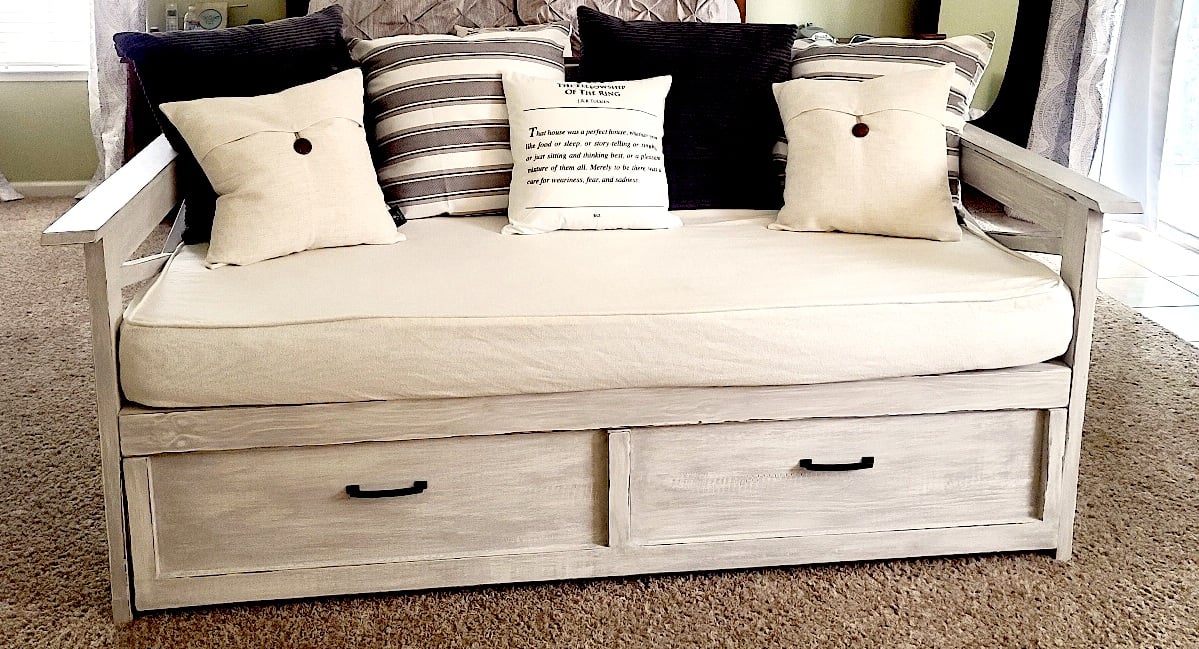
Great plans for a really useful storage daybed! I modified the plans to include a slat back and rustic x sides, as well as changing the Trundle drawers to a single drawer to fit my exercise equipment. I finished the daybed with stain and chalk paint in old white and Paris Grey distressed for the perfect shabby chic look!

Estimated Cost
$200
Estimated Time Investment
Weekend Project (10-20 Hours)
Finish Used
Varathane stain in Dark Walnut, Annie Sloan Chalk Paint in Old White, color wash over the white with Paris Grey and then sanded for the white and some of the stain to show through.
Recommended Skill Level
Intermediate

Comments

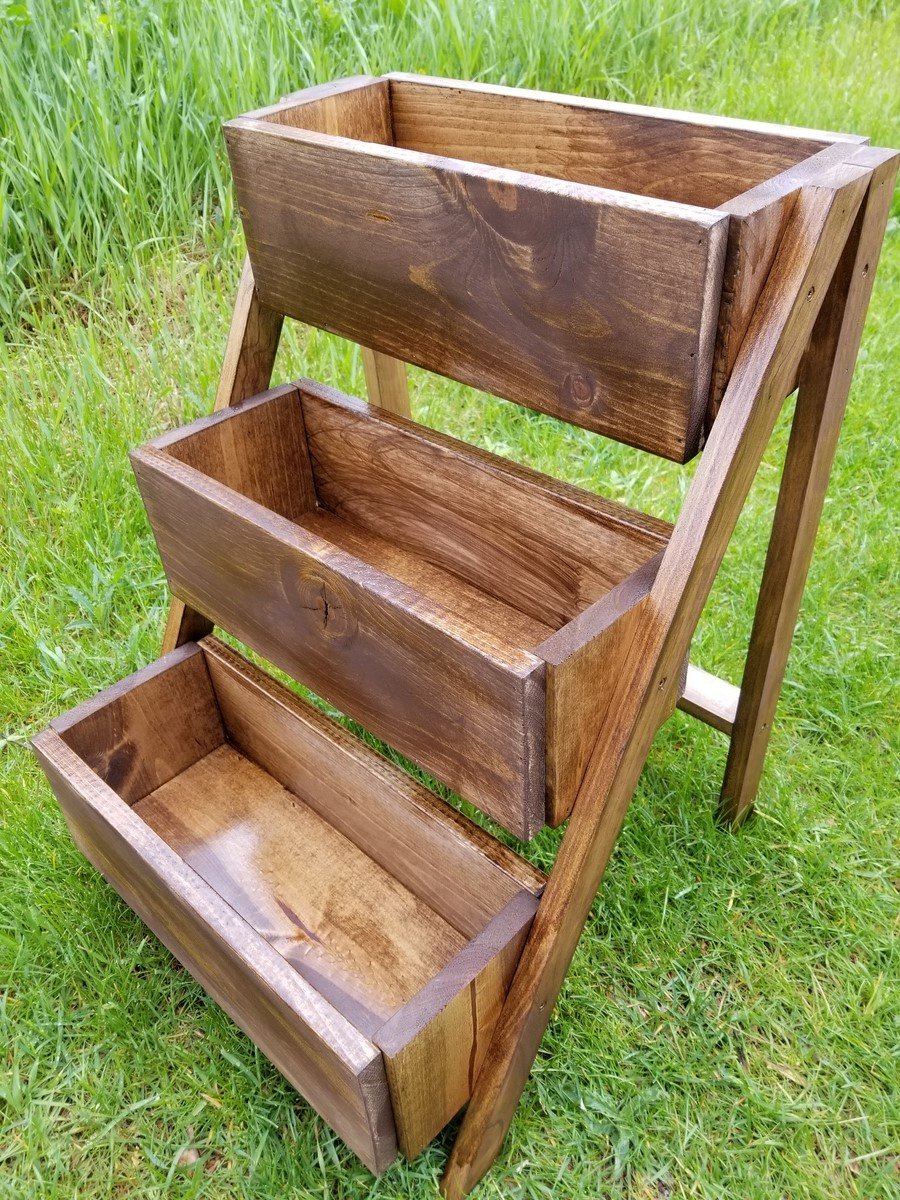
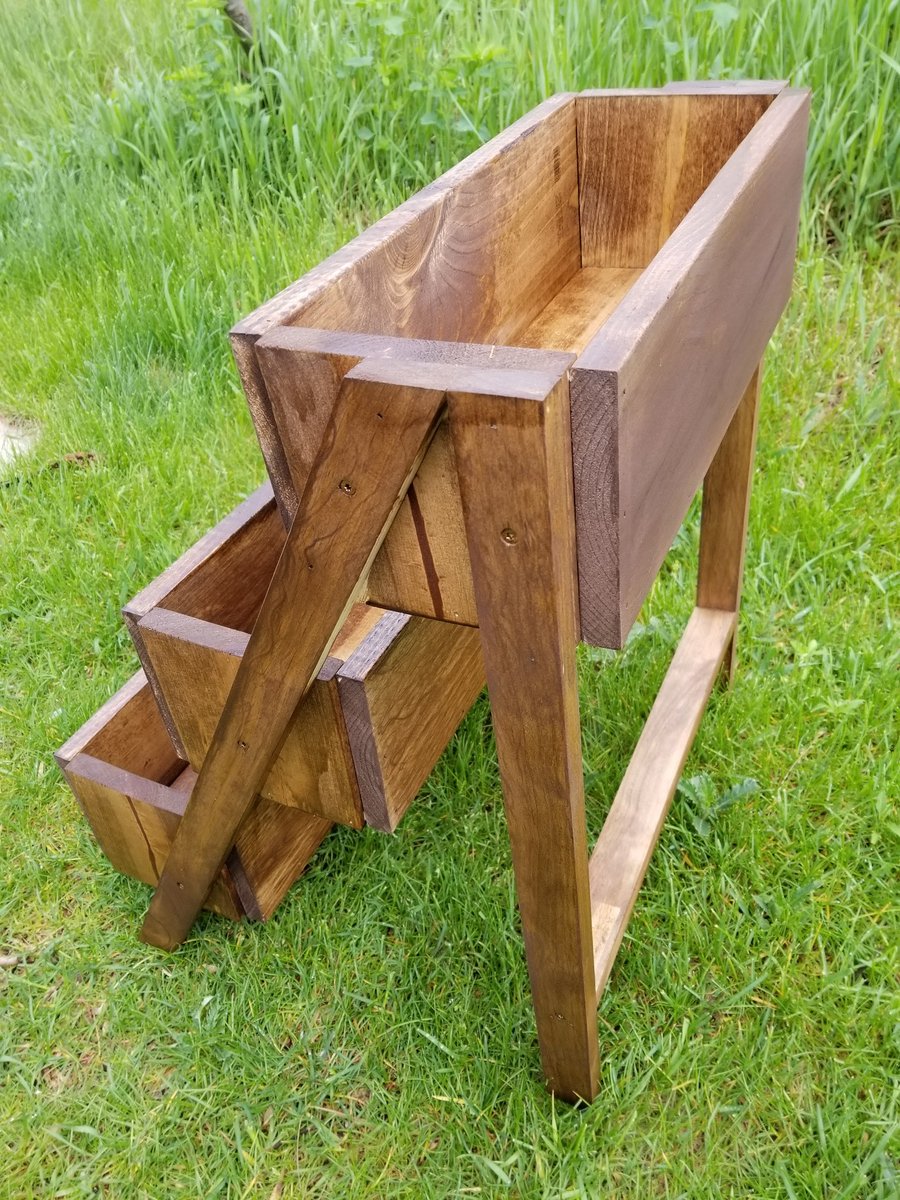
3 Tier Planter

Submitted by ranlim on Thu, 05/18/2017 - 21:24

Love this planter. Used quality pine. Perfect size for the balcony! I use it for fresh herbs... i have have other people wanting one too!

Estimated Cost
17
Estimated Time Investment
An Hour or Two (0-2 Hours)
Finish Used
Special walnut
Recommended Skill Level
Beginner

Email Me
Free Plans

Get new plans sent right to your inbox for free!

    We won't send you spam. Unsubscribe at any time.