Fireplace Wall with Floating Shelves
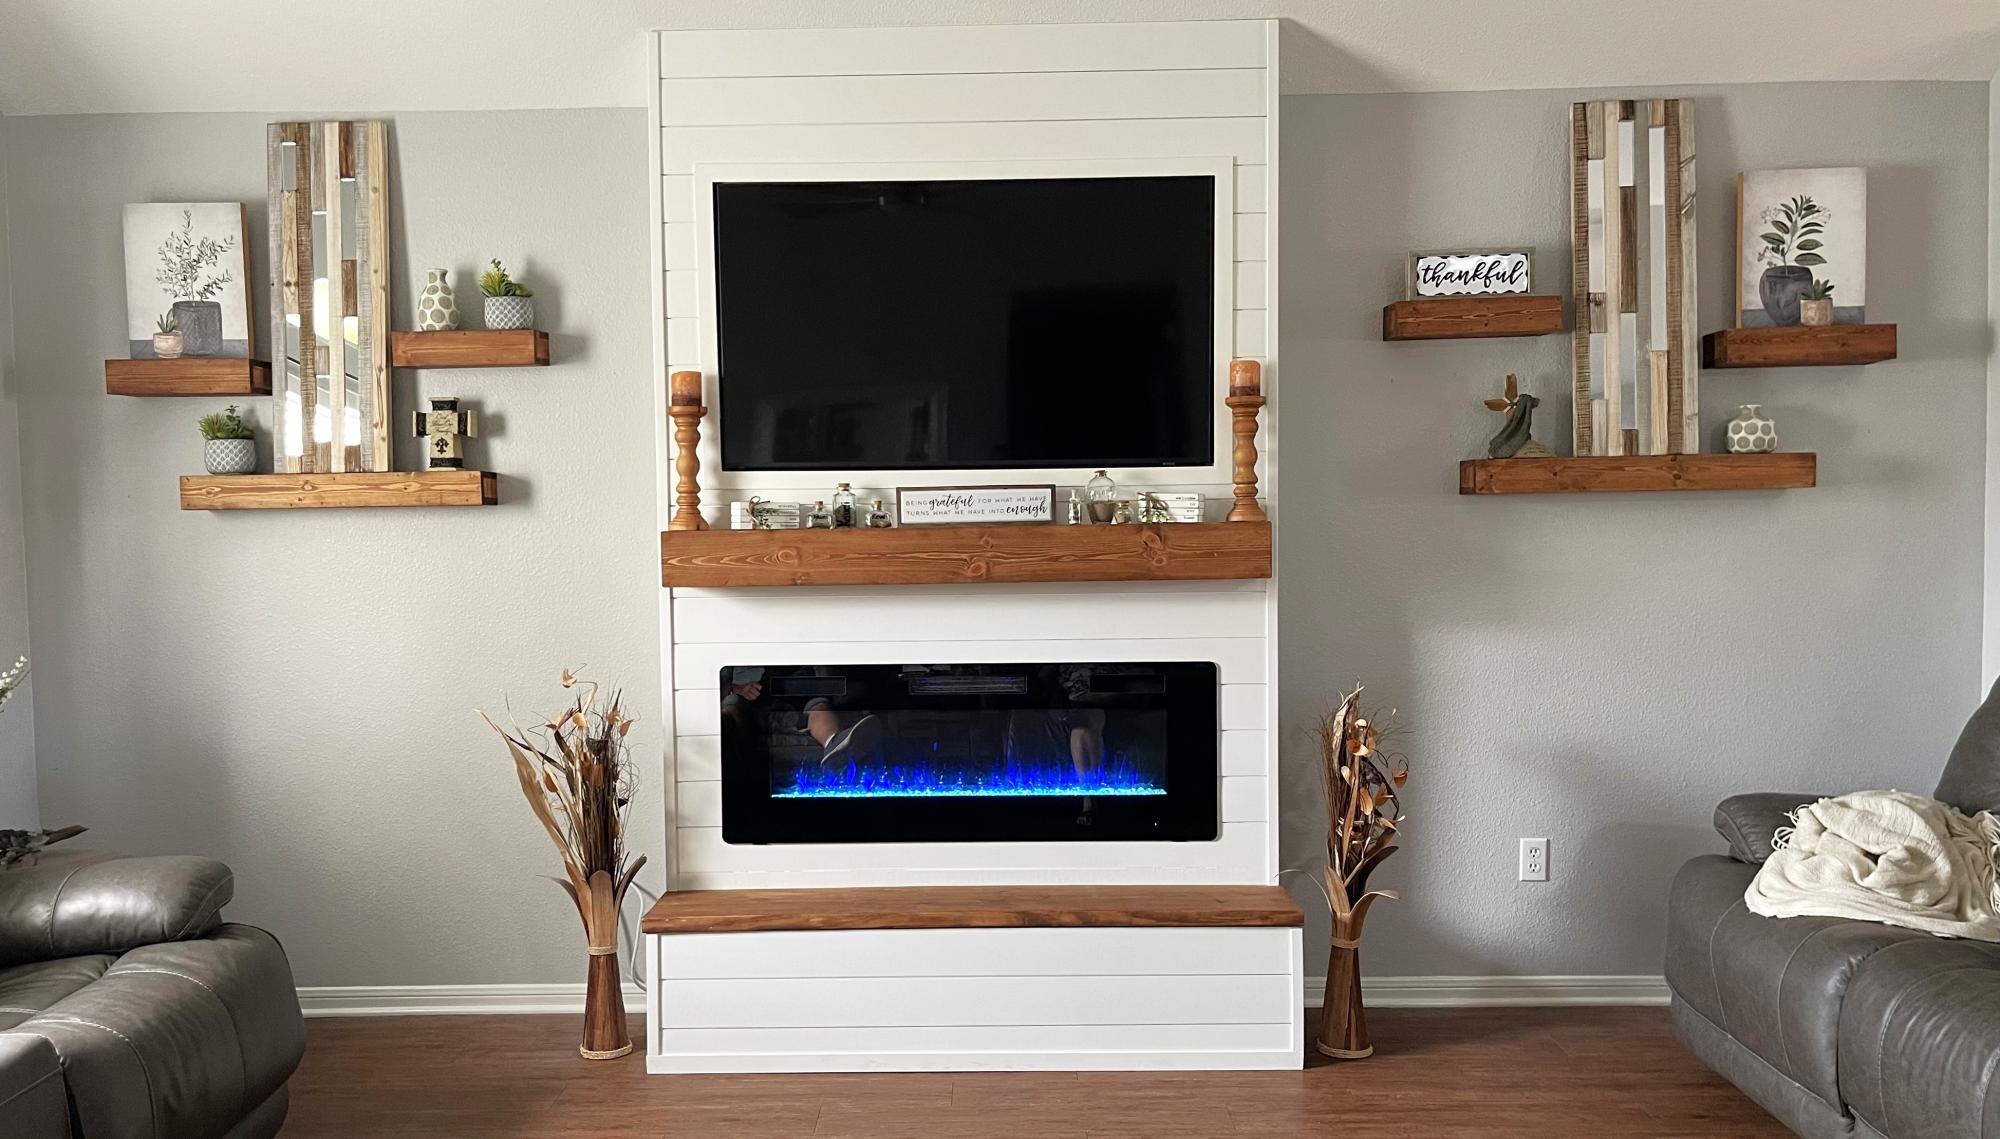
The fireplace wall and floating shelves I built for my sister.
Darla
Built from Plan(s)
Seasonal And Holiday
The fireplace wall and floating shelves I built for my sister.
Darla

My first Ana White project. Built Ana’s awesome small cedar shed as an outhouse for our many cats. The have access to it from inside the house. Great way to keep litter boxes and the mess out of the house. It is stand alone, and attached to the house, in front of a bedroom window. There are two ‘entrances’ as well as two, one-way, escape hatches, if a cat in the outhouse is interrupted by another cat (I.e. a male cat comes in and the female feels trapped) they can exit to the outside (one way so no critters can come inside!). Ana has easy to build plans, great site! I plan on making the square table just posted today for my newly refurbished deck. Keep in mind, my estimated costs and time reflect a LOT of additional features on the inside. The shed itself, very easy, simple, inexpensive. Very little waste with Ana’s projects as well.

Thu, 04/29/2021 - 09:06
Thank you for sharing, what a cool project!
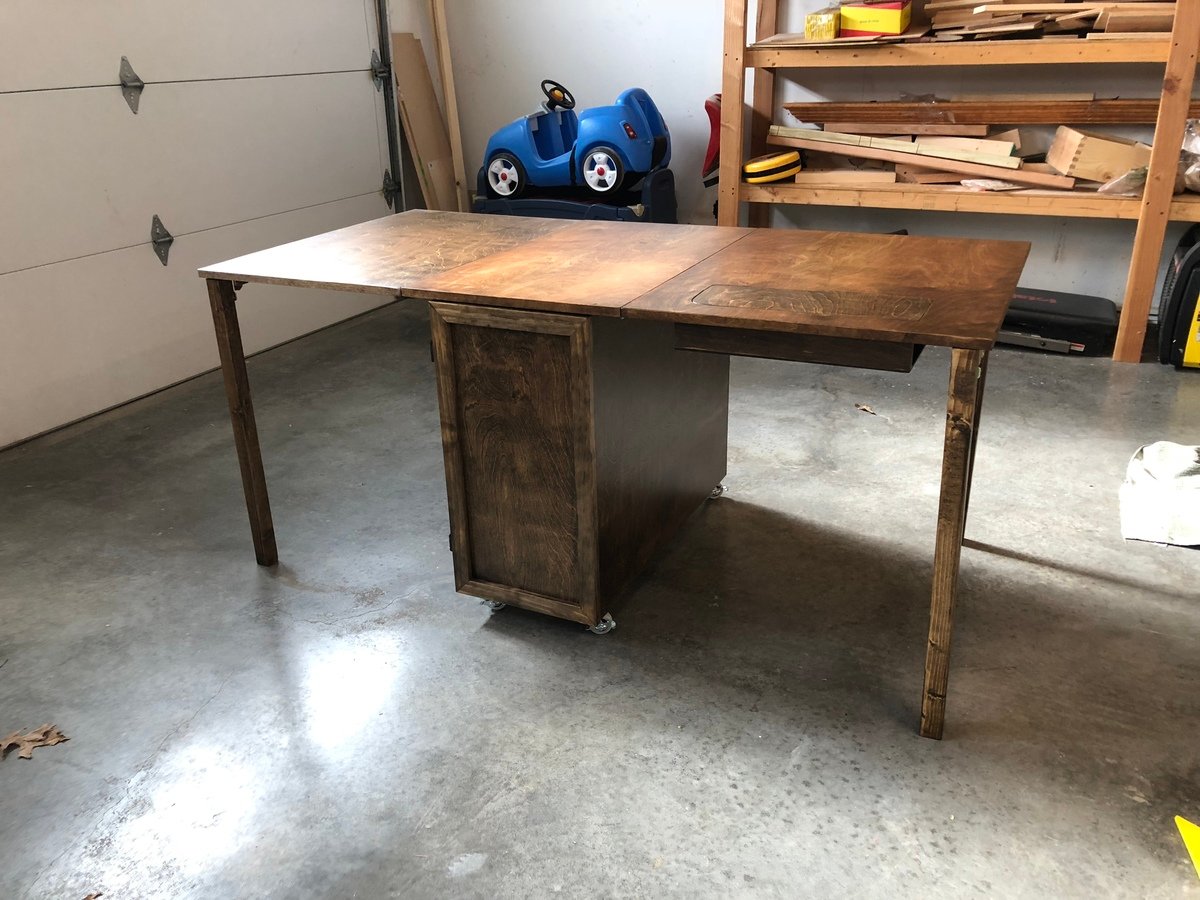
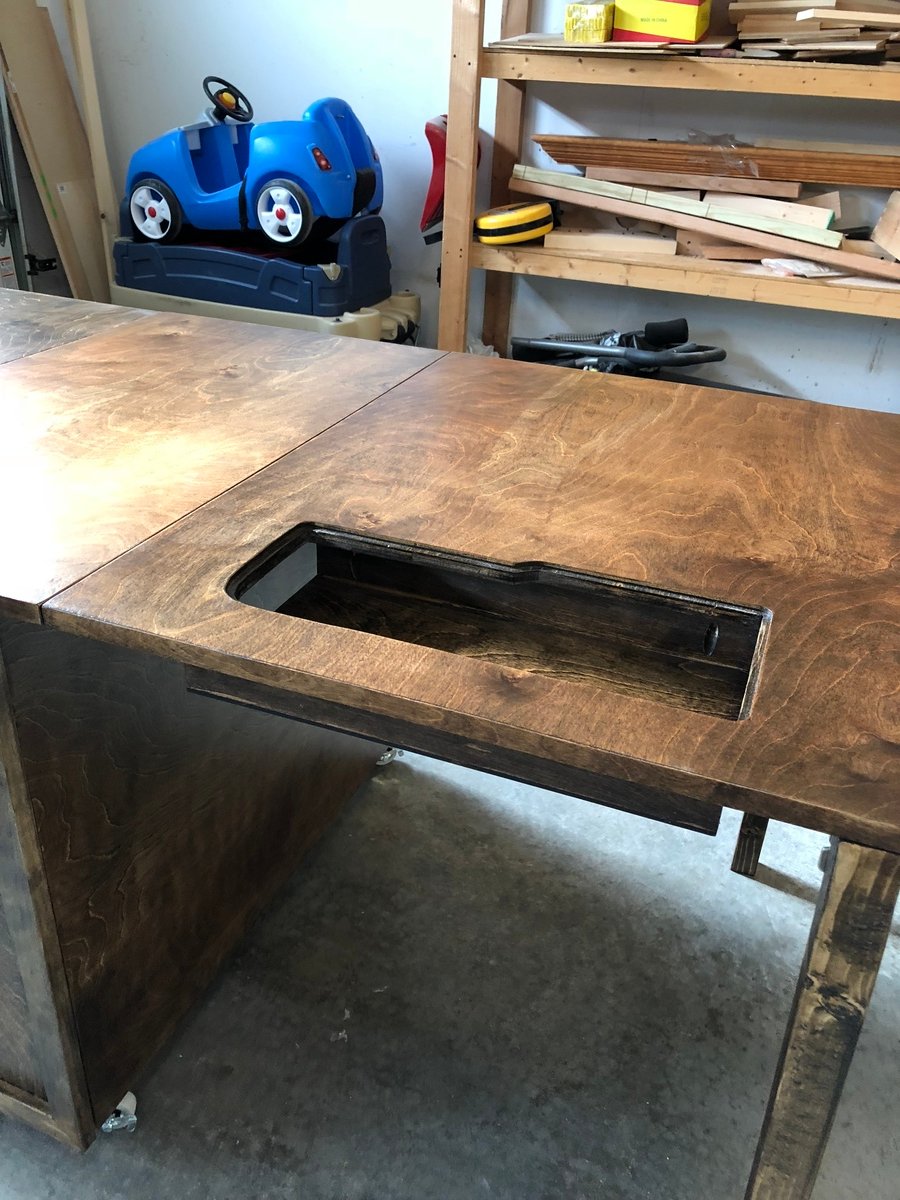
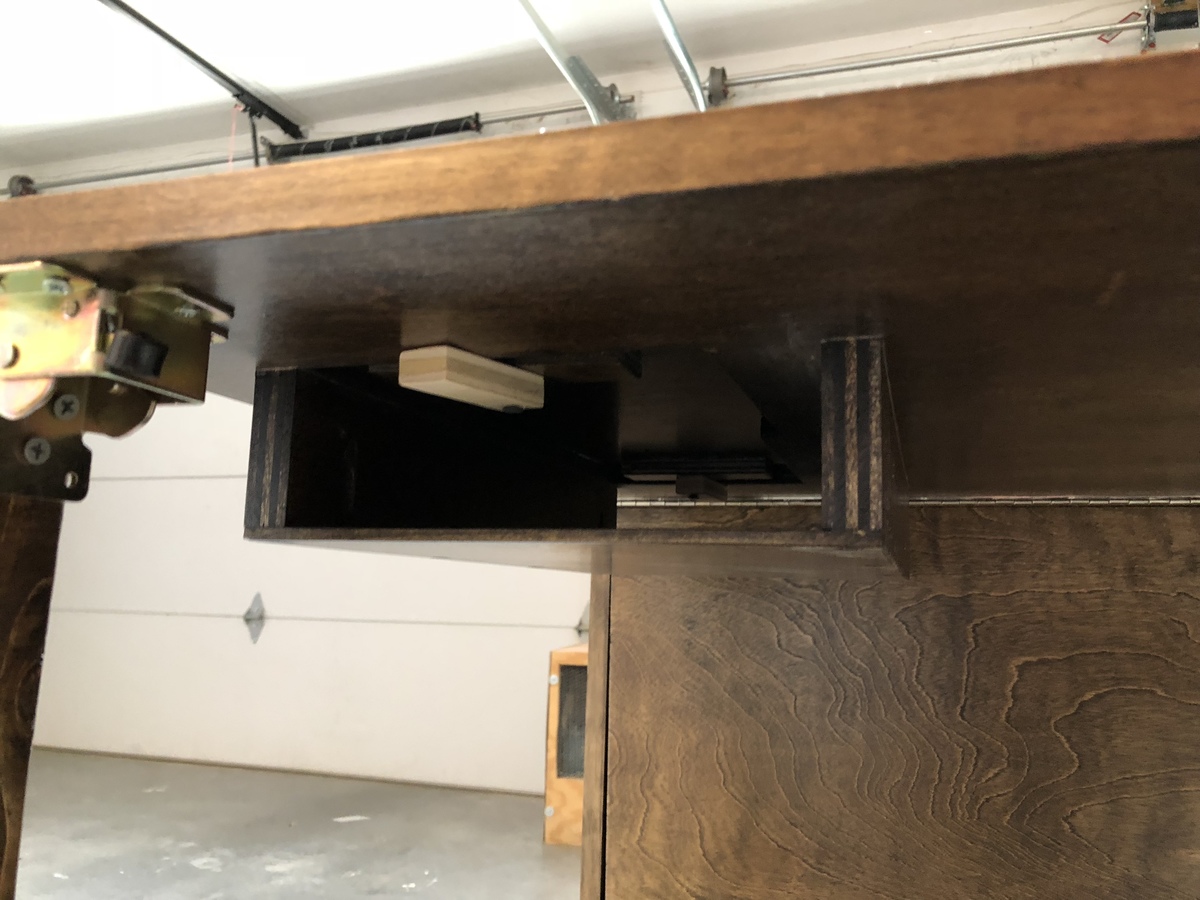
Great project and my wife loves it. I added a door, locking hinges, and made a custom cutout with shelf for the machine to sit flush with the table. I switched to piano hinge for the leaves and locking hinges for the 2x2 legs. Turned out great.

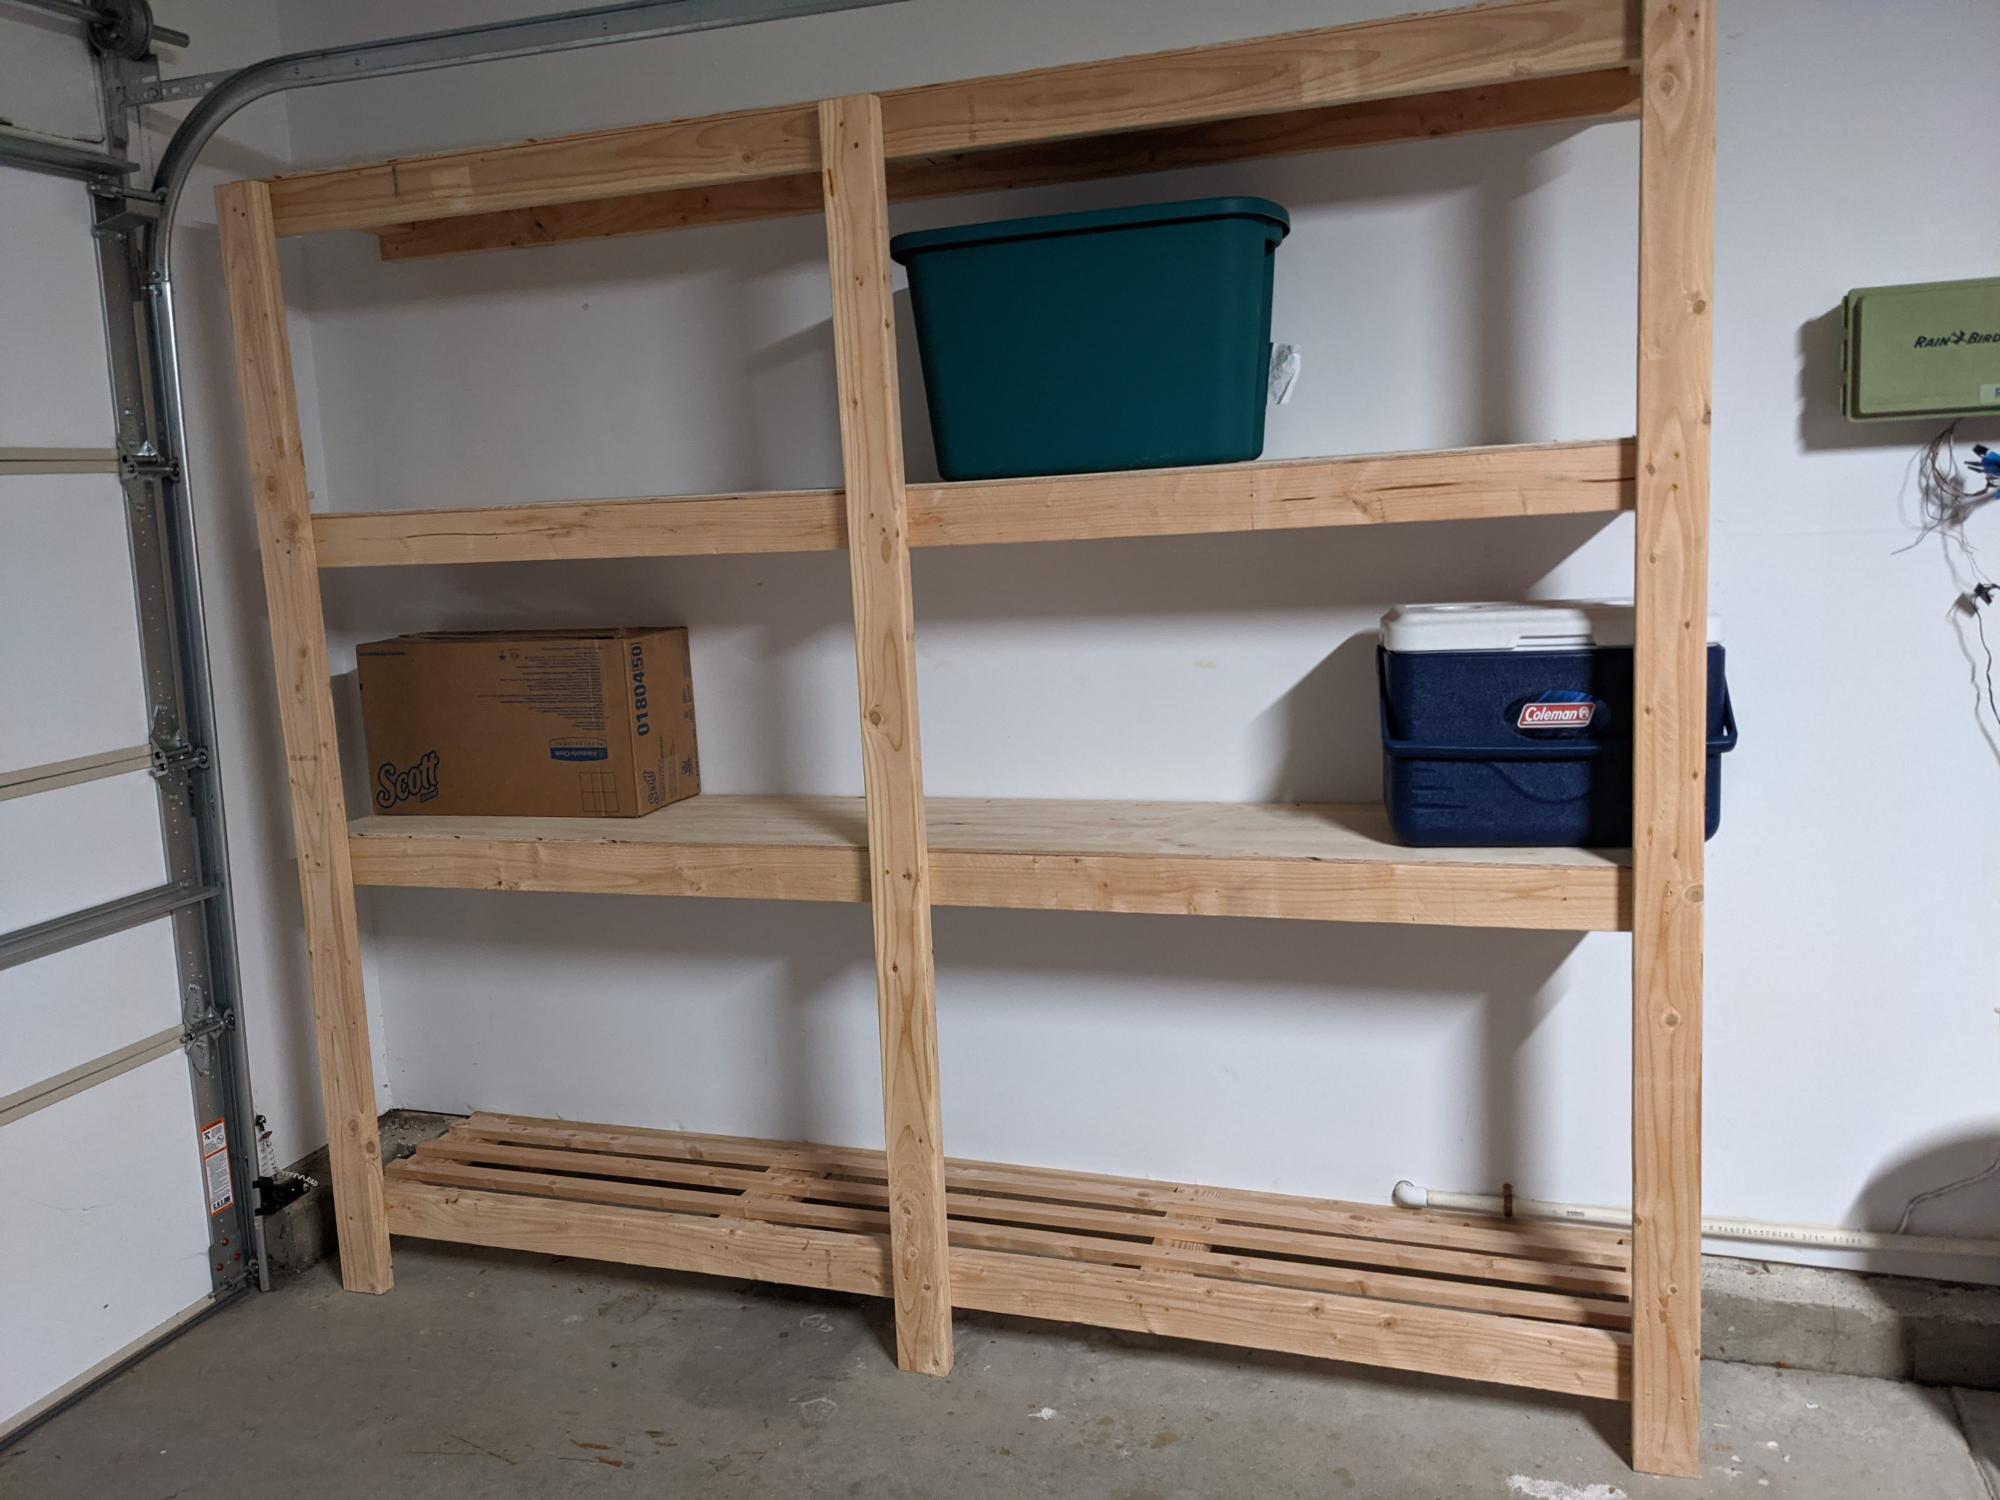
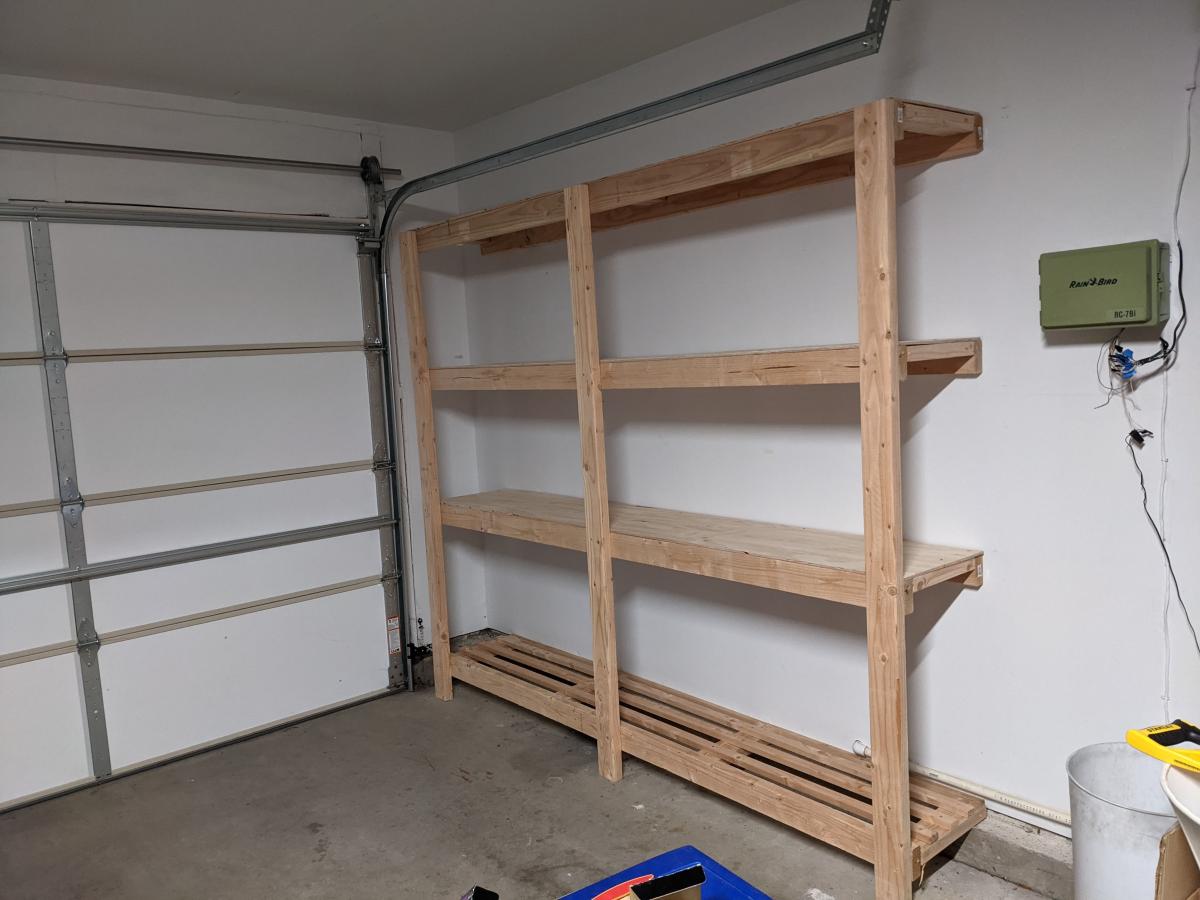
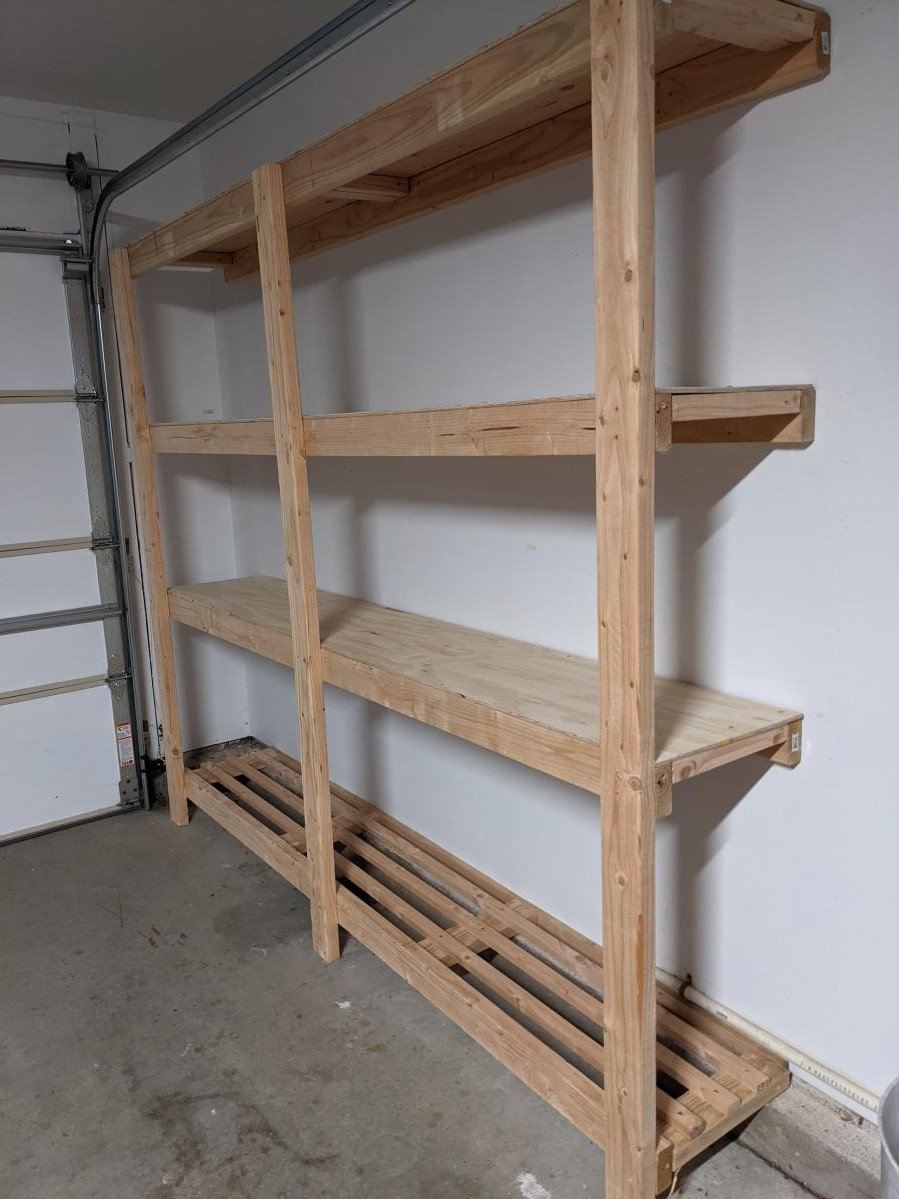
I just made this shelf using 2x4s 8 ft long wood. It is very strong and looks great. My garage size required the shelf to be max 16 in deep, so I used a 1 plywood sheet divided by 3 equal parts for the upper 3 shelfs. Since I made a 4th shelf, I used 3 1x2s for the 4th bottom shelf instead of a new plywood sheet and avoided having extra 2/3 of the sheet around and also saved like 30$ since the 2x1s were only 2$ea. That touch makes it look a bit stylish too so a win win. If you do that, here's a tip: use the outer 2x4s as rails - make sure that the cleats on the lower shelf are placed a bit lower ~ 1in. In such way, you can place the three 1x2 rails at the same level as the outer 2x4s and this you end up having 5 rails total in the shelf. Do use the wooden screws with star head if you can, they were muuuuuch easier to use compared with the regular ones. Note, this shelf is very strong, probably too strong for my needs. For a 8ft long, and my storage needs (camping, Christmas stuff, other lighter things), I'd probably use 2x2s instead of 2x4s. That would save costs, specially since wood isn't cheap these days( I spent ~$150 in materials Jan 2022).
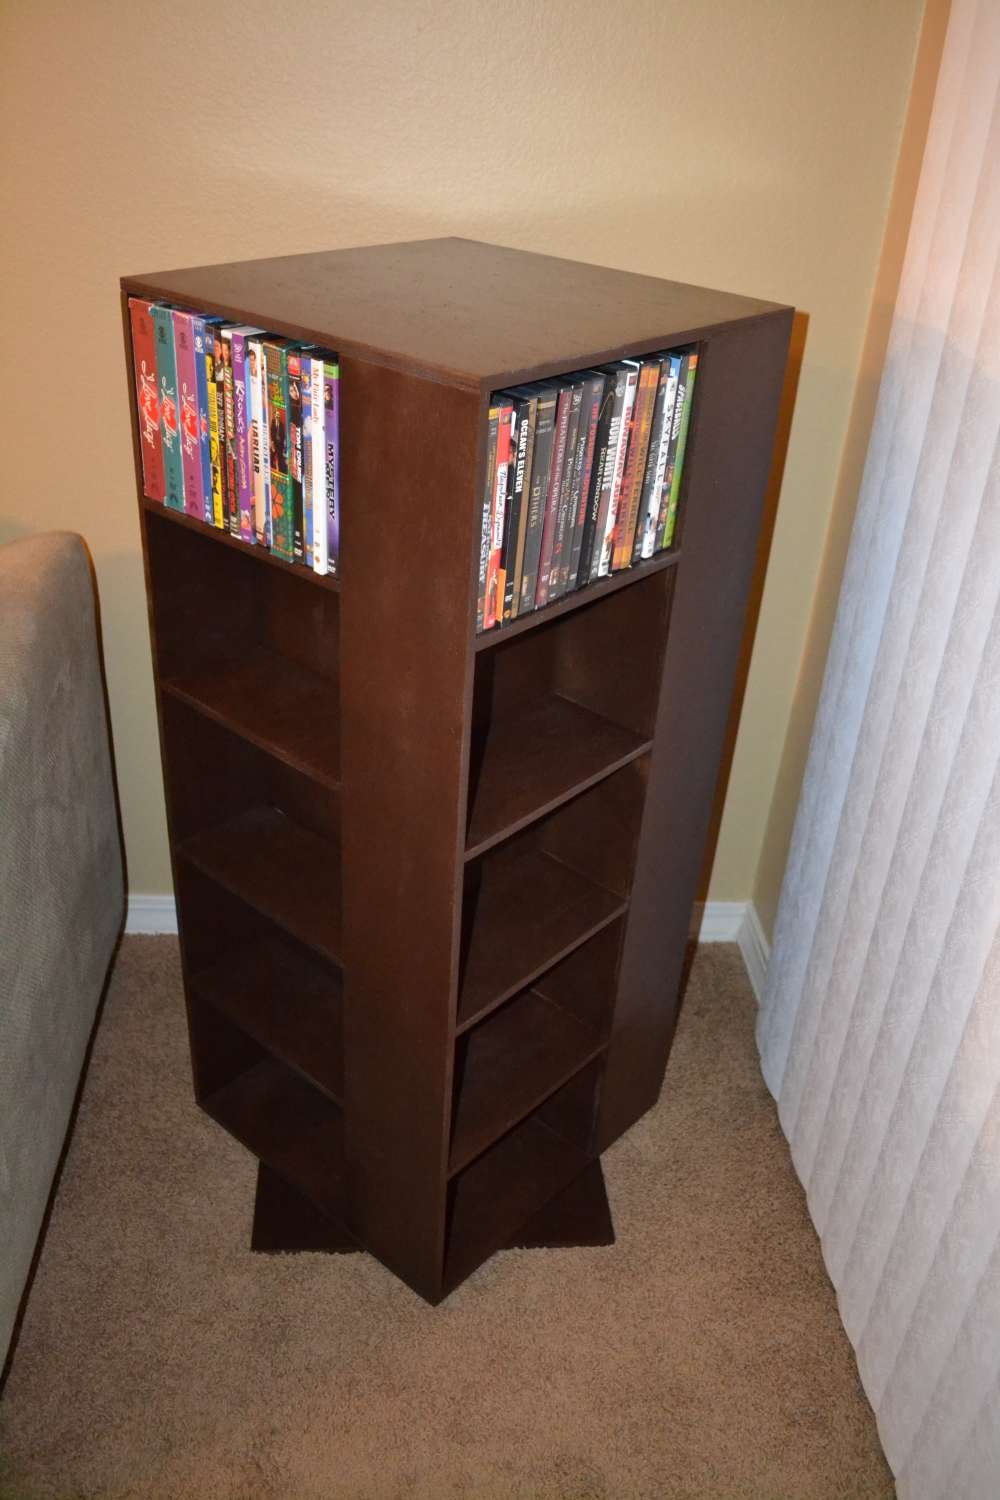
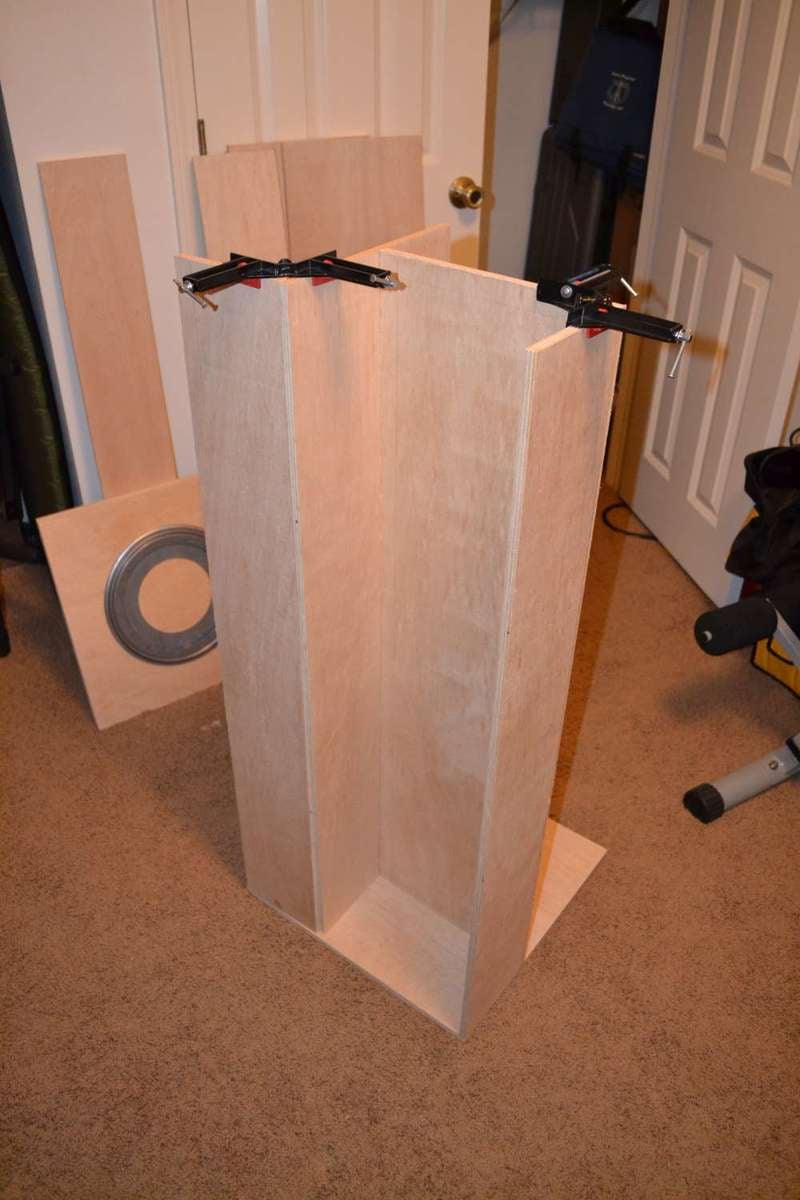
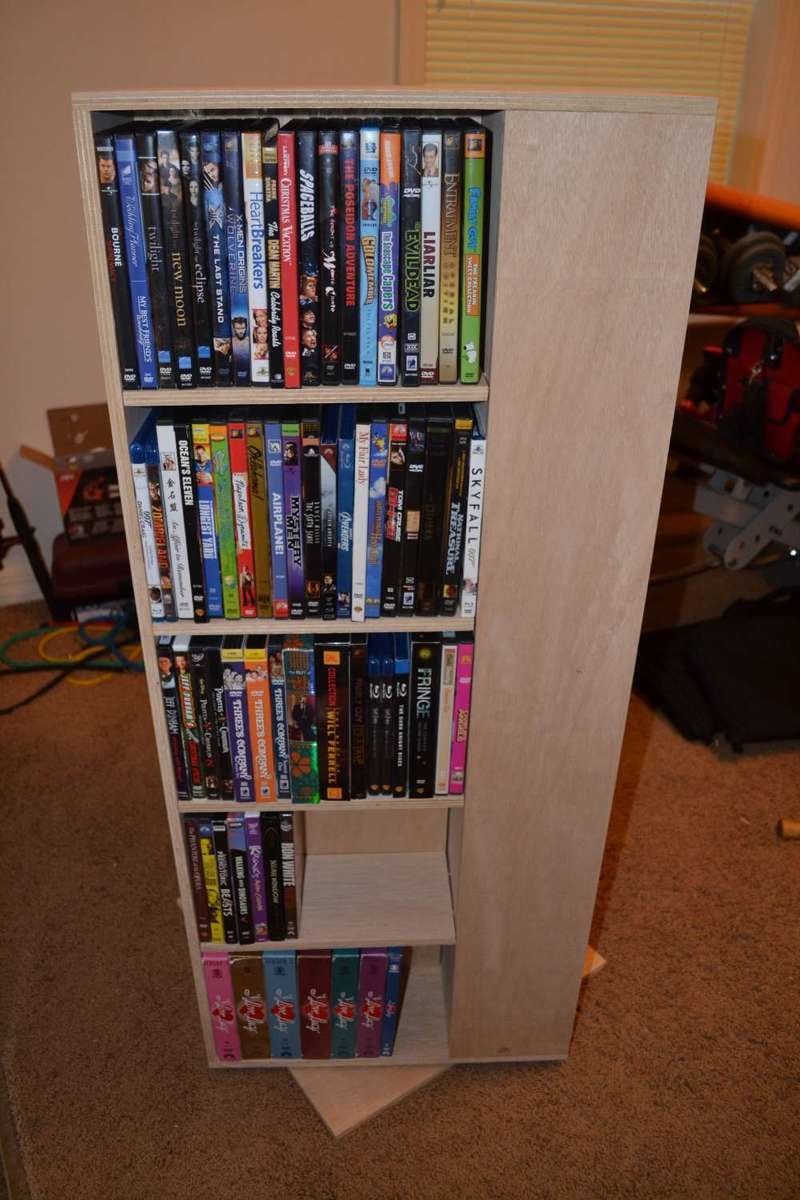
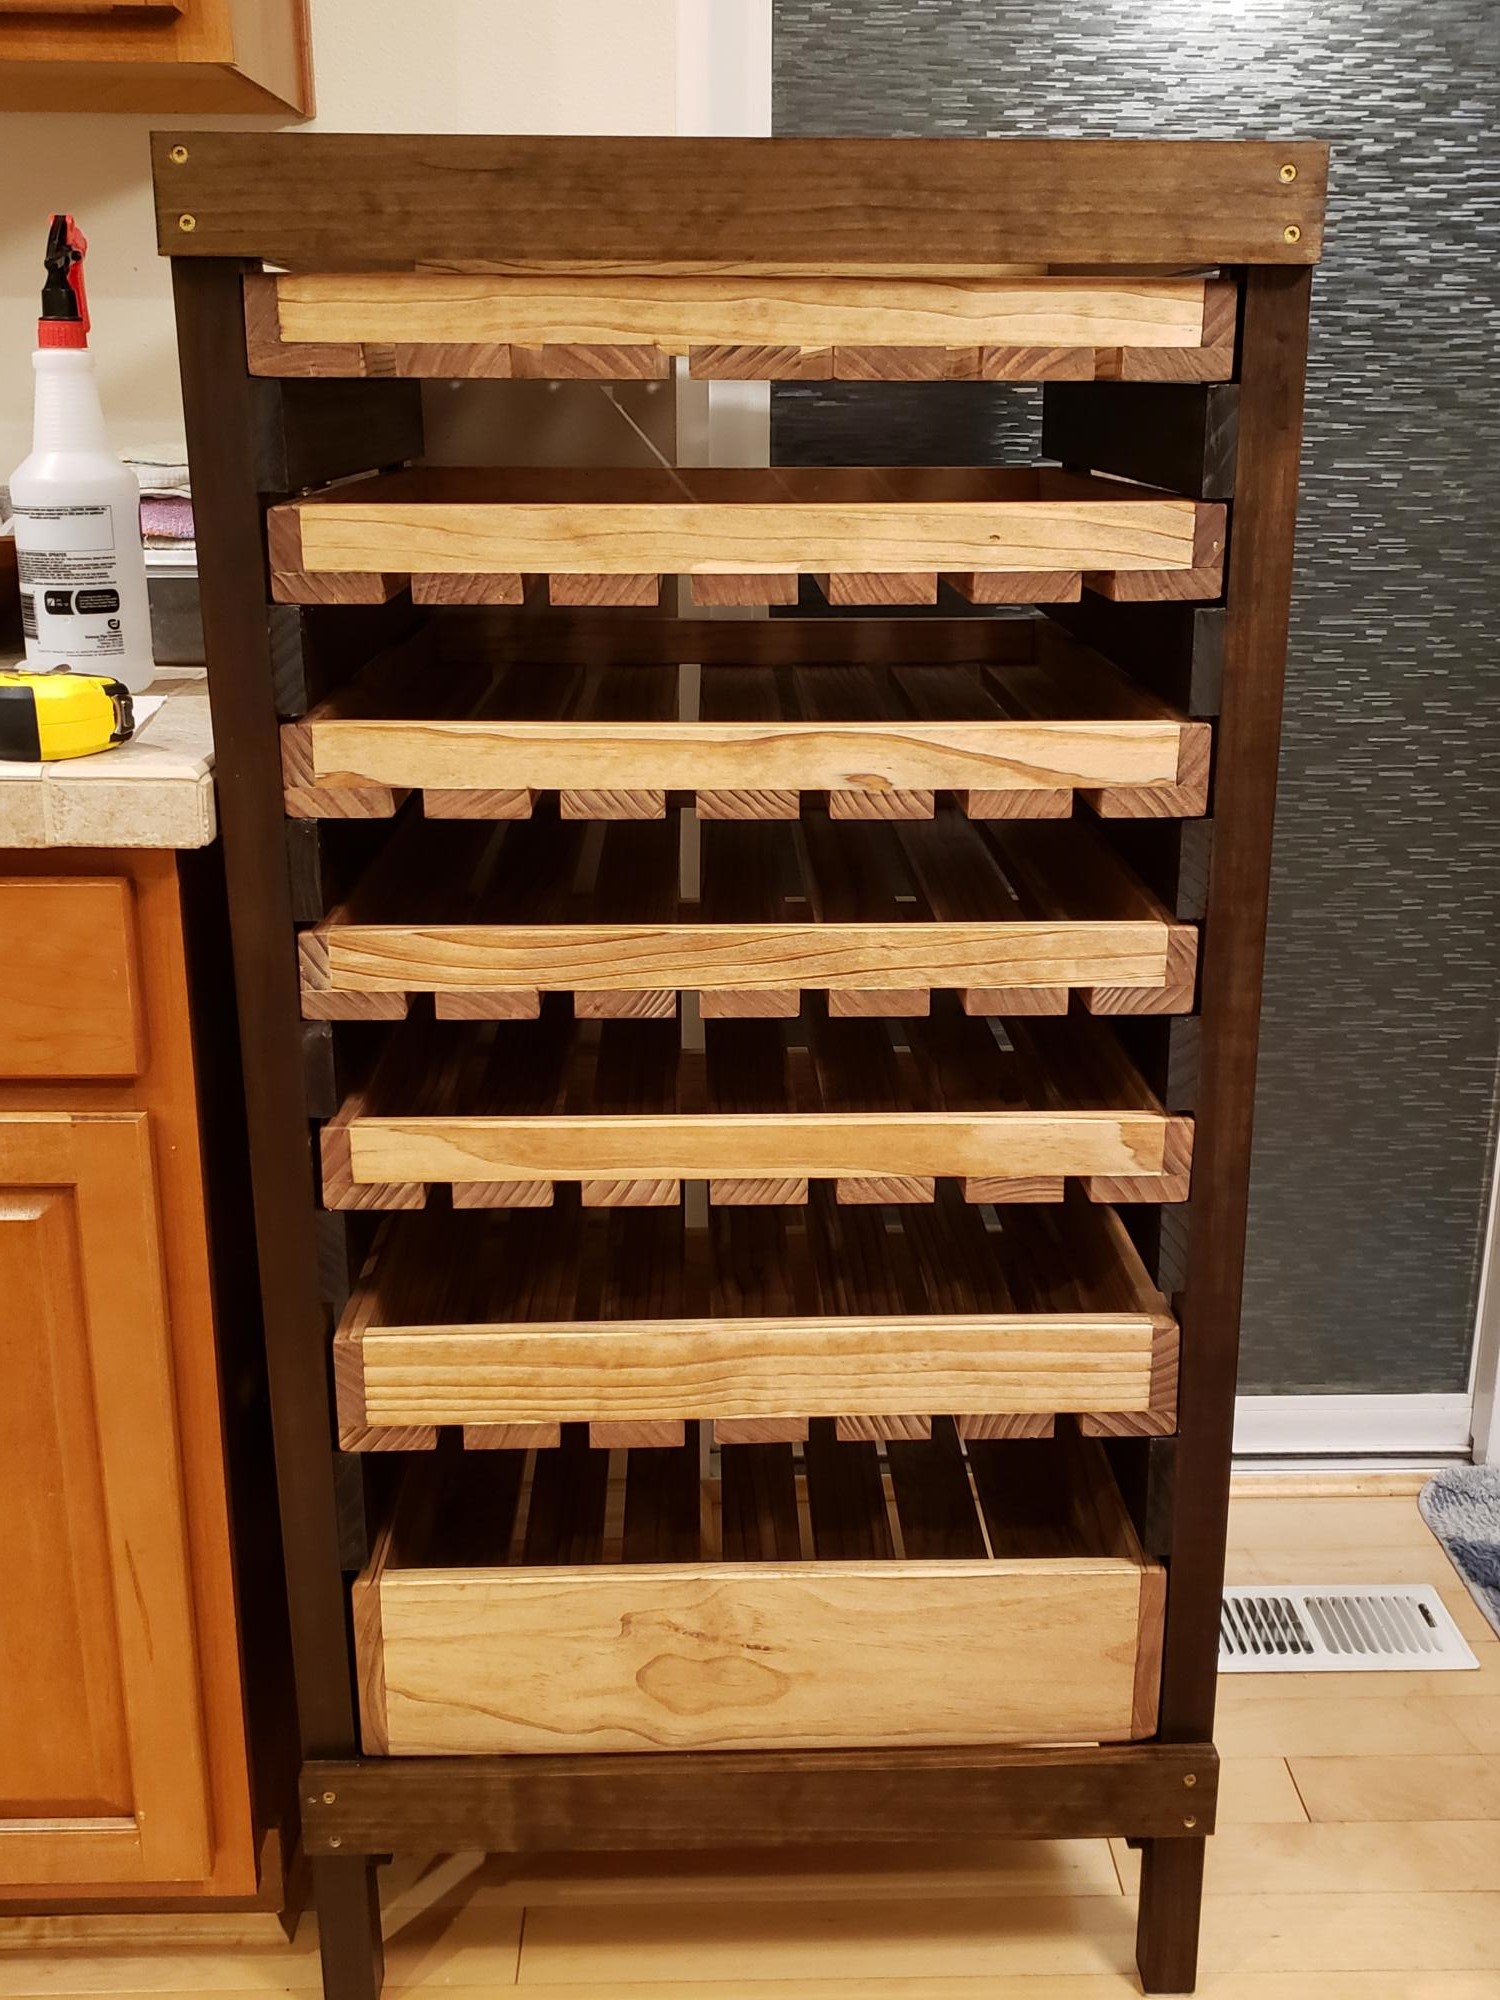
I was looking online for a spinning DVD rack to buy when I stumbled across a picture of a custom built rack. I decided to give it a try and this is the result. This is the first project I've done outside of basic shelves and it was a great learning experience. The overall fit and finish isn't quite where I'd like it to be but overall I think it turned out pretty well. I was able to find a 12" lazy Susan at a hardware store that supports over 300lbs and worked perfectly for this project.
I used pocket holes for the shelves, finishing nails for the top and screws for the bottom and lazy Susan. I also used pocket holes to attach the shelf backs and hid them behind the shelves. One thing I definitely won't use next time is spray paint/enamel. The finish isn't nearly as nice as I wanted and it cost far more than I was expecting.
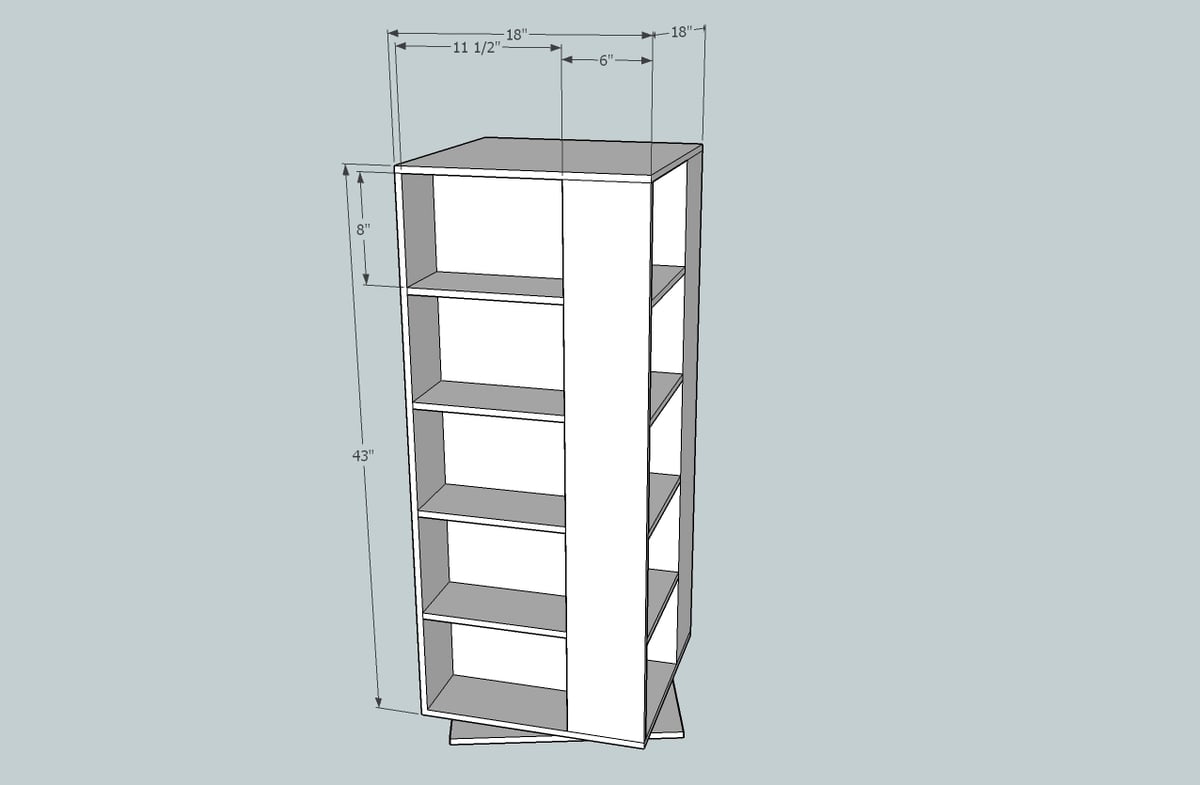
This is also my first time using SketchUp and I'm really impressed with it. I've uploaded a copy of the plans.
Criticism and suggestions are appreciated.
-Dan

Sun, 07/14/2013 - 11:35
I like this spinning DVD unit! Coincidentally, I just finished using spray enamel to redo some cupboard door handles. It's horrible stuff! I ended up sanding it off, and doing it over in flat black. I roughed up the edges with 180 grit to antique them a bit. Looks much better!
Sun, 02/12/2023 - 01:19
Can I get a design drawing for this piece?
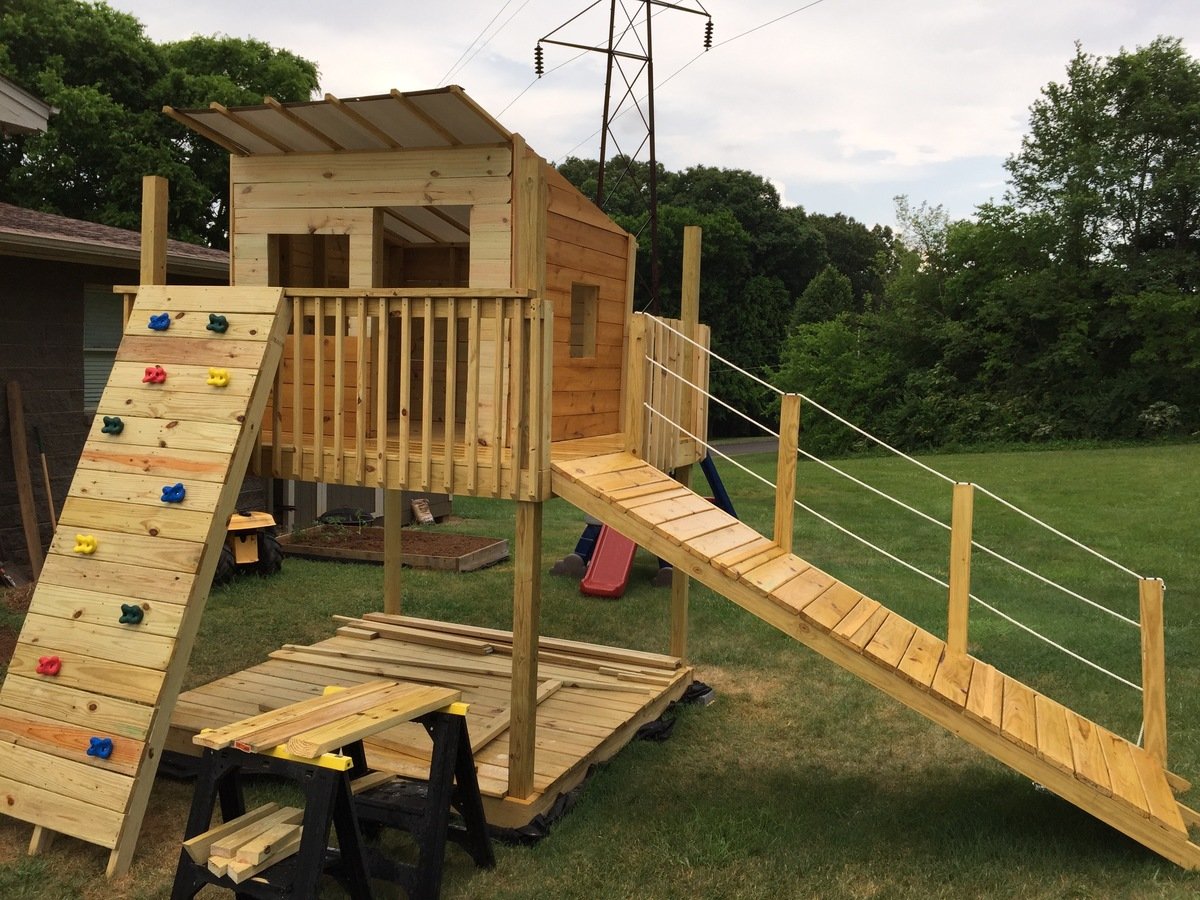
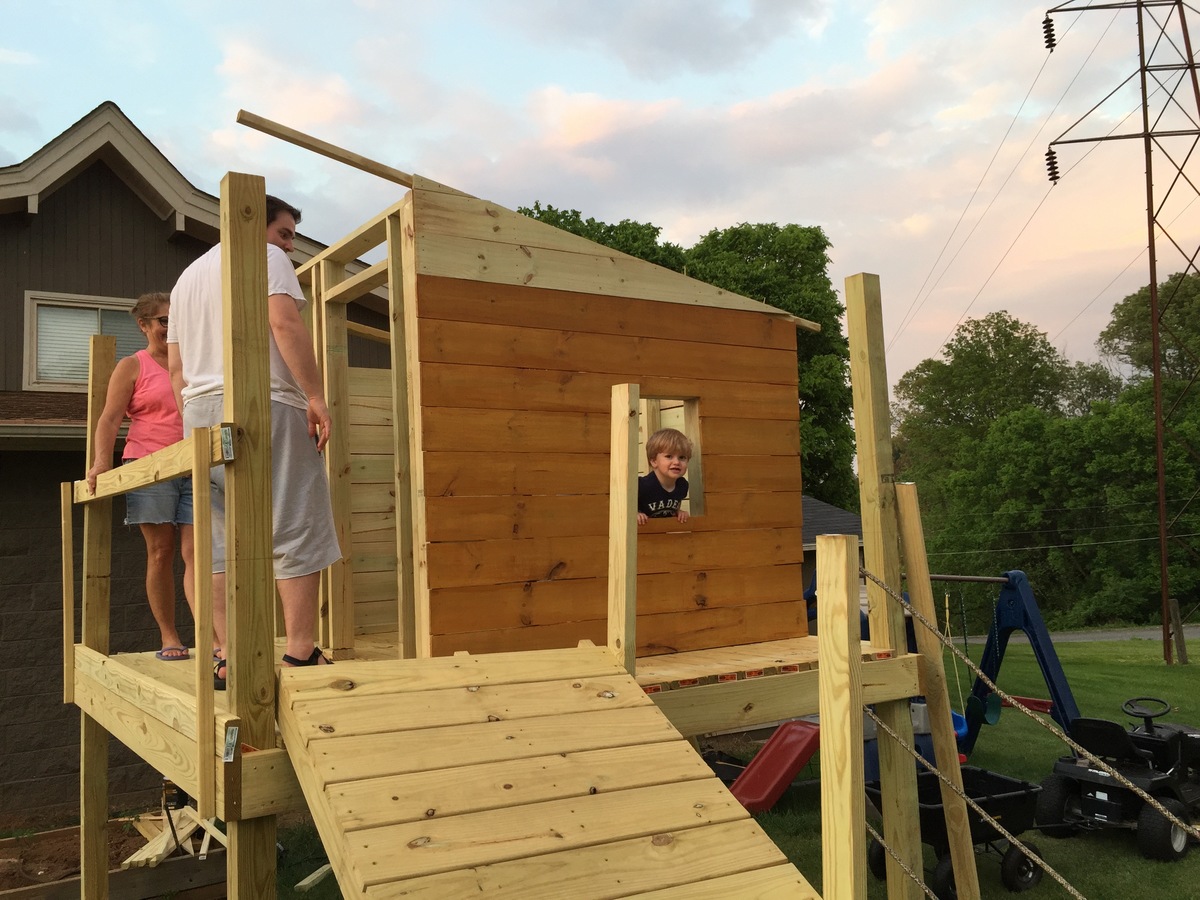
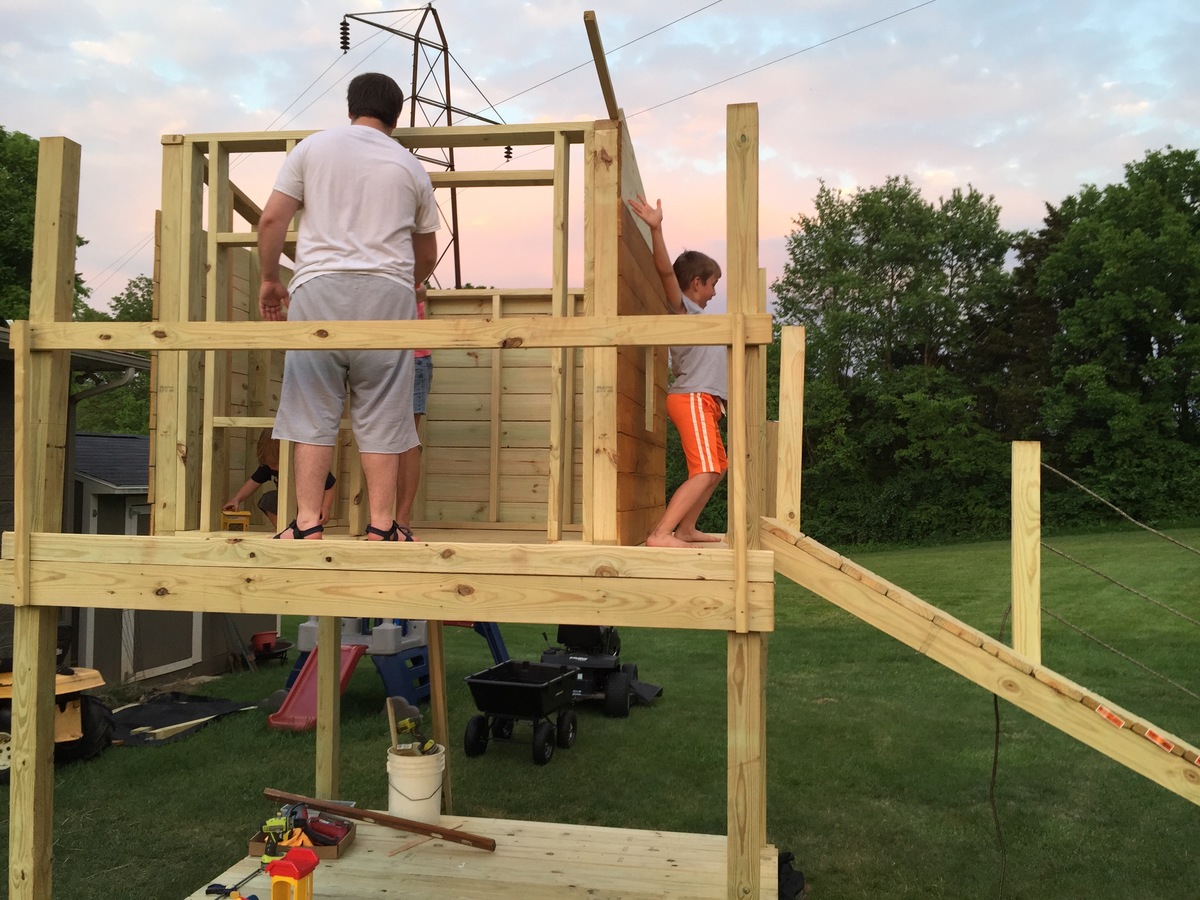
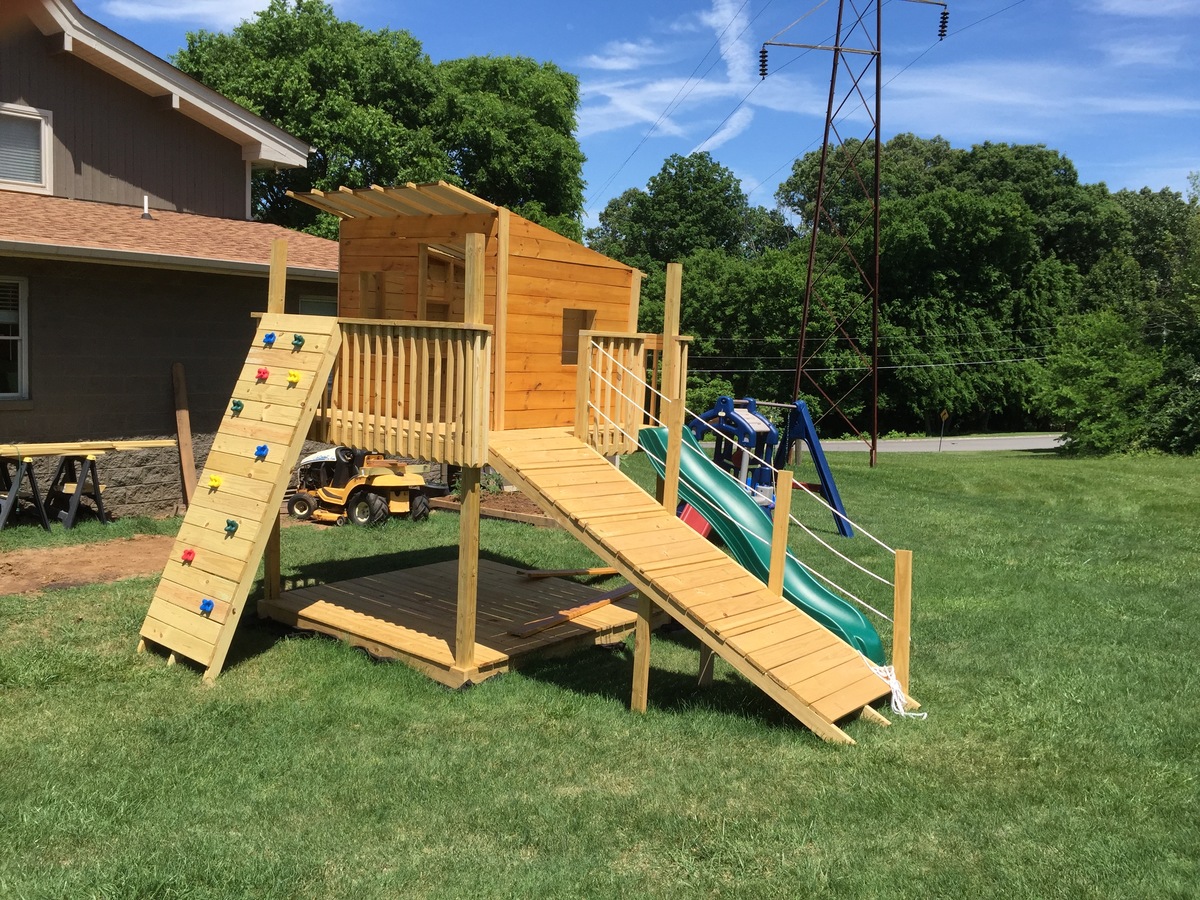
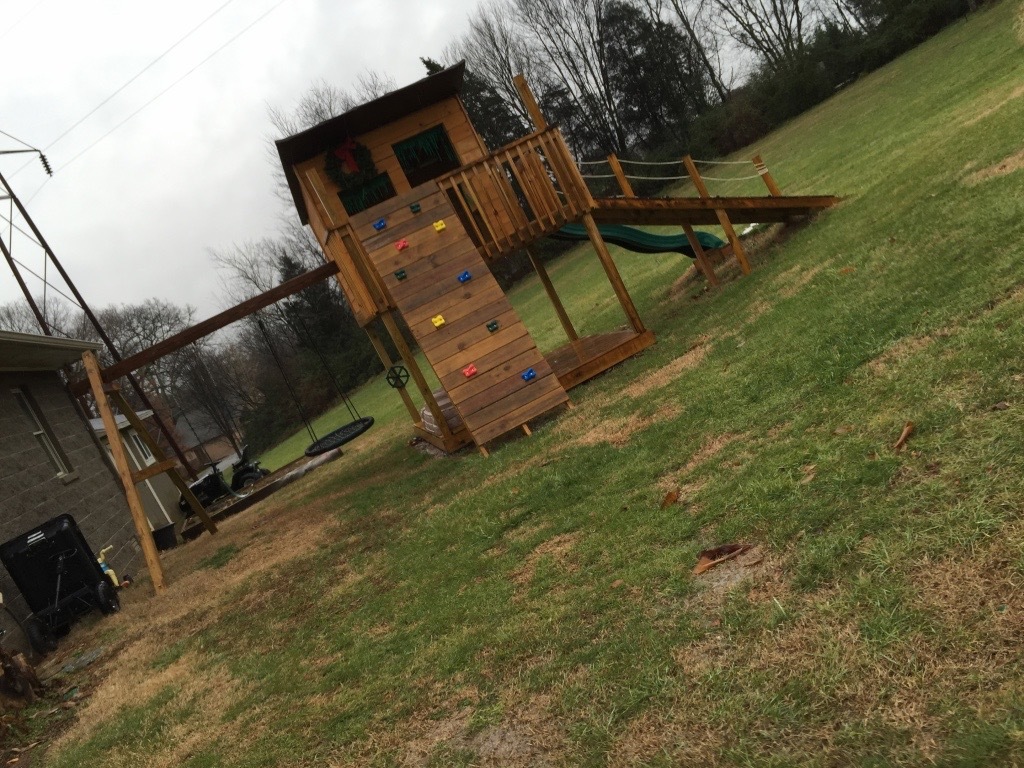
I wanted to build a structure for the kids to play in and on. I used the playhouse deck design and made it 8 feet by 8 feet. The "roof" is removable to provide shade when it's sunny. It's just 2x2 and a tarp - pretty simple, but it does the job. I used treated posts, dog eared fence boards andlots of screws. I stained and built the walls in my garage before assembling it. Once all of the wood at been stained, it came together pretty quickly with the grandkids help...Lol
Tue, 05/05/2020 - 06:43
What is the estimate cost of the entire playhouse with swing?
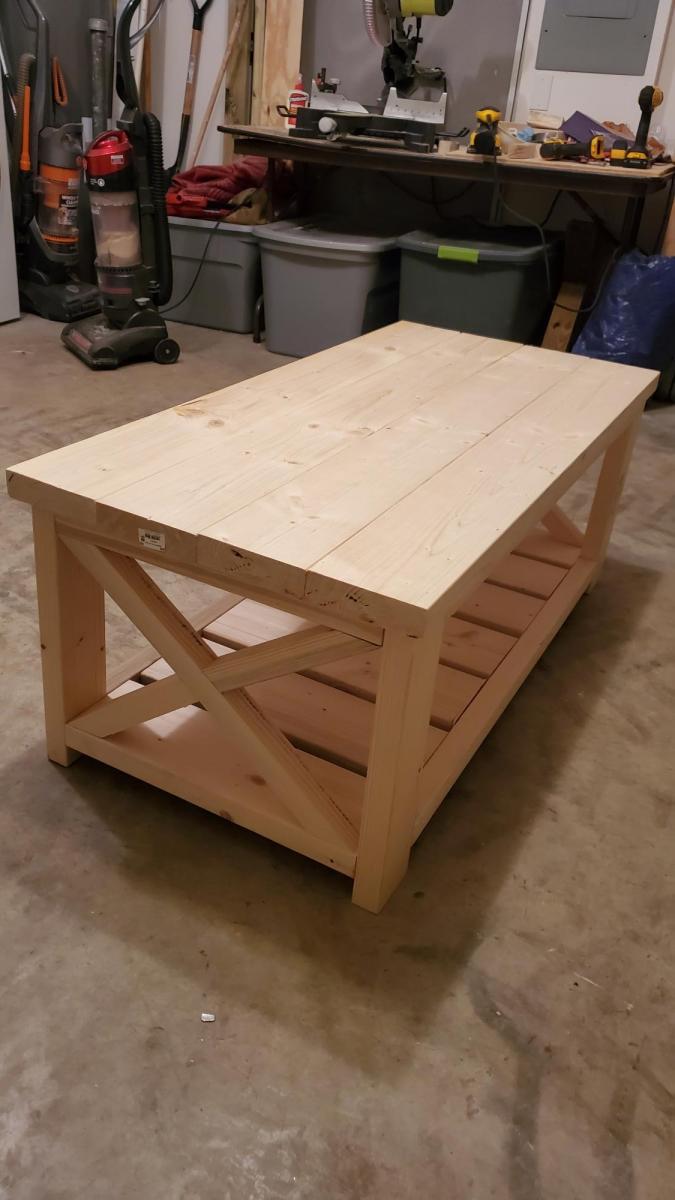
This was a fun project to get my feet wet again in woodworking. We adjusted the plans slightly. Our table is 80" x 40". It is supported and bordered with a 2x4 frame that ties it all together. As my friend said, you can stand on that thing. Lots of fun, and can't wait for my wife to enjoy it.
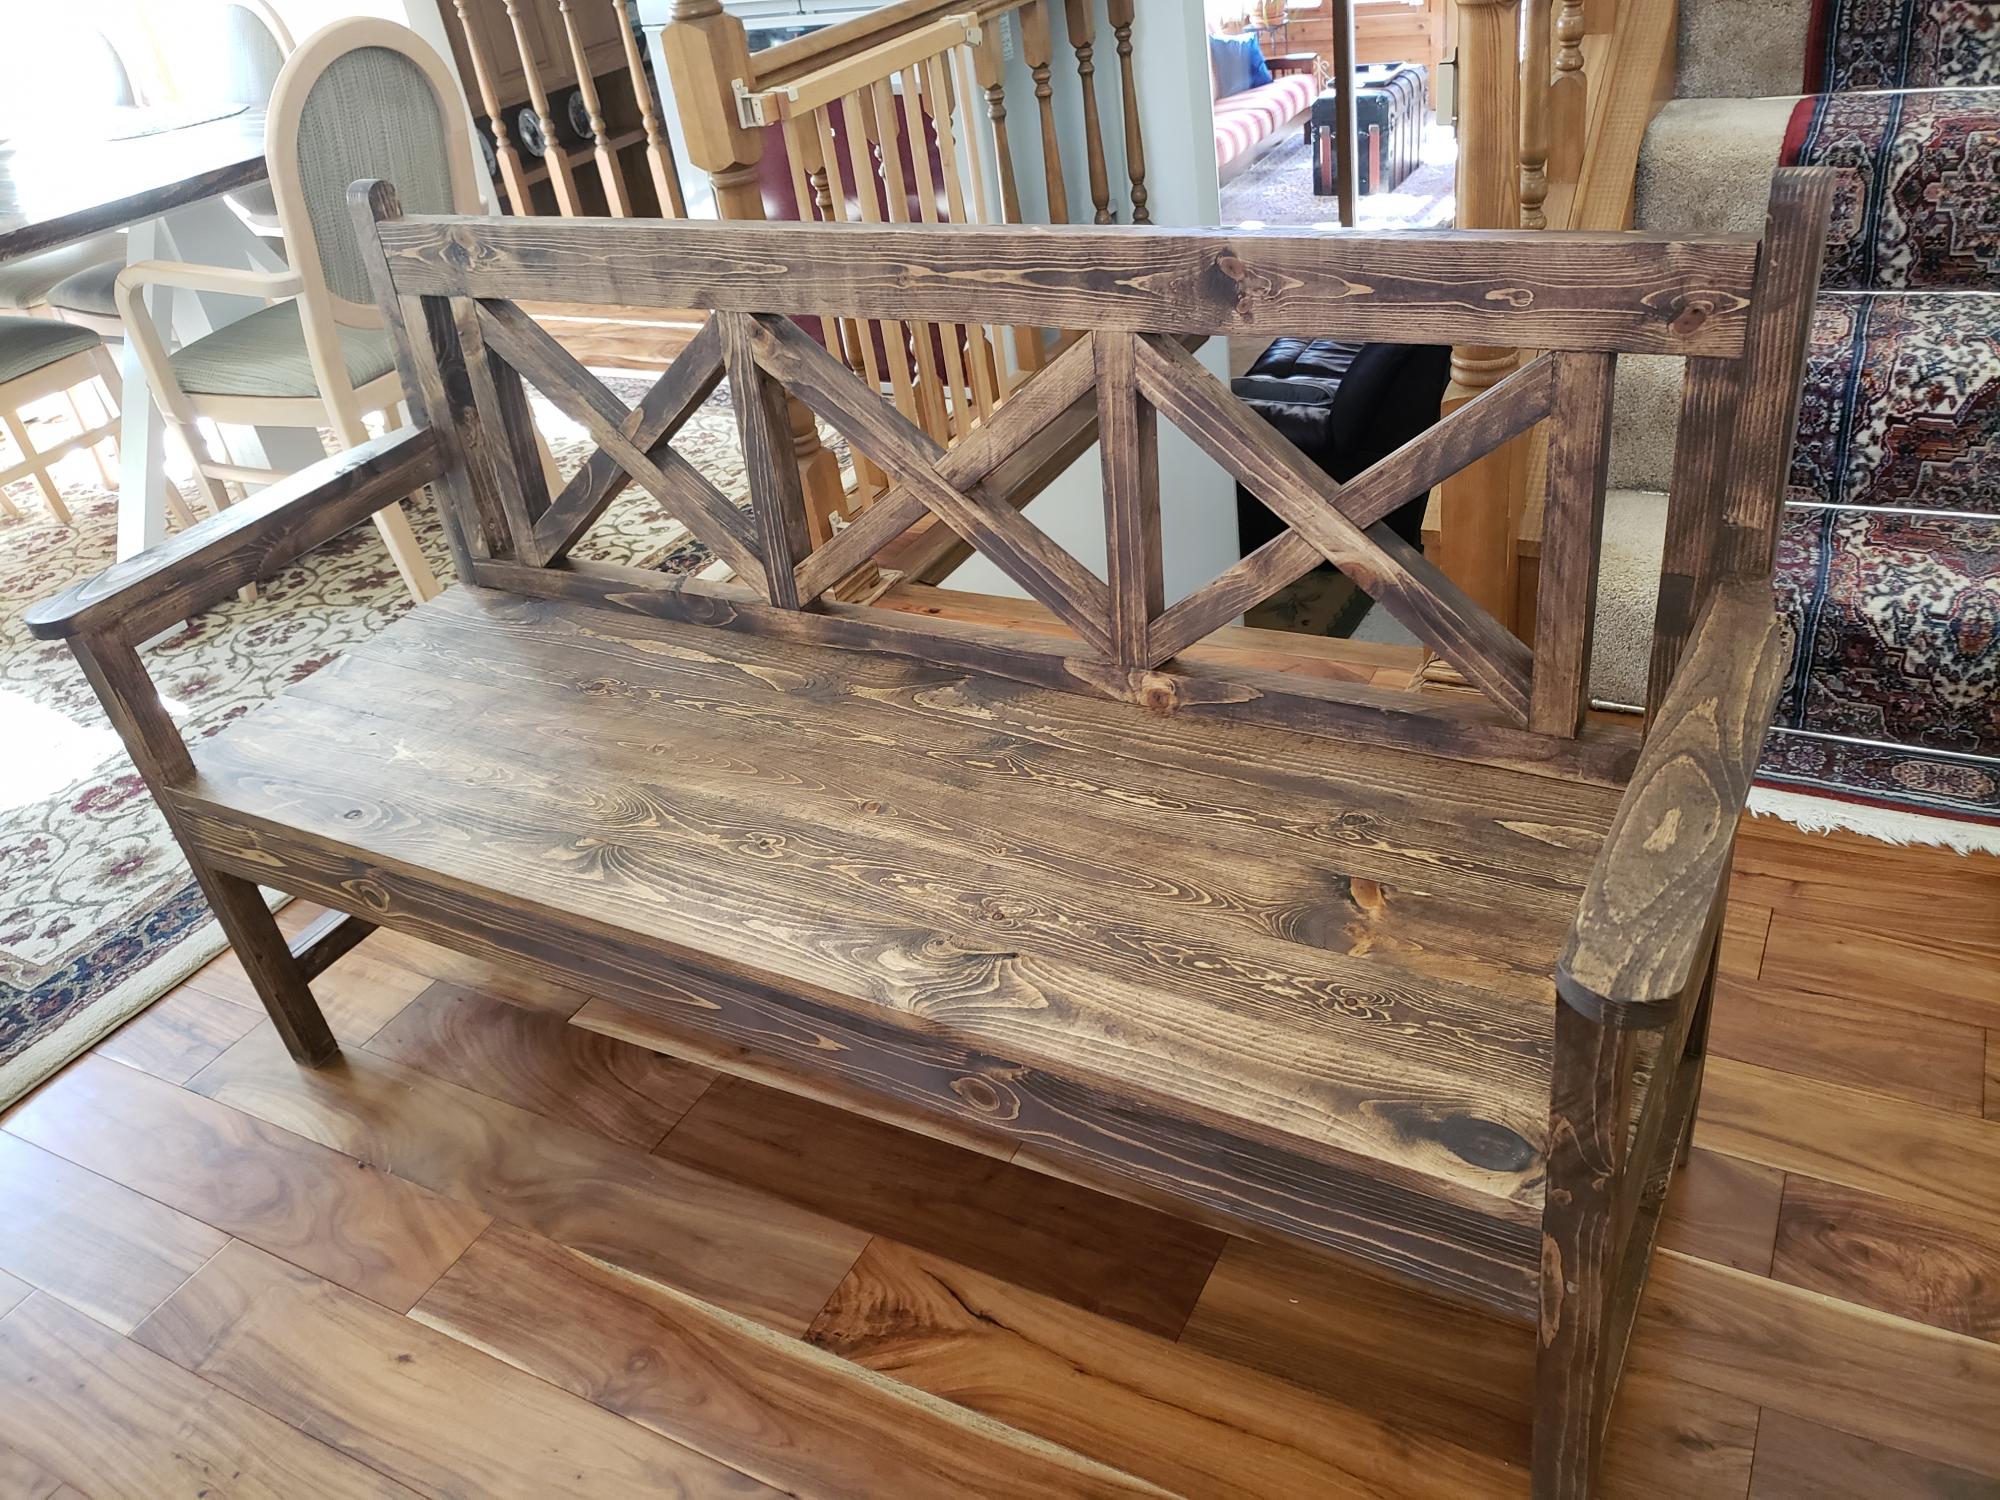
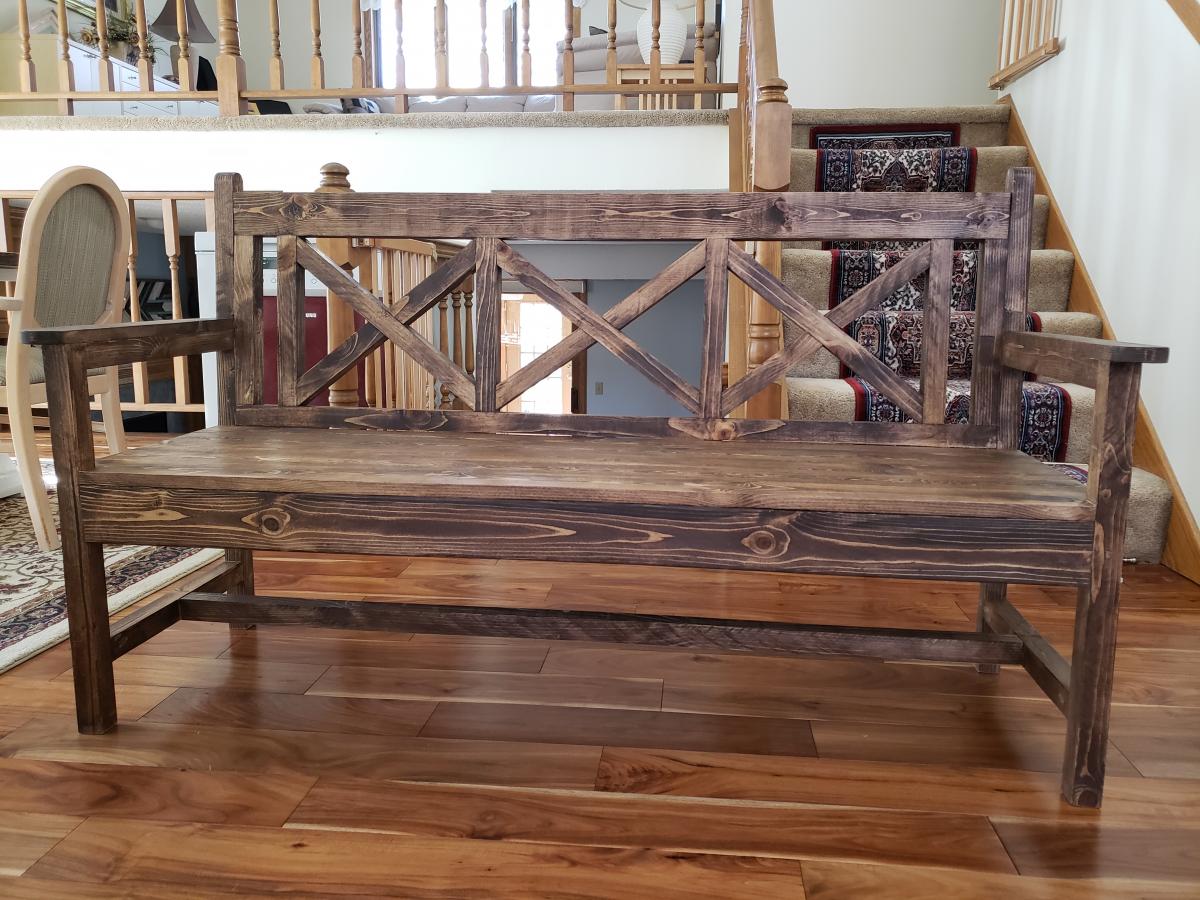
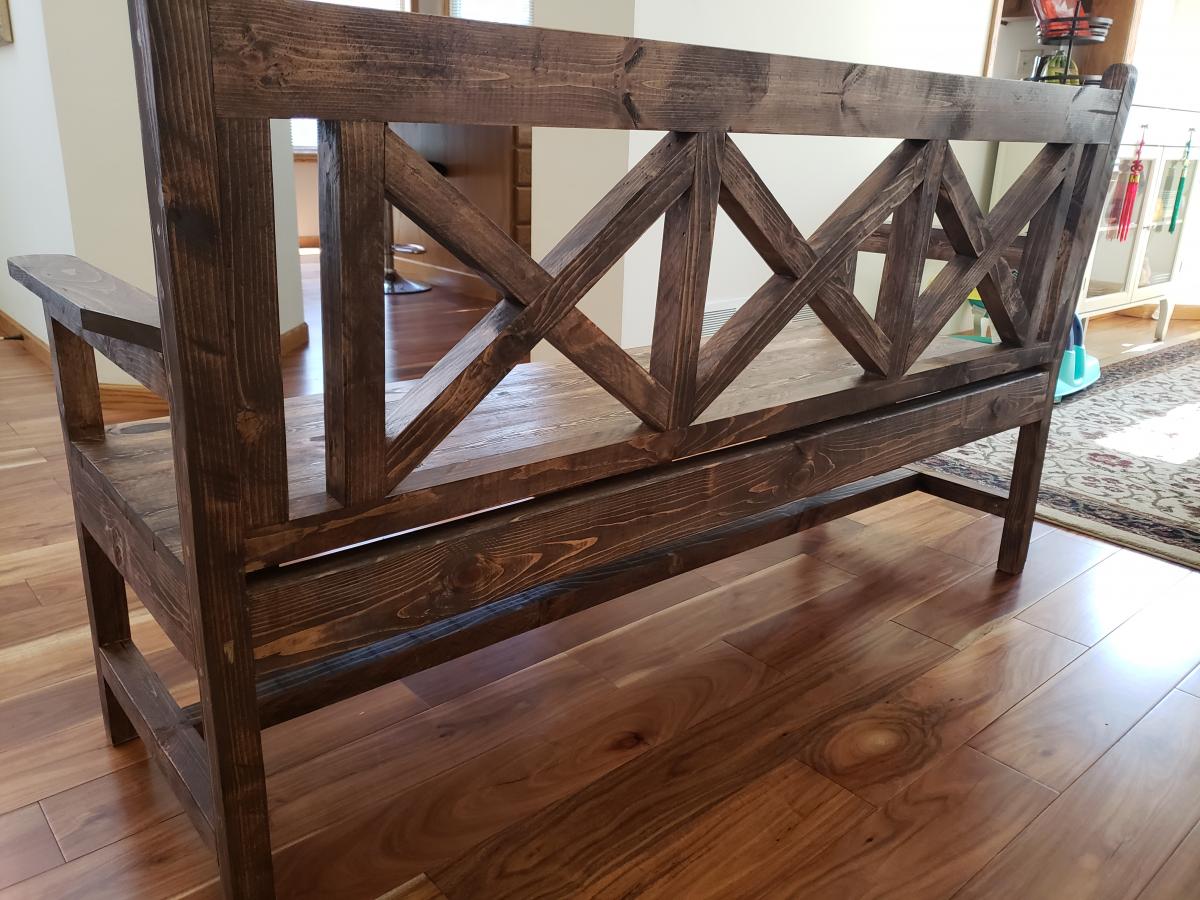
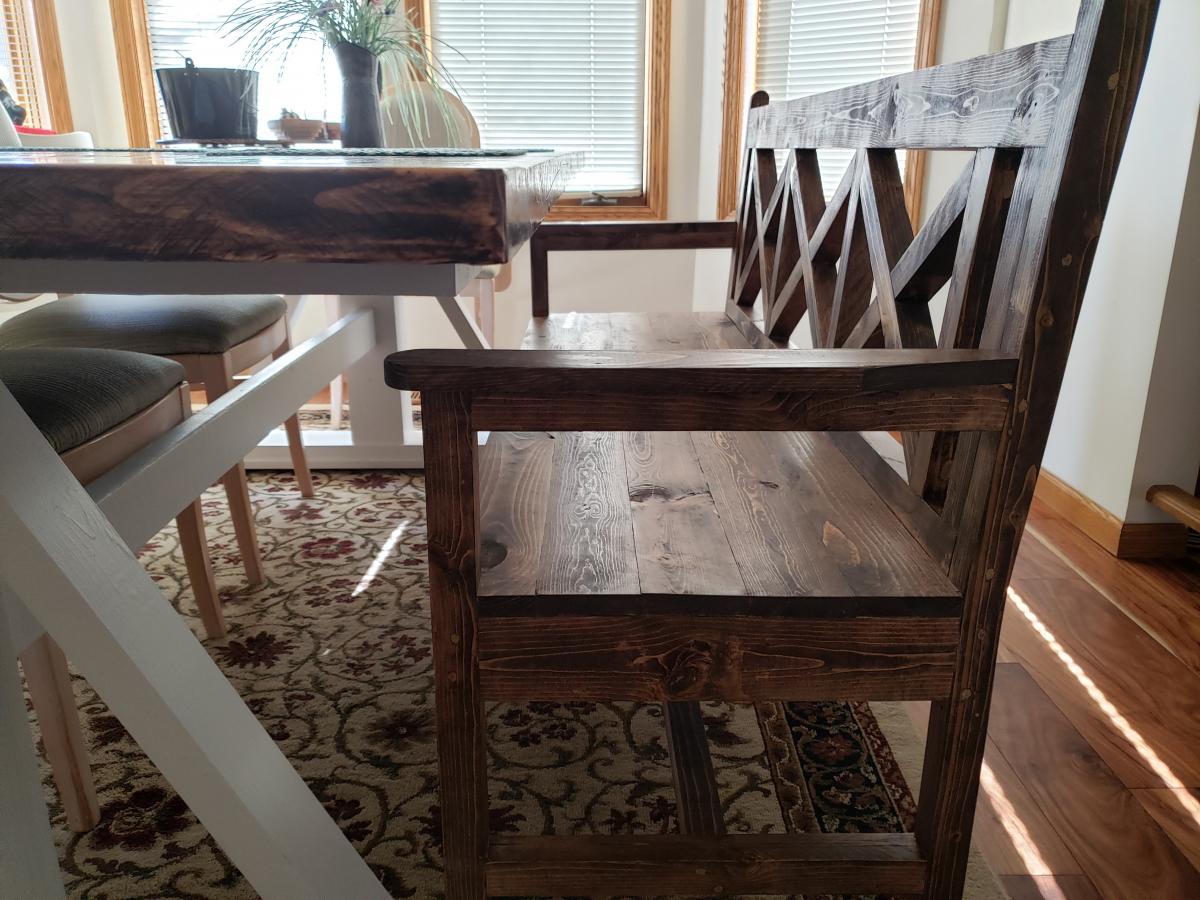
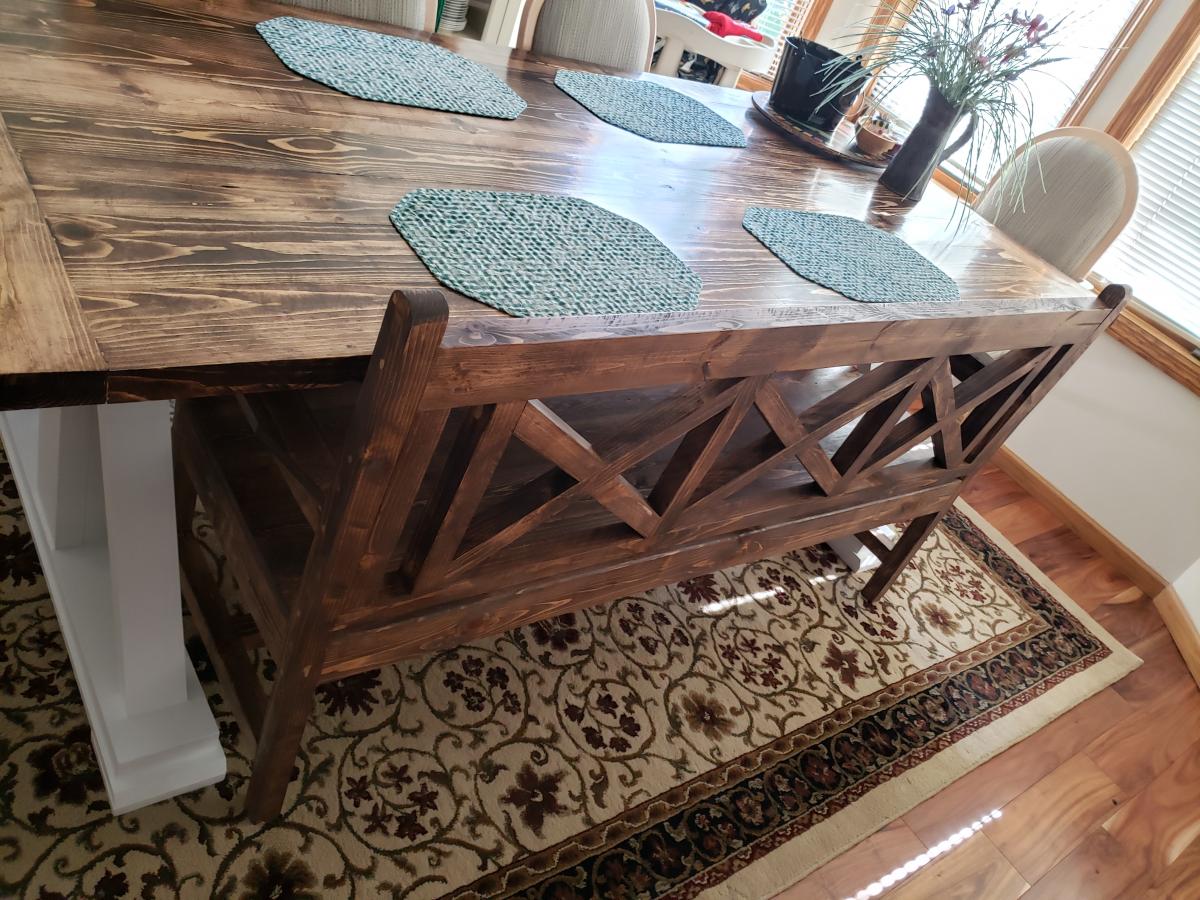
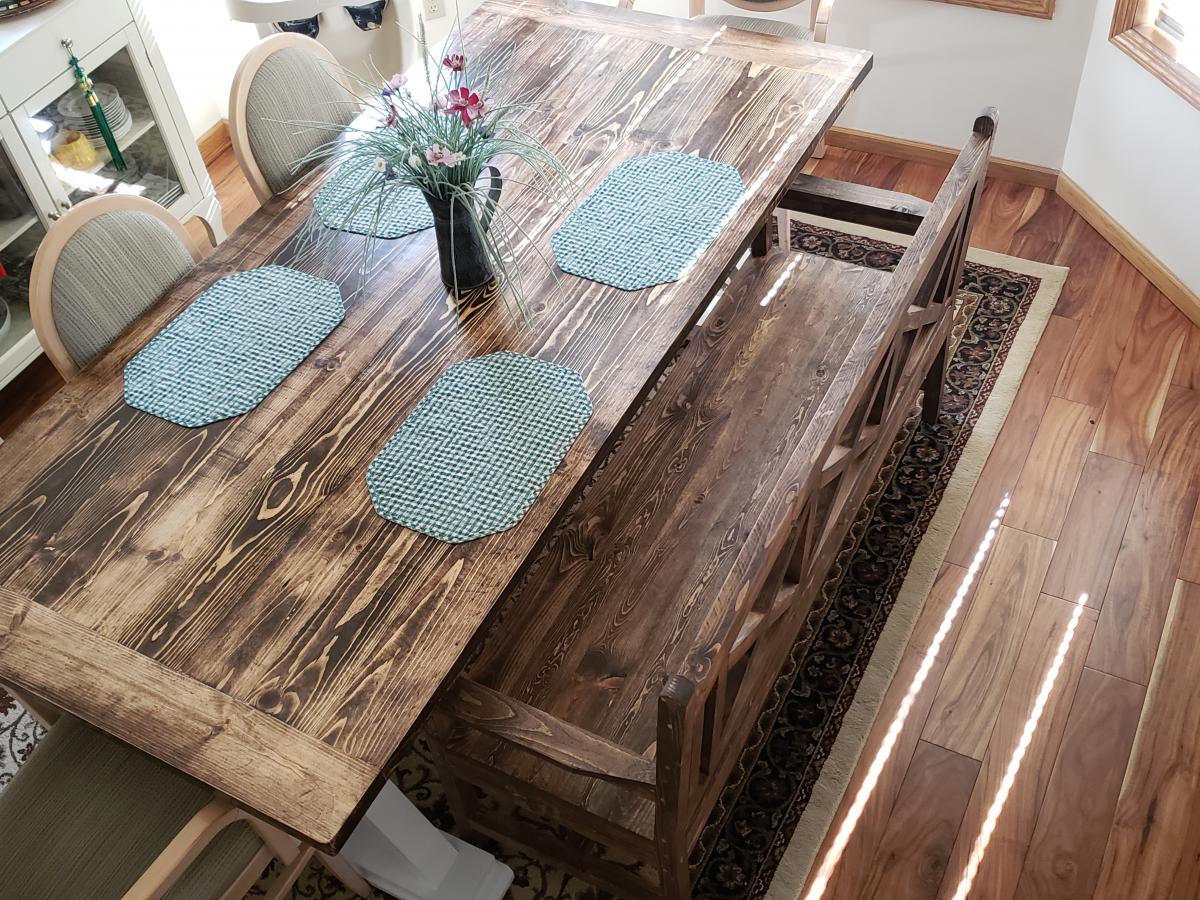
I made this bench for my Farmhouse dining table, modified for 3 seats.
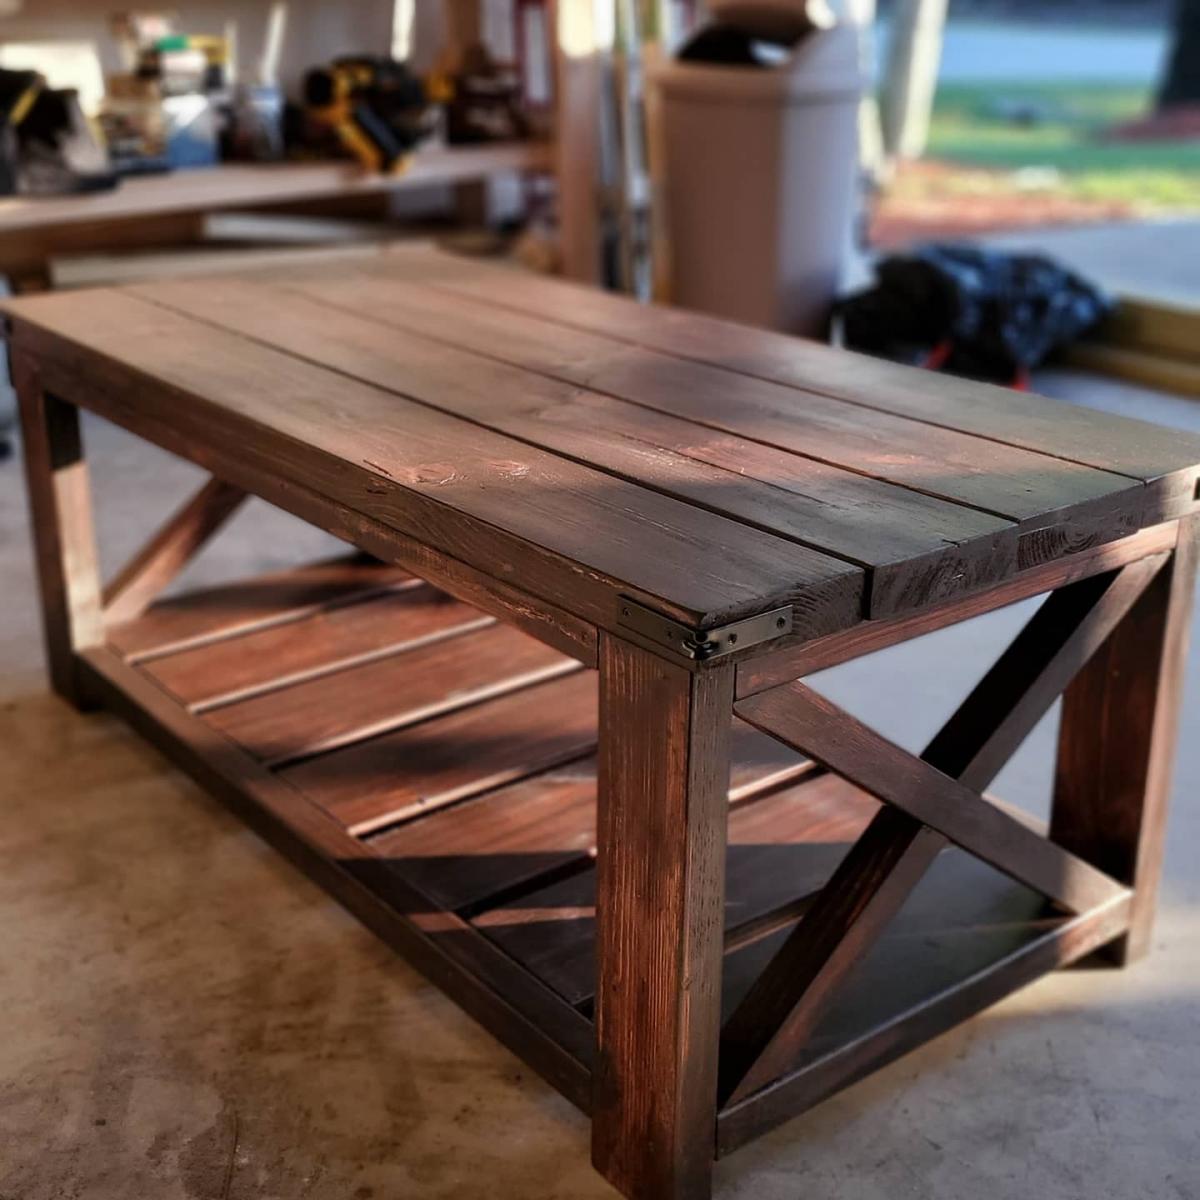
Thank you for the awesome coffee table plan. Love the finished project on it. Can't wait to do something else.

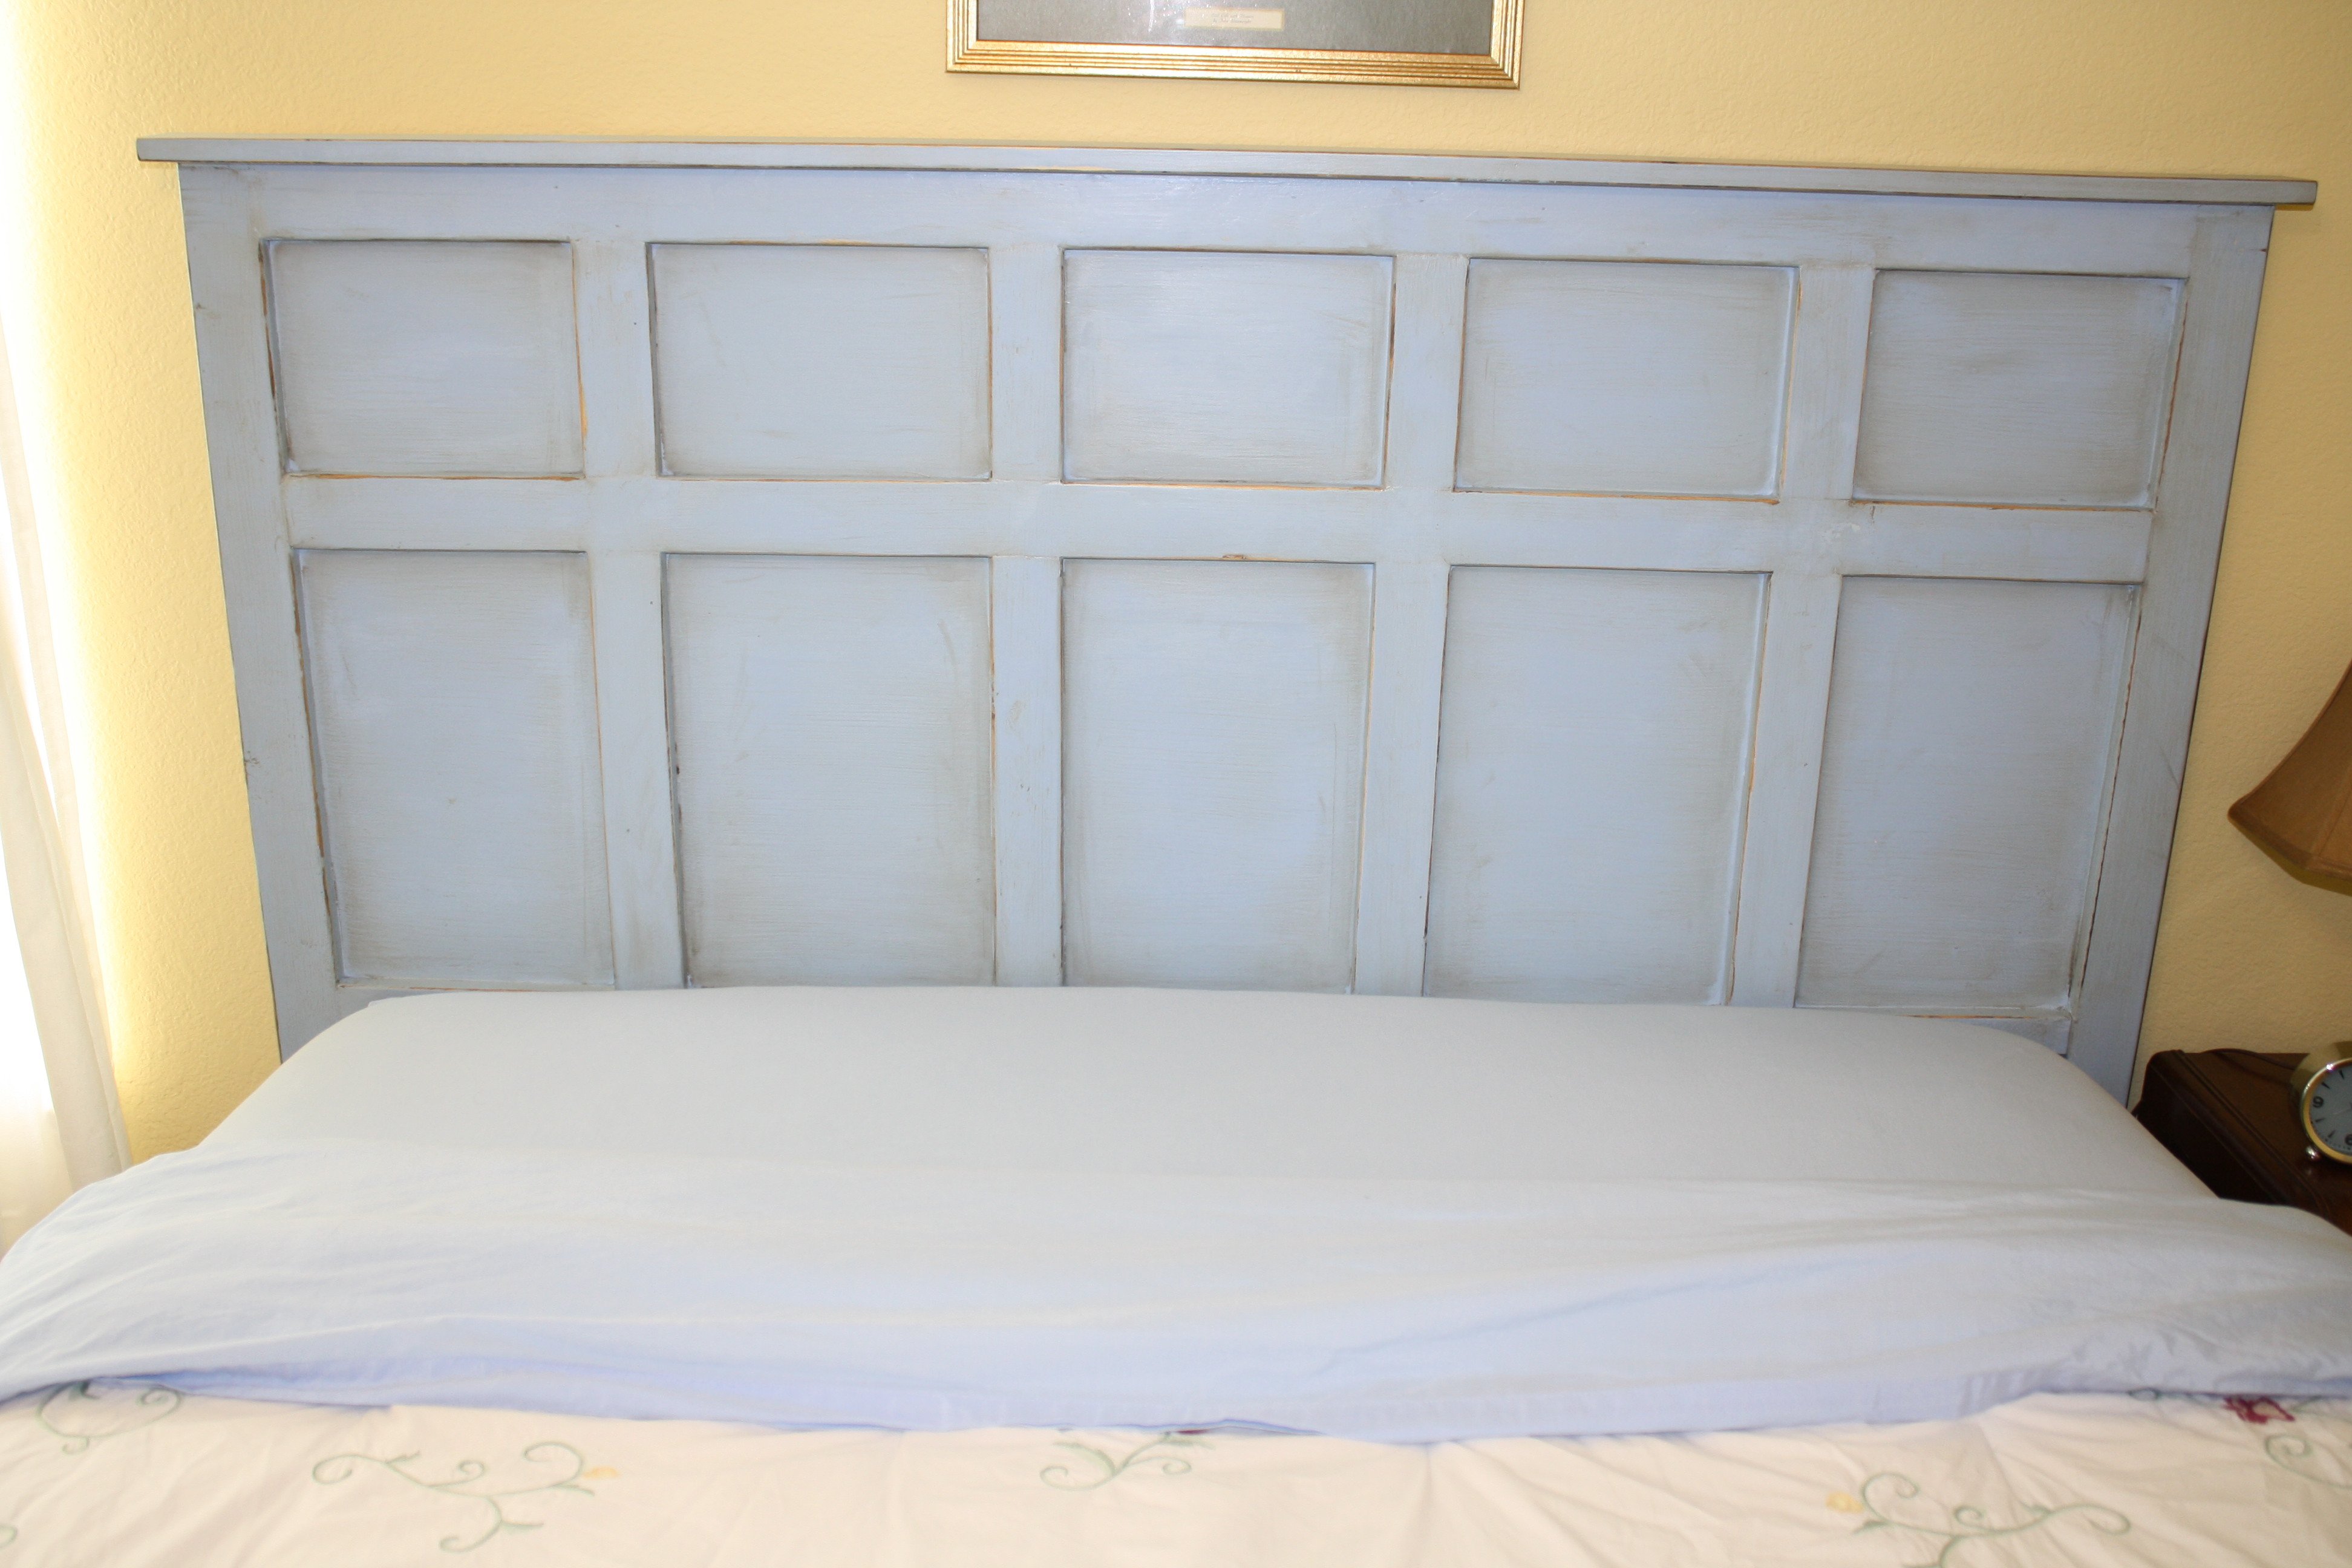
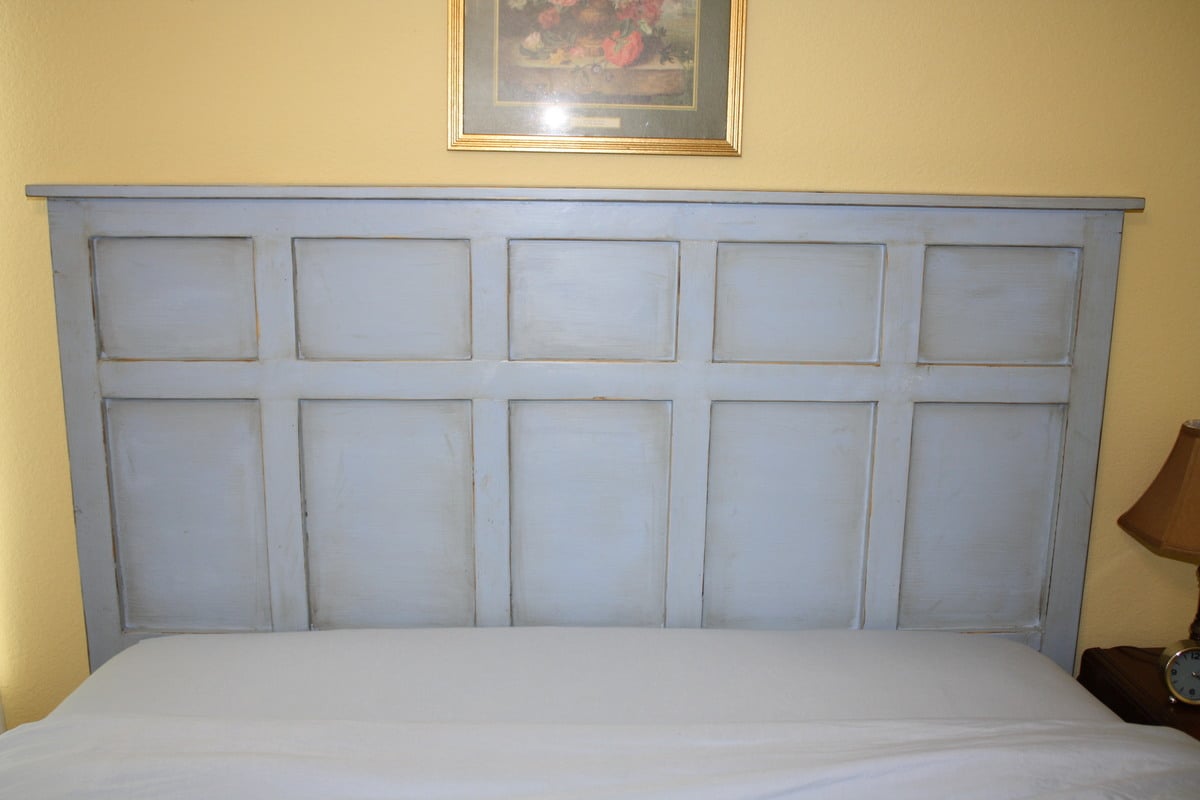
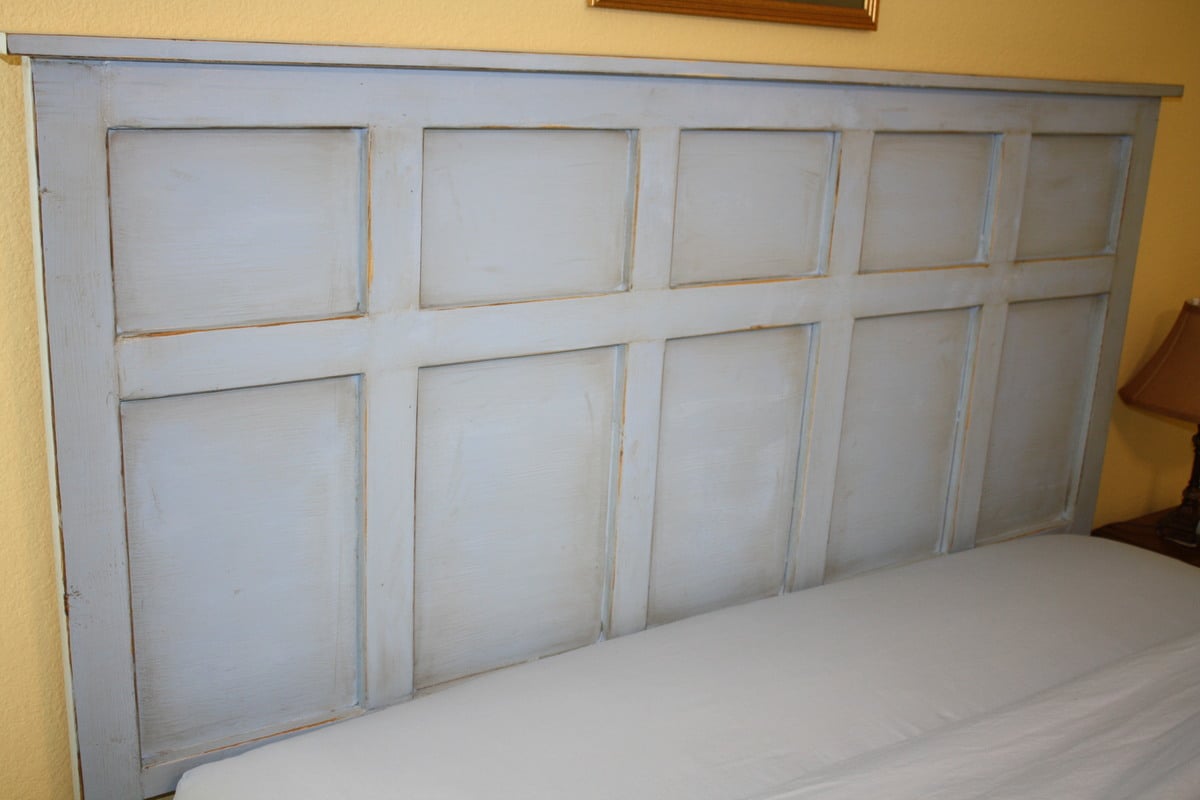
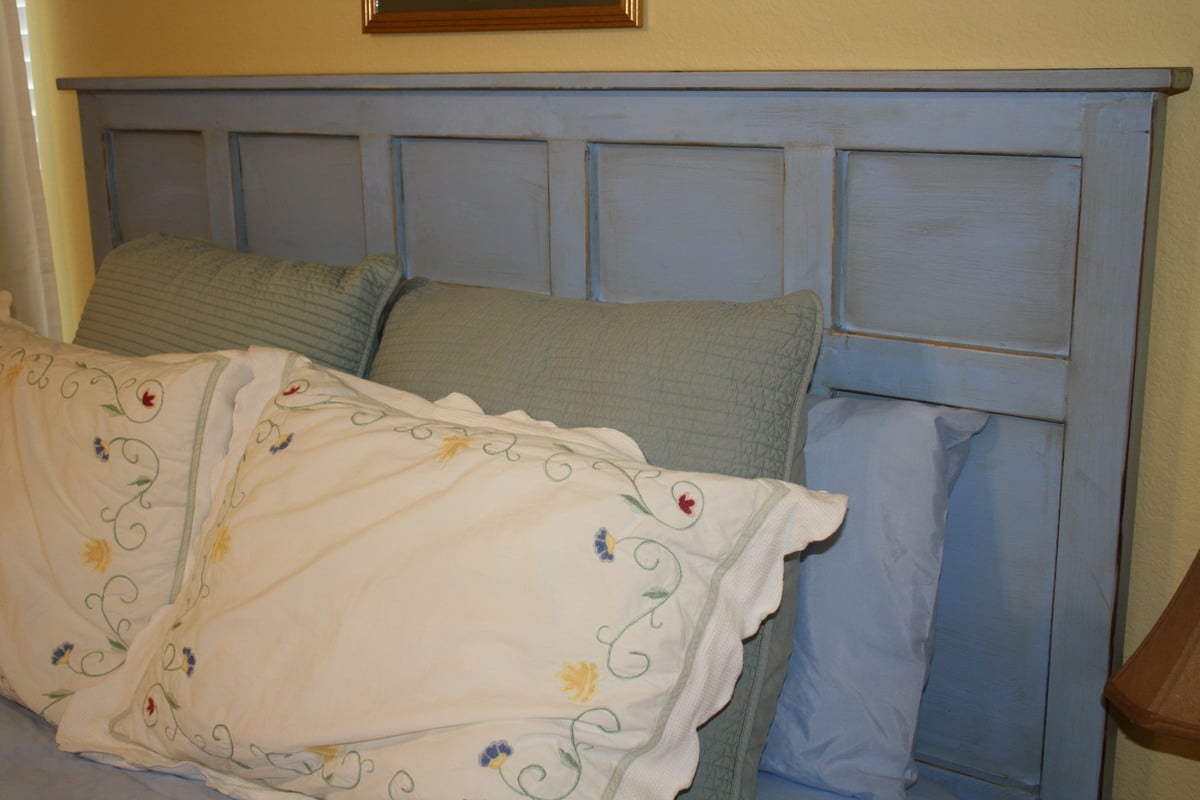
Our guest room finally has a headboard! I put together this queen size headboard using what I had learned building my daughter's headboard (and consulting the plans for the Reclaimed Wood Headboard) using the remainder of the plywood sheet from her headboard project, 2x3s for the legs, a 2x4 to join the legs (and connect to the metal bed frame), furring strips, and a 1x3 to top it off.
Our plywood had been cut to fit our car, so the first vertical furring strip was placed to hide the seam where I joined the two pieces back together. Then we evenly placed them from center as just looked right to us.
We had a great time seeing this come together as we didn't follow a specific plan, but were able to be a bit more creative inspired by various plans.

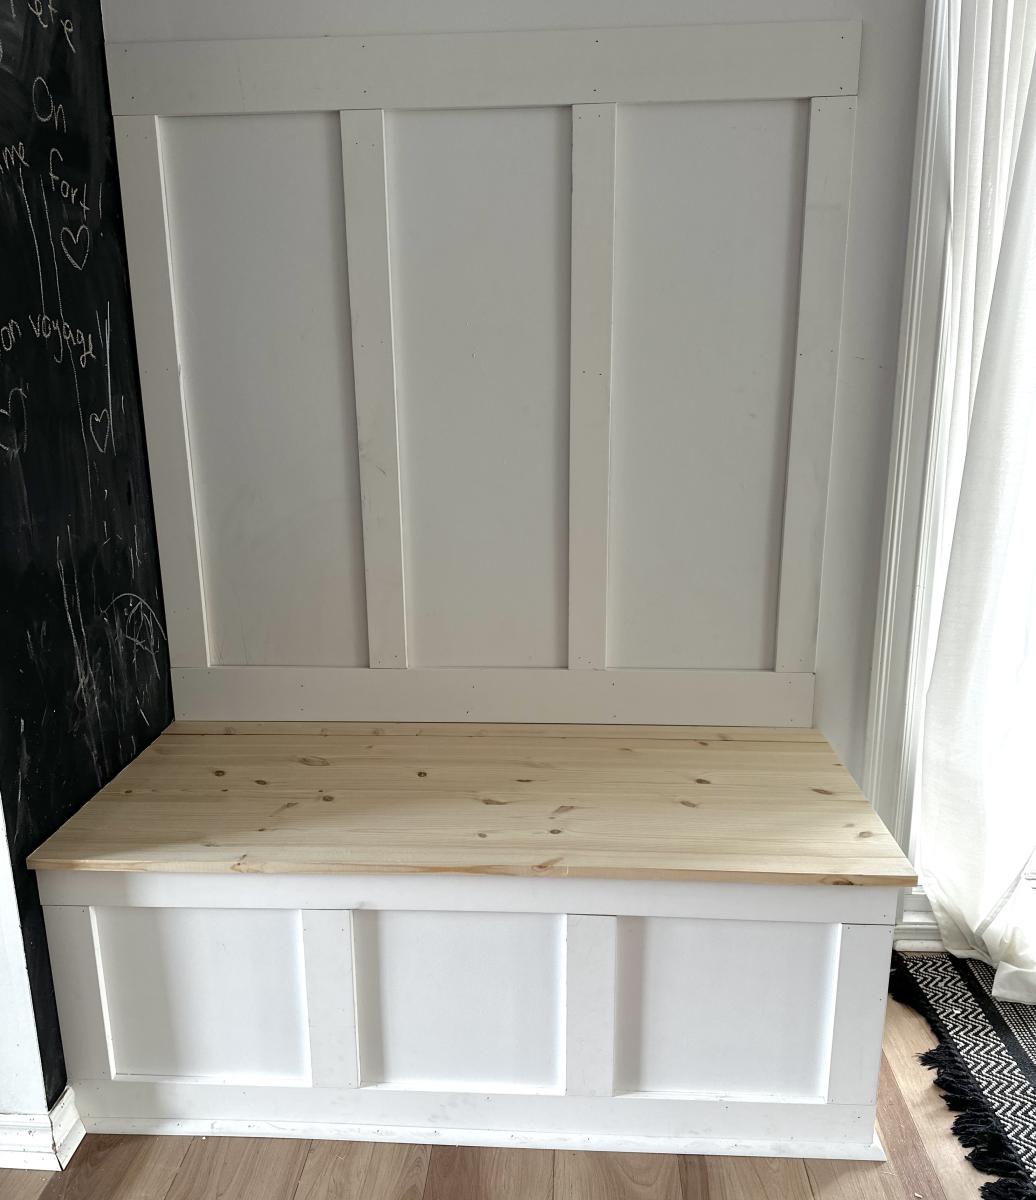
A nice bench with storage!
Built by Sylvie

I've been wanting to buy or make a sandbox for my son for a couple of years now. Since seeing this on Ana White I knew I had to make it. My son is 4 yo and I didn't think the 4' square sandbox would be big enough for him, so I made it bigger. Ours is 6' square. Materials: 4@1x8x6' 12@1x6x6' 2x4 - used leftovers from another project 8 hinges 4 handles decking screws Cut lengths: 2@1x8 cut to 71.5 (long sides of the box) 2@1x8 cut to 70.5 (short sides of the box) did not cut the 1x6 boards (top planks) - actually designed the other boards to fit their length to prevent cutting (saving time) (note that original plan uses 1x4 planks - I used 1x6s so I could use the same number of planks but cover a larger area) 4@2x4 cut to 11.5 (arm rests) 4@2x4 cut to 18.5 (back supports) followed instructions for assembly otherwise. At my husbands suggestion we put the handles on the sides and can easily open from either side - prevents having to lean over to the middle to open (back saver) I finished the project in 4 hours including clean up and a couple of small breaks. This is my first Ana White project. It was a lot of fun to build and I hope my son will enjoy it for years to come!

Sat, 09/01/2012 - 20:59
Wow, this is just what I need! I've been wanting to make a sandbox for under the playhouse but the other plan was too small. This would be great for the little guys. Thanks!
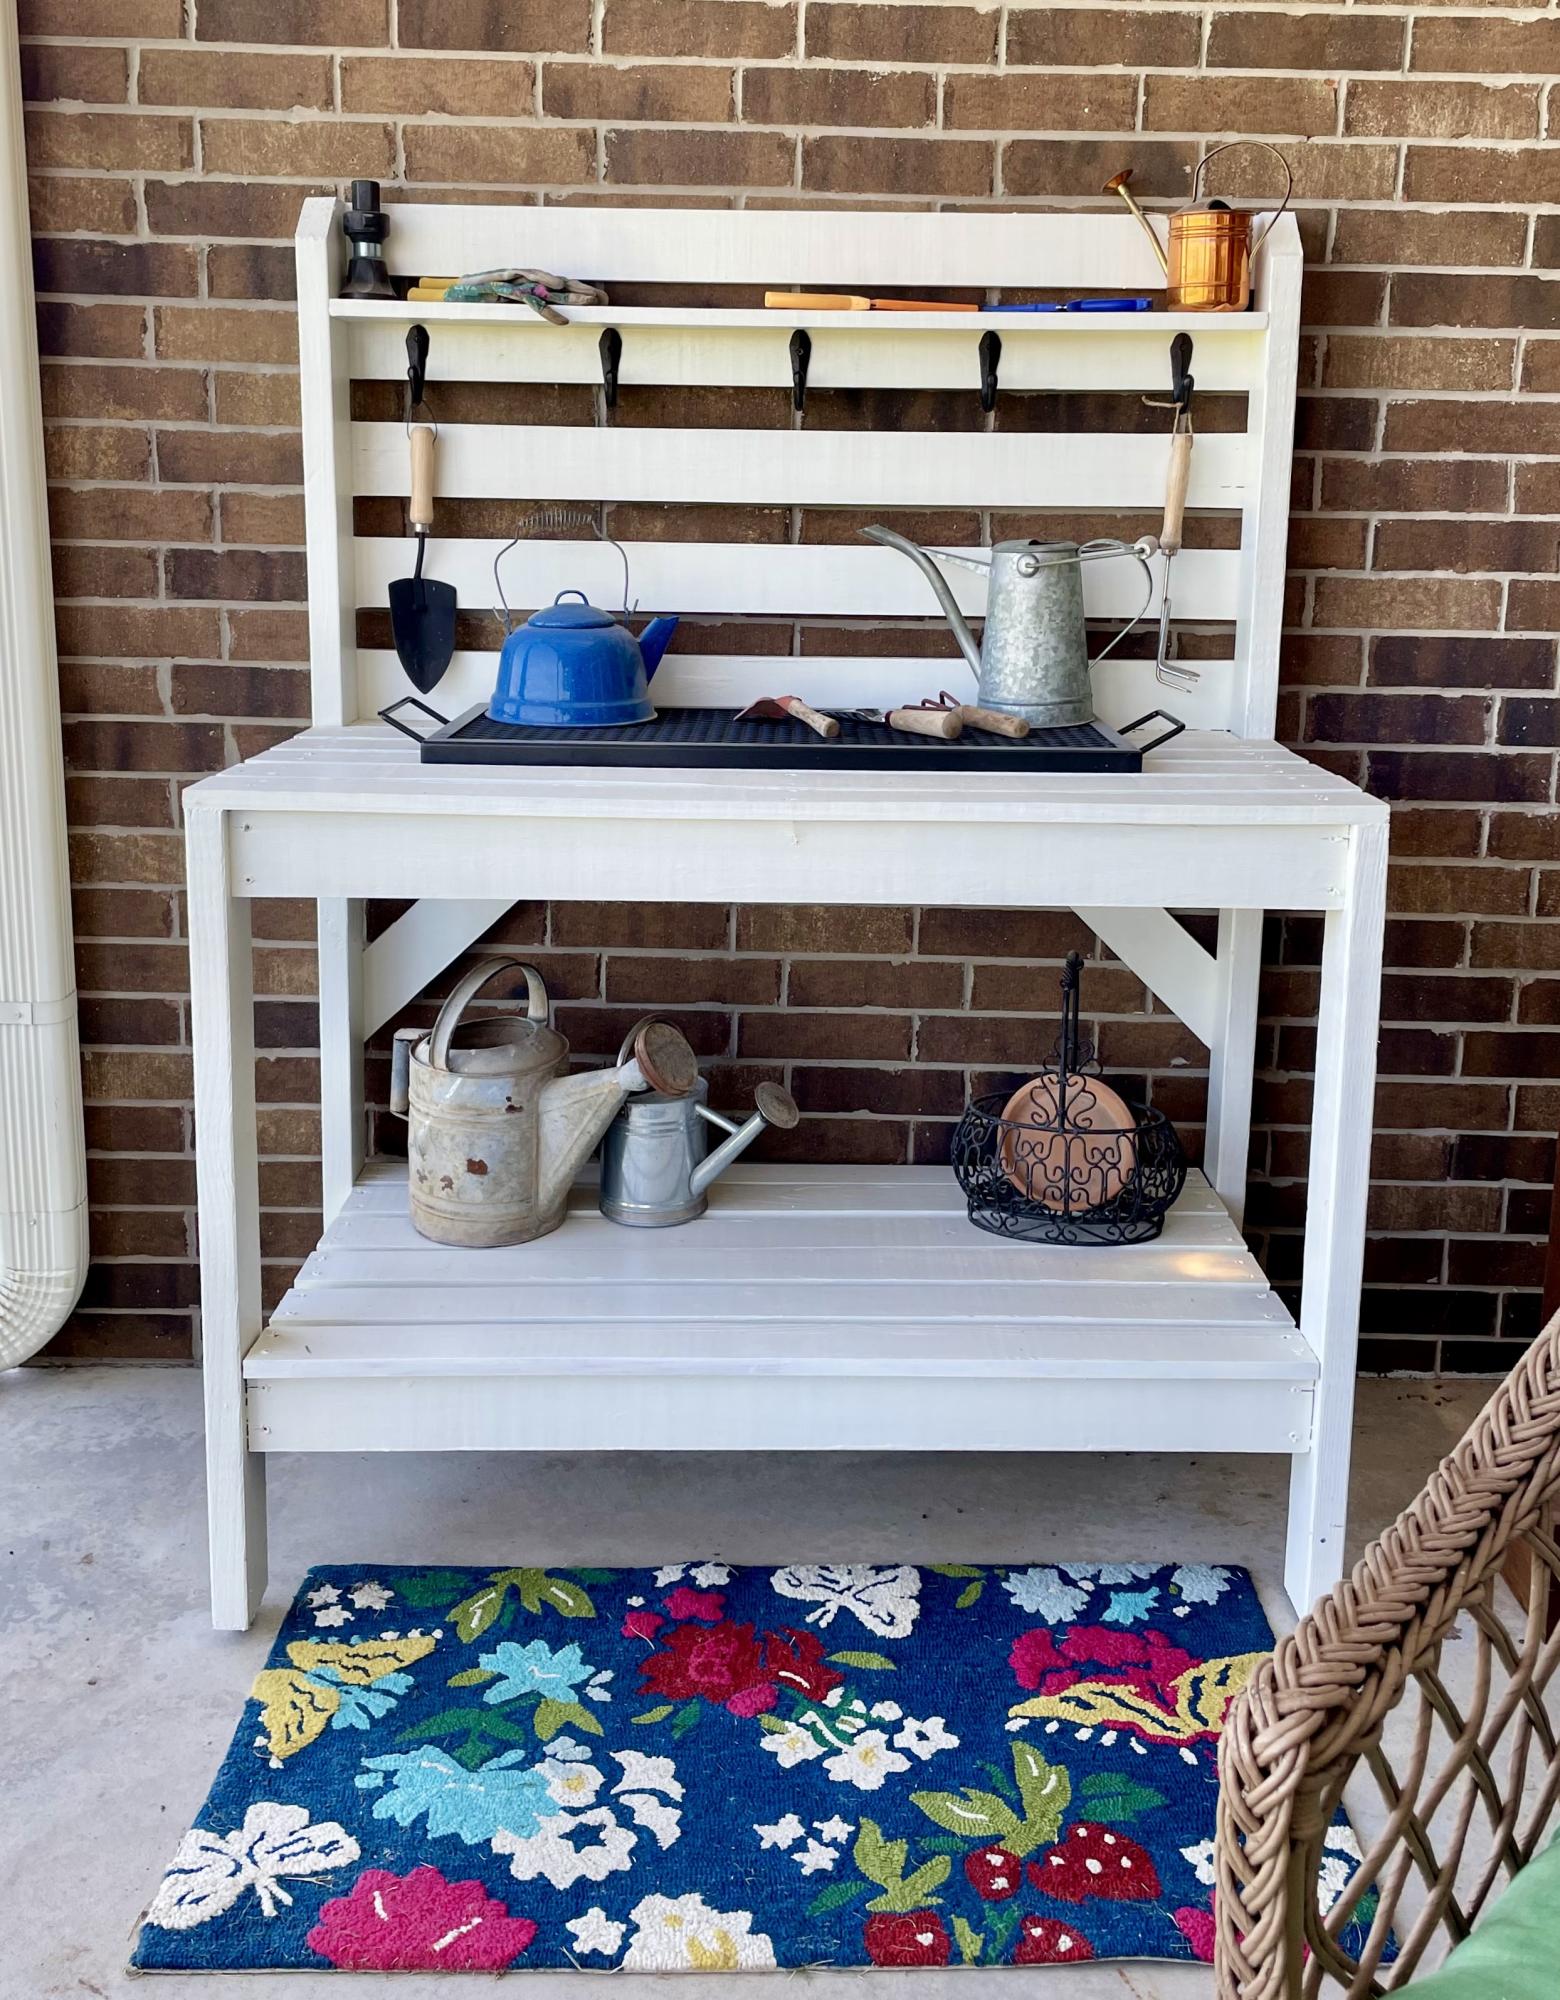
My husband built me a potting bench and I painted it with leftover house trim paint. We did make it several inches wider and added a middle 2x4” under the top surface slats to help with bowing boards. I added iron hooks for tools. Love it!
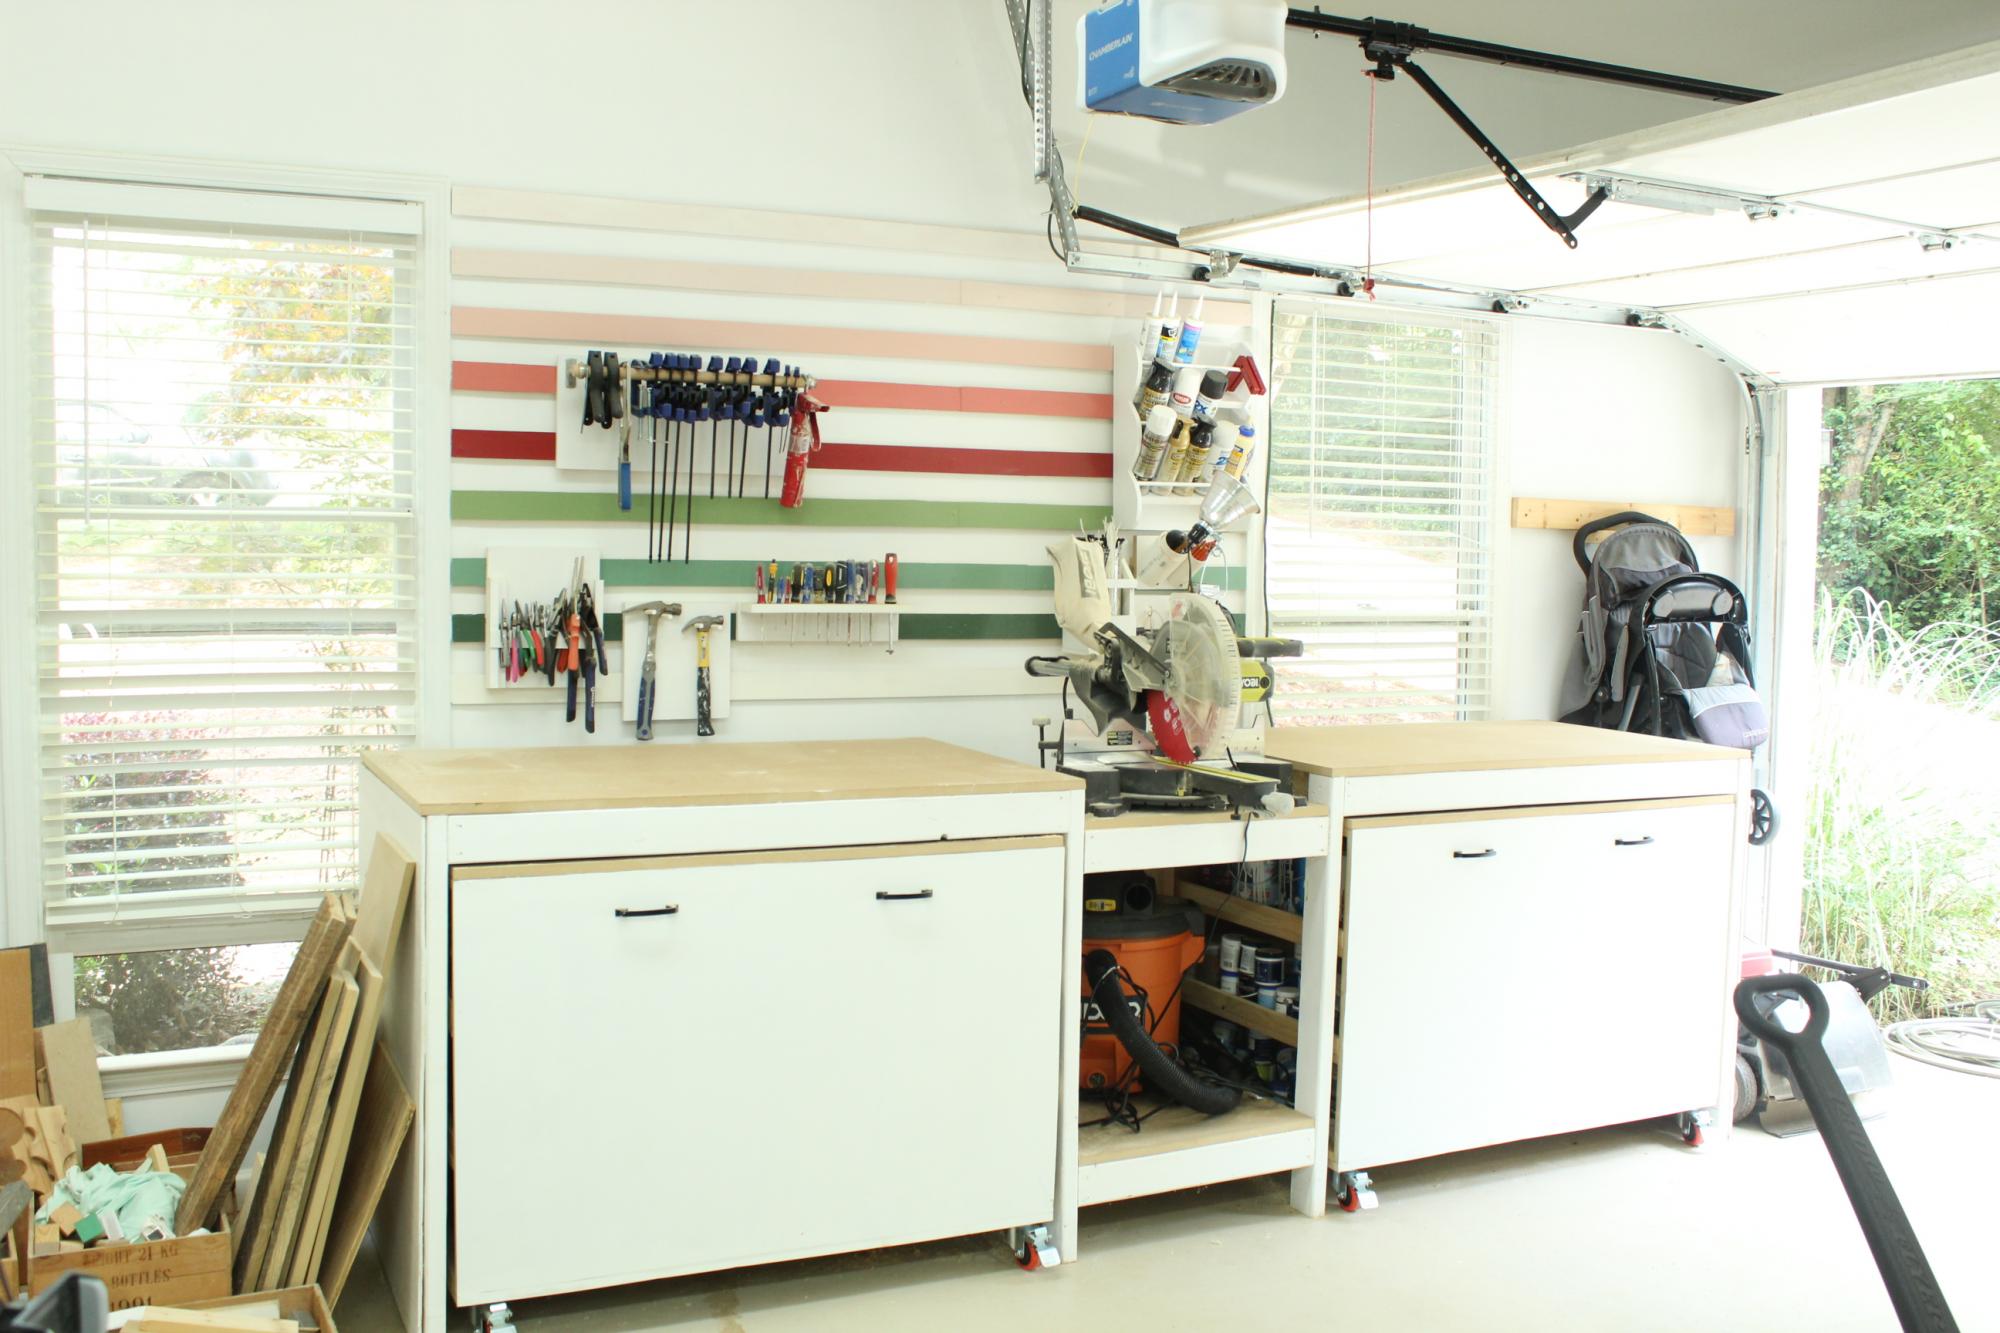
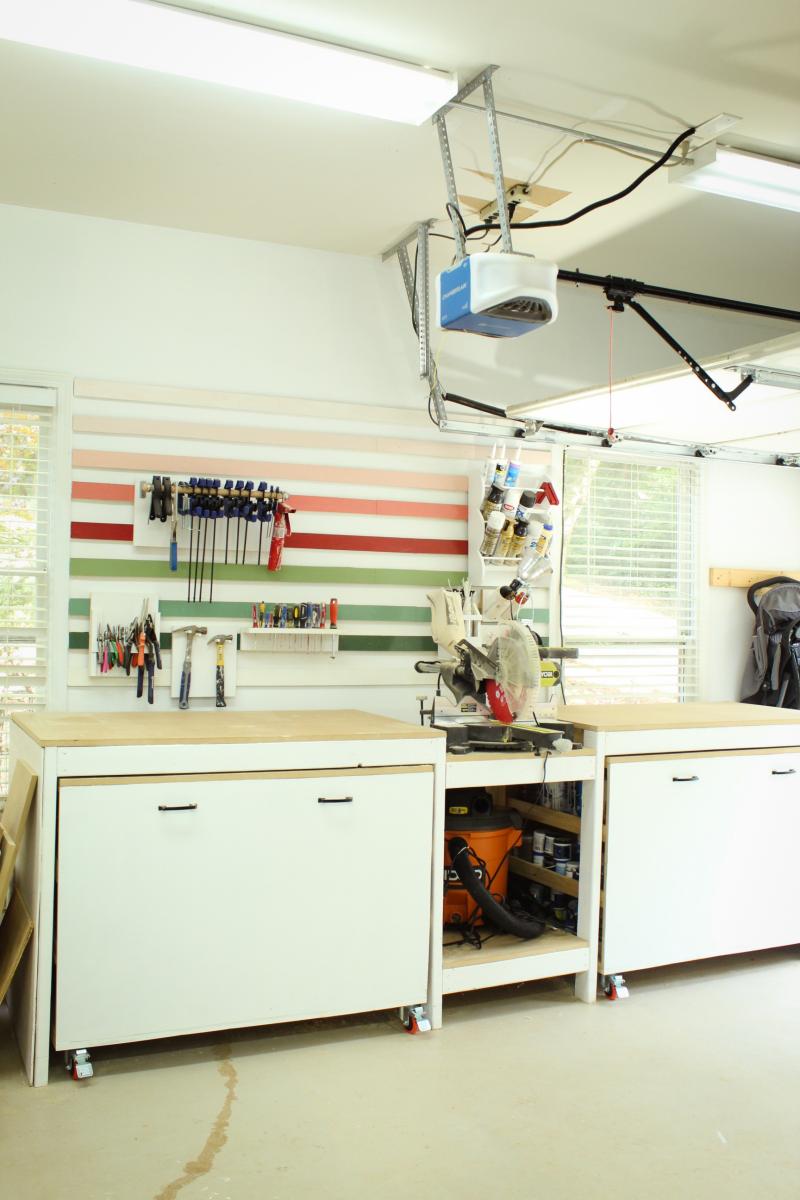
I love, LOVE my built-in miter saw stand! No more using my saw on the cold cement floor. I took others' advice and used pocket hole joinery to connect the bases. It was a lot more solid with this modification. I also secured the top and bottom of each cart with additional screws around the perimeter to prevent separation. I used MDF instead of plywood because plywood is crazy expensive right now! In retrospect, it would have been better to splurge on plywood since MDF splits easily and is more sensitive to temperature changes. I painted the front of the carts Chantilly Lace by Benjamin Moore and attached the hardware using an old cabinet jig leftover from a previous project.

Tue, 07/27/2021 - 11:47
WOW, wonderful job! Can't wait to see all the projects that come from your awesome space, thank you for sharing.
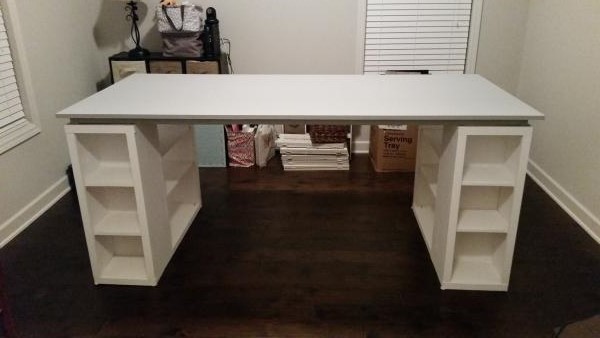
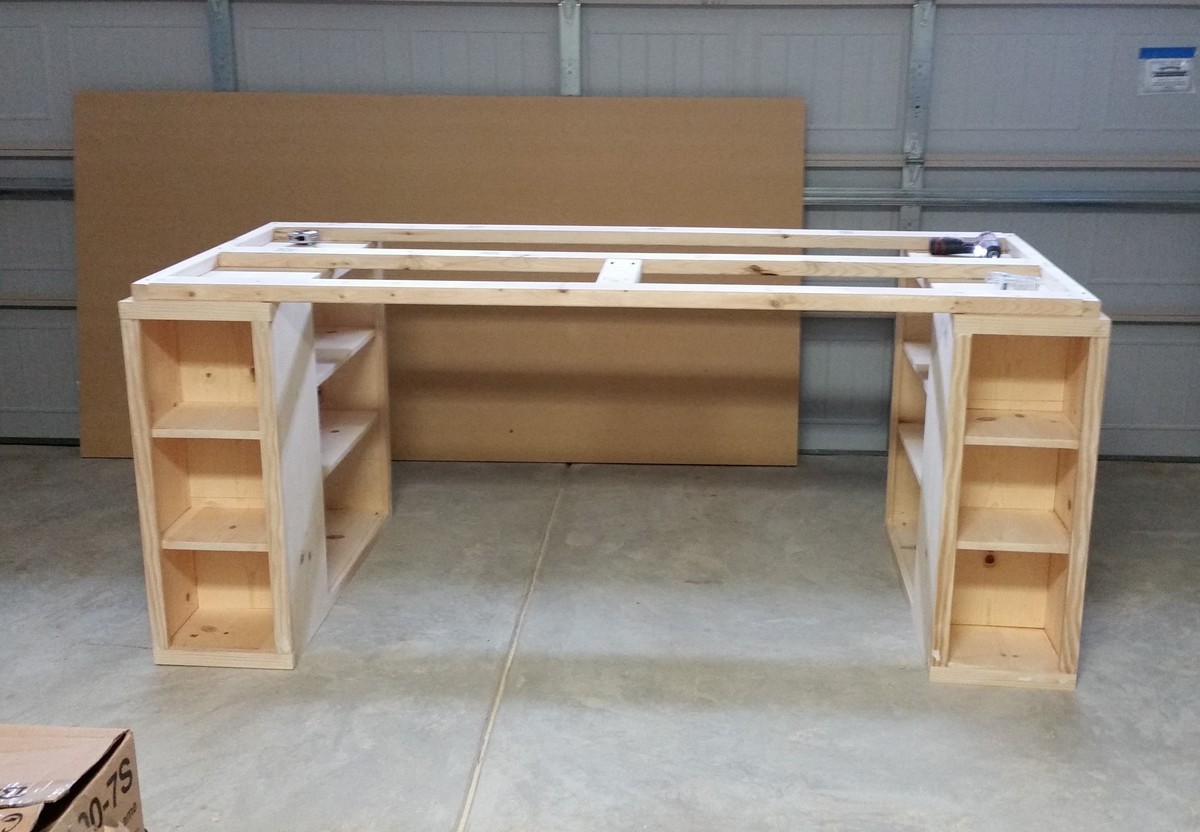
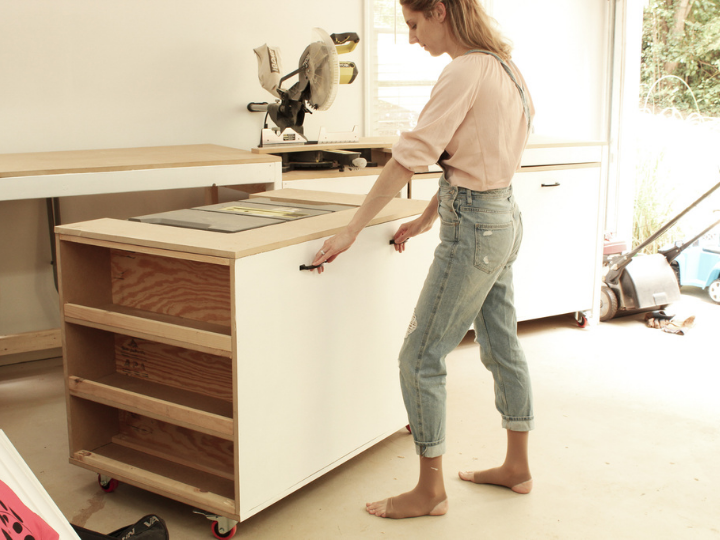
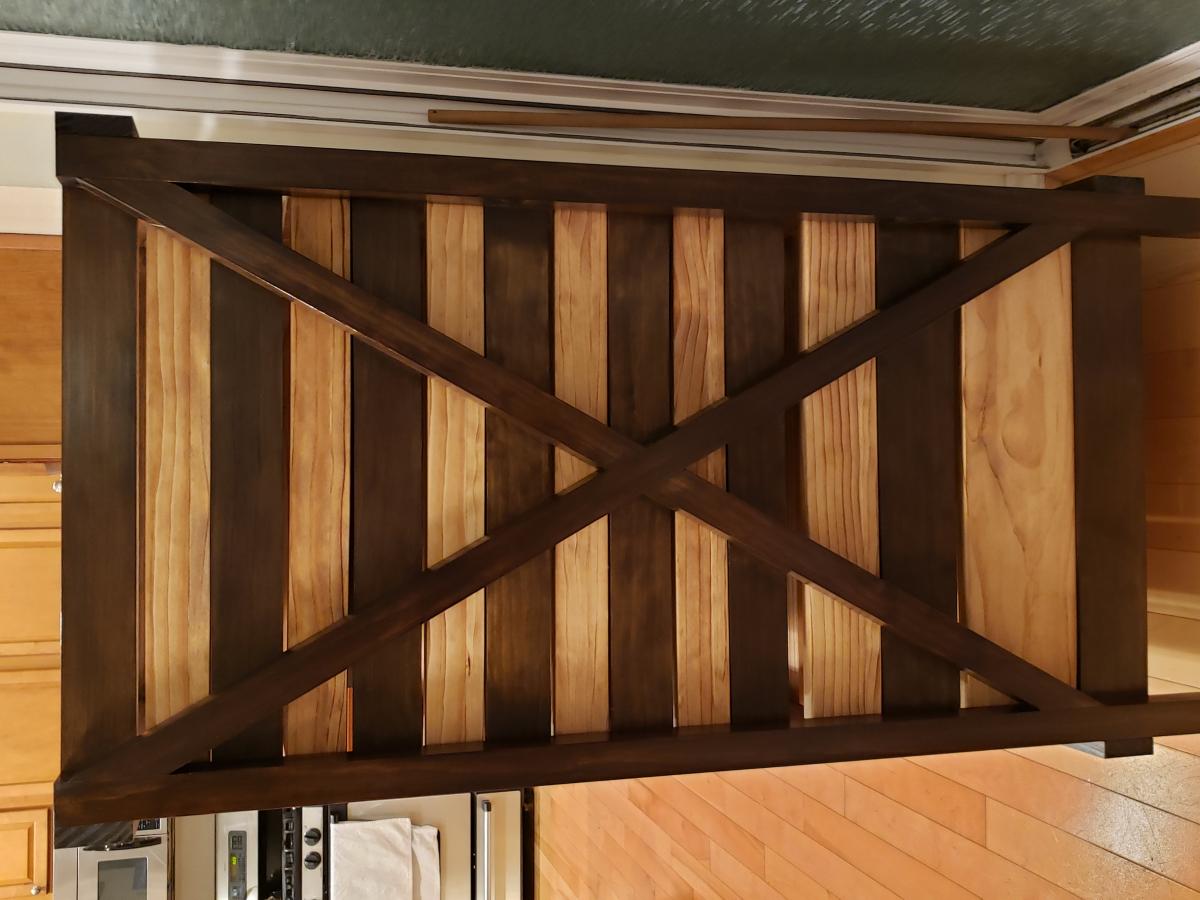
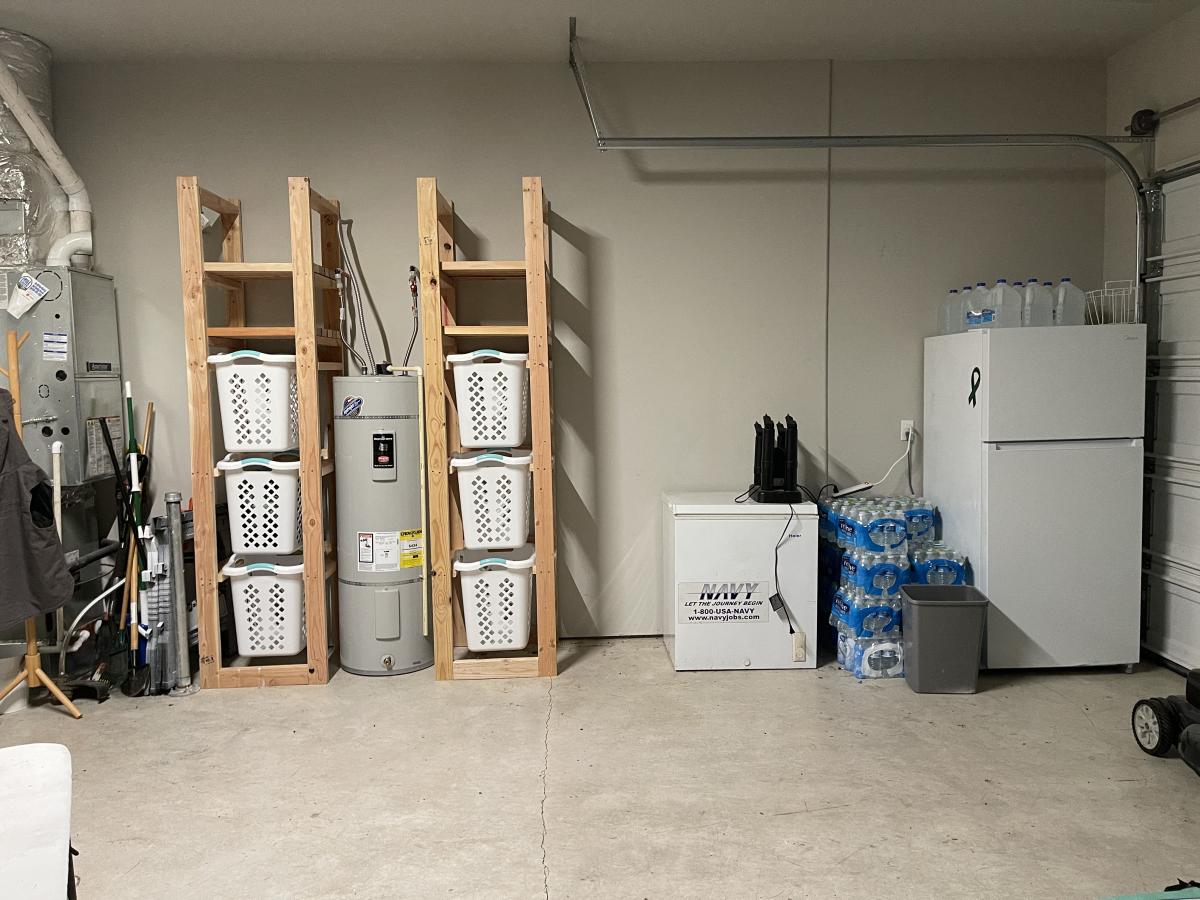
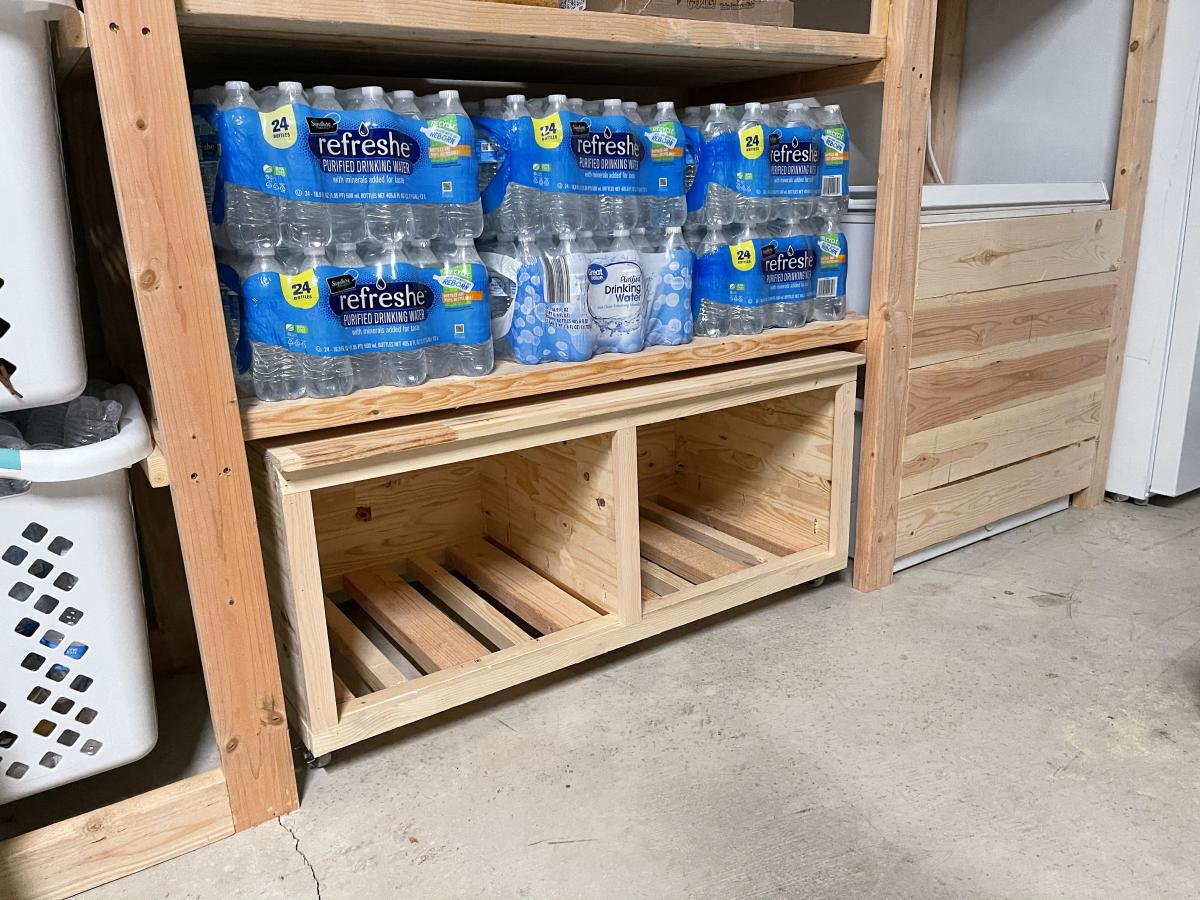
Been wanting to build this for awhile. Now I know why the plan pics are all unfinished! I modified the plans slightly to allow for 2 slightly larger trays on the bottom and allow for robotic vacuum to clean underneath.
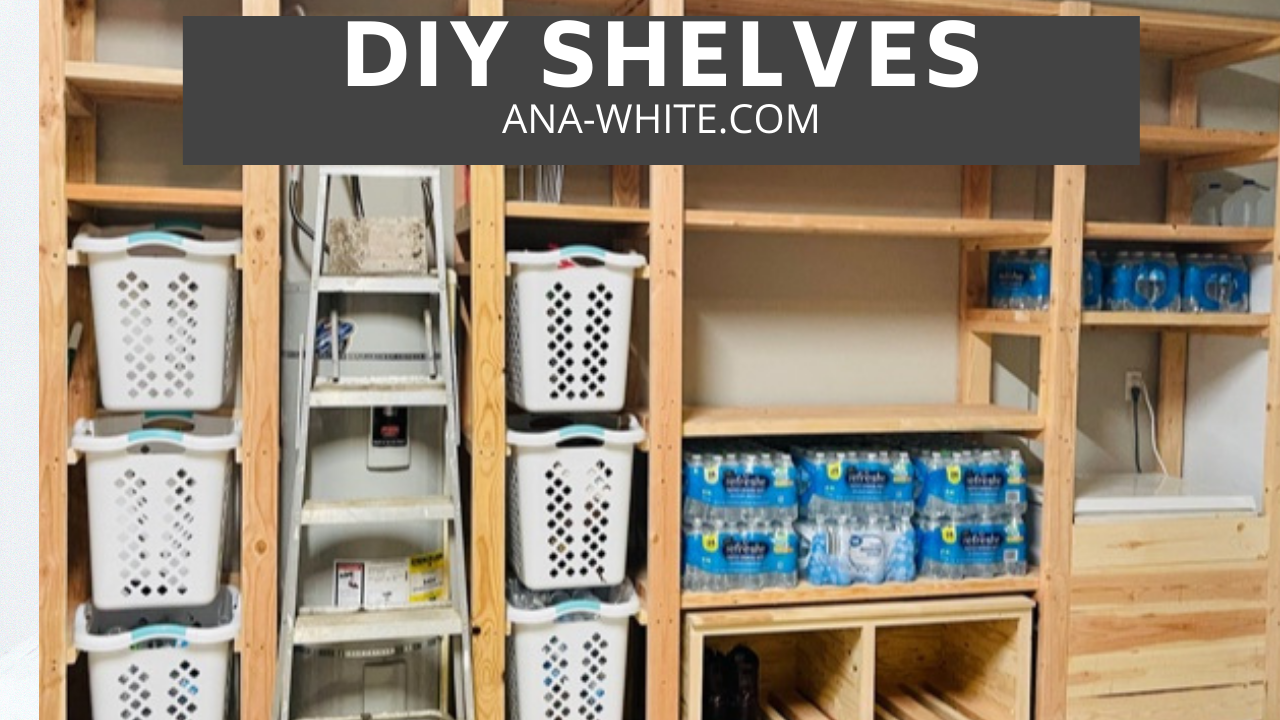
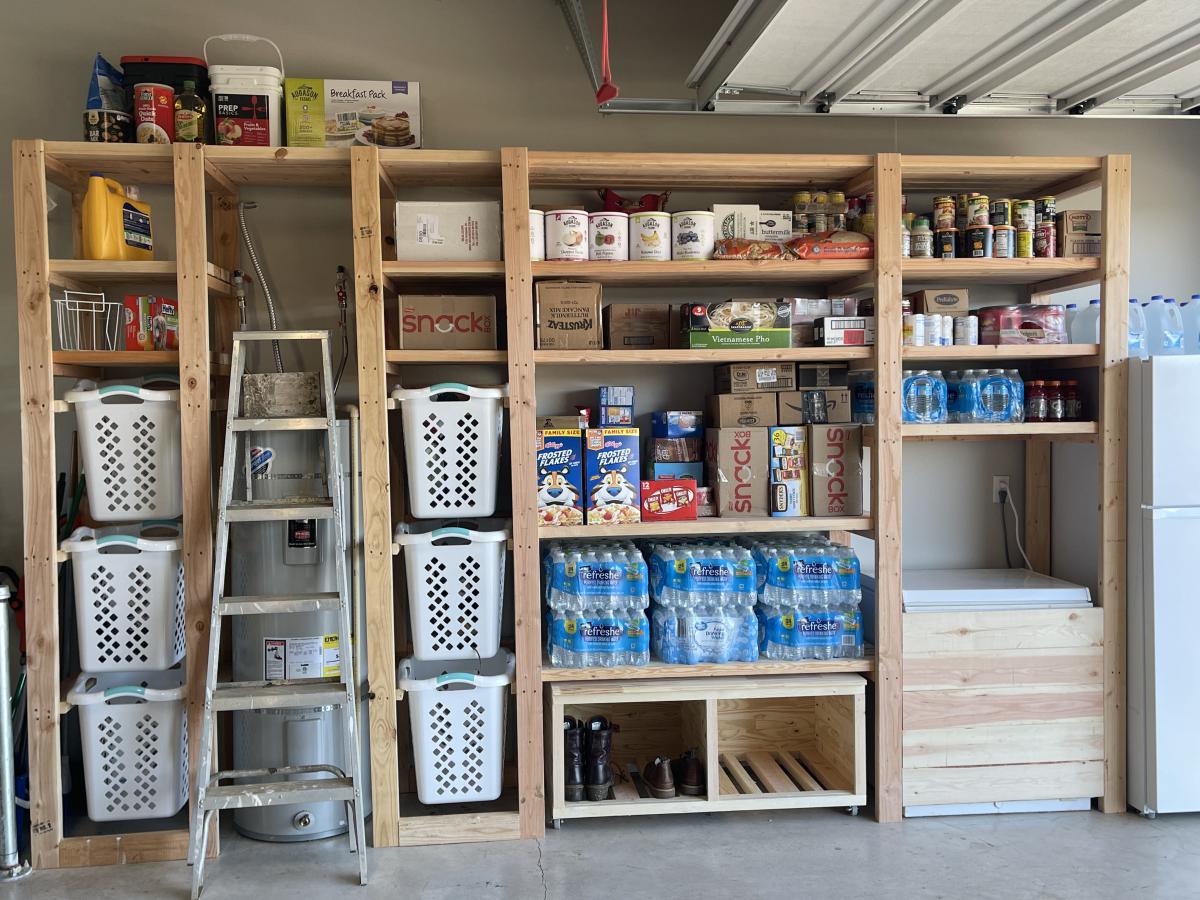
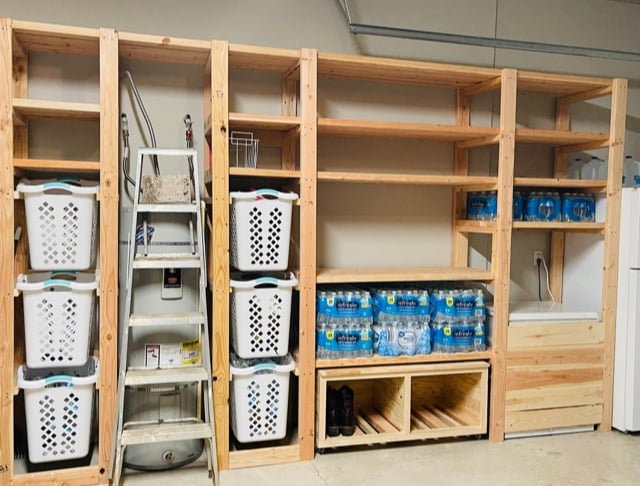
I used Ana's Freestanding Shelf plan and customized it to fit my needs. I incorporated laundry and recycle storage, a rolling bench and built in for our chest freezer. If you want to see it being built with some added tips, that video is available here https://www.youtube.com/watch?v=N8w7XGiVMbs&t=258s
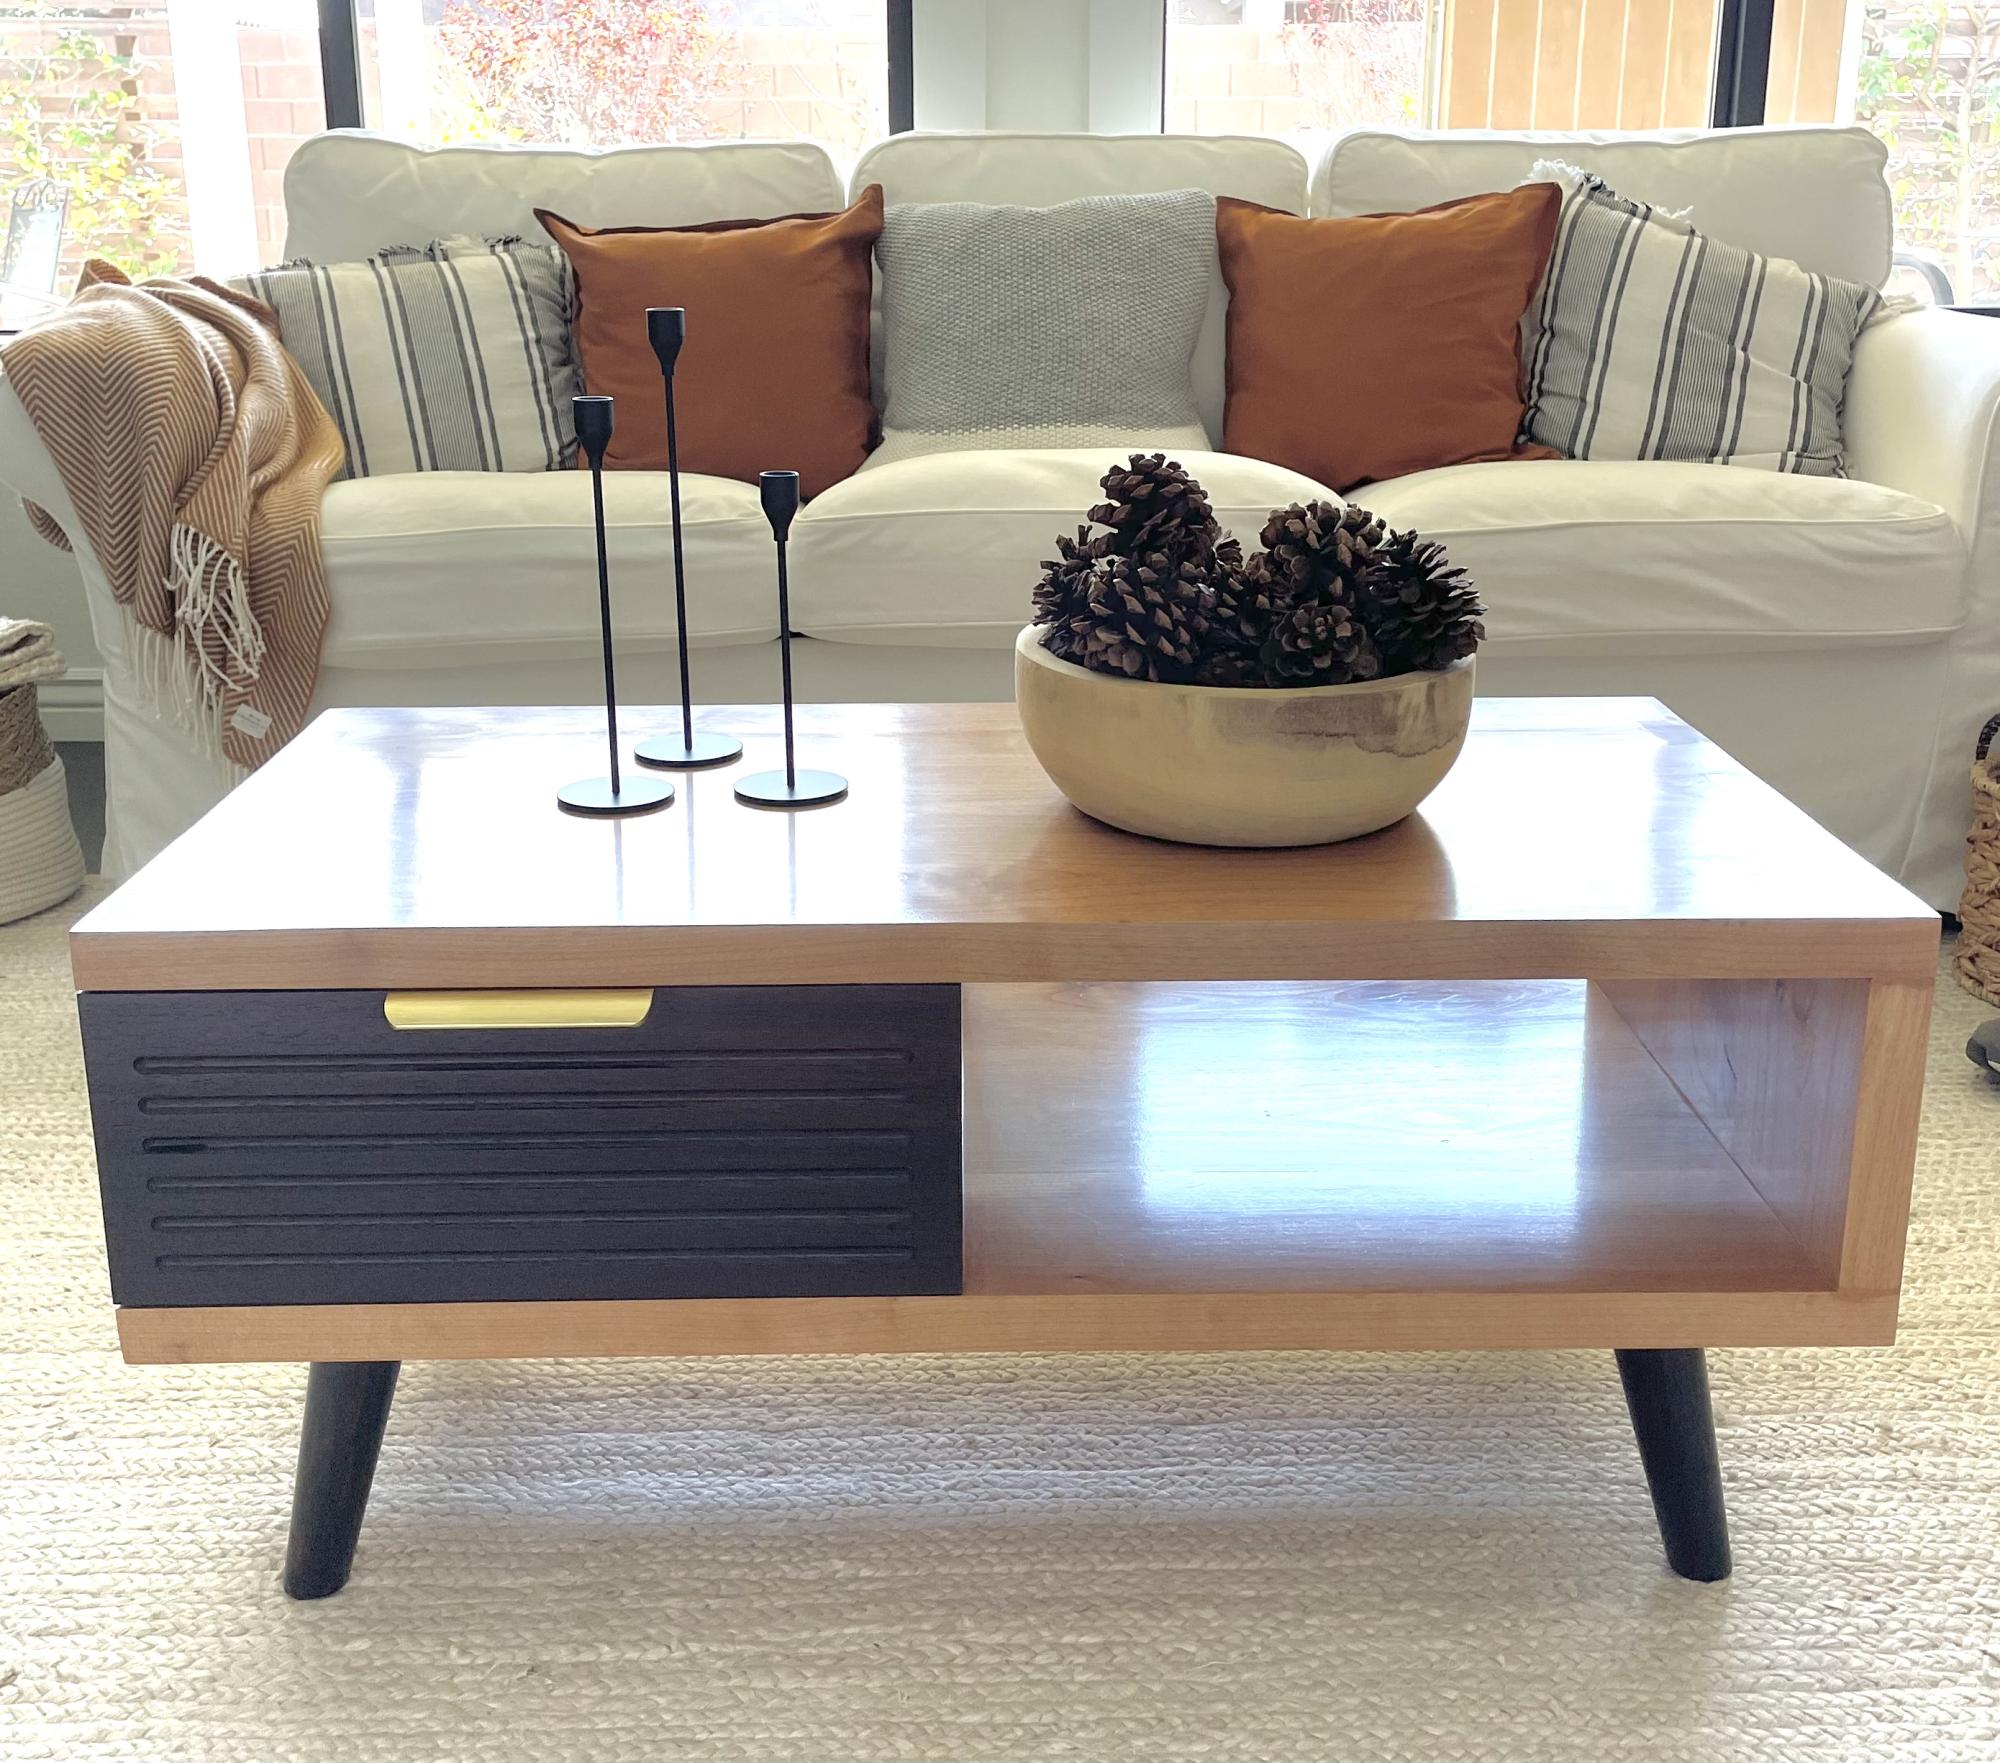
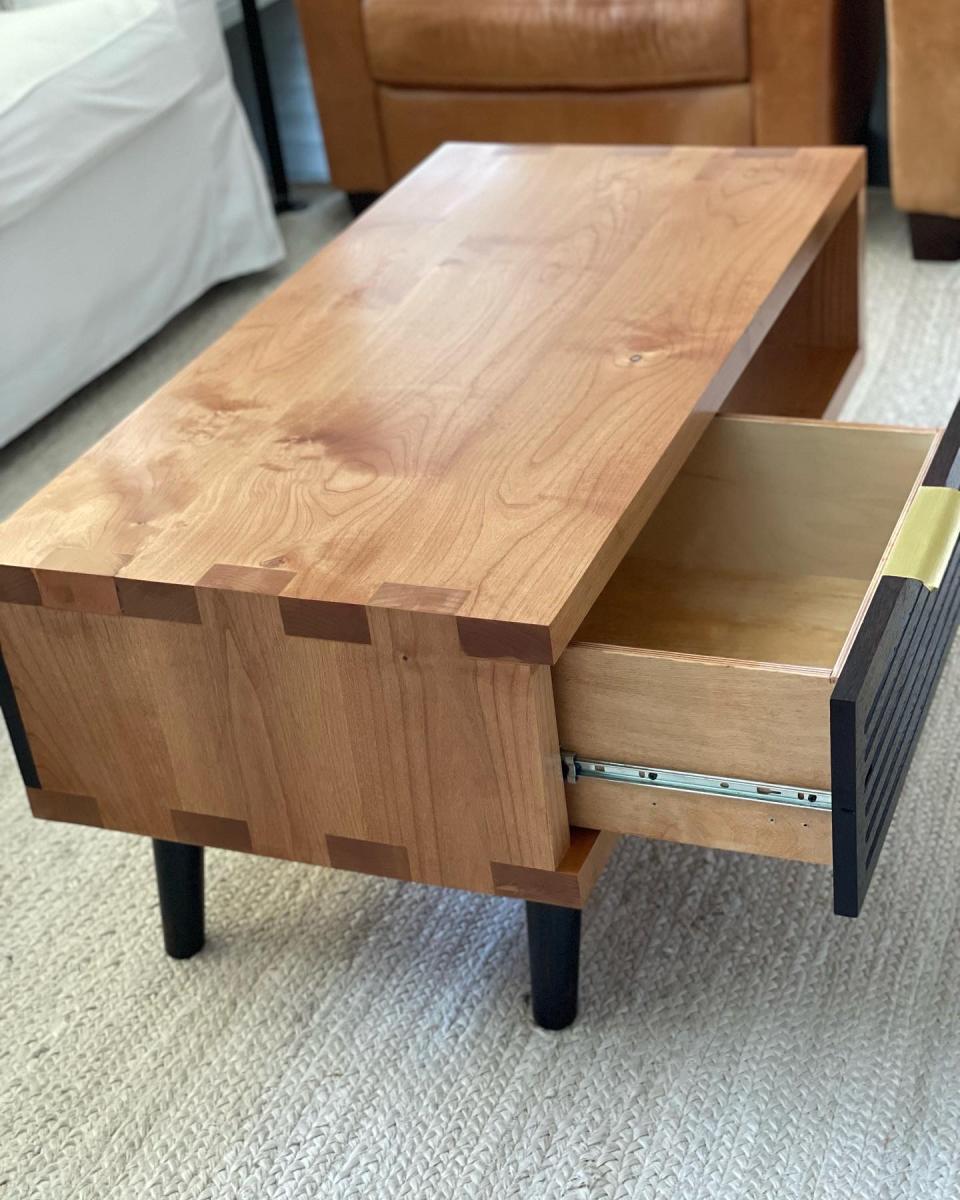
Mid-century modern alder and wenge wood coffee table. Dove tail corners, router grooved drawer.
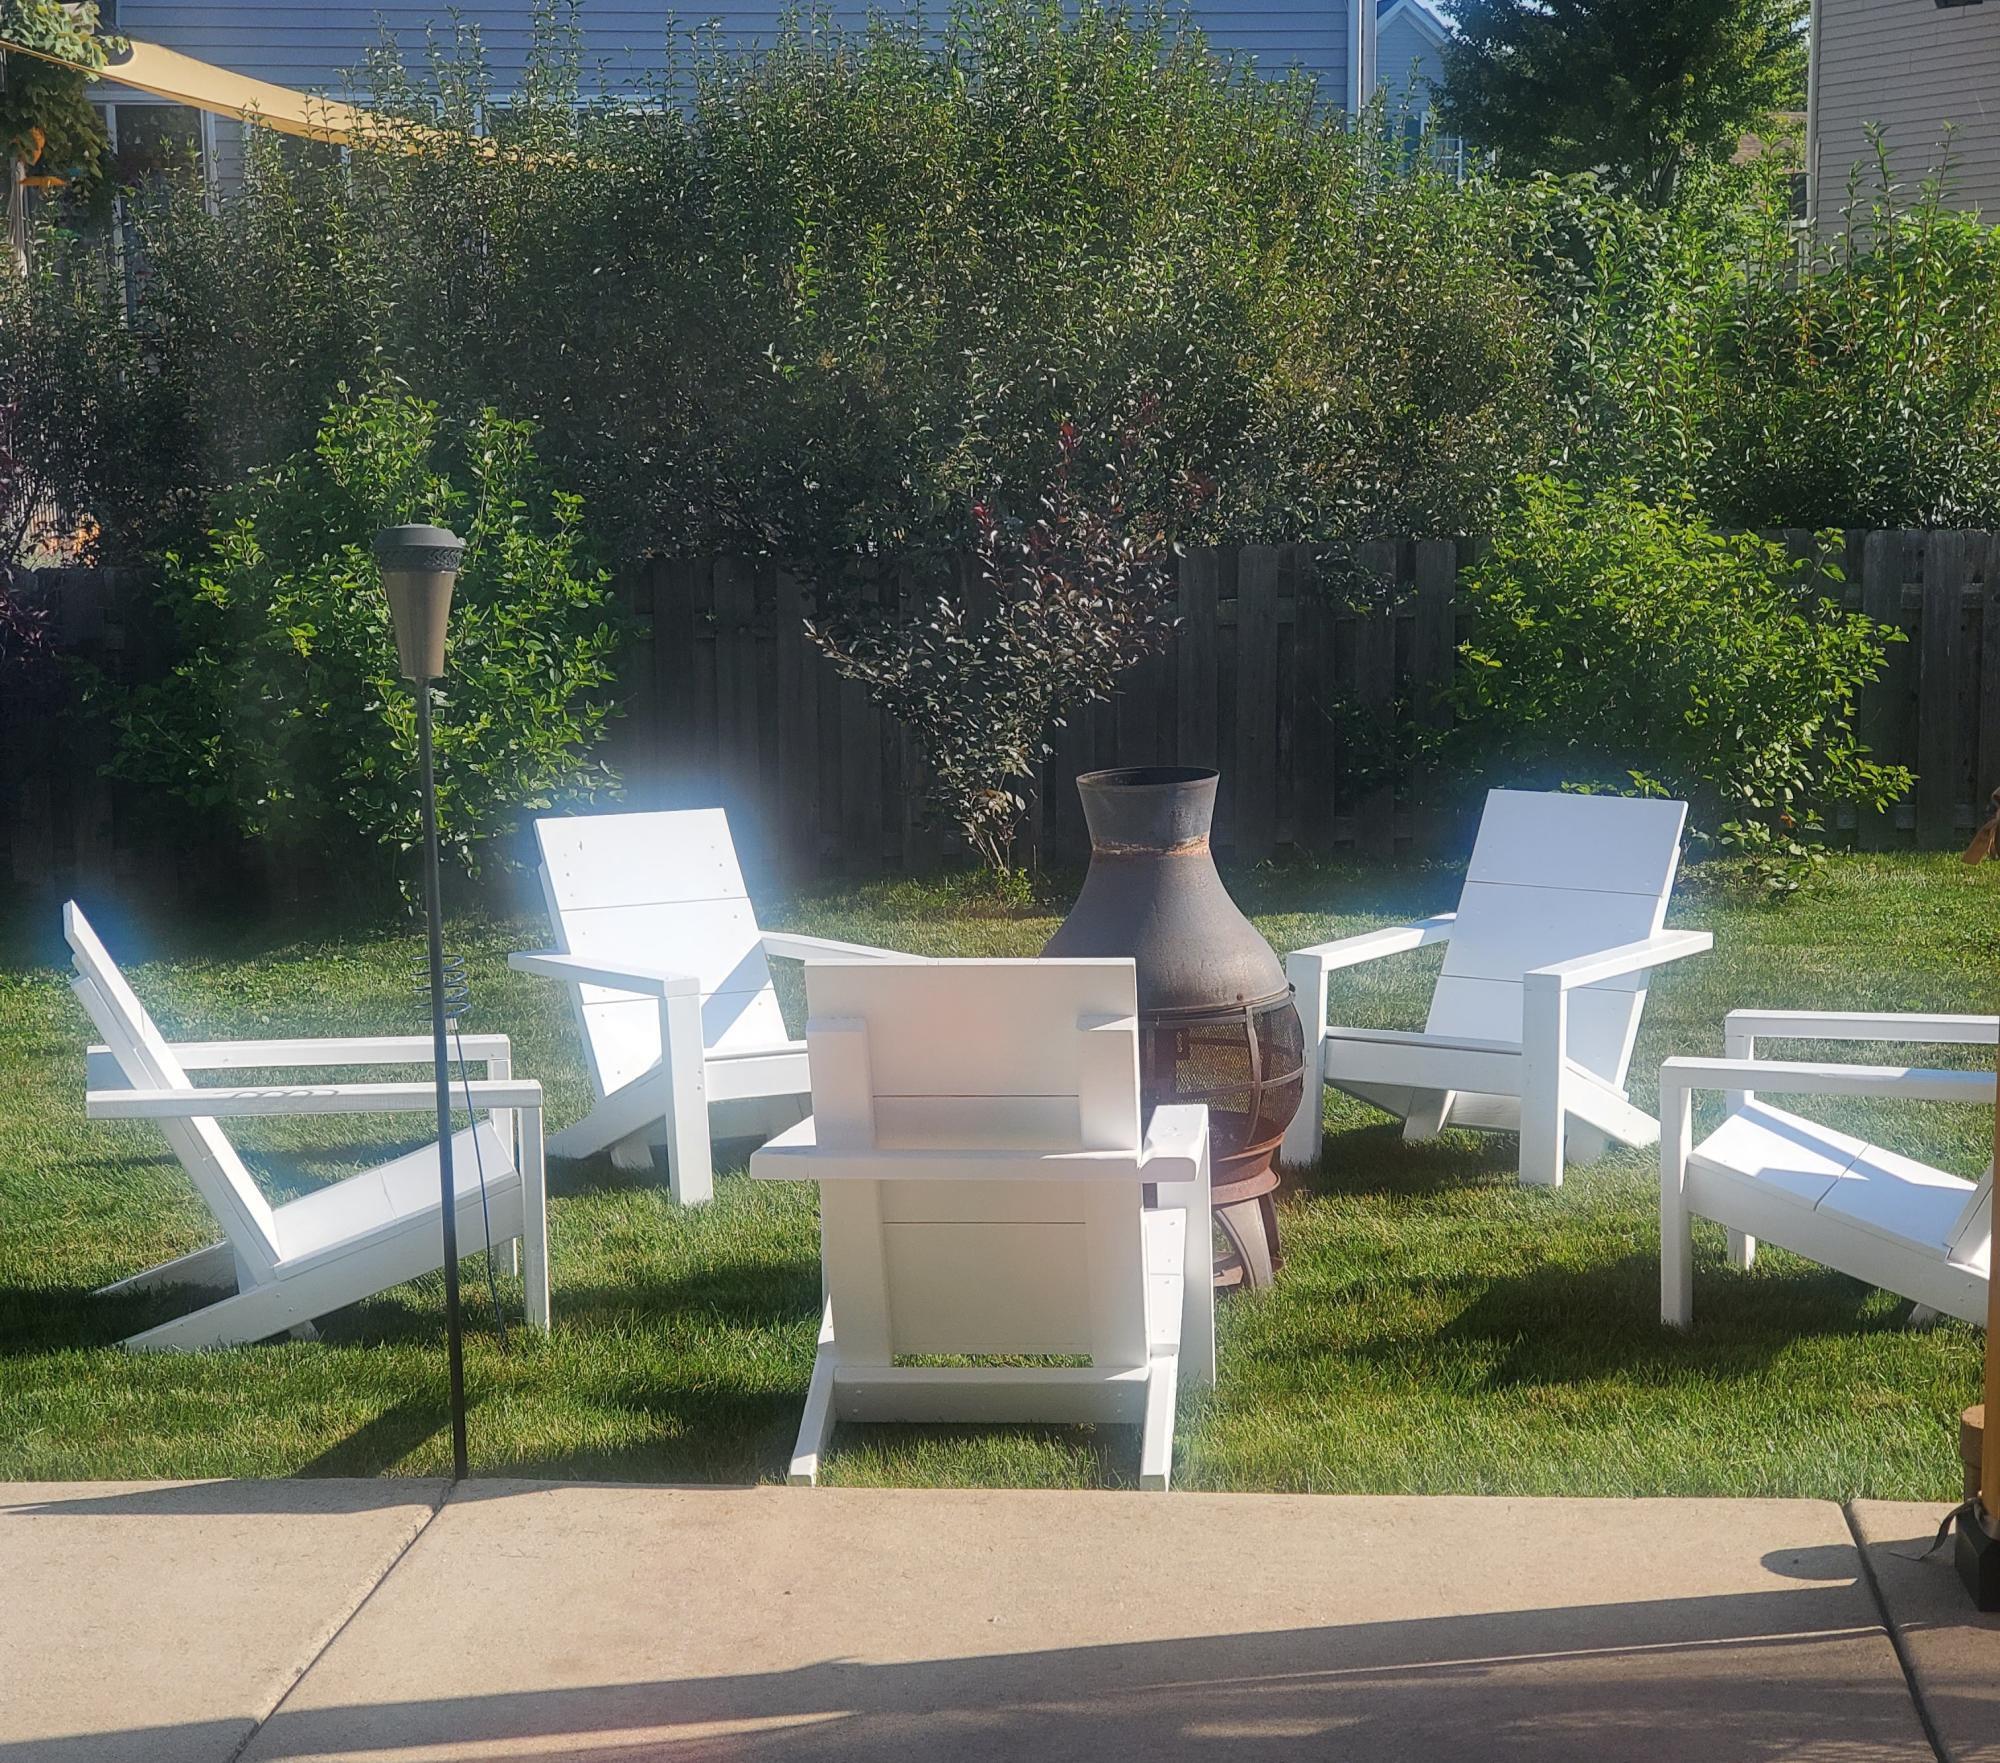
These chairs were soooooo easy to build and are stunning in any light. The stark white makes them look like we spent a fortune on a new set but we're smarter than that lol. Thanks for the plans and continued home improvement inspo Ana!!!!
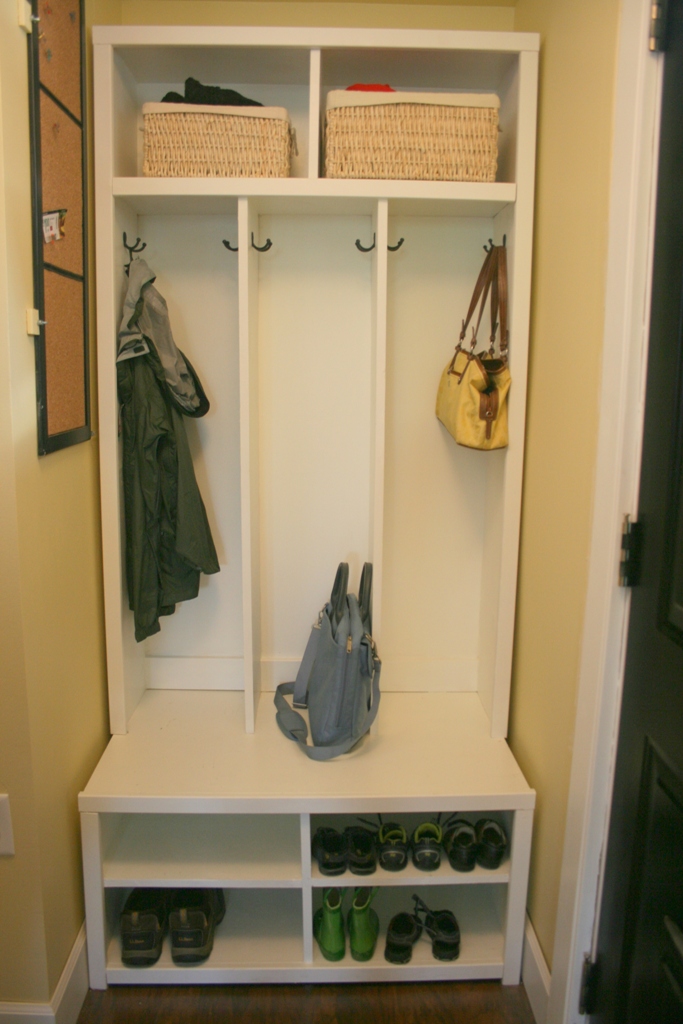
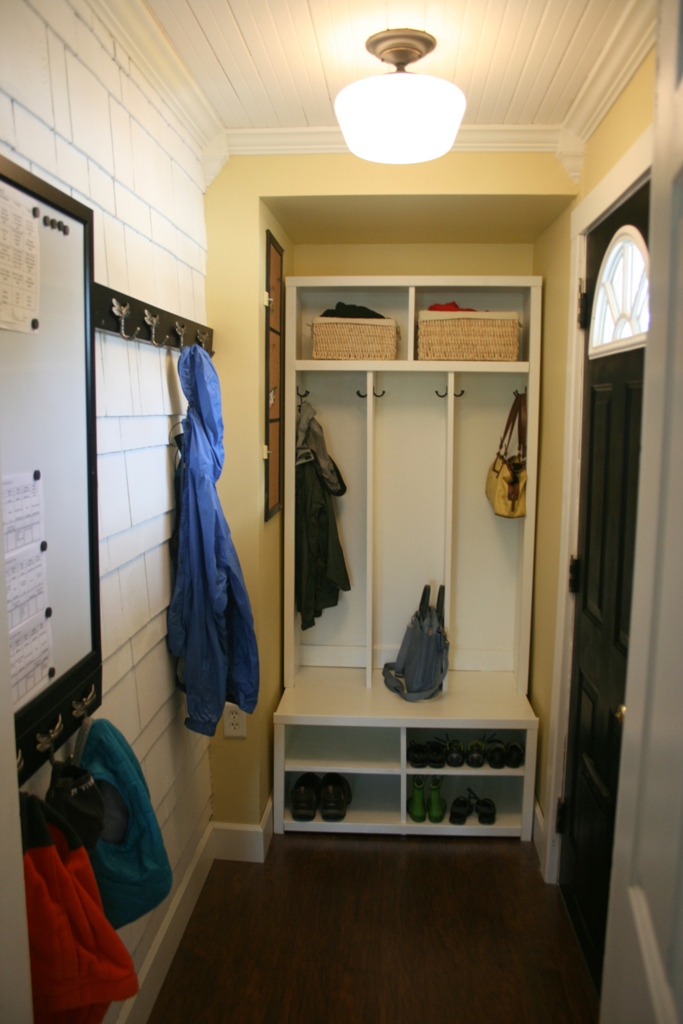
We had a small mud room off our back door that was in need of serious help! We started from scratch in this room - framing, drywall, floor, molding, etc. To complete the room, we modified the Braden Entryway Hutch and shoe bench plans to fit the dimensions of our space, and add a third cubby. It has worked wonderfully!
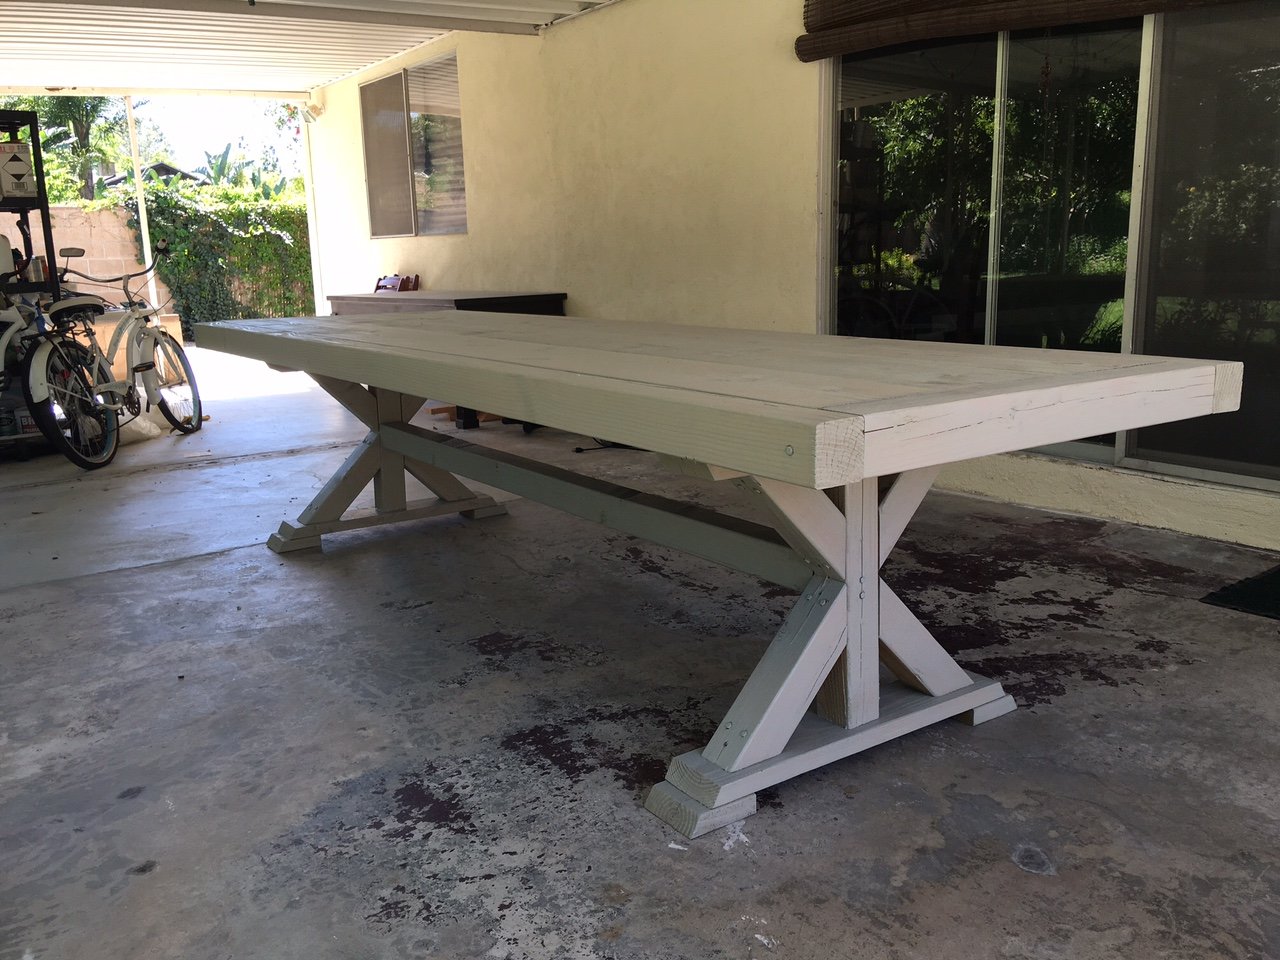
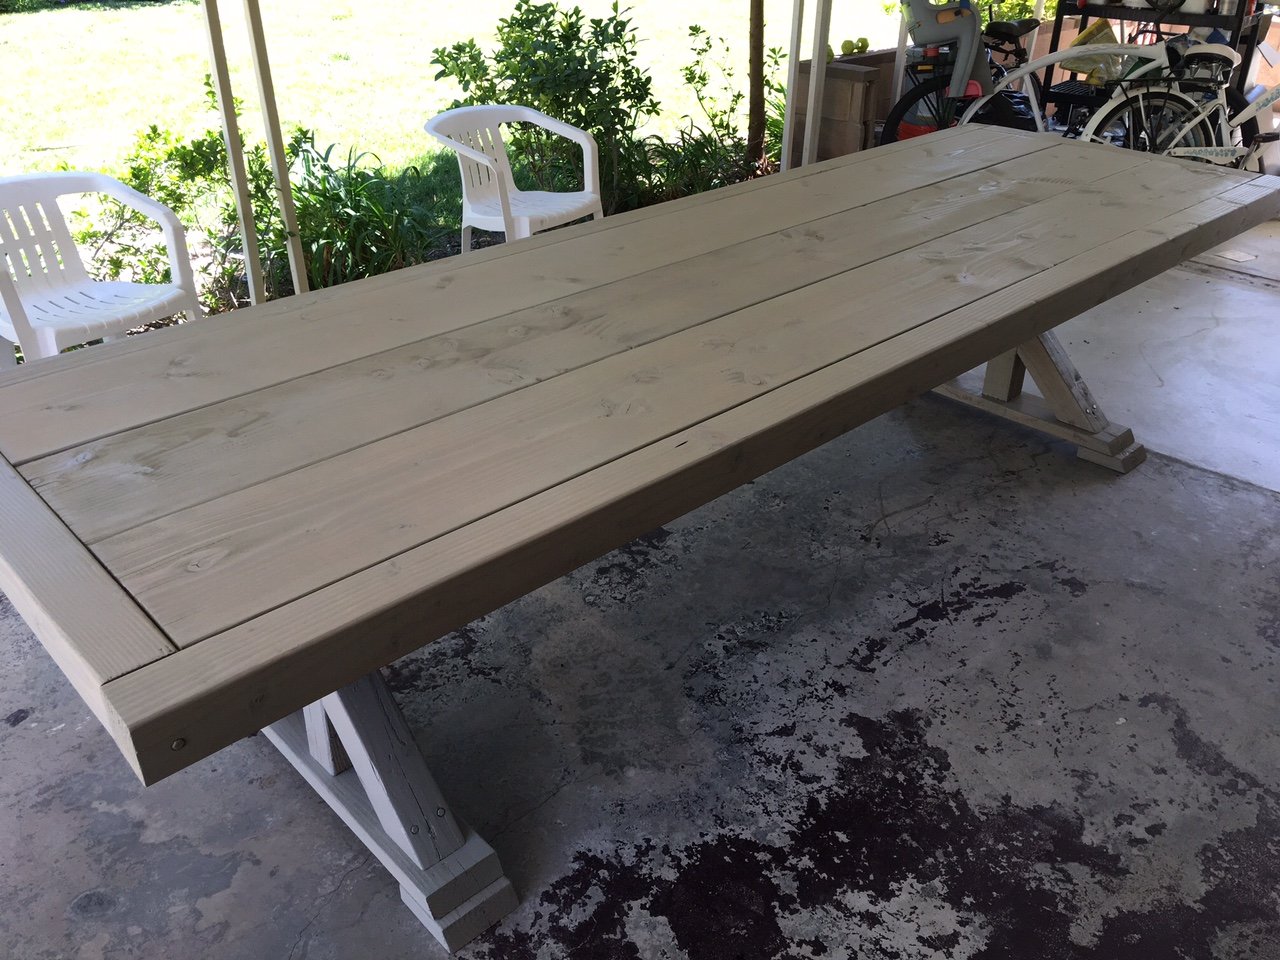
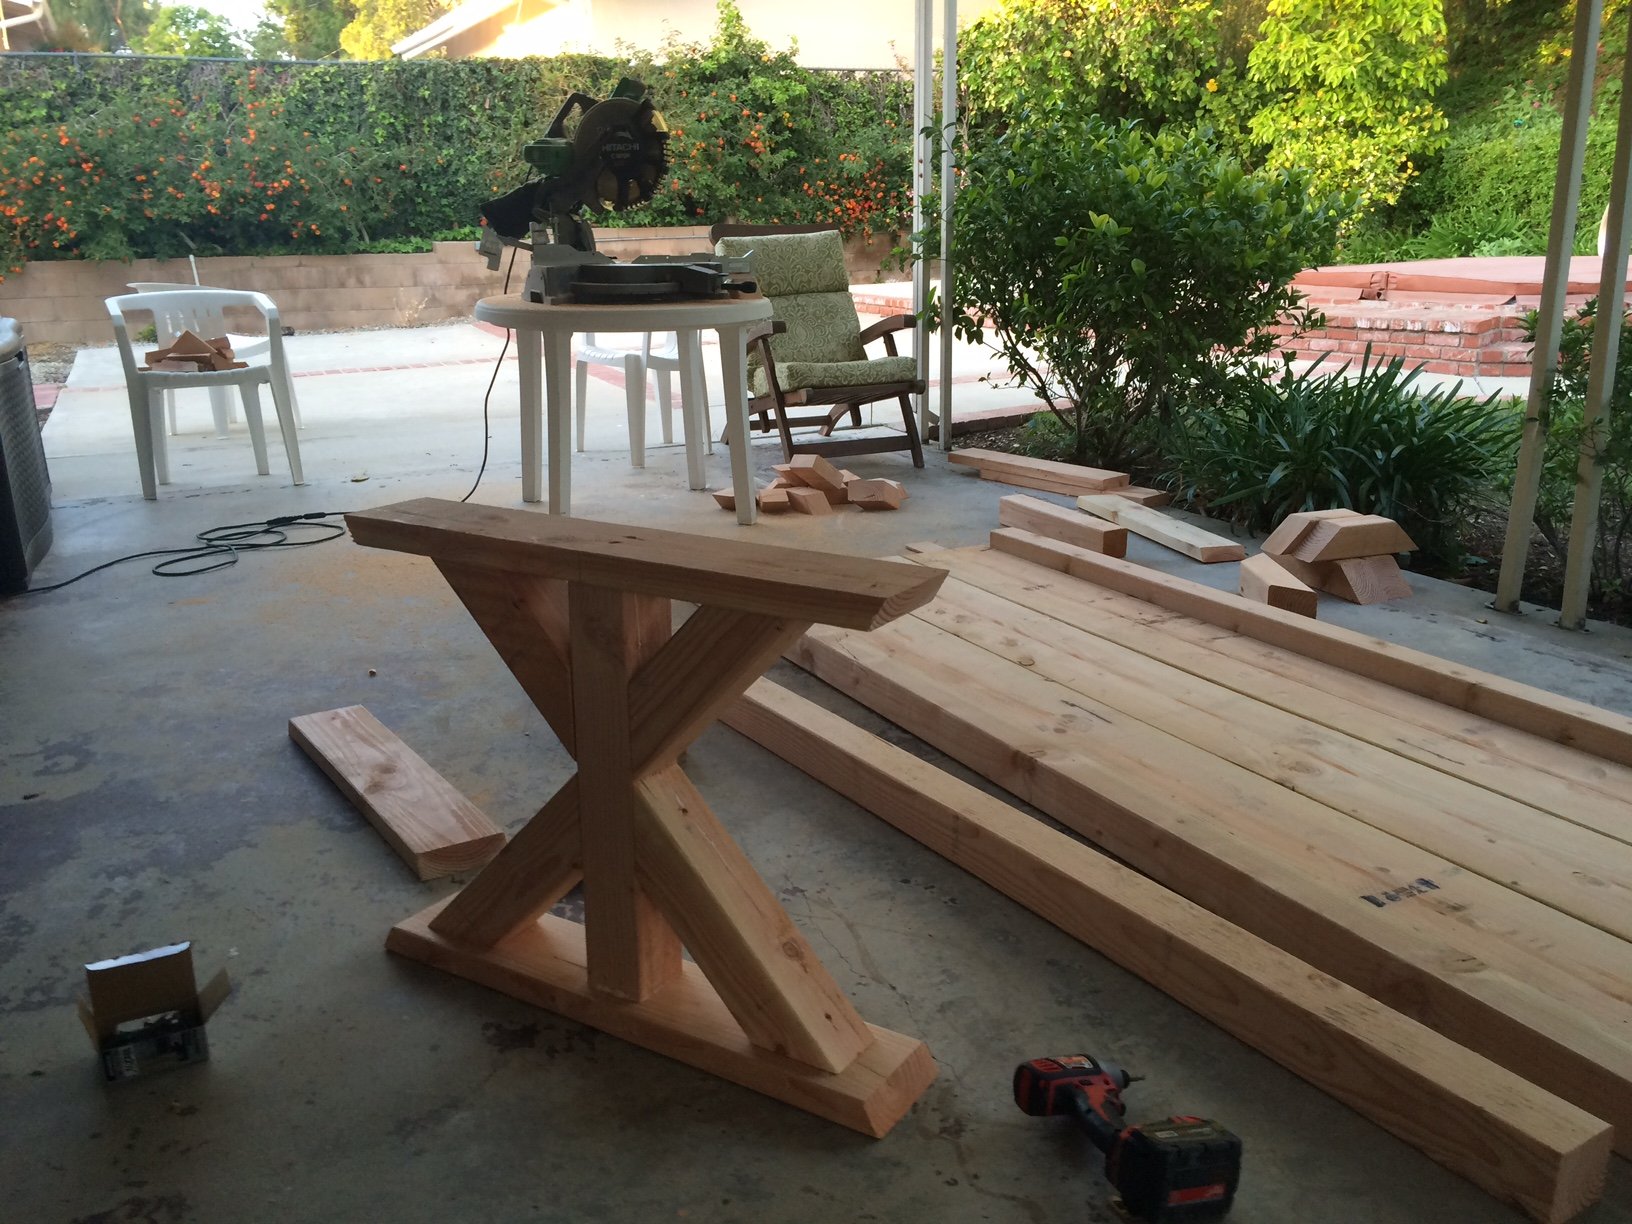
So my sister in-law kept sending me tables on craigslist that were for sale. I didn't like anything I was seeing and to buy what I wanted I was looking at roughly $1000 so I found these plans and was like... YES! When I told the family I was doing this they were all pretty much like... "yeah sure, good luck"
I knew that I could do I just needed the plans which were here.
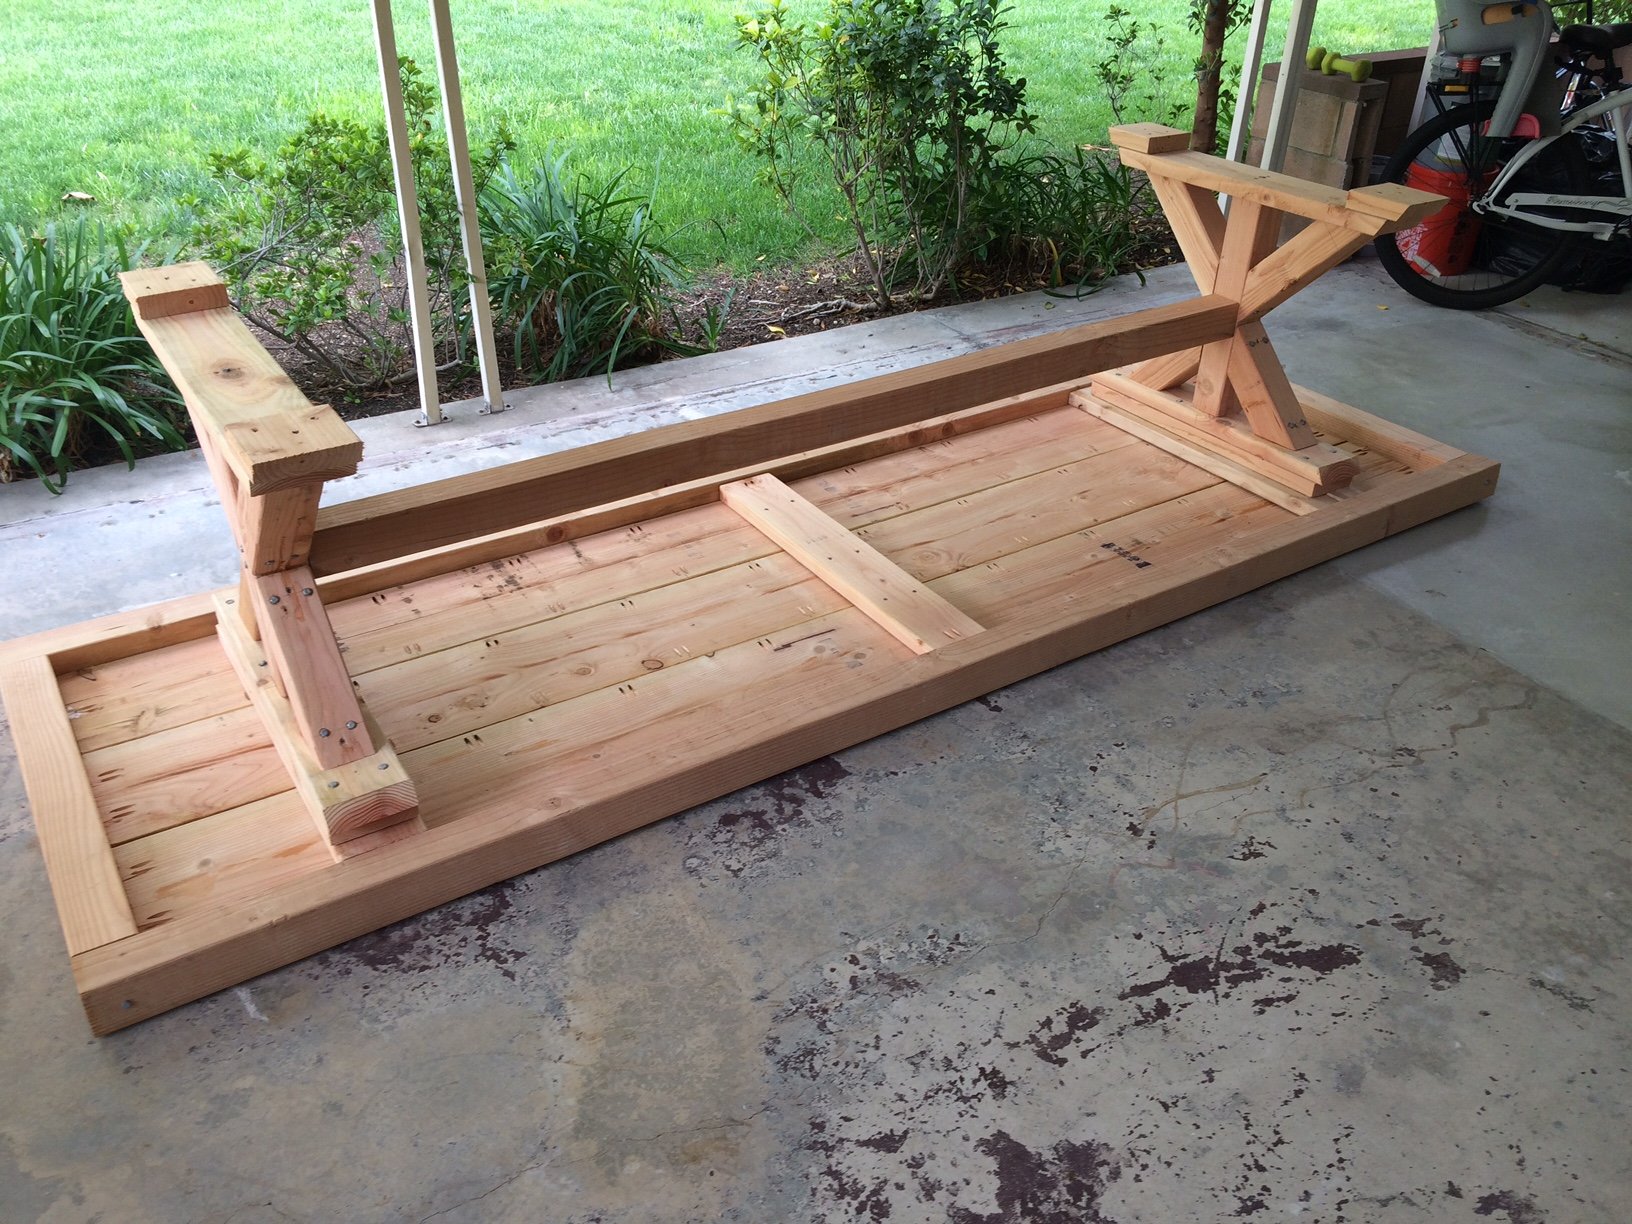
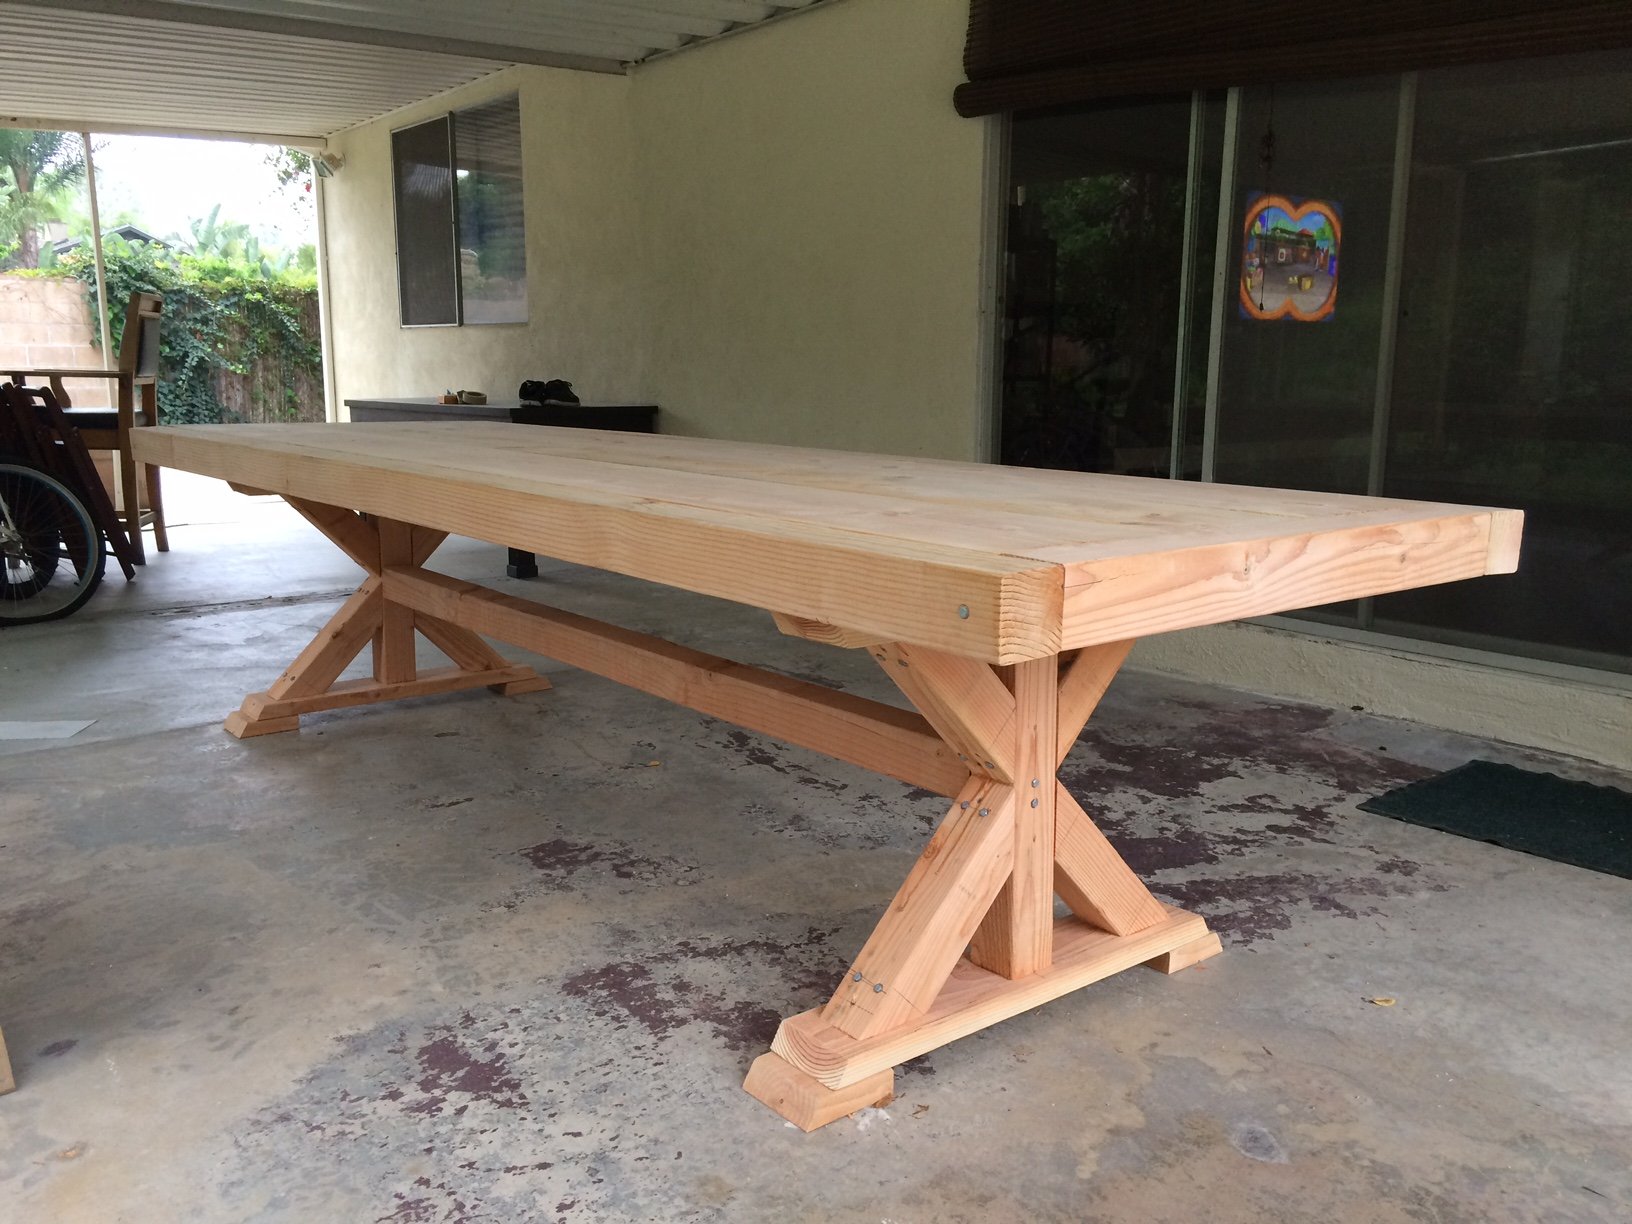
I pretty much stuck to the plans with a few exceptions. I made the table longer to accommodate the entire family on Friday Family Night...! It's a little over 10' long. Instead of 3 – 1x12x8 I went with 3 - 2x12x10. One because as I said earlier I wanted the table longer and two because I just felt that the 1x12 was too flimsy and I wanted something real solid. Because of that I ended up putting pocket holes on each side of all the 2x12 boards and I also put a 2x6 in the middle for additional support.
Everything was pretty much right on except for the base posts, for some reason they were about 2" too short which forced me to cut the upper parts of the X on the base a bit shorter as well. I ended up putting an additional 2 2x6 on top of the base to raise the table to the height I felt was necessary. If I did it over I would have just made my base post 2" higher and only used one additional 2x6 for the additional height.
I ended up staining it with a semi-transparent beige stain to give it a grayish look.
I gotta say everyone was like "holy crap...!" and thought it was beautiful. I gotta say it feels really good to build it yourself and especially when it comes out the way you want it.
thanks so much for the plans!!!
Thu, 06/04/2020 - 12:15
Hi Ana. I'm a new member here. My wife and I really enjoy your projects! Quick question about the Chunky X Base Table... we're about to build it and we're going to do it 10 ft long like you did. I'm curious how rigid the center span is? I'm guessing the span is roughly 6'. Is it bouncy? I was thinking about running 2 or 3 2x4 "joists" under thre table attached to the bases to provide more support. Thoughts? Suggestions? Thank you!

I needed a new bed and stumbled upon your plan for a bed frame. I love it and had so much fun building it!
Marielle Krupa