Community Brag Posts

Wranglerstar Greenhouse

Thank you Ana for the excellent plans. We have been talking about this for months and are excited finally have a greenhouse. We live in the mountains and this will help extend our growing season. Please tell Ram thank you from the Wranglerlerstar family.

Built from Plan(s)
Estimated Cost
$750
Estimated Time Investment
Week Long Project (20 Hours or More)
Finish Used
stain
Recommended Skill Level
Advanced

Comments

jnow8687

Sat, 08/31/2019 - 12:34

Did you extend the base height? I want a greenhouse to enclose trees that do not do well in the winter and I think I would like to raise the base height a foot or so.

Adirondack chair from Pallets

Submitted by Anonymous (not verified) on Fri, 03/24/2017 - 19:42

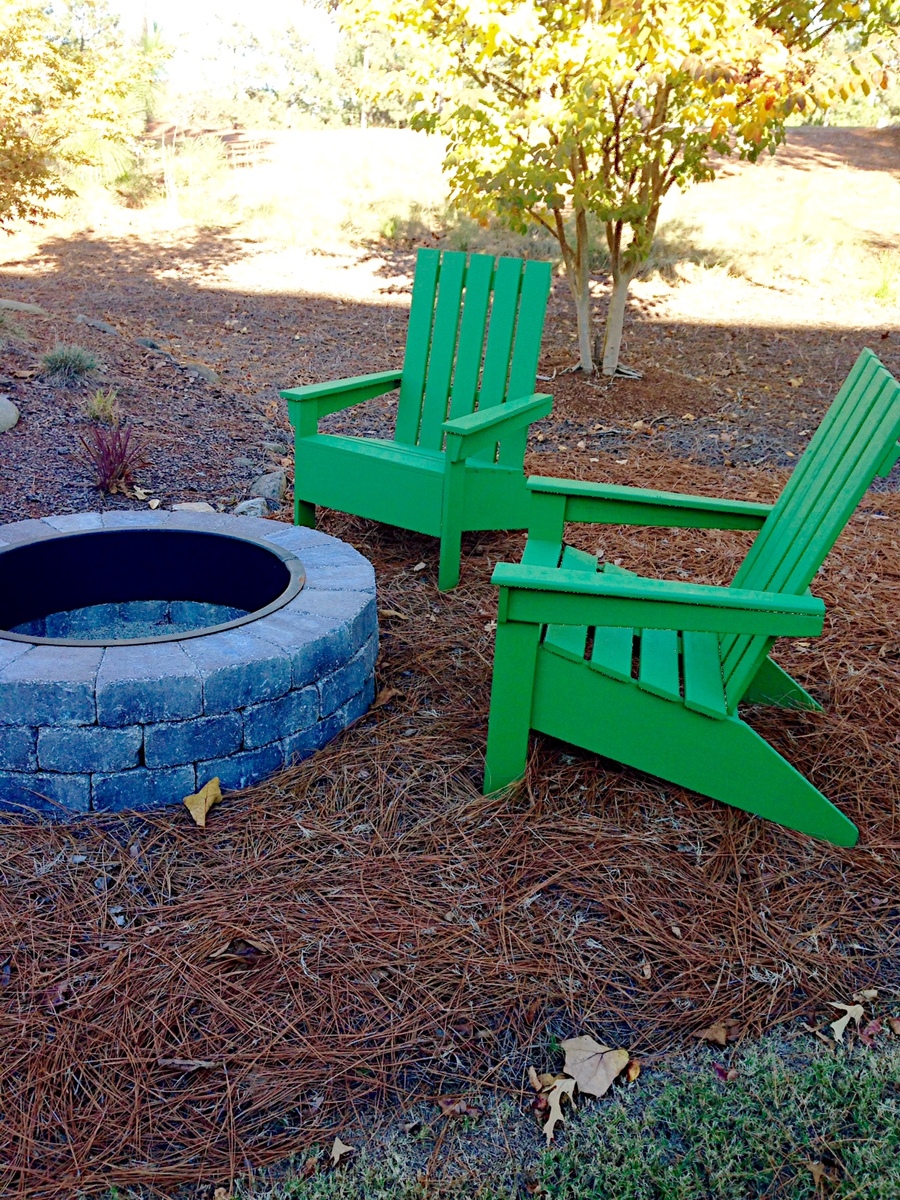
I decided to try and use the plans on Ana's site but with a twist. I wanted to limit myself to using only pallets. I think it turned out great! I can't upload all the photos because they exceed the maximum size limit. If I was able to you could see how each chair is slightly different and has a lot of character. I finished them with a waterproofing oil which I highly recommend over other finishes. 

Estimated Cost
$10 for screws.
Estimated Time Investment
Afternoon Project (3-6 Hours)
Finish Used
Cabot oil
Recommended Skill Level
Beginner

Comments

Jeep Bed

Submitted by papamike on Mon, 07/05/2021 - 17:15

I hope this is OK to add here. It's not an Ana White plan, so moderator please delete if it is not allowed. I made this bed for my grandson. I bought a plan online and modified it from a twin to a full size bed. The dome light and running lights work as night lights. A motion sensor light activates if he crosses the door to illuminate the ladder. Front tire is made as a step so his parents can climb in and read to him. The whole thing is on EZ Sliders so they can move it away from the wall to make the bed.

Estimated Cost
$150.00
Estimated Time Investment
Weekend Project (10-20 Hours)
Finish Used
Latex paint.
Recommended Skill Level
Beginner

Comments

French Cleat Sanding Station

Estimated Cost
Free! I used scraps to make this.
Estimated Time Investment
Weekend Project (10-20 Hours)
Recommended Skill Level
Intermediate

Modified Miter Saw Cart

Submitted by DavidH on Fri, 01/19/2018 - 20:56

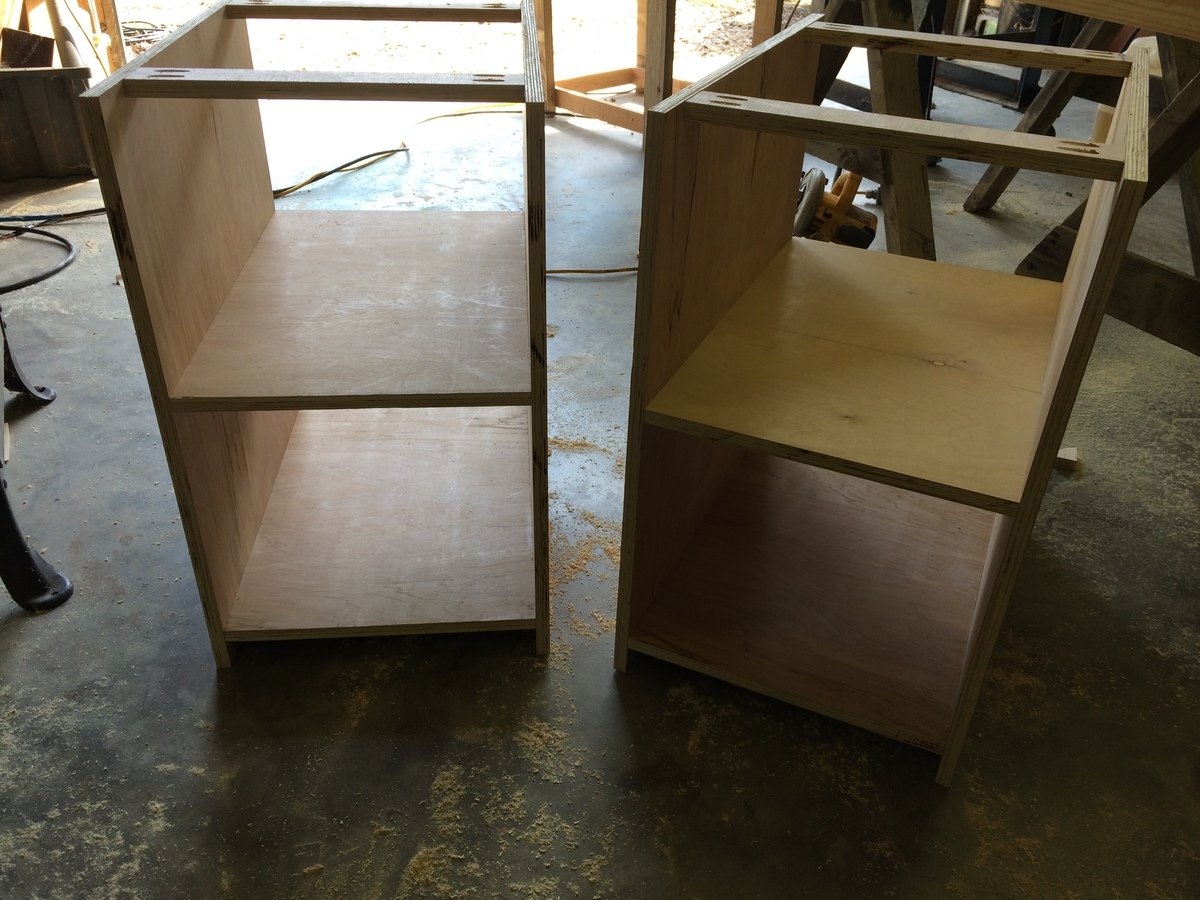
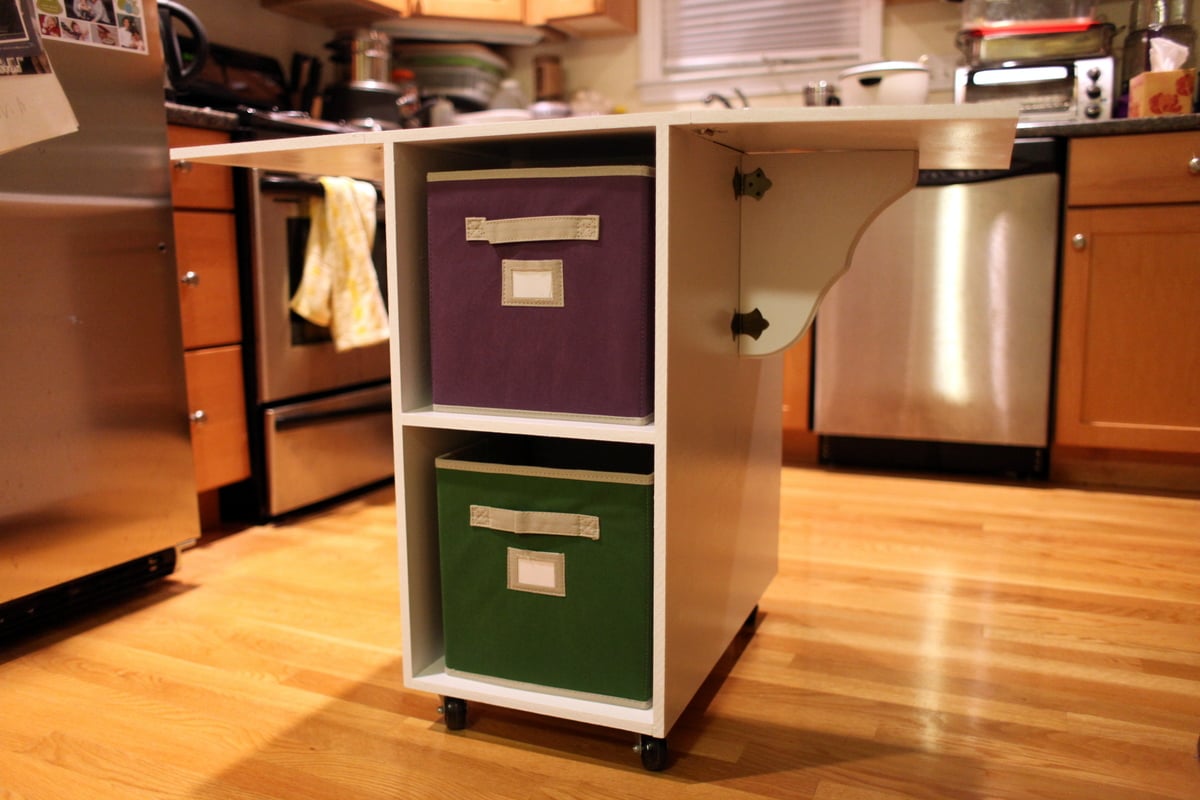
I started with the basic plans and dimensions, then made it my own from there. I added a center shelf, used regular (cheap) hinges and a removable brace instead of the shelf brackets, with stop blocks on the brace cleats to help easily center them. Added 2x4s on the sides to mount the hinges and let the wings fall flush, 2x4s on the bottom to mount 4” casters, 1/4” plywood backing, and 1x3 trim on the front for aesthetics and as a lip to hold items in place. The backing completely covers the lower shelf, and I left a gap to run cables through in the upper shelf backing. Velcro strips on the back hold the wing braces when they’re not in use.  Even though it’s plywood, I sanded everything thoroughly to reduce splinters and snags. 


Built from Plan(s)
Estimated Cost
$100-$125
Estimated Time Investment
Weekend Project (10-20 Hours)
Finish Used
Unfinished
Recommended Skill Level
Beginner

Comments

nzmitchell11

Sat, 02/03/2018 - 08:22

Hi there. I’m planning to use Ana White’s plan to build this miter saw cart but I like some of your alterations like with adding the 2x4s to allow the leaves to fall flush and the 2x4s at the bottom to attach the casters. How did you attach the casters? I have ones similar to yours- plate casters with 4 holes. Did you use bolts or screws? 

Curved Bench

Submitted by stevez8420 on Sat, 08/08/2015 - 13:41

I followed your idea but i think my bench is a touch smaller. I decided to add arm rests on each end, I kept the top beverage ledge or "Bever-ledge" as I call it and ofcourse I added rope lighting along the underside. This was my first ever DIY project.

Estimated Cost
150
Estimated Time Investment
Weekend Project (10-20 Hours)
Finish Used
I used a Cedar Tone semi-transparent finish which turned out a little more orange than i though but it still looks good!
Recommended Skill Level
Intermediate

Essential Wood Outdoor Chair Frame for Standard Chair Cushion

Submitted by Anonymous (not verified) on Sat, 11/05/2022 - 14:11

Beginner here and I enjoyed this one quite a bit. I played with the angle of the back and finally perfected it on chair three and four. I put the last bottom slat a little closer to the front to create more of a back angle. I also added a third back support position of the bottom slats are essential for comfort so you’re not sitting on a slat. My cushions need to be a bit thicker because you can definitely feel it. Overall, I enjoyed this project. Longest part was making all the cuts, and then painting because I use the sprayer and had to clean it. Thanks Anna!

Comments

Small Cedar Fence Picket Storage Shed

Submitted by Pembat on Sun, 10/06/2013 - 20:37

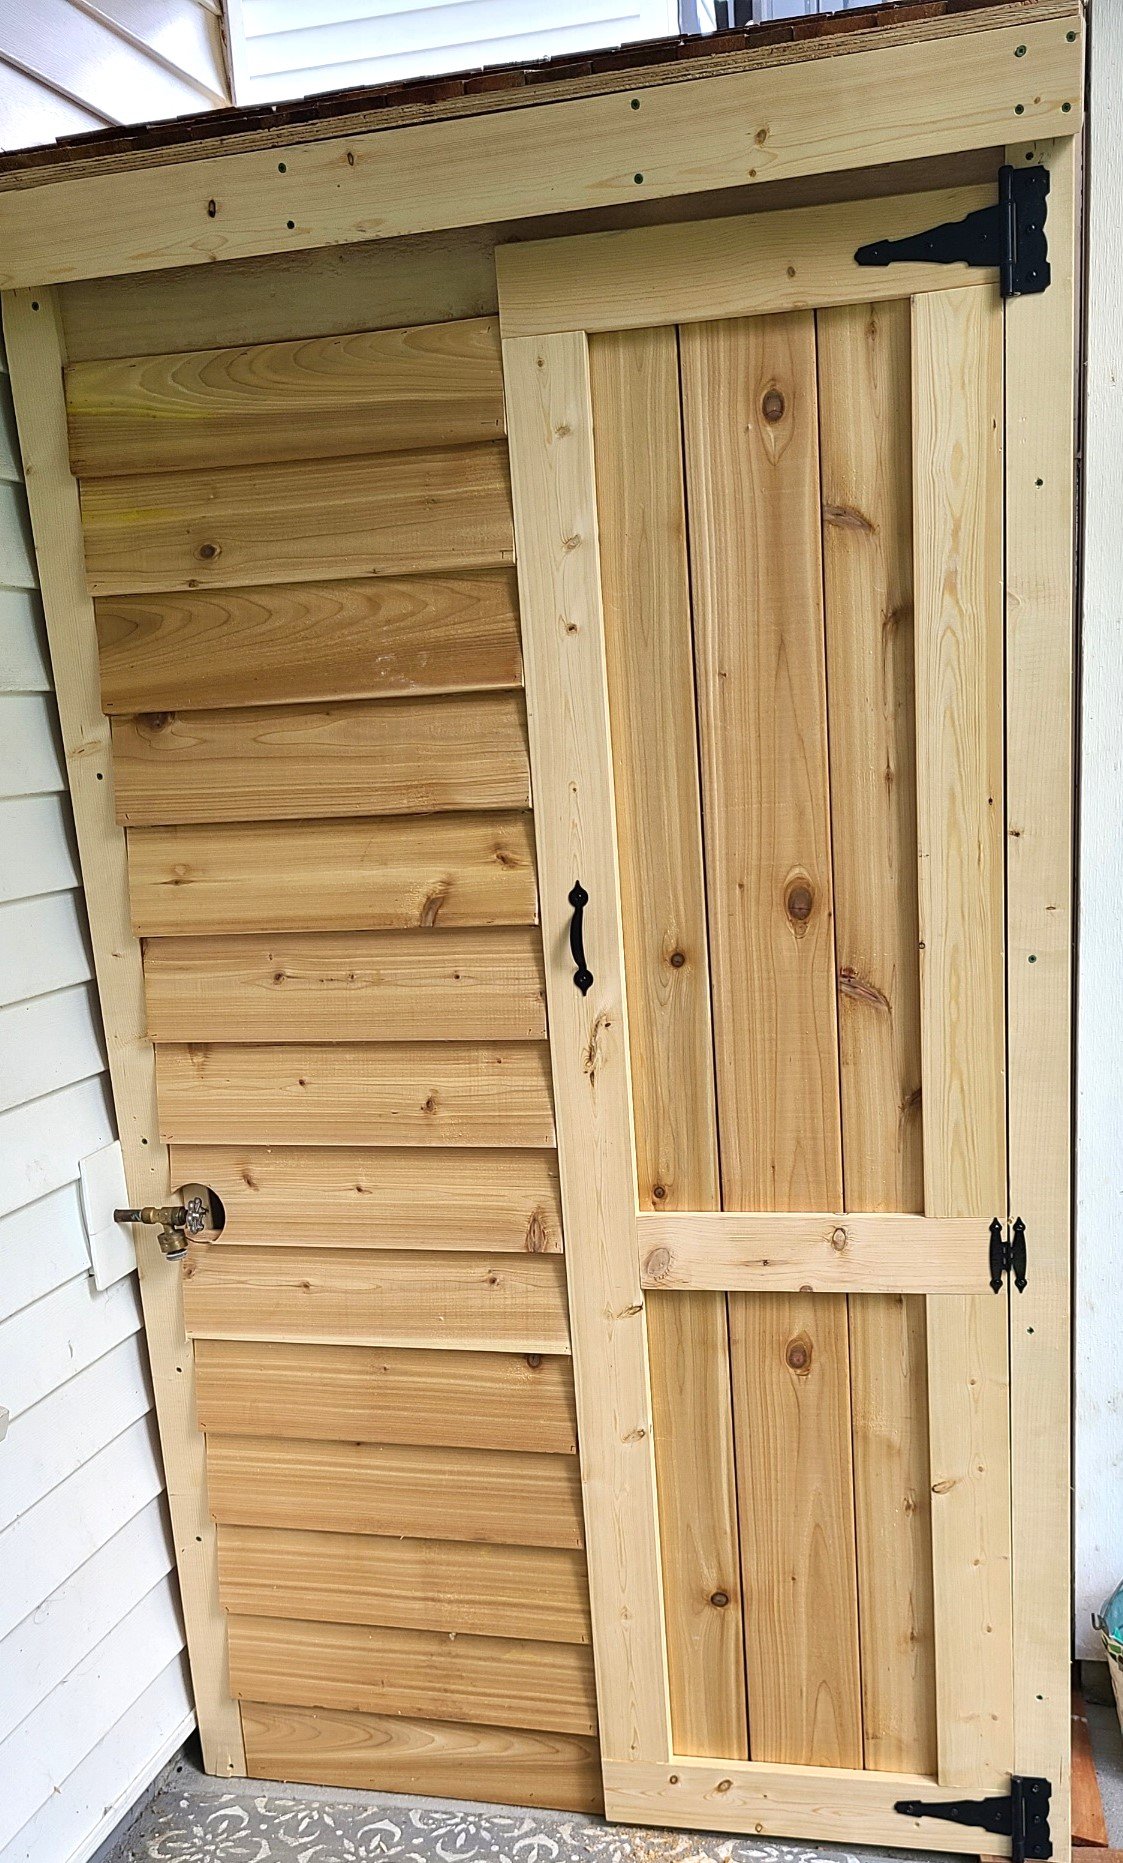
Built this in a weekend, took about 1.5 days. I ended us using 2x4's instead of 2x2's, I think it resulted in a much stronger frame. I also built a base for it to sit on. I got pre-stained cedar fence boards, and overlapped them 1" instead of a 1/2". Pretty easy project, I ended up siding the back on the ground, installing it, and then adding the side walls without the siding (just the framing), and then sided them in place. The doors work perfectly. I took my total inside dimension between walls, made sure the opening was square, and then divided that by two to get the width of each door. I then took another 1/4" off that, so each door had an additional 1/8" gap, it worked perfectly. When I set the doors, I put them on a piece of roofing closed as I screwed in the hinges, and then opened them and removed the roofing. I opted to run the door siding horizontal to use up a bunch of waste wood. I'm happy with the outcome. I also found some 6" self starting lag bolts and lagged through the back of the shed into studs (through the siding) into the garage behind it.

Estimated Time Investment
Weekend Project (10-20 Hours)
Recommended Skill Level
Intermediate

Workbench modified with casters

Submitted by ogie287 on Tue, 04/02/2019 - 20:06

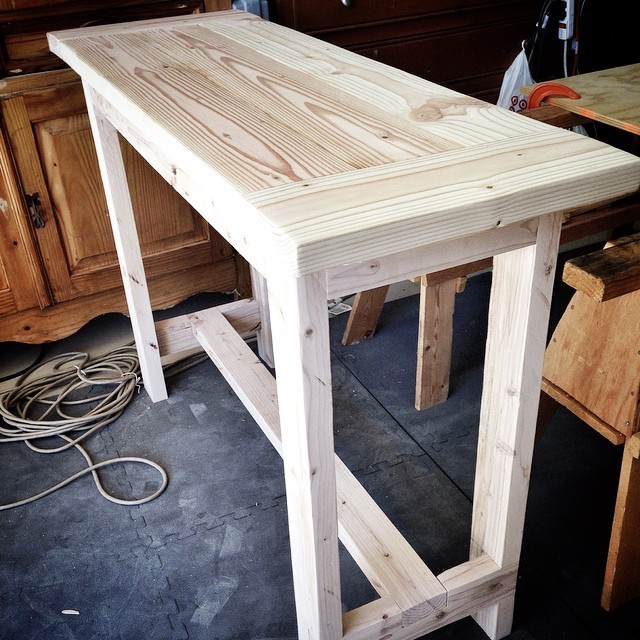
I love this workbench! I added casters so I can move it around the garage, outside, wherever it's needed. I just took 4 inches off the bottom of the legs. My hubby is admiring my handy work and planning on making one for himself.

Estimated Cost
$130
Estimated Time Investment
Afternoon Project (3-6 Hours)
Finish Used
None
Recommended Skill Level
Beginner

Comments

JBeecher

Wed, 01/25/2023 - 14:31

Love this with the casters! So beautiful. I'm new here and wondering at what point you took 4 inches off the legs. Did you build the table and then just cut off the legs? Or did you adjust the measurements of the cuts? Thanks in advance! :)

JimCoz516

Mon, 01/30/2023 - 02:32

The overall height of a 4-inch caster wheel is a little over 5 inches with the mounting bracket, so that also needs to be taken in to consideration. 2nd photo shows the overall dimensions, but to me the bracket and brake area appear to be a bit more than 1.03 inches. https://amzn.to/3DkMKzB
I think the best bet would be to have and measure the overall wheel height, prior to measuring and cutting the lumber.

The Gíaffe TV Stand

Submitted by Anonymous (not verified) on Thu, 02/06/2020 - 09:55

The Gíaffe Free Standing TV Mount. Handcrafted and engineered to use its center mass to deliver strength and balance for tv sizes 30-60". Display your television without detracting from your home's decor. The Gíaffe Free Standing TV Mount is the perfect solution and its rich finish will be perfect for any house/office room.

Estimated Cost
$109
Estimated Time Investment
Day Project (6-9 Hours)
Finish Used
Stain - Dark Walnut - Varathane - 2 Coats
Finish - Water Based Polyurethane - Varathane - 3 Coats
Recommended Skill Level
Intermediate

Comments

Diy Upholstered Settee

I started off with Ana's plans and kinda went rogue from there. The idea of creating those curved back legs scared me so I thought I'd sacrifice an Ikea dining chair and use it as the legs. When I ruined one of the legs I decided that I'd come too far to back out and that I must continue. I adapted many conventional methods to make the settee but I'm super pleased with the outcome. For the full step by step on how I completed the settee, please check it out here Part 1 Part 2 Part 3


Built from Plan(s)
Estimated Cost
150
Estimated Time Investment
Weekend Project (10-20 Hours)
Finish Used
Rustoleum Ultimate in American Walnut, Rustoleum Ultimate Polyurethane in Satin.
Navy Blue Upholstery Velvet, French Natural Nailhead Trim.
Recommended Skill Level
Intermediate

Comments

Console Display/Sofa Table

Submitted by BigEBama on Thu, 07/10/2014 - 20:06

My wife had purchased a few antique printing press trays a few years ago to use to display family keepsakes. She also wanted a sofa table for the Living Room so I combined the two concepts into one table. I used the Rustic X Console table concept and modified it to fit my space and added the drawer compartments for the trays to slide into. I added two glass pieces to the top and there you have a sofa/display table. I used pine boards, hammer to distress the piece, Early American stain and a couple of coats of poly for the finish. The glass pieces we the biggest expense at $50. The table itself was built for around $55 before the glass was added.

Built from Plan(s)
Estimated Cost
$55 plus $50 for glass
Estimated Time Investment
Weekend Project (10-20 Hours)
Finish Used
Early American stain and Minwax Poly
Recommended Skill Level
Beginner

Double Inset Bookshelf Doors

Submitted by dholubar on Wed, 08/21/2013 - 07:08

You made this project look so simple that I just had to try it. However, to suit my needs I had to make a few alterations to the plans. I had a set of bi-fold doors that were in need of replacement and I thought inset bookshelf doors would be the perfect way to replace them. This project was easy enough for me to do it myself and I am really new to the DIY game but I did have some help. I really love the way they turned out. You can read all about my my adventure at http://heresalittletmi.blogspot.com/2013/08/bookshelf-doors.html

Built from Plan(s)
Estimated Cost
$120.00
Recommended Skill Level
Beginner

Modern outdoor 2x4 chair with modification

Submitted by Anonymous (not verified) on Fri, 03/08/2019 - 13:31

This chair was made off Ana white'smodern outdoor chair with modification to add back support. Without the back support the back pillow would keep falling off.  The cushion are 25x25 but very thick for comfort.

Estimated Time Investment
Afternoon Project (3-6 Hours)
Recommended Skill Level
Beginner

Comments

Brittsiana

Sun, 08/16/2020 - 10:03

Does anyone know what degree angle this is for the back support?
I would like to add it to my newly finished chairs I made over the weekend. The pillow keeps falling down.

Custom Dog Bath

Submitted by dananicb on Thu, 07/22/2021 - 07:21

Tego needed a raised dog bath. No, I needed a raised dog bath. Specifically, my knees needed a raised dog bath for Tego. So, after looking at Pinterest and Ana's plans, I decided what I really wanted to do was customize something to fit my needs (and knees) and build it myself. Overly ambitious for a first-time woodworking project, but hey, raise the bar.

I started by reading and rereading Ana's beginner's woodworking guide (very informative). I also learned so many other things along the way. There's a reason, besides looks, you need flat boards (they need to screw together tightly). Unfinished basement floors are so not level (especially near the walls). Screw lengths matter (need shorter ones for thinner boards). The big-box store doesn't make precise cuts (but they can make a lot). Planning for the finishes will save you time (know your basket sizes). Just to name a few.

It's going in an unfinished basement, so I wasn't going to tile and add glass doors. I wanted to keep it relatively simple, basic.

The stairs were the hardest to measure and build (math matters) - and I might re-do. I made the steps smaller, dog-sized, but she finds them awkward. I'd stick with typical riser heights, but it depends on the size of your dog.

Plumbing to link the tub drain to the utility sink drain was the most expensive. Probably I could have done it myself, but I decided not to learn both plumbing and woodworking for one project.

Overall, I'm pleased with the result - and Tego is learning to love it.

Estimated Cost
$250 in supplies (plus plumbing)
Estimated Time Investment
Week Long Project (20 Hours or More)
Finish Used
Exterior paint in semi gloss
Recommended Skill Level
Beginner

Comments

Chicken Shed

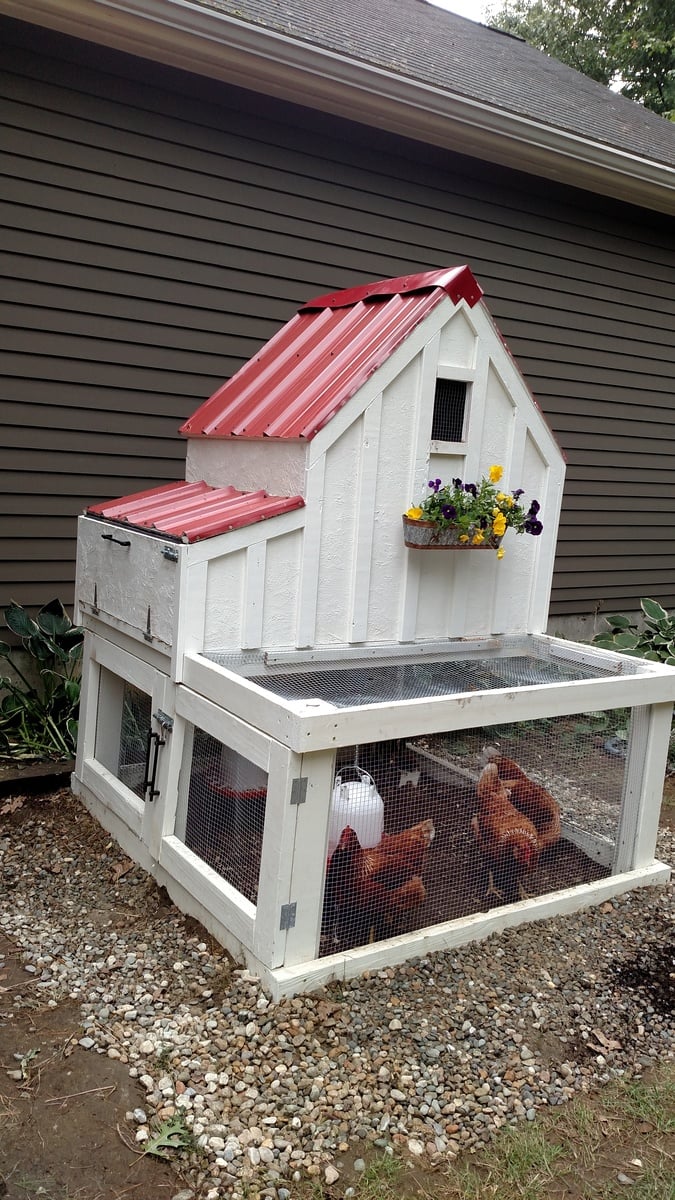
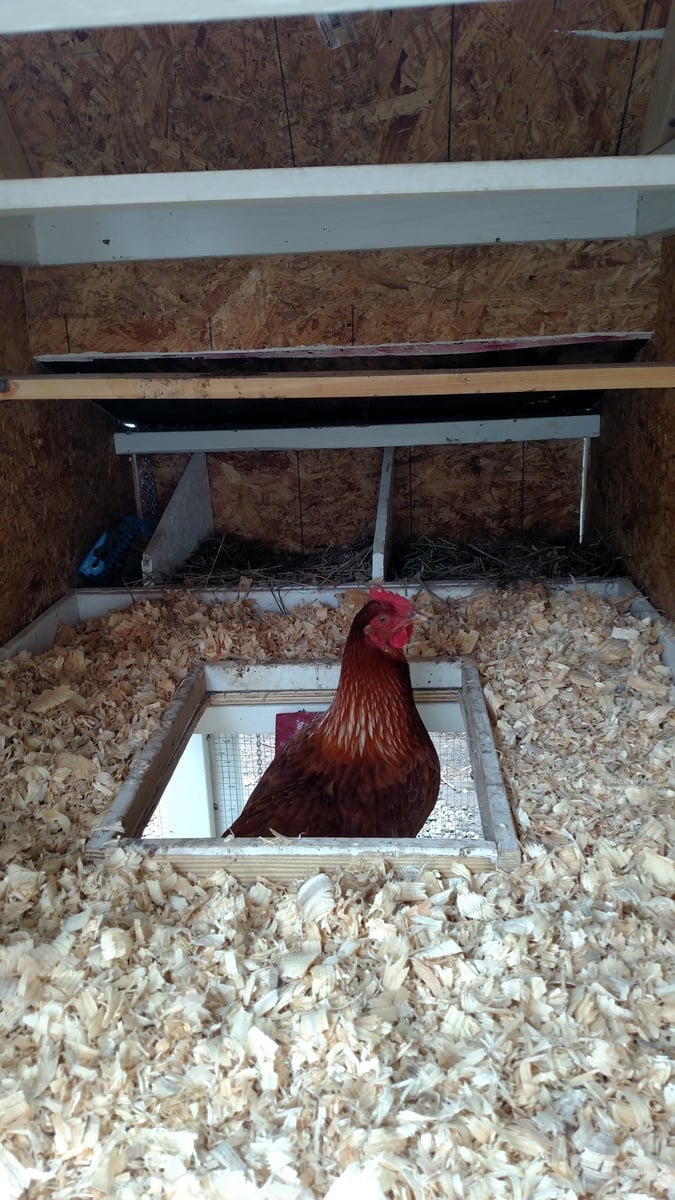
I used the chicken shed plans to create the coop, with a modification to include two nesting boxes, one on each side.

I slightly modified the nesting boxes, using a U shaped frame and added hinges for the front to swing down and the pine shavings to be swept out.

For the siding, we found it easiest to do the tack and trace method. We tacked each full sheet of siding in place and traced the cuts for the window, roof line, doors, and nesting boxes. We then took them down, darkened the lines, cut 'em, and re-hung them. It made it a million times easier, IMHO.

For the inside, I designed several roosting bars with poop platforms. The water is a gravity fed chicken nipple/pvc setup, which I found online.

The food stations, also gravity fed, are (new) sewer pipes with wye connectors.

I used the roof and siding scraps to make shelves for storage inside.

By sourcing reclaimed materials, I built the coop, run, interior, feeding stations (5), and waterer for $550. I only bought 27 pieces of new lumber (15 2x4's and the 12 8 foot long 1x3's)

Even the paint was free! (We have a drop and swap at the haz mat recycling center run by the county. We have gotten 100's of dollars of free paint, stain, and varnish there. I even used a can of free spar varnish to seal the inside of the coop)

There are still a few pieces of trim to be cut and painted, but the girls are inside eating, drinking, and merry!

I did find that at the Home Depot, if you buy chicken wire, it costs way more then 150 feet x 36 inch "stucco netting". The stucco netting was $54 for 150 feet, and chicken wire is $76 for the same amount. It is the exact same wire.

I built the run out of resourced 1x2 furring strips. They were a pain to work with, very prone to breaking when not supported, but with the entire run costing $25 for wood and $54 (with half a roll left over) for chicken wire, I can handle some extra time and effort.

If anyone has any questions for me, feel free to contact me! I'd love to help!

Built from Plan(s)
Estimated Cost
550
Estimated Time Investment
Week Long Project (20 Hours or More)
Finish Used
Free paint !

I know several counties in CO have drop and swap places. Maybe your county does, too!

We got three cans of exterior rust colored paint and mixed them all together to make one color. This only works if the colors are pretty similar. It prevents one side from looking different then another.

The trim was a full gallon of blue-grey. Free and never even used.
Recommended Skill Level
Intermediate

Comments

xman1x

Mon, 02/06/2023 - 08:12

Hi! Do you still have this coop? It's been about a decade now and wondering how it has held up, if you have any suggestions, or additional pictures of the inside. Thank you!

Church Pulpit

Submitted by BBLinda on Sat, 06/08/2013 - 10:34

A good friend of mine, a pastor of a local church, asked me to build a pulpit for their recently finished church up in the countryside of Grenada. She showed me a picture of what she had in mind and based on that, I drew my own plan in SketchUp, and then built it out of Yellow Pine boards and Plywood.

Note to the dimensions:
After I drew the plan, and just when I was at the lumberyard to have the plywood and boards cut, I thought I might have had it estimated not wide enough, so I decided on the spot to make it 2" wider and the top panel 2" wider and deeper too. So if you'd like to build based on my plans, please consider if it's wide enough for your purposes.

This is what I used (corrected measurements here):

2x 2x8 26" long YP Boards (Base)
1x 18 1/2" x 6 1/2" Plywood (Base Support Panel)
1x 26" x 16" Plywood (Top)
1x 18 1/2" x 9" Plywood (Shelf Panel)
2x 45" x 9 1/2" Plywood (Side Panels ) - these are cut angled, see plans
1x 44 1/2" Wood Moulding (for the "stopper" on the top panel, and the "back" of the top shelf.

Estimated Cost
~ US$ 115 (material is very expensive here on the island, and I guess you could build it for about half or 2/3 of this in the USA)
Estimated Time Investment
Weekend Project (10-20 Hours)
Finish Used
MINWAX Polyshades / American Chestnut Satin (375)
Recommended Skill Level
Beginner

First Build - Redwood Adirondack Chairs

Love the results of my first building project.....a pair of redwood adirondack chairs. Angled cuts were a great way for a beginner to learn to use the miter saw.

Estimated Cost
$75 for redwood per chair
Estimated Time Investment
Weekend Project (10-20 Hours)
Finish Used
Discovered a non-toxic, non-flammable, water-based, environmentally friendly product called Seal-Once. Quick and easy two coat application in natural clear to protect wood outdoors for up to 10 years. Soaked right into redwood without leaving a shiny finish or residue.
Recommended Skill Level
Beginner

Comments

JoanneS

Sat, 09/07/2013 - 19:59

Love these gorgeous redwood chairs! The color and grain on that wood is awesome, and the clear coat is perfect for it. You did a great job on this build! I popped over to your blog and I enjoyed your post on this build very much. Well done!

Seasonal And Holiday

Dog Houses

Our local Habitat for Humanity puts on an annual event where they get folks to restore discarded or worn down furniture and sell them at auction. My wife and I participated last year and this year I was asked to build 4 dog houses and then they were going to let local designers/decorators finish them out.

I figured it would be easy to find a good dog house plan, but I was wrong so I had to come up with my own designs. I did not want to use plywood becauase I wanted them to look good. So I used 1x4's and 1x6's. I built them all just a little bit different, but the same basic design on all 3. Since I am not very good with circular cuts, did not do any fancy 1/2 circle doorways!

There are "after" pictures on the Blog. Thanks for looking!

Estimated Cost
$100 each
Estimated Time Investment
Afternoon Project (3-6 Hours)
Finish Used
I didn't finish them out, but did use screws to attach everything, so filled those in with wood putty and sanded down of course.
Recommended Skill Level
Beginner

Comments

Cindy from Indiana (not verified)

Sun, 11/06/2011 - 16:10

Great job for a great cause!

Farmhouse TV console table

Submitted by Anonymous (not verified) on Fri, 02/17/2023 - 11:45

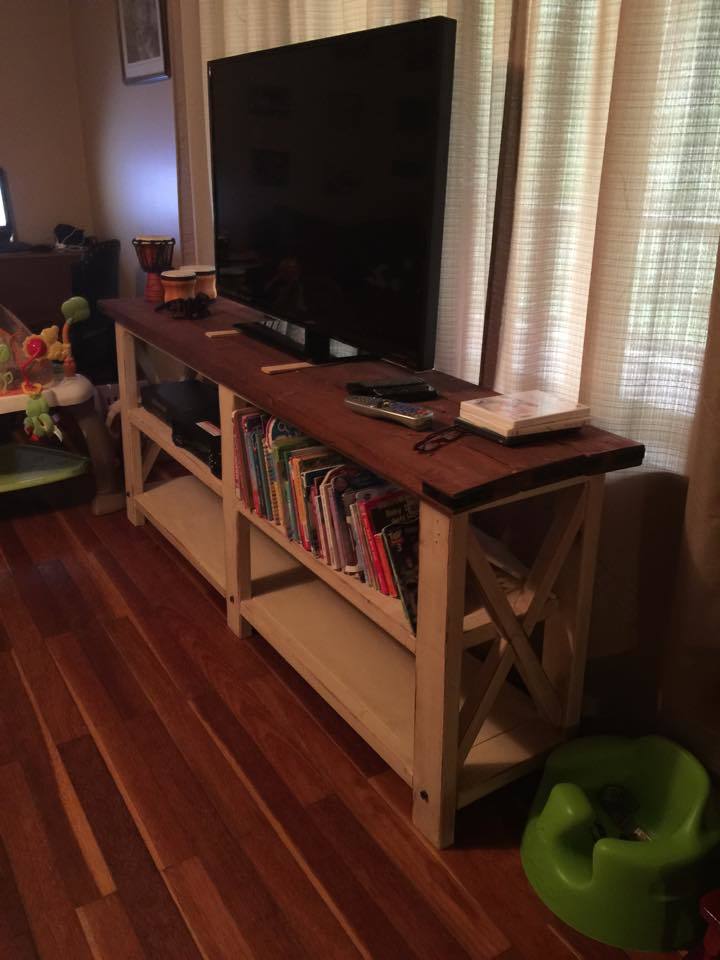
I built this TV console based on Ana’s plan and some modifications from The Turquoise home. Made it 6’ long and a bit lower to fit all my elephants below the TV.
It turned out beautiful and suuuper heavy.
Thank you Ana!

Built from Plan(s)