THE MOTIVATION
After a recent washer outage (that I was ultimately able to repair myself), my wife and I talked about eventually replacing our front-loading washer/dryer set. One of the bullets I hate biting is paying the exhorbitant prices for the matching pedestals for new washer/dryer sets.
Having just bought a good set of cordless powertools, and having watched my father when I was a kid build countless household fixtures, window dressings, furniture pieces, etc., I decided to try my hand and construct a permanent platform for our current washer/dryer set, thereby eliminating the need to ever buy manufacturer pedestals again.
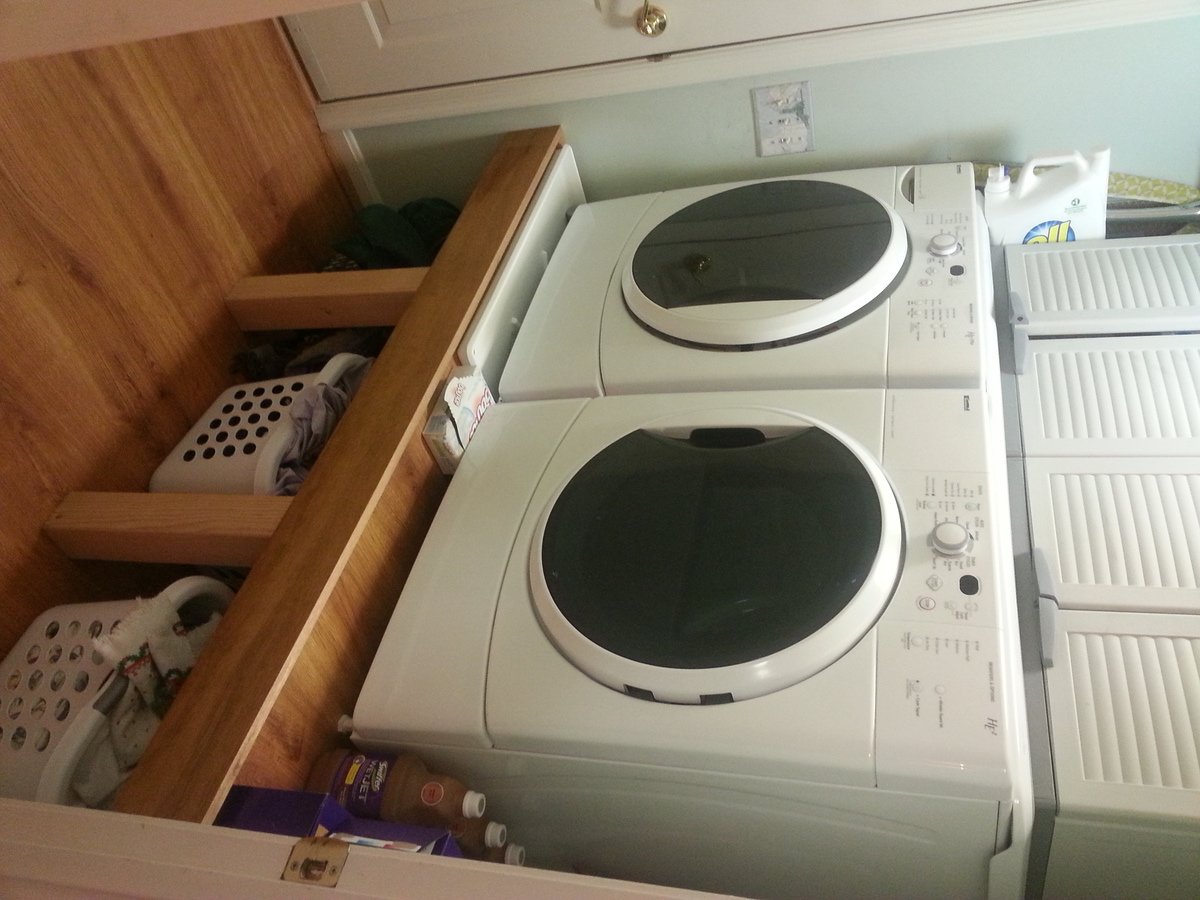
The existing pedestals were a standard 15" high, with a storage drawer, which we felt was still not high enough for comfort. And, the washer pedestal drawer was entirely inaccessibl due to the 2" walls on the washer drain pan, so its drawer was totally useless, wasted space.
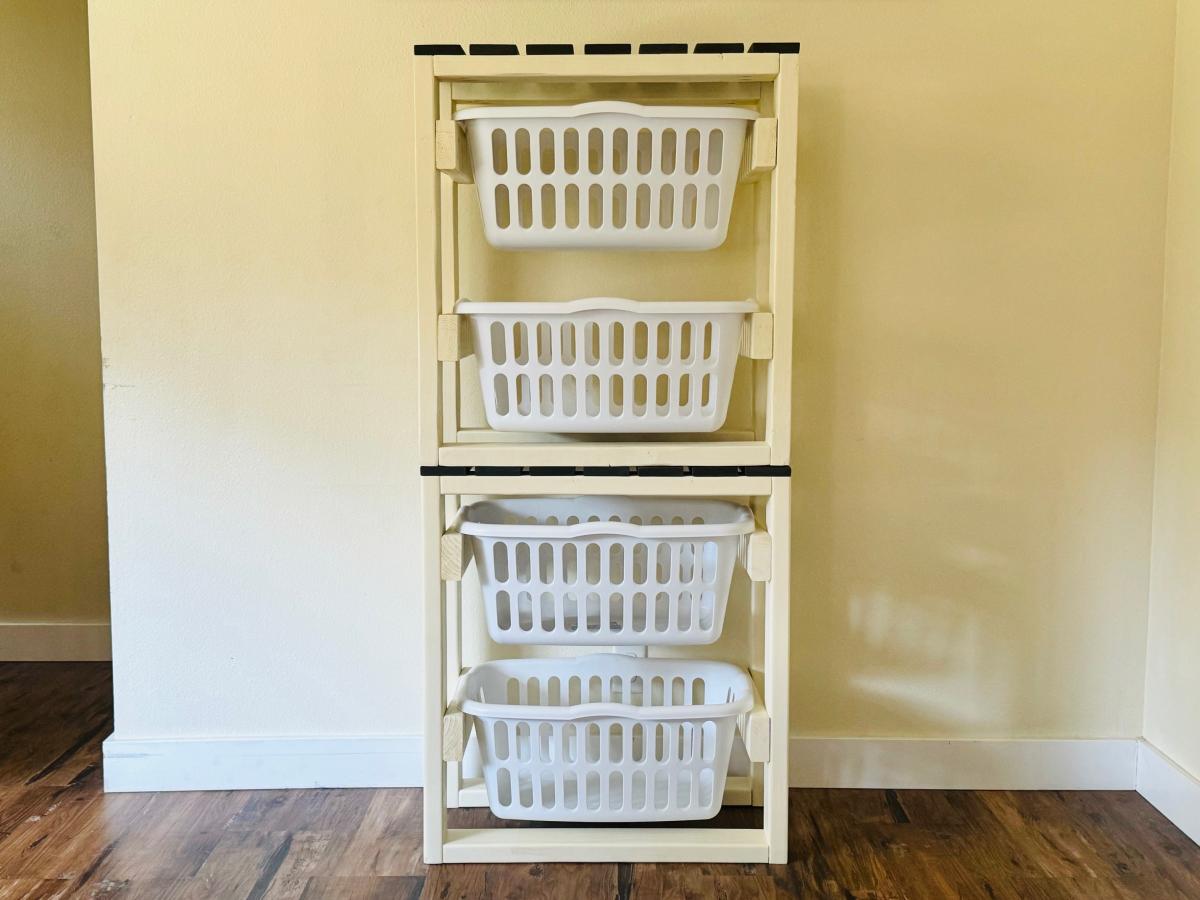
And, lastly, we really wanted more space for clothes baskets full of laundry, which we generally stacked (full and haphazardly) on top of the machines.
THE CHALLENGES
The largest challenges were mainly logistics, and gravity. The washer/dryer would have to be unavailable for at least 2-3 days while they sat disconnected in the next room waiting for their new home. So I coordinated with the family so they'd know when they needed to have their laundry done, or tough it out until I was done.
There was no way to know for sure what the drain connection for the washer pan looked like until I got the washer out. So it was a small gamble that I'd be able to get the parts needed to extend the drain pipe up to the new platform right when I was ready for them. Fortunately, this was no issue at all.
The biggest challenge turned out to be toward the end when it came time to lift our 230-lb. washer onto the new platform. I seriously considered disassembling the washer to the point that I could remove its molded concrete counter-weights, but instead (and arguably stupidly) elected to use a large hydraulic car jack to raise the washer. This ultimately worked, but I have to STRONGLY ADVISE AGAINST trying this.
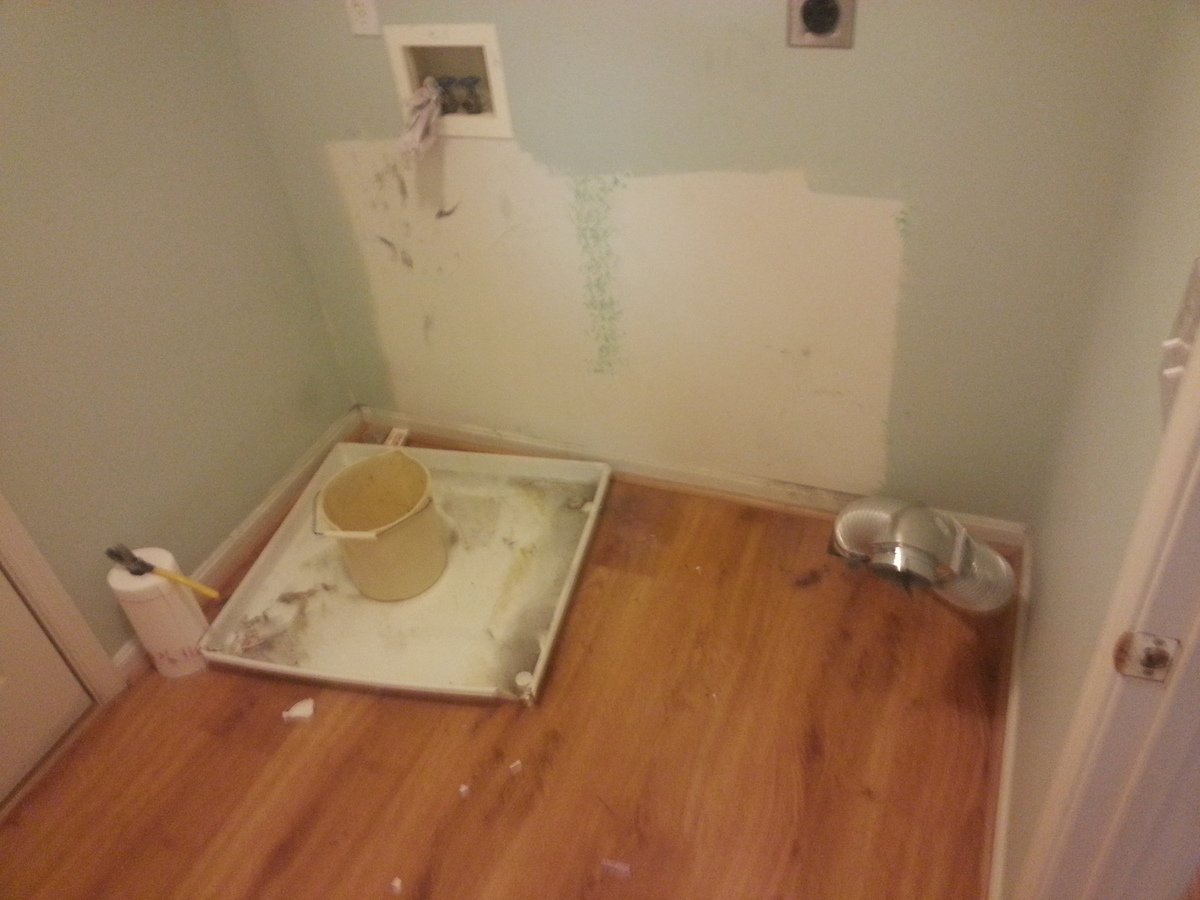
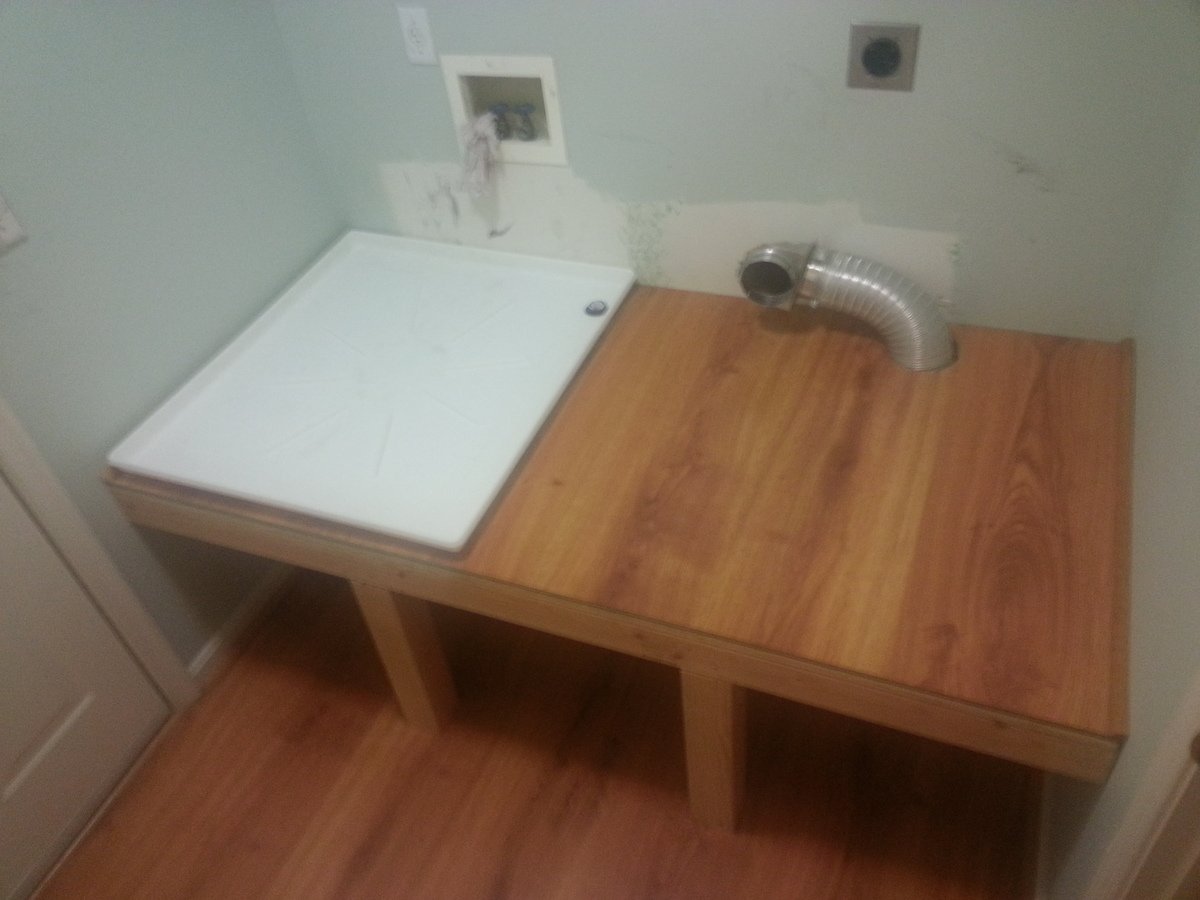
THE SPACE
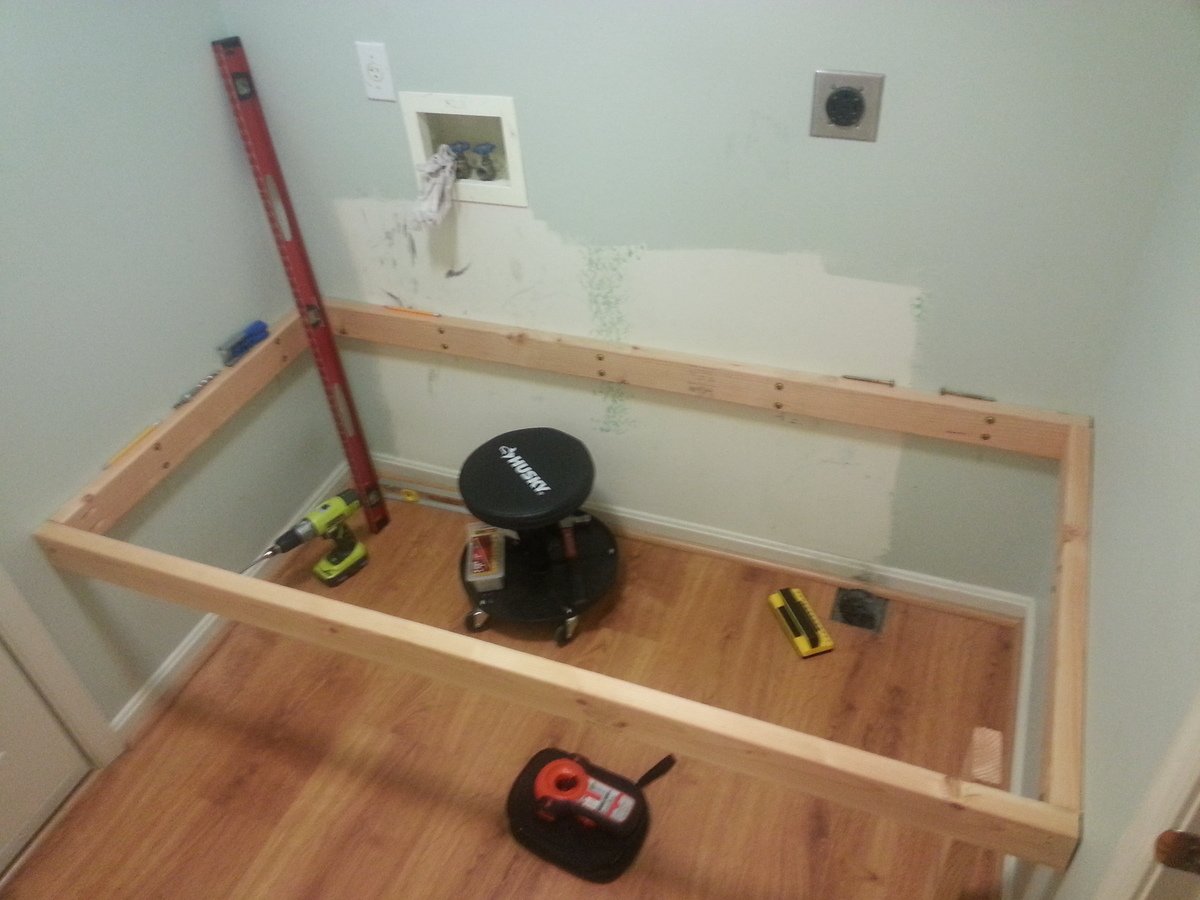
Our laundry room is also the "mud room" between our kitchen and the garage. It is only large enough for the two machines, and the walk way between the two doors--in total, about 70.5" square. Building the platform from wall-to-wall made the most sense, and minimized framing by fastening edge framing directly to the wall studs.
THE PLAN
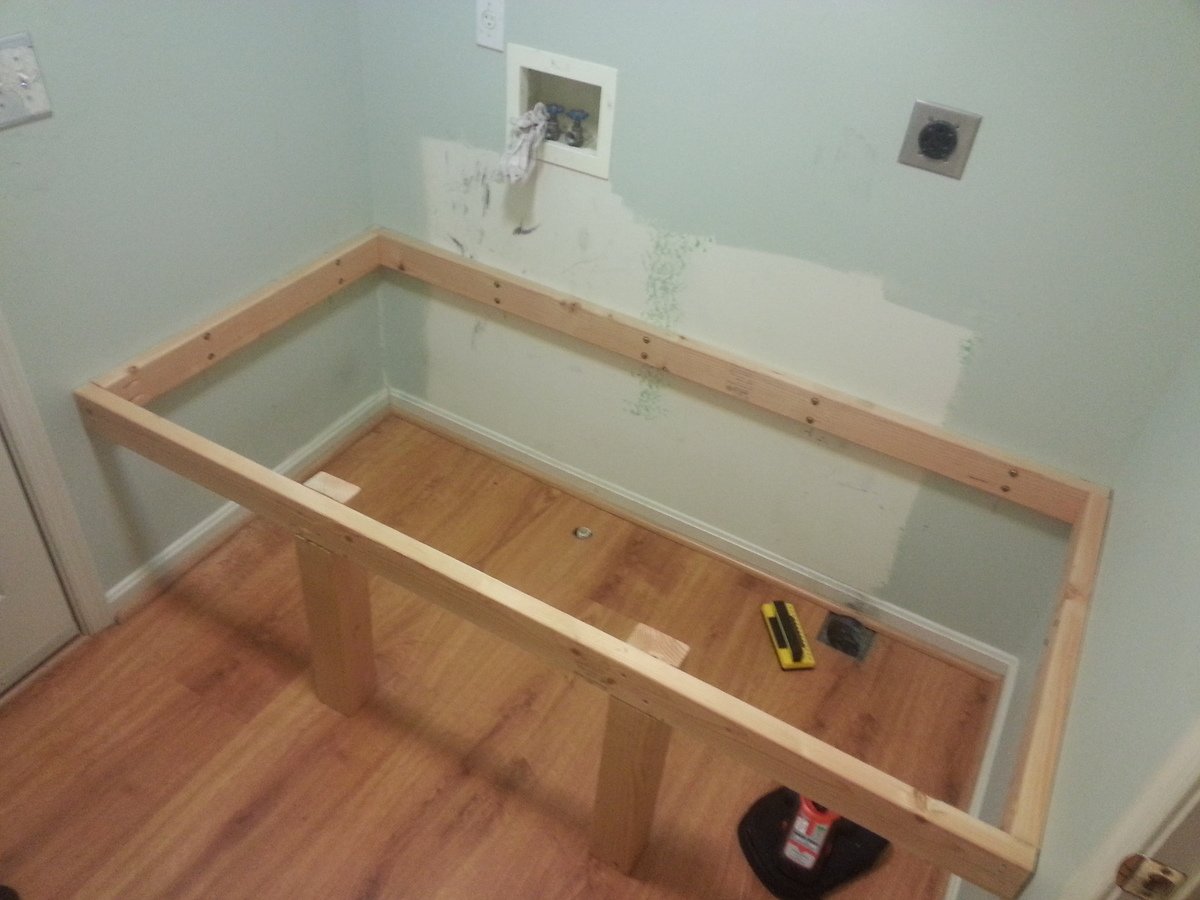
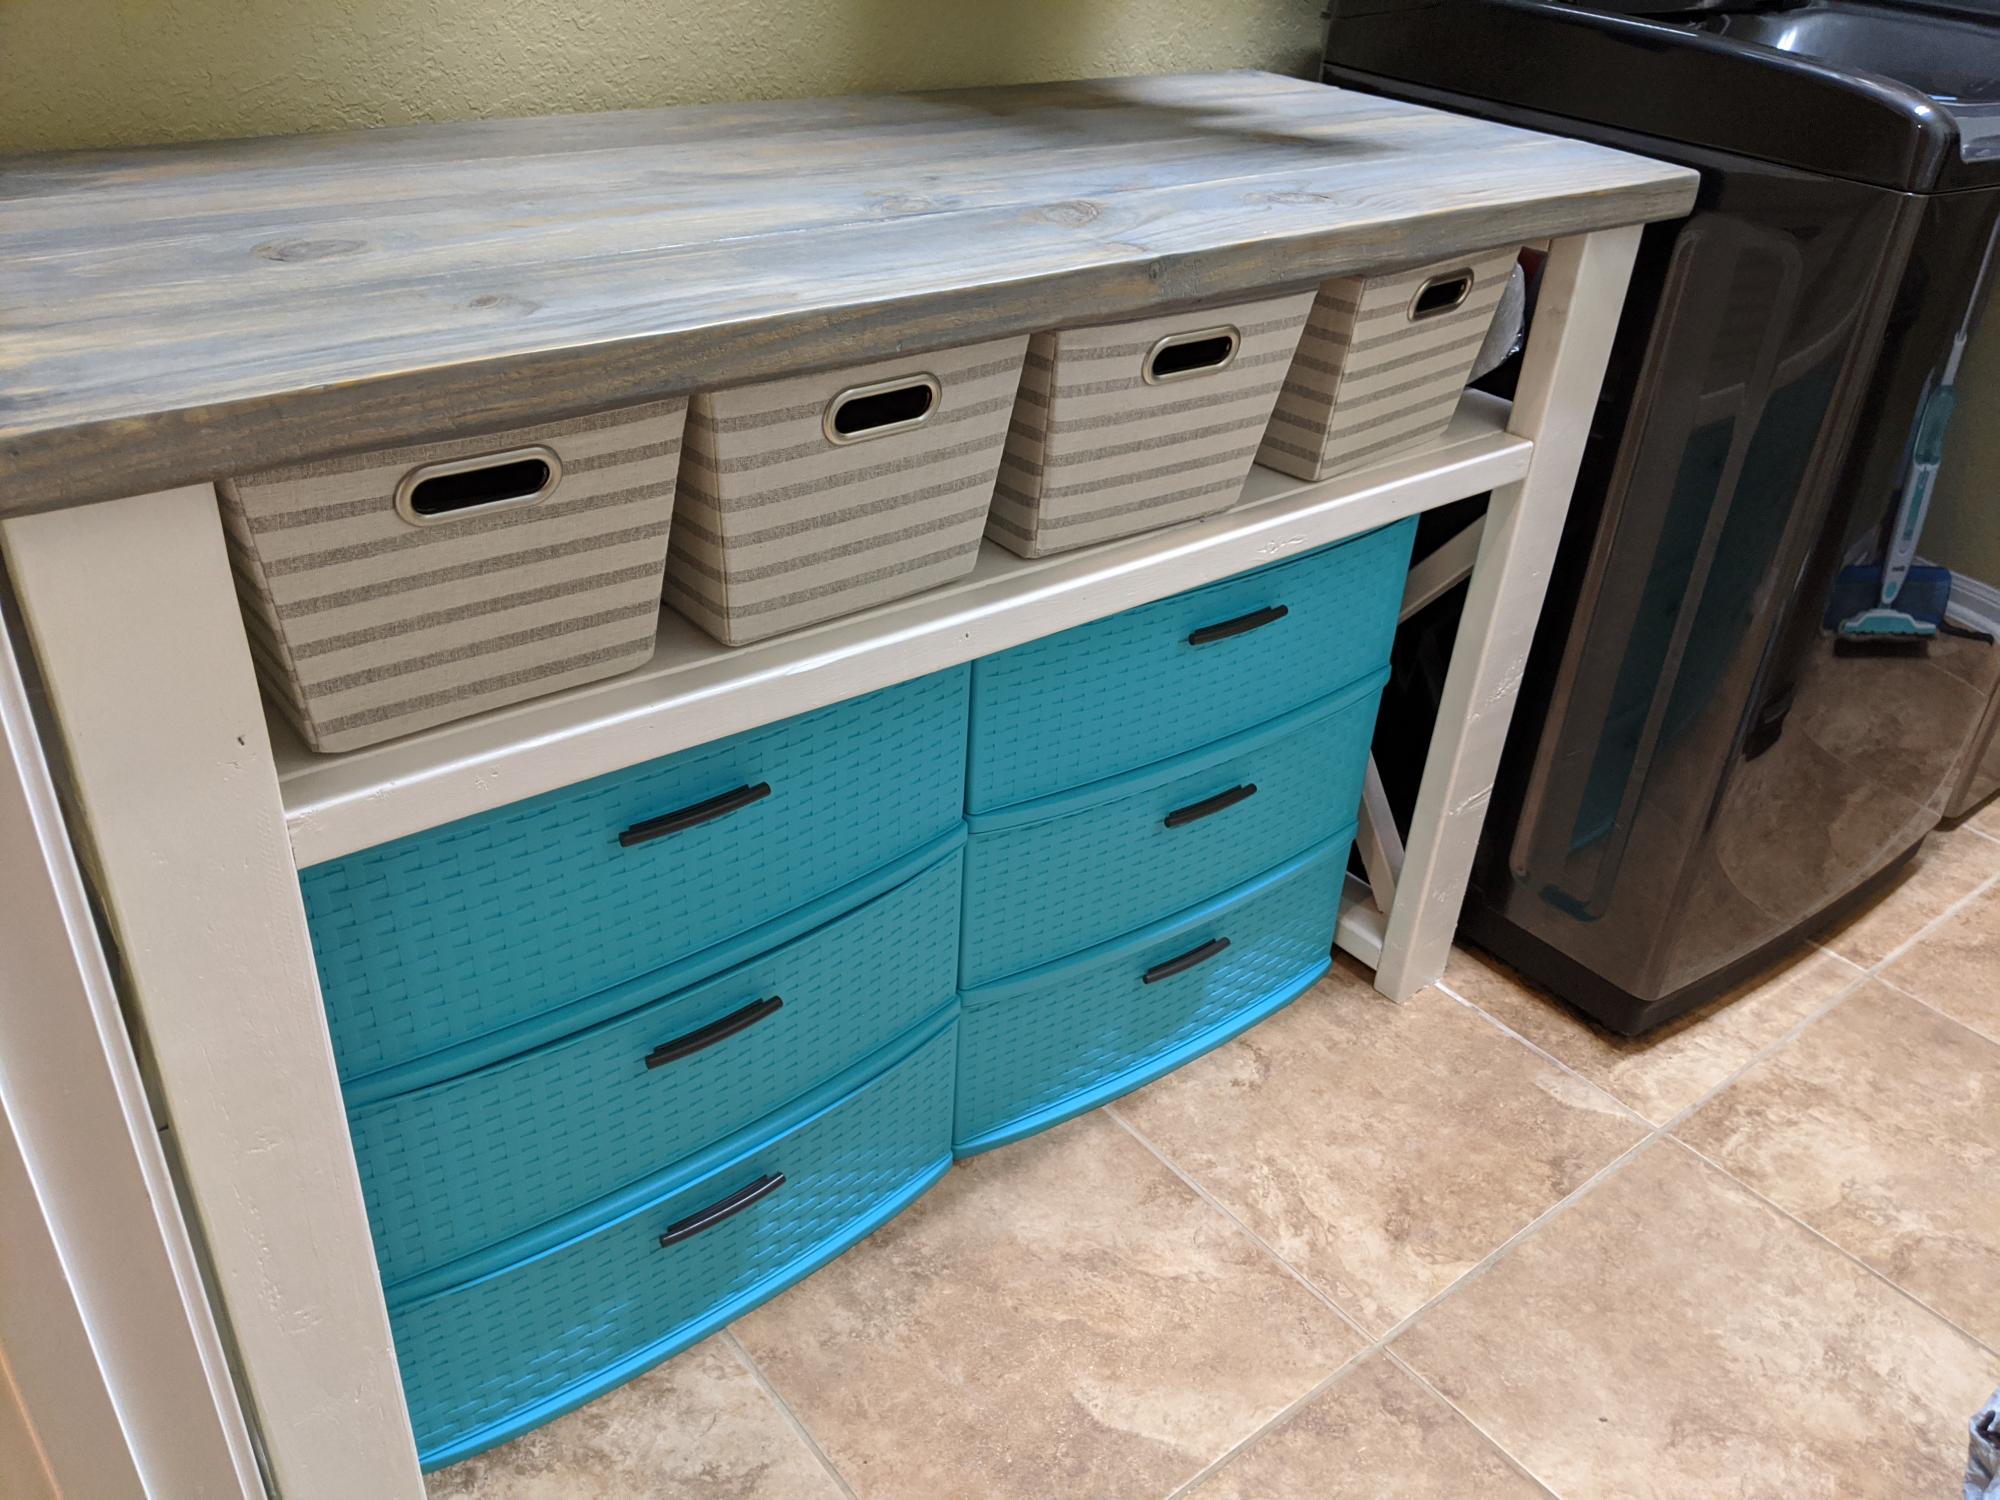
Pretty basic: 2x4's all around for the edge framing--back and sides fastened directly to the wall studs, and front 2x4 supported by two, notched 4x4 legs. 3/4" plywood for the subsurface, and 1/4" laminate faux-wood flooring on top (left over from reflooring, so it matches the floor below). Bore holes for the washer pan drain and the dryer vent. 1" quarter-round molding on the sides, and 5.5" face piece flush with the top of the molding across the front (spare lauan I had looks perfect). I also made a point of putting the machines on the platform before the face piece since it might have been in the way or damaged.
Anyone will tell you that it's best to at least sketch out what you want to do so you can minimize surprises, forgotten parts, etc. I, of course, did virtually none of that, and made several course changes and corrections along the way. For this project, I was lucky that I didn't need to backtrack at any point, and probably won't learn this lesson any time soon anyway. However, you SHOULD.
TAKE-AWAYS
The main mistake I made was while gathering the platform dimensions for cutting the plywood. It was only blind luck that kept me from having to do it more than once (and having to buy more than one 4x8 sheet). I know that it's actually very unlikely that two adjacent walls are perfectly square, so I made a point to measure the width between the walls at the back and at the front--and, sure enough, found a 1/8" difference--wider at the front. But when I measured and marked the plywood for cutting, I measured both distances from the precut edge, and then cut. By doing this, I inadvertently assumed that one of the back corners was perfectly square.
What I should have done was used a carpenter's square in each back corner to extend a square line from the back edge to the front, and then measured from the square lines to their respective side wall. This would have accounted for neither back corner being square.
Fortunately, my mistake wasn't big enough to keep the plywood from fitting, but it was very, VERY close.
GIDDY
I honestly couldn't be happier with the finished project (or more smug). We've raised the washer/dryer 9" higher than they were (24" off the floor), and we now have basket storage underneath all the way across. I placed two 24" plastic cabinets on top, which still leaves room for the detergent right over the soap inlet on the washer.
And, most importantly, I got to use every powertool I own. Kinda beats "the quick brown fox jumped over the lazy dog" thing, huh?