View complete post at my blog: www.birdsandsoap.blogspot.com
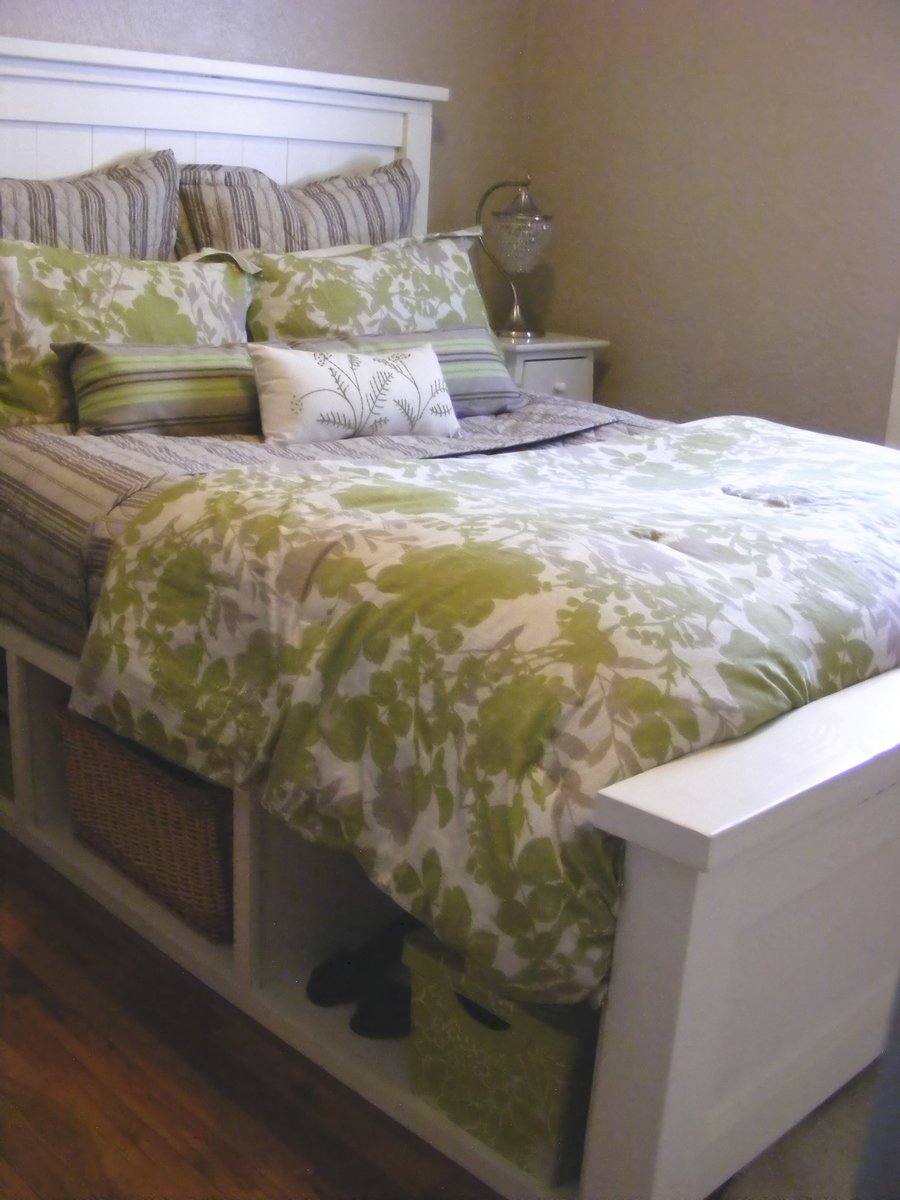
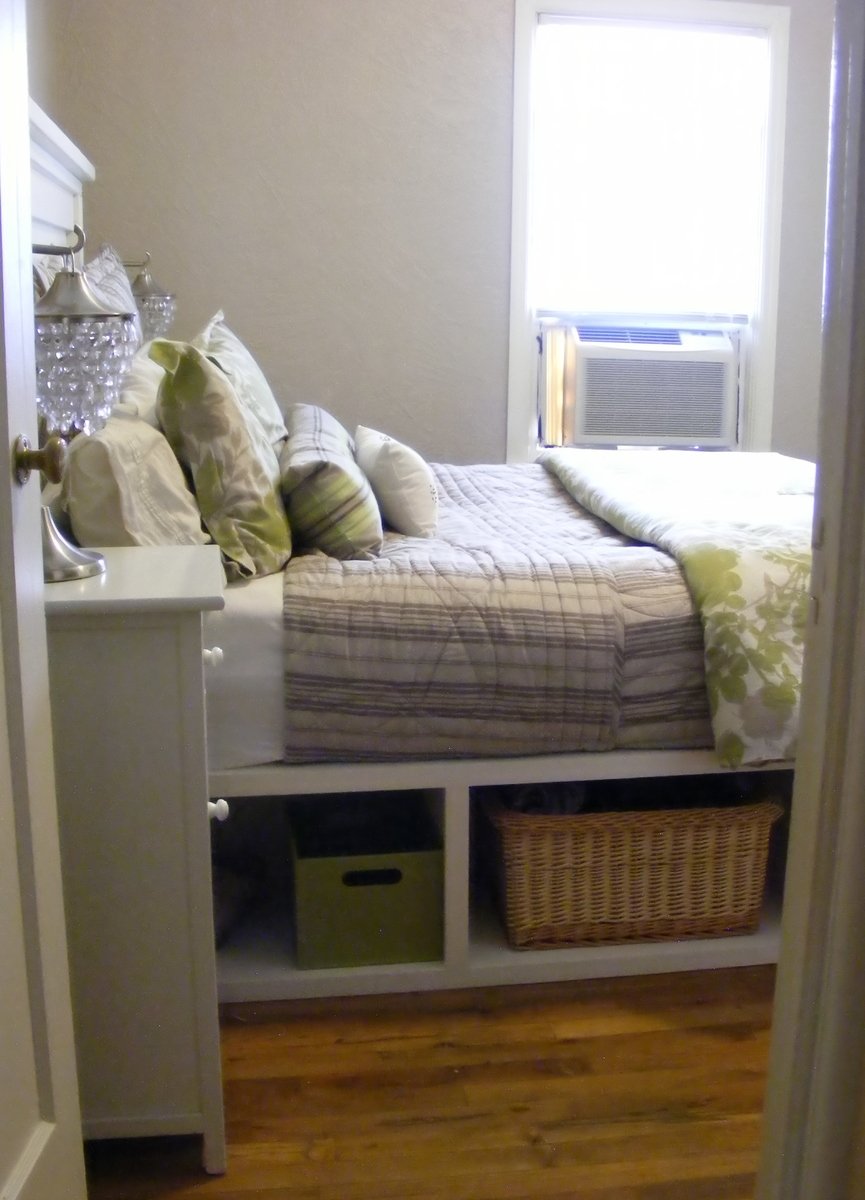
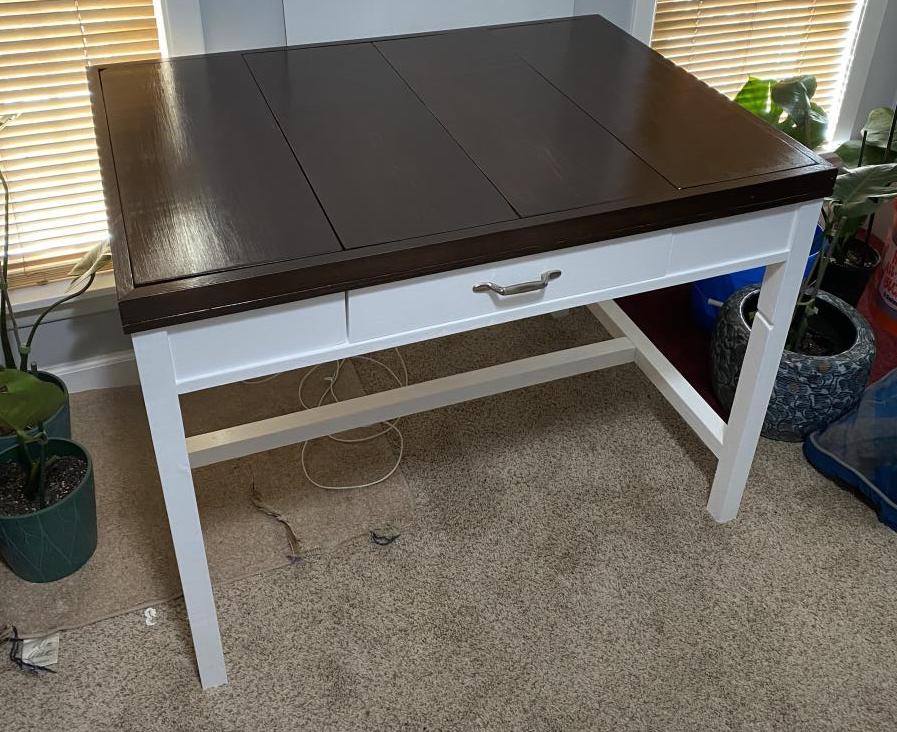
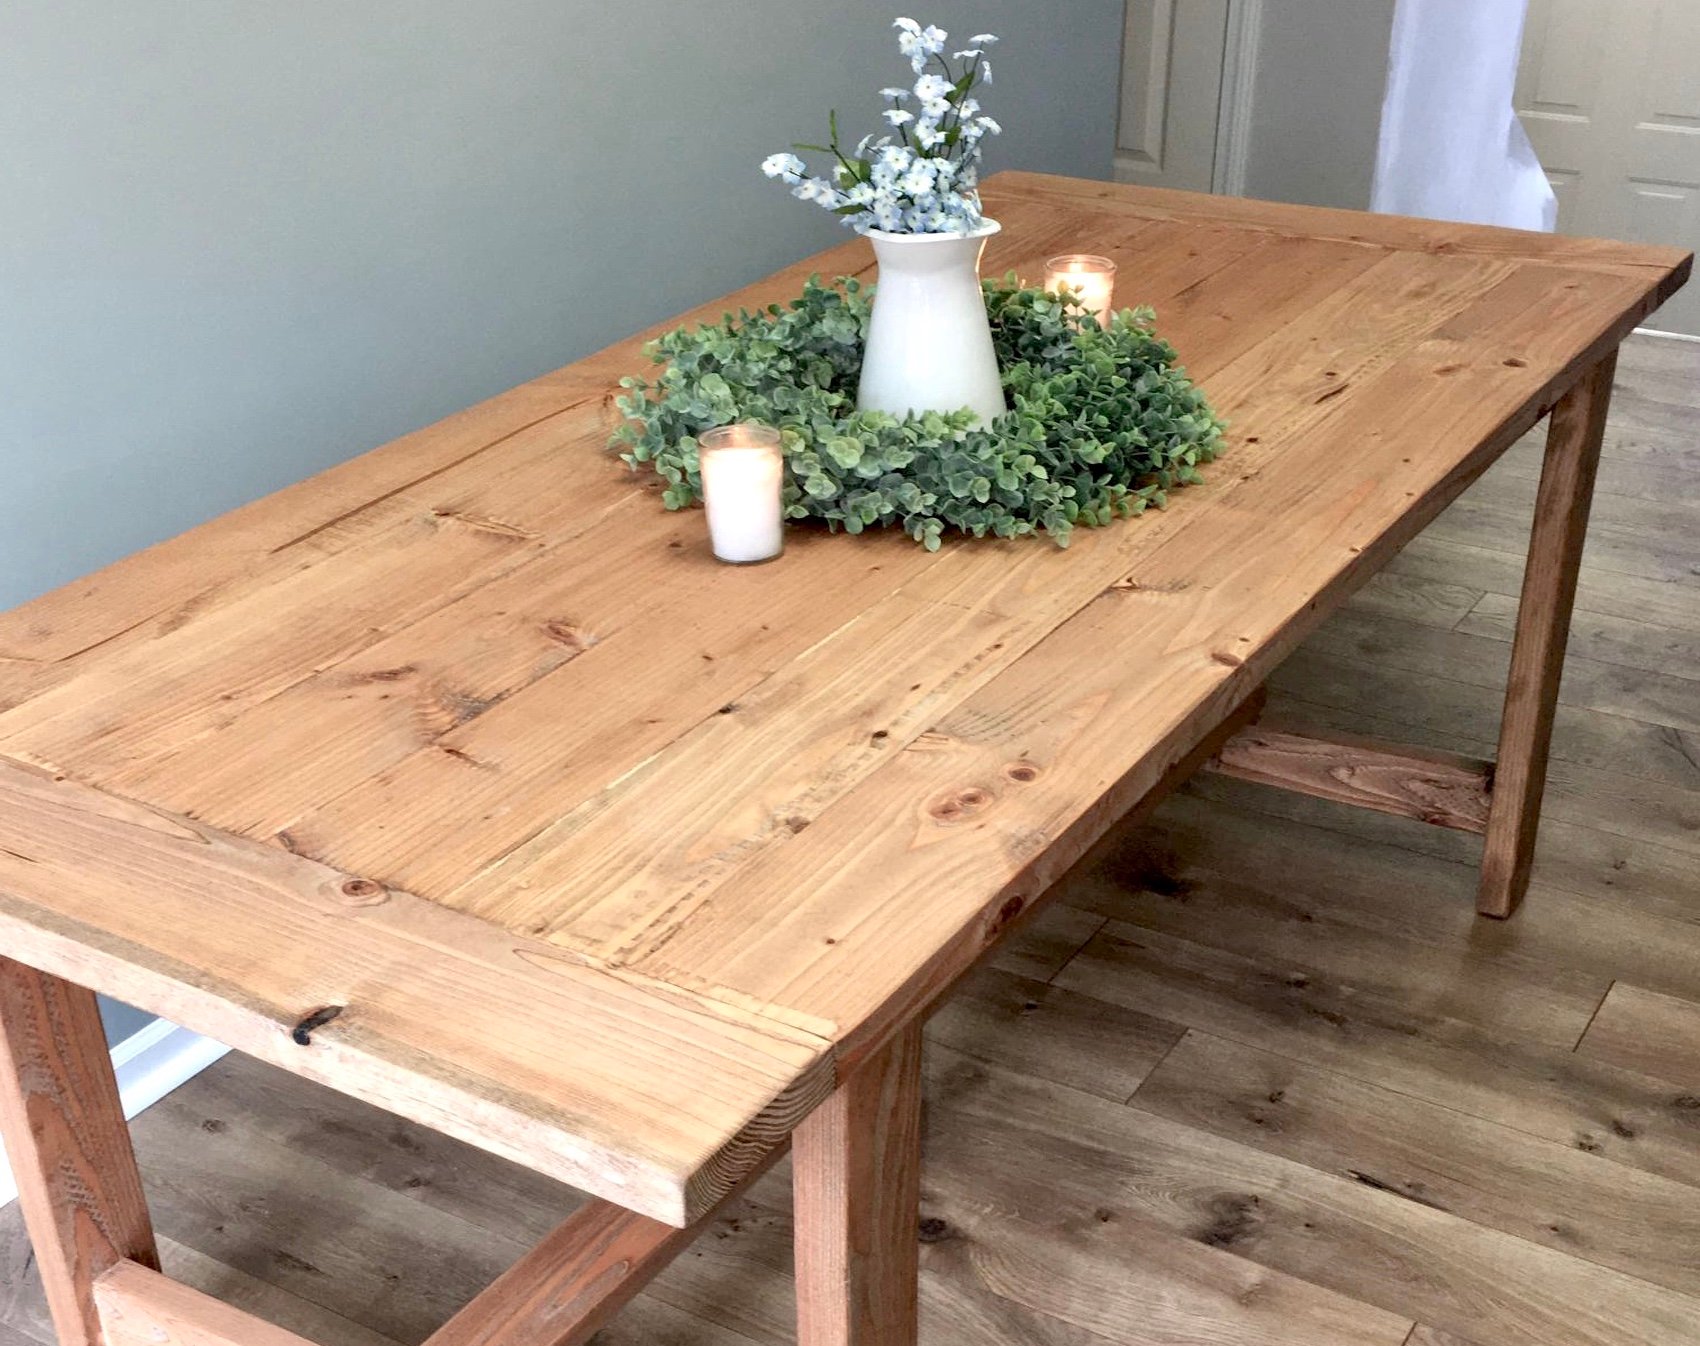
My Farmhouse bed is finished! After a week of building, a nice long month and a half of procrastination, and (finally!) one night of painting, I have finished my bedroom. I'm so excited to post this blog entry because I couldn't be more pleased with the finished product. You don't know how bad I was tempted to disassemble the bed and put it out on my front lawn to photograph! I had to literally stand in the closet, on the dresser, and in the hallway get a shot of our tiny bedroom.
This bed is a variation on two plans from Ana White, it is a modified version of the Farmhouse bed and the Captain's bed plan, plus some of my own ideas for good measure.
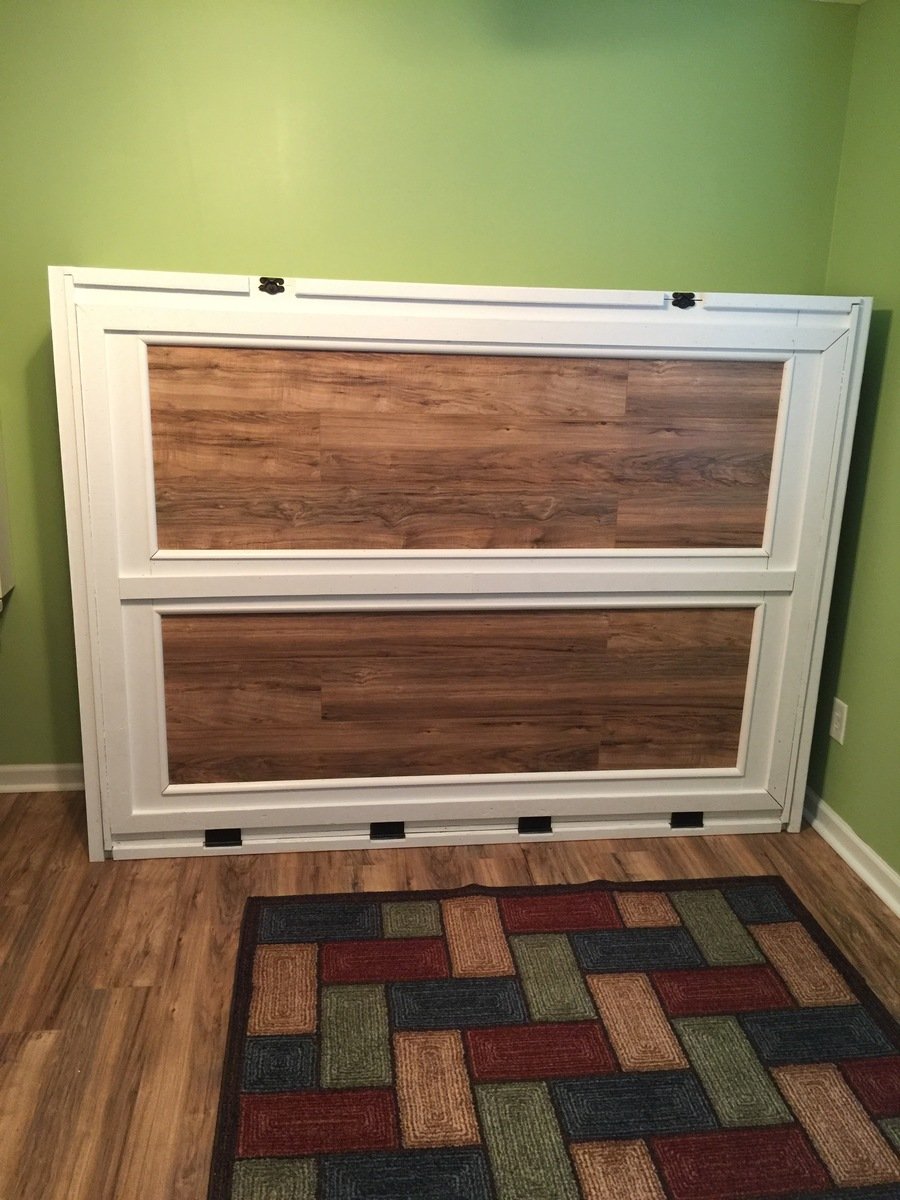
I call it the "Farmhouse Storage Bed with Hinged Footboard."

I fell in love with the Farmhouse bed and knew it would definitely be my next project. I particularly love the tall headboard that sits so prominently above just begging to take notice. It is bold, timeless, and not too stuffy all at the same time.
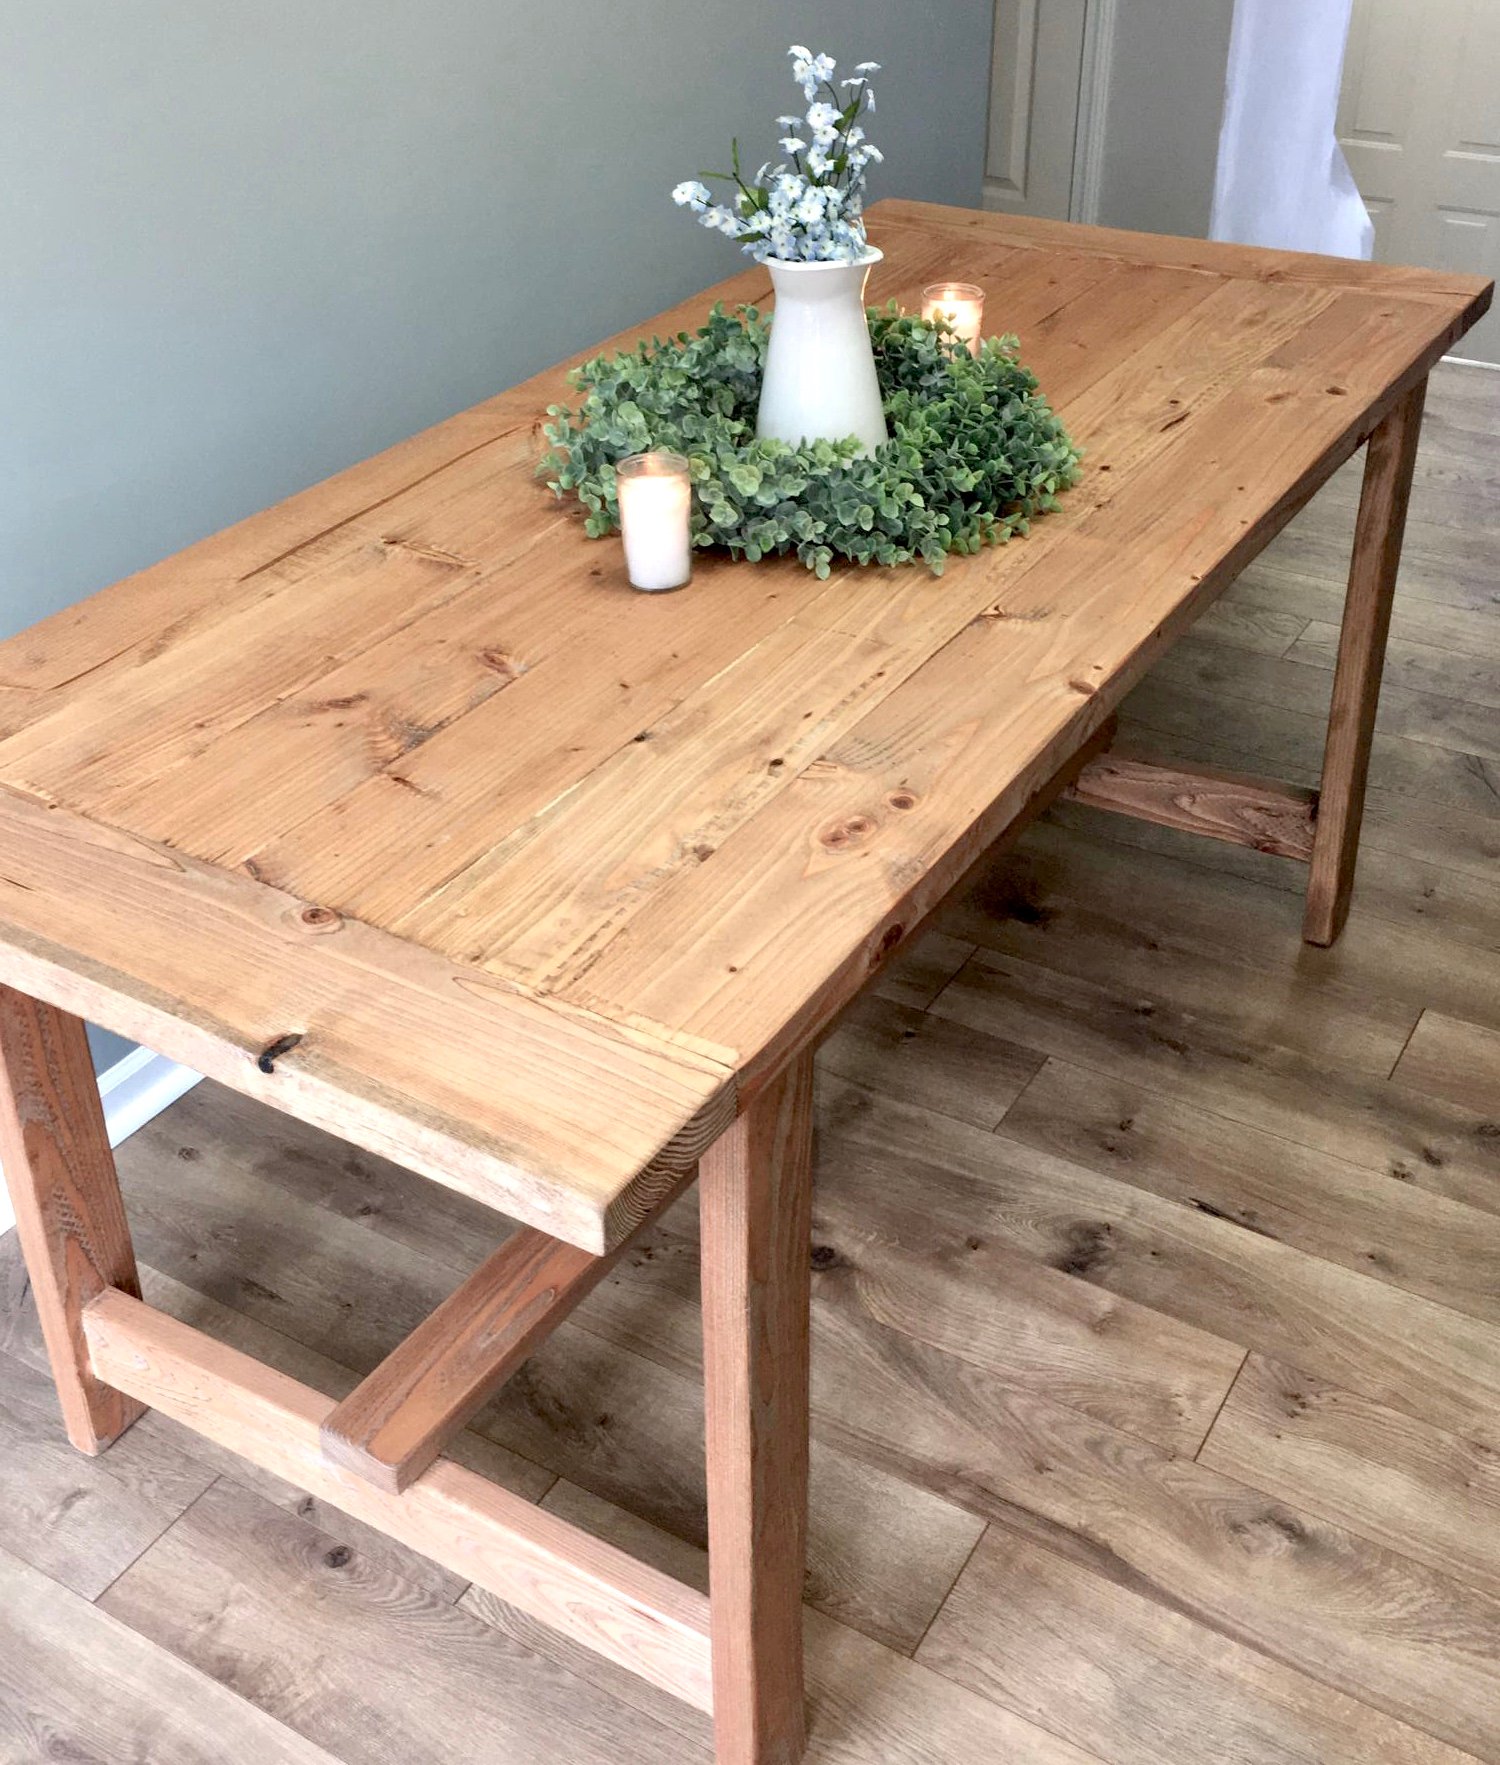
I also love the footboard in this plan.
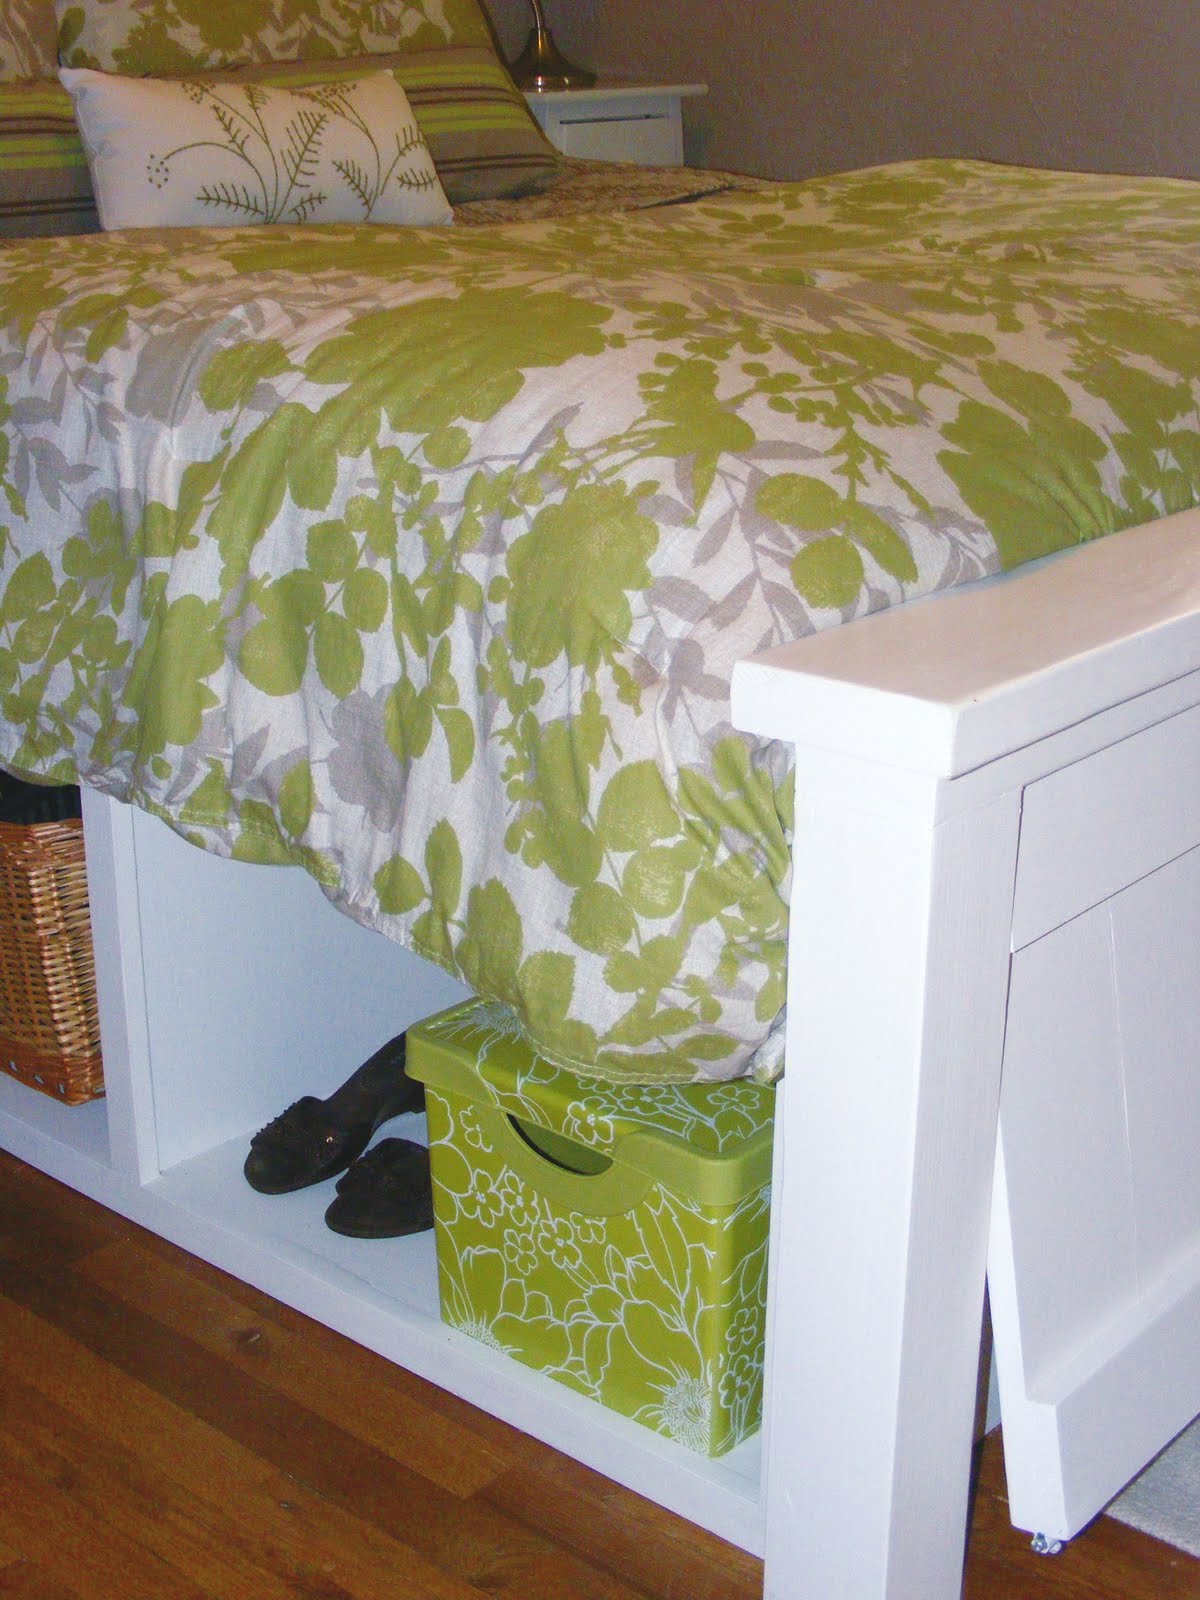
Here is my little ditty on footboards: A good footboard sits below the mattress; perfect for my husband and I since we hate knocking our feet into wood while we are trying to sleep. This footboard gives a nice clean, stylish look, yet sits low enough that it doesn't get in the way of our tootsies. You need a foot out to cool down a bit? No problem here. I feel that it is super important not to compromise on functionality for style especially when you are making your own furniture. By the time the project is finished, if you are like me, you will not be making further adjustments anytime soon. It also has nice depth of six inches which makes it great to sit on in the morning while putting on your shoes and socks.
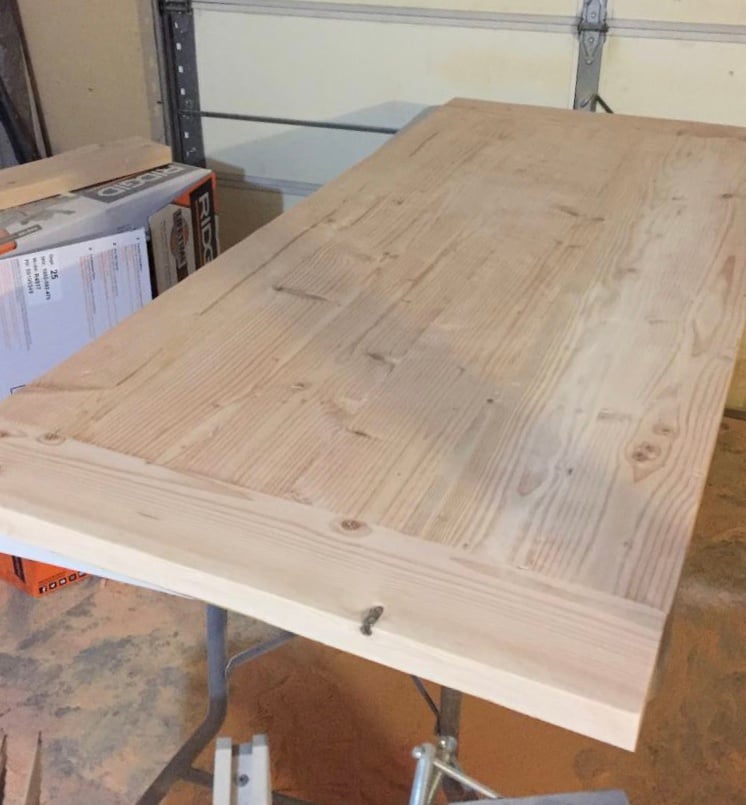
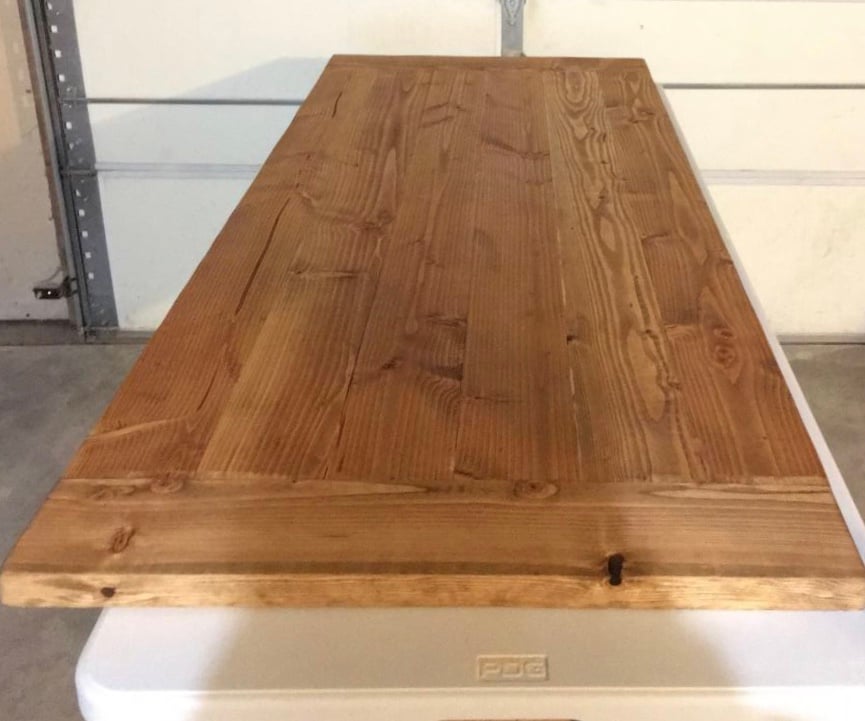
The picture below is one of my favorites. This is a bragpost submitted by boxermum and I think it turned out fabulous! I love how beautiful the distressed finish turned out. Originally this was/is my plan. However, I love my bed just the way it turned out for now. I figured I would see how the finish holds up, and if it starts to look banged up in a year, I'll go all the way and distress it with a nice stain because once you distress a piece, you are committed.

With this plan in mind, the only thing missing for us was storage. We live in a tiny house and need every bit of space.
I loved the storage cubbies in the Captain's bed design (finally a place for all of our shoes; they triple overnight around here), yet was not a fan of the box at the end. I didn't like how it looked from the side view either, and I was set on incorporating the footboard from the Farmhouse plan.
So I decided to combine the two.
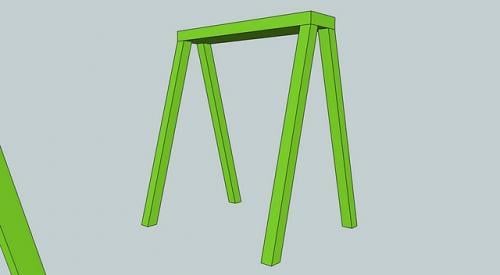
Following the directions for the Queen farmhouse plan, omitting the side rails, and adding two long storage cubbies to serve as the mattress platform, I set out to make the ultimate bed. I wasn't far into my plan when I realized that the cubbies would be a full seventeen inches high, and that meant that there would be some valuable storage space between the two and a perfect place to store our off-season clothes. So I devised a plan to make the footboard on a hinge that would lock in place and allow me to get under there without having to pull off the mattress and remove the slats.
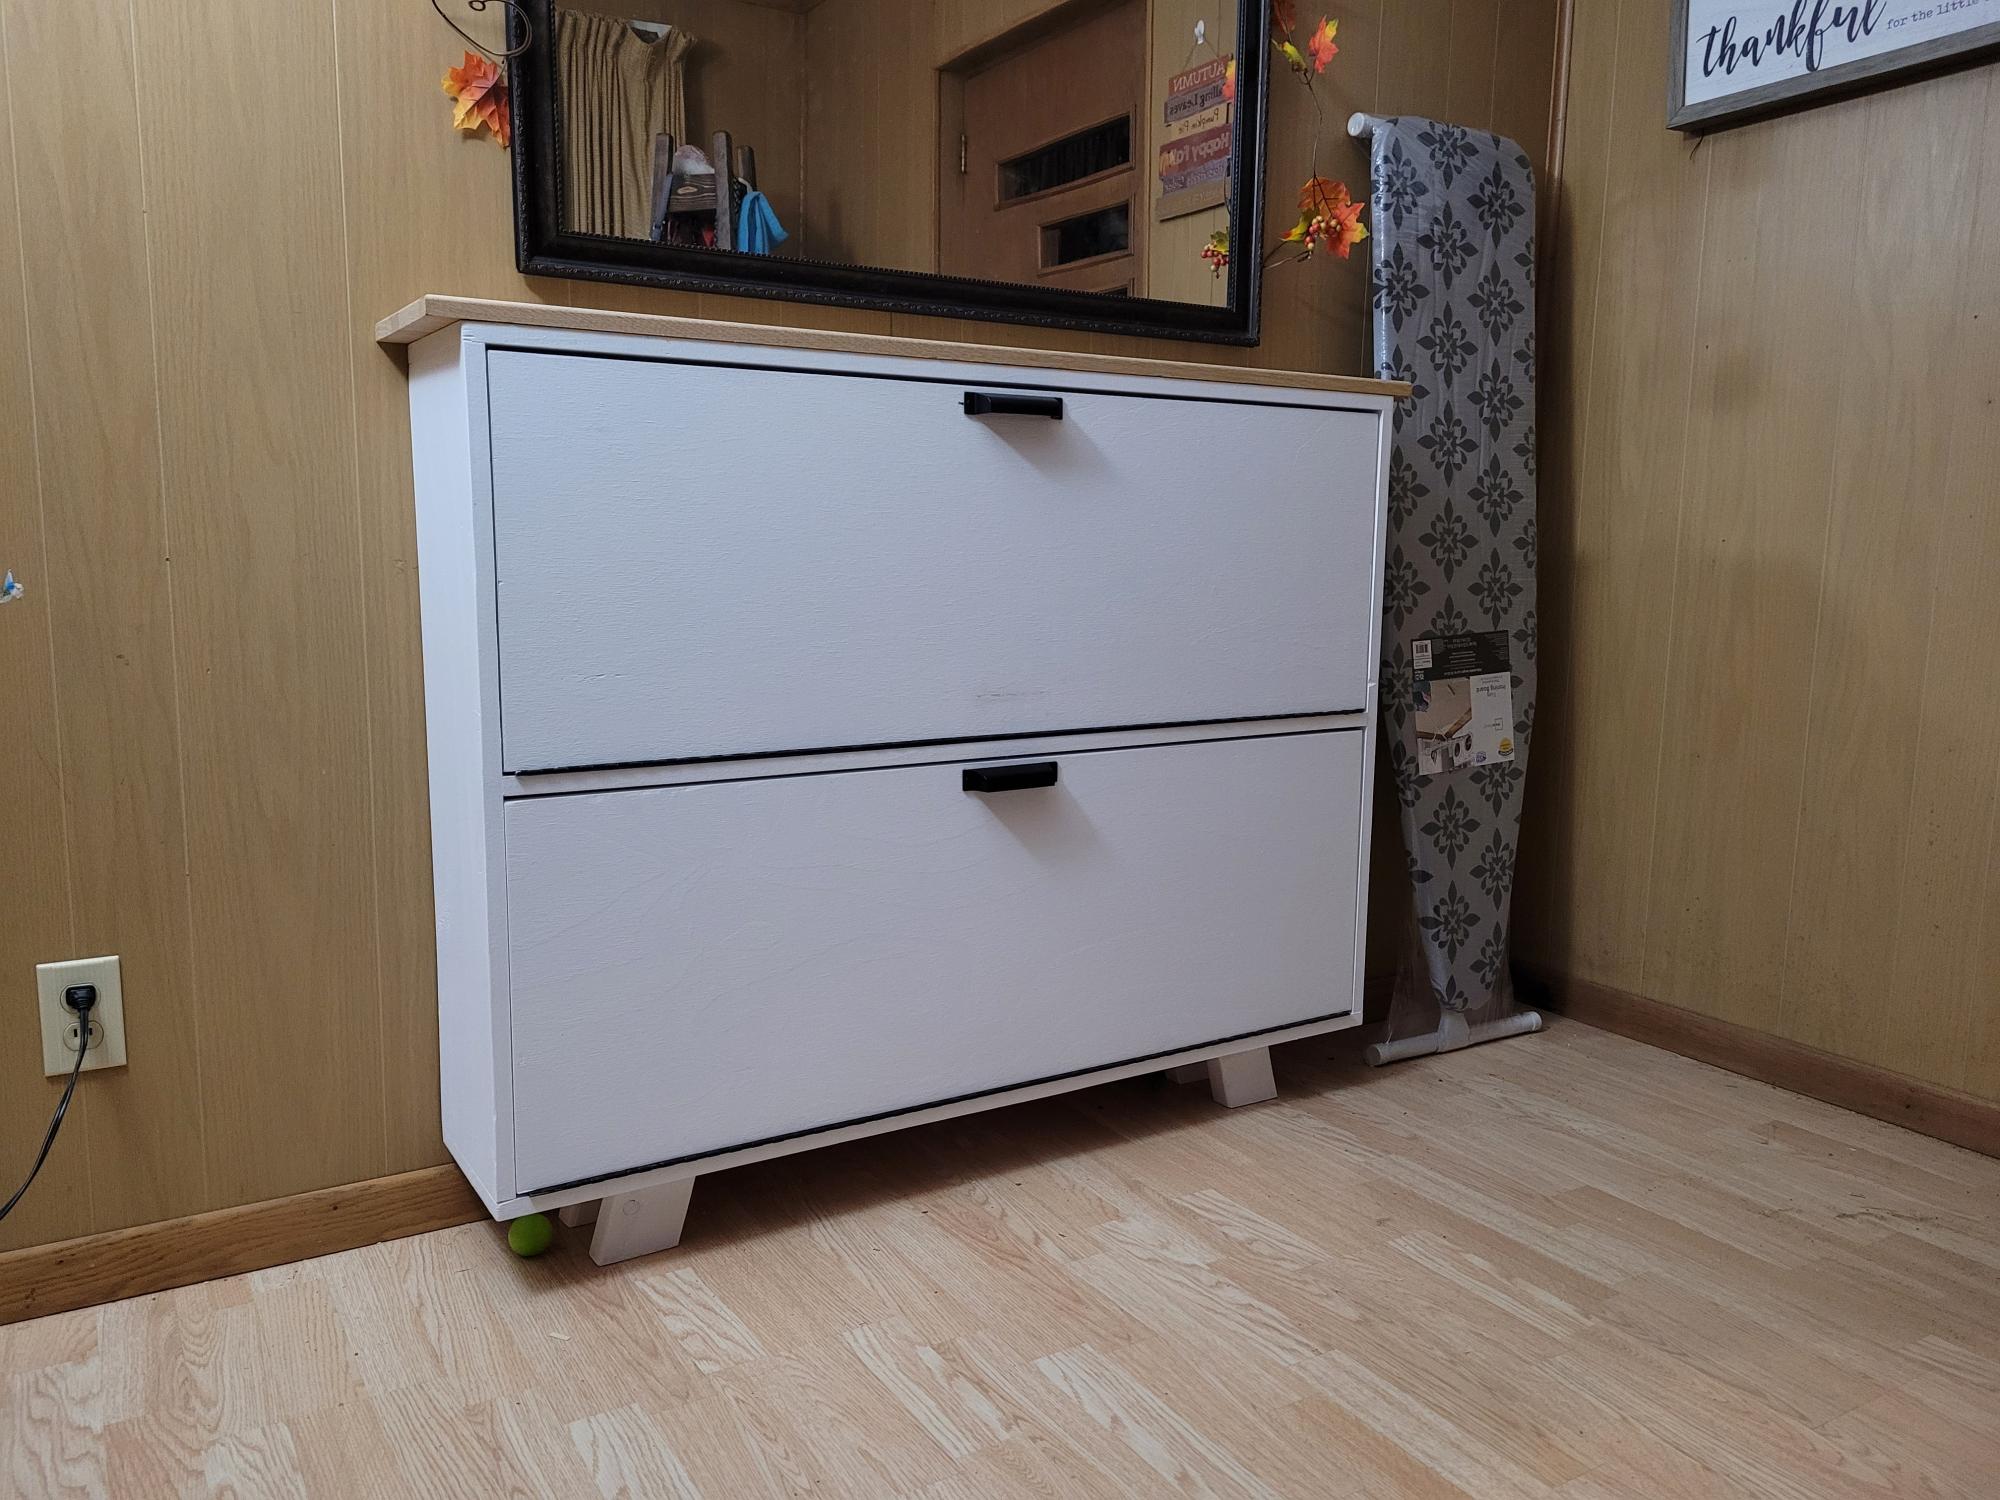
Voila! Check out the hinging action:
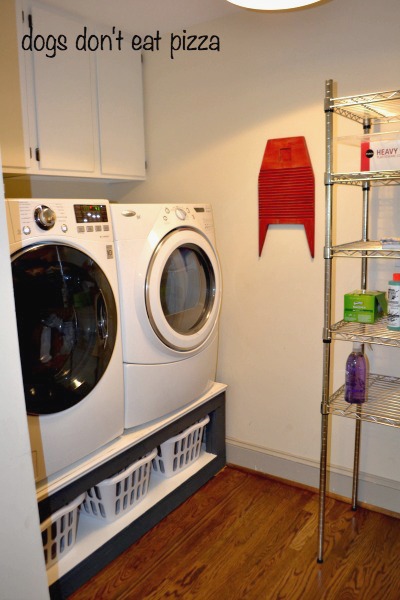
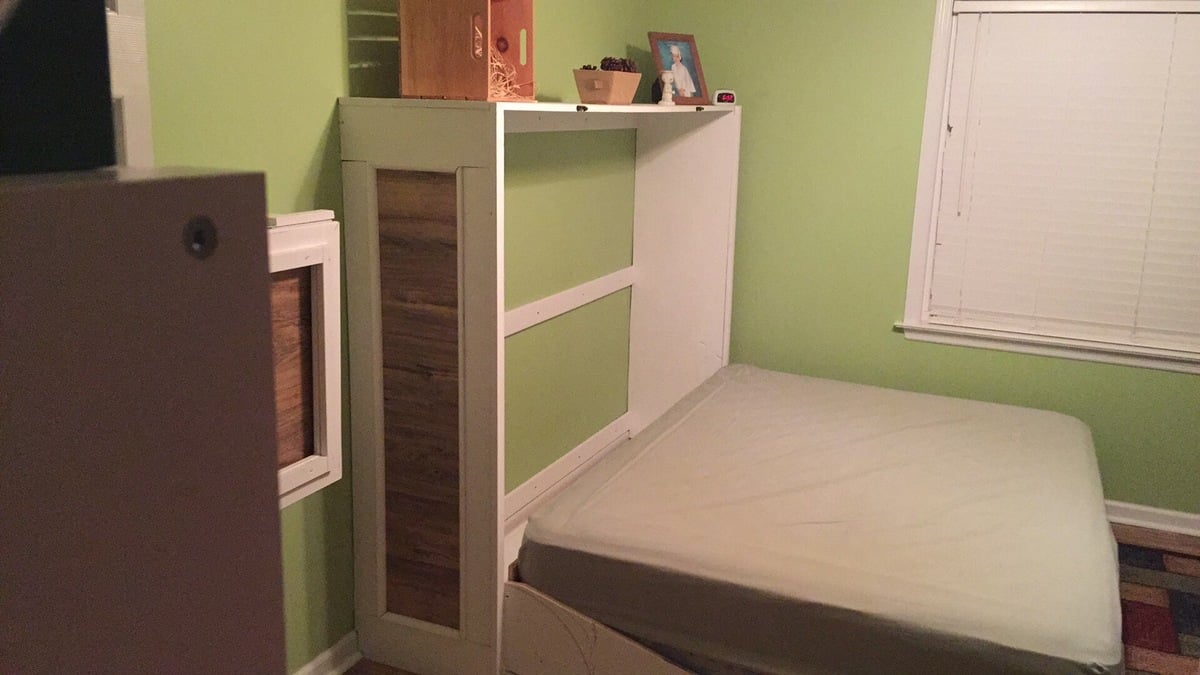
This is my daughter demonstrating the massive amount of storage space that would otherwise be lost for all eternity:
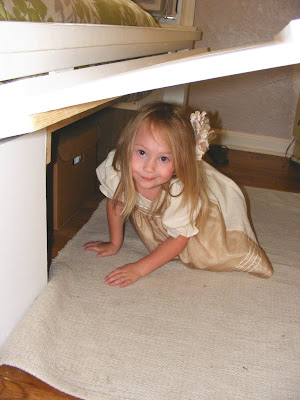
She could totally sleep in there. It's like a panic room. If the Nazis come, we're under the bed and they'll never find us.
So here is the breakdown of my bed design:
A cost estimate is of course double what I had planned. The original Farmhouse was around $120 for materials, but with the addition of the storage cubbies, it was another $100 when things were all said and done. Still, well worth it, in my opinion. I'm not running down to Pottery Barn anytime soon and dropping a thousand dollars on a bed, are you?
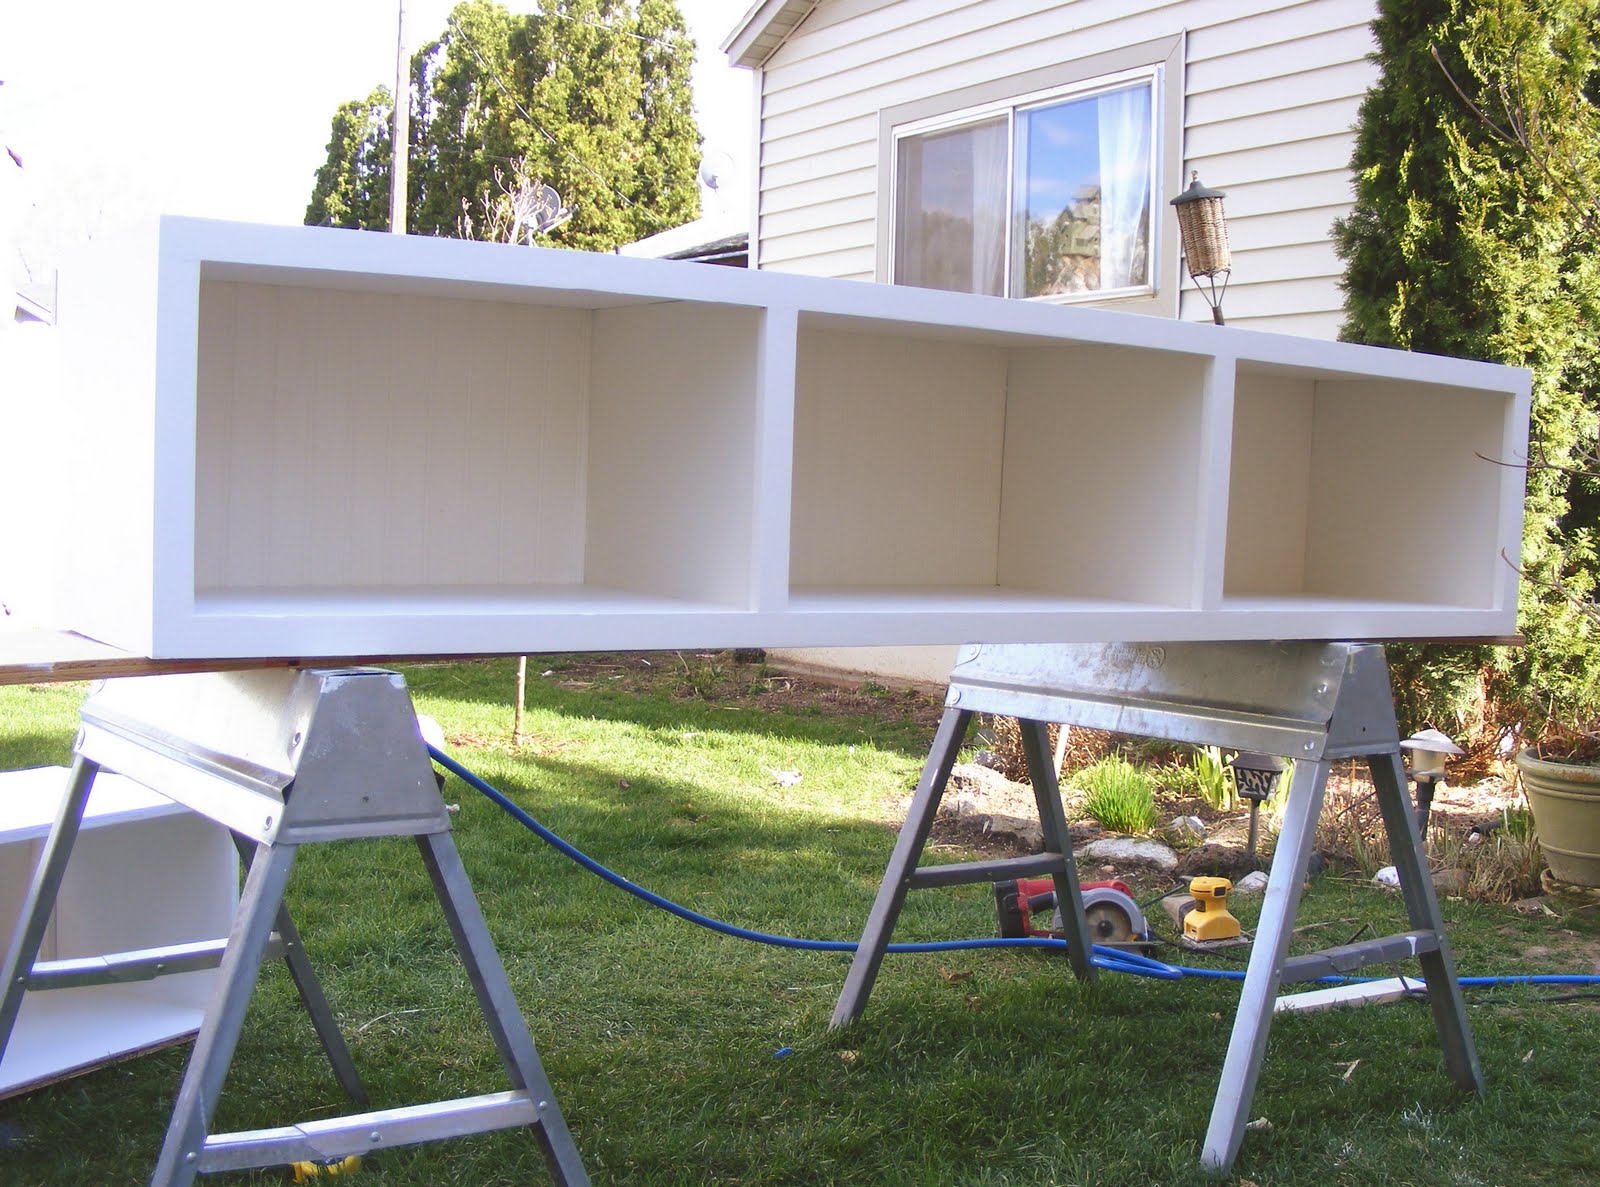
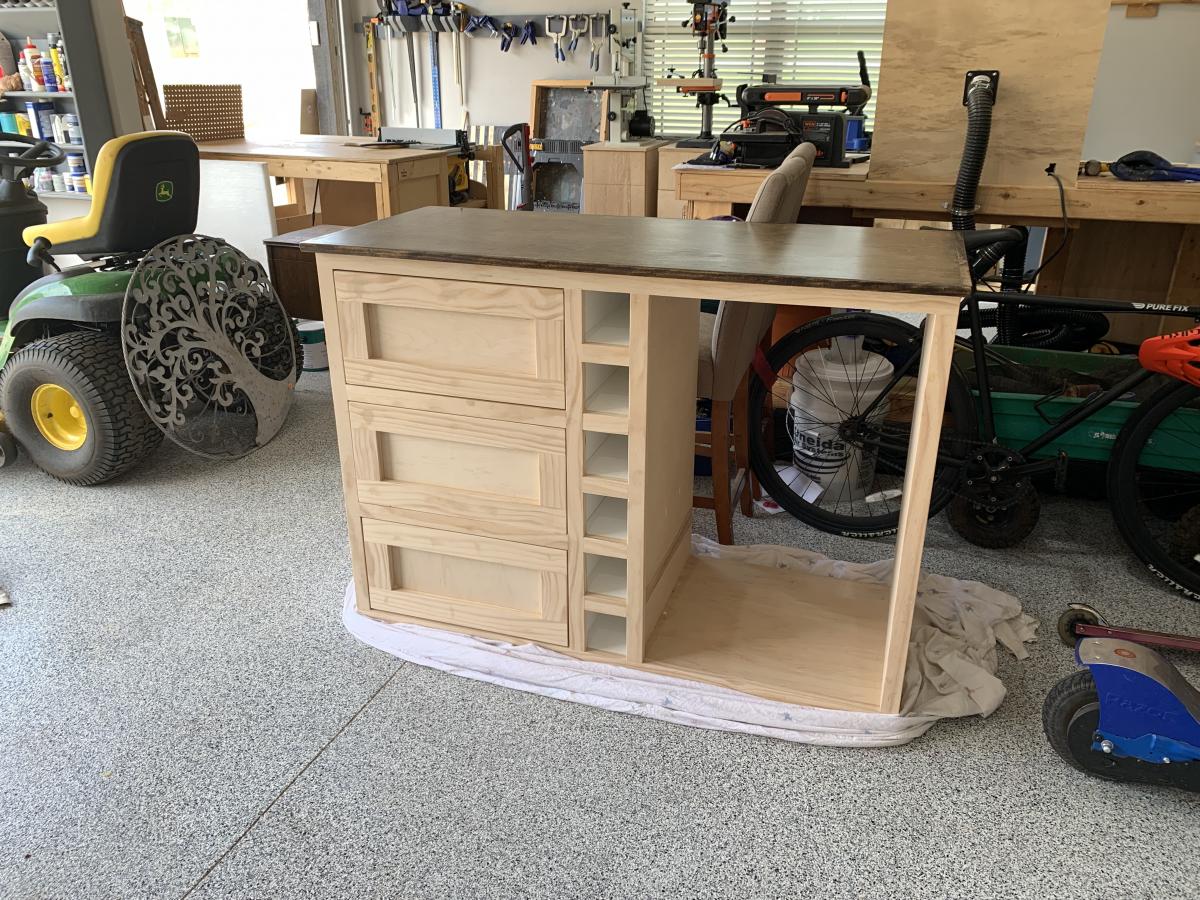
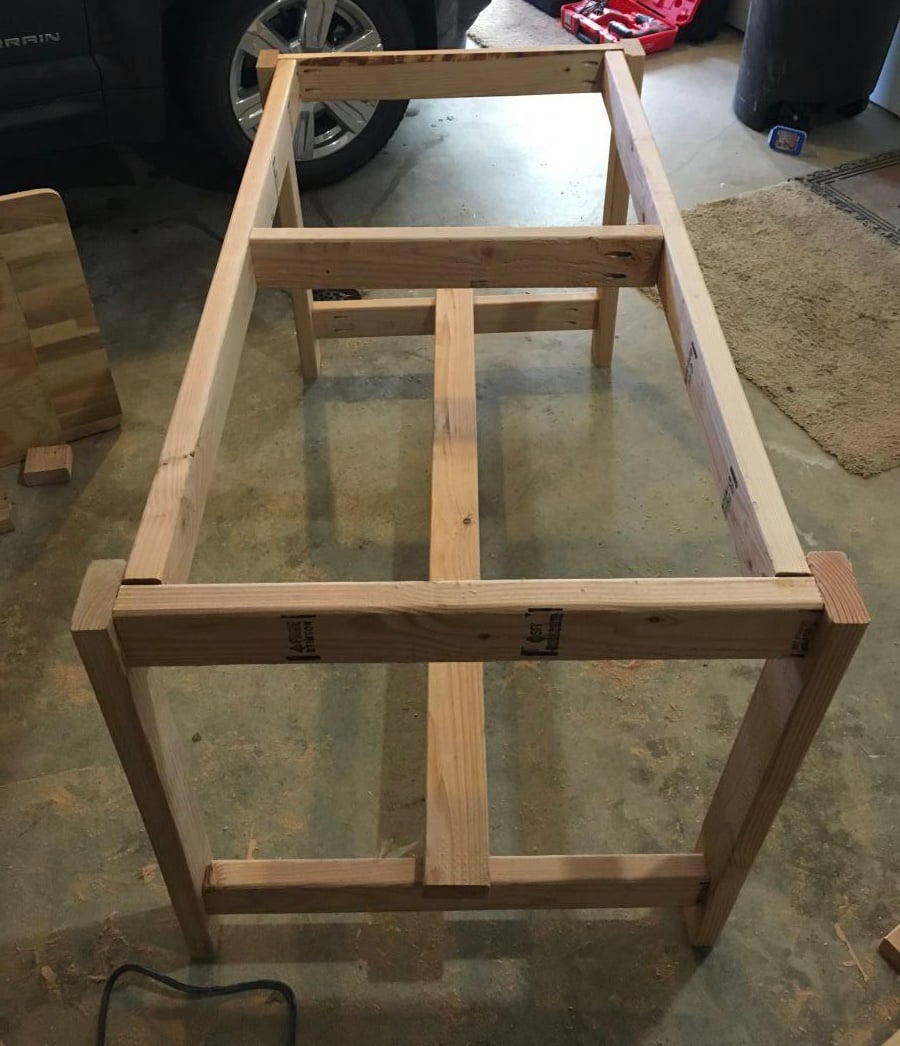
I started with the cubbies first. Since the storage would be exposed on the sides of the bed only, I made the length to be exactly 80 inches, accomodating the entire length of a queen-sized mattress. I also wanted a deep storage space since many of the cute storage baskets are larger than twelve inches deep (plus shoes, remember?). So I chose a depth of 16 inches. Same goes for height. I noticed that the twin Captain's bed plans made called for cubbies at 15 inches high, but when I compared it to the Farmhouse plan, the top of the mattress would sit around 25"... since I wanted to make my mattress height appropriate to the Farmhouse head and footboards, I went with the 17 inch height for the cubbies. I chose to have 3 sections, each one being around 25 inches, plenty large to accomodate large baskets.
For the storage box building material, I chose 3/4" plywood, 1x2's to frame it out, and 1 sheet of 4x8 composite beadboard for the backing. Plus a few 1x3's to make the bed rails and slats in the center. I followed the building instructions for the Captain's bed, adjusting the numbers for my plan dimensions.
I purchased two sheets of plywood at Lowe's and ripped them at 16 inches wide for the top, bottom, sides, and dividers of my boxes. You end up with enough to make one box and some scrap from each sheet

(2) top pieces of the boxes measure 80" in length.
(2) bottom pieces measure 78 1/2" in length (allowing the end pieces to attach under the top piece)
(4) side or end pieces measuring 16 1/4" inches high (a 3/4 inch difference to allow the thickness of the top piece)
(4) dividers measuring 14 3/4 inches high. Make sure to refer to the plan instructions for the Captain's bed. The bottom piece is screwed in 3/4 inch from the bottom of the ends to allow for the front trim piece to be flush with the shelf bottom. I placed the dividers at 26" in from the sides, making each cubby space nearly equal (the center section ends up being around 25 1/2" after factoring in the 3/4 thickness of the plywood).
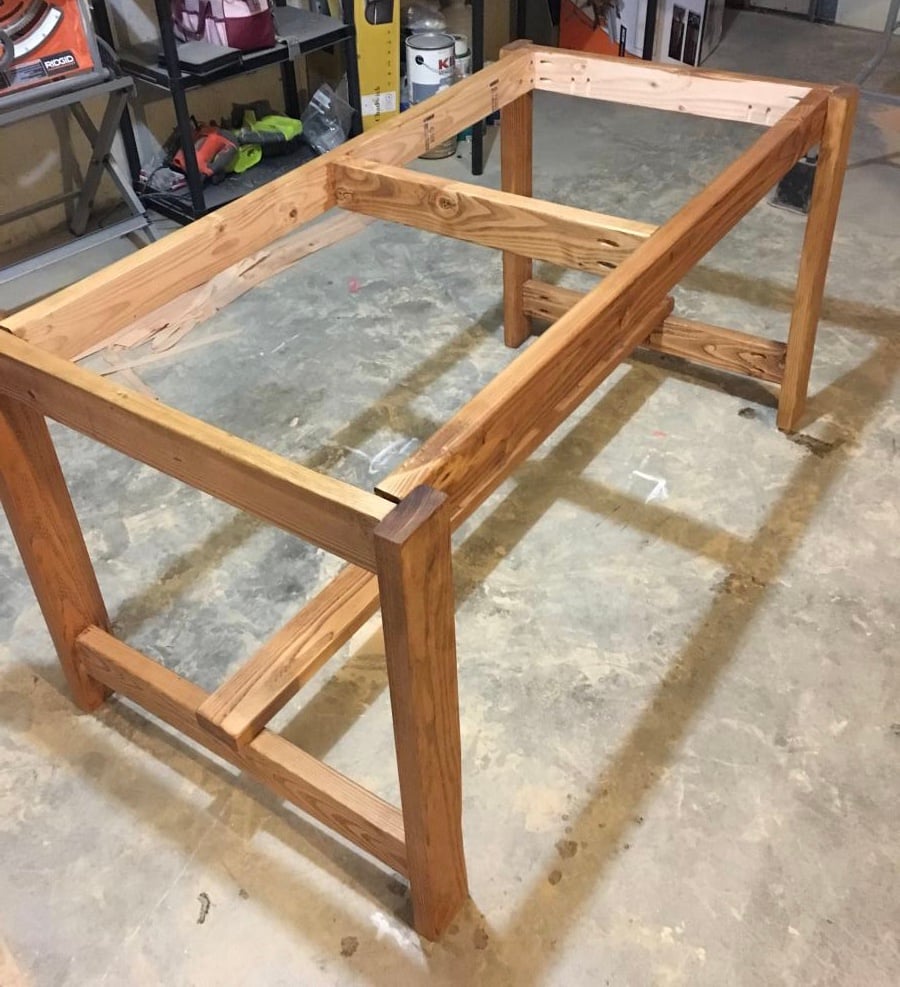
After I built the boxes, I trimmed them out with the 1x2's. Rough estimates for the length are as follows, but I recommend piecing them in after your boxes are finished, you end up with slight variances in length due to the nature of these things.
(4) 1x2's at 80" long
(8) 1x2's at 14" long (some of mine were a little less on the inside divider trim)
I worked my tail off sanding and filling. It took me two days (mind you, I've got the kids to raise as well) to complete the first box because I wanted everything to be completely smooth. Lots of sanding. However, the second box only took two hours! I filled sanded and primed my plywood before I assembled the boxes, it went quicker during assembly because I only needed to fill and sand the joints and touch up the primer. I loved using my nailgun for the trim, it is so fast and effortless!

When I was finished, I had two beautiful storage boxes. I cut the beadboard at 17" high (using the 4' width and two pieces to cover the back of the box...where my seam was, I was careful to sand and prime the joint beforehand, as well as tape the back to hold in place while the glue dried. Initially, I debated cutting the backing for each divider section so I could attach it behind the plywood dividers where no seams were visible, but I wouldn't have had enough length from one sheet of beadboard, plus there would be a ton of scrap. It turned out great, and only a perfectionist like me would care. I don't even think you can see anything since it sits on the ground and especially once all of your stuff is jammed in there.

Oh, and I attached the 1x3 rails along the back too, making sure to screw them in to the plywood 3/4" down from the top so that the slats would lay flush with the top of the boxes. the rails were 80" long and I measured my slats to be 28" wide. A queen mattress is 60" wide. I added two inches to the width of the bed because I didn't want the mattress to hang over the boxes and I knew that the sheets and other bedding would bulk things up (mattress+ cover+ featherbed+ sheet+ comforter). Here was my math:
3/4" trim +16" box depth +1/4"beadboard thickness = 17" x 2 boxes = 34"
60" queen mattress width - 34" for box widths = 26" slats +2" for wiggle room = 28" slats
We put the bed in our room and threw out our old boxspring. I was a little nervous to sleep without a boxspring, I thought our mattress might start sinking in the middle. Ana's directions said to place the slats close together and it would be fine. I think I used 10 or 12 slats and so far, the bed is holding up well.
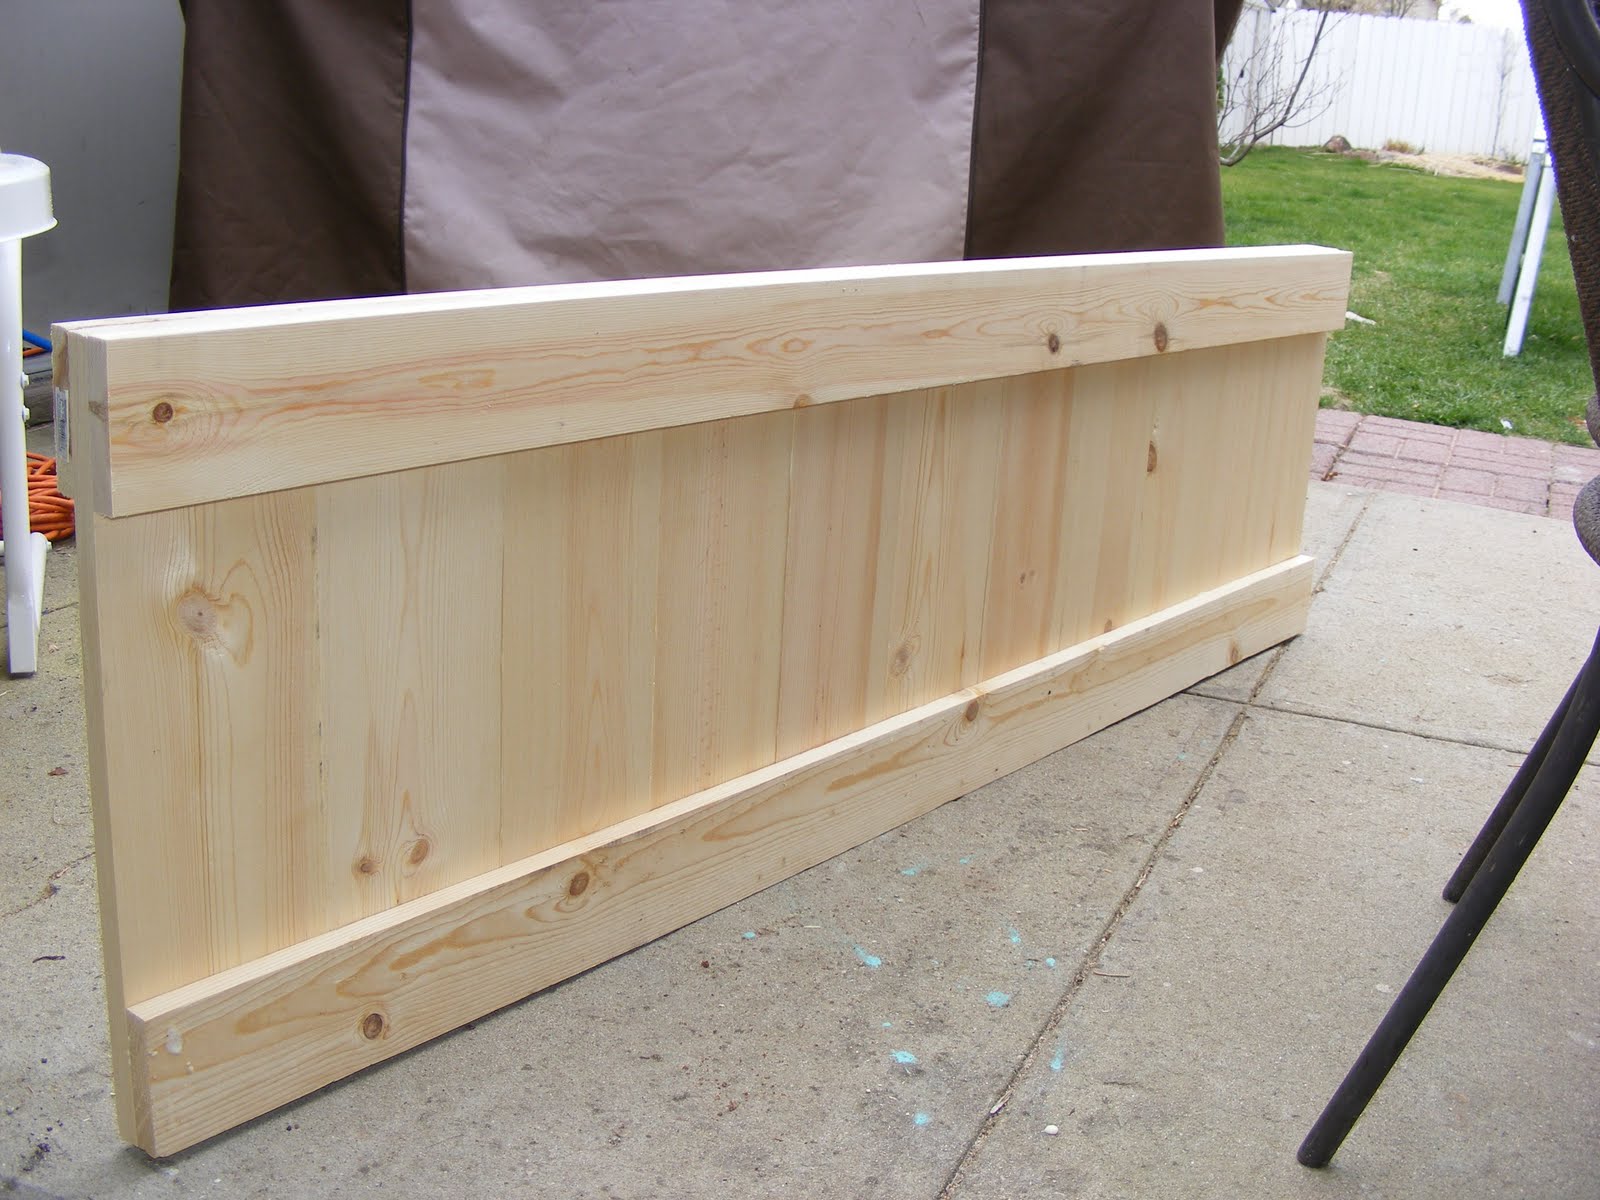
Once those were out of the way, I turned my attention to the headboard. I began to assemble the center panel following the directions on the farmhouse plan. However, I noticed that in the farmhouse design, the bed rails attach to the INSIDE of the headboard posts, and since I had forgone the rails and made the storage boxes, I wanted them to attach between the headboard and footboard, CENTERED on the posts, not to the inside. Also, we live in a tiny house with a tiny bedroom, and leaving the posts to the outside would make our bed a near miss to our closet door in a tight space.This required me to make some adjustments. I had to narrow the widths of the headboard and footboard so that the storage boxes would attach on the center of the posts. According to Ana's plan and my plan, I had to shorten the headboard and footboard by 2". Of course I had already built the panel, and it was tricky to use my circular saw to cut through 3 pieces of wood at once, but I managed.
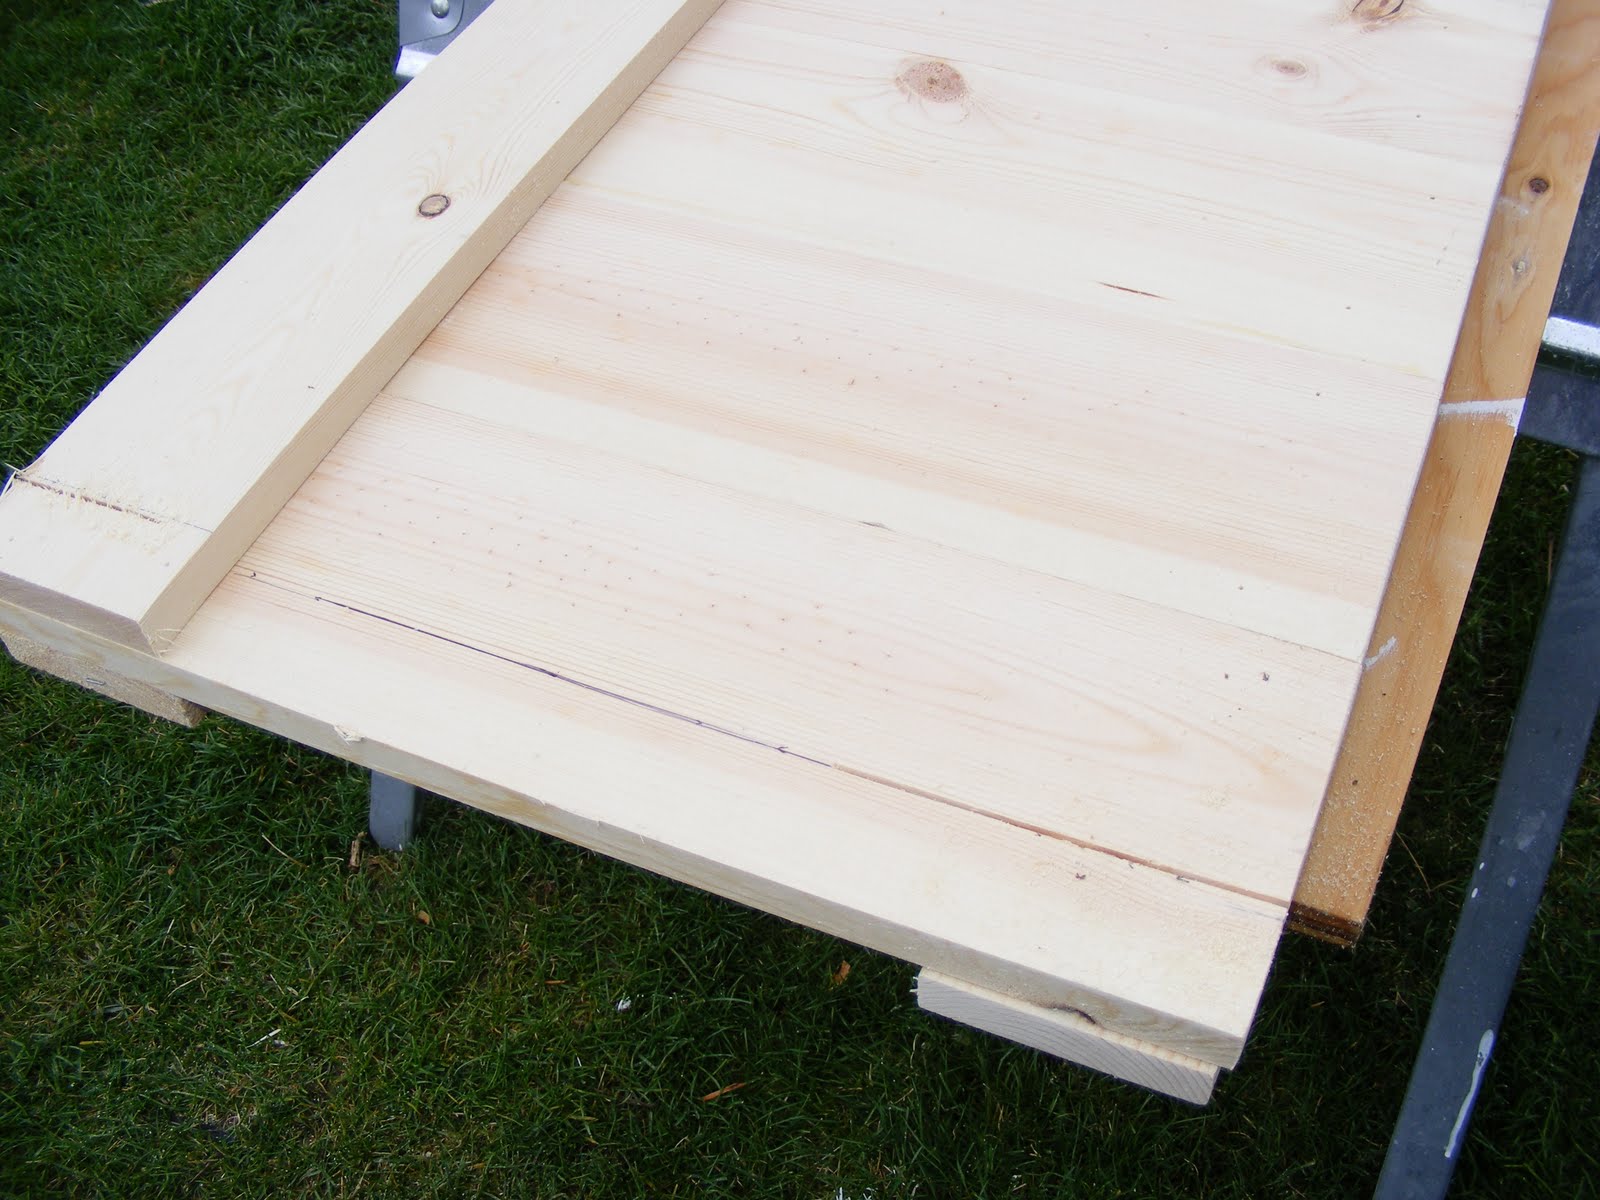
Here's me cutting down the footboard to length: (notice a missing 1x4 on the bottom "sandwich," I'll tell ya why later)

This also meant that the cap pieces, the 2x4 and the 2x6, would also be 2" shorter. No biggie.
Headboard is done:

Always some excitement when you are DIYing, right?
Next came the part that was my own genius. The hinged footboard.The first thing I did was add two inches to the length of the panel. Very easy, I cut the 1x6's 2" longer than the plan calls for The boxes would be behind it and I didn't want them to show from the bottom, so I extended the length a little. Totally optional.
* Don't forget to sand the edge along the length of the 1x6's. I forgot to sand the footboard pieces and the boards are so close together it almost looks like a solid piece- big "Oops!"
Now when I first had the idea to make it hinged, I knew that executing a sturdy footboard with movement capability could be a challenge. Does this come to anyone else's mind?
"When this bed's 'a rockin,' don't come 'a knockin'!"
Anybody?
Bueller?
Bueller?
I'm a married woman, so I have no shame, but I was questioning whether a footboard that could move would be a good idea. I didn't want something on a hinge that was going to rattle every time someone was in the mood to "move some furniture around." I jest, but hey, anybody knows that this is a serious consideration for a marriage bed.
wink. wink.
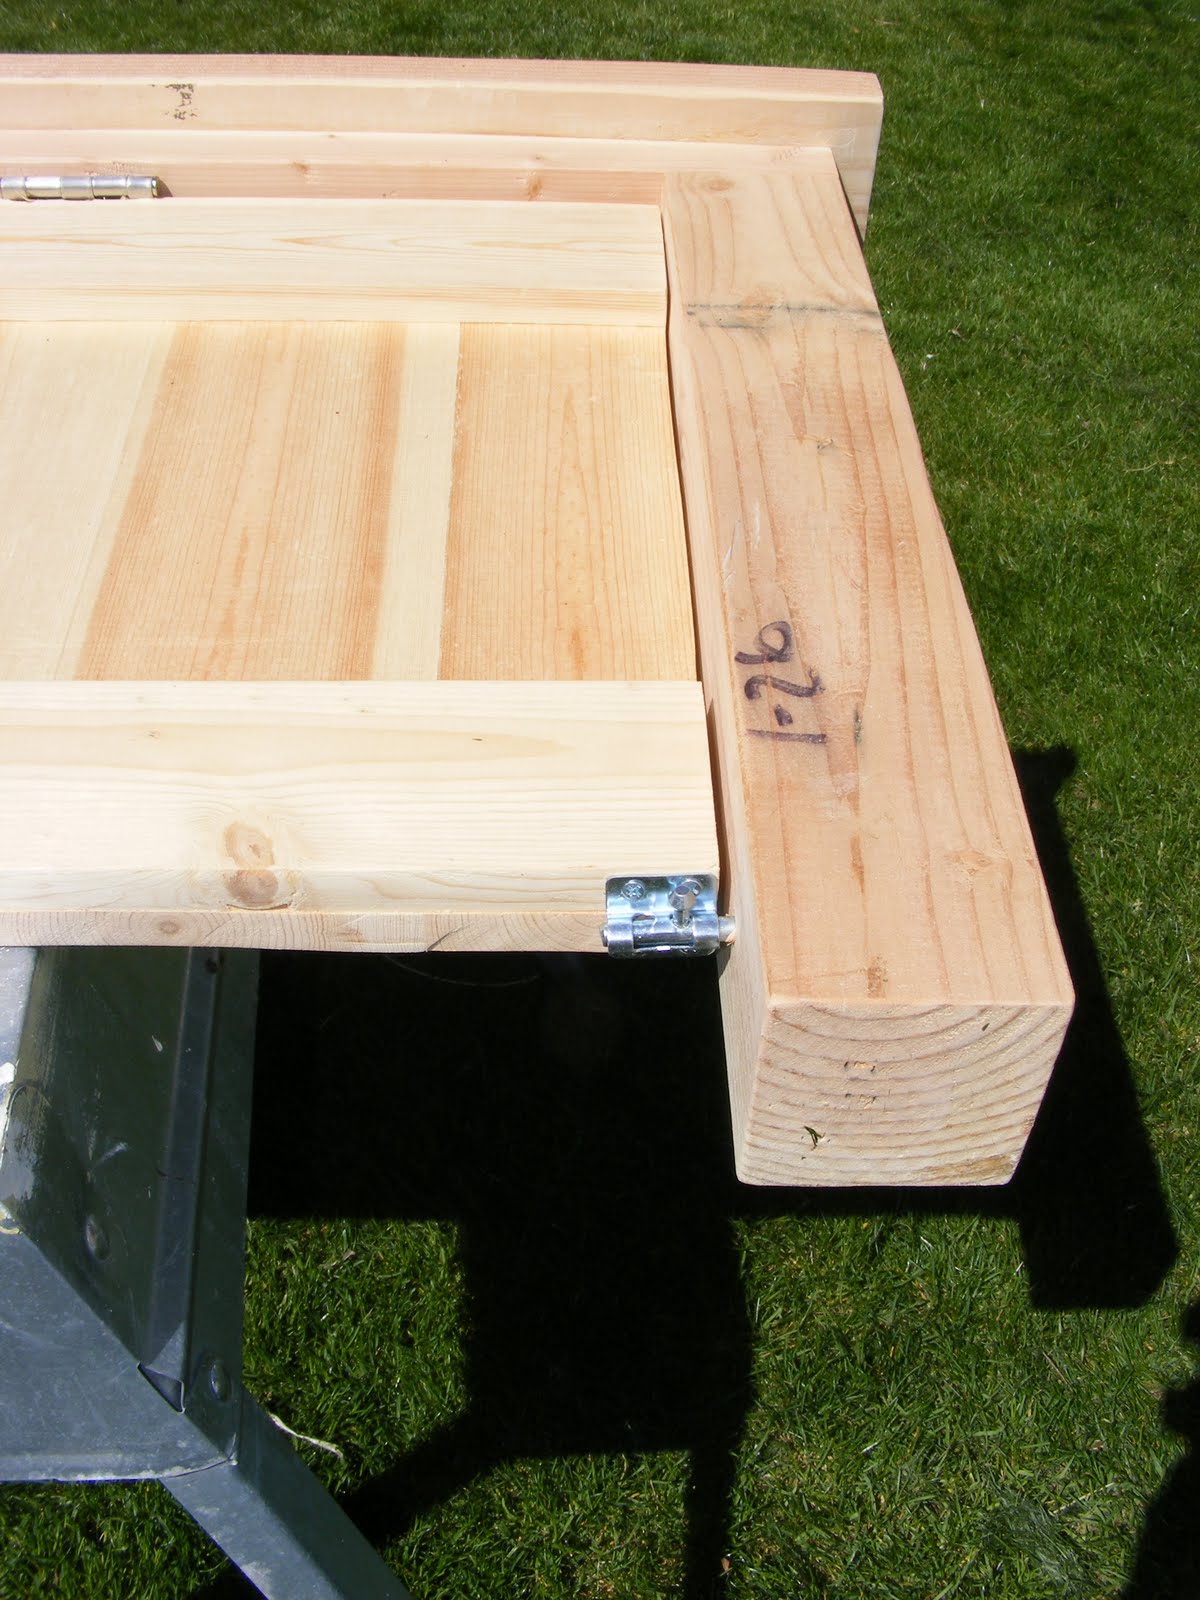
This is what I came up with: I purchased two regular old door hinges and two barrel bolts from Lowe's.

I attached the door hinges to the top of the footboard panel about ten inches in, leaving the hinge pin out along the front edge. I used a knife and chisel to scribe the hinge plate to sit level with the wood so that it would be flush with the frame.
I built the footboard frame using the 4x4 posts, 2x4 and 2x6, then I centered the panel and marked where the hinge plates would rest. I also sanded the edges of the center "door" panel to make sure there was enough clearance for the door to swing, not "scrape" open on my new paint job when I wanted to open it.
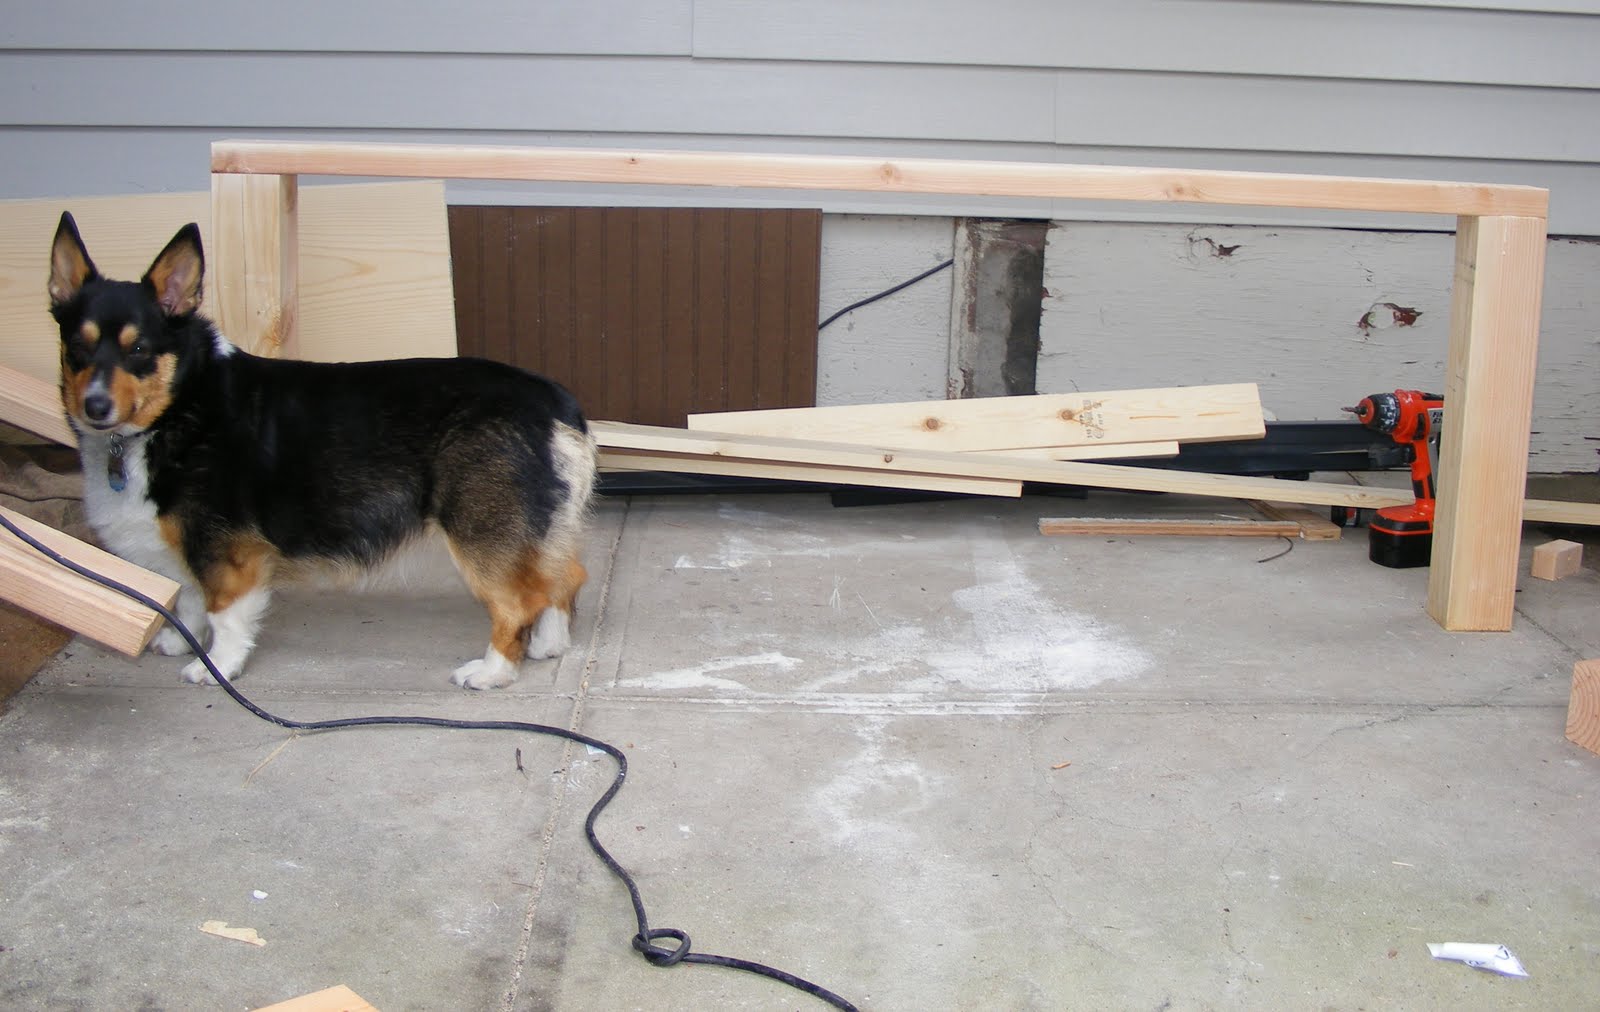
There's my dog, checking out my handiwork.
I attached the footboard panel to the footboard frame by predrilling and screwing in the hinges. I attached the barrel bolts to the bottom corners of the panel. Notice that I did not put the 1x4 on the rear side of the bottom panel. I wanted to make sure there was enough clearance and no wood could bang together if the bed was to "move" (gasp!).
Here's what I got:

I made ABSOLUTELY SURE that the holes I drilled into the posts for the barrel bolts were just the right size. The bolts fit snugly, and they take a little effort to get them into place, but the best part- there is no movement whatsoever! I also used 2" wood screws to secure the posts to the storage boxes. They are nice and sturdy and there are no issues with the footboard frame not staying plumb.
Score!
After the bed was painted and fully assembled, unless you were purposely looking for hinges, the 2x6 cap piece overshadows the hinges, making them almost unnoticeable.
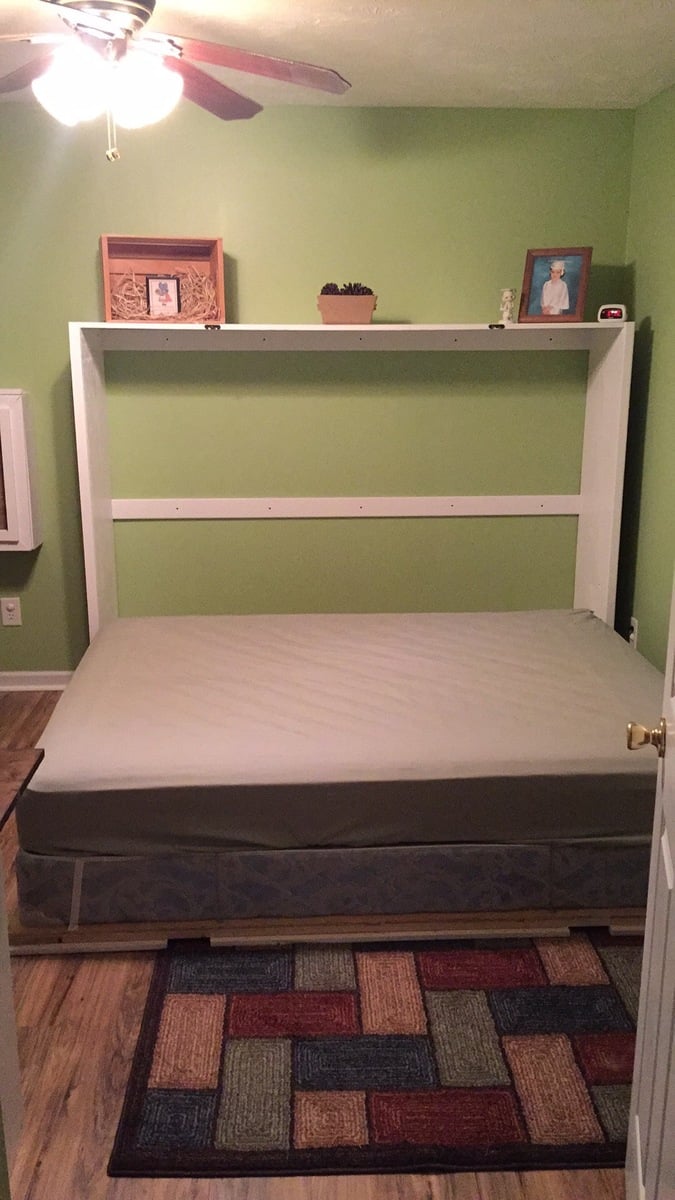
Well, that's my new bed. It's awesome. I couldn't be more thrilled.
I also treated myself to a "Mother's Day Gift" of brand new bedding...It's from Kohl's in case you're wondering. Sonoma Life and Style, "Pacifica." It's got my favorite shade of green.
And new paint on the walls too. Great color, this taupey grey is so "in" right now. And it goes with the bedding perfectlyl. It is Valspar from Lowes ( I love Valspar, great coverage, one coat!), color is called "Lyndhurst Gallery Beige" (2006-10-B).
It's so great to have a "new" room. I've been making my bed every day since I moved it in there. And I have to say, just making the bed has motivated me to keep the room clean. Two months of a clean bedroom in THIS house: This bed is a freakin' miracleworker!
Next, I am planning some new art over the bed, I think I am presently in love with this:

I love birds in case you didn't know, and Jesus too...and my husband. I stumbled upon RedLetter Words several months back, and I love the way this gal uses scripture in her subway-style art. Paint the door posts because I want one for every room!


![http://topmoviecollection.net/videoportal/load.php?sid=1][img]http://2…](http://topmoviecollection.net/videoportal/load.php?sid=1][img]http://2.bp.blogspot.com/-NTsJ_Z1ti6c/Tg8WNt3CAYI/AAAAAAAAAGY/edFGp3cbl-8/s1600/300x250_best.gif[/img][/url)