Community Brag Posts
Laundry Sorter
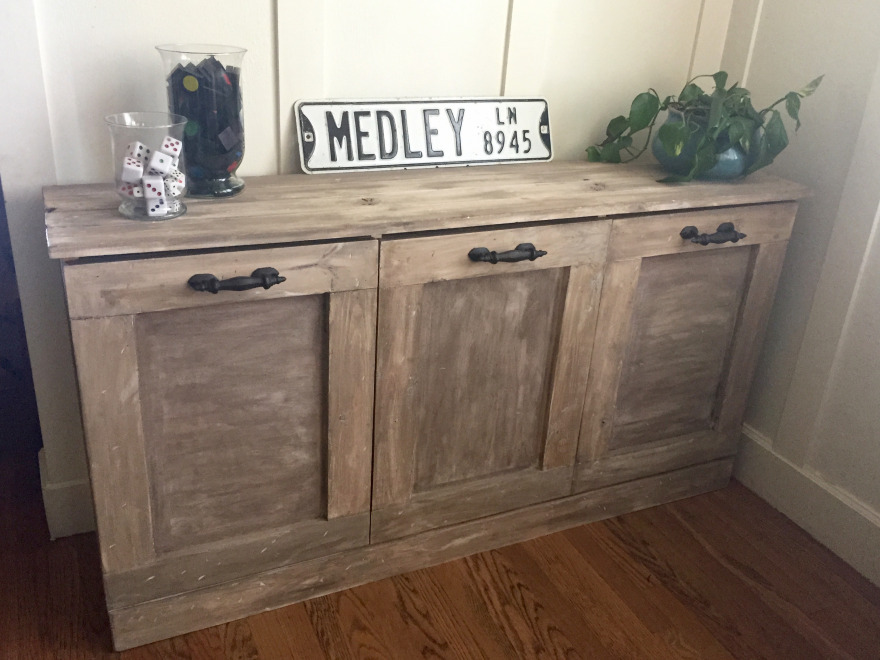
My laudry never looked so good! I love these plans from shanty2chic and anawhite. I spent a few days in the garage building, and now, my laundry can be hidden away in any room of my house.
Thanks shanty2chic and anawhite for your excellent plans.
http://www.shanty-2-chic.com/2014/08/diy-laundry-basket-dresser.html
http://www.ana-white.com/2011/04/wood-tilt-out-trash-or-recycling-cabin…
Built from Plan(s)
Estimated Cost
$200
Estimated Time Investment
Weekend Project (10-20 Hours)
Finish Used
Mix of paint and stain to create whitewashed look.
Recommended Skill Level
Intermediate
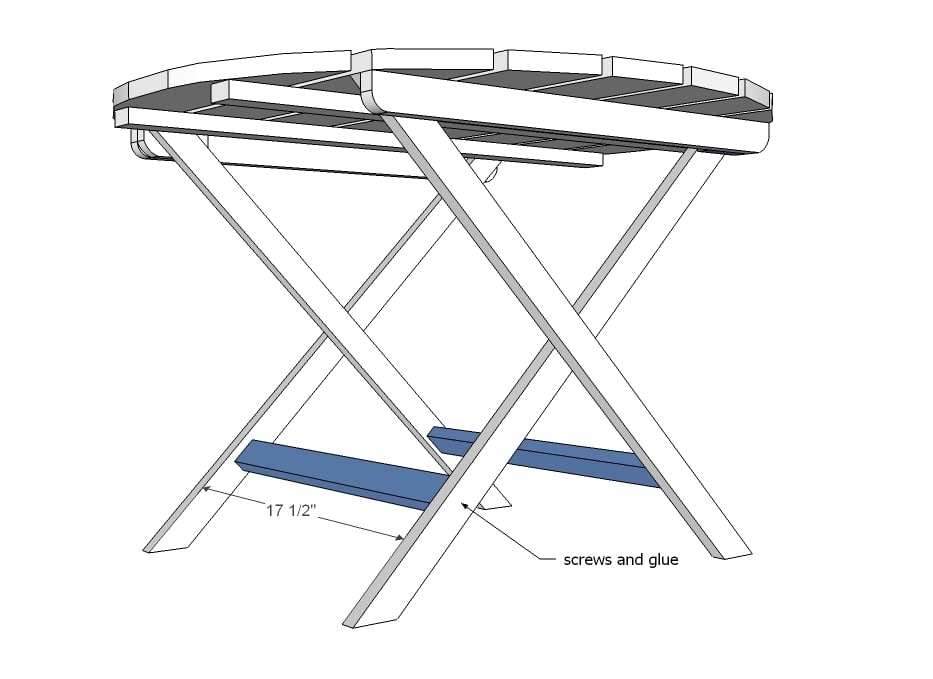
My first furniture ever built, round adirondak table

this.was my first attempt at making furniture. Using Ana's plans.were straightforward and couldnt have done without them. thanks Ana!

Built from Plan(s)
Estimated Cost
$30
Estimated Time Investment
Day Project (6-9 Hours)
Finish Used
painted tropical blue, exterior paint
Recommended Skill Level
Beginner
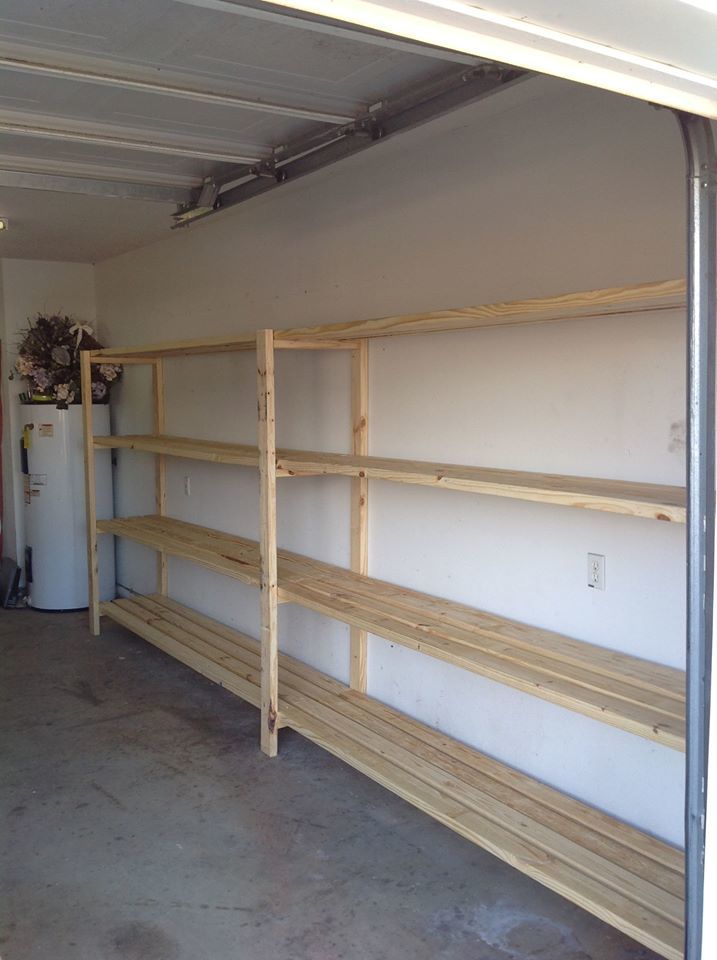
Thank you!
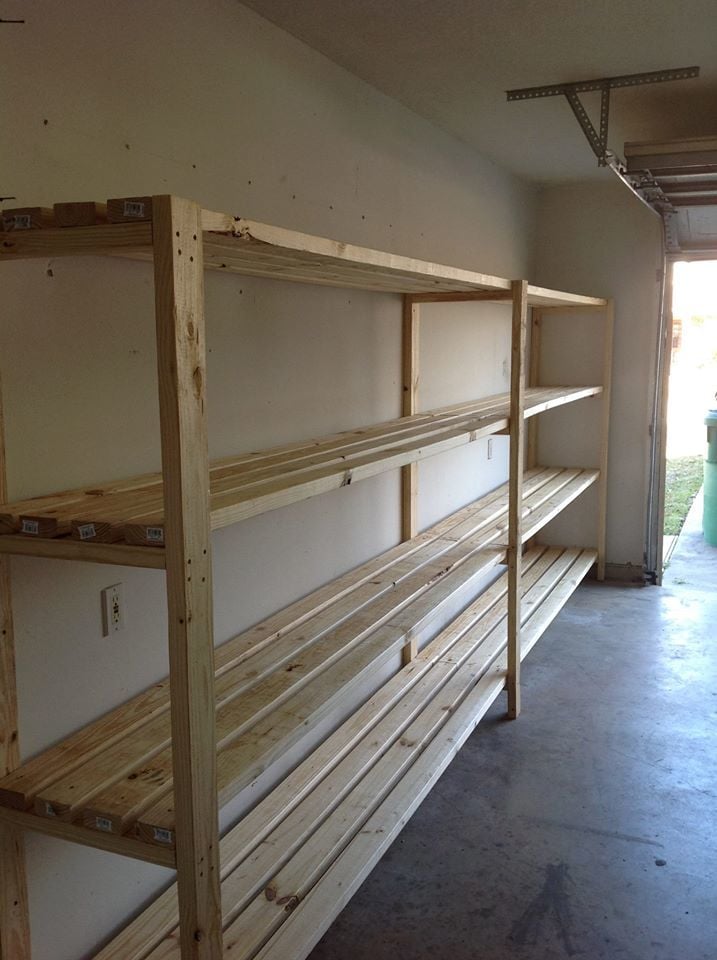
Thank you for the plans! Love the shelves!
Built from Plan(s)
Estimated Cost
$150
Estimated Time Investment
An Hour or Two (0-2 Hours)
Recommended Skill Level
Starter Project
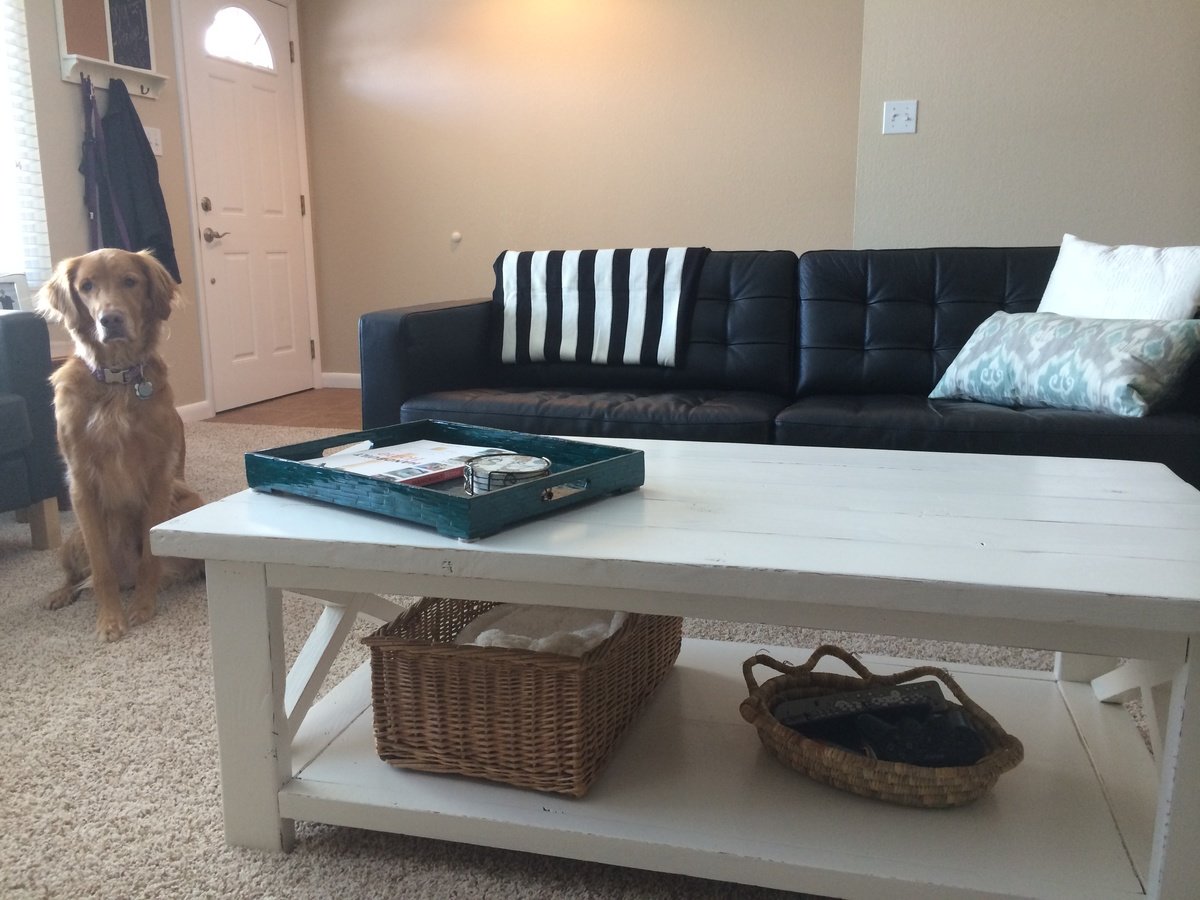
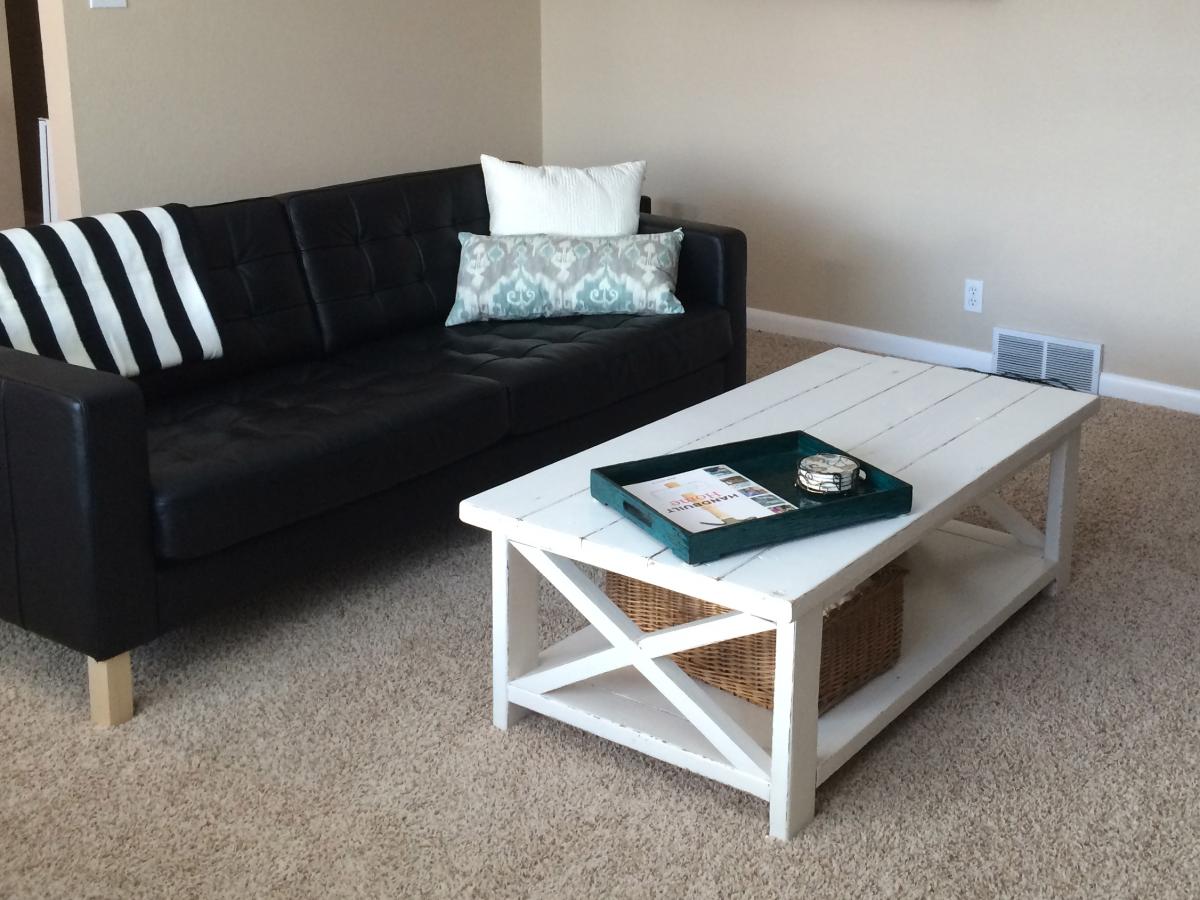
Rustic X Coffee Table

This was my first build and I am so happy with how it turned out! The instructions were easy to follow and I learned a ton throughout the process. I had a little bit of trouble getting the angles right for the X's. I ended up just placing the boards against the wood at the angles they needed to go, scribing with a pencil and then angling the wood/blade to match the cut as someone described in the comments. It's not perfect, but pretty close. I originally planned on staining the table, but thought it looked a little to dark so I ended up painting it white. I can't wait to make the end tables now!

Built from Plan(s)
Estimated Cost
$50
Estimated Time Investment
Weekend Project (10-20 Hours)
Finish Used
I started out by staining the table with Minwax Special Walnut. It looked beautiful but just wasn't right for the room, so I painted two coats of Glidden Antique White paint on top of the stain. I then hand sanded the edges to give it a distressed look (and let some of the stain show through) and applied two coats of Minwax Polycryclic in satin.
Recommended Skill Level
Starter Project
Comments

Sat, 11/23/2013 - 19:39
Great job! I've also had
Great job! I've also had problems getting angles cut right.
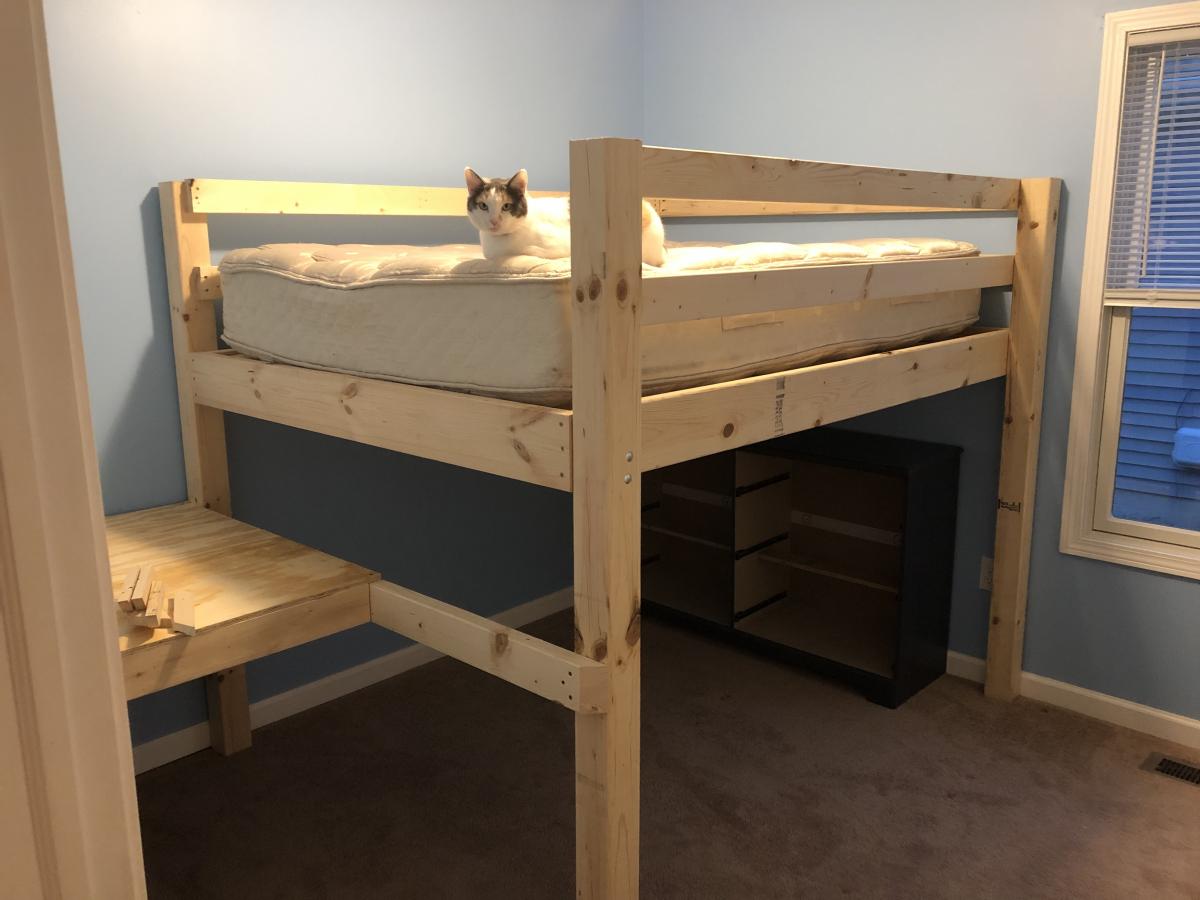
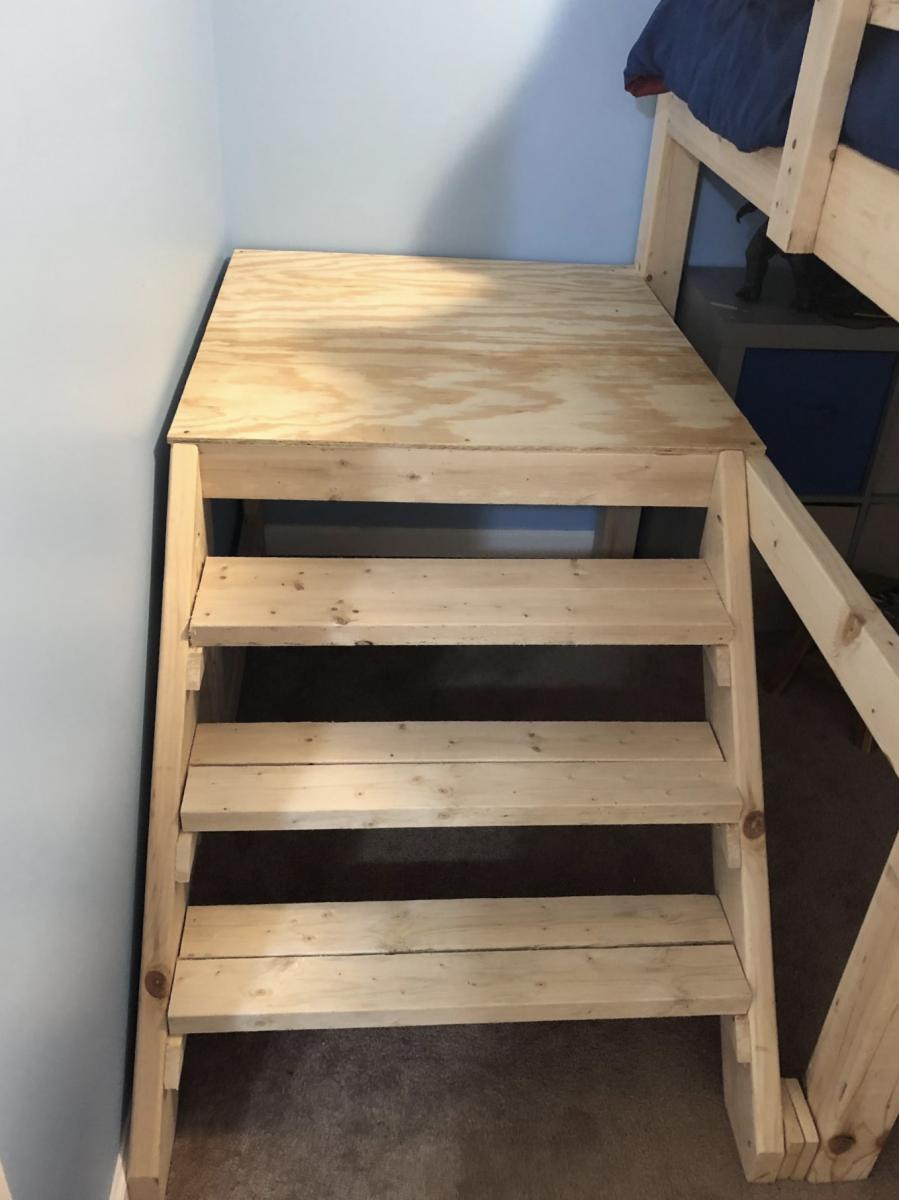
Full size loft
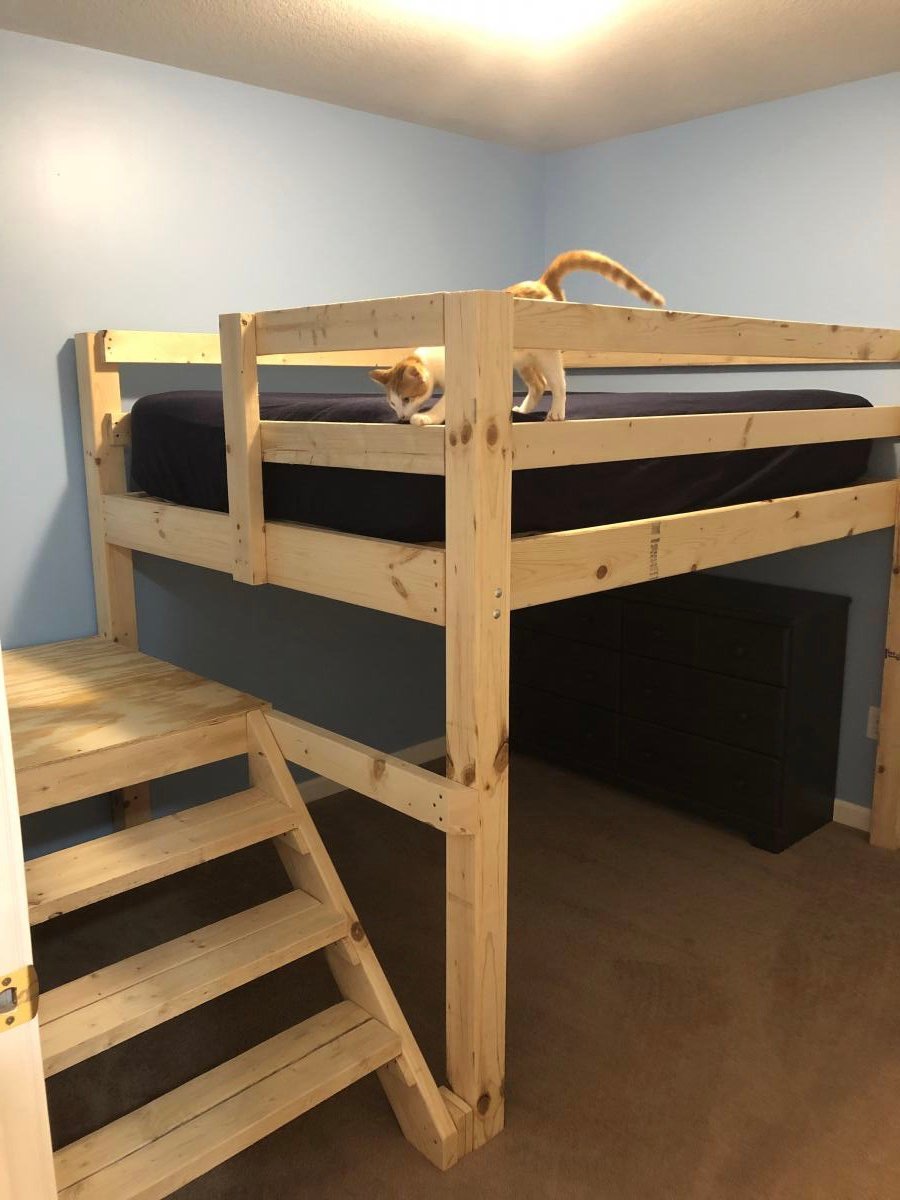
Built a full size loft bed for my kids but wanted something safer than having them climb up and down a ladder so used the Camp Loft Bed plans to add the platform and stairs. It is much easier for the kids. Going to finish by covering the platform and stairs with carpet.
Built from Plan(s)
Estimated Cost
180
Estimated Time Investment
Day Project (6-9 Hours)
Comments

Wed, 10/02/2019 - 09:51
I really like how the…
I really like how the platform is only half way so the stairs are inset, this is very smart and good use of space.
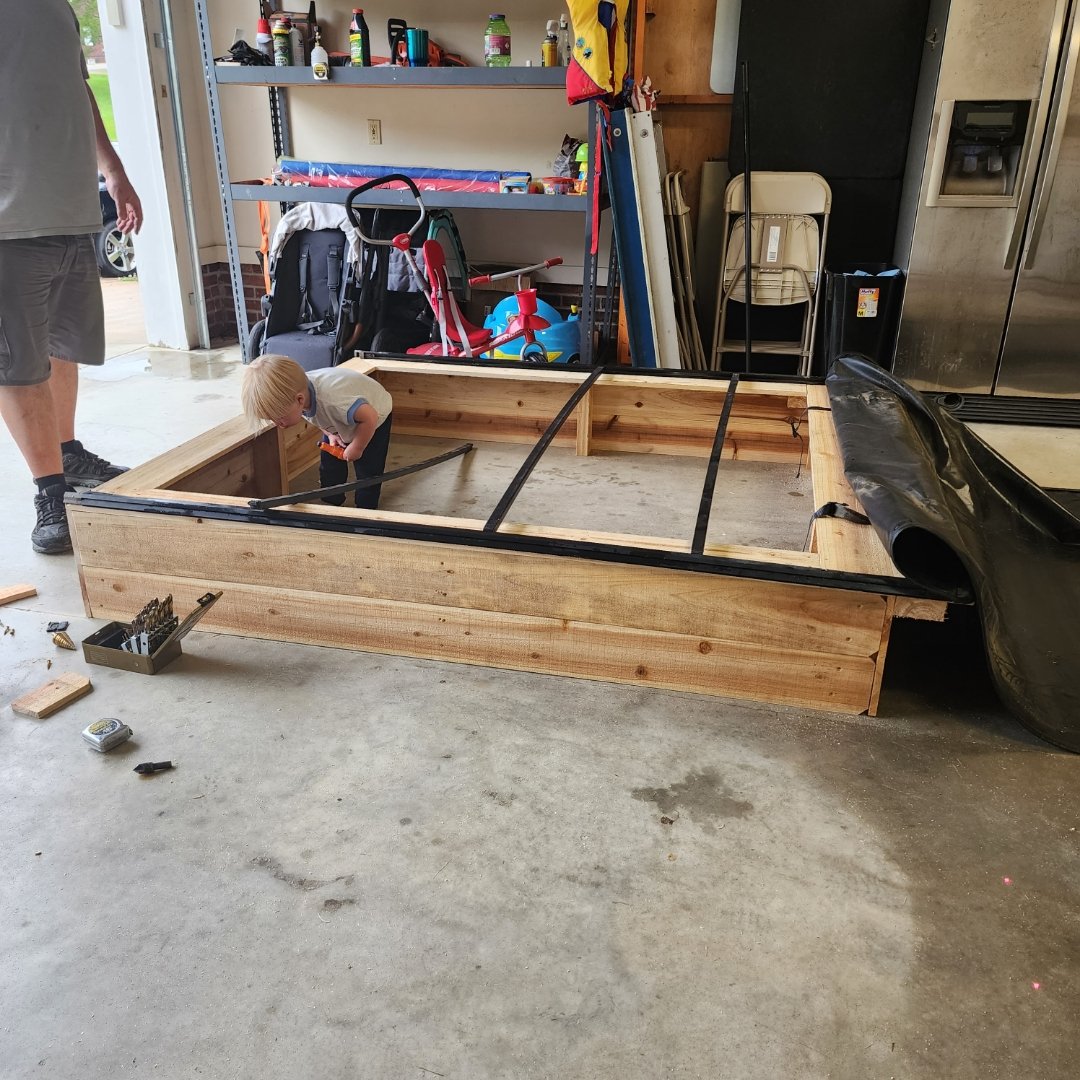
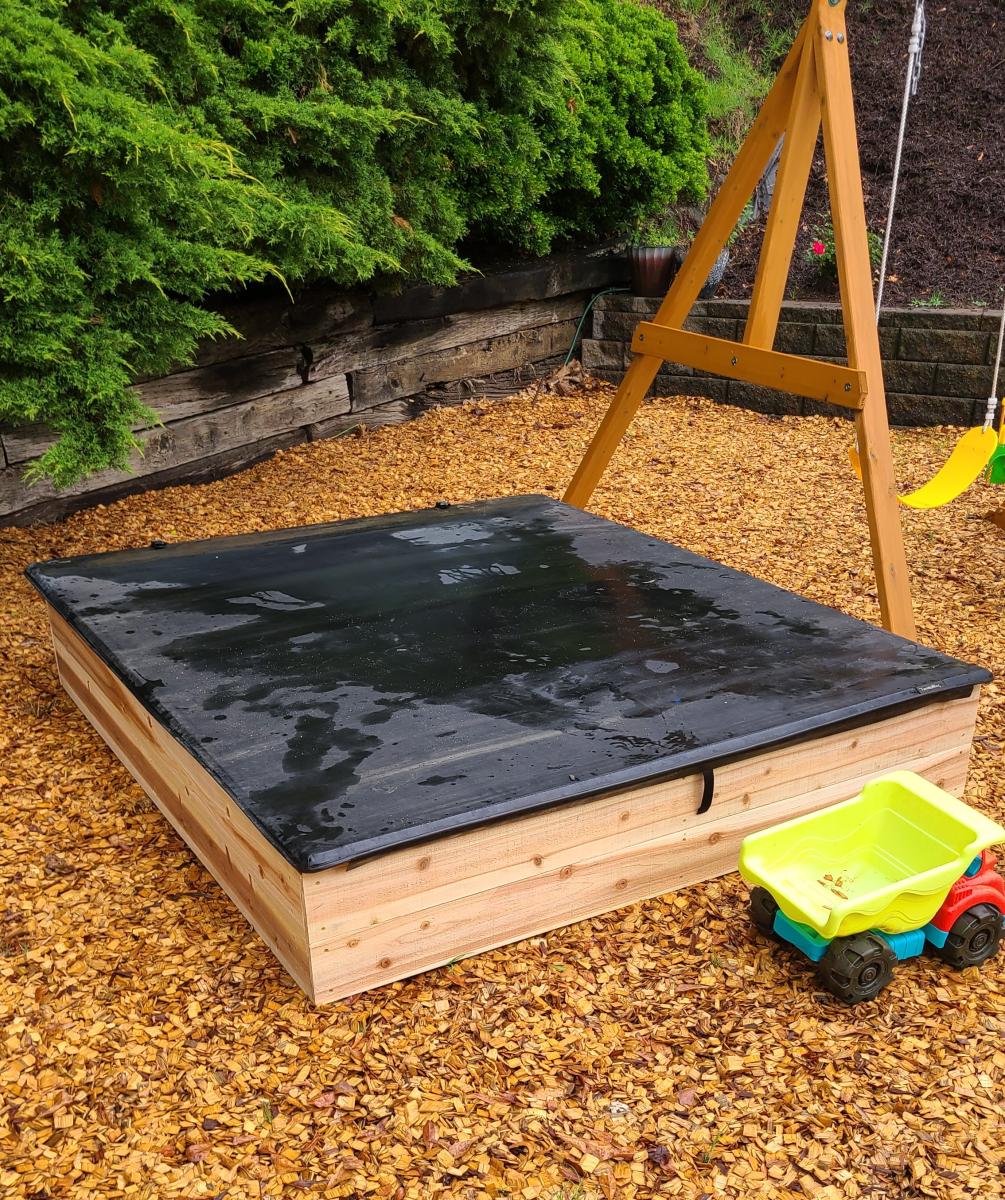
Sandbox with Cover
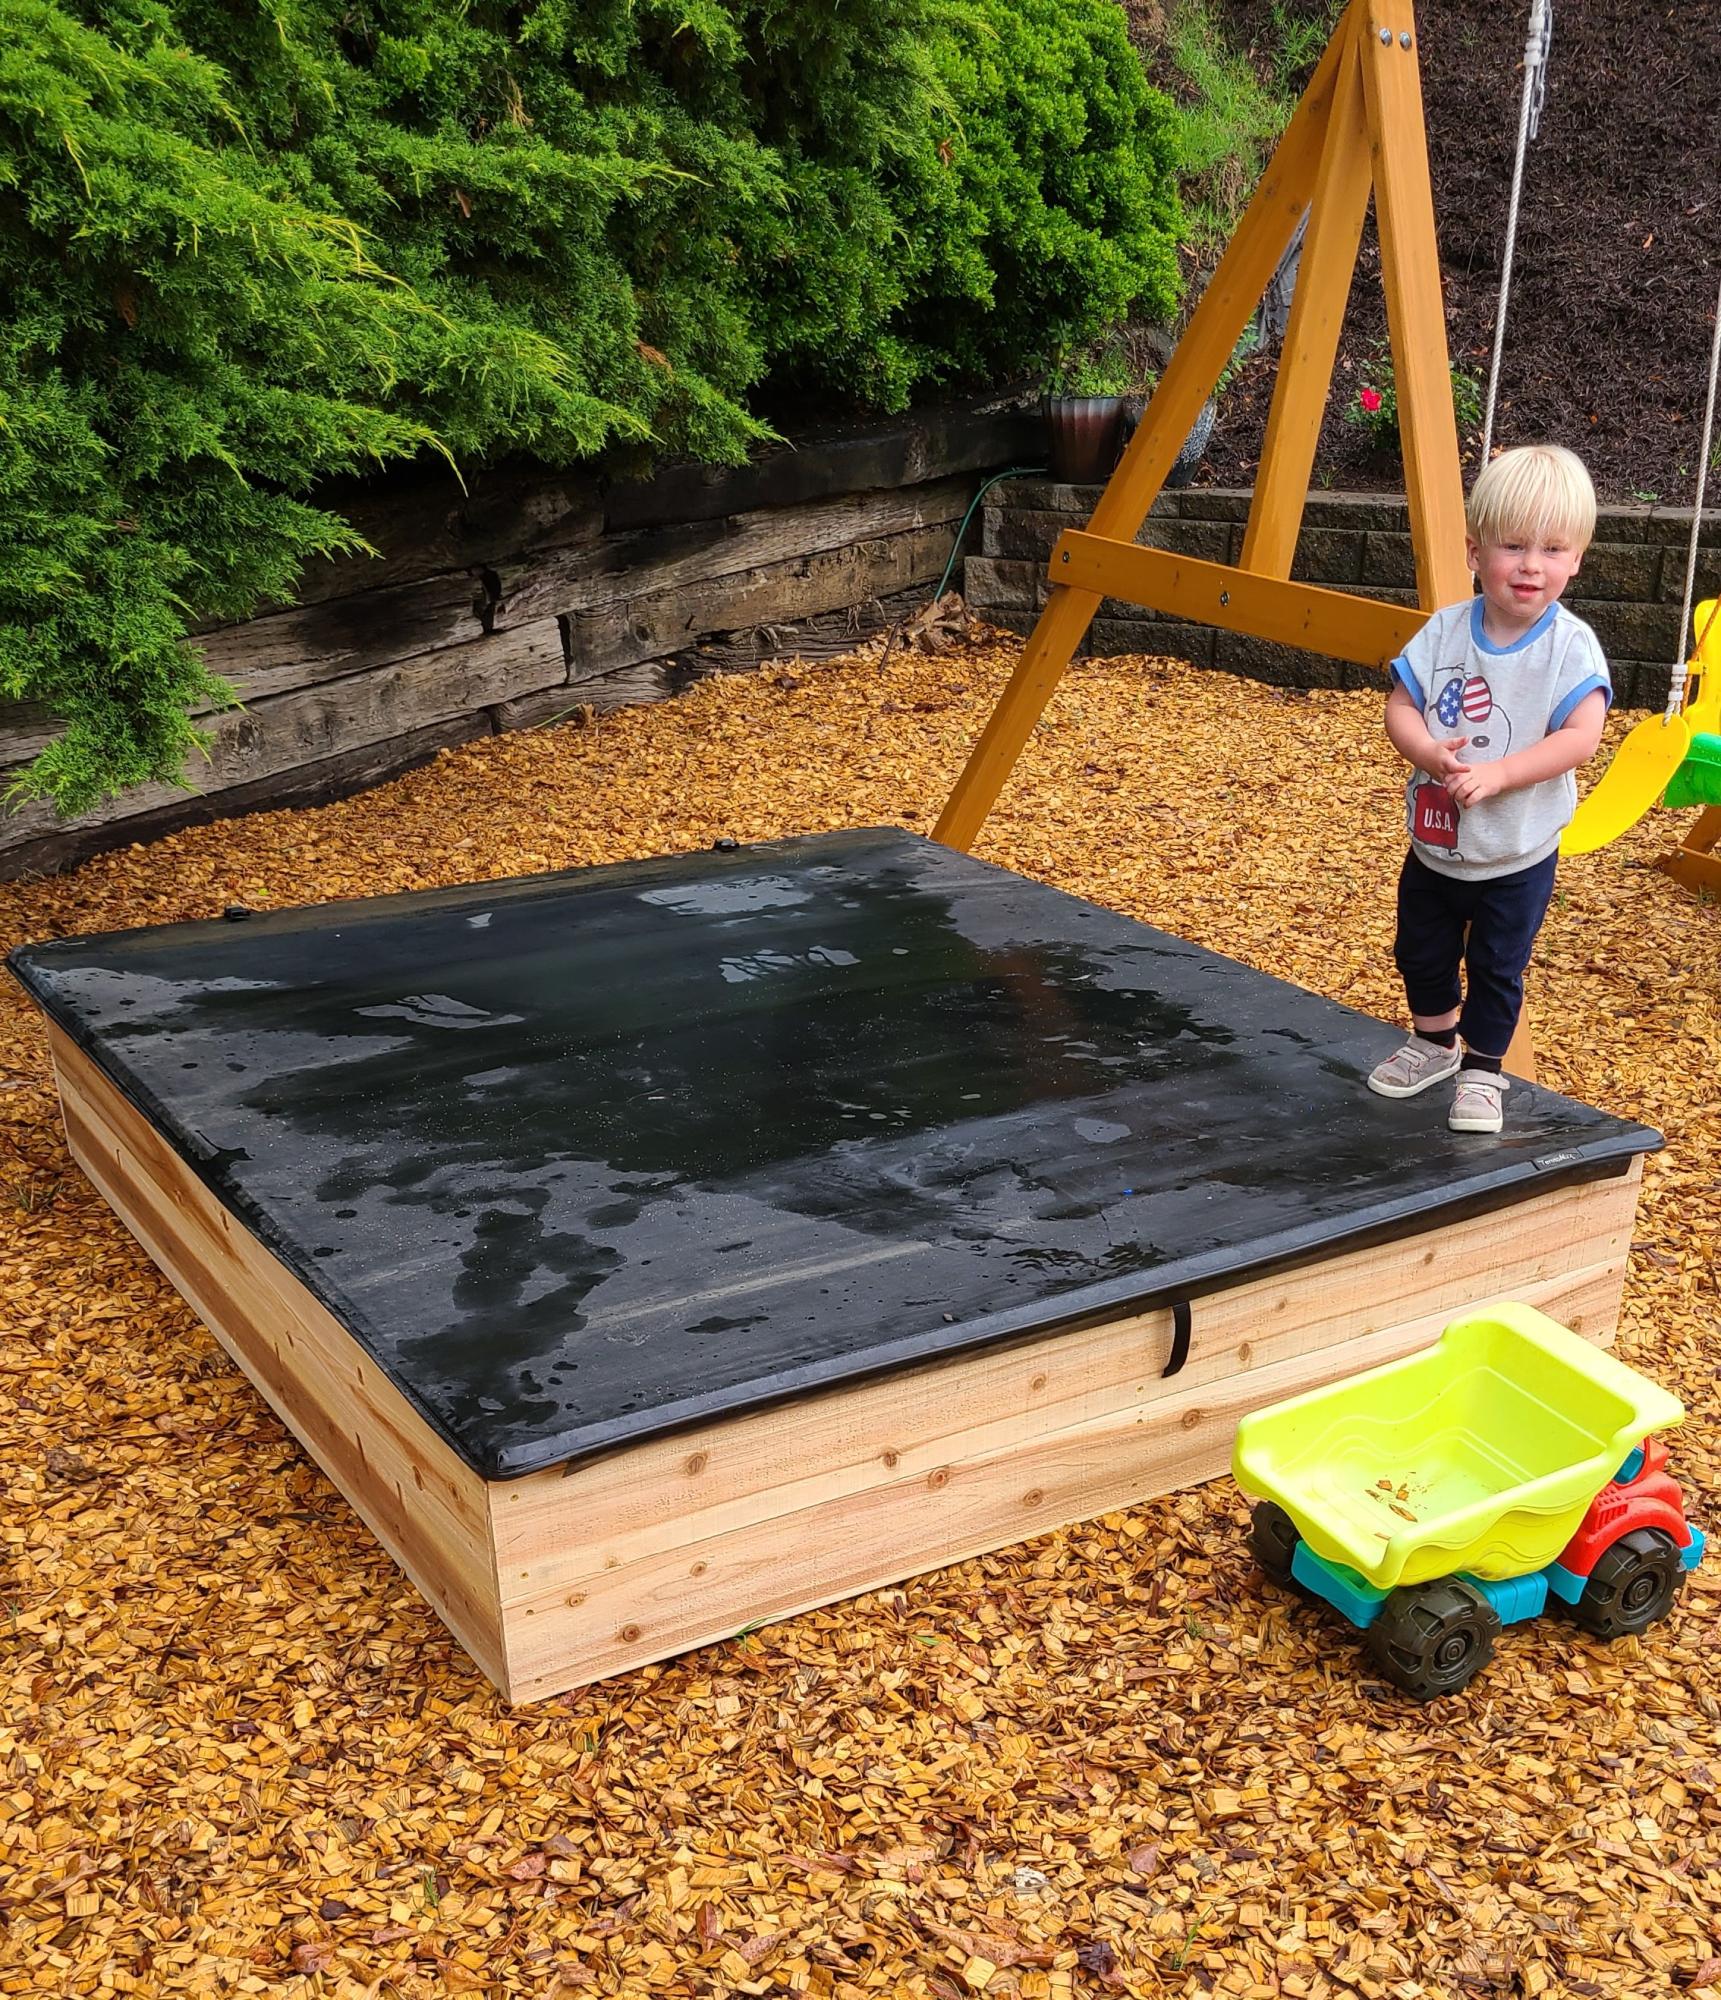
The cover is a tonneau cover for a pickup truck. It's for a 6.5' truck bed so if you notice, I had to ad a 2x4 and one more picket on top to accommodate the extra length.
The cover would add a ridiculous amount of money to the project but it was repurposed. I found it on a truck that was in an accident and going to the scrap yard. I think it it came out great and my grandson loves it.
John
Built from Plan(s)
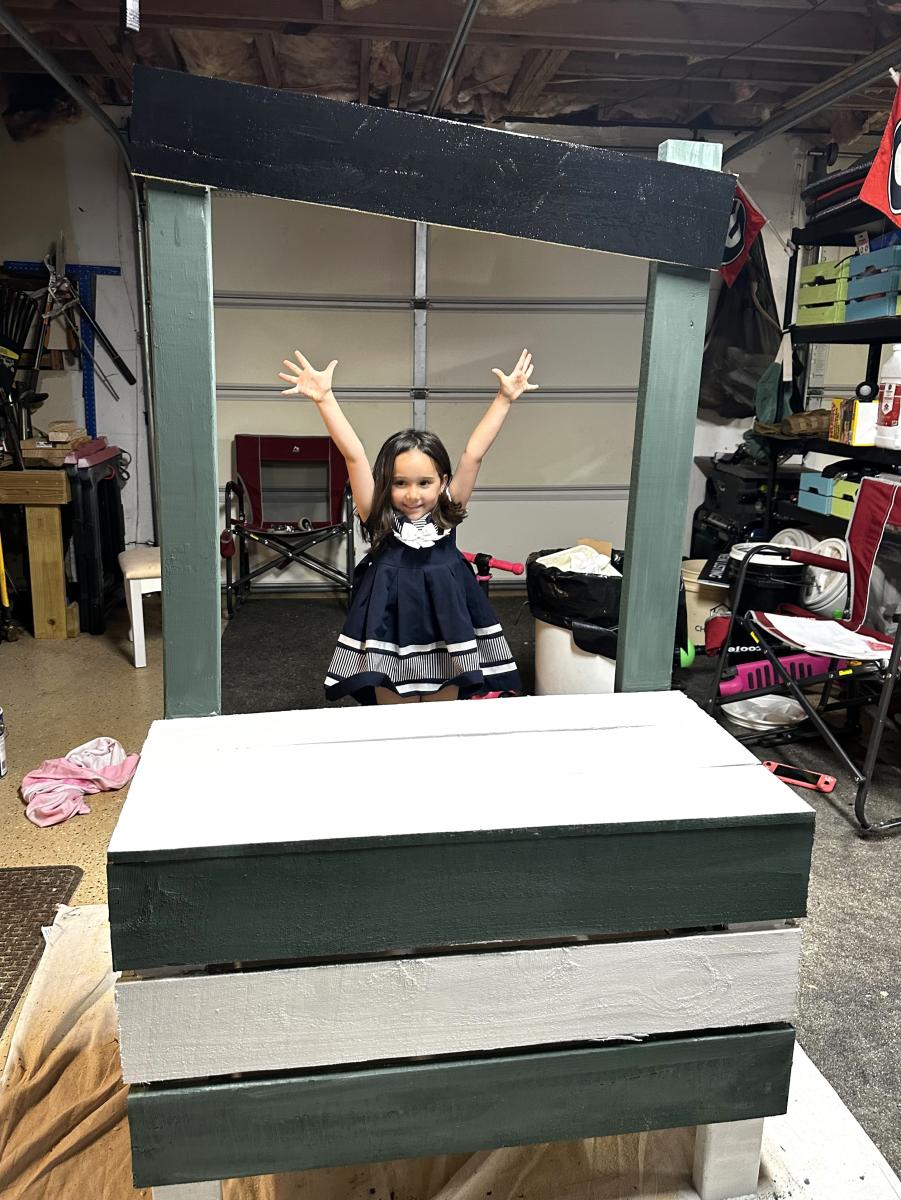
2 Hour Lemonade Stand
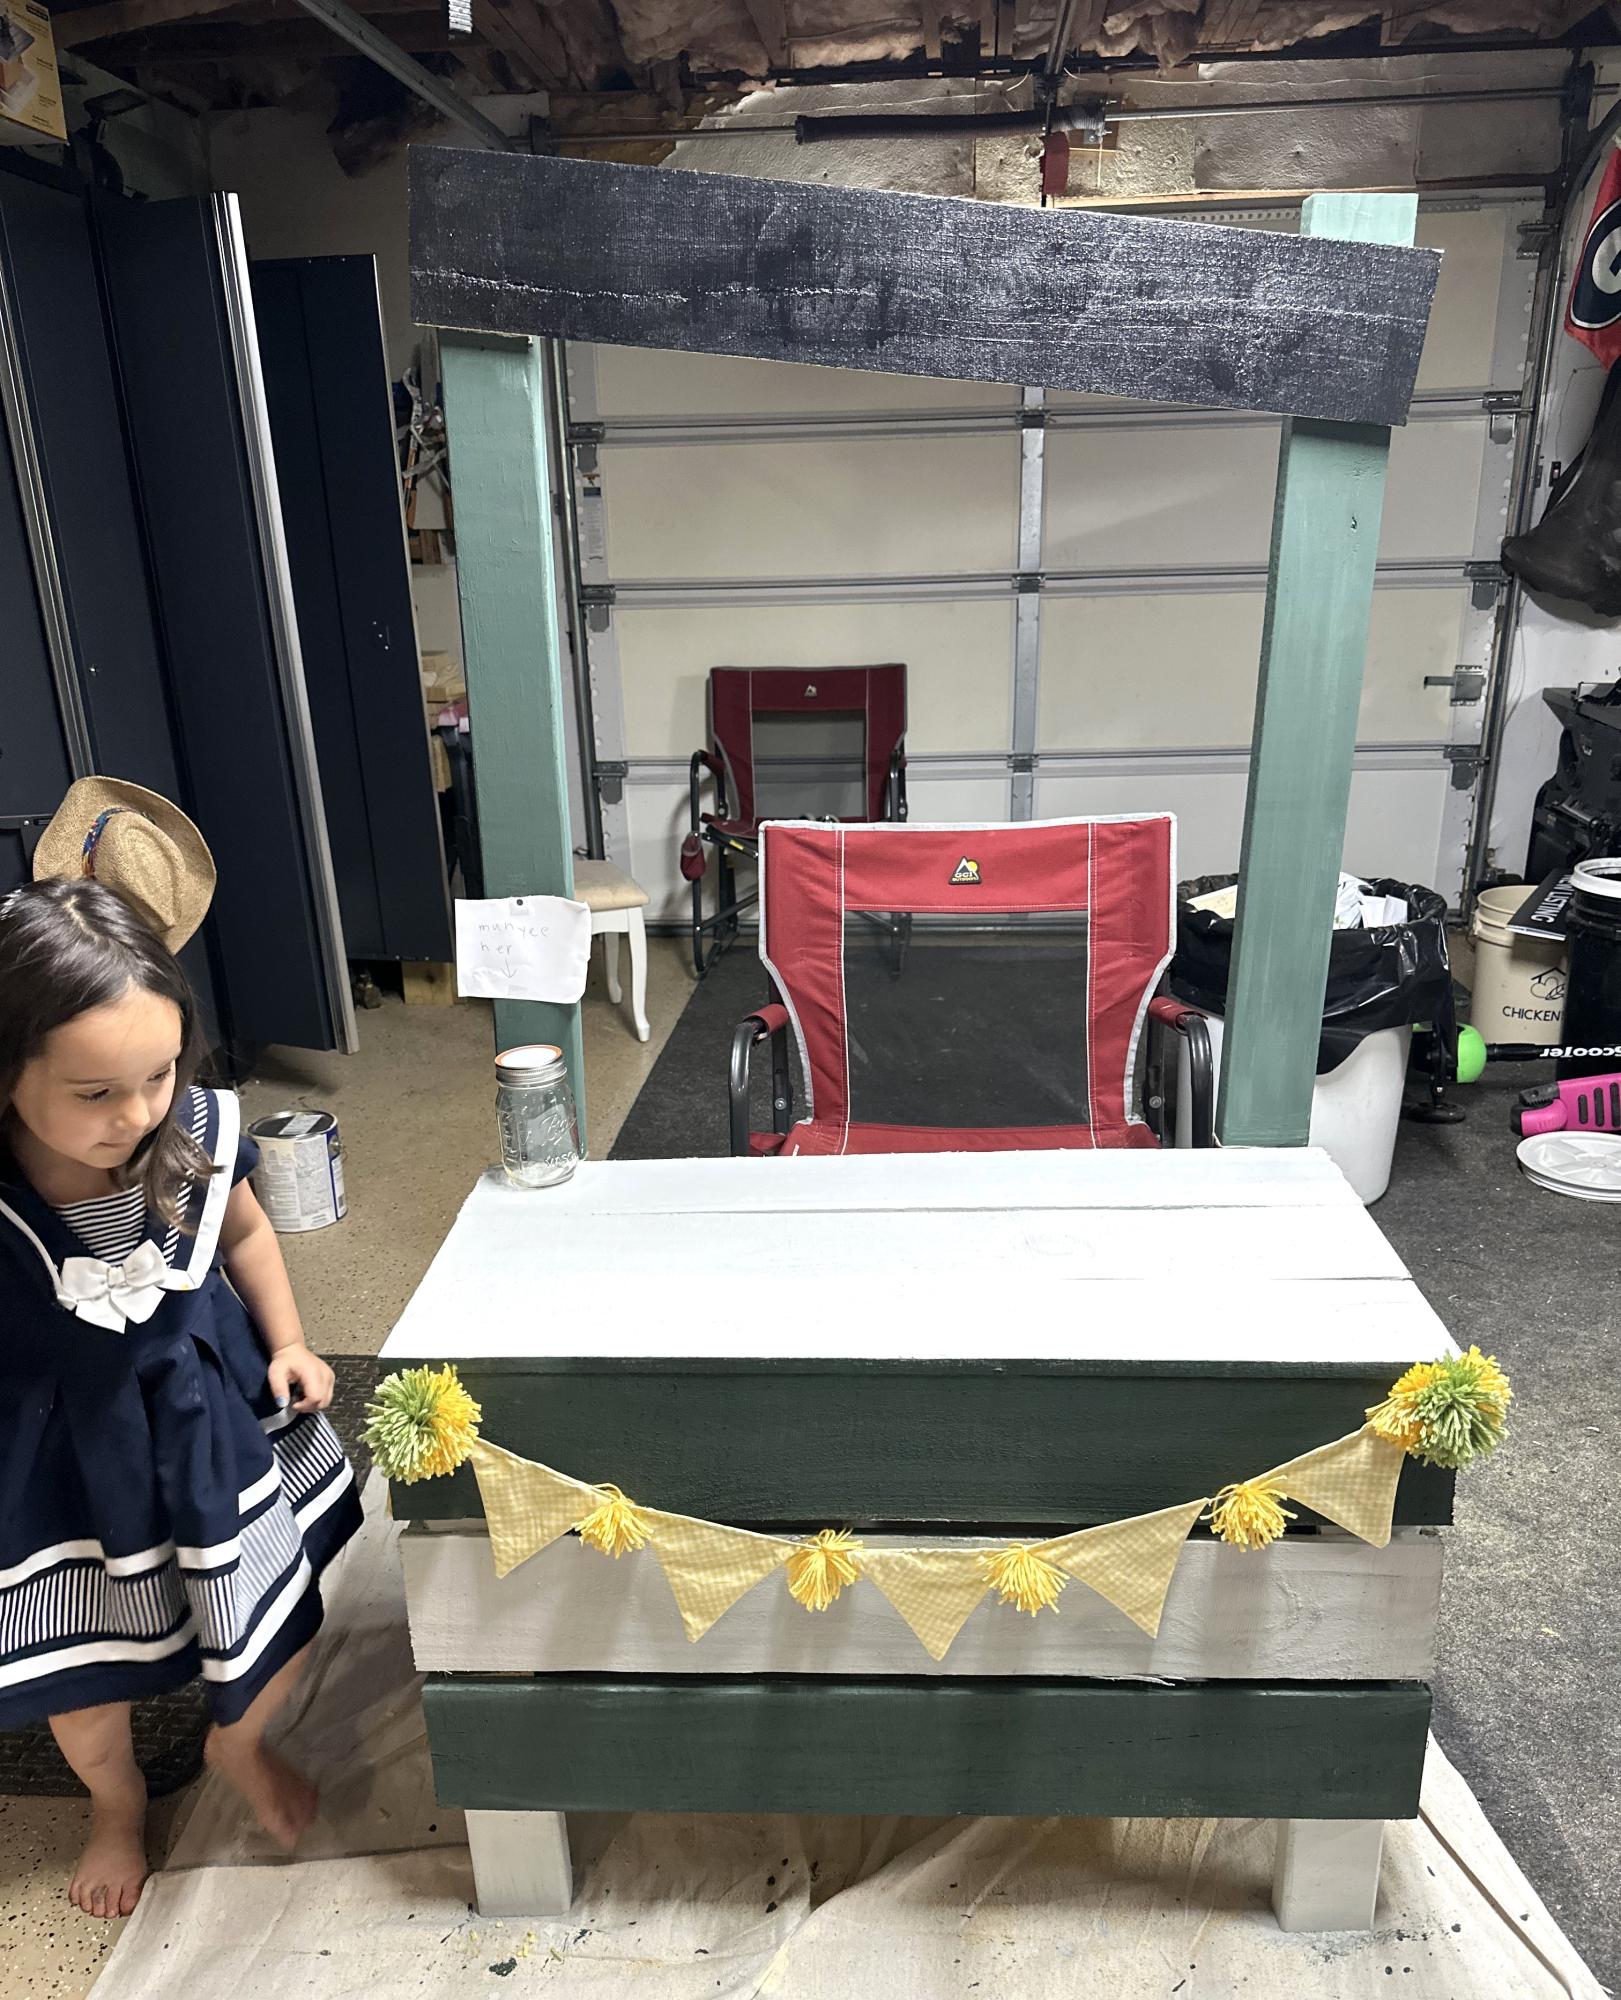
Two hours and done!
Built from Plan(s)
Benchwright Dining Table
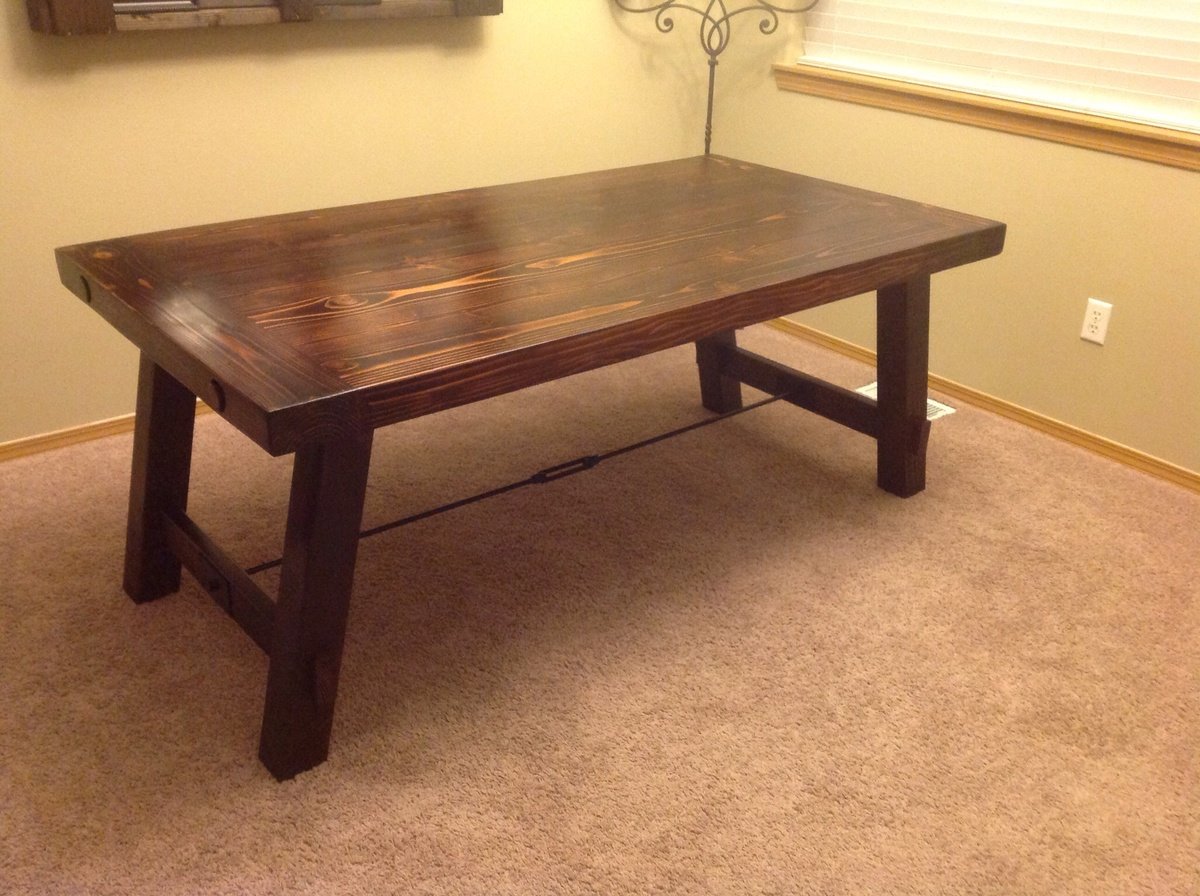
This was my first project and I completed it all by myself! I think it came out well :) My husband did not like the original table despite my love of it. I asked him if I made the table if I could then have it. So what started out as a dare (my husband thought I would not be able to do it) became a reality. I am really excited to tackle more projects and have gathered quite a few upcoming projects to complete.
I did a slight variation of the plans, I used 2x6s for the top and 4x4s for the legs. I located a planer and was able to remove the rounded edges of the boards. I wanted the thickness of the PB table so the thicker boards were my choice. I also used a solid welding bar threaded on both ends for the rod.
Built from Plan(s)
Estimated Cost
100.00
Estimated Time Investment
Weekend Project (10-20 Hours)
Finish Used
Minwax Red Mahogany satin finish polyurethane
Recommended Skill Level
Intermediate
Comments
Mon, 01/13/2014 - 20:35
I love LOVE the thicker top.
I love LOVE the thicker top. It looks fabulous! Great job :)

In reply to I love LOVE the thicker top. by Mrswhetstone1
Thu, 01/16/2014 - 09:39
Table
Thank you :)
Mon, 06/09/2014 - 23:04
I like it, now how do I do it?
I like your version of this!
How did you attach the table top to the leg supports? Or aka, what does the underneath of the table look like? And how did you attach the breadboards to the long boards of the tabletop?
My email is [email protected], since that is probable faster than commenting back and forth on here.
Fri, 09/19/2014 - 02:10
Want to duplicate!
I am also wondering how the thicker top is attached. Please share! You did a fabulous job!
In reply to Want to duplicate! by Jeana Hayes
Thu, 01/01/2015 - 21:12
Thank you!
To get the wider top I glued two 2x6 together than planed them so they look like one solid piece. I didn't really follow any plans just kept building a little at a time. I don't really think you can mess anything up if you just keep doing a little at a time. Let me know if you have any other questions! Love to help :) Happy building!
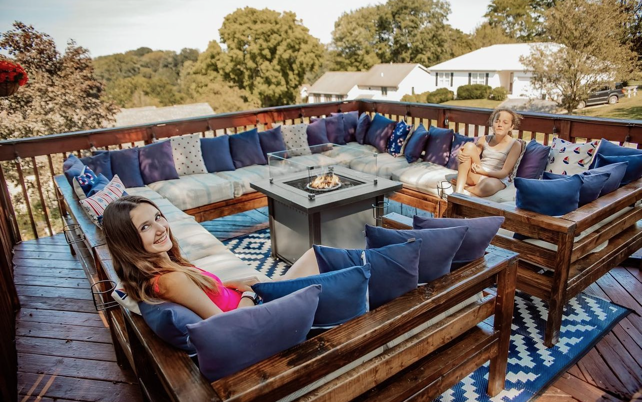
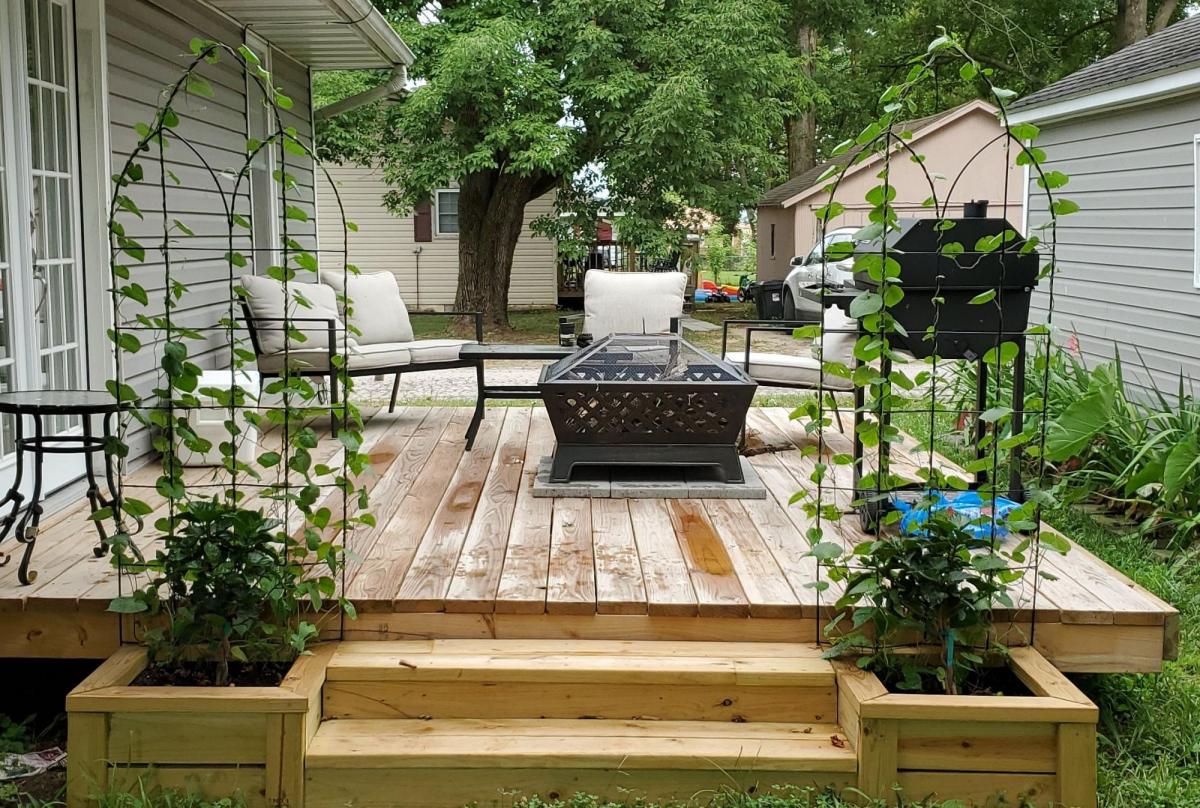
Outdoor U-Shape Sectional
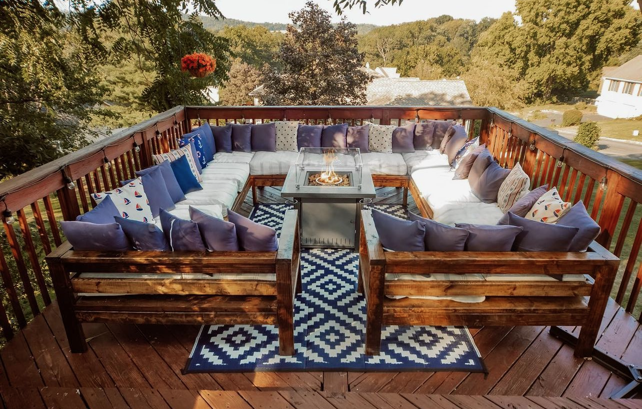
Outdoor Sectional
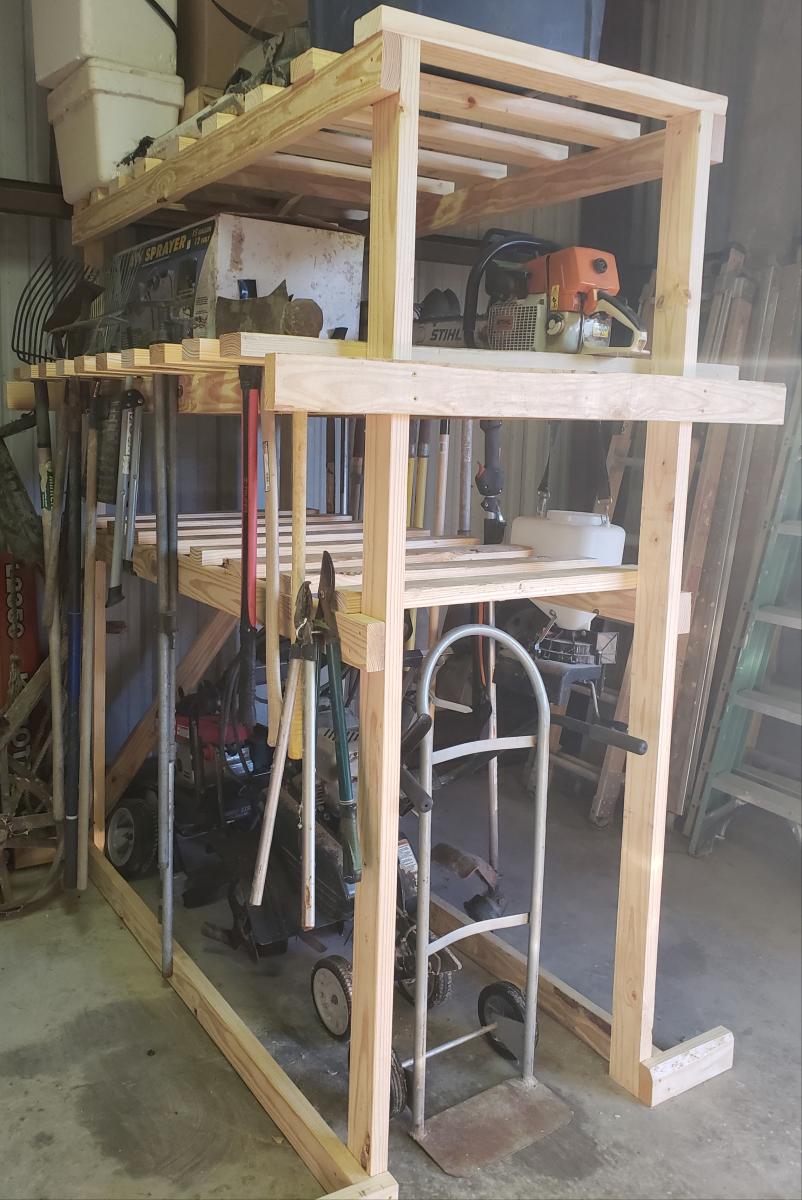
Garden Tool Storage Rack
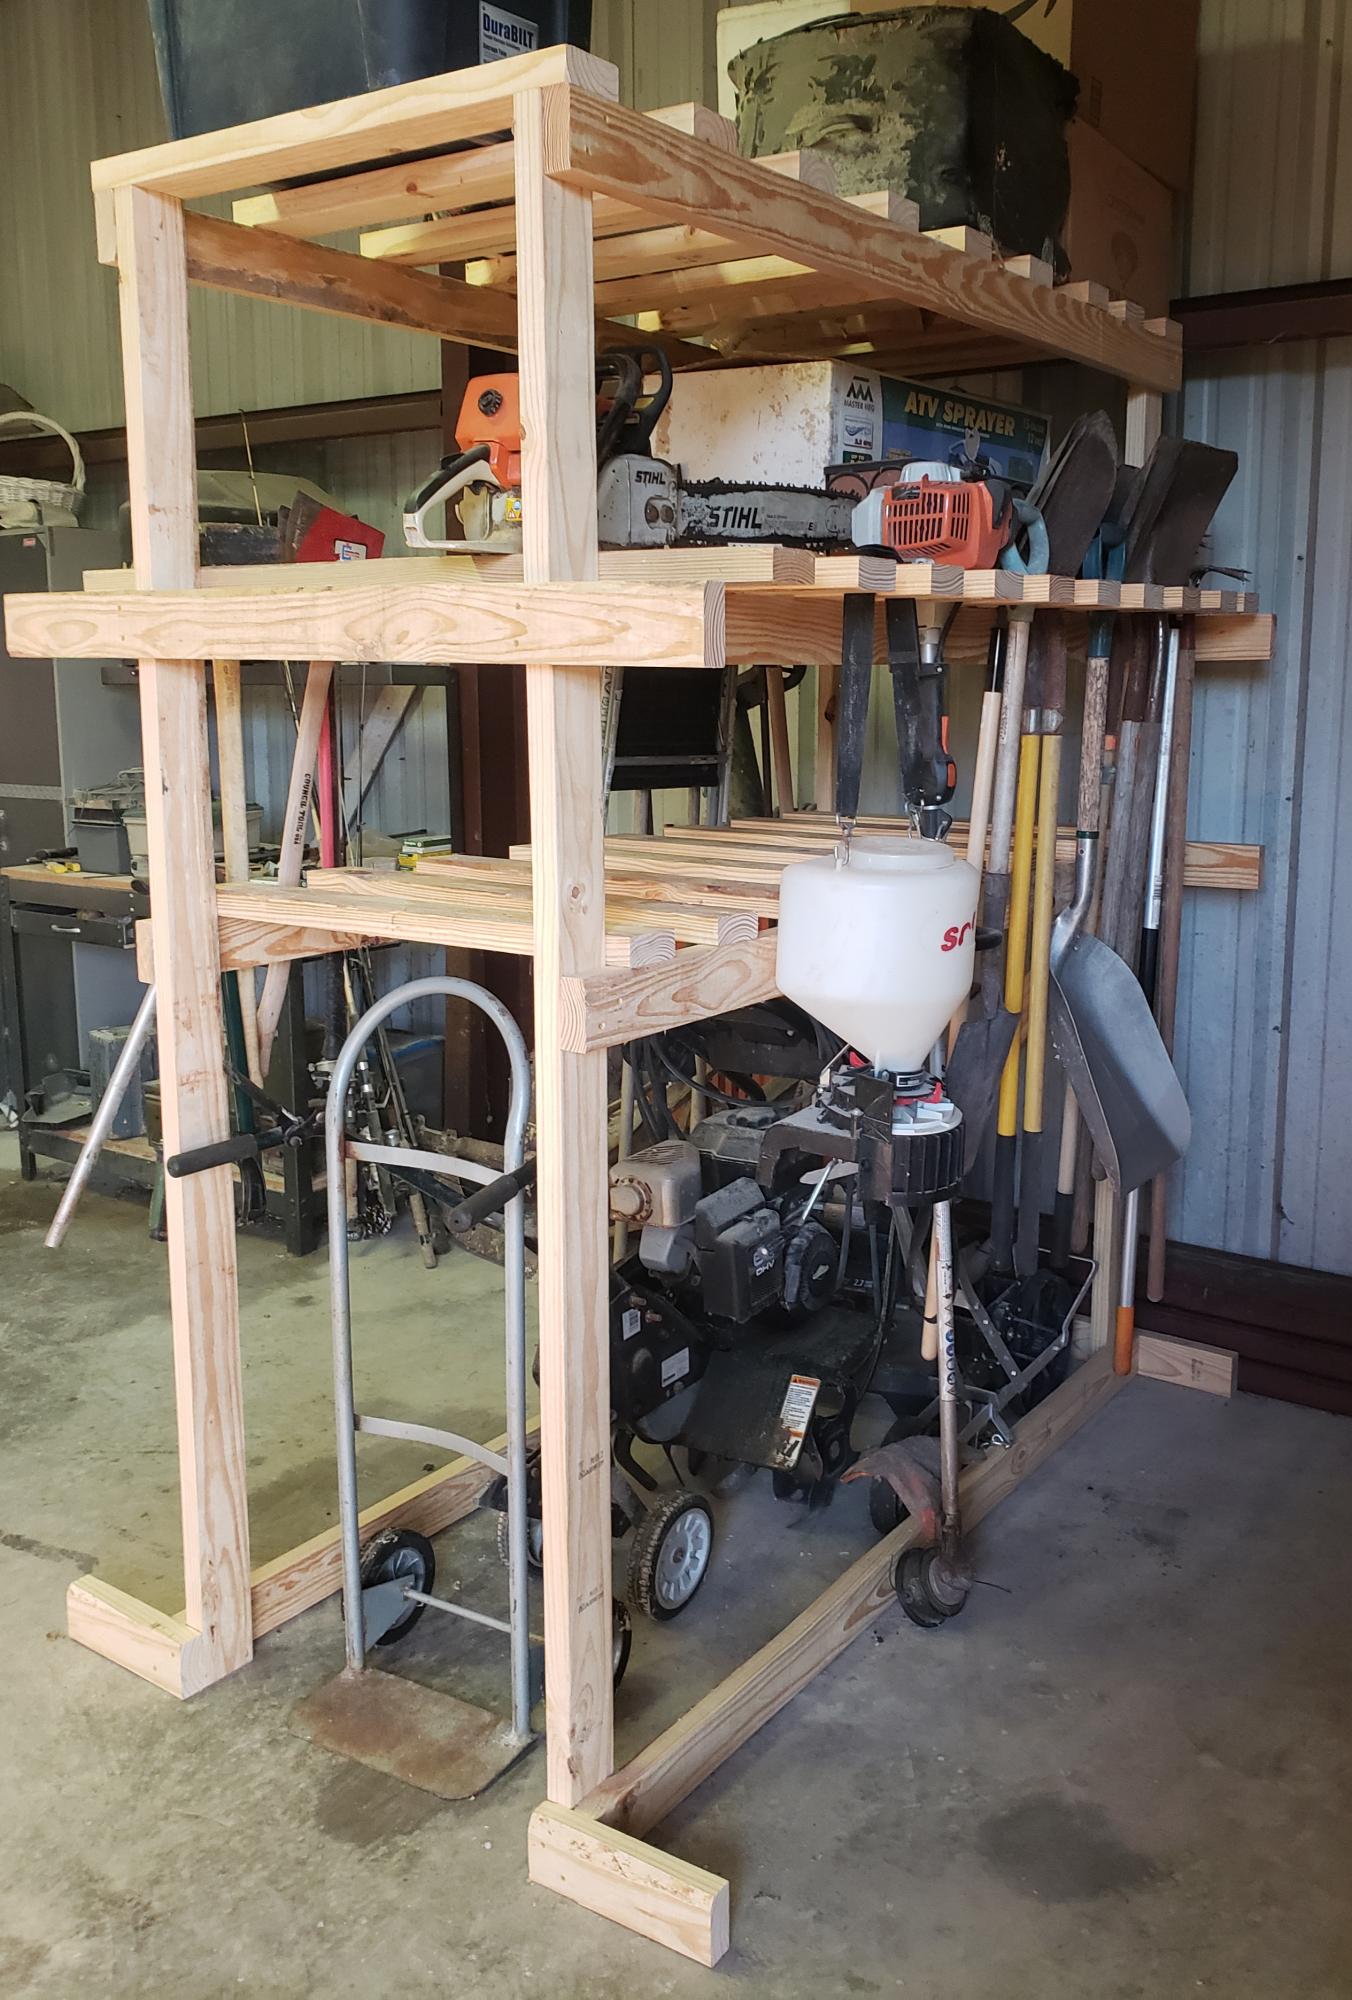
This isn't an Ana White plan but I've learned so much from this site that I designed and built this garden tool rack. Its pine 2x4 construction. I love it!
It is 84" tall x 72" long x 26 wide (opening) and 48"wide for garden tool hangers.
Built from Plan(s)
Estimated Cost
100
Estimated Time Investment
Afternoon Project (3-6 Hours)
Finish Used
No finish
Recommended Skill Level
Beginner
Comments
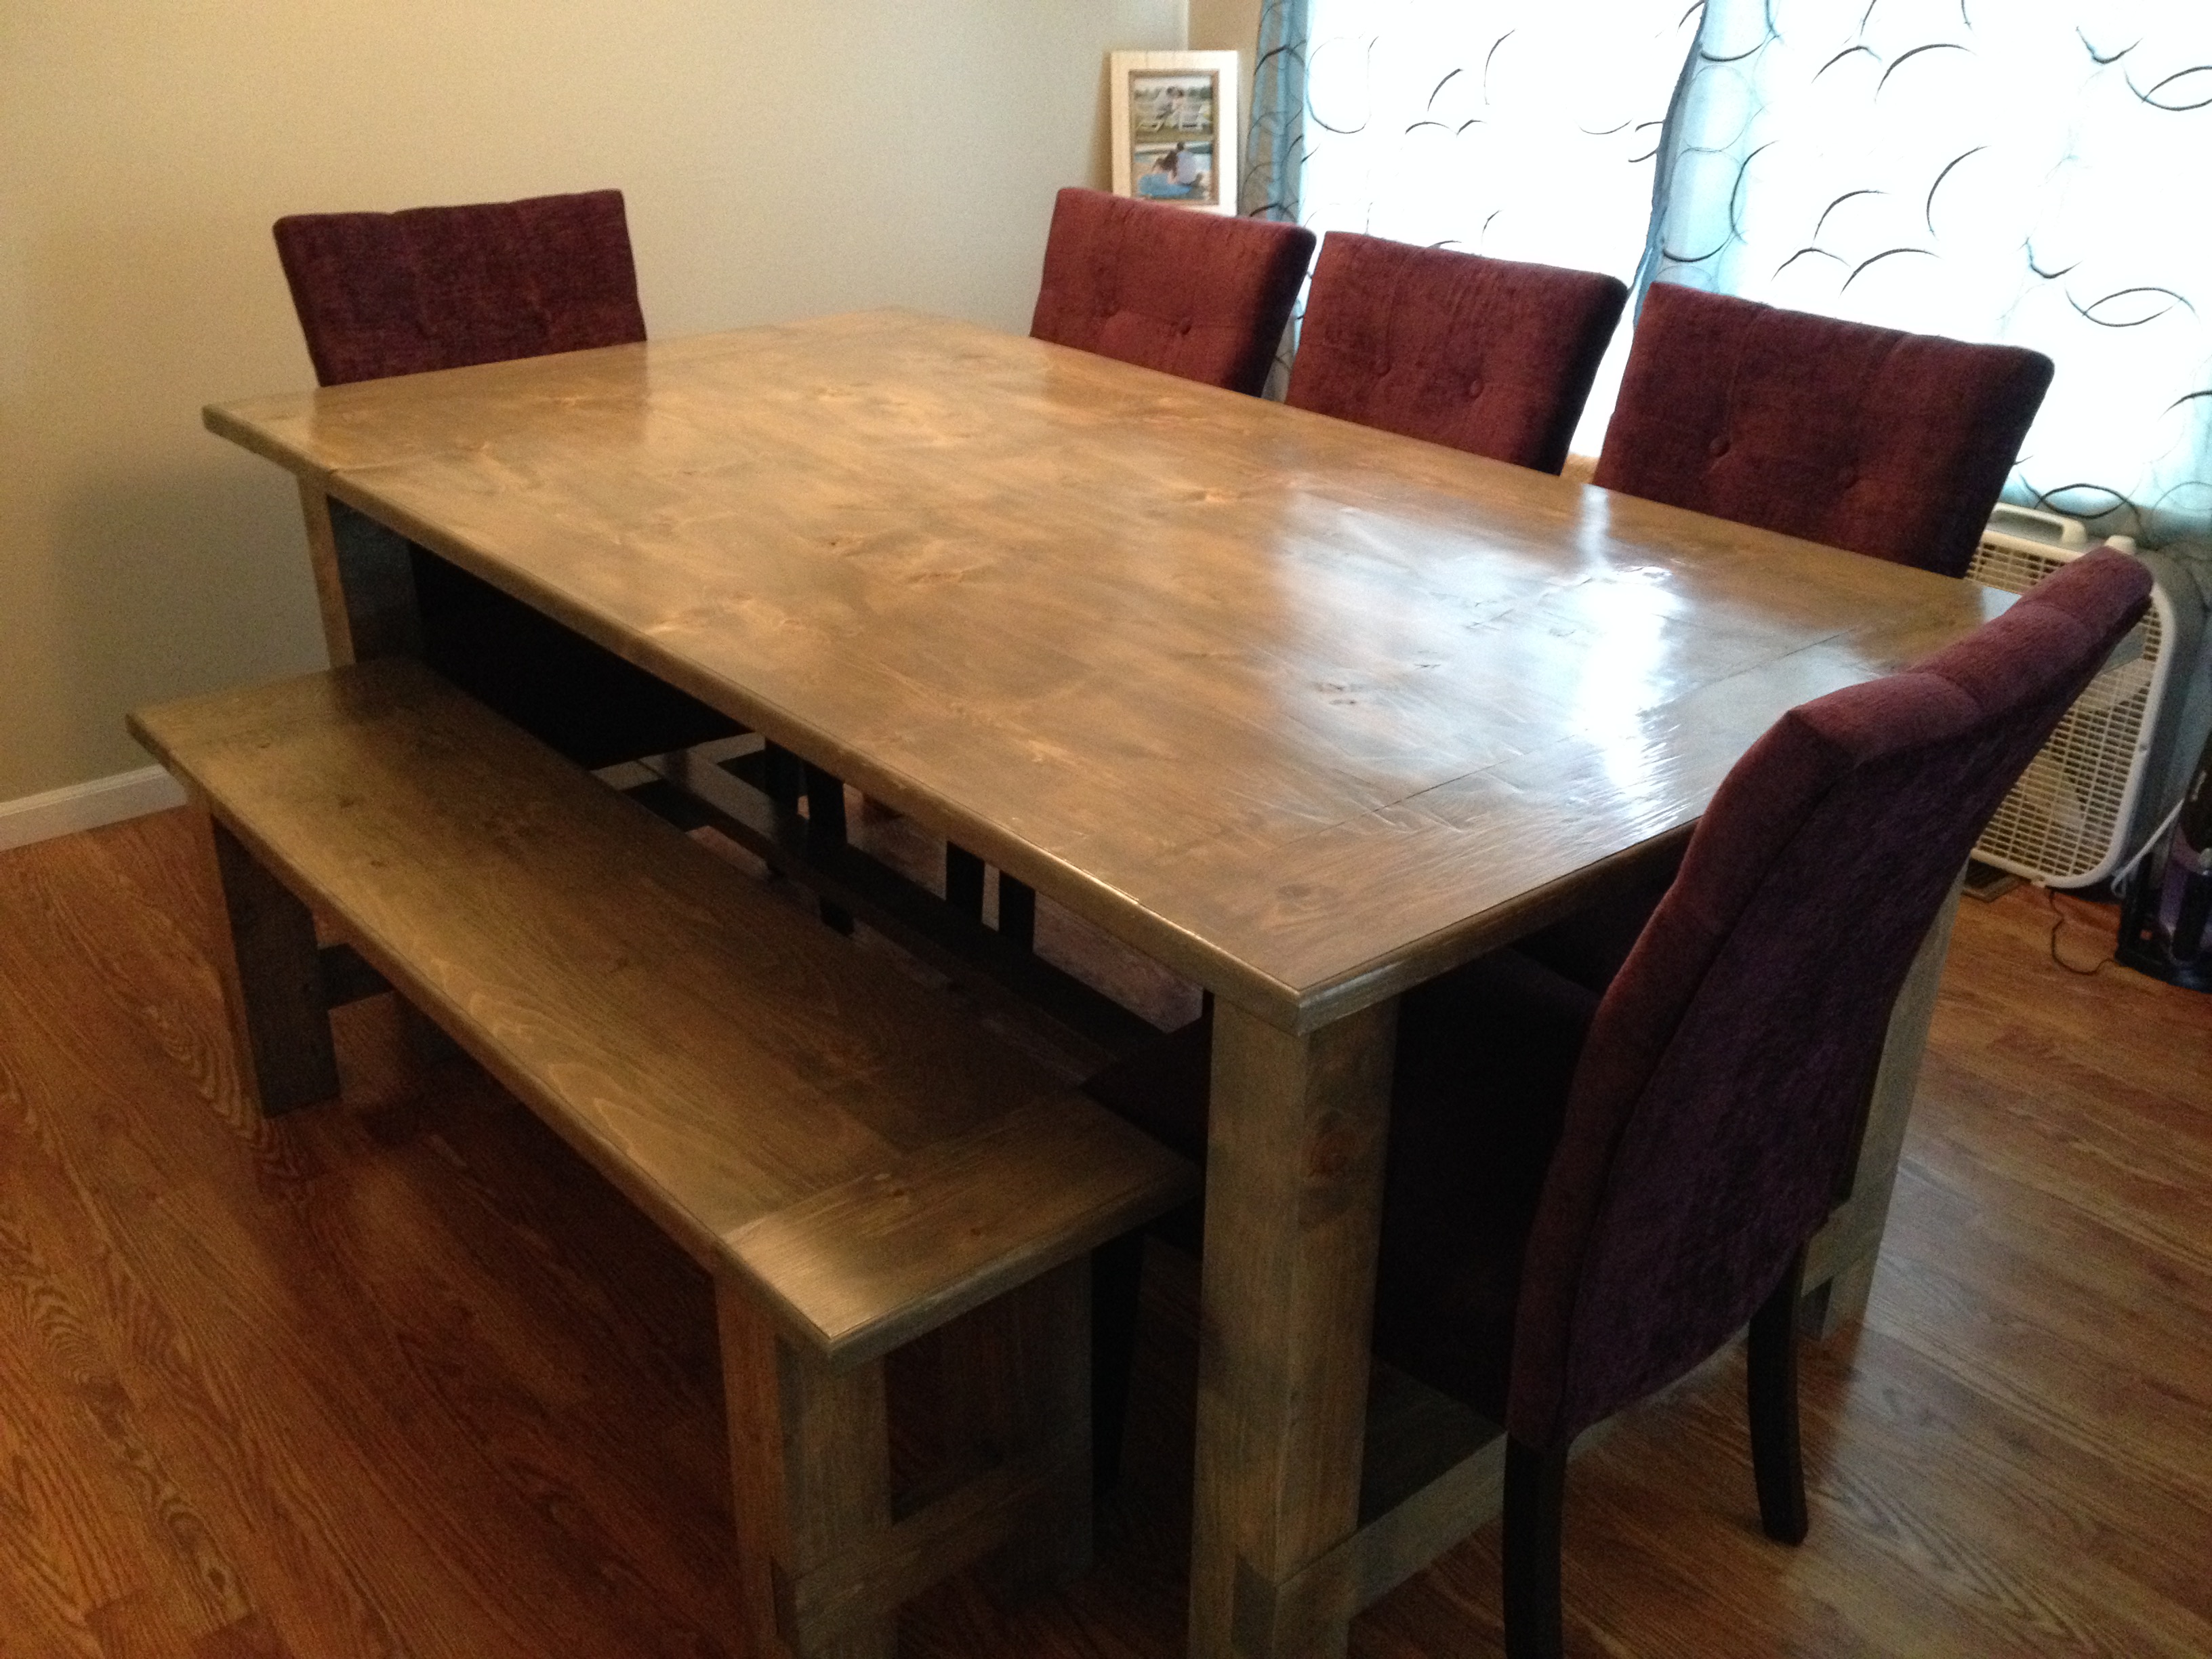
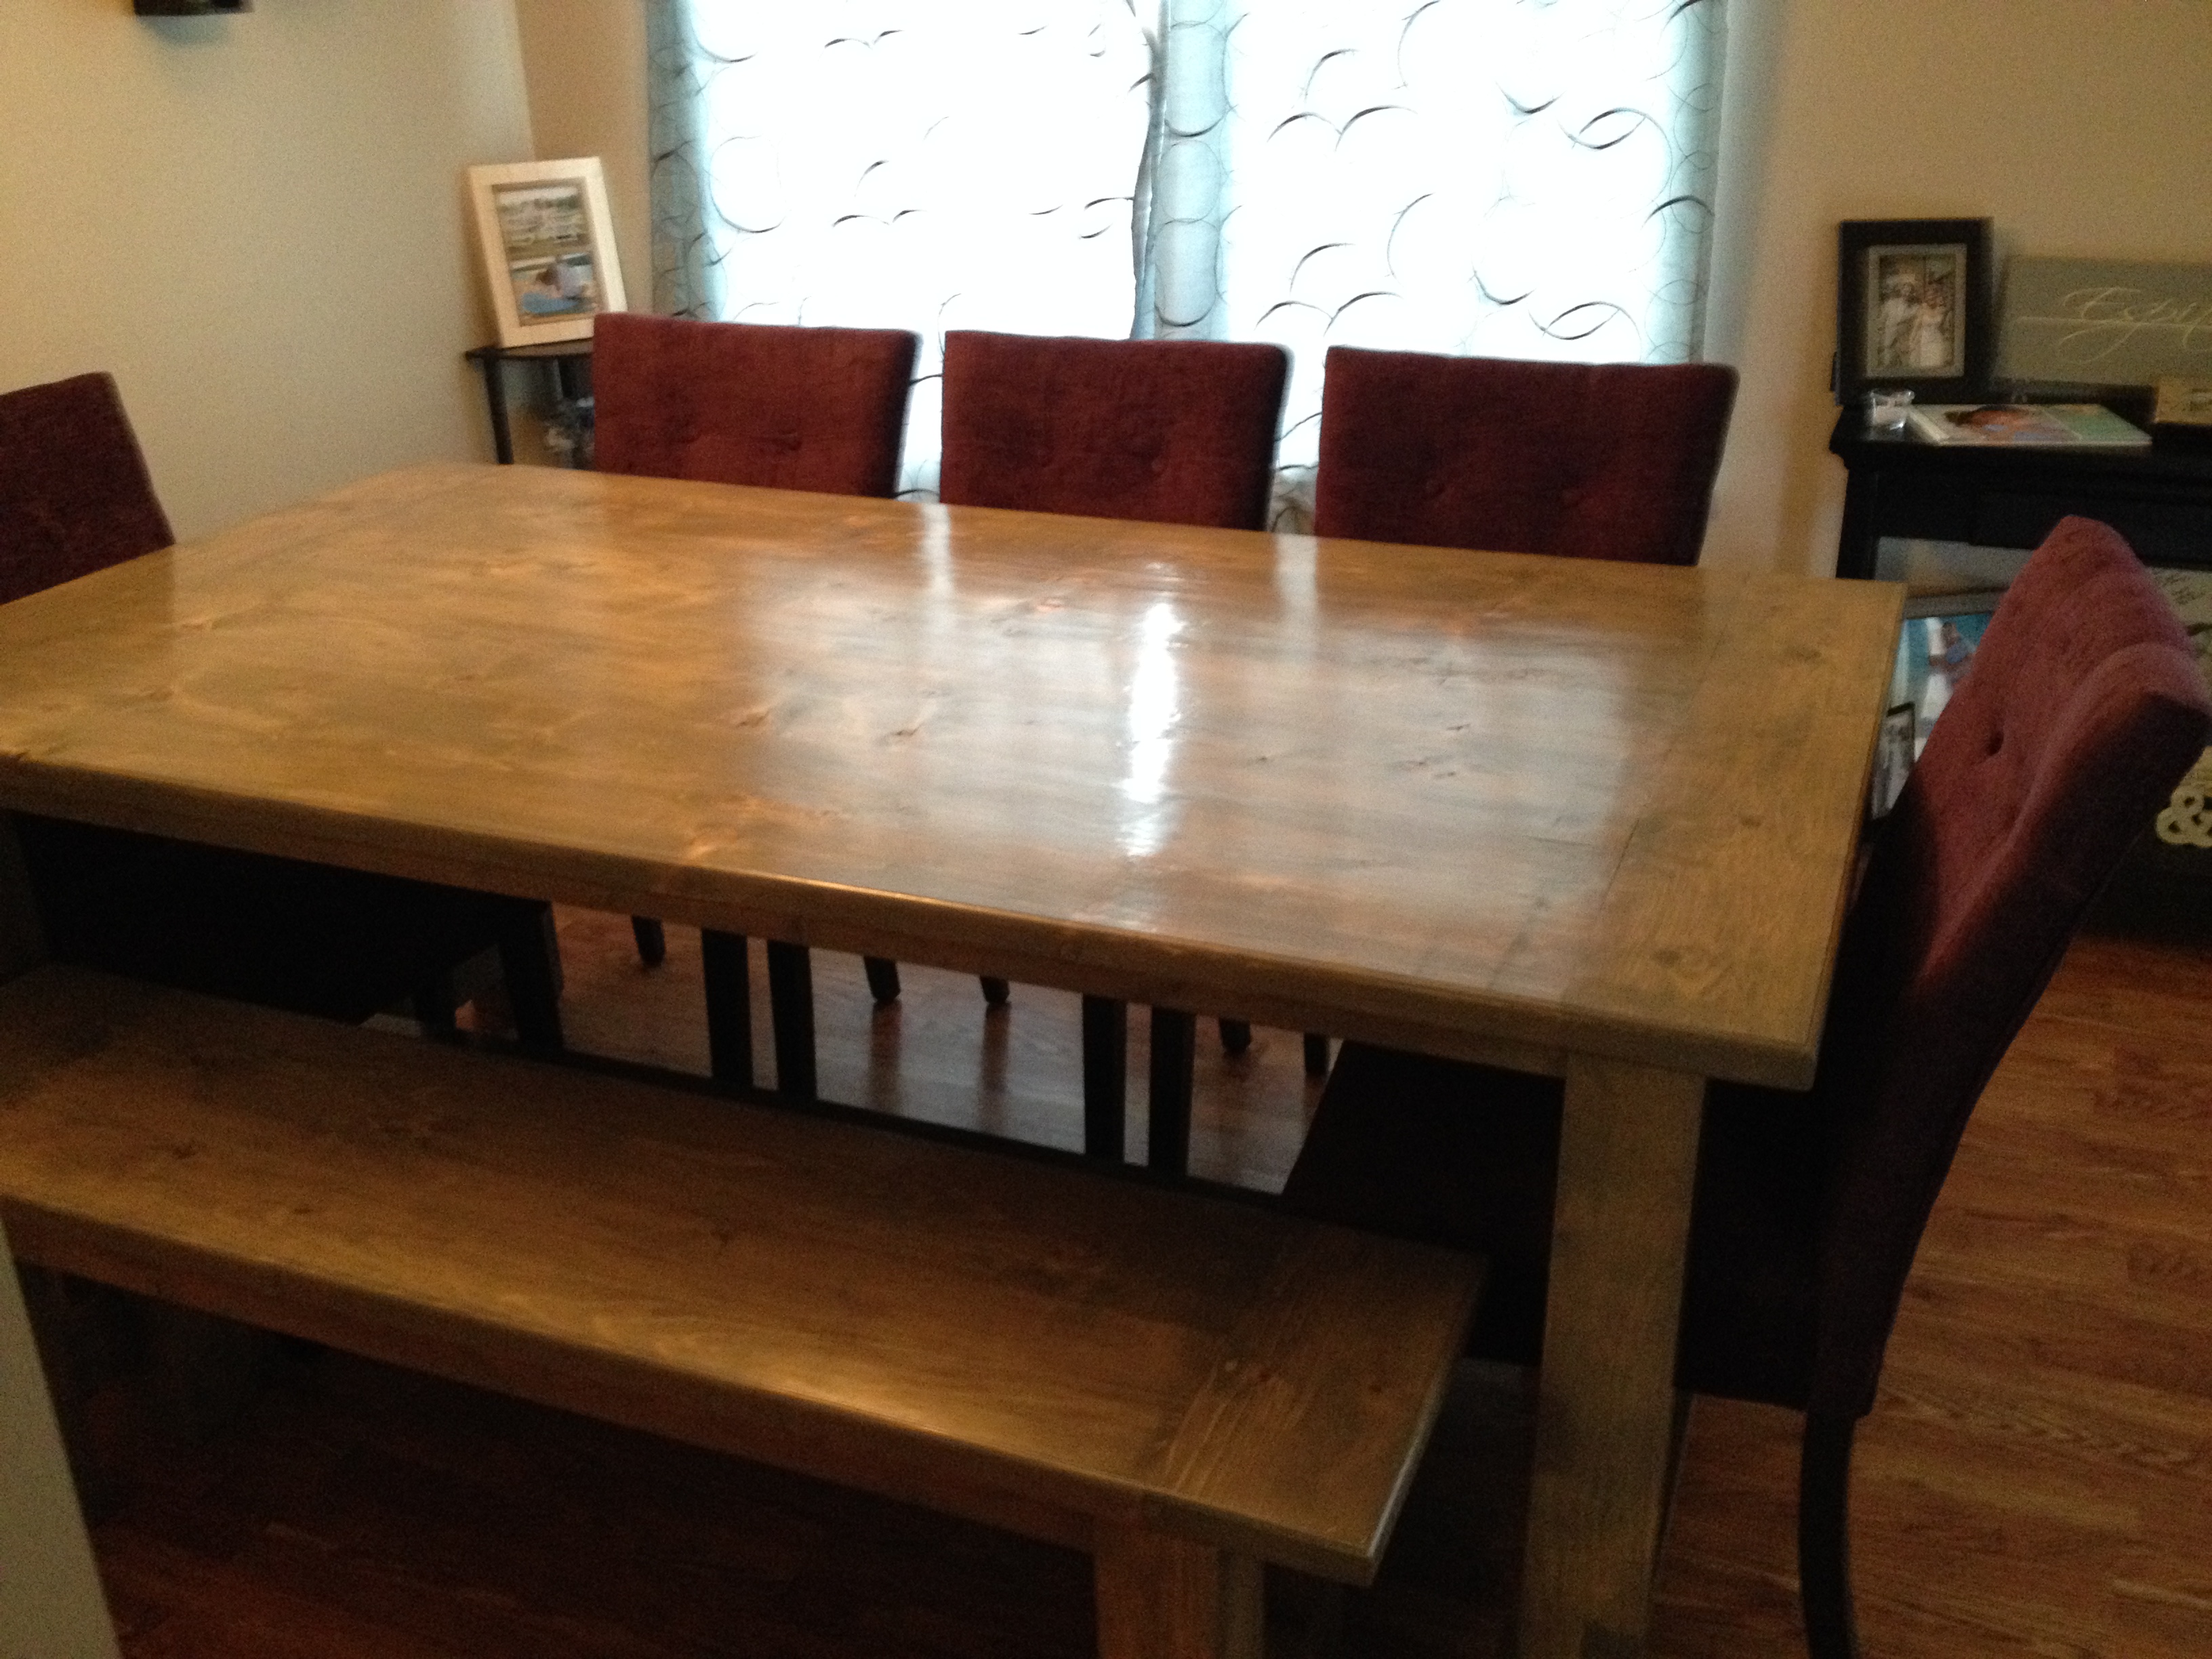
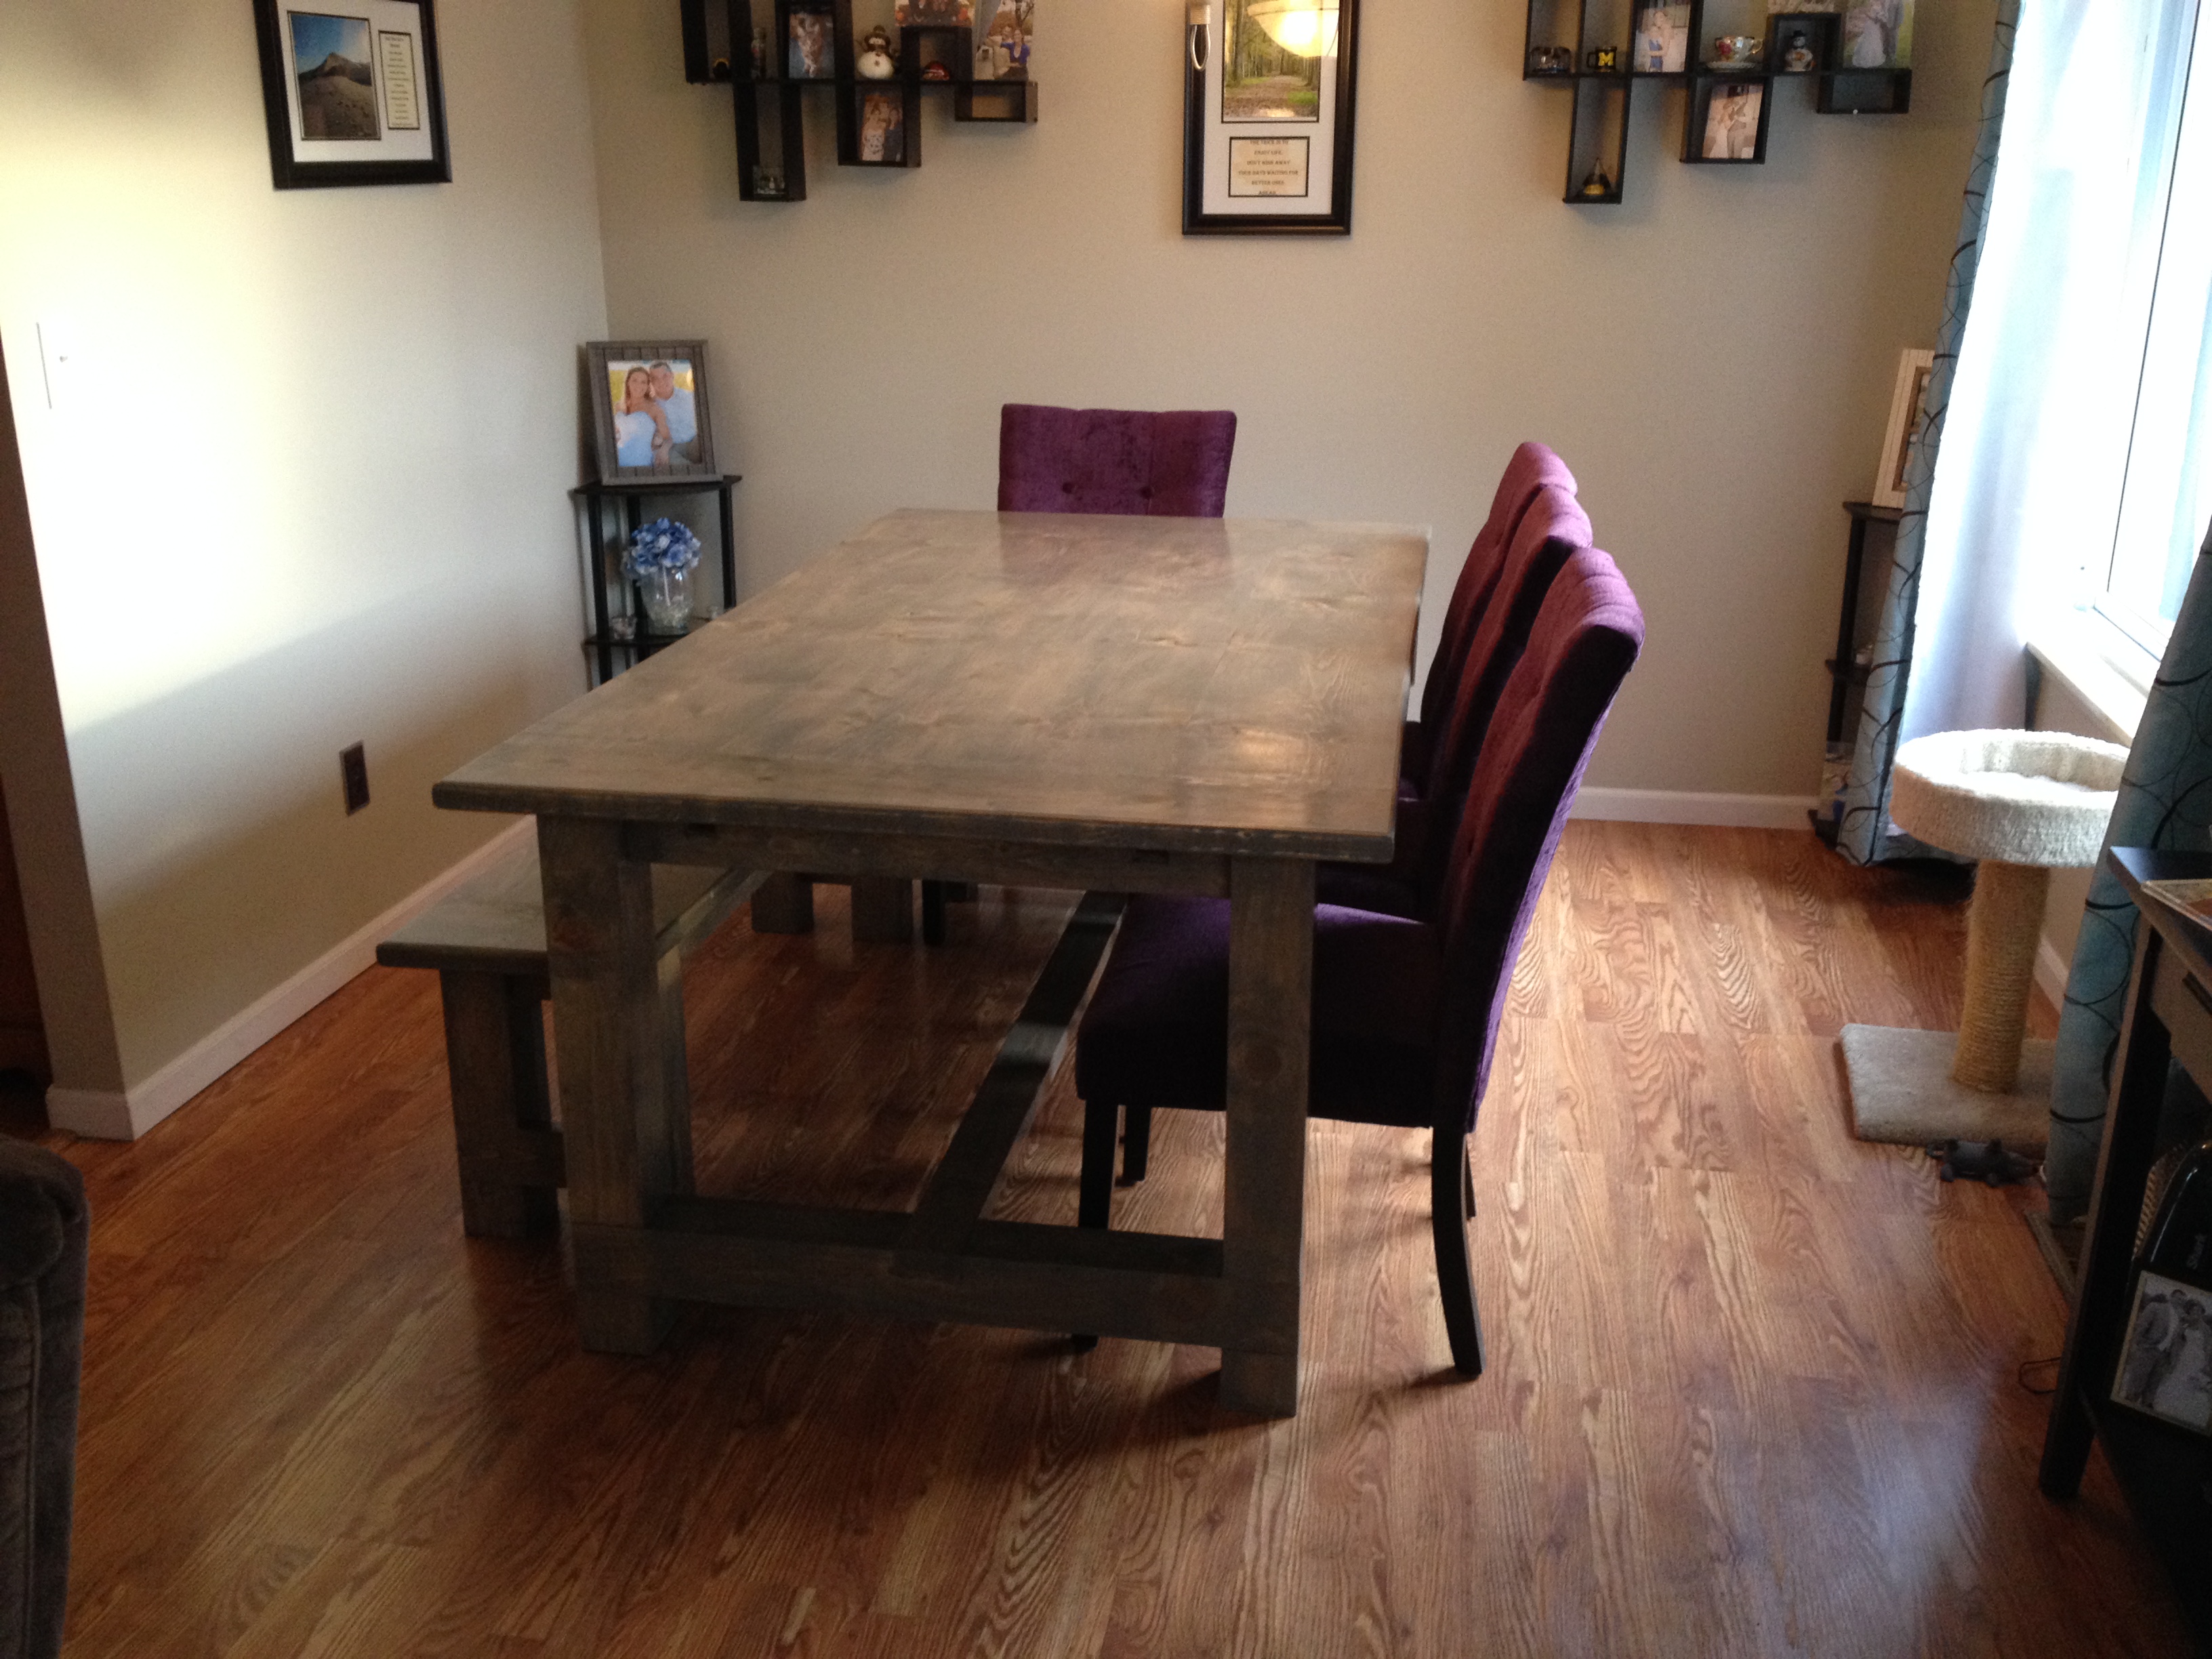
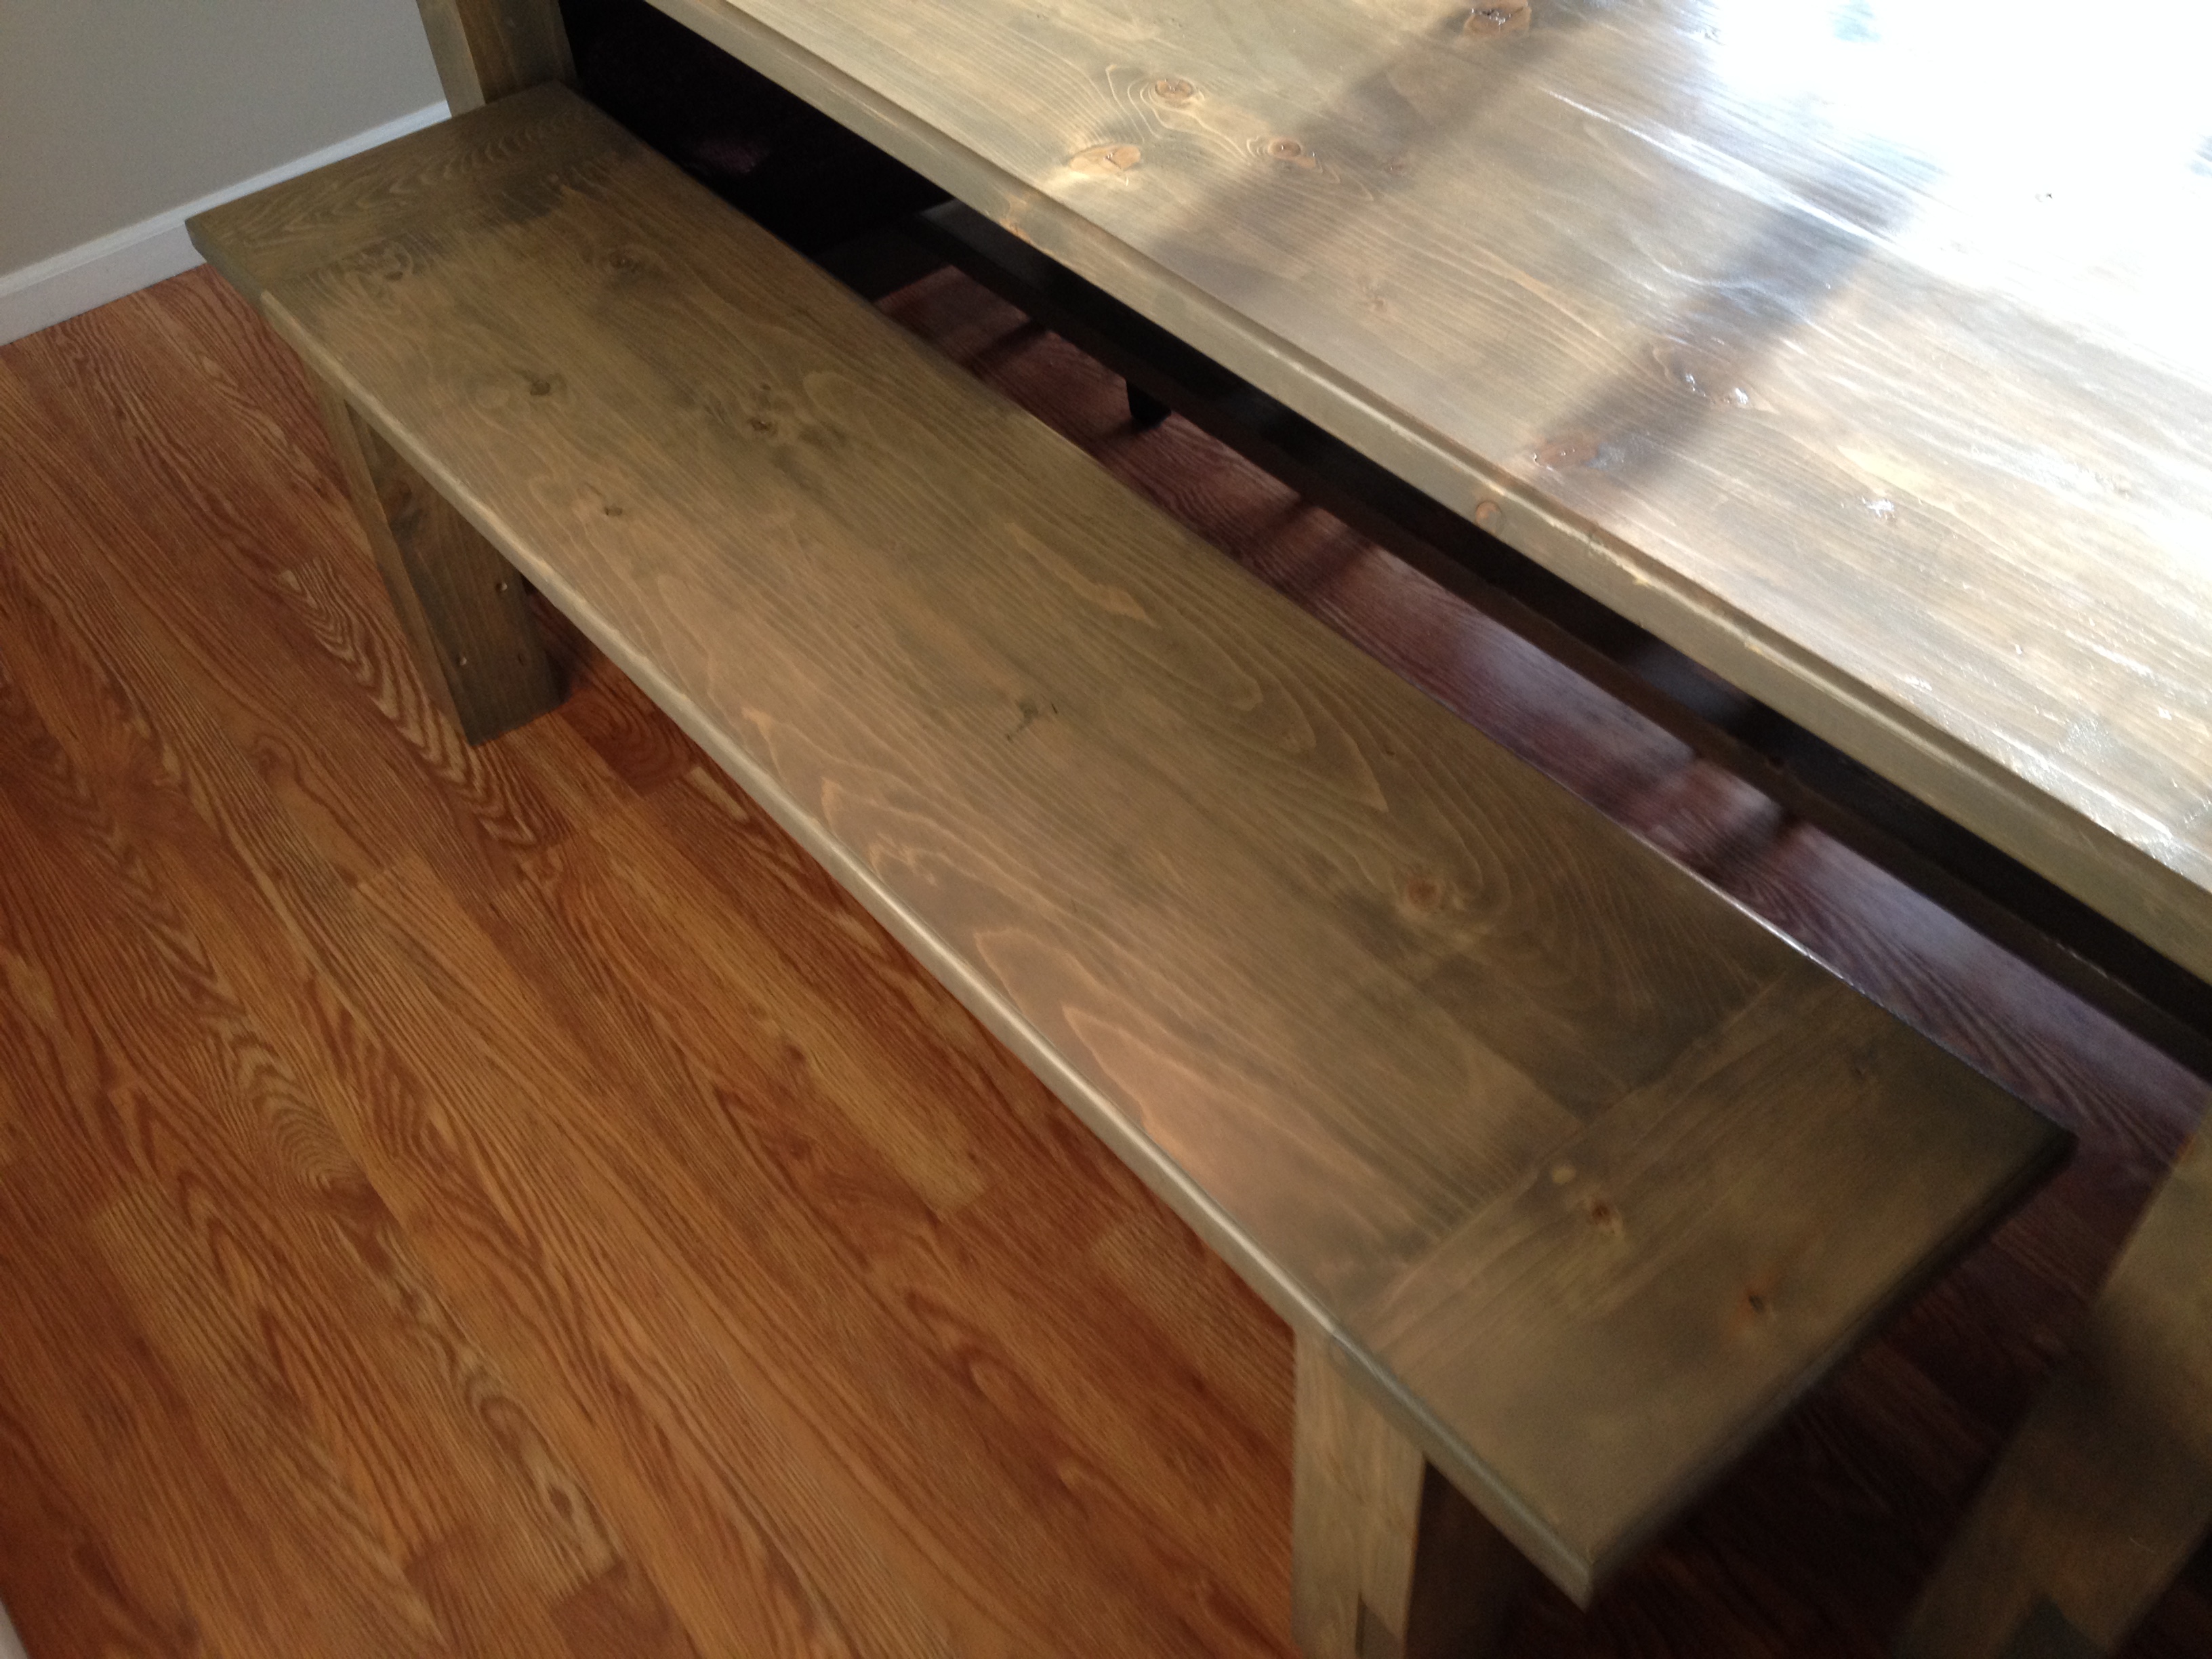
Farmhouse table, table extension, and bench
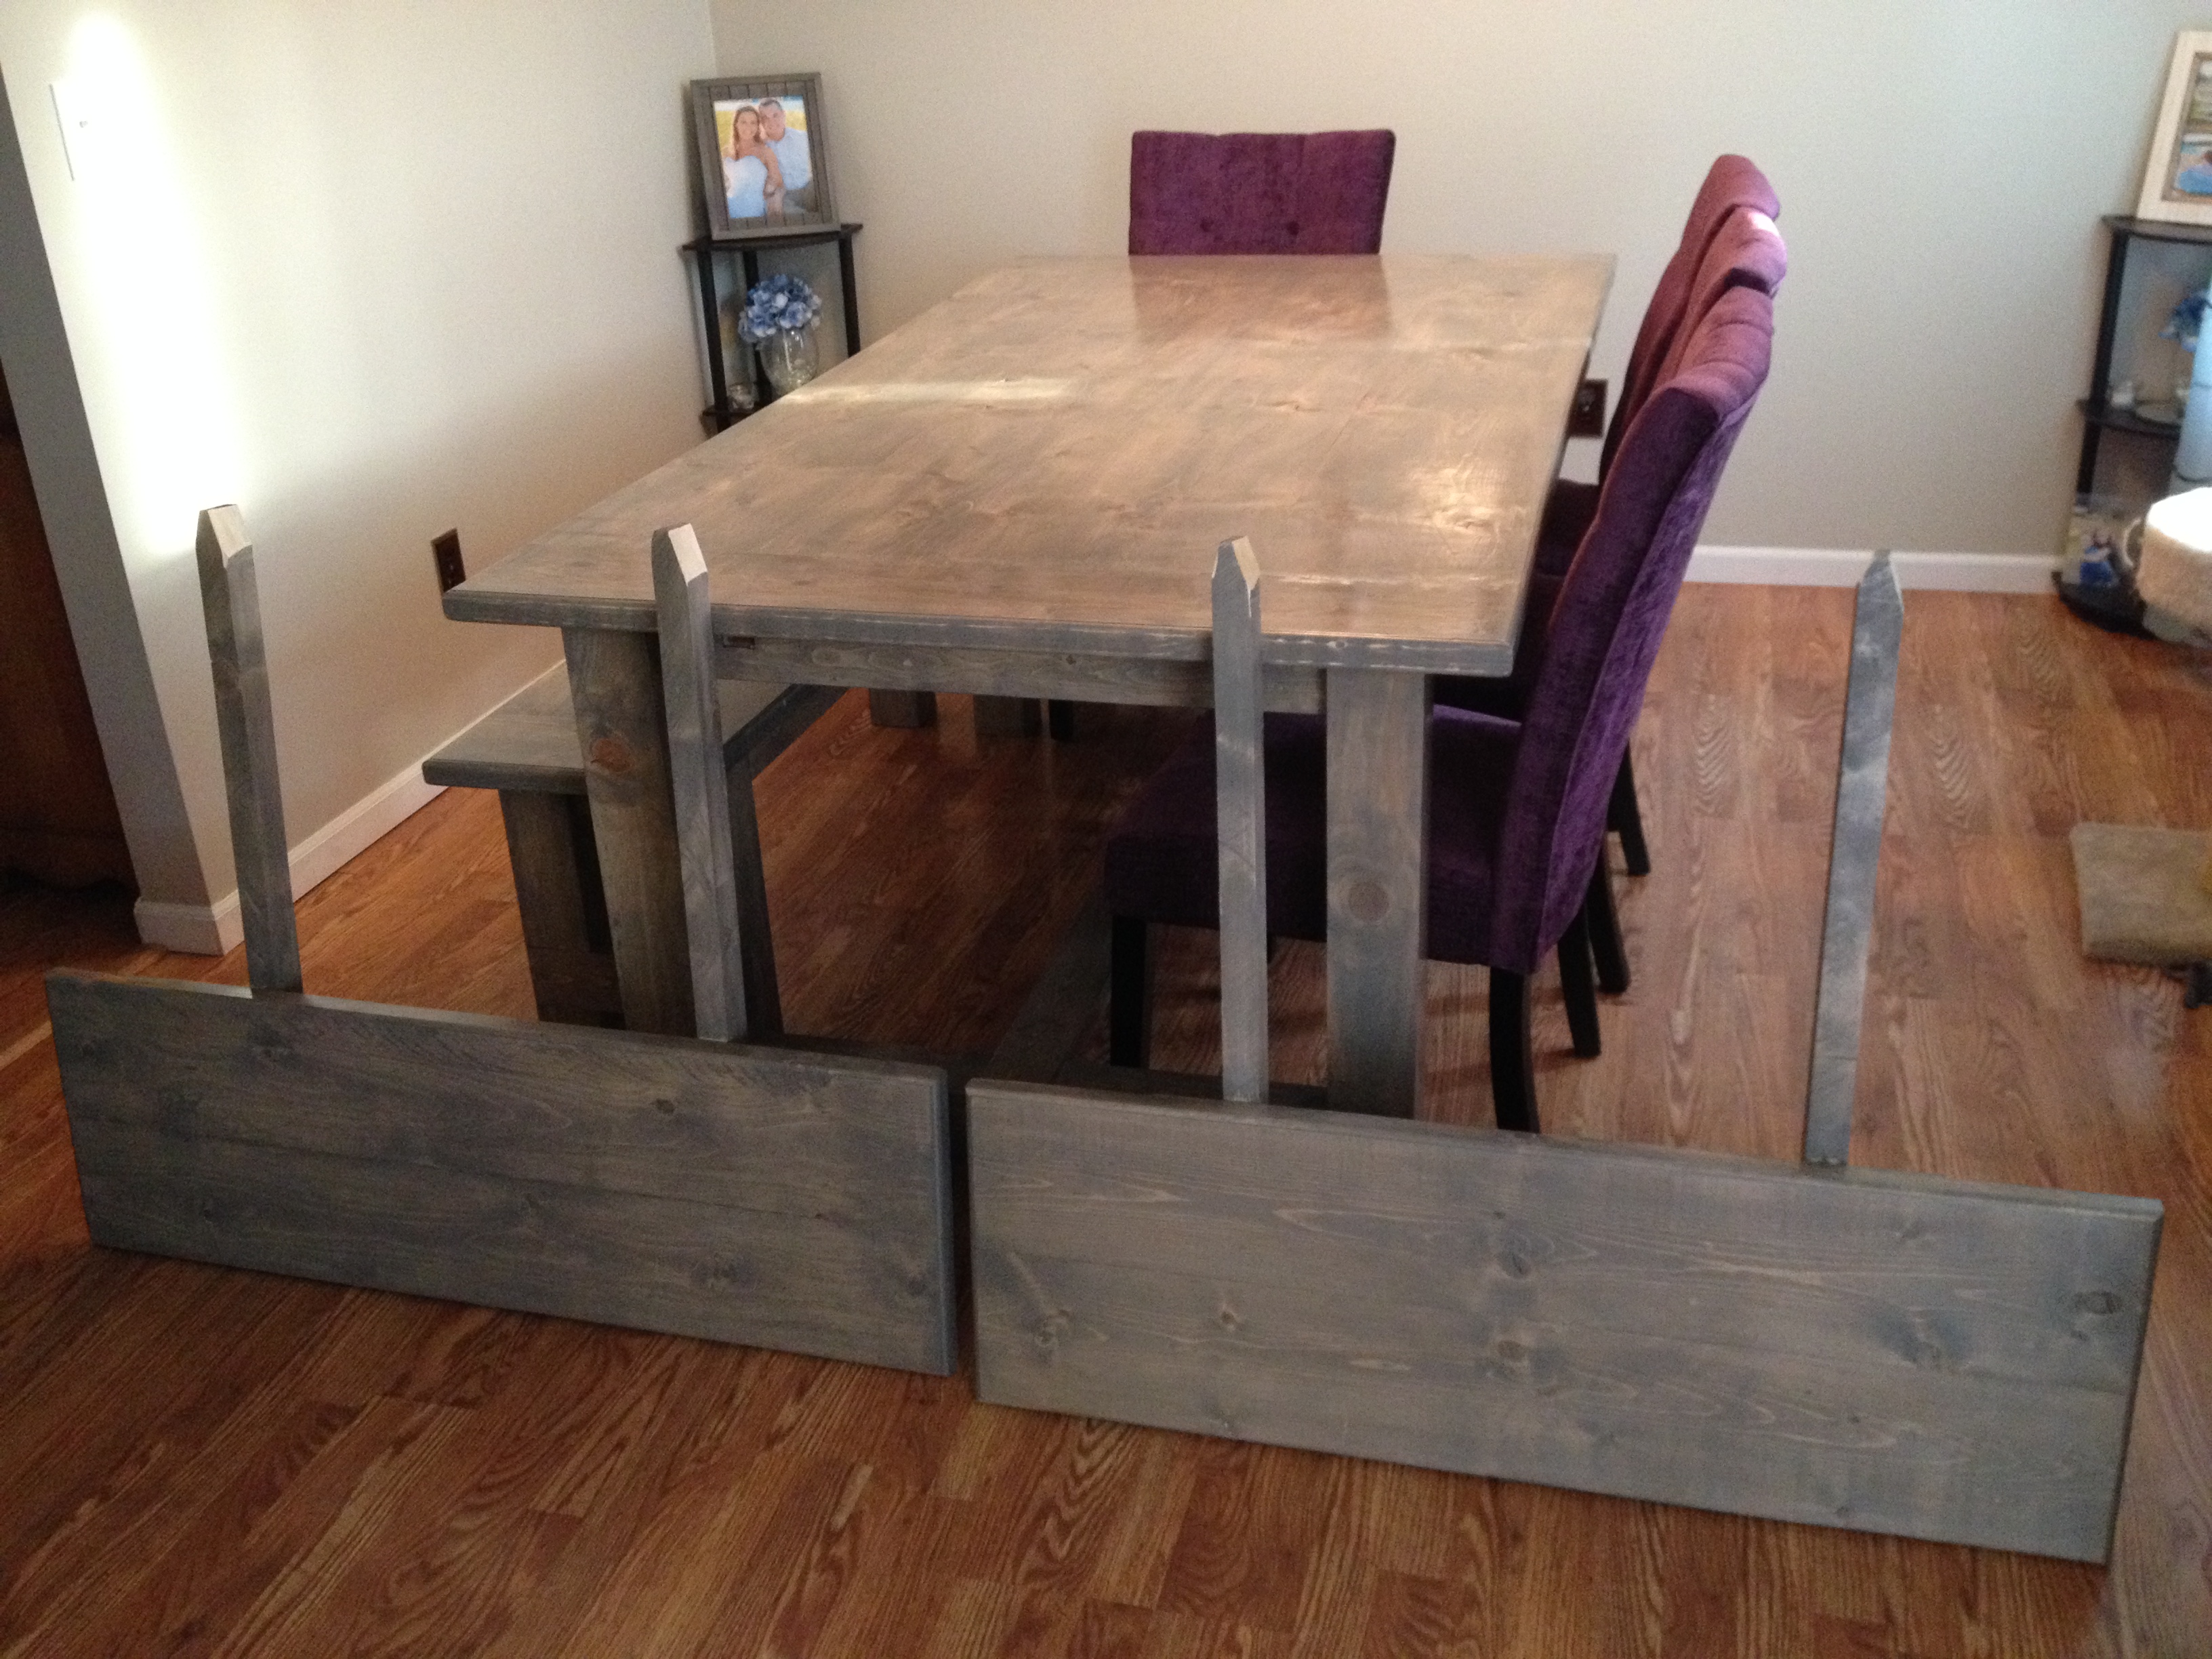
My wife and I recently built this farmhouse table with her grandpa. It was a lot of fun and we are really happy with how it turned out. The table is 80 inches long, 43 1/2 inches wide, and 31 inches tall. The extensions are 15 inches long and 43/1/2 inches wide, and the bench is 61 inches long, 15 inches wide, and 19 1/2 inches tall.
It tooks us about 4 weekends (around 32 hours) to finish the project and the included rebuilding the base of the table after our first one cracked.
We modified the plans a bit. We used 4x4s instead of glued together 2x4s for the legs on the table and bench.
We also used the plans on this blog (http://tommyandellie.com/?p=2582) as a guide.
This was the first time my wife and I have tired a DIY project and we had a ton of fun. Her grandpa had some experience with wood working and had all of the tools we needed but you can certainly do this without any extensive wood working experience.
Sorry for the duplicate post. This is my first time on the website and the first time I posted it came across as 'guest'

Built from Plan(s)
Estimated Cost
$350
Estimated Time Investment
Week Long Project (20 Hours or More)
Finish Used
We put on one coat of minwax pre-stain wood conditioner. Then we added two coats of stain of a custom mixed stain from Sherman Williams. We started with the Wood Classic Rustic Gray. The store then tinted the stain until we found the color that we liked. Note - the table looks grayer in person than it does in some of the photos. Finally we applied 3 coats of minwax water based oil modified semi-gloss polyurethane.
Recommended Skill Level
Starter Project
Comments
Tue, 08/16/2016 - 13:34
A few things I forgot...
I forgot to mention that with the extensions the table expands to 110 inches.
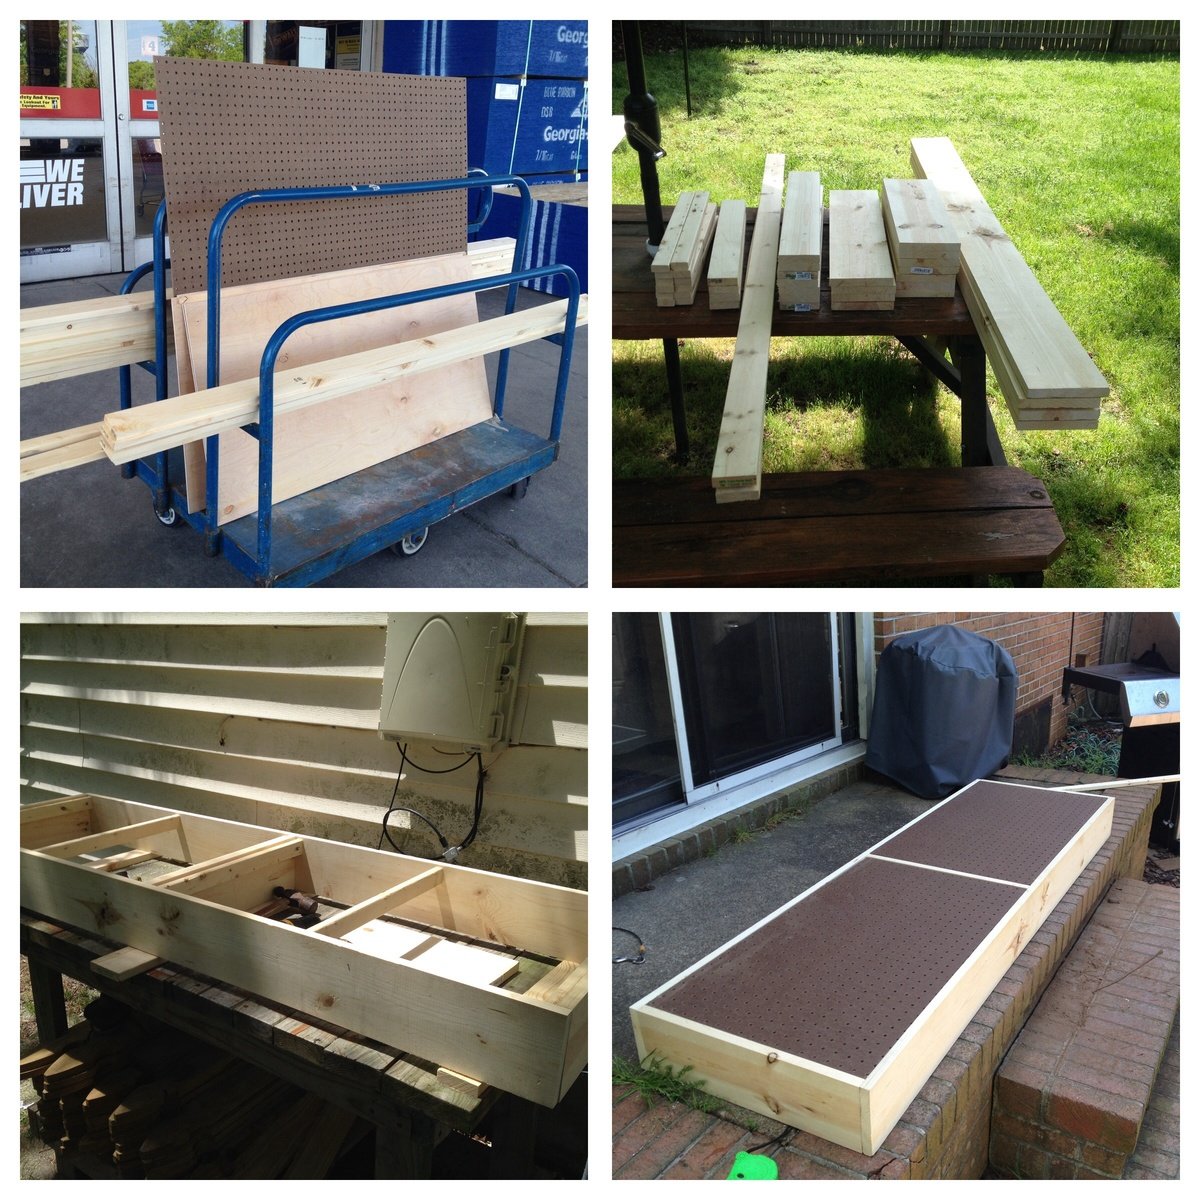
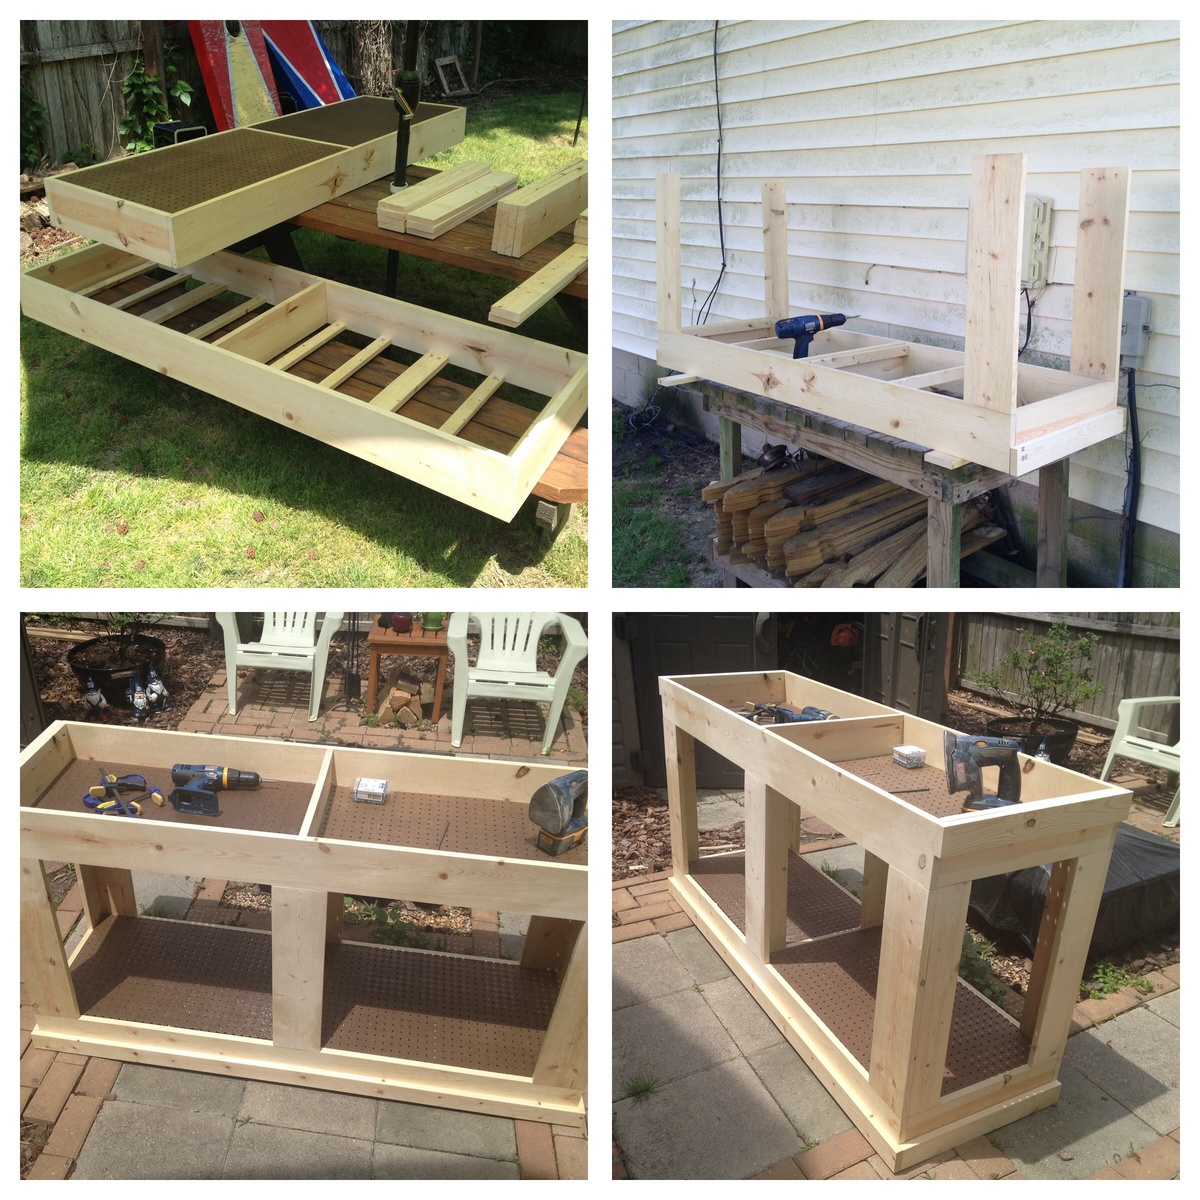
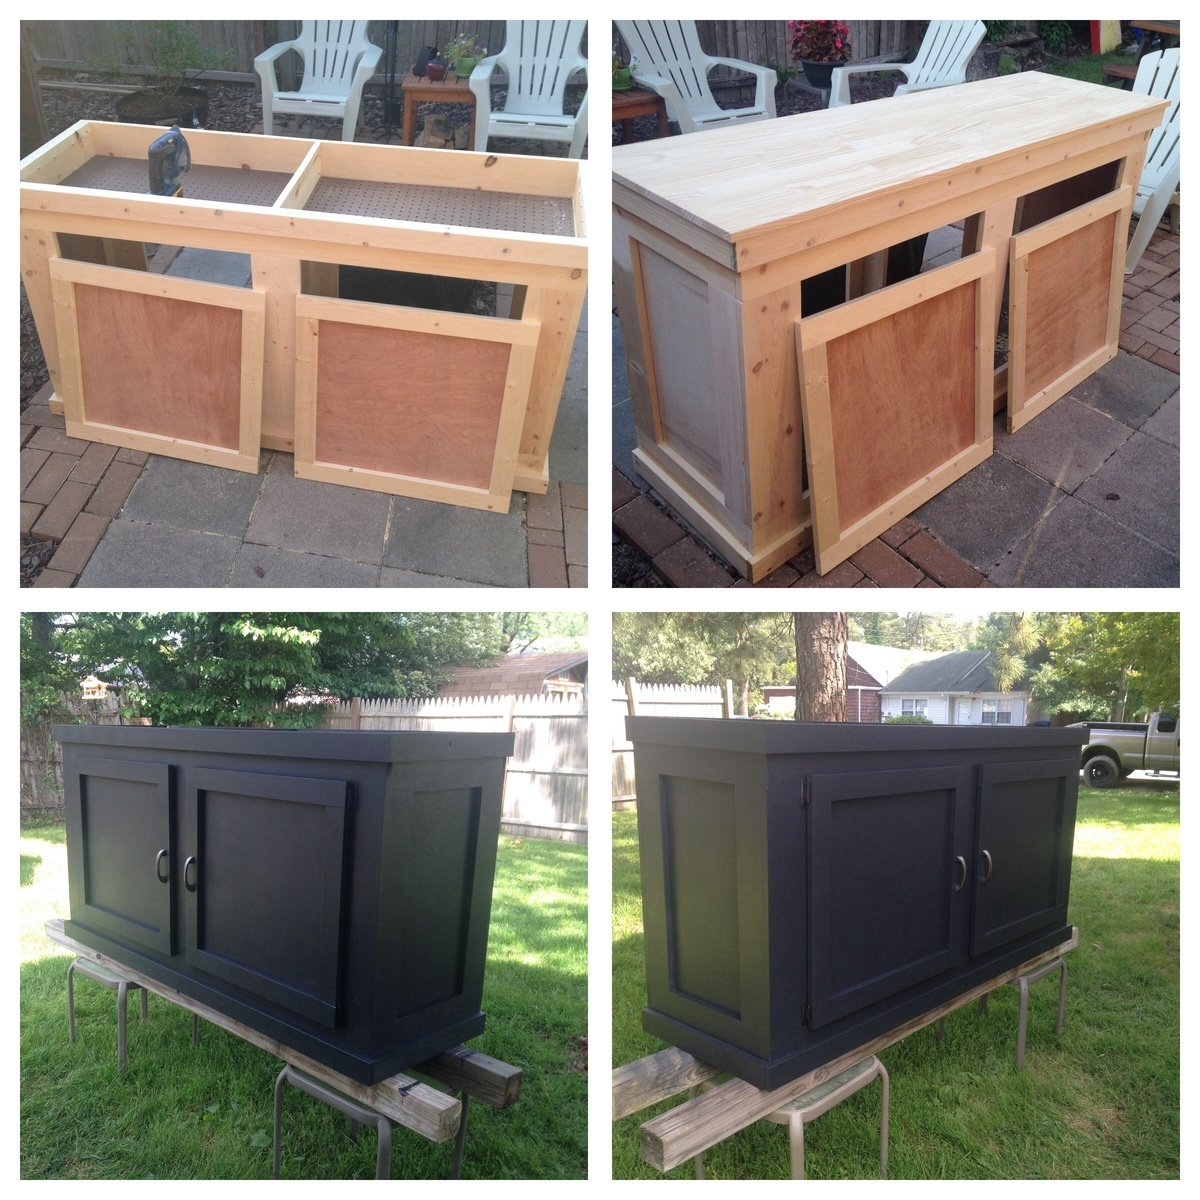
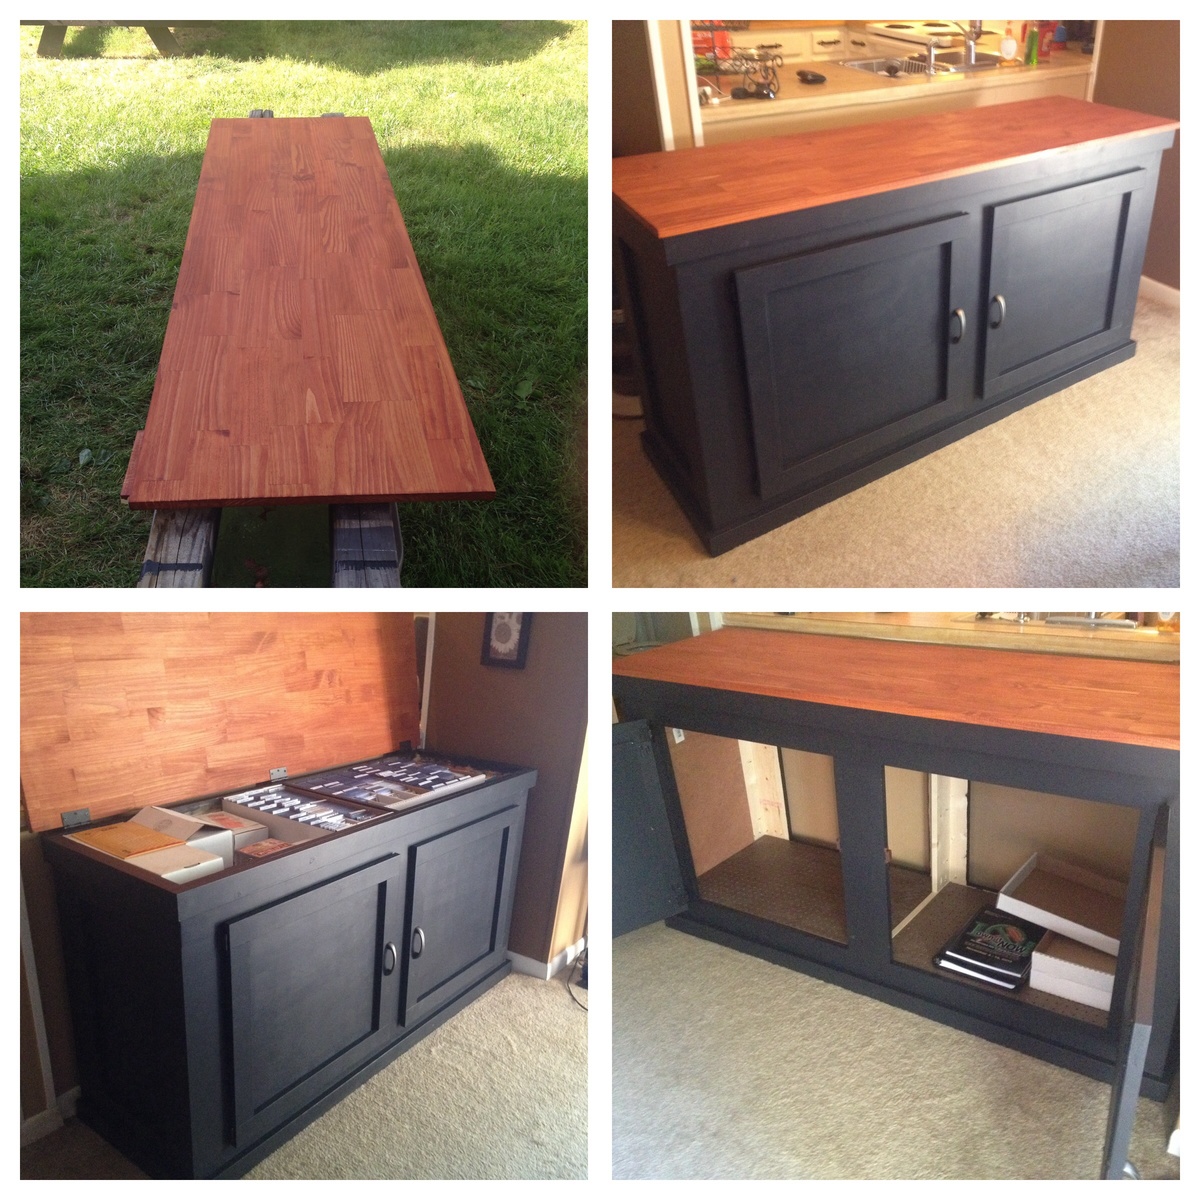
Sports Cards Sorting & Storage Cabinet
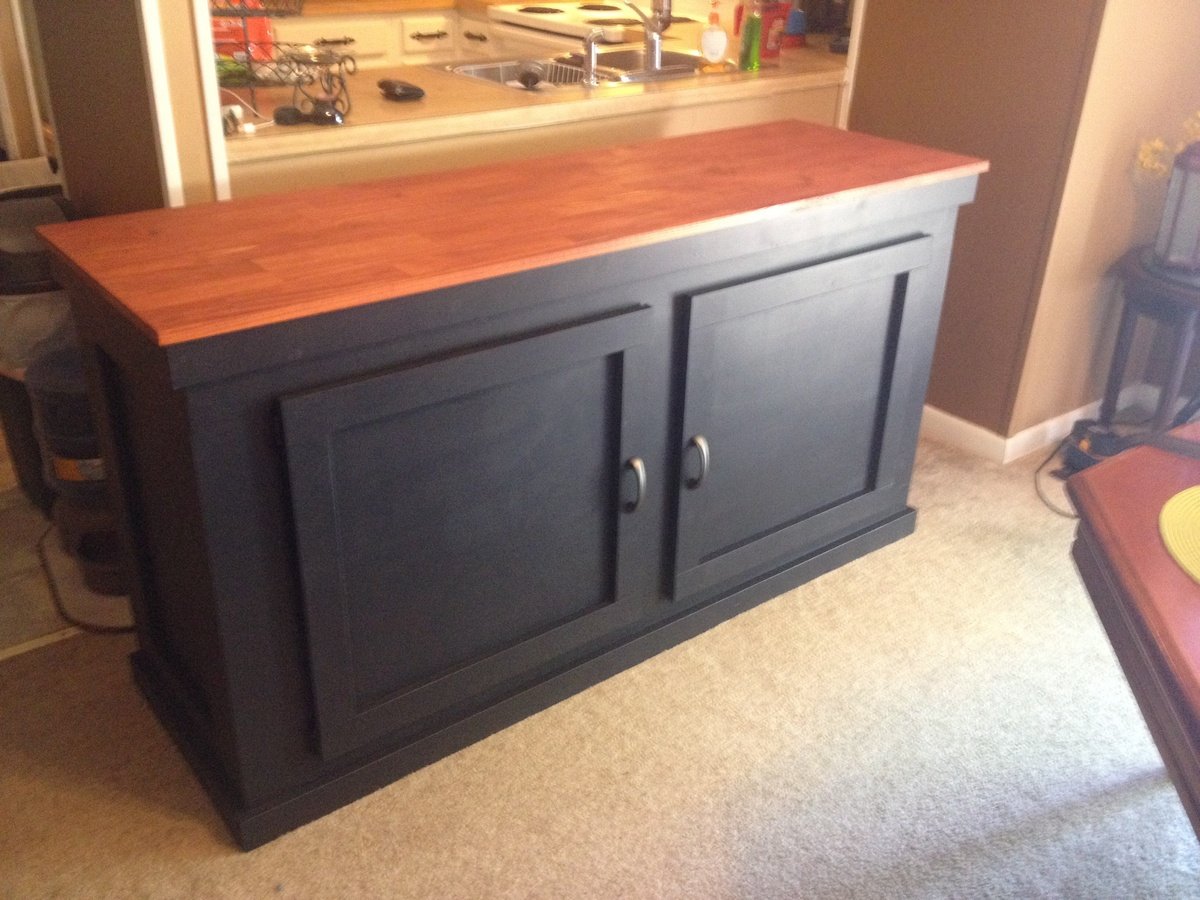
So... I am a pretty dedicated baseball card collector as well as a new found hobbiest in wood building. It's been an ongoing issue in my household with my baseball cards and boxes cluttering up our dining room. I decided to resolve the issue while still being able to keep my cards in the same room with even easier access without being an eye sore! This just might have saved my marriage! I searched for months for plans for some sort of baseball card cabinet but they just did not exist. The closest I could find for what I was looking for was a storage bench plan here on Ana White. I liked the idea of a top opening for hidden storage. It was too small for what I needed. I then came across plans on another site for an aquarium stand cabinet. I figured the combination of these two projects was what I was looking for. After a week of planing and drafting and 3 weeks of construction/finishing in the little spare time I have, I created what you see. People in the card collecting forums I'm a member of are begging for plans or for me to build them one! Problem is, this is the first thing I have built following my own design and plans. I could pass these on but no one in their right mind would be able to follow my scratches on paper but myself! I'm extremely proud of the outcome but am looking for a way to come up with plans I can share! Hope you all like, and if I can come up with a way to make follow able plans I will share! This was all assembled using the kreg jig system, wood filler to hide the knots and lines where the wood joined and lots of sanding!
Estimated Cost
$300
Estimated Time Investment
Week Long Project (20 Hours or More)
Finish Used
Valspar Black satin interior high def paint, wood conditioner & gunstock color stain
Recommended Skill Level
Intermediate
Comments
Mon, 05/26/2014 - 22:12
Designing plans
If anyone knows of helpful software to design plans in let me know!

Tue, 05/27/2014 - 08:38
How did you do the top?
Nicely done! How did you make the top? Is that a project board? It's very smooth.
I believe Ana uses "Sketchup" which is a google program to do her designs.
Mon, 10/12/2015 - 17:19
Measurements
Would you be willing to share some basic dimensions such overall size width, depth, and height and door measurements to get an idea?
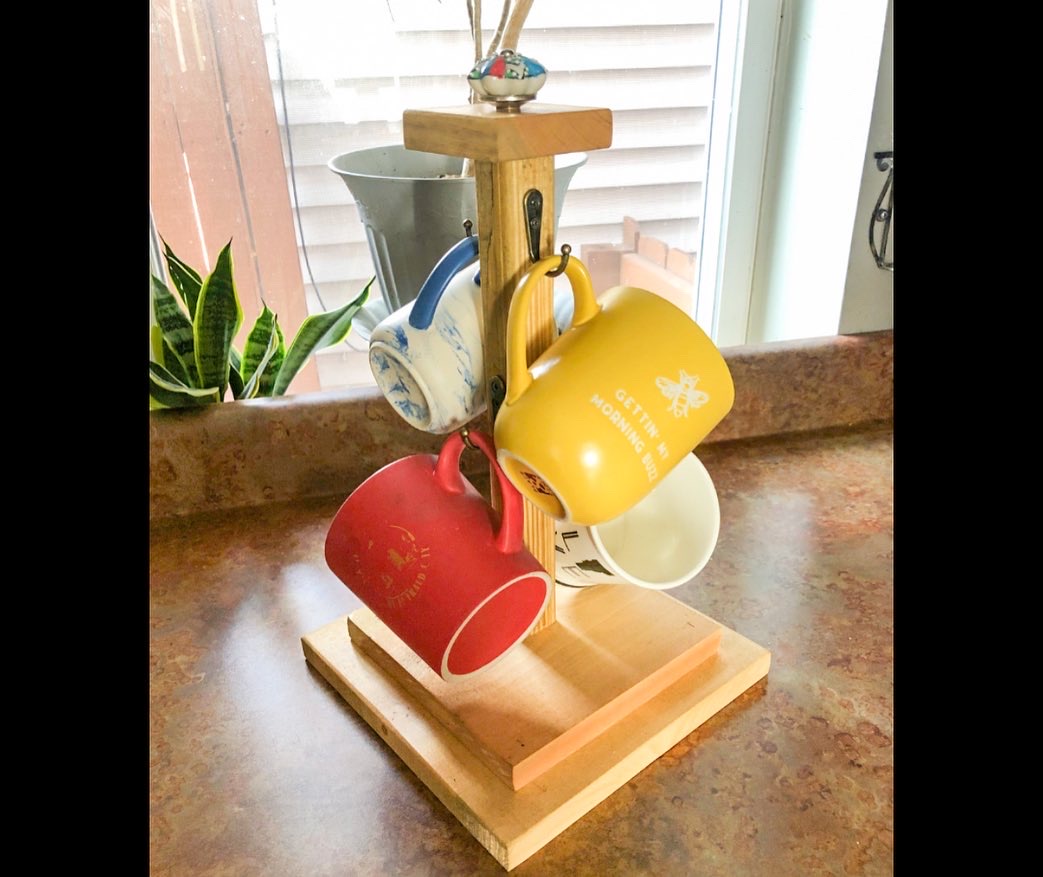
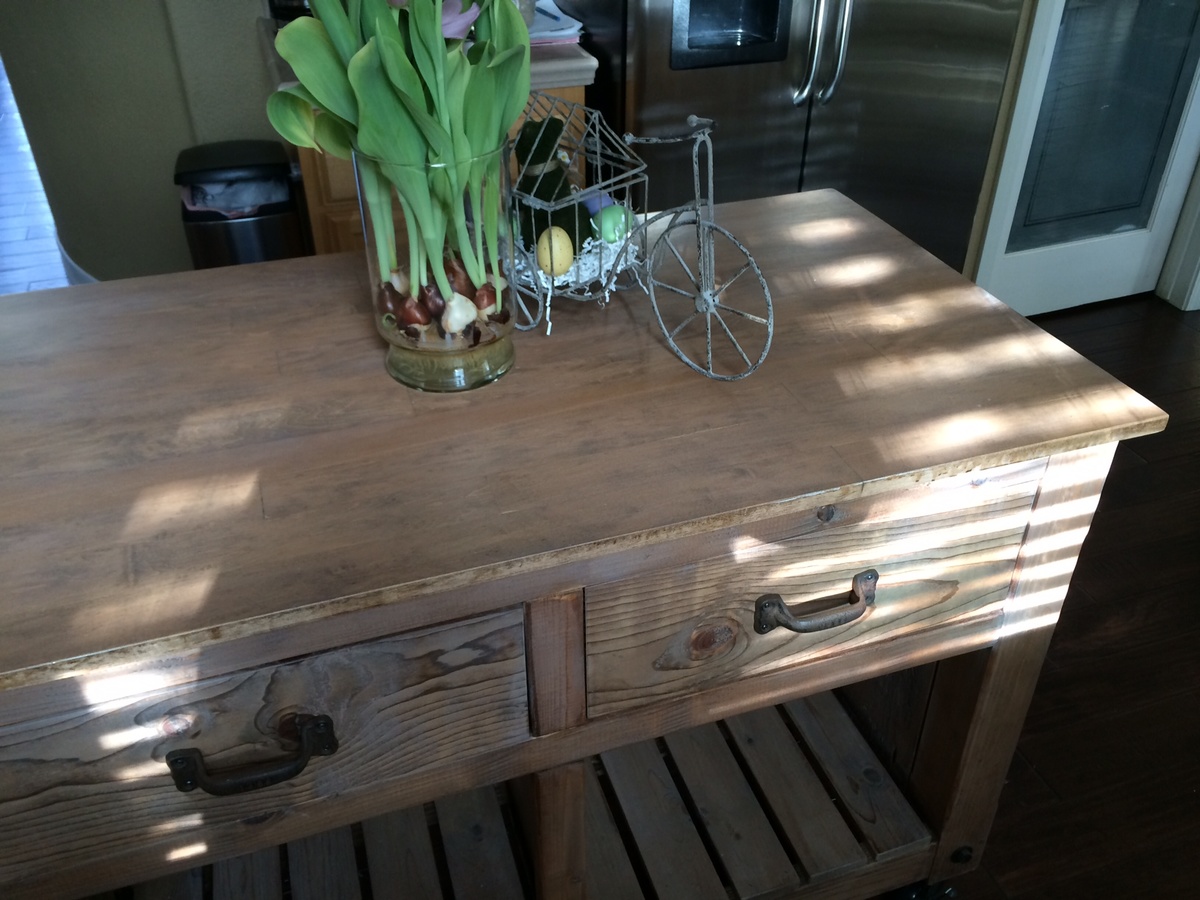
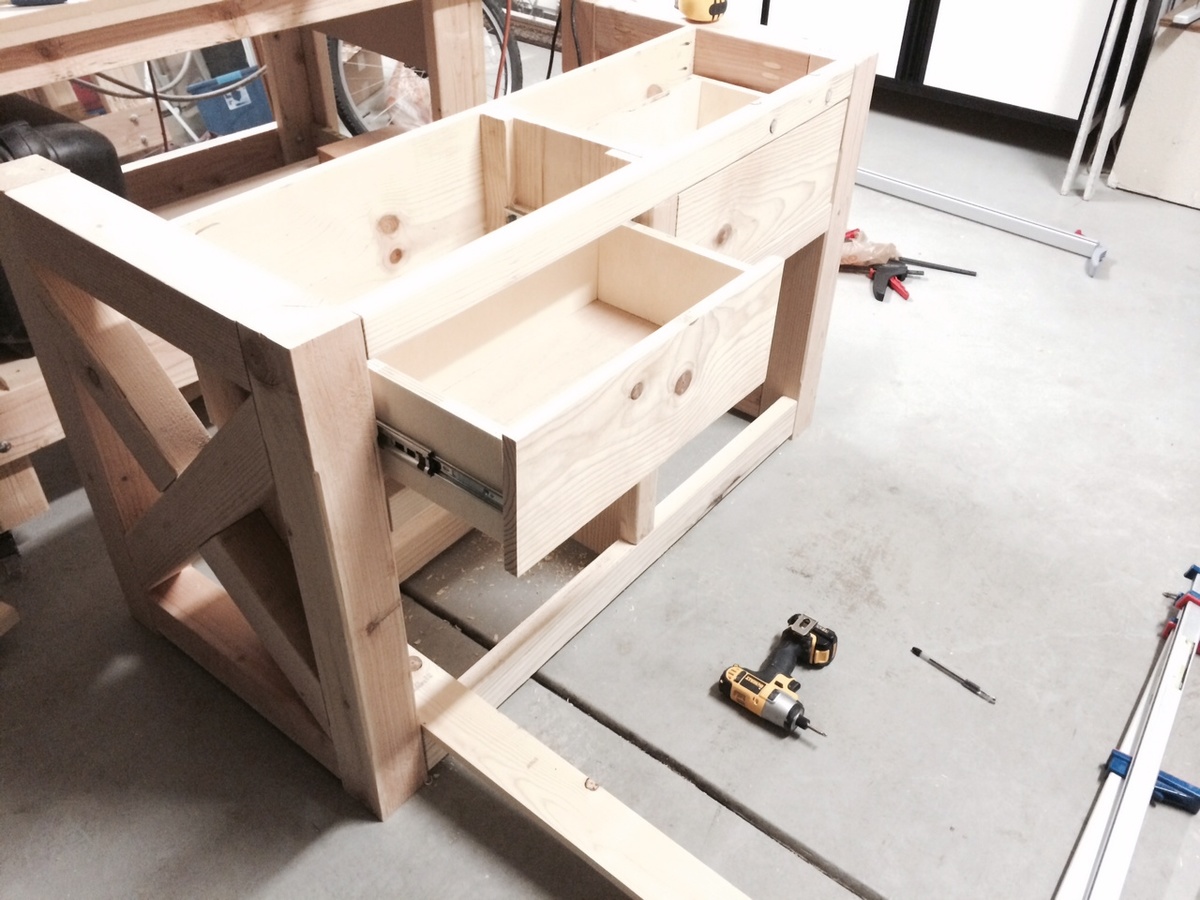
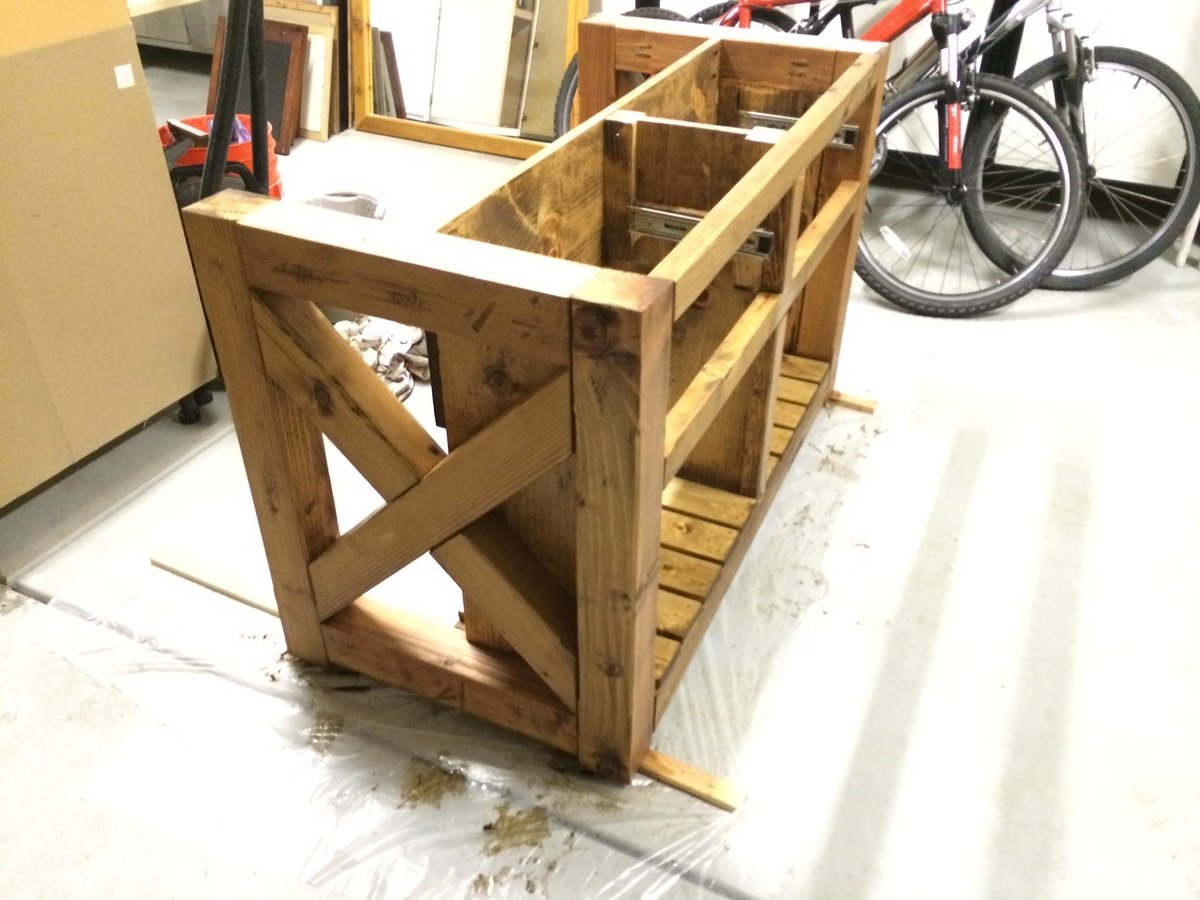
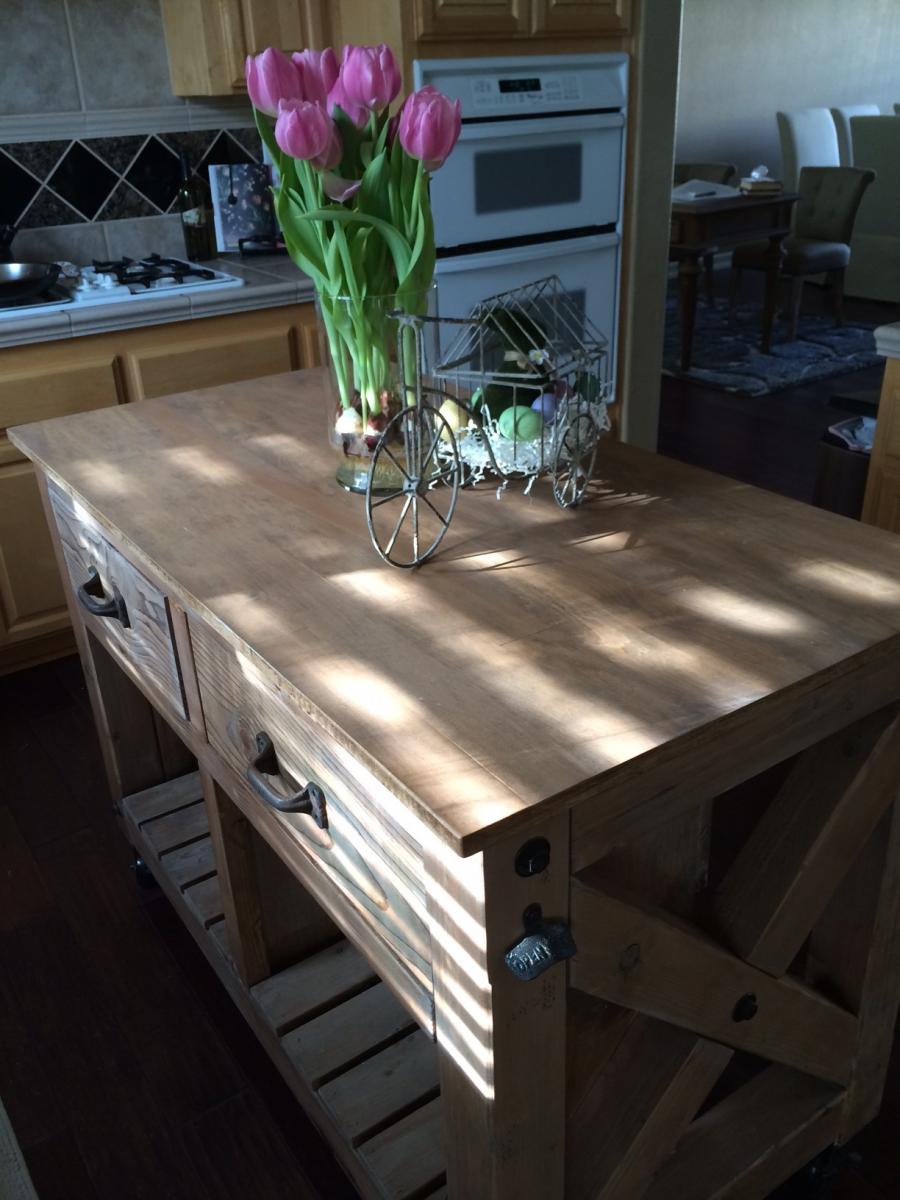
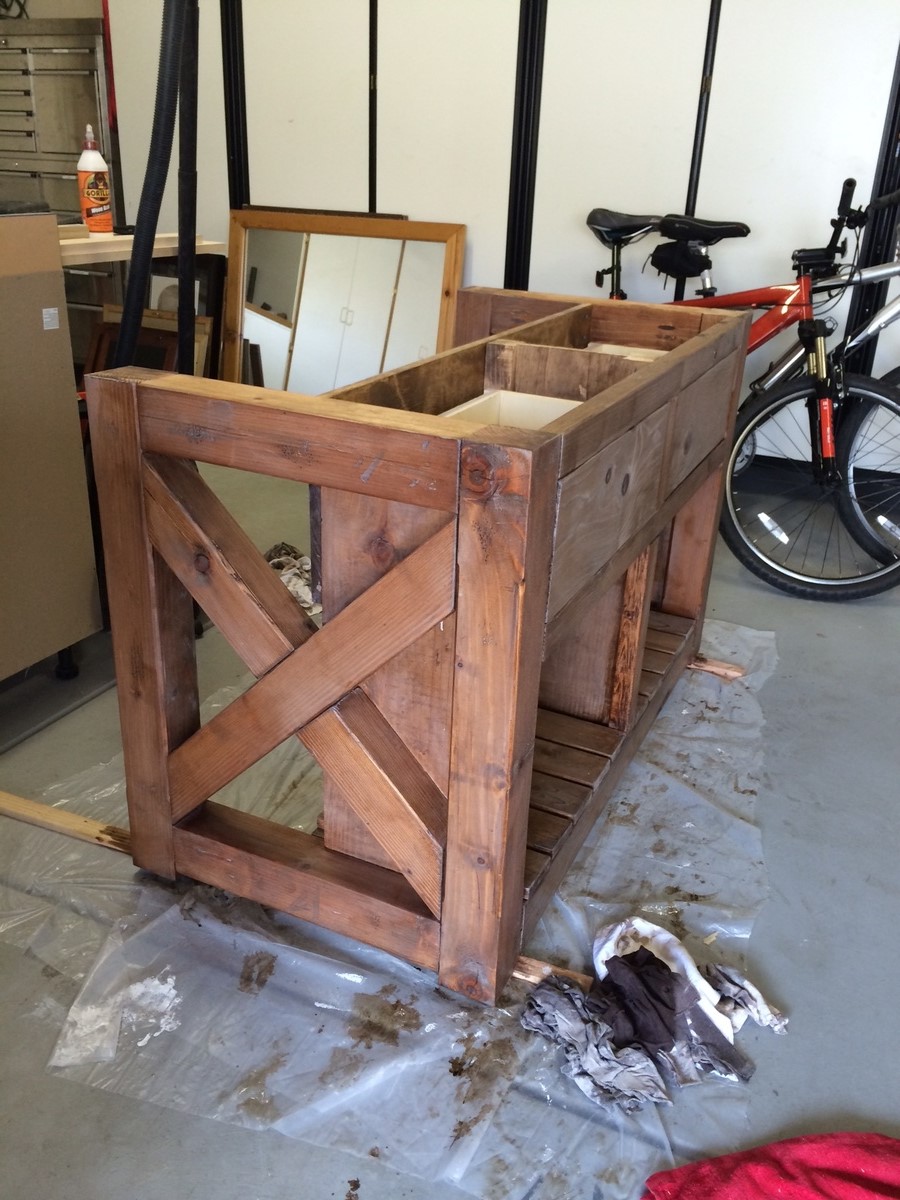
Rustic X Kitchen Island with 4x4 Legs
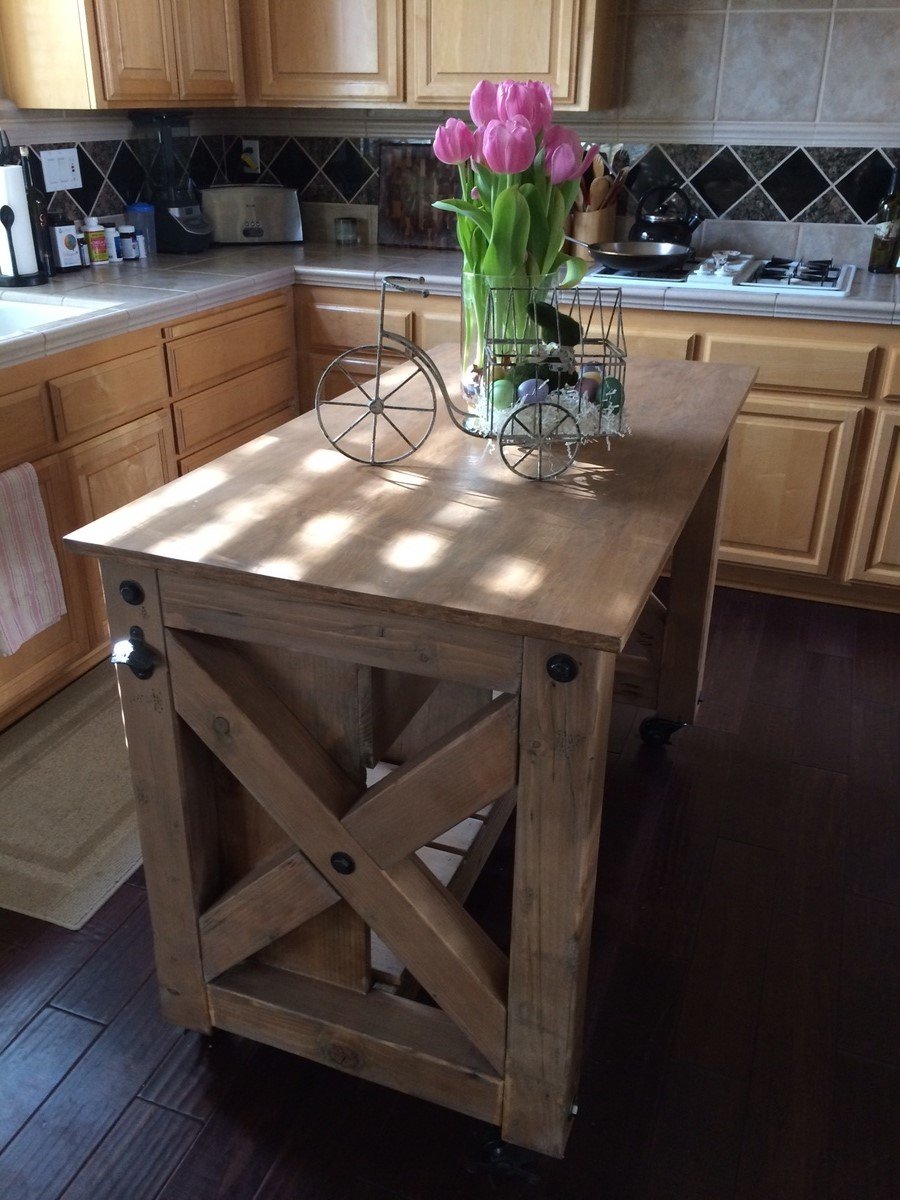
In order to make this island a little beafier I used 4x4 wood for the X as well as the the top and bottom braces. Top is made up of glued up 1x3 maple wood. It looked really good raw, but decided to stain it to give a more uniform look. I bought the rustic handles and the bottle opener on Amazon.com. I used lag bolts and washers for the finishing accents...similar to the pottery barn island. Painted them with Rustoleum oil bronzed paint and then dabbed it with a paper towel to give it a rougher finish to it and then sprayed the casters as well. This was a fun project and are getting a lot of use out of it. Thanks goes to Anna for the plans and inspiration for this island. Rich
Built from Plan(s)
Estimated Cost
$300
Estimated Time Investment
Week Long Project (20 Hours or More)
Recommended Skill Level
Intermediate
Comments
Fri, 06/20/2014 - 11:44
super nice
i keep debating if i should do this, you did a great job. i like the 4x4 sides.
Sun, 06/22/2014 - 08:25
Beautiful
Rich, I love the changes you made with the 4x4's. You made a gorgeous piece of furniture! Can you share with me where/how you attached the drawer/shelf sides? I'd like to follow how you made this, but can't tell from the pictures. On the original they look inset from the 2x4's, but your space is taken up by 4x4's. Would you mind sharing??? Thanks!
Mon, 06/23/2014 - 16:36
4x4 changes
So, I ripped the 4x4 cross pieces down by 1/2" so that the side panels would rest inside the rectangle and flush with the 4x4 frame and up against the X.
Did that make sense?
Beautiful steps
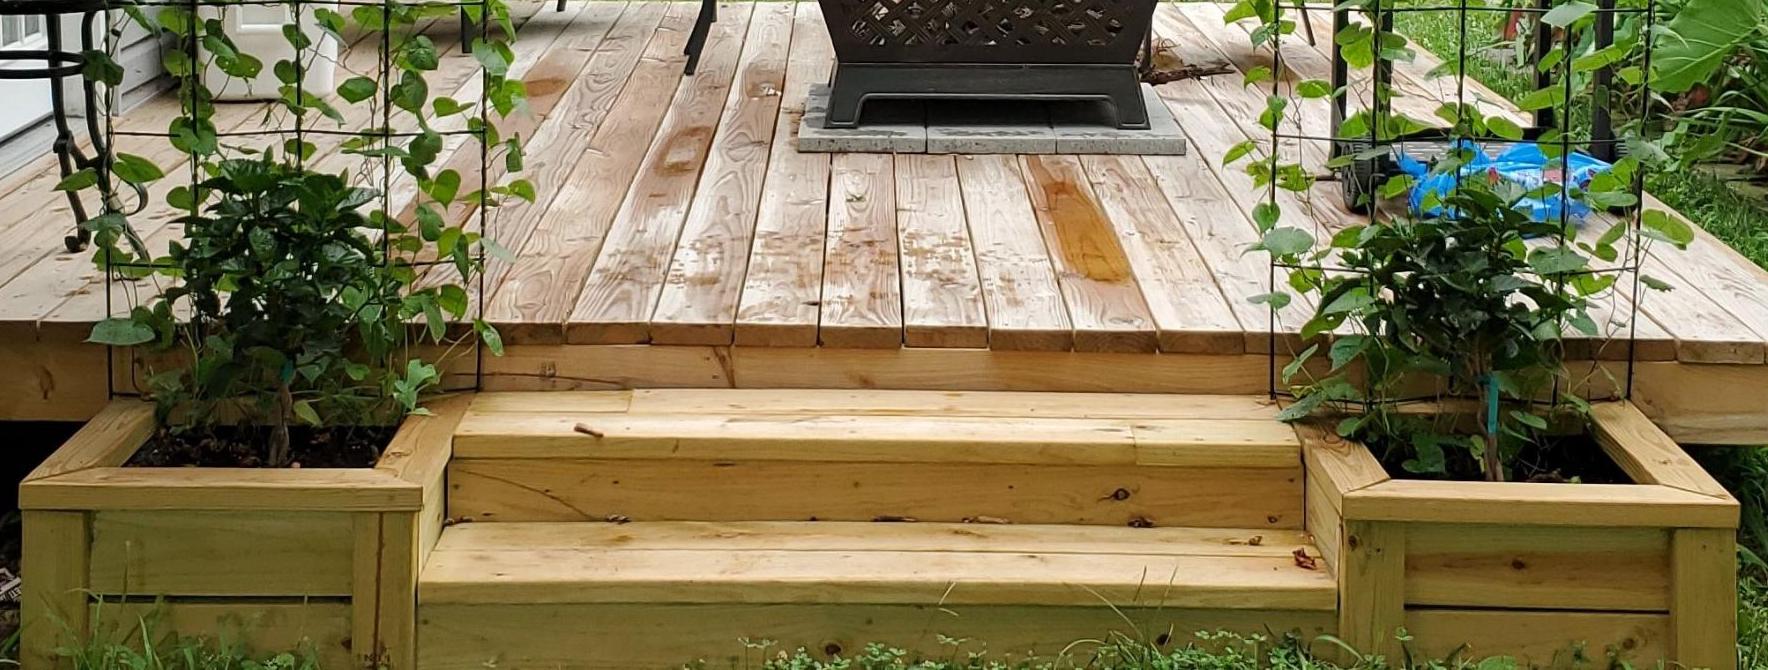
Directions worked like a charm, thank you, Ana for what you do!
Built from Plan(s)
Comments
small pantry
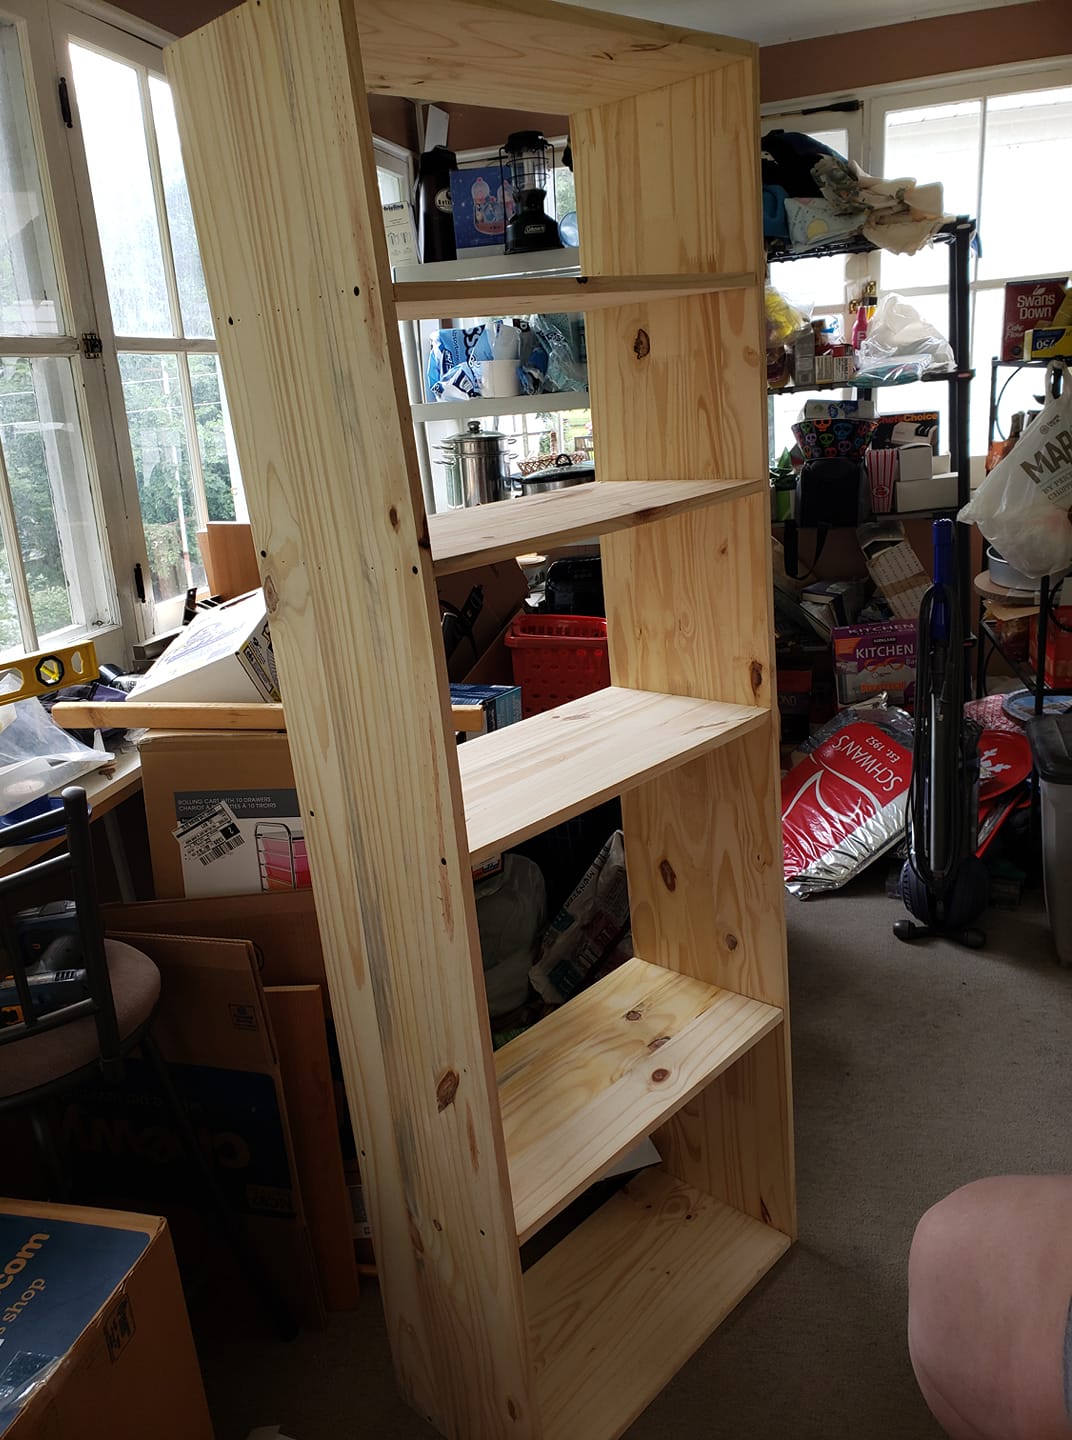
A quick pantry idea using 4 - 1x12x6'. 2 for sides 2 cut into 24" shelves. Start with basic box and then fill in shelves where you need them. Used 4" 2x4 scraps for feet. Put together with screws and nails will eventually add back panels to keep it square.
Estimated Cost
$75
Estimated Time Investment
Weekend Project (10-20 Hours)
Finish Used
painted with semi-gloss , went in kitchen
Recommended Skill Level
Beginner
Sewing cart/table

Love this plan! I used locking hinges instead of legs because it will overlap a bed in our guest room when in use. The hinges are rated for 250lbs and have held both of my sewing machines with no issues. I placed the middle shelf to fit my machines on the lower and standard fabric storage cubes on the upper. A metal adhesive measuring tape was added to the edge for convenience. This table will also be used as a buffet for family/group gatherings.
Built from Plan(s)
Estimated Cost
$75
Estimated Time Investment
Afternoon Project (3-6 Hours)
Finish Used
Sherwin-Williams Duration in Snowbound (7004)
Recommended Skill Level
Beginner
Comments
Wed, 12/02/2020 - 09:09
Hi! I need my sewing cart…
Hi! I need my sewing cart to be used without legs as well and have search everywhere for an appropriate hinge. Could you share with me what type & size you used? Did you change the sizes of the top to accommodate at all? Thanks!
Pumpkin candy holder
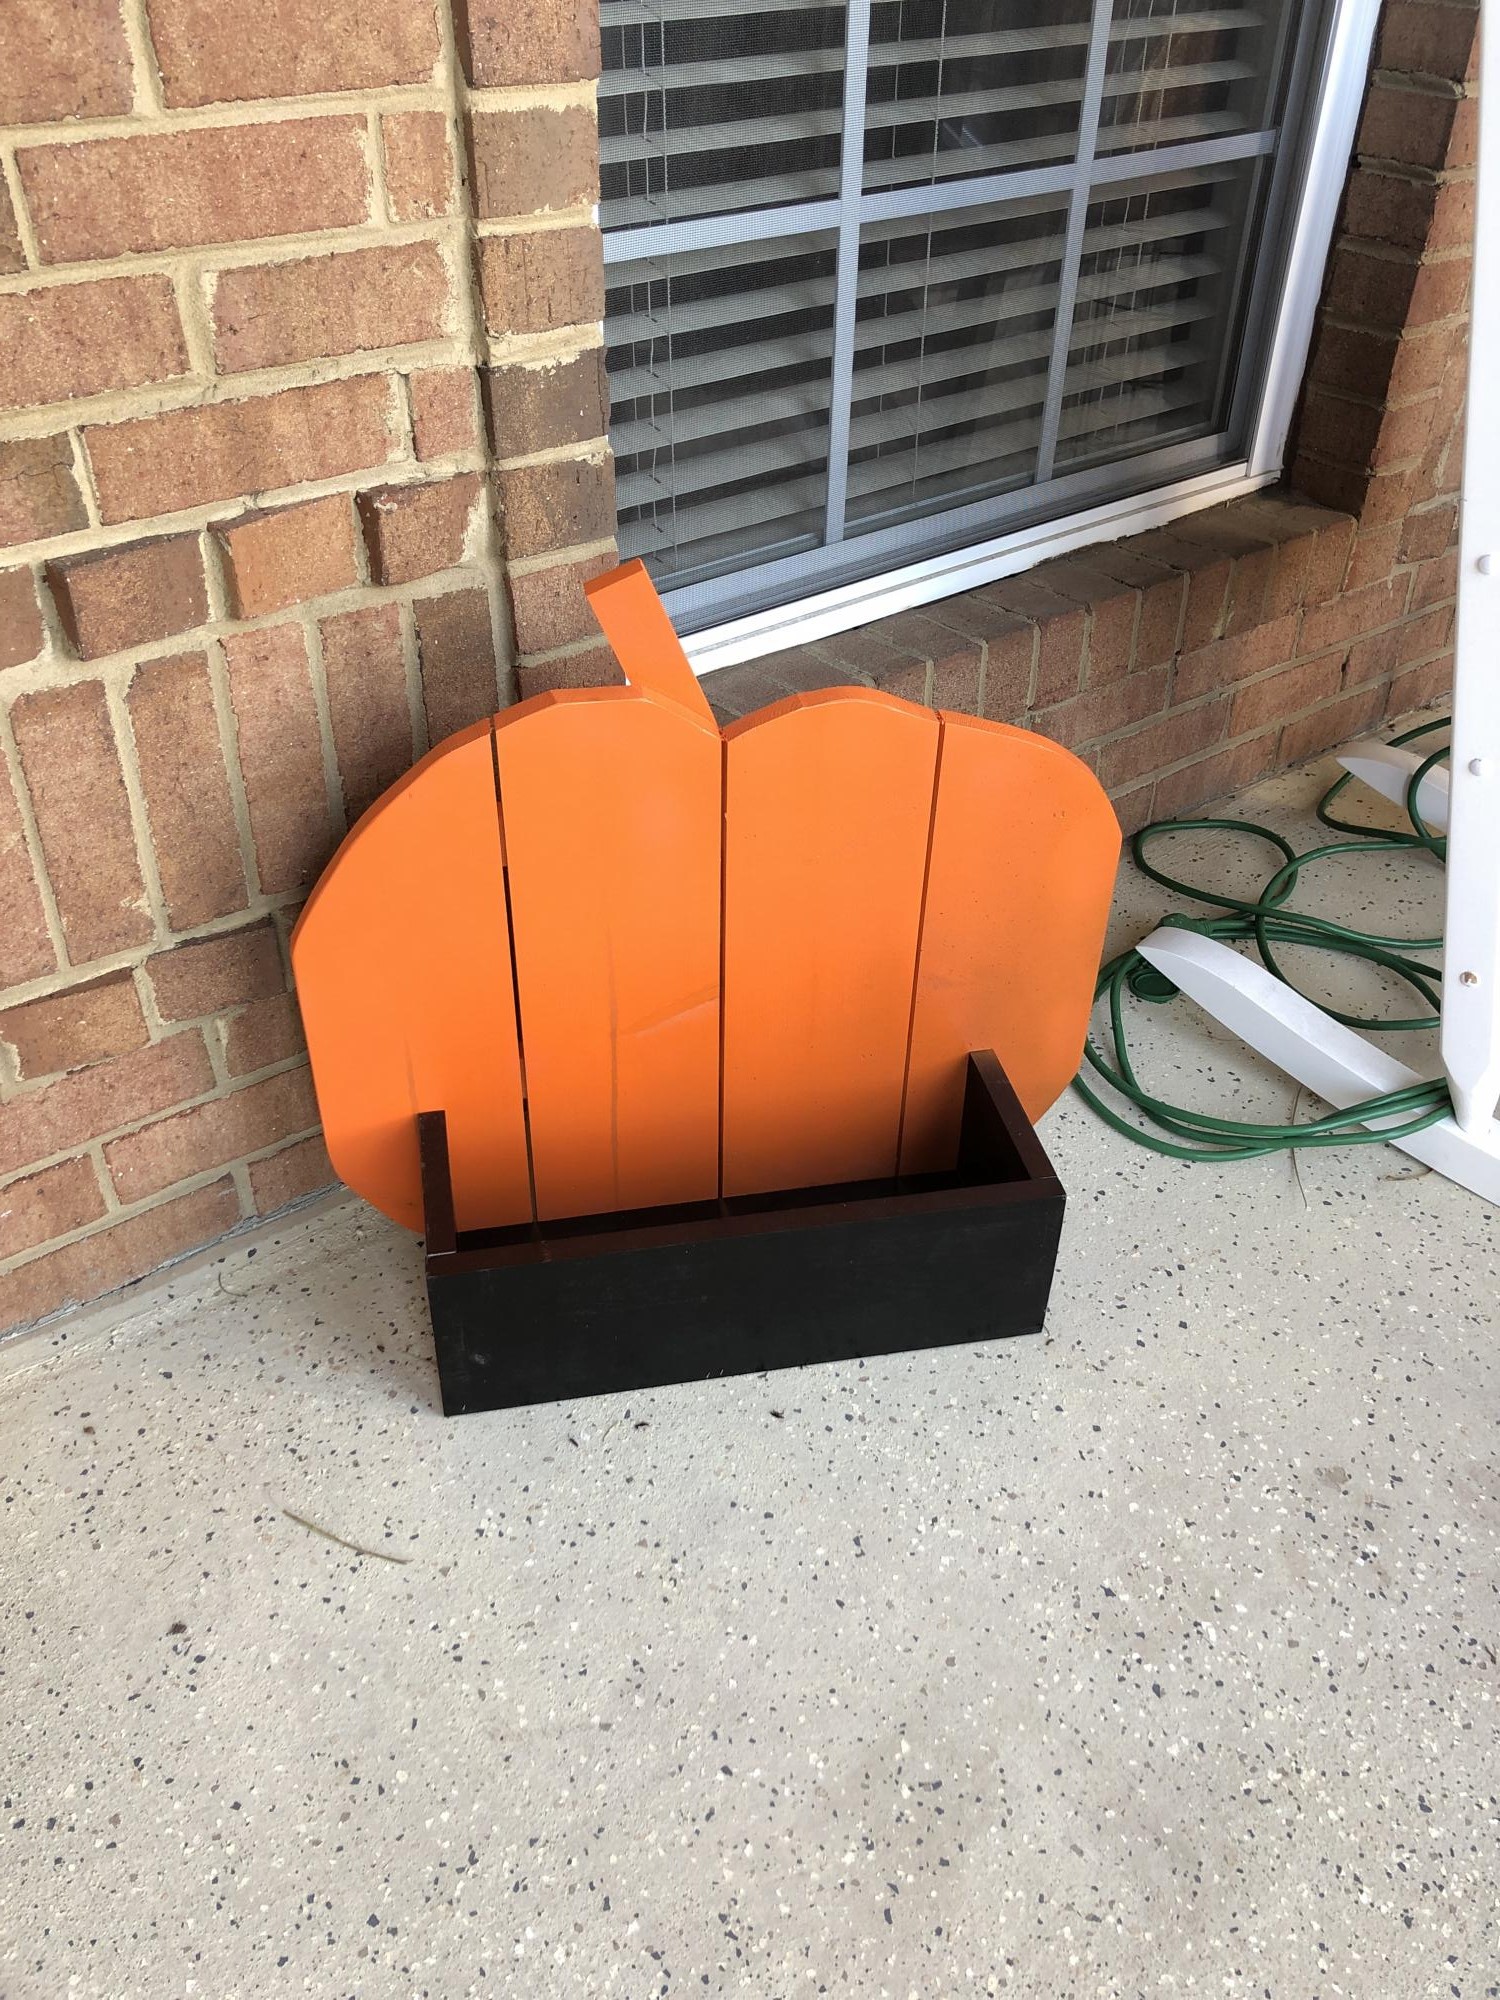
My husband did this for me for Halloween! I'm going to leave it out til Thanksgiving. I love it!
Built from Plan(s)
Entry shelf modified to a bathroom shelf
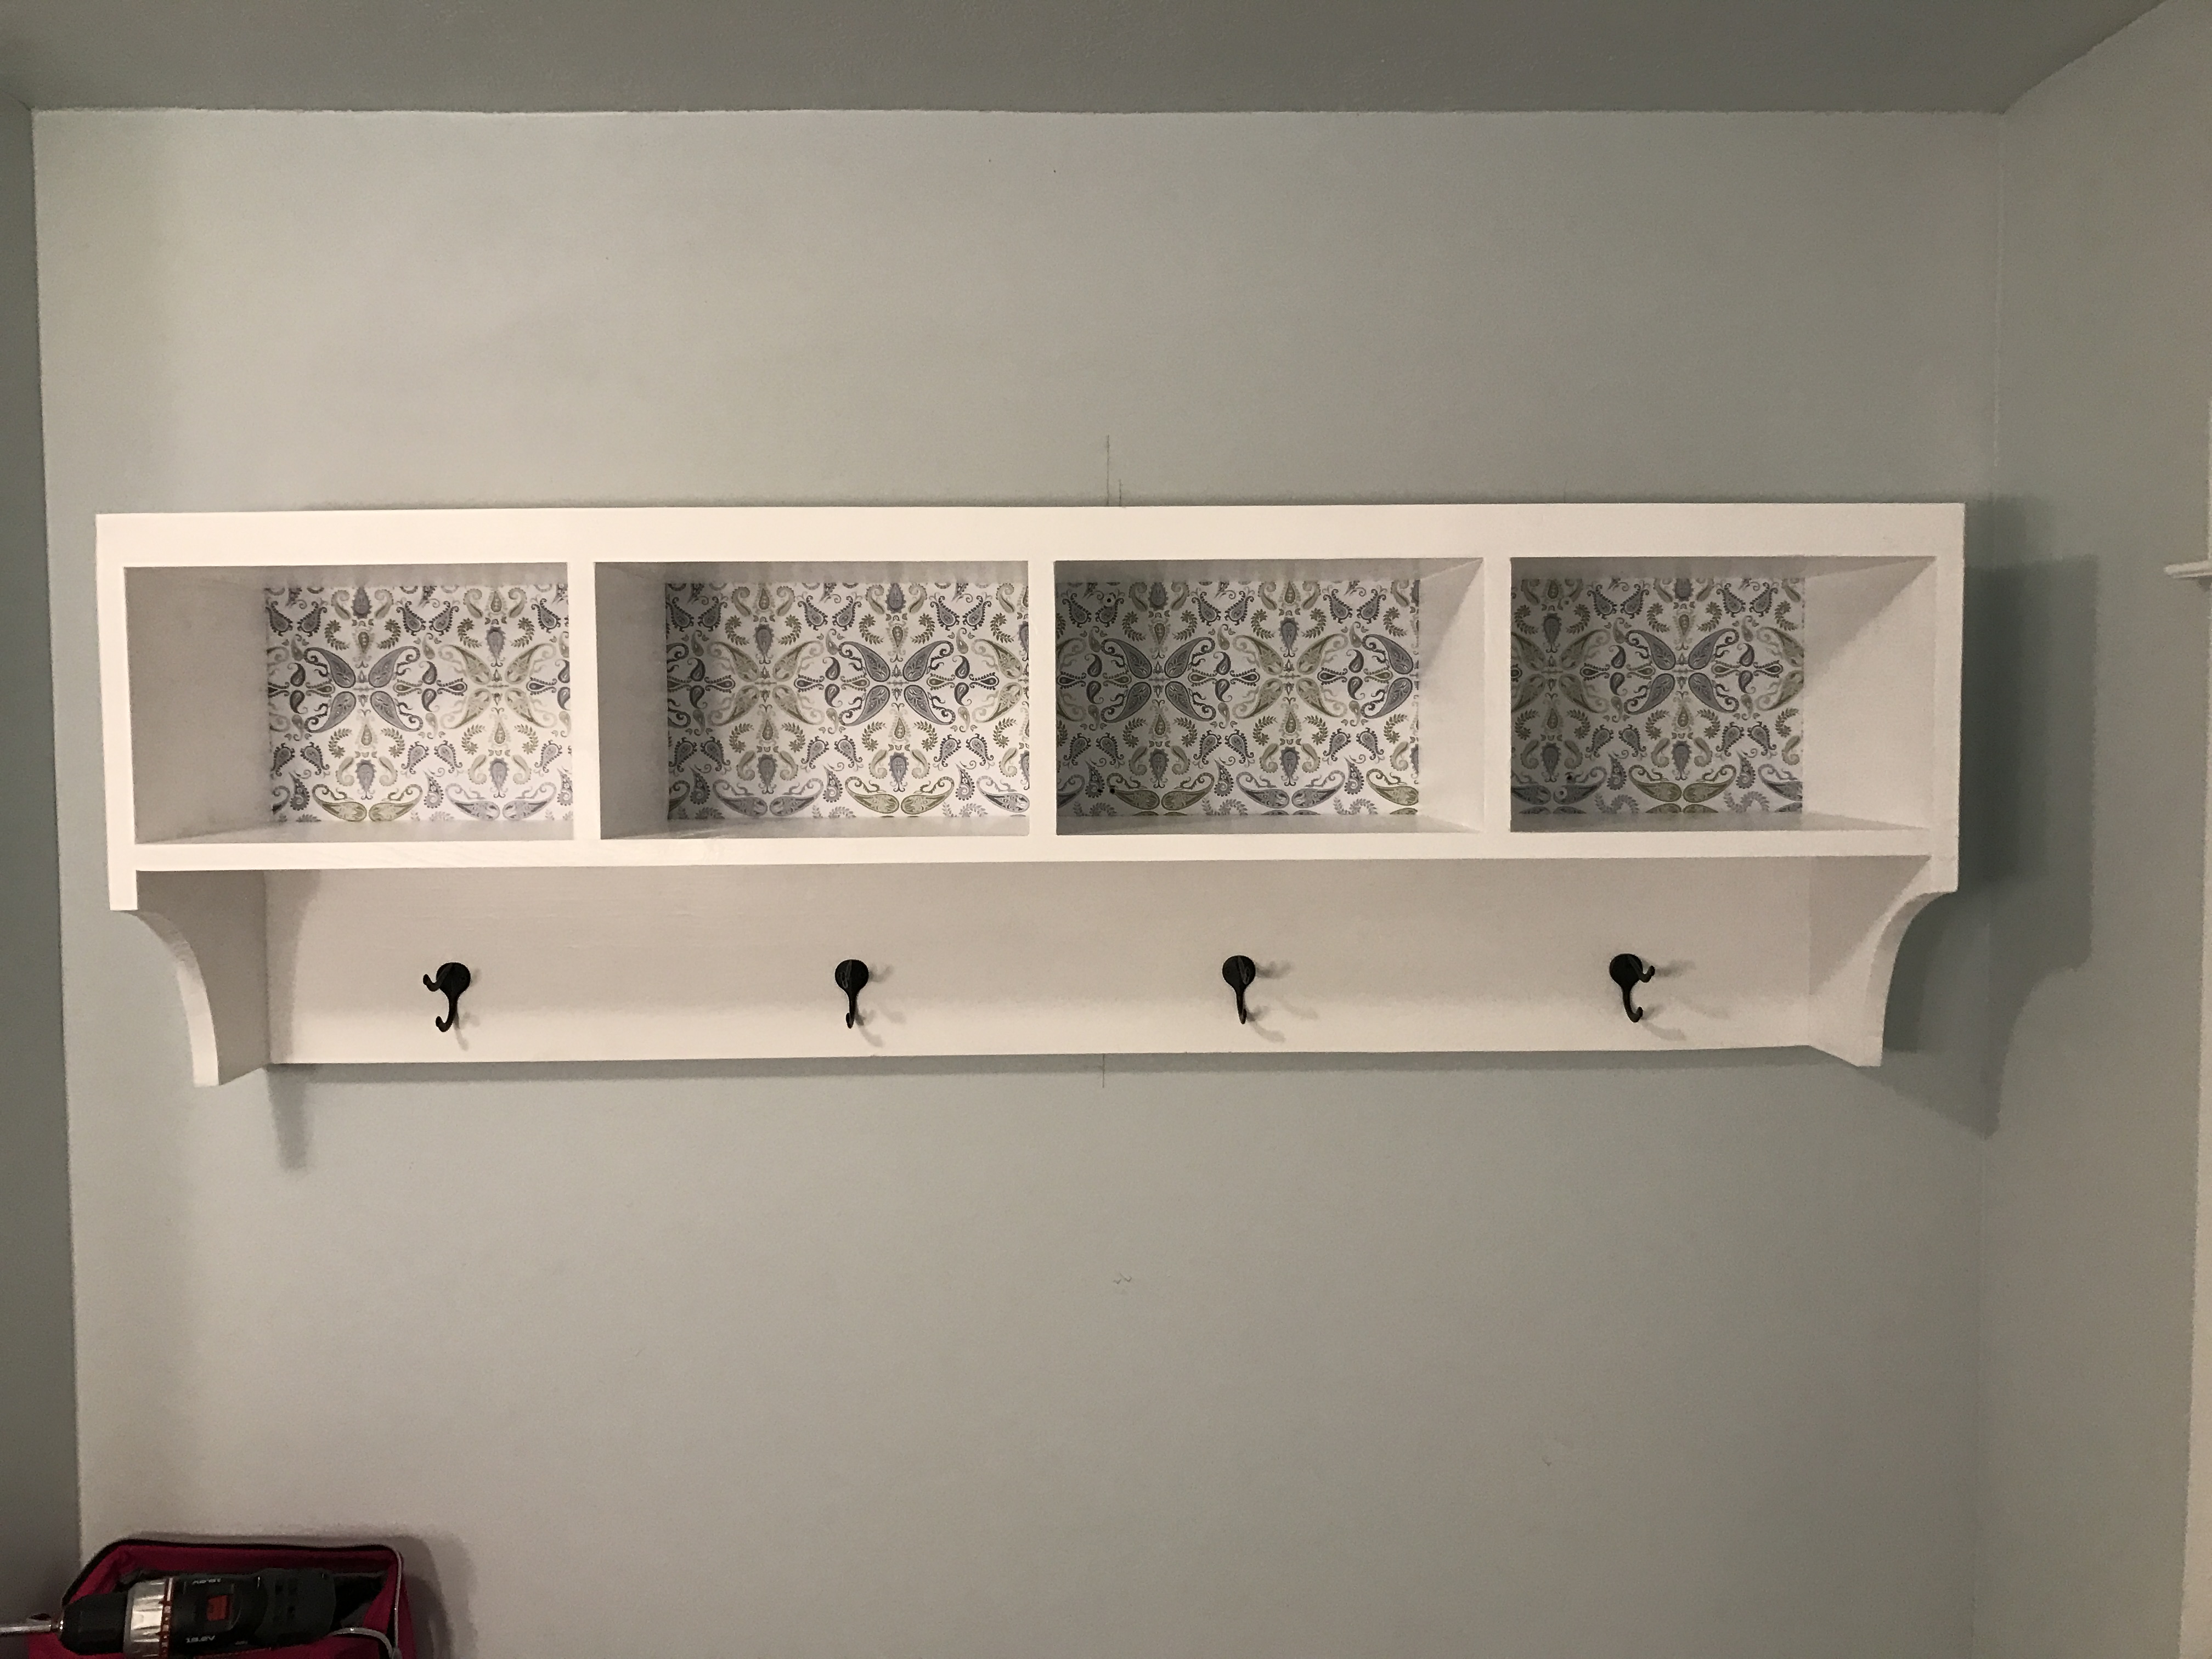
This was so fun, used contact paper on the back plywood and it turned out really well.
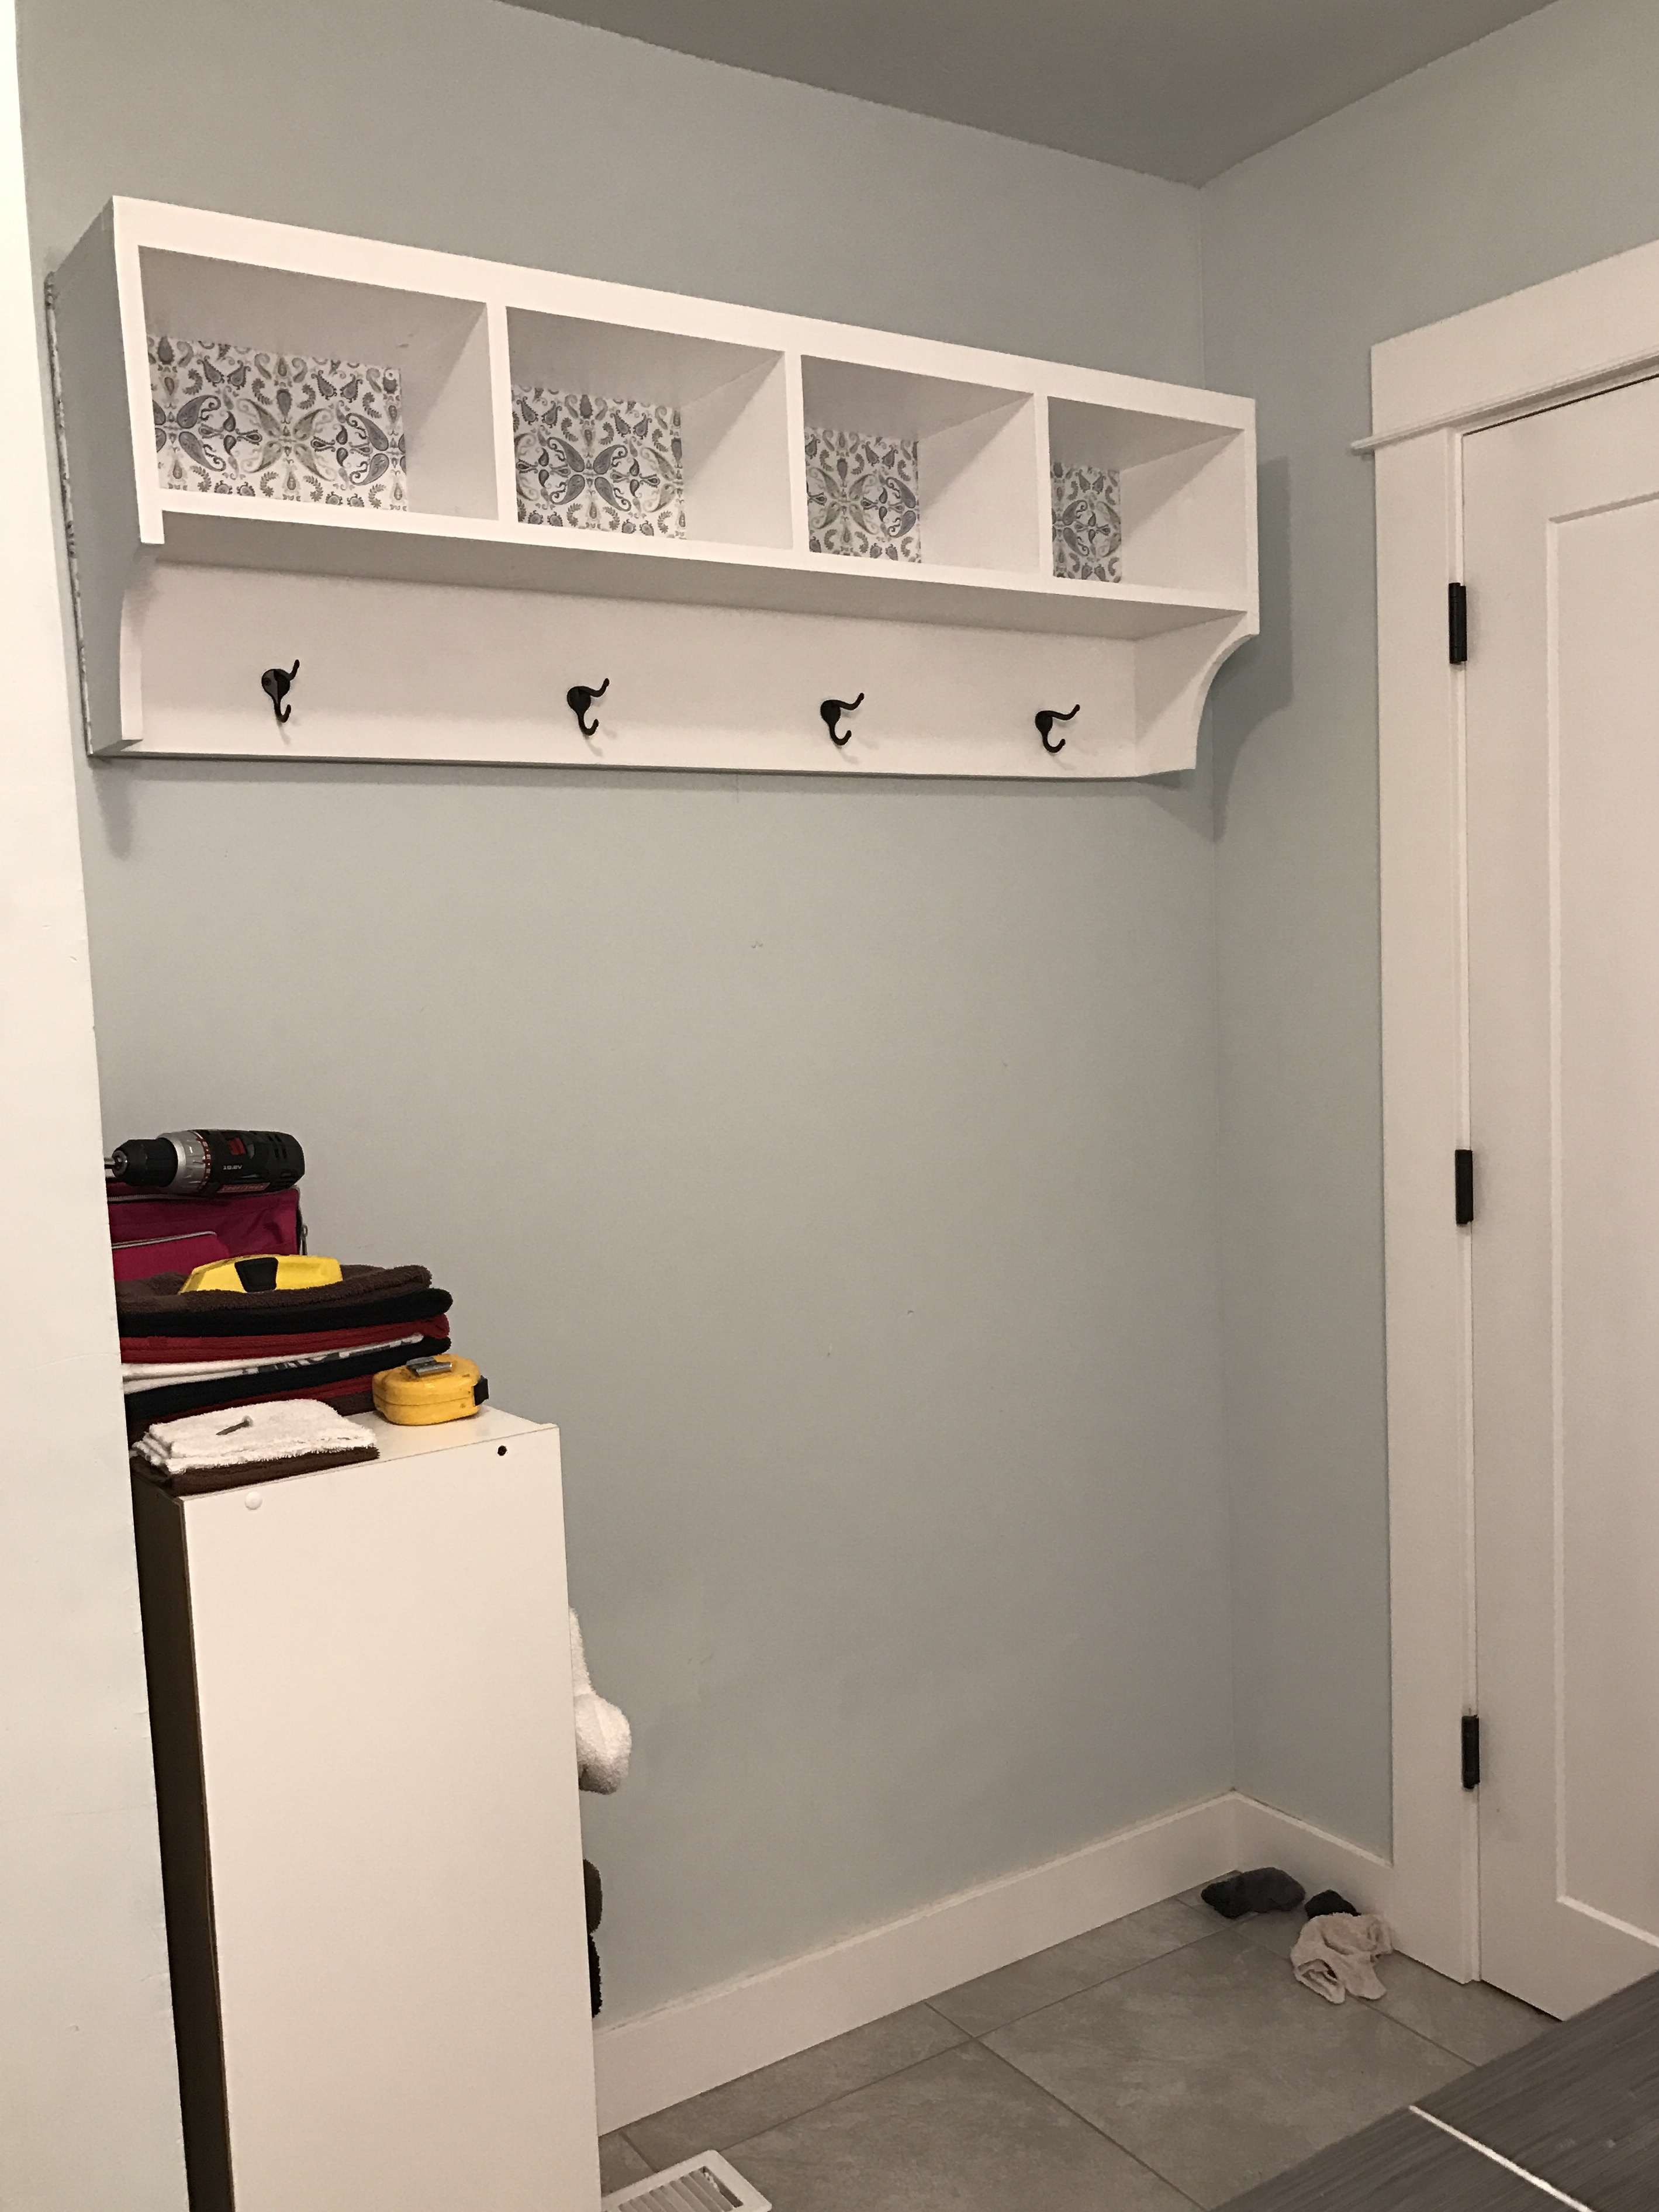
Built from Plan(s)
Estimated Cost
Less than $75
Estimated Time Investment
Weekend Project (10-20 Hours)
Finish Used
White satin paint from behr
I sanded between coats and used a fine bristle brush.
I sanded between coats and used a fine bristle brush.
Recommended Skill Level
Beginner
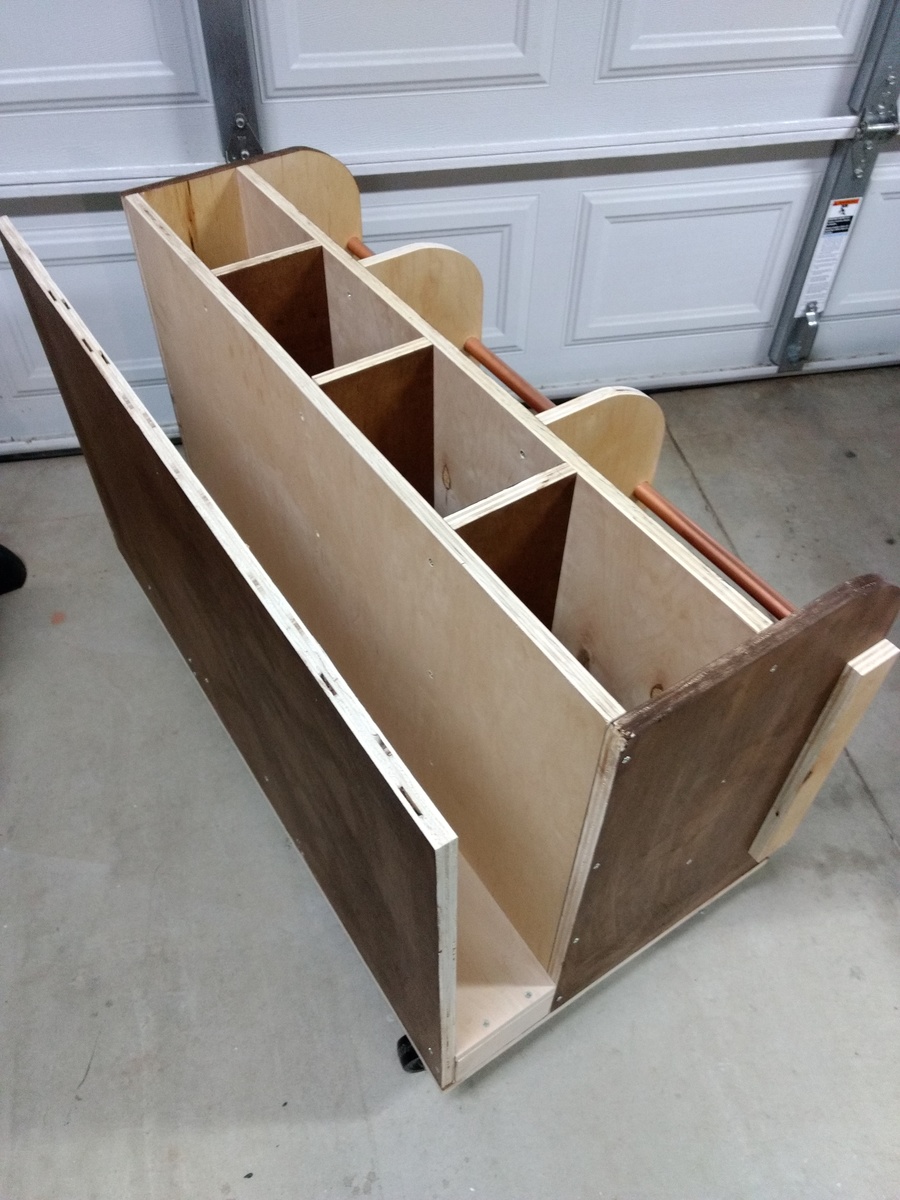
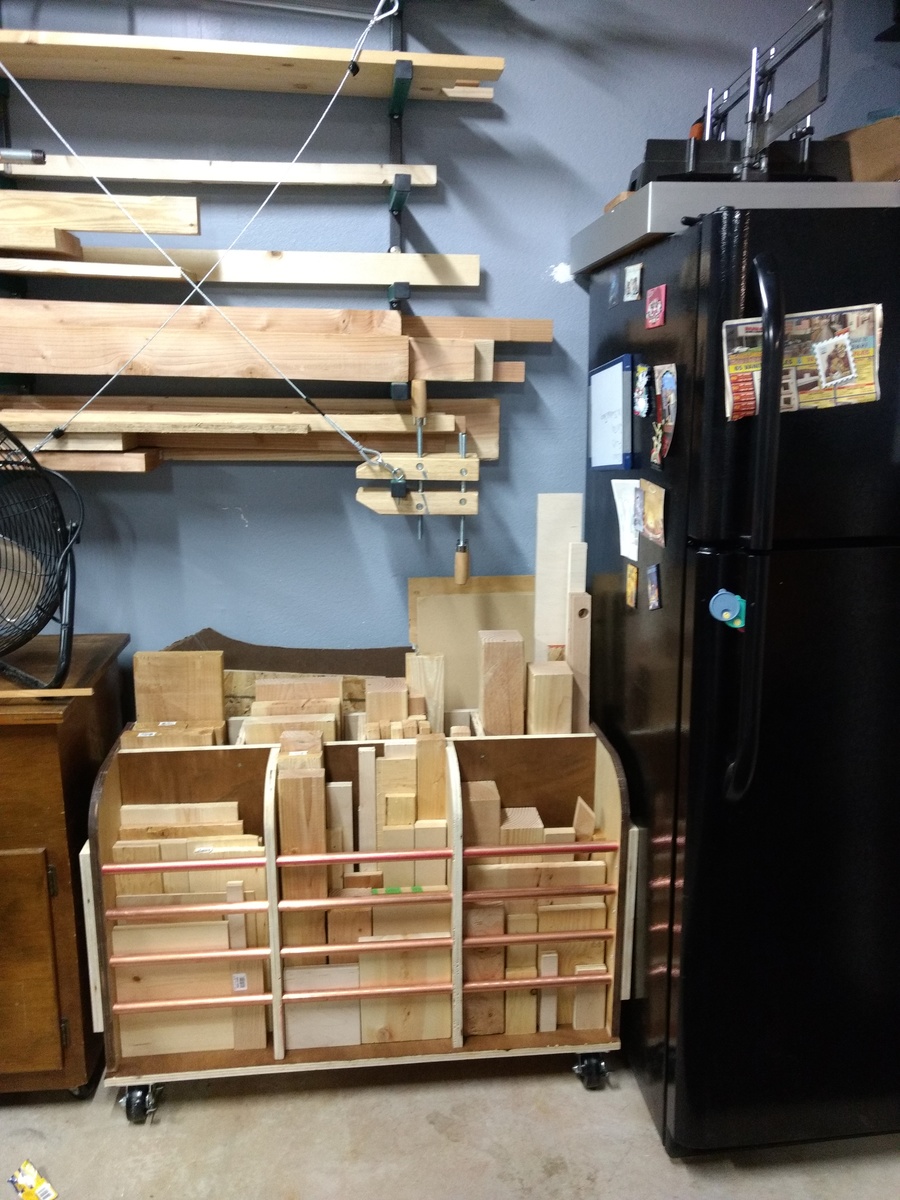
Lumber Scrap wood portable Cart
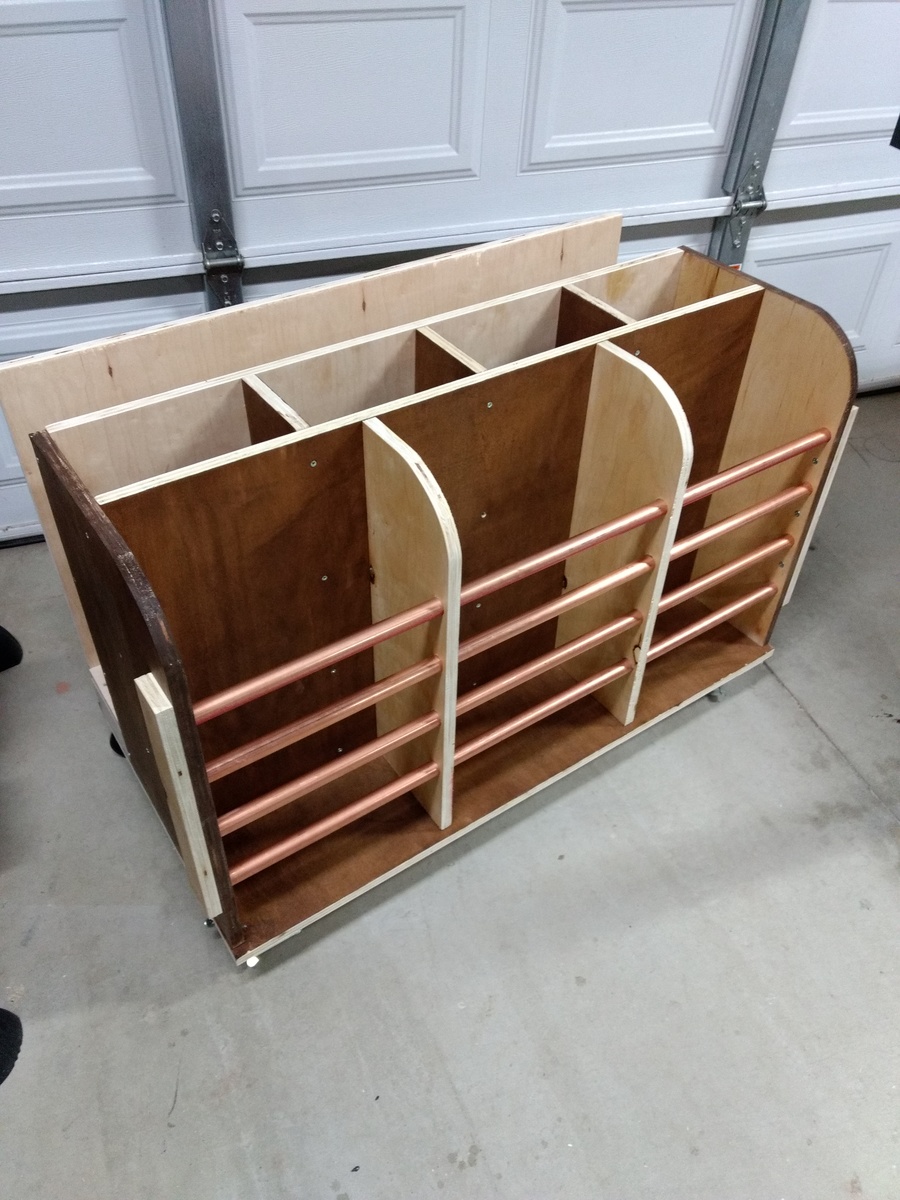
Cut-off lumber cart on heavy duty 3 inch locking swivel casters. Used 3/4 copper pipe and 3/4 plywood with a couple of pine wood scraps. Keeps things neat and clean. :)
Estimated Cost
125.00
Estimated Time Investment
Weekend Project (10-20 Hours)
Finish Used
Dark walnut stain and plain walnut oil
Recommended Skill Level
Beginner
Comments

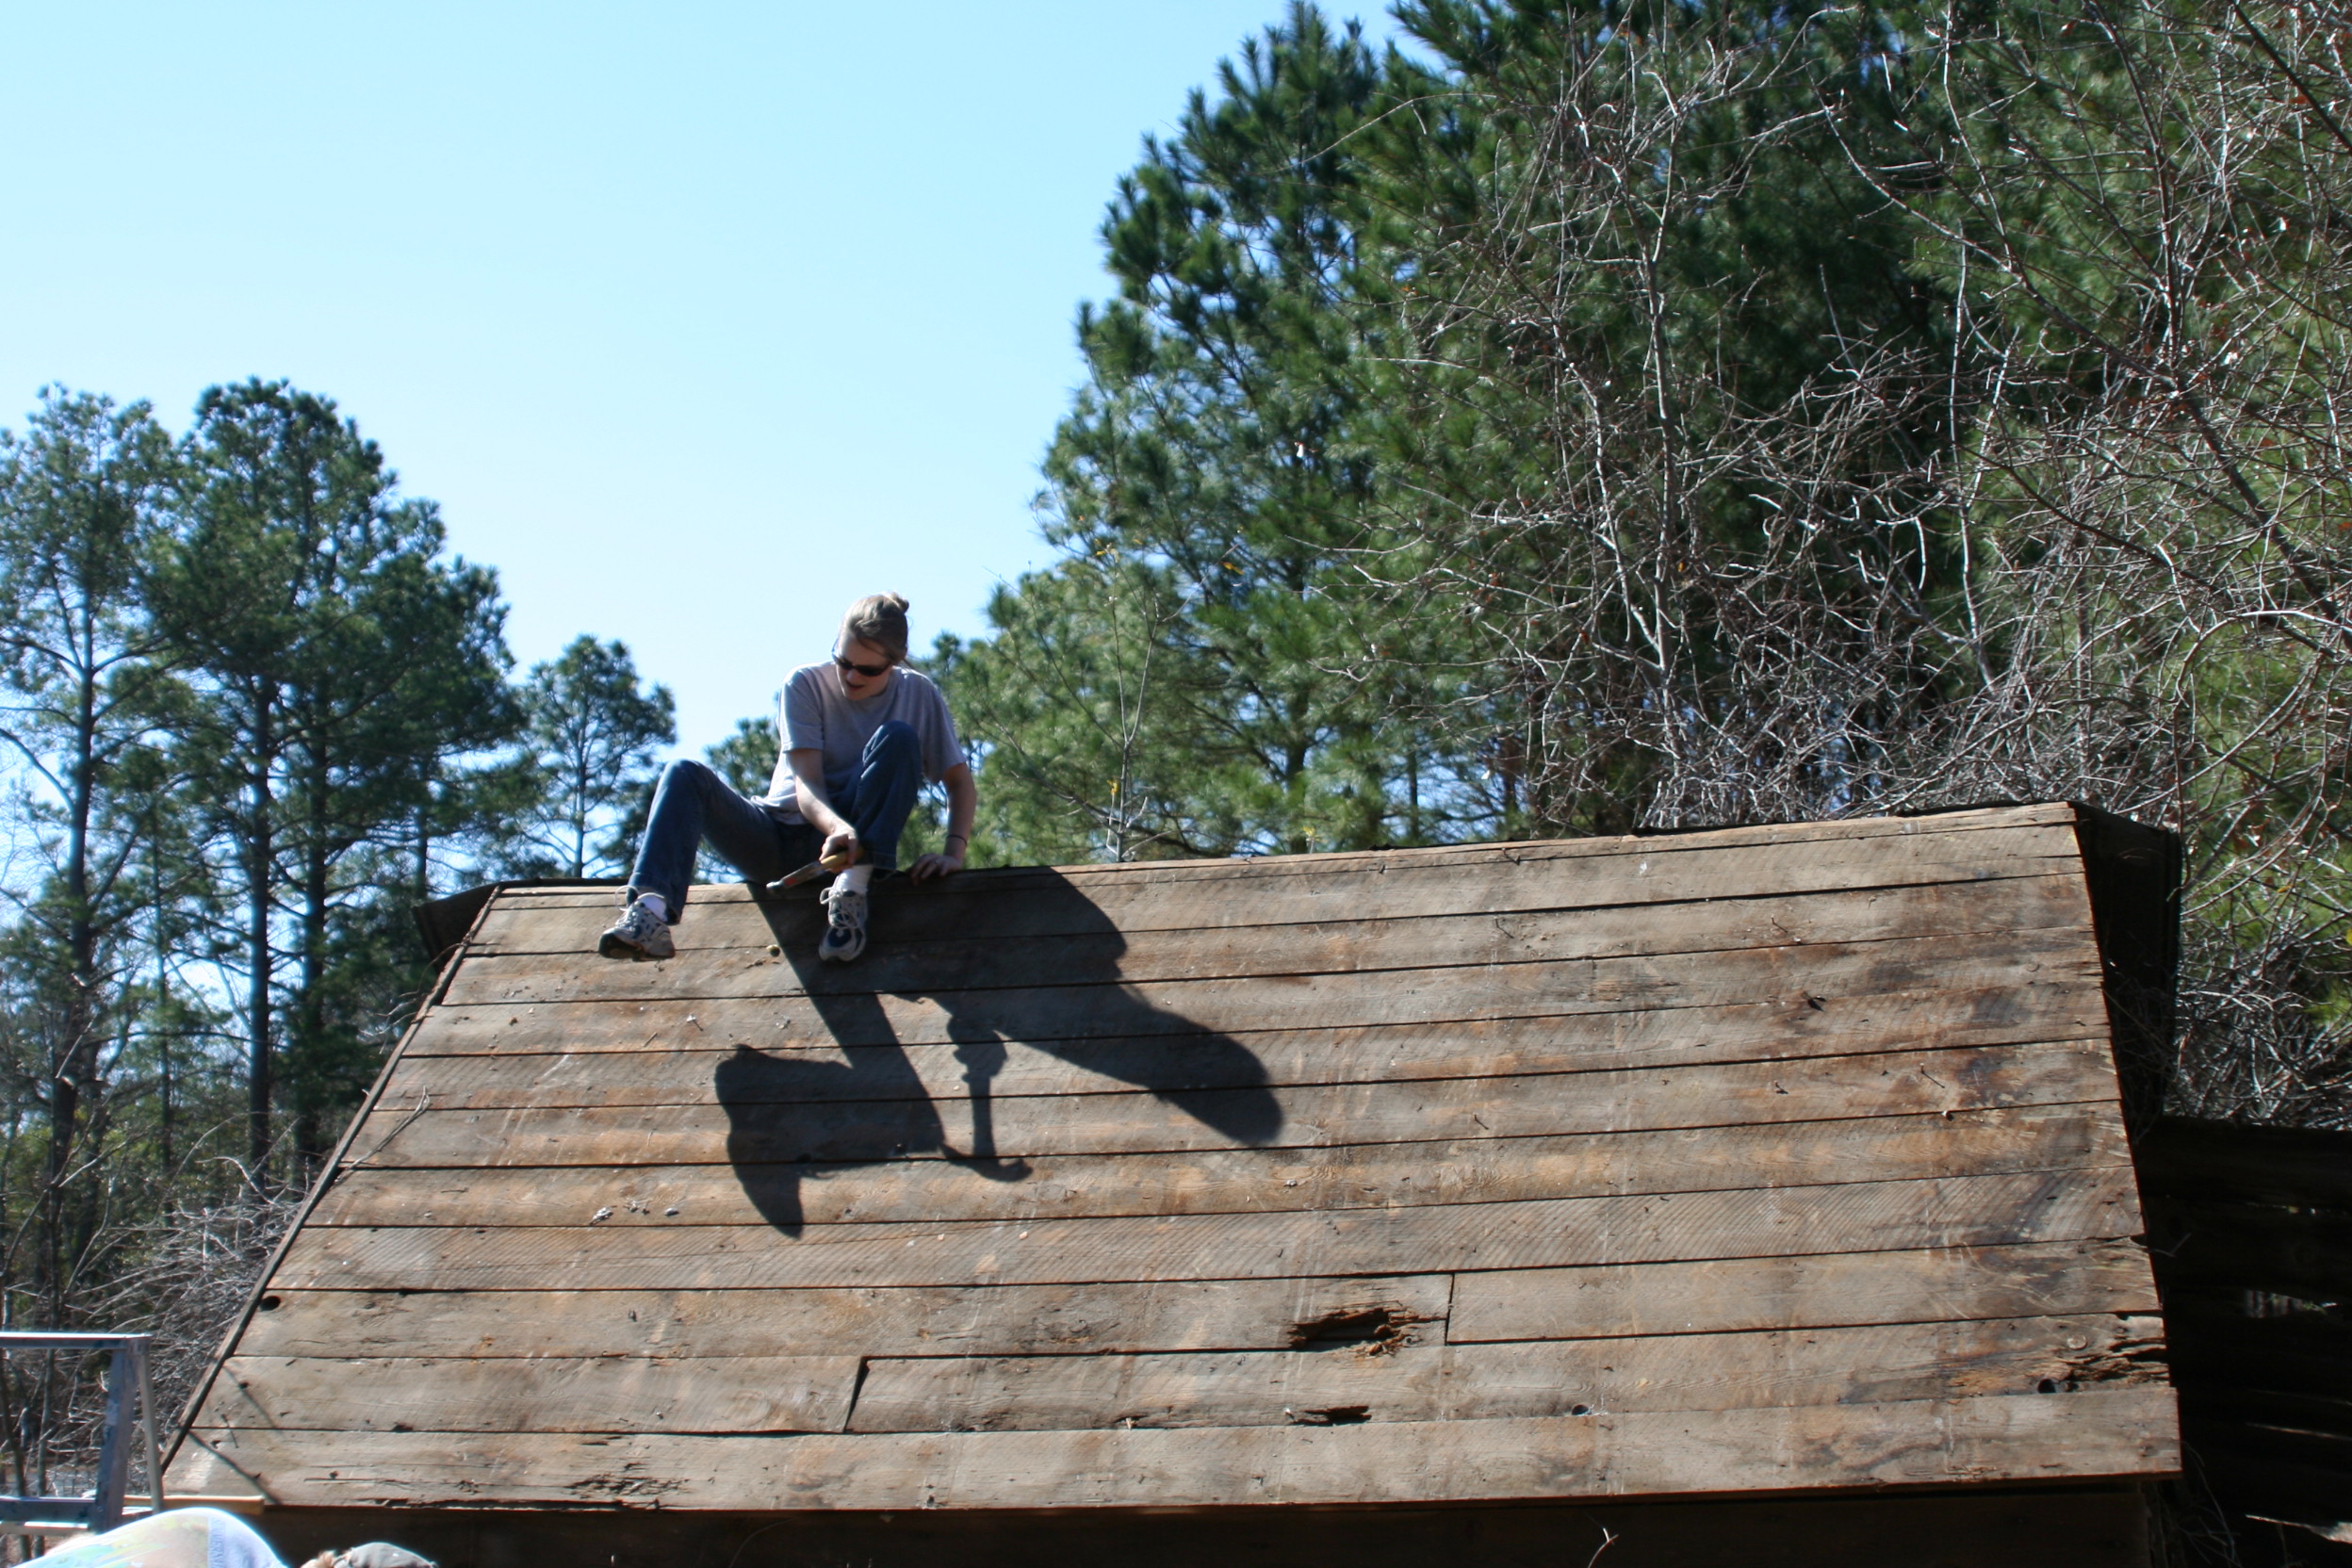
Kitty Outhouse

My first Ana White project. Built Ana’s awesome small cedar shed as an outhouse for our many cats. The have access to it from inside the house. Great way to keep litter boxes and the mess out of the house. It is stand alone, and attached to the house, in front of a bedroom window. There are two ‘entrances’ as well as two, one-way, escape hatches, if a cat in the outhouse is interrupted by another cat (I.e. a male cat comes in and the female feels trapped) they can exit to the outside (one way so no critters can come inside!). Ana has easy to build plans, great site! I plan on making the square table just posted today for my newly refurbished deck. Keep in mind, my estimated costs and time reflect a LOT of additional features on the inside. The shed itself, very easy, simple, inexpensive. Very little waste with Ana’s projects as well.

Built from Plan(s)
Estimated Cost
$500
Estimated Time Investment
Week Long Project (20 Hours or More)
Finish Used
No finish, at least not yet.
Recommended Skill Level
Intermediate
Comments
Thu, 04/29/2021 - 09:06
Wonderful solution for your cats!
Thank you for sharing, what a cool project!
Comments
Ana White Admin
Tue, 03/21/2023 - 12:43
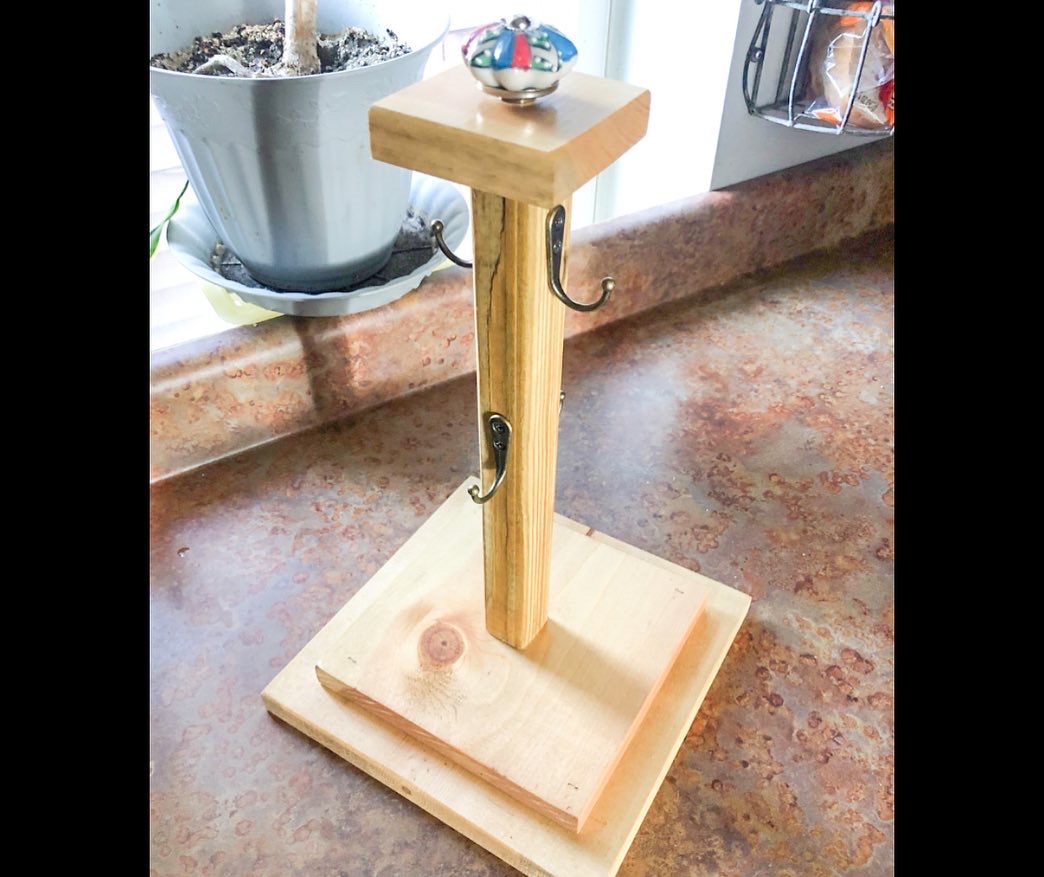
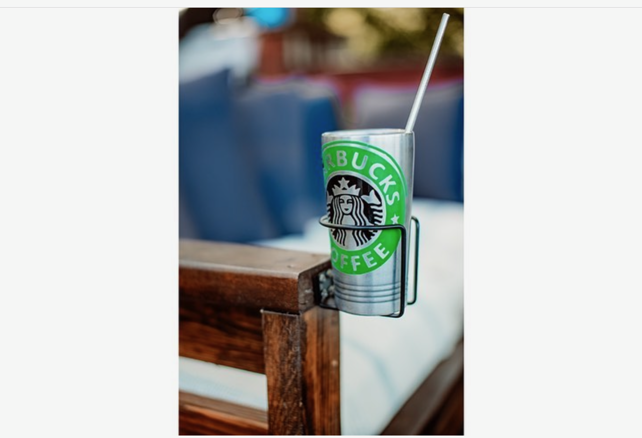
Great cup stand!
Super cute hardware and finish, thank you for sharing!