Community Brag Posts
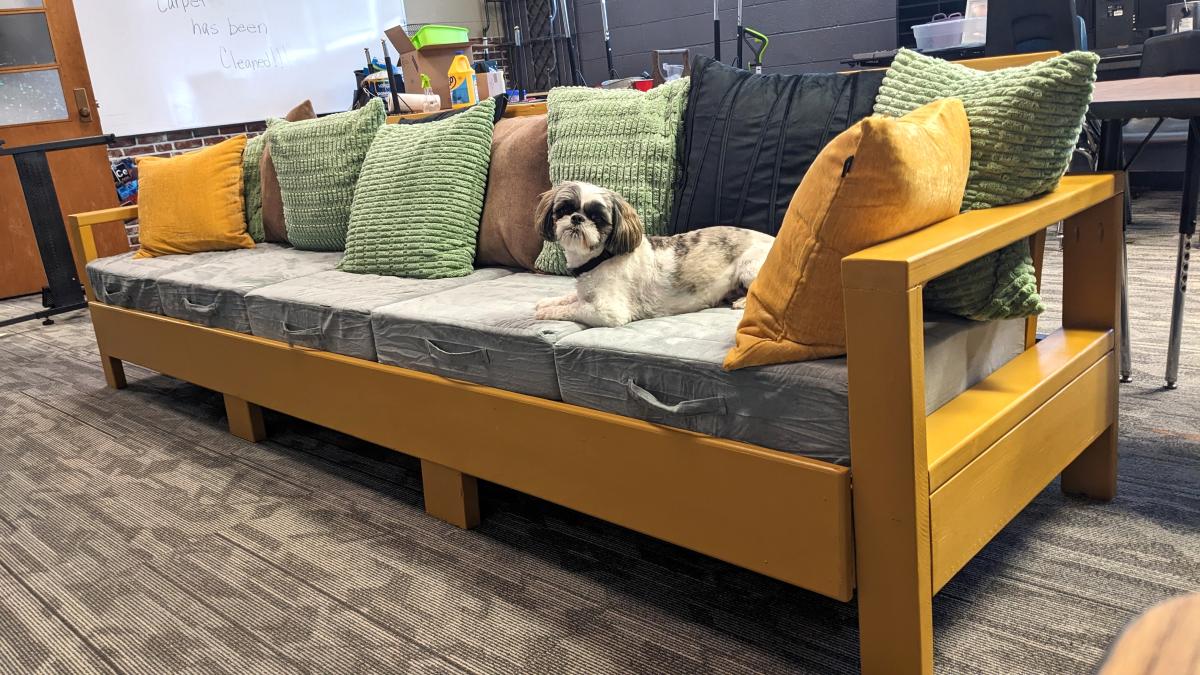
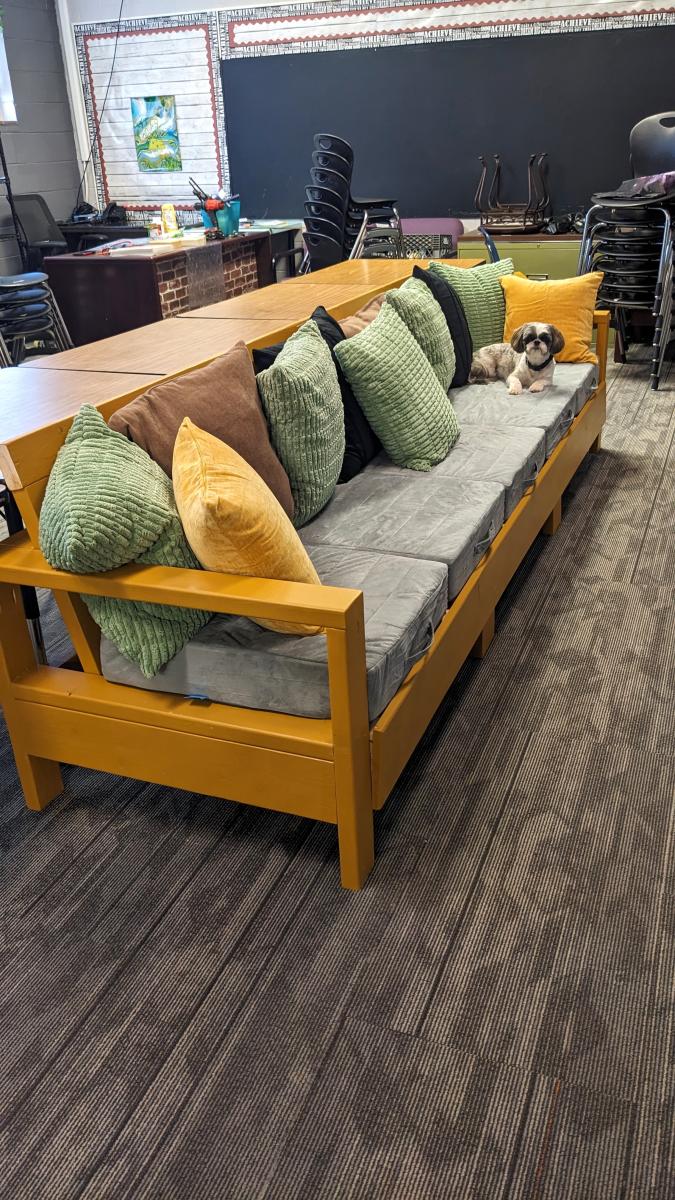
Classroom Couch
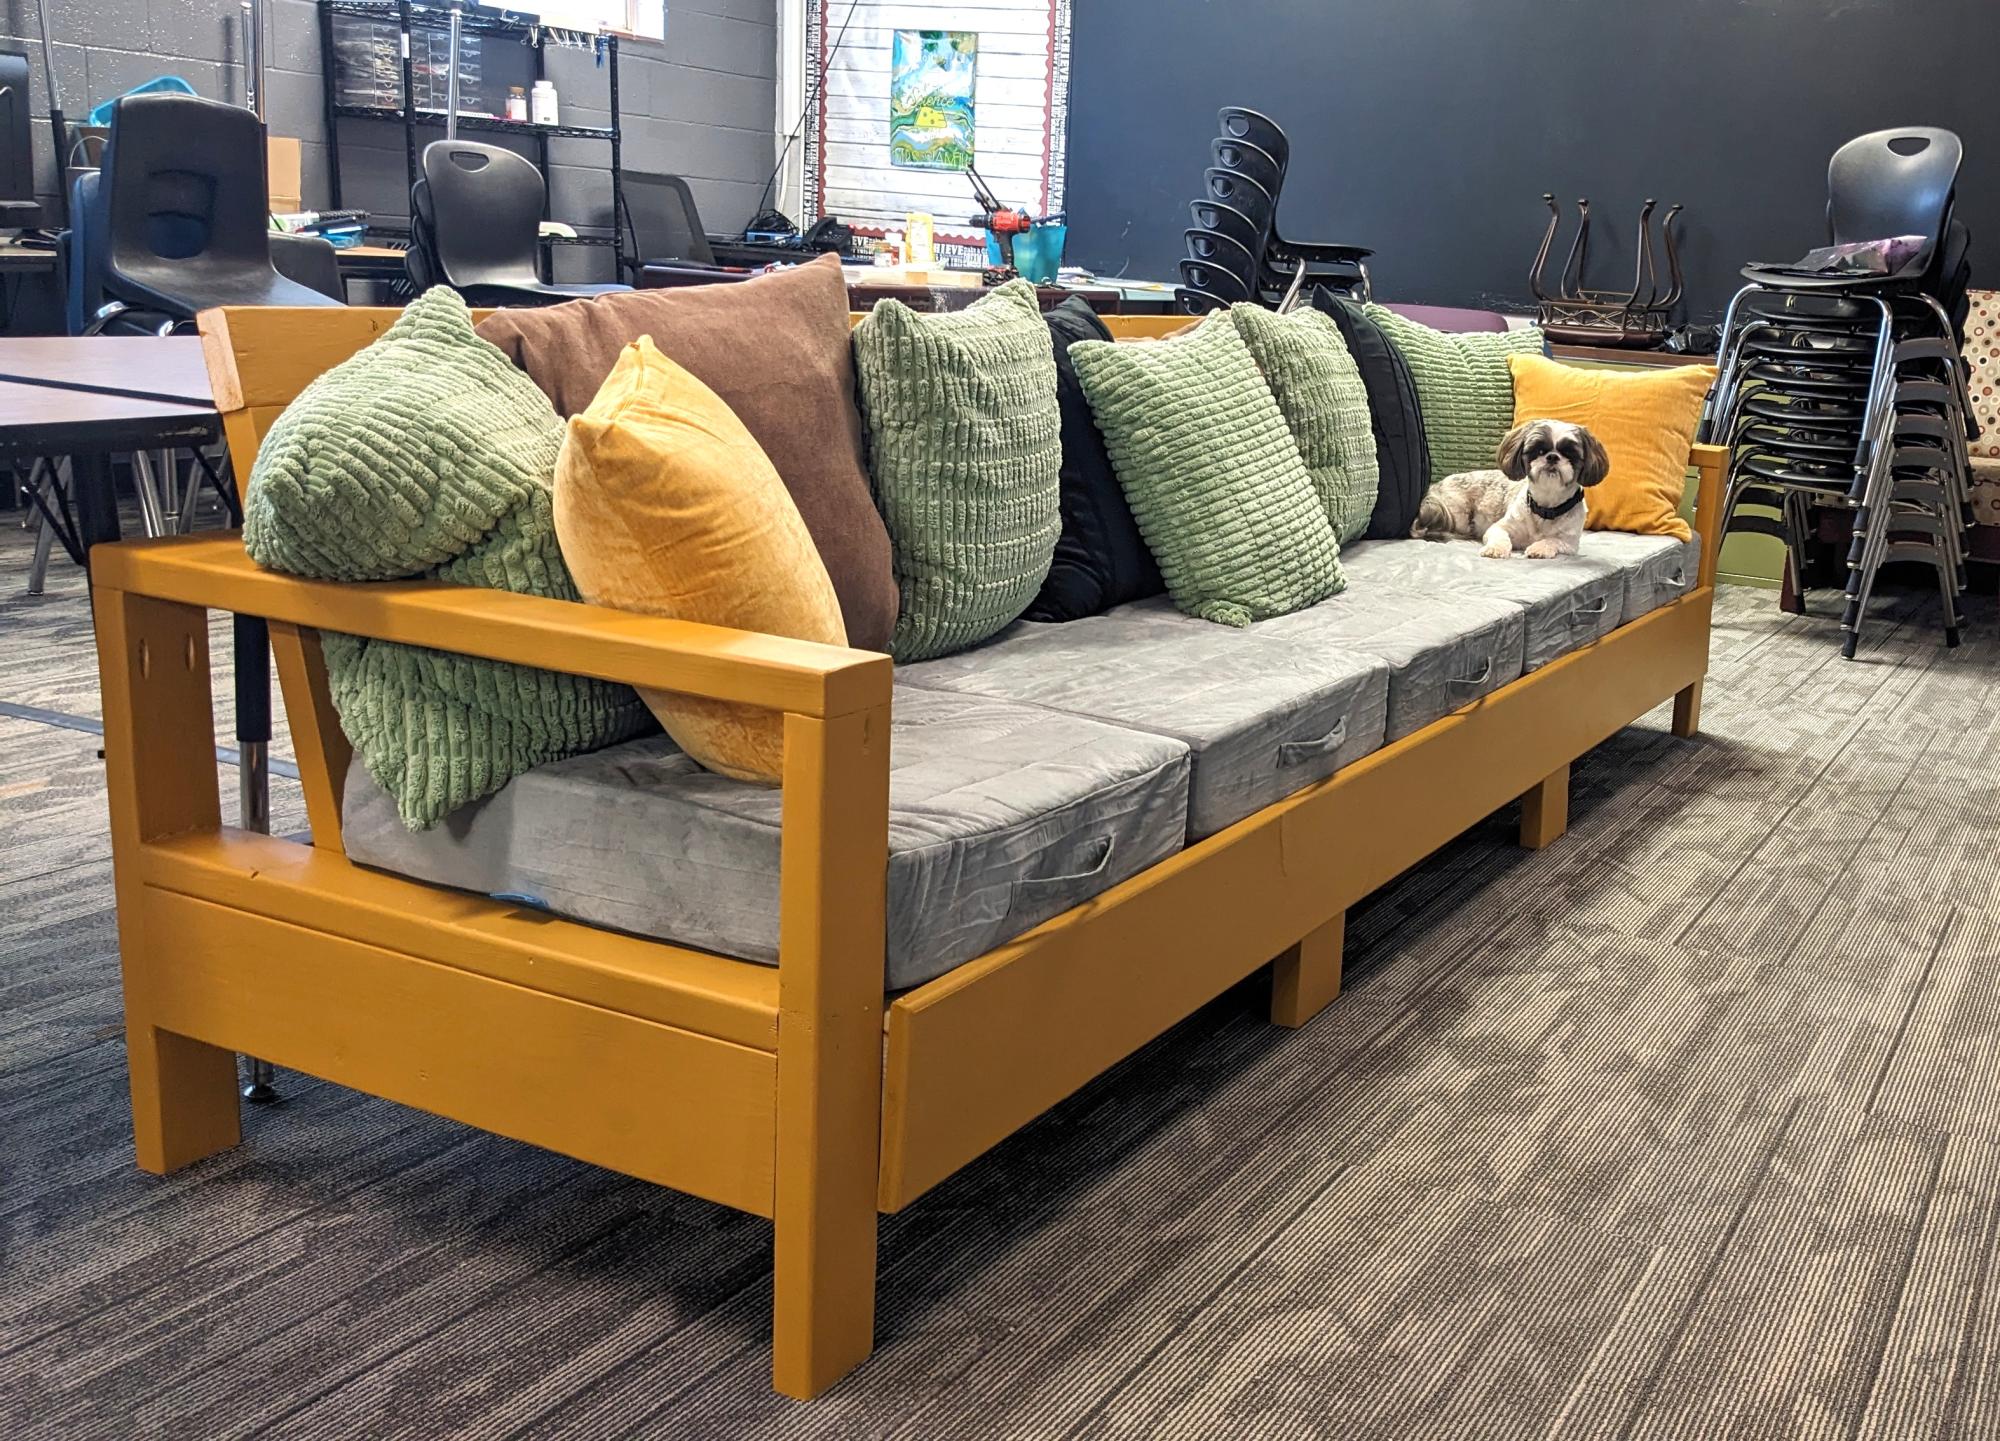
I'm a high school teacher and like flexible seating. I needed something that is very sturdy and can take a beating from teenagers. I used Ana's "2x4 Outdoor Sofa" plan, made it longer, added some extra braces, and here it is! My new classroom couch.
Julie Stanfill
Built from Plan(s)
Comments
Wed, 03/12/2025 - 06:19
Writing academic papers can…
Writing academic papers can be a demanding task for students, requiring extensive research, proper structuring, and strong argumentation skills. Many struggle with time management, balancing multiple assignments, or simply finding the right words to express their ideas effectively. Professors expect well-researched and properly formatted papers, which can sometimes feel overwhelming. For those who need guidance, this resource https://phdify.com/ offers professional academic assistance to help students meet their deadlines without compromising quality. Whether it's a research paper, dissertation, or coursework, having expert support can make a huge difference in achieving academic success. With the right approach and resources, students can enhance their writing skills and gain confidence in their work, ultimately preparing them for future academic and professional challenges.
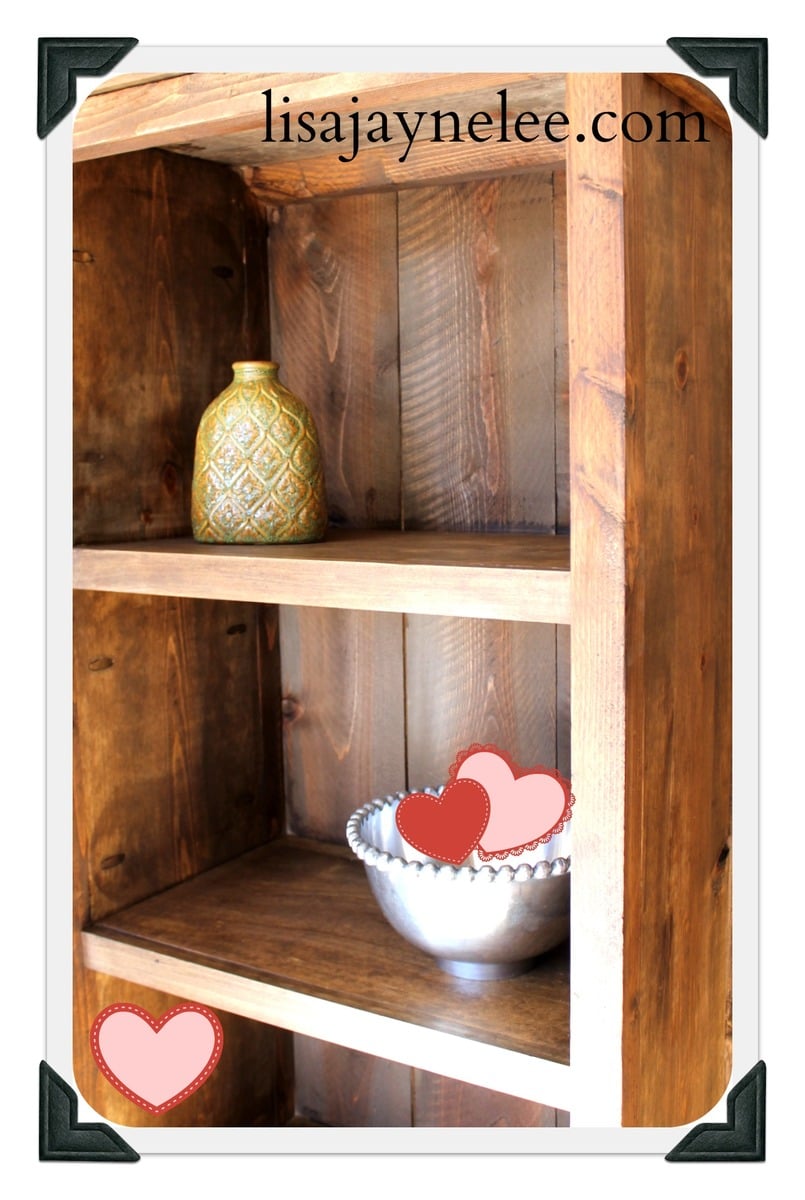
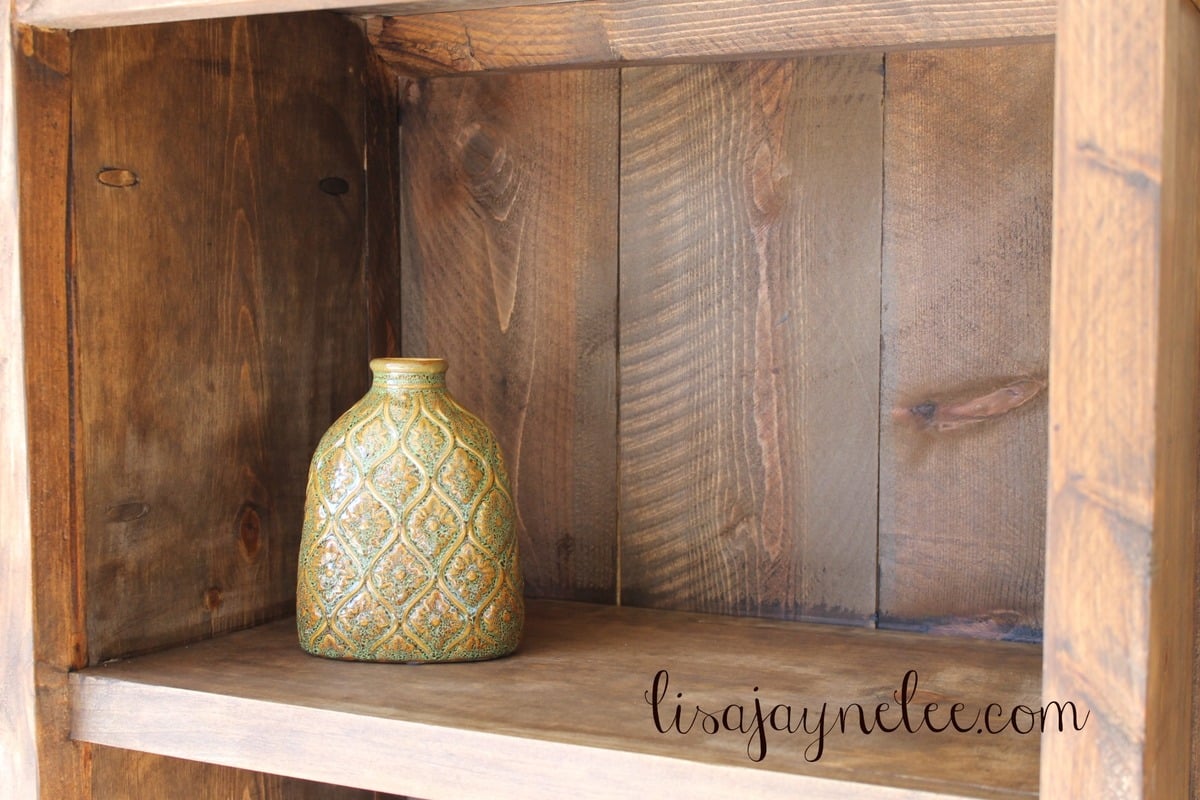
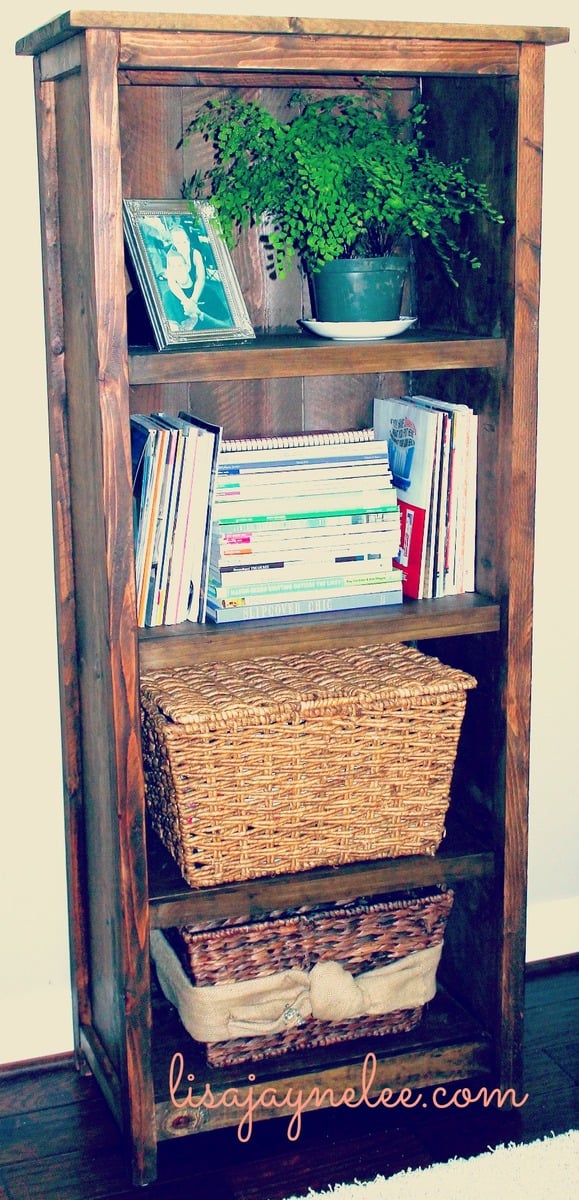
Kentwood Book Shelf
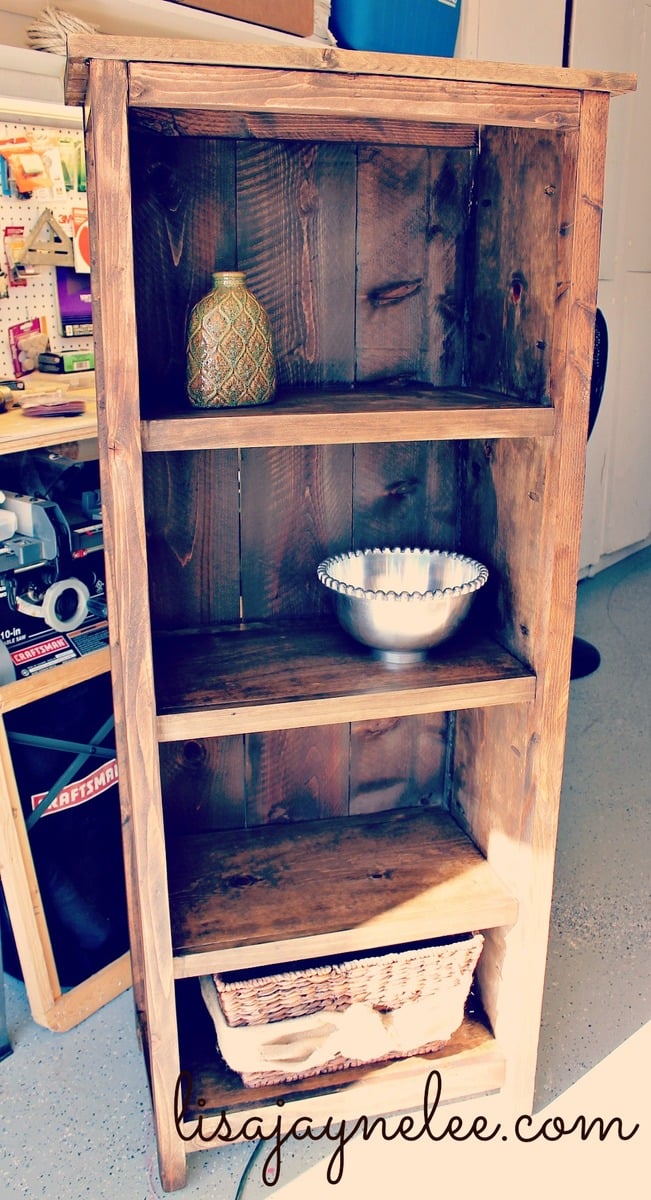
This was my first major build with plans from Ana. I actually found this bookcase via Shanty2Chic. It went smoothly and all in all took me a few evenings about an hour at a time. I have 3 kids so it did take me a little longer to finish. I am so impressed with myself and so is my husband. I used a 10" chopsaw for most of the cuts. I also used my KregJig. Thanks Ana!
Built from Plan(s)
Estimated Cost
$100
Estimated Time Investment
Day Project (6-9 Hours)
Finish Used
Minwax Special Walnut followed by Annie Sloan Chalk Paint Dark Wax Finish.
Recommended Skill Level
Intermediate
Comments
Basement Play Structure with Foam Pit

This was the first thing I have built on my own! It was super fun to use the plans as a base and then make my own modifications. Pulled it all together by adding a slide and foam pit!

Built from Plan(s)
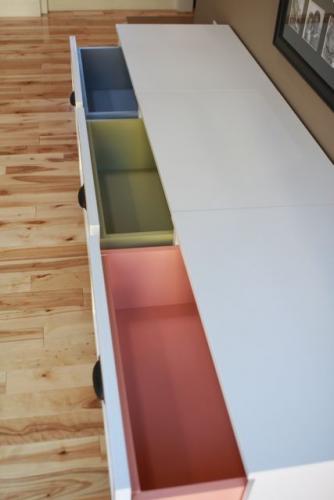
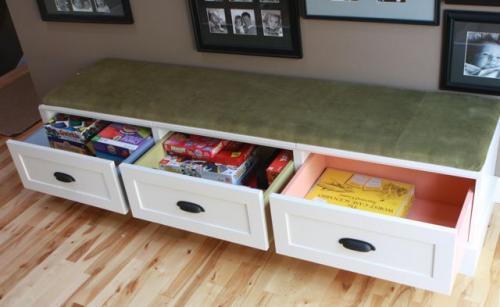
Drawer bases turned banquette
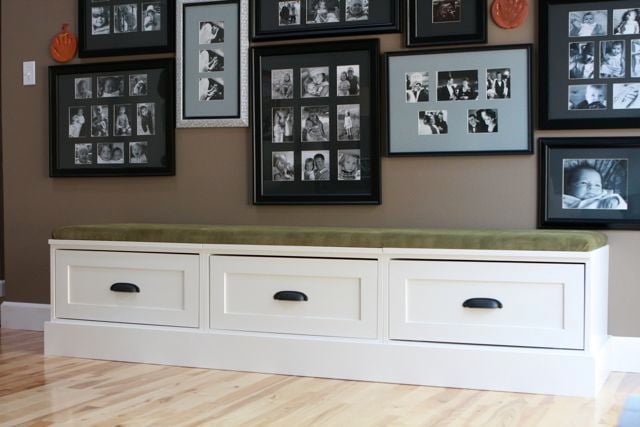
I took Ana's open base and drawer plans, added a few inches to the height (so that the base trim on the storage units would clear the base trim on our walls), and put them together to create a banquette-style bench with tons of storage underneath. We use the drawers for our family board games and photo albums.
Built from Plan(s)
Estimated Cost
$100-$150
Estimated Time Investment
Weekend Project (10-20 Hours)
Finish Used
Sherwin-Williams Pro-Classic in semi-gloss followed by Minwax Polycrylic.
Recommended Skill Level
Beginner
Clubhouse based on Ana's Plan

I used Ana's plan as a base.
I changed it from 8x8 to 8x12, made the 4x4x8's to 4x4x10' for a higher main platform and swing platform, and added a 12' long monkey bar set to the other side. Also, an 8' climbing wall and a plank walkway to accompany the two slides.
For the clubhouse, I used Hardiplank 4x8 sheets for the siding and an EZ-Framer kit for the structure itself.
The slides I purchased from Lowes, monkey bars from Amazon, and the swing frame braces from Amazon as well. The swing kits I got from ebay.


Built from Plan(s)
Estimated Cost
1500
Estimated Time Investment
Week Long Project (20 Hours or More)
Recommended Skill Level
Intermediate
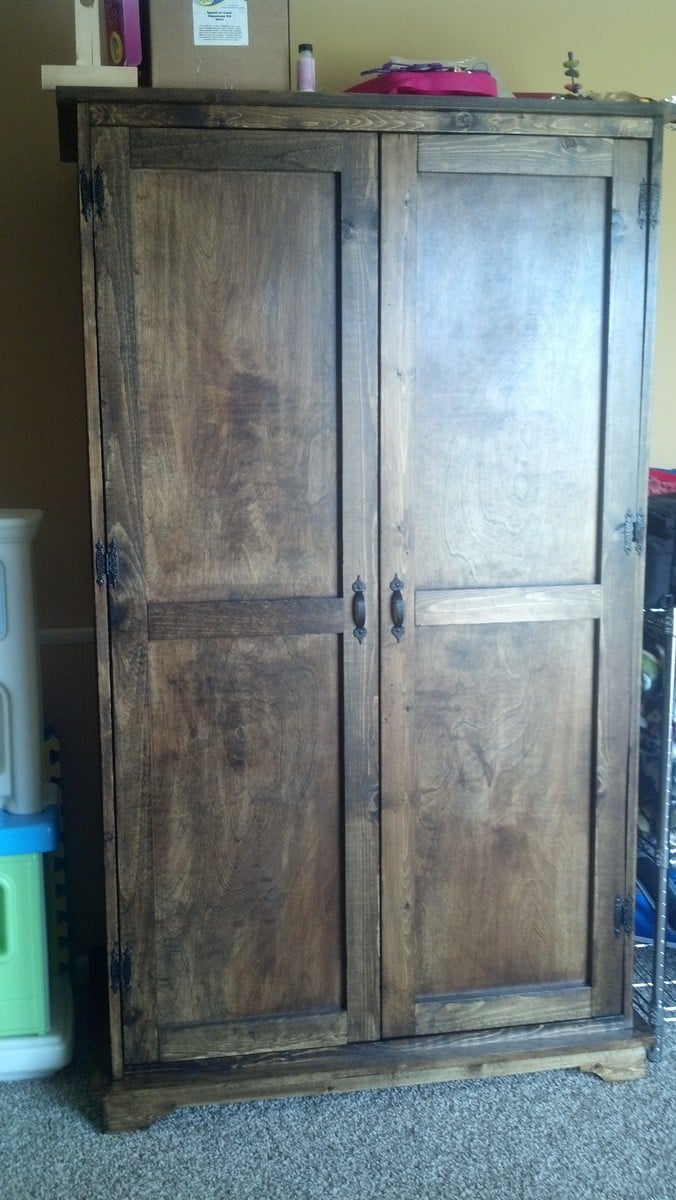
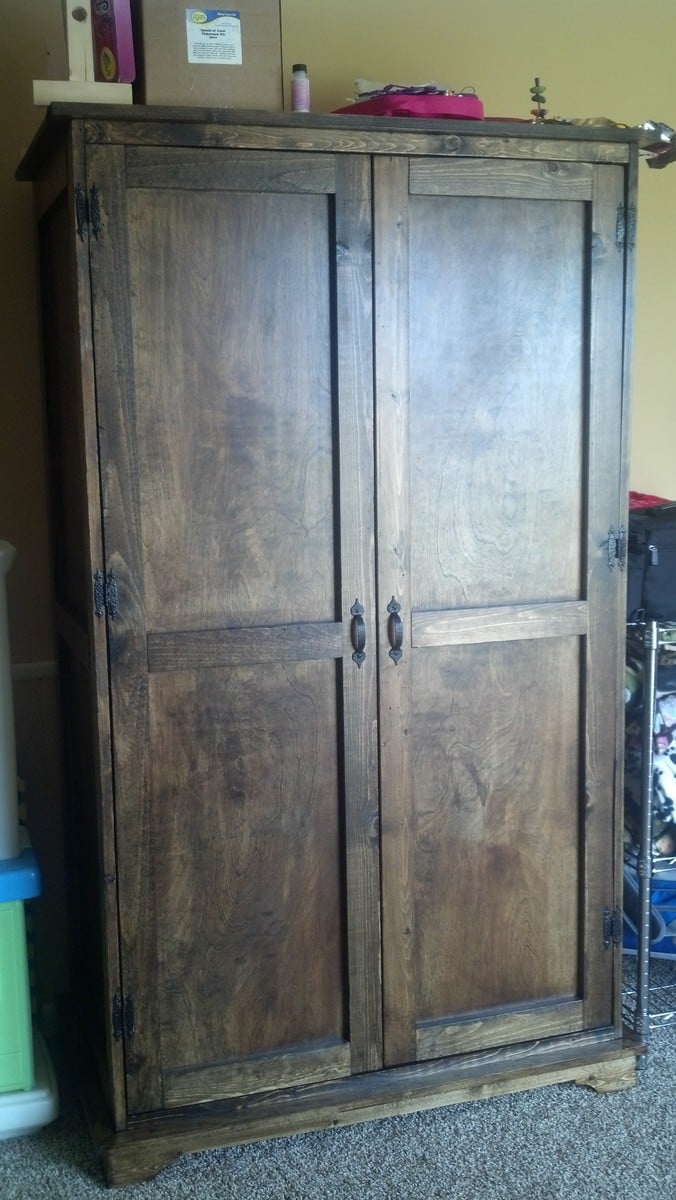
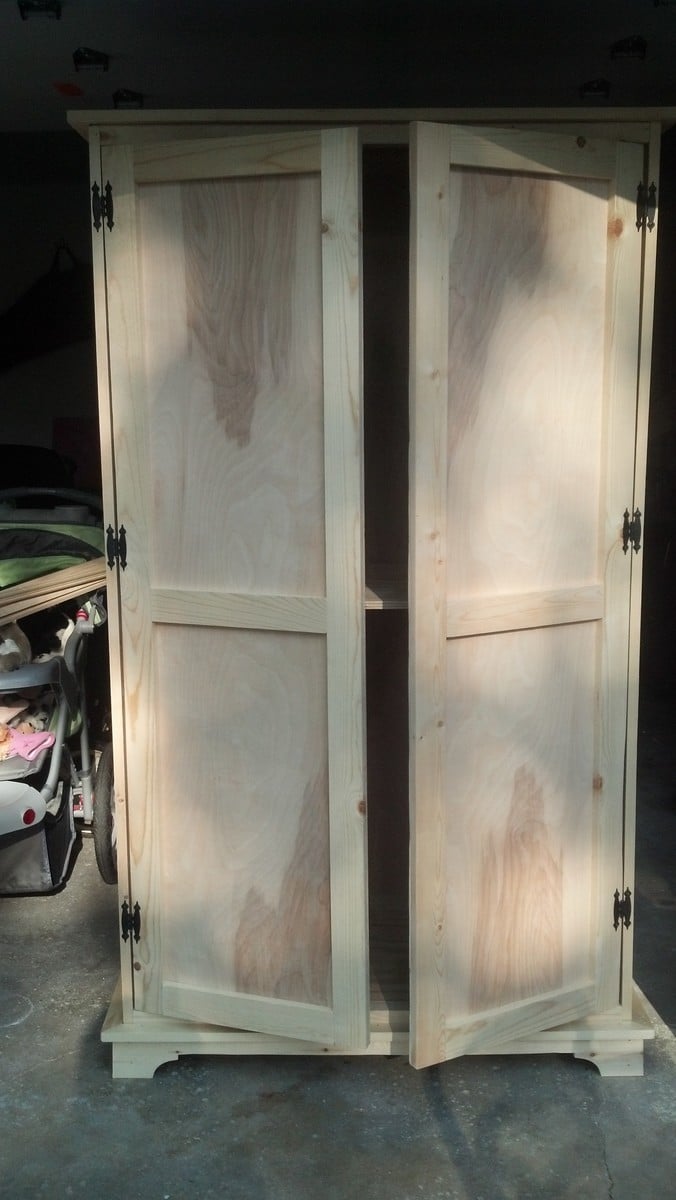
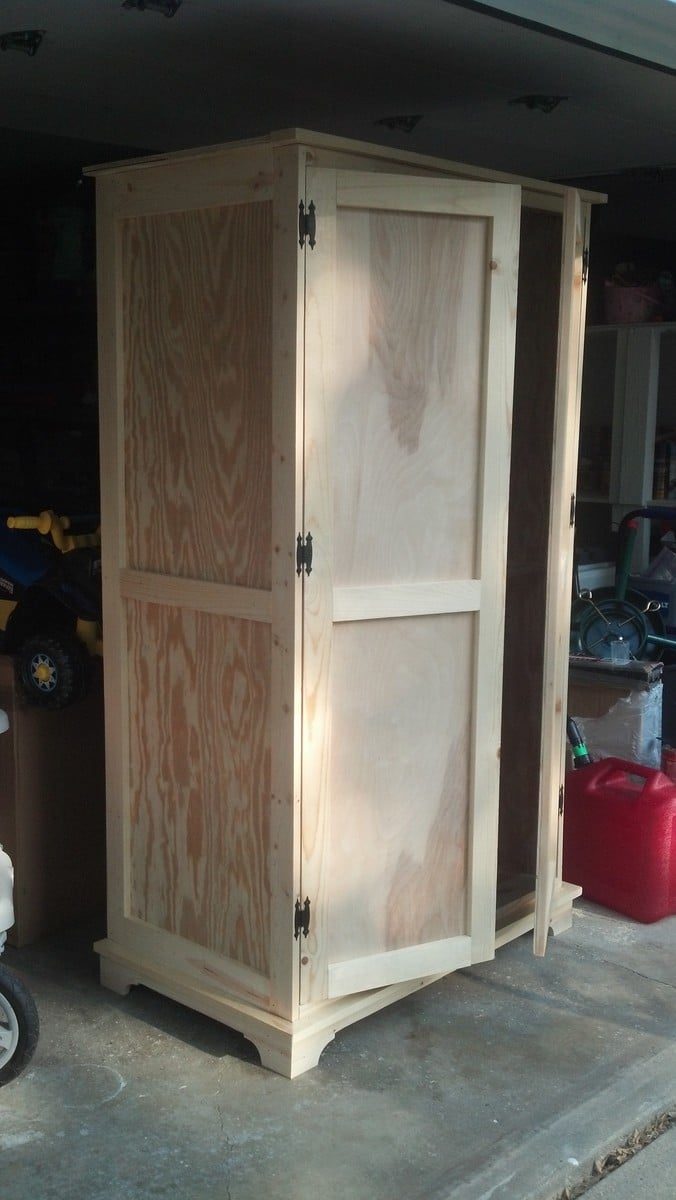
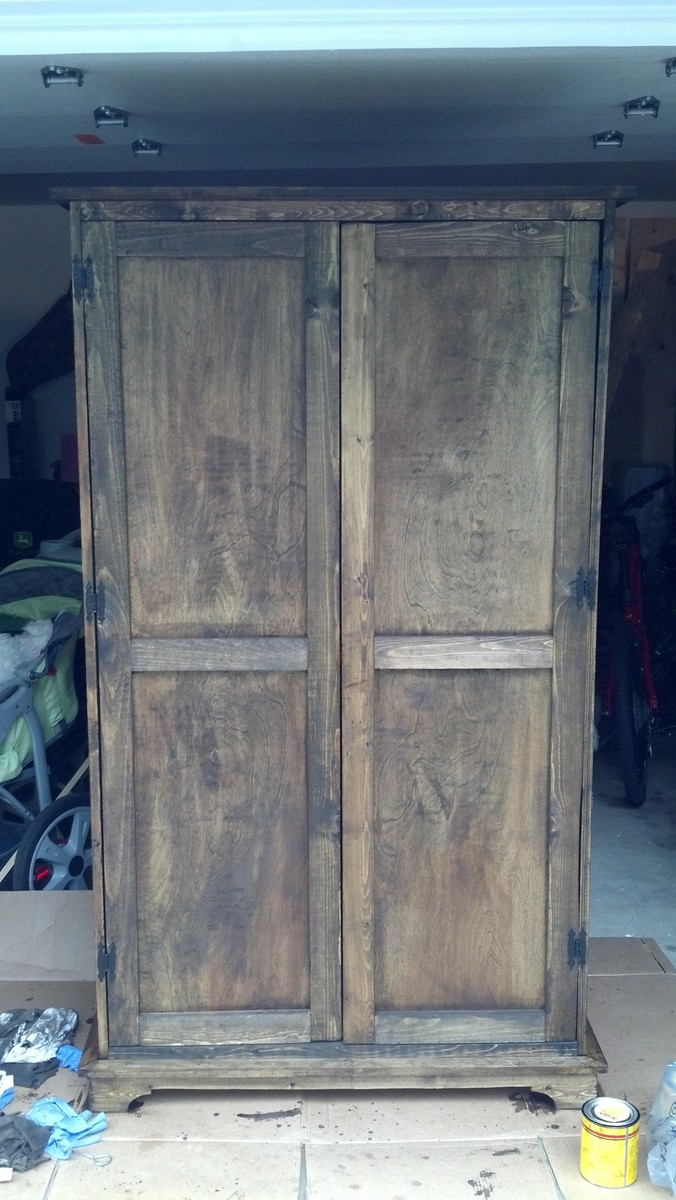
Toy Armoire
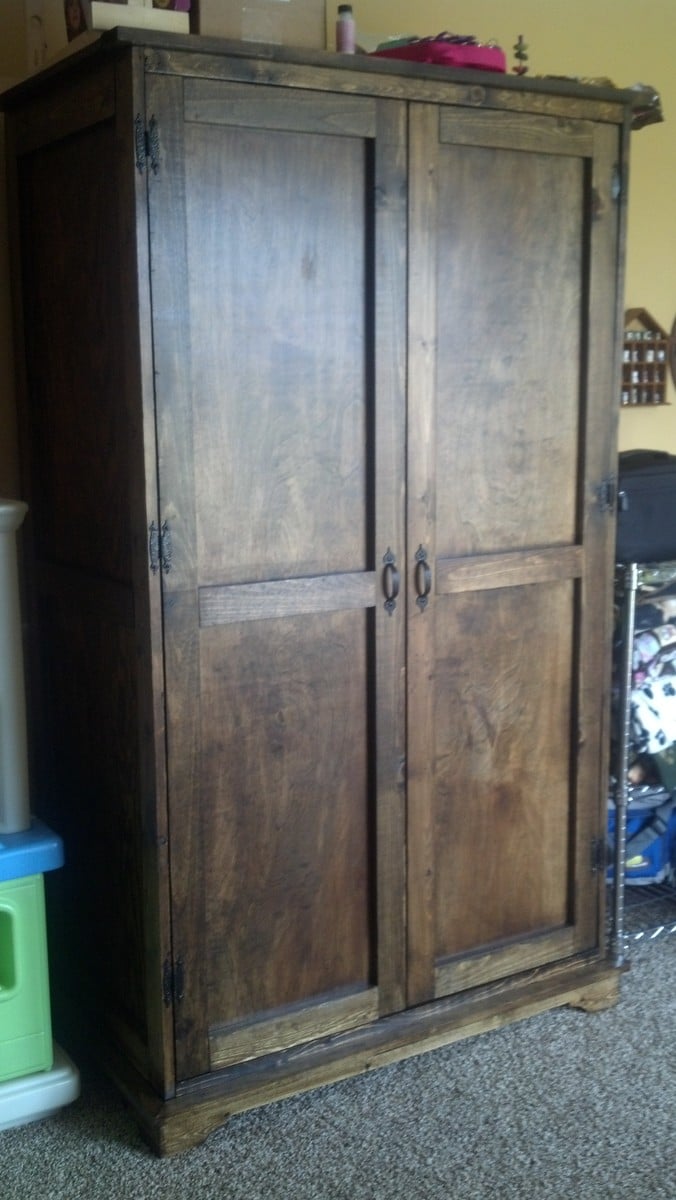
I adjusted the height of the armoire to 72 inches. It was a little tricky getting the doors to hang straight. I blame the new driveway; we just moved into a new house with a sloped driveway (our old one was super flat). I got the hardware at Lowe's. I also added a block of wood at the top, on the inside, to mount the door catches. I mounted them on the top and bottom on both doors, so four catches total. That really helped with the way the doors looked when closed.
Built from Plan(s)
Estimated Cost
$100
Estimated Time Investment
Weekend Project (10-20 Hours)
Finish Used
I used Minwax Dark Walnut with Minwax Satin Polyurethane. Two coats of each.
Recommended Skill Level
Intermediate
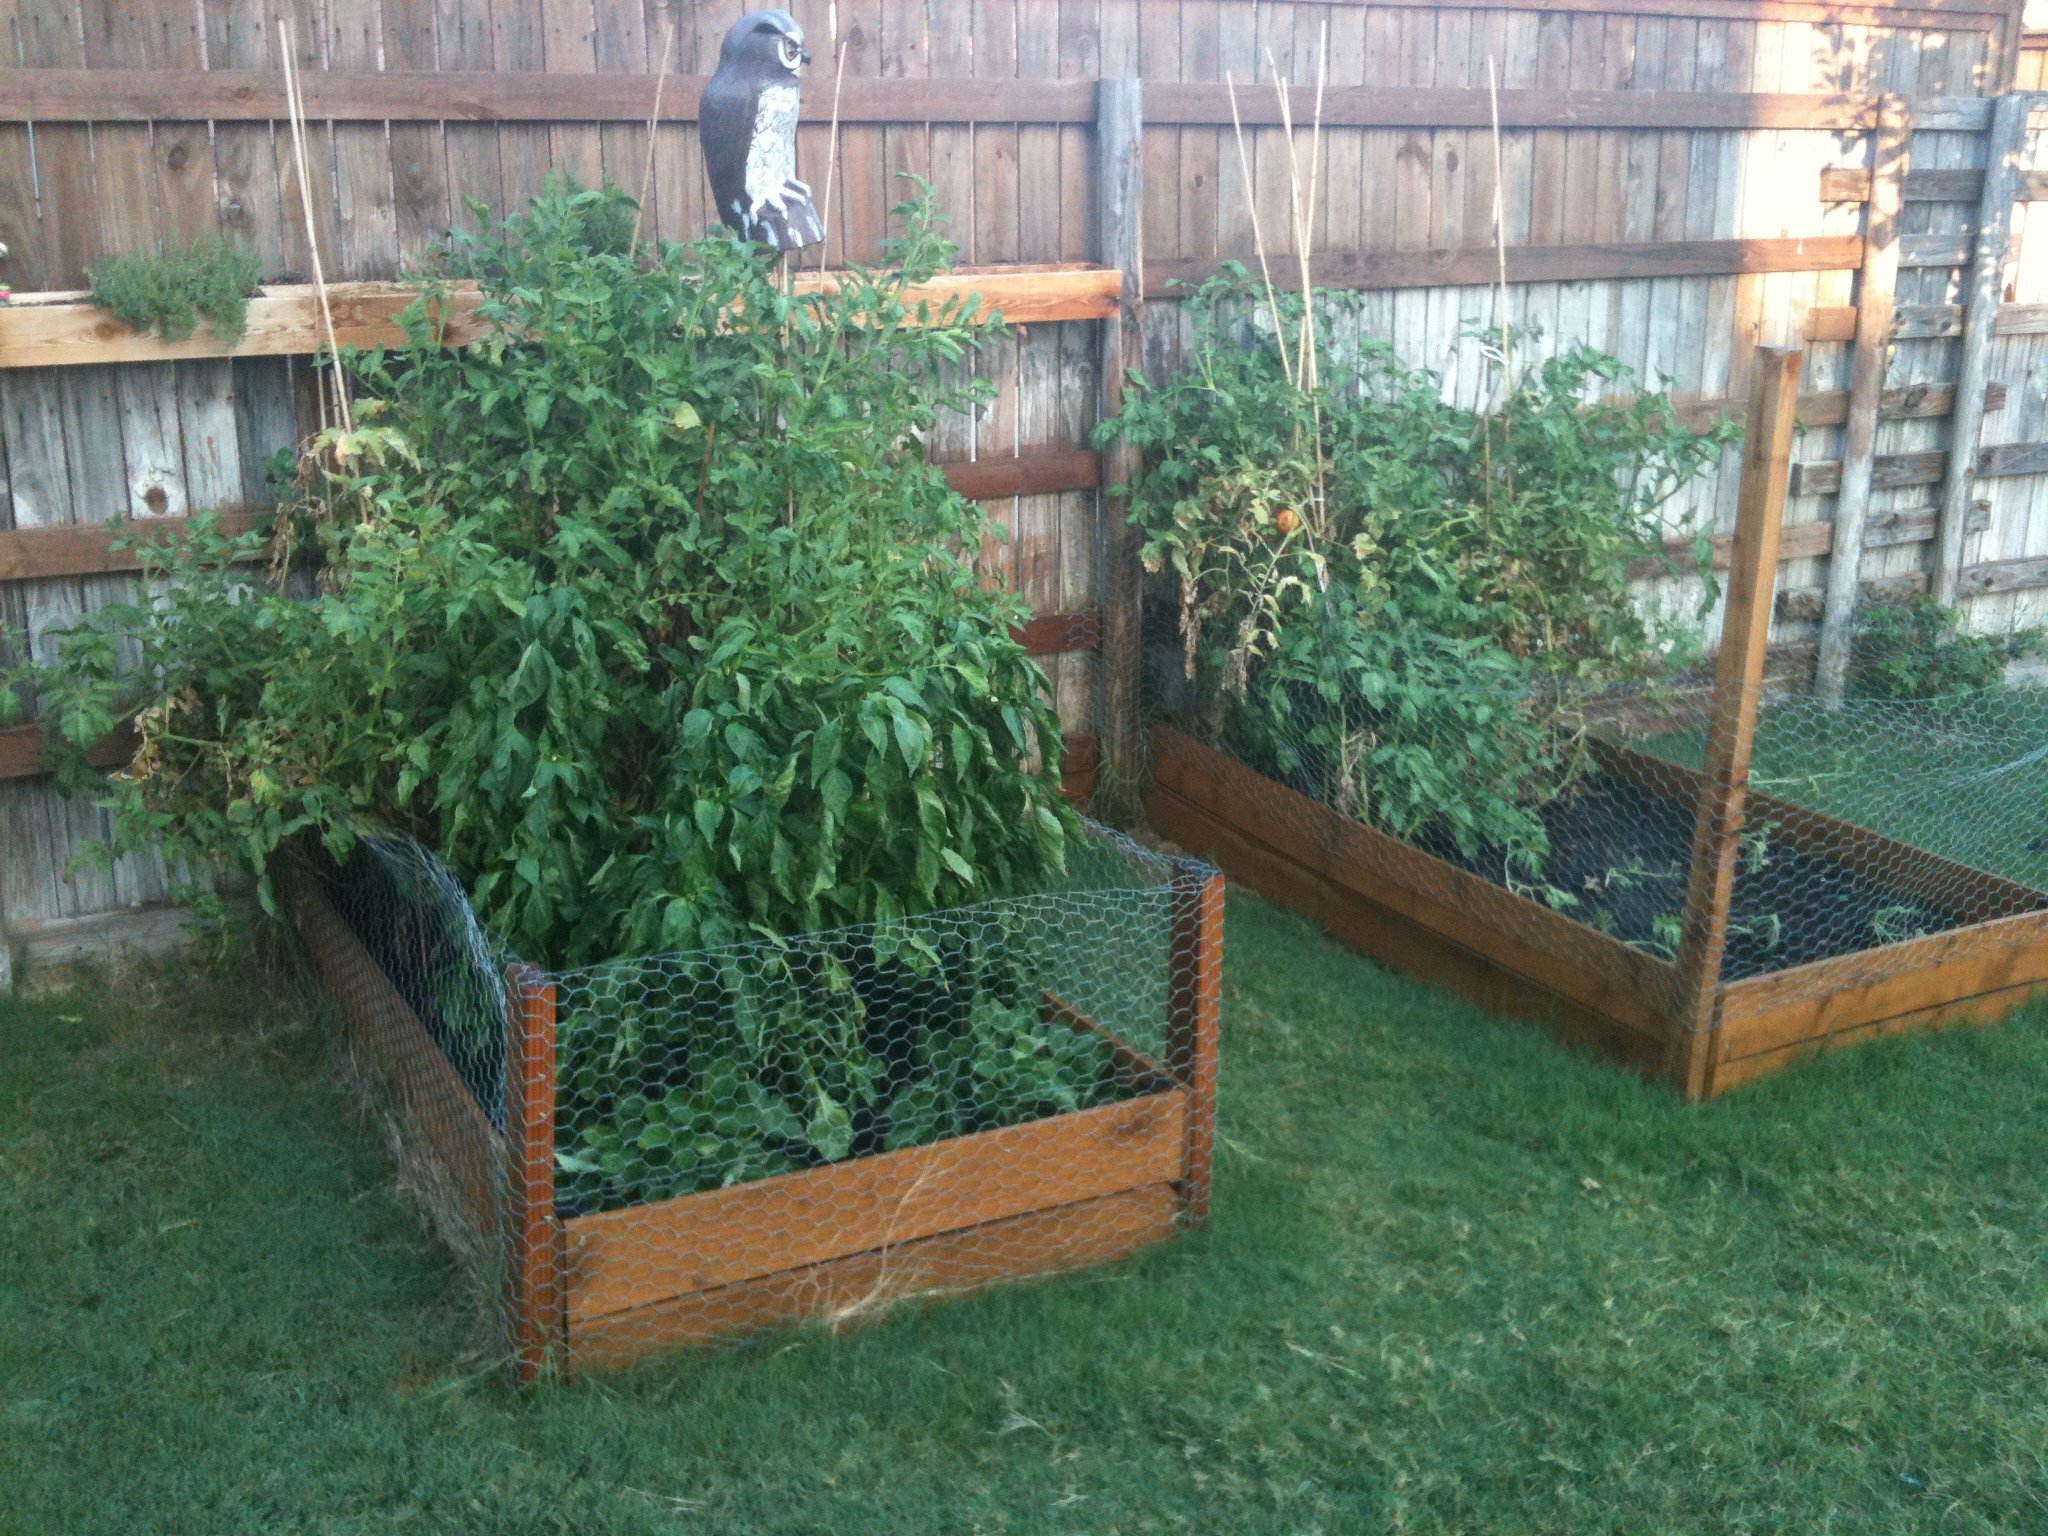
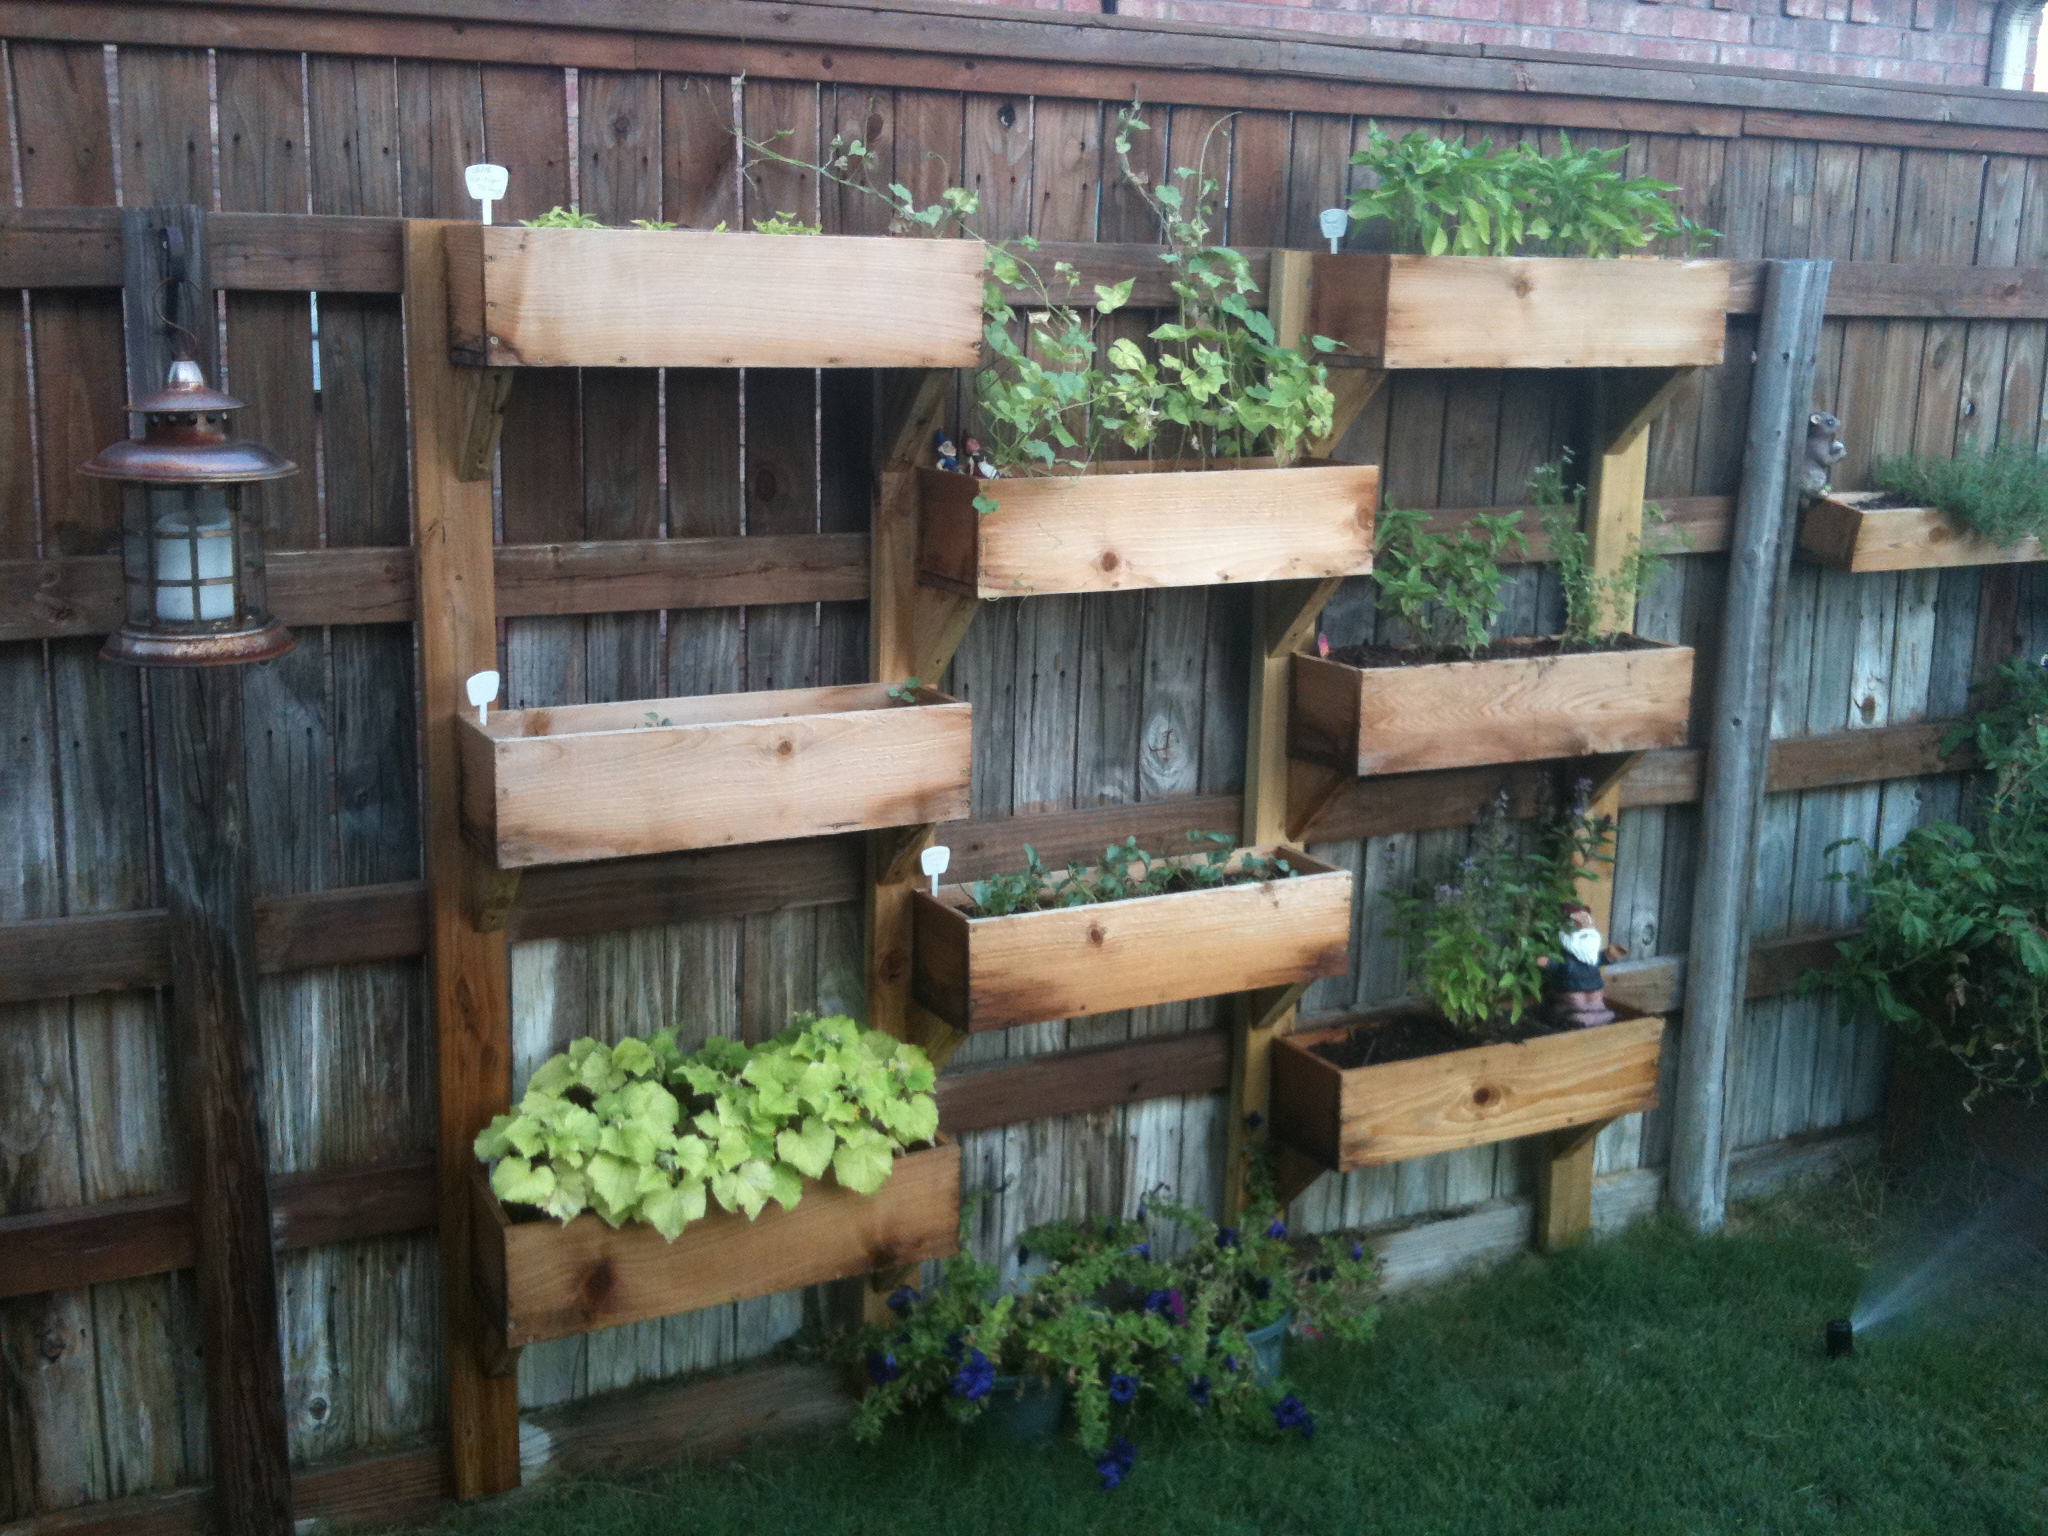
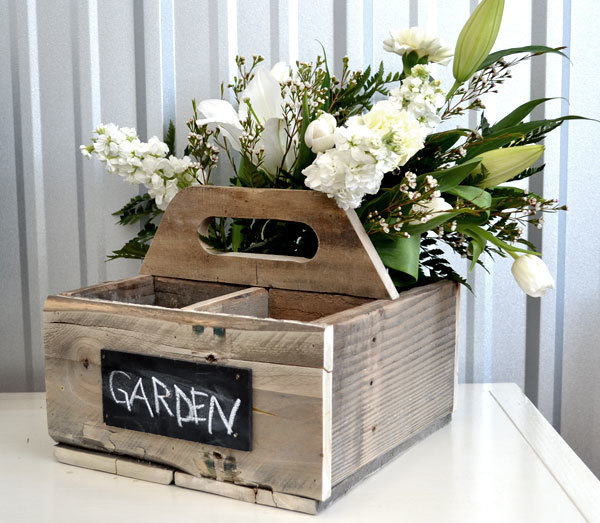
Cedar Boxes
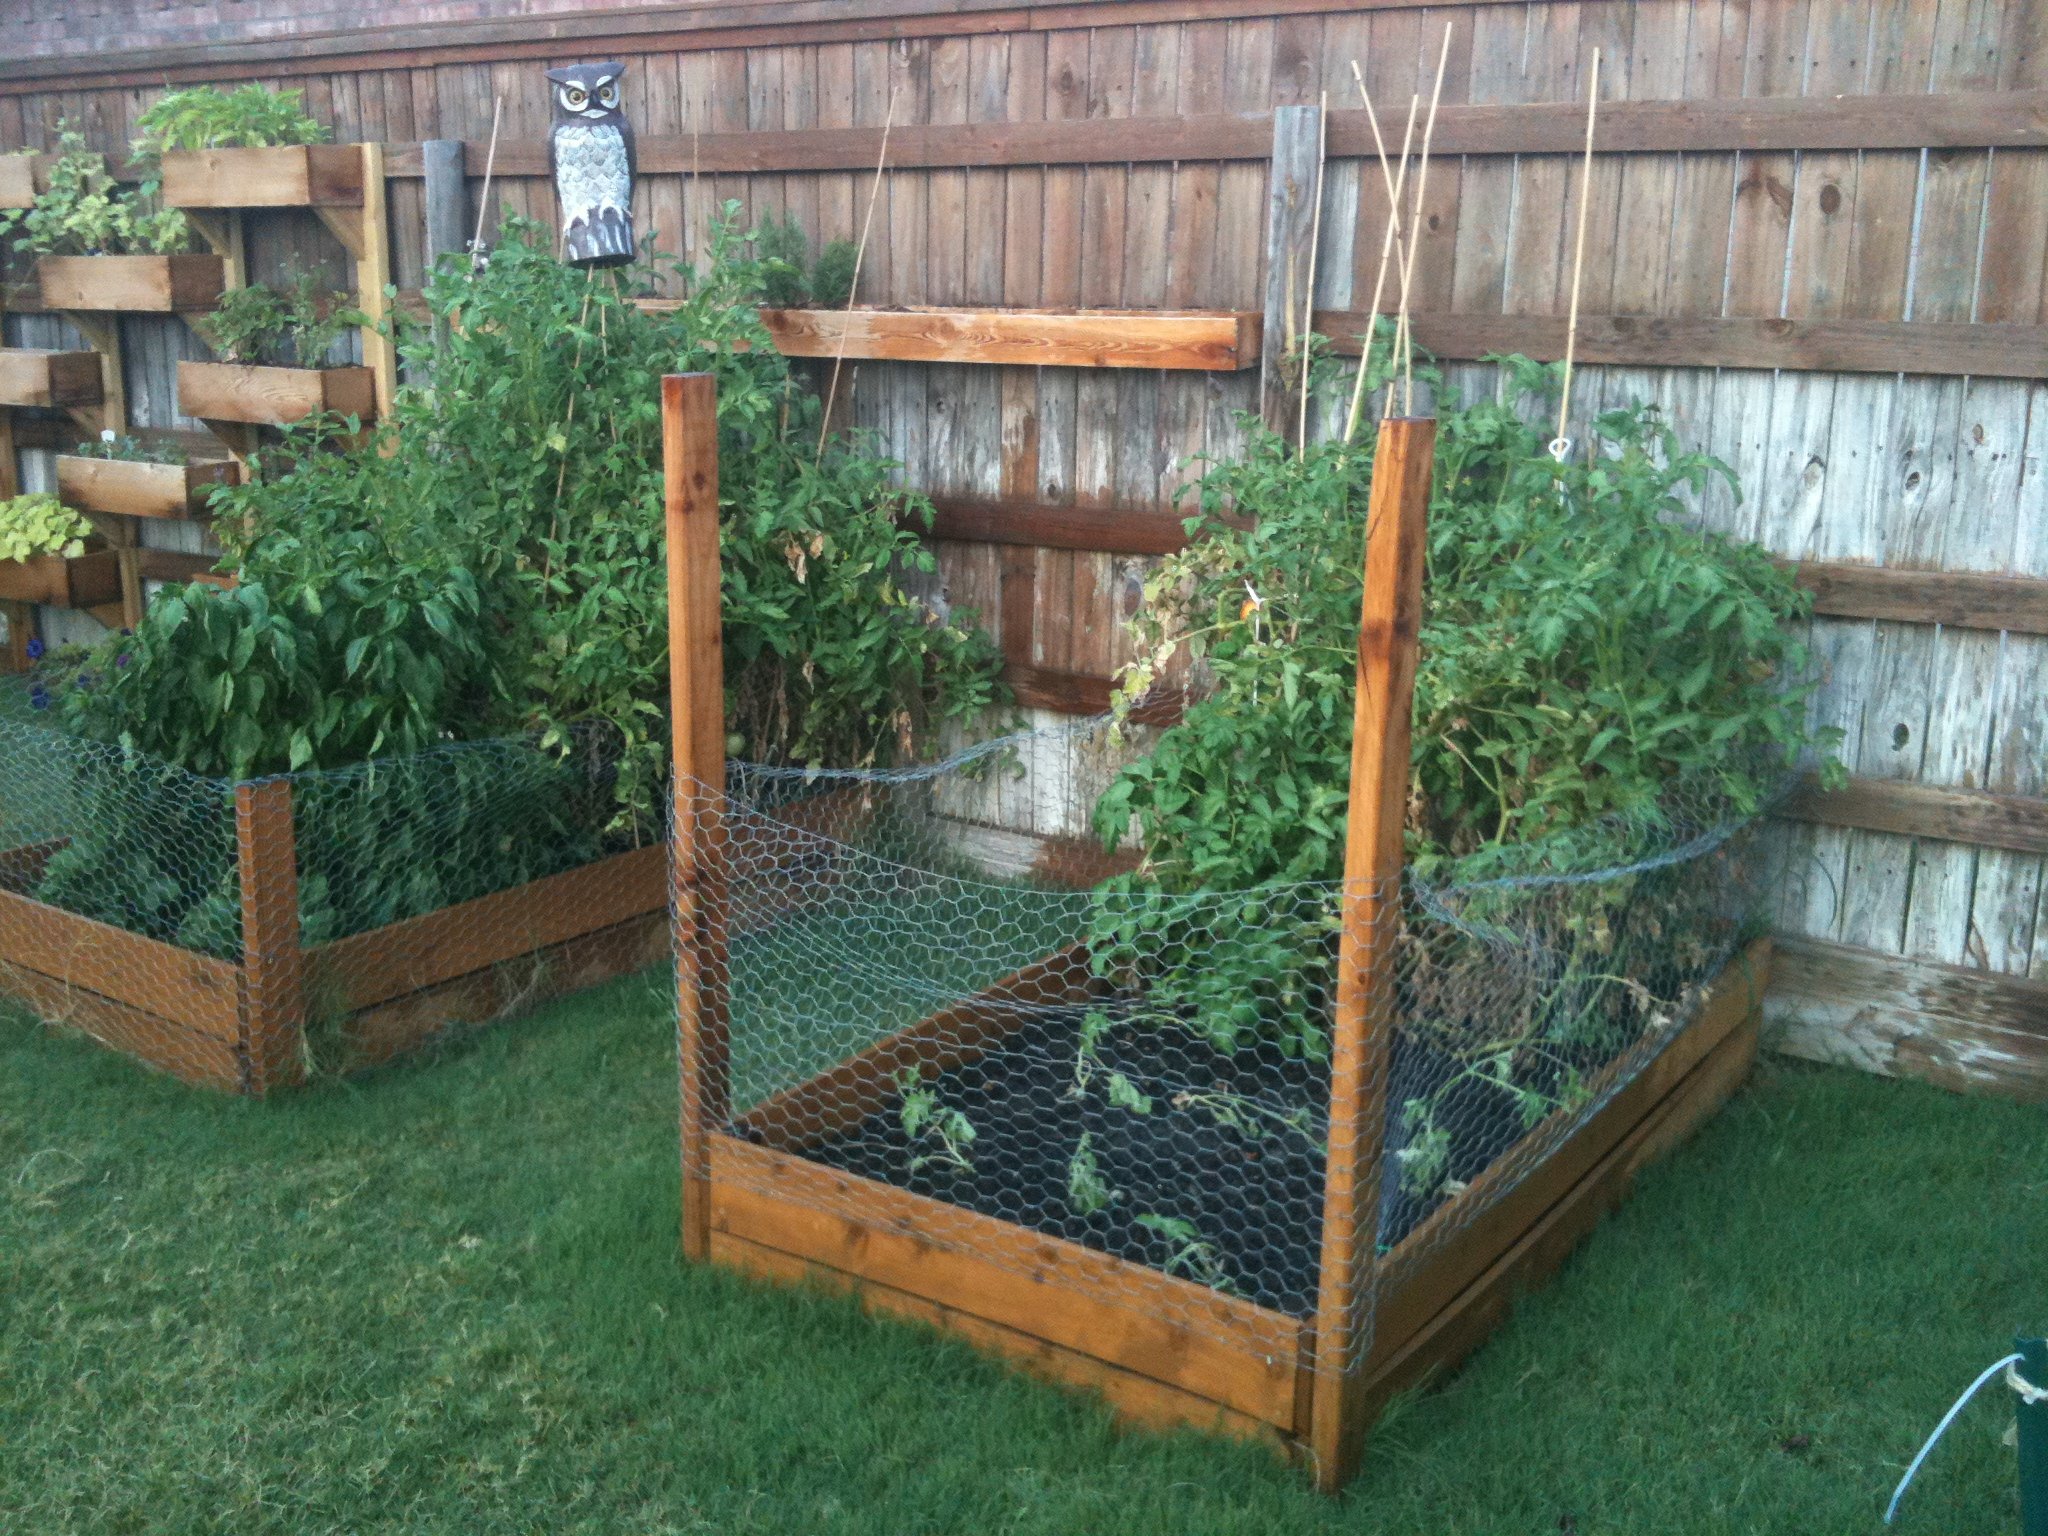
We built these before we saw these plans, but they are pretty much the same... We added the chicken wire to keep the rabbits (and our dog) out of the garden. We added the owl to keep the birds out. We've gotten a ton of tomatoes, onions, and bell peppers so far. Next year, we'll add a few more beds. We also added the verticle garden to take up less space, but its not deep enough. We'll make the next one deeper.
Built from Plan(s)
Estimated Cost
$30
Estimated Time Investment
An Hour or Two (0-2 Hours)
Finish Used
none
Recommended Skill Level
Starter Project
Comments
Sun, 07/10/2011 - 14:19
Love the vertical garden!
Love the vertical garden! What a wonderful idea! Did you line the boxes with plastic??
Thu, 11/17/2011 - 07:59
Success
We ended up getting a ton of tomoatoes and green peppers from the garden boxes. We've actually built a couple more. We'll probably double again before next spring. We're looking at adding more veggies.
We now have ton of stuff planted for the fall...
Tue, 04/03/2012 - 06:19
vertical box instructions?
i love the vertical boxes. I am just trying my hand at the world with a green thumb and could use as much advice as possible about how to make as well as to line the boxes or not to line them. All advice appreciated!
Fri, 11/23/2012 - 21:53
Hello there
Hi, my name is berman. I found you pin from my pinterest and your box garden is so great. I am a newbie in this field and so interested to build garden in my house. If i can ask you some question, could you please to answer that?
cheers,
berman
Tue, 03/10/2015 - 21:19
Vertical Box Instruction!
Hello! Do you mind sharing the Vertical Box Instructions? I absolutely love this idea!
Sun, 05/31/2015 - 21:00
Love the vertical boxes
Came across this beautiful design while searching for my next diy garden idea. Wondering if there are blueprints available
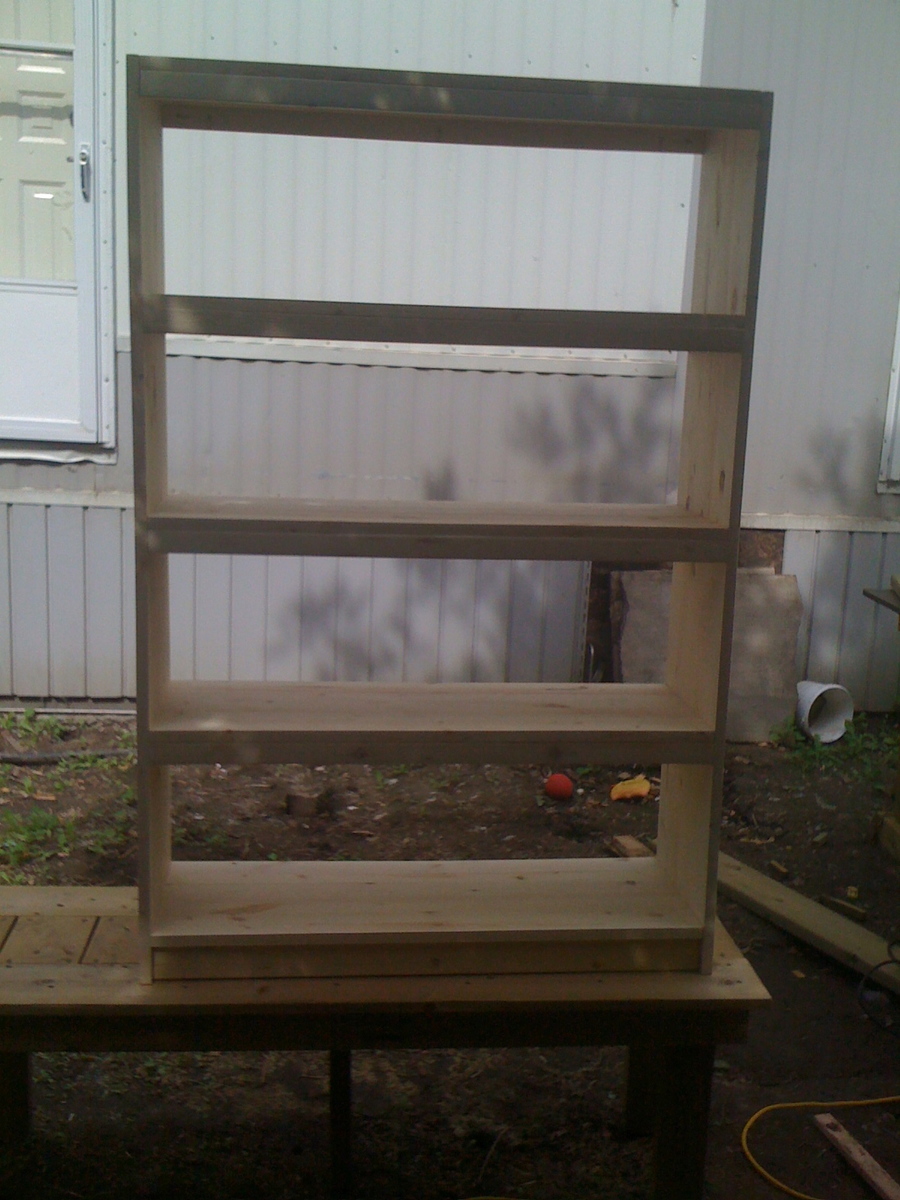
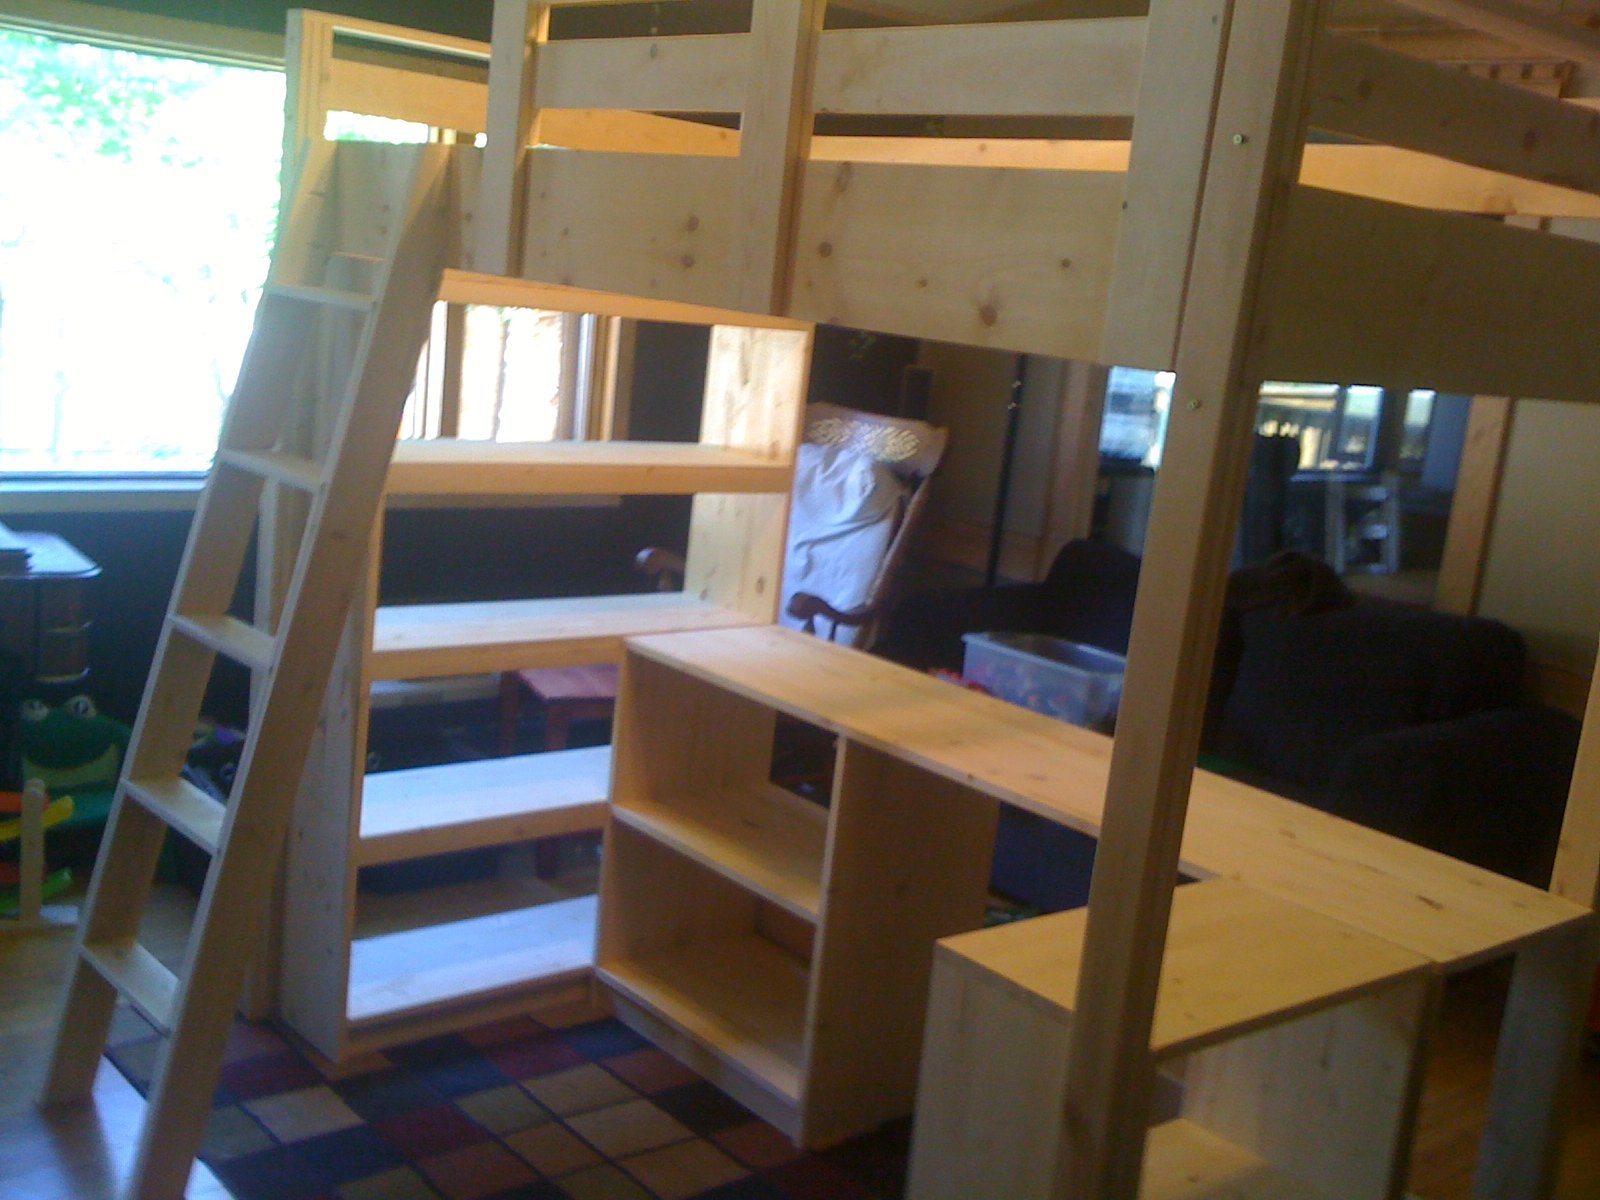
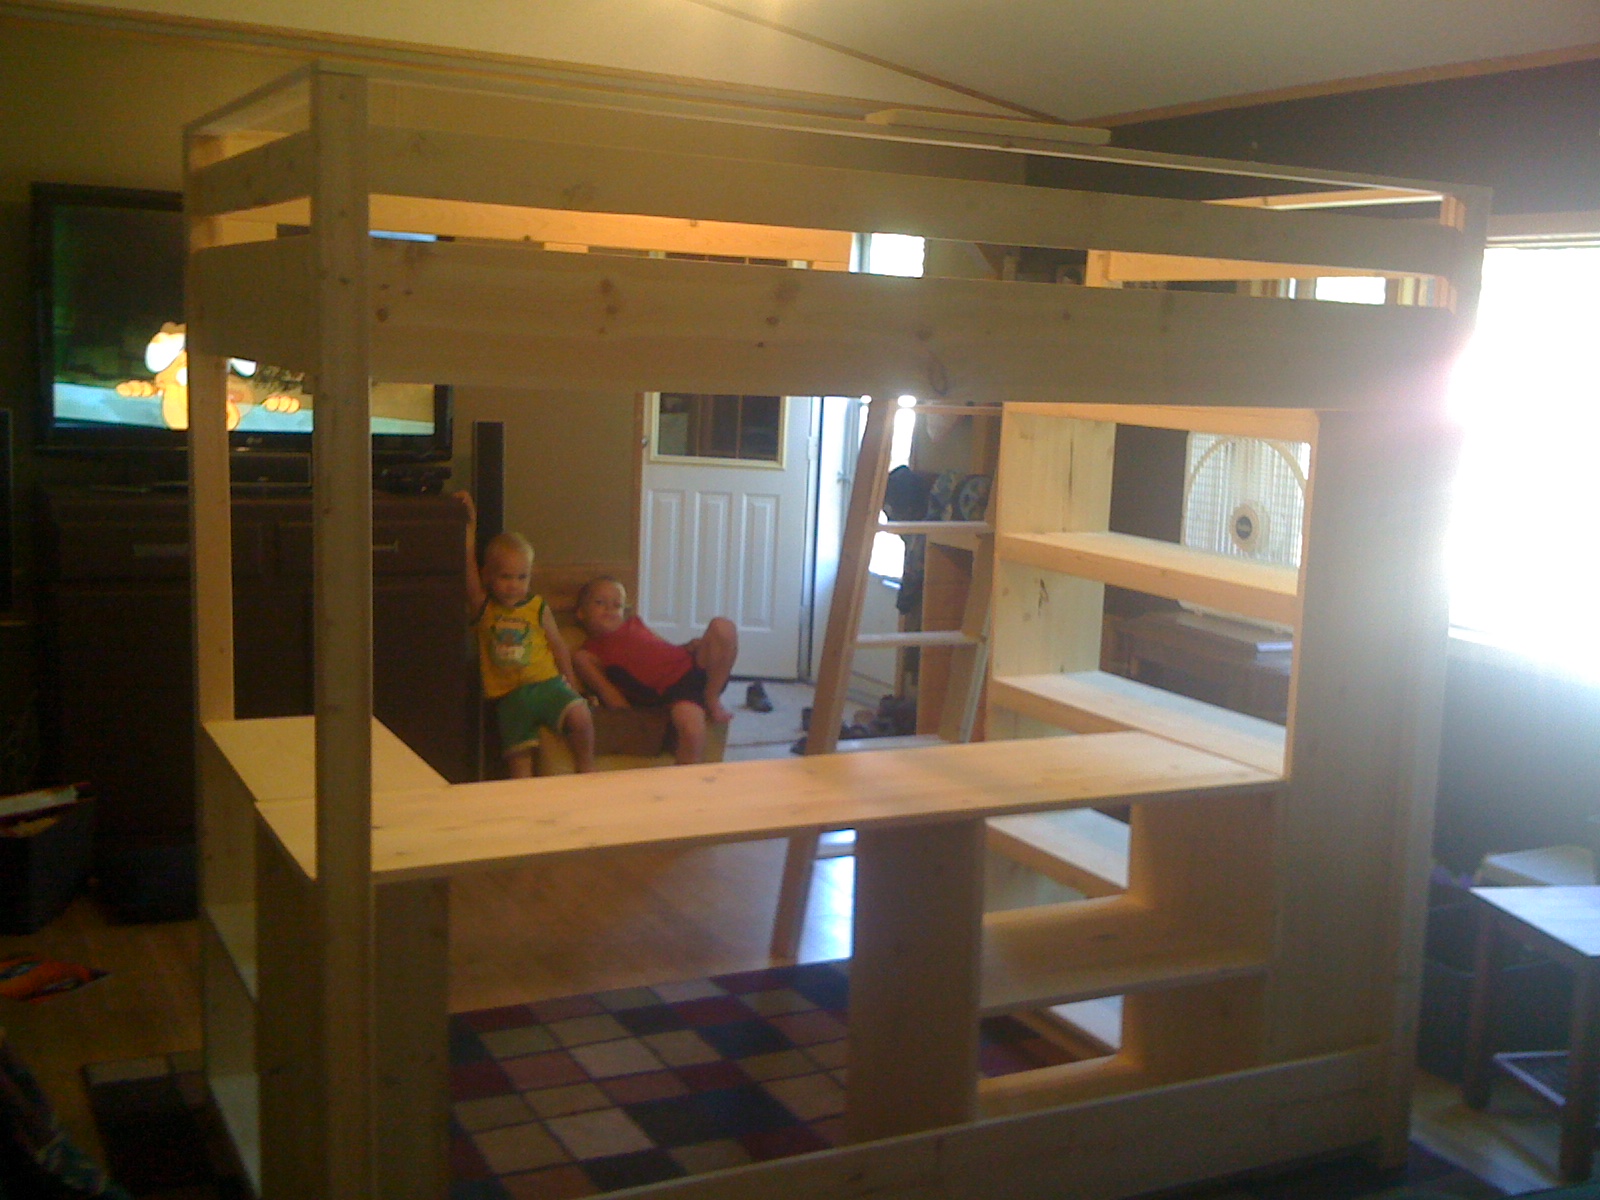
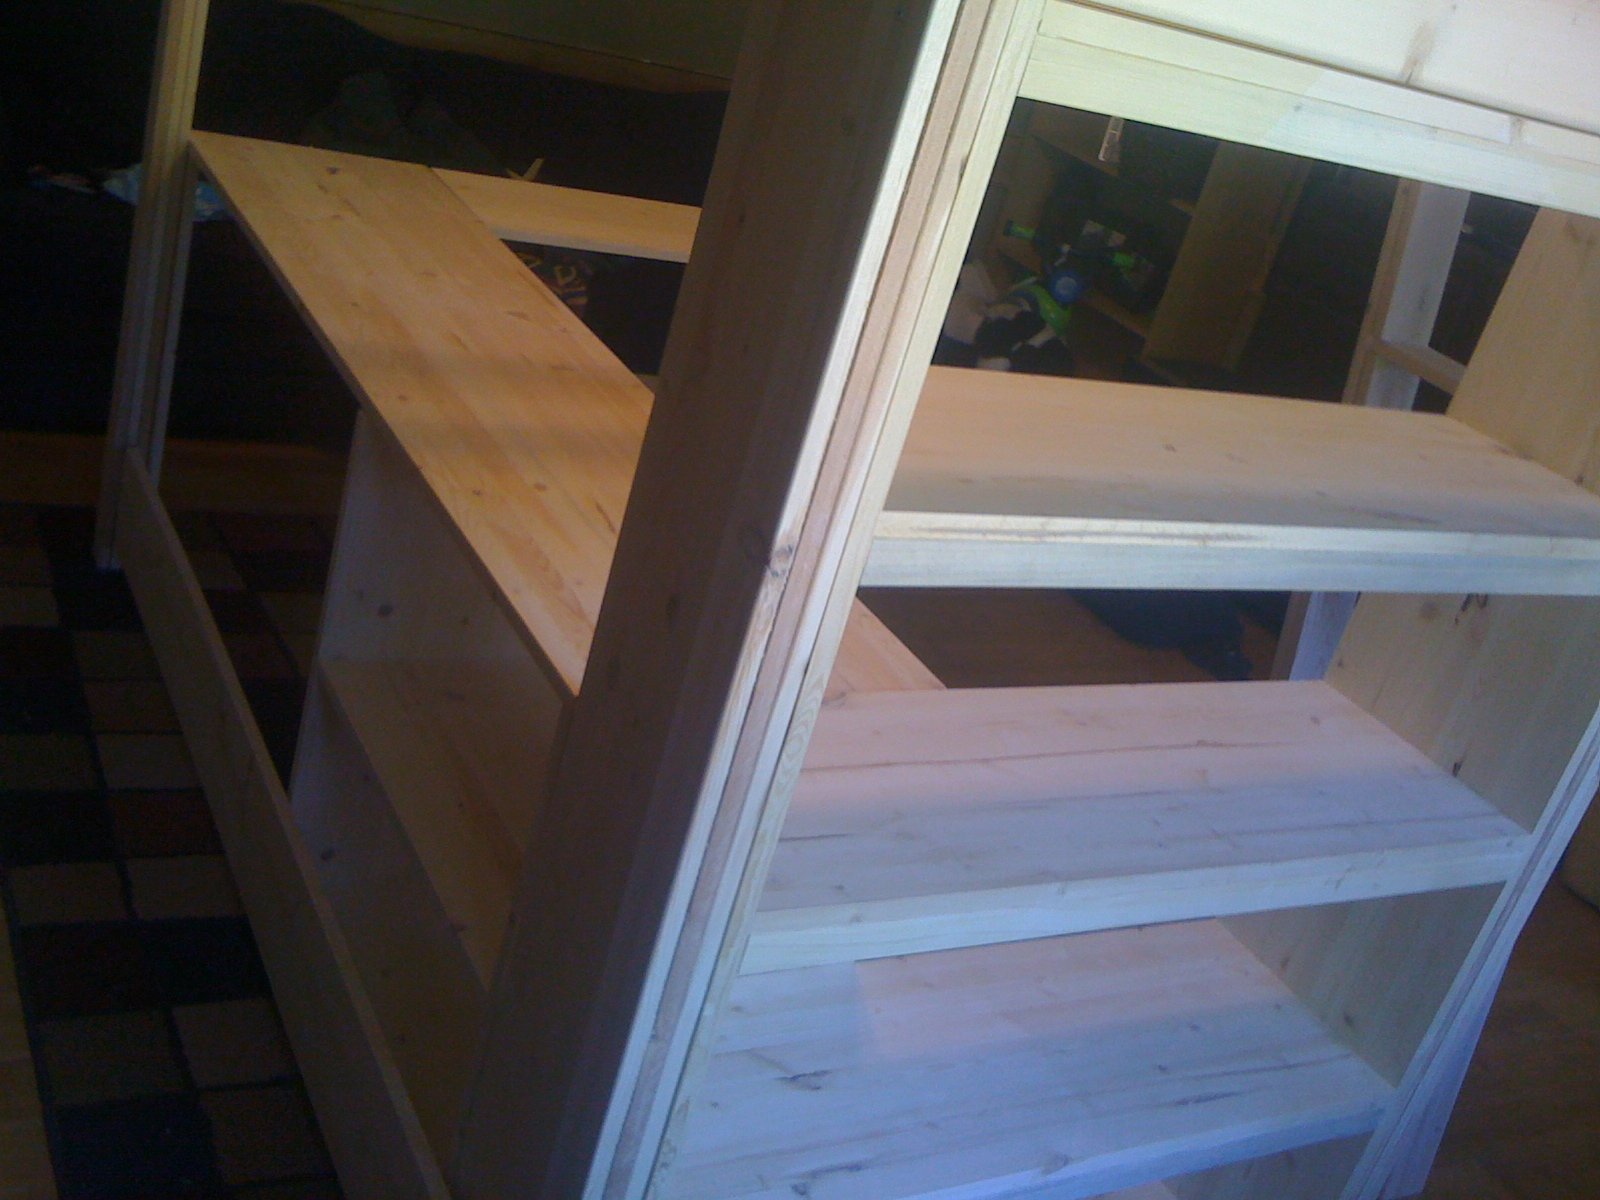
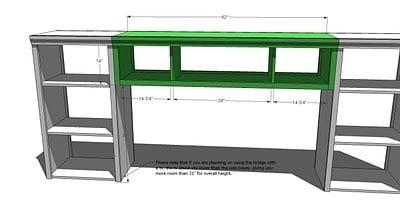
Claire's Loft Bed
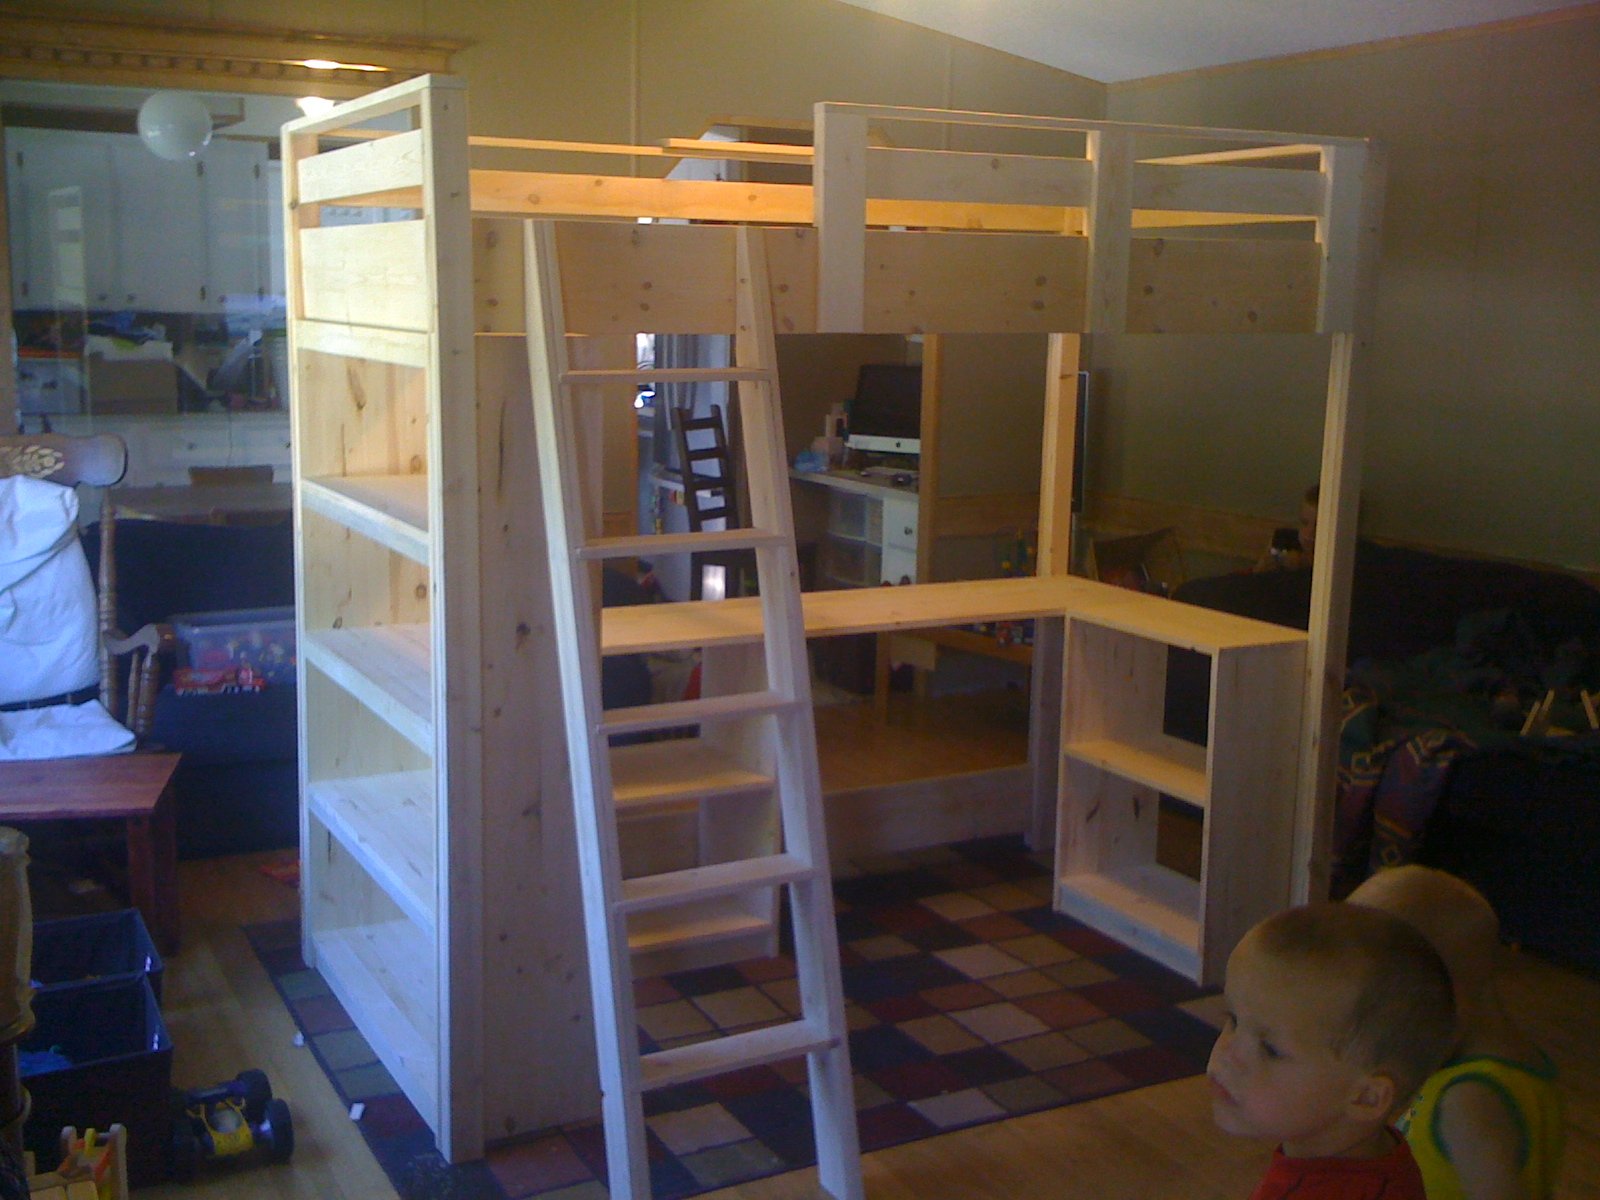
A few months back a friend of my Sister asked if I would build a bed for her 10 year old daughter. I was excited to do it! So I finished up the projects I had already started and then went to work. I had never built bookshelves before. I wanted it clean and "hole-less" on the outside, so we found a Kreg Jig and I started learning. SUPER easy!! I believe it has been painted white. I can't wait to go see it!!
I followed Ana's plans except I used 2*2s for slats and used 16" wide boards for one of the bookshelves and the desk top. I want them to be able to use this for years to come and not out-grow it too quickly.

Built from Plan(s)
Estimated Cost
$300
Estimated Time Investment
Weekend Project (10-20 Hours)
Recommended Skill Level
Intermediate
Comments
Fri, 10/21/2011 - 09:39
Loft bed with 16" deep desk and small book cases.
Where did you get 16" wide boards? We're thinking of making the same loft with the 16" desk and 16" small book cases. I was planning on using plywood.
In reply to Loft bed with 16" deep desk and small book cases. by Guest (not verified)
Thu, 11/24/2011 - 10:32
My apologies, I just saw
My apologies, I just saw this.
I got them from Home Depot down the shelving isle.
Sat, 02/25/2012 - 05:56
hello just a quick question
hello just a quick question about the railing. Is it screwed on or is it just sitting over the wood? Very nice bed.
In reply to hello just a quick question by judee (not verified)
Tue, 08/07/2012 - 15:06
My apologies, I just saw this
My apologies, I just saw this now. It is screwed on, but from the inside.
Tue, 08/07/2012 - 13:35
How many 2x2s did you use? I
How many 2x2s did you use? I think I am going to do the same to make sure that I do not outgrow the bed. Also did you have to change the size of the little bookshelves when you changed the desk to 16" instead of 12" ? I'm trying to build the whole set on my own (im 14)
In reply to How many 2x2s did you use? I by WannaMakeA LOFTBED (not verified)
Tue, 08/07/2012 - 15:09
I think I used around 20
I think I used around 20 2x2's, and did use a center beam to add strength. I only changed the one bookshelf to a 16" (the one under the desk). The other one I left as a 12". Good luck building your bed!
Sun, 05/12/2013 - 19:37
Thank you so much for your pics!
Hook fam, Thanks so much for your work and for the pictures. I really like how you left the lower back side of the big book shelf off and still included the desk behind. Love the 16" too and I think I will go with that for the desktop but leave the 12" for the shelves. Thanks again! This is now my next project!!!
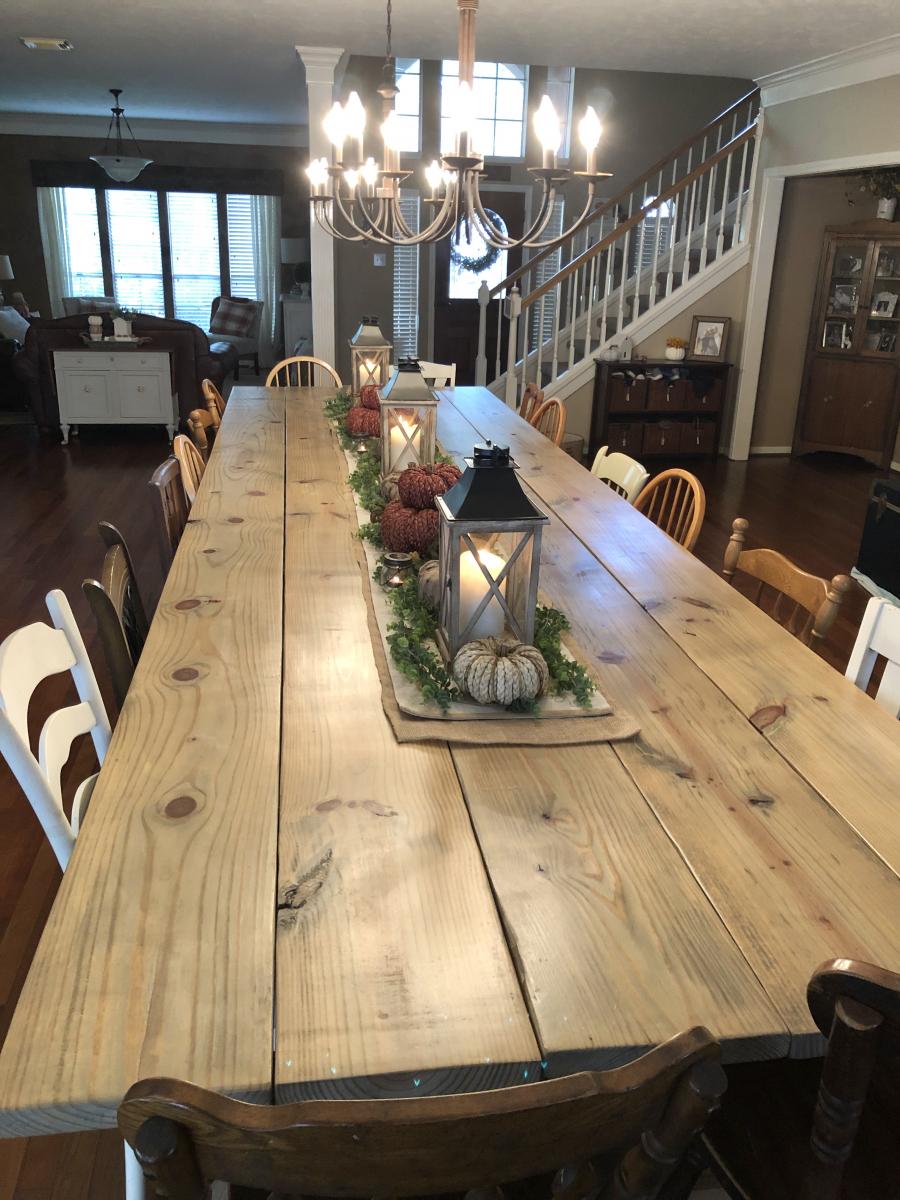
16ft x 5ft farm table
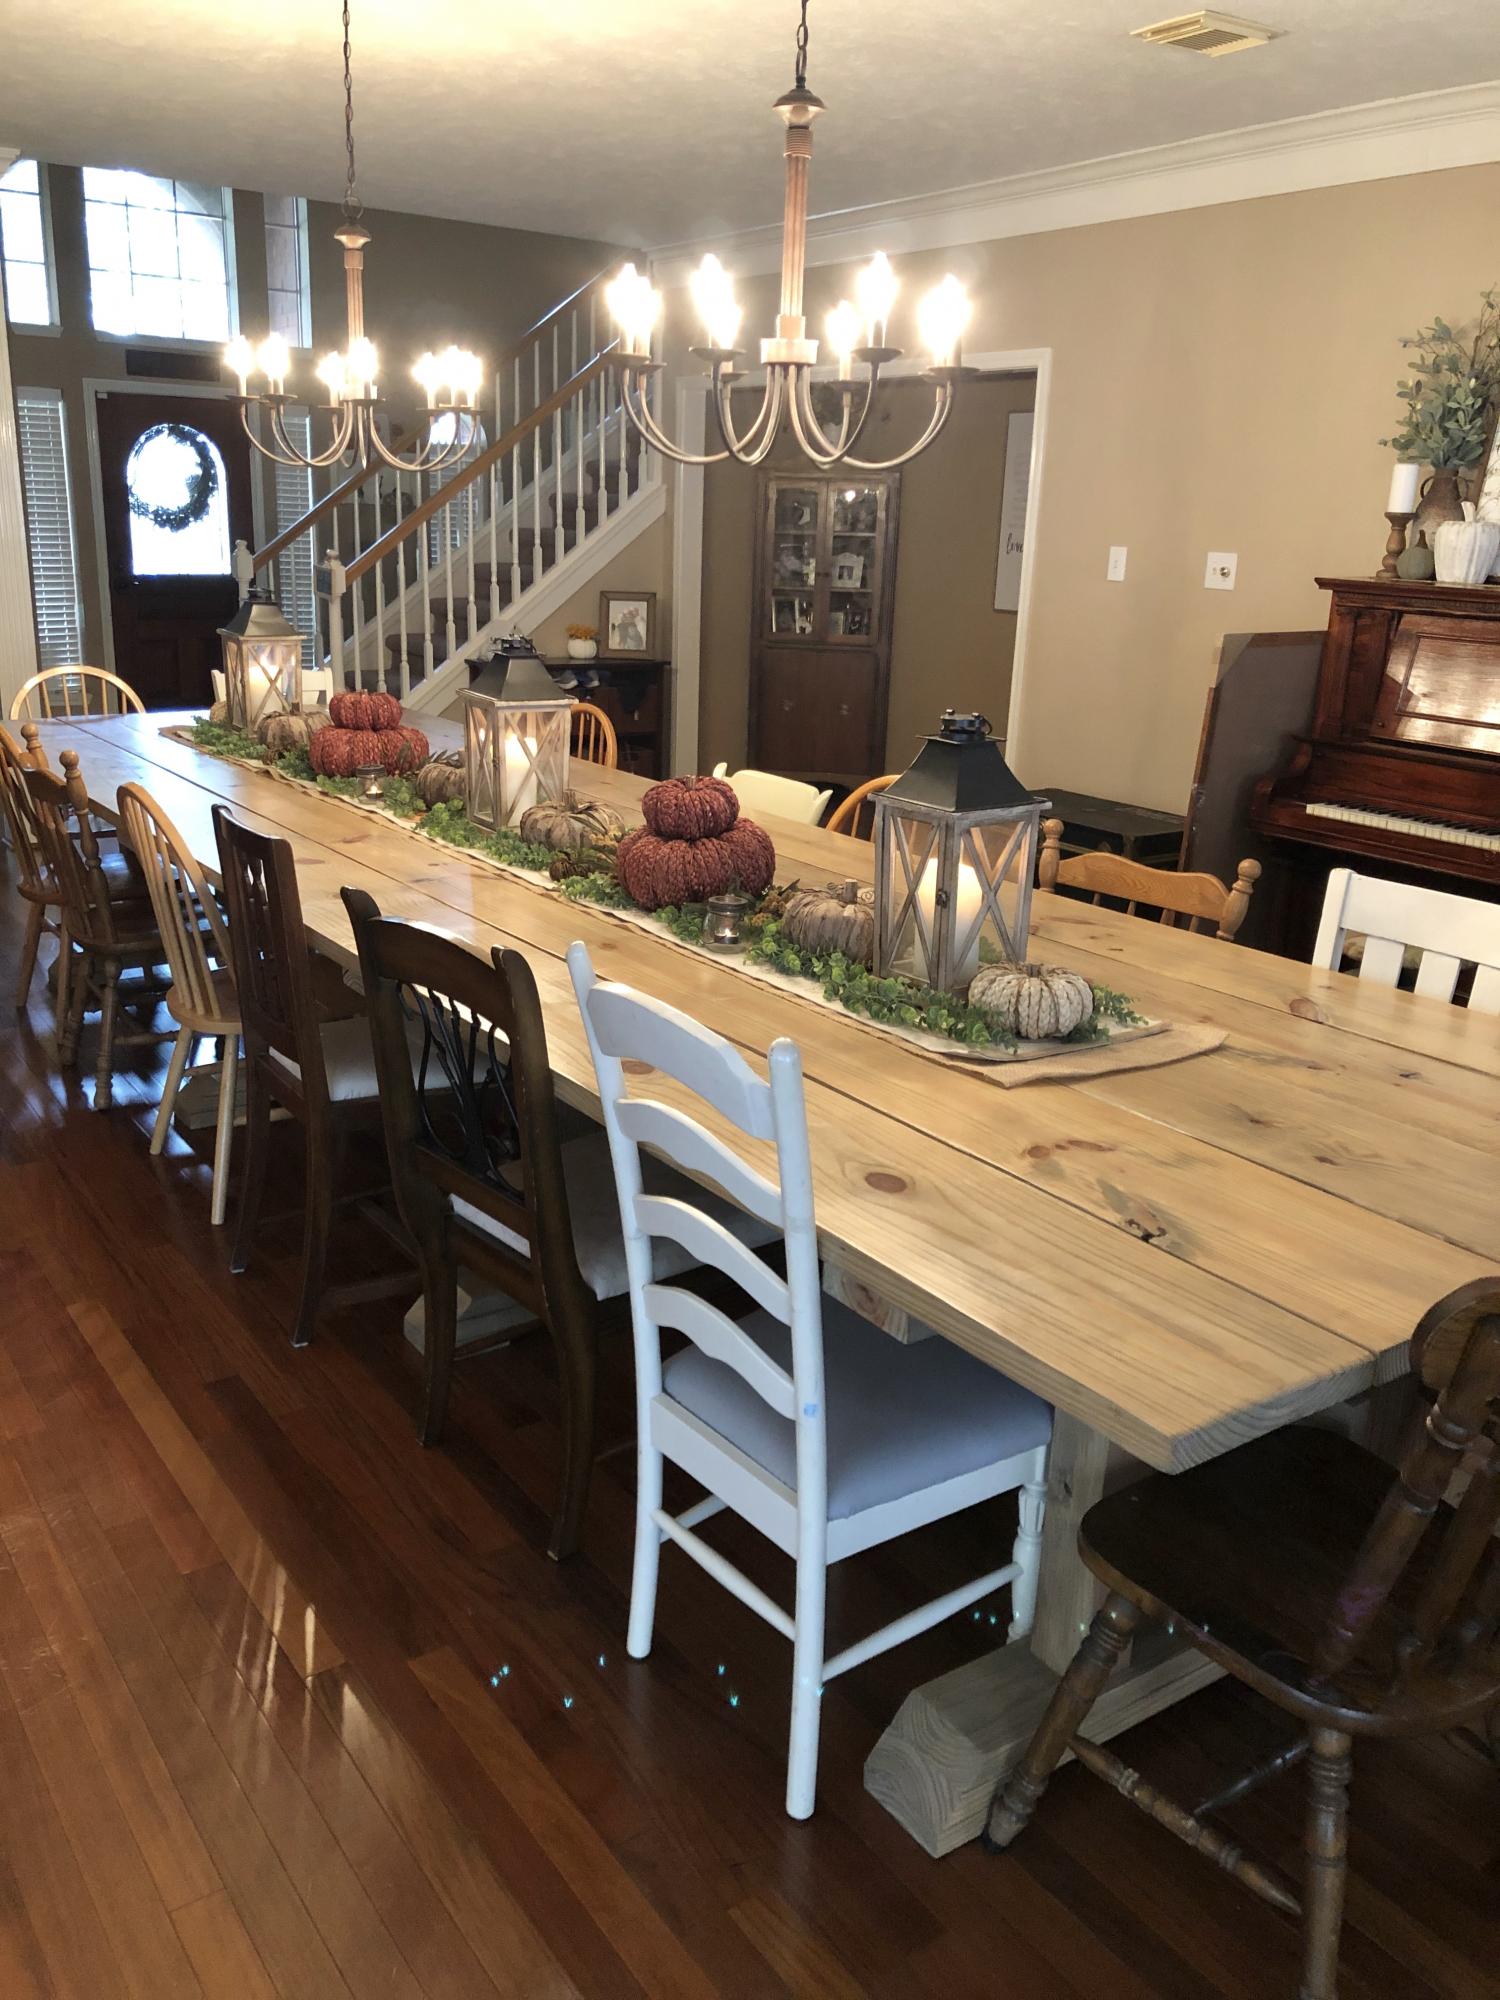
This table was created using a variety of plans. It can seat up to 20 people comfortably. The table top was built with 5 pieces of 2x12. The legs were a combination of 4x4 posts and 2x6s. 2 coats of Minwax Weathered Gray was the stain and then 3 coats of varathane semi-gloss finish. We sanded between each coat of poly.
Built from Plan(s)
Estimated Cost
435.00
Estimated Time Investment
Weekend Project (10-20 Hours)
Finish Used
Varathane semi gloss poly
Recommended Skill Level
Intermediate
Seasonal And Holiday
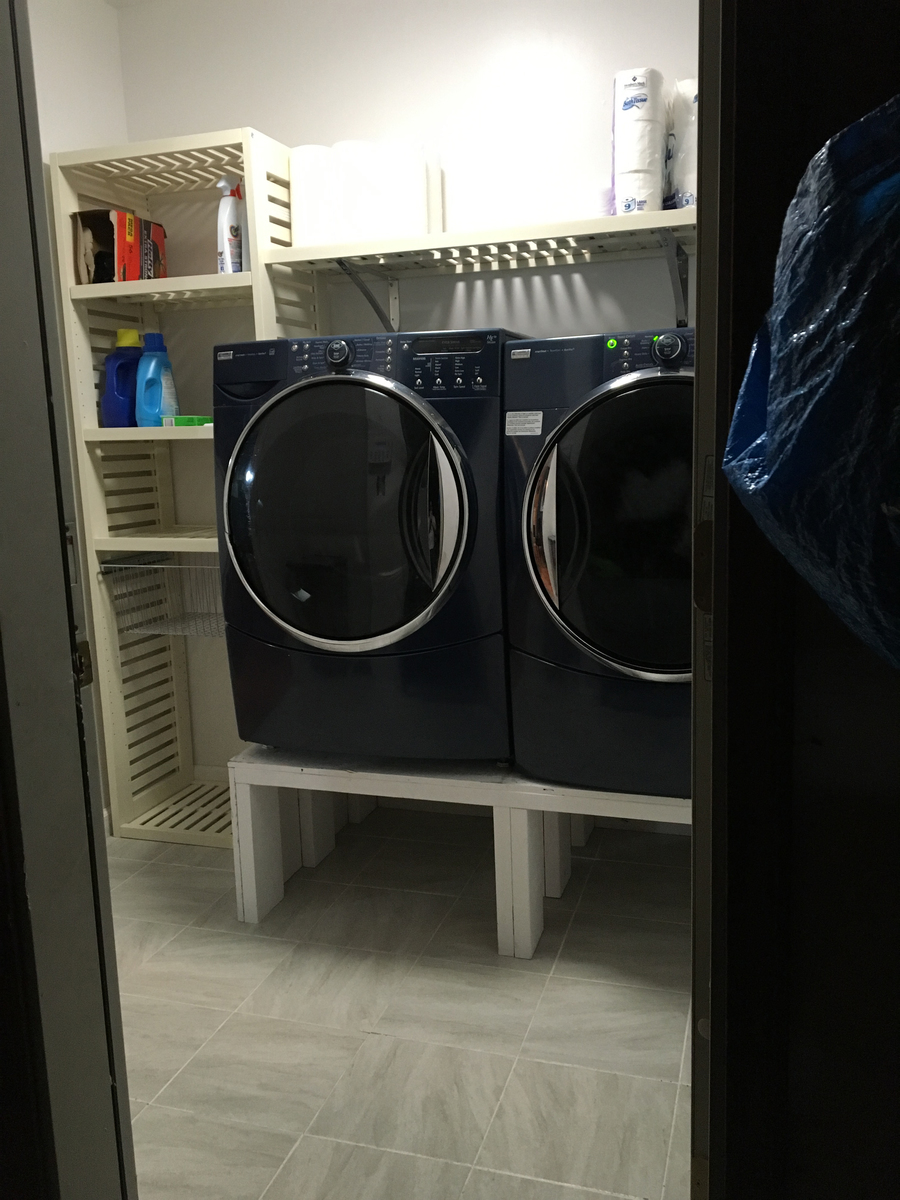
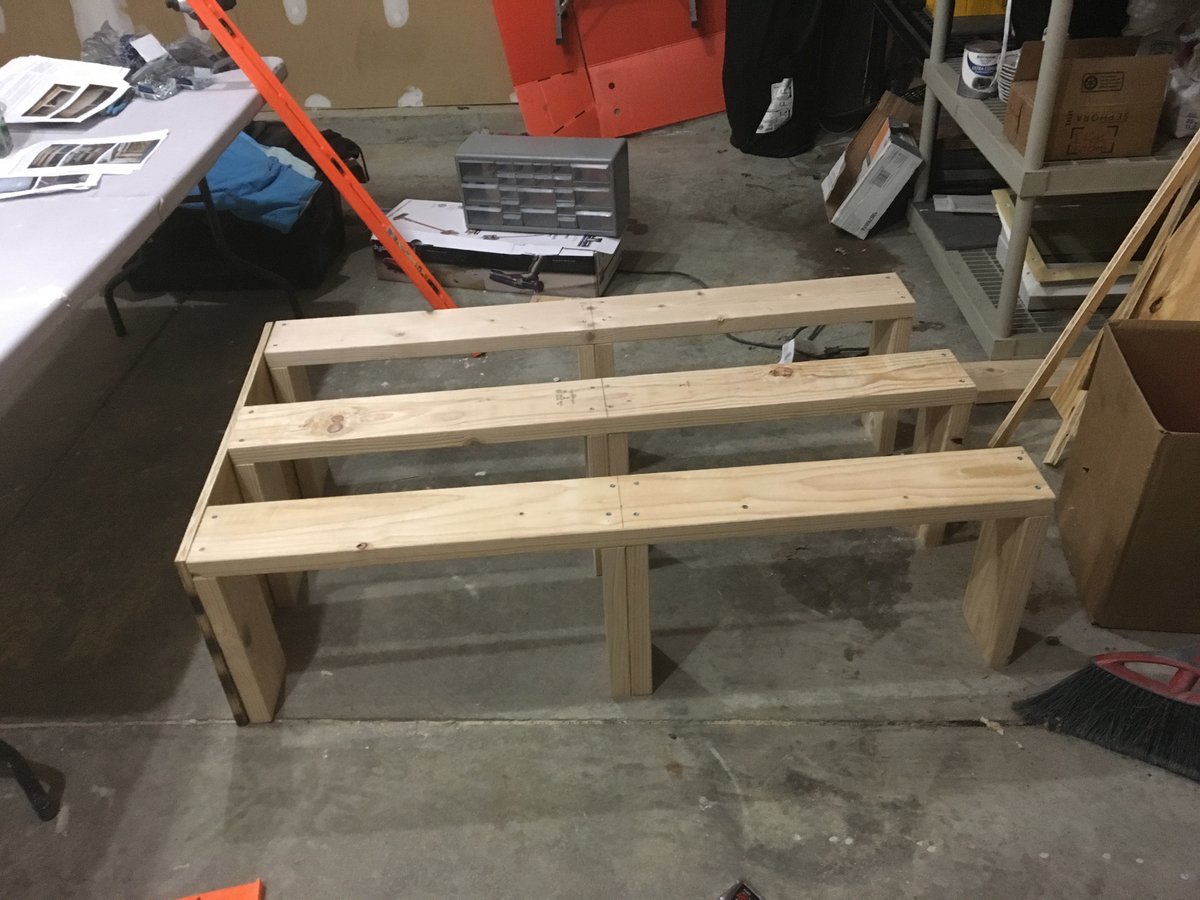
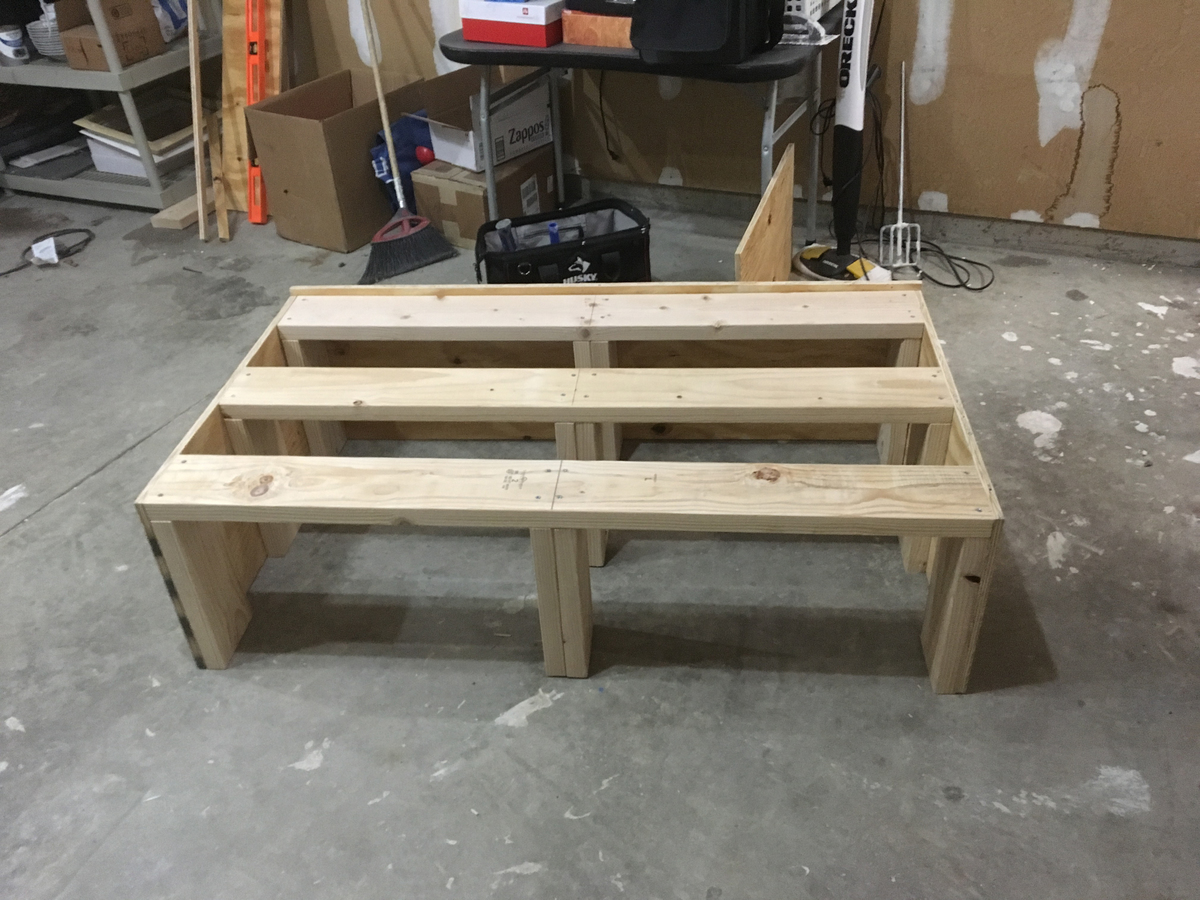
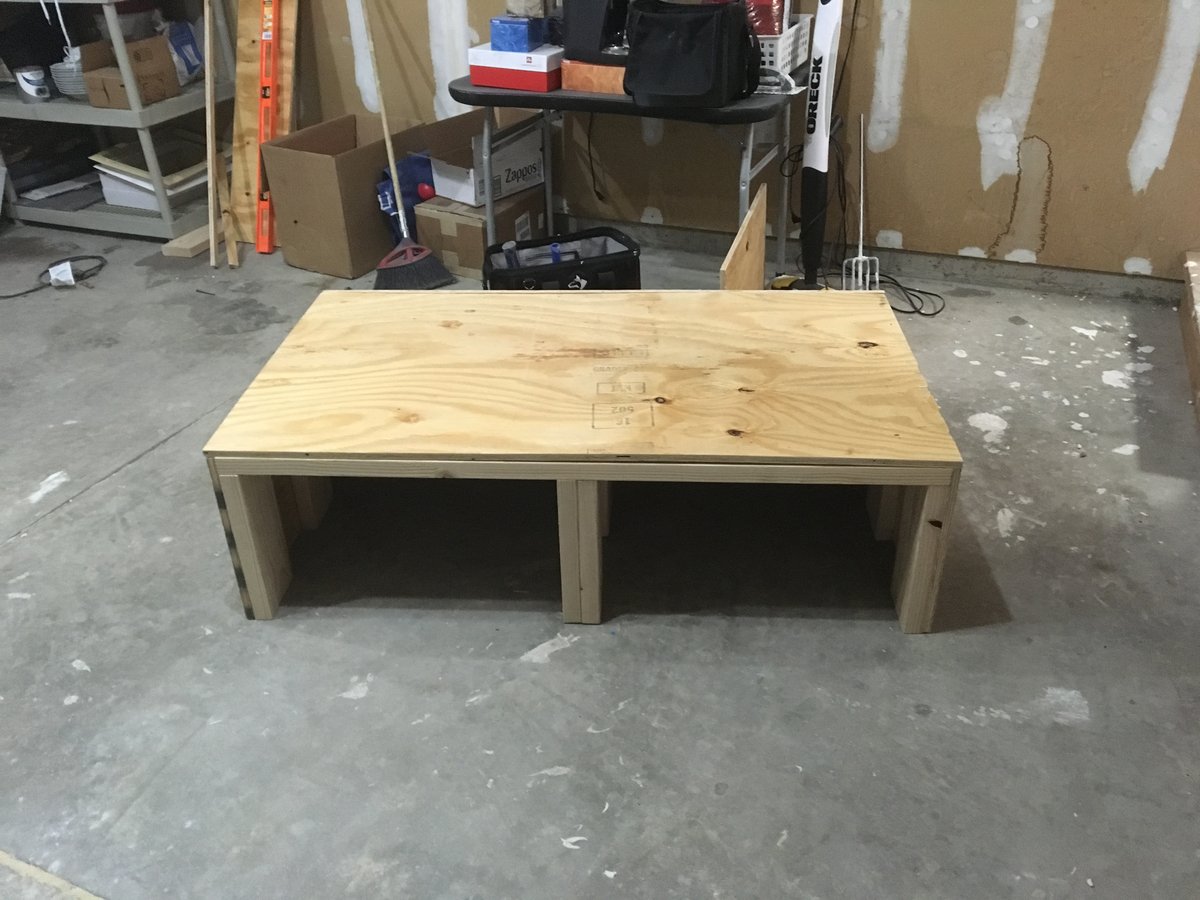
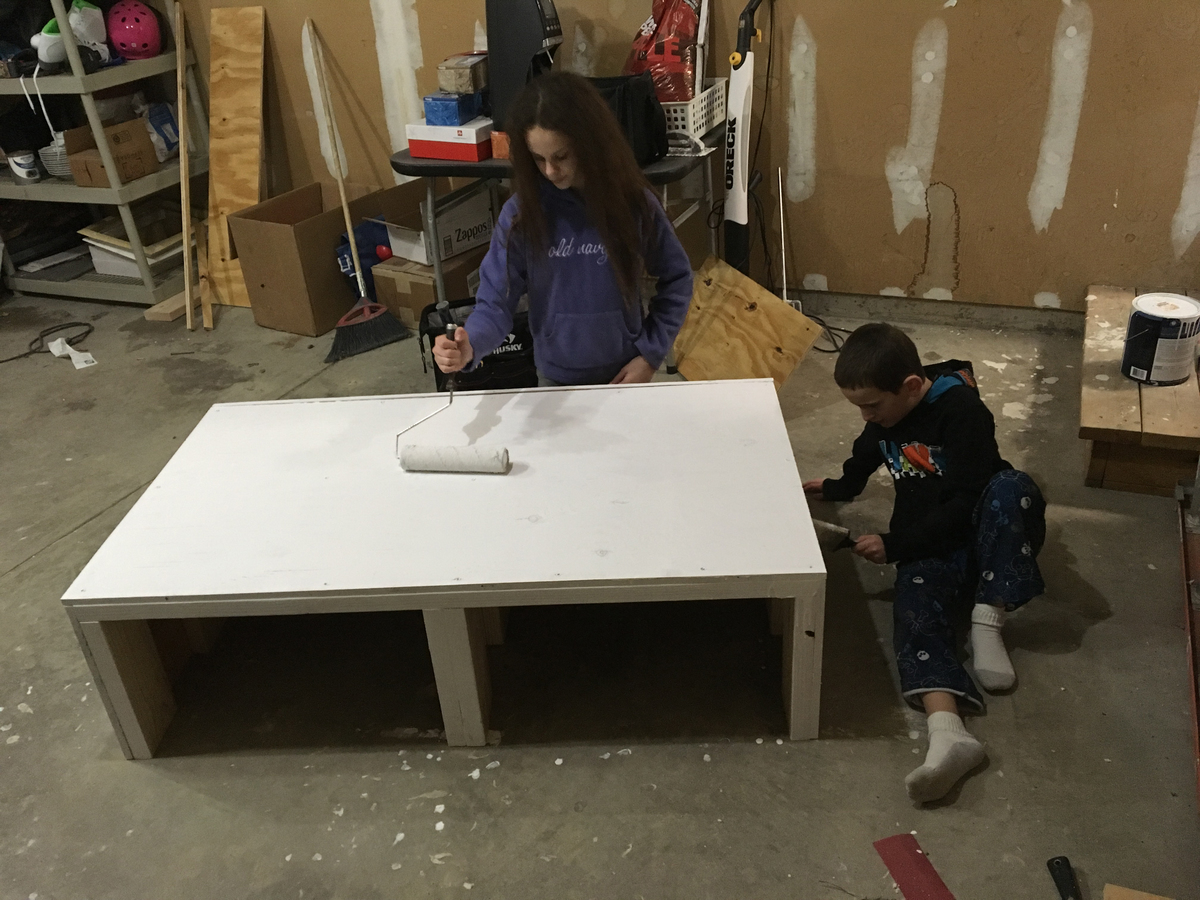
Washer & Dryer Pedestal
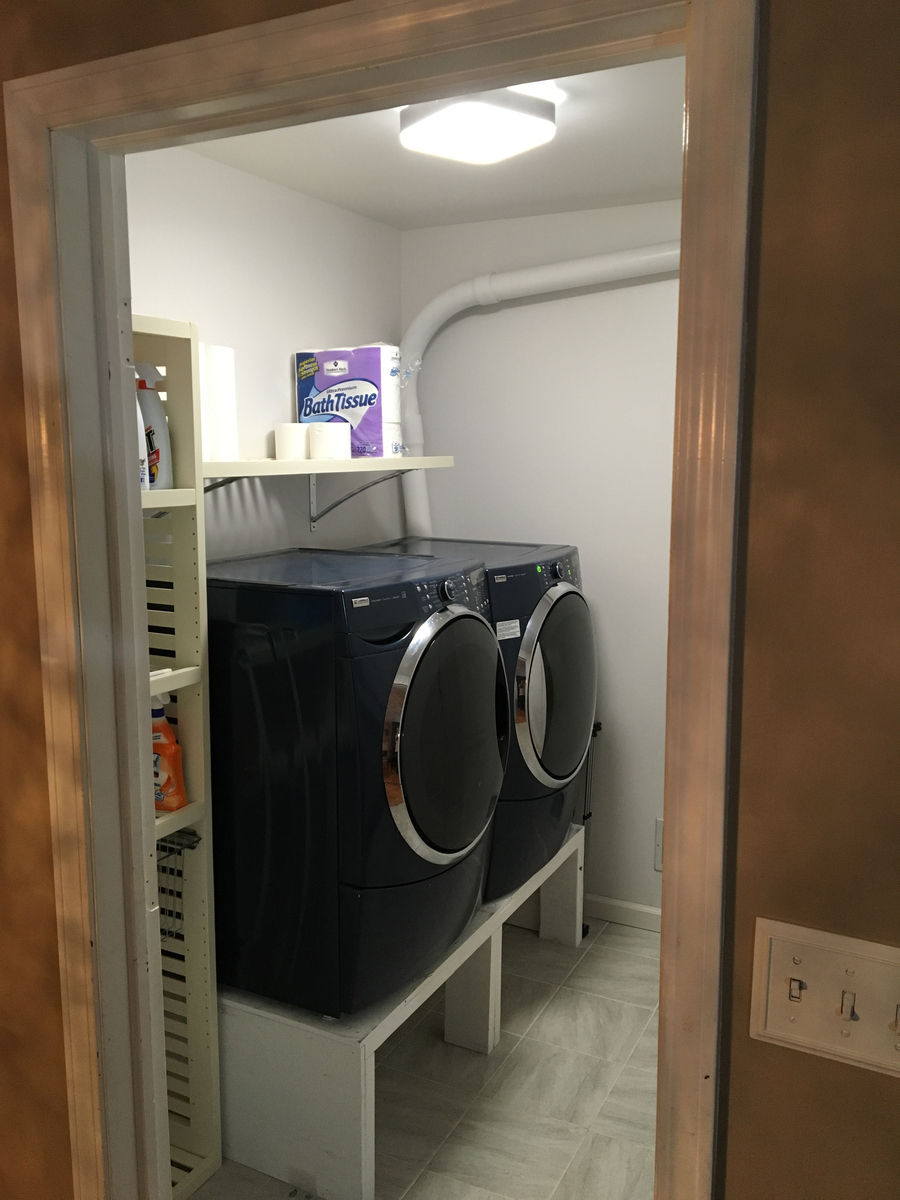
Thank you dmccoy!! Washer & Dryer Pedestal / Platform with Drawer
Followed your plan and these came out sturdy and solid.
I adjusted it to 55 inches to fit my smaller space and decided to not build the drawers.
So simple to put together and saved over $400
Built from Plan(s)
Estimated Cost
About $100
2X6 wood, plywood, screws
I had extra paint in the garage
2X6 wood, plywood, screws
I had extra paint in the garage
Estimated Time Investment
Afternoon Project (3-6 Hours)
Recommended Skill Level
Beginner
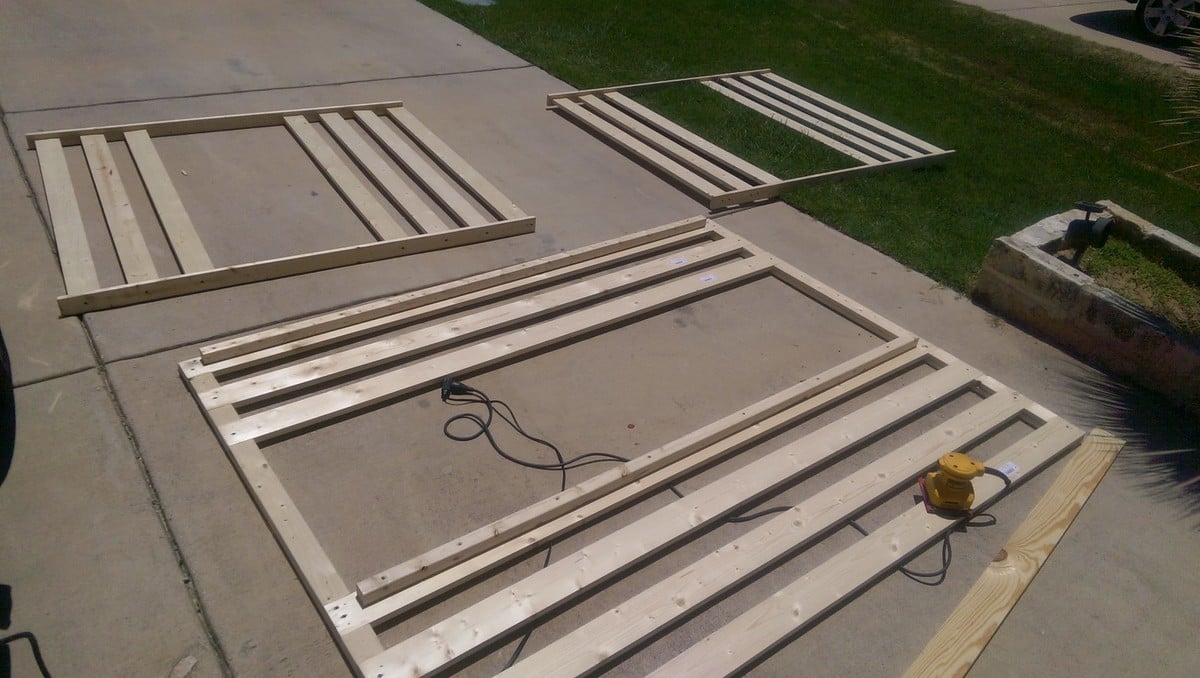
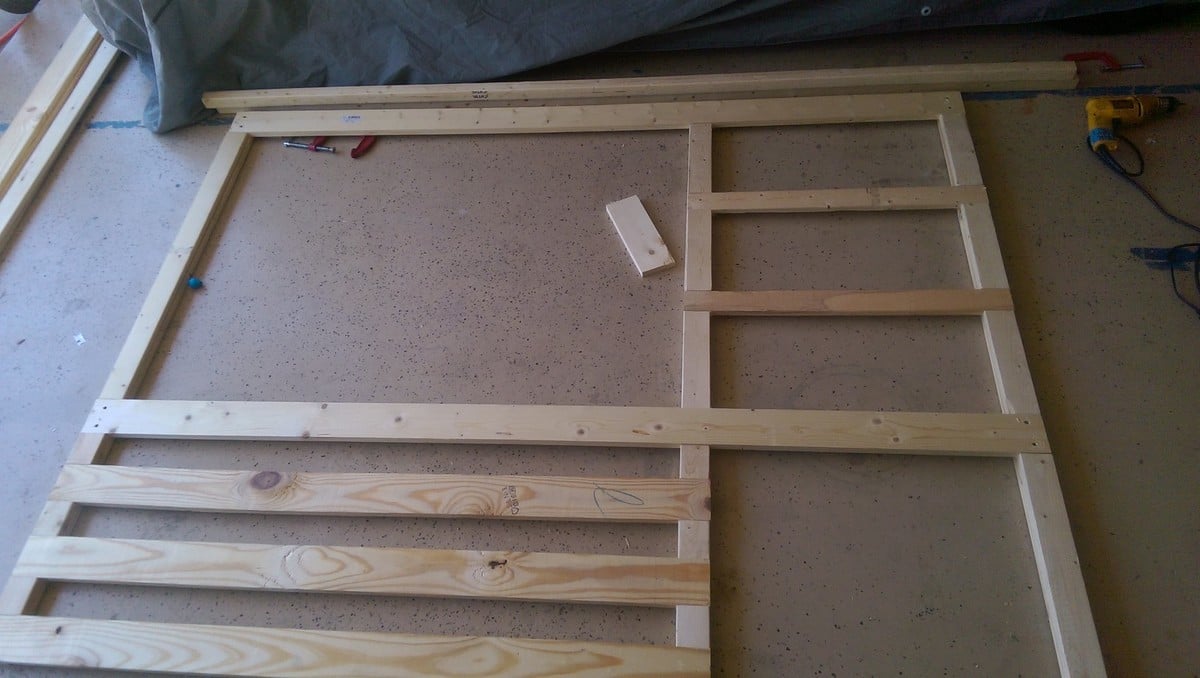
Full over Full Bunk Bed
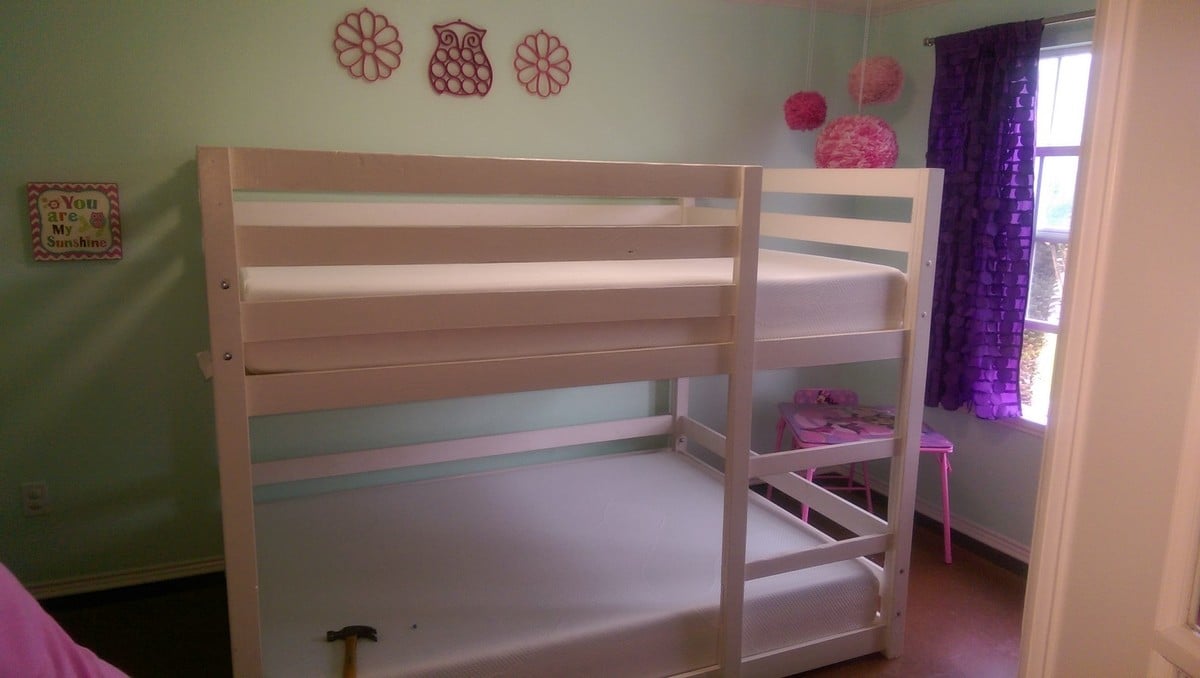
Full over Full bunk beds. Adjusted for Full from a twin measurement. only 1" off floor for more head room.extra rail bar coverage upstairs for my daughter who rolls out of bed regularly.
Built from Plan(s)
Estimated Cost
used common board mix and a few premium cuts. Pine was more costly. @$250
Estimated Time Investment
Weekend Project (10-20 Hours)
Finish Used
White primer/paint
Recommended Skill Level
Beginner
Comments
Wed, 12/30/2020 - 12:15
Dimensions please
Would also love to know dimensions used for the full! Thanks for sharing your amazing talent!
Kitchen Island and Floating Shelves
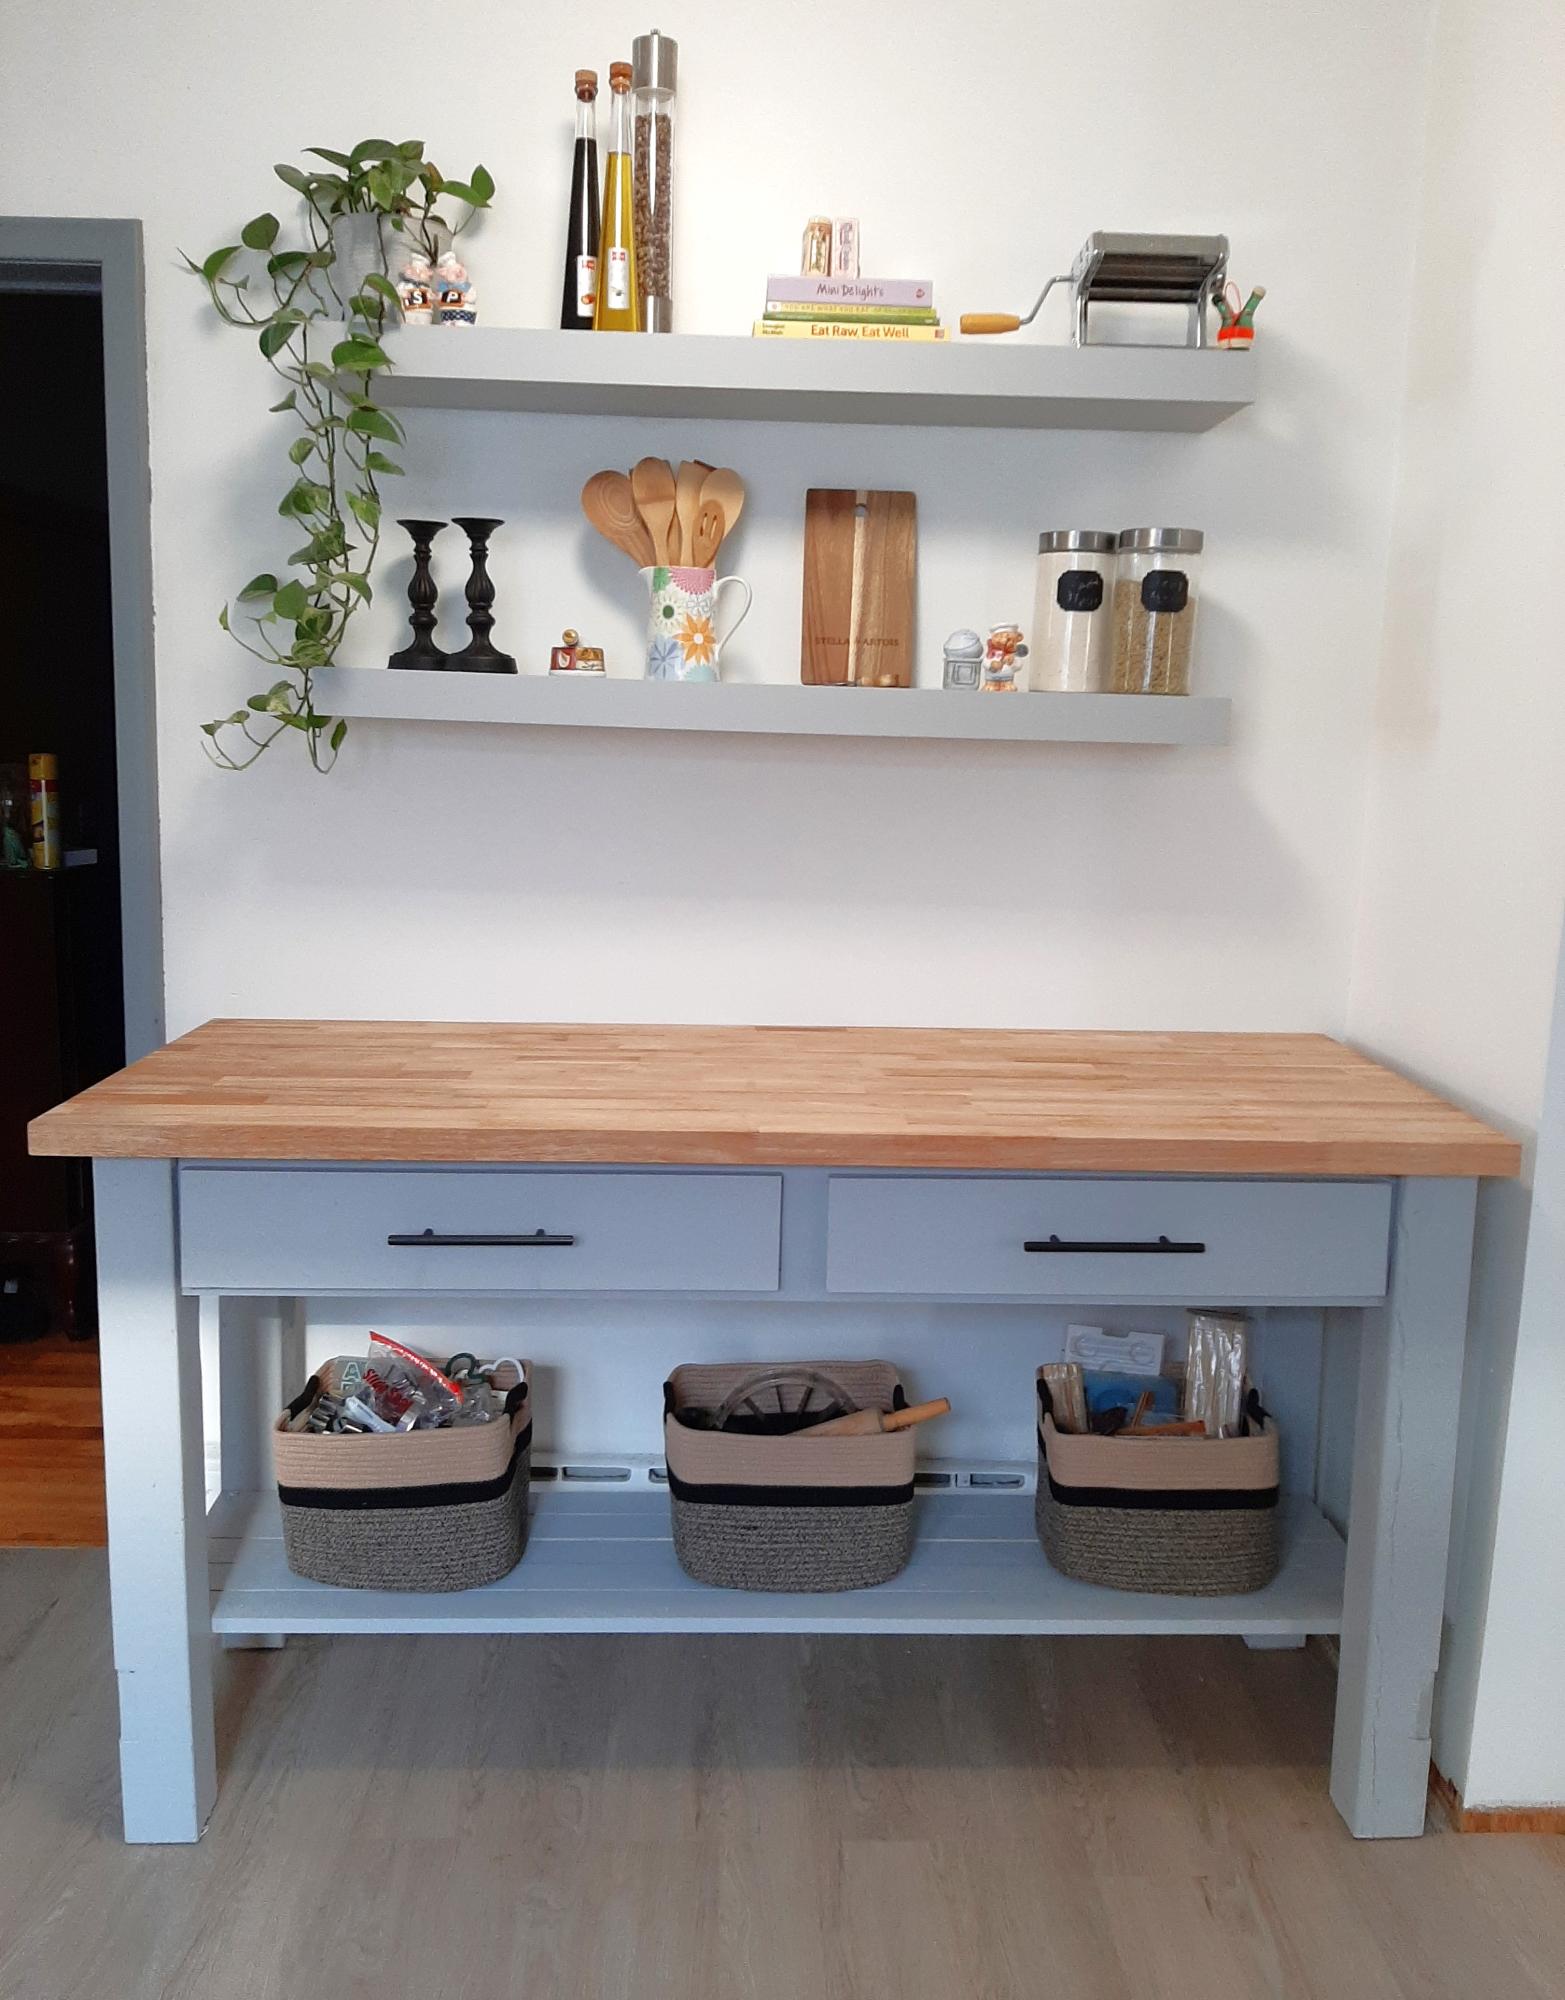
Our very first project. Both Ana White projects. Loving it! Thank you so much for free plans!
Built from Plan(s)
Redwood 2x4 Outdoor Sofa

This is my attempt at the 2x4 outdoor sofa. The entire sofa is made out of 2x4 Redwood, so the cost was a little high at $150 for the wood. I'm still waiting on cushions, but I went overboard and bought them custom made so the total for those came out to $520. Overall, I could have easily bought a complete set online but hey, this is more fun!
My one concern is the back support. I'm thinking of building something angled in, but haven't thought of the best approach yet, that will still look good.
Estimated Cost
$670
Estimated Time Investment
Afternoon Project (3-6 Hours)
Finish Used
Redwood stain
Recommended Skill Level
Beginner
Great weekend project...the "love swing"

A great weekend project...the "love swing"! I used the plan from Ana for the swing seat and added two arm rests from left over 1x6, rounded them off and sanded.
I cobbled together an A-frame to hang everything, made from five 8 foot 4x4s and two 8 foot 2x6s laminated together for the stretcher. Assembled with 1/2" galvanized carriage bolts and hung with 1/4" chain.
Definitely going to want a good miter saw for the A-Frame angles (the top ones are a bit tricky to get everything lined up)
Love it! Thanks for another great plan Ana..and of course..Shanty2Chic!


Built from Plan(s)
Estimated Cost
$200 ish..including the A-Frame... the hardware and chain can be pricey!
Estimated Time Investment
Day Project (6-9 Hours)
Finish Used
Behr exterior weatherproofing stain - Chocolate.
Just 2 thin coats, dries fast...second coat can be applied later the same day.
Just 2 thin coats, dries fast...second coat can be applied later the same day.
Recommended Skill Level
Beginner
Comments

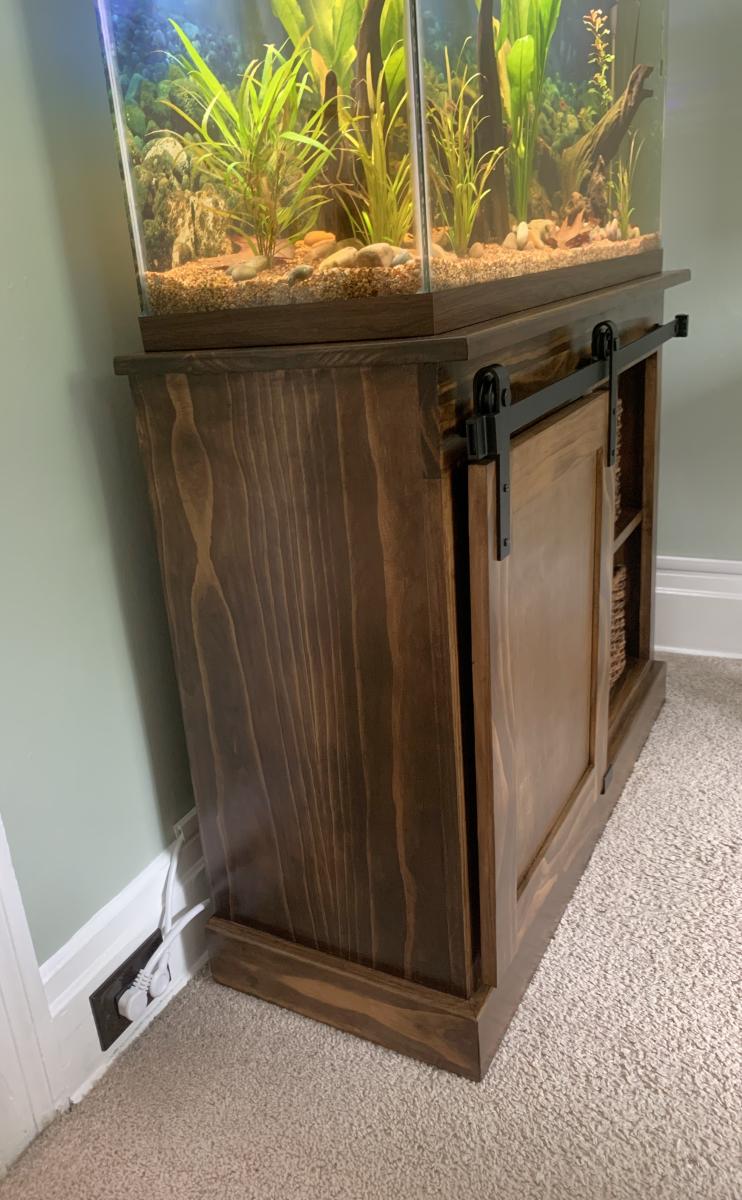
Custom Fish Tank Console
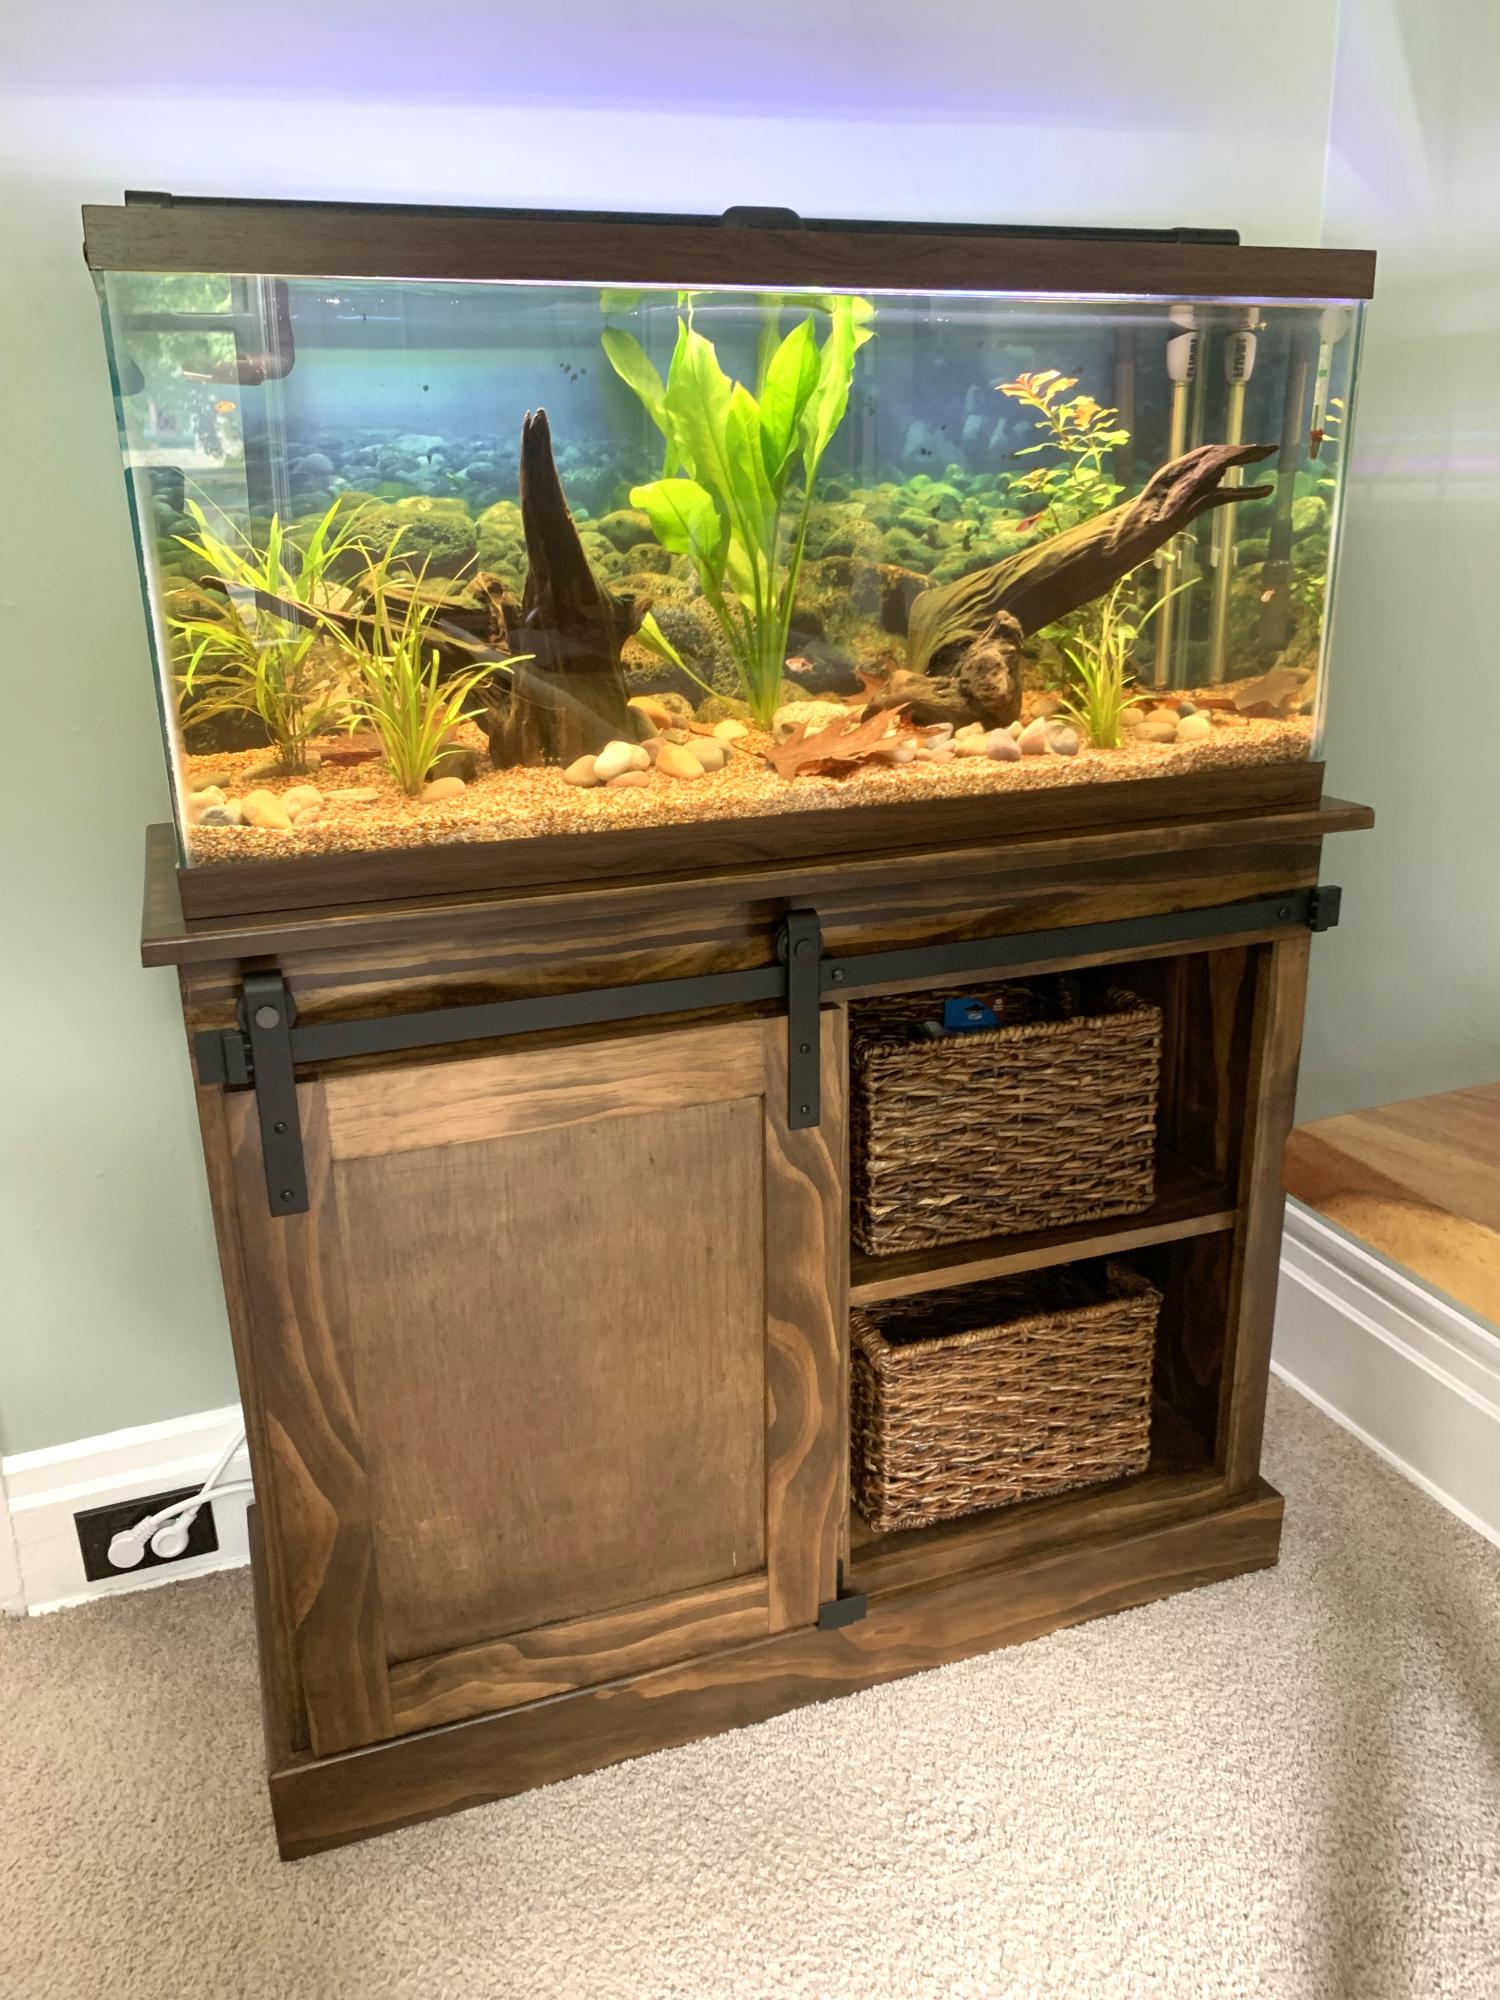
I wanted to make an aquarium stand and really liked Ana’s barn door cabinet (intended to house a mini-fridge and microwave). I adjusted the dimensions to match my needs, added matching baskets on the right to hold aquarium supplies, and most importantly, use the barn door on the left side to hide my canister filter, etc.
Jeremy
Built from Plan(s)
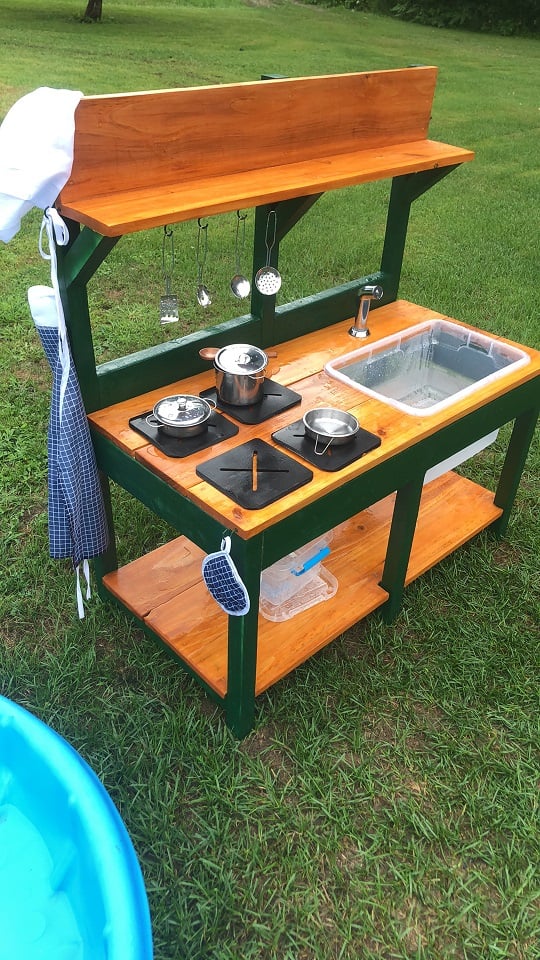
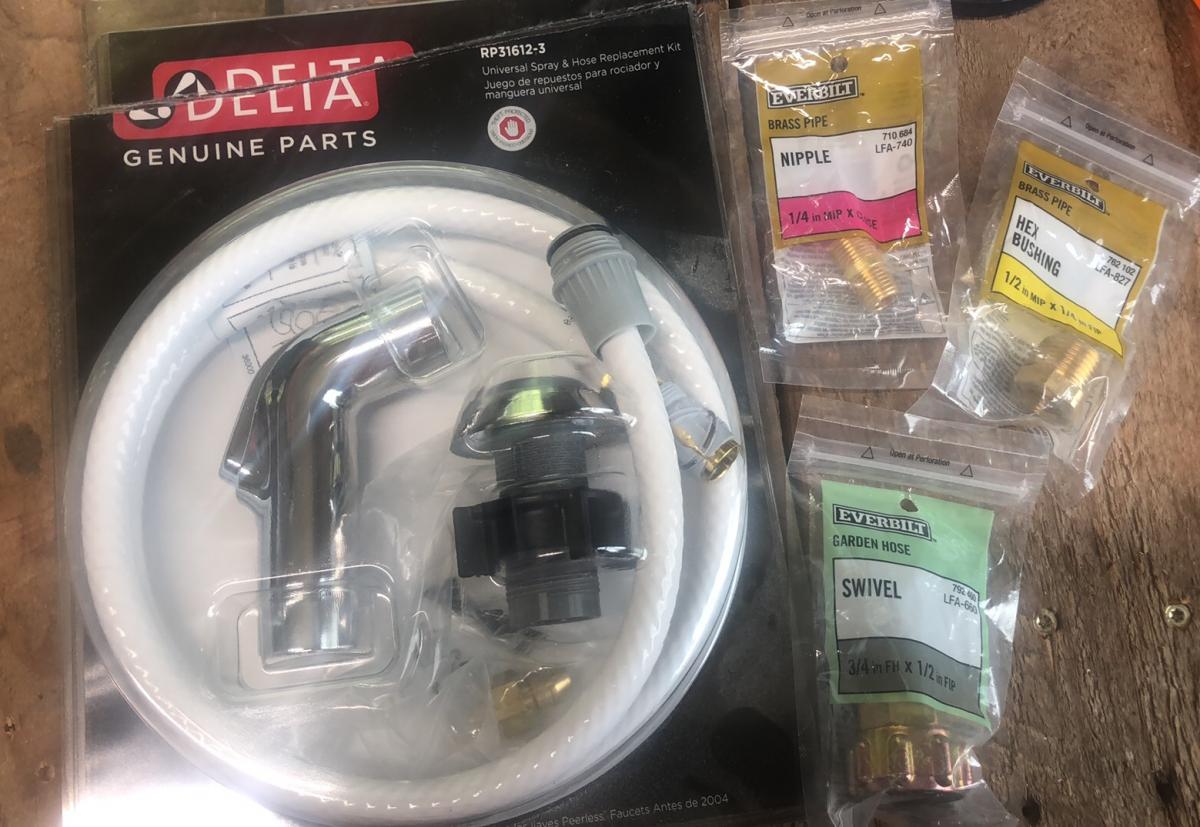
Mud Kitchen
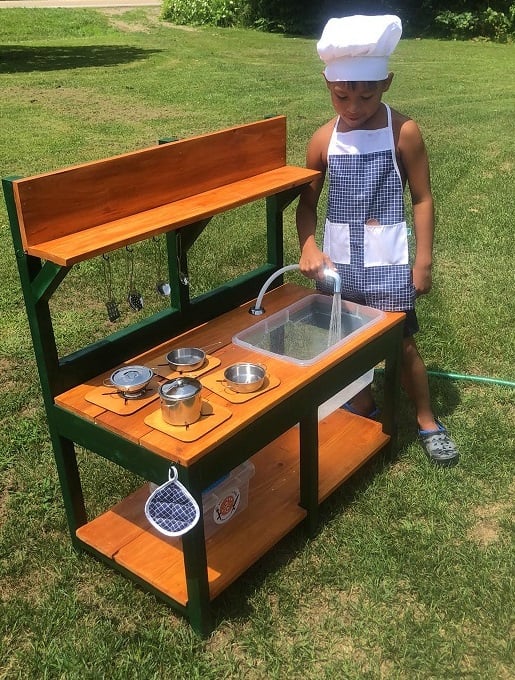
This was my first build, like ever. I am very proud! Props given to my hubby who is a carpenter by trade. I went back and forth on stains and paint colors at home depot. He didn't rush me and was awesome the entire time! He actually picked up the supplies, and is now a fan of the self tap screws! He thought he knew where everything in home depot was, but he had to ask to find those LOL. He wanted to use his new nail gun, but I wanted to follow the plans. The plans are awesome! We decided not to add an oven door just yet. Likely will soon. (Avoiding pinched fingers for now) I also have the knobs for the front, but it was hot and since I had only just stained them, they needed time to dry and second coat yet. (I kind of forgot about them once I finished them with my new dremel) We purchased the hose kit from the kitchen section at home depot. It came with everything, I searched market place and even posted asking if anyone had a used one for sale. No luck. This was $20 and came with everything, the guys at home depot showed me what adapters to get to ensure that it would hook up to our garden hose, and we grabbed those too and they worked perfectly! I messed up cutting one of the angles for the shelf the wrong way, but there was enough scraps for my husband to help me fix it. It was a fun build, and so rewarding to see our kids playing with it! I used my dremel 4300 and it wasn't powerful enough for the thicker wood, so my stove tops are thinner, but he actually enjoys setting them up and spraying them off the table with his hose! I painted the brass hooks green when we were painting the kitchen so they would match. The pots and pans came with the little tote and the apron chef hat and pot holder. It was a perfect finishing touch. *Edit to add photos kitchen hose kit from home depot, reading comments, others had a hard time finding adapters. I suggest taking what you have with you to home depot so they can show you what adapters you need. We needed three because we have a quick attachment on the end of our garden hose, (for our sprayer) now little mans mud kitchen can be connected and disconnected easily!

Built from Plan(s)
Estimated Cost
$75
Estimated Time Investment
Weekend Project (10-20 Hours)
Finish Used
Rust-Oleum Ultra Cover 2X Enamel Spray Paint and Behr Semi-Transparent Waterproofing Exterior Wood Stain and Sealer
Recommended Skill Level
Starter Project
Picnic Table for 2!
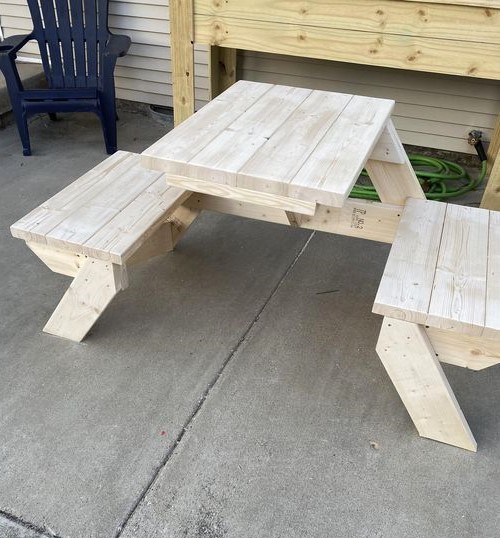
This was a fun build thanks AW - Scott Roy on Facebook
Built from Plan(s)
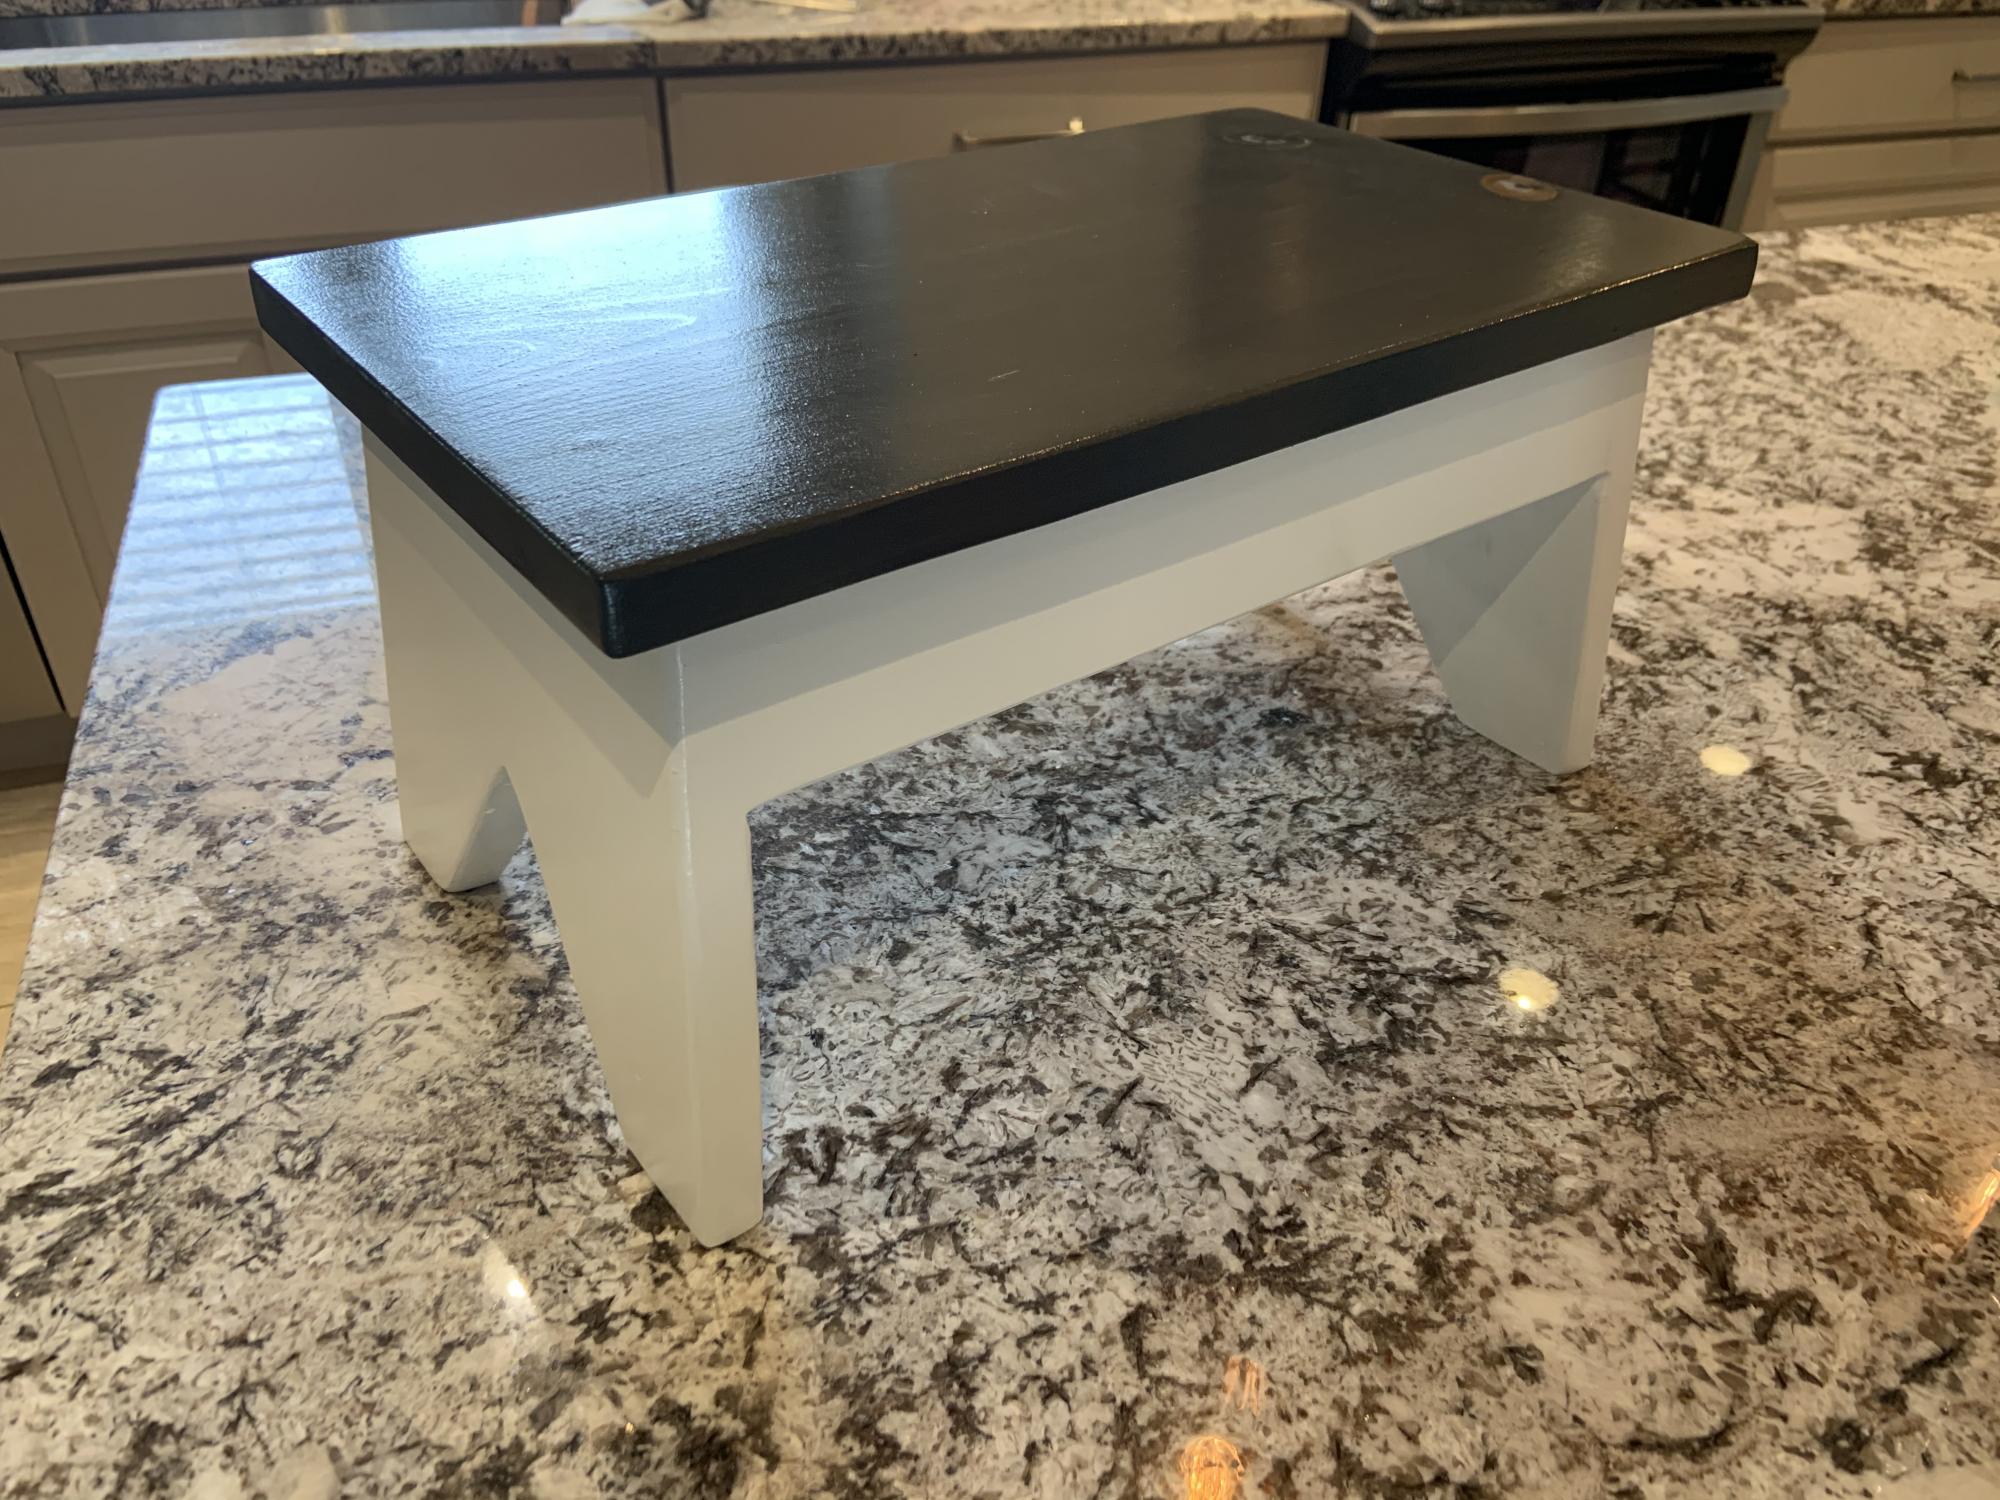
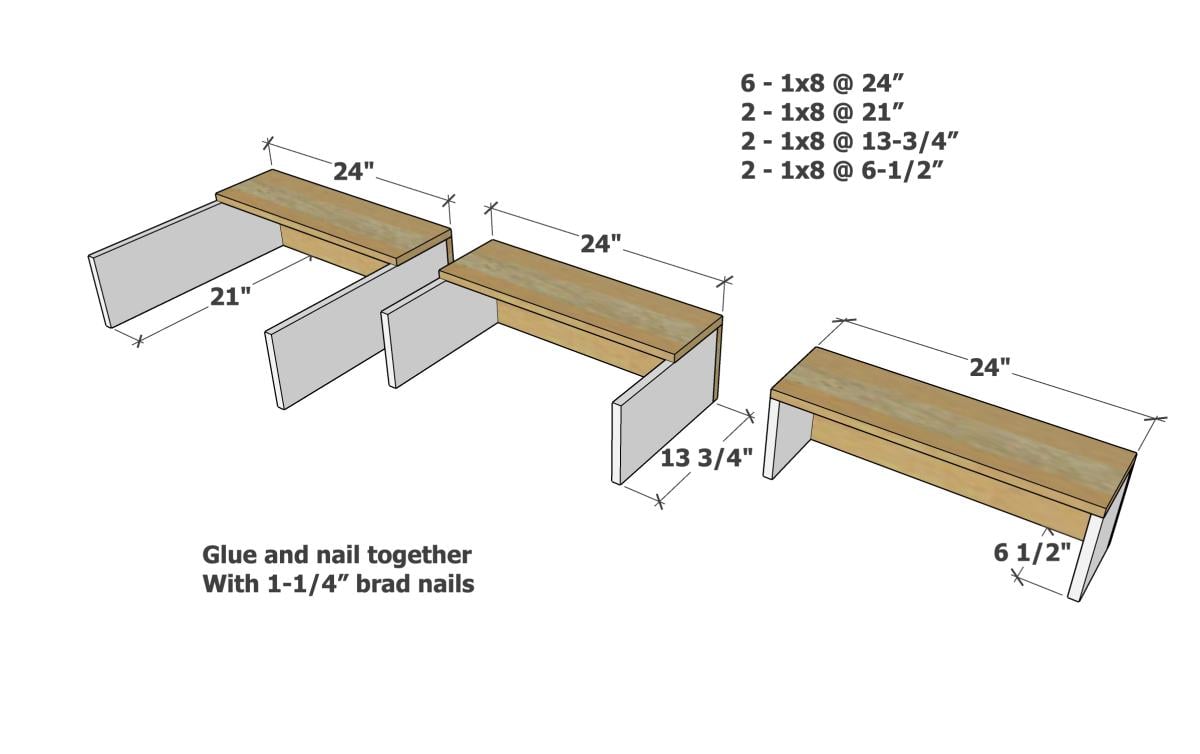
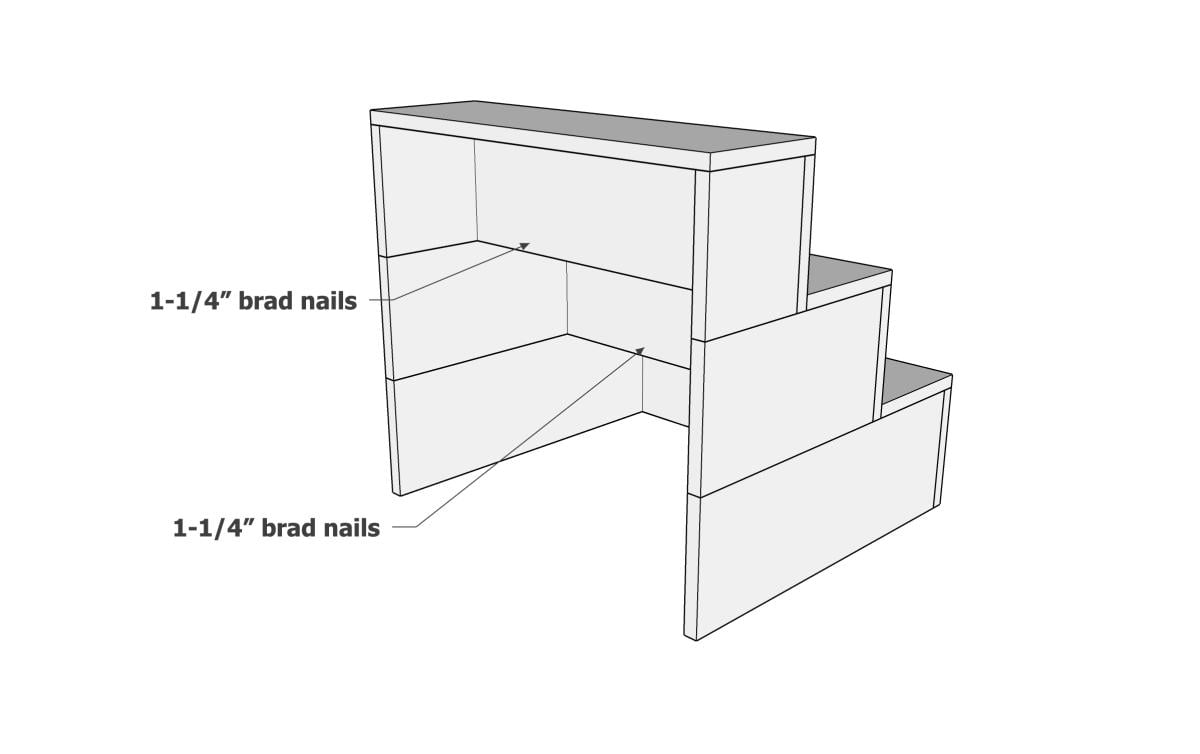
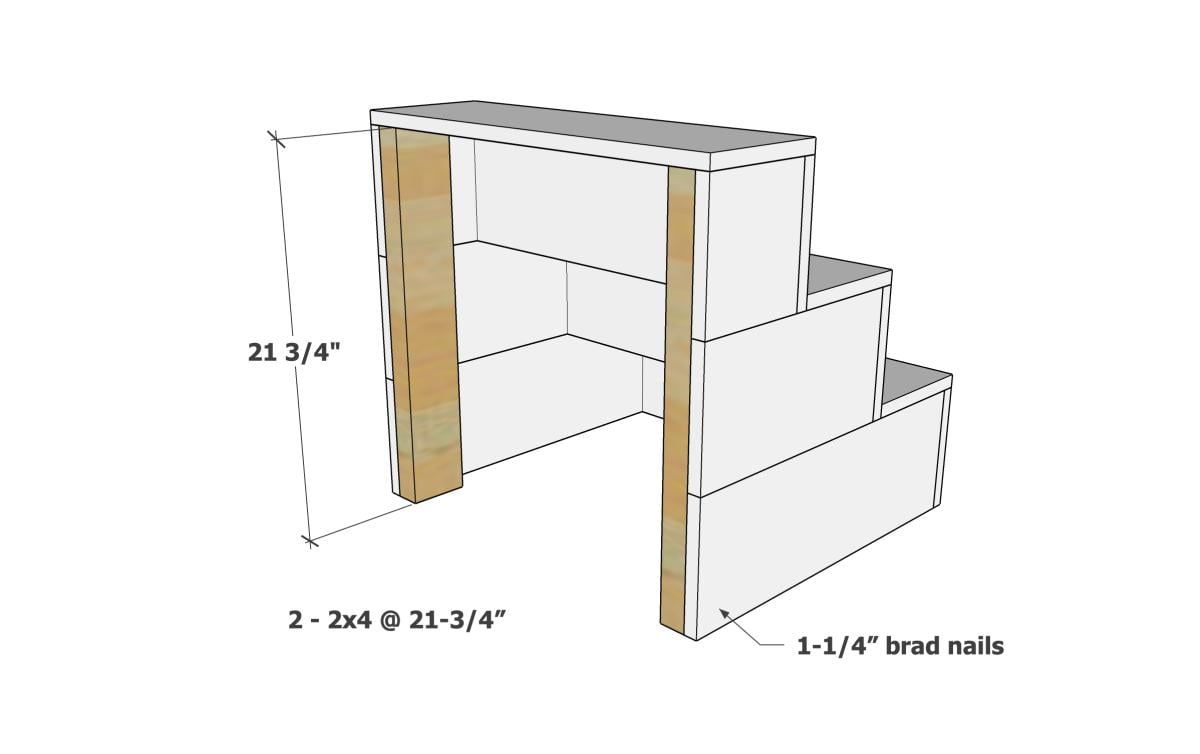
Pet Stairs
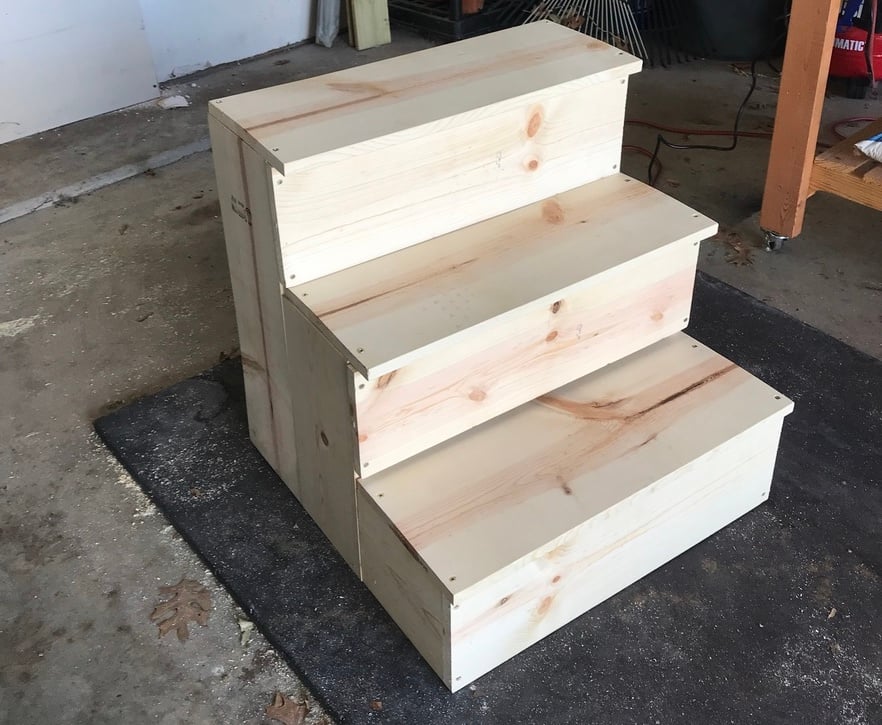
I needed sturdy stairs for my 2 60lb dogs. My bed is 33 inches from floor to top of mattress. So, this is my very first project completed by myself! Custom size pet stairs 24inx24inx24
Estimated Cost
$40-50
Estimated Time Investment
Afternoon Project (3-6 Hours)
Finish Used
Minwax polyshades Espresso gloss (3 coats)
Recommended Skill Level
Starter Project
Comments
My $30 Closet Makeover!
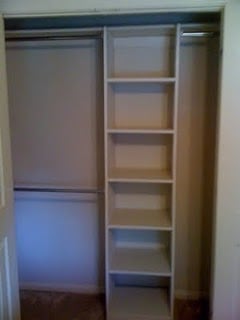
This project is closest to the Simple Closet Organizer, but I wanted to be able to re-use the existing components of the closet. The only purchased materials were one sheet of cabinet grade plywood and dowel rod holders (since I already had paint and screws).
Estimated Cost
$30
Estimated Time Investment
Afternoon Project (3-6 Hours)
Finish Used
sand, prime, sand, paint
Recommended Skill Level
Beginner
Comments

Tue, 07/12/2011 - 09:06
This is on my very soon to do
This is on my very soon to do list. I actually drew up a sketch yesterday of my plan and the husband seems ready to start! Thanks for sharing yours!.
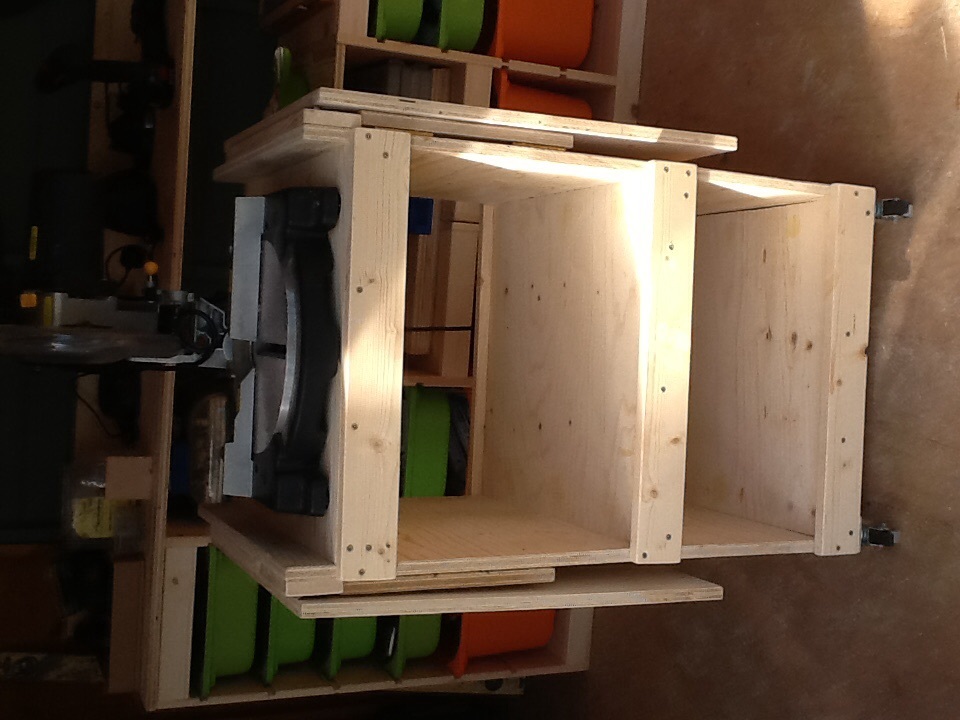
My first project - metric mitre saw stand
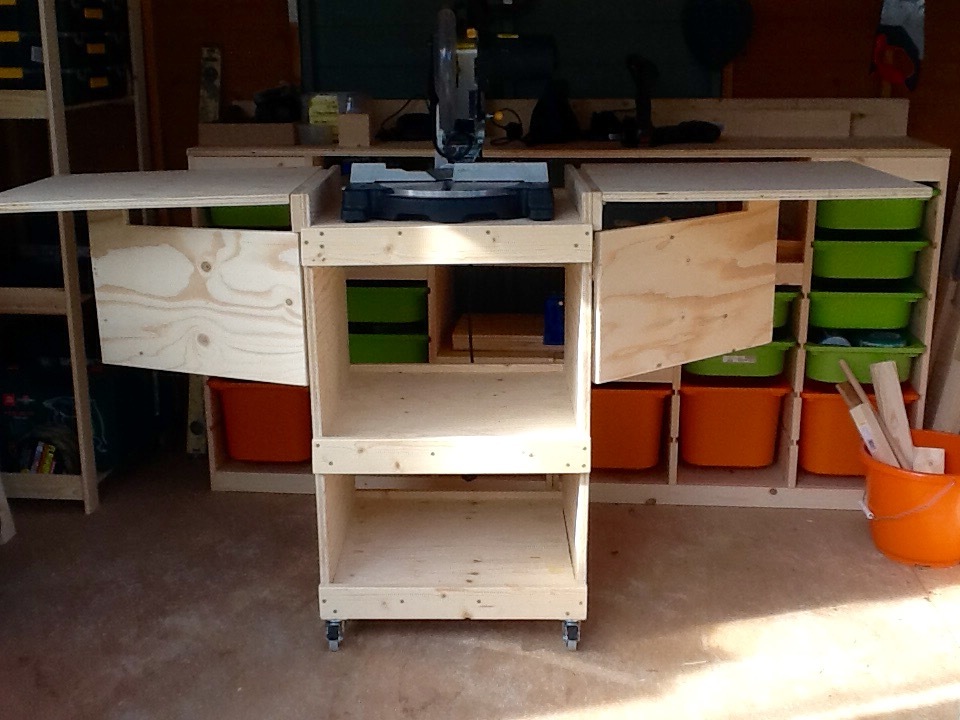
Adaptation to fit my little mitre saw, small workshop and the metric timber available in B&Q. My first build, this should let me build more while staying comfortable and safe. I'm ridiculously pleased with myself!
It took longer to build than expected because my little boy thinks naps are for wimps.
In case anyone in the UK wants to build similar, here's my adapted sizes.
18mm plywood cutting list:
2 85cm x 50cm (sides)
3 50cm x 50cm (shelves)
2 50cm x 60cm (leaves)
2 45cm x 30cm (leaf supports - replaced fancy brackets that were too expensive over here)
Timber cuts:
6 34mm x 34mm @ 50cm (cleats)
6 18mm x 70mm @ 52cm (supports)
2 18mm x 70mm @ 42cm (spacers)
Built from Plan(s)
Estimated Cost
£40
Estimated Time Investment
Day Project (6-9 Hours)
Finish Used
Help me use my mitre saw safely and comfortably.
Recommended Skill Level
Beginner
