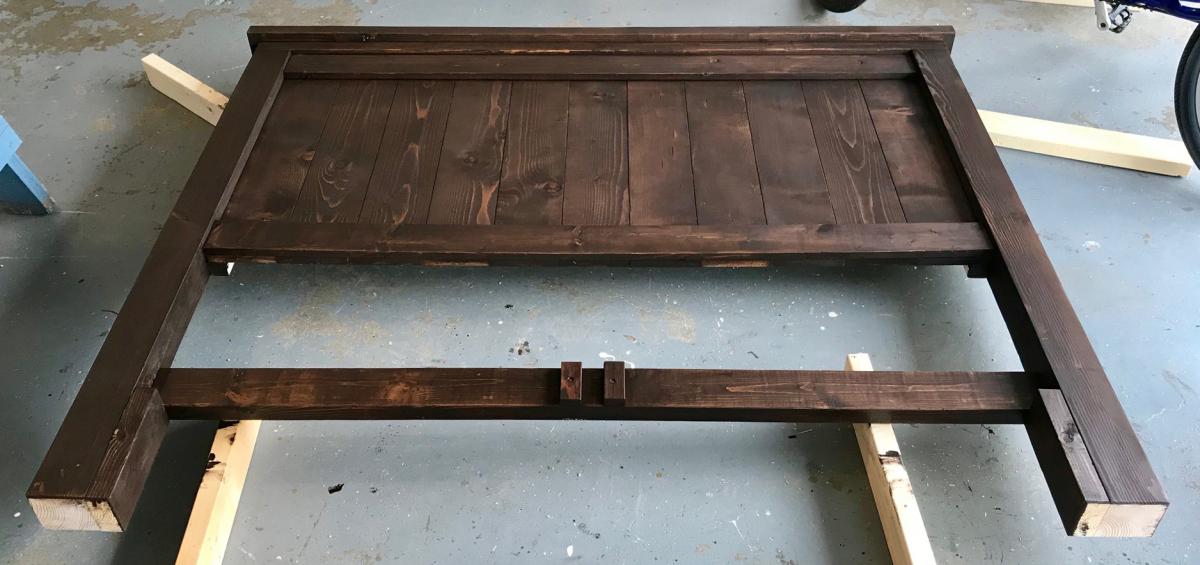
Classic Farmhouse Bed - by Leslie
Beautiful bed build. shared by Leslie.
Built from Plan(s)
Beautiful bed build. shared by Leslie.

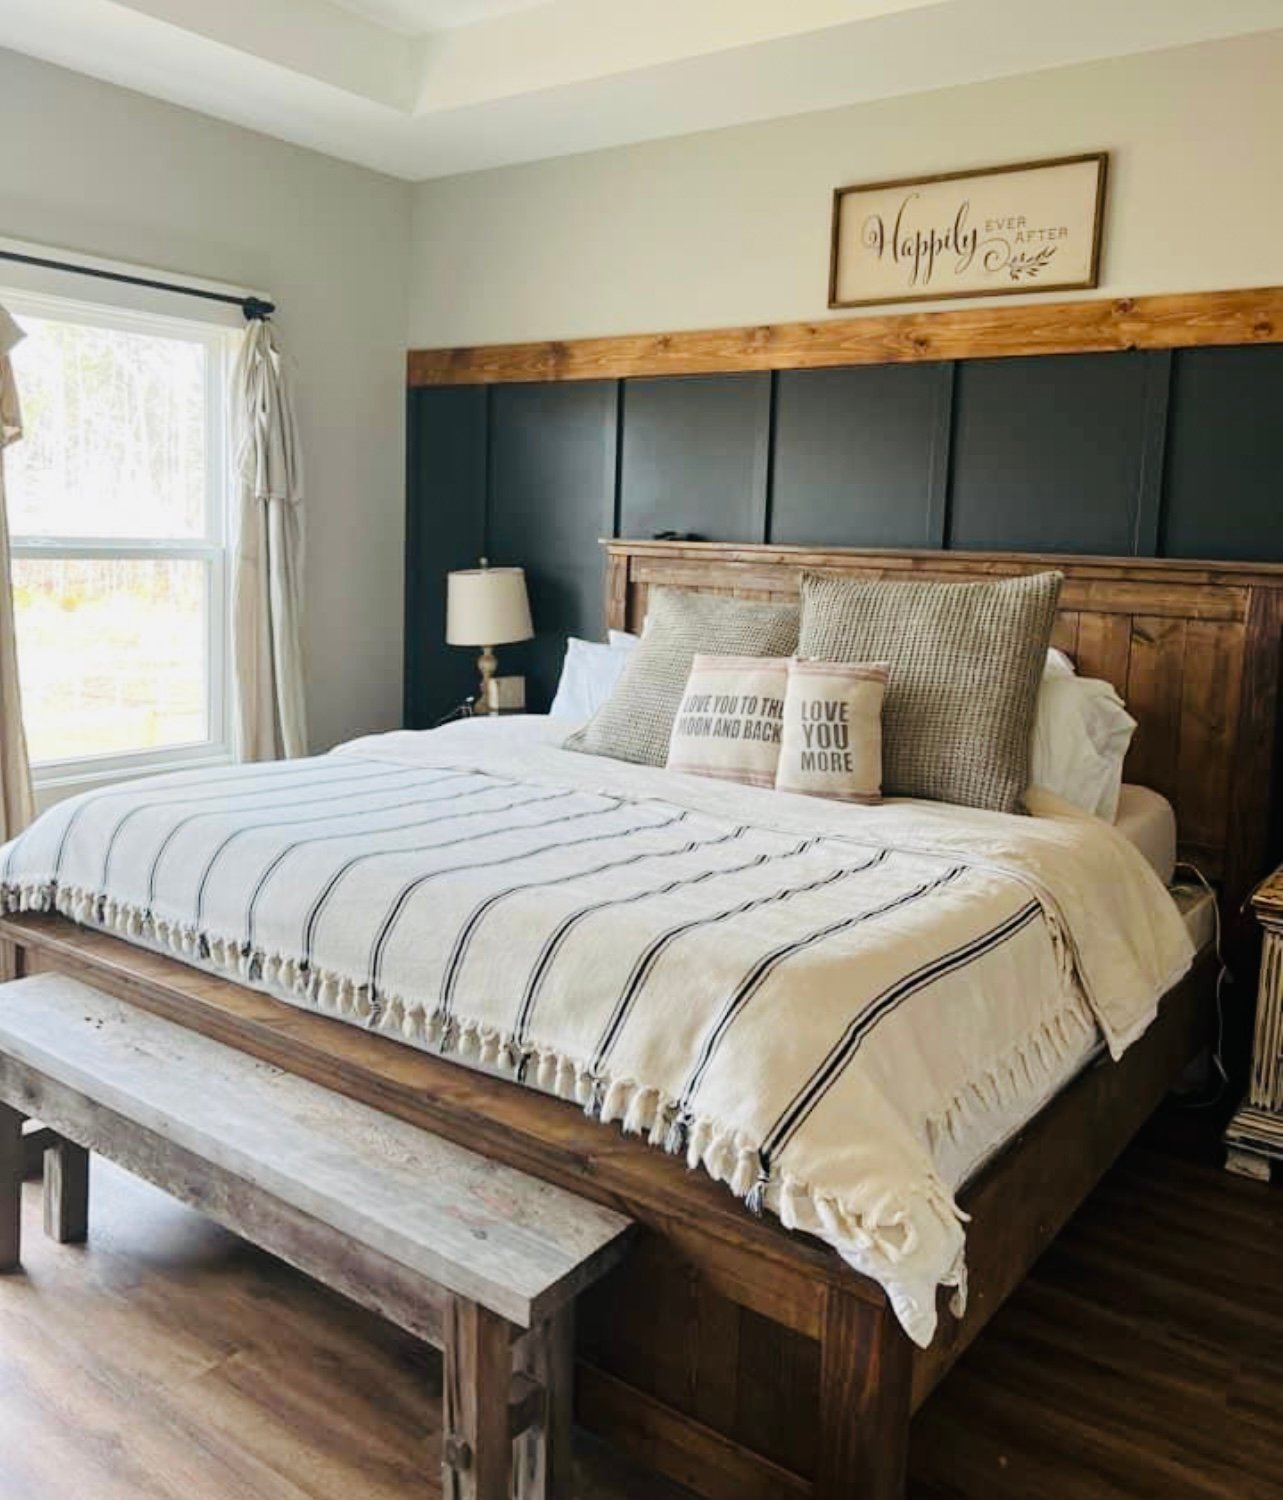
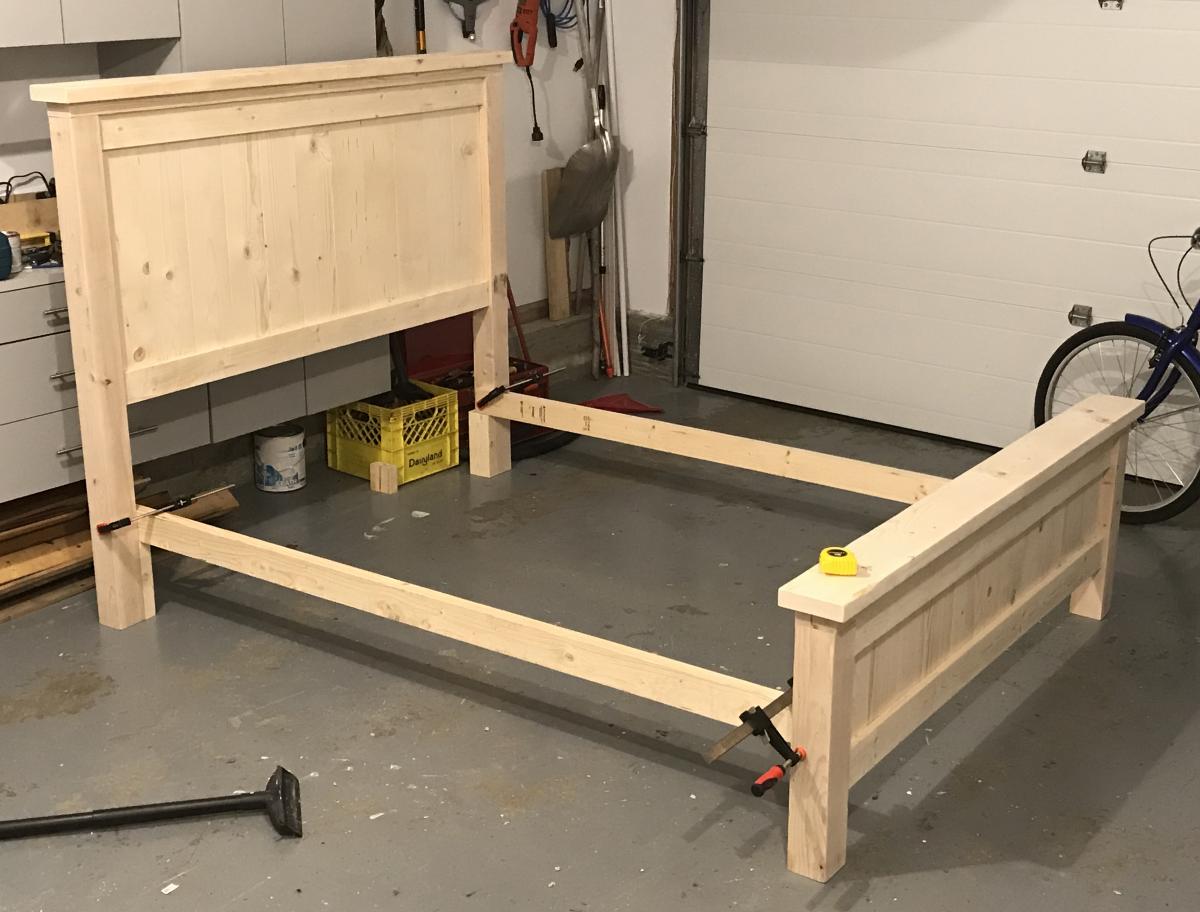
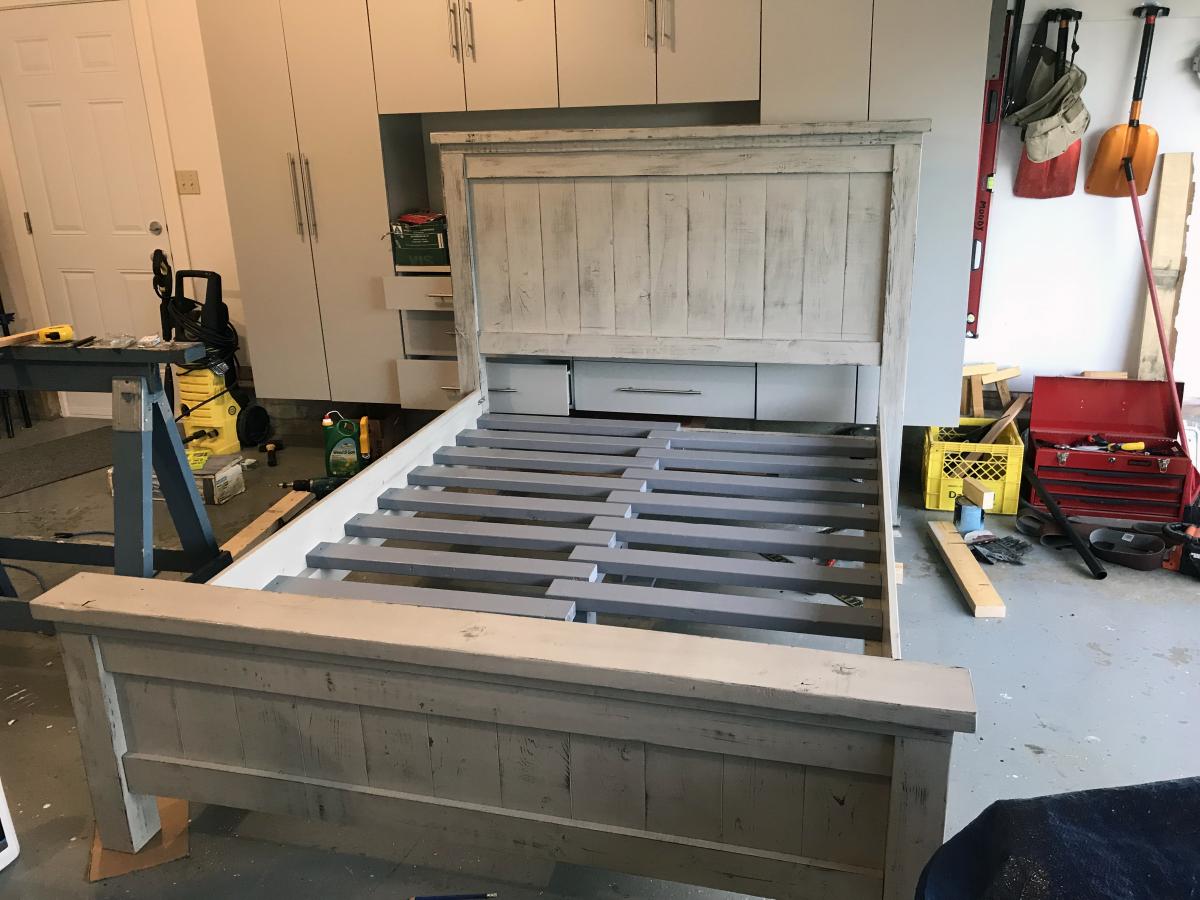
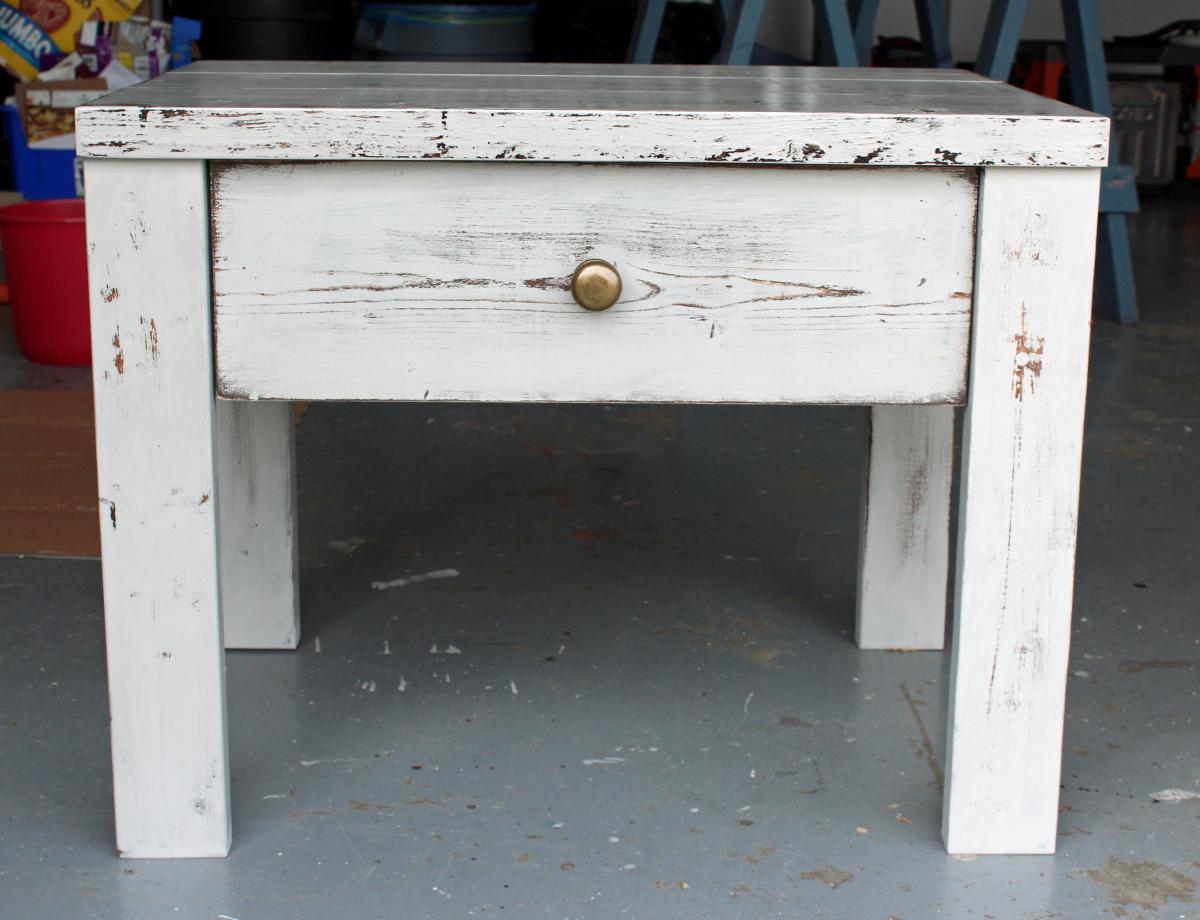
A friend of mine wanted a new queen bed in a rustic, weather grey look. I have built many projects from Ana's site and decided on the Farmhouse Bed. The plans were perfect and building the bed didn't take me long. The time consuming part was the finish. I really wanted an old, weather wood look so the entire bed and night tables were first stained with a dark Kona stain. Once this dried I applied two coats of a watered down (50:50) light grey paint. The thinner paint made it easier to sand. Once this was completely dry I used a medium grit sanding sponge and selectively sanded everything. This took a while. Once complete I carefully cleaned all pieces and then applied three coat of semi-gloss varathane. The bed is incredibly solid with the 2 x 4 slats and will last a few generations. As always great plans from Ana.

I made this coop twice as wide like Ana suggested since I have 4 chickens and wanted to make sure there was some extra wiggle room in case “chicken math” got the best of us. I made a nesting box to mount on the outside. I also used plywood for the sides like Ana did in the video. I installed a Run Chicken automatic door that opens at sunrise and closes at sunset. I added some hasps and clasps to make sure all my doors would close tightly. I put hardware cloth across the top before installing the roof panels. I stapled and buried hardware cloth around the perimeter for predator protection. I also spray painted the hardware cloth flat black so that it would be easier for us to see inside the coop. I stained the rest of the wood with Varathane Semi-Transparent stain, color “Carbon Gray.” I also added some roosts and cedar shingle siding for some extra protection during our New England winters at to match our house. Working 2-4 hours a day, off and on, with a bum shoulder and weak hands, this took me about a week! Thanks for the great plan, Ana!


This is the first thing I've ever built and with a few minor imperfections, it turned out great. I wanted a rolling table for my laptop, but needed a larger one than the plan for my big laptop and to use a mouse. My table is about 26" x 18". Since I don't have the proper saw, I bought a sheet of MDF at Home Depot and had them do the cutting for me and it cost abut $35 bucks total. Casters were about $8 & paint was $11. I decided to do mine with the shelves so I'd have storage for laptop peripherals like usbs, external hard drive, and cords. I was really scared to get started screwing stuff in, but once I did it was pretty easy. I did slightly crack the wood on my first screw and read up about it and figured out I screwed too close to the edge. It only took a couple hours to put together, the painting was the long part.
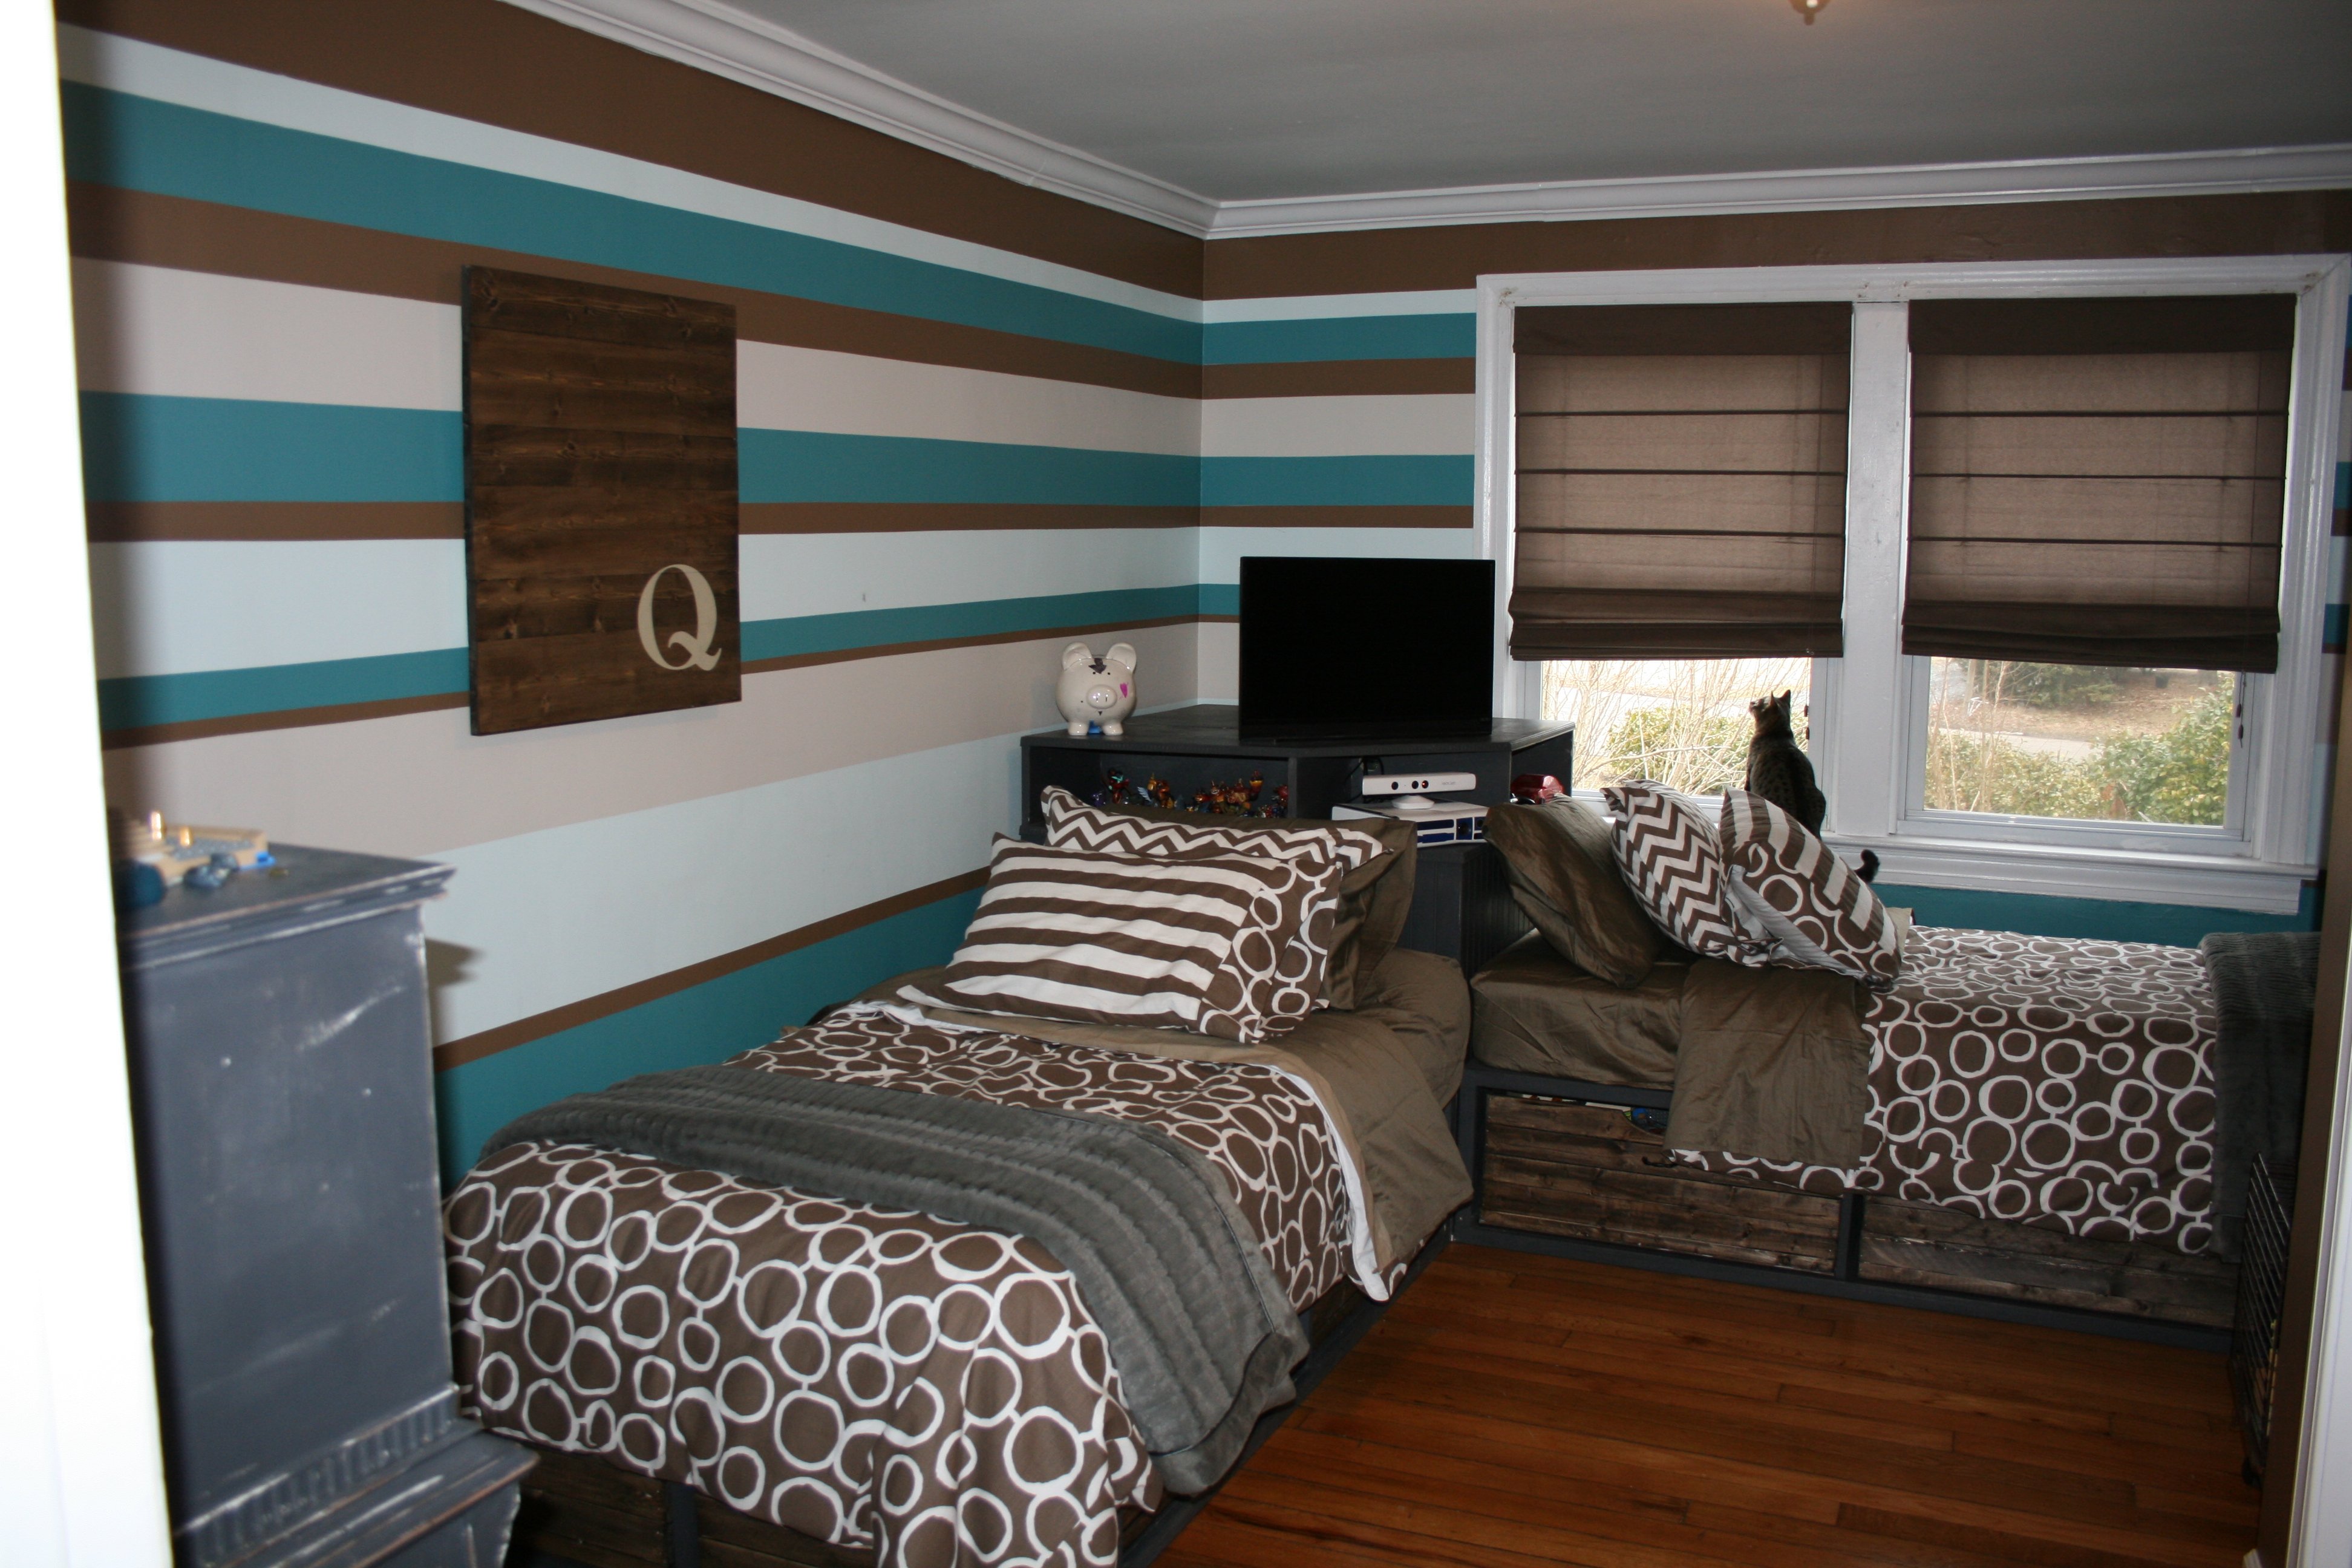
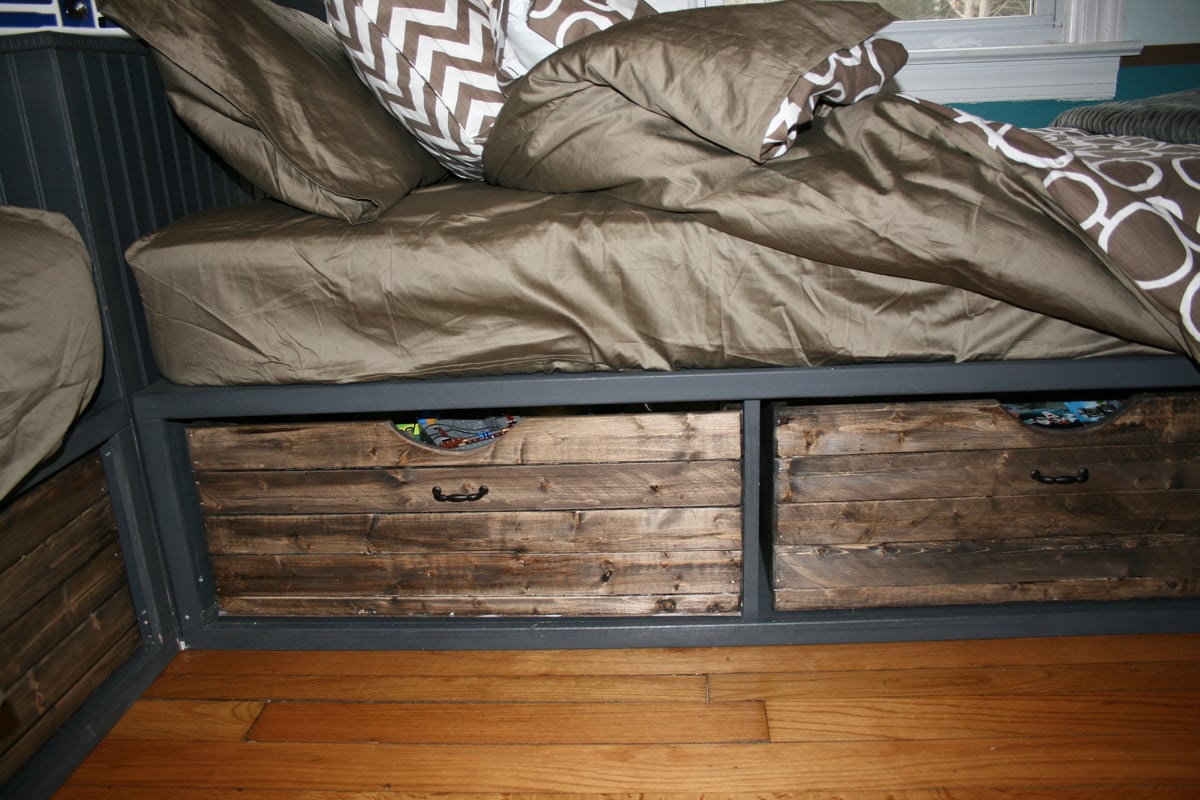
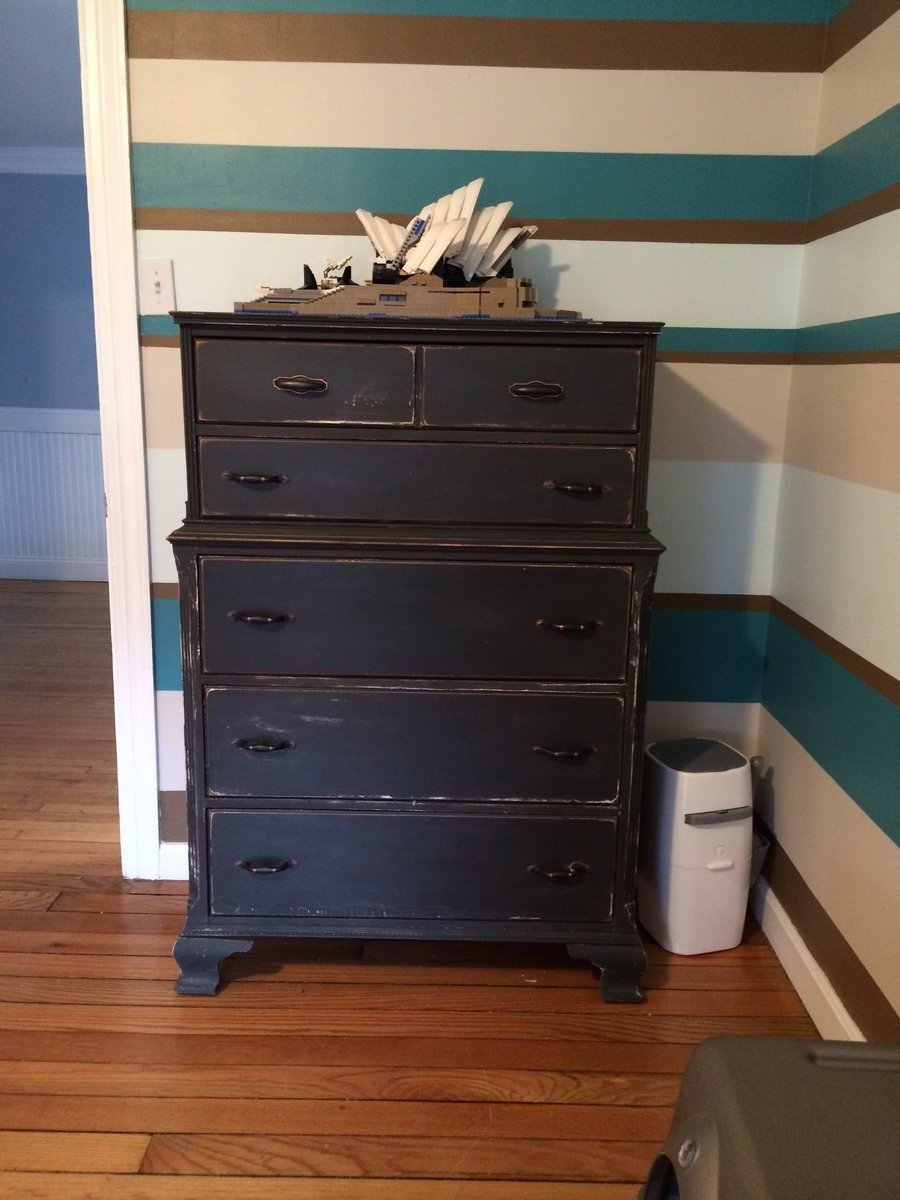
This was my first build and it took me about a week to finish. My son has an L shaped room due his closet being the laundry room. This plan was perfect for his room and provided tons of storage. I could not find baskets that I liked so I just made bins using 1x2 for front and backs, left over scraps for sides and 1/4 plywood for bottoms then stained them. The approx cost for each bin was 5 dollars. I made my own chalk paint and painted them the same as the antique dresser i found on craigslist that I refinished.

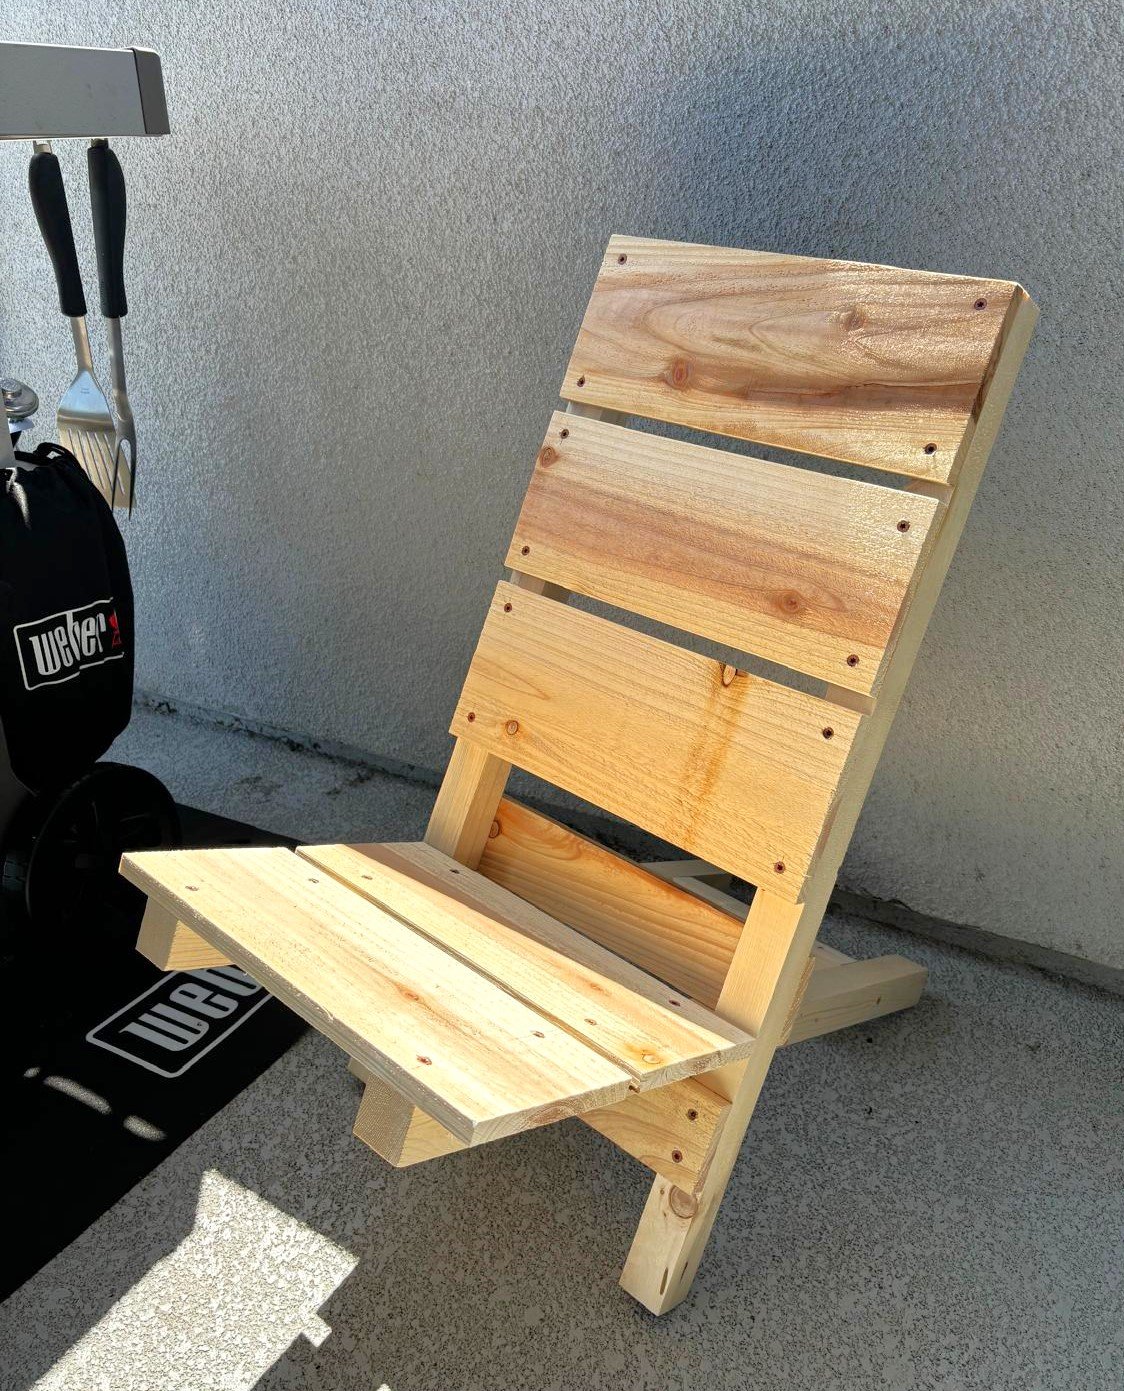
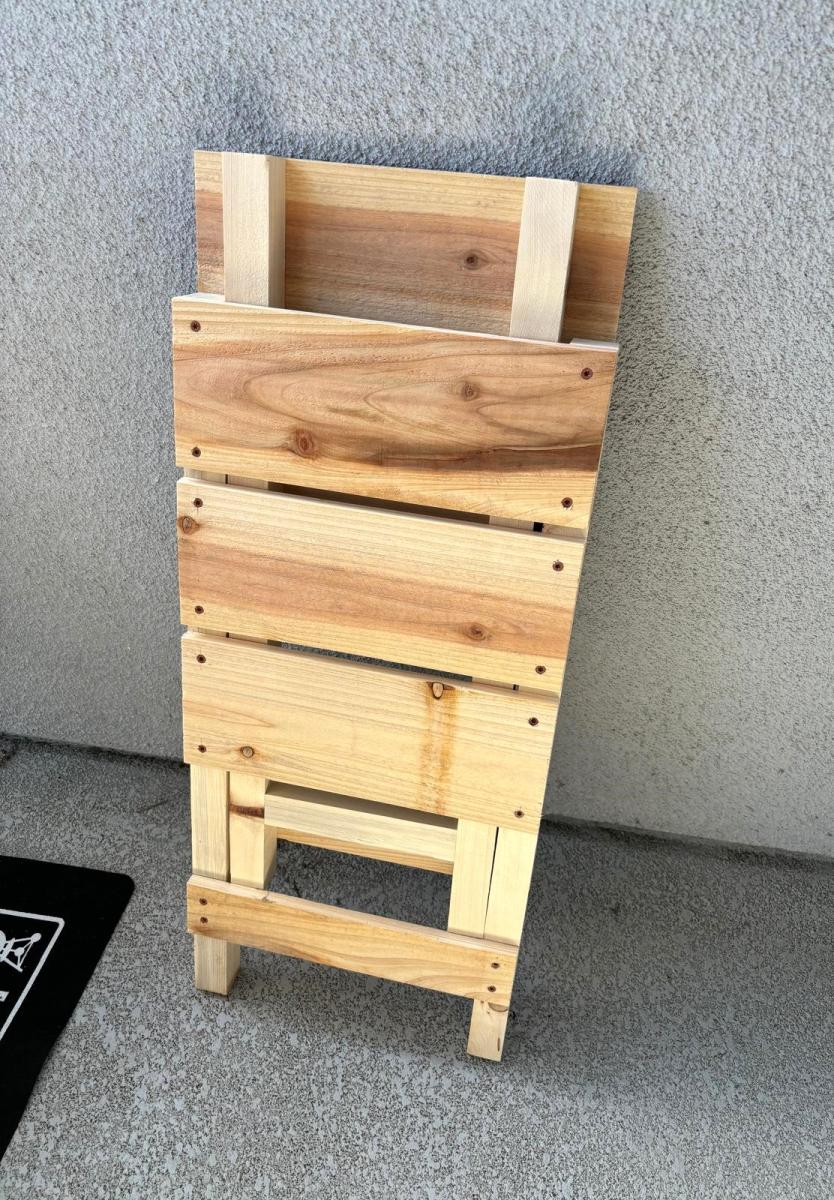
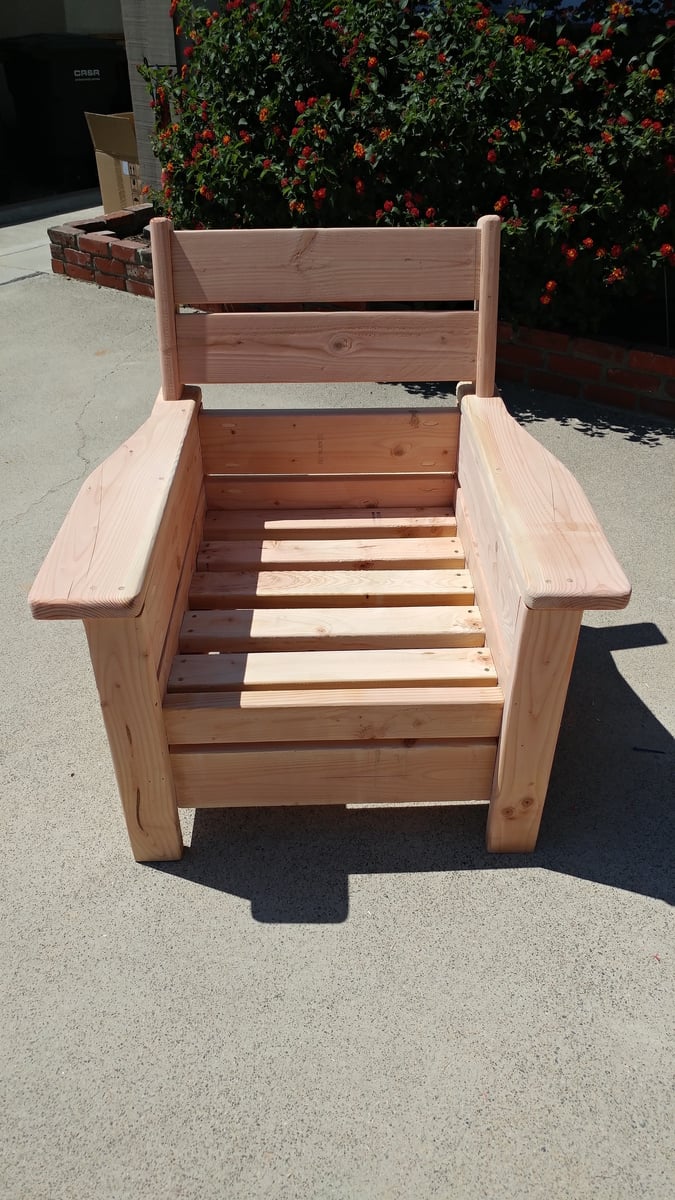
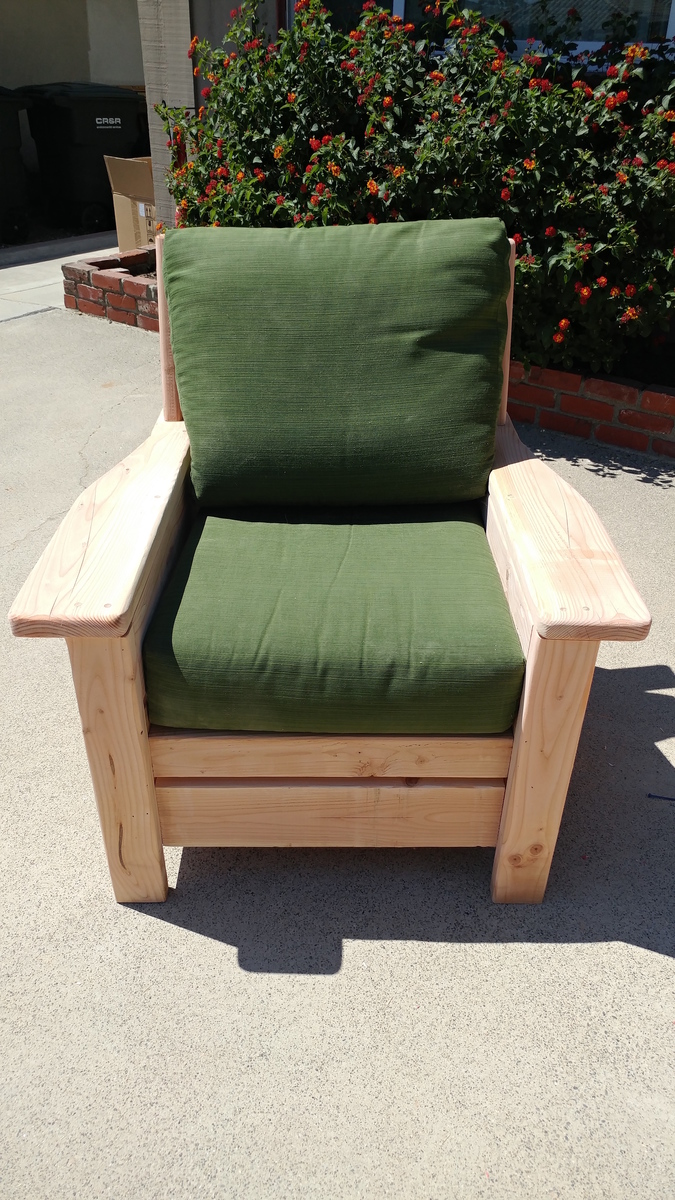
Two Piece Portable Outdoor Wood Chair
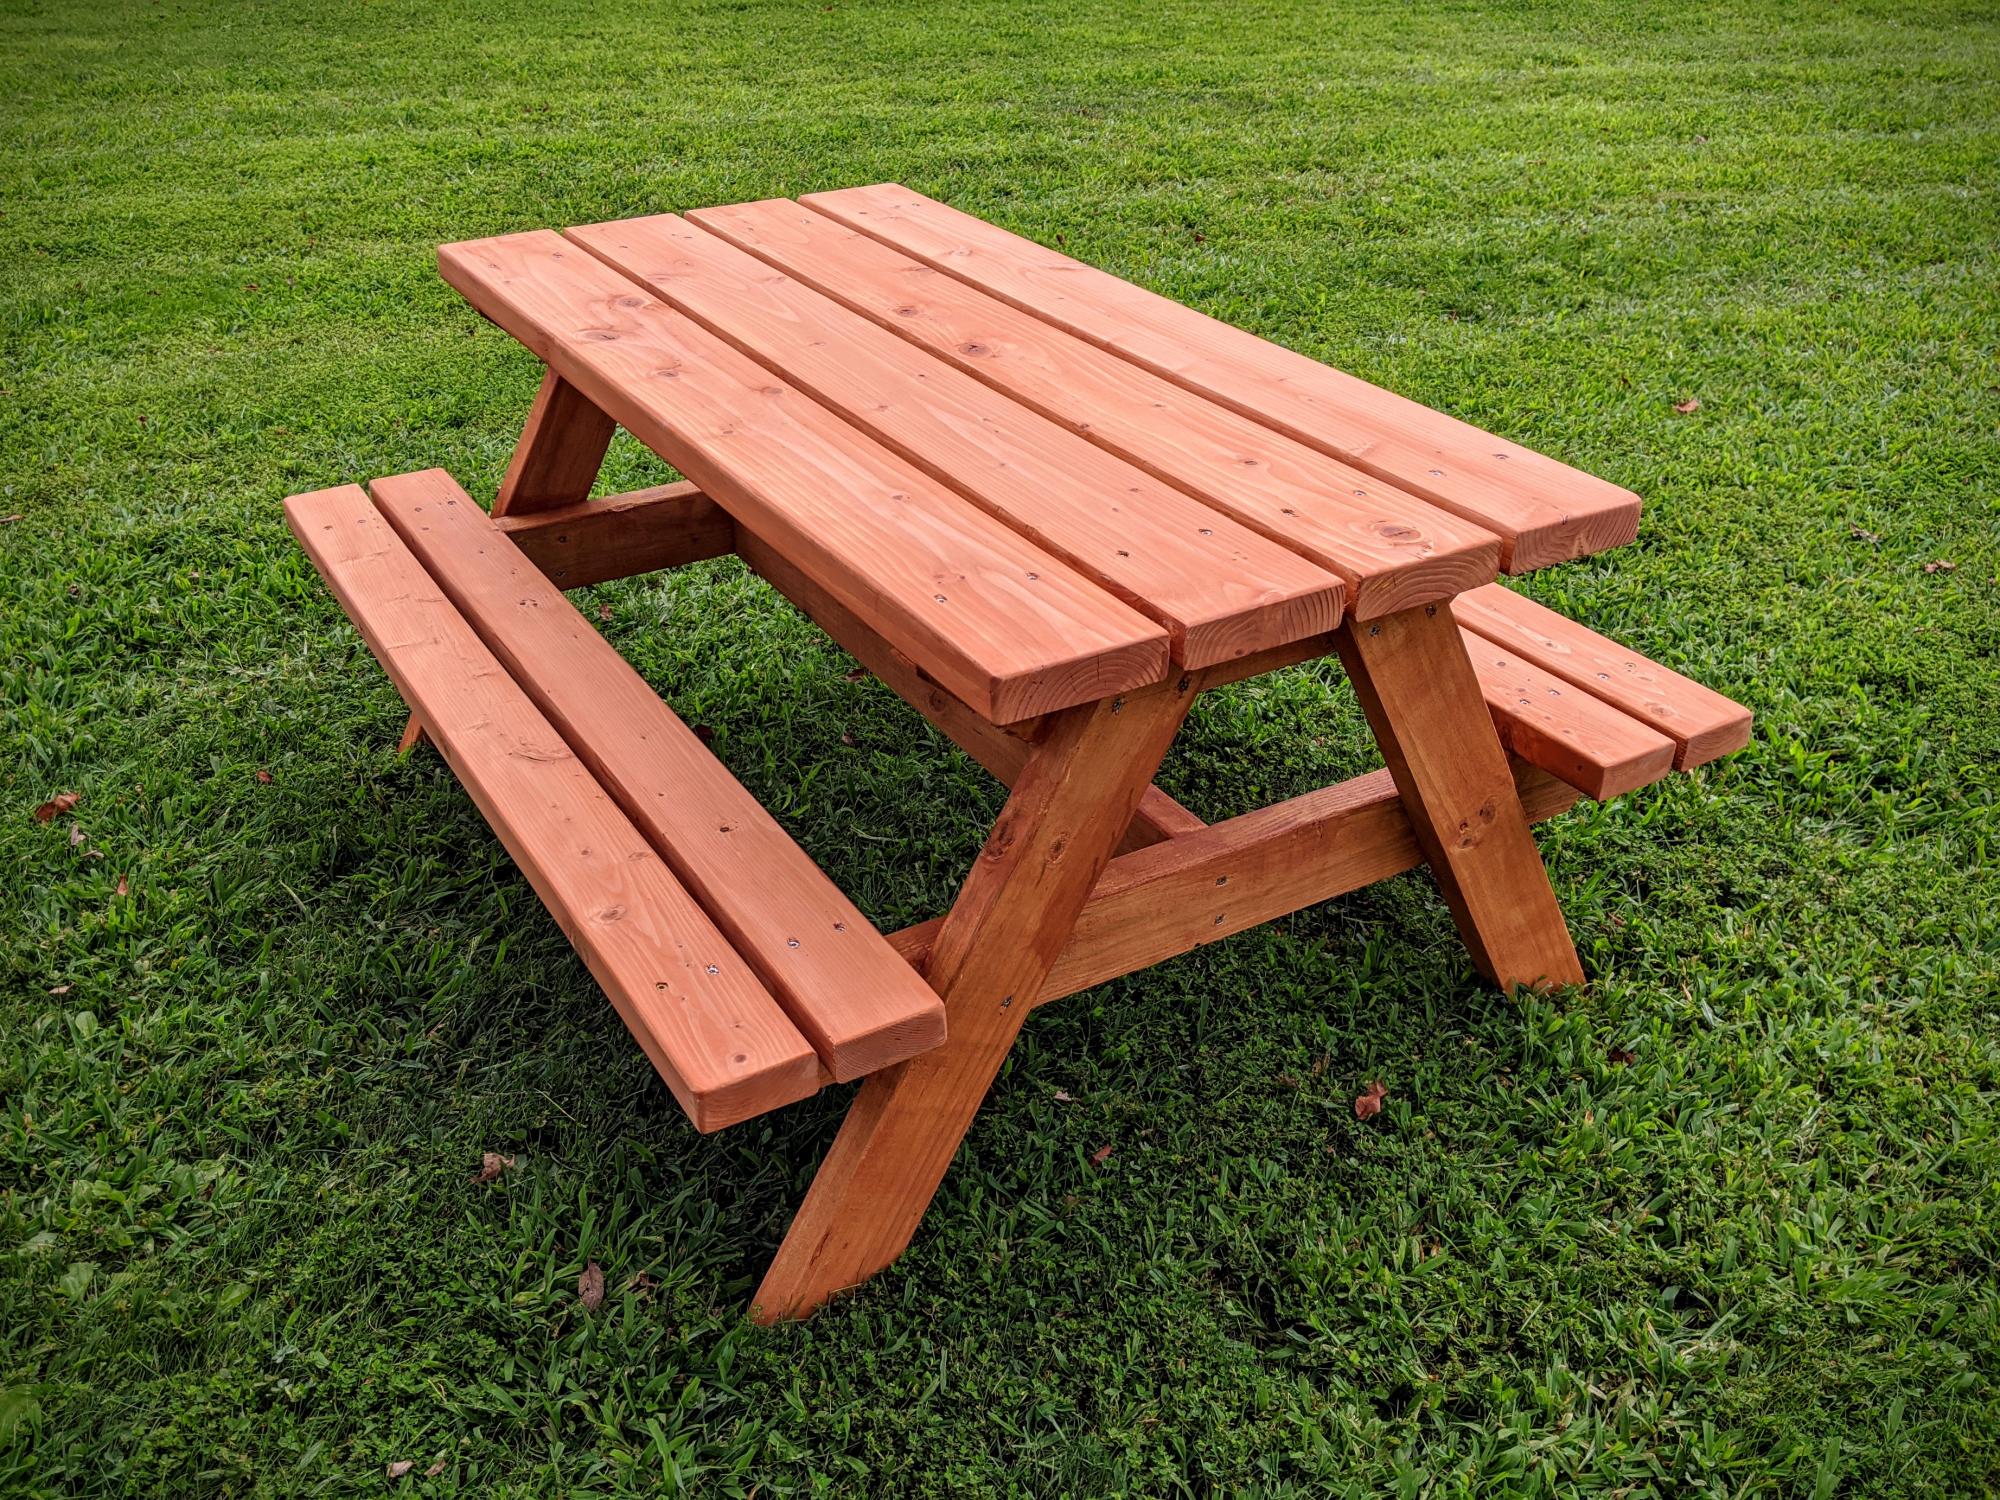
Built using Ana Whites plans for a Bigger Kids Picnic Table. Used pressure treated 2x4 for frame (legs and supports), 2x4 and 2x6 pine (fir) for table top and bench. Finished with Cabot's semi-transparent redwood stain and sealer.
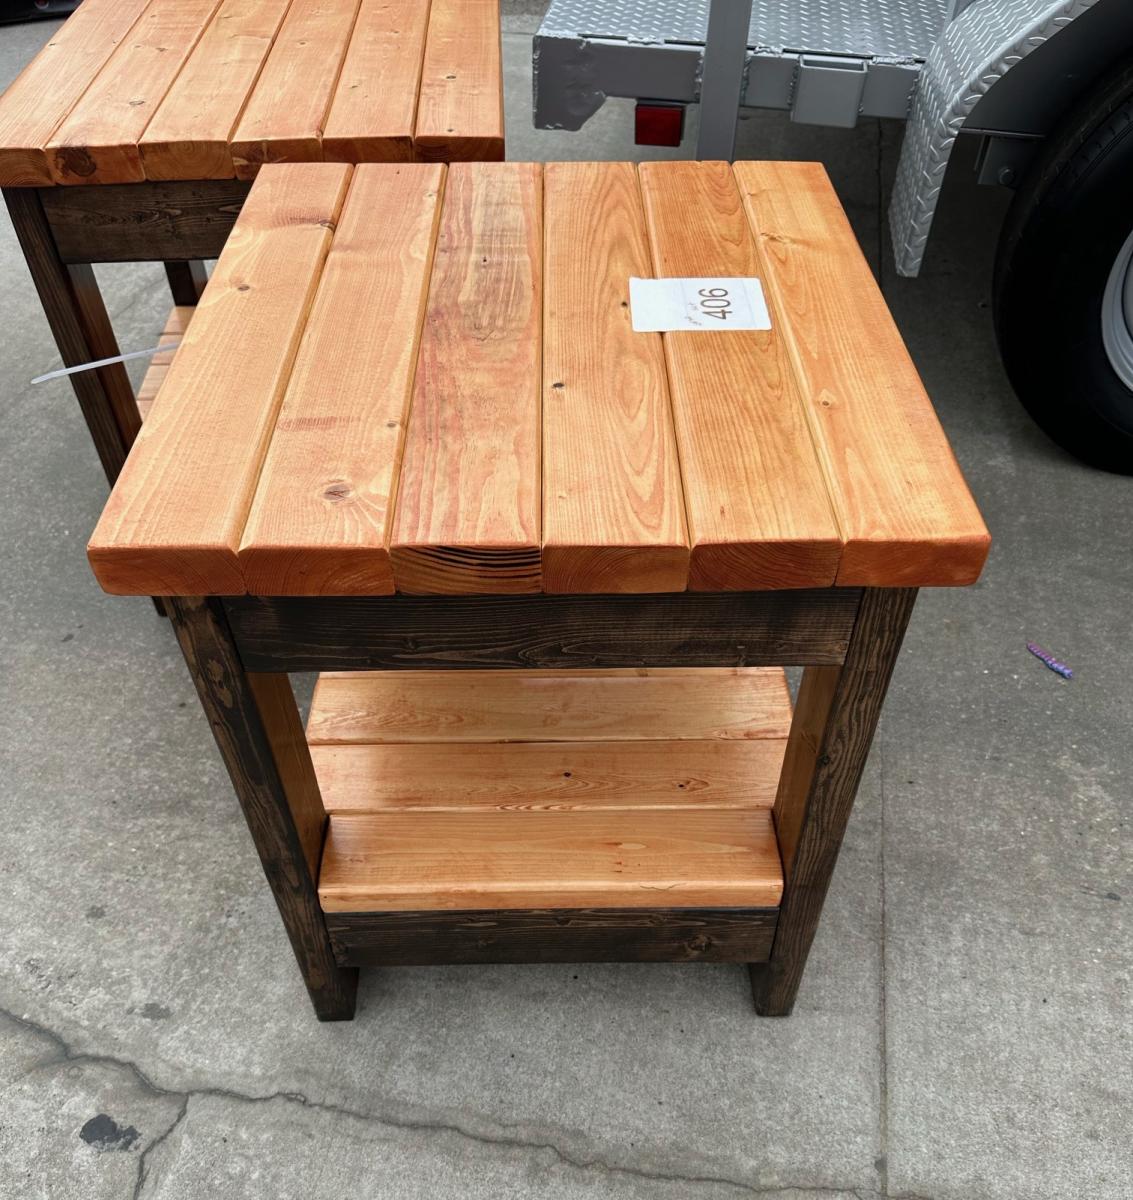
A student built a pair for a show and placed, the buyer liked them so much he requested a coffee table to match.
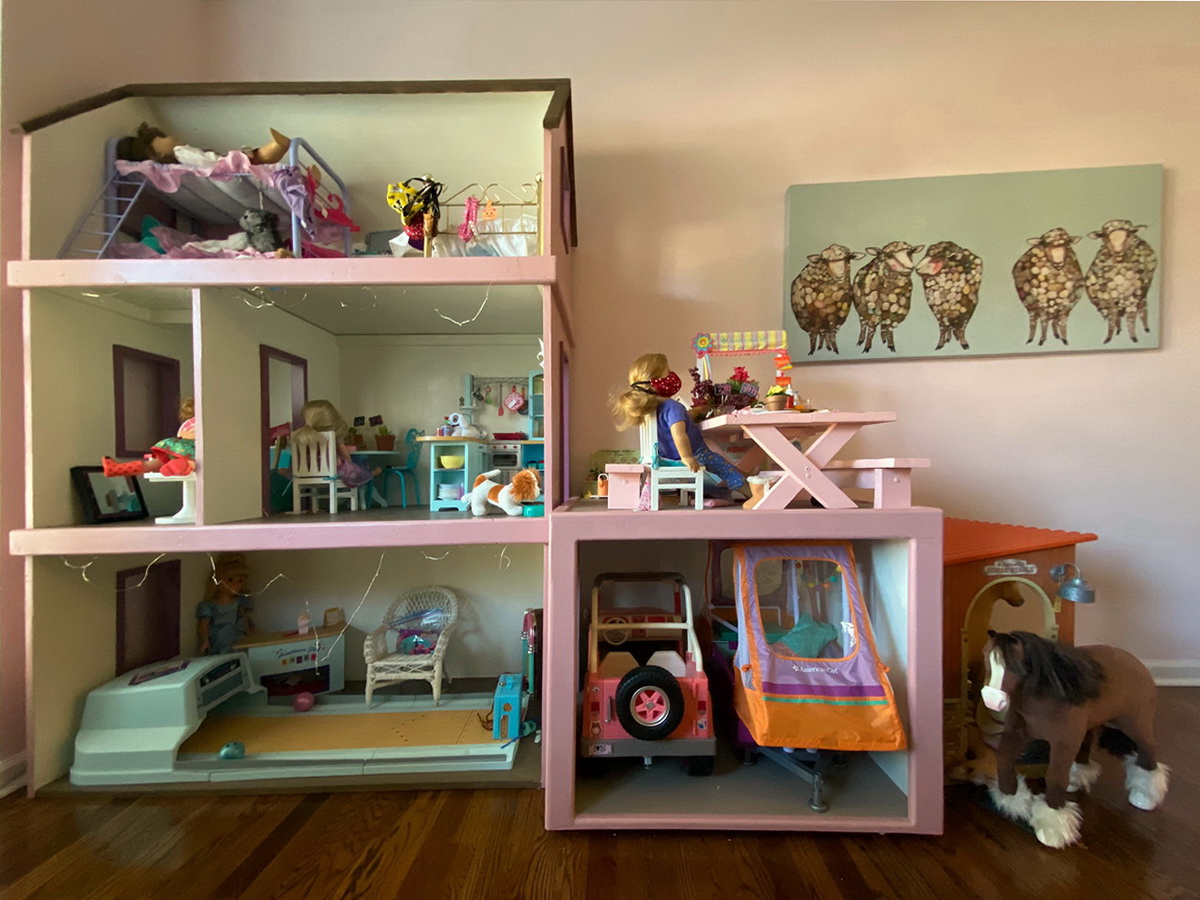
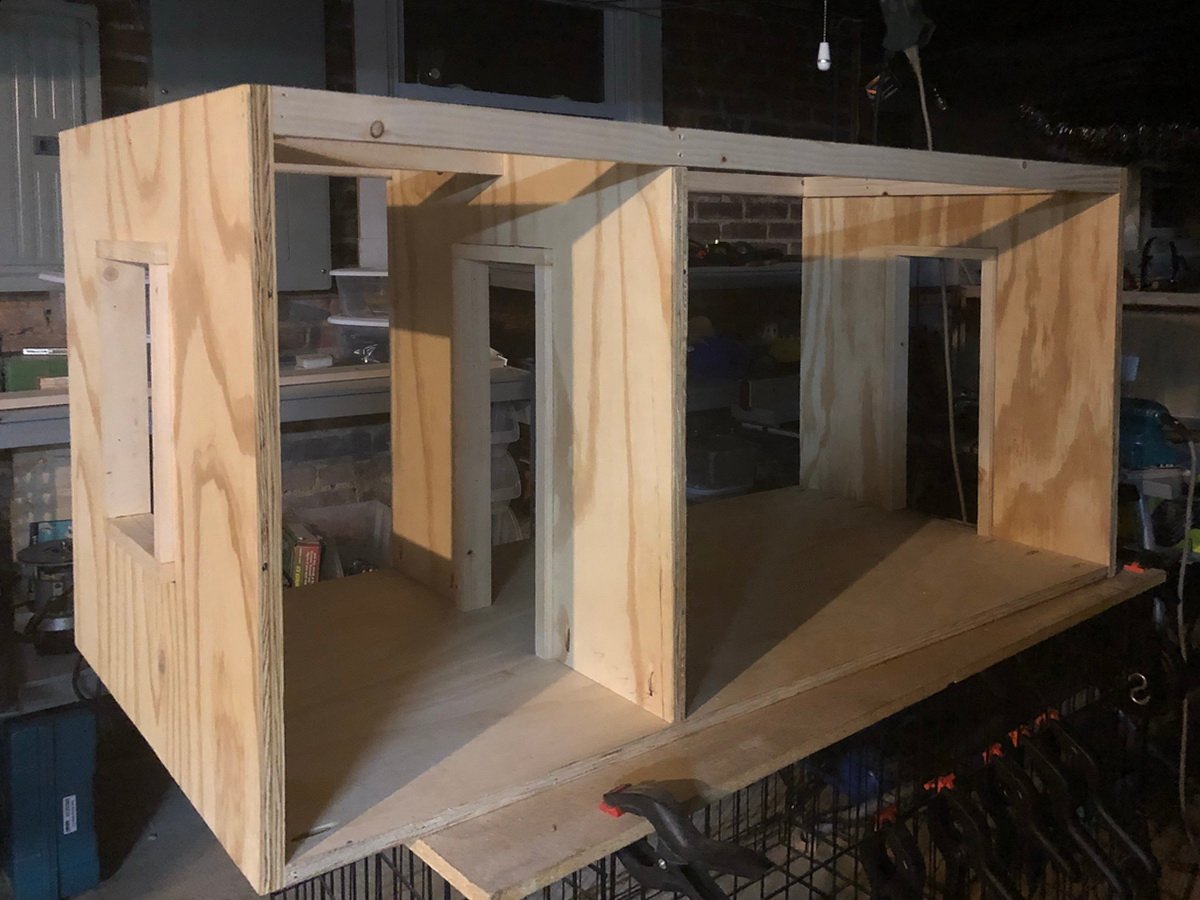
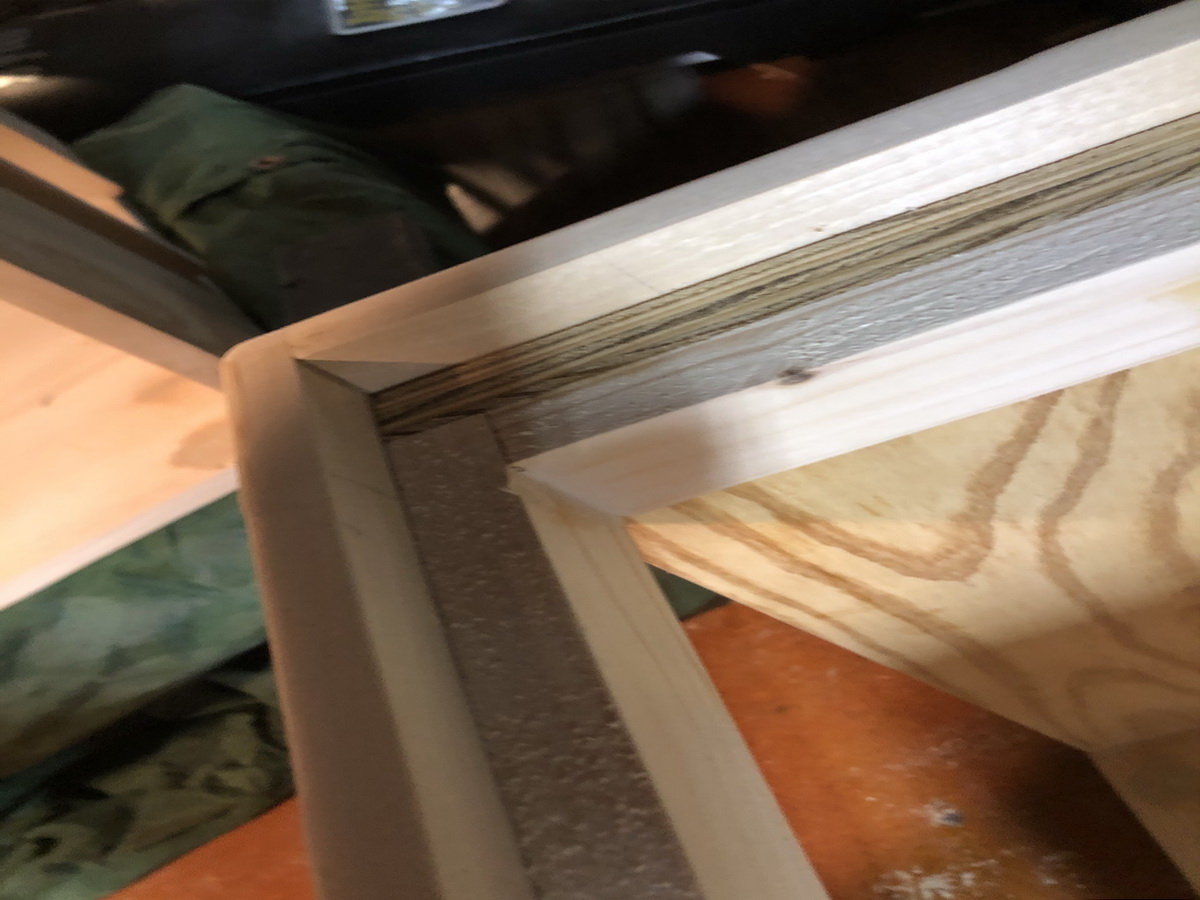
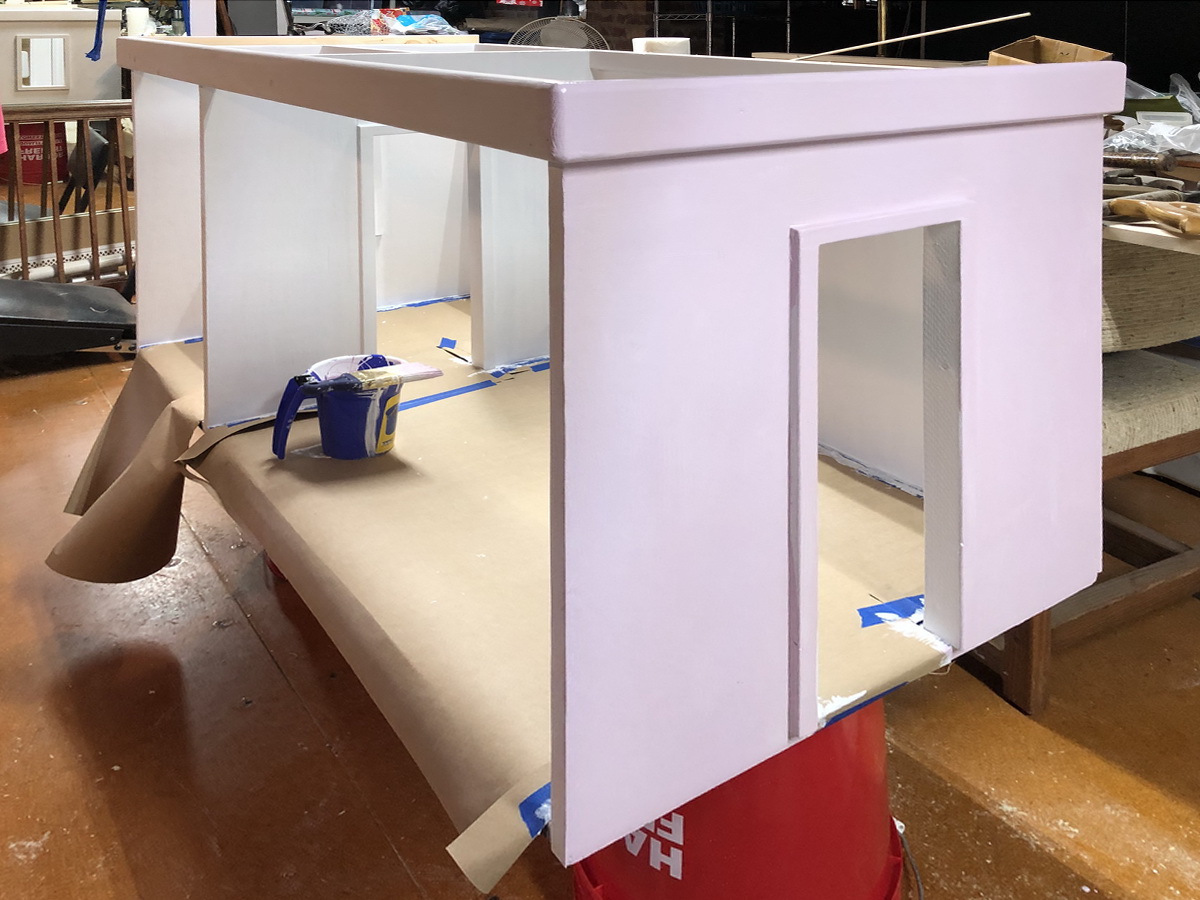
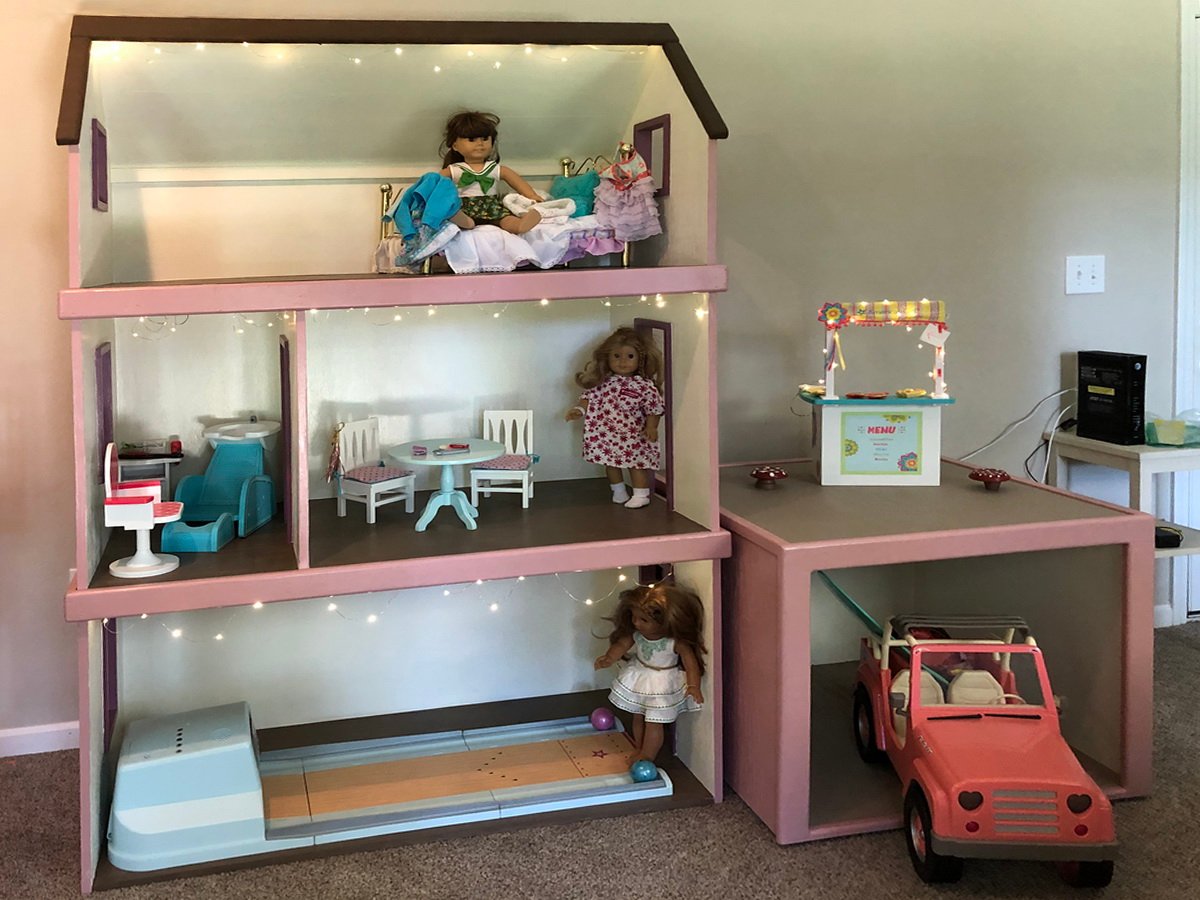
I loved the AG Doll House plans you designed and when my granddaughters asked me to make one for them.... how could I resist. Unfortunately my 7' basement ceiling and steps created a challenge. As a 72 year old female, there was no way I could man-handle a 6' x 4' x 2' - 3/4" plywood project in addition to the challenges of my work space. I was not going to disappoint my granddaughters so I had to come up with a plan. Instead of making the doll house in one piece, I decided to make it as 3 individual boxes (the floors) and stack them on top of each other. Not only would I be able to handle them mostly by myself, but I would be able to work around the low ceiling and transport them up the steps. With only a few modifications to the original plans, I believe I came up with a workable solution.
Instead of the sides resting on top of the doll house floor, I extended the sides 3/4" longer to run past the floor for more stability. I also used 1x 2s to frame the inside at the top of each unit for more support and to help in keeping the box square. This may not have been necessary, but I just wanted to make sure it would be sturdy. The main change to the original plan was to add 1" x 3" routed trim to the outside top of each box having it extend 3/4" above the sides. This created a pocket that allowed the next floor to nestle in place and protect it from sliding off in case any little ones decided to climb on it. I also made a 2 car (30" x 30" x 24") detached garage for the AG vehicles. I did fill the holes, plugs, and errors with wood putty, sand numerous times, prime and paint. It was a real help to add some of the paint to the primer because plywood really soaks it up. I think this kept us from having to paint a 3rd coat. The floor was painted a med dark brown, but wiped with the grain before it dried to give a wood grain look.
I finished it in time for the birthday party even though it took 3 vehicles to transport it to the destination. It was a joy to see their faces when it was unveiled and to watch them climb on it of course.

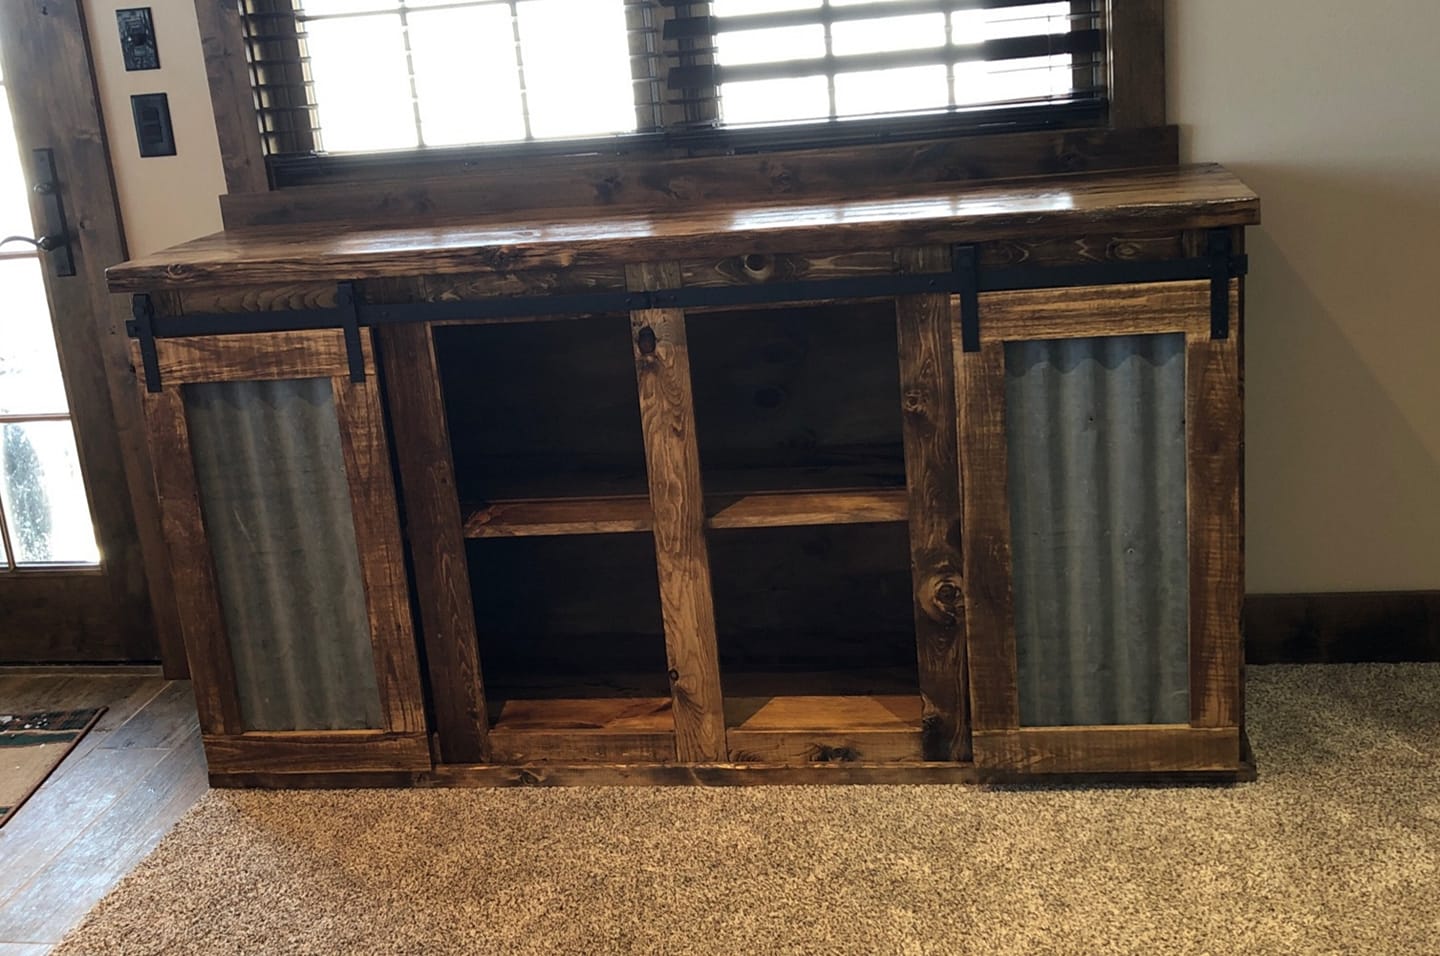
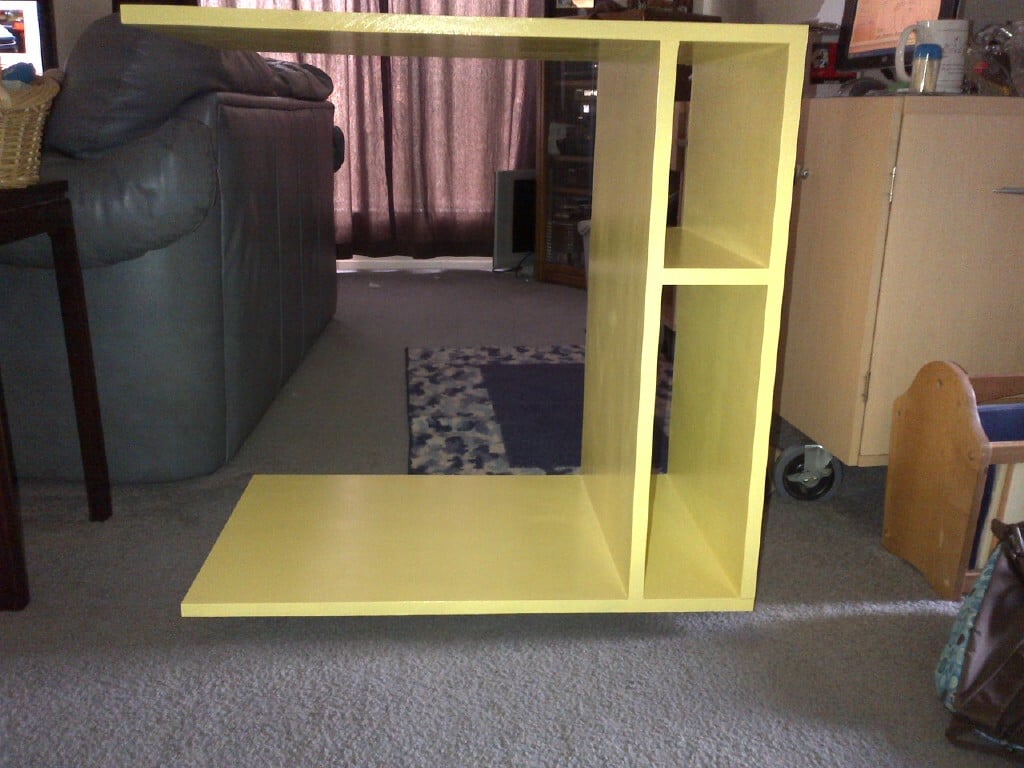
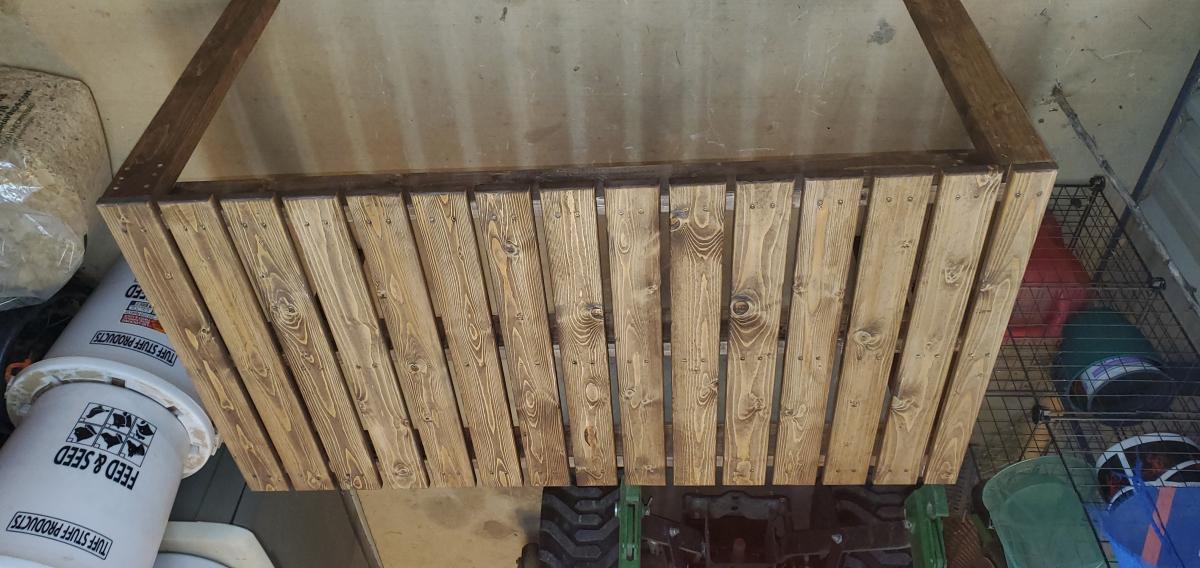
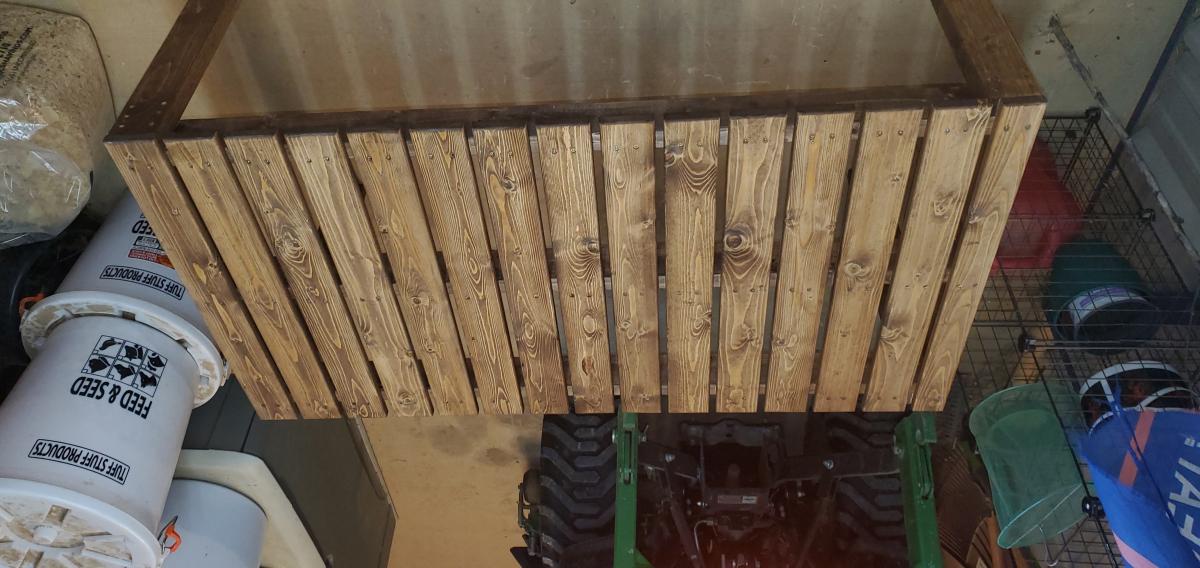
I made this out of primarily reclaimed lumber. This project had to be modified in size to fit in a certain space.

My father and I made this awesome poolside towel cabinet using the Benchmark Cabinet plans. A super easy 1 day build and it looks amazing on the patio. Bring on the pool weather!

Taken from the Modern Outdoor chair project and added a back. Then decided that I love the andorak style chair arms and thus the Andrmodern chair was born..
Mon, 08/03/2020 - 09:02
I’d love to know how you made the changes, love it!

Thu, 03/18/2021 - 09:20
Could you please share how you added the back and arms to the modern chair plans.
The entire project cost $70. Also, I finally bought a Keg pocket hole jig for $35.


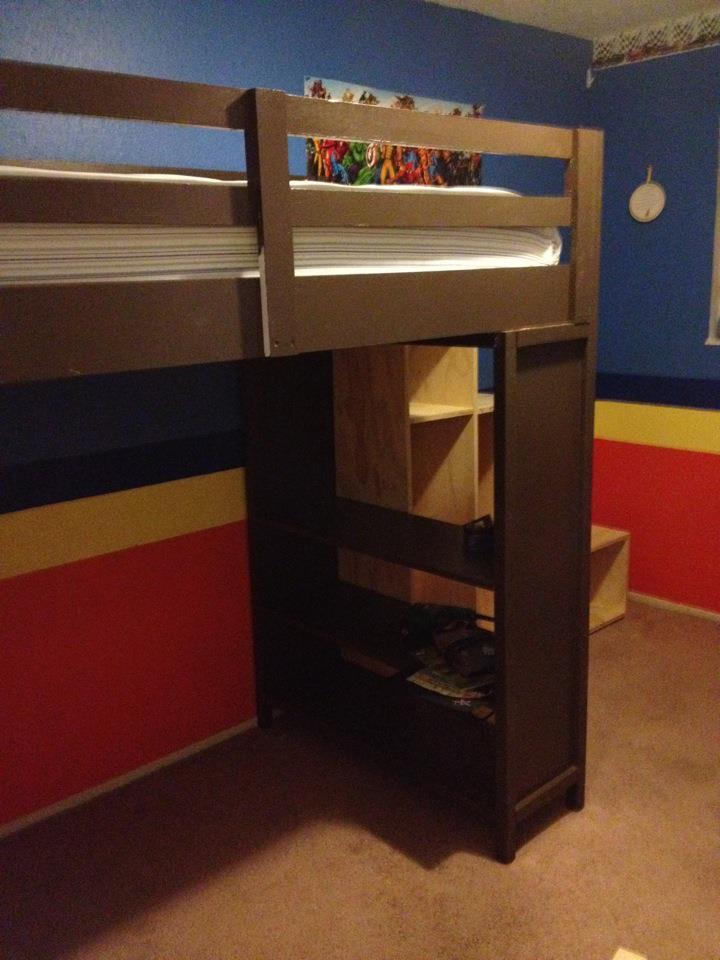
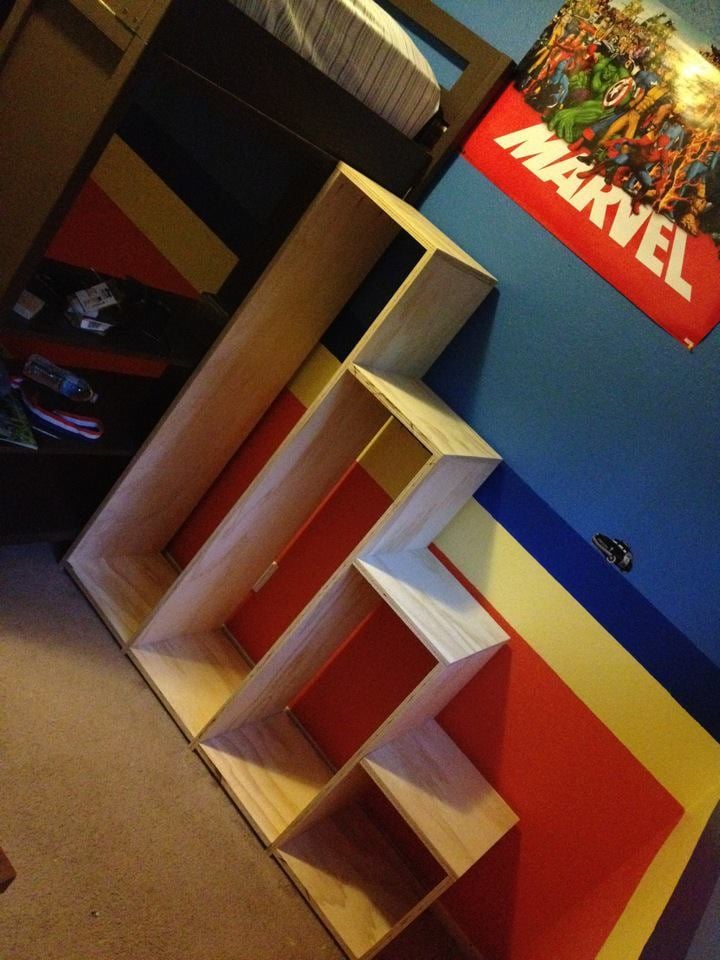
I built this low loft bed following Ana’s plan as soon as I found out that I was pregnant with baby #2. We needed a “big boy” bed for our 3 year old, and I couldn’t find a loft bed on the market that was priced reasonably or looked sturdy. This the biggest challenge I have taken on to date, and I was certainly sore after building. I don’t have a workbench, so I worked on the floor of my garage and used a couple of saw horses that my dad had next door. I am so proud of this and can’t wait to build more after baby boy comes!
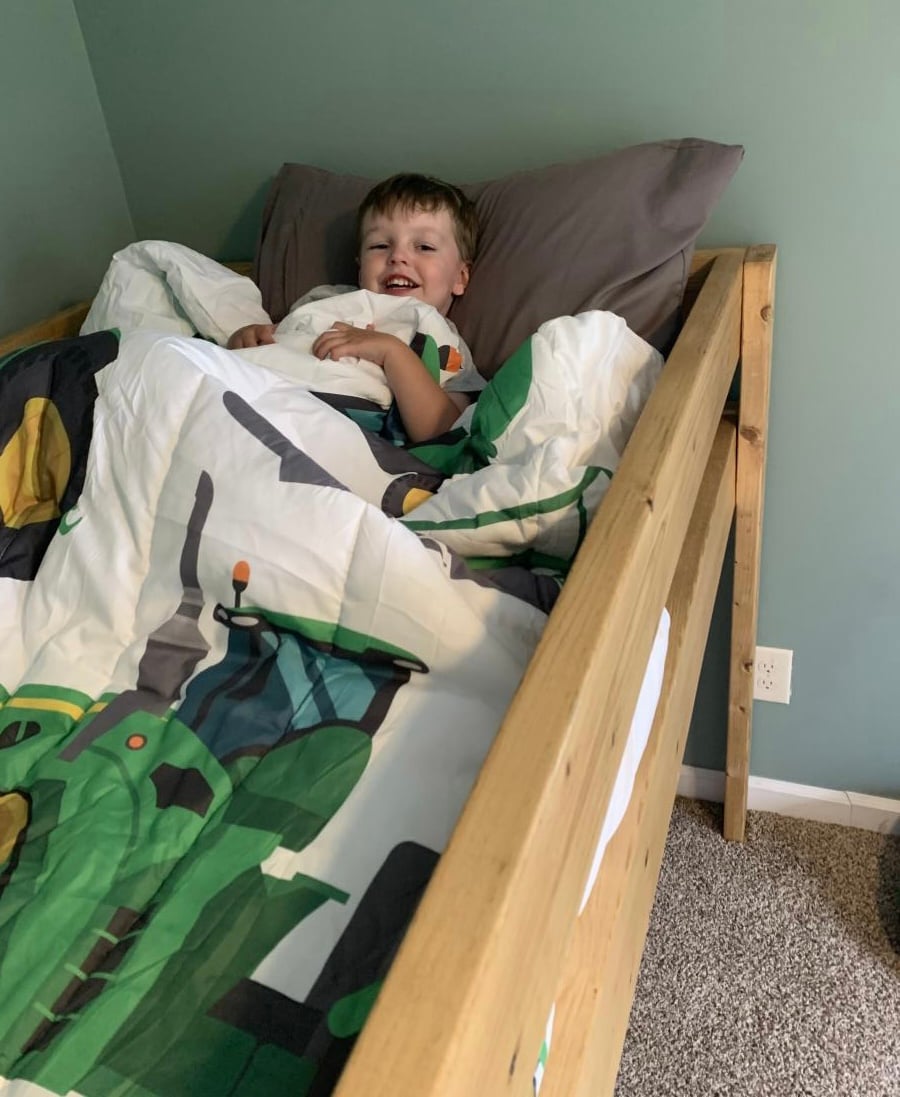
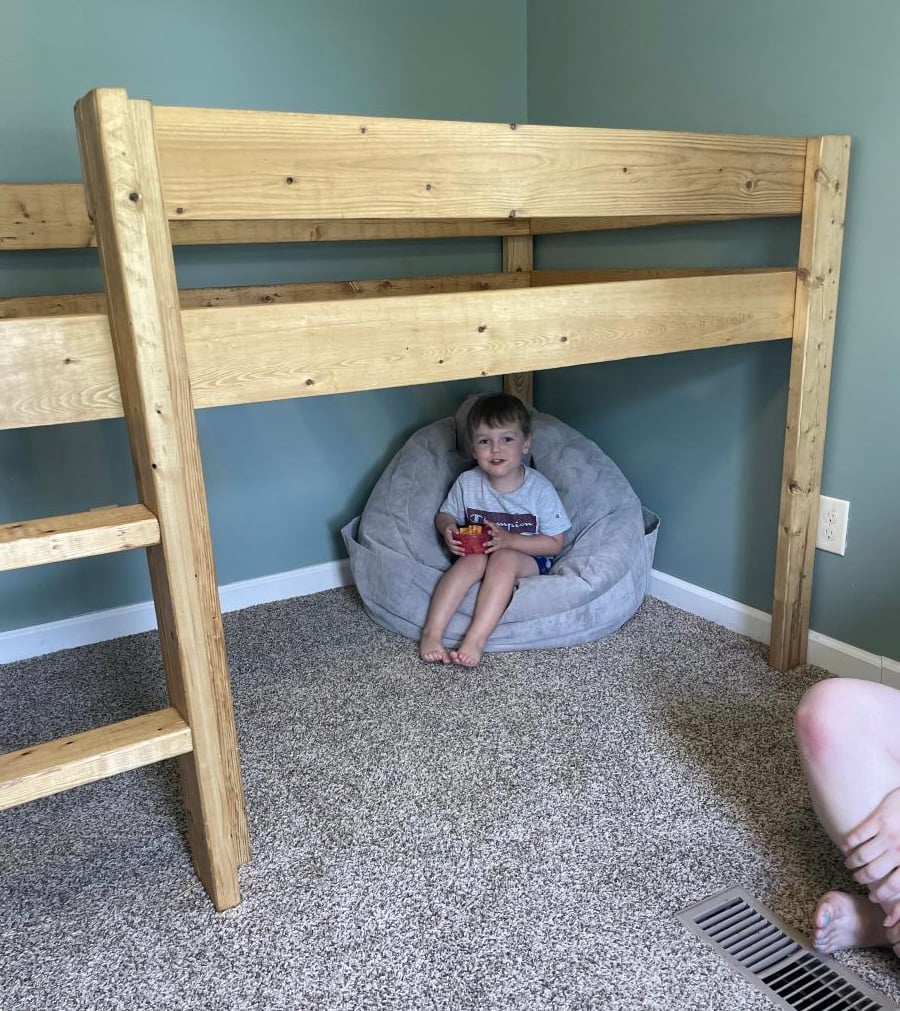
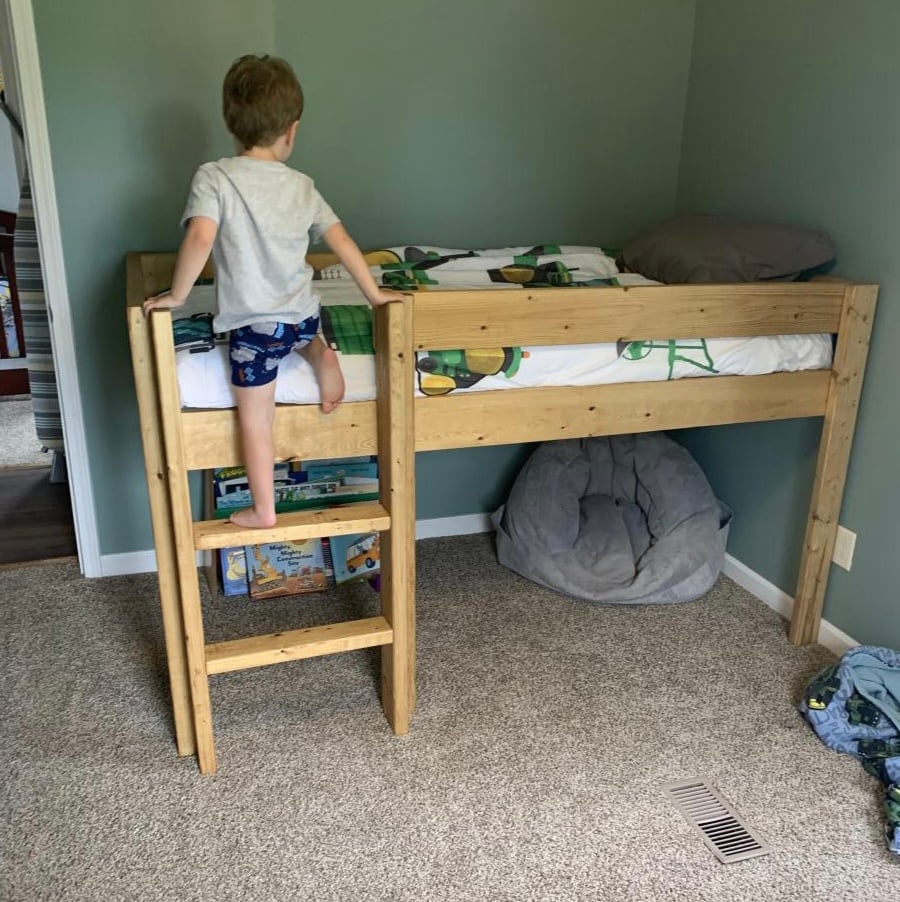
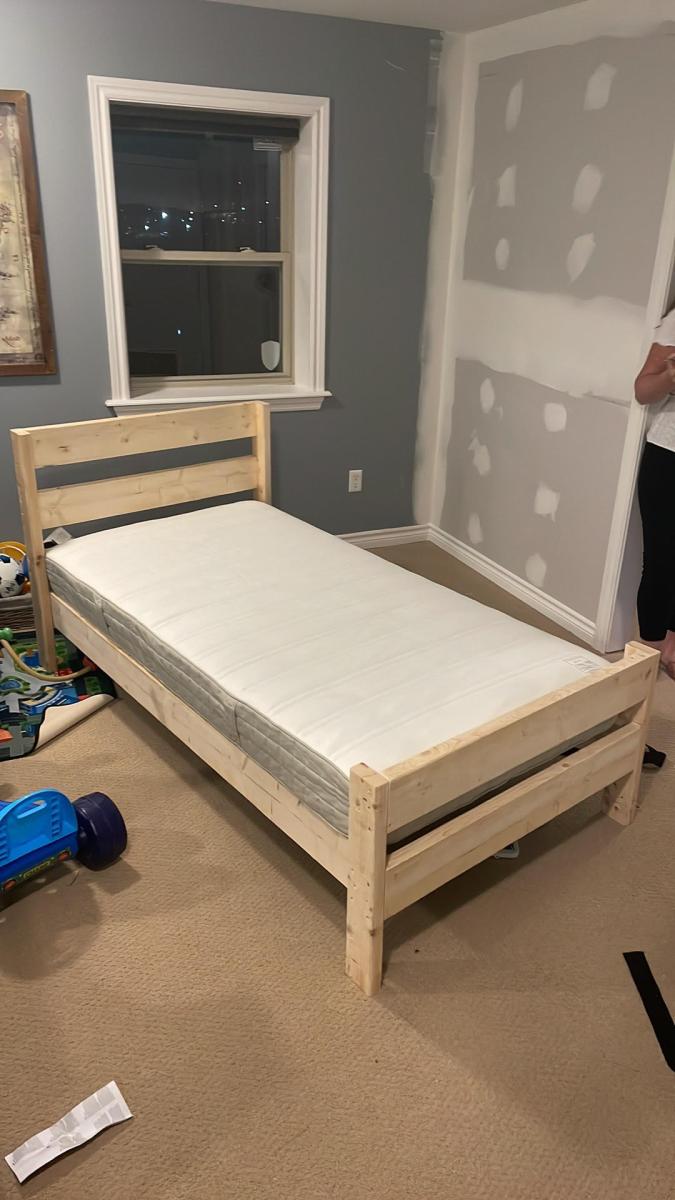
I’m not a handy man, but when I saw the high prices for shoddy twin bed frames in stores, I decided to do my own using your plans. This is our 3 year olds first real bed and he loves it :)
Submitted via email user John from Nova Scotia
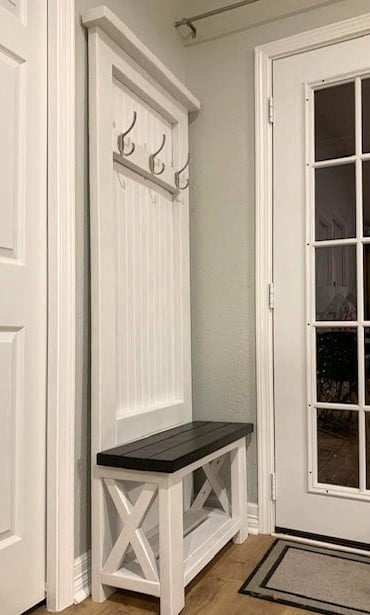
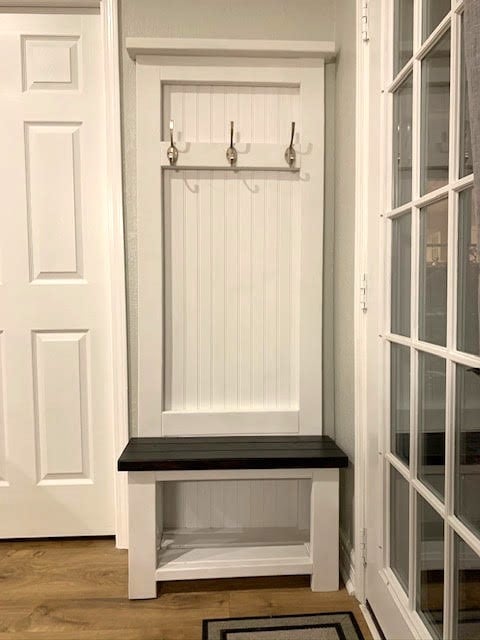
Farmhouse hall tree modified for the space!
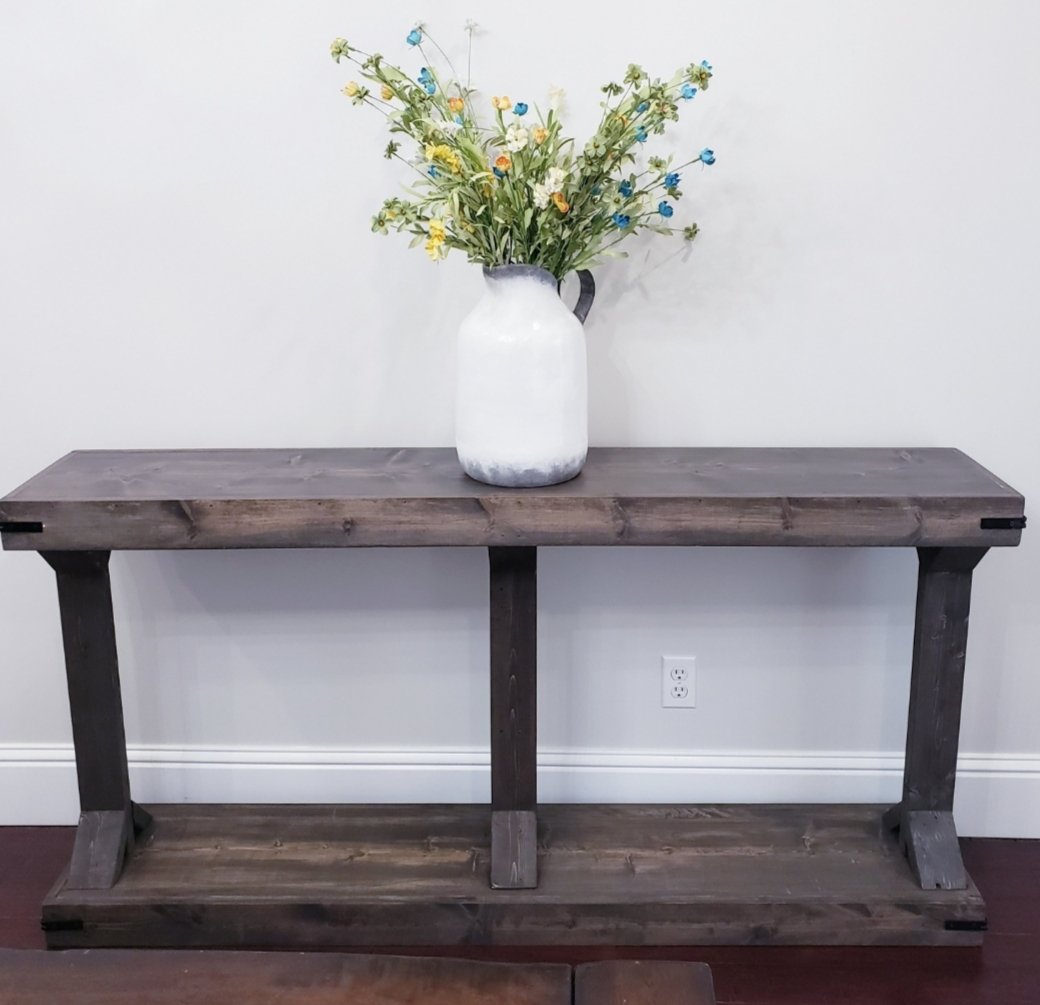
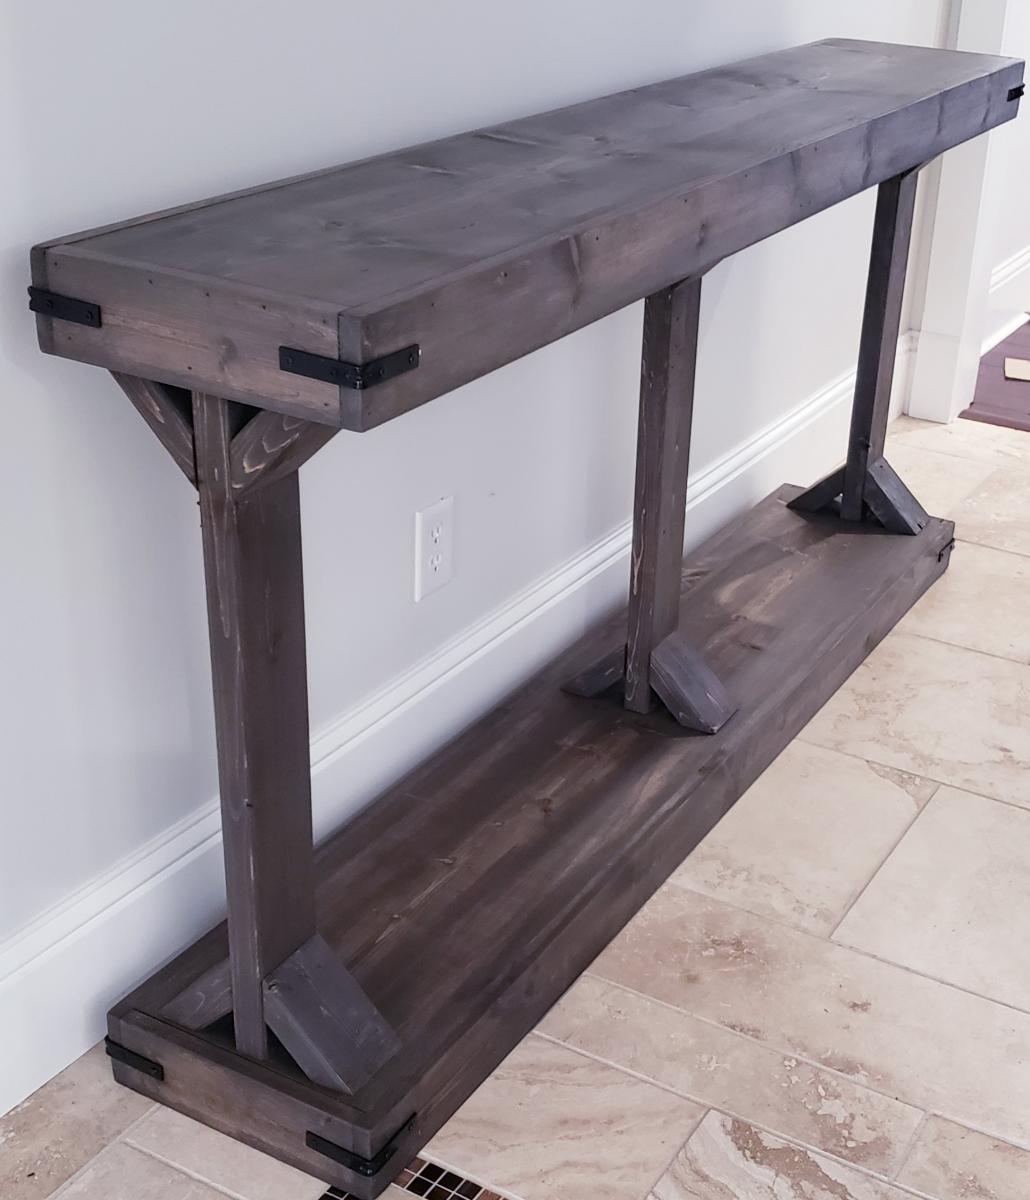
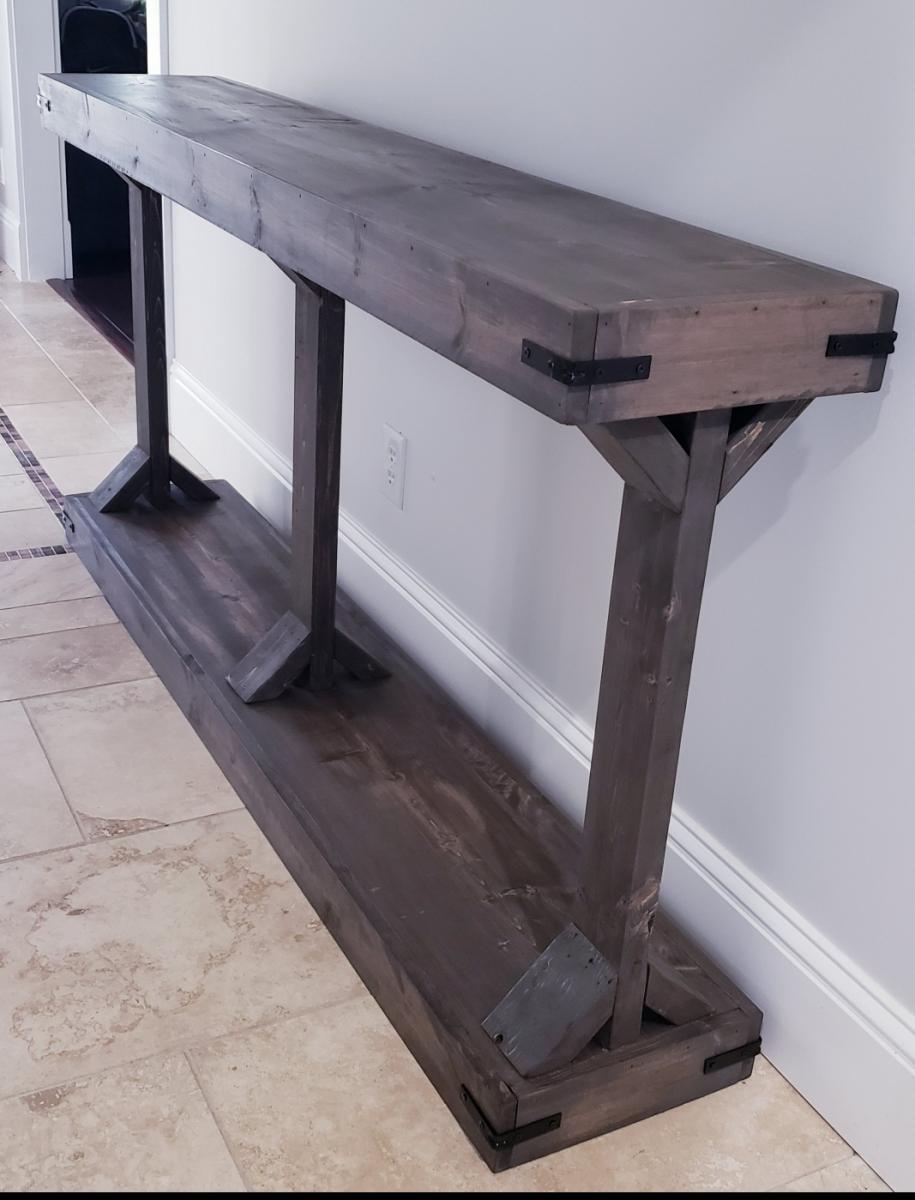
This is a beautiful console table built using the Narrow Console Table (Modern Farmhouse) plan. This is modified to be slightly wider, longer, and taller than the original plan. The dimensions are 68" long, 34" high, and 12.75" wide. The plan was very easy to follow and it was simple to adjust the measurements.
I used Varathane Dark Walnut Stain and once that was dry, I went over that lightly with Varathane Classic Gray stain. The final finish is Minwax Dark Wax and buffed.
More photos available on my facebook wood shop page at the link below.
Thu, 12/05/2019 - 12:06
Beautiful! I really like the finish you did on this table, thanks for sharing the details. I may need to try this myself.
Tue, 02/02/2021 - 19:09
Great color. I have never gone over color 1 with color 2 - I will now try it. Great look!
Tue, 02/02/2021 - 19:13
How do you wipe paint 2 over paint 1? Do you use a cotton cloth?

My precious second granddaughter loves her tower!
I made a few mods:
1. Eliminated the curvy top: no band saw.
2. Used piano hinges for strength.
3. No need for anti-tipping legs; just lower the platform to lower center of gravity.
4. Kreg-Tool a MUST. Didn't like the KregTool white plastic hole plugs.
PS I built my precious FIRST granddaughter a toy box to match her bedroom furniture.
And a Cradle Boat:
http://www.clcboats.com/shop/boats/rowboats/dinghies/baby-cradle-pram.h…


For my son's 7th birthday, I promised him a new lofted bed. I poured over different designs, drooled over all of the different things I could make, worried about whether or not I could actually do it. Nothing in the market fit my requirements or my budget... I was determined to make this for my son.
Over the long weekend, this bed was constructed... a little "Loft Bed", a little "Claire", a little "Cabin" and a little inspired innovation and ta-da: The Fred-enstien Bed :)
Claire guardrails and bookshelf supports
Modified Claire Desk (work in progress)
Cabin Headboard
Custom built storage shelf stairs (he didn't want a ladder)
Next weekend will be touching up the paint and installing the remaining bookshelves

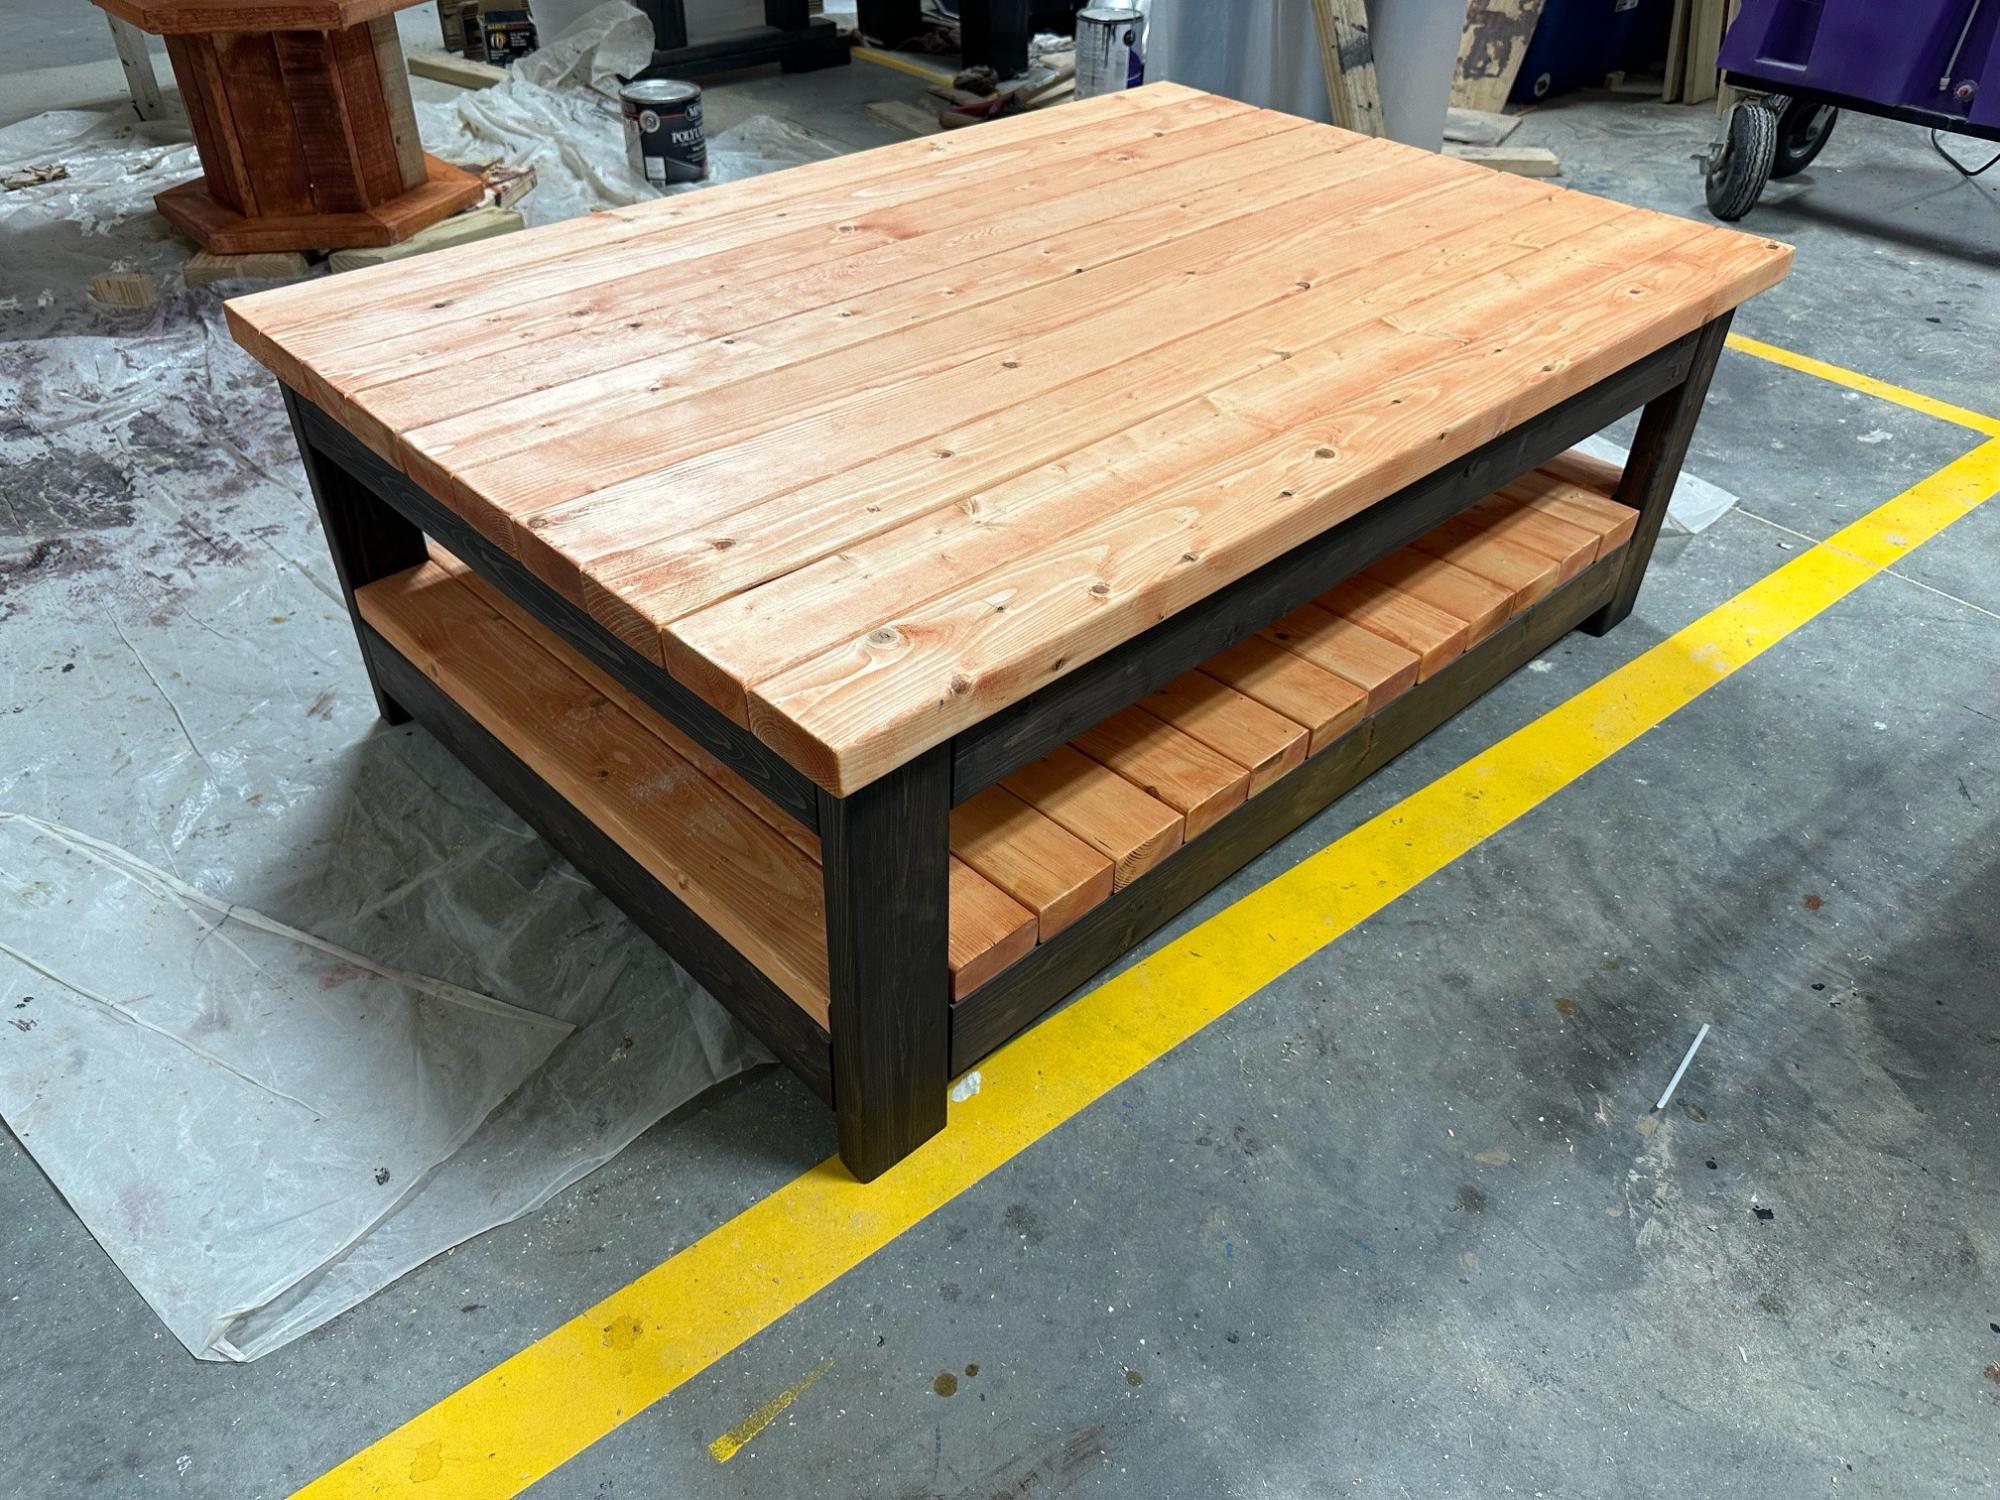
This table is very nice and so simple and inexpensive. Just choose your lumber selectively. I used prime 2x4's for higher quality.

My first Ana White project. My friend Shelley and I are RN's, and she got me hooked on woodworking. I started with cushions from Lowes ( in the sizes that you recommended)to see if I loved the sectional for a few years. I loved it so much I decided to have custom Sunbrella fabric ones made. Even though the custom ones were more expensive, it has been worth it. They go perfect with my California Mission style home. Now I want to add the armless one and make it a U-shape. I did add a piece at the bottom back of each sofa to hold the cushions in. The seat cushions would slide out the back when sitting on the sofa. I made the coffee table to match. Our family loves it!
