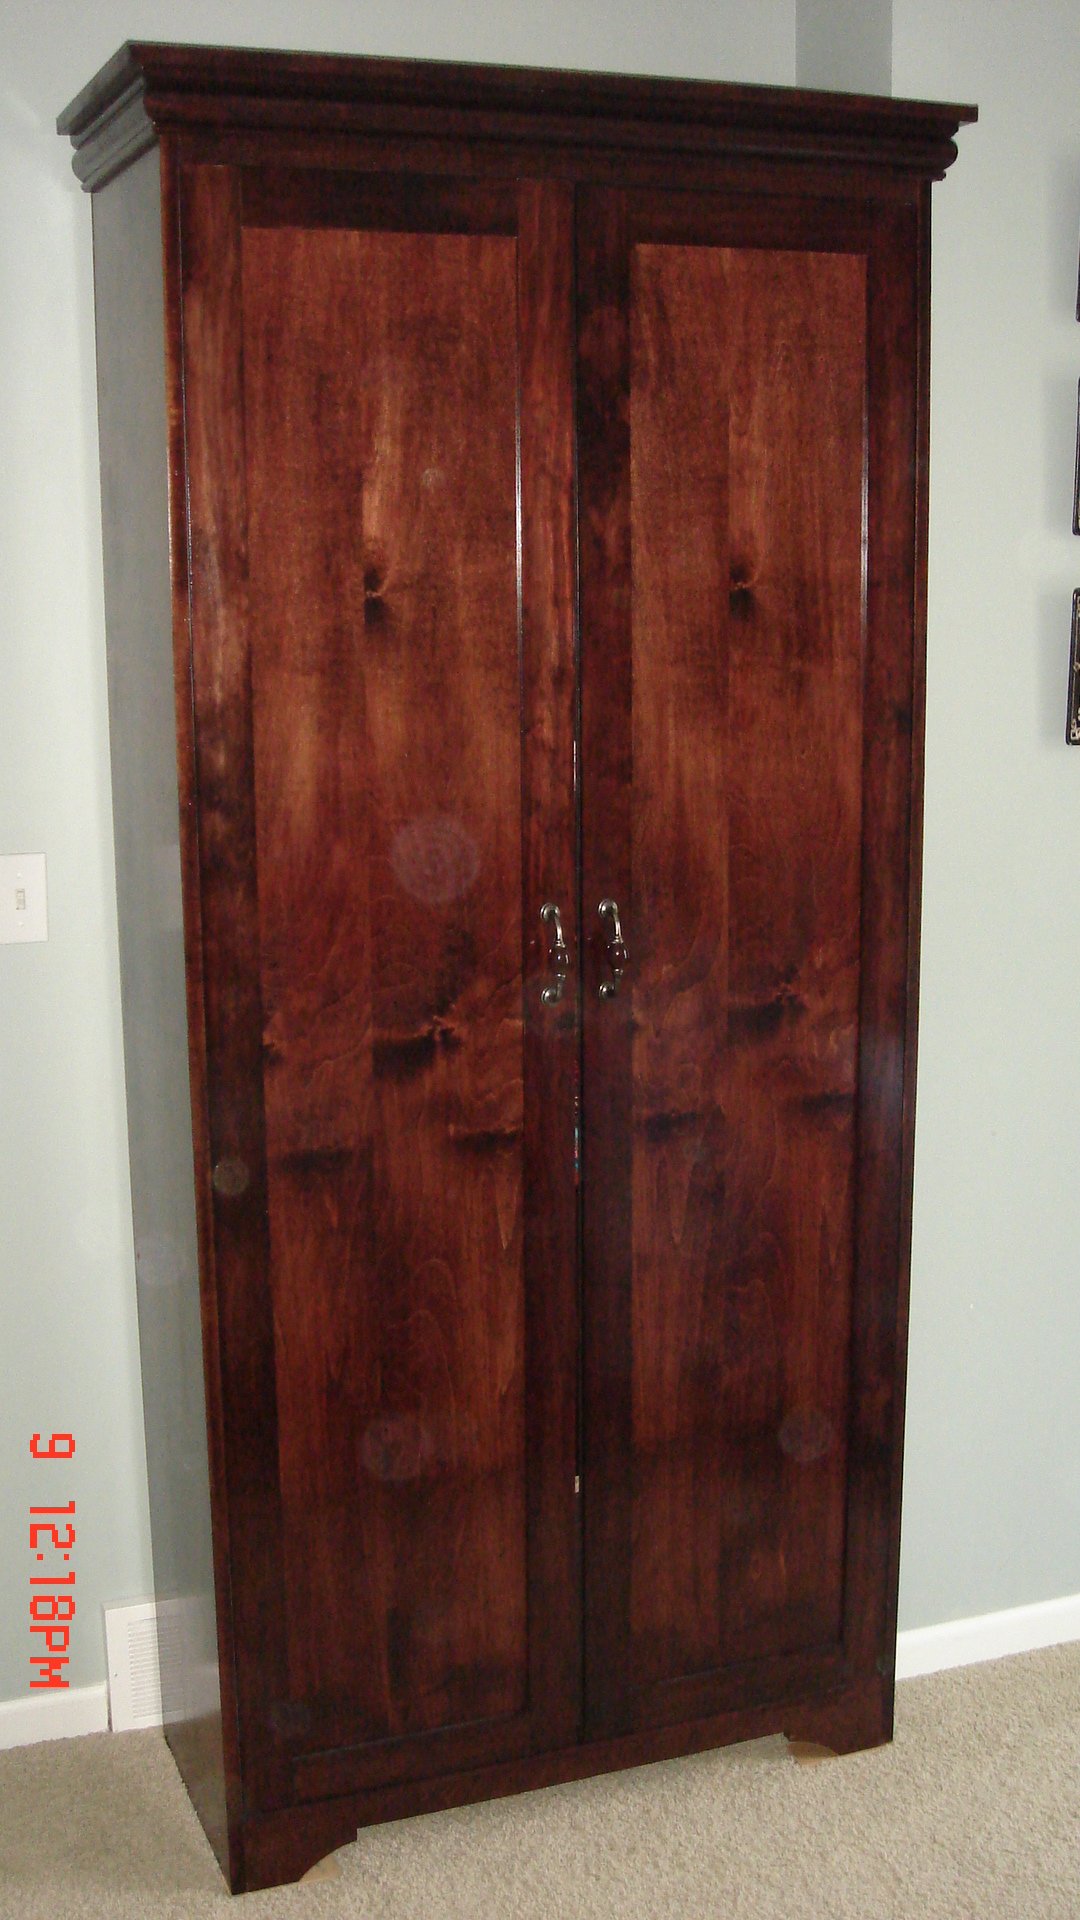
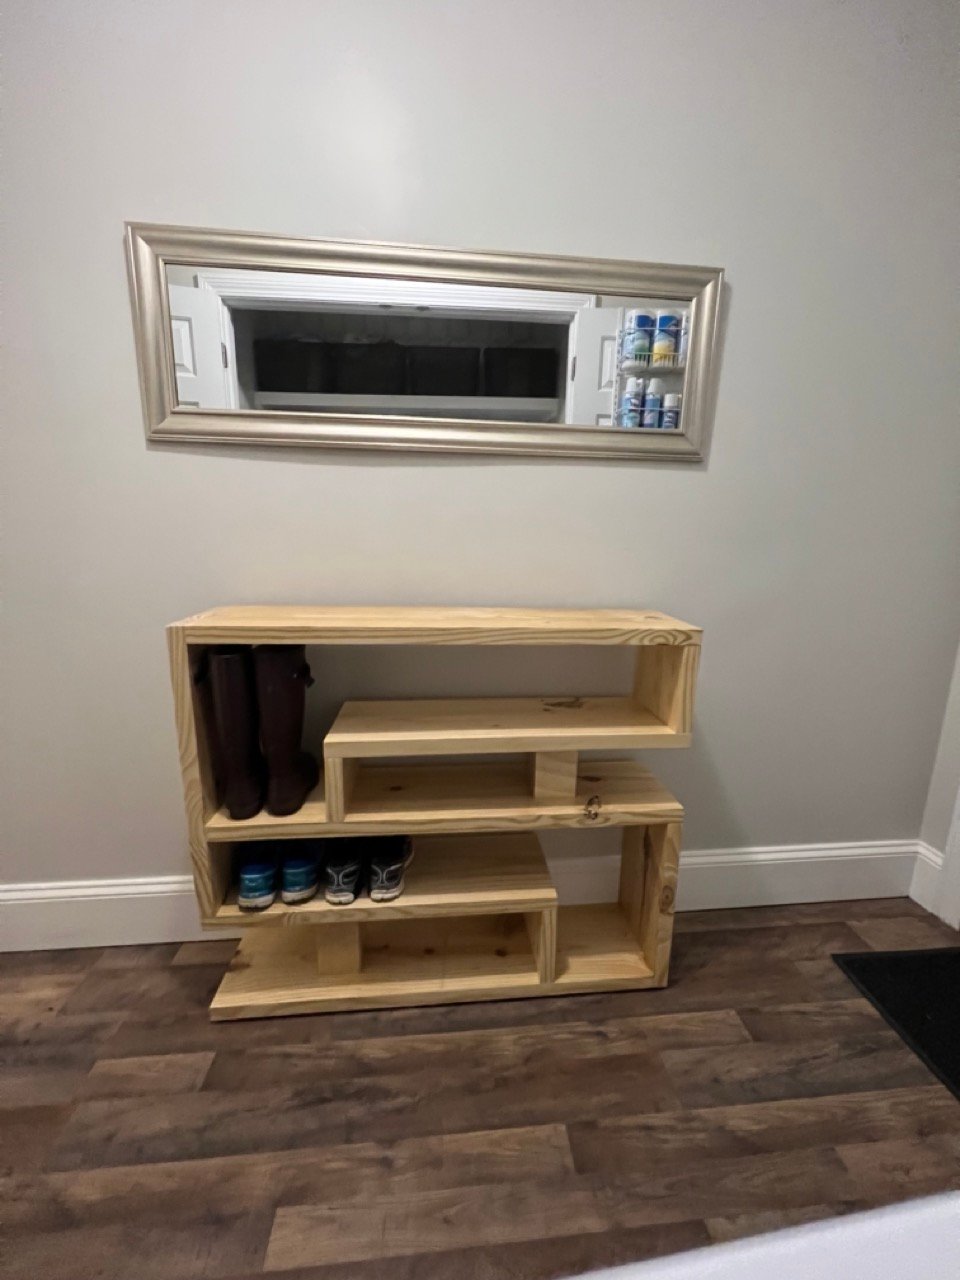
Community Brag Posts

Door Spice Rack

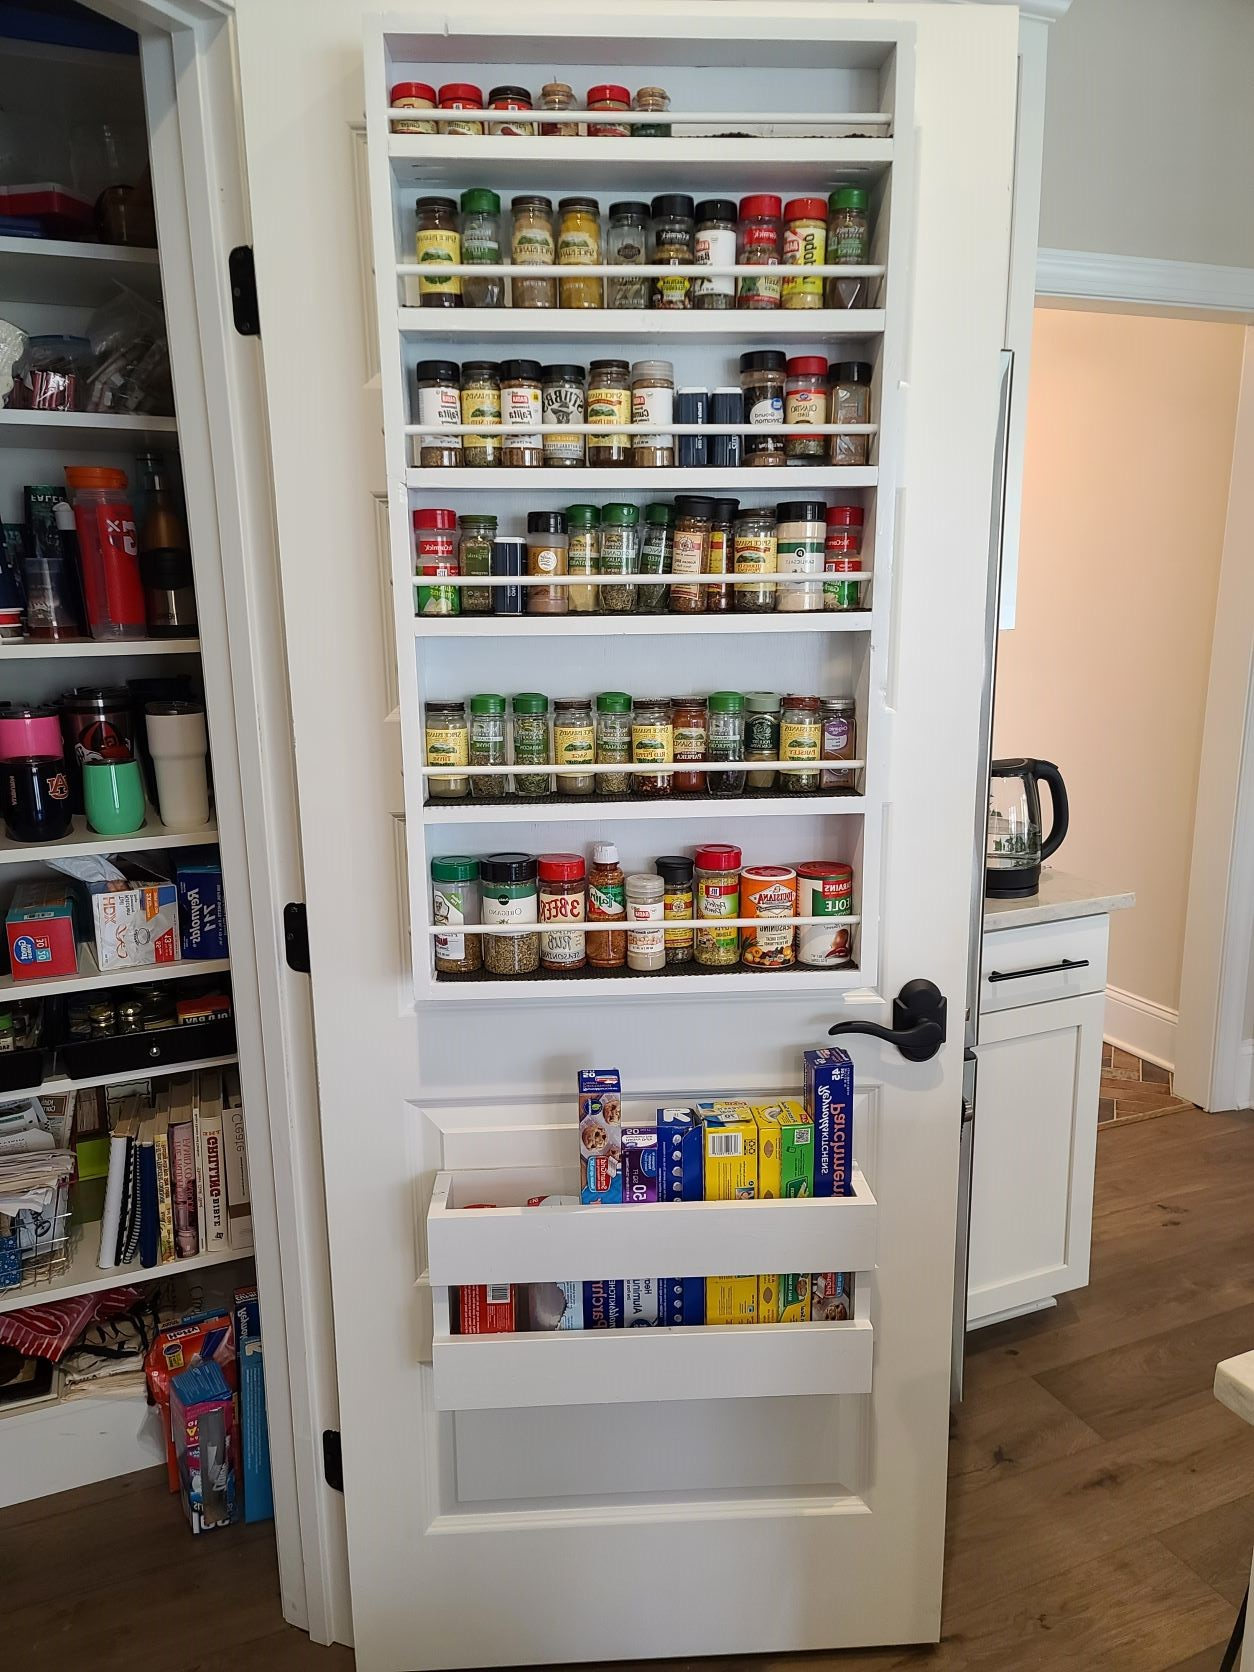
We just moved into our newly built home, I love to cook, and realized really didn't have a good spot in the pantry for all the spices. This was my first project and in doing internet search for ideas came across Ana White's website, not only did I find the spice cabinet plan I was looking for, but a treasure trove of other projects and ideas. New to this so I have found Ana's site to be such a blessing. Yes, this made me a hero to my wife!

Built from Plan(s)

Shoe organizer

Submitted by Liz H. on Wed, 06/01/2011 - 21:26

I took the 25 cubbies plan and changed the dimensions to fit shoes. I made a simpler version for my husband too. This project went together quickly and was so fun to build.

Estimated Cost
$10
Estimated Time Investment
An Hour or Two (0-2 Hours)
Finish Used
White paint
Recommended Skill Level
Starter Project

Lift Top Coffee Table

Submitted by JJones0925 on Fri, 03/16/2018 - 20:48

Instead of attaching the top to the coffee table base as done in the plans, the top is attached using a set of coffee table lift top hinges. 

Built from Plan(s)
Estimated Time Investment
Weekend Project (10-20 Hours)
Recommended Skill Level
Beginner

Comments

Utility room storage modified for skis and a freezer

http://www.ana-white.com/2014/09/free_plans/easy-economical-garage-shel…

This is the garage shelving construction method, but modified because we needed room for the freezer, there is a steel support column, and skis needed to be hung.

It's really three "ladders" of 2x4s, nailed with my framing nailer.  The rungs support the shelves.

  • The only dimensions I measured were to reserve space for the freezer, and the height of the support for the ski rack pegs.  The rest was based on the height of the things I wanted to store (coolers, etc), the width for the shelf unit was "as wide as possible" and the depth was "as deep as possible without covering the power outlet". 
    Cut to fit.
  • The ladder pair at the rear of the photo makes one shelf unit. 
  • The third ladder has rungs on both sides of the support column to stabilize it, keep the skis from banging into the freezer, and to provide a place to put the ski hanging pegs. It is also has one support for the shelf over the freezer.
  • The shelf over the freezer area stabilizes the unit side to side.  It's a good place for bulk paper storage because that is light and not heat sensitive.
  • The only truly new pieces of lumber were the 6 2x4 studs for uprights and some of the rungs.  I used all the suitable scrap 2x4s I could find before I cut into new wood.
  • Shelves were made of scrap plywood from another project, and some salvaged wood from the garden shed.  Some were previously part of my truss shelves, which were no longer needed after the workshop storage improved.  (yes, I recycle my recycled and reclaimed wood.
  • Shelves are nailed in place with finish nails to keep them from slipping.
  • You can't see them, but each shelf has a 1x4 or 1x6 board nailed to the ladder behind it to keep things from falling through the gap.
  • Ski storage is dowels inserted into a 2x6.  The paired dowels are far enough apart that the ski bindings won't whack into each other.  After the picture was taken I put an over-the-door coat hook between the skis to hang the poles.
  • The space for the folding stepstool was 100% accidental! 

It's CHEAP and EASY storage.

Two reasonable skilled people could do it in an afternoon.

Estimated Cost
$20 in new wood
Estimated Time Investment
Day Project (6-9 Hours)
Finish Used
None. I left it bare.
Recommended Skill Level
Beginner

Comments

Simple Armoire - Courtesy Ana White

Submitted by geauxpea on Sat, 07/09/2011 - 15:46

Second project we under took after stumbling over this blog. The armorie fit well in our bed room and has enough space for all my Indian sarees. Added a jewelery drawer in the middle. Love your blog Ana, thanks for the great work you do. Next project is to build a bed to match the armorie.

Built from Plan(s)
Estimated Time Investment
Weekend Project (10-20 Hours)
Finish Used
MinWax Red Mahagony stain and a polyurethene coat.
Recommended Skill Level
Beginner

Comments

JES

Sat, 07/09/2011 - 18:42

Love the finish and detail, beautiful inside and out. The jewelry drawer is a super idea! Super job- Love it! :) J

Framed and Tufted Upholstered Headboard

Submitted by marrsgirl on Wed, 08/21/2013 - 17:16

I love the look of diamond tufting, so that's how I did the upholstered insert, which added hours to the project. The frame itself was built in about 3 hours, so this could easily be an afternoon project if you skipped the tufting.

Estimated Cost
$200
Estimated Time Investment
Weekend Project (10-20 Hours)
Finish Used
Behr "White Mocha" with wipe-on poly finish
Recommended Skill Level
Beginner

DIY Laptop Desk with Storage

How to build a simple laptop desk to use when working from the couch. This was a quick build from a woodworking plan found on the Ana White website. We added a small storage area for my blogging binder. 

Estimated Time Investment
Afternoon Project (3-6 Hours)
Finish Used
Distressing with pink paint and wood stain, poly on top.
Recommended Skill Level
Beginner

Entryway Table Shoe Rack Bench

Submitted by robinles on Tue, 05/16/2023 - 10:17

I adapted the plan for the Shoe Rack Bench to give it multiple levels and allow it to serve as an entryway table in addition to a shoe rack. I used 2 x 10's for the project.

Built from Plan(s)

Comments

Outdoor chairs w/ accent table

Submitted by bnakka on Wed, 09/25/2019 - 18:18

I have bookmarked these plans for my front porch a year ago. Finally last Saturday I decided to finish. 

I had to change the chair dimensions to fit 24" x 24" cushion, and the accent table leg height from 13 1/2" to 20". 

I also forgot sanding the surface too fine makes staining so hard and fine sawdust is not good to be around. 

Estimated Cost
80 for the furniture (100 for cushions and carpet)
Estimated Time Investment
Afternoon Project (3-6 Hours)
Finish Used
Behr Premium (Russet). Finish the wood before you assemble. If you want the cushions to be snug take off half inch more than the recommended specs.

Found the cushions on wayfair for around 30 a piece and the carpet for 40. I am using old pillows I already have in storage.
Recommended Skill Level
Intermediate

Jackson's new bed

This was a simple project, super easy to do if you need an inexpensive bed for a young child. It freed up floor space in our son's small room, which he loves.

Built from Plan(s)
Estimated Cost
About 100.00
Estimated Time Investment
Day Project (6-9 Hours)
Finish Used
Krylon Gloss and Krylon Chalkboard-both spray paints.
Recommended Skill Level
Beginner

Comments

Farm house queen bed modified for box spring

This bed was built completely out of necessity. Our old 30 year old bed (including mattress) had given me my last backache. A new bed and mattress set was too expensive so I decided to build the bed and spend the saved money on a mid class mattress. So glad I did! What I built seems waaaay better than what we could have afforded. And it only took me a long weekend plus a few days waiting for stain and polyurethane to dry. Plus the return trips to HD to purchase new lumber after making wrong cuts and the cheap furring strip I bought at first continuously split on me.o t

I wanted the box spring to fit inside of the frame as much as possible. I realized the farm house queen bed plan plus the platform bed plan that I was using did not do that a bit late. By then I had already glued and screwed on the side rails. So I just flipped the frame around and decided to go with that side. Later I realized that the inside width of the bed was 57!! (60 - 3 for the frame) so I needed to return to the store to get new wood for the frame since what I cut already was 3 inches too short. My already built headboard and foot board also would not fit like the plan suggested so I needed to improvise. What you see is mainly my improvisations as a result of many, many mistakes.

My bed has two sets of legs. I did not trust the headboard and footboard legs as I could not attach them as described so I added a set to the frame itself. I also made the upholstery so that I could easily change it by unscrewing it from the head and footboards.

Estimated Cost
$90. Less than $70 initially but went up with the addition of trims and mistakes. Already had fabric and foam.
Estimated Time Investment
Week Long Project (20 Hours or More)
Finish Used
3 coats of Minwax polyshades in satin followed by Minwax gloss polyurethane. I applied it using foam brushes.
I would have liked it to be lighter. Just as I thought the color was good - after 2 coats - I spilled half the can of stain onto the foot board. Was forced to brush that in and add another coat to the headboard.
Recommended Skill Level
Beginner

Comments

moosmani

Fri, 01/10/2014 - 20:10

Oh my! I had to giggle about your experience, especially the last part when you were forced to put on another coat after spilling half the can! Been there, done that. You did a great job at improvising and I'm impressed you could keep the cost so low. I really like the dark color. Great job!

moosmani

Fri, 01/10/2014 - 20:09

Oh my! I had to giggle about your experience, especially the last part when you were forced to put on another coat after spilling half the can! Been there, done that. You did a great job at improvising and I'm impressed you could keep the cost so low. I really like the dark color. Great job!

Full Size Storage Bed

My son chose this system for his room (minus one bookcase - the room wasn't large enough!) and even painted a few of the pieces himself! he's very tall so I lengthened the bed to 92" which is the length of the extra-long mattresses. For the time being, I added 6" high-density foam to the end of his mattress. I also used plywood with edge banding instead of 1x12 boards.

Built from Plan(s)
Estimated Cost
Around $200
Estimated Time Investment
Week Long Project (20 Hours or More)
Finish Used
Dutch Boy Interior Satin in Alloy
Recommended Skill Level
Advanced

Comments

Farmhouse Bed with Storage and Bookshelf footboard

Submitted by rbgreene04 on Sat, 05/21/2016 - 15:50

I altered the plans just a bit so that I could make use of the drawer closest to the headboard, while using bedside tables as well (not the ugly ones in the pictures, but some that only exist in my mind as of now). With the plan as is, I didn't think that first drawer would be able to open if you have a nightstand. So I left about a 17" gap that can be used as an open shelf for storage, and still had room for 3 drawers. I also wanted to include a bookshelf as the footboard to make it multifunctional. We have a ton of books and no place to store them (fear not, a large bookshelf/media center is coming soon!) I also altered the top of the headboard just a bit to give it more texture and visual appeal (hopefully, but beauty is in the eye of the beholder so I've been told). Lastly, I did not put the 1/4" plywood backing on the drawer carcasses. They were pretty sturdy as is, and only got more sturdy as they were attached to the headboard and footboard; I'm not worried about racking at all. Leaving the back off also allows me to pull the drawers out and access some hidden storage in between the two drawer carcasses. 

I wanted a simple finish, so I rubbed it with dark walnut Danish oil. Super simple finish and I think it'll hold up as the bed is not like a desk that needs poly or something. 

Estimated Cost
Cost? Great question! I build things, but don't keep track of receipts. Whoops! It's a major flaw of mine, and I'm working on it. I'd estimate just shy of $300.
Estimated Time Investment
Week Long Project (20 Hours or More)
Finish Used
I sanded to 120 and then lathered on Dark walnut Danish oil. I let it soak into the wood, and boy was the wood thirsty. Then reapplied after about 30 minutes and wiped off the excess, which there wasn't much excess--did I mention the wood was thirsty?
Recommended Skill Level
Intermediate

Comments

ciara5545

Sun, 08/28/2016 - 19:50

This bed turned out amazing.  I love the modifications and agree the first drawer will be more usable.

DIY Bar Cabinet

Submitted by Anonymous (not verified) on Mon, 02/24/2020 - 16:27

I bought this tv corner cabinet for $40. I spent many hours turning into my perfect bar cabinet. I built a custom lighted liquor display. I have posted photos of the transformation.

Estimated Cost
$1000
Estimated Time Investment
Week Long Project (20 Hours or More)
Finish Used
Benjamin Moore- hale navy
Recommended Skill Level
Intermediate

Comments

frendlygrl

Tue, 07/06/2021 - 19:04

So this is not your project? Because there isn't much information or a before and after picture. This gave me an idea for our home.

Pottery Barn Inspired Media Console

Submitted by katie0910 on Wed, 03/05/2014 - 05:29

This project has been a long time coming and I'm so excited that it is finally finished. We modified the plans to better fit our media center opening, so it is about the same dimensions as the original Pottery Barn Benchwright TV Stand. We also used true dimension lumber, so we adjusted the measurements based on that. This is definitely my favorite project to date!

Built from Plan(s)
Estimated Time Investment
Week Long Project (20 Hours or More)
Finish Used
Minwax Stain in Provincial
Minwax Polycrylic in Satin
Recommended Skill Level
Intermediate

The Fred-enstein Bed

Submitted by bookette on Wed, 05/30/2012 - 14:30

For my son's 7th birthday, I promised him a new lofted bed. I poured over different designs, drooled over all of the different things I could make, worried about whether or not I could actually do it. Nothing in the market fit my requirements or my budget... I was determined to make this for my son.

Over the long weekend, this bed was constructed... a little "Loft Bed", a little "Claire", a little "Cabin" and a little inspired innovation and ta-da: The Fred-enstien Bed :)

Claire guardrails and bookshelf supports
Modified Claire Desk (work in progress)
Cabin Headboard
Custom built storage shelf stairs (he didn't want a ladder)

Next weekend will be touching up the paint and installing the remaining bookshelves

Estimated Cost
$500 (includes shelf/stairs)
Estimated Time Investment
Week Long Project (20 Hours or More)
Finish Used
Valspar Semi-Gloss Swiss Chocolate
Recommended Skill Level
Beginner

chicken coop

Submitted by namaste7 on Mon, 05/11/2020 - 22:10

Modified to make the coop bigger and the planter smaller. Added 1" foam insulation on the inside and changed the design to use the "deep litter" method. This means the coop bottom goes all the way to the bottom of the support beam rather than using a removable tray. Added a steel roof with a ridge vent at the top. The chicken run under the coop is lined with buried hardware cloth so no animals can dig under the coop. All hinges are mortised and doors flush mounted. The coop is wired for power for a heat lamp. The planter is lined with a metal tray. The coop can be separated into two pieces so you can move it or rotate the top 180 deg if needed (so you can get to the eggs from the left or right side). Great plans, thanks Ana!

Estimated Time Investment
Week Long Project (20 Hours or More)
Finish Used
cedar deck stain. Olympic. brand
Recommended Skill Level
Advanced

Comments

Seasonal And Holiday

Outdoor Play Kitchen

Submitted by Anonymous (not verified) on Mon, 04/15/2024 - 10:05

I built this using Ana's plans for her outdoor play kitchen. I live in North Carolina and took it to my grandchildren in Ohio. They love it! I used an inexpensive beverage dispenser installed into a trashcan and connected a small aquarium pump to recirculate the water from the sink to the water tank. I'm super pleased with how it turned out!

Nancye Butterworth

Built from Plan(s)

Fancy Jewelry Box

Submitted by Matt L on Mon, 06/29/2020 - 19:52

Great plans and a fun build. I made some modifications. My drawers are 1.5” high and 10” long. It allowed for 6 drawers. Overall height is 13.75” and length is 17.5”.

I used rabbits and dados rather than butt joints. There is flocking in the drawers.

Built from Plan(s)
Estimated Time Investment
Week Long Project (20 Hours or More)
Finish Used
Garnet Shellac at a 2# cut. Wiped on. I used 4 coats sanding with 400 grit after coats 2 and 3. I used 0000 steel wool after coat 4. Then I applied Paste wax.
Recommended Skill Level
Intermediate

Farmhouse Bed - King

Submitted by SNukem on Thu, 07/03/2014 - 21:43

We built the farmhouse king size bed over the last week. We used 2x4 hangers to hold the 2x4's in place and used 2x4's to support the mattress. We put 7/16" plywood on top of the 2x4's to support the mattress. We struggled with how we were going to attach the side rails to the bed frame and finally came up with a way we felt would be strong enough. Please see the pictures included to see exactly how we attached the rails to the bed frame. We used lag bolts, and metal brackets.

Estimated Cost
200
Estimated Time Investment
Week Long Project (20 Hours or More)
Finish Used
Glidden Antique White Primer and paint combo in semigloss, we did 2 coats.
Recommended Skill Level
Beginner
Back