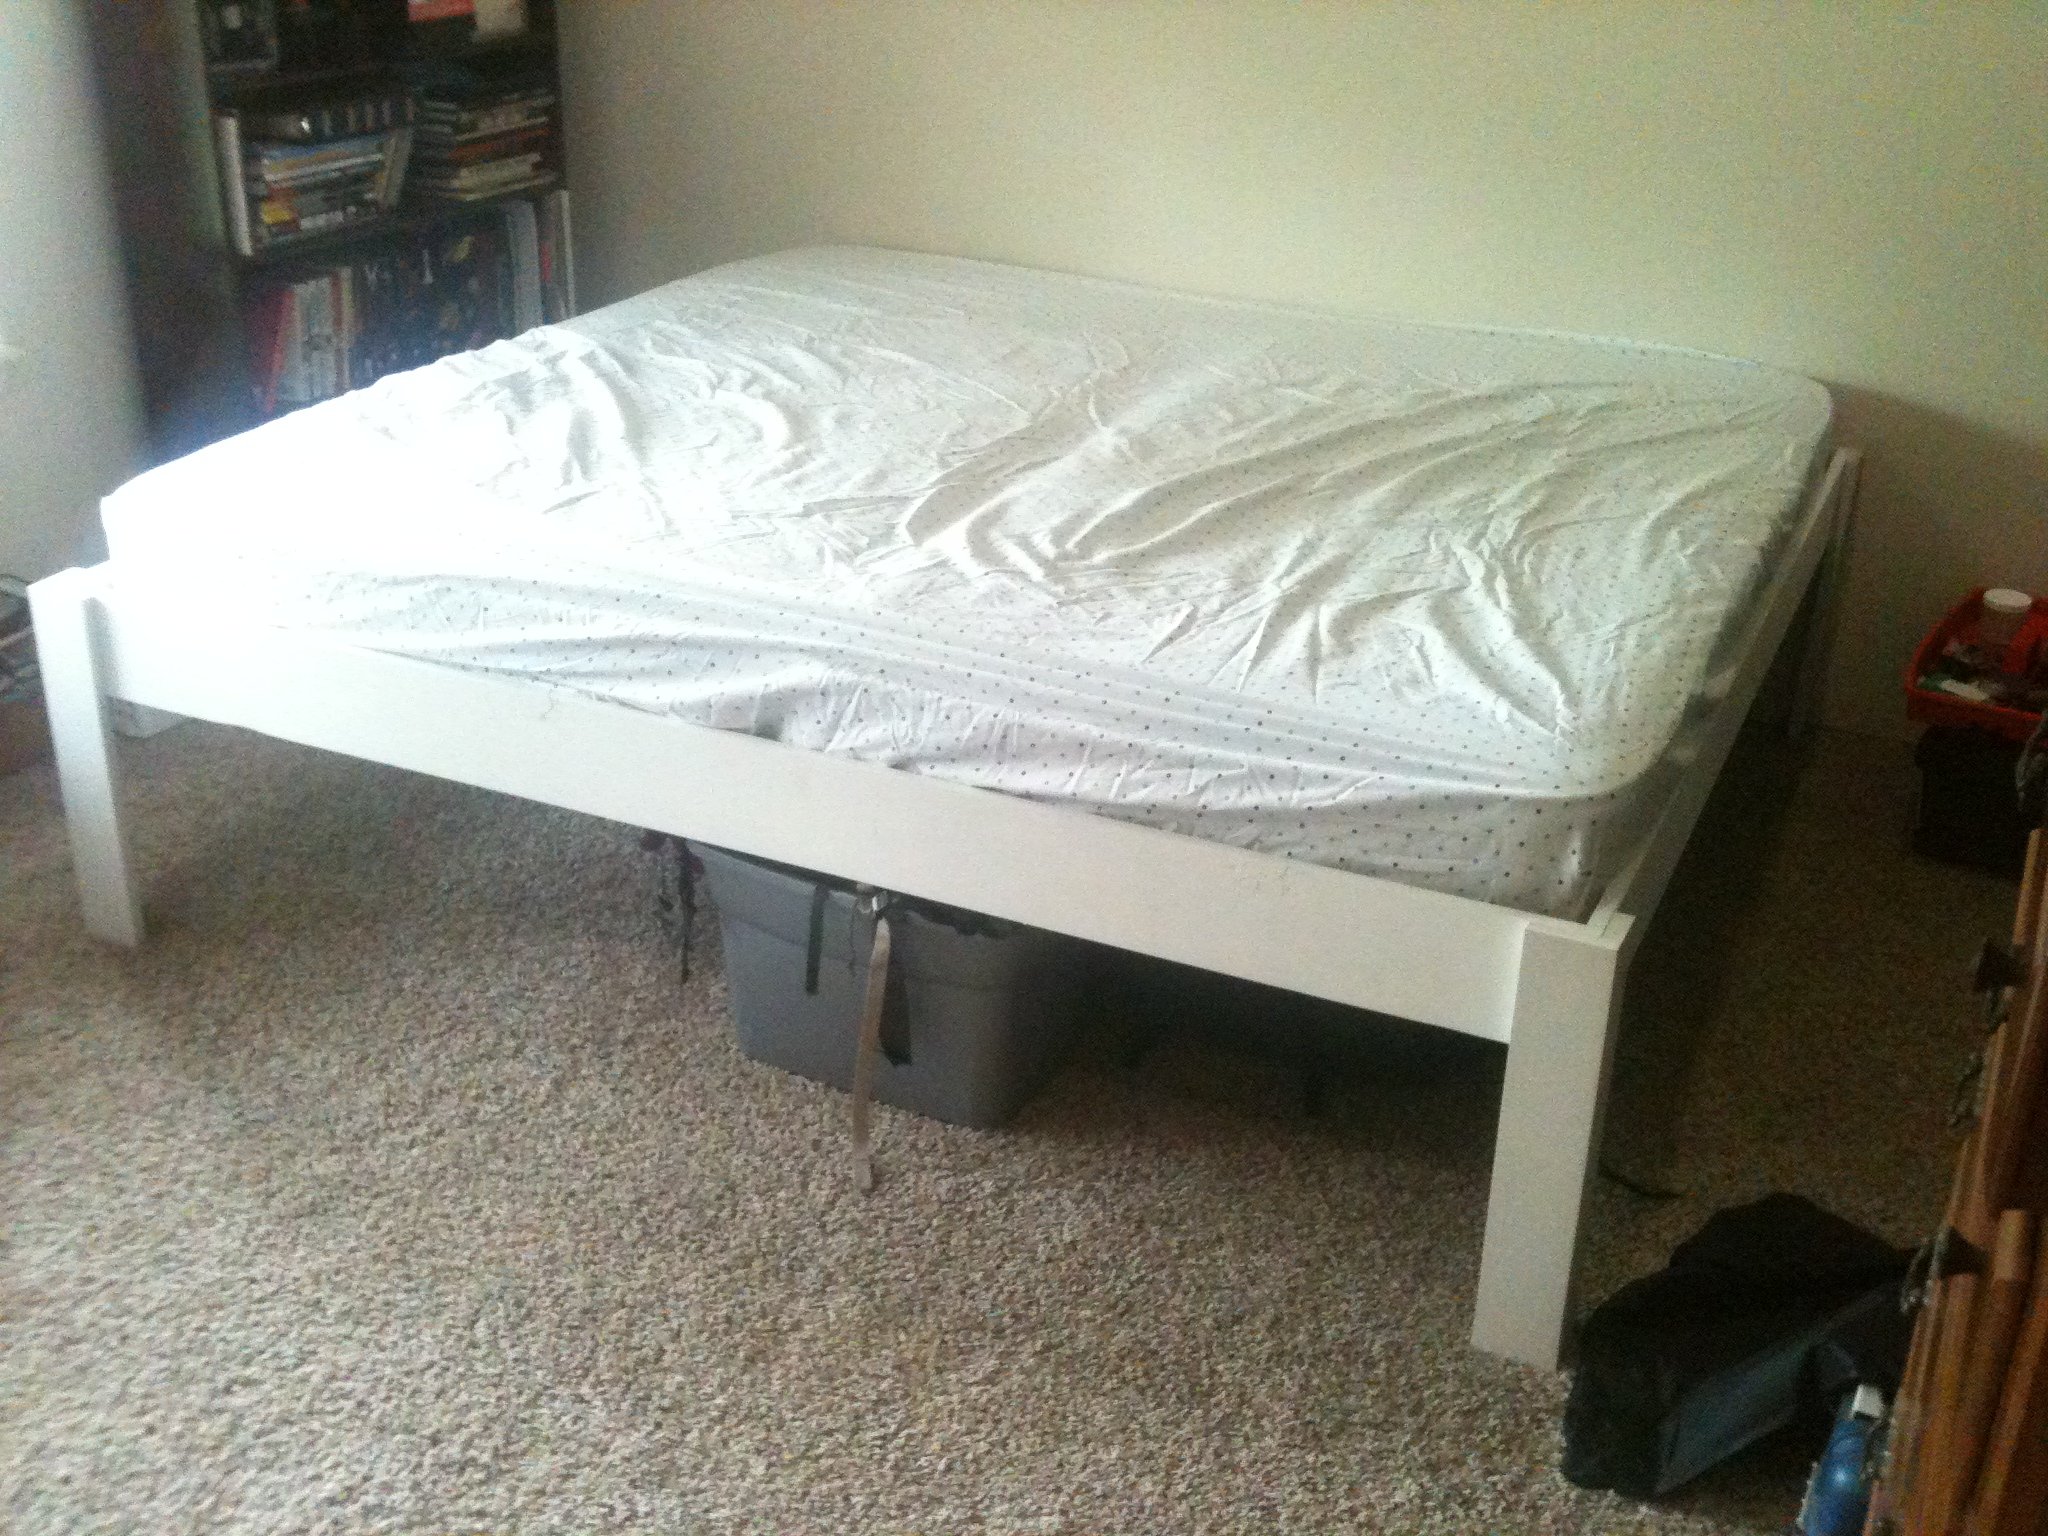
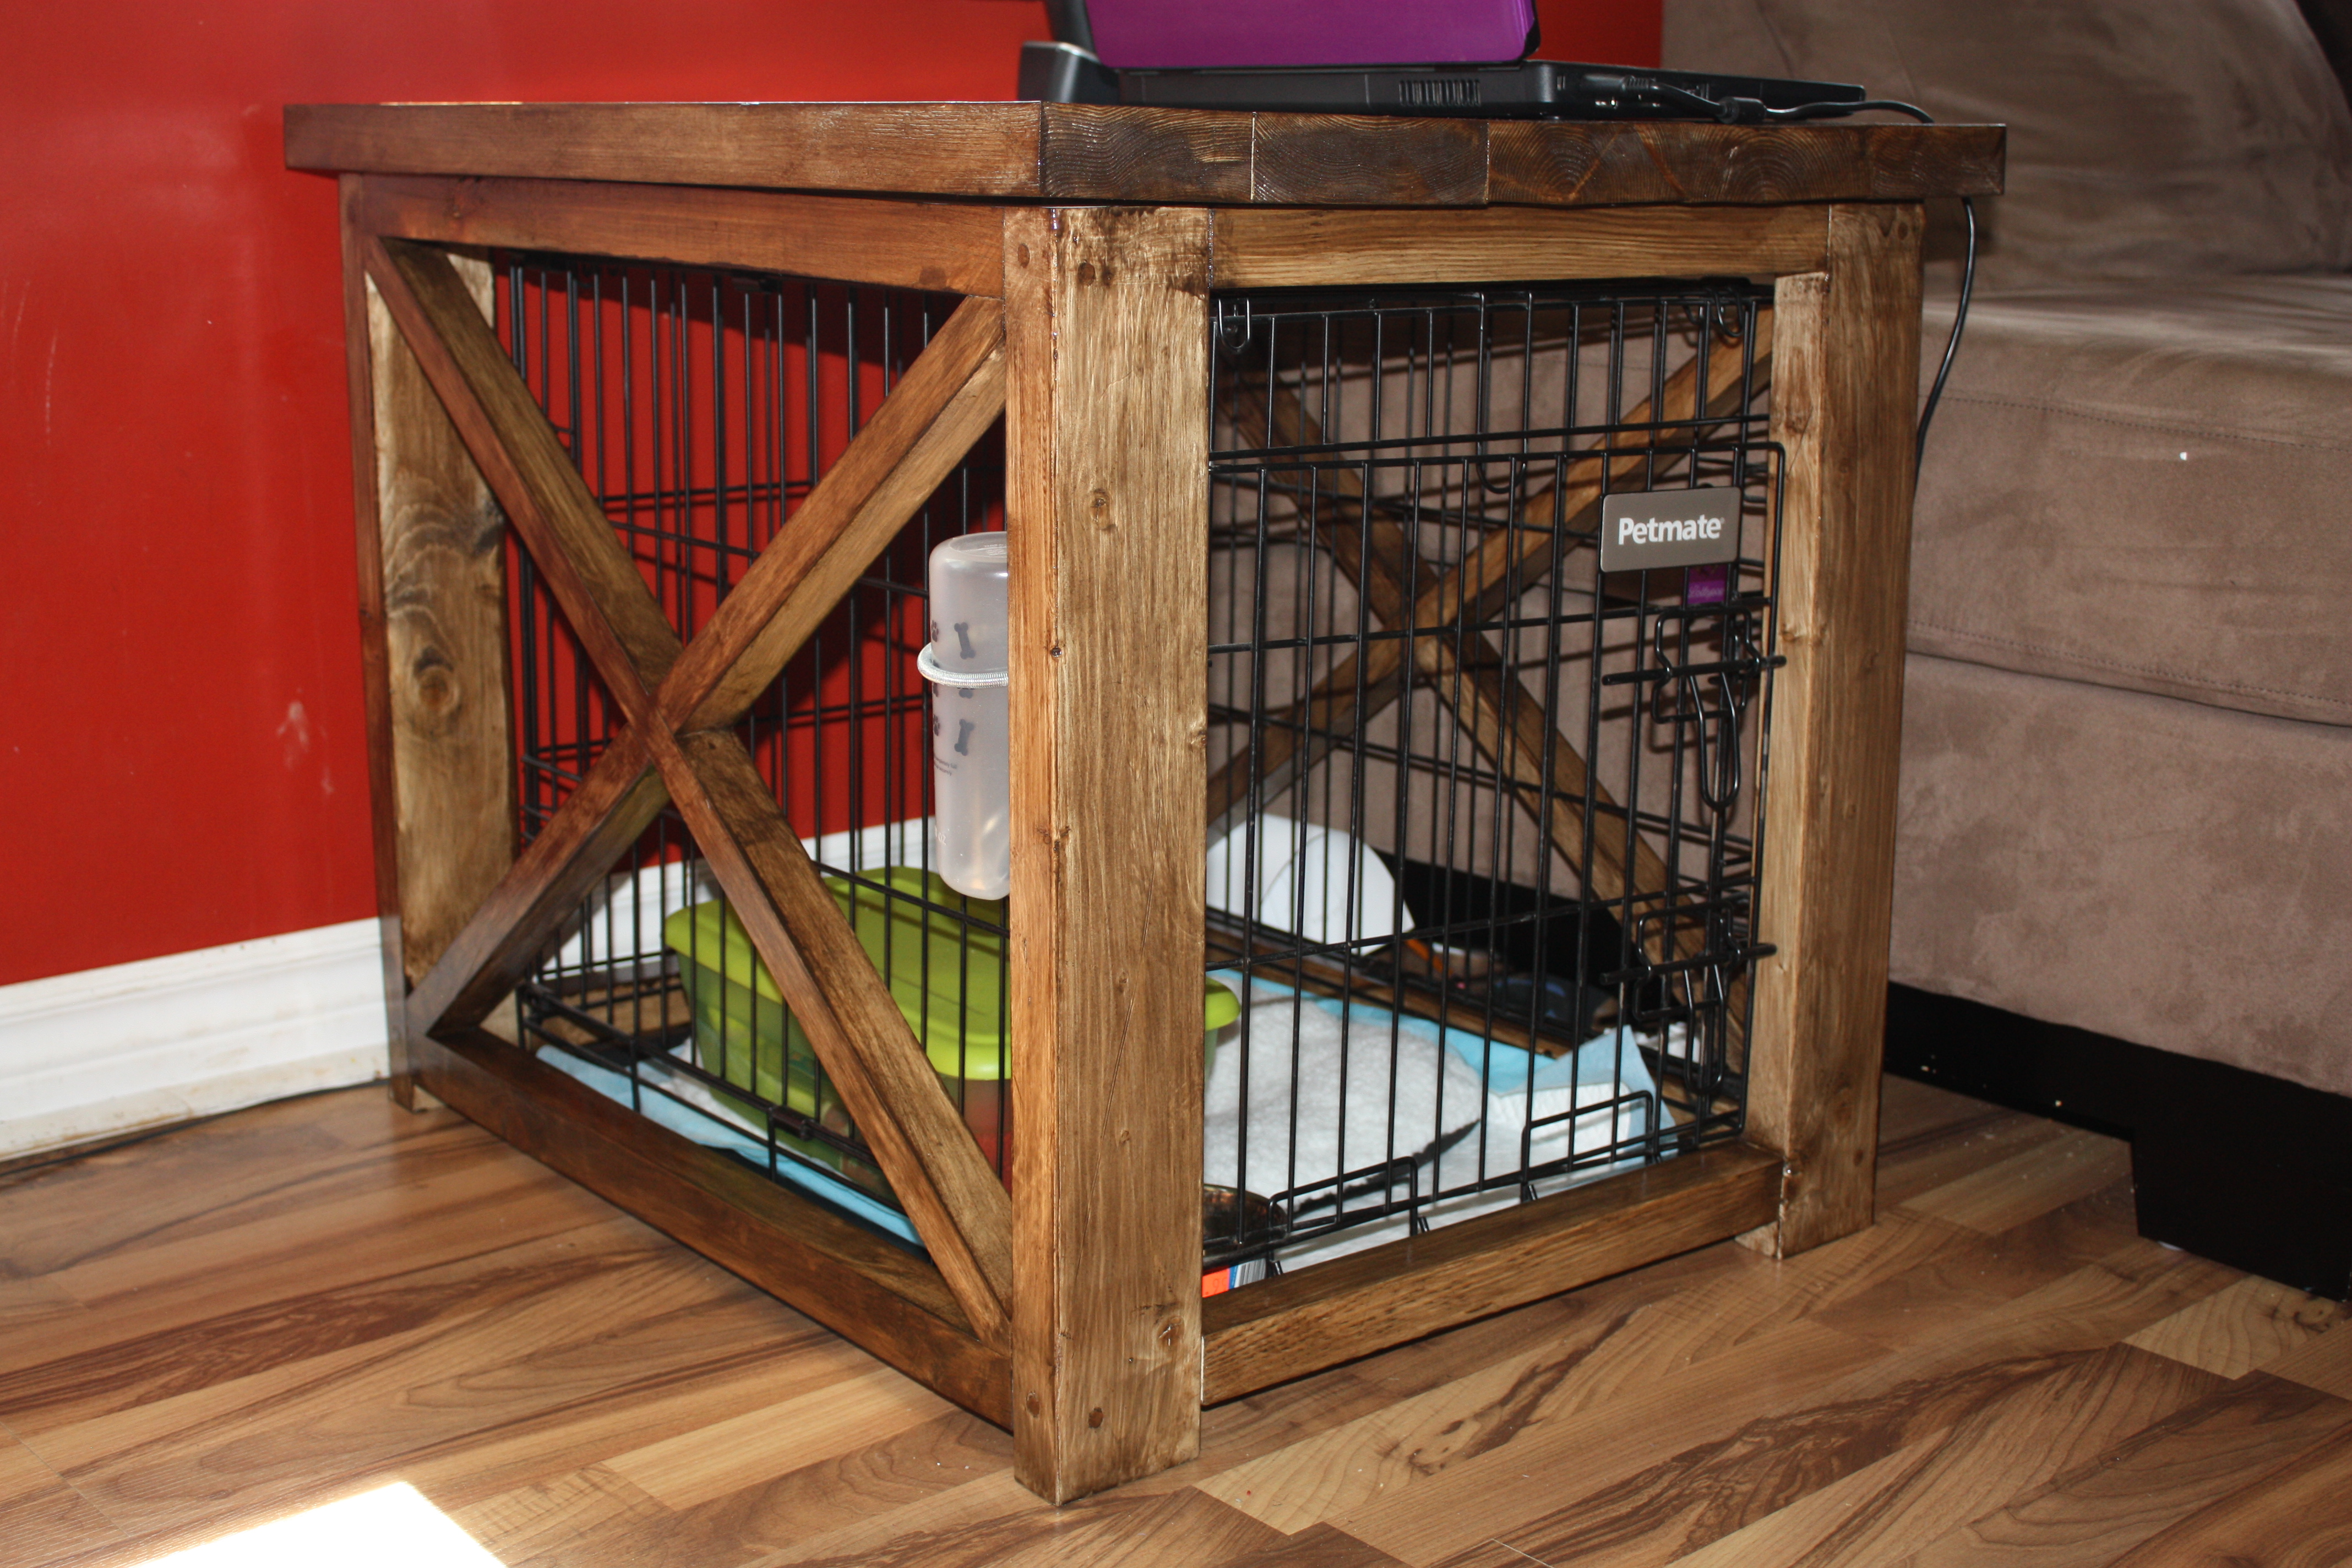
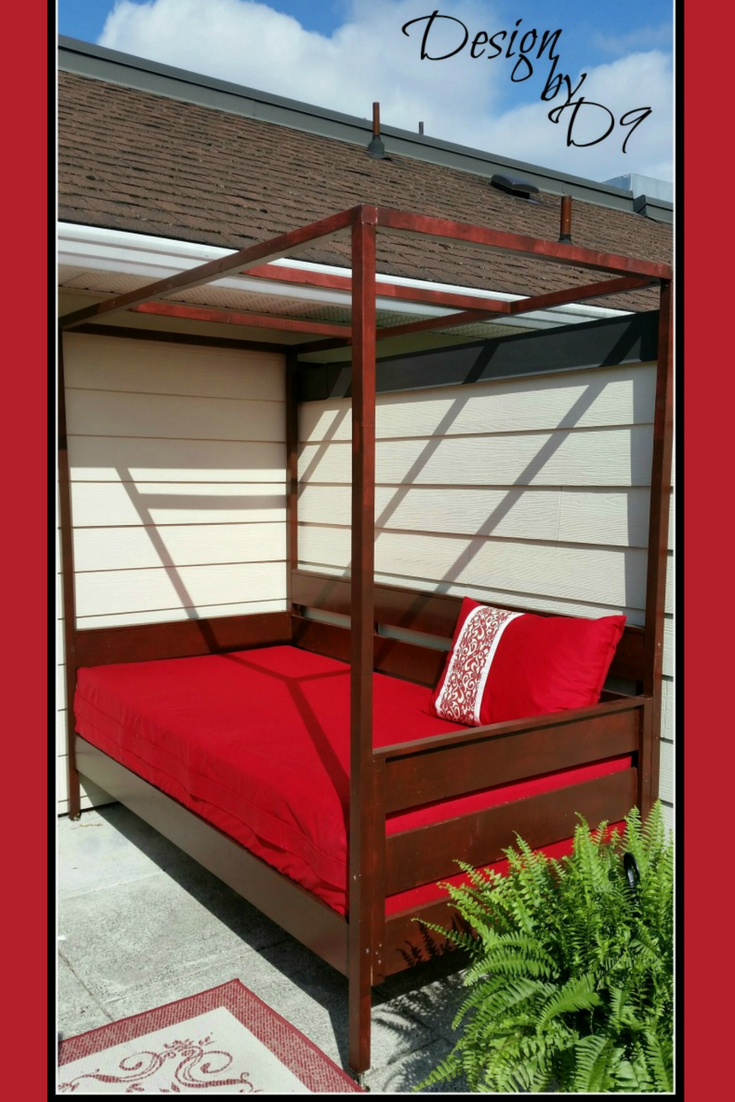
Community Brag Posts

Catio heaven

Submitted by bhoppy on Fri, 09/04/2020 - 15:43

Ana doesn’t have a plan for a catio but she does for a playhouse and a cedar shed made from 2x2’s. I sort of combined my knowledge from making her plans over the last 10 years and came up with this for my cats. It was fun to make!! My baby kitten is loving it. I used garden fencing and stapled it to the outside and pocket holes for the walls. I made each wall individually like the playhouse then connected them once in place.


Estimated Cost
$250
Estimated Time Investment
Week Long Project (20 Hours or More)
Finish Used
Cabot semi transparent outdoor deck and fence stain. ($9 oops section)
Recommended Skill Level
Intermediate

Comments

Wifey

Wed, 06/09/2021 - 12:36

Thank you for sharing! My daughter wants a cat for her birthday but it can't be inside due to our son's allergies. Roaming outside isn't really an option because we have coyotes. We are going to use one of these in combination with an underground electric fence.

Seasonal And Holiday

Farmhouse X Desk

Submitted by Jeremysj on Thu, 10/15/2020 - 10:59

I built the Farmhouse X Desk with full extension drawers instead of shelves.

Built from Plan(s)
Estimated Cost
$125
Estimated Time Investment
Weekend Project (10-20 Hours)
Finish Used
White cabinet & furniture paint and dark walnut stain for the top. Finished the top with several coats of Minwax polycrylic.
Recommended Skill Level
Intermediate

Hidden Catbox

Submitted by Anonymous (not verified) on Thu, 10/22/2020 - 07:26

Wife and I decided we needed something to contain the smell of our two litter boxes. Found the Ana White plans and modified them to fit my needs. Used a grow house filter attached to an inline extractor fan to keep a slight negative pressure inside the box. With the extractor fan on low there is zero litter box smell.
Project turned out really well. Although this one turned out great, I would spend the extra money and buy the better wood for the frame next time.

Estimated Cost
$350.00
Estimated Time Investment
Week Long Project (20 Hours or More)
Finish Used
Minwax water based prestain, old leather stain, and polycrylic finish
Recommended Skill Level
Intermediate

Comments

Garage Shelves + Work Bench

I used Ana’s plans for the garage shelves, but modified them to include a work bench. A lot of you tubers have done this, built a combination work bench and shelving, but I built nearly everything according to Ana’s plans. 12 feet long, 24 inches deep. I got some LED lights (two 1600 lumen strip lights) from menards that really brighten up my entire garage and make the work bench more useful. The one thing I really wanted was to not have a supporting pillar on the work bench to keep it open, and I loved how it turned out. I went for 3/4 plywood, mostly to have a stronger work surface, and I’m glad I did. I have since added a supporting 2x6 off of the study to support the top shelf above the bench and its strong enough to do pull-ups off of, and I have reinforced the support leg under the bench with a cross bar. Thanks for the great plans!!

Estimated Cost
~$200 (lumber prices have gone up recently due to supply issues with covid)
Estimated Time Investment
Weekend Project (10-20 Hours)
Recommended Skill Level
Starter Project

Comments

Square Picnic Table Project

This was a great summer project. The table looks great and it was any easy build. Doesn’t get any better than this. I added a hole in the center of the table for my umbrella and used the longer screws for more frame stability.

Built from Plan(s)
Estimated Cost
$200.00
Estimated Time Investment
Day Project (6-9 Hours)
Finish Used
Used semi transparent cedar tone stain. Lightly sanded edges and surfaces. Applied stain with a brush before assembly.

Comments

Seasonal And Holiday

Kid's country bench

This was my first building project from scratch! I have modified some thrift store finds, but this was the first from lumber. I learned to countersink! I was amazed at how easy this was, and I'm so excited that this bench will sit by our front door for my three boys to perch on when they put on or take off their shoes. I went with 3 cubbies to hold three pairs of shoes. It also works great for a couple of kids to sit on at the table for when we have guests and need some spare seating.

Built from Plan(s)
Estimated Cost
$30
Estimated Time Investment
Afternoon Project (3-6 Hours)
Finish Used
Oak stain (one coat) and polyurethane (2 coats).
Recommended Skill Level
Starter Project

Floating Bench (Walnut bench Board and Batten Wall)

Submitted by Anonymous (not verified) on Thu, 12/30/2021 - 06:25

Followed the instructions in the original blog. I would like to thank Ana for the blog. It was the inspiration I needed. This project was challenging for a rookie like myself. The plan is basically the same as the original post from Ana.

Materials:
4" Vertical MDF primed boards
3" Horizontal MDF primed boards
Our wall has texture so we had to use tempered board to make it nice and smooth.
Half inch plywood for under the bench seat.
2x4 for the bench frame
I ordered furniture quality Black American Walnut from a sawmill for the floating bench (not cheap but worth it). I stained it with one coat of Watco Black Walnut just for protection (took 10 minutes to do super easy) let it dry for 24 hours at least.

Challenges:
1. The wall on the right side of the bench did not have a stud just a corner stud, I was not going to risk this bench support so I put the bench support on the one corner stud and installed a hidden strong tie: https://www.homedepot.com/p/Simpson-Strong-Tie-CF-4-15-16-in-x-6-in-Con…
This provided the support that the missing stud would've. Now the bench is structurally sound.
2. Walnut uneven cuts from the sawmill, I had to use a plane to bring the planks closer together didn't want huge gaps.
3. Outlet in the way. City code mandates to remove outlet leaving access to it. We decided to build above the outlet making the bench a bit higher than we wanted it but still worked out, now we still have an accessible outlet under the bench.

Comments

Tall Bedroom Dresser

Had a blast with this project and am getting more confident with drawer slides. I built a matching dresser that is much shorter and wider. It can be found here: http://www.ana-white.com/2018/08/DIY_furniture/bedroom-dresser

Estimated Cost
$150-$200
Estimated Time Investment
Weekend Project (10-20 Hours)
Finish Used
Varathane Weathered Wood Accelerator, Varathane Poly
Recommended Skill Level
Advanced

Comments

hutchingslv

Thu, 08/12/2021 - 15:35

Any way to get a copy of these plans? I really like the look and want to give it a shot. Have to make a few of these if all goes well for all my boys.
Thanks

Sandbox with built-in seats

I modified this a tad from the original plans to suit my needs. I will eventually be adding a platform with attached slide and swing set.

Plans were easy to follow. My store didn't have 1x8's so I stacked 1x4's and used my Kreg jig to join them together and then I added extra bracing.

I had seen this on Pinterest a couple years ago and thought it was the coolest thing! Io excited I was able to build it myself!

Built from Plan(s)
Estimated Cost
About $40
Estimated Time Investment
Day Project (6-9 Hours)
Finish Used
None yet. I will stain and seal everything when I get the entire play set finished.
Recommended Skill Level
Beginner

Barn Door Garage Storage

Submitted by MommaBlue on Wed, 10/09/2019 - 07:13

I adapted this build from the Barn Door Entertainment Center plan.  Like most families, our storage space needed some major help!  We had minimal space to work with and all sorts of awkward things to store (rollerblades, helmets, etc).  I measured how deep I needed the shelves to be to fit our helmets and pretty much built around that!

The open shelves are great as they allow easy storage spots for the kids to reach - the doors are great because they allow me to hide the stuff that just never seems to get organized!  And the best part?  The sliding barn doors!  I park next to this thing so not having a swing out door was a major win for me!

I left the center of this piece open so I could fit a stand I already had in our garage, which allowed for a “charging station” for the cars!  Our garage is rustic theme so on this piece I went with standard common board for the walls and shelves and built the trim and doors from cedar.  The entire piece is stained with Minwax Provincial.  

Built from Plan(s)
Estimated Cost
300
Estimated Time Investment
Weekend Project (10-20 Hours)
Finish Used
Minwax Provincial
Recommended Skill Level
Intermediate

Comments

Garden Enclosure

Submitted by Anonymous (not verified) on Thu, 06/04/2020 - 17:29

My chickens took over my garden area and being the voracious raptors they are, I needed to build a garden enclosure to keep my veggies safe. I modified a little, making my beds deeper. I also had to stretch chicken wire over the top to keep the great flyers out. I also used it as a way to organize my garden tools (which is possible because I live in Southern California with moderate temperatures and little rain. Thanks for the plans! Yvonne

Built from Plan(s)
Estimated Cost
500
Estimated Time Investment
Weekend Project (10-20 Hours)
Finish Used
Deck on the outside. Clear coat on the inside. I also added chalkboard paint on the inside so I could fill in what I’m growing and erase it after.
Recommended Skill Level
Beginner

Master Closet System

Submitted by Michael B on Thu, 01/17/2013 - 13:17

Followed plans with slight modifications:
1. Made shelves deeper but narrower
2. Used 3/4" Birch Plywood for all
3. Built no base just mounted to floor & wall
4. No drawers just shelving

Estimated Cost
Under $80
Estimated Time Investment
Afternoon Project (3-6 Hours)
Finish Used
Clear Poly
Recommended Skill Level
Starter Project

Comments

Kids Country Bench

Submitted by iwn2000 on Wed, 04/22/2015 - 12:34

We wanted a bench for our daughter for our front porch, both for sitting and for storage of her rain boots, outdoor toys, etc. I'm definitely a beginner woodworker so I wanted something easy I could tackle in a couple of days with only basic tools, so I chose the Kids' Country Bench project. I liked the version posted here by a user named Jenny Anne, who modified the bench to make three cubbies rather than two on the bottom shelf, so I did the same thing.

It was easy, and the bench turned out great! I used no power tools except for a cordless drill to do the 40+ pilot holes & woodscrews. I don't own a jigsaw and I want to learn hand tools anyway, so I used a coping saw (a kind of miniature hacksaw) to do the curved cuts on the trim & the legs, and used heavy-grit sandpaper to smooth out the wobbles (there were a lot of wobbles).

For the rest of the cuts I used a Japanese-style pull saw (a cheap one from Ace Hardware). Cutting all the boards to length with a handsaw was probably the hardest part, and I had a tough time truing the edges. Next time I would probably use a miter box and miter saw to get perfect 90-degree angles, but I got better as I went along, and was able to finish the edges pretty well with a wood file and sandpaper.

I wanted to stain it a deep red color, but my better half insisted on a clear stain, so I used clear Polycrylic, four coats on the top & outsides, and three coats on the inner & undersides.

The bench feels pretty sturdy and is definitely strong enough to take my 3-year-old's weight. The trim on the front and back acts as a brace, so it's got some structural integrity. I don't know that I would trust it to hold an adult's full weight for very long -- I probably won't be dancing on it or using it as a stepstool or anything, but for a kid's bench it's solid and level.

The whole build probably took me four sessions in my "workshop" (i.e. my basement), at probably 2-3 hours per session. With woodworking it's definitely true that you learn by doing -- I gained confidence as I went along and am excited to try some more advanced projects!


Built from Plan(s)
Estimated Cost
About $150 total, but that included some tools I needed for my workshop. It would have been much cheaper for just the lumber and glue.
Estimated Time Investment
Weekend Project (10-20 Hours)
Finish Used
Clear Polycrylic, applied with synthetic-bristle brushes (brushes can be cleaned with soap and water between uses). Four coats on outer faces, three coats on inner and under sides. Two hours' drying time between coats, 24 hours' drying time after final coat before use.
Recommended Skill Level
Starter Project

Industrial Coffee Table

Submitted by Anonymous (not verified) on Tue, 02/16/2016 - 12:24

I was seeing this coffee table everywhere so I knew we had to make it. It's the easiest build ever. I think the only tricky part is the painting near the edge. We like a more sanded/finished top. We tried spray painting the base and then attaching the top, but then we sanded the top and the spray paint on the base near the top came off, so I had to cut in and I'm not good at that.

So we're still working on a way to do this properly. We tried making the top on the ground and then sanding & attaching it. But the top needs to be completely exact/square in order to do this. We live in a old farmhouse, so we prefer to attach it as we go - then sand. We also plane the top for a more exact and modern look. 

Estimated Cost
Under 50.00
Estimated Time Investment
Afternoon Project (3-6 Hours)
Finish Used
Top stained in our custom beachwood mix. A mixture of Minwax stains, Bottom spray painted in Oil Rubbed Bronze & semi-gloss polyurethane ( two coats )
Recommended Skill Level
Beginner

Comments

Full over Full Bunk Bed

Full over Full bunk beds. Adjusted for Full from a twin measurement. only 1" off floor for more head room.extra rail bar coverage upstairs for my daughter who rolls out of bed regularly.

Built from Plan(s)
Estimated Cost
used common board mix and a few premium cuts. Pine was more costly. @$250
Estimated Time Investment
Weekend Project (10-20 Hours)
Finish Used
White primer/paint
Recommended Skill Level
Beginner

Comments

bjerfr

Sat, 07/11/2020 - 10:12

What measurements did you use to adjust to a full size?

Back