Garage shelf and work bench
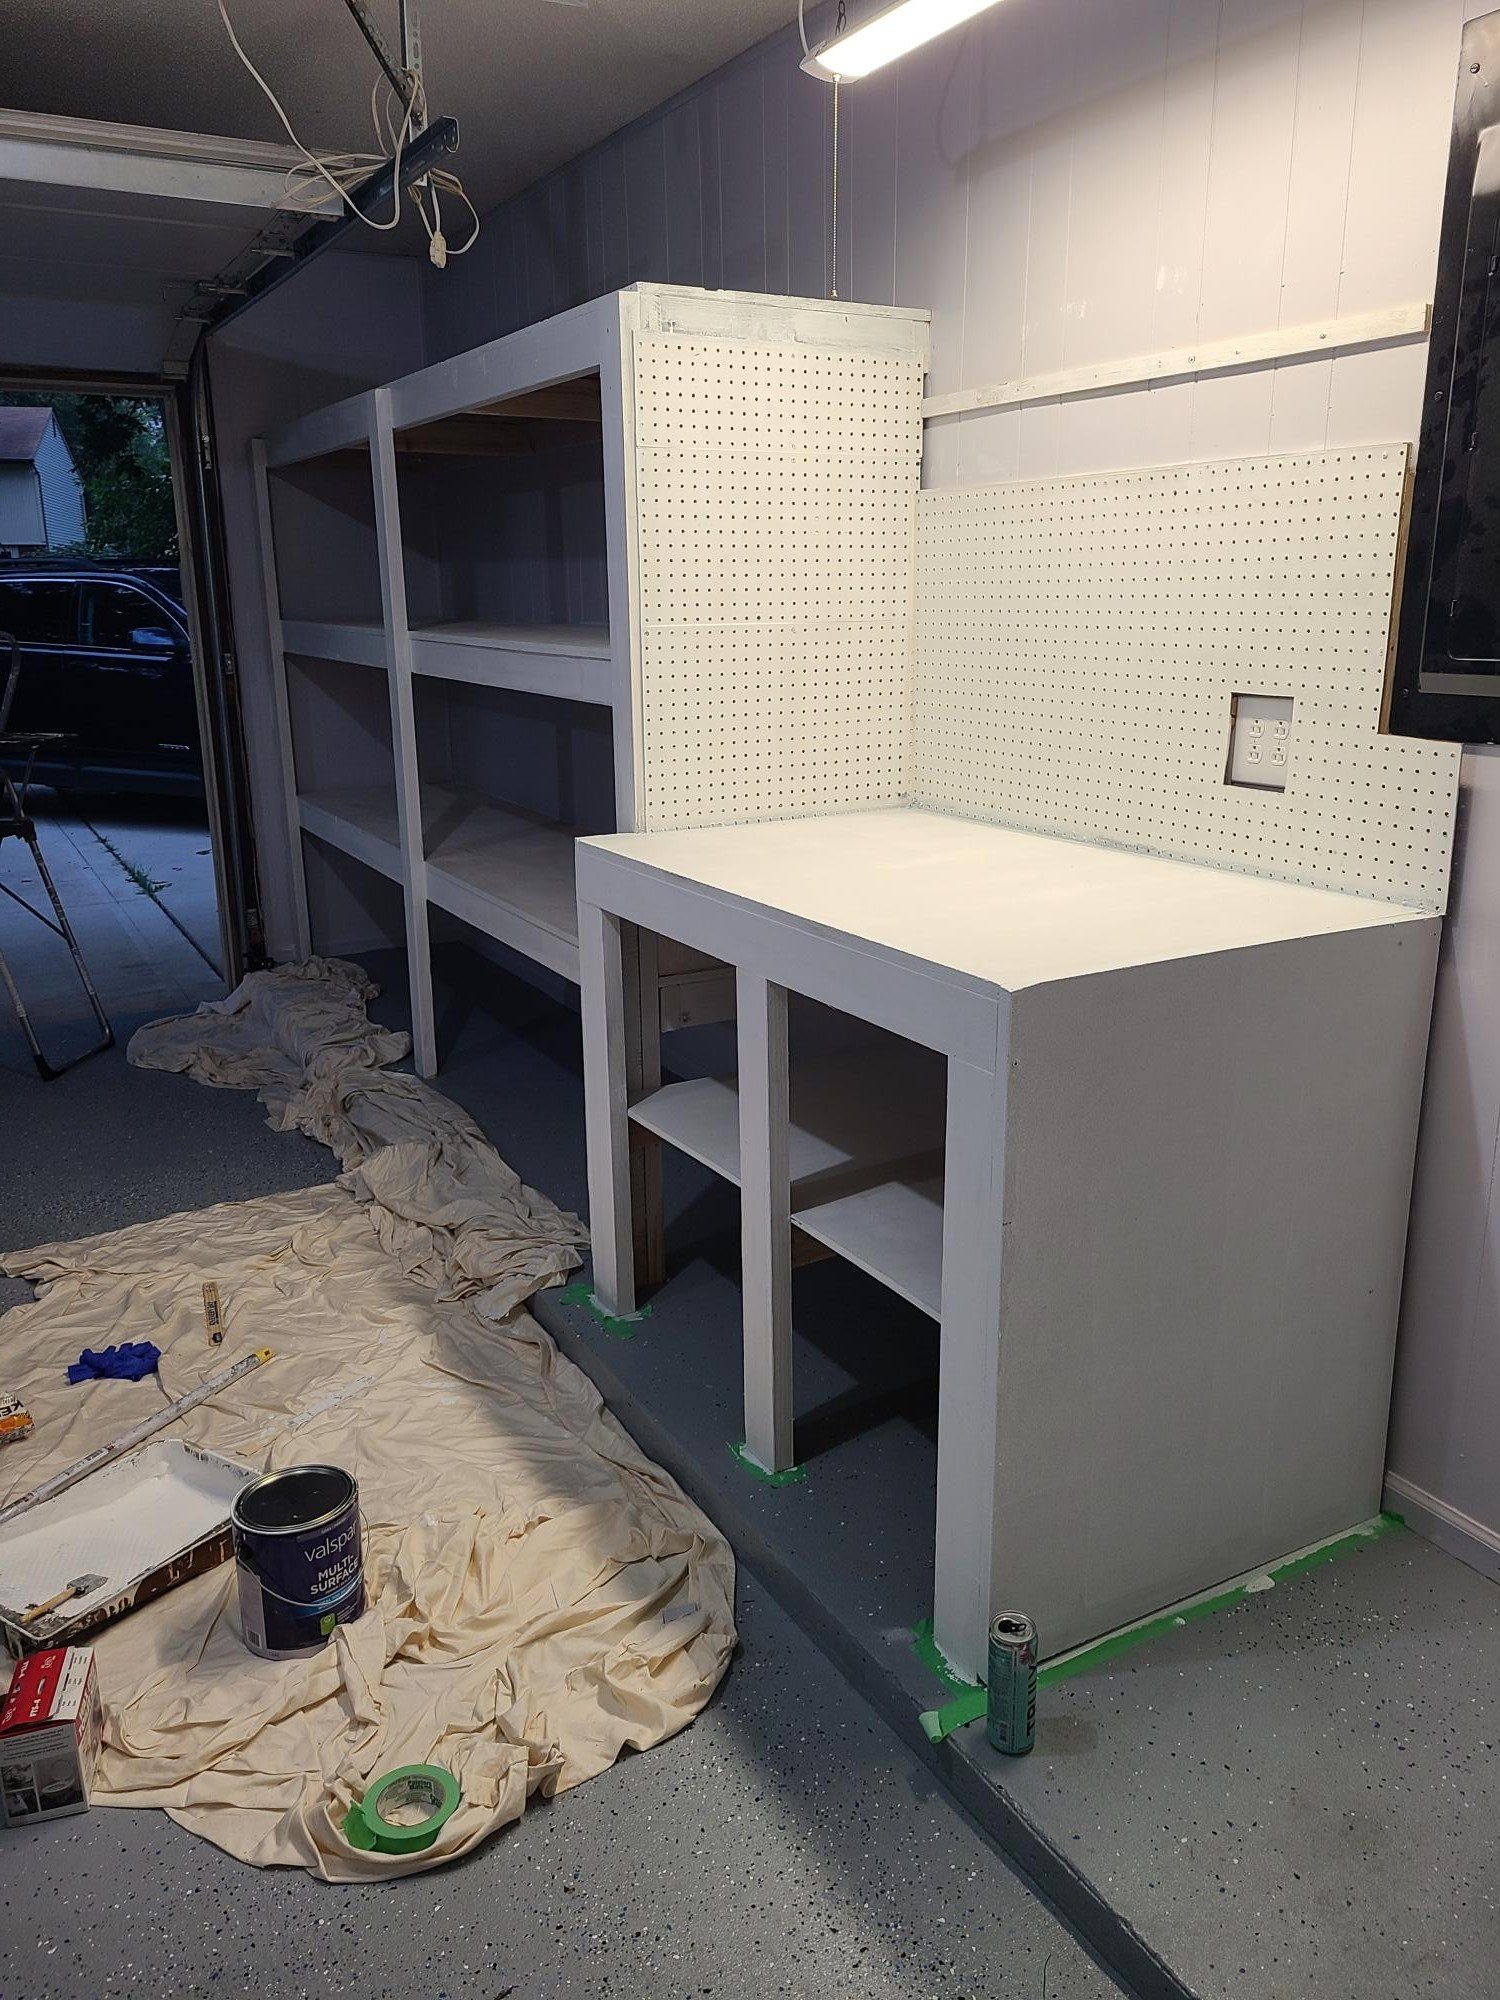
Used the plans from attached garage shelving to make a 10 ft, 24 inch wide shelf then used similar idea for workbench which I still need to put doors on. I love it! Such an easy plan!
Built from Plan(s)
Used the plans from attached garage shelving to make a 10 ft, 24 inch wide shelf then used similar idea for workbench which I still need to put doors on. I love it! Such an easy plan!
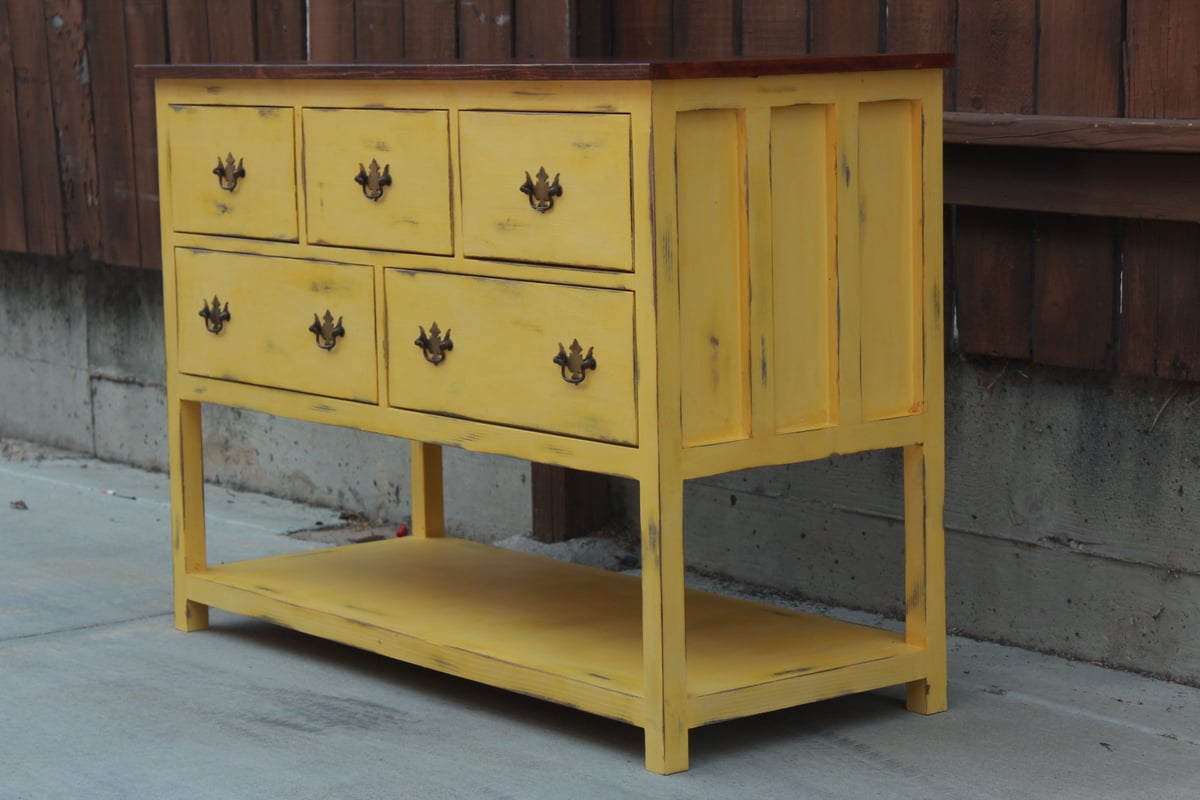
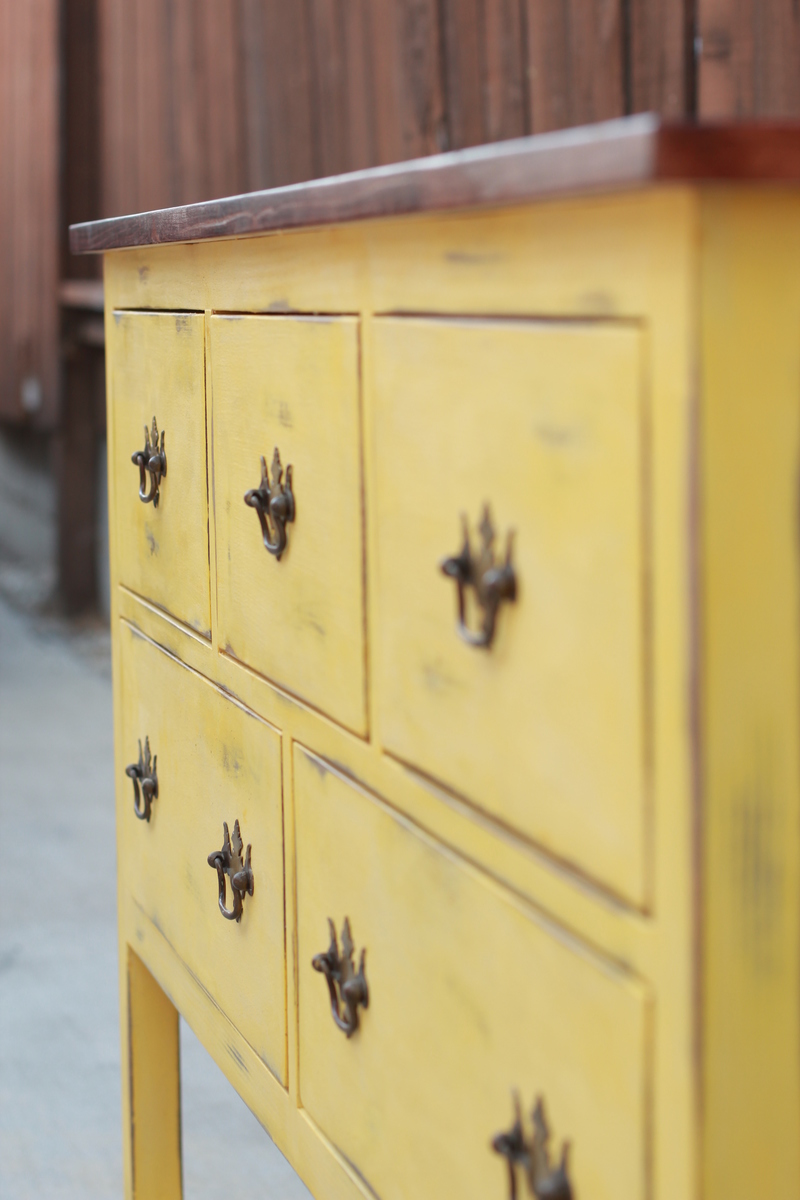
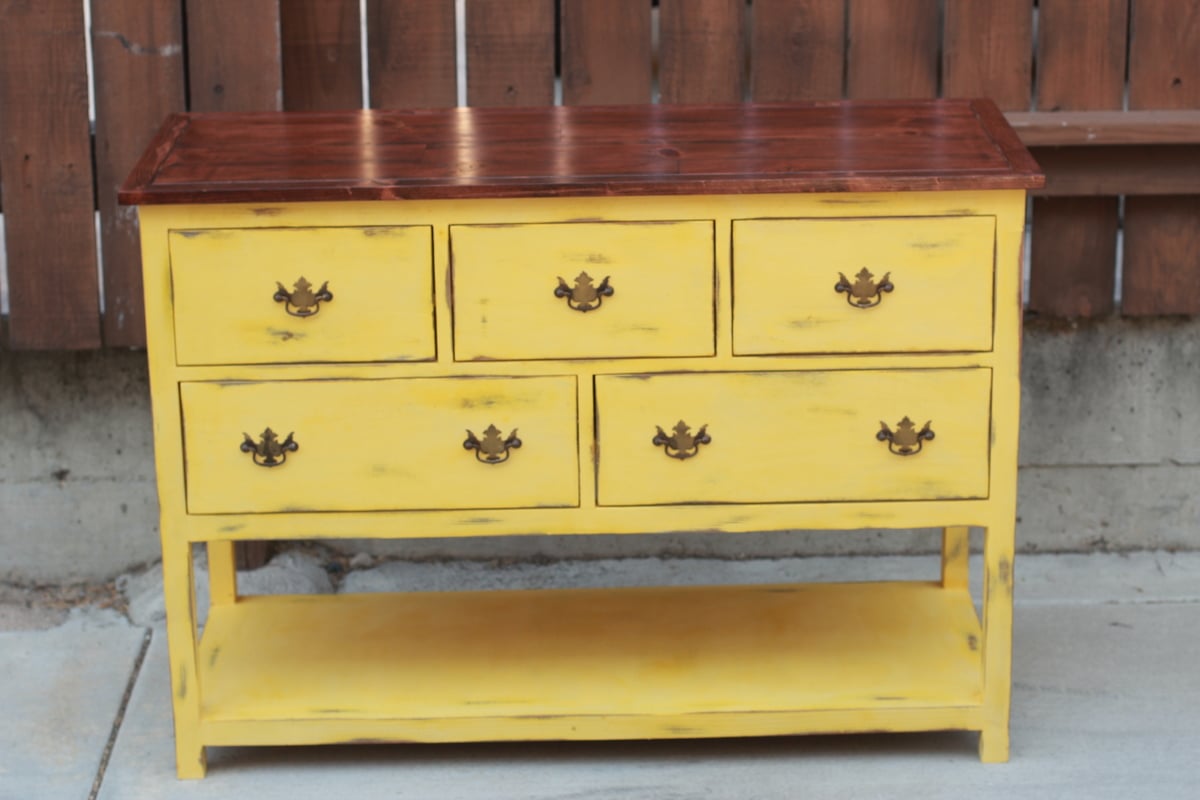
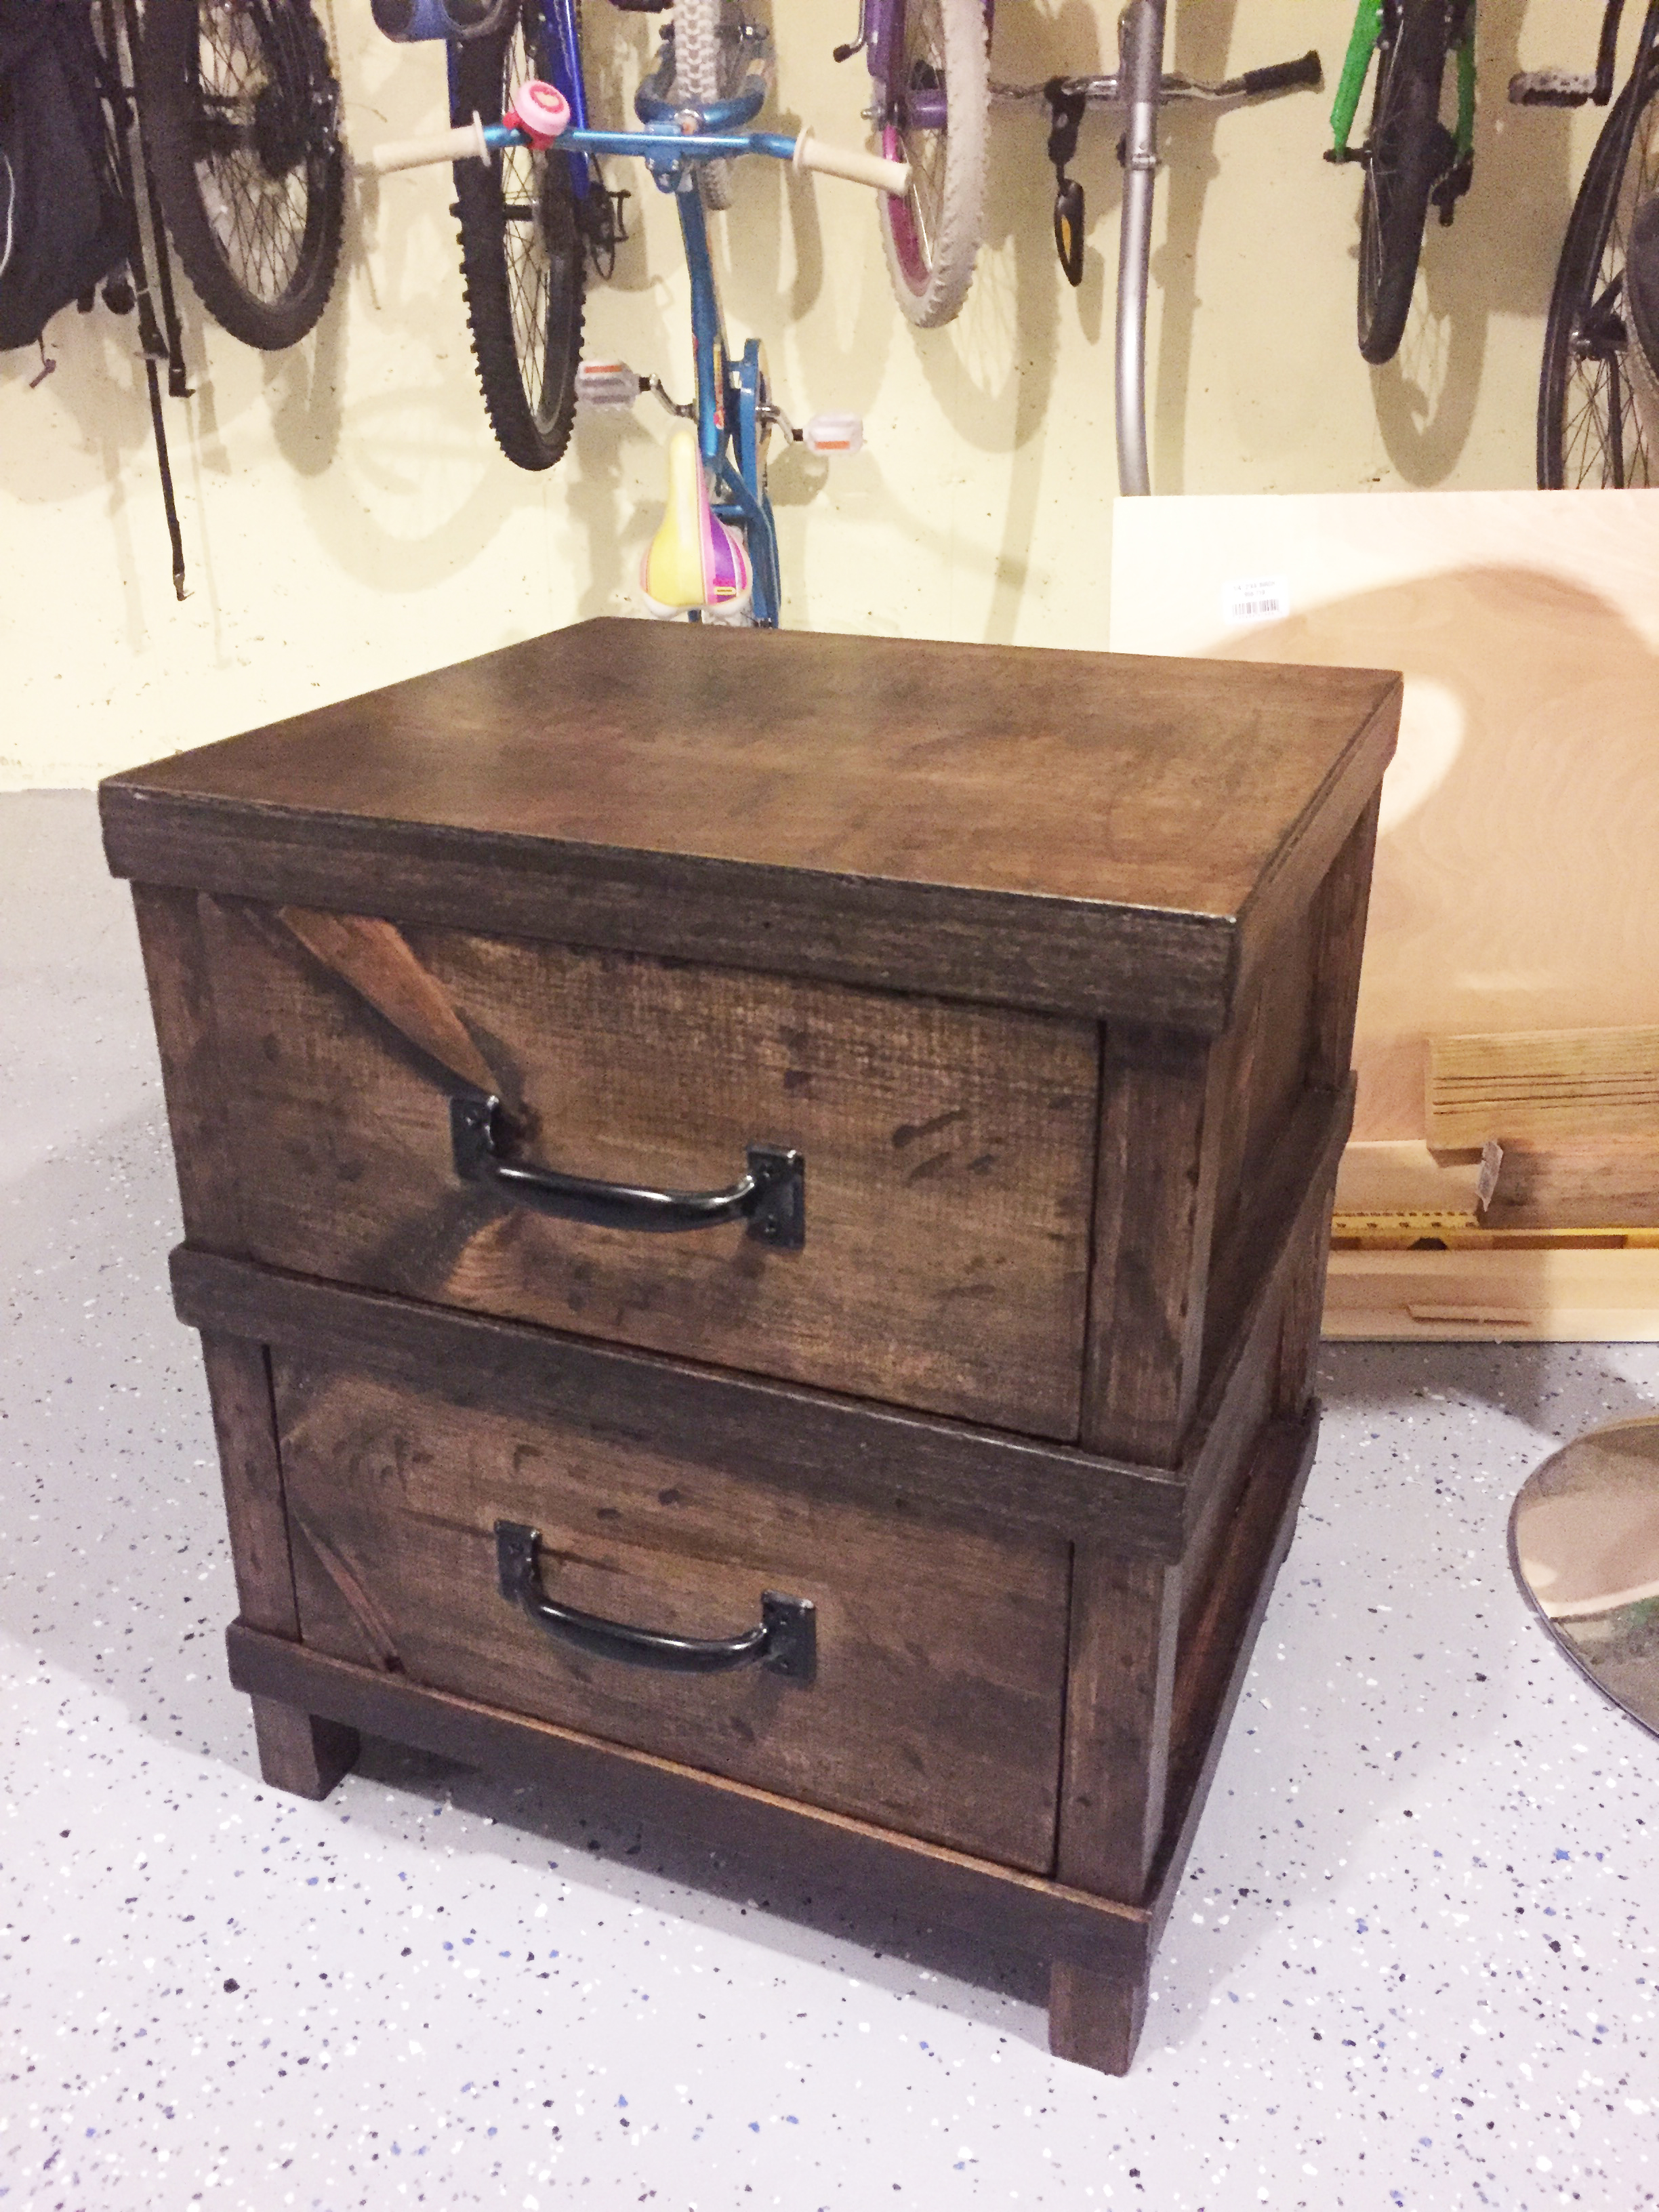
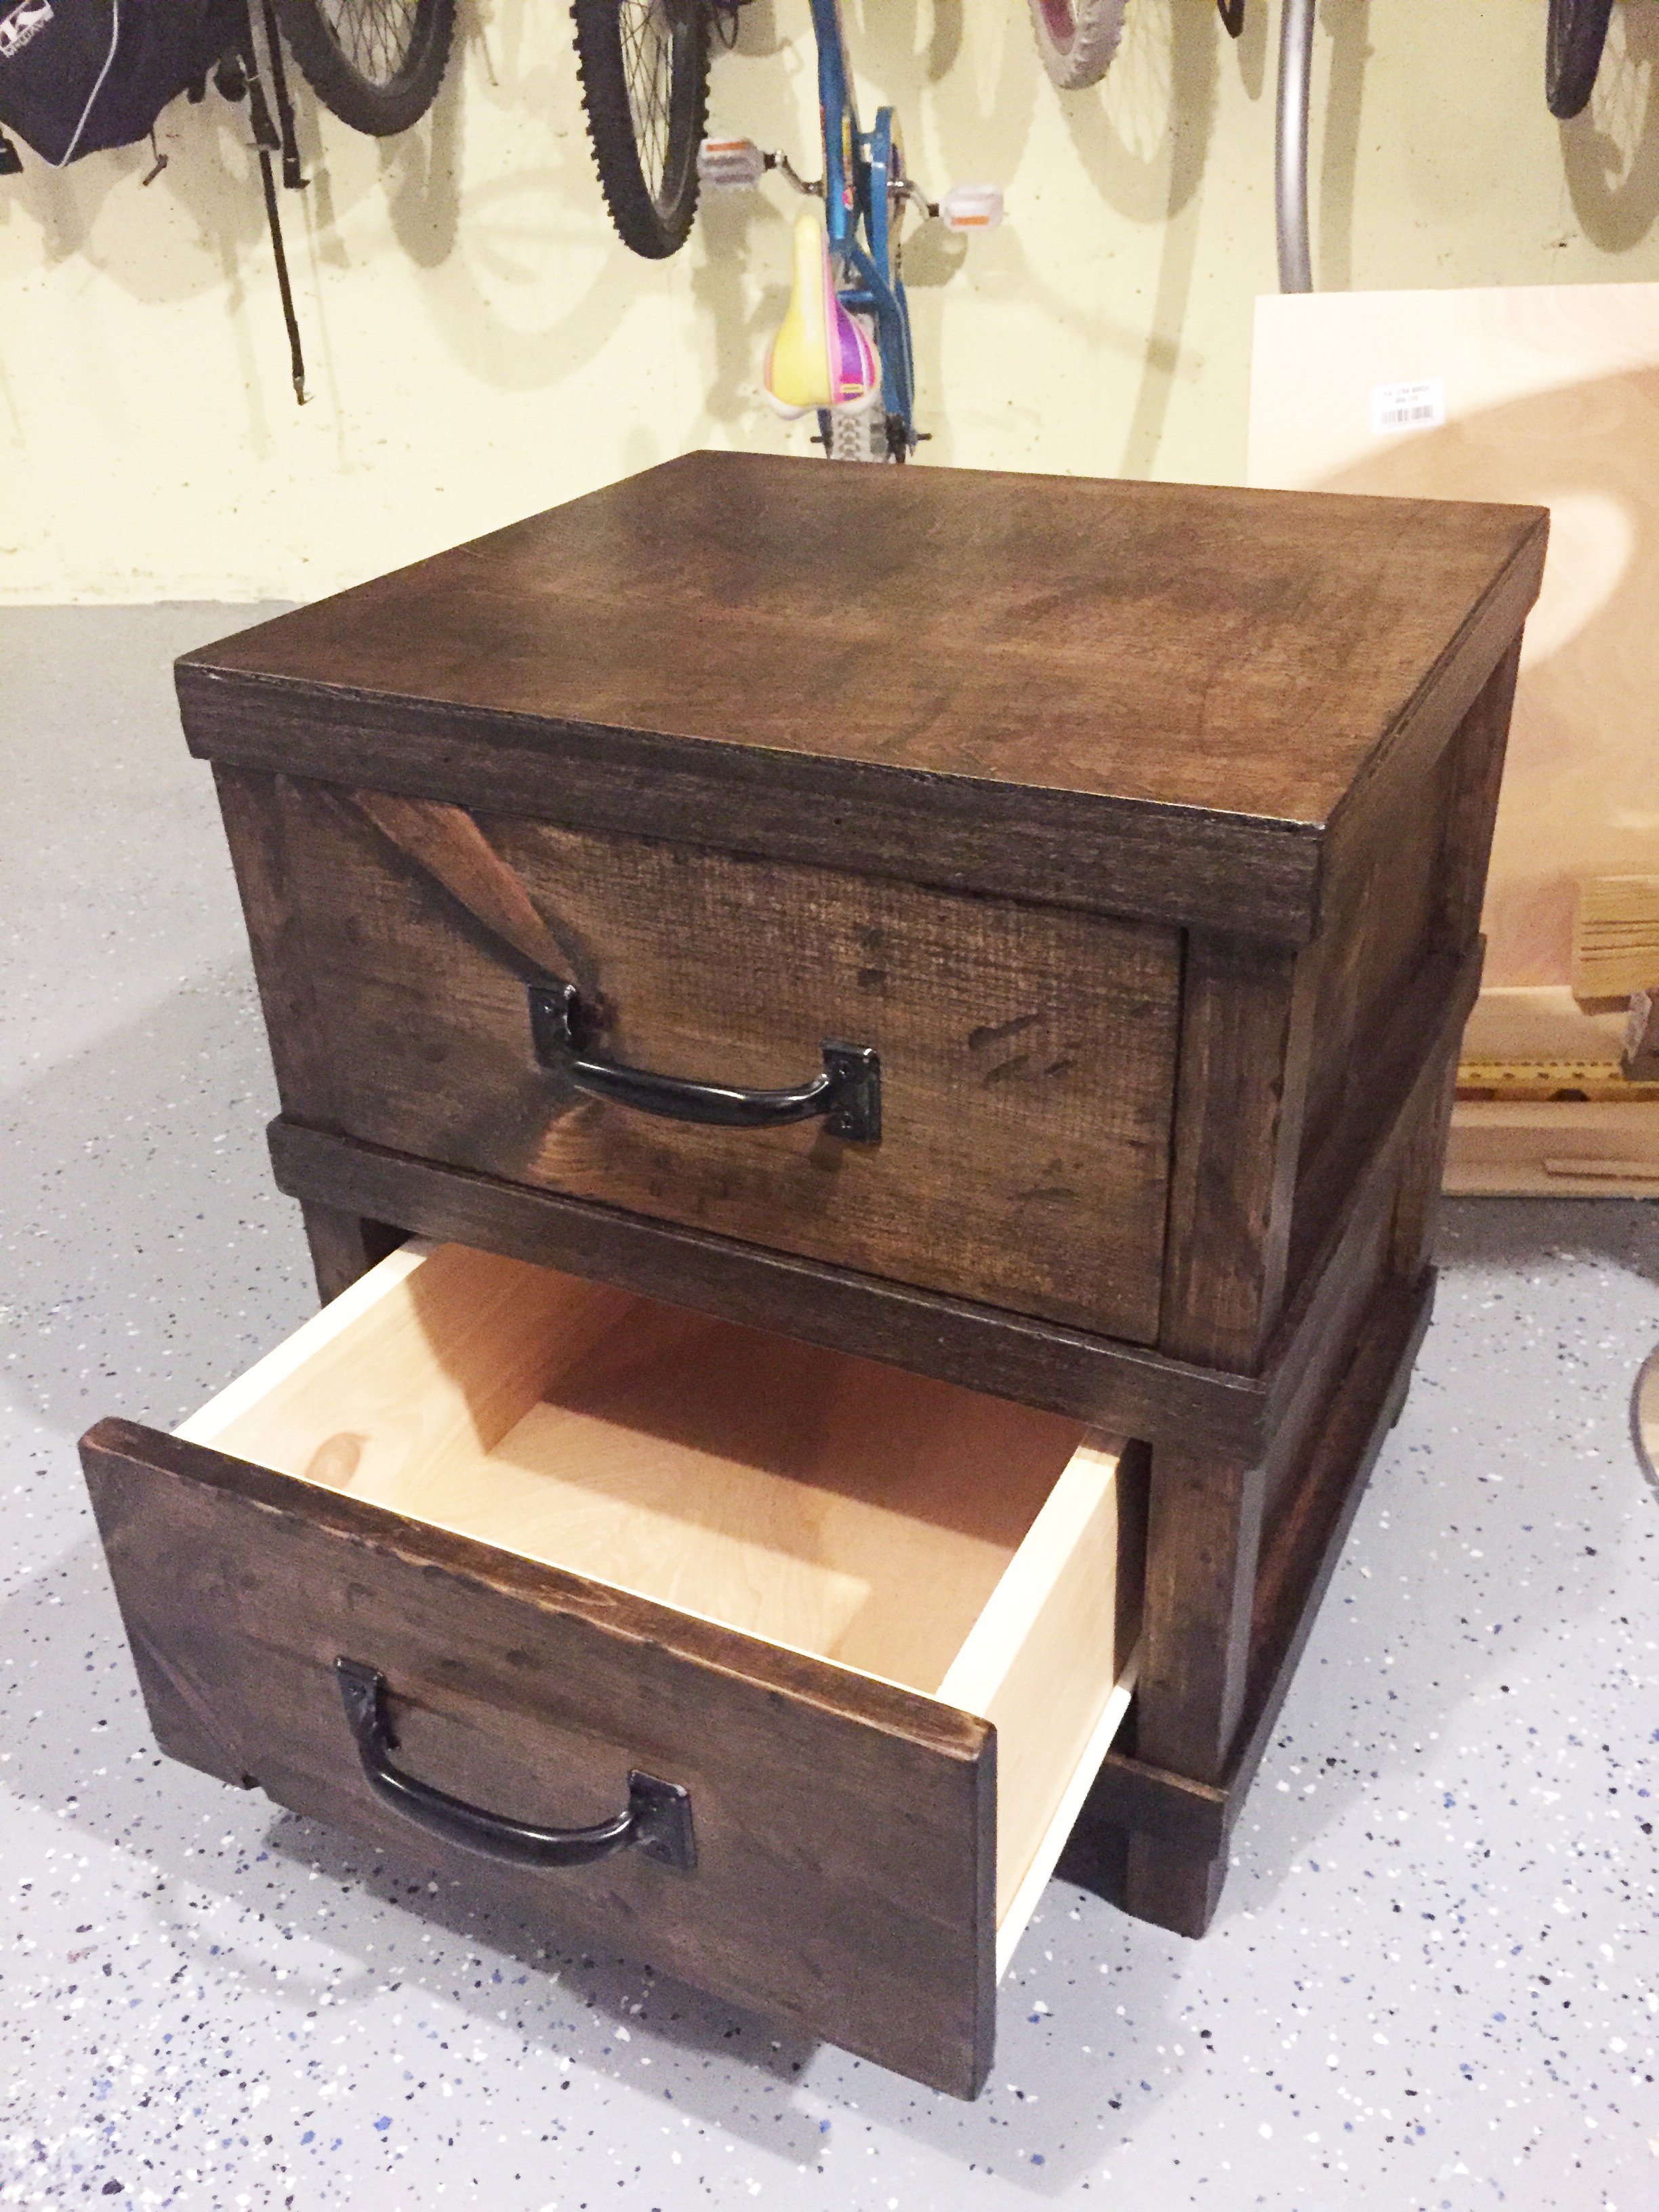
This is a country style dresser I built from one of ana's plans. I slightly modified the top and the dimensions to fit my needs. Painting this dresser was the biggest challenge. First I stained the entire dresser, then I applied 3 coats of ce ce caldwells chalk paint. I then used a wet rag to wipe away the yellow in areas I wanted distressed. Last I applied a paste wax to seal it.


This is my first furniture build! I am thrilled with the way it turned out, and now I am totally addicted. It's going into my son's room.
Mon, 11/16/2015 - 12:47
Perfection, thanks for sharing your first build! Can't wait to see what's next!
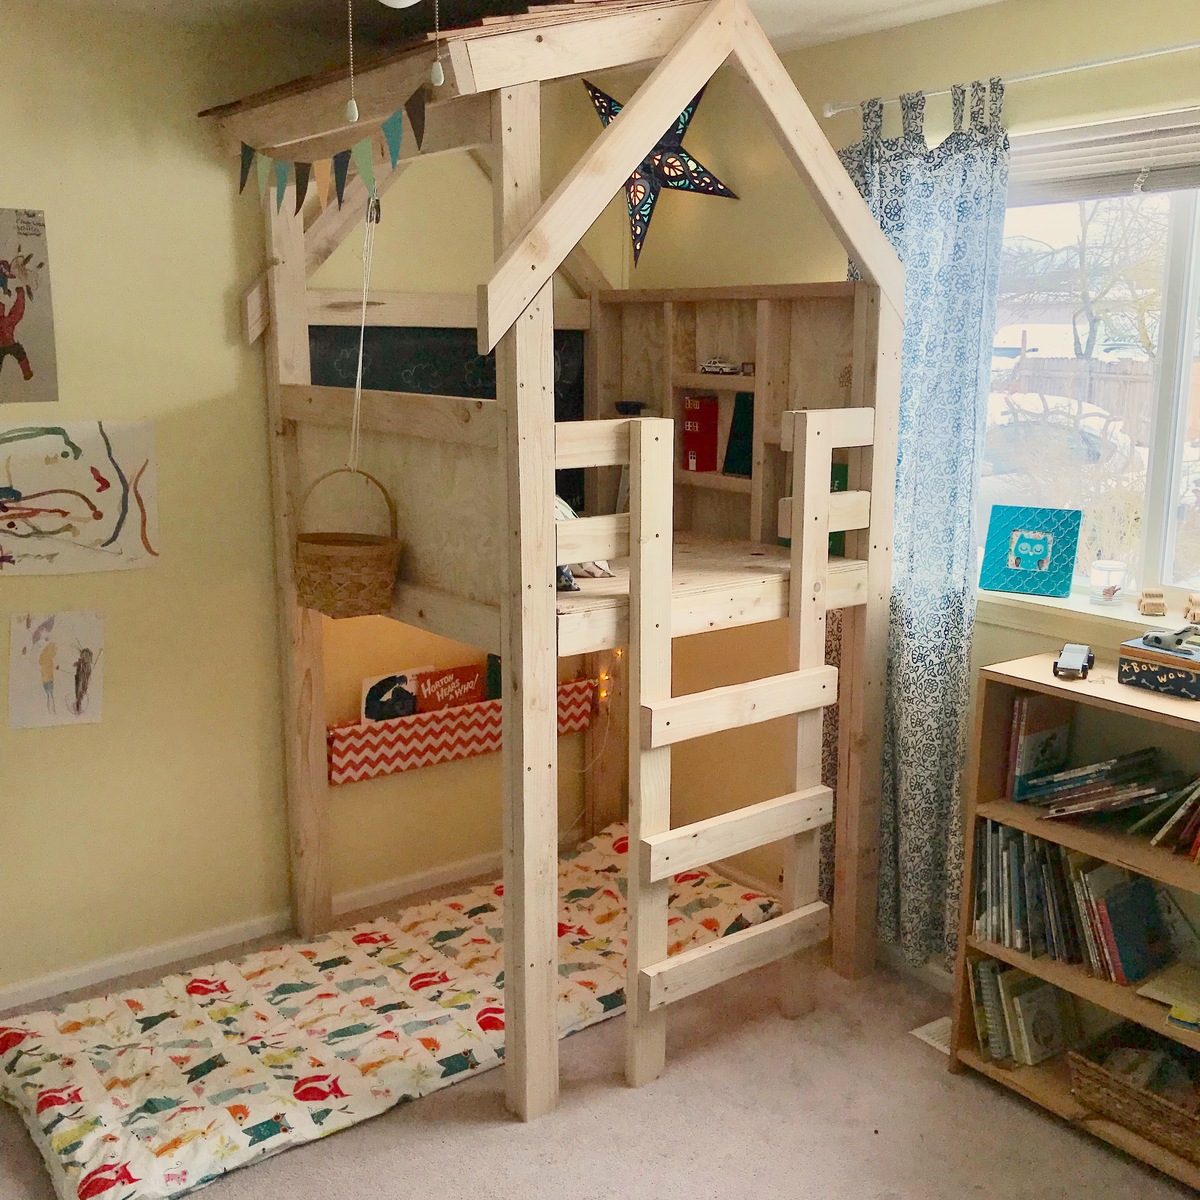
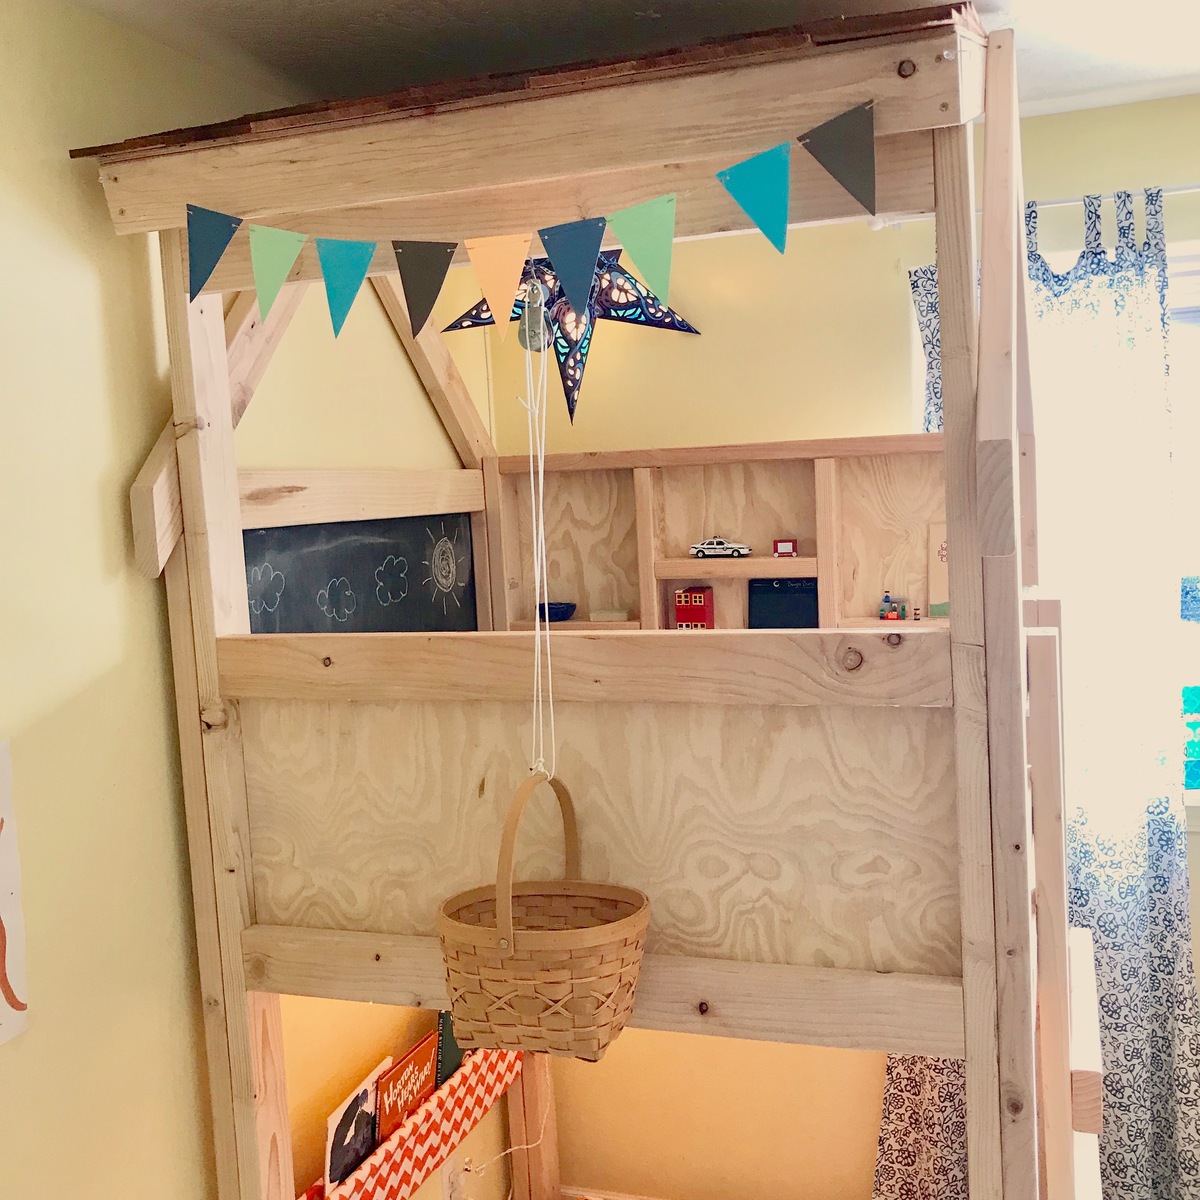
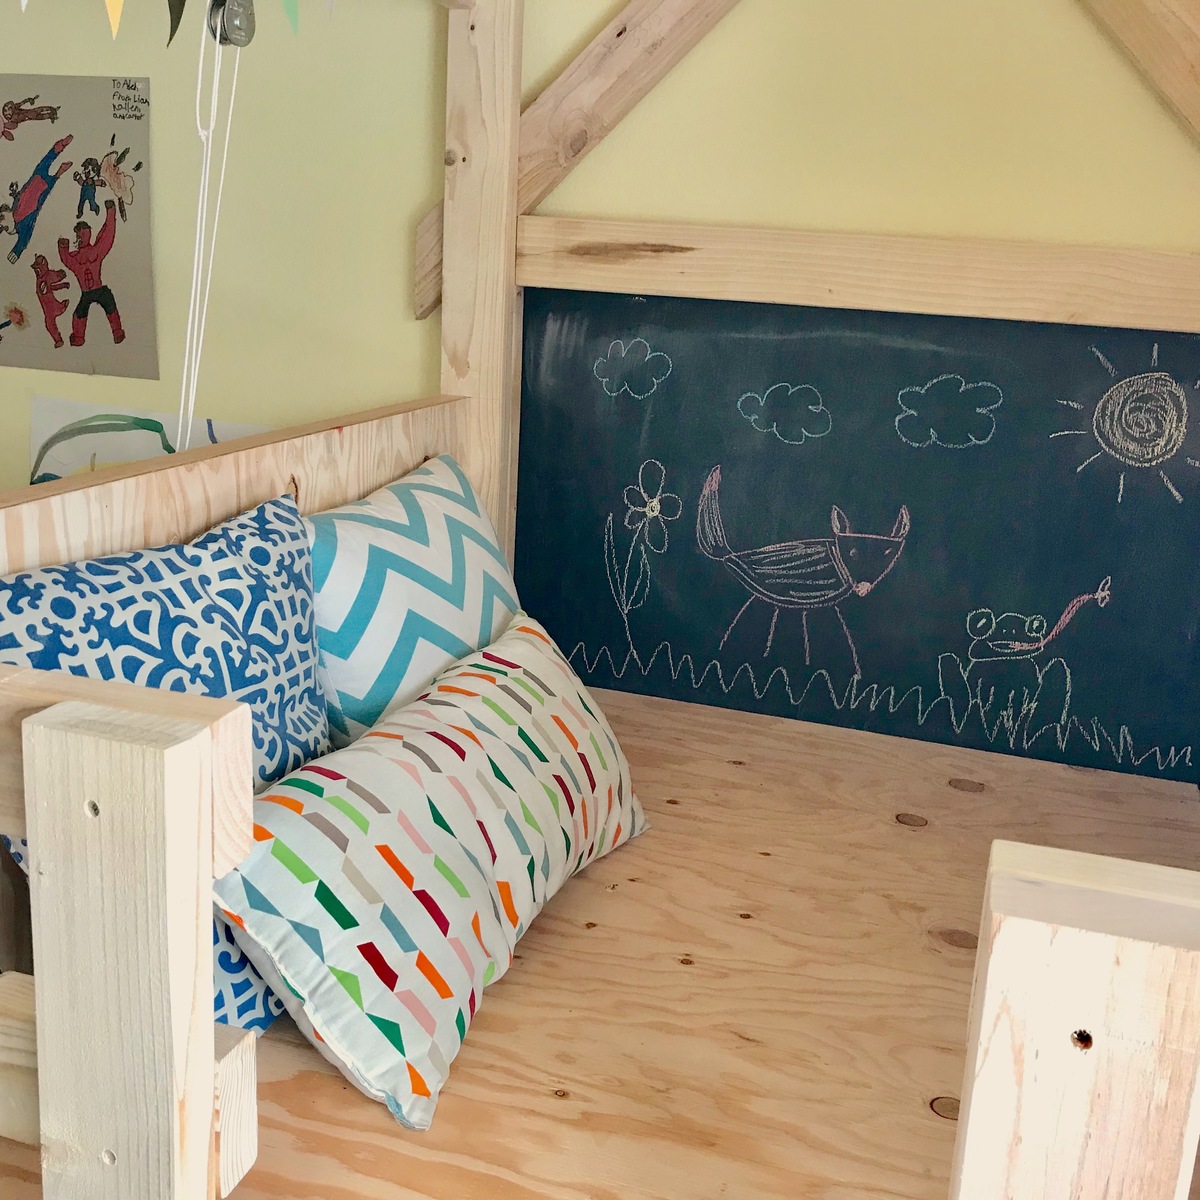
Husband and I built this beauty over a rainy weekend. He had cut the wood a few weeks before, then we had to wait for a free weekend to assemble. We switched the placement of the walls around so the bed wouldn’t go over a heat vent and had to trim a few inches off the legs to fit with our lowers ceiling. I painted the back wall with chalkboard paint and we added shelves to the side like shown in the blogpost linked on the build page. We added a light above and Christmas lights below to brighten things up. A book sling and pulley with basket added the perfect finishing touches. All our boys love this magical new addition to our youngest son’s room and gave already spent many hours playing there.
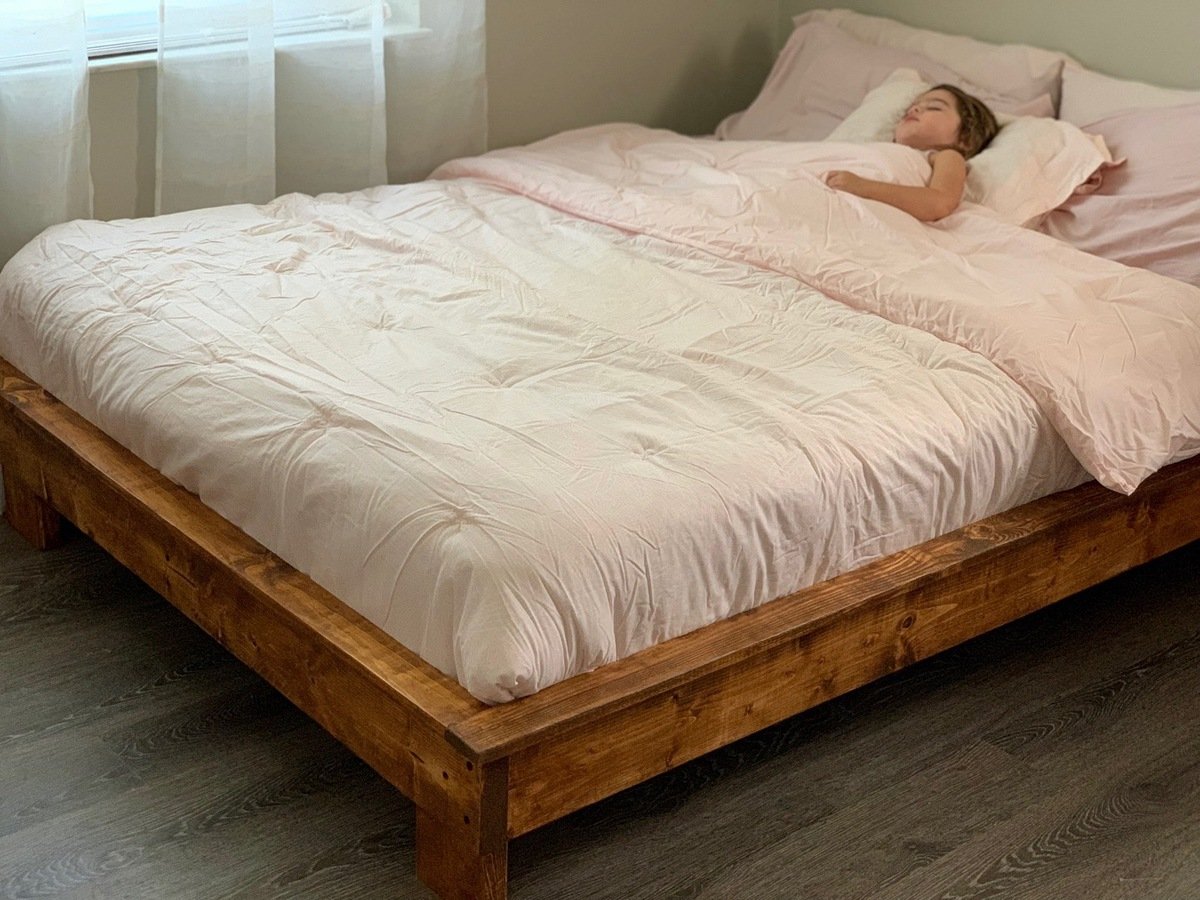
I’m in love with how well this bed turned out. Modified by using a 2x4 for middle support and 1x4’s for slats. It was less money and felt better for support.

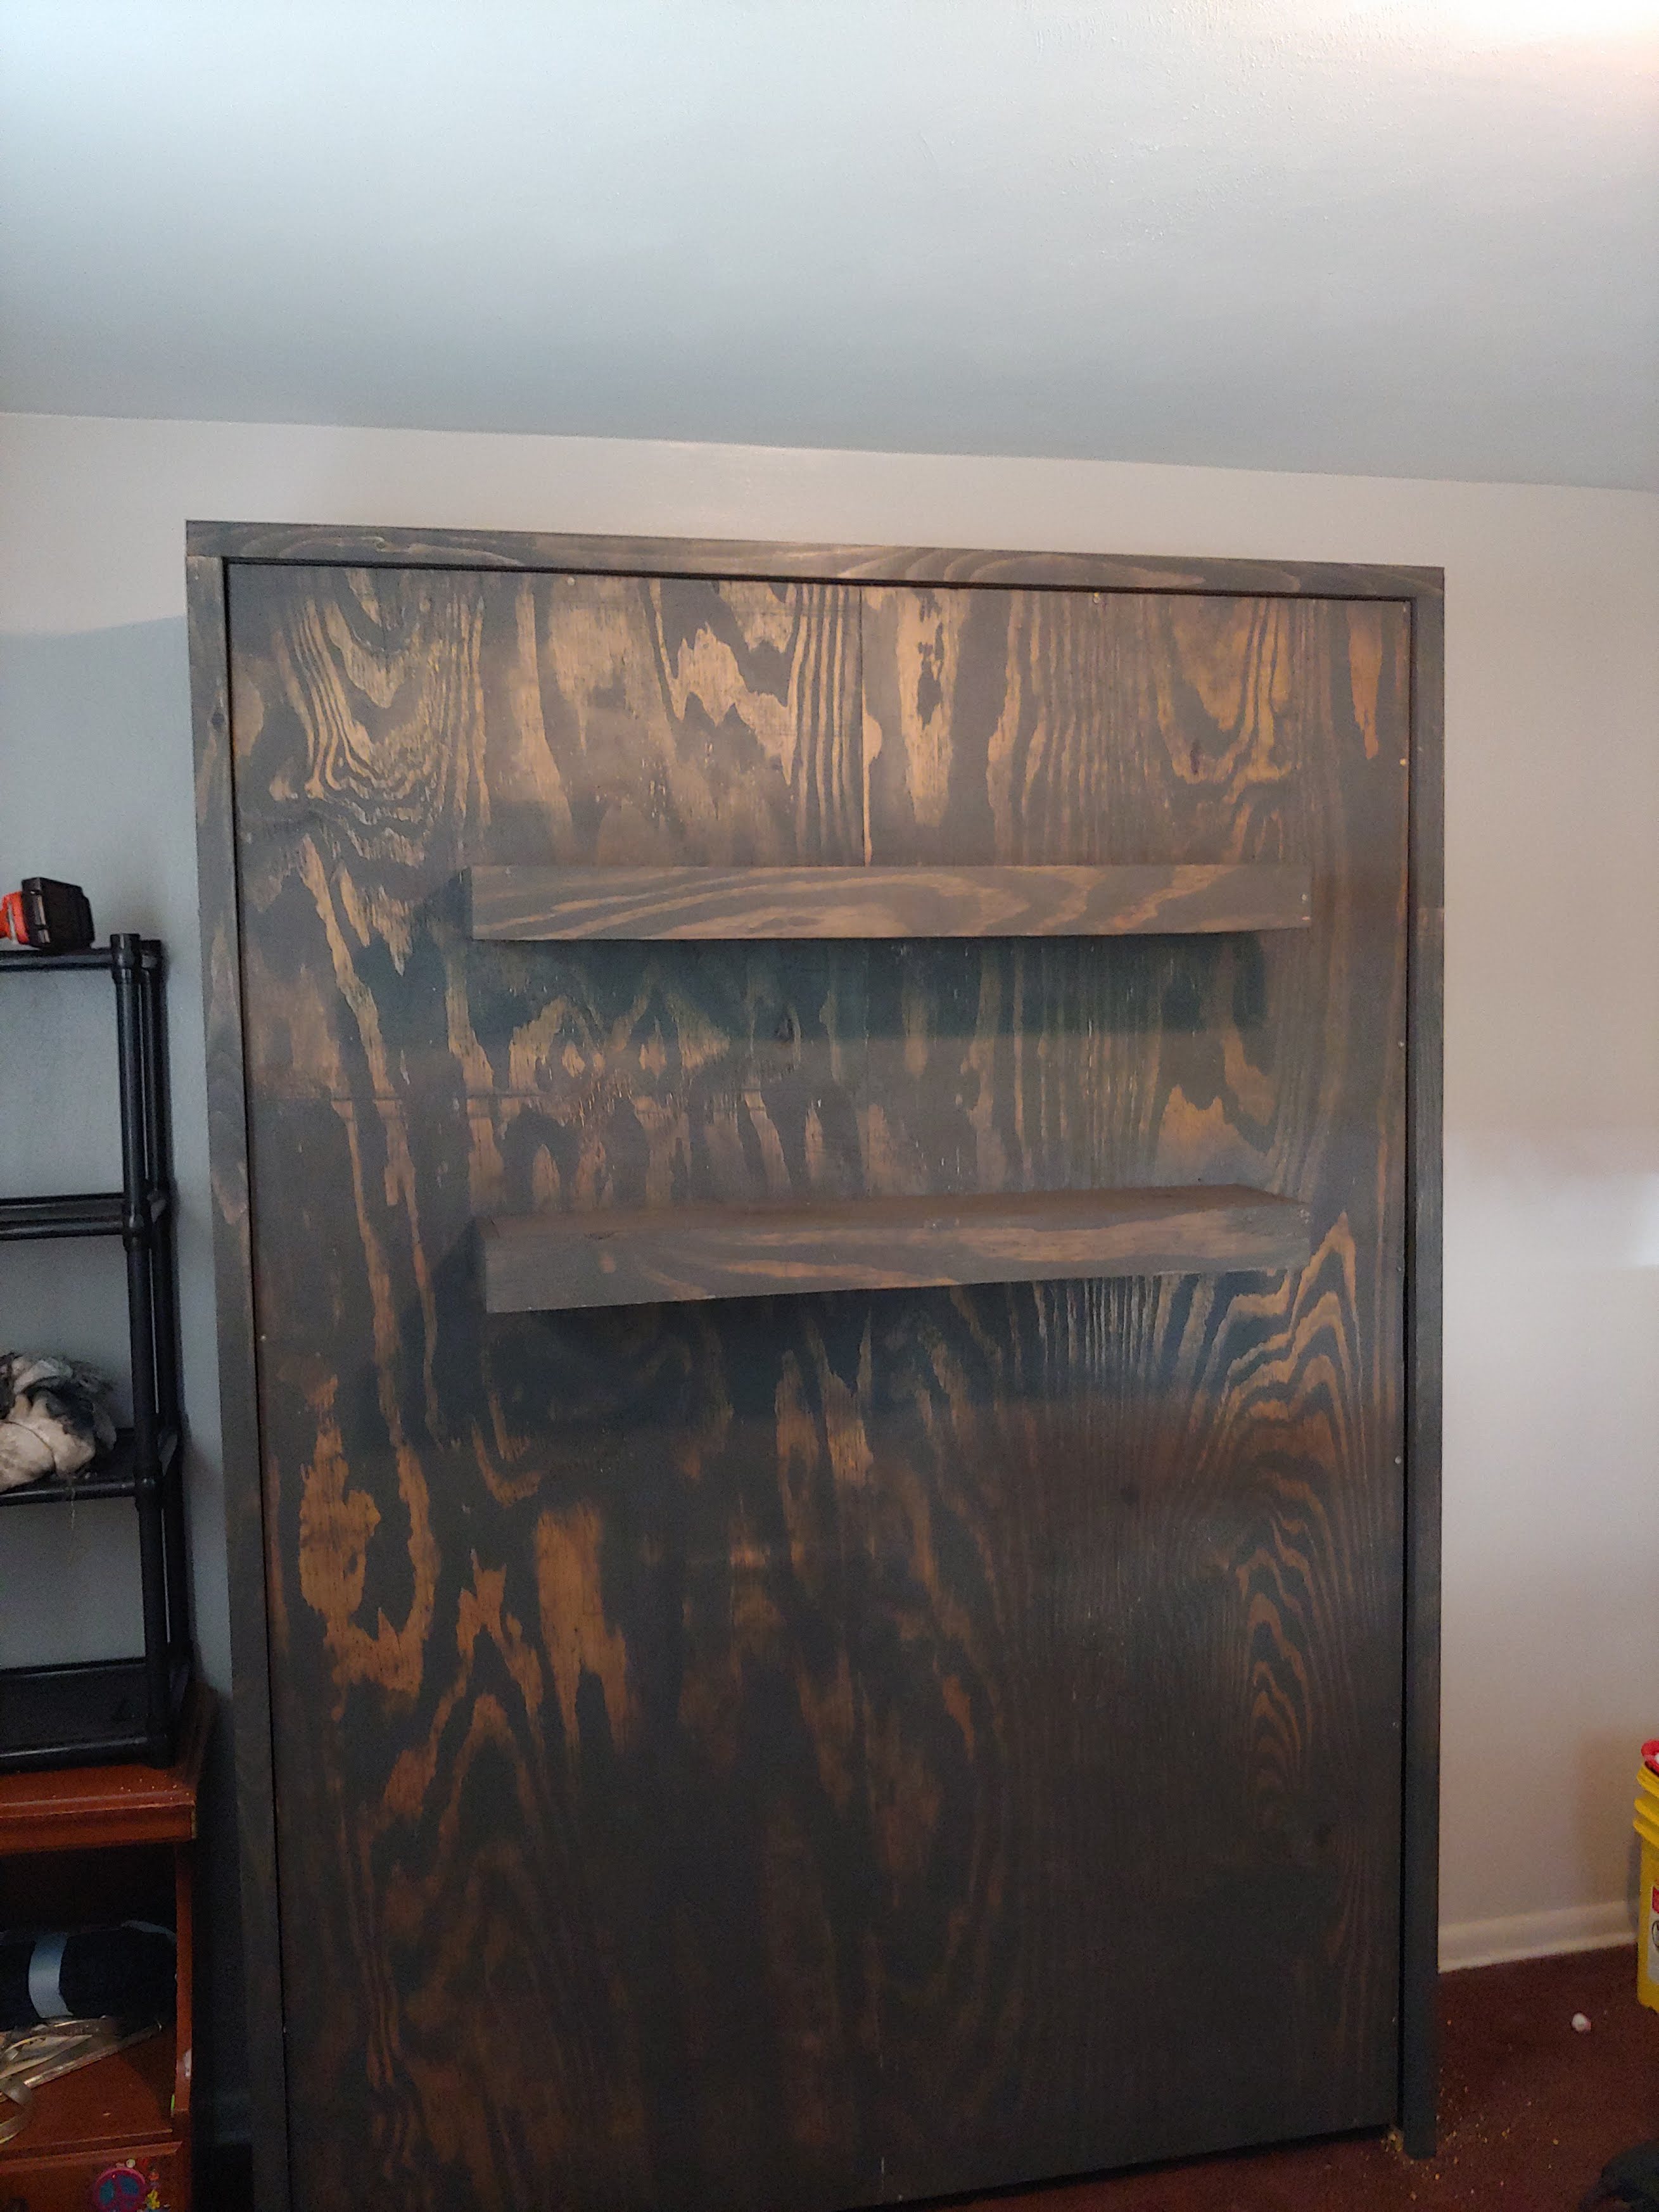
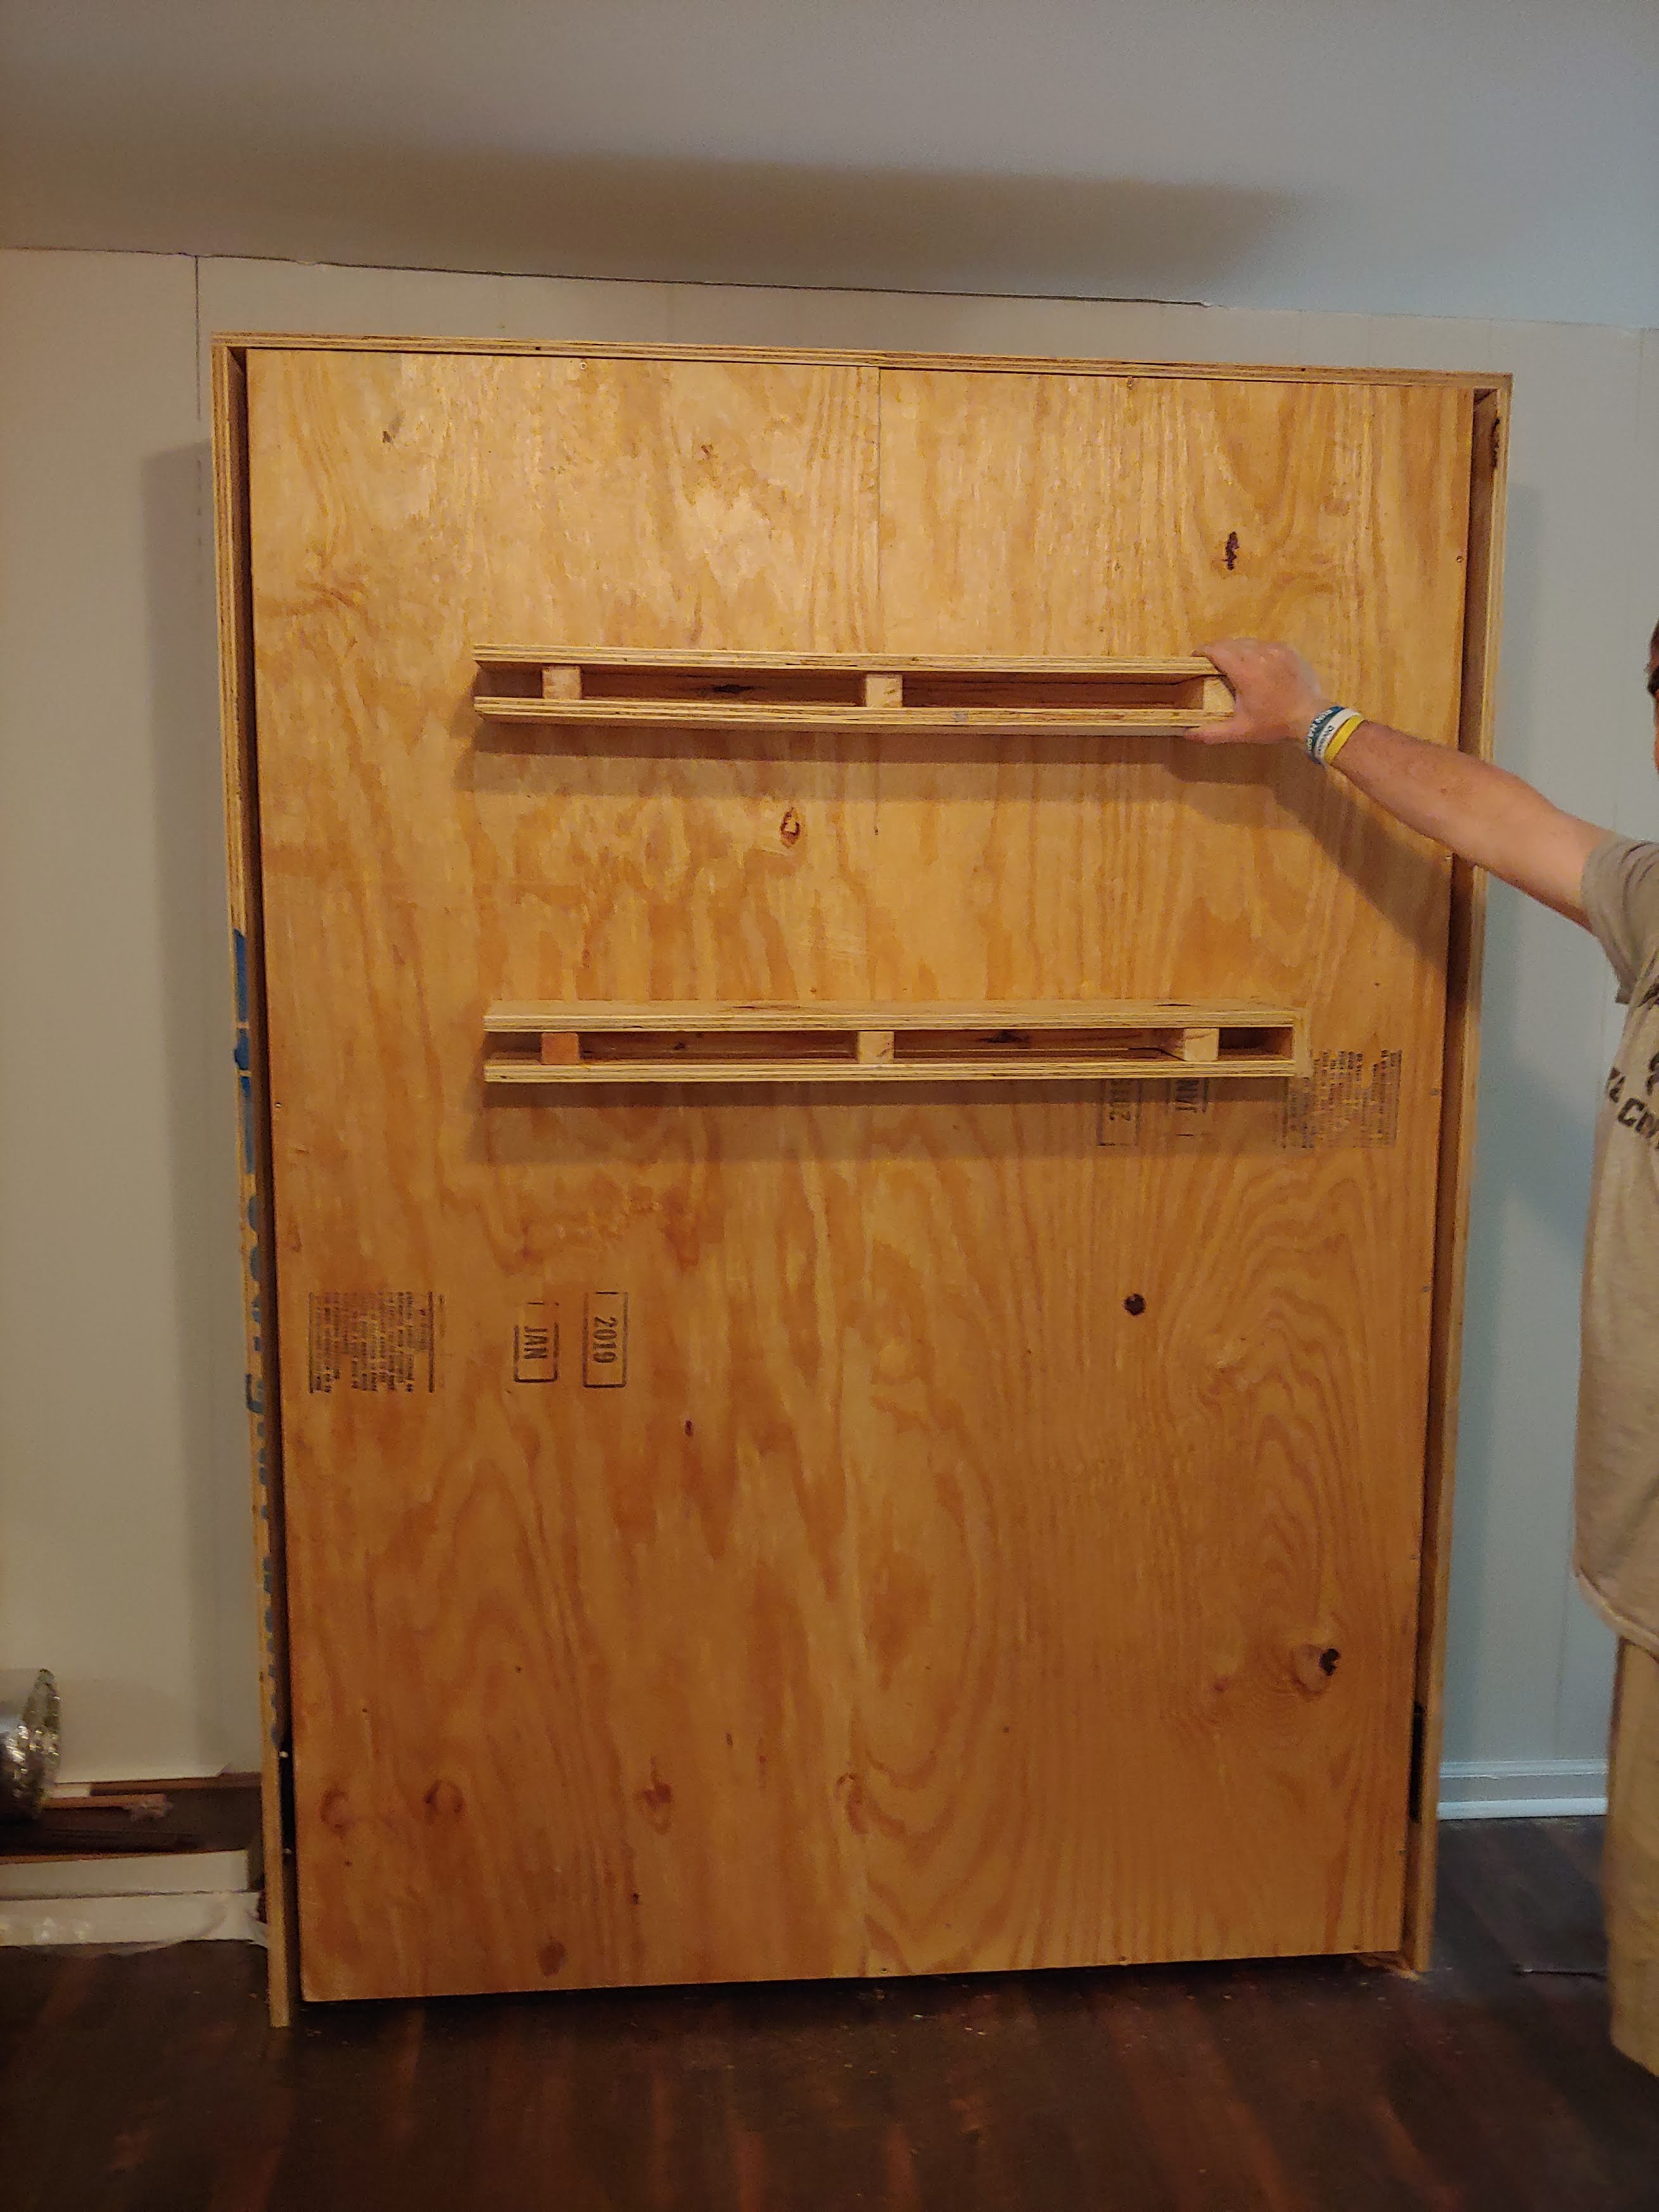
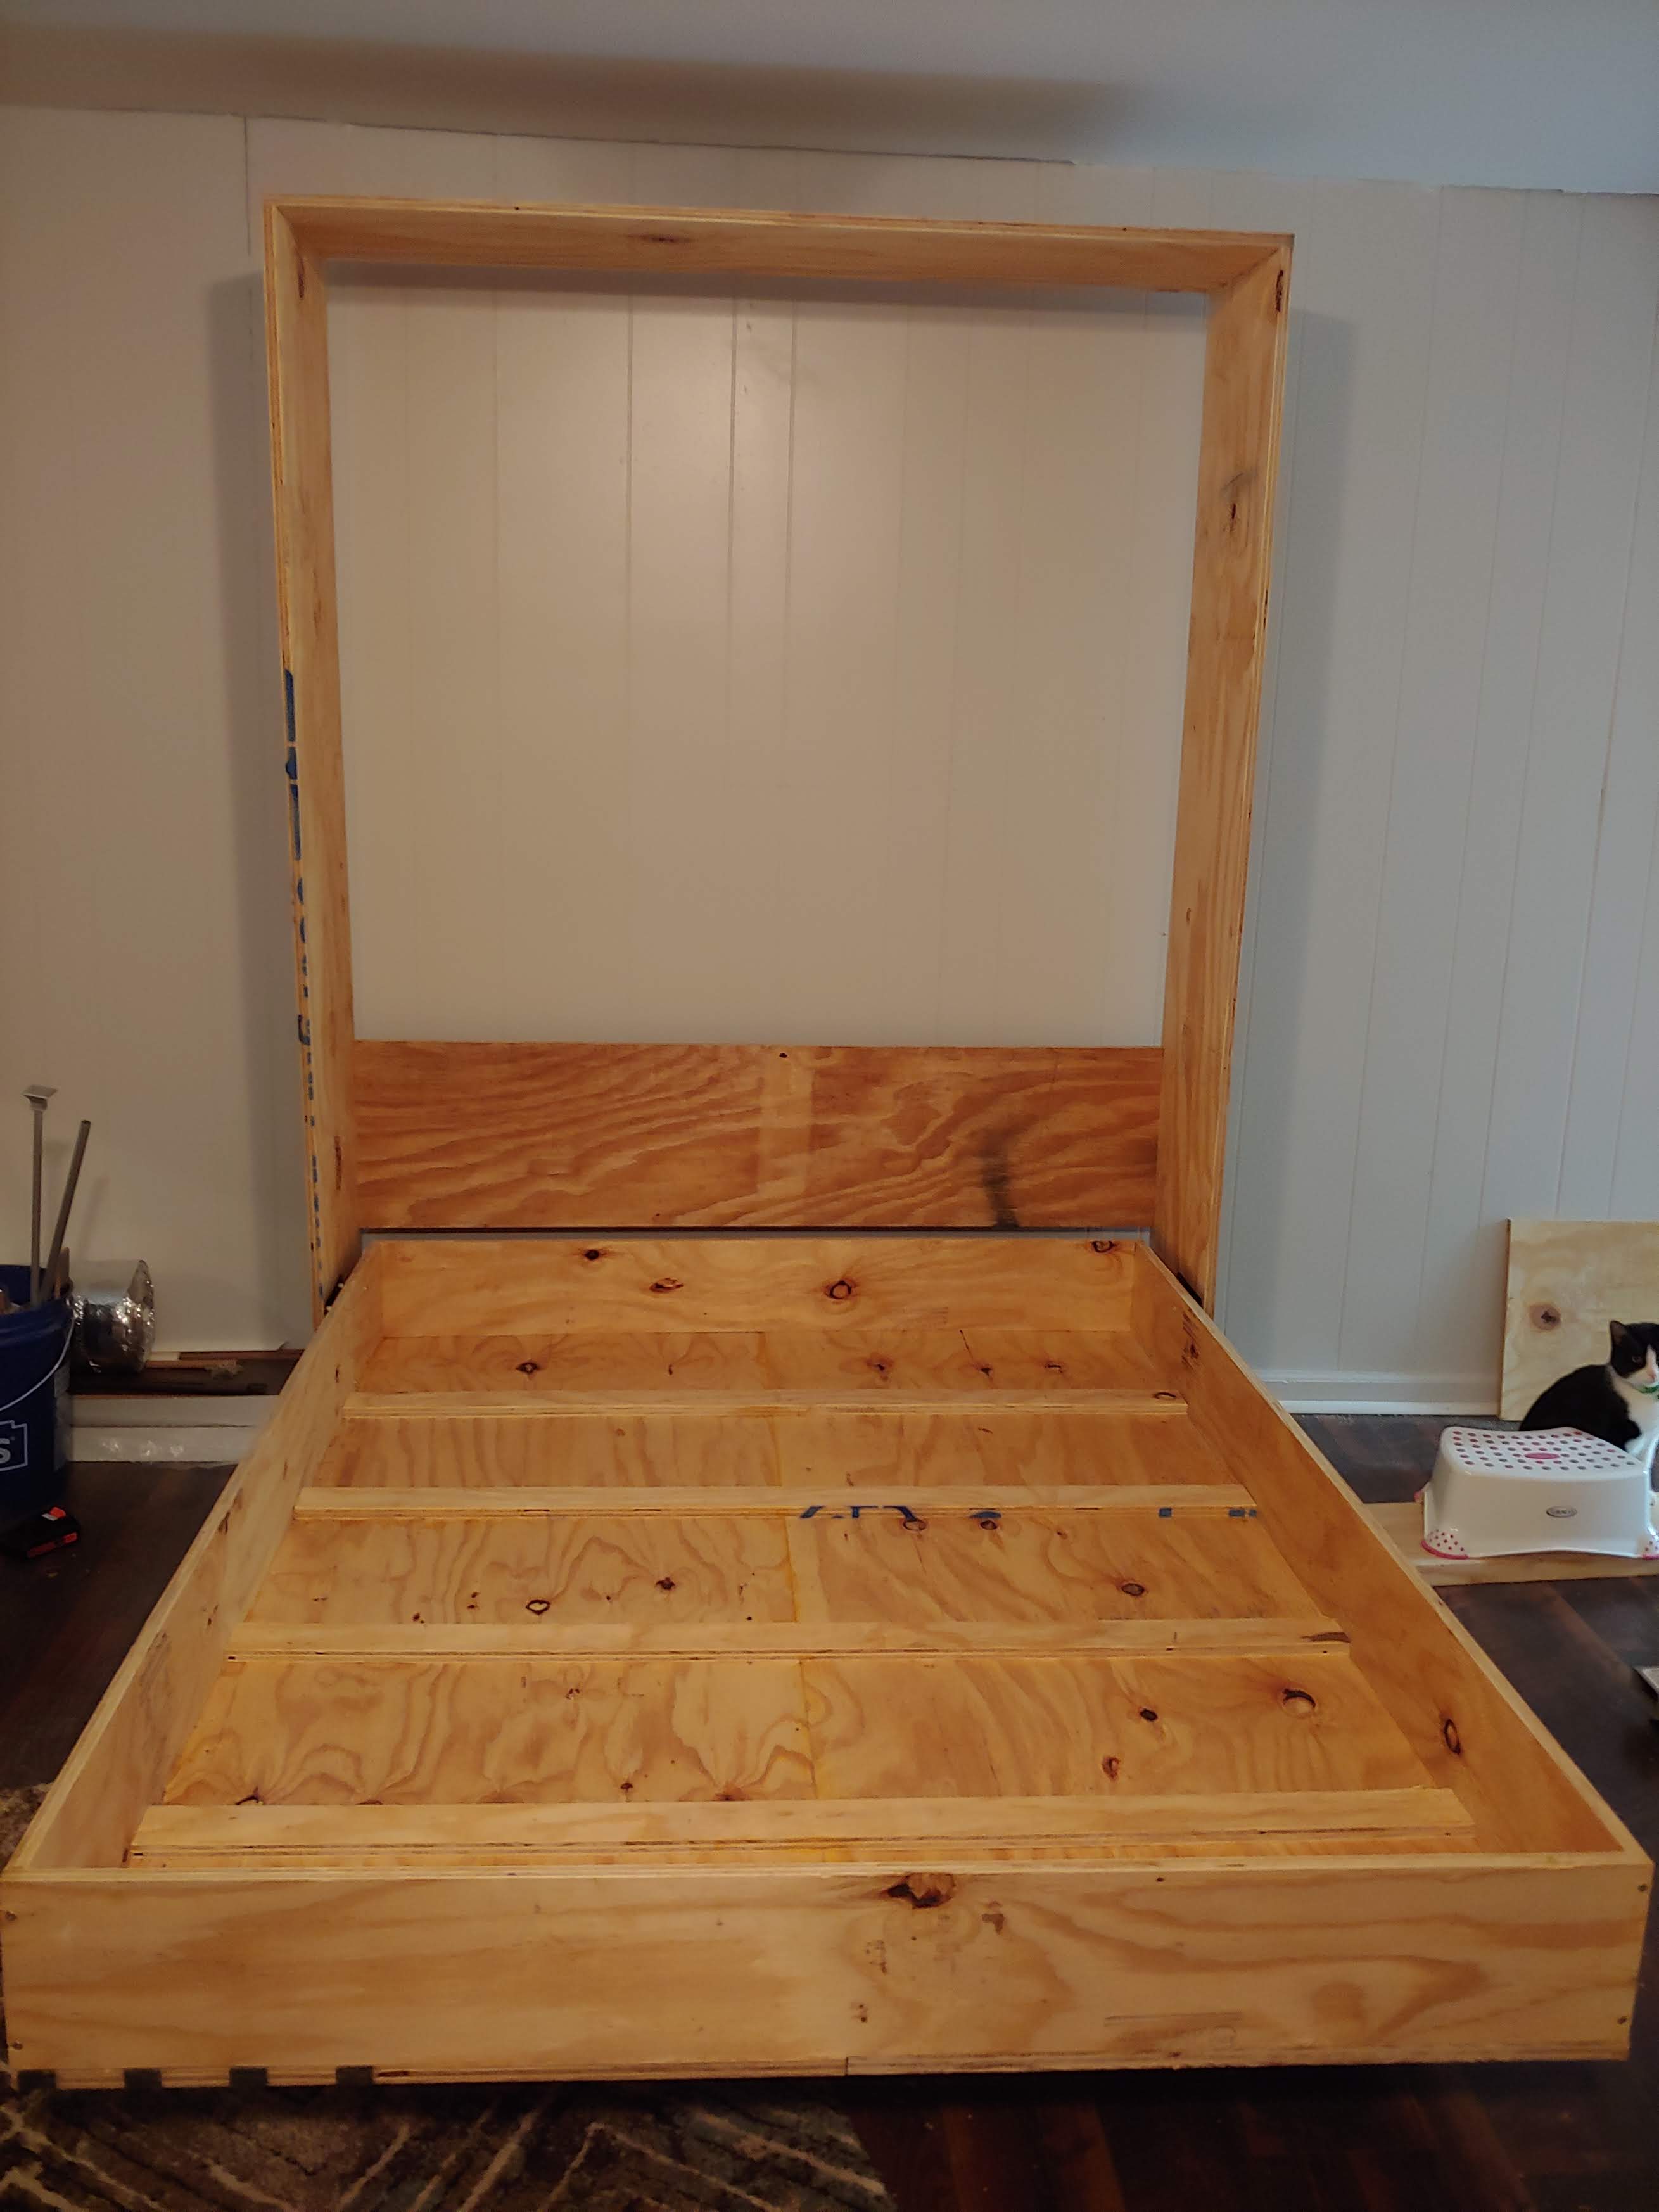
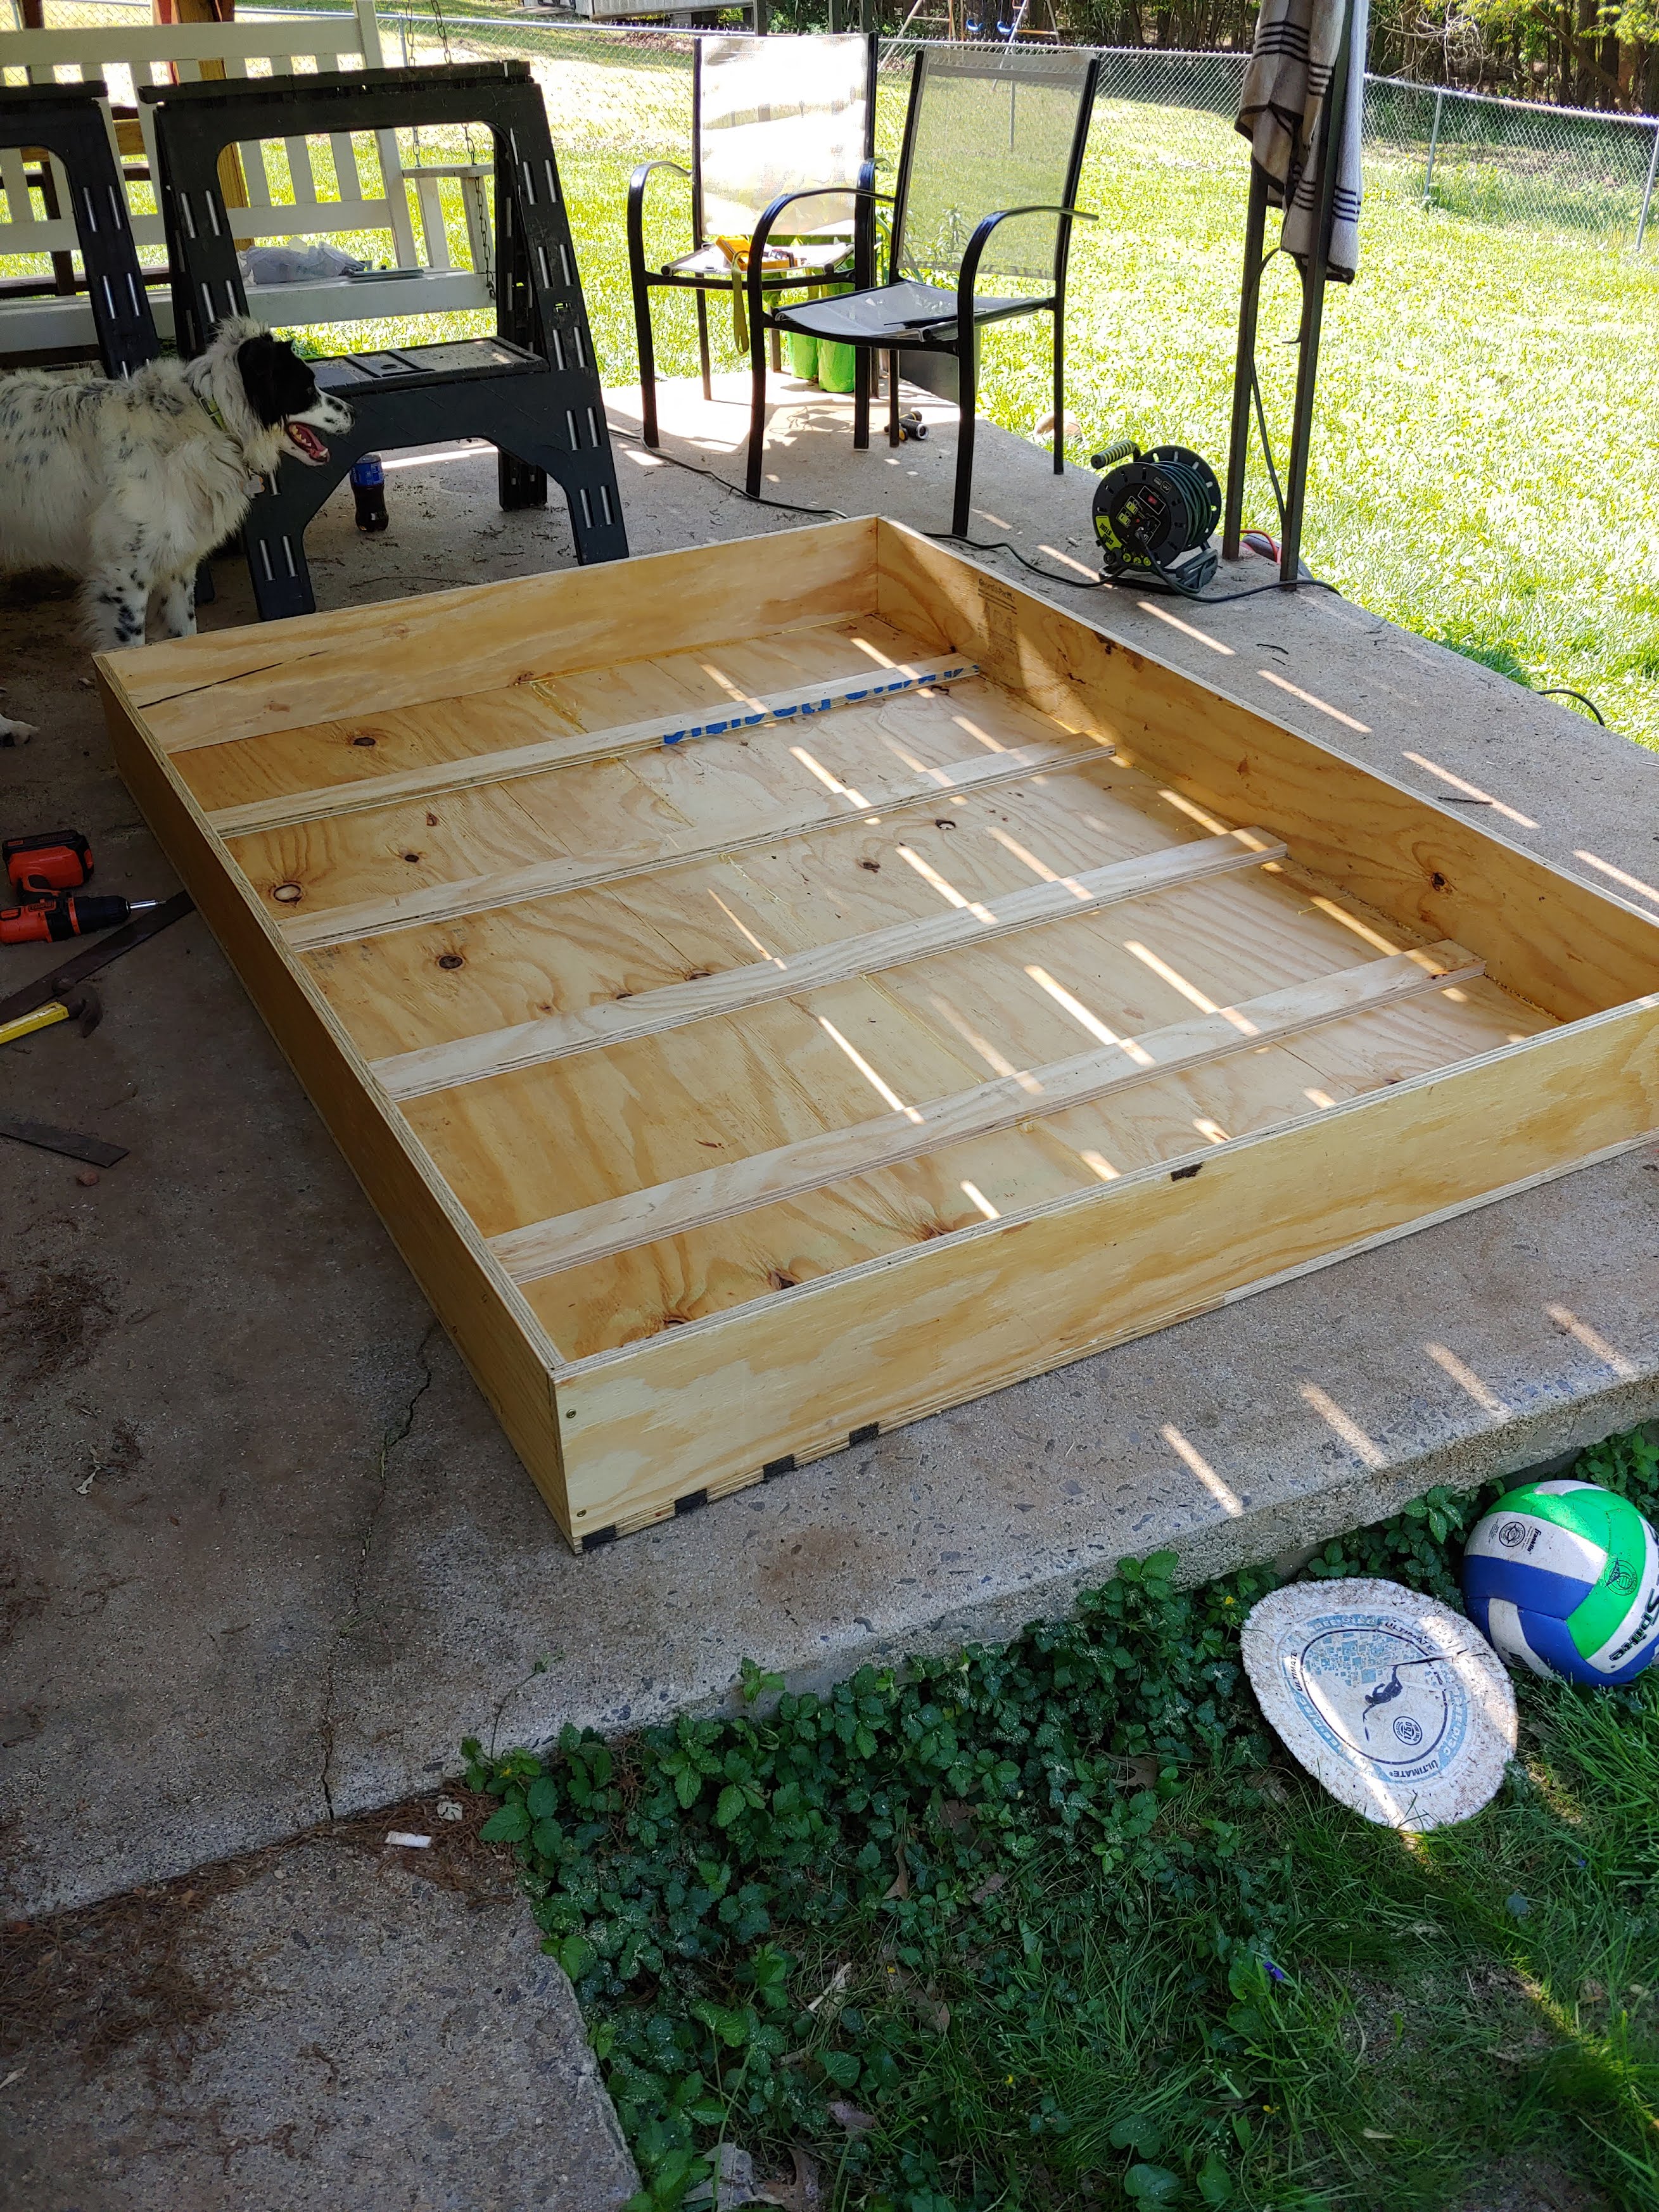
So I've always wanted to build a Murphy bed. And by always I mean since I first came across plans here that made it look so simple. It ended up taking me a while to do because my job has me working 6 days a week so I was only able to work on it for short chunks of time.
I ended up utilizing a few different plans and mashed them together to build a full size murphy bed. The shelves are the support legs when the bed is down. The "hinge" mechanism are heavy duty 360 degree seat swivels.
All-in-all it turned out WAY better than I expected with only some minor issues throughout the construction process.
Next up is a twin xl Murphy bed with a murphy desk attachment that will serve as a craft table when up.
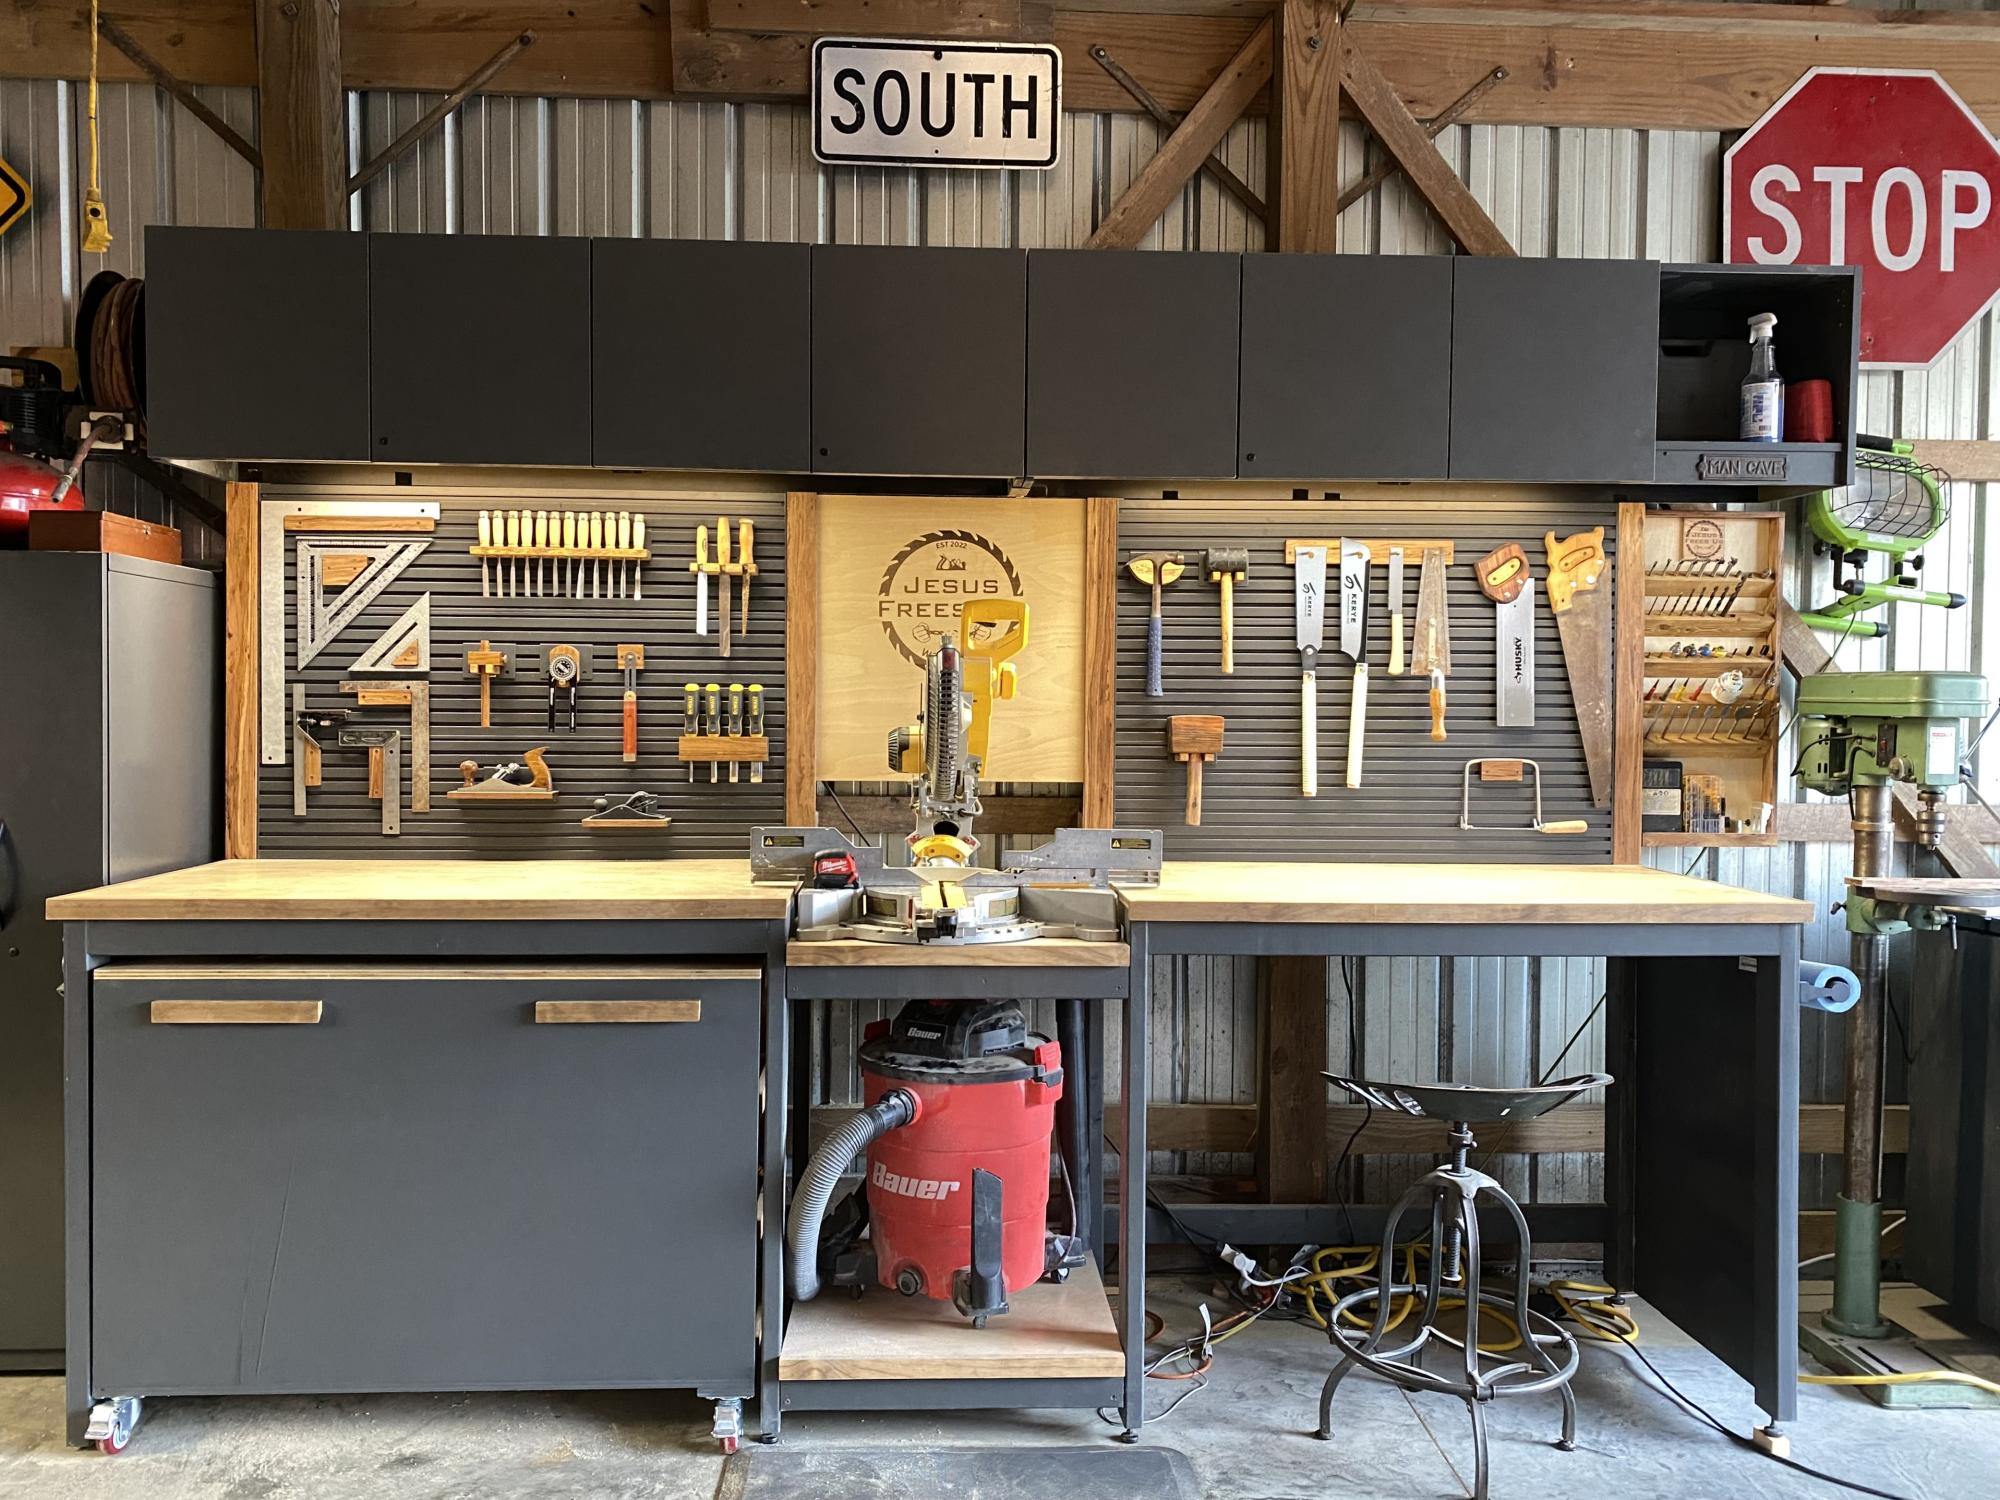
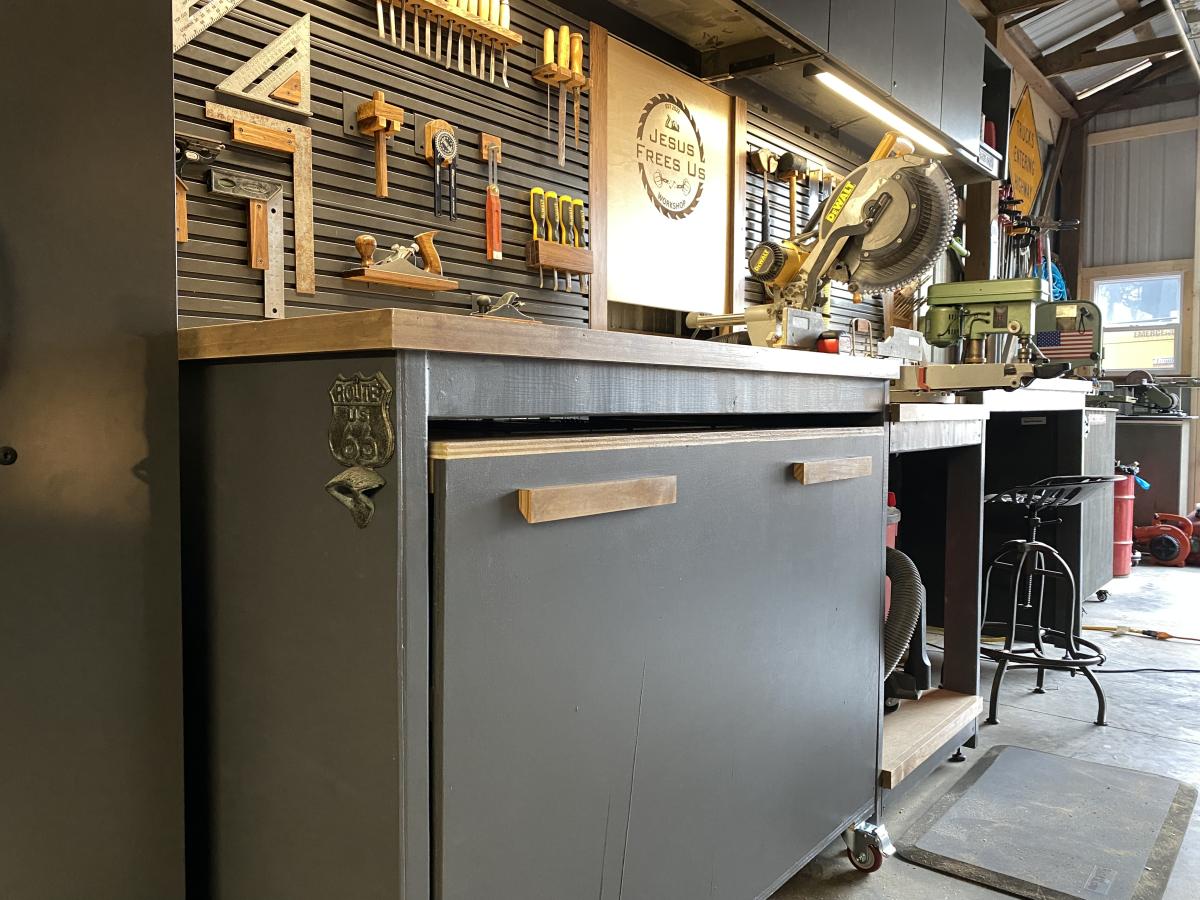
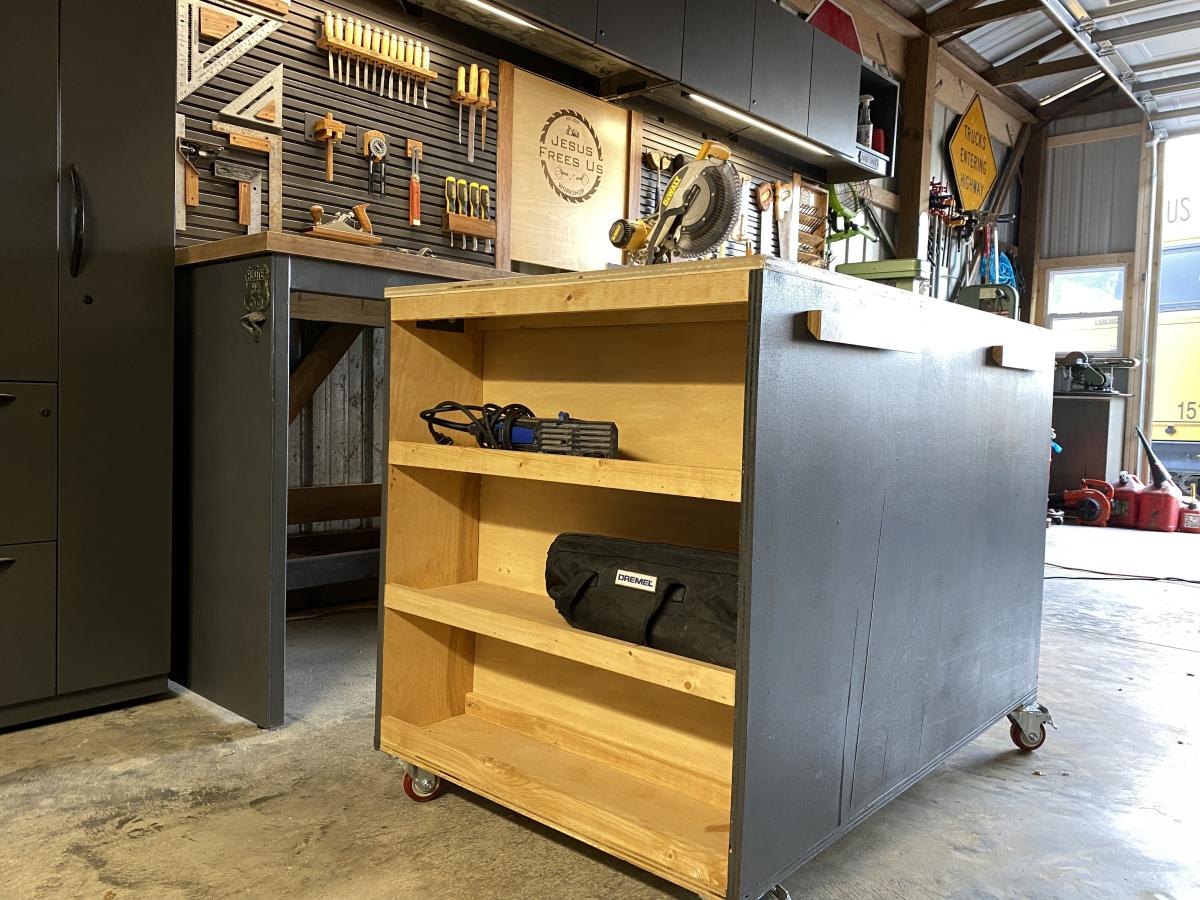
This plan is exactly what I needed for my workspace. I ended up adding some slat wall pieces and cabinets above from cubicles in an old office nearby that closed down for a tool wall and storage. I left the right opening empty due to how unlevel my floors are. I may close it in later with drawers or cabinets, but it will be my sitting workspace for now. I trimmed out the edge with 1x2s and painted and stained everything for aesthetics.
Mon, 03/06/2023 - 17:36
WOW, this looks so good! Thank you for sharing your amazing work.
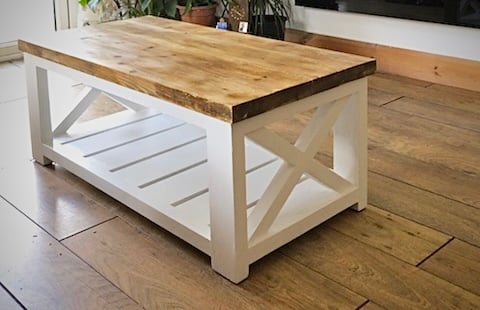
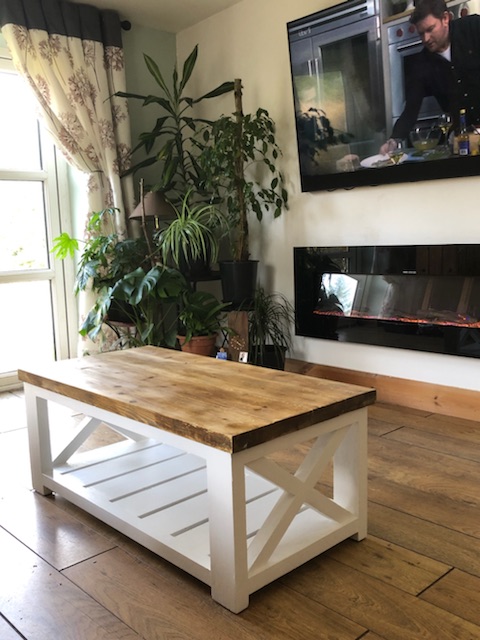
Than you Ana, My first time ever that I have made anything - my coffee table taking pride of place. Looking forward to making my next project from your plans.
Sat, 03/25/2023 - 09:24
WOW! This is beautiful, can't wait to see your next project. Thanks for sharing:)
Built 2 of these for some friends. One of them plans on putting it in the wall! Loved the build and they love the product.
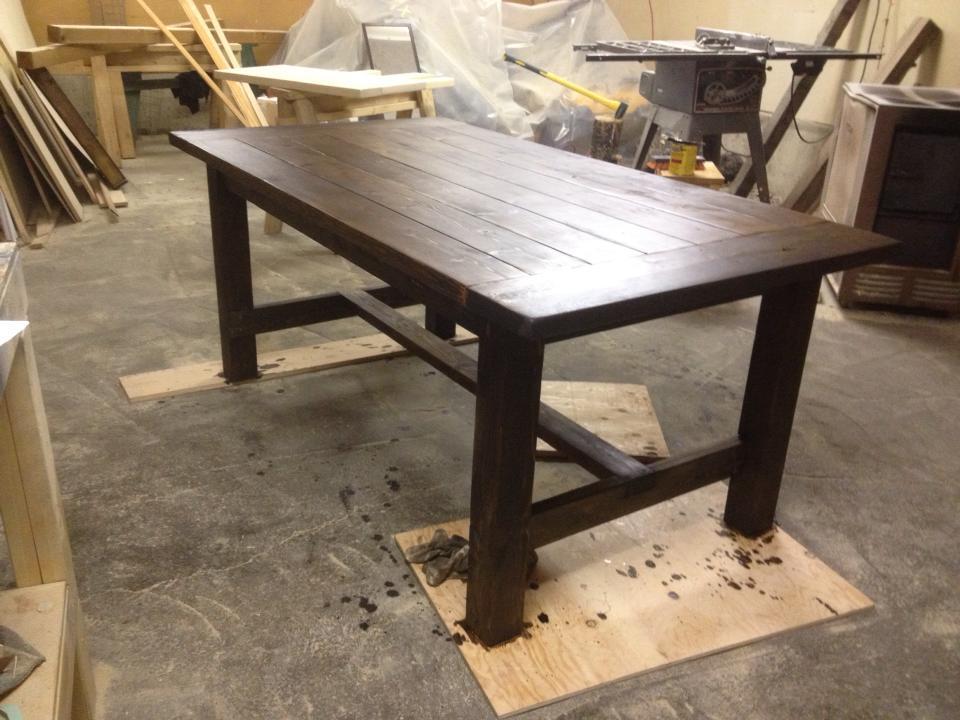
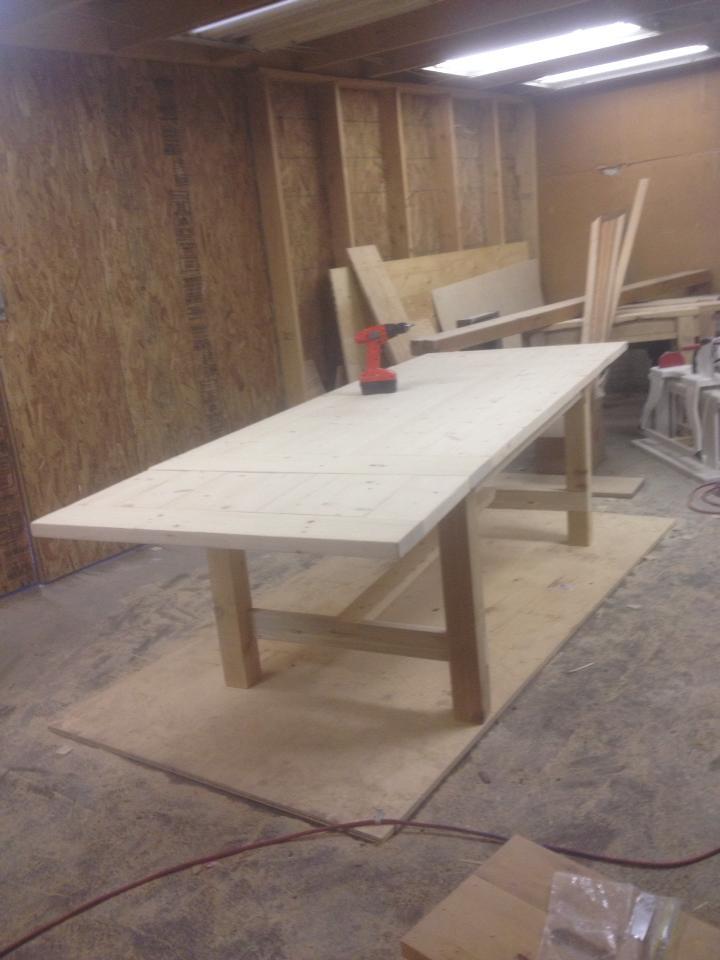
This was the second table I built - it was much improved on my first and was for my sister as a Christmas present. It has 4x4 legs that I notched out with a circular saw for the legs and a spruce top. I modified the length down to 6' for her house but added extensions on the end that make the table up to 9' long when fully extended.
Tue, 09/23/2014 - 13:42
How was the epoxy worked out in the cracks?
And separation or trouble?
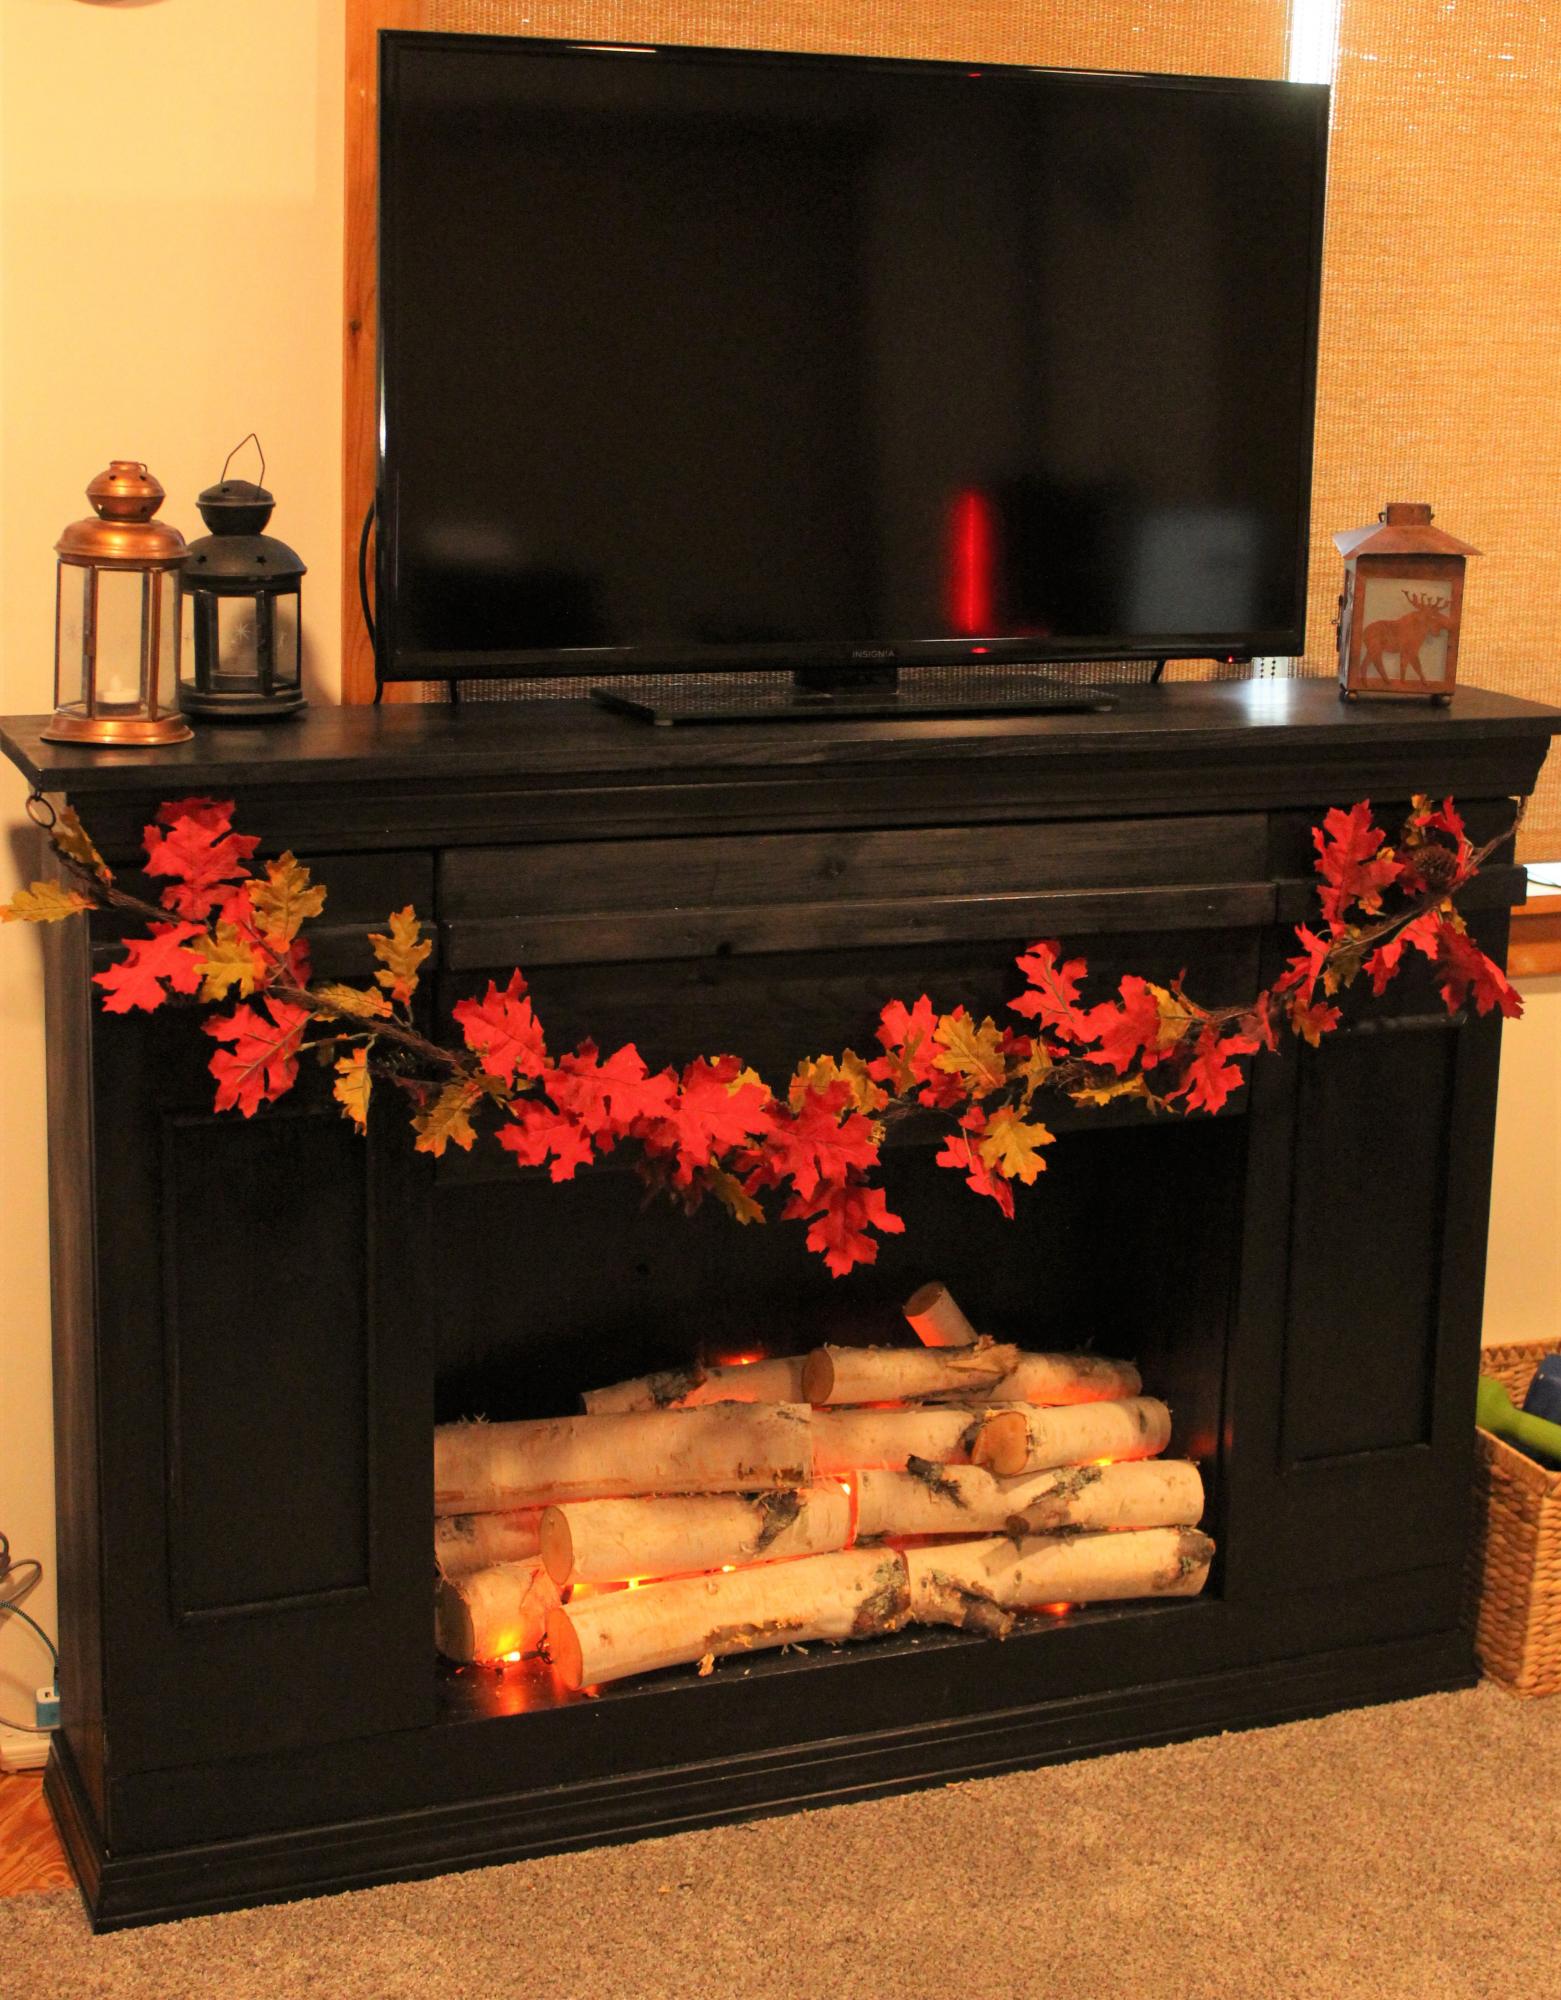
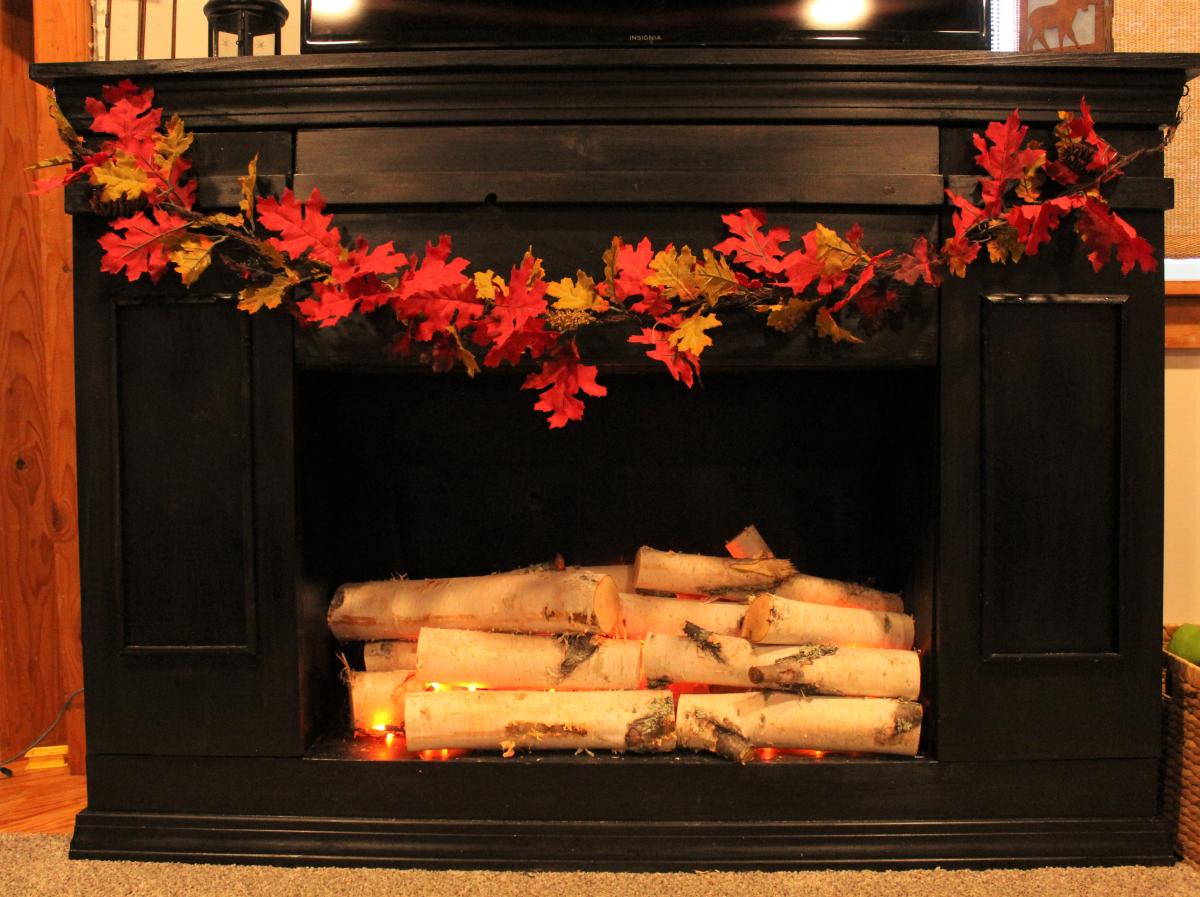
Went with a black, high gloss finish which I sanded down with 220 grit sandpaper to soften the look. Cut up a birch tree from the backyard, back-lit the logs with two strands of orange Halloween lights from the dollar store (we drilled a hole in the bottom back for the plug for the lights).
Added a remote extender so we don't have to open the front middle door in order to operate our streaming devices.
Love to be able to decorate this for the holidays--can hardly wait for Christmas!
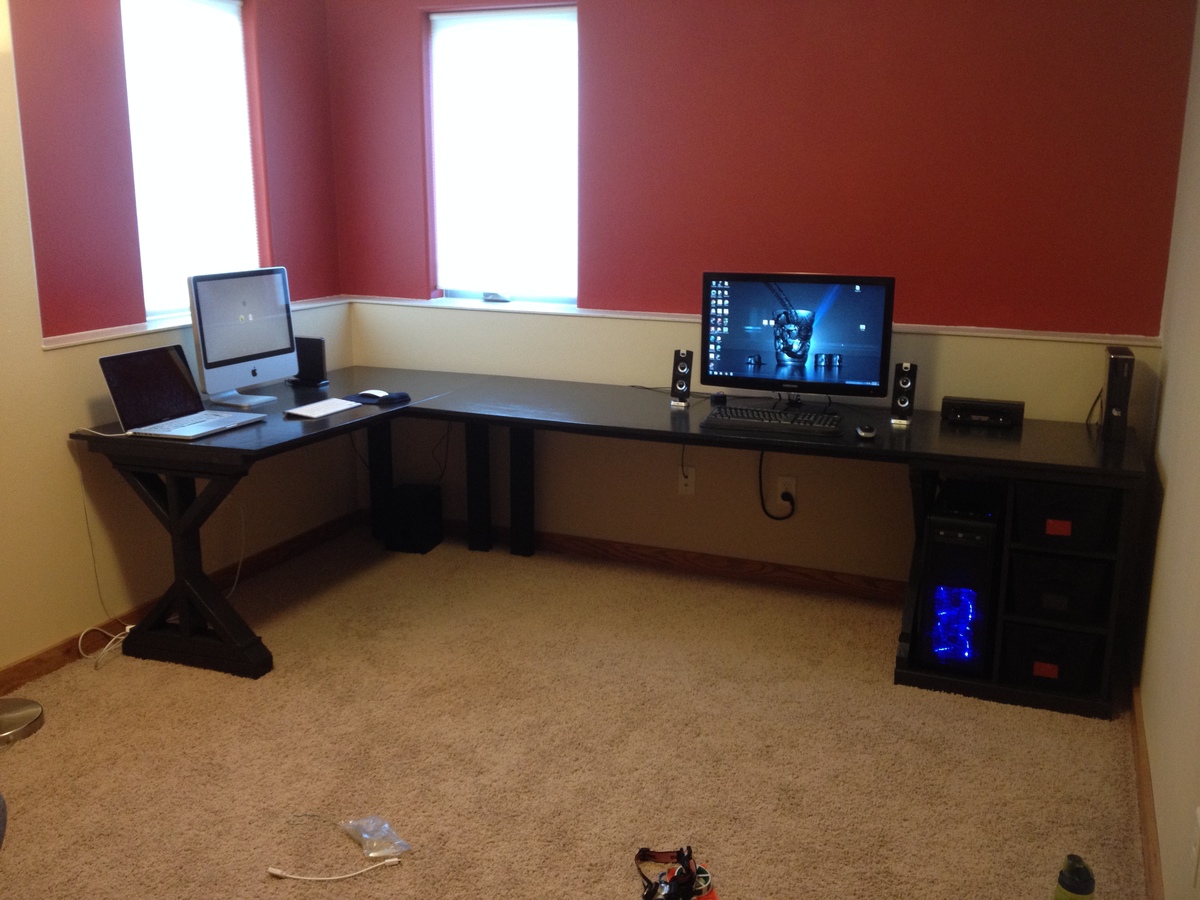
This desk was made using the "Fancy X Desk" and "Modular Office Base" plans. A CPU enclosure was added with a similar "X" design. The top is 3/4'' plywood with 1x2's and 2x2's providing the framing. A 1x4 runs down the back of the desk with a cord try to hide cables.

Mon, 06/08/2015 - 08:46
I am not able to find the plans you are referring to. Is there a way you can comment with direct link
Thu, 01/07/2016 - 15:16
HI, The desk is awesome and I thought I would make this my first attemt at building something.
But I am unable to find the instructions.
Please help.
Thank you.
Sun, 01/10/2016 - 08:46
Ok after reading the subject matter I realized that this is the merging of two different desks.
Can you post a photo of how you joined them.
The support for such a long desk is my concern, with out it having any middle support or at the the corner?
Thank you.
Sun, 01/10/2016 - 08:47
Ok after reading the subject matter I realized that this is the merging of two different desks.
Can you post a photo of how you joined them.
The support for such a long desk is my concern, with out it having any middle support or at the the corner?
Thank you.
Tue, 01/12/2016 - 14:52
Hi,
Could not find attached plans. I did see the same comments before too for the same project.
I loved this plan. It was my first build from Ana White plans and a true jumping off point for my imagination. I used pine boards, matte red underneath and semi-gloss white top coat. Steel wool was my tool for the distressing.
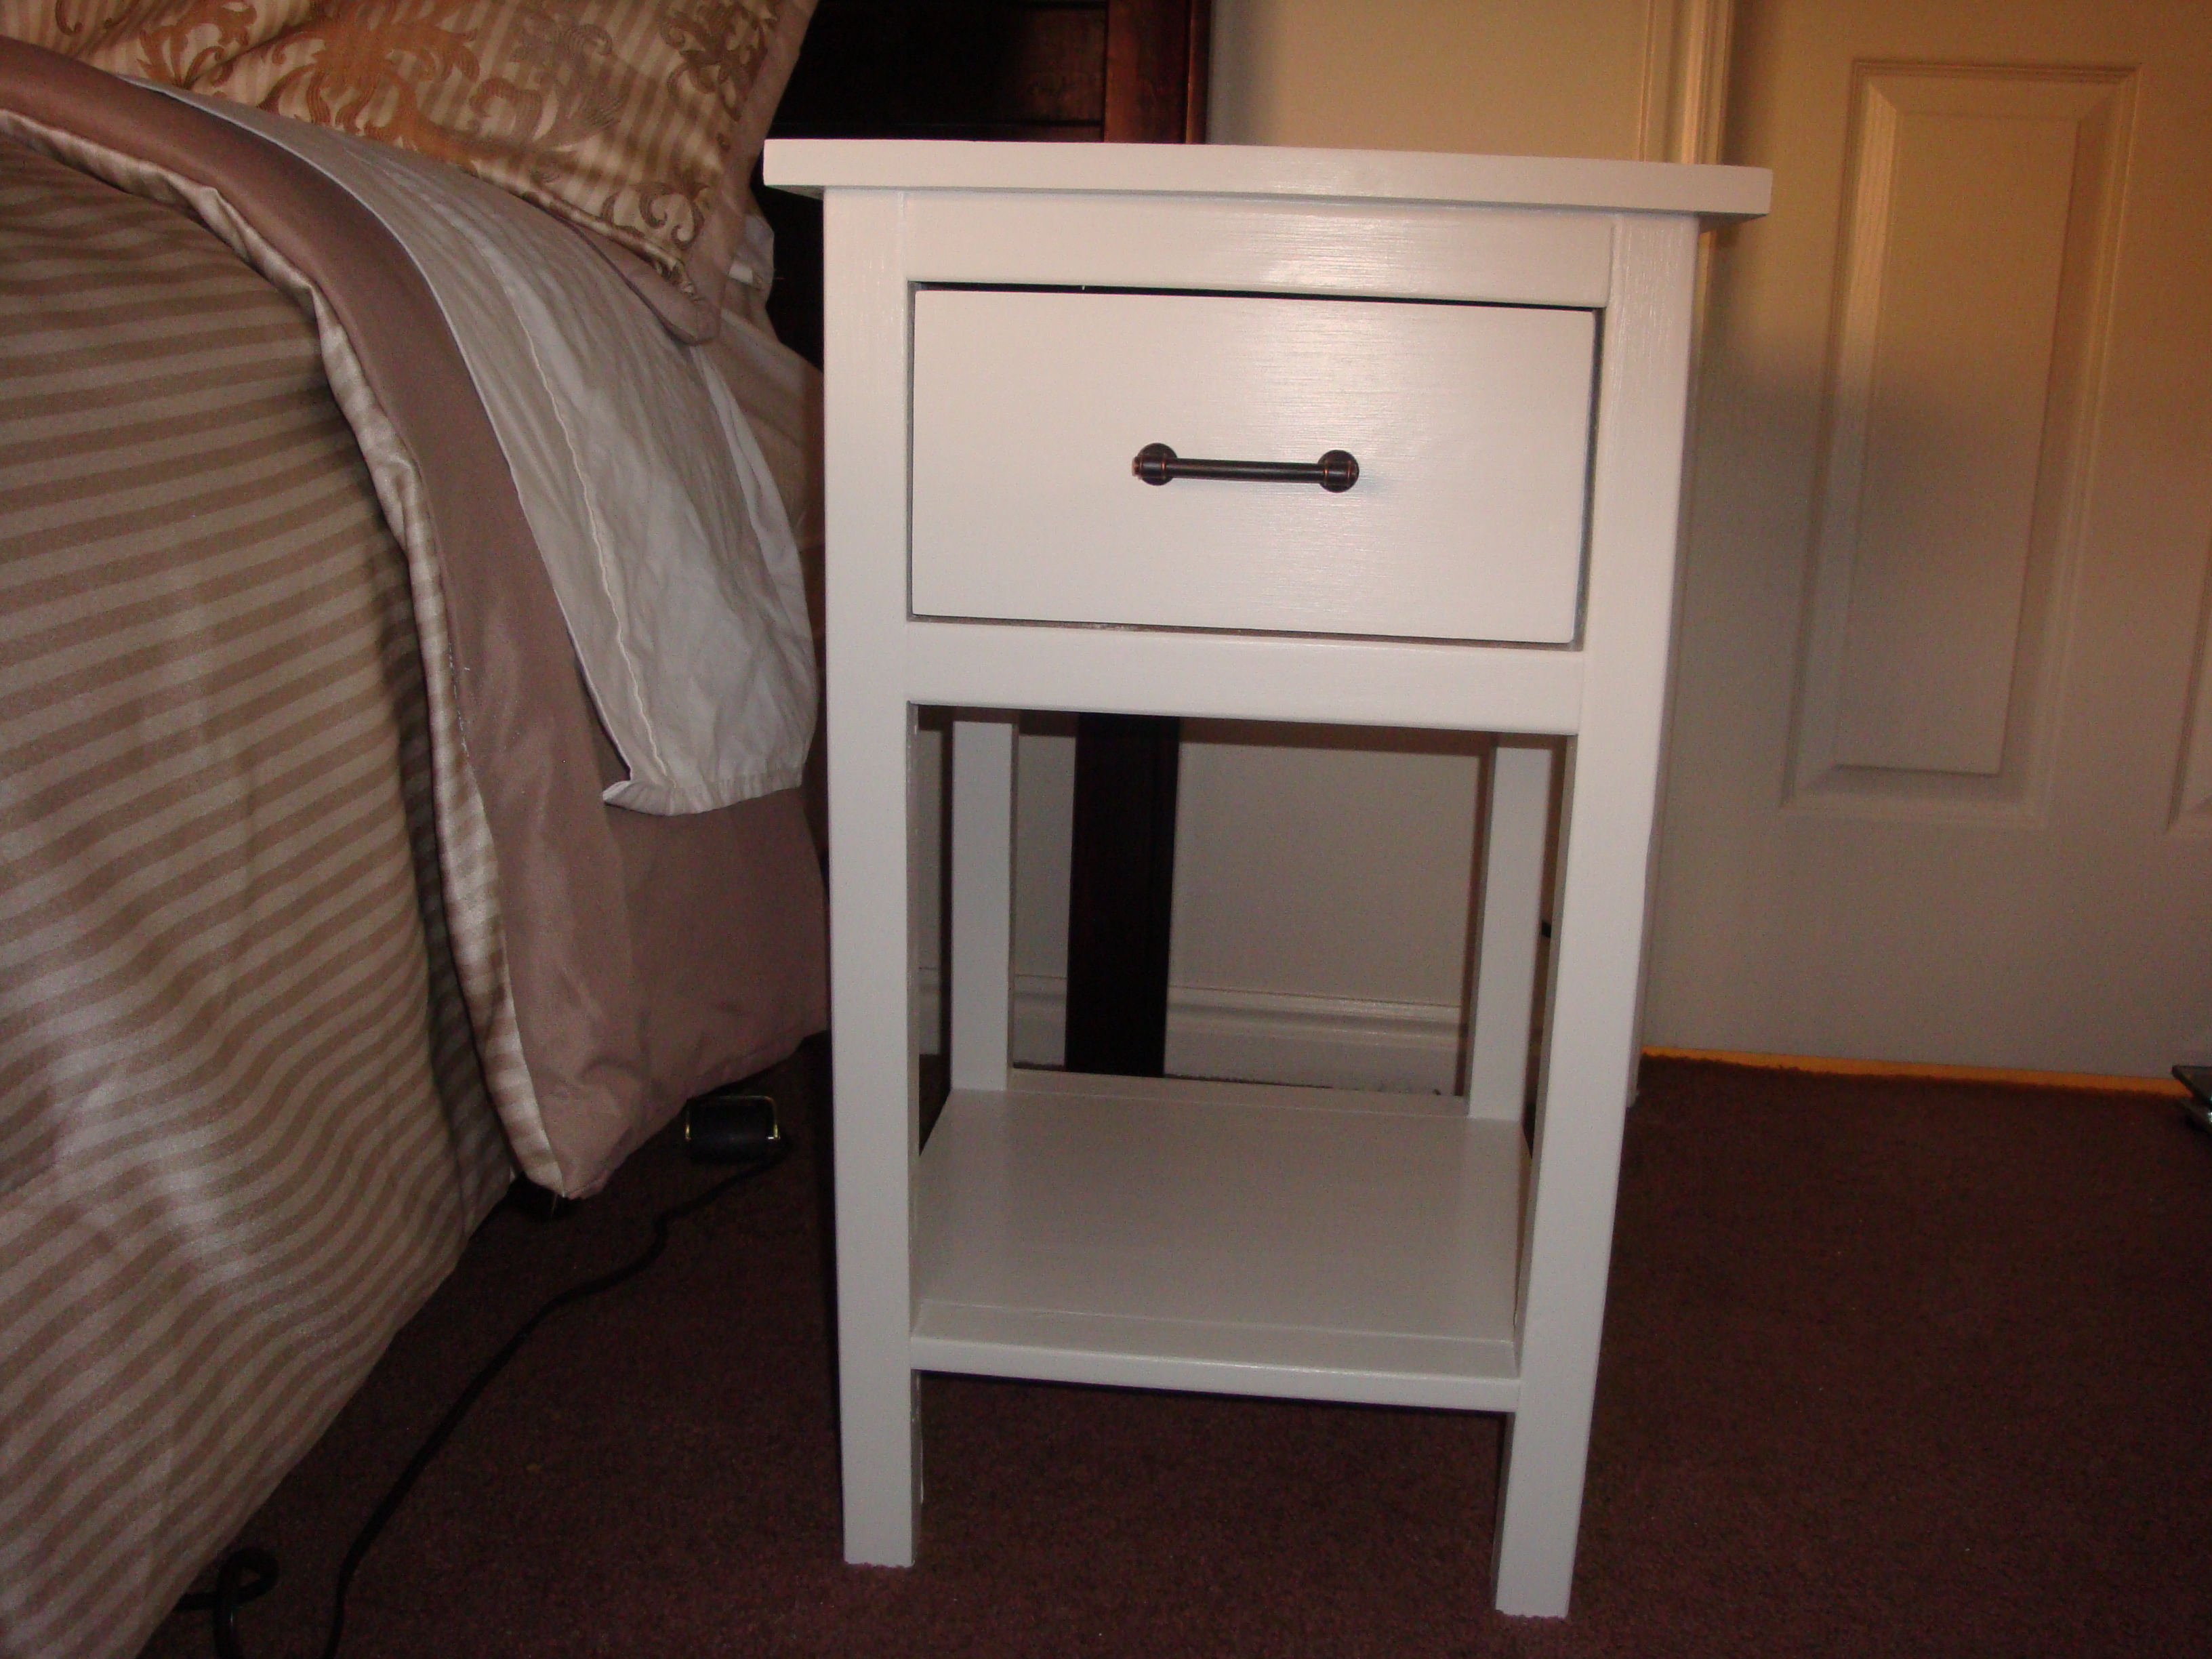
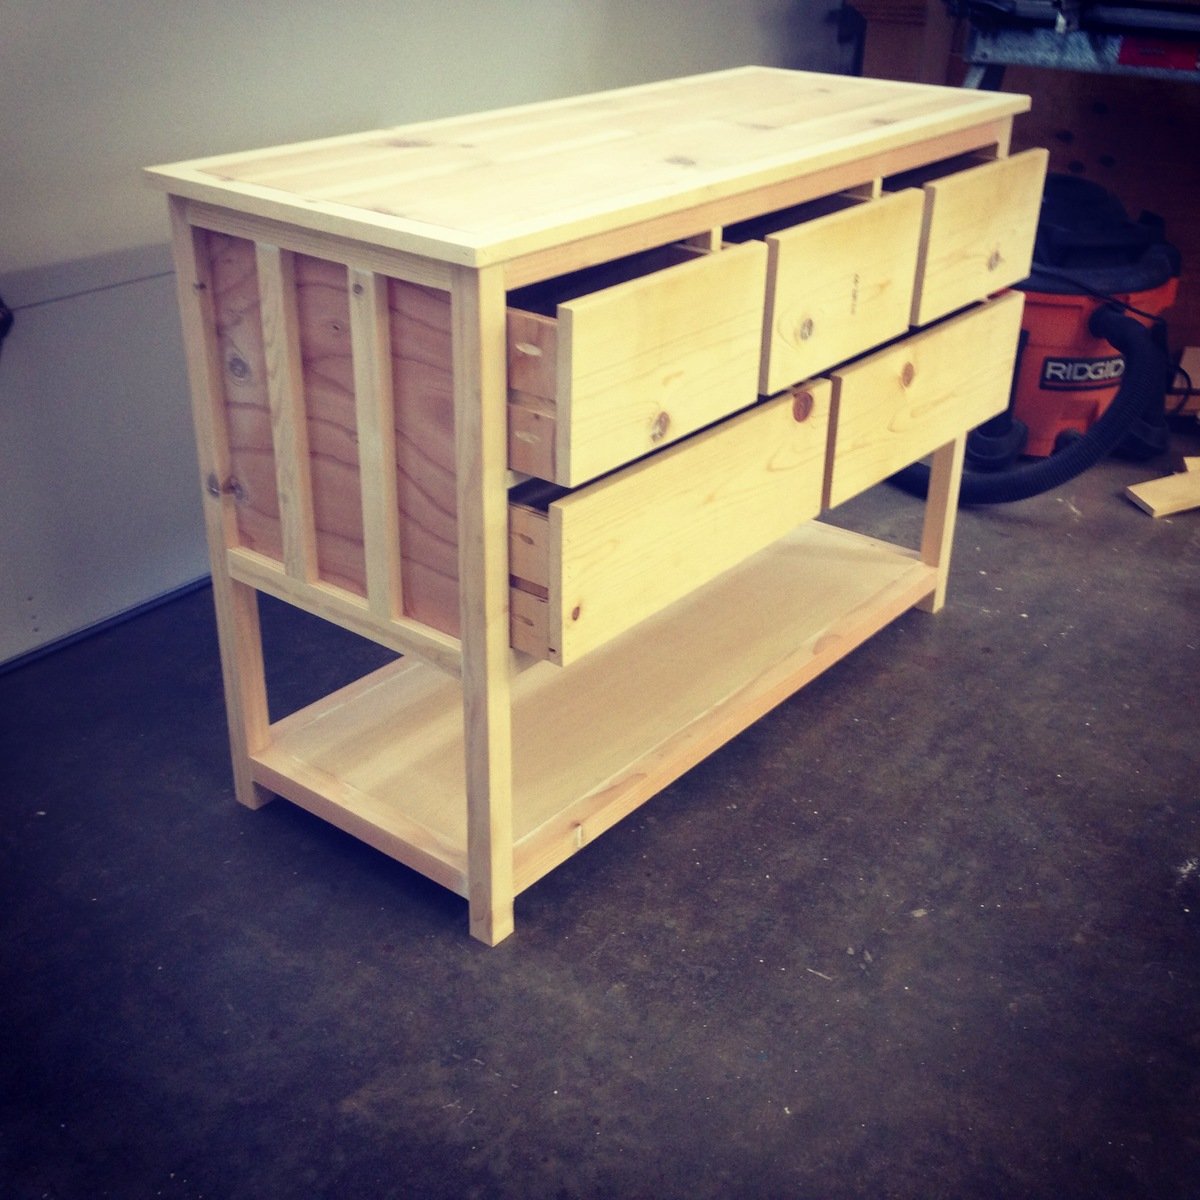
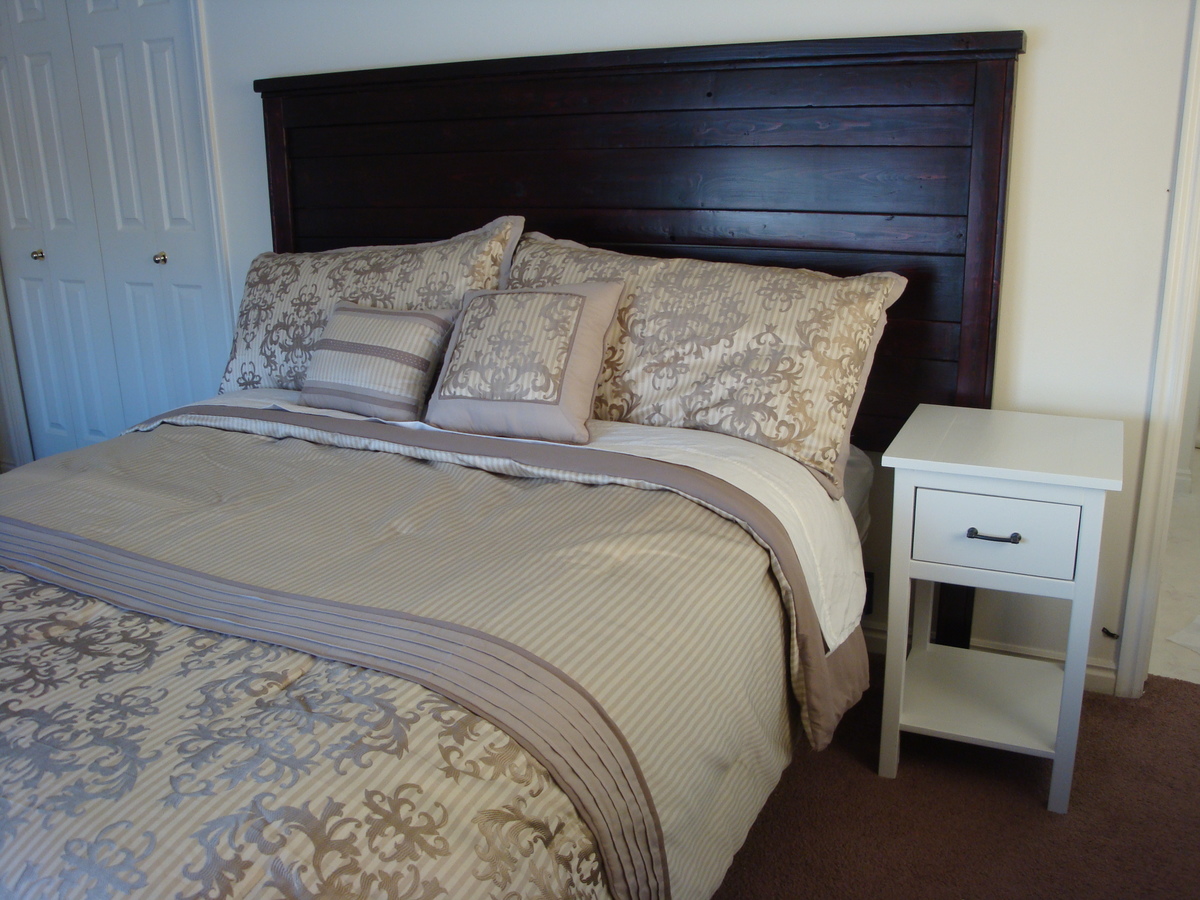
I made two of these bedside tables for our master bedroom and I LOVE how they turned out. Really like the white with my red mahogany headboard. These weren't too difficult to build. The only problem I ran into was trying to fit my drill in some of the tight spaces to get some of the screws in. I had to do a few of them by hand with a small screwdriver. I mostly used leftover scraps to build them. The tops are made of several boards kreg jigged together rather than one big piece. I was a little nervous about the drawer because I have never made one before, but it wasn't as bad as I thought and it came out just about perfect! yay.

Tue, 01/14/2014 - 16:39
Love this nightstand, it's the perfect size, not too big or too small. Your white finish looks great, and the drawer looks perfectly even. Great job!
Sun, 02/09/2014 - 10:47
Awesome job with your drawer! I just finish build my mini table now and getting ready to cut up another woods for the drawer part, what size is your front drawer? Is it 11 1/4? What about the length? I want to make sure I measure it right before I cut em soon.
Tue, 02/11/2014 - 18:29
Sorry, I just saw your questions! Yes the drawer front is 11 1/4 wide, and the length of the drawer is 11 1/2. I just followed Ana's cut list exactly for the mini farmhouse bedside table. Since you already have the table built you can measure the opening for the drawer to make sure it will fit.

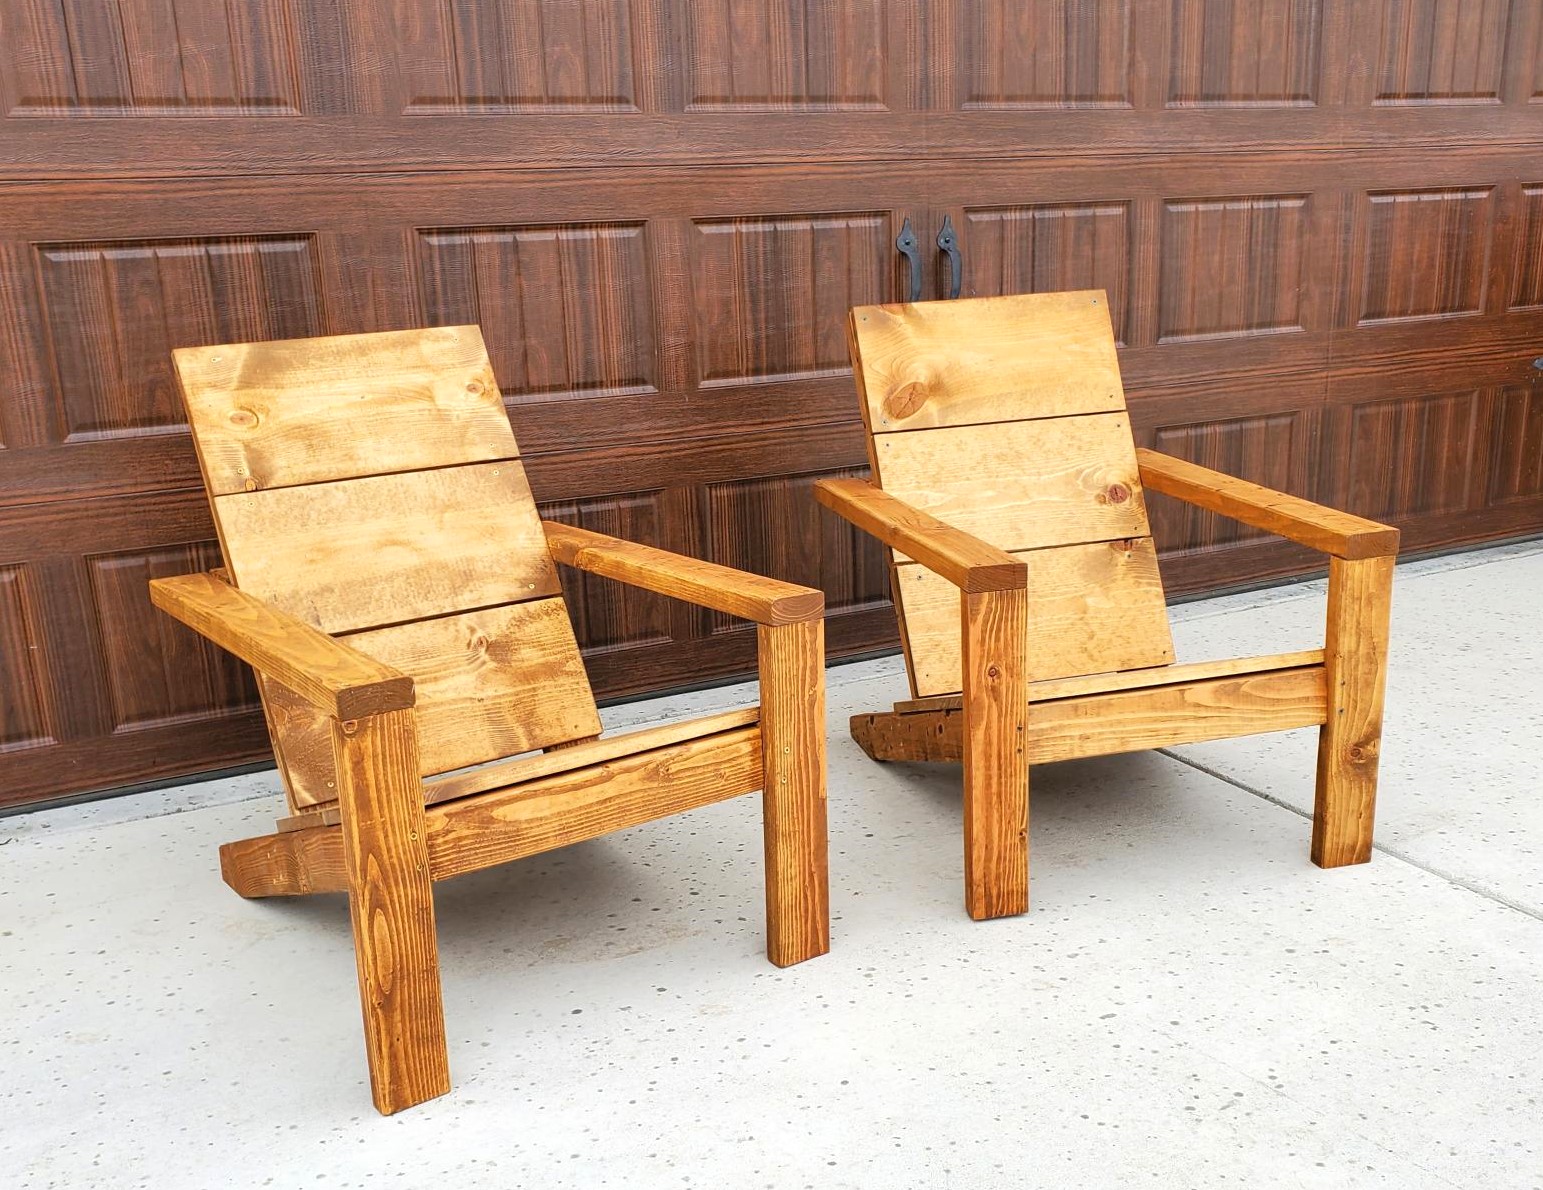
I modified this chair with 2x4's as the base and 2x2 for decoration on arms, this is prior to sanding and finishing

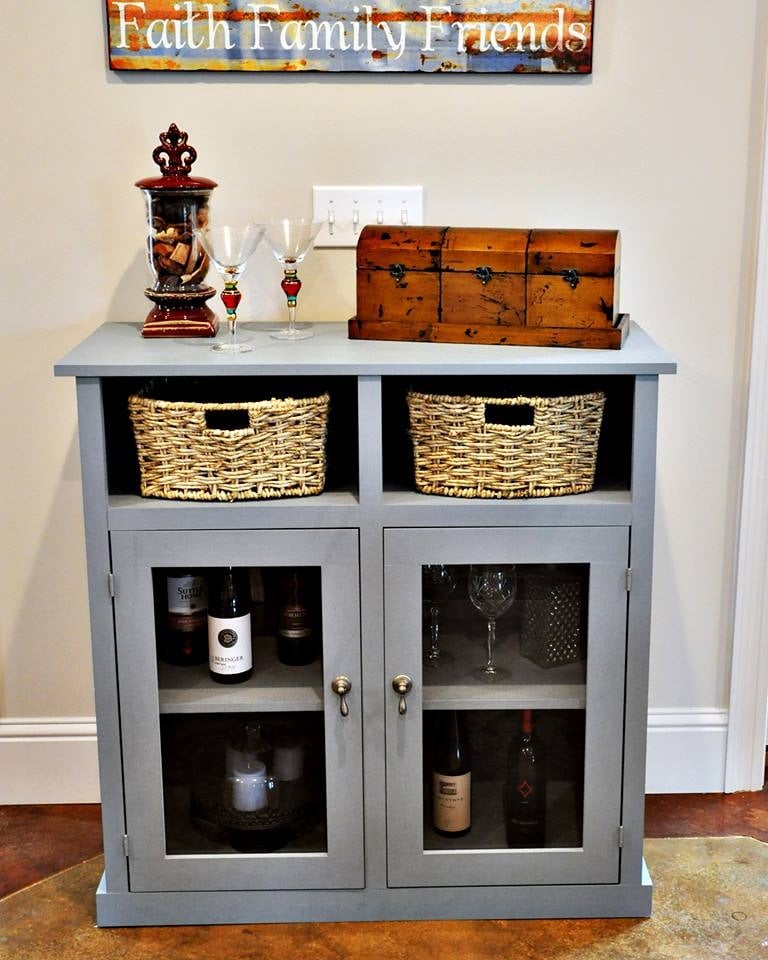
I modified the size of the original plan to better fit the space. It is slightly deeper and taller than the plans. I also used a router to create a rabbet for the glass inserts in the doors.
The finish is a homemade chalk paint followed by multiple coats of furniture wax. The build itself was quick and straight forward, but the finish took the most time.
The console really pops in a room full of stained furniture. I love the look, shape, and versatility of it--thank you for sharing the plans!

Thu, 01/23/2014 - 08:36
This project looks really good. I love the glass inserts and the color you chose.
Val @ artsybuildinglady.blogspot.ca

I had the wood to make this for about 2 weeks. Started on Tuesday and finished Thursday evening! I wanted the look to be different from the Apothecary look so I made the doors a little different!
Mon, 04/14/2014 - 17:16
I love this! I just finished putting the frame together but wasn't loving the original door look. Can you tell me how you did the beadboard doors? And what hinges? Thanks!
In reply to I love this! I just finished by jeanniemn
Sat, 04/19/2014 - 08:02
Sure! I just bought a 4'x8' sheet of beadboard from Lowes. I have about half left over. They sometimes have half sheets but didn't when I went. I had them to rough cut it into 20" strips to fit in my car. It came white but I painted over it with Rustoleum Heirloom White spray paint. I bought 2 12ft boards for the frames, I think they were 1/2"x2".. only around $8 per piece and they are stocked vertically at lowes near the beadboard (at the store near me at least!) I cut the beadboard at home and then cut the frame board to fit. I used glue and a brad nailer with 5/8" nails to attach them to the beadboard. My doors had to overlap the plywood since I had the extra shelf that was flush with the rest of the cabinet.. I couldn't inset my doors like she did at Shanty-2-Chic. I bought the same hinges she used, the brand is Liberty and I found them at Home Depot. $5 something for a 2 pack. They are awesome! The doors aren't heavy duty but we didn't need them to be. You could always add a layer of MDF or Lauan if you wanted them to be more sturdy!
I hope this helps.. I'll be glad to answer more questions!
Thu, 05/01/2014 - 18:28
Thanks!! We are almost done but are stumped by the hinges (I bought the Liberty ones too). Any tips on those? I think we are just over-thinking it, it can't be that hard!!
Thu, 05/01/2014 - 18:42
Thanks!! We are almost done but are stumped by the hinges (I bought the Liberty ones too). Any tips on those? I think we are just over-thinking it, it can't be that hard!!
Fri, 05/02/2014 - 06:53
...has completely stumped me before, and buying the wrong type has halted one of my first projects. Make sure you pick the right hinge for how you want your doors to align. From my experience, HD sells mostly "overlay" and "3/8 offset" hinges, with a small selection of "inset" hinges. These links are to a different hinge manufacturers, but the little pictures/explanations have helped me figure out what type of hinge I need to buy:
http://www.rockler.com/how-to/understanding-hinges
http://www.menards.com/main/store/20090519001/items/media/Millwork/Belw…
(and vlilly, I love the distressed finish on the console above).
2 simple chairs that look great
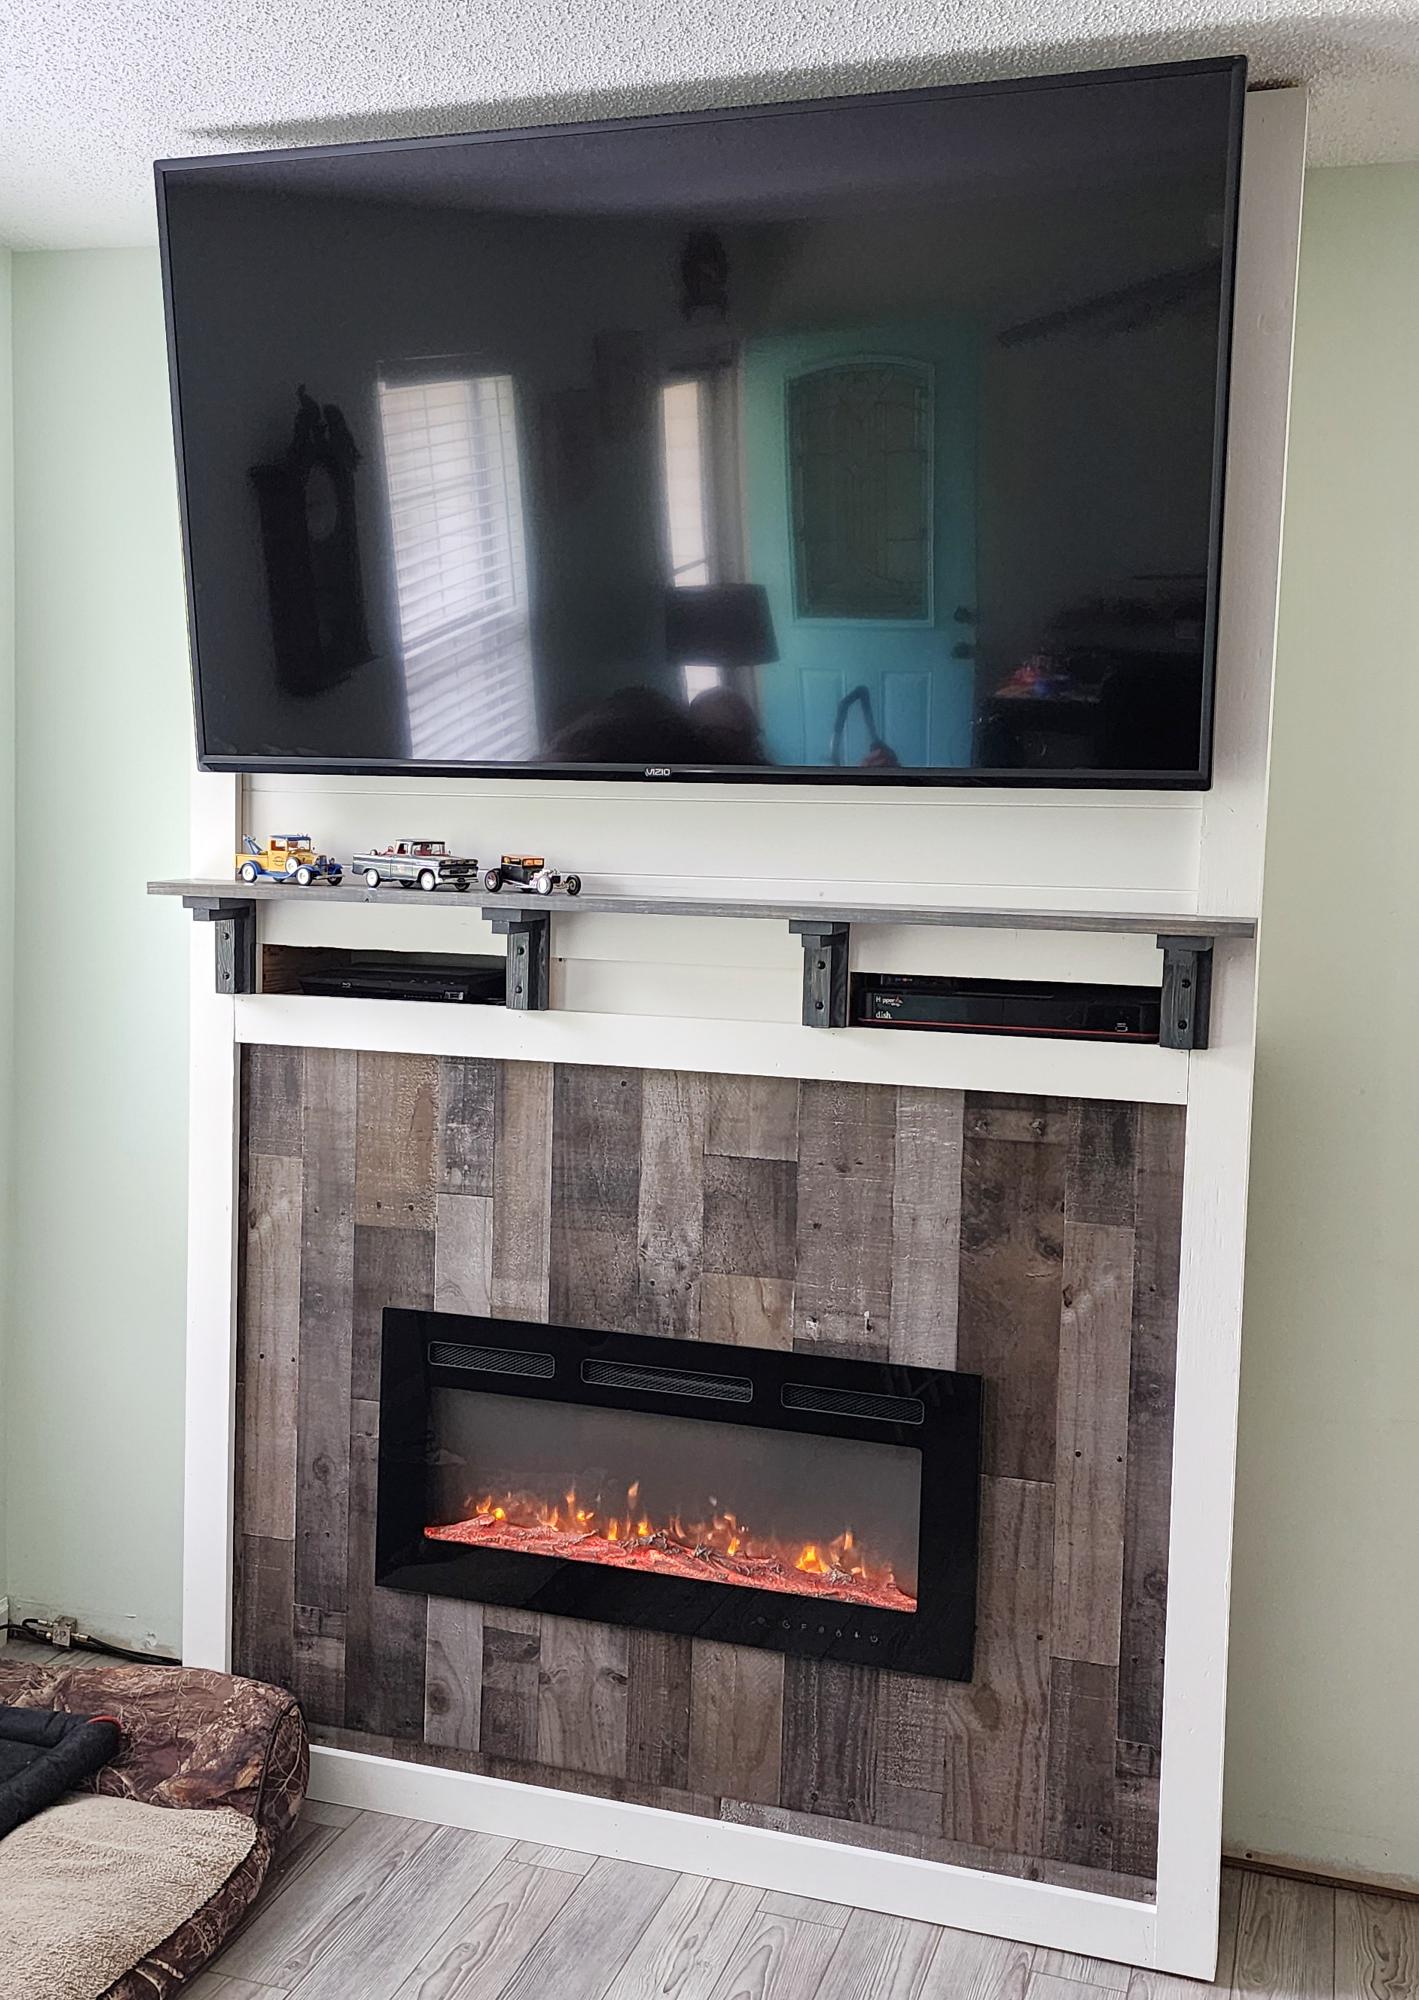
I wanted a tv/ fireplace for Christmas and my husband built this using your plans. I love it!
Joe Hall
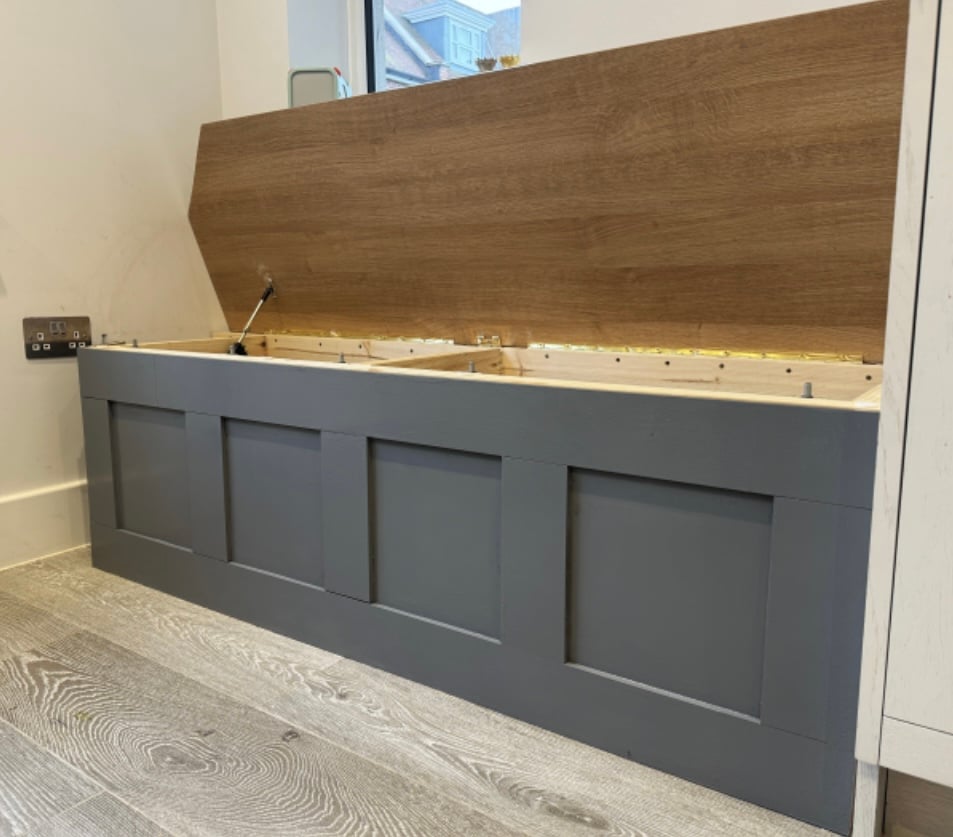
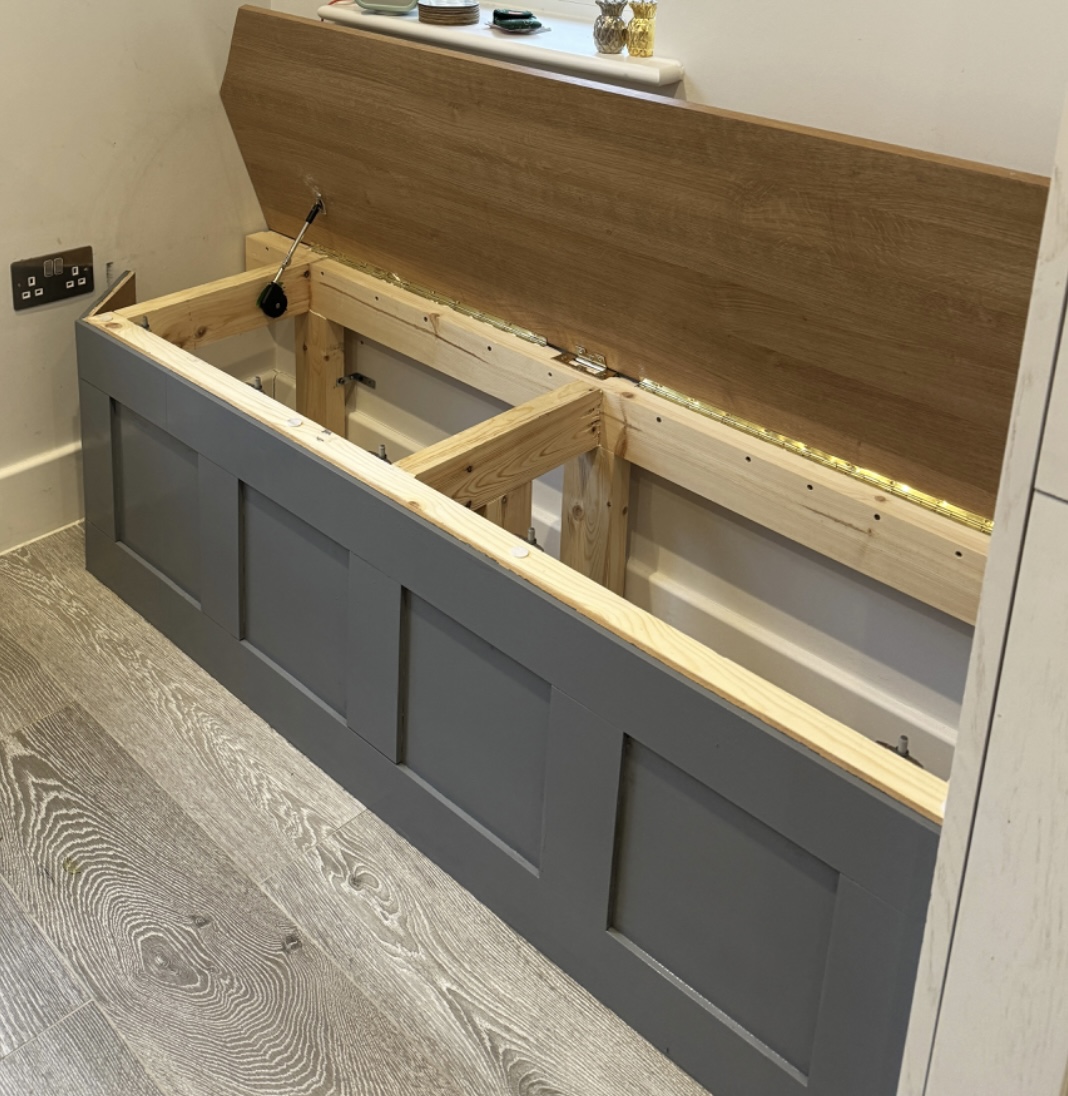
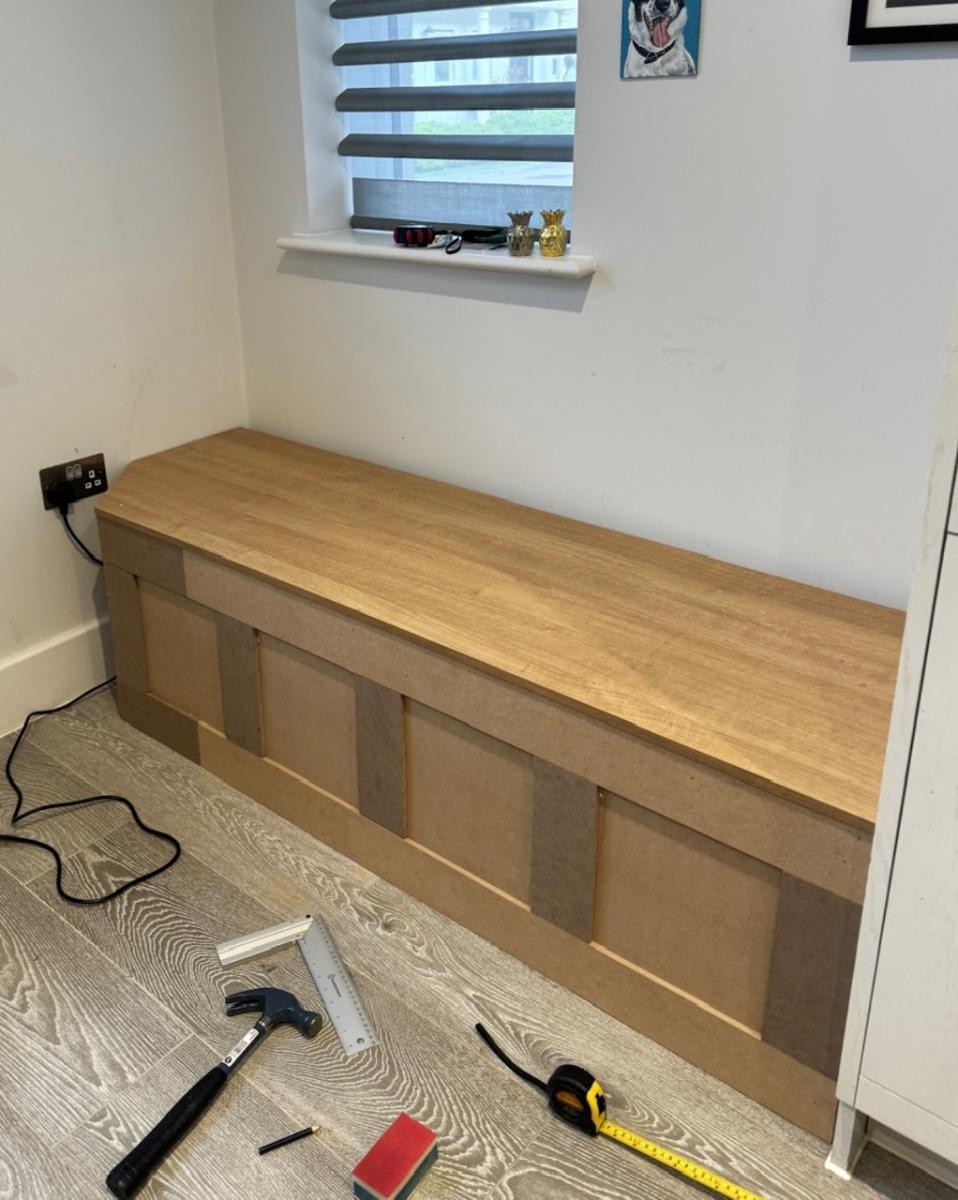
Kitchen dining bench with storage. Due to the plugs being in an awkward position, I opted to build this bench with a facade as opposed to adding a back and sides. This also meant it had to be panelled in situ which was a fun challenge! It has piano hinges as well as soft close pistons making for a great storage bench that is in keeping with the rest of our kitchen.
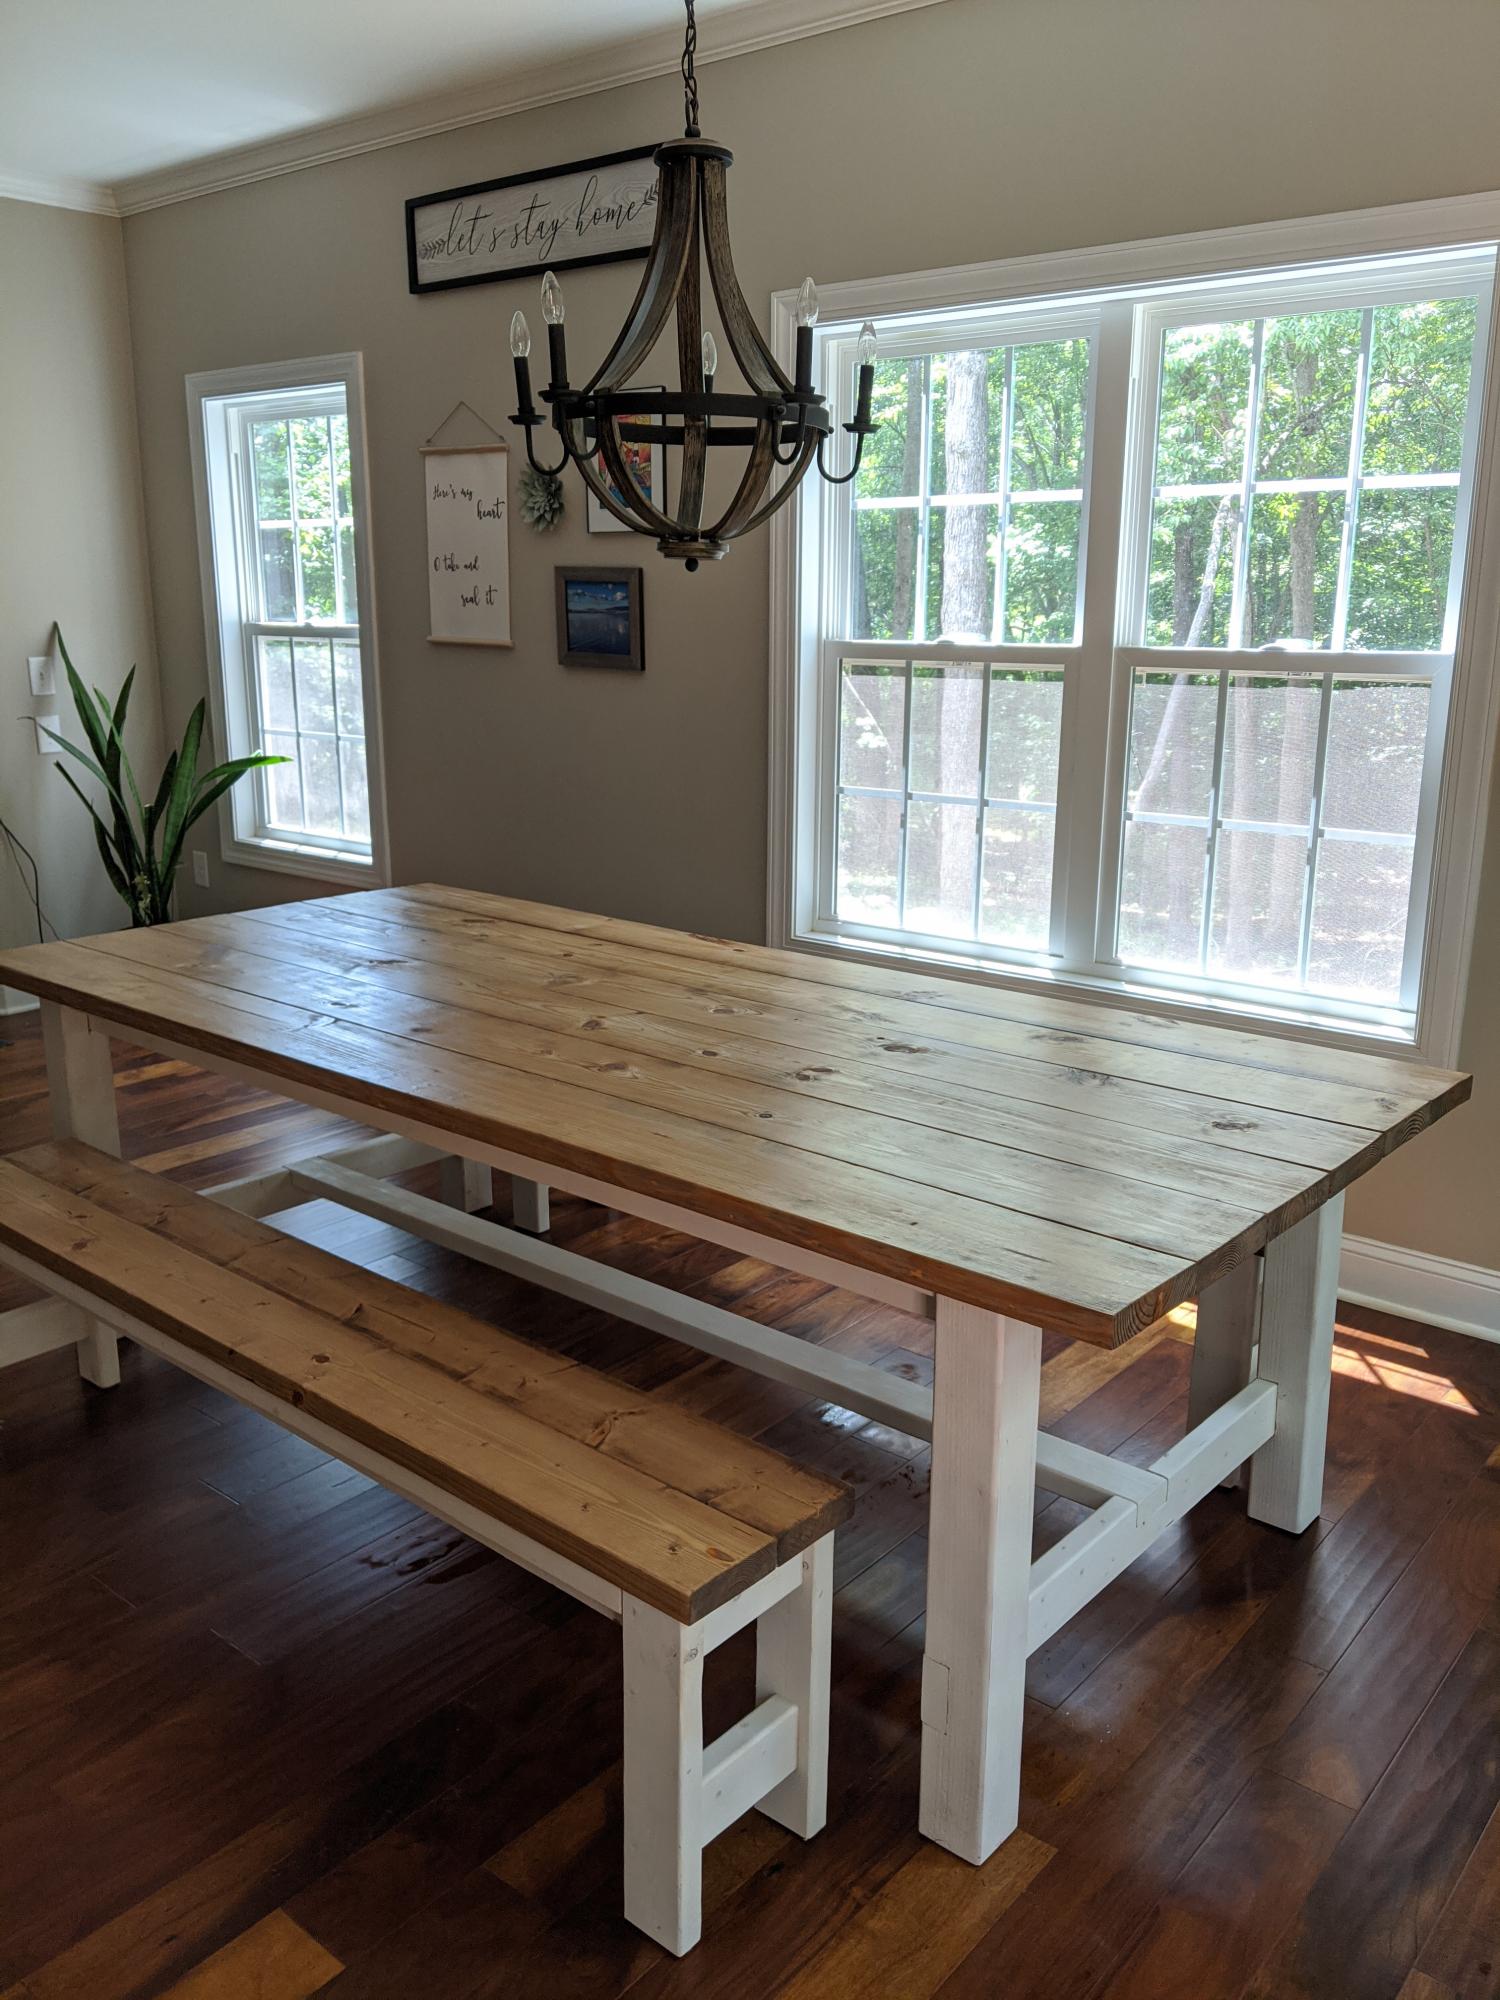
First table build! We modified the plans with no breadboard ends since we live with lots of humidity and wanted to allow the wood movement. We also used 4x4s for the legs. White chalk spray paint legs and custom mix of special walnut and weathered oak stains. We LOVE it!!
Comments
Ana White Admin
Thu, 08/11/2022 - 20:31
Looks awesome!
Thanks for sharing, love how you did this!