Jelly cupboard
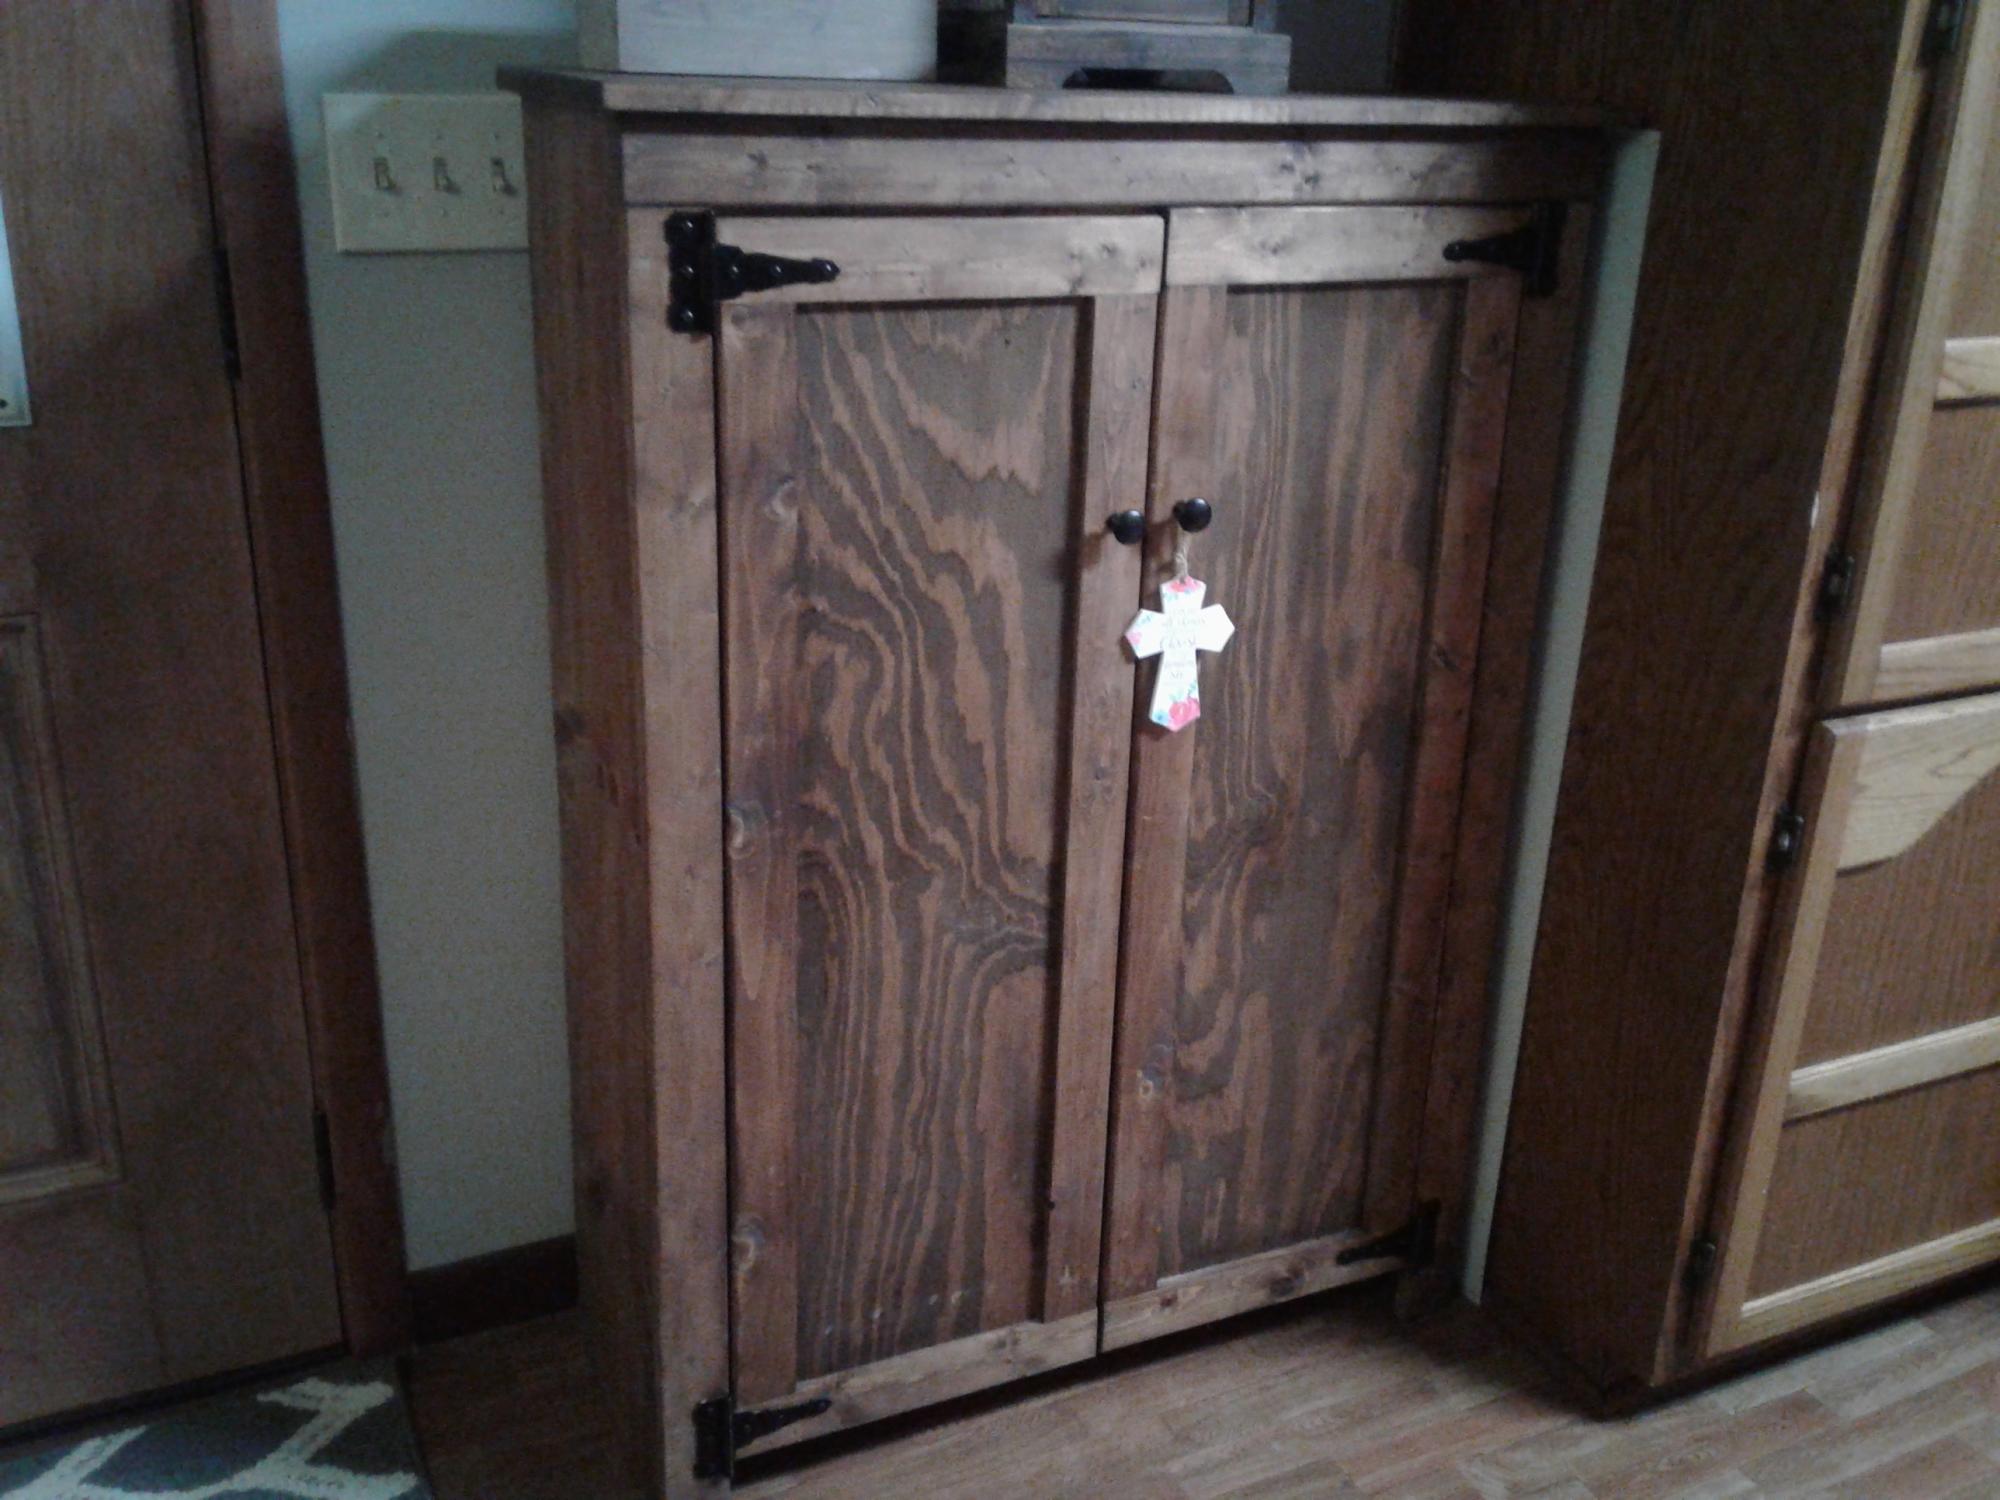
Made from Ana White `s plan. Thanks for the help.
Built from Plan(s)
Made from Ana White `s plan. Thanks for the help.
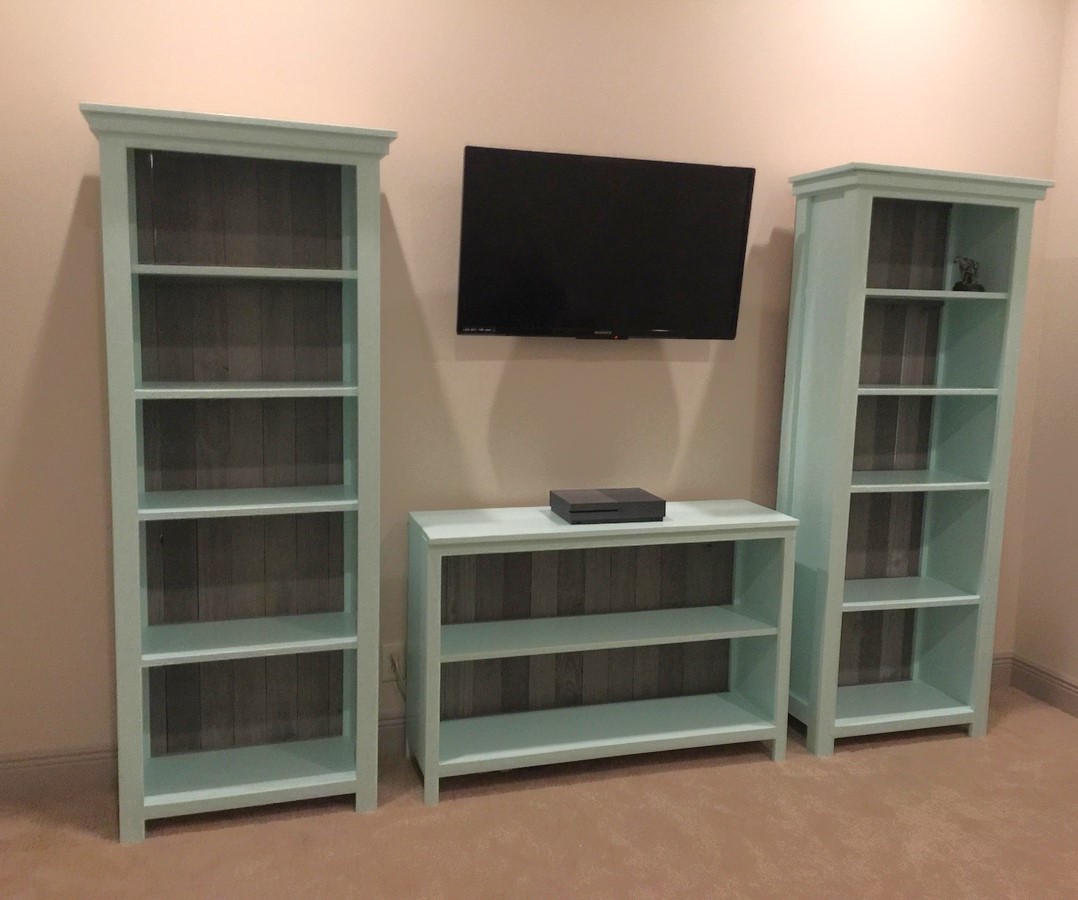
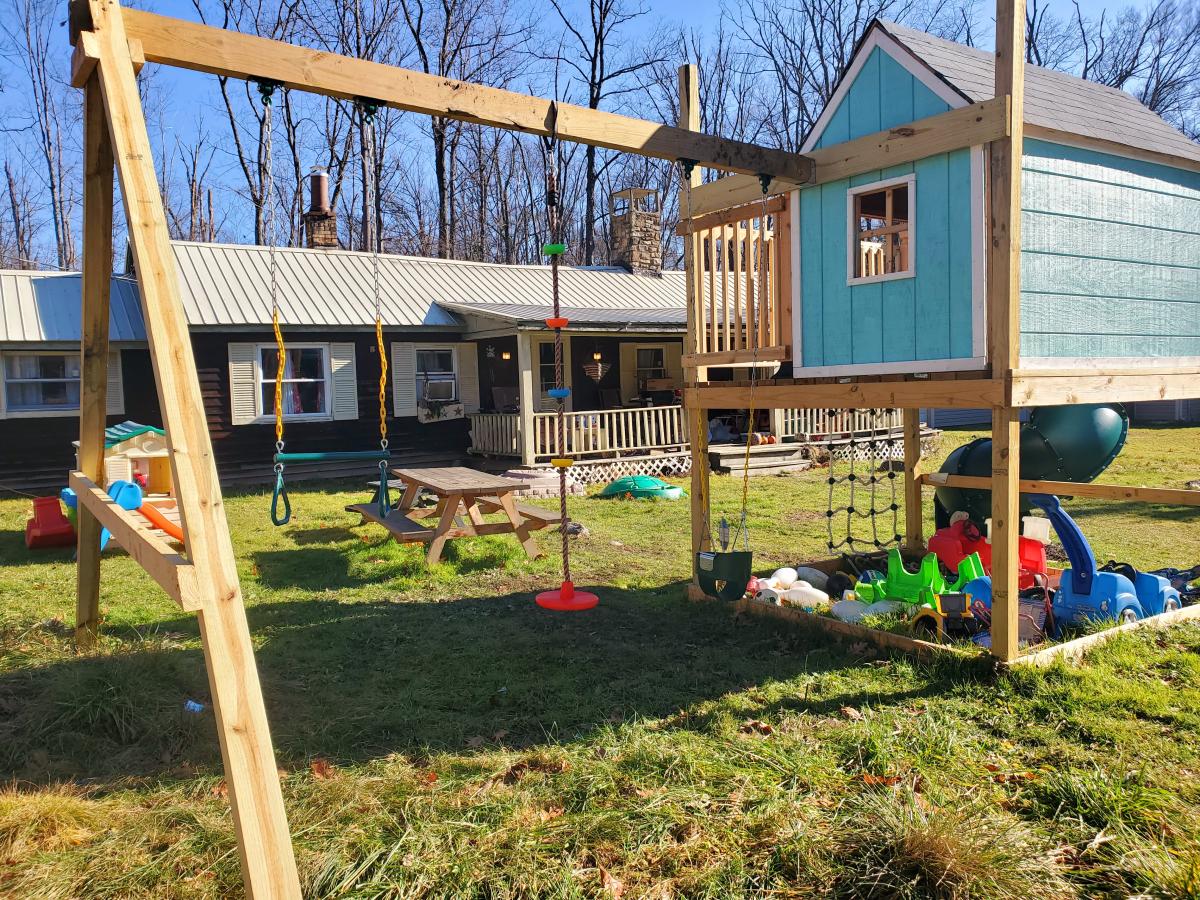
Our playroom needed serious help so as my first Ana White project I decided to tackle these shelving units.
We made a few changes to fit our needs but love the design. Way better than any kit you can buy!

I made this for my son; he loves it! I don't have the tools to bevel edges so I did my angles with a cheap jigsaw and I think they turned out just fine. Thinking of adding a narrow shelf on the bottom.
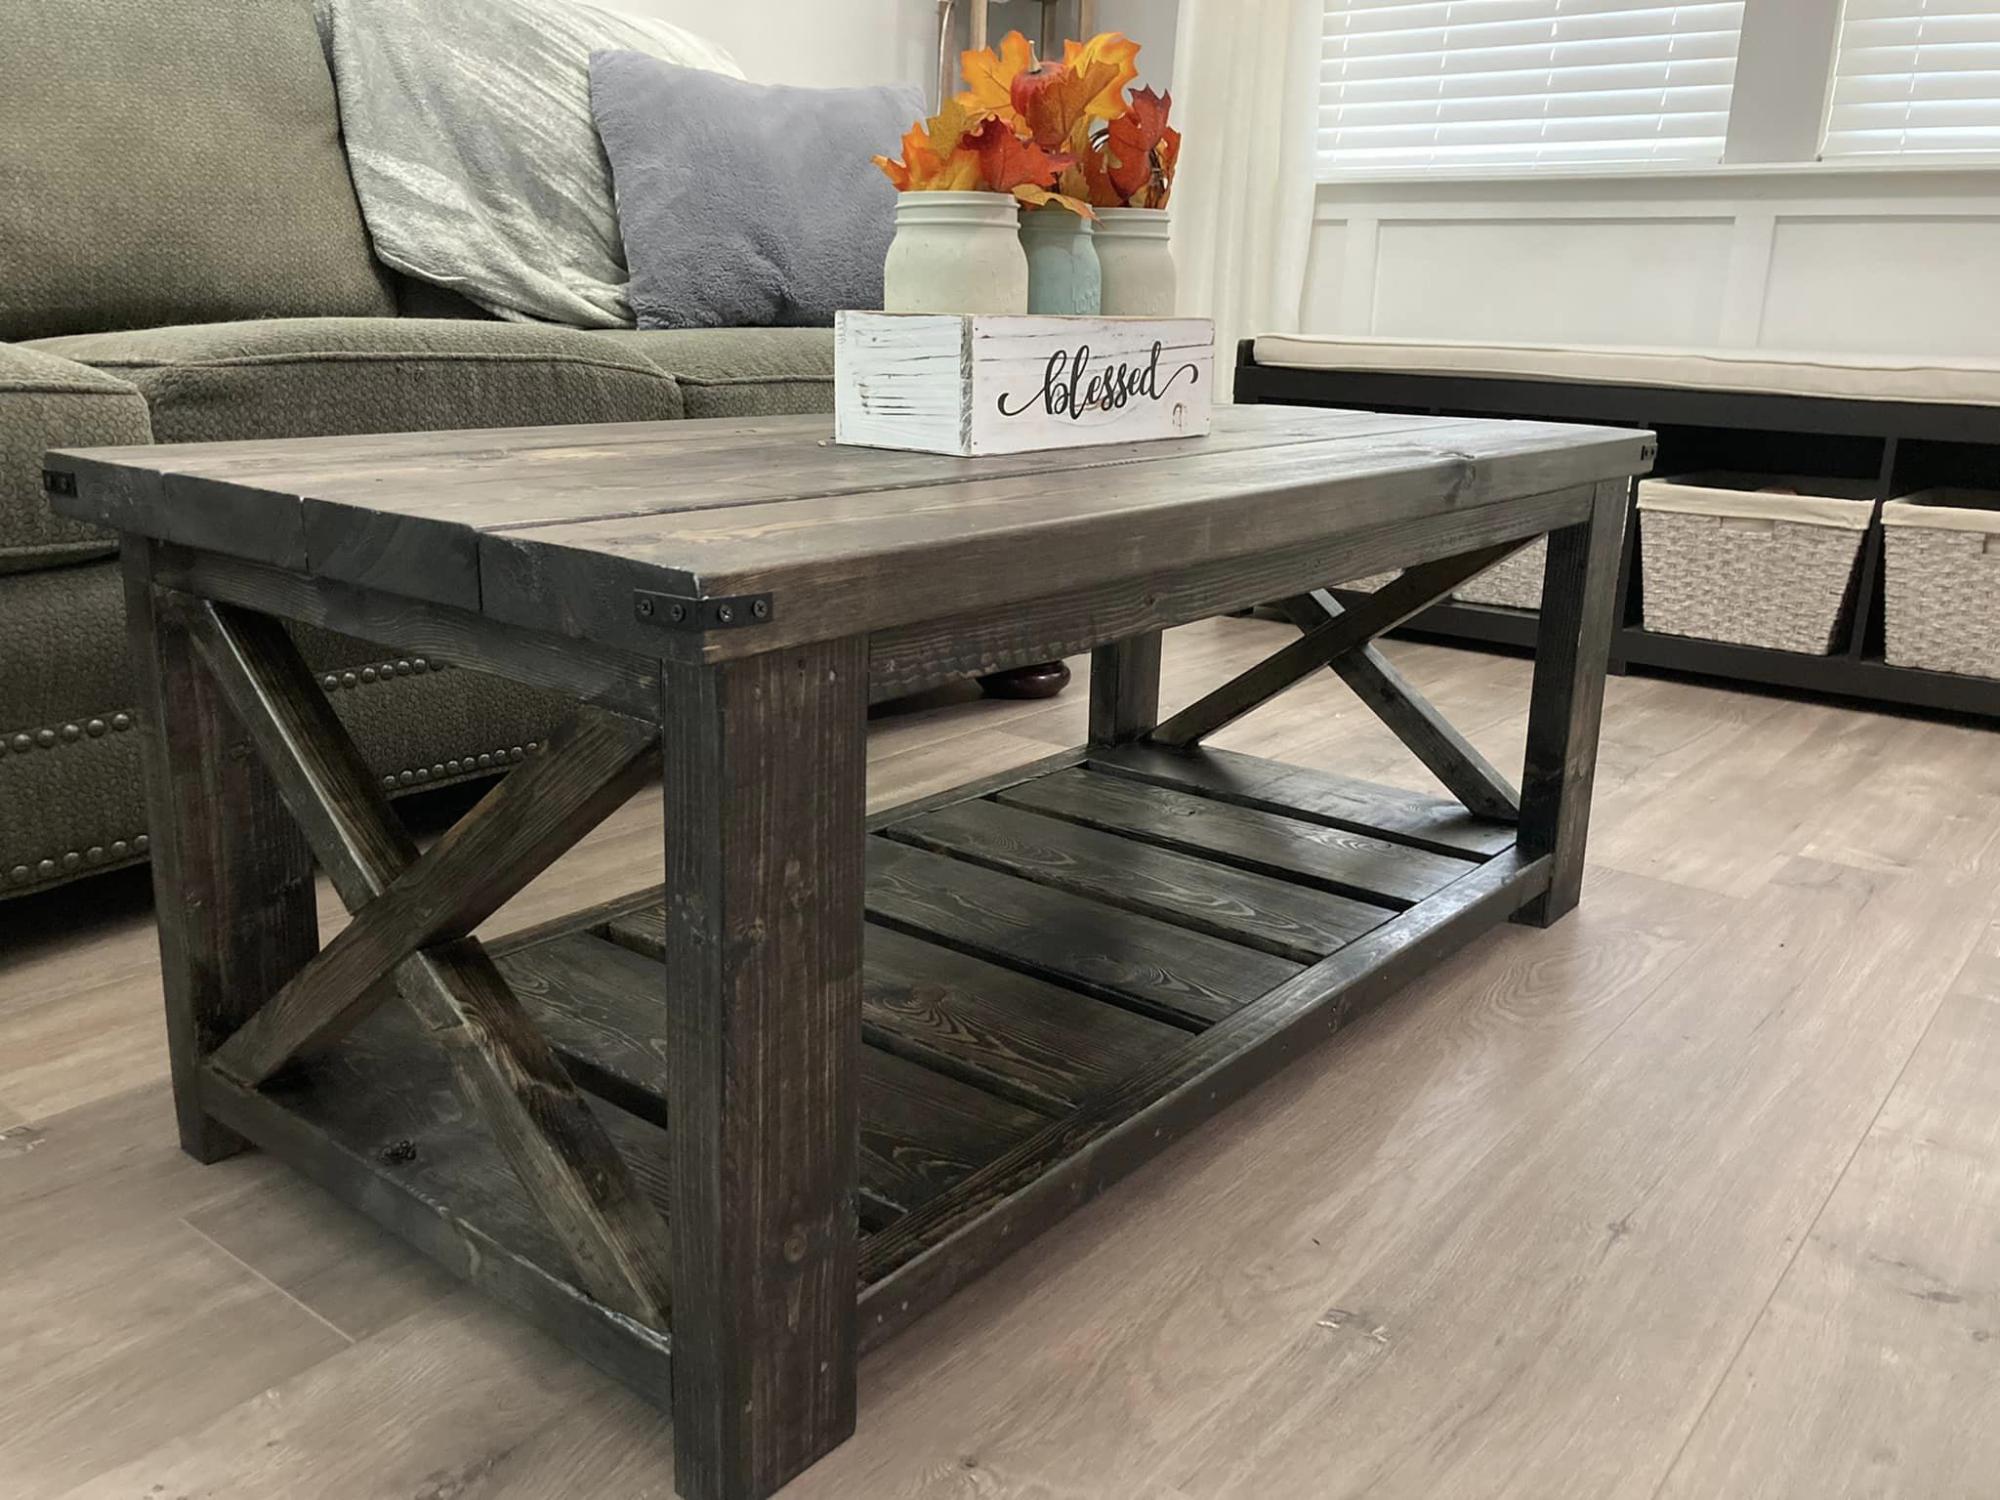
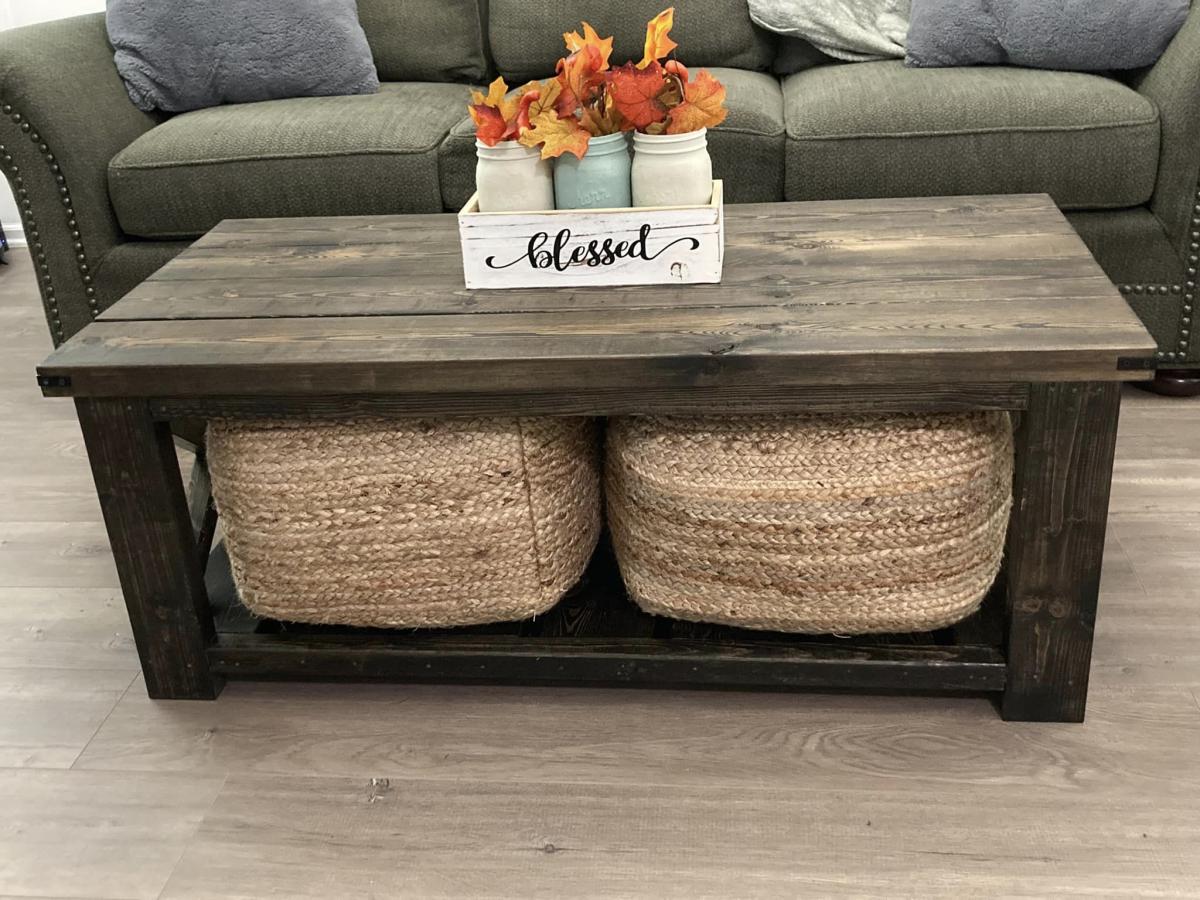
Super easy and inexpensive build!


My husband and I needed more room and storage in our small one bedroom apartment. In order to get both we needed to get rid of our big hutch, desk and tv stand. So when I saw these cubes shelves I thought they would be perfect, then I saw TRACYSMITH's brag post a decided that was perfect! I painted it and did some organizing and it was probably the best decision we have ever made!
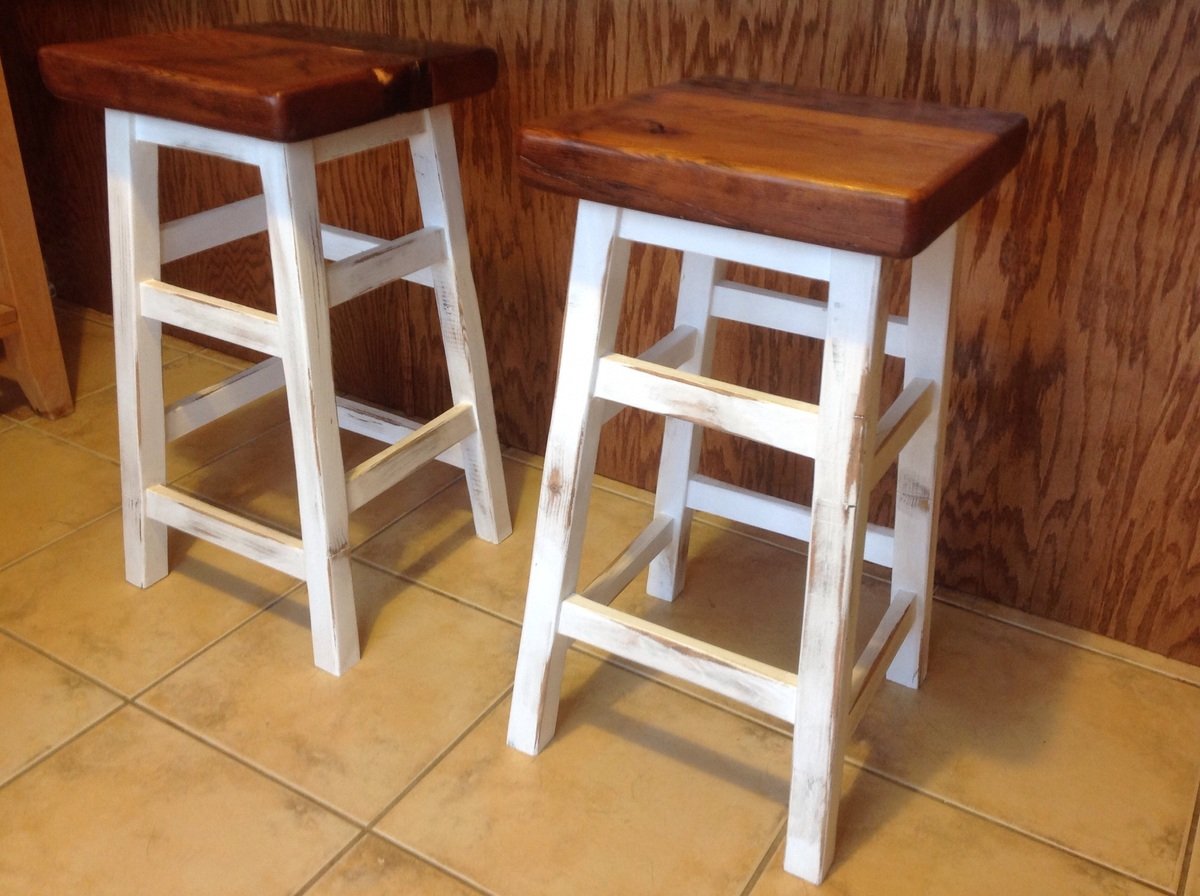
I modified the Simplest Stool plan for this project to use some old threshing floor boards that I had leftover from another project. I like the blocky and chunky look it gives it. We chose to distress these stools to make them look as though they've been around for awhile. The stools didn't take long to build, but since the finish needed time to cure between coats, the overall length of time for the project was about a week.
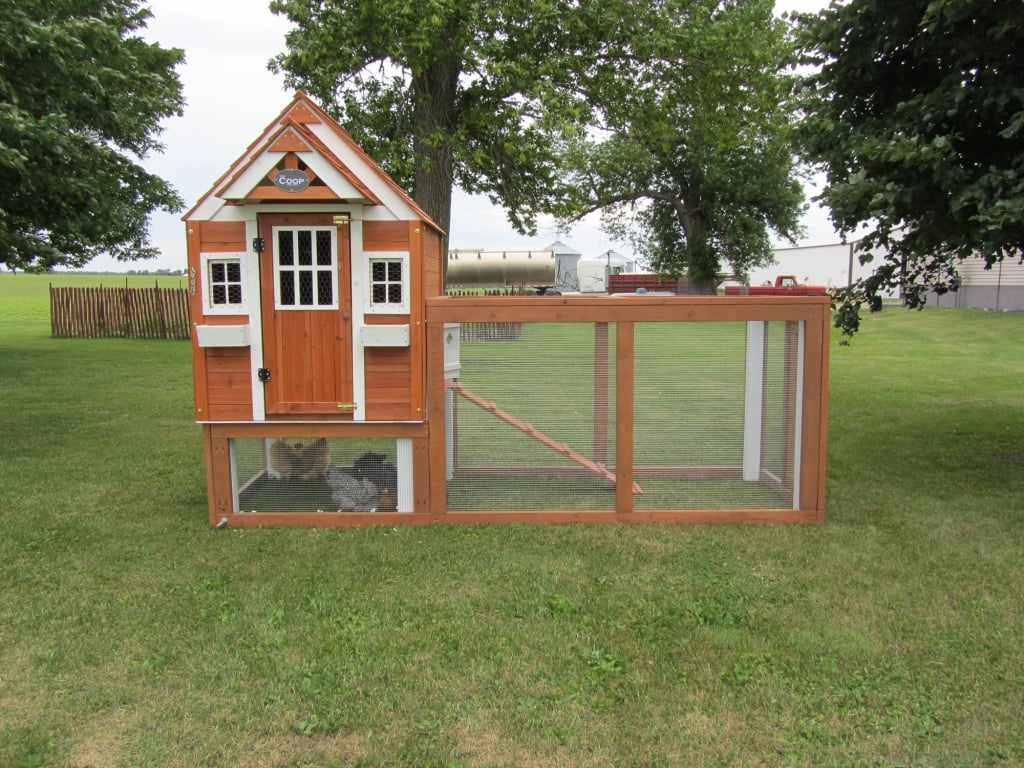
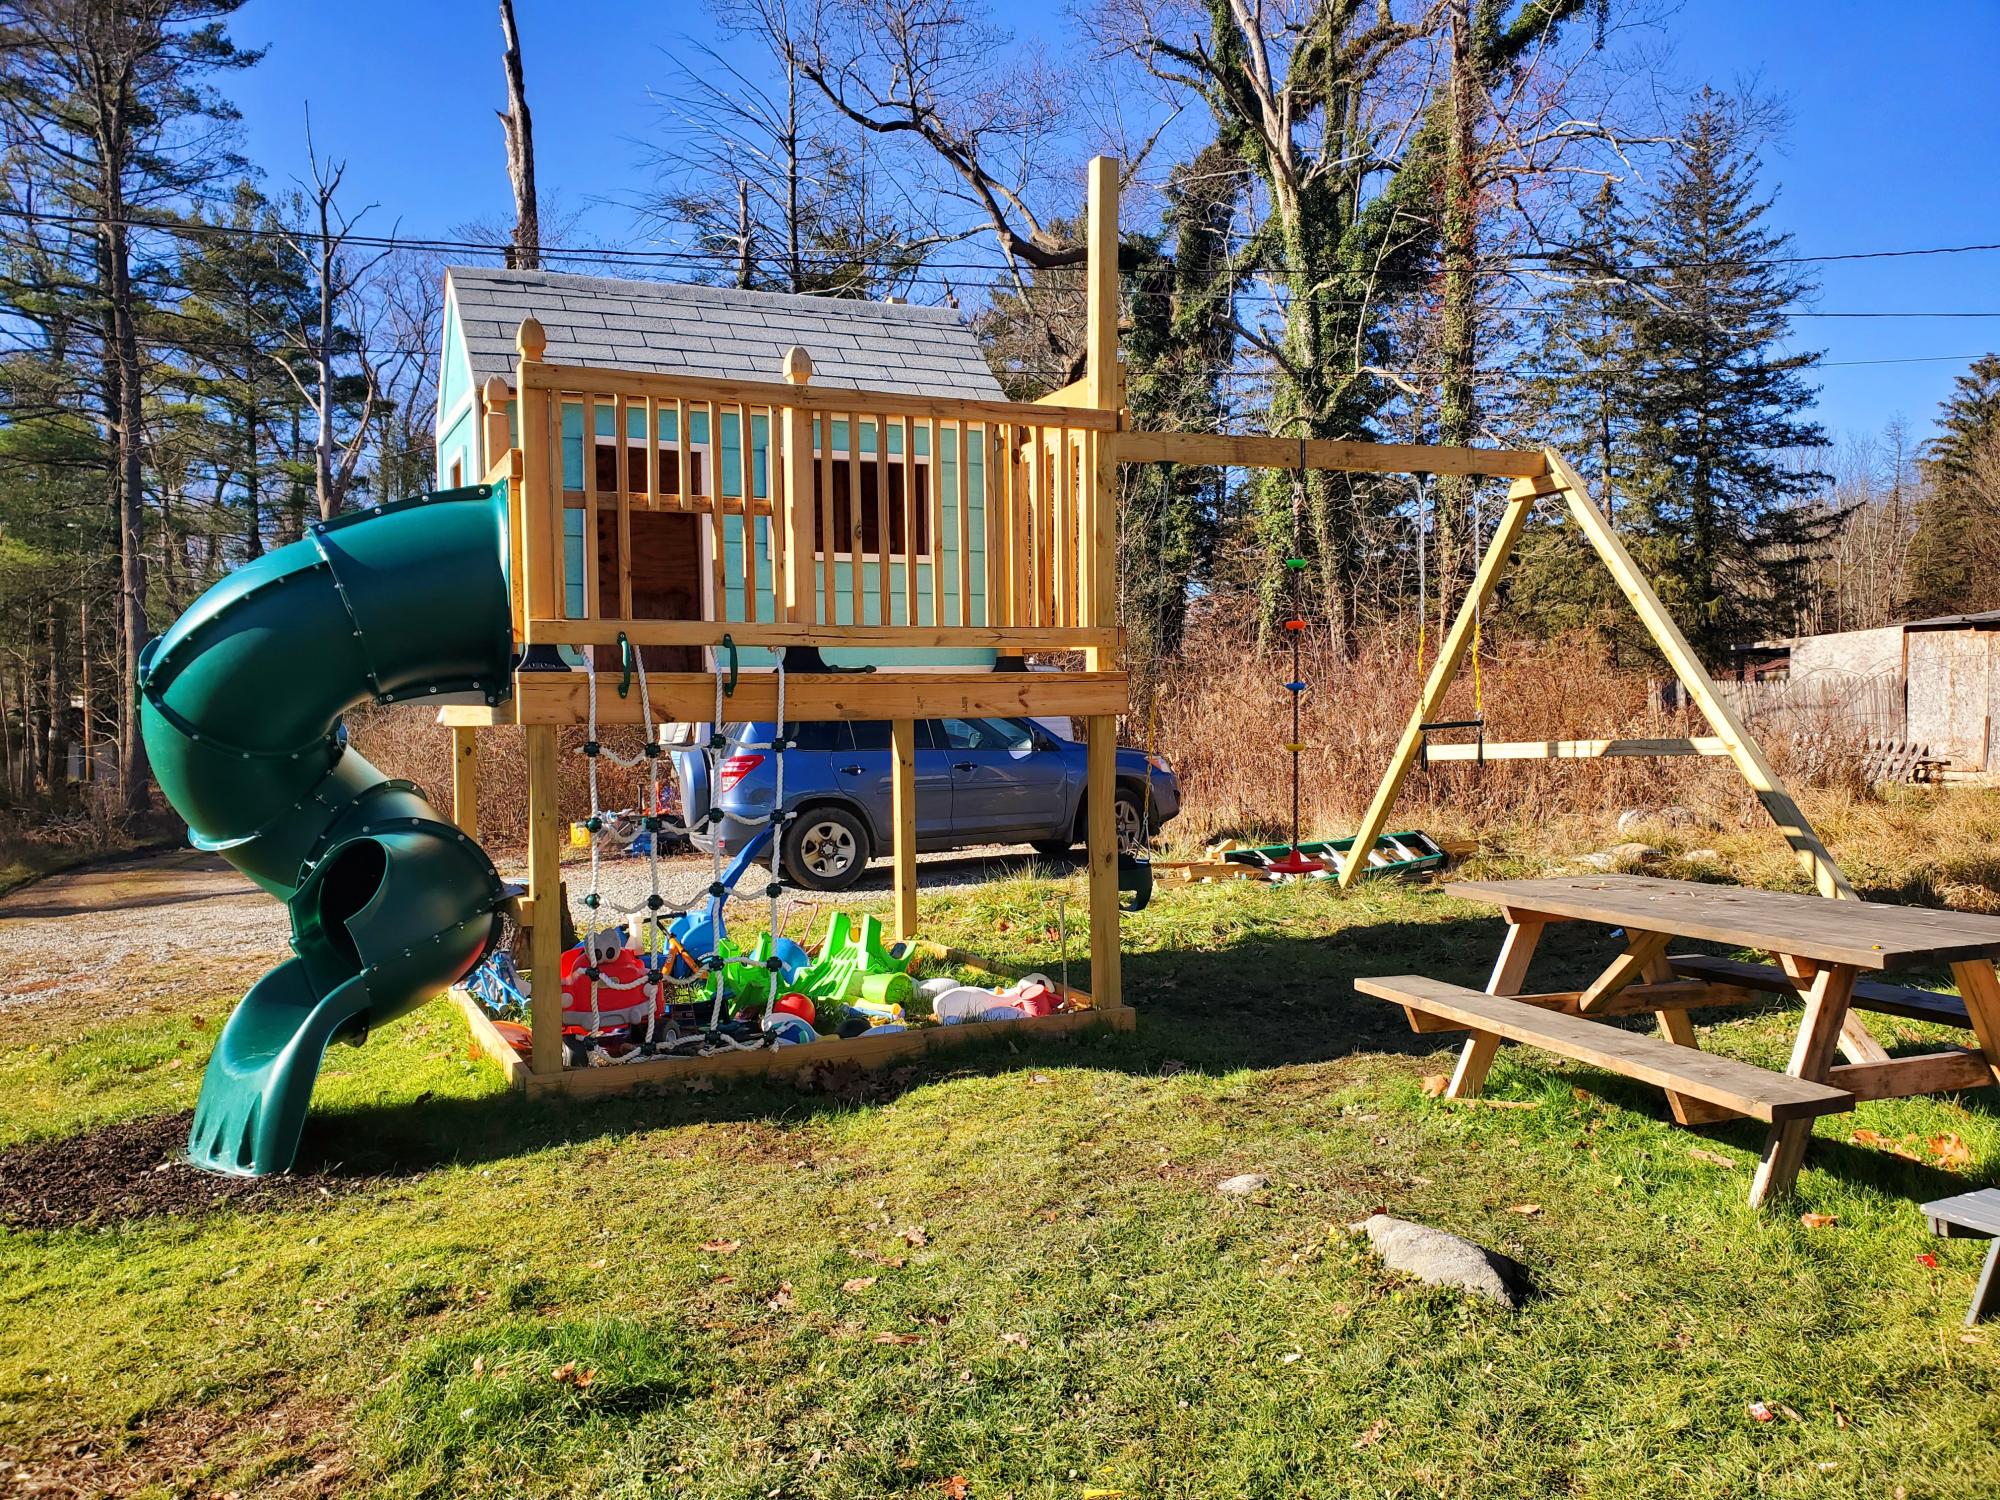
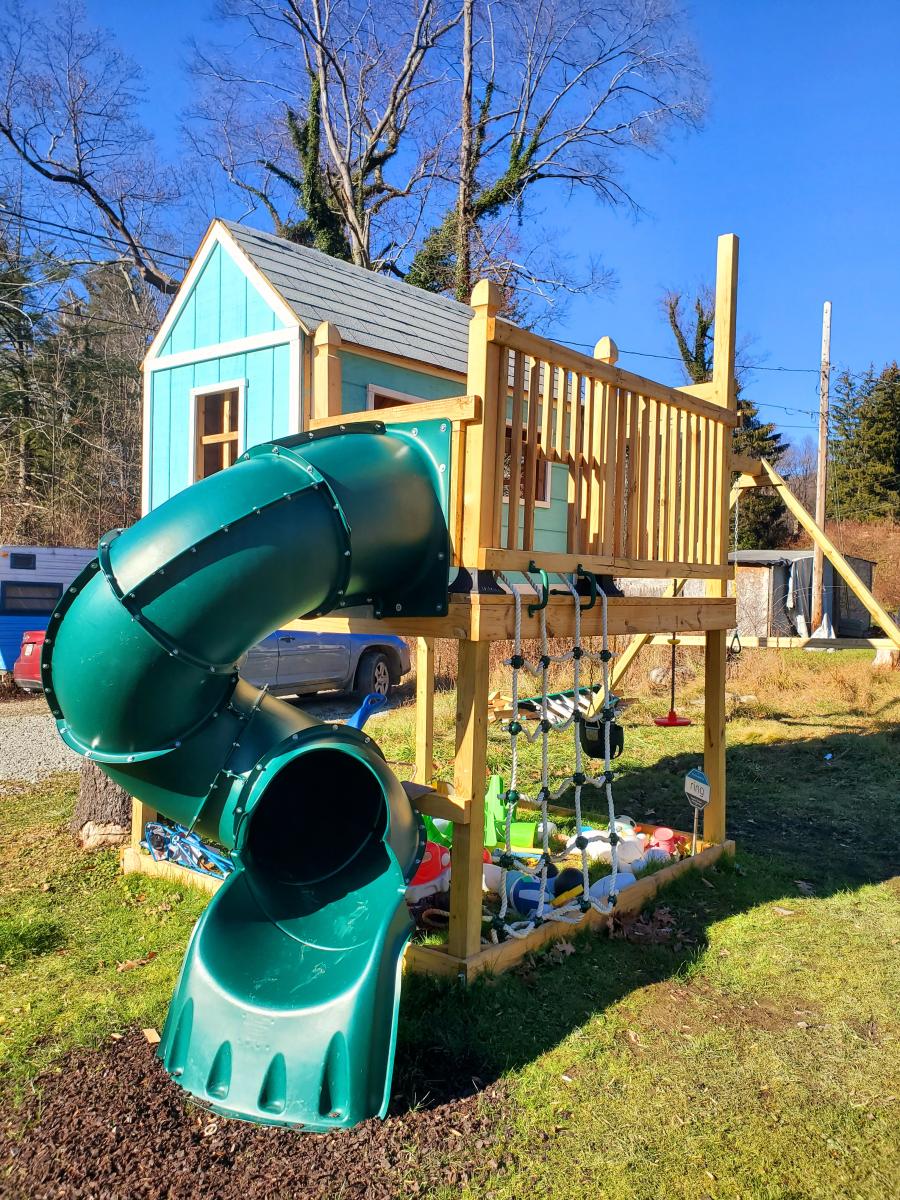
My husband and I live on a small hobby farm and are growing/raising a lot of our own food. We decided to venture into working with chickens. We wanted to start out small so we got 6 chickens and needed a home for them. We found a kids play house one day while shopping and got the idea of modifying it into a chicken coop with a run. We took off with this idea and with quite a bit of modification and some extra building materials we were able to raise it up in the air and attach a run so our chickens would have a nice home to protect them from preditors and the emements and not to mention one that looks good in our yard!

In reply to OMG! by benfoldsfivealive
Wed, 05/27/2015 - 18:42
Building chicken coop doesn't have to be expensive. Just get the easy-to-follow plan from this:
http://bit.ly/how-to-build-cheap-chicken-coop
Fri, 06/17/2011 - 21:26
Looks awesome! I just spent the evening building a coop for 4 hens of my own!
Tue, 02/21/2012 - 19:08
Are the plans available? I have Black Copper Marans and Lavender Ameraucanas and I really need to separate the LAs from the BCMs and this would be perfect!
Sun, 02/26/2012 - 18:00
When I click the link to get the plans for the standard coop, they are not there. Do you know where I can find the original plans? Thanks.
Tue, 02/28/2012 - 10:20
Yes - would love the plans please!!!
It's gorgeous - great job!
Sat, 06/02/2012 - 15:22
Sorry guys there are no plans for this coop. My husband and i just "winged it" and built it without any plans.
It is a play house that we found at Mills Fleet Farm and we modified it to make it a chicken coop. We put together the play house based on instructions from the box (with a few of our own modifications to make the window on the ground etc.) added some chicken wire to the doors and bay window, added some 4x4 "stilts" and a floor to get the house in the air, and constructed a frame around it with 2x4's and wire fencing to make the run
Sorry I dont have any plans to give you guys!
This was my first project and I loved every second of it. I did the whole thing by myself (with the "help" of my two-year-old) and I'm 5 months pregnant! THAT is how easy it is.

Sun, 08/11/2013 - 20:41
How awesome is that? =D It looks gorgeous, and I applaud you for tackling it with your 2 year old and baby on the way. =D When I was pregnant, the only thing I considered doing was putting furniture together. Now that I've built furniture, I now realize how much harder it was to follow the assembly directions than it is to make your own assembly directions. Keep it up!
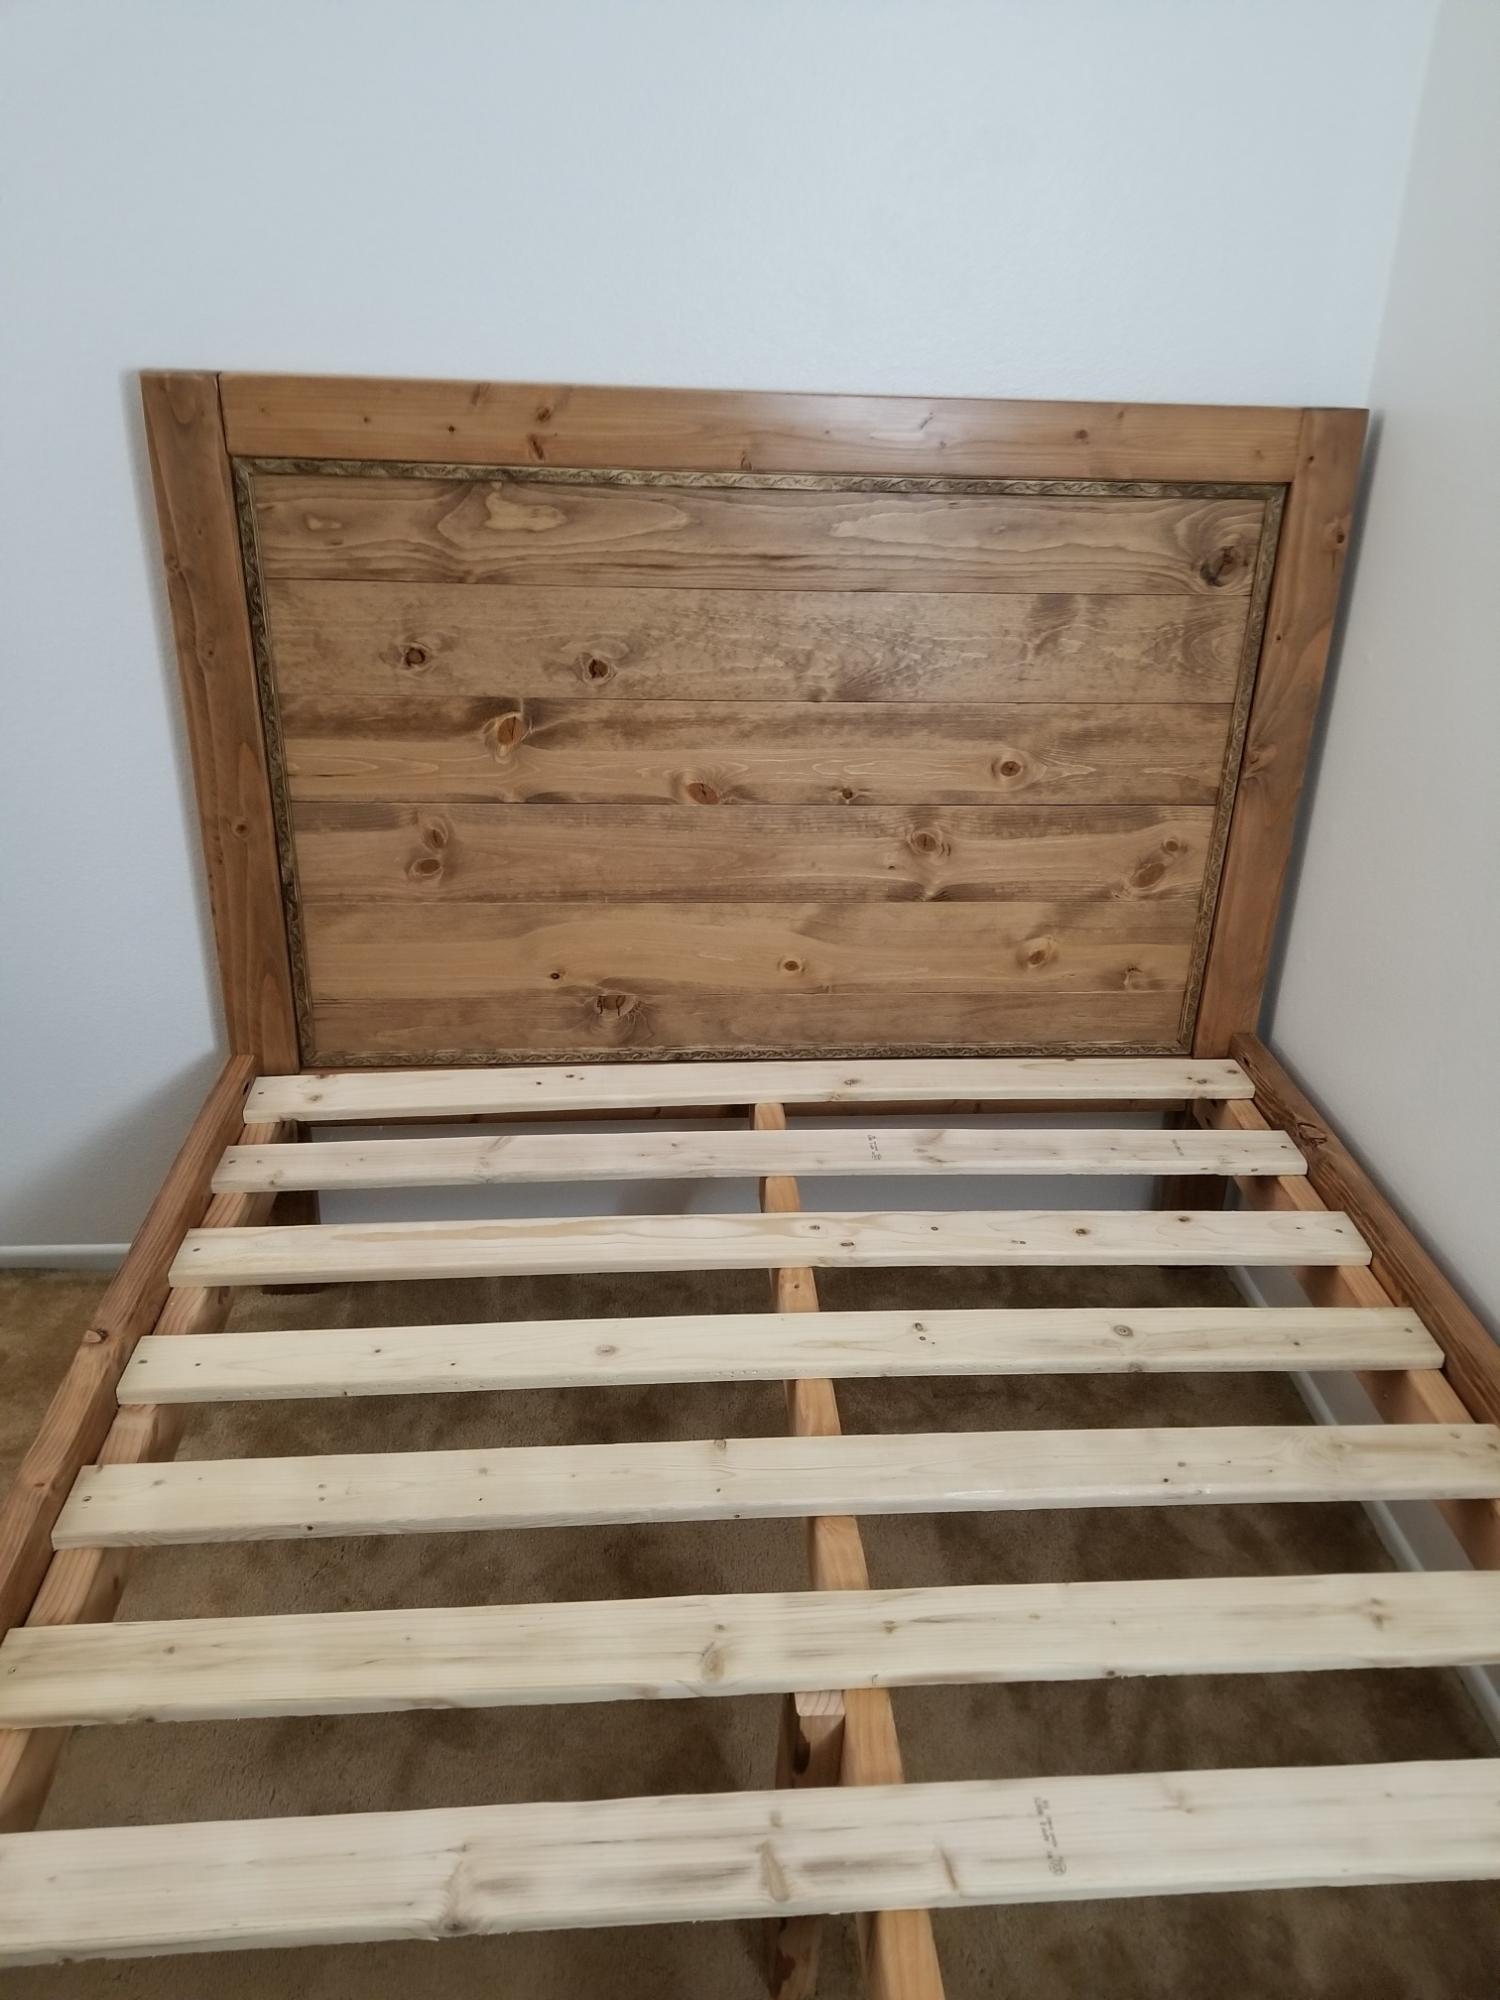
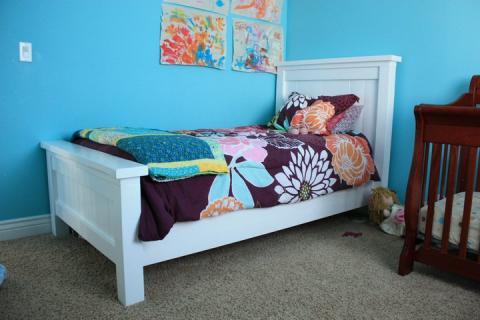
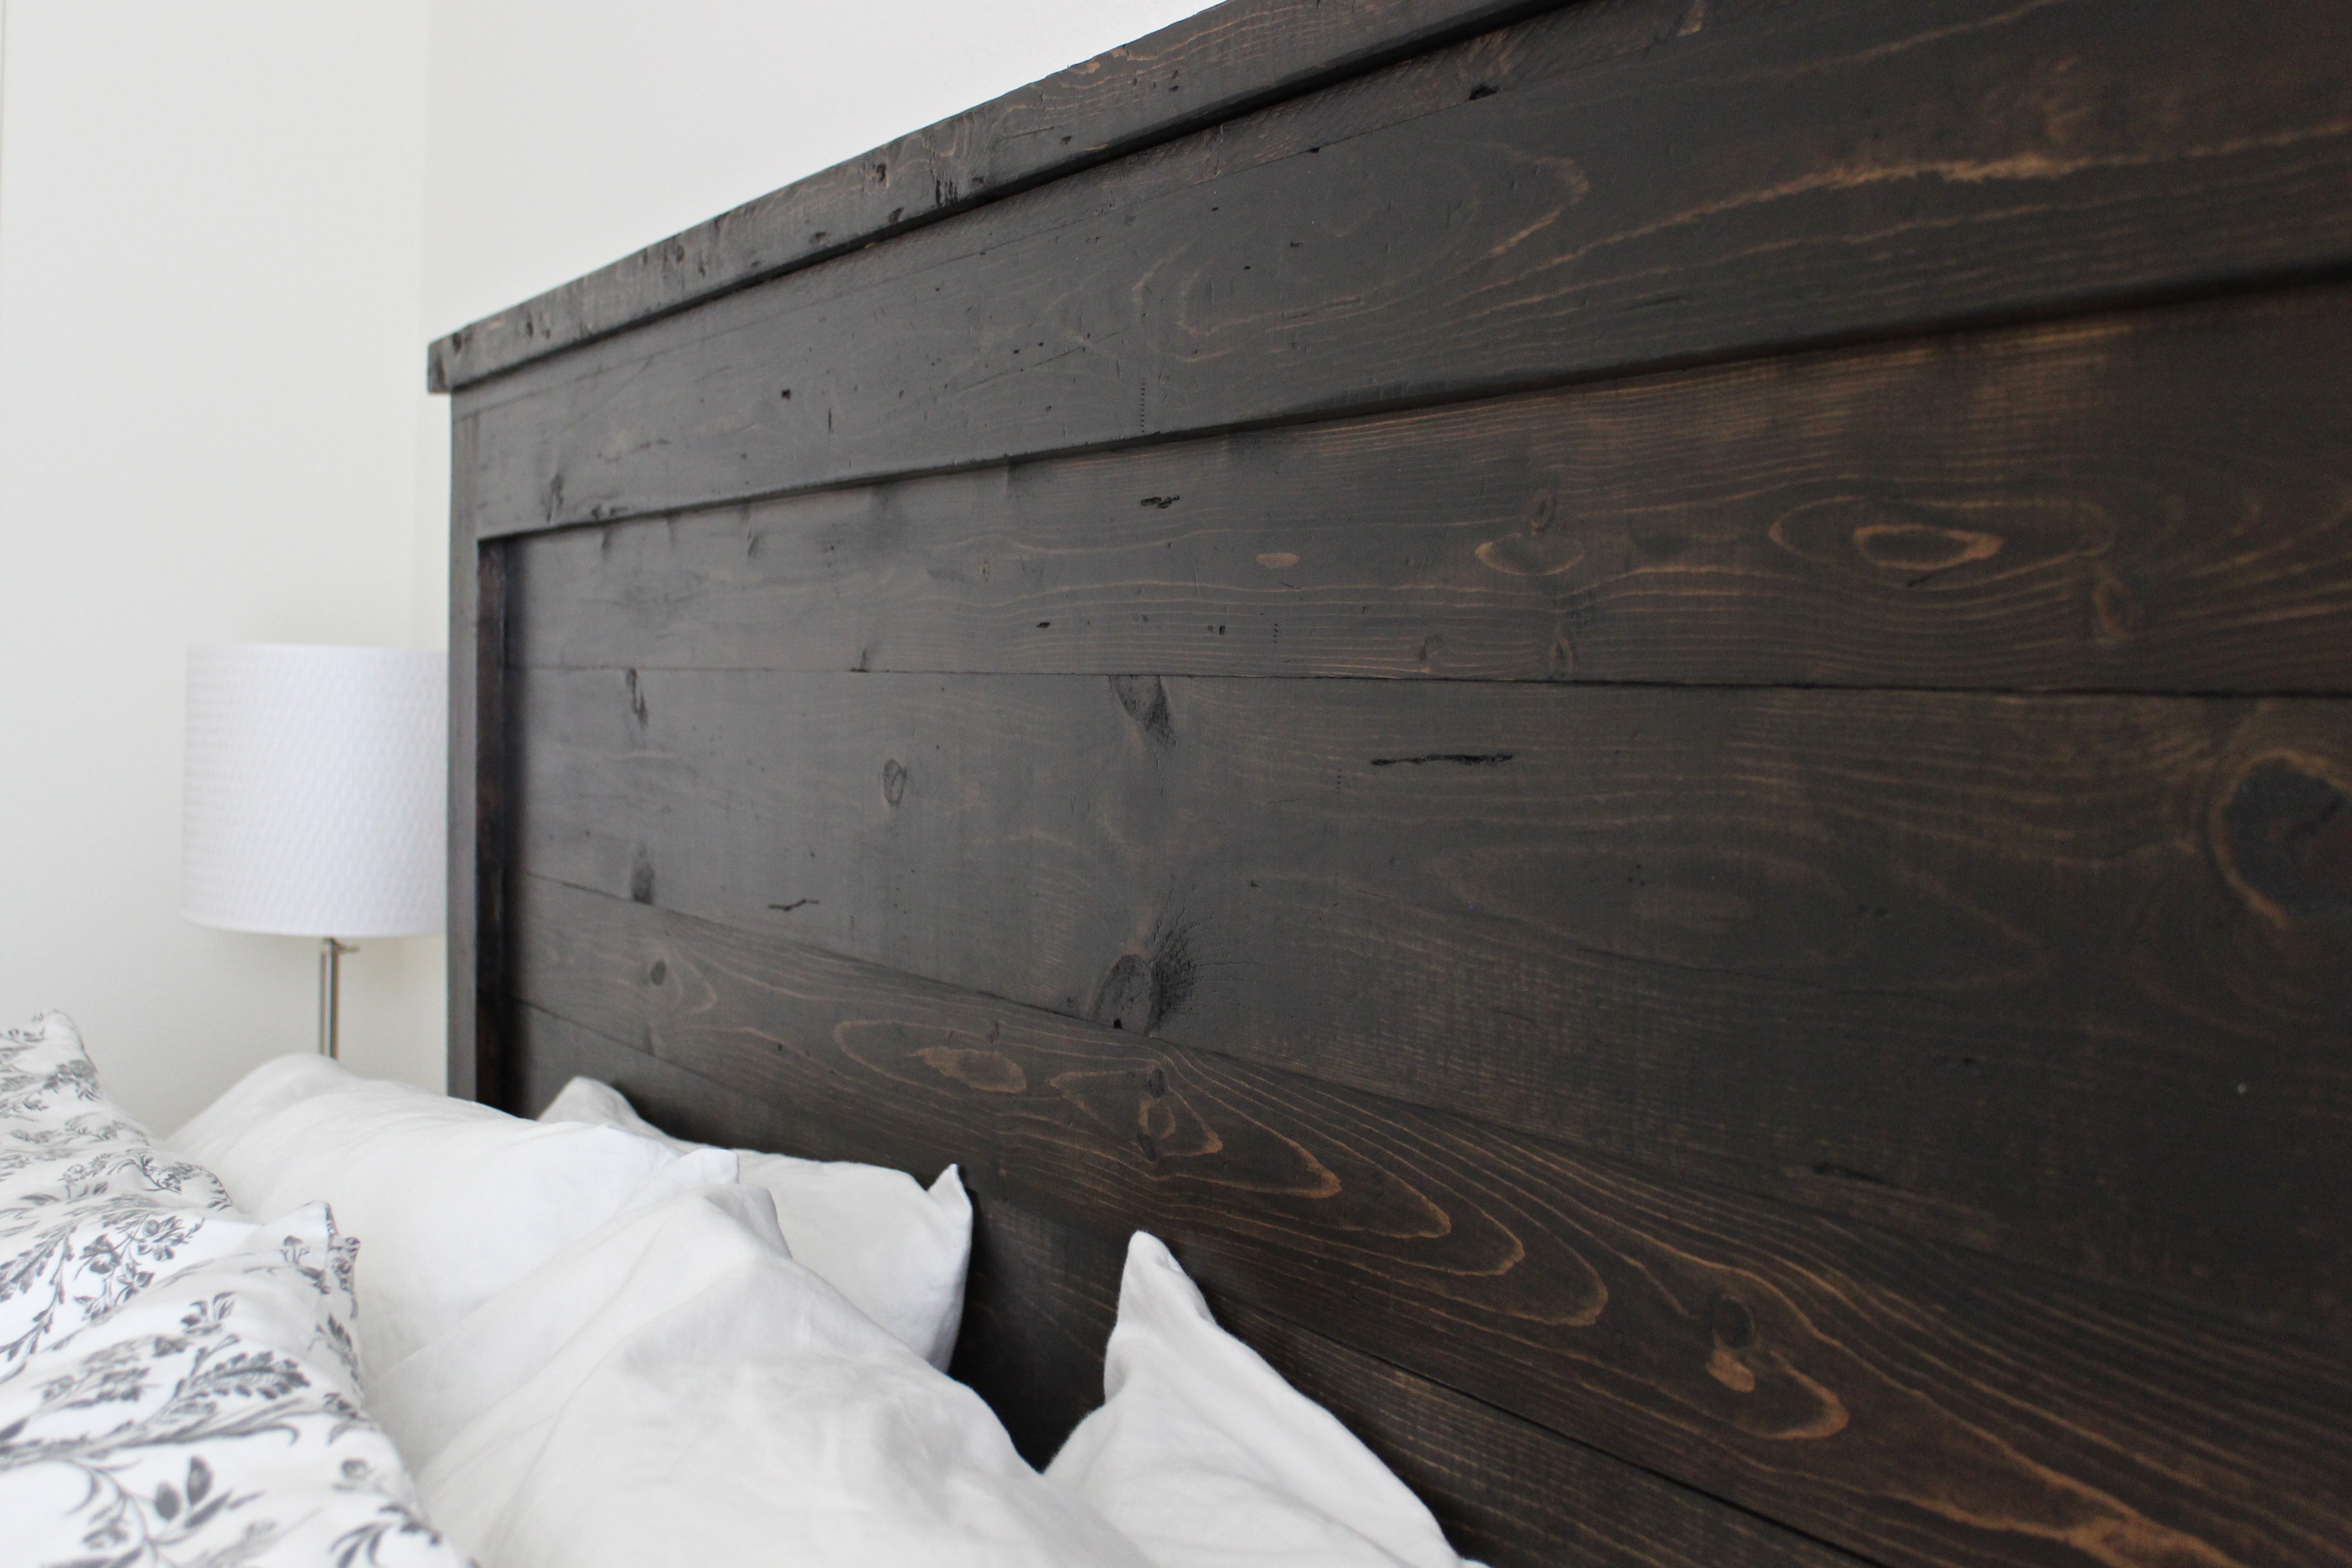
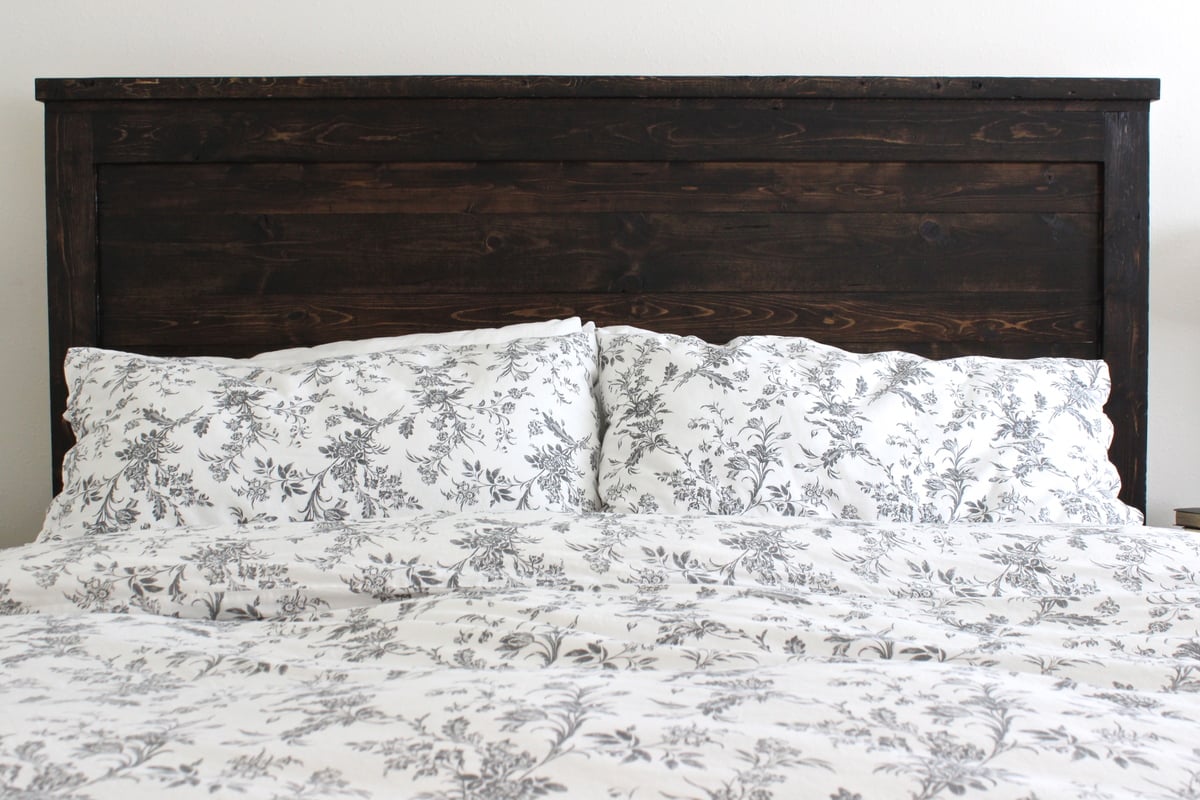
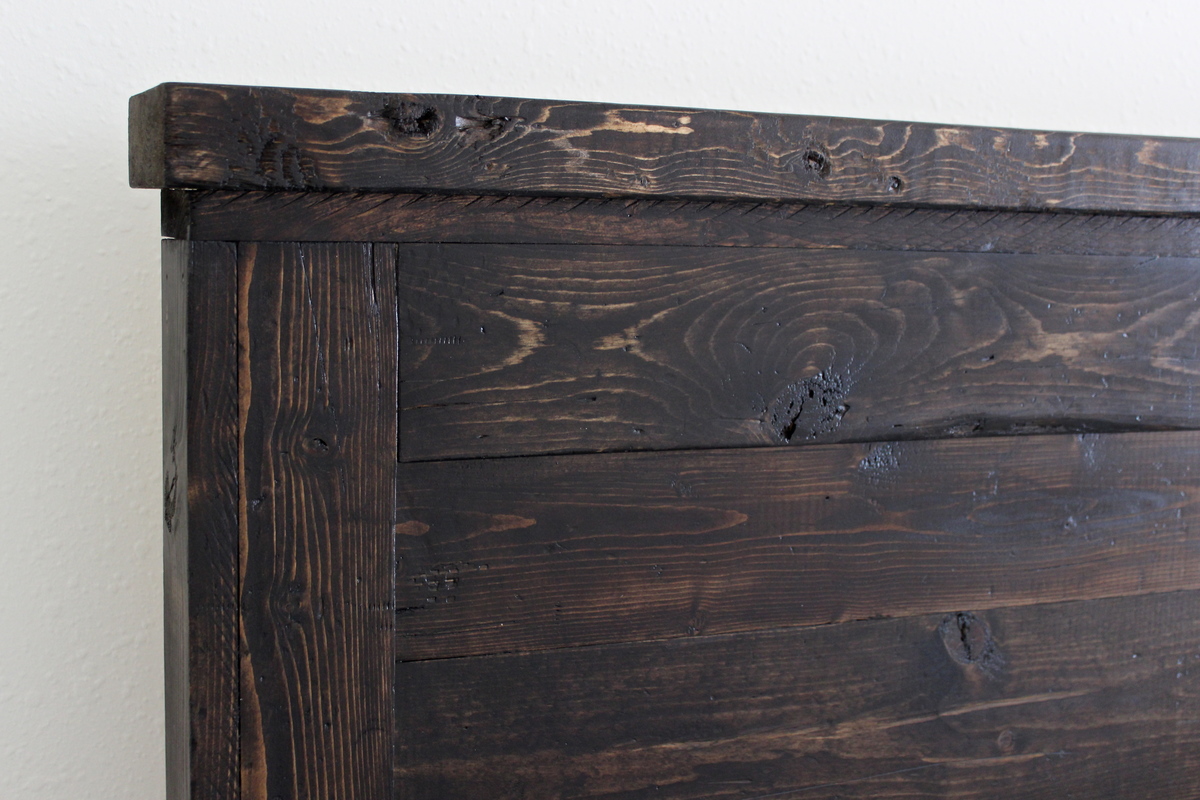
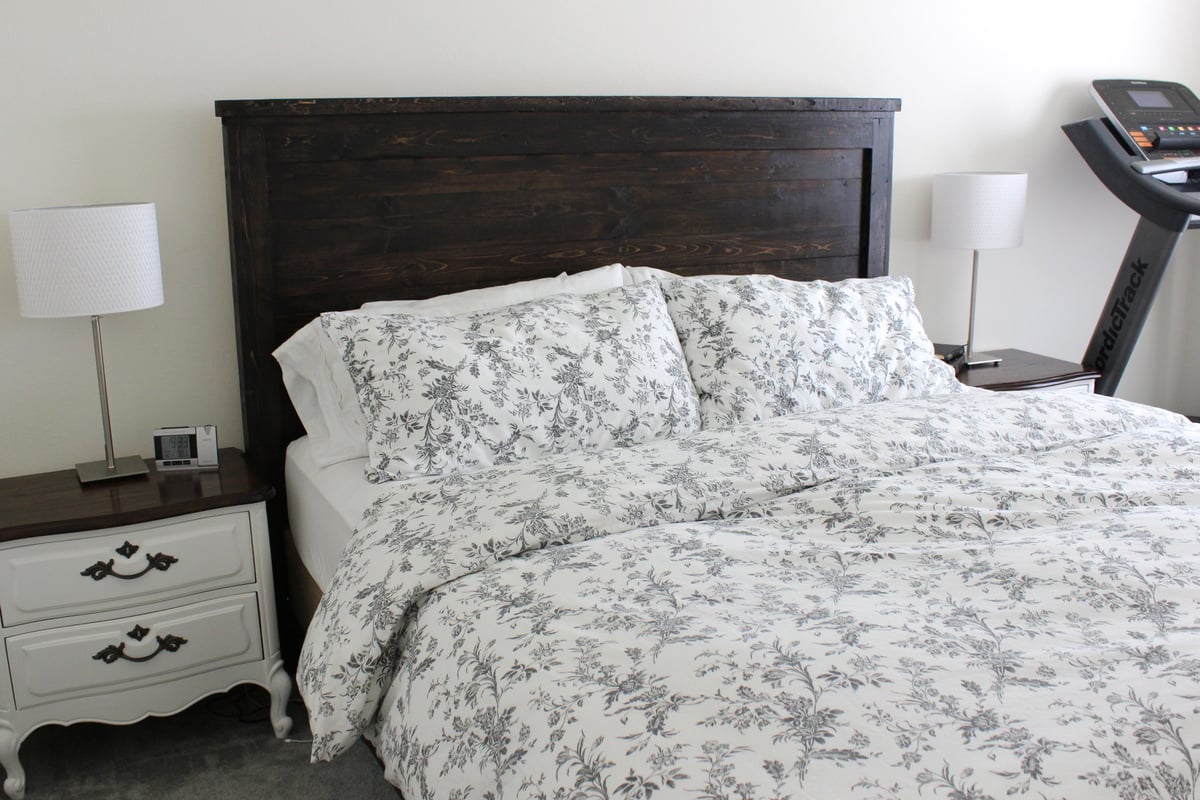
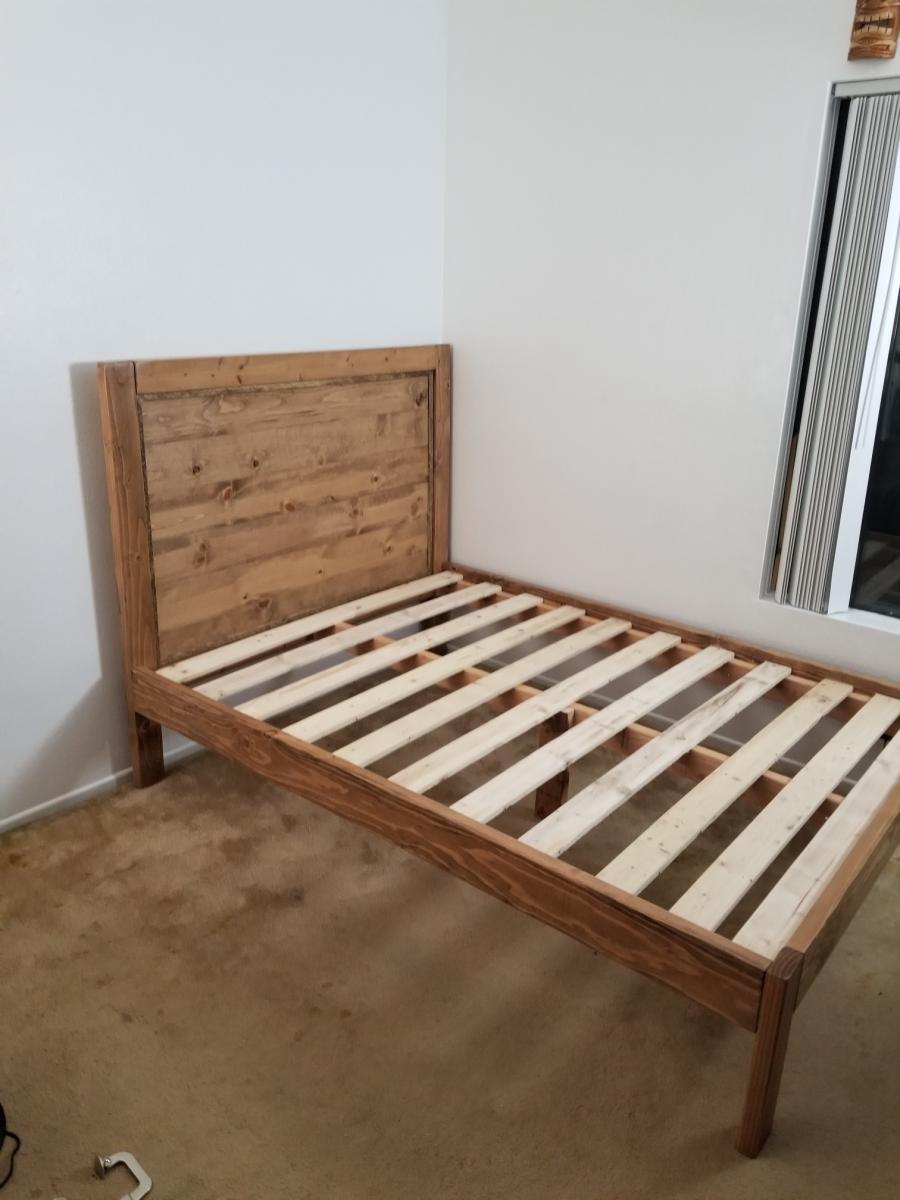
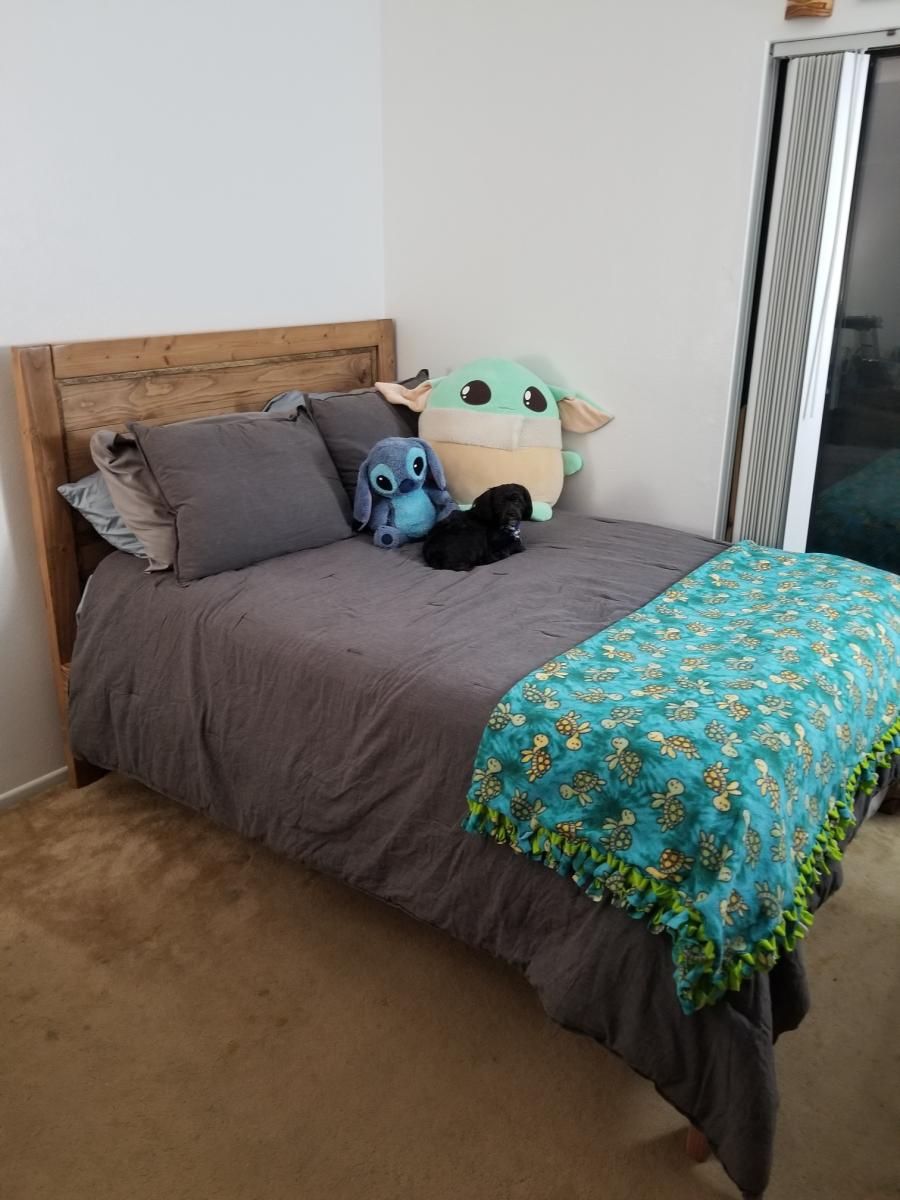
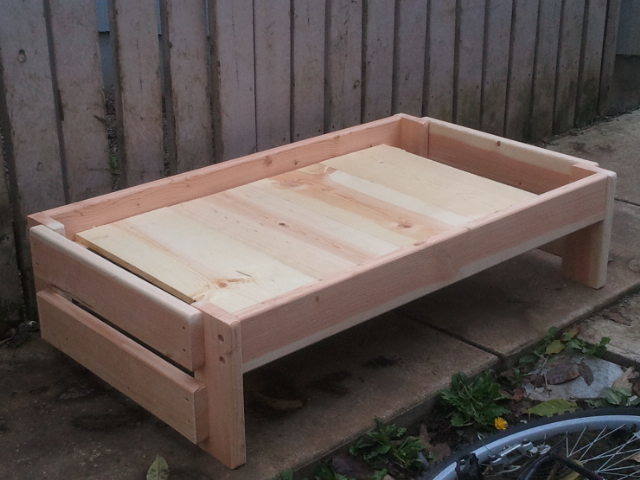
My grandaughter and I built the super simple bed and modified the Hailey planked headboard. We used common douglas fir from Home Depot. The finish is equal parts Minwax cherry and early american with 3 coats of Minwax wipe on poly with a light sanding with 220 grit between coats. Total cost was about 250.00.
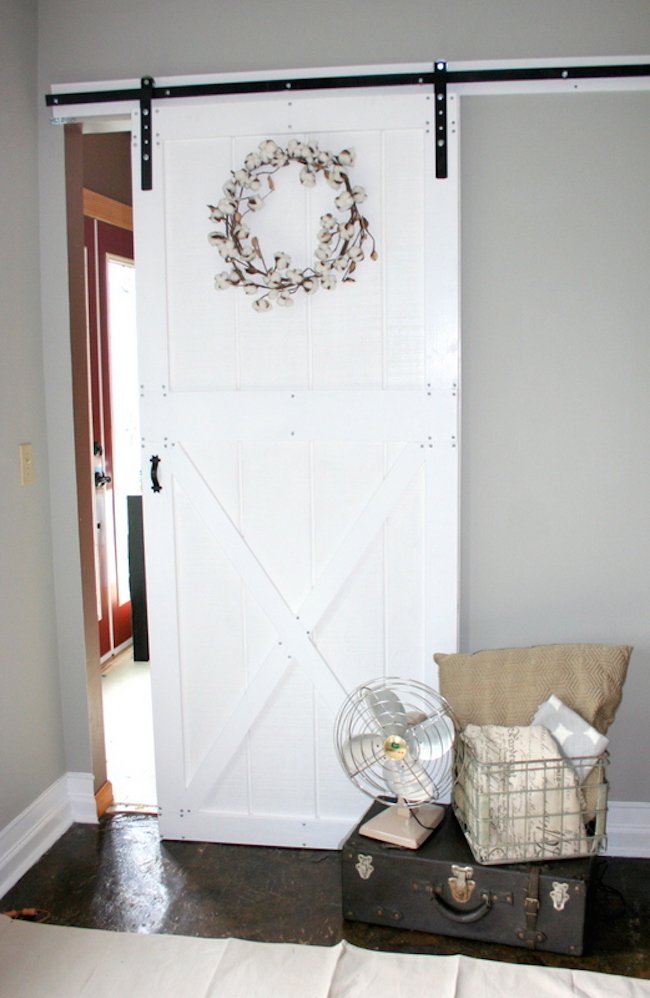
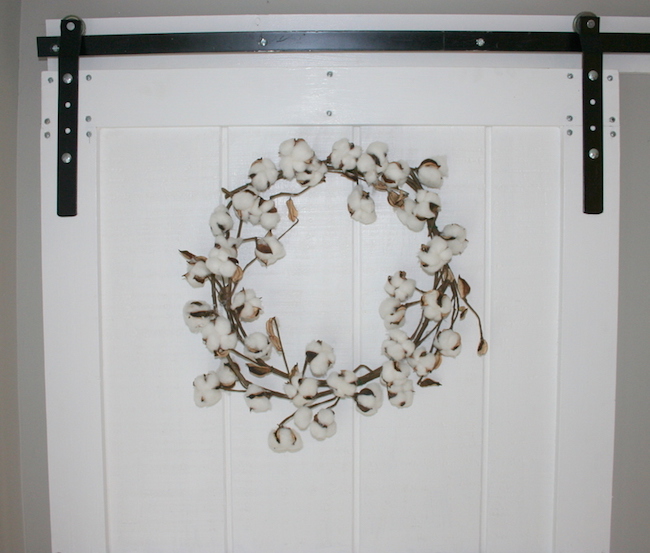
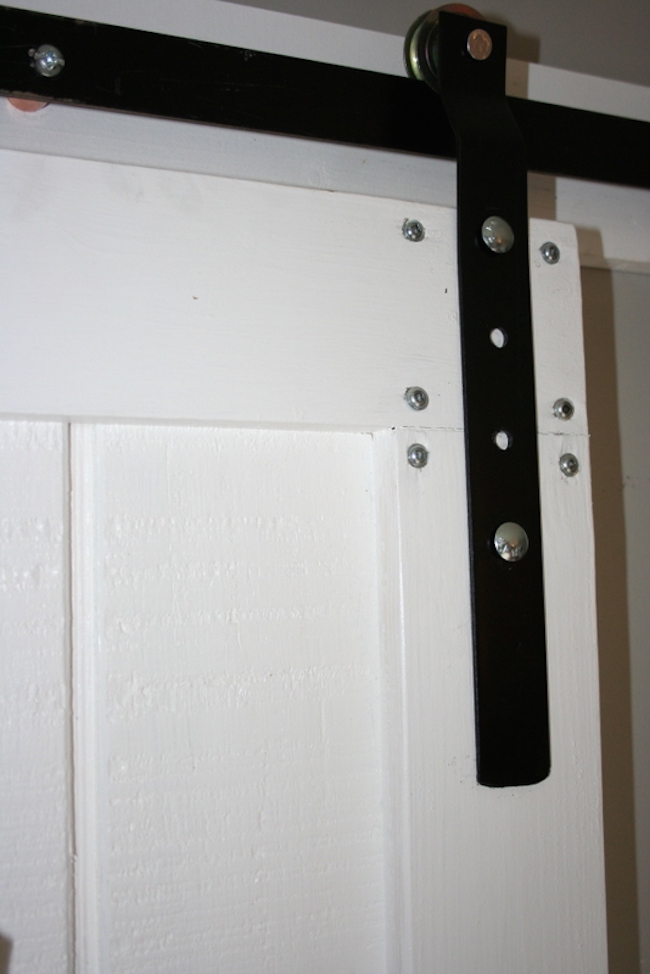
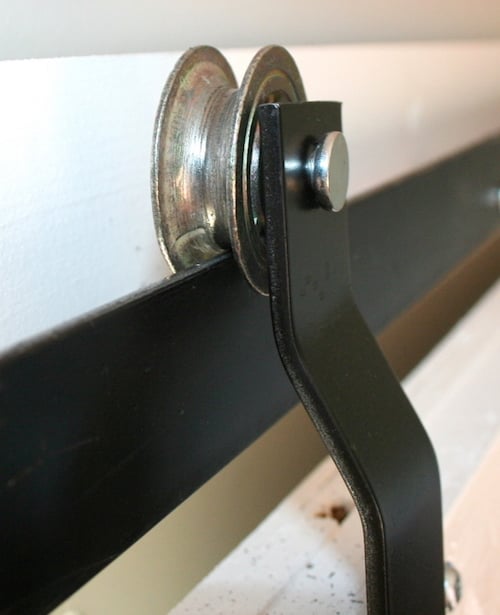
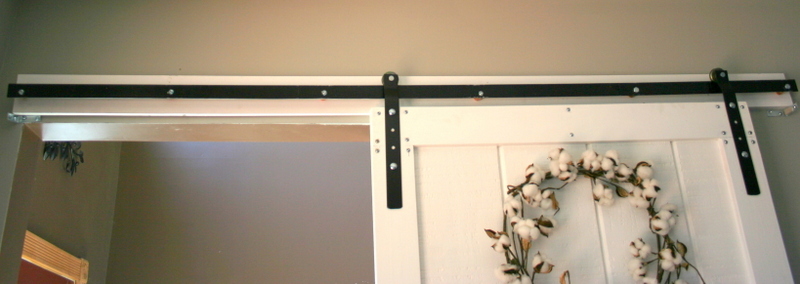
I really wanted to put a barn door in my husband's home office, but have you looked at the prices of the kits? No way was I going to spend that for a door. So I decided to fabricate it myself. For the rail hardware- I used a 72" steel rod, copper pipe fittings, and lag screws. For the door hardware, I used 12"ish, long pieces of steel, pulleys, and carriage bolts.
The door itself is made from plywood siding, 1 x 4's, 1 x 6's, and 1 x 3's. The entire door and hardware cost around $80 to make myself. It's functional and looks amazing! The entire tutorial is up on my blog!

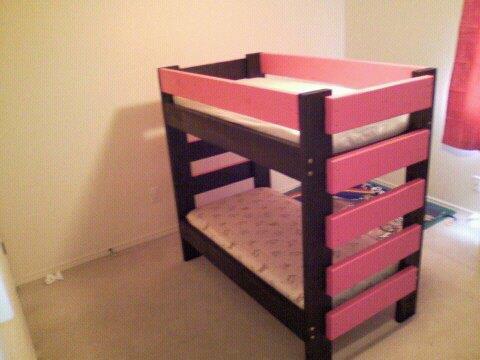
Building Bunk beds and custom beds is what i do. I router the corners so that they are rounded, plane the face's of the boards,and sand to perfection. then i glue and screw it all together. you can check out the site at http://www.dreamworksbunkbeds.com

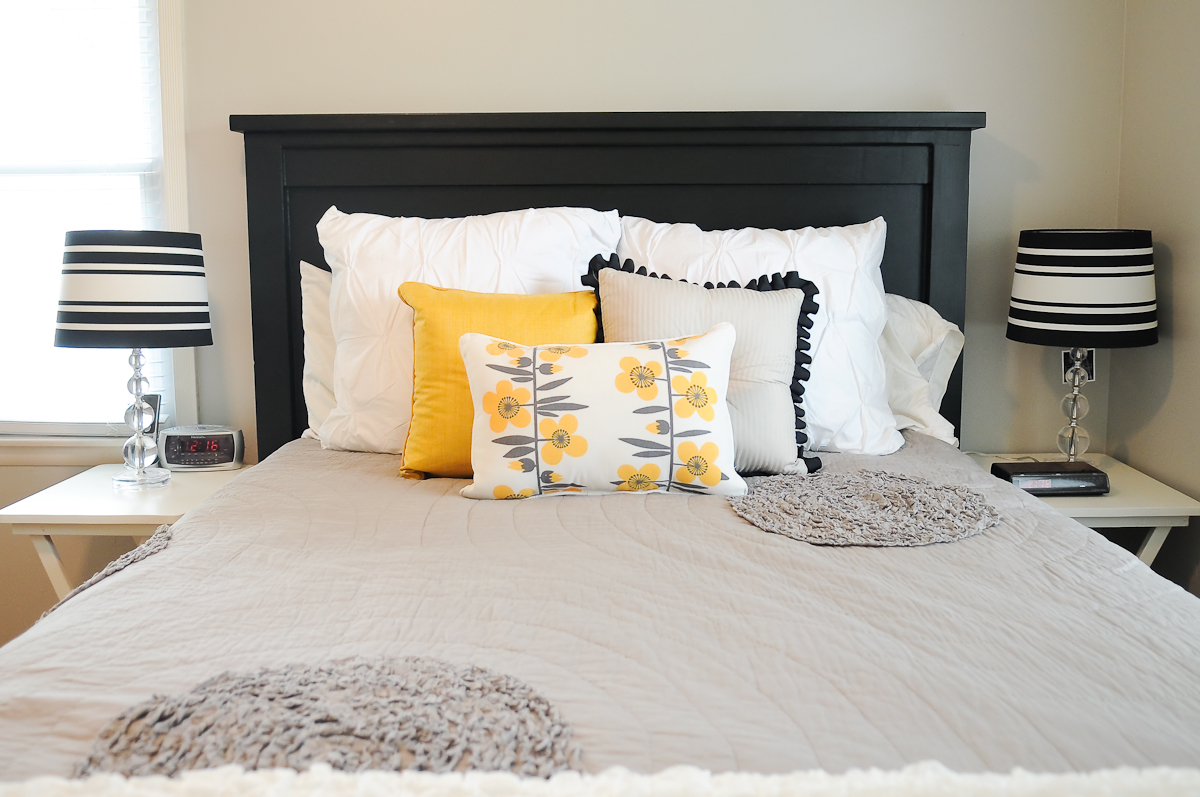
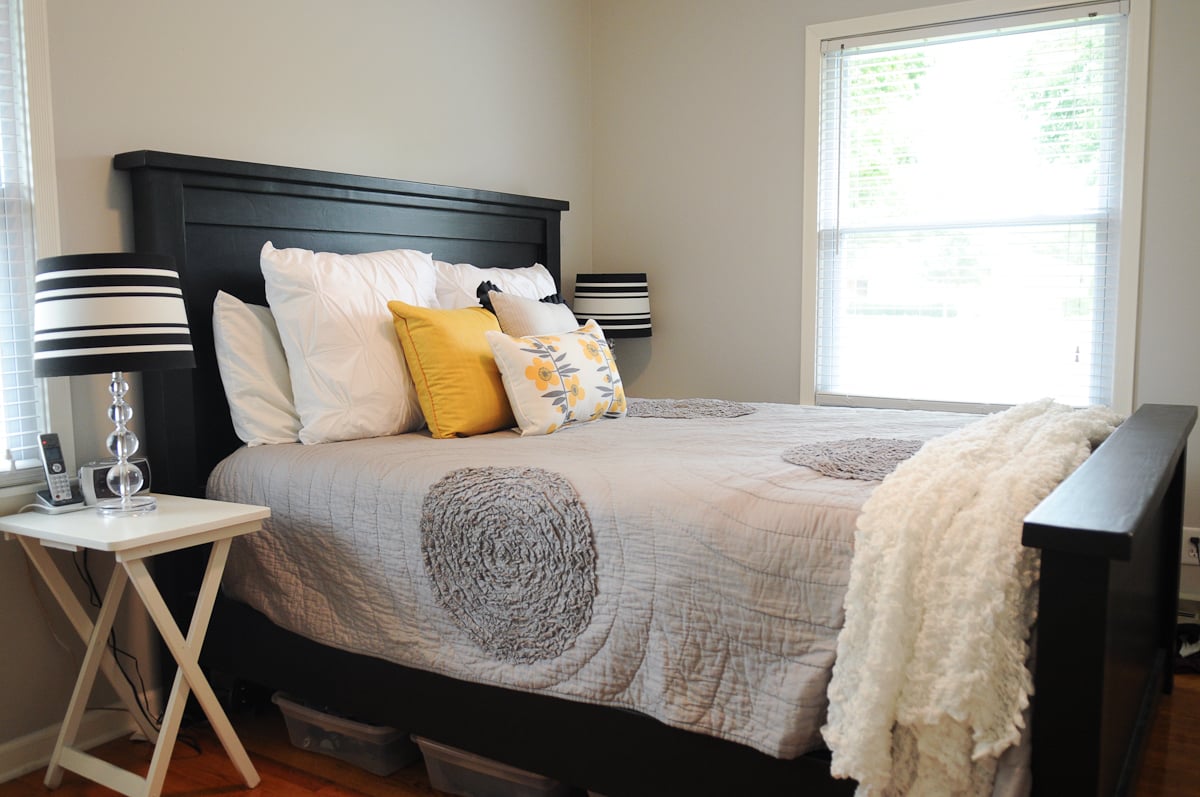
I built this bed as a modified farmhouse bed. I chose to have a solid wood headboard instead of having a slotted look as it fit better in the decor of our home. I purchased a bed rail kit from Rockler so that I could remove the rails without removing any screws. (http://www.rockler.com/product.cfm?page=5783) It was a relatively easy project considering my skill set was very low when starting! http://www.lifewithfingerprints.com/2010/09/labor-of-love.html
Wed, 08/17/2011 - 14:03
Very beautiful! I dream to build the farmhouse bed. The finish is awesome in black.

I built this American girl doll house for my daughter. I wanted to give her something to keep her youth alive!


Sun, 01/06/2019 - 16:43
What an amazing Christmas gift! Super dad! Thanks so much for sharing a photo and building! Ana
Sun, 01/06/2019 - 21:46
Thanks Ana! This is her momma that built it for her. I wanted to tackle something on my own and challenge myself. Your plans were amazing to work with. Thanks for taking the time to make these plans so easy to understand and follow. She is very happy with the doll house! Happy New Year! -Abbey
Thank you so much for sharing your plans!! You are so generous! This is my first attempt at building furniture!
Check out my TikTok at - https://www.tiktok.com/@floridagirl092/video/7152573909735427370?is_fro…
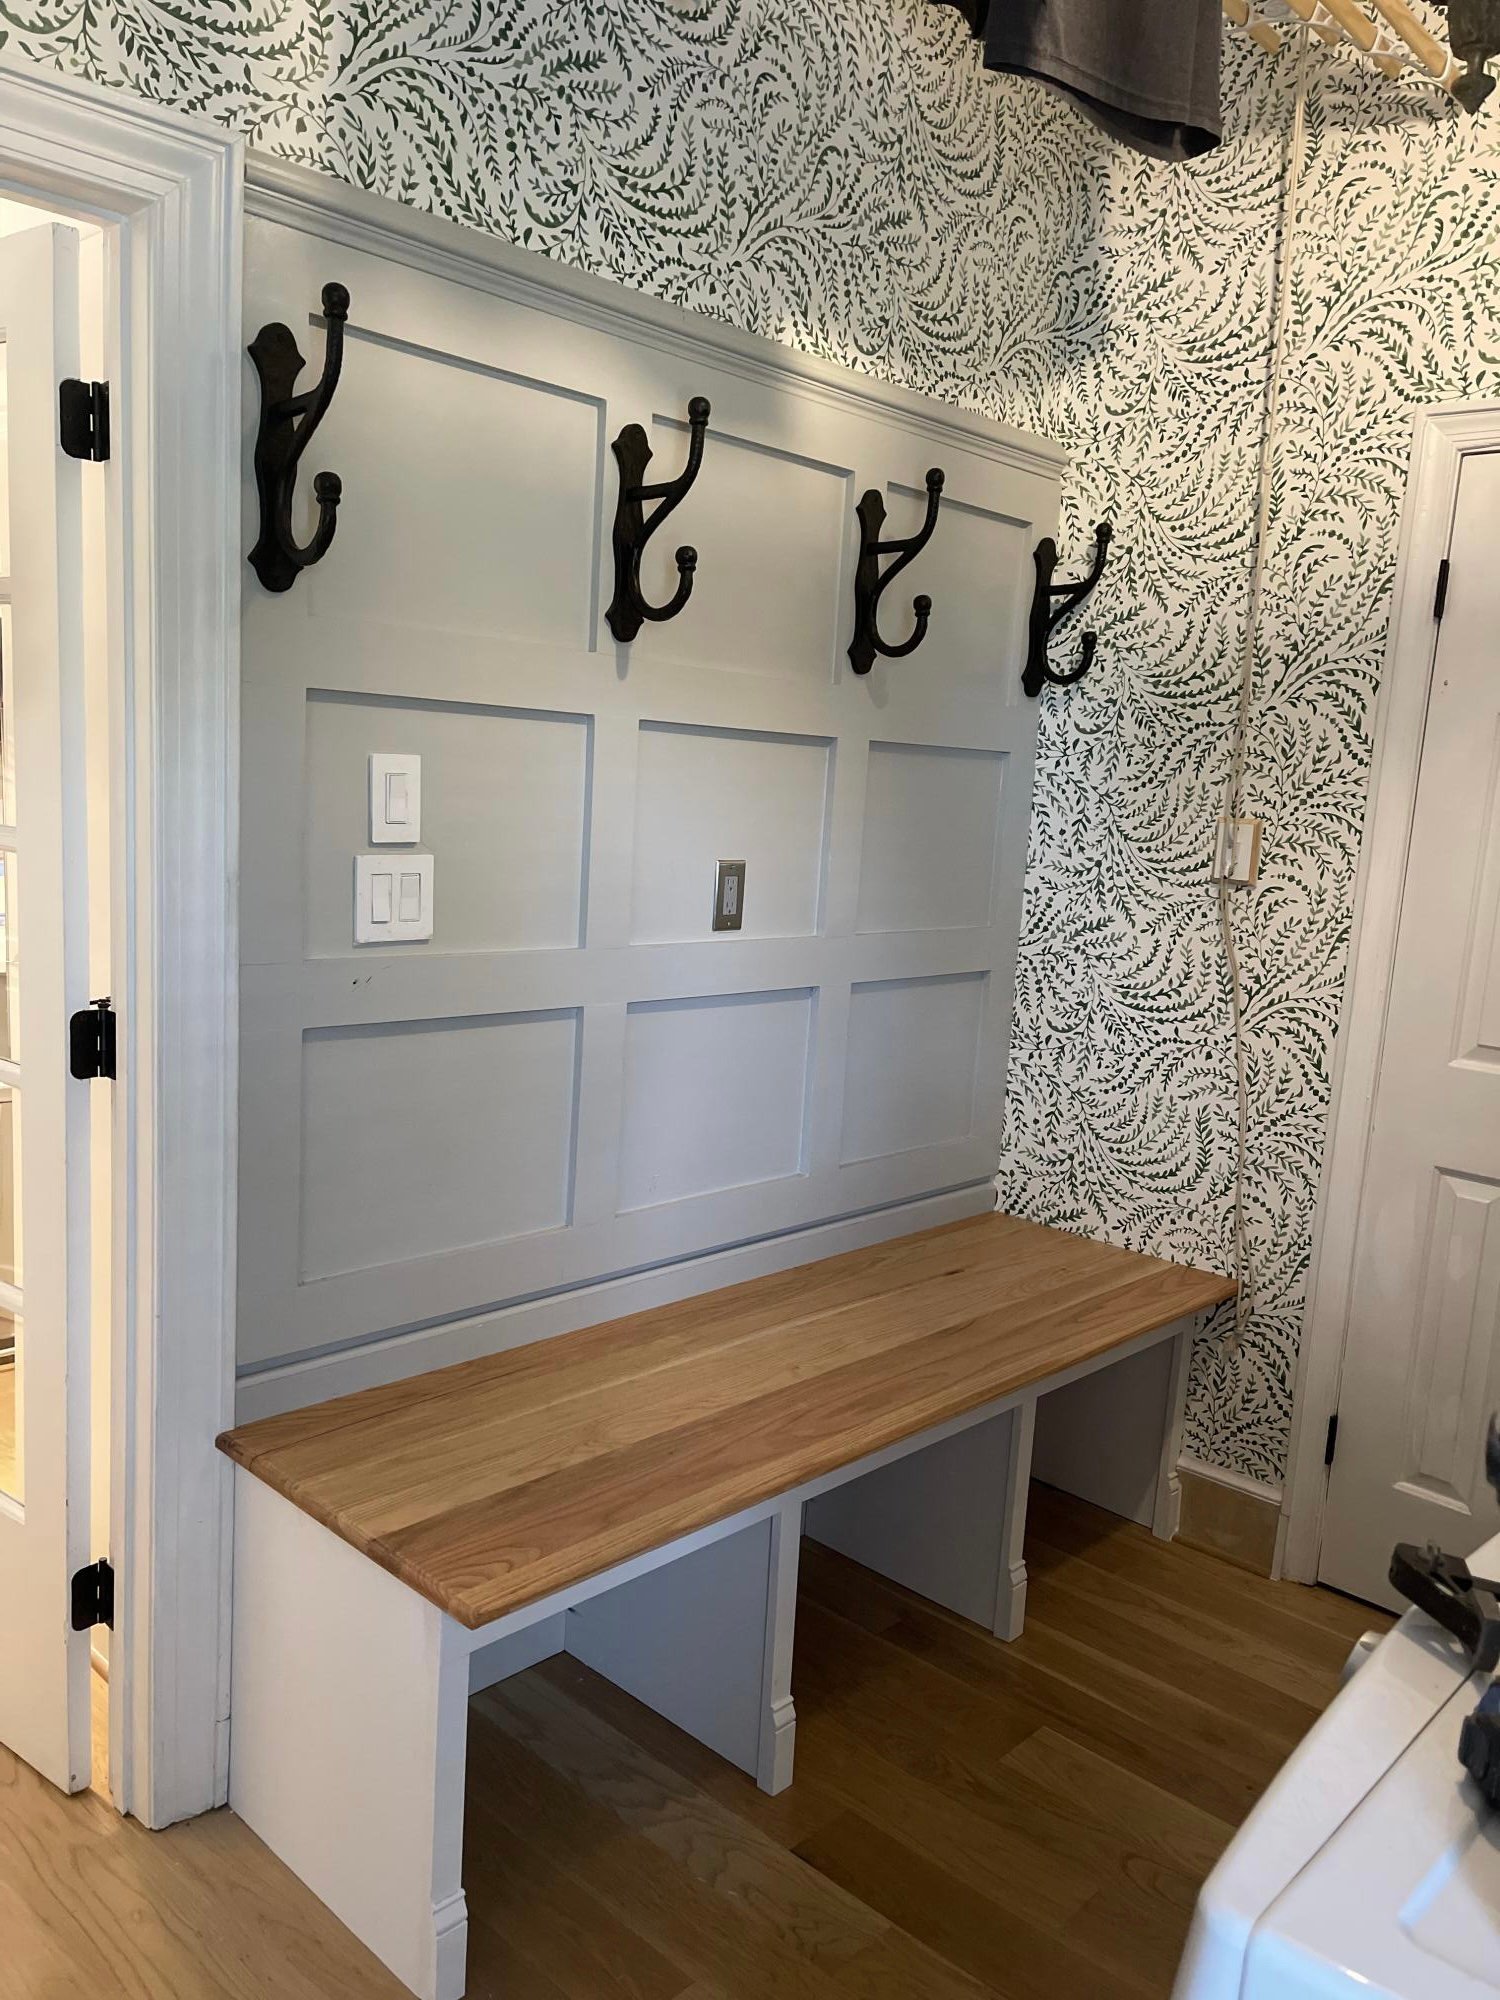
Ana I came across your open bottom garage bench design and really liked the concept. Inspired by your design I put this together in our laundry/mudroom and am really pleased with the result. As you described, being able to clean under it is a huge benefit and the whole bench was less than $200 even with the solid oak boards I joined and edge routed for the top. Thanks for the inspiration and all of your project posts.
Fri, 12/02/2022 - 08:34
WOW, this is gorgeous! Absolutely love the color choice the oak top and the hardware, bravo!
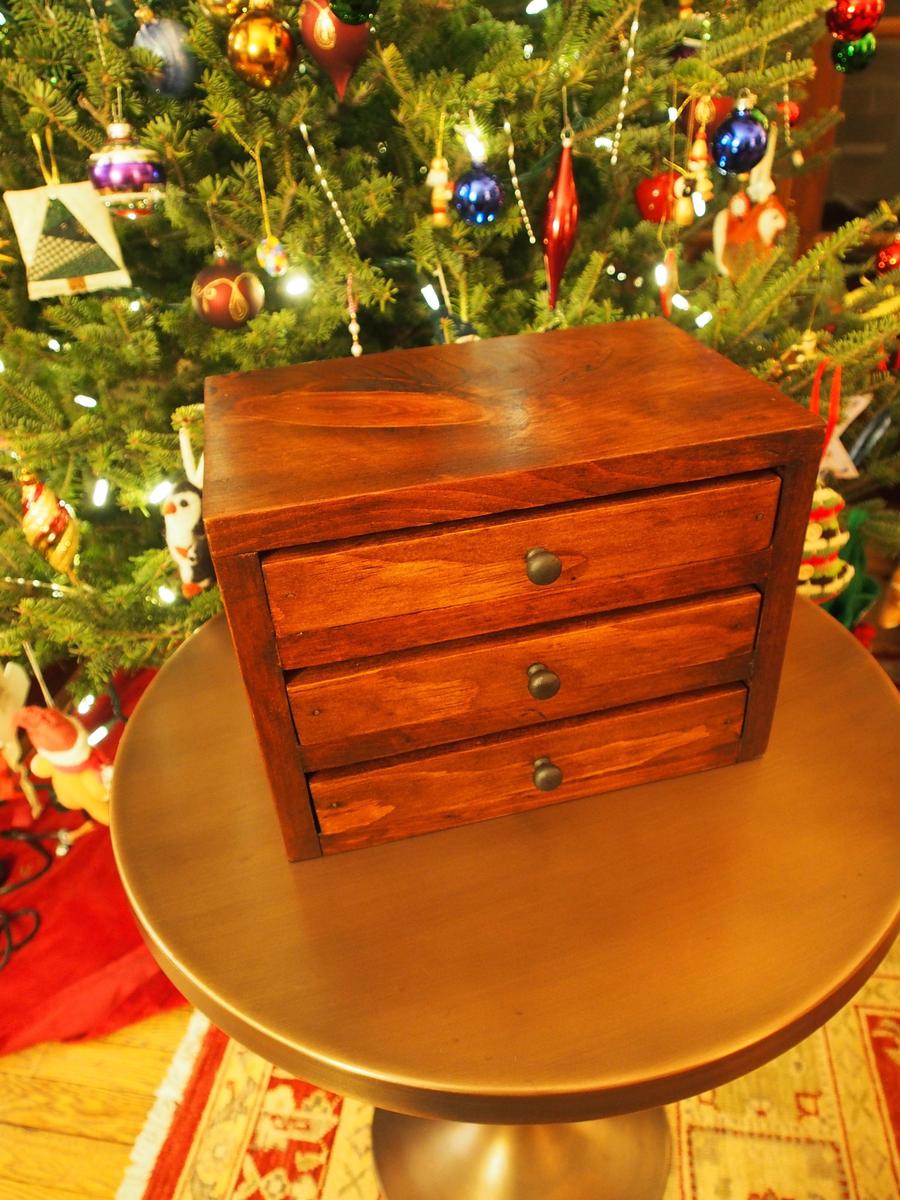
I built this as a Christmas gift for my office partner/best friend.
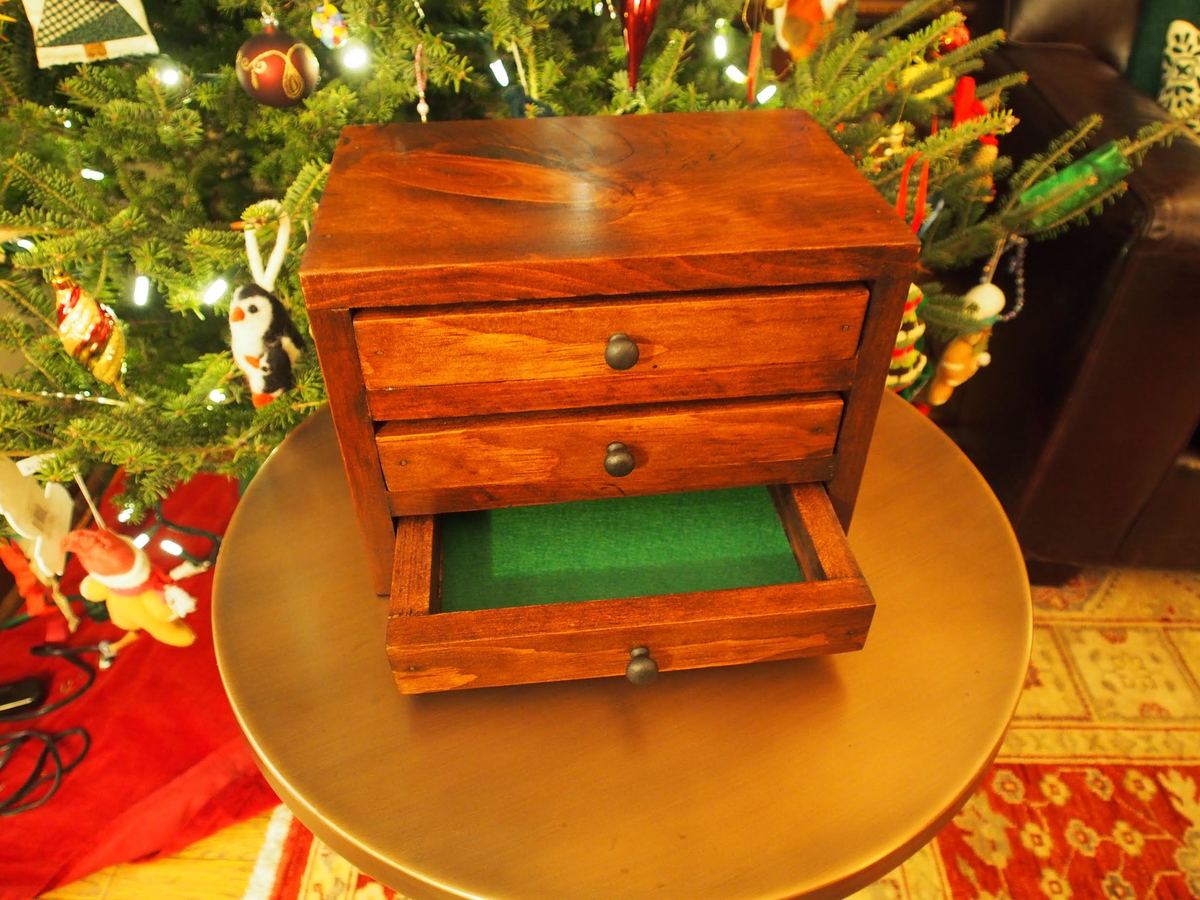

Sun, 01/03/2016 - 14:53
Gorgeous jewelry box! You did a fantastic job on this build! And your finish is amazing!

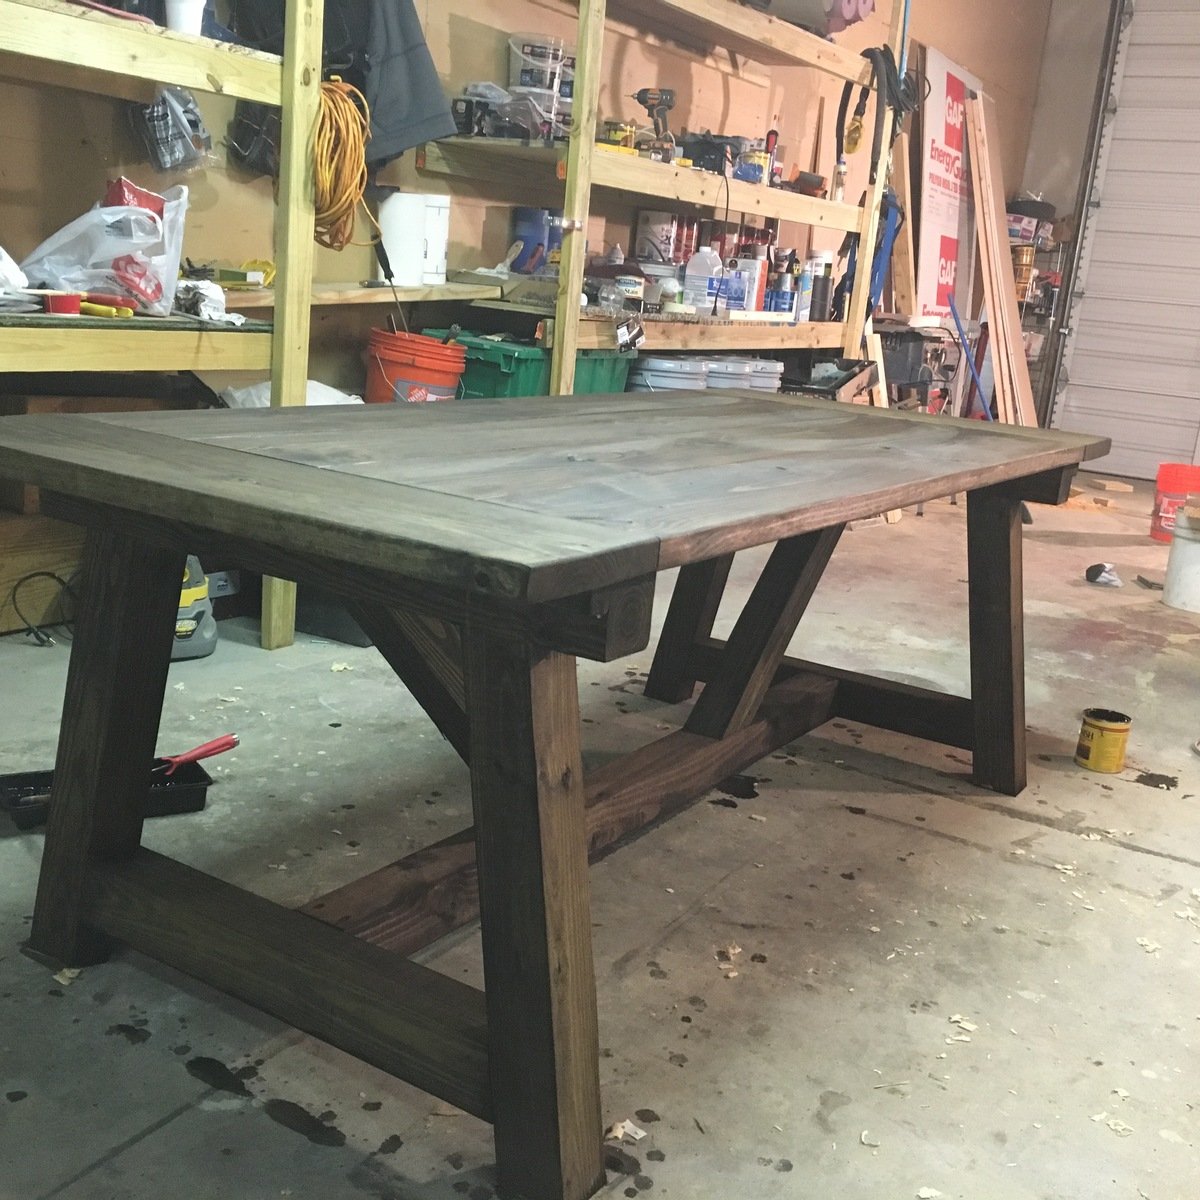
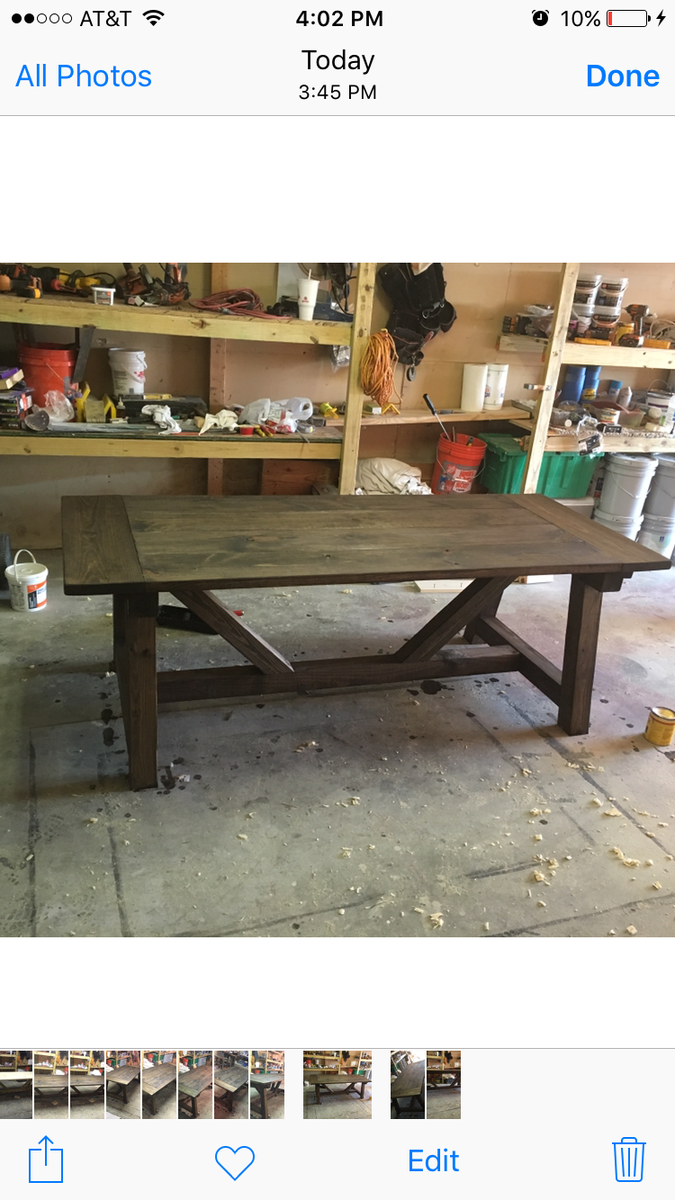
My daughter moved into her first apartment and asked me to make her a dining room table. I used the plans found on Ana's website and made a slight modifcations. I used 5/4" pine boards to build the tops and regular douglas fir 4x4s and 2x4s for the bases. All screws are hidden exept the lag bolts I painted black and used to bolt the end trusses to the center truss which gives it kind of a industrial type accent. Thanks to Ana White and Shanty 2 CHIC for the great plans. My daughter loved the table and bench and she is going to find chair for the other side of the table.


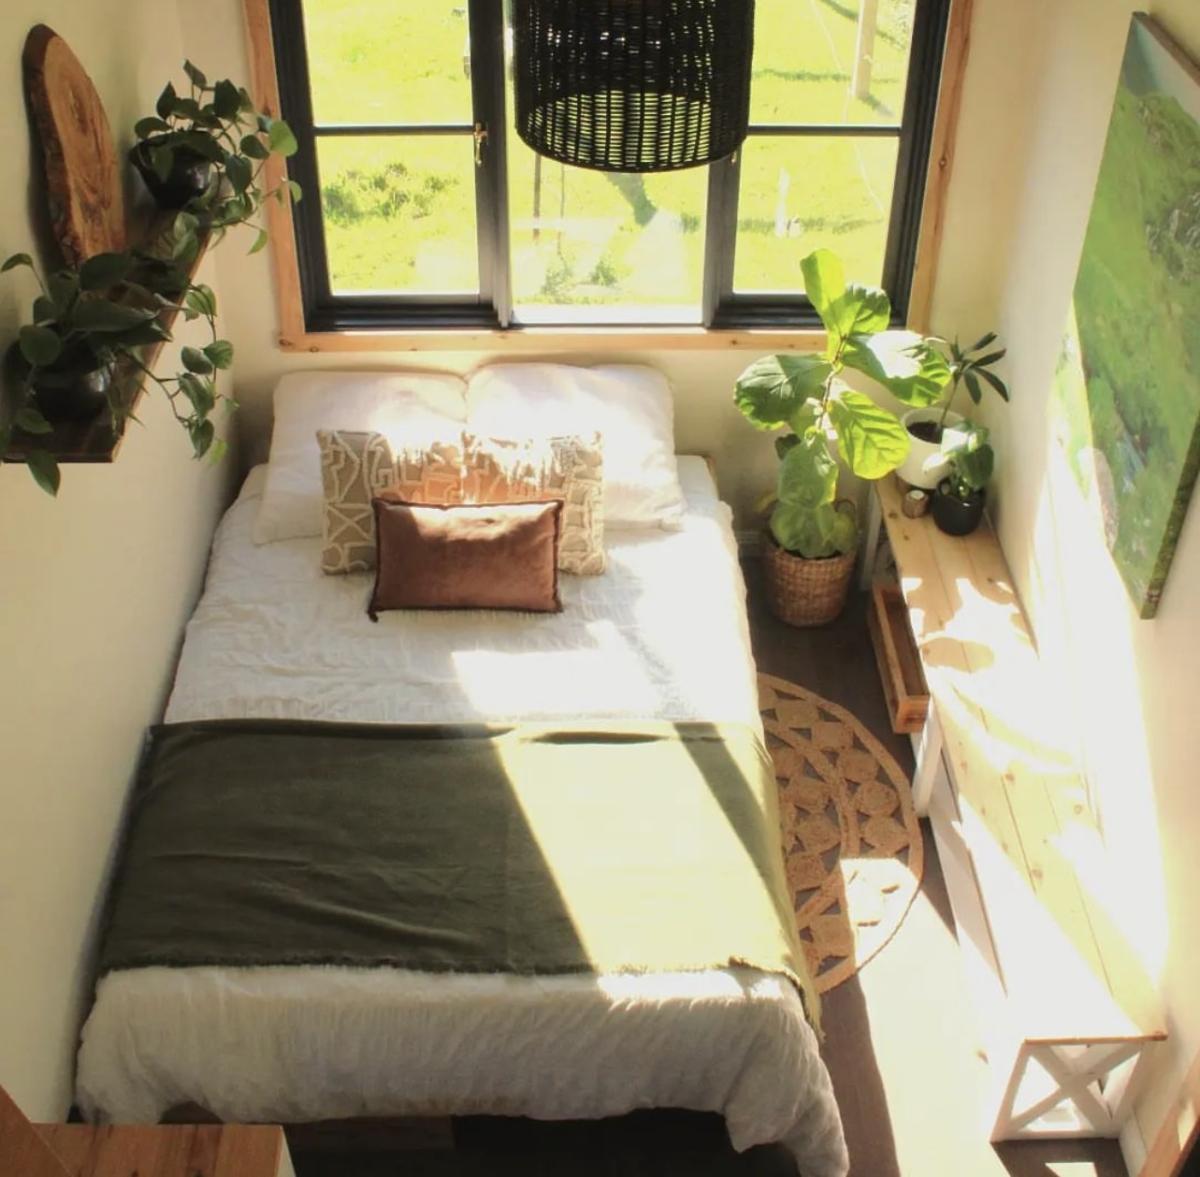
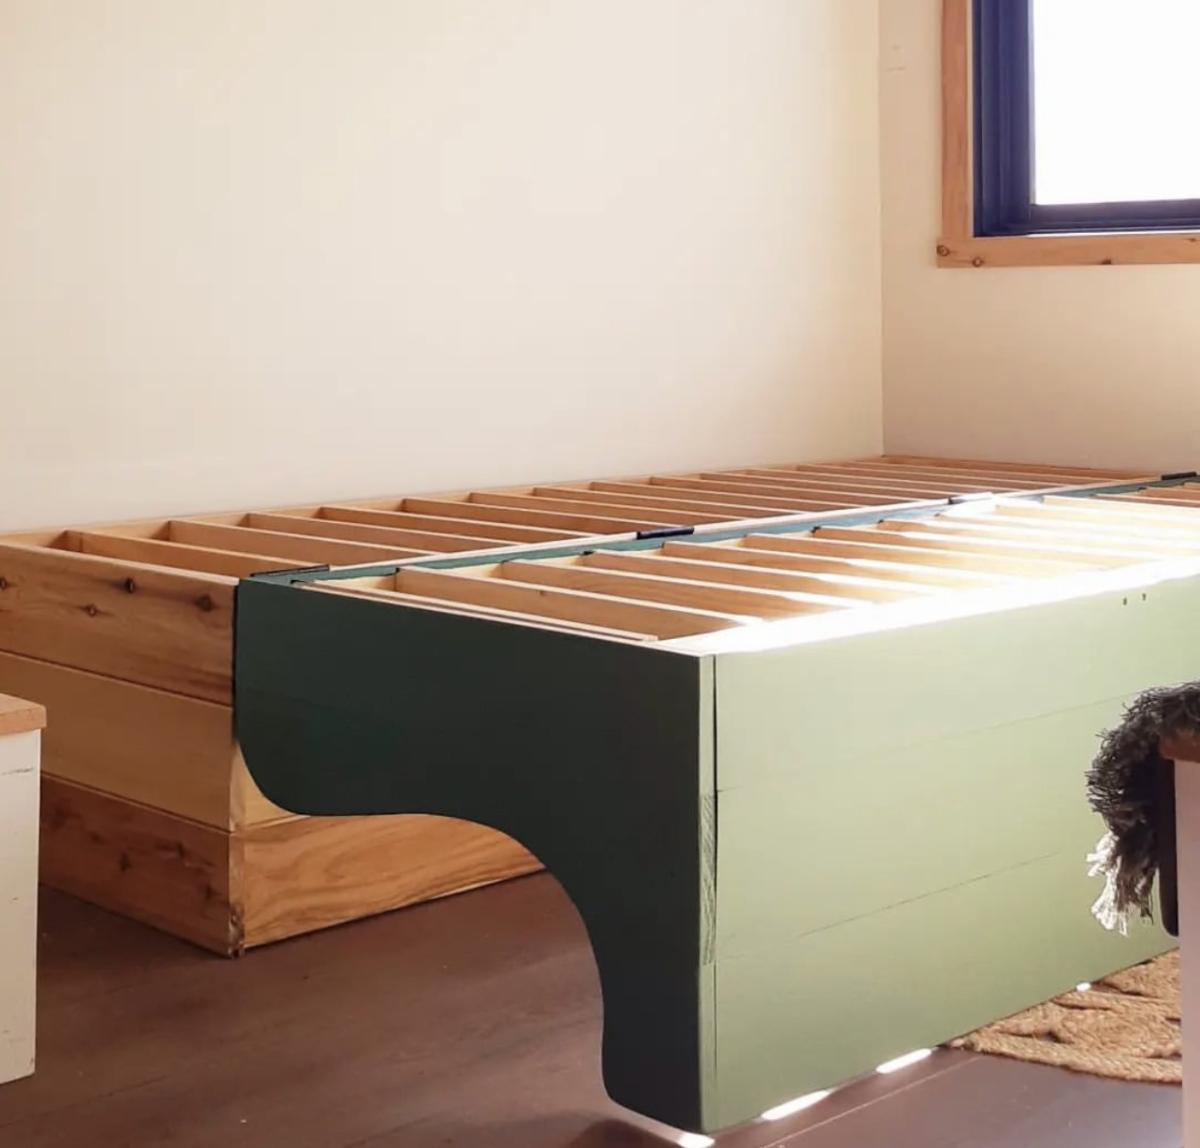
Modified from our twin sleeper chair plan, this amazing hinged sofa bed was built and shared by #tinybuilderau
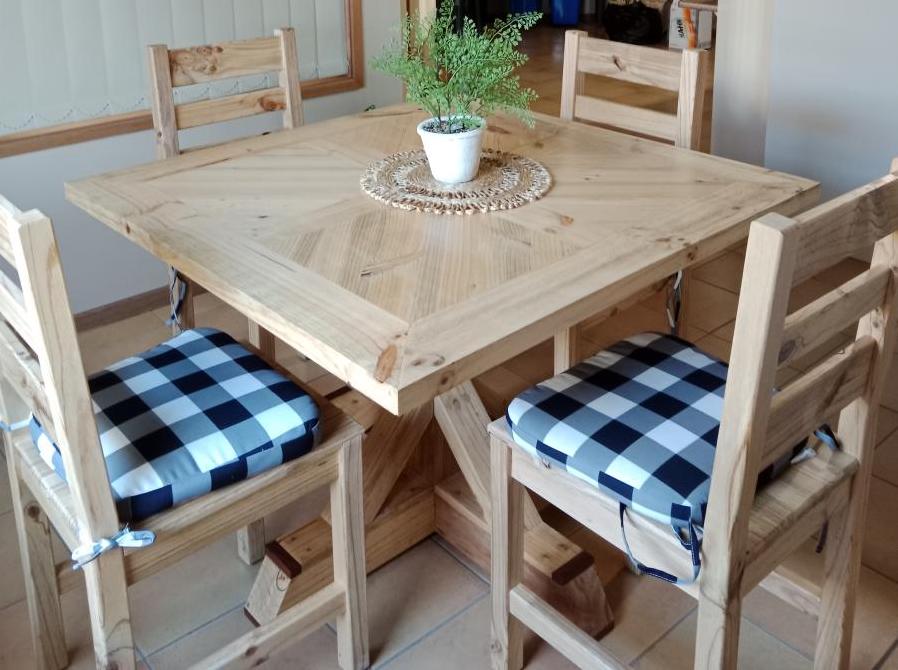
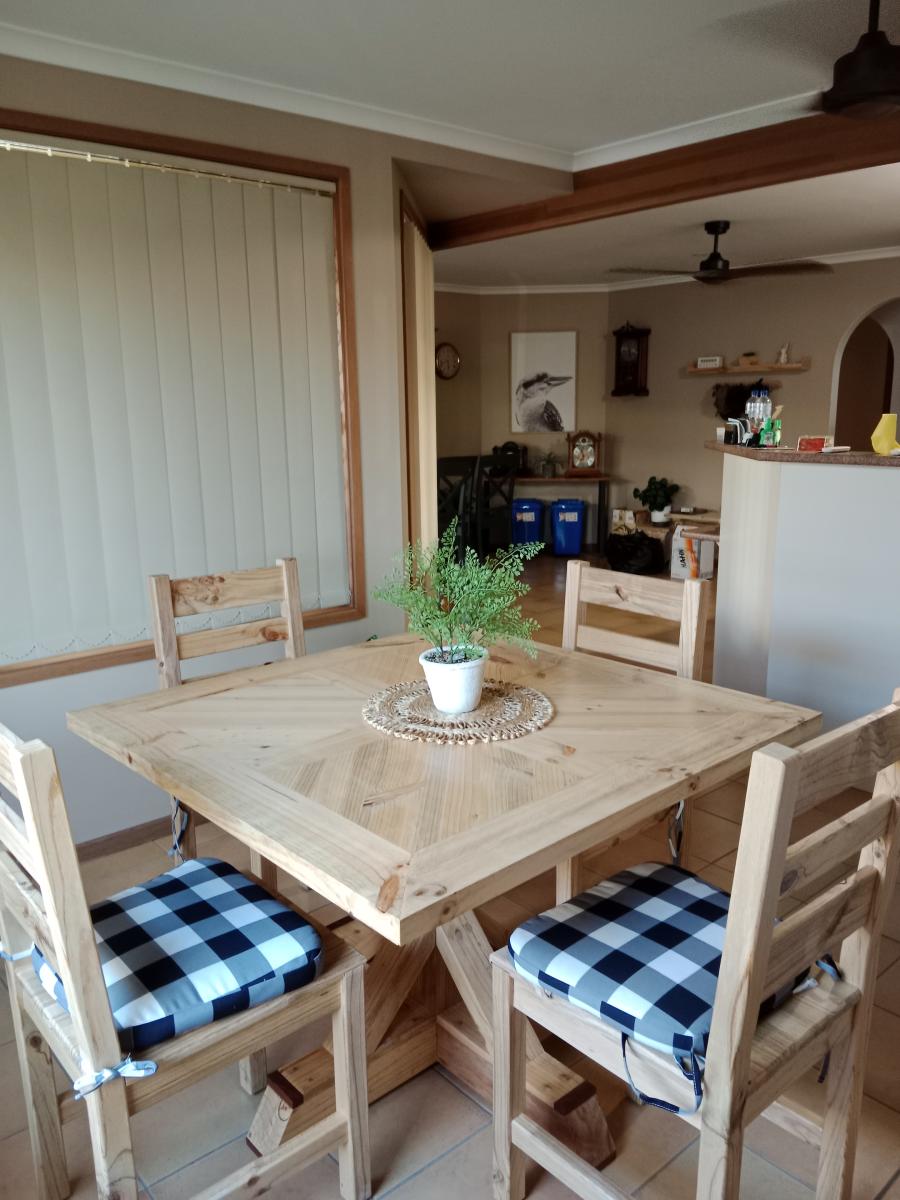
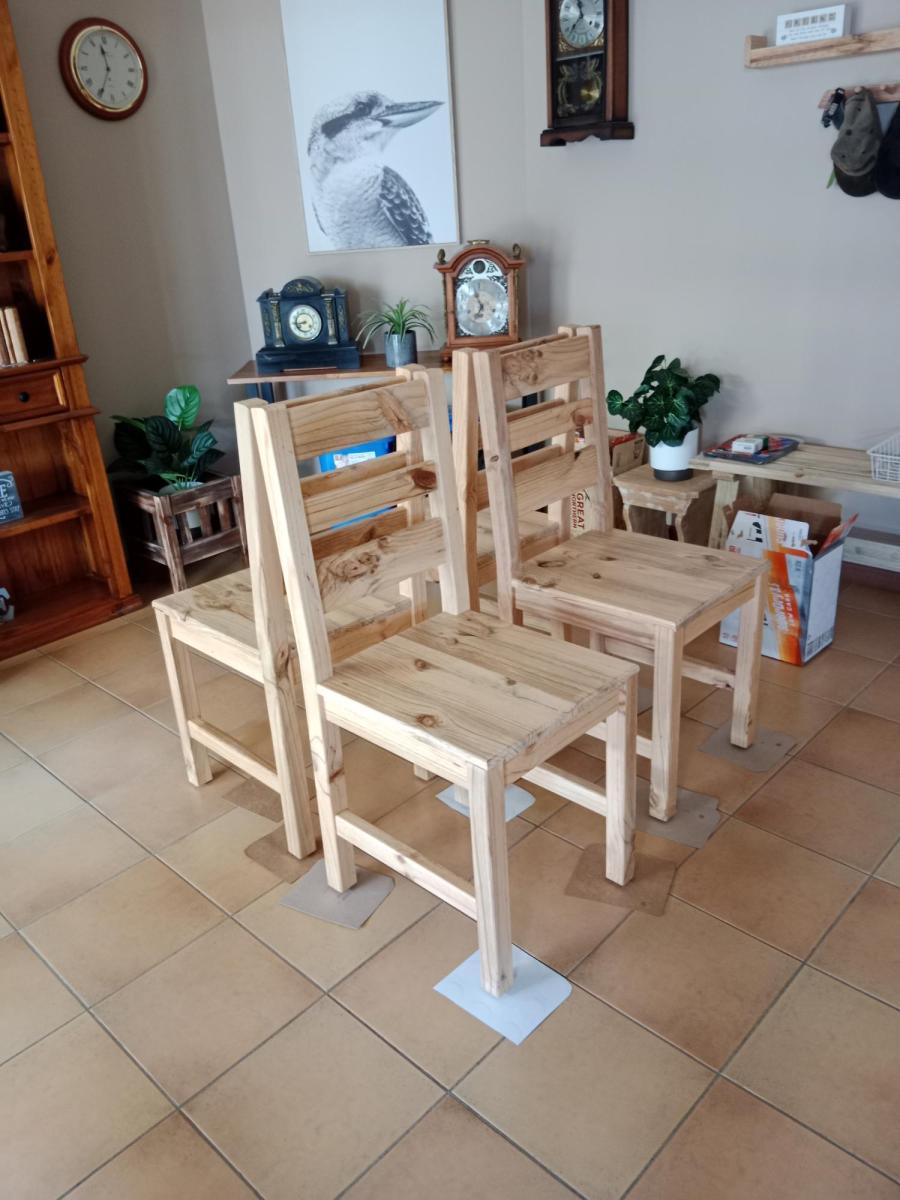
I made the 4 chairs to complete the dining suite. The table was made from the X based pedestal table plan.
The timber was all cut from 200mm x 50mm pine sleepers and finished with Cabots clear finish.
Mon, 03/06/2023 - 13:35
What a beautiful set! Thank you so much for sharing your amazing work:)
Fun build 4hrs to complete.
One of of the cuts is off says long to short it's long to long.
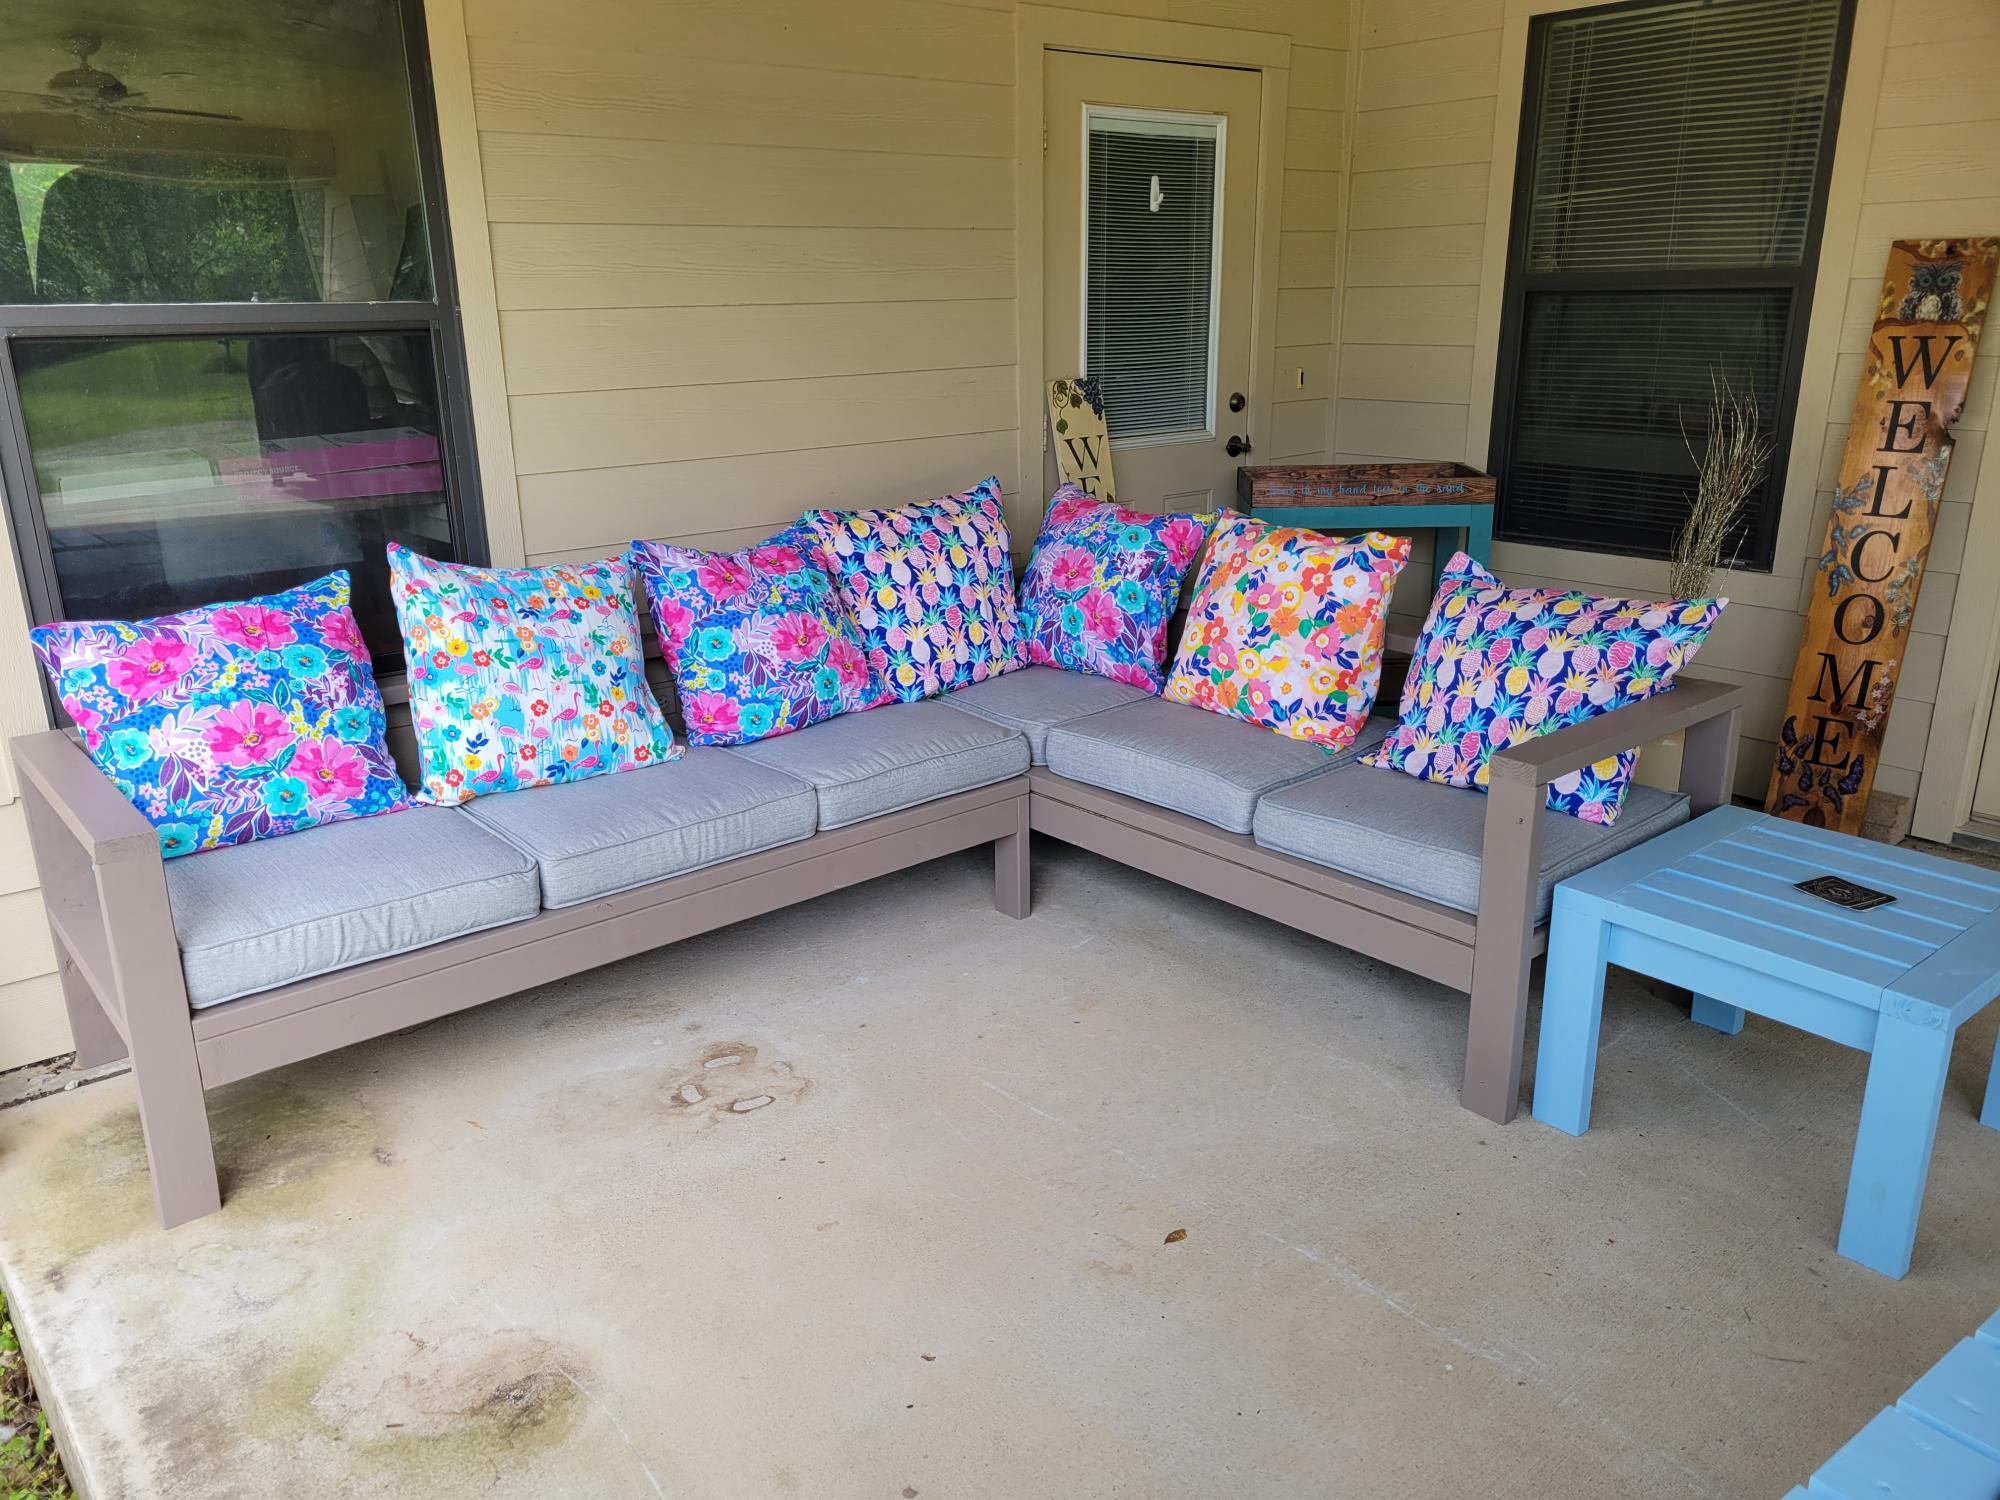
my husband and I used your plans for the sectional, end tables and chairs I made the pillows thanks so much for the designs we love them

Mon, 04/03/2023 - 20:12
Fantasic job, thank you so much for sharing your lovely space!

Comments
Ana White Admin
Mon, 12/27/2021 - 22:20
Very Pretty!
Looks great, thank you for sharing!