Community Brag Posts

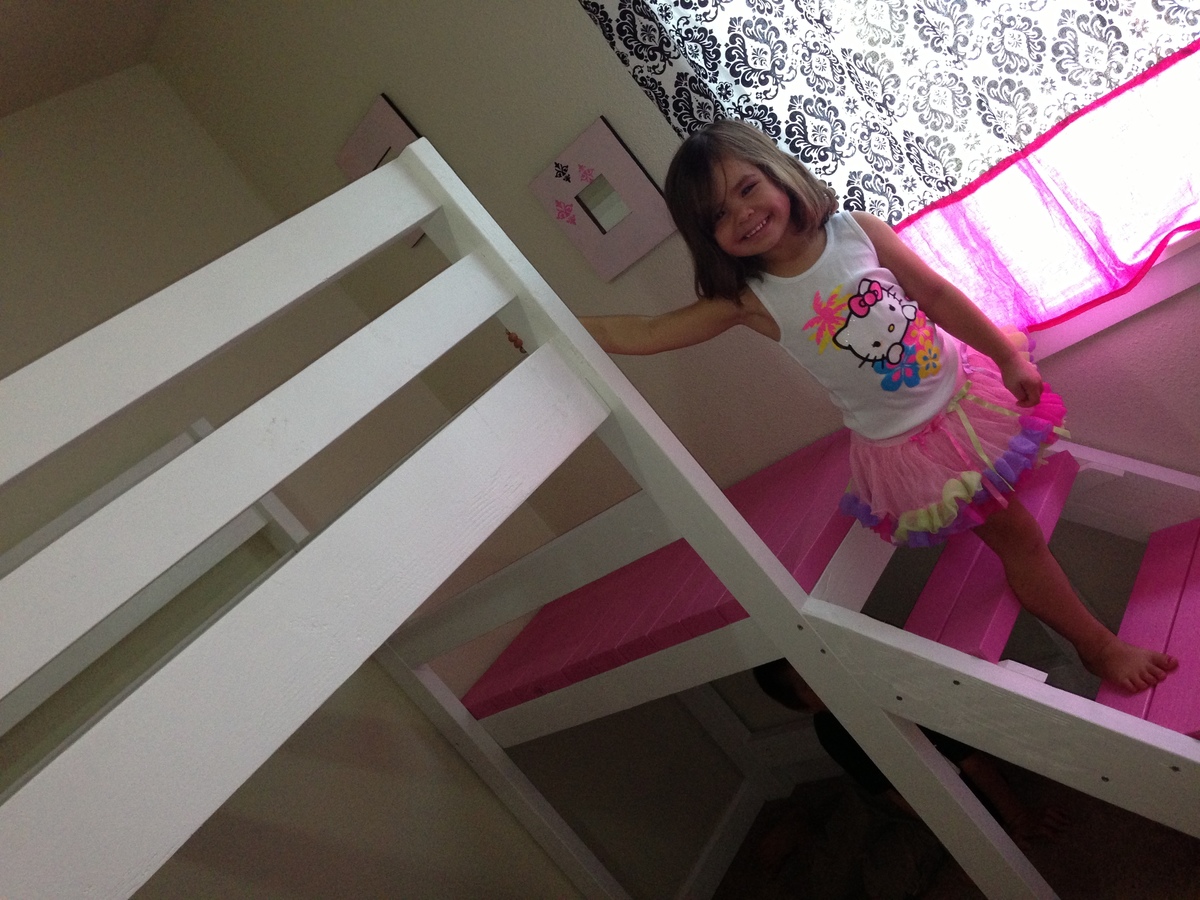
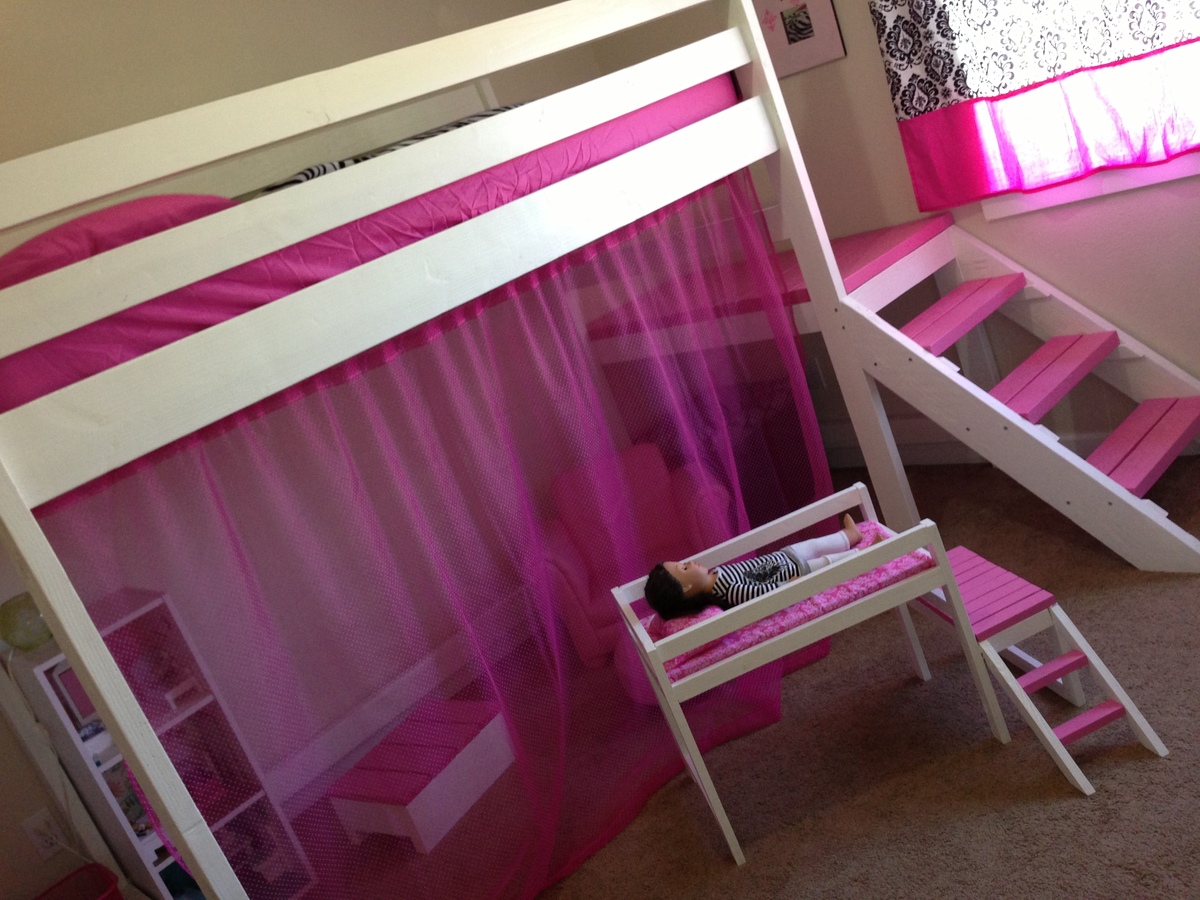
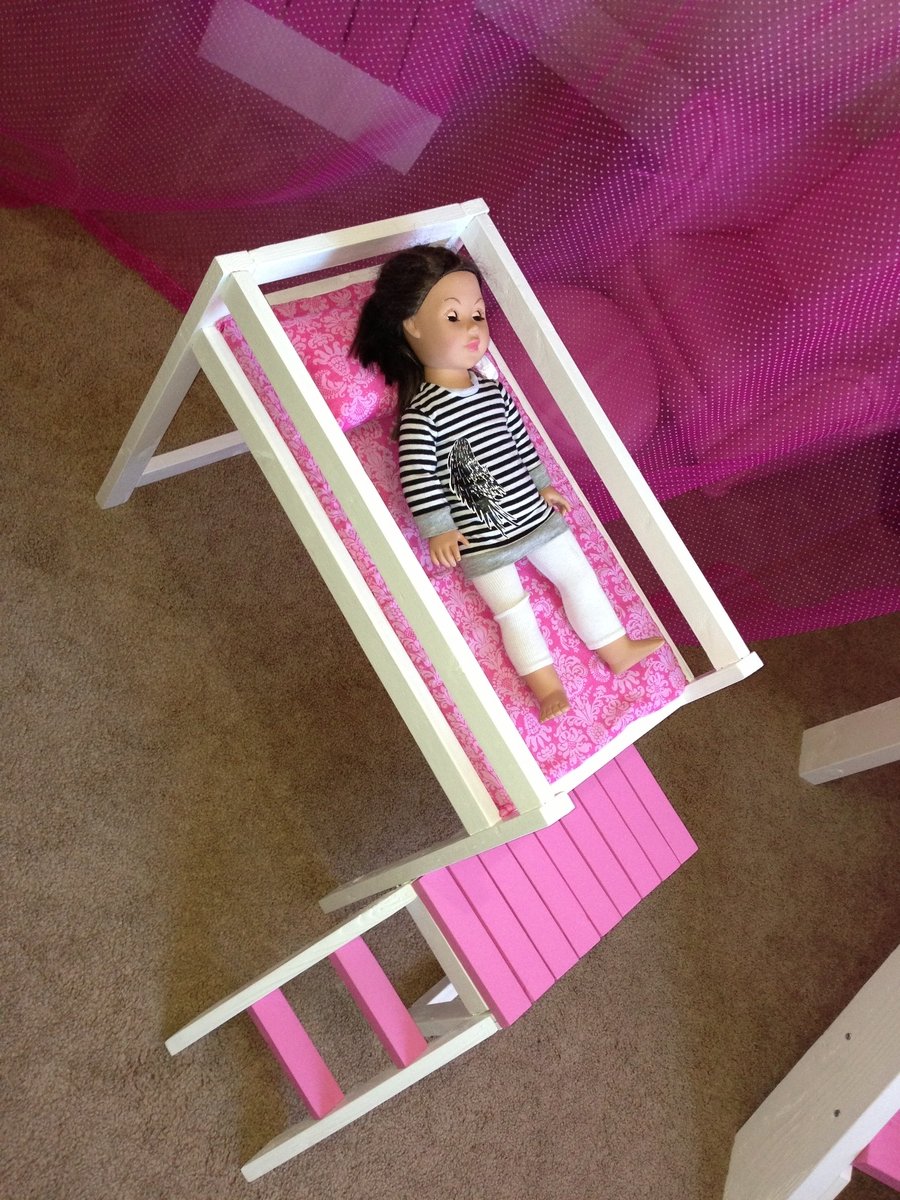
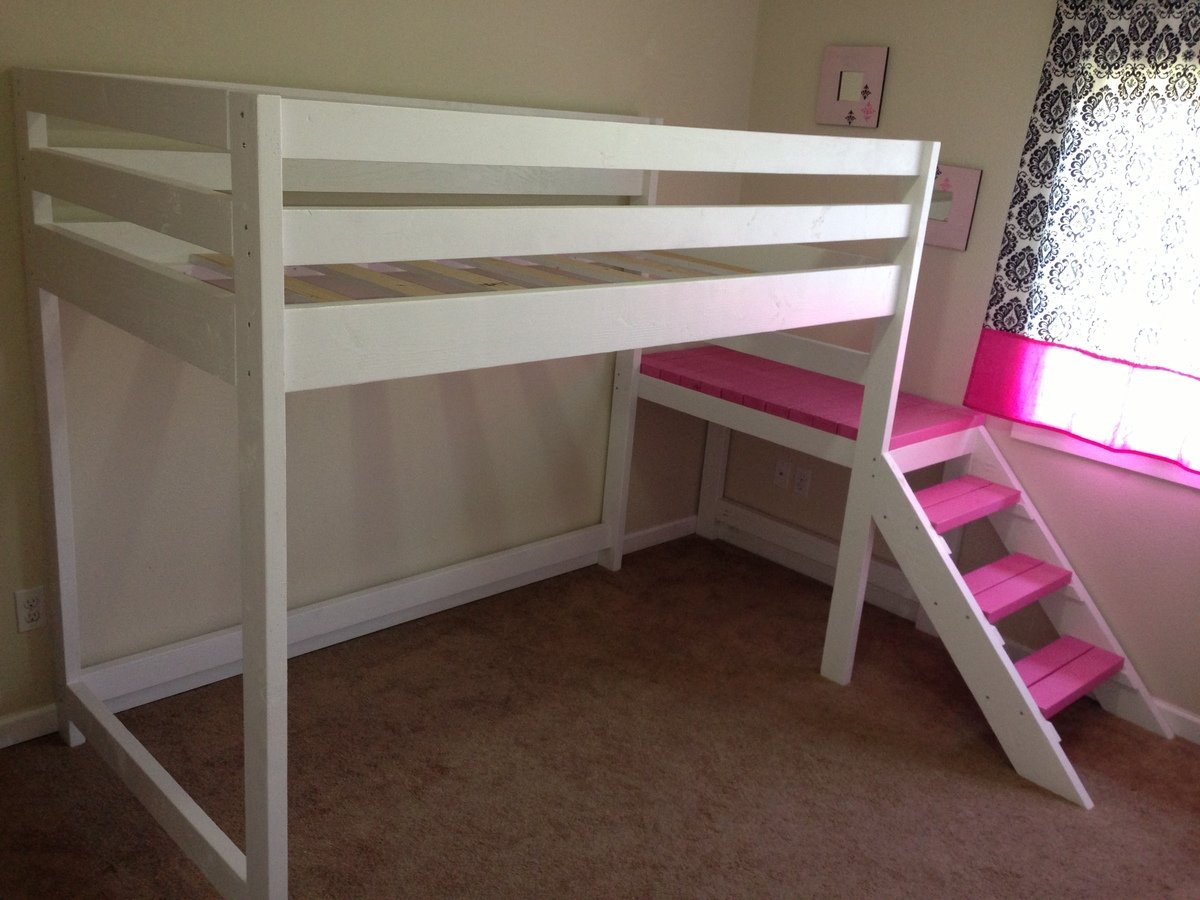
Camp Loft Bed with Matching Doll Sized Loft Bed

Submitted by lisatw on Tue, 08/20/2013 - 17:20

We made this loft bed for my daughter's 4th birthday. I did all of the cuts, sanding, and painting on my own, and had my husband help me with the assembly of the bed. It took us 2 full days to complete this build. The sanding and painting was the most tedious part of the project. I think it cost us about $150 for all of the lumber, paint, screws, etc.

My daughter's really into playing with 18" dolls right now, so I decided to make a mini version of her loft bed for her dolls. I think it turned out really well and she absolutely loves it! The doll sized loft bed only cost about $15 to make (including wood, foam for the mattress and fabric). You can't beat that price for a wooden doll bed...and what little girl wouldn't love a matching bed for her dolls?!?!

I'm so happy with how both beds turned out!

Estimated Cost
$150
Estimated Time Investment
Weekend Project (10-20 Hours)
Finish Used
Semi-gloss paint
Recommended Skill Level
Beginner

Comments

JoanneS

Tue, 08/20/2013 - 18:32

This looks awesome! Love the pink on the steps. And the matching doll bed, how cute is that?! :) Great job!

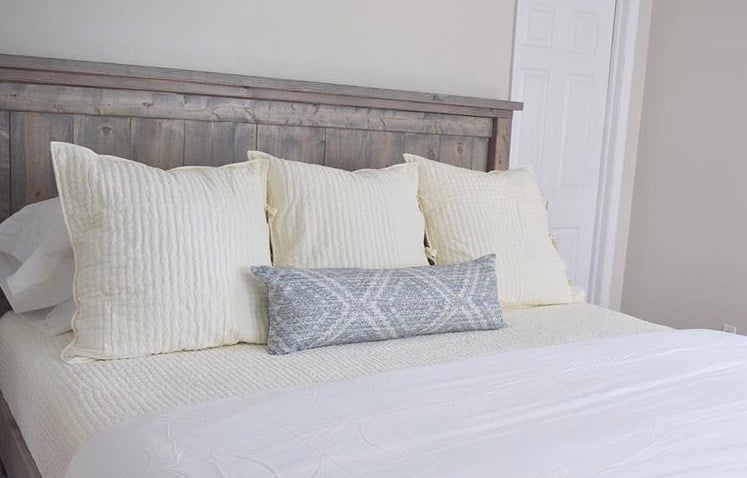
Farmhouse bed king

Submitted by Anonymous (not verified) on Wed, 01/09/2019 - 18:02

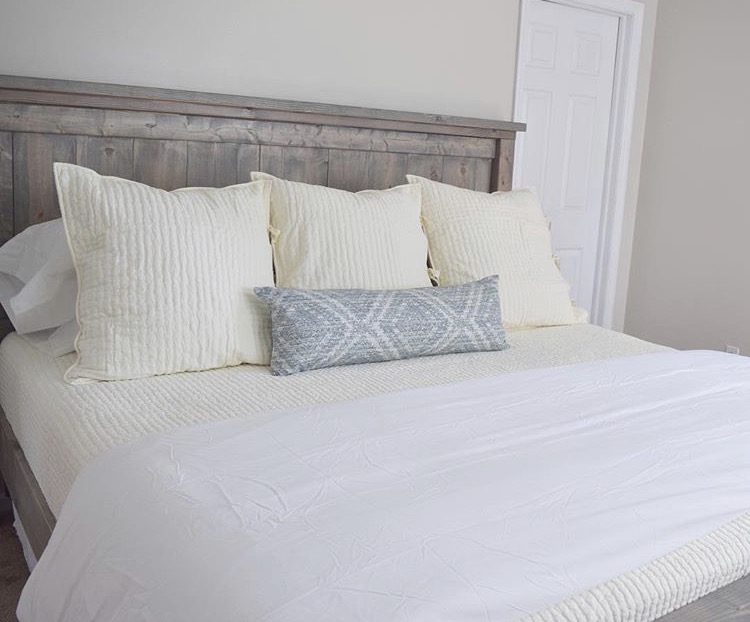
Such a fun project. This is the 5th piece my husband and I have completed by Ana White. This bed is by far my favorite piece of furniture in our home. So sturdy and only took a few hours (not including stain and poly). We have a love for knots, so we chose pieces of wood that had a lot of beautiful imperfections. We went very light on the stain, and it looks weathered with still some of the natural wood color shining through. We got our wood from our local Home Improvement store, and had minimal cutting to do. Neither of us are pro woodworkers by any means, and we completed this with ease.

Estimated Cost
$200
Estimated Time Investment
Day Project (6-9 Hours)
Finish Used
One thin coat of Rust-Oleum Weathered Gray then two coats of Minwax clear Polyurethane.
Recommended Skill Level
Beginner

The perfect sewing table!

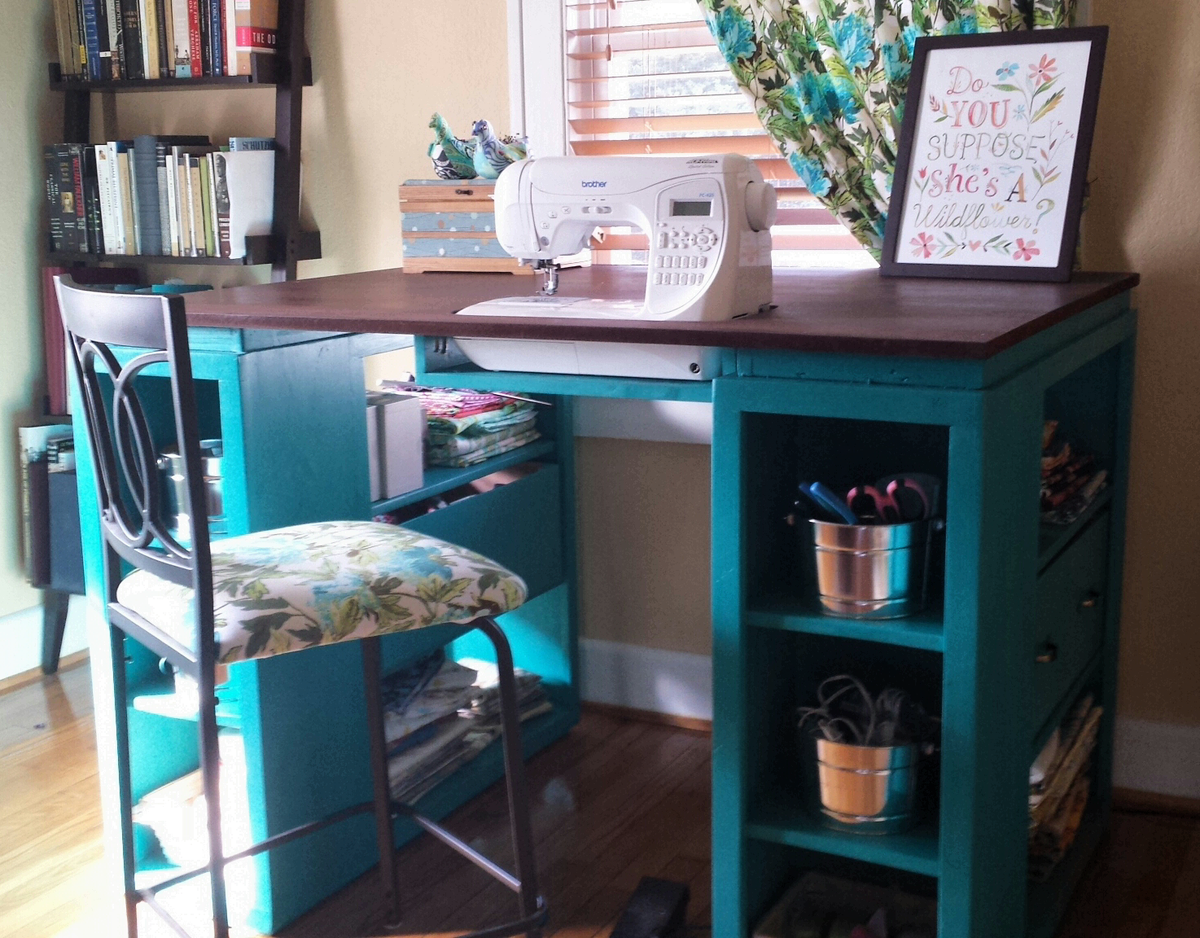
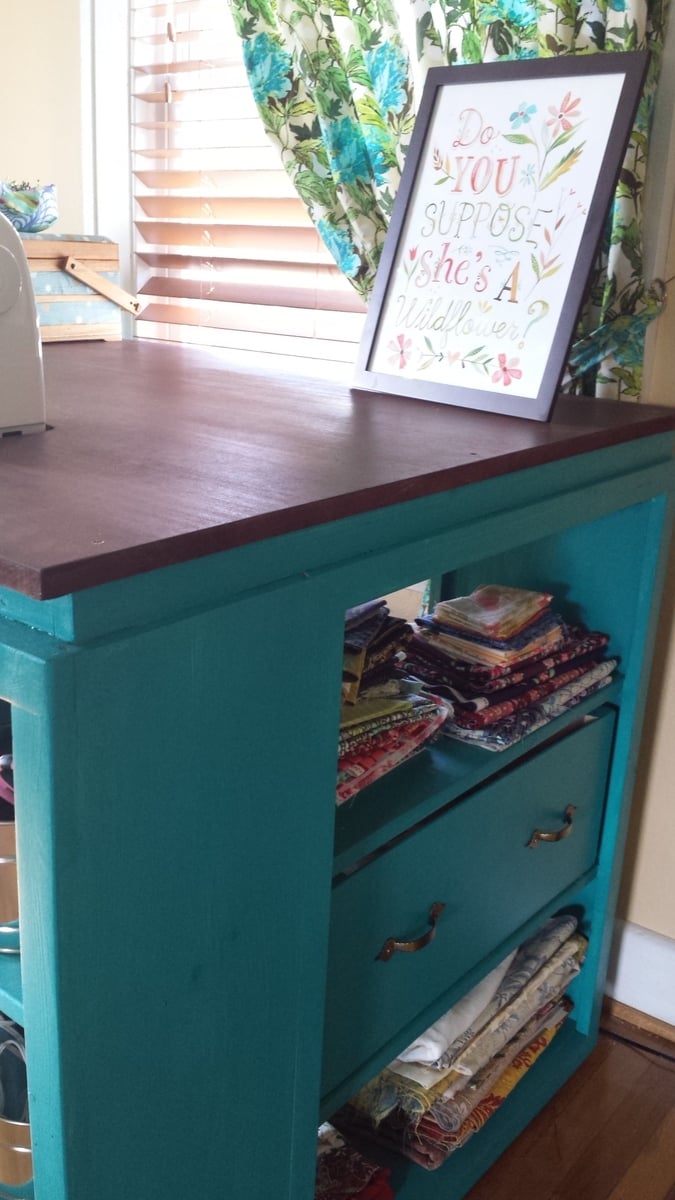
I have been looking at sewing furniture for years, but the prices always made my jaw drop. I have a small craft room, so I needed a table that could also triple as a cutting table and fabric storage. Thank you so much to Ana White for this plan! I built exactly to the plan in The Handbuilt Home, and it's the PERFECT size.

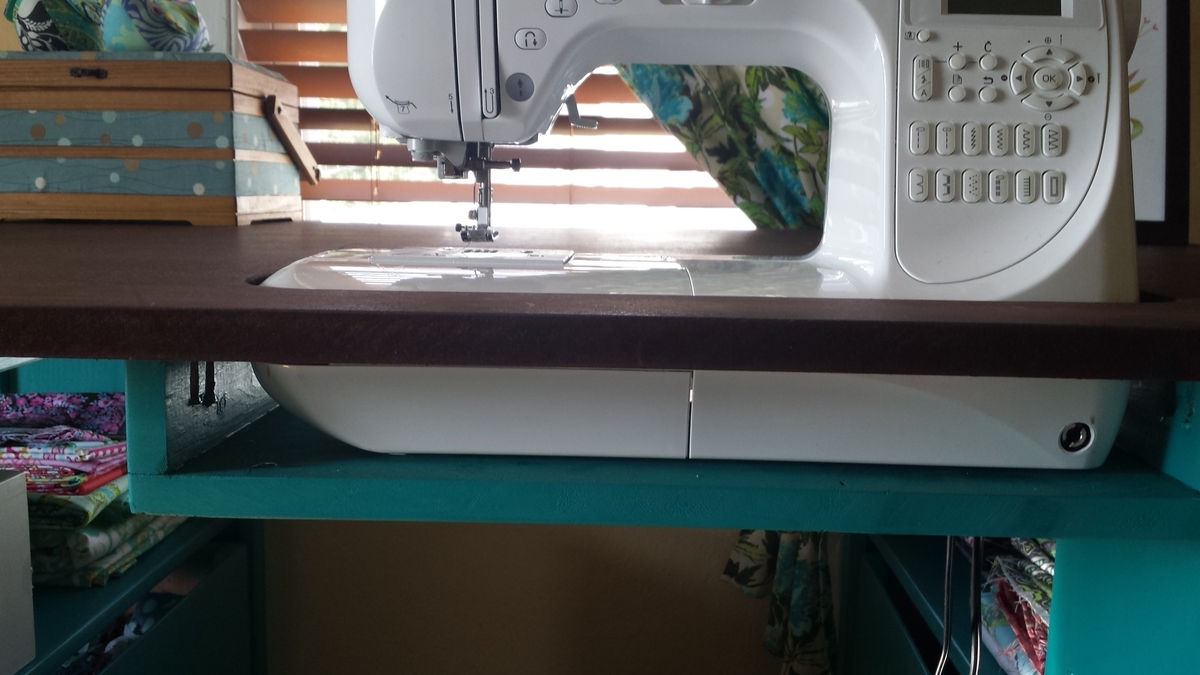
So the sewing machine can sit flush with the top, making working on big sewing projects way easier, I traced the outline of my machine on the MDF and cut it out with a jig saw. Then I built a small shelf using a 1x12 scrap and 2 1x3 scraps. Putting the 1x3s on top of the 1x12 made the shelf 3.75 inches deep, which is exactly the depth I needed. I attached it to the underside of the tabetop using a pockethole jig and screws.

I built 2 boxes using 1/4 inch plywood, and installed drawer pulls on them, giving the illusion that the table has 2 drawers built in. This is where I keep my ugly stuff--interfacing and fabric scraps.

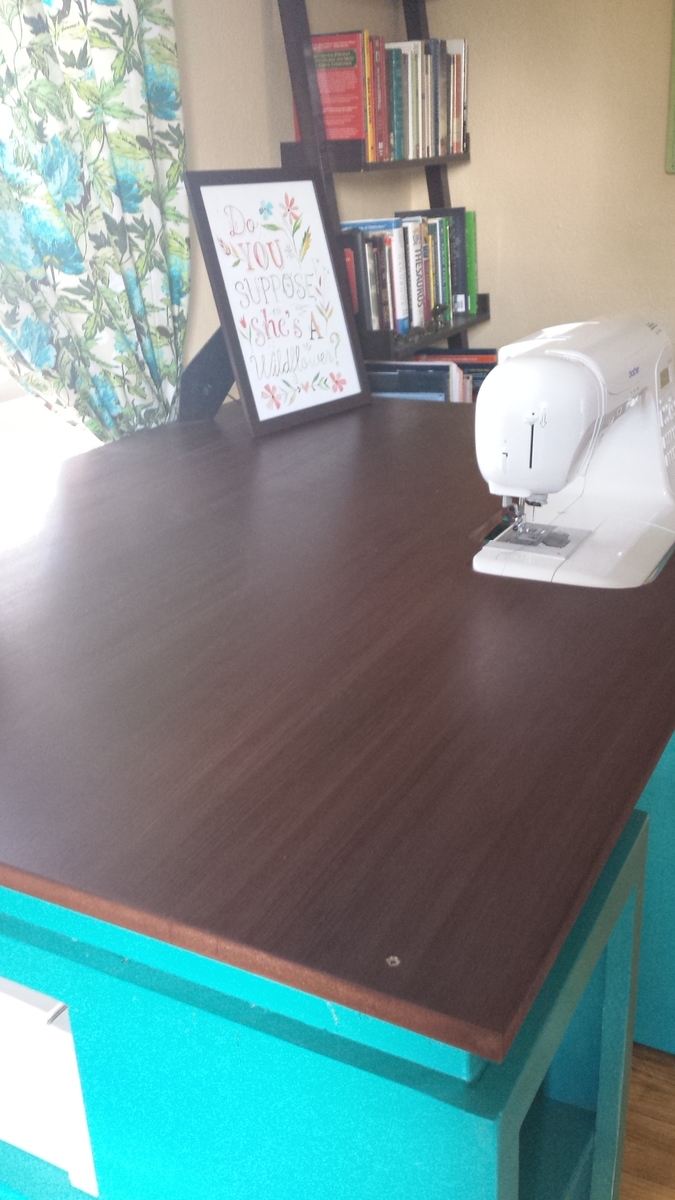
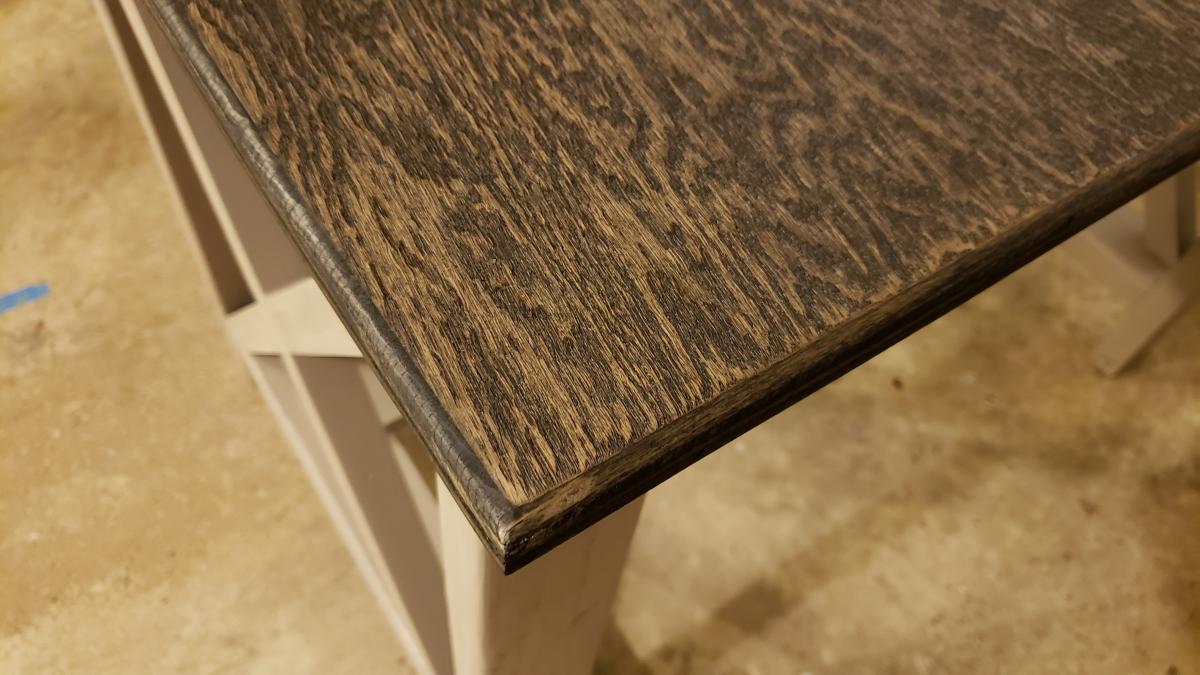
I got the color scheme for the table from the entryway console plan in The Handbuilt Home. In order to make the MDF top look like it had a wood grain, I applied mahogany gel stain with an old washcloth in very thick strokes that spanned the length of the tabletop. It soaked in and lost the "grain" look in some places, but the majority still looks like wood. I did have to apply several coats of polyurathane over the stain; the MDF has a prickly texture that grabs fabric and makes it hard to feed through the sewing machine.

My only complaint is that I didn't quite think through the fact that seating is bar height and I'm 5'7". It's a little difficult to reach my sewing machine pedal. I may build a small stool for the pedal to sit on so I don't have to half sit/stand to sew.

This is the first woodworking project I've done alone from start to finish: from going to Lowe's and picking out the wood, to cutting the wood with a circular saw, assembly, and finishing. (My fiance did carry it up the stairs for me. :) )

I'm so in love with this table! And now to finish the quilt I started 6 months ago....
Built from Plan(s)
Estimated Time Investment
Week Long Project (20 Hours or More)
Finish Used
I used 2 coats of Valspar Signature paint in Laguna Beach, and Minwax mahogany gel stain on the MDF tabletop.
Recommended Skill Level
Intermediate

Comments

MissMehndi

Mon, 09/23/2013 - 15:22

I love this idea!! I too have wanted a sewing table for a long time but the prices of them take my breath away. I may have to make myself one! Thanks for the inspiration!!

Washer Dryer Pedestals Bases

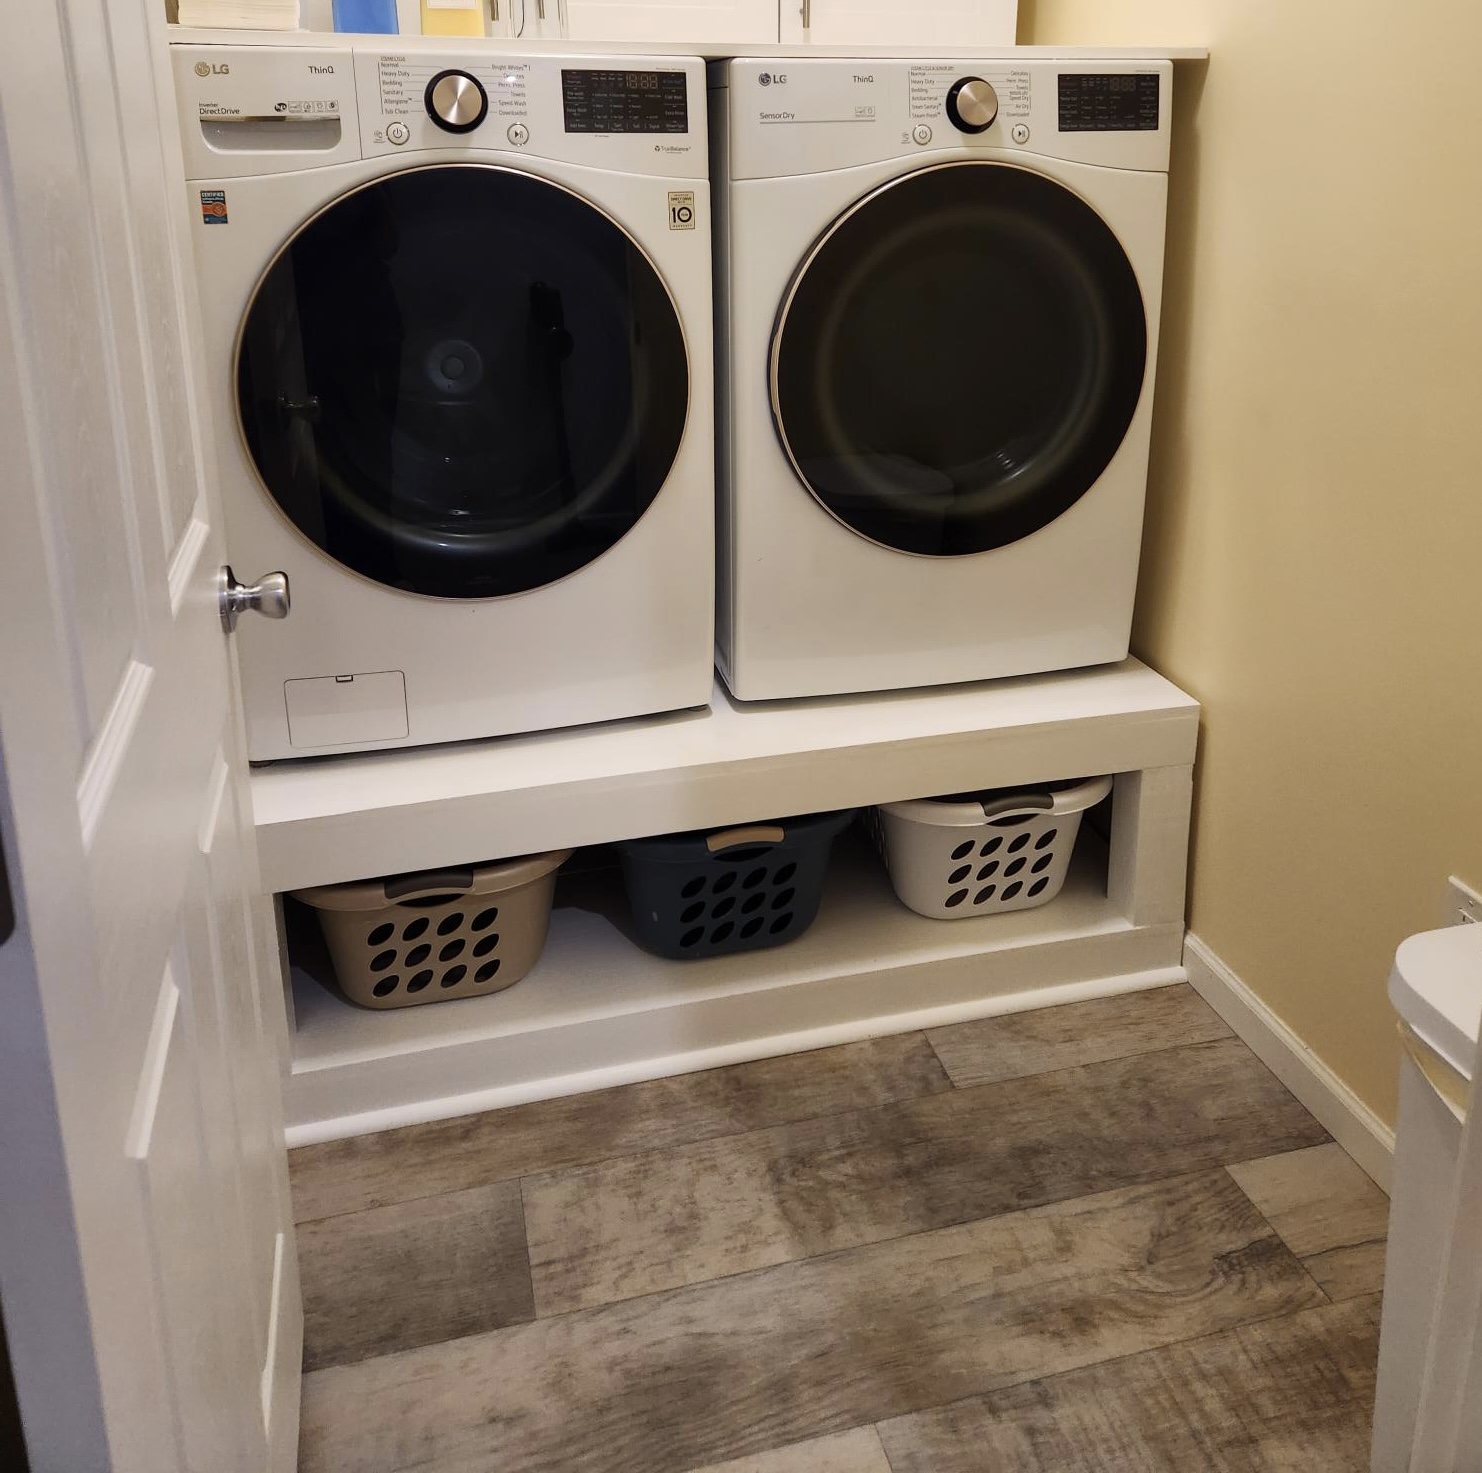
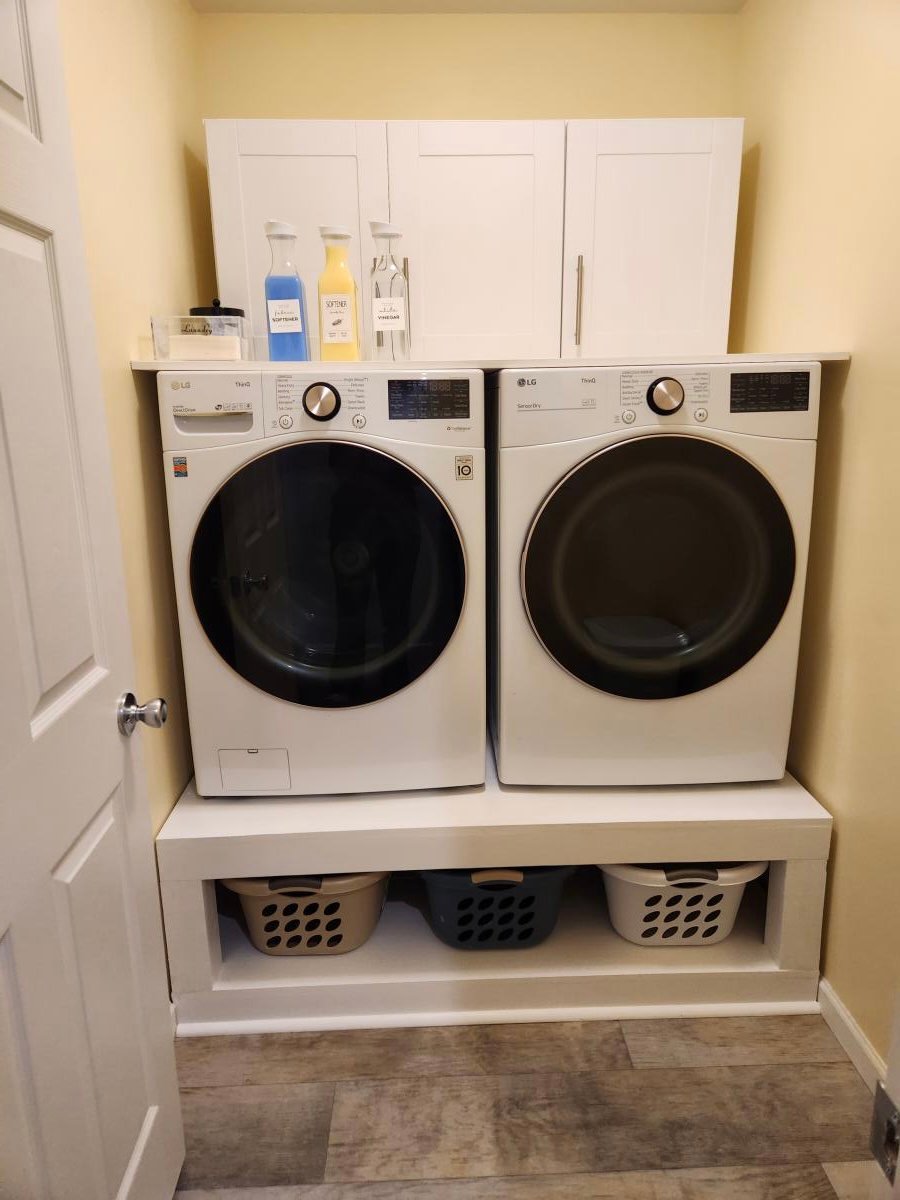
This pedestal base for the washer and dryer really created the perfect opportunity to organize and declutter our tiny laundry room. Had to resize it a bit to fit the space but it turned out perfect! I added a super easy top for an even counter space and bought some stock laundry room cabinets to sit in the back for extra storage. Such an upgrade!

Modified clubhouse bed

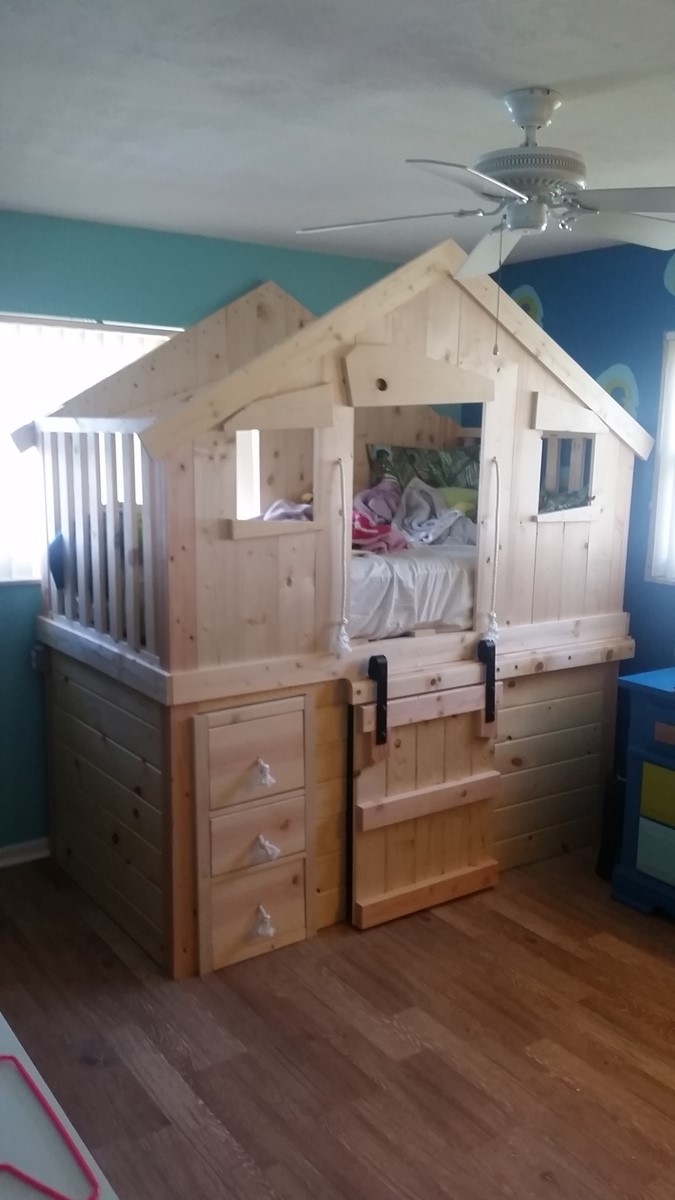
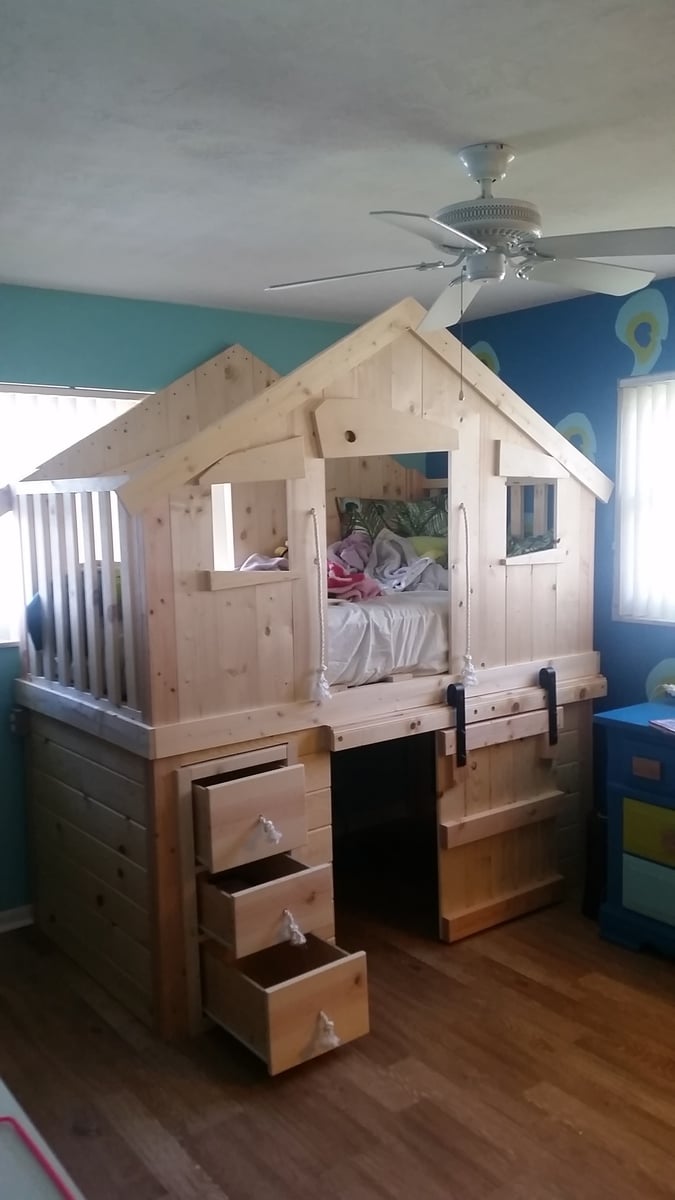
My daughter wanted to remodel her room with a peacock farm theme. These plans worked perfectly. I decided to just enclose the bottom, add 3 drawers and a barn door to give it functionality and add to the "farm" theme. Enclosing the bottom mad for way more storage in her room. I'm going to add a cubby on the head board side. It's going to mimic a "lean to" shead to further add to the rustic farm look.

Built from Plan(s)
Estimated Time Investment
Weekend Project (10-20 Hours)
Finish Used
None
Recommended Skill Level
Intermediate

The no more "you make a better door than a window" media cabinet

Submitted by bookette on Sun, 08/12/2012 - 12:30

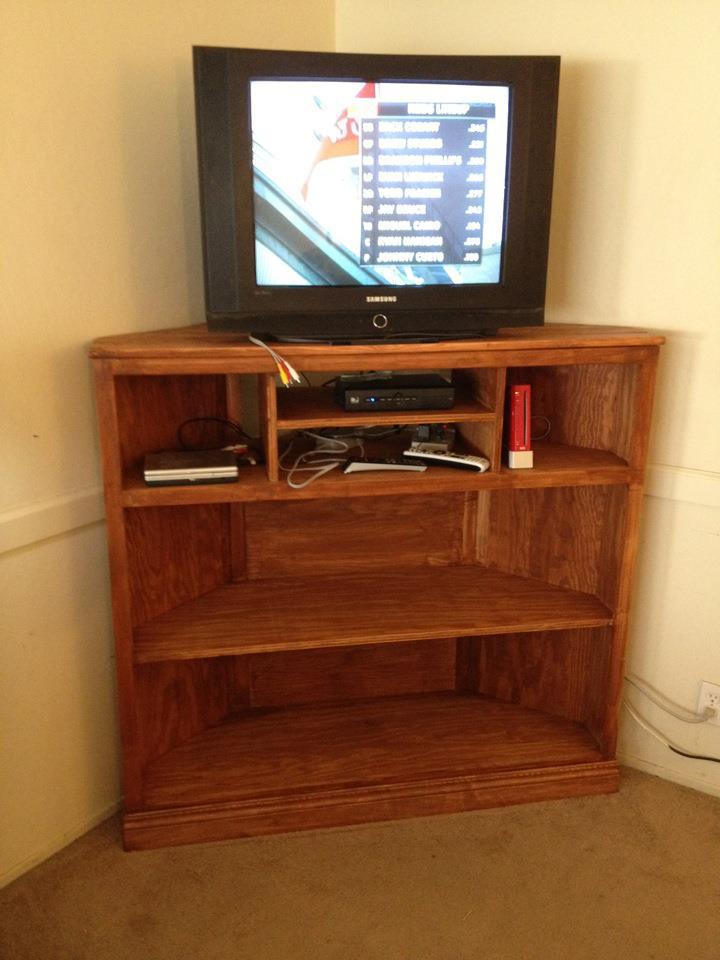
I absolutely fell in love with the Tall Corner Media Console the moment it was posted. We had a decent corner stand for our TV, but it was low and was hard to watch when kids and adults alike were constantly saying "I can't SEE!" or "You're in my WAY!". I've learned that explaining "you make a better door than a window" over an over to a 7yo and a 4yo only takes longer.

Two dilemmas faced us:
1 - Which comes first, the chicken or the egg? DH insisted that we needed a big screen tv before building the console. I insisted that we needed the console first, so that we would have a place for the tv. Since it was determined the that console was cheaper than a tv, I won :)

2- What to color it? Paint? Stain? I was the one building, so DH said he didn't care, but that he liked the idea of staining. Having never stained before I was a bit intimidated - paint was my safety net. DH got this one, but only after I made him choose the stain.

I have the doors built and they are in the garage. With other things in the living room we wouldn't be able to open them all the way anyway. That and my final build weekend topped out at 105+ deg - and I was DONE being outside :) All in all, i like the open look of it, although I reserve the right to install those doors if need be.

Built from Plan(s)
Estimated Cost
$200
Estimated Time Investment
Week Long Project (20 Hours or More)
Finish Used
Minwax Wood Stain - Vermont Maple
Recommended Skill Level
Intermediate

Comments

debandtom25

Thu, 08/30/2012 - 18:18

You did a fabulous job and I can definitely see it working without the doors too. The nice thing about stain is that can easily be covered with paint, if you change your mind down the road.

Simple Composting Toilet Outhouse

Submitted by Emillie on Thu, 06/18/2020 - 13:36

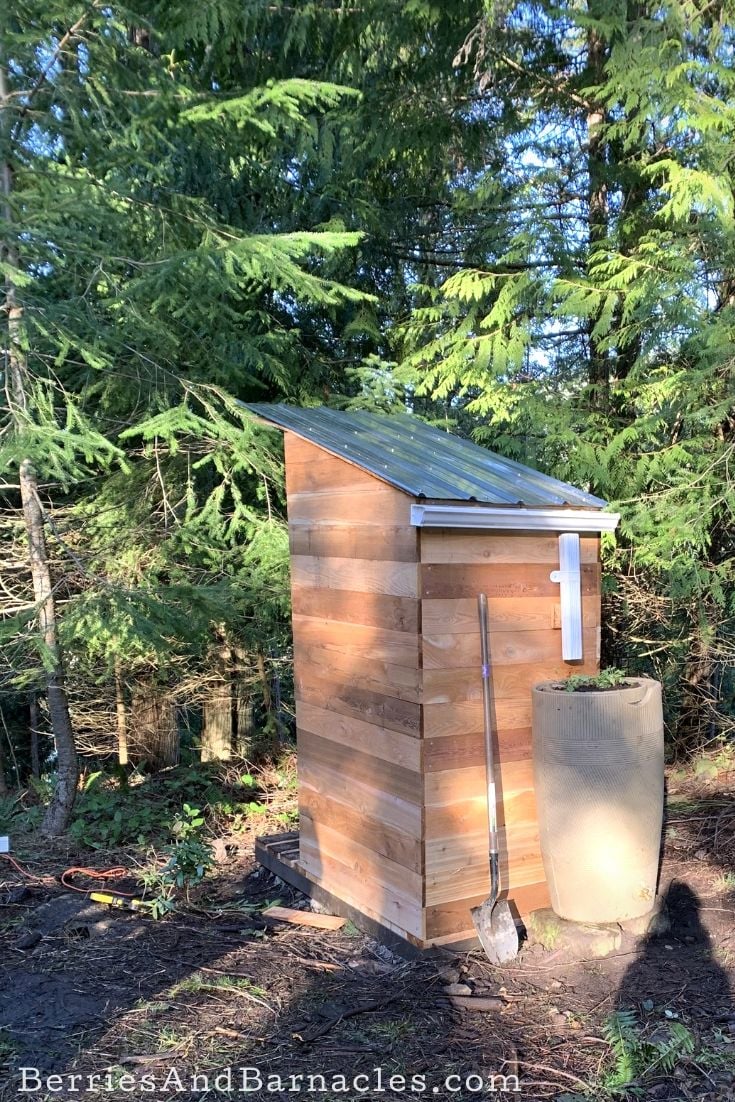
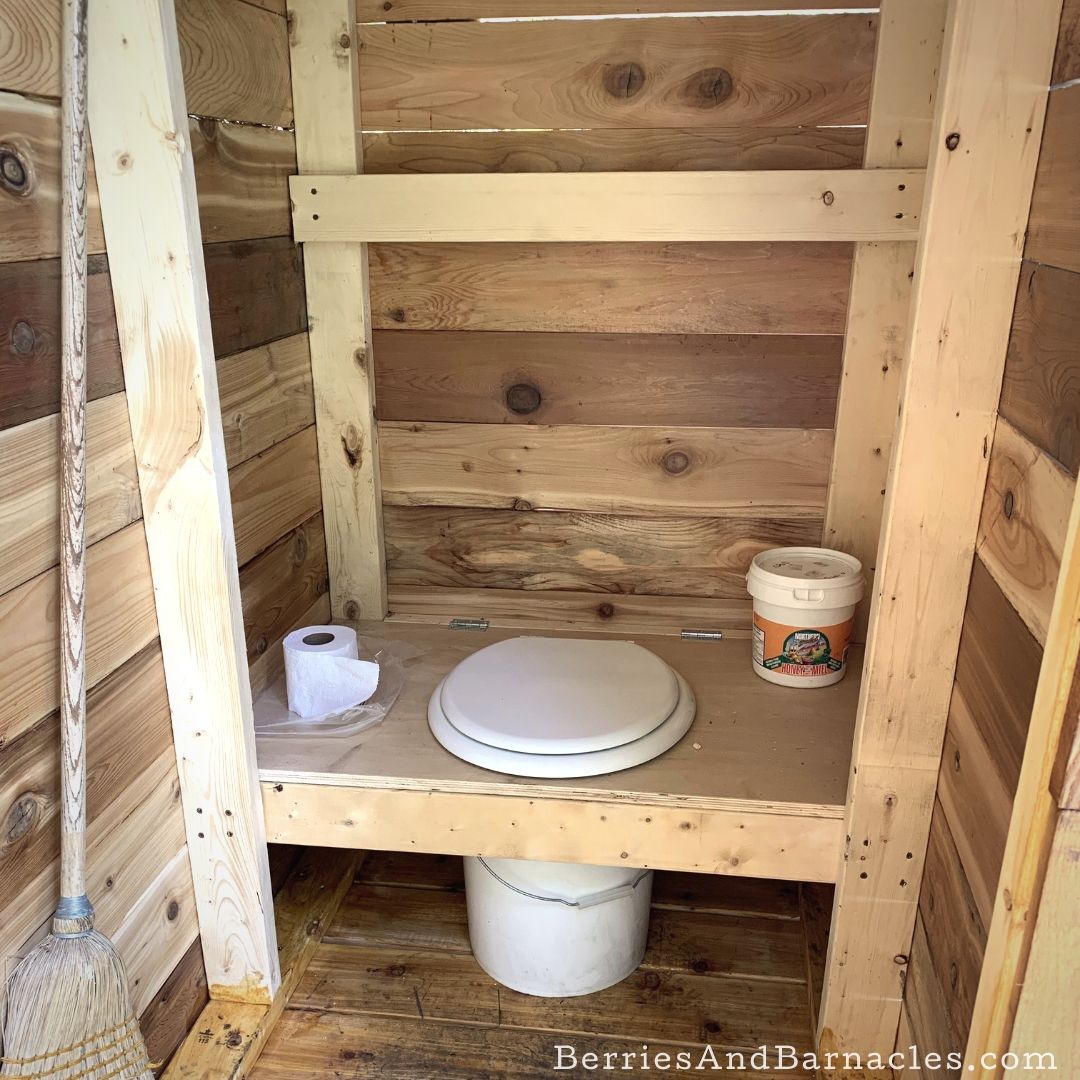
We built this composting toilet as one of the first things we did on our piece of vacant land. (How can you build anything else without somewhere to go when nature calls?)

An eco-friendly design was important to us, so we used cedar fencing instead of plywood. Otherwise, we followed Ana White's simple outhouse plans. It came out perfectly! It even has a rain barrel for hand washing.

Estimated Cost
800
Estimated Time Investment
Weekend Project (10-20 Hours)
Finish Used
We stained the outside with a semi-transparent stain and varnished the inside with an outdoor varnish.
Recommended Skill Level
Beginner

Outdoor rolling bar top

Submitted by Anonymous (not verified) on Wed, 07/08/2020 - 19:43

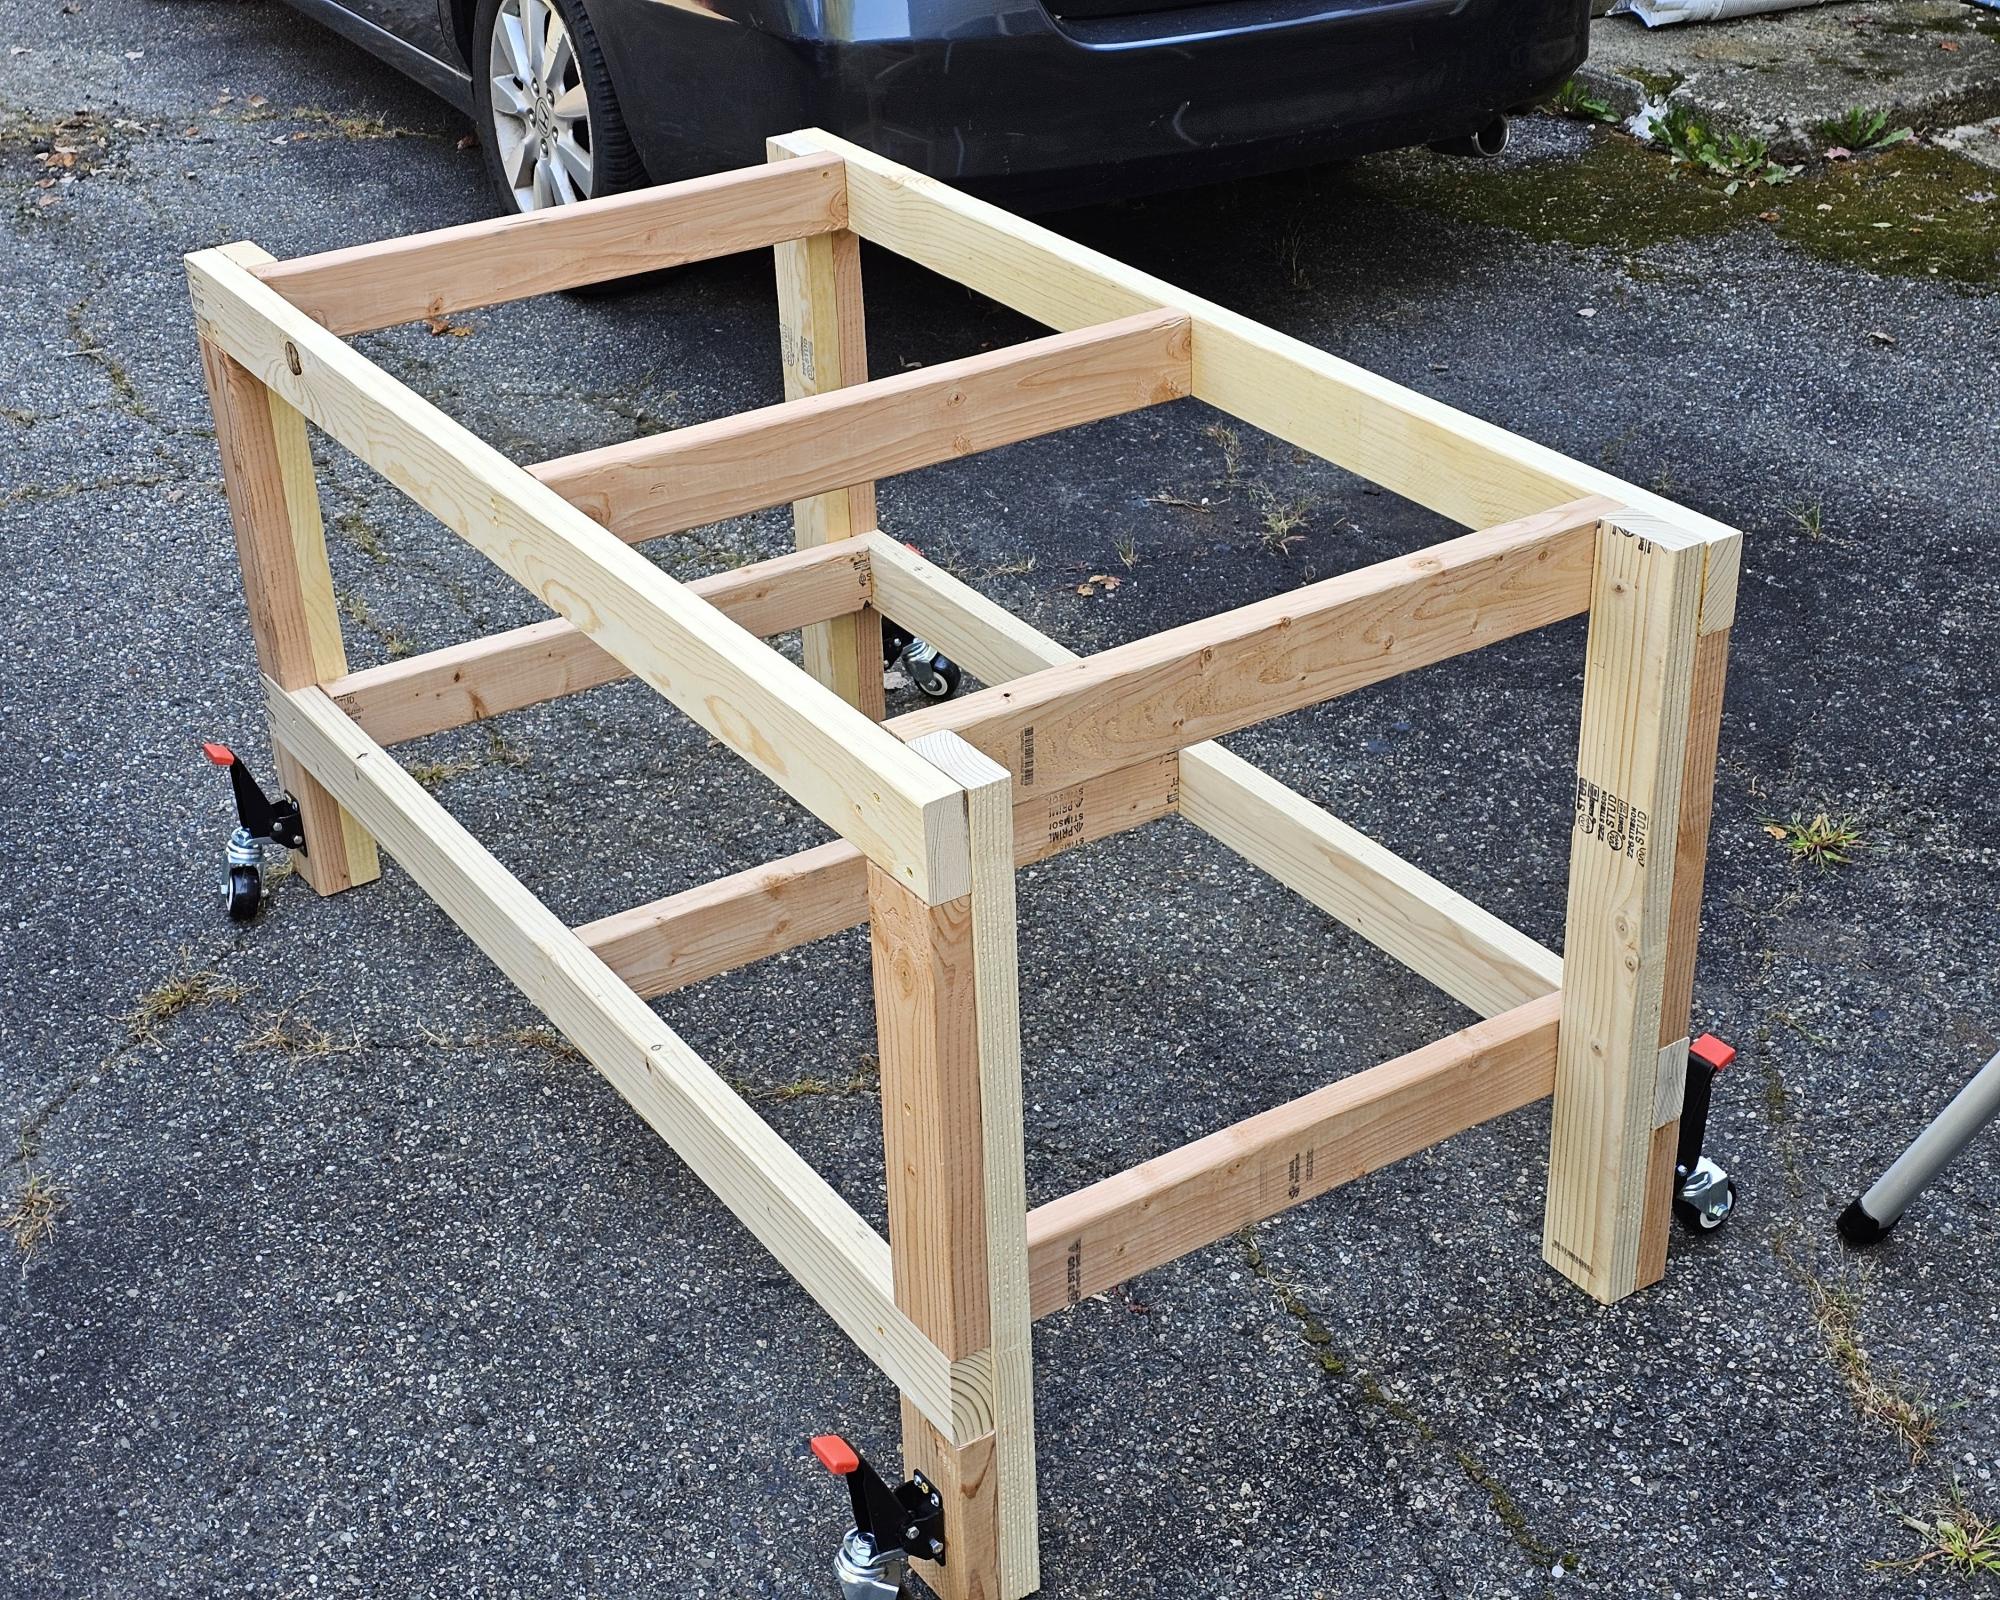
We had some leftover granite from an outdoor kitchen build and wanted to maximize the use of it. We loved the look of a rustic table from Pottery Barn and set out to find something that was asking the same aesthetic. I came across the Jilly and Mia workbench console and thought it would work great with some minor modifications. I shortened the overall length and height, went with some heavy duty casters to support the weight of the granite, and reinforced the cross beams that would support the 3/4" plywood sheet and granite. I went with cedar for this build since it was outdoors and I'll finish it with a clear sealant.

Built from Plan(s)
Estimated Cost
$300
Estimated Time Investment
Day Project (6-9 Hours)
Recommended Skill Level
Intermediate

Comments

Mini Wine bar

Submitted by ericaf on Sat, 10/18/2014 - 10:41

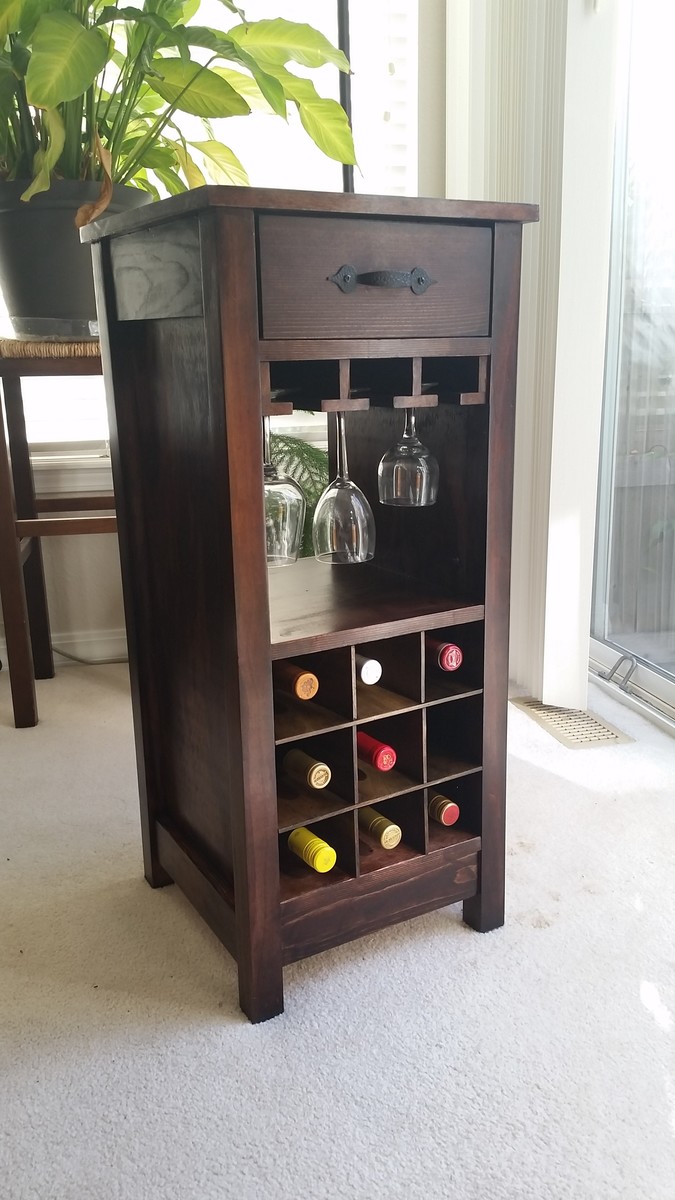
Be aware: some of the measurements and materials needed in the plan are off. For example, you need 1/8" hardboard for the bottom of the drawer but earlier in the plans it shows 1/4". Also, if you have larger wine glasses, you'll want to plane down your stemware holders so the distance between them is 3 1/8" instead of 3". It would have also been a good idea to pre-stain those before adding them in. Regarding stain, it would also look really good with a light stain. Another really nice thing about this project is that people are really impressed with it though it is fairly straightforward. :)

Built from Plan(s)
Recommended Skill Level
Beginner

Comments

ericaf

Fri, 06/10/2016 - 07:09

Thank you. :) I don't remember exactly, I believe it was regular Minwax wood stain, walnut and/or red mahogany. I will try to find what I actually used.

buffet/sideboard with expanded metal

Submitted by lworthy on Tue, 02/21/2017 - 14:40

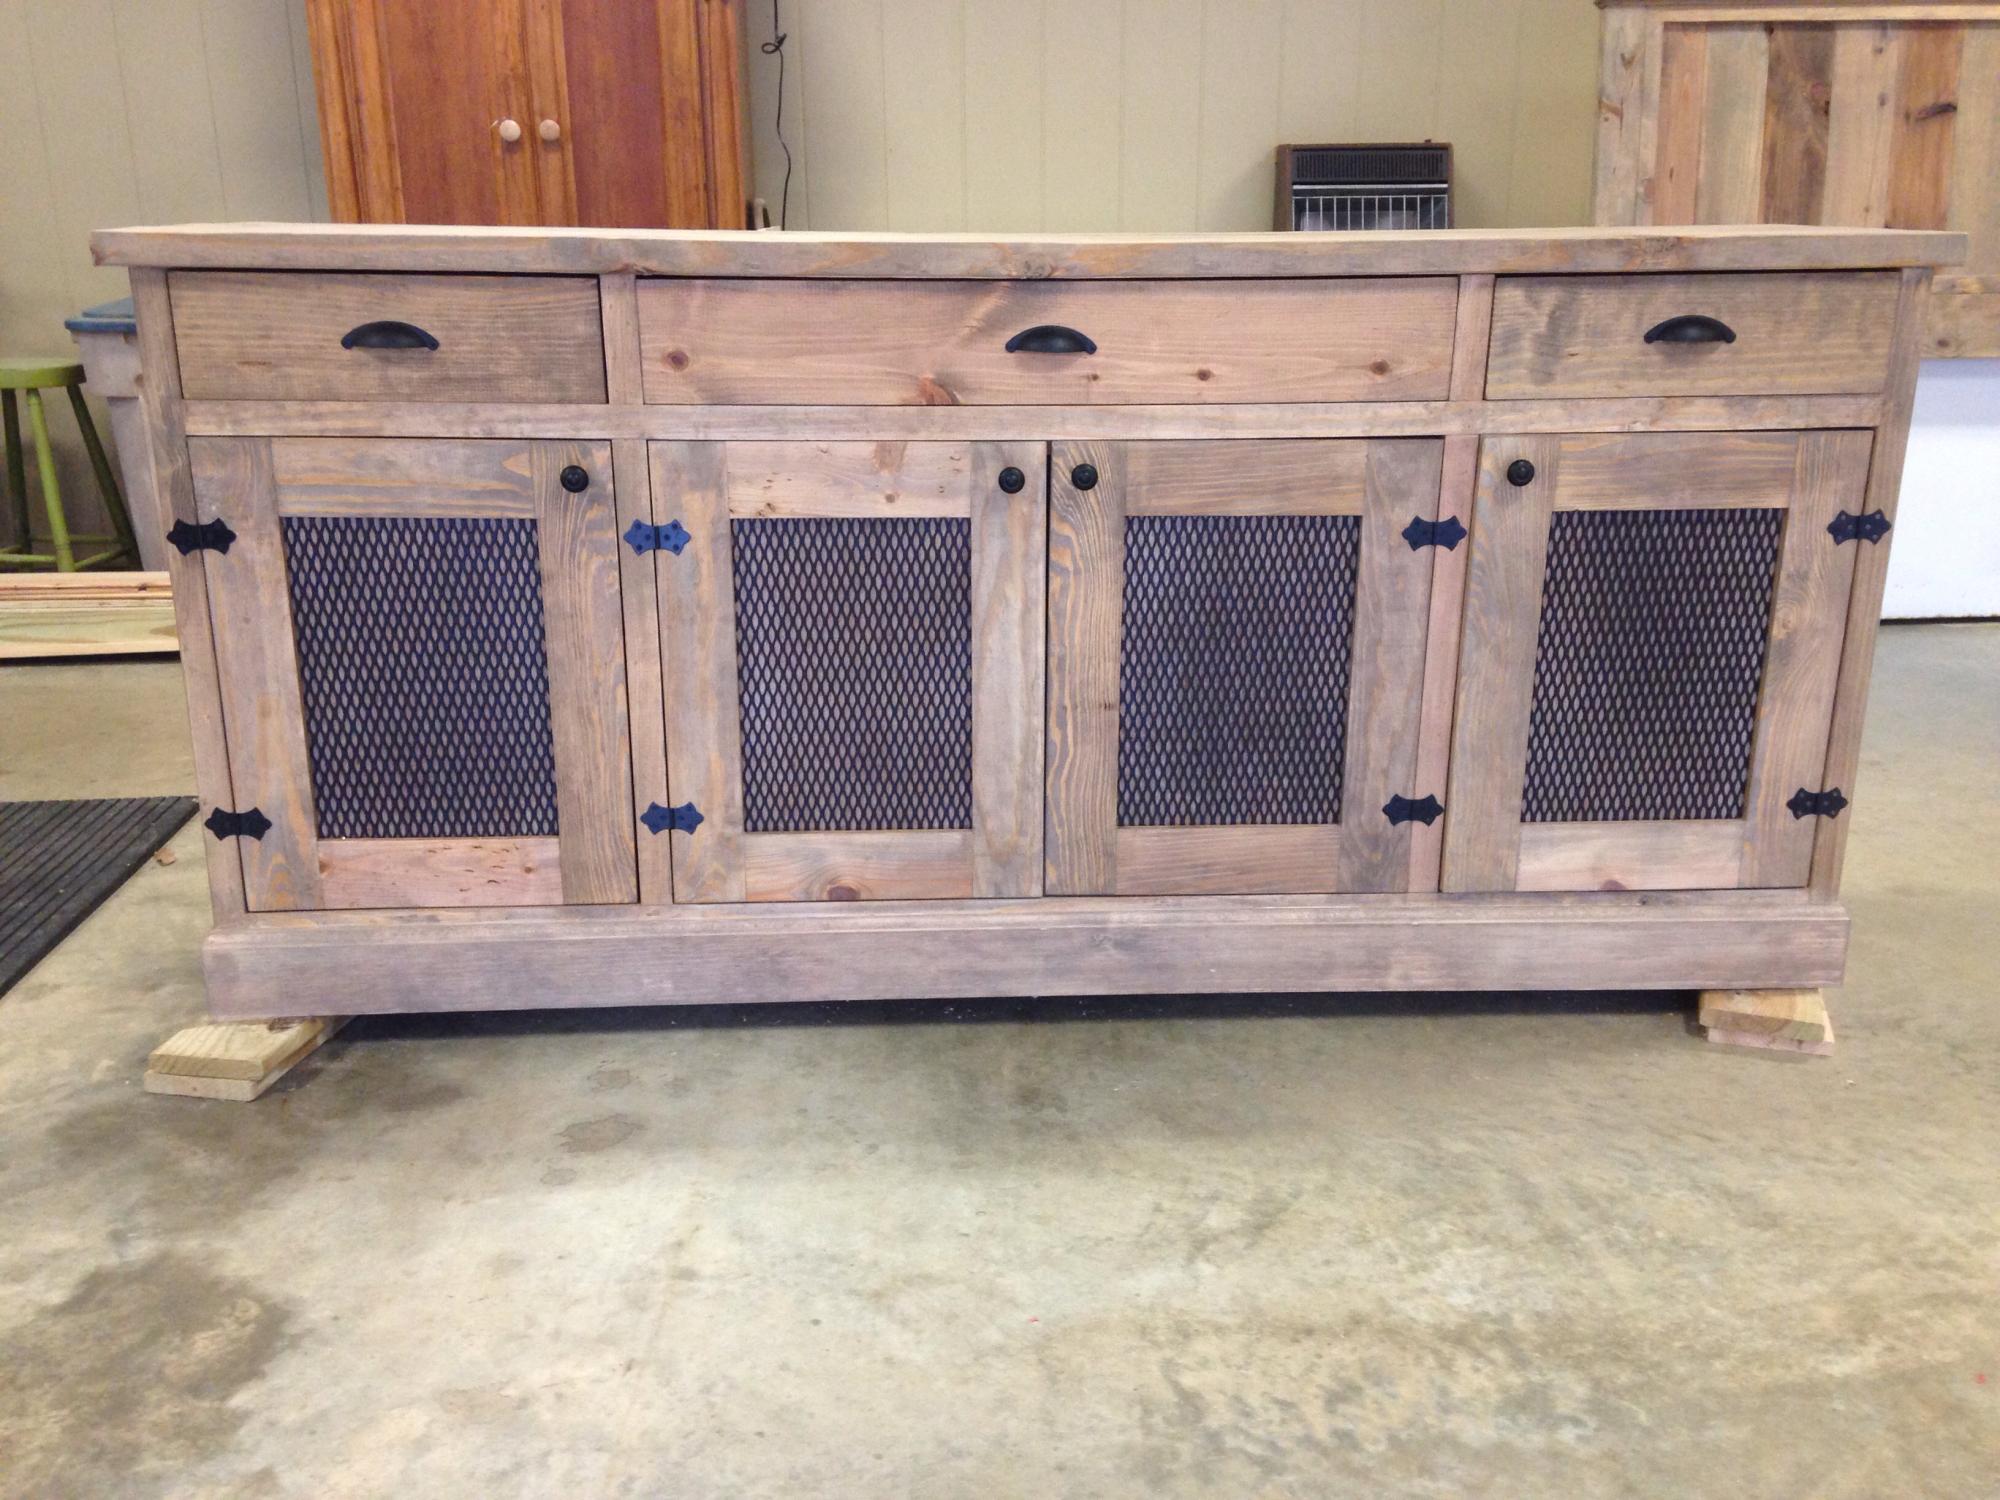
I really loved this plan of Ana's so I decided to build it for myself. I love the stain color on the one Mid Atlantic Rustic built and they were so kind to tell me the color and it turned out perfect! I will say if I ever built another I will make some adjustments with the doors and drawers and have them sitting on the outside of the facing. Those things were the devil for me!! I have only been building on my own for 6 months, so it was tricky for me. THE PIECE IS HUGE!!! I also added 2  2x4 supports under the bottom,

Happy Building

Built from Plan(s)
Estimated Time Investment
Weekend Project (10-20 Hours)
Finish Used
Minwax stain 2 step process
Recommended Skill Level
Intermediate

Comments

Walnut Console Table and Matching End Table

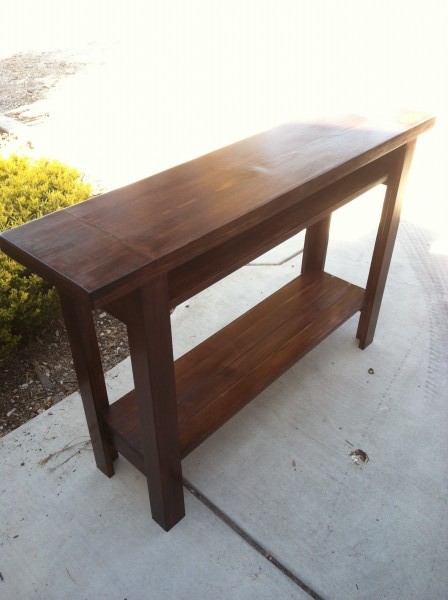
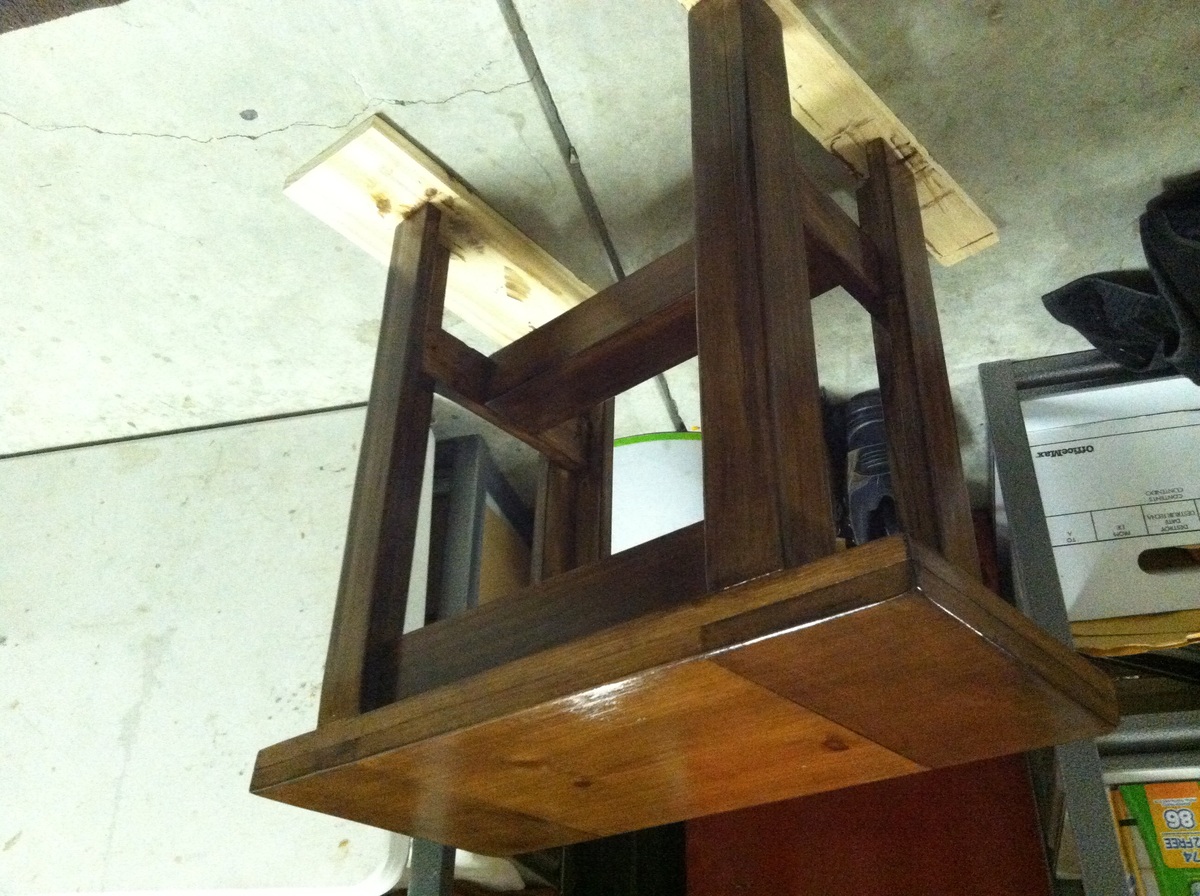
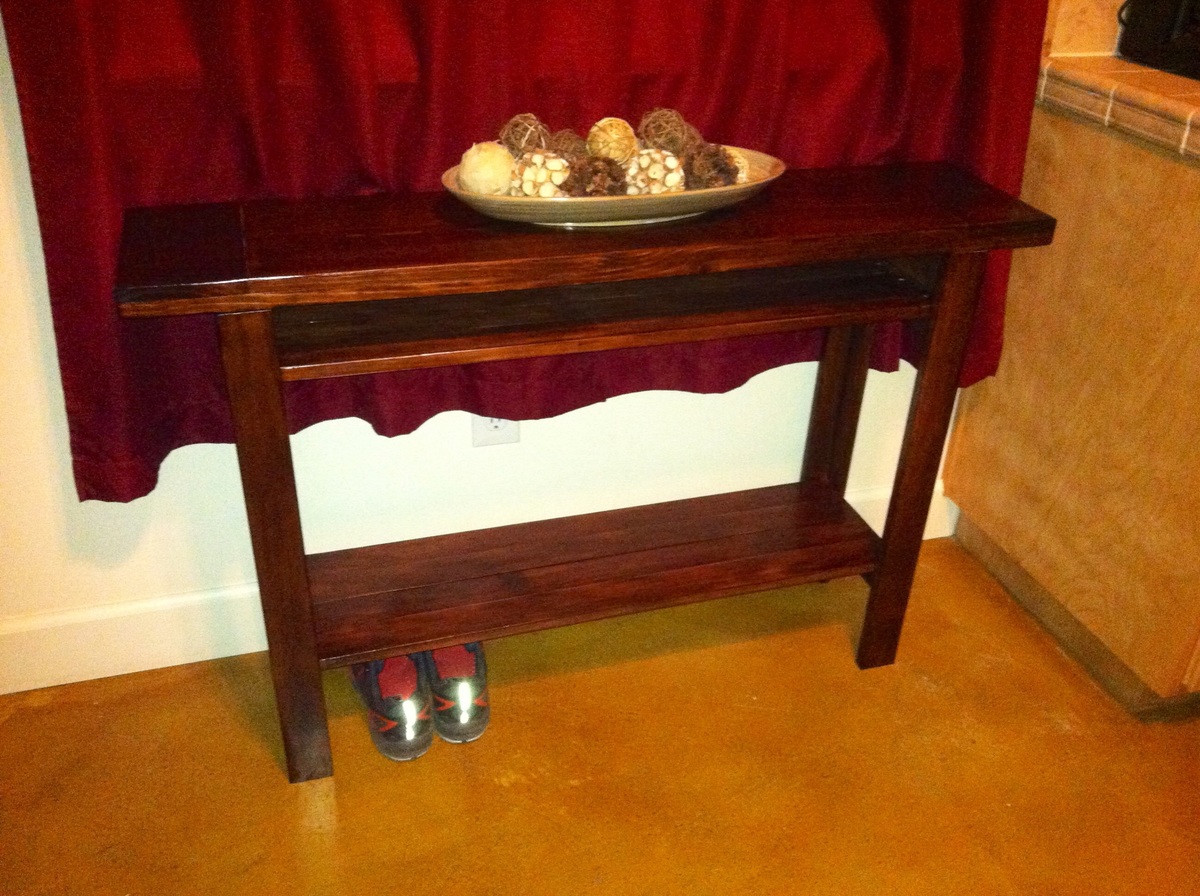
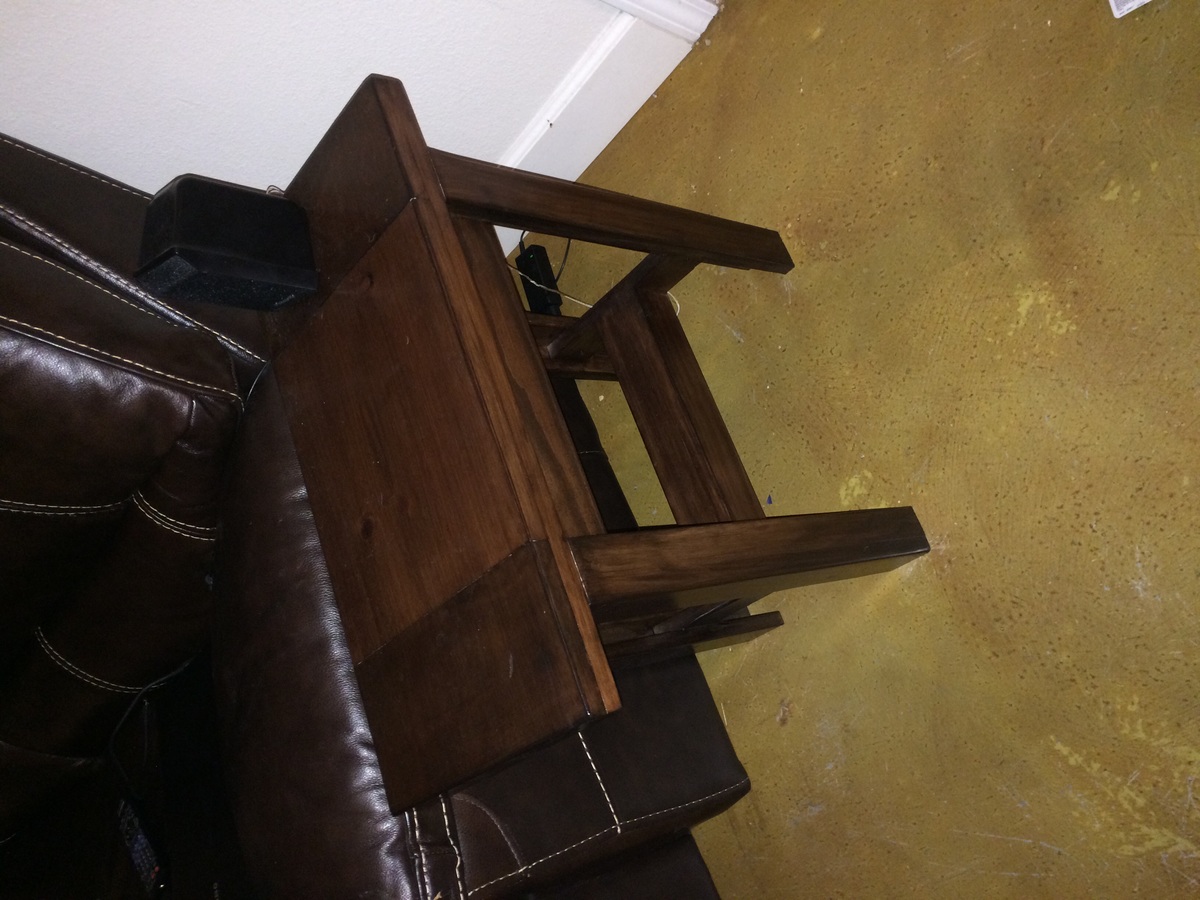
tryde console table with a twist... Added shelf above and below. Created a smaller version for a matching side table. Double layered top with staggered wood pattern. I receive compliments every time someone new comes over. Solid piece of furniture. Looks very expensive. 
Built from Plan(s)
Finish Used
Walnut
Recommended Skill Level
Intermediate

Comments

Jelly Cupboard Armoire

Submitted by Fallmark18 on Fri, 12/12/2014 - 11:23

This is my first solo and most ambitious project. I only had some help with getting the doors hung. I combined my long-time love of machine embroidery and my new found love of woodworking to create the doors on this project and really make it something special. I'm going to be using this piece in place of a chest of drawers in my bedroom.

Built from Plan(s)
Estimated Cost
About $150
Estimated Time Investment
Week Long Project (20 Hours or More)
Finish Used
Rustoleum Ultimate Wood Stain in Cabernet and several coats of Rustoleum Interior Ultimate Polyurethane
Recommended Skill Level
Intermediate

Comments

JoanneS

Fri, 12/12/2014 - 13:21

What an awesome project! Love the finish, and the design on the doors. How did you do the door panels? They're lovely!

Fallmark18

Fri, 12/12/2014 - 14:53

Thanks so much for the compliment! The door panels are made of replacement storm door screen. I used my embroidery/sewing machine to embroider the design onto the screen.

Fallmark18

Tue, 12/16/2014 - 09:25

I'm so glad people like it. Everything I know about building I've learned from your site!

Corner Desk - from Farmhouse Desk plans

Submitted by james_e on Wed, 01/13/2021 - 14:15

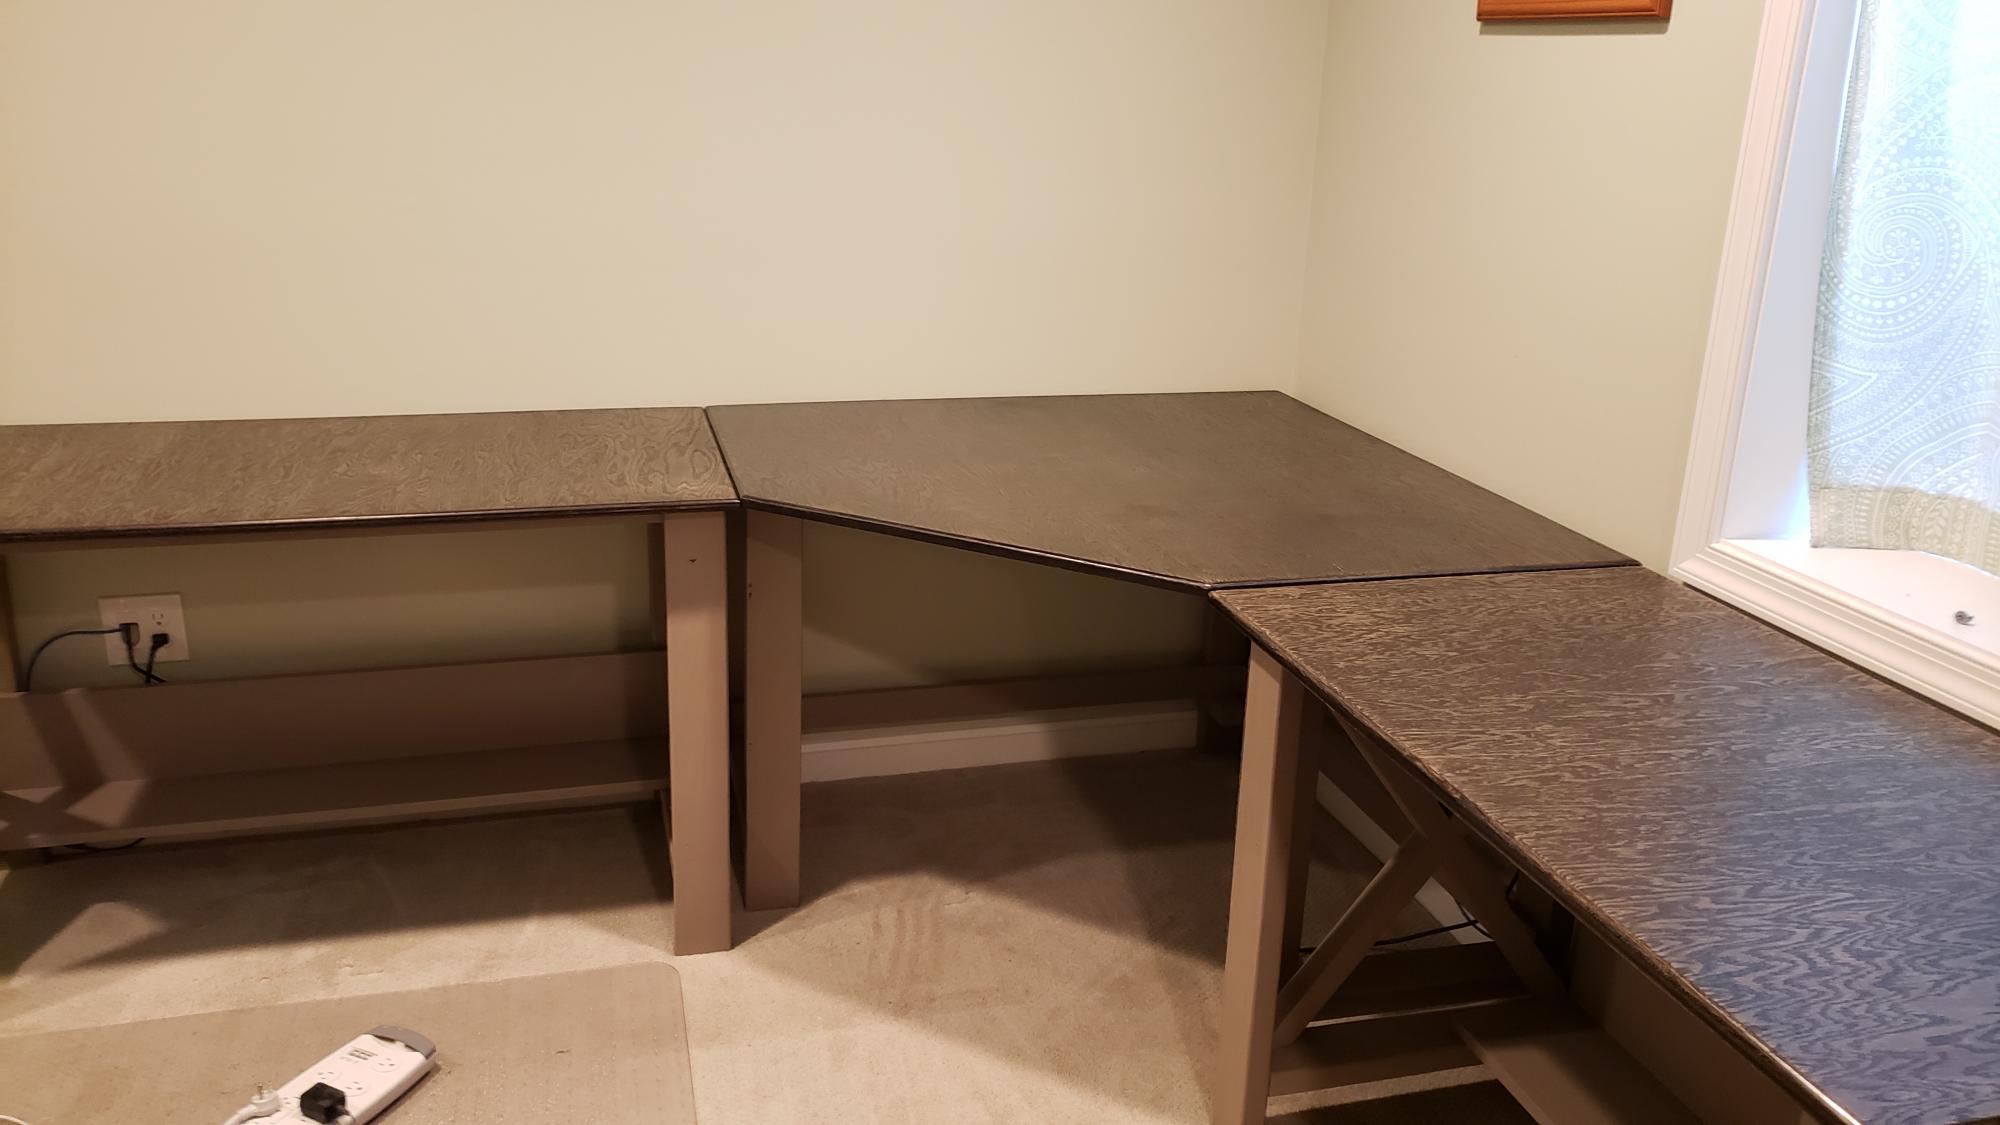
My wrist has not taken well to the work at home requirement of the pandemic. So, I decided to replace my desk with a similar one that I have at work. Only, this one is much prettier.

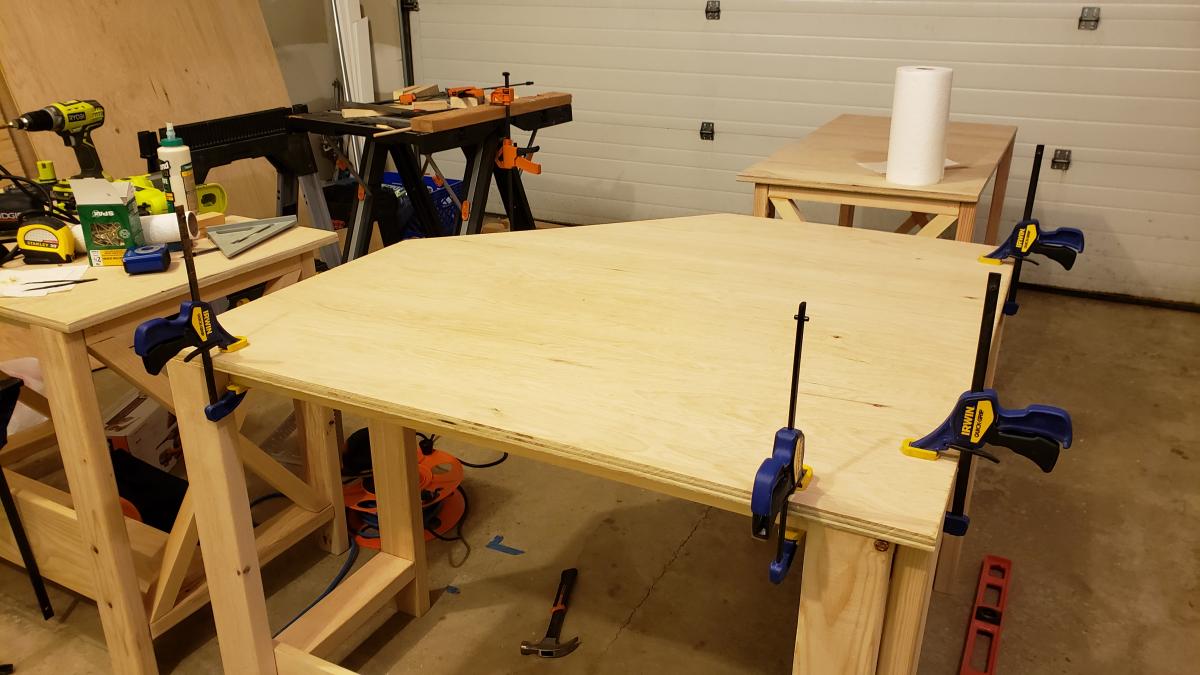
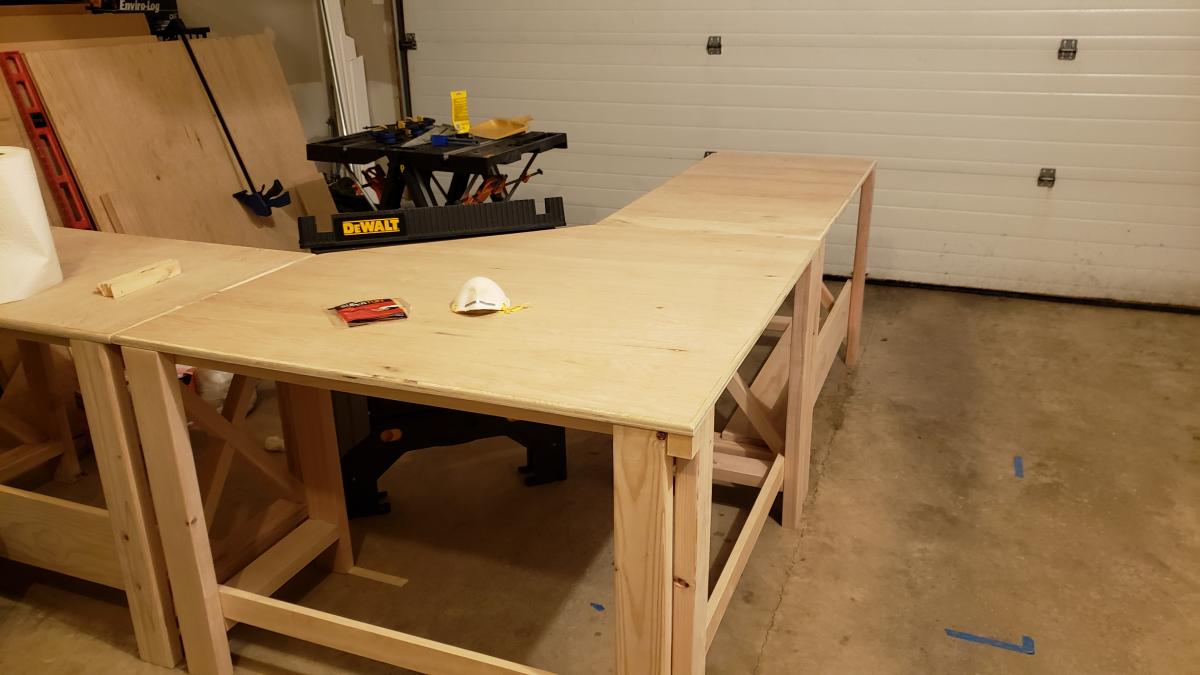
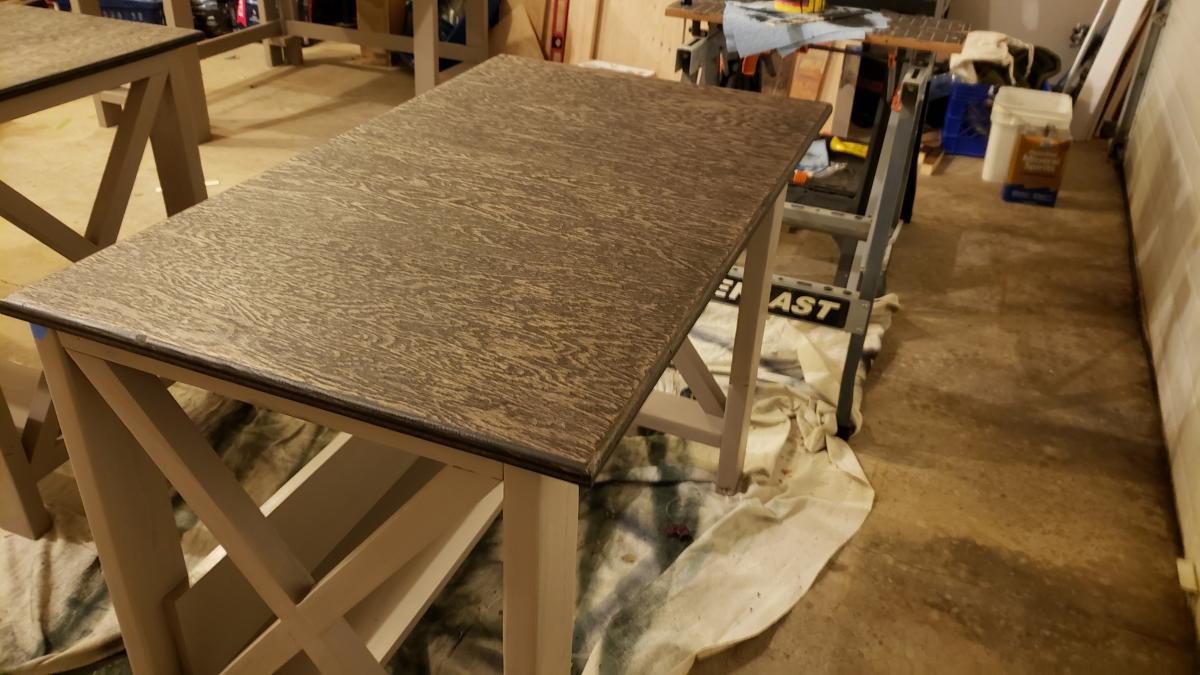
Essentially, I built two desks using the farmhouse desk plans. One of them I made less wide than the plans by simply making the horizontal pieces 36" instead of the plan's 47 1/2".

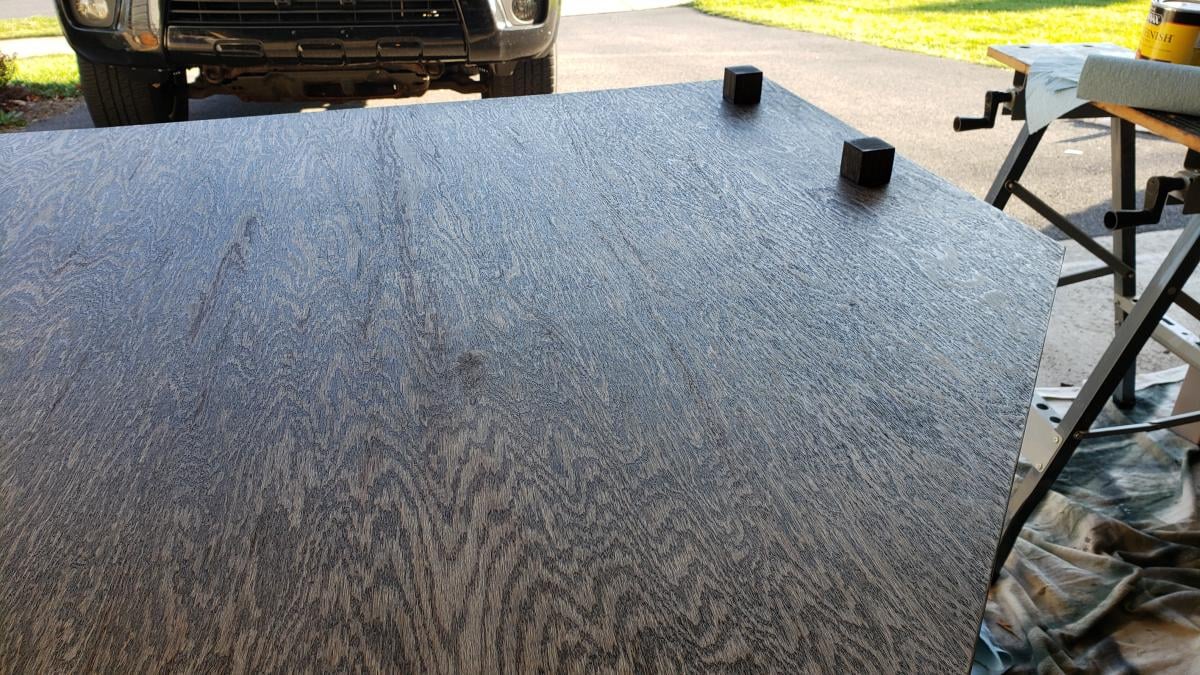
For the middle portion of the corner desk , I based it off of the Office Corner Desktop plans. I made just the middle portion for those plans, but made the edges 46" instead of 38" for a deeper desk as well as to allow more room for my legs not to hit the uprights of the farmhouse desks. I made the corner desktop detachable, so it was easier to fit down the stairs to the office, using some small ~2" cubes placed on the bottom. They just serve to keep the desktop from moving around on the frame. The base of the middle portion I made up using the same ideas used to create the farmhouse desk frames.

I made plenty of mistakes along the way as I'm a software engineer, not a carpenter. I think next time I'll buy a miter saw, most of these cuts were by hand and aren't as straight as I'd like them to be. But, I like to work with my hands and this has made my day job less painful while I'm working from home.

Estimated Cost
$200
Estimated Time Investment
Week Long Project (20 Hours or More)
Finish Used
Minwax oil based Ebony 2718, then satin poly
Recommended Skill Level
Beginner

Modern Toy Box

Submitted by Anonymous (not verified) on Sun, 03/19/2017 - 14:32

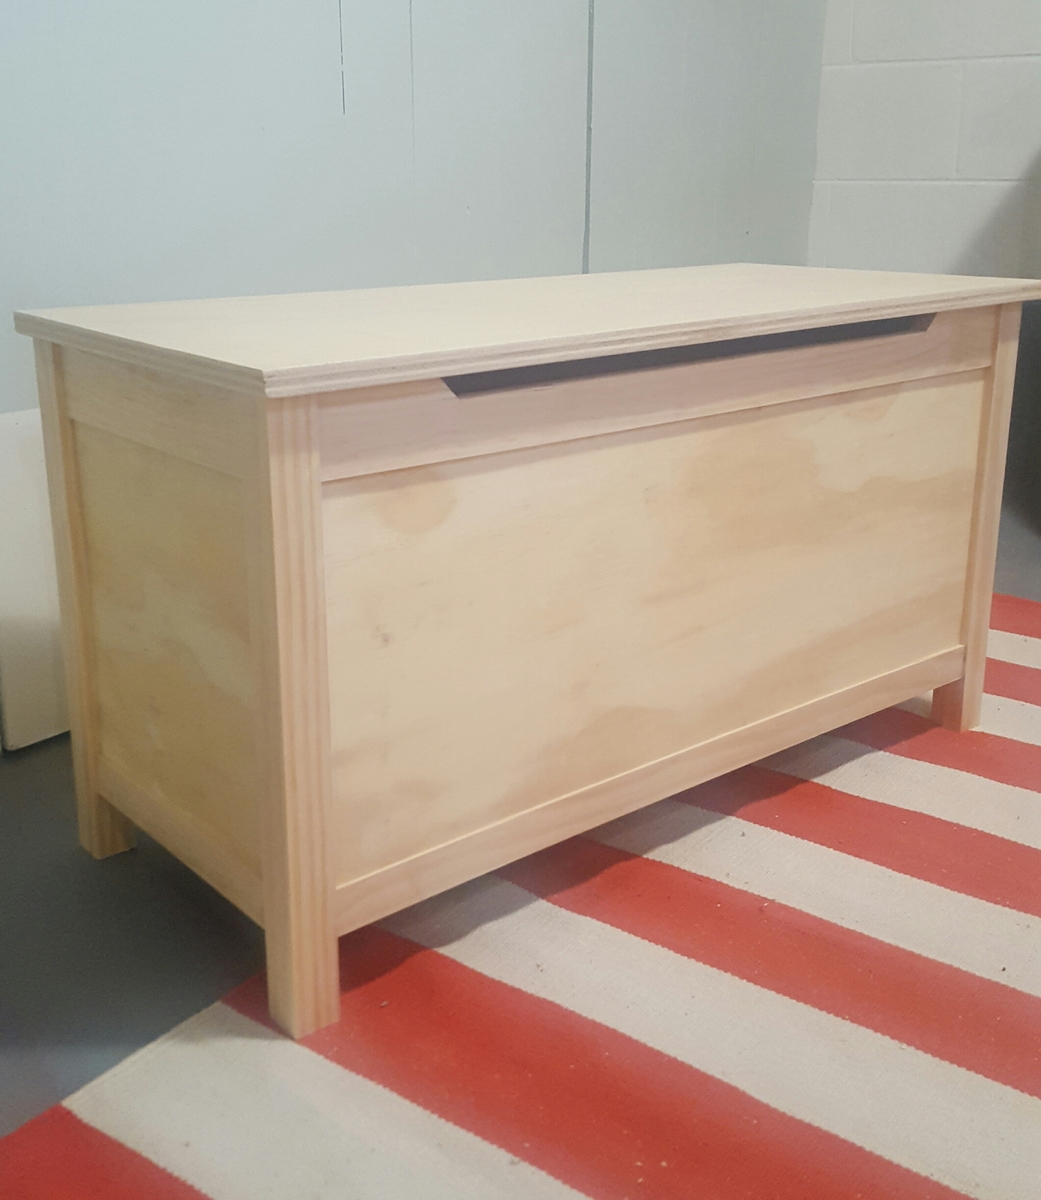
I had a wonderful time making this toy box and learning new techniques. Having access to a table saw really made this project turn out awesome. I was able to get 1/4" shims made that allowed for easy, precise offsets. The family just loved it!

Built from Plan(s)
Estimated Cost
$100
Estimated Time Investment
Weekend Project (10-20 Hours)
Finish Used
ProClassic white paint
Recommended Skill Level
Intermediate

Kitchen Island with pallet wood

Submitted by Anonymous (not verified) on Sat, 01/23/2021 - 19:35

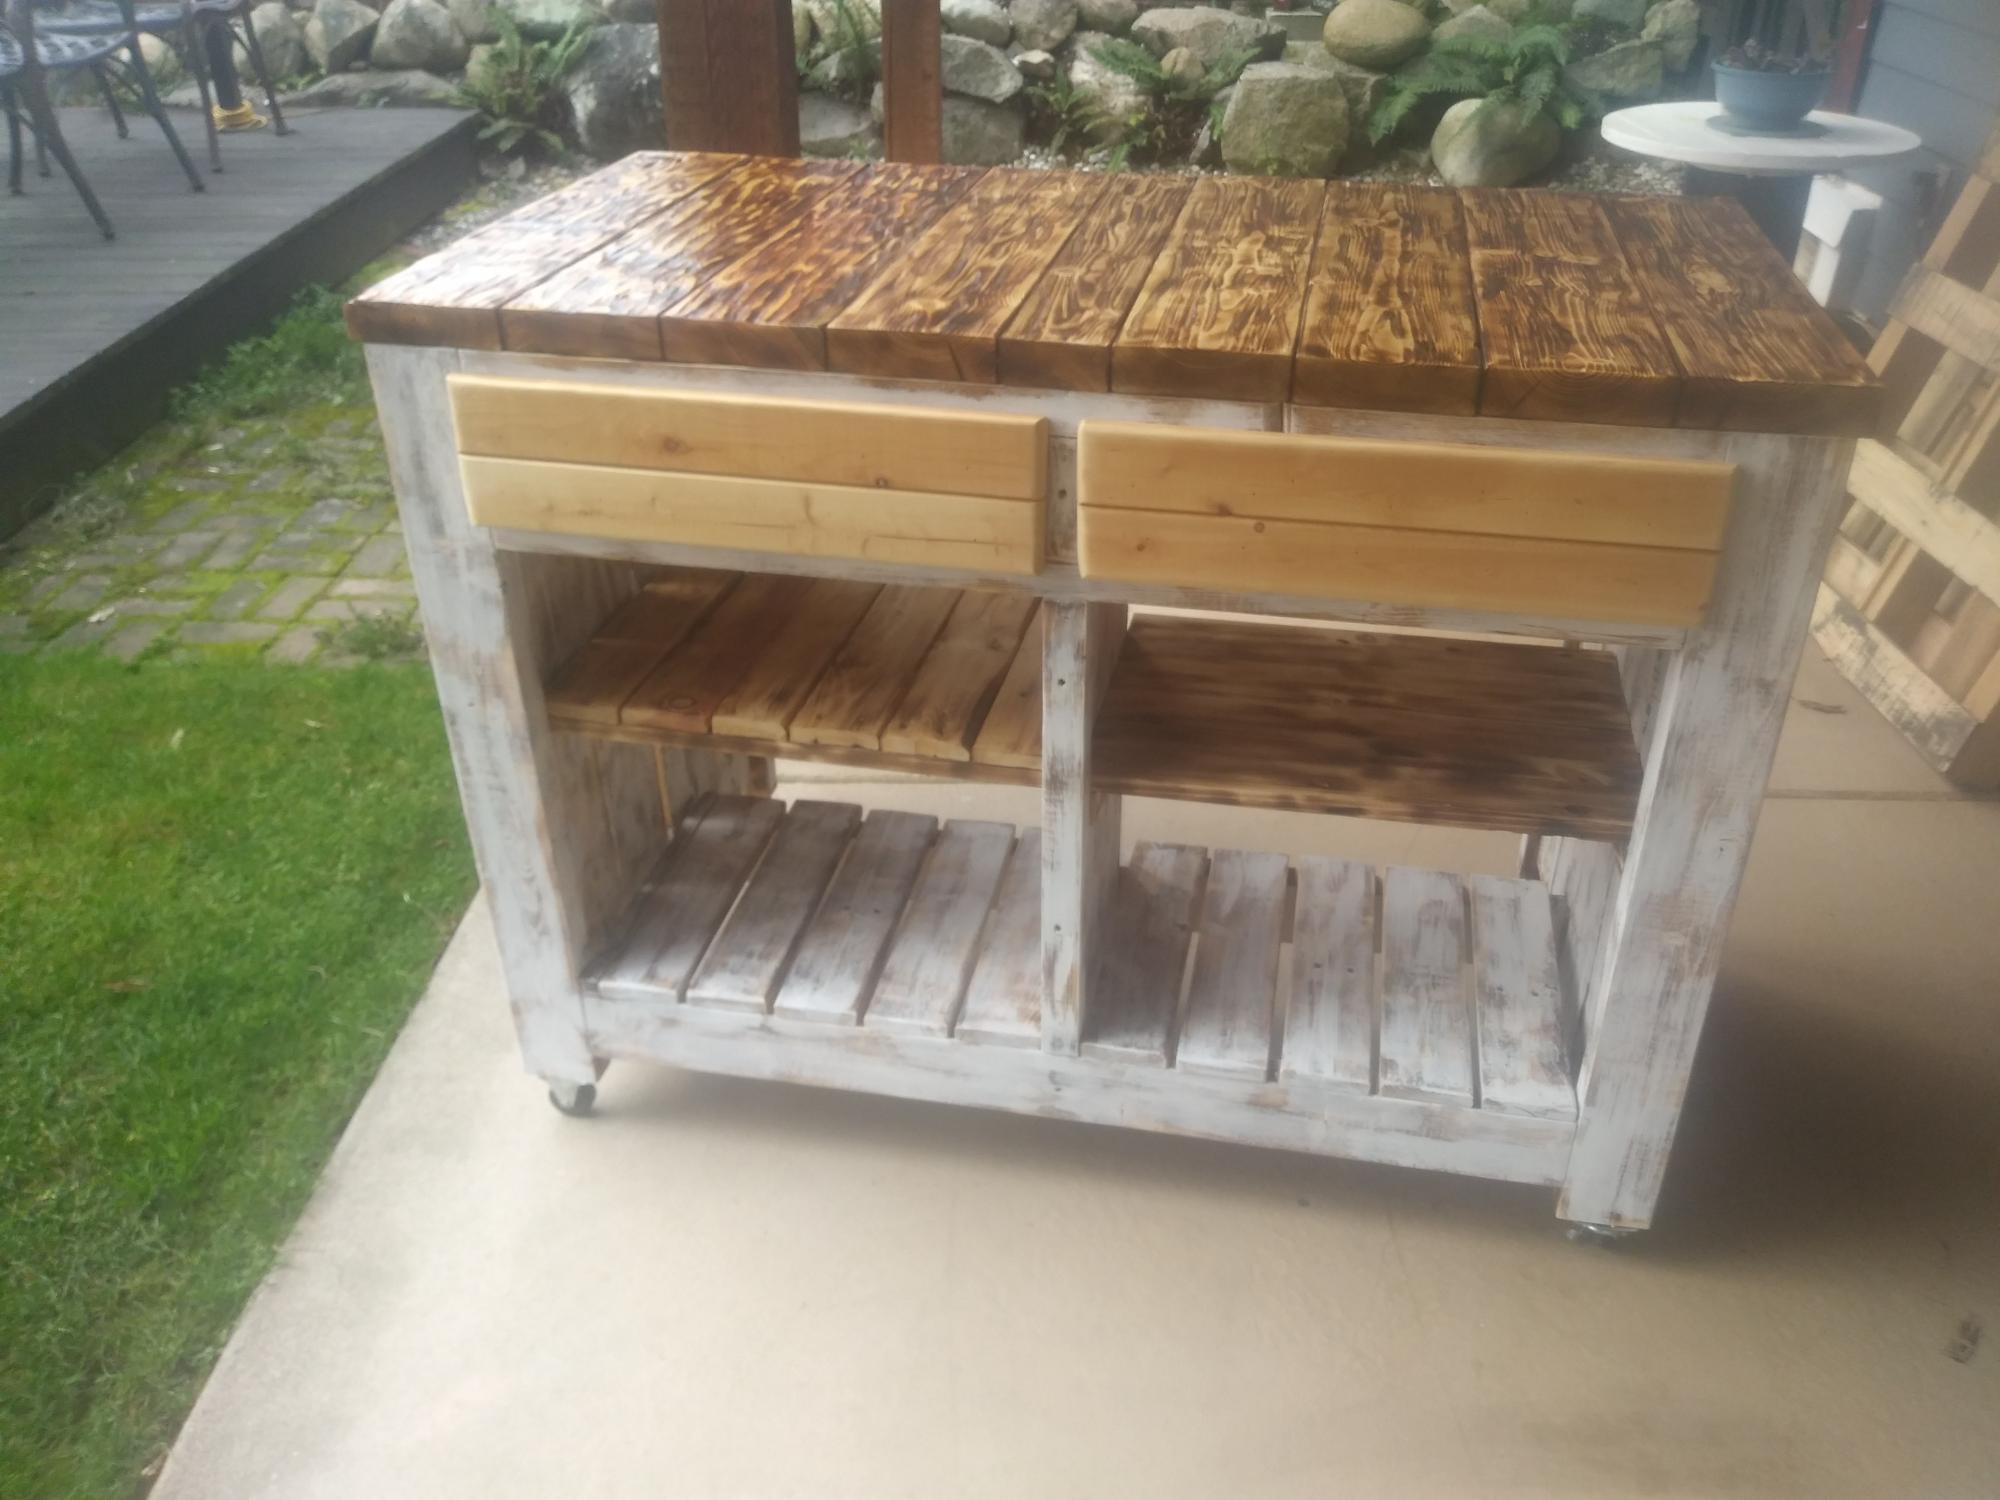
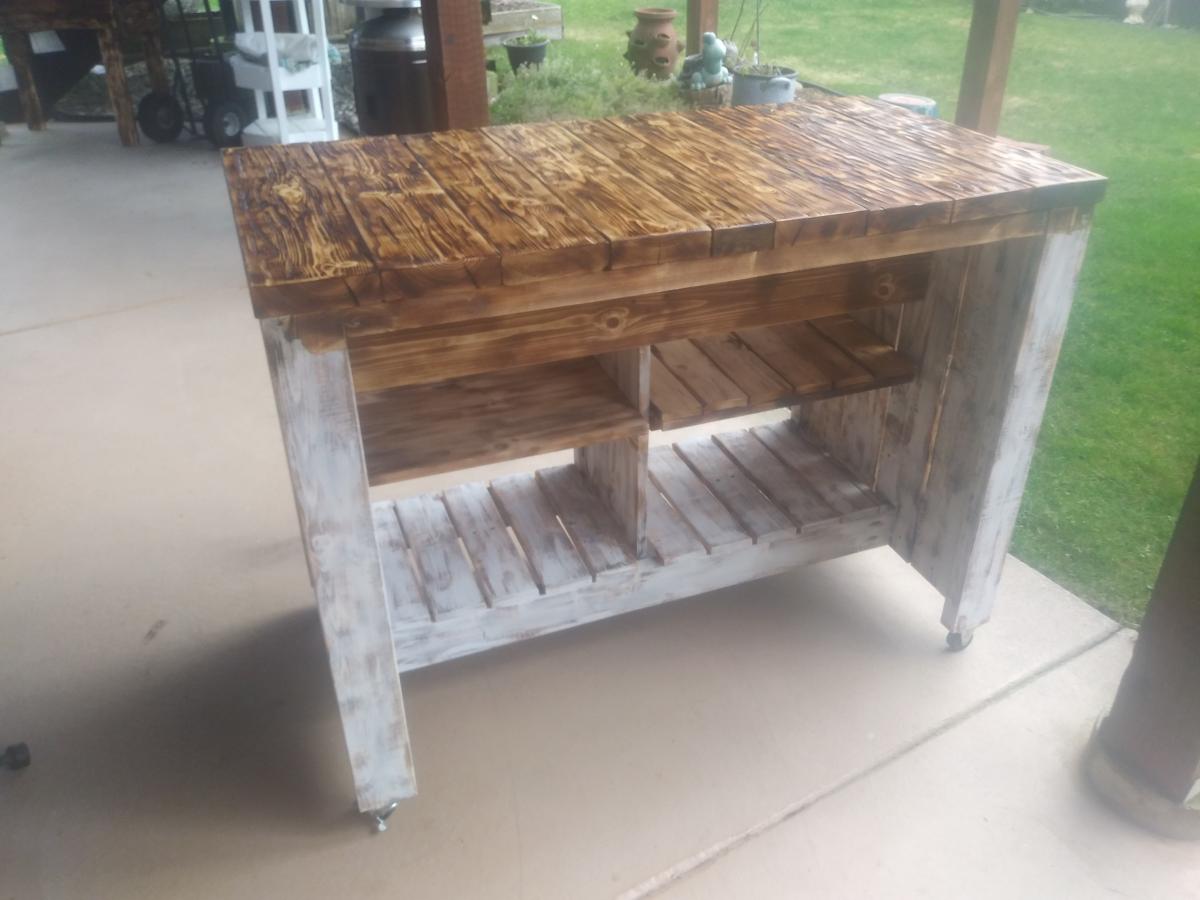
After following Ana Whit and other bloggers for a long time i figured my skills were at a level to try an advanced build like the Kitchen Island.. But i also wanted to challenge myself even more and was determined to make it from as much reclaimed wood as i could, mainly pallet wood.
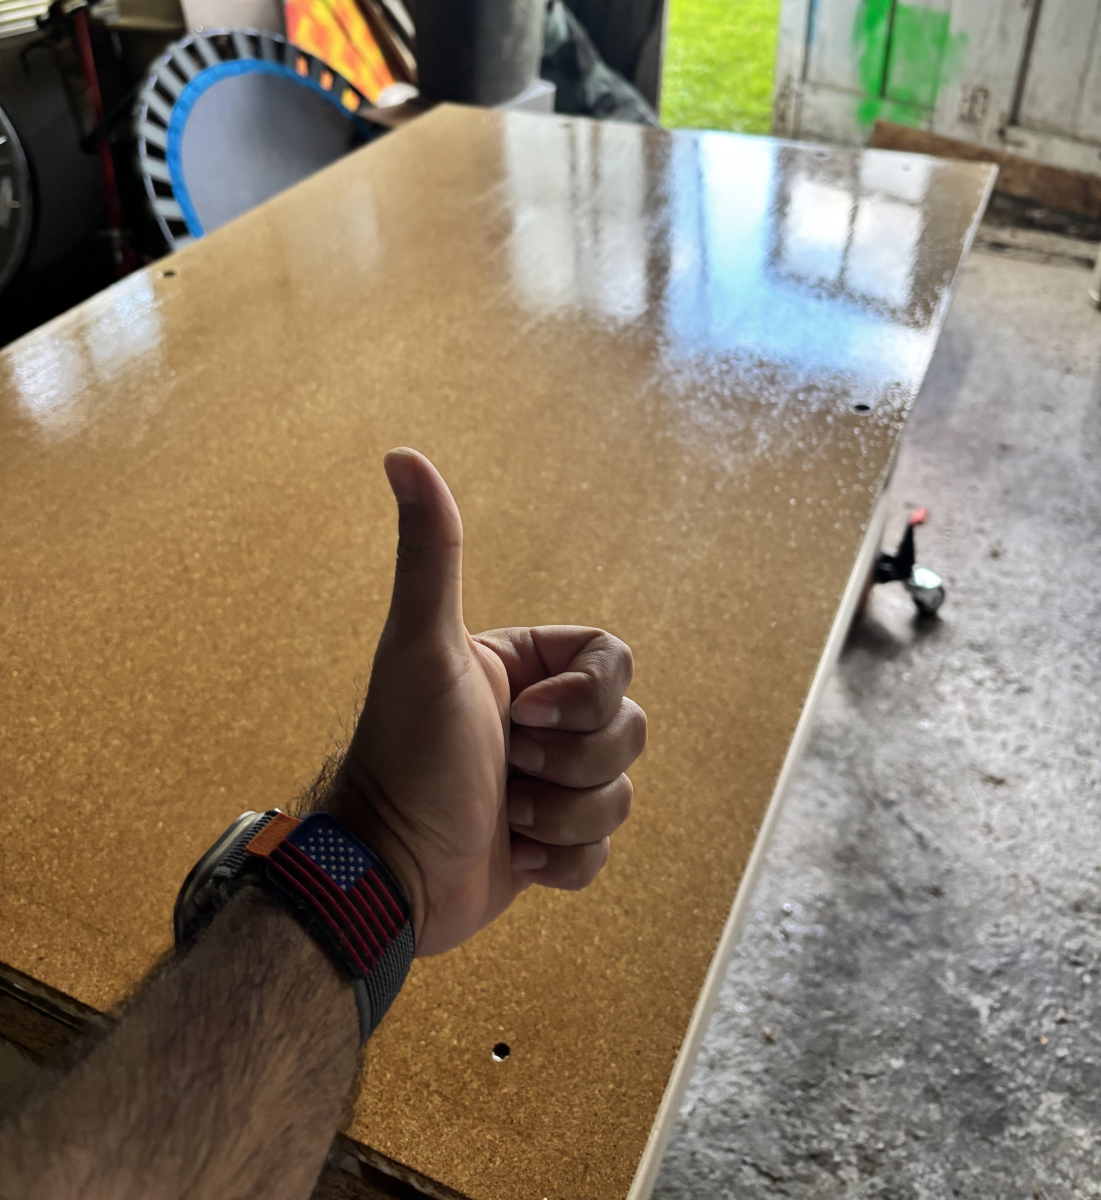
With a lot of modifications to make it work i think I got a good result from these plans.

While i used as much reclaimed wood as i could, i still needed some clean 2x4's , 2x2's

Built from Plan(s)
Estimated Cost
$50
Estimated Time Investment
Week Long Project (20 Hours or More)
Finish Used
I burned the top and used a cup wire brush on an angle grinder to get the effect of barn wood. then a couple coats of lacquer on the top. And a spray finish of polyacrylic for everything else.
chalk pain ( linin) to do the White wash
Recommended Skill Level
Advanced
Back