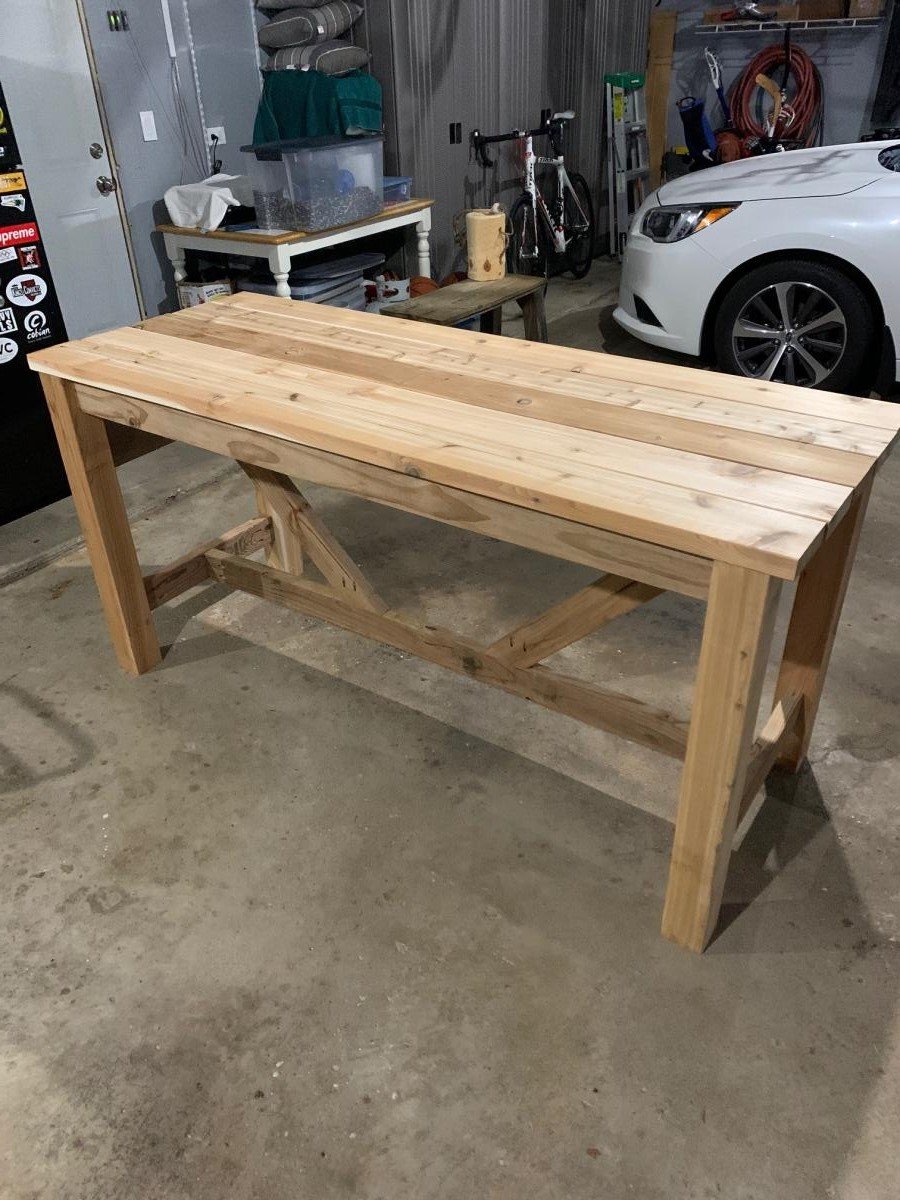
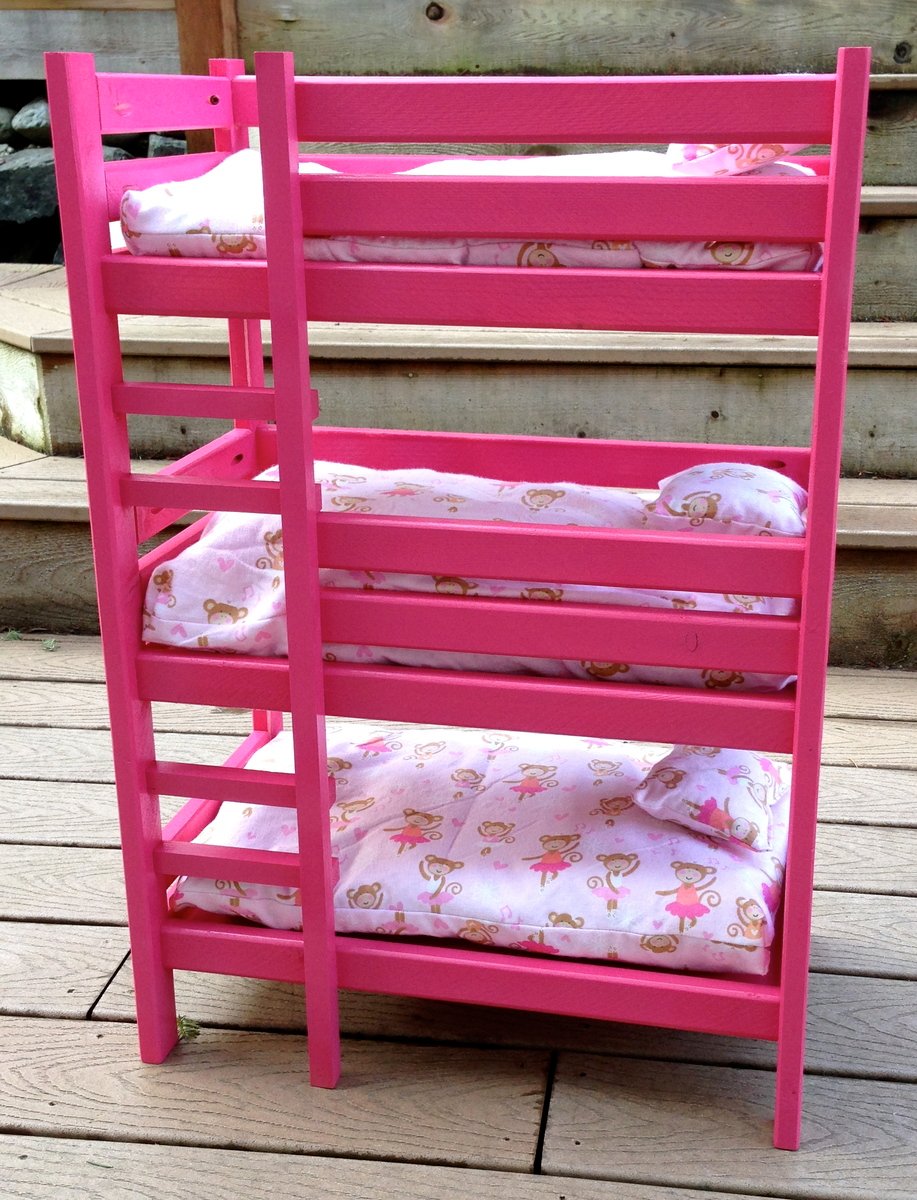
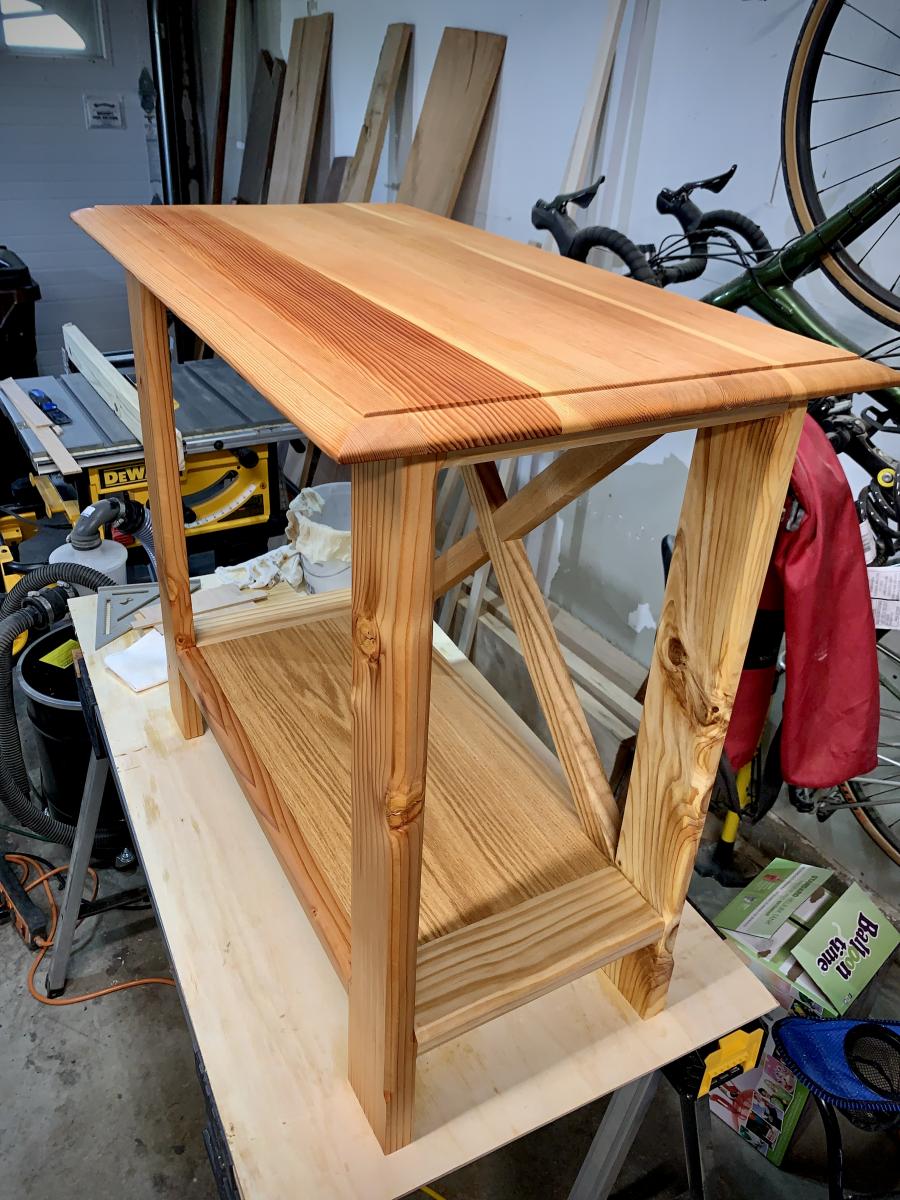
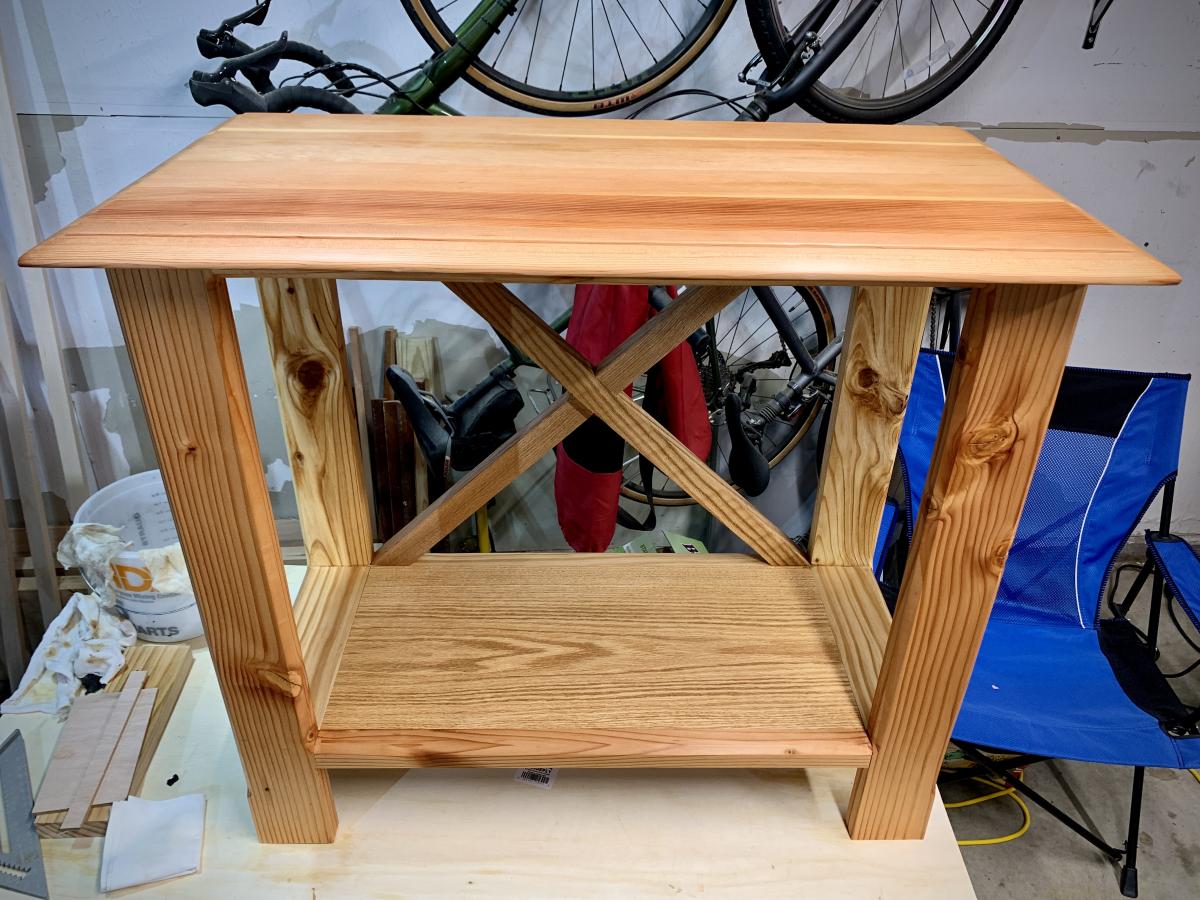
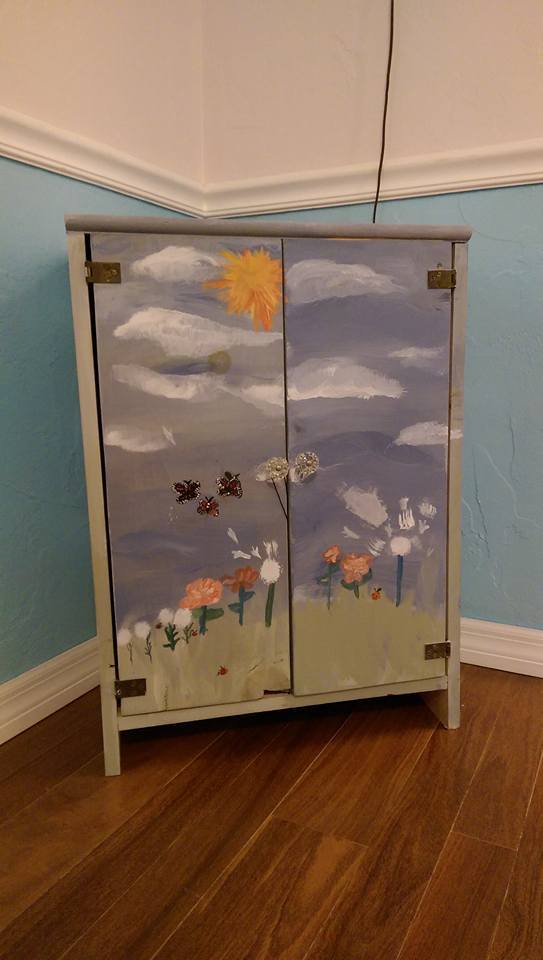
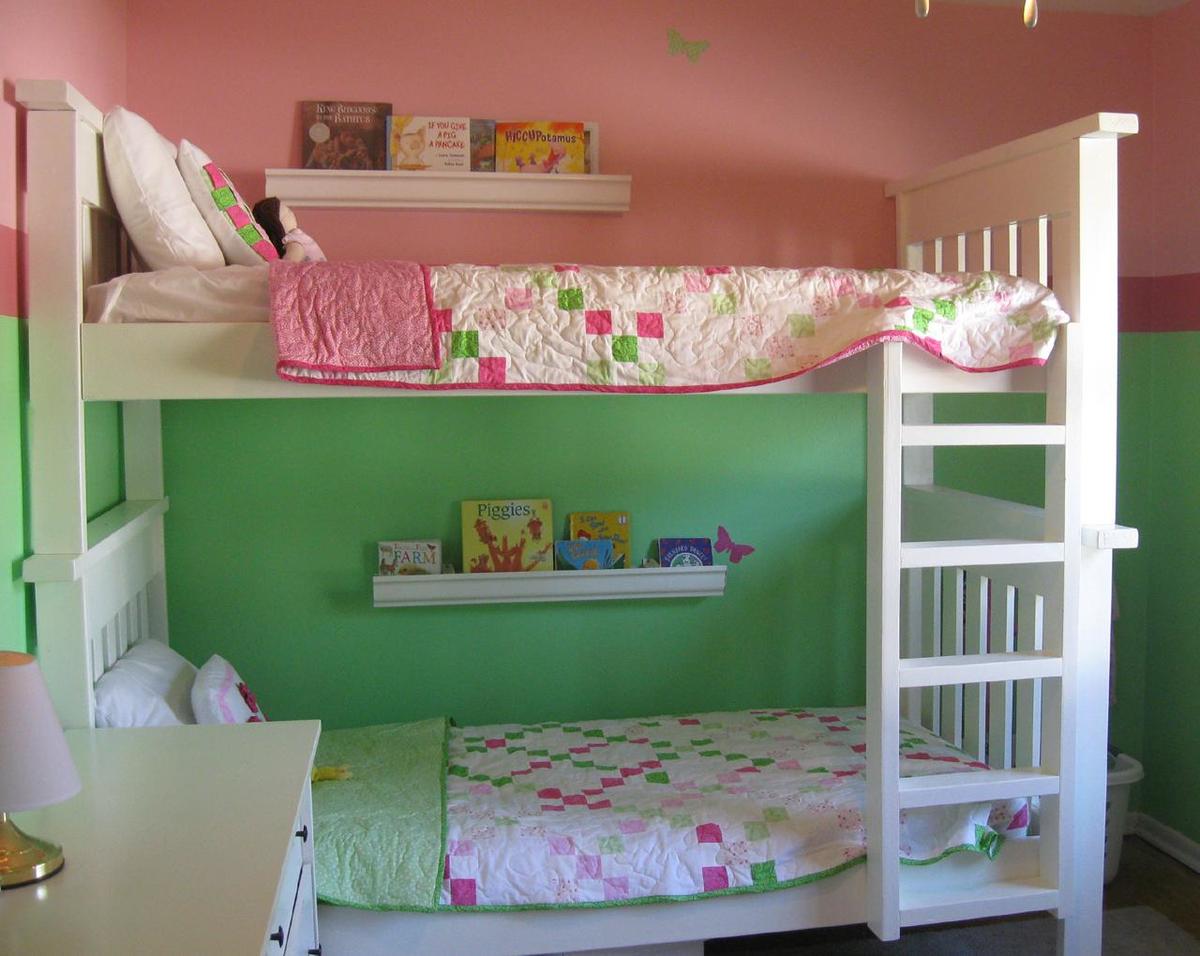
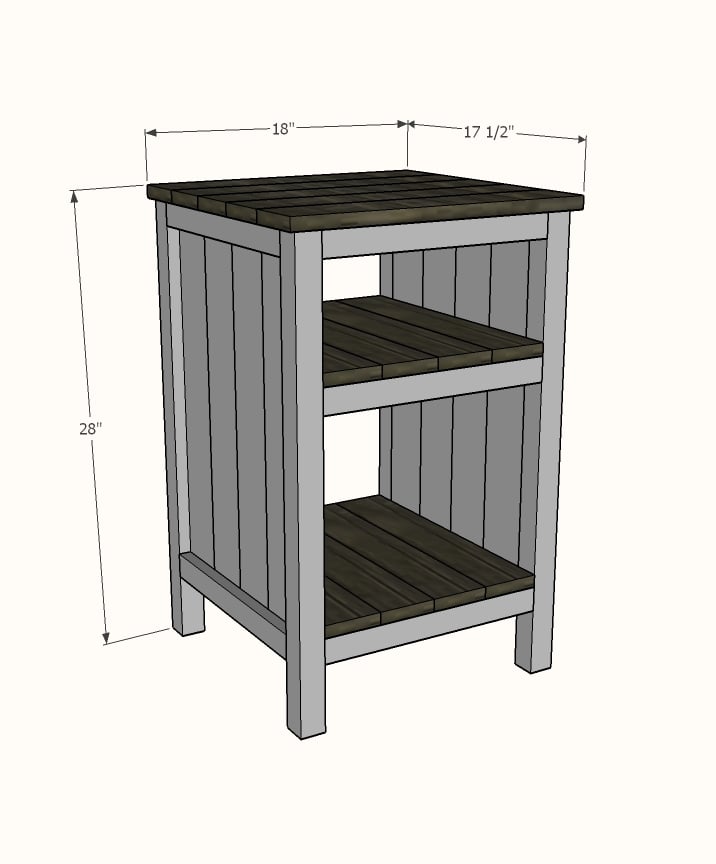
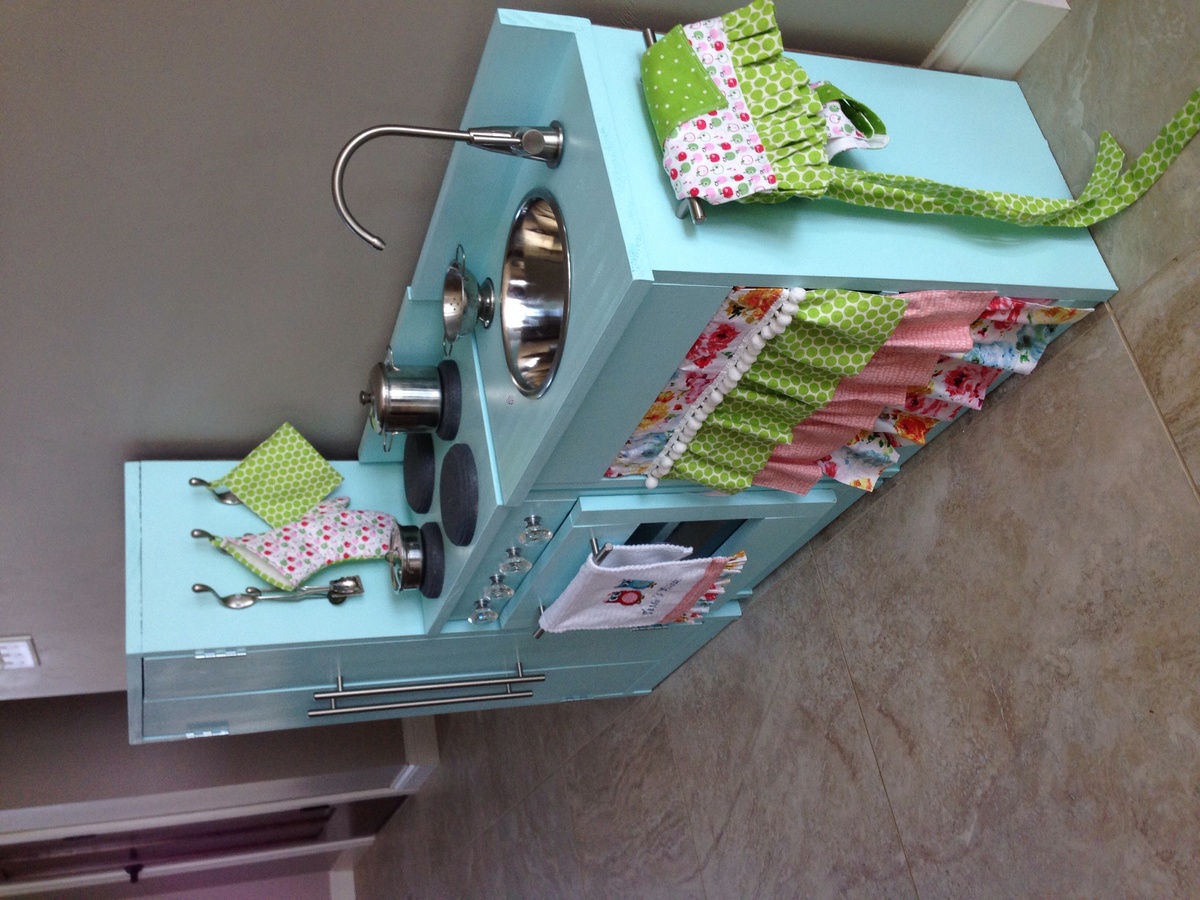
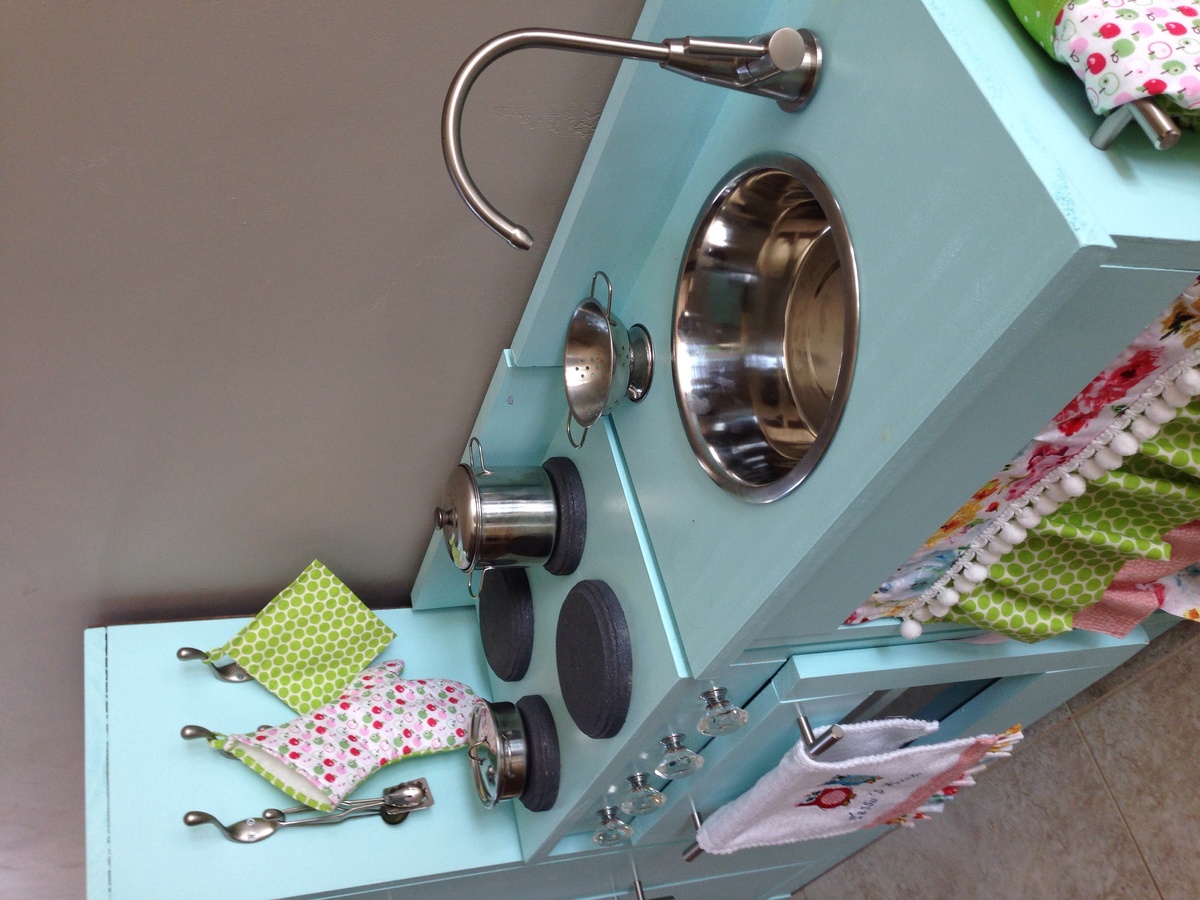
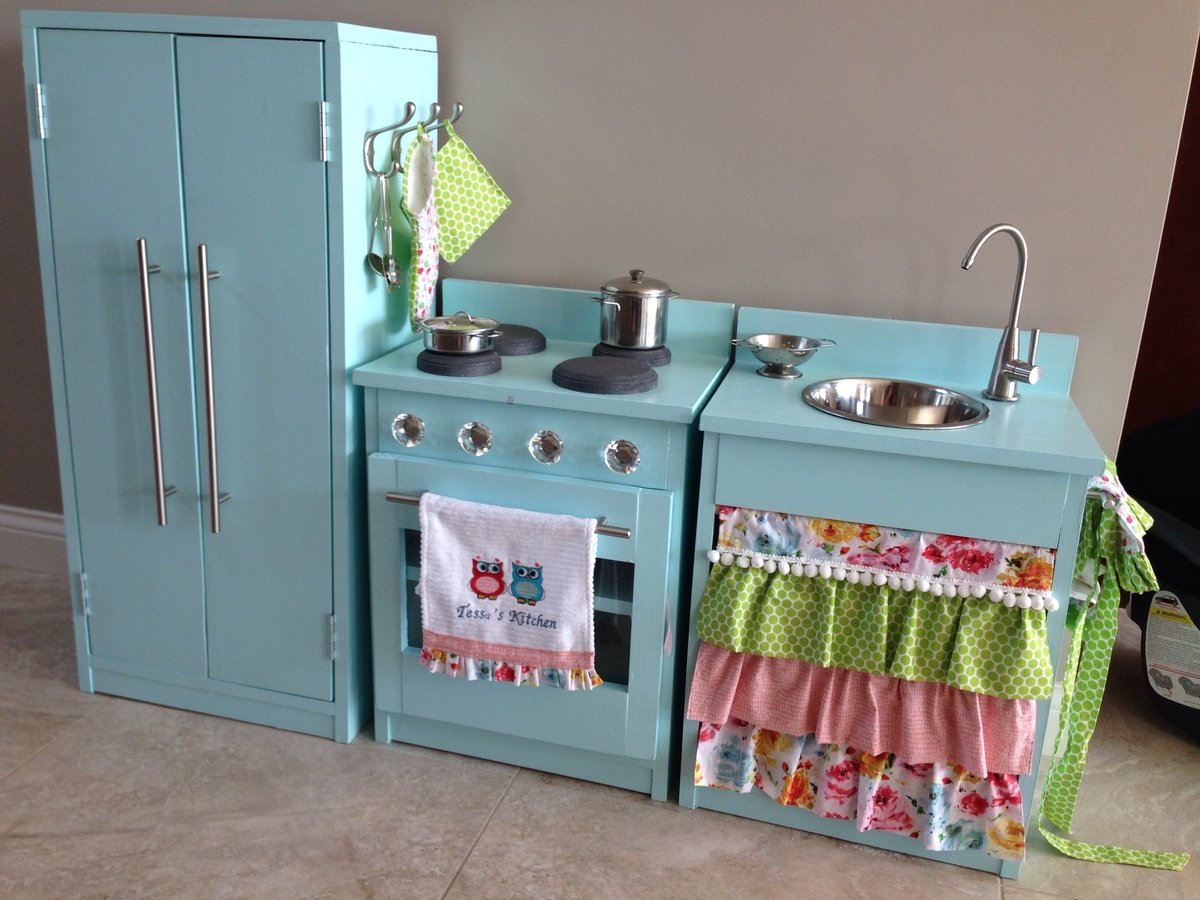
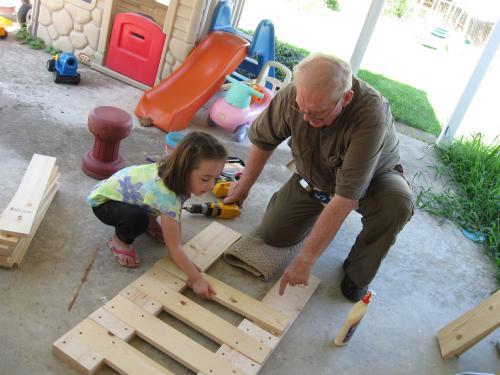
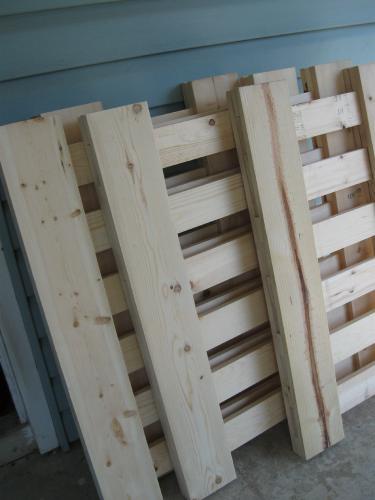
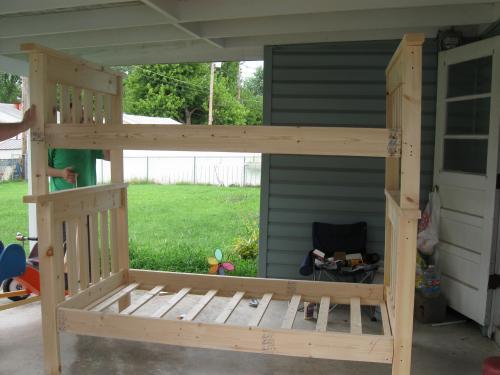
Community Brag Posts

Truss 4x4 Farm Table

Submitted by iamjulz622 on Sun, 09/20/2020 - 19:07

I love this site and the user friendly plans. I used the suggestion of turning the 2x4’s but I think it would have been better to have more to screw the top boards to if I hadn’t.

Built from Plan(s)
Estimated Time Investment
Week Long Project (20 Hours or More)
Finish Used
White paint, stain and sealant.
Recommended Skill Level
Intermediate

Barn door pantry

Submitted by rayt871 on Thu, 10/01/2020 - 18:47

Barn door pantry scaled down to 5' x 7' with purple heart header and footer.

I had to add a guide at the bottom of the door to prevent it swinging out. Possibly my entire cabinet (or the wall) is slightly off level which is why it wanted to lean outward. I used a piece of felt inside the guide to prevent it scratching the purple heart.

Built from Plan(s)
Estimated Cost
600
Estimated Time Investment
Week Long Project (20 Hours or More)
Finish Used
5 coats of satin finish polyurethane and 2 coats of spar urethane on the purple for UV protection.
Recommended Skill Level
Intermediate

Comments

Tilt Out Trash Bin

This was my first project using an Ana White plan....Modified it a bit...quite happy with how it came out...it was very low cost to make and a lot of fun.

Estimated Time Investment
Weekend Project (10-20 Hours)
Finish Used
Varathane Stain....Spring Oak
Recommended Skill Level
Beginner

Our version of this awesome little greenhouse

I found your plans last summer and loved the design so I decided to build one for my wife for her birthday last August. I didn't get started until the weekend of her birthday in late August so there was little expectation to have it finished before winter. It is now 14 months later and I only have a few trim pieces left to install. We live in a harsh climate and I wanted to be able to use it through the winter so I made a few changes. I built a 2 x 12 base and insulated it with R40 and the bottom walls are 2 x 6 instead of 2 x 4 and are insulated with R20. I used twin wall polycarbonate instead of the corrugated lexan because of the superior R factor. The insulated walls are of course vapor barriered and I covered them with tongue & grove cedar. I also made raised benches out of cedar for growing potted plants on. The floor has ceramic tile on it and the exterior is colored metal. I also ran underground power to the building and installed a fluorescent grow light. Surprisingly a small 110 volt heater keeps the temperature above freezing even during our awesome -40 winter temperatures. If the daytime temperature is anywhere near or above freezing we have to keep the screen open in the door or it overheats inside. I have attached links to a few pictures of the almost finished product, ready for another winter full of flowers and veggies. I initially used clear vapor barrier until the twin wall polycarbonate showed up. This worked rather well. 

I have posted this in the comments section as well, but I think it belongs here.

Built from Plan(s)
Estimated Cost
Material costs were just over $5,000
Estimated Time Investment
Week Long Project (20 Hours or More)
Finish Used
exposed cedar was stained
Recommended Skill Level
Intermediate

Comments

JB

Sat, 03/21/2020 - 09:42

Love your ideas! I have a few questions if you don't mind. Where did you buy the polycarbonate sheets, and what sizes were available? Did you end up changing the plan a bit to accommodate the vertical sheets? Did you seal top and bottom with foil tape and dust tape respectively or poly flashing?

Any help or advice would be appreciated very much.

JB

Brookstone Desk

This was a fun project. My first using drawer slides. Best advise would be to recheck squareness before attaching top.

Built from Plan(s)
Estimated Cost
$65
Estimated Time Investment
Weekend Project (10-20 Hours)
Finish Used
Dark Walnut stain
Poly top coat
Recommended Skill Level
Beginner

Comments

Farmhouse Bed - Modification

Submitted by Michael B on Wed, 01/16/2013 - 10:01

I followed the bed design posted for the Farmhouse Storage Bed, with some modifications to the base support. I have a queen waterbed and needed to reinforce the structure substantially. So I added more center support by building a simple 2X4 Header frame down the middle with 4 legs and beefing up the rails along the drawer boxes. I also included additional slat supports. I also placed the drawer boxes directly on the floor so that I would not have to buildup any additional legs. For the headboard and footboard, I did not have any beadboard so I ripped some 1/4" Birch-Ply into 6 1/4" strips, beveled the edges and nailed them with brads onto the 3/4" ply. I placed 1/16" spacers to create gaps between each and then just painted it. This gave me the look I wanted. It was a little more work, but well worth it in the end. I live in Manhattan so I actually had to construct this in my living room. Luckily I was undergoing a renovation at the time so the additional mess and dust was not too much of an obstruction. But now I'm hooked and want to build a lot more.

Estimated Cost
Built mostly from scraps - Less than $100
Estimated Time Investment
Weekend Project (10-20 Hours)
Finish Used
Benjamin Moore - White Dove (PM-19)
Recommended Skill Level
Beginner

Comments

First Build EVER!

Submitted by arowe10 on Fri, 12/11/2020 - 06:42

This was a great “gateway” build! This is easy to do and gave me the space to dig deeper into my newfound woodworking hobby! It’s not perfect but I love it!

Estimated Time Investment
Afternoon Project (3-6 Hours)

Split drawer built-in bench with oak herringbone top

Submitted by GeekAthair on Sat, 12/19/2020 - 10:17

My second take on Ana White's mudroom bench design. This time I went with a split drawer design to provide room for the power outlet on the wall behind it and made my first attempt at a custom herringbone pattern for the benchtop. The frame is made out of douglas fir and the benchtop is made out of reclaimed red oak. The herringbone pattern is accented by two geometric mountain ranges (Minwax Antique Jade wood stain), signifying our placement here in the Pacific Northwest, nestled between the Olympic and Cascade mountain ranges. The benchtop was finished with 3 coats of Minwax Fast-Drying Polyurethane (semi-gloss). I'm very happy with how it turned out and plan to make a similar benchtop to replace the one in our dining room once I clear my plate a bit :)

Built from Plan(s)
Estimated Cost
450
Estimated Time Investment
Week Long Project (20 Hours or More)
Finish Used
Minwax Fast-Drying Polyurethane in Semi-Gloss
Minwax Woodstain in Antique Jade (for the mountains as well as the frame and drawers)
Recommended Skill Level
Intermediate

Comments

Anna's Bedside tables

Made these for my niece as a wedding gift. These were one of the first of many of these I have made.

Built from Plan(s)

Comments

16" Cedar Patio Planter

Submitted by prelude on Fri, 03/05/2021 - 04:33

I created these 16" cedar patio planters using Ana's plans. I bought four 6' cedar pickets from Lowe's for $1.98 each or under $8 for the lot. I used the extra picket to cut our my 1x2s and 1x3s so the whole construction is made of cedar including the pieces to hold a potted plant. I used Behr's clear and cedar finish to complete the job in under 1 hour. Thanks Ana for the motivation.

Estimated Cost
$8
Estimated Time Investment
An Hour or Two (0-2 Hours)
Finish Used
Behr's clear and cedar exterior finish
Recommended Skill Level
Intermediate

Comments

Bathroom Cubbie Shelf

Submitted by adeath on Fri, 01/16/2015 - 11:19

This is a piece from Ana's book.  I used the plans from the book and followed Shabby-2-chic's recommendation for the finish.  I used 120 grit sandpaper to knock the edges off then applied a dark minwax stain.  Soft scrub was used to remove the extra finish from my white paint.  The kreg shelf pin jig was invaluable in getting the holes just right.   

Built from Plan(s)
Estimated Cost
$60.00
Estimated Time Investment
Weekend Project (10-20 Hours)
Finish Used
Behr premium white with primer in eggshell. Minwax dark stain applied to the sanded edges.
Recommended Skill Level
Beginner

Little Big-Girl Farmhouse Bed

Submitted by Tea Granny on Tue, 03/12/2013 - 11:49

This bed was my 3rd project from Ana white. I'm just getting around to posting it now....

The headboard and footboard were made 2 inches wider than the original plans to account for my wider crib mattress. For my mattress width (28"), I required an extra 1x4 for the headboard and footboard center panels (7 instead of 6), along with 2 1x3s. This meant that I needed to add one extra 1x4 to my shopping list. I only required one 1x6, at a 10 foot length (since I didn't make the arch on the headboard).

Most of the work was done on our backyard deck, my outdoor workshop. I usually enjoyed the company of a little chipmunk as my "helper". He became very tame over the summer, allowing me to pick him up and pet him. At times, he would sit on my lap or ontop of my shoulder while I was working on a project. He was always with me, just hangin' out. I'm not really sure how long this project took, as I was usually distracted by his company!

I really enjoyed making this project! Our daughter was SO excited to sleep in her new big-girl bed!

Thanks Ana for the great plans!

Built from Plan(s)
Estimated Cost
Wood, $28.45. Paint, $36.97 per gallon (I already had the paint from another project)
Estimated Time Investment
Weekend Project (10-20 Hours)
Finish Used
Behr Premium Plus Self Priming Paint - I had 2 separate gallons of this in different colours and finishes. One was semi-gloss white (I found this to be too shiny, and the shade too cool). The other gallon was a flat finish, in a Farrow and Ball colour "Pointing".
Since the walls of the room are already in the "Pointing" colour, I wanted to keep the bed whiter than the walls, just slightly off white. I ended up mixing some of both gallons together. The result? - a lovely eggshell finish in a warm white colour. Perfect.
Recommended Skill Level
Beginner

Comments

dmcarwin

Wed, 03/13/2013 - 08:01

You did a great job! I love you "little helper" in the first picture!

In reply to by dmcarwin

Tea Granny

Wed, 03/13/2013 - 13:40

Hi dmcarwin - Thanks so much for your comment!

I love my little helper as well. You, however, must be a VERY busy lady! With 6 little helpers??? How do you ever find the time for all your fabulous projects? You truly amaze me!

In reply to by Tea Granny

dmcarwin

Wed, 03/13/2013 - 15:35

You are so sweet, I don't do projects in a normal time frame, they are more like, cut the wood one day, sand the next, build another, etc....It is rare I do a build all at once, for obvious reasons! But I truly love it and so I make the time for it when I can! I just checked out the rest of your projects they are fabulous!

Tea Granny

Wed, 03/13/2013 - 18:07

Oh, yes. I certainly know about the non-normal time frames. My projects are done during nap-time or in the middle of the night. I finished a play kitchen at 4am on Christmas Day! Cutting it close - after numerous 4am nights, a couple all-nighters ...and about 40 hours later. I definitely was an elf in the workshop.

The play kitchen is pictured in the background of my second photo for my Toddler Chalkboard project. I used Ana's plans and another plan as my inspiration, heavily modified the measurements. I have not had time to post it yet, but soon....

Okay, so I've just checked out your blog! Wonderful.

LindseyMagno

Sun, 08/09/2015 - 06:51

This is gorgeous!!!!! My daughter will be two in two weeks, and while I'm not quite ready for a big girl bed, and we don't need her crib for another baby yet, I'm so excited to finally find the perfect plans when I am ready. You did a GREAT job, it's just beautiful. When I compare this to the $400 plus beds in stores I just shake my head and say THANK YOU ANA for giving us great alternative options. Thank you for the inspiration!!

Mudroom bench

Submitted by Dan Kielty on Thu, 04/01/2021 - 18:16

Mud room bench with recycling cabinet

Estimated Cost
$300
Estimated Time Investment
Weekend Project (10-20 Hours)
Finish Used
Behr chalk paint, Minwax ebony
Recommended Skill Level
Intermediate

Comments

Mini Night Stand

Submitted by Anonymous (not verified) on Mon, 04/24/2017 - 21:07

Took us 4 months cause we have kids so we have to work during naps and after bedtime and then we were hesitant to work on it for a while after a little stressful episode building the drawer. We had to lower our expectations for perfection when working with pine and no clamps. We're happy with how it turned out though! Reminds me of Van Gogh's "The Bedroom" for some reason. 

Estimated Cost
$25 wood
$8 paint
$22 Prestain, stain, poly
Estimated Time Investment
Weekend Project (10-20 Hours)
Finish Used
Minwax special walnut/ 3x water based poly
Americana indoor outdoor "patio" grey
Recommended Skill Level
Starter Project

Fancy X Desk

My first big project. It turned out great! There are a couple of issues with the plans but nothing a little common sense couldn't resolve. Also, for any beginners out there, make sure when you're going through your cut list, start with the larger pieces first then work your way down to the smaller cuts. You'll end up having to take another trip to the hardware store if you cut the smaller pieces first. Great plans Ana White! I built this as a Christmas gift for my girlfriend. She was blown away! She absolutely loves it!

~Justin~

Built from Plan(s)
Estimated Cost
Wood cost: $45.95
I did end up spending a lot more on stain, polyurethane, hardware, sandpaper.. The list goes on. But most of these items are things I can reuse for future projects.
Estimated Time Investment
Weekend Project (10-20 Hours)
Finish Used
Black Cherry Stain and then a clear polyurethane.
Recommended Skill Level
Beginner

Comments

I'm pretty proud of myself

Submitted by Anonymous (not verified) on Mon, 05/01/2017 - 10:17

Pretty straight forward plans.

Built from Plan(s)
Estimated Cost
$350
Estimated Time Investment
Weekend Project (10-20 Hours)
Finish Used
Shou Sugi Ban/ Tung oil
Recommended Skill Level
Beginner

Simple 2x4 Potting Bench - Modified

I was intrigued by Ana’s Simple 2x4 Potting Bench. The project seemed simple enough and it would be used as a means to clean up clutter in the garage. My main focus was to make it semi-portable and weather resistant. Instead of using 2x4’s for the corner posts, I used 4x4’s to accommodate casters. I also shorted the length of the posts by 4 inches to compensate for the height of the casters. To provide extra rigidity I did a dado for the 2x4’s that connect the front and rear legs. In retrospect, I wish that I did not dado the legs because it made it more difficult to attach some of the shelf planks. I painted the frame green and left the shelves and backboards clear for beautiful contrast. My wife is ecstatic with the result.

Estimated Time Investment
Weekend Project (10-20 Hours)
Finish Used
Benjamin Moore Environ Green paint for the frame and Minwax Polycrylic for the poplar shelves and backboards.
Recommended Skill Level
Intermediate

Comments

Seasonal And Holiday

Outdoor sofa

Submitted by Julisib on Sun, 06/06/2021 - 06:39

Thanks a lot for the free plans. We enjoy out new deck !

Comments

Seasonal And Holiday

Chicken Coop

Submitted by Anonymous (not verified) on Mon, 05/29/2017 - 11:44

Made this coop in a weekend. $140 in material. Still a bit of work to do.

Built from Plan(s)
Estimated Time Investment
Weekend Project (10-20 Hours)
Recommended Skill Level
Beginner