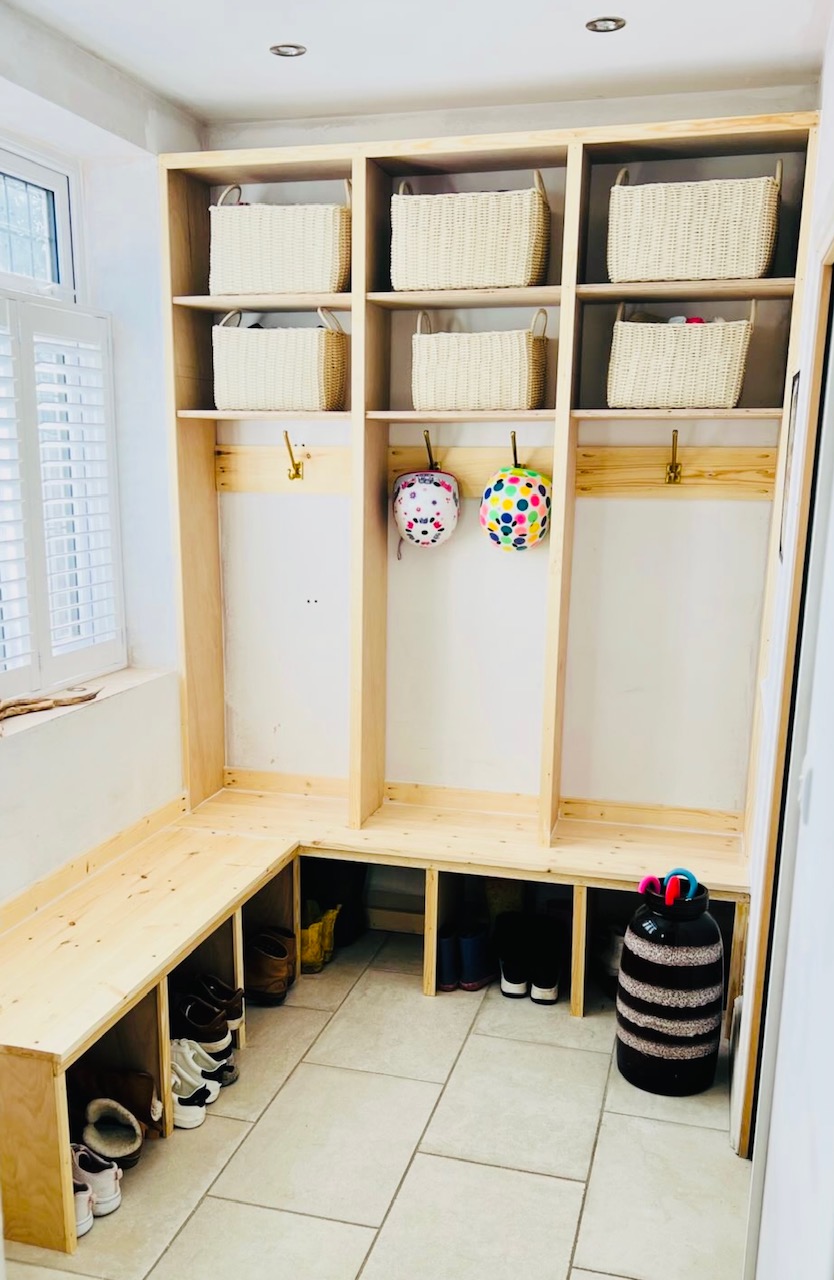
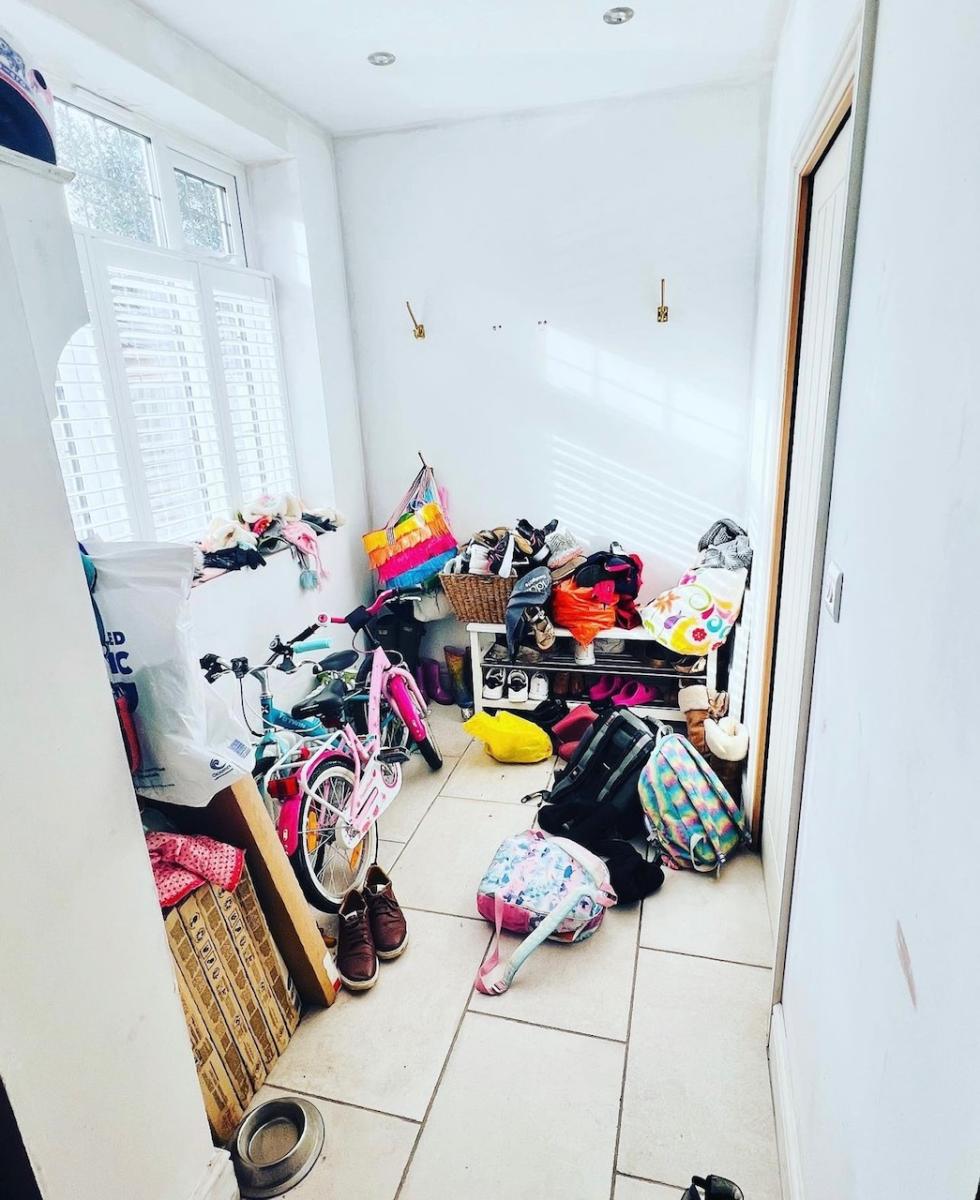
Boot Room Before and After
Got bored, built a boot room! Thank you Ana White for the plans!
Got bored, built a boot room! Thank you Ana White for the plans!
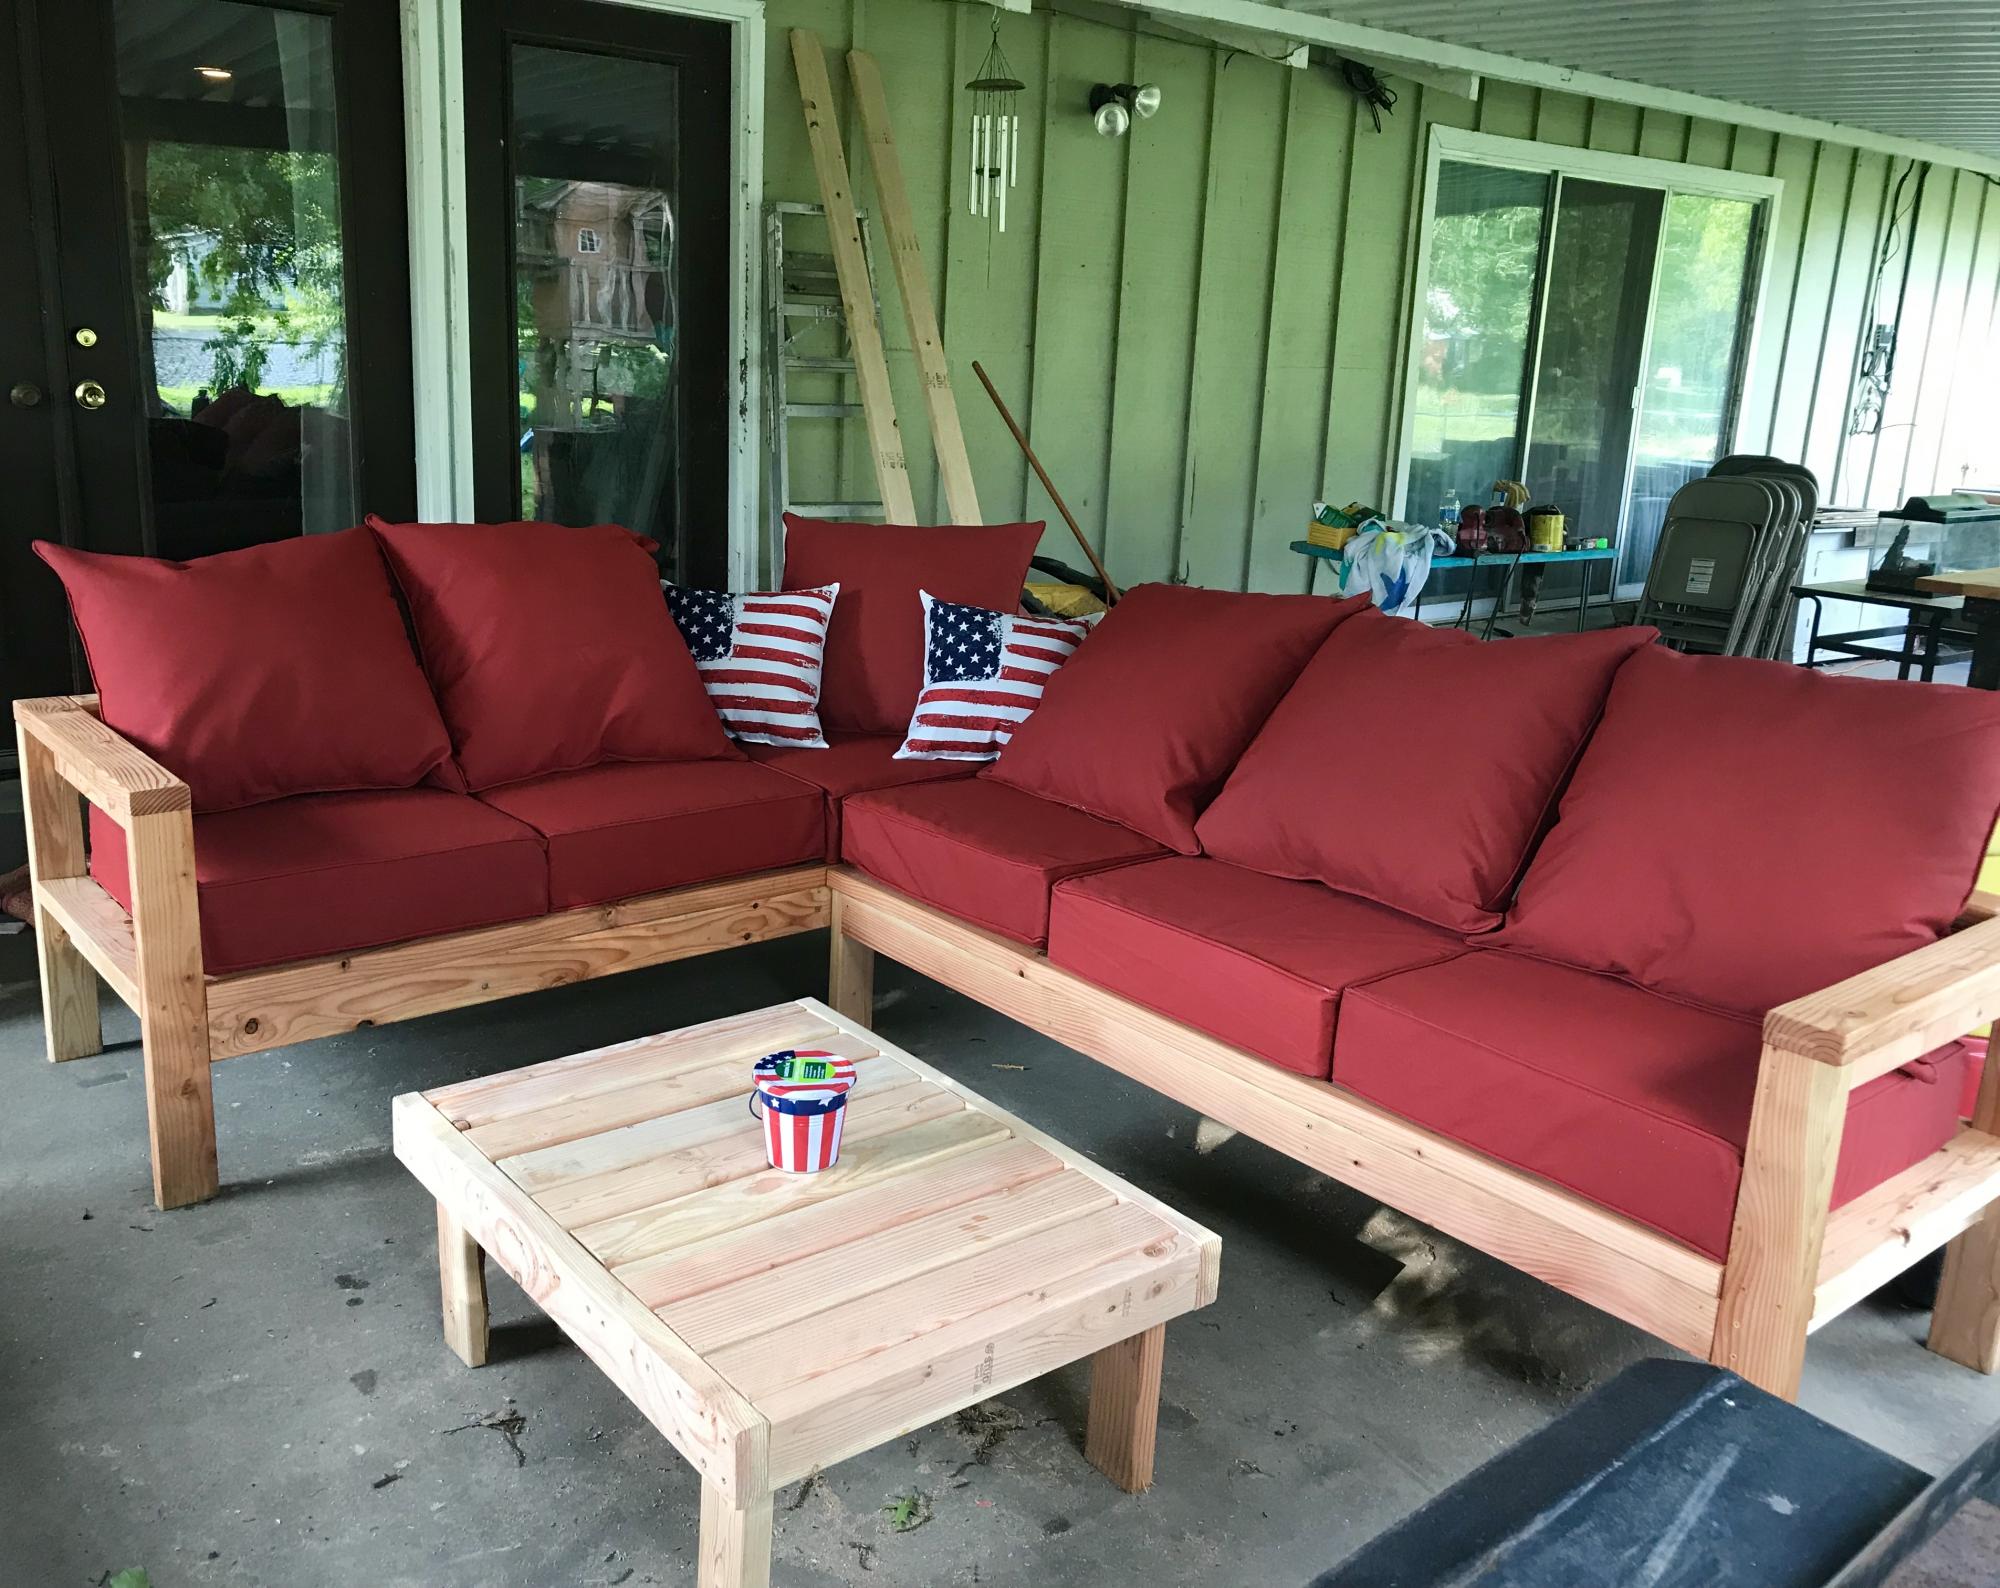
I followed the plans as written, It took me about 6 hours and that includes sanding and staining. Very simple yet offers a very wow finish. I think in total we spent about $300 for all supplies including cushions which was the most expensive part. I just finished it off with Teak Oil and an Americana theme for our covered patio. We love it.
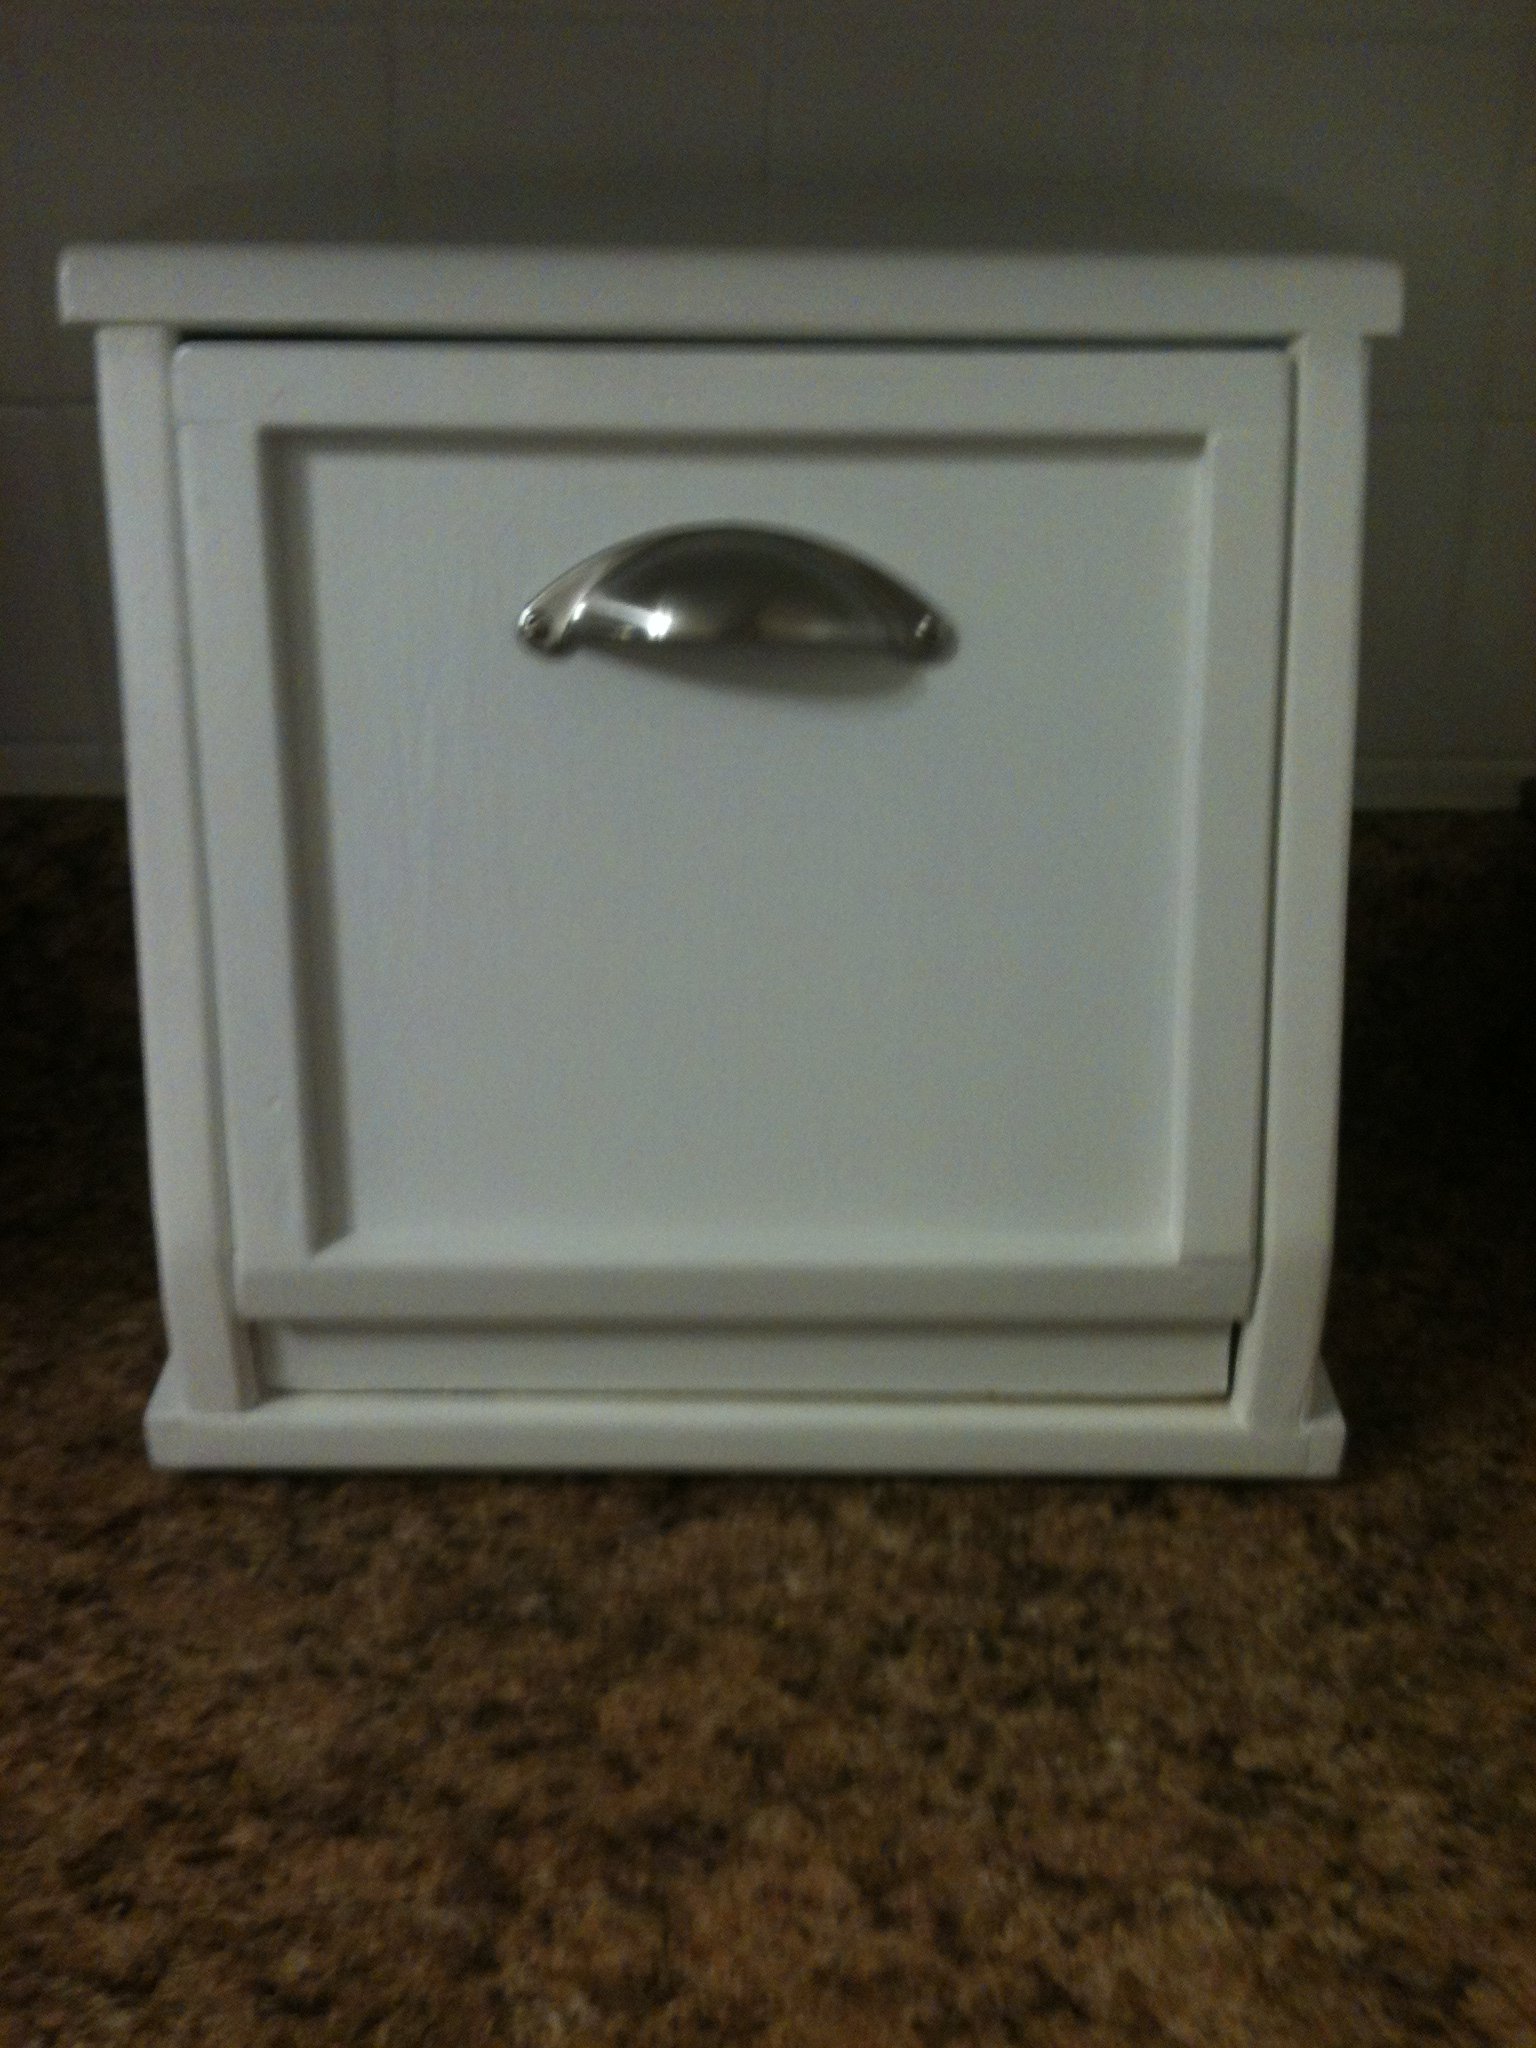
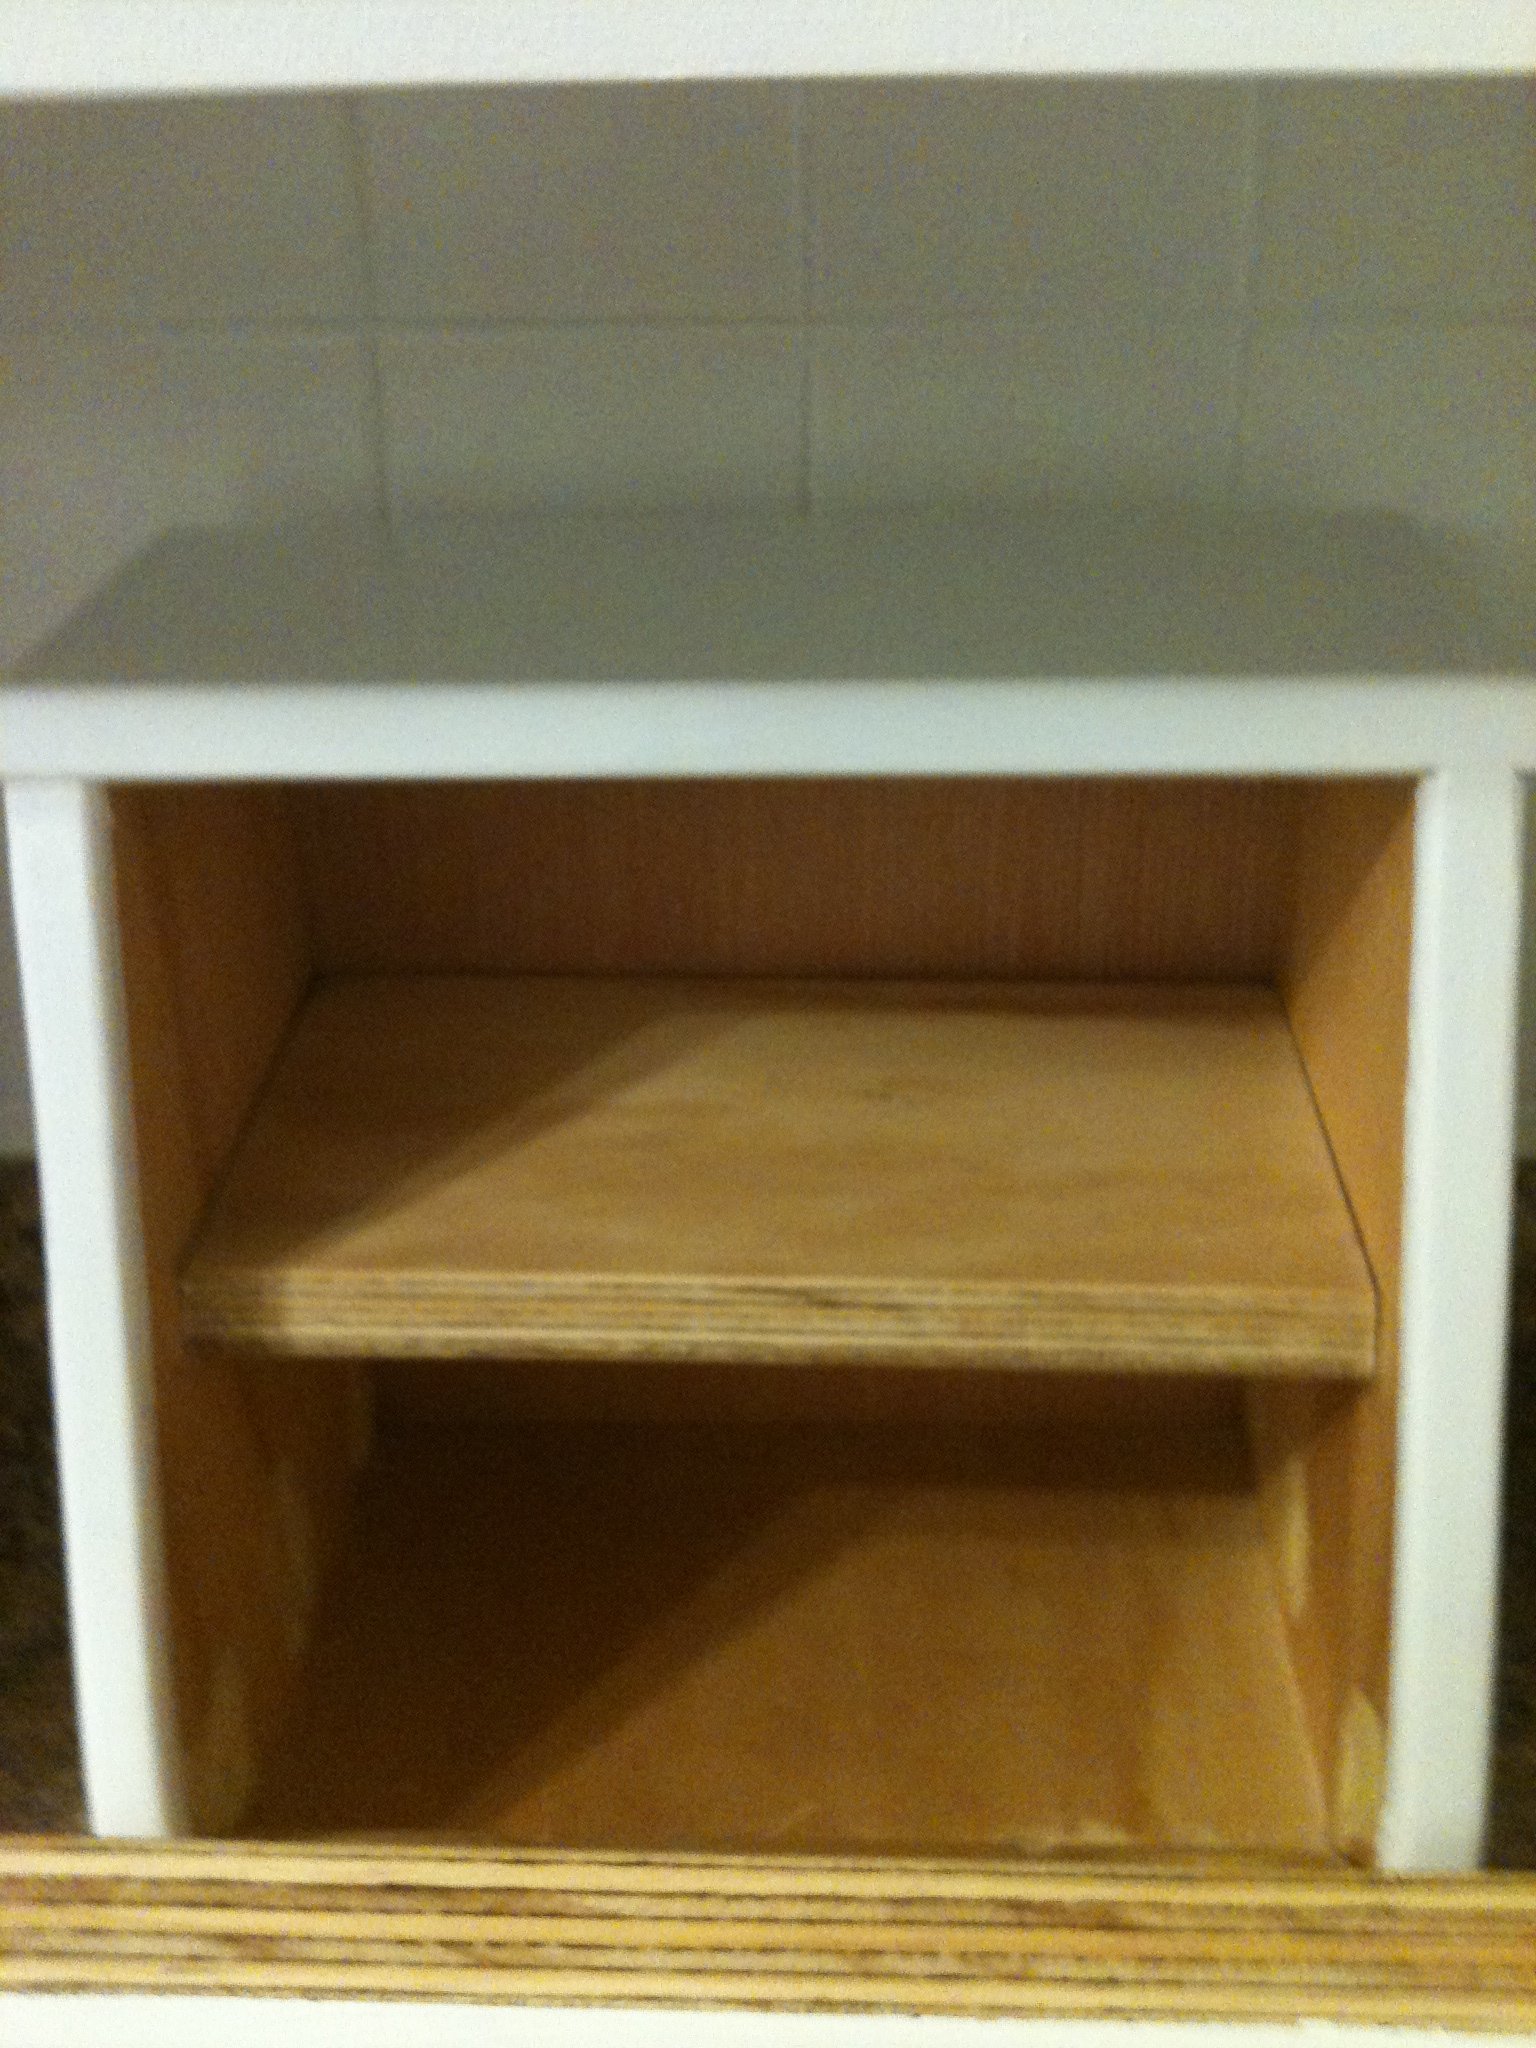
I started baking my own bread a few months ago, and storage was an issue. My husband decided to build me an old fashioned bread box and set out designing one on his own to fit in our small galley kitchen. I love it. It is a double decker, so I can fit two loaves in it just fine. The inside is coated with a food-grade sealer.


Sun, 12/04/2011 - 02:32
That is a great idea indeed and I love how it has a shelf inside.

Wed, 12/07/2011 - 03:49
This is an awesome idea, can't wait to make one for my kitchen. Beautiful job! Thanks for sharing this!
Sat, 06/30/2012 - 07:05
Just what I'm looking for! Do you have a pattern or measurements on this project? Thanks!
Tue, 08/20/2013 - 10:40
Please, let me know if there are plans/measurements somewhere. Love this!!
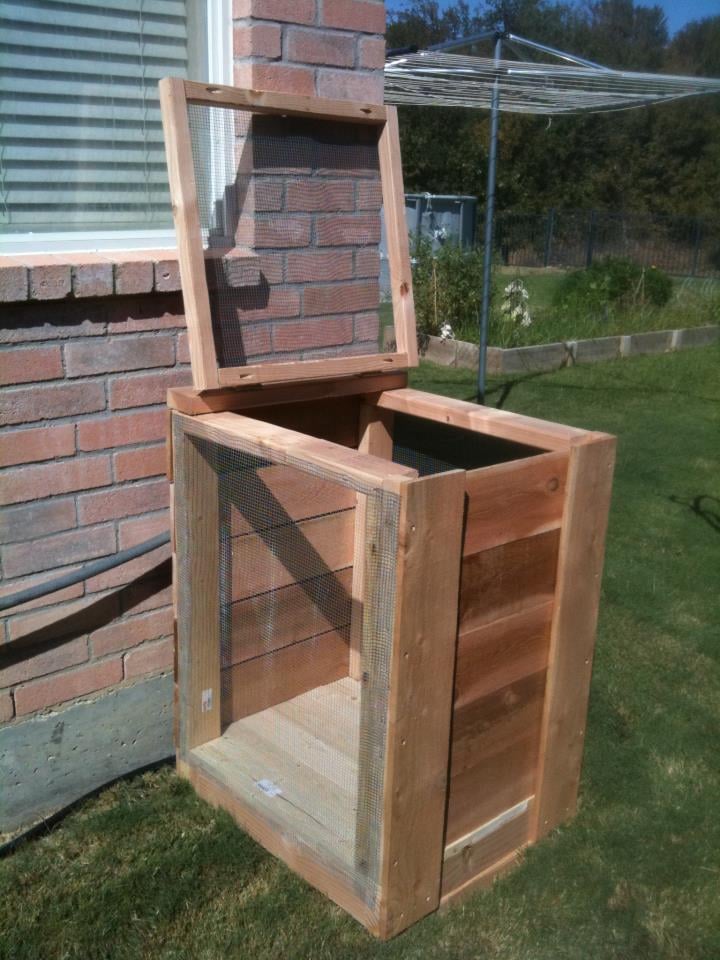
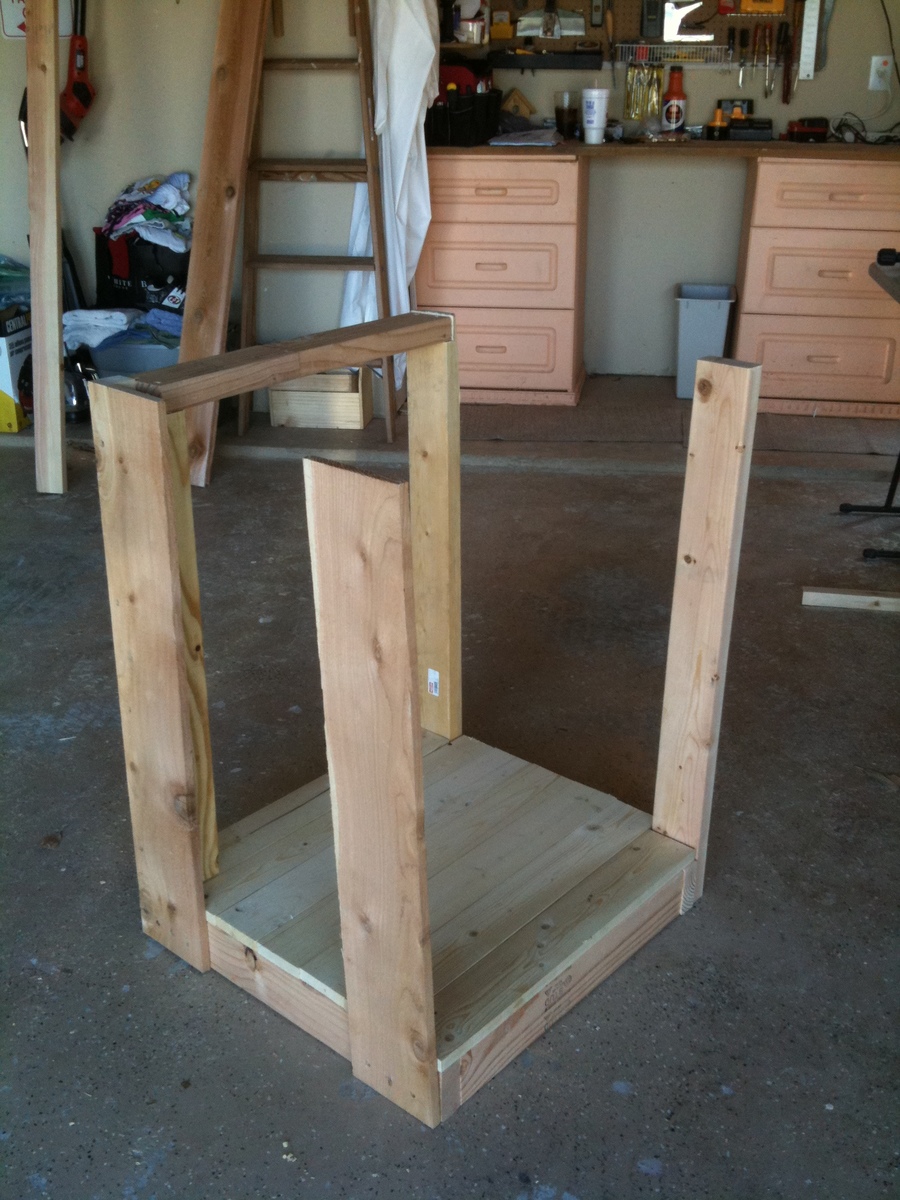
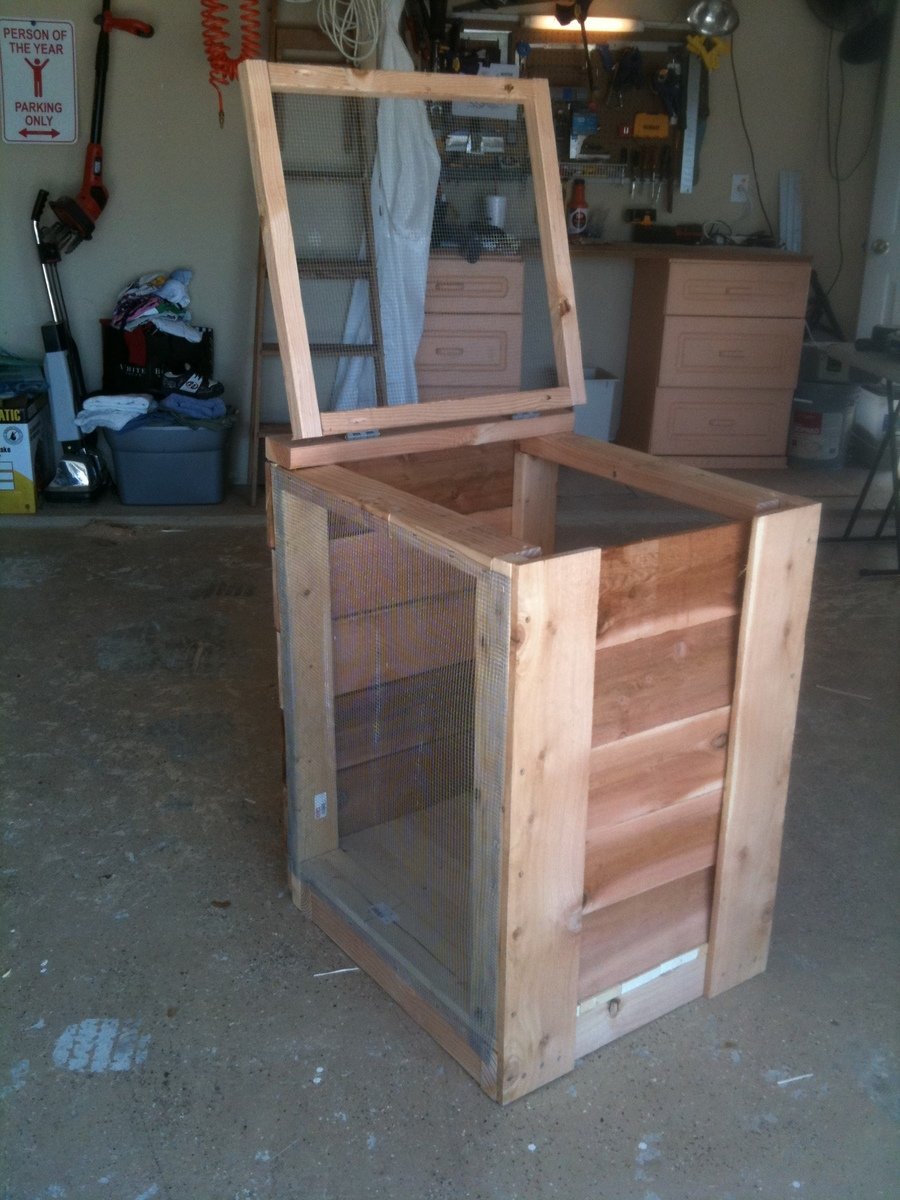
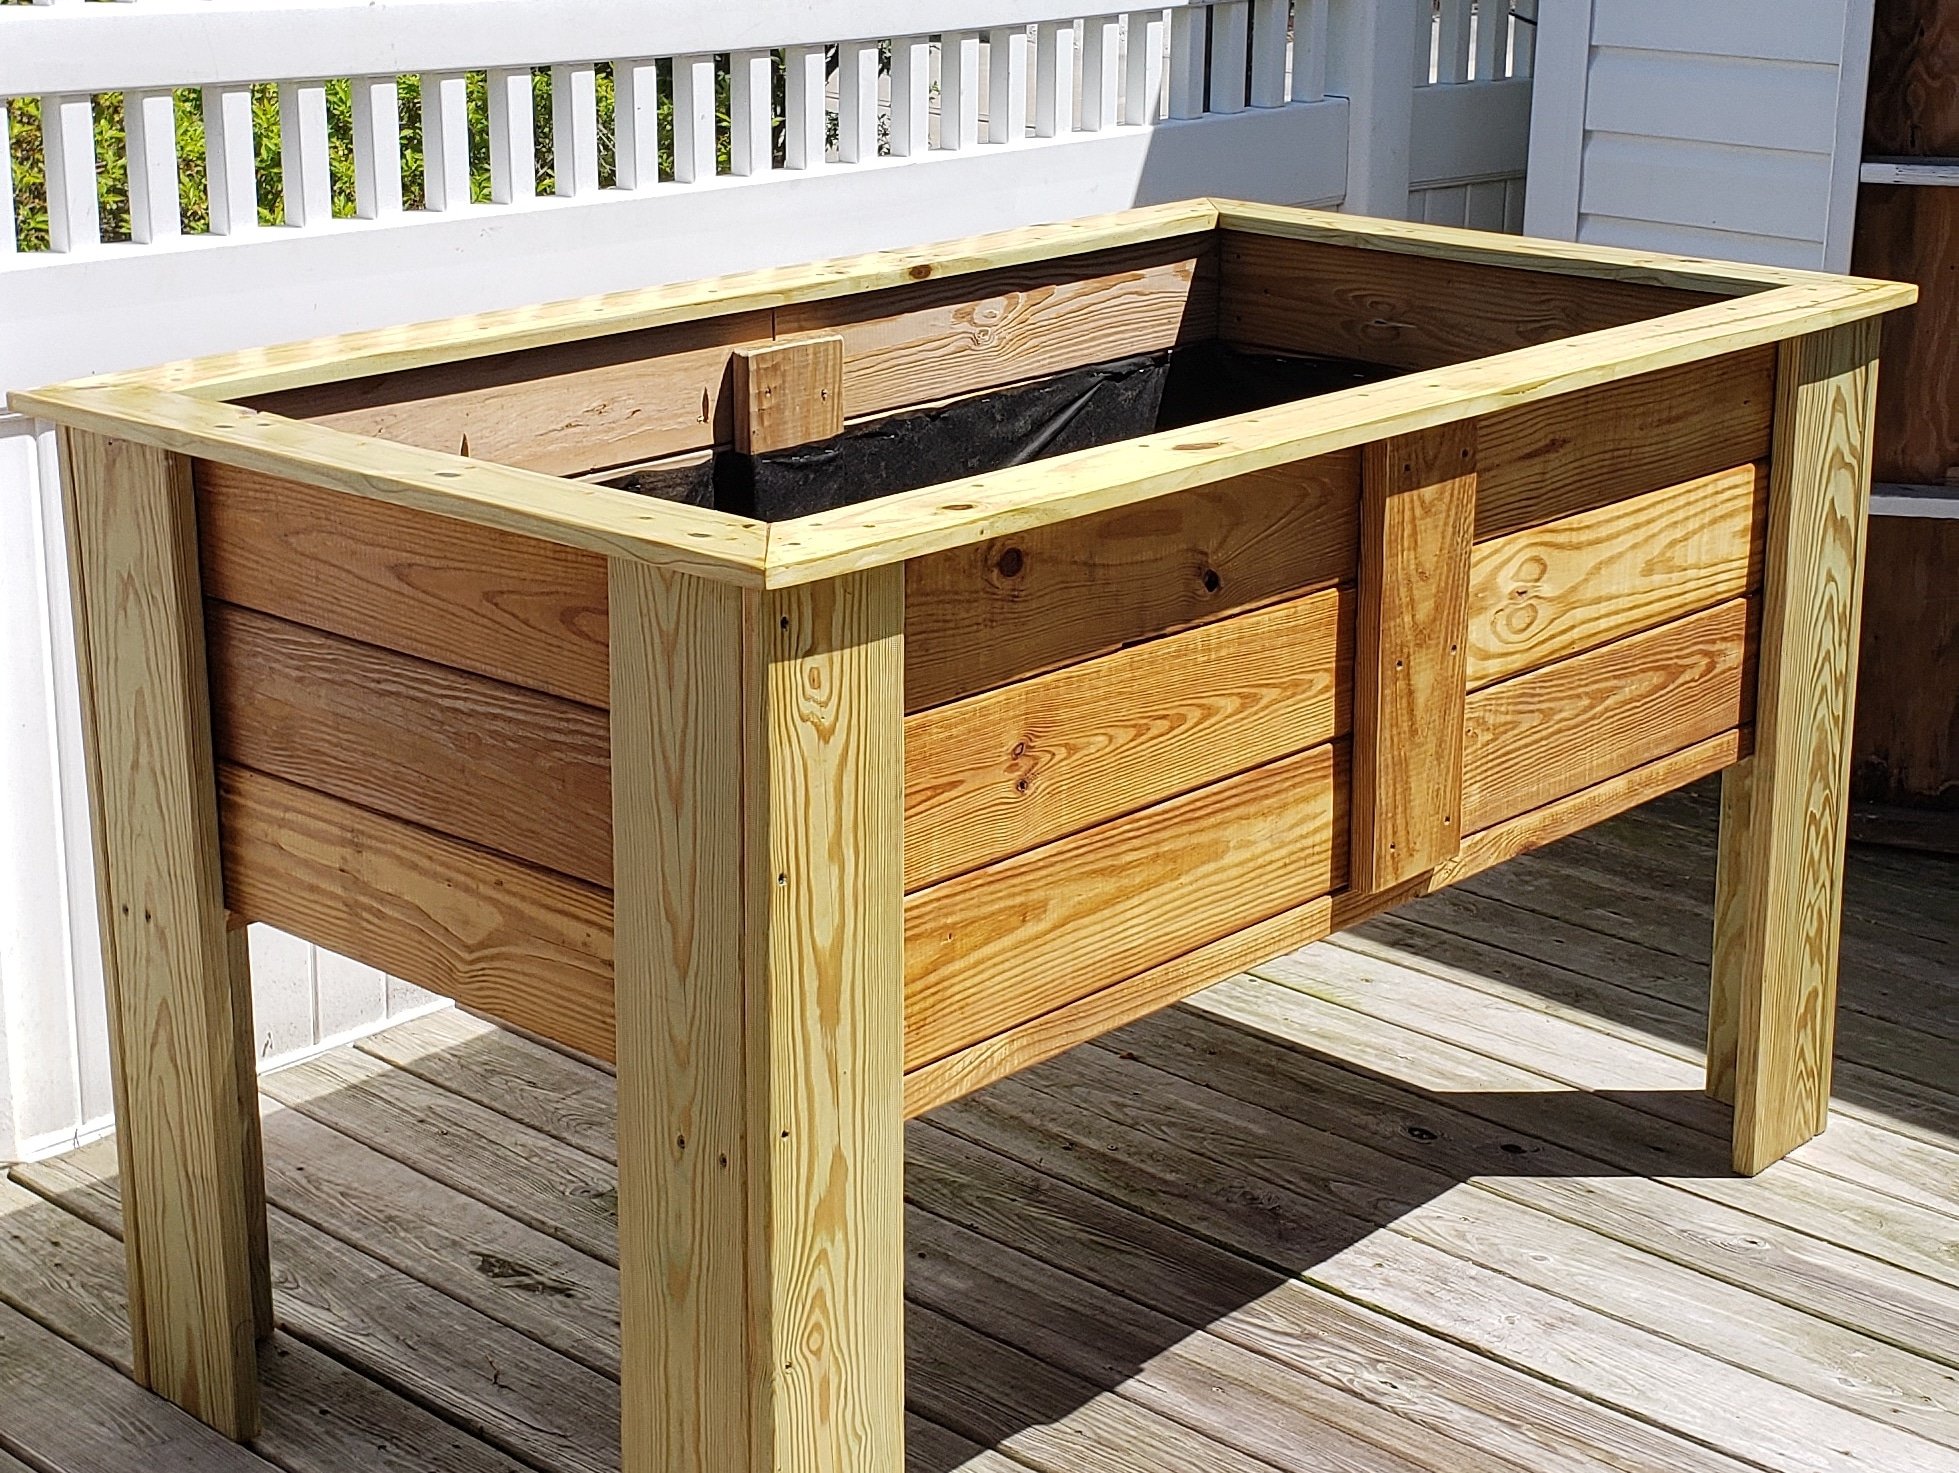
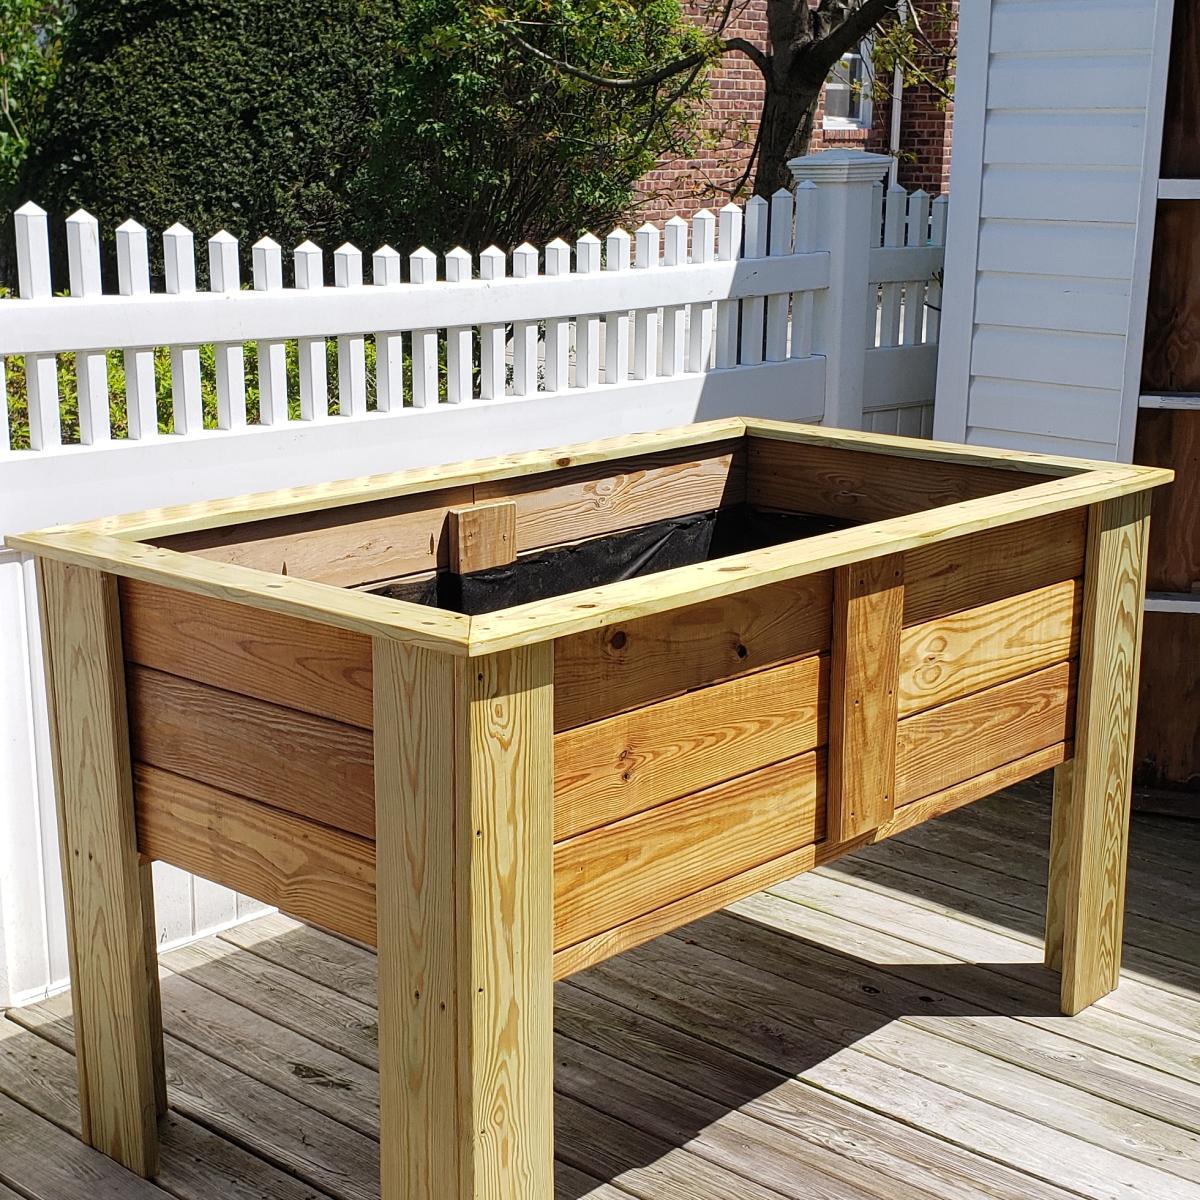
In my endeavor to be more green and self-providing, I started a backyard garden this past Spring. Thanks to the Texas heat, it was not as fruitful as I would have liked. I won't just blame the weather, but my novice status. I kept thinking I should have done more to amend the soil. So, I have been tossing around idea of composting to make my own nutrient rich soil and have a better experience with my garden next year. So, I found these plans online and I modified them down to a single 2'x2' sized bin. It also had to be mobile in that I could move it around my yard if I need to find a better place for it.
From Plan: Build A Compost Bin www.lowescreativeideas.com
http://lowescreativeideas.com/idea-library/projects/Building-a-Compost-…
Estimated Cost: $20 for Lumber $13 for Hardware Cloth $14 for Galvanized Hinges
Estimated Time Investment: 3 hours
Required Skill Level: Intermediate
Type of Wood: Cedar and Pine
Finish Used: Natural/Matt Finish
I was able to use some left over wood for my project, but the estimate above would represent all wood being purchased. I was not really happy on the price of the galvanized hinges and I used two of them at $7 each.
The plans also called for 2x6's for the bottom, but that sized plank would have made it very very heavy and to me the whole point of having a bottom to your compost is so that you can move it if need be... so I use 1x4's
Since I didn't want my compost to come into contact with pre-treating chemicals, I did not use pretreated wood. Instead, I put a light coating of a matte finish on only the wood that would stay in contact with moisture. Otherwise, I want the cedar to mellow and age.
My final cost was about $40 using some left over wood. In one case, I actually used my Kreg Jig to create a 2x4 of appropriate length with some of my scraps. Worked beautifully. Also used it on the lid, as you can see in the picture.
A friend of mine has issues with her knees but loves gardening so I built this to allow her to continue gardening. She loved it.
I didnt follow any particular set of plans I watched several you tube videos and combined different ideas from the videos to develop my own plan.
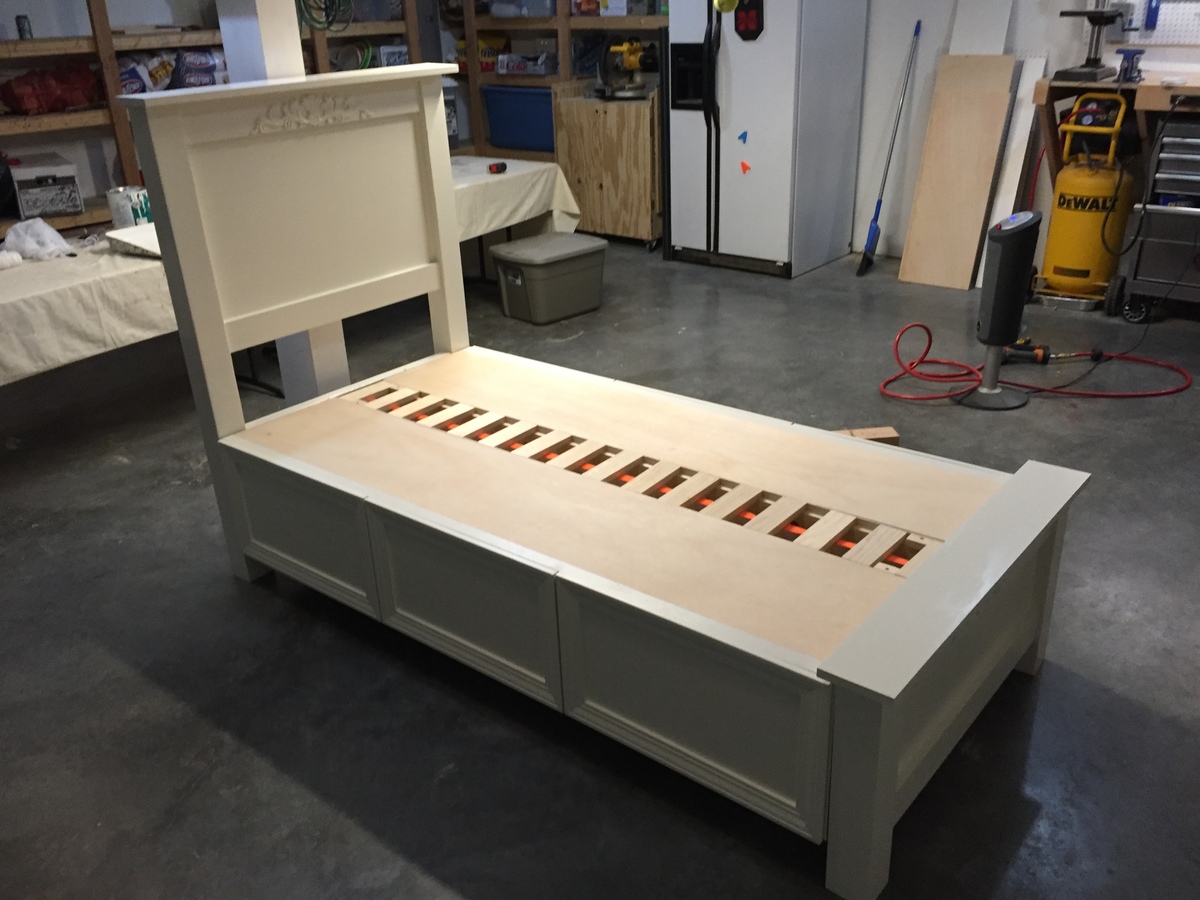
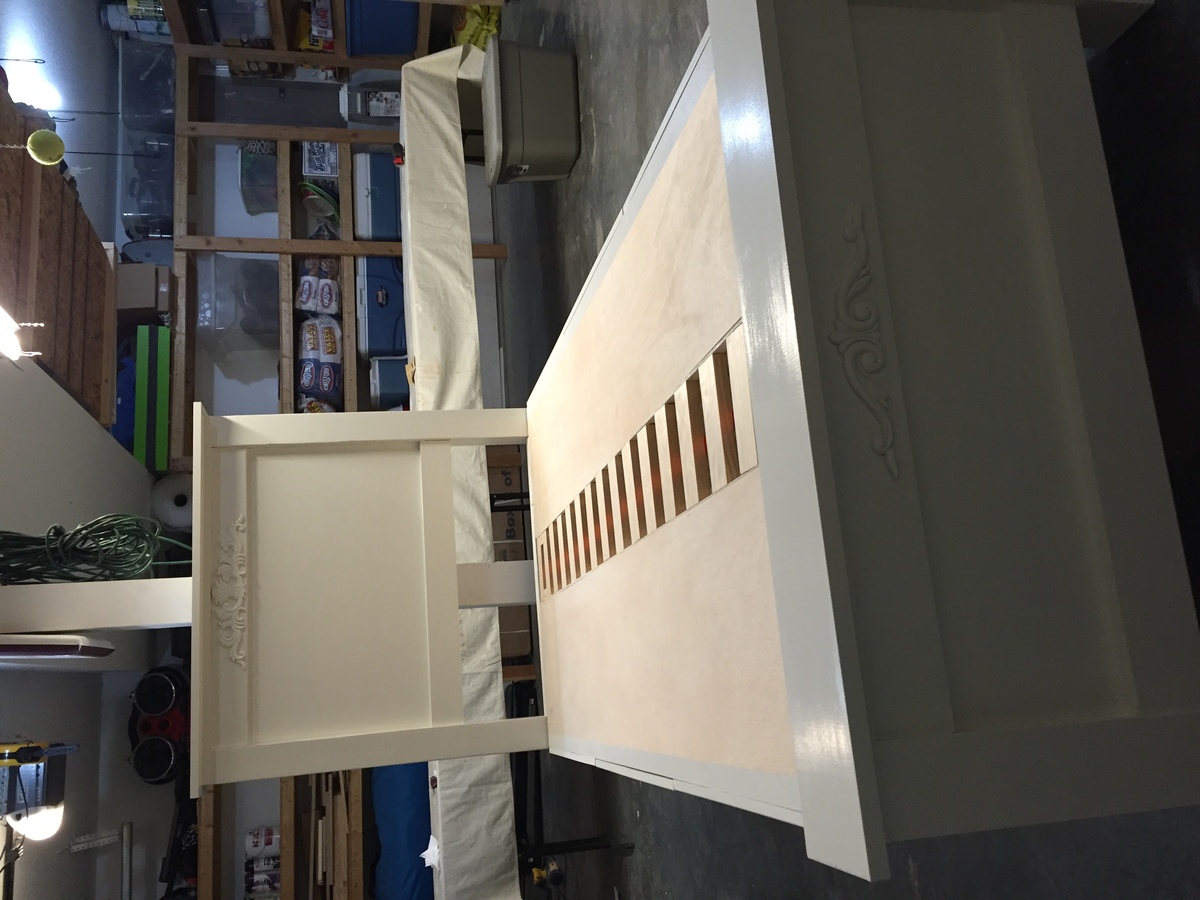
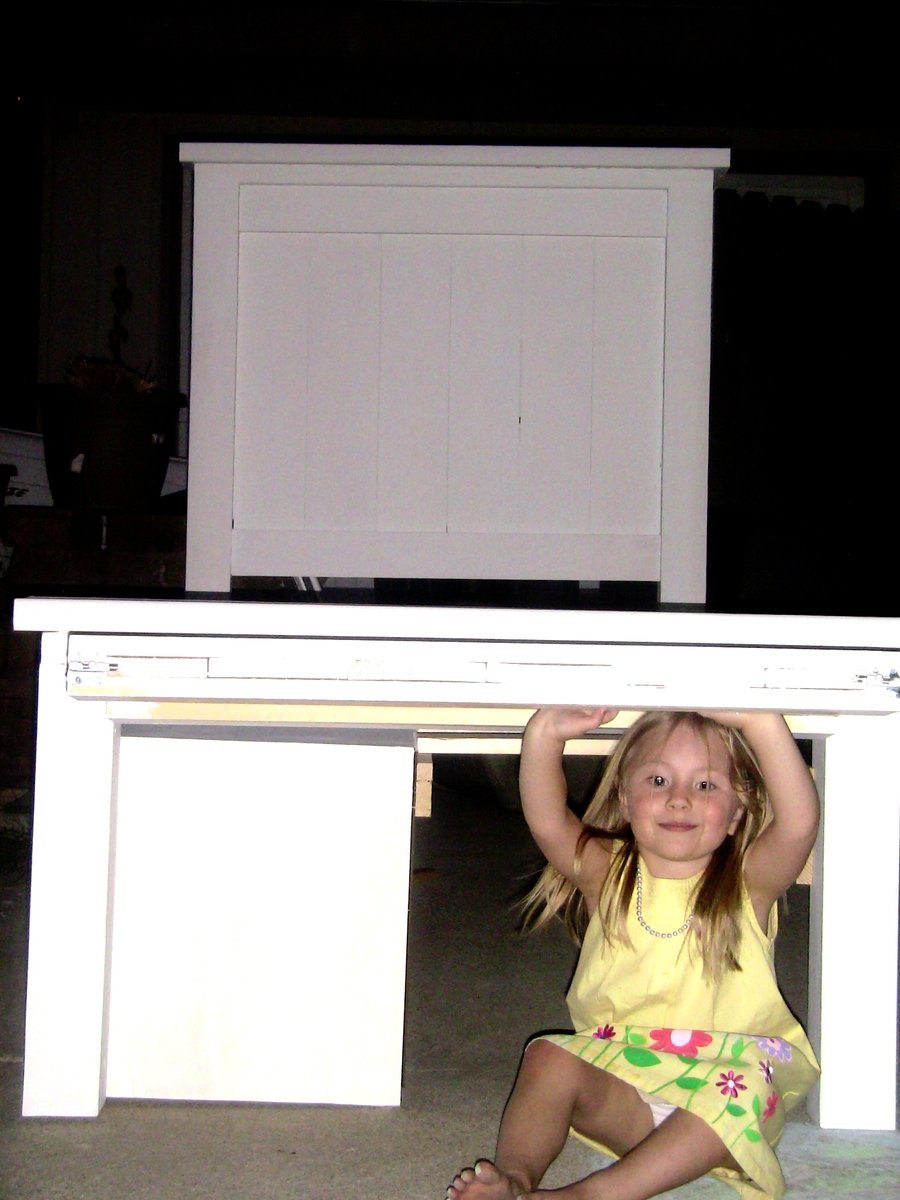
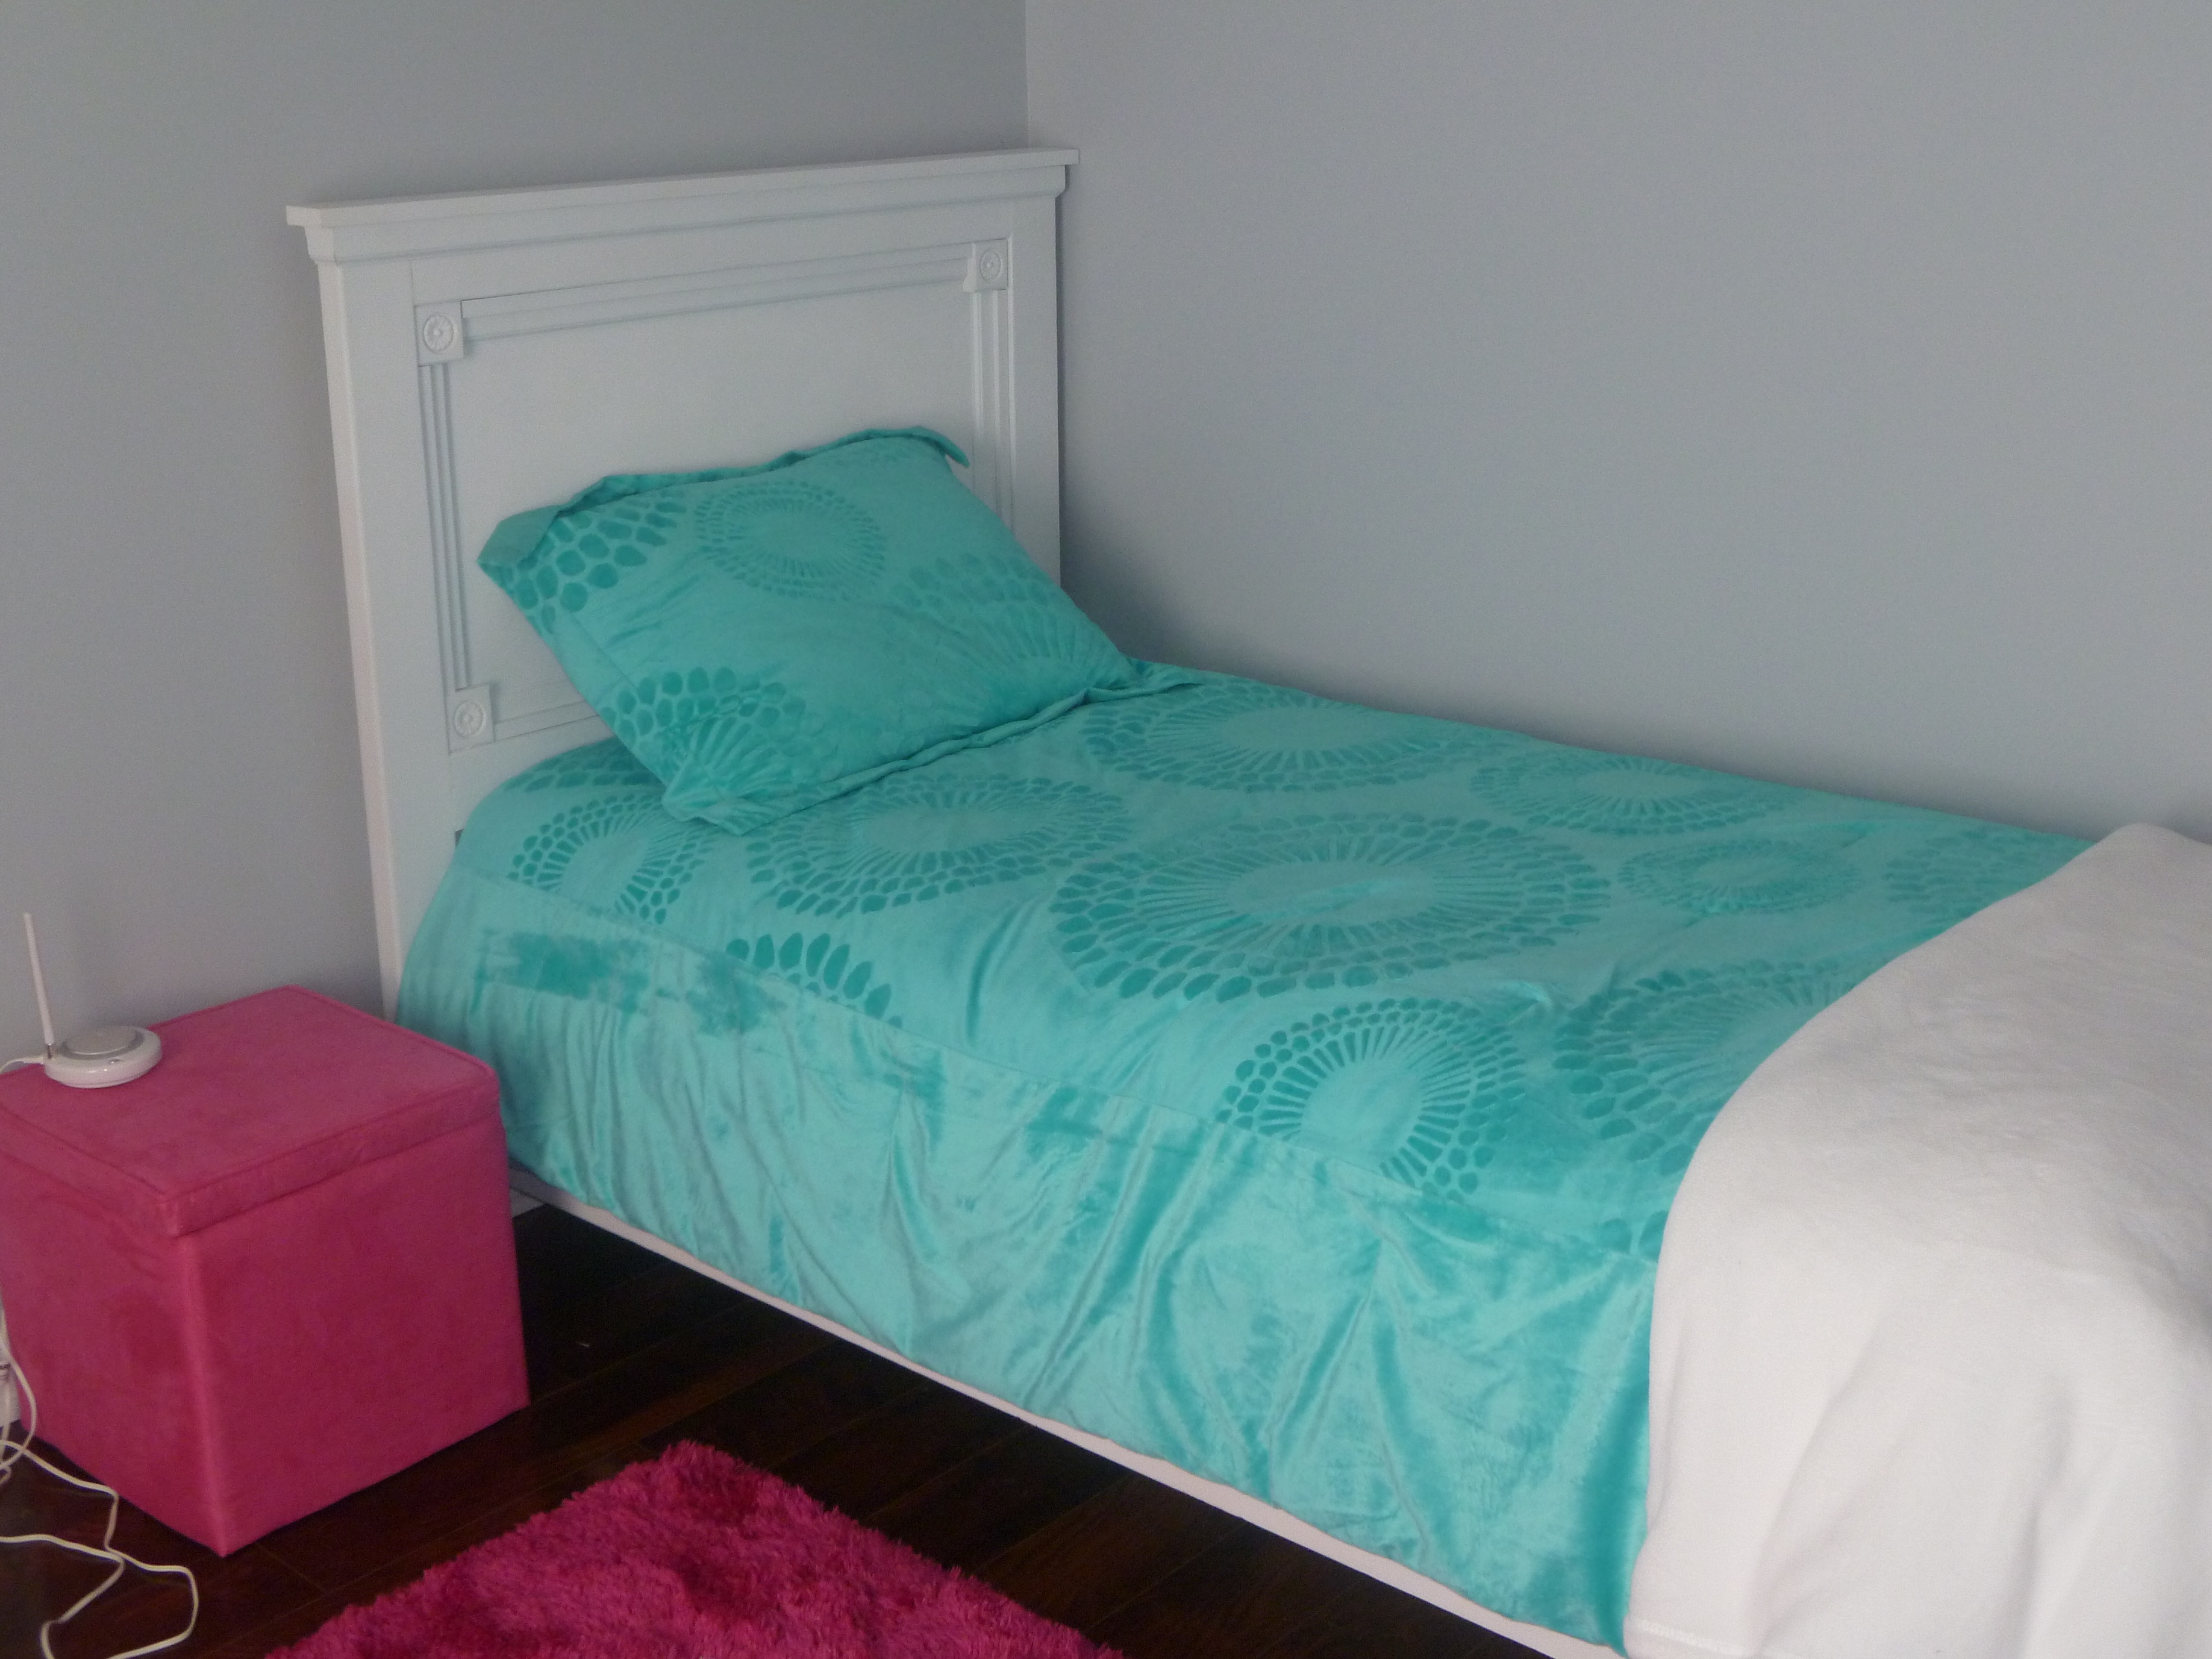
First time posting on here, made several items from this site. Thanks for all the plans. I modified this to a twin size for my daughters first bed and added a few features so I wanted to share. Twin is 39x75 so I just made it 21 inches narrower and almost 5 inches shorter. I say almost because I made the storage boxes 75 3/4 so that the drawer boxes would divide evenly into 3 to be the same size. The height of the bed is the same as Ana's plans. A few other small additions I made were webbing stapled to the slats and a small peice of scrap wood at each end to keep them taught so I didn't have to screw them all in. This makes it easier to move later as well. I also attached scrap wood 3 1/2 inches from the bottoms of the boxes so that they can easily rest on the 2x4s from the head and foot board. This makes it easier to assemble, especially if you plan on moving the bed in the future. just rest them on those 2x4's and screw together. My daughter loves her new bed.
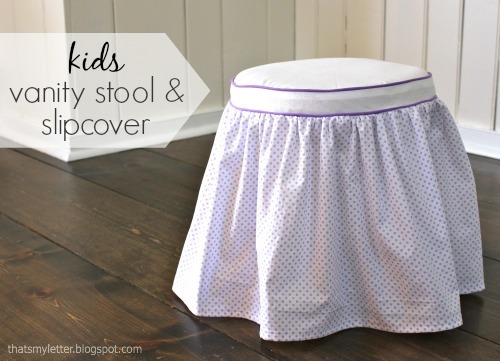
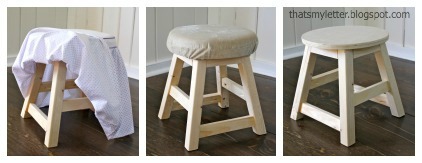
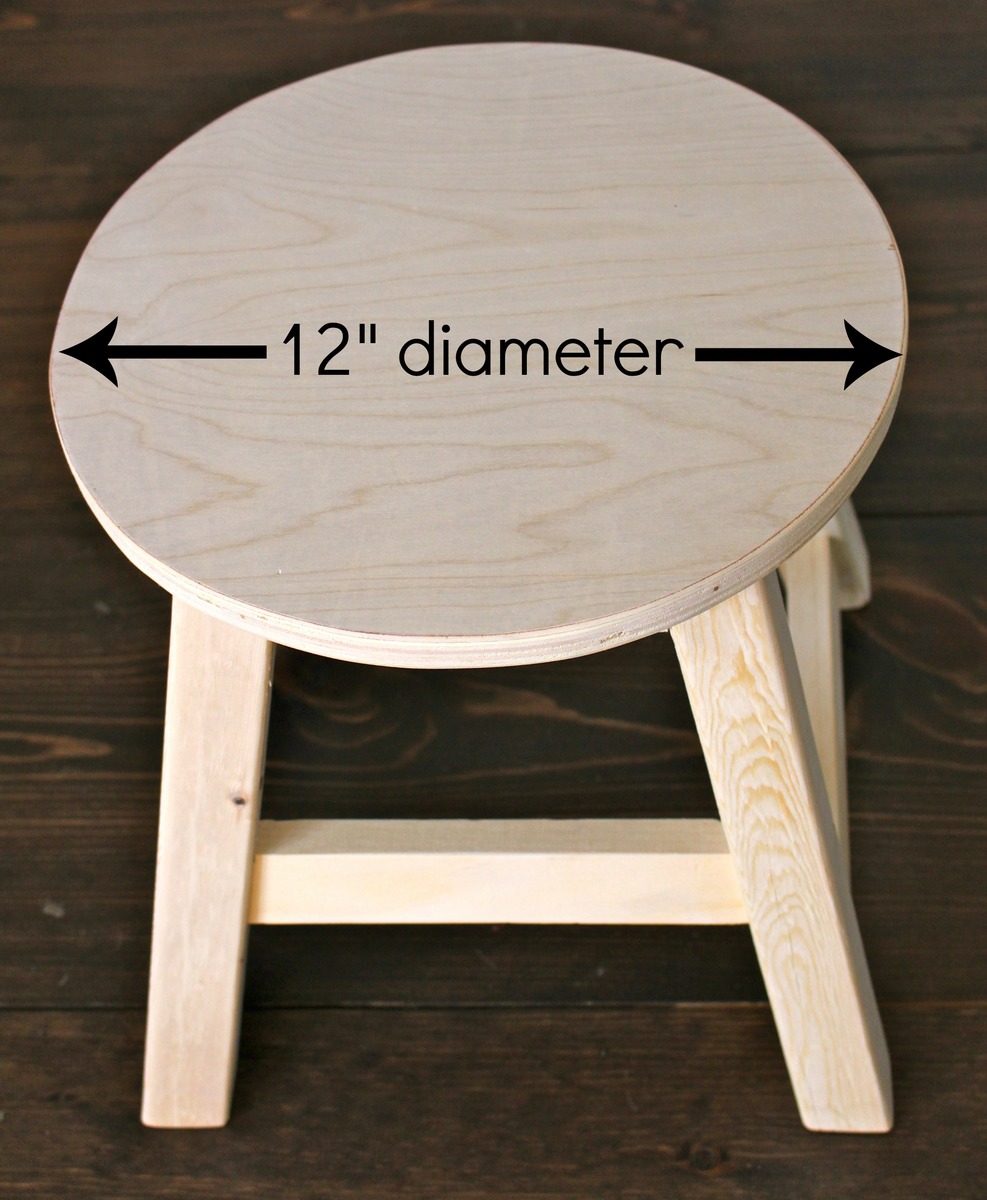
I used all scraps to construct the stool modifying the leg height to 12 1/2" and the seat to a 12" diameter to fit properly at the kids vanity. See the complete details on the slipcover in my blog post link.

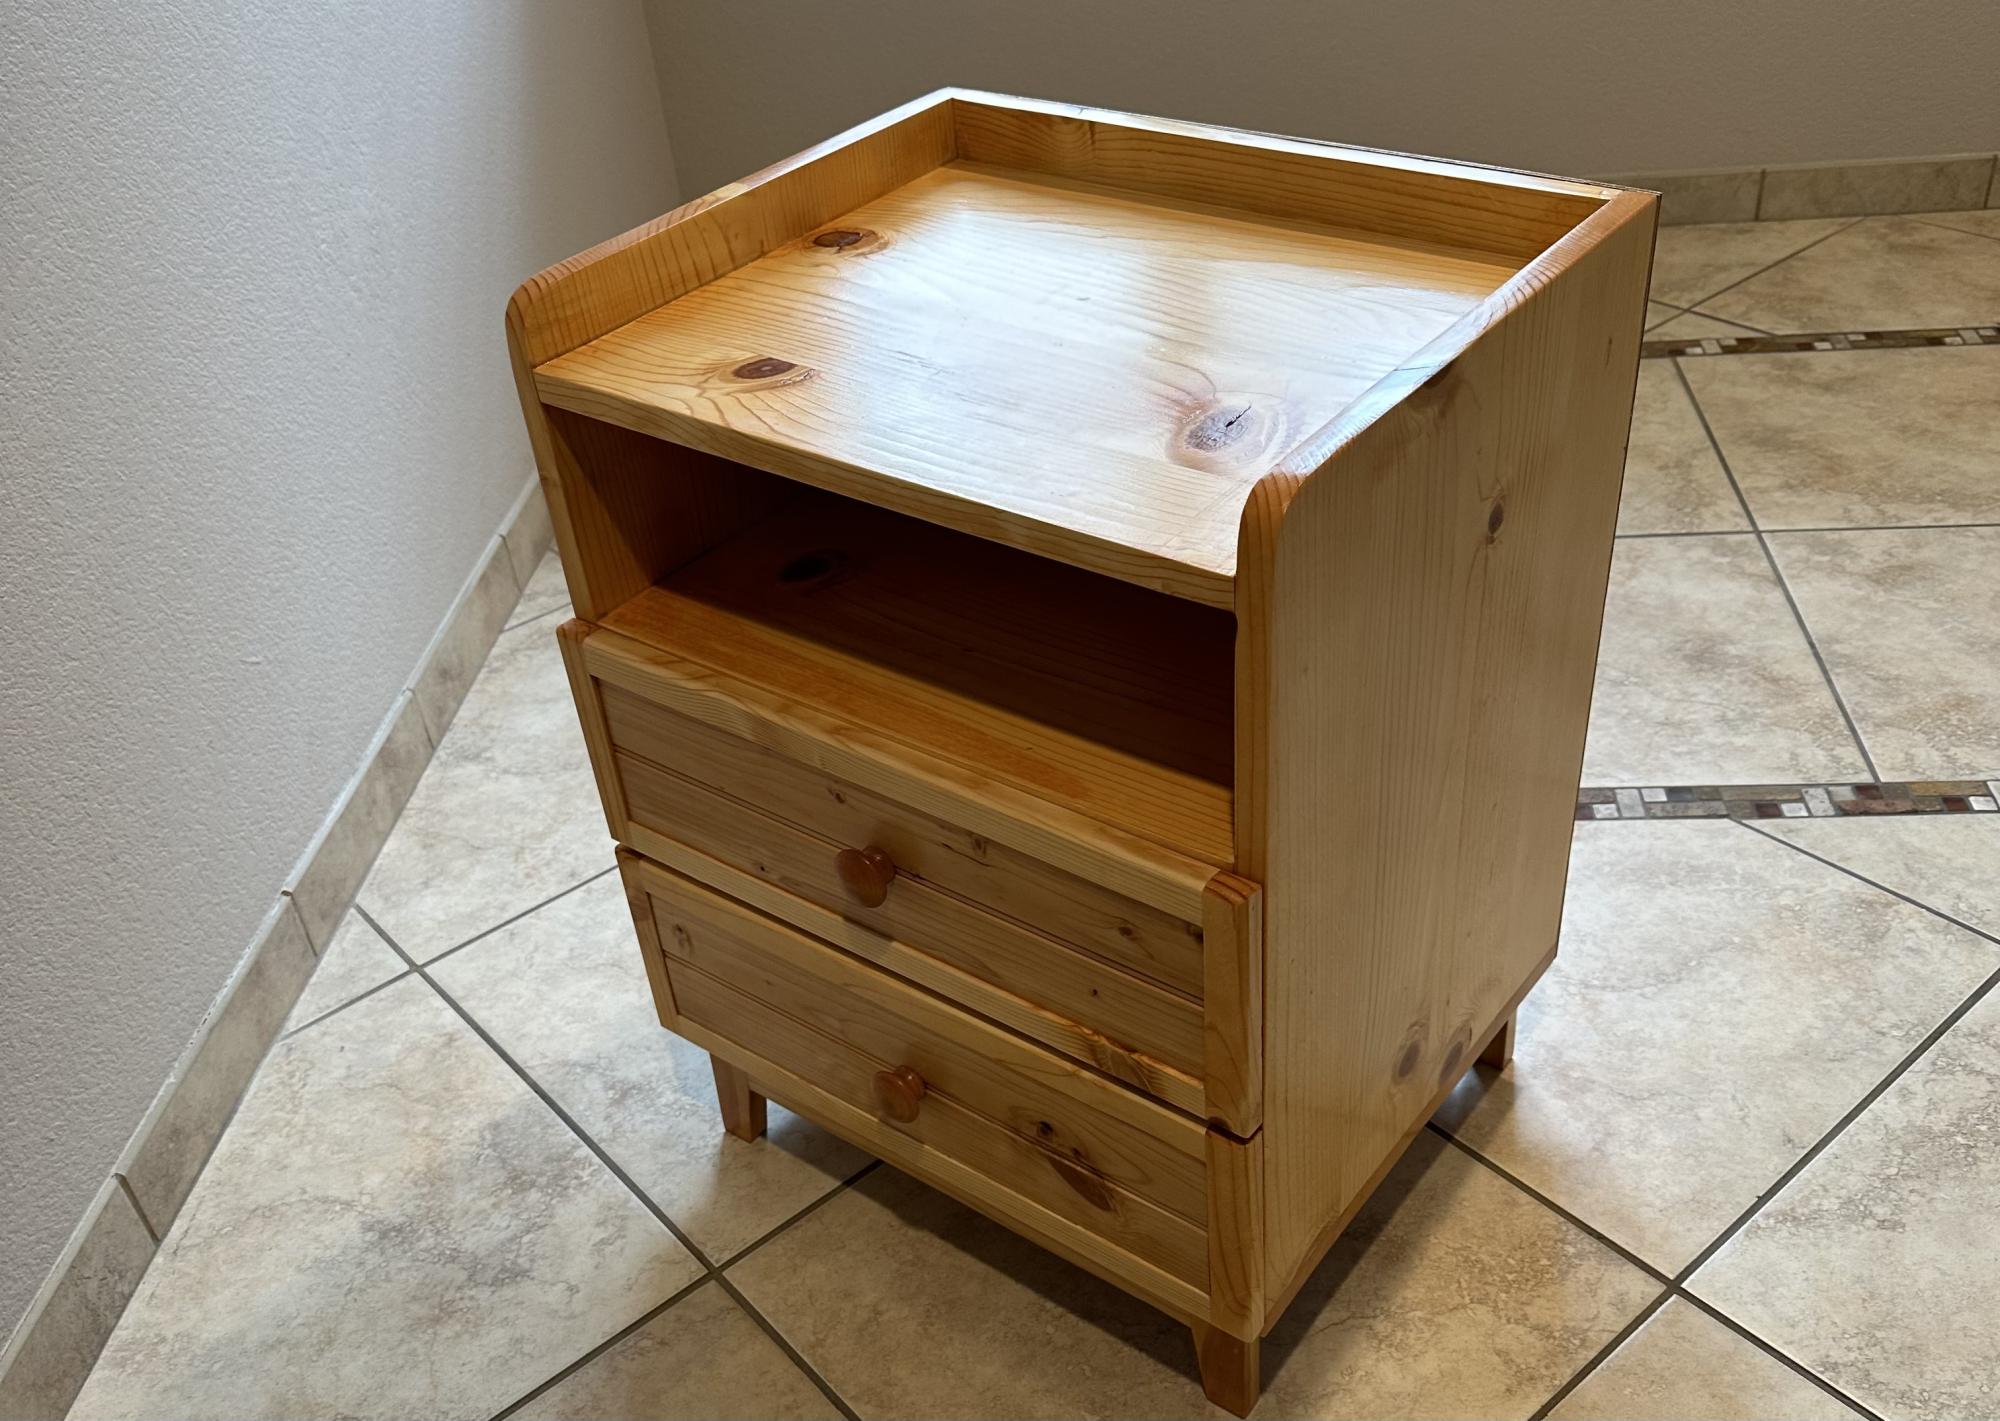
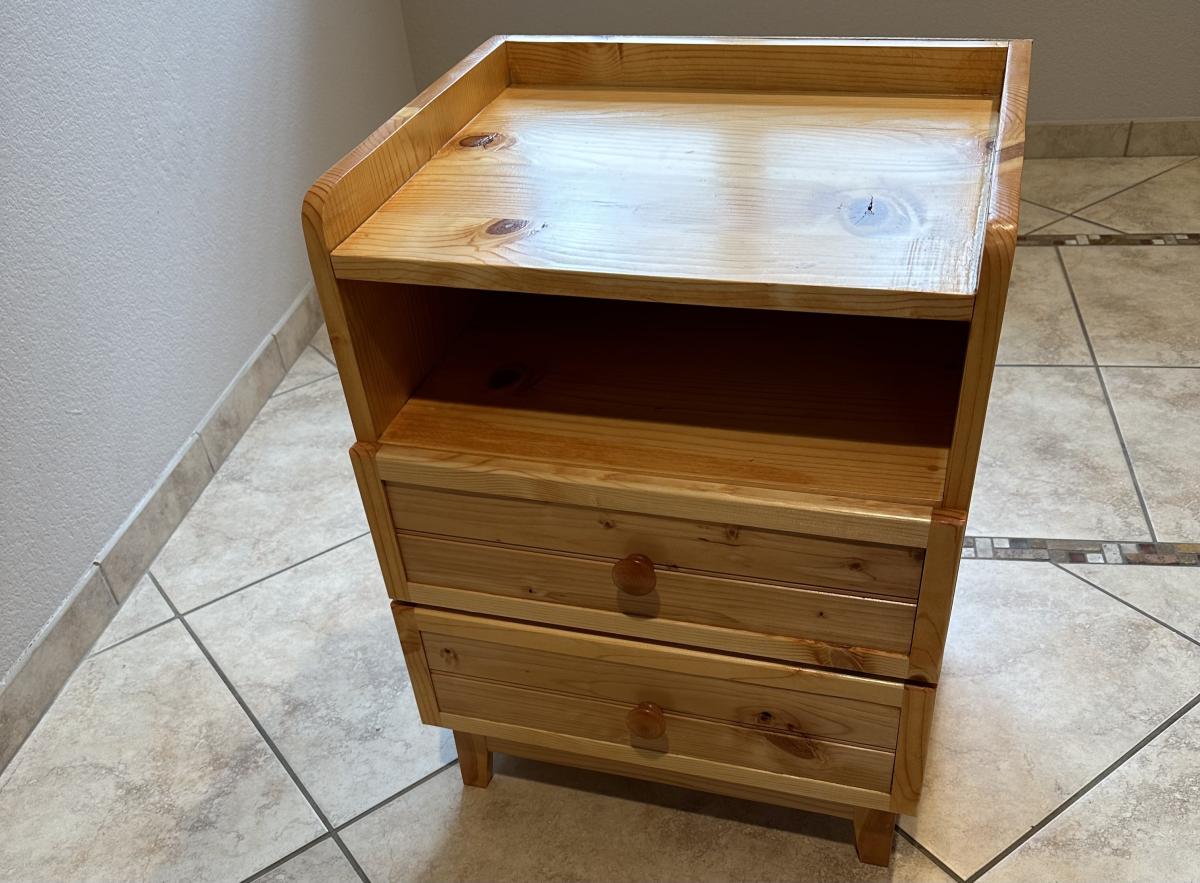
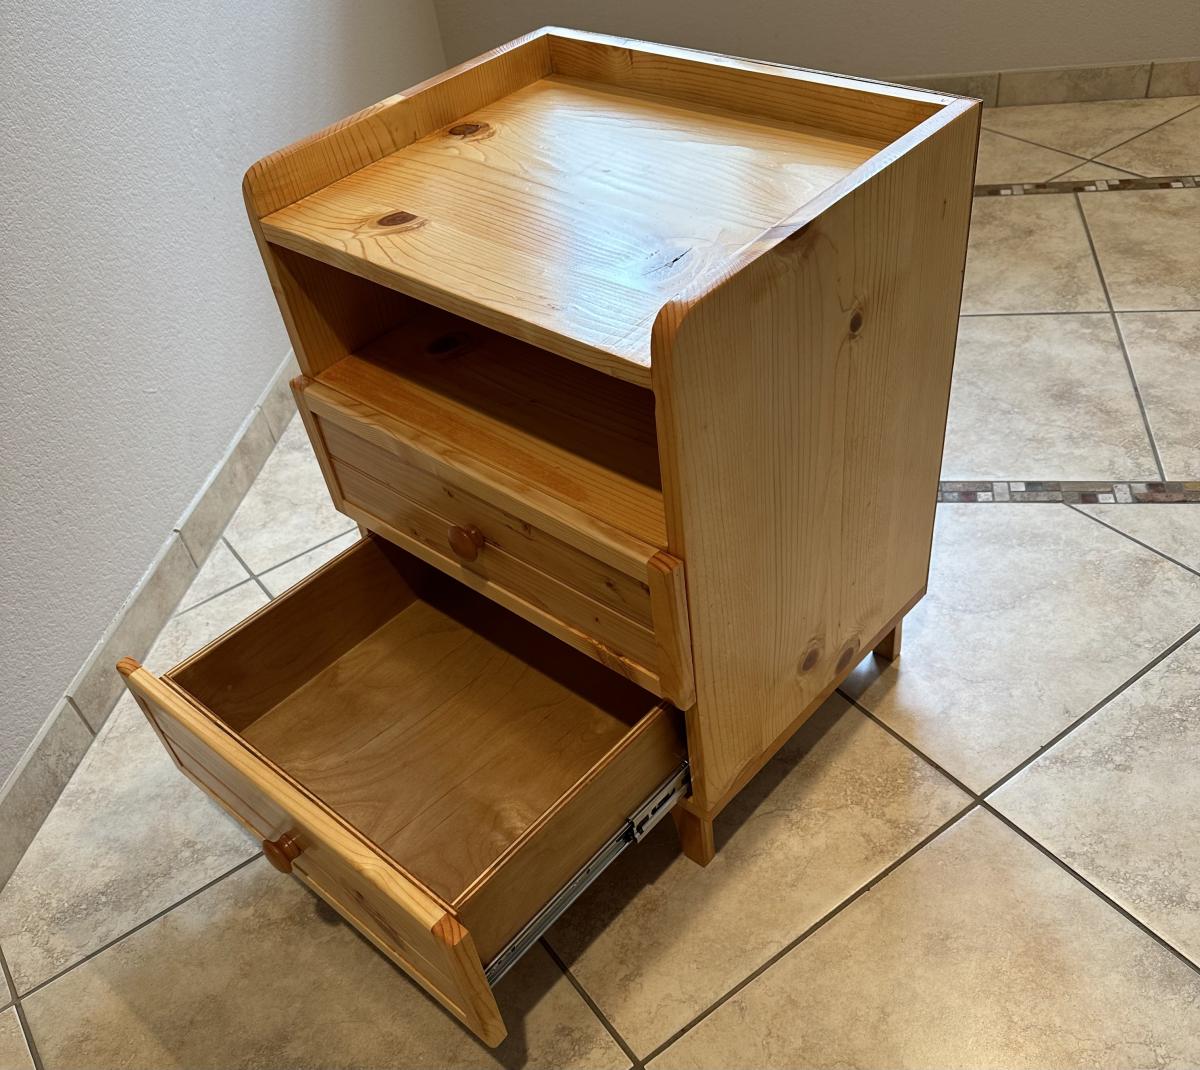
Thank you so much for your plan. I made some small changes. I used pine wood for the box sides and dividers, I moved the drawer faces to the outside and used 1/2 inch plywood for the drawer boxes to add some more space. The drawer faces have an inlaid to match my farmhouse bedroom I am currently building. The final product was stained with Minwax Golden Pecan and clear coated with warm semi-gloss.
Thu, 06/01/2023 - 09:15
Great job on this build, love the finish choice! Thank you for sharing.
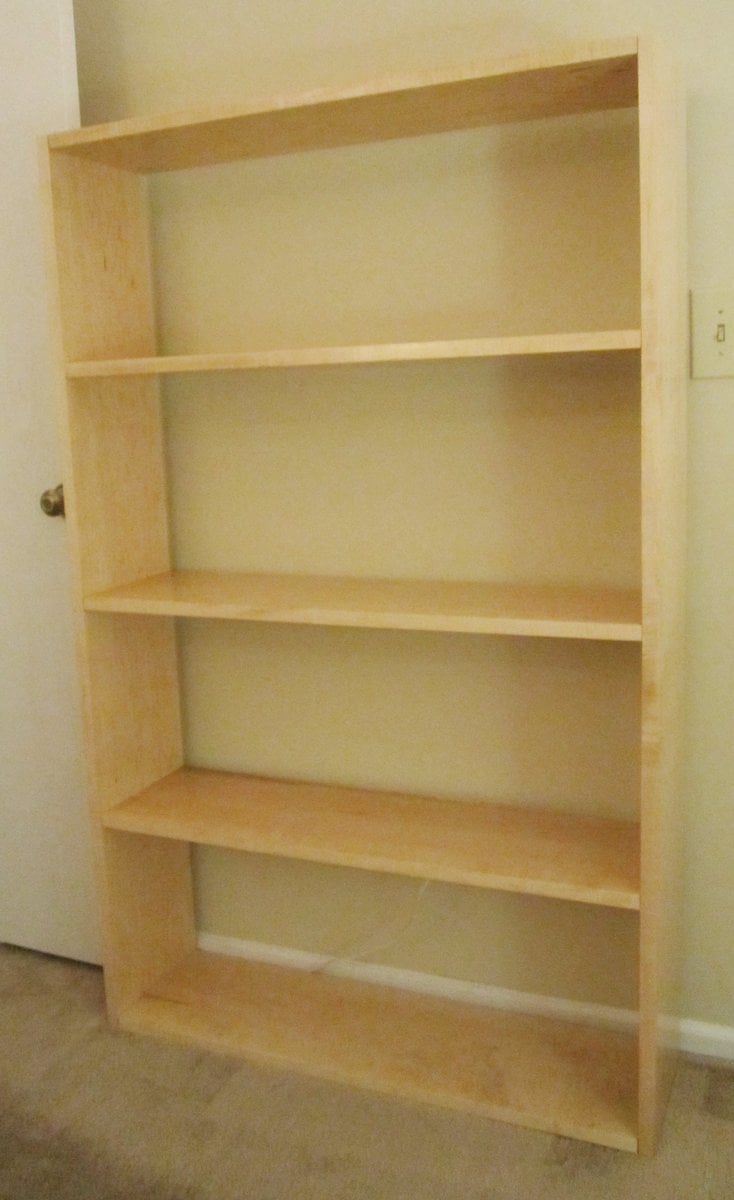
I made this bookcase out of solid hard maple lumber. The project was more expensive because I chose to use this wood. It also took more time because I had to do a lot of sanding in order to finish it with shellac and paste wax, but I think it was worth it. I altered the plans and made the bookcase 5' tall instead of 6' as it would have been a little large for the room I put it in otherwise. I used a kreg jig to create pocket holes on the undersides of the shelves so that I did not have to drill and make holes on the sides of the bookcase. I also used L and T brackets on the back to hold the whole thing together.

Tue, 01/24/2012 - 10:12
I really like this. I made a similar set a while back out of pine, because I needed a lot of book storage in a hurry, but nothing near this nice.
How is the side to side stability? I found a need to put bracing along the back, which also served to keep my books from falling off when the cats push up against them.
Tue, 01/24/2012 - 10:46
The side to side stability is pretty good. It'll rock a little bit, but it's really quite sturdy. The L and T brackets in the back helped significantly with the stability.
Great, simple bookshelf for our nursery
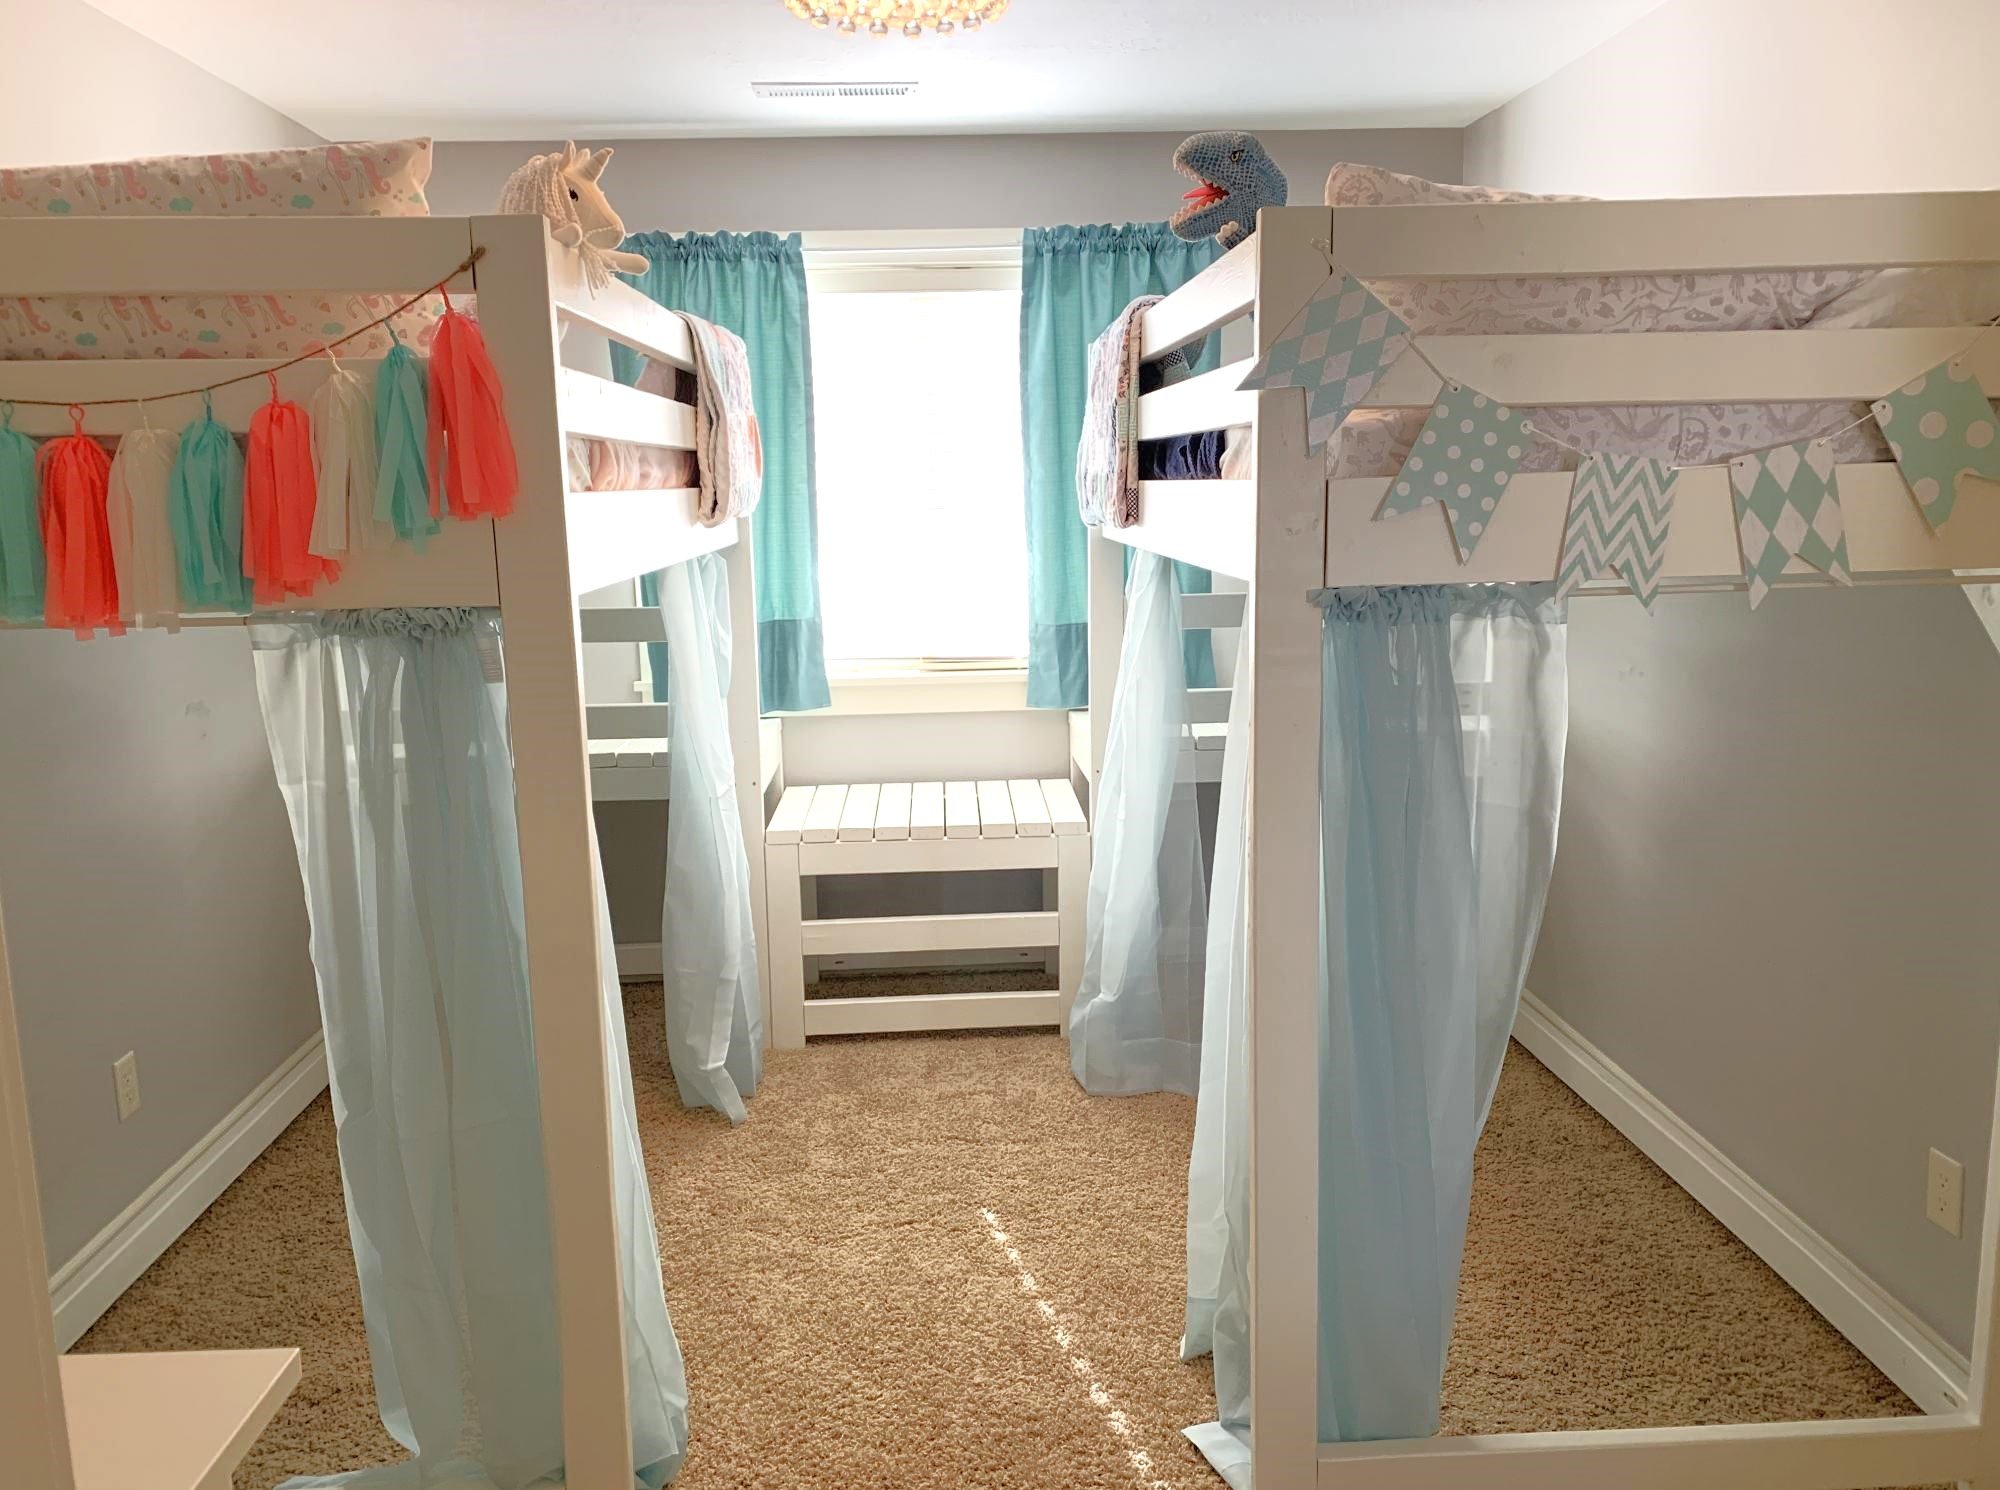
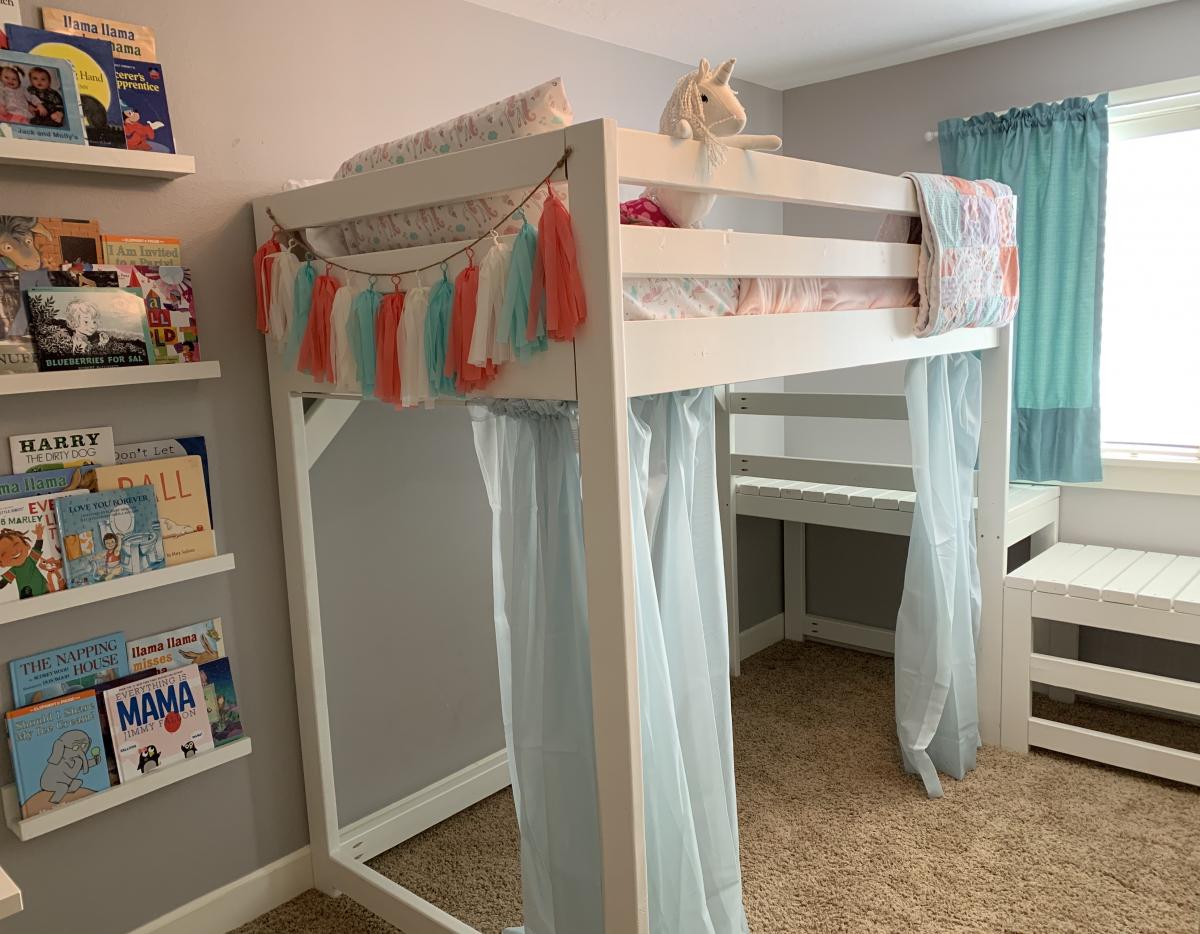
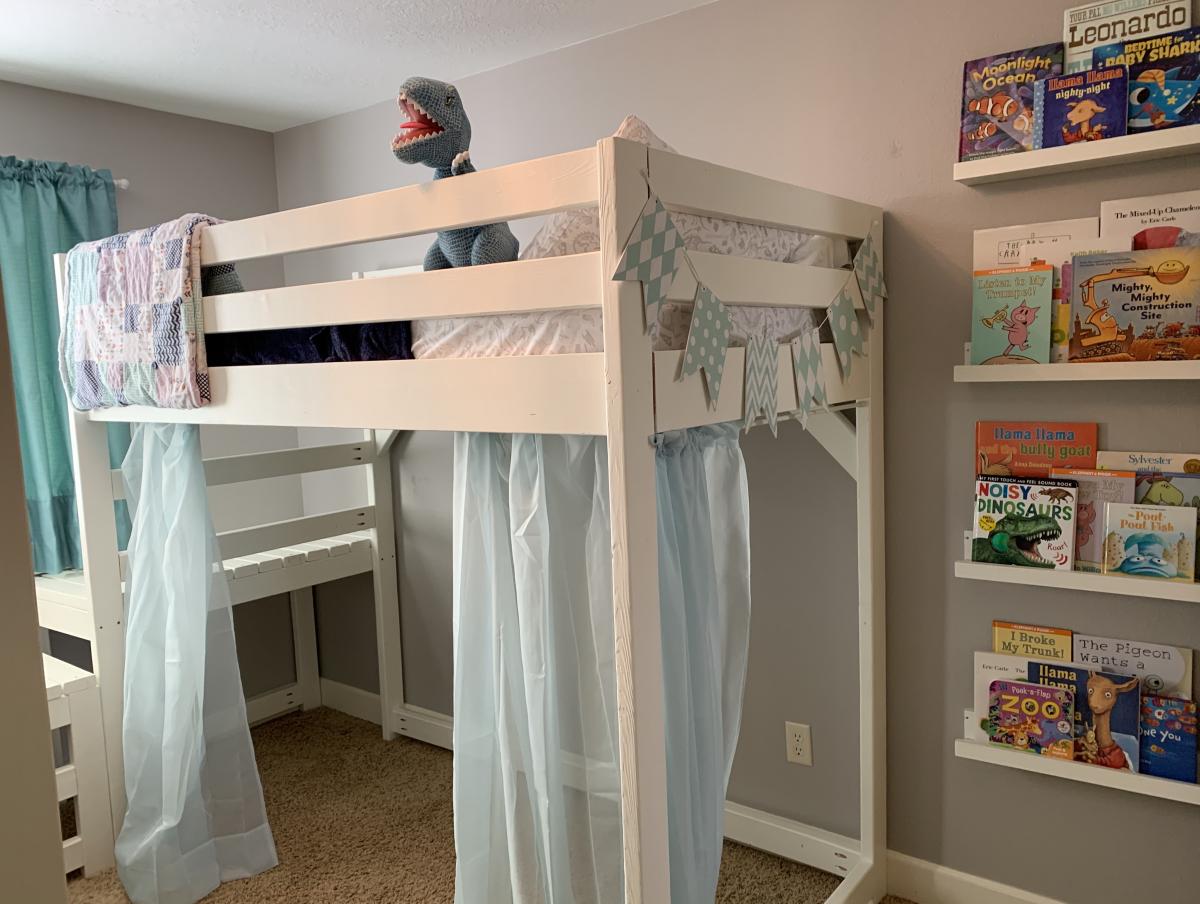
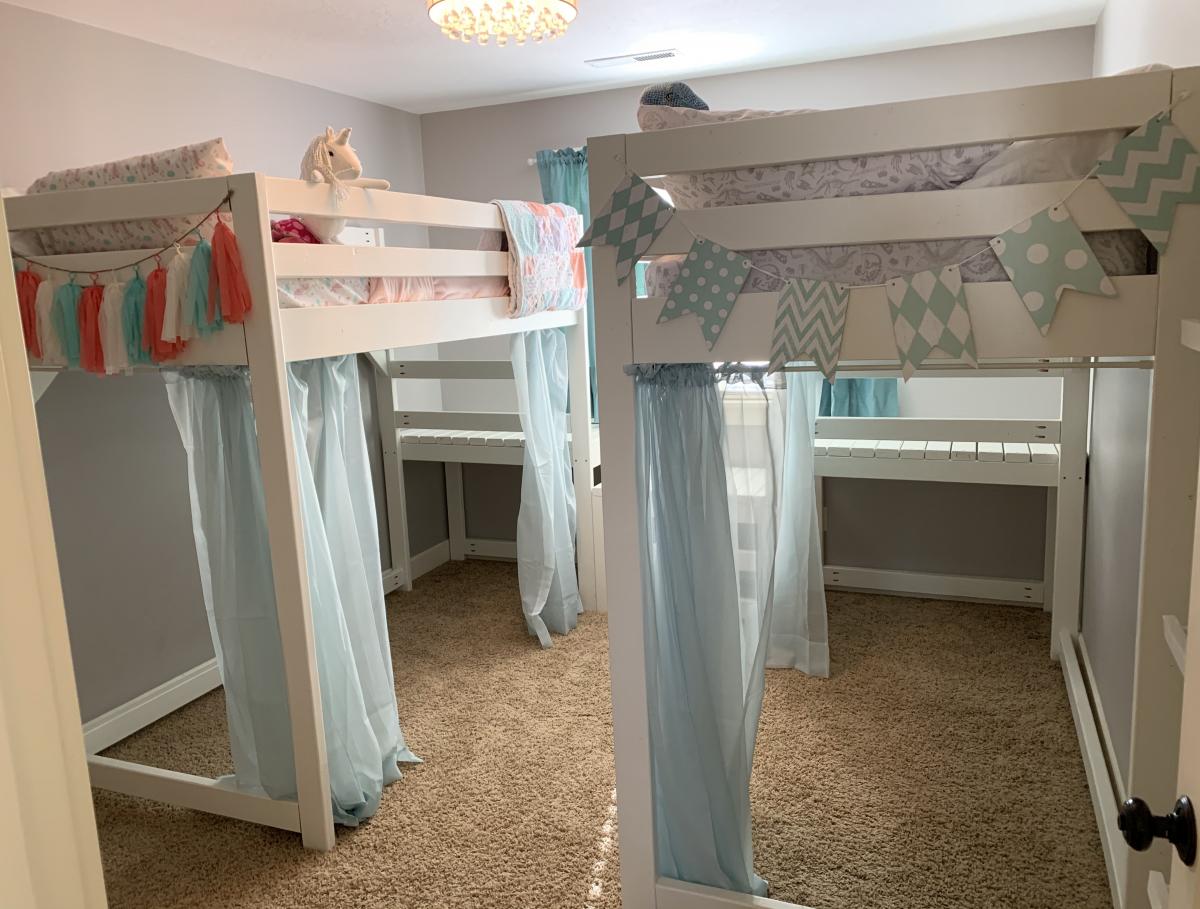
My twins just turned four and were still sleeping in their toddler beds, so it was time for an upgrade. They still want to share a room so we knew we needed to maximize space and open up some room for them to play. We chose the Camp Loft Bed but raised the height to 72" (with 53" of headspace) so we might be able to add a desk underneath when they get older.
Essentially, we made two loft beds with the platforms but omitted the stairs. Then we built a slightly lower platform to put between the two beds, which acts as a step down. Then instead of making stairs that jut out into the room, we added two 2x4s as ladder rungs to the lower platform. This also acts as a tunnel for the twins to crawl under to go between each other's play spaces. This also makes it so the beds can be easily separated if we ever need to put them in separate rooms.
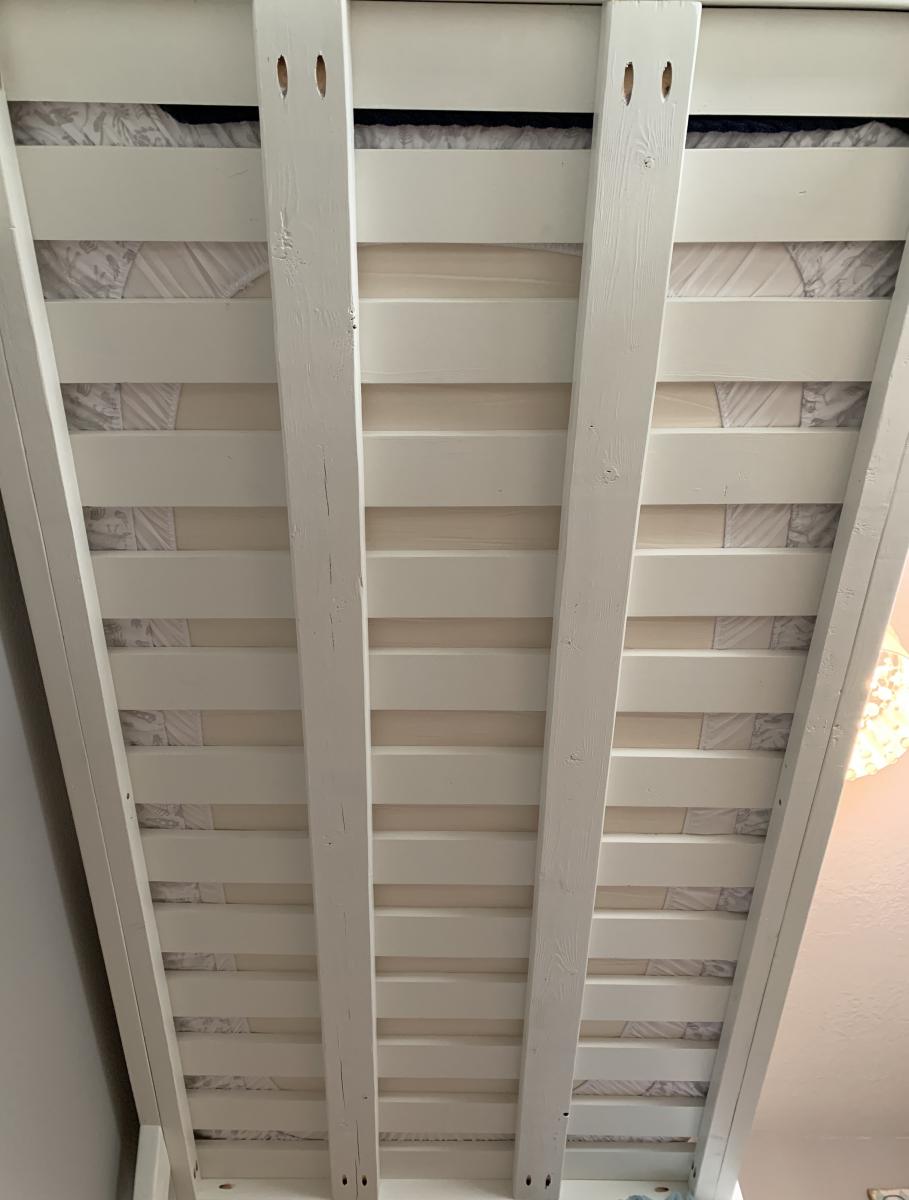
When it was complete we noticed one of the beds was a little wobbly, so we added diagonal braces in the corners and another 2x4 across the length of the bottom to help stabilize it. We also chose to use 1x4 pieces of pine as the slats for the mattress to lay across, but they didn't feel like they would support our weight if we wanted to read to them in bed. So we added two more 2x4s underneath the slats the entire length of the bed, which has added a ton of support.
We stopped keeping track of exactly how much it cost, but it was close to $400 for both beds combined. And it took most of my husband's free time for two weeks, but most of that was painting two coats of paint on every piece before assembling. First he cut all the pieces to size, drilled the holes with a Kreg Jig, and then painted. To make the painting more efficient, he put a bunch of screws into boards so he could paint all the exposed sides of the lumber, flip, and leave them to dry. Then we assembled the beds in their room.
The twins love their new beds, and we love how much more space they have to play in their room! We were worried the room would feel too crowded but with the openness of the plan and the space that was opened up underneath, we think it turned out great! Now we can move in a bunch of their toys and reclaim some of our house! Thanks for the great plans!

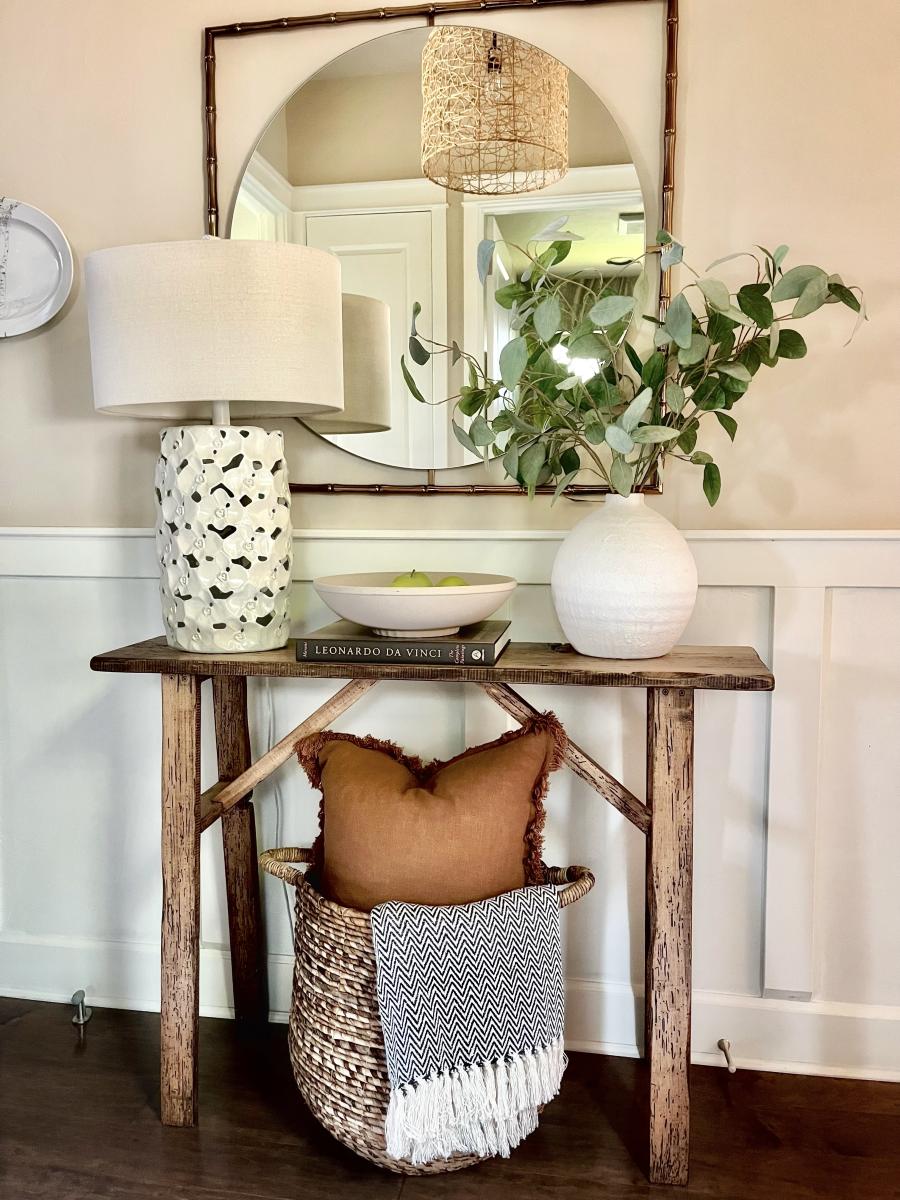
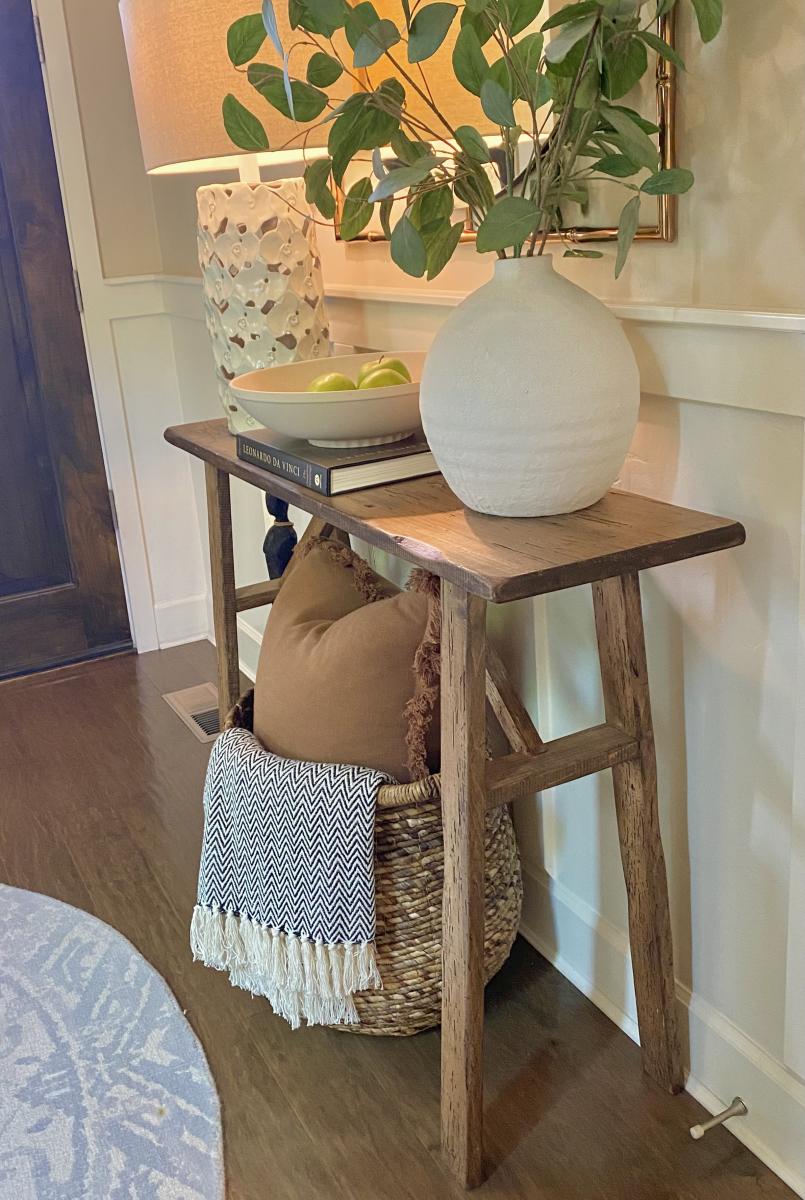
This entry table I made from wood I got from a recycle center of wood products. It’s been in our entry now for several years. I have only basic tools-no planers and jointers, etc. I do have a fold up table saw that I use once in awhile. I enjoy working with natural /live edge and or construction grade materials. Always impressed with the items Ana has built. Good job Ana😁👍
Twin Farmhouse Storage Bed With Hinged Footboard.
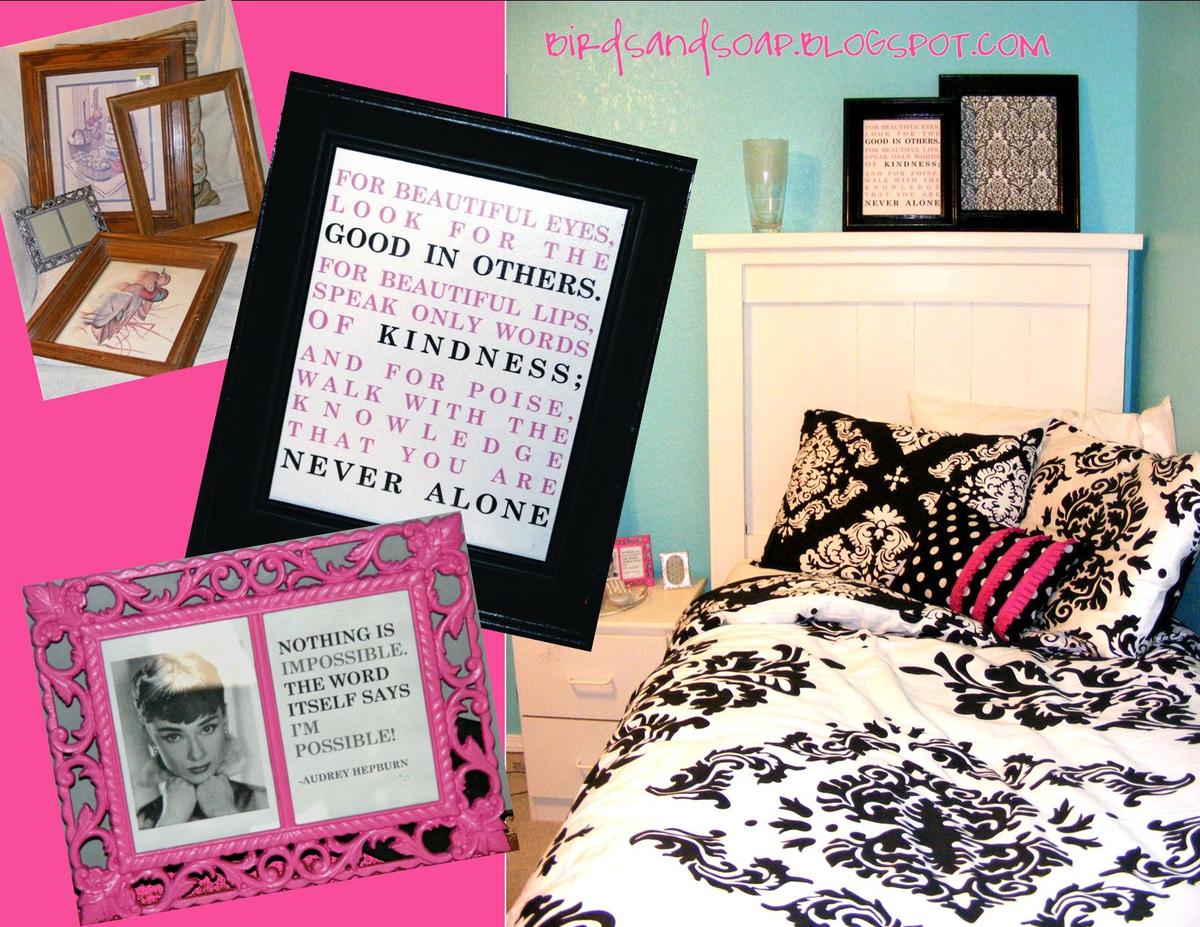
After making a queen-size for myself, I built this twin-sized version for my niece. Along with a "Breakfast at Tiffany's inspired" theme, she got a new bed and a new bedroom for her 15th birthday.
For this version of the bed, I made just one storage cubby because it sits against a wall. With the addition of the hinged footboard, she has a secret vault for storing her Super Secret Teen items (or shoes or snowboards). I followed the traditional farmhouse bed design, omitting one 1x6 in the head/footboard panels. This way, it is not as wide and the storage cubby meets the bedpost on center.
(Again, my daughter modeling the hinging action).
Wed, 06/13/2012 - 02:06
Excellent posting here people will get lot of information with the help of posted information & topics from this blog. nice work keep it going.
www.ahappydeal.com
Tue, 09/11/2012 - 20:43
I'm wanted to make my daughter a bed simple to this... Was wondering, since you took one 1x6 piece out on each end... How many inches is the gap from the wall to bed? I want to have my DD's bed against the wall but, since she is only 3 I don't want a big gap for her to fall into! I hope you understand what I mean. Thanks.

In reply to I'm wanted to make my by kad050209 (not verified)
Tue, 09/11/2012 - 21:53
The gap is actually determined by the widest part of the bed, which is the cap piece on the head and footboards. At most, your gap would be around 3 inches, but you can shove a foam pool noodle from the dollar store in that gap if you are concerned she will get stuck.
And just to be clear, I only removed (1) 1x6 from the headboard and (1) 1x6 from the footboard to match; not two boards from each panel. Wasn't sure if you understood.
Wed, 03/06/2013 - 02:05
i like the theme of "Breakfast at Tiffany's inspired" . http://www.365trustbuy.com
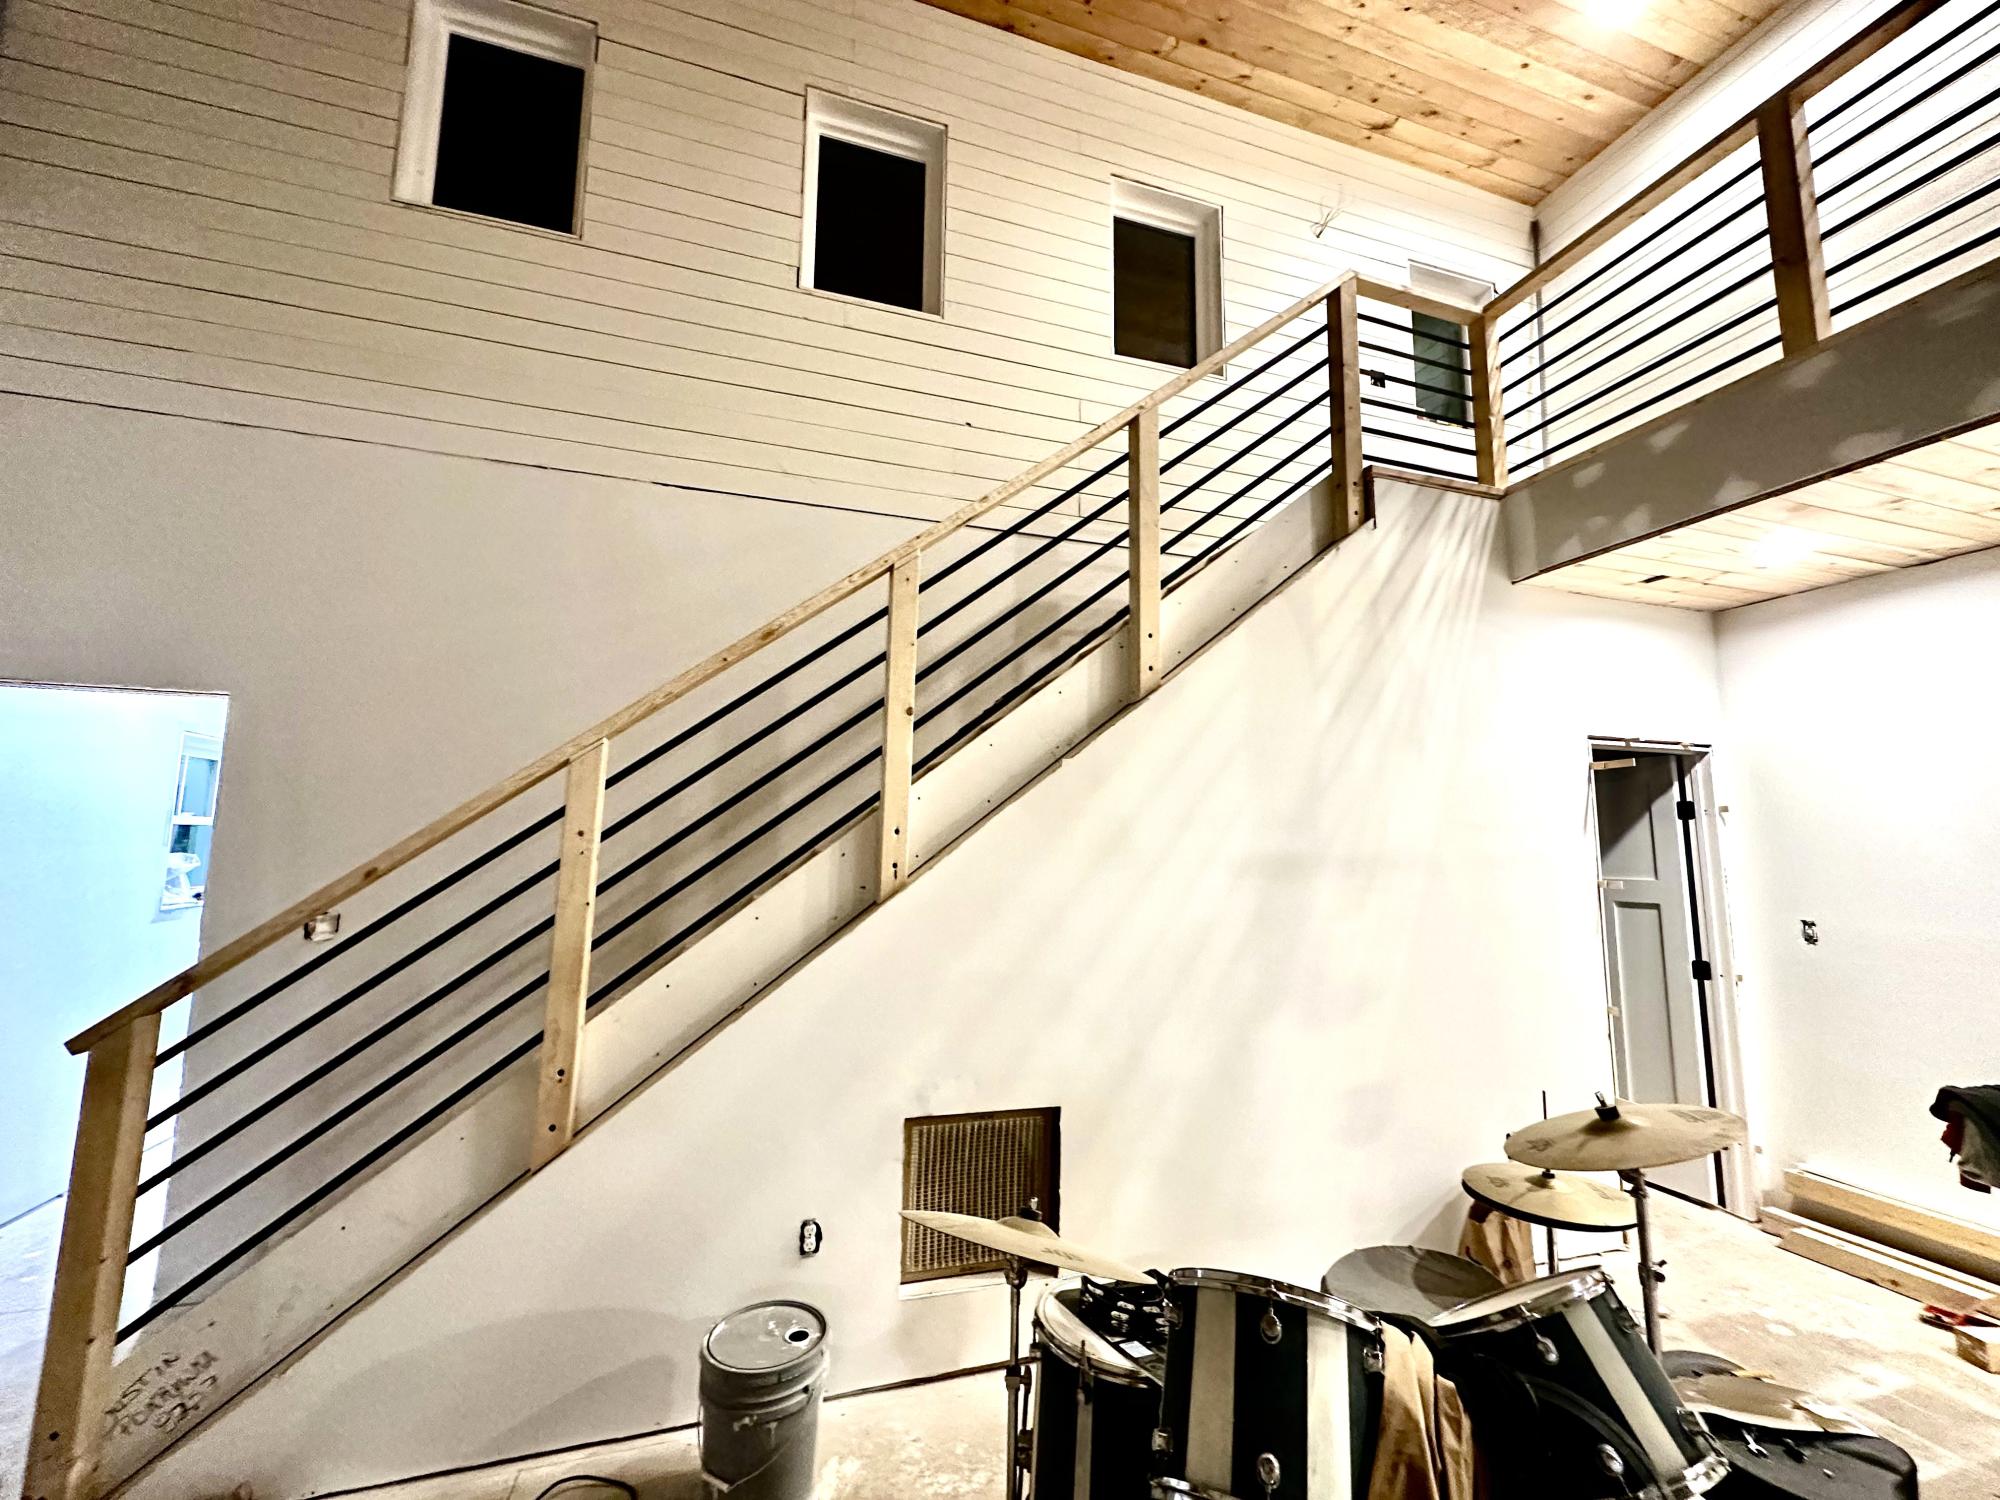
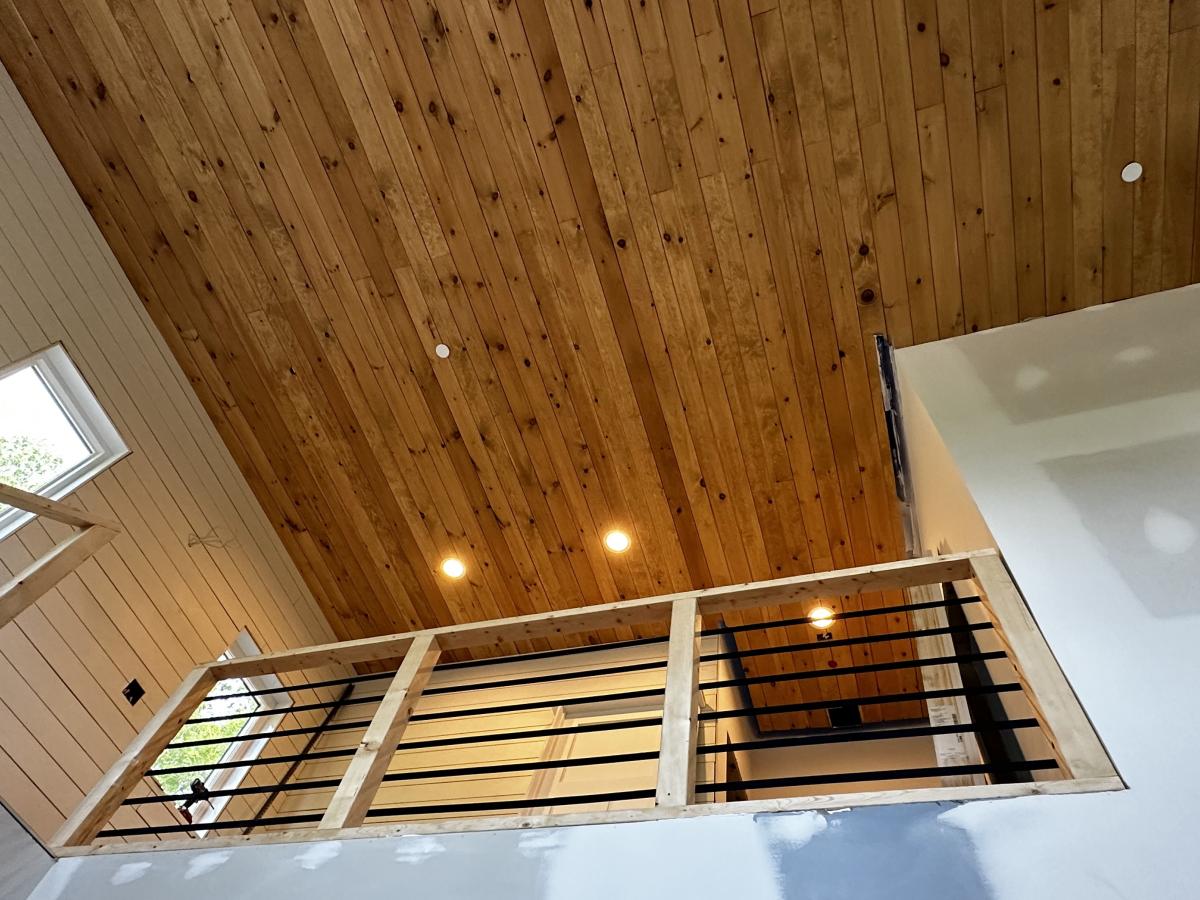
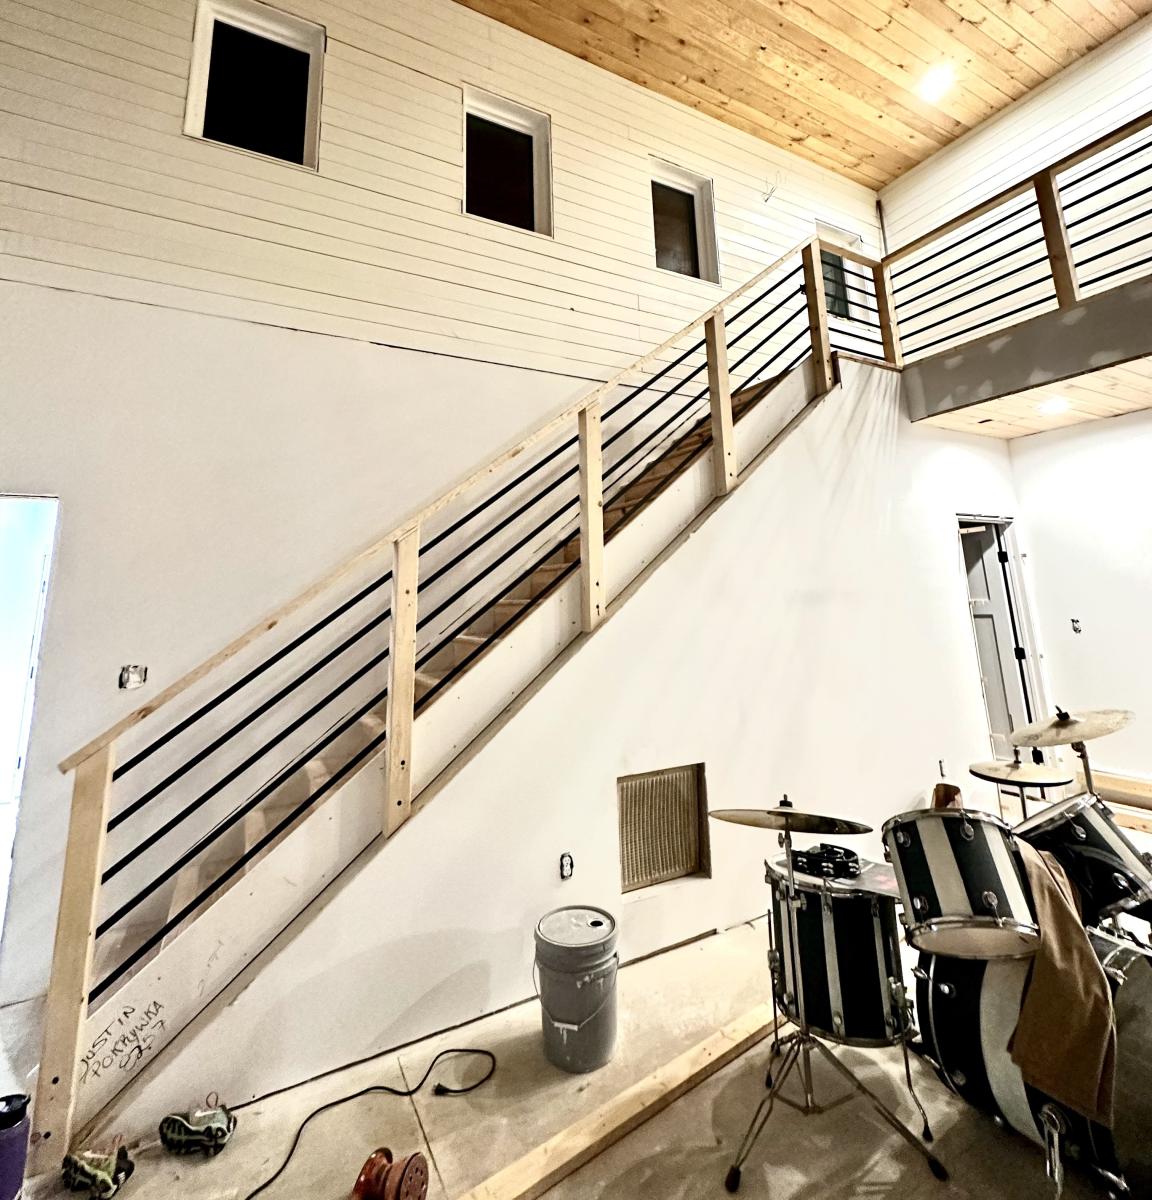
We used your idea of railings for our new home!
We used 4x4’s for the posts instead of 2x4’s
We love it and so does everyone else!
Justin Pokrywka

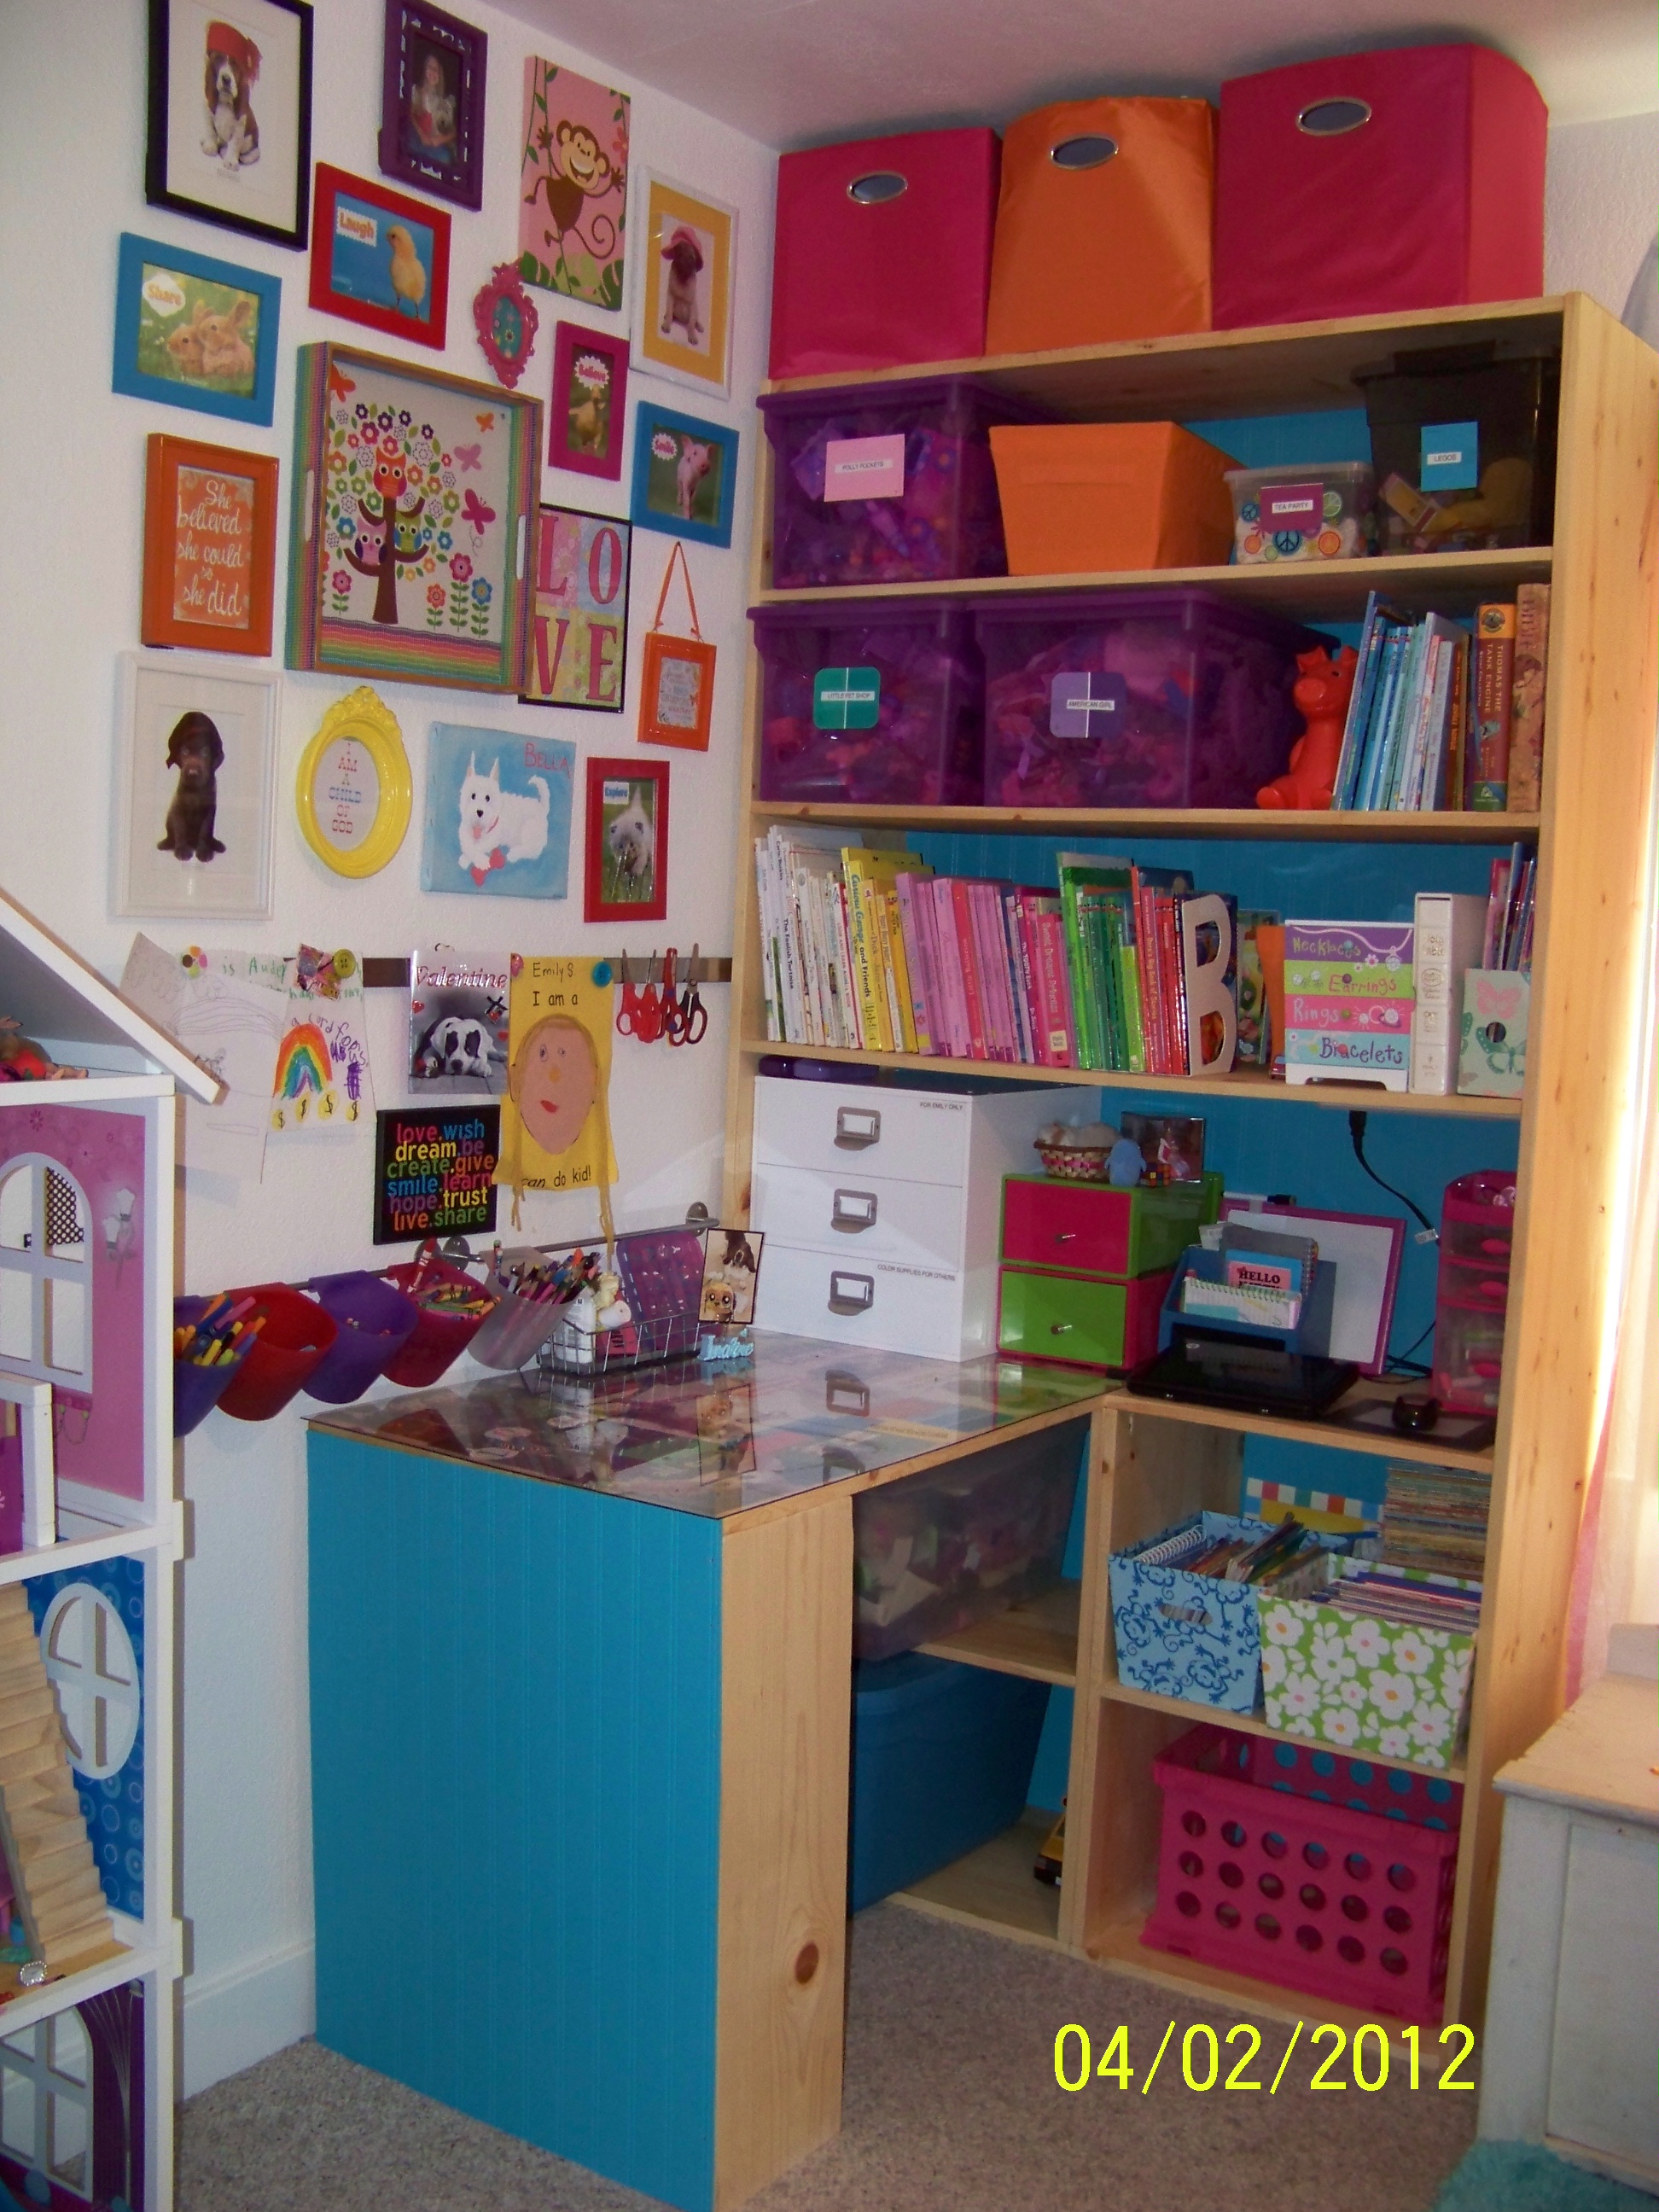
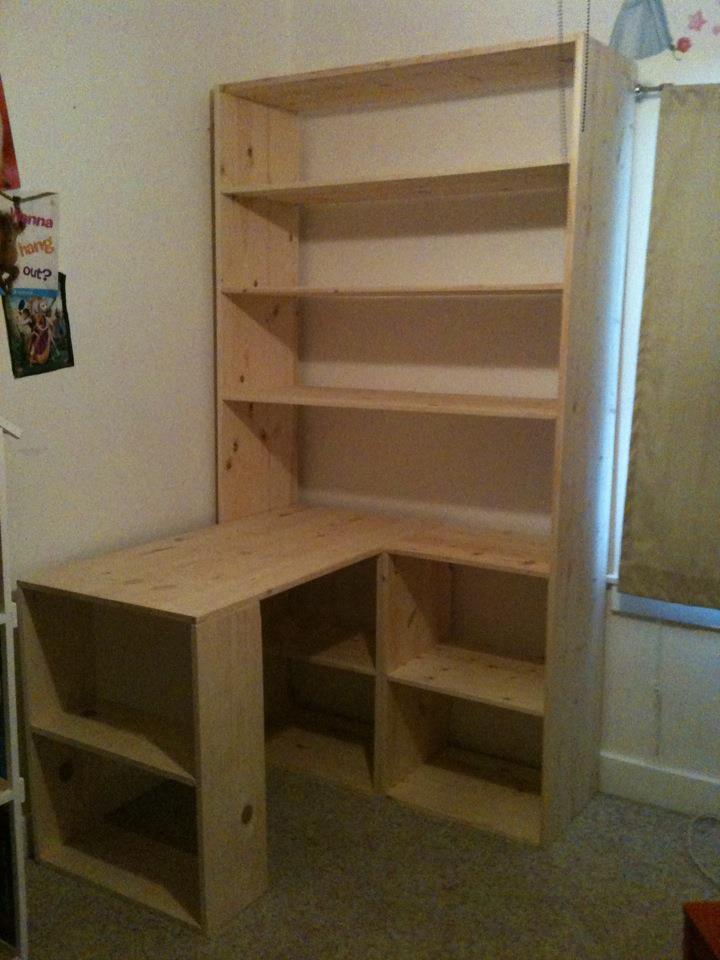
If it was not for this site I would not think we could do this. Inspiration was from the IKEA LACK bookshelf and varioous craft desk tutorials on here. Bookshelf is 7 ft tall, 4 ft wide and shelves are 16 inches deep. Writing desk area is 3 ft long 2 ft wide. It could be done cheaper but it needed to hold all my daughters toys in bins so we paid more for the 16 inch deep boards. It only took a Saturday afternoon to build, but more time in decorating, clear coat of stain. It has a acrylic top writing surface.

Mon, 04/02/2012 - 23:01
Oh I love it! What a huge amount of storage!!!! I love the bright colors and wood grain too! Thank you so much for sharing! Very inspiring!
Fri, 07/11/2014 - 11:35
my brother saw this on line picture and he would like to make it for his little girl. Like to get the plan from you if you have it.
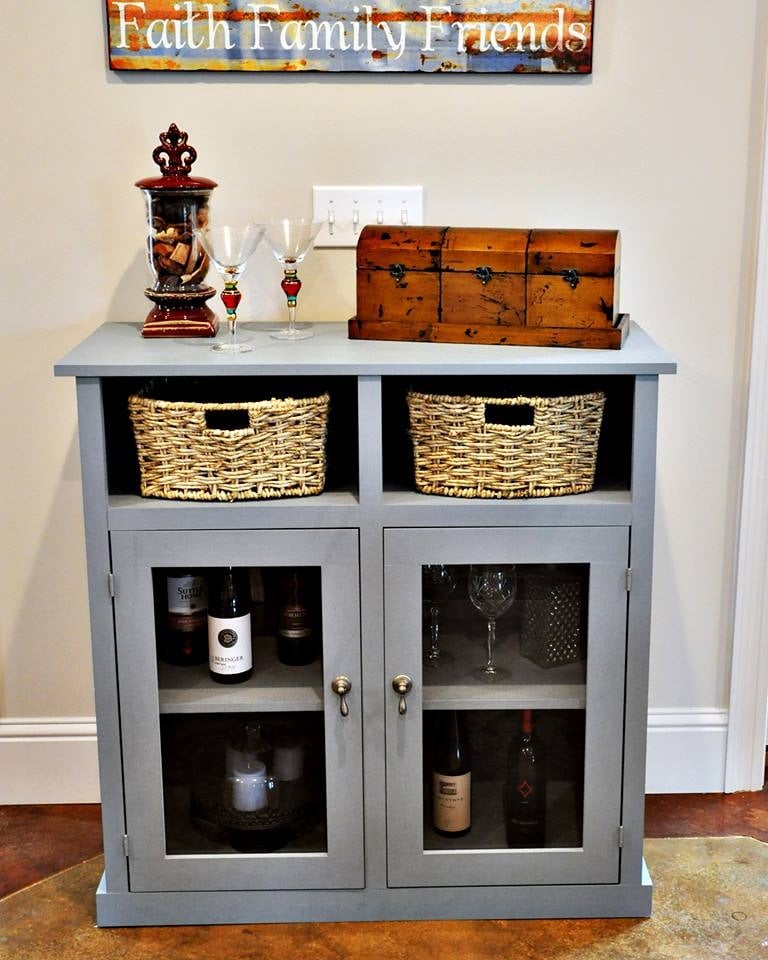
I modified the size of the original plan to better fit the space. It is slightly deeper and taller than the plans. I also used a router to create a rabbet for the glass inserts in the doors.
The finish is a homemade chalk paint followed by multiple coats of furniture wax. The build itself was quick and straight forward, but the finish took the most time.
The console really pops in a room full of stained furniture. I love the look, shape, and versatility of it--thank you for sharing the plans!

Thu, 01/23/2014 - 08:36
This project looks really good. I love the glass inserts and the color you chose.
Val @ artsybuildinglady.blogspot.ca
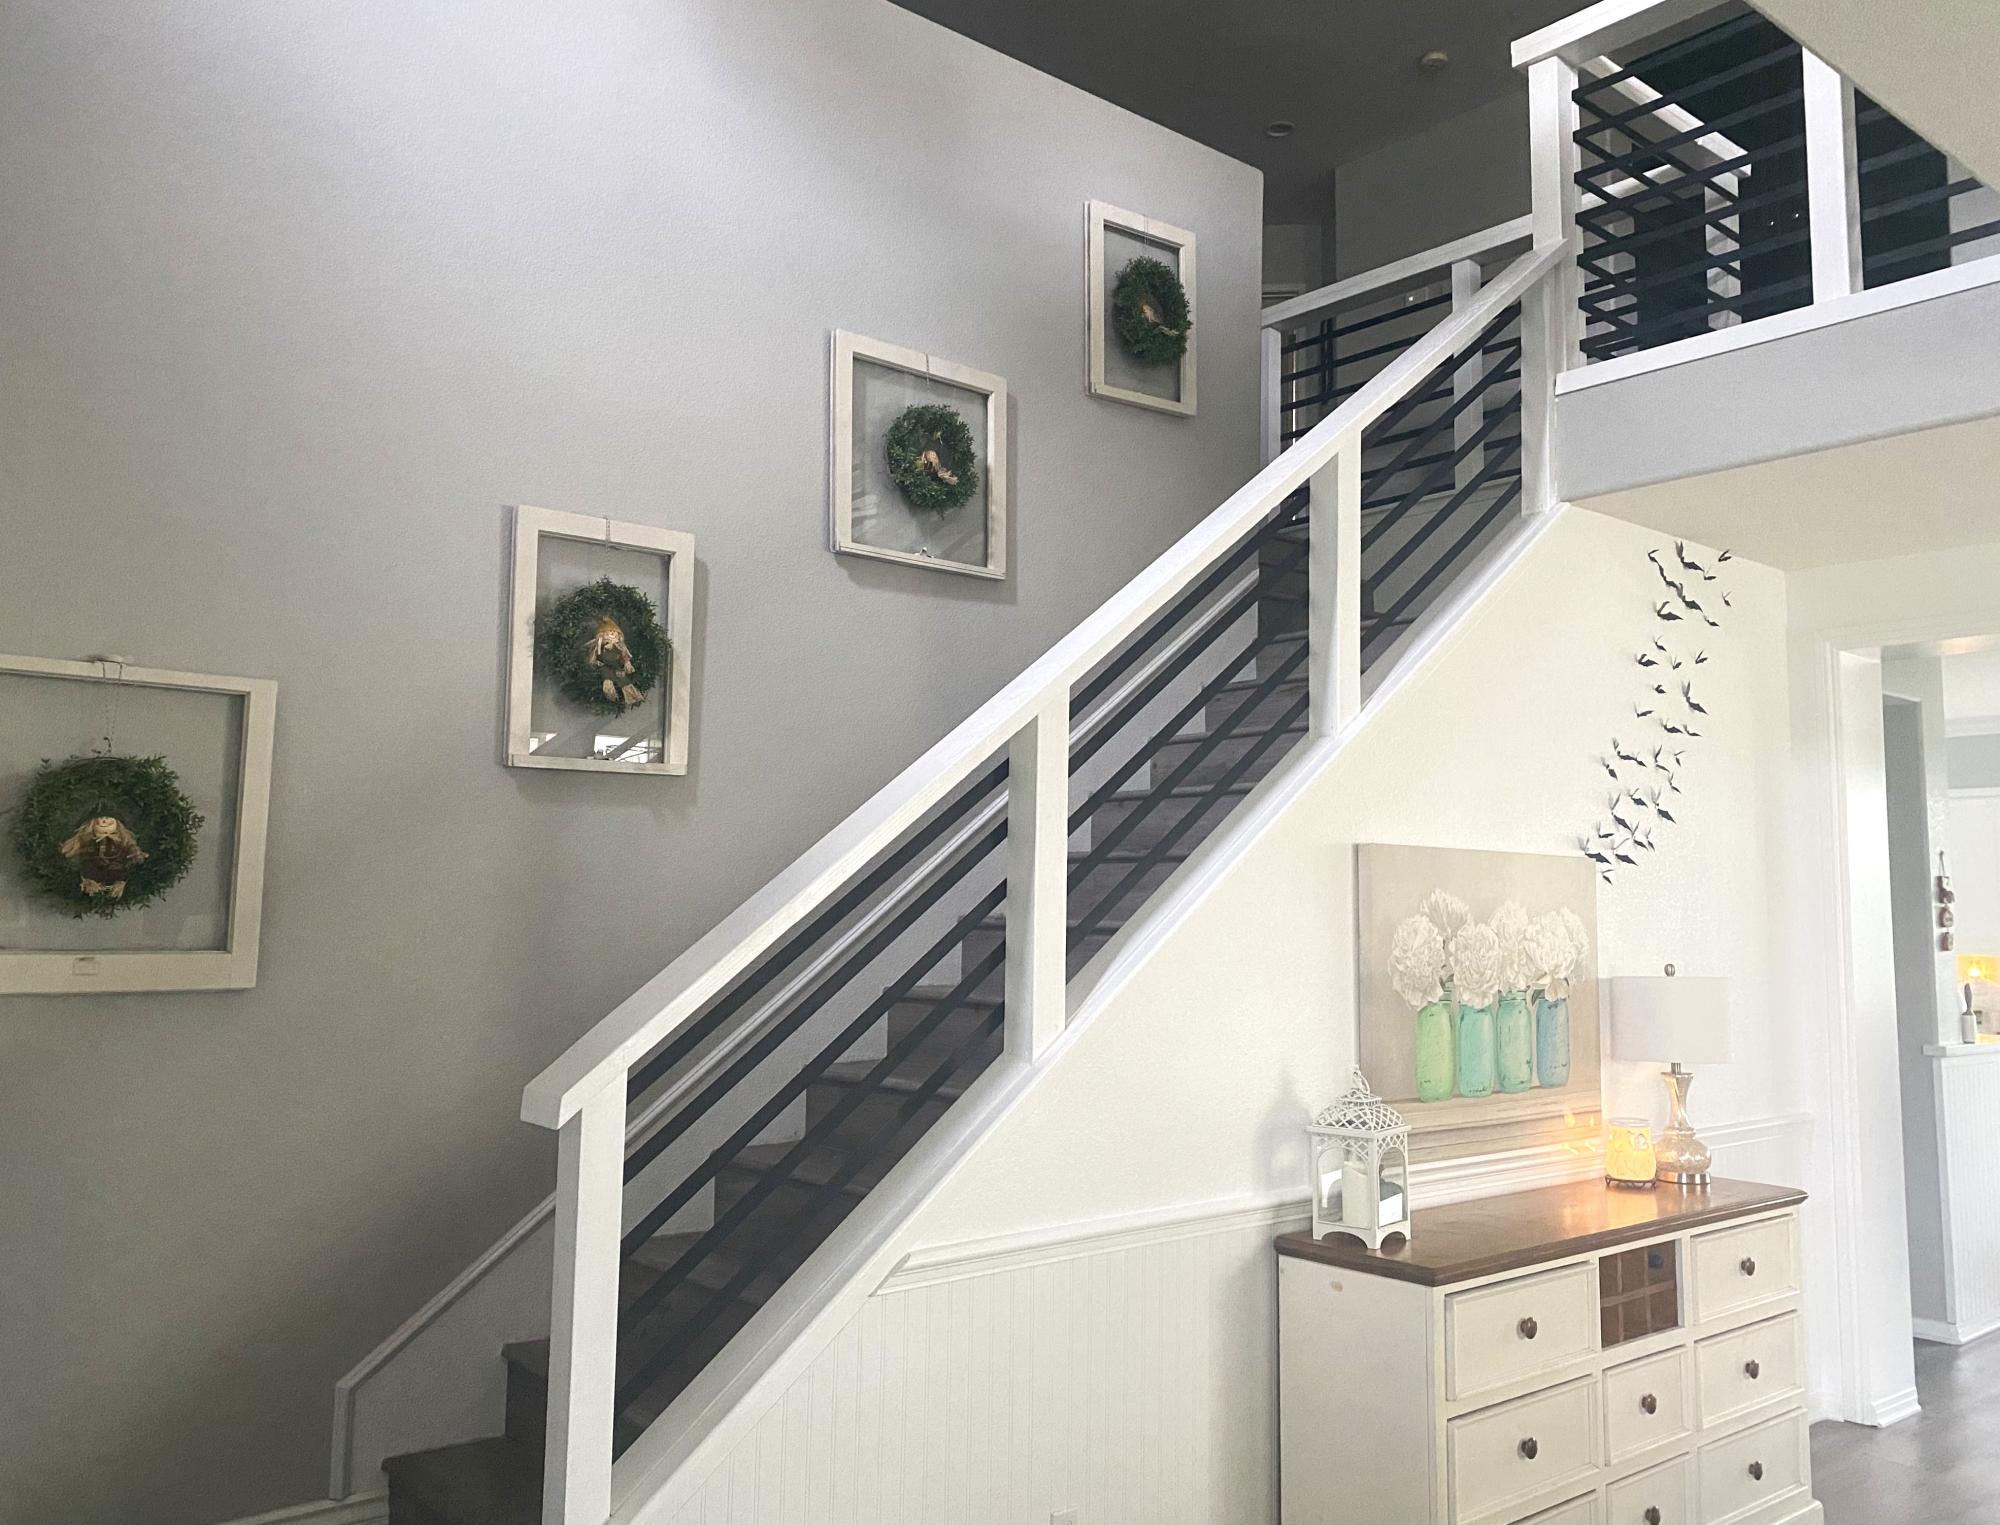
During a home renovation we found out part of our stair rail would need to be replaced and the quote from the contractor floored us. We were searching for an economical way to DIY the stairs and come across your idea. I immediately loved it and we worked to figure out how we could put it together with our limited construction knowledge. The end result exceeded my expectations. I totally love it!
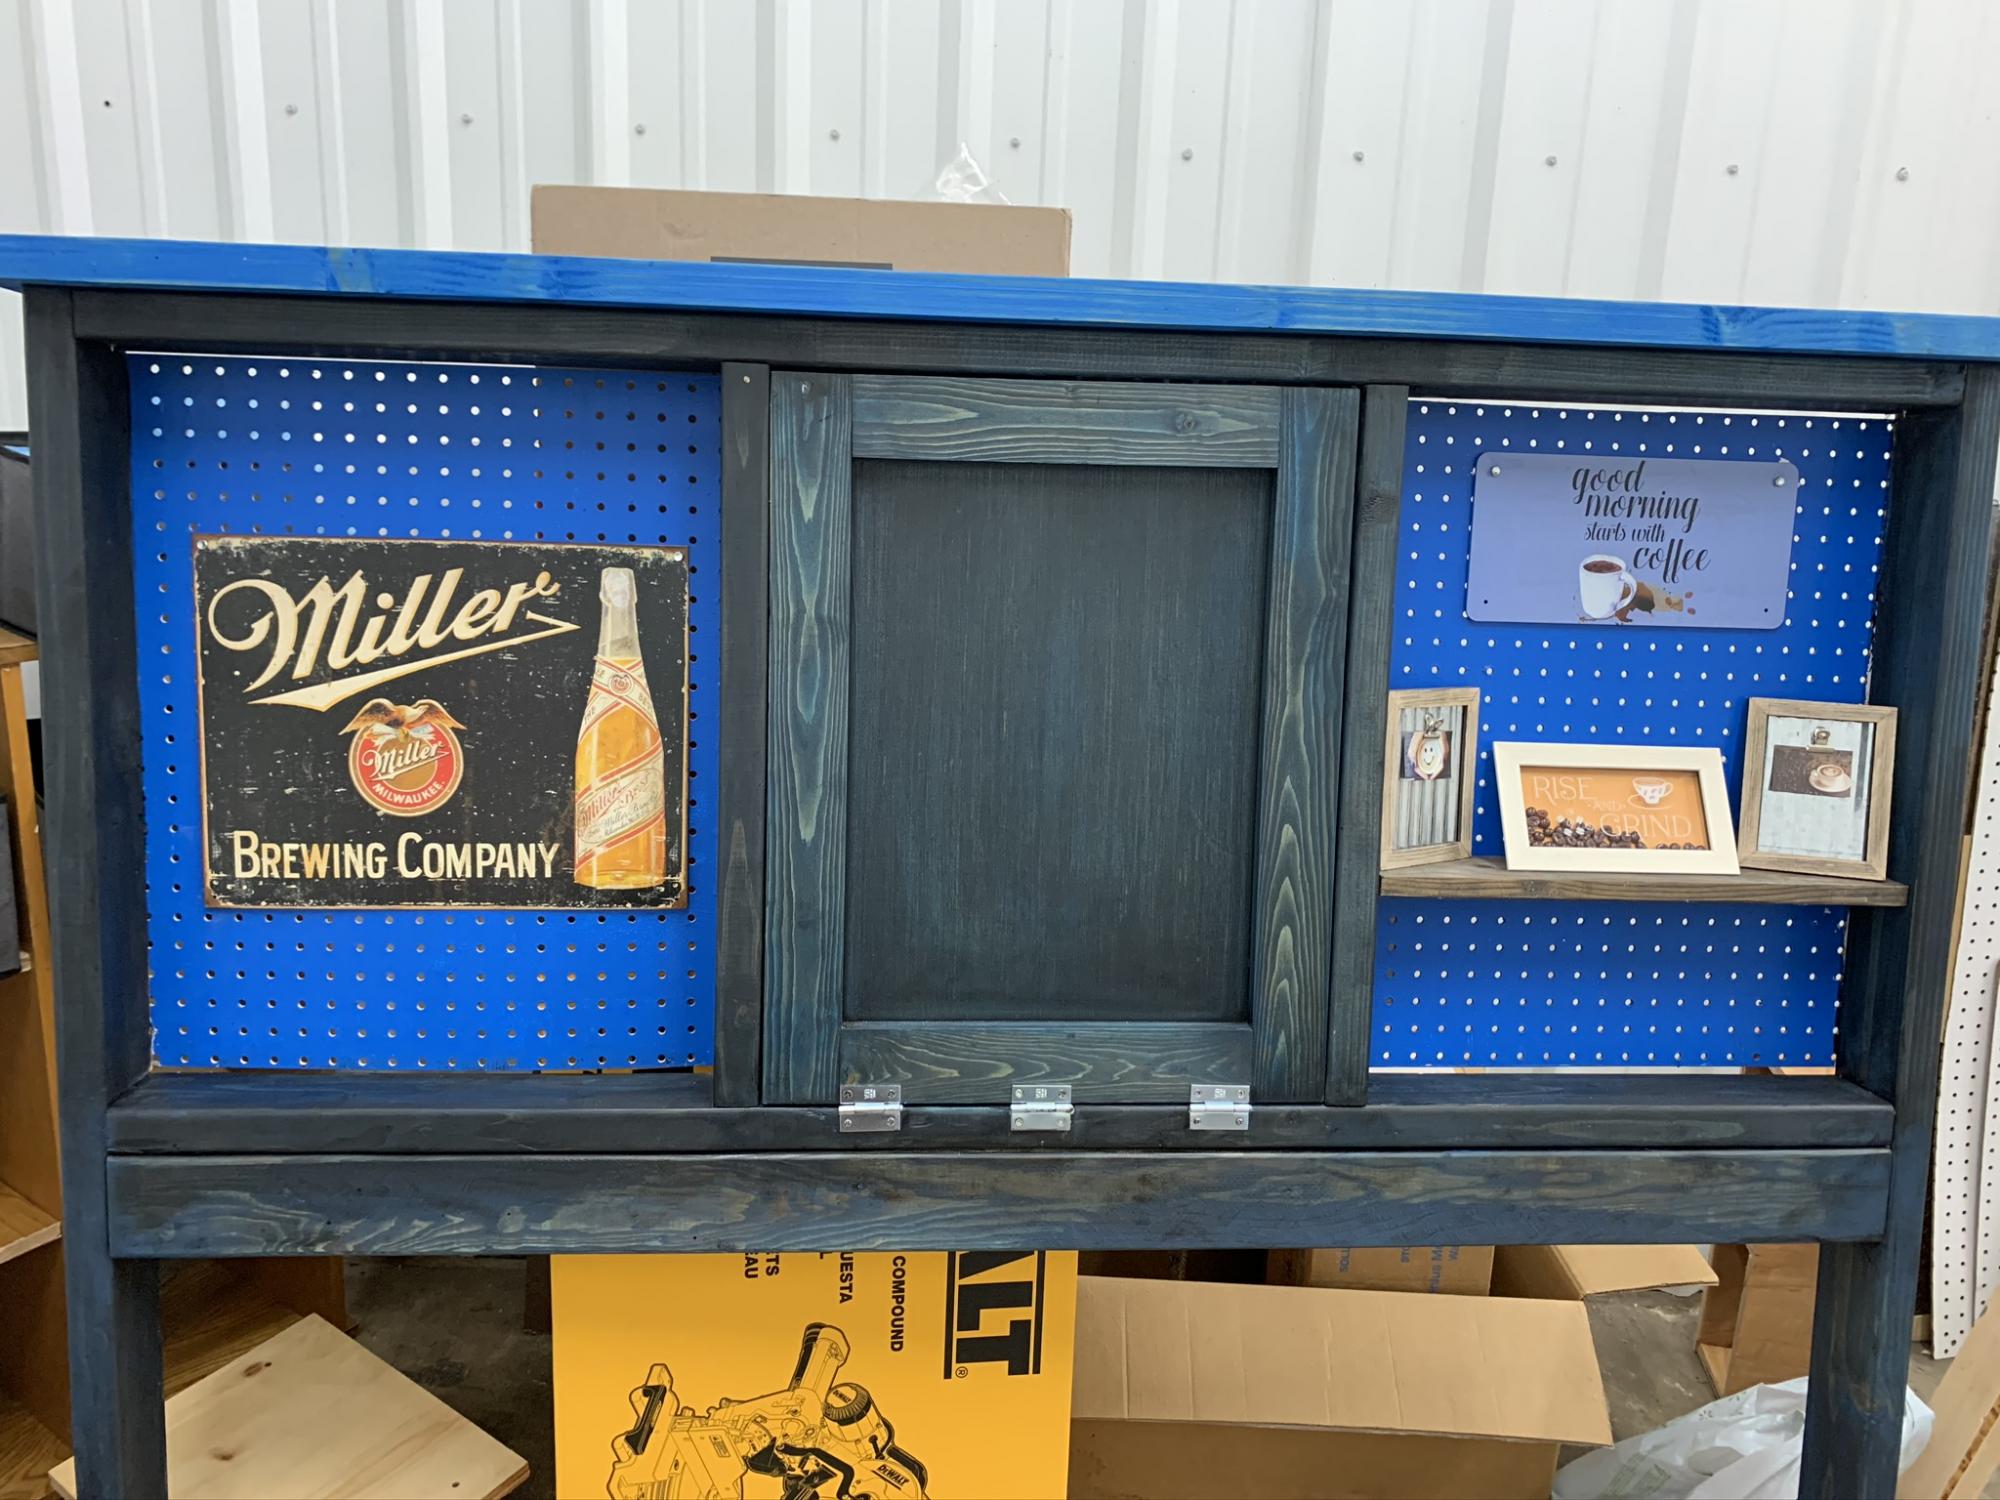
Wow, my 2nd piece of furniture I attempted. A lot of wood filler was involved. My shelves seemed too big, so I just did one, then my back board accidentally got used in “open shop” so I used some left over pegboard. I had fun but spent a lot of time fixing “oops, that doesn’t seem right”. Peg

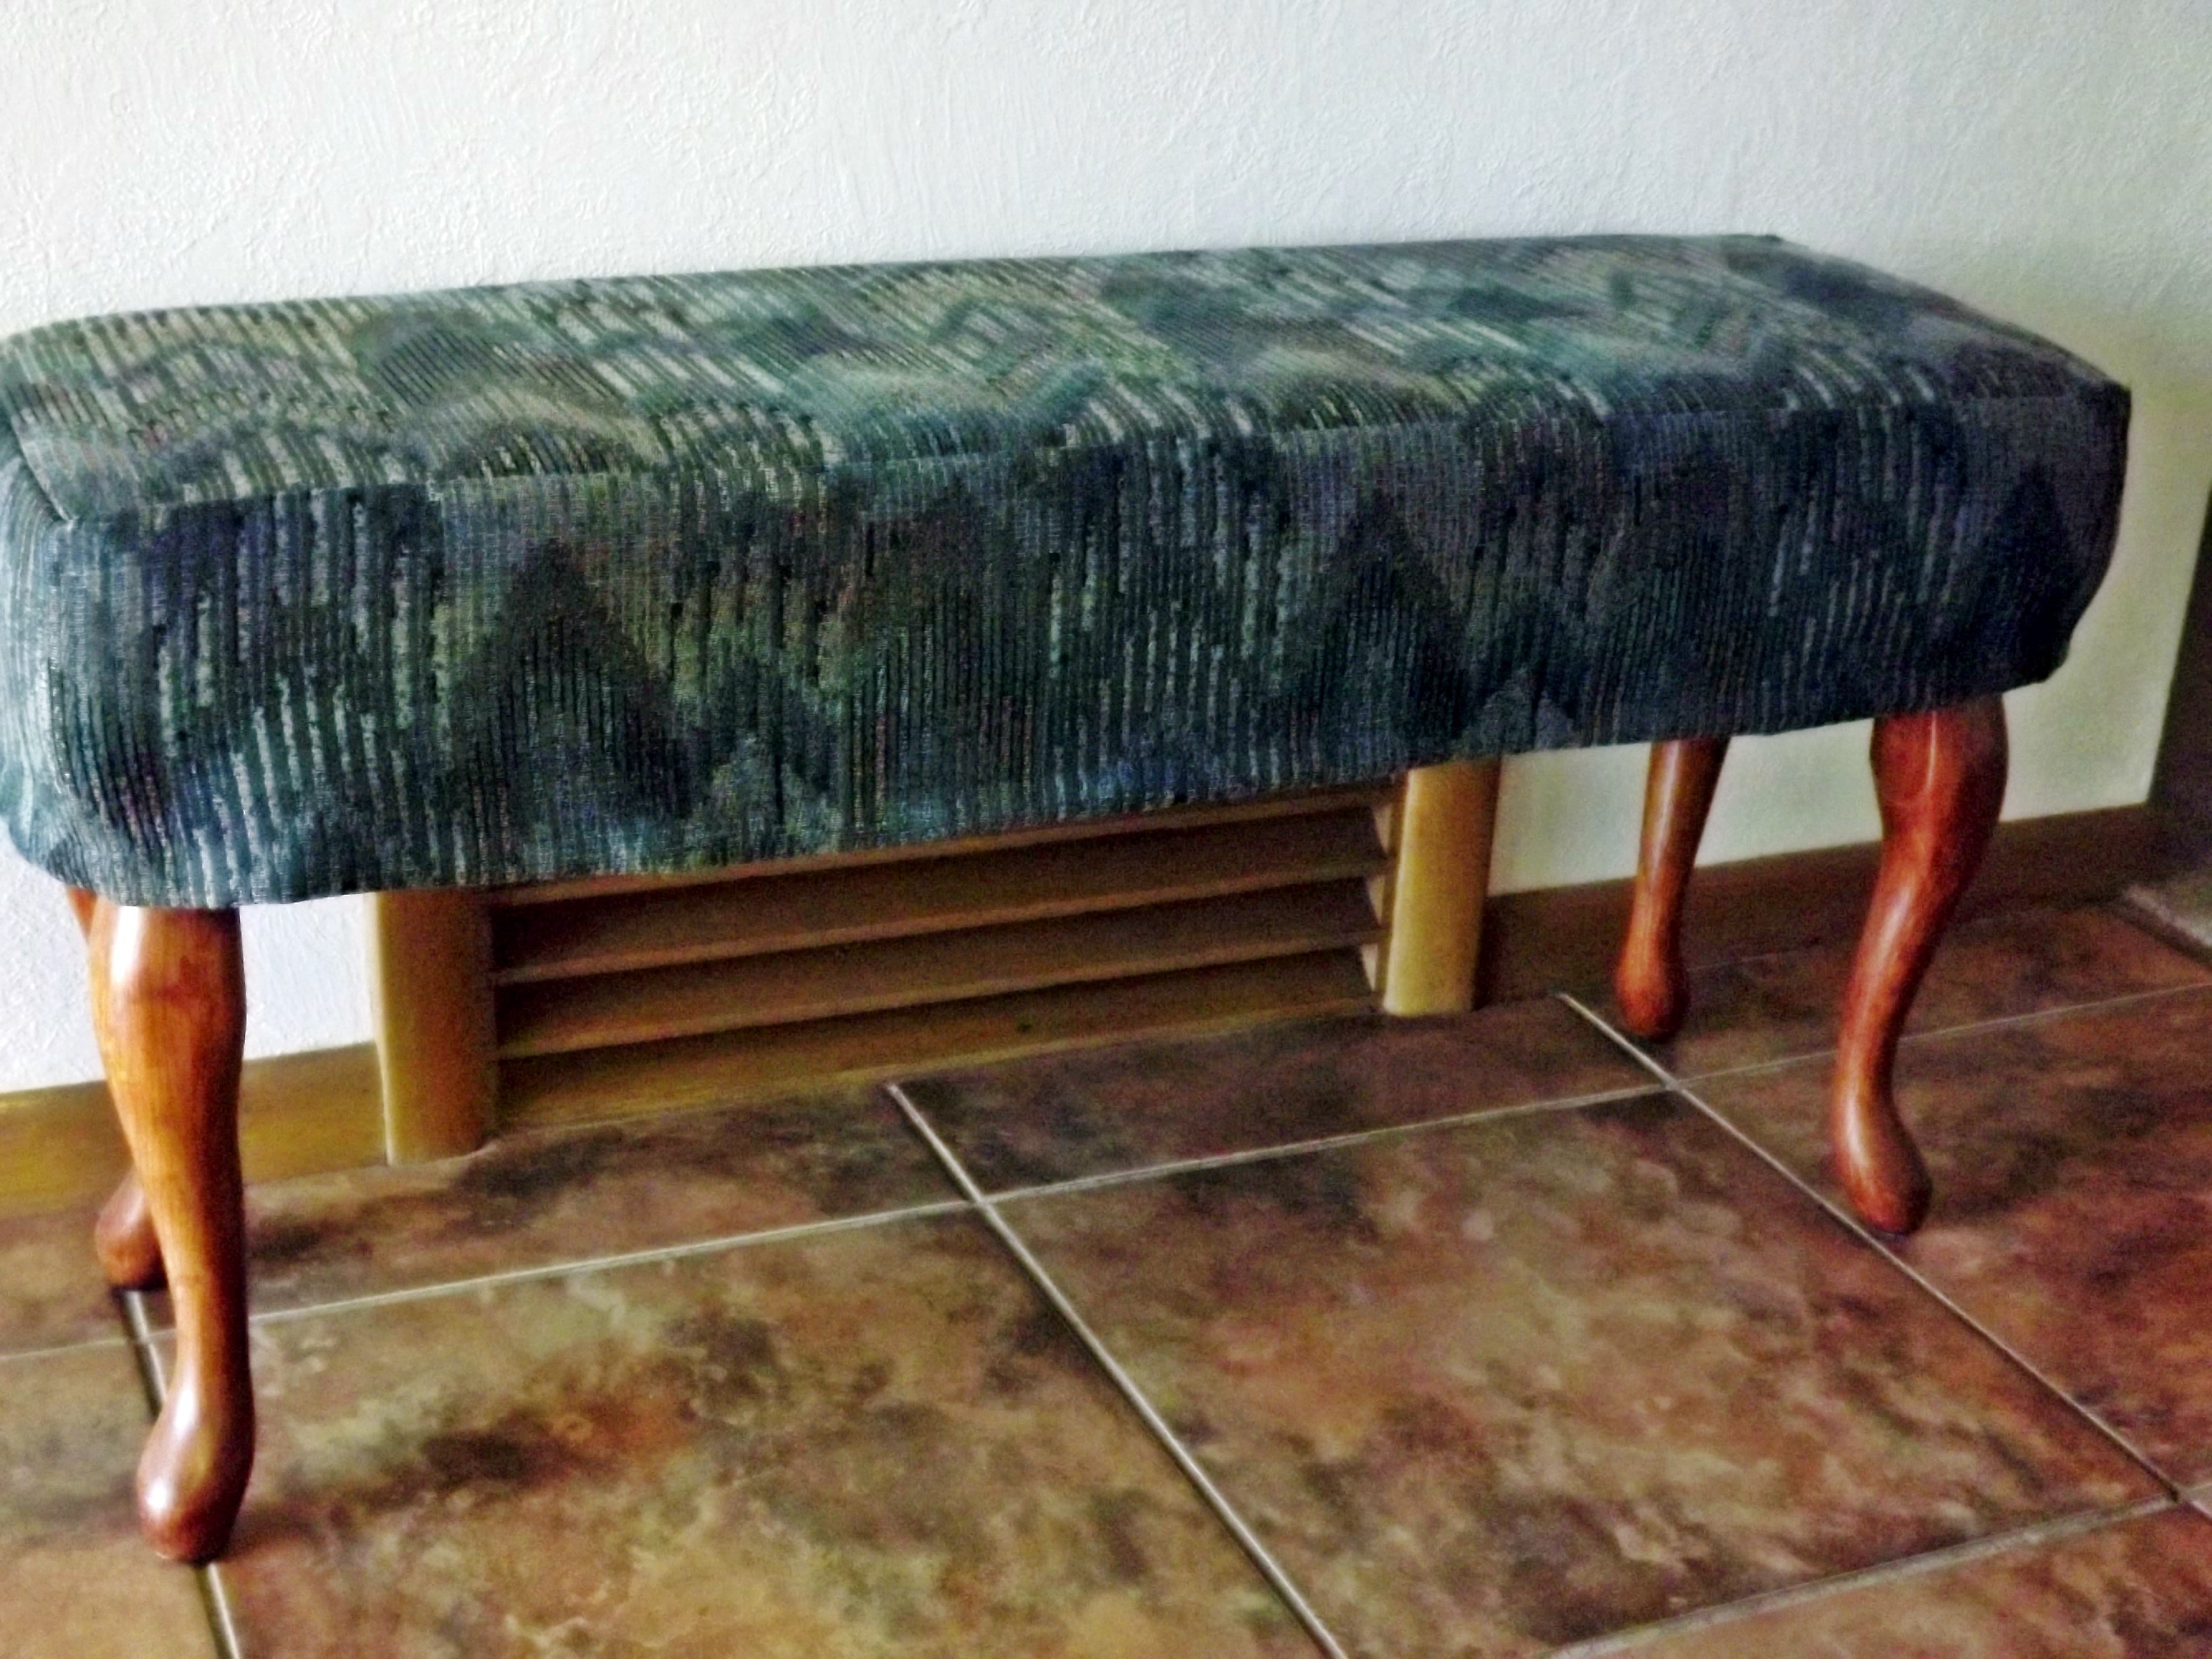
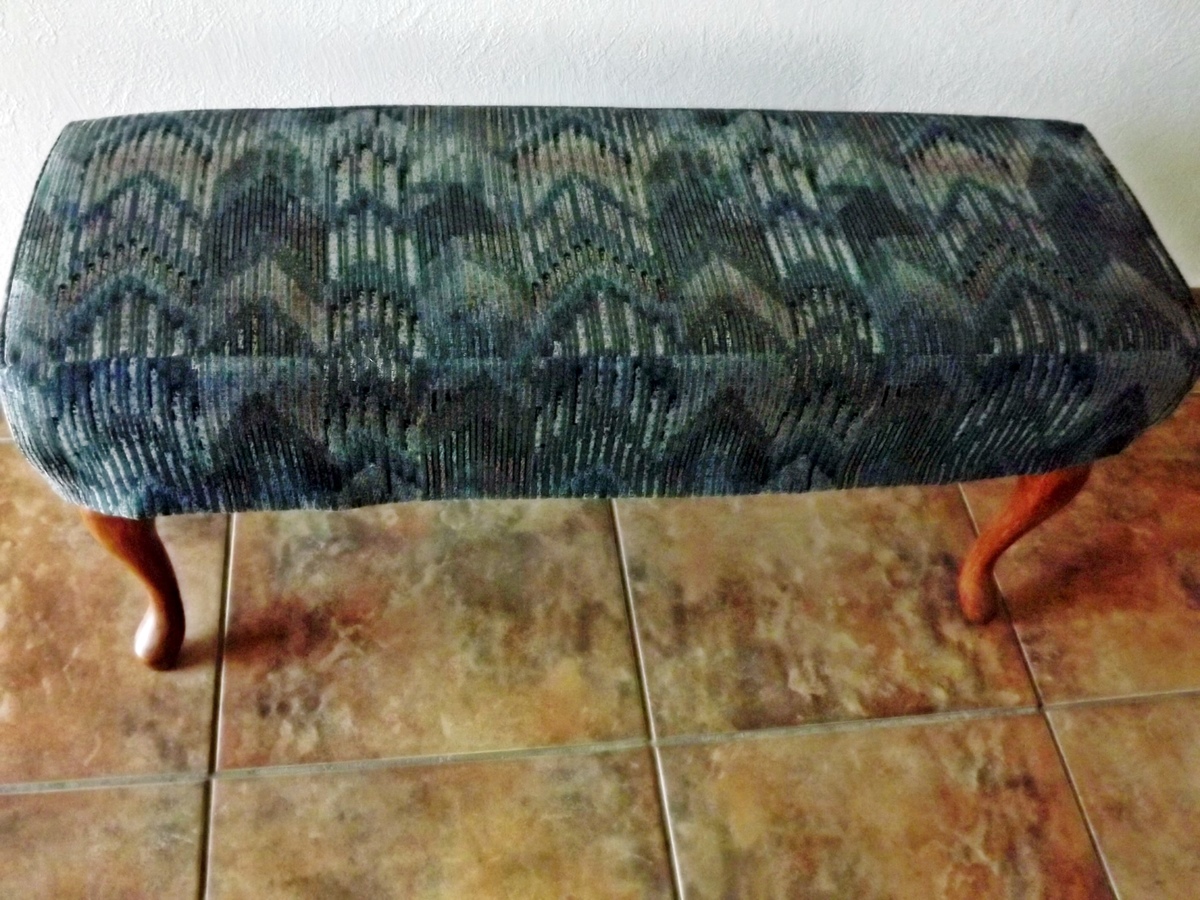
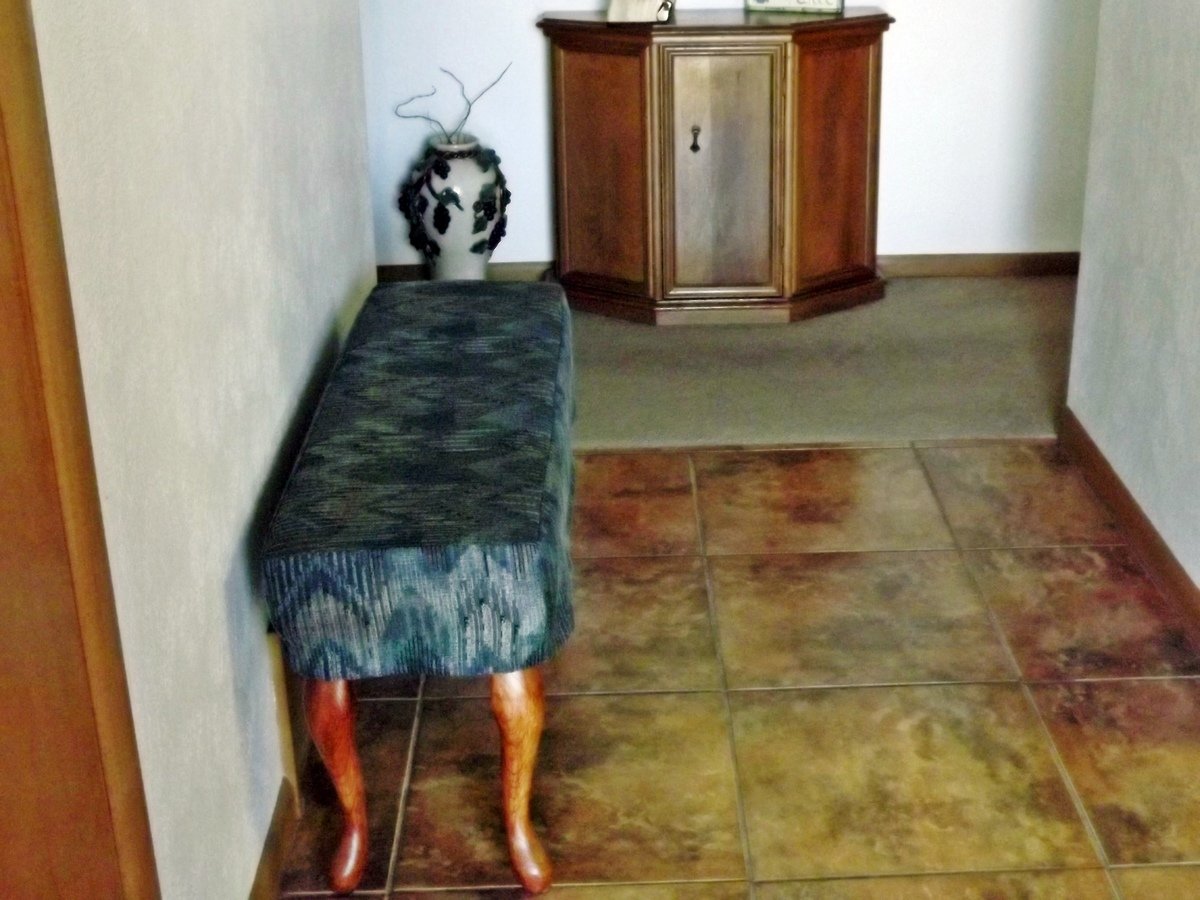
My mother needed a bench in her small entryway. She had definite dimensions in mind and we looked everywhere. None fit the bill. Then I saw these plans and we went from there. She had leftover fabric from recovering her dining room chairs, and I had the plywood. She wanted the Queen Anne legs to go with her traditional furniture; we put felt floor protectors on the bottom of the feet of the legs, which helps keep the bench from moving so easily on the tile floor. The plans were easy to follow, including the tutorial on how to sew the slipcover. The bench worked out just like she had hoped. Thanks Ana, for the great plans.

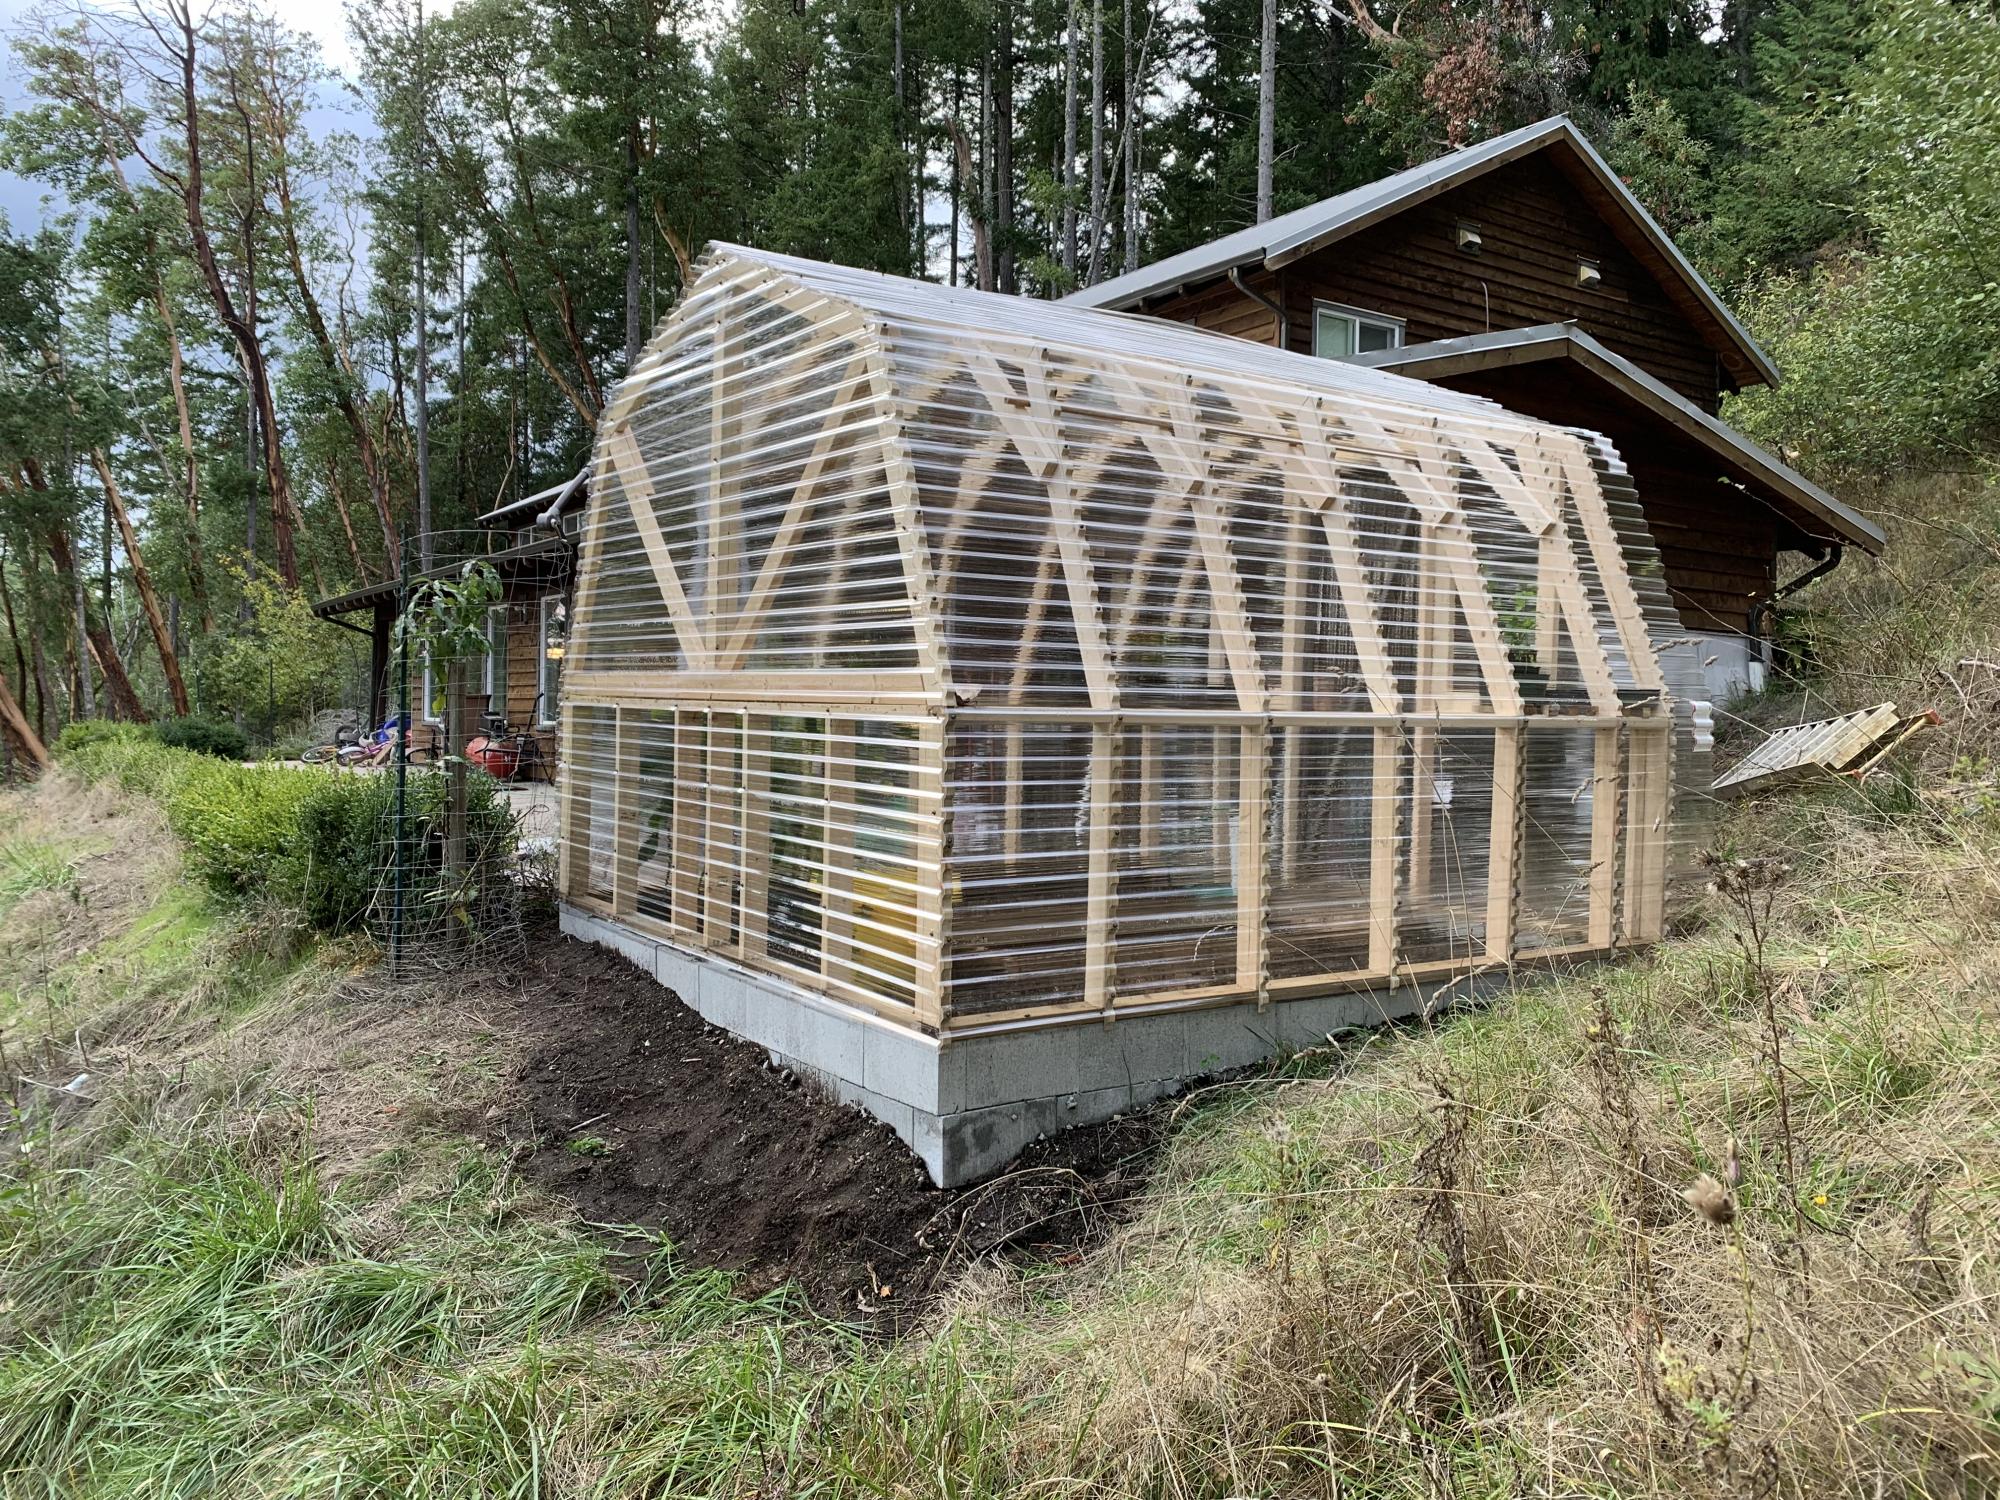
Great little project from your site!
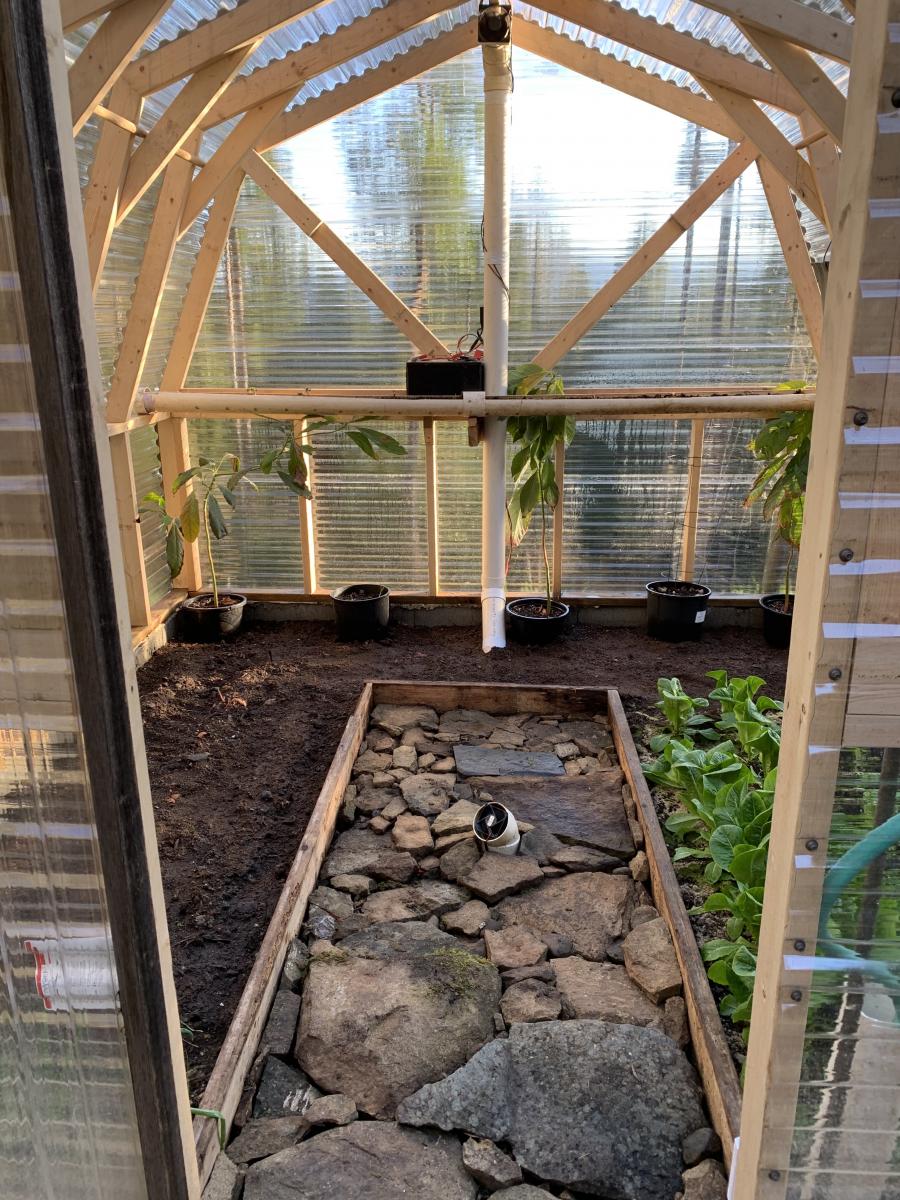
I put PVC to the ground vs the metal siding and added a heat sink in the middle with some old computer fans.
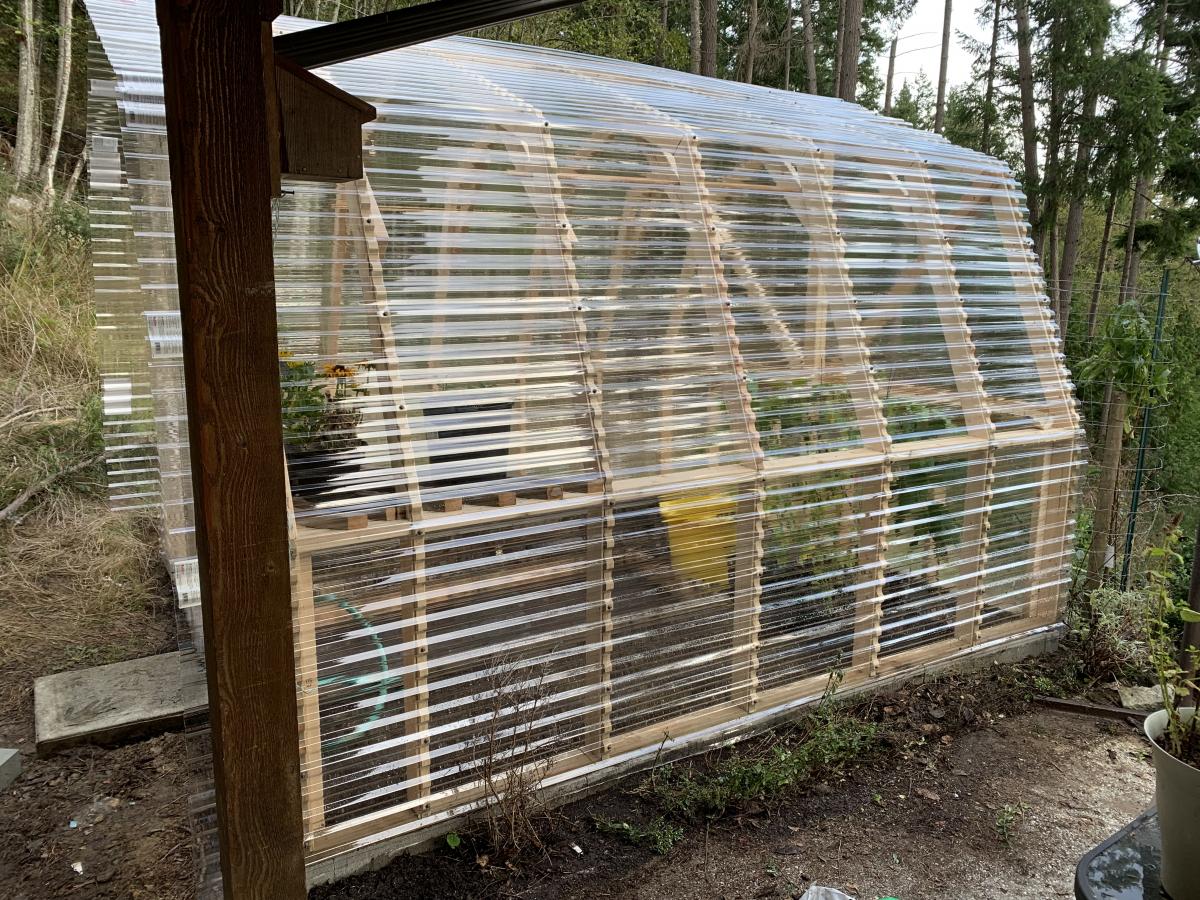
Sat, 05/23/2020 - 17:23
That PVC heat pipe intrigues me. Can you share a little more about it? I'm assuming it pulls hot air from the upper vent, and cools it down via the section of pipe below ground, sort of like a natural A/C. Keeps things from gettting too hot during the summer months?
Kinda looks like you'd frequently trip over it though. I'd probably have run the lower exhaust right up by the edge of the door frame, or a corner.
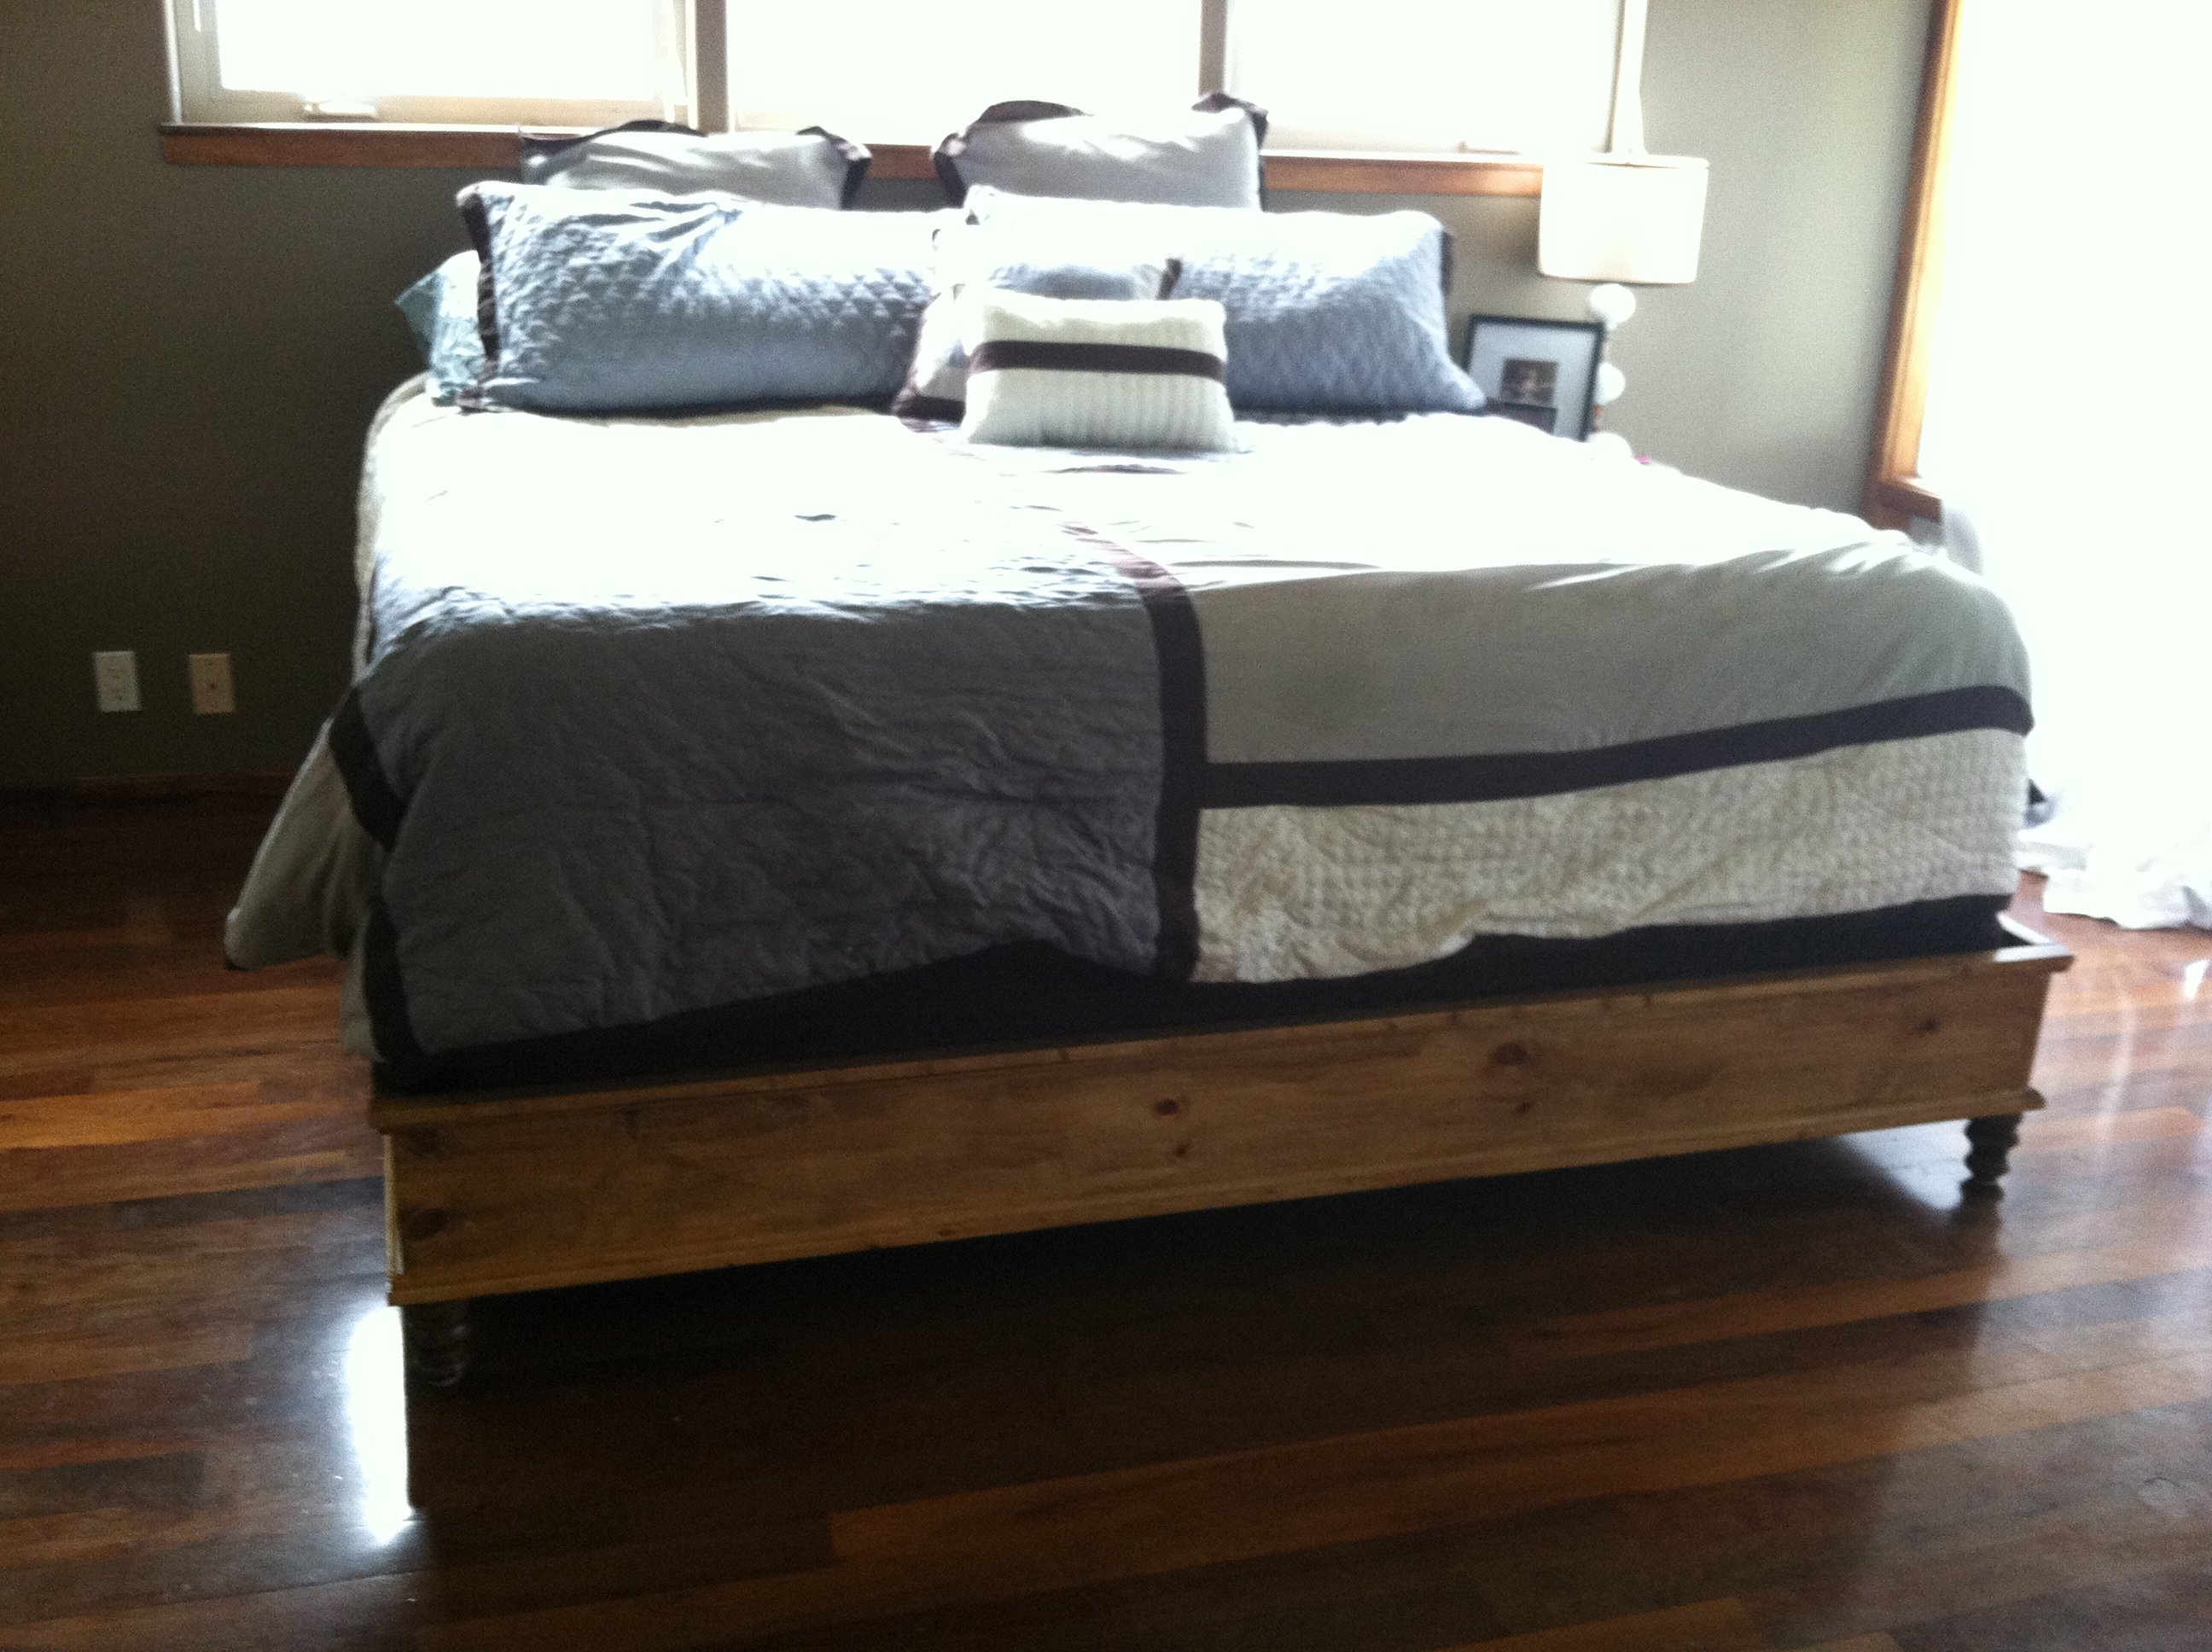
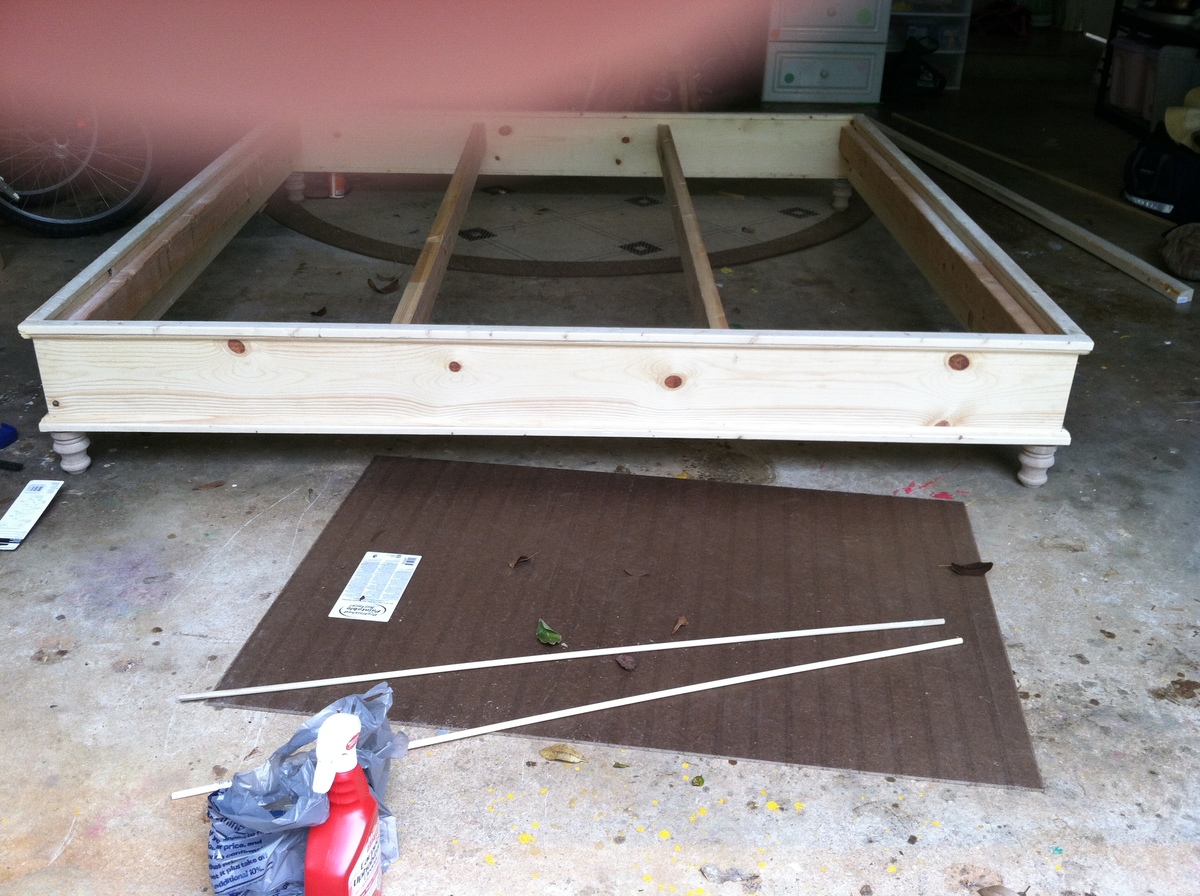
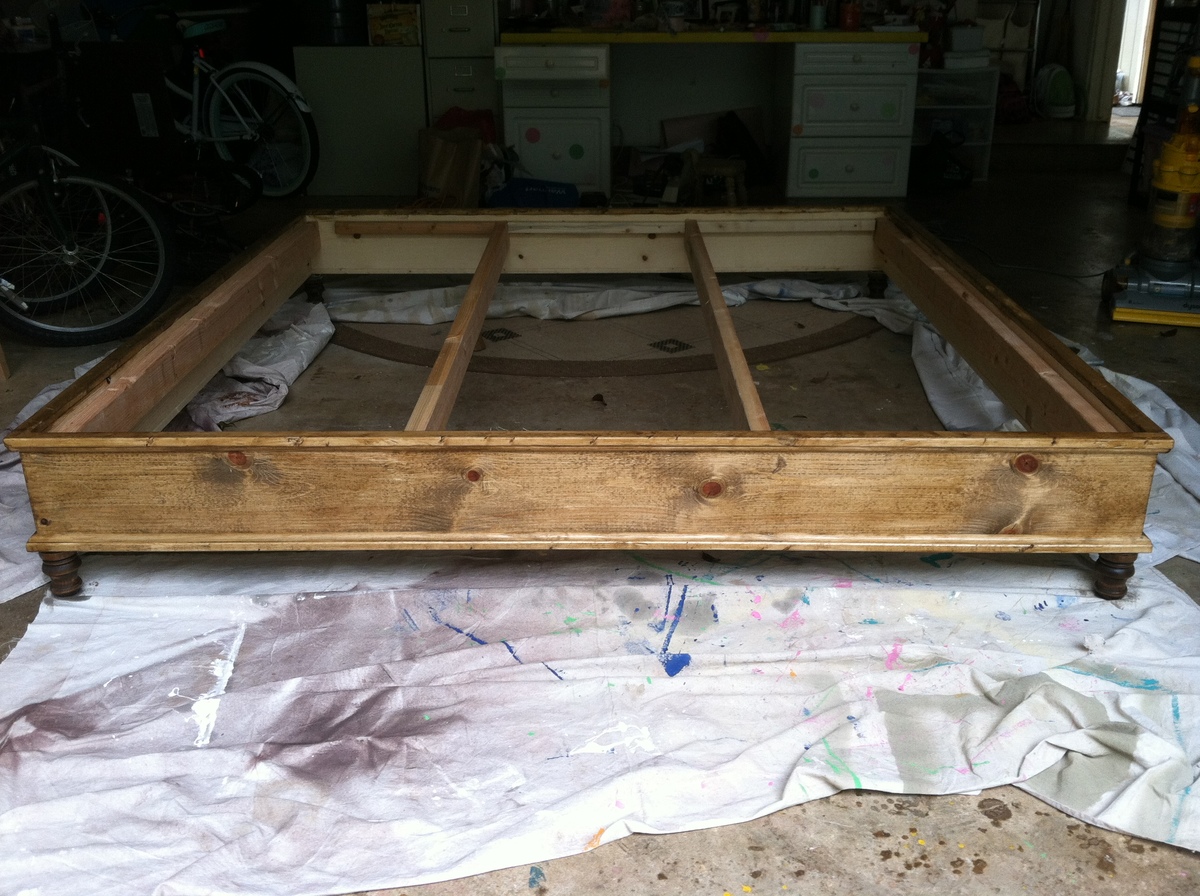
After building my daughter's beds and some outdoor day beds, I finally got around to building a bed for my husband and I. I altered the plans to a king size bed. I added a second 2x4 in the middle for support and around the inside edges as I used the box springs to make the bed taller. Using the kreg jig really made this project so easy. I also used 1x8's instead of 2x8's because I couldn't find those in Hawaii anywhere, except pressure treated wood. It still turned out great.
Thanks for the wonderful plans!
Mon, 06/25/2012 - 19:40
I LOVE this bed! I'm asking my husband to build it and I was wondering if you could email me the dimensions for the plans of a king size Chestwick Platform bed? I'm pretty sure he could figure them out on his own, but I'd love to make it easier for him :) Love your work!
In reply to King platform bed by Katie Saldivar (not verified)
Sun, 07/22/2012 - 11:58
I made the bed 80 x 79
Tue, 10/26/2021 - 10:48
Amazing! can you please provide the cut list for the king size measurements?
Thank you!
Comments
Ana White Admin
Fri, 03/10/2023 - 13:31
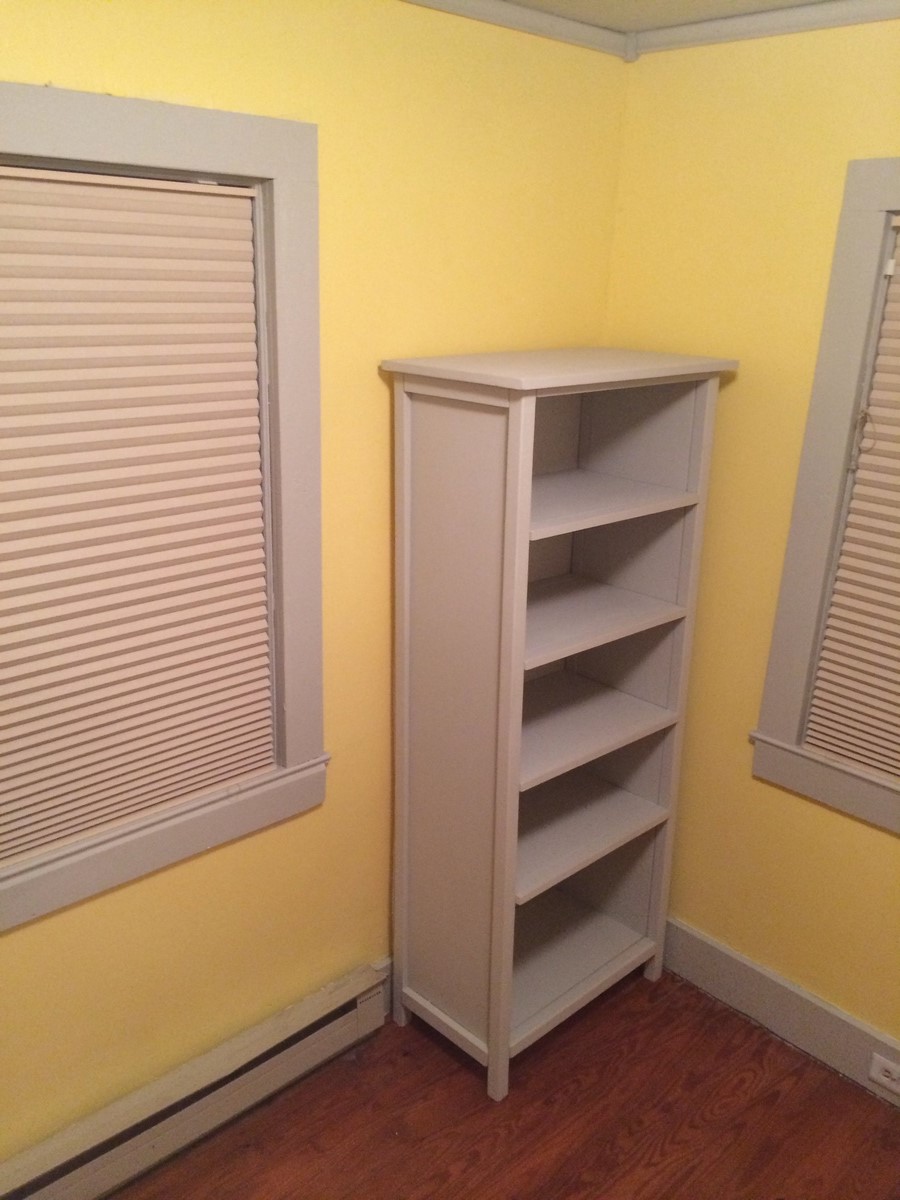
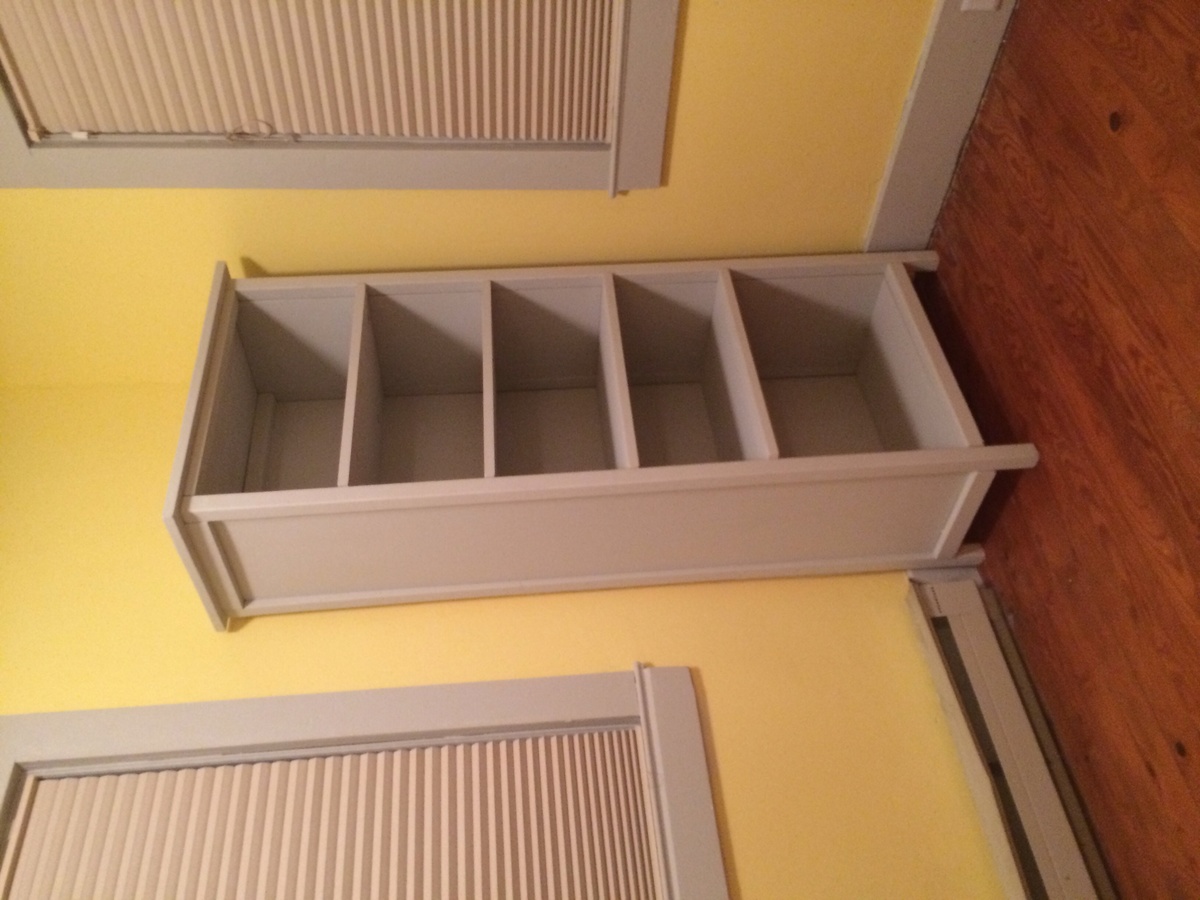
Perfect Shelf Help Project!
Love the before and after, thanks for using Shelf Help!