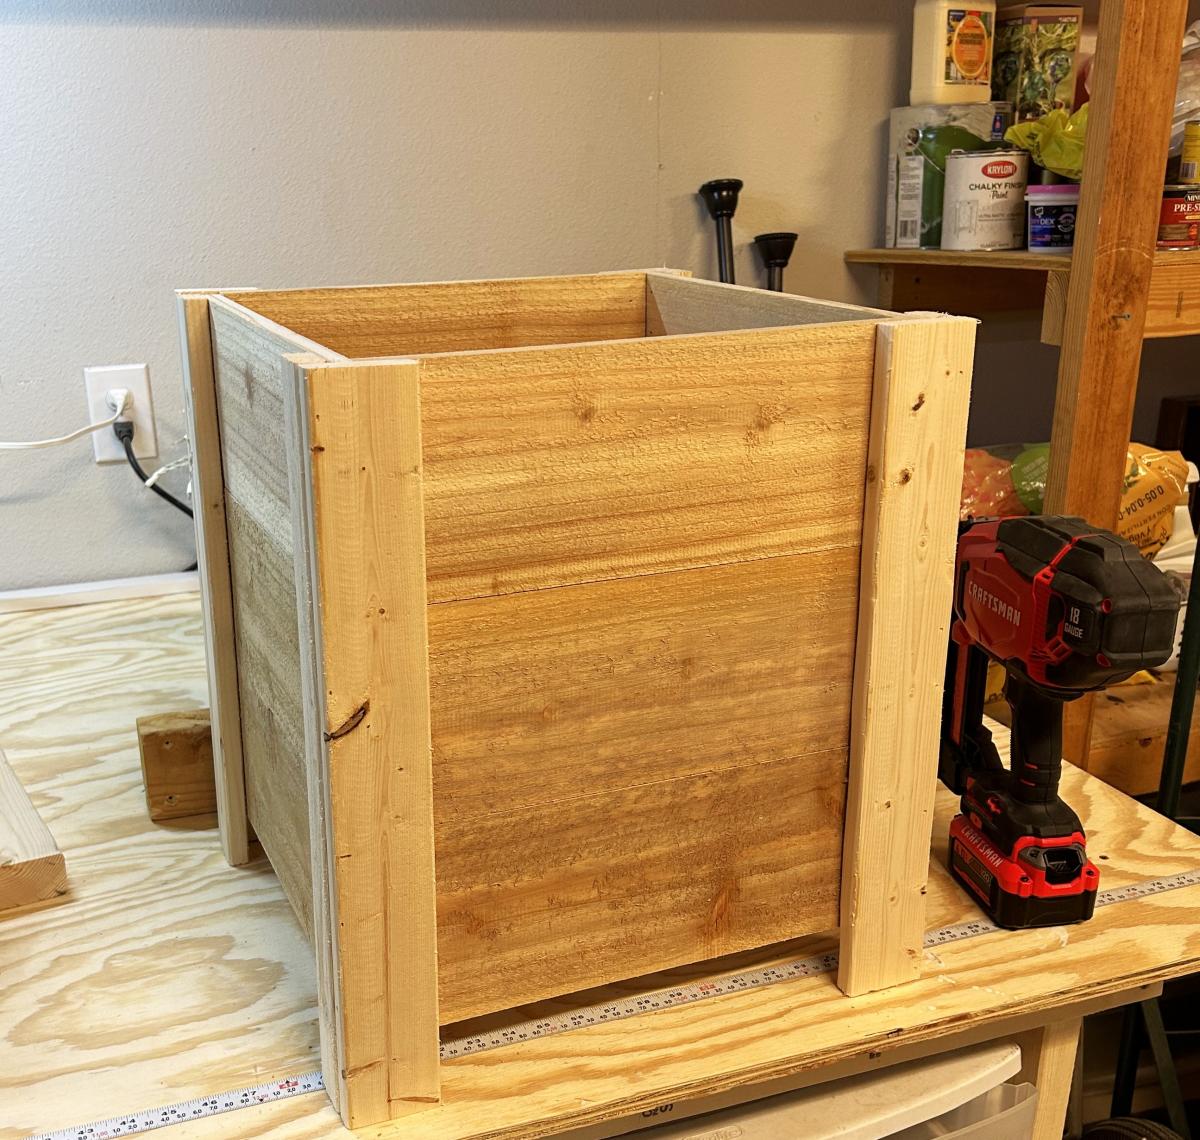
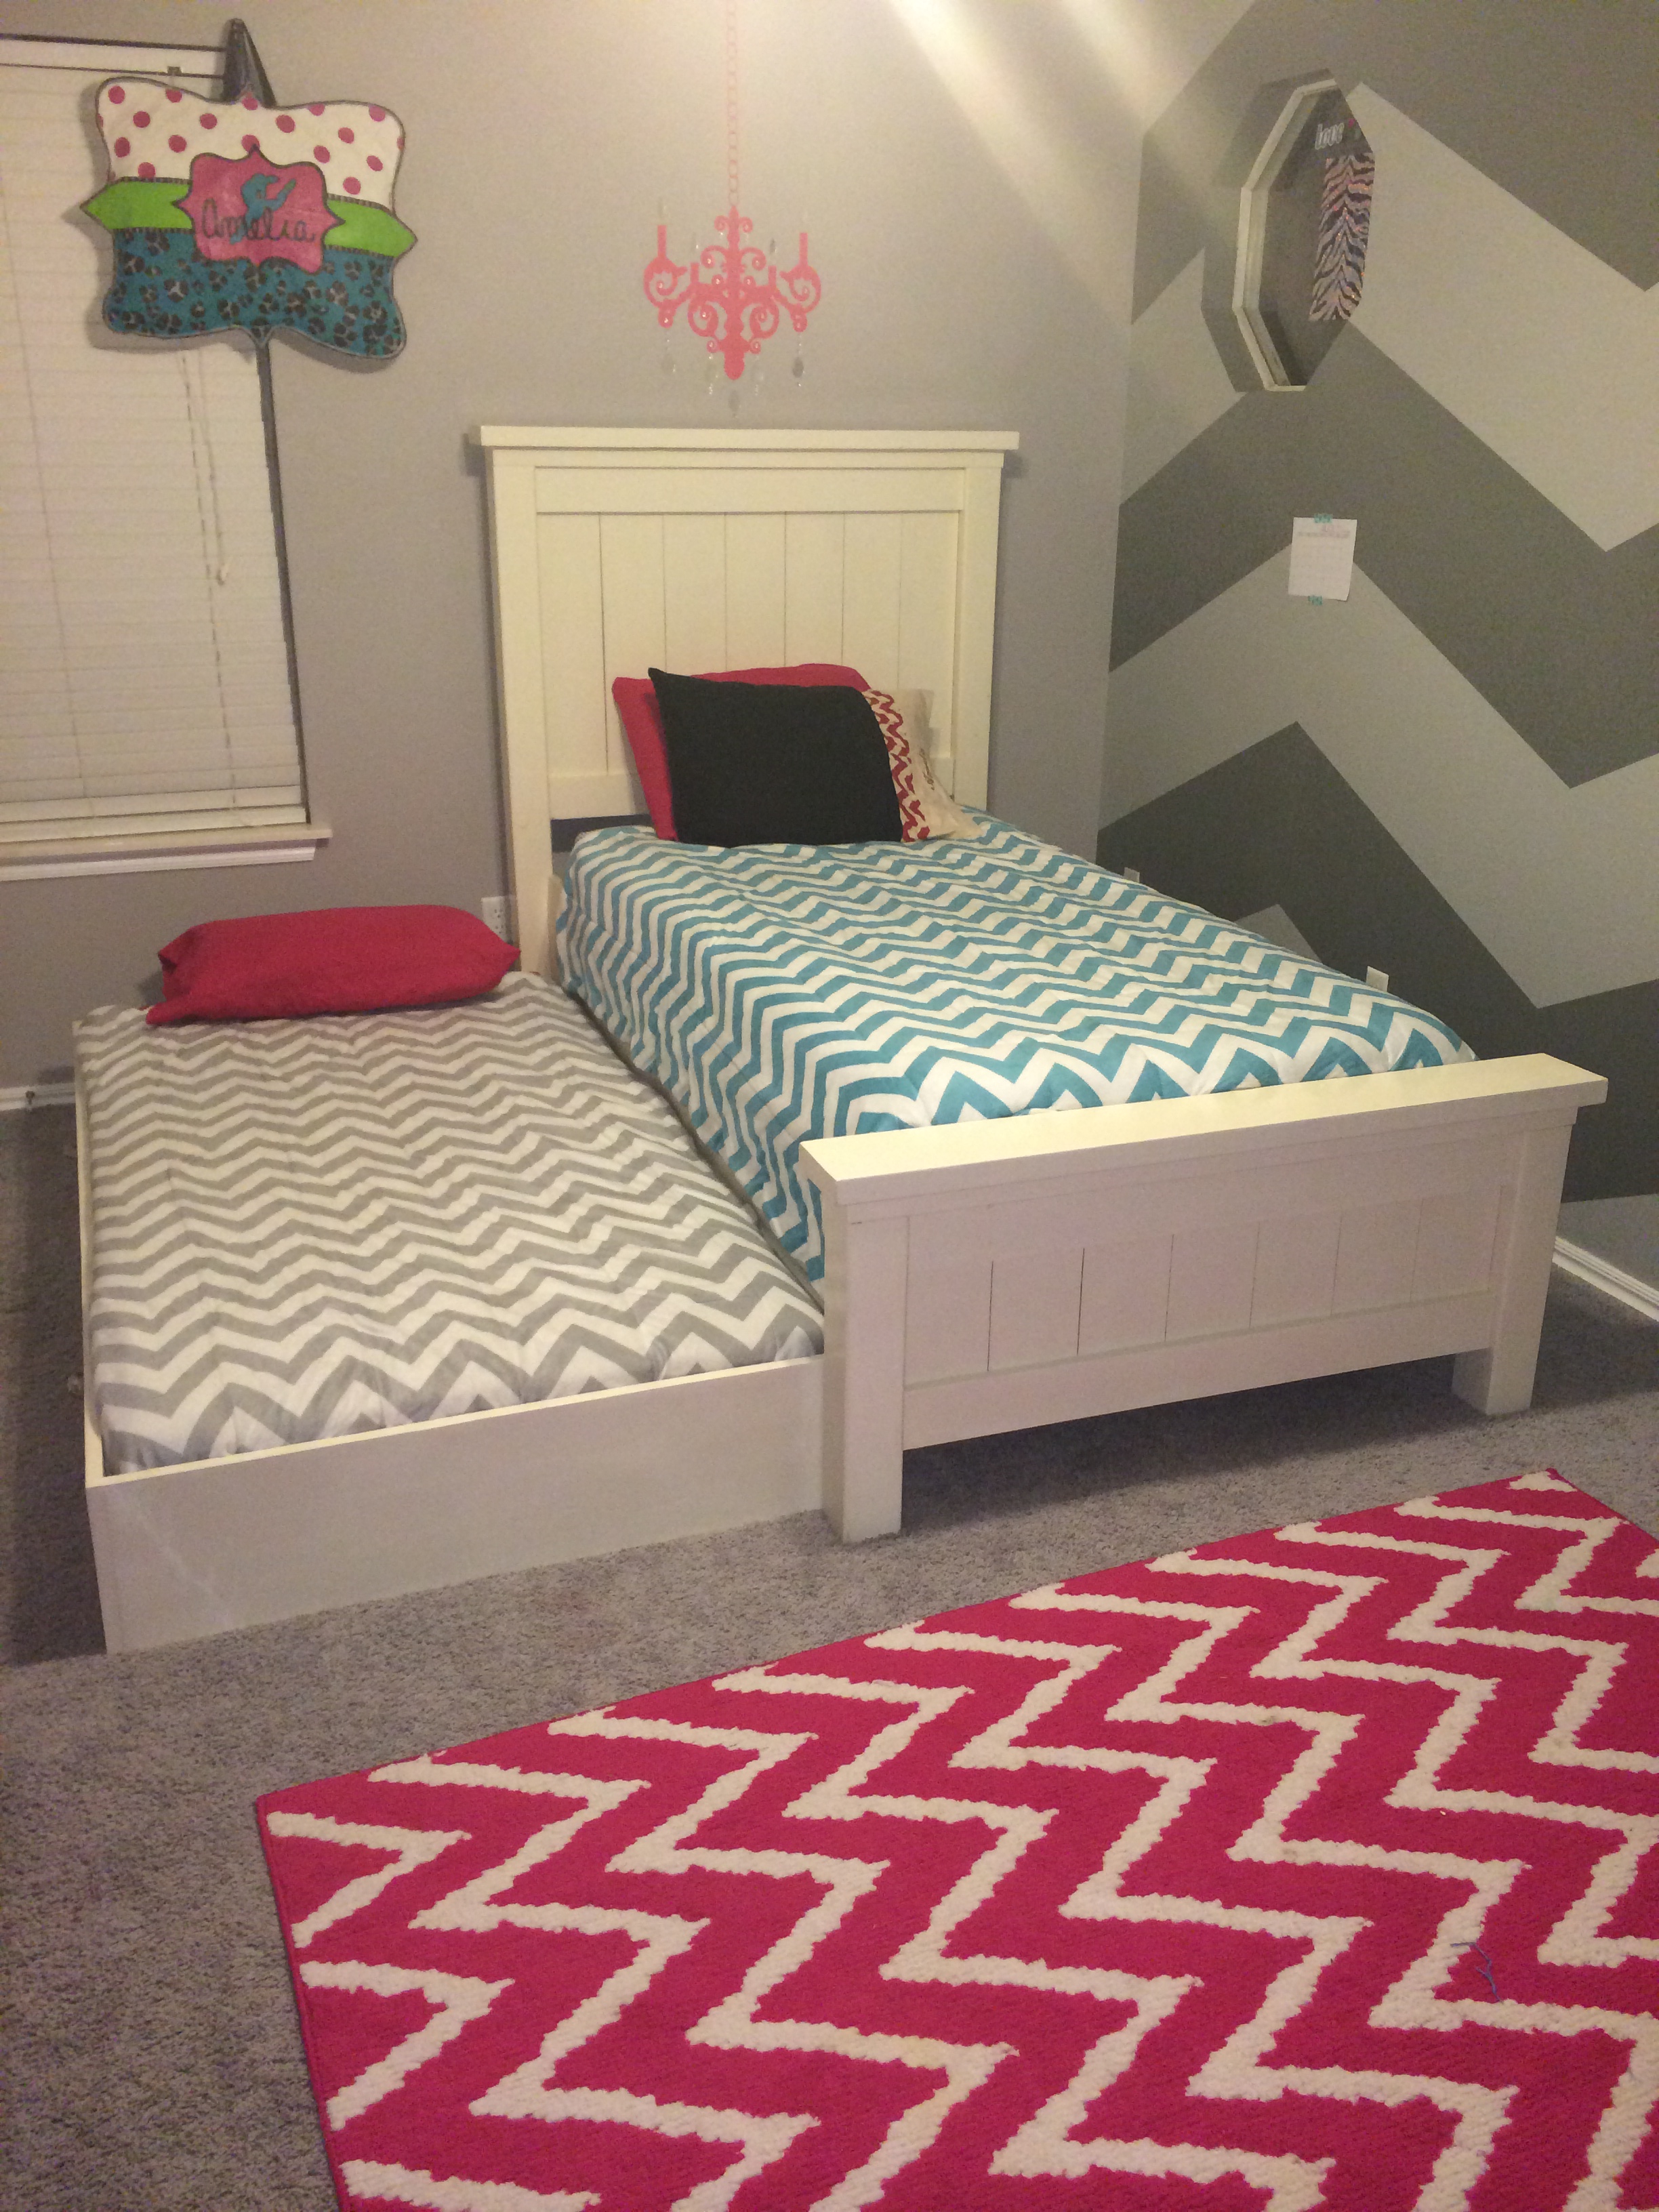
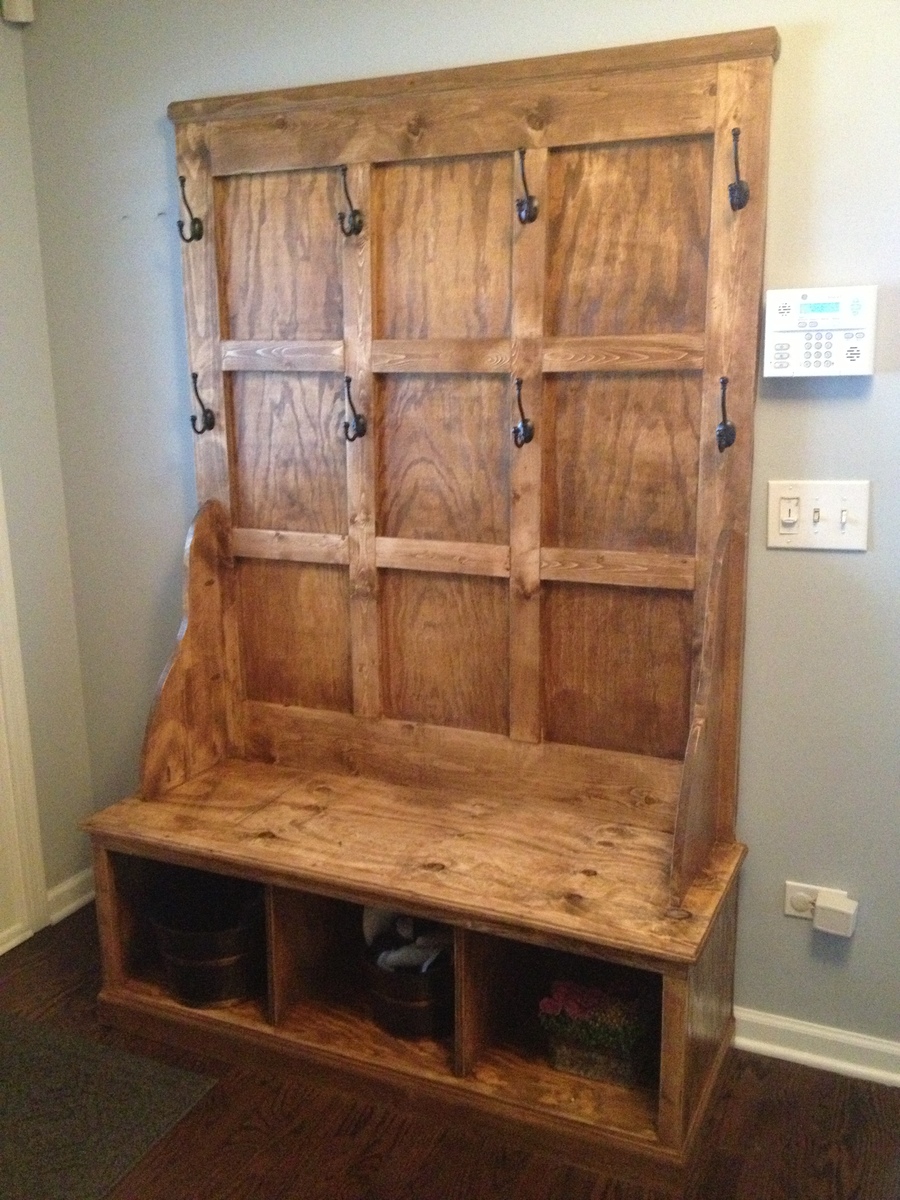
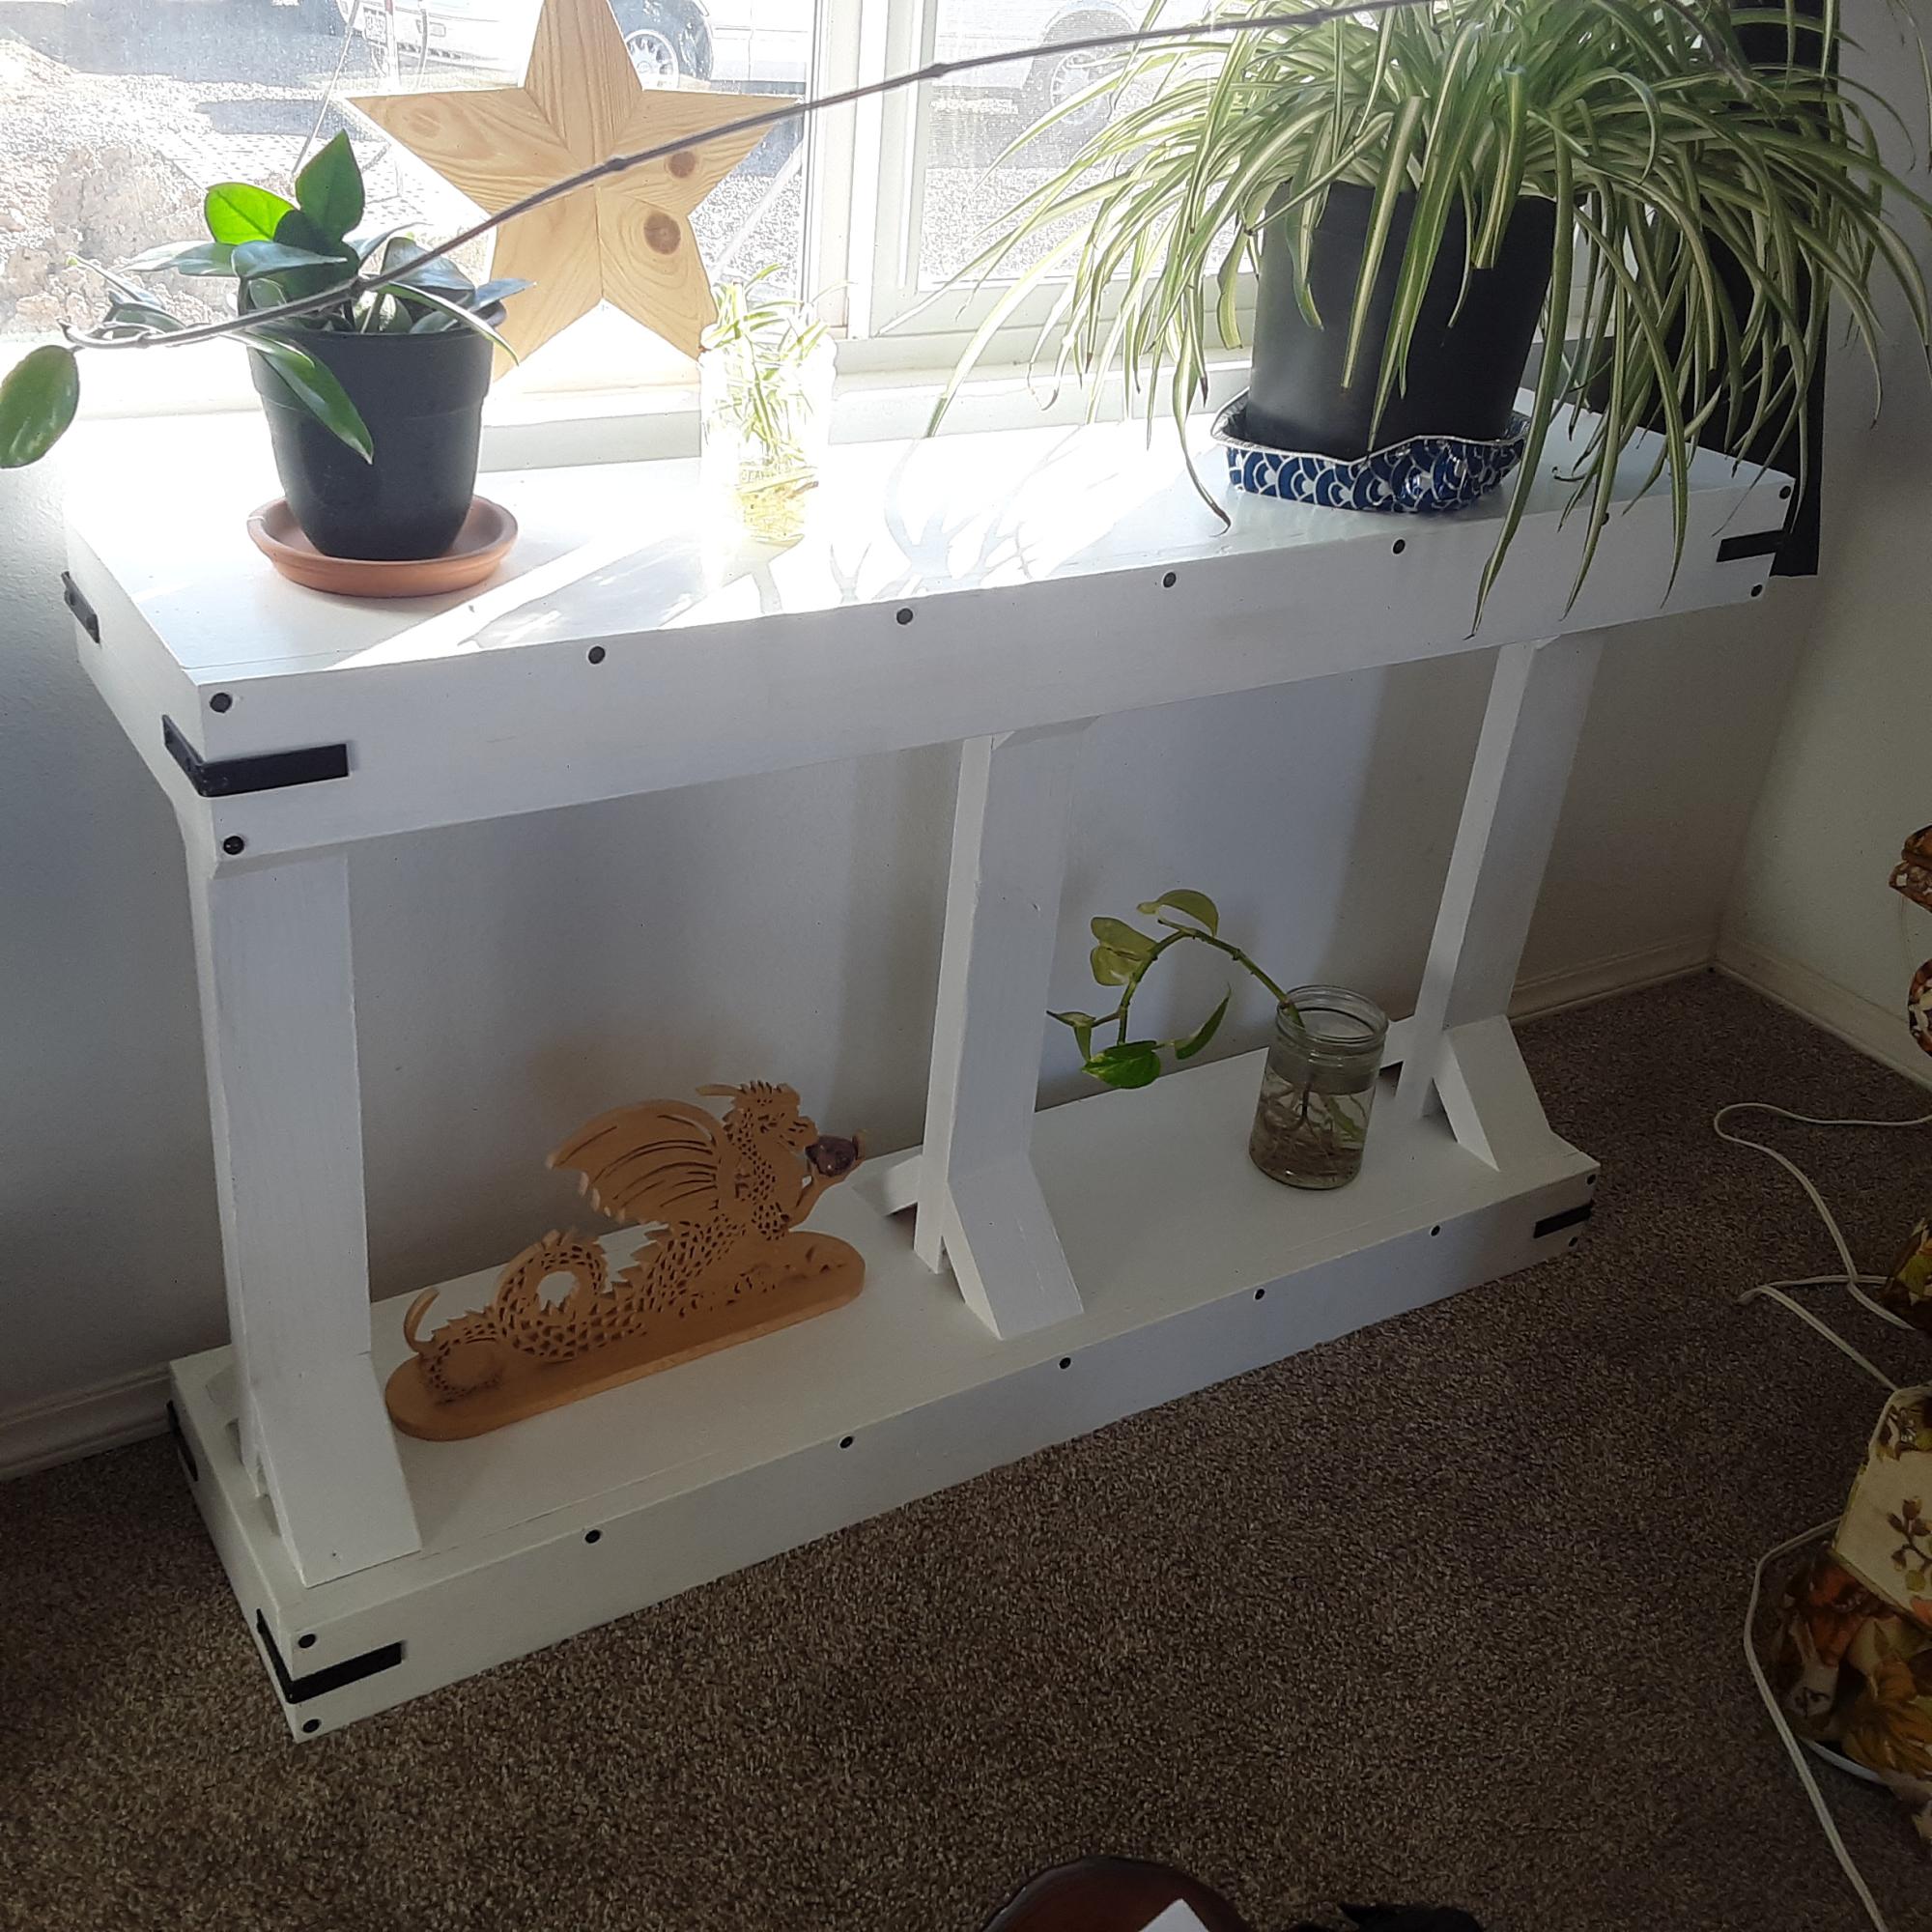
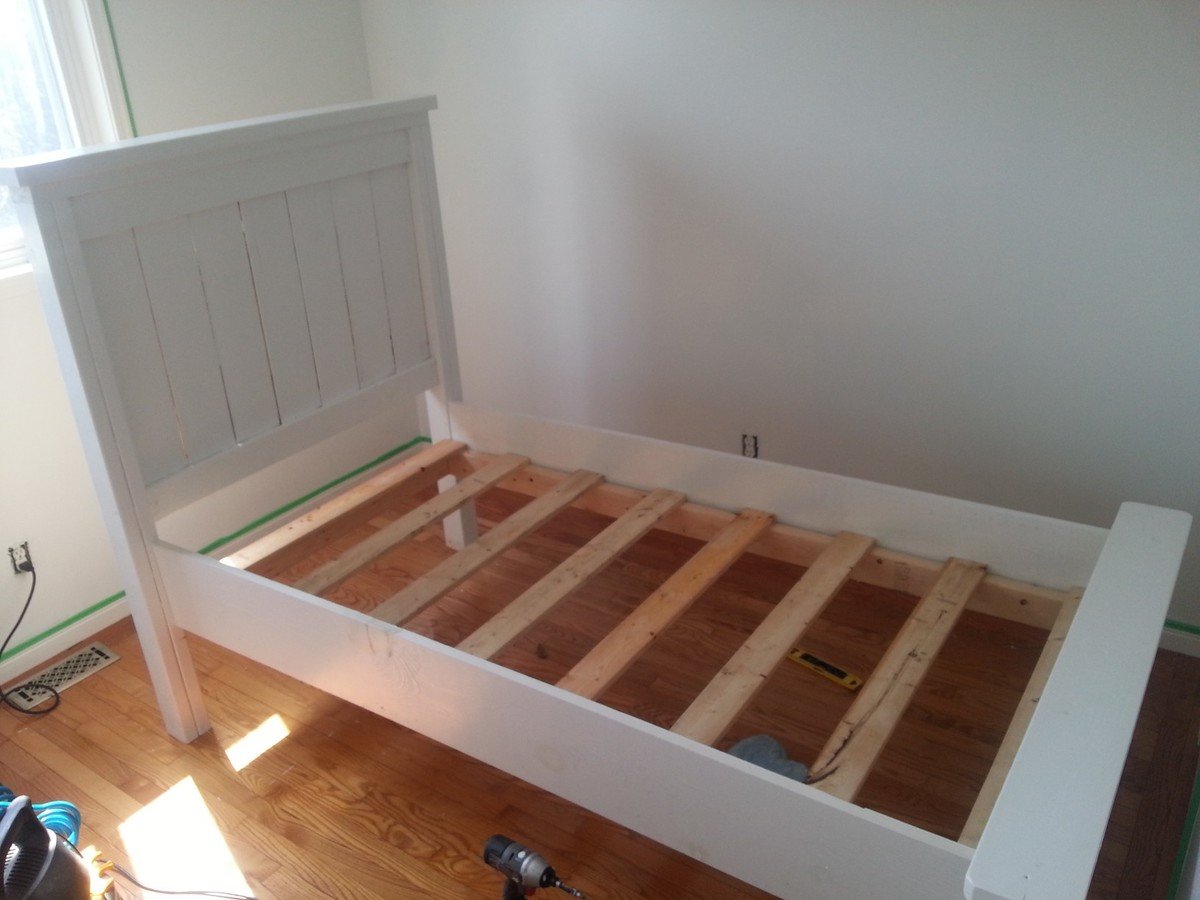
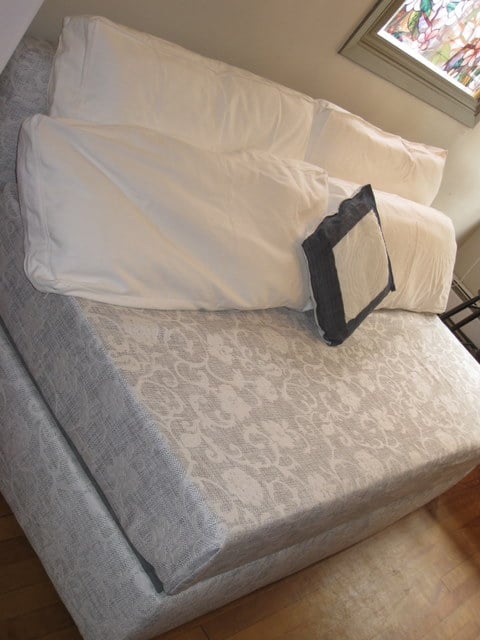
Community Brag Posts

2x4 Essential Adirondack Chair

Submitted by mricks1960 on Mon, 11/16/2020 - 11:31

I used Western red cedar to build my chairs. The build was a little more expensive but well worth it. The chairs were stained with Cabot’s Australian Timber Oil ( Jarrah Brown). Thanks for the plans Ana, your site is awesome and you do a great job! Mark


Comments

Stocking Stand

Submitted by mpjacob08 on Thu, 12/10/2020 - 06:34

So fun! Directions were easy! Can also be used as Backpack hanger if you put a little bit longer feet on them. I bought the metal hooks from Walmart.

Built from Plan(s)
Estimated Cost
$18
Estimated Time Investment
Afternoon Project (3-6 Hours)
Finish Used
Jacobean Minwax stain
Recommended Skill Level
Starter Project

Comments

Seasonal And Holiday

Bathroom Storage Tower

Submitted by Quintin79 on Sat, 01/26/2013 - 08:53

I loved the look of the Craft room Storage tower but modified to suit my wife's bathroom theme/decor. The inside back (MDF beadboard) is painted a milk coffee color to lighten it up. The door inserts are plexiglass, which was more expensive than glass but with 2 boys 6 and 2 it is well spent, and the MDF beadboard. Covered the plexiglass with self-adhesive film for glass on both sides to hide the towels inside. This project took me about 12 hours to complete but over a 3 month period, mostly spent on finishing the project with my boys underfoot or at 12-2am. YIKES!!! If i keep this up she will want to buy instead of letting me build.
Price List:
wood: $100
Stain/Paint: left over from house reno. would have been $15 stain $20 Varnish 30$ quart of paint
Handle: $7
Hinges: $4 basic style
I wanted to use Eurostyle hinges but opted to buy the Kreg system instead of Forstner drill bits.

Will be building another just different dimensions for laundry room makeover.

Built from Plan(s)
Estimated Cost
100$ CDN for lumber everything is more expensive in Canada
Estimated Time Investment
Weekend Project (10-20 Hours)
Finish Used
Saman's waterbased stain Chocolate Varnish applied
Recommended Skill Level
Starter Project

Comments

Quintin79

Sat, 01/26/2013 - 12:18

Thanks! It was my first furniture building project! I did a huge reno that i did on my house but that is construction and 1/8th in isnt as big of an issue as in furniture.

First Piece of Furniture Ever

Submitted by Anonymous (not verified) on Sun, 12/13/2020 - 20:51

So, my skills have been as a cobbler, handy kind of guy for decades. Rough shelving for shop/garage basement storage etc... I've always done all my home maintenance and repairs so I'm familiar with a lot of stuff in and around the house. However I've never attempted a finished piece of furniture before. As always, I love the build and hate the finishing process.

My daughter had a pretty new mattress that she loved which was 13 inches thick and her celling is the standard 8 feet. Consider these kind of things before you build this design. We did and the plans were altered a little bit. We'll be building the bookcase later and either buying or building a desk as well. She can set up in bed with several inches above her head and there will be plenty of room over her head in a standard height office/computer chair underneath. All I basically did was; add a few inches to the height of the legs and uprights for the guard rail (4" I think), increased the head, foot, back and guard rail top planks from 1X4s to 1X6s. Which changed the dimensions of some of the spacers too. She isn't sure she wants the top rails on it but I think I'll put them on later.

We made our own bunkie board for firmer support, which also raised the thickness about 1/4" over just slats.

Details: Ladder fits tight between the leg and the guard rail. Glad I got those dimensions right. We'll be using Velcro to fasten the ladder to the bed (it's that tight, it'll be fine and she's 14yrs old). This way we can take it off easier to clean, move etc. Glue and screw everything you can except the long boards that will allow it to be broken down. Glue them and you'll never get it apart without breaking it. I used Titebond III on everything else with lots of clamps along the way.
On the front and back of the ladder treads I simply smeared some filler in the joints to smooth them out. You can see the result in the pictures. There is one closeup of the finish so you can see how it turned out doing it the way I did. If you want is smoother then a 220 sandpaper finish is what was called for on the clear finish, which I didn't do.
I also said it was a weekend project 10-20hrs. Had I bought better wood and did an easier finish it would have been. My learning experiences/errors made it longer than that for me.

Lessons Learned:
1. Buy better wood! If you want a better finish buy better wood. By the time I was finished filling, sanding, filling again, sanding some more... I used almost a whole quart of filler to make knotty pine smooth. Just buy smooth wood, I'm tellin ya! Hours of work and dry time. Again, if you want a good finish, then you need to shellac knotty pine so the resin from the knots doesn't bleed through. Better wood might have added 5-10% to the materials cost but saved several hours and would have looked even better that what I achieved. Better wood and you could cut the shellac ($15 per quart) if you didn't want the two tone distressing.

2. Check the actual board dimensions. For outer facing pieces I bought some better wood with no knots (radiata pine). These were for the outside pieces on the legs. They were just a bit wider than the common boards that were sandwiched between them... more sanding and filling to get a nice square smooth finish. It also made clamping and gluing them together harder before the filling and sanding could even begin. See number 1 above. lol

Anyhow, I'm not afraid of building furniture anymore and my daughter loves it. OH, yes now we have to repaint her room and accessorize for the ocean cabin look. More projects with my daughter. YAY!!!!

Thanks Ana

Built from Plan(s)
Estimated Cost
$400-500
Estimated Time Investment
Weekend Project (10-20 Hours)
Finish Used
In order of operation: Wood putty for knots and filling in marks. 120 grit sanding each coat. B-I-N Shellac-Based White Interior Primer and Sealer, for sealing knots and prepping for even paint application. Light sanding again with 120 grit. Behr Designer Collection Chalk Decorative Paint (color: ocean boulevard). 220 sanding thru to wood in some places for distressed look. One thick coat of Varathane Triple Thick Polyurethane (clear matte). The matte did preserve the chalk look while making it smooth and easy to clean. I didn't sand after the Varathane though it called for light sanding with 220 grit between each coat (if you use more than one) and a light sanding after the final coat.
Recommended Skill Level
Intermediate

Comments

My wooden magazine files

Submitted by NeoMoses on Wed, 02/13/2013 - 20:17

These are my wooden magazine files made after looking at Ana's plans. I chose to paint these to match my bathroom.

See more of my build process at http://www.bryanpryor.com/2013/01/26/magazine-holders/

Built from Plan(s)
Estimated Cost
$2
Estimated Time Investment
An Hour or Two (0-2 Hours)
Finish Used
Semi-Gloss Latex Interior Paint (ColorPlace) brushed on by hand. Two coats of paint for full coverage.
Recommended Skill Level
Starter Project

Comments

Anna's Bedside tables

Made these for my niece as a wedding gift. These were one of the first of many of these I have made.

Built from Plan(s)

Comments

16" Cedar Patio Planter

Submitted by prelude on Fri, 03/05/2021 - 04:33

I created these 16" cedar patio planters using Ana's plans. I bought four 6' cedar pickets from Lowe's for $1.98 each or under $8 for the lot. I used the extra picket to cut our my 1x2s and 1x3s so the whole construction is made of cedar including the pieces to hold a potted plant. I used Behr's clear and cedar finish to complete the job in under 1 hour. Thanks Ana for the motivation.

Estimated Cost
$8
Estimated Time Investment
An Hour or Two (0-2 Hours)
Finish Used
Behr's clear and cedar exterior finish
Recommended Skill Level
Intermediate

Comments

Bathroom Cubbie Shelf

Submitted by adeath on Fri, 01/16/2015 - 11:19

This is a piece from Ana's book.  I used the plans from the book and followed Shabby-2-chic's recommendation for the finish.  I used 120 grit sandpaper to knock the edges off then applied a dark minwax stain.  Soft scrub was used to remove the extra finish from my white paint.  The kreg shelf pin jig was invaluable in getting the holes just right.   

Built from Plan(s)
Estimated Cost
$60.00
Estimated Time Investment
Weekend Project (10-20 Hours)
Finish Used
Behr premium white with primer in eggshell. Minwax dark stain applied to the sanded edges.
Recommended Skill Level
Beginner

Little Big-Girl Farmhouse Bed

Submitted by Tea Granny on Tue, 03/12/2013 - 11:49

This bed was my 3rd project from Ana white. I'm just getting around to posting it now....

The headboard and footboard were made 2 inches wider than the original plans to account for my wider crib mattress. For my mattress width (28"), I required an extra 1x4 for the headboard and footboard center panels (7 instead of 6), along with 2 1x3s. This meant that I needed to add one extra 1x4 to my shopping list. I only required one 1x6, at a 10 foot length (since I didn't make the arch on the headboard).

Most of the work was done on our backyard deck, my outdoor workshop. I usually enjoyed the company of a little chipmunk as my "helper". He became very tame over the summer, allowing me to pick him up and pet him. At times, he would sit on my lap or ontop of my shoulder while I was working on a project. He was always with me, just hangin' out. I'm not really sure how long this project took, as I was usually distracted by his company!

I really enjoyed making this project! Our daughter was SO excited to sleep in her new big-girl bed!

Thanks Ana for the great plans!

Built from Plan(s)
Estimated Cost
Wood, $28.45. Paint, $36.97 per gallon (I already had the paint from another project)
Estimated Time Investment
Weekend Project (10-20 Hours)
Finish Used
Behr Premium Plus Self Priming Paint - I had 2 separate gallons of this in different colours and finishes. One was semi-gloss white (I found this to be too shiny, and the shade too cool). The other gallon was a flat finish, in a Farrow and Ball colour "Pointing".
Since the walls of the room are already in the "Pointing" colour, I wanted to keep the bed whiter than the walls, just slightly off white. I ended up mixing some of both gallons together. The result? - a lovely eggshell finish in a warm white colour. Perfect.
Recommended Skill Level
Beginner

Comments

dmcarwin

Wed, 03/13/2013 - 08:01

You did a great job! I love you "little helper" in the first picture!

In reply to by dmcarwin

Tea Granny

Wed, 03/13/2013 - 13:40

Hi dmcarwin - Thanks so much for your comment!

I love my little helper as well. You, however, must be a VERY busy lady! With 6 little helpers??? How do you ever find the time for all your fabulous projects? You truly amaze me!

In reply to by Tea Granny

dmcarwin

Wed, 03/13/2013 - 15:35

You are so sweet, I don't do projects in a normal time frame, they are more like, cut the wood one day, sand the next, build another, etc....It is rare I do a build all at once, for obvious reasons! But I truly love it and so I make the time for it when I can! I just checked out the rest of your projects they are fabulous!

Tea Granny

Wed, 03/13/2013 - 18:07

Oh, yes. I certainly know about the non-normal time frames. My projects are done during nap-time or in the middle of the night. I finished a play kitchen at 4am on Christmas Day! Cutting it close - after numerous 4am nights, a couple all-nighters ...and about 40 hours later. I definitely was an elf in the workshop.

The play kitchen is pictured in the background of my second photo for my Toddler Chalkboard project. I used Ana's plans and another plan as my inspiration, heavily modified the measurements. I have not had time to post it yet, but soon....

Okay, so I've just checked out your blog! Wonderful.

LindseyMagno

Sun, 08/09/2015 - 06:51

This is gorgeous!!!!! My daughter will be two in two weeks, and while I'm not quite ready for a big girl bed, and we don't need her crib for another baby yet, I'm so excited to finally find the perfect plans when I am ready. You did a GREAT job, it's just beautiful. When I compare this to the $400 plus beds in stores I just shake my head and say THANK YOU ANA for giving us great alternative options. Thank you for the inspiration!!

Mudroom bench

Submitted by Dan Kielty on Thu, 04/01/2021 - 18:16

Mud room bench with recycling cabinet

Estimated Cost
$300
Estimated Time Investment
Weekend Project (10-20 Hours)
Finish Used
Behr chalk paint, Minwax ebony
Recommended Skill Level
Intermediate

Comments

Mini Night Stand

Submitted by Anonymous (not verified) on Mon, 04/24/2017 - 21:07

Took us 4 months cause we have kids so we have to work during naps and after bedtime and then we were hesitant to work on it for a while after a little stressful episode building the drawer. We had to lower our expectations for perfection when working with pine and no clamps. We're happy with how it turned out though! Reminds me of Van Gogh's "The Bedroom" for some reason. 

Estimated Cost
$25 wood
$8 paint
$22 Prestain, stain, poly
Estimated Time Investment
Weekend Project (10-20 Hours)
Finish Used
Minwax special walnut/ 3x water based poly
Americana indoor outdoor "patio" grey
Recommended Skill Level
Starter Project

Fancy X Desk

My first big project. It turned out great! There are a couple of issues with the plans but nothing a little common sense couldn't resolve. Also, for any beginners out there, make sure when you're going through your cut list, start with the larger pieces first then work your way down to the smaller cuts. You'll end up having to take another trip to the hardware store if you cut the smaller pieces first. Great plans Ana White! I built this as a Christmas gift for my girlfriend. She was blown away! She absolutely loves it!

~Justin~

Built from Plan(s)
Estimated Cost
Wood cost: $45.95
I did end up spending a lot more on stain, polyurethane, hardware, sandpaper.. The list goes on. But most of these items are things I can reuse for future projects.
Estimated Time Investment
Weekend Project (10-20 Hours)
Finish Used
Black Cherry Stain and then a clear polyurethane.
Recommended Skill Level
Beginner

Comments

I'm pretty proud of myself

Submitted by Anonymous (not verified) on Mon, 05/01/2017 - 10:17

Pretty straight forward plans.

Built from Plan(s)
Estimated Cost
$350
Estimated Time Investment
Weekend Project (10-20 Hours)
Finish Used
Shou Sugi Ban/ Tung oil
Recommended Skill Level
Beginner

Simple 2x4 Potting Bench - Modified

I was intrigued by Ana’s Simple 2x4 Potting Bench. The project seemed simple enough and it would be used as a means to clean up clutter in the garage. My main focus was to make it semi-portable and weather resistant. Instead of using 2x4’s for the corner posts, I used 4x4’s to accommodate casters. I also shorted the length of the posts by 4 inches to compensate for the height of the casters. To provide extra rigidity I did a dado for the 2x4’s that connect the front and rear legs. In retrospect, I wish that I did not dado the legs because it made it more difficult to attach some of the shelf planks. I painted the frame green and left the shelves and backboards clear for beautiful contrast. My wife is ecstatic with the result.

Estimated Time Investment
Weekend Project (10-20 Hours)
Finish Used
Benjamin Moore Environ Green paint for the frame and Minwax Polycrylic for the poplar shelves and backboards.
Recommended Skill Level
Intermediate

Comments

Seasonal And Holiday

Outdoor sofa

Submitted by Julisib on Sun, 06/06/2021 - 06:39

Thanks a lot for the free plans. We enjoy out new deck !

Comments

Seasonal And Holiday

Chicken Coop

Submitted by Anonymous (not verified) on Mon, 05/29/2017 - 11:44

Made this coop in a weekend. $140 in material. Still a bit of work to do.

Built from Plan(s)
Estimated Time Investment
Weekend Project (10-20 Hours)
Recommended Skill Level
Beginner

Entryway bench

Submitted by Tinia on Tue, 03/03/2015 - 09:38

Used plans for Alexia bench.

I used leftover 4 x 4 pine we had for the legs.  I bought some paneling and moulding to dress it up.

I also used leftover flooring for the drawer faces.

Built from Plan(s)
Estimated Time Investment
Day Project (6-9 Hours)
Finish Used
Early American Minwax and spray polyurethane (several coats)
Recommended Skill Level
Intermediate

Kitchen Hutch

I've built a lot of things...mainly corn hole boards for friends and family but this is my first furniture build. My wife's Valentine present! Now I'm thinking my new big screen tv sure could use a nice Apothecary media cabinet.

Built from Plan(s)
Estimated Cost
I used expensive 3/4 in birch plywood so around $130
Estimated Time Investment
Weekend Project (10-20 Hours)
Finish Used
CHALK Paint with a chalk varnish for a protective finish
Recommended Skill Level
Beginner

Comments

Entertainment Center for 60" Flat Screen LED TV

I used the plans from JRLwoodworking and the pictures from AZCA33 and combined them to create an entertainment center to hold my new 60" flat screen tv. I priced new entertainment centers at furniture stores for a nice entertainment center to hold a large tv and the price was around $2000. I looked around online and found a couple of websites of handmade entertainment centers and decided to give it a try. I had never made anything remotely his large or detailed, but with the plans and some patience, I was able to bring this thing to life. I couldn't have done it without the help of this website or jrlwoodworking. I am very proud of this piece of furniture and plan to cherish it for a long time....

Estimated Time Investment
Week Long Project (20 Hours or More)
Finish Used
Black latex paint (satin), white latex paint (satin), and Polyacrylic (satin)

We painted the bare wood with the white latex paint first. After a couple of coats, my wife used the black paint on the areas that she planned to look distressed. We painted over the black with the white until fully covered. She sanded the white until the black came through like she wanted and then we coated the entire thing with a polyacrylic coat.
Recommended Skill Level
Intermediate

Comments

NimbleShopper

Mon, 04/22/2013 - 13:51

Wait a moment, that is a super WOW!

Really nice work. The piece is worthy of a magazine cover. Very well done.

kristenlotz

Sat, 06/01/2013 - 19:21

Hi RAZORBACKFAN, I am so excited to see this build from our plans at jrlwoodworking.com! This is absolutely beautiful. It looks like a very difficult project, but with the step by step instructions and going through it a few times, it really can be done by a handy do-it-yourselfer. I hope you enjoy yours as much as we enjoy ours. The best part of it is telling everyone you built it. Nobody would believe it unless we had the pictures to prove it.

Mudroom Bench with Hutch

Submitted by calliher on Sun, 09/12/2021 - 18:45

This is my laundry room and it is about 12x10. It looked so bare with only the washer and dryer. So I thought making this a mudroom also. I live in the mountains and have snow 3 to 4 months a year. This will be perfect. I purchased an IKEA cabinet built it in and added the Ana White plans with two bays.

Comments

Kitchen Island Trolley

Submitted by naomi on Fri, 06/23/2017 - 08:29

Base was made from recycled timber and the top was made with new pine.

The rails were made from curtain rails. 

One end has wheels for easy moving.

Built from Plan(s)
Estimated Cost
$20
Estimated Time Investment
Day Project (6-9 Hours)
Finish Used
Enamel Paint and Brown Japan Stain
Recommended Skill Level
Intermediate

Comments

sis2795

Wed, 07/31/2019 - 16:58

I don’t understand the cost for this. The wood is going to cost significantly more than $20. Am I an idiot and don’t know where to get the wood from??? How does that equal out to $20?

In reply to by sis2795

naomi

Sun, 08/11/2019 - 22:41

Hi,

All of the base was made from free pallet Wood and the timber top was one line length of new timber which cost about $8 and the wheels I had in the shed and the curtain rail was a couple of dollars from Bunnings. The paint and stain I already had.

I hope this helps. 😀