DIY Outdoor Wood Chairs
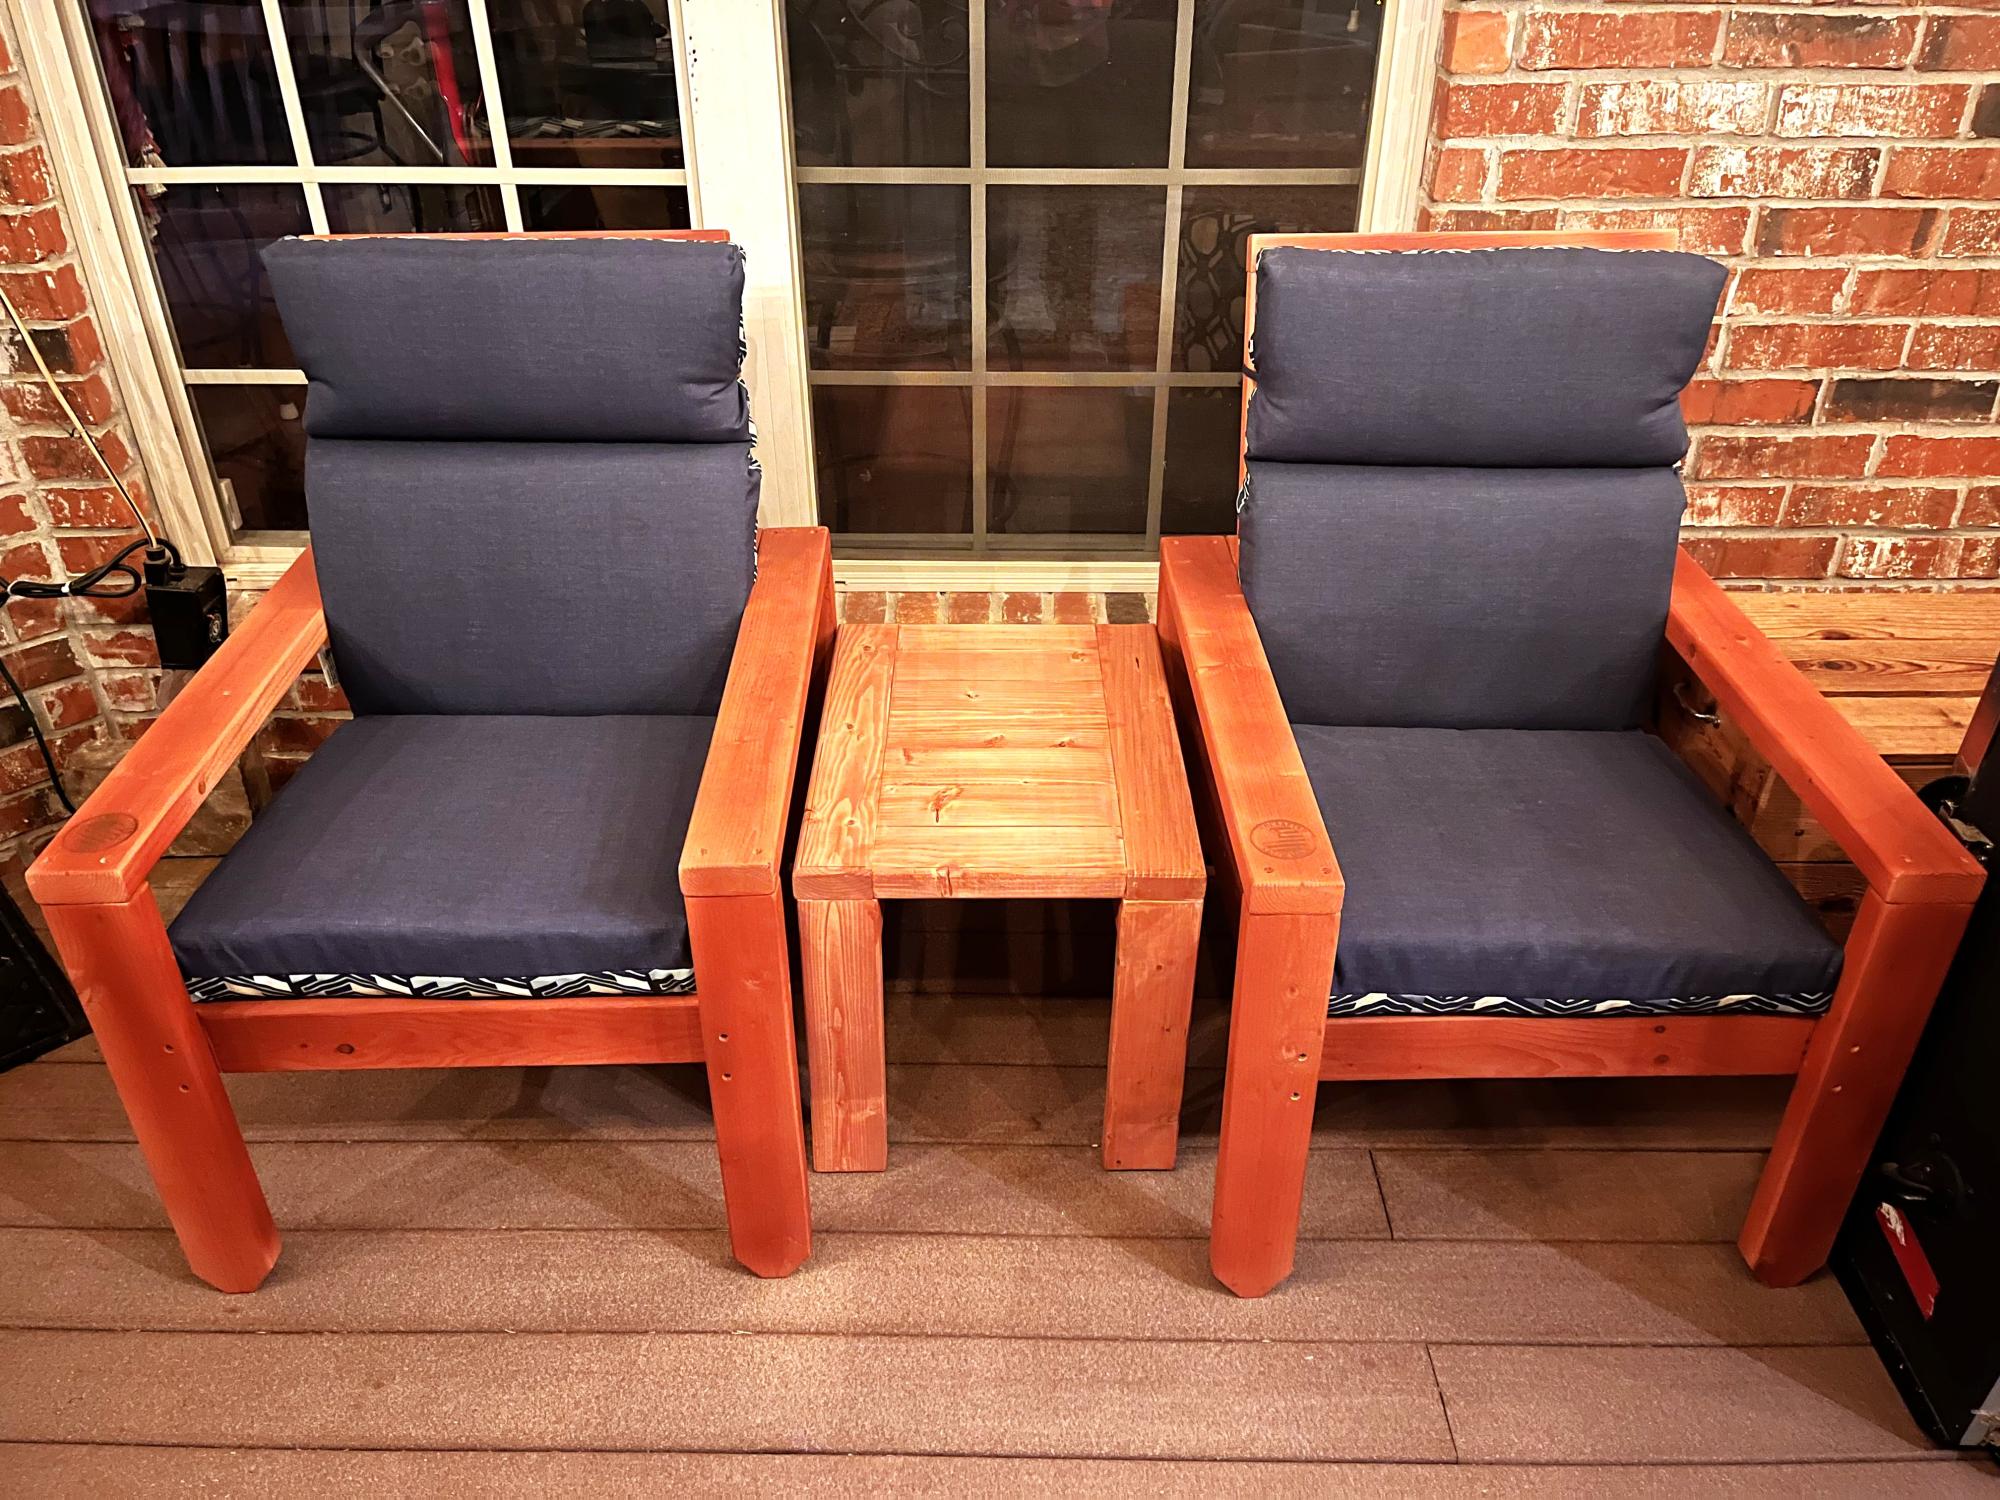
Posted the chairs recently. Here they are with the side table. Side table used 100% pocket holes.
Built from Plan(s)
Posted the chairs recently. Here they are with the side table. Side table used 100% pocket holes.

This was my first project. It was relatively easy but I did make some mistakes that are now design features


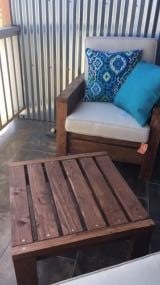
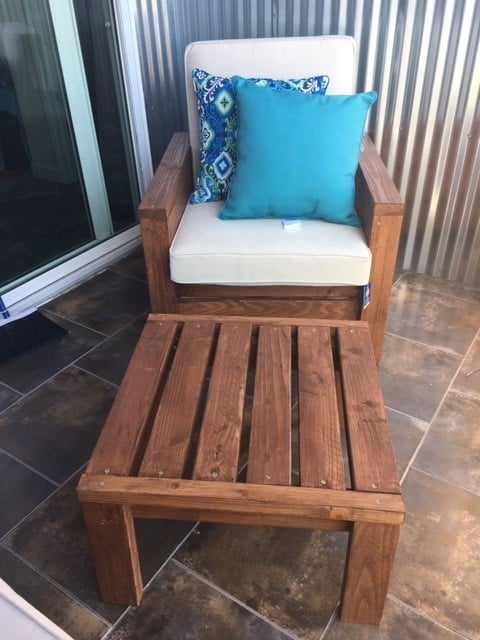
The chairs were my first project ever and they came out great! I even made the ottoman/side table because the chairs looked so good. Ana, your plans were fantastic and easy for a beginner. I learned so much from this first project and I'm already working on another project from your site! The cushions were definitely the most expensive part of the chair.
Our first DIY furniture project. We told friends it was an assignment from couples therapy. lol Don't look too close or you will see the many flaws, but I can say it has character and will serve its purpose.
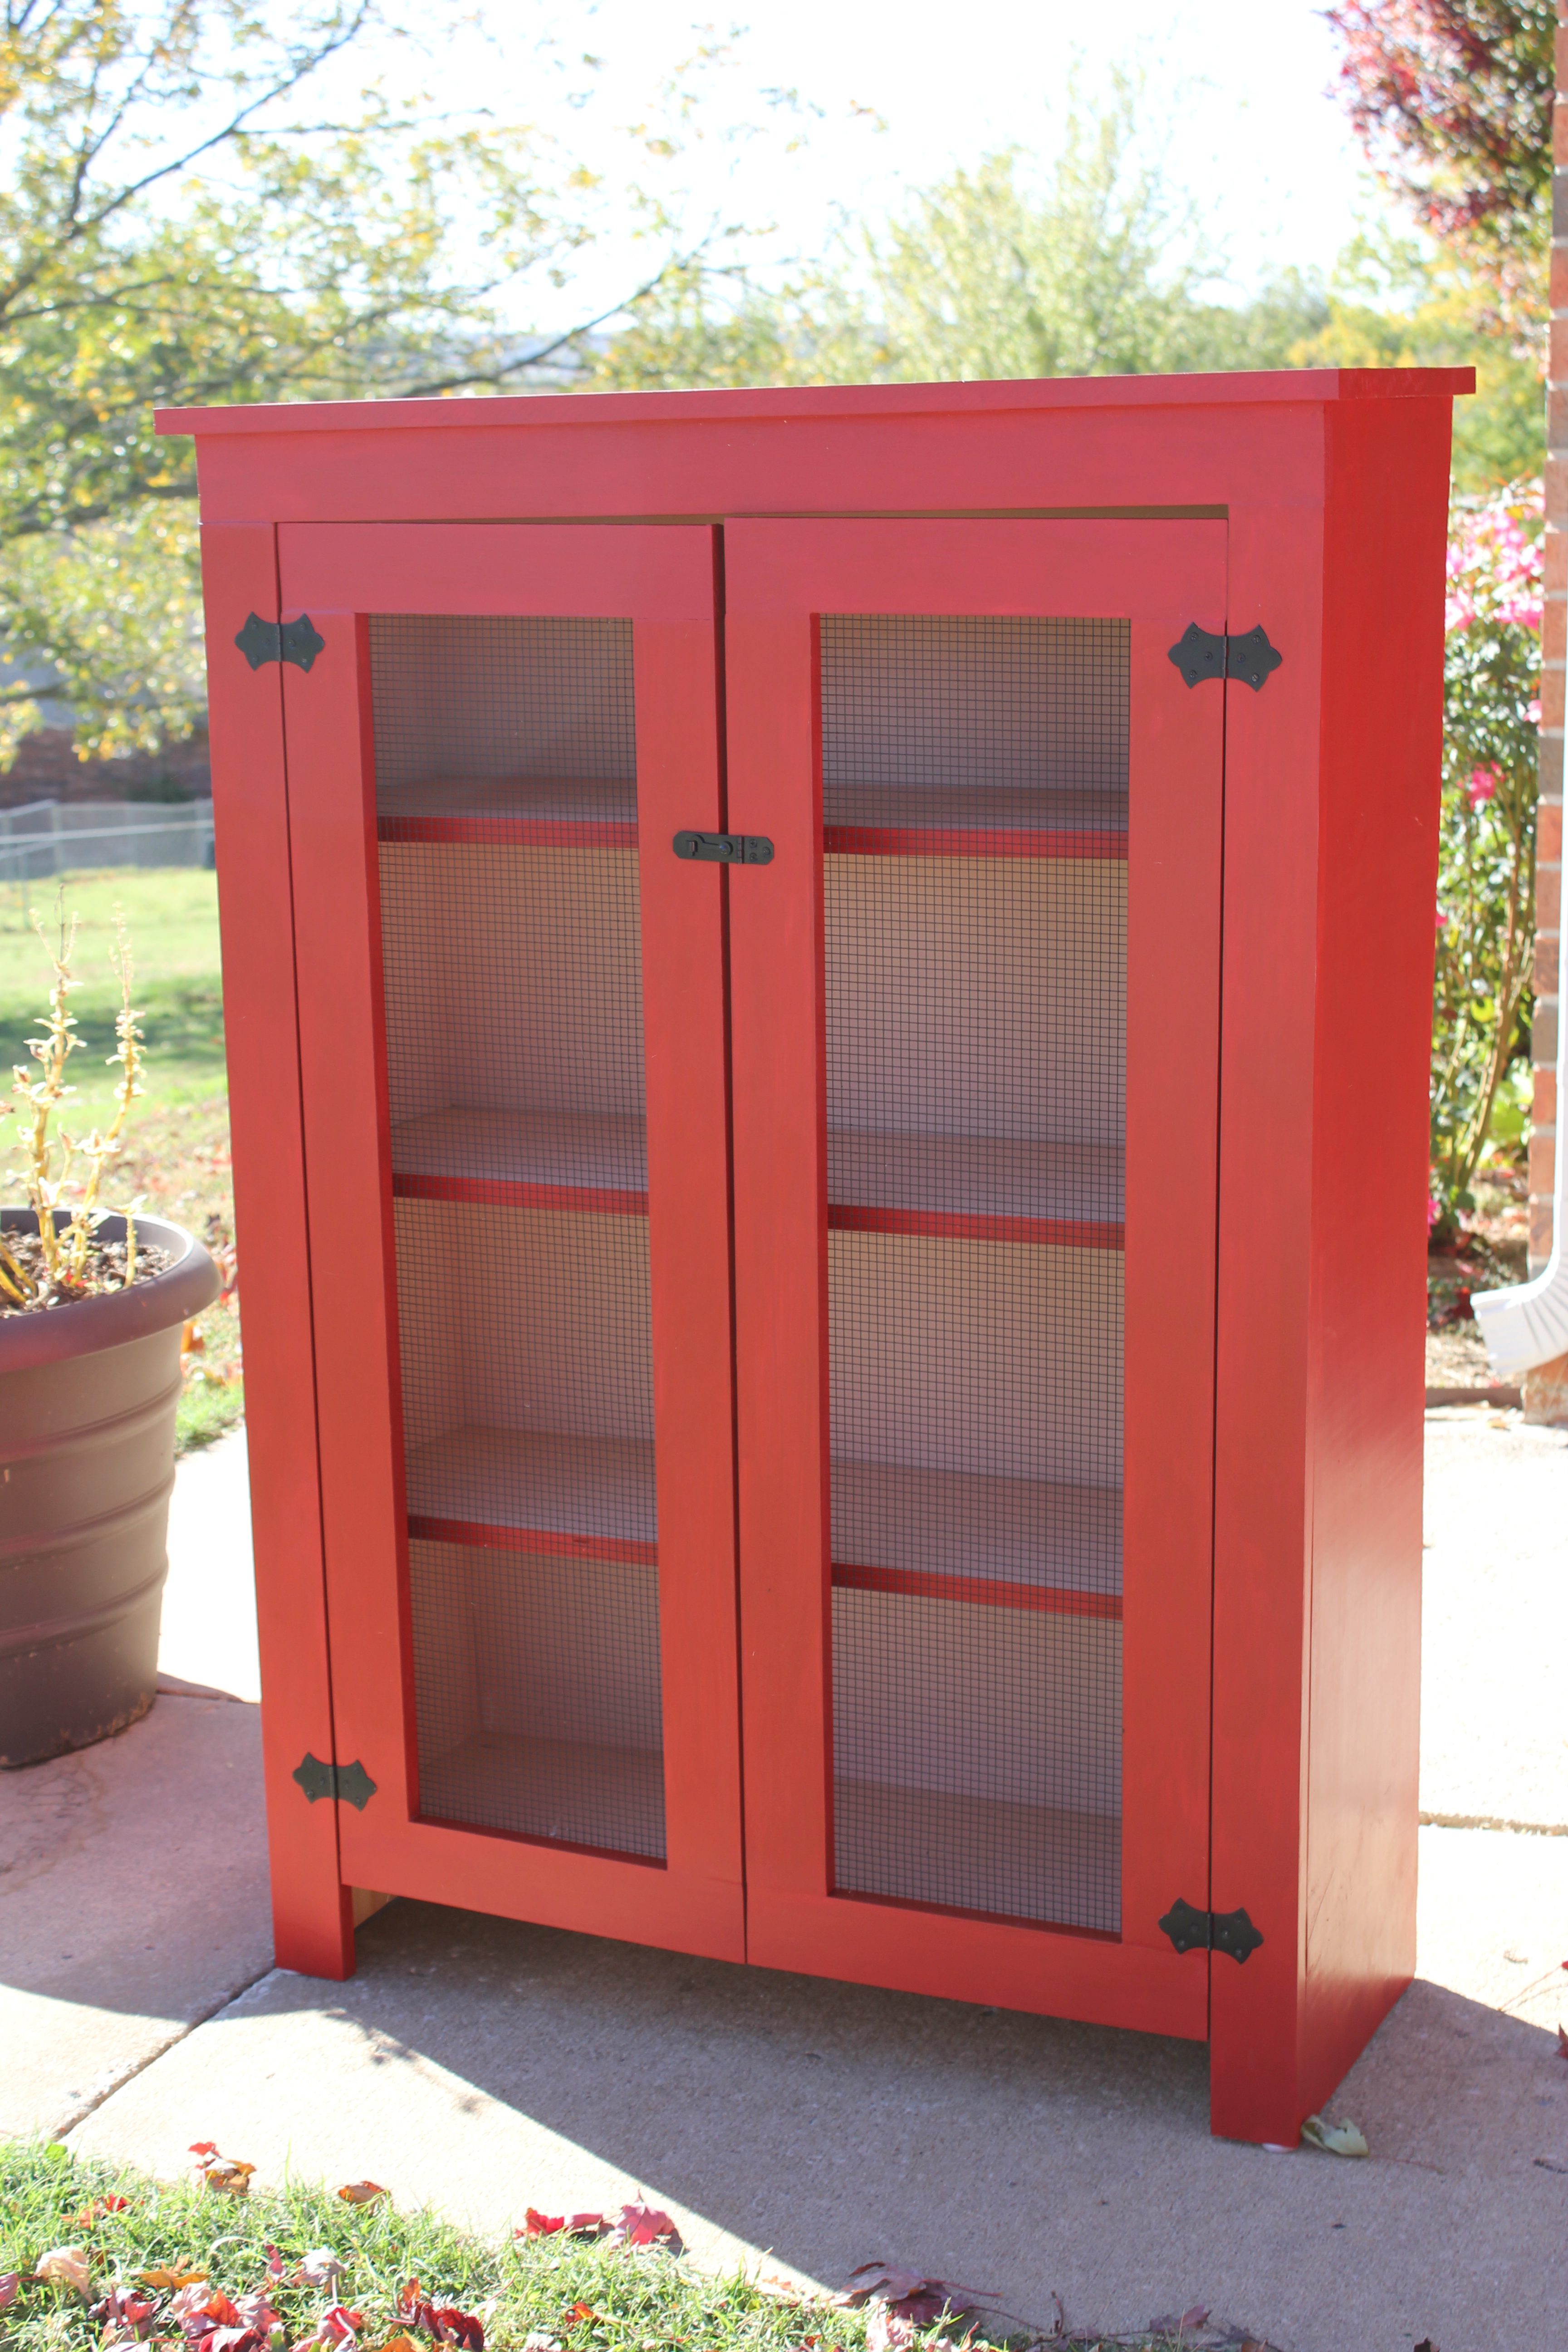
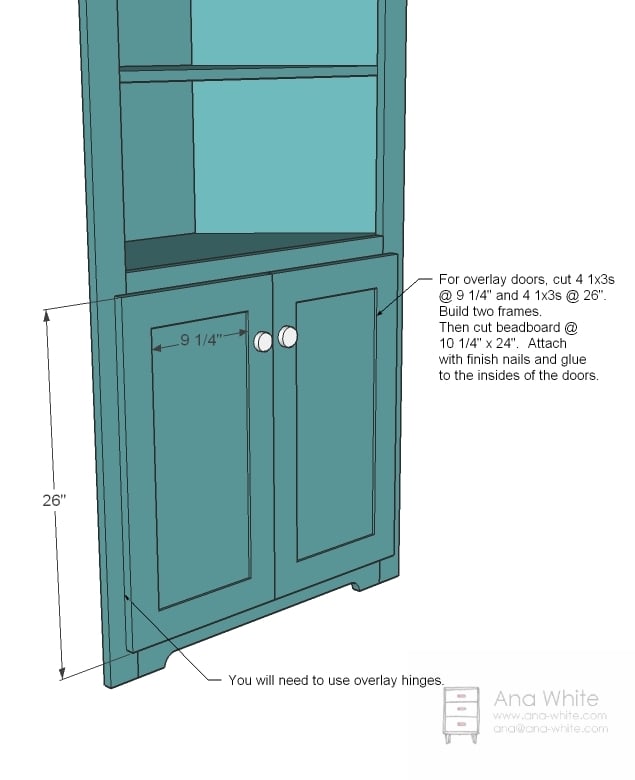
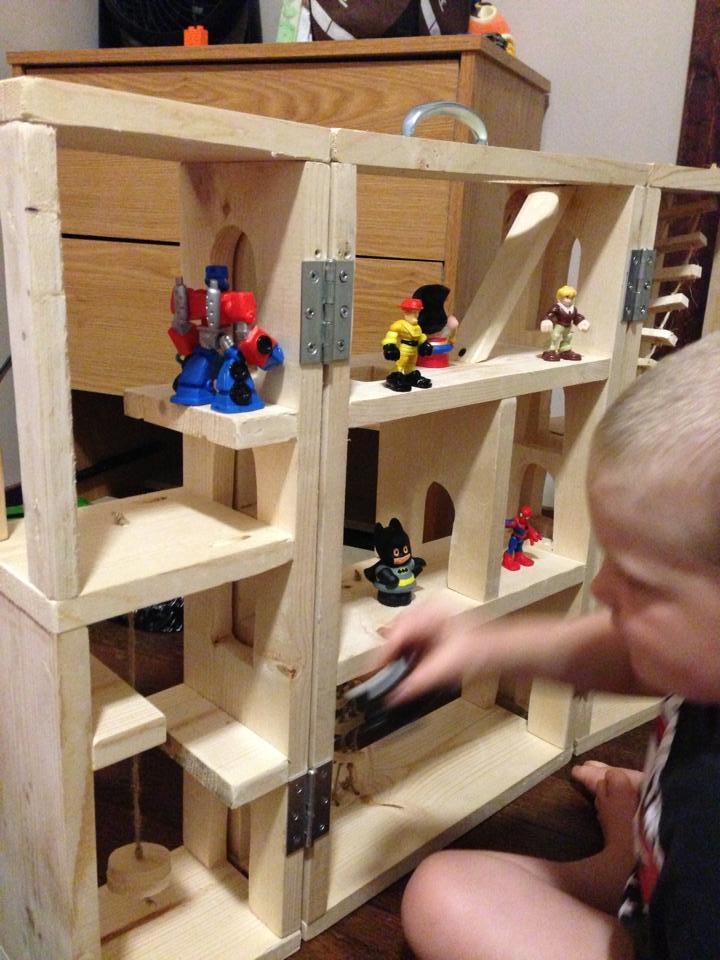
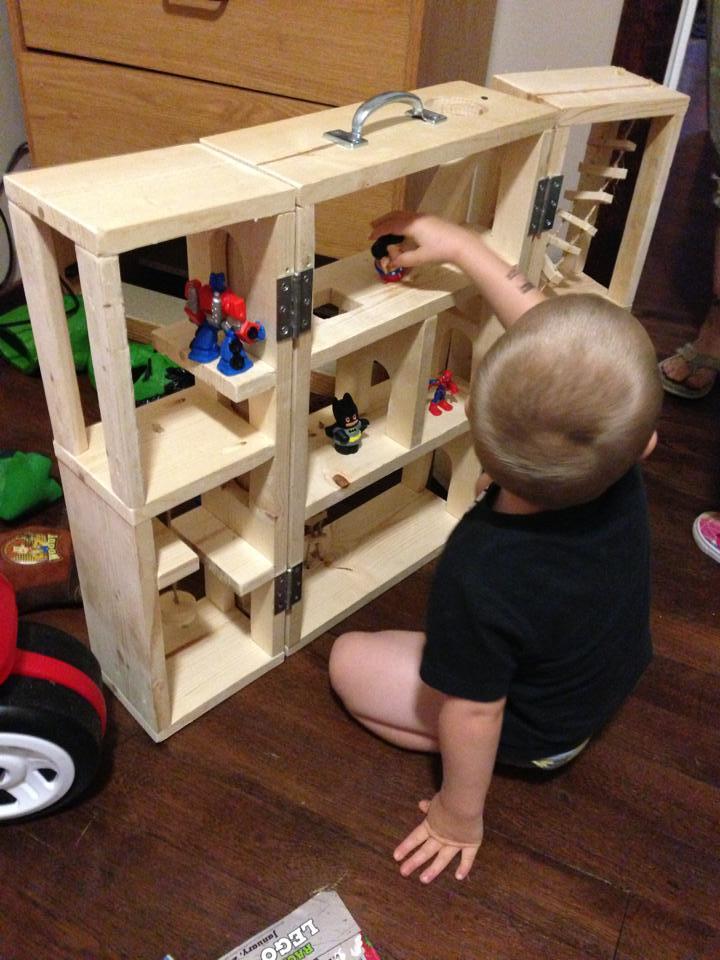
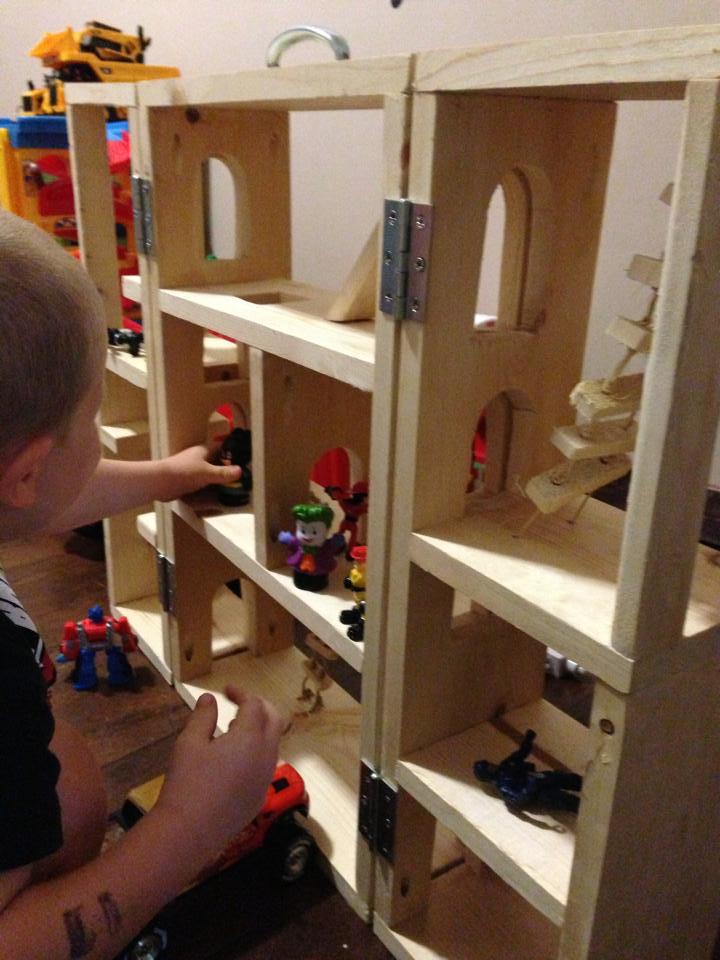
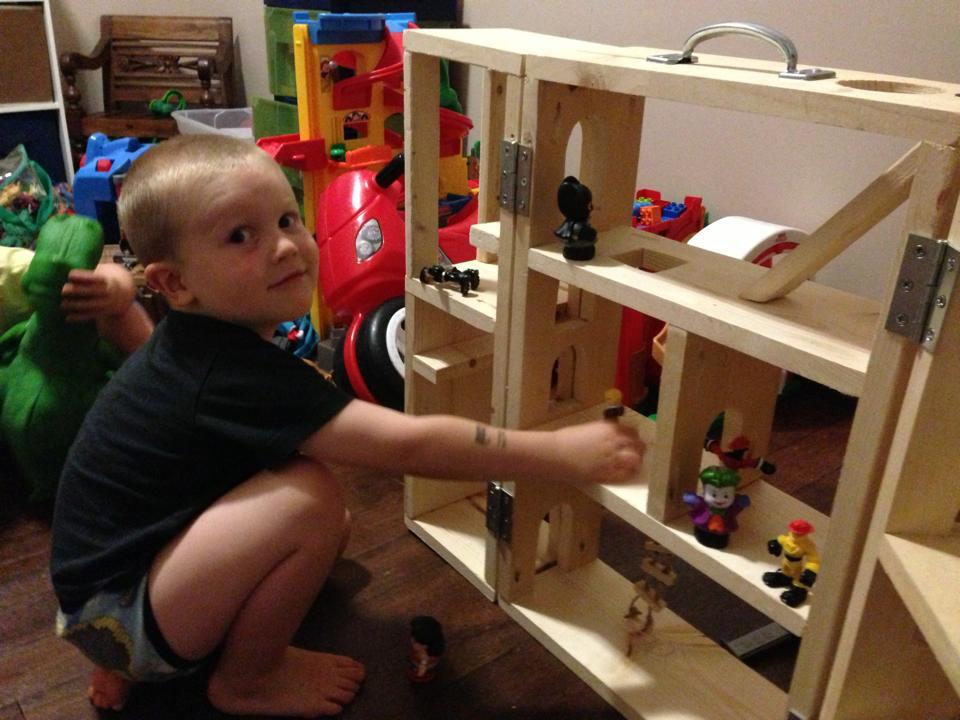
We had problems with the doors. I think they are true and plum, but the cabinet, not so much. They hang a little cockeyed, but they do swing. The plans for the doors didn't quite match the cabinet, but we are newbies so we could have misread the plans.
The hinges and latch are from the blue store - painted matte black from a can from the original nasty brass. The red is Balero and the shelves are a coordinating tan from Sherwin Williams. A coat of Minwax Polycrylic for protection. We used square wire from the blue store for the doors. We didn't router the doors to inset the wire, a stapler worked fine.
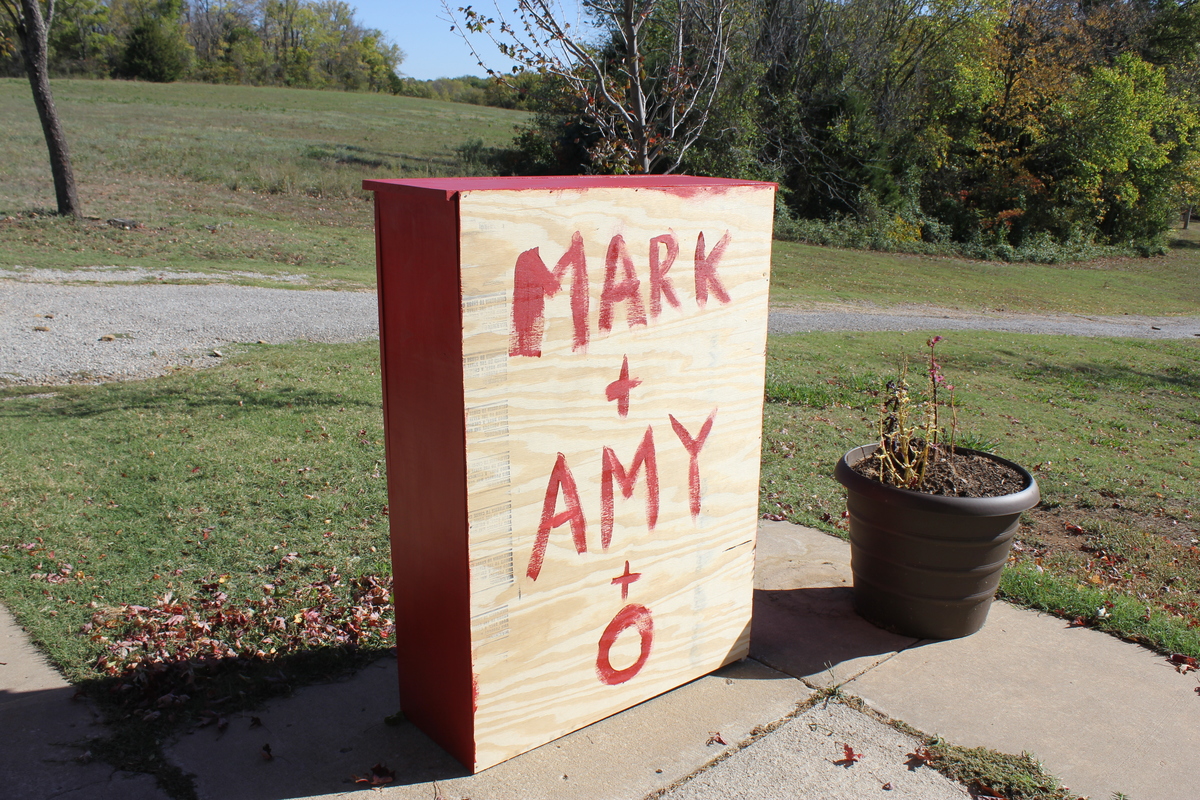
It was an absolute great first project that Husband & I enjoyed tremendously. Mom has been looking for a jelly cabinet for 6 months without success. Old functional furniture pieces just aren't manufactured anymore. This cupboard fit the bill perfectly.
Tue, 10/23/2012 - 08:01
This is awesome. Seriously. You two did such a great job and your mom will enjoy it for many years. That red with the black hardware looks so great.
In reply to This is awesome. Seriously. by Maira (not verified)
Tue, 10/23/2012 - 18:14
Thanks Maira :) That was sweet of you to say. Can't wait to start another project.
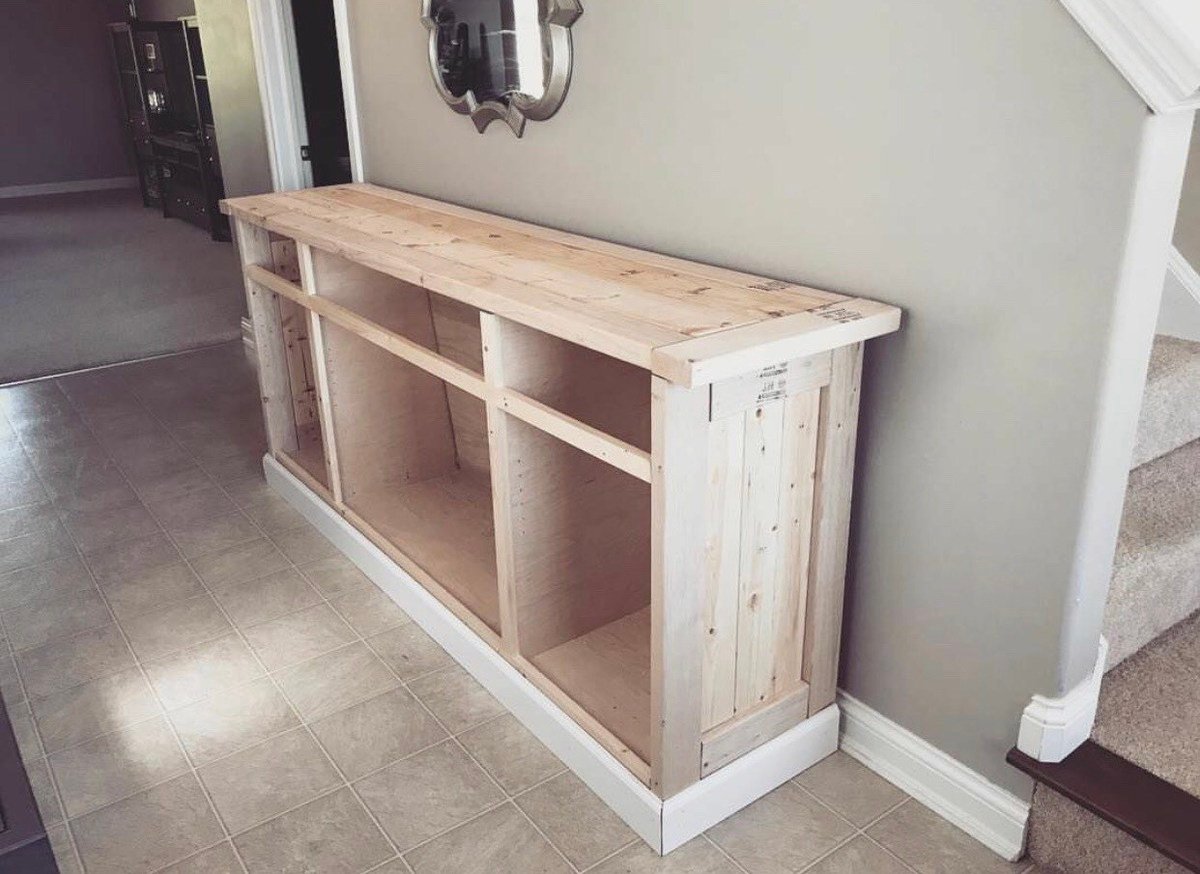
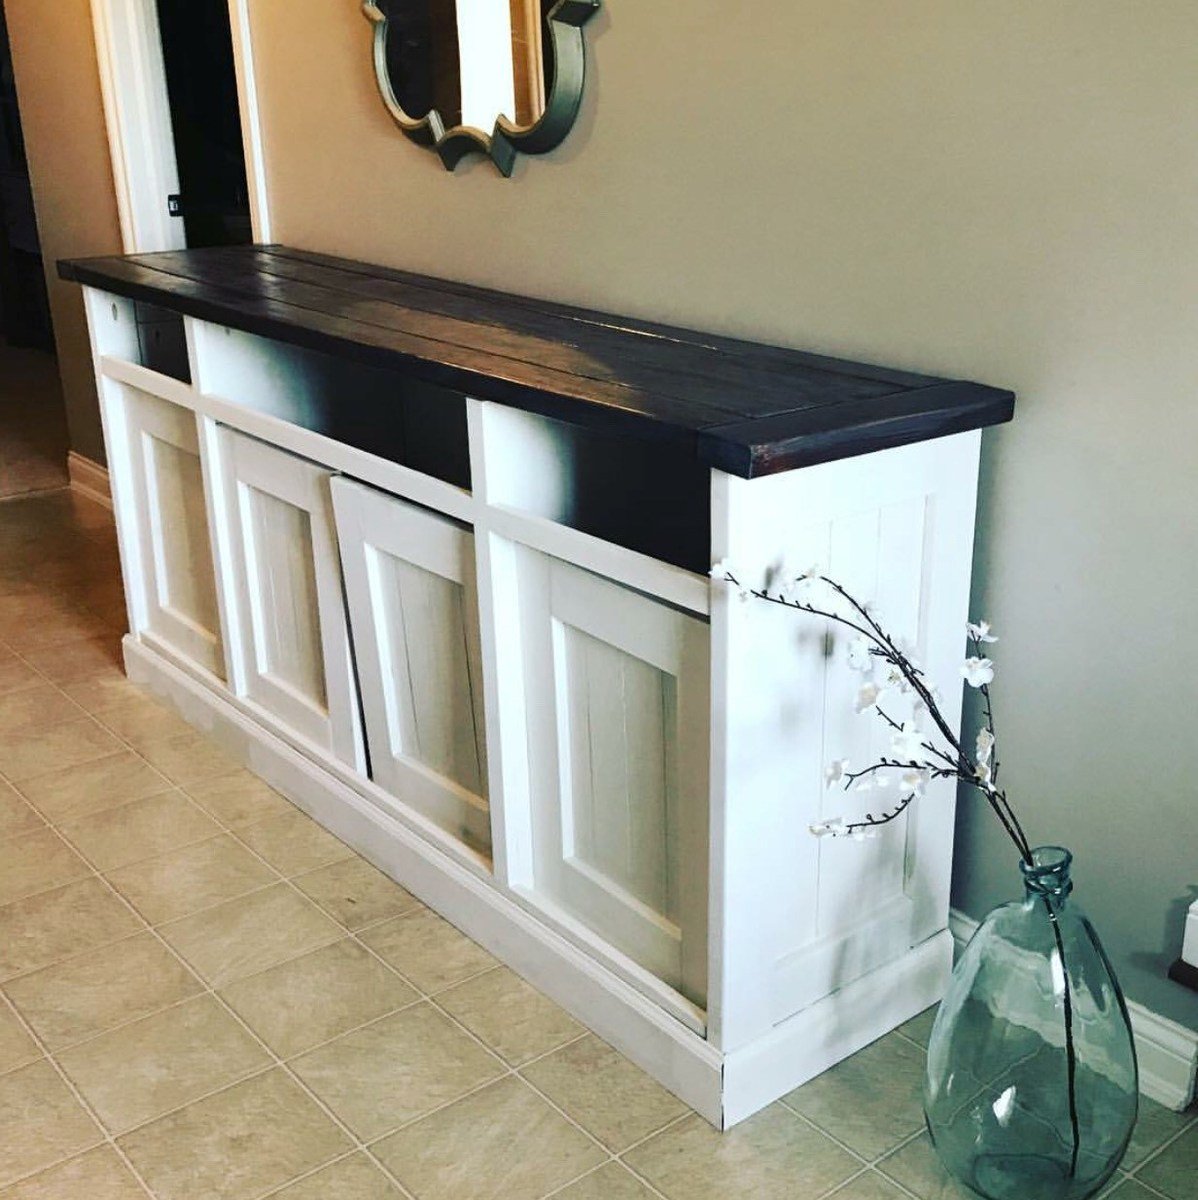
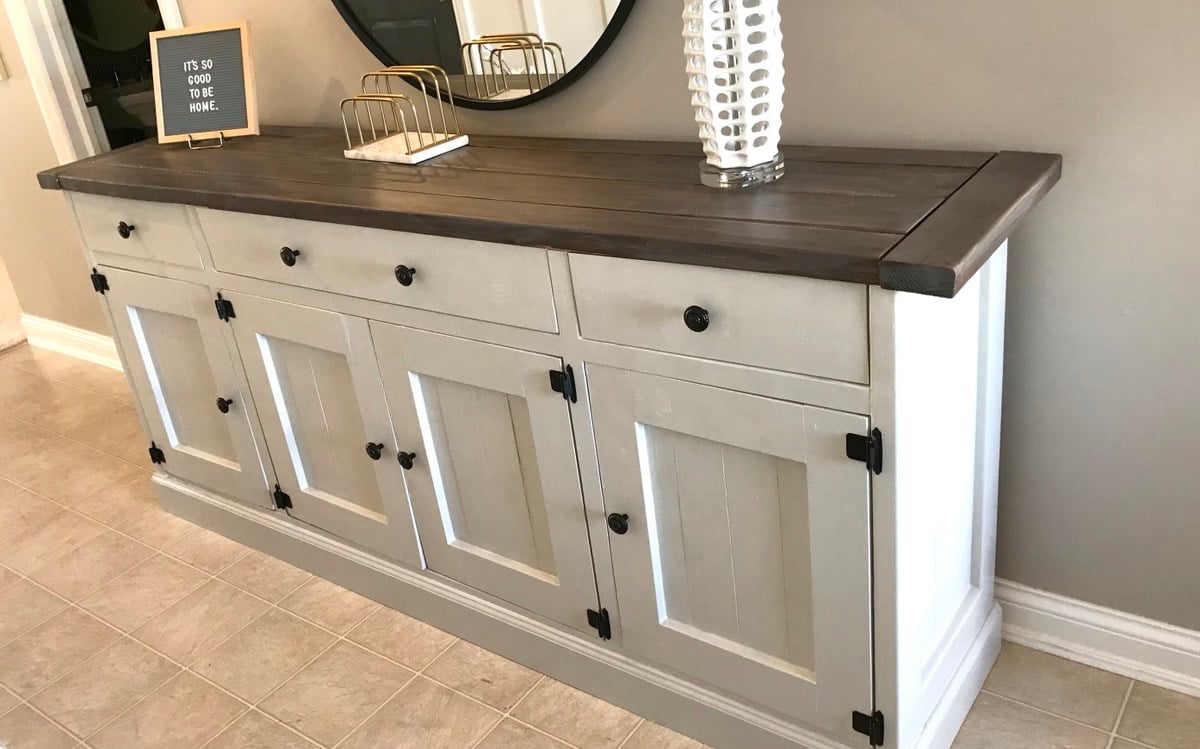
I Modified the plan to eliminate the middle shelf and shortened the length to fit as an entryway table.
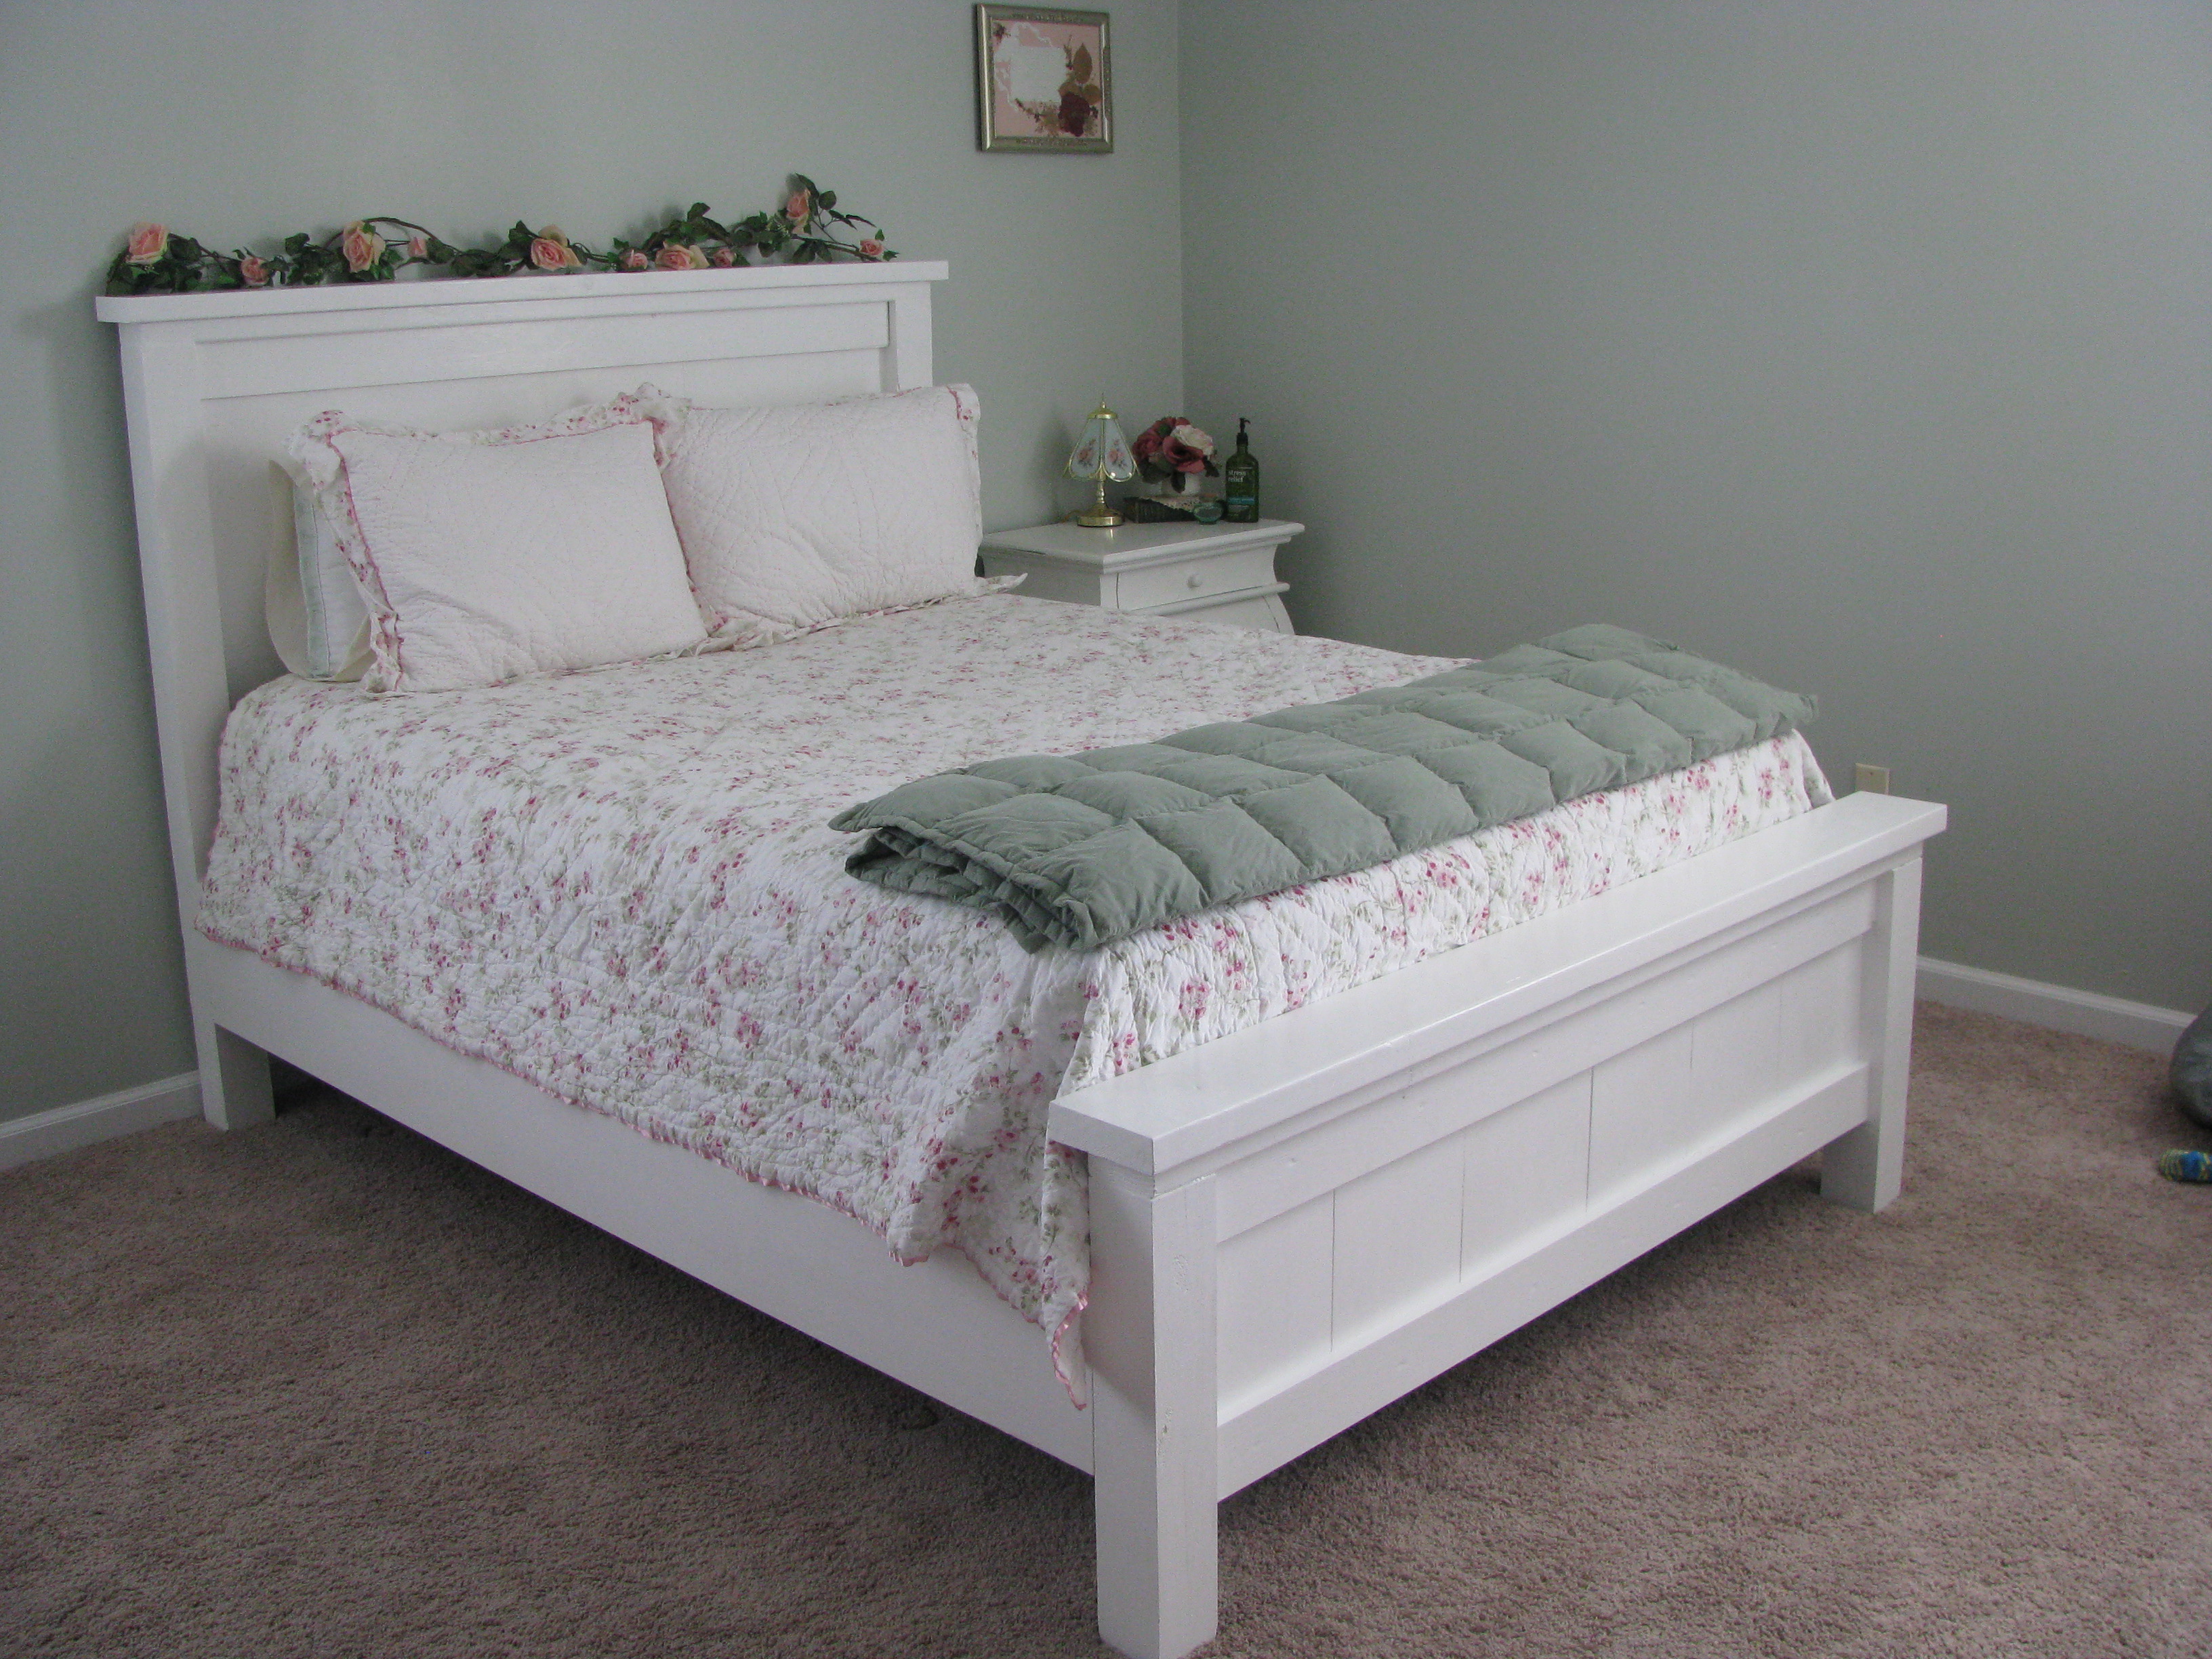
This was our first major project, so we learned a lot while we were doing it. We painted our bed white, and rather than using metal bed rails (which no one seemed to sell), we improvised and fastened 2x4s to the inside of our side rails. Then we cut slats to rest on the 2x4s and run the width of the bed. The 2x4s lend great stability to the side rails, and are much less costly, not to mention easier to obtain. ($10 vs. $75) This bed is sturdy and solid. I think we will be handing it down to our grandchildren in fifty years!
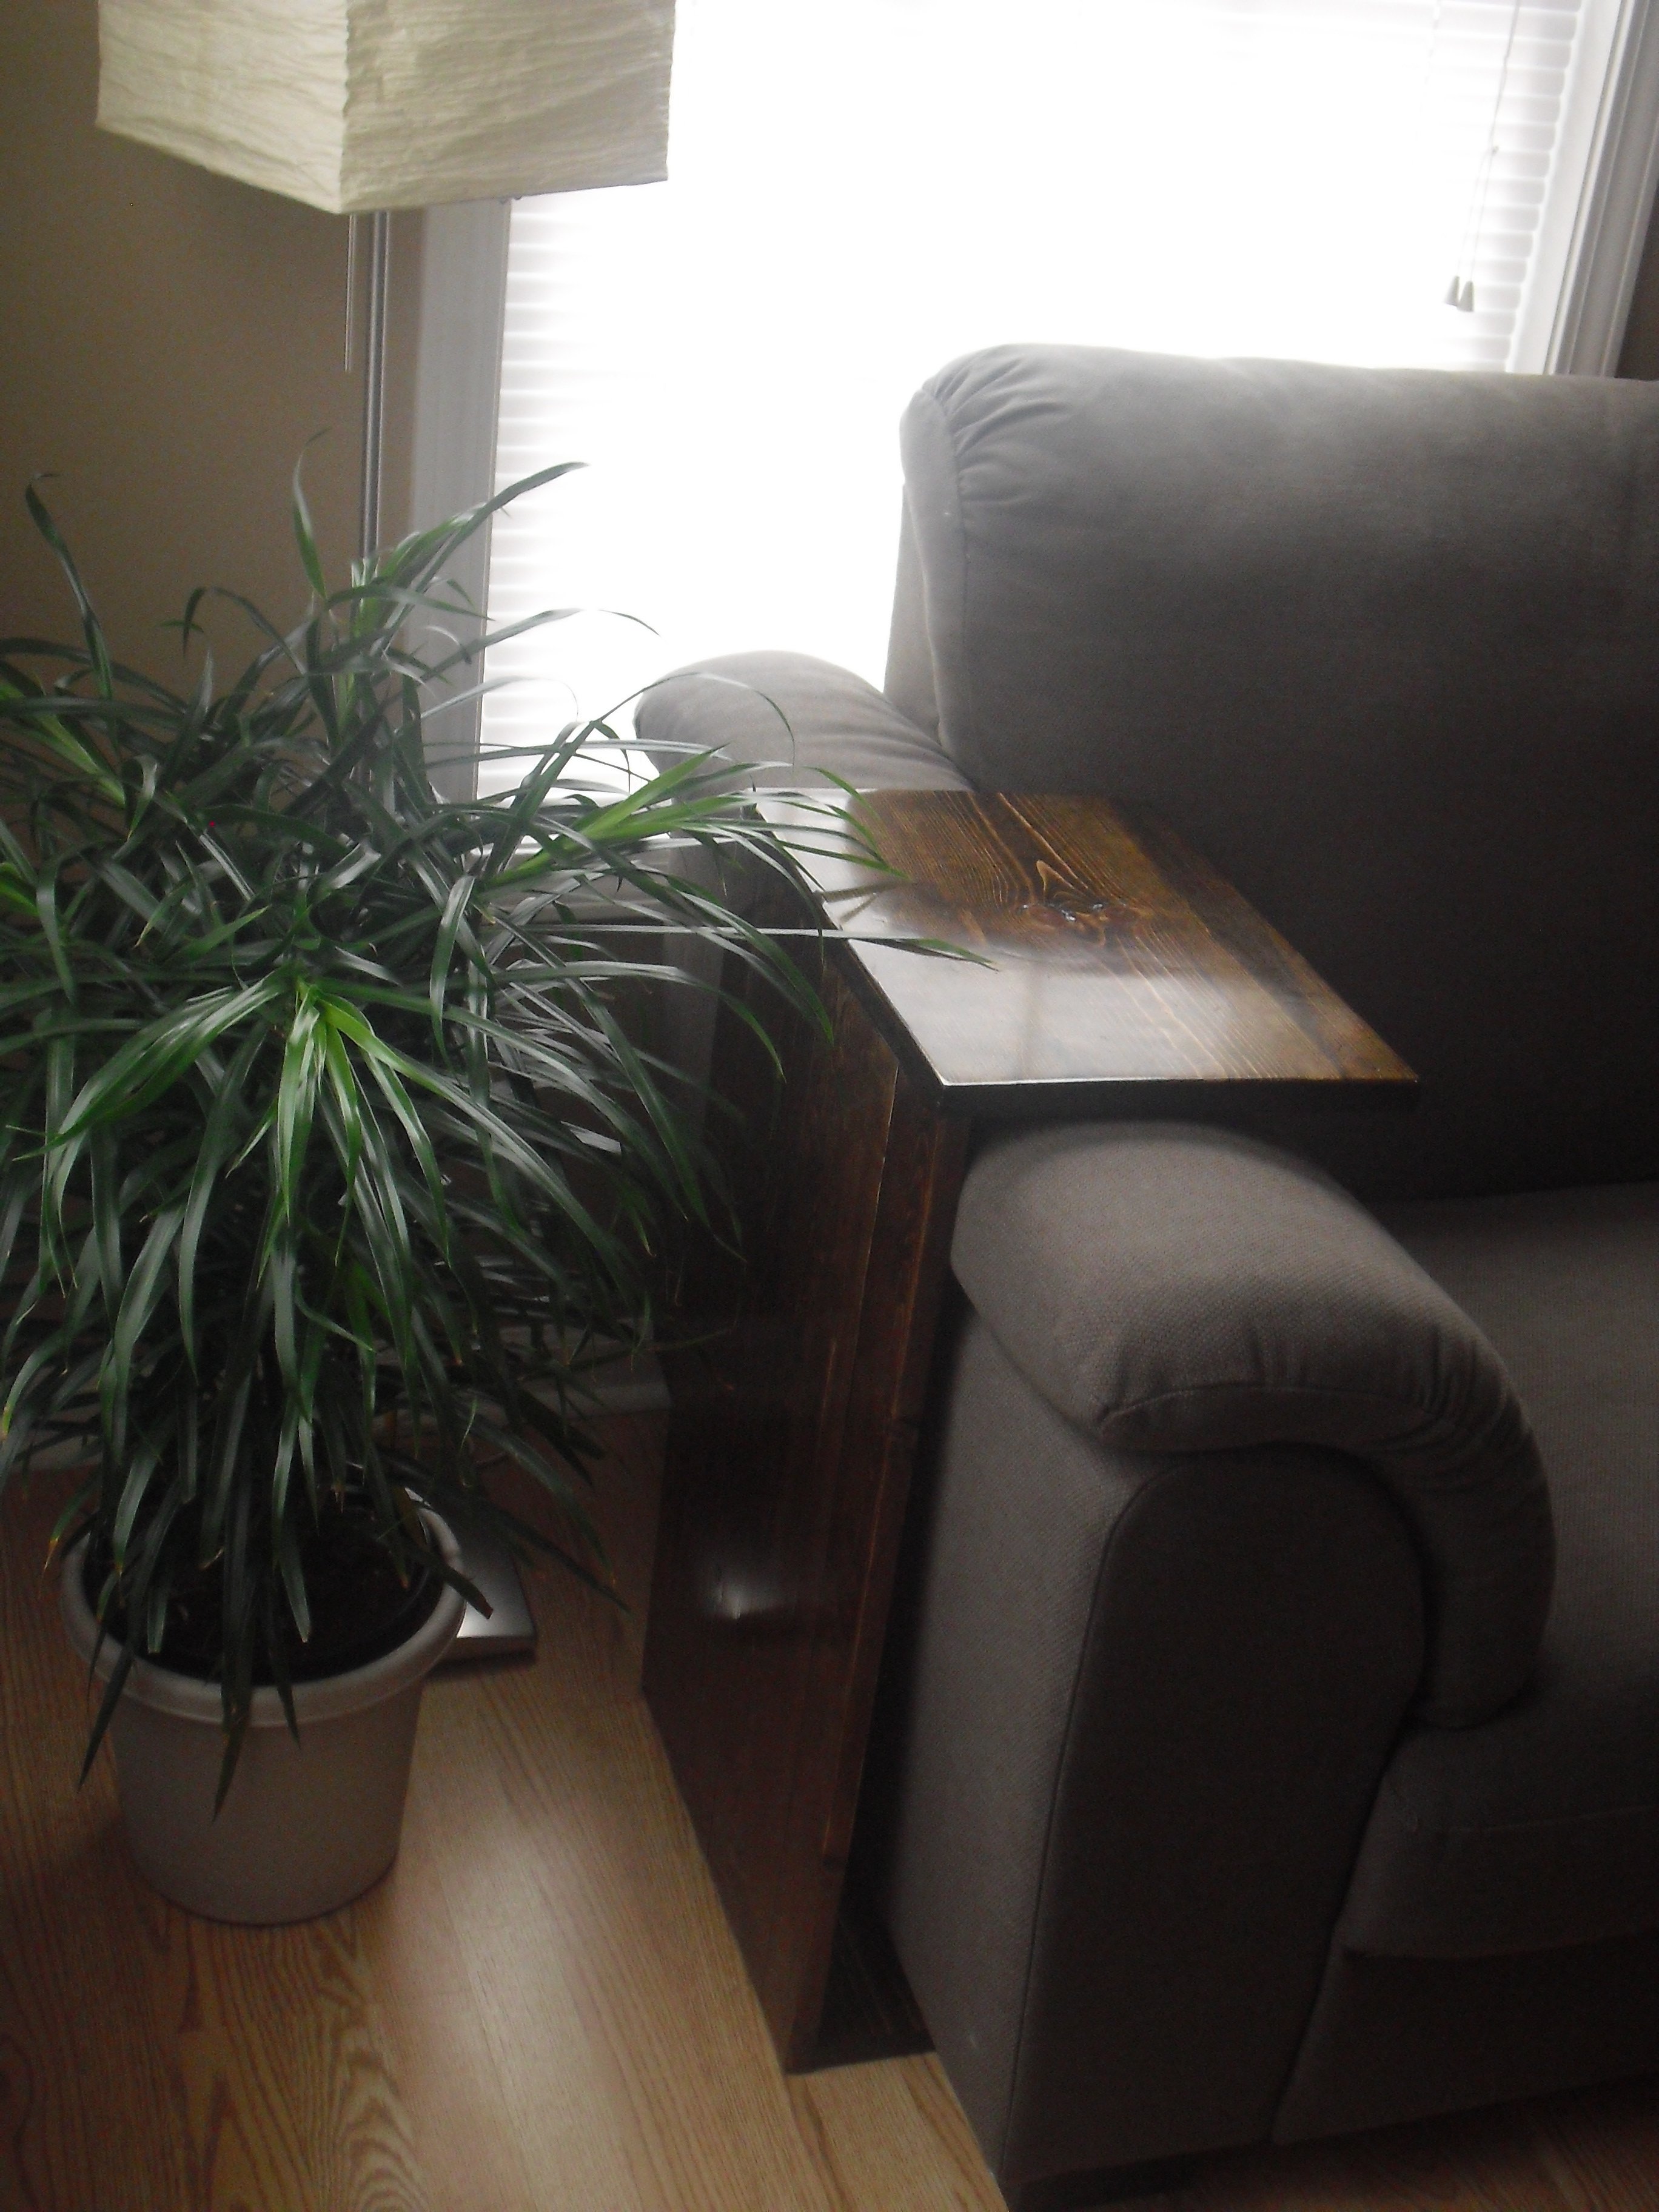
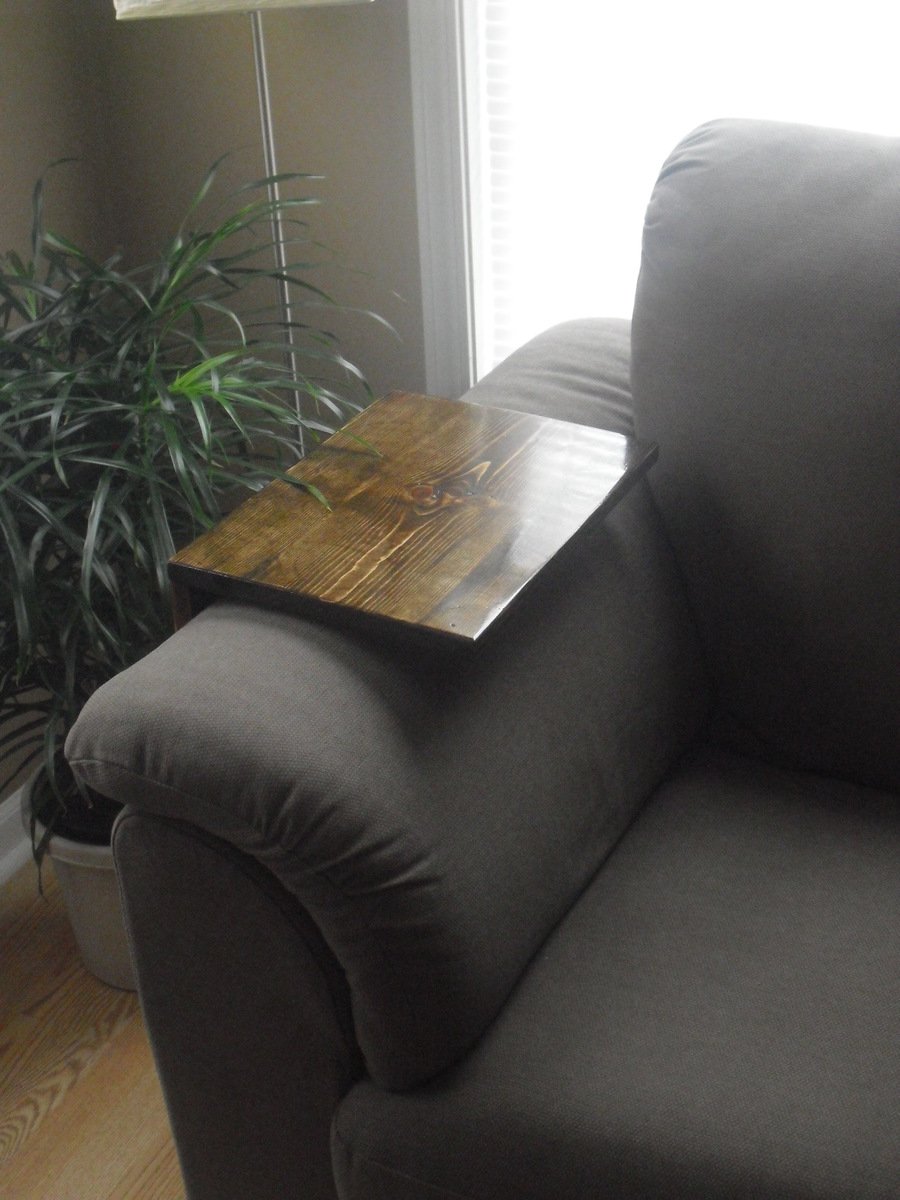
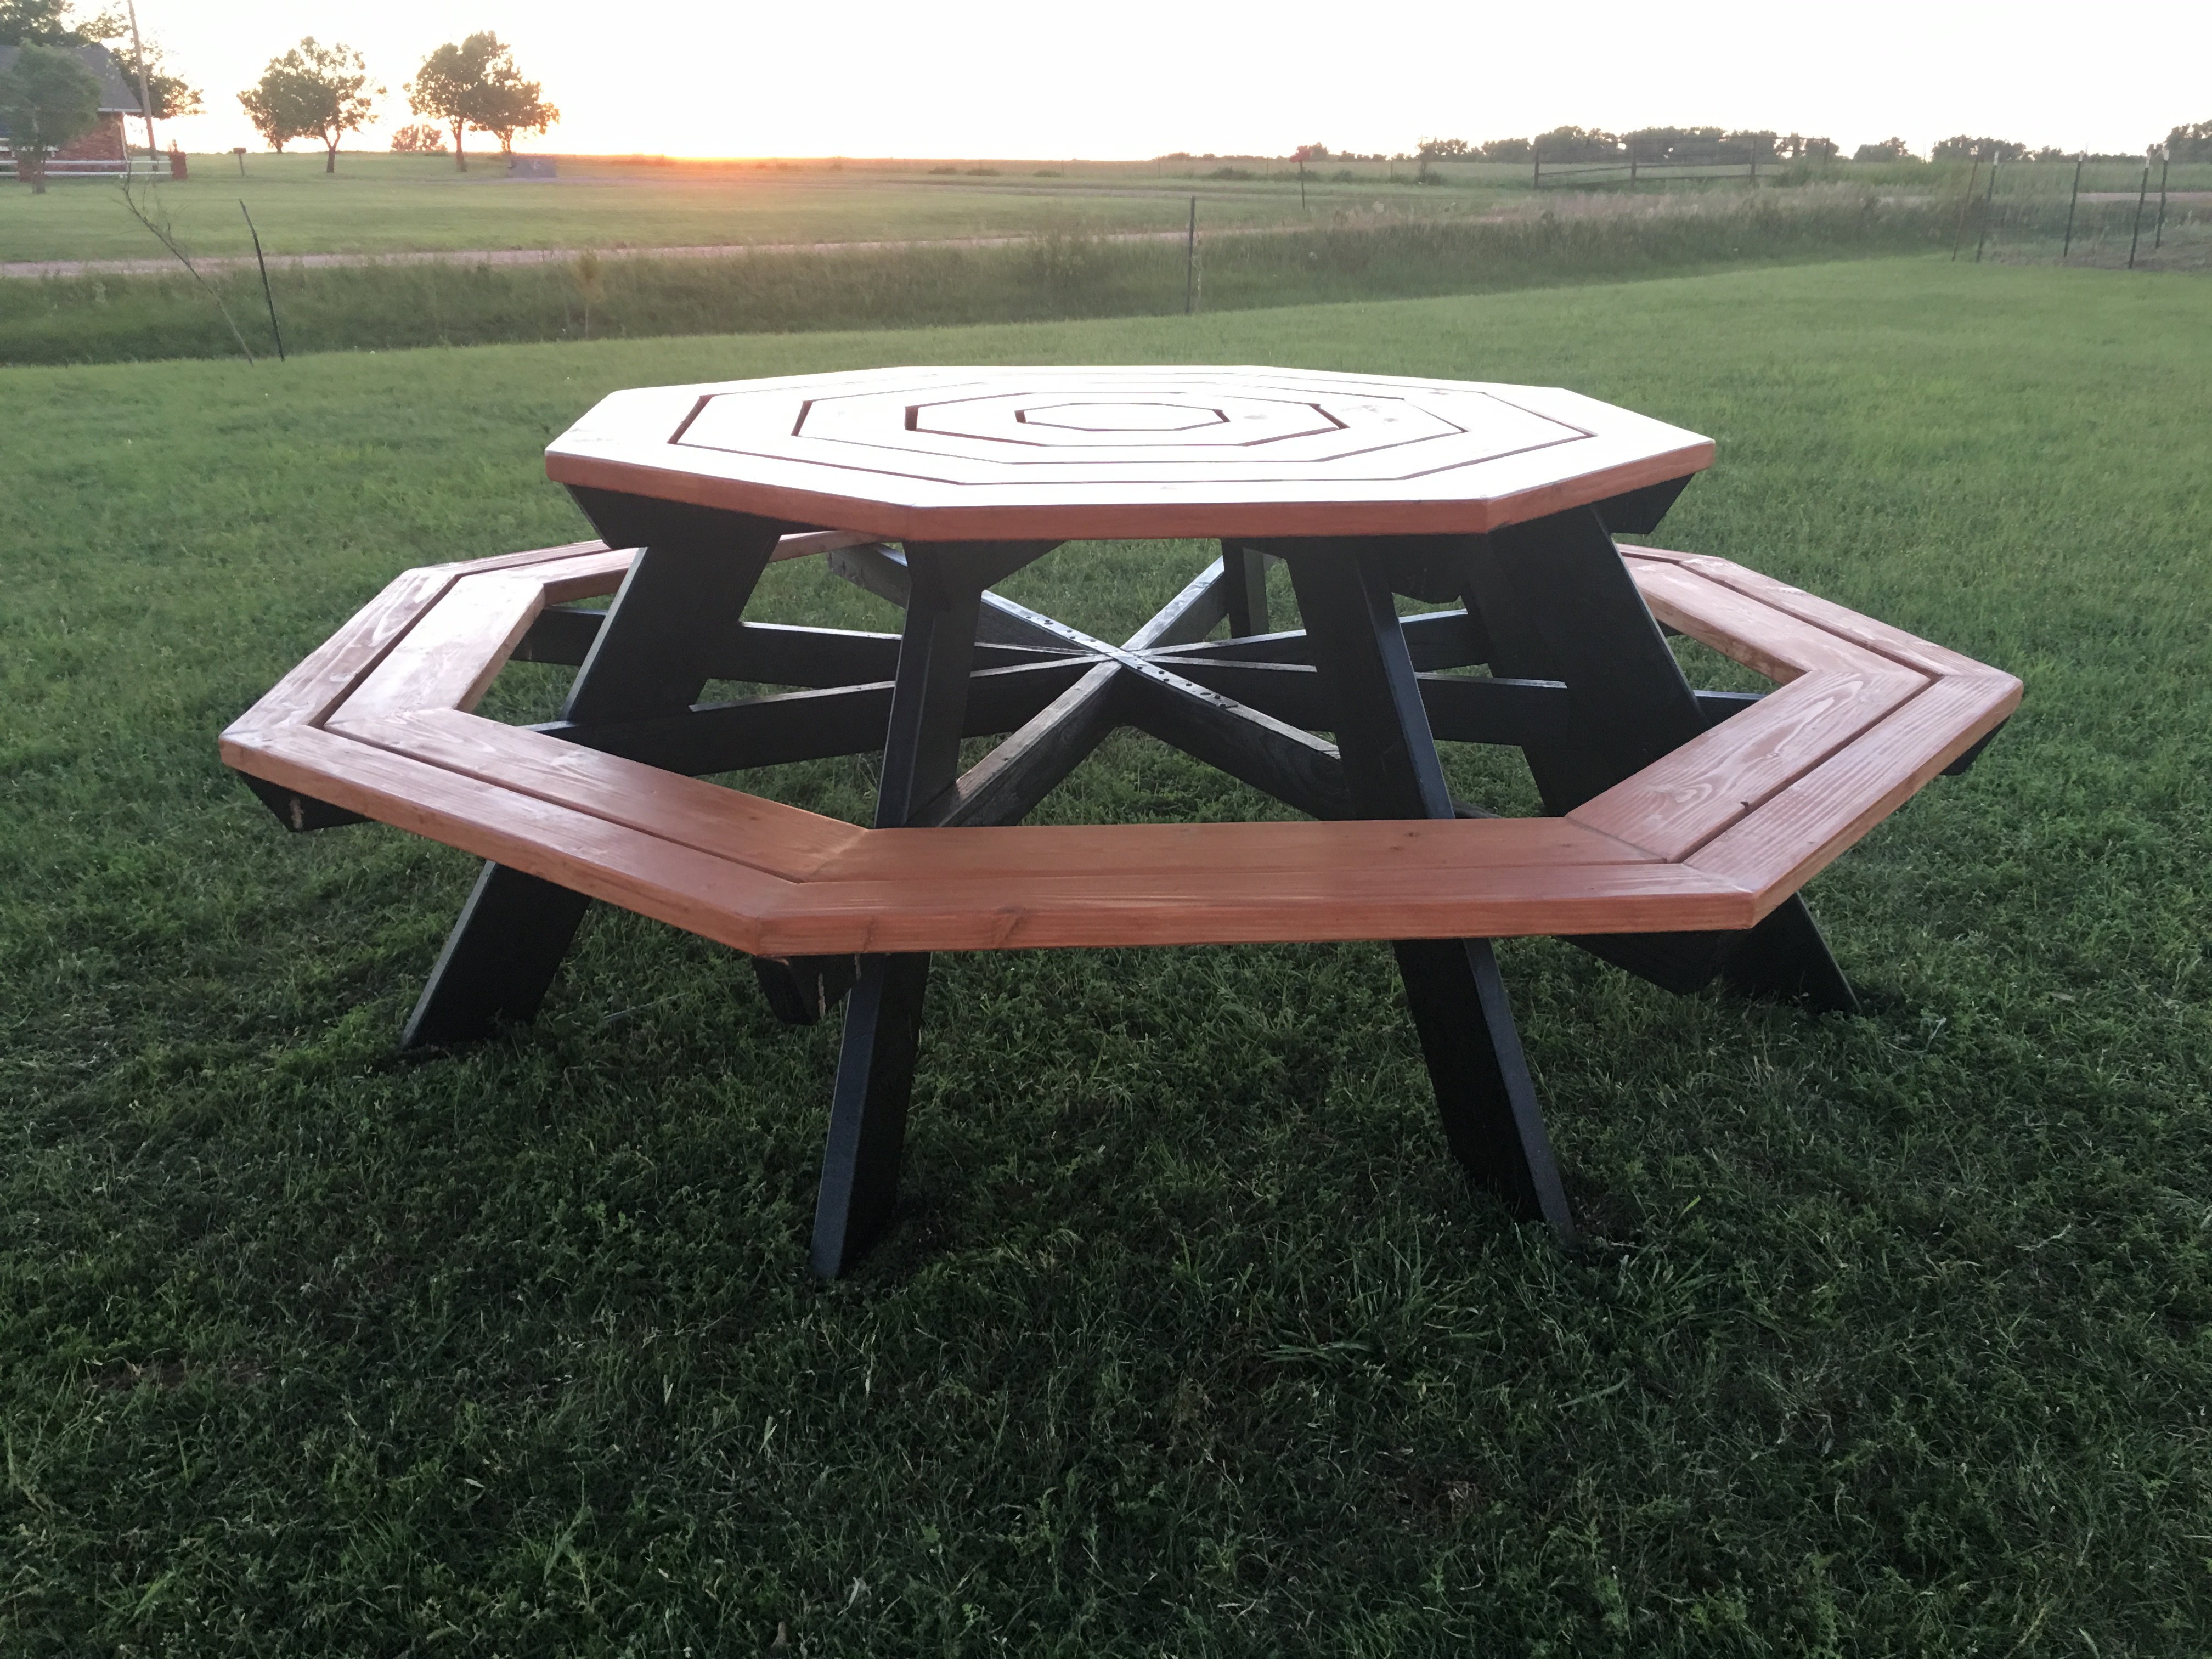
I built this as a side table to eat tv dinners on. I put felt on the bottom instead of wheels.

Mon, 12/26/2016 - 11:05
Without a center support, how did you re-enforce the top?
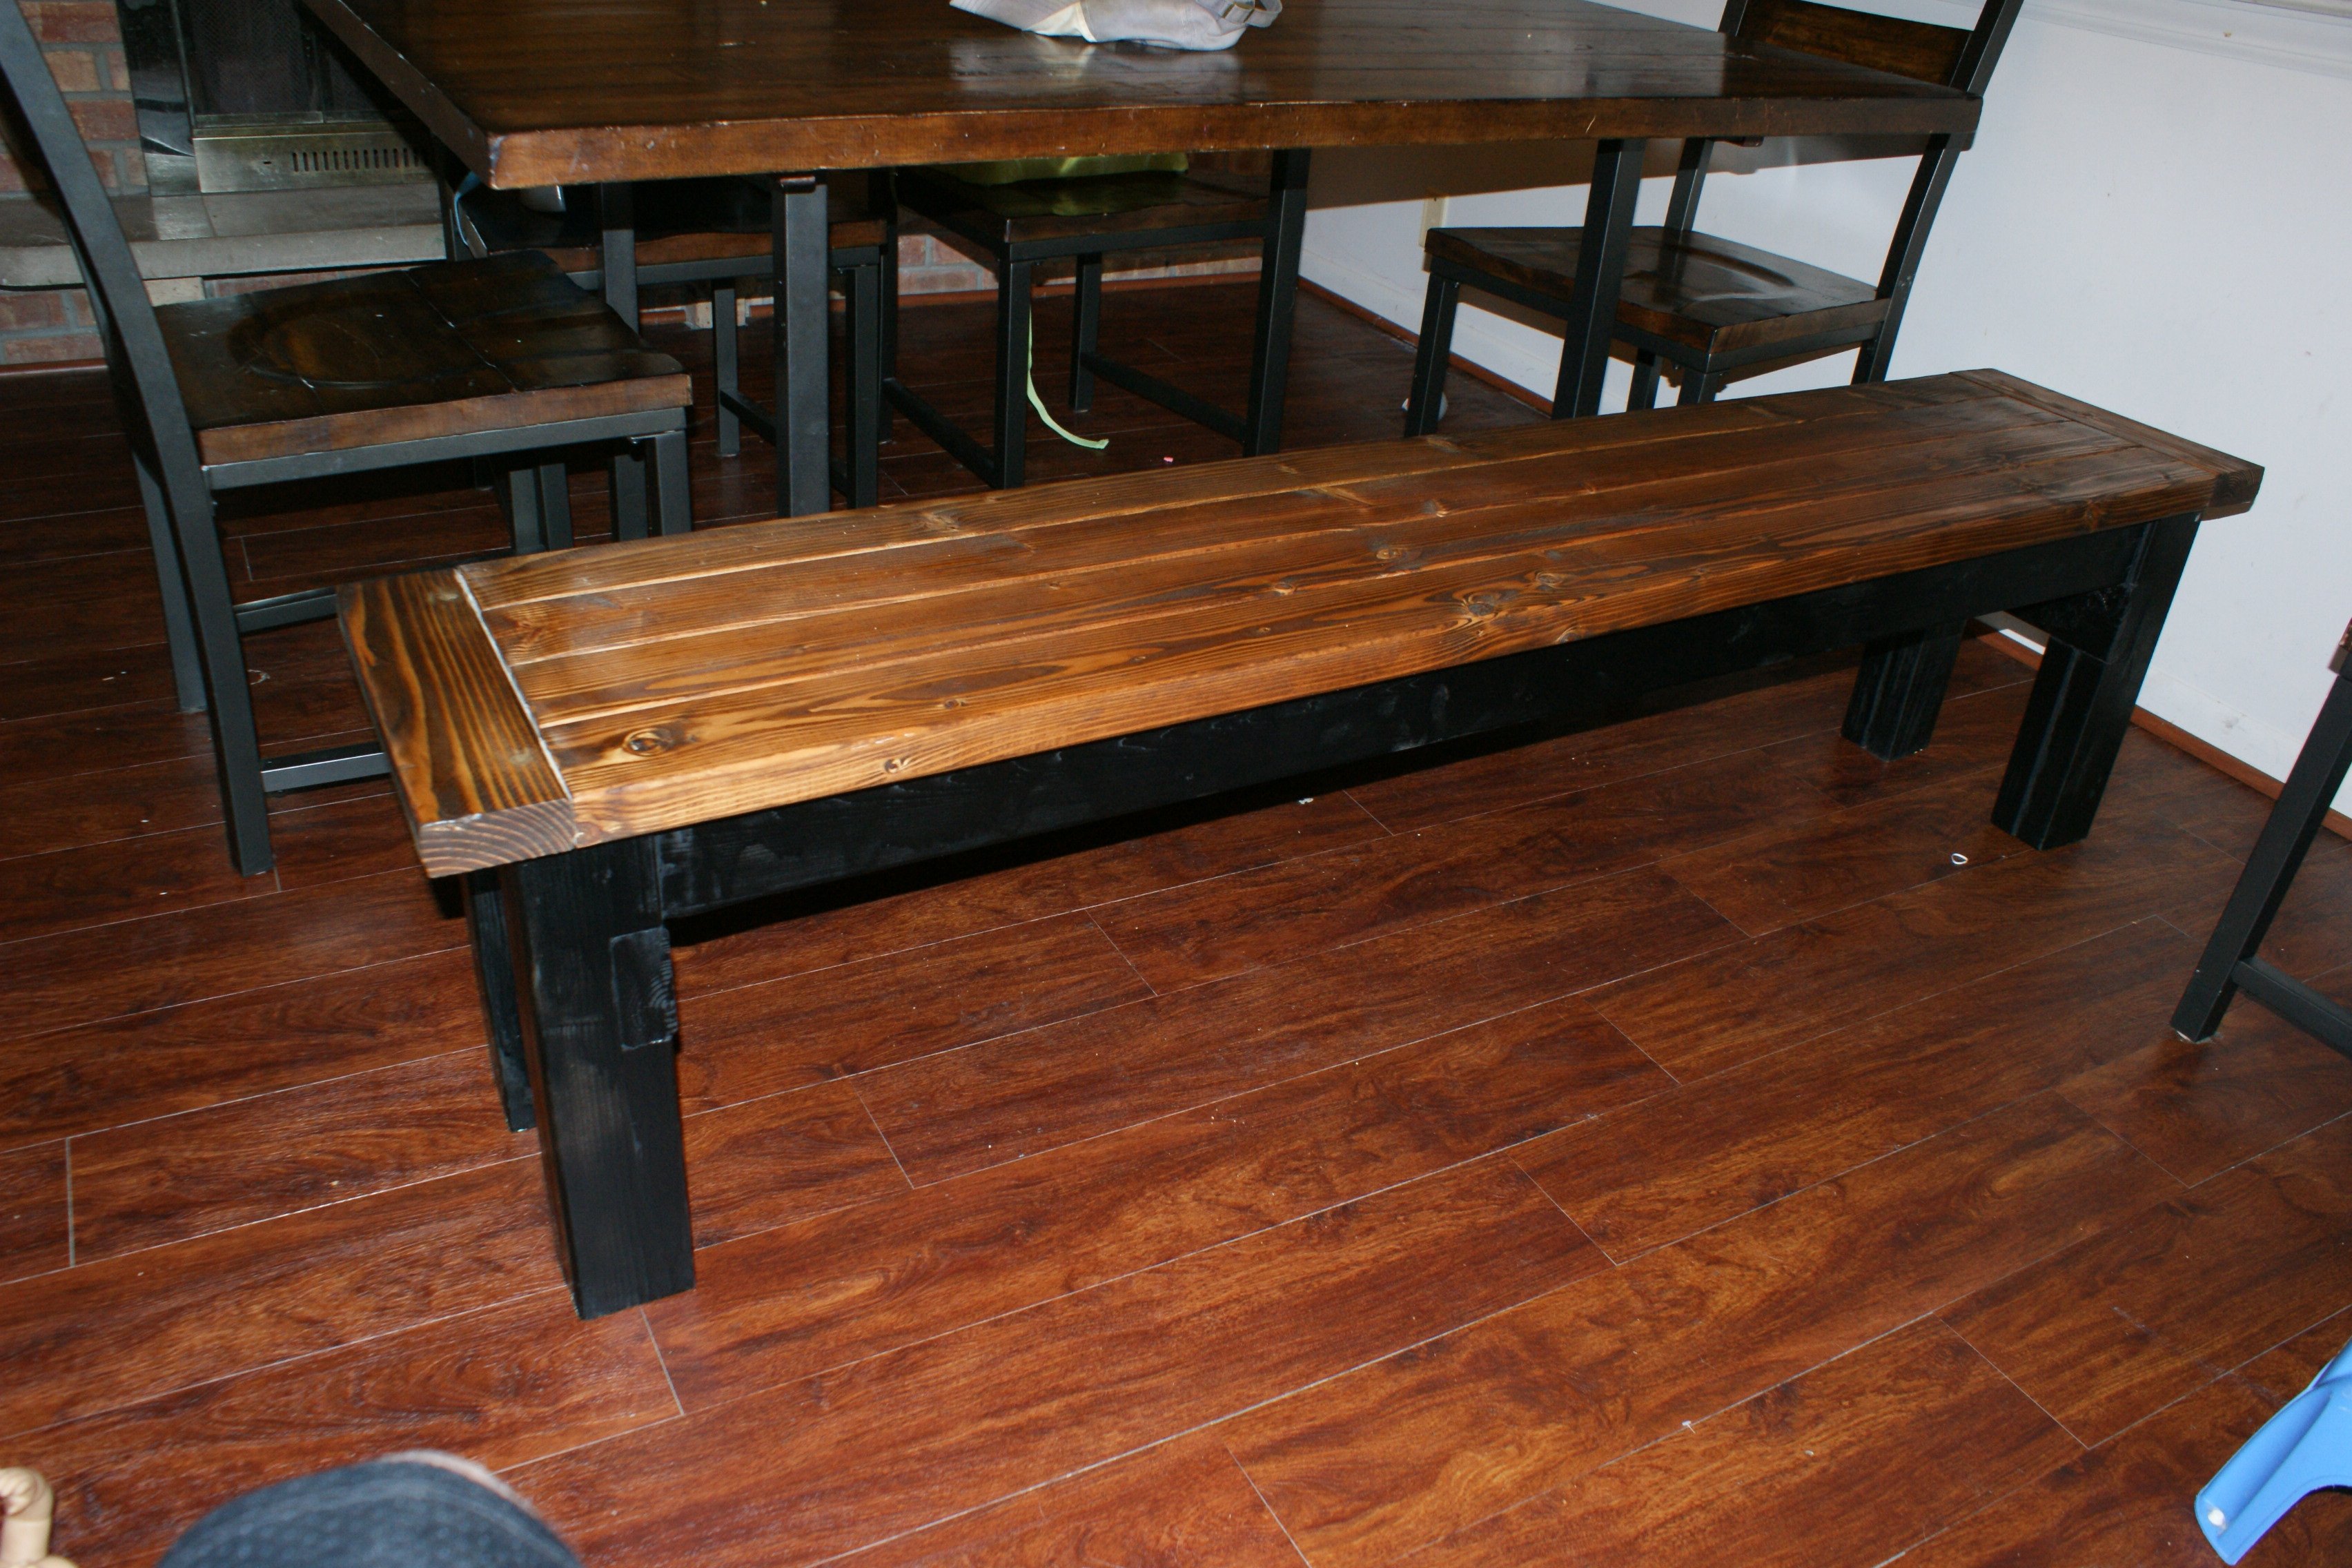
Bench was an experiment. Wanted to see how the style looks in the kitchen. The wife loved it, so onto the farmhouse table.
I love our new table.
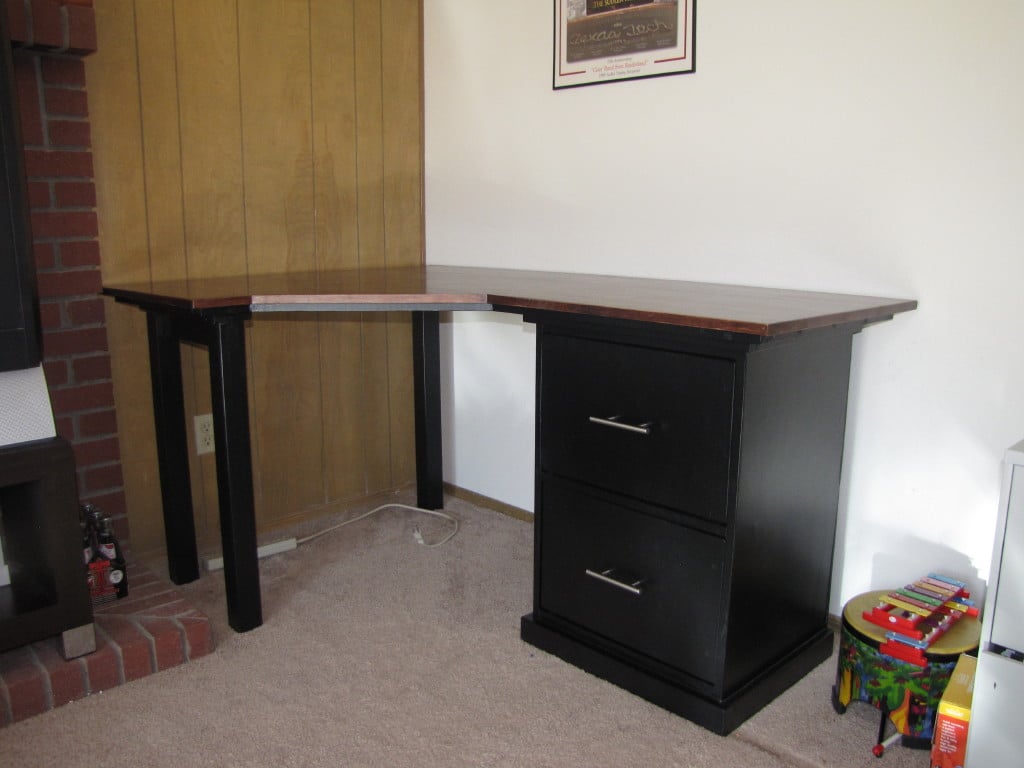
This was my first build I have wanted to get this particular desk from Pottery Barn but don't have the space for it. I used the corner desk plans but on one side I used the plans for the legs used on the smaller desk. Since it wasn't too big I made the desktop one piece. All in all it was pretty straightforward. The only problem I had was when I put the legs on the wrong side, I didn't realize until after I had used wood filler and painted.

My wife wanted a portable farmhouse style rustic dining table that she could take to photoshoots and other events. I started with a top made with 2x6s and make the legs with 4x4s and the rest with 2x4s. Stain is dark walnut with a clear coat on top.
The legs are attached with door hinges and can fold into the top for more portable use. There is also a board that can be inserted in the bottom slots so that when in use the legs can not fold in.
So far the rustic dining table is working out great, although this table is VERY HEAVY and needs 2-3 strong people to carry it around. I have also made a lighter version using 1x6 tops and all 2x4 frame and legs.
Photos courtesy of Jennifer Blair Photography Designed by Amber Veatch Designs


Wed, 06/12/2013 - 04:15
Oh I really hope that you are able to put these modified plans up!!! A foldable farmhouse table.... what will they think of next!

Sat, 10/22/2016 - 12:25
Stunningly beautiful! Thank you for sharing and inspiring!
Sat, 10/22/2016 - 17:21
I cannot find the plans for the tiny house drawers any where. Can someone please point me in the right direction. Thank you!
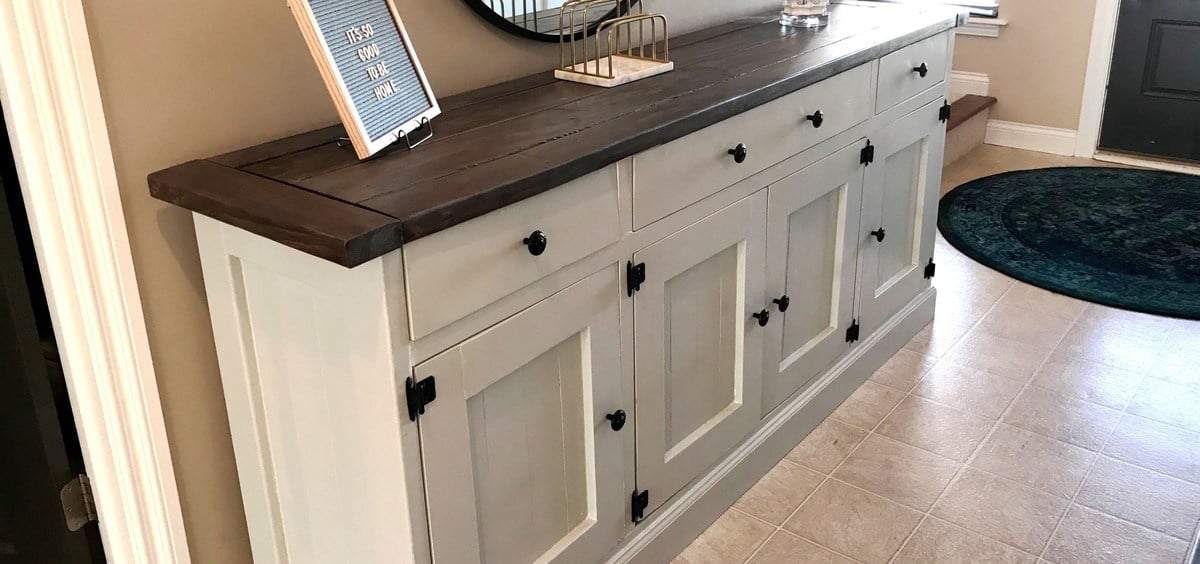
I worked on this project over the course of a few months, and I absolutely love the result! I posted all the info at my blog: http://www.designatedspacedesign.com/2017/10/01/a-rustic-sideboard/
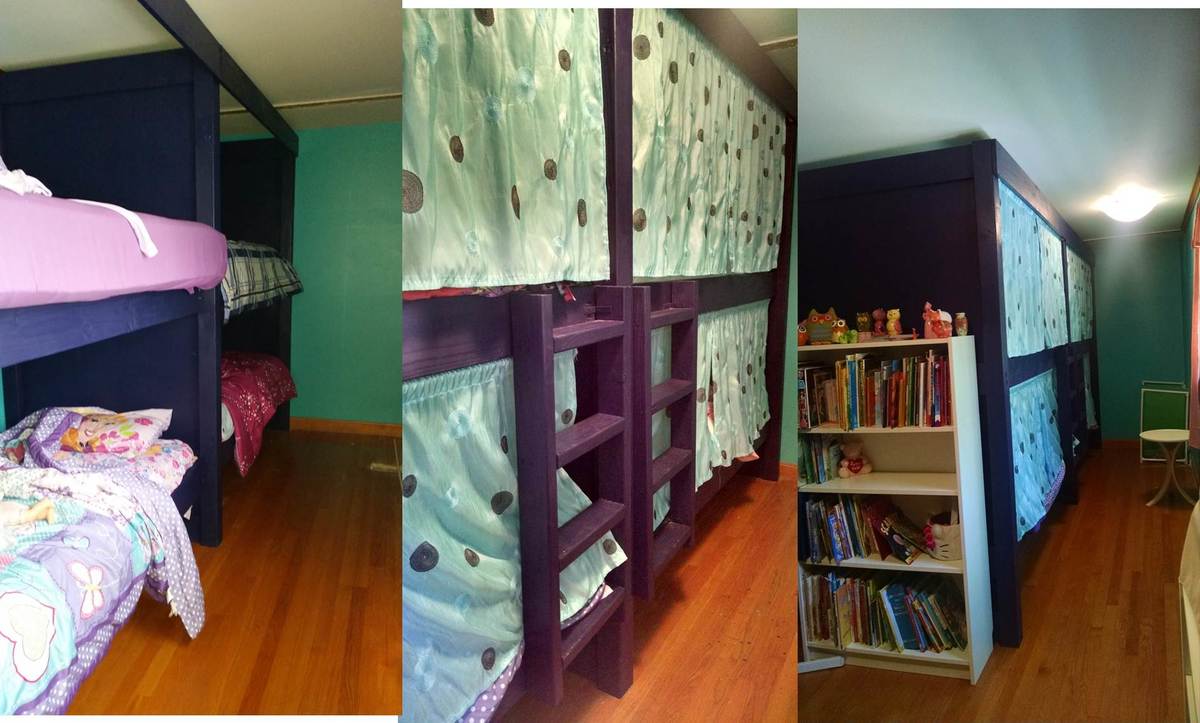
We used the Build a Simple Bed plan and the Bunk Bed from Simple Bed. I modified the plans to build a double bunk bed. We needed a way to fit up to 6 small children in a long, narrow room. Although we haven't built the trundle beds yet, each bunk will also have a trundle bed. The kids especially love their "privacy" curtains!
This is by far the biggest project I've completed yet. It actually surprised me how easy it was to complete. It did take me about 4 days to build the project and an additional week to sand and paint the project.
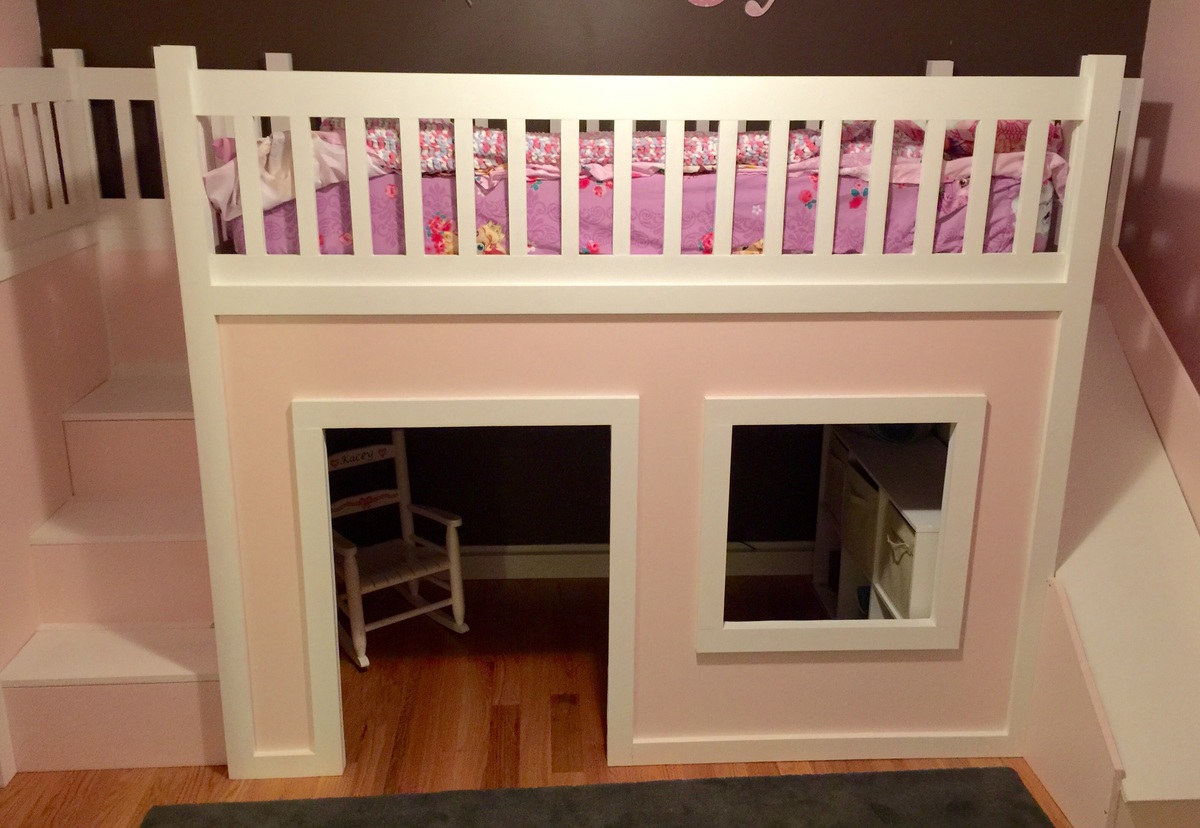
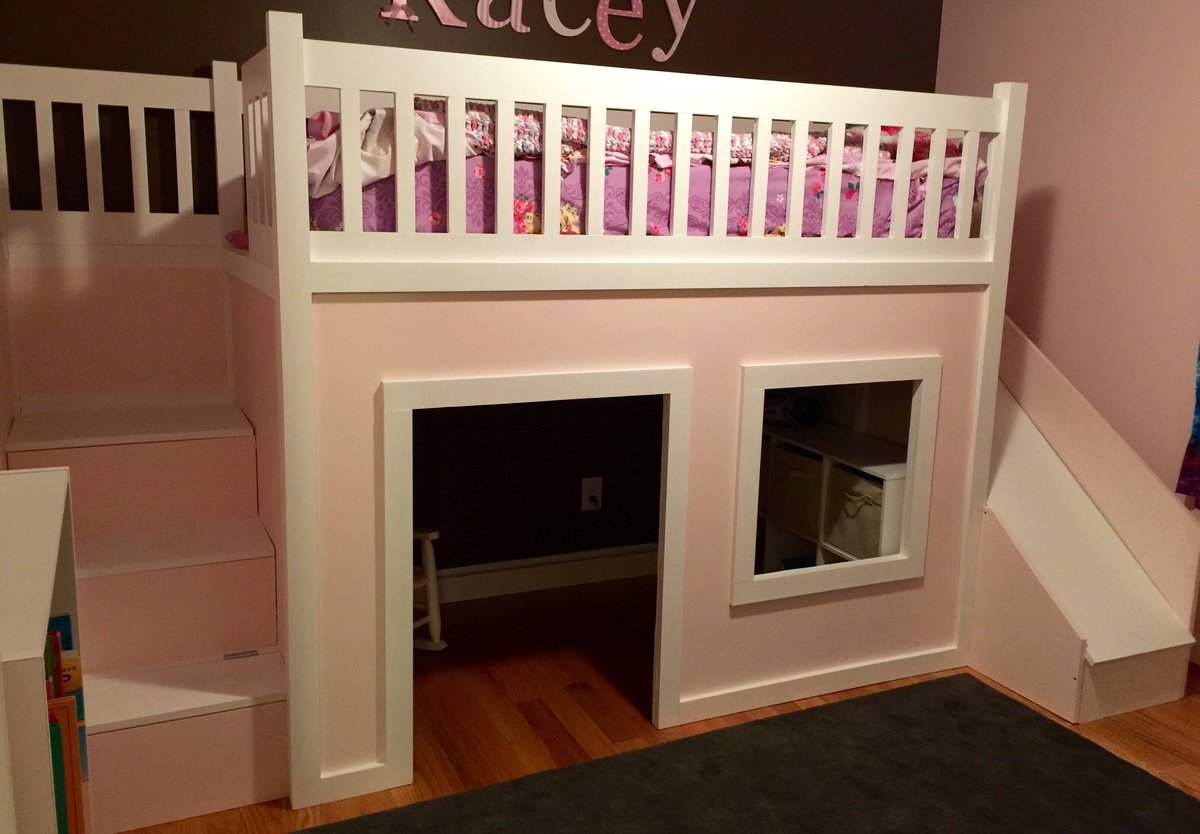
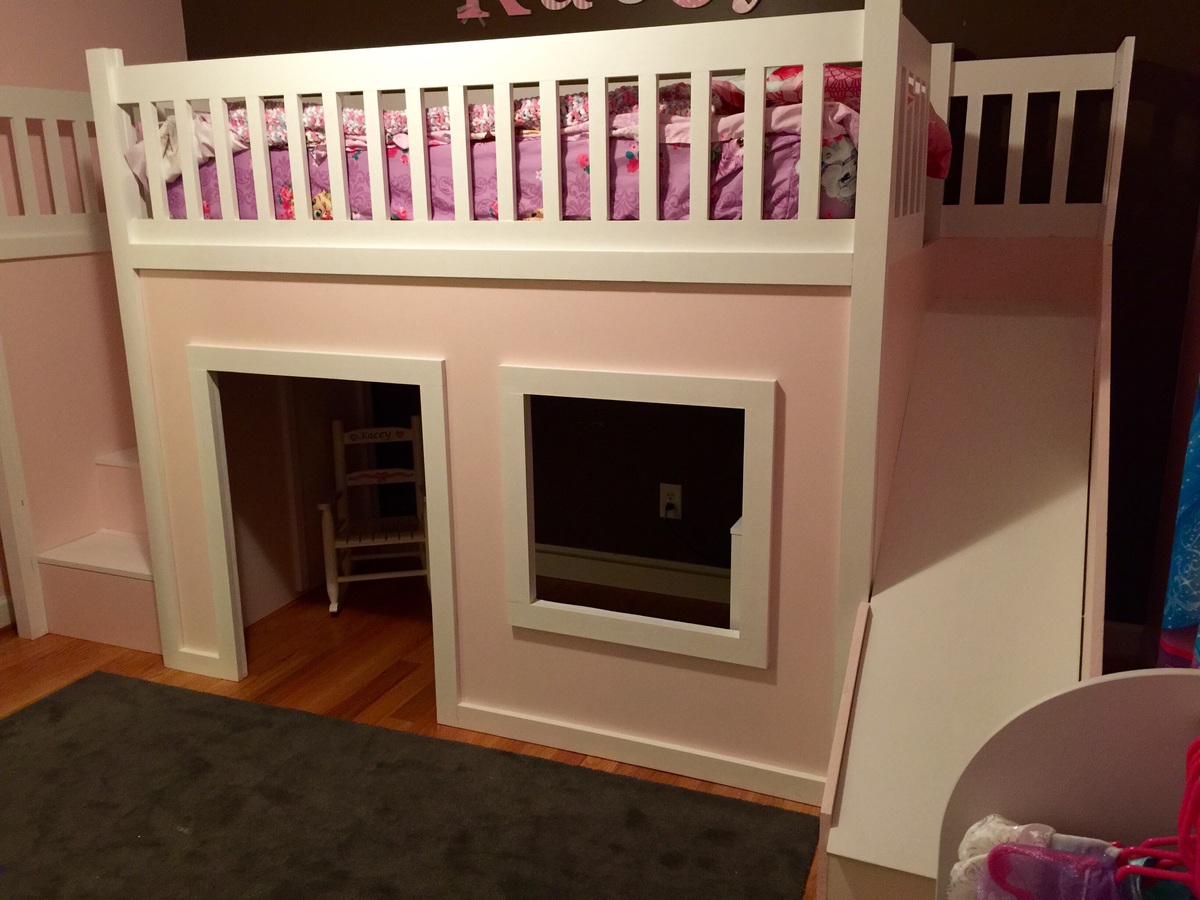
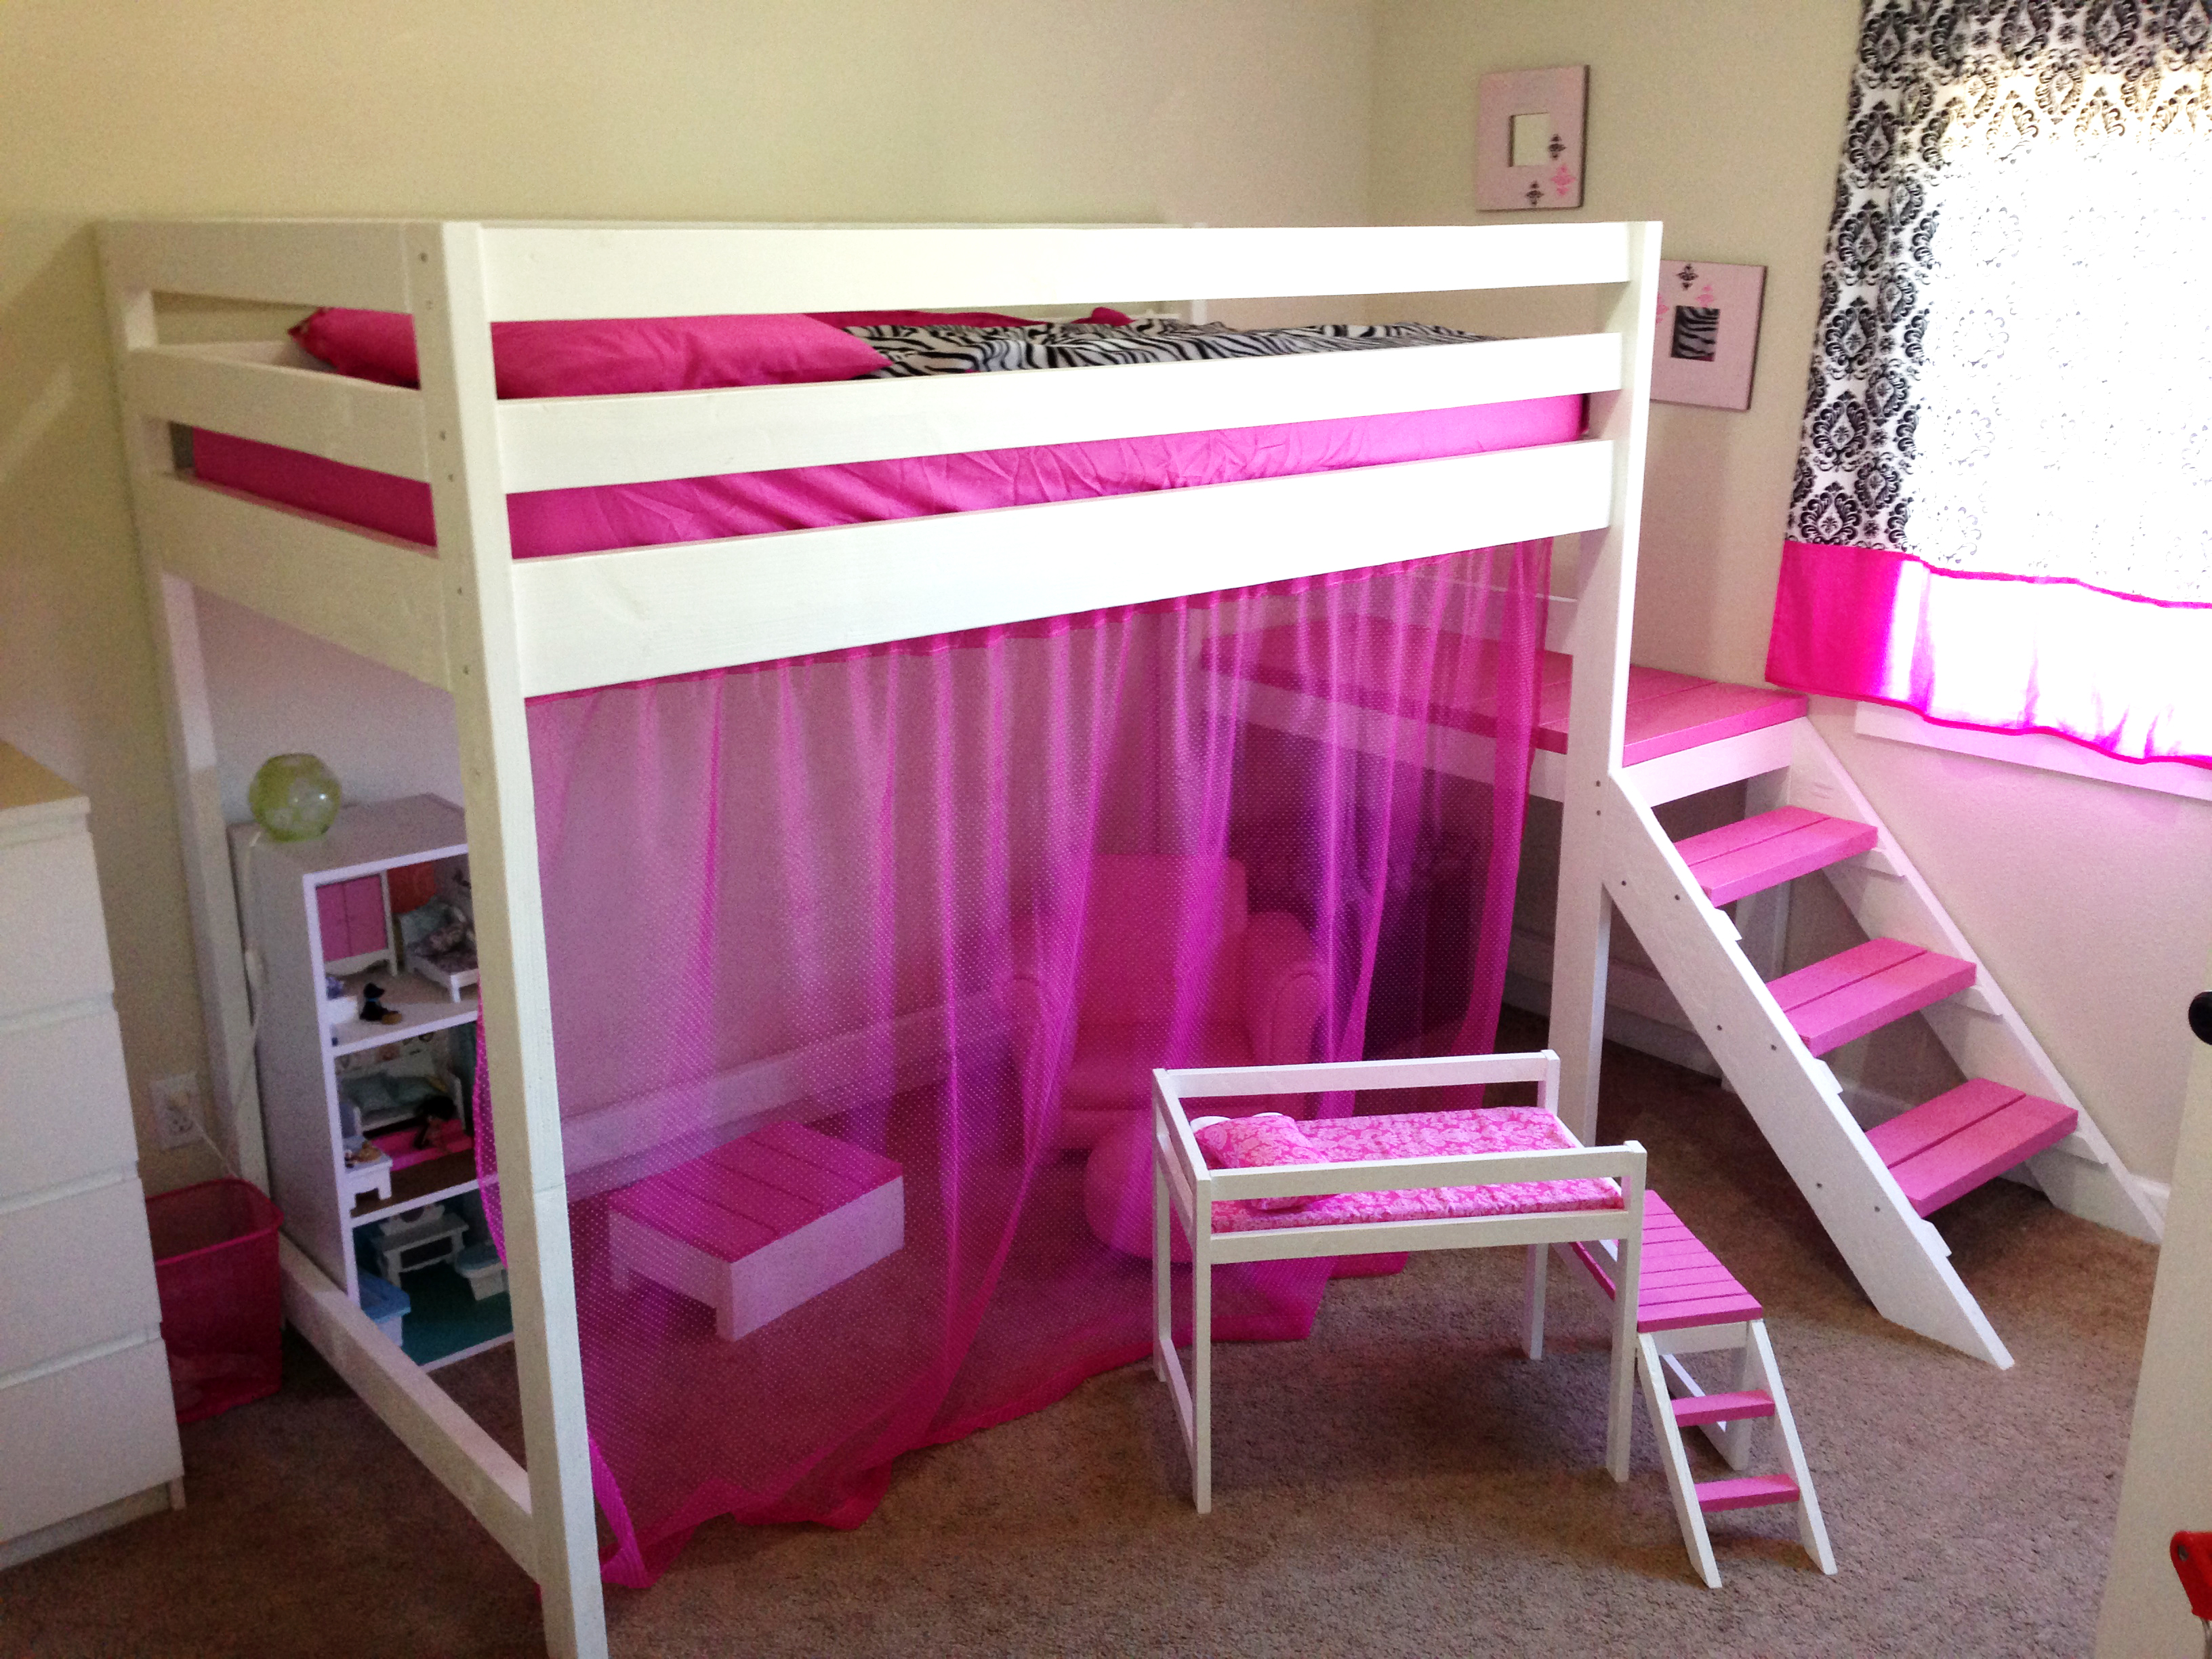
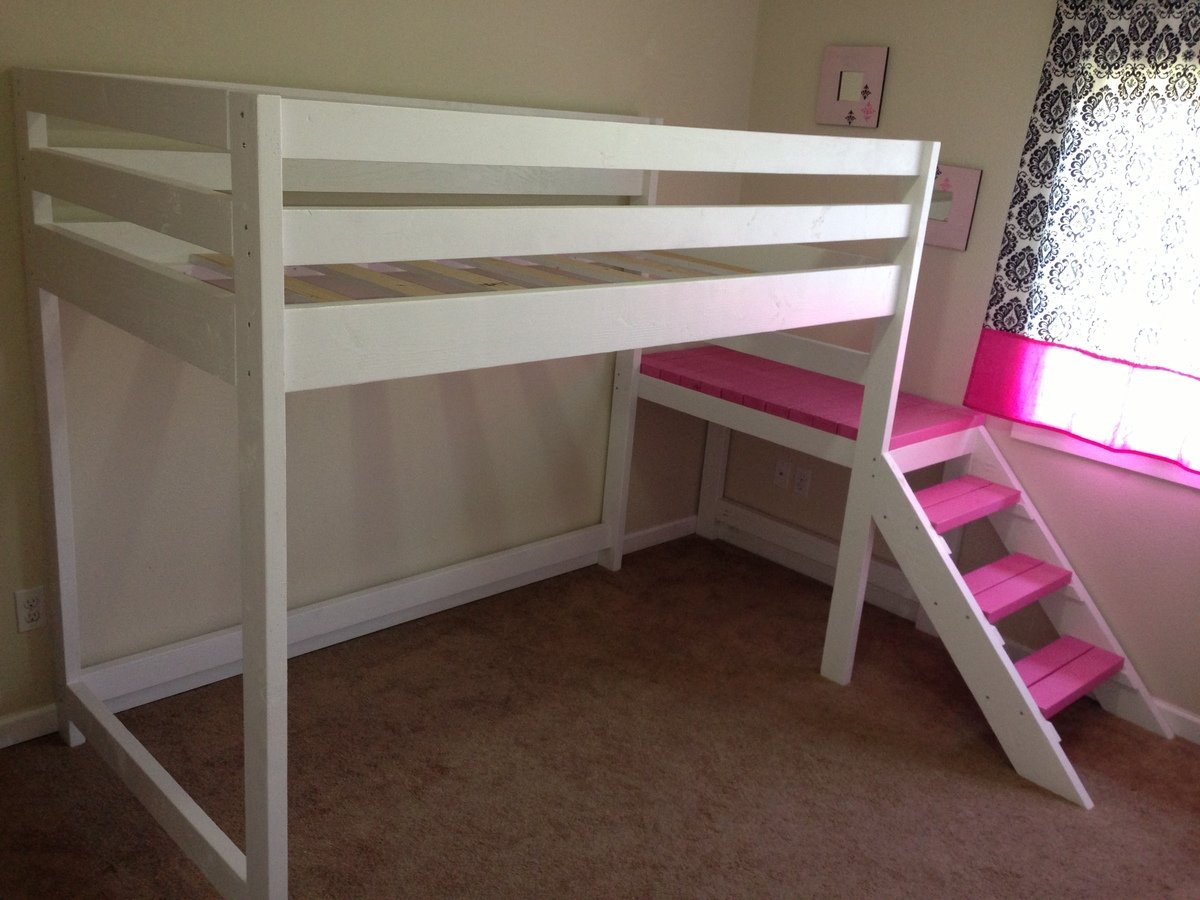
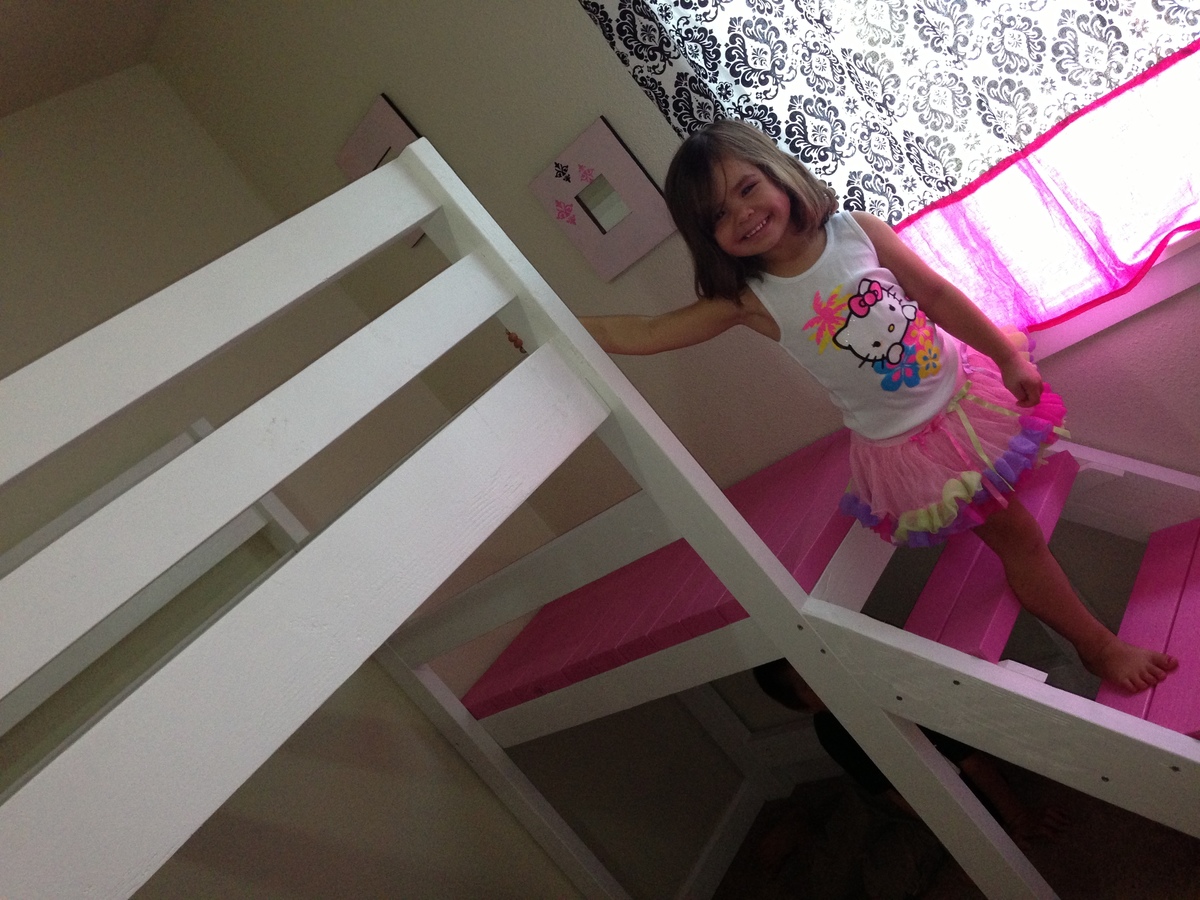
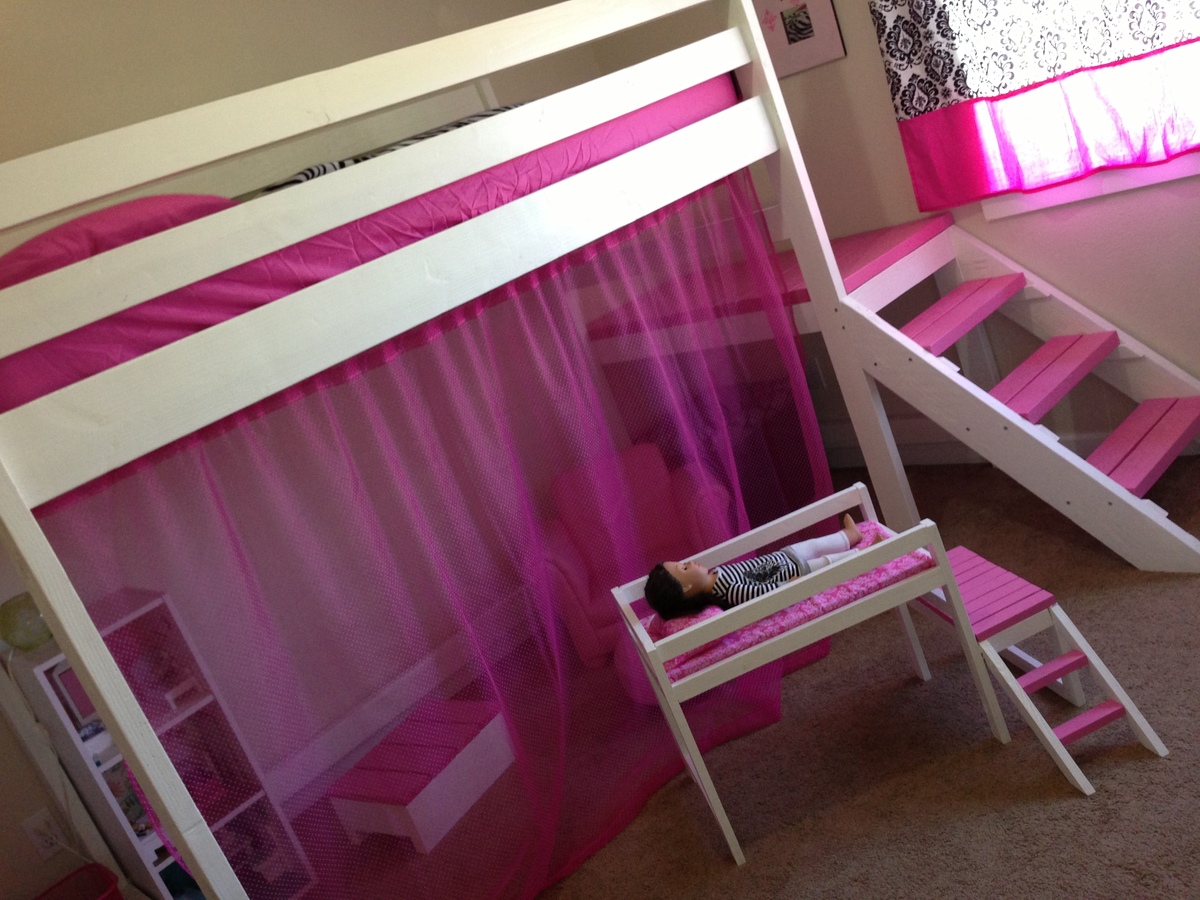
I followed the playhouse loft plans and the storage stairs plans, adjusting only the back to allow for the additional length of the slide. I didn't add the windows to the sides (I didn't see any point in having them there). I also used the castle loft plans for the slide. When I first started this project I was planning on making the slide completely separate. I changed my mind mid project after I had the side wall cut to length at Lowe's, so I just added that small piece to the left of the slide to make up for the gap. I also made this project in 4 separate pieces (stairs, slide, front wall, back) so I could put it together in her room in one evening and not have to kick her out. Once we moved it to her room all I had to do was screw the four corners in and attach the back wall and bed slats.
I definitely recommend not using particle board. I had no idea what the difference was between particle board, mdf and plywood when I started this project. Particle board was less then half the cost of plywood, but looking back I would pay the extra for the plywood. I don't feel like the screws hold well in the particle board and it also chipped on the bottom some. I actually had a chunk come off in the corner where I must of screwed to closely to the edge. I'm sure this is basic knowledge for most, but for those newbies (like me) just a little tip.
I had a lot of fun building this bed (not so much sanding and painting) and learned a lot. Now off to browse for my next project :)
Thu, 07/09/2015 - 07:30
Awesome job! Looks clean and not even close to DIY. Keep it up!
This was hard for me because I am horrible at using the jigsaw. If I do another one I'll probably not do as many door openings.
It took longer than expected due to filling in all the pocket holes an waiting for the wood filler to dry.
My grandson loves it, he didn't care about my mistakes on it.
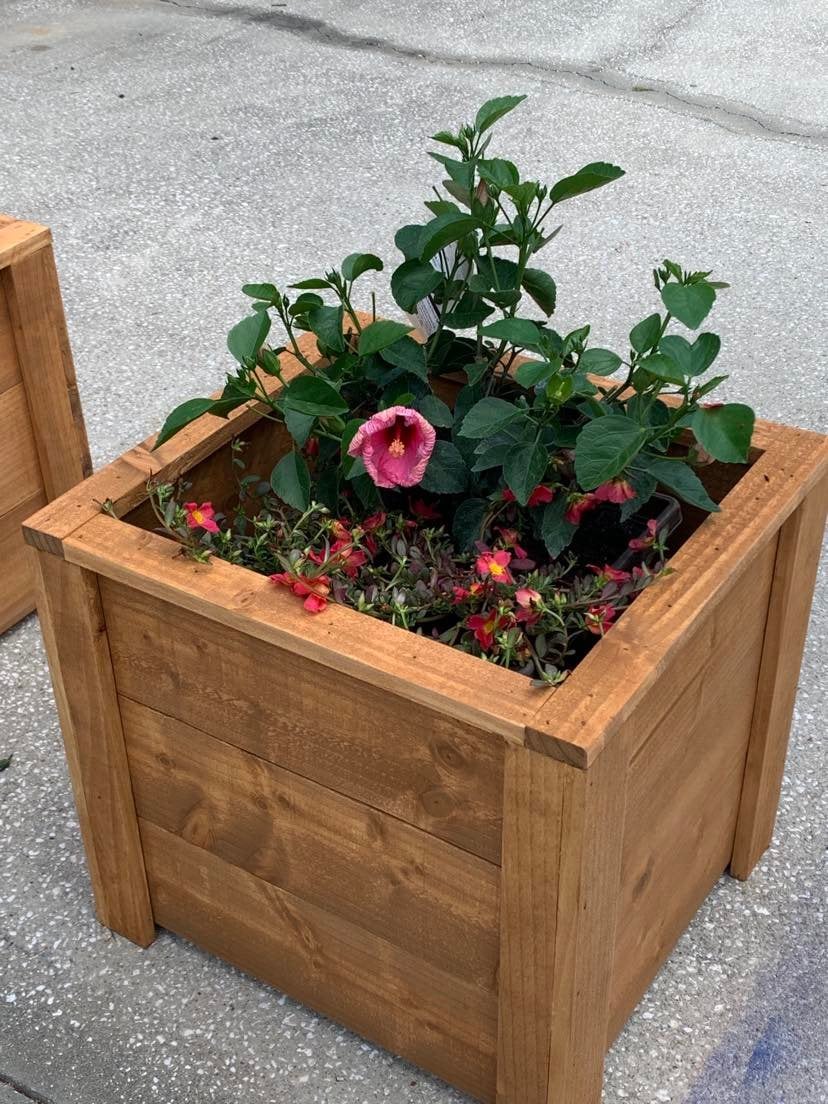
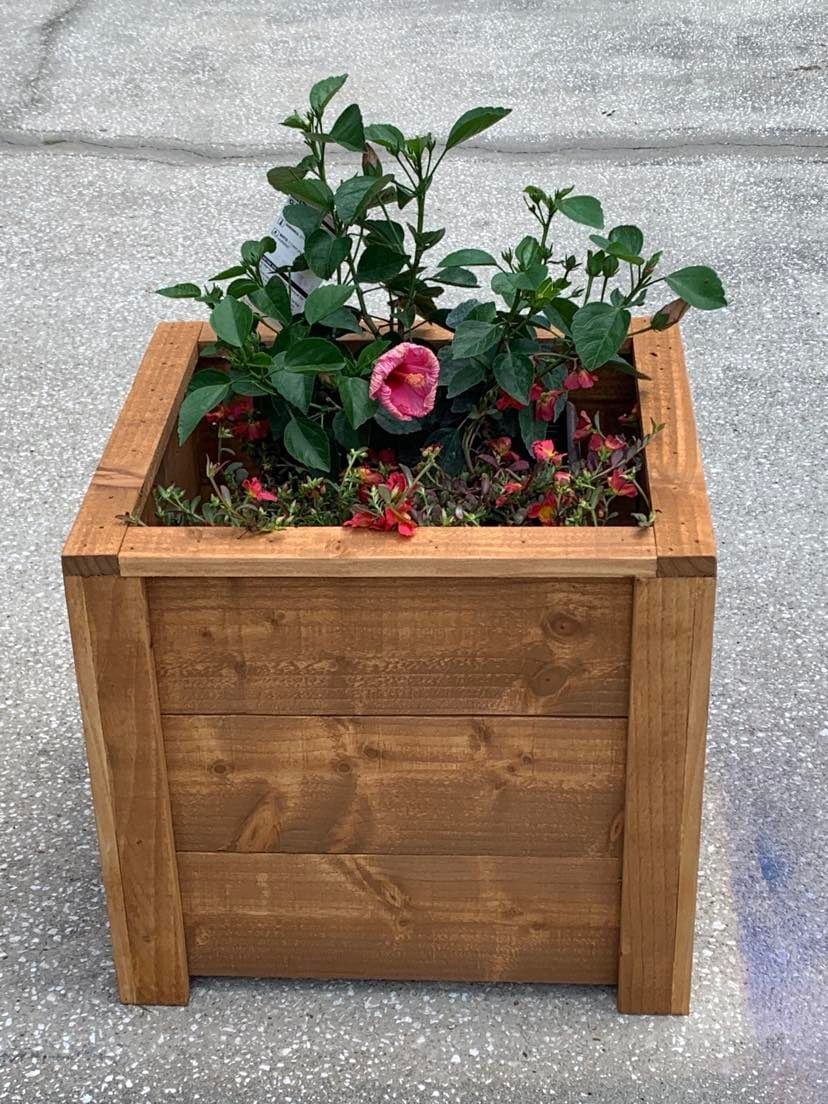
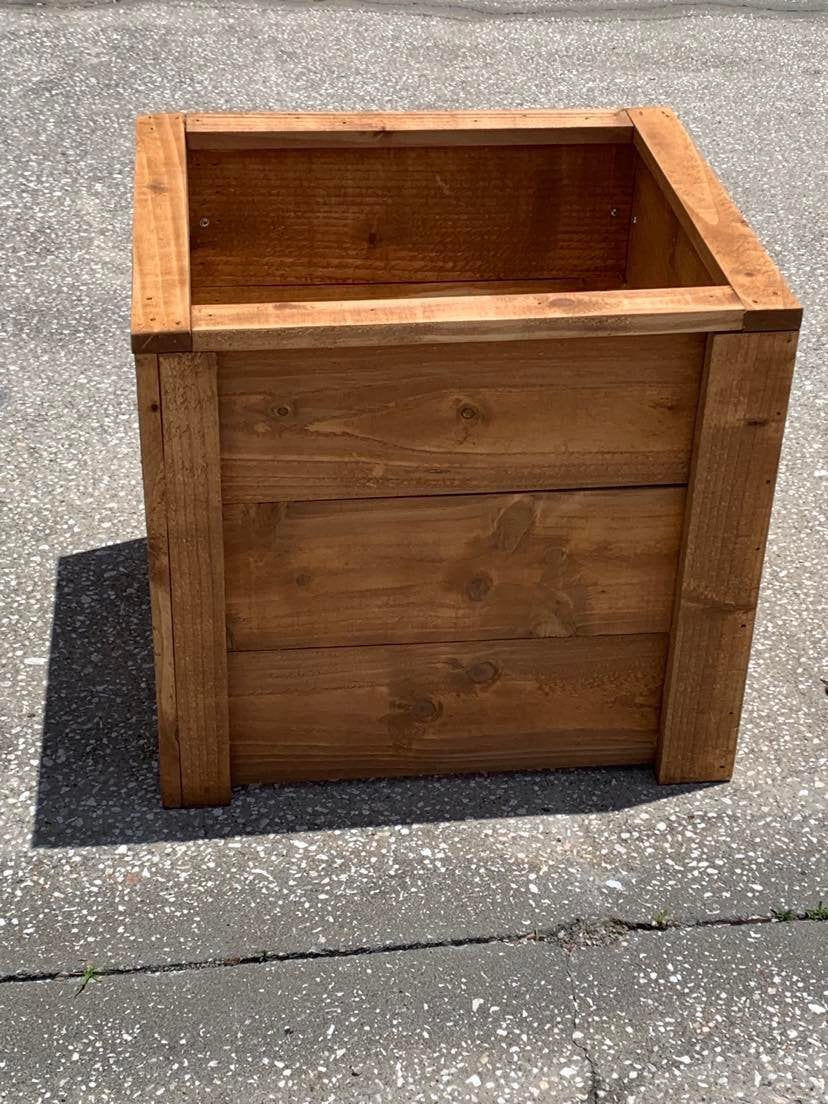
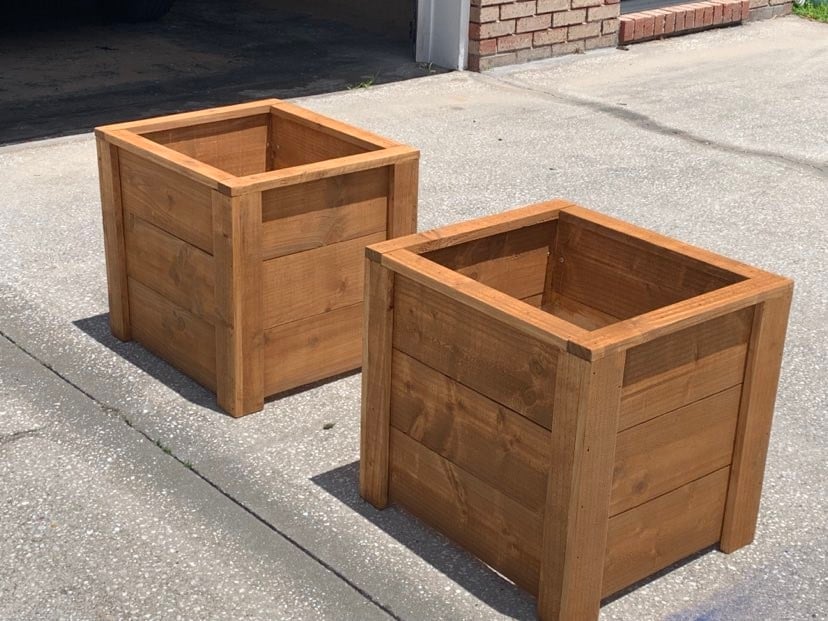
Thanks Ana, I built your planter box, actually built 2 of them, one for each mom. The were a huge hit and I already have people asking me to build them one.
So loved building this planter box. Thanks for all you do for your fellow woodworkers!
Dale G
Callahan, FL
Tue, 05/10/2022 - 07:05
Love these, wonderful idea for a mother's day gift, thank you for sharing!
We made this loft bed for my daughter's 4th birthday. I did all of the cuts, sanding, and painting on my own, and had my husband help me with the assembly of the bed. It took us 2 full days to complete this build. The sanding and painting was the most tedious part of the project. I think it cost us about $150 for all of the lumber, paint, screws, etc.
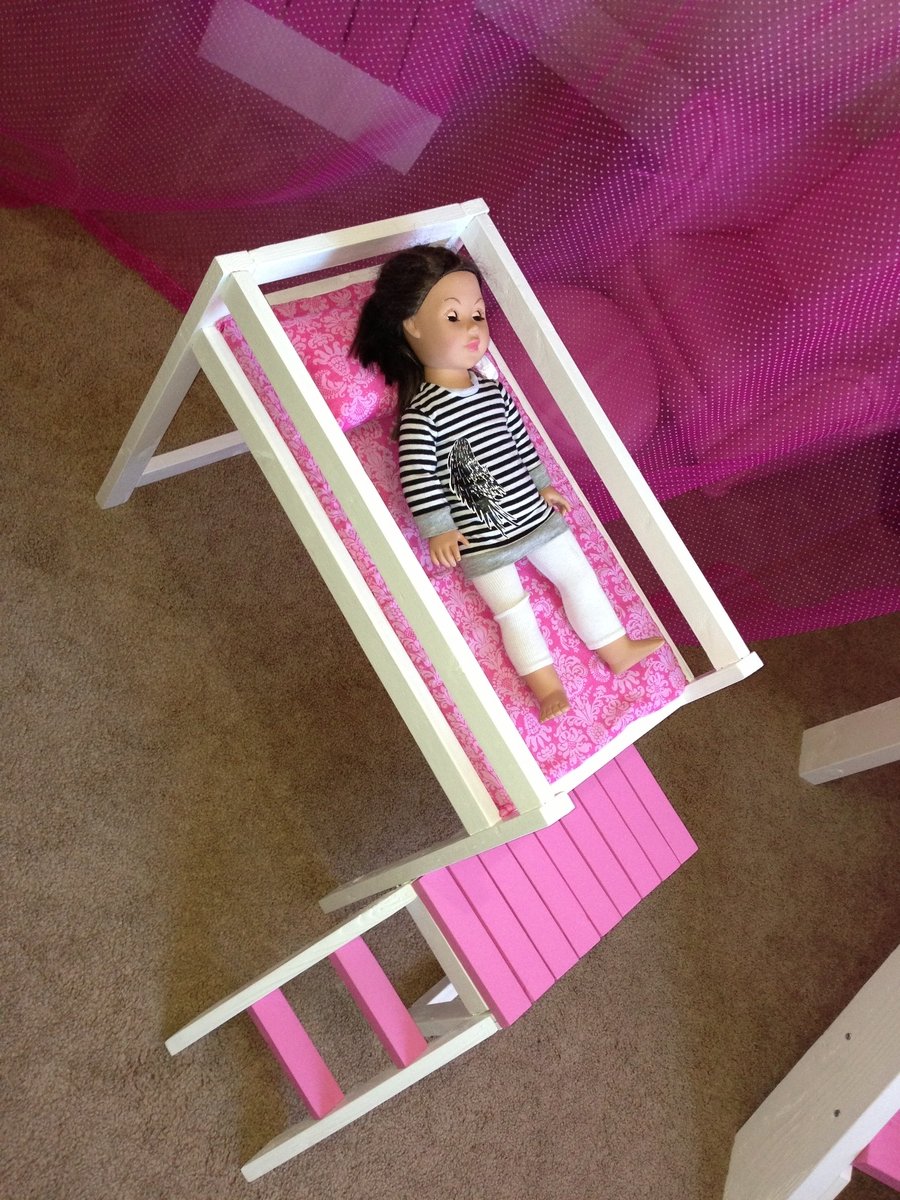
My daughter's really into playing with 18" dolls right now, so I decided to make a mini version of her loft bed for her dolls. I think it turned out really well and she absolutely loves it! The doll sized loft bed only cost about $15 to make (including wood, foam for the mattress and fabric). You can't beat that price for a wooden doll bed...and what little girl wouldn't love a matching bed for her dolls?!?!
I'm so happy with how both beds turned out!

Such a fun project. This is the 5th piece my husband and I have completed by Ana White. This bed is by far my favorite piece of furniture in our home. So sturdy and only took a few hours (not including stain and poly). We have a love for knots, so we chose pieces of wood that had a lot of beautiful imperfections. We went very light on the stain, and it looks weathered with still some of the natural wood color shining through. We got our wood from our local Home Improvement store, and had minimal cutting to do. Neither of us are pro woodworkers by any means, and we completed this with ease.
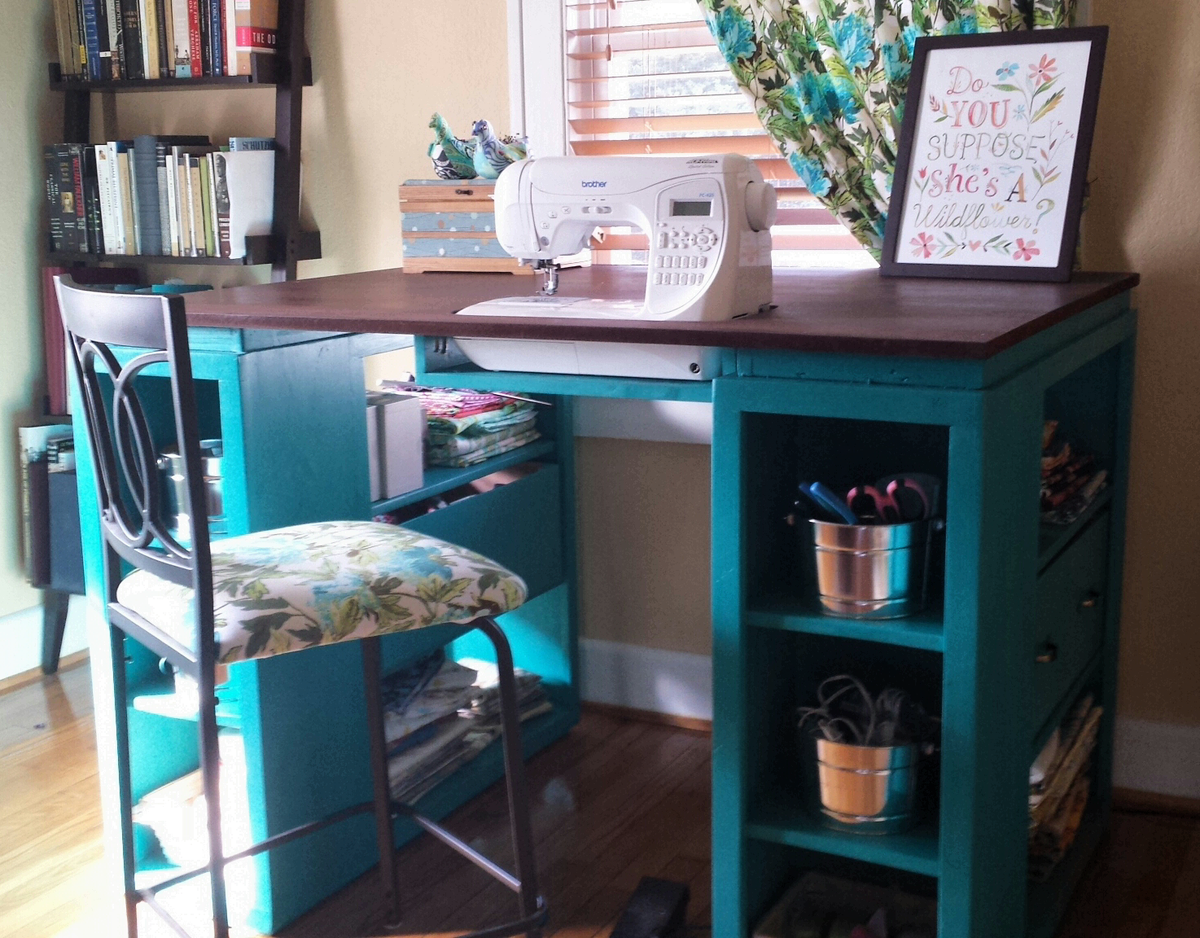
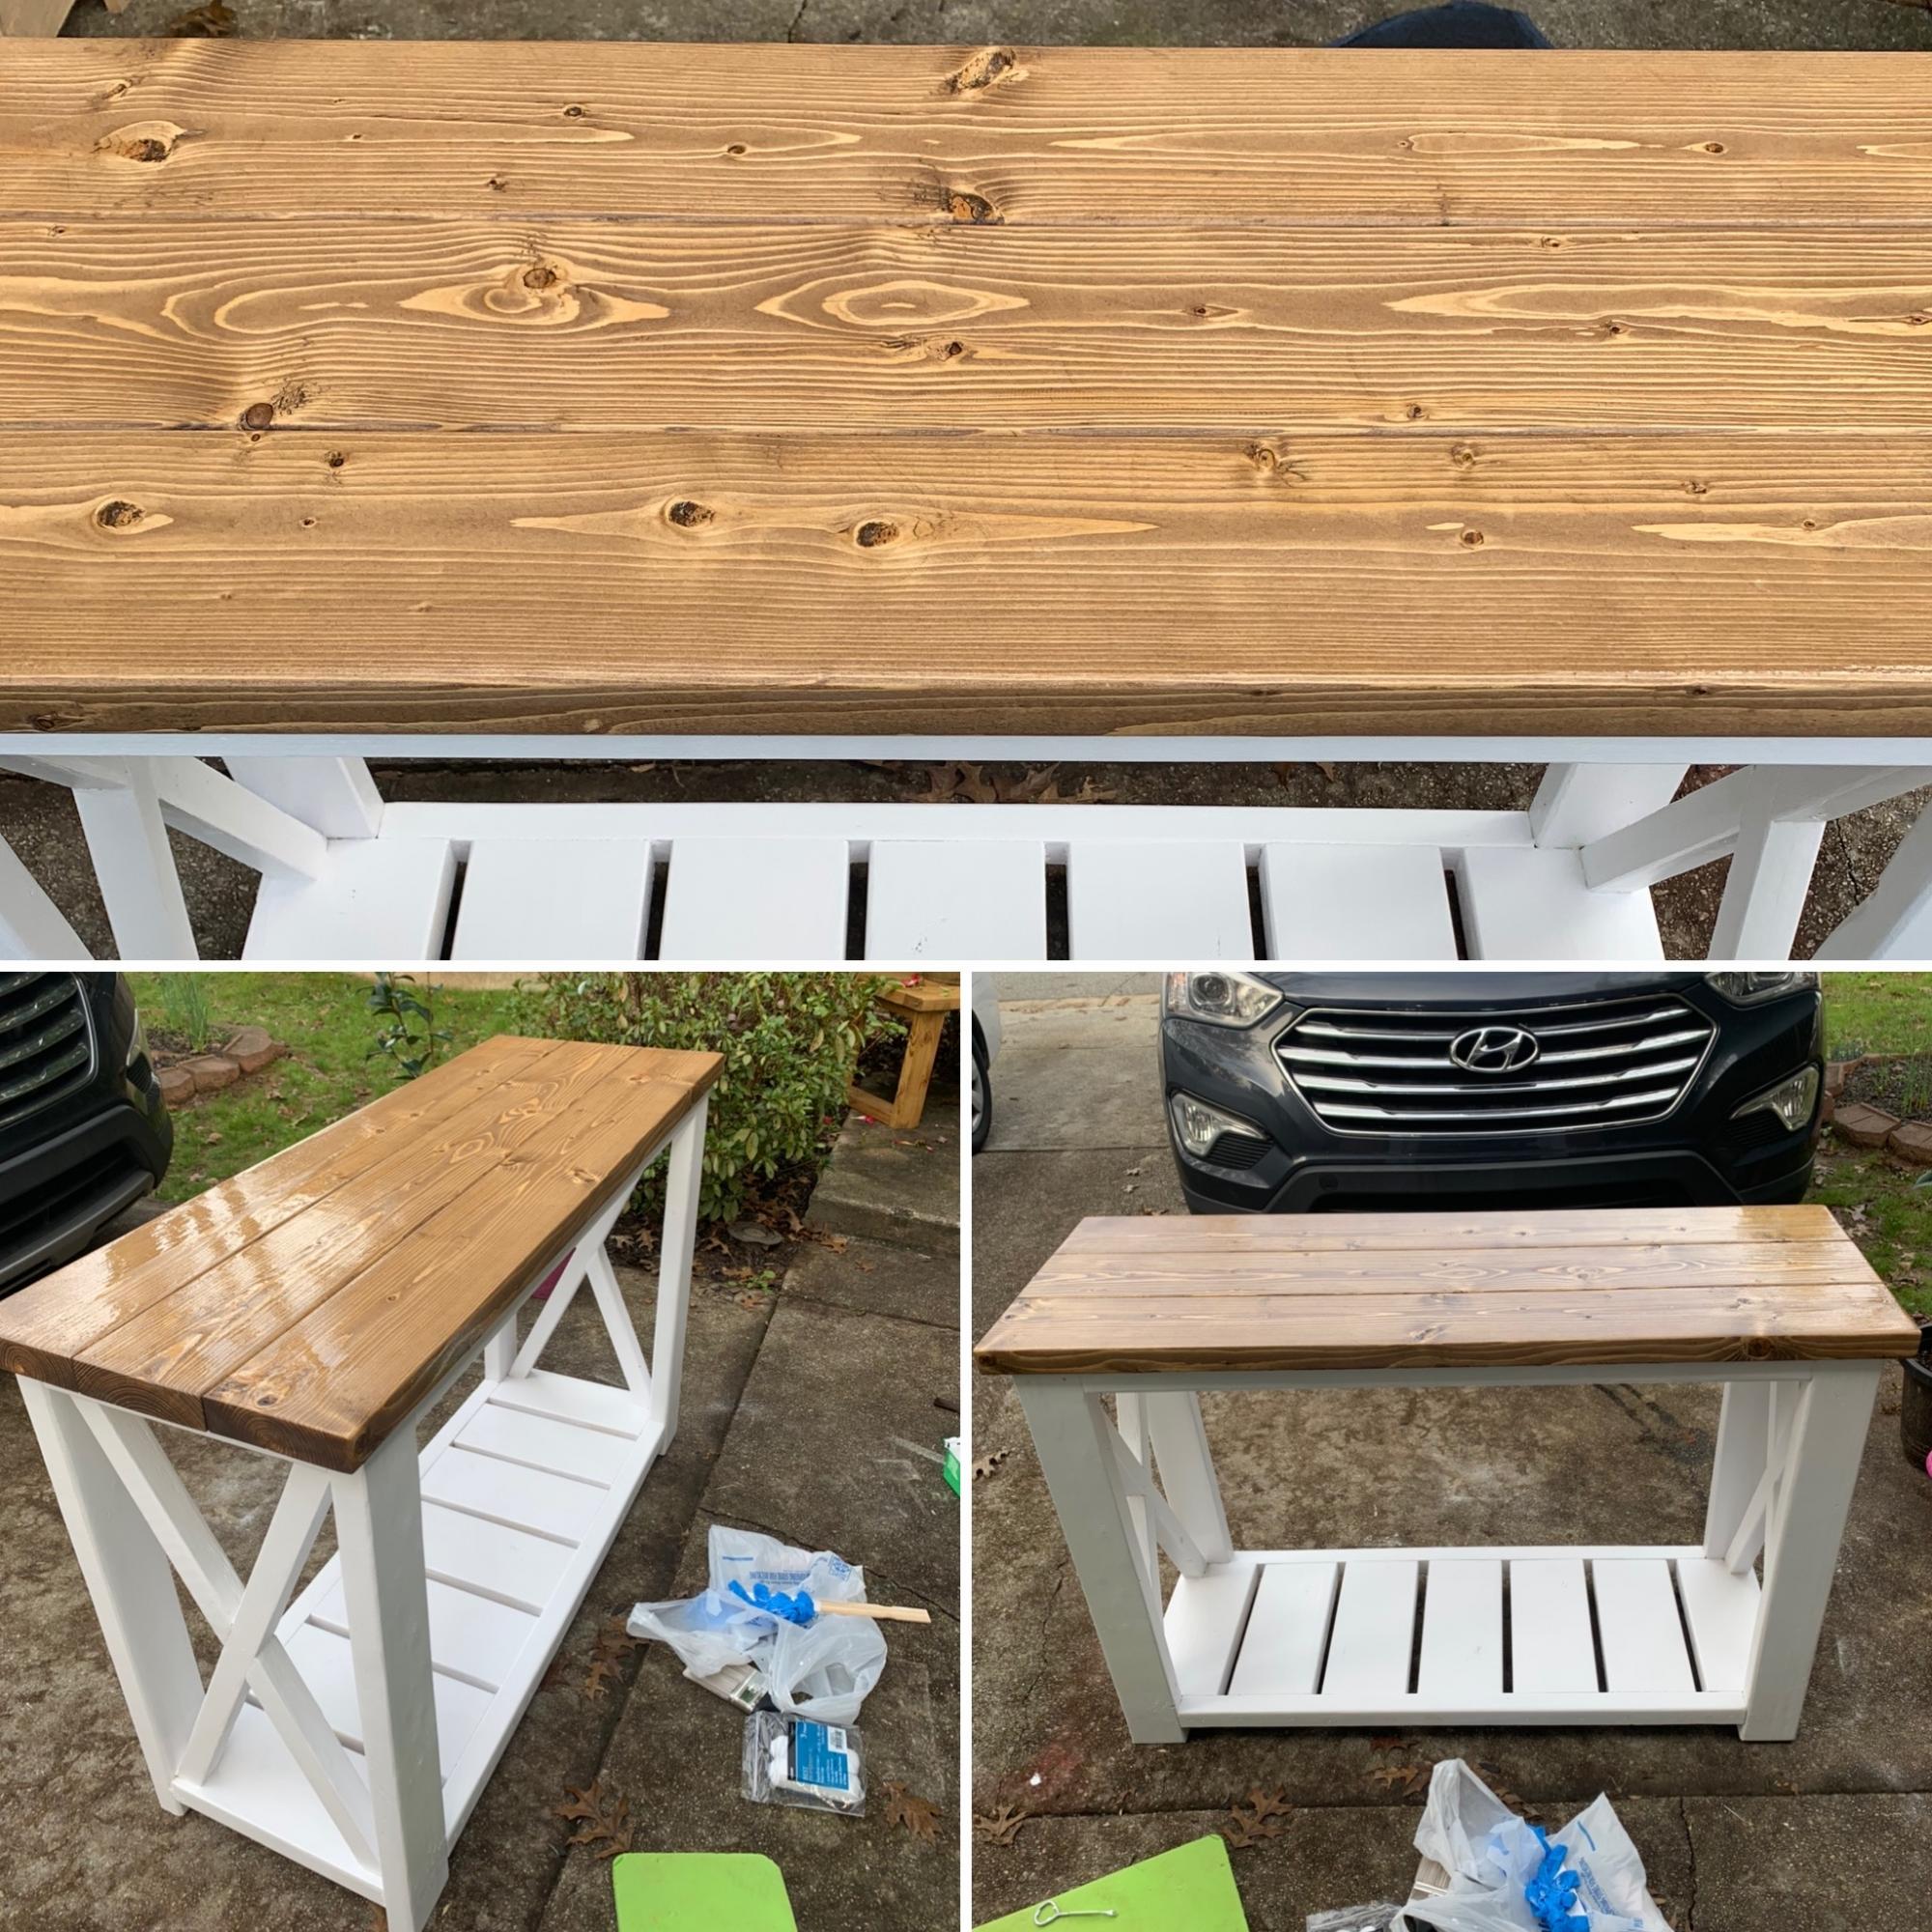
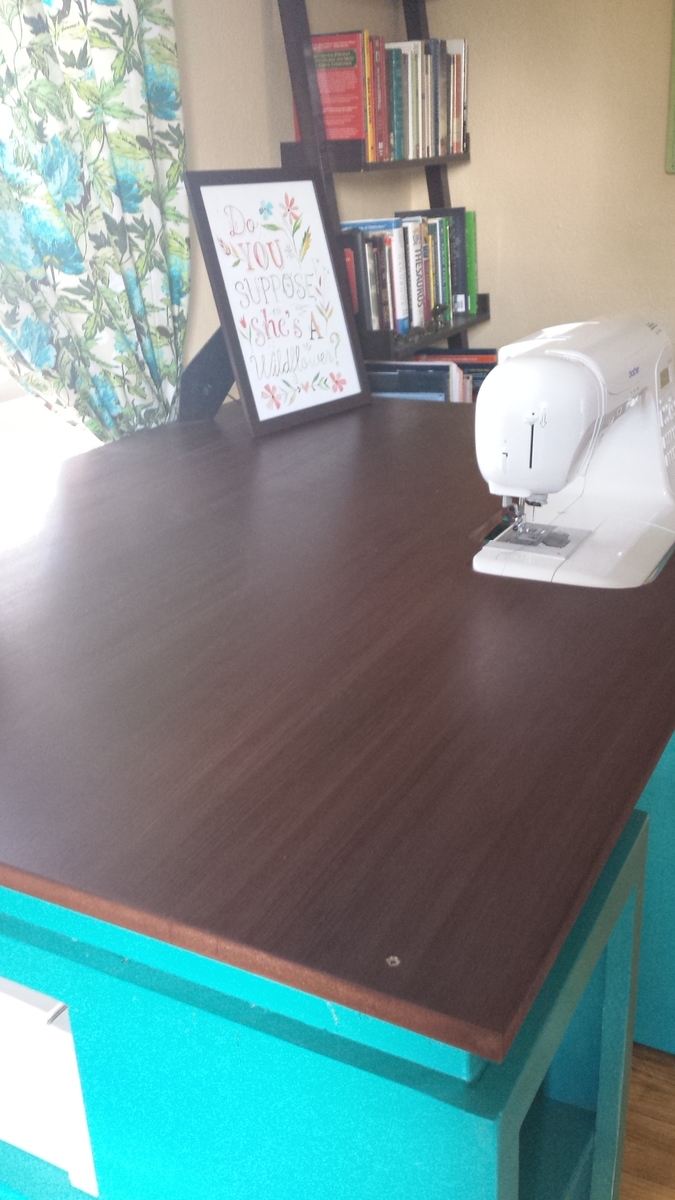
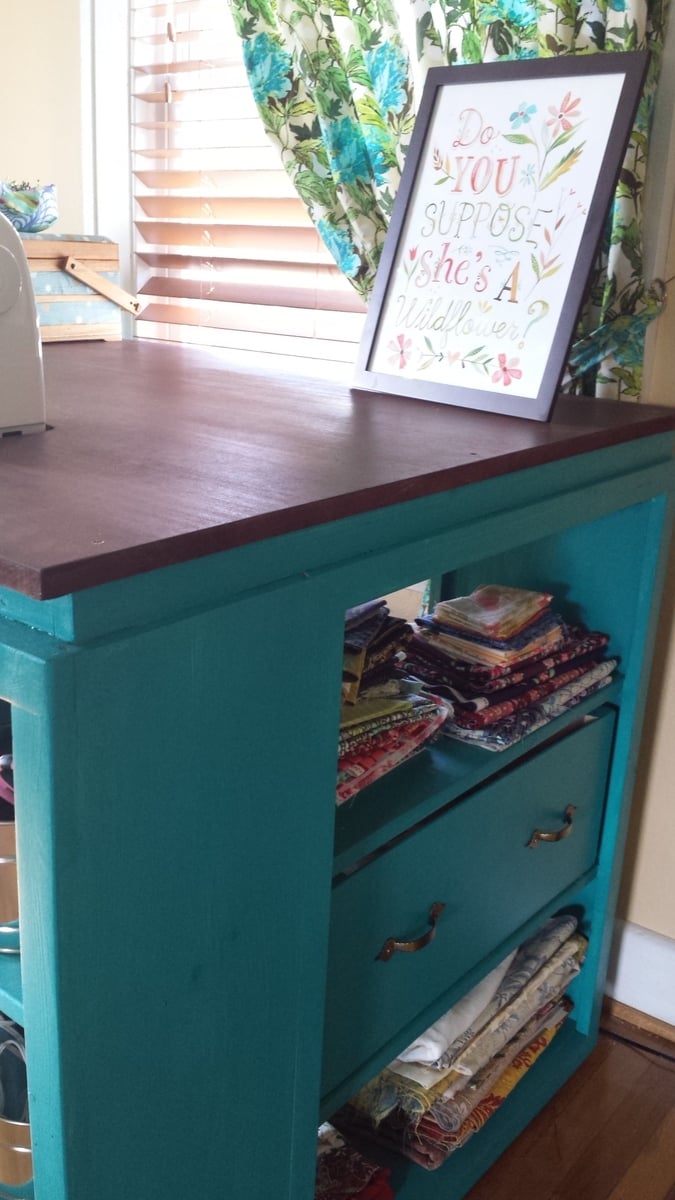
I have been looking at sewing furniture for years, but the prices always made my jaw drop. I have a small craft room, so I needed a table that could also triple as a cutting table and fabric storage. Thank you so much to Ana White for this plan! I built exactly to the plan in The Handbuilt Home, and it's the PERFECT size.
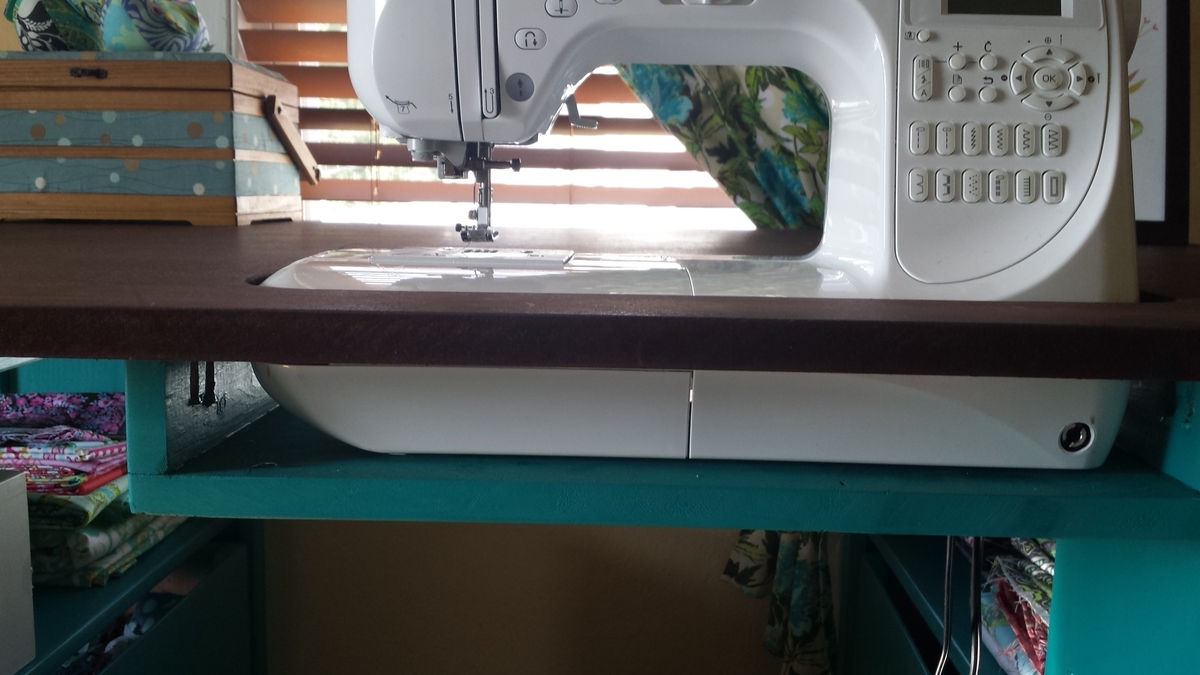
So the sewing machine can sit flush with the top, making working on big sewing projects way easier, I traced the outline of my machine on the MDF and cut it out with a jig saw. Then I built a small shelf using a 1x12 scrap and 2 1x3 scraps. Putting the 1x3s on top of the 1x12 made the shelf 3.75 inches deep, which is exactly the depth I needed. I attached it to the underside of the tabetop using a pockethole jig and screws.
I built 2 boxes using 1/4 inch plywood, and installed drawer pulls on them, giving the illusion that the table has 2 drawers built in. This is where I keep my ugly stuff--interfacing and fabric scraps.
I got the color scheme for the table from the entryway console plan in The Handbuilt Home. In order to make the MDF top look like it had a wood grain, I applied mahogany gel stain with an old washcloth in very thick strokes that spanned the length of the tabletop. It soaked in and lost the "grain" look in some places, but the majority still looks like wood. I did have to apply several coats of polyurathane over the stain; the MDF has a prickly texture that grabs fabric and makes it hard to feed through the sewing machine.
My only complaint is that I didn't quite think through the fact that seating is bar height and I'm 5'7". It's a little difficult to reach my sewing machine pedal. I may build a small stool for the pedal to sit on so I don't have to half sit/stand to sew.
This is the first woodworking project I've done alone from start to finish: from going to Lowe's and picking out the wood, to cutting the wood with a circular saw, assembly, and finishing. (My fiance did carry it up the stairs for me. :) )
I'm so in love with this table! And now to finish the quilt I started 6 months ago....

Mon, 09/23/2013 - 07:40
I really like your colors! And that drawer idea is so clever! Nice work!
Val
artsybuildinglady
Mon, 09/23/2013 - 15:22
I love this idea!! I too have wanted a sewing table for a long time but the prices of them take my breath away. I may have to make myself one! Thanks for the inspiration!!
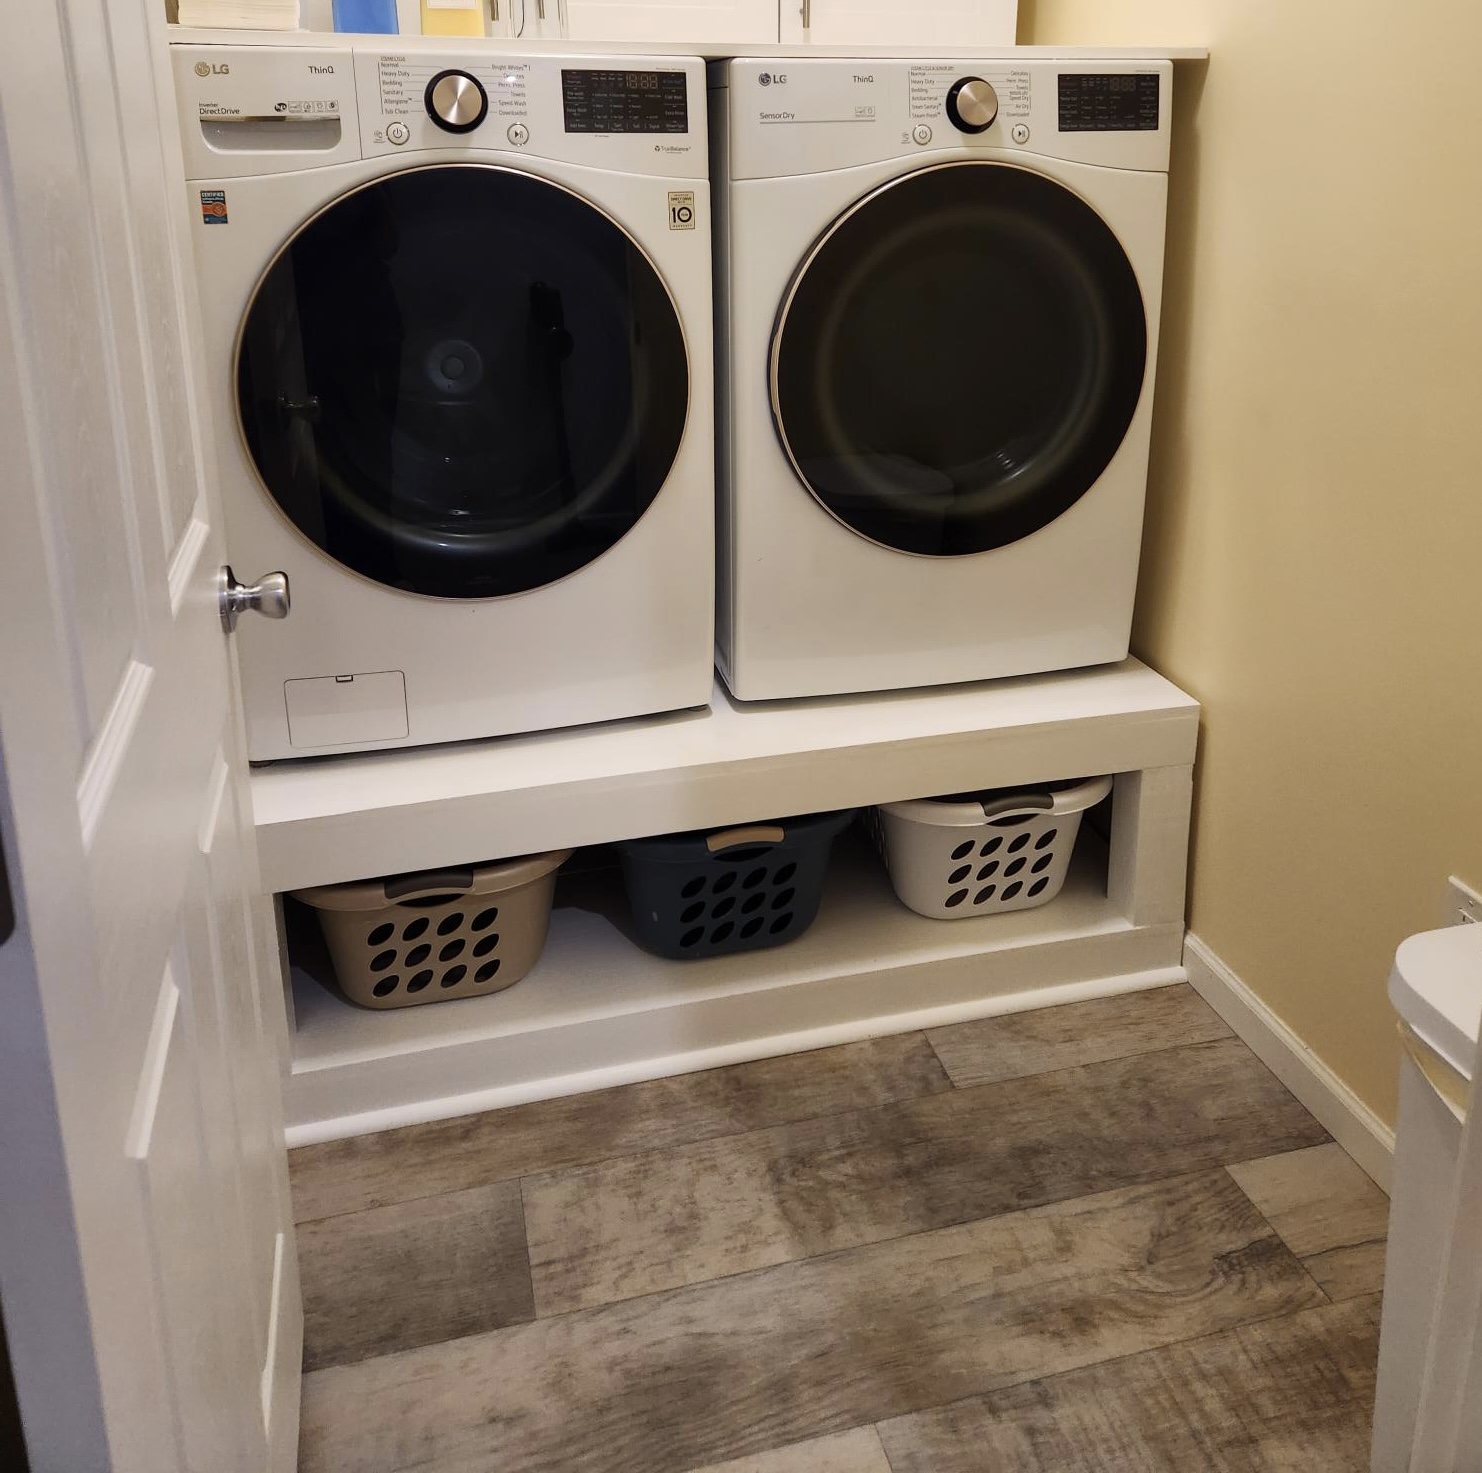
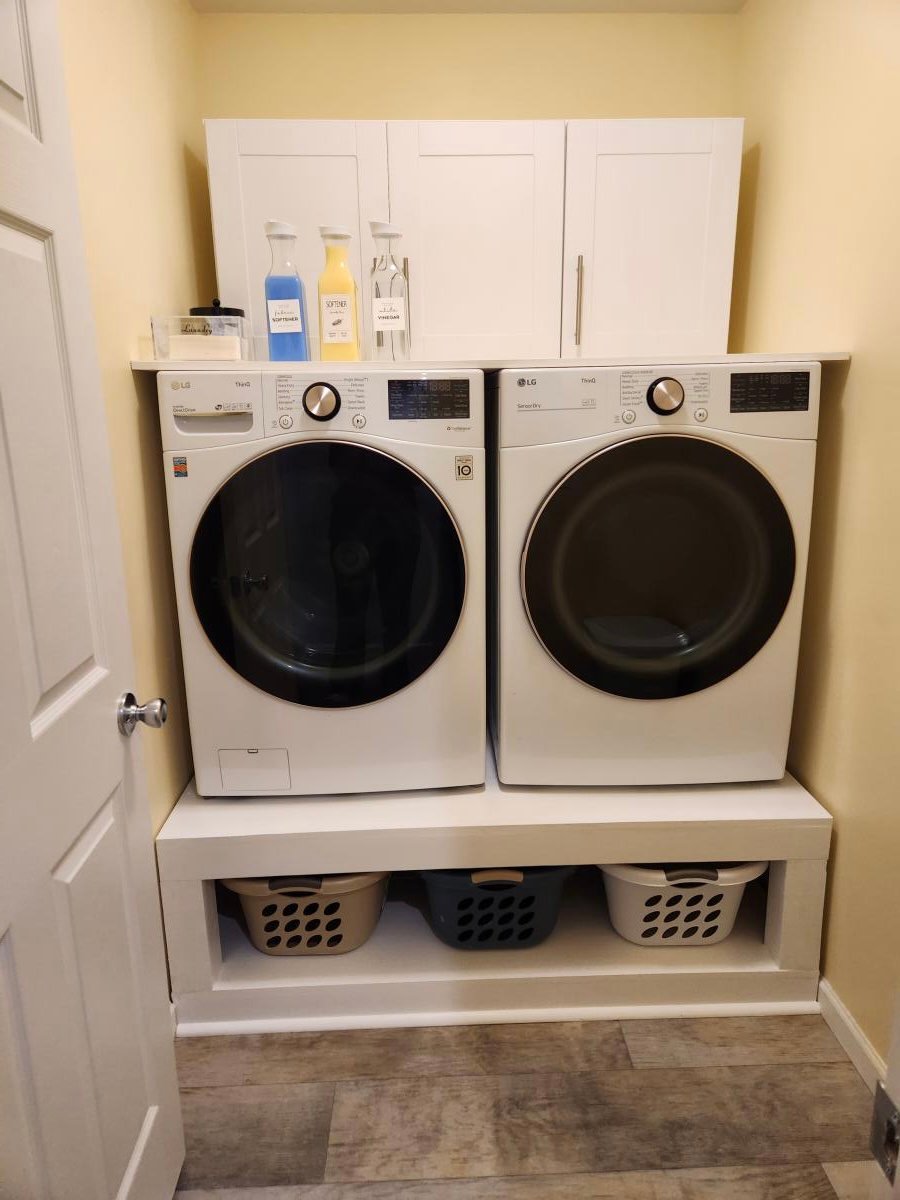
This pedestal base for the washer and dryer really created the perfect opportunity to organize and declutter our tiny laundry room. Had to resize it a bit to fit the space but it turned out perfect! I added a super easy top for an even counter space and bought some stock laundry room cabinets to sit in the back for extra storage. Such an upgrade!
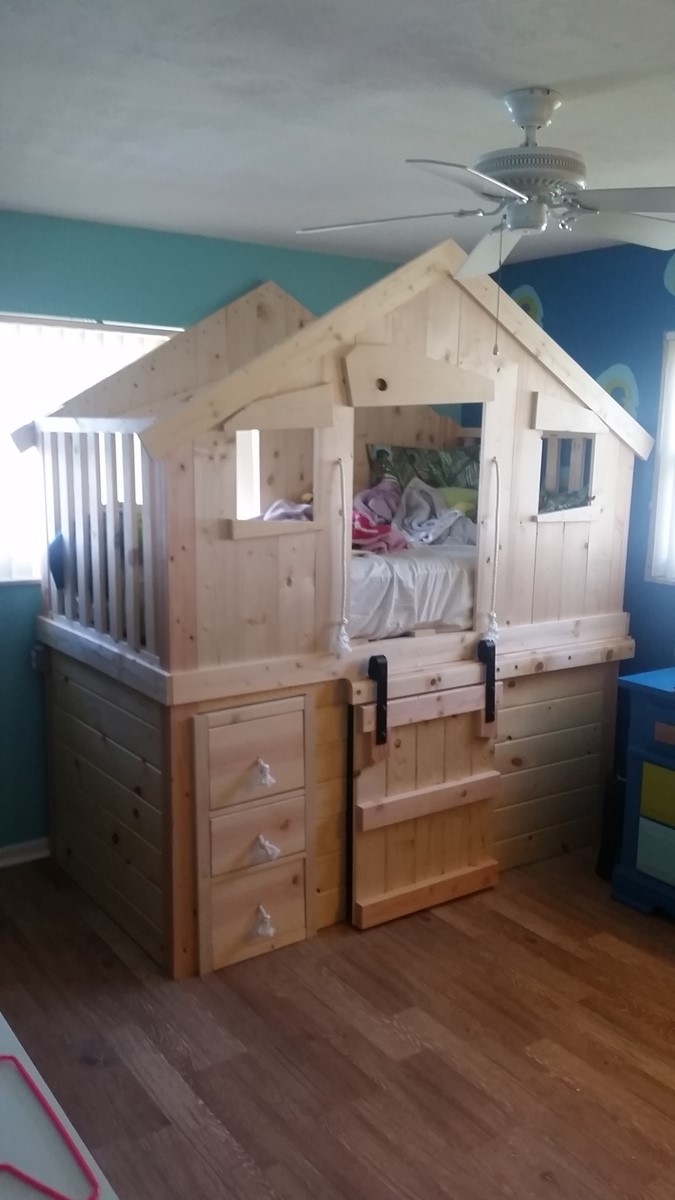
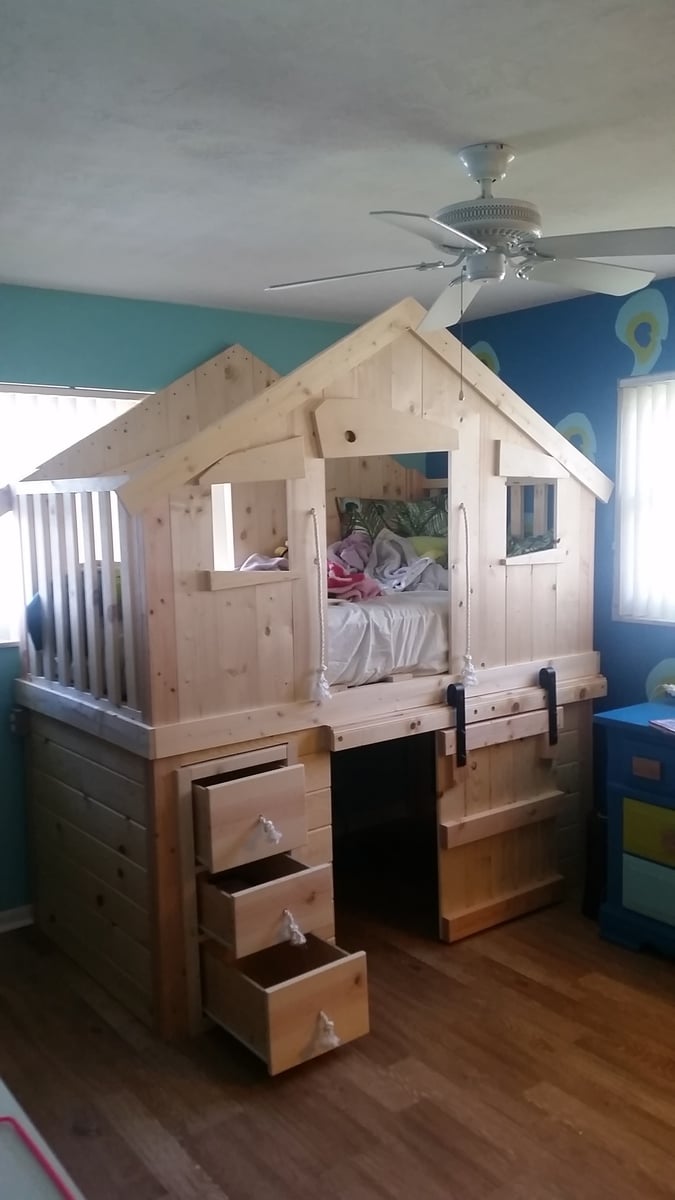
My daughter wanted to remodel her room with a peacock farm theme. These plans worked perfectly. I decided to just enclose the bottom, add 3 drawers and a barn door to give it functionality and add to the "farm" theme. Enclosing the bottom mad for way more storage in her room. I'm going to add a cubby on the head board side. It's going to mimic a "lean to" shead to further add to the rustic farm look.