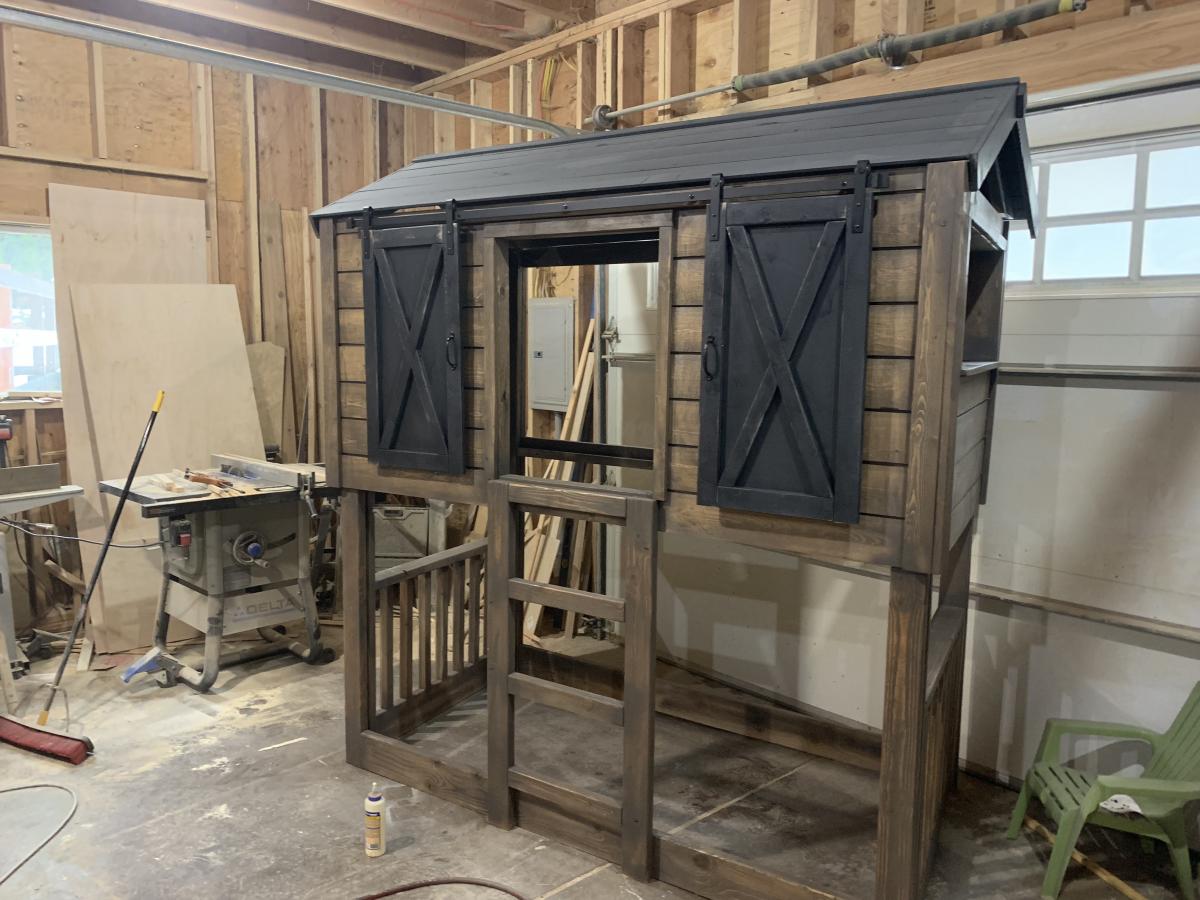
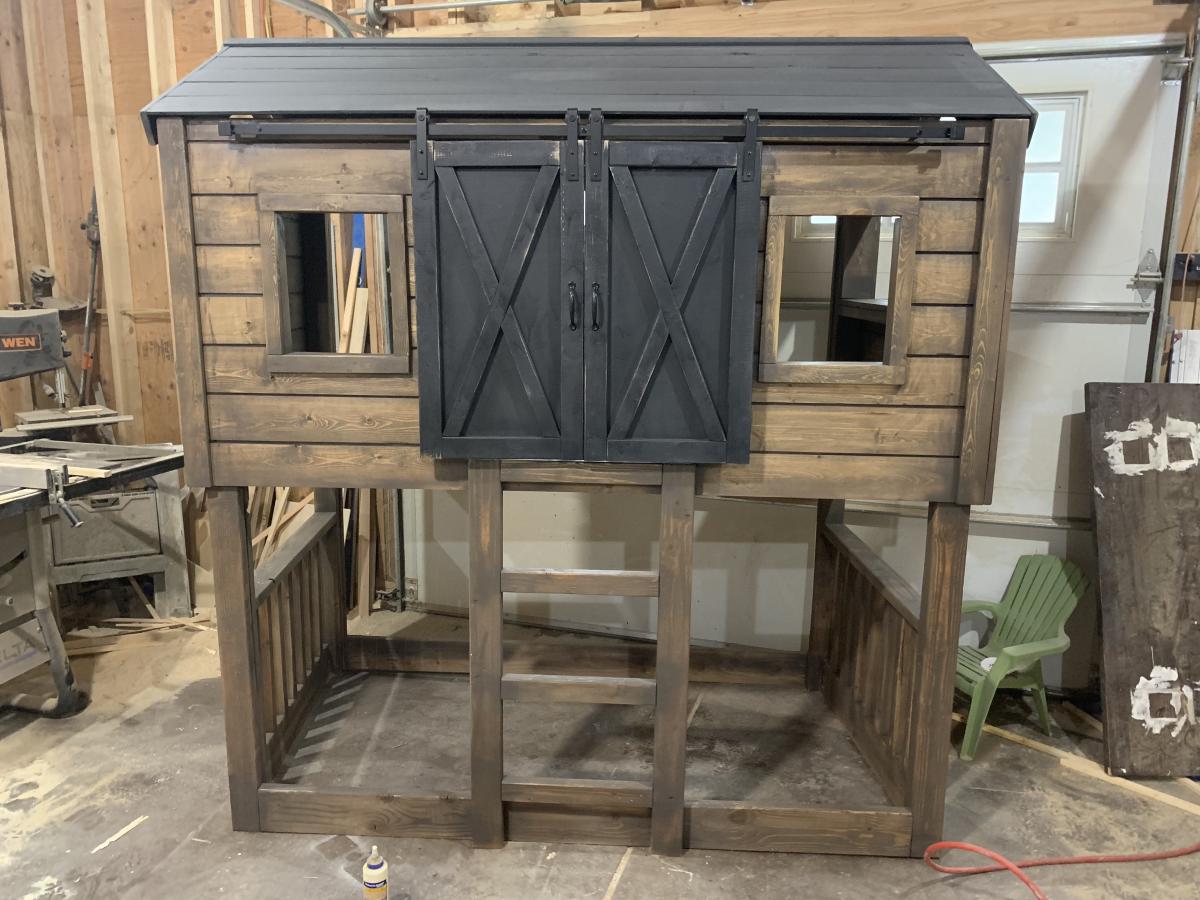
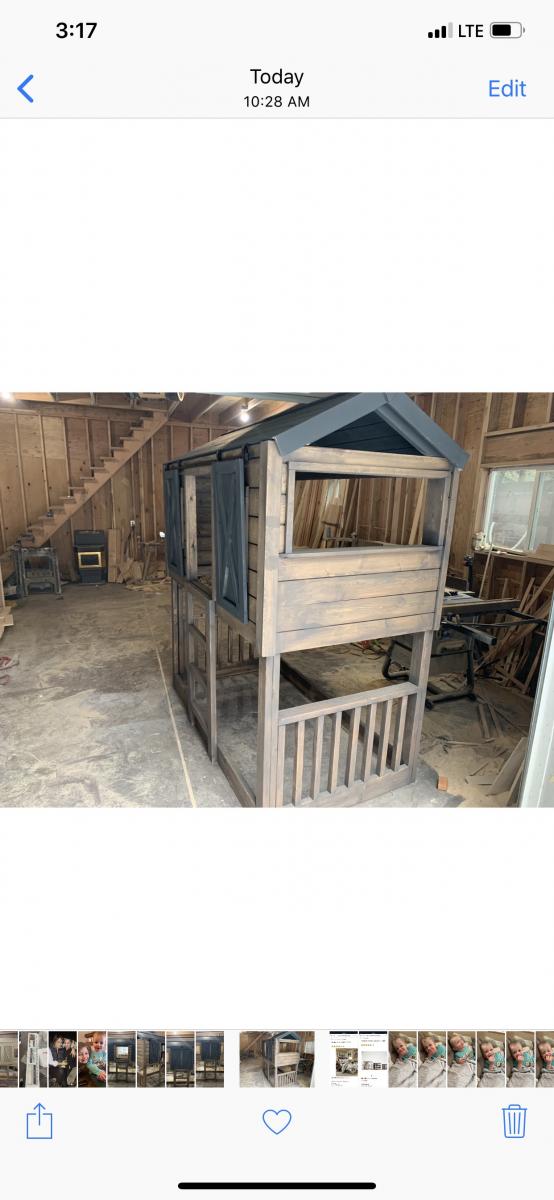
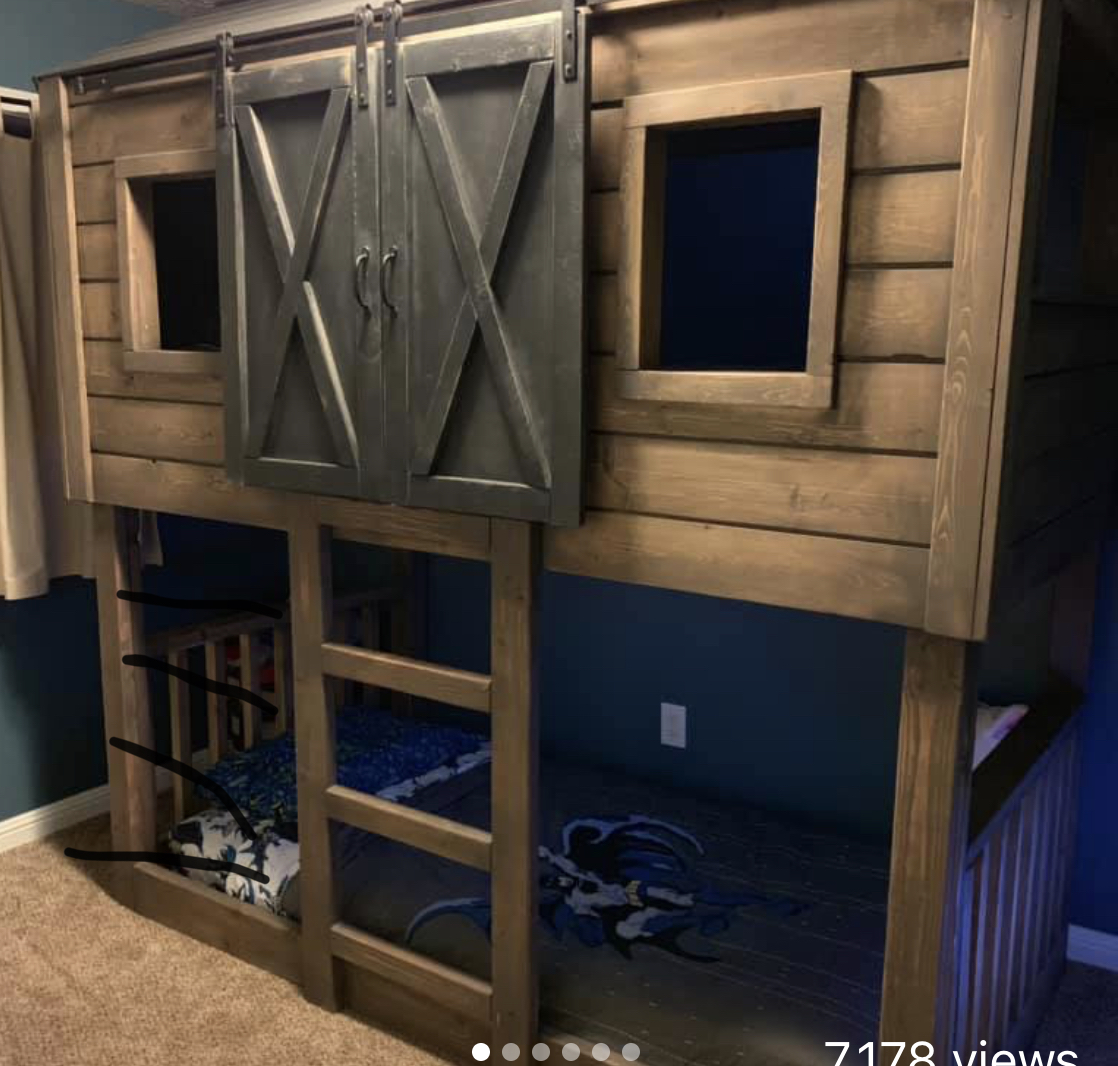
Kids Cabin Bed with Barn Doors

Hand made kids fort bed

Built from Plan(s)
Estimated Time Investment
Day Project (6-9 Hours)
Recommended Skill Level
Intermediate
Hand made kids fort bed
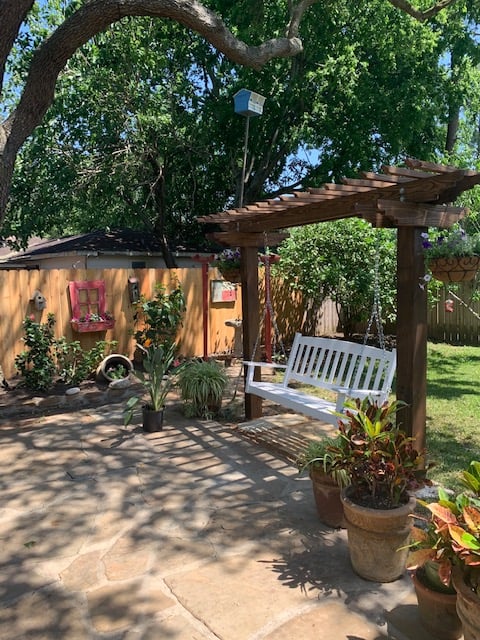
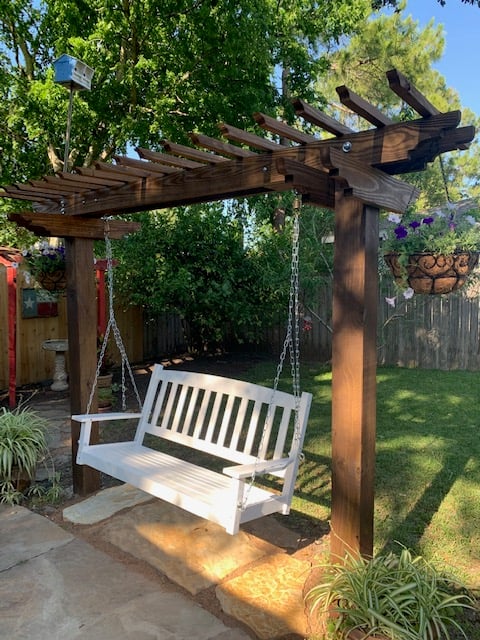
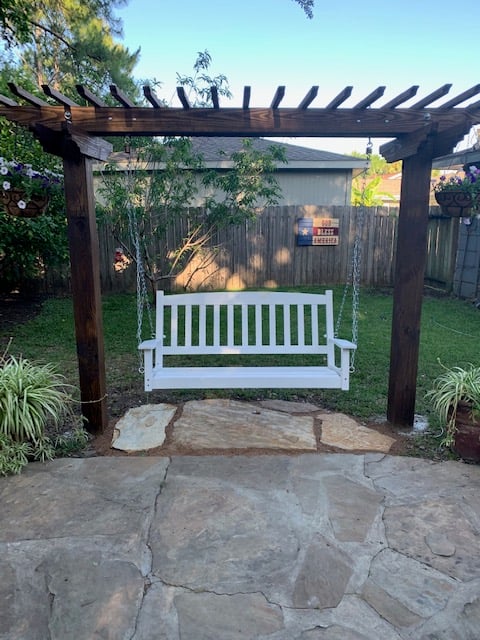
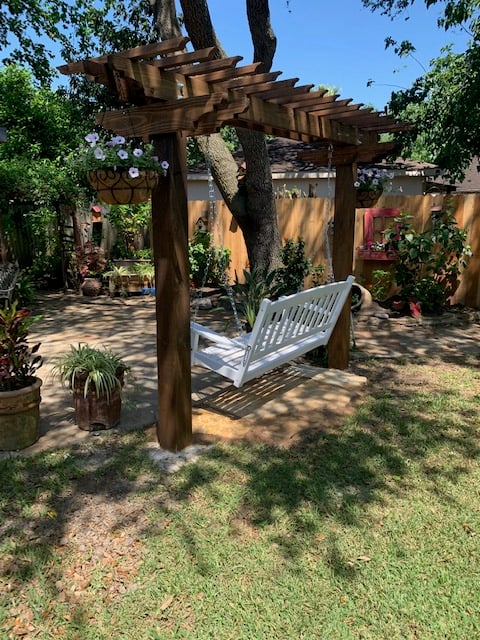
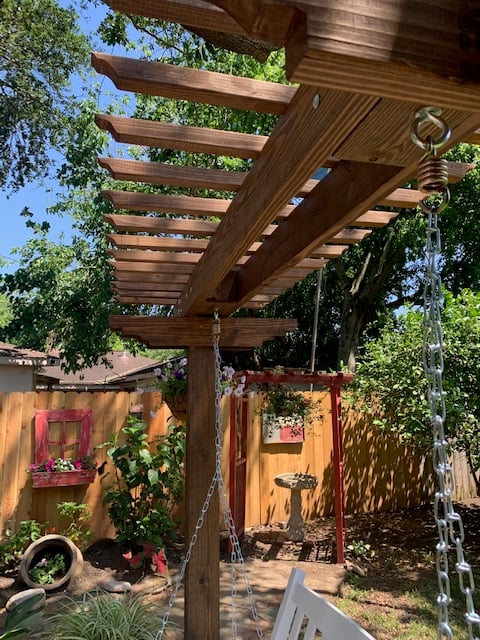
I saw this project on YouTube under Arbor Pergola Swing. It did not mention any specific detailed plans or cut list but it was enough to get me started. I began with (2) 10' 6" x 6" post. buried each 24" and cemented. I cut the post tops at 83" from ground line. The rafter consist of (2) 10' 2"x 6". I used the leftovers of the 6" x 6" post tops in the middle of my rafters to hang the swing from with 1/2 " eye bolt. Then I used (9) 2" x 2 " x 8' and cut each at 36" to finish off the top and (2) 2x6x8 for the 4 rafter supports. I drew out the designs of the rafters and top ends free hand and at made a template for the cuts with s jigsaw.
The entire cost including hardware minus the swing was $170. My wife had purchased the swing last Fall at a clearance for $40 brand new.
This is my second large wood project...and both from this blog! The plans were fabulously easy. This was the first time I used my miter saw, and it was a great way to break it in.
I made another turned leg table... this time on accident! Lots of finishing details on my blog. http://whitneysworkshop.blogspot.com/2012/07/the-accidental-table.html
Fri, 07/20/2012 - 05:28
Nice rescue job on the legs for both the find and the finish. They turned out very nice.

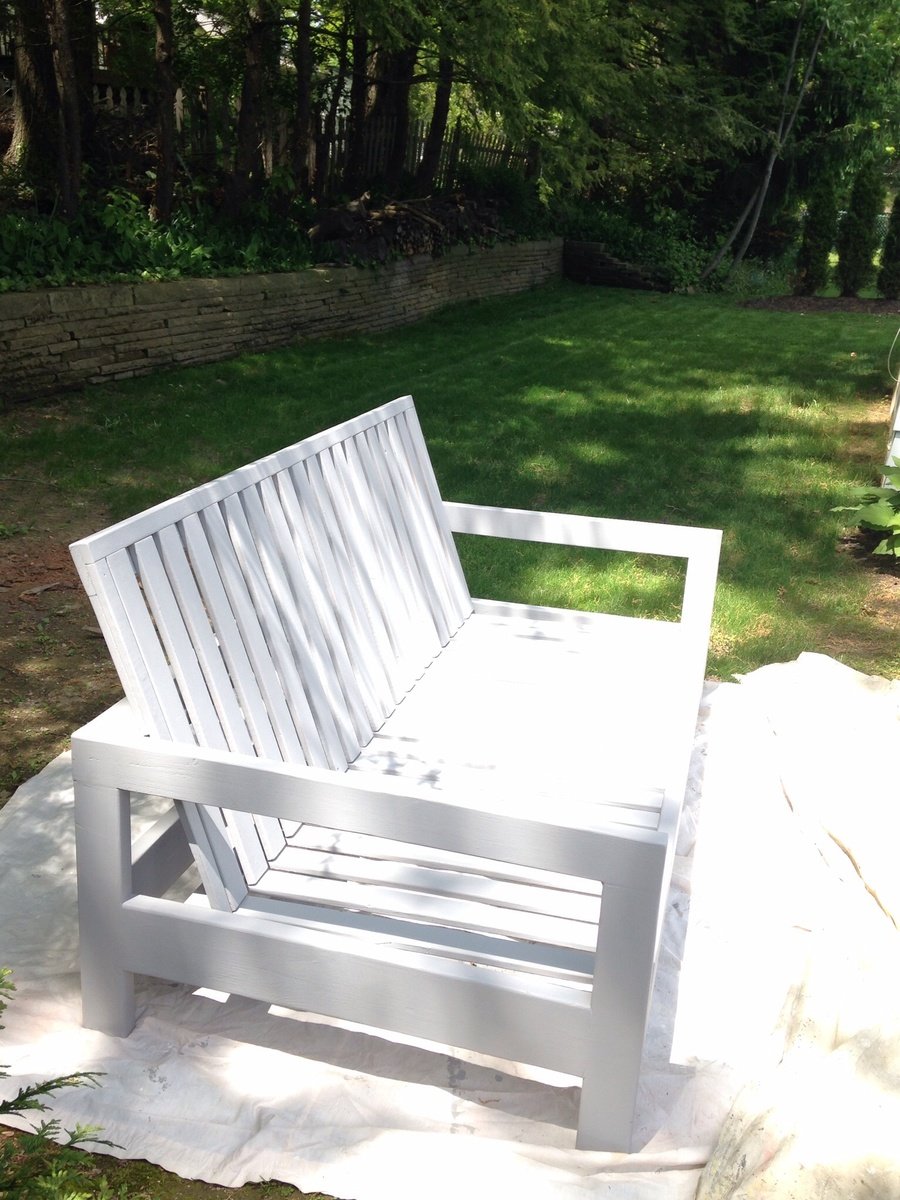
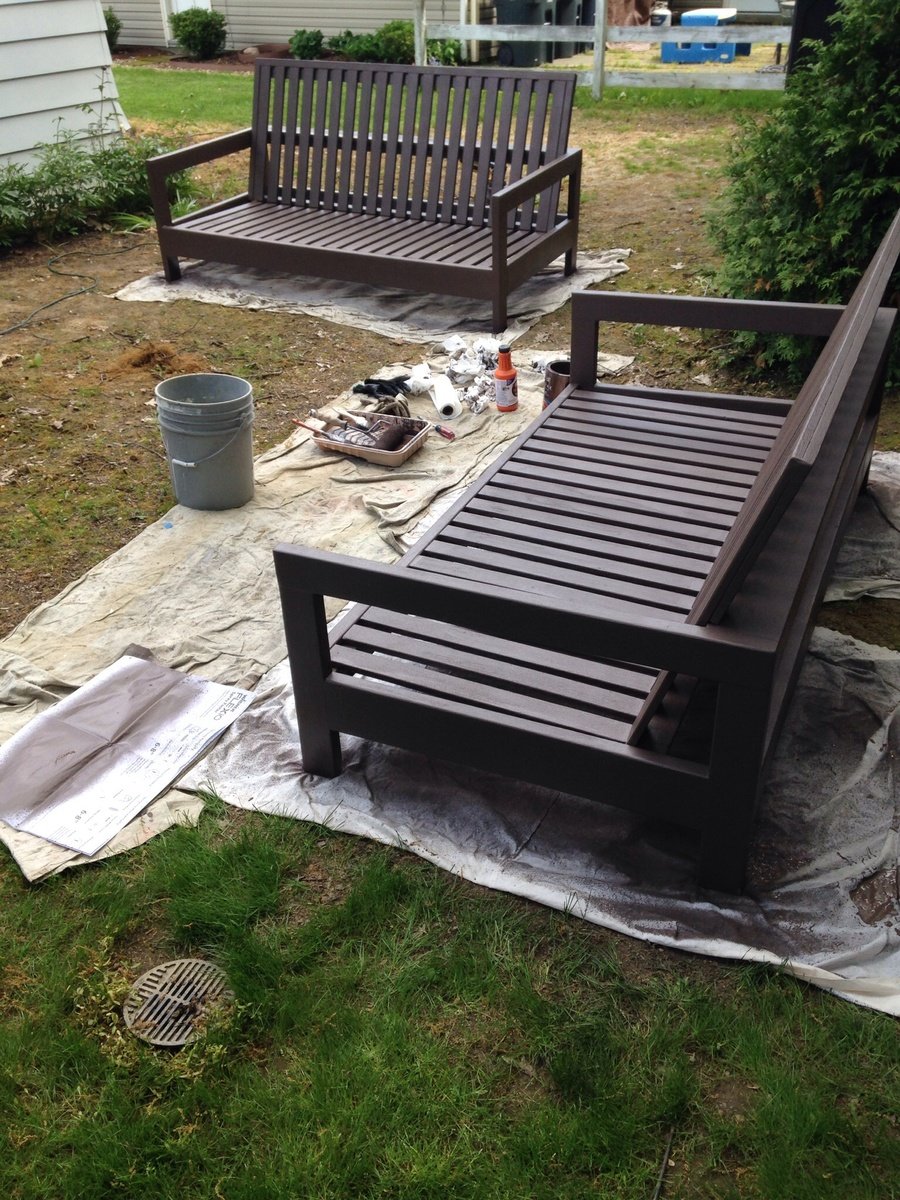
Ana White inspired chaise lounge......
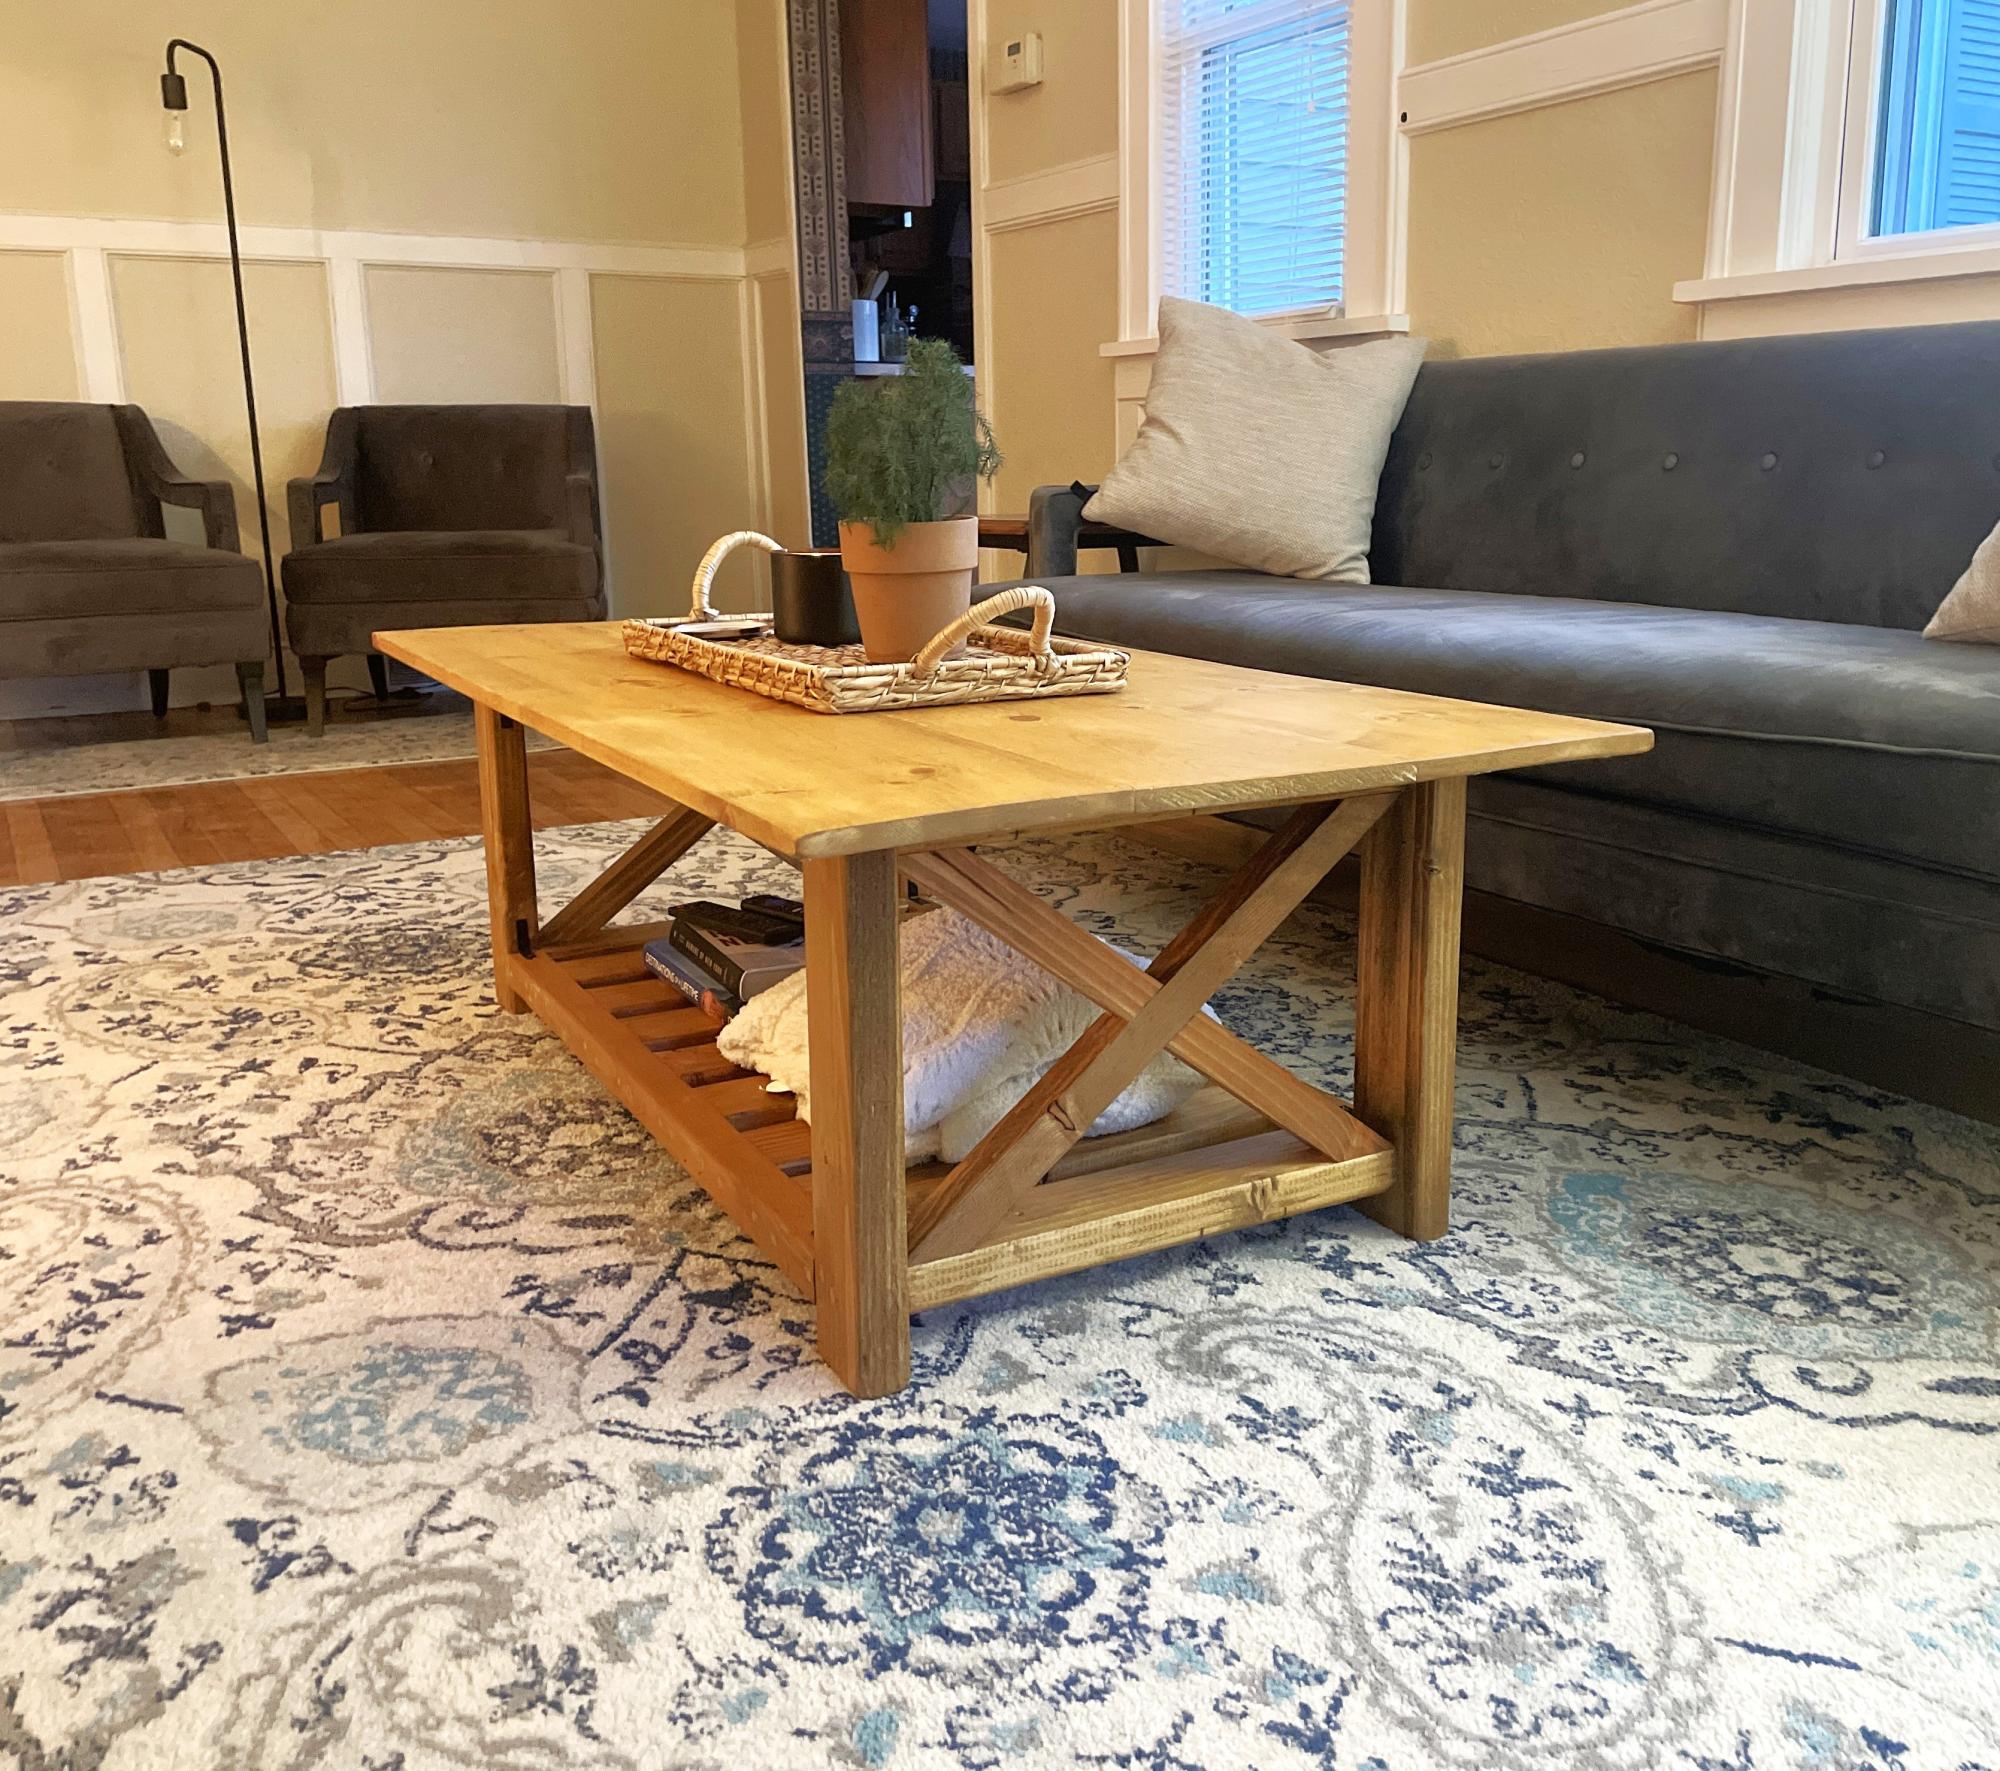
Coffee table! Golden oak stain on pine lumber.
Jack Hutchinson
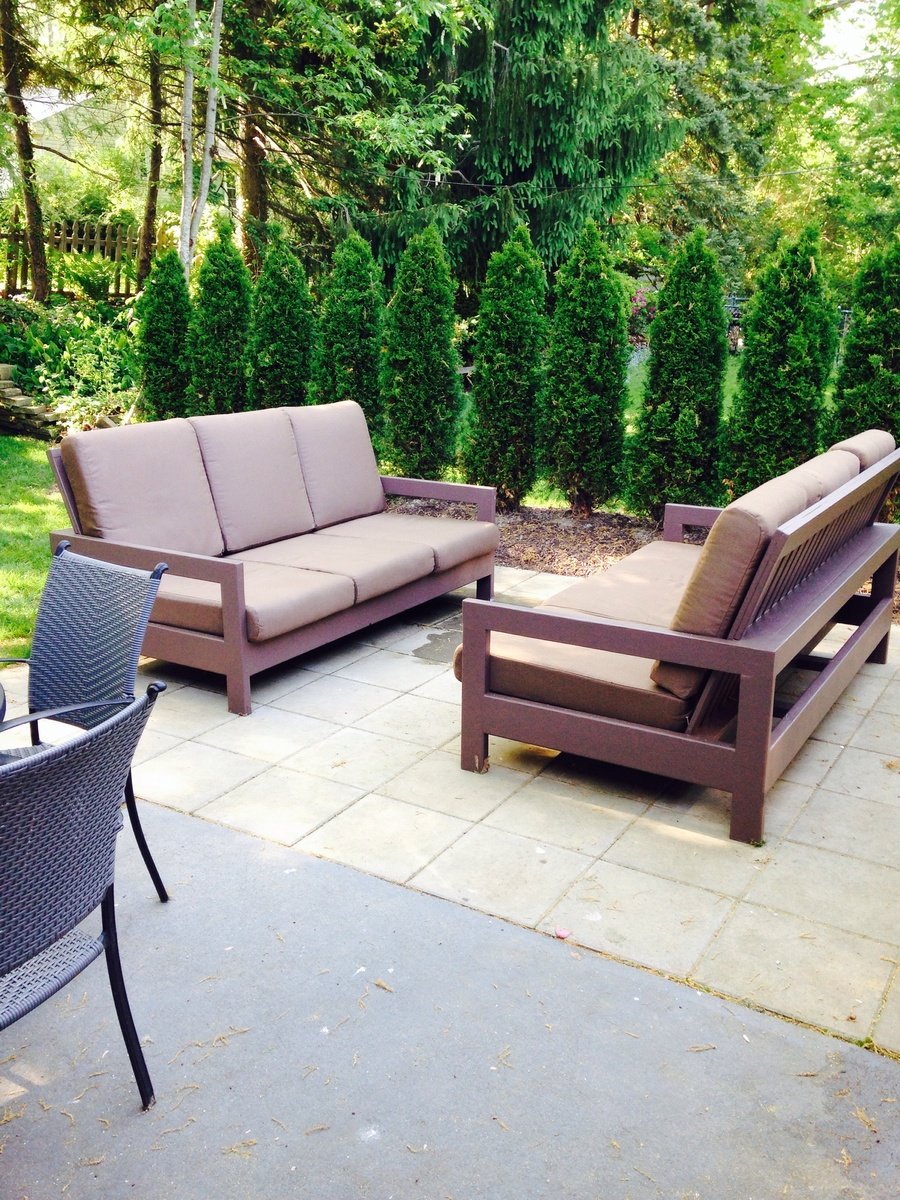
Love this design! We had to adjust the plans to fit a different cushion from Restoration Hardware. The couches turned out great and we had a party the day after the paint dried! Thx Ana-white!

Built one for my niece, my daughter's is next!

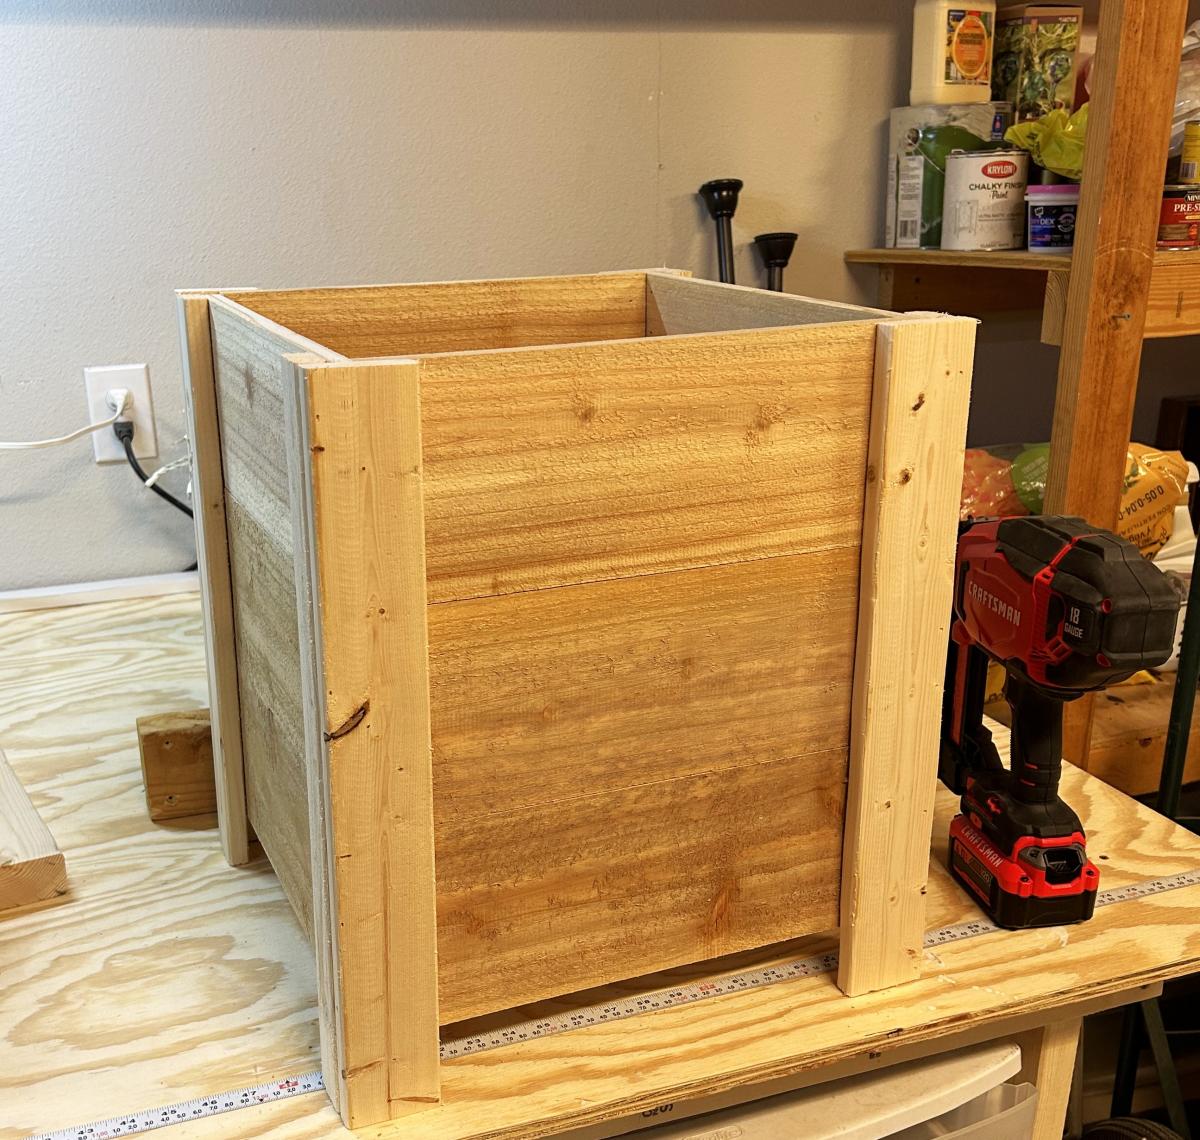
Easy Build DIY Planter Box with Cedar Fence Pickets
Followed these plans and made these planter boxes for the front porch! I couldn’t believe I was able to complete a project like this so quickly! Instead of paint, I opted to use some grey stain I had leftover from another project. Thanks! I love them!
Beth
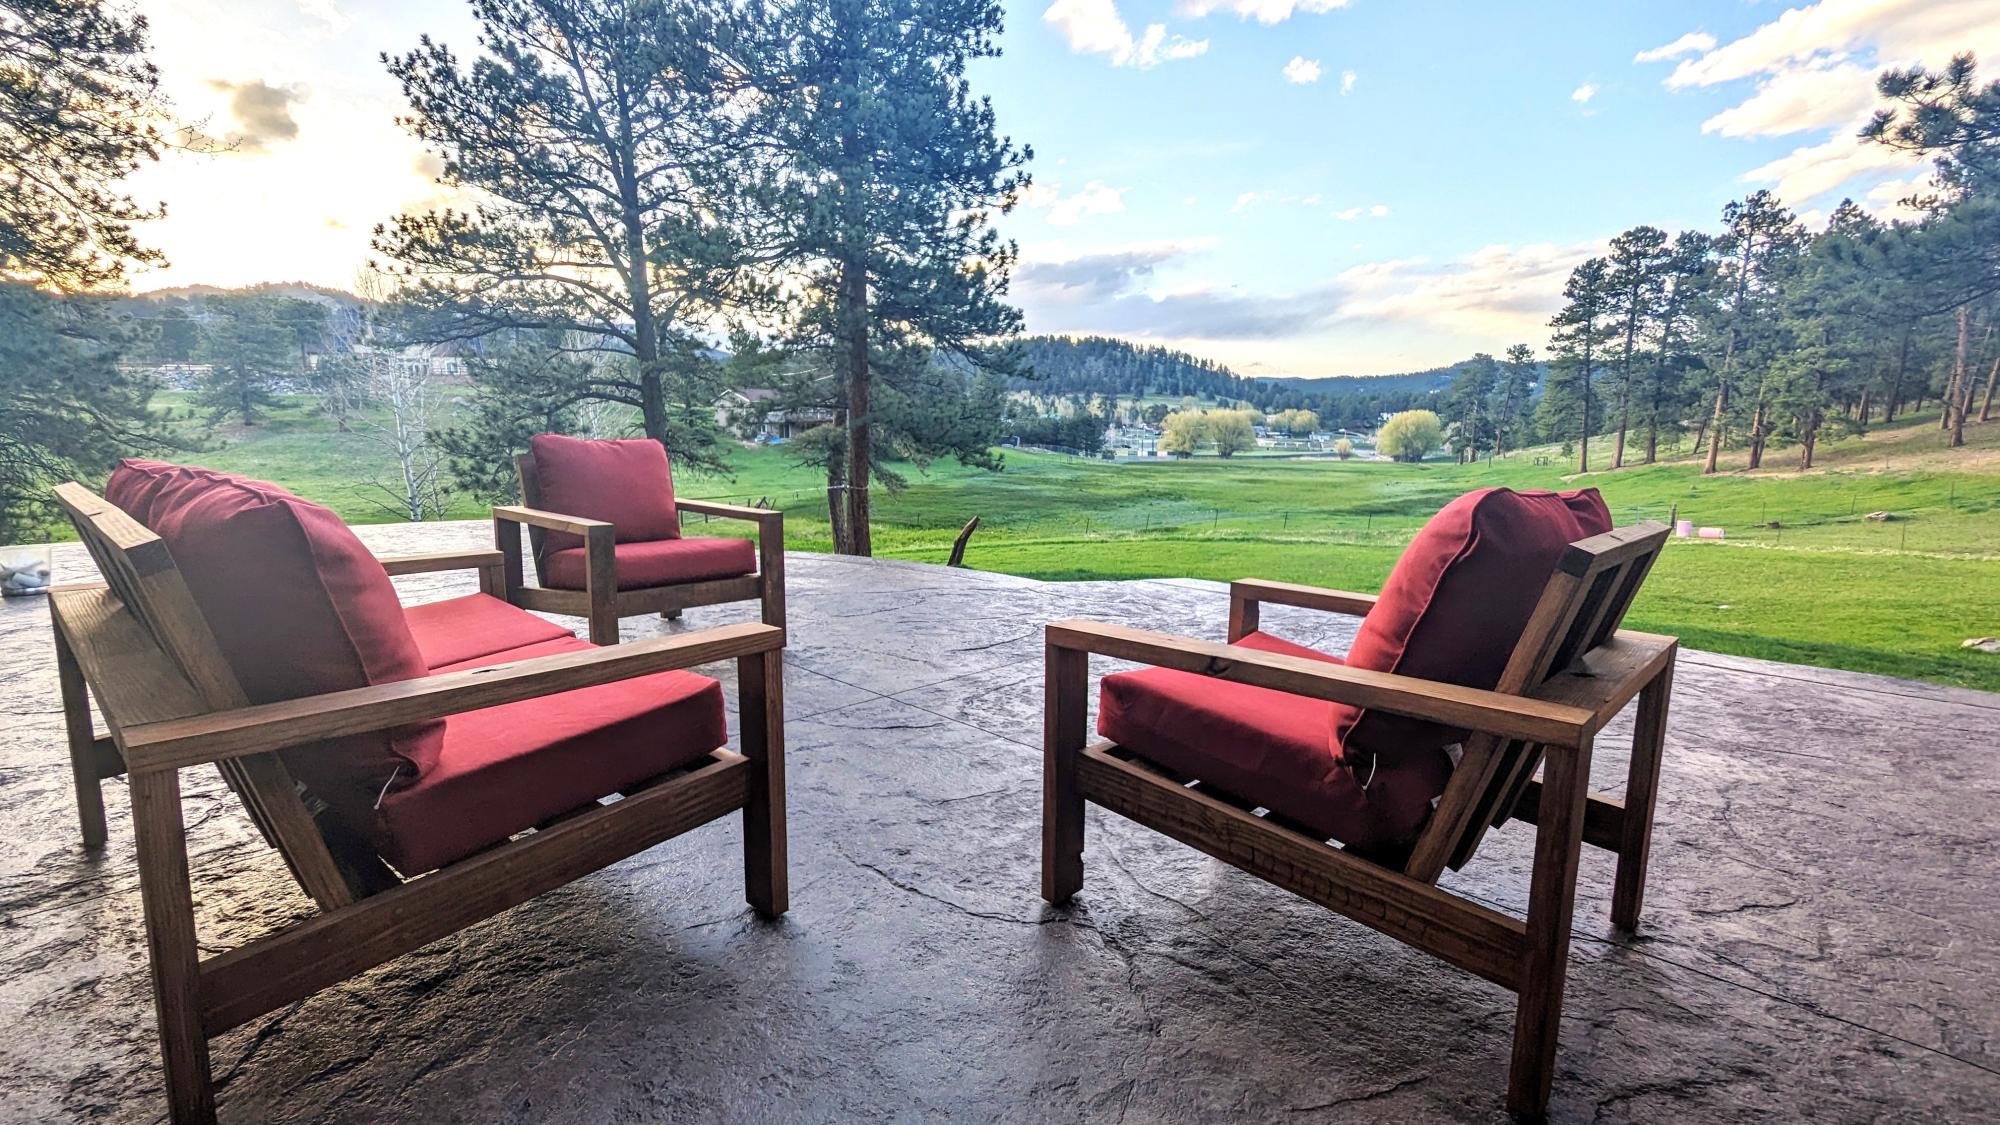
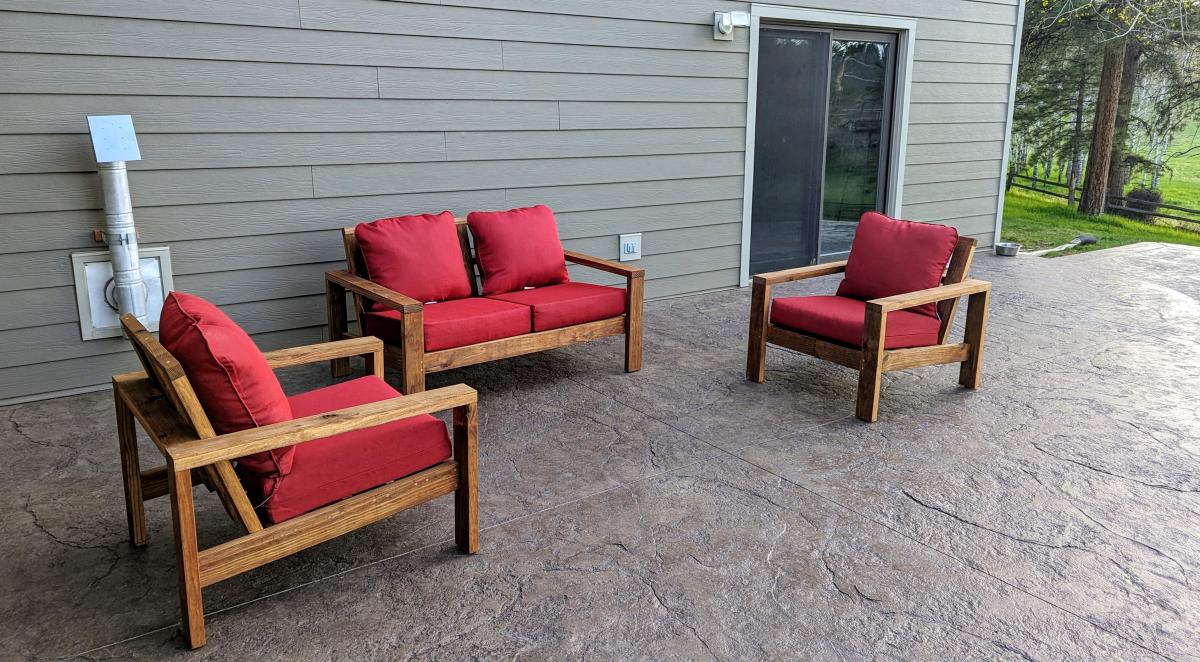
Made this patio set out of old lumber from a deck we replaced. I saved a lot of the 2x10 joists. I ripped them all into 2x4s, then had to sand off 25 years of grime. Built two chairs and a loveseat. Just added additional seat support for the loveseat. Then stained them. Very happy with how they turned out. Was nice to be and to repurpose that old wood.
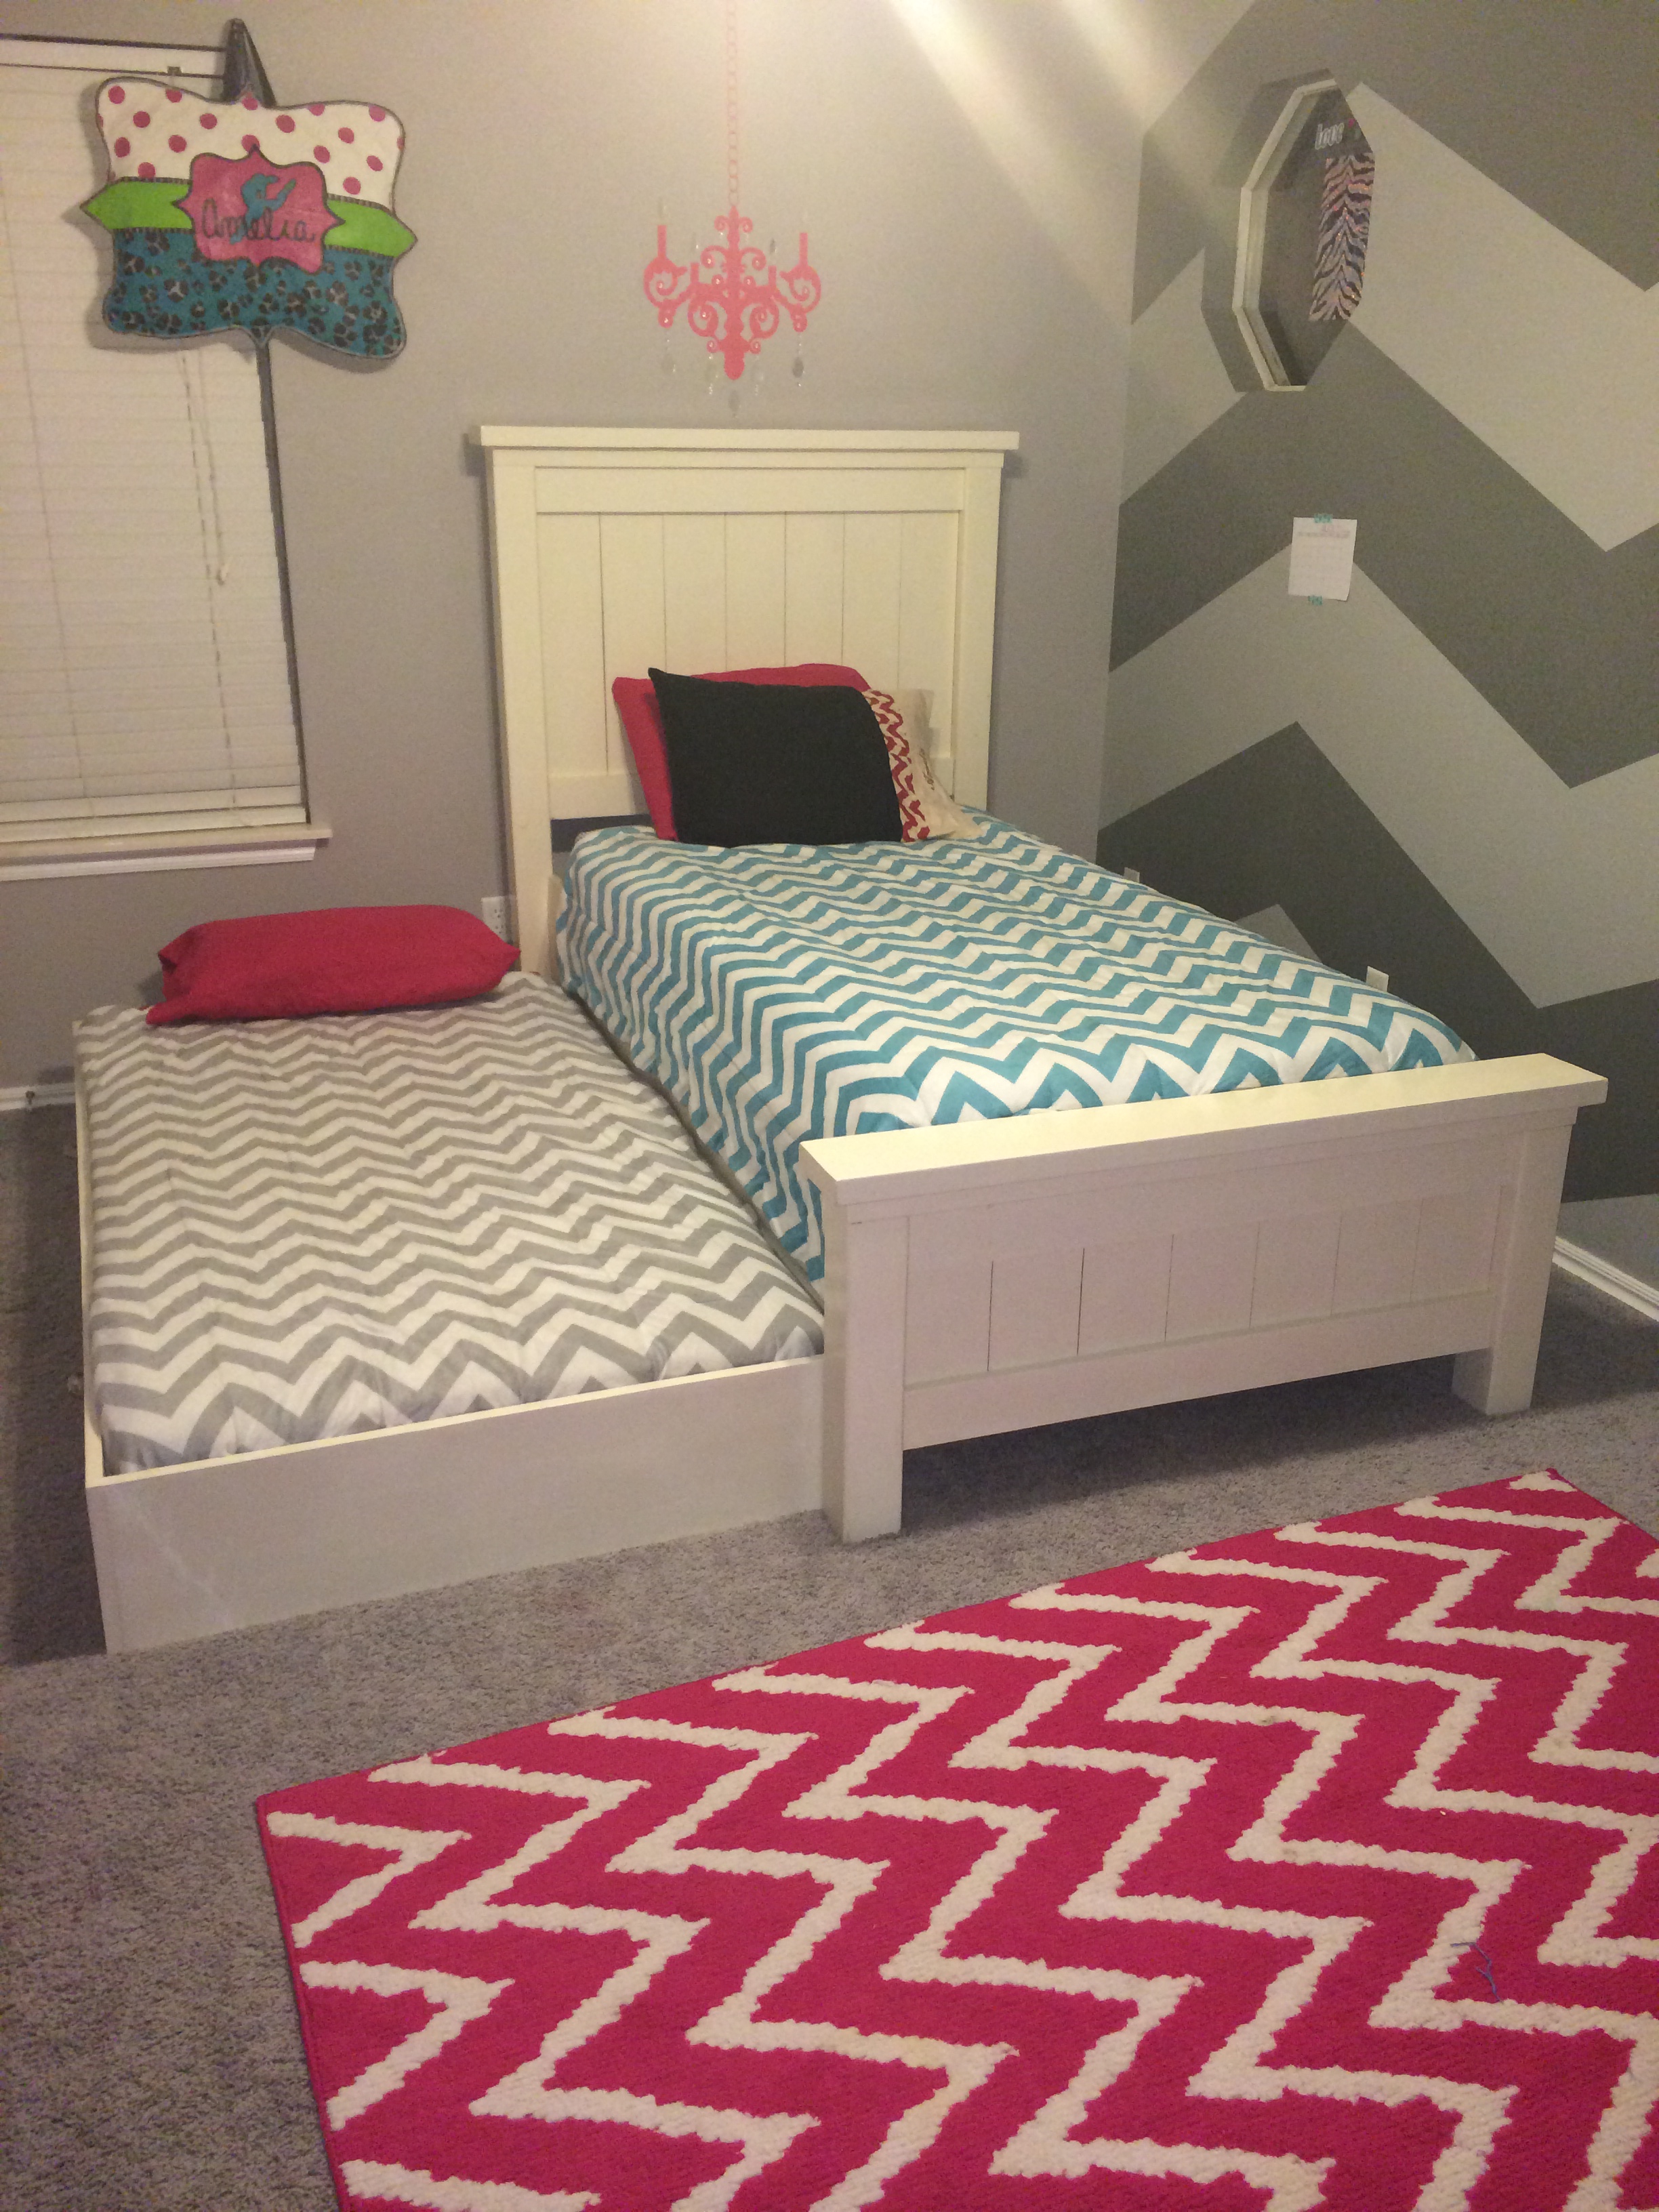
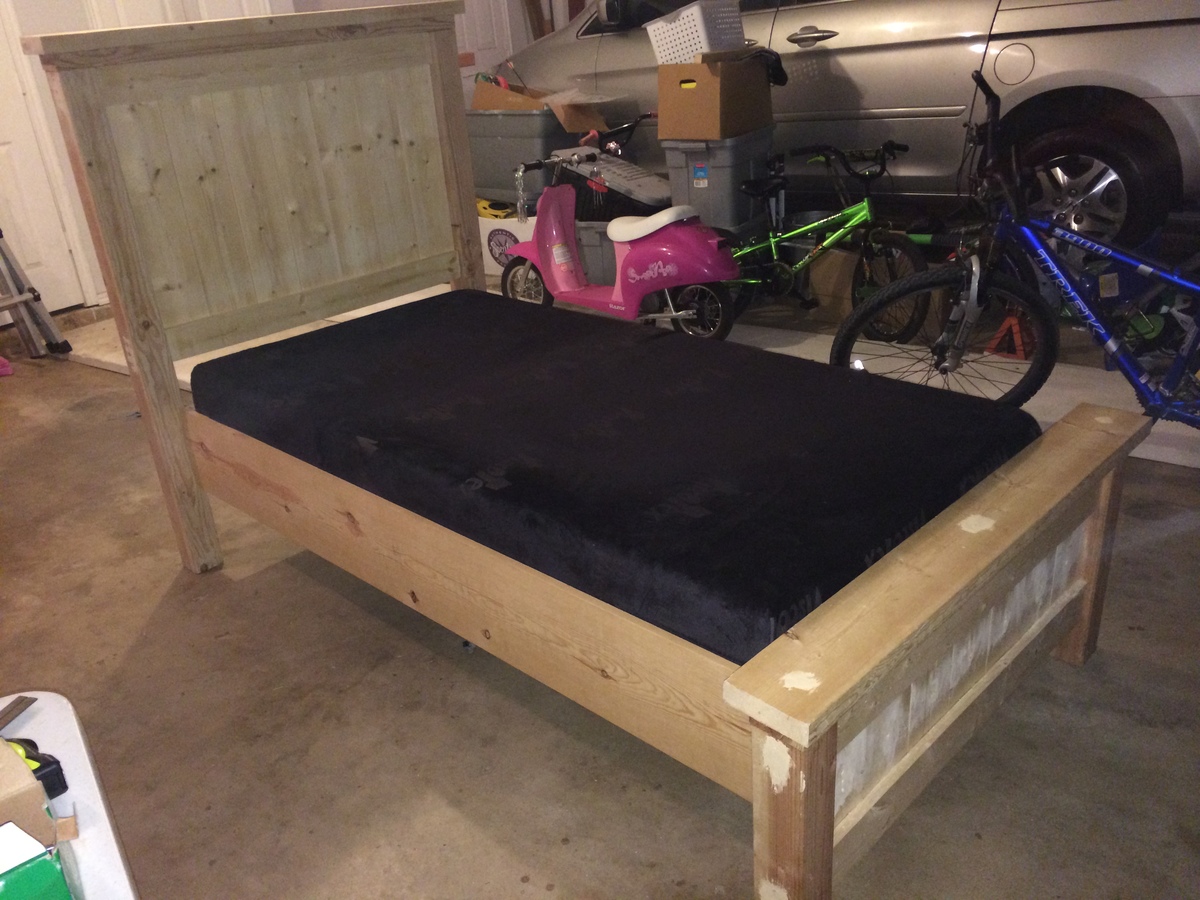
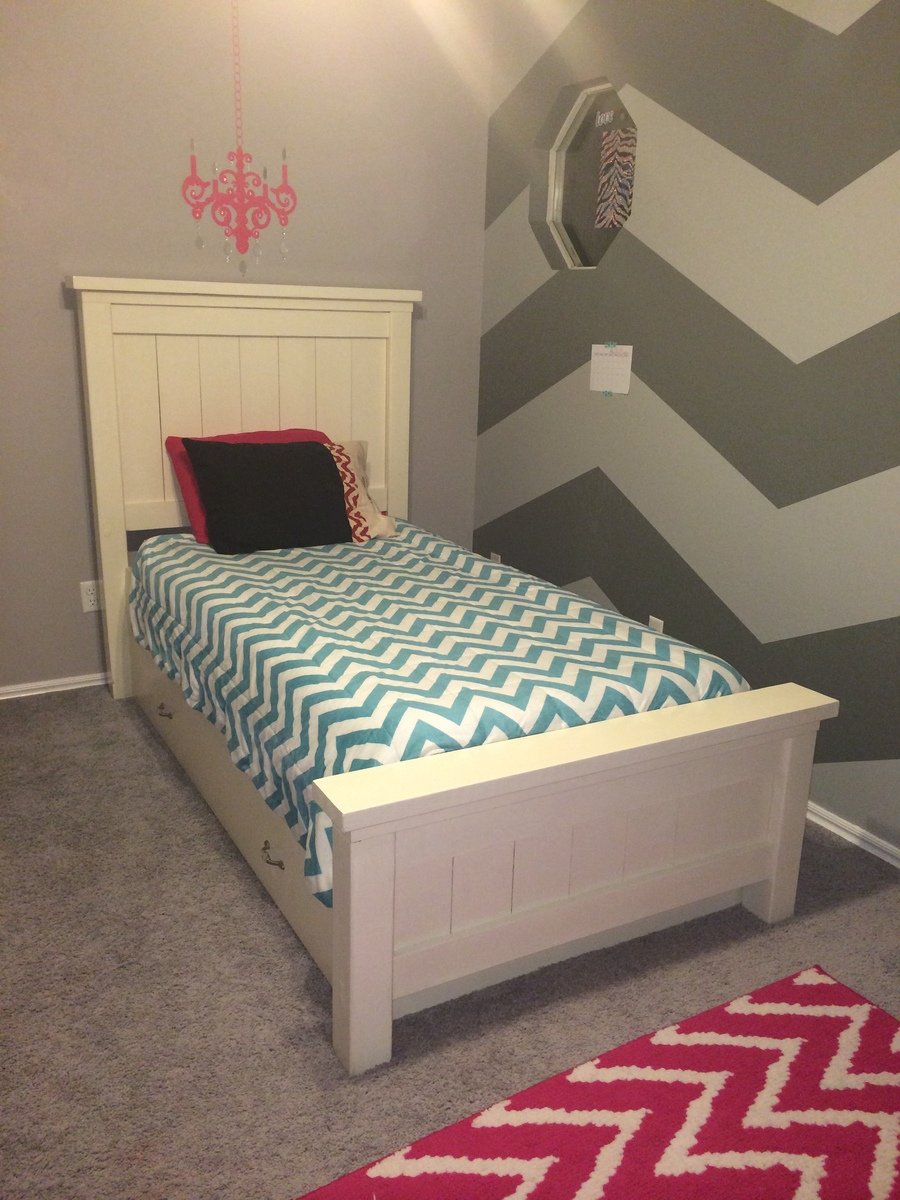
We made the traditional Twin Farmhouse bed using Ana's plans. We did modify the height of the headboard and foot board in case we decide to move the bed to under her window.
I was very particular about the sizing and placements of the sideboard/trundle. I did not want a big gap between the mattress and the trundle. Also, did not want the actual bed mattress to sit down too far into the 1X10 and look like a crib.
Very happy with the results. Thanks so much, Ana!!!
Mon, 08/18/2014 - 05:01
This looks great! I see you have carpet (as do I) did you use caster wheels? It looks like it's resting on the floor. I want t build but, I'm concerned about the ease of sliding. Tips appreciated.
Thanks in advance.
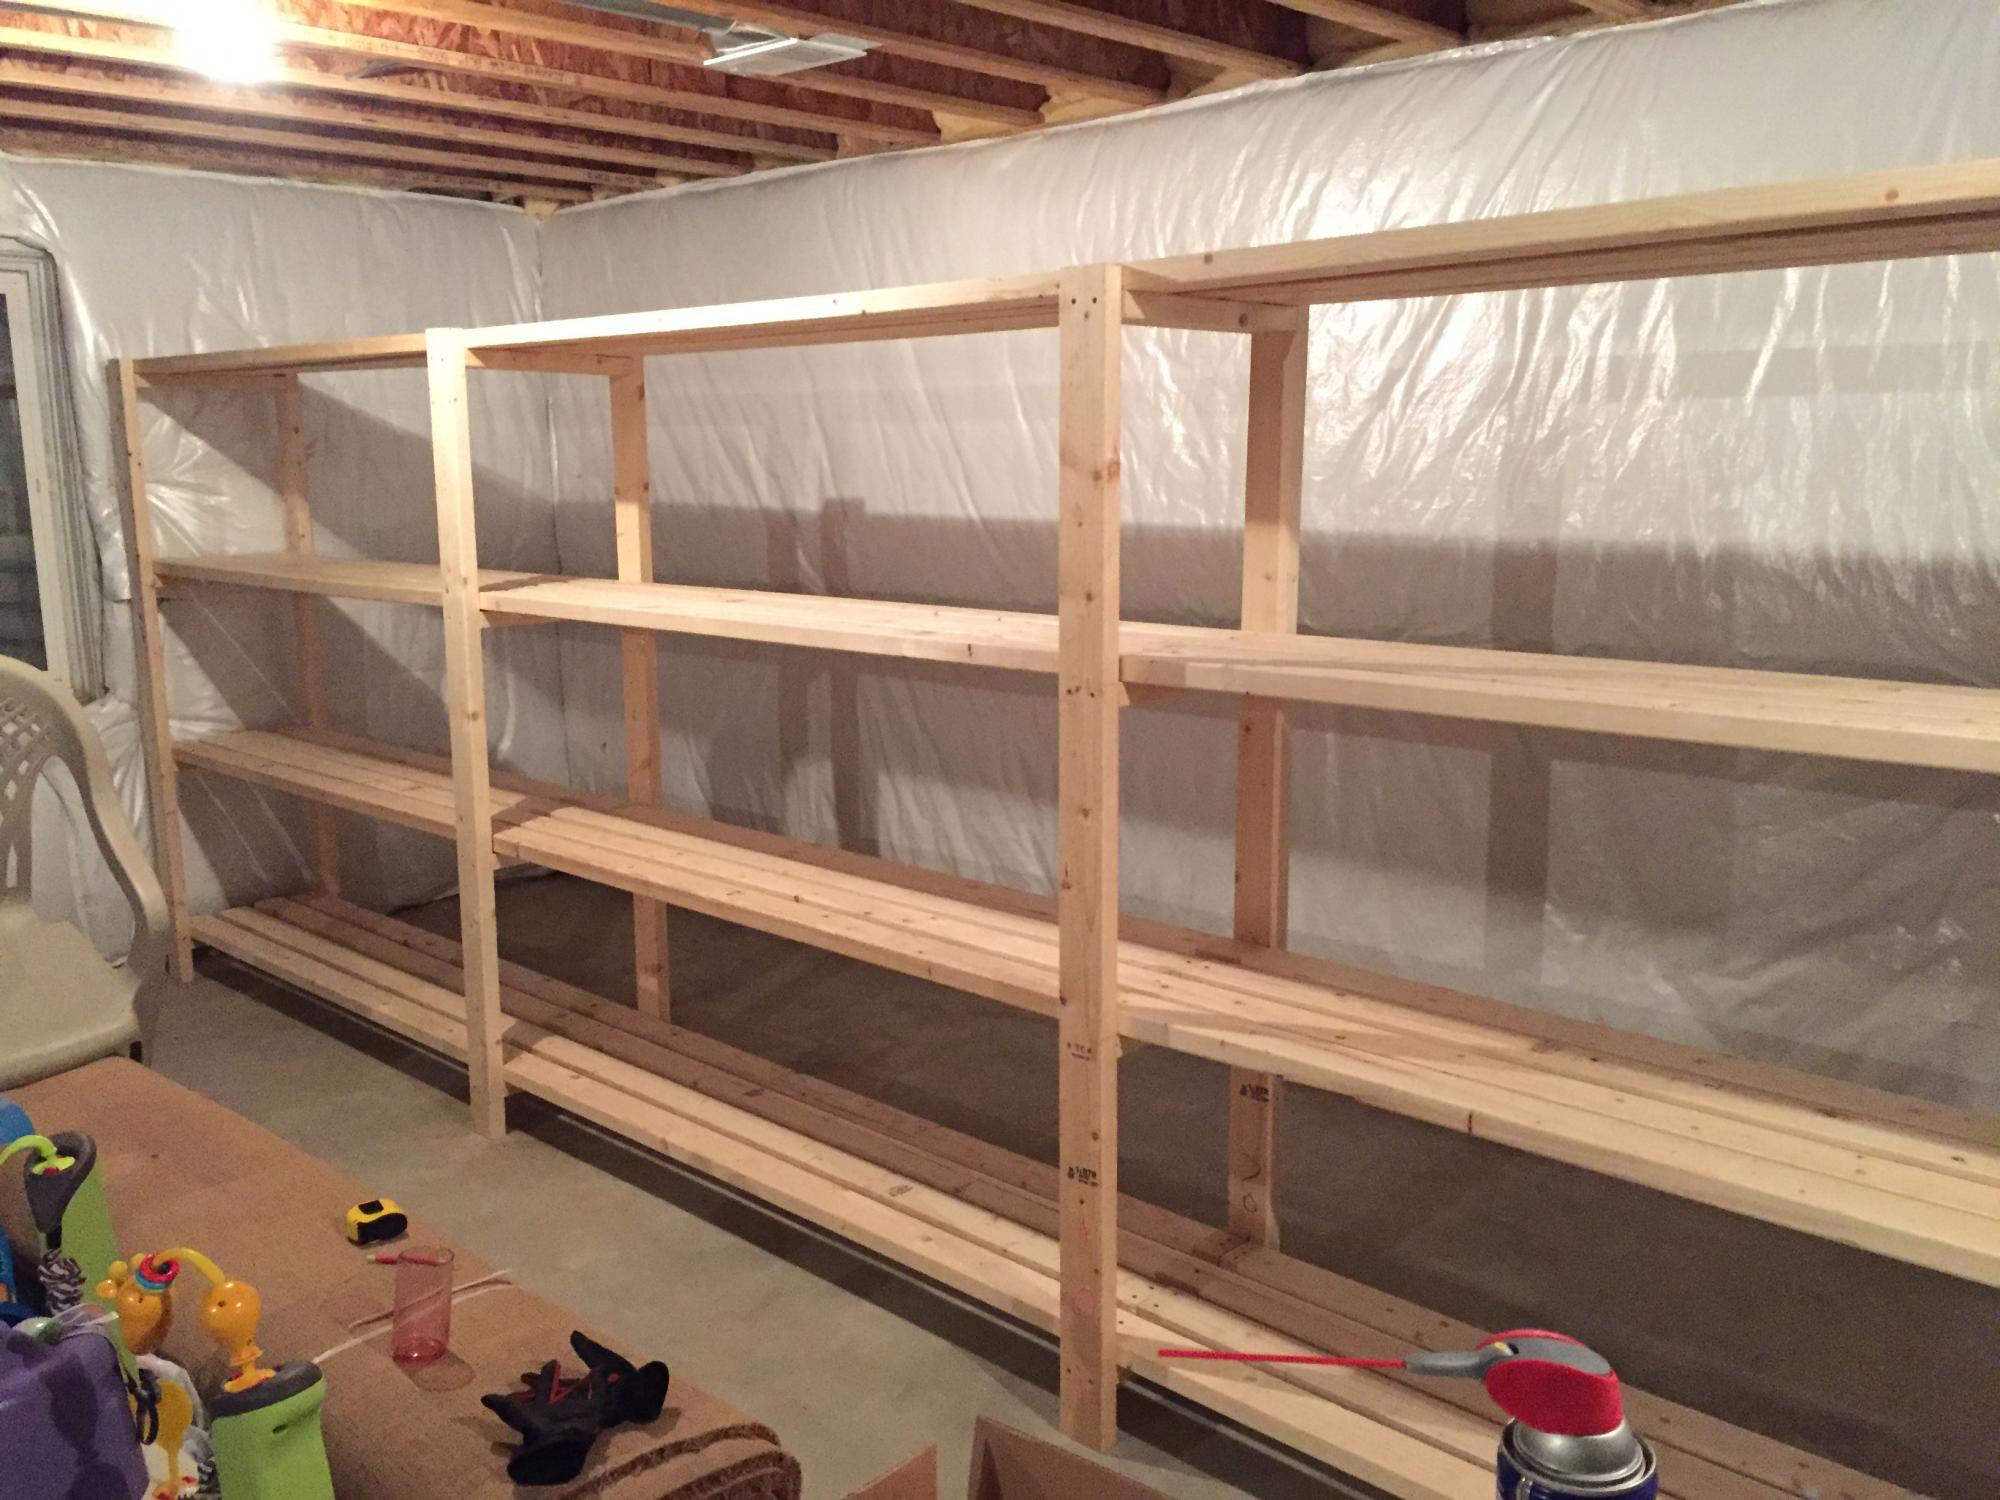
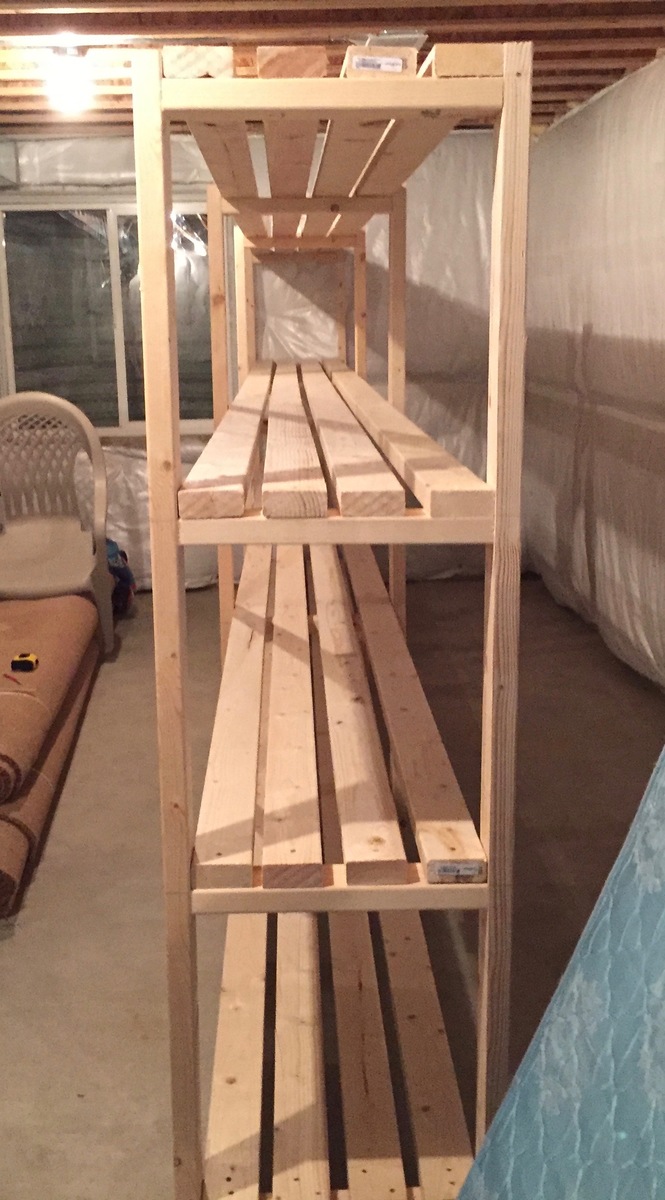
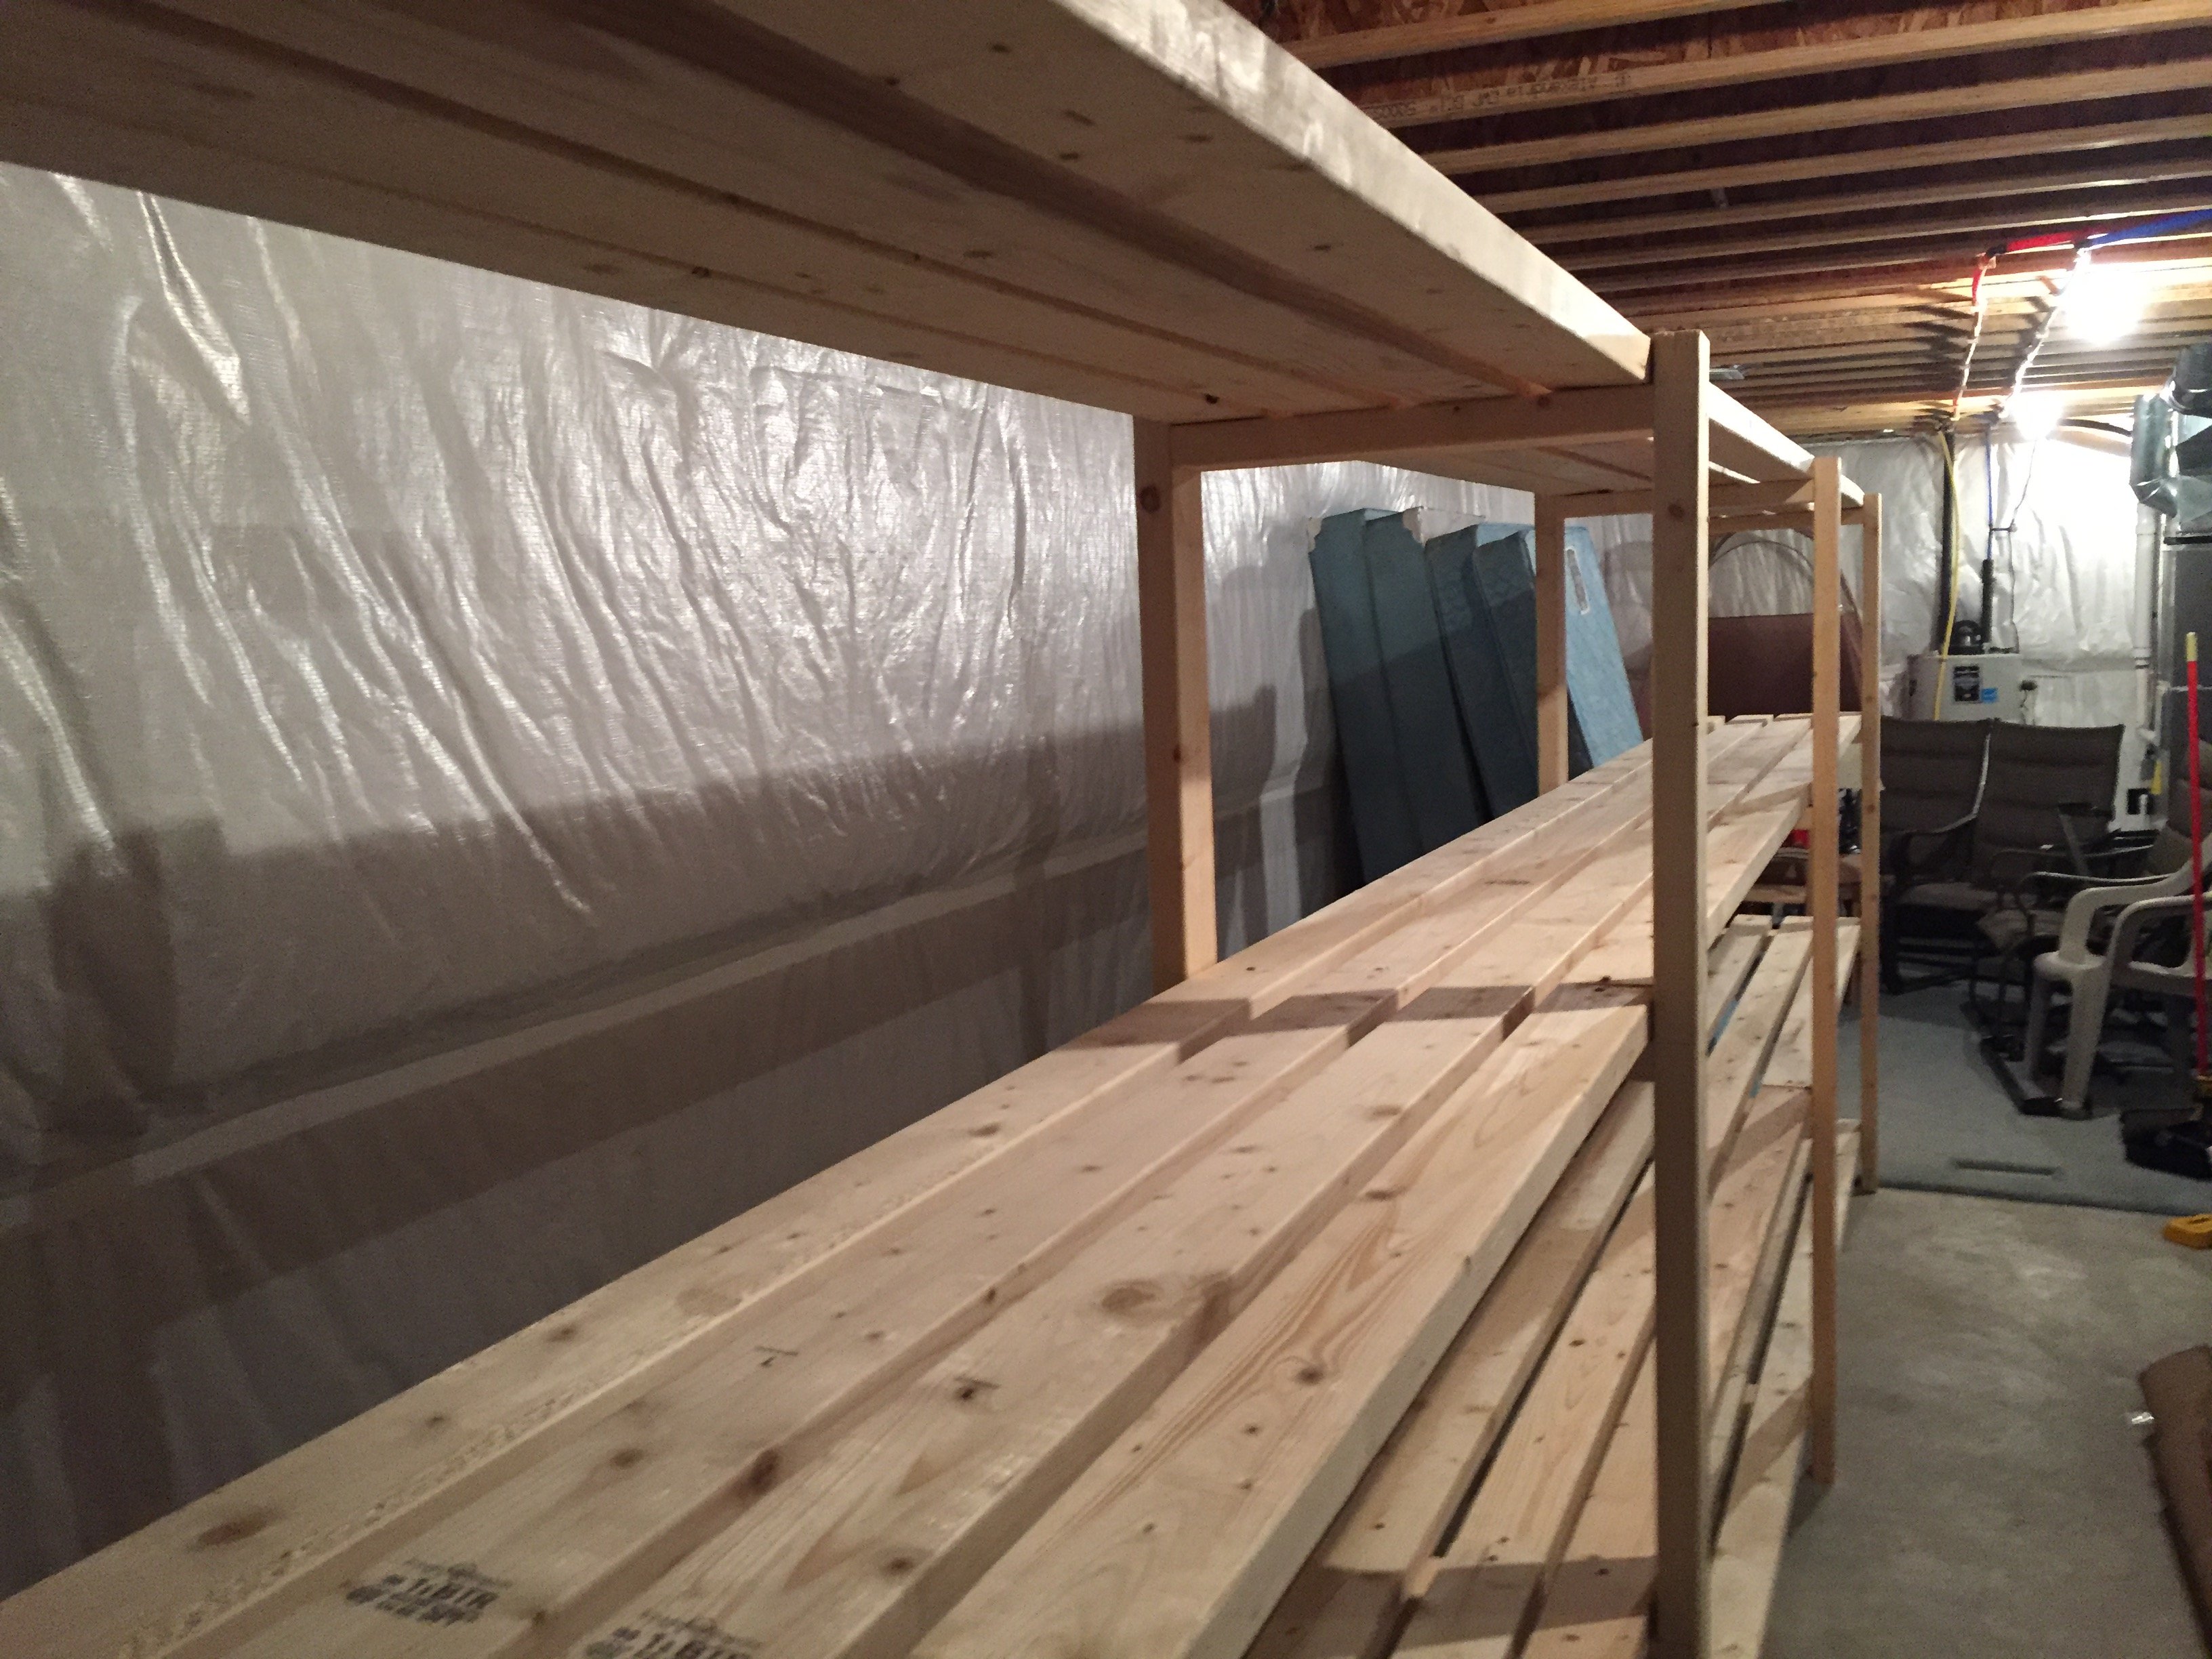
Thanks for the instructions! Here's my version. I haven't built much of anything before, but I needed it in my basement to handle kids' stuff. My version is 18 feet long. I combined a 12-foot and 6-foot 2x4 to get that length, which meant less cutting, which I had done at Lowe's (for free). I used the 6-foot 2x4s throughout the shelf to ensure it was strong (in other words, I didn't want a 12-foot "section" and a weaker 6-foot "section" added on).
I was able to get everything in my car but the ride home was slow. I also had to use my egress window to get the 12-foot boards in the basement.
Total cost for me was about $170 including a couple boxes of screws and wood glue. I could've easily spent double the cost on store-bought shelving. Thanks for the plans!
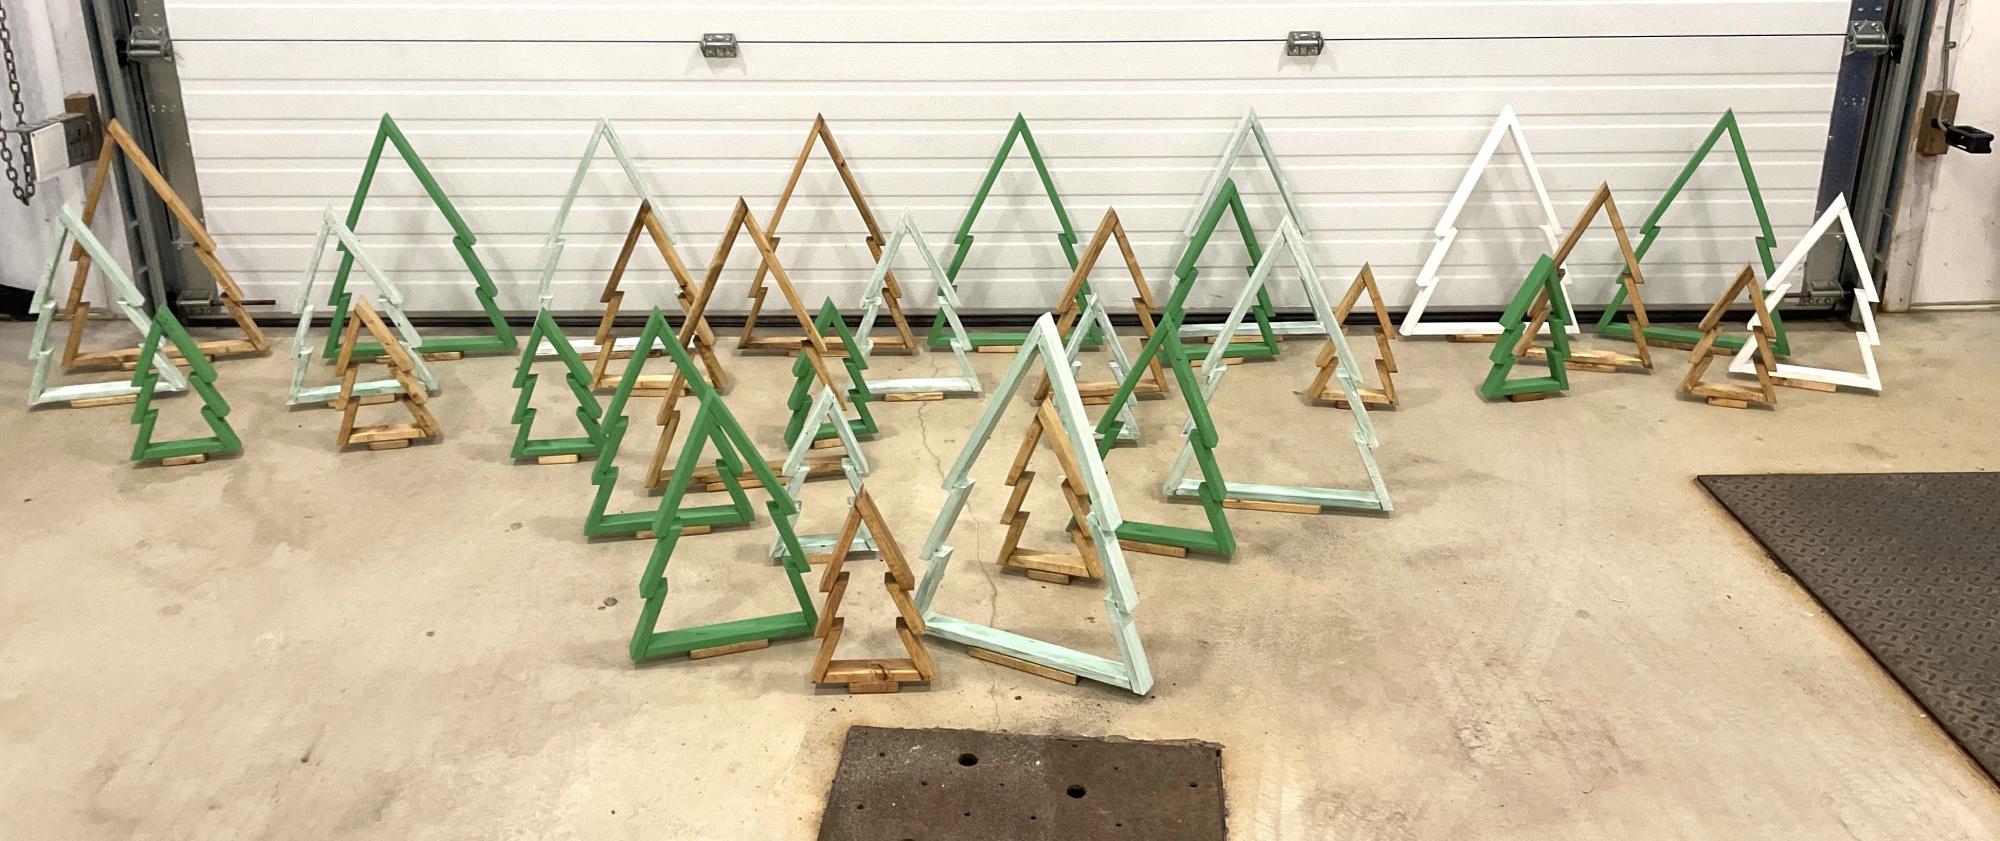
Wood Christmas Tree Decor

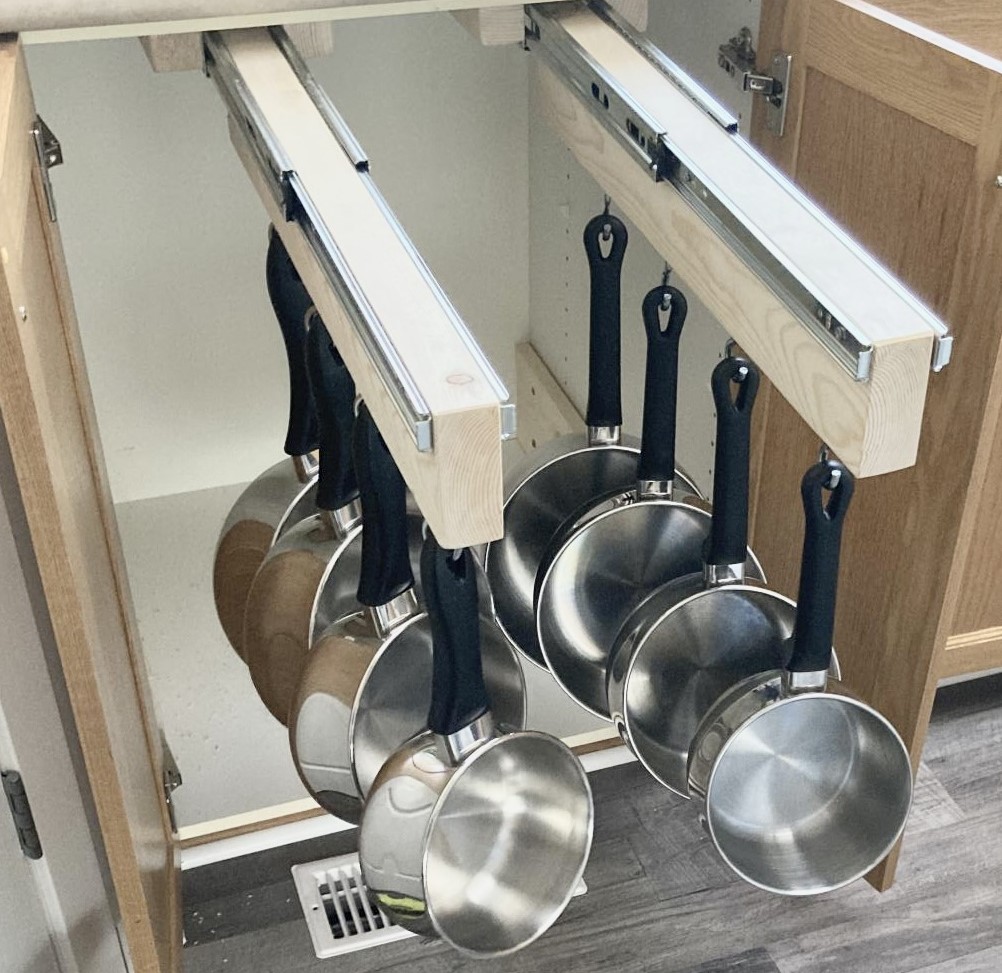
Working off your idea. Added another holder. There will be a bottom drawer for bigger stuff.
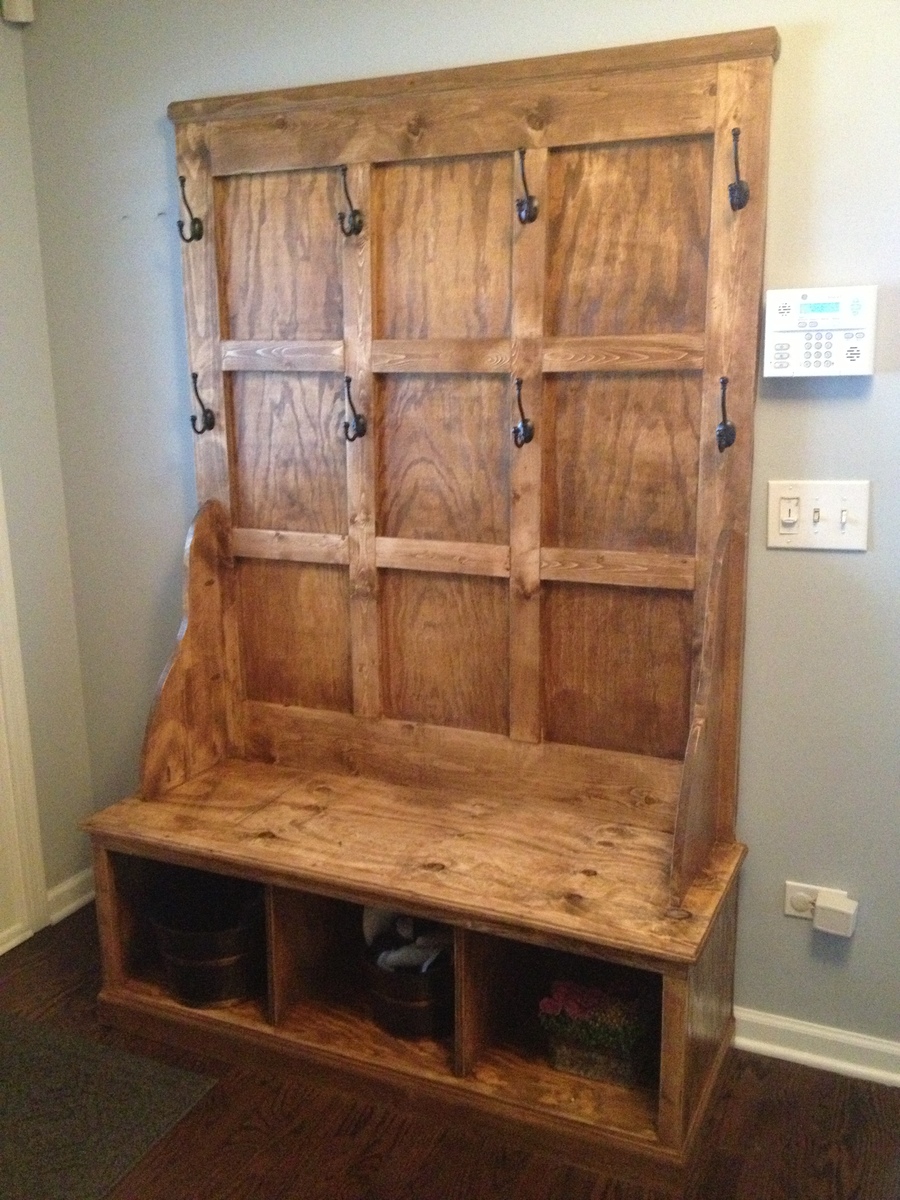
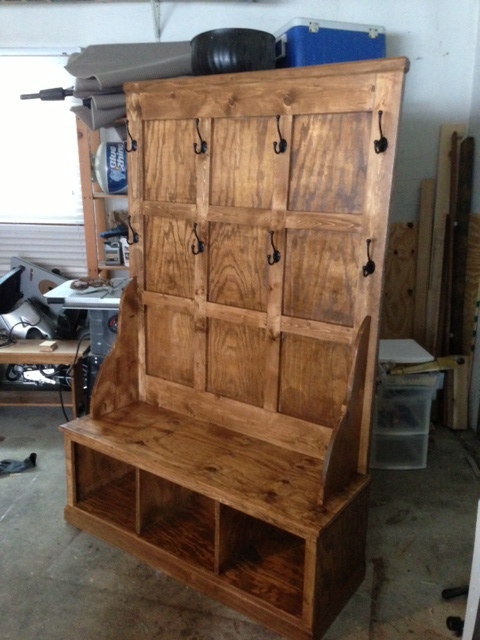
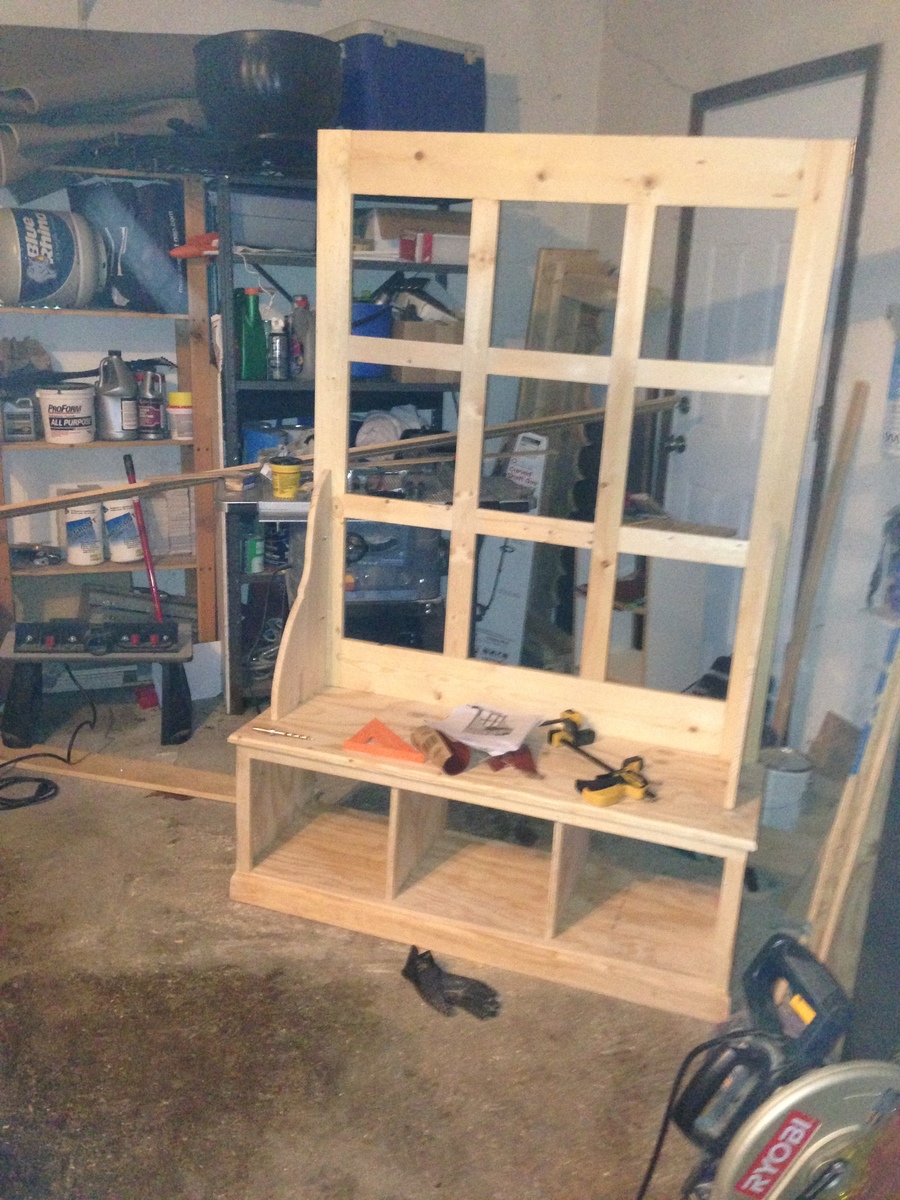
The well-laid out plans from this site made it a pleasure to build. I used pine for everything and stained with Rust-Oleum Early American. Also, I did three coats of Minwax Clear Satin Polycrylic. My wife and I decided to use 8 hooks because we have two young children who could not reach the top row of hooks.
Mon, 03/11/2013 - 13:42
This is awesome. There is something very fulfilling to have something this nice in your house that you made. Congrats
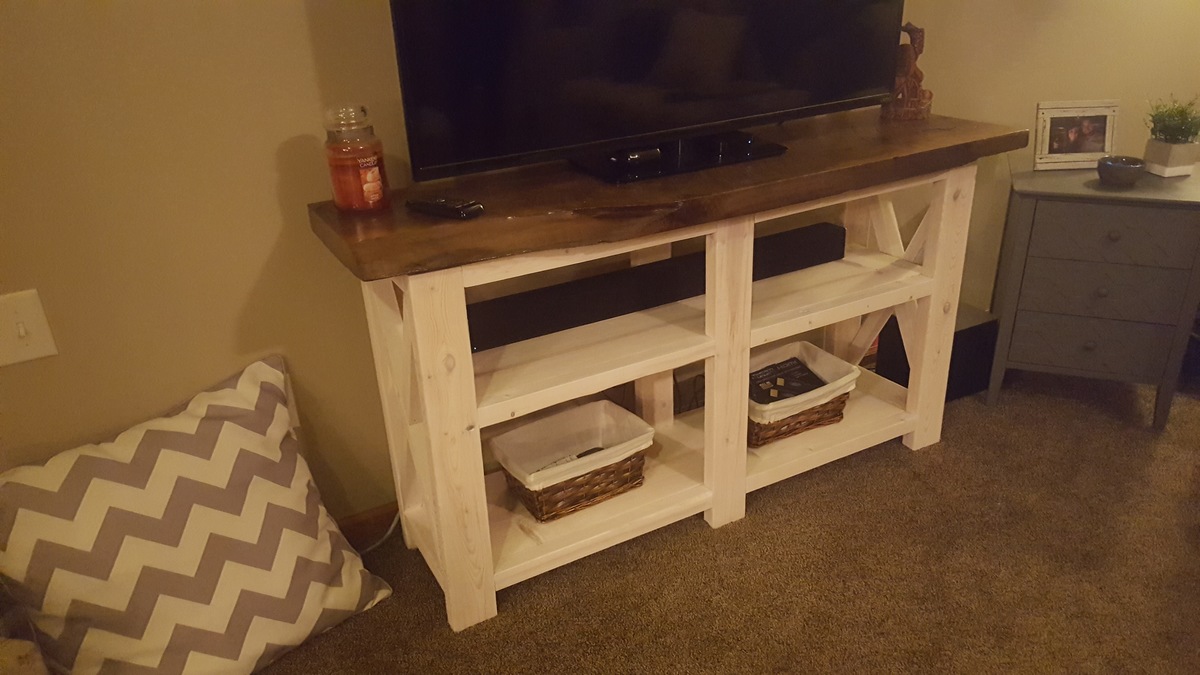
My friend and I made this together and it was my first time using the Kreg pocket hole system. I was very impressed. The base of the piece is pine finished with a white-wash stain so the grain is still visible. The top is a restored piece of walnut finished with a simple clear coat of polycrillic. Thank you so much for the design idea! My friends love it in their living room!

I built this play workbench for my son's 2nd birthday present. He (and his big sister) couldn't be more thrilled with it! It was built in one evening after the kids went to bed. Only the pegboard and top piece were attached the morning after because of the paint of course. Now my big man can work next to me in the garage all spring and summer long.
I linked a blog below which was my model of inspiration for this project but I modified it to suit the size we wanted. I used premium pine studs (3 1/2" x 1 1/2") that had a beautiful natural red hue to them and a 18" x 24" cut piece of plywood pegboard which was painted with some spare blue paint. 2 1/2" deck screws were used for all attachments and drilled flush with intention of being exposed for a rugged look. The bench measures 24" wide, 17" deep, 41.5" tall from the back with a 19.5" tall countertop.
My wife and I had a lot of fun getting creative with what to add to it.


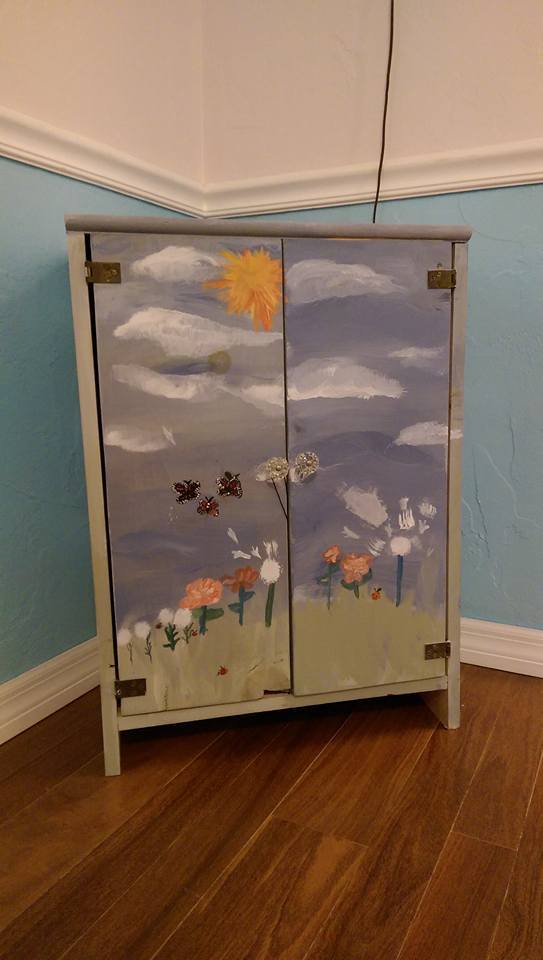
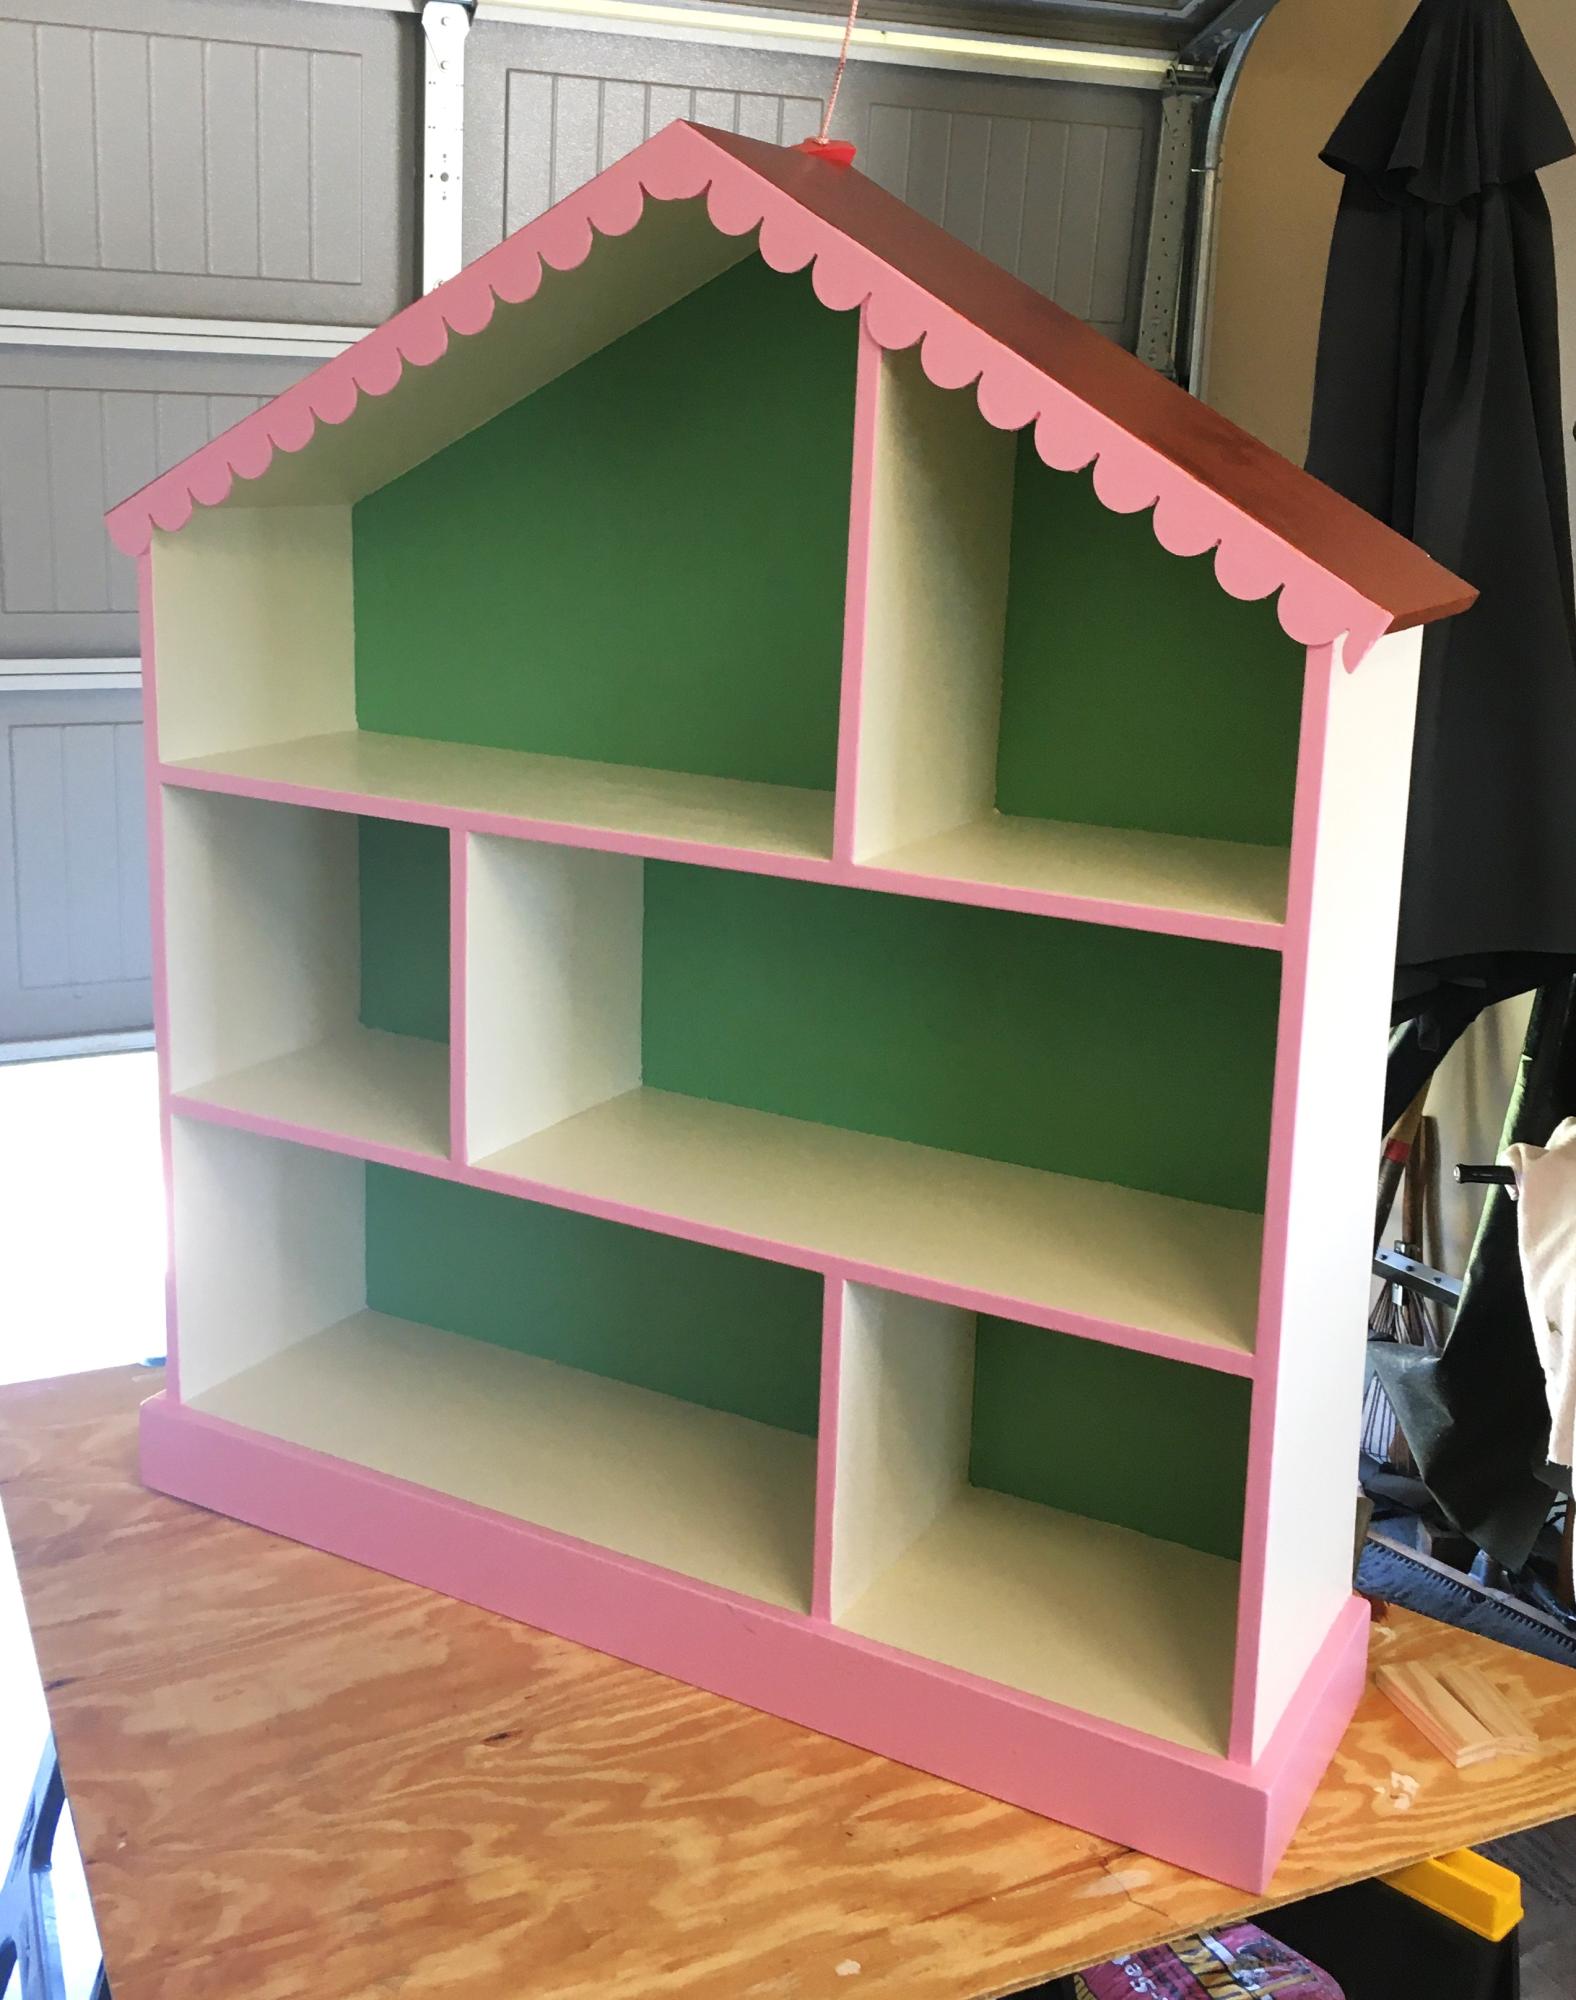
This was fun and easy. I had some of the wood already so I didn't spend that much. My girls painted it to add a personal touch. I would consider adding a magnet to help the doors stay closed a little better. Its been a couple of years and they are still enjoying this. At the time I had no idea how to make a star. Now I know it woudl be easy with a jig saw.
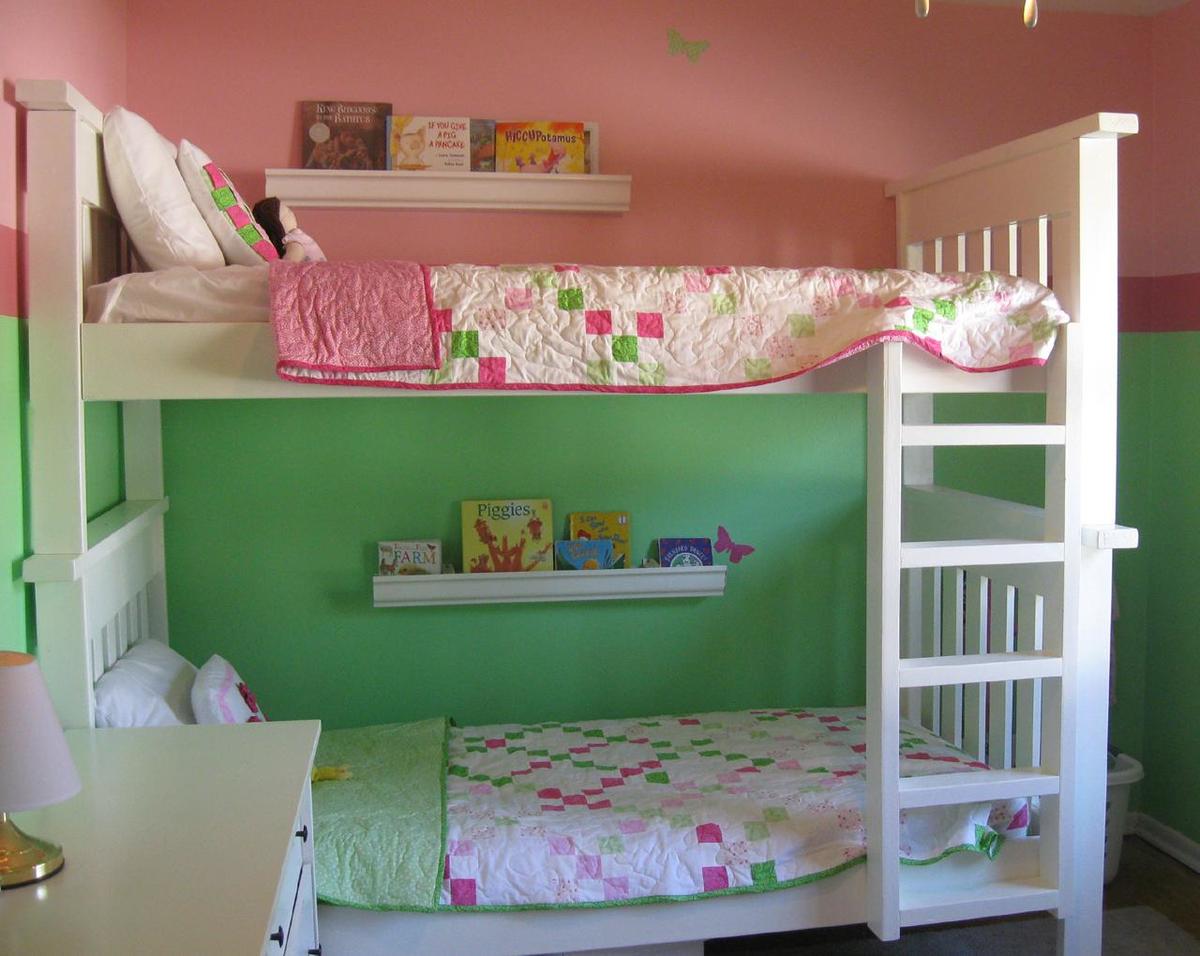
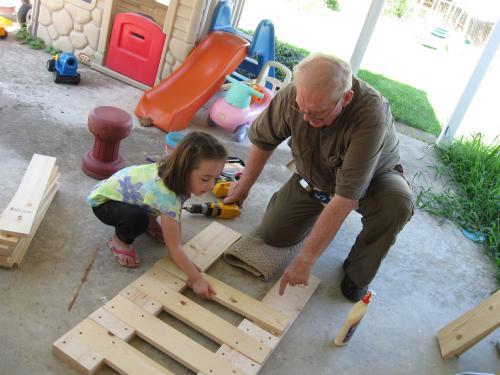
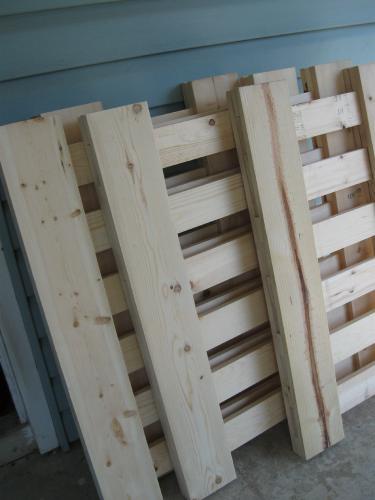
I redid this whole room for less than $600! Make sure you take your time with cuts and fitting. I did this with my father in law (my daughter even got to help out!), and it's less than perfect due to some rushing! More details on my blog.
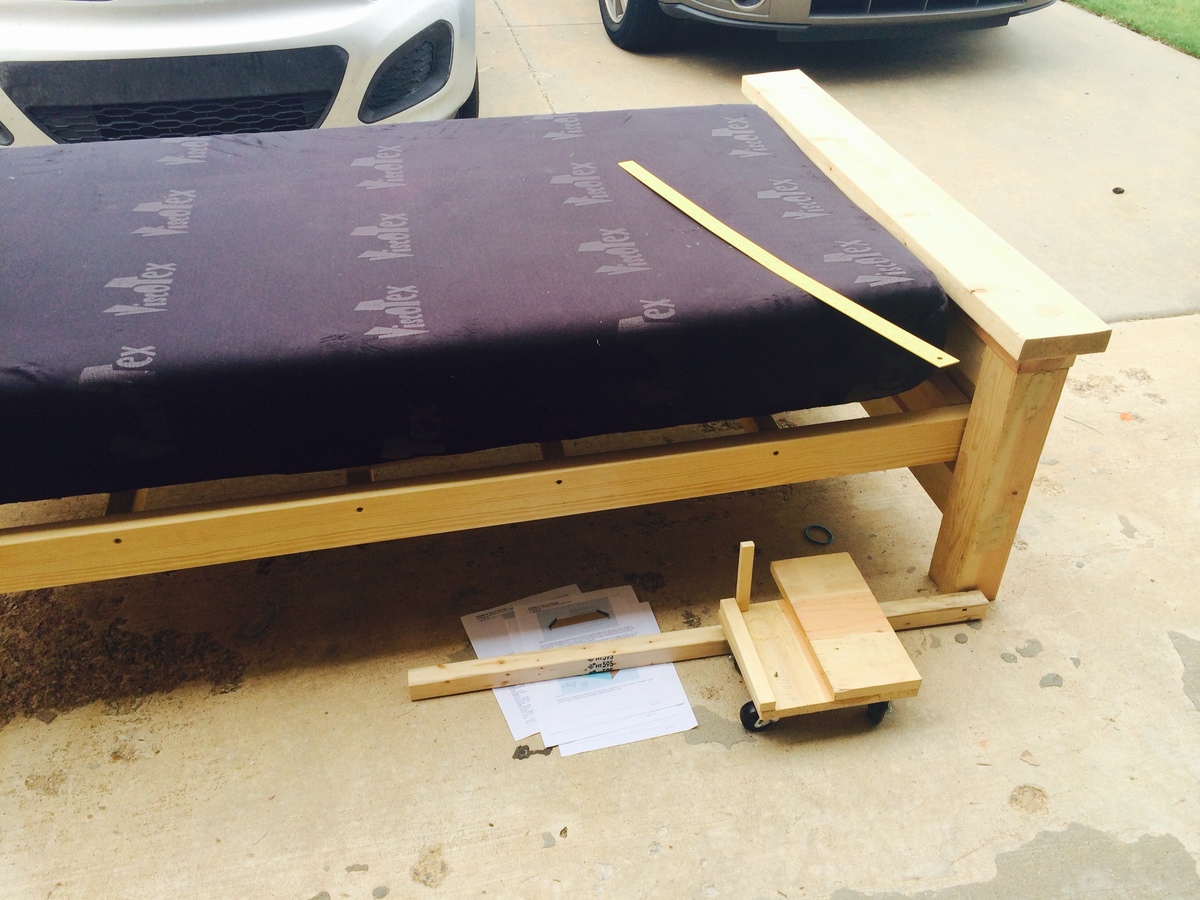
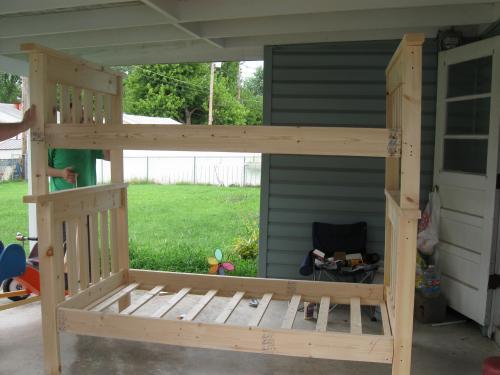
I also couldn't find any 4x4's. Instead of doubling up on 2x4's, I just used one. That allowed me to change the tops of the head/foot boards to only 48" instead of 50 1/2. You can get enough for a head and foot board out of one board this way.
After looking at a TON of bunk bed ladders online, I designed my own. Just some leftover 2x4's. The sides are 47 1/2 inches long, and the rungs are 13 1/2 inches long. It's screwed to the bunk bed from the back so you don't see the screws.
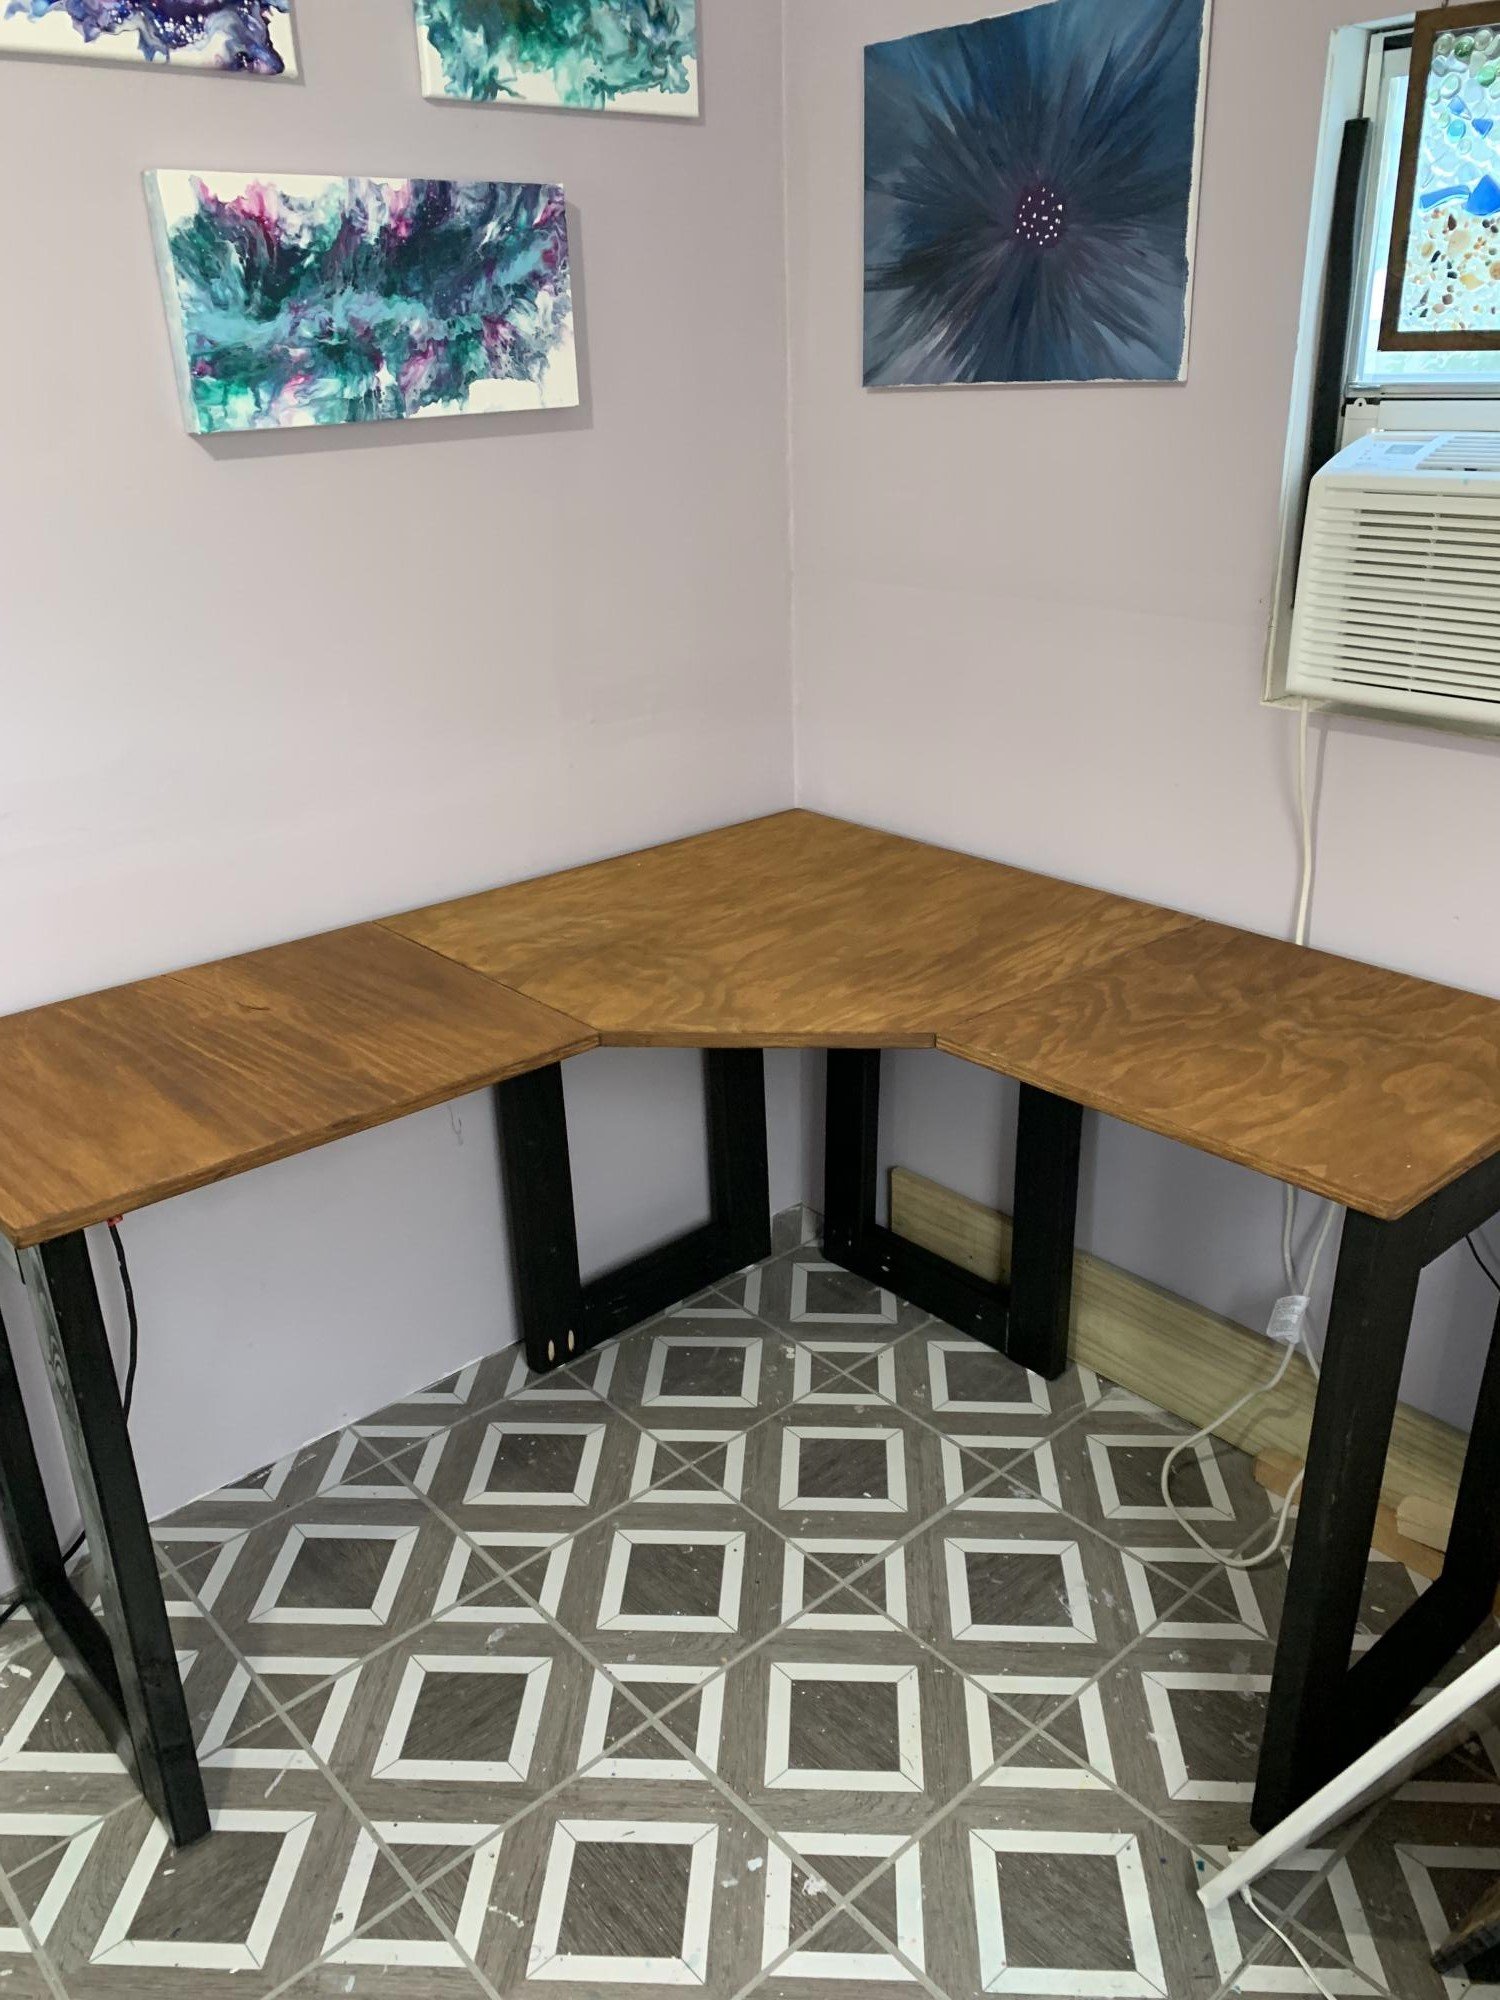
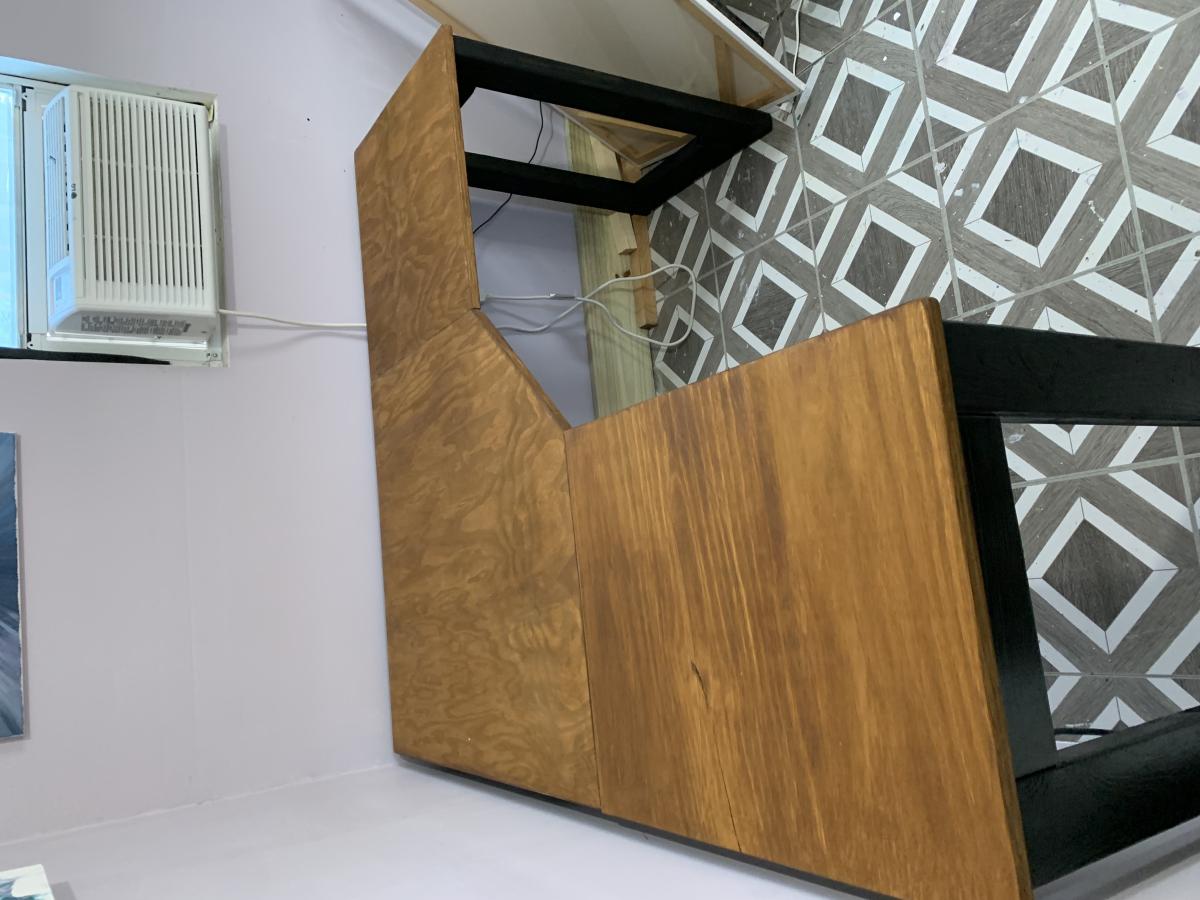
I wanted to convert my craft shed to my office after I accepted a new job and would be working from home full time. My shed is only 10x8, so I needed something smallish and functional. I modified the plans slightly and I did make a few mistakes. In the end, I think it turned out great for a 50 something grandma who likes to work with her hands!

Comments
bugheather
Tue, 02/18/2020 - 19:16
Awesome Modifications!
This is perfection! And exactly what my boys have been asking for. Any chance you have your modifications? Thanks!
Ana White Admin
Tue, 11/03/2020 - 13:49
Totally awesome!
Thanks for sharing, love your mods!