Community Brag Posts

Balin Console With Some Changes

We made this table from the original Balin Console table plans, but faced out the drawer fronts with some mitered trim and added some drawer stops inside to keep the drawers from falling out when pulled all the way.

The drawers were made with a cabinet grade plywood along with the sides and bottom of the table. We used 1x8s on the console top to get that nice wood look, where all corners and ends would be showing, but for the sides and bottom of the table, since the edges were all trimed out, the plywood worked out nicely. 

The legs seemed plenty sturdy without the extra trim, so we skipped that to get a more simple look.

Drawer handles were found at our local Home Depot.

For the finish, we stained (with Minwax ebony) the edges where we wanted distressing, then wiped on vaseline along edges and painted over in Behr Swiss Coffee (white) in matte. After drying we took sandpaper to the edges to show the dark stain through. Because we used matte paint, after everything was finished, we waxed with a clear wax and buffed for a nice shine and a smooth texture.


Pin For Later! 

Balin Console With Some Changes

Built from Plan(s)
Estimated Cost
$125 for plywood, wood pieces and knobs. We already had paint and stain.
Estimated Time Investment
Day Project (6-9 Hours)
Finish Used
Minwax ebony stain, vaseline where you want distressing, then paint Behr (matte) Swiss Coffee on top. Sand all surfaces to distress and smooth, then wax with clear wax to add shine.
Recommended Skill Level
Intermediate

Modified Clubhouse Bunkbed

Submitted by Anonymous (not verified) on Sun, 06/04/2017 - 18:39

I used the plan from the Clubhouse bunk bed and modified to look similar to a Mathy-by-Boles Treehouse Bunkbed.

Built from Plan(s)
Estimated Cost
$450
Estimated Time Investment
Week Long Project (20 Hours or More)
Finish Used
Primer and kid friendly paint. oh yeah...sanding. Lots and lots of sanding!
Recommended Skill Level
Intermediate

Full Length Mirror Sliding Beauty Storage Cabinet

Submitted by csihoratio on Tue, 07/20/2021 - 07:30

Great idea being my wife is not a hair person she really loves it.

Estimated Cost
$40
Estimated Time Investment
Afternoon Project (3-6 Hours)
Finish Used
primer and white paint
Recommended Skill Level
Beginner

Comments

DIY Closet shelving

Submitted by Ruiz1323 on Sat, 08/07/2021 - 10:22

Closet

Built from Plan(s)
Estimated Cost
180
Estimated Time Investment
Day Project (6-9 Hours)
Finish Used
Spray paint
Recommended Skill Level
Beginner

Comments

Cal-King Storage Bed

Submitted by Chris 1975 on Thu, 04/25/2013 - 12:03

I loved the bed by plan, and now love it more that I have built it.

Estimated Time Investment
Weekend Project (10-20 Hours)
Recommended Skill Level
Beginner

Beginner farm table

Absolutely love how this table turned out! I slightly modified the length to accommodate our space. Definitely a beginner friendly project. I used farrow and ball studio green for the base and just poly on the top.

Comments

Kitchen Bar with Drawers

Submitted by Anonymous (not verified) on Sun, 09/12/2021 - 16:30

I decided to demo our old pantry and build a counter height bar in its place. I used Ana’s mudroom bench plans and added an additional drawer to the length and 2 more drawers to the height, making a total of 12 drawers. I also used Ana’s video on sizing drawer faces https://youtu.be/AlvlrPxXGUw
—at least for the bottom 4 drawers. I didn’t find that video until I’d completed the first 2 rows of drawers and they definitely require some tweaking still.
I added some moulding to the back and sides with 1/2” plywood ripped into 2.5” strips to complete the shaker look. Then I had a quartz top fabricated and installed.

Built from Plan(s)

Comments

Height Chart

Submitted by MMTruncale on Thu, 05/09/2013 - 08:36

We bought the house my husband actually grew up in. In the garage, on the wall, is theire family's height chart. When they moved taking it with them wasn't really do able. So, for Mother's day we wanted to give his mom a NEW (relocatable) height chart for her grandbabies.

One long board, another small board to insert at each foot mark, some house address numbers, and two different colors of stain, and we had what we wanted.

My husband made this in no time.

Estimated Cost
$15ish
Estimated Time Investment
An Hour or Two (0-2 Hours)
Finish Used
Spray Stain. (It's the best and easiest stain EVER)
Recommended Skill Level
Starter Project

Children’s Stool

Submitted by Anonymous (not verified) on Mon, 10/04/2021 - 13:19

This was a gift for my goddaughter along with a keyboard for her third birthday! I love the way it turned out, and it fits perfectly in with the animal theme in their playroom!

Built from Plan(s)

Comments

Farm House Table

Submitted by Luke2220 on Sat, 05/11/2013 - 07:22

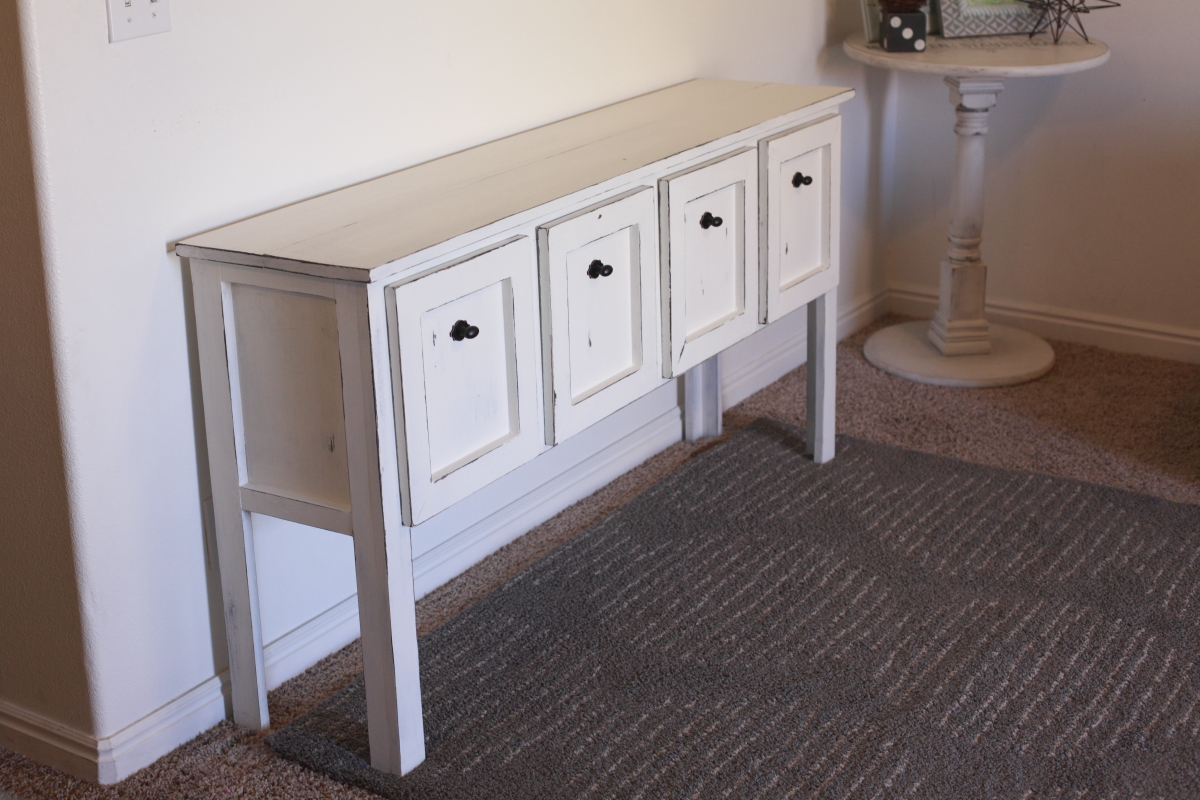
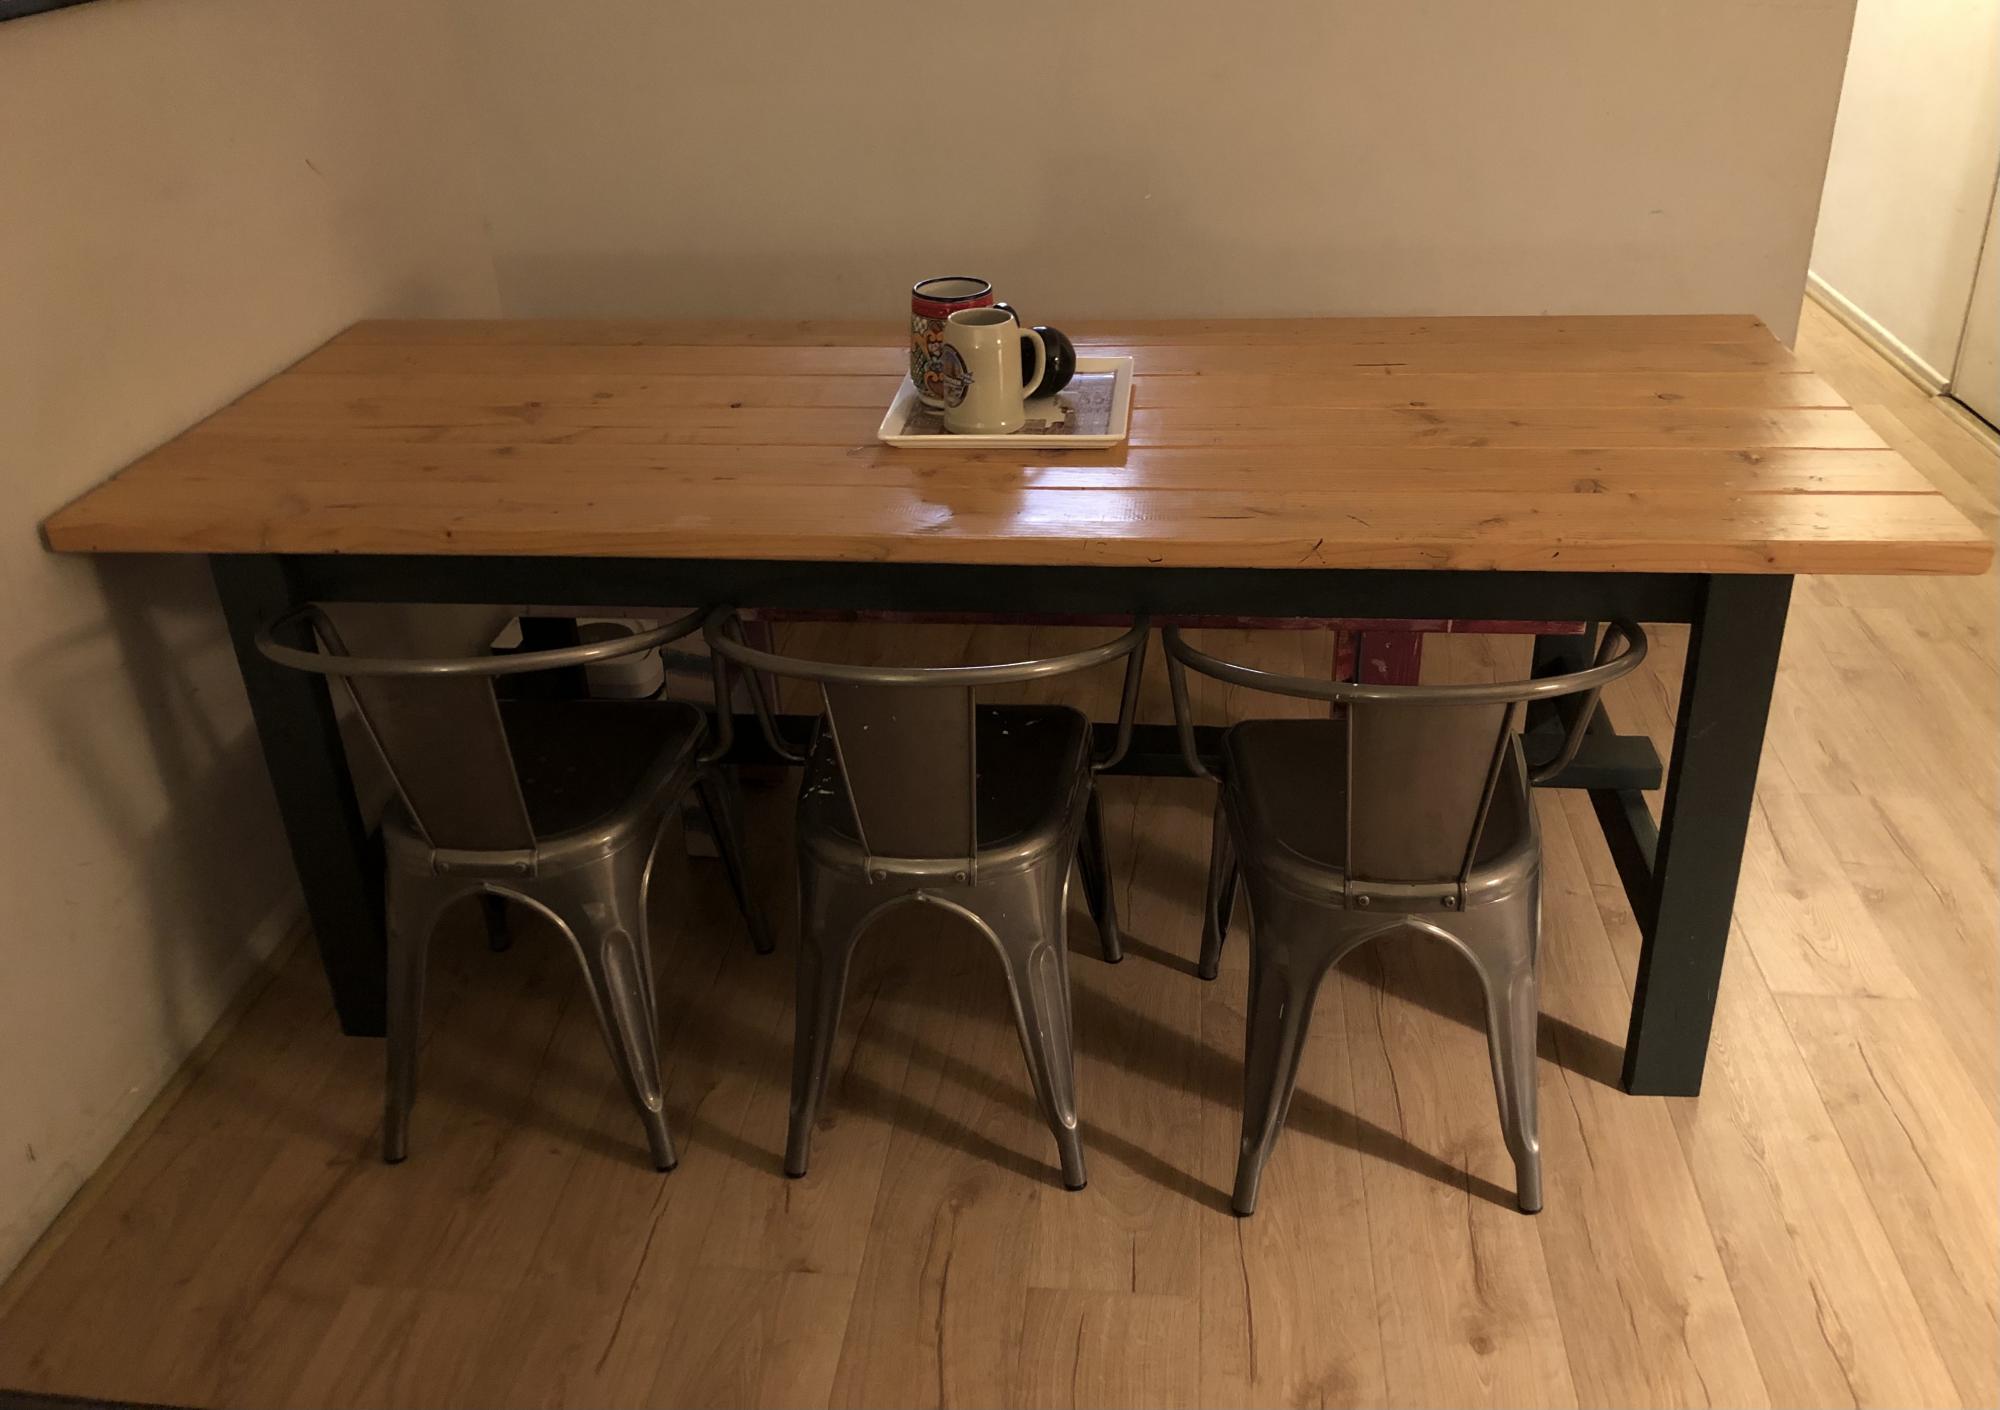
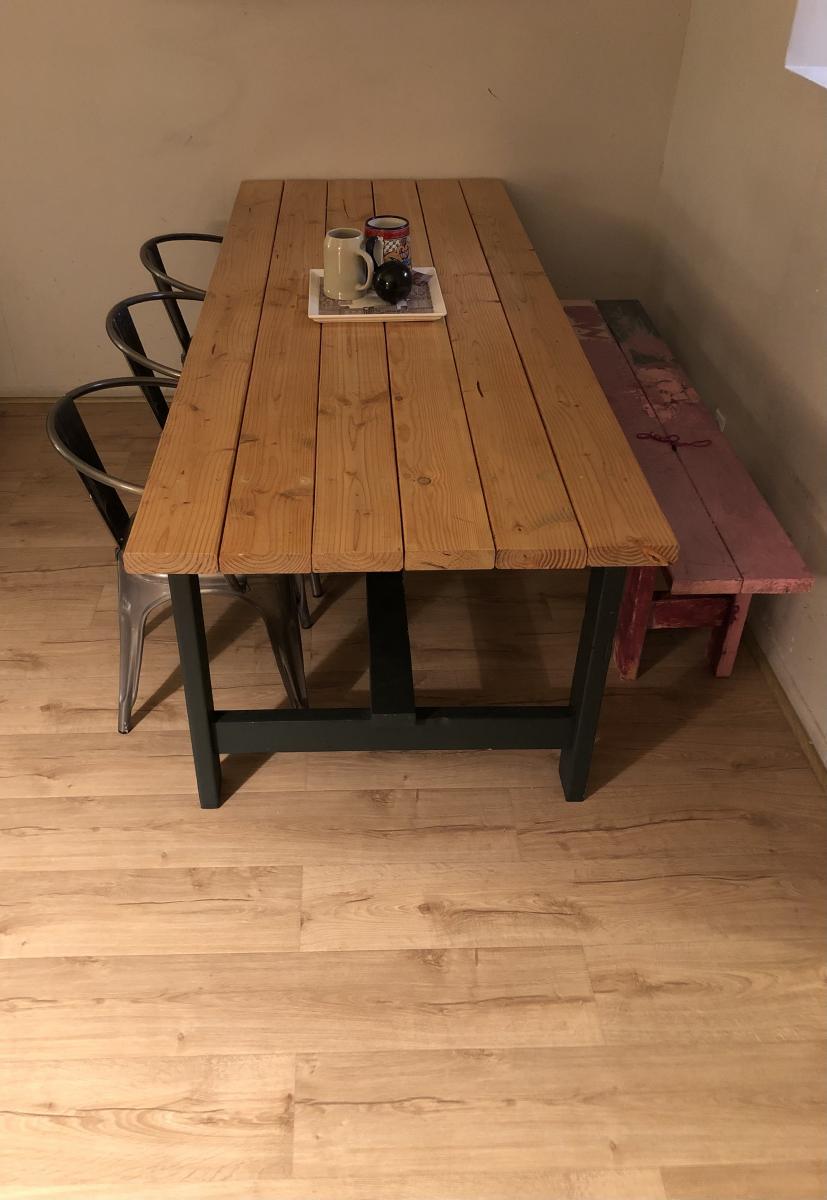
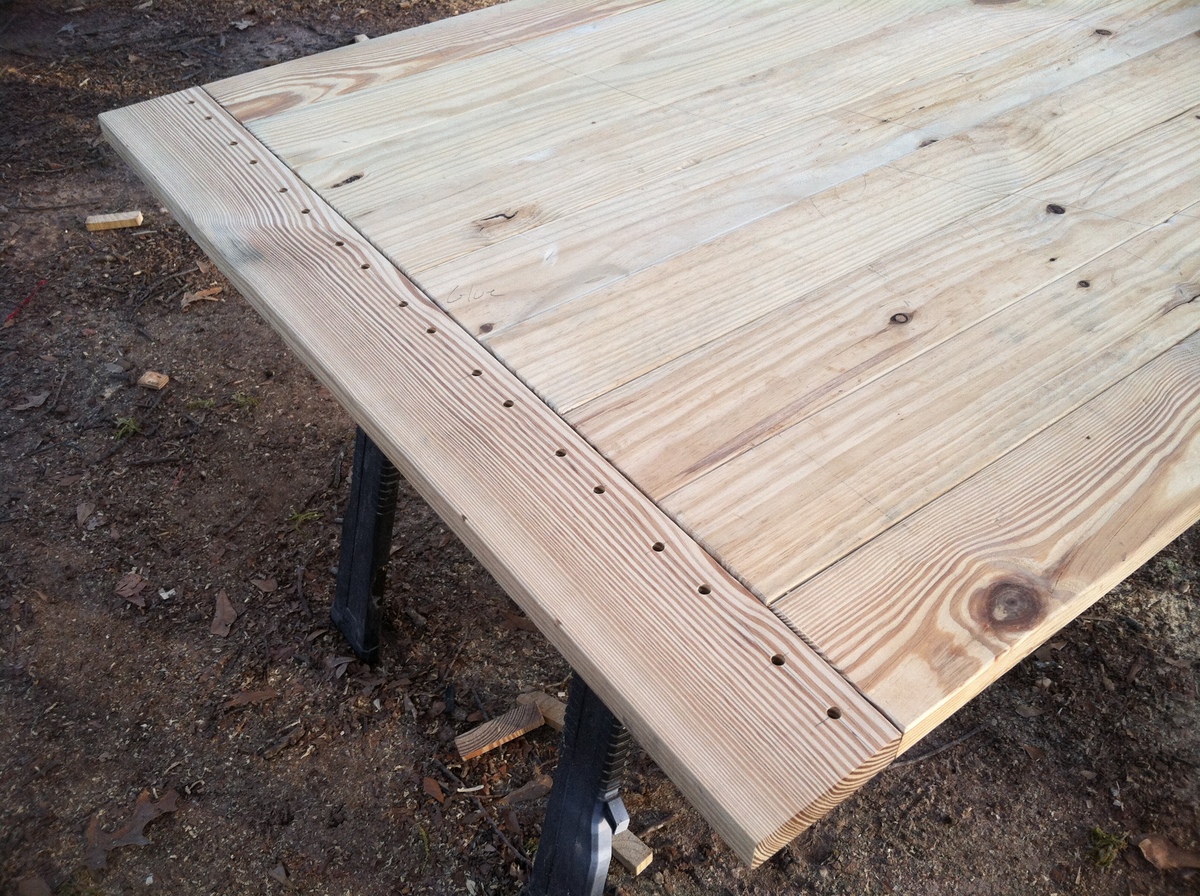
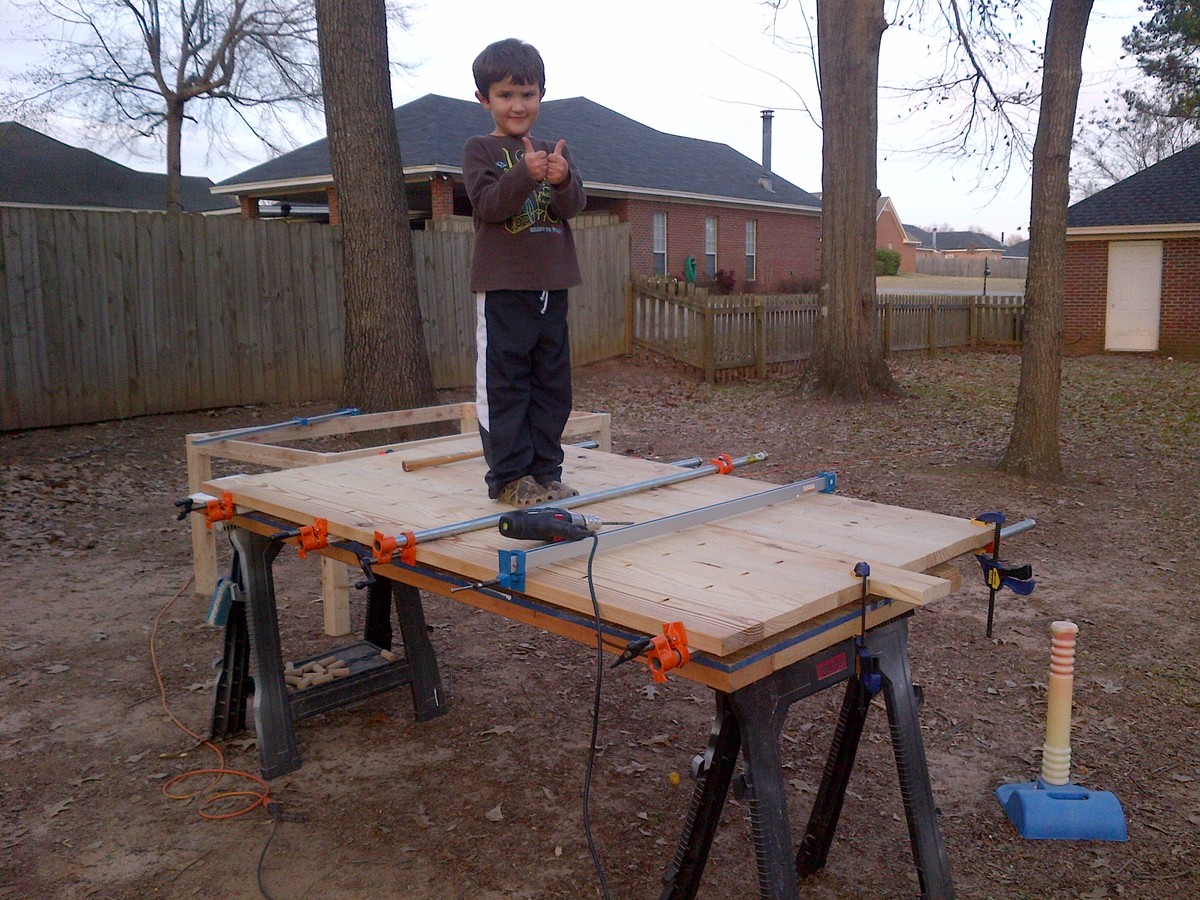
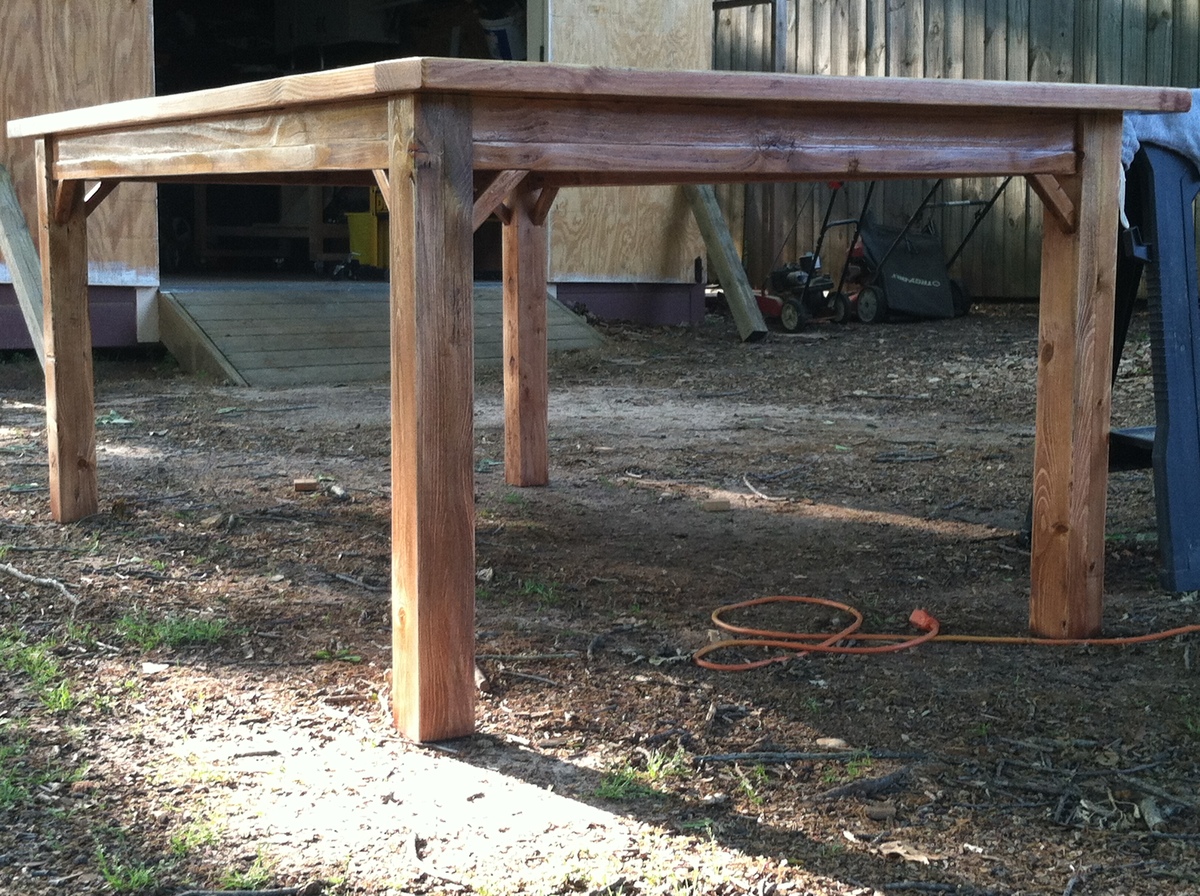
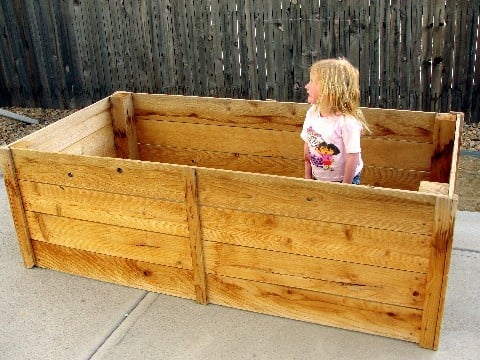
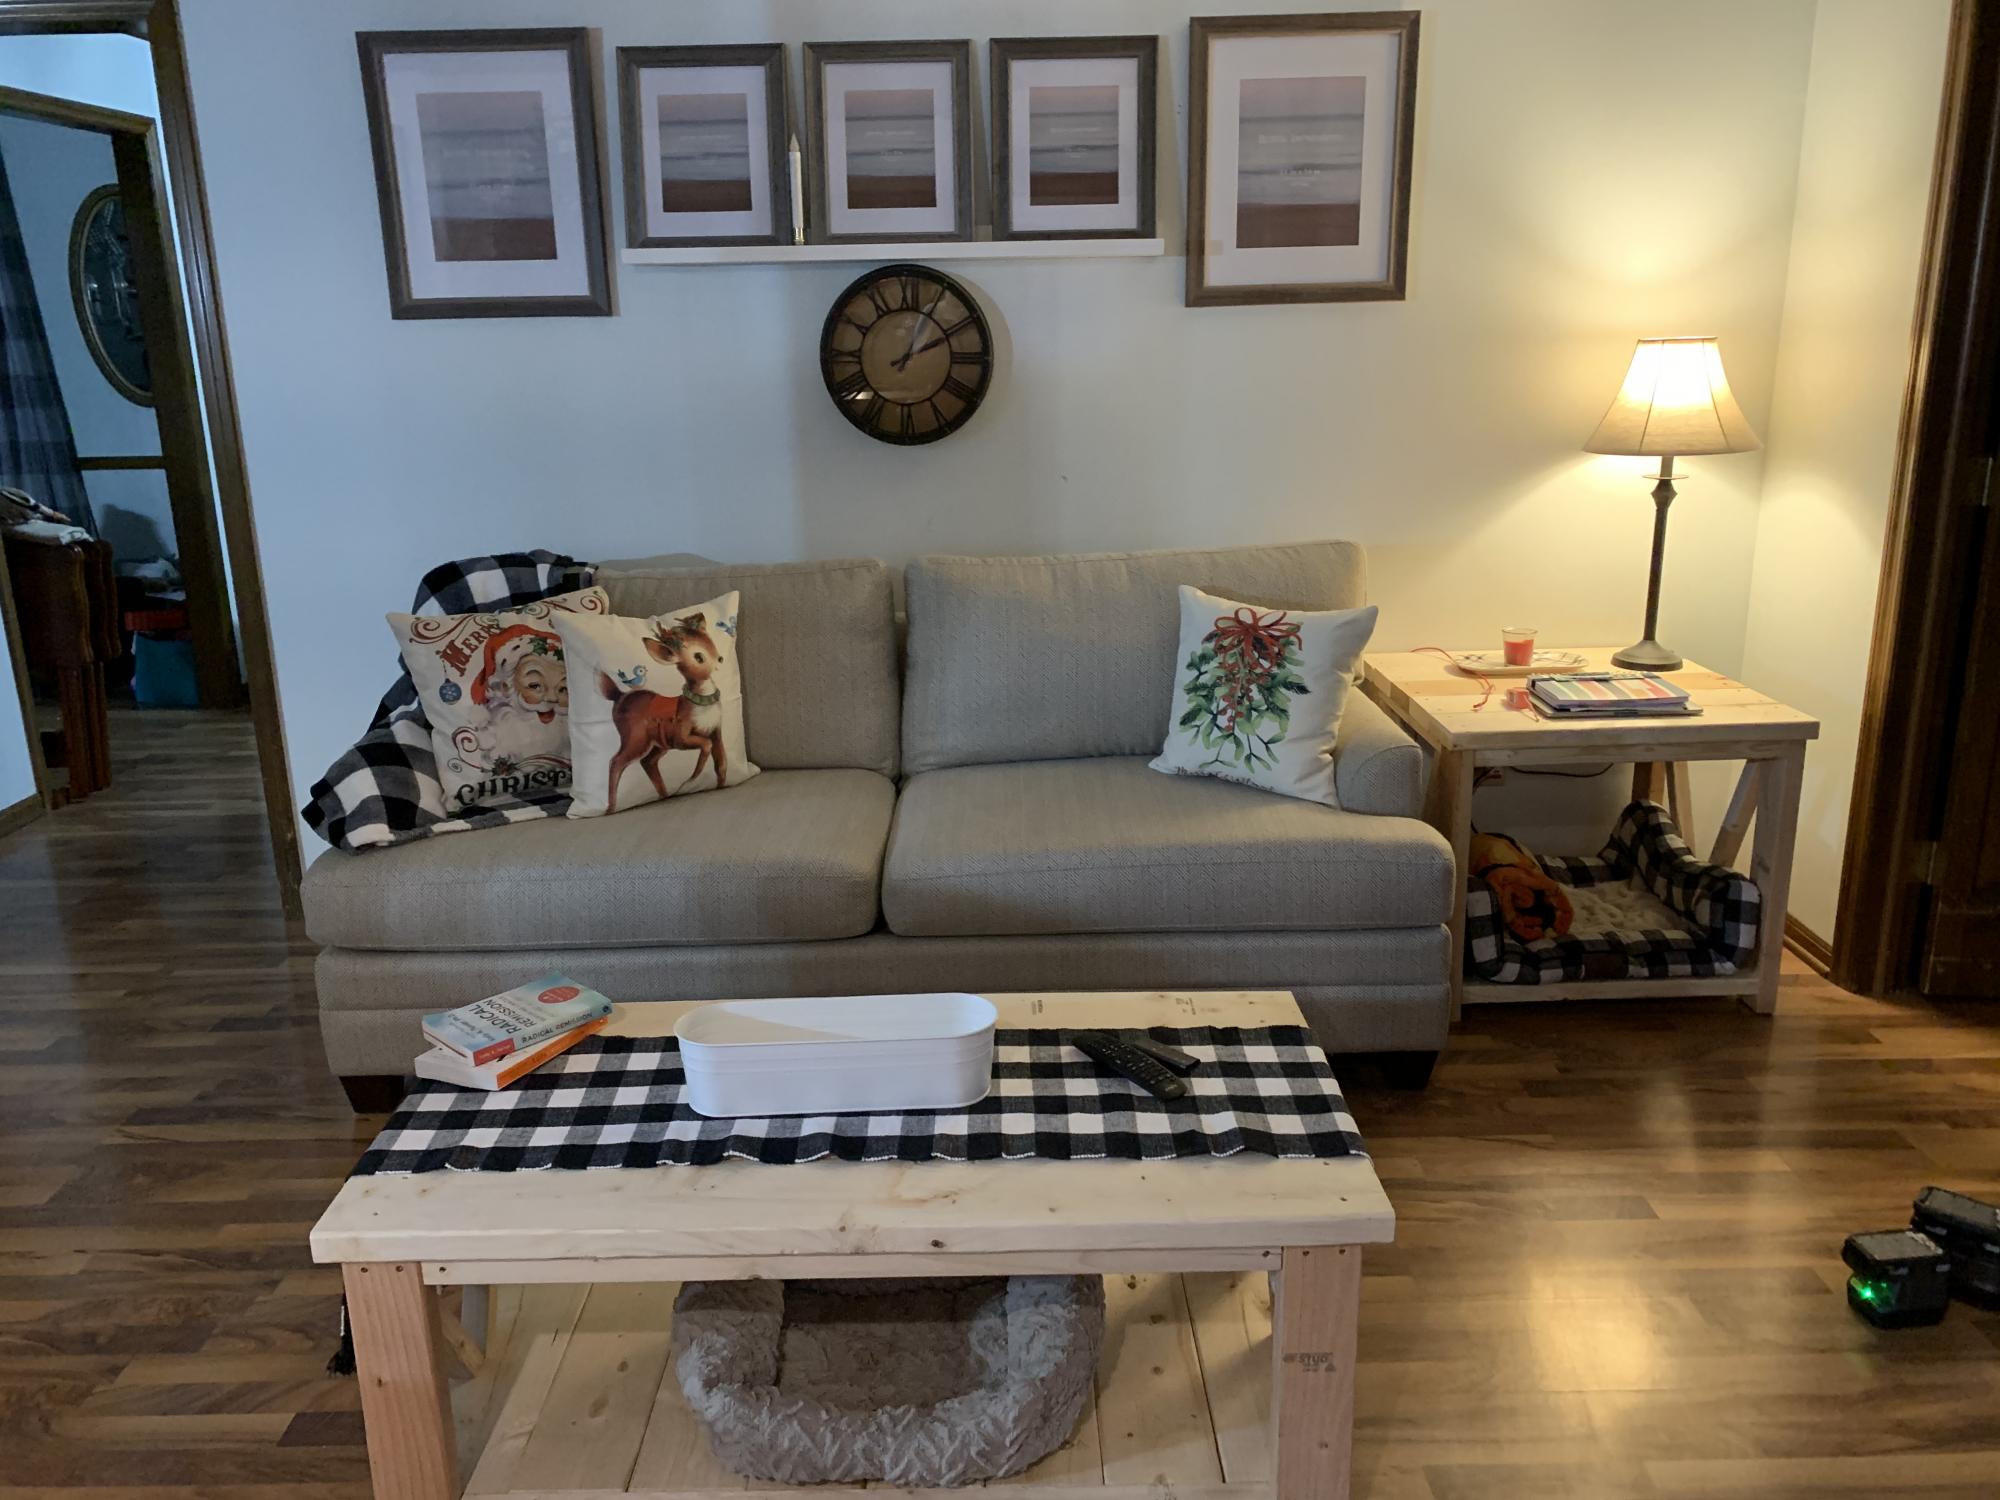
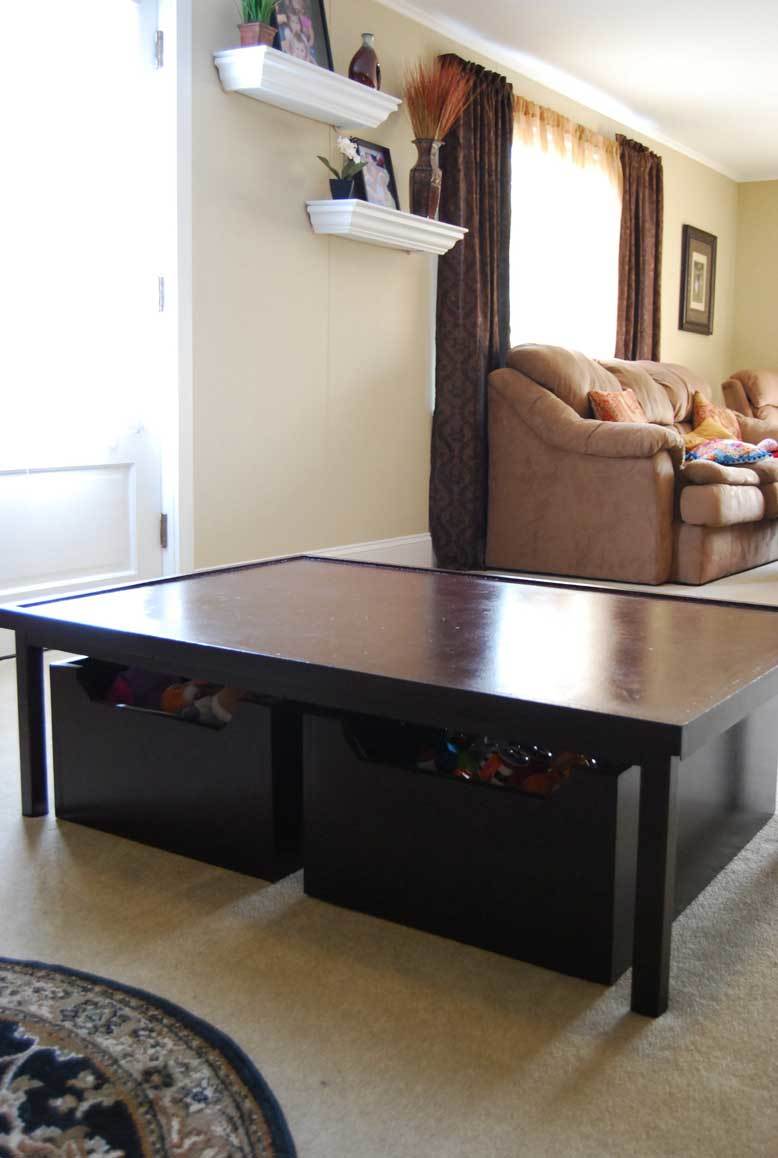
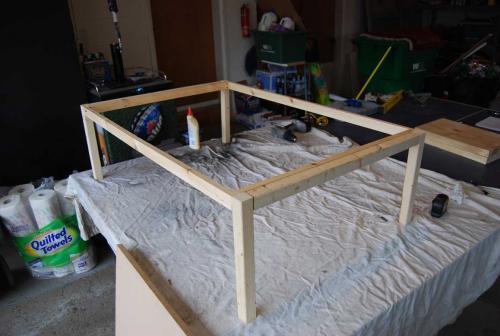
My wife and I love this table: http://www.woodlandcreekfurniture.com/graphics/DT00100NEW.pdf so I took the Farmhouse Table plan and modified it just a little bit. I used pocket screws to join the table top and eventually wound up installing 2x4 runners on the underside to sturdy the top even more. I also used my son to help keep the boards flush while I screwed them together. He though it was wonderful to help his dad out this way.

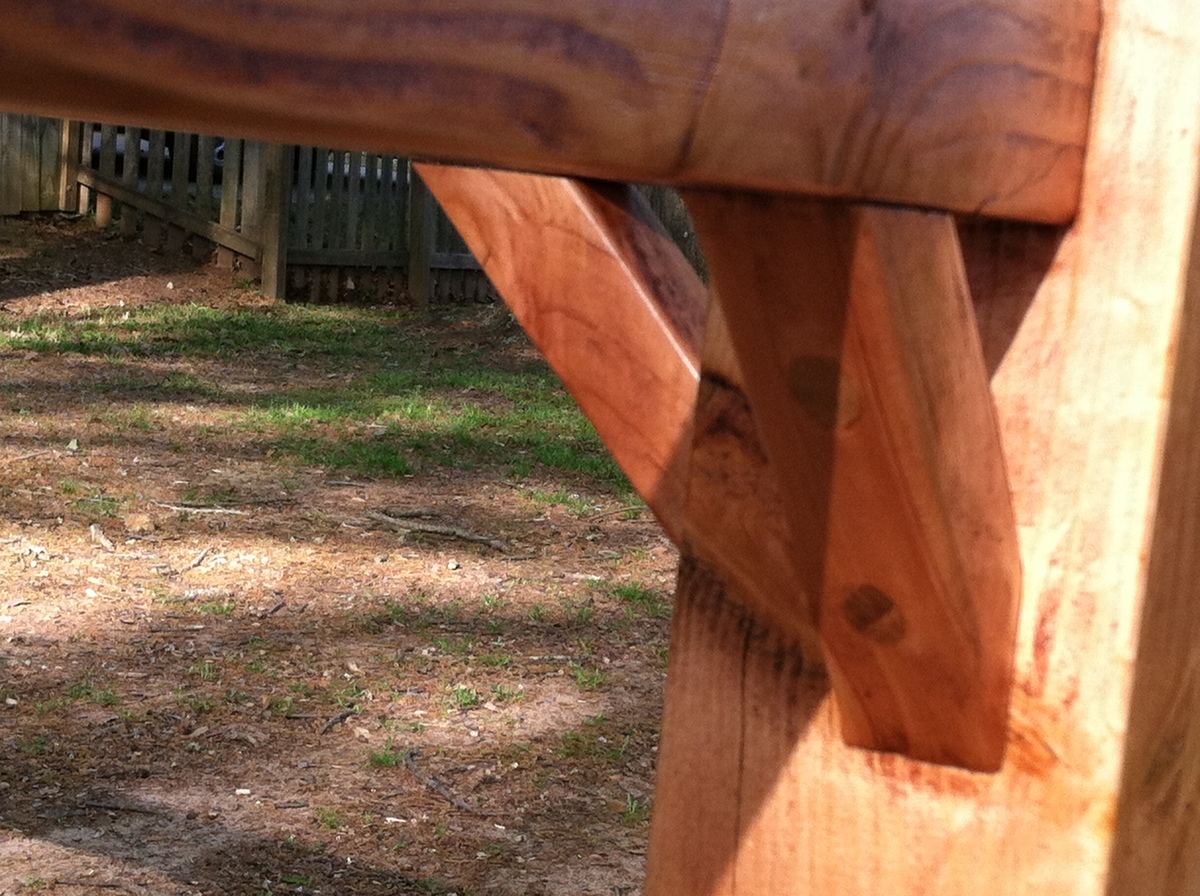
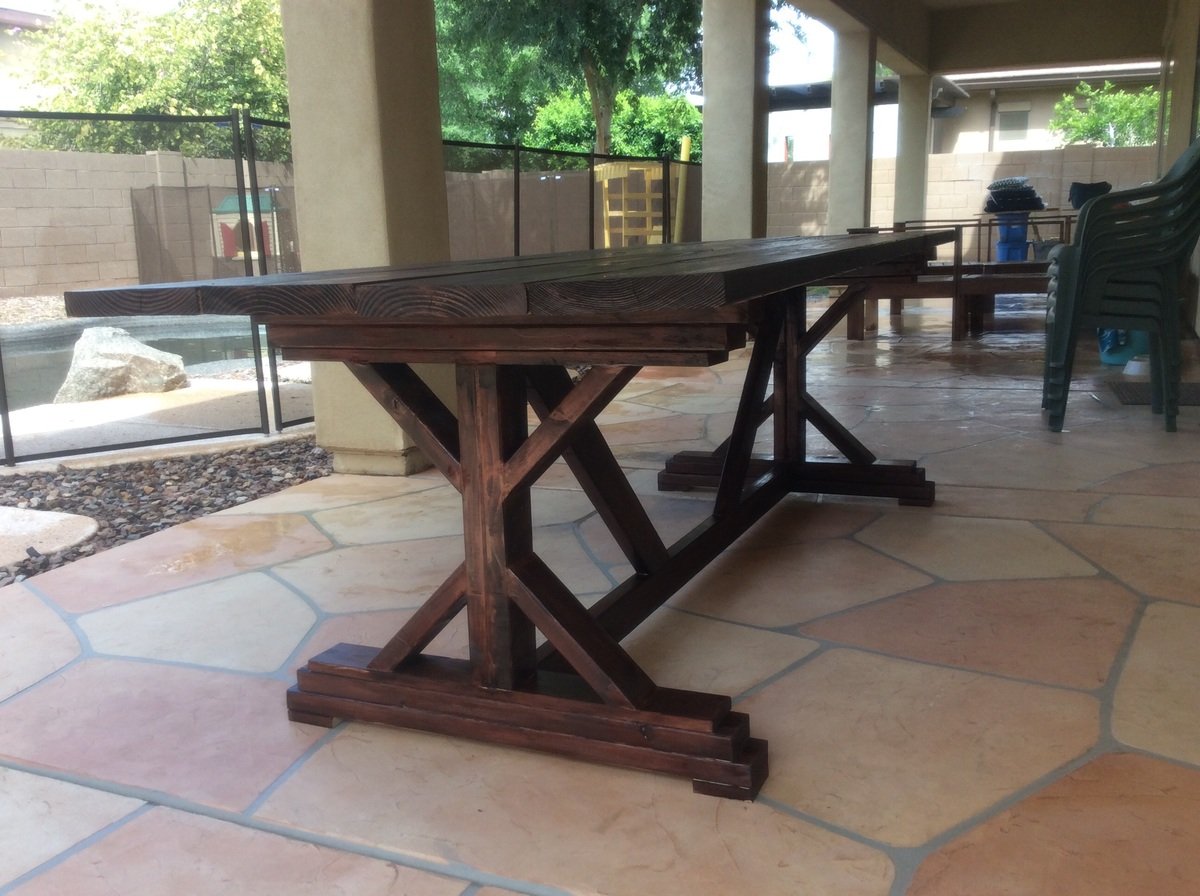
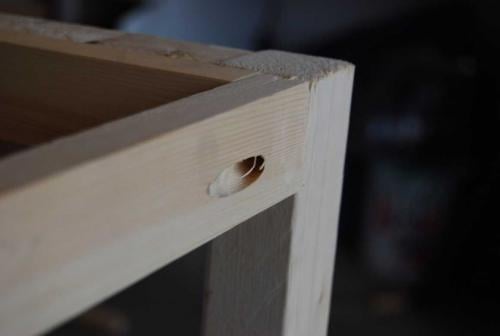
For the table frame I used a 1" straight bit in my router to put a little "flair" on the rail. The leg bracing is 1x1 scrap that I had left over from ripping the rail to size. I used my drill press on the bracing to make the recessed hole for the screws at the correct angle. I then covered the screw hole with a 5/8" red oak dowel.

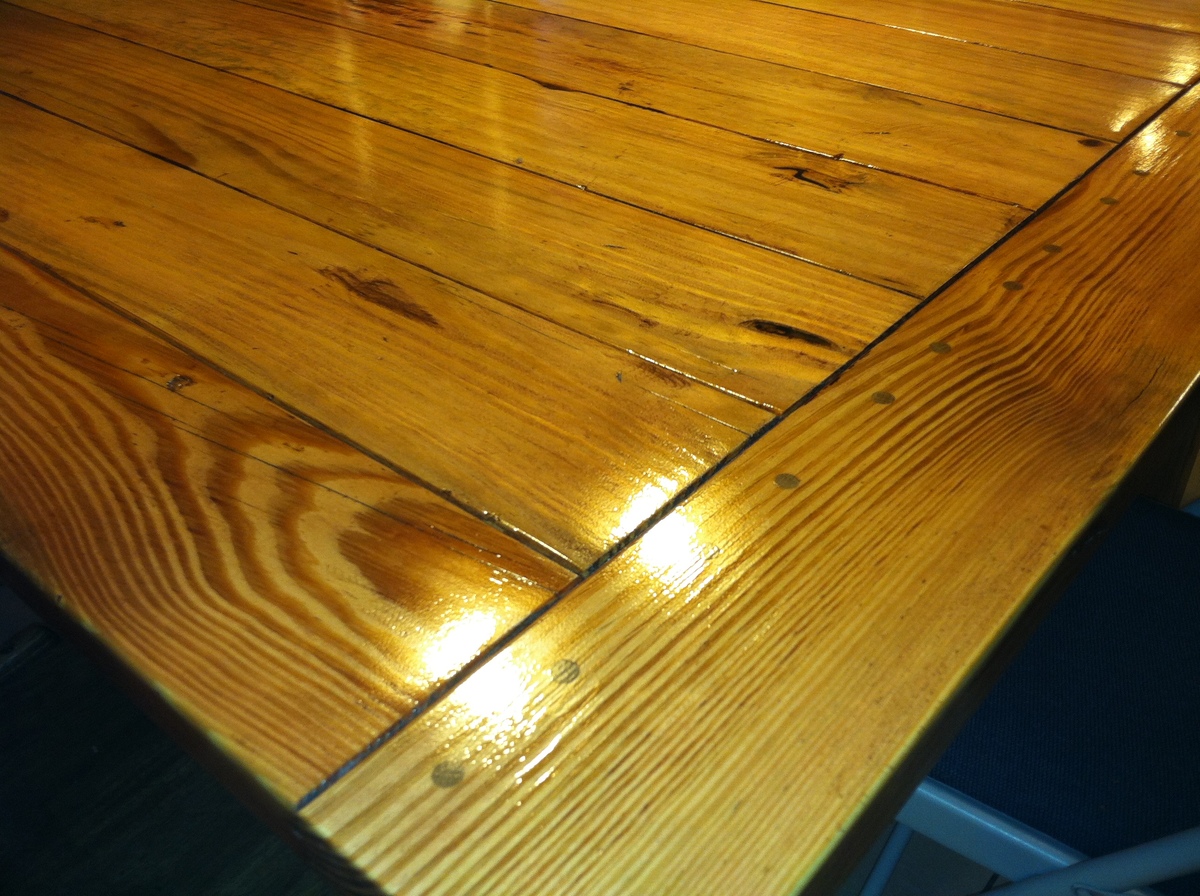
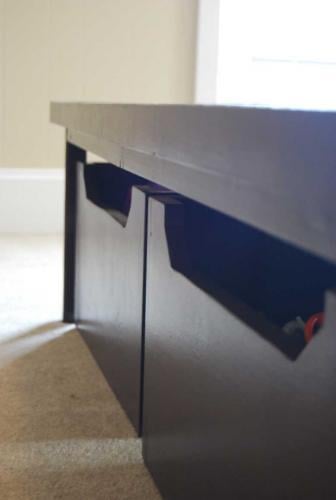
I decided to go a little more traditional on the breadboard end just to see if I could do it. Its really not that hard just more time consuming. I used a 5/8" red oak dowel that I bought at the hardware store for joining the breadboard to the rest of the table top.

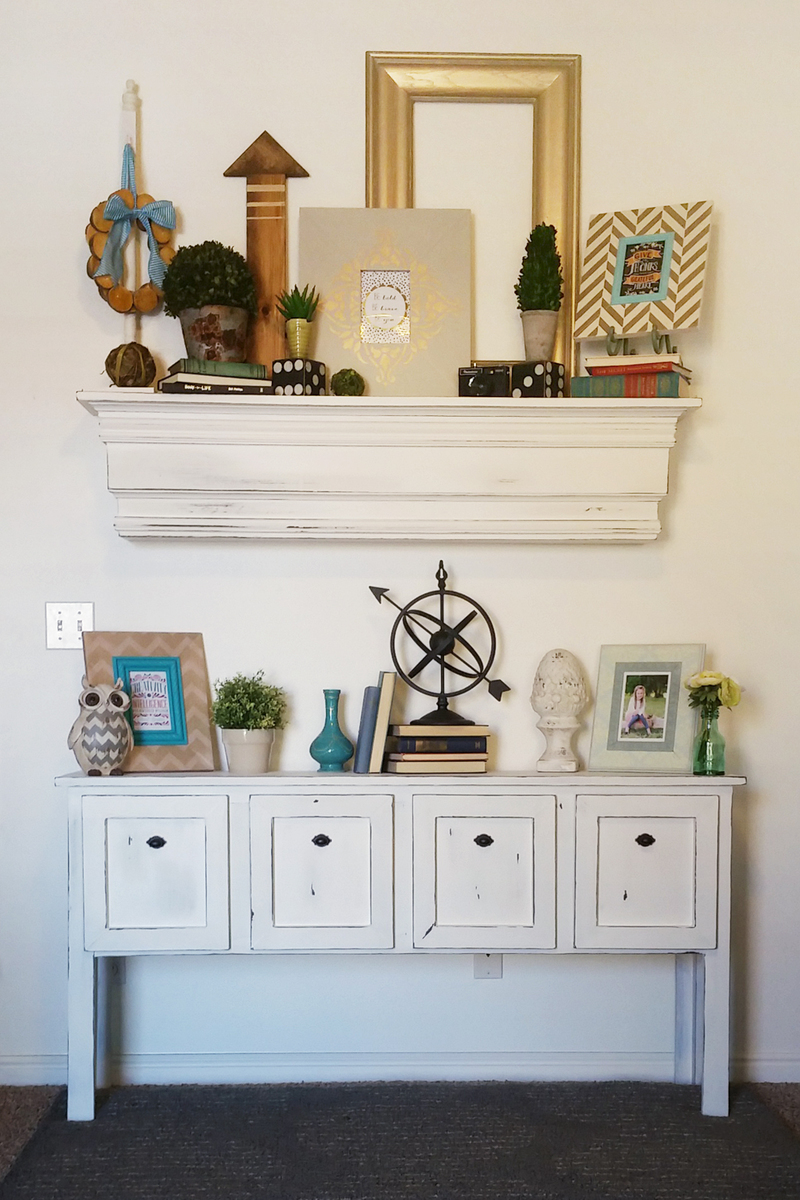
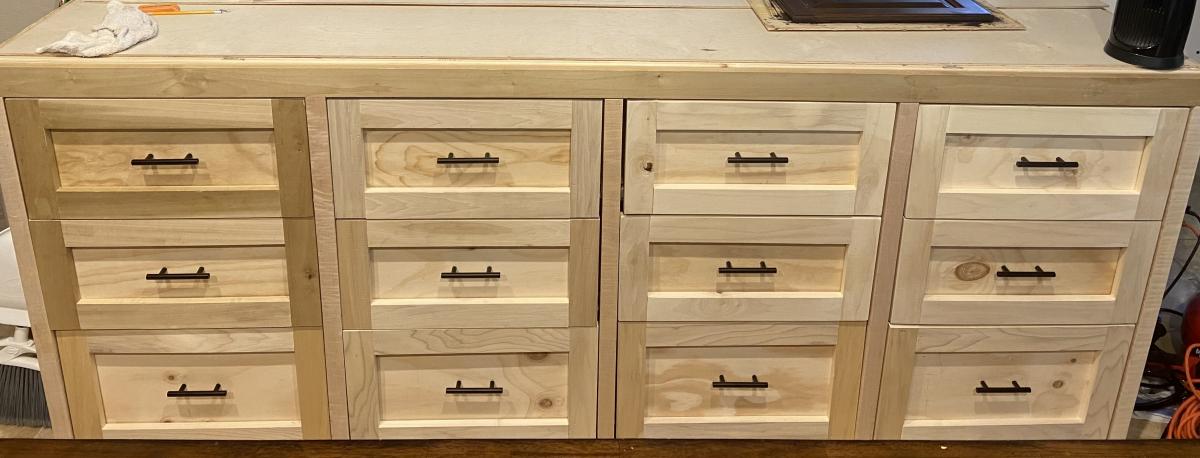
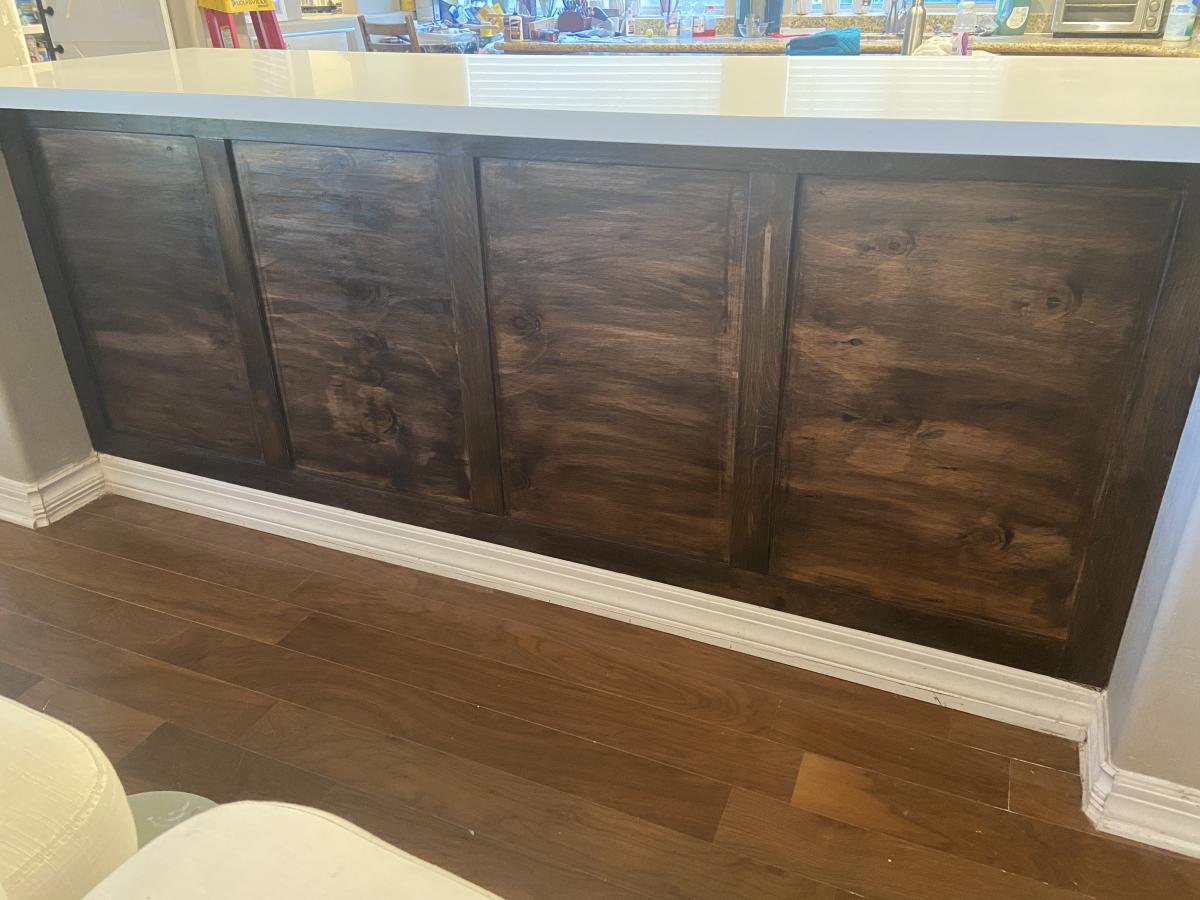
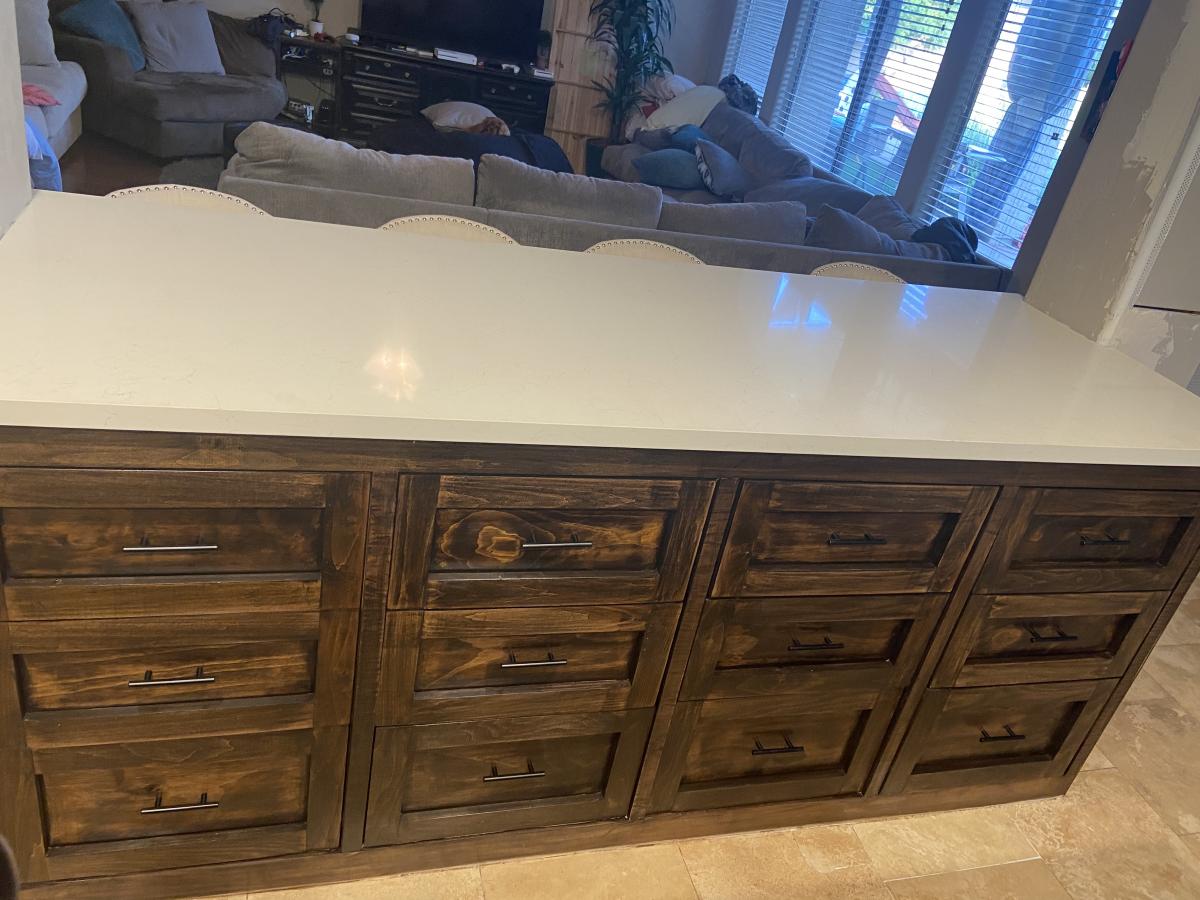
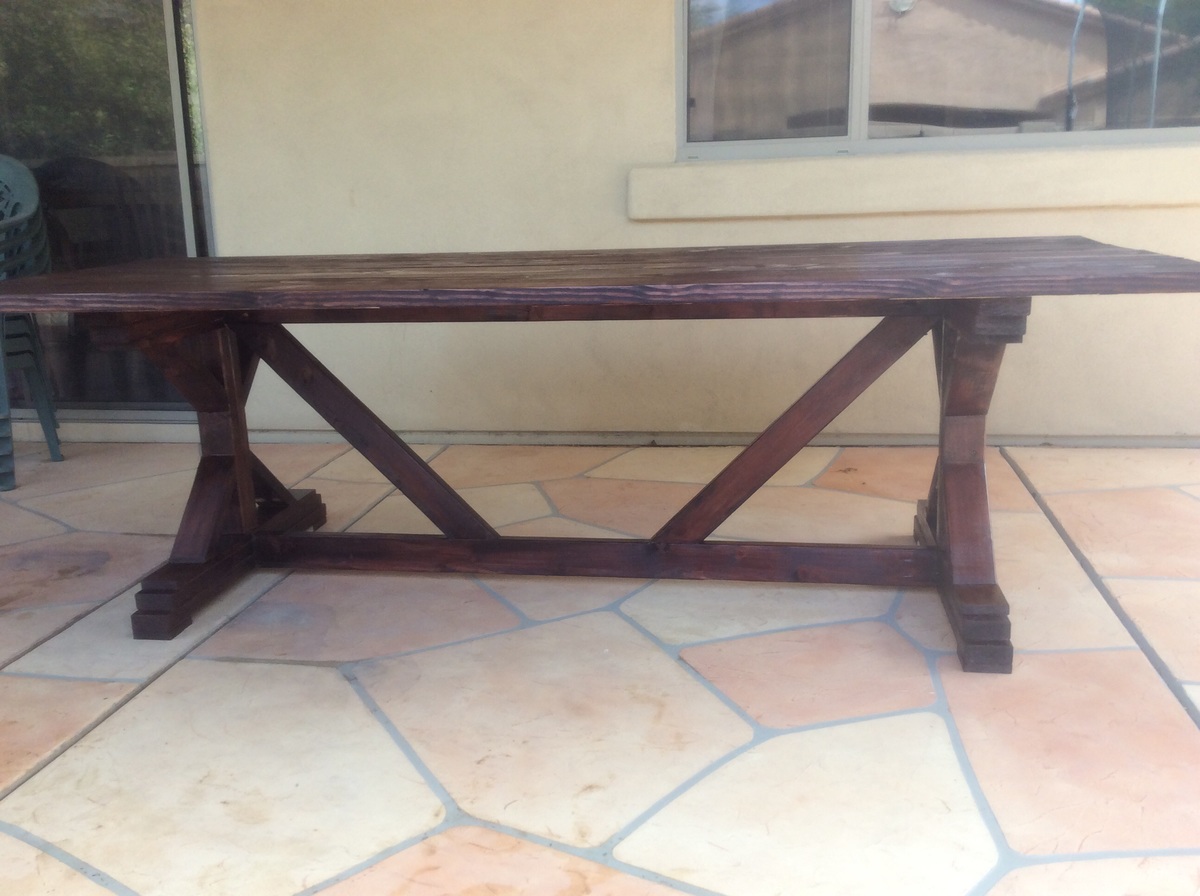
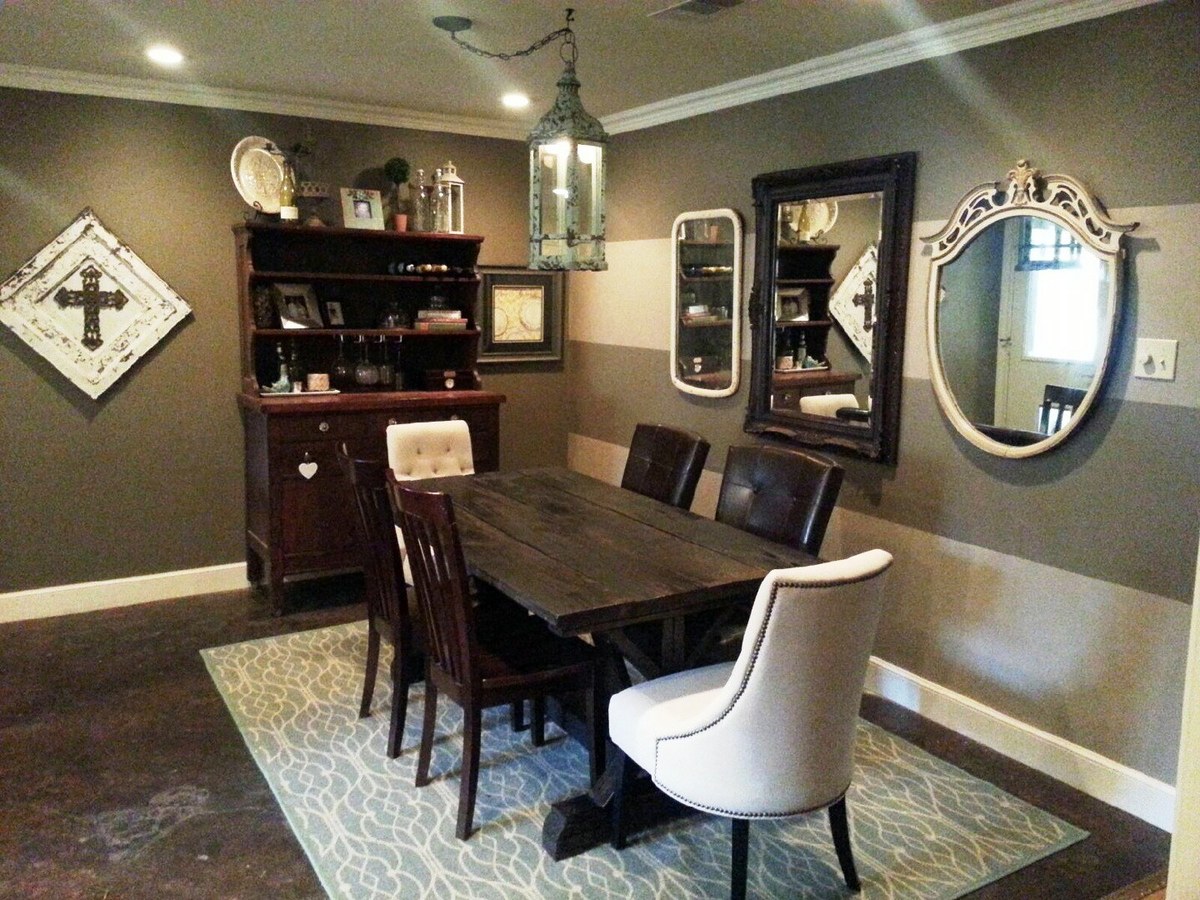
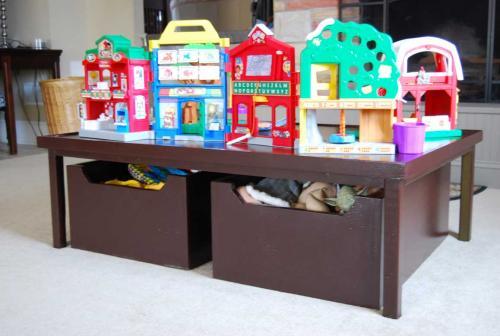
My table is made of a mixture of pine and spruce. I used shellac to seal the wood before staining. Shellac keeps these softwoods from splotching when they are stained. I then used Minwax Red Oak stain. I let the stain sit for about 15 minutes before wiping it off. The color turned out great. I used my Christmas money to buy an LVLP spray gun to hook up to my pancake compressor. I used the Spray-It 3000 to apply polyurethane. I put 5 coats on the frame and 10 coats on the top itself. In between each coat I used 0000 steel wool to buff the surface. The very last coat I left alone so it would shine. It left it with a little bit of an "orange peel" finish but I thought it made the table look more rustic so I left it alone.

All in all it took me about 60 hours over a 6 month period to get the table done. When you have a real job, kids, and a house to take care of it takes a while to do stuff like this.

I've got a plan for some chairs so I think I'm going to try chairs next. They say if you can build chairs you can build anything. I've built just about everything but chairs so maybe this saying will work in reverse. If the chairs go as fast as the table did, it might take another 6 months to get one done.

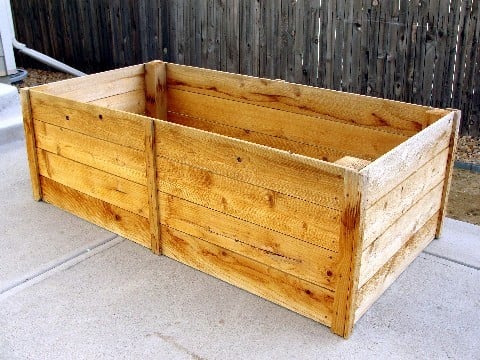
The wood for this table I got for free. My brother-in-law works in the lumber business and this wood was the throw away that none of the contractors wanted. All of it had been sitting in the sun and was warped, gray, and cracked. A friend from church who does woodworking for a living planed and jointed the boards straight and square for me. The lumber is construction grade pine and spruce. Most of the money I spent on this was for the spray gun, the finish, and the hardware that I used for joining the tabletop to the frame.

A help hint I found out after the fact. If you're sanding pine and spruce with a random orbit sander or any electric sander you are going to leave little "swirlies" throughout the wood. Either sand the wood by hand to prevent the "swirlies" or learn how to use a card scraper so you don't have to mess with sandpaper. The "swirlies" showed up when I applied the stain. Before then I couldn't see them. My wife thought the "swirlies" added to the rustic-ness of the table, so I left them alone.

Estimated Cost
$150
Estimated Time Investment
Week Long Project (20 Hours or More)
Finish Used
Clear Shellac
Minwax Red Oak Stain
Clear Gloss Polyurethane
Recommended Skill Level
Intermediate

Comments

Triple Printer Console

Submitted by jbolson21 on Tue, 04/07/2015 - 16:07

We made this and a dresser just like it.  We wanted matching furniture.

Estimated Cost
$350
Estimated Time Investment
Week Long Project (20 Hours or More)
Finish Used
Danish Oil
Recommended Skill Level
Intermediate

Comments

Mega work bench with miter station

Submitted by Anonymous (not verified) on Mon, 10/04/2021 - 16:51

When I was 8 months pregnant and going through my “nesting phase” I knew I needed to get my garage organized. Prior to building this, my tools were all over the place. To try to get it done before the baby came, I called my dad to help me out, and we built it together in just a couple days. It was a weekend I will never forget and I smile every time I walk into my shop knowing we did it together.

Comments

Mudroom Bench

Submitted by hmctagg on Fri, 08/04/2017 - 20:03

We combined several ideas to create this built in mud room bench.  I searched high and low for the design I wanted and loved Ana's hidden storage.  It's perfect for off season stuff that would otherwise take up space in a closet.  It's such a pretty, functional space that gets so much use.  

Estimated Cost
We paid $1200 to have the entire structure built by a carpenter. It definitely could be done for less, but with two toddlers we just didn't have the time.
Estimated Time Investment
Weekend Project (10-20 Hours)
Finish Used
Minwax Dark Walnut
White trim paint
Recommended Skill Level
Intermediate

Jewelry Box Retirement Gift

Submitted by JoanneS on Mon, 04/20/2015 - 17:19

This jewelry box is a gift for a friend at work who is retiring.   It is a variation of the Easy Jewelry Box, with the following modifications:

Hinged lift-up top with mirror

Overlay drawer fronts from ¼” craft wood (Gold stencil on top false drawer front, and drawer boxes are 1/8” shorter than the shelf from front to back, to ensure the fronts sit flat against the box front and drawer back doesn't touch the box back at all)

The bottom is 2 pieces thick, to allow space for the drawer overhang and attaching the bottom moulding.

Solid wood back (instead of plywood)

Top and bottom edged with mini stop moulding to make the overhangs, and added feet made from lattice

Removable drawer divider tray and 2 heights of removable dividers for the top, made from dentil, lattice and screen bead mouldings

I really took my time on this build to get everything just right with the build and the finish.   Probably spent about 6 hours spread out over the last few weekends. 


Built from Plan(s)
Estimated Cost
Cost: 1x8 and 1x2 Lumber and finishes were already on hand (left over from other projects) and I spent about $25 for the mirror, hardware, felt, mouldings, and craft board.
Estimated Time Investment
Day Project (6-9 Hours)
Finish Used
3 coats Clark & Kensington semi-gloss paint + primer in Crushed Peanut, sanded between coats. Stencil: 1 coat Americana Gloss enamel metallic in glorious gold. Soft wax on the shelf and drawer bottom.
Recommended Skill Level
Beginner

Comments

Linda7

Tue, 04/21/2015 - 18:57

This is your best one yet, Joanne. Love it! :-)

JoanneS

Wed, 04/22/2015 - 18:29

Hi Linda, thank you for the nice comment! This was a fun build, and I'm very glad to say the gift was a big hit! :)

Chair Build with Loveseat Modification

Submitted by Joshh81 on Sat, 09/02/2017 - 12:26

Built the 2 chairs according to the plans, and then modified it for a bench that's 48" (our cushions are 23.5 x 23.5). Worked really well!

Estimated Time Investment
Weekend Project (10-20 Hours)
Recommended Skill Level
Beginner

Comments

Seasonal And Holiday

Raised Garden Beds

Submitted by kari on Sat, 03/12/2011 - 09:54

I made these last summer for my sister. And she didn't even use them yet! Very easy to make. She did want them taller, so that is the only modifacation I made. We're hoping the bunnies won't notice all the yummy veggies up this high :) I know, probably wishful thinking. Makes a great kid corral too.

Estimated Cost
it's been a while
Estimated Time Investment
An Hour or Two (0-2 Hours)
Finish Used
none
Recommended Skill Level
Starter Project
Seasonal And Holiday

Outdoor patio table

Submitted by Sjhunt on Sat, 04/25/2015 - 16:23

My family of 6 needed and outdoor table that would fit us all. The weather in Arizona is beautiful right now, so I decided to build this so we could enjoy it before it gets too hot. A big thank you to Ana White and the Shanty2chic sisters for this beautiful table. 

Built from Plan(s)
Estimated Cost
65.00
Estimated Time Investment
Day Project (6-9 Hours)
Finish Used
Red mahogany
Recommended Skill Level
Beginner

Farmhouse Coffee Table and end tables

Submitted by Anonymous (not verified) on Fri, 10/08/2021 - 06:58

My dad and I built these amazing coffee and end tables during a Christmas last year. We modified the ends to for a “M” instead of the traditional farmhouse “X”. Our last name is Mayberry-so the M was fitting. Sadly, my father lost his battle to cancer and this was the last project we did-one that will forever hold precious memories! Thank you for the fabulous plans!

Comments

Rustic X Farmhouse Table

We were able to finish this table after work one afternoon and stain it the next day. (we have a 16 month old also, so you can do it! :) ) I wanted a similar style I had found at World Market that retailed for $700 we were able to complete this entire table for $100 including all hardware and stain. LOVE it so much and get SO many compliments on it. Thanks so much!

Shelby
The Dandy Lion

Estimated Time Investment
Day Project (6-9 Hours)
Finish Used
A satin poly with espresso stain in one
Recommended Skill Level
Intermediate

Low Activity Table

With three little kids we needed some place to put the loads of toys that we have.  The first time I saw this - I knew I had to build it!

This project was quite the task.  For me building is a breeze - it's the painting that is the process!!!


I started working on this on Sunday last week - it was built in about 3-4 hours.  Painting took forever, and three colors!


Love for you to check out my blog post with all the details, even my painting flub up.

Estimated Cost
$108...$70 in wood, $30 in Wheels, $8 in paint.
Estimated Time Investment
Afternoon Project (3-6 Hours)
Finish Used
Sanded...primed...sanded...random painting experience...ended with Rustolium Kola - Semi-gloss.
Recommended Skill Level
Intermediate

inside corner wall cabinet

First cabinet in my kitchen remodel.


Built from Plan(s)
Estimated Time Investment
Weekend Project (10-20 Hours)
Finish Used
Sherwood by Sherwin Williams. Special purchase 5 gallon minimum. Water based lacquer. Dark Mahogany stain, HVLP sprayed on lacquer.
Recommended Skill Level
Intermediate