Camp Loft Bed

I had a friend who needed a bed for two energetic boys for a small bedroom. I saw these plans and thought this would be perfect for them. They absolutely loved it and now have plenty of room for their toys in their bedroom.


I had a friend who needed a bed for two energetic boys for a small bedroom. I saw these plans and thought this would be perfect for them. They absolutely loved it and now have plenty of room for their toys in their bedroom.


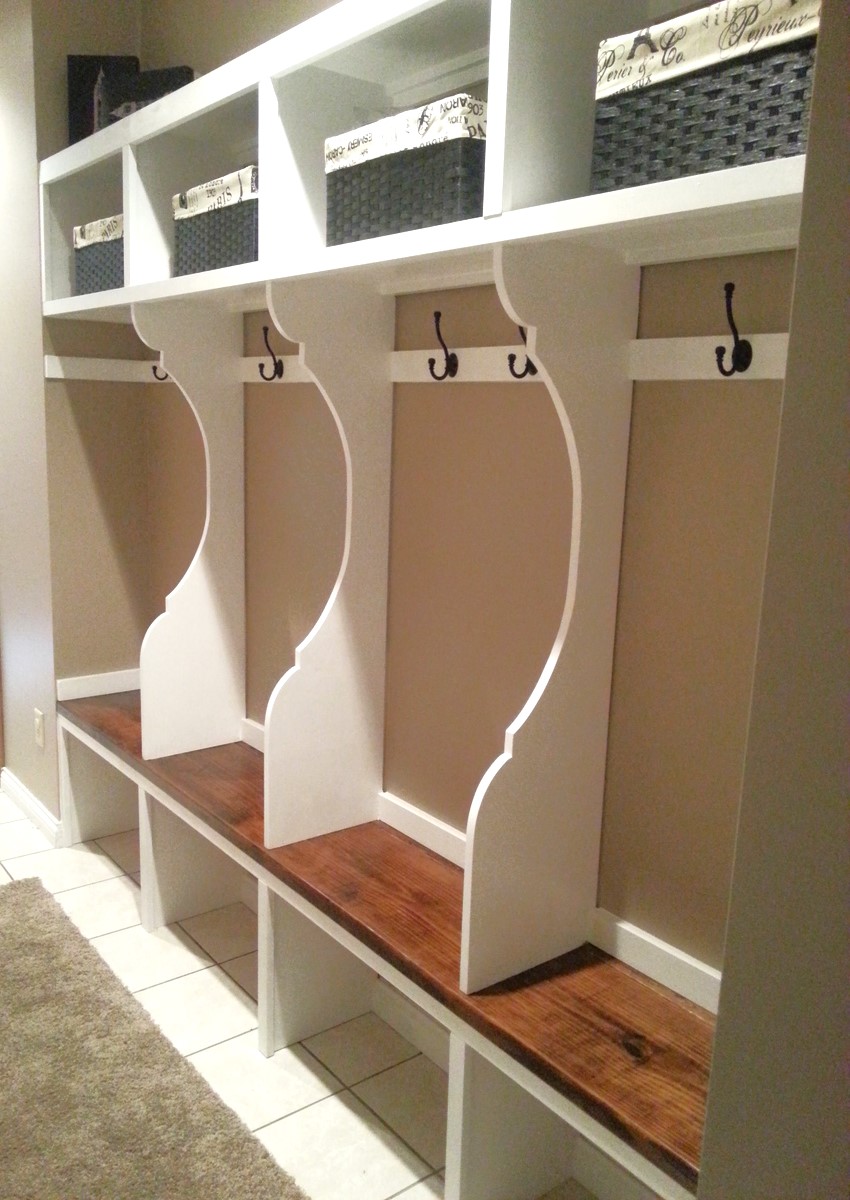
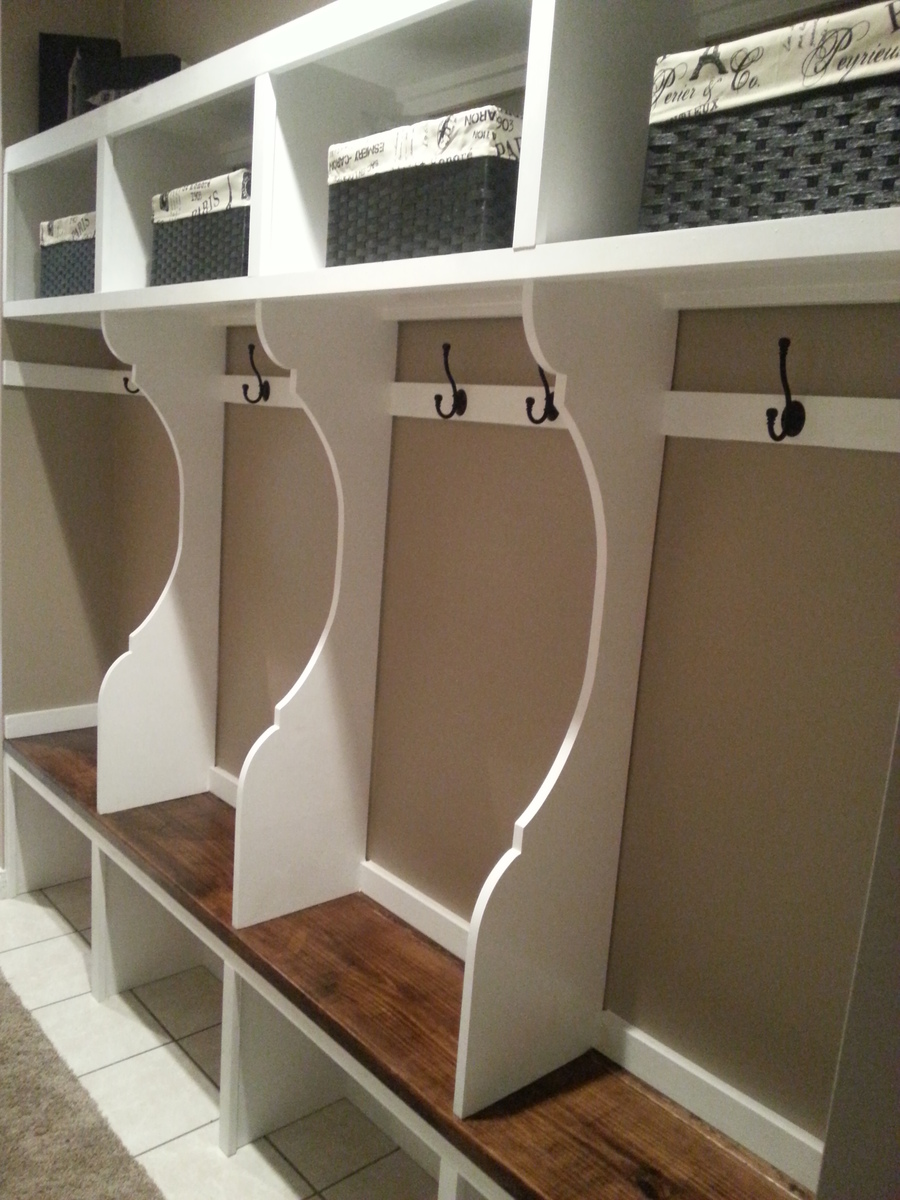
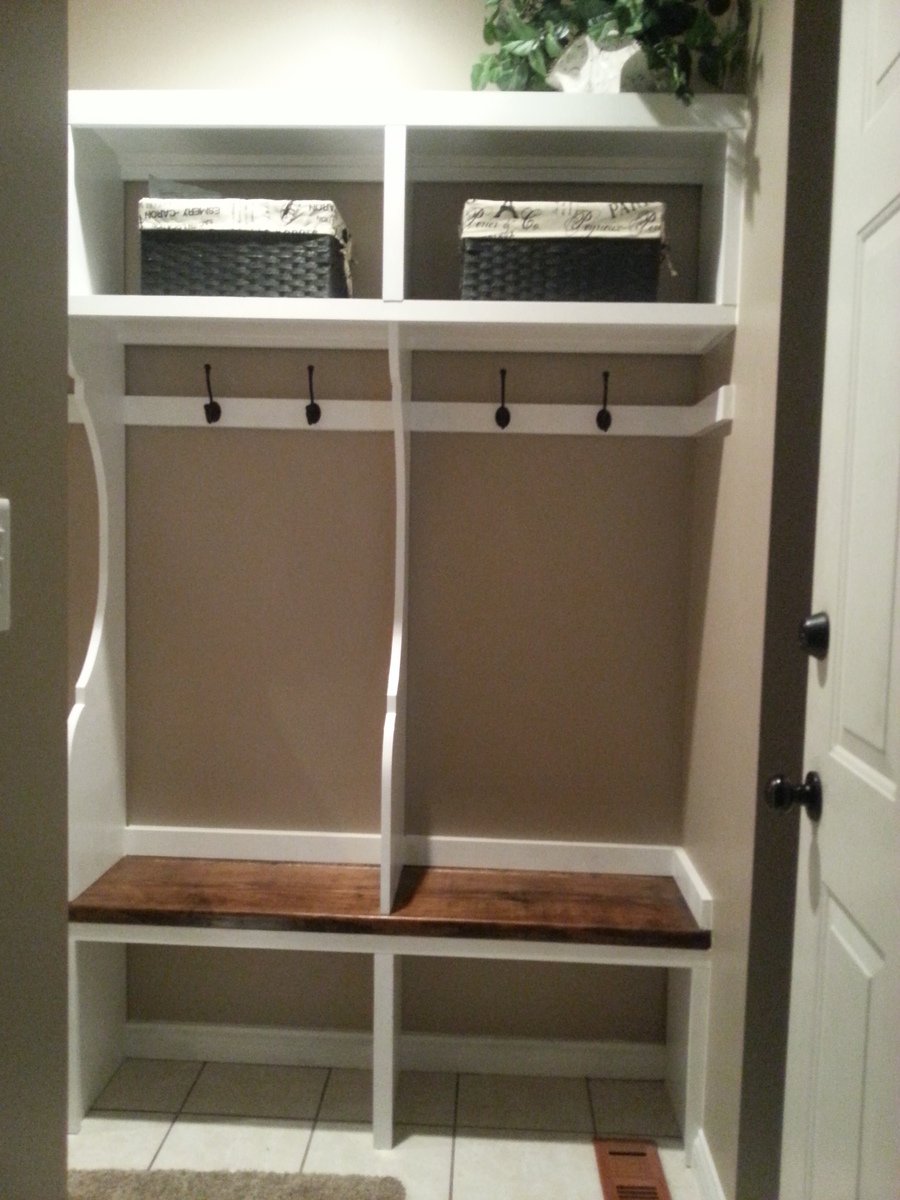
I duplicated this plan from Ann White's Smiling Mudroom Plan. My space was not as deep and was longer than the original plans, so we modified the plans to fit our space. . I liked the idea of a thicker seat that another person used, so we incorporated that. Materials cost us about $200 to make it. Thank you for the inspiration. I love it!
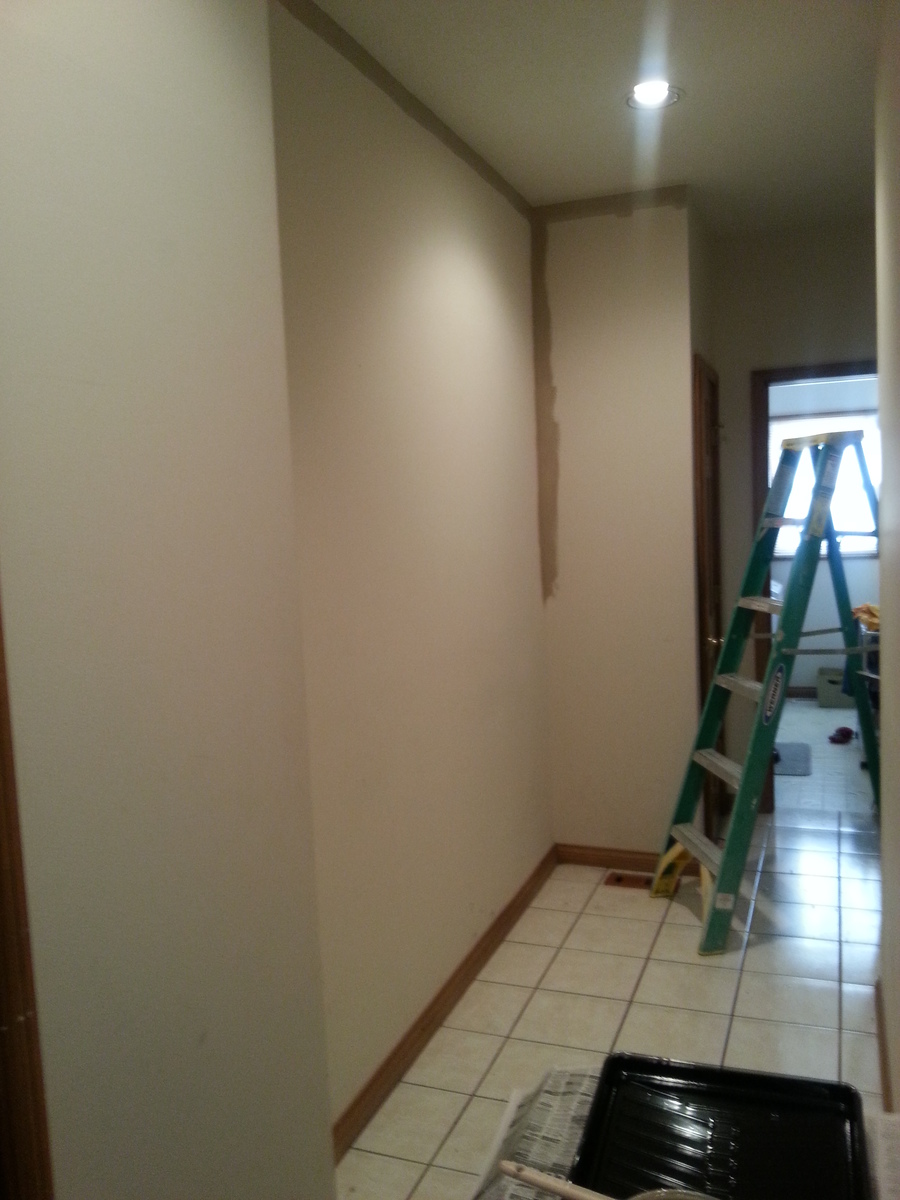
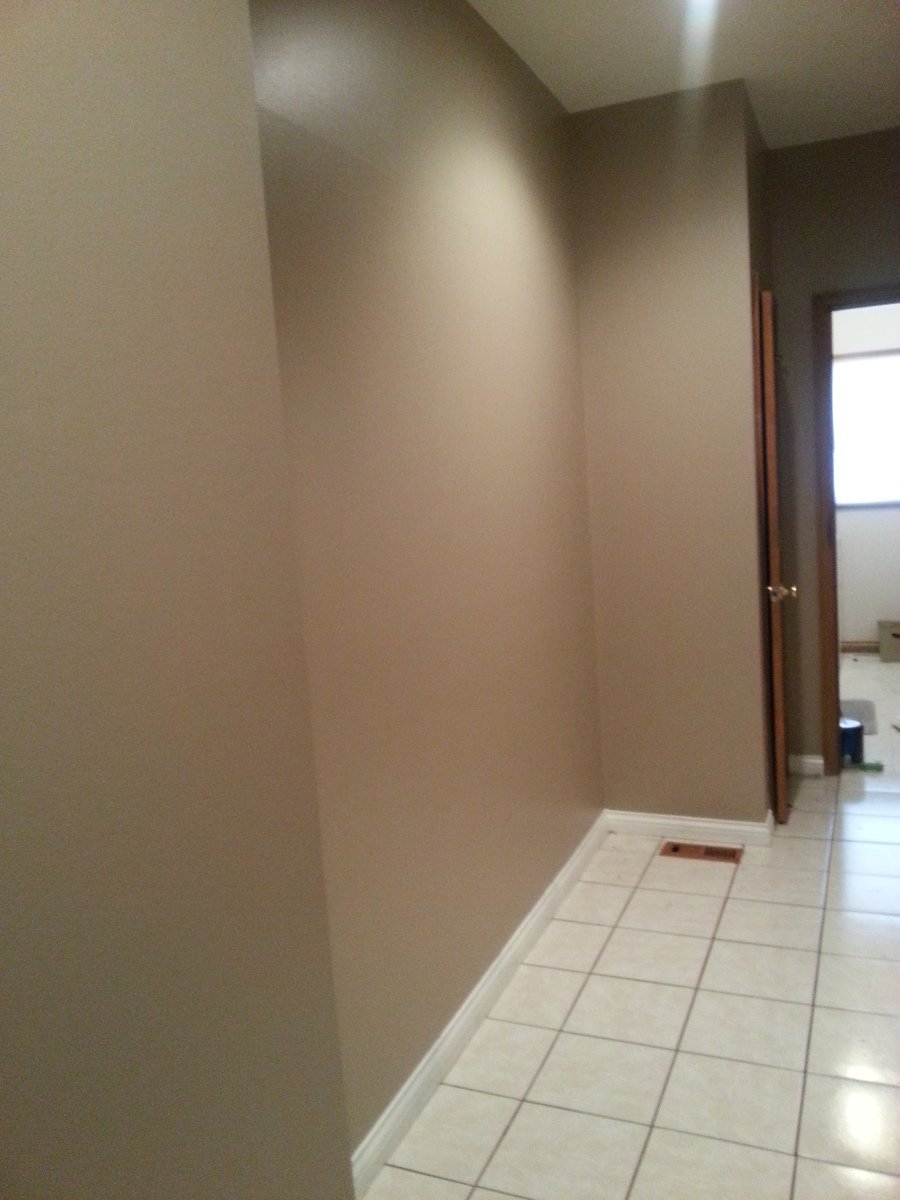
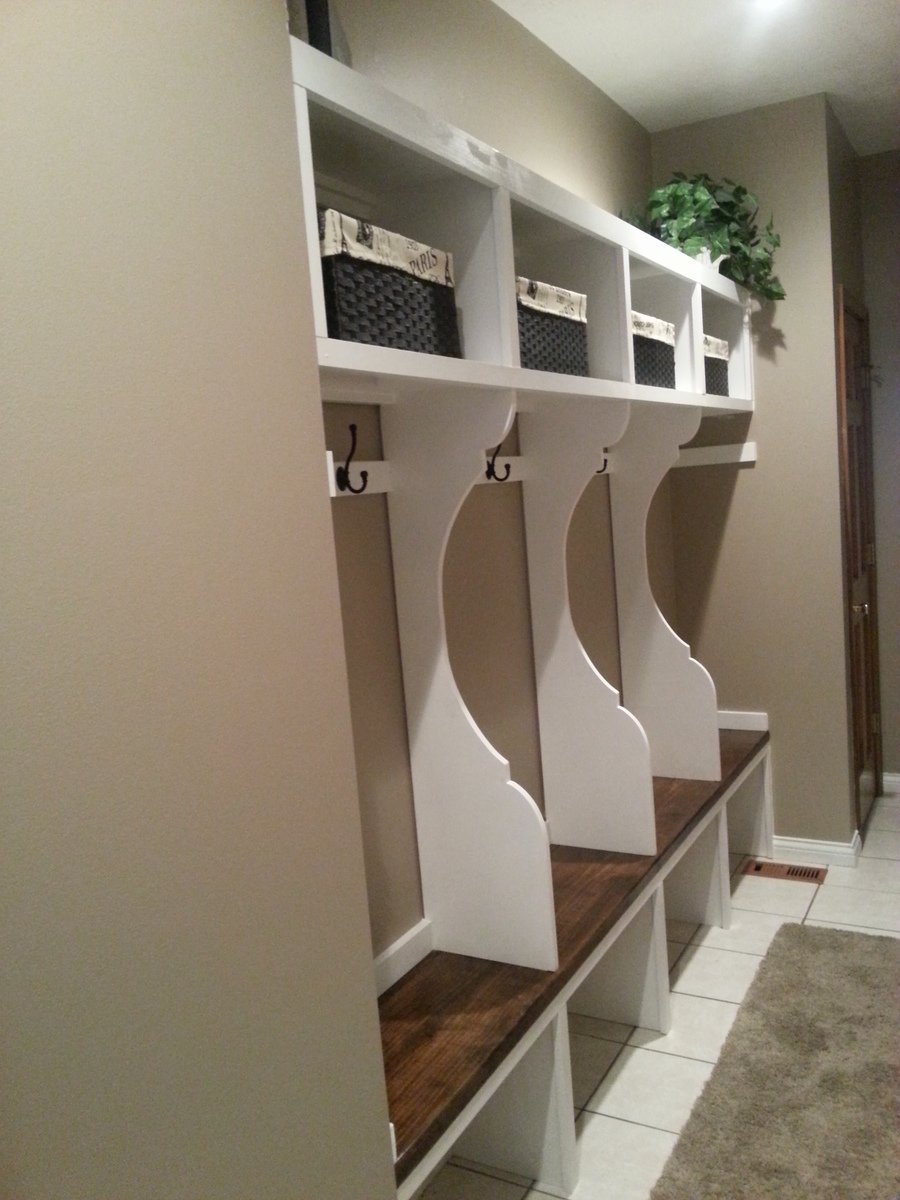
Tue, 02/19/2013 - 16:36
This is a beautiful, yet practical build. The empty space pictured is just begging to be filled. I especially like the wall color and the trim just above the seats that is repeated with the coat hangers. Great work - love it!
Tue, 02/19/2013 - 18:52
Phenomenal !!! Looks great. LOVE the colours too. what wood did you use?
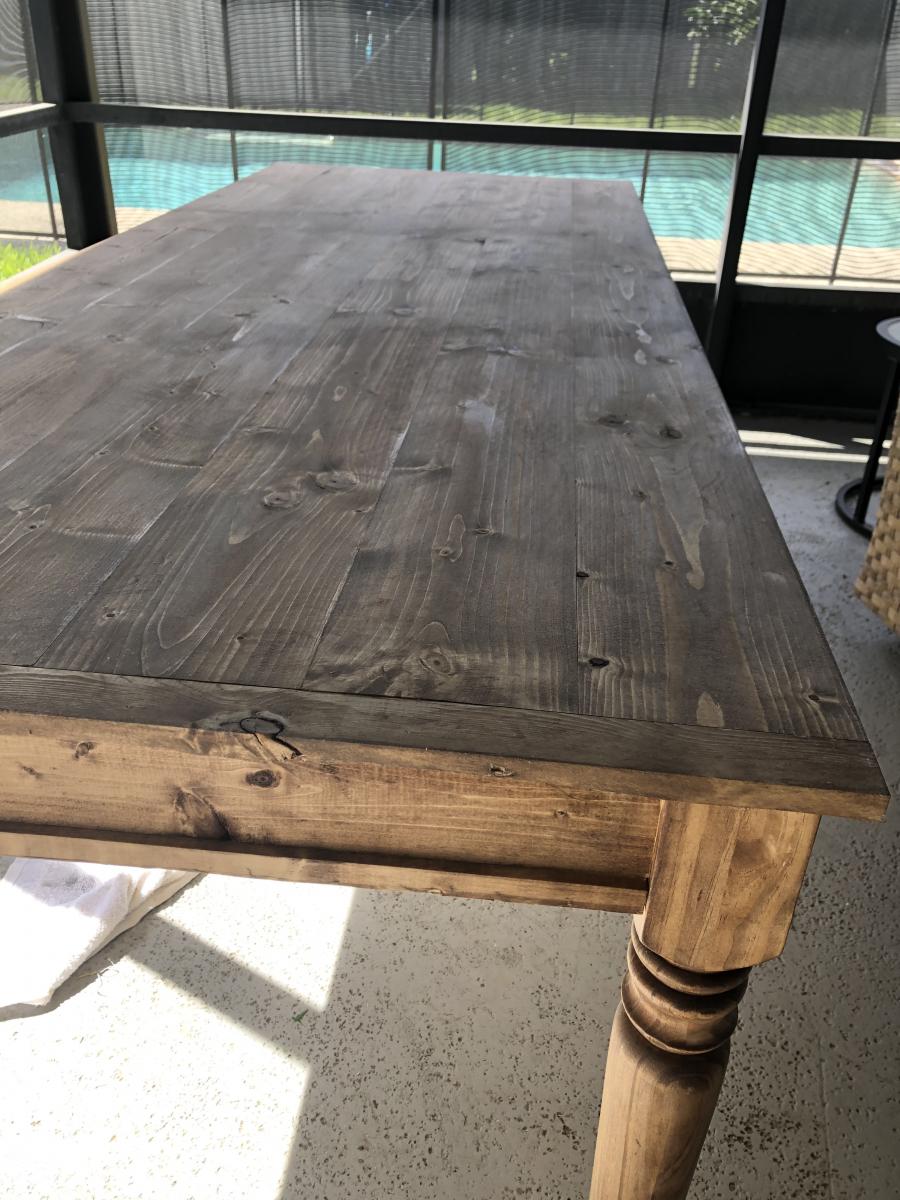
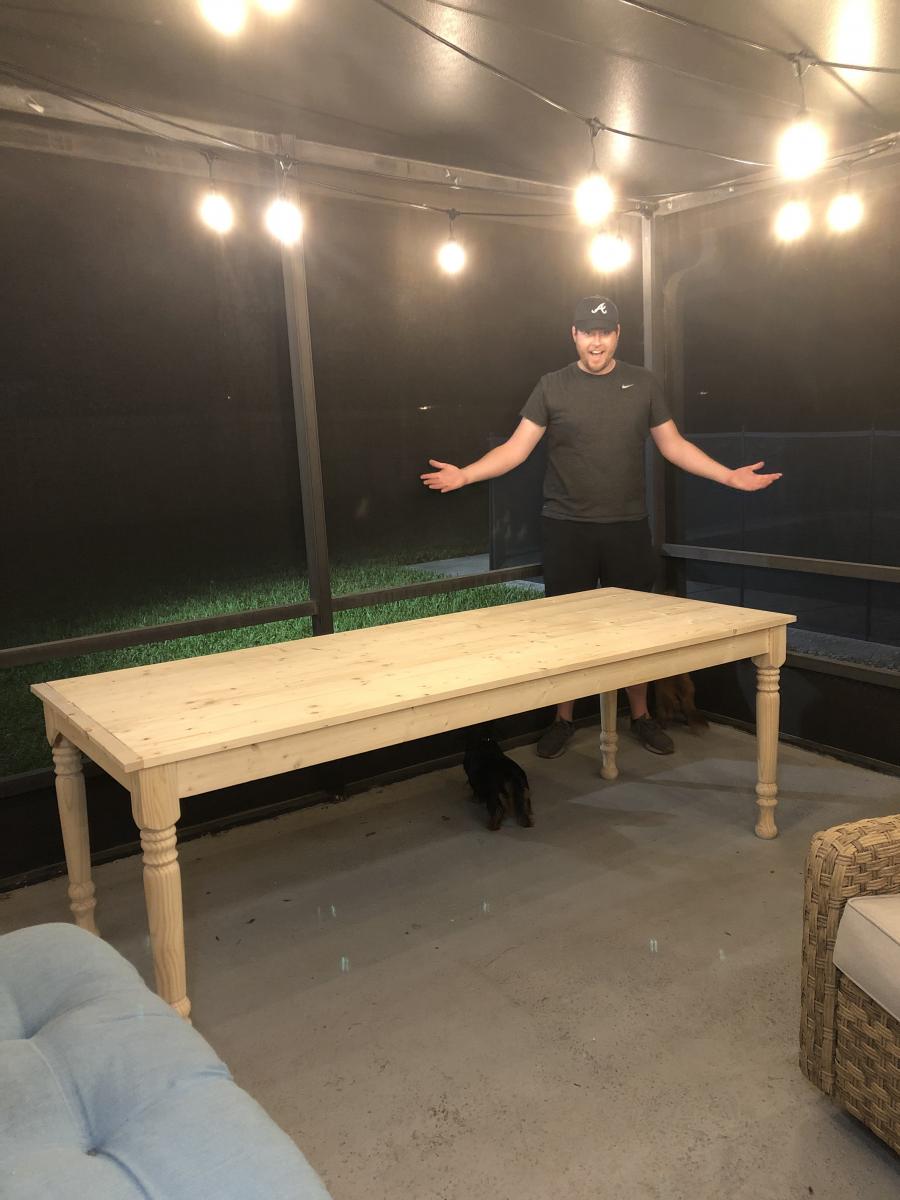
My wife and I were wanting a large outdoor farmhouse table that looked stylish, and like it could have been bought at Pottery Barn or another high-end furniture store. We found this plan that Ana white had made "Small Old English Style Farmhouse Dining Table". We often host groups from our church and will have 15-20 people on our patio or around our pool area, so we needed a bigger table... I just made some modifications to make it longer (7ft) in length to better fit our space and allow for more people to sit.
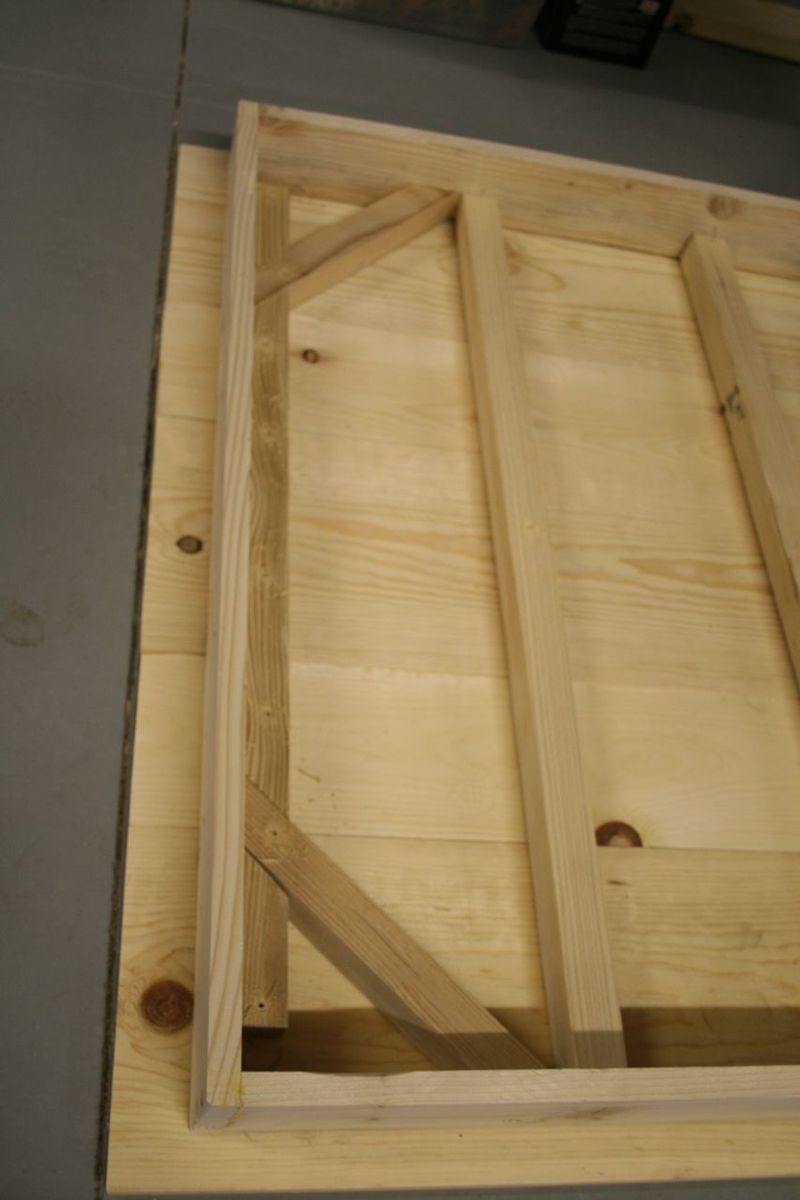
To make this plan longer, I simply adjusted the cut-list on the long 1x2s, 1x4s, and 1x6; and added a crossbar to prevent the longer tabletop from sagging. I also added the diagonal corner struts to make the table a little sturdier.
Adjusted Shopping List:
4 - 1x2 @ 8ft
5 - 1x4 @ 8 ft
6 - 1x6 @ 8ft
Waterproof 1 1/4" Kreg screws (for outdoor use)
Minwax Weathered Oak
Minwax Vintage Grey
Adjusted Cut-List
• 2 - 1x2 @ 26.5"
• 2 - 1x2 @ 76.5"
• 2 - 1x2 @ ~33.25"
• 2 - 1x4 @ 26.5"
• 2 - 1x4 @ 76.5"
• 4 - 1x4 @ 7.25" w/ 45º miter (diagonal corner supports)
• 1 - 1x4 @ ~28" (Crossbar - I forget the exact measurement)
• 6 - 1x6 @ 82"
For seating we just bought some inexpensive farmhouse weather resistant chairs from Walmart:
https://www.walmart.com/ip/Yaheetech-Metal-Dinning-Chairs-Stackable-Cof…
Tue, 03/02/2021 - 08:46
Love the to see the increased length on this plan. thanks for sharing!
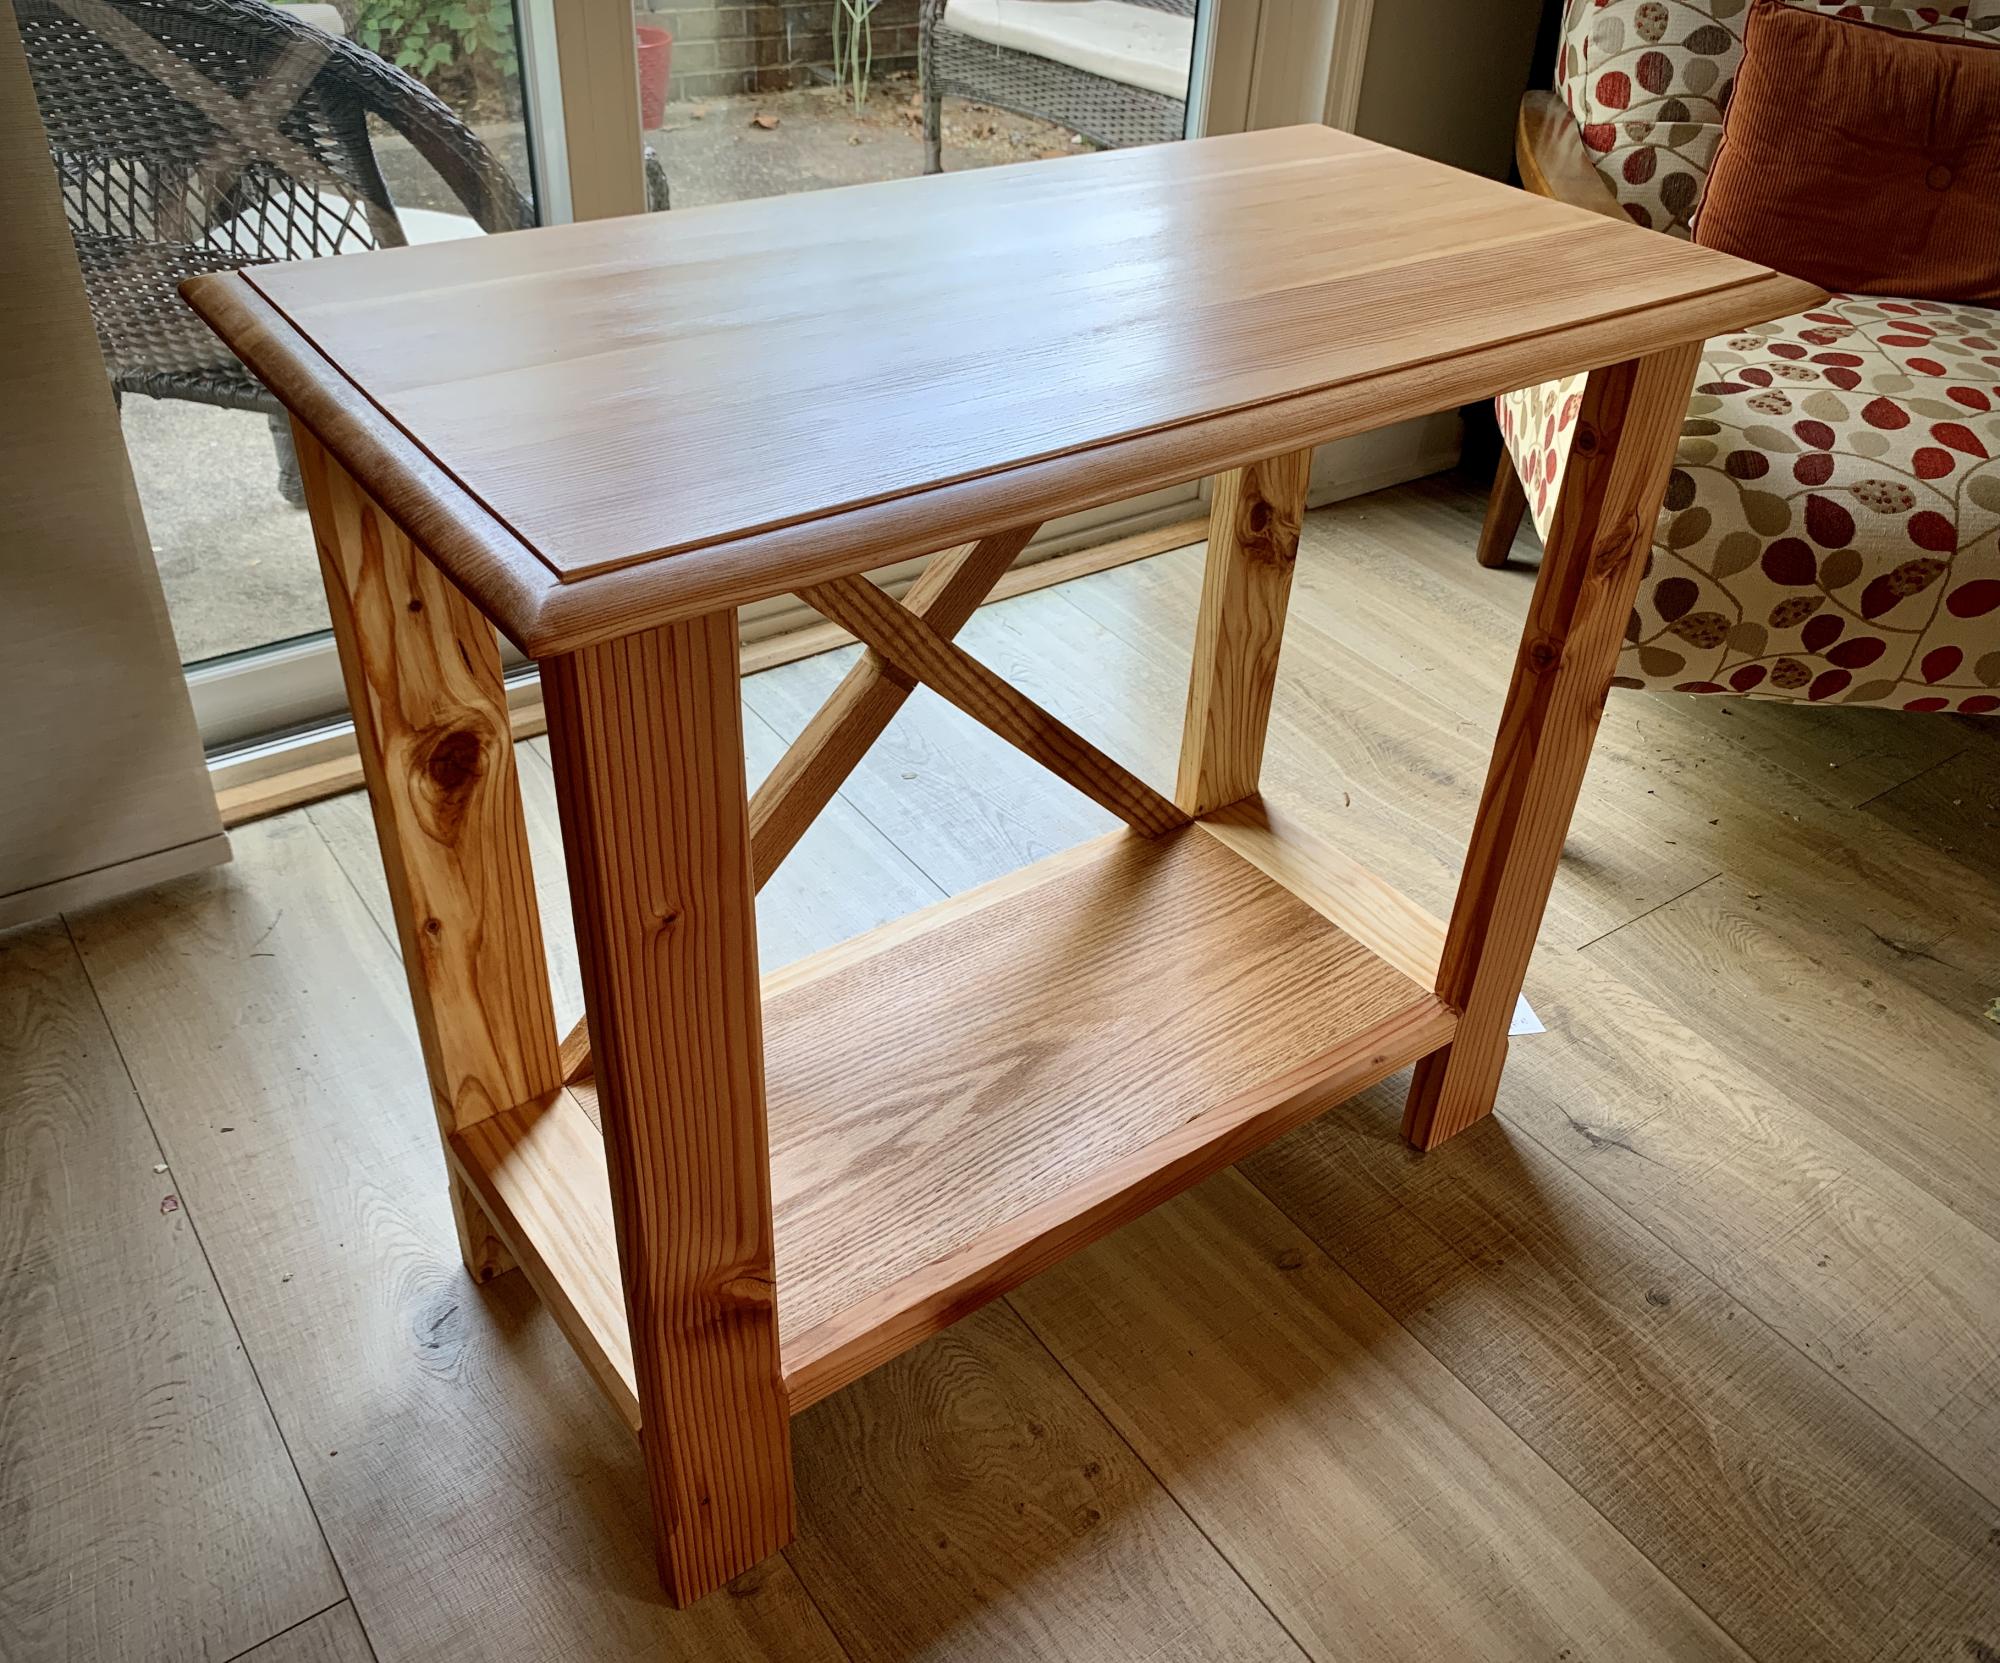
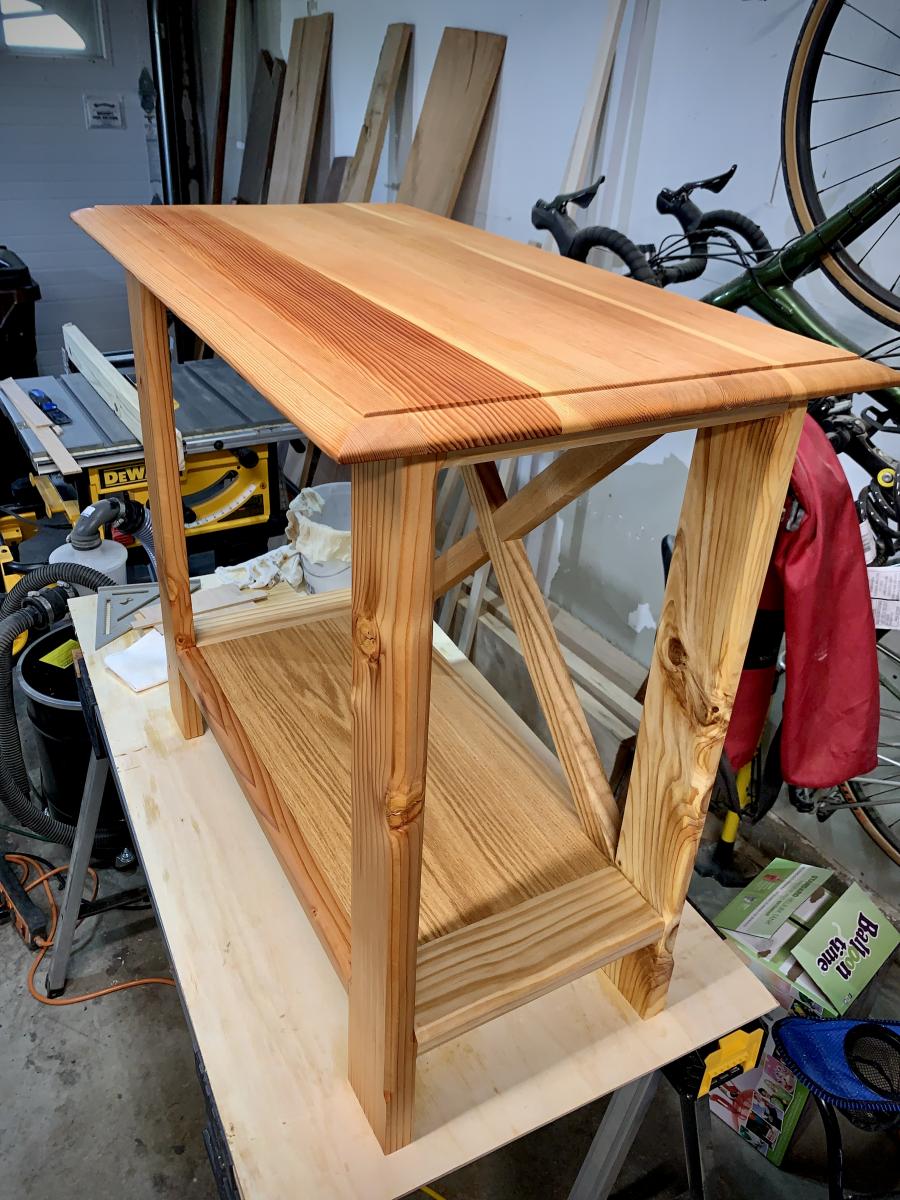
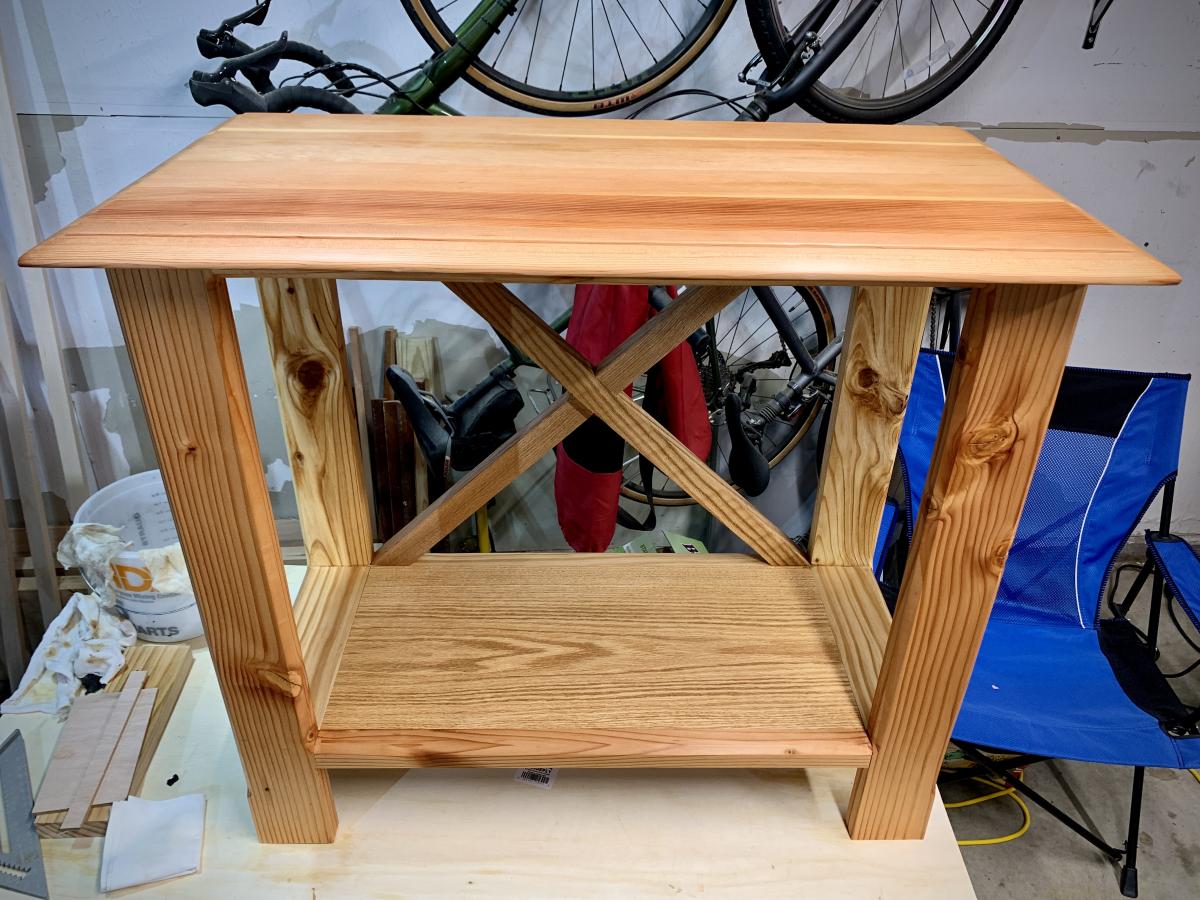
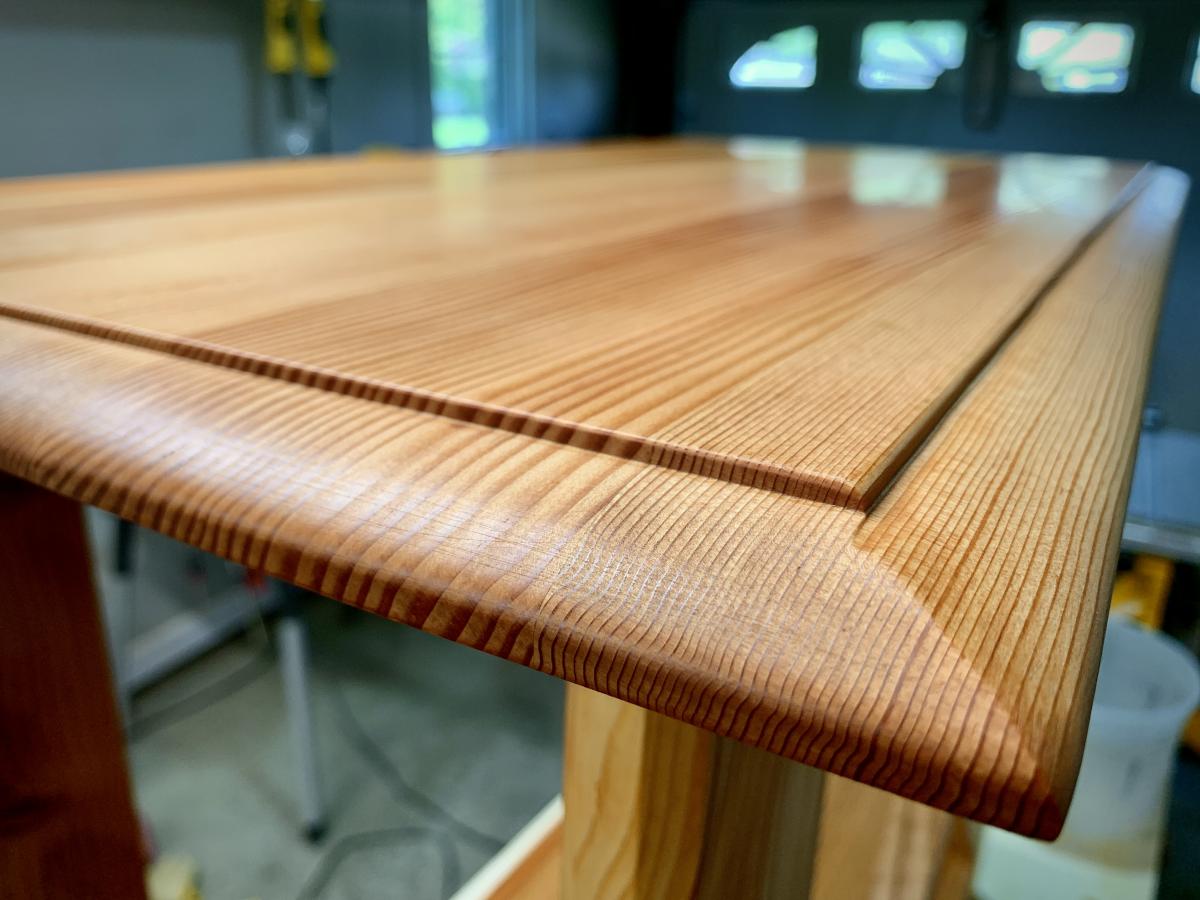
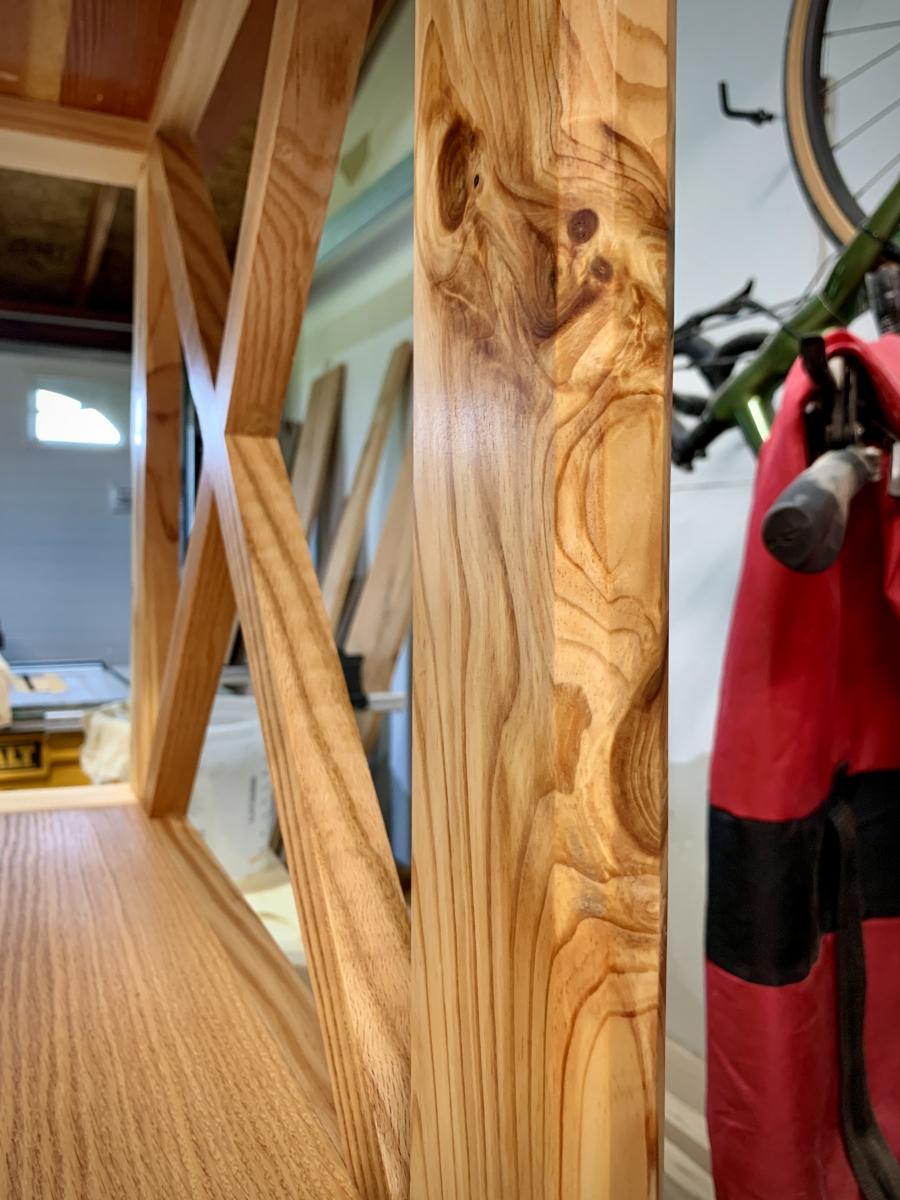
A couple more passes of finish and this will have a new lease on life. Beginning as a mixture of reclaimed wood and some shelving that Brian Carla Baker Smith had in their garage, it will soon be sporting a television as life begins anew for our friends. The most gnarly pieces turned out to provide the most character. I think that is a wonderful observation of life. Great plan from Ana White!
In reply to Wonderful details! by Ana White Admin
Fri, 07/16/2021 - 17:02
Thank you for the great plan Ana. Your plans, the details, and equipment required for the project have gotten me into woodworking. I appreciate all the work you put into your project posts.
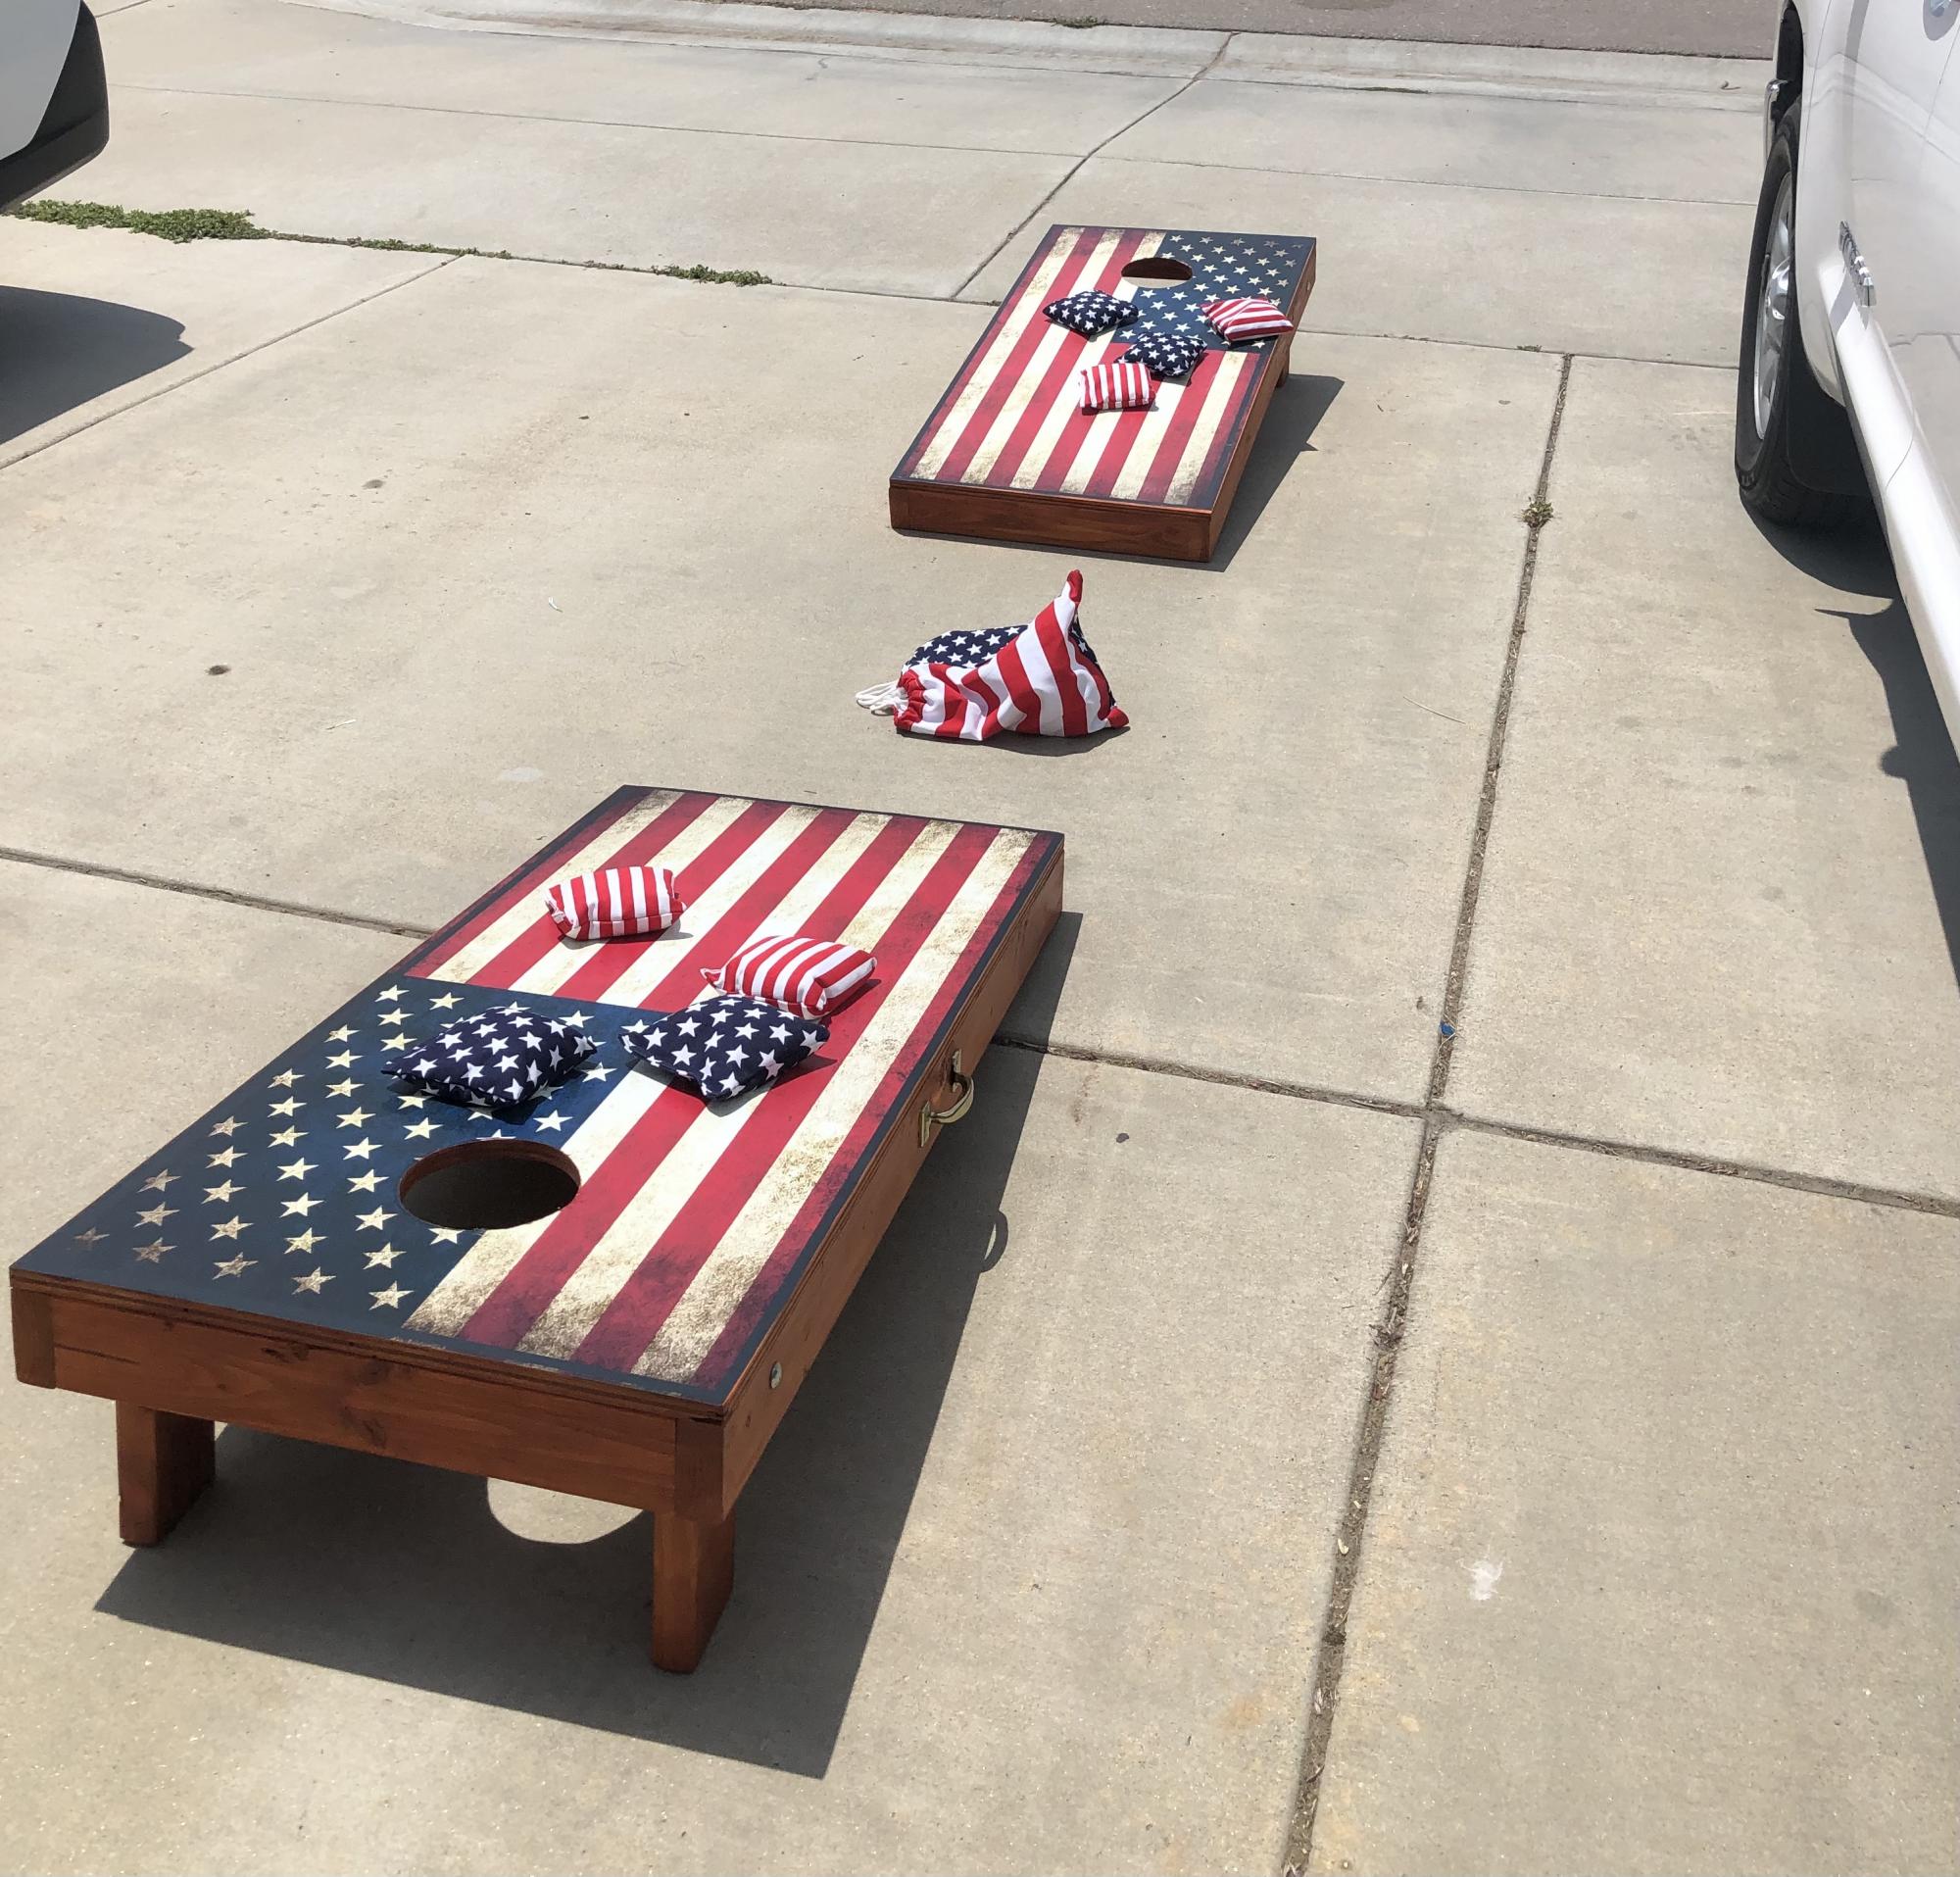
I wanted some Cornhole Boards and I wanted to make them myself. I used some vinyl stickers (distressed American flags) that I got on Amazon! I also bought the Cornhole Bag set on Amazon as well! I added some carrying handles from hardware At Home Depot. I found the link here on Ana's website! I love them!
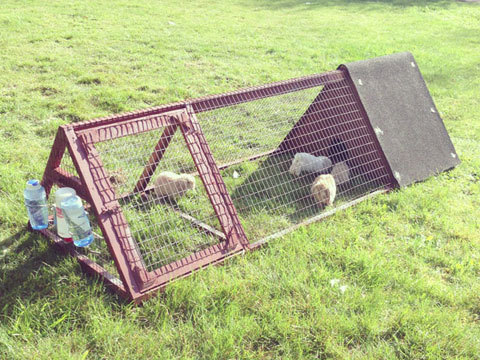
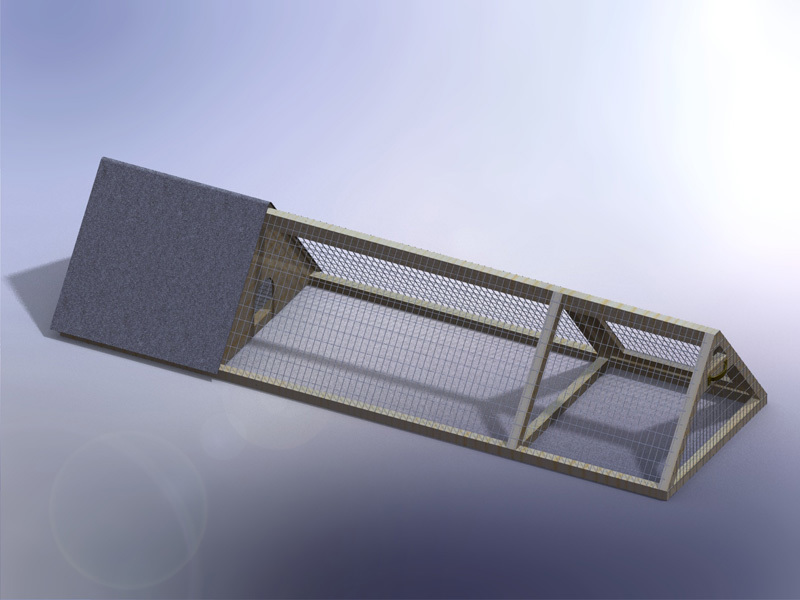
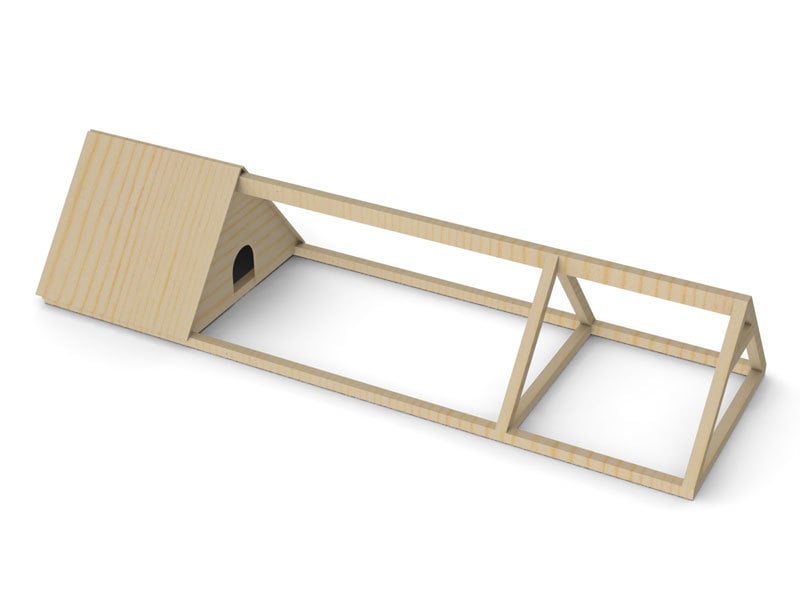
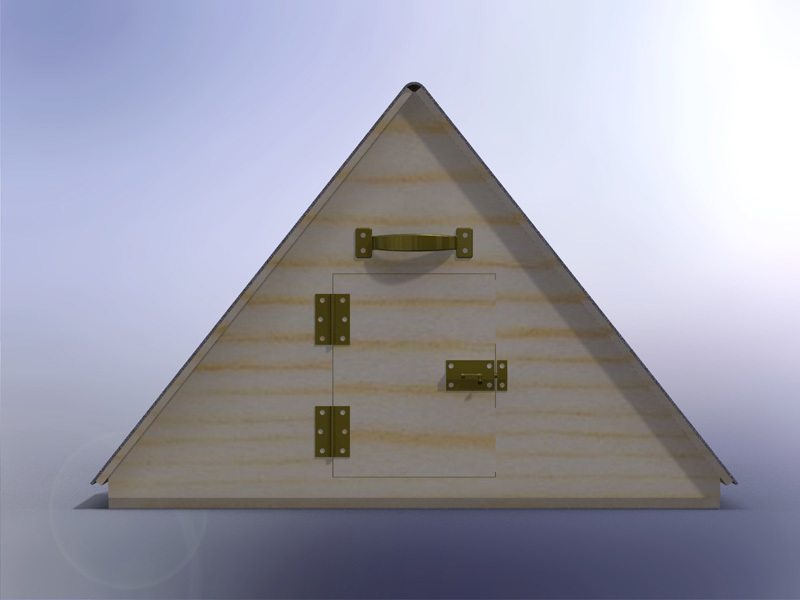
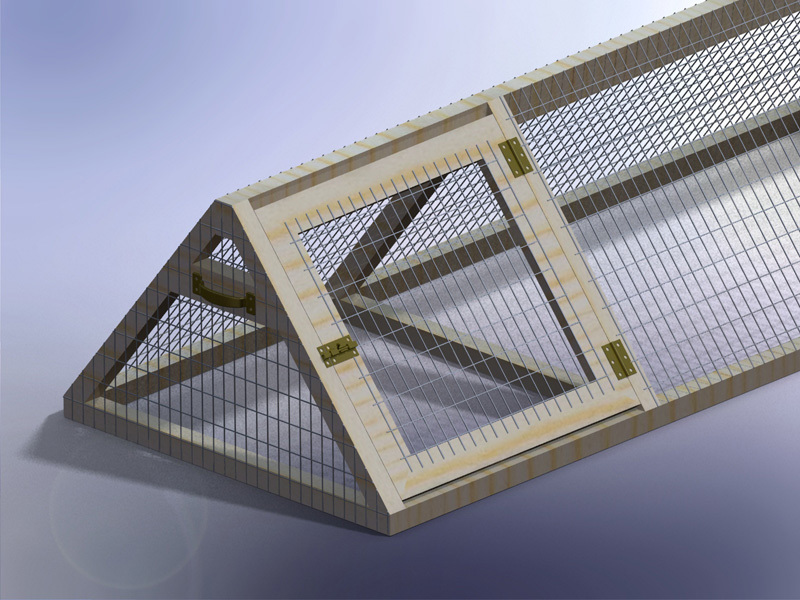
This is a rabbit hutch I created for my kids 5 rabbits. The thing that makes this hutch really nice is if you have a large lawn you can just move the hutch a little bit every day and the lawn gets mowed, fertilized and you don't have to worry about cleaning up all the rabbit droppings. I also mounted a rabbit feeder on the inside of the house door to keep the food dry, which has worked really well.
Here is a short blog of all the steps in its construction:
http://design.medeek.com/gallery/RH3080_COPALIS_2013/RH3080_COPALIS_201…
Sun, 05/05/2013 - 01:52
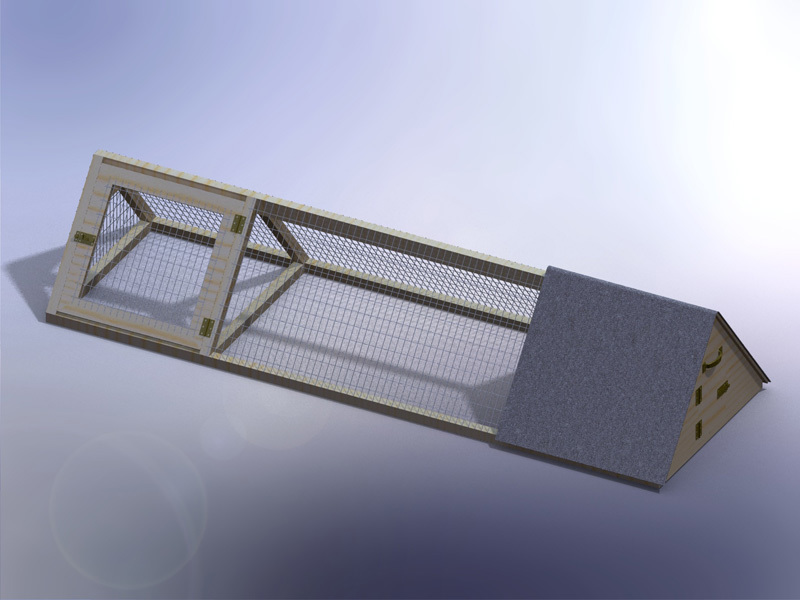
I apologize I haven't got the completed planset up for this project yet but I will try to get it up in the next couple of weeks as well as a very complete materials list. You will need to go to a farm/feed store to get the correct 1"x2" wire and 1/2"x1" wire for the floor. Do not go to Home Depot and use the cow wire they have or the hardware cloth for the floor, neither of which are the correct choice. Home Depot has the lumber but not the wire. If you have any questions or even improvements to my design I would be interested in hearing from you.
Sun, 09/13/2015 - 19:18
Finally got around to uploading the plans. I still need to create a material list for this plan but the basics are there now. We've had rabbits in it for about a year but recently we've tried some guinea pigs and it works great for that as well. The guinea pigs can pretty much live off just the grass and dandelions but you do need to move it daily to give them plenty to eat.
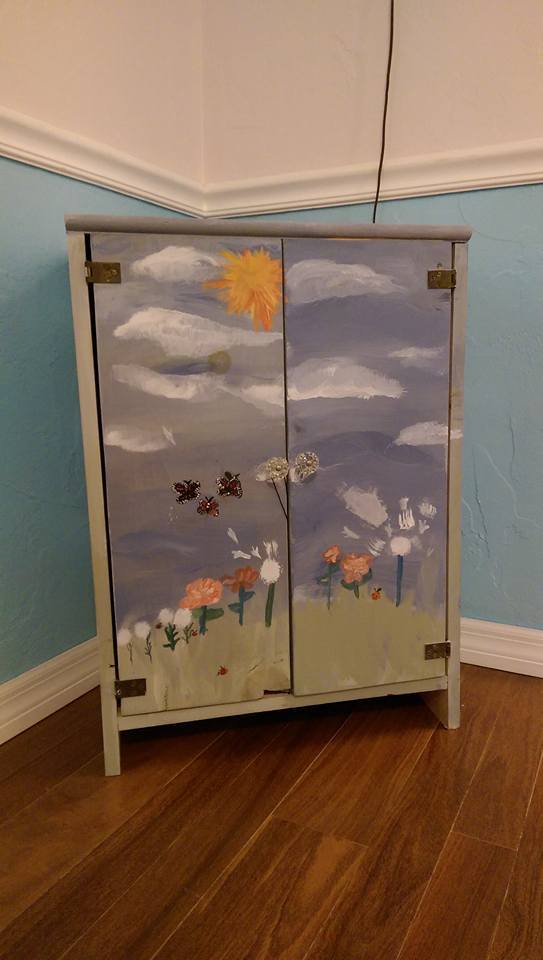
This was fun and easy. I had some of the wood already so I didn't spend that much. My girls painted it to add a personal touch. I would consider adding a magnet to help the doors stay closed a little better. Its been a couple of years and they are still enjoying this. At the time I had no idea how to make a star. Now I know it woudl be easy with a jig saw.
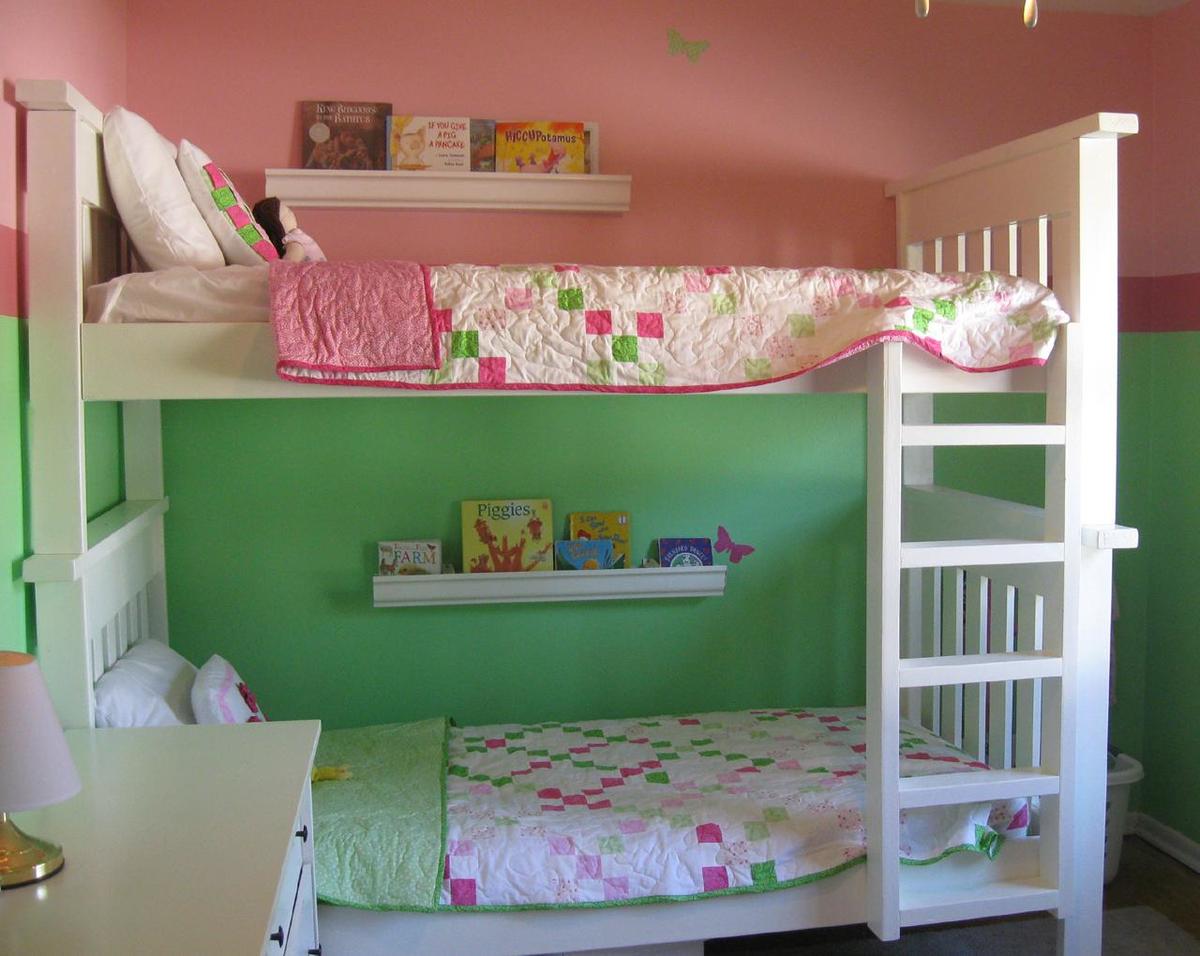
I redid this whole room for less than $600! Make sure you take your time with cuts and fitting. I did this with my father in law (my daughter even got to help out!), and it's less than perfect due to some rushing! More details on my blog.
I also couldn't find any 4x4's. Instead of doubling up on 2x4's, I just used one. That allowed me to change the tops of the head/foot boards to only 48" instead of 50 1/2. You can get enough for a head and foot board out of one board this way.
After looking at a TON of bunk bed ladders online, I designed my own. Just some leftover 2x4's. The sides are 47 1/2 inches long, and the rungs are 13 1/2 inches long. It's screwed to the bunk bed from the back so you don't see the screws.
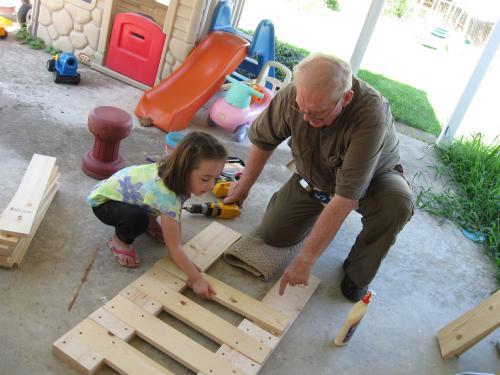


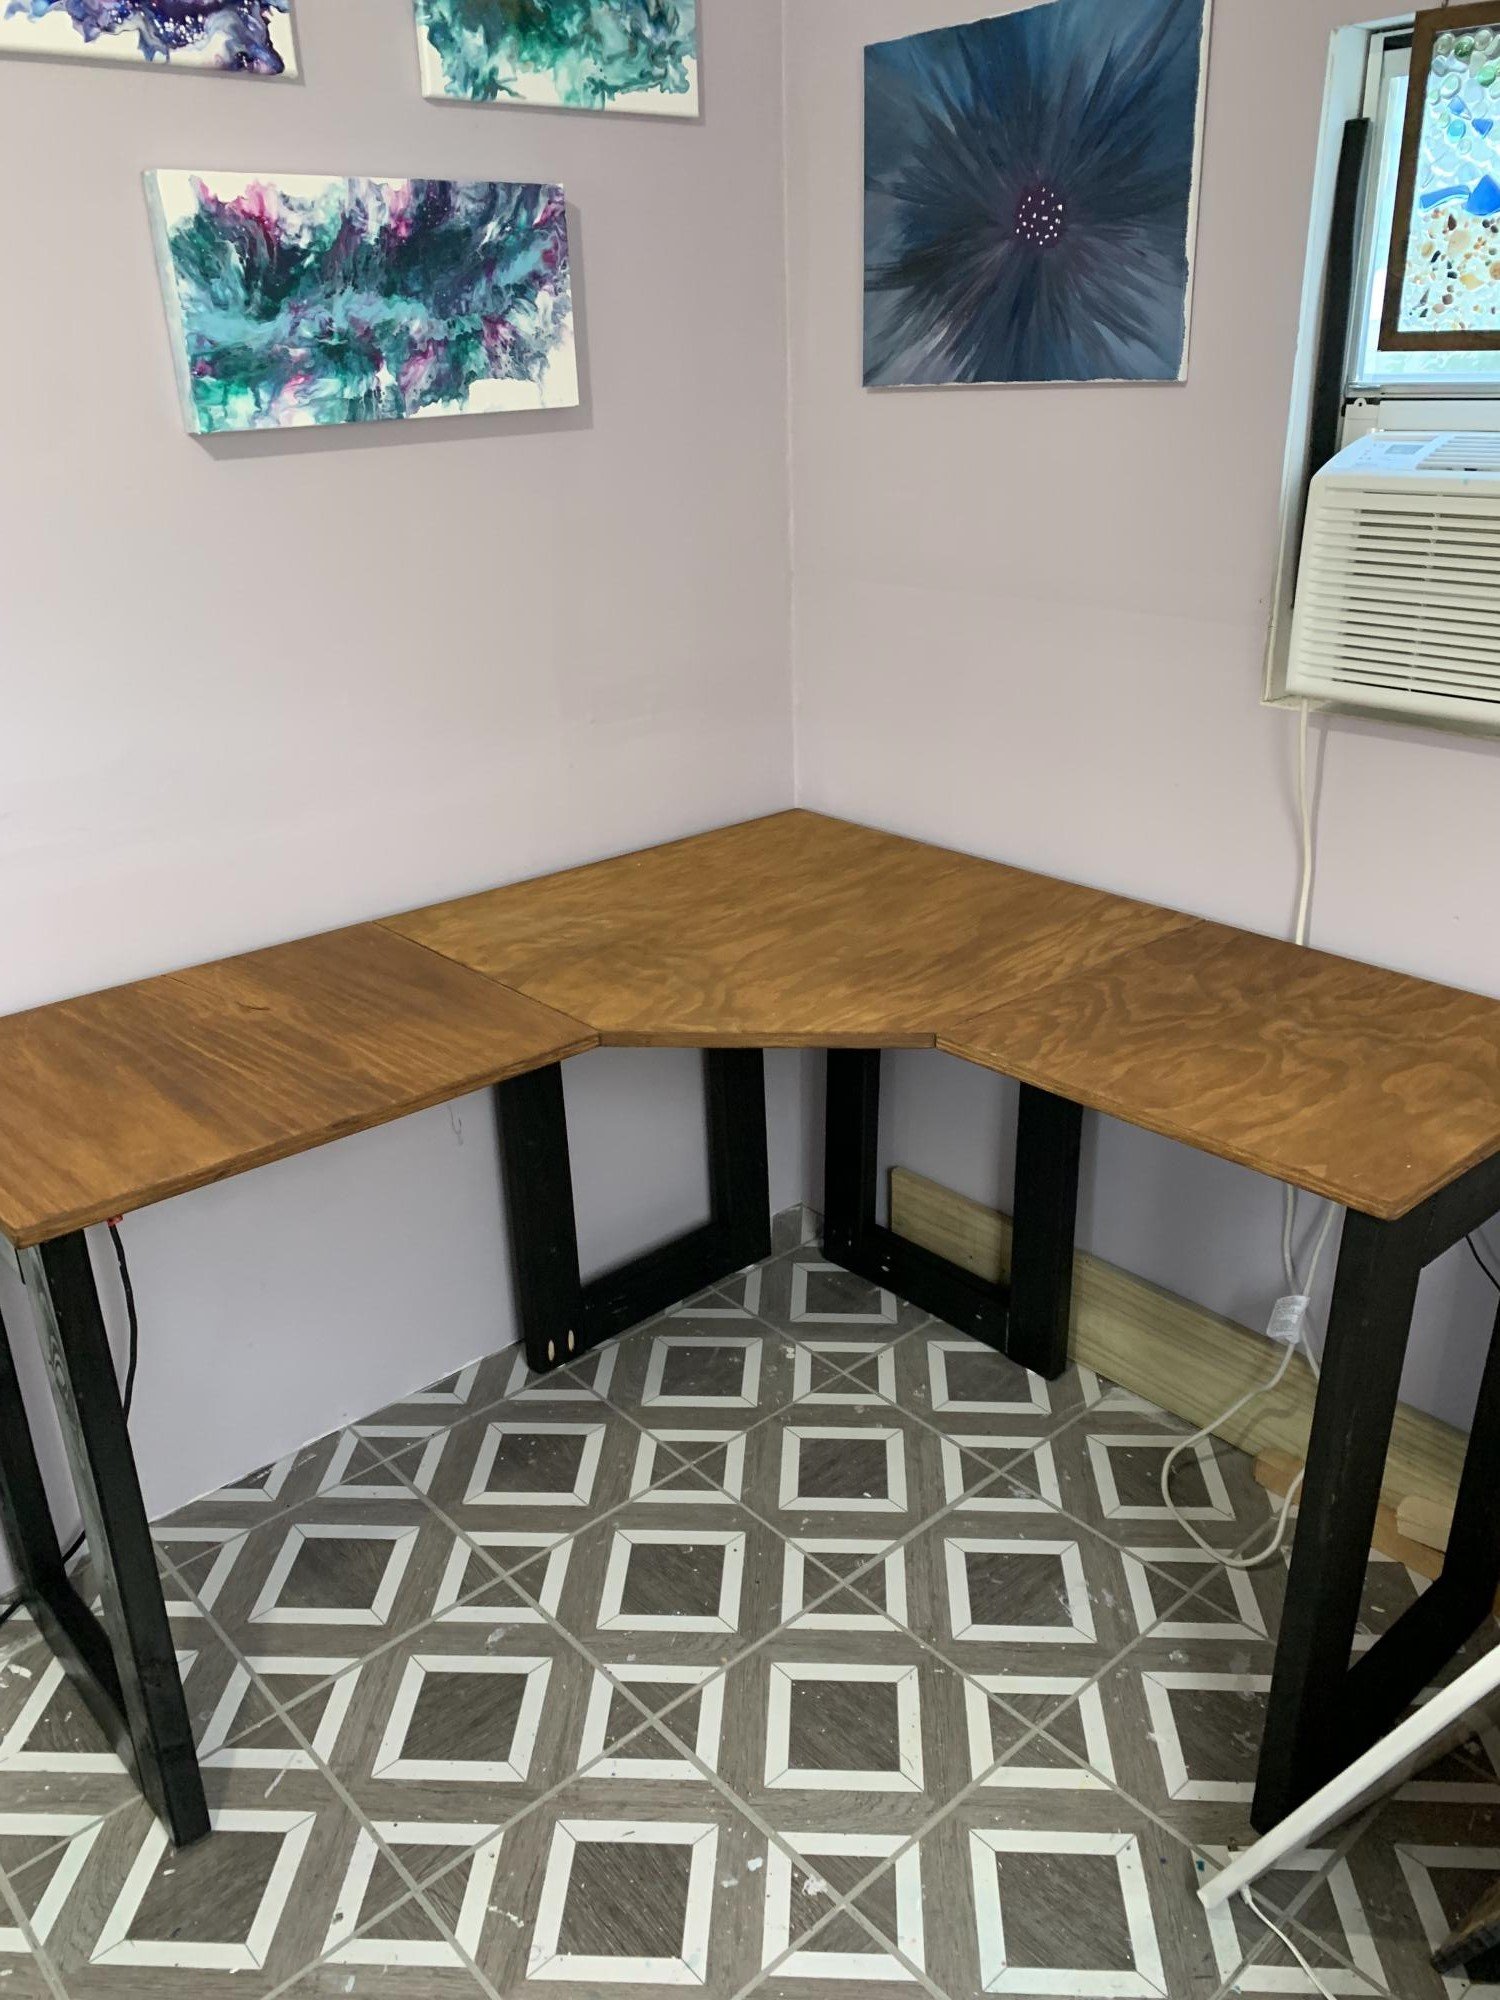
I wanted to convert my craft shed to my office after I accepted a new job and would be working from home full time. My shed is only 10x8, so I needed something smallish and functional. I modified the plans slightly and I did make a few mistakes. In the end, I think it turned out great for a 50 something grandma who likes to work with her hands!
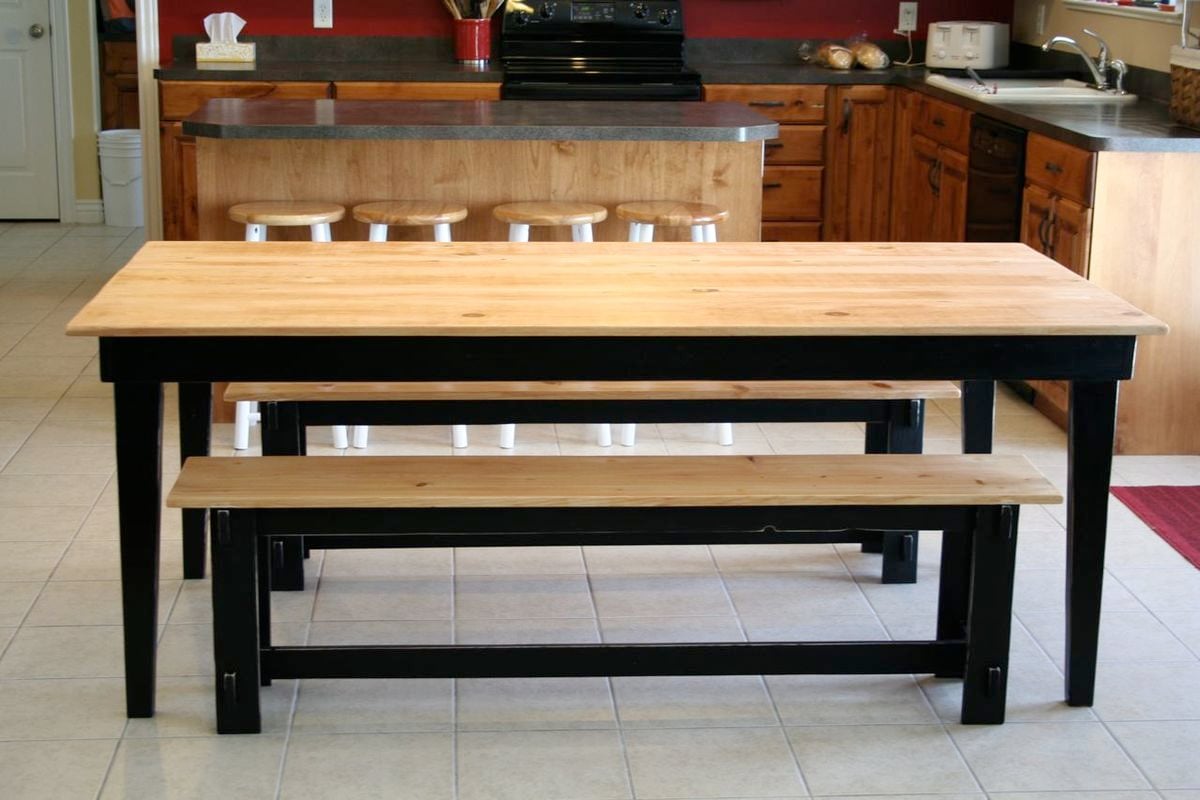
We shortened the table and lengthened the benches - you can see all our details and changes in the blog link.
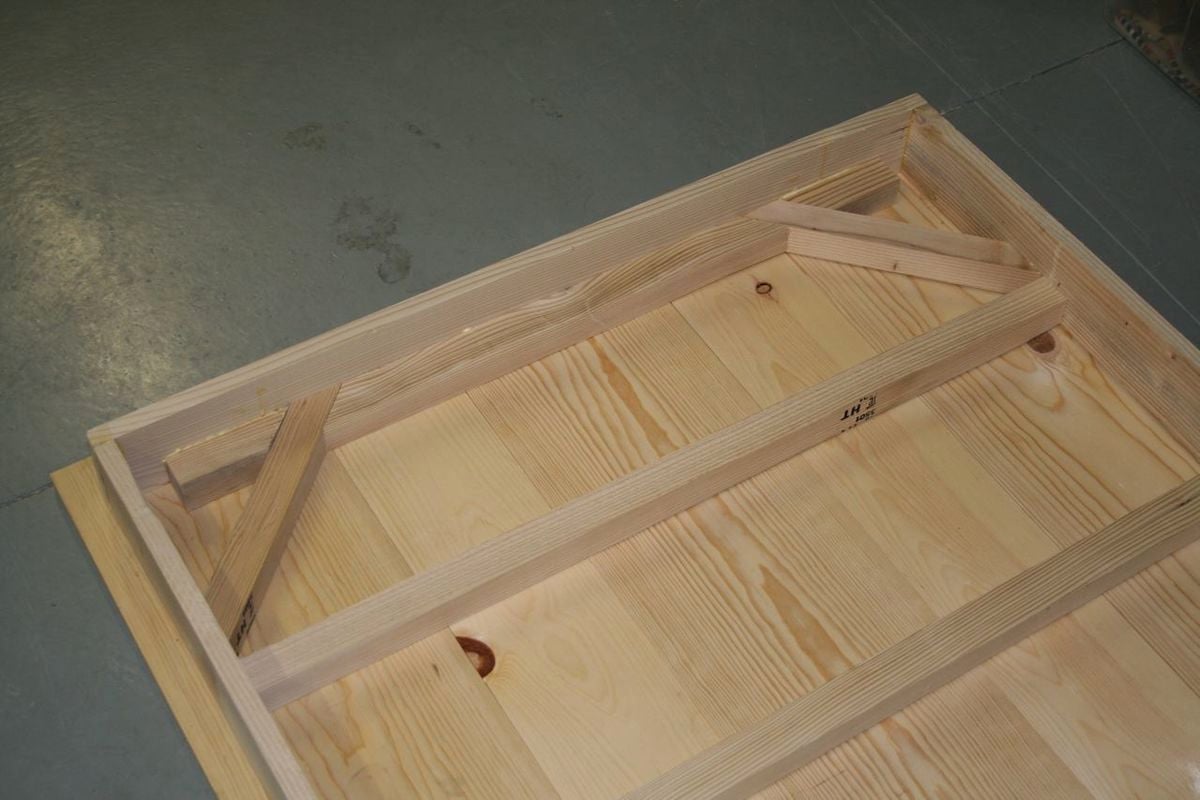
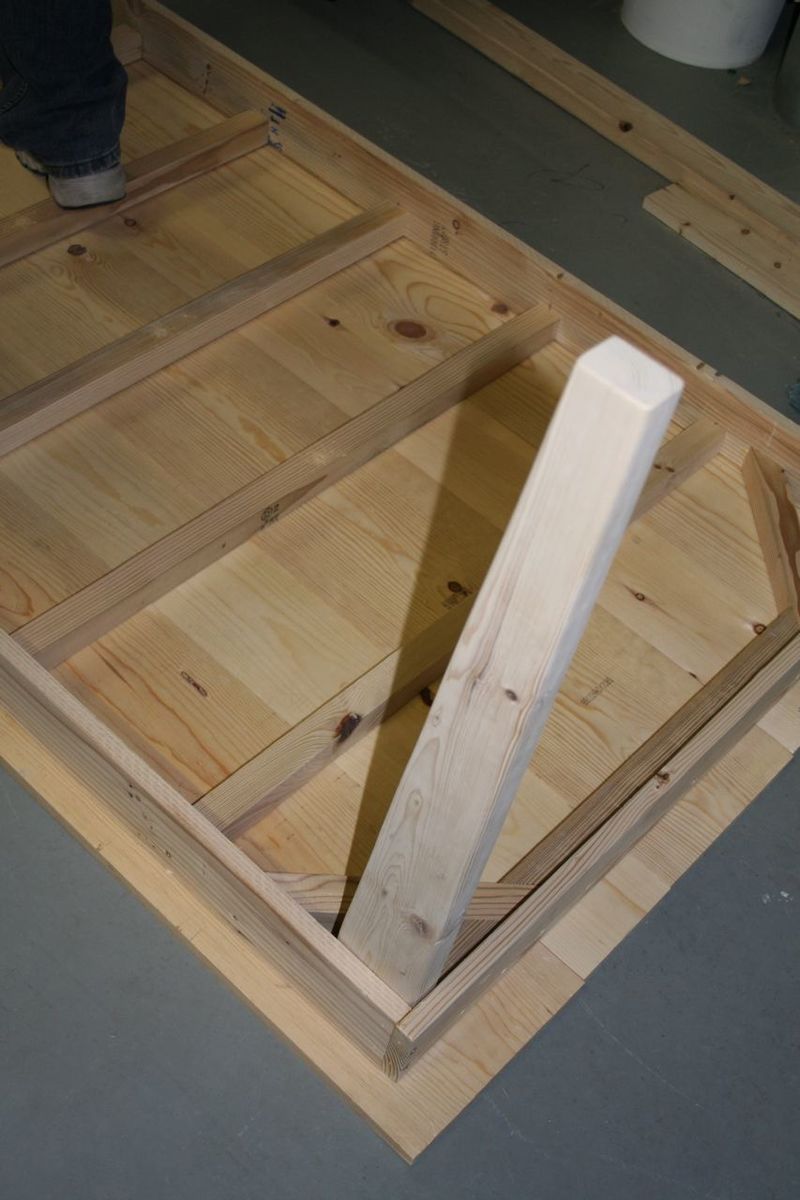

These are made from the three drawer plans but modified the size to meet our needs and used planks for shelves instead of drawers. Painted white and black gel stain.
UPDATE FROM ANA - We have received MANY requests for this plan and have created a plan inspired by this post here.

Shopping List (for ONE bedside table) + Tools
Cut List (for ONE bedside table)

Cut 1x4s and 1x2s with miter saw. Layout side panel 1x4s as shown above. Measure and cut 1x2 to length. Nail the 1x2 to the 1x4s, two nails per overlap with glue. Make sure your side panels are square. Build two.

Drill 3/4" pocket holes on inside edge of 1x4 ends as shown above. Cut 2x2s with compound miter saw. Attach to the 2x2 legs with 1-1/4" pocket hole screws.

Set Kreg Jig to 1-1/2" setting. Drill 1-1/2" pocket holes on end of each 2x2, one per end. Attach to 2x2s with wood glue as shown above.

Cut 1x4 shelf boards with compound miter saw. Nail and glue to the inside of the project as shown above.

Cut 1x4 top boards with compound miter saw. Nail and glue to top with 1-1/4" nails and wood glue.
If you wish to add a back, measure and cut from 1/4" plywood and attach with 3/4" brad nails.
Mon, 02/12/2018 - 16:24
Is there plans for this one? Its gorgeous and I'd love to build it!
In reply to Is there plans for this one? by laurahamer07
Thu, 06/07/2018 - 15:37
Hello, this nightstand was built using these plans http://www.ana-white.com/2011/06/reclaimed-wood-look-bedside-table instead of adding drawers the builder added shelves. The shelves can be 3/4" plywood or 1x boards.
In reply to bedside end tables by karenlouder
Thu, 06/07/2018 - 15:40
Hello, this nightstand was built using this plan, but instead of drawers, simply measure and cut shelves to fit from 3/4" plywood. http://www.ana-white.com/2011/06/reclaimed-wood-look-bedside-table
Wed, 07/24/2019 - 09:24
It's taken us a couple of weekends, but we finished our bedside table. We made two, but one still needs painting.
Thank you for the plans. We had a great deal of fun and learning experience making these.
Want to see it? https://www.facebook.com/photo.php?fbid=2830583376957272&set=pcb.283058…
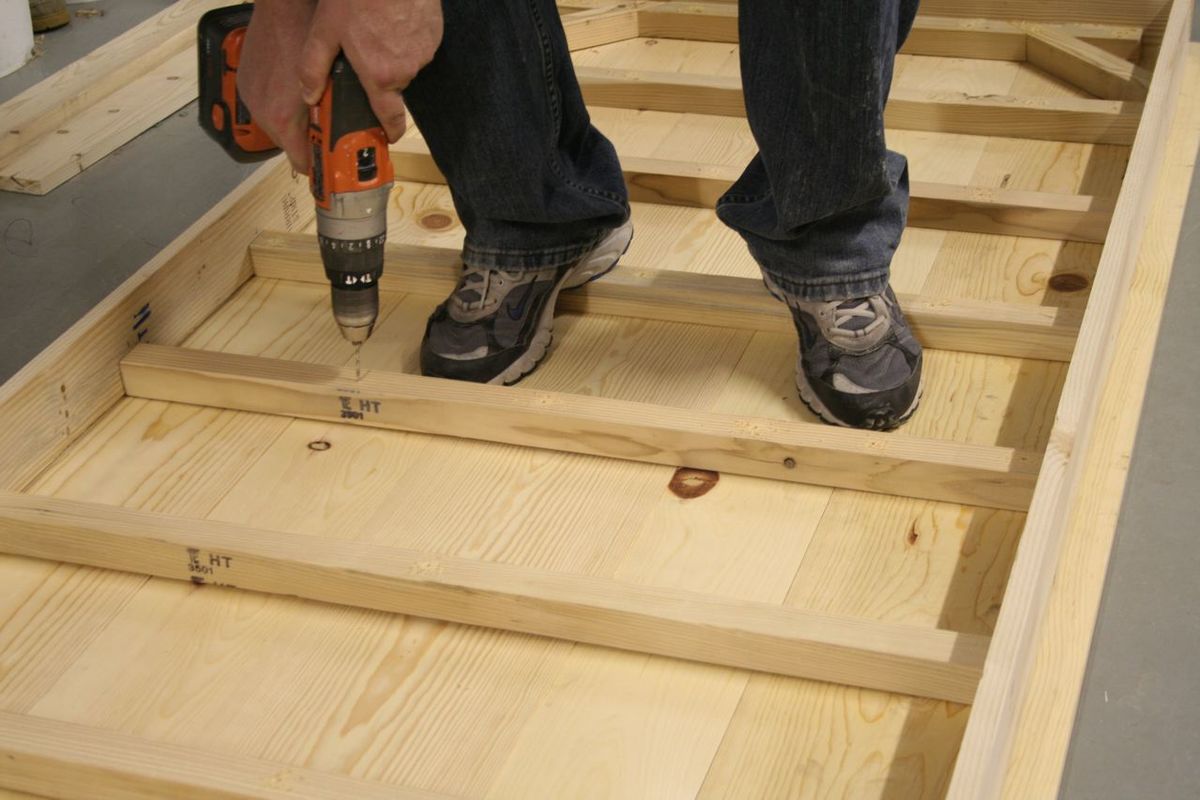
Wanted a Patio table and when I saw the plans on this site I really liked it; I just changed the plan a bit. Everything was screwed from the underside of the table, also I attached the legs with 2" lag screws.
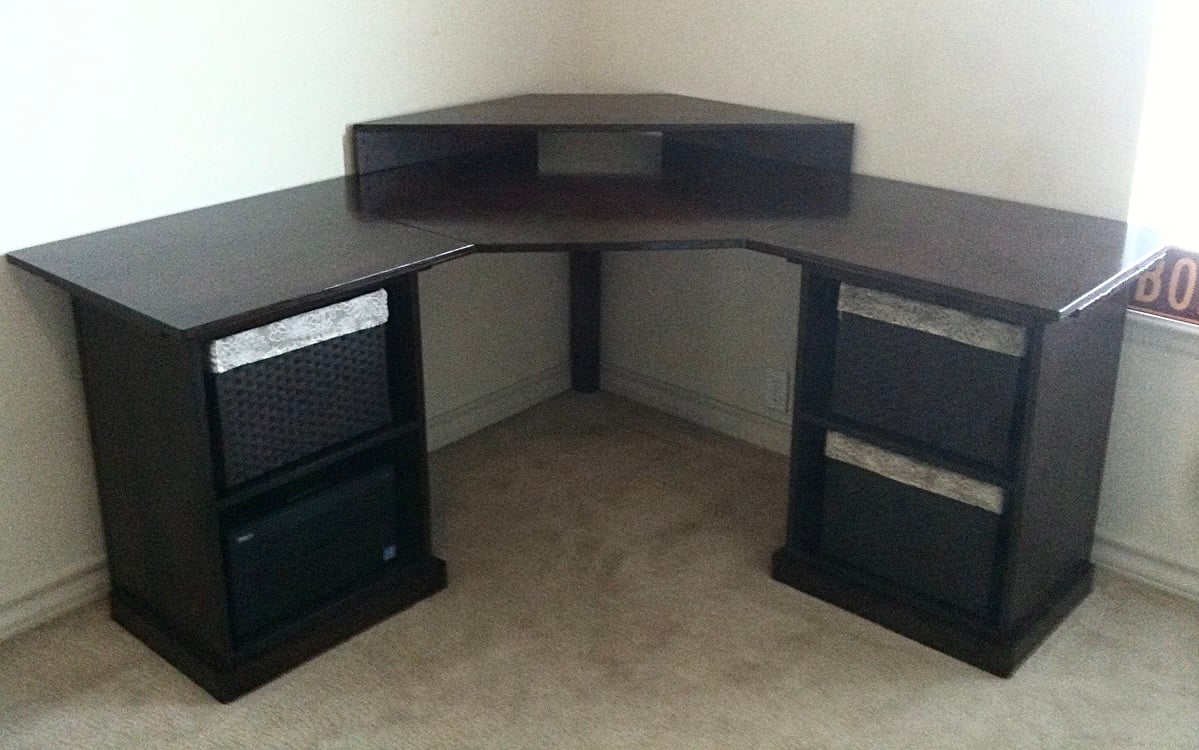
a variation of the corner desk plans. for more pictures visit: http://www.facebook.com/media/set/?set=a.10100136762454037.2548324.2960…
Fri, 02/24/2012 - 22:02
Hey i love the elevated platform, can I get you to post dimensions & Cuts?
Wed, 08/11/2021 - 04:20
Immersing yourself in your own area significantly improves productivity and motivates you when you decide and select best design of corner table admin should allow everyone to share their best comments for help to find best experenice
This is great topic
My wife and I are expecting our first child so I wanted to make a toybox for his toys. I liked the plan that i found on this website since the front piece had the cutout to reduce fingers getting pinched. I also added some spring assisted hinges to make help the lid stay up and also close a little softer than just regular hinges.
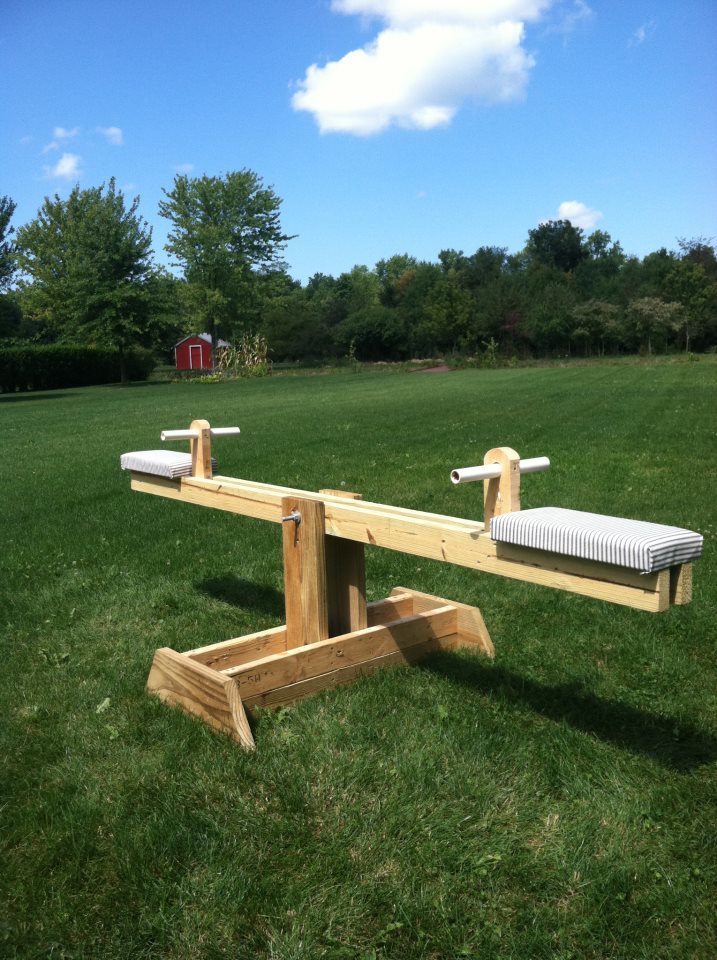
This is one of the cheapest projects for my kids I have ever completed!! And the most rewarding. I think everyone of my neighbors has been on the teeter totter...including adults :) My kids just love it and I am thinking of making a few for my nephews for Christmas. I was able to find all the wood I needed in my scrap pile. I had the PVC pipe and bolt already also so all I had to make a trip to the store for was the foam for the seats. My son helped me build this in an hour. I liked the unfinished look so I just sprayed it with a little Thompson Water Seal. Thank you Ana White!!
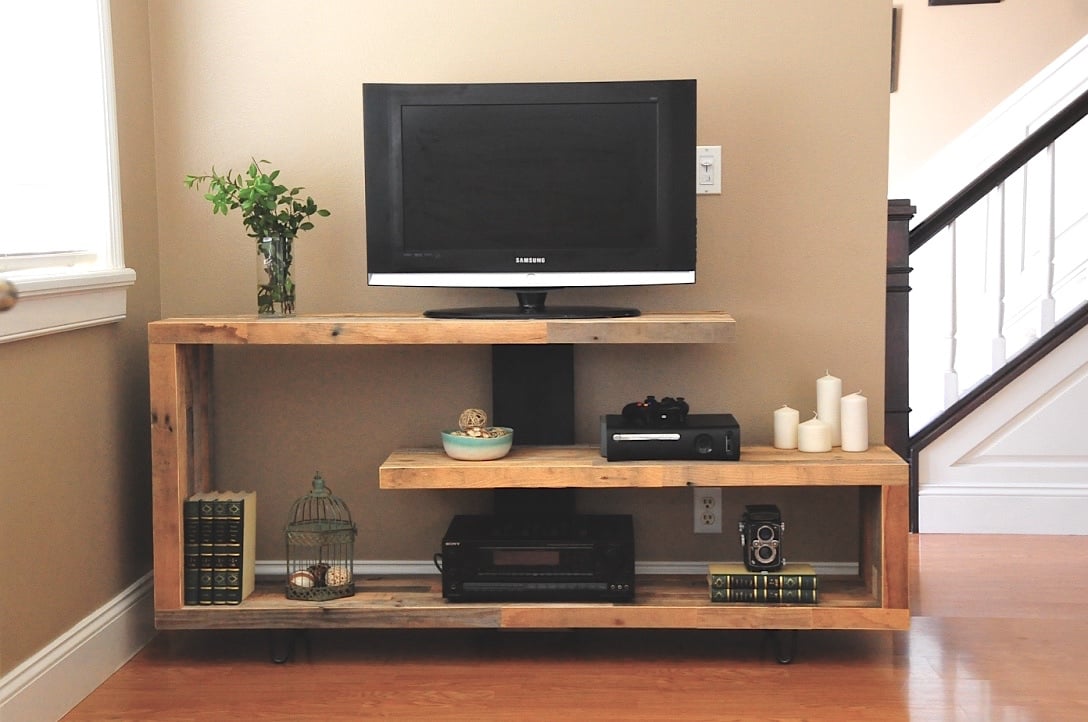
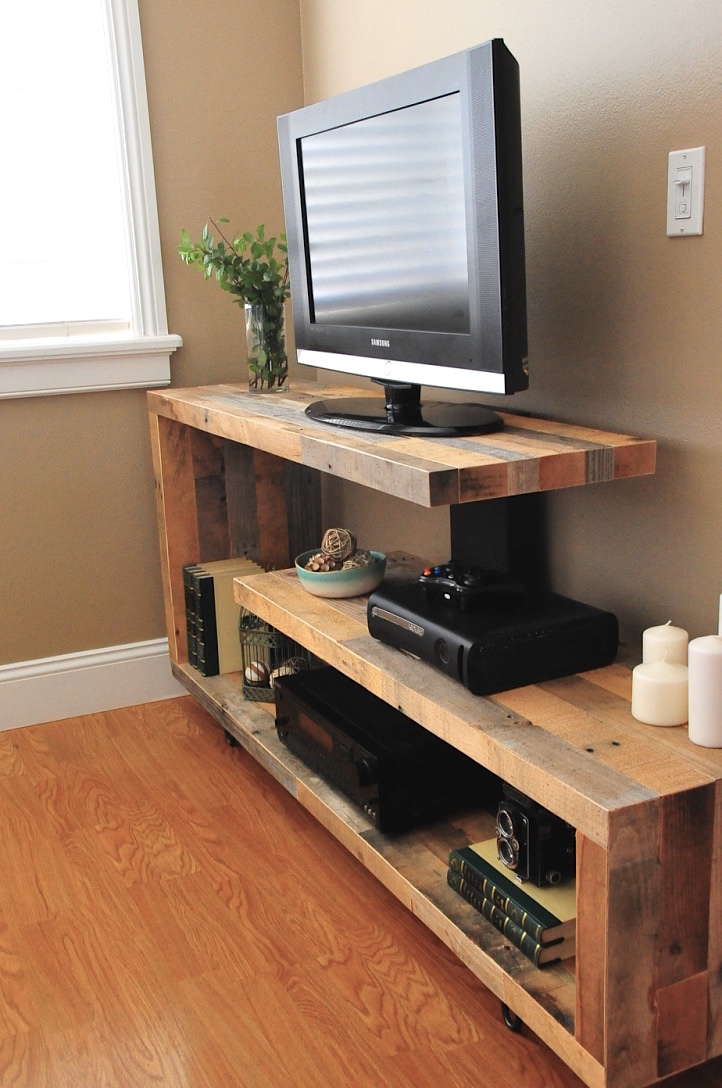
Just finished up this unique TV console. Built from reclaimed pallet wood.
Mon, 12/02/2019 - 22:10
Hi there Im new to site and also have the issue of not seeing the plans for this Rustic Modern TV Console. Are they available and Im doing something wrong or??
Sat, 06/27/2020 - 05:03
I am logged in and I do not see the plans for the "Rustic Modern TV Console"
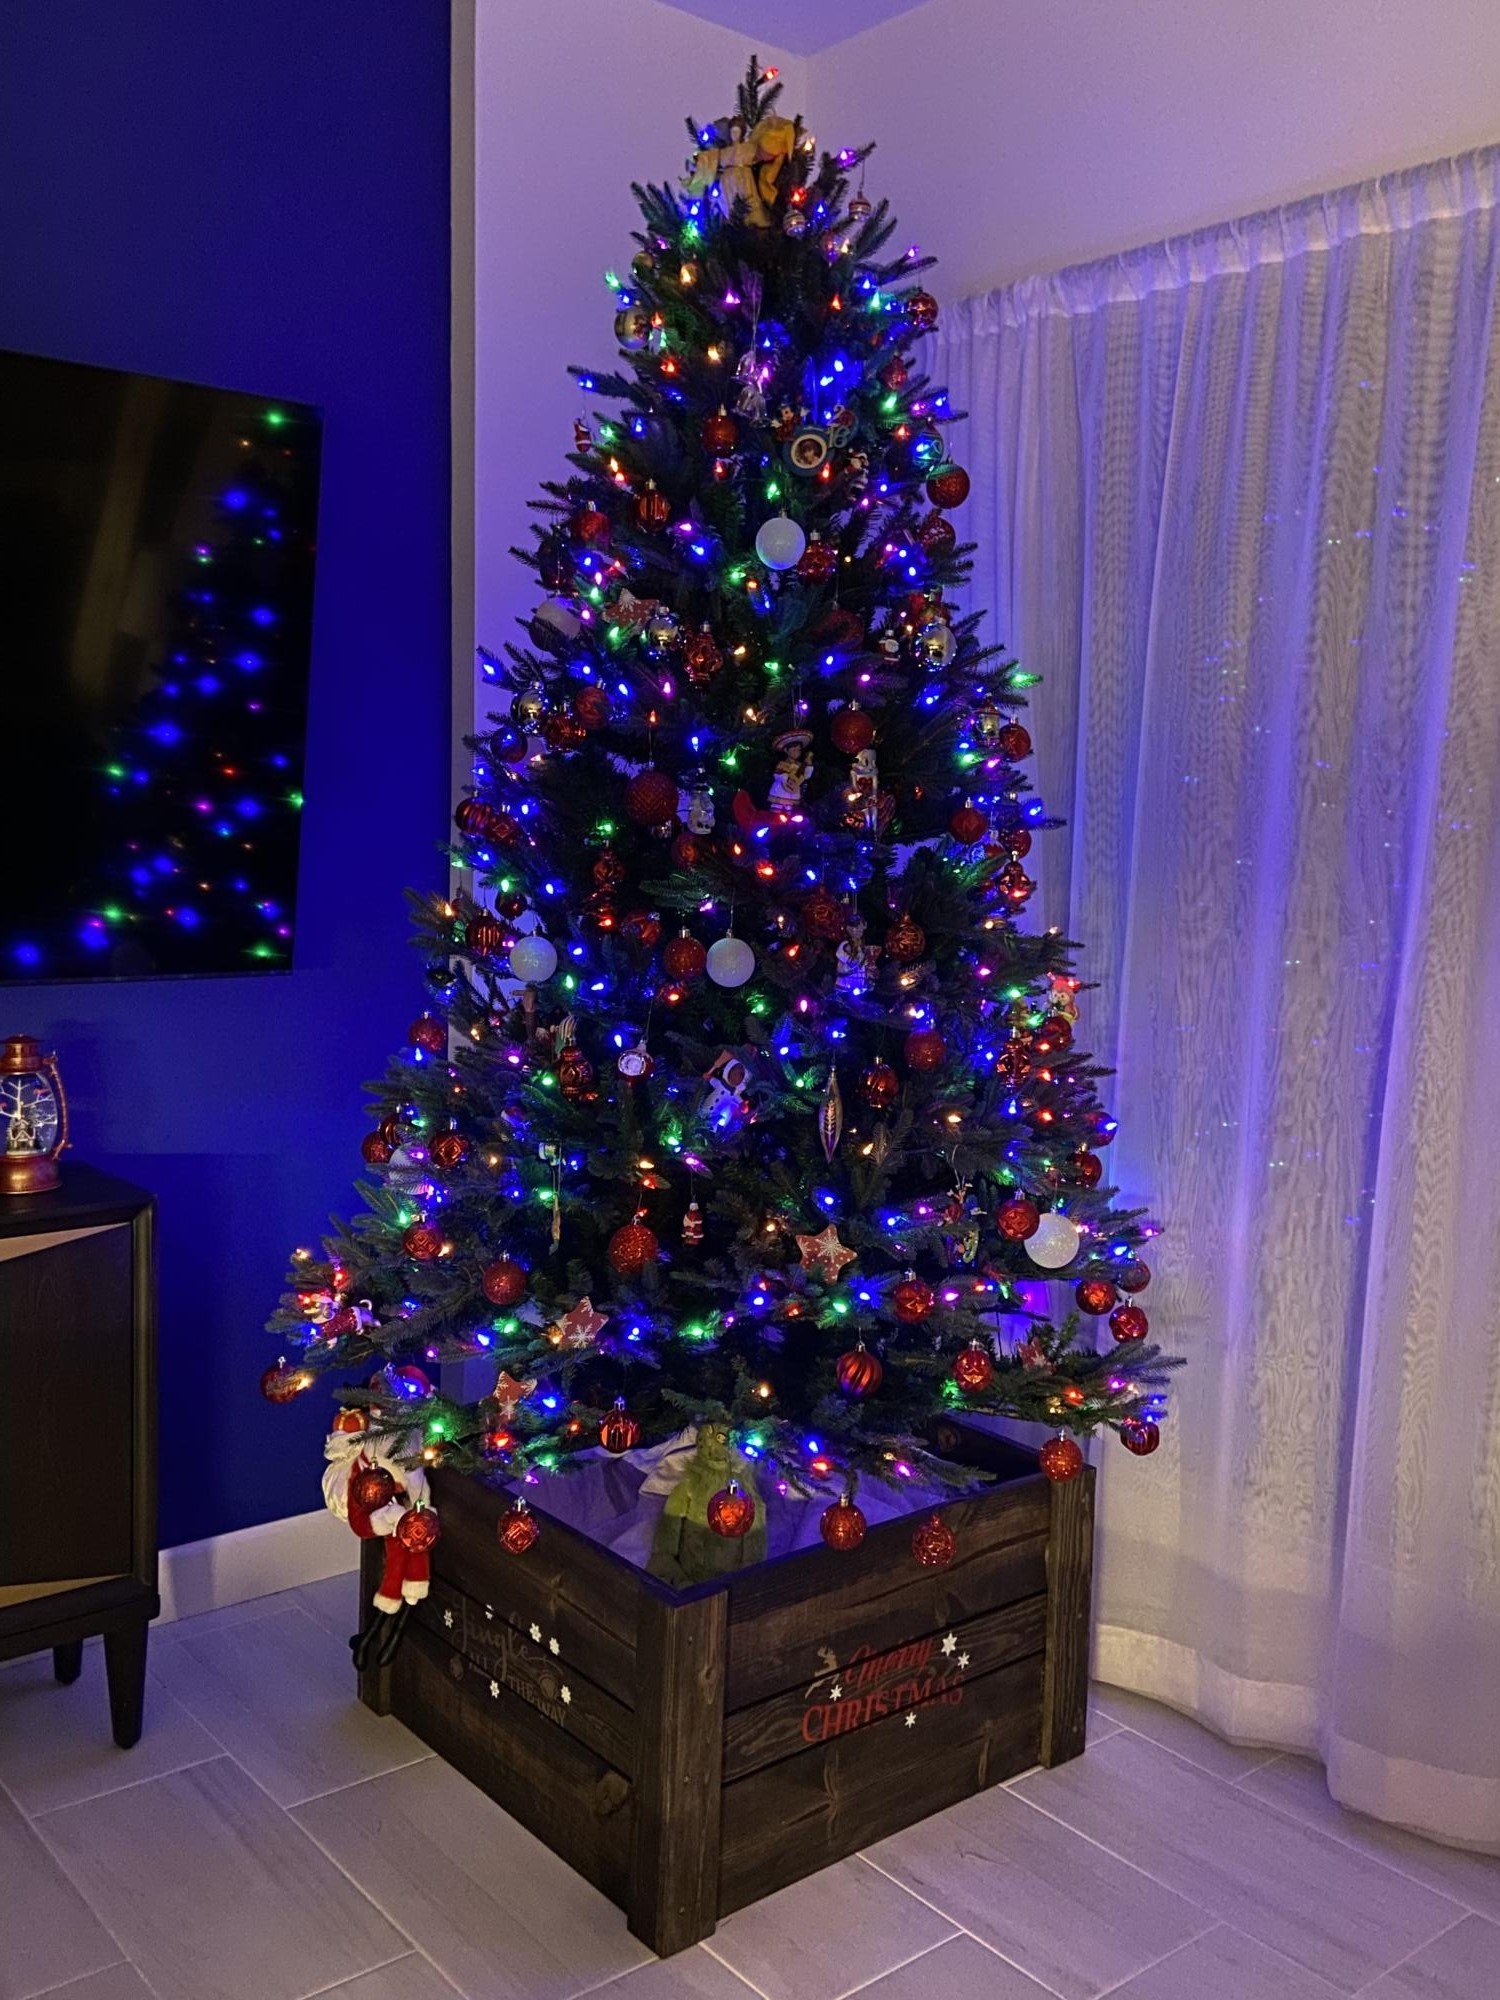
I made this plan at my wifes’s request. I added a platform on the inside for our artificial tree and stencils on the outside of each side. Plan was relatively easy. We love the look. Bonus, made the tree taller. George from Arizona.
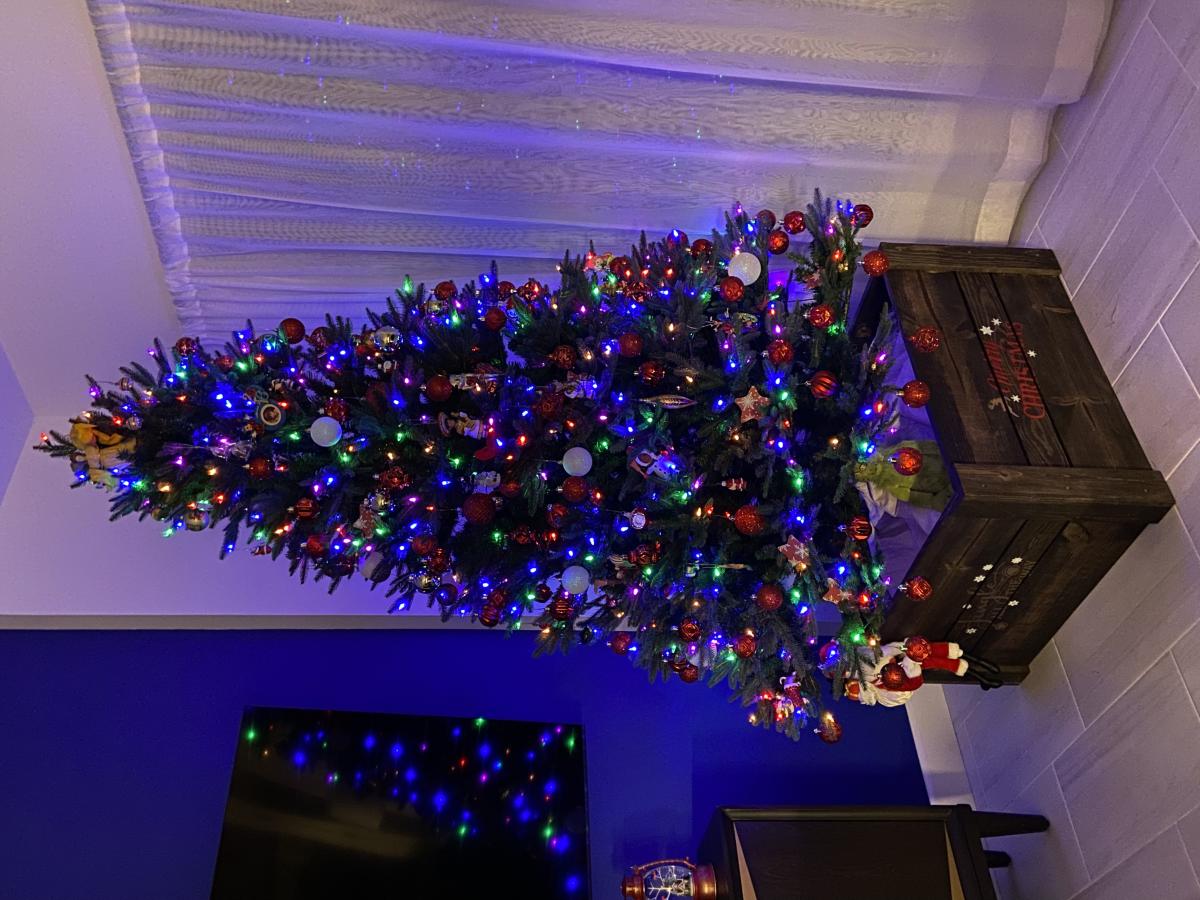
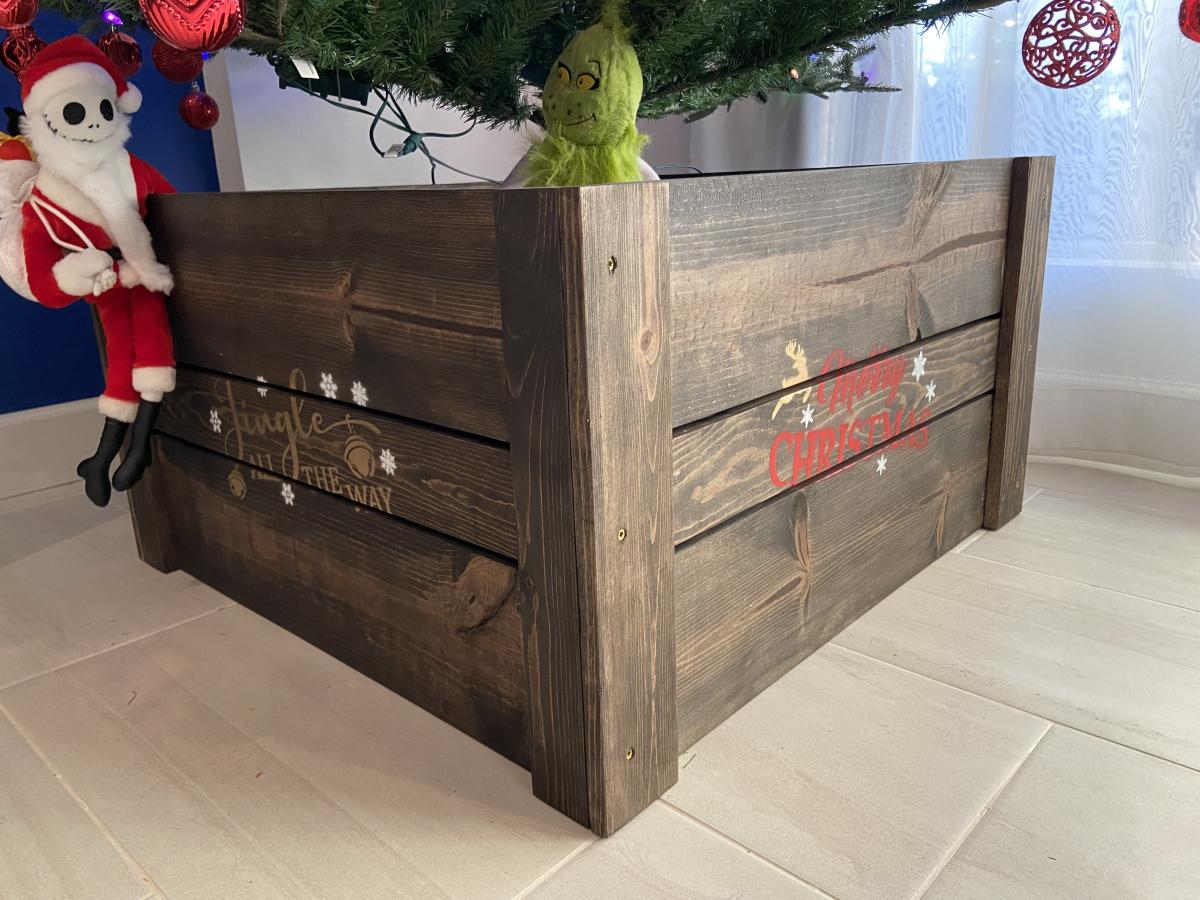
Sun, 11/27/2022 - 10:59
Love the stain choice and the added stenciling, thanks for sharing!
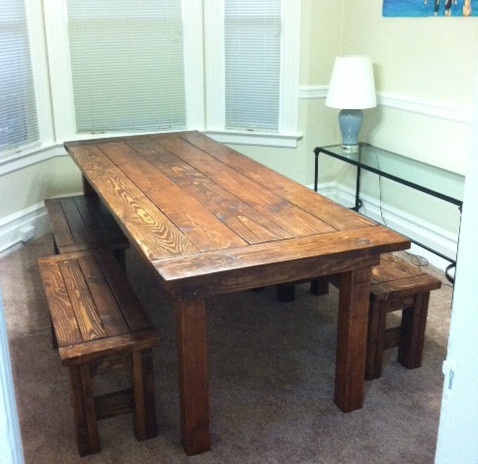
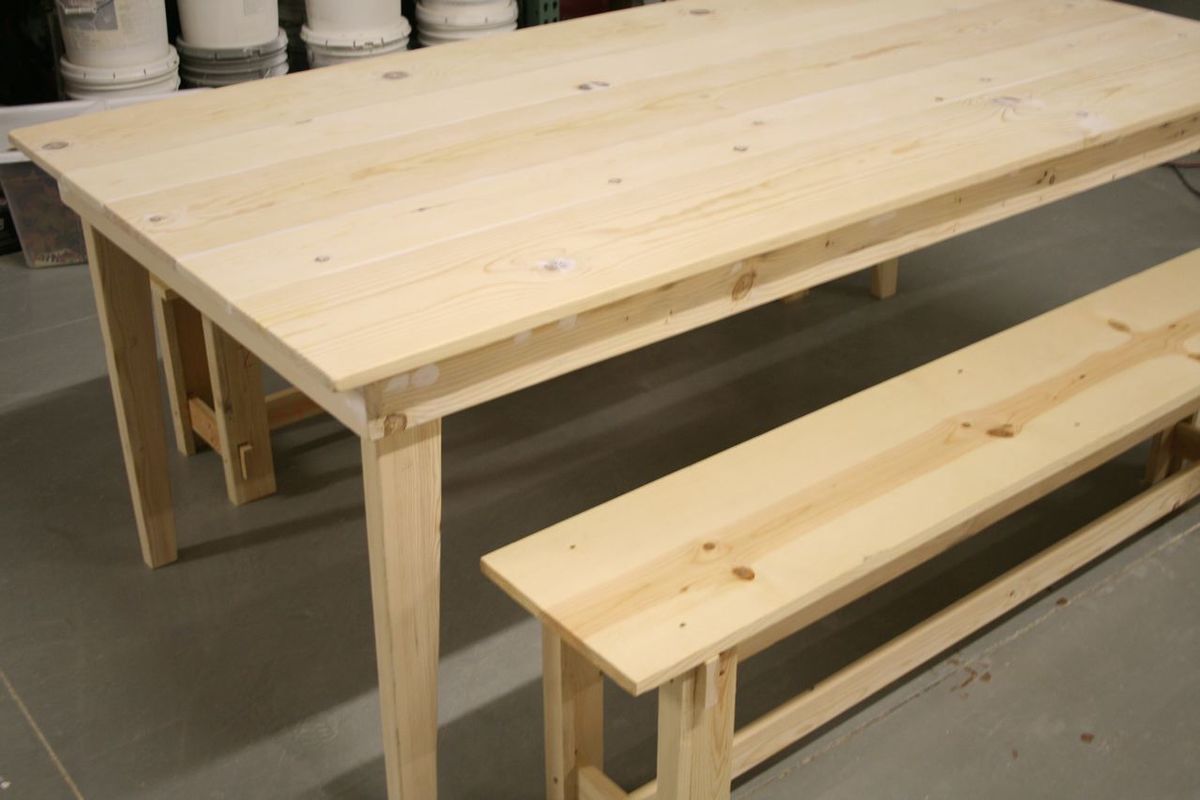
I wanted a big rustic farm table, didn't want to drop thousands on one from a store, so I decided to make my own!
I built it in the (formerly empty) dining room, with tarp on the floor and plastic to seal the doorways.
Was a big project and my first project so I started with the benches as this site and users recommended.
I used the farm house bench plan - just shortened the dimensions so that I could have two benches on either side of the table. Then I merged the two table plans so that I could have the top with the bread boards but legs that attached underneath (like the rustic table) so that they could be removed when we move. I'll work to upload my plans too.
Used Minwax Wood Stain in "english chestnut" and Deft Satin Wood Brushing Lacquer (instead of a Polyurethane).
Sun, 09/25/2011 - 12:18
Your use of short benches makes the set more family and guest friendly. I usually hand rub my finish, I think i want to build this and probably use 0ak 2X12's (know it will be heavy).
Suggestions?
I will use it on a Florida roofed concrete deck for an outdoor dining area. Typically more formal dinners. Deck overlooks beautiful cove.
Thu, 10/13/2011 - 11:00
Can you explain how you merged the plans to add the bread boards? I would love to do the same!
Tue, 03/06/2012 - 01:30
Would love to see the plans for this!
Looks amazing!!
Are the table legs 4"x4"?
Fri, 06/01/2012 - 09:09
This is exactly what I am looking for in a table to build. We want bread boards on the end and we don't want stretchers on the bottom. How did you combine the two to do this. Can you send me a copy of your plan? [email protected]
Fri, 06/08/2012 - 12:59
i would the plans for that table my daughter loves and wants me to build her one
send to [email protected]
Mon, 06/11/2012 - 13:19
We love this table! Could you please send plans to [email protected]
Thanks so much!
Mon, 06/11/2012 - 13:21
We love this table. Please send plans to [email protected]
Thanks!
Fri, 06/15/2012 - 10:00
Your table turned out awesome!
I already have old boards waiting on plans to be turned into a table. Any chance you could send the plans for your table to [email protected]?
Sat, 08/04/2012 - 13:35
Could you please send me the plans for this table? I love it and would love to attempy making it. Thanks so much!
Sun, 09/23/2012 - 14:37
Hi, Can you please send me the plans to make this table?
Thanks!!
Alex ([email protected])
Sun, 09/30/2012 - 18:34
I love this table. Can you please send the plans to [email protected]
Sun, 11/04/2012 - 11:07
I would love to attempt this!Would you please share your plans?
[email protected]
Thanks so much
Sun, 11/04/2012 - 17:17
This table is exactly what I've been looking for!! Could you please share your plans? [email protected] Thank you.
Sun, 11/04/2012 - 17:25
This table is exactly what I have been looking for! Could you please share your plans? [email protected]
Tue, 01/01/2013 - 06:09
Can you send plans for this table build to [email protected] thanks.
Wed, 01/02/2013 - 15:53
Your farm table and benches were exactly what I was looking for. Please send me the plans if they are available. Thanks
Wed, 01/02/2013 - 19:18
I would love your table plan. This is absolutely gorgeous!! Please forward table plans to [email protected]
Wed, 01/02/2013 - 19:23
I would love a copy of the plans for this gorgeous table you made. I am inspired.
Fri, 01/18/2013 - 18:01
Could you please send plans? I love the look of your table!
[email protected]
Sat, 03/16/2013 - 20:12
Can I please please please have the plans? I have a very narrow dining area and this table is PERFECT. Thanks
Sun, 05/12/2013 - 14:30
I would REALLY like the plans for his version as well. I am going to combine them. Can someone ask him to post or his he sending via email? If so, [email protected]
Thank you SO much!!!
Wed, 06/26/2013 - 13:09
Thu, 06/27/2013 - 13:34
Fri, 06/28/2013 - 10:49
Great table! I too would like plans - please send to [email protected]
Thanks!!
Mon, 07/15/2013 - 09:48
just bought a cabin and need all sorts of furniture. I love what you did and would sure love to have your plans and how you merged the two----both for the table and especially for the benches. Trying to do a 10' table for huge family gatherings. Thanks so much! You rock!
Tue, 07/23/2013 - 14:28
This table and bench set is exactly what I am looking for. You did such a great job!
Do you have plans that you wouldnt mind sending to my email? [email protected]
Mon, 08/26/2013 - 13:09
Hi! I noticed MANY requests for the merged plans. Did you post them somewhere or can you please email the plans to me at [email protected]?
BIG THANK YOU! Tina
Fri, 09/06/2013 - 13:49
I would love the plans for this table... could you please email them to [email protected]?
Thank you so much!
Beth :D
Fri, 01/09/2015 - 19:54
Hi everyone,
Well I didn't see all these comments! Sorry to have ignored your requests for plans!
This is the bench I made (I did four of these, and adjusted the measurements so they were each about 40" long)
http://ana-white.com/2011/01/farmhouse-bench
I was going to do this table, because it matches the benches, but decided I wanted a table with removable legs so it would be more maneuverable when we move!
http://ana-white.com/2009/12/plans-farmhouse-table-knock-off-of.html
I ended up using more of this plan in terms of how I assembled it, but adjusted the plans to have the tabletop include breadboards (the plank on top perpendicular to the long tabletop planks) and I used 4x4s for legs, plus the top was from 2x8s not 1x10s. I put in the optional cross supports too, and additional supports under the breadboard to connect it to the table frame and table top slats.. this is more info than you need, all to say, plans are flexible and you can do what you want!
http://ana-white.com/2010/03/plans-very-rustic-table-and-cool.html
Sorry I don't have detailed notes. I was very picky about the dimensions (based on space) and how high I wanted the table (about 1.5" taller than a normal table). I also measure the distance between the underside of the table and the tops of the benches so I could cross my legs under the table (an odd requirement).
Happy Building!
Sat, 03/21/2015 - 17:34
could you send me the plan for this rustic table that was made from the farm house and rustic table if they are available? Email to [email protected]
Sat, 03/28/2015 - 12:45
can you please send me the plans [email protected]
i love it!!!
Wed, 04/01/2015 - 15:10
I like the english chestnut stain. That works so well with this type of lumber. Great job. I plan to use the same stain on the Tryde coffee table I am building. Thanks for sharing your work!!!
Sat, 08/08/2015 - 12:30
Thu, 08/13/2015 - 19:17
Sorry! I accidentally hit the spam button but I really would like the plans for the table. Sorry for the confusion!
Thu, 08/13/2015 - 19:23
Ok, now I feel really silly. Obviously, this is my first time leaving a comment. I love the table. It is exactly what I've been looking for. Could you email the plans to [email protected]?
Thanks!
Fri, 01/08/2016 - 17:38
Fri, 01/08/2016 - 17:40
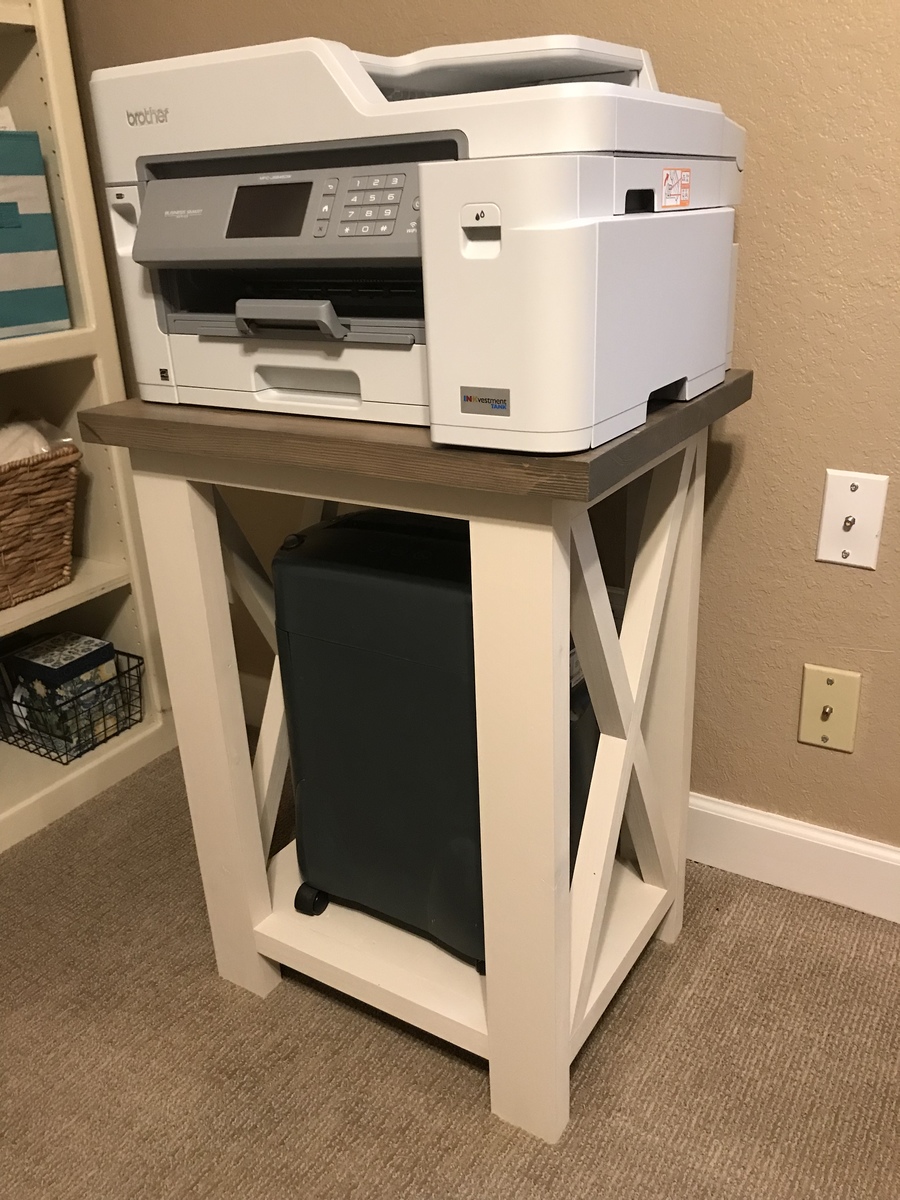
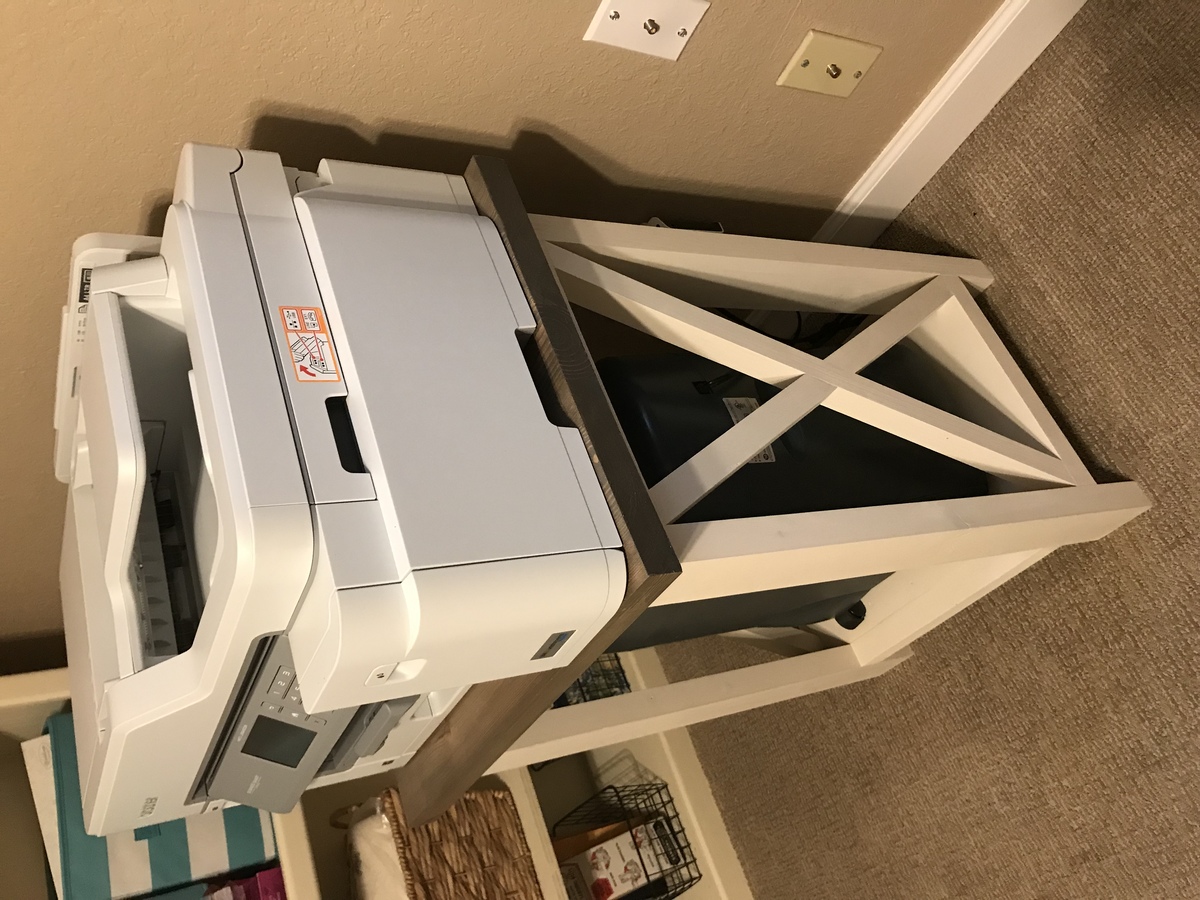
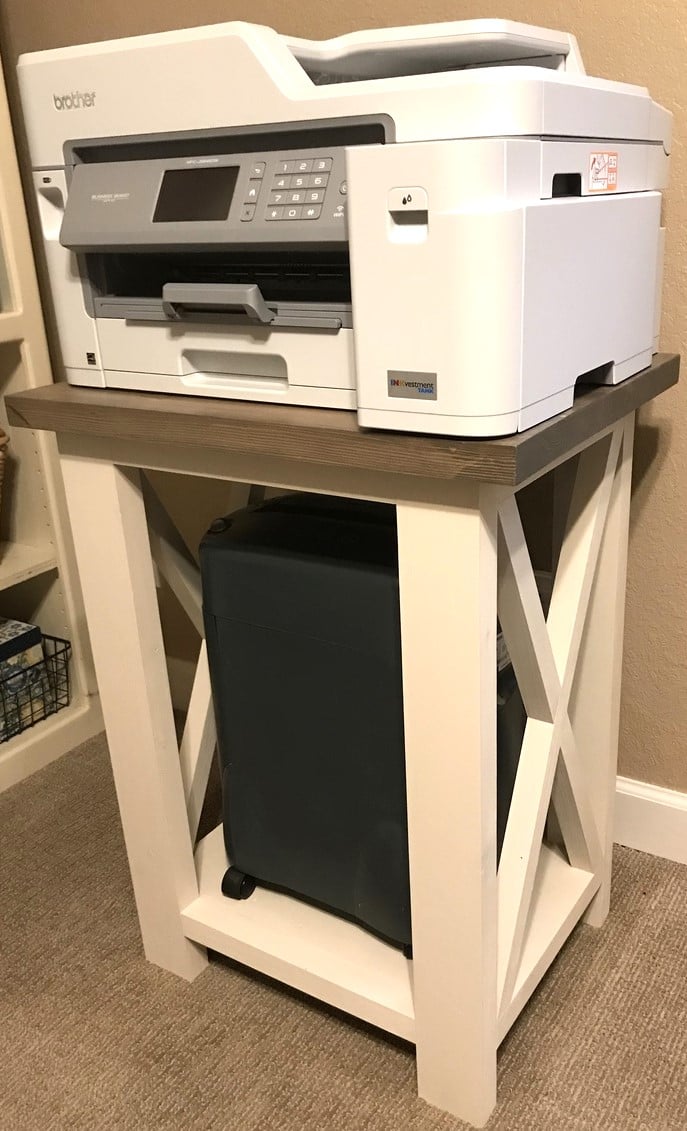
I adapted the plan to make a stand for our printer and shredder. Except for one board, I was able to use scraps so my total out of pocket was $9! I did plane the 2x material to 1 1/4”, and also used 2x material for the base to add a little strength to hold the shredder. Thank you Ana White, for generously sharing your plans!
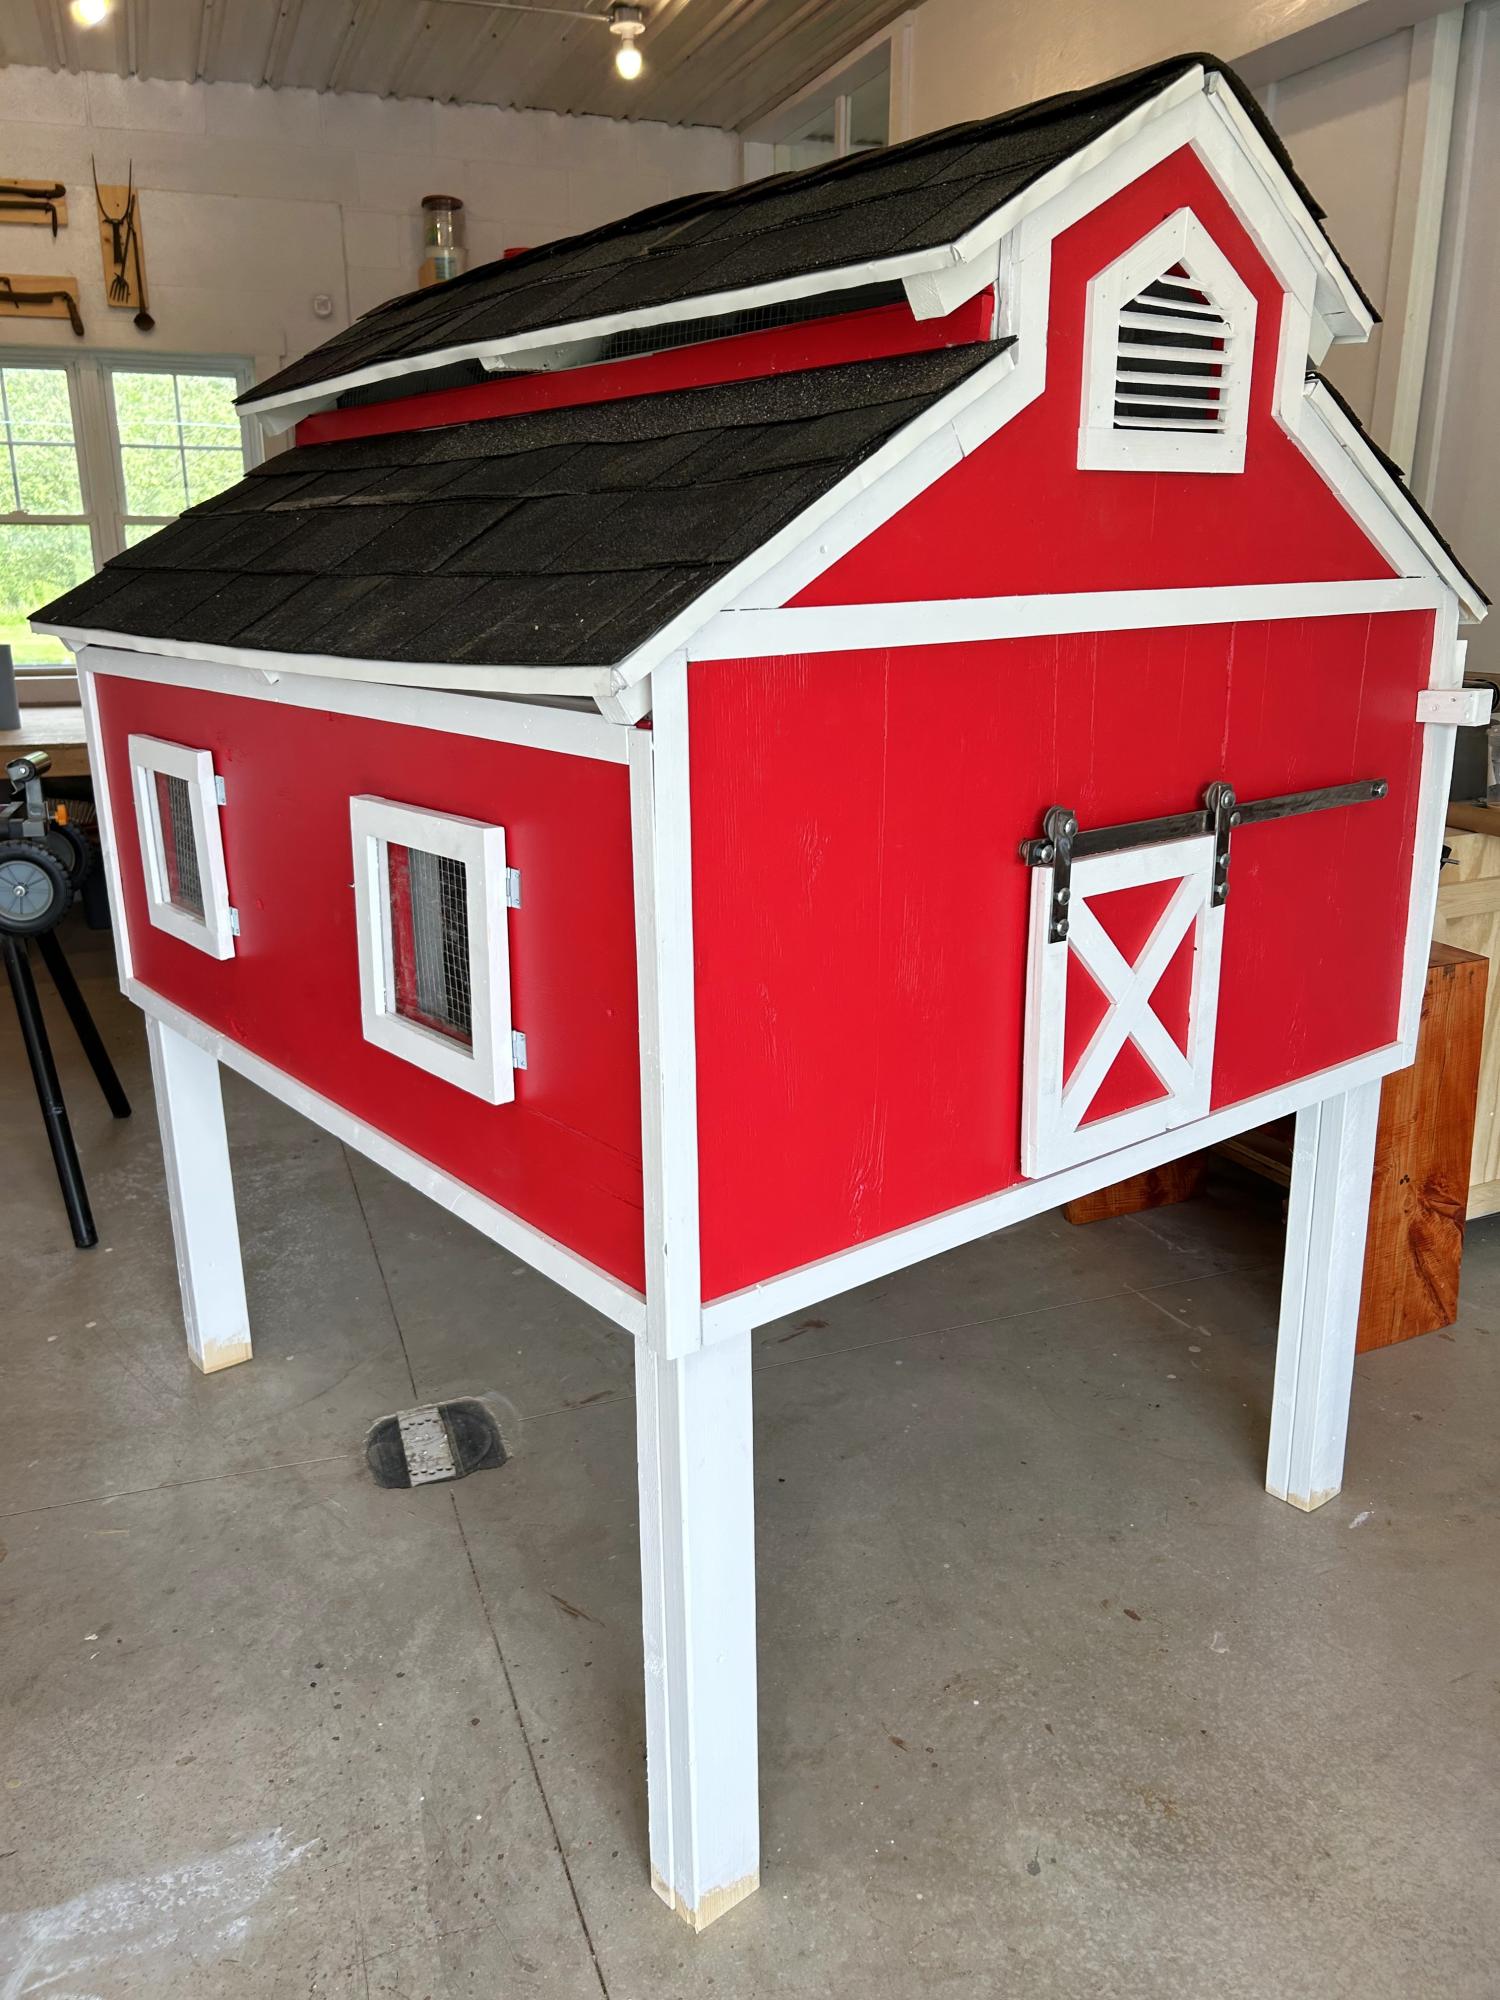
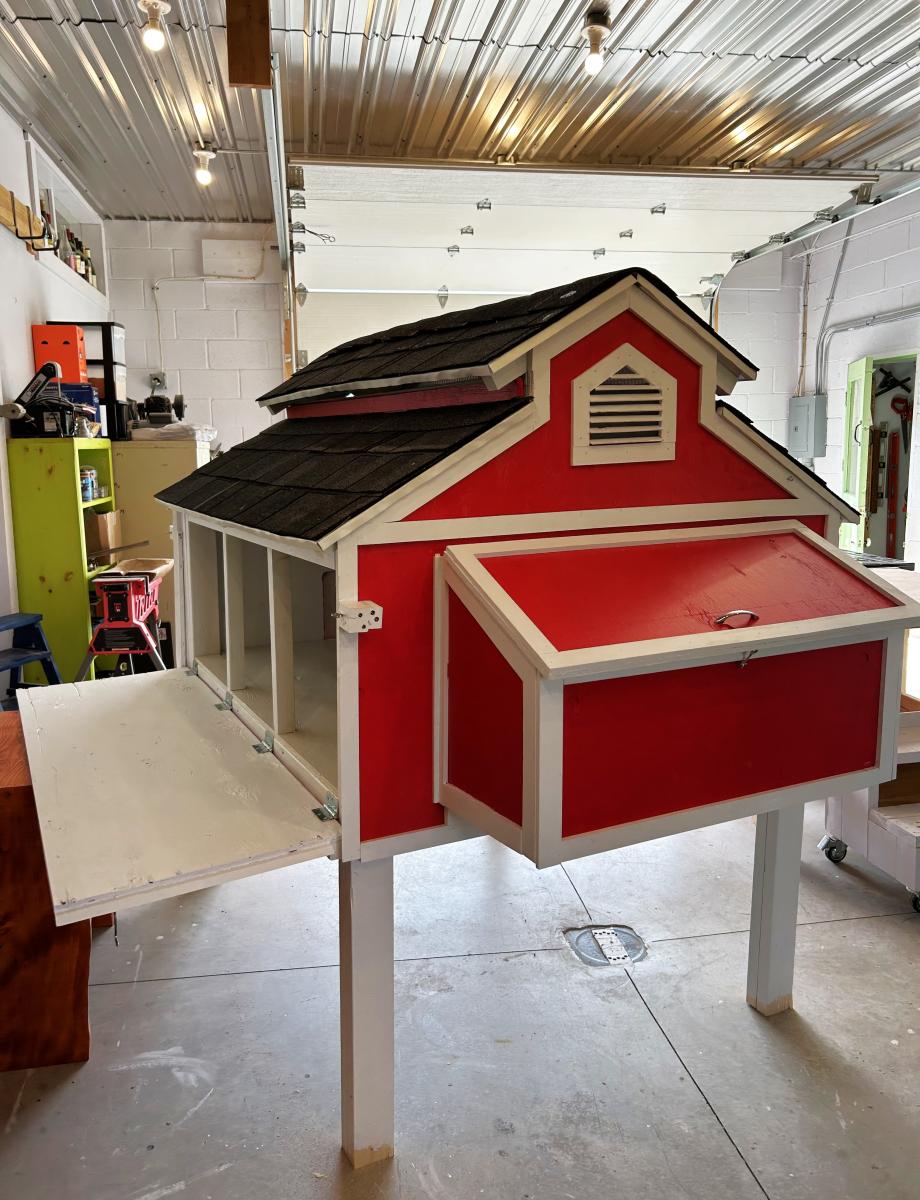
Chicken coop I made to look like a little red barn complete with a working barn door. We have seven girls and they love their lovely barn home.
Sue Laidacker
Comments
handmadewithash
Fri, 12/19/2014 - 17:35
Great job! This looks super
Great job! This looks super awesome. I think I'll have to add this to the to-build list when my little boy is older. I bet he'll love it too.
milyron
Tue, 05/19/2015 - 11:00
few questions
Hi, This bed is awesome. I have few question and would appreciate if you could help me.
Did you use any connector bolts to be able to take it apart easily?
How did you connect the slats of the platform to the frame? with PH screws?
would appreciate any details you can give me.
Thanks
Mily:-)