Twin Farmhouse Bed with Trundle
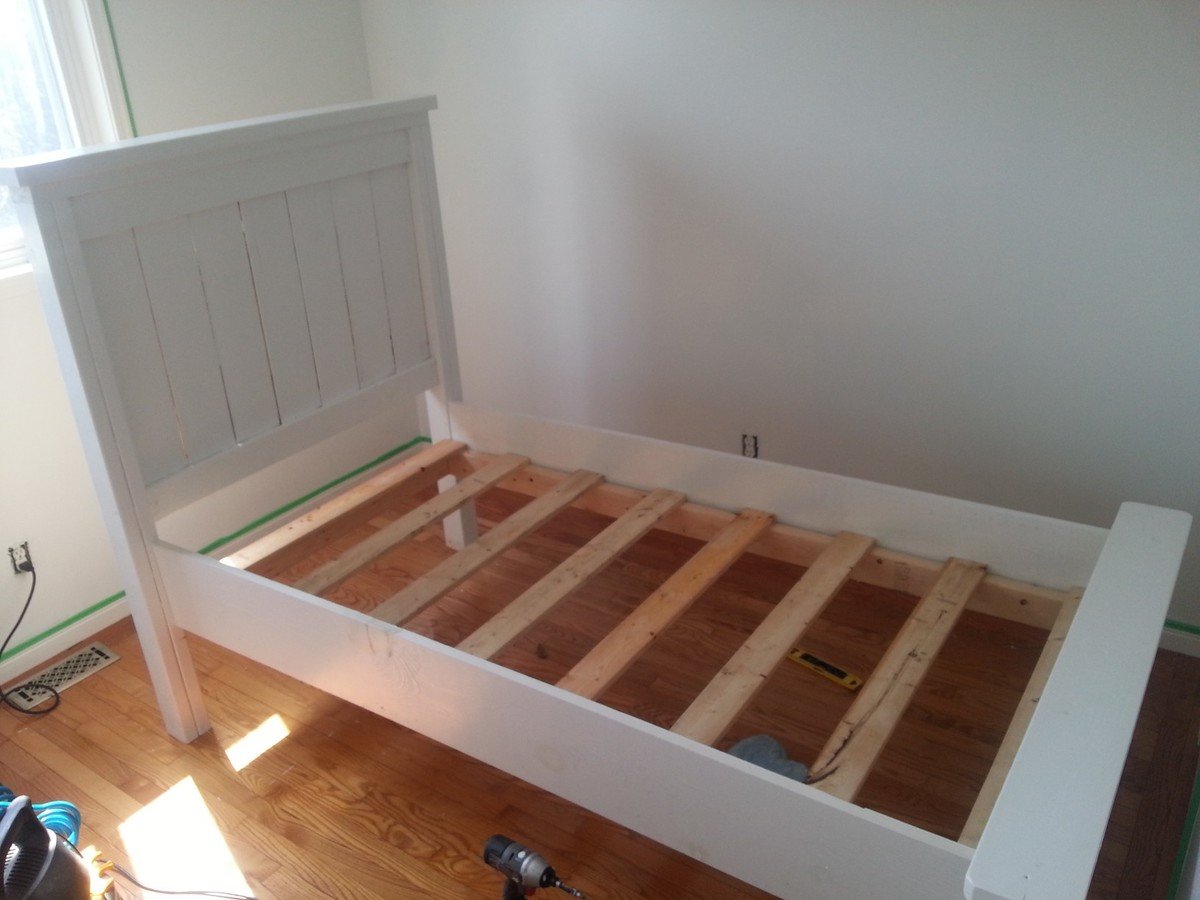
Took the farmhouse plan and added a Trundle. Was initially going to build two farmhouse beds for my two girls, but thought adding the Trundle would free up some much needed floor space. The girls love it!
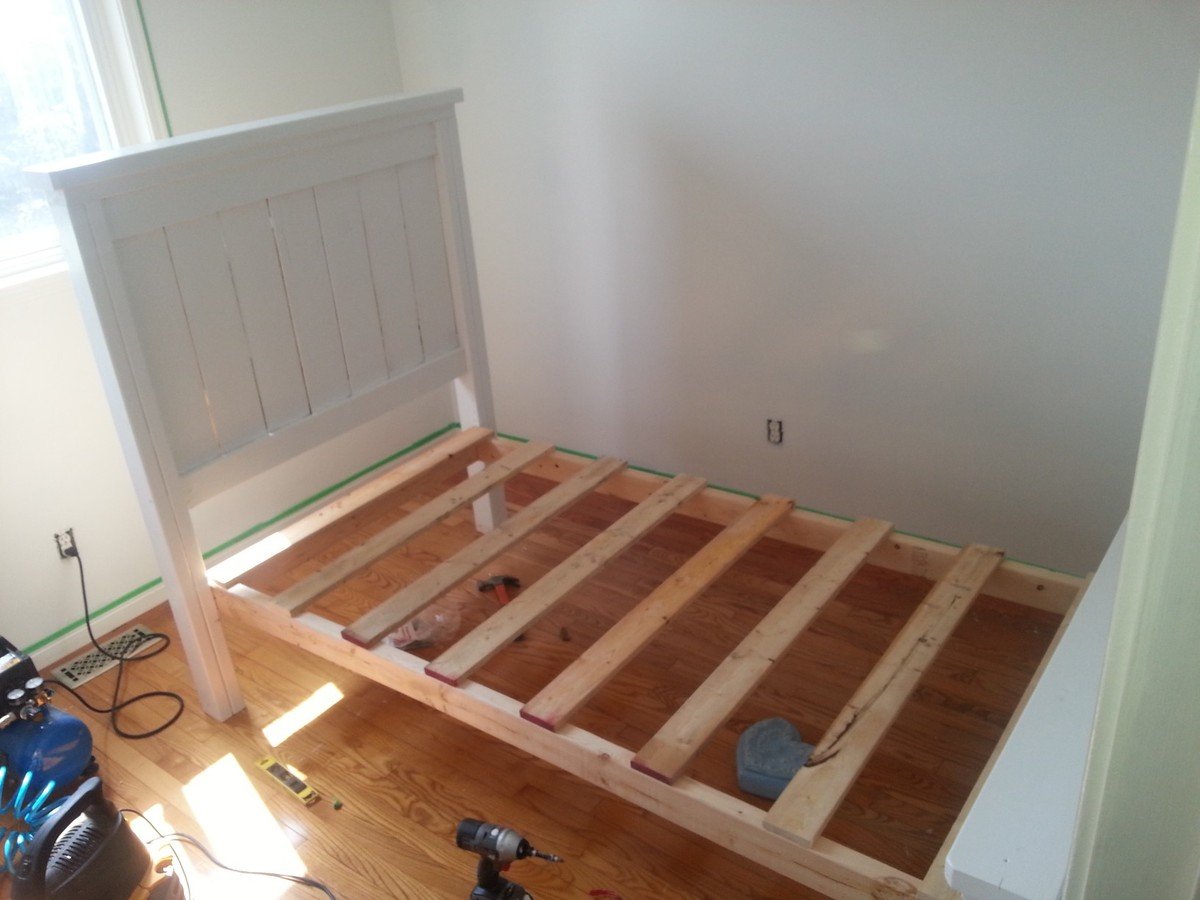
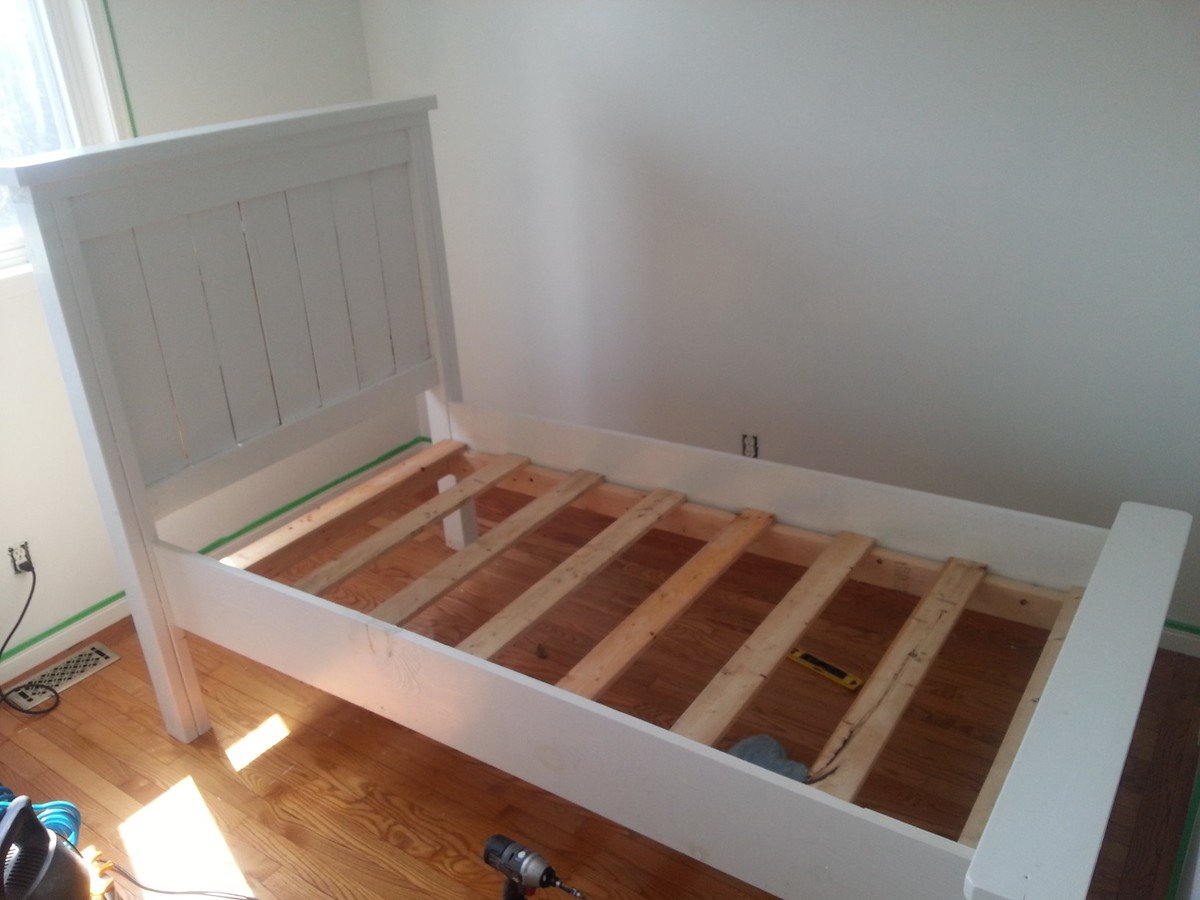

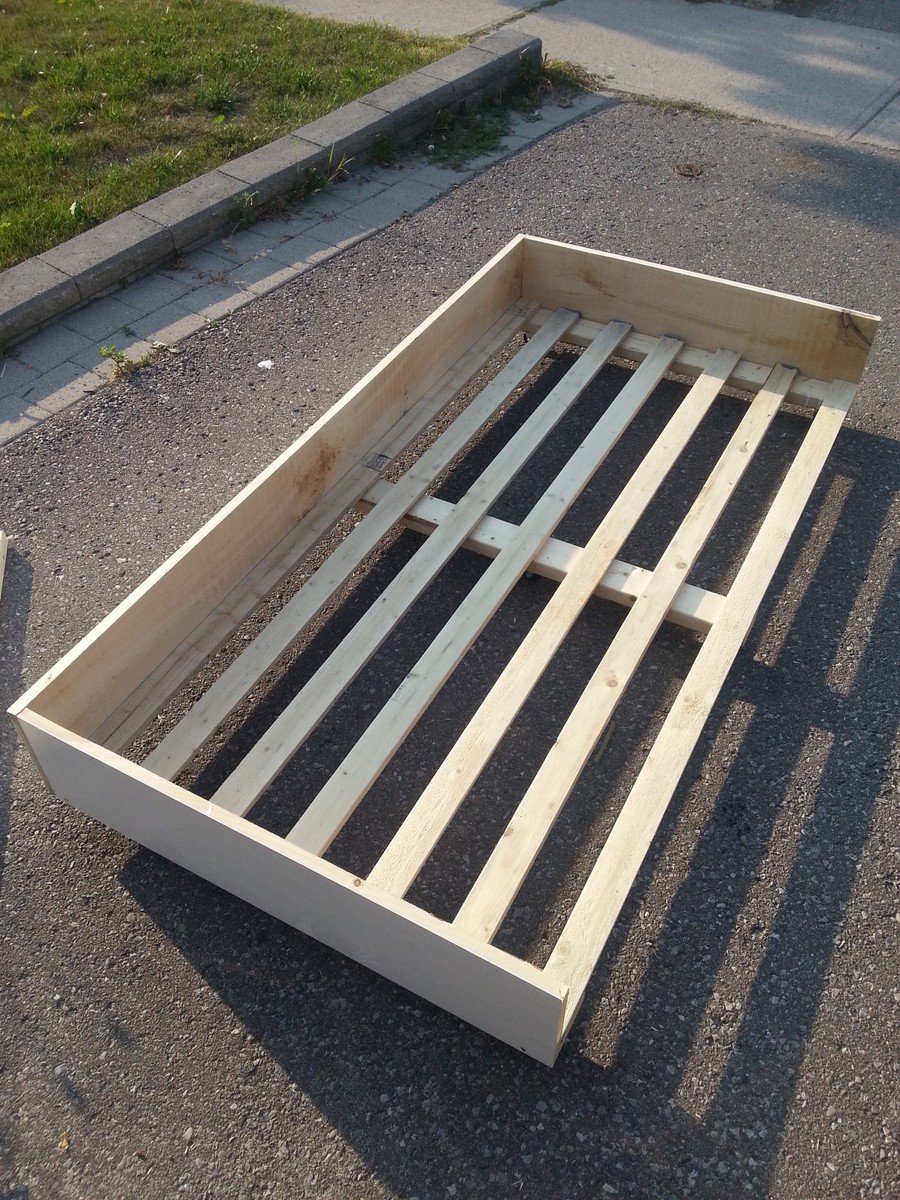
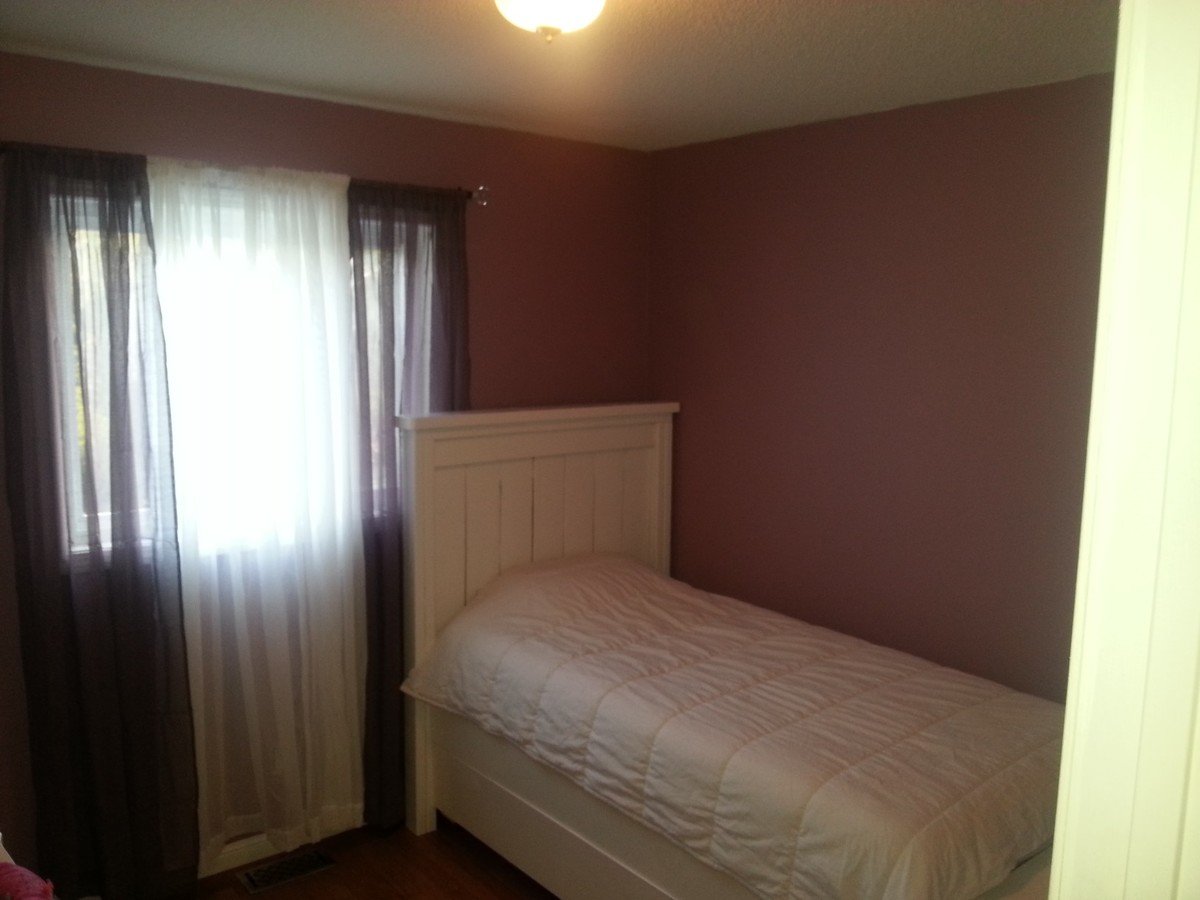

Took the farmhouse plan and added a Trundle. Was initially going to build two farmhouse beds for my two girls, but thought adding the Trundle would free up some much needed floor space. The girls love it!


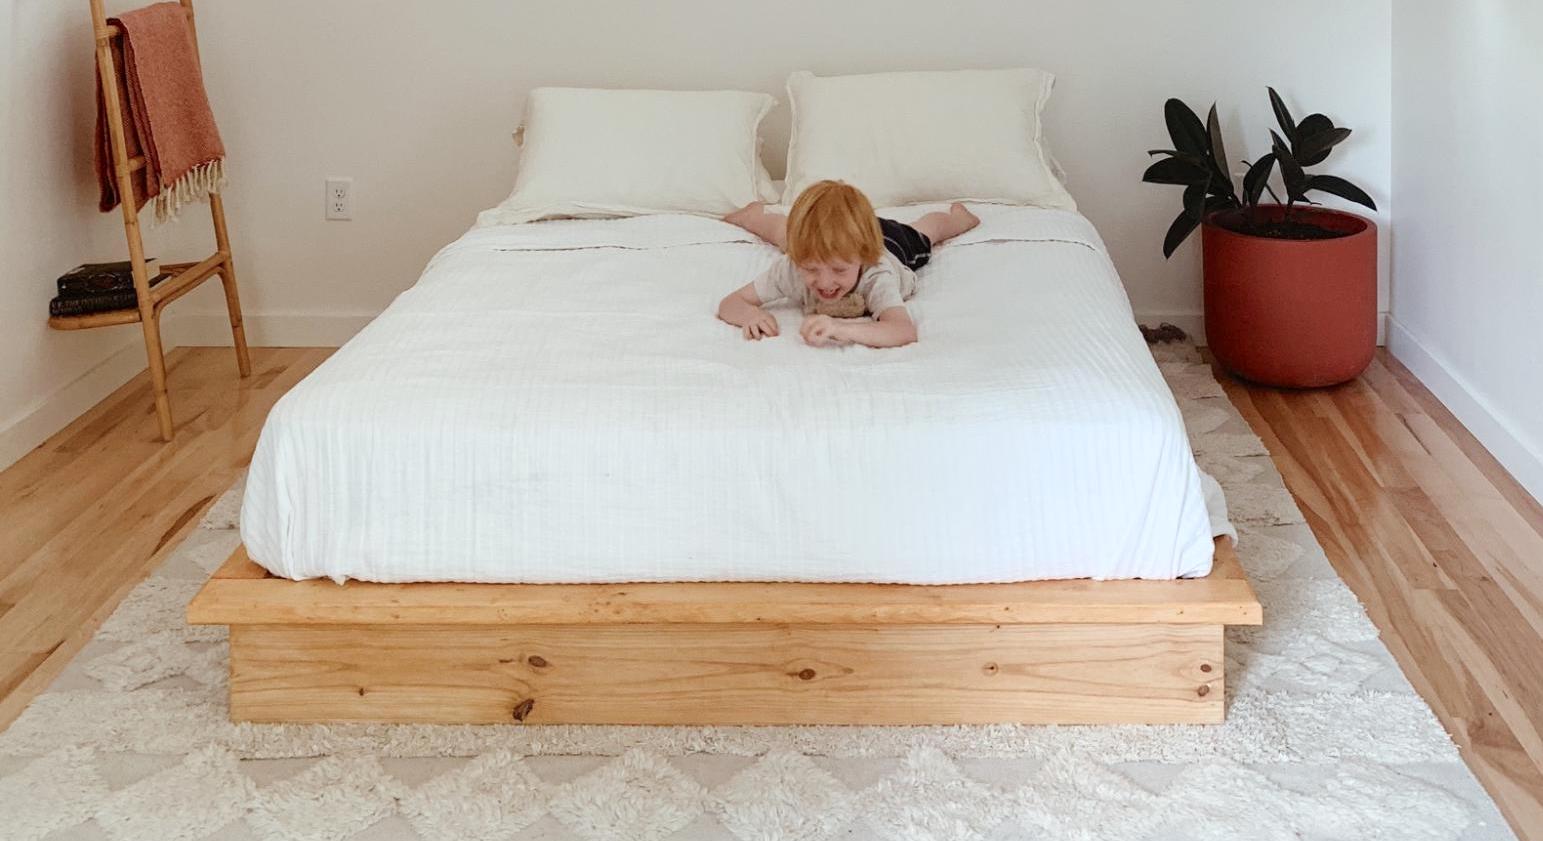
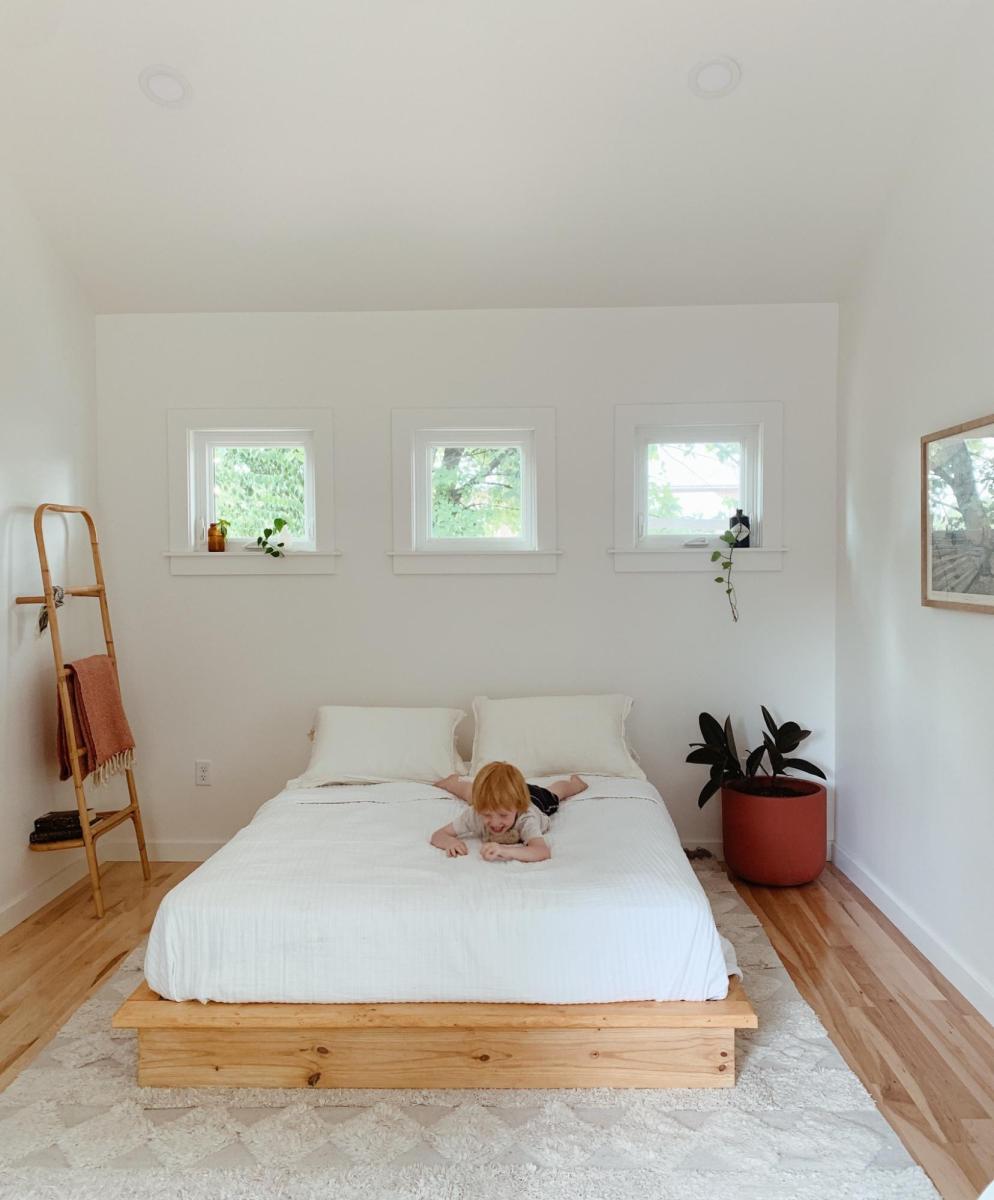
I've been wanting to build this bed for awhile and finally got around to it. I made a few small changes to the plans:
-I used 2x8's instead of 2x6s, so it wouldn't be so low to the ground.
-I ripped 3/8" off of the 2x8 supports in the middle so the mattress would nest inside the frame and not slide around
-I didn't add the headboard because it seemed a bit chunky/rustic for my taste. I will come back and do something else for the headboard. Maybe a cool paneled wall with built in sconces? We'll see!
Love these plans though, appreciate it!
Mon, 07/25/2022 - 21:44
Love the look and your mods, well done! Thank you so much for sharing.
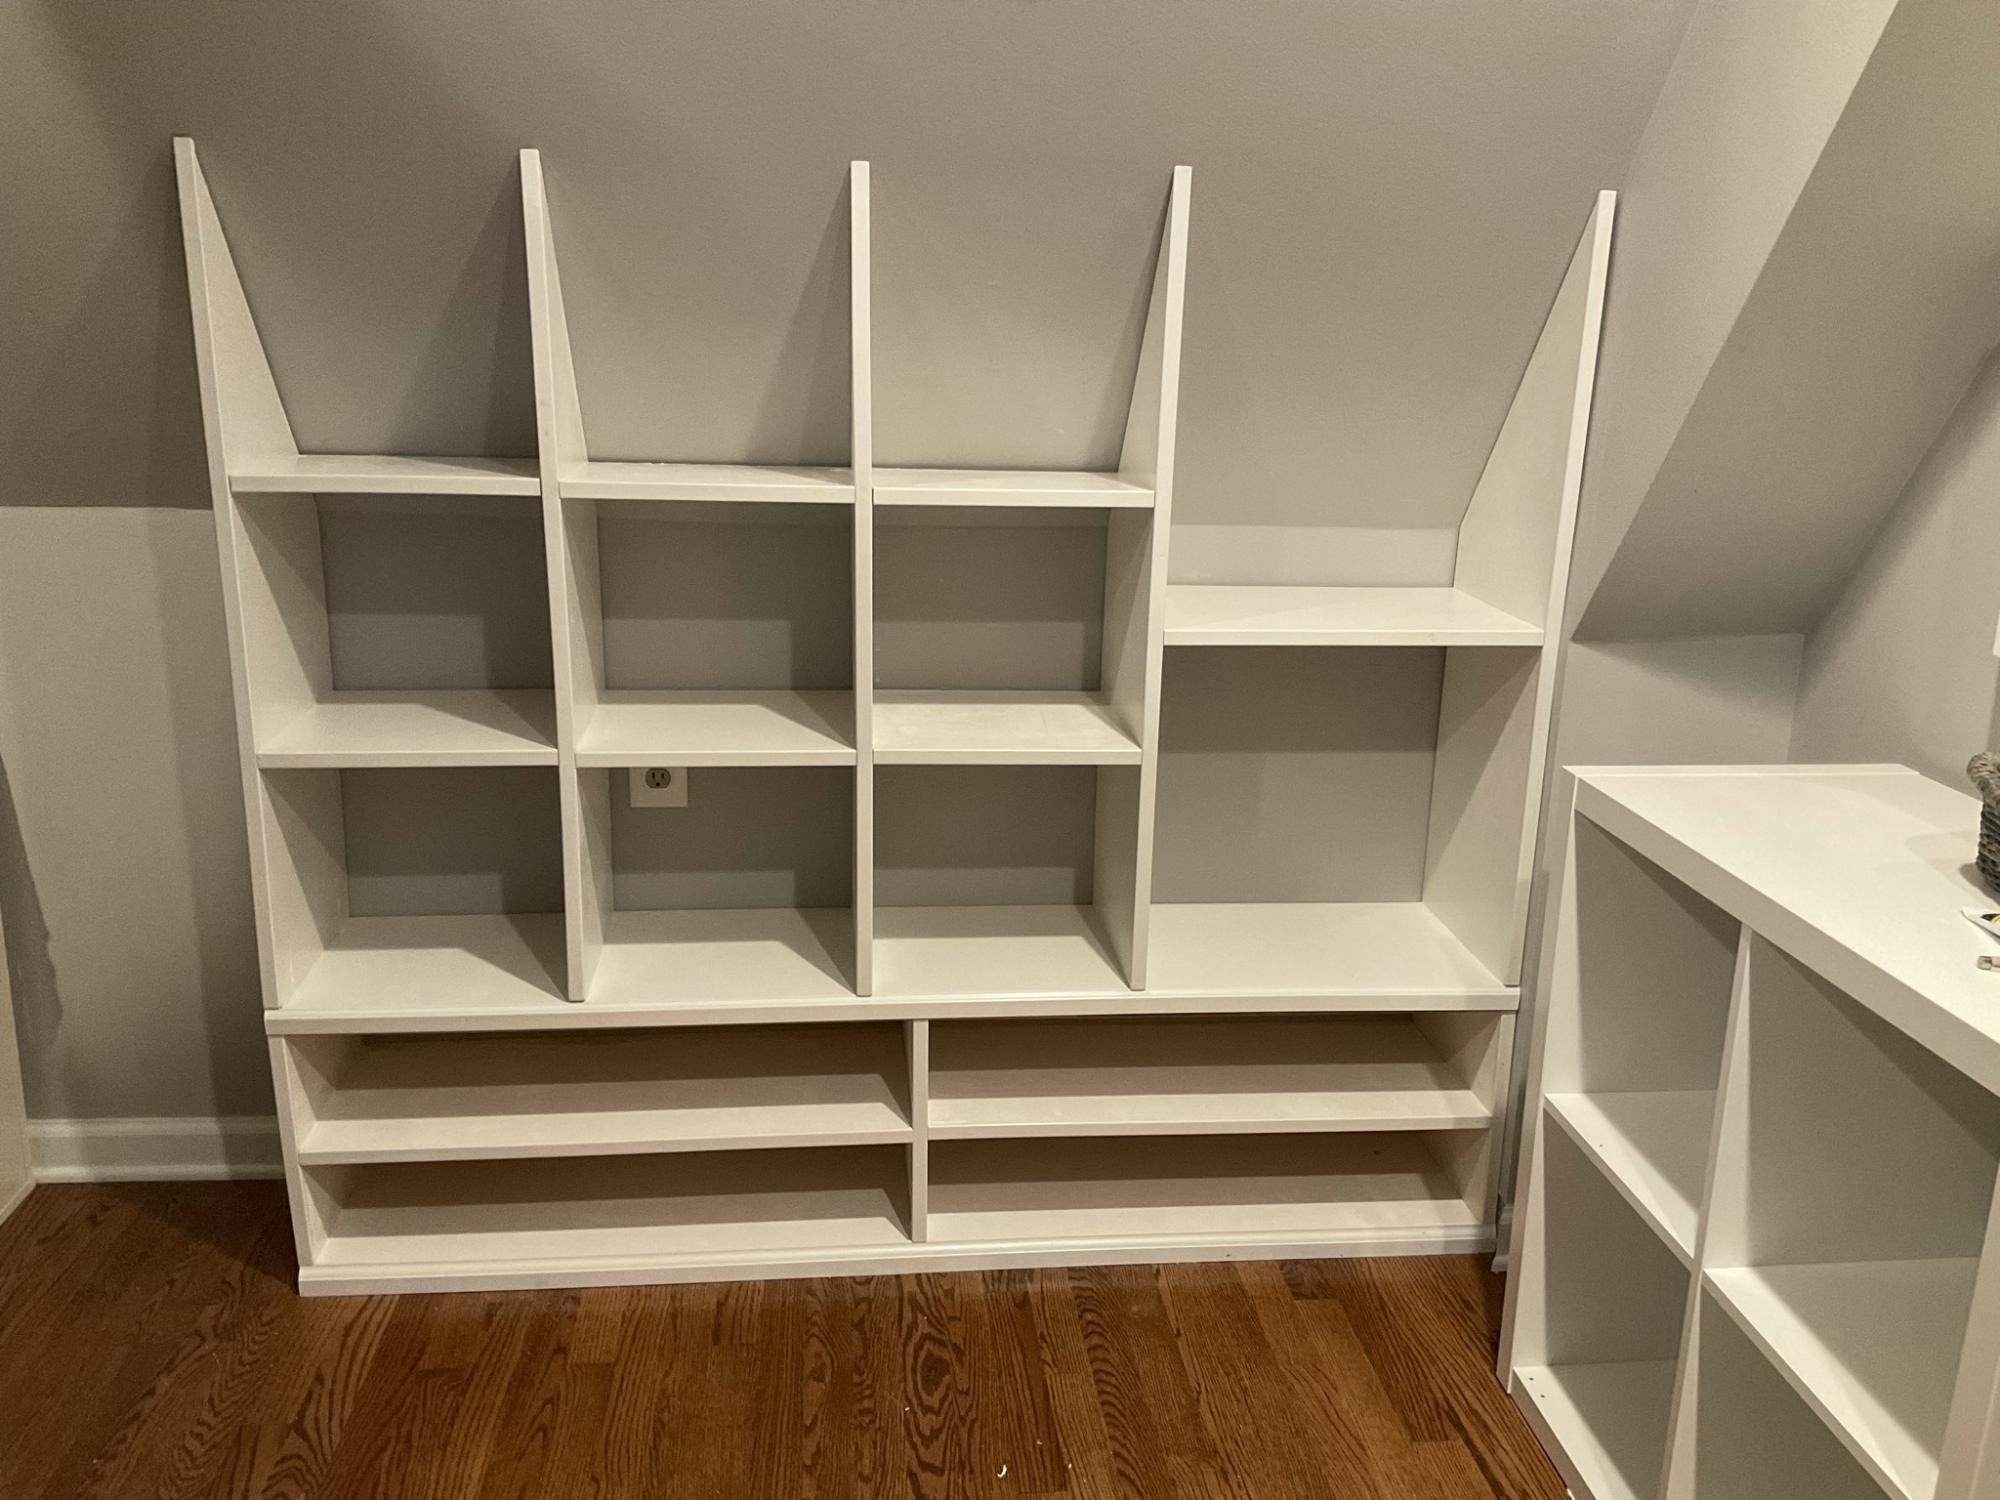
I used Ana’s Shelf Help Configurator to build these shelves for a deeply sloped ceiling. None of those well known Closet Organizer Companies could come up with a decent plan for this closet and they charge a small fortune.
Wed, 08/28/2024 - 20:52
Cool. I’ve been looking for wood working classes so I can do something with my long narrow attic (bonus/media) craft room.
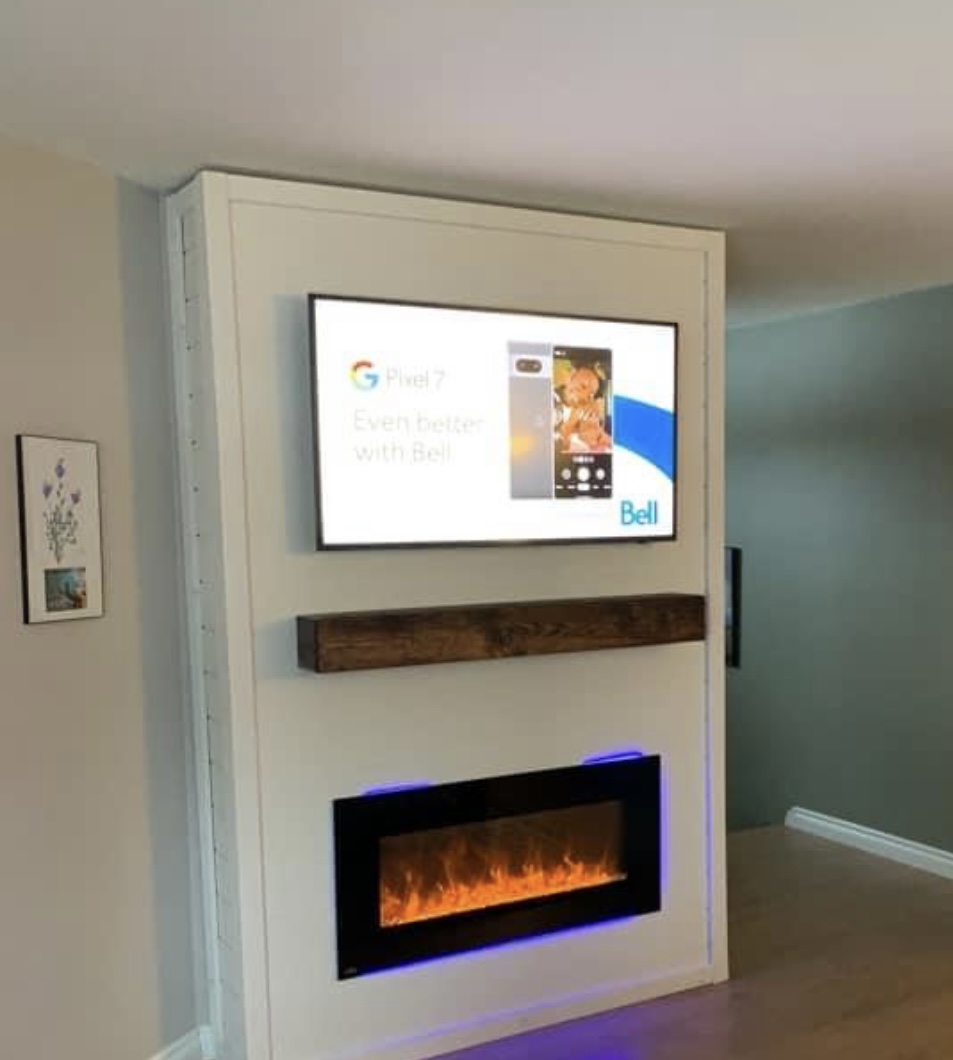
Beautiful Shiplap Fireplace By Adam Morrison
Built this while 8 months preggo with help from my husband and best friend (sewing). I wanted to make it big enough to be an extra bed and I wanted it to be comfortable so I invested in an 8"memory foam mattress. Here is the pic before the leg base went on.
We made the back 3" higher since the mattress is so thick. I have kids so I made the cushion cover around the whole mattress so we could take it off and wash it. I staple gunned plain grey fabric to hide the plywood of the lid (since I was limited to fabric I had found).
It is a little too deep to sit on for two people but it is great in a corner where you can lounge on it with a book or snuggle for a movie with your partner or kids! :)
Wood /glue/adhesive spray - about $120
Fabric - bargain bin upholstory fabric/thread - $67
Cushion covers (filled with old pillows,leftover uphostry foam and two KING pillows) - cream, from IKEA bargain bin 4@ $5 each= $20+tx
Mattress- Twin memory foam (Classic 8")- $199+tx @ Jysk on sale (they go on sale every two months).
So the whole thing was about $450 and we love it. The only thing I saw that came close was $3000 in a store downtown.
Thank you so much for the plans Ana!!
Samantha A.
Halifax, NS
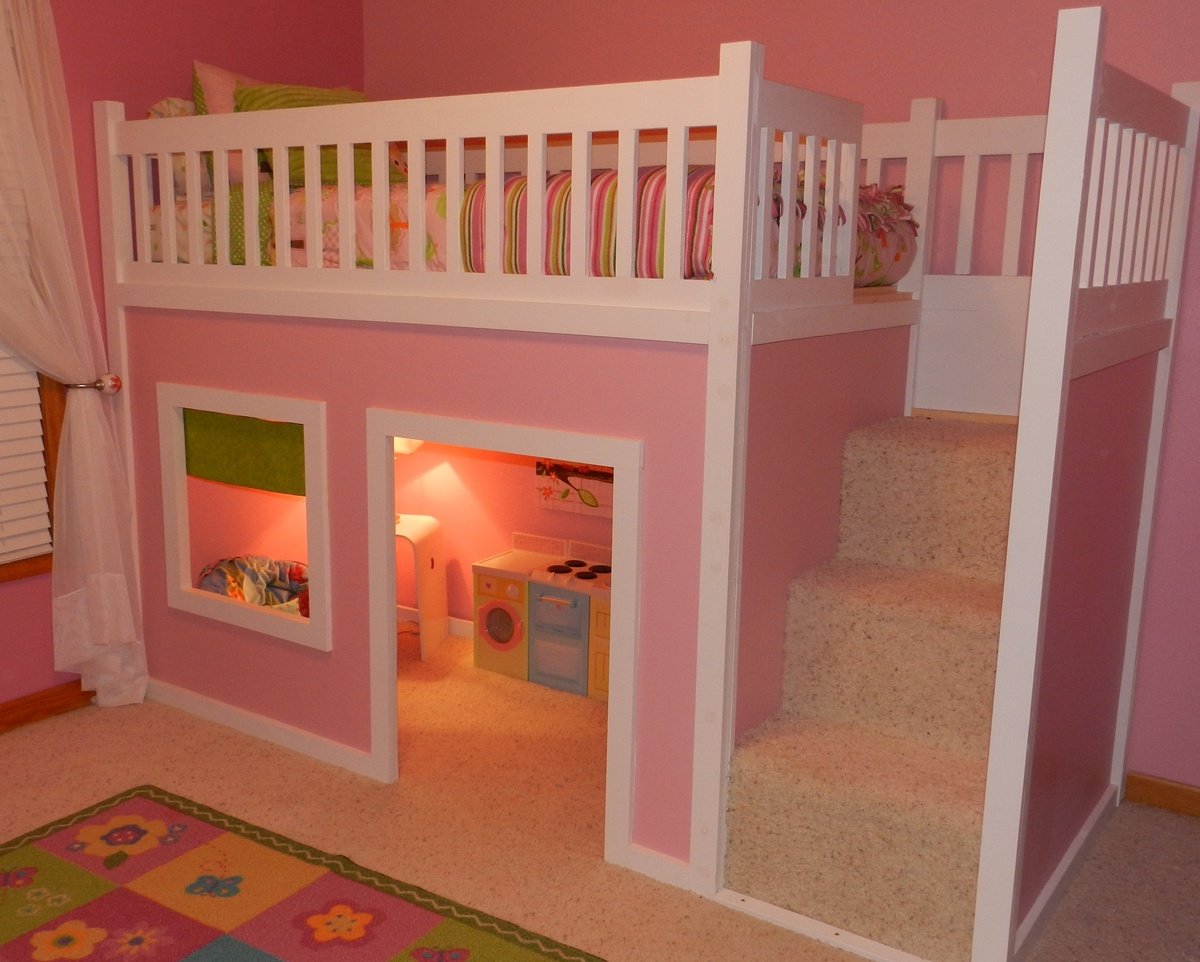
When I showed my husband the plans for this playhouse loft bed on Ana's site, he decided that we needed to build it for our daughter for Christmas. We combined the two plans for the Playhouse & the stairs and modified it slightly to fit our space. We had left-over carpet which we used on the stairs. She absolutely LOVES it!! And secretly, I think her 3 older brothers do, too. Thanks SO much, Ana!!
Sat, 01/12/2013 - 19:47
Omg....I love this I need to know how to do out....so I can make my husband build it..
Thu, 01/05/2012 - 06:34
are the plans free, and if so can I get a copy?
Thu, 01/05/2012 - 07:16
Philip and Guest -
The plans are free, and click on the links in the post
From Plan: (plans are linked here)
Sun, 01/15/2012 - 17:58
RE: http://ana-white.com/2012/01/playhouse-loft-bed-stairs
Would you please send me the plans for the Playhouse Loft Bed with Stairs?
Thank you.
Tue, 01/17/2012 - 09:20
I would like to know how to get a copy of the plans for this bed. This is exactly what I want to do in my little girls room but I have not beed able to find plans. Thanks!
In reply to Playhouse Loft Bed Plans by Guest (not verified)
Fri, 01/27/2012 - 21:44
If you look in the section above, you'll see "From Plan:" There are two links (they're black and don't look like links. You'll need to hover over them). One for the basic bed and one for the stairs.
Tue, 01/17/2012 - 18:38
I do not see the plans for the playhouse loft bed. Where is it located? Can you email it to me or post the link?
Thu, 01/19/2012 - 21:42
In reply to Age by Guest (not verified)
Fri, 01/27/2012 - 21:38
I would say your 2 year old daughter is a little young for a bed this high. I think general guidelines would suggest waiting until age 6 for lofted and bunked beds, but I think that's being very cautious. Our daughter is just about to turn 4 and she does fine in it.
Wed, 01/25/2012 - 11:29
You did a great job! That looks fantastic!
I'm going to be making this bed within the next month or two for my daughter. She's 4 (will be 5 in April). I know the overall design isn't *that* high off the floor, but my daugter has a tendency to roll out of bed...often. LOL
Do you find the guardrail/slats are high enough to prevent roll offs, or should I add some height to them when I build?
Yours turned out awesome! I can see why your daughter (and sons) love the bed!
Cindy
In reply to Looks fantastic! by Cindy from Indiana (not verified)
Fri, 01/27/2012 - 21:34
Hi Cindy.
Thanks for your kind words.
We had the same concerns about our daughter rolling or falling out. She is almost 4, but still had rails on her previous bed. We put the slats that the mattress sits on in the very lowest possible position and actually traded twin mattresses with her brother who had a thinner mattress. Her's had a pillow-top and even the extra 2 inches made quite a difference.
There are nearly 9 inches between the top of her mattress and the top of the rails which is plenty to prevent accidental roll-outs, but it certainly wouldn't hurt to add extra if it would make you more comfortable.
Now if we could just keep her from standing up there, I'd feel a whole lot better. lol
Good luck with yours.
Kara
Sat, 01/28/2012 - 07:27
Hey Kara,
Thank you so much for replying! That does make me feel more comfortable that there will be around 9" between the mattress top and the rail top. Not sure yet if I'll add a bit more or not, but it's good to hear how it worked out for you guys. Now I'll be hoping to keep my little dare devil from trying to 'fly' off the top of it and we'll be good to go. LOL
Thanks, again! That was really helpful.
Cindy
Thu, 01/26/2012 - 12:59
Hi! LOVE THIS!!! Am planing on making for my daughter. Any chance there are plans for this in a Full Size bed?
In reply to Hi! LOVE THIS!!! Am planing by Guest (not verified)
Fri, 01/27/2012 - 21:48
I've seen some posts on Ana's Brag Boards of these lofts with full sized mattresses on top. Ana's original plan is a twin bed, but others have modified it to suit their needs. You may just want to search and see if anyone has included their plans for a full. Sorry I can't be more help. Good luck!
Tue, 01/31/2012 - 18:32
That is very nice if you dont mind me asking how long did you make that one... I am wanting to make one for my daughter but I dont have 103 inches that called for in the one plan...
In reply to Very Nice... by JessiW (not verified)
Sat, 02/04/2012 - 16:10
We made our bed to the exact specifications that Ana gave (103"), however, if you need to save space, you could leave the stairs off and opt for the ladder.
In reply to Bed Plans by Kelly Kelley (not verified)
Wed, 02/15/2012 - 18:34
Hi Kelly,
There are links to the 2 plans in the "ABOUT THIS PROJECT" section above. Just hover your cursor over the "From Plans:" and the links will change color. They appear black and therefore, don't look like they're linked to anything. They're both there. Good luck!!
Sat, 02/11/2012 - 09:30
I need the plans for this can someone please send me them :) [email protected]
Wed, 02/15/2012 - 18:40
There are links to the 2 plans in the "ABOUT THIS PROJECT" section above. Just hover your cursor over the "From Plans:" and the links will change color. They appear black and therefore, don't look like they're linked to anything.
Or...I've added them here.
http://ana-white.com/2010/09/playhouse-loft-bed
http://ana-white.com/2010/09/easy-playhouse-loft-bed-with-storage-stairs
Mon, 03/05/2012 - 20:01
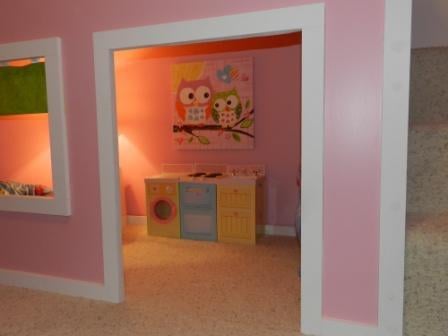
Hi there, I was wondering if you could tell me where you got the fabulous little washer and dryer combo that I see in the photo. I know the sweet owl painting is from target, but I love the little play space you seem to have created! :)
Sat, 03/17/2012 - 22:52
I LOVE this so much! I love the color scheme as well, we decided to copy the scheme in my daughter's room. I was wondering where you got the curtain from? Did you buy it or make it yourself? It's almost exactly the color of the green paint we bought so I would love to know. Also, I love the washer and dryer too, also curious about that. Thanks!
In reply to Cute Decorations! by Kirstie (not verified)
Mon, 03/19/2012 - 19:40
Hi Kristie.
I made the little curtain and the little washer/stove/sink set are from the Playskool Rose Petal Cottage collection. Good luck building your playhouse. It's a little girl's dream!!
Wed, 03/21/2012 - 20:27
Hi Kara,
I'm really interested in building two of these for my girls... they caught my attention because they've been asking for a bunk bed and I don't want to do a bunk bed because I hate the idea of struggling to change the bedsheets. Just wondering if it's a hassle with a bed this height.
Yours looks amazing, btw!
Thanks,
Sarah
Tue, 04/10/2012 - 11:18
oh my god i love this it would be awesome for my daughter also. were you able to stay in your budget???? do you think is a safe style for a 3 year old? she would go absolutely nuts!
Fri, 04/13/2012 - 20:17
so beautiful! if i wanted to do this with a full mattress how would i tweak the measurements? i want to do this with a full with the stairs... just so she can be in the bed for a longer period and also the space underneath to be a bit bigger... also if i wanted to make the stairs have a drawer? i really would appreciate alll the feedback if possible because im so far from handy... :-/ and 1 more thing how did u get a light down there?
Fri, 05/11/2012 - 18:27
I was wondering if once put together is it easy to take apart? My dad builds houses for a living and was going to make it for my daughter at his house then bring it to mine to set it up
Sun, 06/10/2012 - 14:40
My husband and I just finished making this bed with stairs for our 3 year old and he loves it.
Tue, 06/12/2012 - 06:41
what age would you reccommend this for?? my son is 3 n a half and i woant to attempt to make this bed, but dont want to spend time and money if i will have to buy him a new bed in a couple of years. i would like it to last a good while. also, like veahava, i was wondering if this was easy to dismantle once put together as i am planning a move in the future, thankyou
Tue, 10/02/2012 - 02:14
This is absolutely divine - you are so talented! I have just found this website and can't imagine I'd ever be able to make something so beautiful. Putting up a shelf is beyond me. Your daughter must be so proud of her little nighttime palace!
Sun, 10/21/2012 - 20:01
I am trying to get the plans for this bed with the stairs but when I click on the link it doesn't give me the plans. Help, my granddaughter would love love love this. Thank you so much.
Wed, 01/16/2013 - 06:05
hi!
Someoneo to tell me how many hours spent on it?
Mon, 02/04/2013 - 20:53
PLEASE, PLEASE, PLEASE, SOMEONE TELL ME HOW TO GET THE PLANS, I REALLY WANT THIS BED FOR MY LITTLE GIRL!!!!
In reply to PLEASE, PLEASE, PLEASE, by ochoa
Mon, 05/25/2015 - 22:12
You can download more plans from these resources:
Thu, 02/14/2013 - 12:36
This is awesome, how do I get a copy of the plans for this bed? I would love to do this for my grand daughter as a birthday gift
Thu, 02/14/2013 - 12:48
found the link, here is it for those wo are also looking I can't wait to start this project THANKS
http://ana-white.com/2010/09/easy-playhouse-loft-bed-with-storage-stairs
Wed, 09/11/2013 - 05:11
We made this bed for our daughter and now my son and daughter play with her kitchen and table underneath in the playhouse. Your instructions were so easy to follow and everything matched up perfectly. We did do the ladder due to space but the bed is beautiful. We get so may compliments when people come over and I always tell them about your website. You truly have awesome ideas! I can not wait for the next project and I am sure it will be off your site :-)
Mon, 10/07/2013 - 17:26
I love your playhouse with loft bed! How tall is the underneath part? Would you be able to fit a desk underneath? Also, could the plans be adjusted to accommodate a double bed?
THANK YOU!!
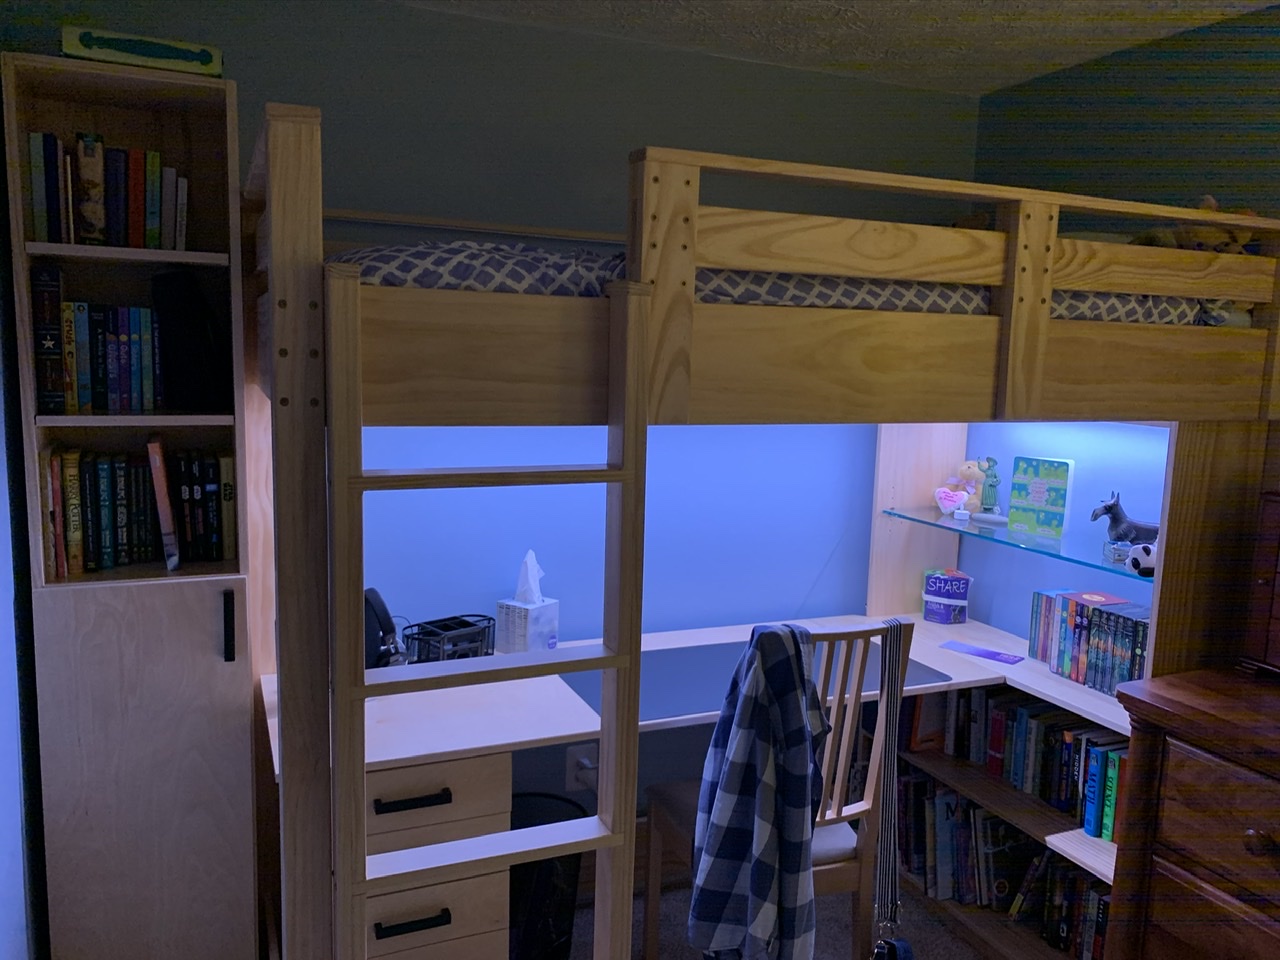
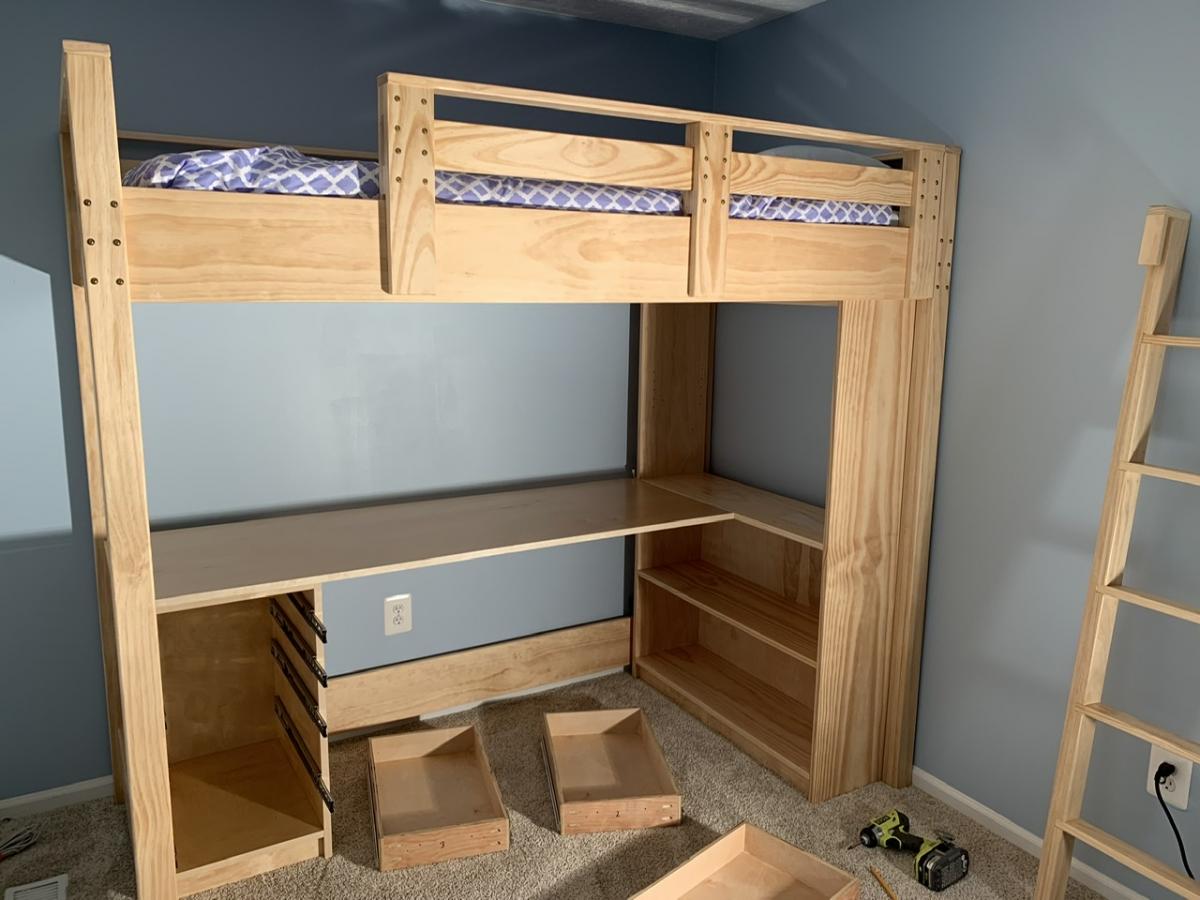
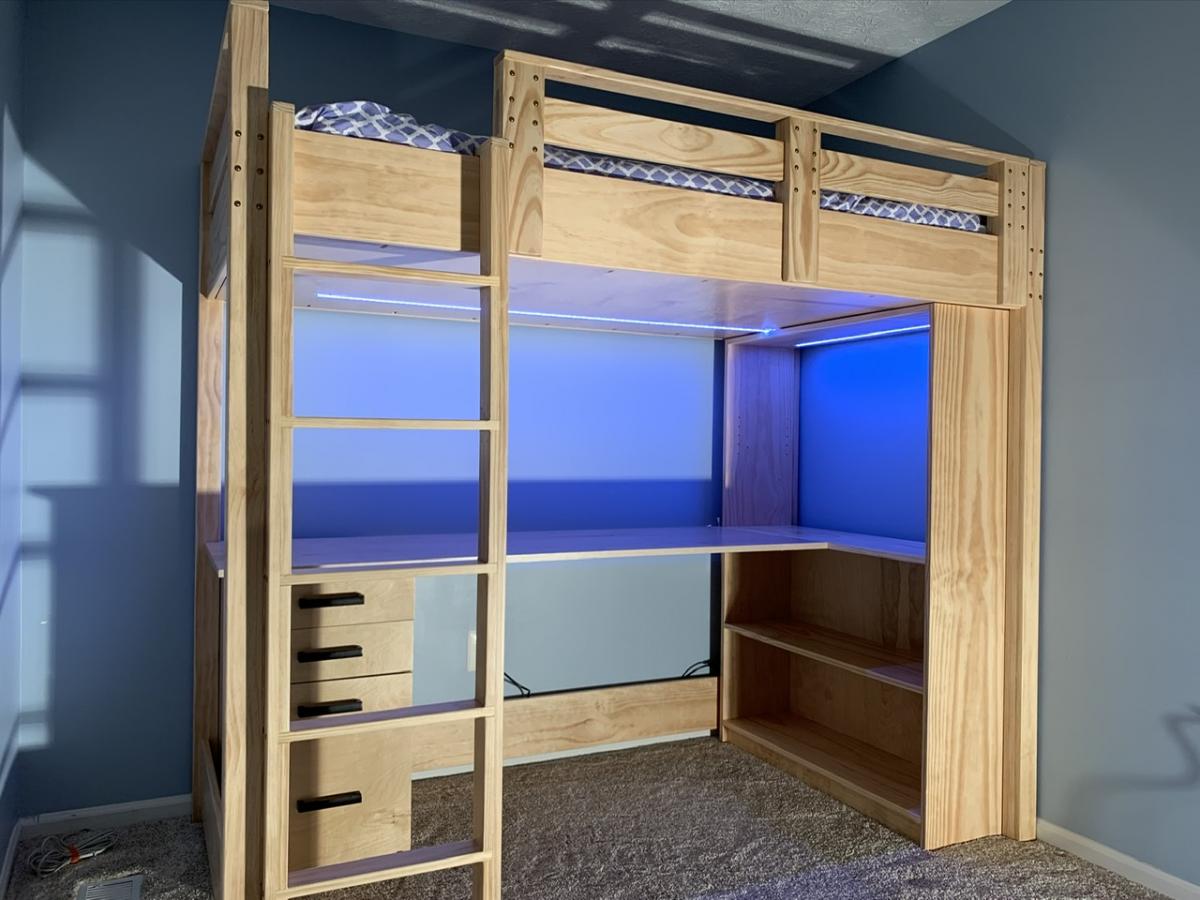
My daughter desperately needed a new loft bed for her small bedroom as she became a teenager. After looking a long time, I finally decided to take the plunge and make something custom after we couldn’t find a bed that met her needs (she’s VERY tall for her age). Thank you for posting the loft bed and bookshelf plans to this site, as they were great to work from and customize! This is my first woodworking project of any kind, and it came out great with these plans.
We followed the Loft Bed and Loft Bed Bookshelf plans pretty closely, but we did make some changes as we went...
First, we tweaked the guard rail design to make it removable by adding back vertical posts. This way, the front and back posts slide over the front rail and it no longer needs to be screwed in place. This is a nice tight grip for safety, but it’s much easier to make the bed by removing the guard rail and dealing with the mattress. If you do this, just make sure the back vertical posts are shorter than the front ones to make room for the cleats and slats on the inside of the rail! This also means the top of the rail is made with a 1x3 instead of the 1x2 in the instructions.
We also decided to use a vertical ladder design rather than an angled ladder. We did this for space considerations in the room; it’s a bit harder to get up the ladder, but not that much. This also helped avoid any weird angle cuts with my basic tools. We also made the ladder about 3” wider than the one called for in the plans.
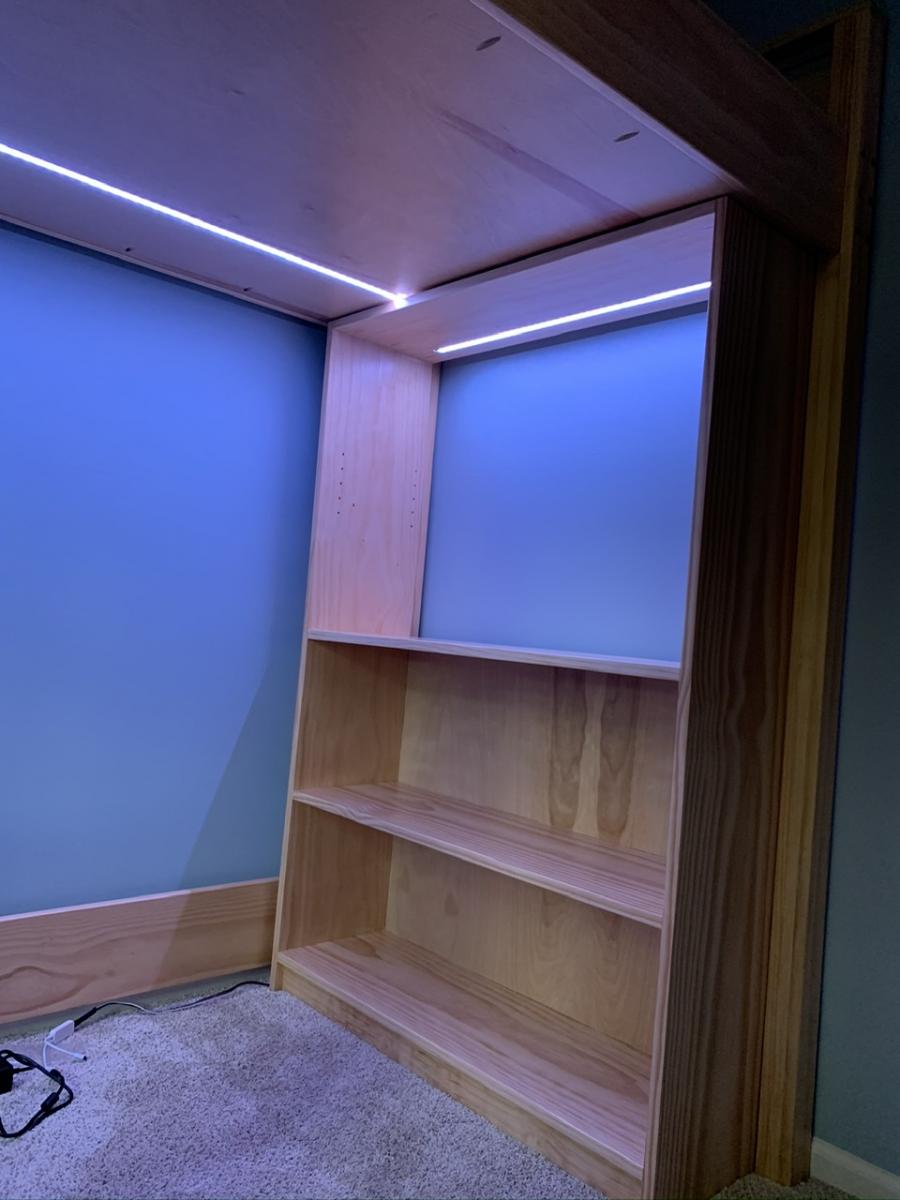
One of my favorite features was adding a 3/4” plywood “ceiling” above the desk. We did this by moving the long side cleats upward by 3/4” of an inch in the plans, and using pocket holes roughly every 10 inches around the perimeter of the plywood. We used this to hide the bottom of the mattress and all the bedding from view when sitting at the desk. It also provides for LED strip lighting above the desk, which is installed by routing out a pathway in the board and installing the lights within an aluminum channel for heat dissipation and to allow installation of a plastic diffuser over the lights. The wiring for the lights lives in the ~1.5” gap between the board and the slats thanks to the 1 x 2 cleats.
In the shelving, we made the upper shelf in the wide bookcase adjustable with the help of a Kreg shelf pin jig. We also ordered a 3/8” tempered glass shelf for this area to let more of the LED light strip we installed in the top of this shelf shine down as well. Again, this was installed in a routed-out pathway that holds an aluminum channel, and the wiring goes up through both the bookcase top and the plywood bed “ceiling” panel to join into the power. We got the strip lights, aluminum channel with diffusers, power supply, and controller from Amazon.
To get power to the LED lights, I routed out a channel for 5-conductor wire in the middle board of a rear leg assembly. Before gluing up the leg, I coated the wire with silicone spray to avoid the glue adhering to it so I could slide the wire around as needed. With a little bit of chiseling, this wire is able to come out of the slide-in joints for the upper and lower wide rails on the back of the bed. On the top, these wires go into a splitter and then to the two sets of LED light strips. On the bottom, the wires to into the LED controller which is mounted to a scrap board along with the power supply that stands on end in the 3/4” gap between the back side wall of the bookshelf and the bottom bed rail.
We created a custom-designed file drawer unit as the pedestal for the desk opposite the wide bookshelf. This was modeled roughly after Ikea Alex drawers with three narrow drawers and one file drawer. The carcass is about 14 1/2” wide by 21 3/4” deep by 29 1/4” tall and made of 3/4” plywood. The drawer boxes are approximately 12” wide by 20” long made of 1/2” plywood with 3/4” plywood fronts. We used full-extension soft-close drawer slides and positioned the cabinet so they have nearly full extension behind the ladder. Four wooden dowels are used on the top corners to align and secure this end of the desk surface.
Speaking of the desk, it is a piece of 3/4” plywood approximately 24” deep by 64” long. One end rests on the file drawer cabinet, and the other end is flush with the middle shelf of the bookcase and attached using two 6” by 5” 14-gauge galvanized T-straps usually used in framing applications. These are screwed upwards into the bottom of the desk and shelf from below, and are holding up quite well. This avoids the need for desk legs by the bookshelf.
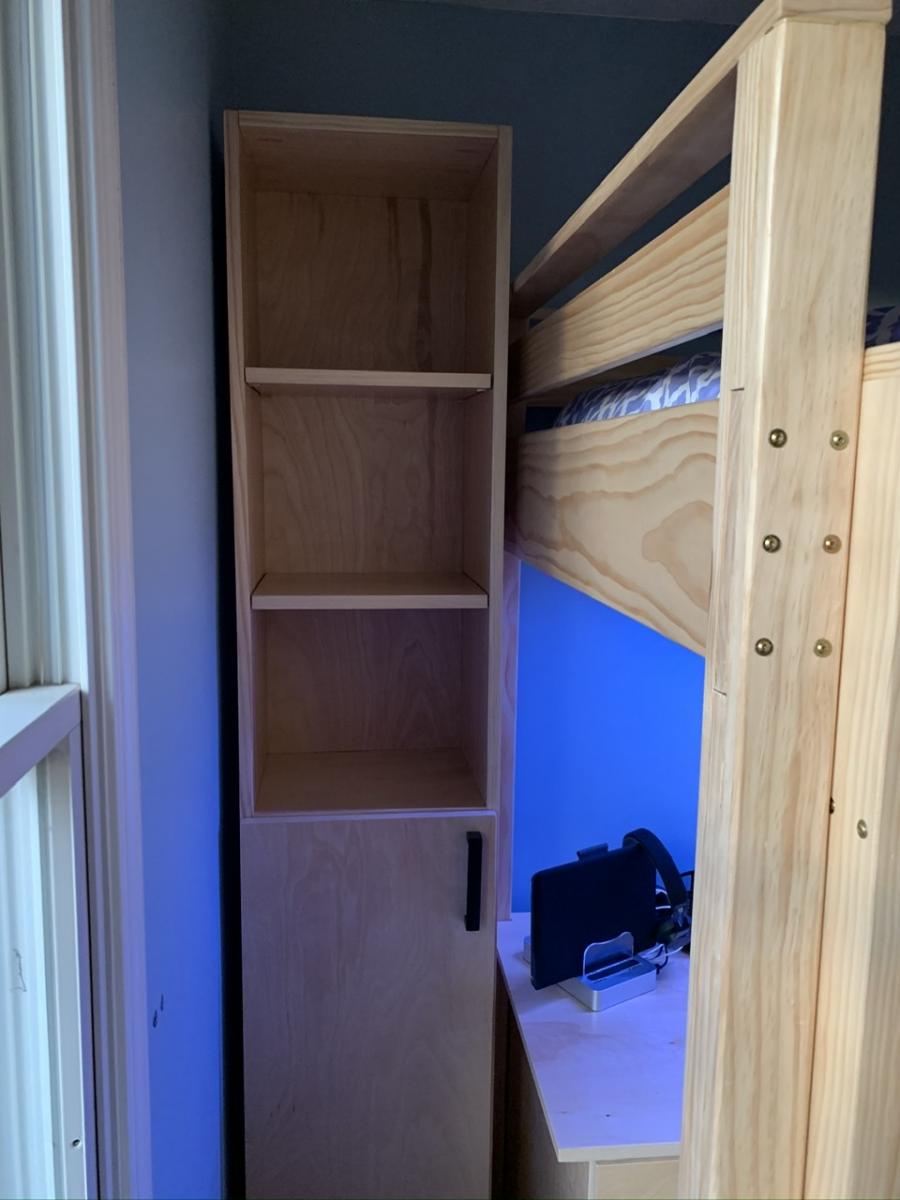
We then adapted the techniques used for the wide bookshelf to build a narrow bookcase (79” tall, 14 1/2” wide) out of two more 10-foot long 1x12 boards. This bookcase sits between the end of the bed and the corner of the room to finish out the look and provide more storage. The top, middle, and bottom shelves are fixed and there are a total of four adjustable shelves (two in the top half, two in the bottom half). We also cut a door and installed it using a pair of full-overlay euro hinges. With these dimensions, the tall bookcase is also capable of working with 11” x 11” x 11” storage cubes just like the wide bookshelf.
The finishing touch was to create a shelf that attaches to the guard rail and provides a place for my daughter’s alarm clock to sit and be within easy reach. This shelf is made around a piece of the scrap 3/4” plywood that is approximately 21” long and 9” deep. I used leftover 1x3 pine that I glued and nailed to the outside perimeter of the plywood flush with the bottom to hide the layers in the plywood while providing walls around the shelf. I also glued and screwed another 1x3 piece to the front of the plywood, this time flush with the top, as the first piece of a U-shaped grip to slide over the top of the guard rail. Another 1x3 scrap was then positioned, glued, and brad nailed to this front piece to finish the grip. I then cut a triangular piece of wood from a 1x6 to provide additional support under the shelf against one of the vertical pieces of the guard rail. This piece is held in place with counter-sunk screws that go through the top of the plywood shelf down into E-Z Lok threaded inserts in the top of the triangular wood support. The whole shelf assembly is only attached to the guard rail so that I can still easily remove the rail to change bedding on the mattress.
The whole project is constructed out of Home Depot select pine boards and birch plywood. Throughout construction, I used a 3/16” round-over bit in a router to eliminate sharp corners pretty much everywhere on the bed itself (legs, rails, ladder, etc.). I didn’t use this on the bookshelves, the file drawers, or the desk. Edge banding was used to hide any exposed plywood edges. I used 200-grit sanding discs and an orbital sander to sand the various pieces during construction and before finishing. The entire thing is finished with two or three coats of Minwax Polycrylic water-based polyurethane, sanding between coats, which gives this a nice smooth finish and lets the richness of the wood grain come through.
Hopefully the pictures I’ve posted can help understand the write-up on modifications to the project. I enjoyed building this a lot, and my daughter really loves what this did to her room to make it much more usable! That was worth all the effort and time right there.
Ana, thanks a million for the plans!!
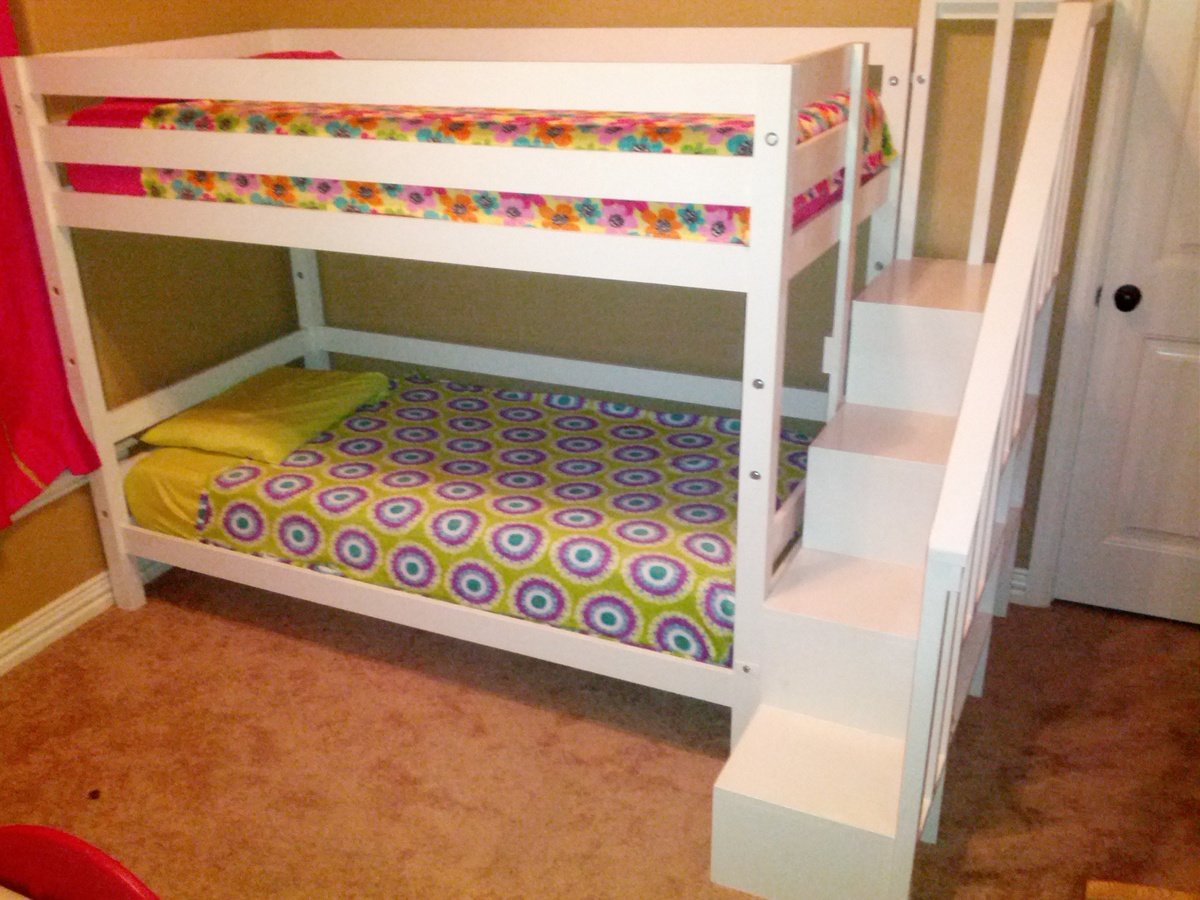
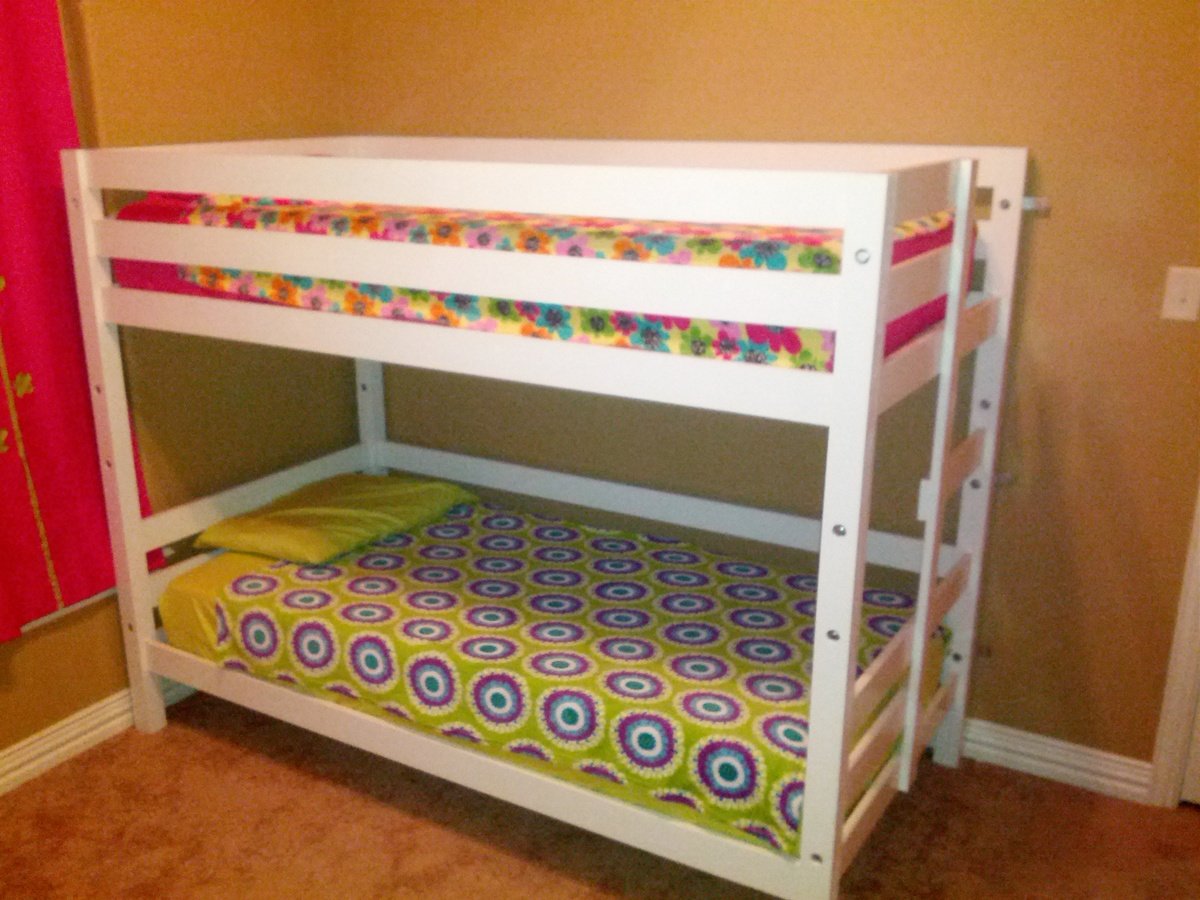
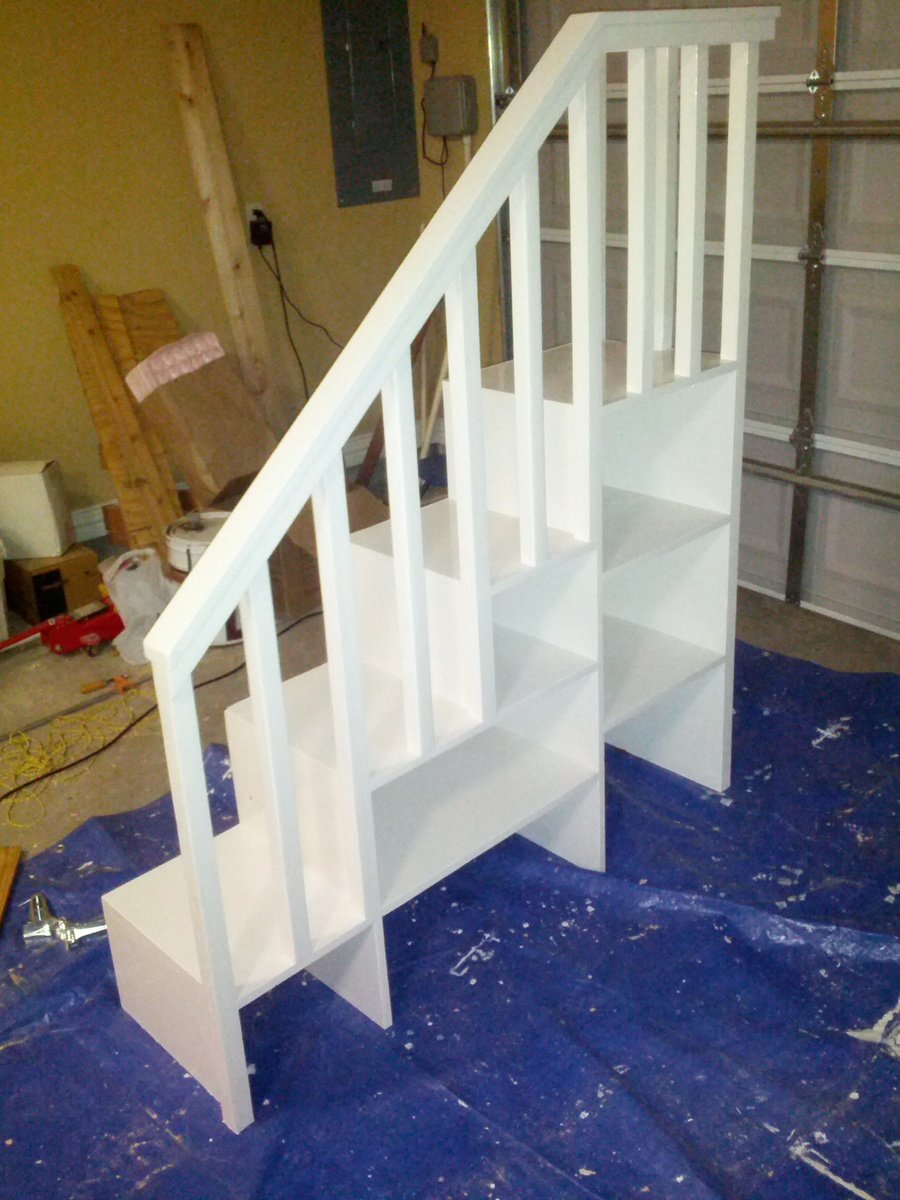
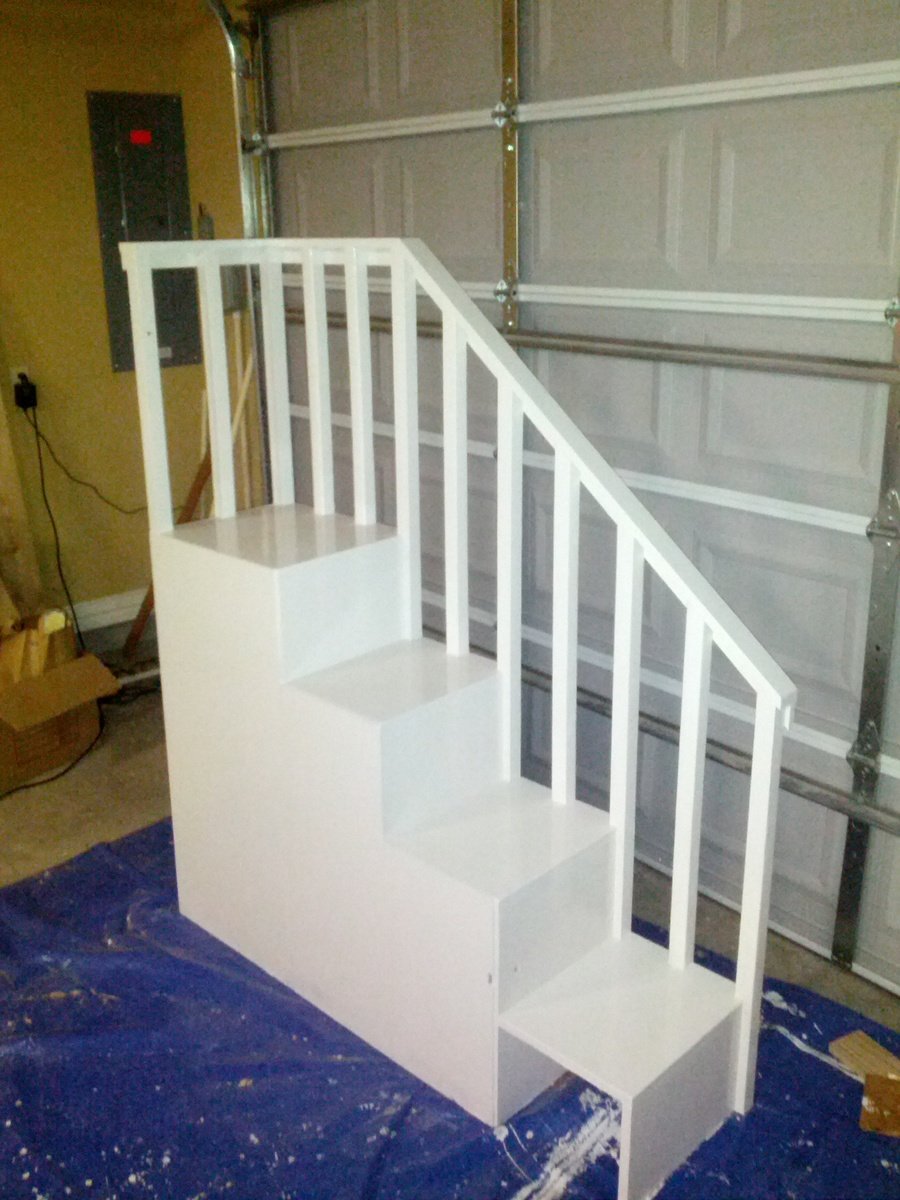
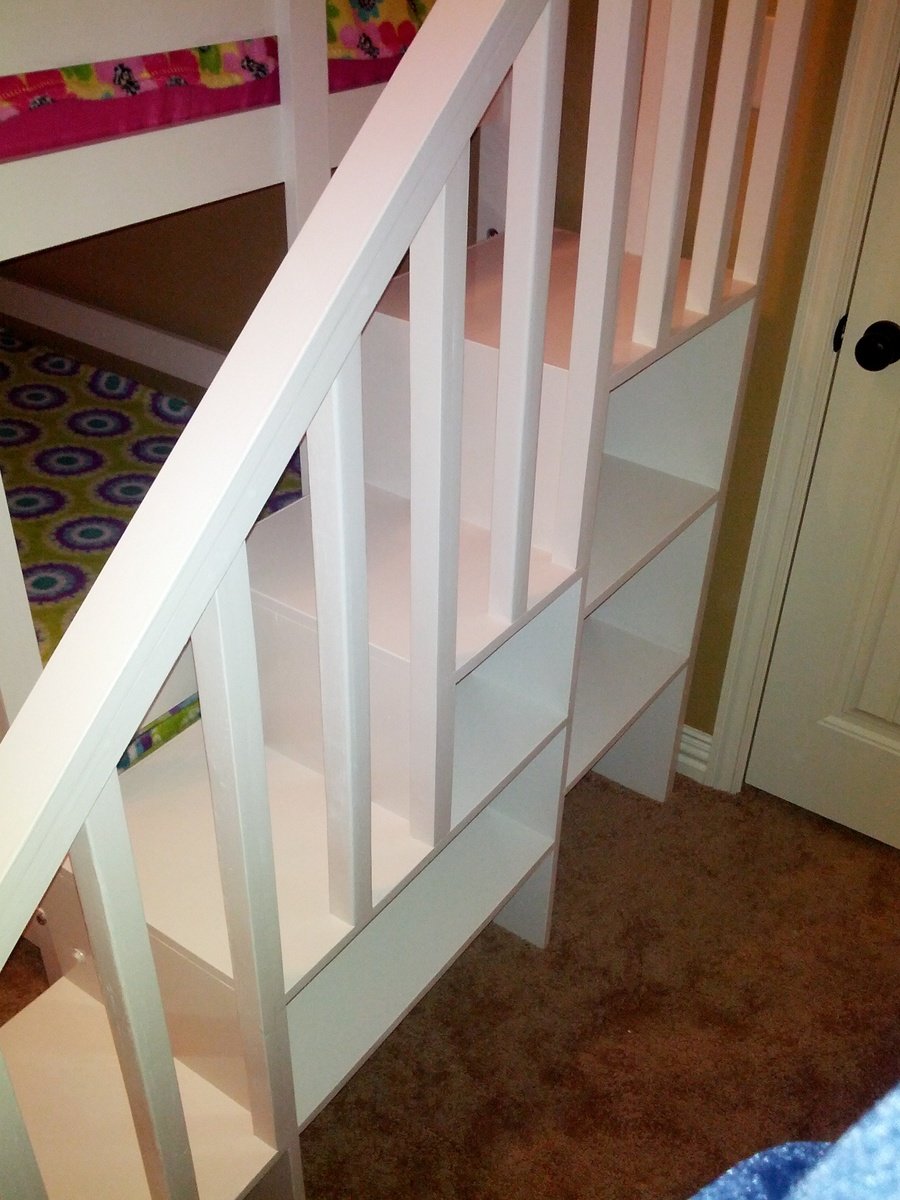
I wanted a bunk bed for our daughters, it needed to be easily moveable like the "classic bunk beds." I also wanted stairs like the "Sweet Pea Garden" bunk bed because we have toddlers in the house. I modified the classic bunk bed to put the ladder on the end, then built the Sweet Pea stairs to fit to the opening (I think the only difference in dimensions was a 20" top stair. I didn't want the unfinished ends of plywood so I got 4'x16"x3/4" pine boards from lowes which happens to be the width of the stairs in the plan. Instead of using the 1x2's as trim on the ends of the shelves I put two of them together, one all of the way down the front of each stair and one resting on the top of the stair (screwed together) so I wouldn't lose lateral stability. I then spaced 2x2's in between to keep it "simple" looking instead of the heart shaped decorations from the sweet pea bed. I used some 1/4" paintable composite board to provide a backing to the stairs. I bolted the stairs on to the bed with some flat bar stock cut to size and 3/8' in hex bolts cut to length. I used pocket hole joints wherever possible and countersunk all other screws and used 3/8" dots from lowes to fill the holes. I painted it with a coat of primer and a coat of Glidden Trim and Door paint in antique white from the Easy Vintage Step Stool project.
Mon, 06/23/2014 - 06:39
This is absolutely beautiful! Did you modify the size for toddler mattresses?
I would love to do the same for my kiddos - is there any way you could send me your version of the plans? [email protected]
Thanks so much!
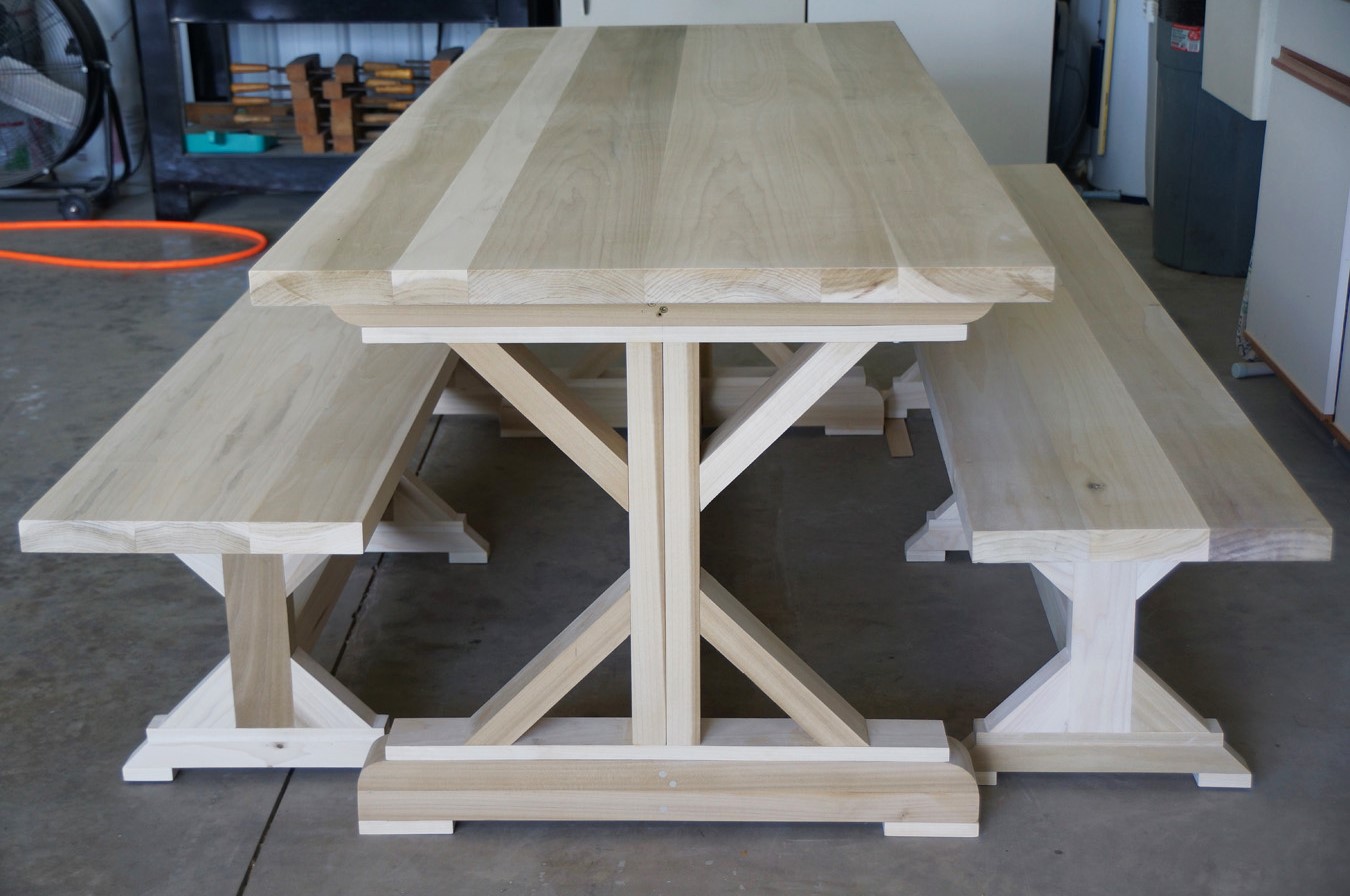
Farm Table 2 benches. Wood is Poplar
David Bellamy 89
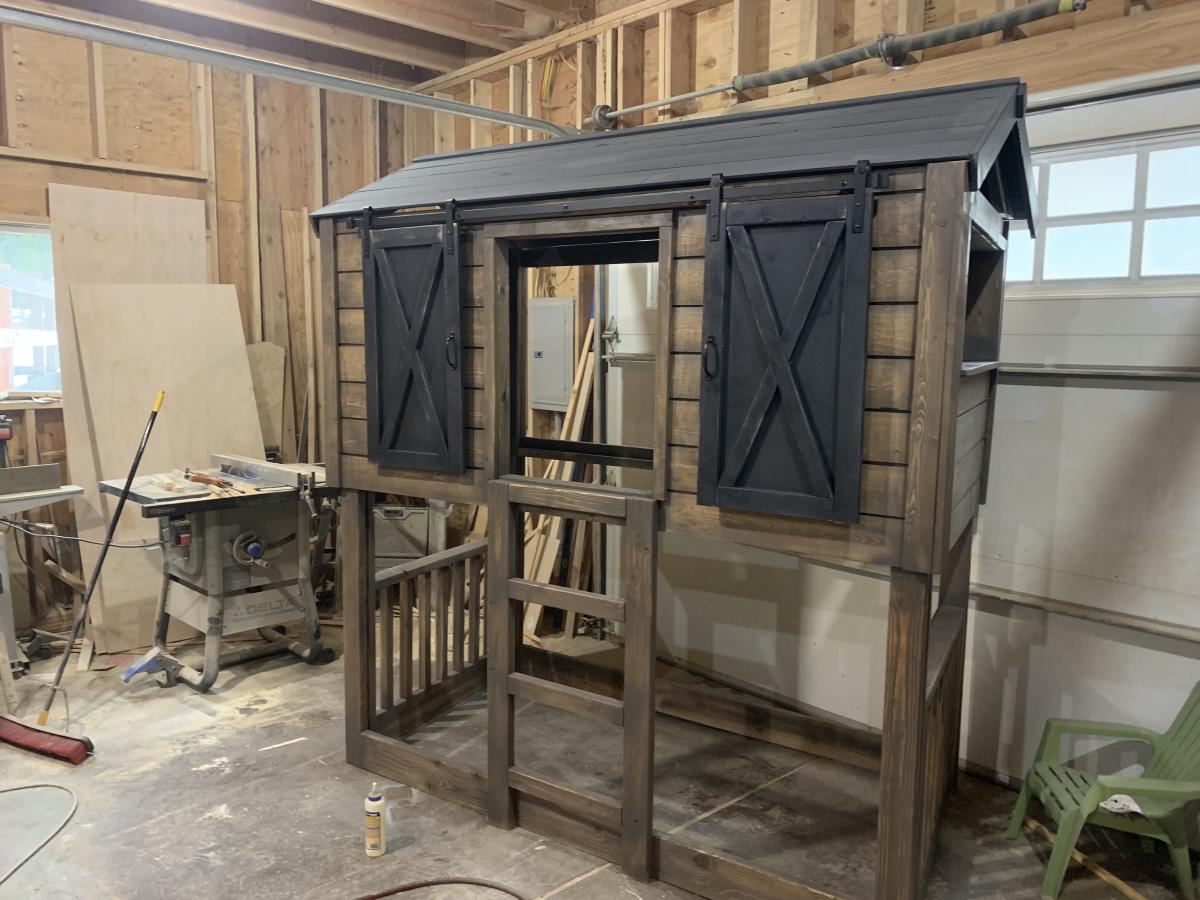
Hand made kids fort bed
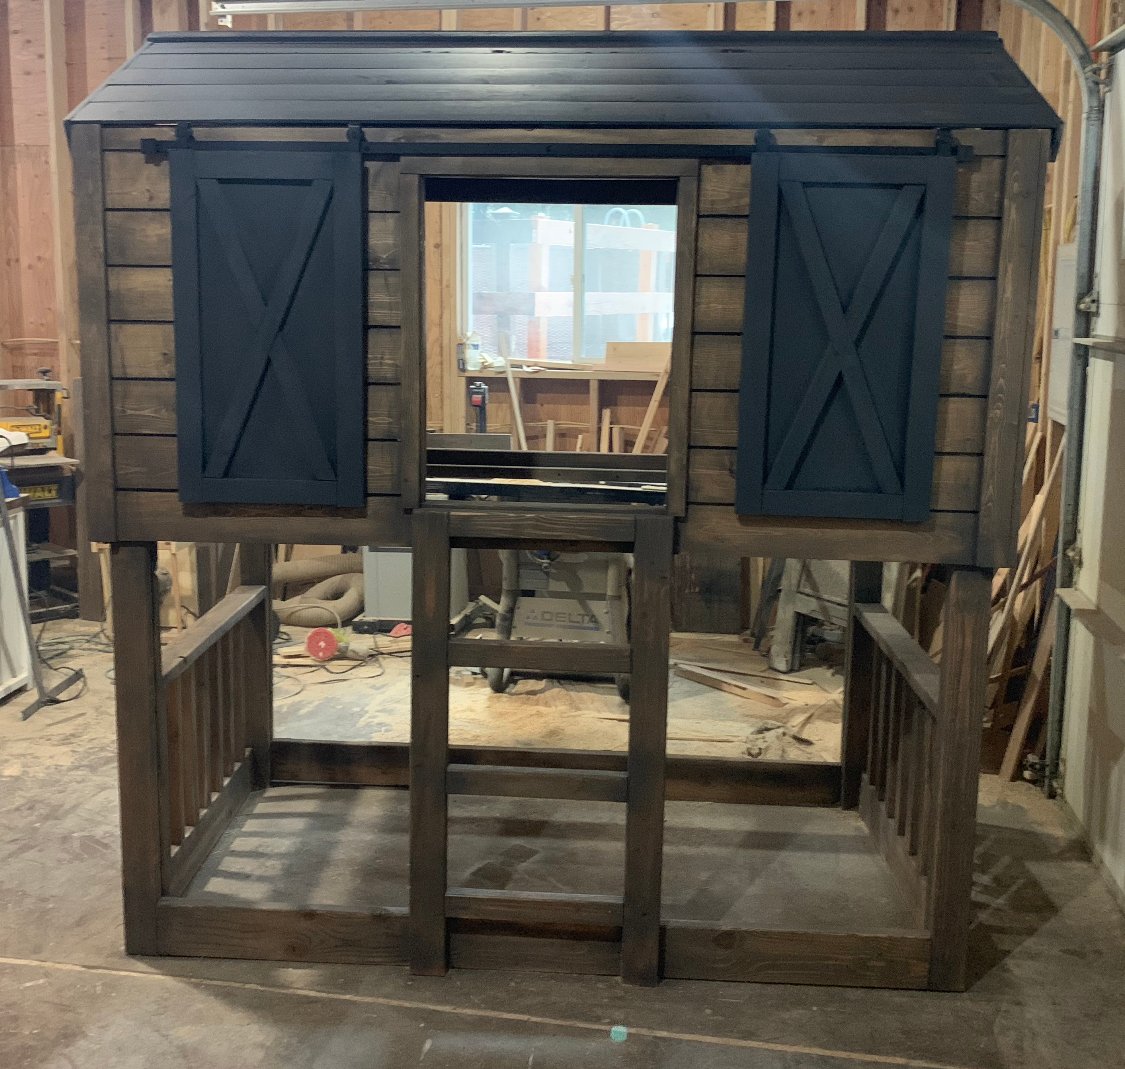
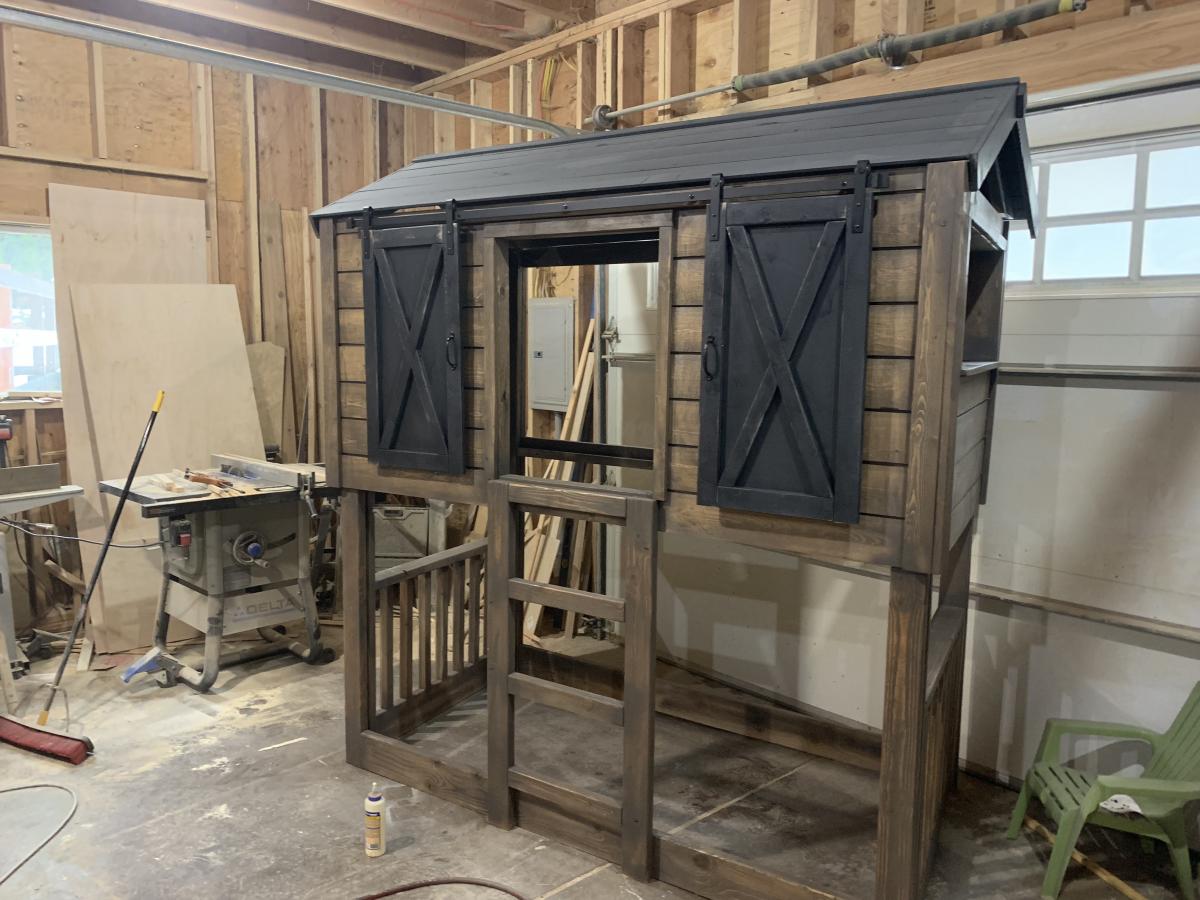
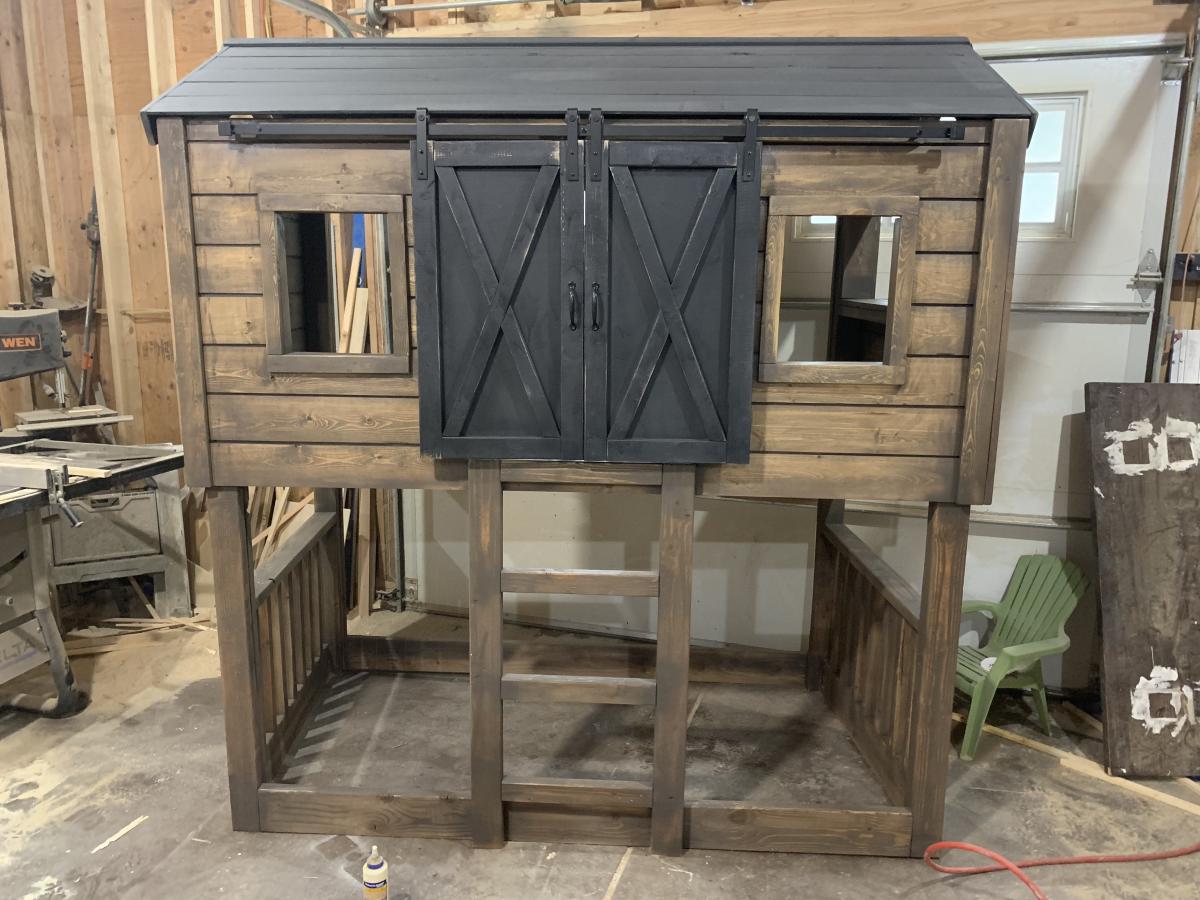
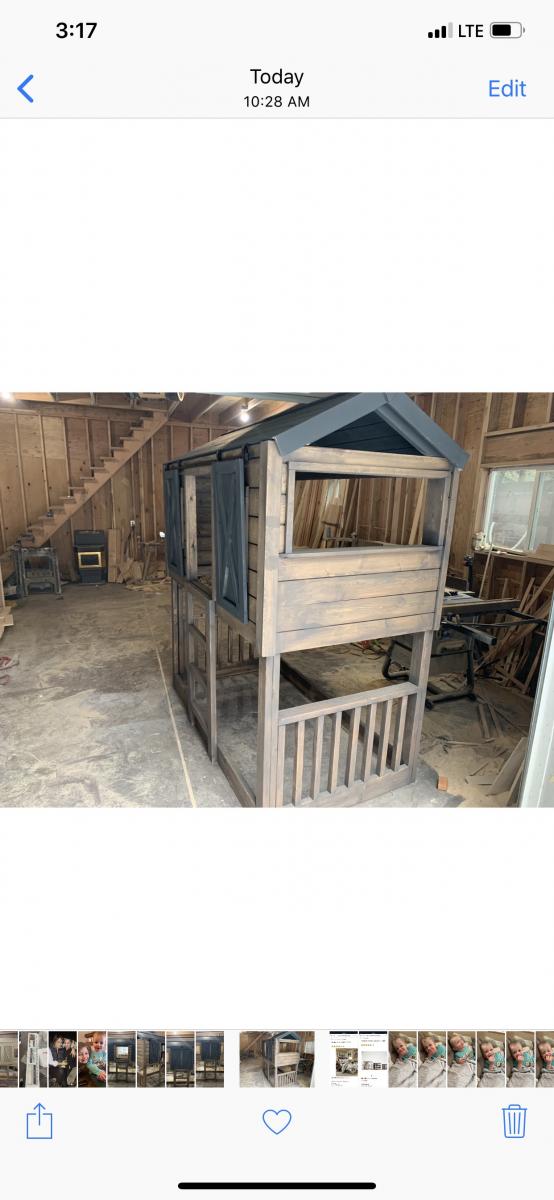
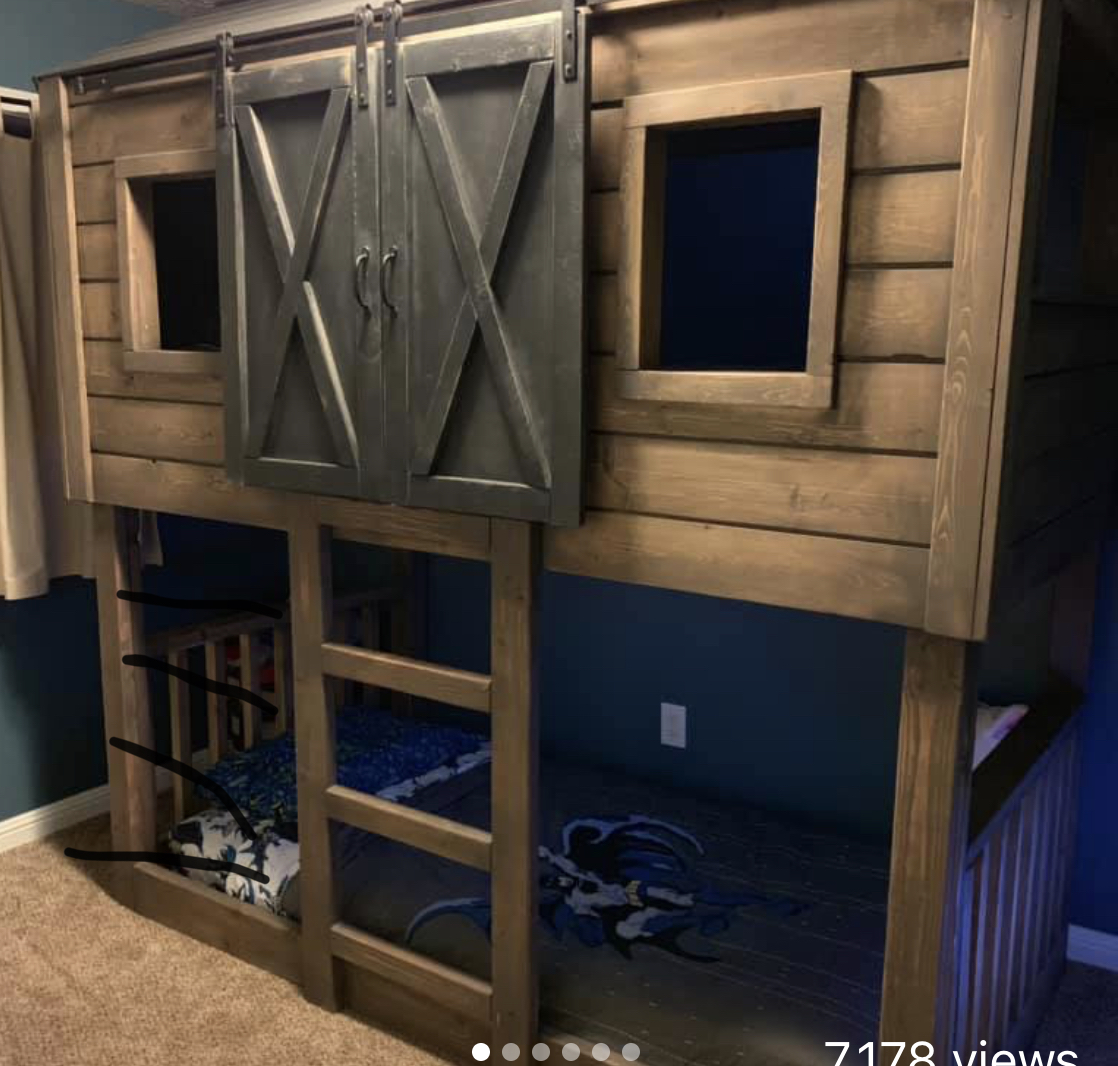
Tue, 02/18/2020 - 19:16
This is perfection! And exactly what my boys have been asking for. Any chance you have your modifications? Thanks!
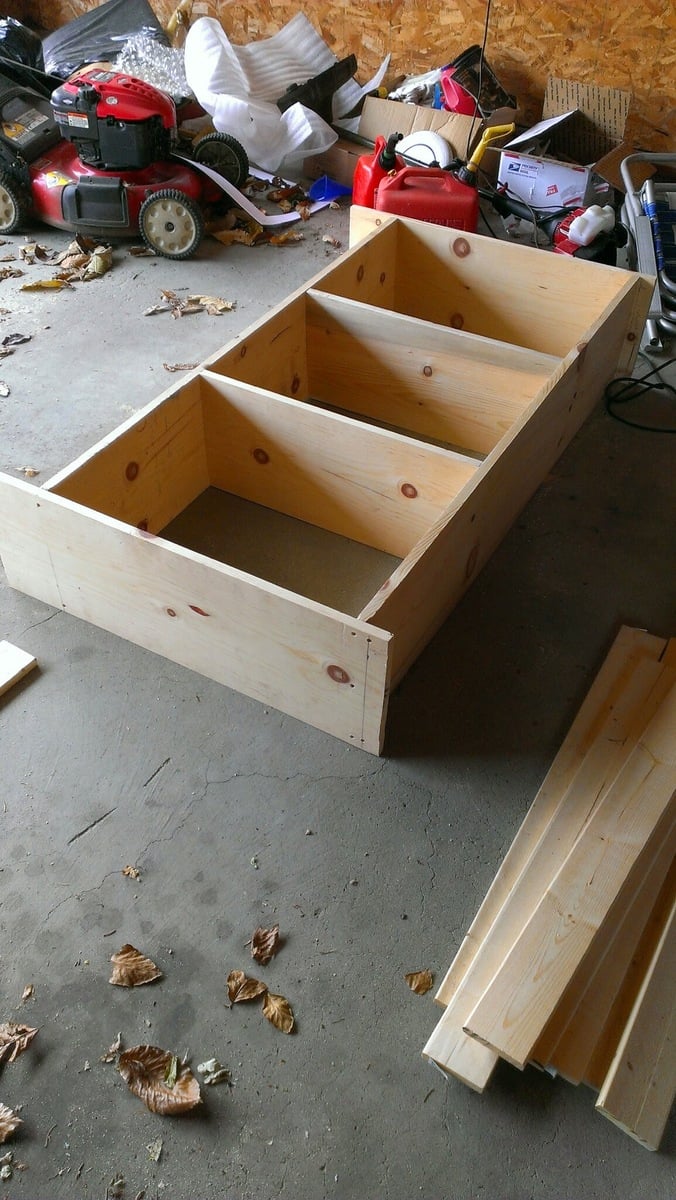
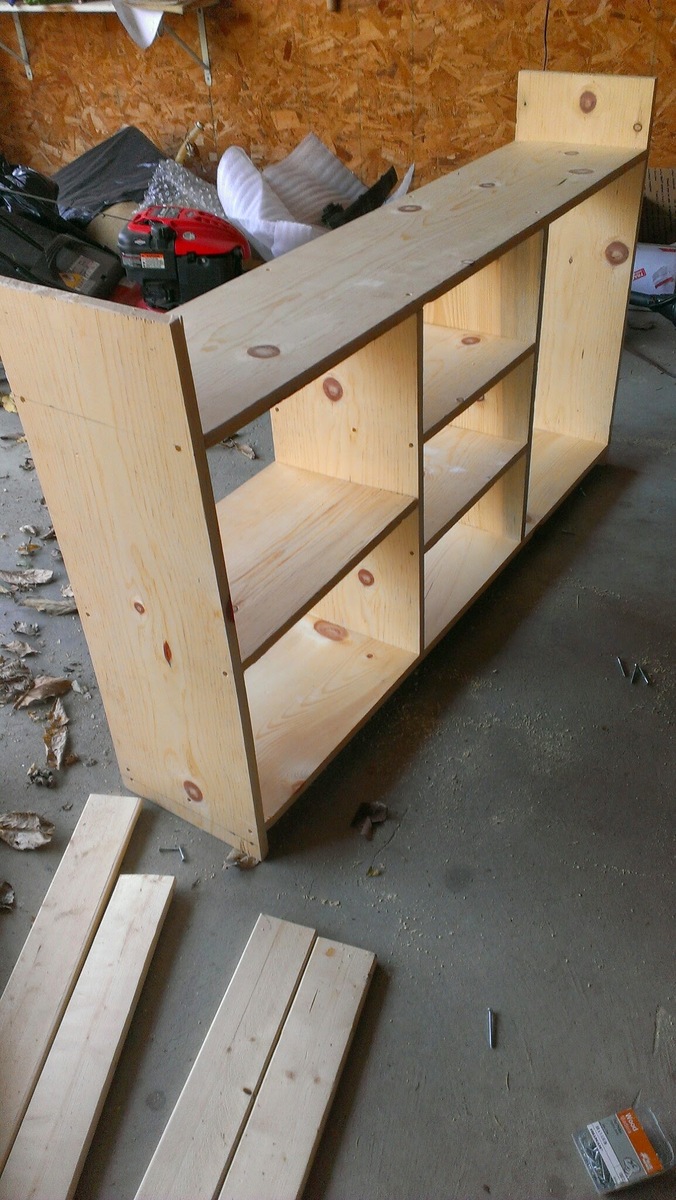
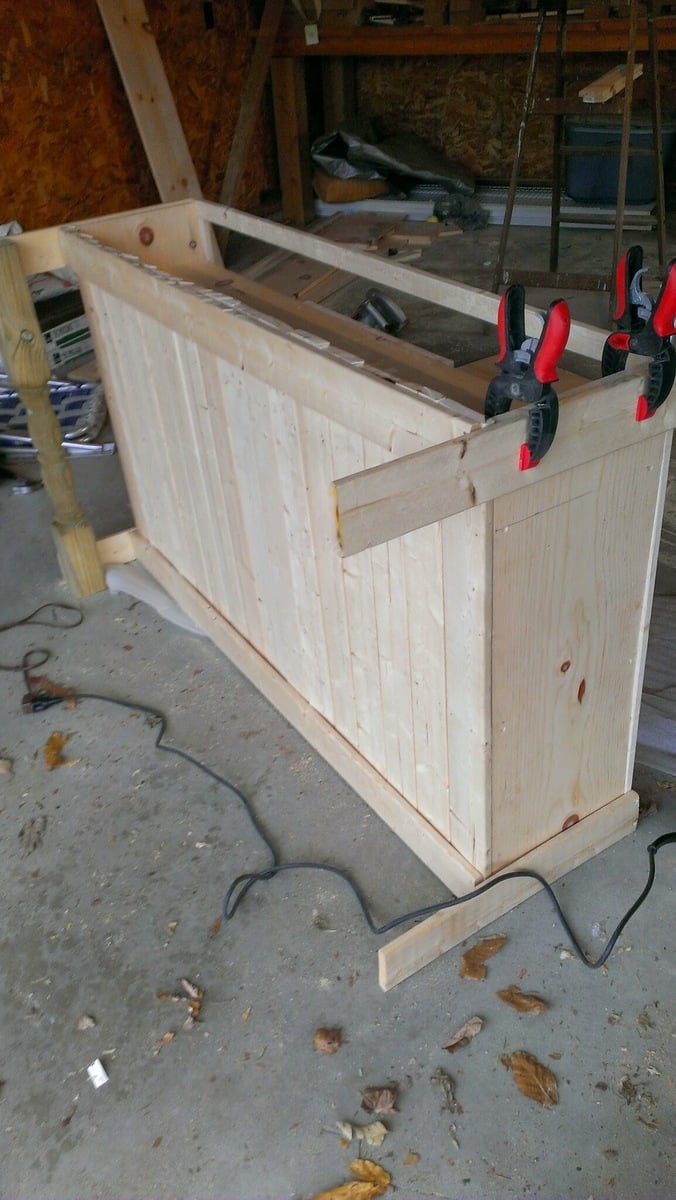
Grabbed some cheap whiteboard for my first project. My wife was looking at buying an island and I decided to surprise her by trying my hand at building one. Turned out to be an enjoyable new hobby that I hope to continue (plus, Laura now says I am her "favorite husband!").
Materials breakdown:
The lumber is white board from Lowe's for $115
The countertop is laminate Pragel from Ikea for $59 (cut to size)
Paint, polyurethane and drawer hinges were $50
I had another $75 in tools, glue, wood filler, nails, etc, because this was my first project.
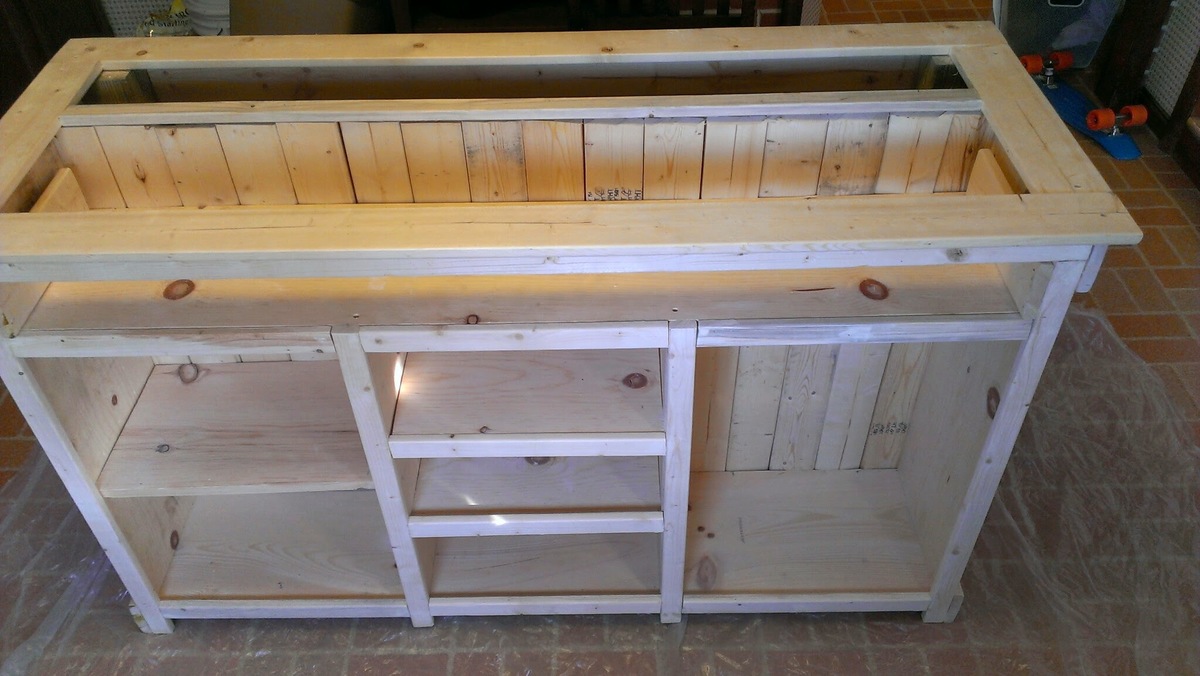
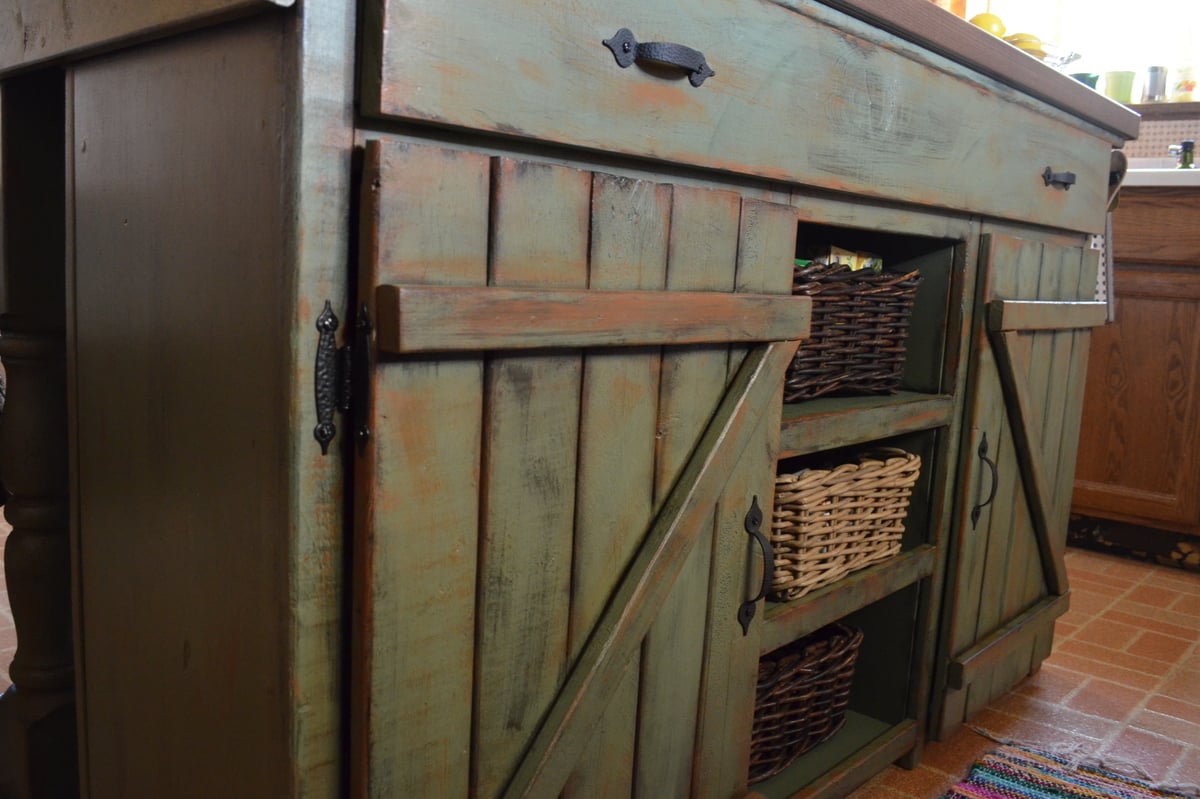
In reply to Love the color by NimbleShopper
Wed, 04/02/2014 - 17:38
My wife, Laura, helped with the paint and came up with the dry-brush distressing technique.
In reply to Impressive by Ana White Admin
Wed, 04/02/2014 - 17:42
We just moved into an old house with a garage and the previous owners left a work table and an ancient Craftsman jig-saw, circular saw, and scroll saw (all from 1956). They were a bit sketch, but they got the job done!
Fri, 04/04/2014 - 21:42
wow. very impressed. love the finish! it turned fantastic for your first project; looks like you have a new hobby!
In reply to wow. very impressed. love the by birdsandsoap
Tue, 11/15/2016 - 00:15
I love that. It have a nice design. ین درها دارای تکنولوژی مدرن و پیشرفته بوده و استفاده از آن سهل و آسان می باشد. وجود موتور توبولار و مرکز کنترل پیشرفته الکتروند فرانسه در آن باعث ایجاد امنیت، آرامش خیال و سهولت کارکرد آن بصورت دستی و اتوماتیک شده است. این مدل درب اتوماتیک به دلیل کم حجم بودن و جمع شدن در زیر سقف فروشگاه ها و یا مراکز تجاری و یا به صورت عمودی در سوله ها و کارخانه ها، هم باعث کارآیی بیشتر و هم دارای زیبایی مضاعف می باشد و کاربرد آن در مراکز تجاری، فروشگاه ها و صنعتی باعث ایجاد امنیت، راحتی و سهولت در استفاده از آن شده است .
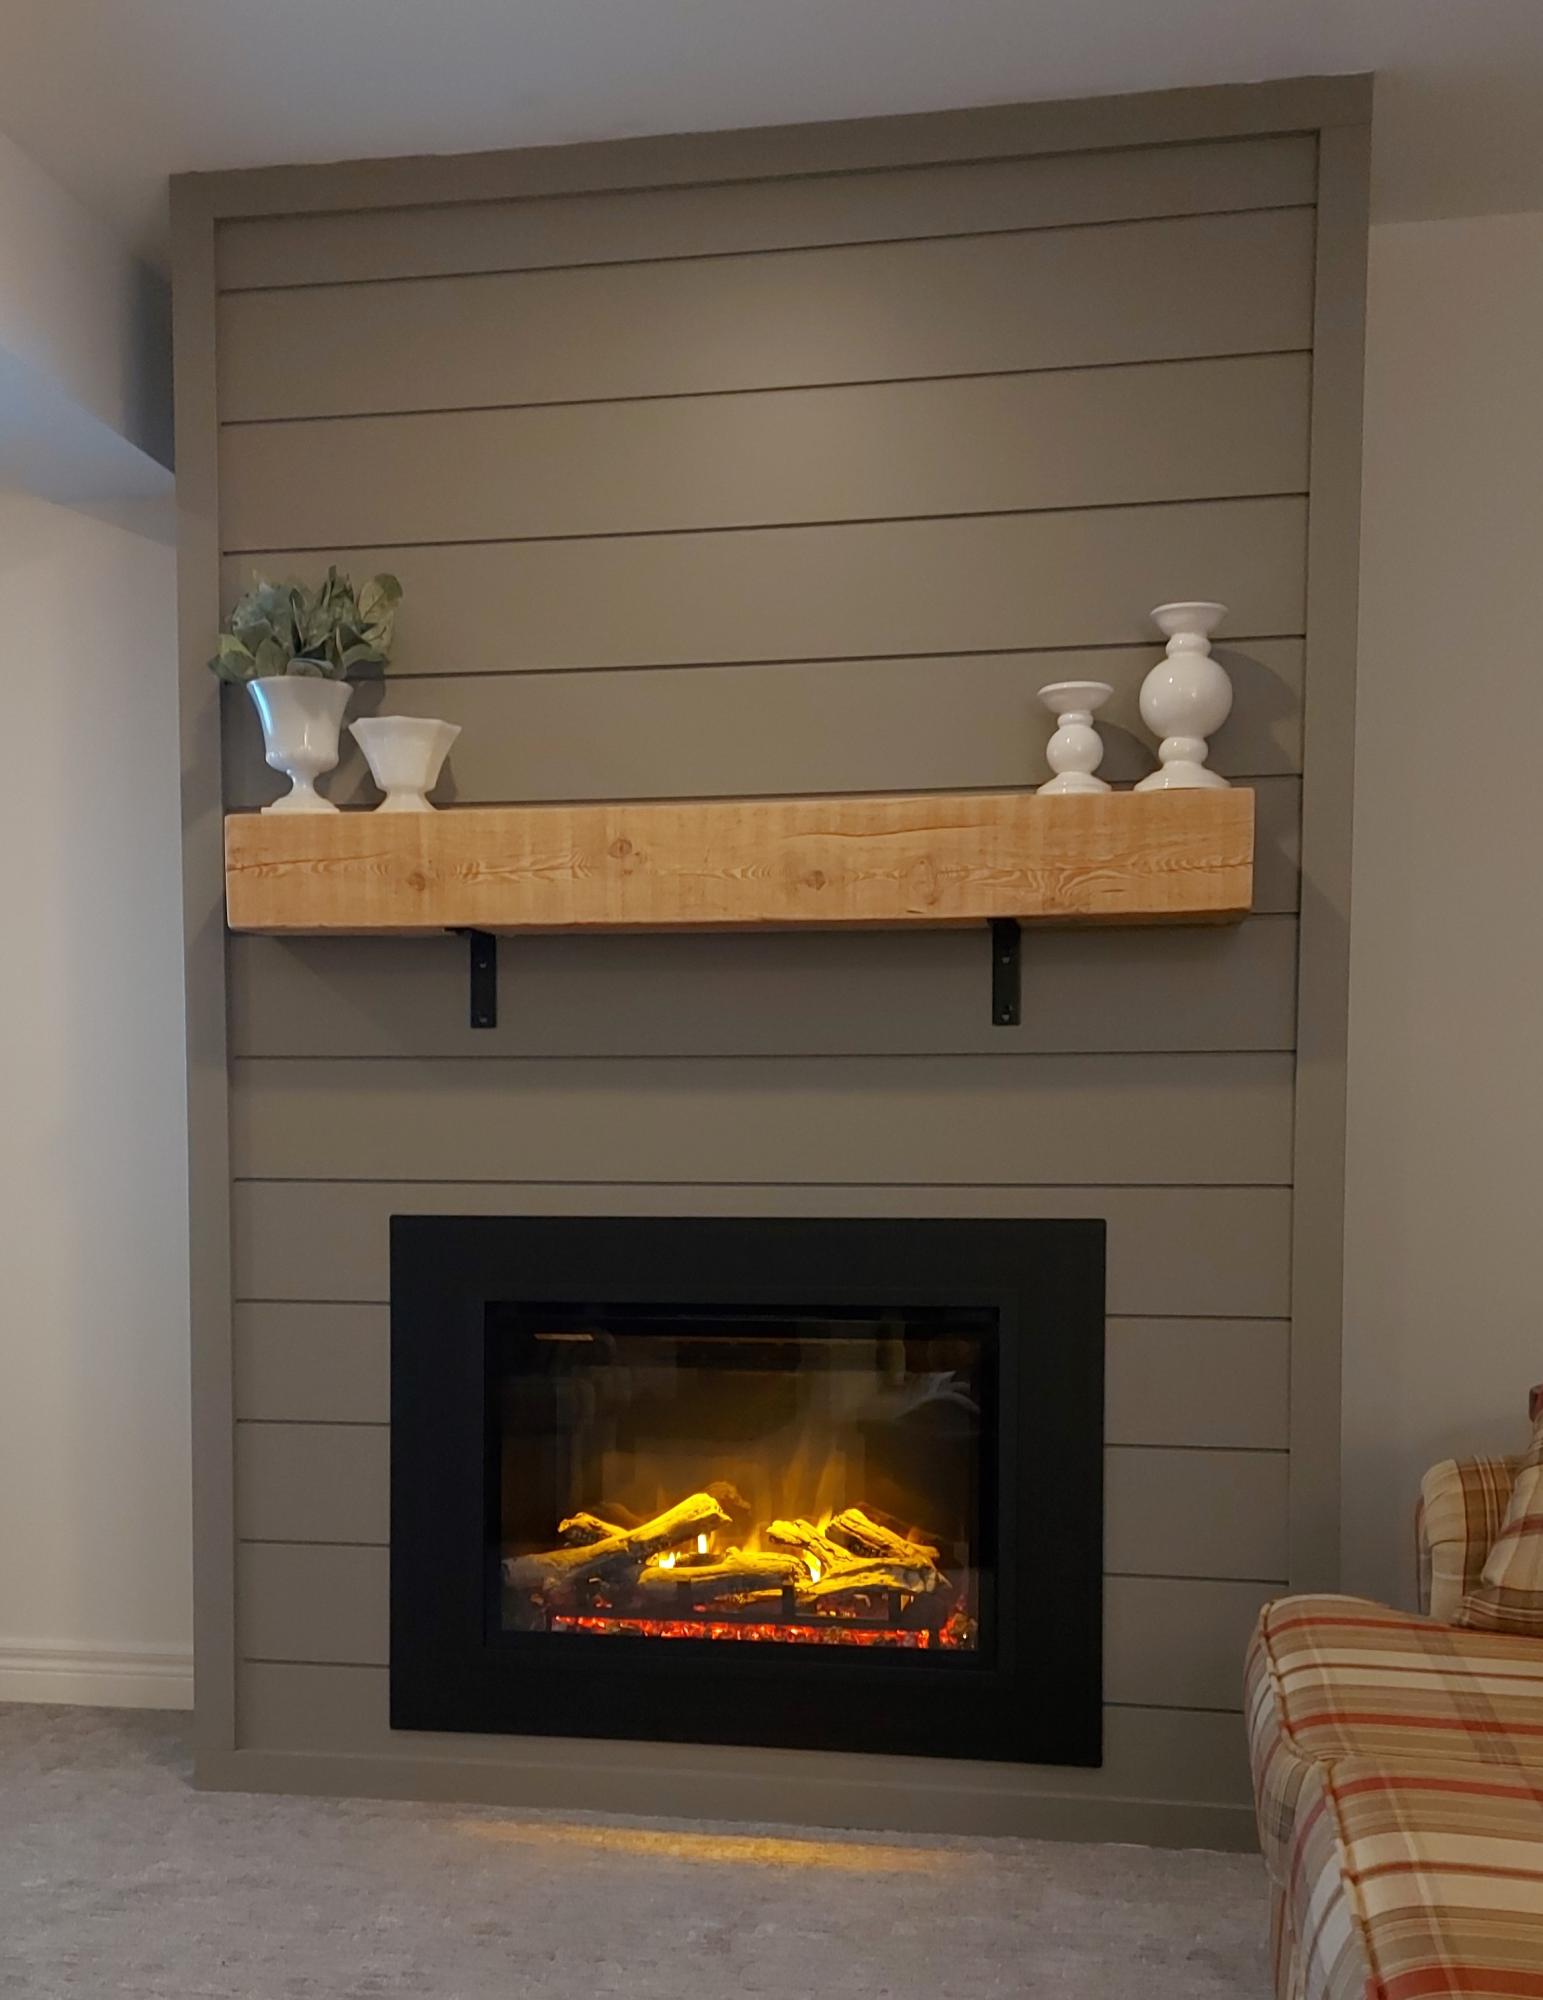
We built this fireplace where nothing existed before. The instructional video was very helpful. We are so proud of how it turned out.
Jim and Susie Jacob
Wed, 02/28/2024 - 19:20
Hello! I’m wondering if you think this could be built as a temporary piece that could be moved? I live in apartment and wouldn’t want to leave something like this behind after spending time and money to build it. Maybe if I built in some removable access panels (a few of the slats?) to be able to attach it to studs (and later remove it) after building the entire piece. Thoughts? TIA!
My garage is in a different dimention now! Thank you Ana!
I had a bit of trouble with the length of the dowels but overall I am so happy with it.
Sun, 09/25/2016 - 12:33
Glad to see these made! It is such a simple project but so userful! Your space looks great, thanks for sharing! Ana
In reply to Glad to see these made! It by Ana White
Sun, 09/25/2016 - 18:56
I have to say I will be making a few of those! I find the plan you designed is simply awesome! The boots are of the floor which simplifies the cleaning, the dowels are not very long so you wouldn't stumble upon them, the spacing is great! I can go on and on about this one very well thoughtout !!!
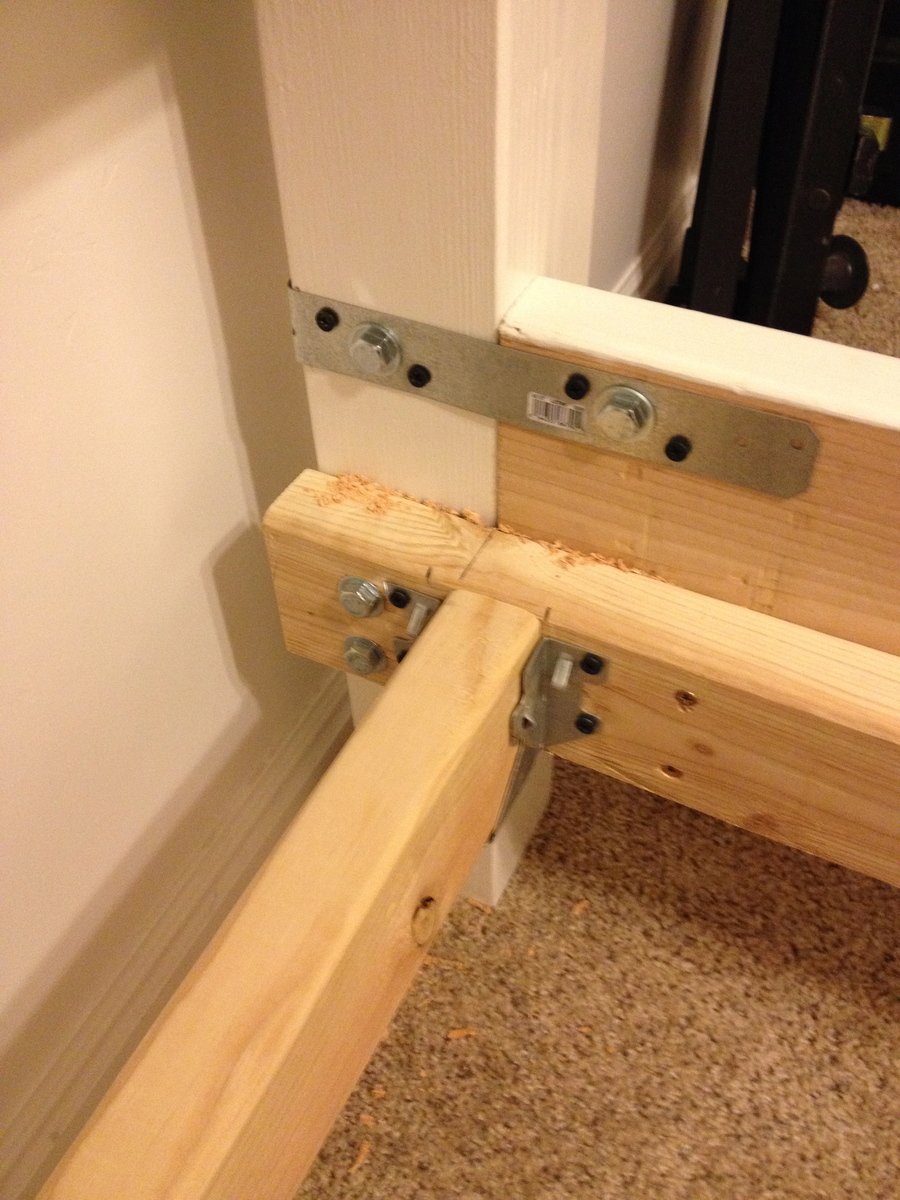
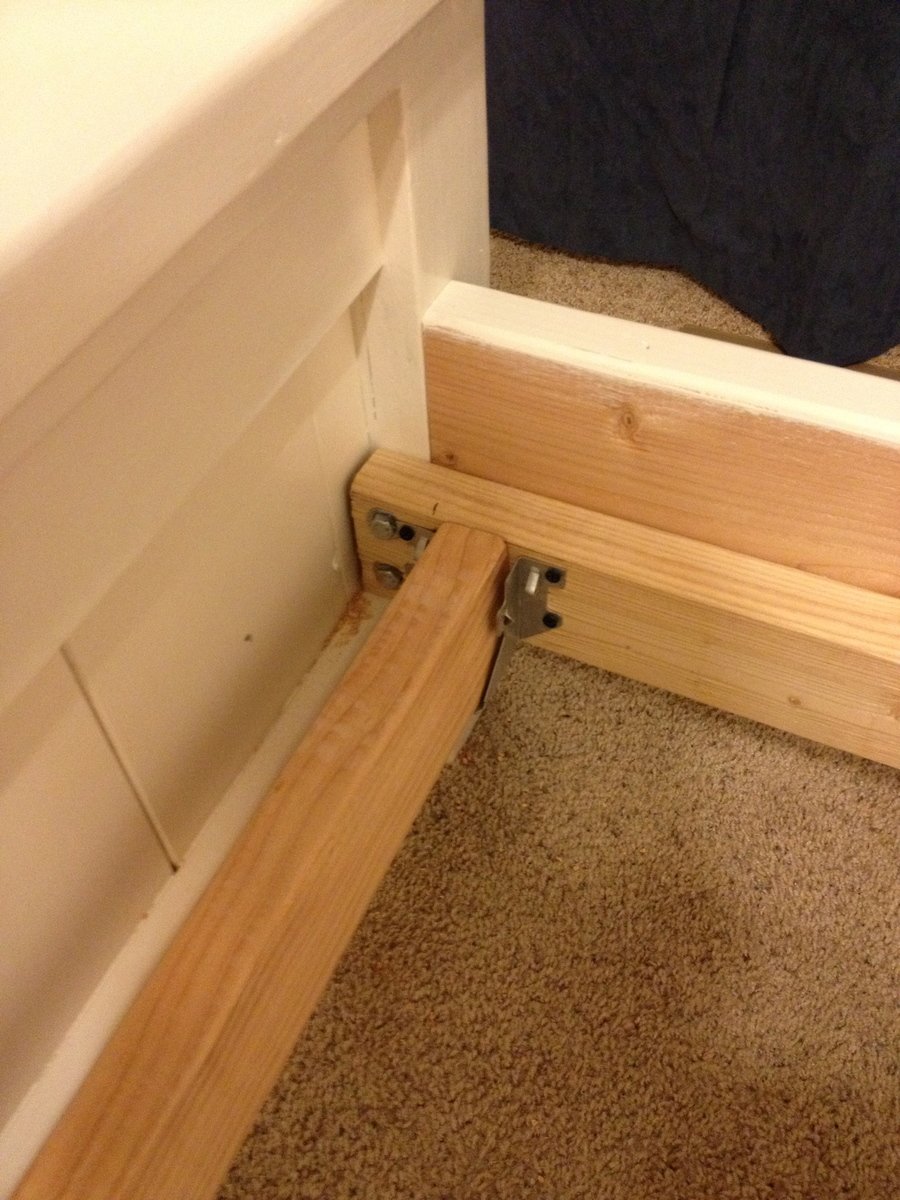
We built the farmhouse king size bed over the last week. We used 2x4 hangers to hold the 2x4's in place and used 2x4's to support the mattress. We put 7/16" plywood on top of the 2x4's to support the mattress. We struggled with how we were going to attach the side rails to the bed frame and finally came up with a way we felt would be strong enough. Please see the pictures included to see exactly how we attached the rails to the bed frame. We used lag bolts, and metal brackets.
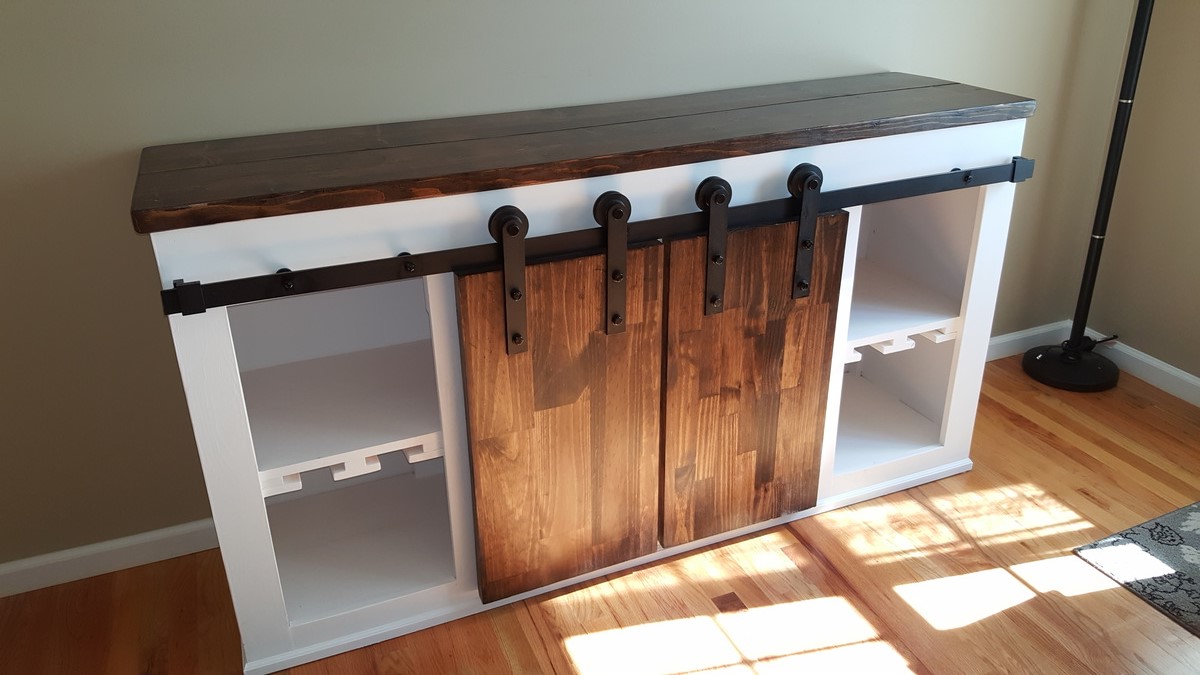
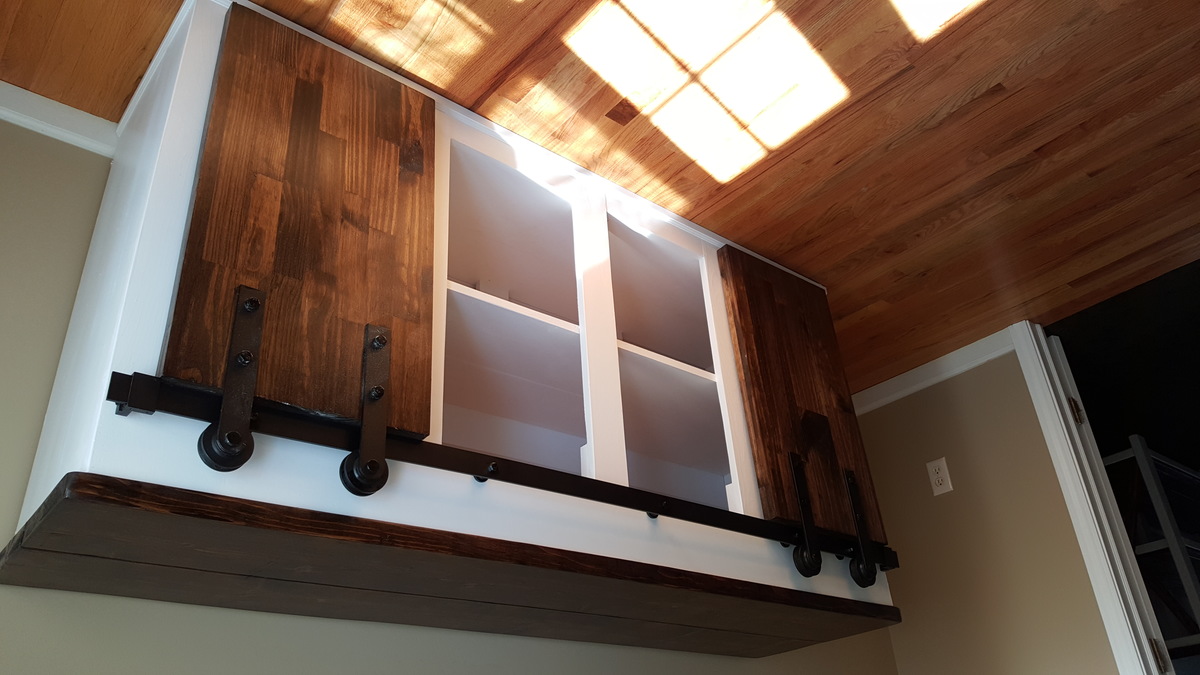
72L x 18W x 36H
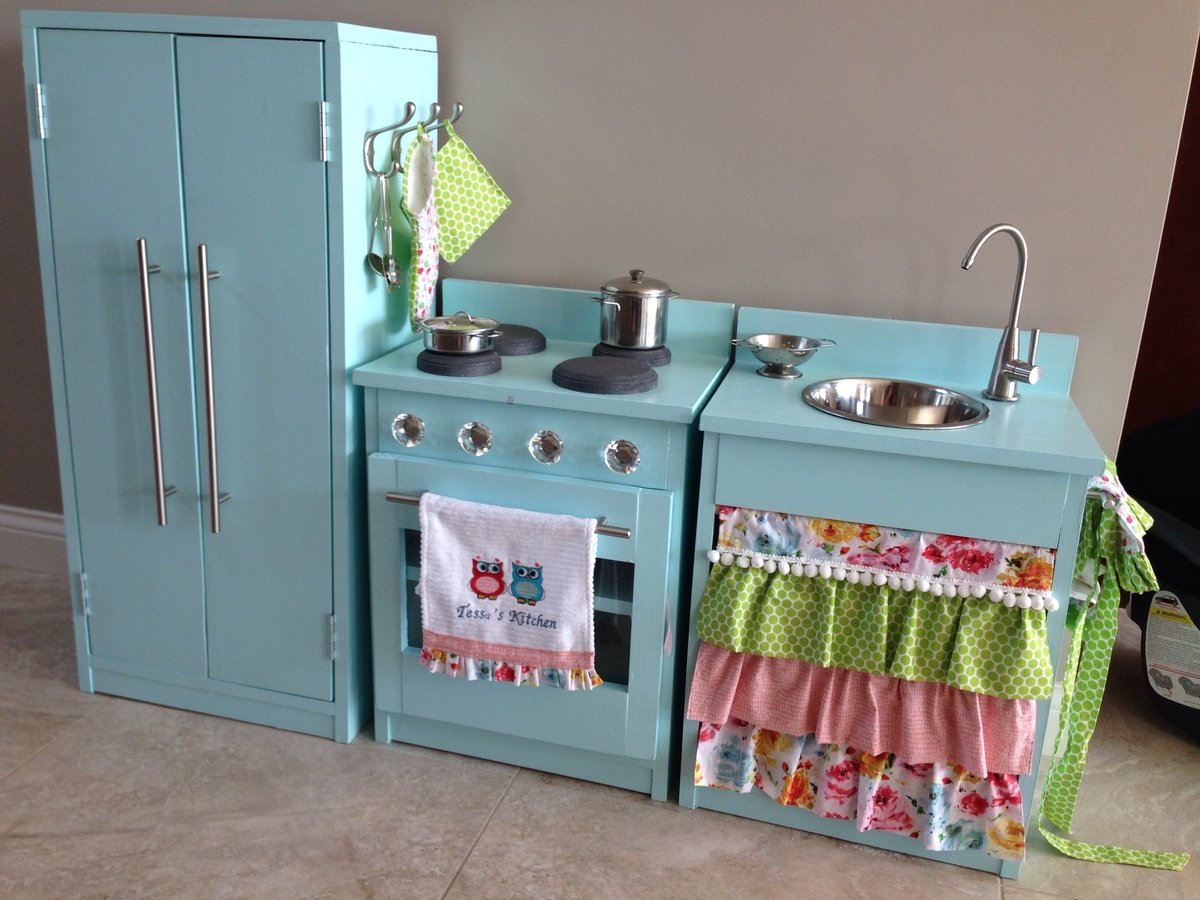
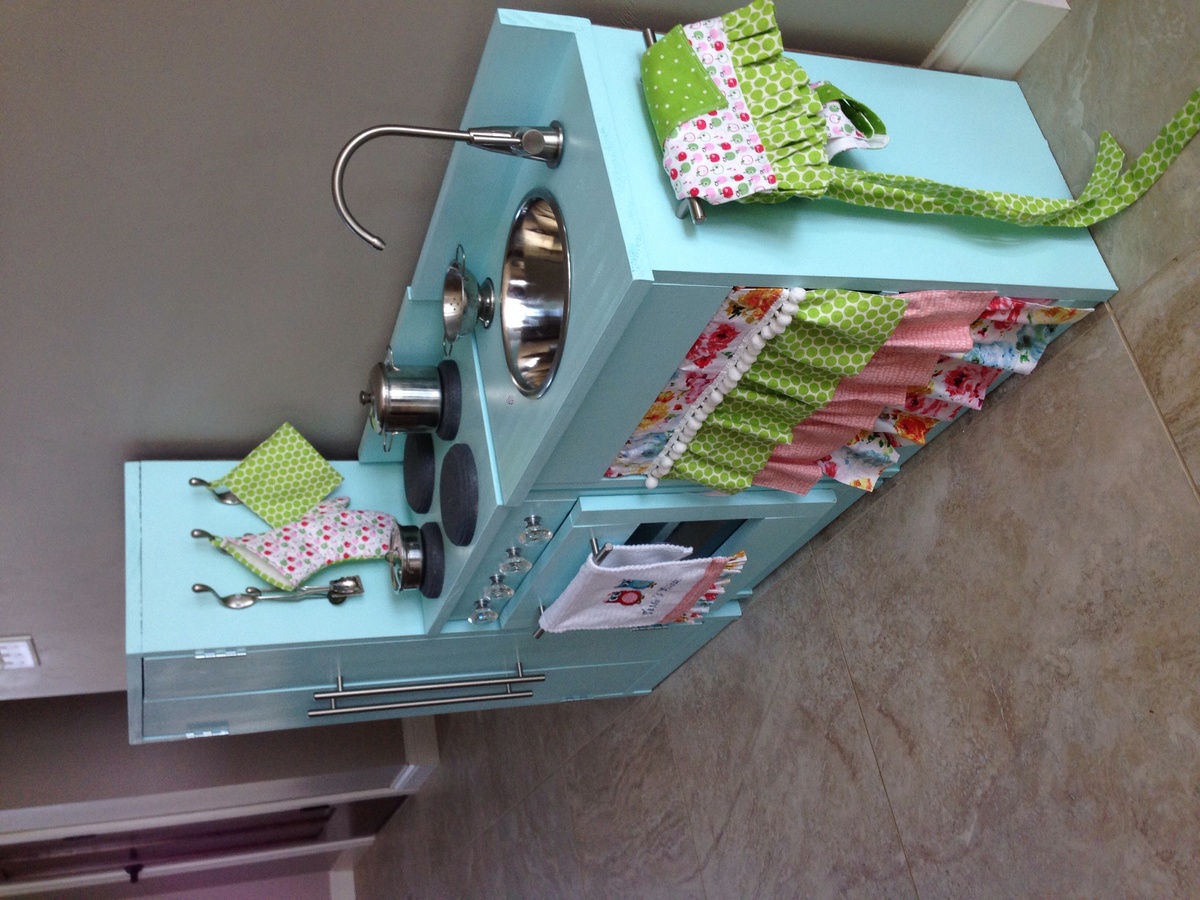
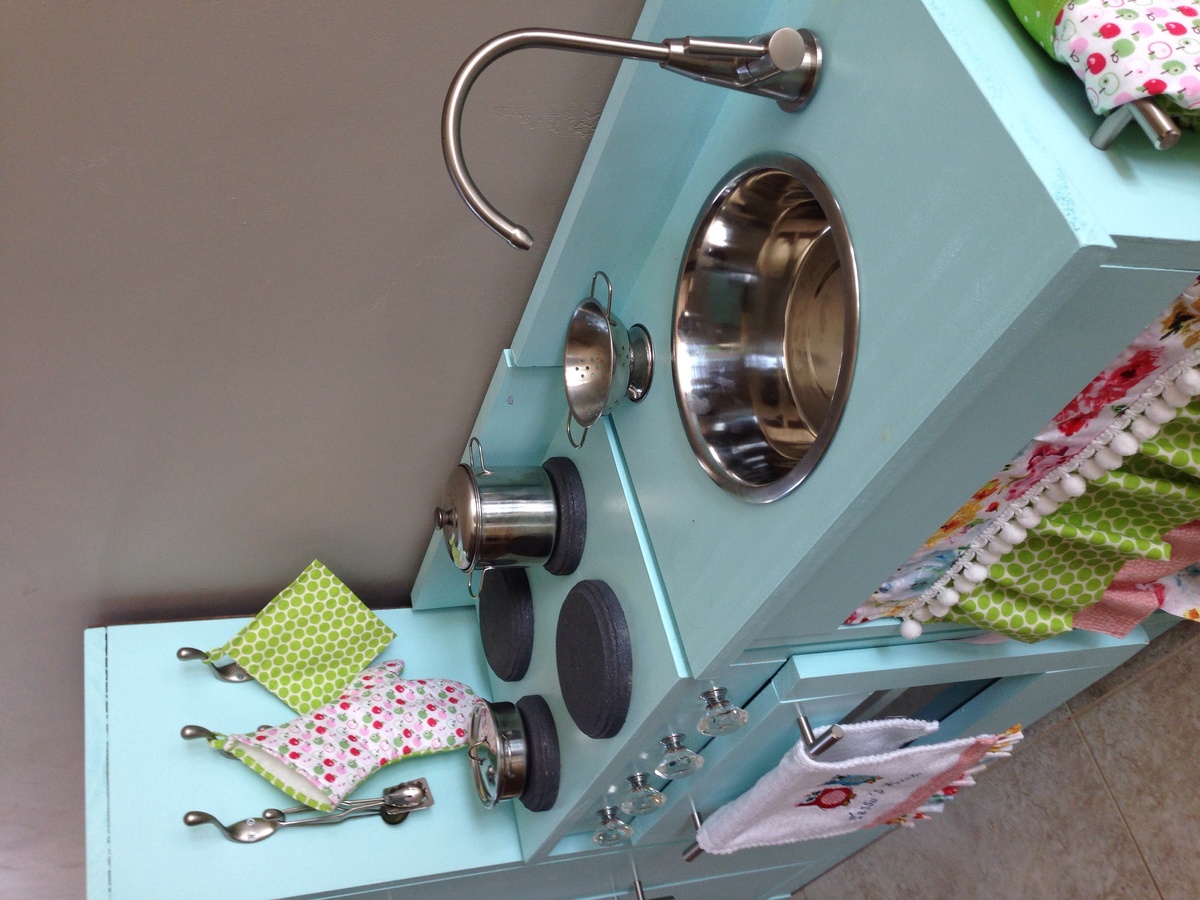
I built this play kitchen for my daughter's second birthday during my newborn son's short naps or often with him strapped to me in his baby carrier. I spent more money on higher quality wood to save myself time and effort sanding the wood down. I splurged on a drinking faucet as it was the perfect size and a mini version of my real kitchen faucet. I used magnets on the fridge doors and oven door and a simple ribbon to prevent the oven door from opening too wide. I have built a few things befor-shelves, table, baby gate but consider myself a beginner who is still learning a lot about woodworking.
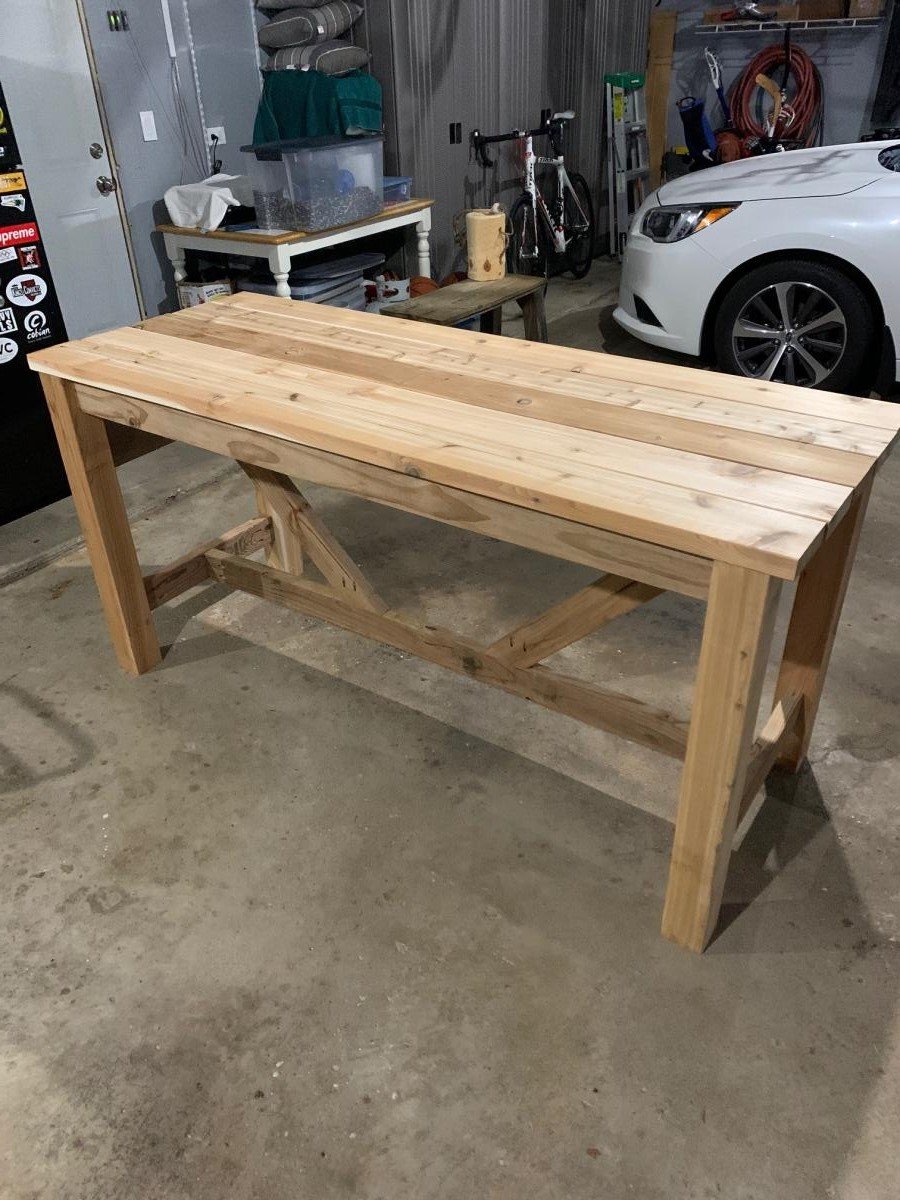
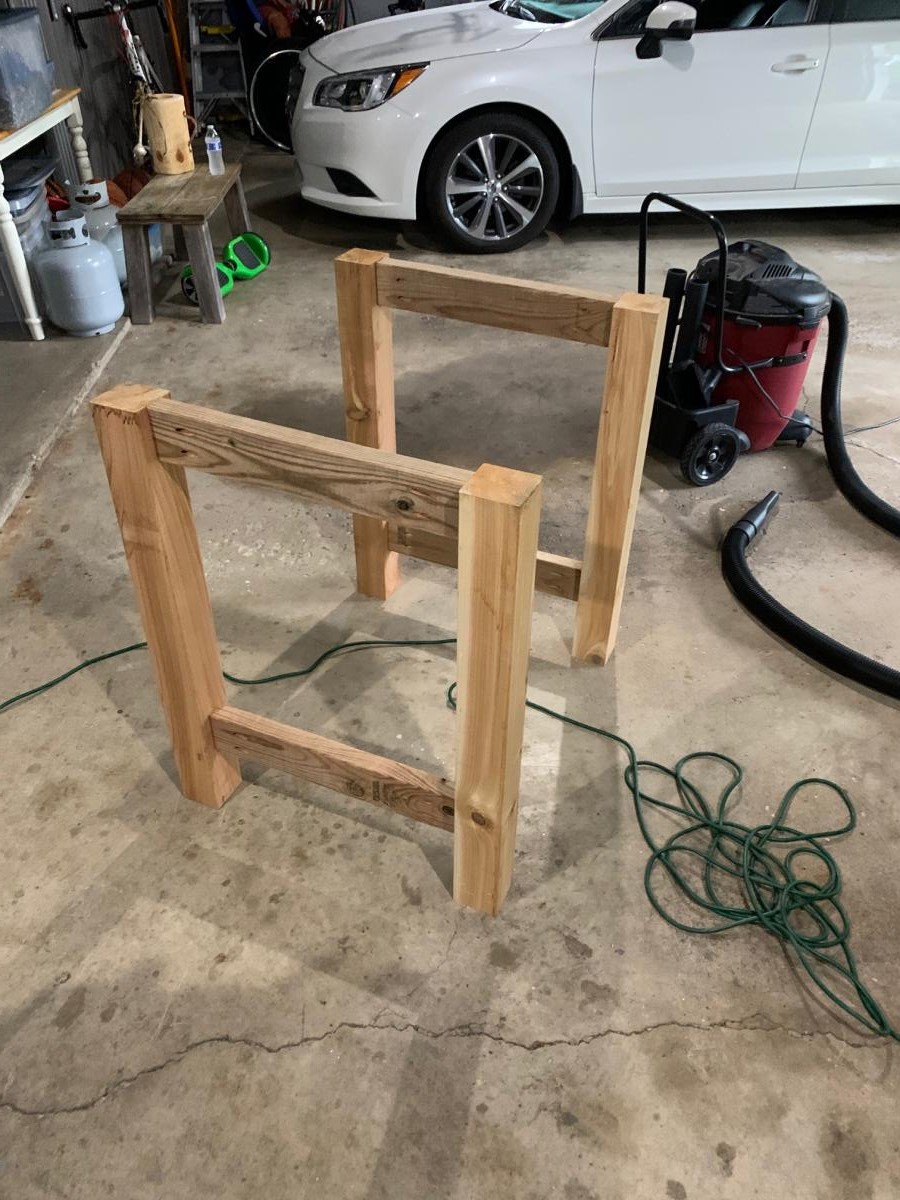
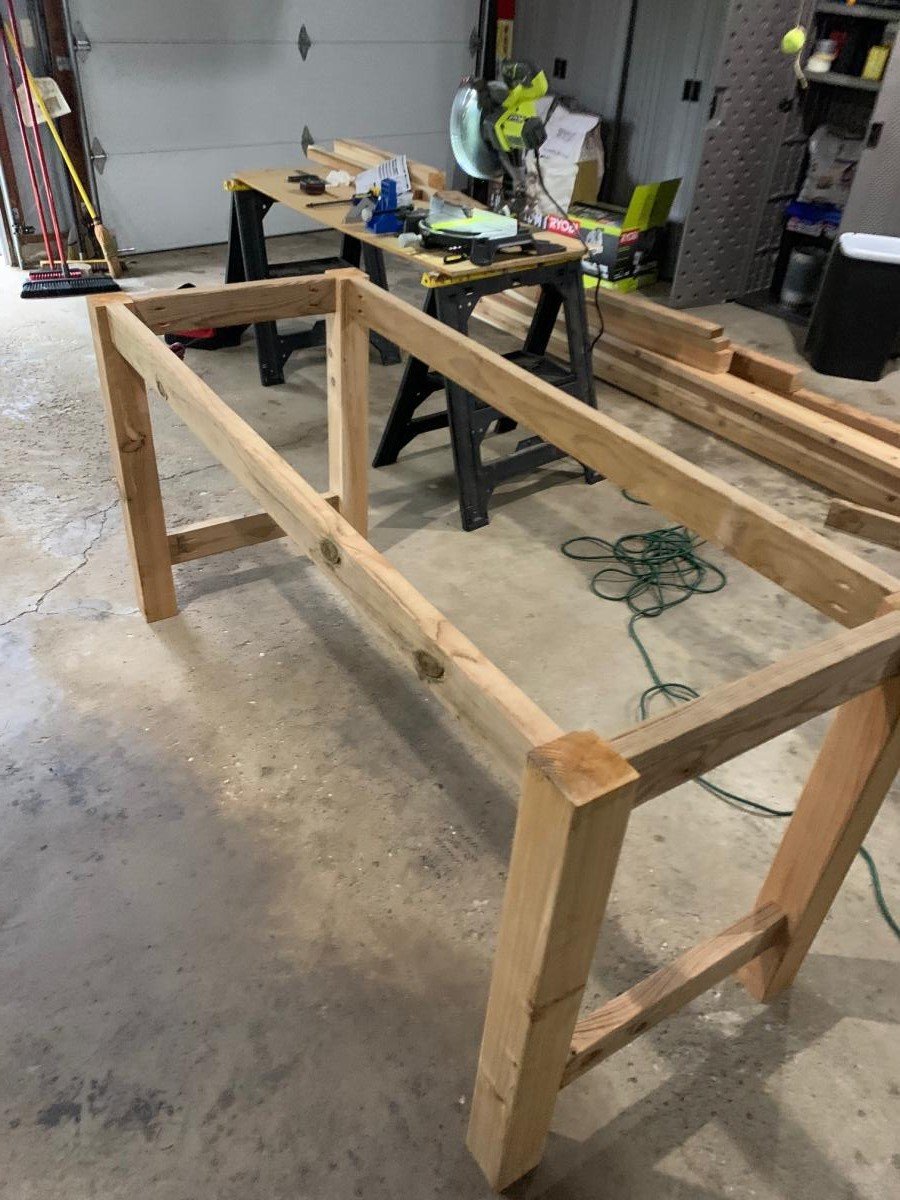
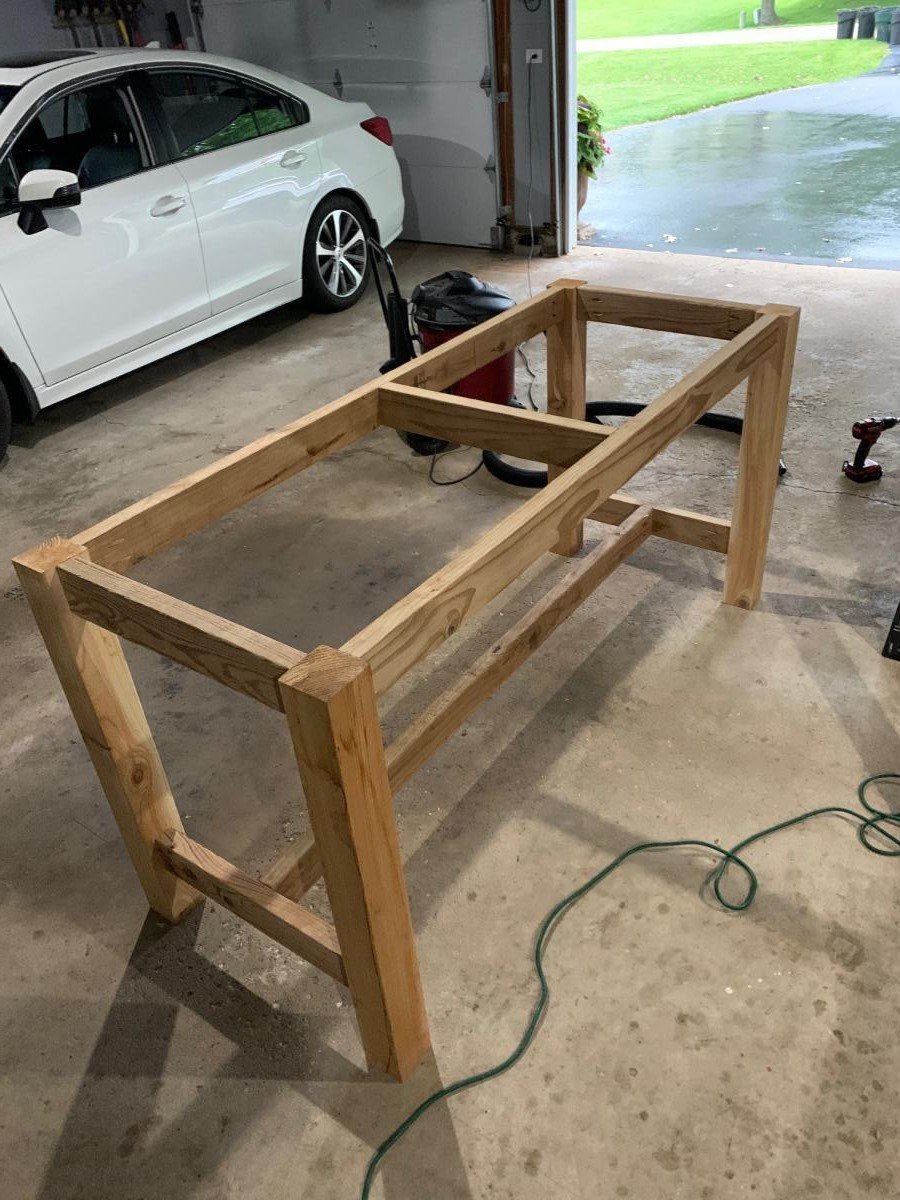
Not quite finished but love the table already. Trying to decide how to stain/paint it. The Kreg jig was a must for this project. It was my first of hopefully many! I used cedar for the 4x4s and 2x6 top pieces. The 2x4s are treated lumber (only because there were no more cedar ones....apparently lumber is getting hard to get lately!!!). Anyway....thanks for the great plans and motivation for this project.
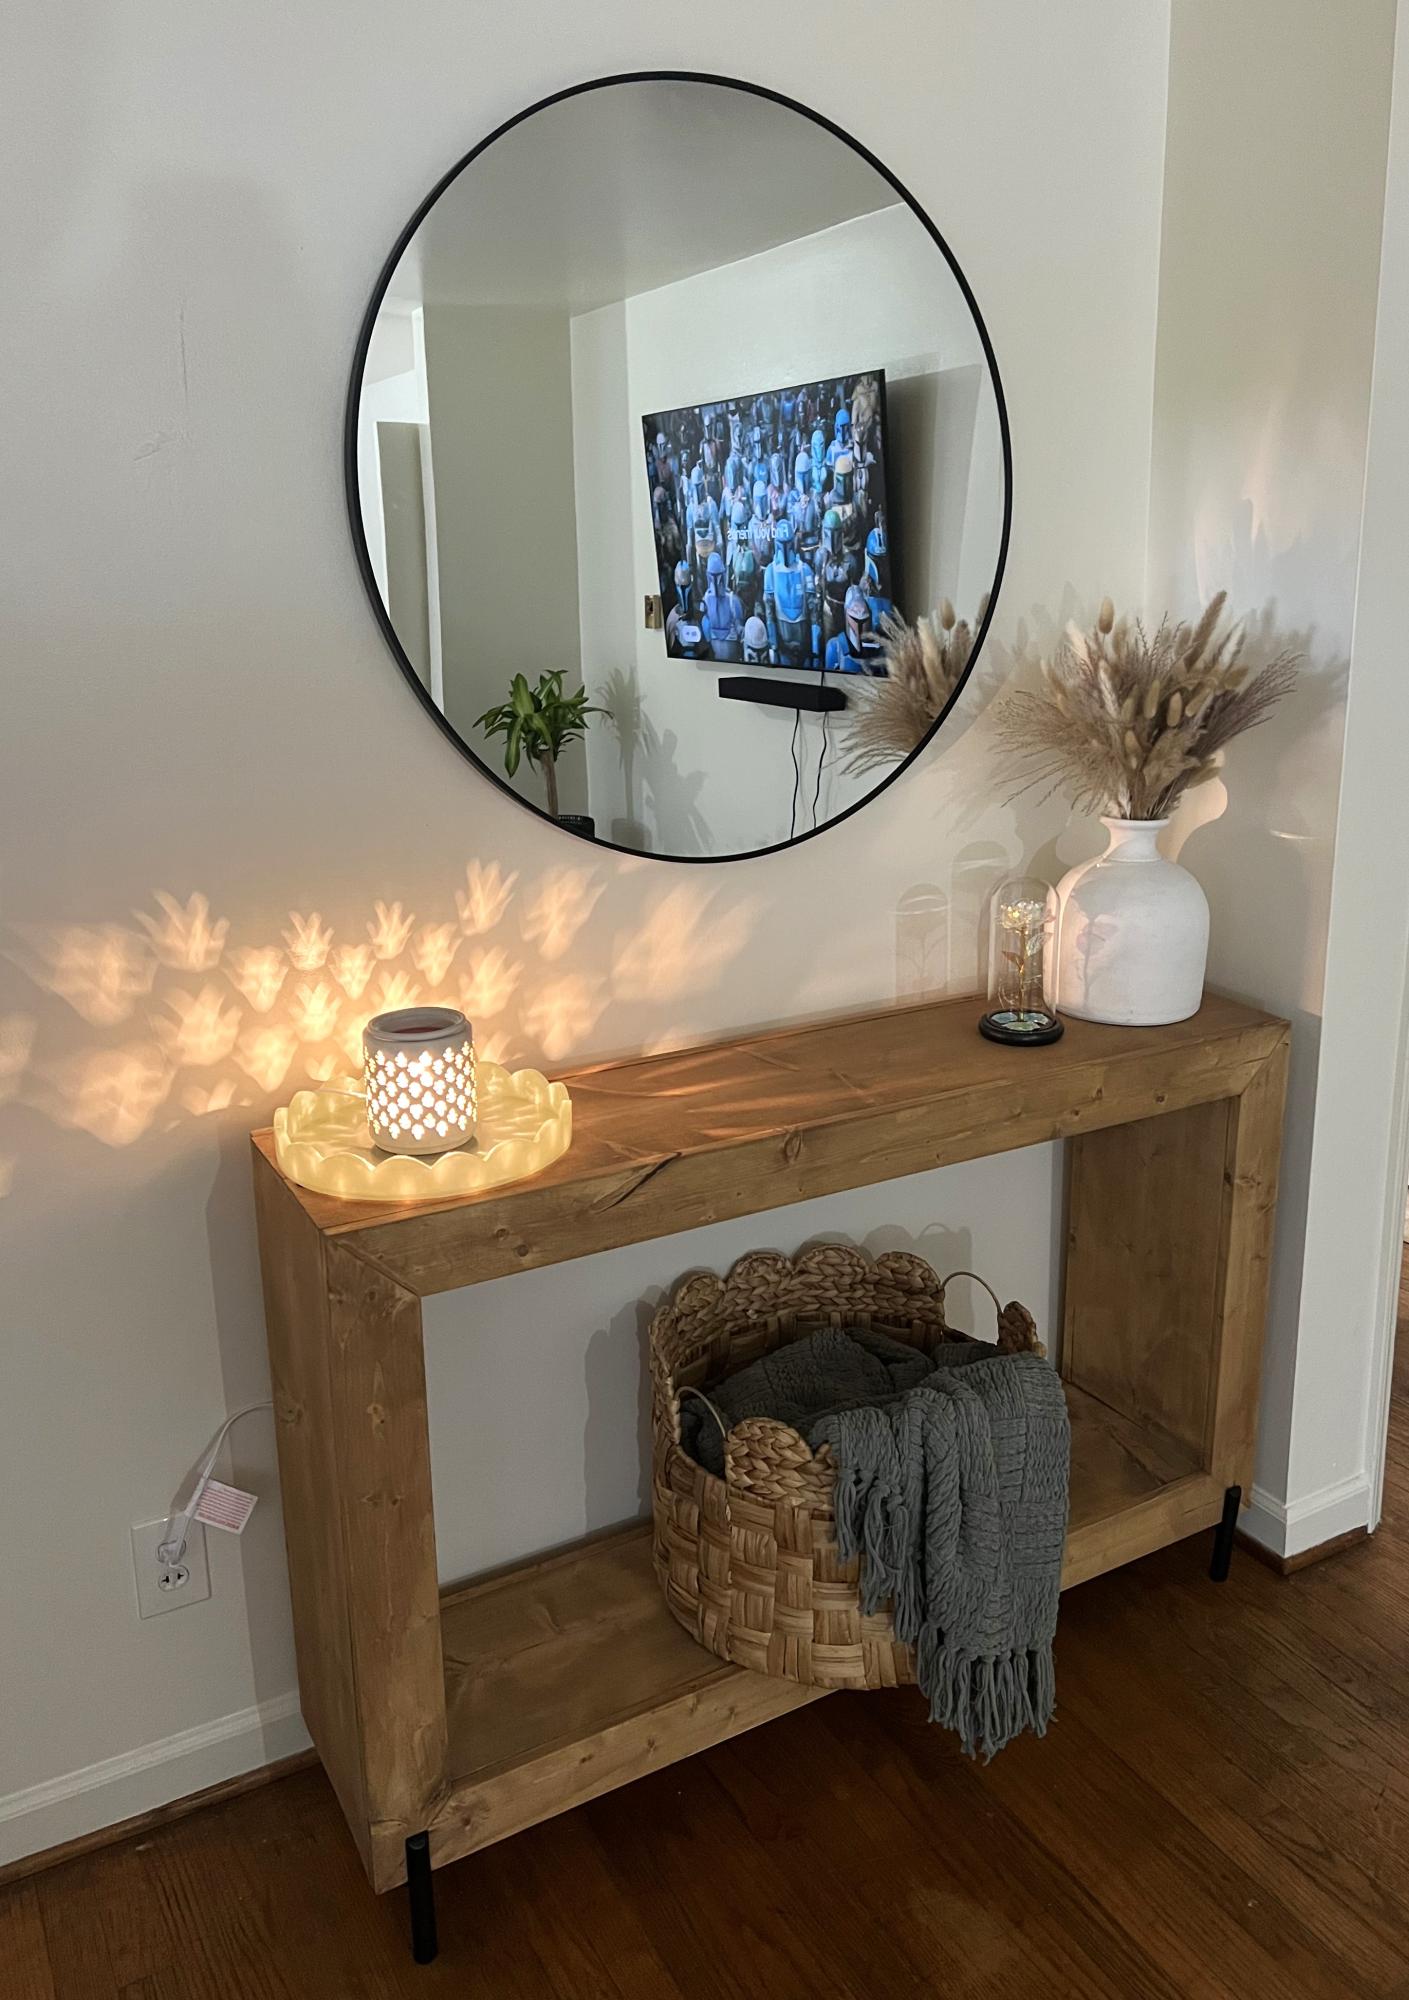
DIY Wood Waterfall Console Brandy Robinson @beautylikebran on IG
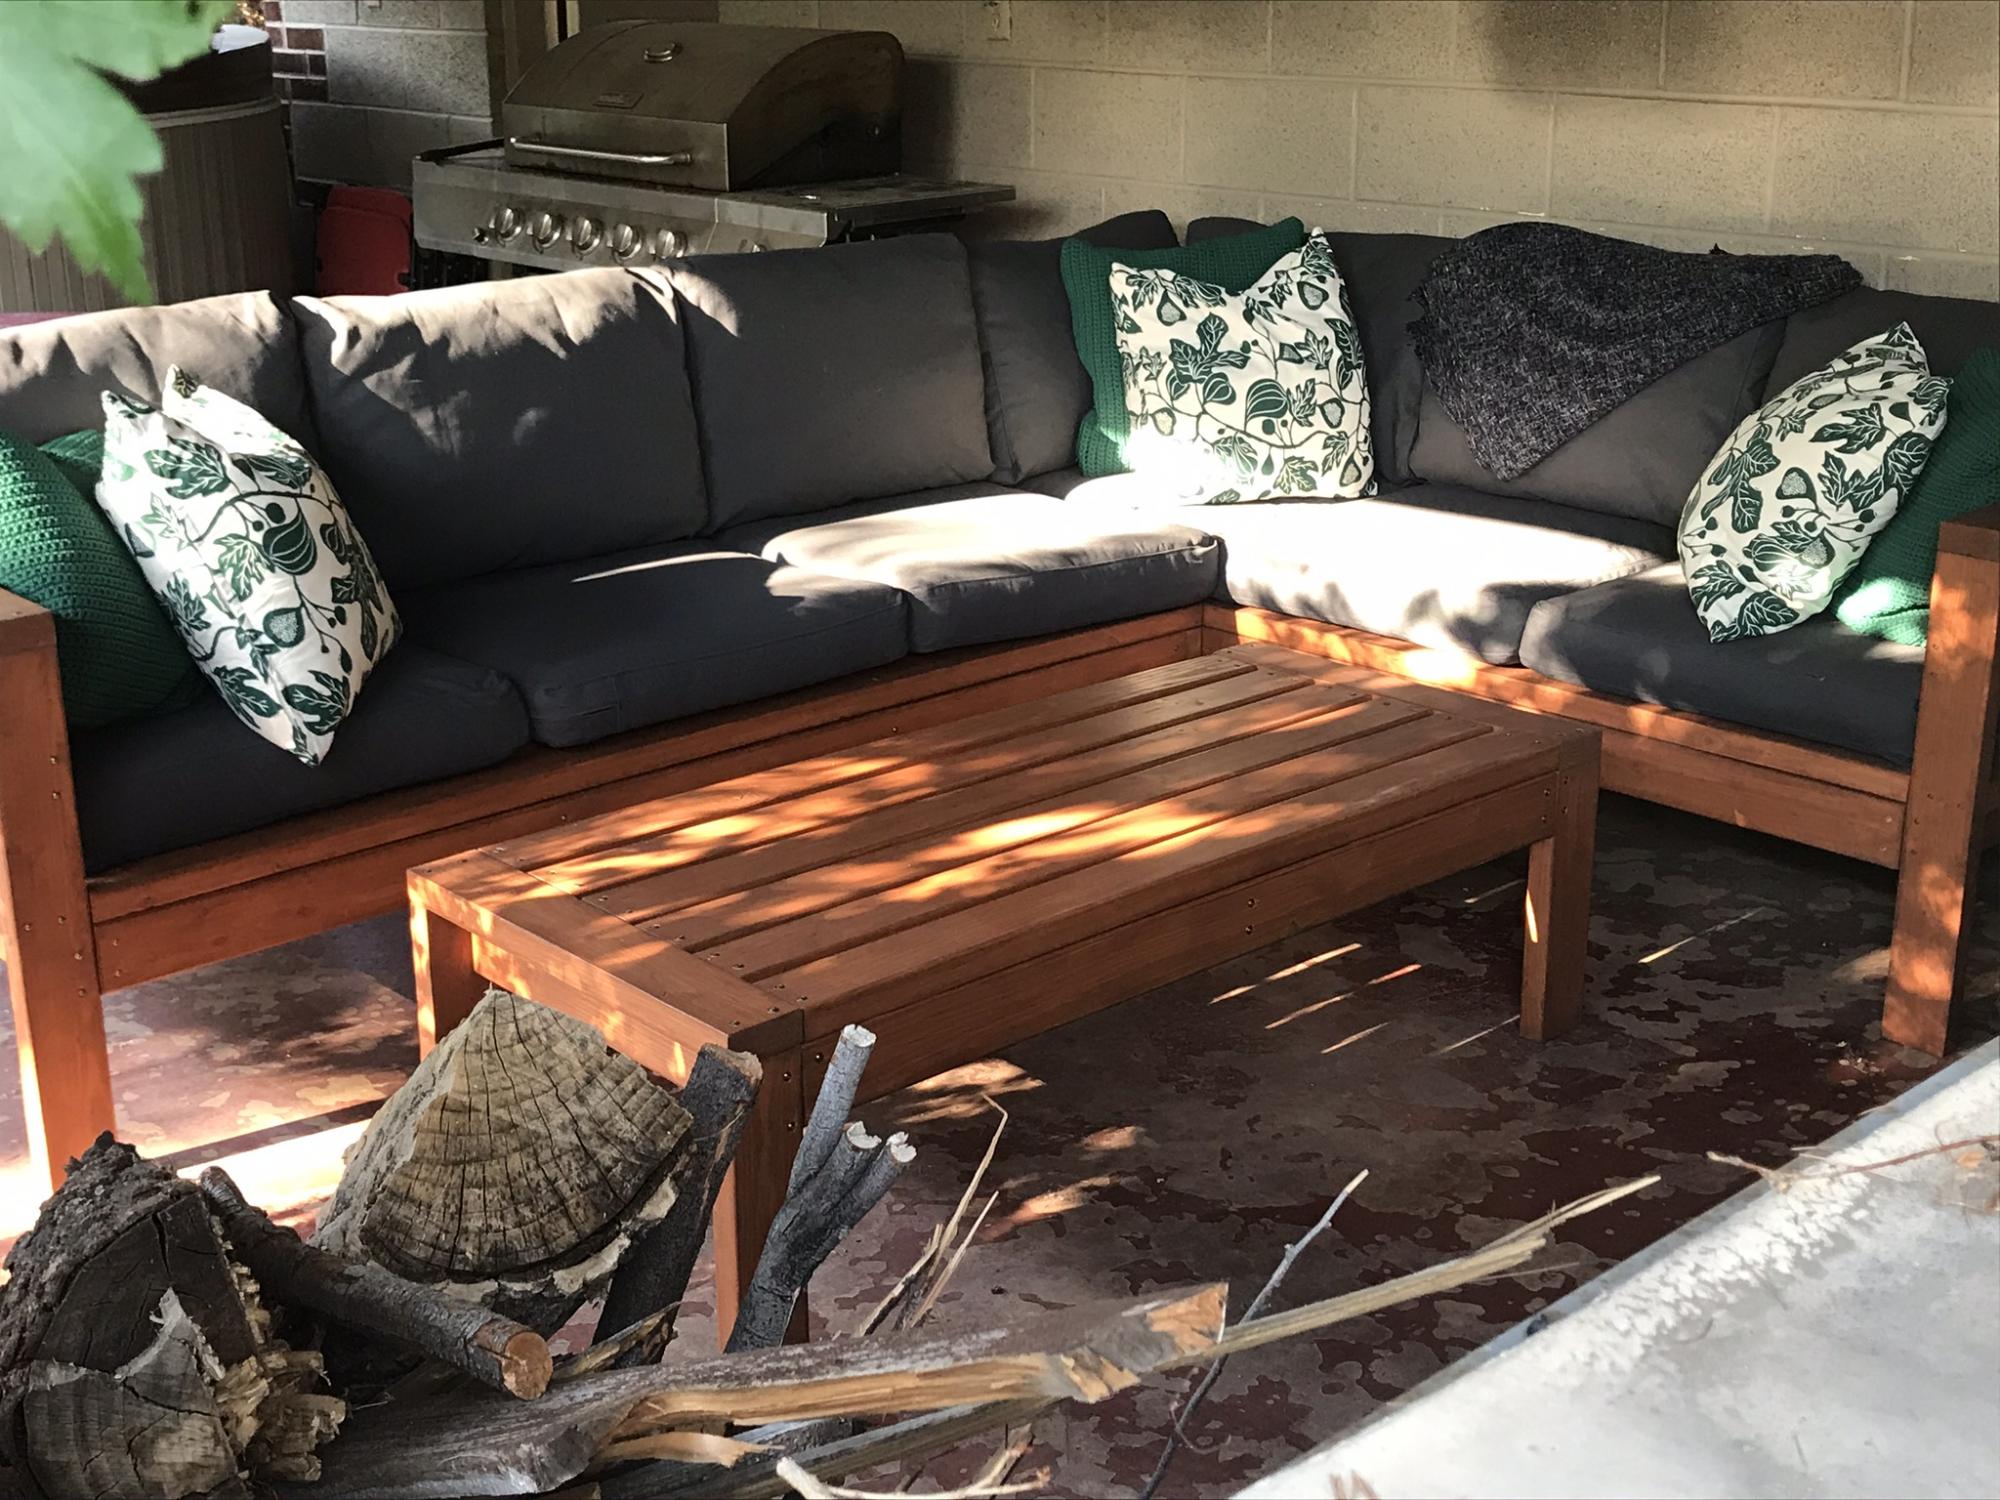
This project took a while. Stained everything before assembly which made it easier. Plans are easy to follow. Thank you for making them available. Our property is starting to look a lot like your website.
Mon, 08/02/2021 - 08:35
Looks amazing! What method did you use (pocket holes, dowels, deck screws, etc) to join the visible portions like the arms?
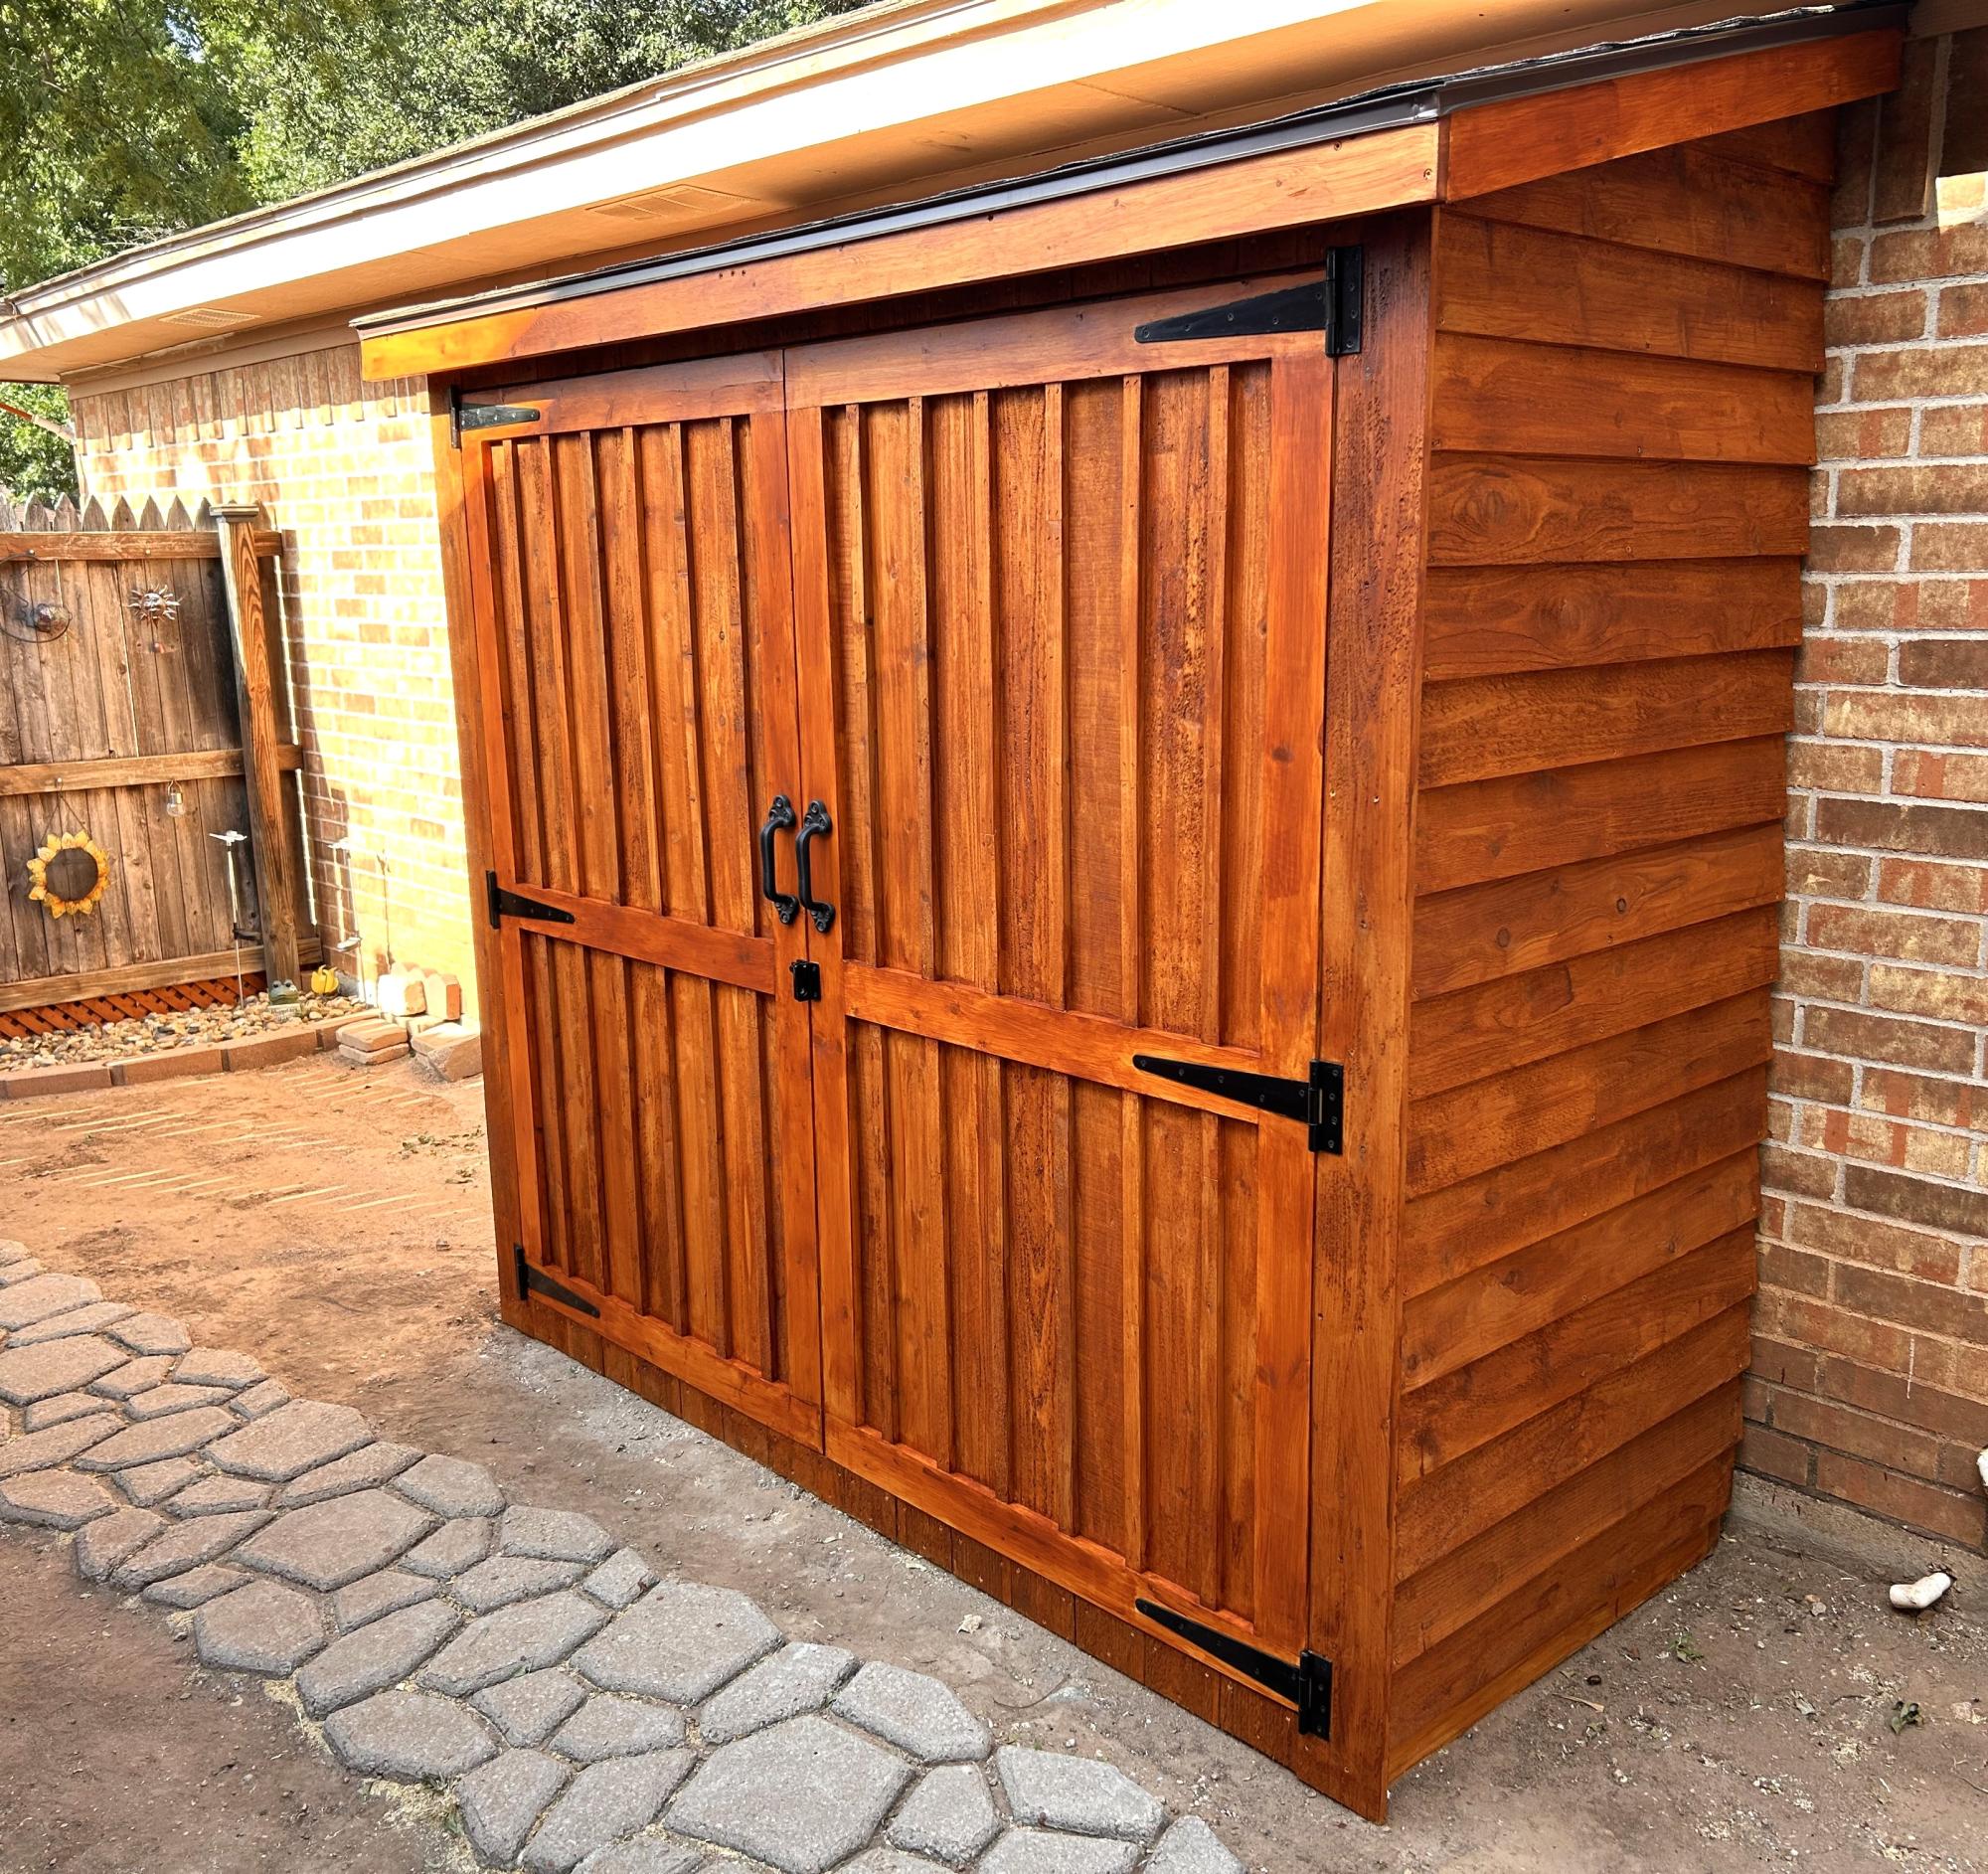
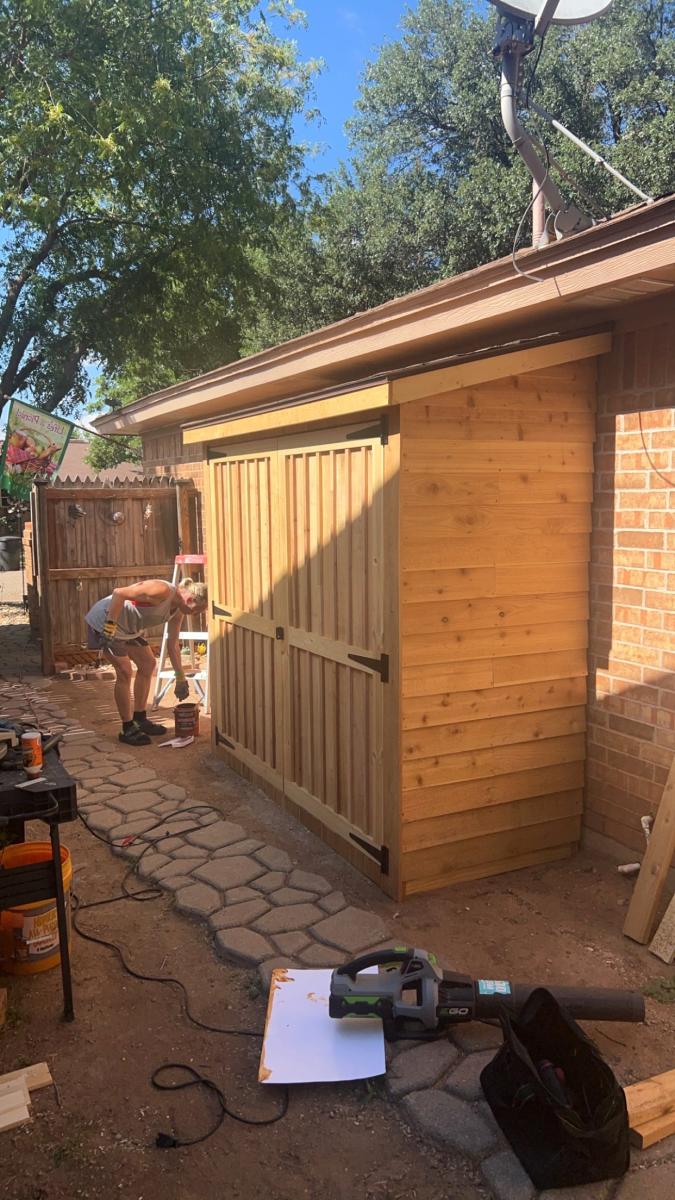
Now storing 5 bikes in the shed instead of hanging from the ceiling in the garage.
Len Verhulst
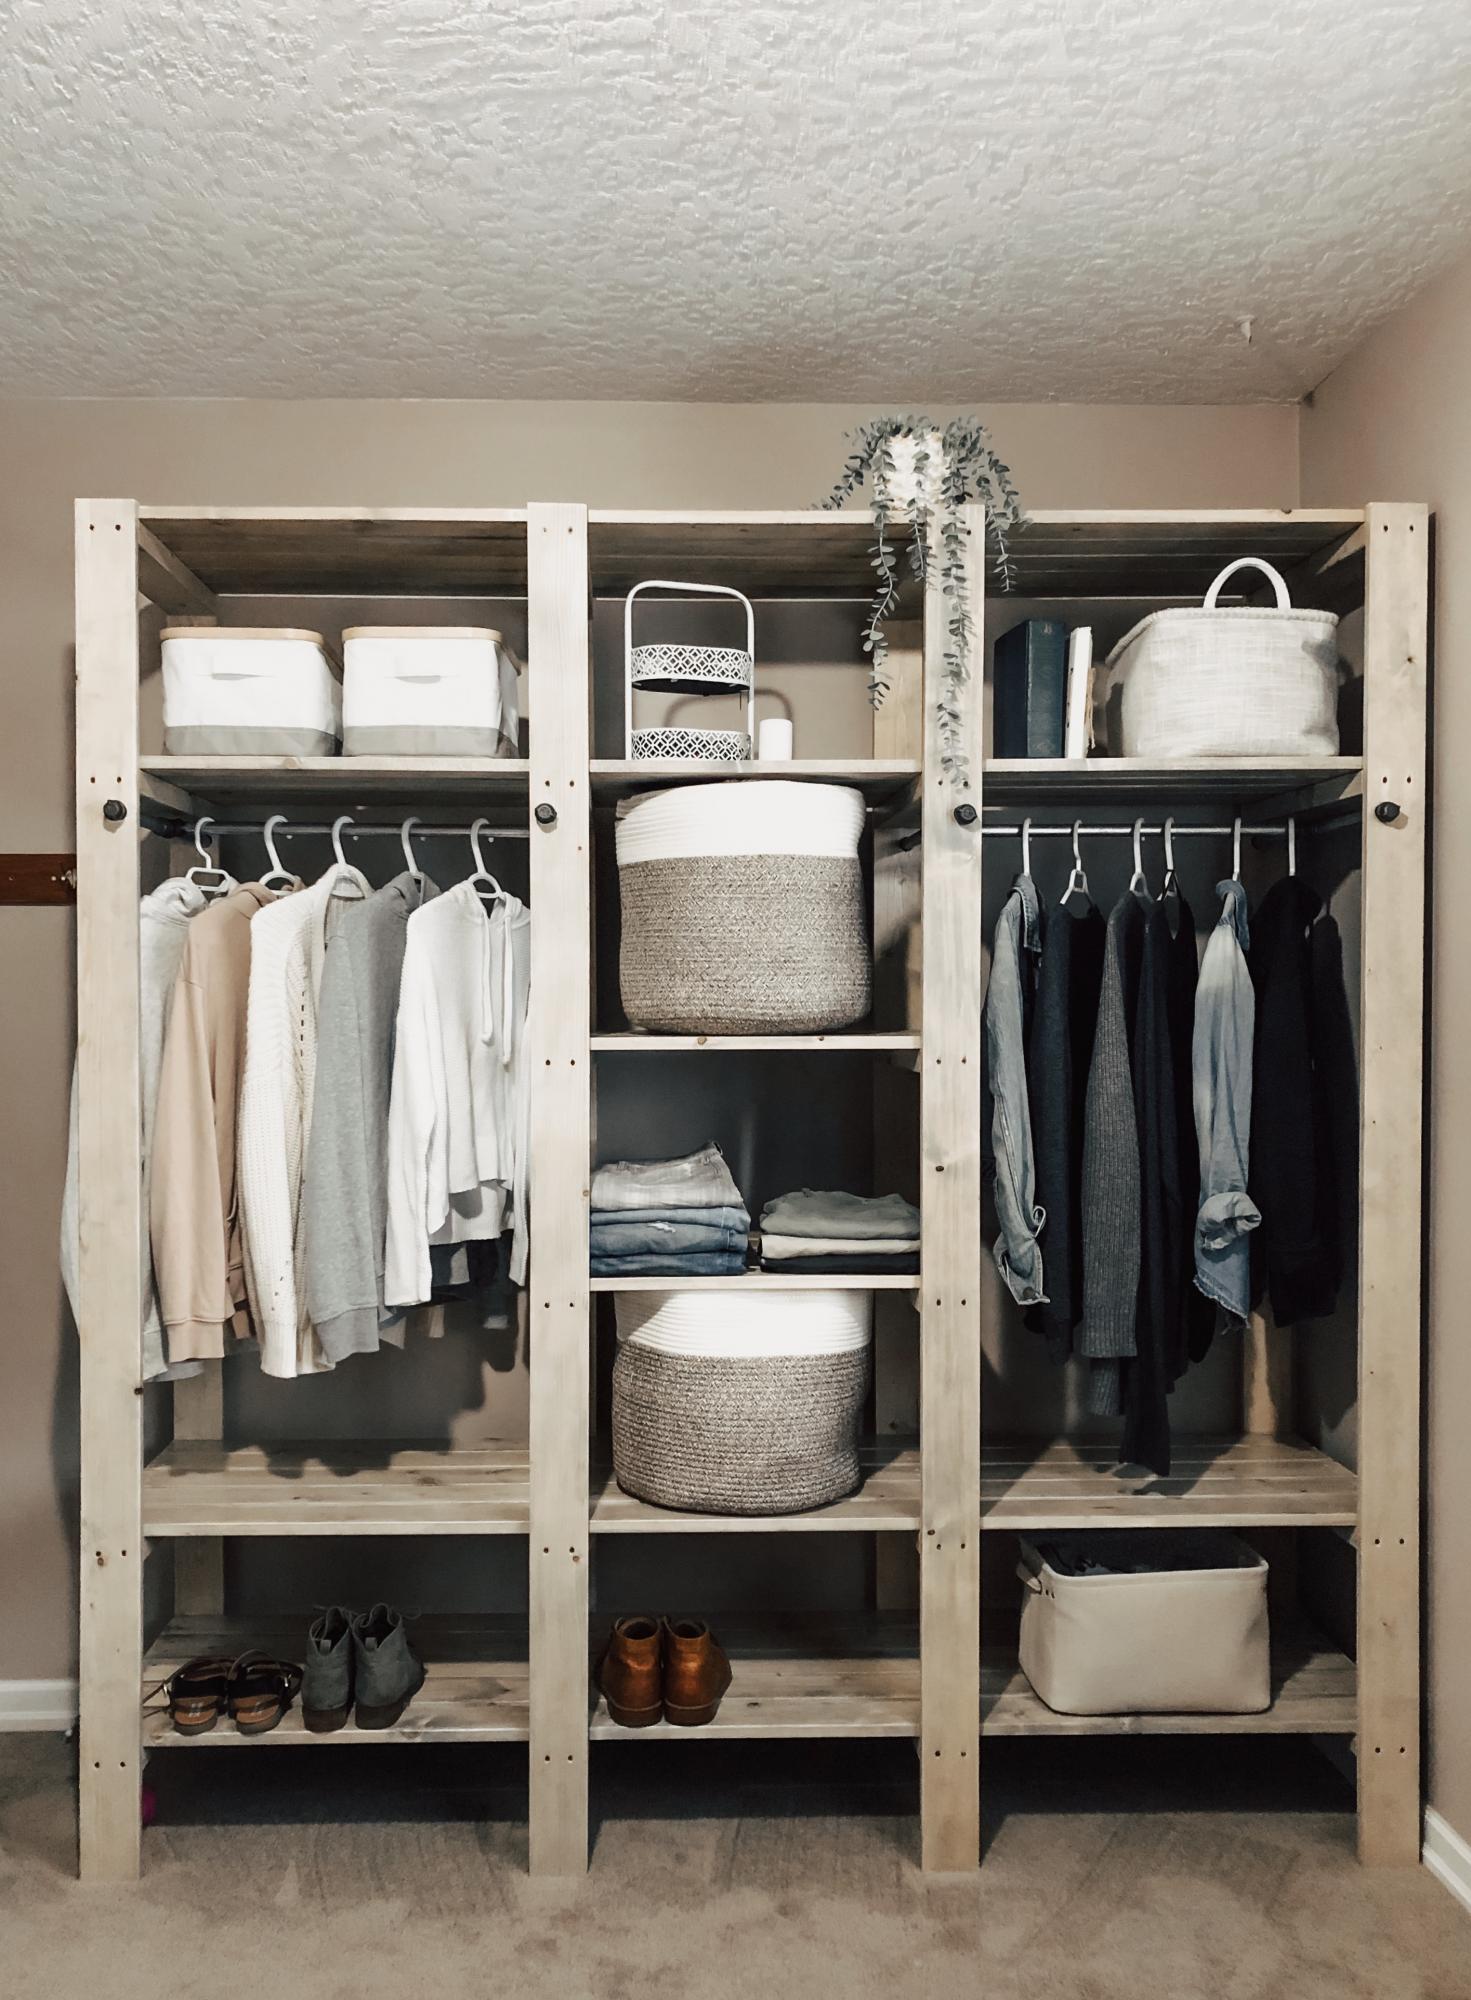
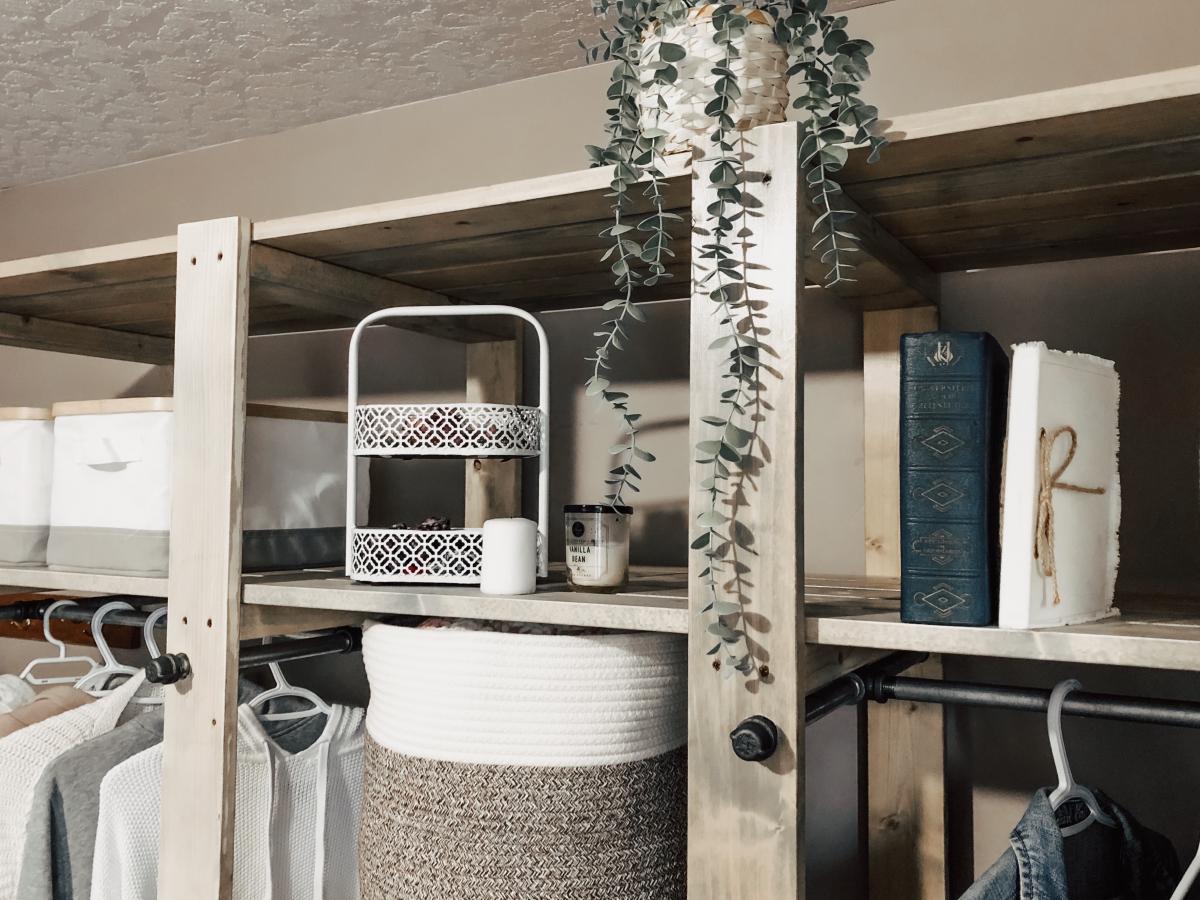
I’ve been searching for a free standing closet for so long!! I stumbled across these plans a few months ago and asked my hubby and brother if they would be up for a little project and boy, did they ever do an amazing job!! I am so happy with this. We ended up making ours a little bit shorter to fit in our room and adjusting some of the other plans. The rods were cut a little short, but everything still worked out beautifully. Thank you for these plans! <3
Sat, 09/12/2020 - 11:14
Thanks for sharing, we chose this as our Brag Post of the Day on Facebook!