Community Brag Posts
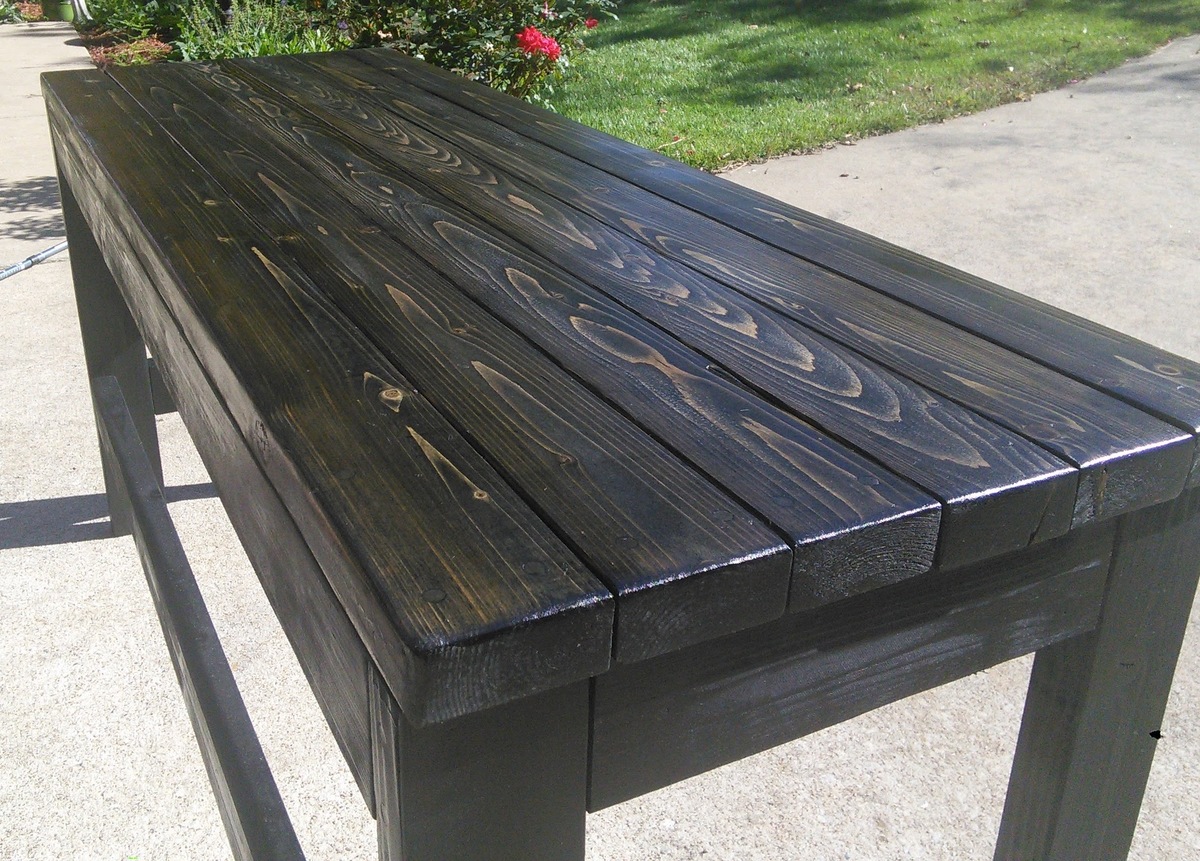
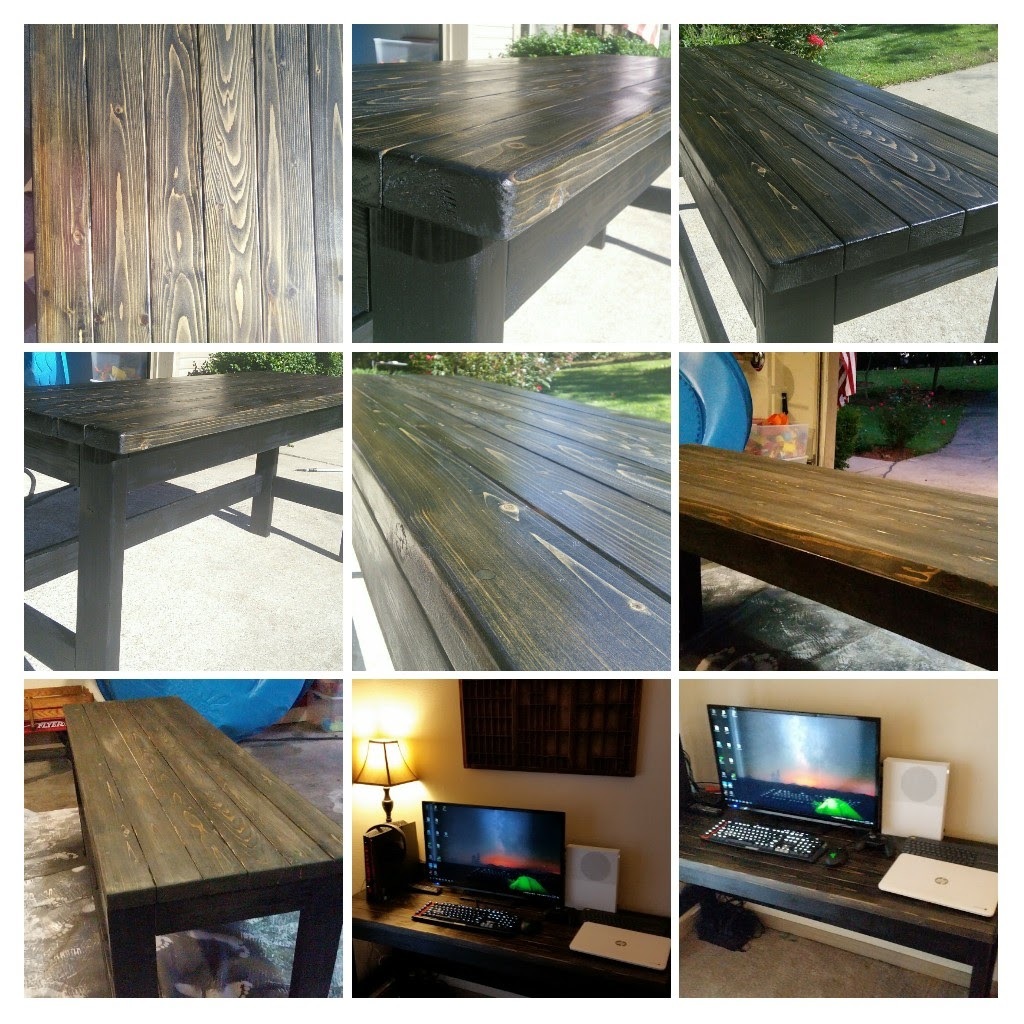
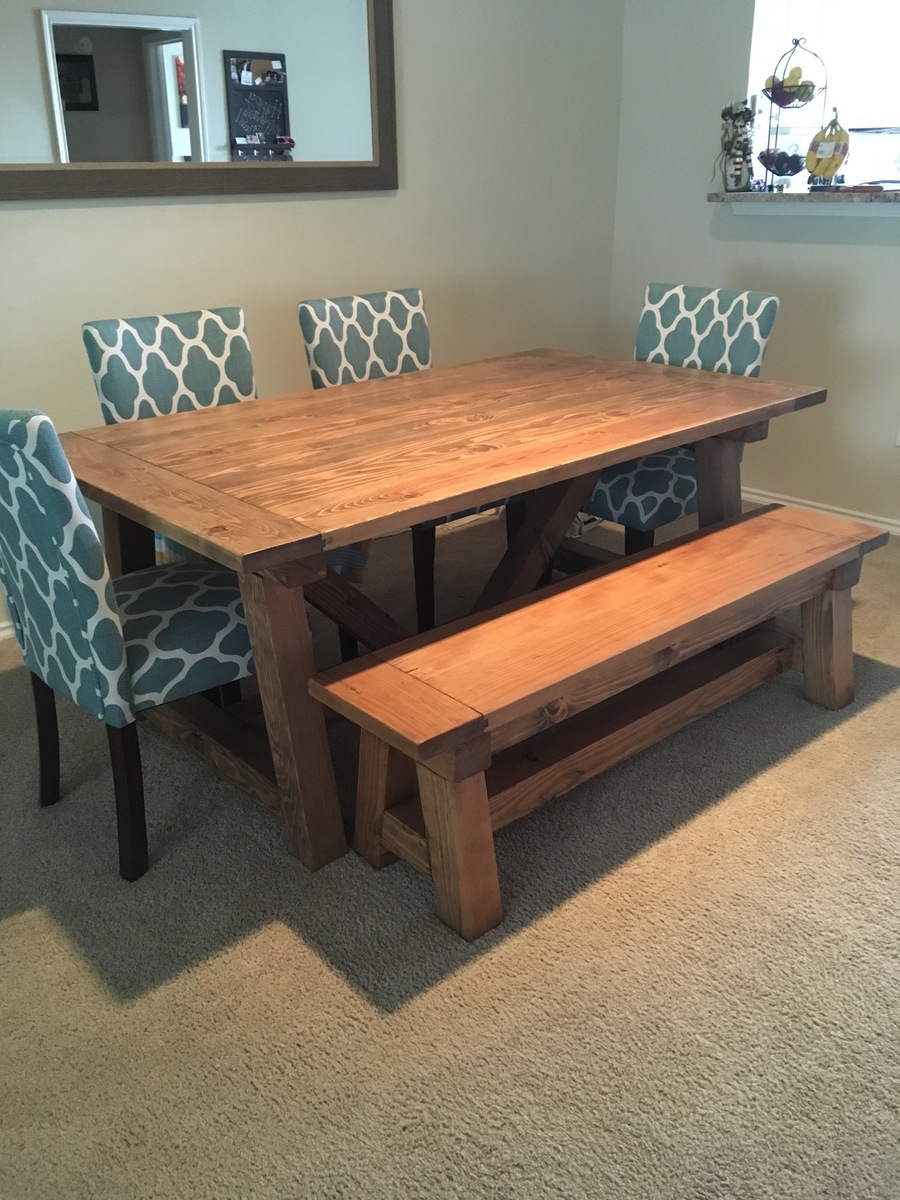
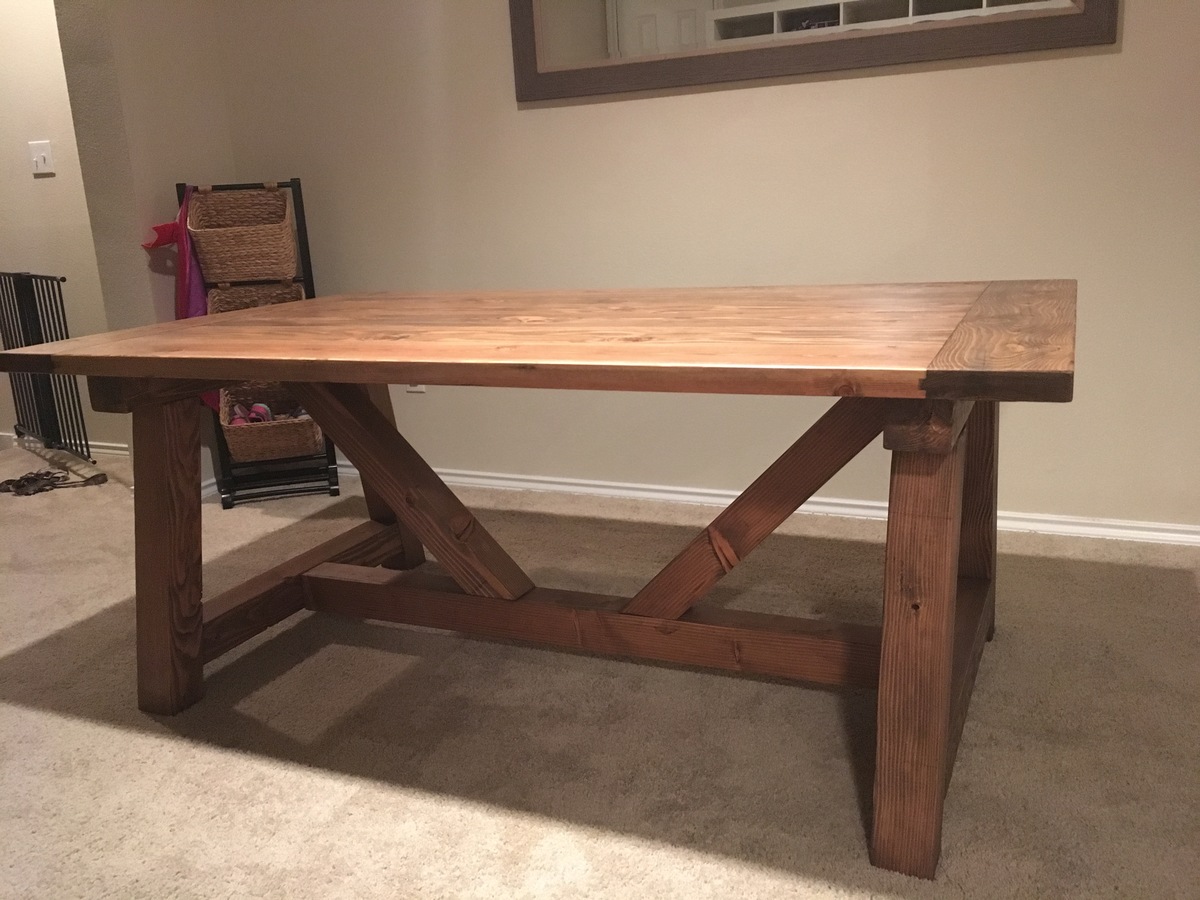
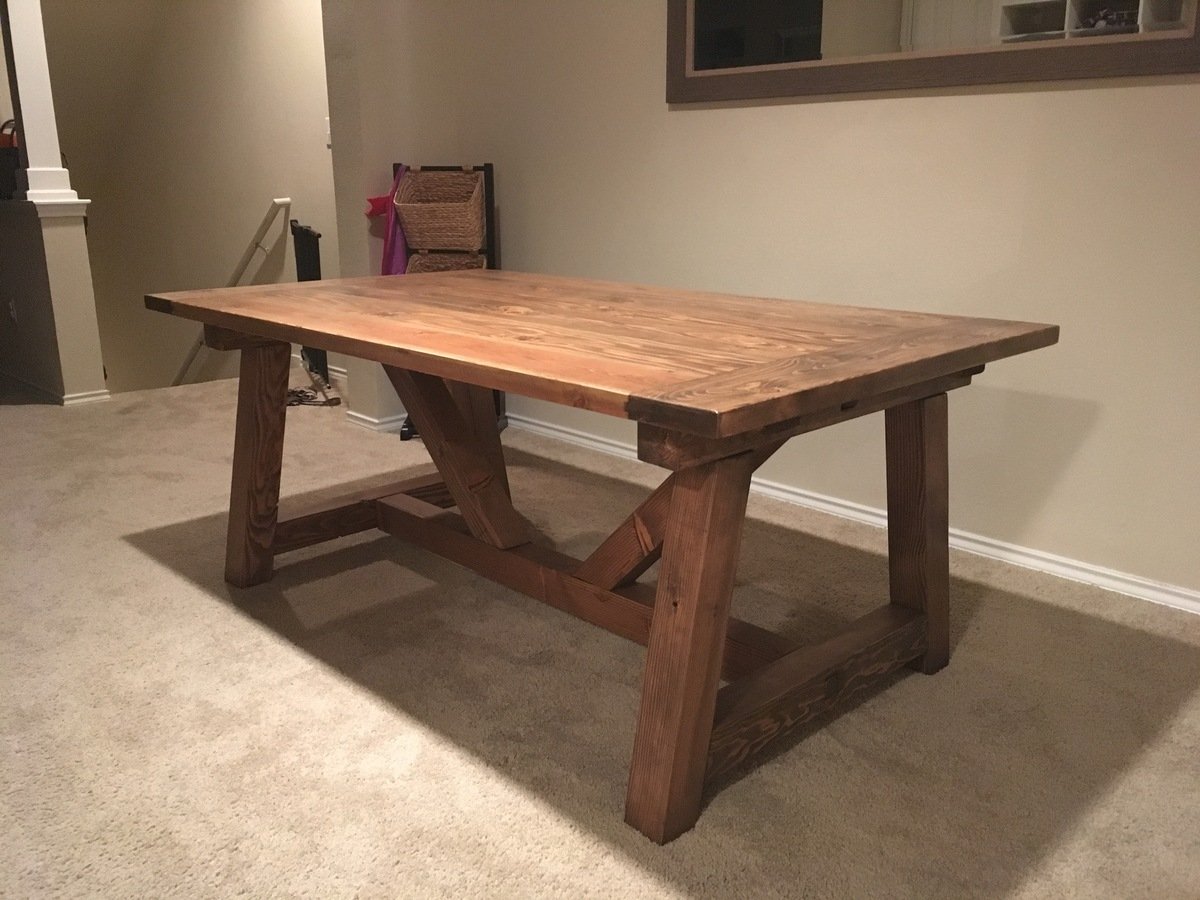
Rustic Table - 4x4 legs
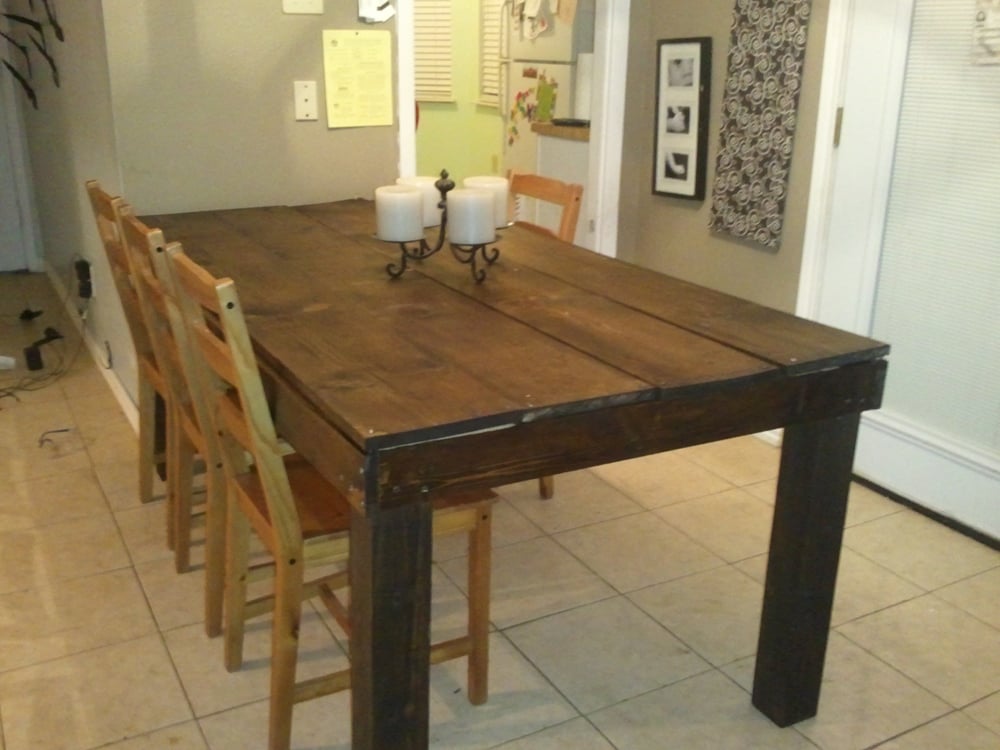
LOVED doing this! I am a total beginner so it is not truly perfect but that is what we love about it! My five year old helped me and learned how to work an electric screwdriver. We saw Pottery Barn was broadcasting a table like this and using that the screws showed as a marketing piece - so we have some screws showing and it is soooo warm and inviting. It looks 100 years old. Everyone loves it!! Thank you for the great inspiration. We made ours 6 feet long and 3 feet wide to fit our space and 4x4's for the legs.
Built from Plan(s)
Estimated Time Investment
Day Project (6-9 Hours)
Finish Used
Miniwax in jacobean
Recommended Skill Level
Starter Project
Comments
Thu, 11/24/2011 - 20:26
Can I have the step by step
Can I have the step by step plan too! Pretty please! I love this table :)
Thank you so much
-erin
Brick Fireplace
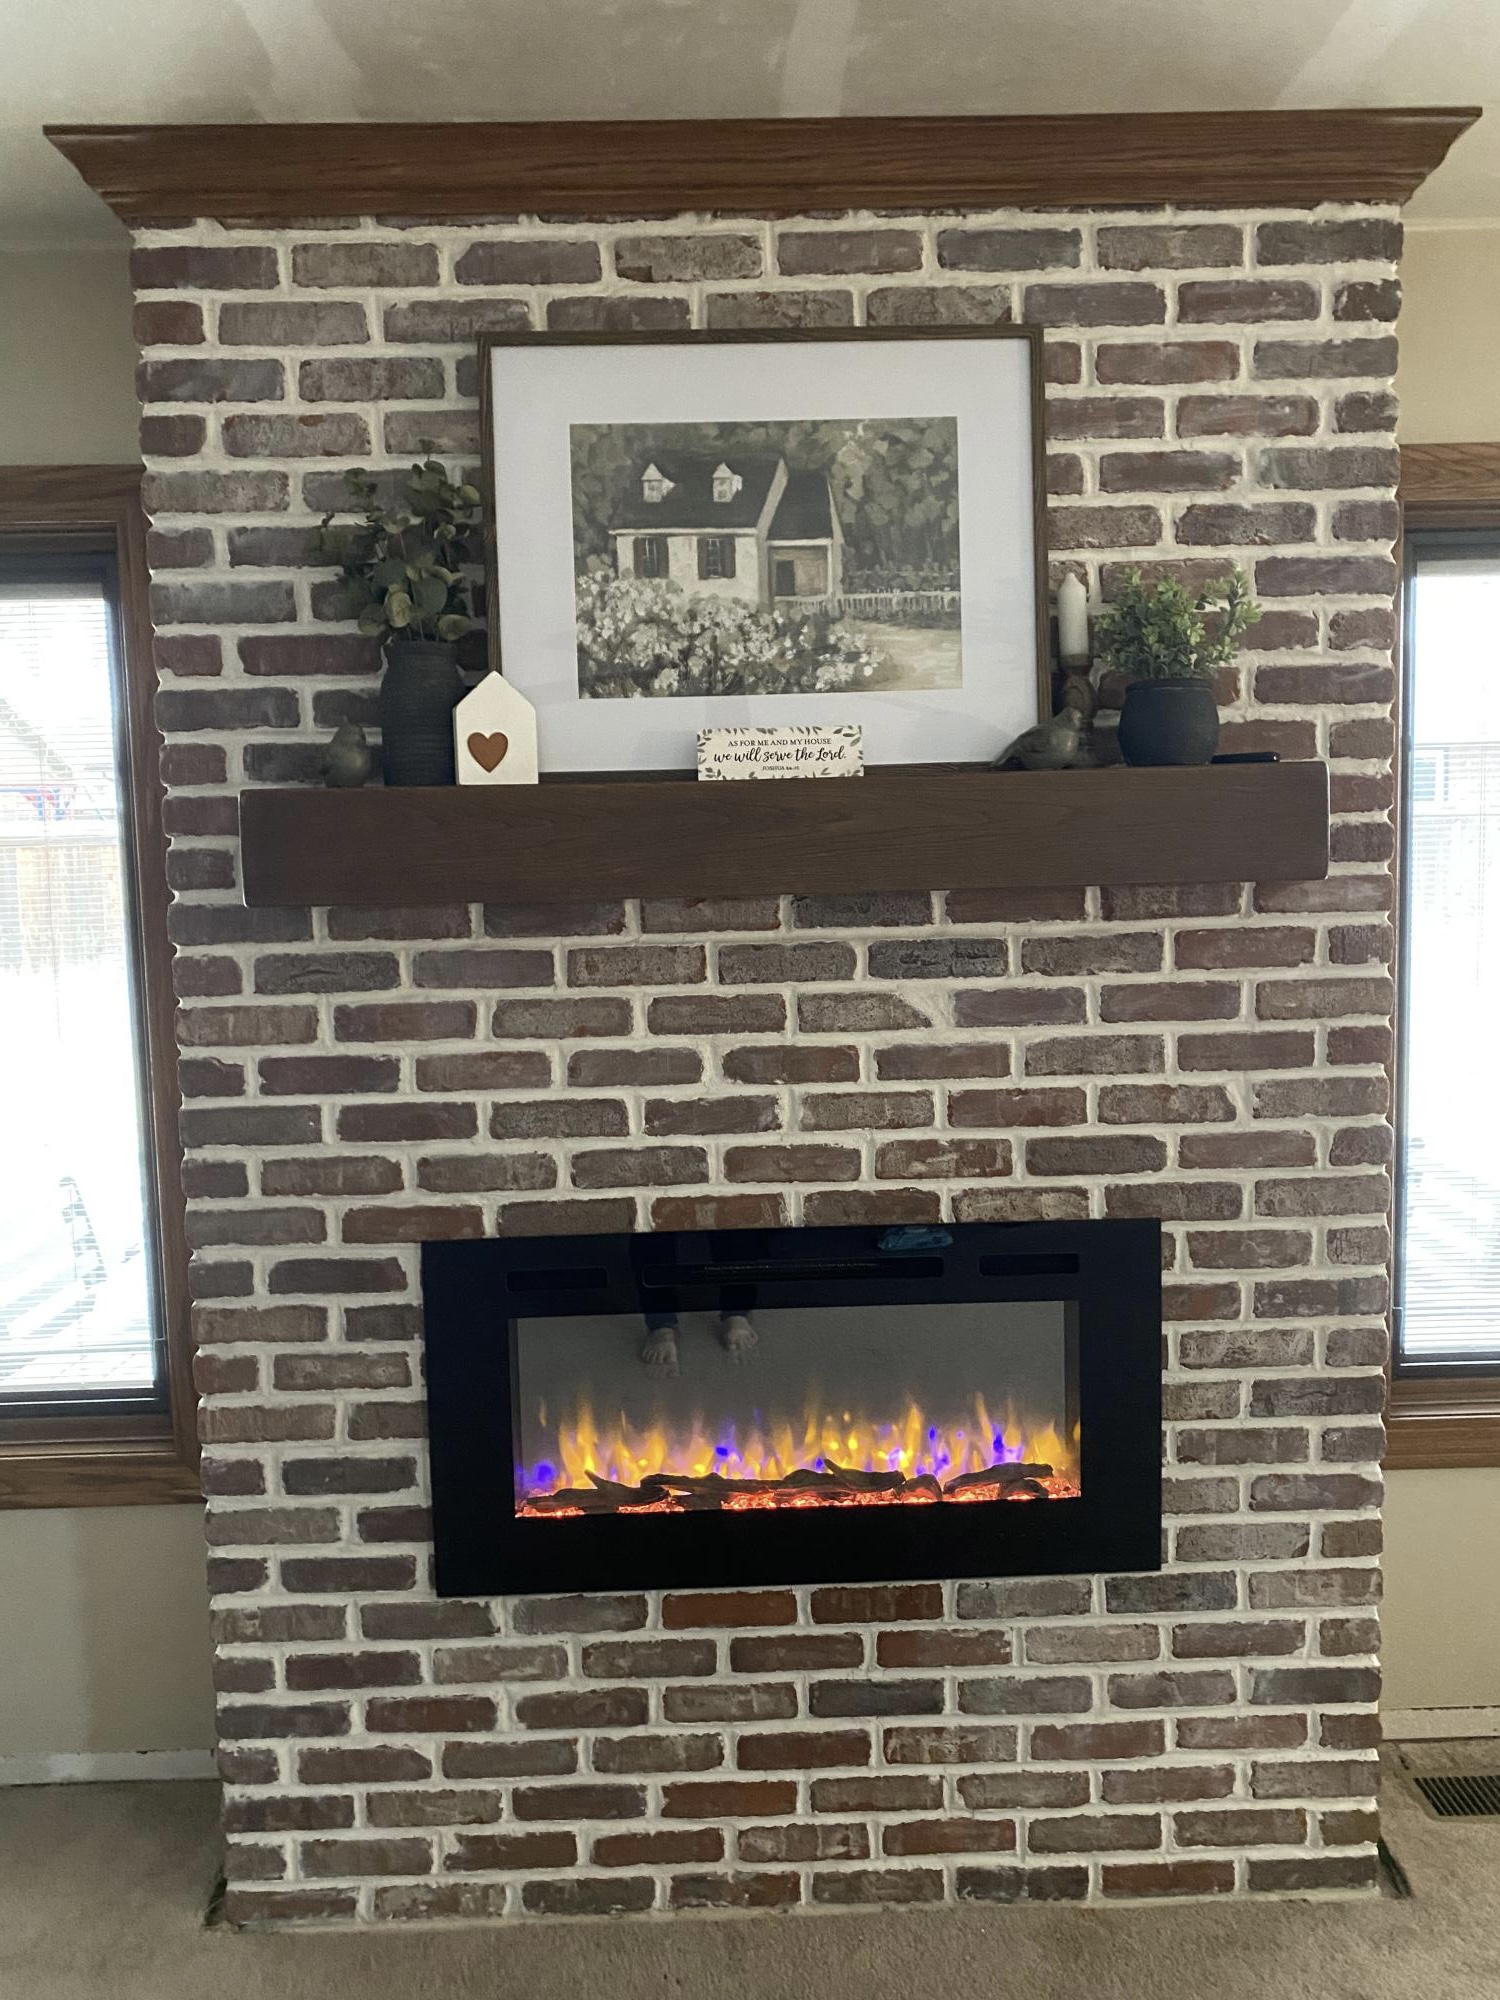
We used Ana White shiplap fireplace tutorial to build the structure and then followed her advice for brick installation instead of shiplap. It all turned out so great. The fireplace has changed the entire feel of our house now. Thank you Ana!
Built from Plan(s)
Comments
Workbench
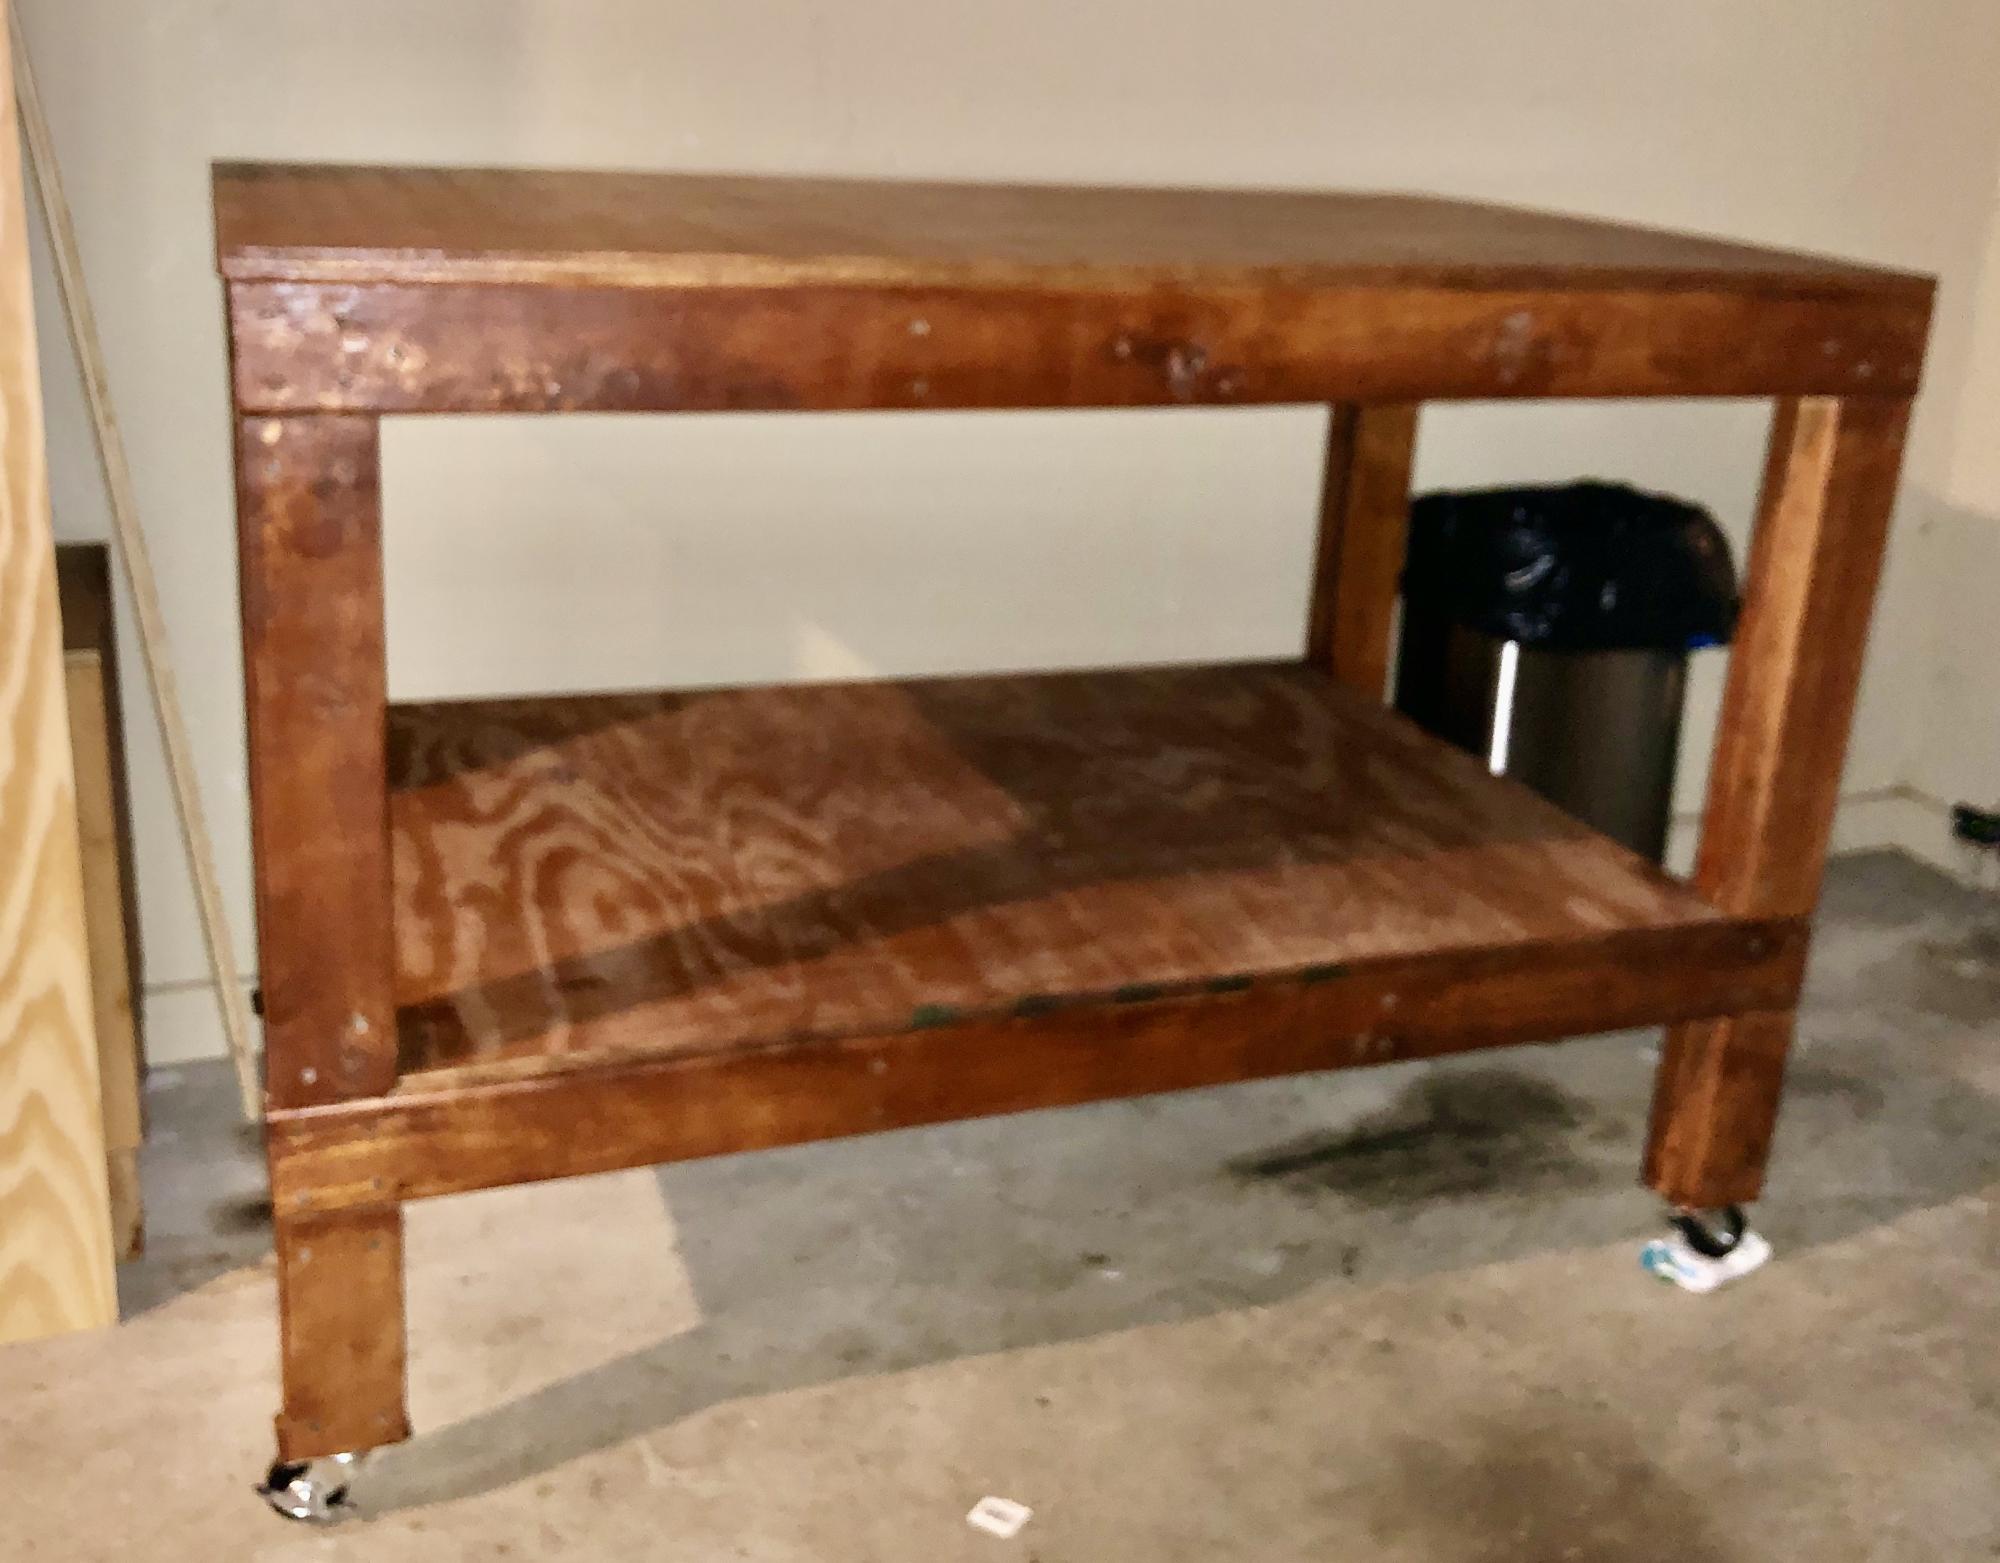
This was my first build and experience with power tools. The size of the workbench table is absolutely the perfect length and height. I ended up adding wheels that lock in place. I’m hooked! Thank you Ana White for providing the plans for a workbench.
Built from Plan(s)
Estimated Cost
$70.00
Estimated Time Investment
Day Project (6-9 Hours)
Finish Used
Walnut stain
Recommended Skill Level
Beginner
Comments

Thu, 02/20/2020 - 11:04
Sturdy wood workbench table
This project is perfect for the beginner. The plans are very simple to follow especially for one that’s never picked up a power tool. I am absolutely hooked.
Geo Dresser
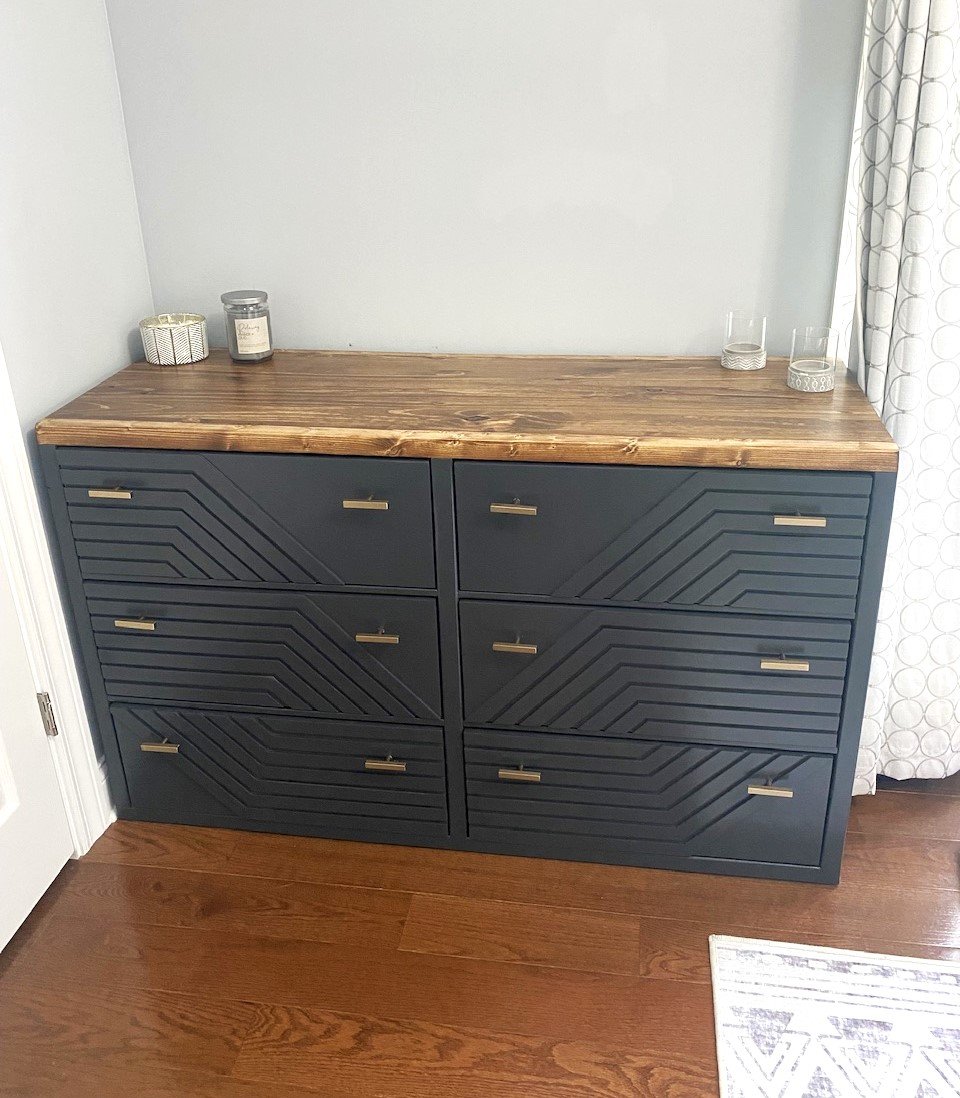
Bedroom dresser made from Ana White’s plans! Absolutely love it and it was easy to build!
Kristen Kobeszko
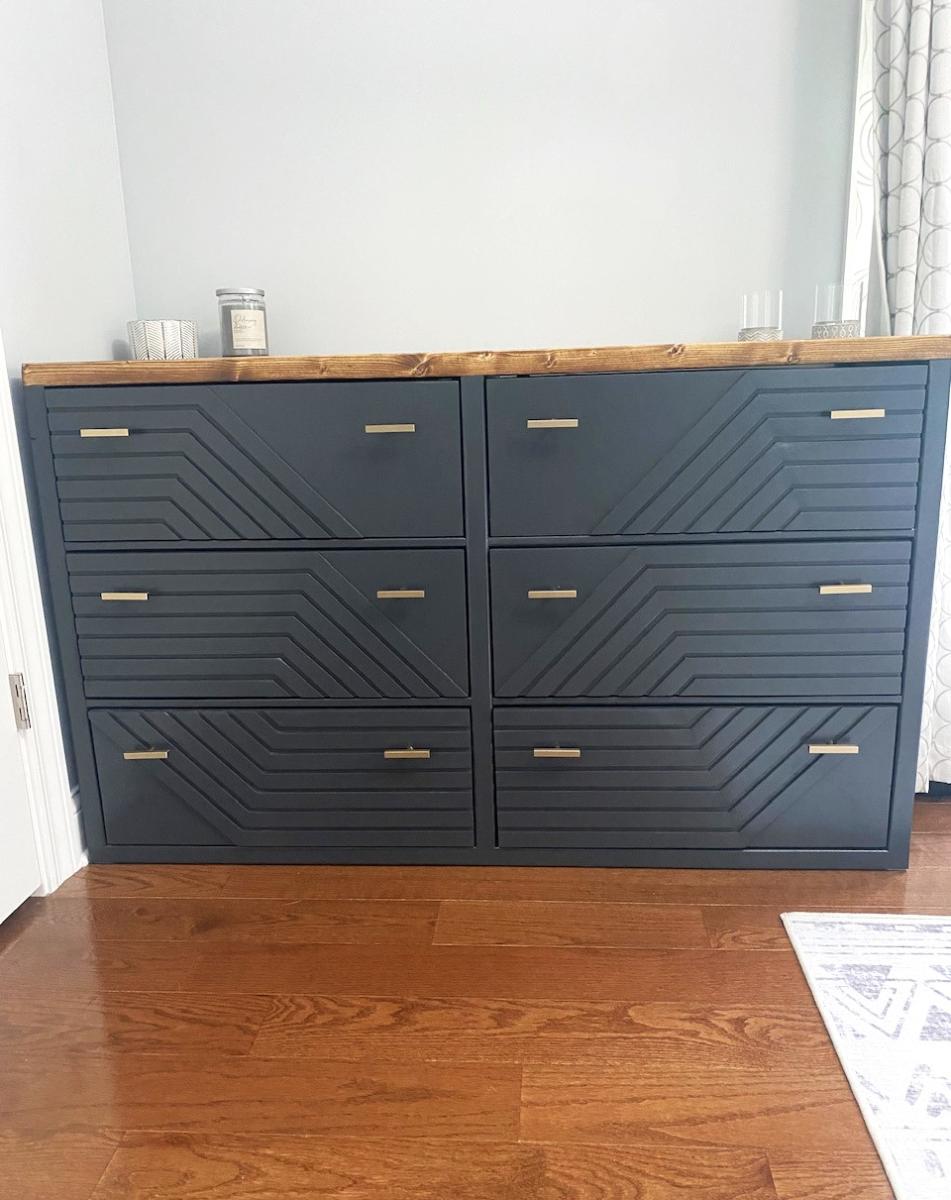
Built from Plan(s)
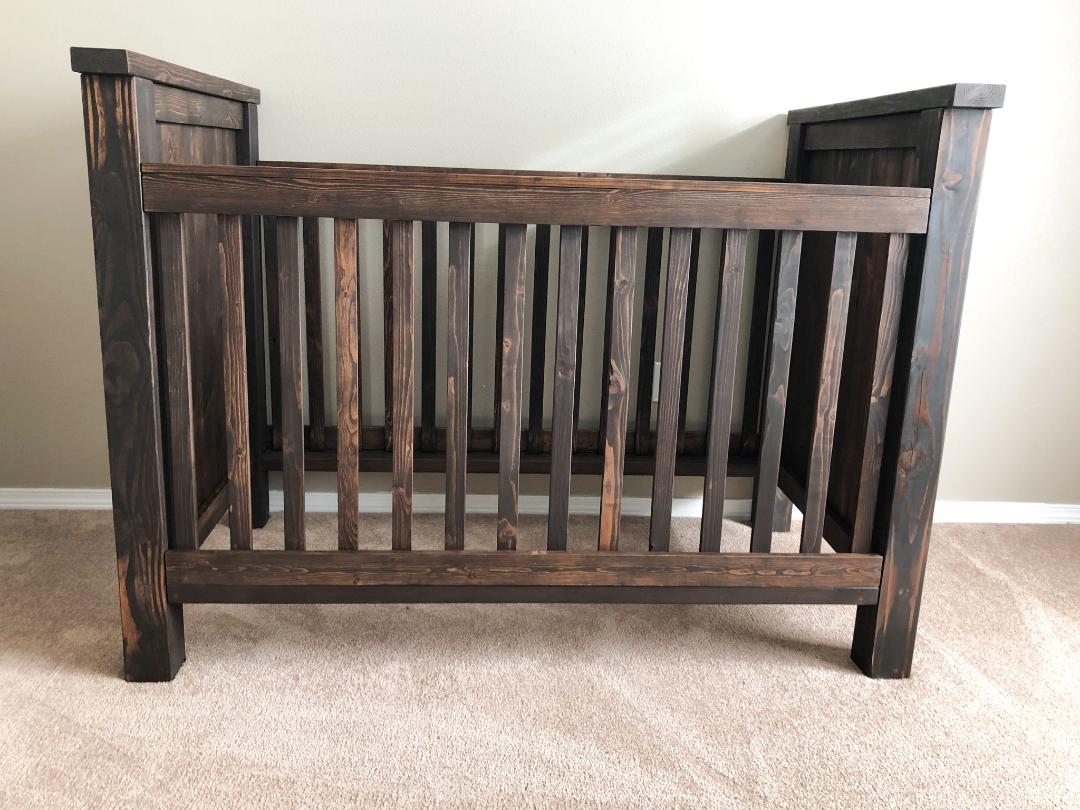
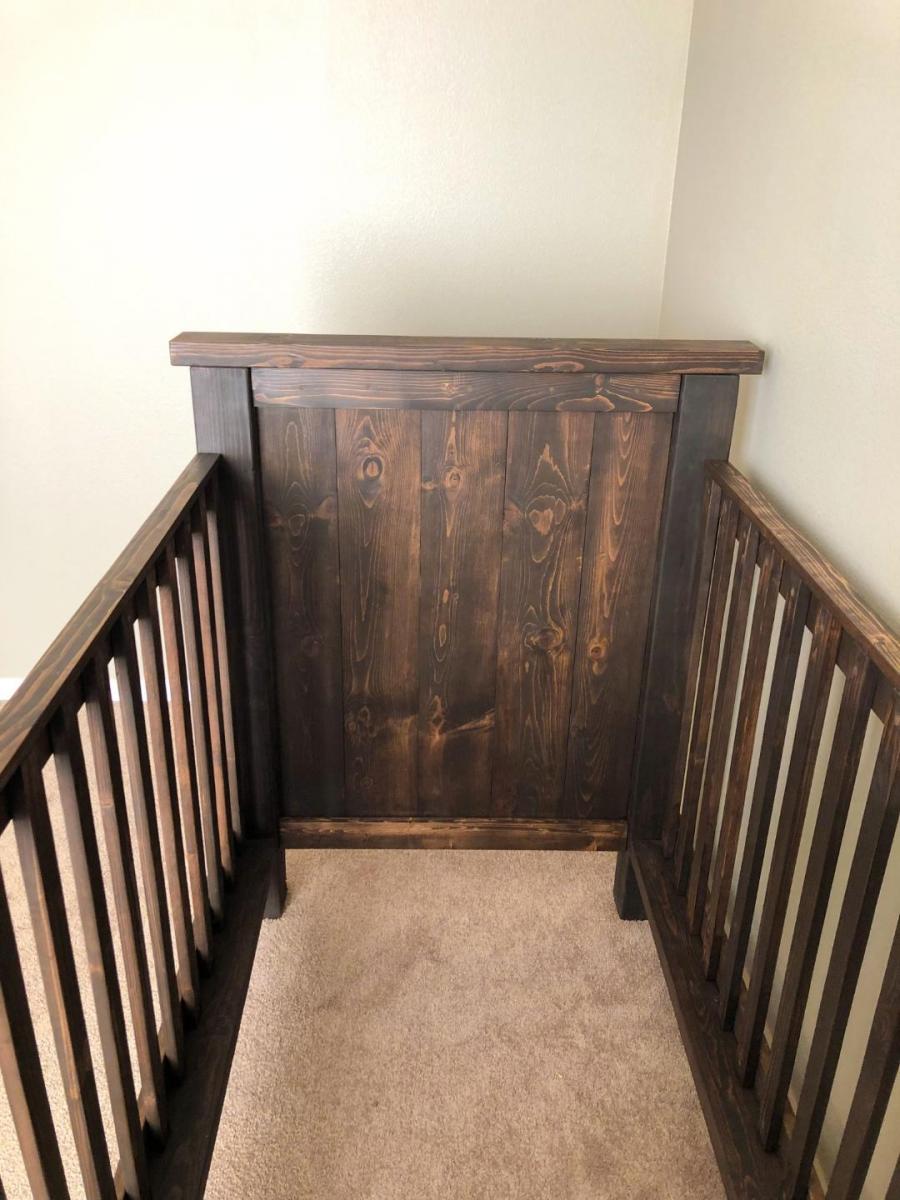
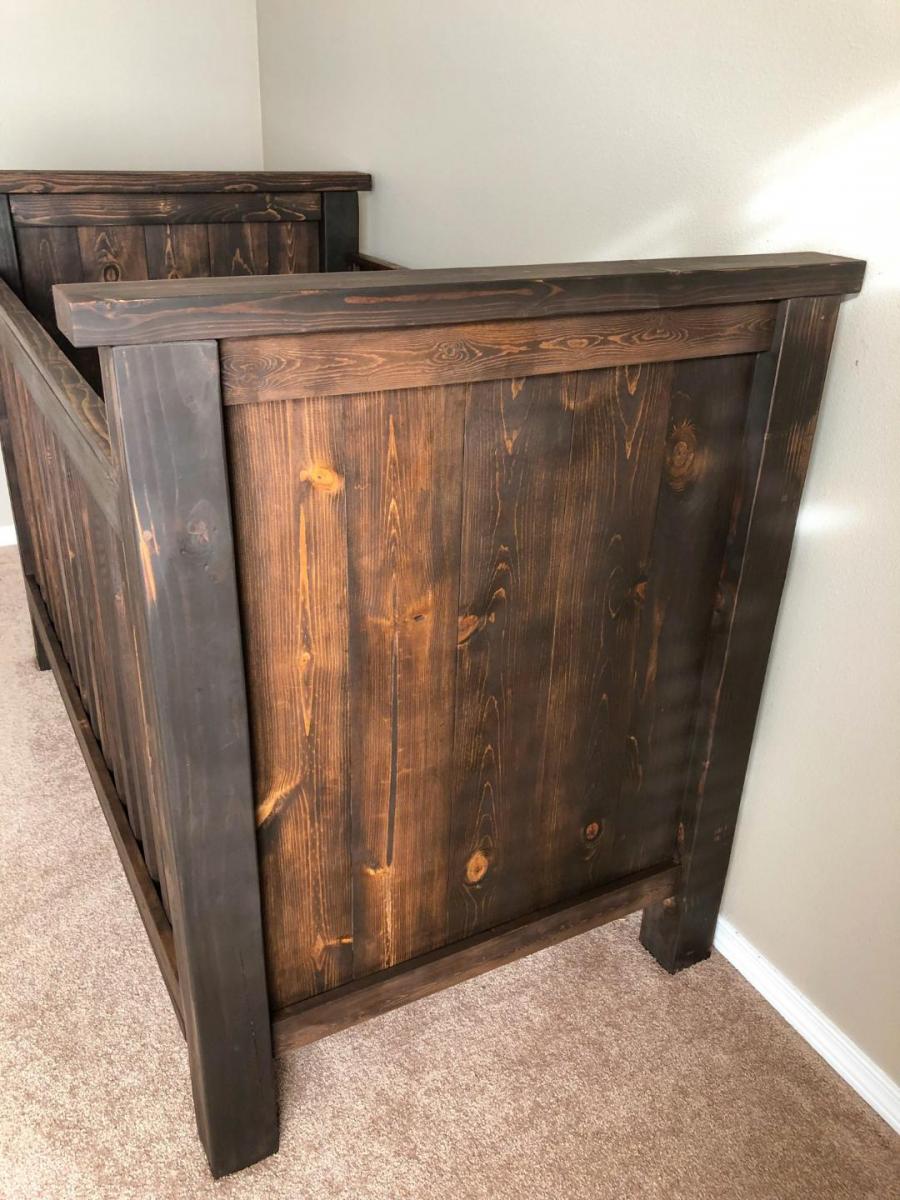
DIY Stinctly Made Crib
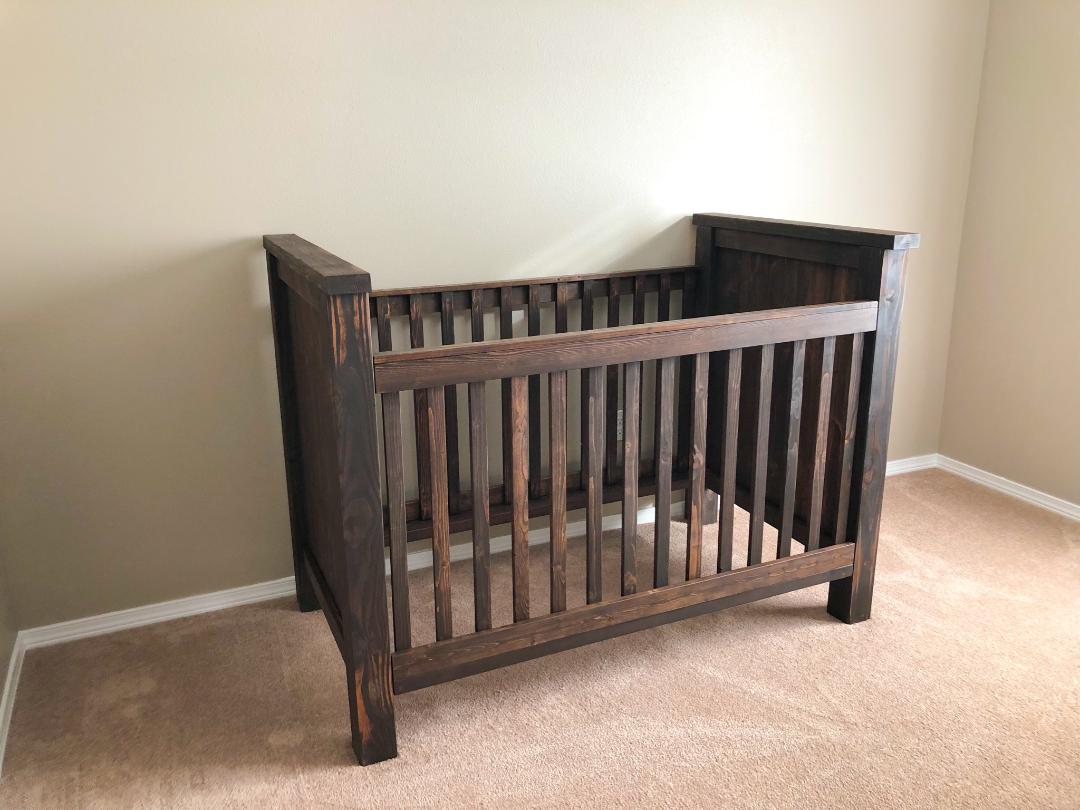
While I found the plans a little difficult to follow as there were steps left out, missing measurements, and misinformation, it was an easy project and I'm so glad I made it. Even at 21 weeks pregnant it was totally doable alone. The only thing I needed my husband for was to hold the side rails at the correct height.
Built from Plan(s)
Estimated Time Investment
Week Long Project (20 Hours or More)
Finish Used
Kona by Varathane
Recommended Skill Level
Beginner
DIY Christmas Tree Decor
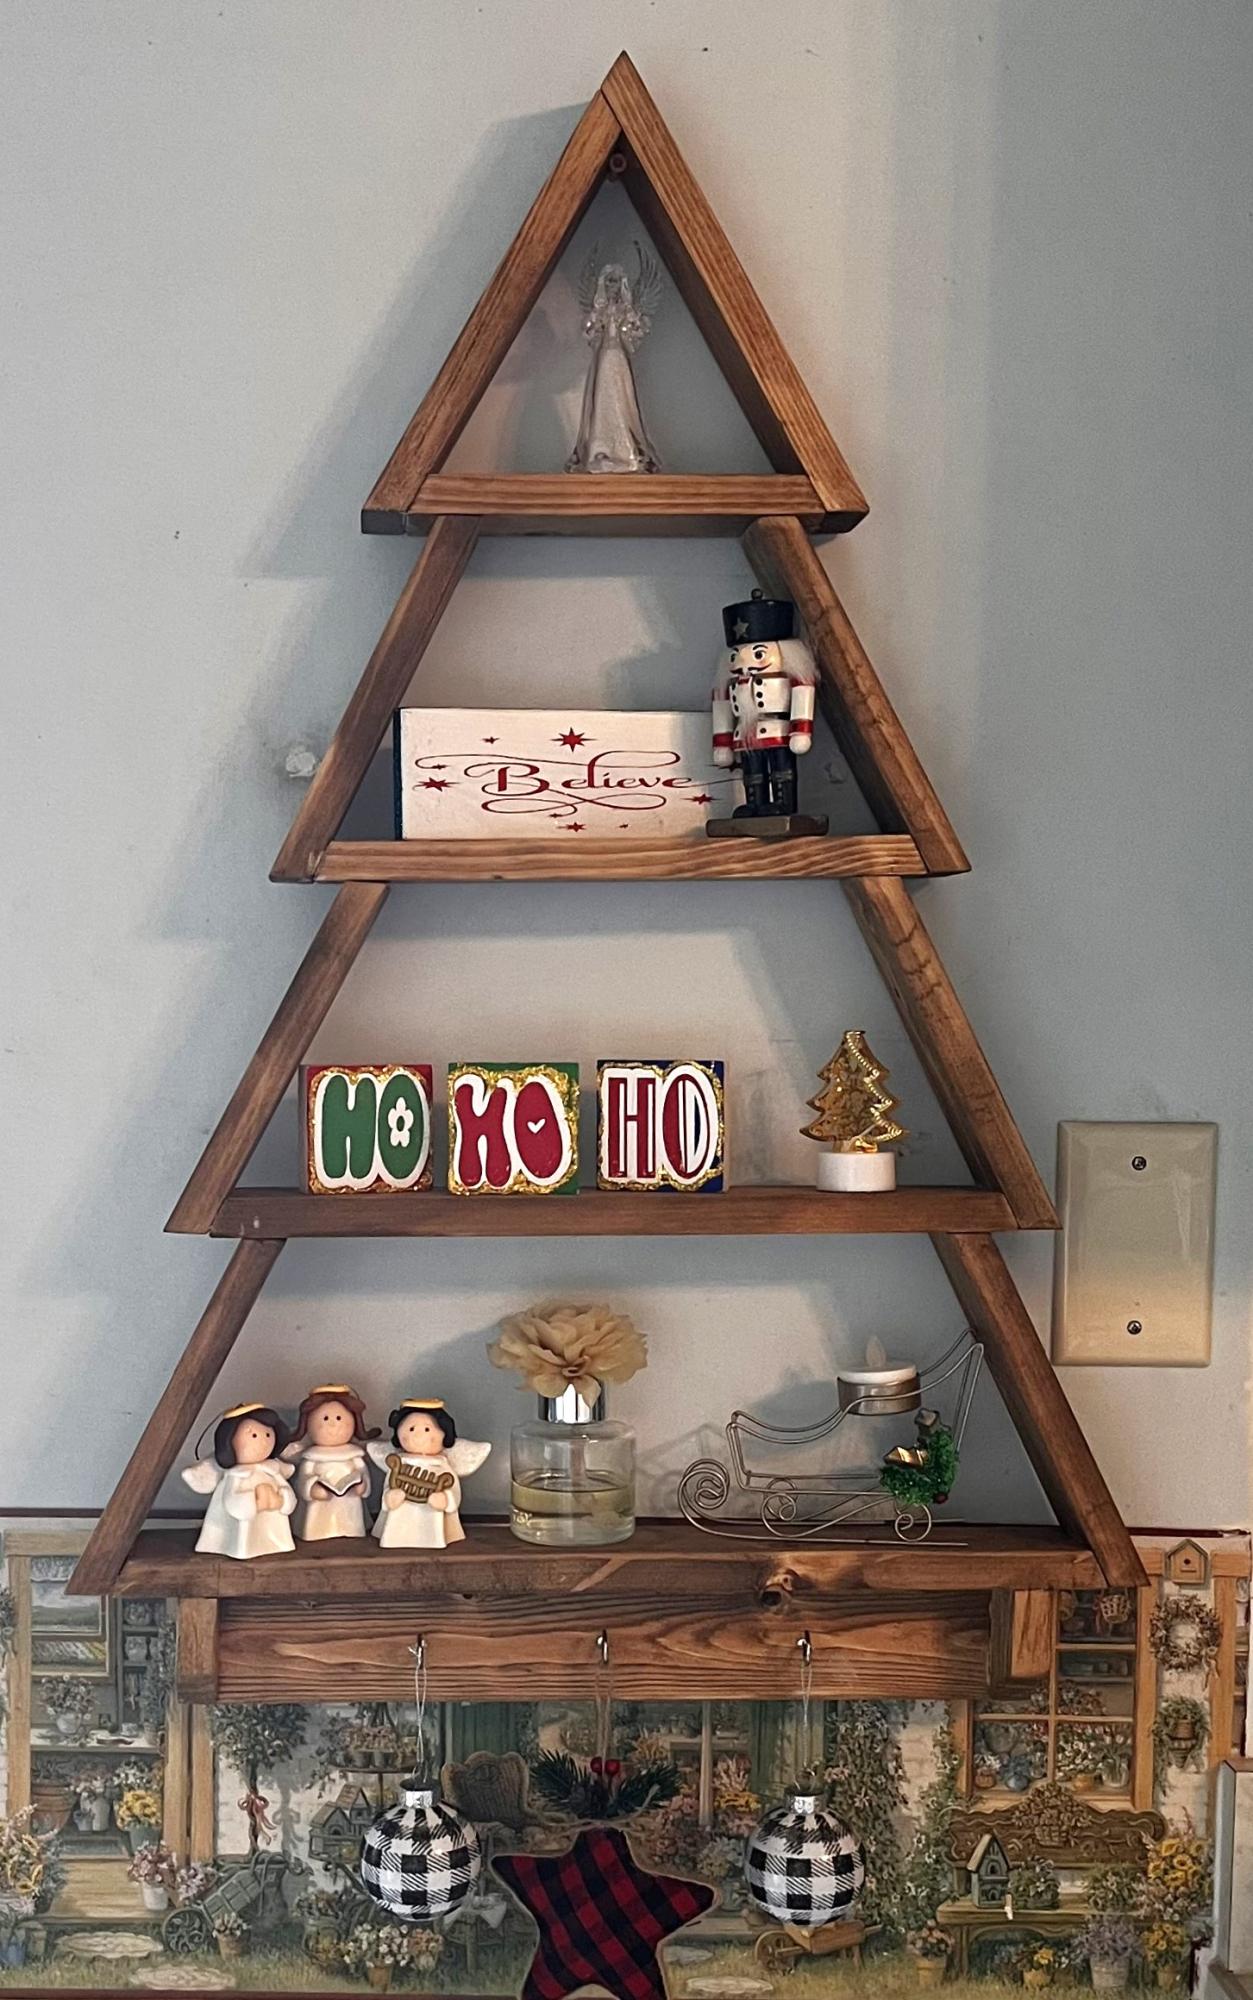
This was such a fun build and a wonderful addition to my Christmas collection.
Beth Belflower
Built from Plan(s)
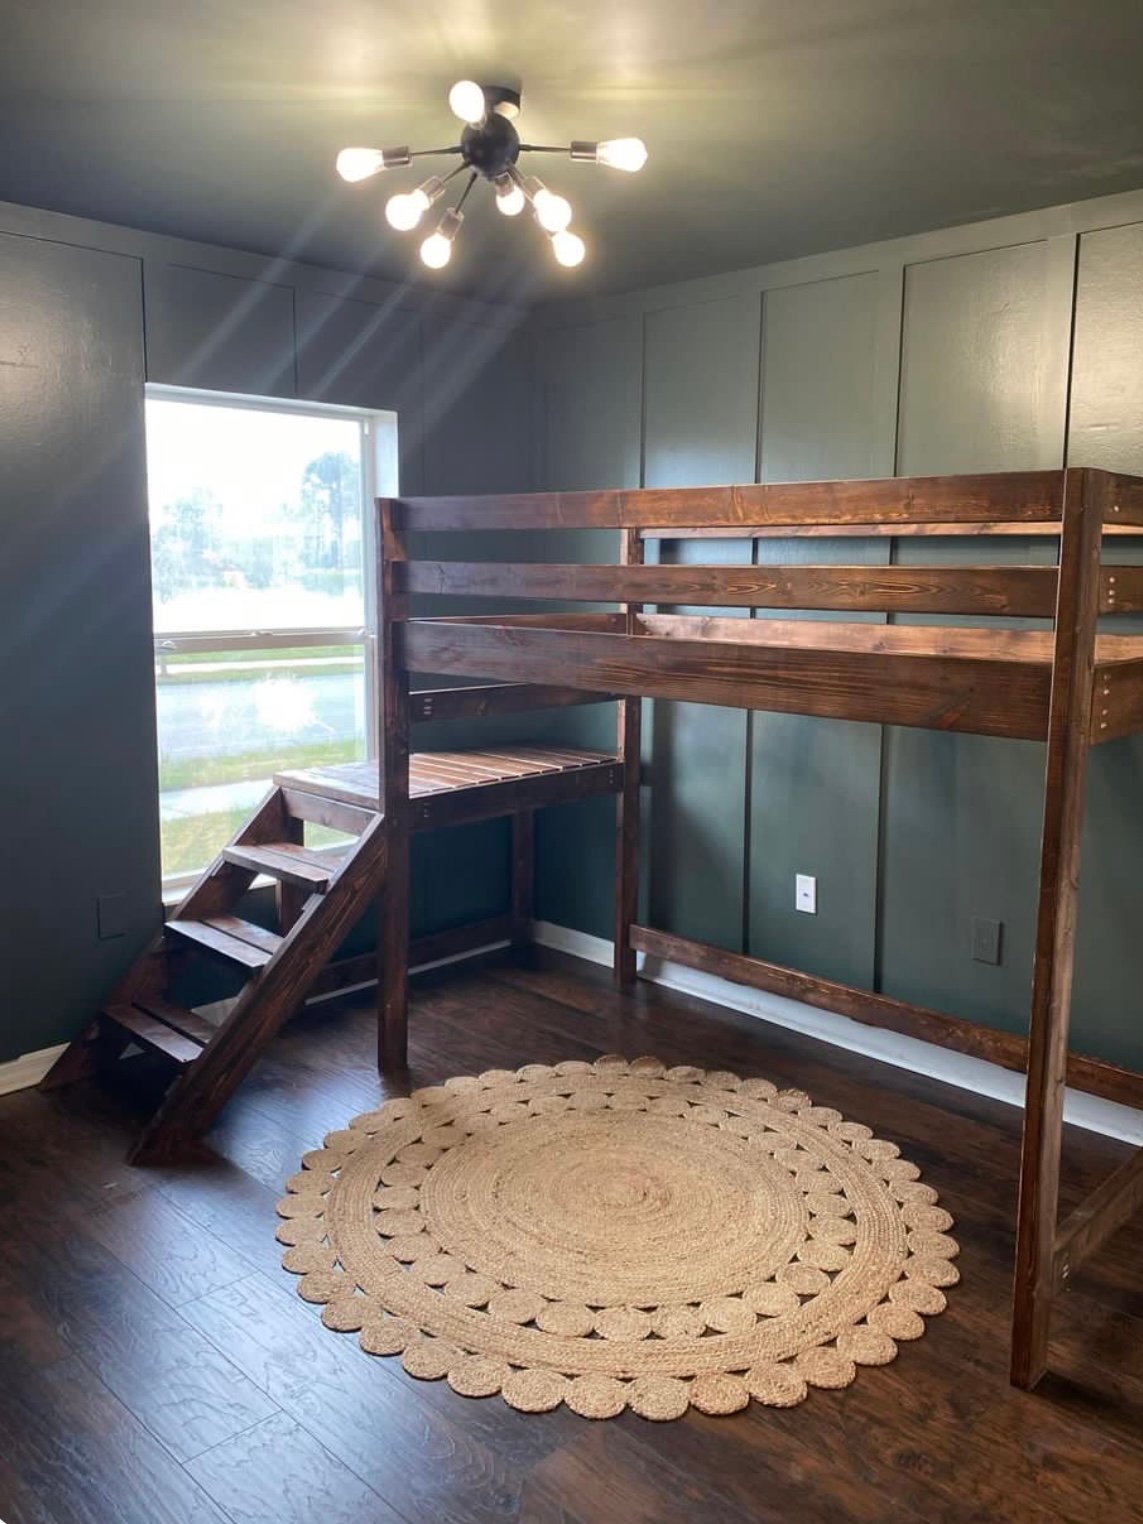
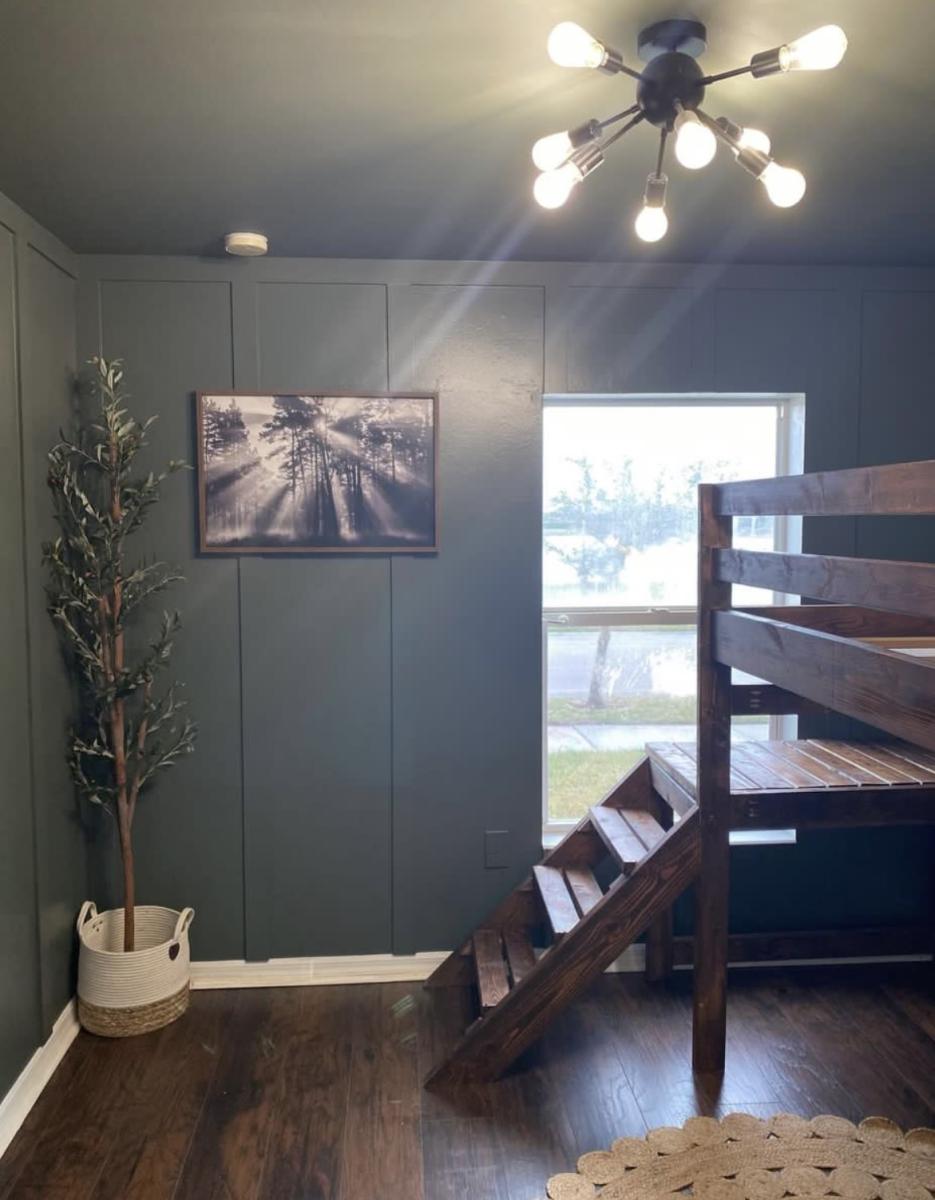
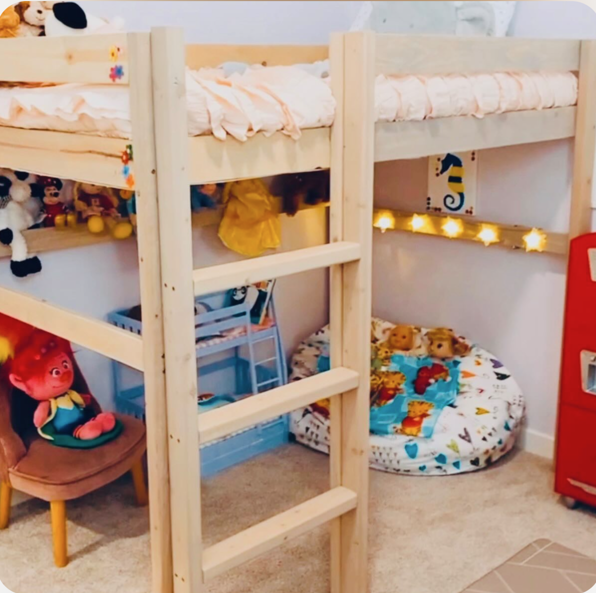
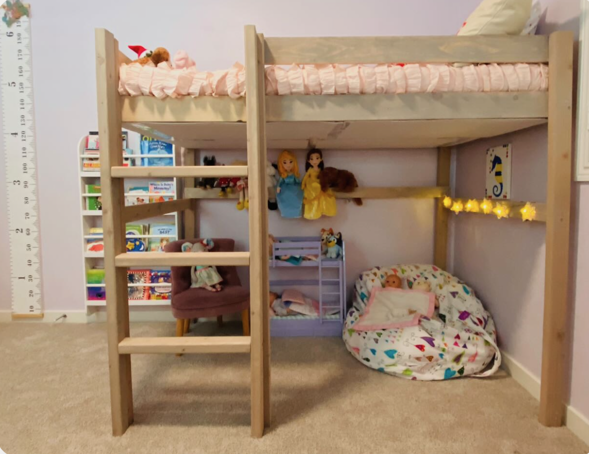
Playroom Loft Bed
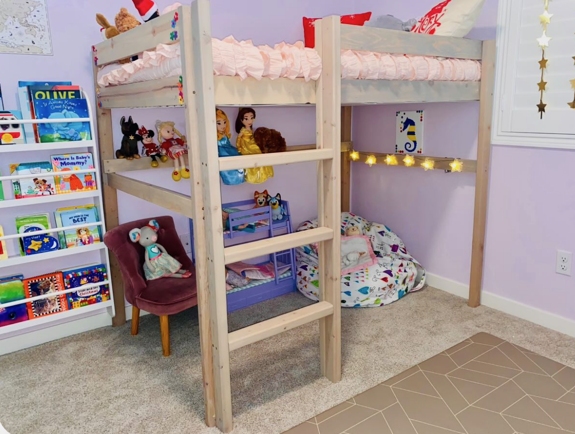
Built this loft bed for my girls playroom! They love it.
Built from Plan(s)
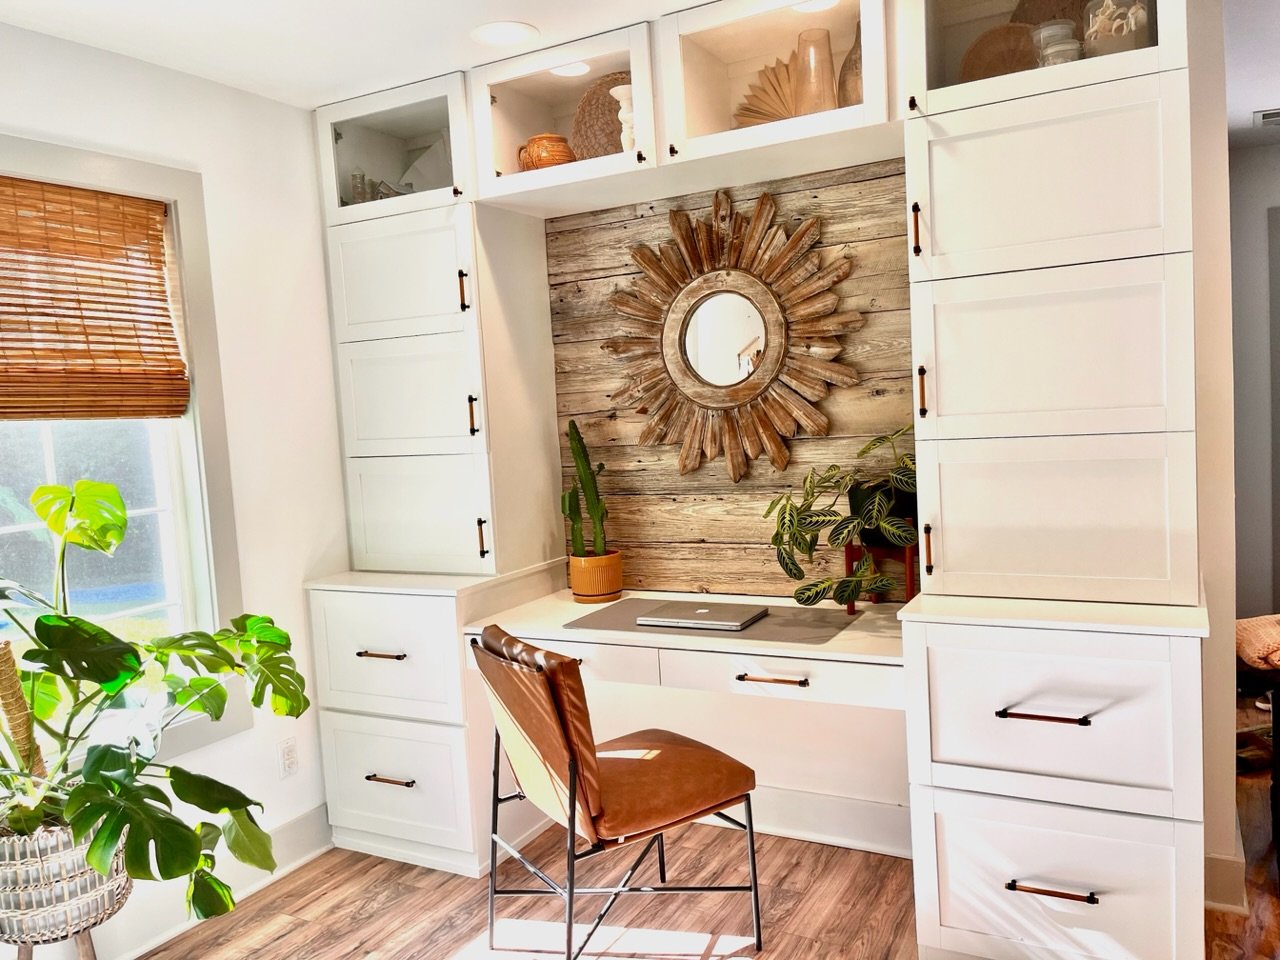
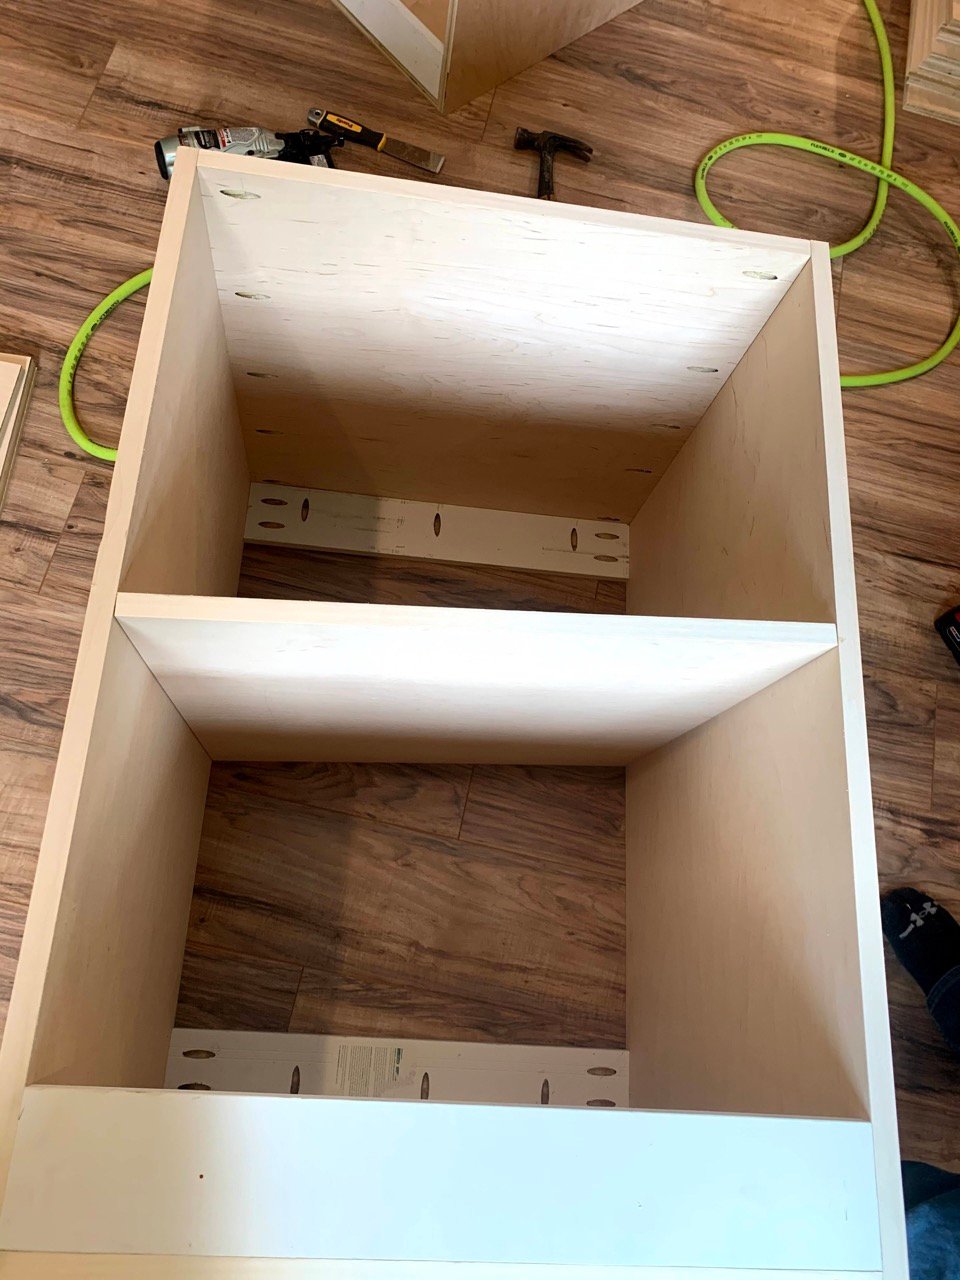
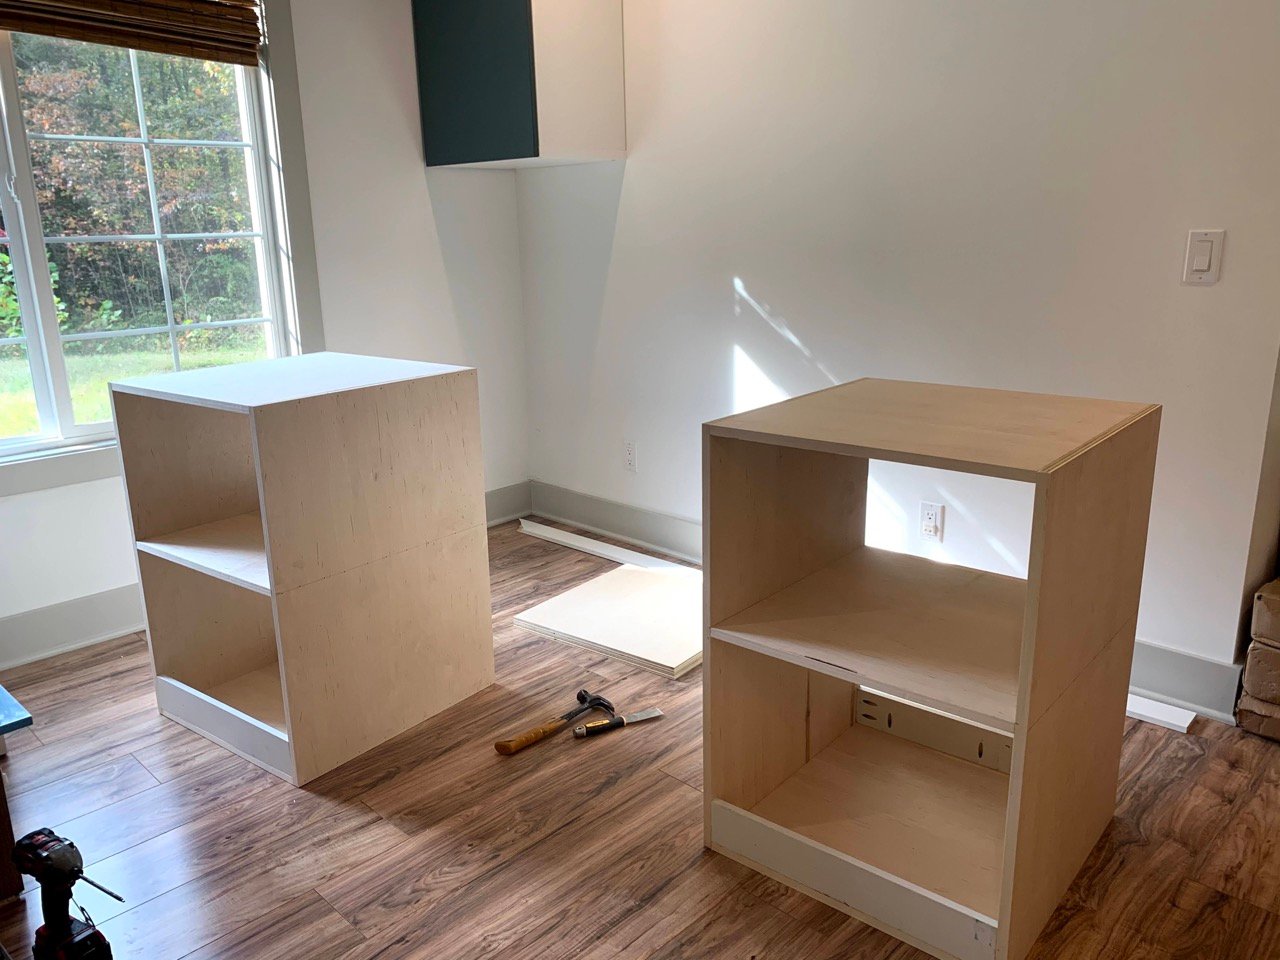
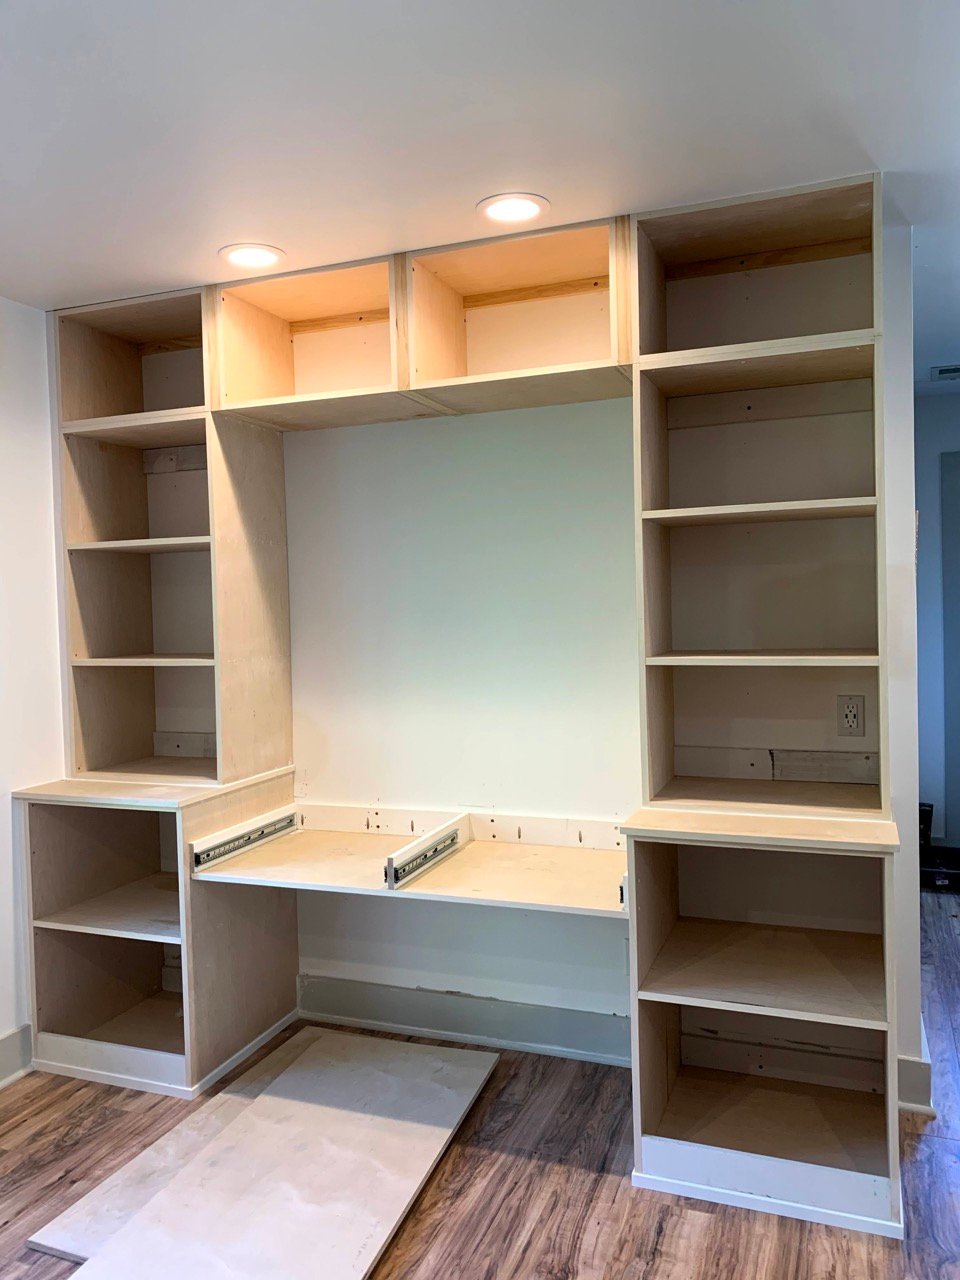
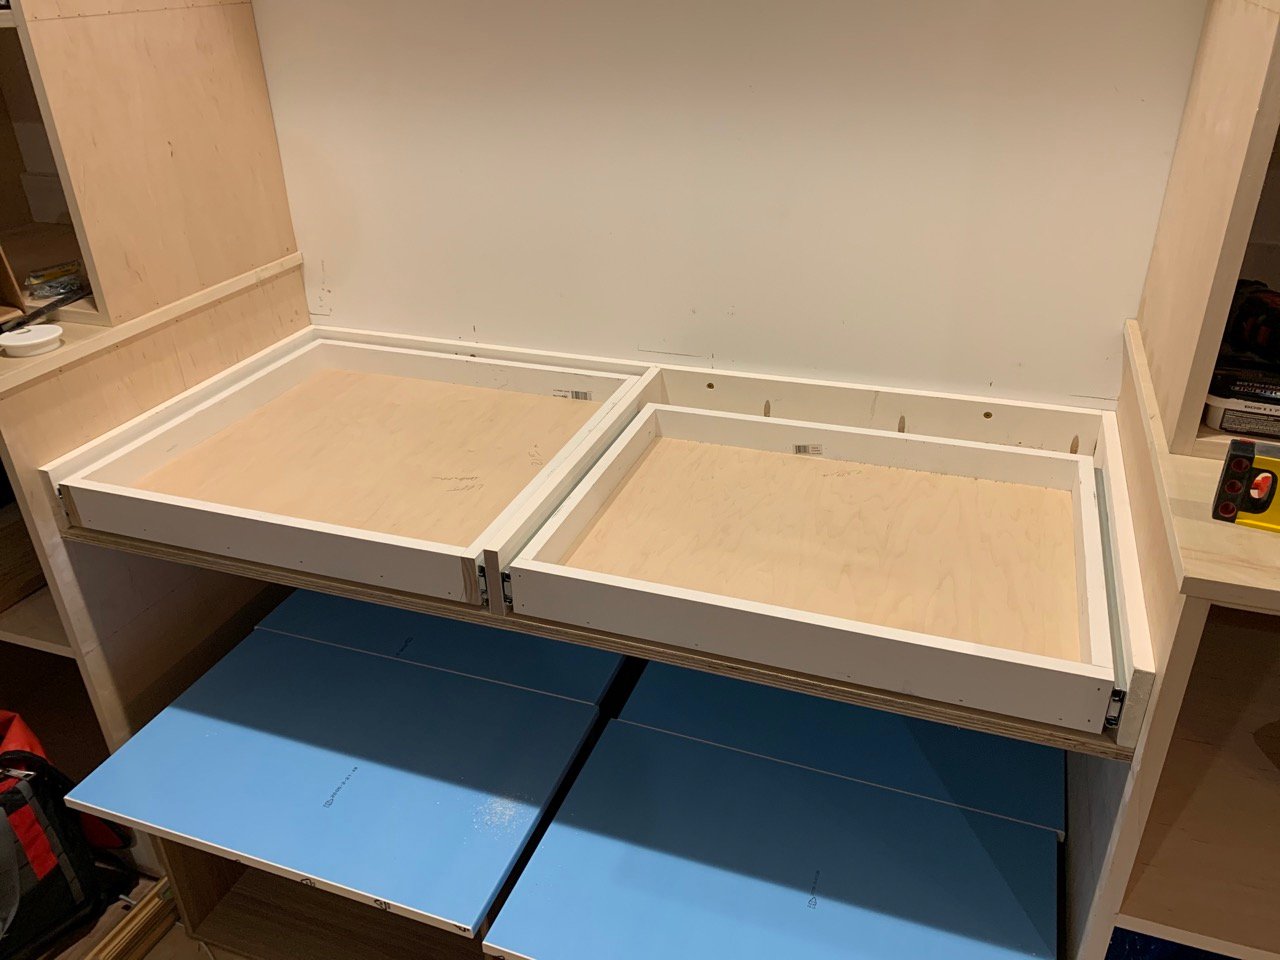
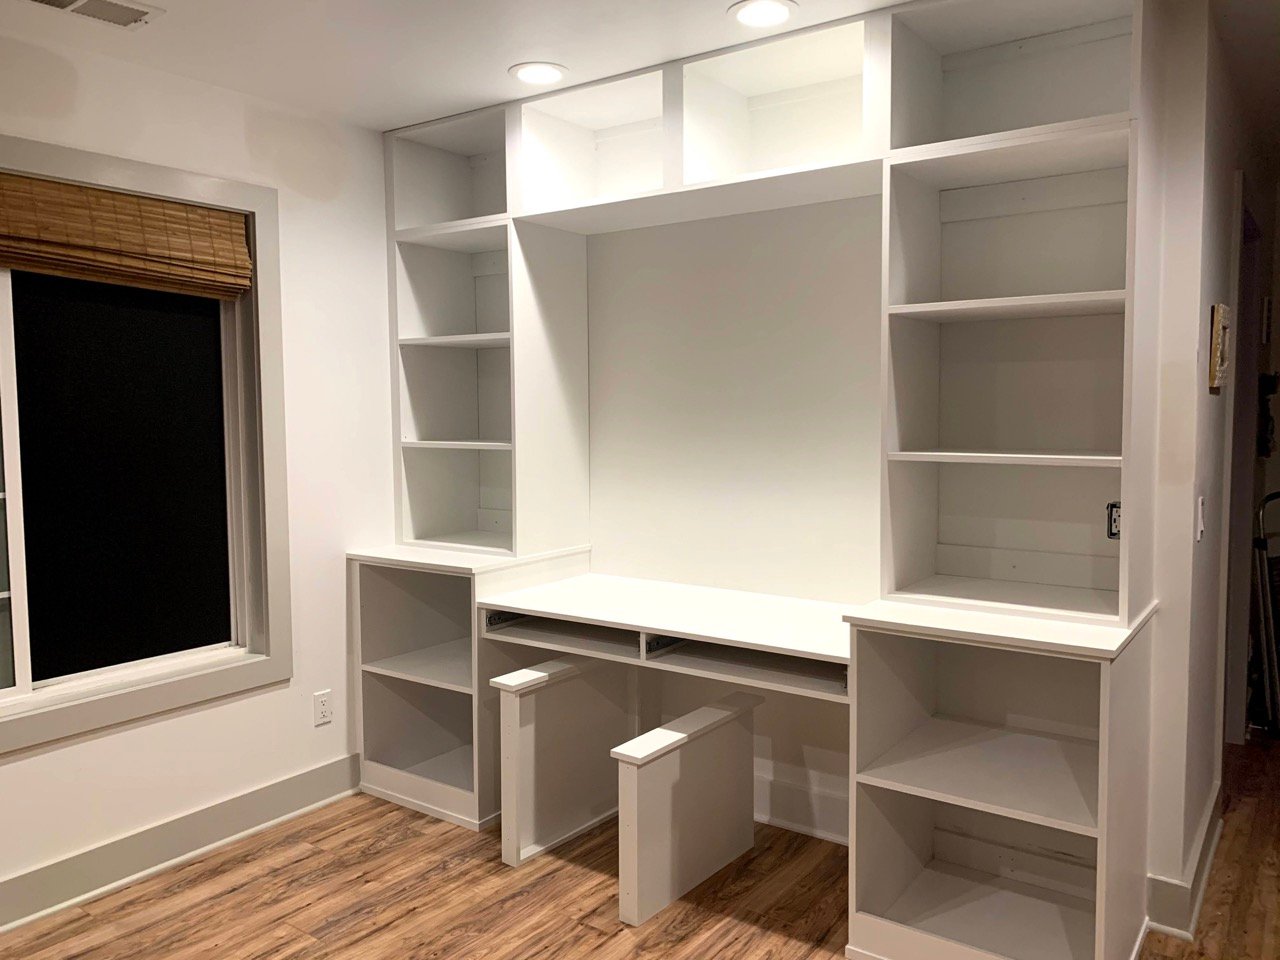
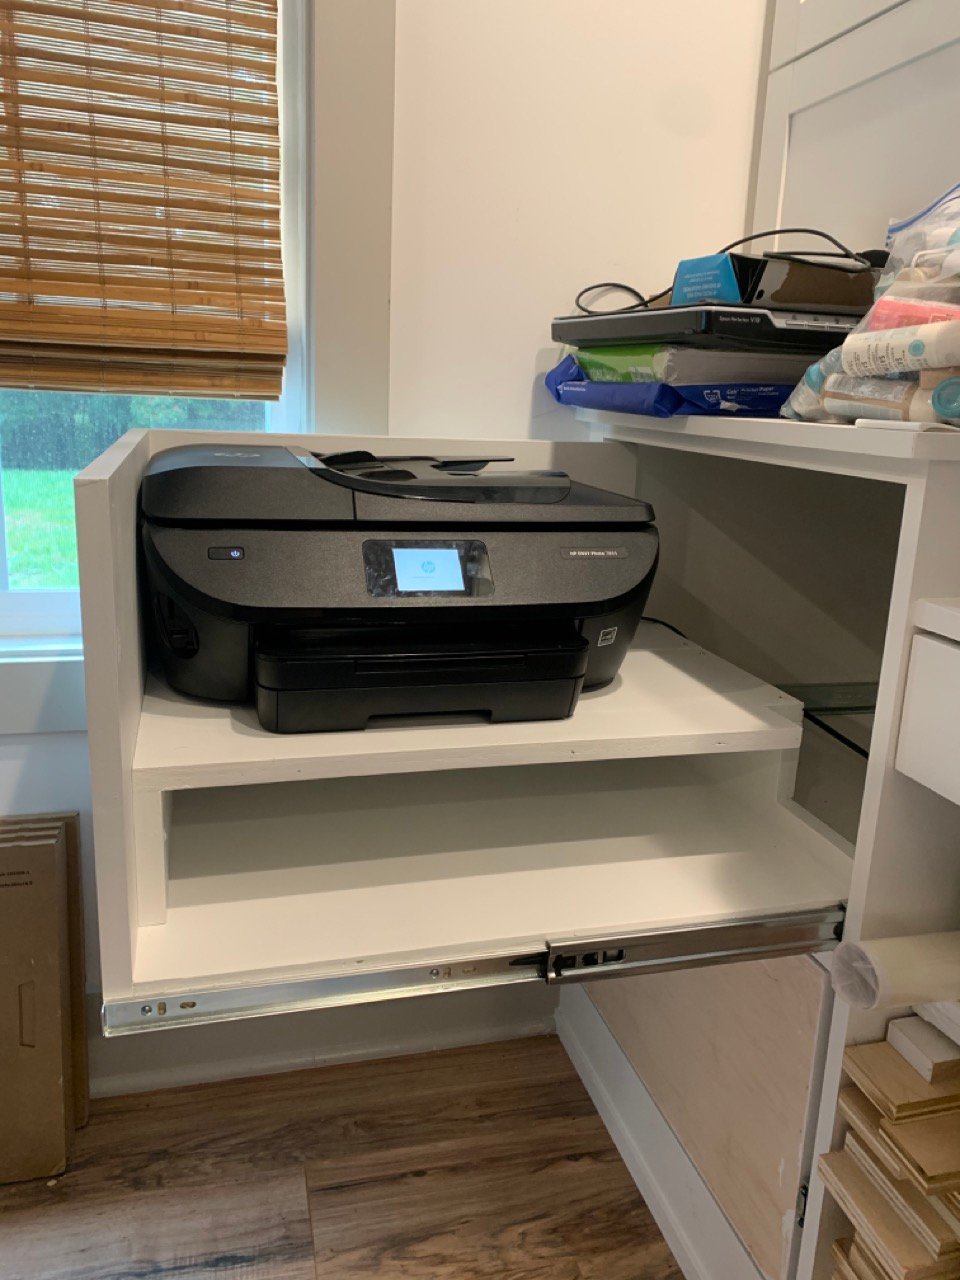
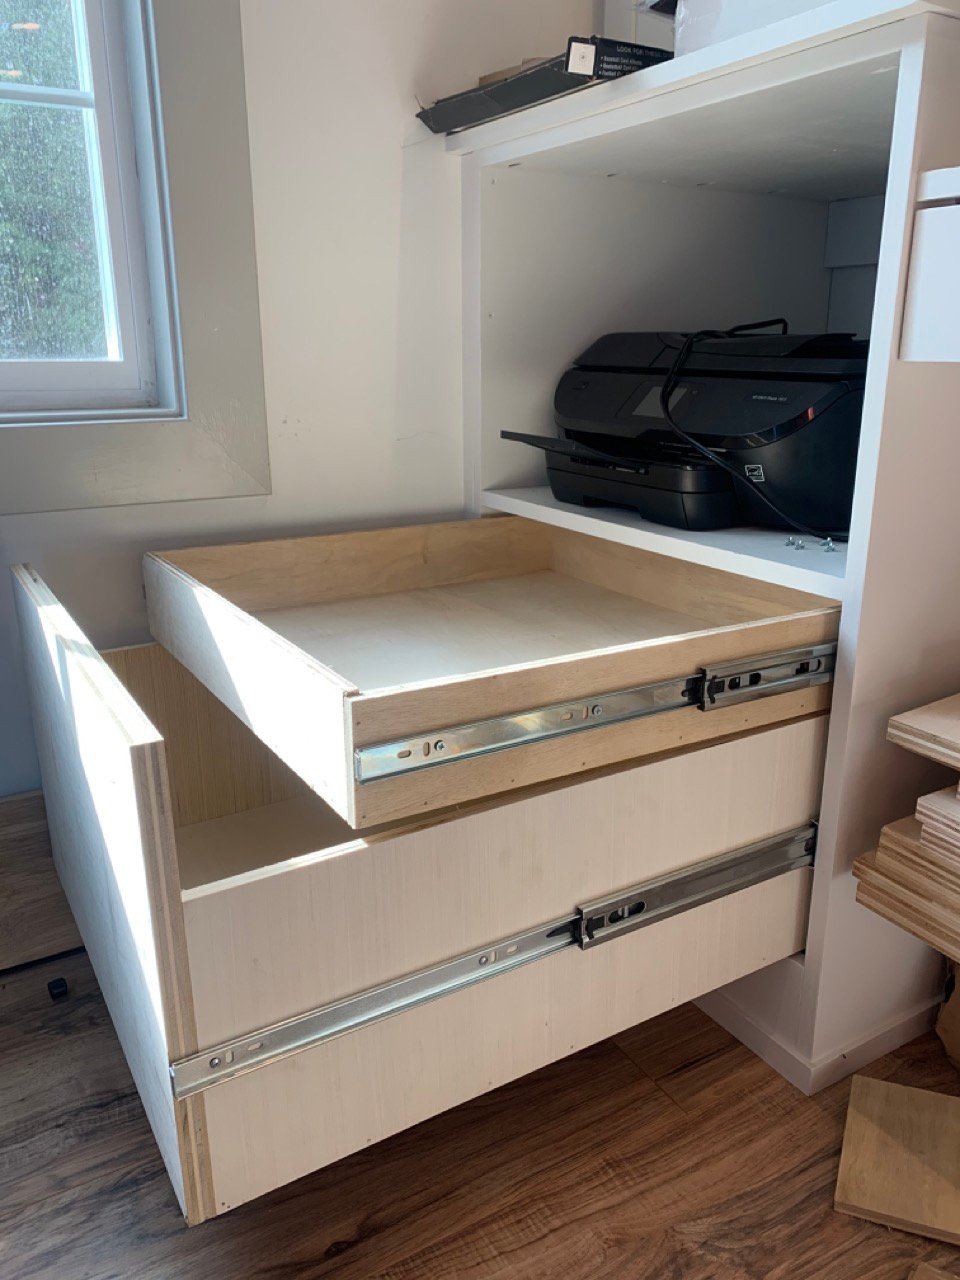
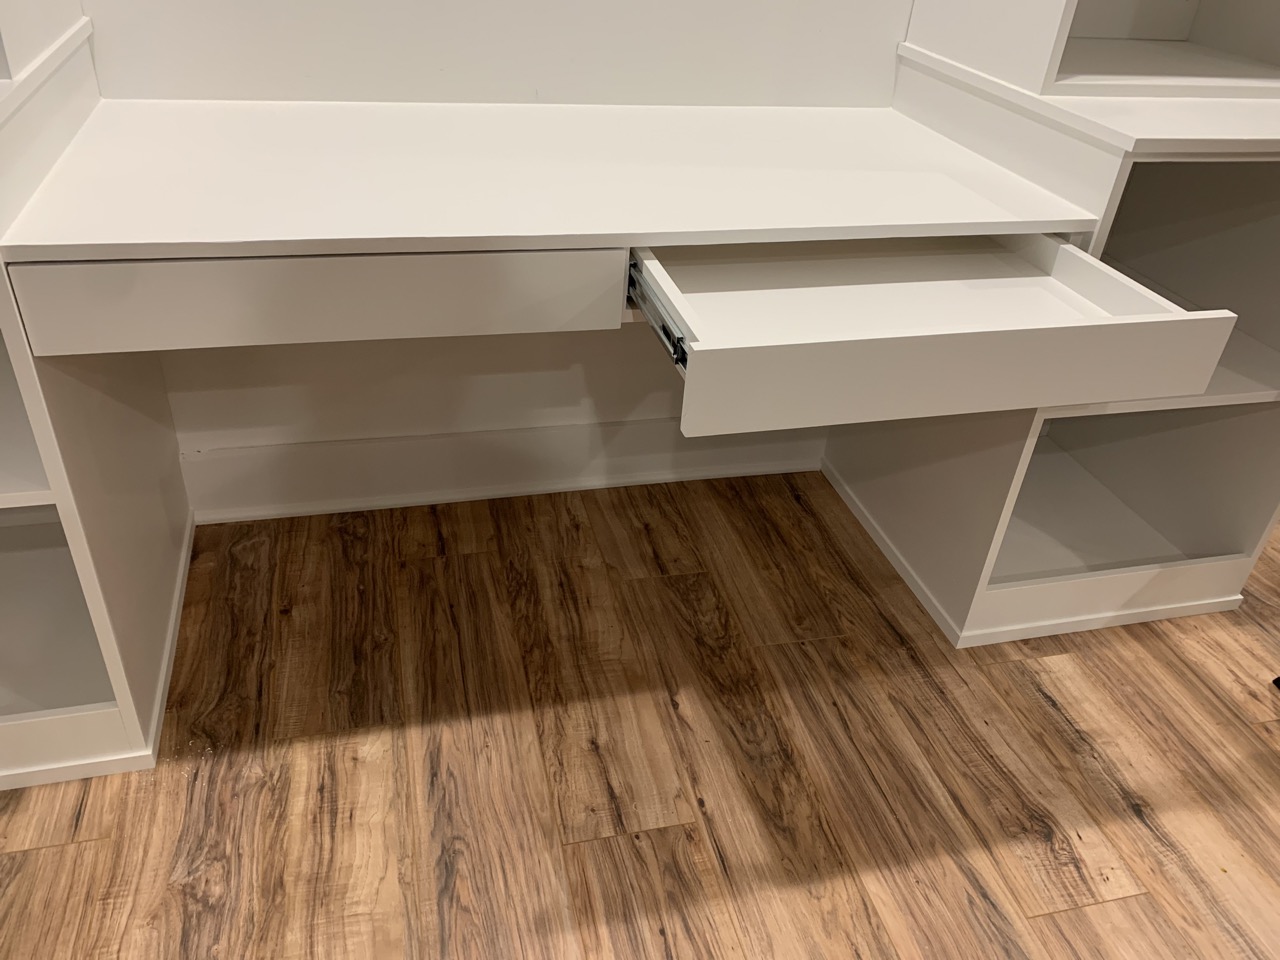
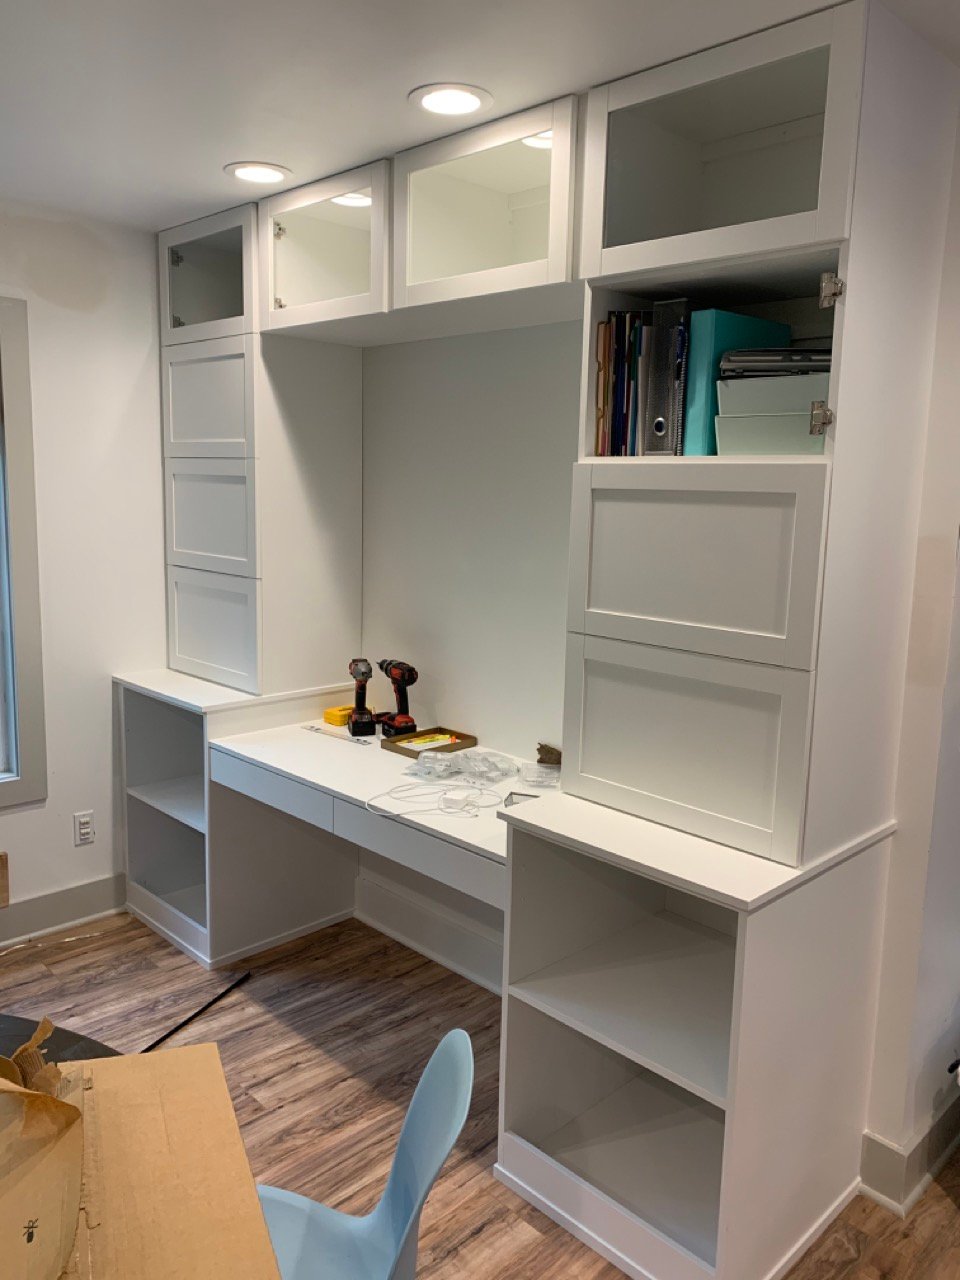
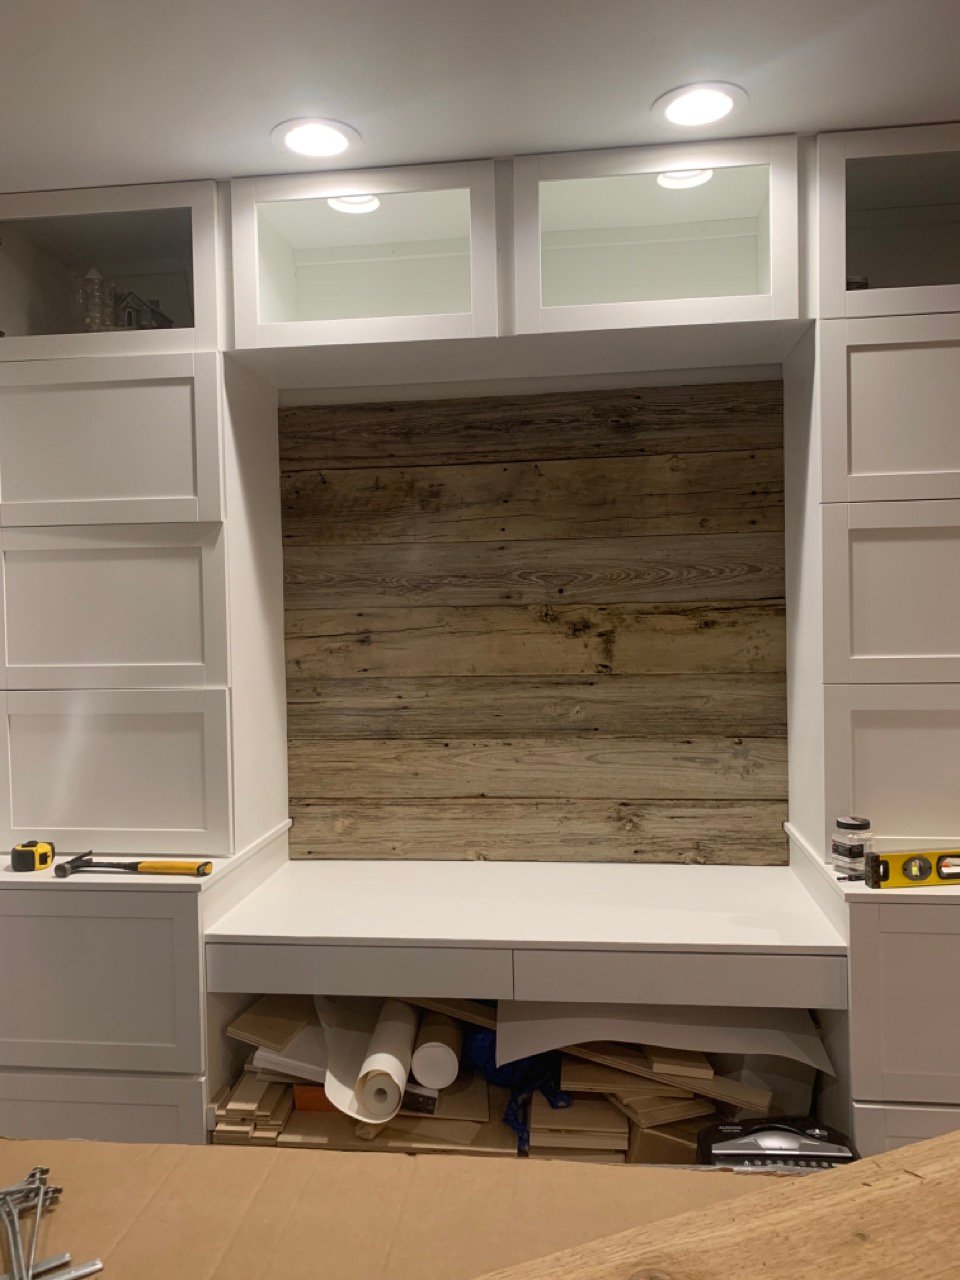
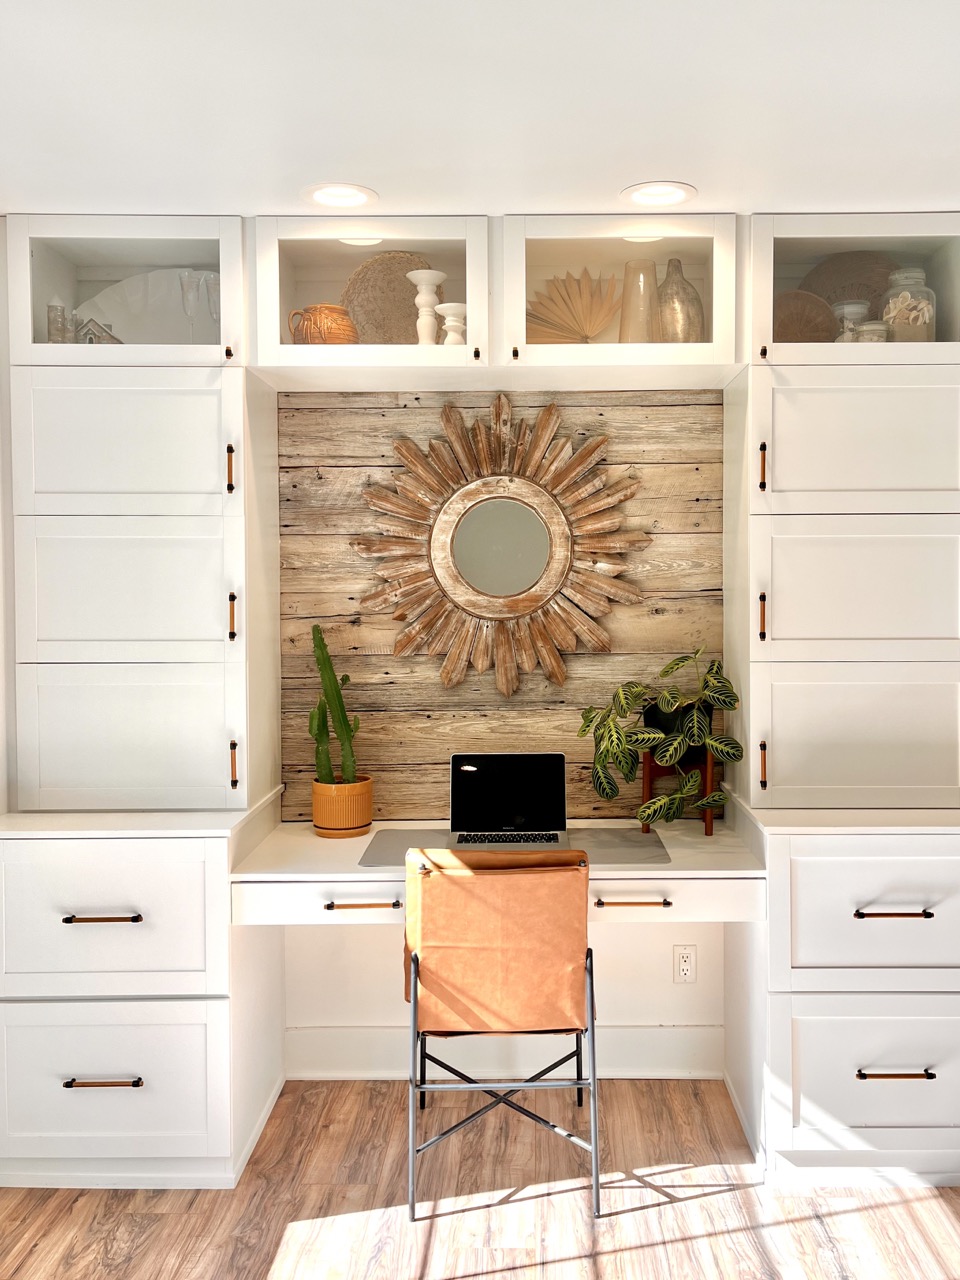
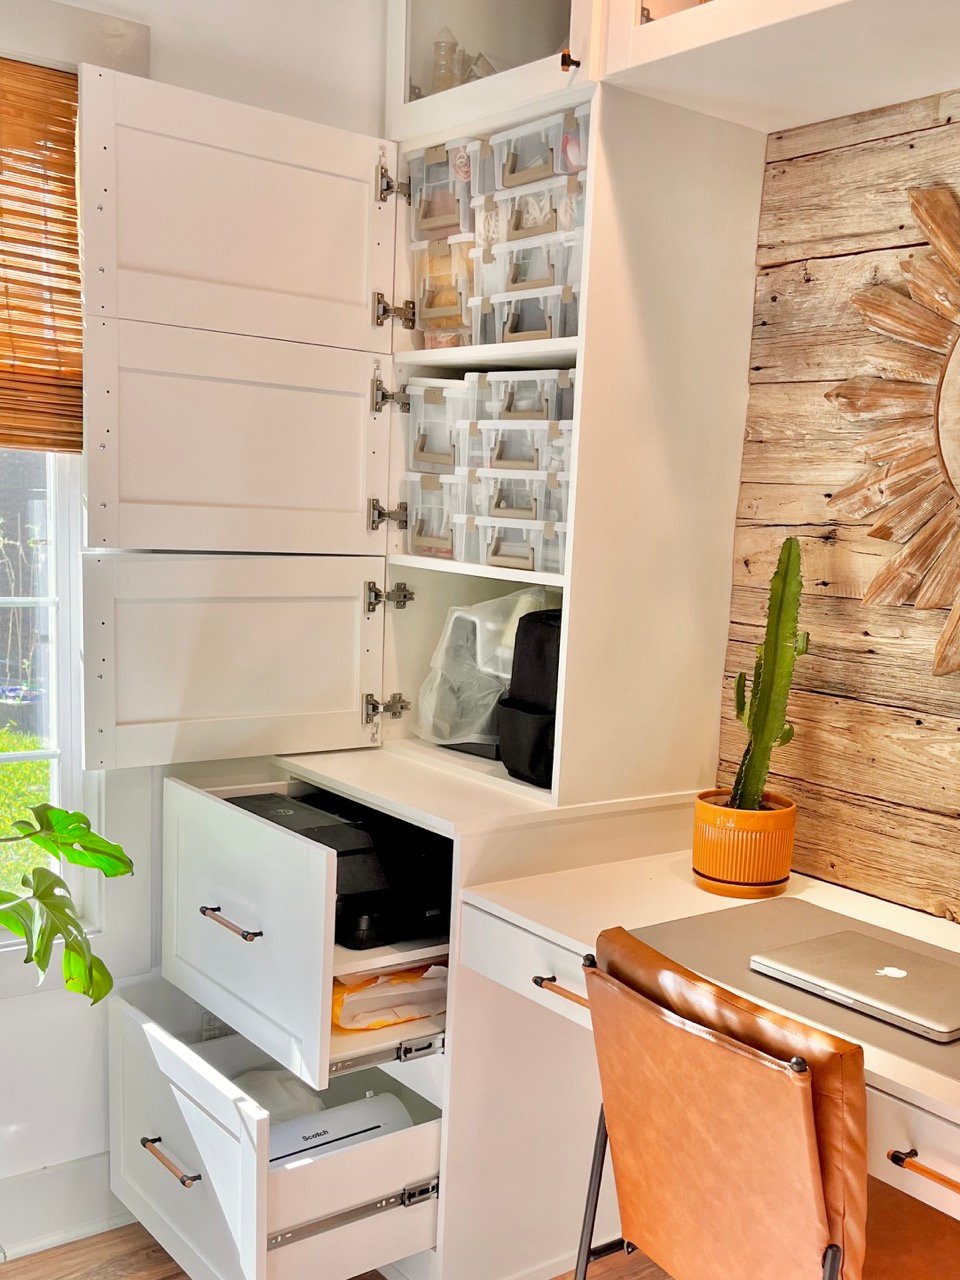
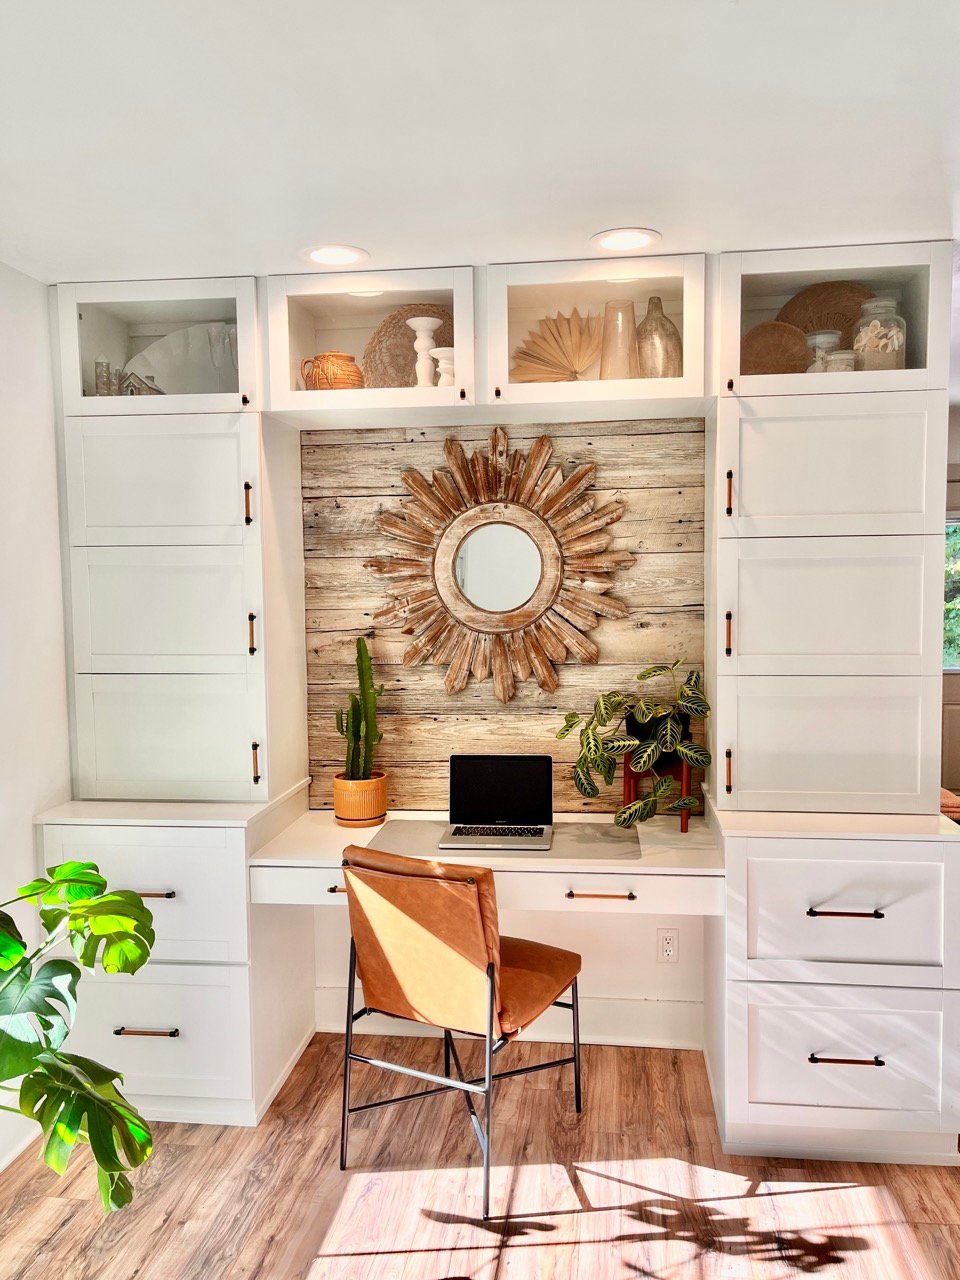
Desk Wall System with IKEA Door Faces

Seasonal And Holiday
Fancy Hall Tree - First Project!
This was my first major woodworking project, and I am so pleased with it! I have been looking for a piece of furniture like this and couldn't find something that I liked and could afford. I spent about $180 in lumber, and also took Ana's advice and invested in a Kreg Jig. I HIGHLY recommend this! It is expensive ($100) but so worth it. I had to learn a few things along the way, and had encountered some obstacles, but in the end I am very pleased with the project. A few things I learned on my first project:
1. Exact cuts are SO important. Every 1/8" matters. It was helpful to do as many cuts as possible at the lumber store.
2. Ana mentions this in her beginners section, but it bears repeating: wood glue will repel stain. Be sure to wipe away ALL residue of wood glue before staining, and be sure to give extra sanding attention to areas that had wood glue. Otherwise you will have a white spot in the midst of your stain.
3. On this plan in particular there is one change that I recommend. Do not add the wrap around trip on the top and bottom until AFTER you have put the plywood backing on in the last step. The reason is that the plywood adds another 3/4 inch, and so there was a gap between the edge of the trip and the back on the furniture. I redid it on the top because it was so noticeable.
Built from Plan(s)
Estimated Cost
$180
Estimated Time Investment
Week Long Project (20 Hours or More)
Finish Used
Minwax Dark Walnut, satin polyurethane
Recommended Skill Level
Beginner
Comments
Wed, 04/30/2014 - 11:14
This is gorgeous! You did a
This is gorgeous! You did a great job! I want to make this but I have no place to put it in my tiny apartment. Someday…
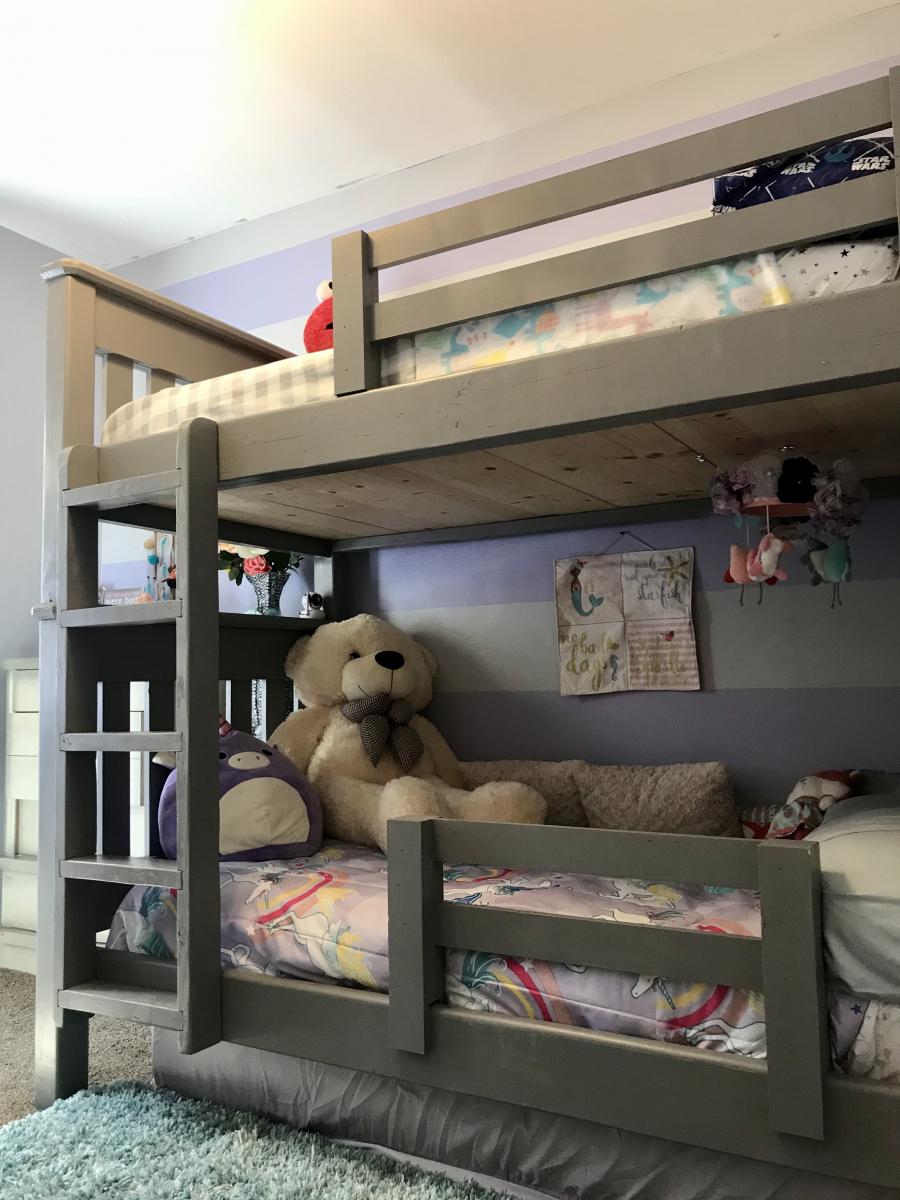
Simple Bunk Bed
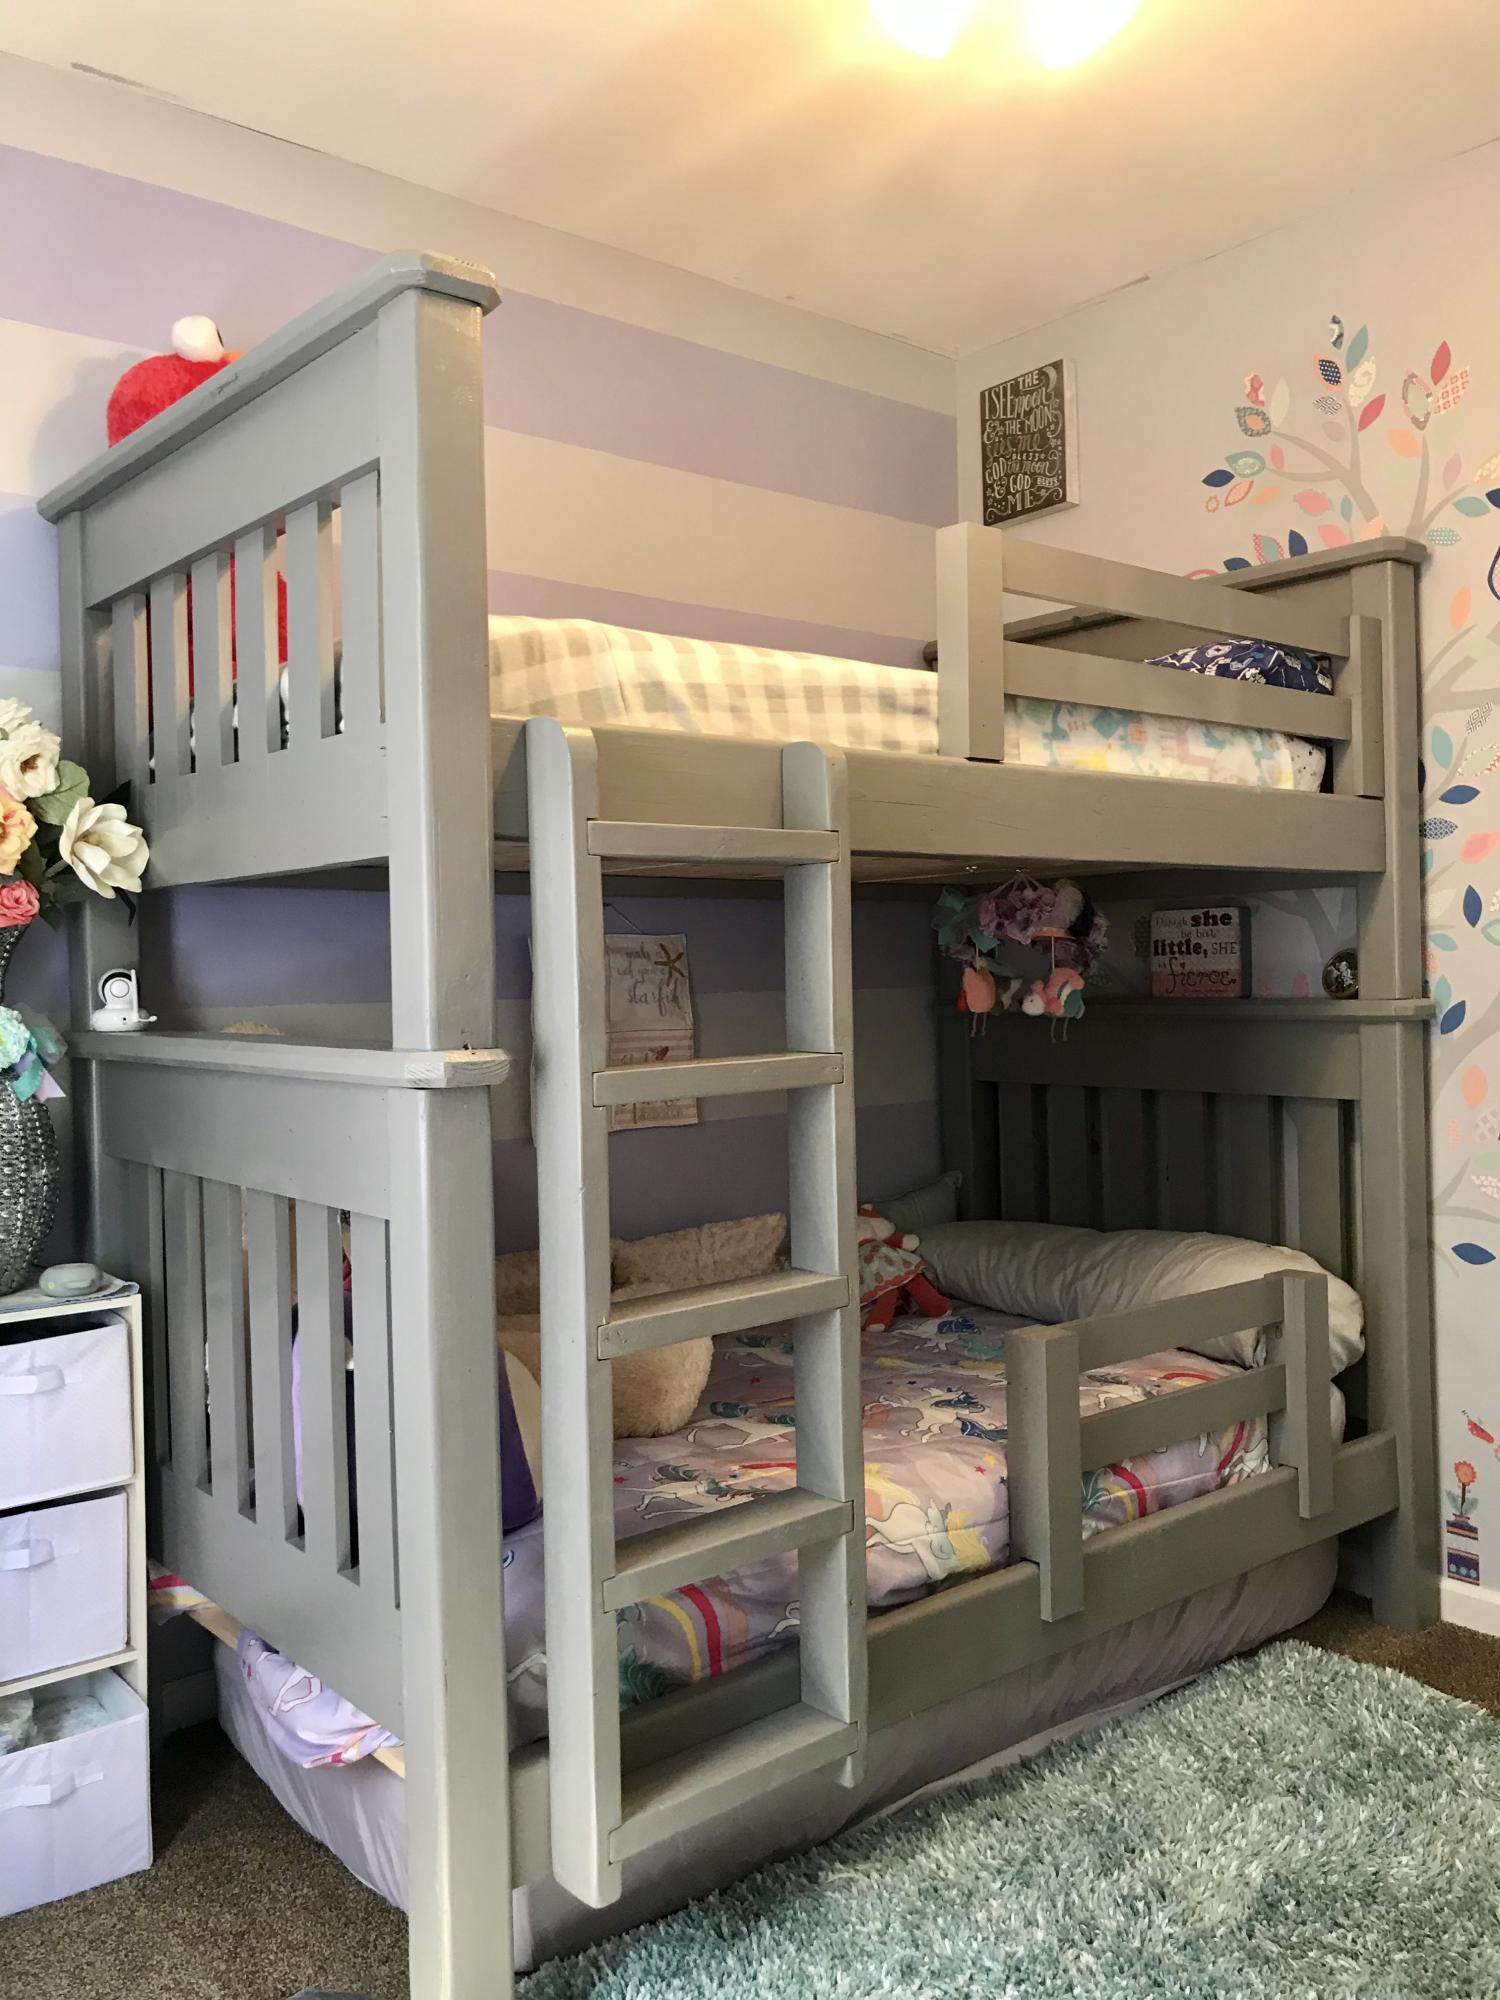
Built mostly from the Simple Bunk Bed plans on this site with a couple of modifications. Namely: made a vertical ladder, used Rockler Bed rail fasteners, increased bed height to fit 3rd twin mattress underneath for when my moms visits, and made a removable bottom safety rail that slides on when my daughter goes to sleep. Overall it was a fun project to do and they kids are really enjoying it.
Built from Plan(s)
Estimated Cost
380
Estimated Time Investment
Week Long Project (20 Hours or More)
Recommended Skill Level
Intermediate
Comments
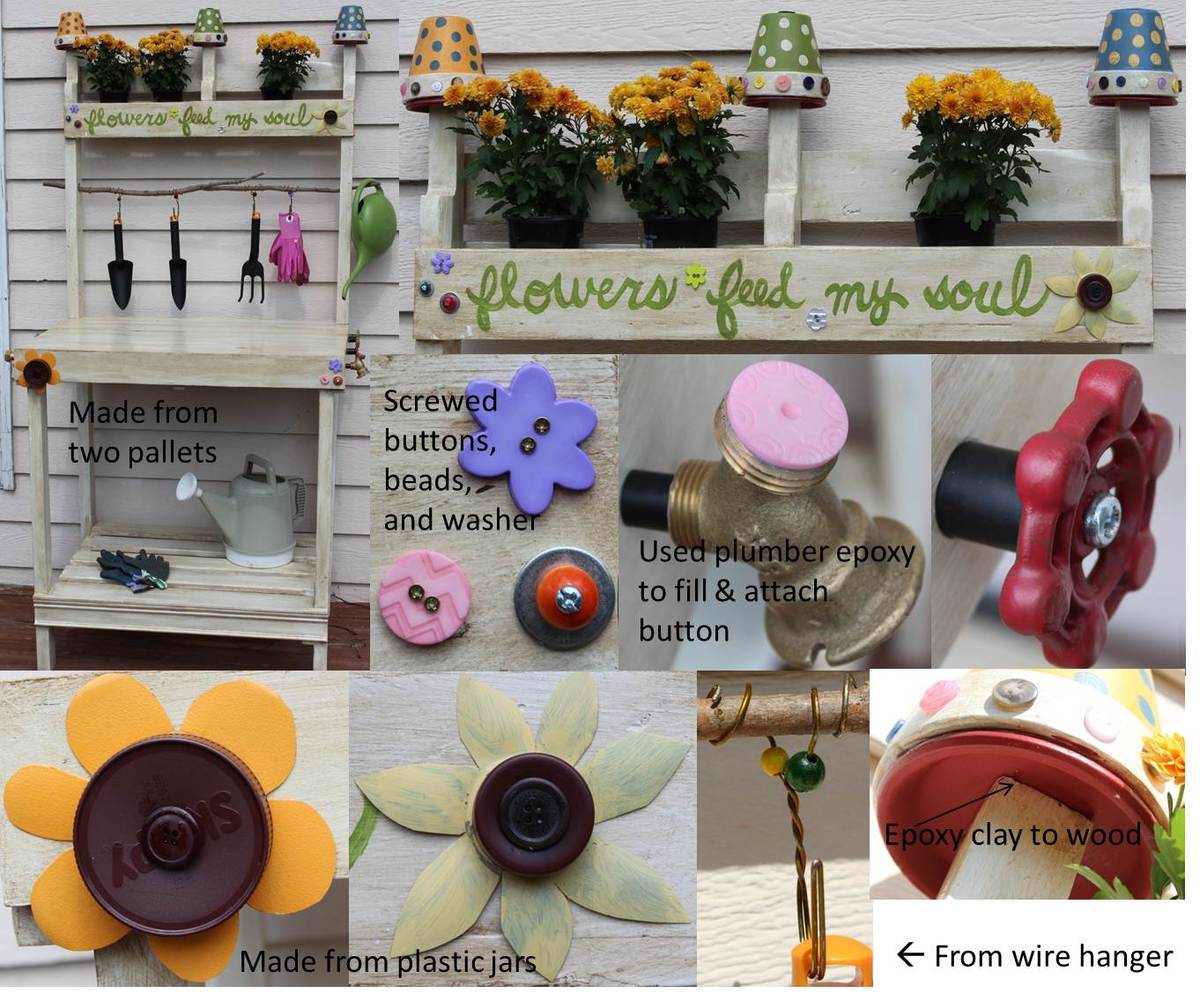
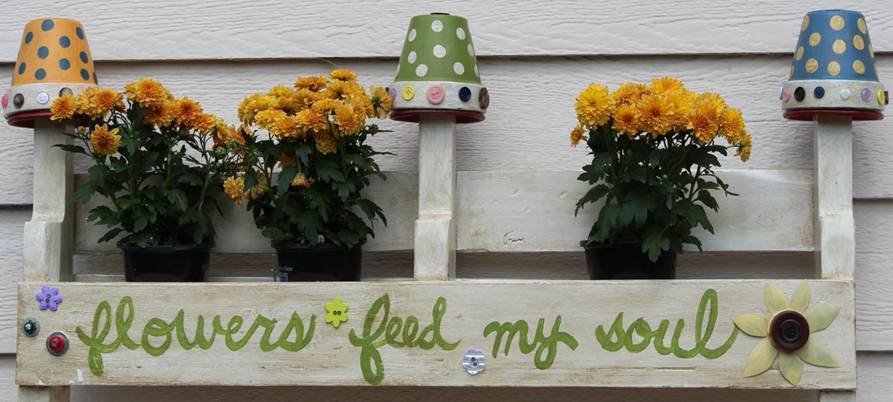
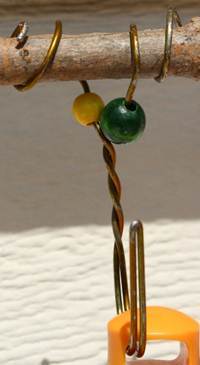
Cute DIY Pallet Potting Bench
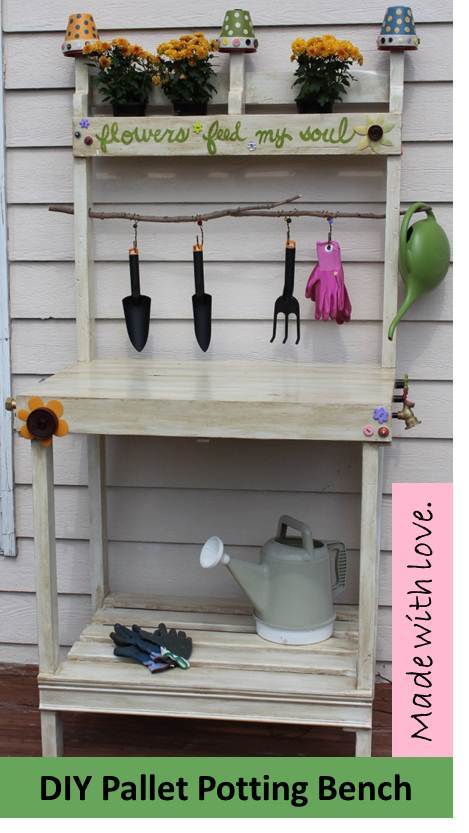
Made from 2 pallets, 2 x 6 x 8, leftover trim from my house, wood branch from my backyard. Attached shelf with pocket holes.
Accents:
-Handpainted lettering; painted prior to glazing entire piece
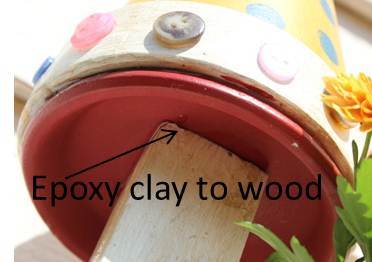
-Finials made from 4.25 inch spray painted and glazed clay pots and saucers coated with Valspar clear finish and attached together with epoxy; buttons attached to pots with E6000 adhesive
-Buttons attached mostly with small screws; a few with holes too small for screws were attached with epoxy
-Plastic flowers made from mayo and water bottles and lids; sanded, primed, spray painted, coated with Valspar clear coating; attached with screws
-Faucet knobs sanded, spray painted, glazed and attached with screws
-Plumbing pipe filled with plumber epoxy puttty; insert screw into putty before it hardened, then screwed into wood
-Gardening tool hooks made from pant wire hangers with a few beads attached; wire simply wrapped around tree branch
Not sure that I will use pallet wood again since difficult to pull apart pallets, uneven and some split boards could not be used, and required tons of sanding for those boards that could be used. I think I paid more for orbital sanding pads than the cost of buying new wood. Will use pallet wood for other non-furniture projects not requiring a perfect finish.

Estimated Cost
$40.00
Estimated Time Investment
Week Long Project (20 Hours or More)
Finish Used
Kids distressed with hammers, sanded with 80 grit, Kilz Primer (1 coat), Sherwin Williams Exterior White Latex Paint (1 coat), Behr Glaze tinted with Brown Latex, Spar Urethane (3 coats)
Recommended Skill Level
Beginner
Enjoying my new desk
Took 2.5 hrs to cut, fasten and sand, and approximately 24-48 hrs to paint, stain and poly.
This has been a very rewarding project. Now I have people comissioning work!
Thanks for the plans
Built from Plan(s)
Estimated Cost
Wood: Fur 28$
Paint: $15
Stain: $5
Polyeurethane: $5
Screws: $9.50
Paint: $15
Stain: $5
Polyeurethane: $5
Screws: $9.50
Estimated Time Investment
Weekend Project (10-20 Hours)
Finish Used
Paint, and Dark Walnut Stain, polyurethane
Recommended Skill Level
Intermediate
Mini Firewood Shed
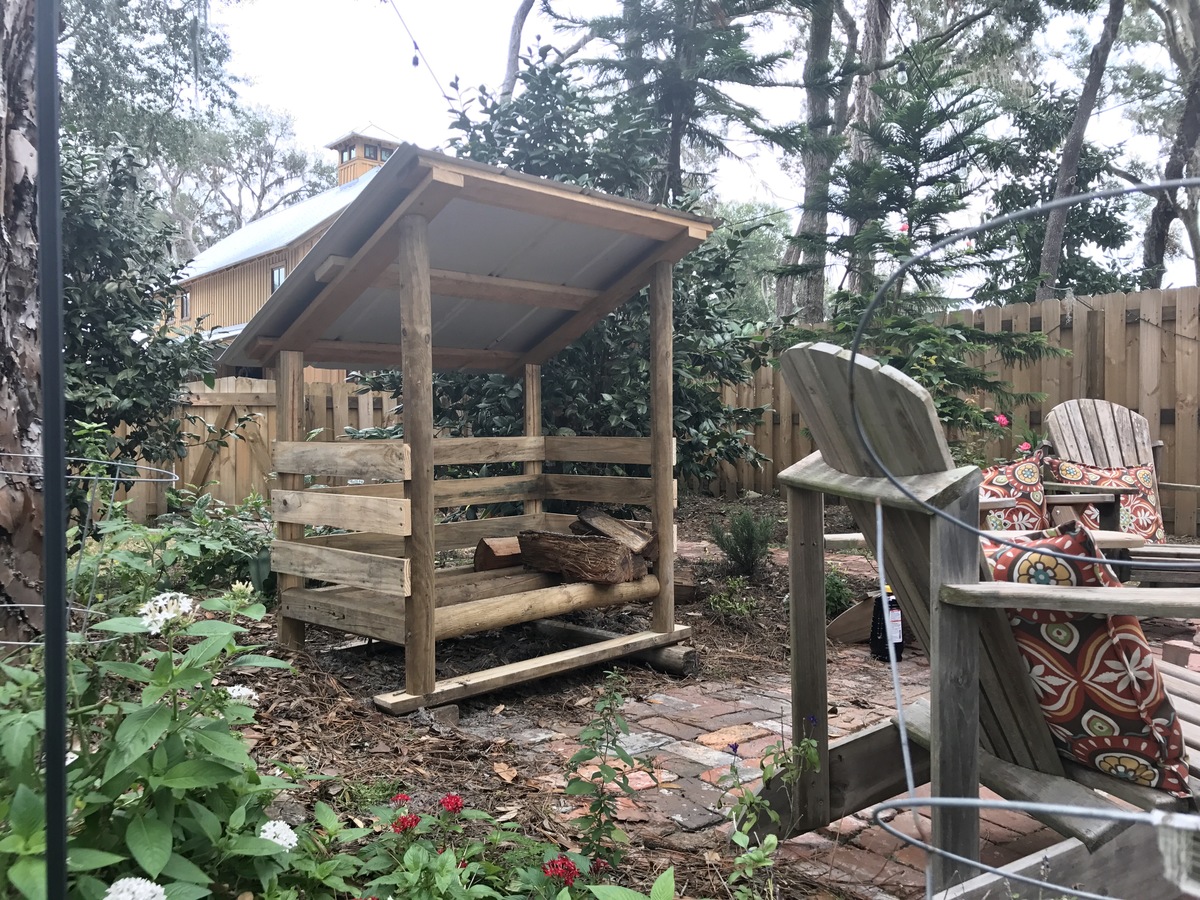
I made this using plans submitted by pericles49. Thank you, pericles49!
I altered the design to use materials I had laying around, and changed the size to fit my space. That made it take a little longer - especially because changing the fastening pattern is still tricky for me - trying to keep screws from hitting each other.
Design
I made mine a little deeper 27-1/2" instead of 24 on the plan.
Materials
- Landscape timbers I had laying around. To save on weight, and wood, I ripped a couple of the landscape timerbers down the middle.
- Roof - 5-V crimp tin roof
- 1x4 pine boards (2nds from other projects)
- 1x4 and 1x2 cyprus boards (2nds from a construction project)
What I'd do differently next time
- The weight of the firewood is resting on the screws that fasten the floor to the posts. Next time I'll make the wood support the weight, and the screws just hold it in place.
Built from Plan(s)
Estimated Cost
$6
Estimated Time Investment
Afternoon Project (3-6 Hours)
Recommended Skill Level
Beginner
First Project

Well, I started with one chair and finished with a full set. Not bad for a first timer. Definitely room to improve. Little tip if you're going to make this amazing set... raise the backs as they are too low with thicker cushions. I built a casing to go on top after the fact. Pretty happy with how it all turned out. Thanks Ana for the plans... now onto the next project!


Comments

Fri, 04/28/2023 - 08:41
2X4 & 2X6 starting set
Very nice workmanship. I'm curious as to how comfortable they are with the straight 90* backs? Let me know please at [email protected]. Again nice workmanship.
Fri, 04/28/2023 - 08:41
2X4 & 2X6 starting set
Very nice workmanship. I'm curious as to how comfortable they are with the straight 90* backs? Let me know please at [email protected]. Again nice workmanship.
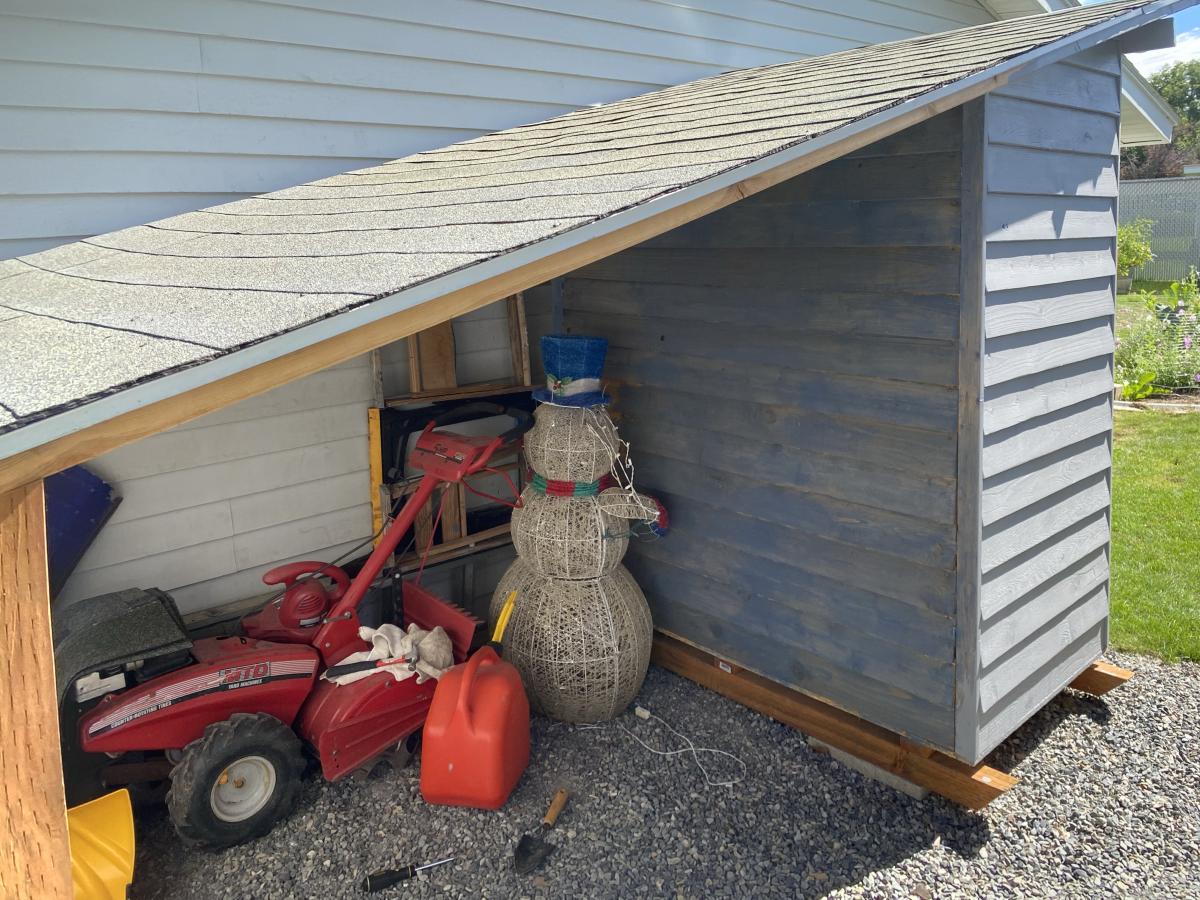
Small cedar shed part- re deux
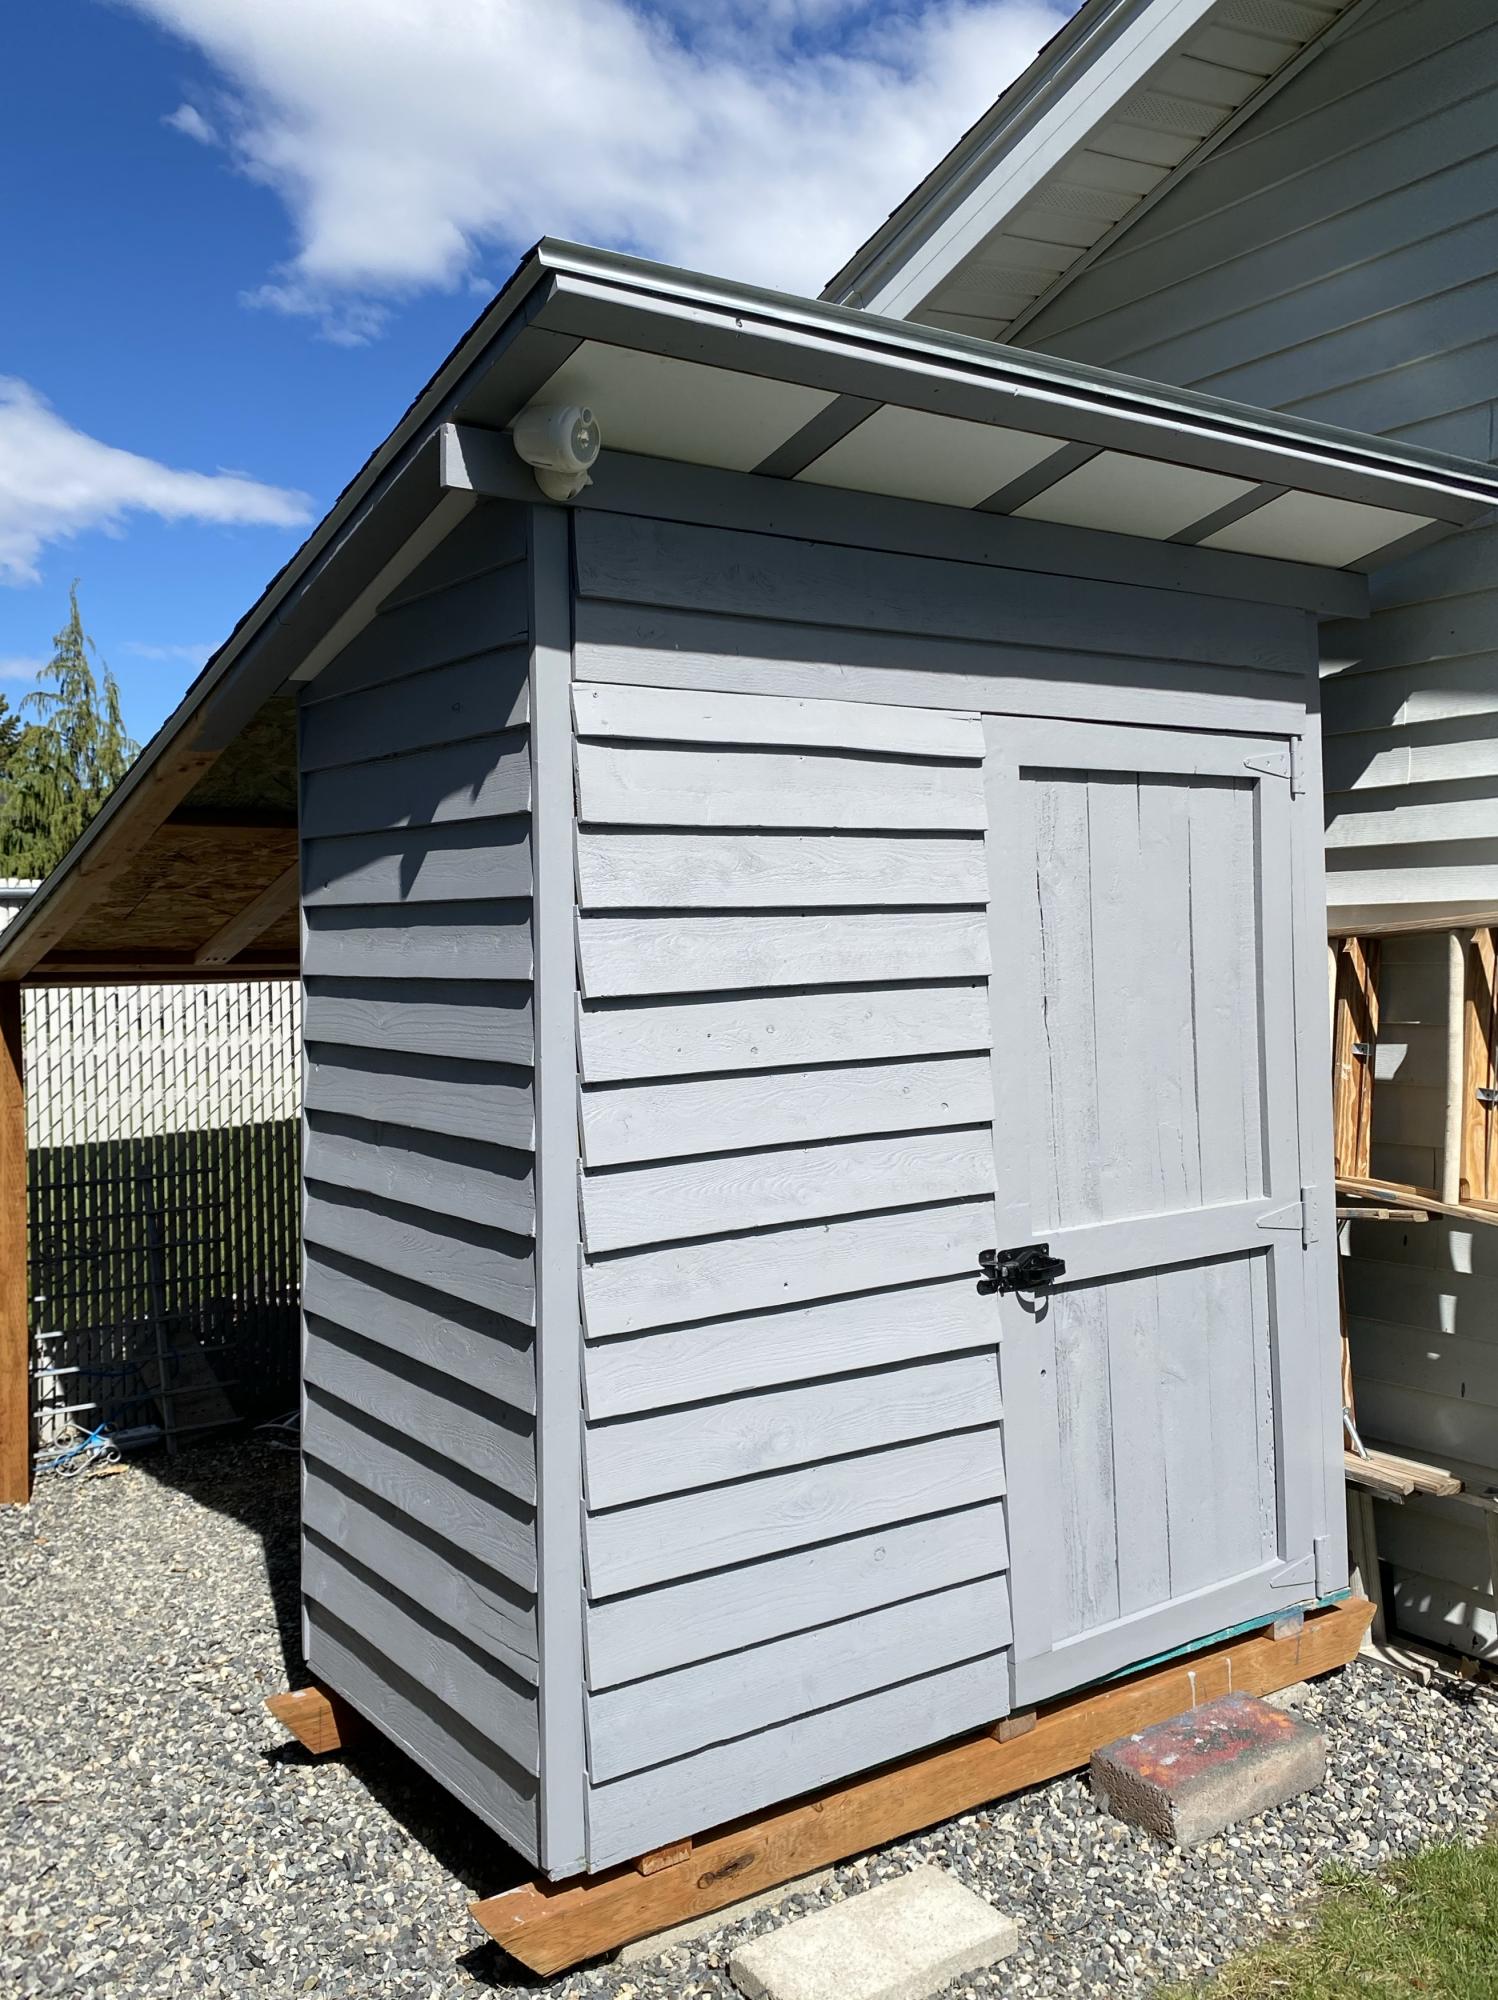
I really needed somewhere to park my rototiller and mower during the summer and ended up modifying the plans to include a lean-too/over hang area. This required flipping the shed to extend the roof line. I continued the 15• roofline and also then had to create and cover the soffits. I also reduced it to one door and placed it on a skid foundation so that technically it would be considered a temporary structure, no permits needed. I first used a semi transparent stain that looked much darker and grayer in the store but looked very blue and terribly streaky on the shed, see back wall area. I then restrained it with a solid stain, which I think looks much better and covered the streaky stain. Because I extended the roof and stained it twice, this really increased the cost, but I think it was well worth it. I can store all my yard and garden tools underneath and inside.
Built from Plan(s)
Estimated Cost
$430
Estimated Time Investment
Week Long Project (20 Hours or More)
Finish Used
Behr premium solid stain
Recommended Skill Level
Beginner
4x4 truss beam table - working breadboard ends and matching bench
mortise and tenon joints with dado for breadboards
Built from Plan(s)
Estimated Cost
$300
Estimated Time Investment
Week Long Project (20 Hours or More)
Finish Used
Custom stain mix
Recommended Skill Level
Advanced
Comments

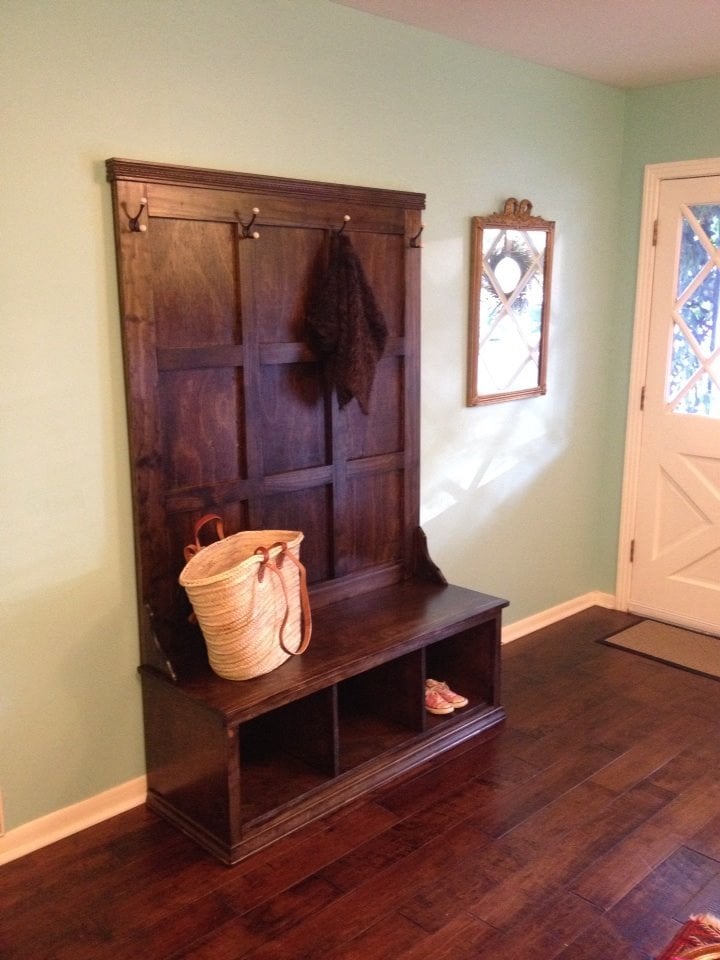
Rustic Farmhouse Hall Tree and Bookshelf
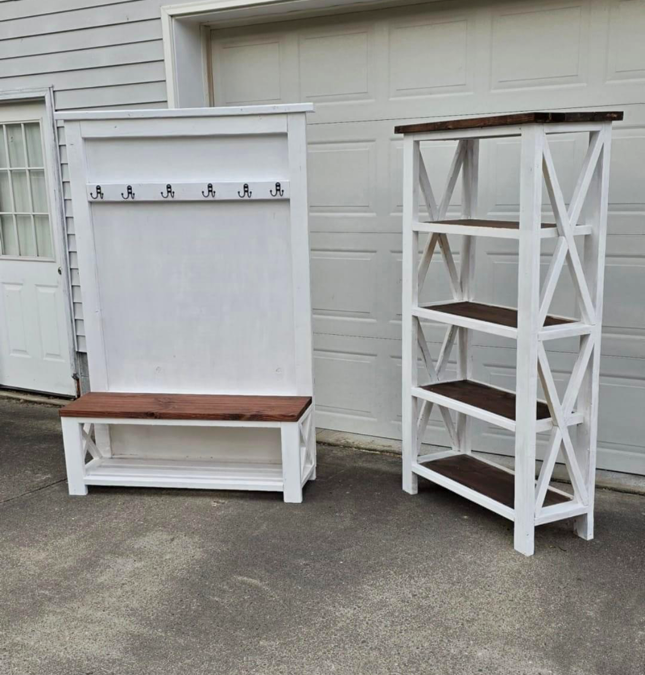
My mother in law wanted a hall tree so I built this for her, my wife wanted a shelf to put some stuff on in our dining room so I knocked that out as well. - Chris Frey on Facebook
Built from Plan(s)
Holiday Lanterns
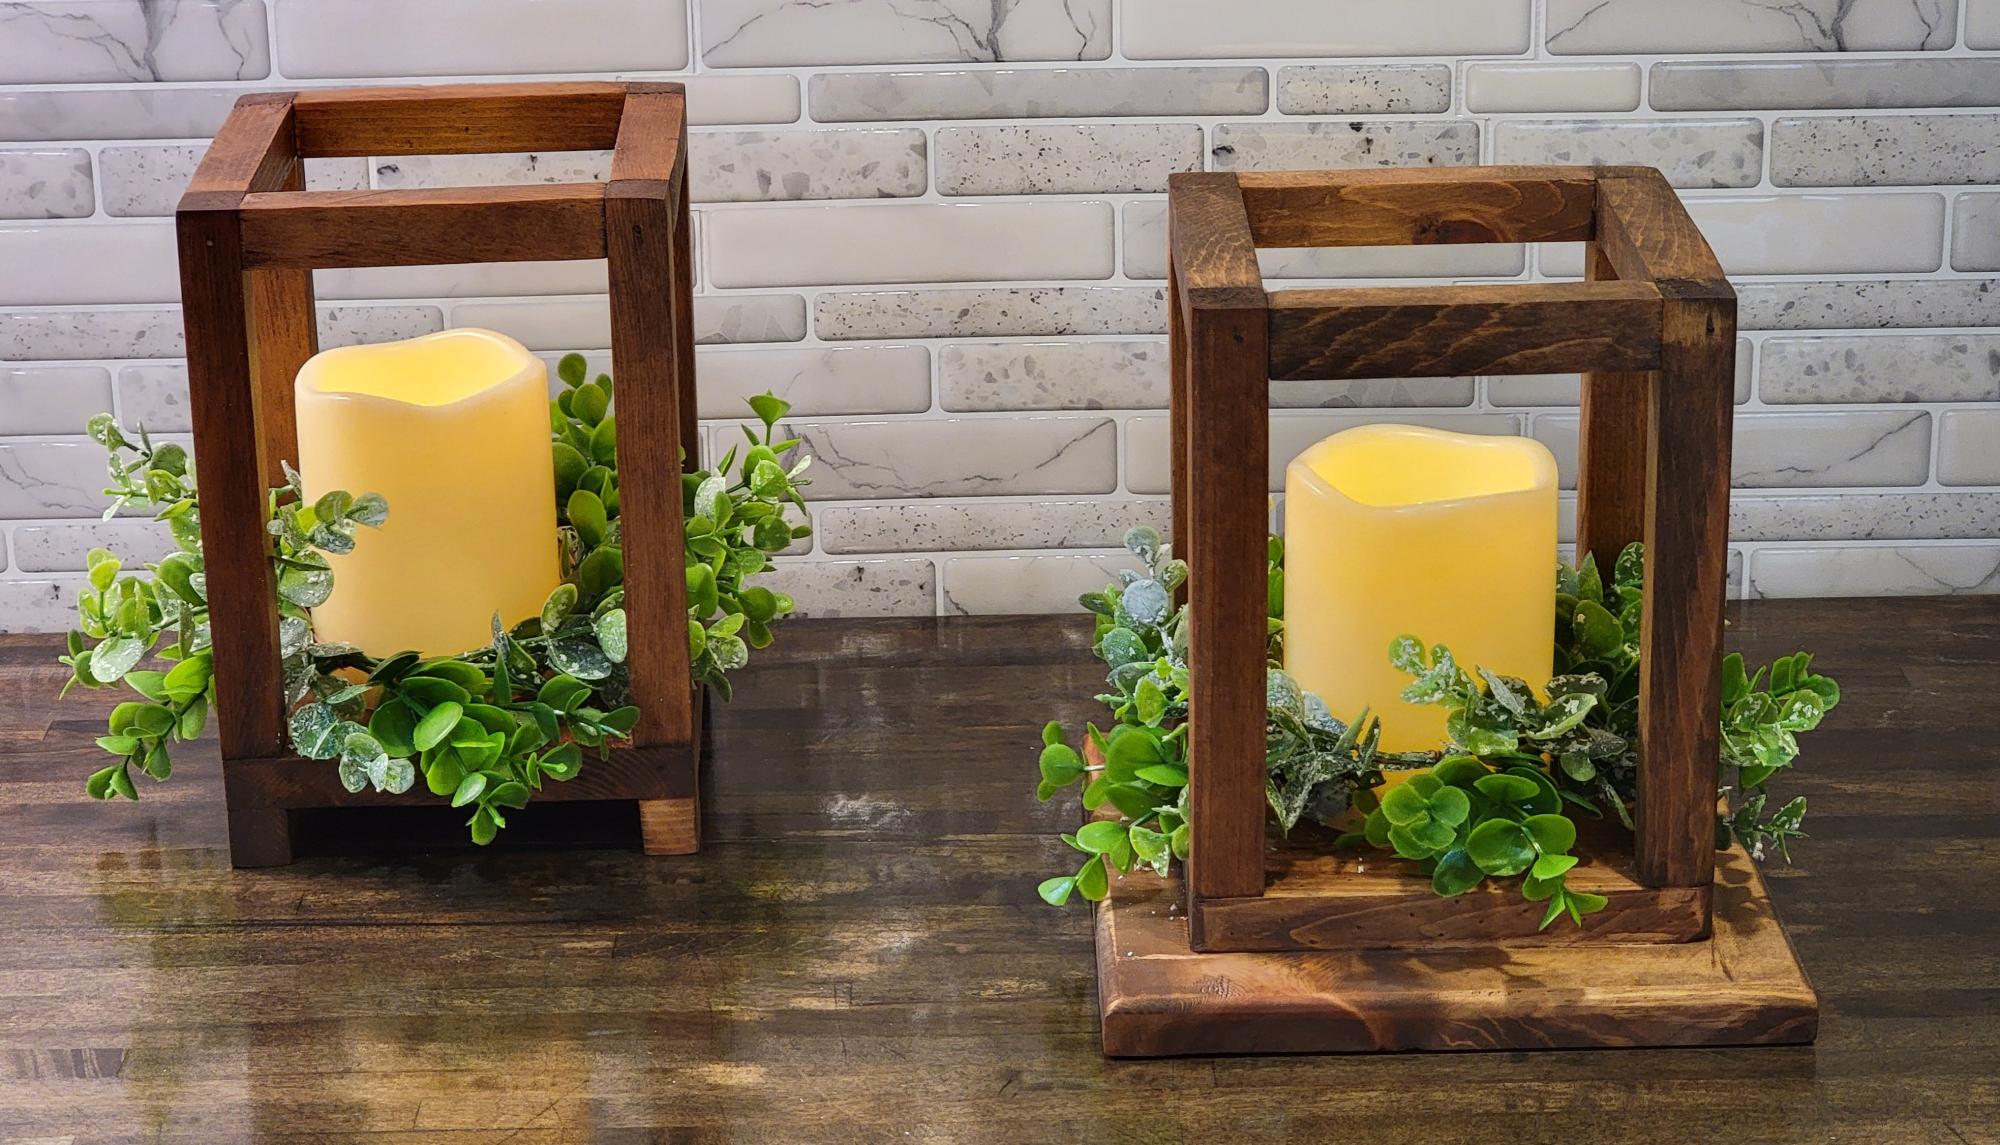
Making several of these for family and friends this holiday season. - Frank Thomas
Built from Plan(s)
Seasonal And Holiday
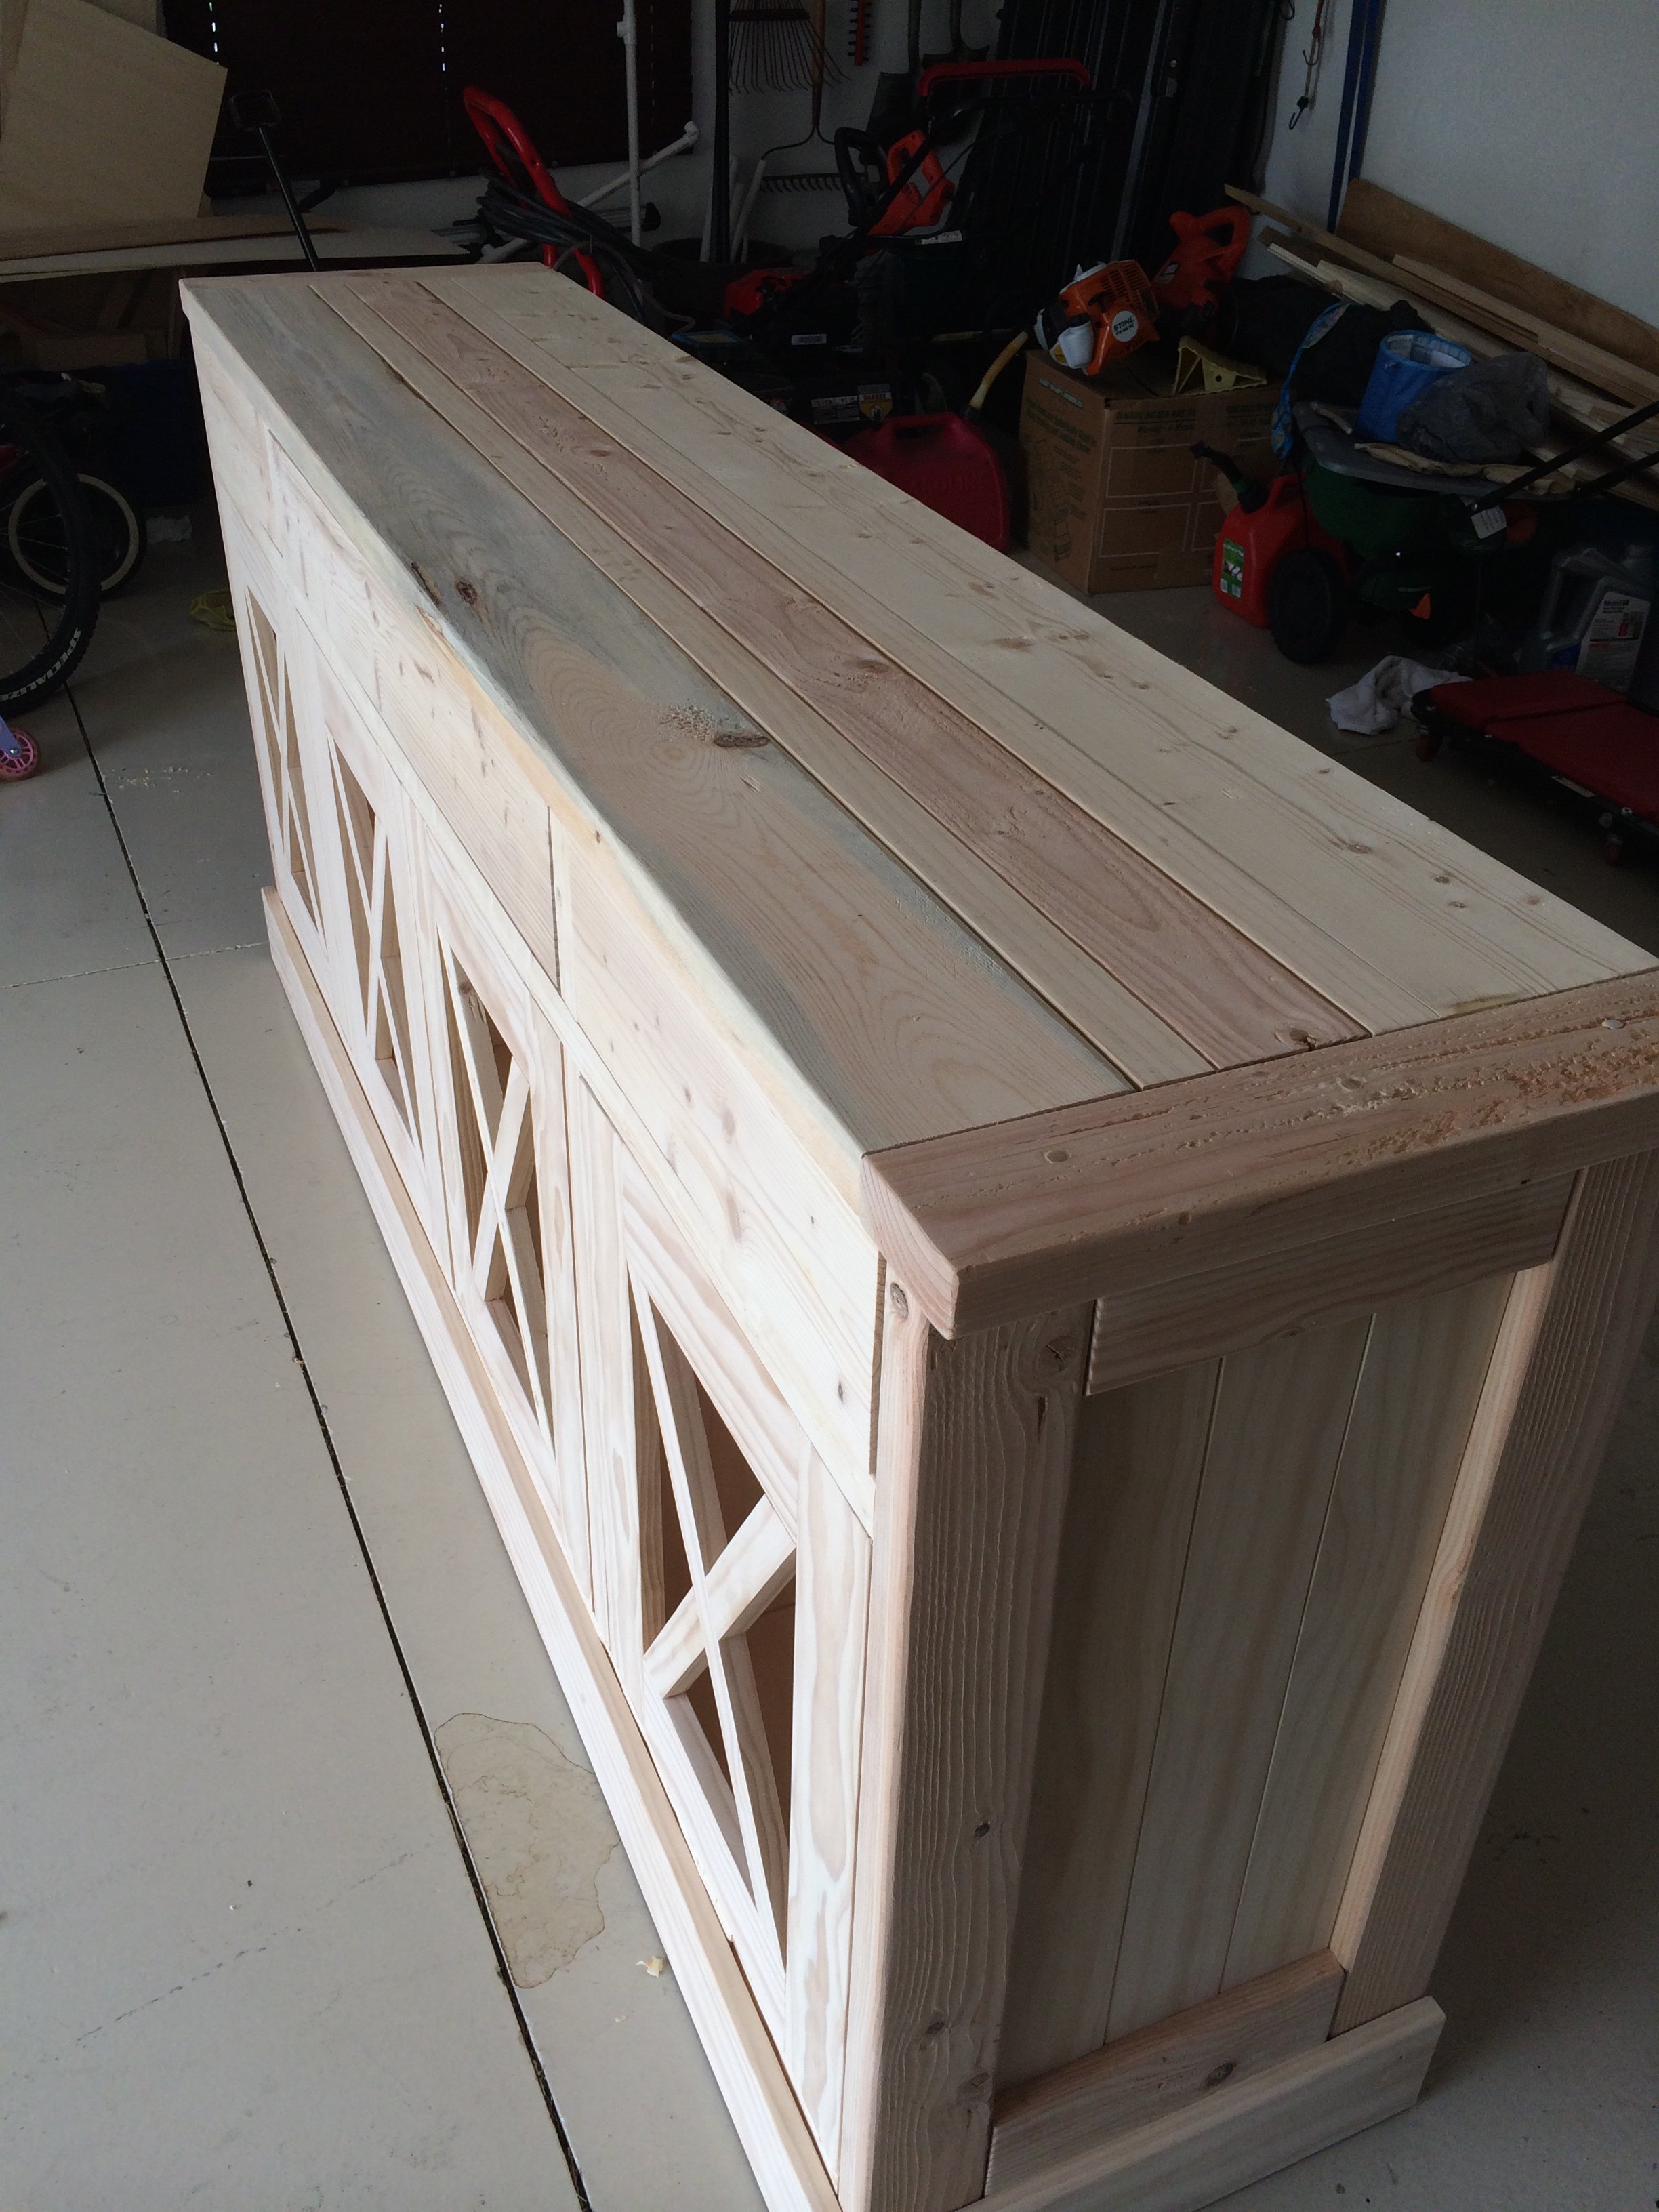
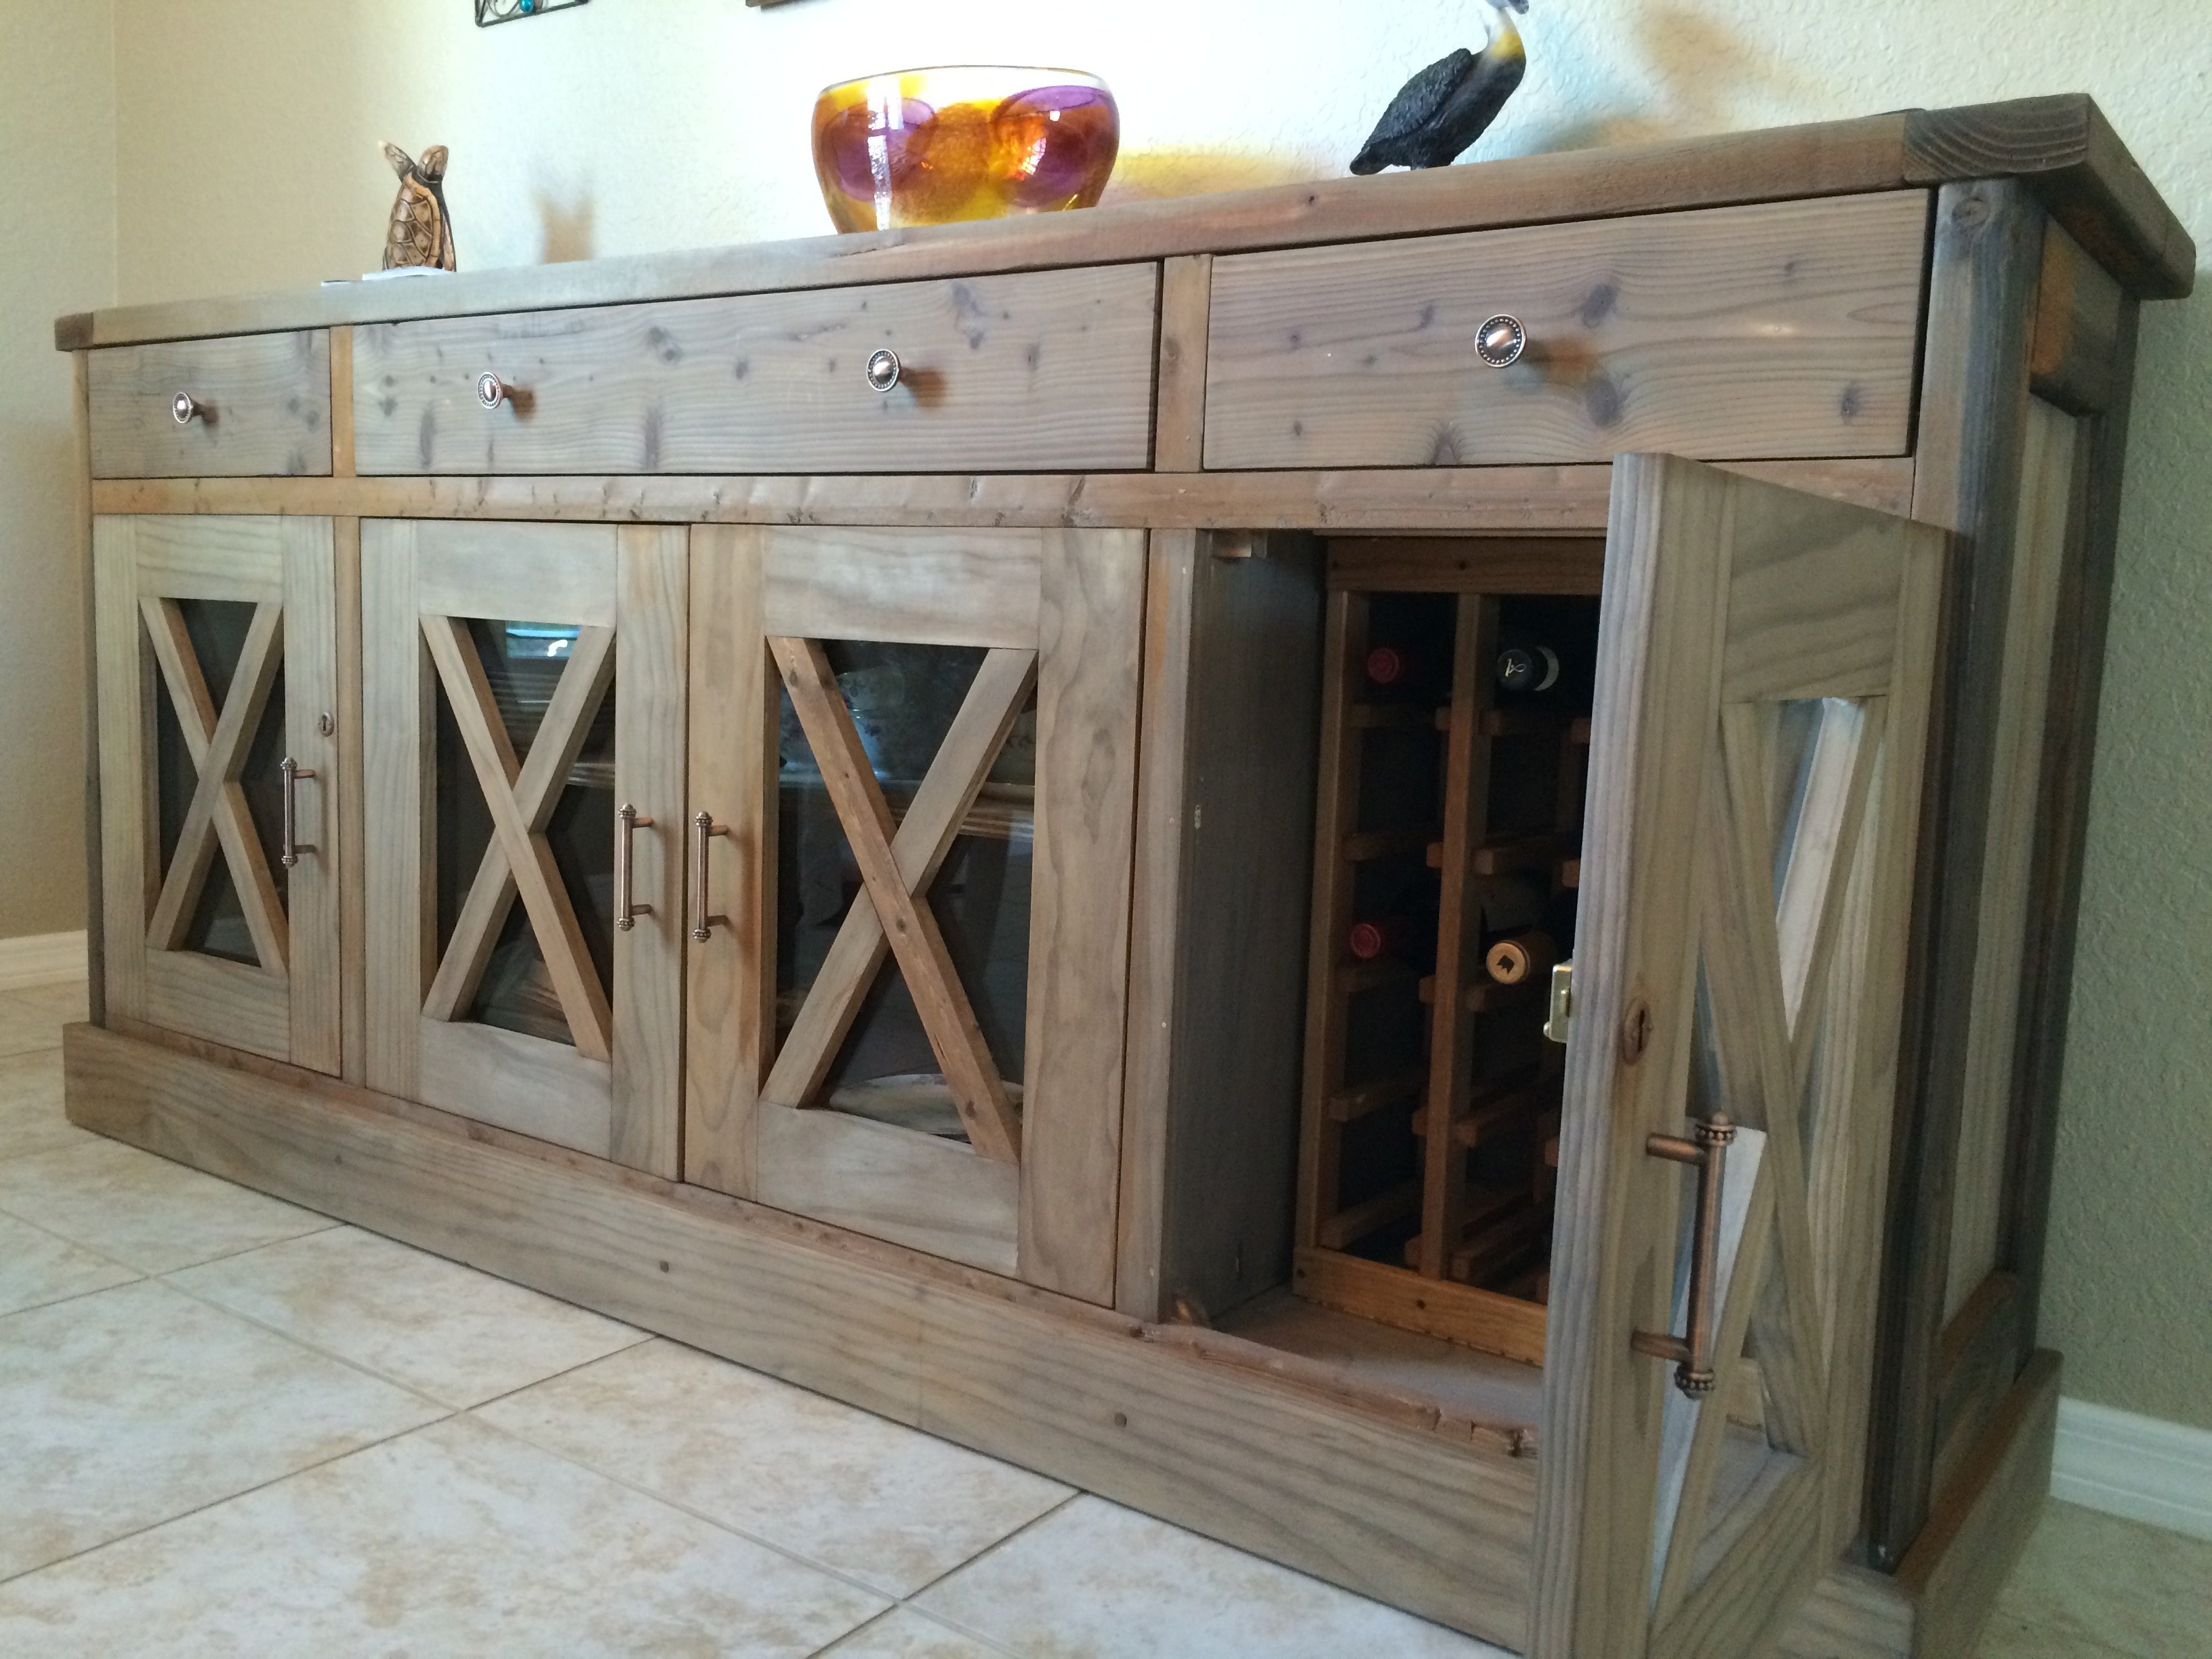
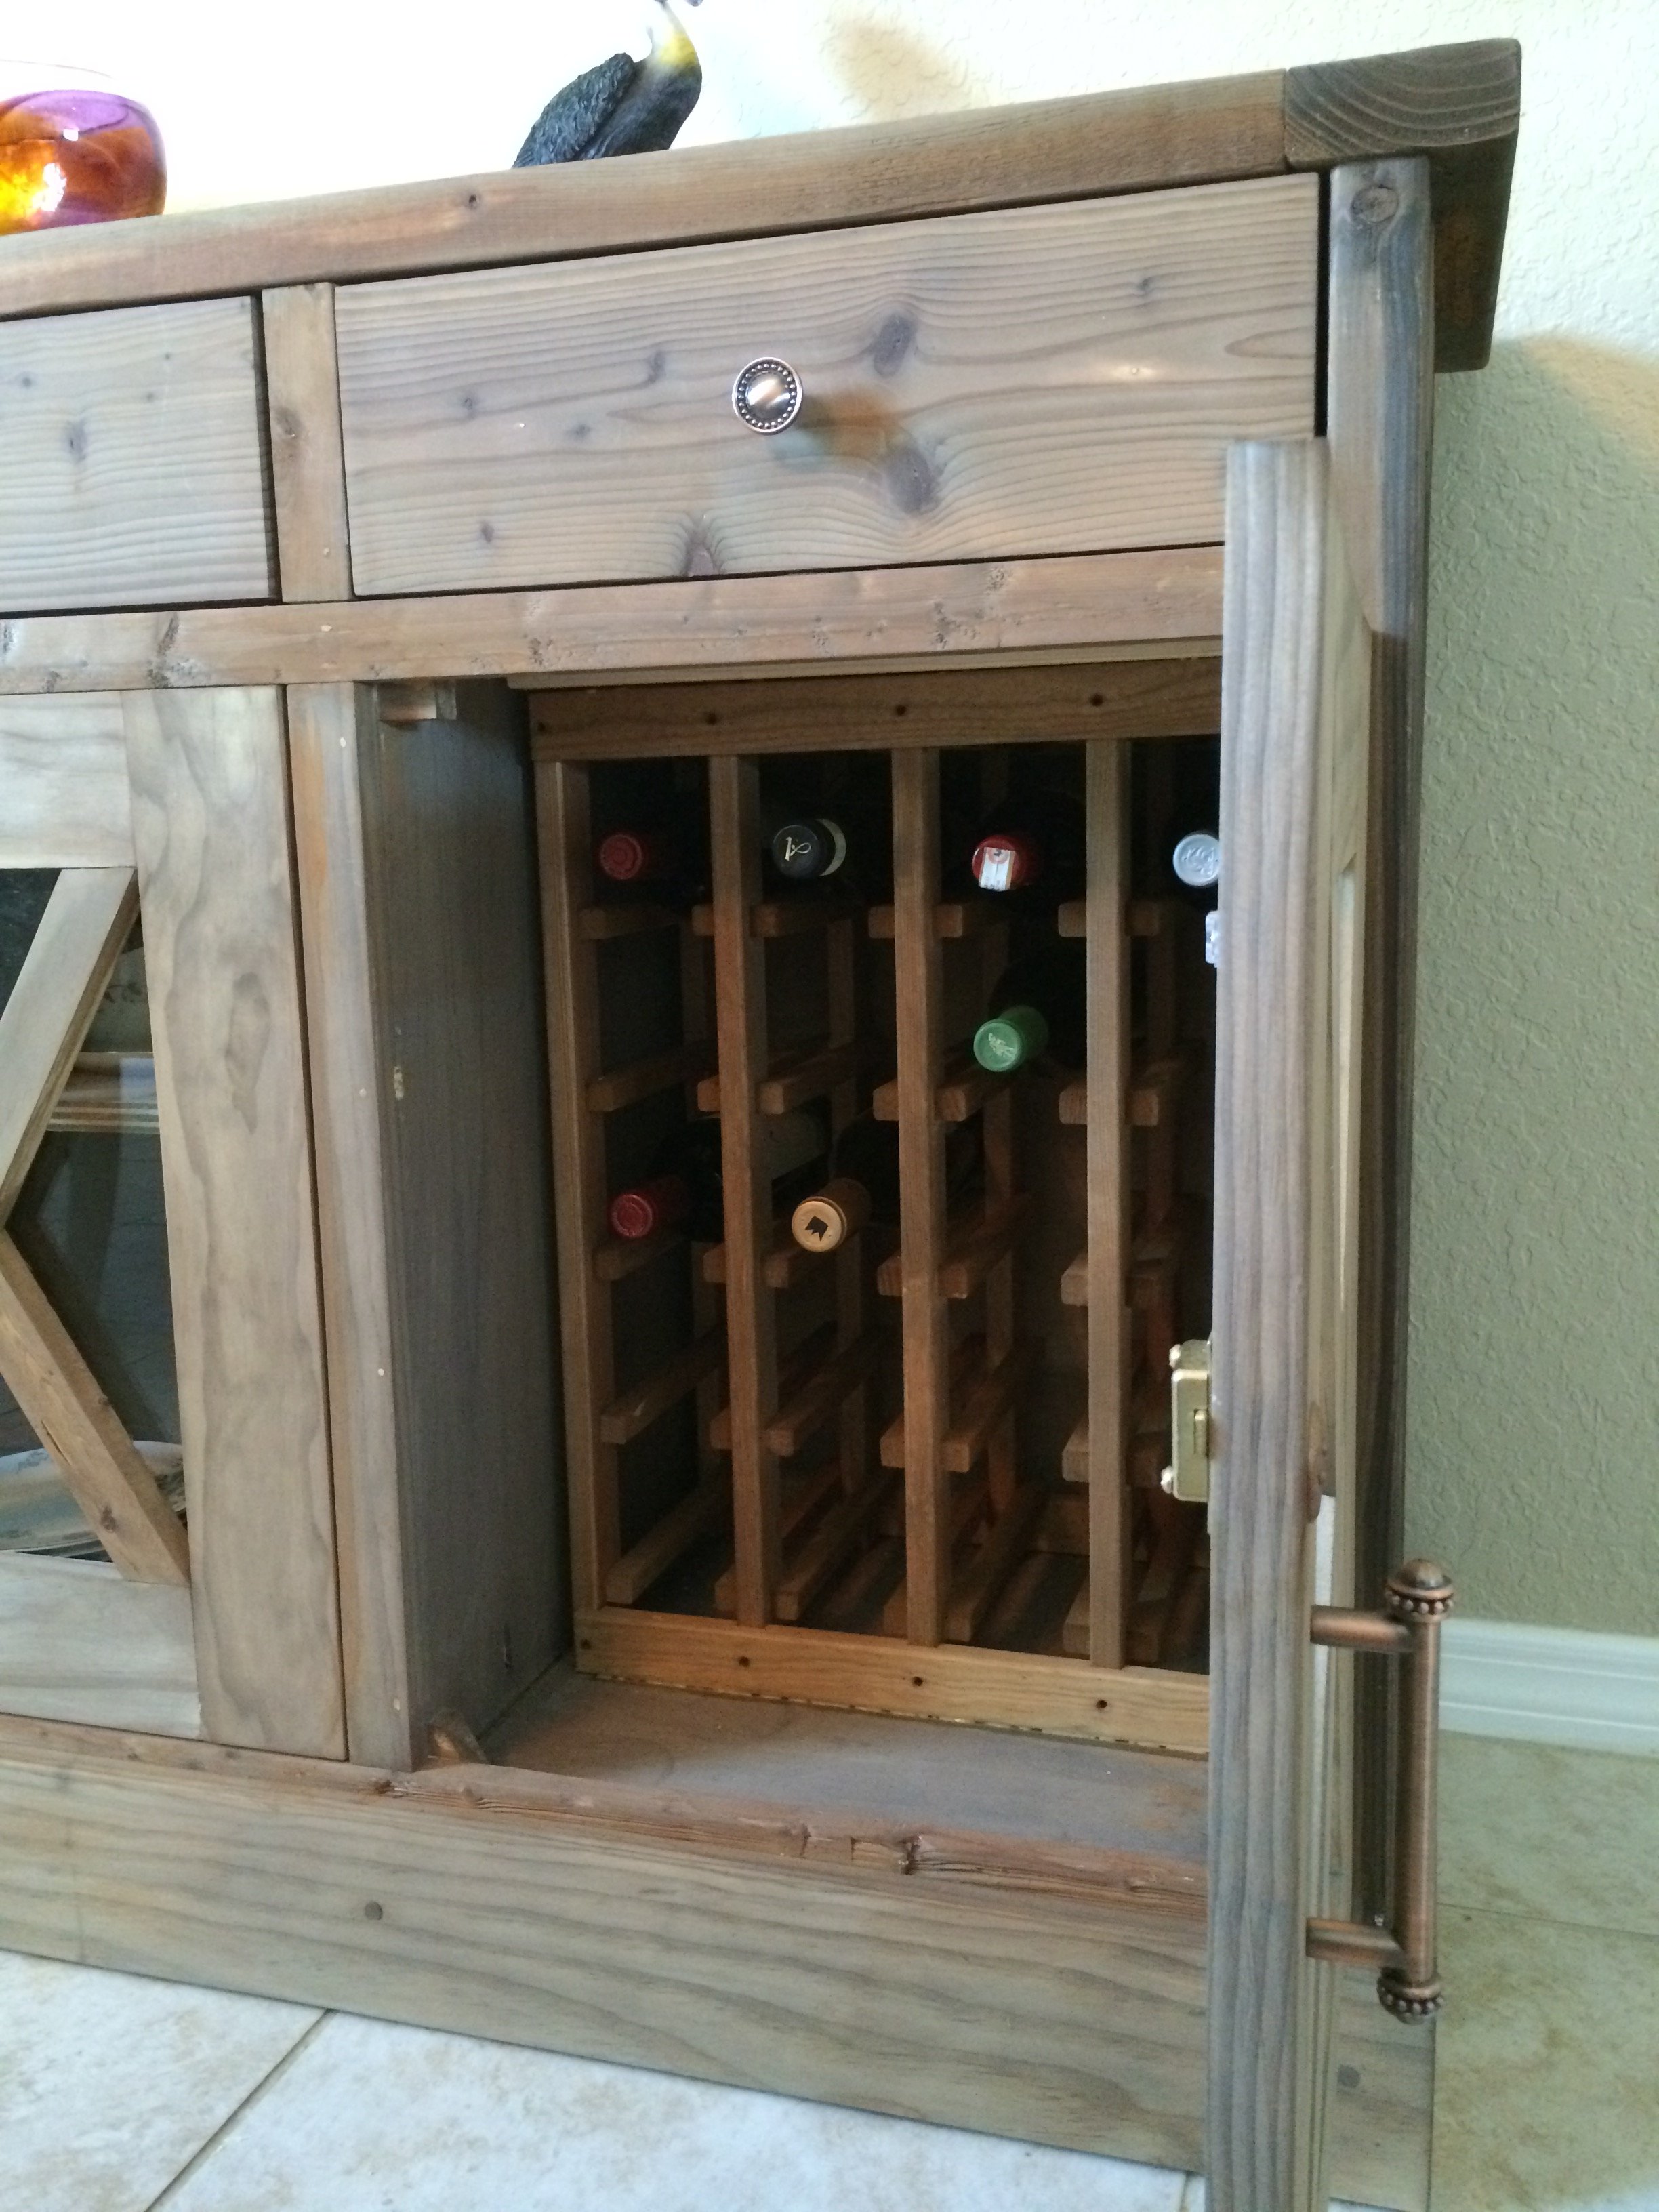
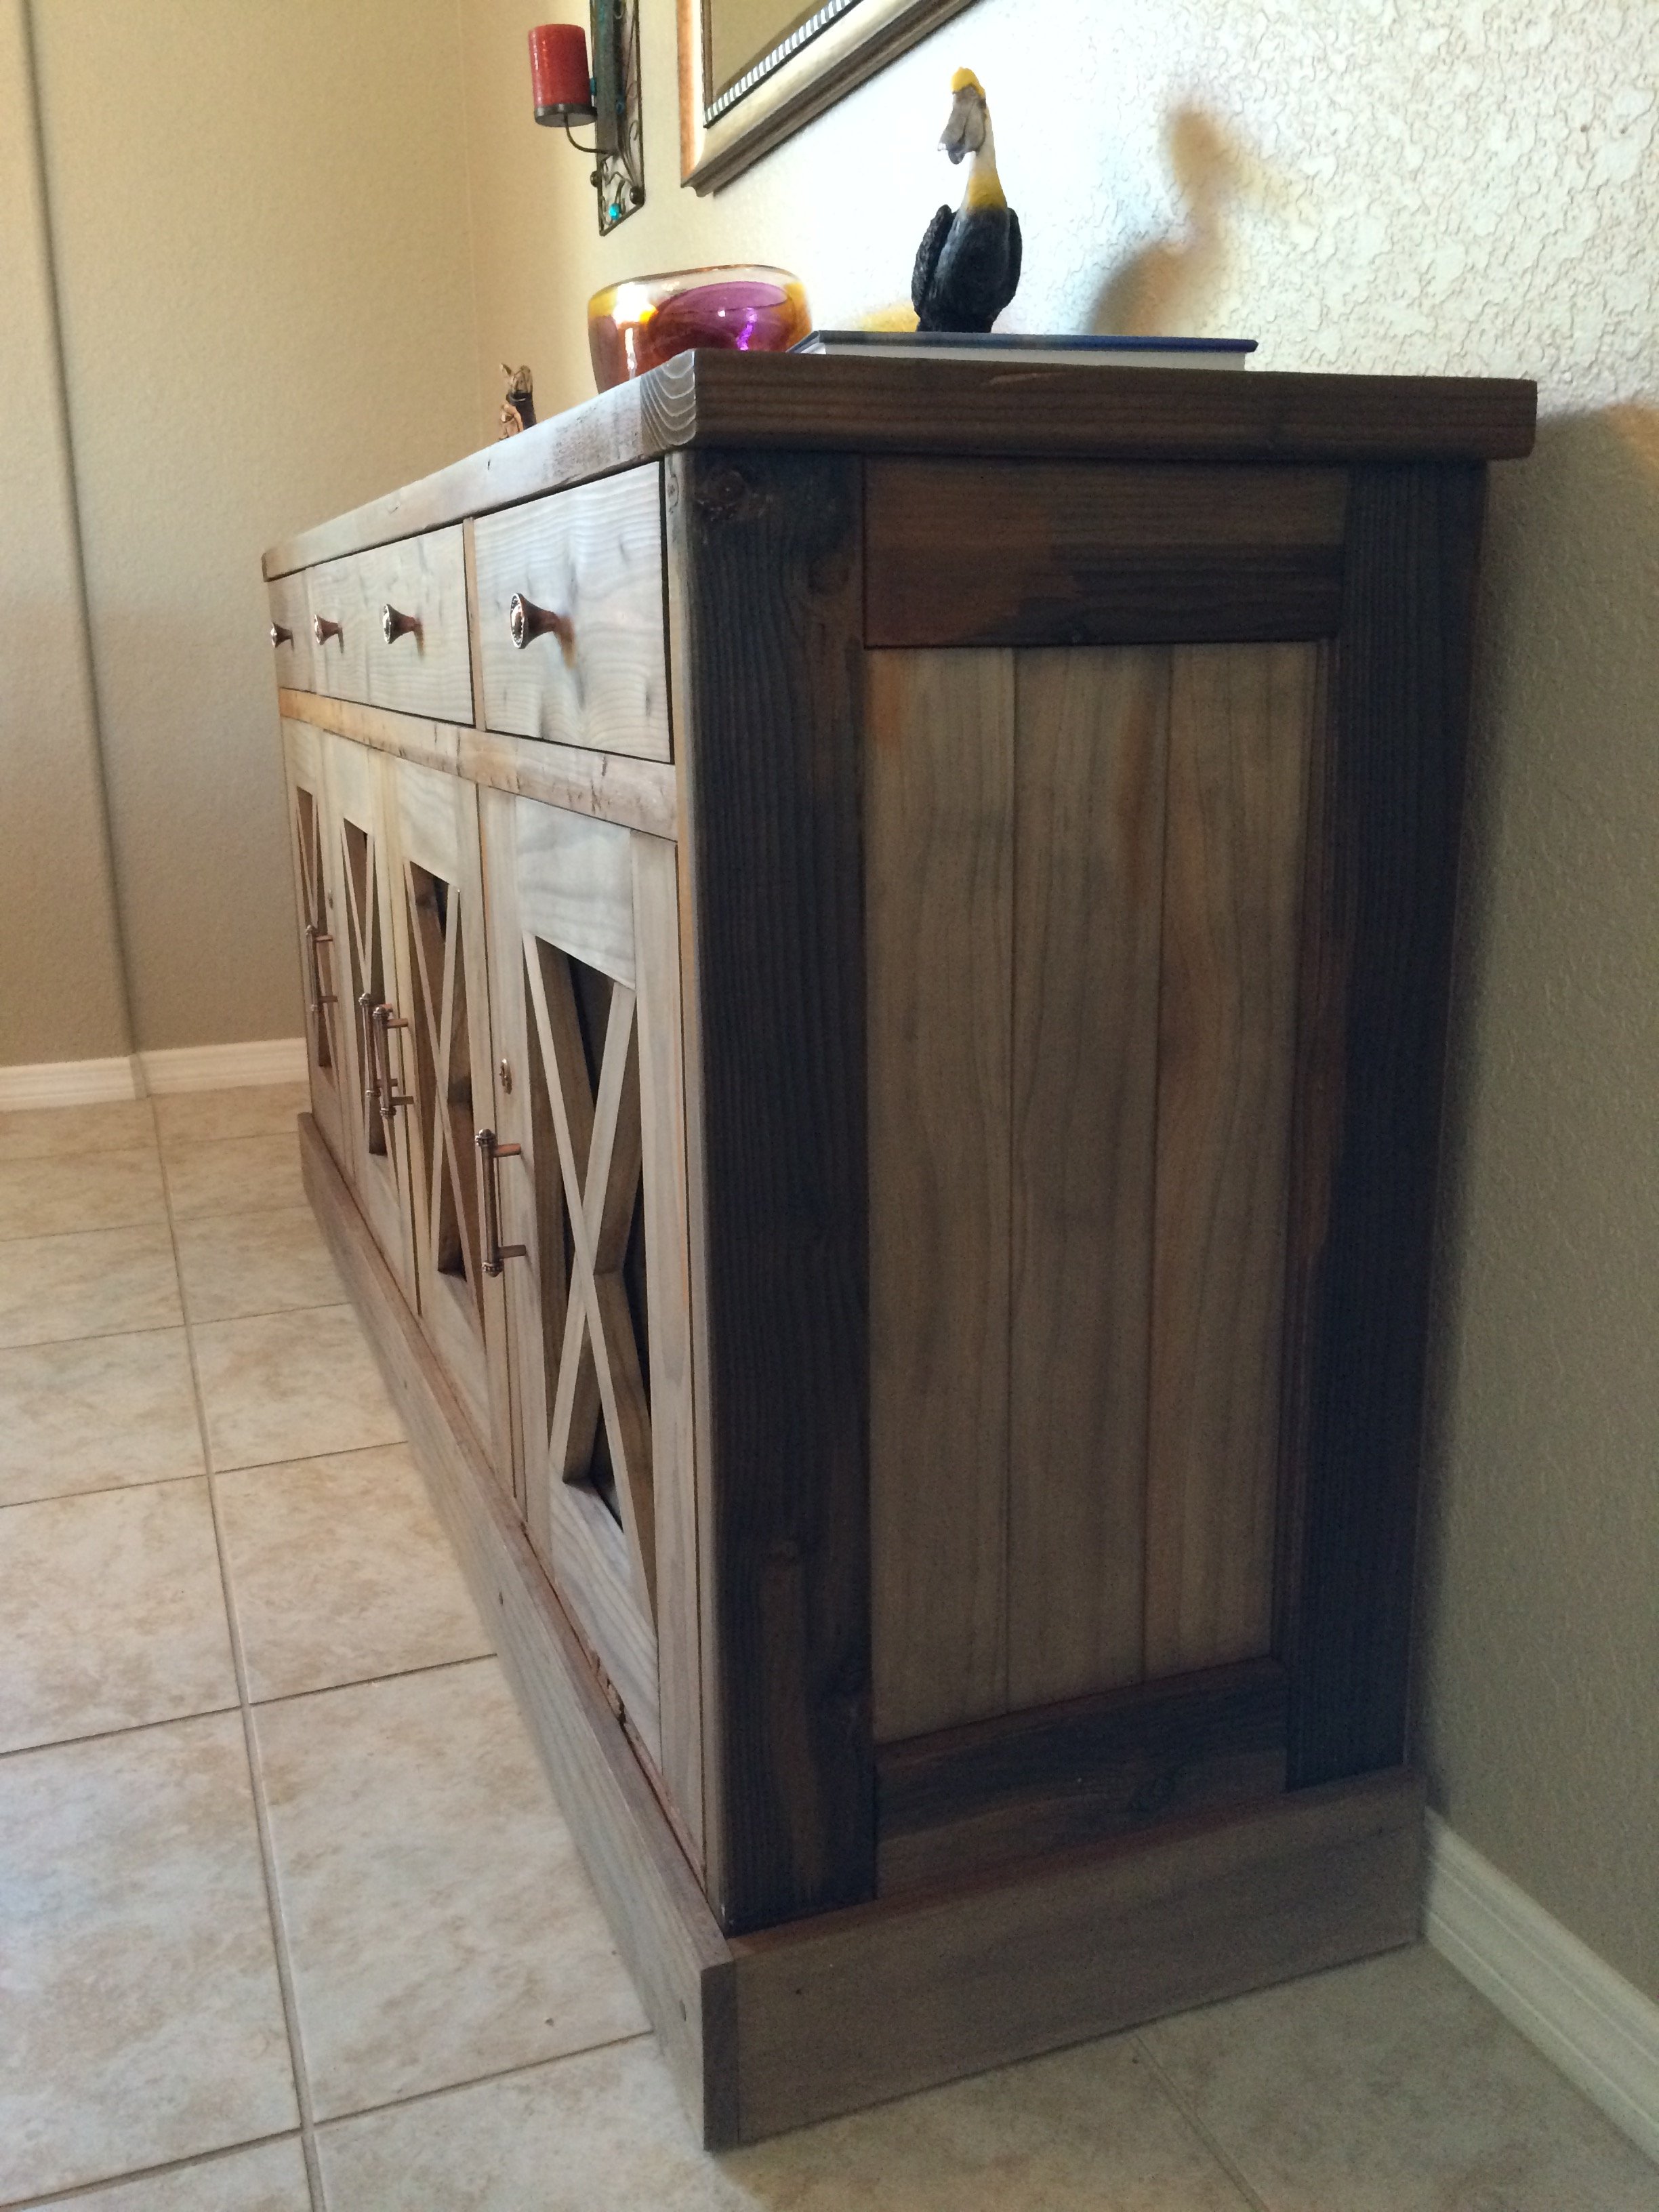
Dining room sideboard
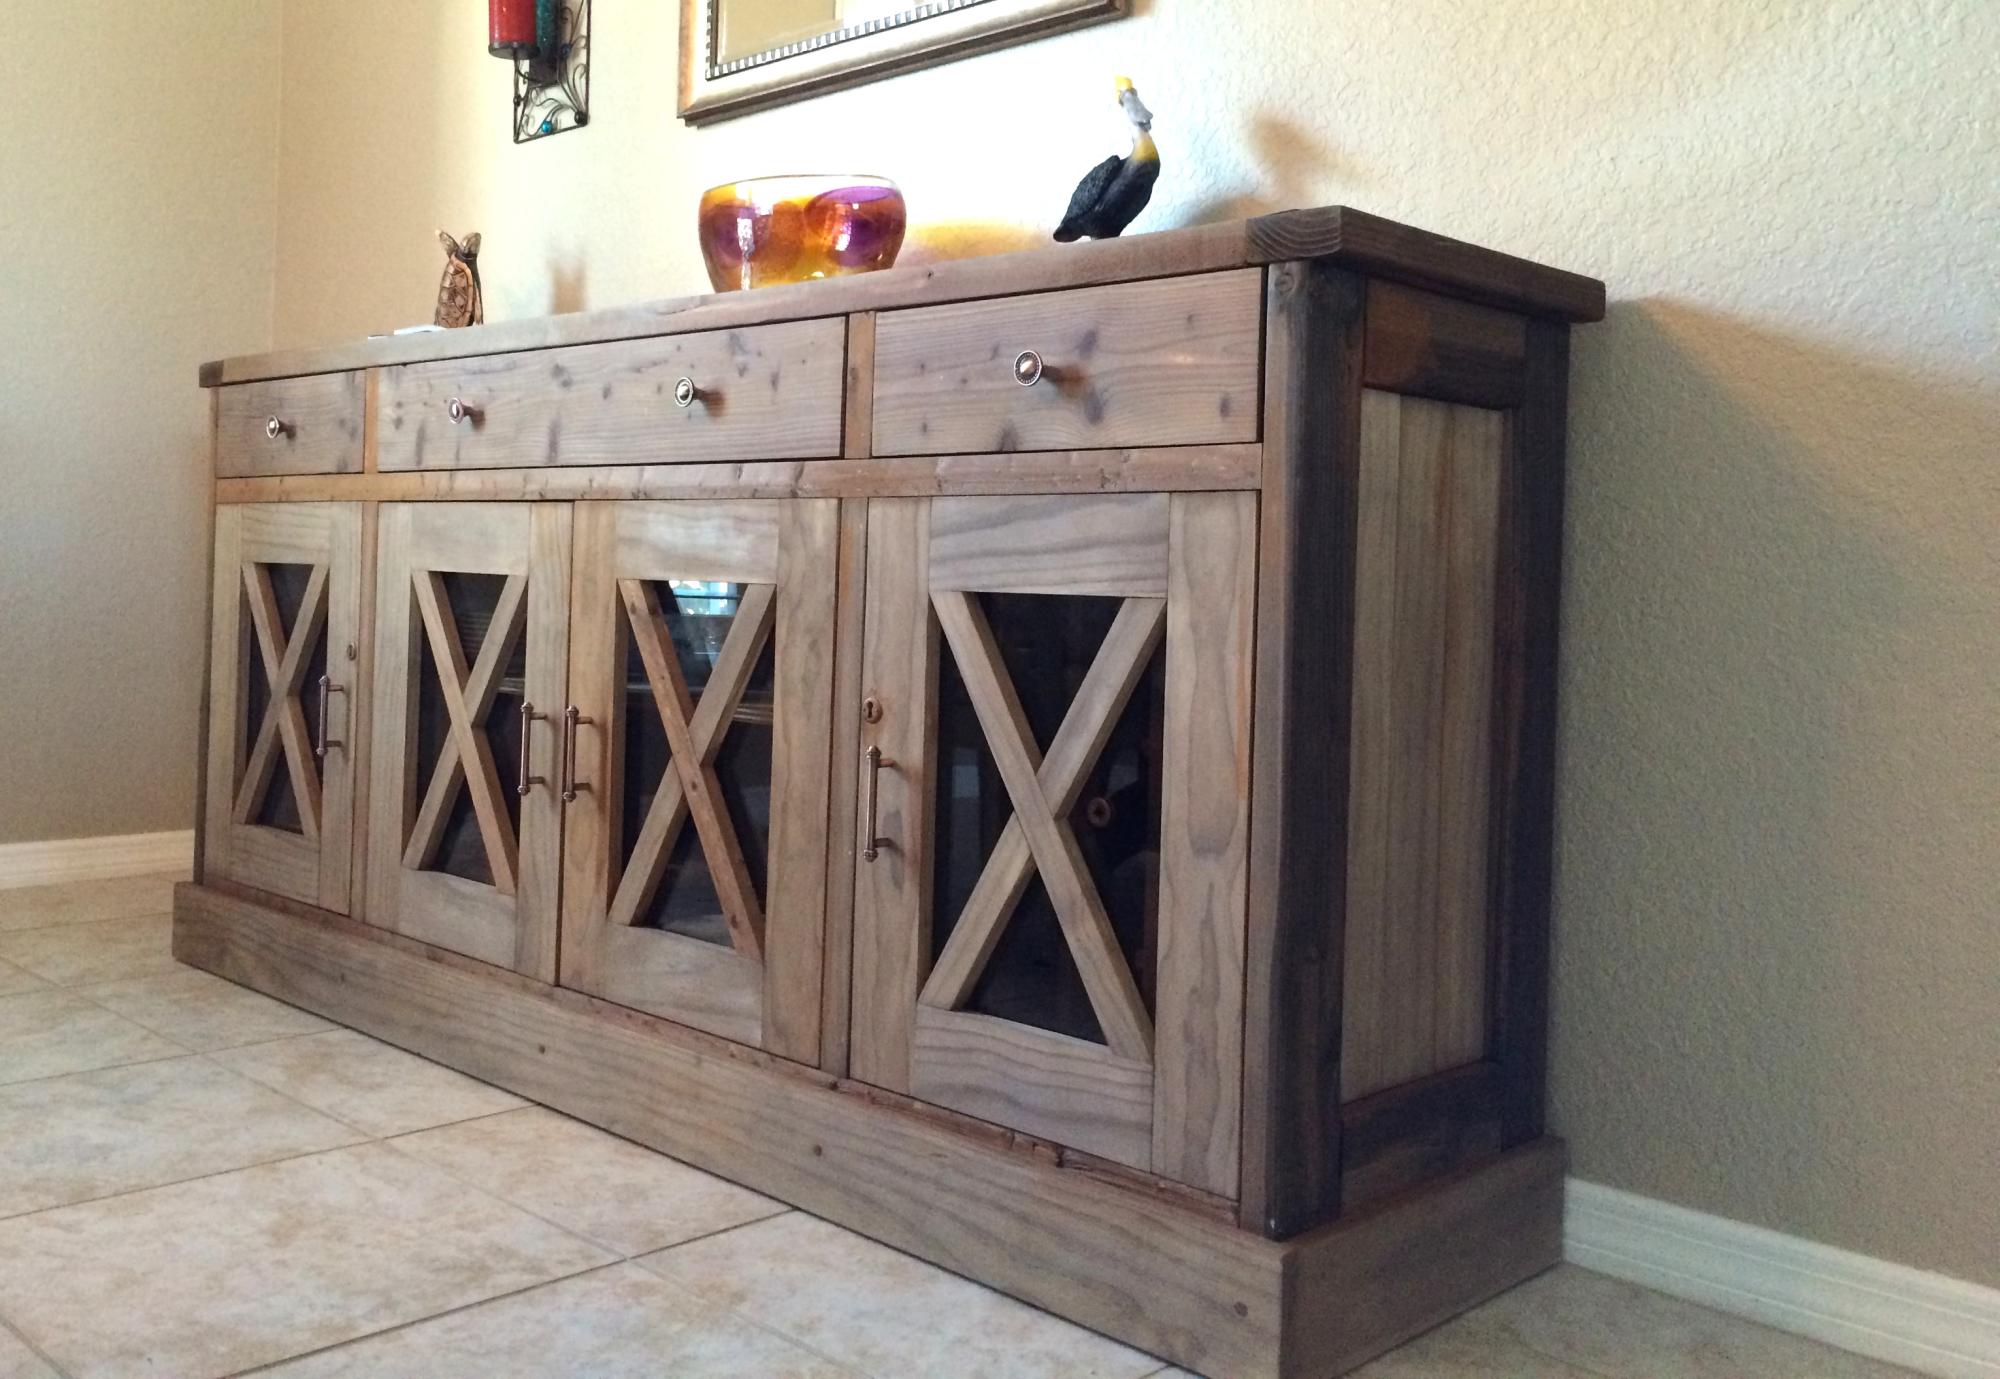
I made a few modifications from the original plans as I wanted to have some visibility into the cabinets. I used natural pine and finished with a tea, vinegar/steel wool solution to give it the reclaimed wood look.
Built from Plan(s)
Estimated Cost
$400
Estimated Time Investment
Week Long Project (20 Hours or More)
Finish Used
Tea then Vinegar/Steel Wool. Protected with wax.
Recommended Skill Level
Intermediate
Comments

Wed, 08/17/2016 - 23:42
Beautiful!
Would you have plans available for the modifications that you made? This is beautiful!!
Mon, 07/22/2019 - 10:52
Do you have plans for the…
Do you have plans for the modifications you made on the doors? Thank you
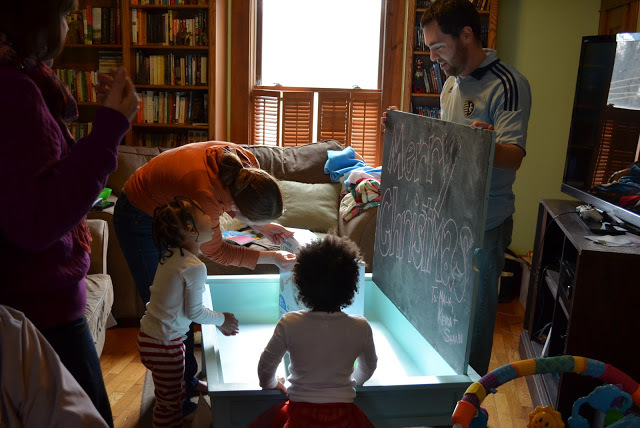
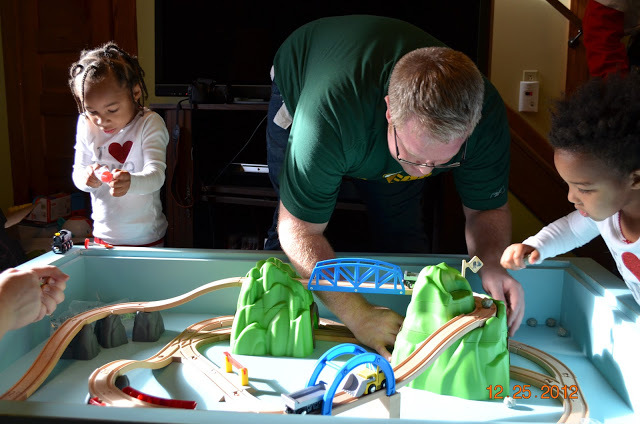
Train Table
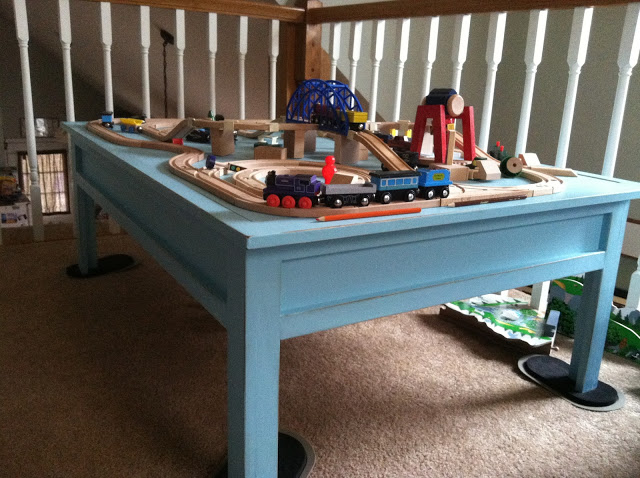
I made this train table for my nieces for Christmas. They LOVED it!
I used pre-primed MDF boards and plywood. I skipped the bottom shelf since I knew it would never actually be used as a coffee table and cut half circles out of the top for access so that it wouldn't need hardware.

Built from Plan(s)
Estimated Cost
$50 (I bought the plywood at the ReStore and saved some money)
Estimated Time Investment
Day Project (6-9 Hours)
Finish Used
I gave it two coats of an aqua I mixed myself from some random paints I had around the house, then distressed the edges and used a Minwax Stain Marker on the bare spots I created. I should have gave the whole thing a coat of furniture wax or hemp oil, butt I didn't get that done before Christmas morning came.
Recommended Skill Level
Beginner