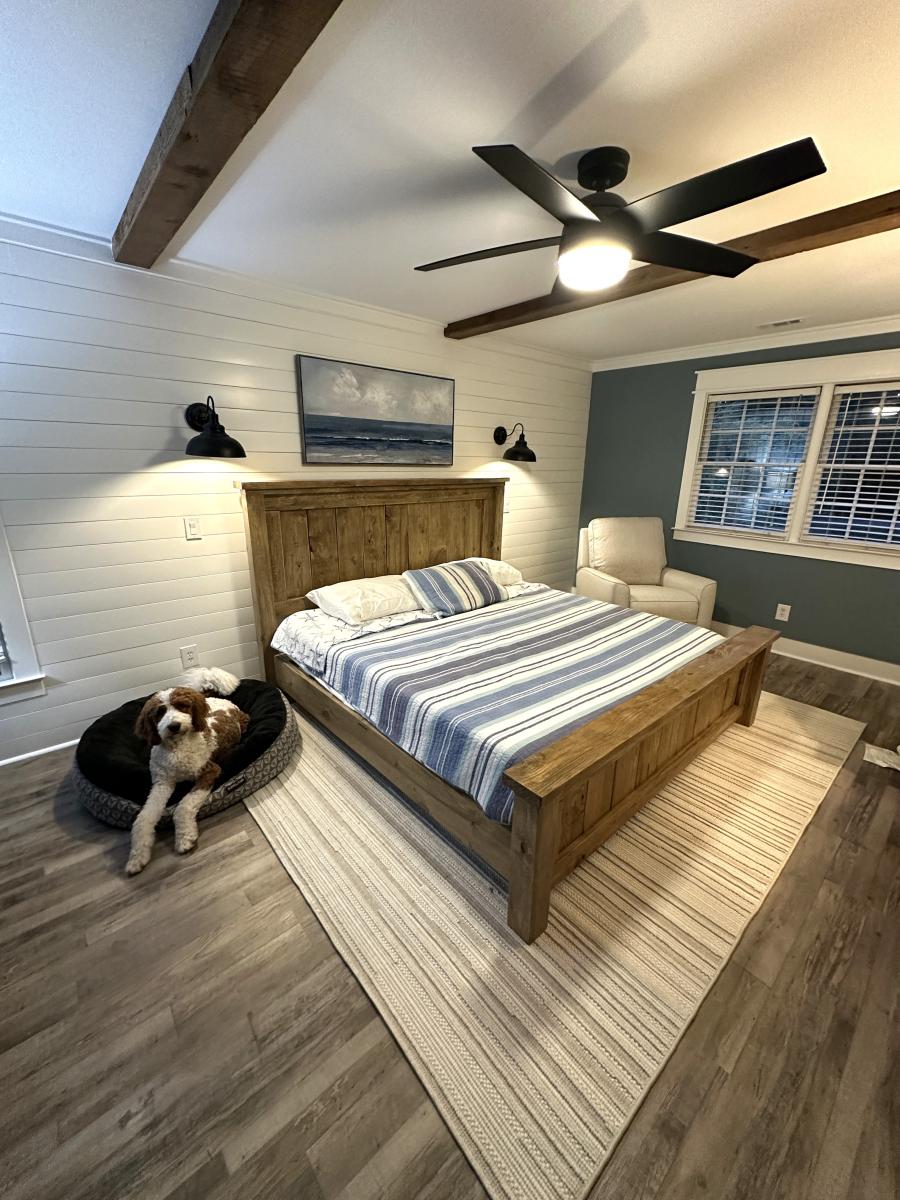
Classic Farmhouse Bed
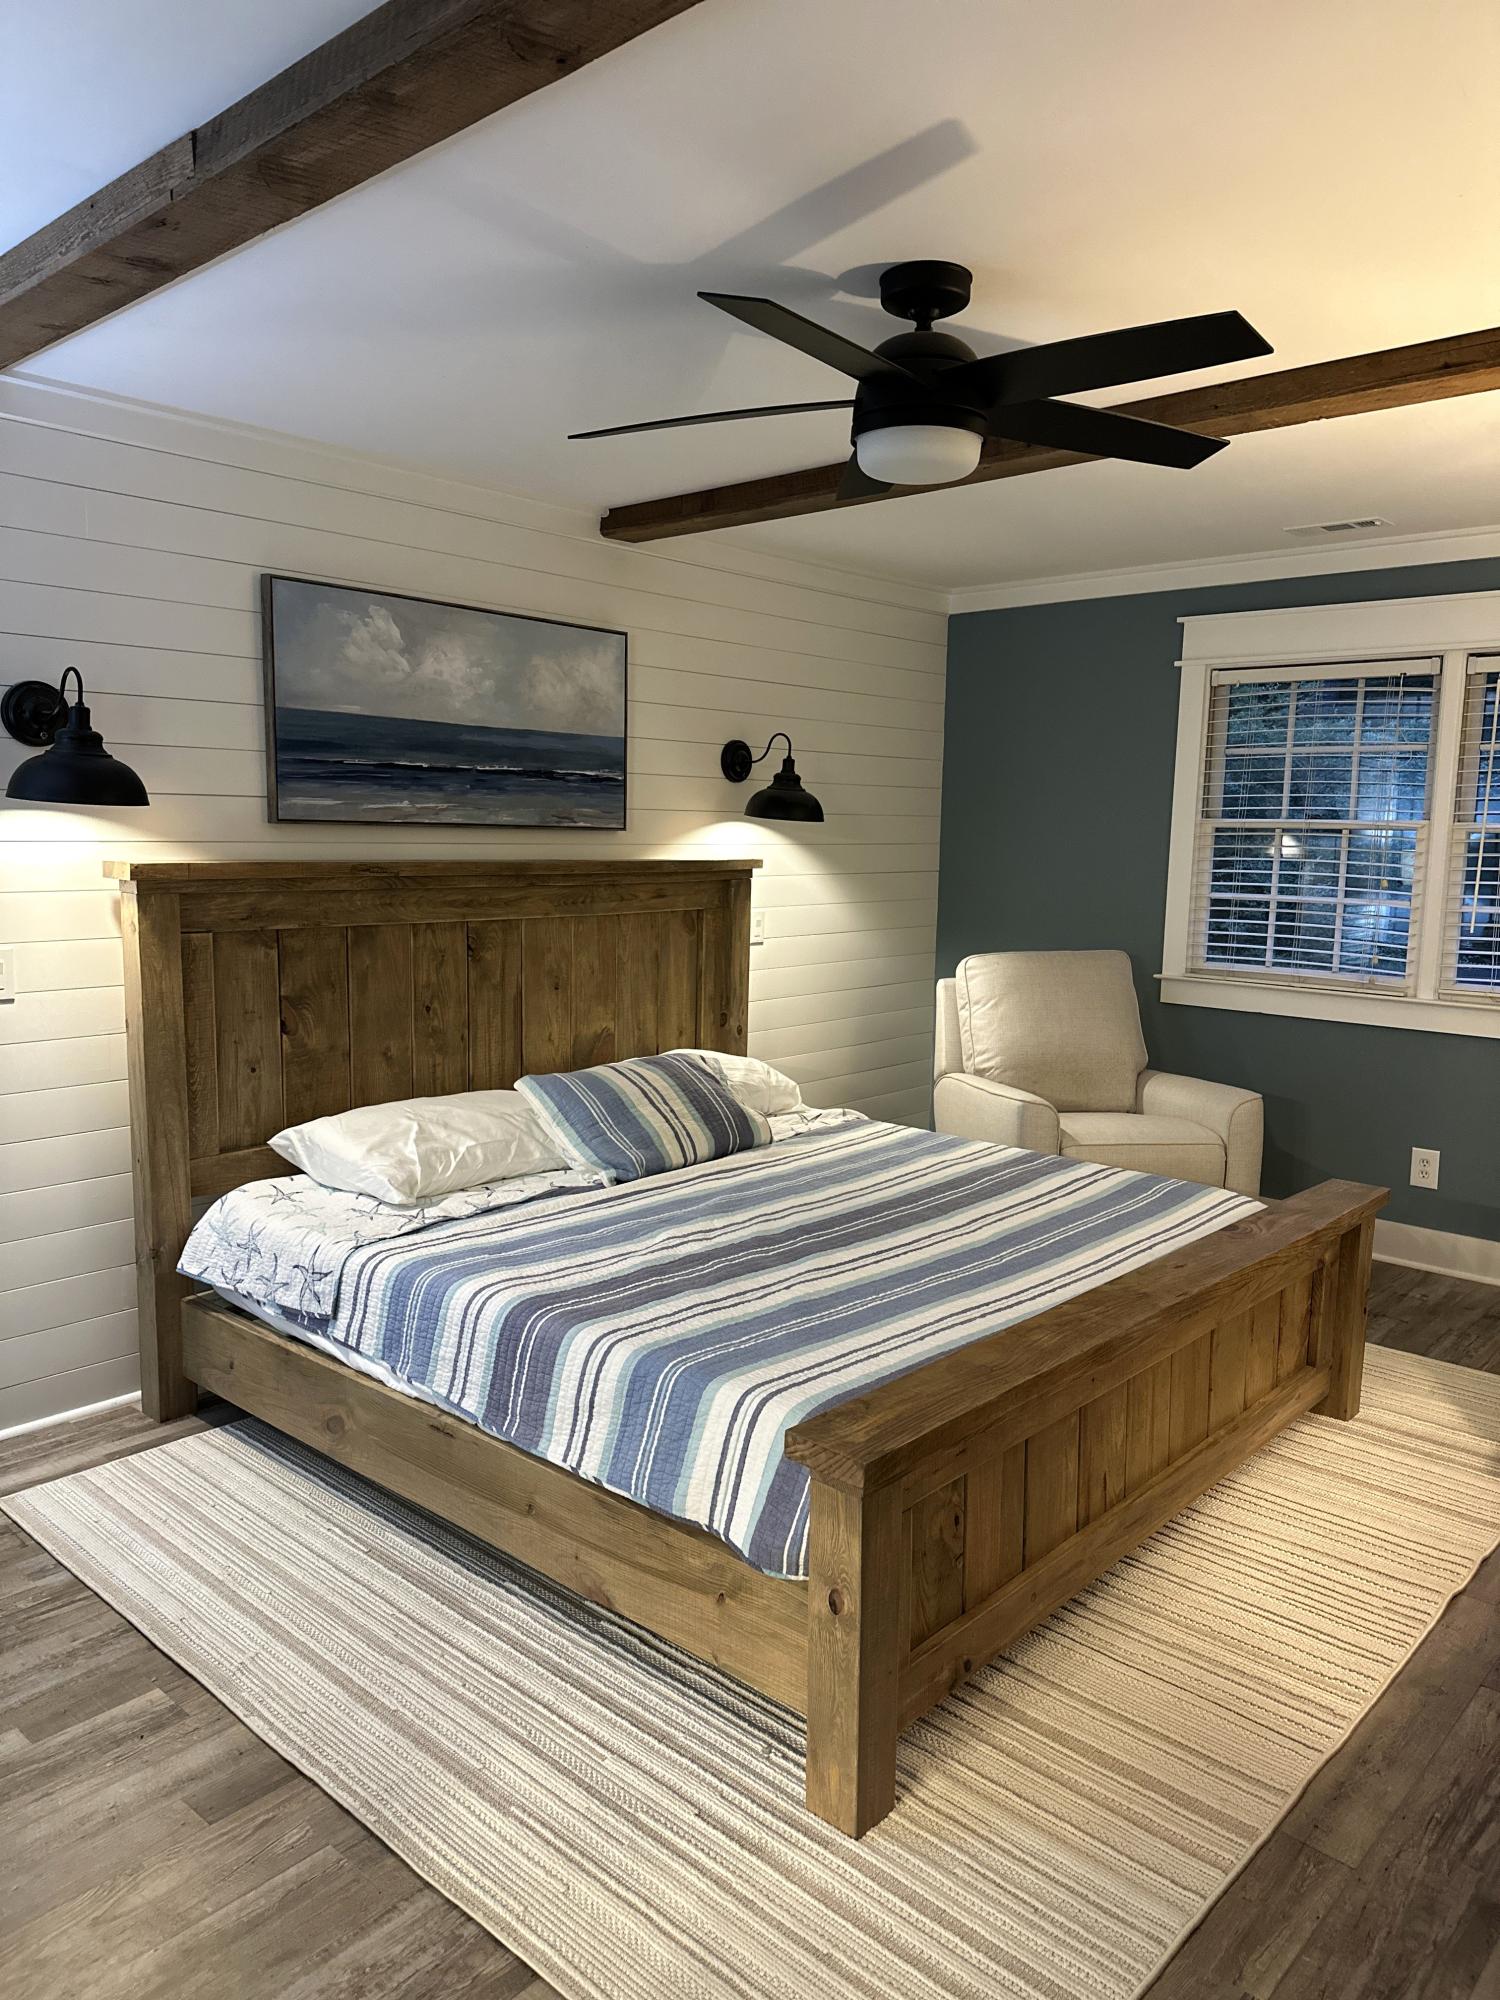
Gorgeous Farmhouse Bed Prowdcreations
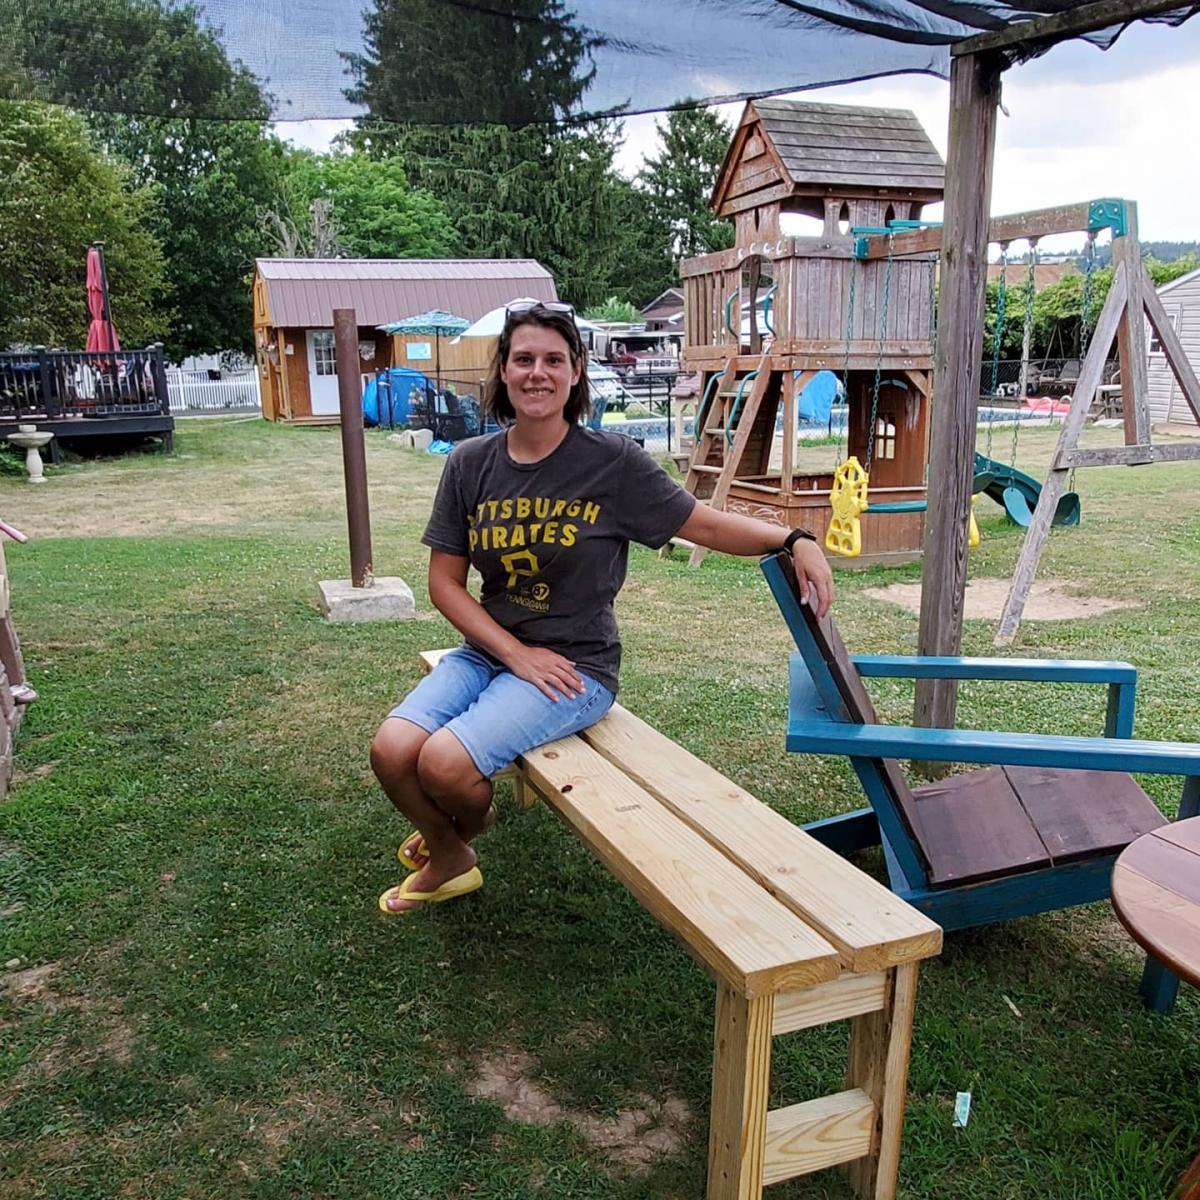
Built from Plan(s)
Gorgeous Farmhouse Bed Prowdcreations
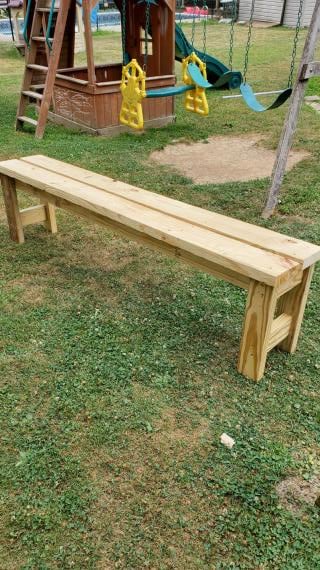
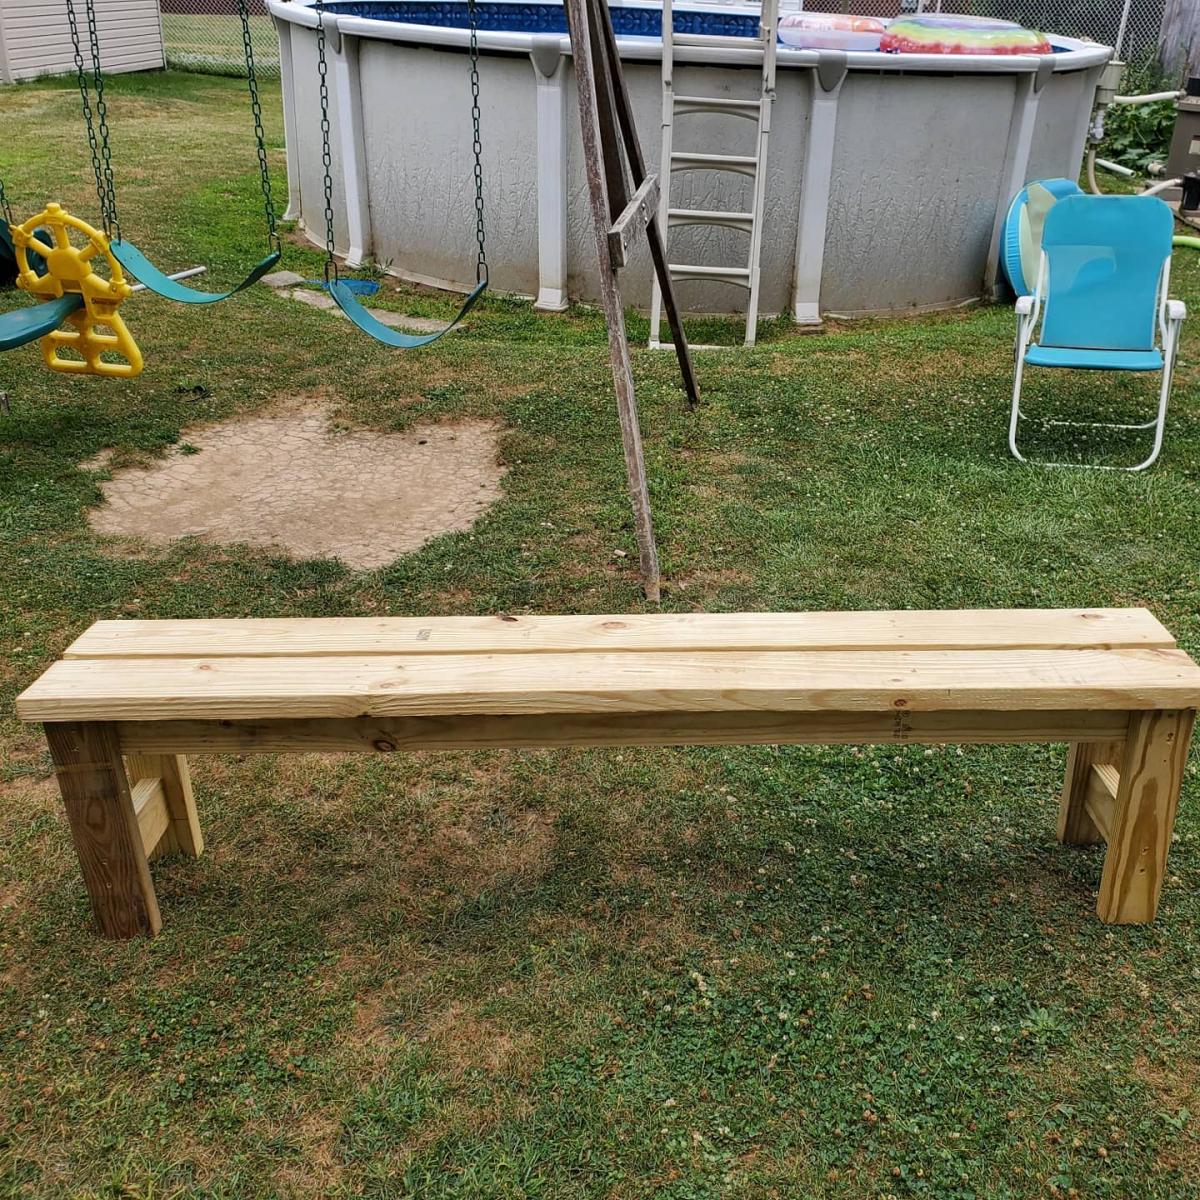
Great, sturdy, easy build!!! Looks amazing and will be my new picnic outdoor seating. I cannot wait to build the next bench and table to go along with it. Thank you for the plans!!!!
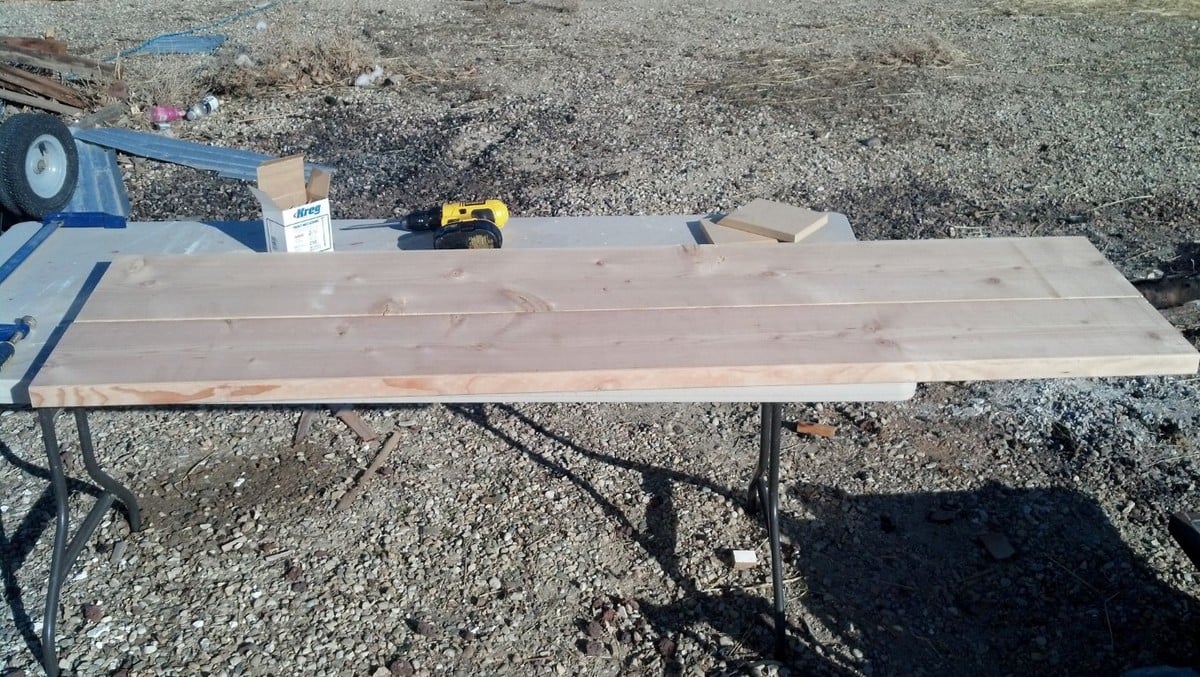
My wife and I really love the farmhouse look and feel. We saw one of these tables at a furniture store for $2000 with no chairs. I had already bought the Kreg Tool, something that I cannot believe I have done without for so long, when I went to build some $10 Shelves that Ana has on her site. My wife asked me how hard it would be to build the table and I told her I have never done anything like it. I also told her if she didn't like the end project, we could use it as a picnic table outside. It was fantastically easy with the plans and Kreg Jig. Thanks to Ana for all the helpful tips!
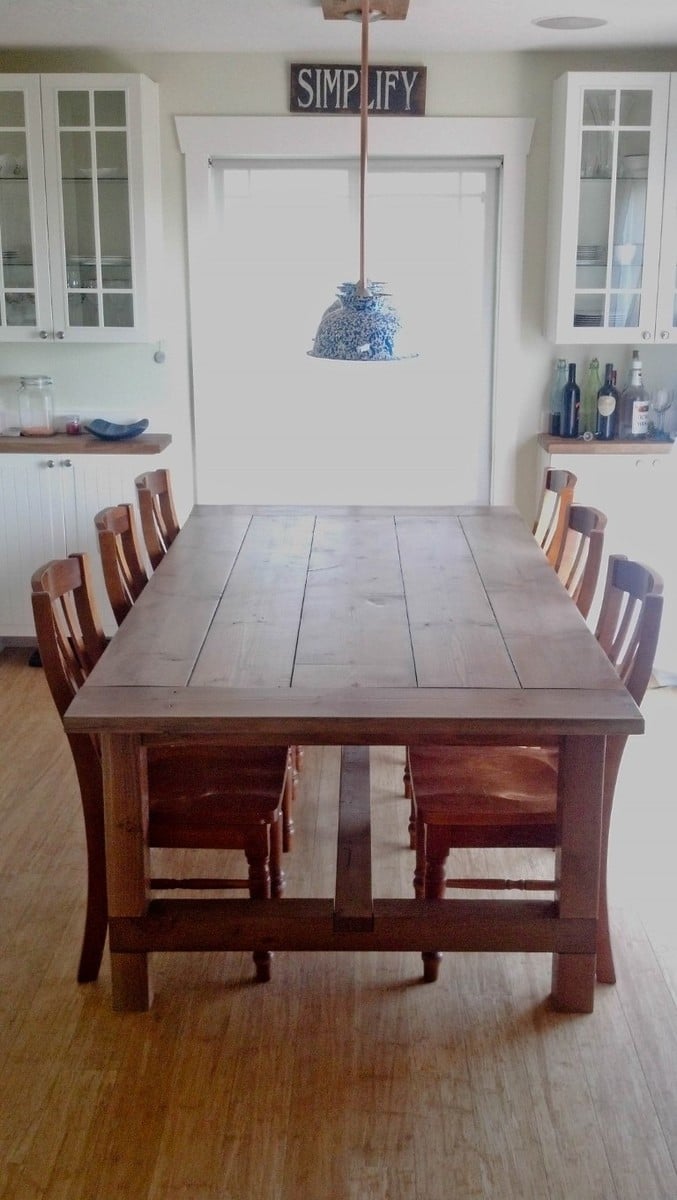
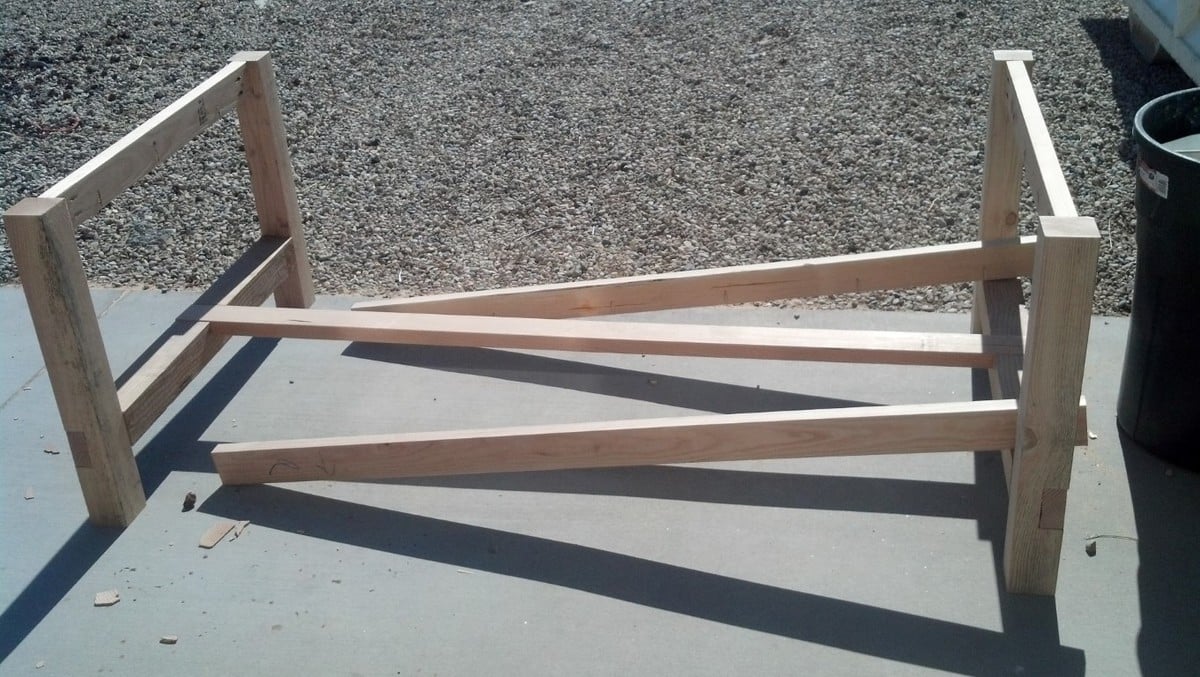
Now to the build. We decided that the table needed to be a bit wider and longer for our needs, so I adjusted the plans. It came out to 90"x48". The center board is a 2x12 with the other 4 being 2x10s. The end pieces are 2x8s that I had from building garden boxes. The benches that I also built were from scrap lumber, they are not pictured here as they need one more coat of stain and then three coats of polycrylic. They are 52" long and go on the ends where the kids can use the cross beam as a foot support.
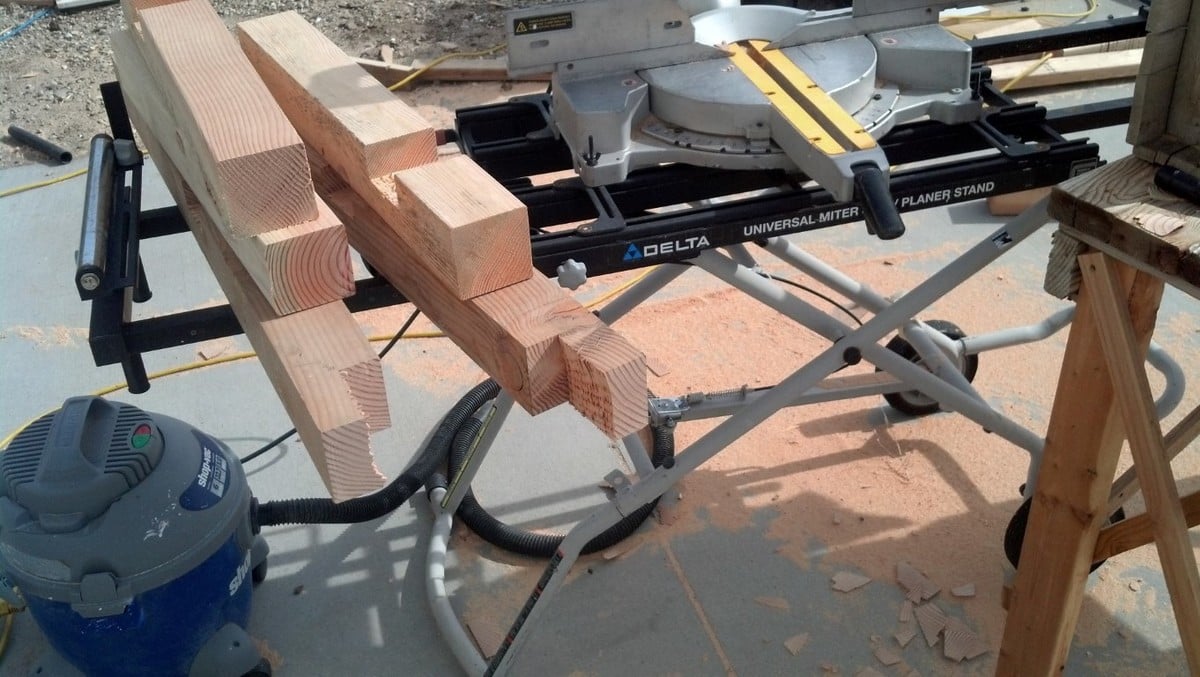
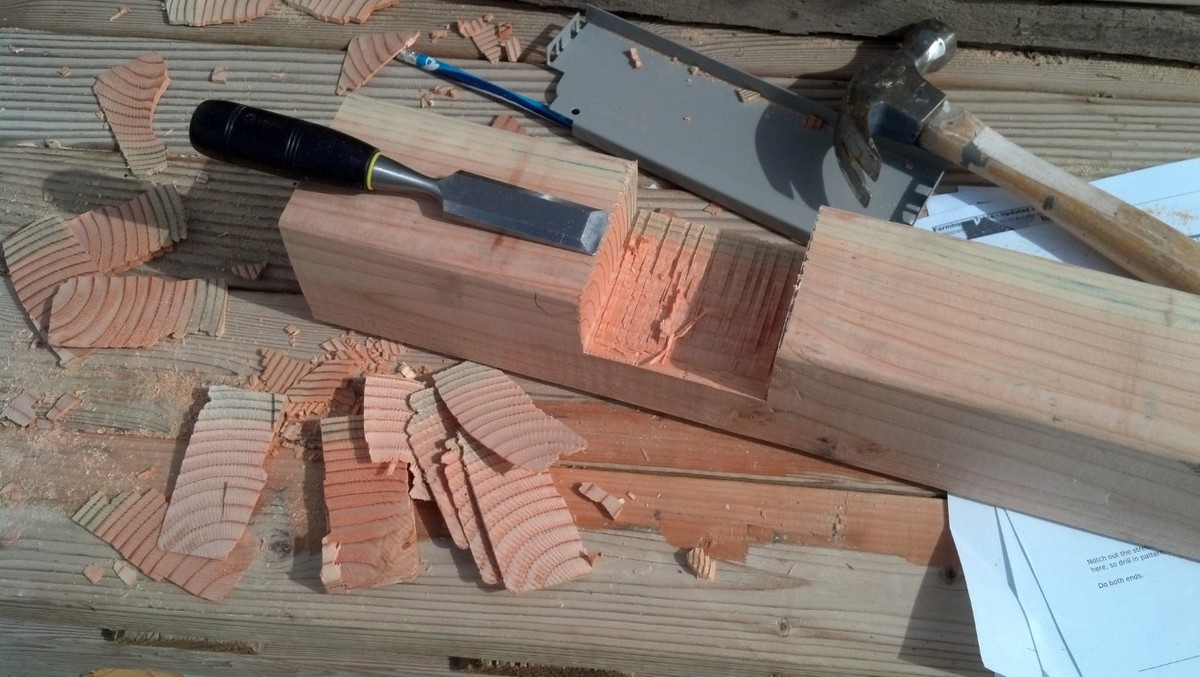
Building this project was rather quicker than I thought. Of course, borrowing a radial arm saw helped out a bunch with the legs. Once it was all together, I sanded the table three times. I used 80, 150 then 220 grit. The palm sander got a real workout over the space of about a week and a half.
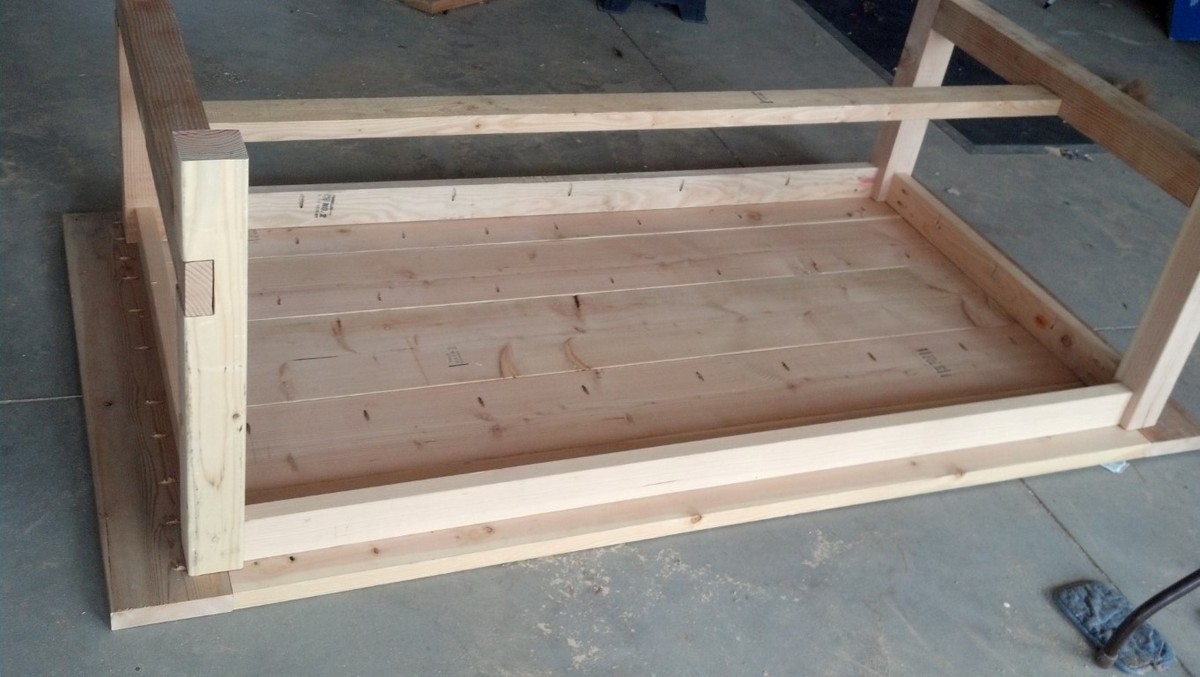
Finishing the project, I decided to follow the plans and went with Minwax Weathered Oak and topped that with Minwax Polycrylic. The legs and underside of the table received 2 coats of each, but the top I gave 3 coats of stain and 2 coats of the Poly with a very light sanding in between each coat.
The table then sat completed in the garage for 3 weeks as I had to find enough help to get it into the house. This is one heavy bugger. If we ever sell the place, it stays! There are ~150 screws and all but 12 of those had pocket holes.
Fantastic build and now I am going to build the farmhouse king size bed. And a murphy bed. And more shelves. And a shoe cubby with coat rack. And a wine rack. And a greenhouse... the list goes on and on...

Fri, 04/26/2013 - 12:50
thanks for posting some step by step pictures they were really helpful. Great table. Really suites your space.!
Fri, 04/26/2013 - 14:09
Could you have used heavy duty steel leg braces? These could slipped into saw kerfs on adjacent sides of the apron. Then used hanger bolts to fasten the legs. This would allow the legs to be removed if needed.
Fri, 04/26/2013 - 15:09
I thought about making the legs removable, but really, it was much easier this way and very sturdy. I had a lot of fun building this.
Fri, 04/26/2013 - 18:17
I looks amazing and you have been so detailed with your finishes, it is amazing ... Your wife is one lucky girl!!!
Sat, 04/27/2013 - 18:55
You have just joined the league of addict builders. You really did a great job on this table. Did you get the lumber from big orange or blue and have it jointed? The boards look really good and the fit is tight. Anyway I am sure we will see more of you in the future.
Wed, 05/01/2013 - 07:19
Hey everyone!
Thanks for your kind words. The chairs were from our previous table we bought some years ago. I was astounded to find that Ana's plans were the same height as our previous table. Great fit for the chairs.
As for the lumber, I got it from a local building supply company (one of the last, sad to say) and they were only a bit straighter. I got them tight by using clamps. Clamps and LOTS of pocket holes.
George
Thu, 08/08/2013 - 11:08
This table looks great and I've decided that its going to be my first project, I just have two questions.
1. What version of the Kreg Jig did you use for the pocket holes?
2. Did you use satin or semi-gloss for the Minwax Polycrylic?
Thanks
Wed, 08/26/2015 - 10:53
Hi! You did a wonderful job on this table. I would like to attempt it but am having trouble figuring out what type of wood to use. The only wood I could find in the 2x8 and 2x10 dimensions was contruction lumber fir. Is that right?
Thank you!
Fri, 01/01/2016 - 11:03
Sorry about not answering... my wife told me this has been pinned over 17k times on pintrist and that there are still some questions...
I used pine, but fir would be great too. The lumber dimentions for the top were 2x10s and a single 2x12 for the center piece. 2x8s for the ends. Really, though, any dimemtion works. Just keep going until you get the size you want.
George
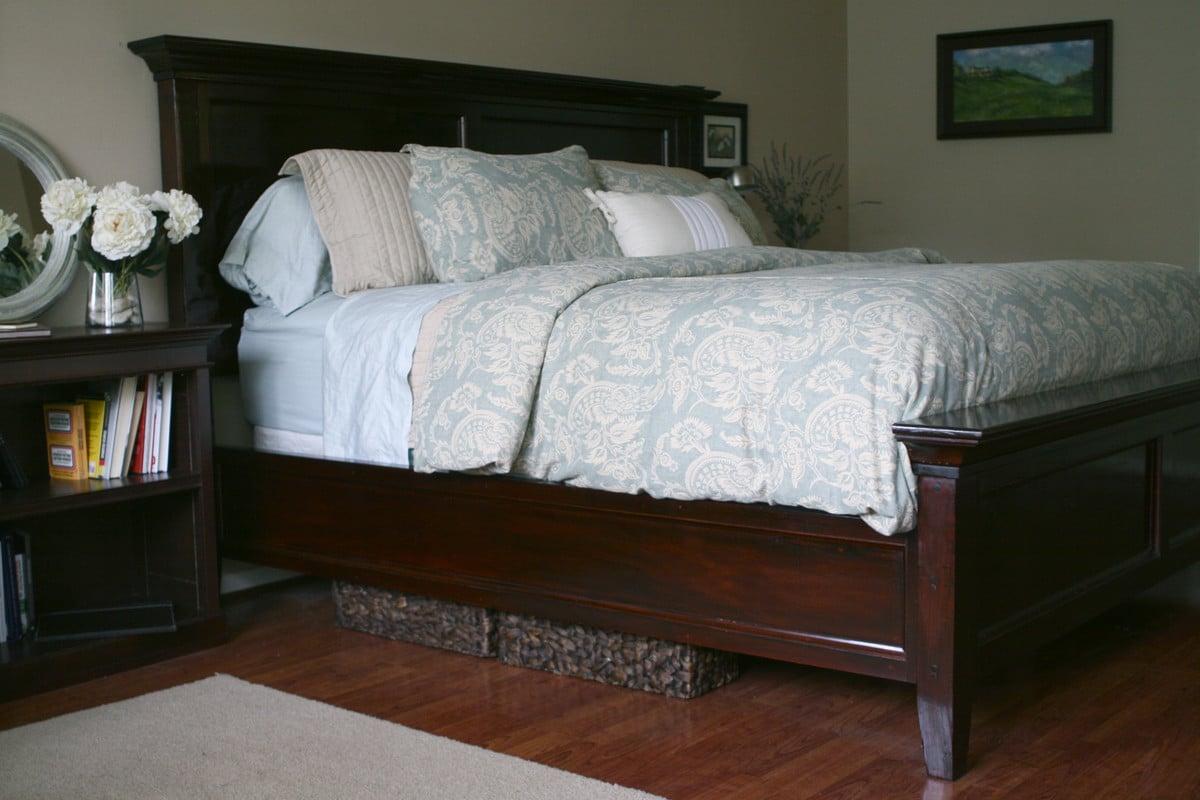
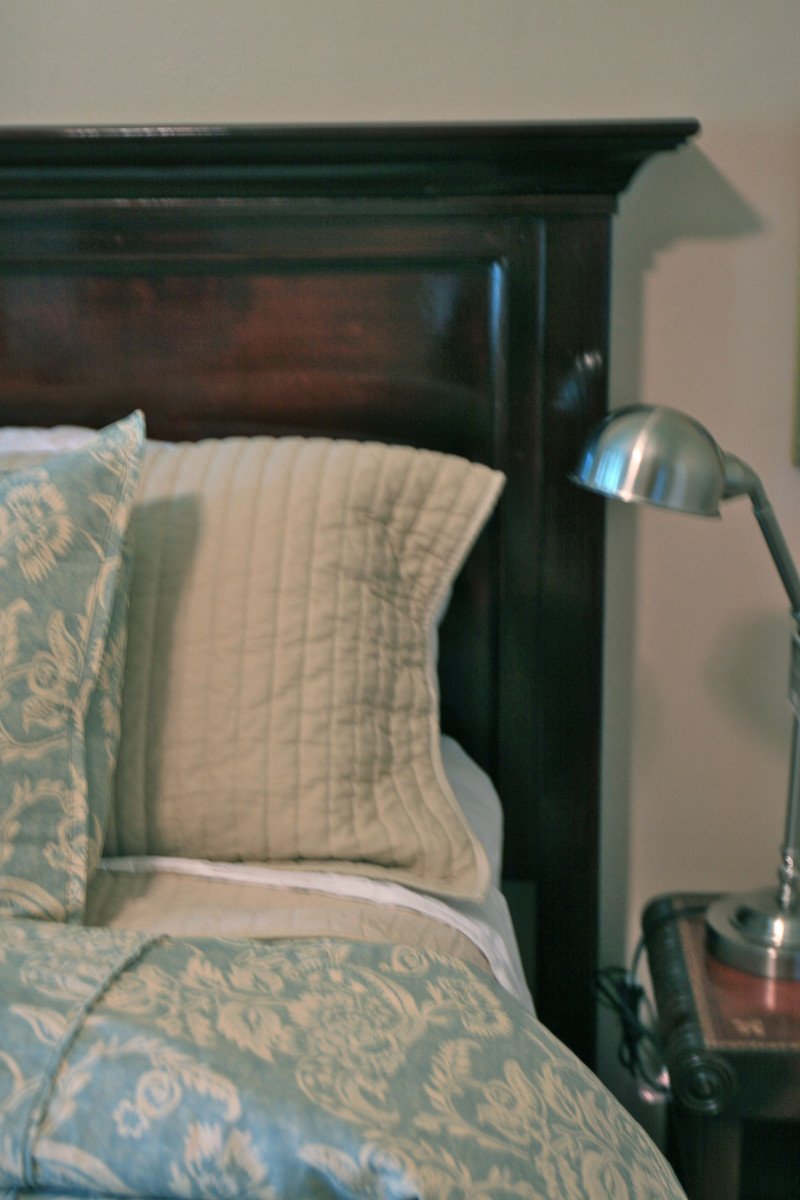
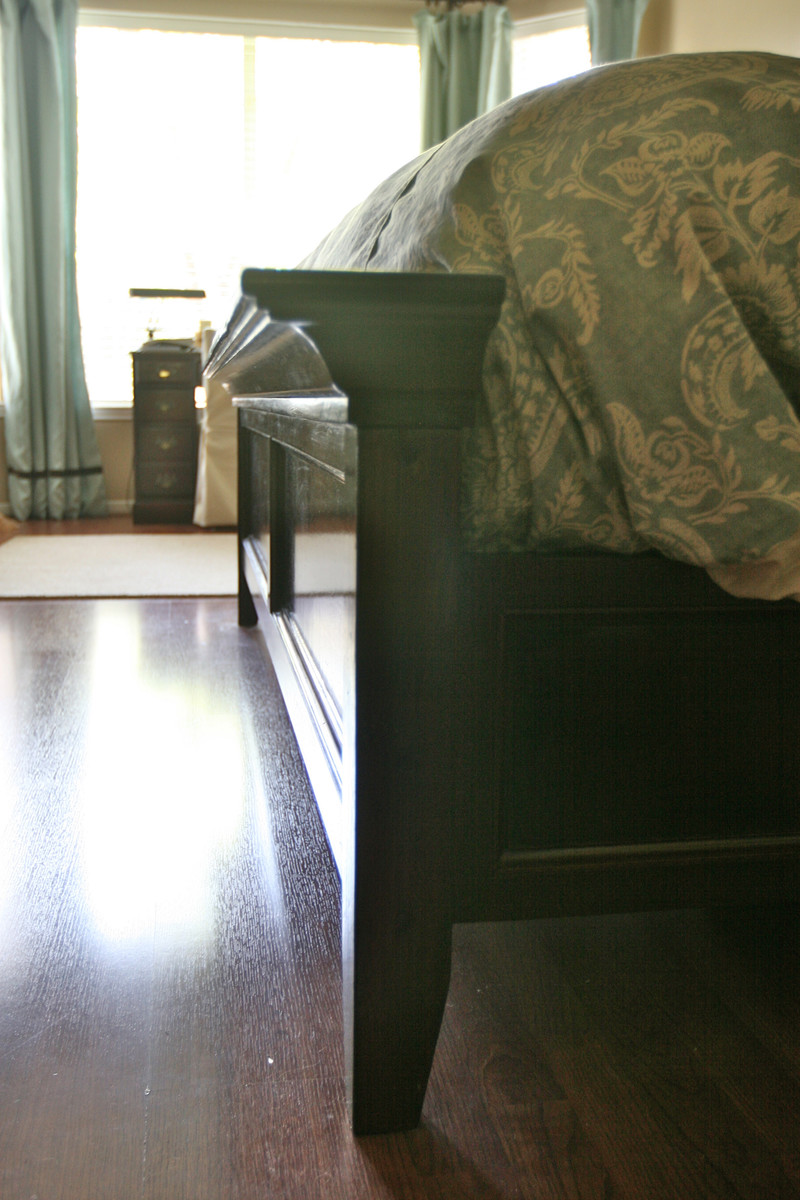
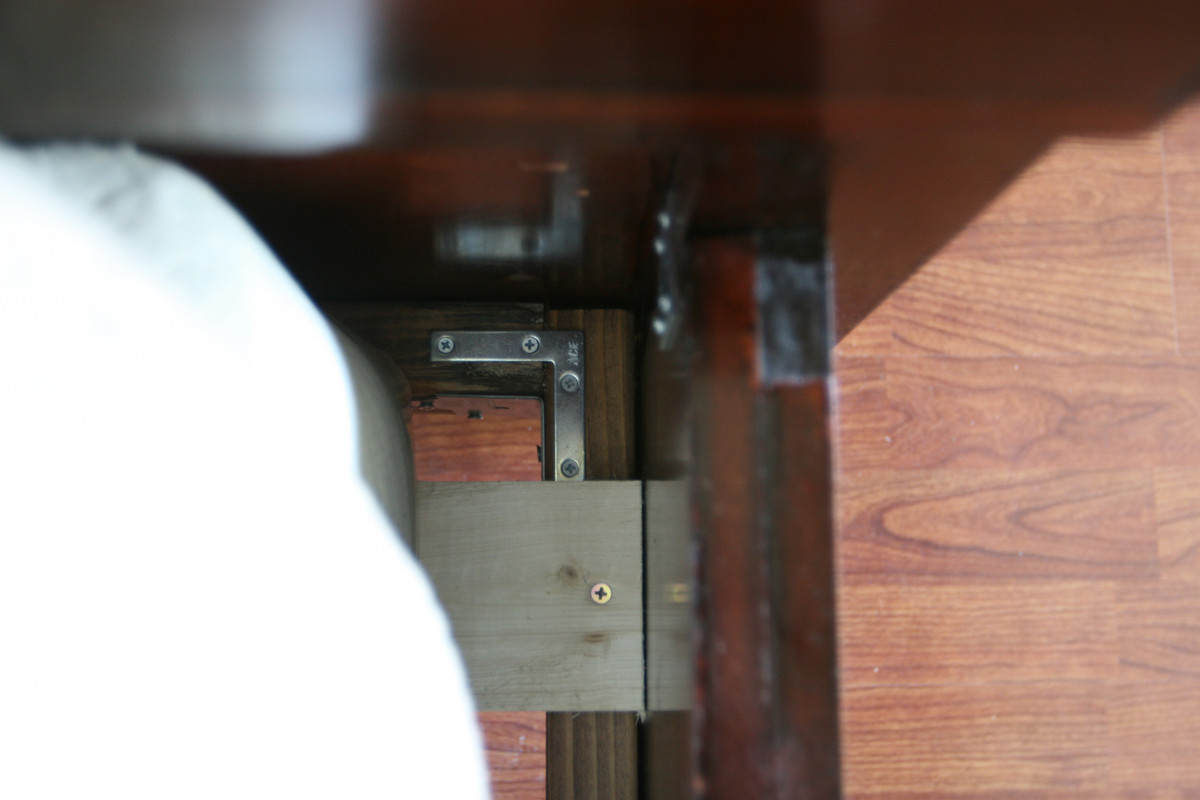
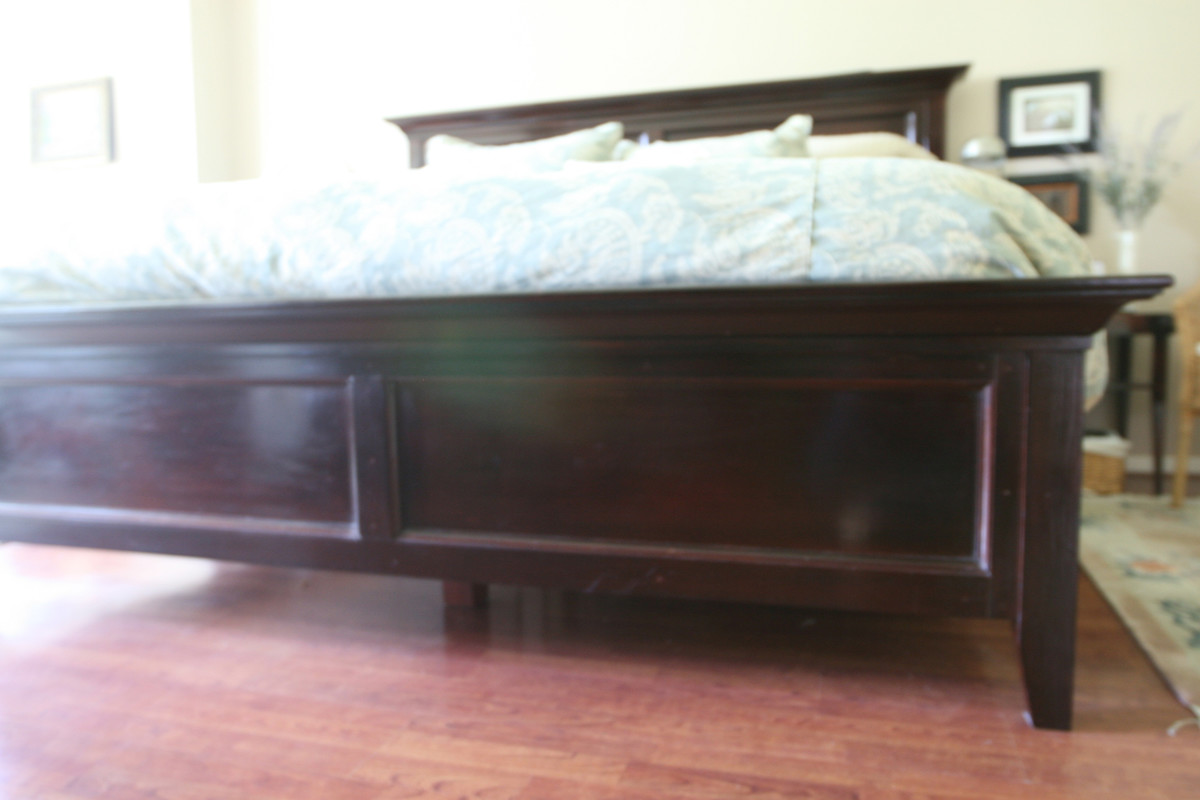
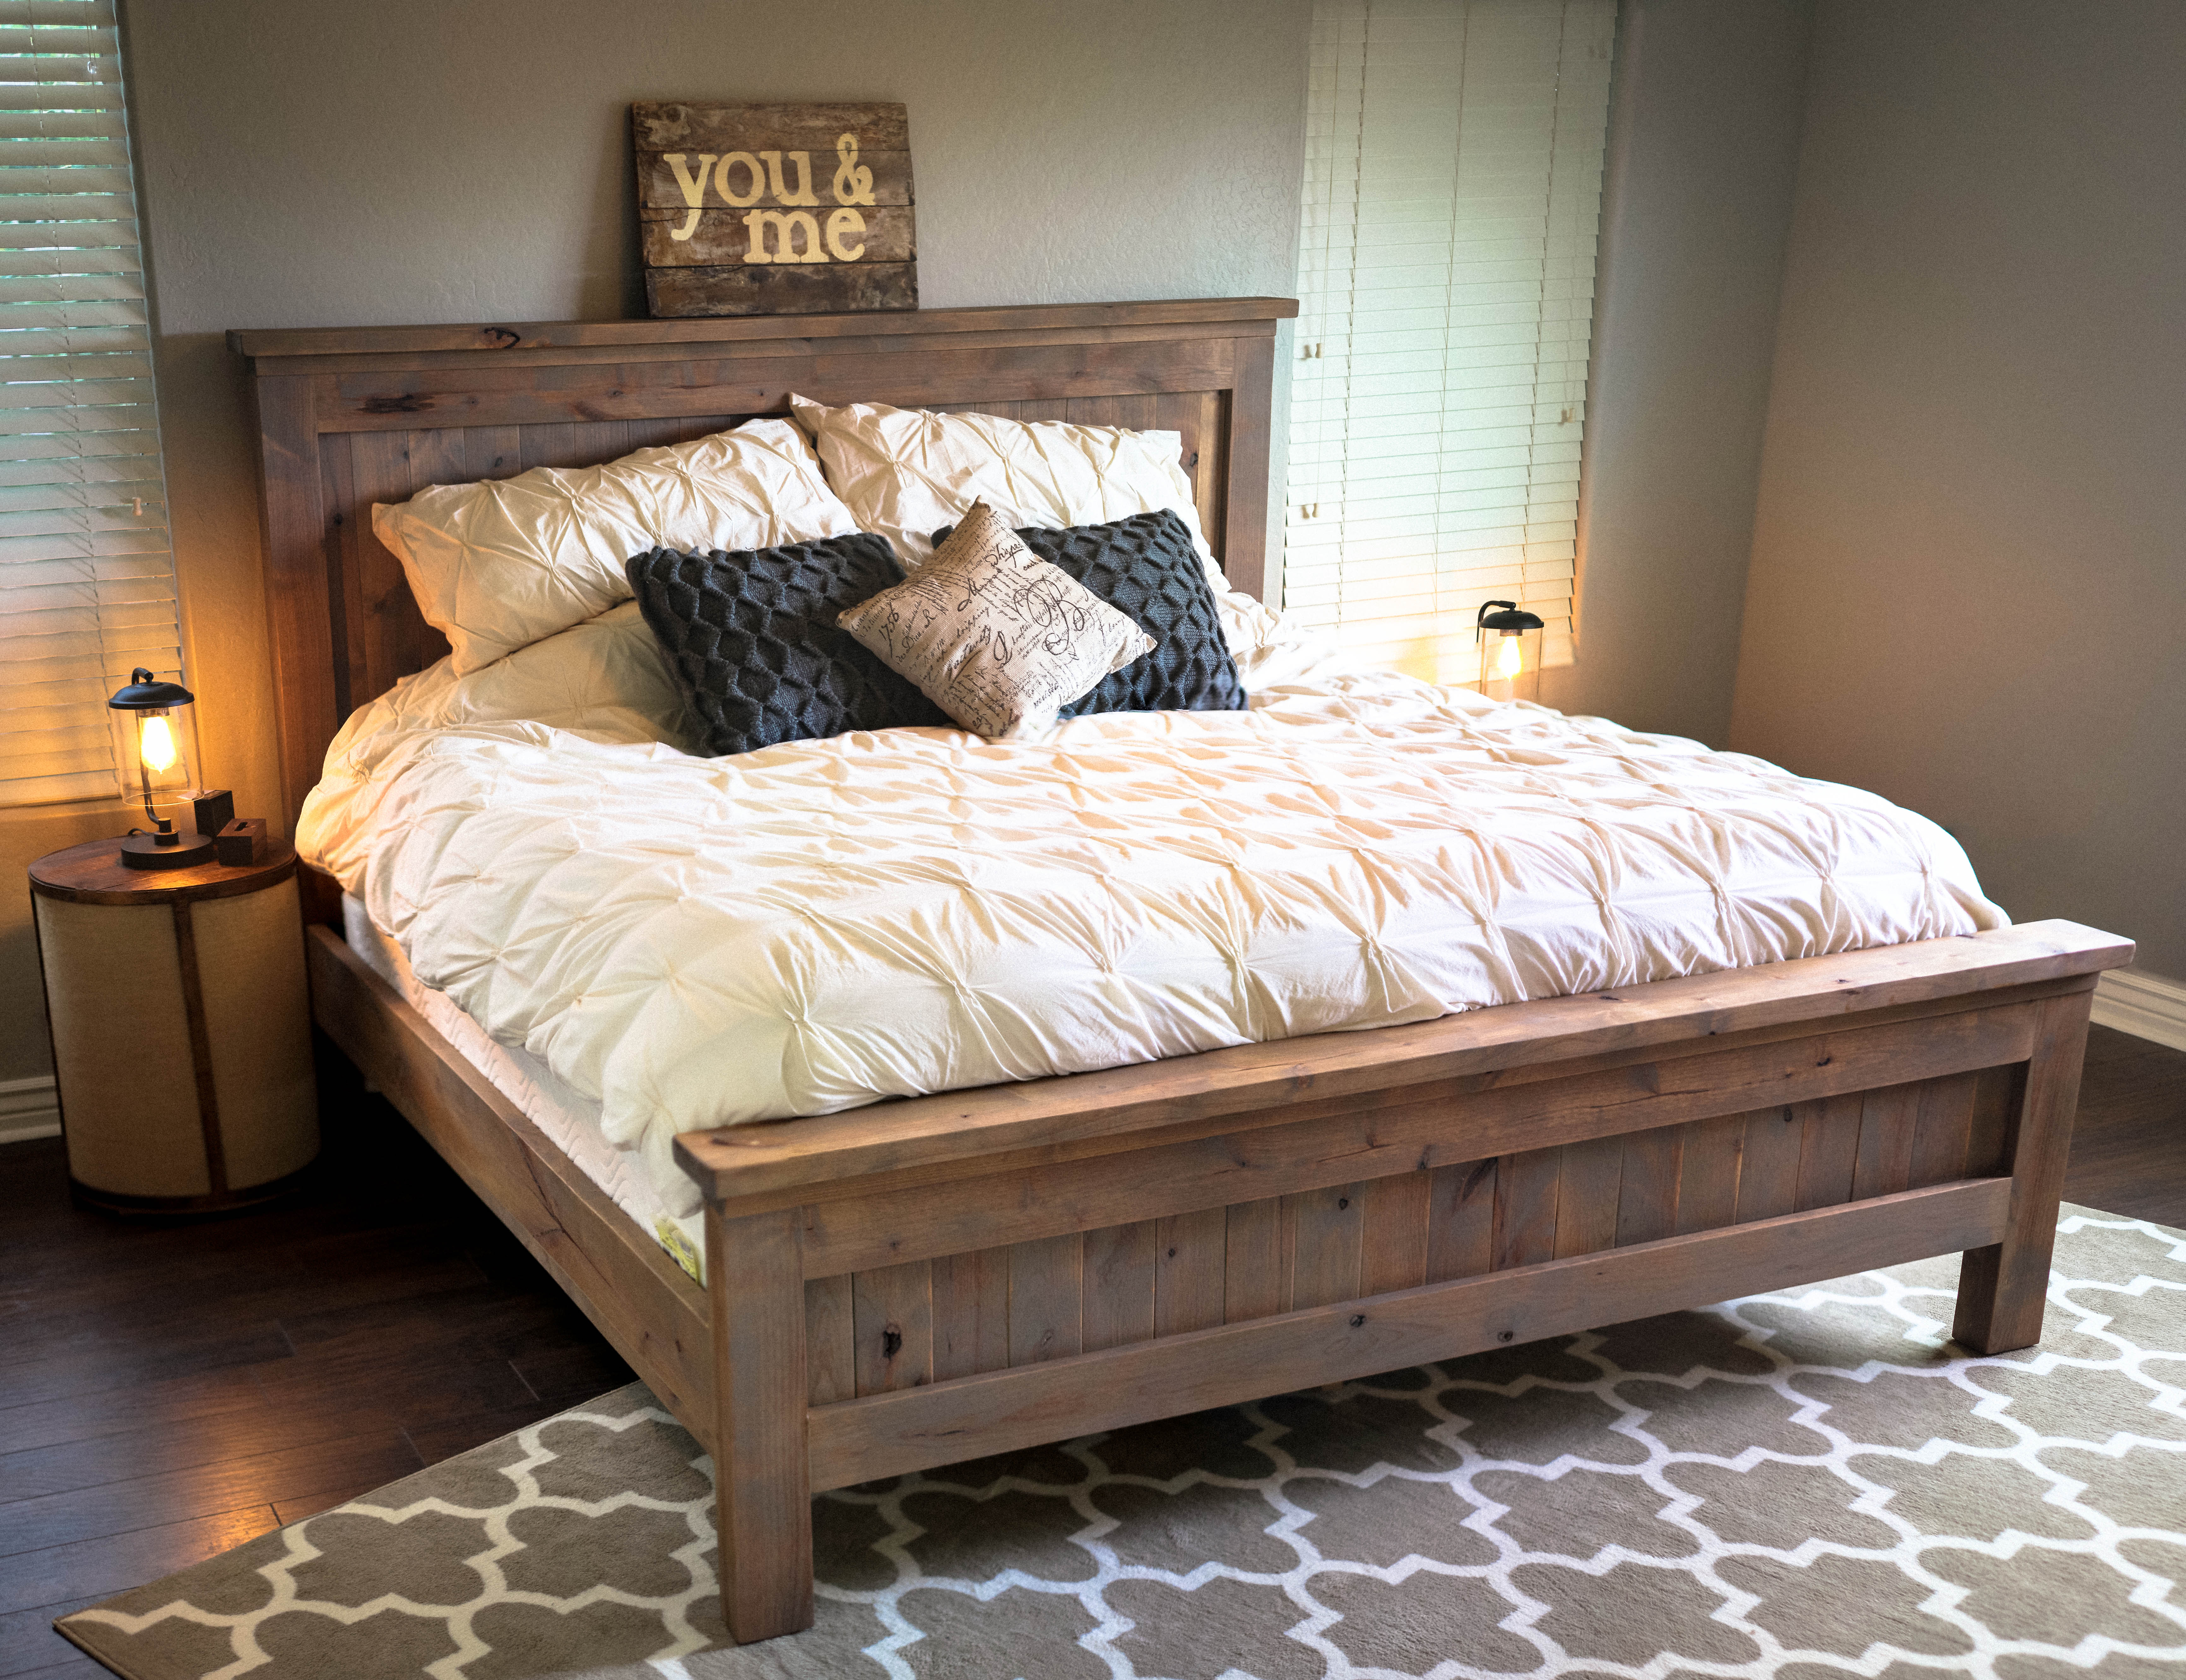
This was our first project. My husband and I took the Farmhouse bed plans and modified them to look more like the Hudson Bed from Pottery Barn. This is a King size bed with removable side rails and under bed supports so that it can easily be collapsed for moving.
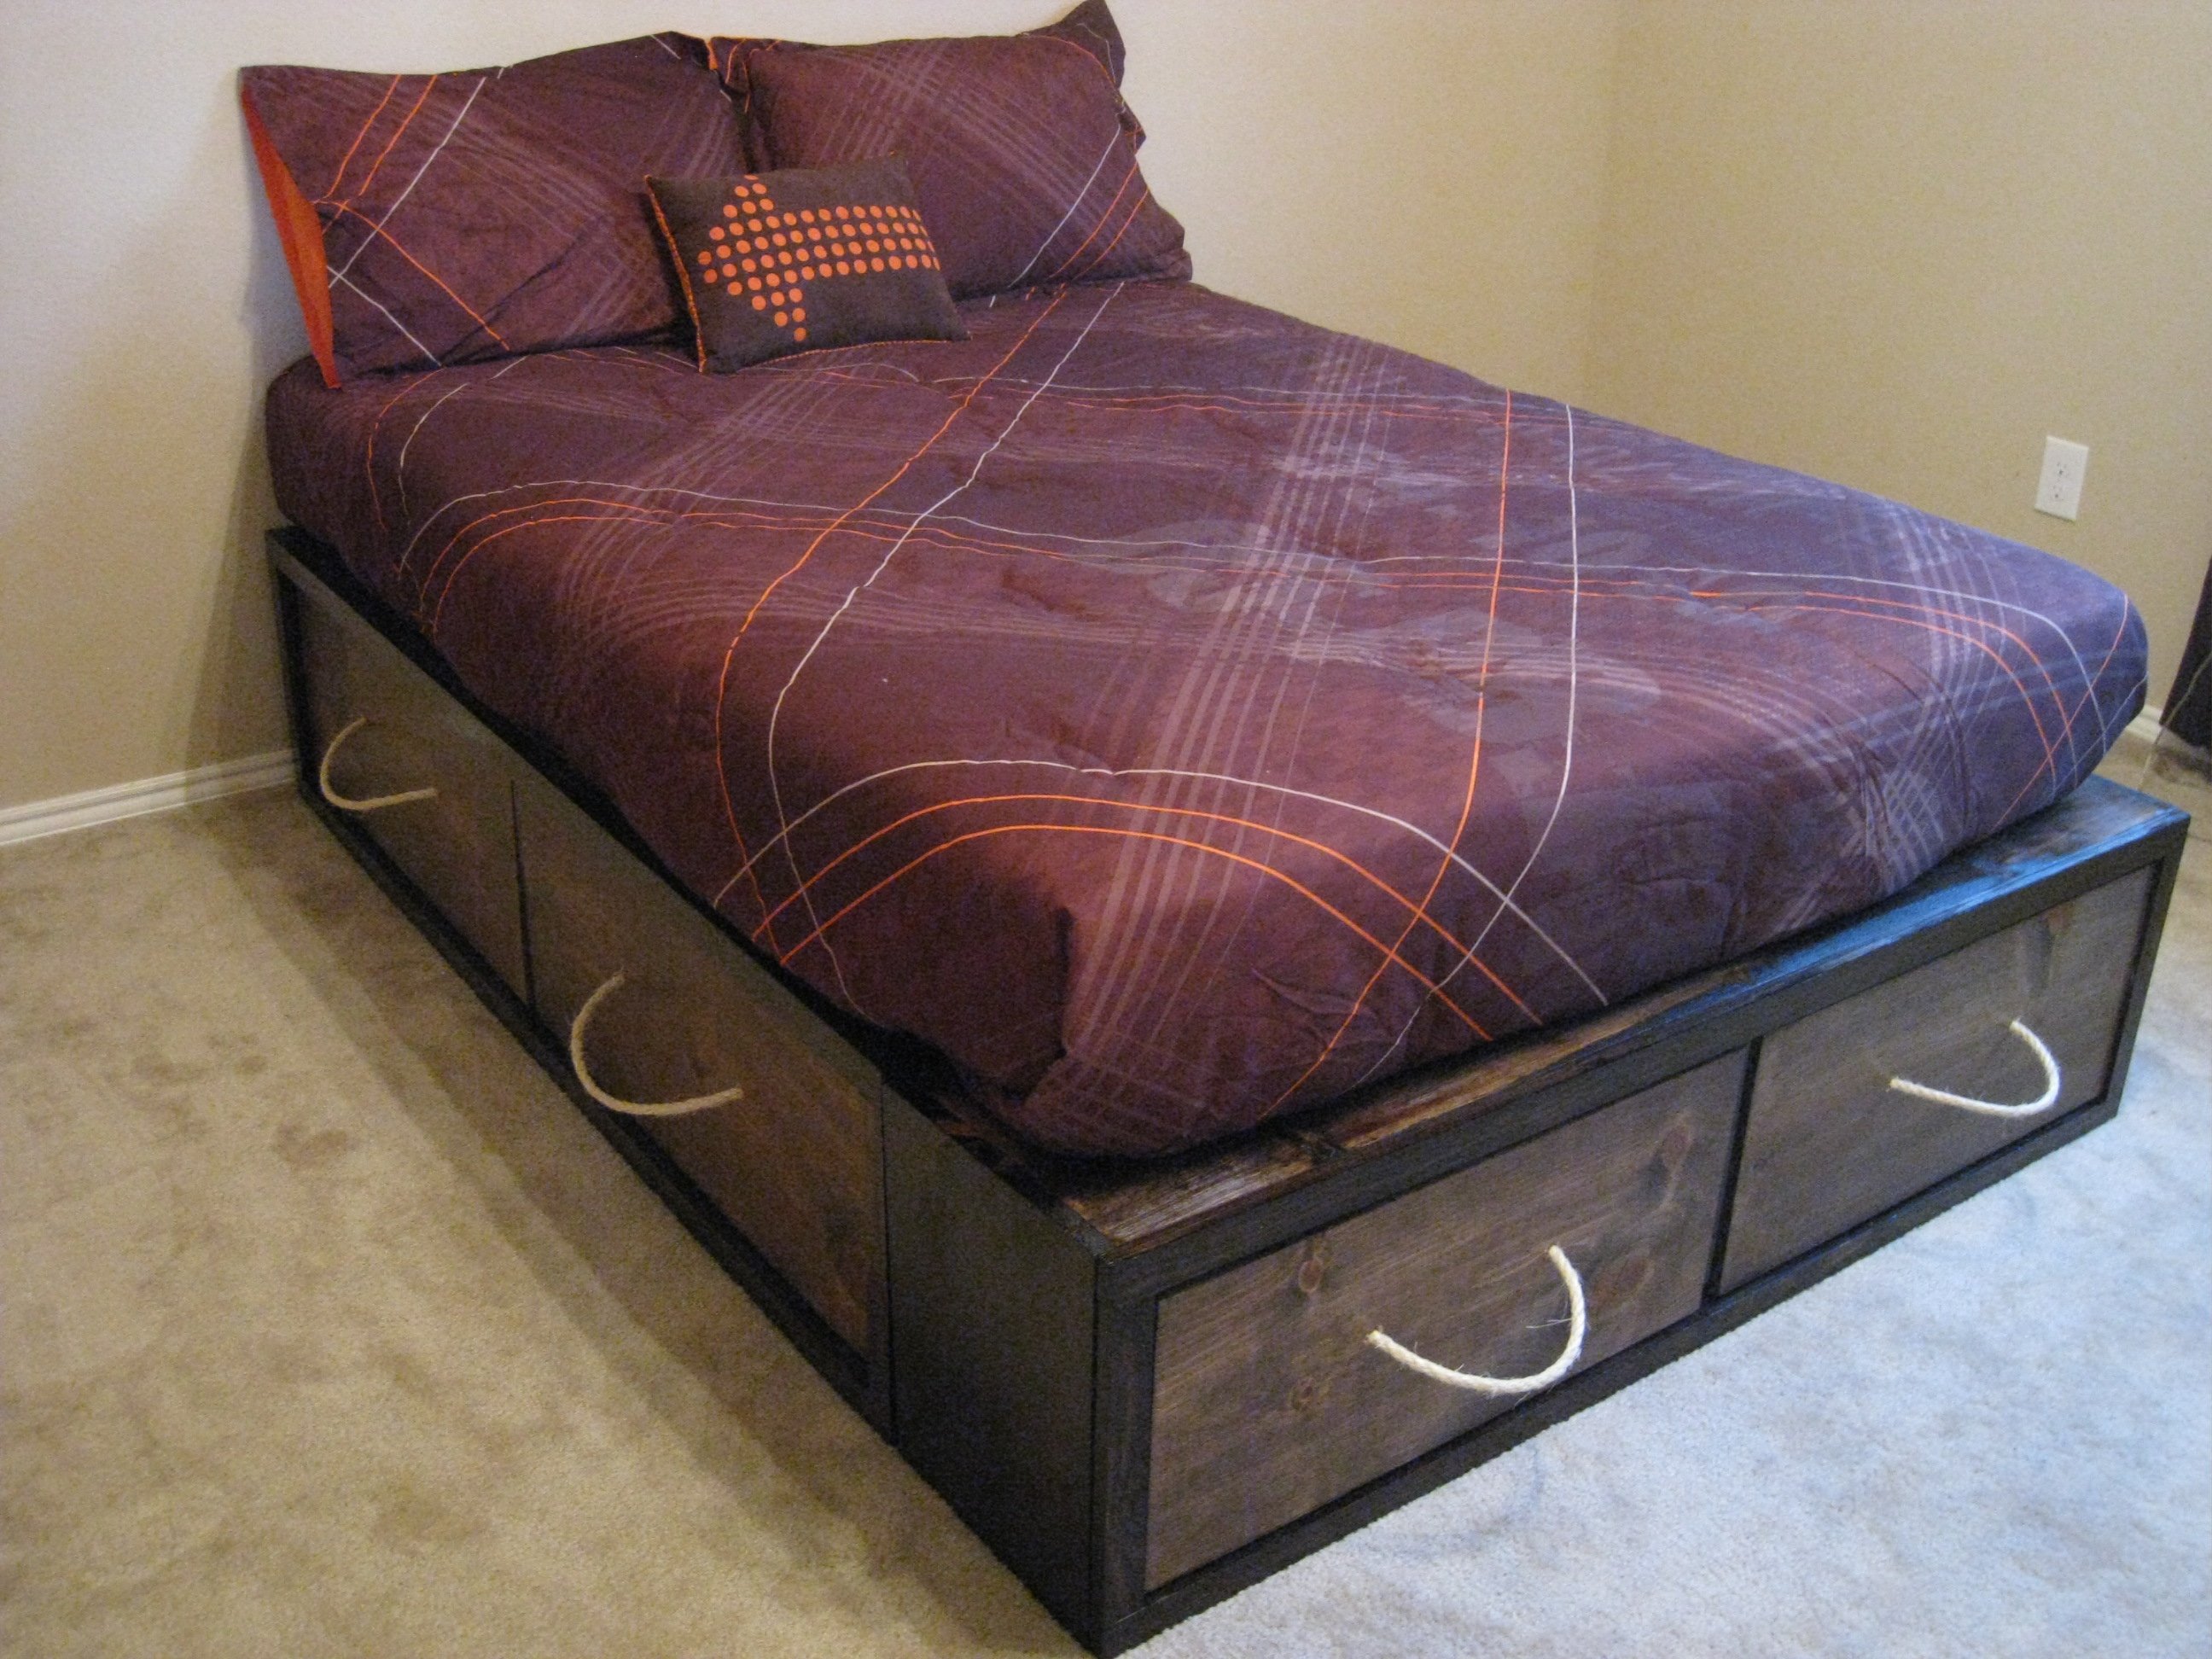
I built the Full Storage Bed using Ana's plans! It was very easy and I love the storage space! You can see it and my modifications at our blog http://www.shanty-2-chic.com/2011/03/crates-for-storage-bed.html
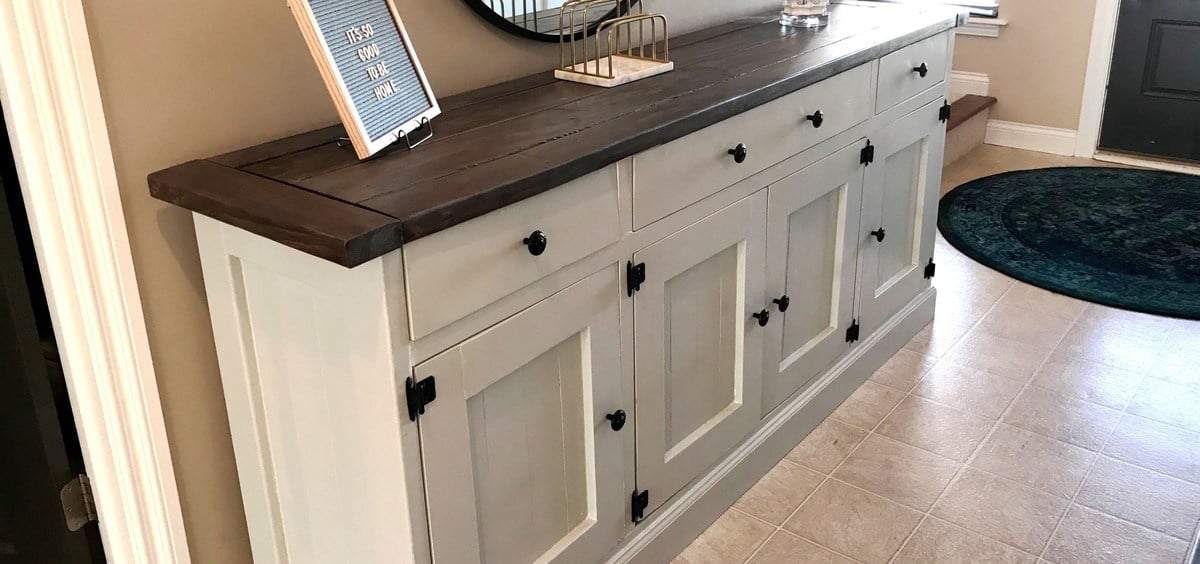
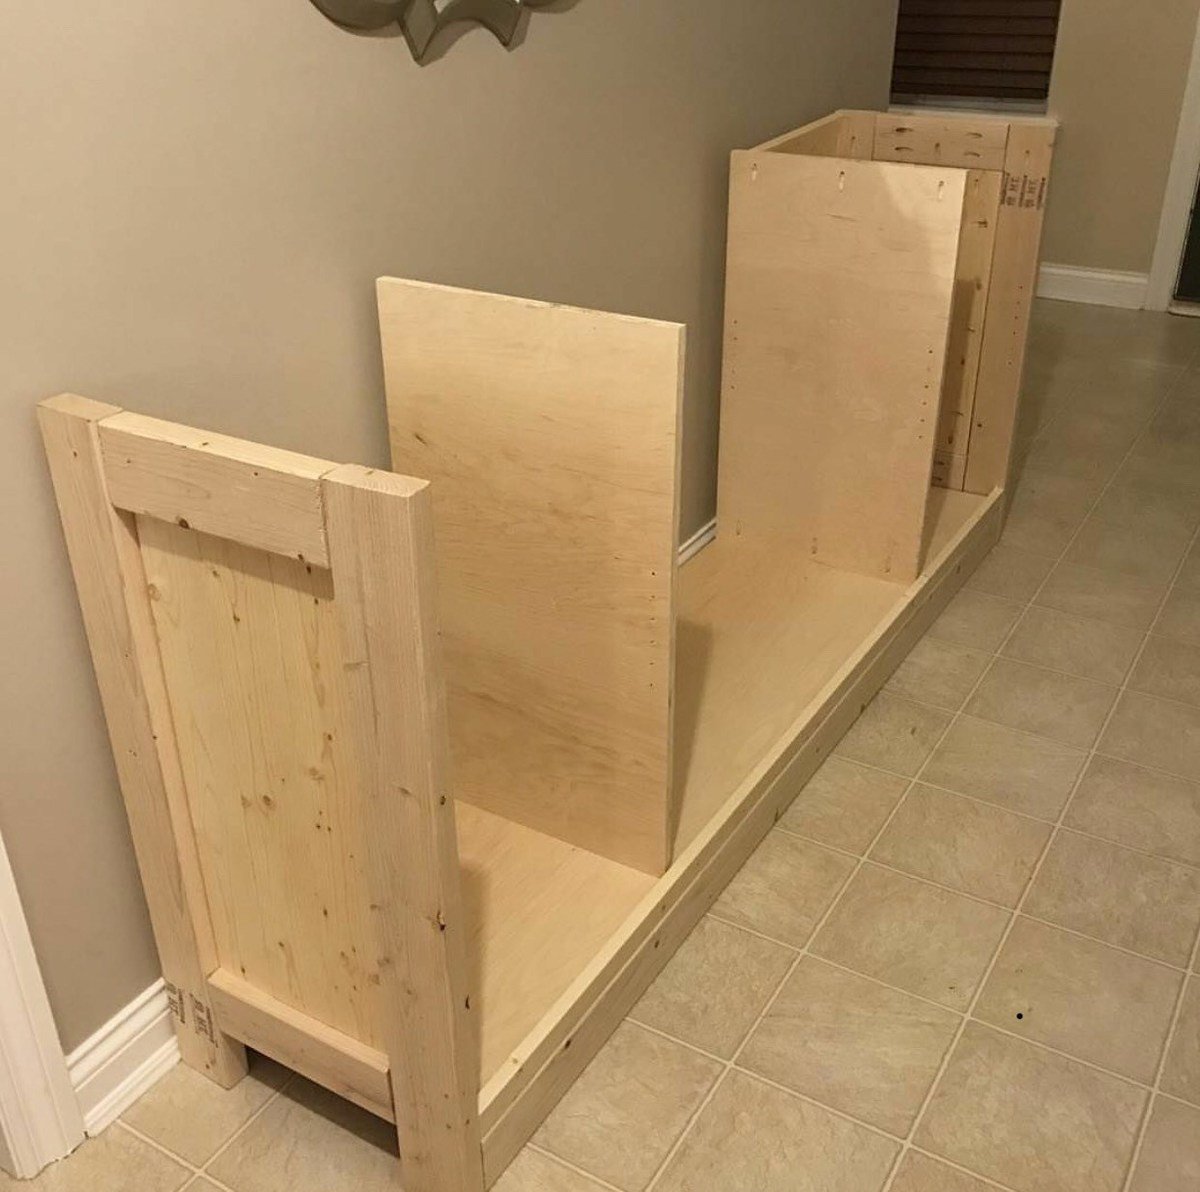
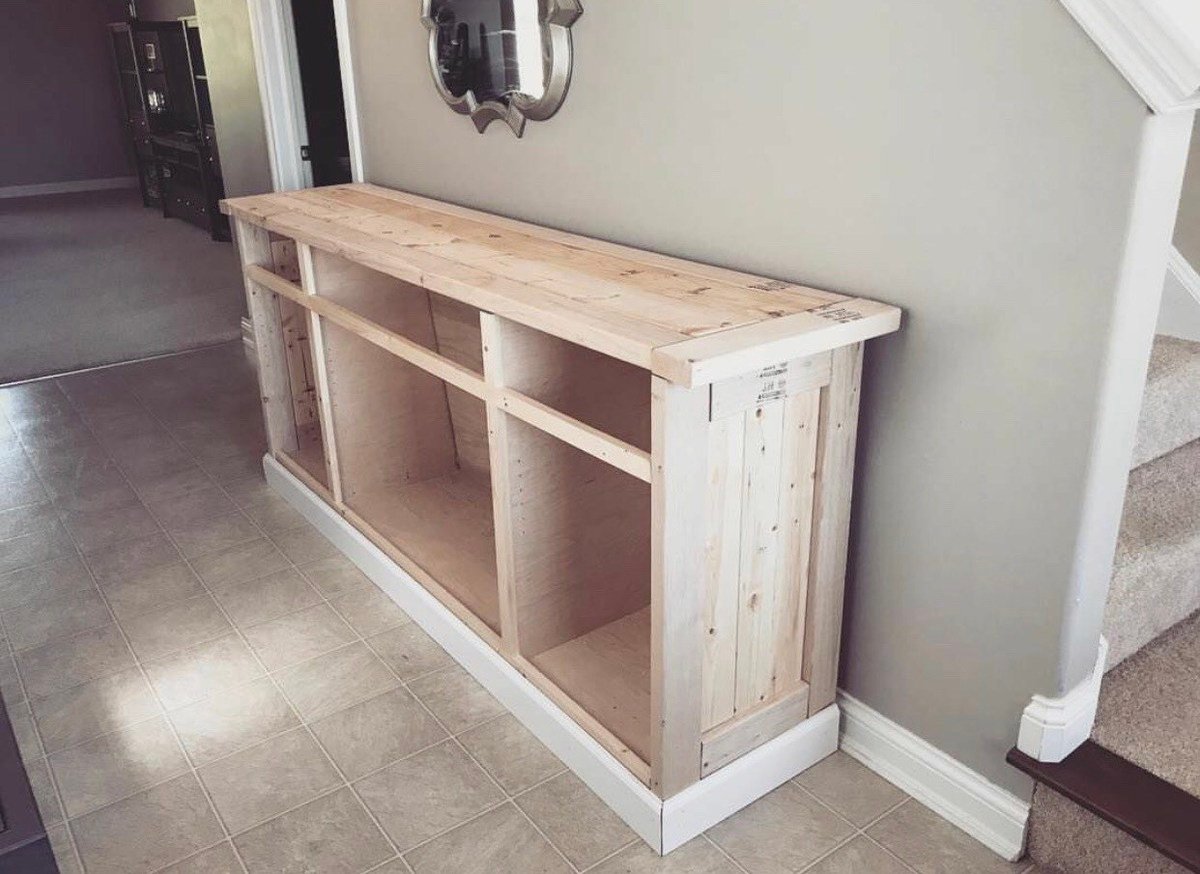
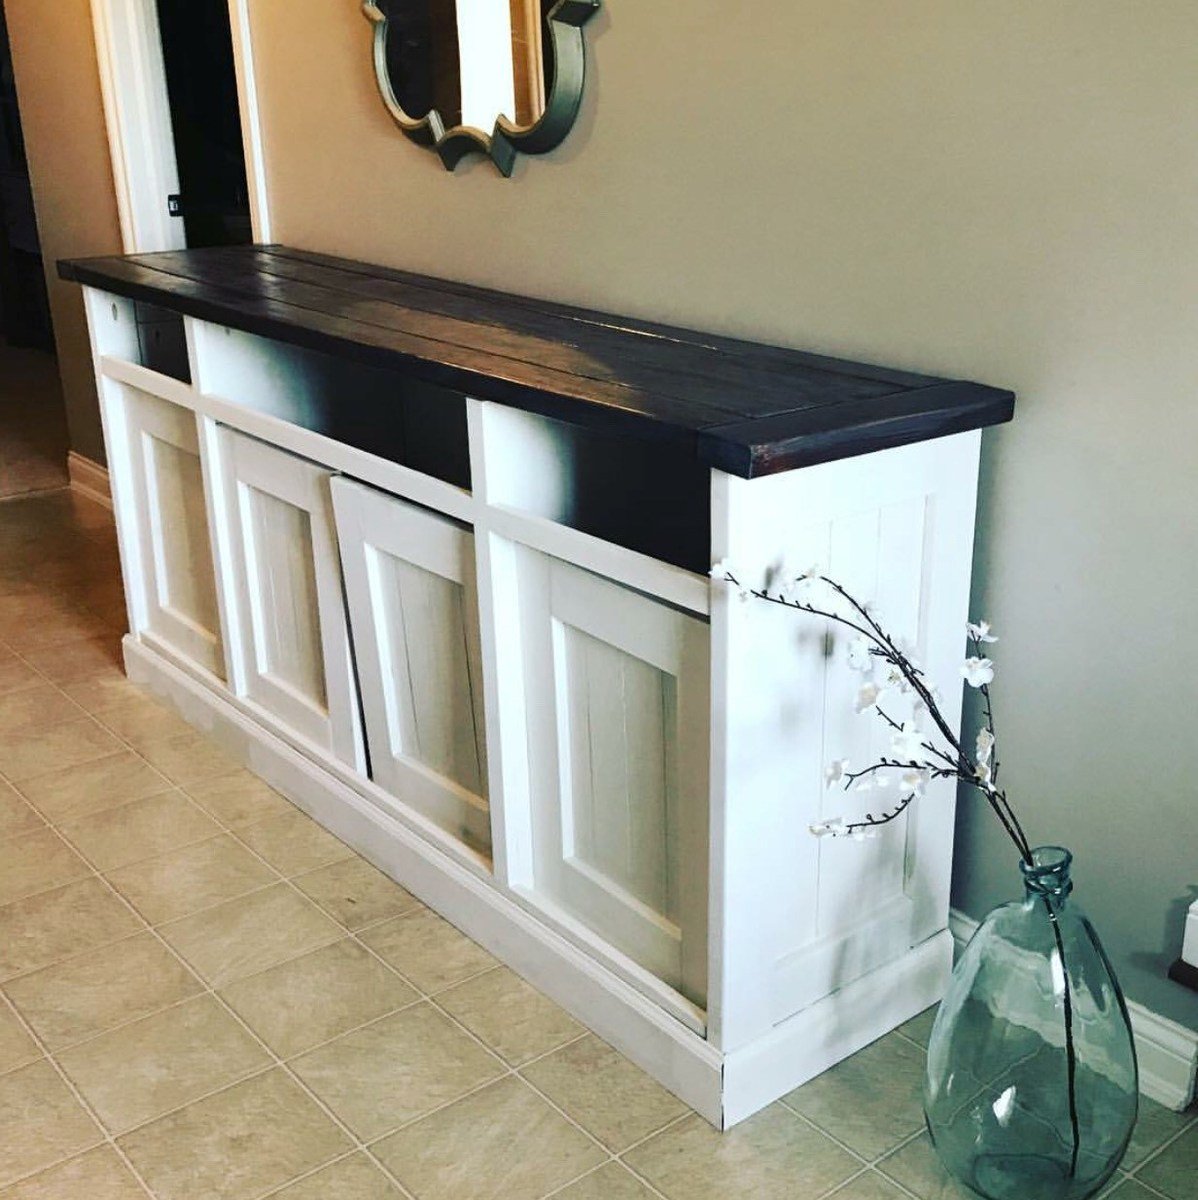
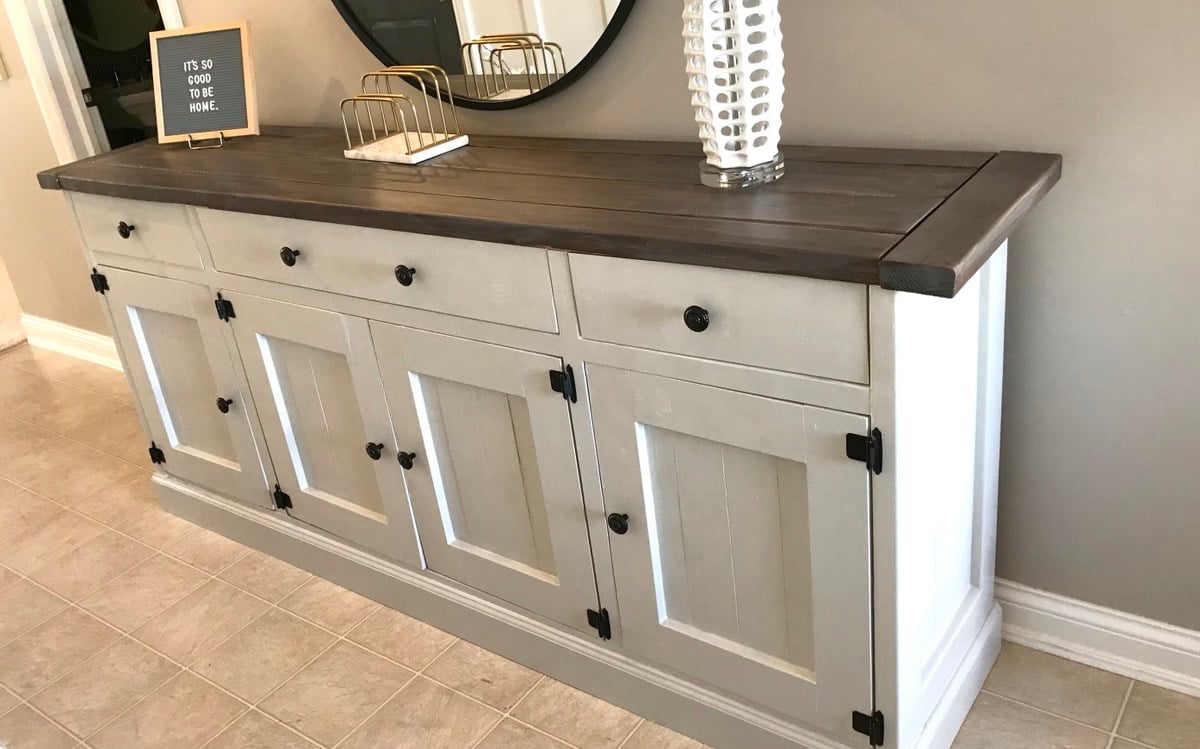
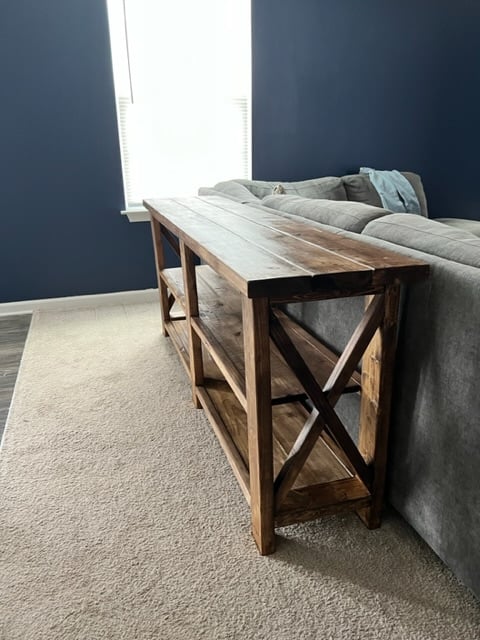
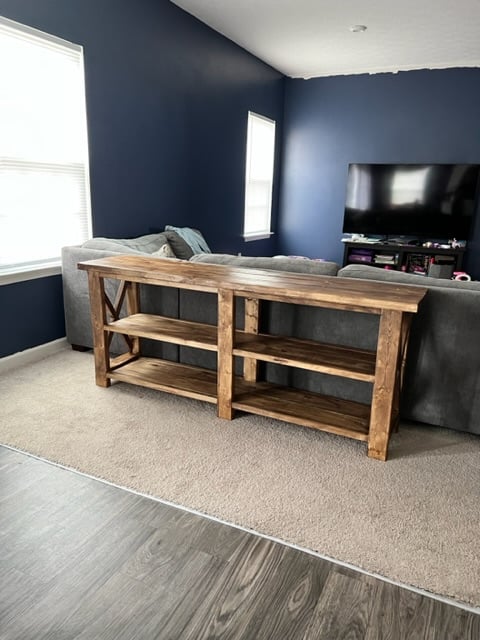
I worked on this project over the course of a few months, and I absolutely love the result! I posted all the info at my blog: http://www.designatedspacedesign.com/2017/10/01/a-rustic-sideboard/
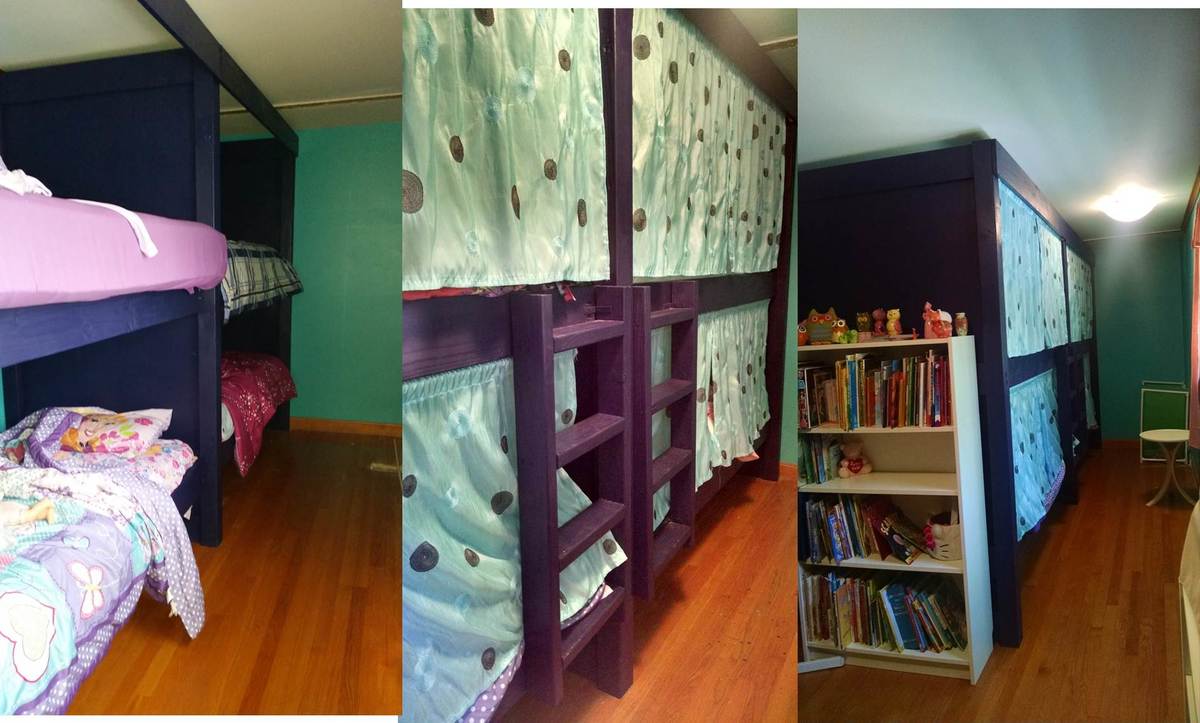
We used the Build a Simple Bed plan and the Bunk Bed from Simple Bed. I modified the plans to build a double bunk bed. We needed a way to fit up to 6 small children in a long, narrow room. Although we haven't built the trundle beds yet, each bunk will also have a trundle bed. The kids especially love their "privacy" curtains!
This is by far the biggest project I've completed yet. It actually surprised me how easy it was to complete. It did take me about 4 days to build the project and an additional week to sand and paint the project.
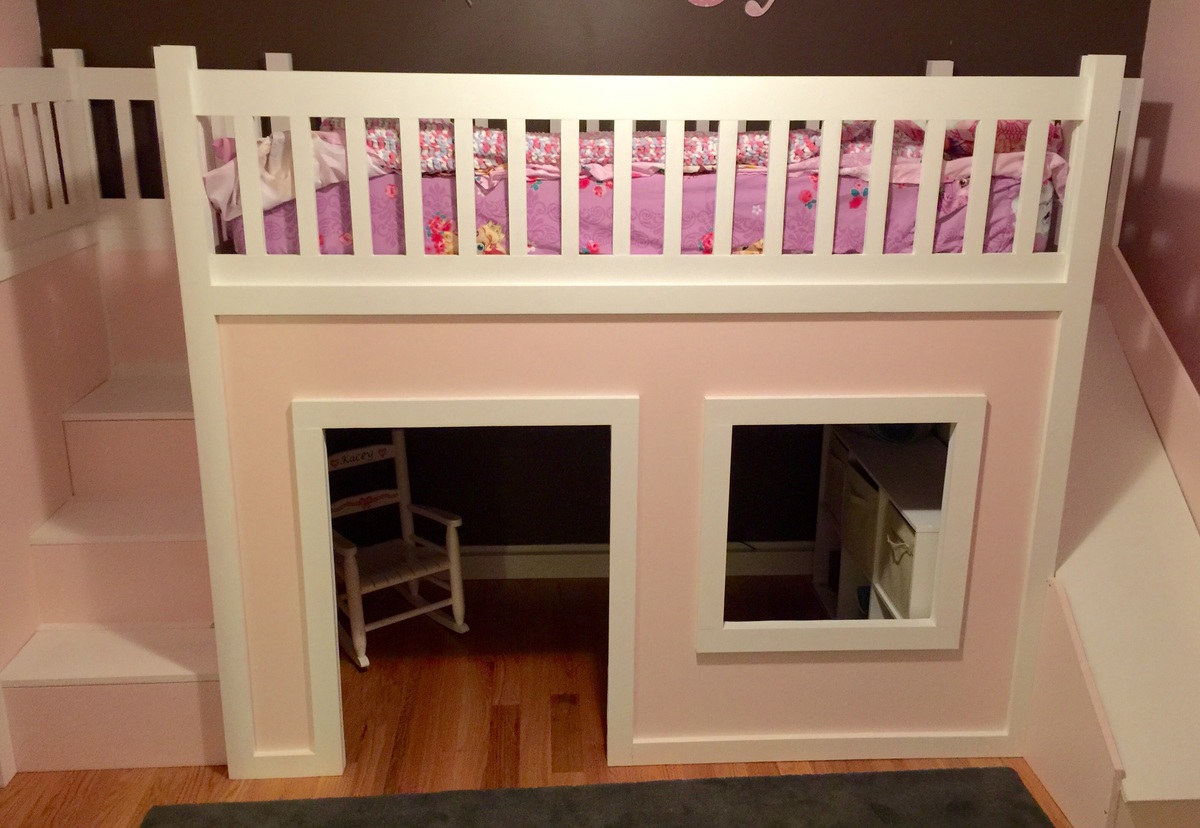
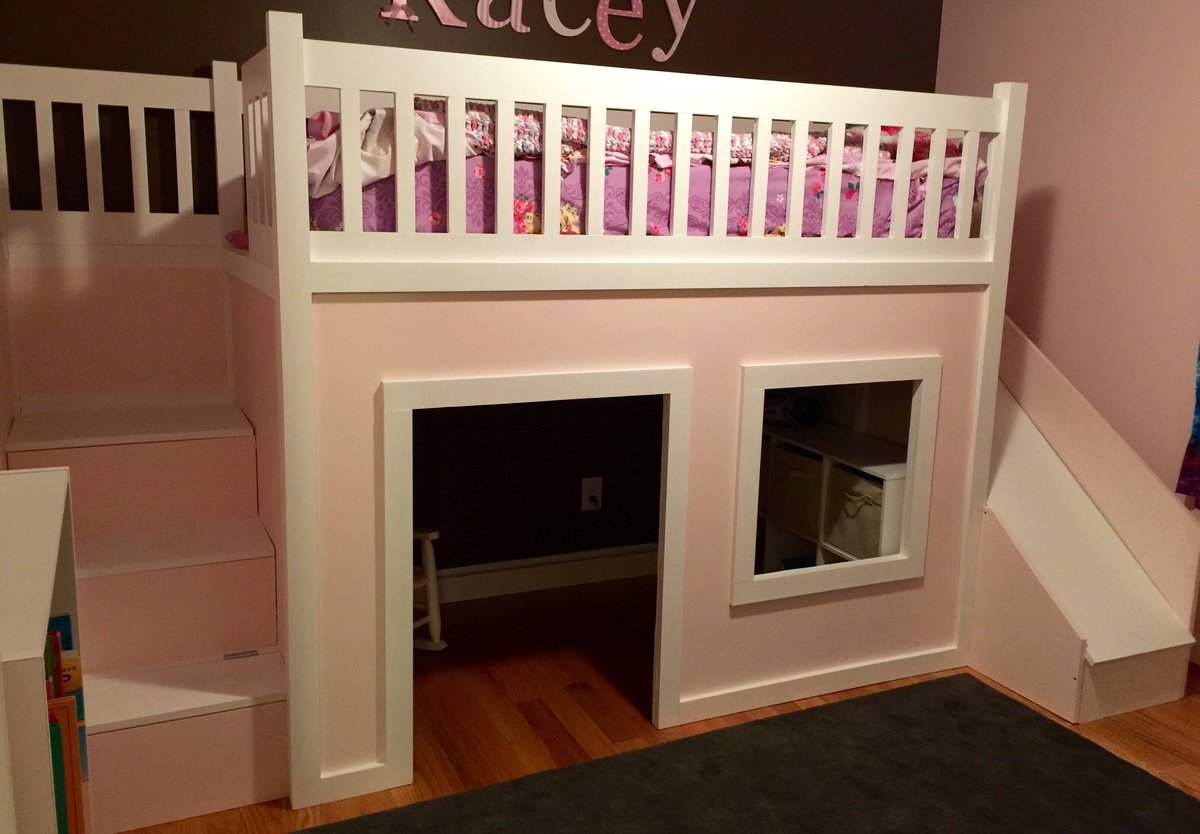
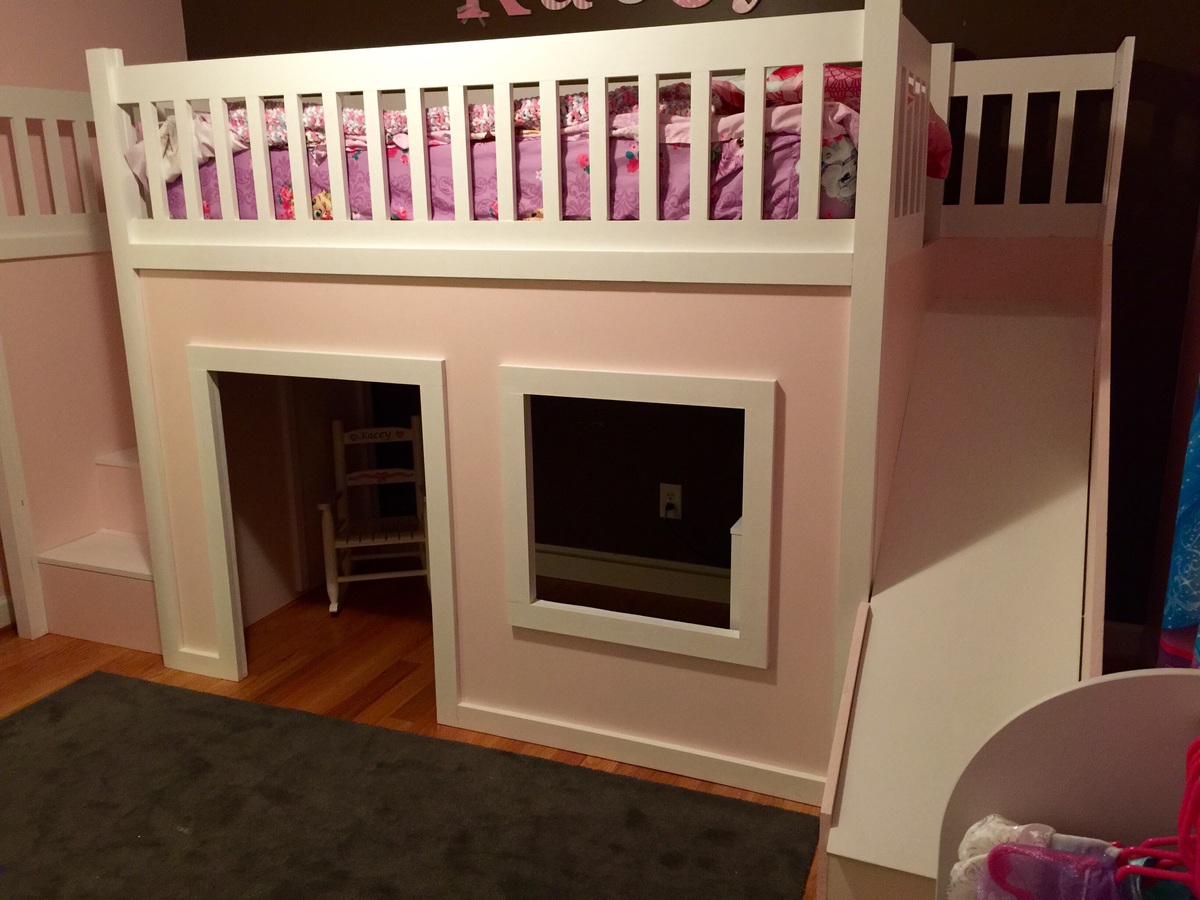
I followed the playhouse loft plans and the storage stairs plans, adjusting only the back to allow for the additional length of the slide. I didn't add the windows to the sides (I didn't see any point in having them there). I also used the castle loft plans for the slide. When I first started this project I was planning on making the slide completely separate. I changed my mind mid project after I had the side wall cut to length at Lowe's, so I just added that small piece to the left of the slide to make up for the gap. I also made this project in 4 separate pieces (stairs, slide, front wall, back) so I could put it together in her room in one evening and not have to kick her out. Once we moved it to her room all I had to do was screw the four corners in and attach the back wall and bed slats.
I definitely recommend not using particle board. I had no idea what the difference was between particle board, mdf and plywood when I started this project. Particle board was less then half the cost of plywood, but looking back I would pay the extra for the plywood. I don't feel like the screws hold well in the particle board and it also chipped on the bottom some. I actually had a chunk come off in the corner where I must of screwed to closely to the edge. I'm sure this is basic knowledge for most, but for those newbies (like me) just a little tip.
I had a lot of fun building this bed (not so much sanding and painting) and learned a lot. Now off to browse for my next project :)
Thu, 07/09/2015 - 07:30
Awesome job! Looks clean and not even close to DIY. Keep it up!
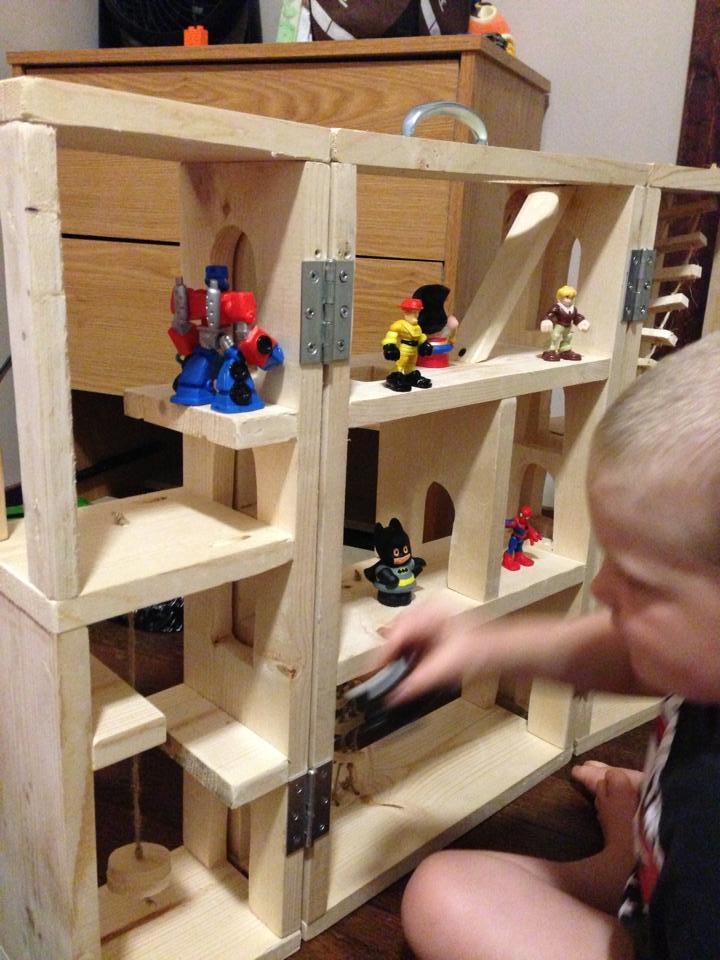
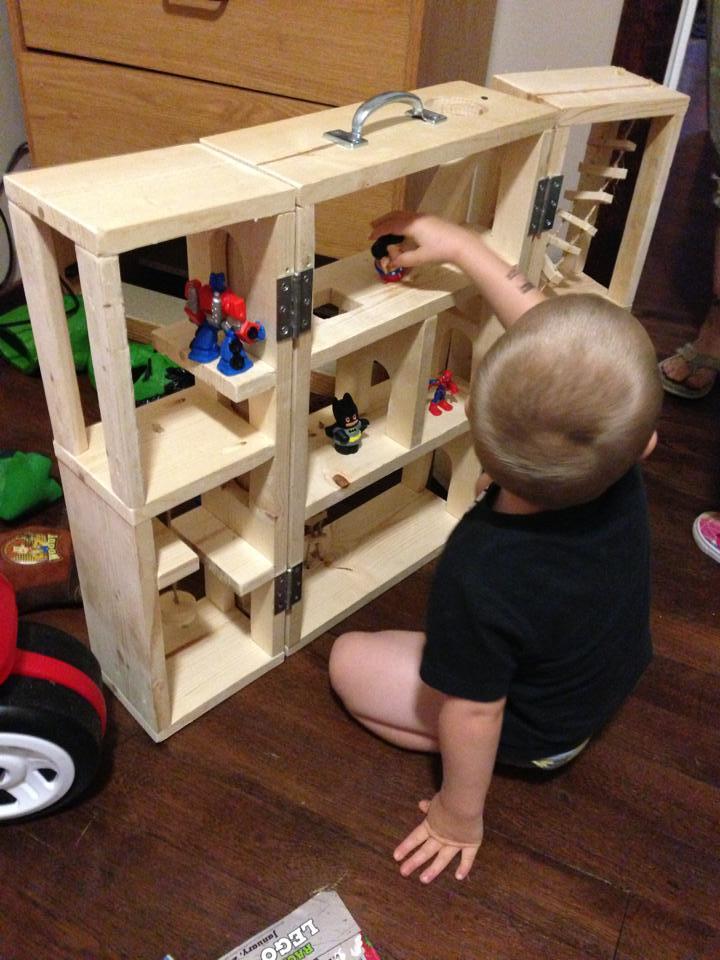
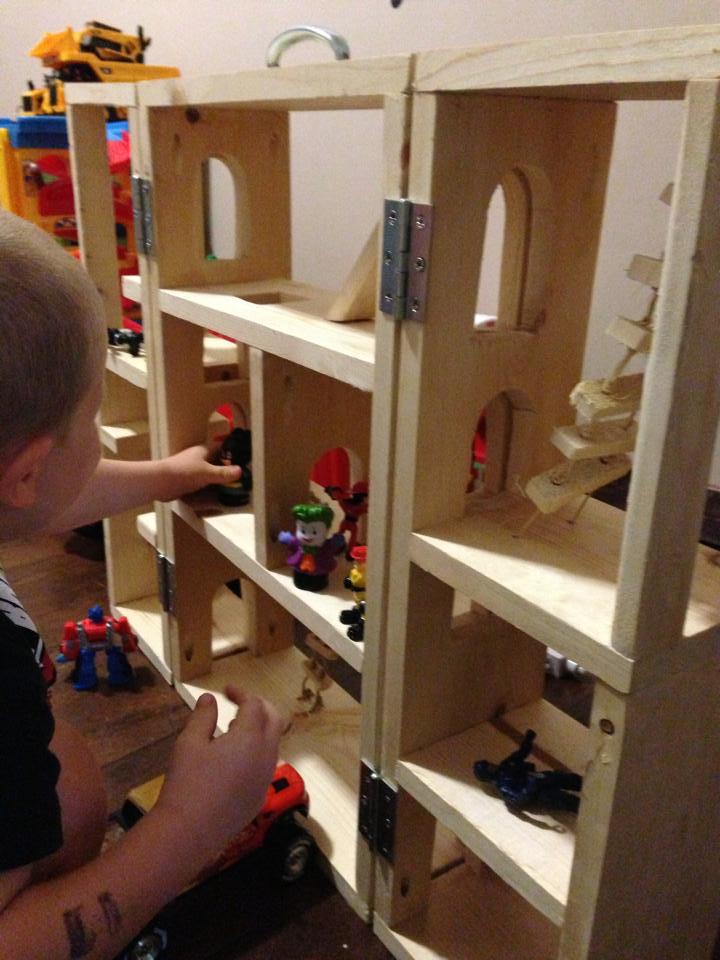
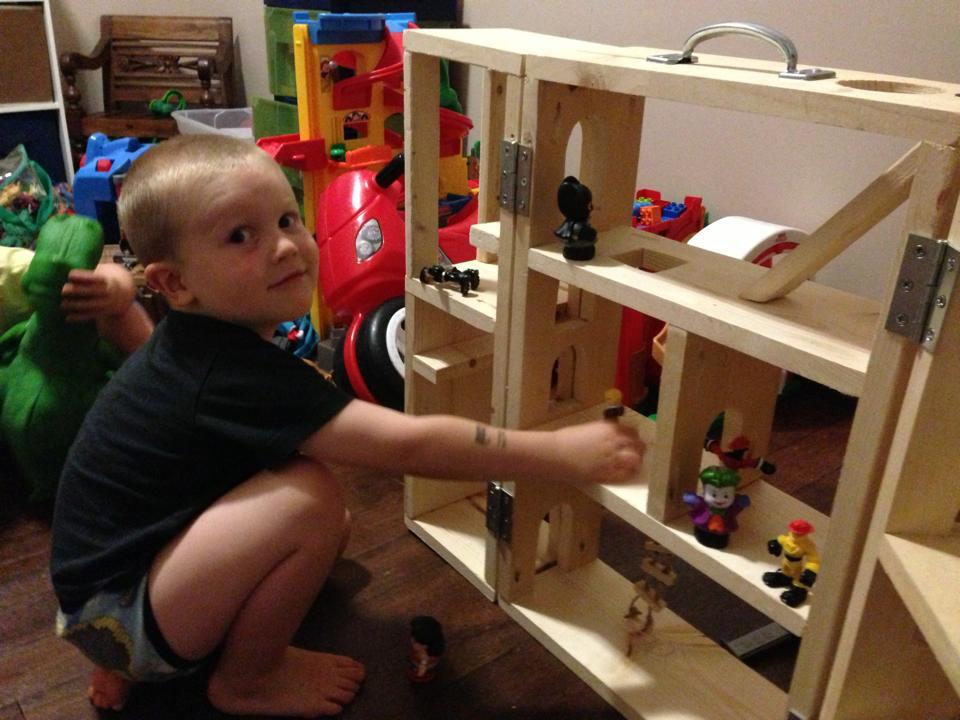
This was hard for me because I am horrible at using the jigsaw. If I do another one I'll probably not do as many door openings.
It took longer than expected due to filling in all the pocket holes an waiting for the wood filler to dry.
My grandson loves it, he didn't care about my mistakes on it.
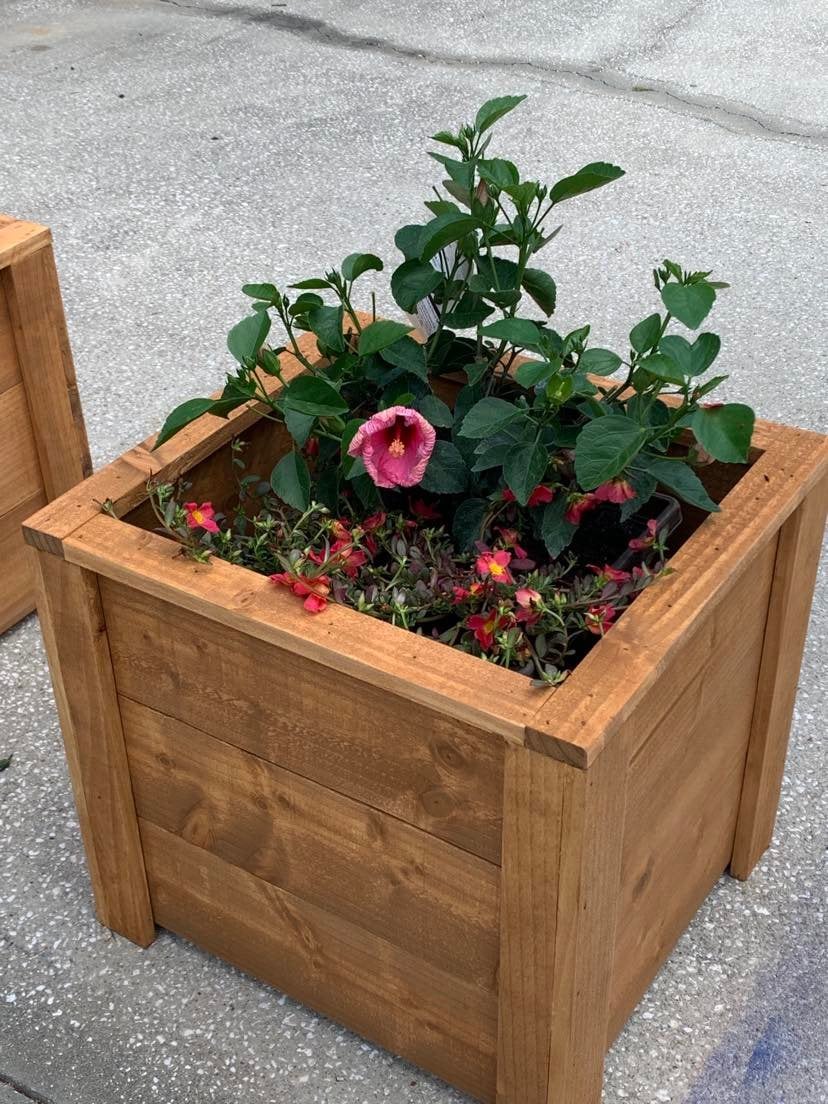
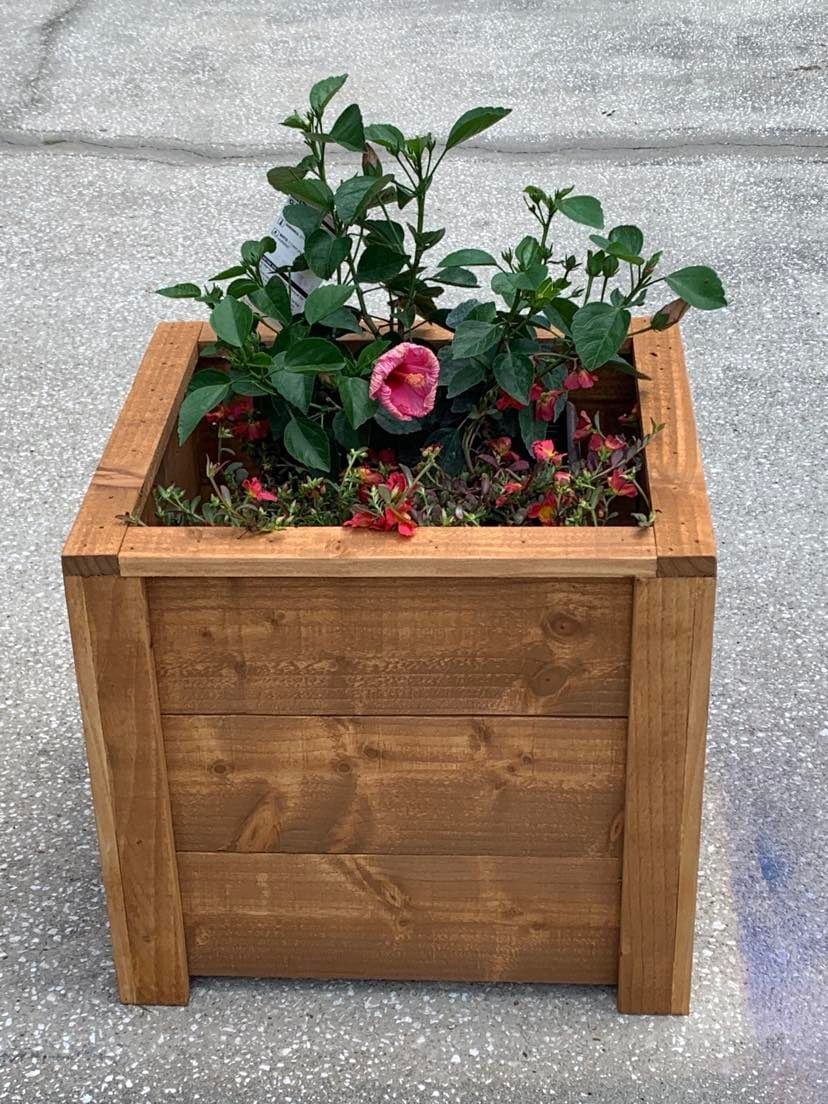
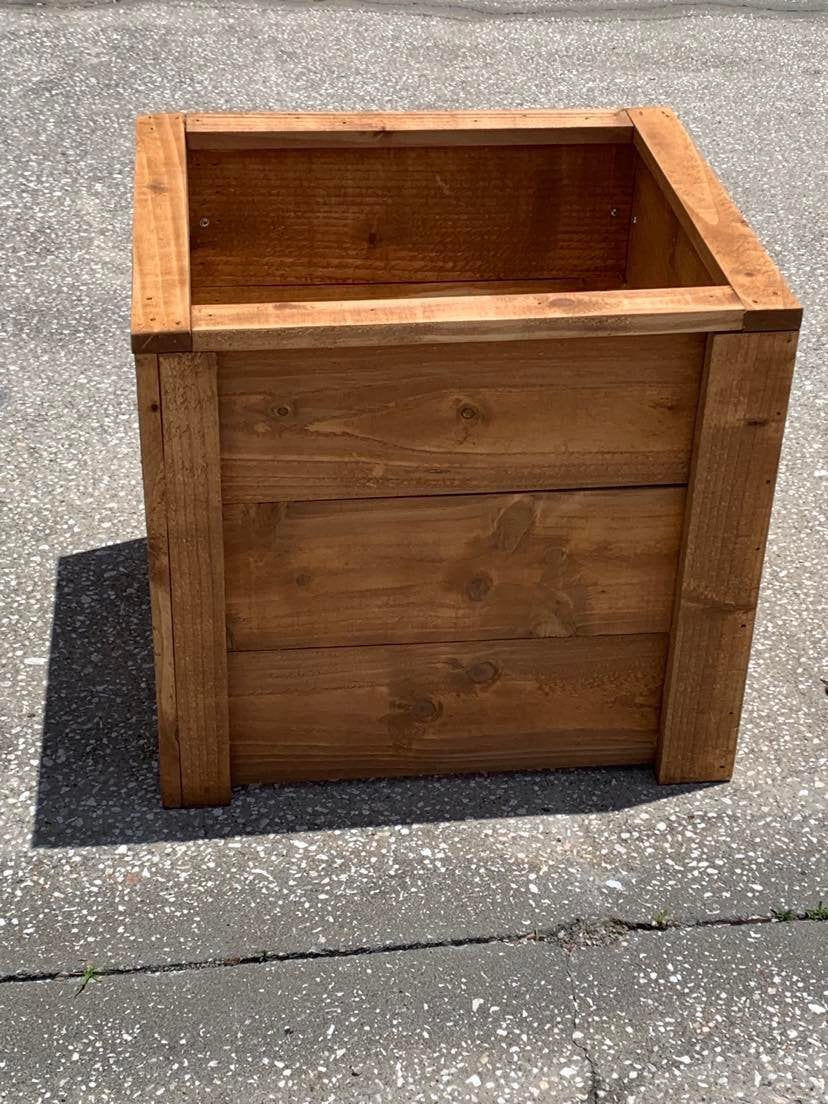
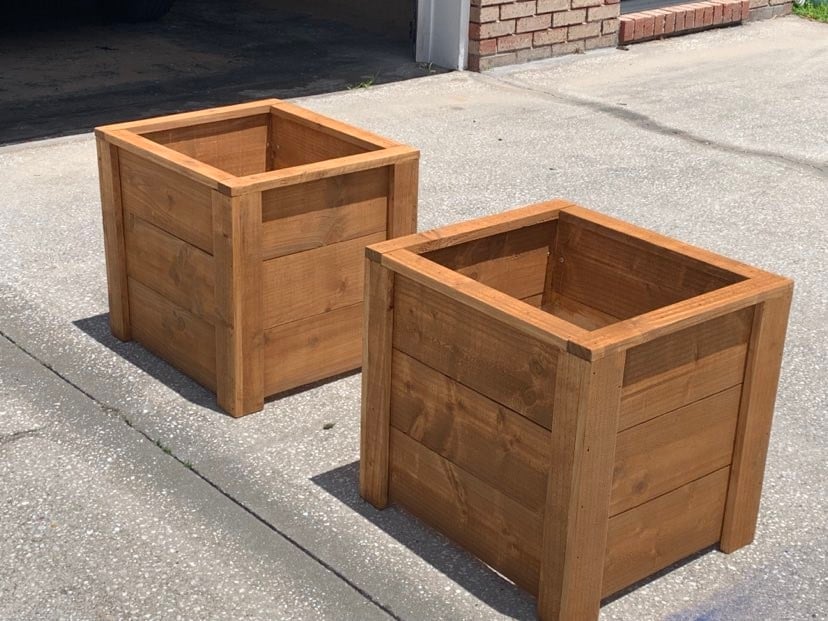
Thanks Ana, I built your planter box, actually built 2 of them, one for each mom. The were a huge hit and I already have people asking me to build them one.
So loved building this planter box. Thanks for all you do for your fellow woodworkers!
Dale G
Callahan, FL
Tue, 05/10/2022 - 07:05
Love these, wonderful idea for a mother's day gift, thank you for sharing!
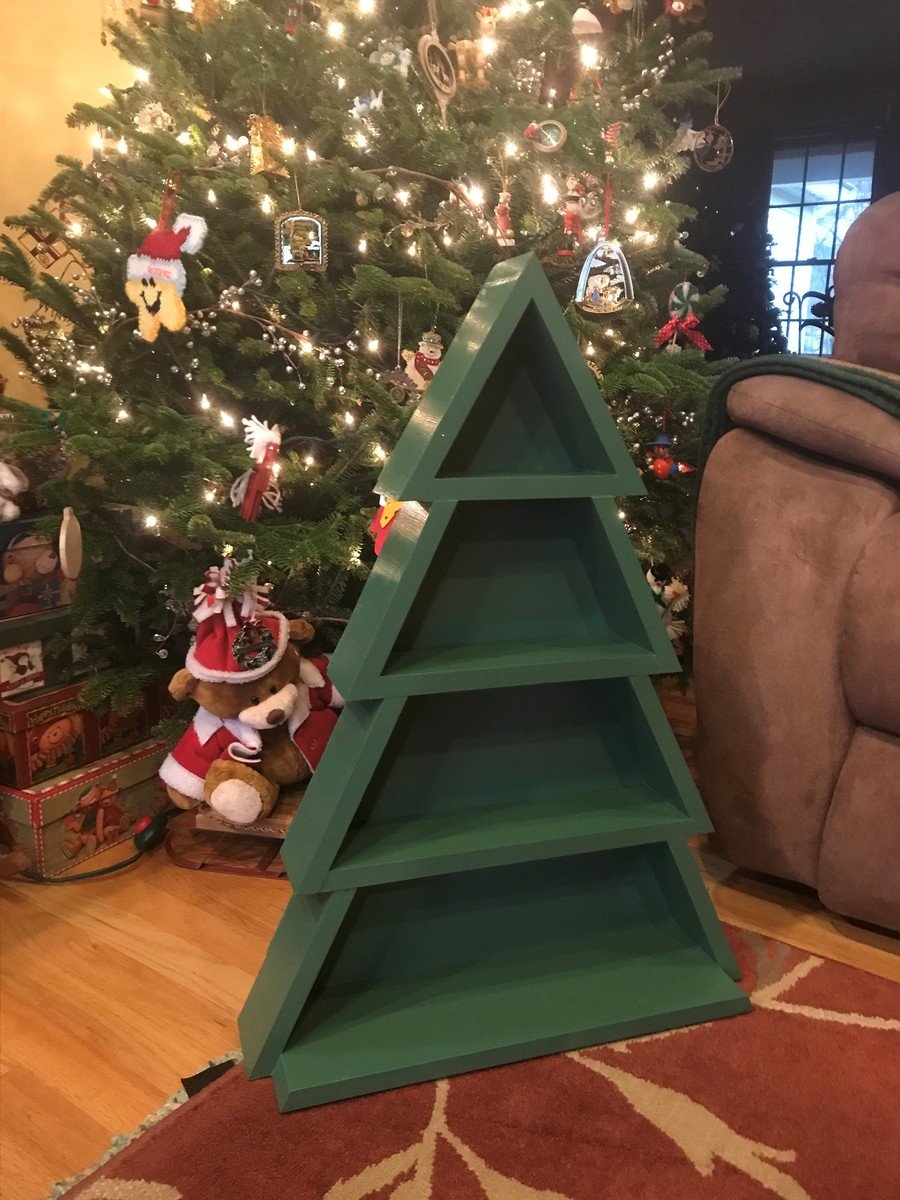
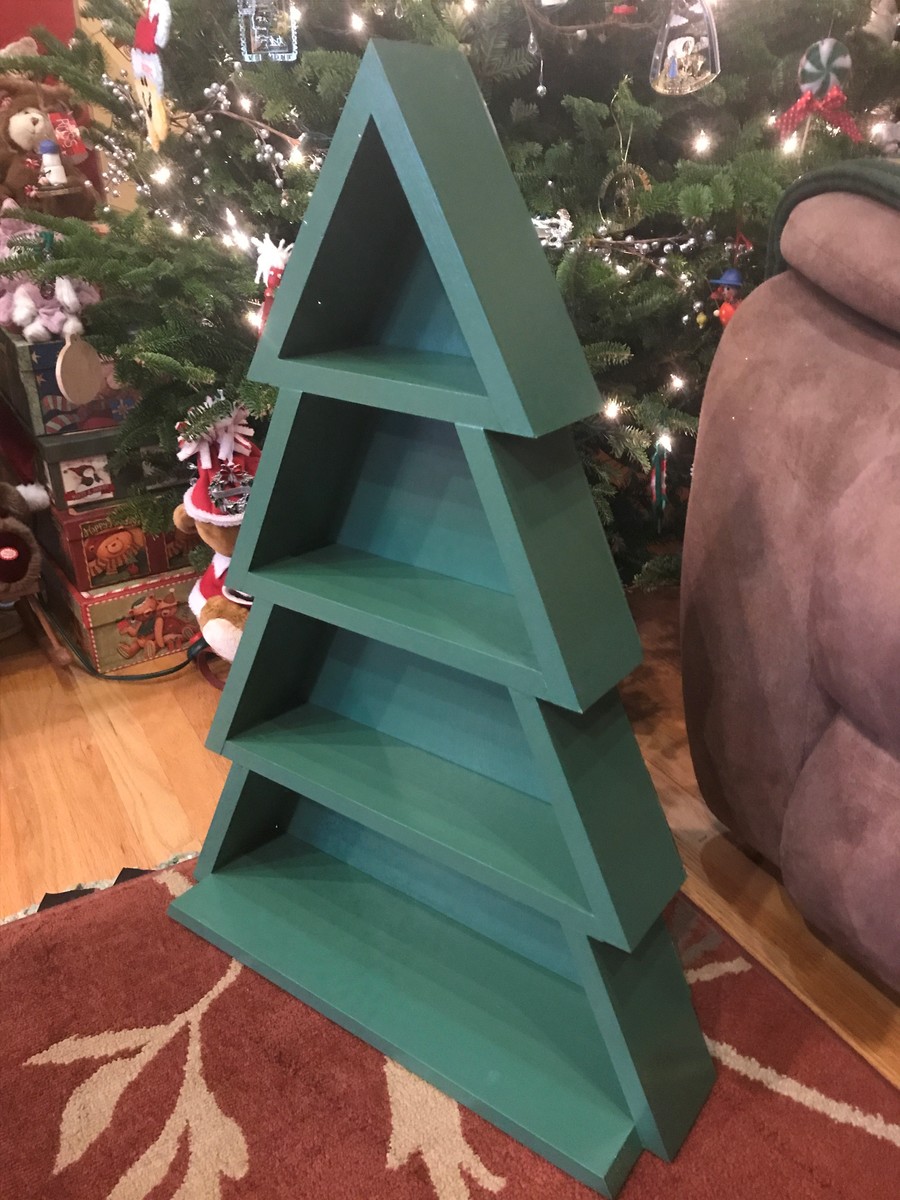
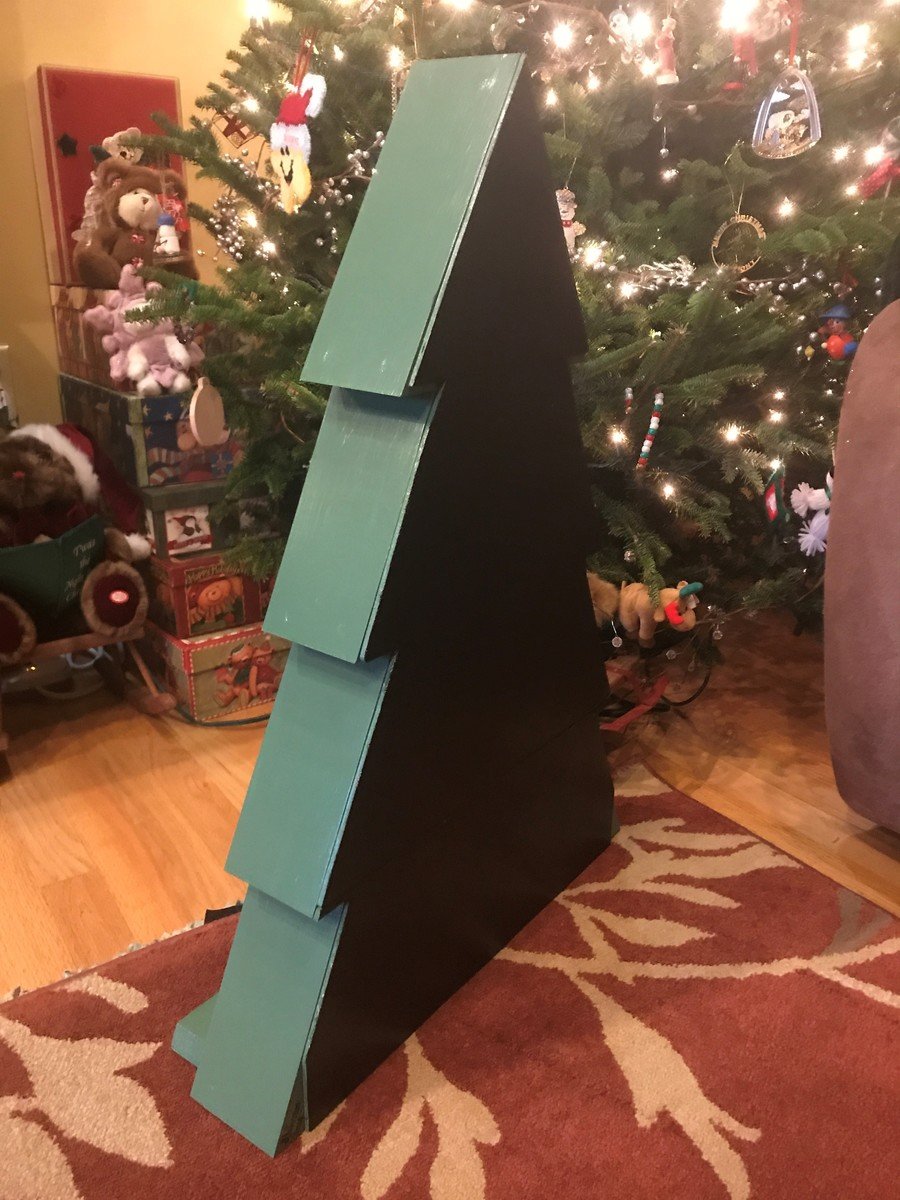
I found the Christmas tree shelf plans and since I had drawn my wife's aunt's name for this year I knew she'd appreciate this build. I chose 1x6 top choice pine and a wider piece for the base since she may decide to set this on the floor instead of hanging it. I also had some oak plywood I used for the back. I screwed all the pieces together, countersunk and filled the screw holes with wood putty. The paint I used was Benjamin Moore, the color was Balsam (567) and I really like how the color came out. I painted the back and the bottom with standard black interior paint just to protect the wood a little. I coated it with a couple of coats polycrylic and bought a couple of Christmassy items for the shelf to get her started. Can't wait to see what she thinks on Christmas day.
This can easily be built in less than a weekend depending on your skill level. I had to recut one of the boards when I caused some damage while putting it all together. The sanding, painting and finishing takes as long as you want depending on the finish and care taken.

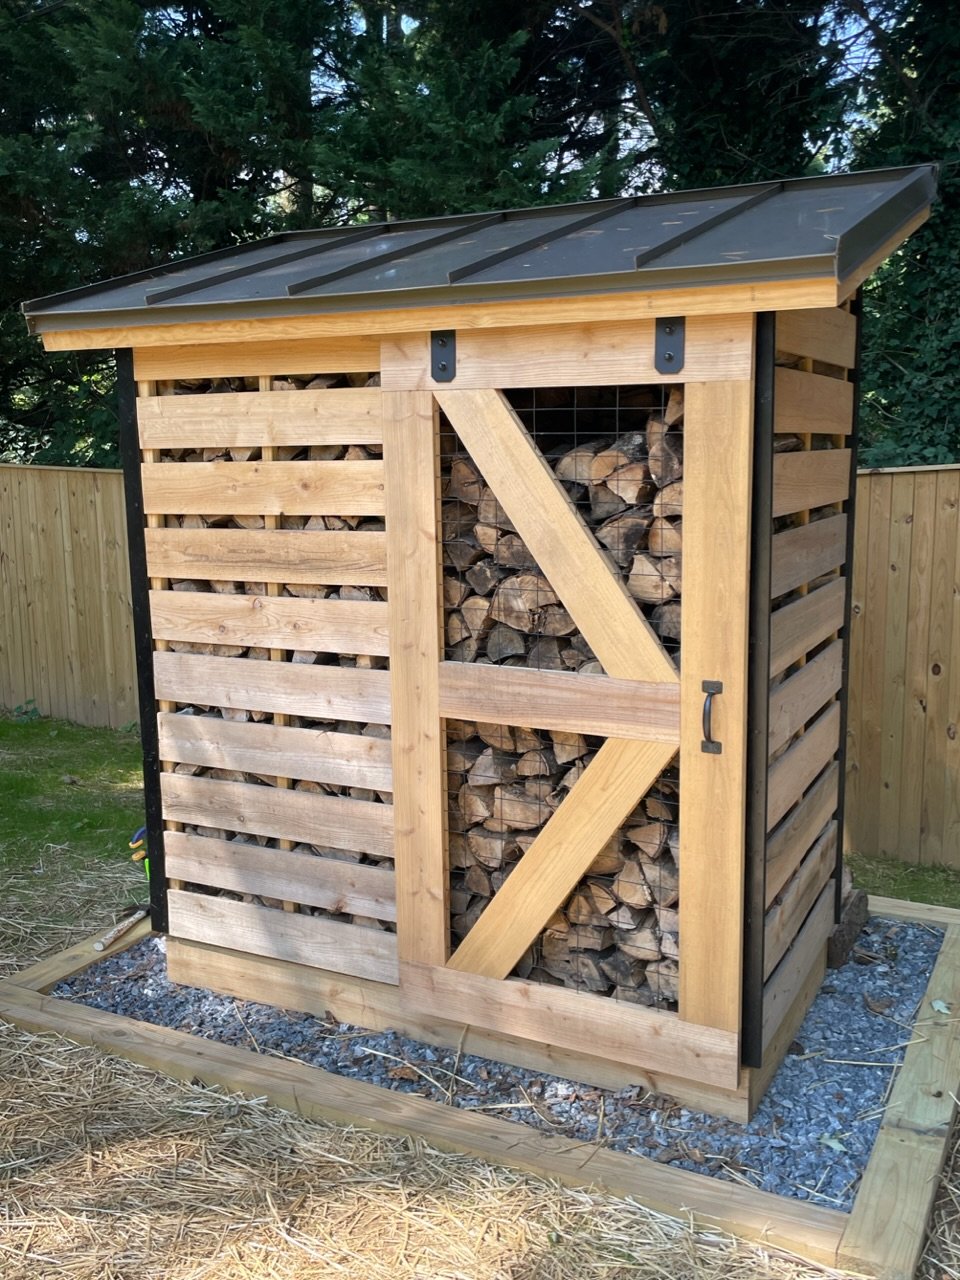
Spaced out the boards to allow airflow; did a sliding barn door and metal roof. Thanks for the plans!
Wed, 10/19/2022 - 08:23
This is totally awesome, way to think outside the box! Thanks for sharing.
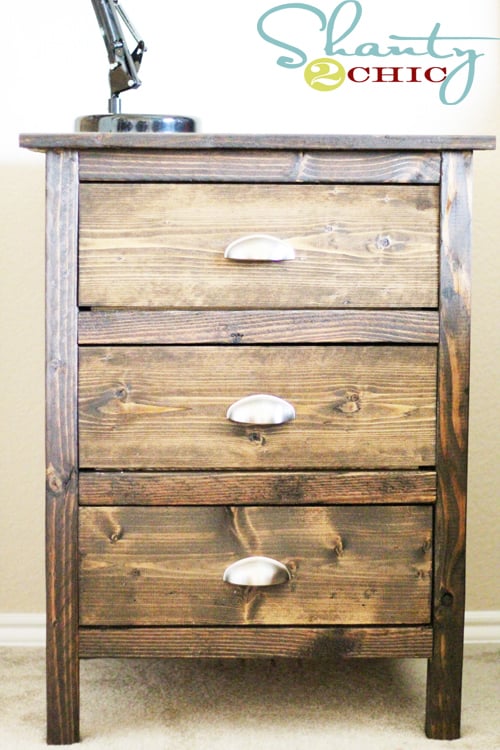
Love these night stands! I spent $40 on lumber for two night stands and $30 on the hardware! You can see more pics of my finished night stands at www.shanty-2-chic.com
Mon, 08/29/2011 - 20:10
We made two of these same night stands earlier this month. I haven't taken a good enough picture to post on here. I need to do that. Great job!
Wed, 09/28/2011 - 22:17
This is wonderful. I'm looking for something similar to build in the next couple weeks. Could you share the plans for it please?
Mon, 05/28/2012 - 06:25
My hubby made these for my daughter and they turned out awesome.So now I have to have them too. He is working on them now, but we are making them out of some oak we already had. Can't wait. Now I need a matching headboard!! Looking for plans...
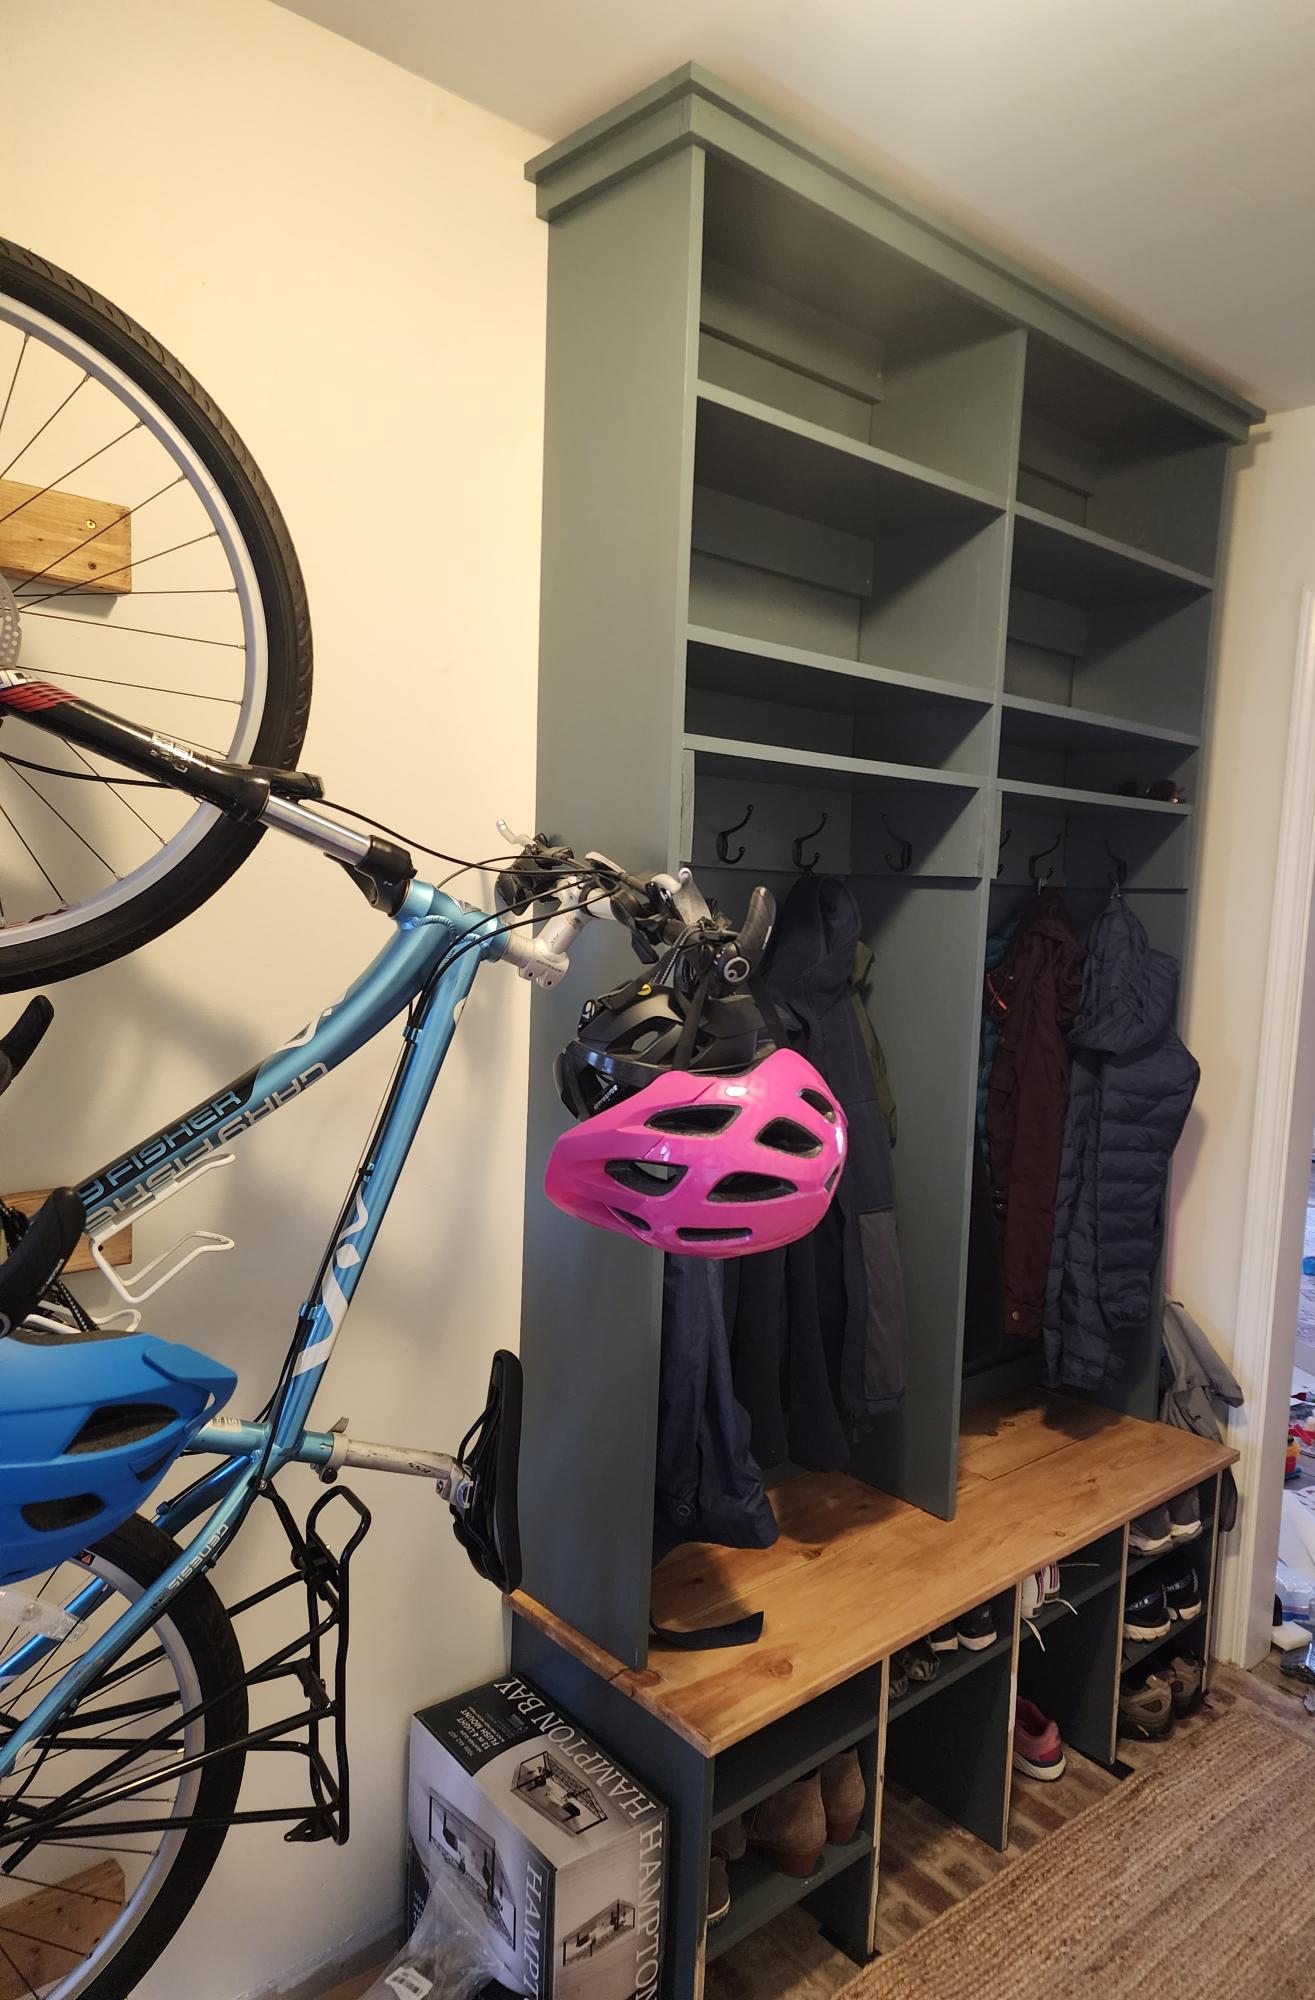
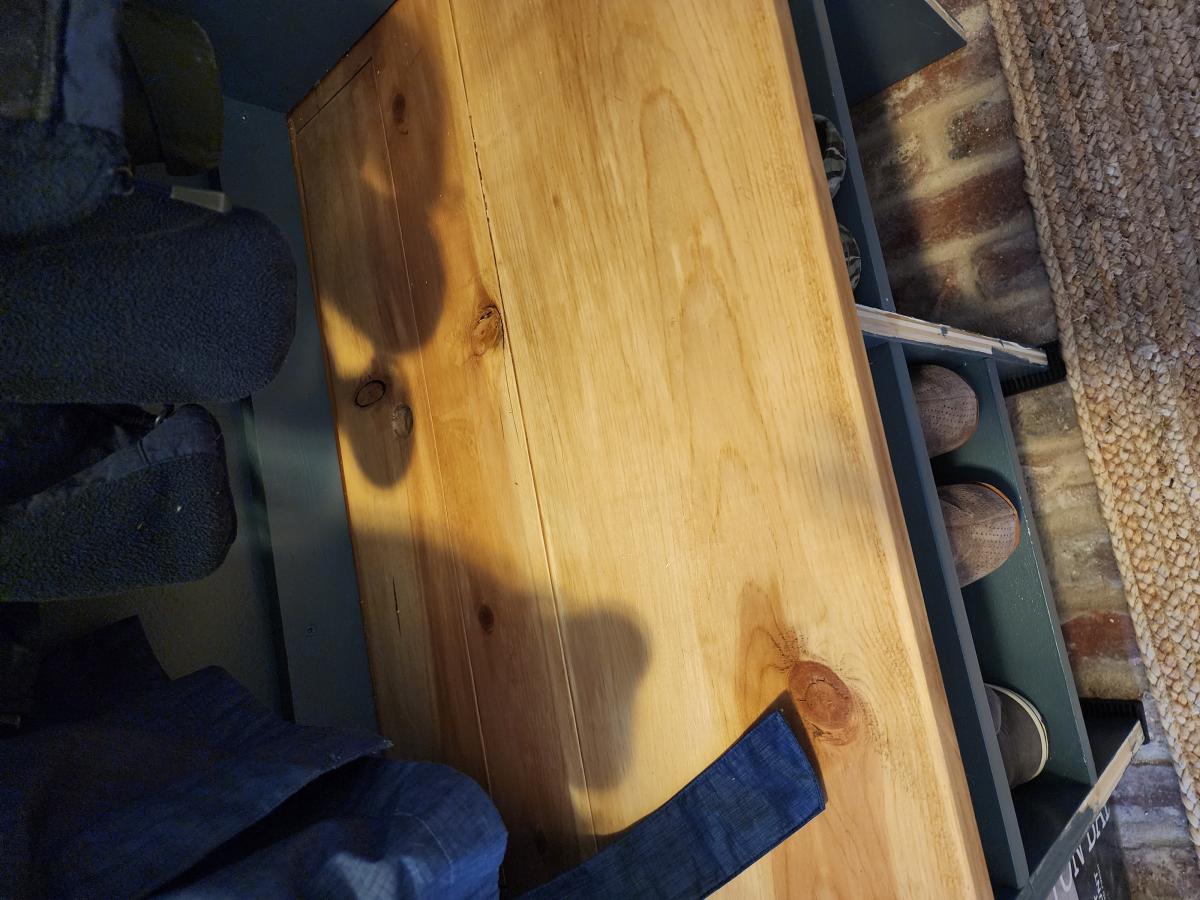
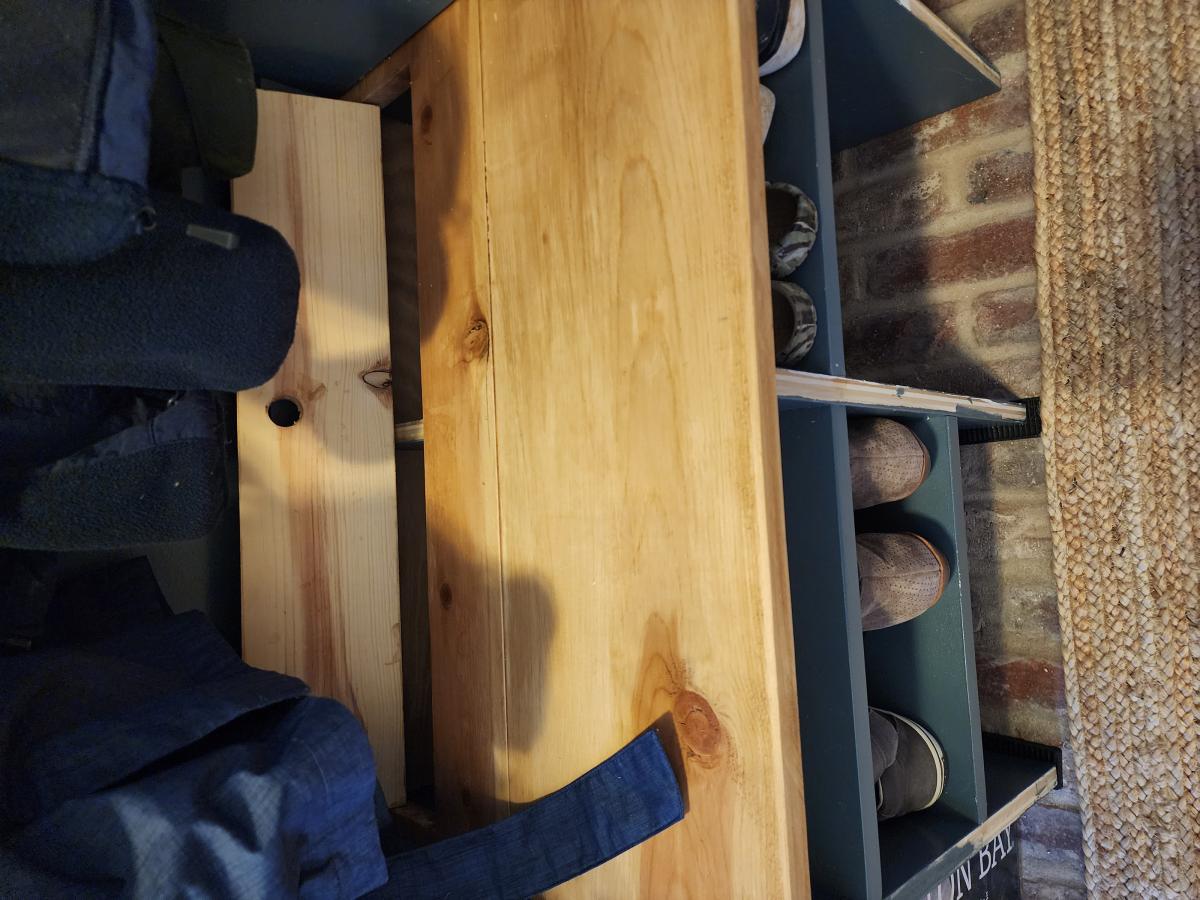
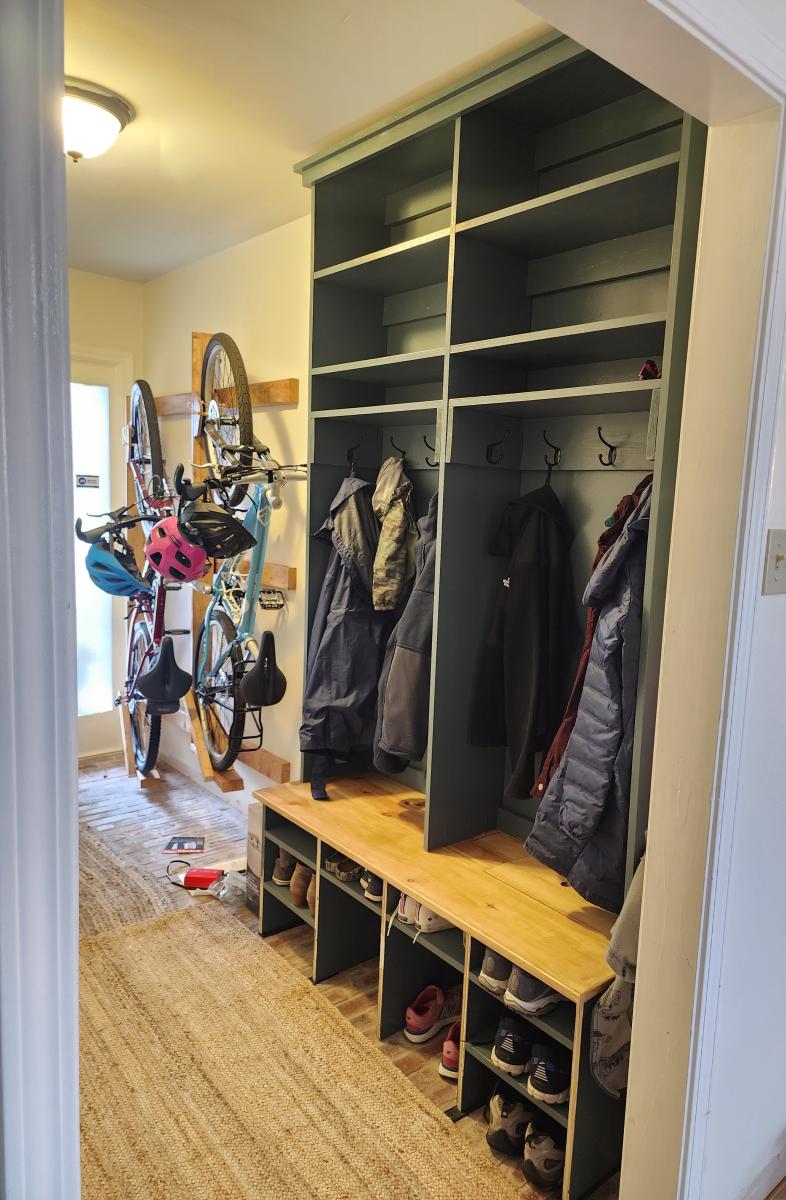
I have been dreaming of this project for YEARS! I used shelfhelp to design the shelf size and the open bottom mudroom plans with matching hutch and the plan with lift up boot storage for inspiration. I still need to add trim but I'm so excited I couldn't wait to say THANK YOU for all the inspiration and help! We absolutely LOVE it!!
Sun, 11/20/2022 - 12:36
Love the color choice, and the build is phenomenal! Thank you so much for sharing.
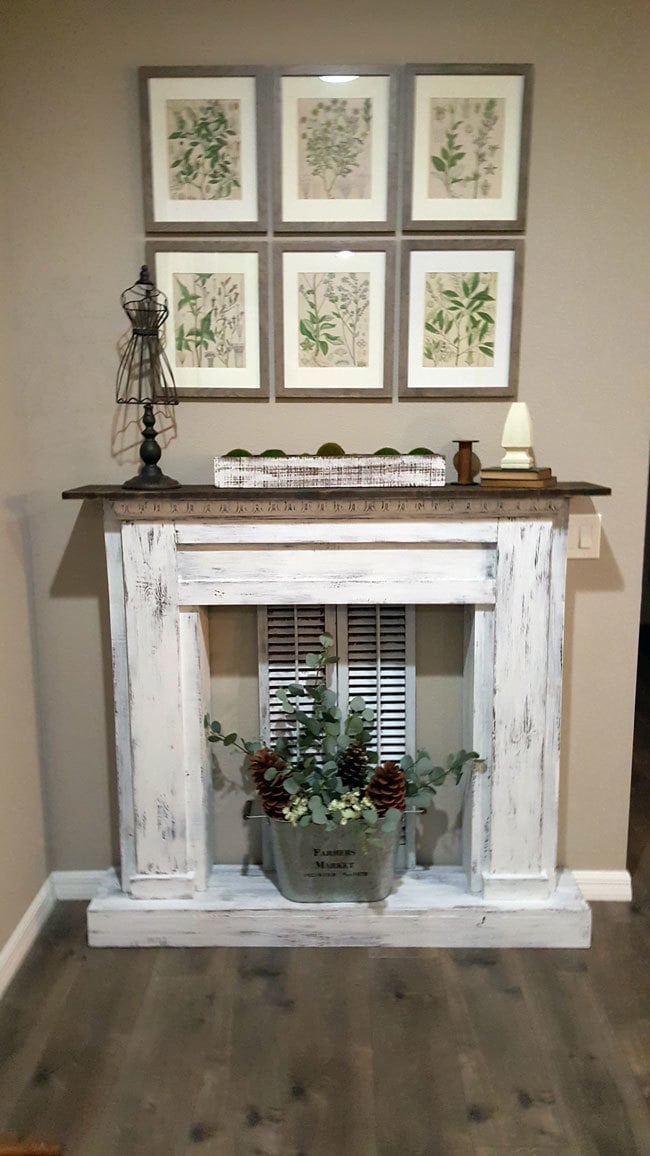
This was a great plan to use! We changed some of the measurements to fit our space and added a simple base to the bottom. My inspiration was a picture of an old chippy mantle from a flea market.
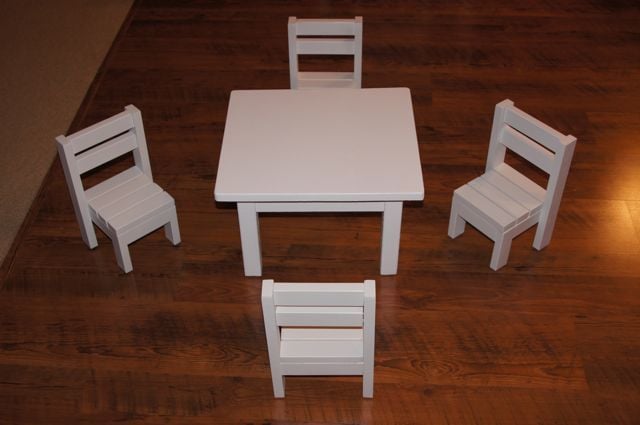
I decided to make the Clara table and the $4 stackable chairs for my daughters for Christmas. They were not for them though but rather for their American Girl dolls. I had to modify the plans to work for standard 18" dolls.
The Table:
It is a little taller than it should be but it allows the doll to fit under the table/apron while sitting in an appropriately sized chair (5" seat).
I also changed the length from 18" to 15 1/2" so the cuts could be made from a 4ft board.
3 - 1 x 6 @ 15 1/2" (Top) (1 @ 4ft)
4 - 2 x 2 @ 10" (Legs) (1 @ 4ft)
2 - 1 x 3 @ 10 1/2" (End Apron) (1 @ 4ft)
2 - 1 x 3 @ 9" (Side Aprons)
The apron is 1 1/2 inches. a 1x2 would probably work for the aprons too. You could then shorten the table legs by about an inch.
The Chairs:
The over all dimensions are now 12" H (back), 5 1/2" H (seat) X 6" W X 6 1/2" D
Cut List:
2 - 1×2 @ 4 1/4" (Side Aprons)
2 - 1×2 @ 5" (Side Supports)
3 - 1×2 @ 4 1/2" (Front Legs and Front Apron)
7 - 1×2 @ 6" (4 Seat Slats, 2 Back Slats and Back Apron)
2 - 1×2 @ 12" (Back Legs)

This was a big undertaking for indoor furniture and I learned so much! I slightly adjusted the size to what I had available with some scrap wood from my old stairs so saved a little on costs with lumber!
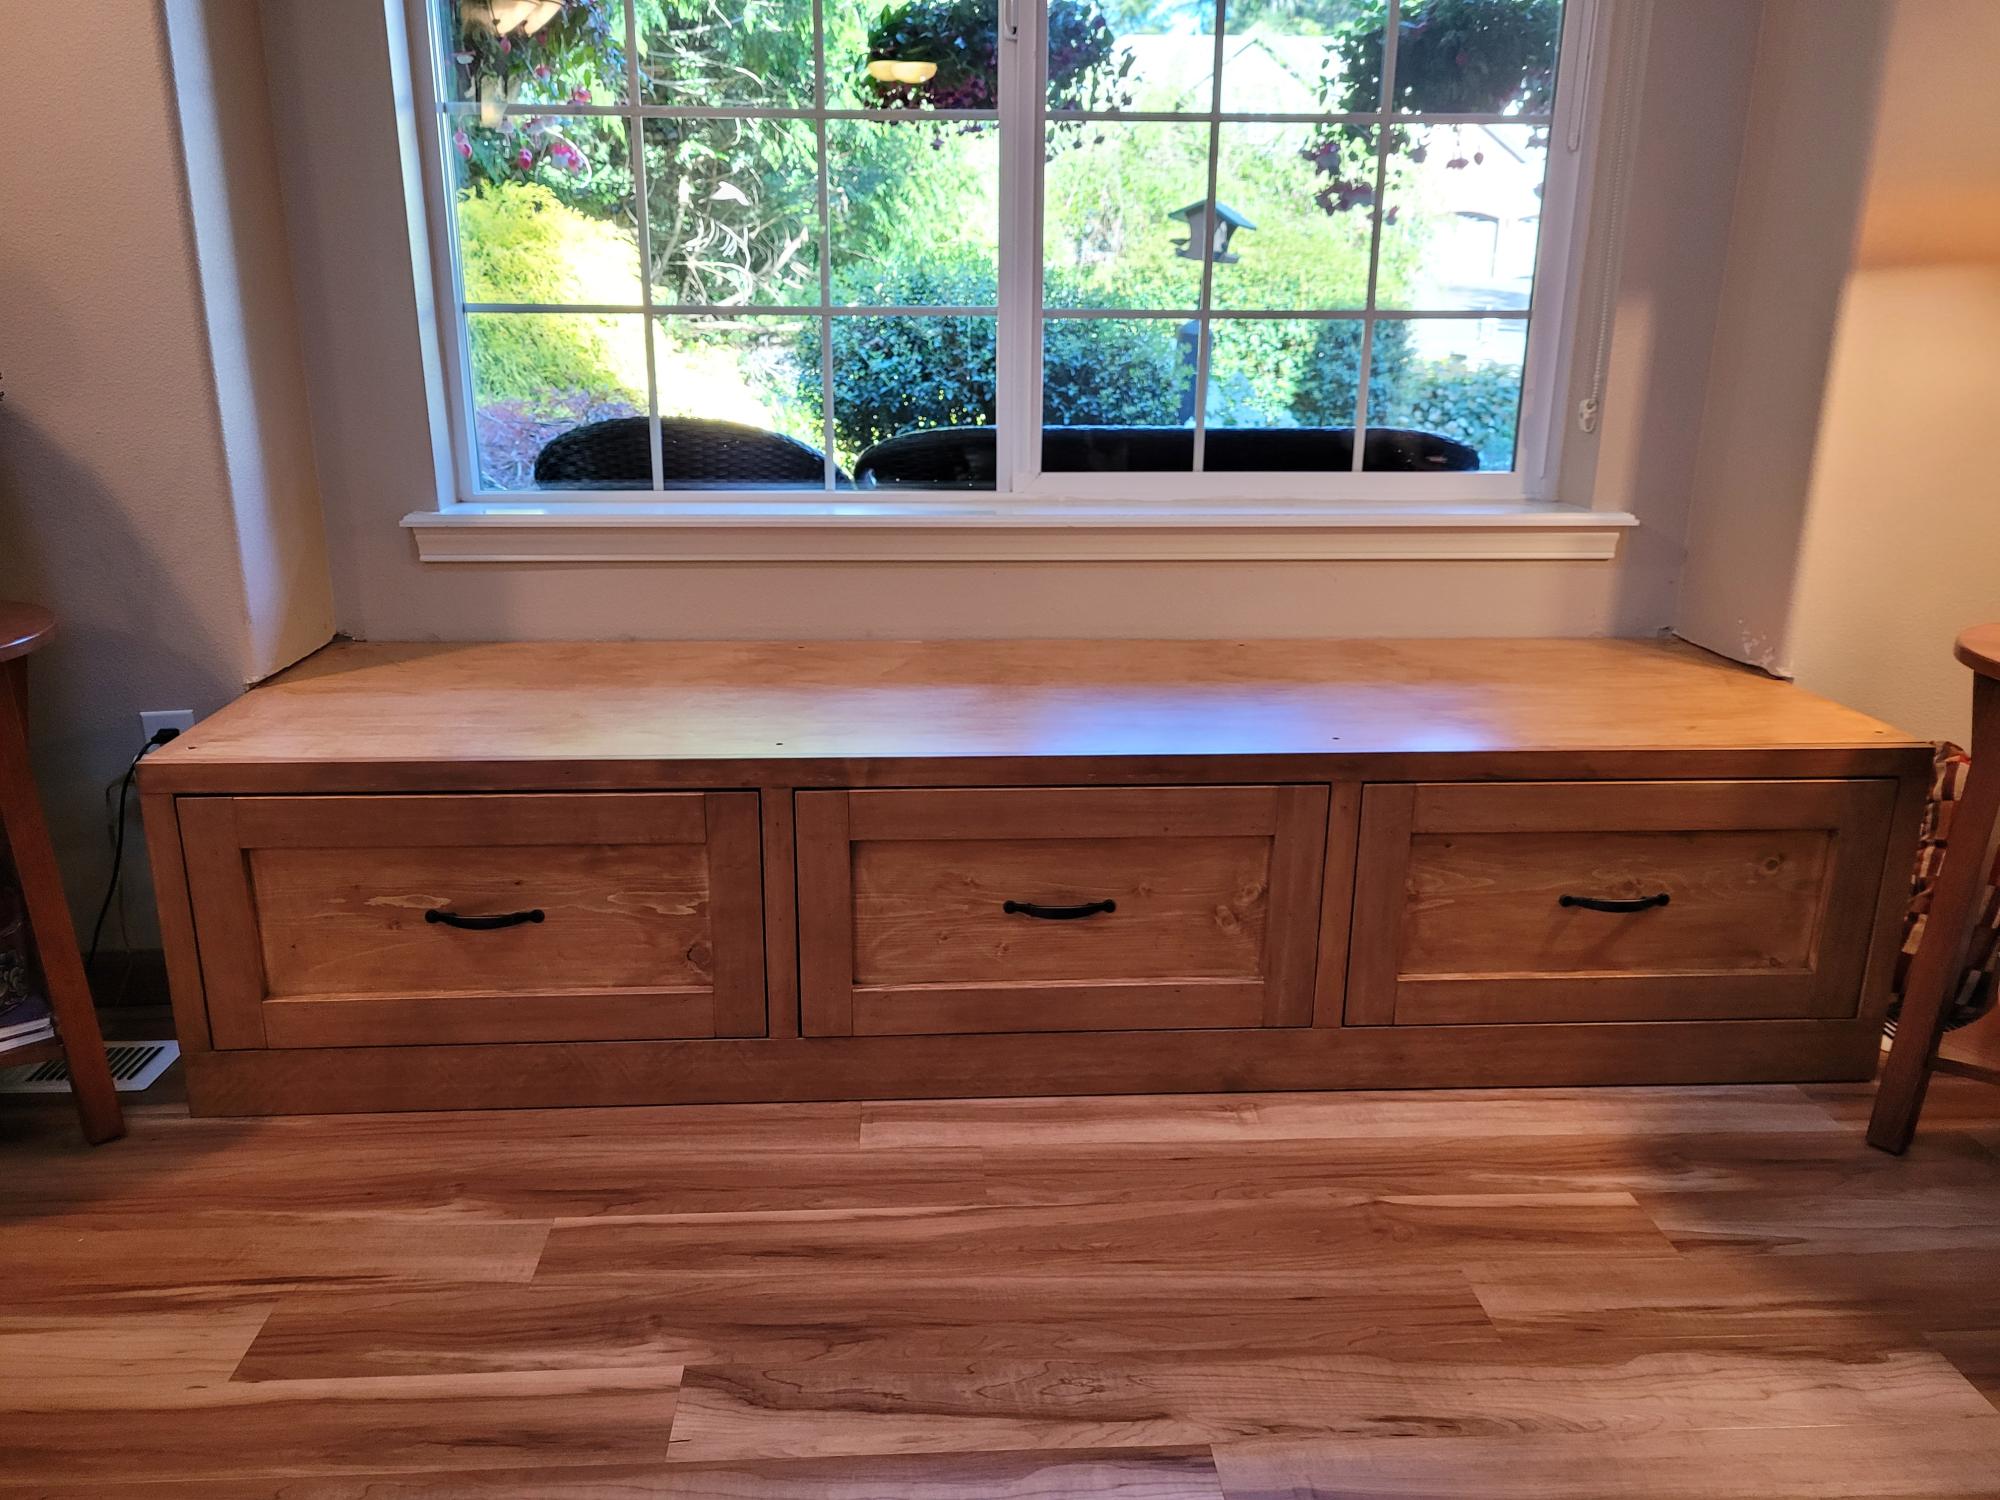
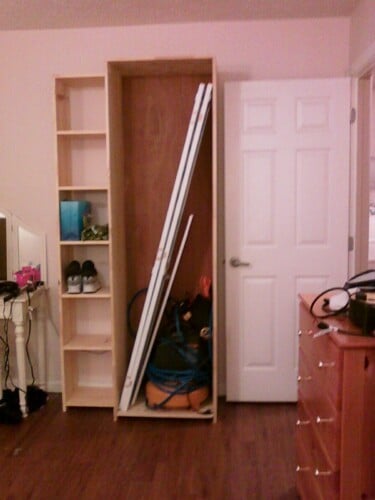
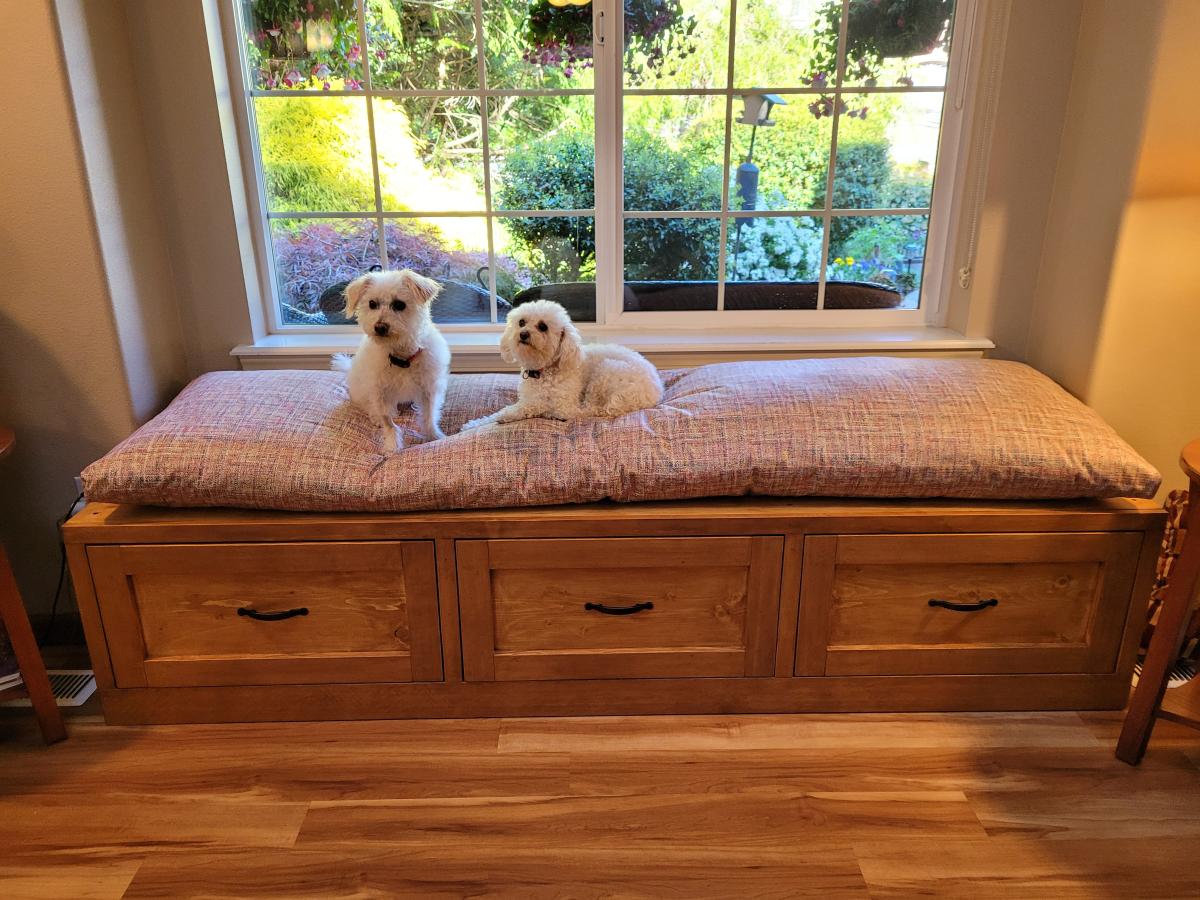
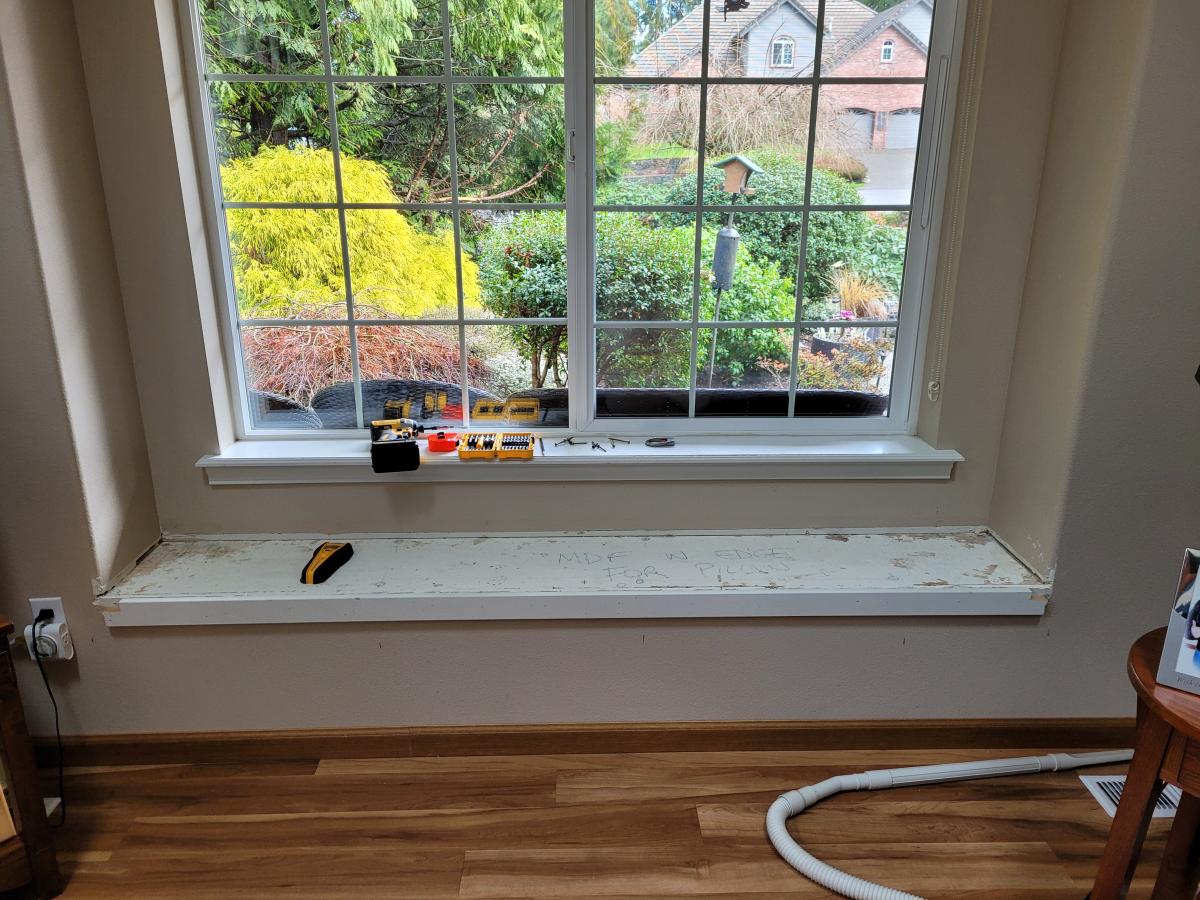
Our home had a window seat that was only 14 inches deep and too small to sit on lengthwise. The before photo shows it just before I started the demolition phase. I had found the mudroom bench with easy drawers plan and decided it would work for our space. This was my first DIY woodworking project. I bought a Dewalt 12-inch compound bevel, sliding miter saw, a Kreg Pocket hole jig, and a Kreg straight-edge guide, and I plan to use them for future projects. I really enjoyed following the plans and building this project.
I got all of my wood at my local Lowe's by sorting through a lot of boards to find the best ones available. I found a nice-looking sheet of hardwood plywood for the top and sides. It was expensive ($84), but I wanted to try staining the project rather than painting it so that it would complement our flooring and other furniture in the room. I decided that if it didn't work out with the stain, I would paint over it.
A local Benjamin Moore paint store did a great job at finding a stain that would match and could be painted over if necessary. It only required one coat of stain to achieve the desired color, and I applied three coats of polyurethane over it.
We ordered a custom cushion with a cover to match the size of our new window seat with drawers. We, and our doggies, are very pleased with how the project turned out! Thank you, Ana White, for the excellent plans and video!
Gene St Germain, Poulsbo, WA
Sat, 05/13/2023 - 13:06
Amazing first project and upgrade, it looks so great! Thanks for sharing.
This was my first building project! I had so much fun with it ... for a guy that can't even hang a photo on the wall! My dad helped and he had all the tools. I spent a few weekends with him so not only was a good father/son project we had something to show off at the end. I think I've caught the woodworking fever.

Sat, 12/21/2013 - 18:55
Your bed turned out beautiful. I love the finish, that grey stain ads so much character!
Mon, 12/23/2013 - 12:10
I really like the look of the stain. I would be interested to know what changes you made to the original to achieve this look. Also, where did you find the lumber? I can't find knotty alder around here.
Thu, 10/23/2014 - 06:32
Is there a way to find the materials needed and specific instructions on how to make this bed? I LOVE IT!
Tue, 11/25/2014 - 19:22
Hello,
This is awesome, I've been looking to build a bed frame for my new apartment. Does anyone know where I can find the plans for this project.
Similar to the person above me, I am new to this and not quite sure what to do. If anyone can provide me with a little insight to this project I would really appreciate it!
Thanks!
Sun, 11/30/2014 - 20:41
I would love to see the plans for this bed. Please post them if you can! Thanks
Tue, 12/23/2014 - 09:23
Here is the plan http://ana-white.com/2009/10/farmhouse-bed-save-158100_7467.html
Thu, 02/26/2015 - 15:36
Love the bed! Where did you get the lumber? Specially ordered or just regular pine from the store like Lowes or Home Depot?
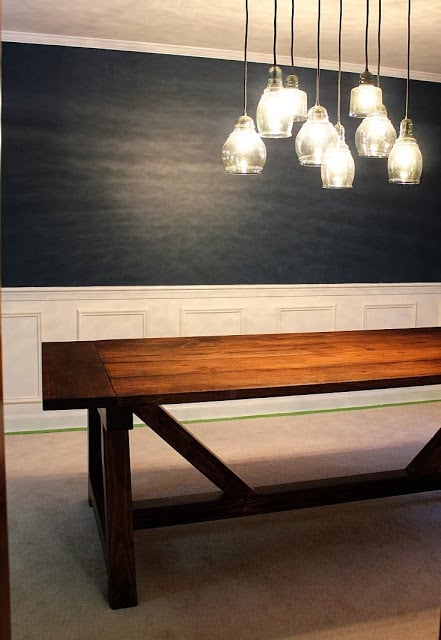
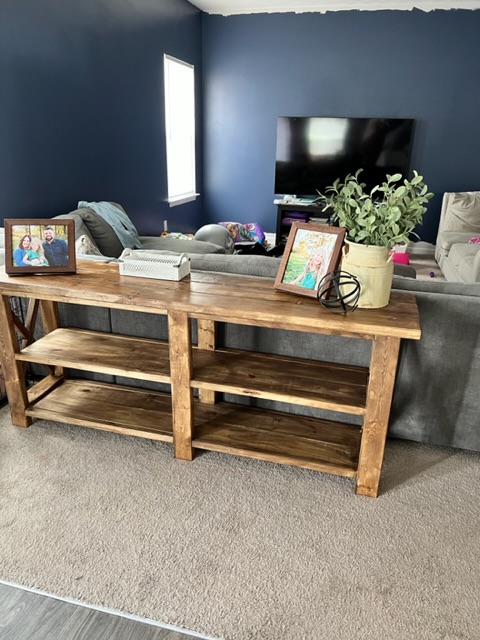
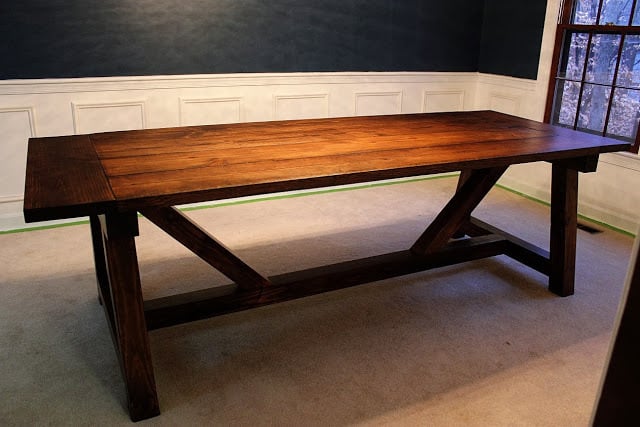
Eight foot Truss Beam Table built out of pine, for about $250 for all of the lumber, pocket screws, stain and poly.
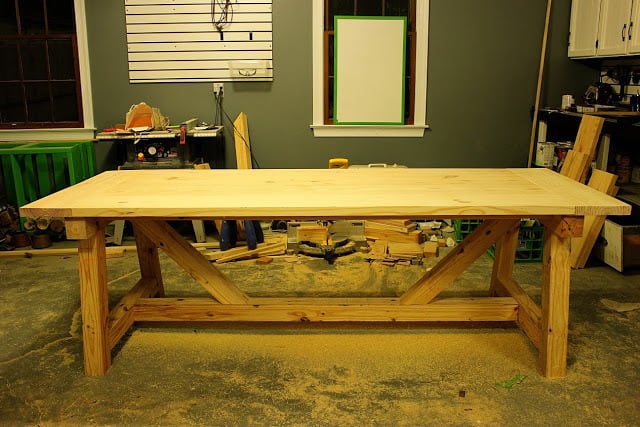
This was my second project, and I found it easier than the Benchright Coffee Table, except for the lifting of the wood. It was so heavy that I needed my husband's help to move the table top after it was pocket screwed together, and we waited until we brought the table inside to attach the base and the table top, due to weight and size.
More photos of the build process: http://thehandcraftedlife.blogspot.com/2013/11/dining-room-progress-diy…

Sun, 01/25/2015 - 16:26
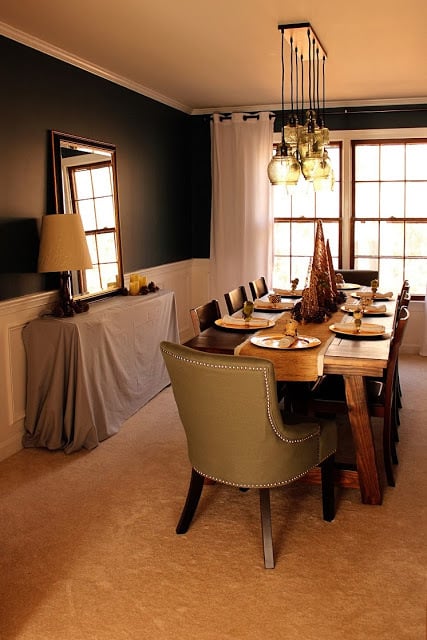
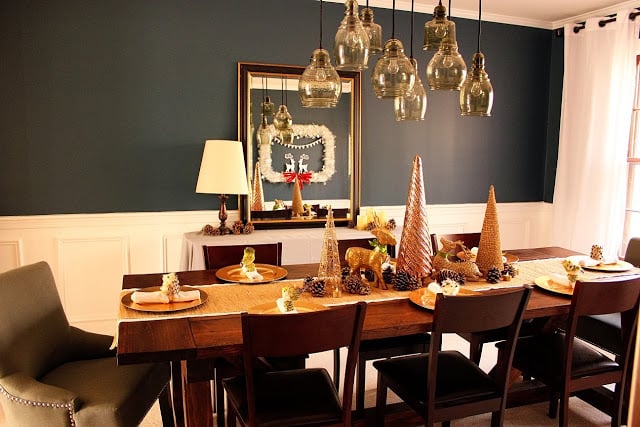
Gorgeous table, and it's now on my to-do list for this summer, but I also love the light fixture! Was this a DIY project as well? I've seen plenty of similar projects using mason jars but I much prefer the variety and shape of the glass covers used in this piece, are they upcycled? Any details I can get would be appreciated!
Mon, 01/26/2015 - 12:22
I have the same lights in my breakfast area, it's the Paxton Chandelier from Pottery Barn.


