Community Brag Posts

Doll Bunkbed mattresses

Submitted by ewebrat on Fri, 07/24/2020 - 13:28

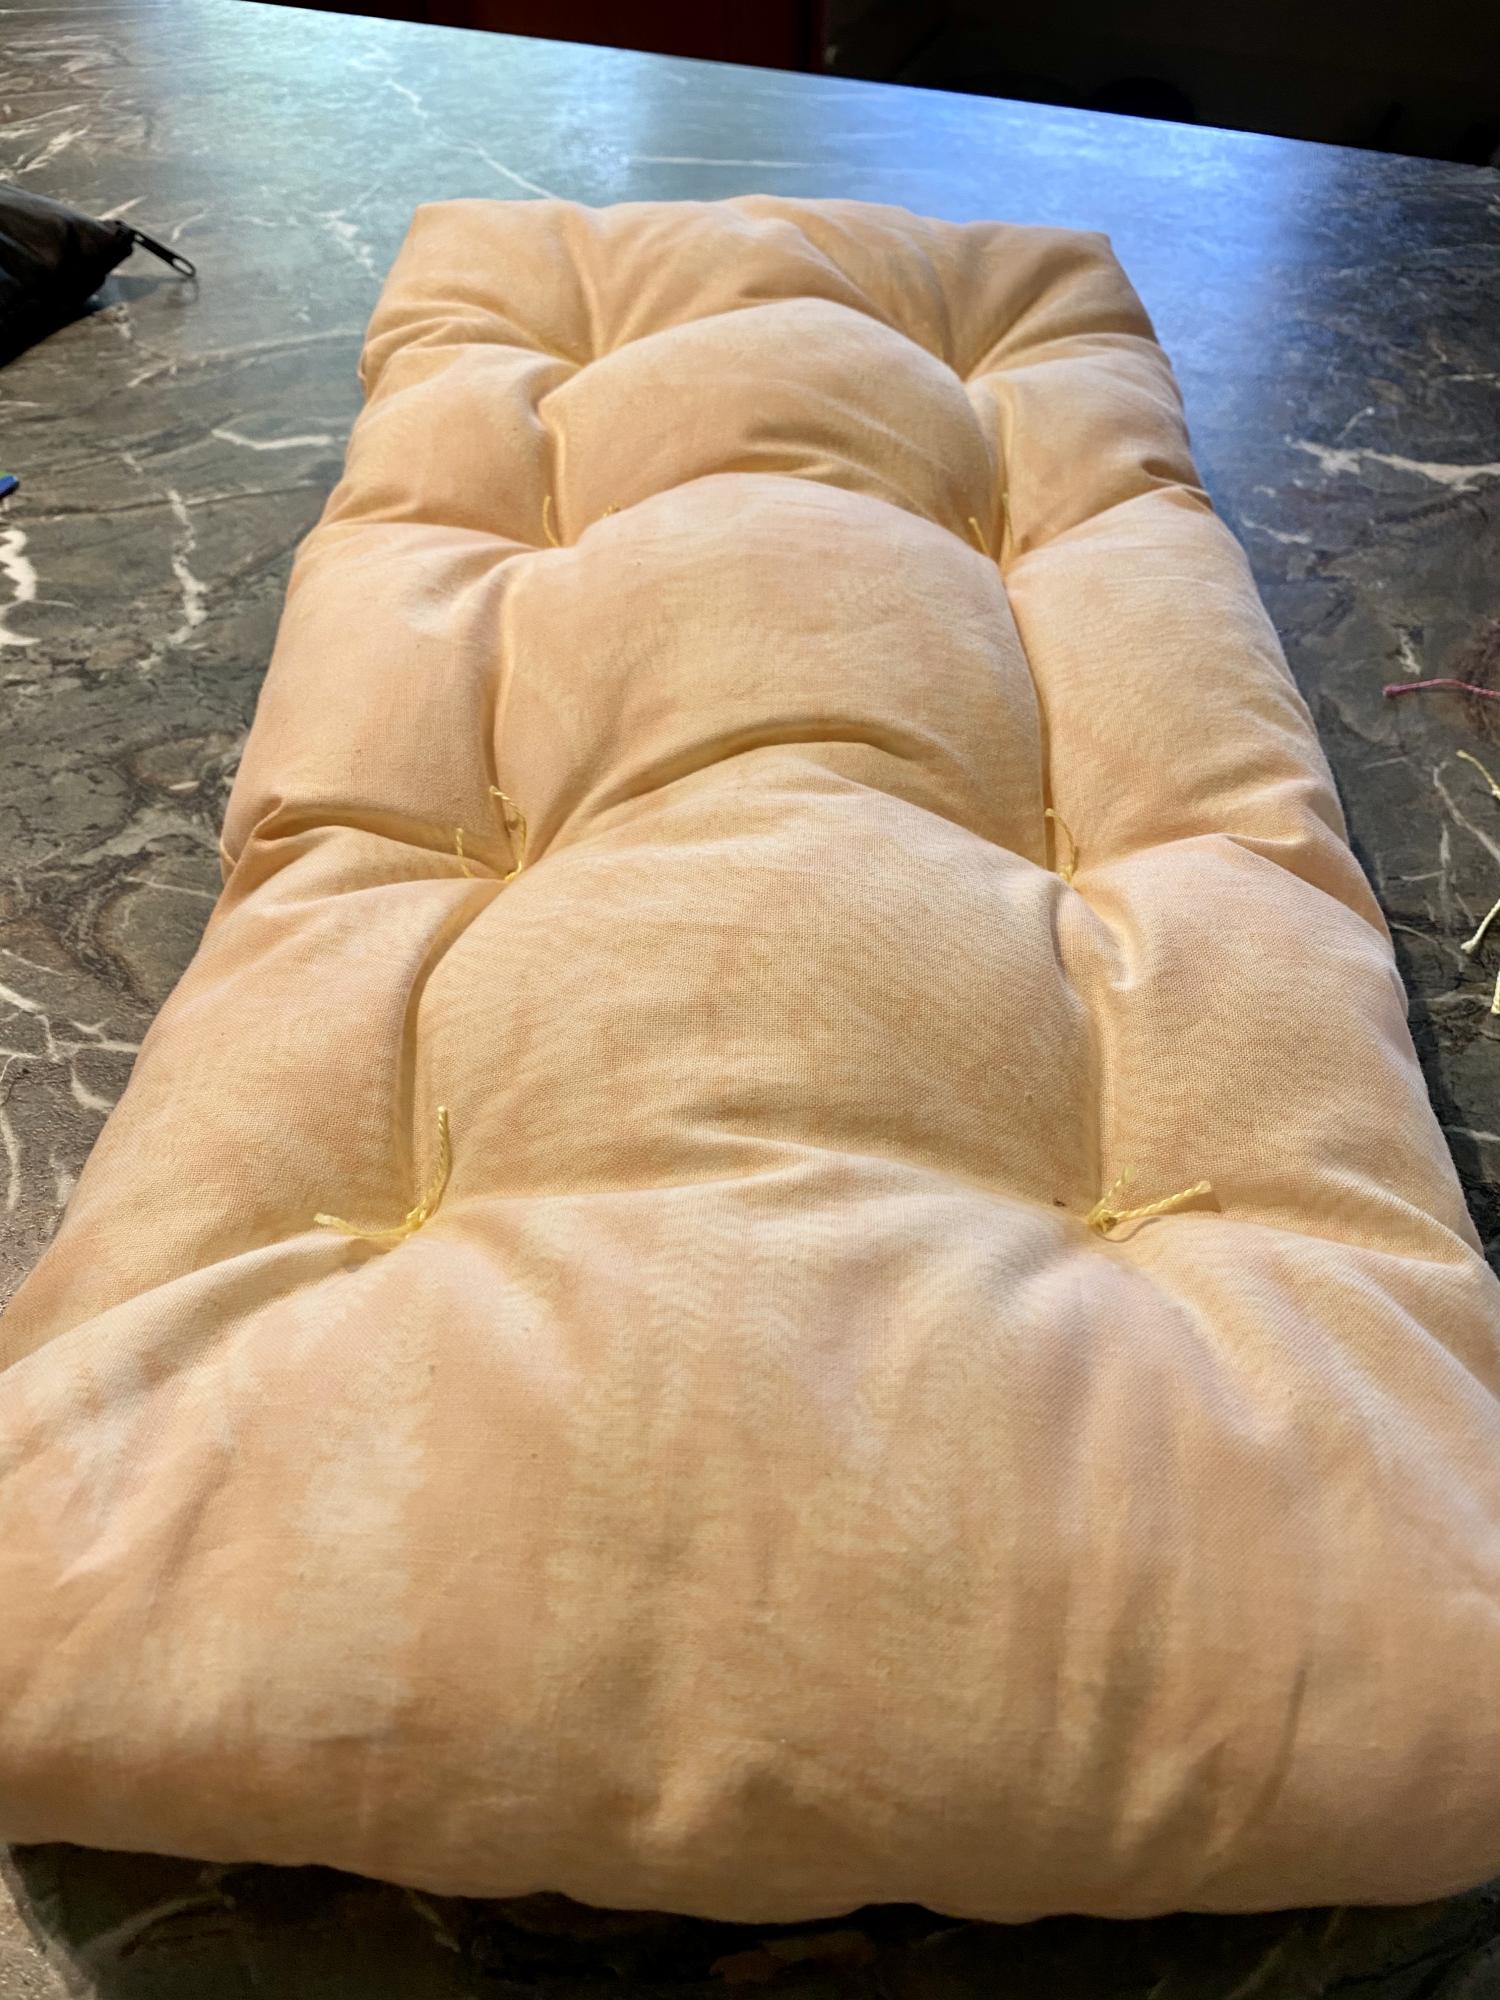
Not a great pic. Made two to go on Bunkbed. Plans were perfect. I did not use buttons as there is a 13 month old eating machine in the house, but instead used heavy craft thread and sewed an X in eight spots, leaving a small tuft of cut thread. Worked just fine.

Estimated Cost
Zero - already owned materials
Estimated Time Investment
An Hour or Two (0-2 Hours)
Finish Used
n/a
Recommended Skill Level
Starter Project

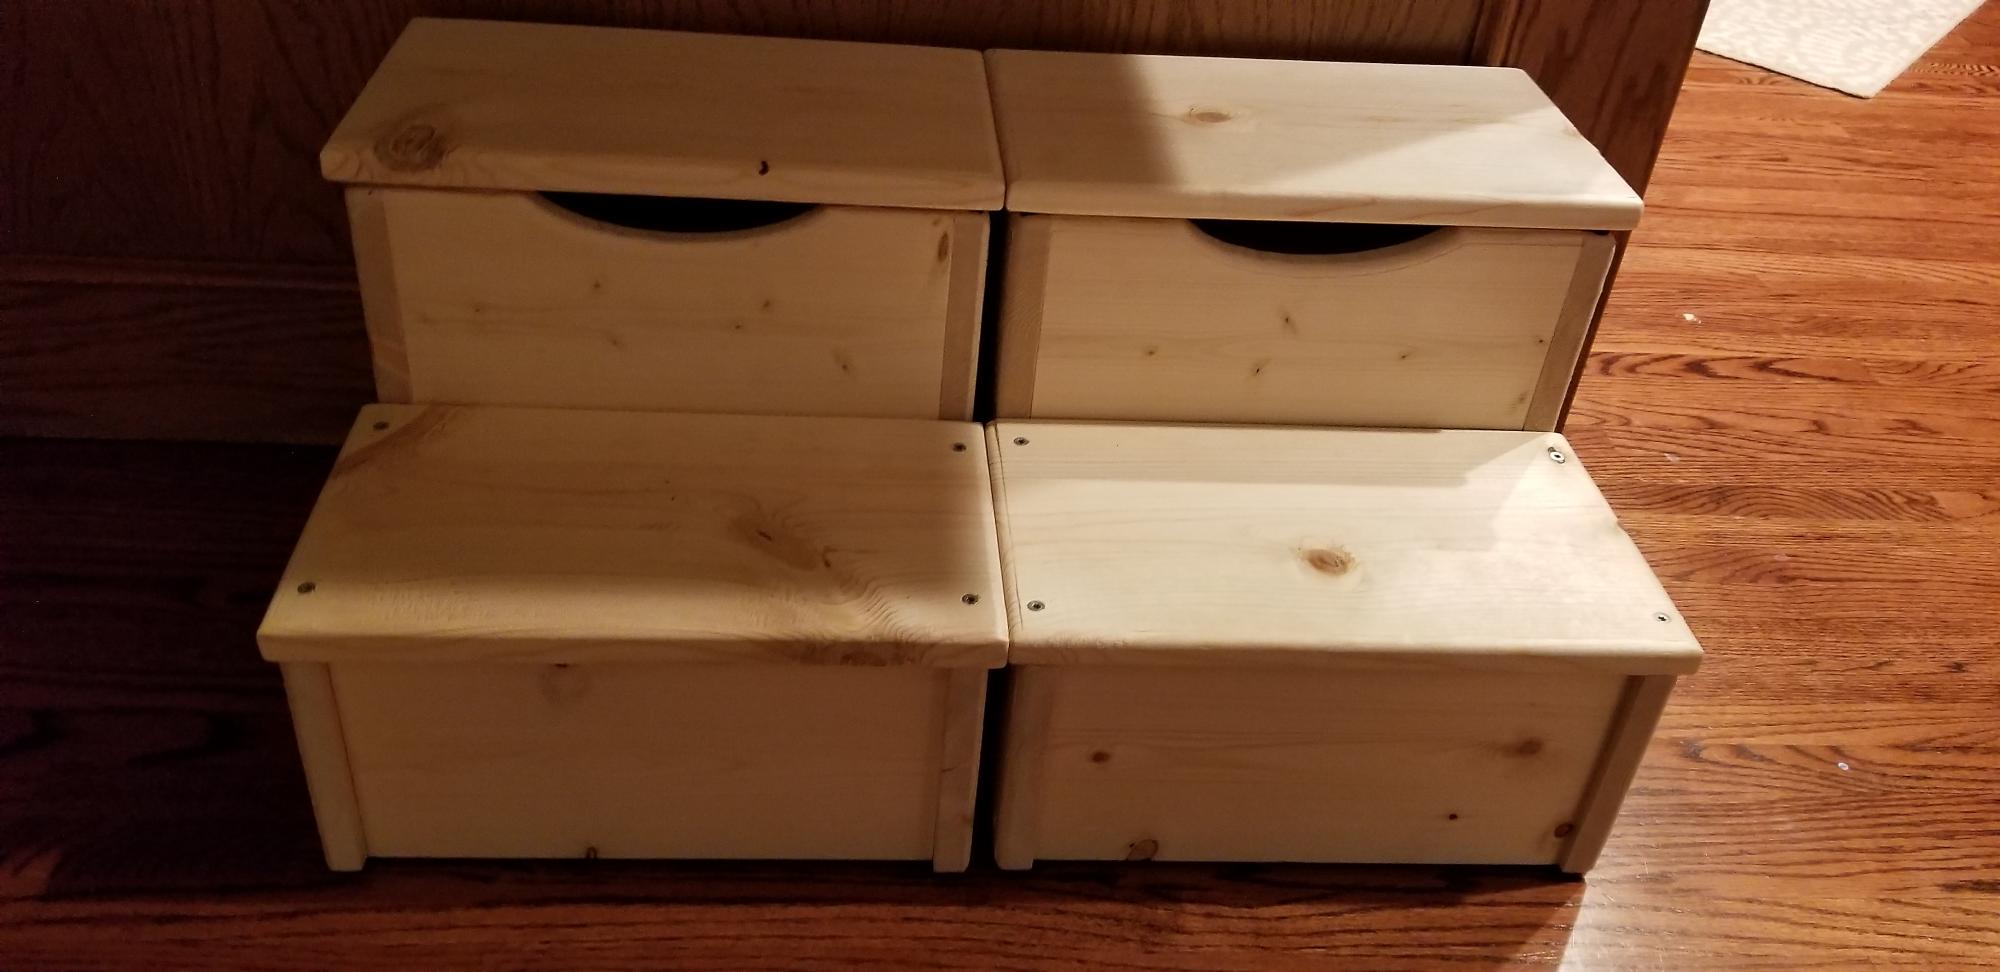
Kid's Storage Step Stool

Submitted by Anonymous (not verified) on Mon, 07/27/2020 - 07:54

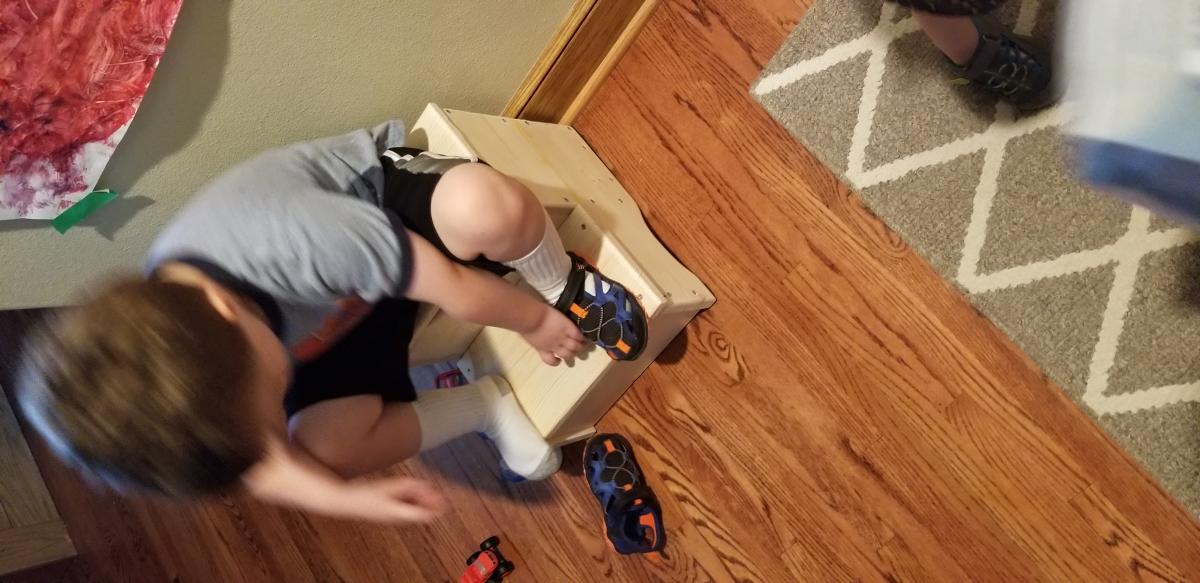
I'm a beginning wood worker enthusiast. I've been slowly collecting plans, tools, supplies and I'm certainly not efficient when it comes to projects- even "beginner" projects like this.

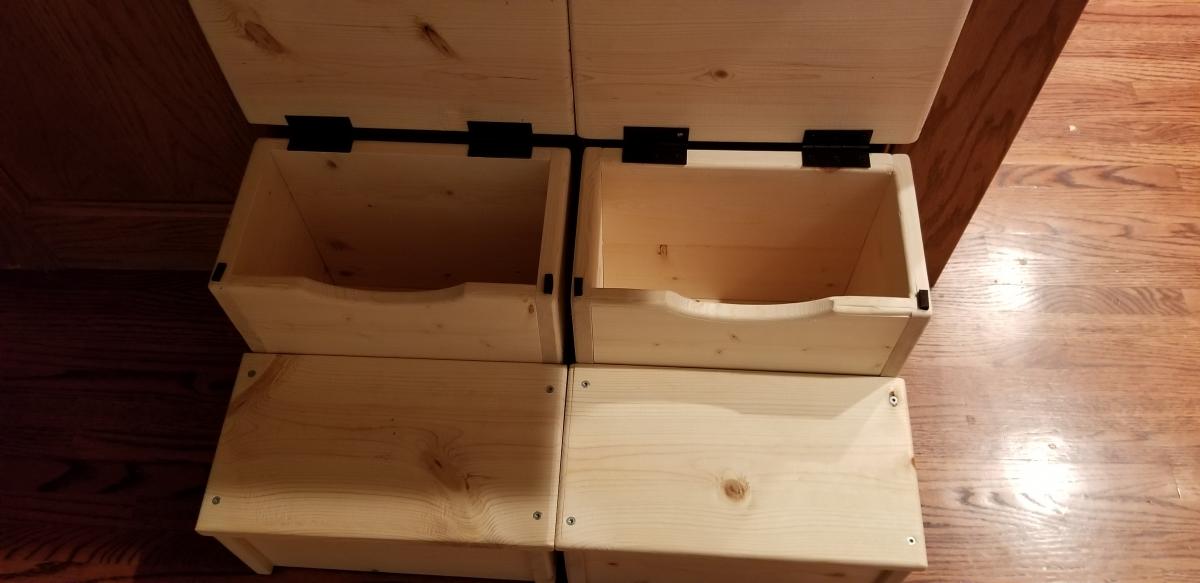
While there's still more finishing to do, I cranked these out over the weekend with a myriad of interruptions - so it's hard to say how long these would really take. I didn't have 12" boards, so glued 1 x 6" pieces together into the shape I needed. Then assembled each with 1 1/4" screws, routed the sides, sanded and cleaned them. The kids will paint them their favorite colors and then I'll put a clear coat on top to finish them up. Once painted and ready, I'll add hands to each side as well as rubber runners to the bottom for stability. These are really nice for toddlers to use while they put on or take off their shoes and put into the storage bin.

Built from Plan(s)
Estimated Cost
~ $30/stool
Estimated Time Investment
Weekend Project (10-20 Hours)
Finish Used
A few things:

1) Assembly of the stool- I assembled mine by fitting them together and using 24" clamps to hold them in place, adjusting each part so it was square to the other parts (sides to front/back pieces, etc. then pre-drilled and assembled with 1 1/4" screws placed at even intervals. Many of the brag posts look like people glued them together. Wood gluing is great which is often stronger than screws- the wood itself will give way before the glue does, I've seen proof of it. At the time of my construction, I needed to assemble them and use them right away so I opted for screws instead.

2) Adding the hinge- Duct-taping it to test out the best fit works really well, but there are at least 3 ways to attach this:
a) hinge on the inside of both the stool and top step
i) non-flush - allows for a felt stopper to minimize wood to wood noise when closing.
ii) flush - mortise or rout out the 1/8" (or whatever the depth of your hinge is) space for the hinge by tracing the hinge location and using a short depth mortise bit OR using a set of wood chisels- not everyone has a router (I had to borrow one from the in-laws...)
b) hinge on the back side- no mortise needed, but be aware of how far back you want the step lid to be able to go, full or 90 degrees from the start.
c) hinge on the inside of one side- i.e.: have the hinge on the outside of the stool and the inside of the step or vice versa.
3) The finish- Mine is still a work in progress- My kids are going to do a family project day with me and paint them their favorite colors. Once they finish painting (with touch-ups by Dad) I'll finish it with a top coat to seal/protect the paint.
Recommended Skill Level
Beginner

Farmhouse L Desk

Submitted by kellyd77 on Mon, 08/17/2020 - 09:02

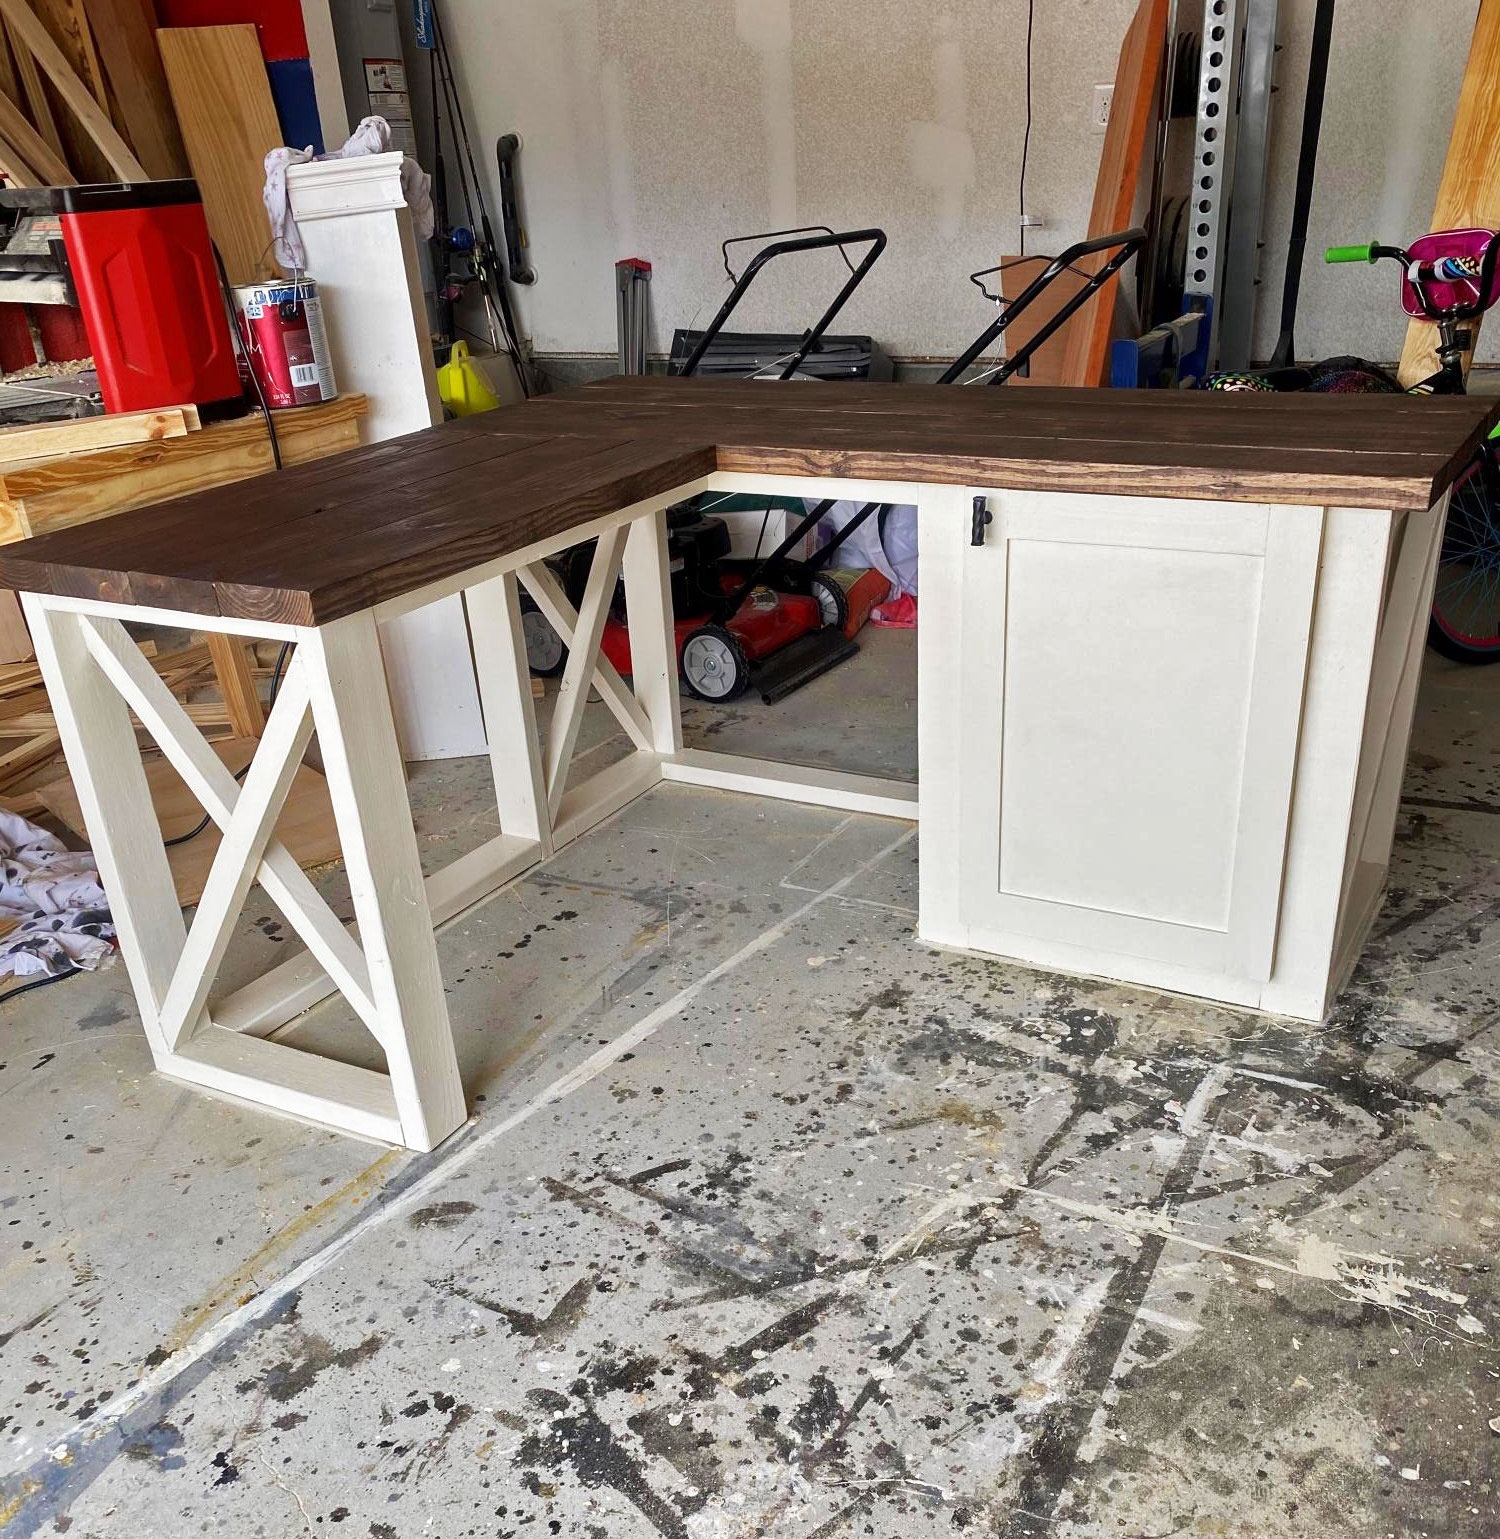
Put a twist on the farmhouse desk plans

Built from Plan(s)

Comments

Playhouse Loft Bed With Stairs And Slide

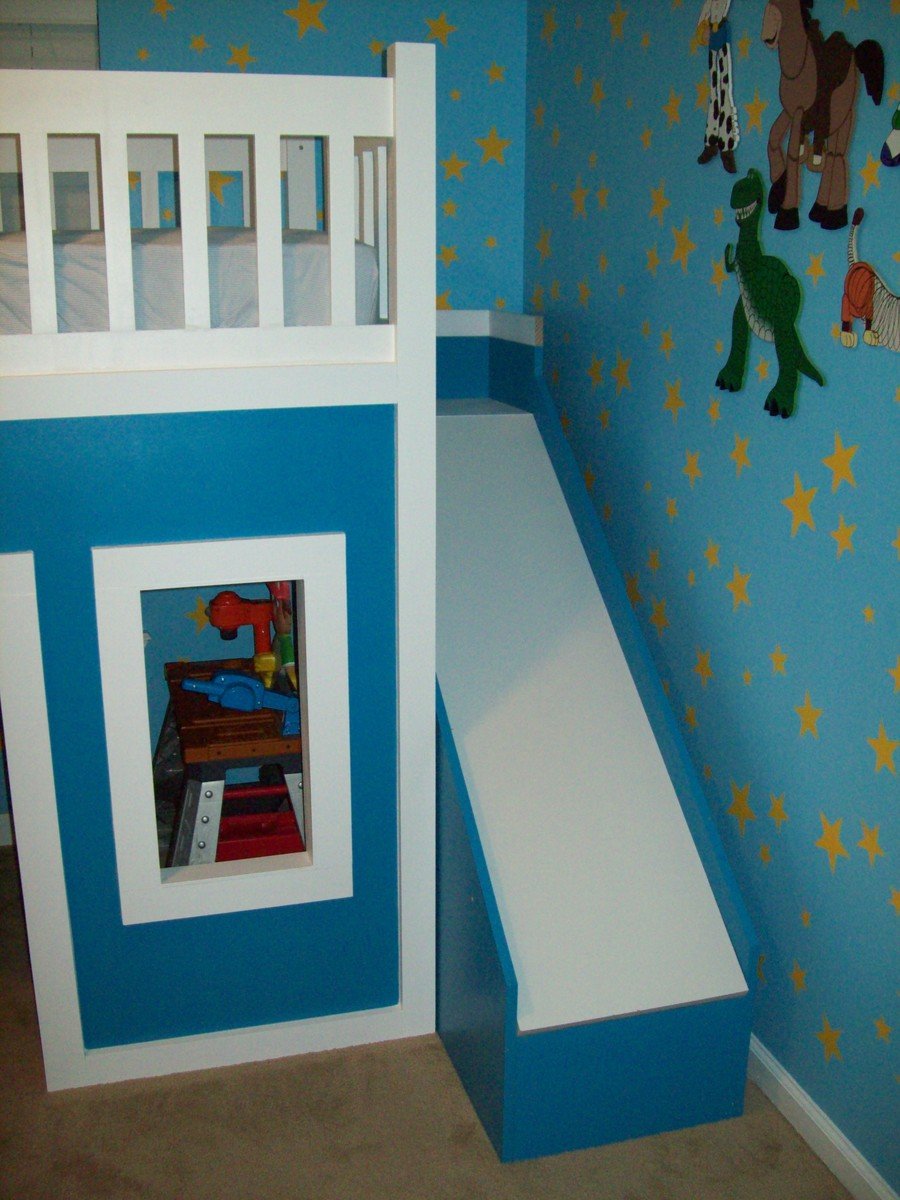
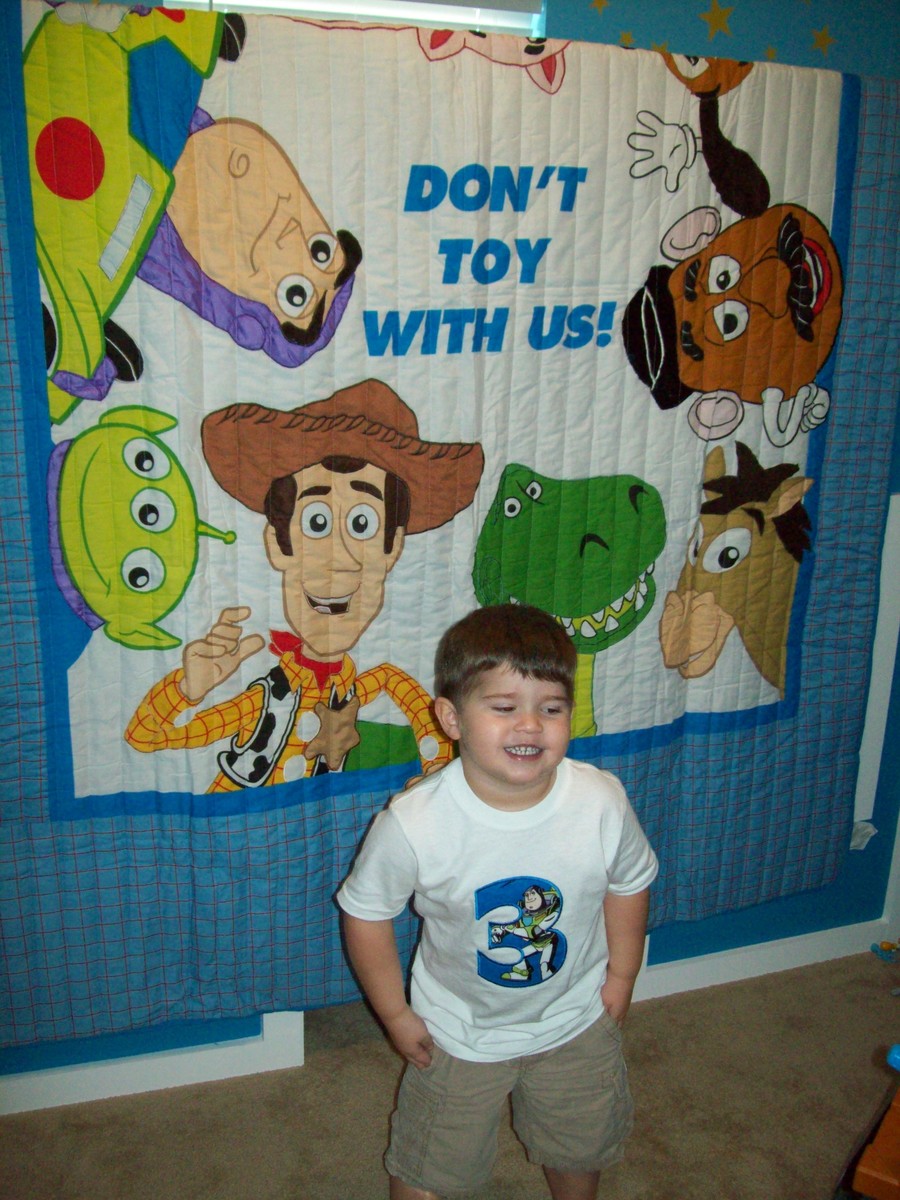
My son was about to turn 3 and I really wanted to redesign his bedroom as a birthday surprise. We went with a Toy Story themed room, he just loves Toy Story.
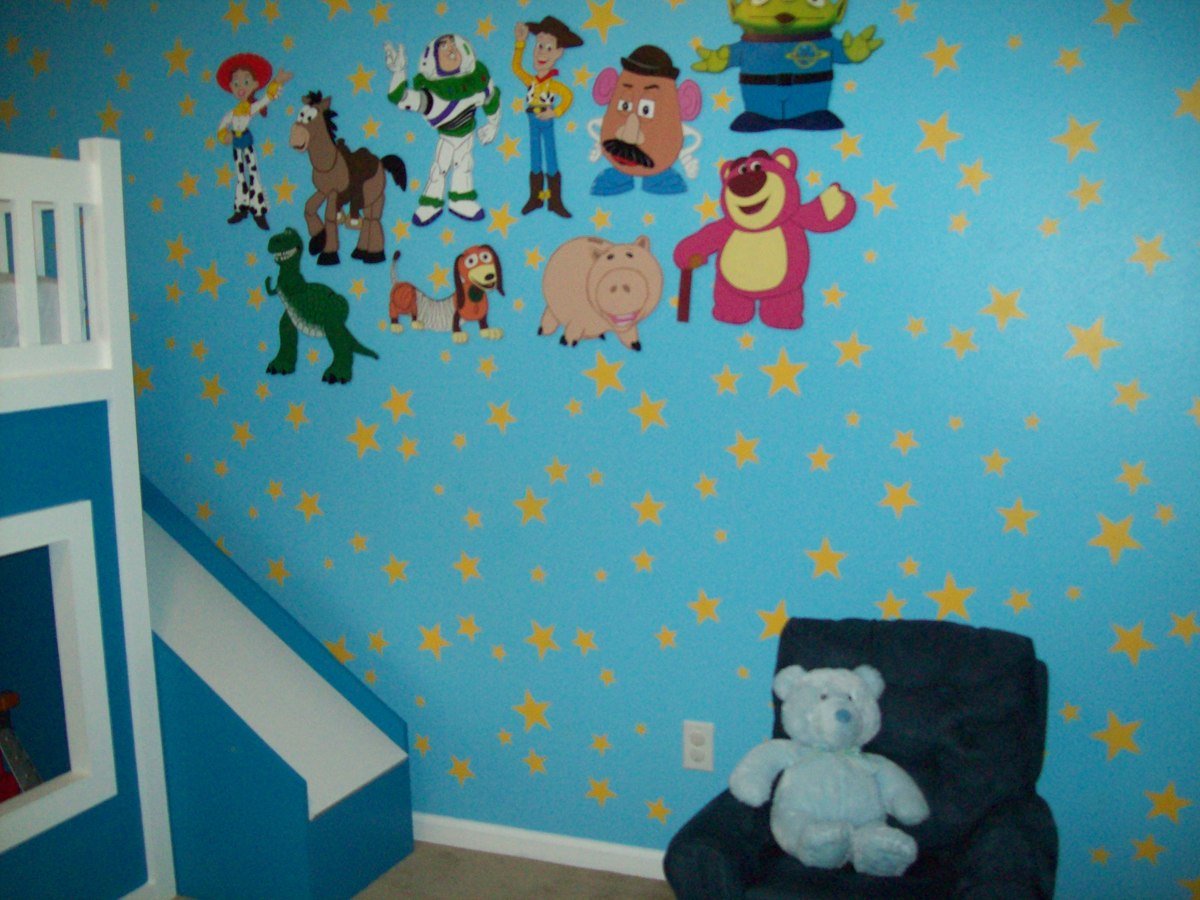
I started off by painting the walls blue with yellow stars like Andy's room in the movie. I added some custom painted art work and then it was off to find a cool playhouse bed. My husband and I were shopping around and we could never really find what we were looking for in the store. So we decided to build one ourselves using plans from this website.
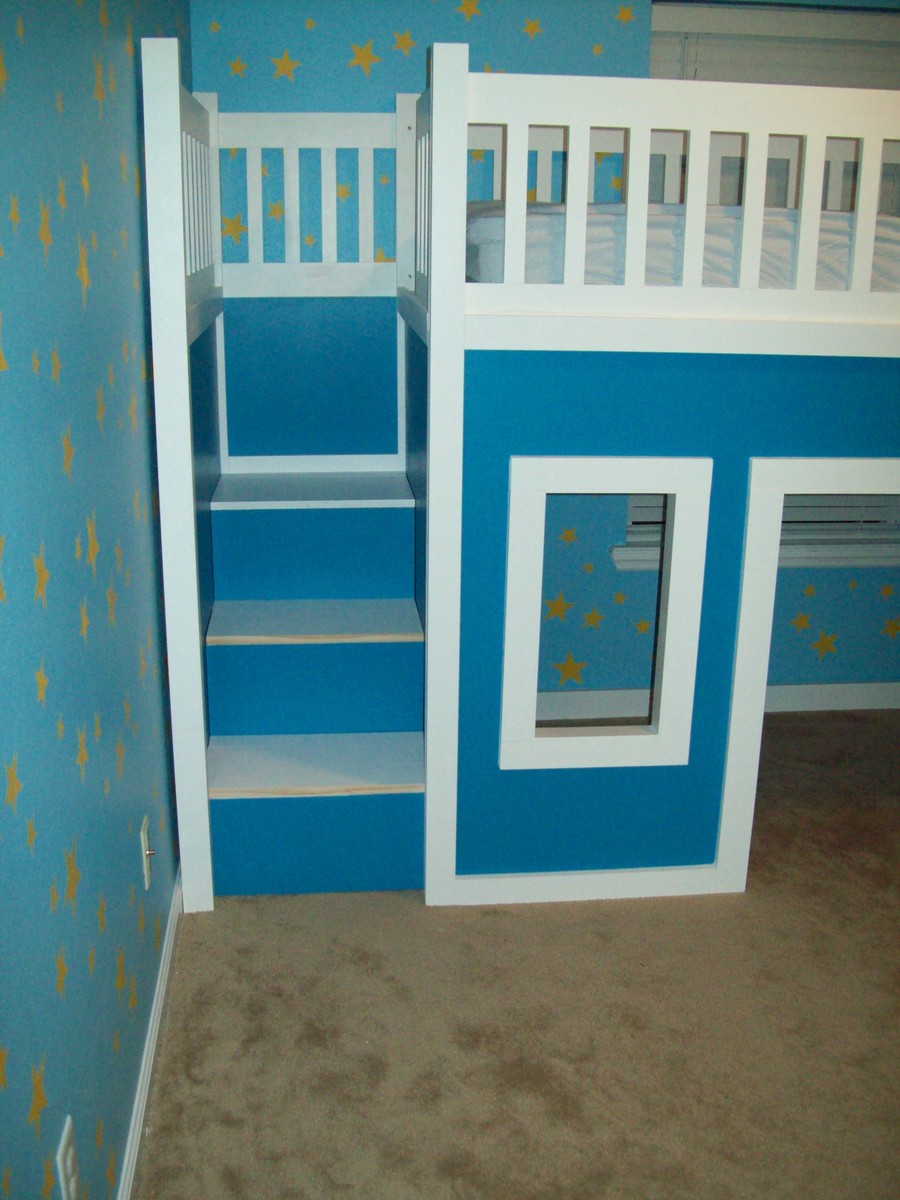
I used the playhouse loft bed and the playhouse loft bed stair plans, for the bed and the stairs. I used the castle loft bed plan as inspiration for the slide. The project took us about 5 weeks from start to finish. We both have full time jobs and we did most of the work on the weekends. I looked at each plan very carefully and made notes. I had to modify the stair plans slightly to fit the space where we wanted to put the bed. The stairs look narrow, but they work just fine. My husband and I can both use them to get up in the bed. The stairs feature hinged stair tread with built in storage. We built them like that at first, but then later decided to make them stationary stair treads, with plywood. I didn't like the way the hinges looked and the top stair was so deep that I was worried my son would fall in there and get stuck. The storage idea was neat, but his safety was more important to me. The bed turned out really nice and VERY sturdy. Both my husband and I are able to get up there with my son (not at the same time).
Another modification that I made was instead of slats to hold on the mattress, I used a piece of plywood. I wanted the roof in the playhouse to look finished, and I didn't want to see his bedding hanging down from the slats. I painted the top of the plywood white, where the mattress goes to blend in with the slats, and the other side was painted blue to match the walls inside the playhouse.
I did modify the playhouse front facade to have 2 windows and one door. I like the symmetrical look. The total project cost about $400. I used birch plywood and select pine boards, and about 6 quarts of paint. I noticed AFTER we had finished the bed using the birch plywood, that Home Depot had cabinet grade plywood on a random end cap, that was just as nice for $12 less a sheet. If I could do it all over again, I would definitely use that!. I wanted the paint to have a nice smooth finish, without having to do a lot of sanding or patching.
We had Home Depot cut the plywood to the dimensions we needed. I had my husband cut the rest of the wood dimensions listed in the plans, and then I painted all of them before we put the pieces together. I used a small roller and self priming paint. The paint finish looks great. After assembling the bed I can not imagine what I would have gone through trying to paint it after the fact.

The slide was a bit tricky, I looked at the plan for the castle loft bed and attempted to use those dimensions, and for the most part they worked. But when we went to assemble the slide, we did end up recutting some of the wood to different dimensions. I used a piece of the melamine coated closet shelf material for the slide.
It is already finished in white and its nice and slick, like a slide should be! I hate MDF, but for this it seemed the best fit. We cut the top edge at an angle to meet up with the slide platform. PLEASE BE CAREFUL with this material. After it was angle cut the edge was razor sharp and I sliced my fingers up. Once it was installed it butted up perfectly to the slide platform, and the edge was hidden and not a danger. But use caution during the install.

Clamps are your friend! We used Kreg clamps for everything. They kept the wood in place while we were screwing the parts together. The coolest thing that my husband came up with was clamping two identical pieces for plywood together, and drawing the template for the slide support walls. Then he used his circular saw to cut them out. We ended up with two mirror image pieces. They looked awesome. I left them clamped together when I sanded the edges as well.
We really didn't have any building experience other, than building tables and chairs for children, We got the deluxe Kreg jig kit and a miter saw on Craigslist for $50 each and they were both practically brand new. This was the first time we had ever used a Kreg jig and we are both addicted. That thing is the bomb.

We locked my son out of his room for a week while we assembled everything. We had the big reveal at his birthday party and all of the guests were excited to see it after seeing my facebook teaser posts of our progress. There were 8 kids up there at one time and the bed did not budge. They all enjoyed the slide. I did the planning and paint and my husband did an awesome job making all of the cuts and sanding everything. We are both very proud of the final product. My son love his new big boy bed.
DISCLAIMER: This bed is not recommended for a child under 6 years old. My son is mature for his age and we monitor him carefully.
Estimated Cost
$400
Estimated Time Investment
Week Long Project (20 Hours or More)
Finish Used
self priming paint
Recommended Skill Level
Beginner

Comments

Teania (not verified)

Mon, 01/21/2013 - 12:41

This bed is awesome. My boyfriend and I want one just like this for are son. Did you happen to write out all your dimensions? I would love to make this bed for my son.

silvinairiana

Thu, 10/16/2014 - 14:40

Hi! Congratulations you did an awesome job!!  Would you please let me know what the total measures are, length and width?  Thank you so much!!


Rustic Hall Tree - just the right size!

Submitted by laurawelsh on Tue, 10/06/2020 - 15:53

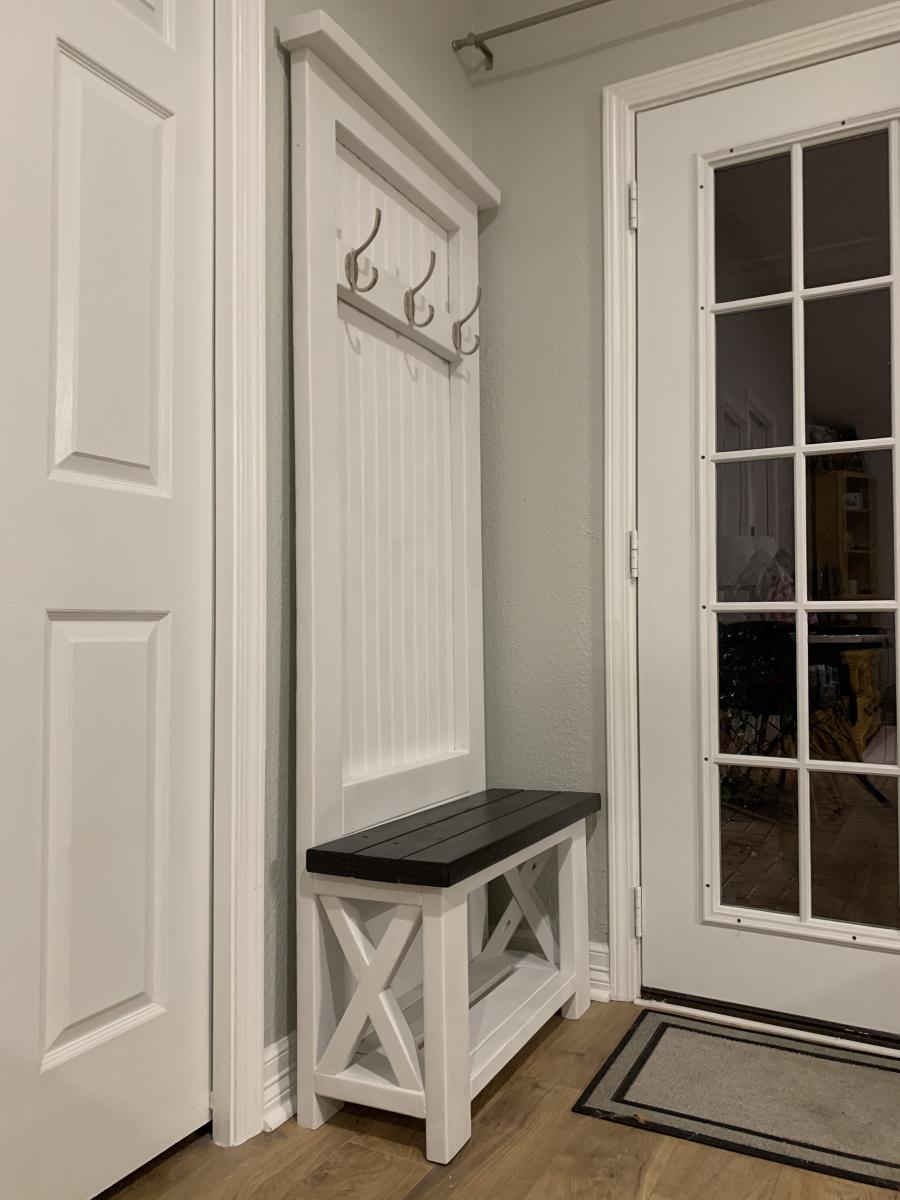
Using Ana's Rustic X Hall tree - I modified the size to fit this small space in the cottage in my backyard. It was impossible to find something to fit this space -- and this is one of my first indoor projects; I am a beginner. It was so much fun building! I used pine from a big box store mostly but opted for Bead board for the backing to achieve a farmhouse type look. My daughter lives in the cottage and loves it!! Thanks Ana for the sweet plans!!

Built from Plan(s)
Estimated Cost
150
Estimated Time Investment
Weekend Project (10-20 Hours)
Finish Used
White Chalk Paint; Espresso Stain for the seat.
Recommended Skill Level
Beginner

Custom Industrial Style Closet

Submitted by slug on Tue, 12/09/2014 - 09:03

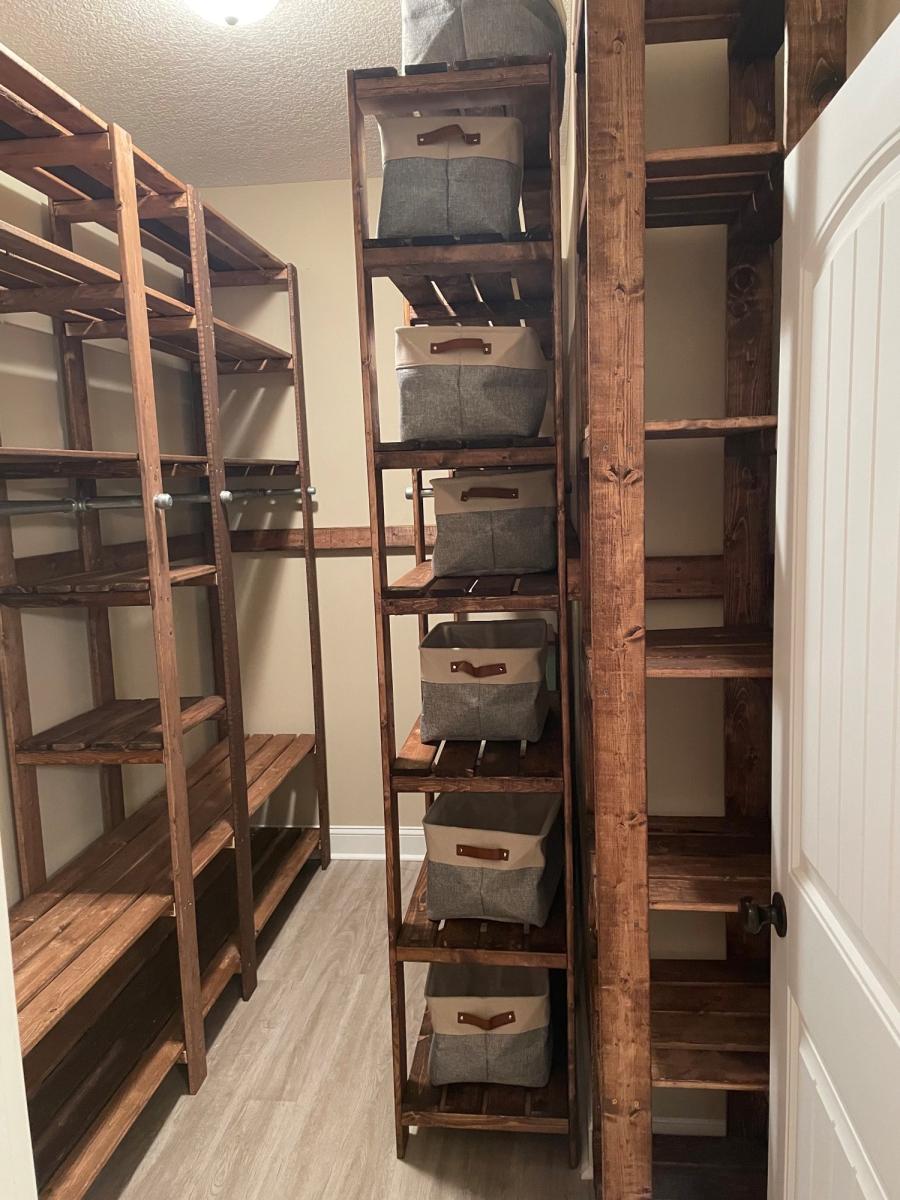
We remodeled our house and now had a new 9x6 master closet to fill. During construction I saw this design on ana-white.com and liked the style, but wanted to customize the layout. I found an online closet designer and played around until I found something my wife and I liked. We ended up with a 9 foot long his/hers double hanging on the ends and a long hanging section in the middle. And on the other side 8 feet of shelving (leaving about a foot for other storage).

I bought the pipe as a 10 foot pipe to be cut and threaded (for free by the store). I did have to change the design a little because the store cannot thread pipe less than 14 inches. So I ended up replacing the short pipes and T's with 2x4s. That made it a little cheaper and I still like the end result.

We stained all the wood using Minwax "Early American". This probably accounts for most of the build time.

Then I put together the supports and brought them into the closet to add all the pipes and slats. I started with the wall for hanging. And later did the shelving.


Here's another forum with more pictures of this project:

http://woodworking.formeremortals.net/me-mo-community/#/discussion/866/…

Built from Plan(s)
Estimated Cost
<$400 for whole closet.
Estimated Time Investment
Weekend Project (10-20 Hours)
Finish Used
Minwax "Early American"
Recommended Skill Level
Beginner

Comments

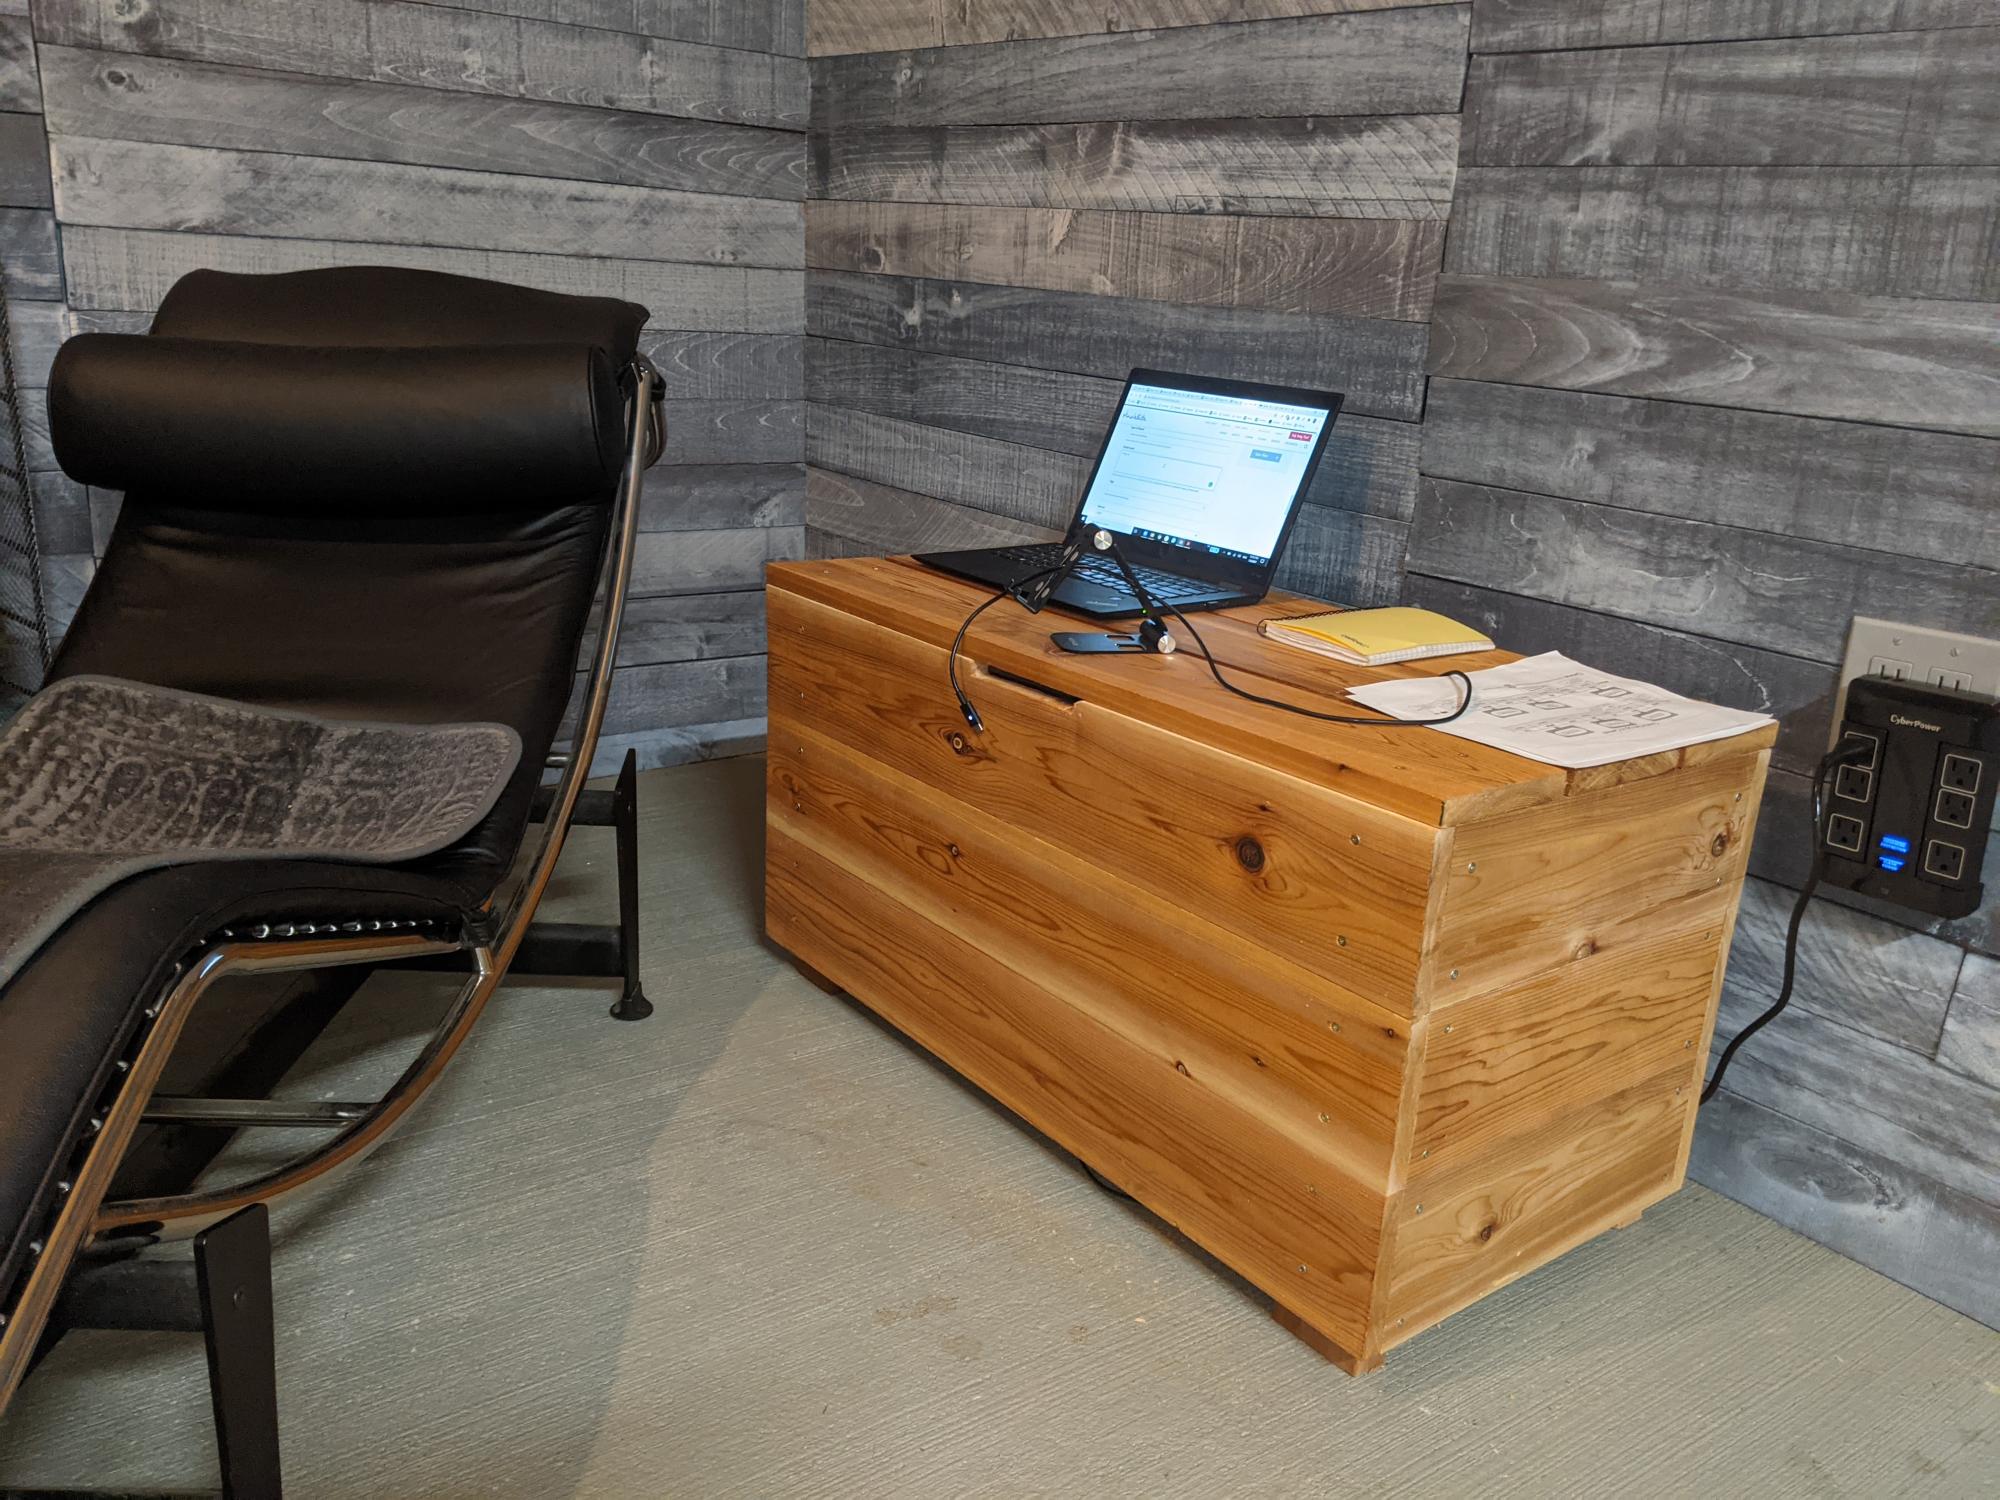
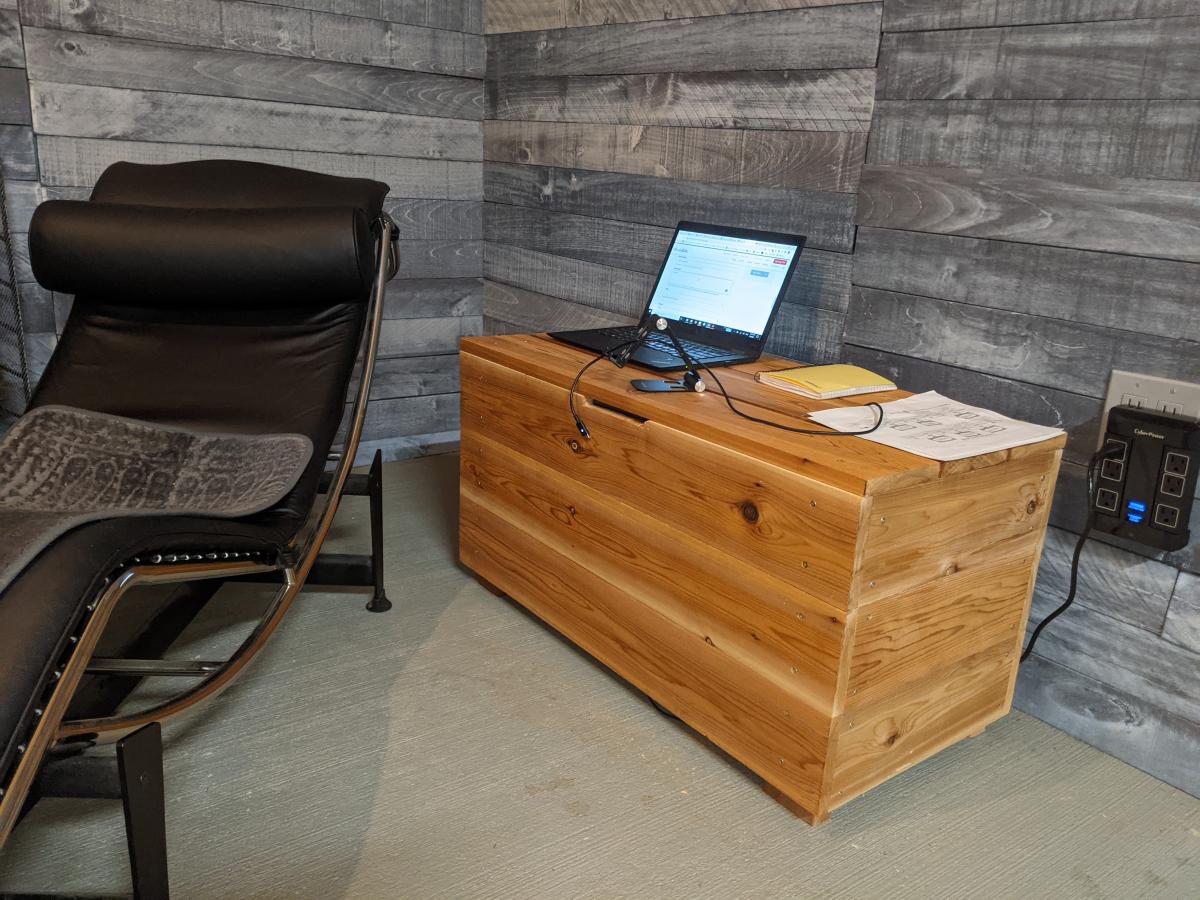
Cedar side table

Submitted by OlgaB on Sun, 01/03/2021 - 19:41

I decided it would make a nice simple side table for my home office and show off the beauty of cedar by using oil.

Estimated Cost
180.00
Estimated Time Investment
An Hour or Two (0-2 Hours)
Finish Used
Tung oil
Recommended Skill Level
Beginner

Comments

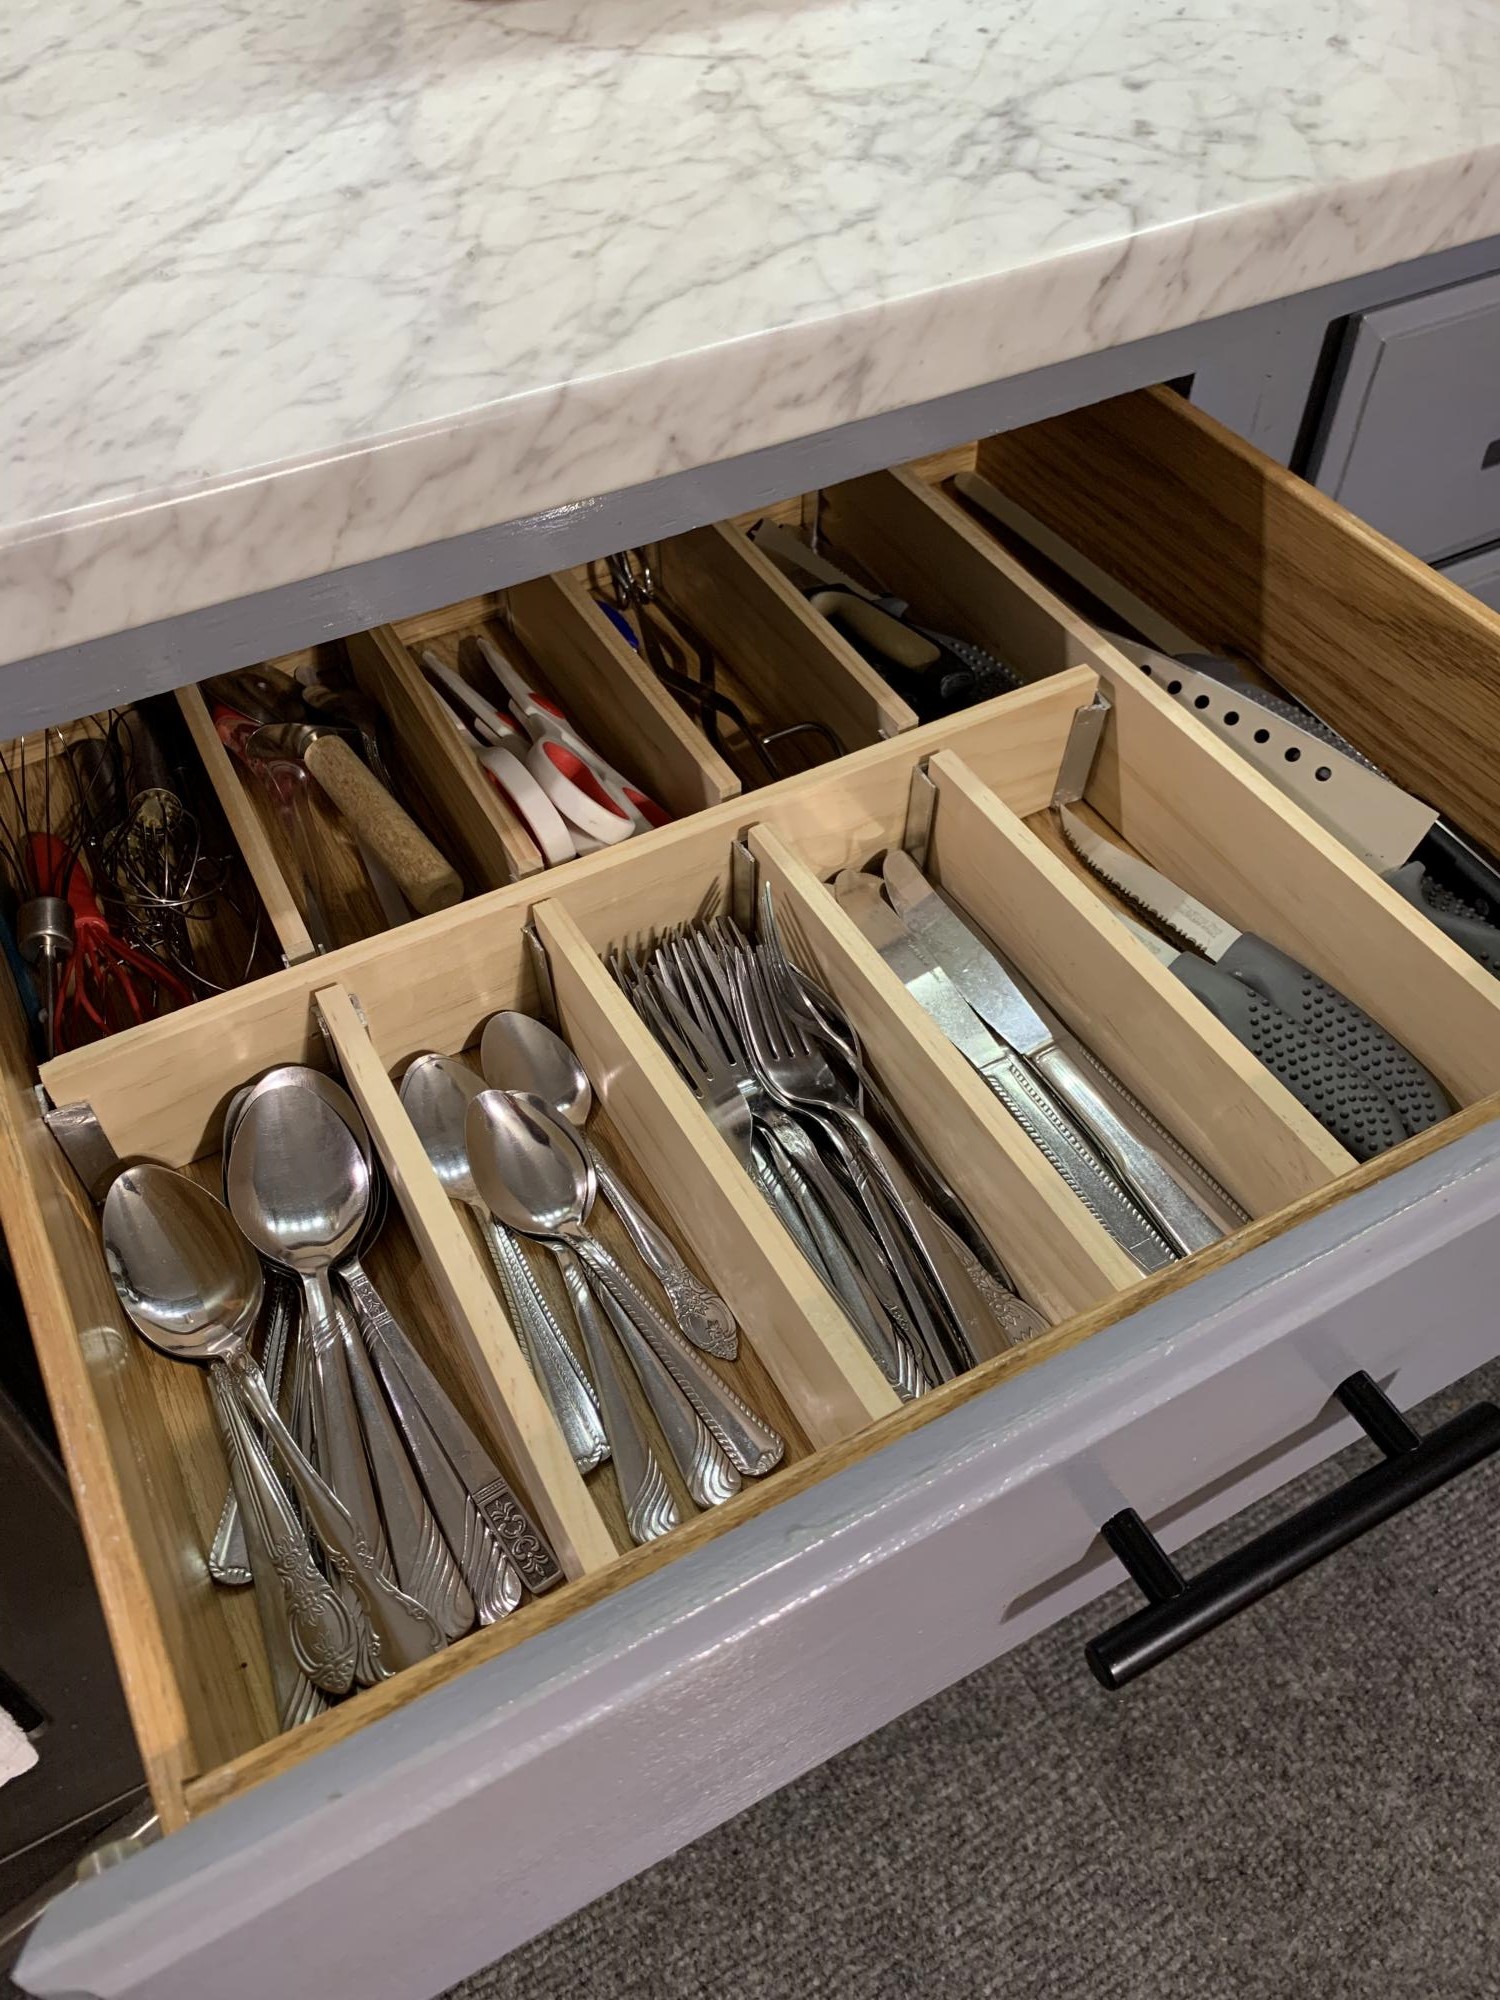
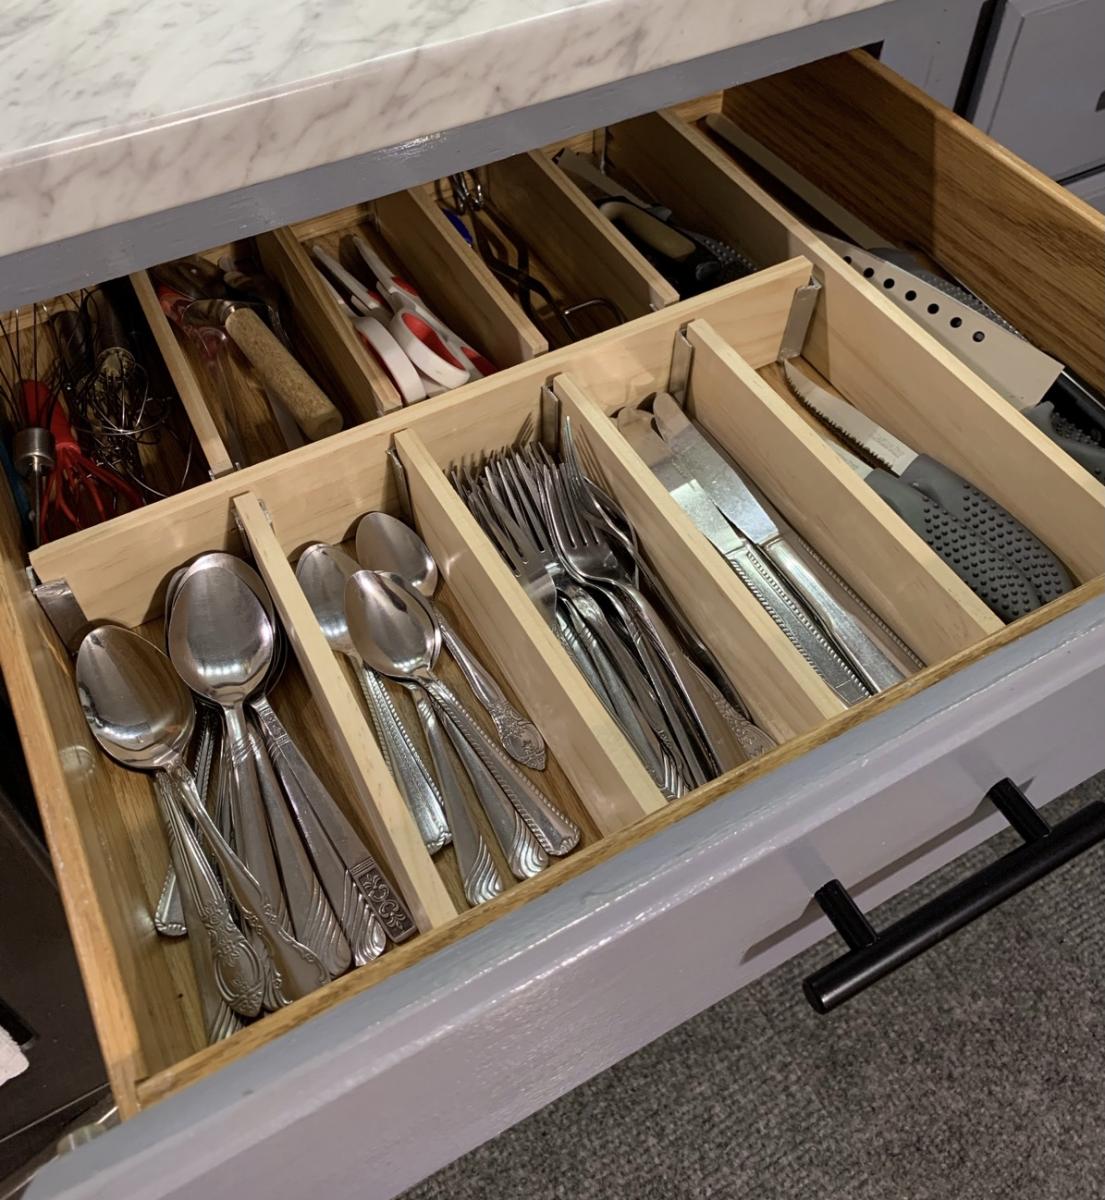
Lovin the Drawer dividers

Finished this in no time and wow did it create a lot of space. I was able to get rid of my knife block because there’s now room for my knives in my drawer. Thank you Ana for sharing your wood work with us! This was well worth the $25 I spent!

Estimated Cost
$25
Estimated Time Investment
Afternoon Project (3-6 Hours)
Recommended Skill Level
Beginner

Comments

Farmhouse Table

Submitted by sarah1122 on Mon, 02/25/2013 - 18:33

This was our second project from Ana's site. There were some bumps in the road (oh, the perils of getting warped 2 by 8 boards to line up perfectly side by side with the Kreg jig). All in all, this table isn't perfect, but it is ours and we love it.

The size of the table in the plans is quite perfect, I'd say. It is long, but fairly narrow. We can sit across from each other as a family of four and still feel cozy, but the table will seat ten if need be.

It is also very, very sturdy....which as a mother to two young boys I appreciate.

This was a 10-20 hour project for us, but we had two children under the age of 5 "helping" and are new to building furniture. I'm certain someone else could build the entire table in an afternoon.

Estimated Cost
$125.00 (not really sure)
Estimated Time Investment
Weekend Project (10-20 Hours)
Finish Used
One heavy coat of Minwax Gunstock (frightfully orangey on its own). Two lighter coats of Cabot Early American (thank heavens I had some of this laying around in the shop). Two coats Polycrylic semi-gloss on the base and three on the table surface.

Recommended Skill Level
Beginner

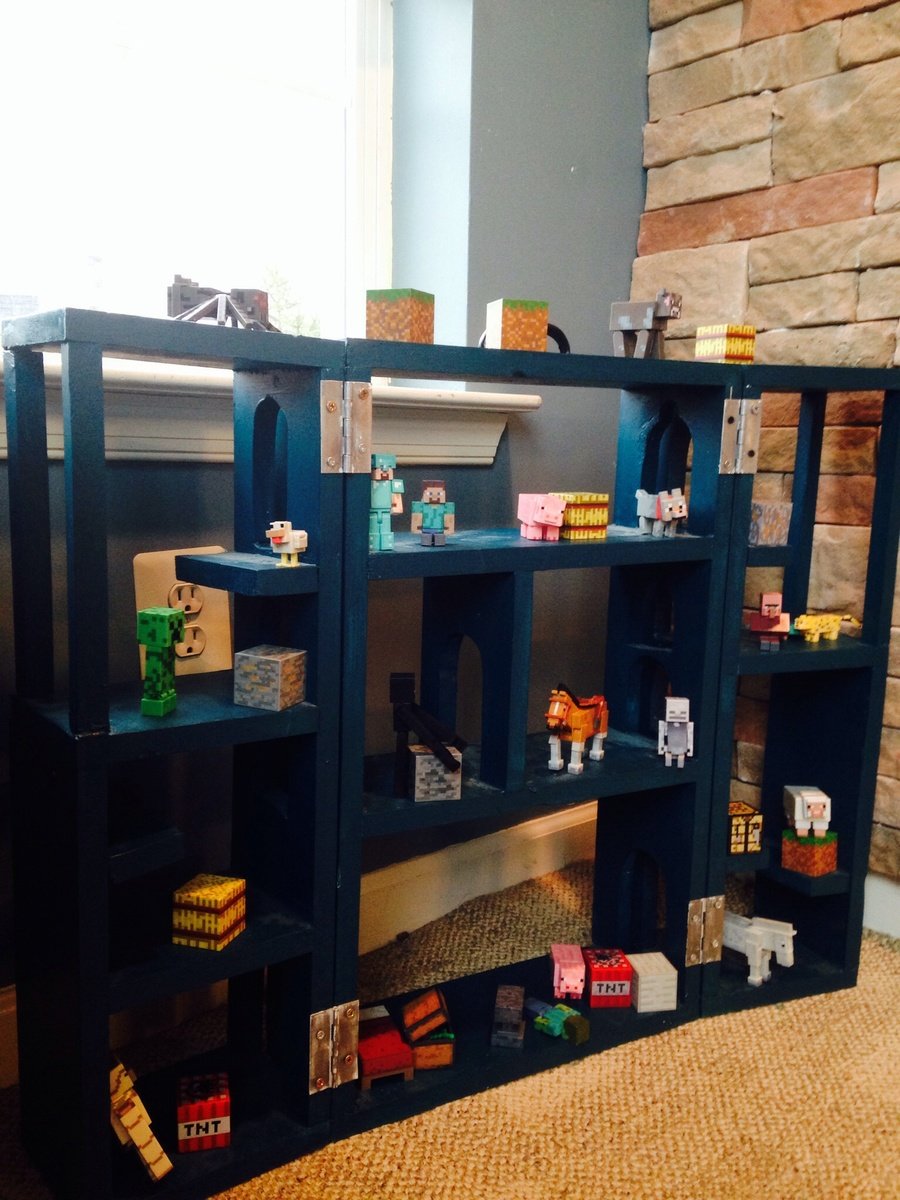
Mine craft toy center

Submitted by Tjkelly on Fri, 01/16/2015 - 15:37

Easy to build toy center for mine craft figures

Built from Plan(s)
Estimated Cost
$30
Estimated Time Investment
Afternoon Project (3-6 Hours)
Finish Used
Paint
Recommended Skill Level
Intermediate

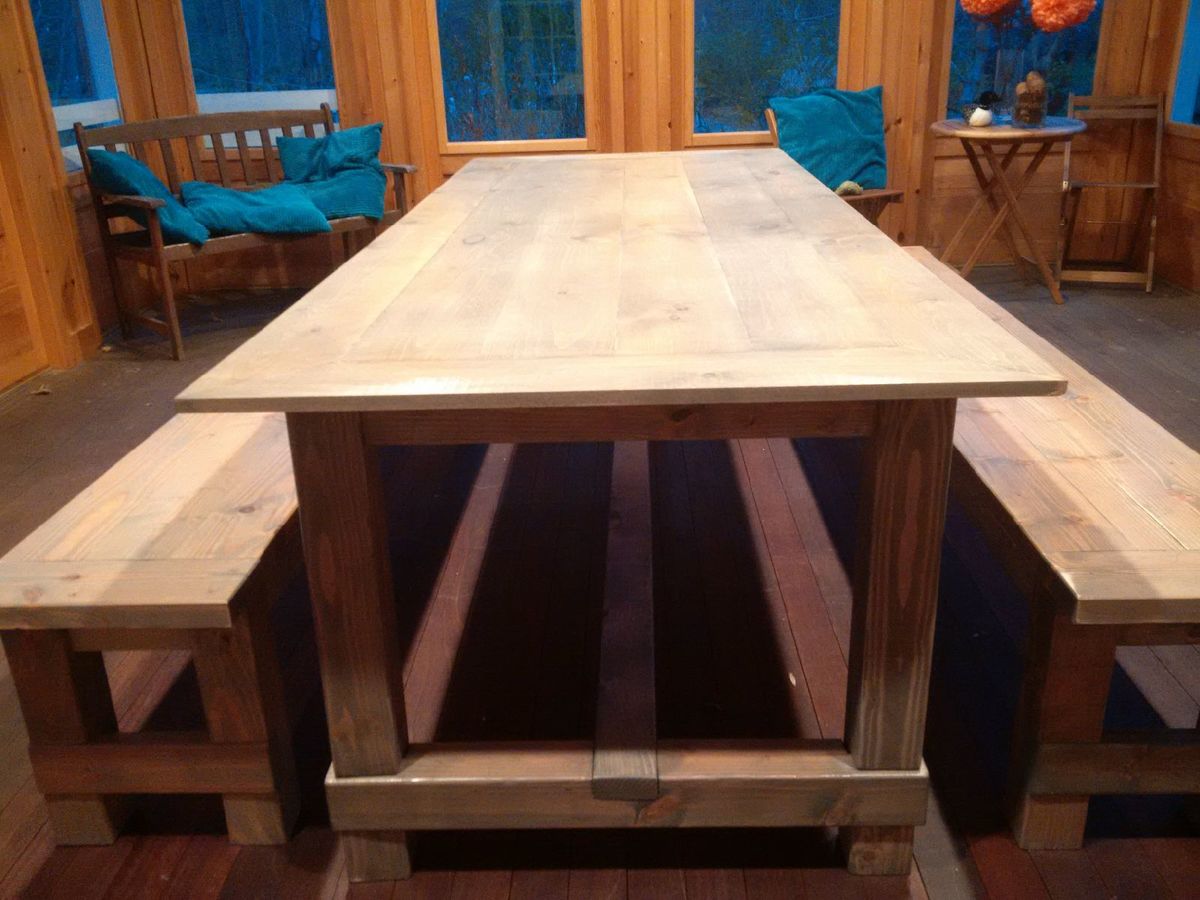
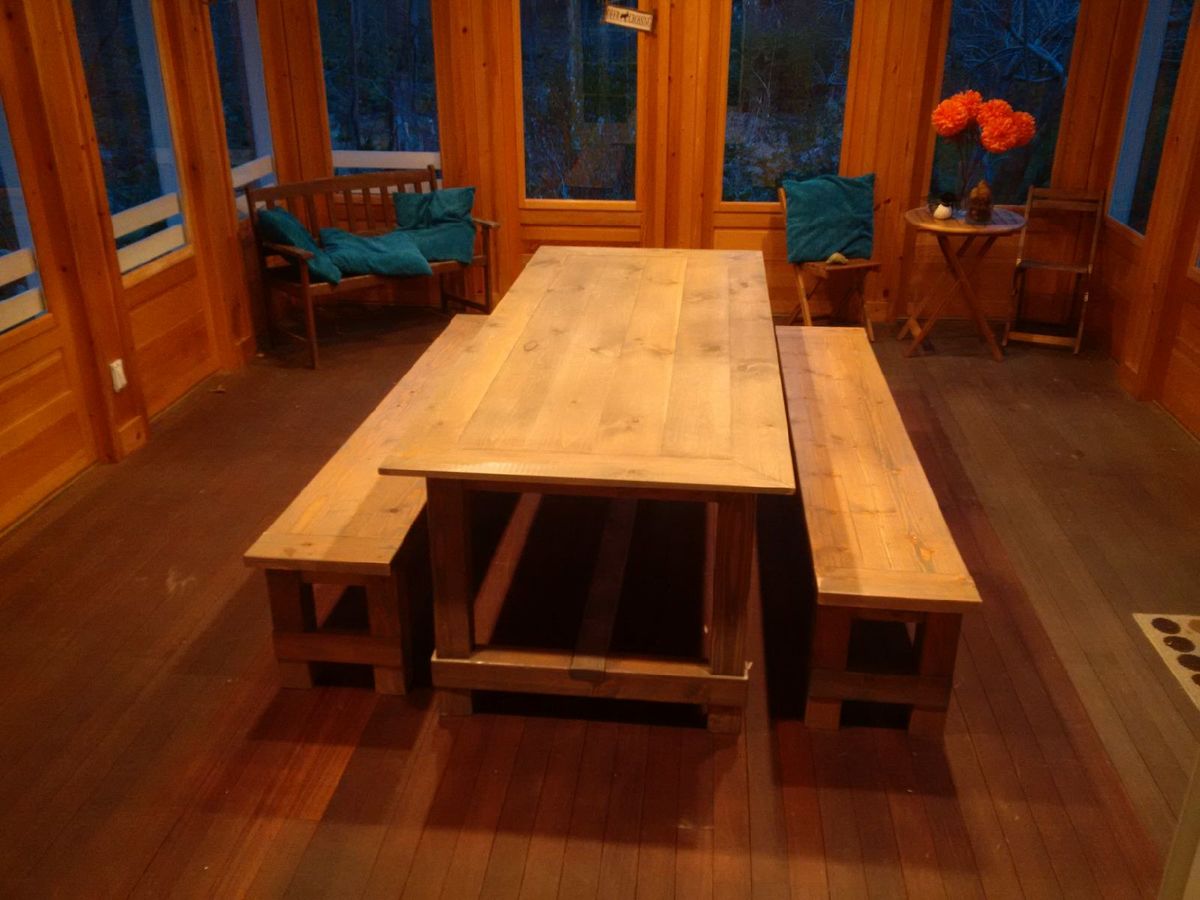
mitered corner farmhouse table - shiplap top.

Submitted by Anonymous (not verified) on Tue, 04/25/2017 - 13:07

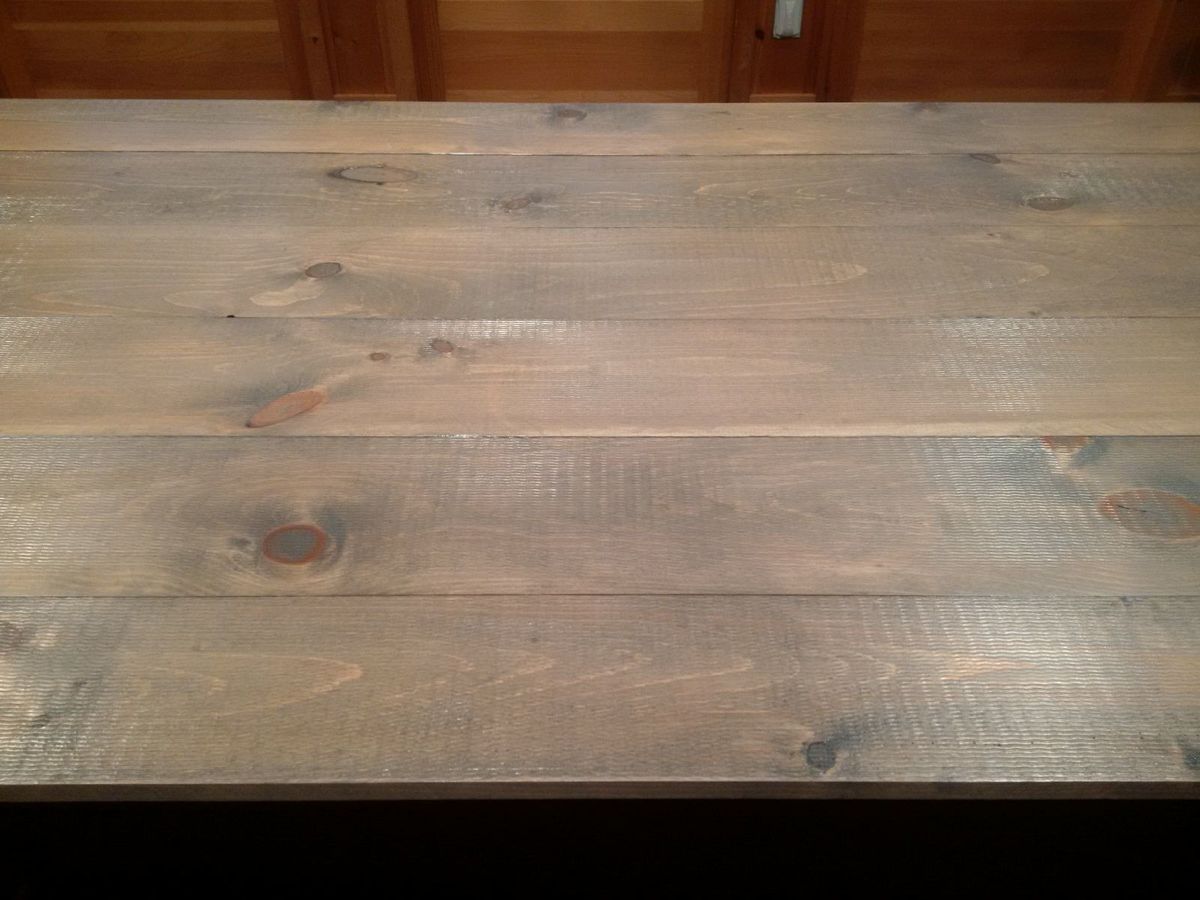
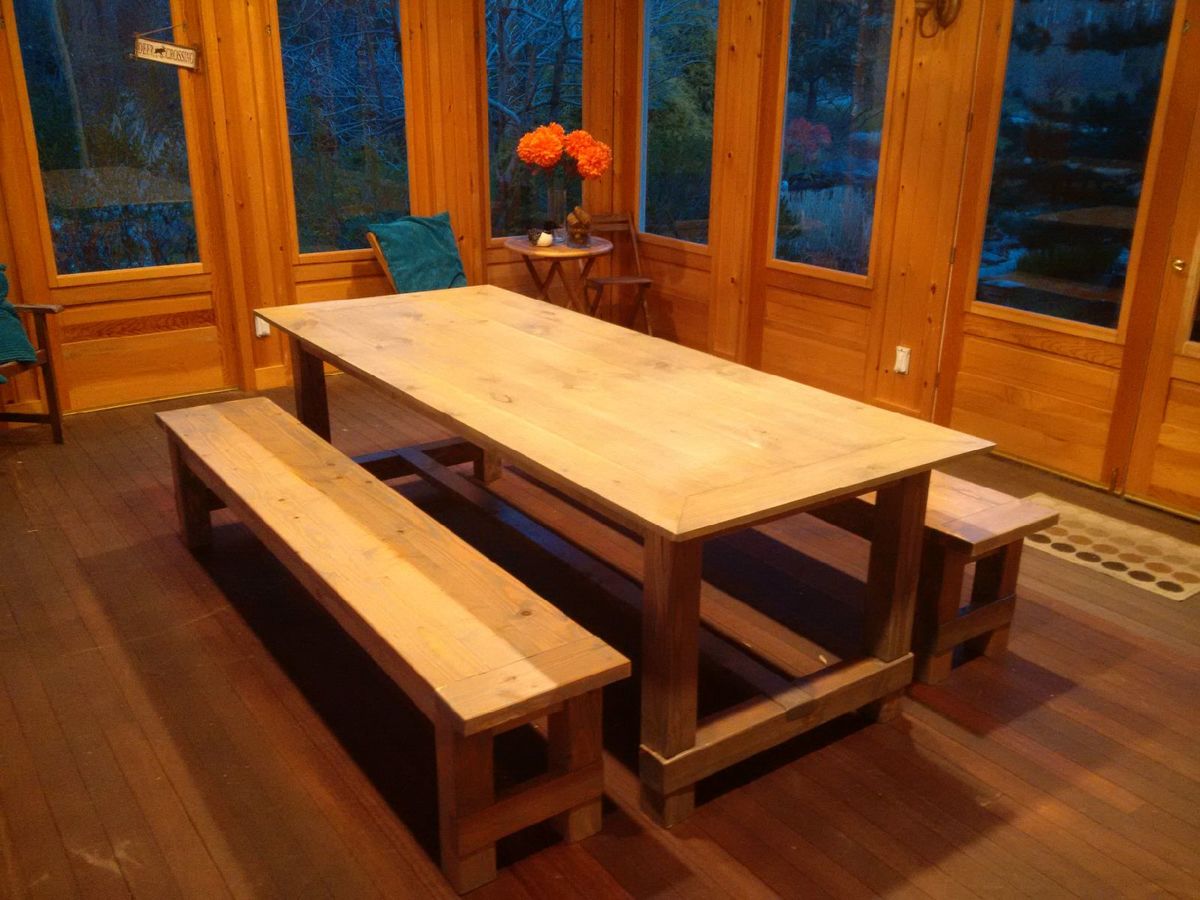
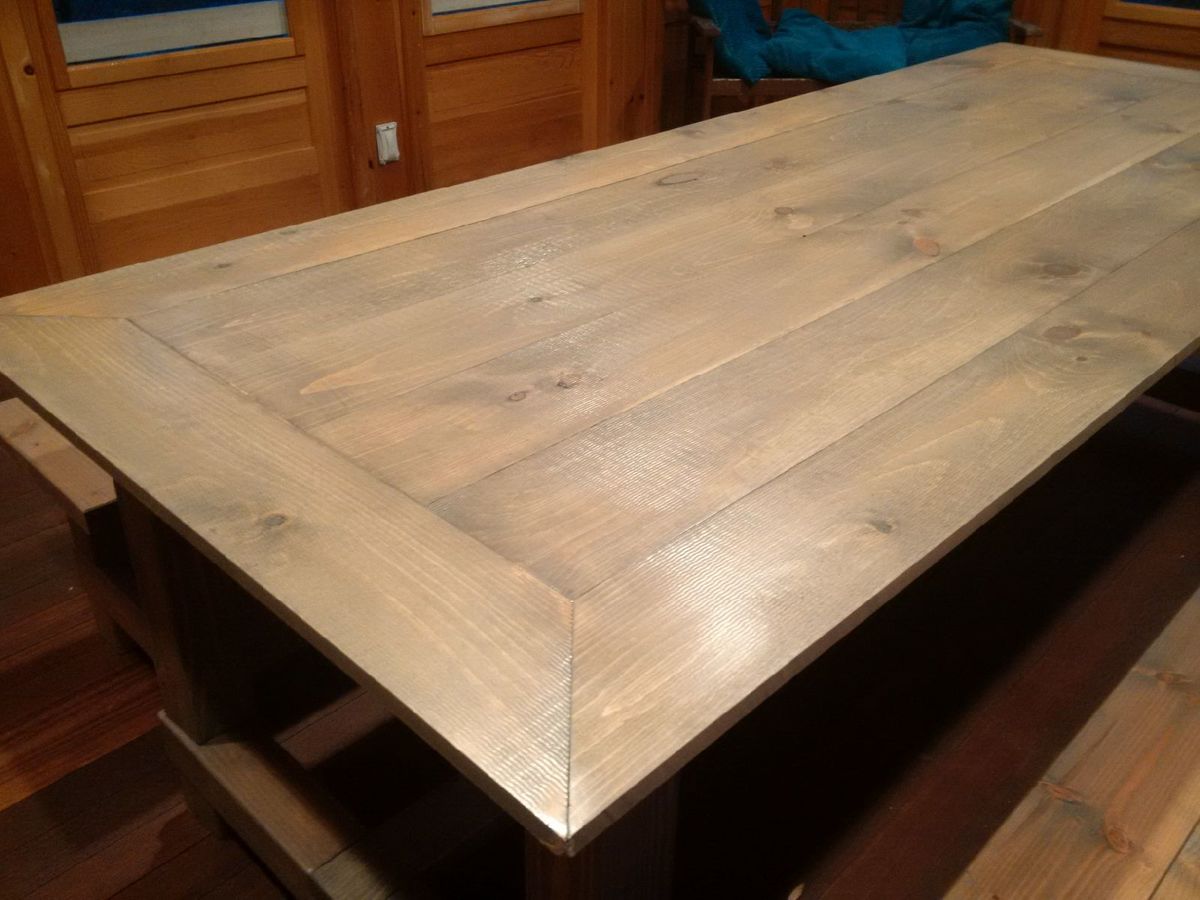
Slightly modified the farmhouse table plans to build the top out of 6 inch pine shiplap, its thinner than the farmhouse plans (its 3/4inch), but I liked the rough cut on the top surface, and overlapping edges made for a great fit. 

I cut the outside edge boards down to 4inch wide, and then mitred the corners to act as a frame for the 6 inch boards. I will build copper corner protectors. 

Finish was: pre-conditioner on the wood, 3 coats of minwax weathered oak stain, 3 coats of polyurethane. Sanded the benches between coats, but not the table, as the table has a rough surface. 

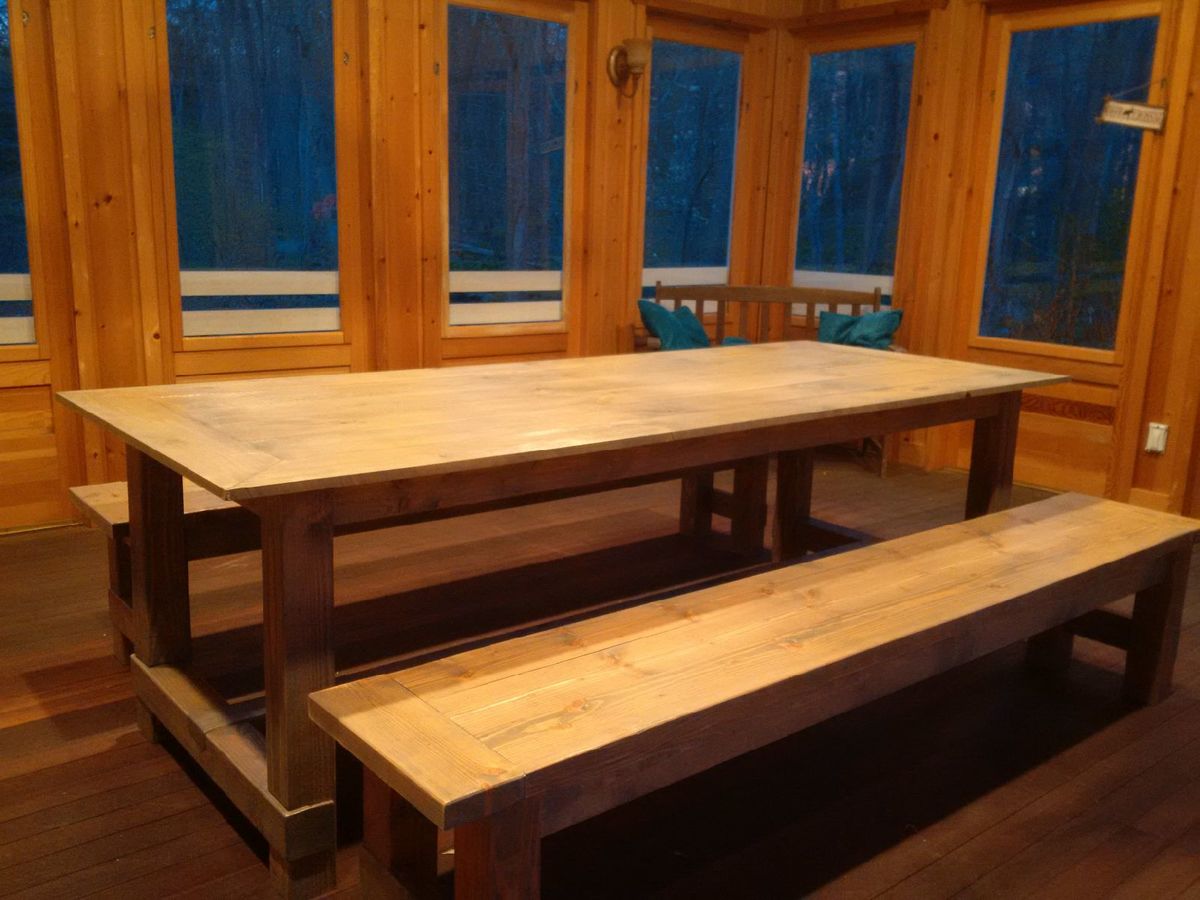
benches are 2x6 fir boards, cut the long edges off on a table saw to make them join better, as I dont have a jointer.  Same finish applied as the table. 

Table is 8 feet long, 38 inches wide.  seats 10 comfortably.

It was half finished in my garage for several months, in which time I used it as a workbench - so it has plenty of authentic weathering dings and dents. 

It was my first project, as I have only recently moved into a house with a garage. 

Loved the construction part, hated the finishing steps. 

thanks!

oz


Estimated Cost
200 in wood, fasteners, stains, etc
Estimated Time Investment
Week Long Project (20 Hours or More)
Finish Used
minwax pre-conditioner, weathered oak and polyurethane
Recommended Skill Level
Intermediate

(Vintage X) Back Step Stool End Table

Submitted by diegaeb on Thu, 05/13/2021 - 23:38

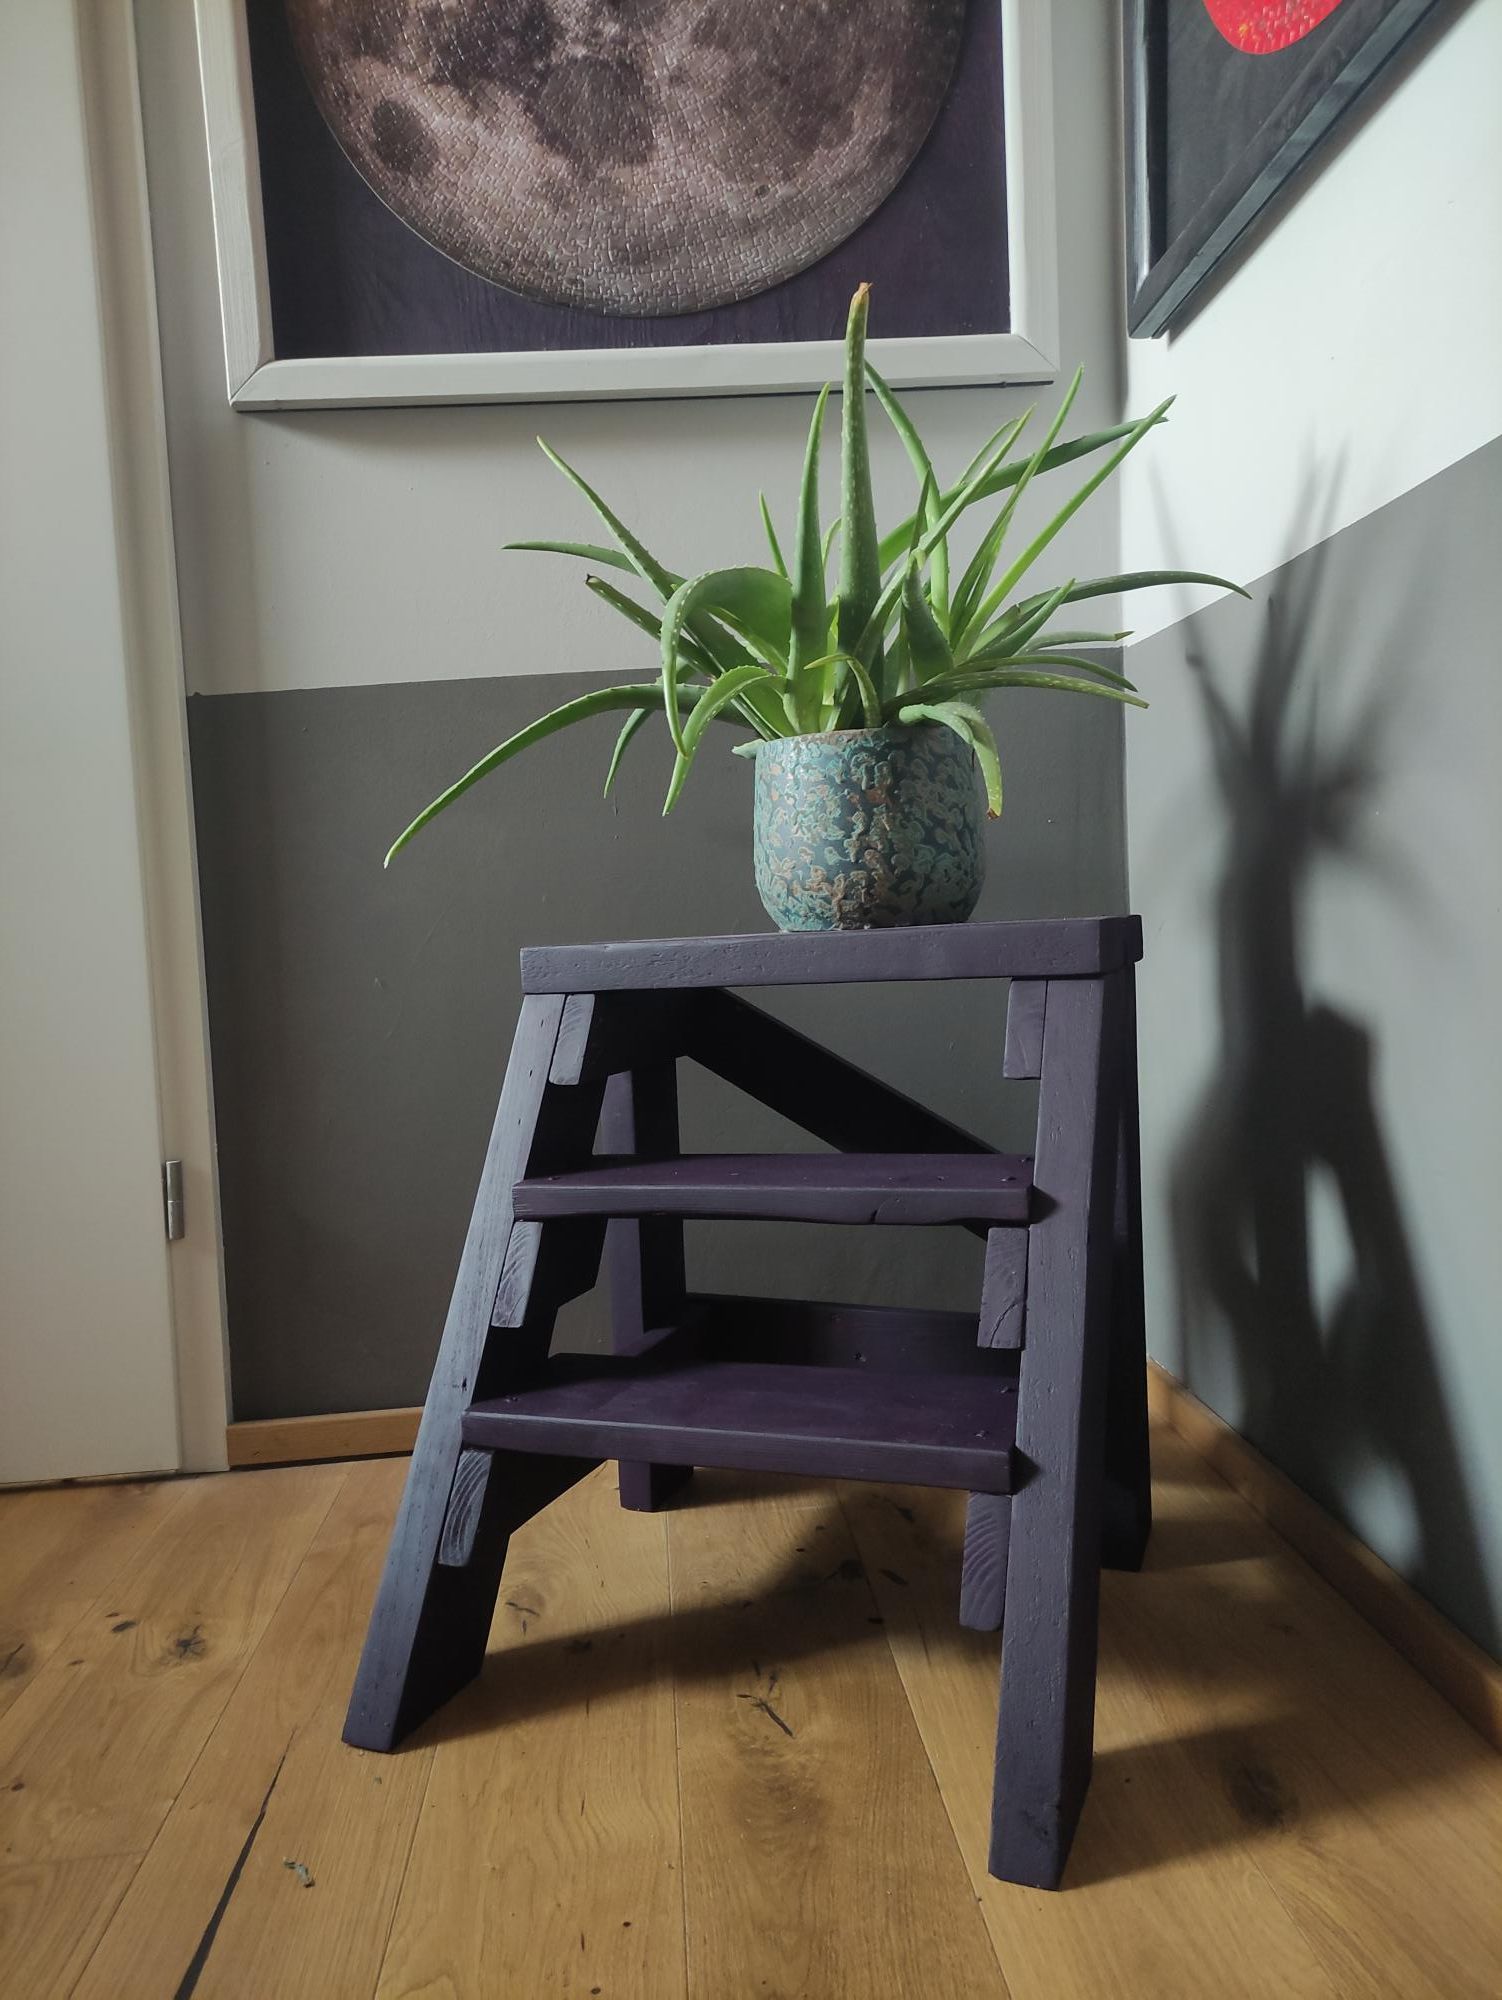
I was looking for a plant table and fell in love with the vintage x plan. And it was perfect to get rid of some of my waste wood from other projects.

I love to work with Ana's plans :-)

Estimated Cost
just waste pieces from other projects
Estimated Time Investment
Afternoon Project (3-6 Hours)
Finish Used
Mylands Duke's House No. 44 Wood & Metall Eggshell

Comments

Modern Farm Table at cabin

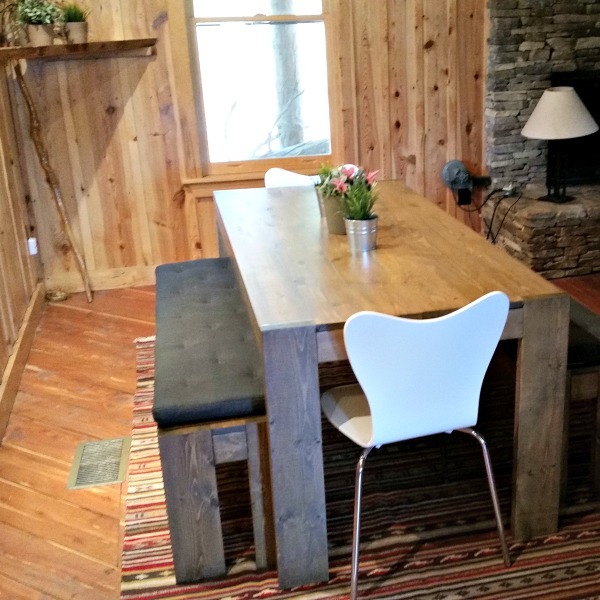
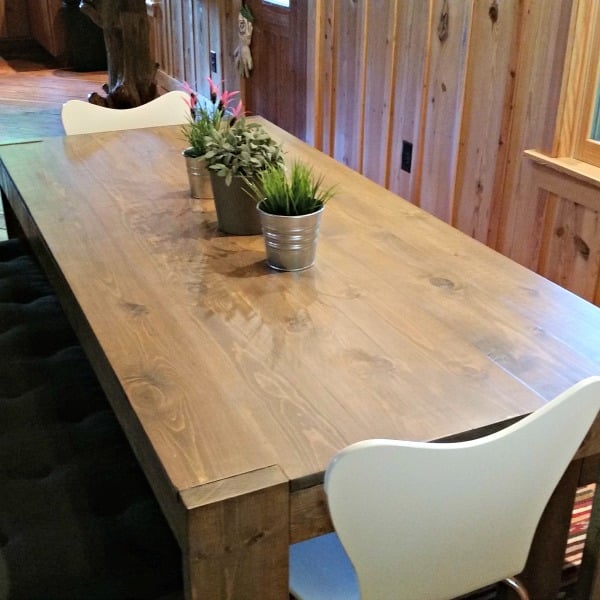
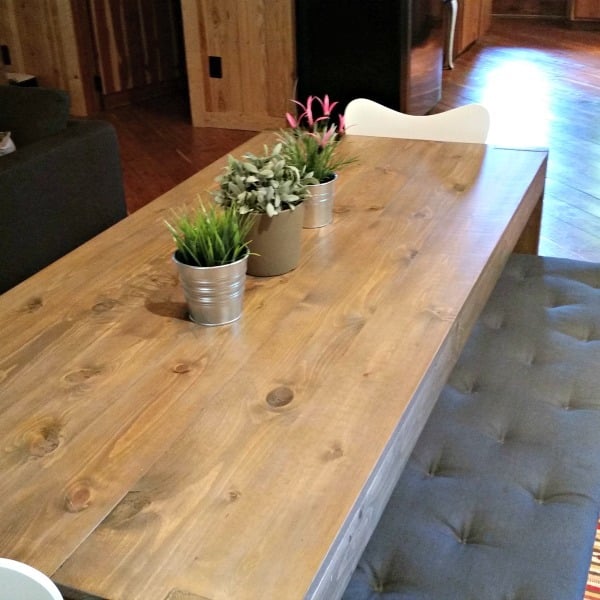
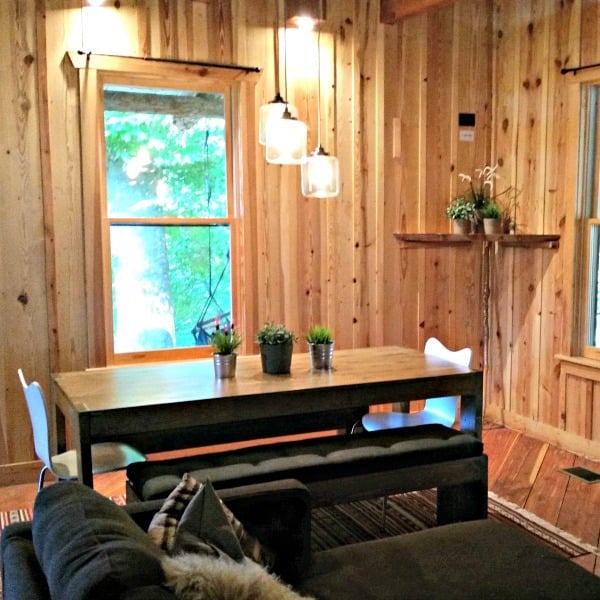
Submitted by jehenslee on Mon, 05/04/2015 - 10:38

I pretty much just followed the plan. It did not take long to build, but I spent quite a bit of time on the finish. I sanded and sanded and sanded. I was going for a restoration Hardware type finish and got pretty close. This was the first piece of furniture I built. Recently moved to a farm so have been building farm needs projects and finally had time to build some furniture.  I purchased the bench cushions. 

Thanks for the awesome plans, information and site Ana! I love it!


Janice

Estimated Cost
$150.00
Estimated Time Investment
Week Long Project (20 Hours or More)
Finish Used
I used the colors and process from this post:
http://ana-white.com/2013/08/rustic-yet-refined-wood-finish
I wanted my table darker though so I used more of the darker stain. Started with the gray, then dark, then a mixture.
Recommended Skill Level
Beginner

4x4 Truss Table and Benches - Modified

Submitted by ride4lamar on Tue, 05/26/2015 - 05:42

I took the plans and modified them a bit to build what we were looking for. - I used 2x8s for the top of the table so that the middle board could have two removable sections that could be used for ice buckets for drinks. I made those out of plastic planter boxes. I also used 4 2x4s across the top for support.

The last major change is that i used corner brackets and bolts or screws to attach all the pieces. I liked the industrial look it gave the table and benches.

Everything was sanded down and finished with a drift gray stain and seal.

The building part was easy, but sanding and staining prior to putting it all together is what took most of the time. It was probably an hour of cutting, an hour of building and the rest was sanding or staining.

Estimated Cost
$350-$400
Estimated Time Investment
Weekend Project (10-20 Hours)
Recommended Skill Level
Intermediate

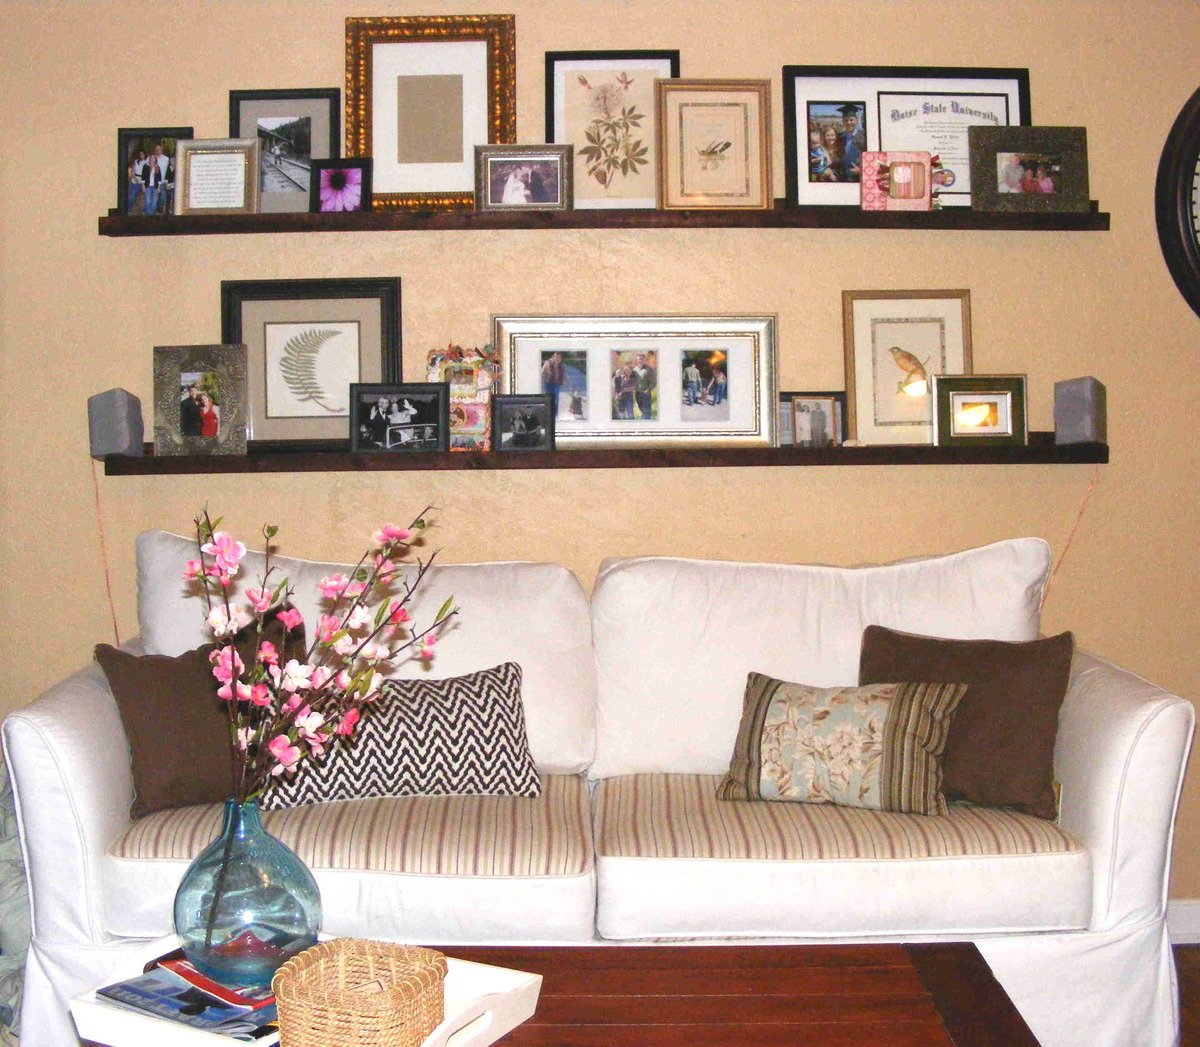
Ledge Lovin'

This was my first project from a list of many...so simple, it was perfect for getting started after a long winter's rest.

Thank you Ana for the plan! I really wanted the floating shelves from Pottery Barn, but they were super pricey. I searched out the fancy hardware that PB uses to mount them and it would have cost as much for the mounting hardware alone than to buy them finished from Pottery Barn.

These shelves were an easy solution for the same look, without the hassle of having to build a sleeve to fit over cleats like other more seamless designs.

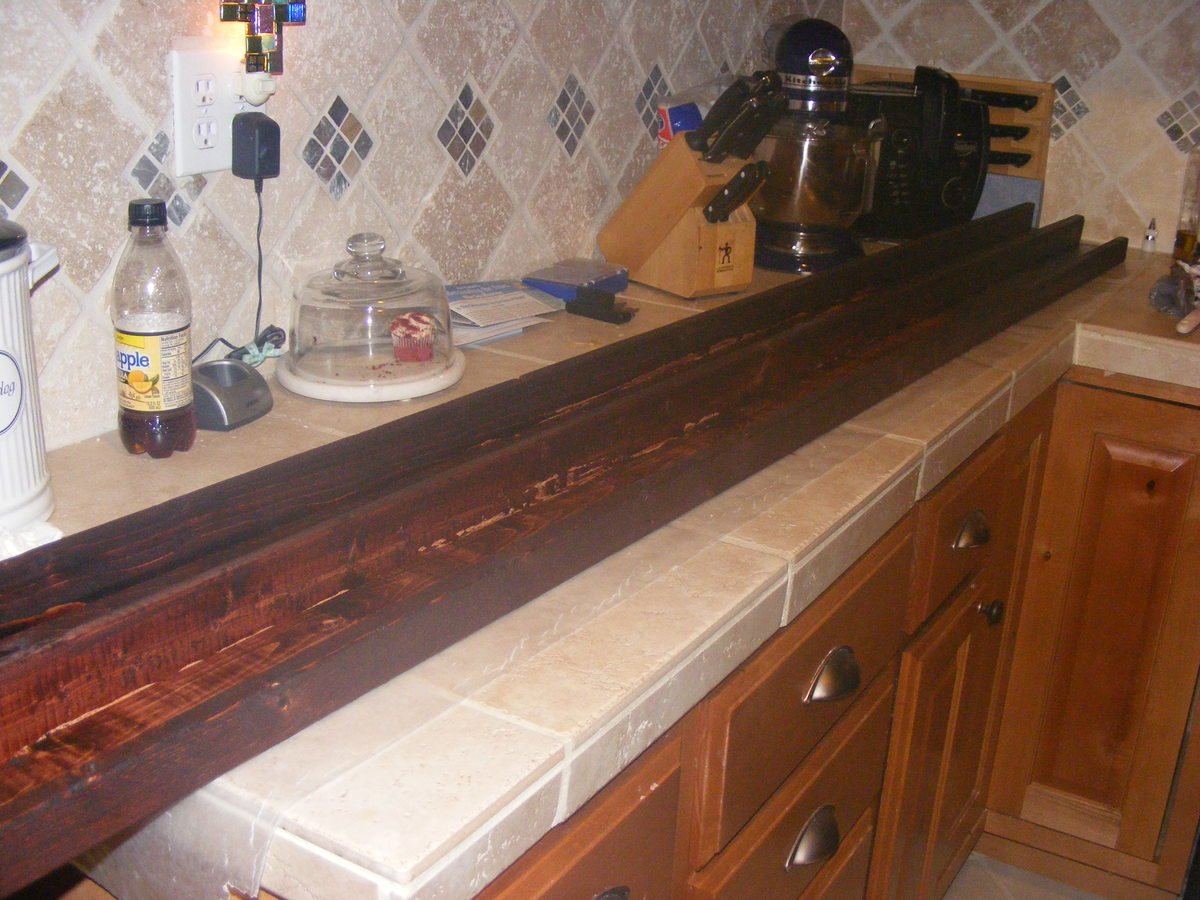
For my ledges, I chose to use 1x3s instead of 1x4s for the rear and base of the ledges. I didn't want them to protrude from the wall as far, nor did I want the rear of the ledges to be as visible (I'm wierded out by the contrast of the thick, dark line behind the pics. I would have chosen 1x2s for the back, but I didn't think it would be sturdy enough and it might be a little trickier to drill. I measured them to be a little smaller than the length of my sofa and they turned out just right. I built them in an hour or two and brought them in and stained them on my kitchen counter ( placed waxed paper underneath). It was February and too cold to do outside.

The best advice I have is to be really choosy about the lumber you buy. The "top choice," as they call it, should be renamed "crappiest choice." I guess that's what you get for cheap pine, right!

It fit just right for my budget and it was worth sifting through to make sure I wasn't getting a piece that was warped or twisted. I live in an old house and I'm sure the walls aren't exactly even (as you can see in the pic, the floor even slants a little to the right) but one of my ledges is not fully flush against the wall on one side because the board bows out a little (or maybe my wall bows in?).

Whatever. I'm thrilled with the look and love how I can display so many pics at one time. I'm thinking I want to put at least 4 pictures in each frame, and rotate them out seasonally. That way my display will go with the season. Yep, I'm a genius like that, hehe.
Built from Plan(s)
Estimated Cost
$15 w/ stain
Estimated Time Investment
An Hour or Two (0-2 Hours)
Finish Used
Red Mahogany stain from Minwax.
Recommended Skill Level
Starter Project

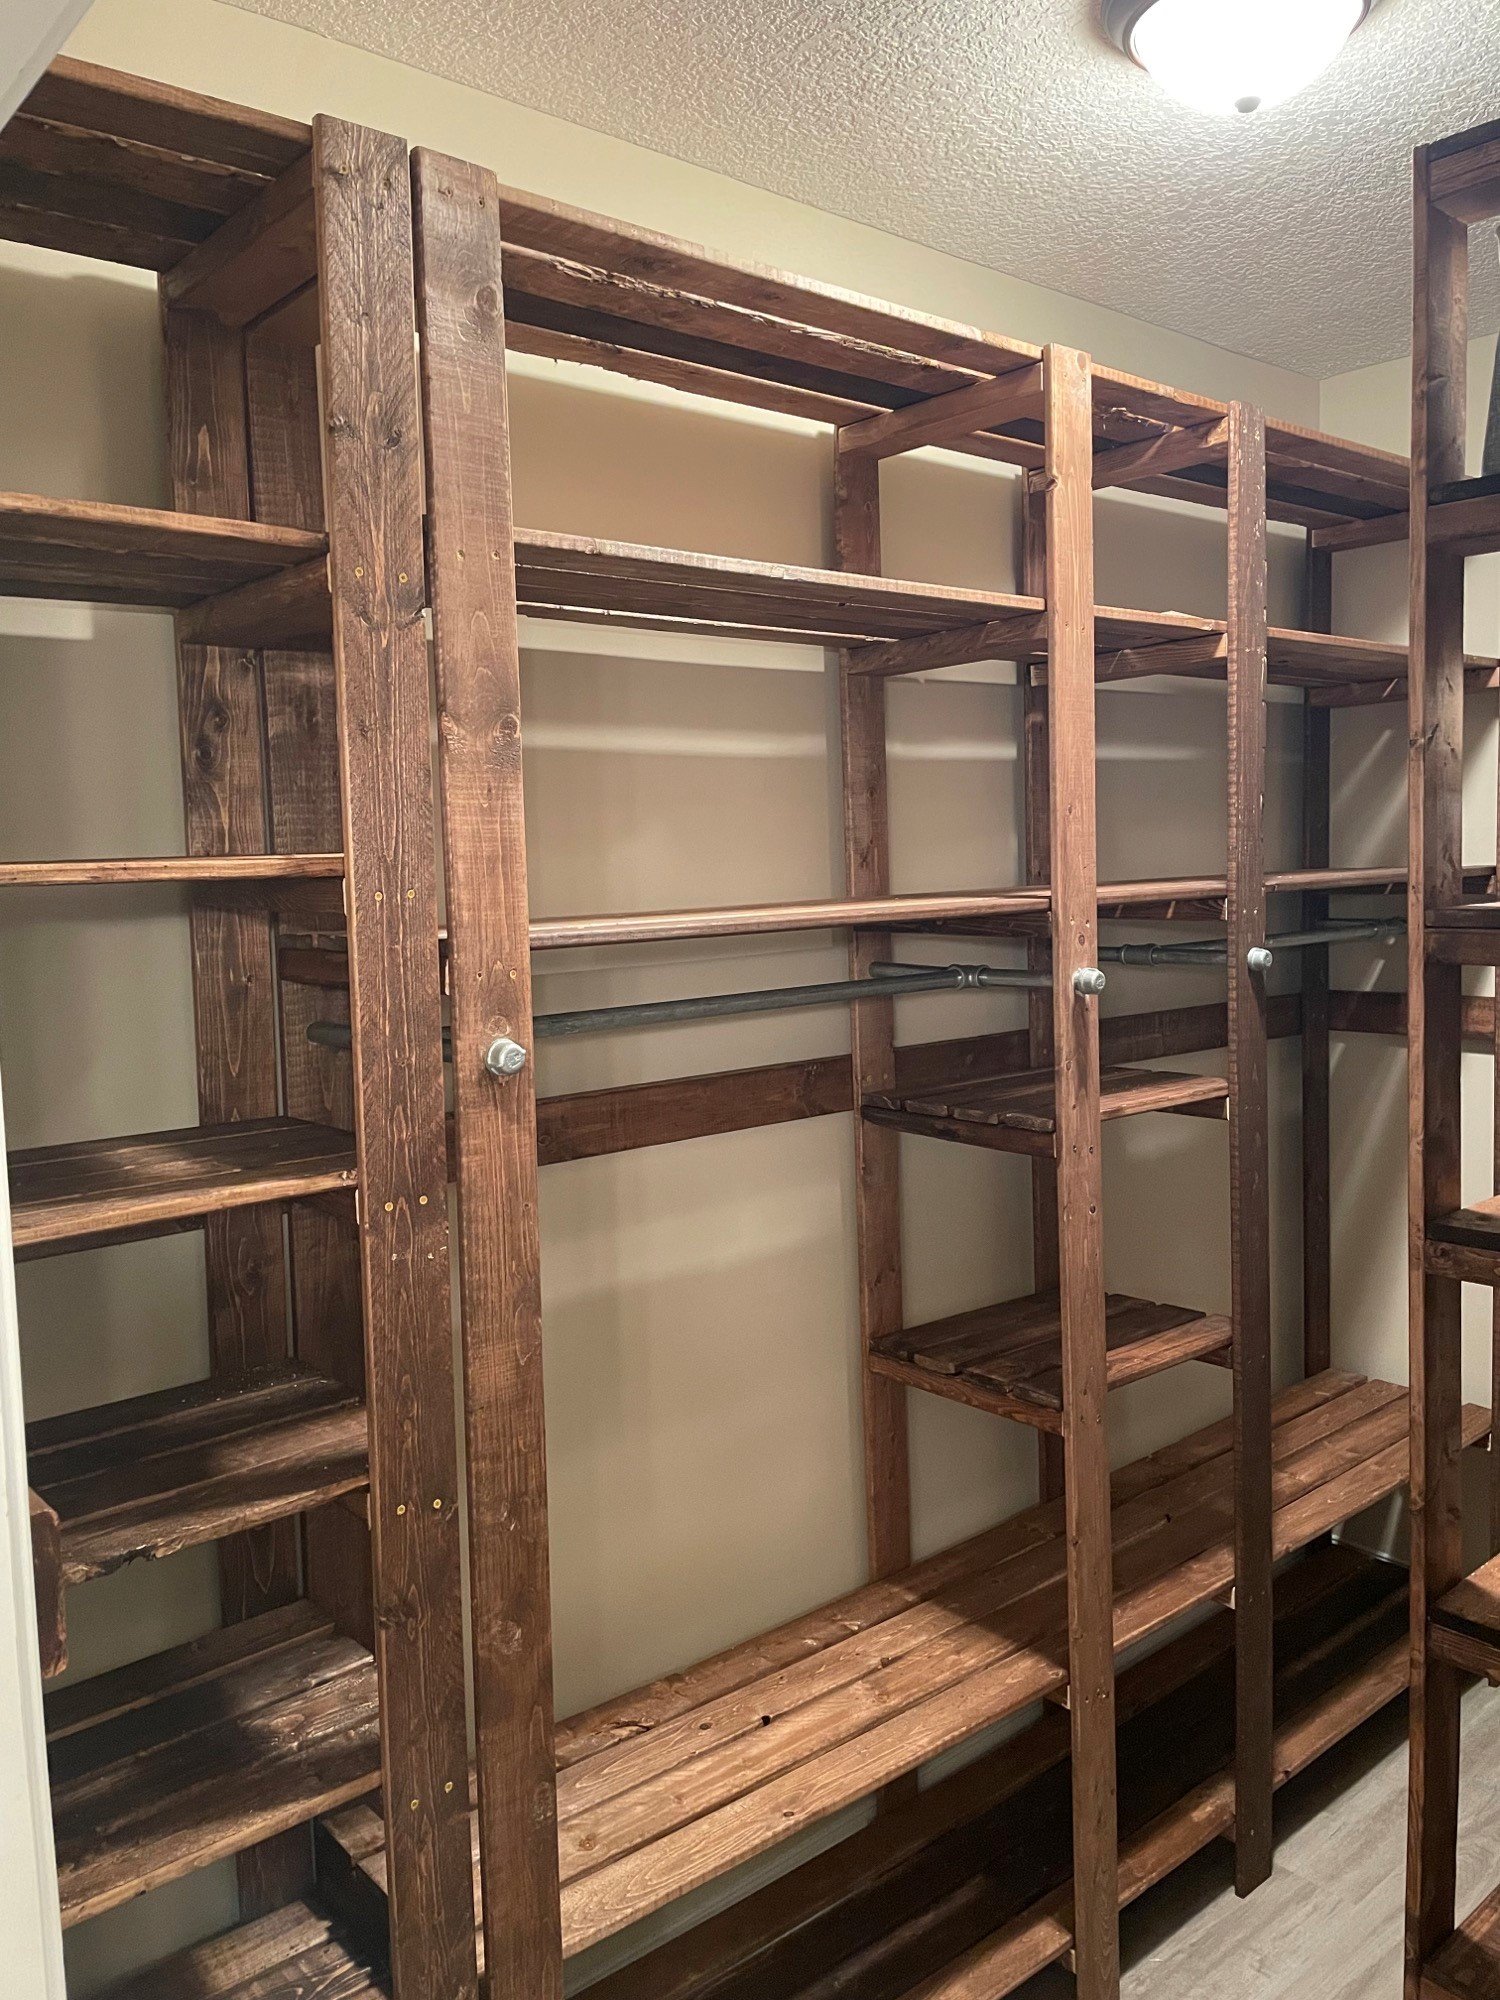
Wood Closet Shelving

Submitted by Anonymous (not verified) on Thu, 01/13/2022 - 09:01

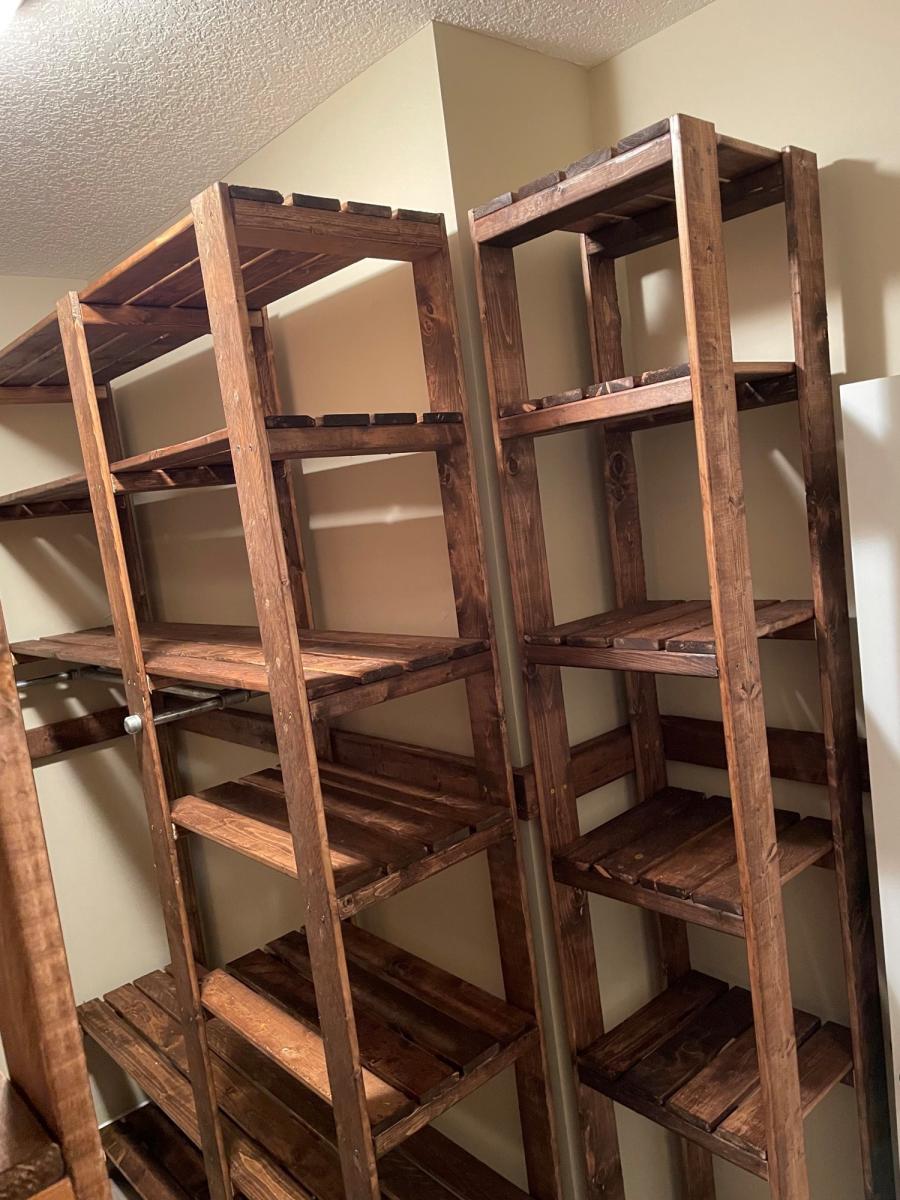
My closet system is four separate units that I butted up together and attached to the wall with a "decorative" 2x4 railing around the entirety of the closet. The main unit looks the closest to the real design but is 8 feet long and 8 feet tall to avoid extra cutting of boards. The smaller unit only has one area for hanging up clothes and is around 5 feet long which is just the length of the wall. I also built a unit for holding sheets and towels and another for my wife's shoes.

The plans are really easy to follow but I would suggest a few things:
-Do stain and boards before cutting; this would have been a nightmare otherwise.
-If you use the metal clothing rods (if I could go back in time I would have used wooden dowels) make sure that you put those in before you attach any boards between the support structures. I ended up having a 35 inch gap instead of a 36 inch gap and it killed my momentum.
-I made mine 8 feet tall because it was less to cut and then re-stain; time wise it probably was a scratch cause I had to build it in place and at the end it was very tight to work in the space.

Built from Plan(s)

Comments

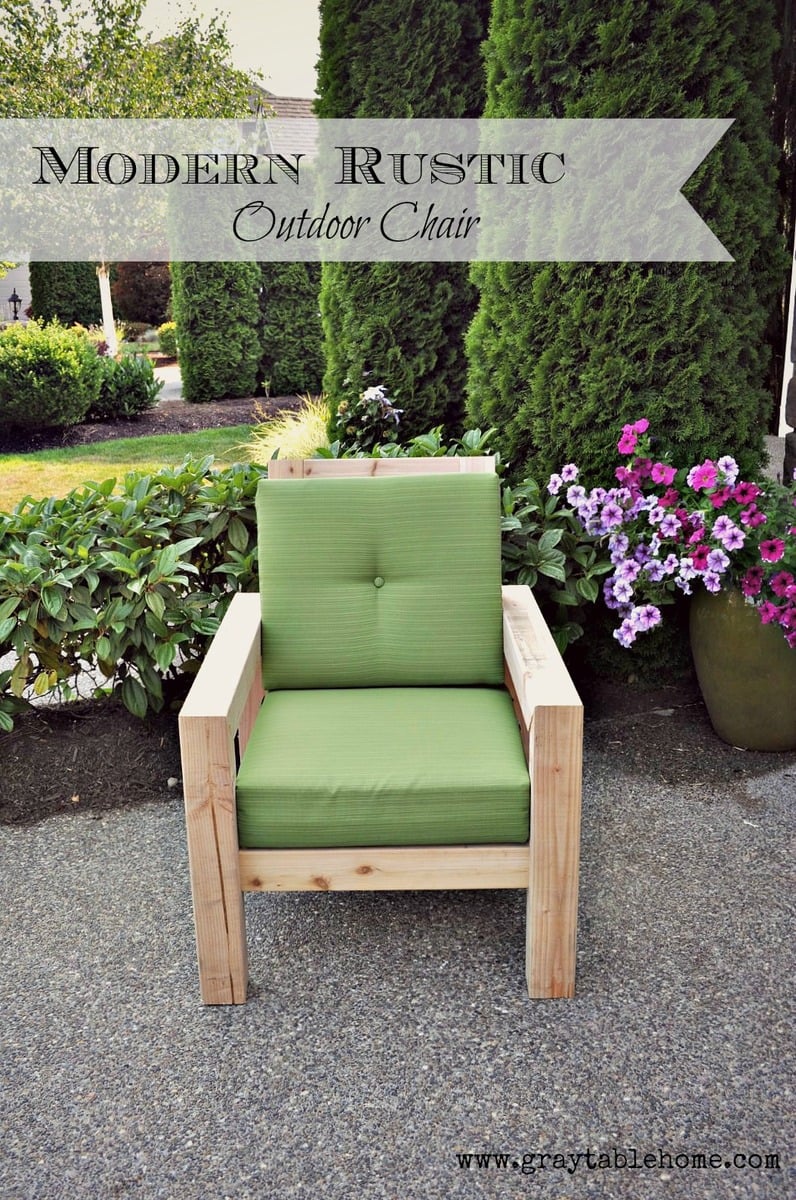
DIY Modern Rustic Outdoor Chair

Submitted by susanshamp on Fri, 07/10/2015 - 15:07

I made this outdoor chair by looking at a variety of plans and designs from Restoration Hardware and other stores. Check out more info on the project on my blog link. Thanks for looking!

Estimated Time Investment
Afternoon Project (3-6 Hours)
Recommended Skill Level
Beginner

Comments

Eco office work space

Submitted by solomonson on Mon, 07/22/2013 - 13:35

We (my husband and I) were in desperate need of a better work space, and this was perfect.

Estimated Cost
$150 (for the whole desk)
Estimated Time Investment
Week Long Project (20 Hours or More)
Finish Used
Bases - Valspar's paint+primer in one in Antique White from the oops bin. Desktop - General Finishes water based stain in Espresso. Top coat - I used Minwax's spray-on polycrylic for the bases and GF's water-based polycrylic in Gloss for the top. Contact paper from Blue for the insides. Paint was rolled and brushed, stain was applied with a rag. Polycrylic was rolled and brushed. Use good brushes (I used Purdy) and you'll never see a brush mark.
Recommended Skill Level
Intermediate

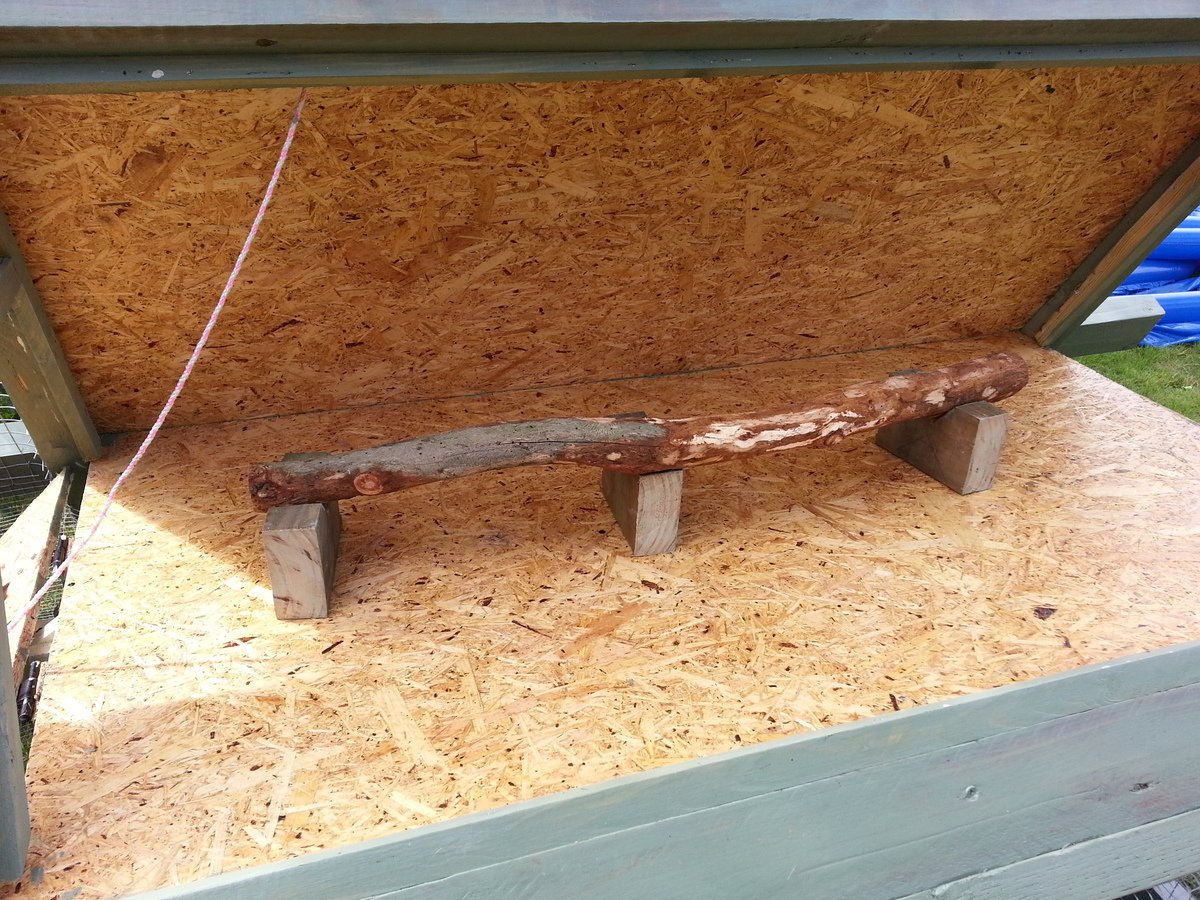
Deluxe A frame chicken coop

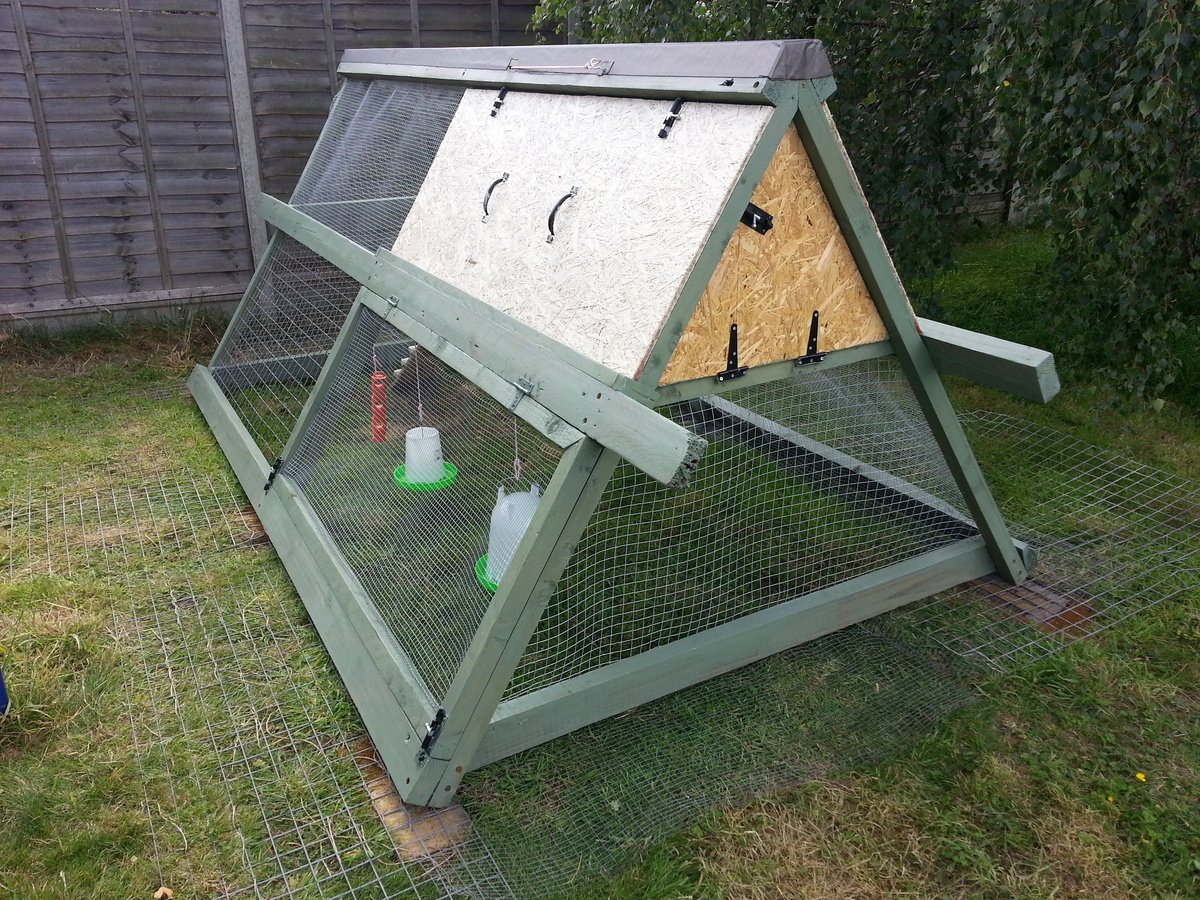
This project was based on the A frame chicken coop. I changed the dimensions  to metric with the main frame being 3m long and each side of the frame being 1.7m. The 2x4 was from reclaimed decking with new 2x2 for shorter pieces.

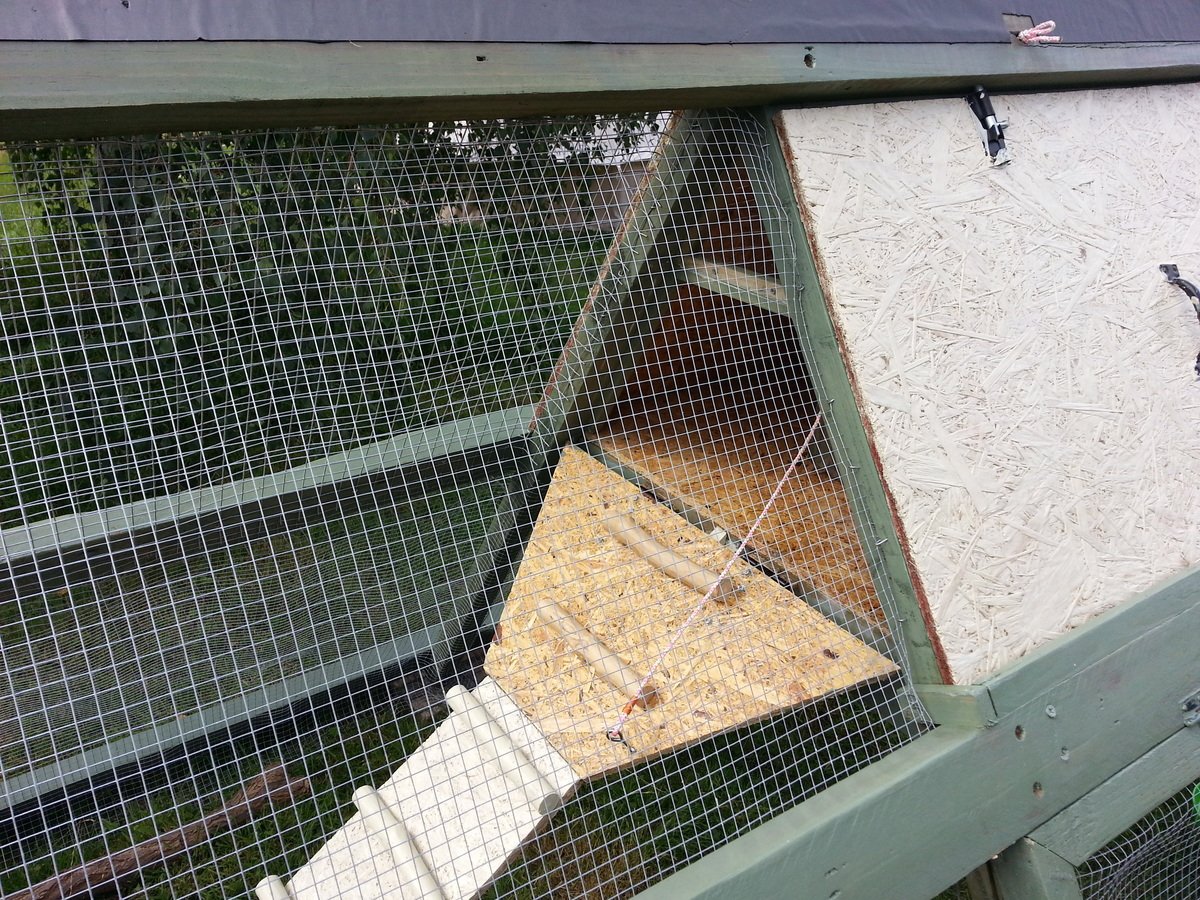
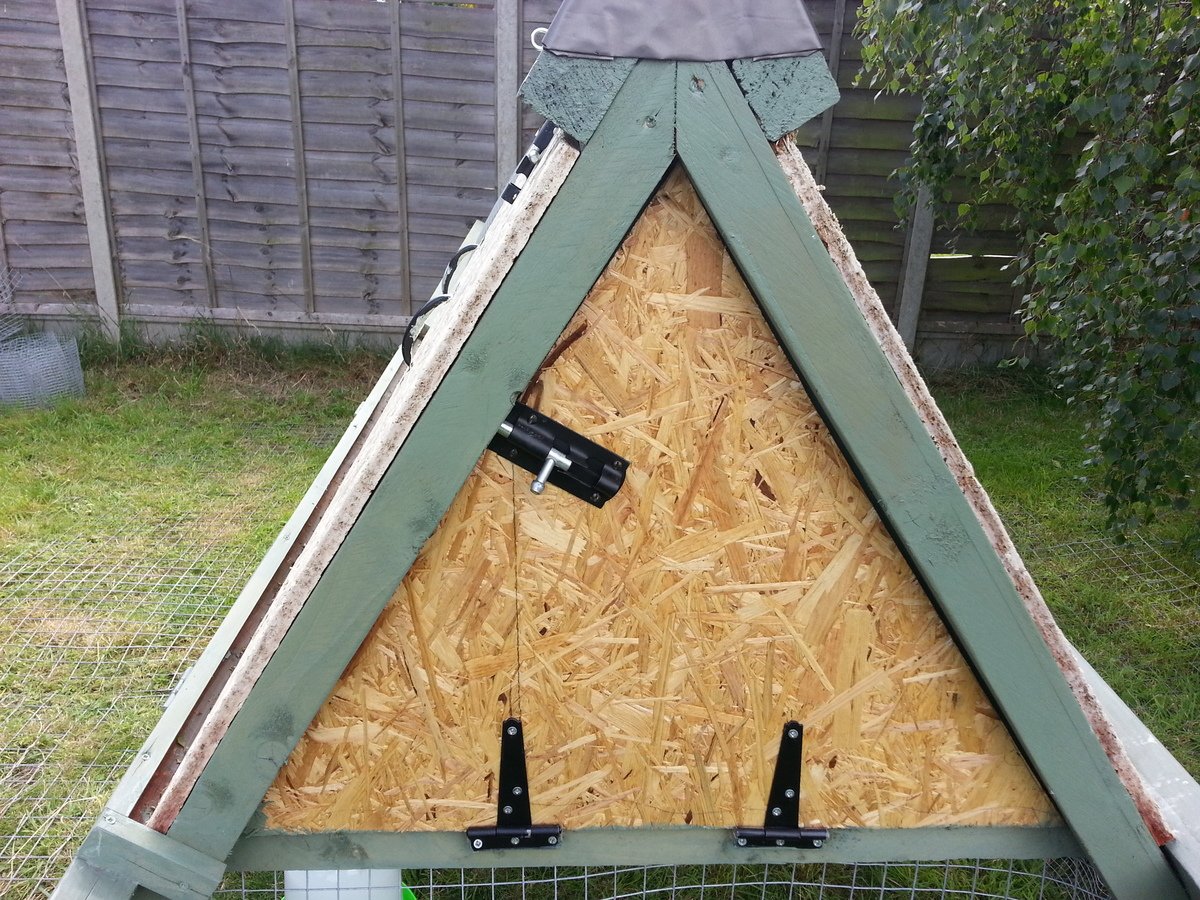
I added a chicken door (with a rope to open and close) and an egg door (with a tower bolt)  at each end of the enclosed chicken house section at the top. The chicken house has a removable roosting bar and space for the nesting boxes.  One of the bottom sections has a hinged frame to allow easy access to the run.
The hardest part was fixing wire netting to the inside as there wasn't much room to swing a hammer to put the fixings into the wood. I used a mix of 13mm and 25mm mesh and welded 50mm framing. There is wire mesh all the way round the outside to stop foxes digging into the run.


Built from Plan(s)
Estimated Cost
£150
Estimated Time Investment
Week Long Project (20 Hours or More)
Finish Used
Water based preservative
Recommended Skill Level
Beginner

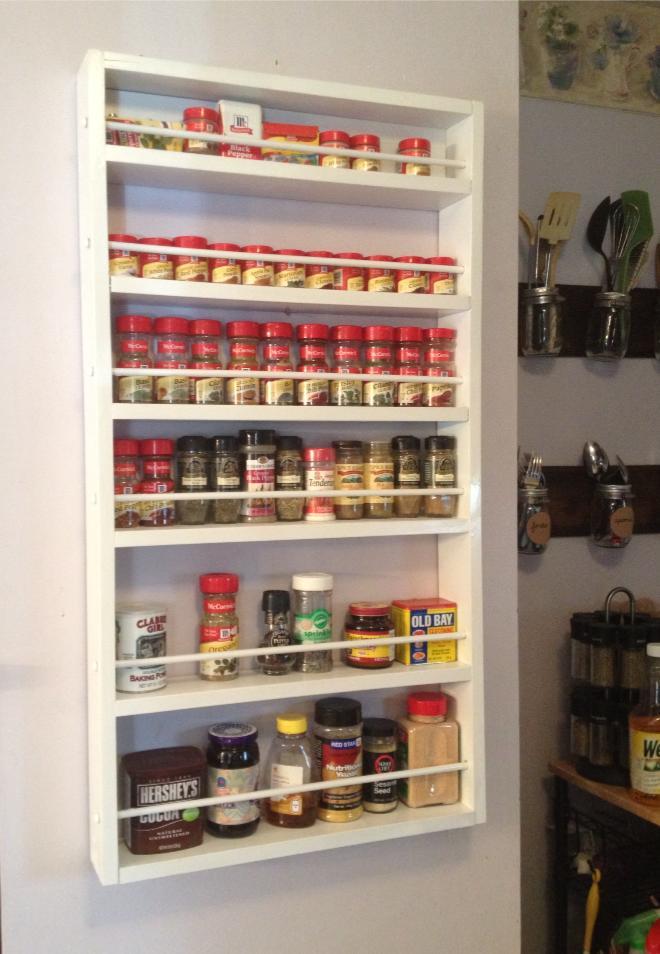
Spice Rack

I absolutely love this project. I do not have a pantry with a door so I just placed this spice rack on my wall and it really looks great! We have a ton of spices so I might need to make another!

Built from Plan(s)
Estimated Time Investment
Day Project (6-9 Hours)
Finish Used
White Spraypaint
Recommended Skill Level
Beginner

Comments

robynred

Sat, 09/21/2013 - 10:33

hi - I'm thinking of building this to hang on a wall like you have. Do you think the dowels are necessary? Seems like it would give a little more shelf room without the dowels - but do you feel like the spices would fall out without them?
thanks!

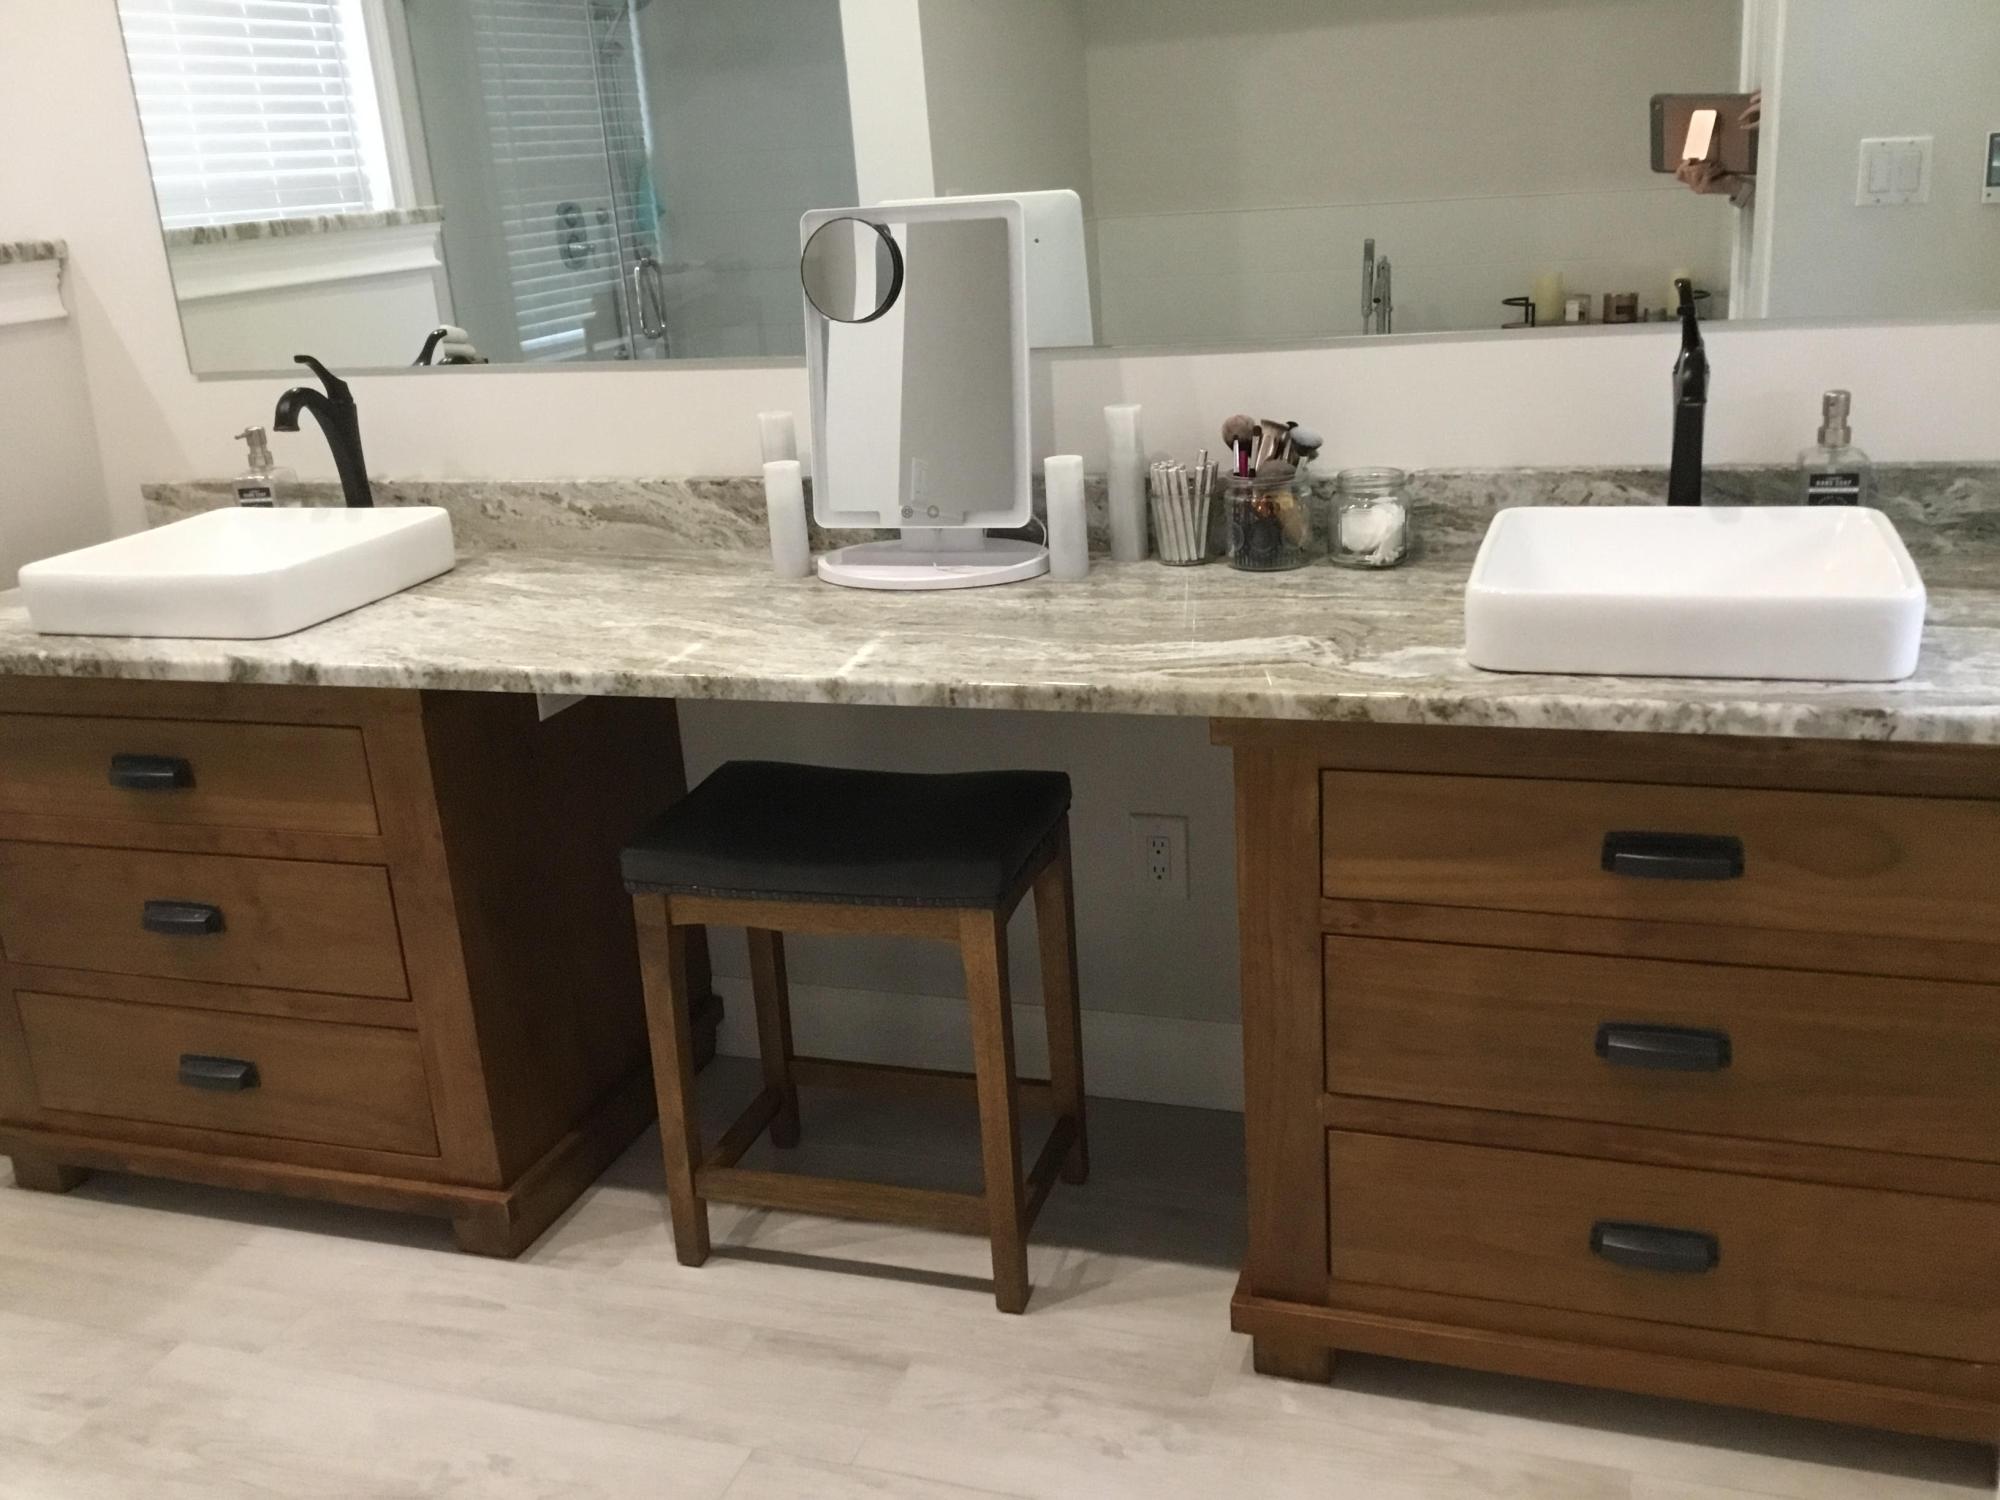
DIY Bathroom Vanities

Submitted by Anonymous (not verified) on Sun, 04/24/2022 - 11:18

Perfect vanities! When I couldn’t find exactly what I was looking for, I searched online for vanity plans and thankfully your site and these vanities popped up. I love all the storage with these, so much better than ANYTHING pre built we looked at online. We had seen vanities that I was going to settle for but they were around $3,000, and I didn’t love them, so my husband said he could build something and this was the result using your plans. I am so thankful and the whole project was a fraction of the cost! I stained them with a vinegar and steel wool stain with poly over it. I couldn’t be more grateful for you and your generosity of plan sharing. Thank you!

Built from Plan(s)

Comments