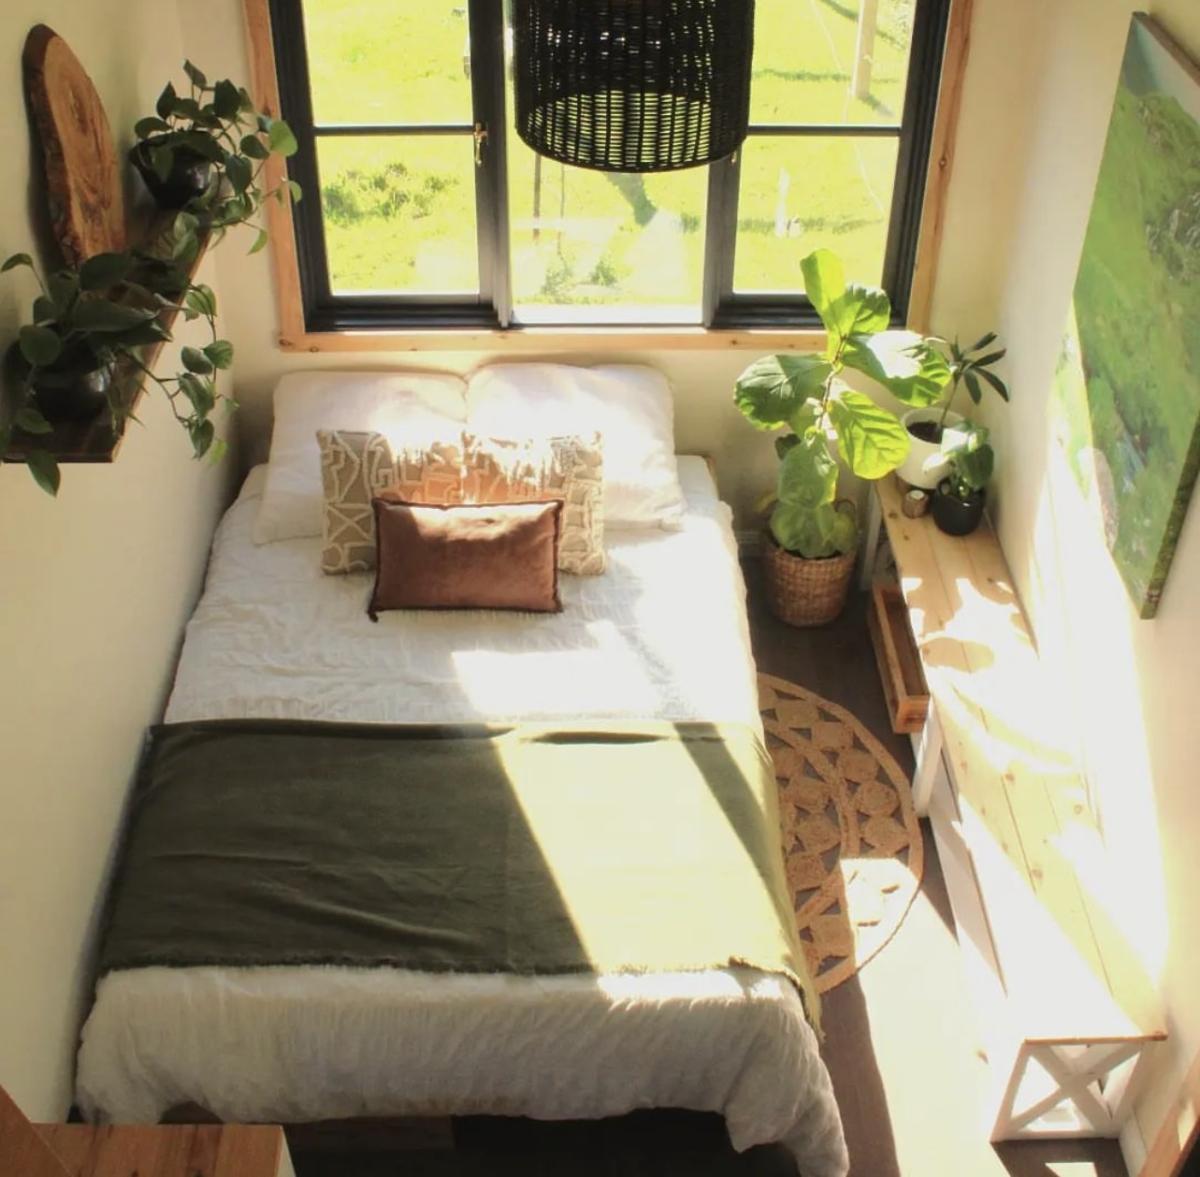
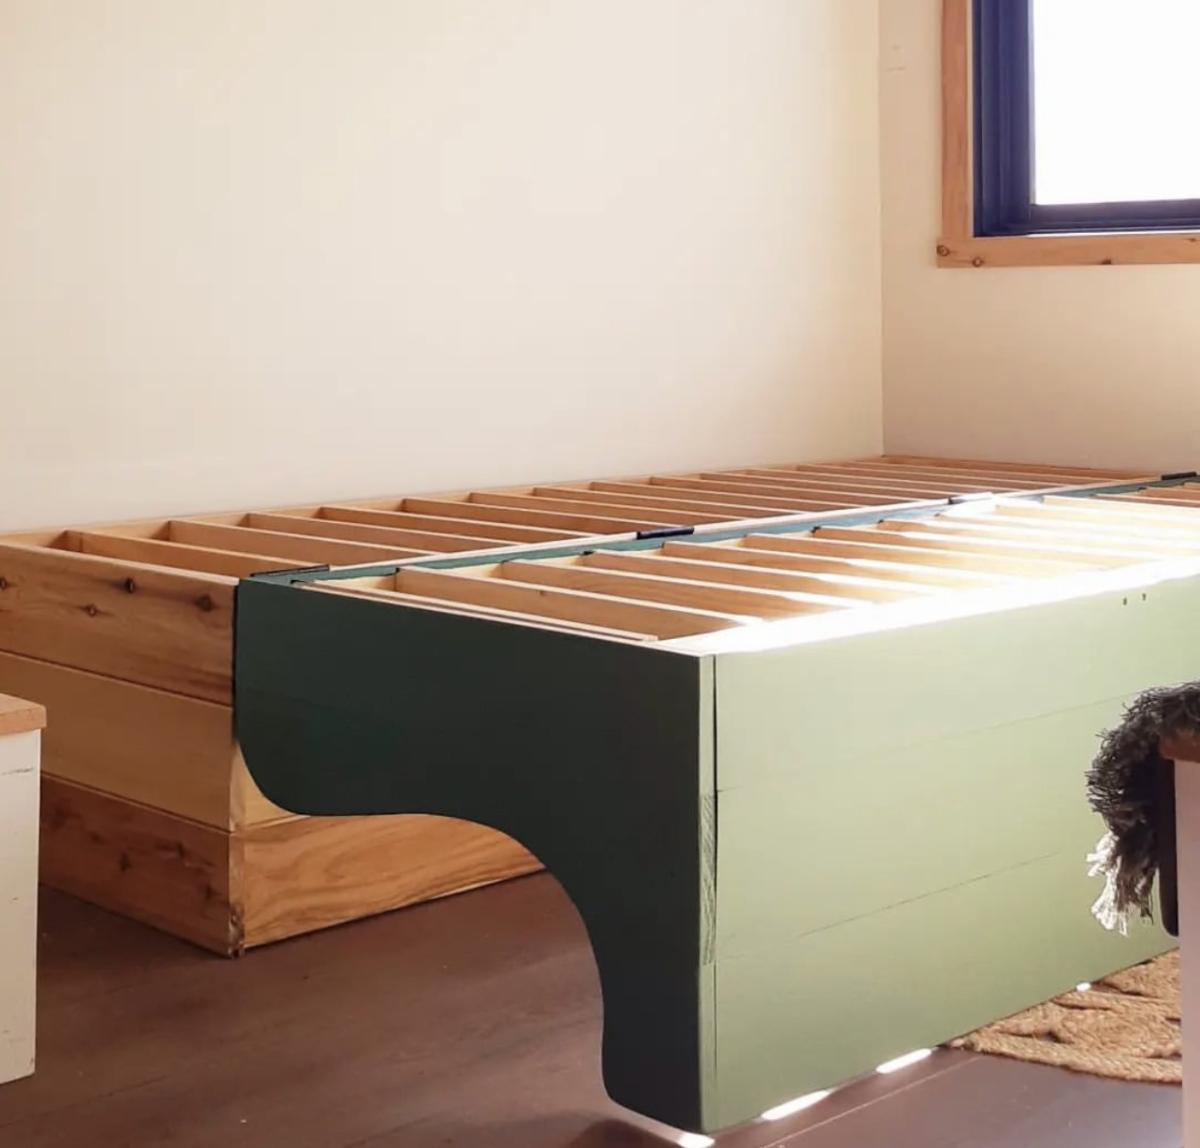
Tiny House Flip Sofa Bed - by Deirdre

Modified from our twin sleeper chair plan, this amazing hinged sofa bed was built and shared by #tinybuilderau
Built from Plan(s)
Modified from our twin sleeper chair plan, this amazing hinged sofa bed was built and shared by #tinybuilderau
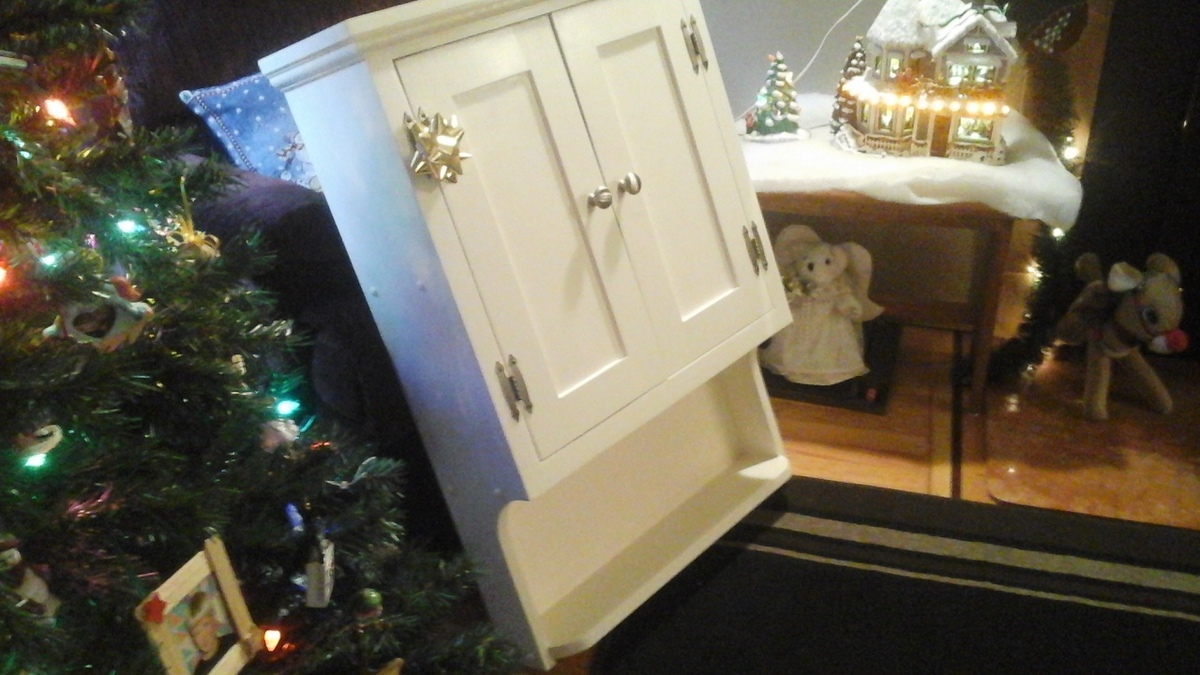
I built this above toilet cabinet for my son and his wife for Christmas. They moved into a new house and wanted this additional storage space. Turned out pretty good!
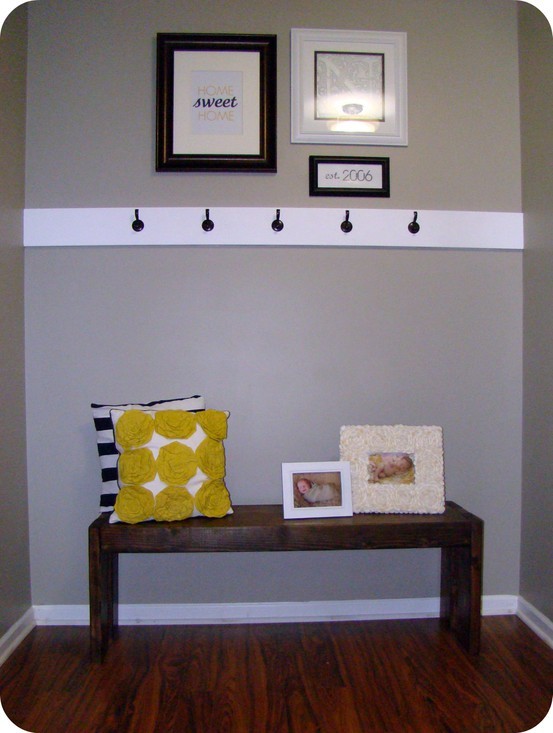
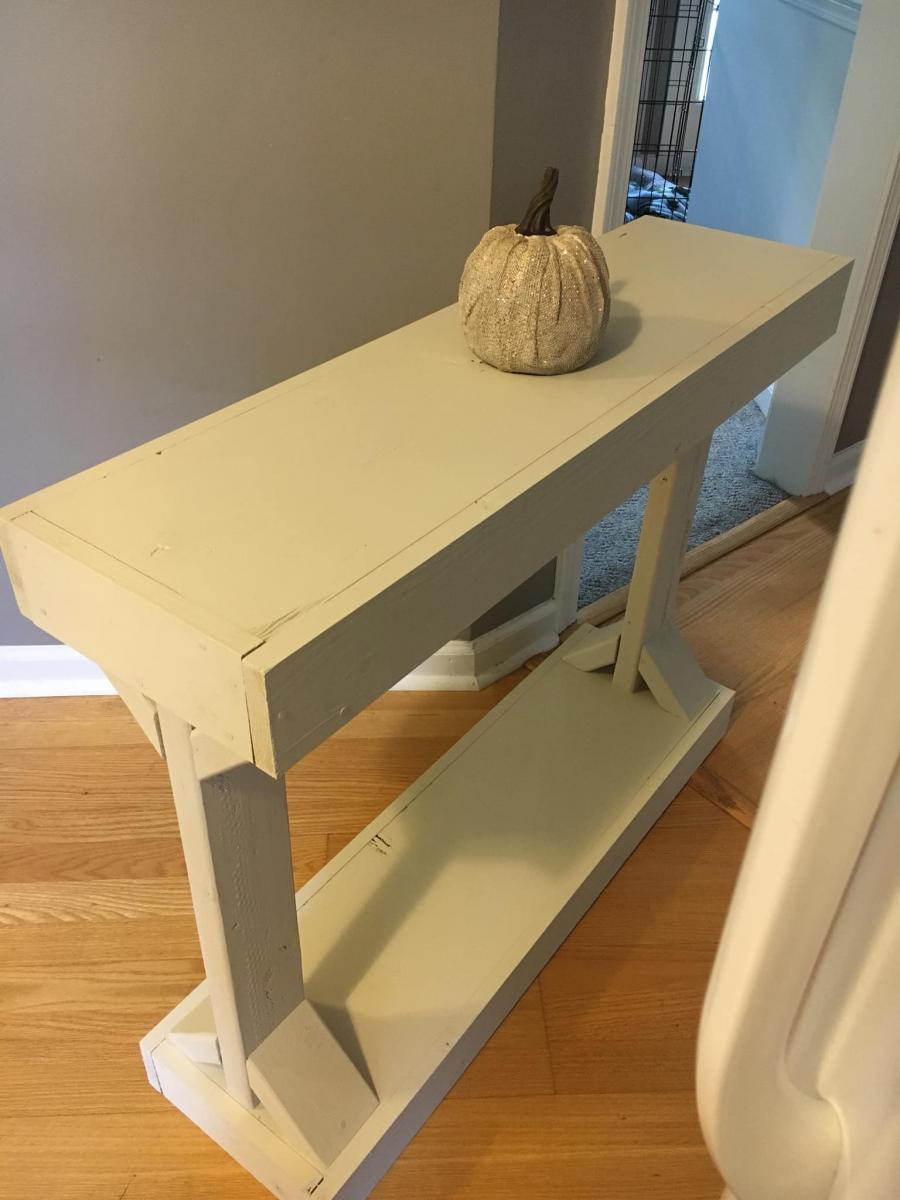
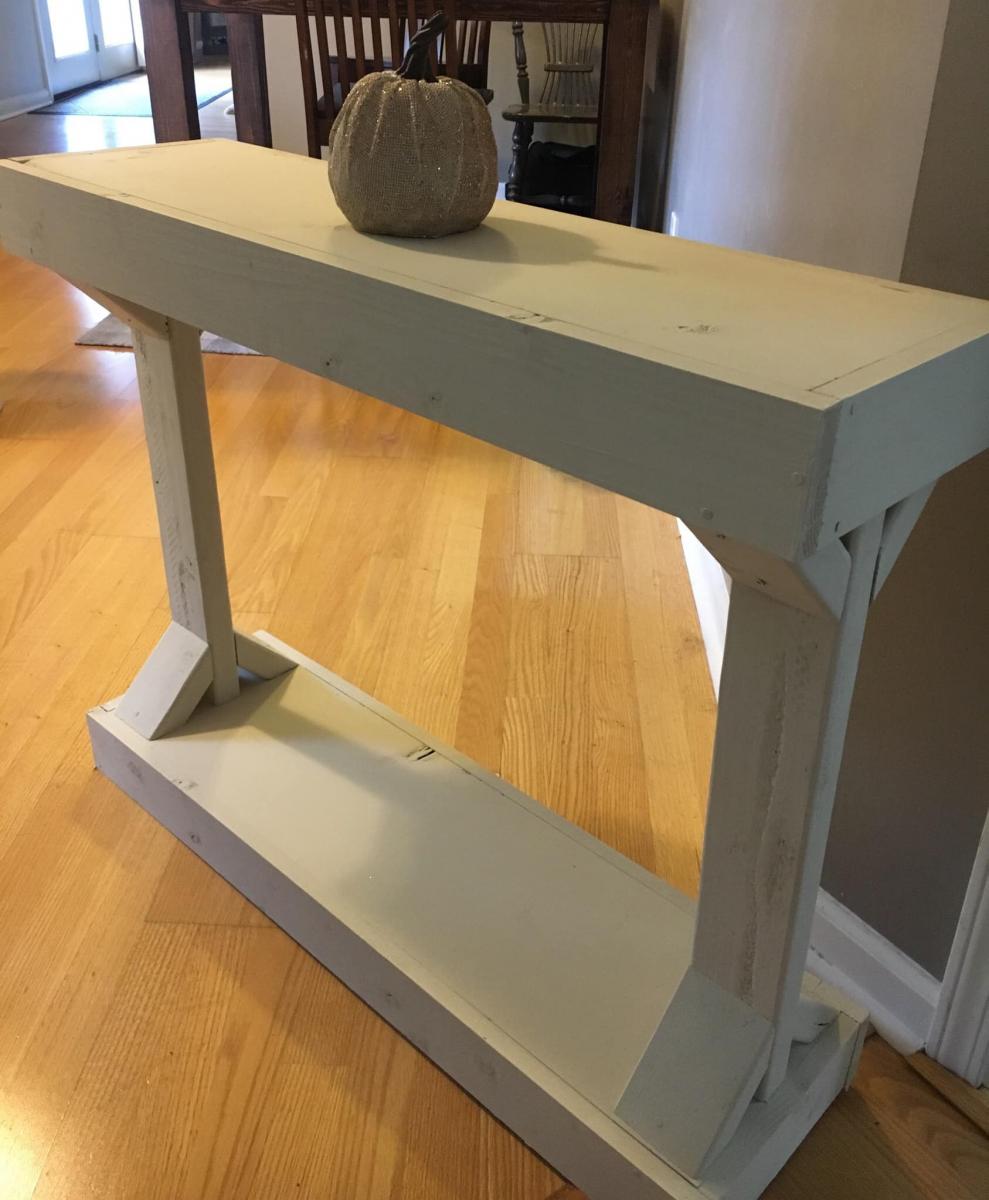
I was looking to make my foyer a bit more kid friendly while still being coze and practical. I came across the modern farm bench plans, and I knew it was the perfect fit!
I have done a few other plans, but all with help. This project I started around 9 pm (after bedtime) one night, and by 11:30, it was completely built and stained. My son was climbing all over it by the next morning :)
I love it - I think it adds the perfect bit of rustic charm to my foyer, while still giving my little guy a sturdy spot to get his shoes/coat on. I have since added baskets underneath for winter storage.
This will definitely not be my last build! Thanks Ana!

I have enjoyed my miter saw cart for years. My sweet hubby gifted me with a table saw but I was nervous to use it without support for large pieces of wood and needed better storage. So... I modified my cart by adding a back leaf and making the shelf adjustable with two sets of cleats for the height of both saws.

Fri, 04/24/2020 - 07:11
How do you make the new supports for the outer folding leaf?
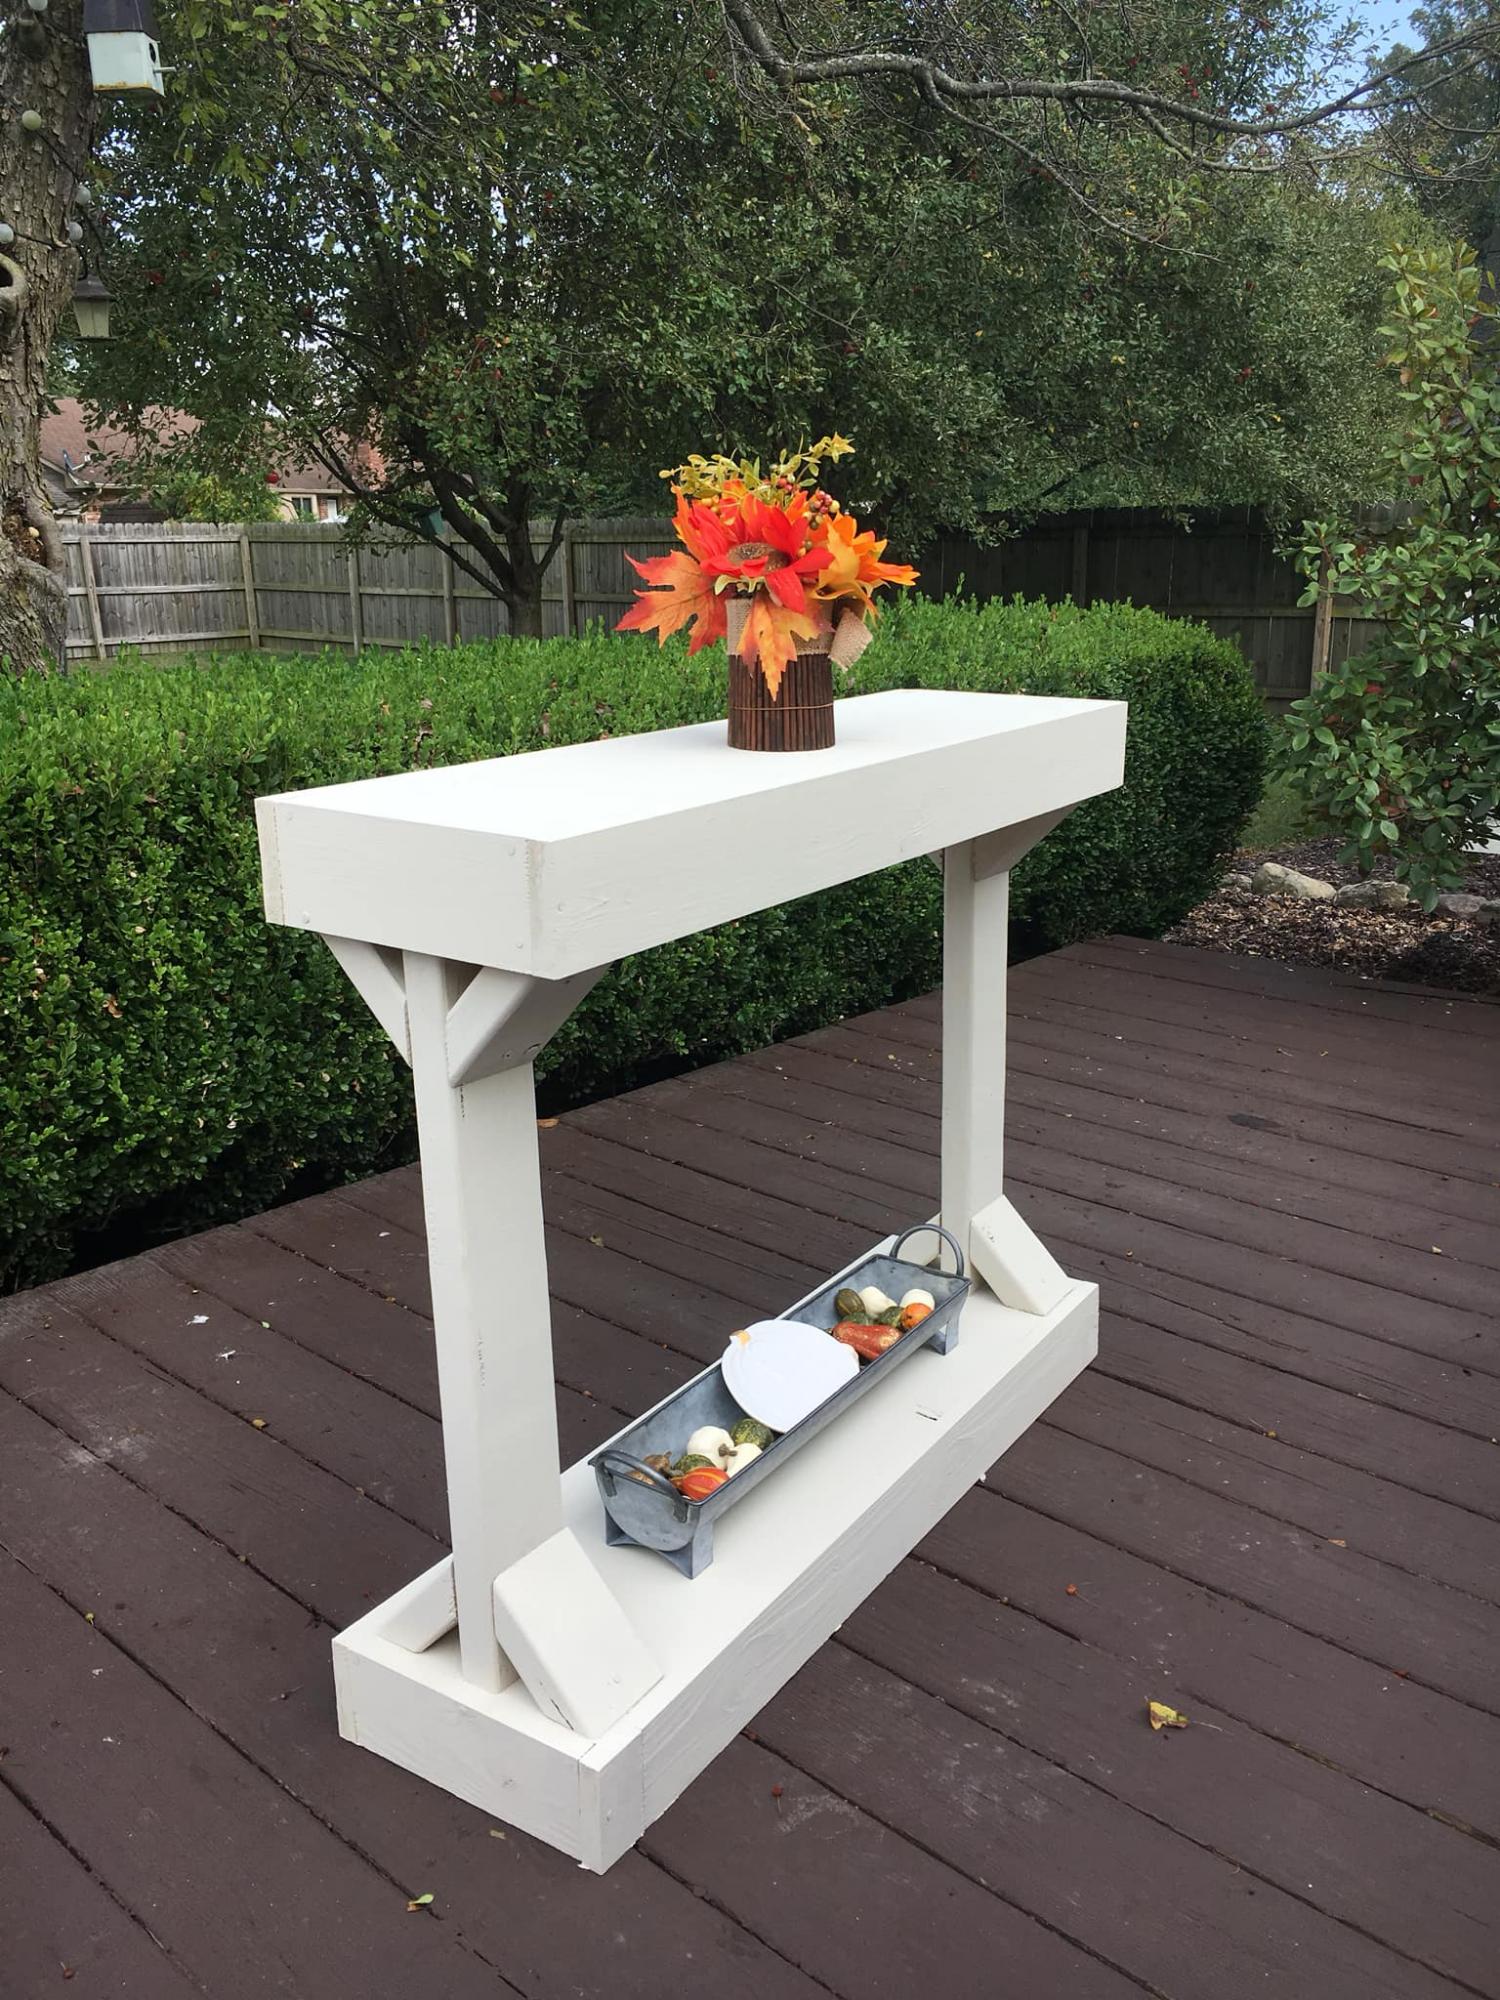
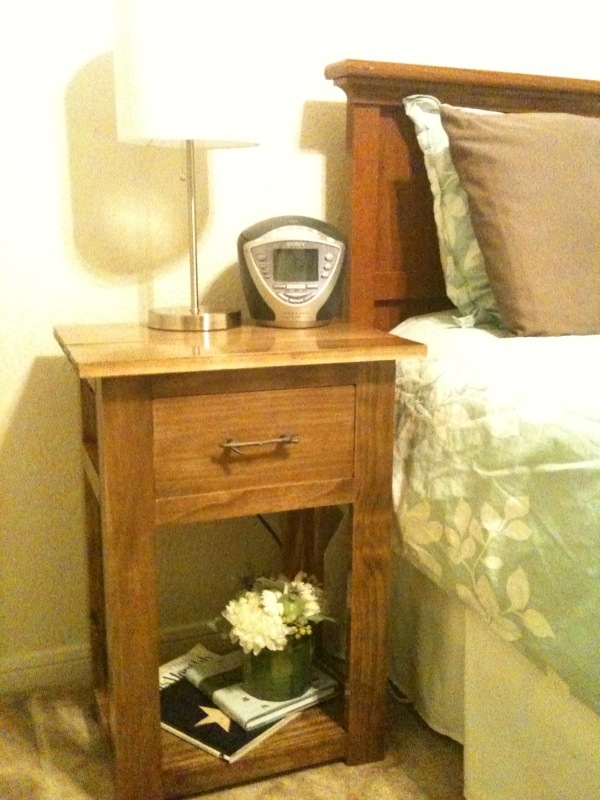
This past weekend I build Ana's Narrow Console table. I went Saturday evening to pick up the boards and cut them. I completed the whole project late Sunday afternoon. I don't have a nailer so in-between the project I switched to self-tapping screws and it became even quicker because using the ol' fashioned hammer and nails was difficult and time consuming. Cutting the angles was a first for me, and it is not bad at all! I was very intimidated first but so glad I took that first step! Also, I just watched her video countless times to ensure I was doing it correctly, and that helped the most ;). It is very lightweight and I did not need any assistance in carrying the table. I truly, truly believe anyone can do this!
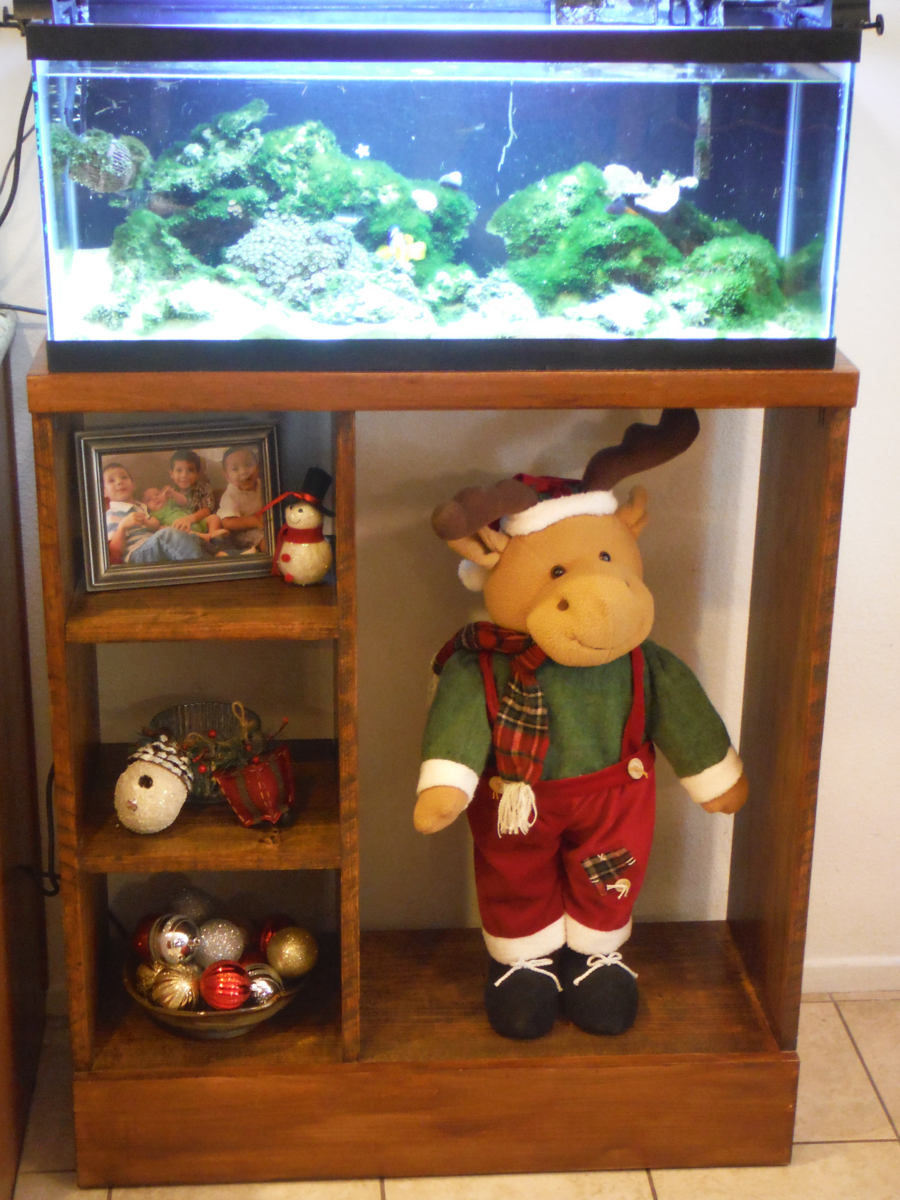
We needed to make sure this was strong enough to hold a 20 gallon fish tank.So, we decided to use poplar wood and stained it with golden mahogany. The height was adjusted to 37 inches.
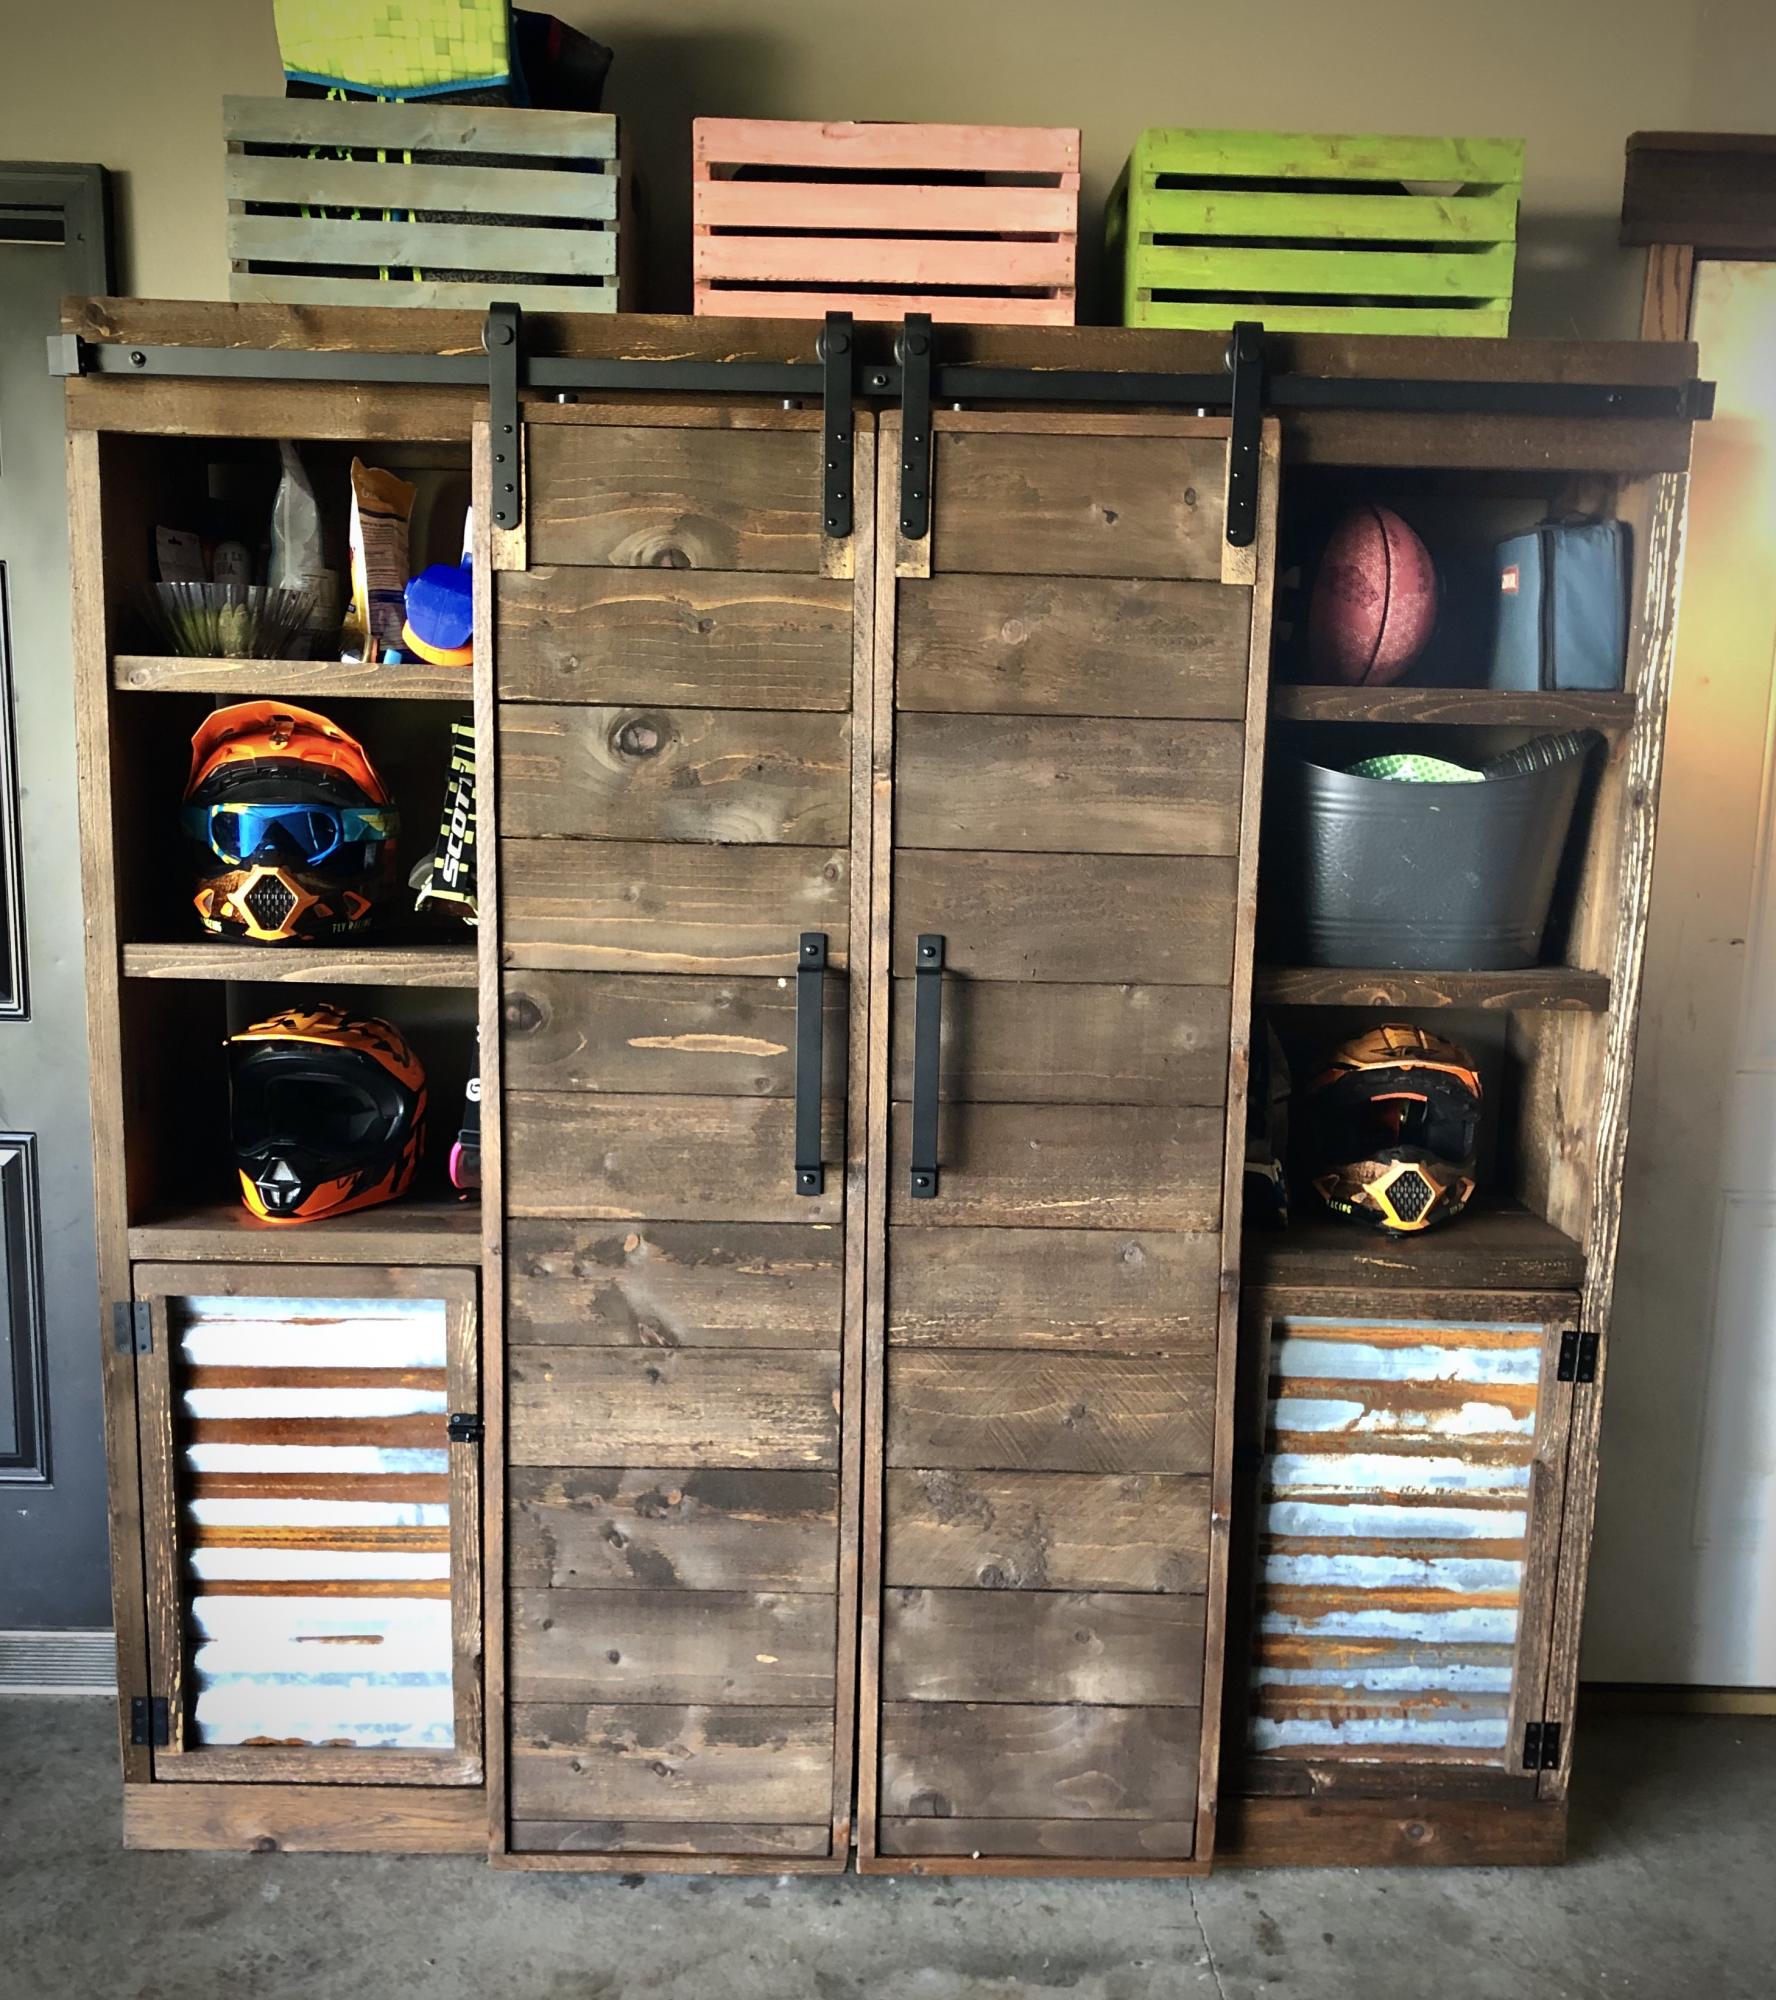
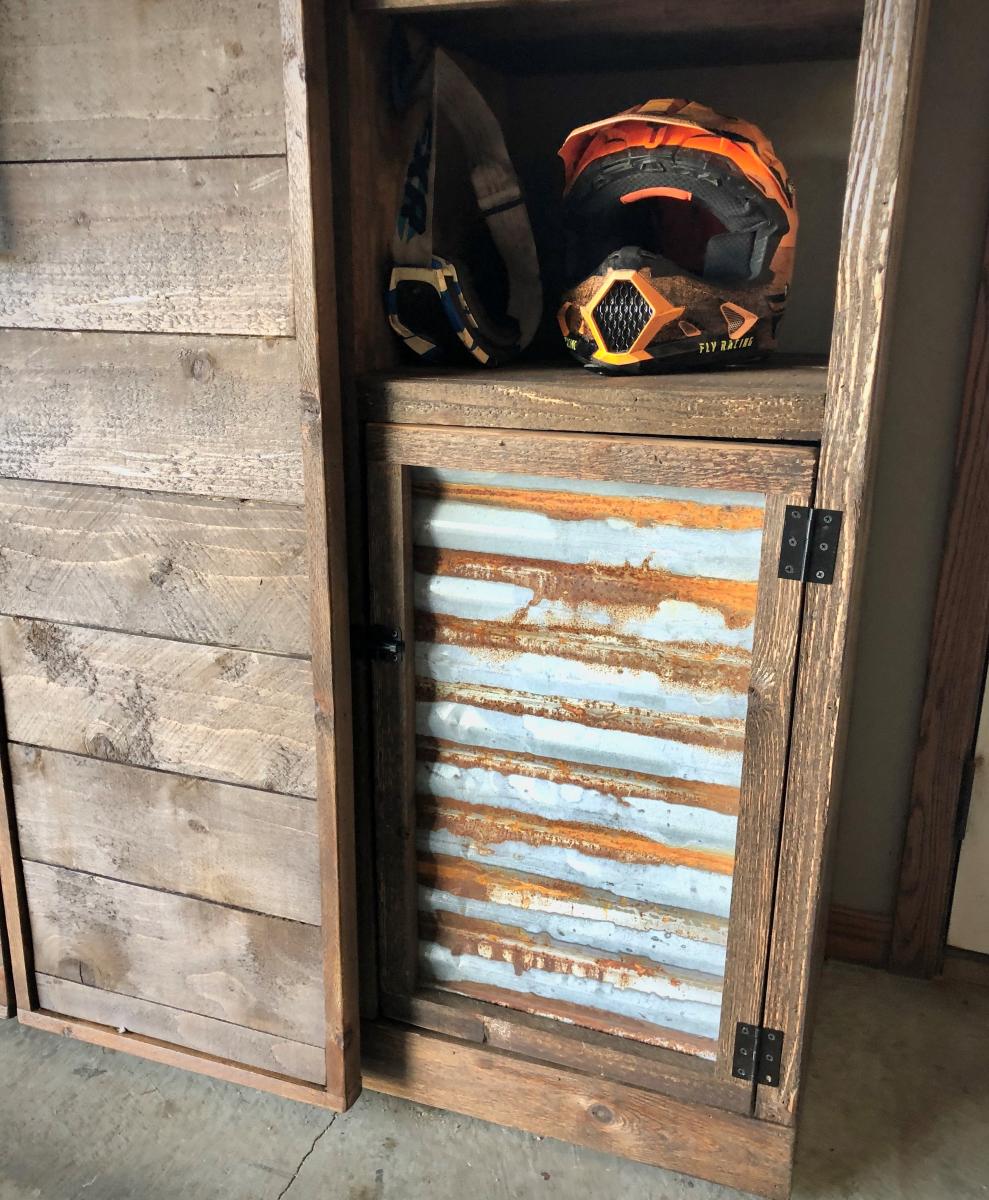
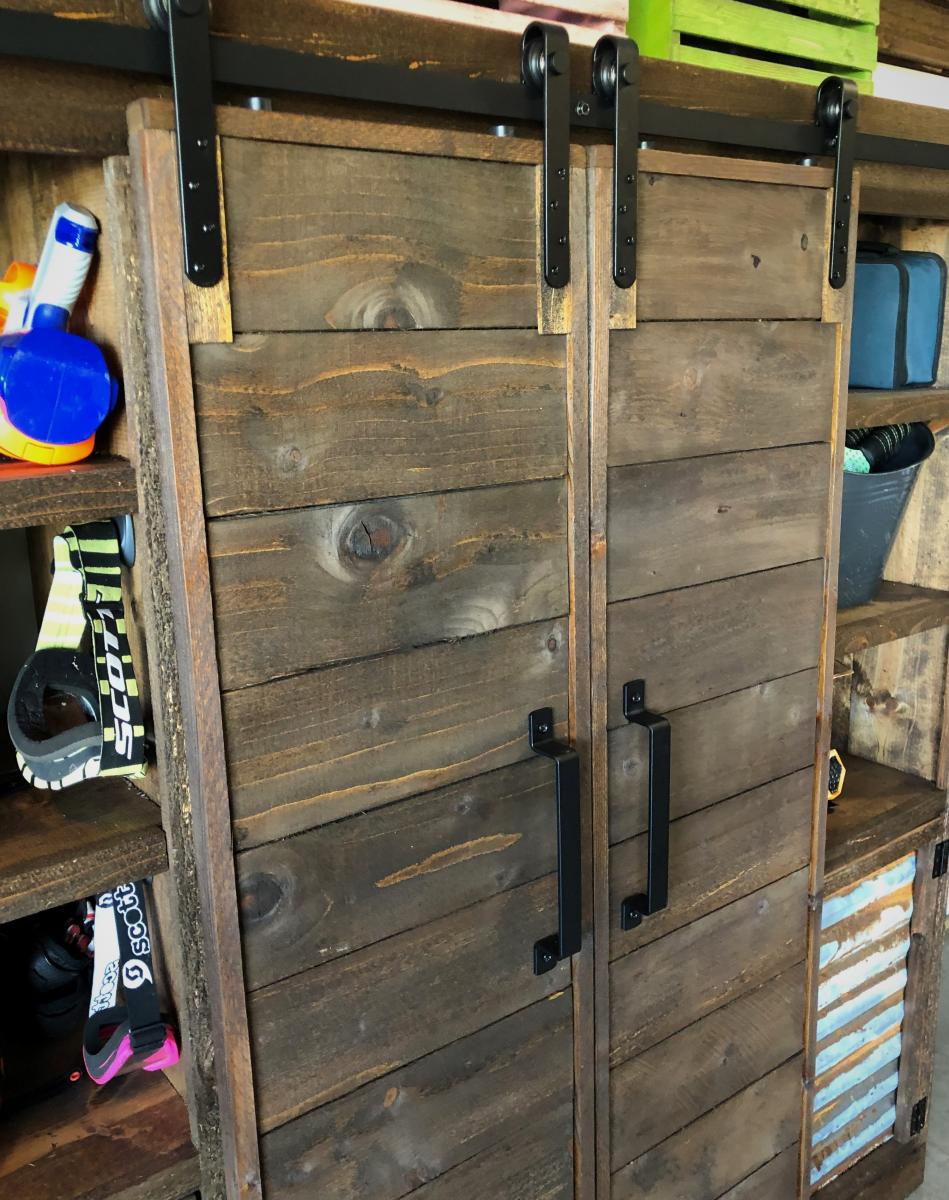
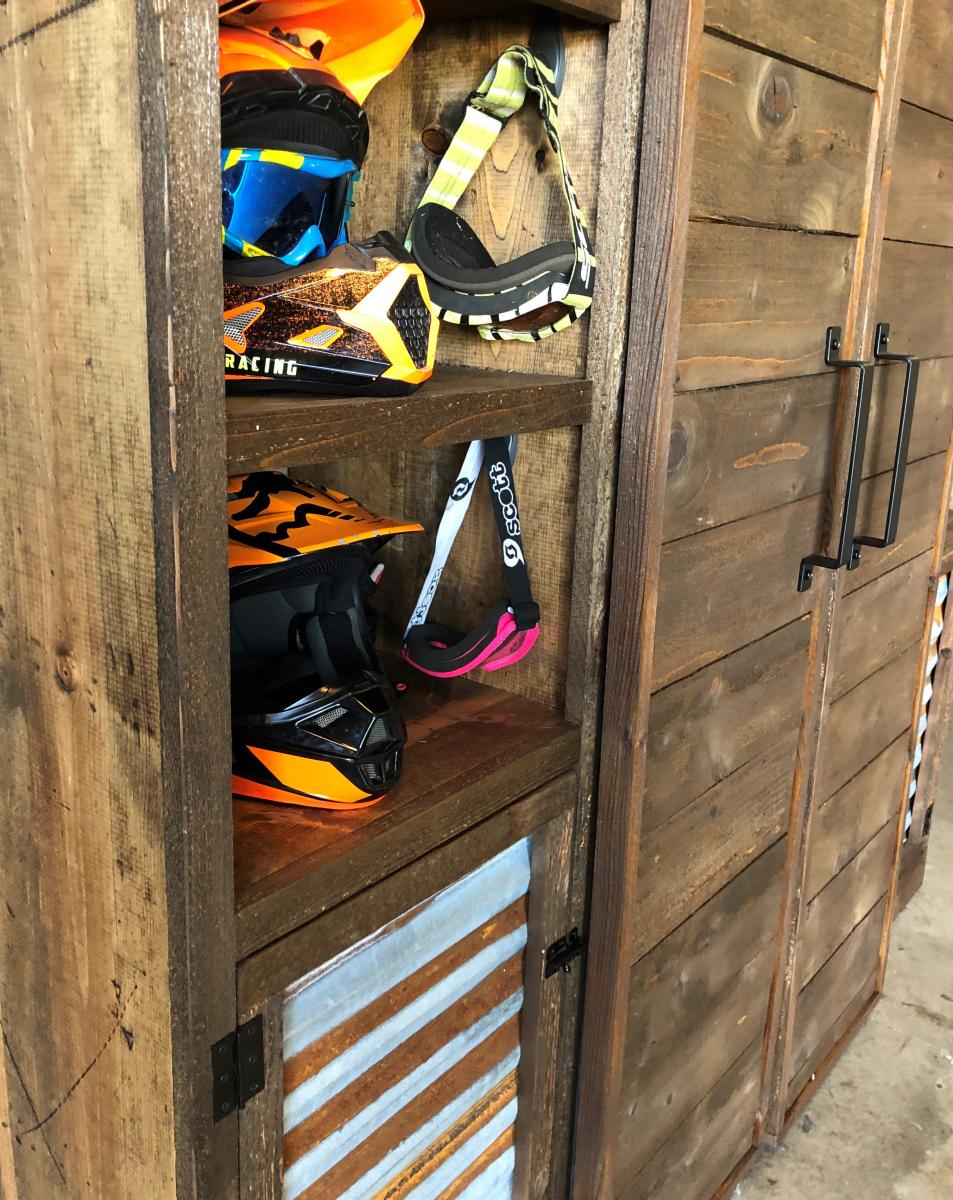
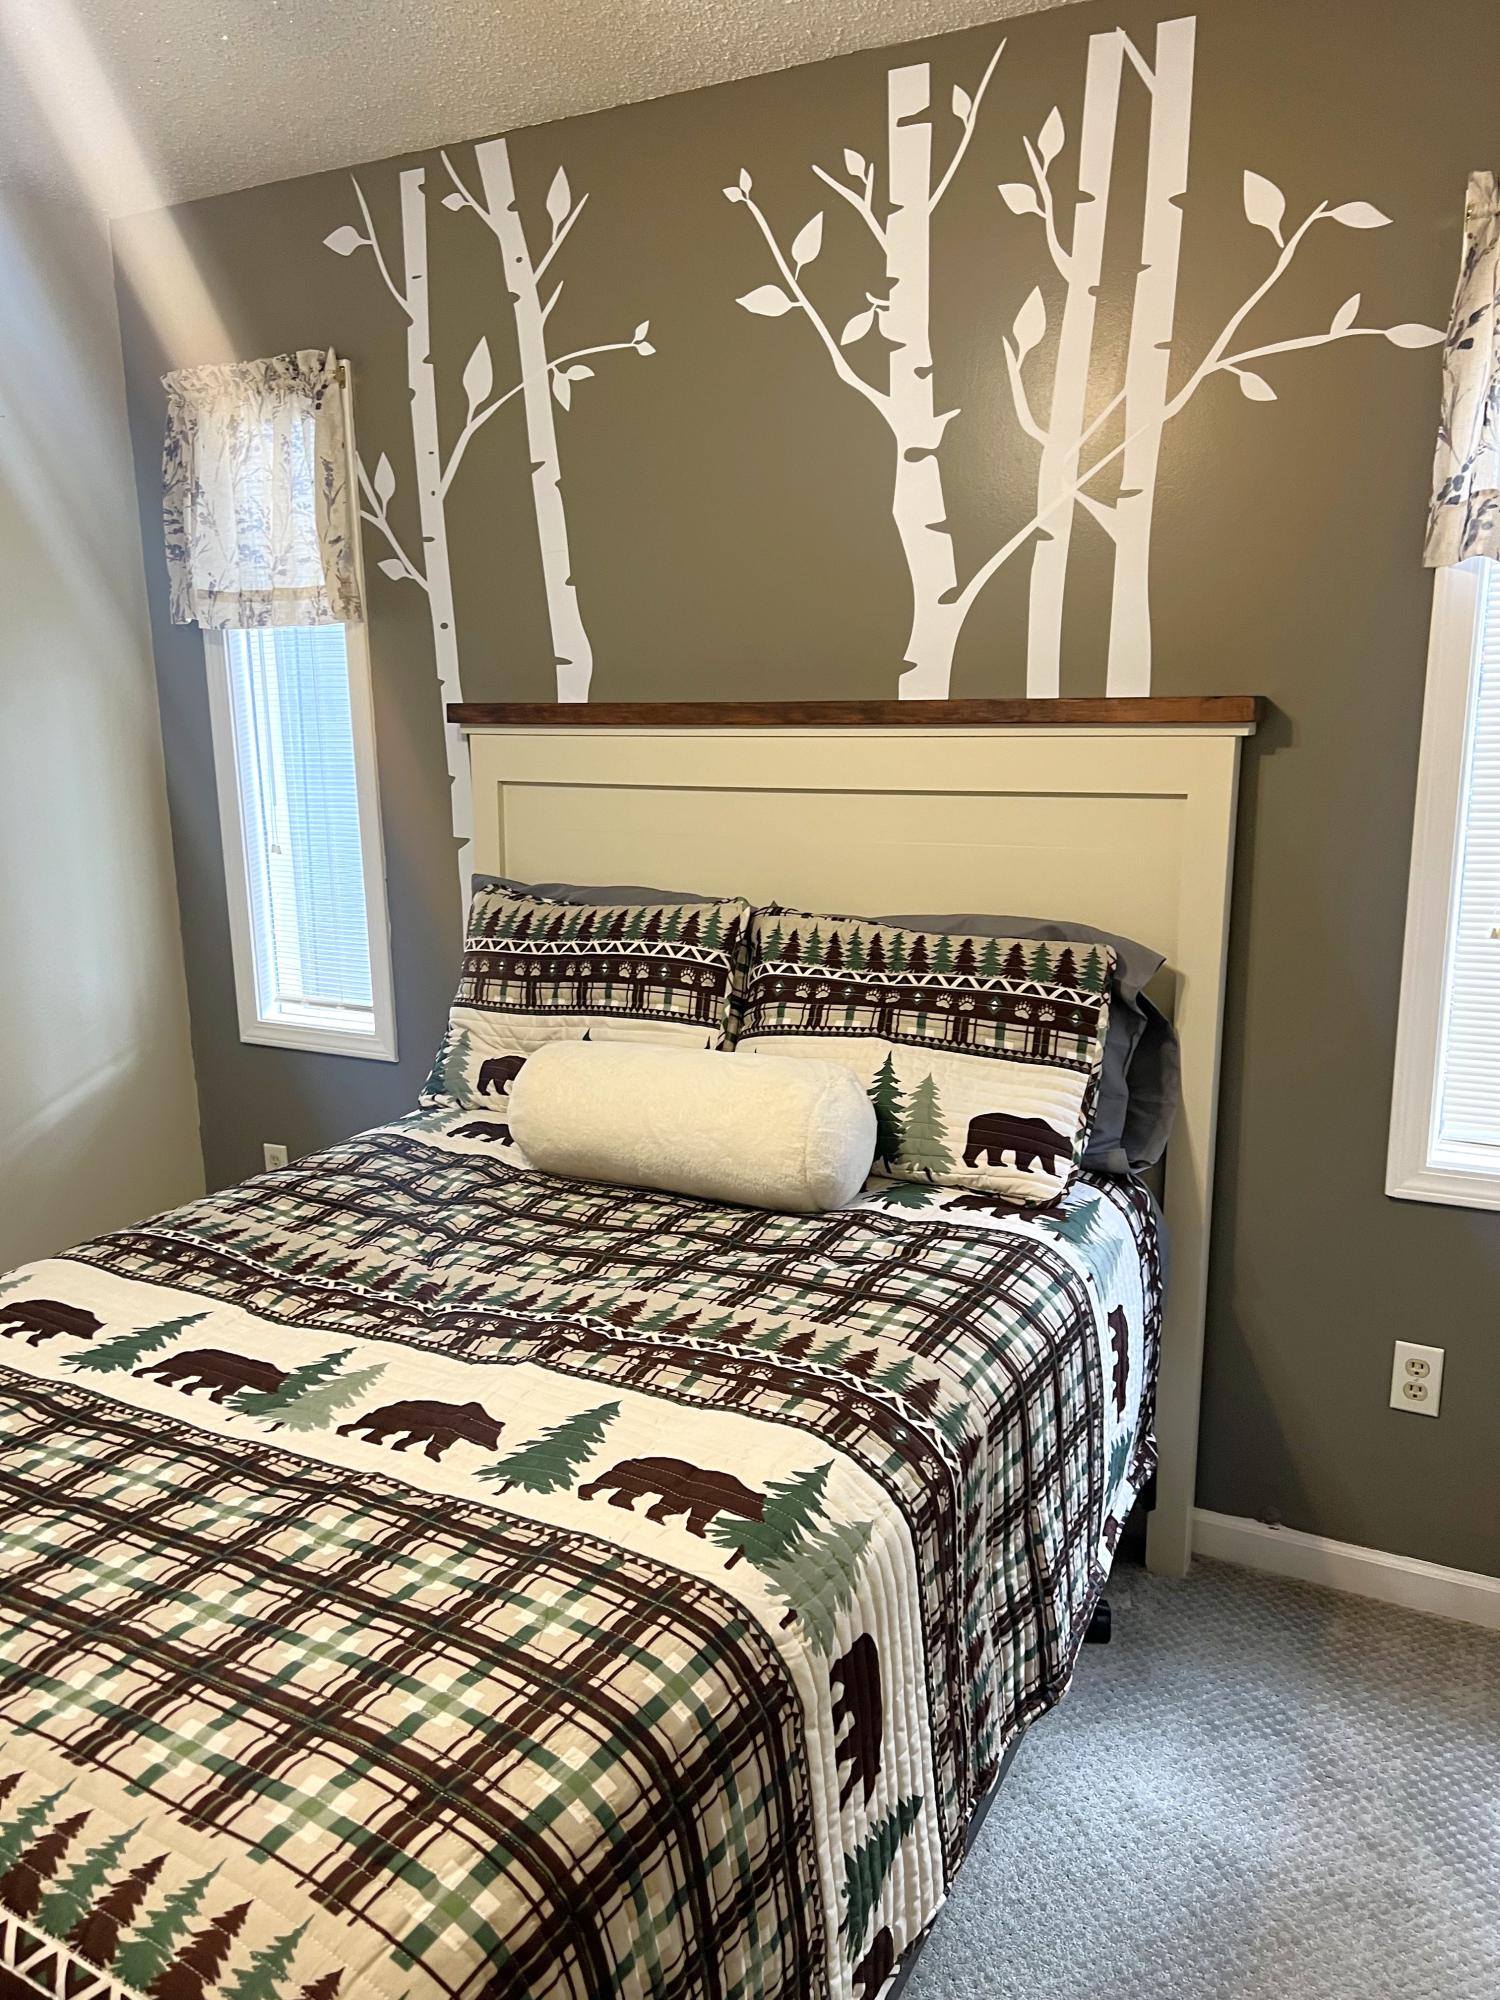
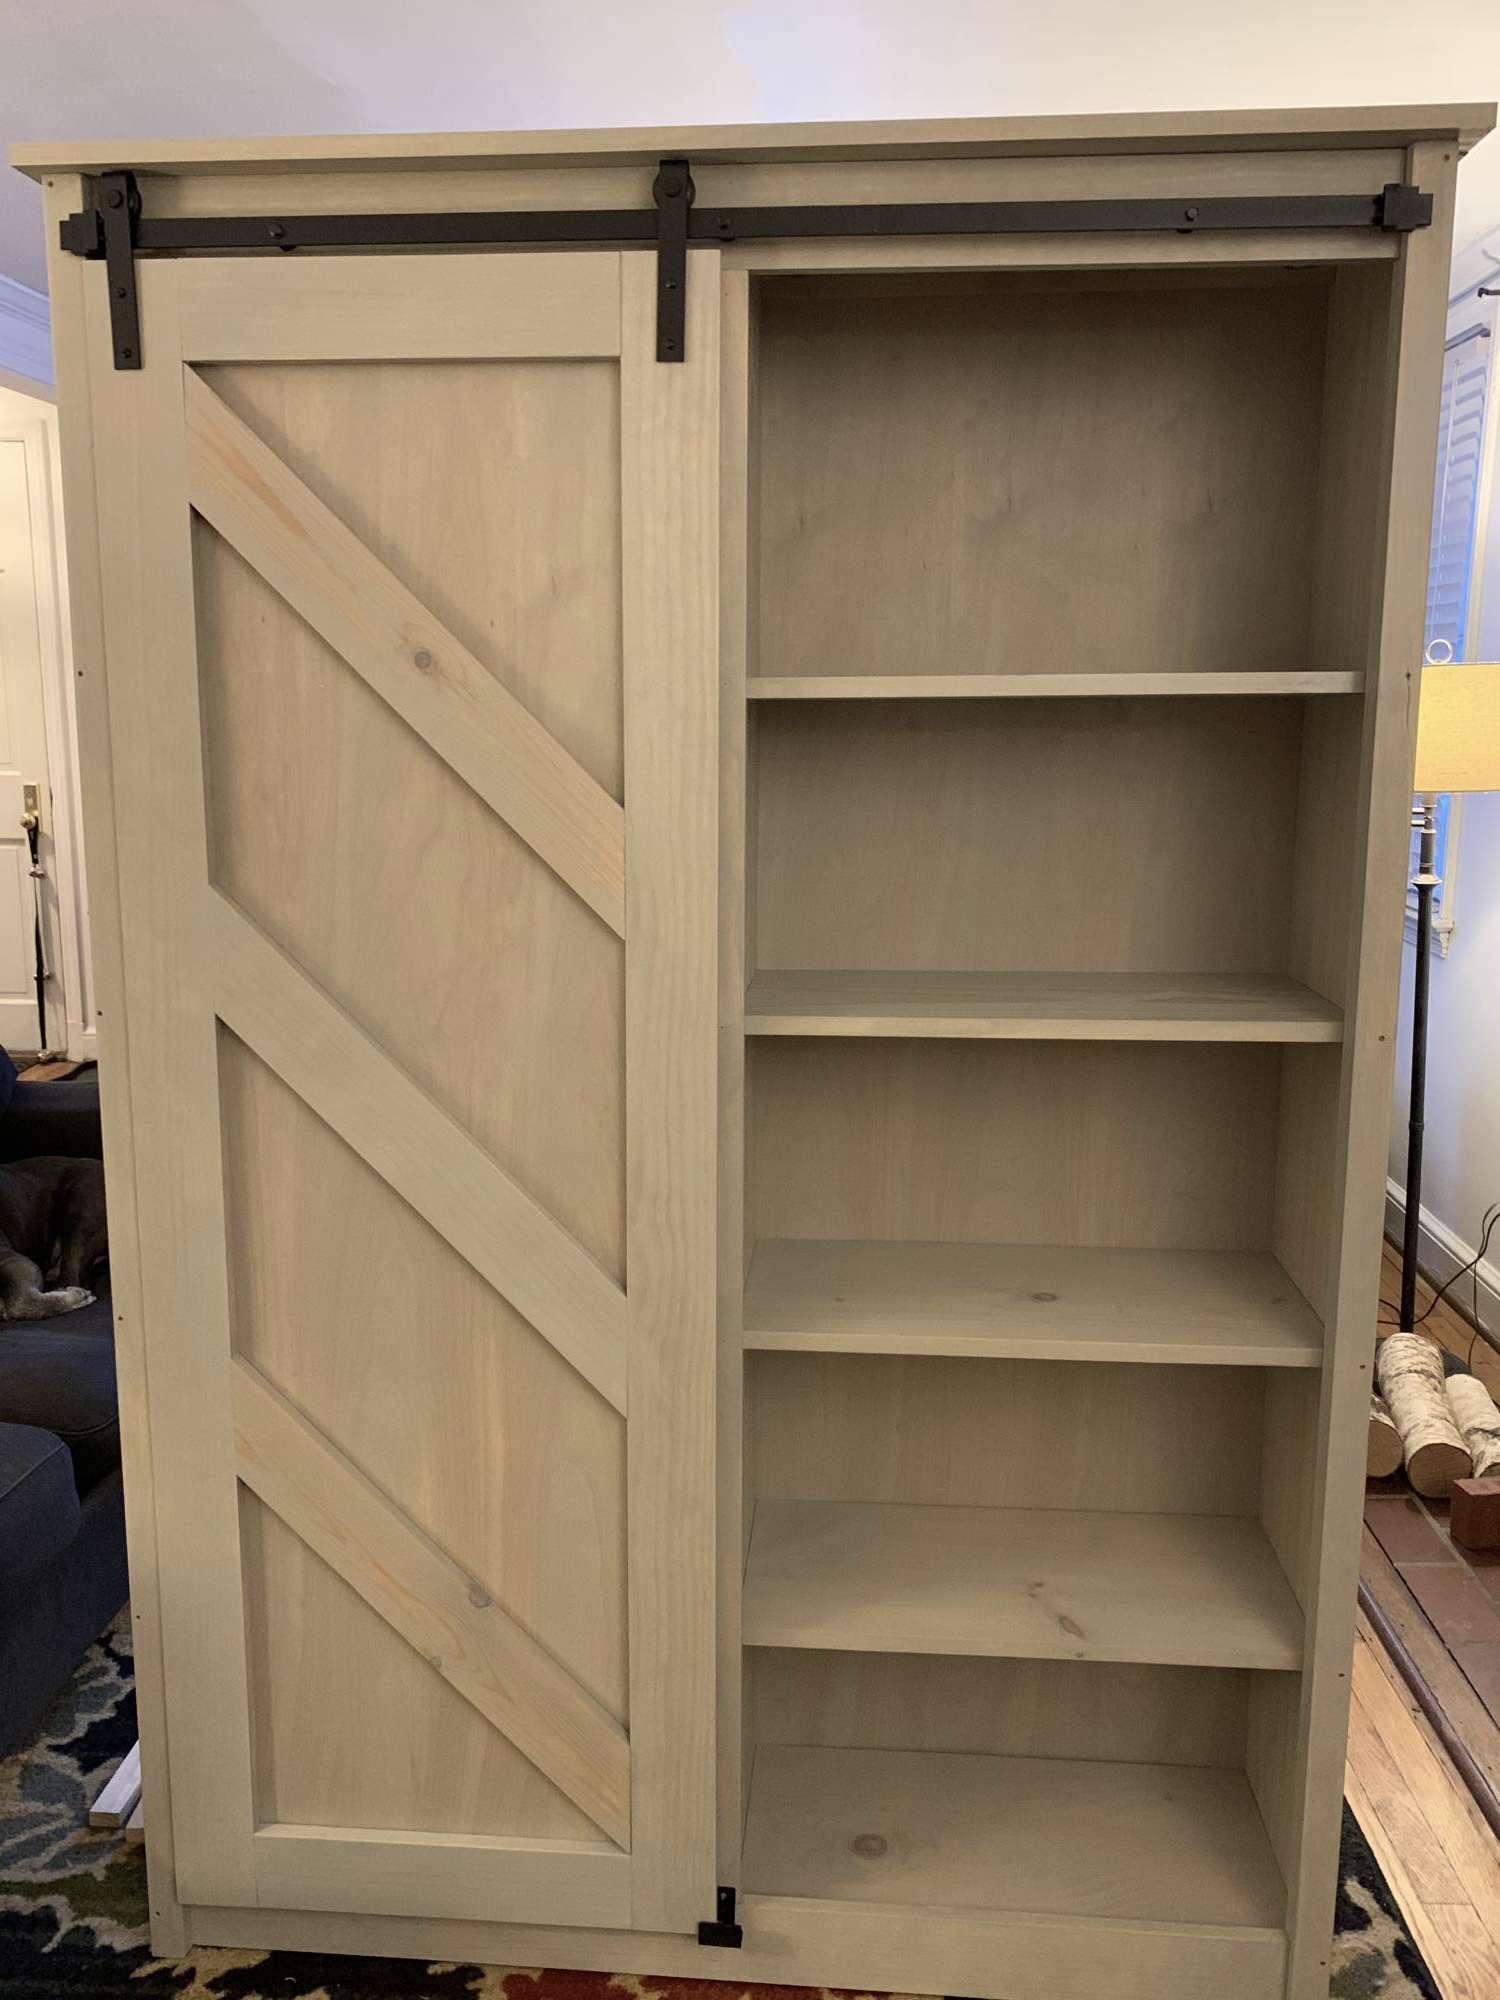
I adapted this build from the Barn Door Entertainment Center plan. Like most families, our storage space needed some major help! We had minimal space to work with and all sorts of awkward things to store (rollerblades, helmets, etc). I measured how deep I needed the shelves to be to fit our helmets and pretty much built around that!
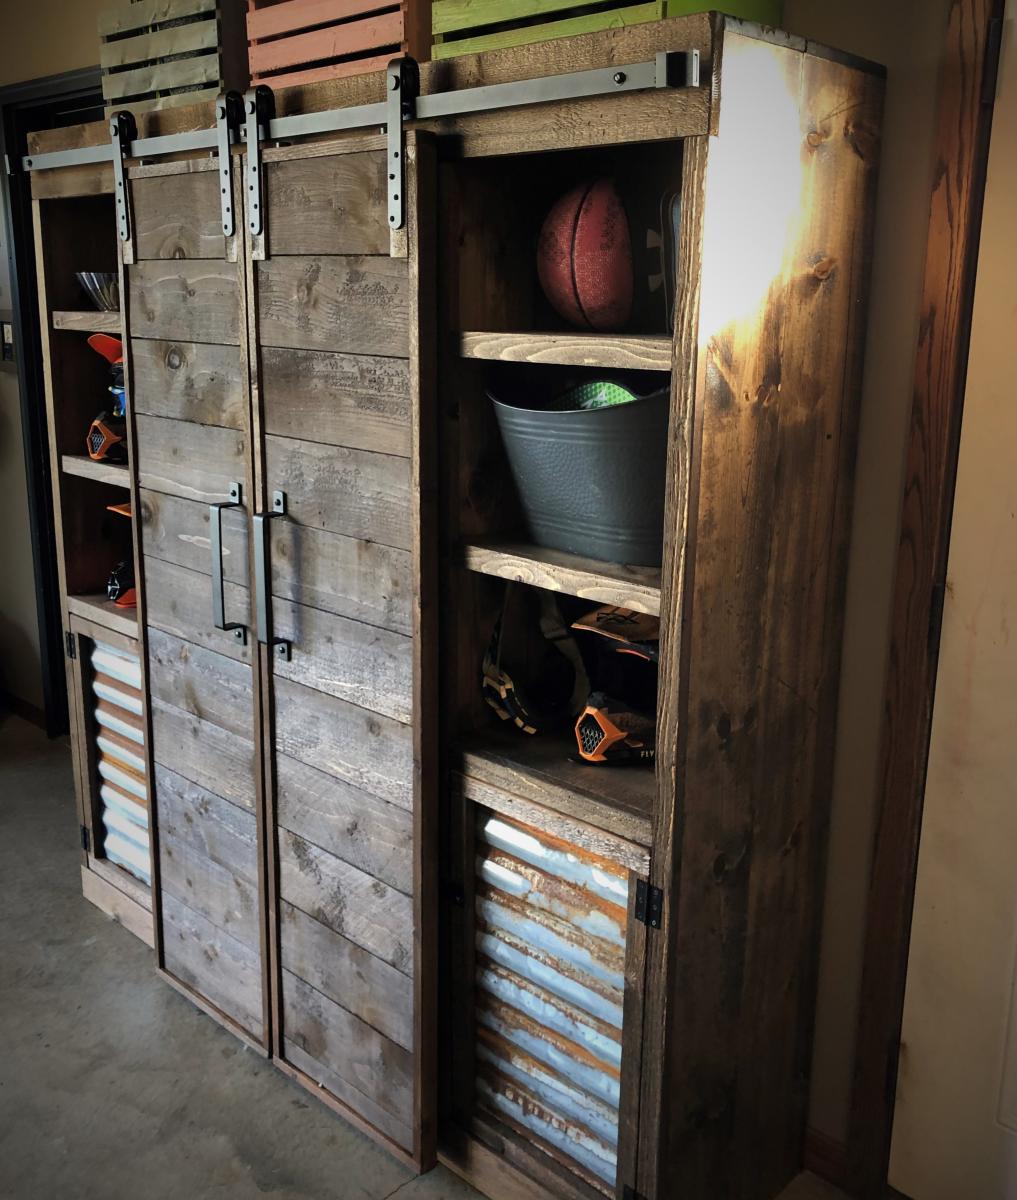
The open shelves are great as they allow easy storage spots for the kids to reach - the doors are great because they allow me to hide the stuff that just never seems to get organized! And the best part? The sliding barn doors! I park next to this thing so not having a swing out door was a major win for me!
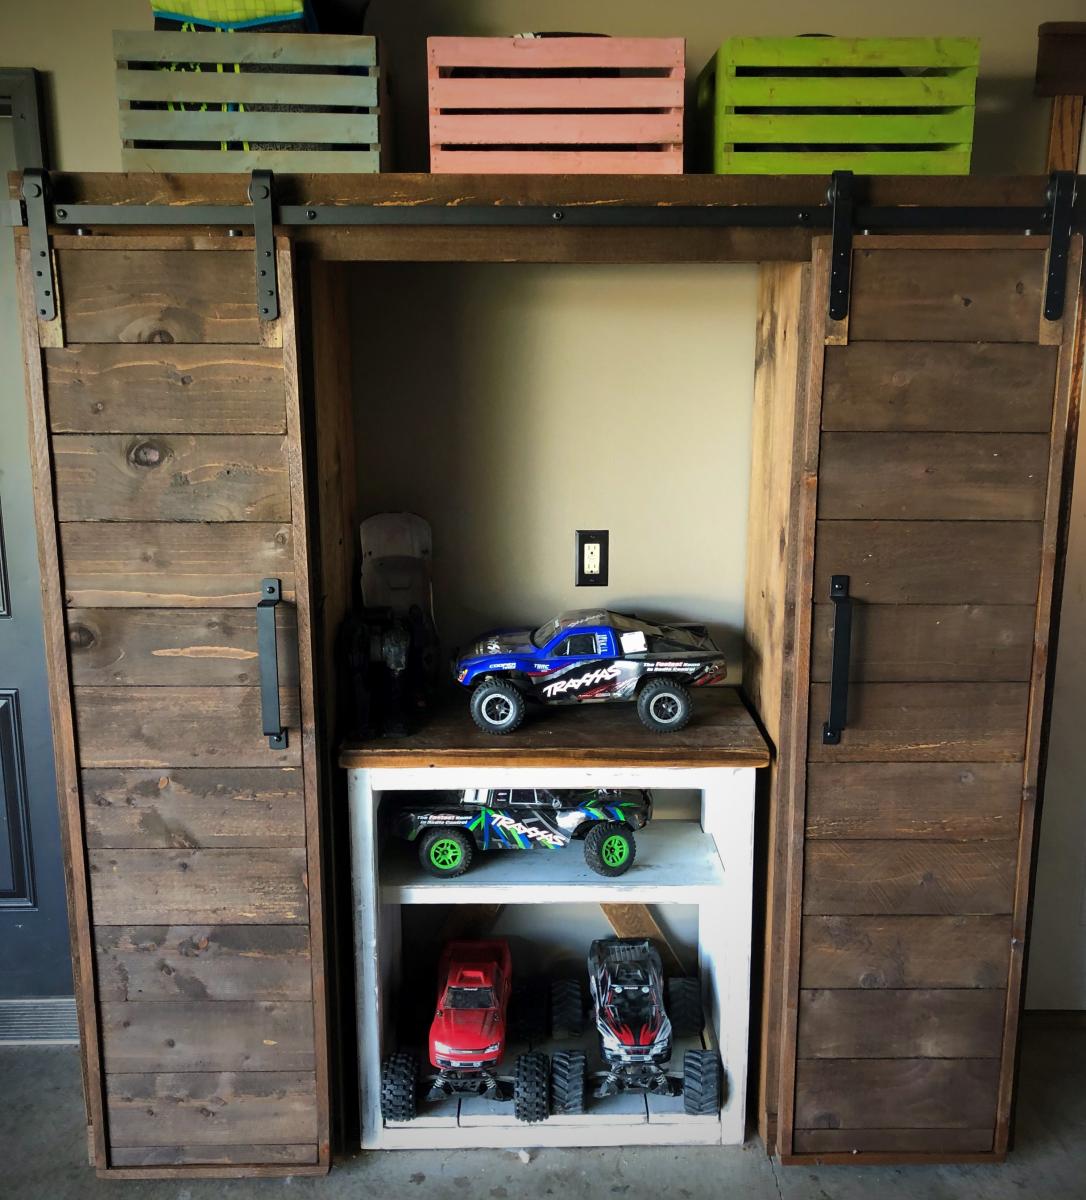
I left the center of this piece open so I could fit a stand I already had in our garage, which allowed for a “charging station” for the cars! Our garage is rustic theme so on this piece I went with standard common board for the walls and shelves and built the trim and doors from cedar. The entire piece is stained with Minwax Provincial.

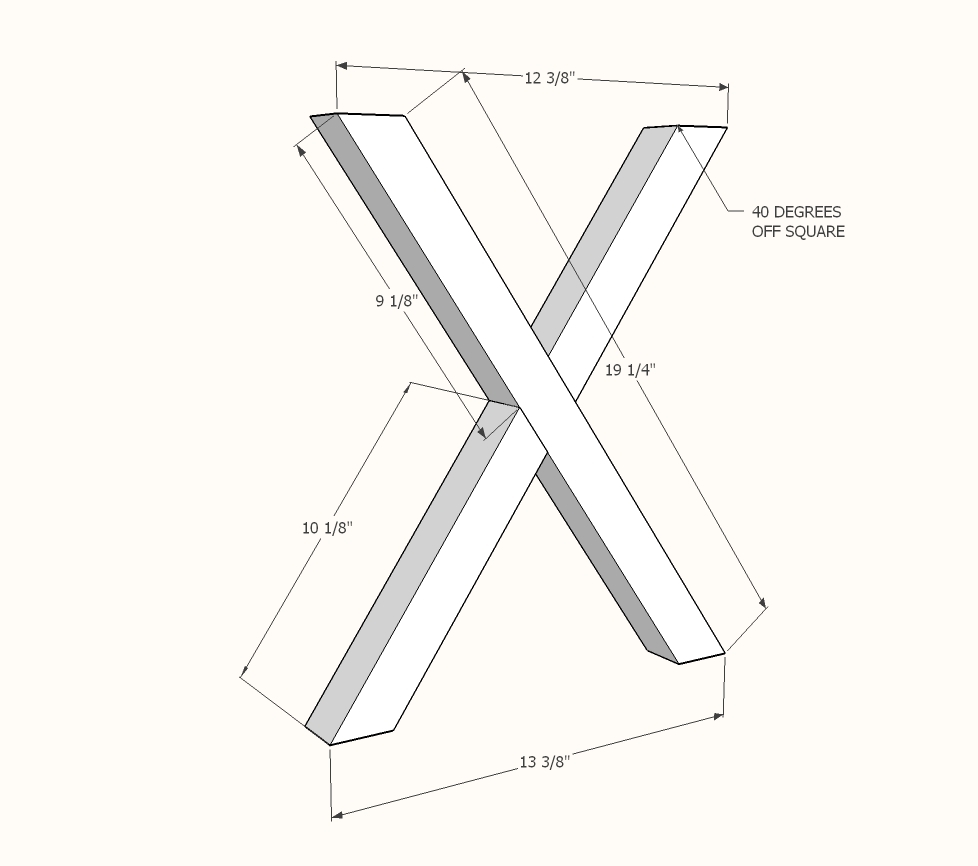
Turned out great! Problem with the plans: written instructions for legs say 35 degree angle but the diagram shows 40 degree angle. Which one should it be?
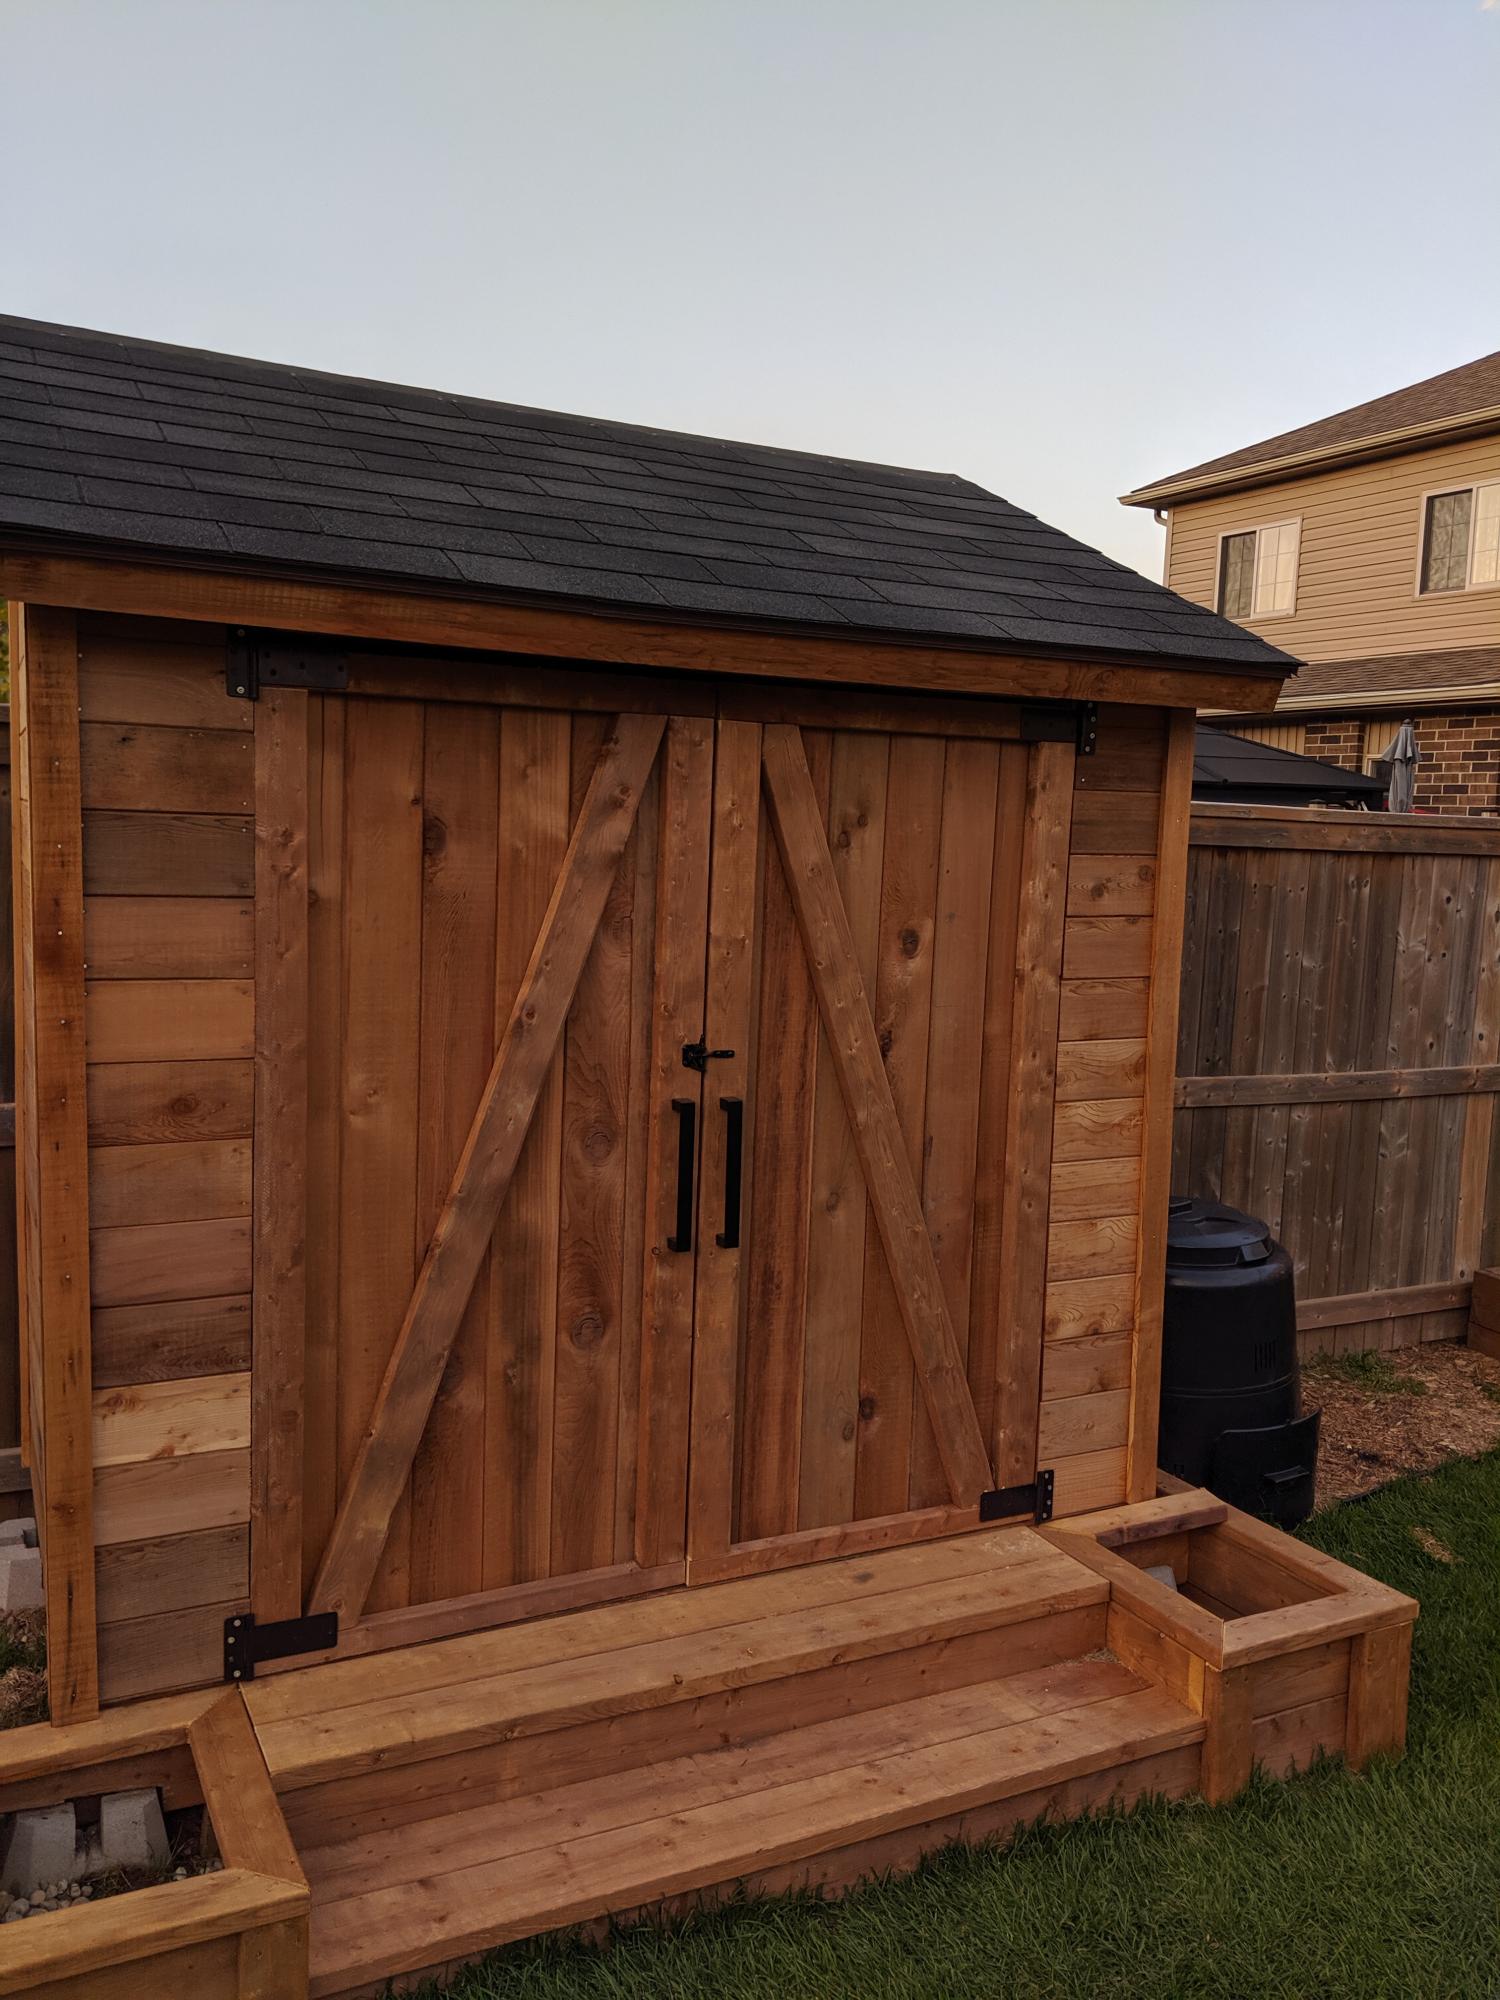
Cedar shed with planter box stairs. Both plans modified slightly to fit my needs. Siding is tongue and groove cedar. All other wood is brown pressure treat. Planter box stairs were sized and positioned to hide cement posts. Sorry for only one photo. Finally finished and ran out of time with good weather here in Canada. Will post more with weather permits. Thanks again for your plans. I've also built night stands and a farmhouse dining table.
Not sure if I linked the proper stairs plan. Was https://www.ana-white.com/woodworking-projects/outdoor-planter-steps-or…

Sat, 11/21/2020 - 18:14
This shed is beautiful! what were the end dimensions of your shed?
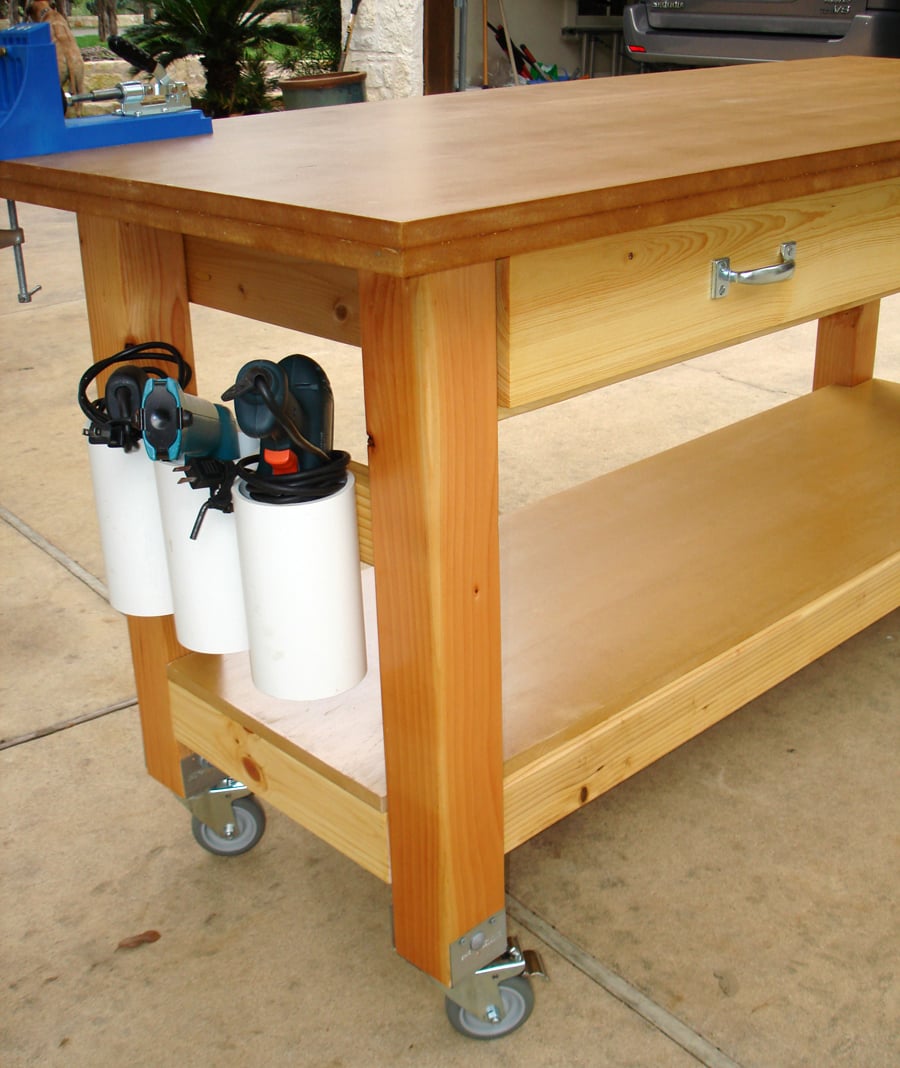
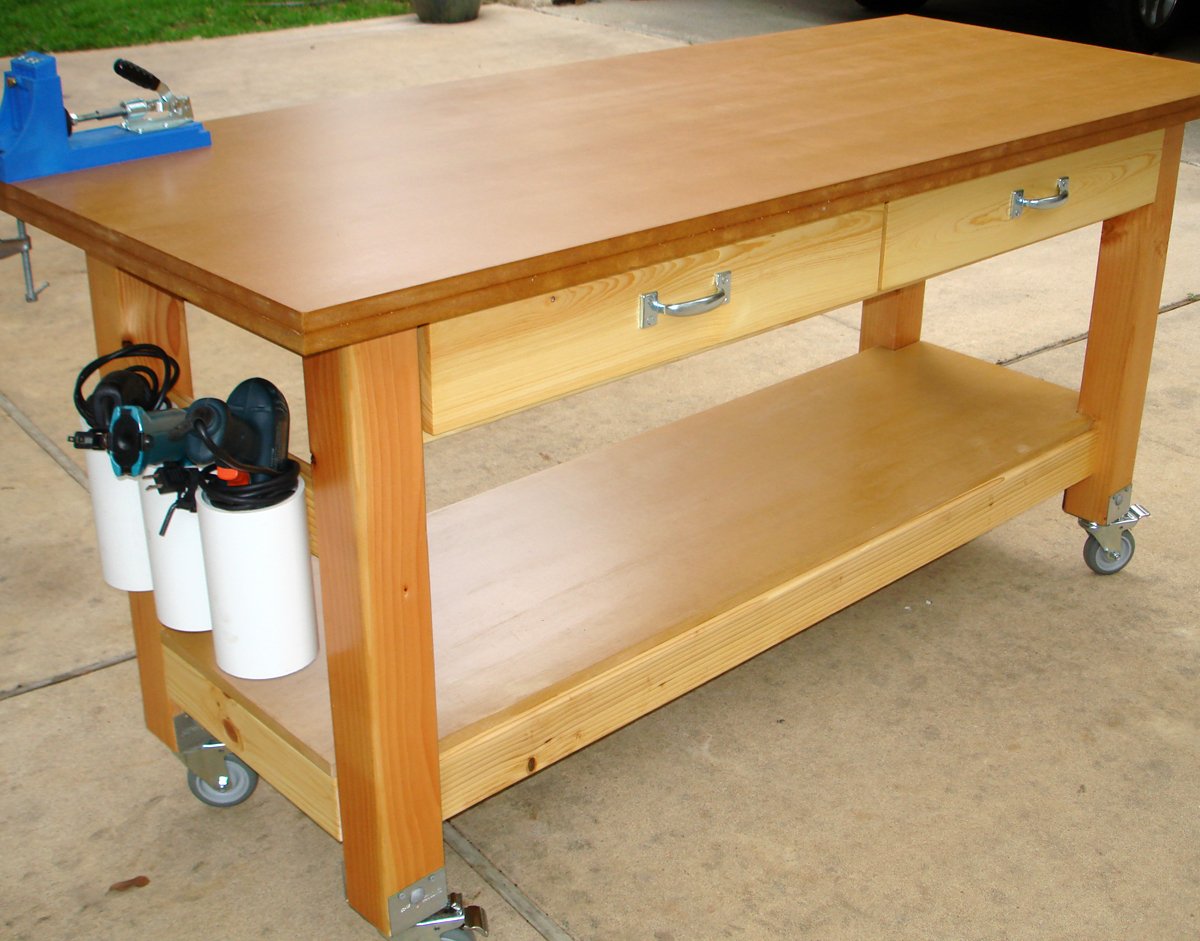
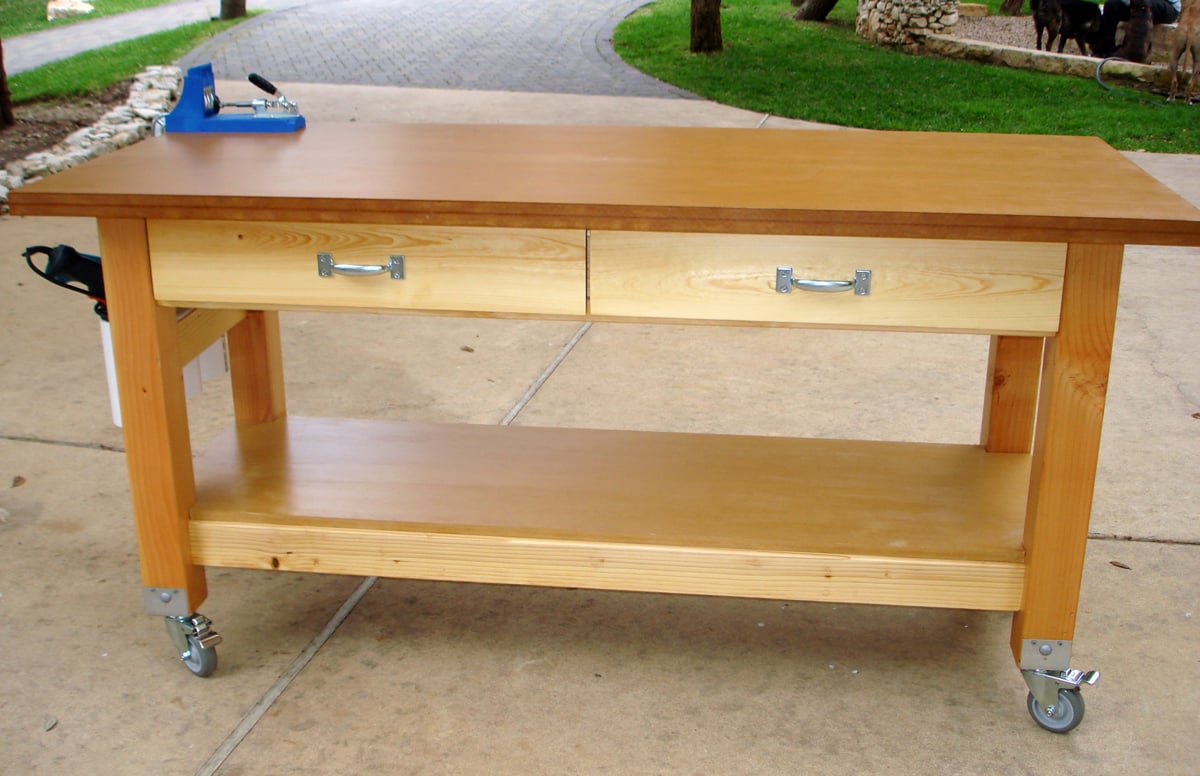
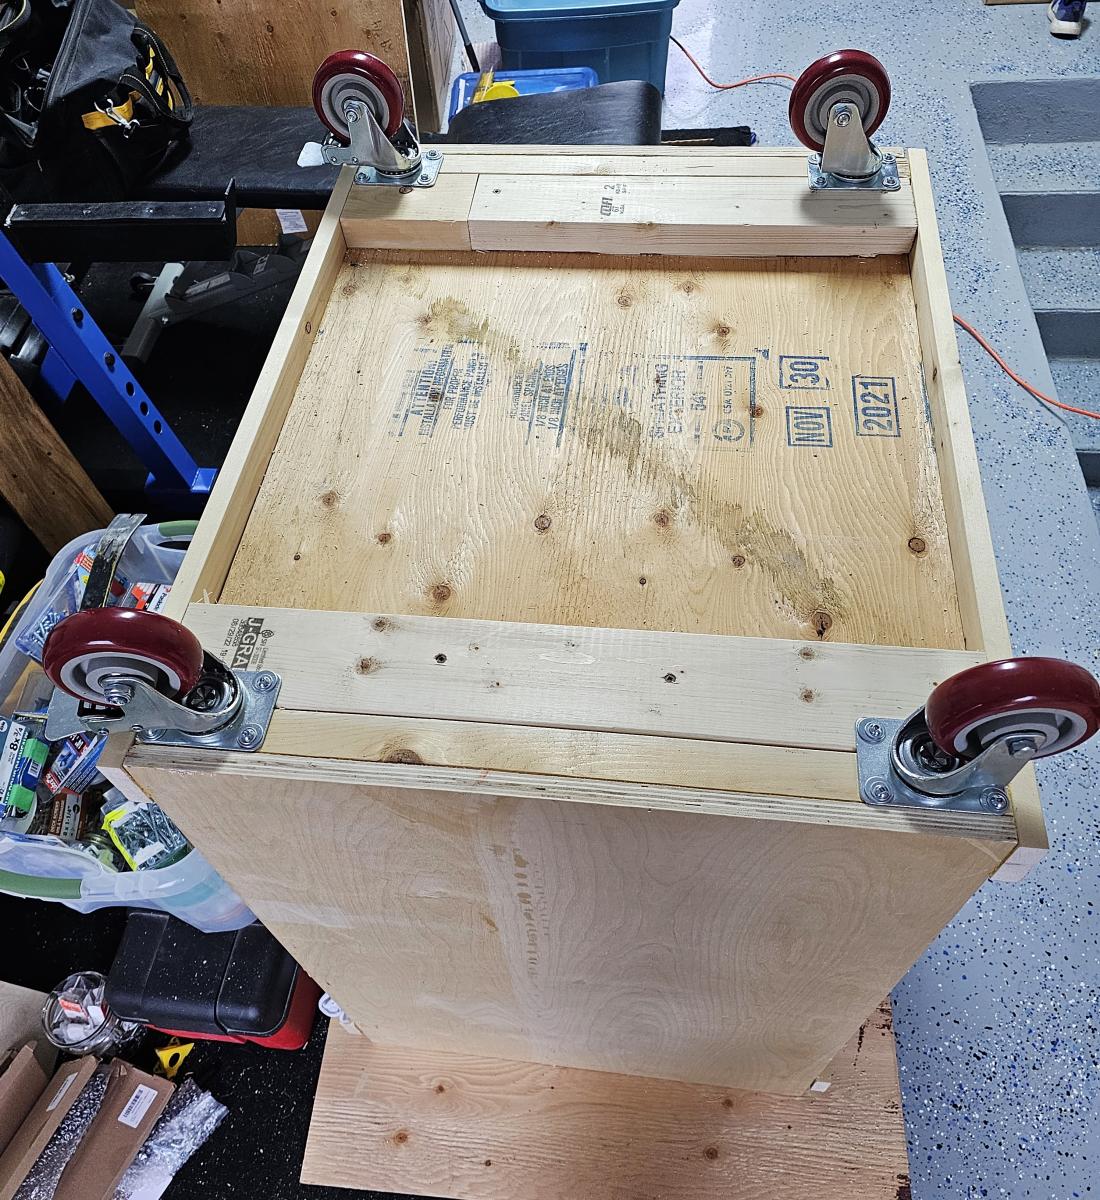
Given that I work out of my garage, I desperately needed a rolling workbench in order to roll out, make the sawdust mess, and roll back in. I had already made Michaela's island for another purpose inside my house, and I loved the sturdiness of the 4x4 posts as legs. I had industrial-type locking castors, but they only screwed in with a threaded post. Thanks to my engineer dad, he determined the best way to attach a screw-in castor to the bottom of the 4x4 (and did all that work for me!).
The size is modified from Michaela's original plan to include a 3 1/2" overhang all the way around for easy clamping (and top is 6' x 2.5'). I also cut a 2' piece of PVC pipe into 3 sections and attached for my drill storage. I put full-extension glides on the drawers and made some dividers from scrap wood.


Sun, 03/18/2012 - 18:21
This workbench is just outstanding!!! I want! Great job!
Mon, 03/19/2012 - 11:51
This would be the perfect workbench for my small shop/garage. Would love a full write up on how to create it. Great work.
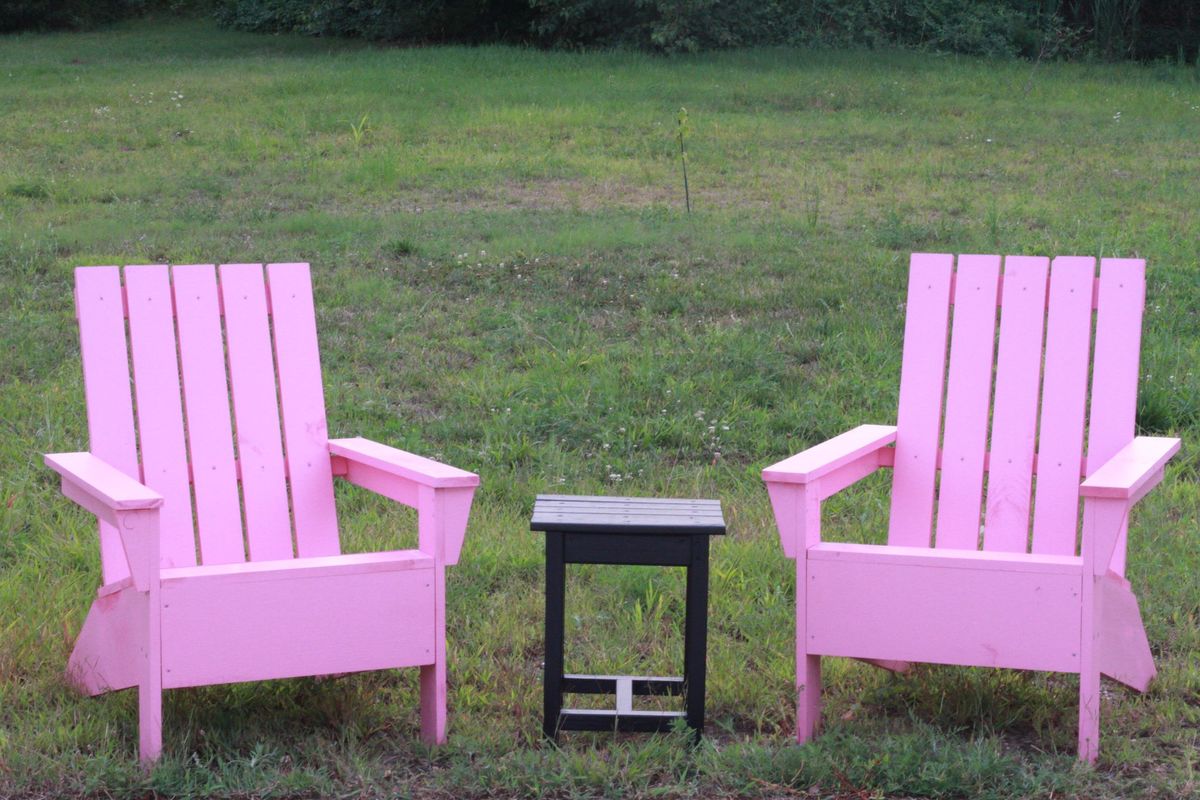
Two Pink Adirondack Chairs

We've been desperate for more storage in our little house and this build really helped. The whole bench is 103“ wide and each drawer gives us 24"x17" of usable space. We had to do some custom shaping for the benchtop (two joined fir 2x12's) fit as the walls are not square but in the end we were really pleased.
The hardest part of the project was getting all of this built and in place while working around a busy family as this is our only meal space and the majority of cutting/forming was done either on the weekends or after bedtimes. If I were to do this again I'd prioritize sending the kids to grandparents for the weekend and know king everything except for paint out in one go.
We could have spent less time with the benchtop by using plywood like in the plans but we wanted the look of a separate benchtop. We may replace the fir with stained oak down the line but this should be plenty sturdy for the next several years.

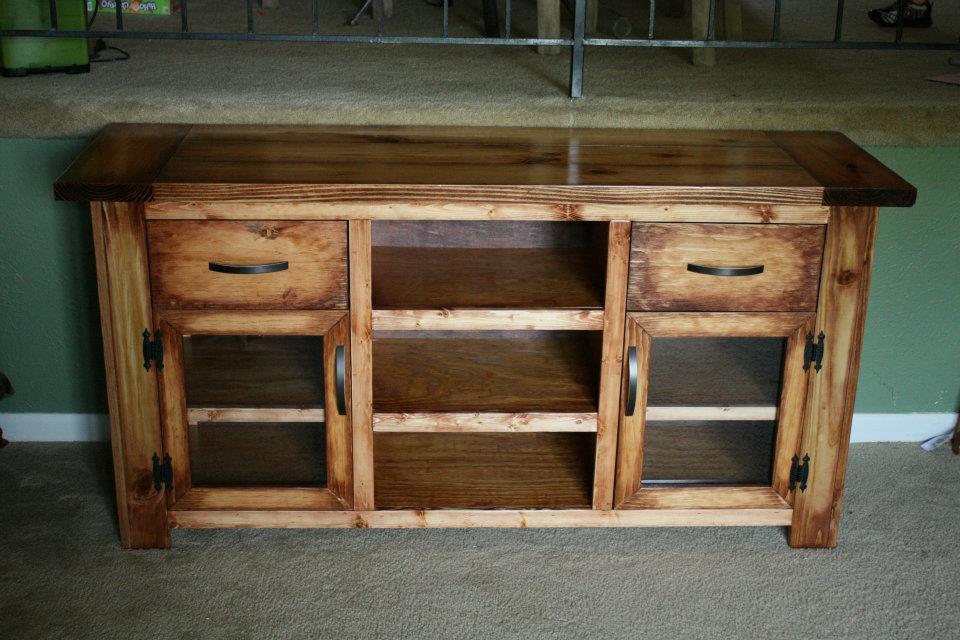
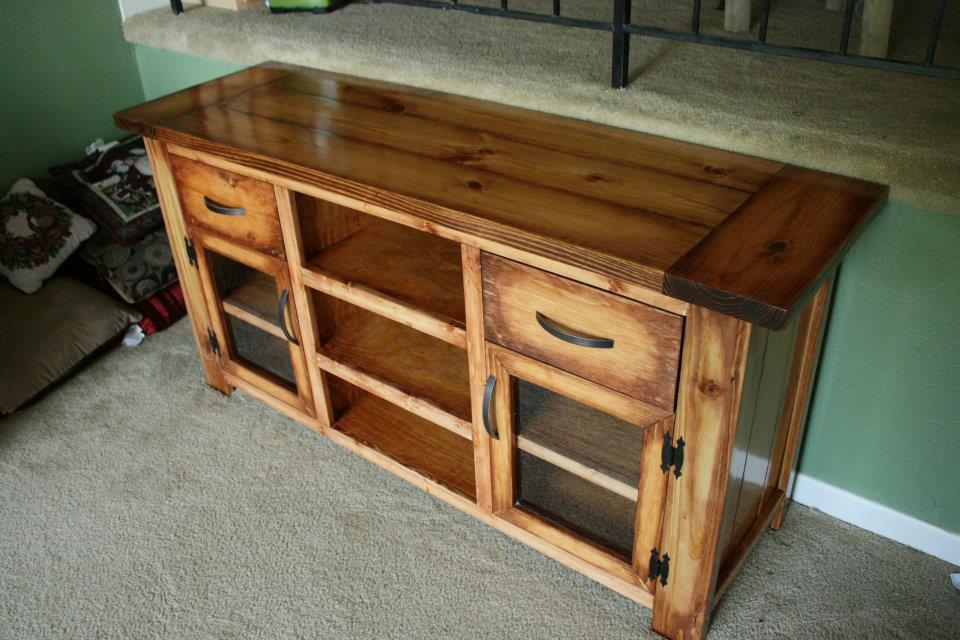
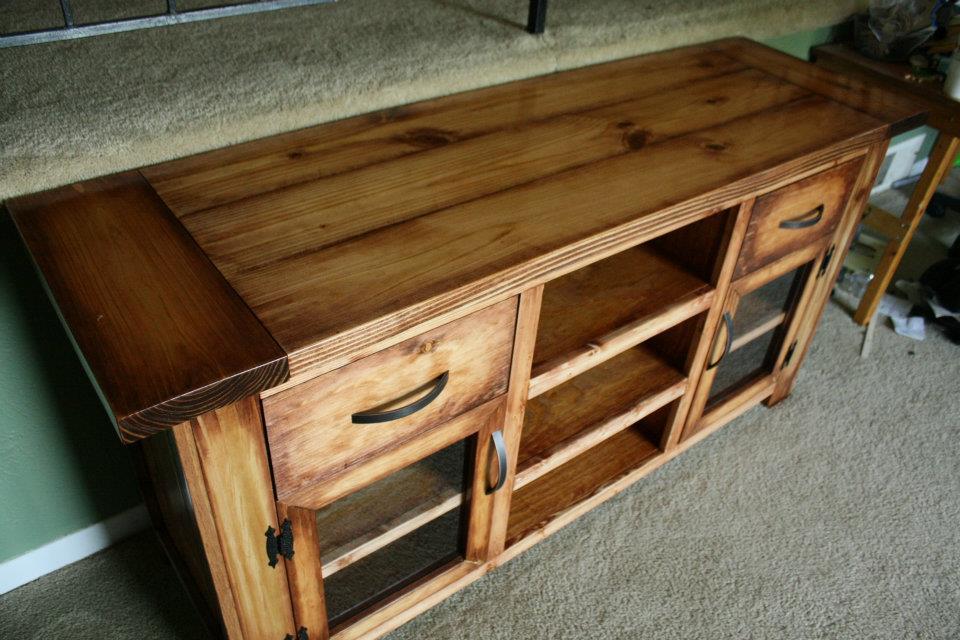
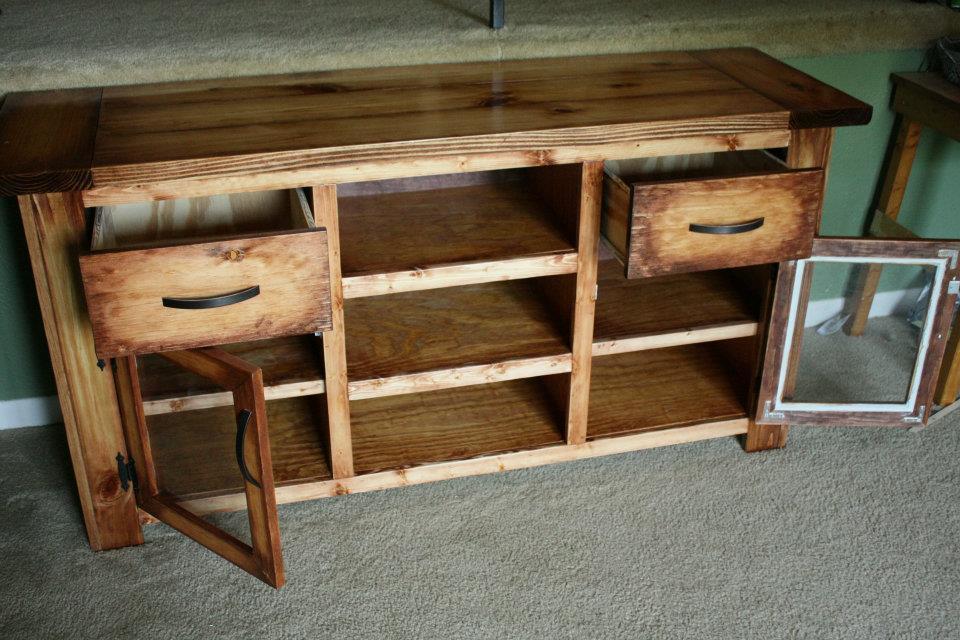
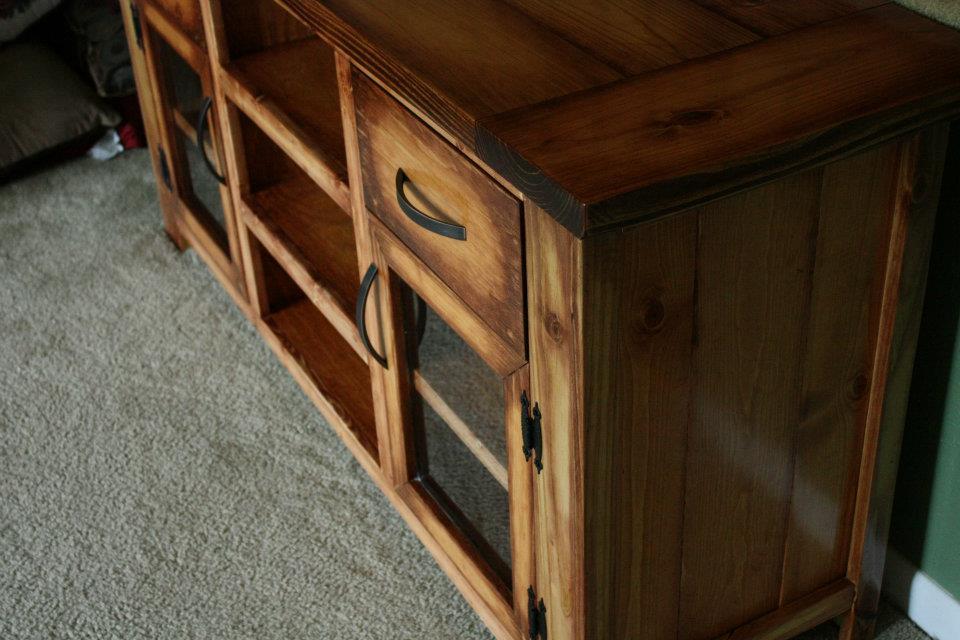
I made this TV Stand for the family that bought the coffee table that I made before. I loosely based the design from a medley of things on the site, but ended up drawing up plans myself in Sketchup.
This took a while because I had to think through alot of the design things - like how to best do the glass panel doors and how to compensate in the plans for some bowing in the plywood.
It is basically a plywood box, trimmed out like most of the things we DIYers do.
My biggest challenge in this project was cost... I severely underestimated how much it would cost me to build it, so I ended up with only $50 profit on the job... Does anyone have suggestion.. if you are building things to sell them how do you price your products? Just curious.

Mon, 05/21/2012 - 09:42
Love this, really great job! As for pricing, I wish I could give you great advice, but I know there can be a lot of variables, such as cost, hours spent, overhead, etc. I know you should at least price the cost of materials and double it at the very least. If you want to consider your time spent, etc, it would go from there. There are some good articles available on-line.
Mon, 05/21/2012 - 18:35
I will do some research online. For quotes I've been giving since I realized that I was not going to profit on this work was exactly that... take a complete materials cost breakdown and just double it. I'm finding though that I have much more work available to be done than I'm ever going to have time to do....so I think that I will start going a little higher once I start needing more work. Really what I need is more time to do the work. I think I could do well if my son were in school but he isn't yet, so the only time I can work on these projects is during the weekends when he is gone. That means I need to get about $200 profit from one weekends worth of work to pay my bills. :)
Mon, 05/21/2012 - 08:34
Amazing work. I agree, cost is a tough one. I always figure out my materials and charge for full sheets and lengths, then add 20% to cover screws, glue and anything I missed (kind of a OH cover). I figure out my hours, and charge those back at whatever "rate" I would be charging for the piece....try your best to pad these a bit too. I worked in estimating for several years; so you kind of get a feel for it after awhile. Good Luck!
I LOVE the finish on this and your coffee table; mind sharing your technique??
Mon, 05/21/2012 - 18:45
There are more factors than just materials... also have to consider how much money I need to make within the month to pay rent. :)
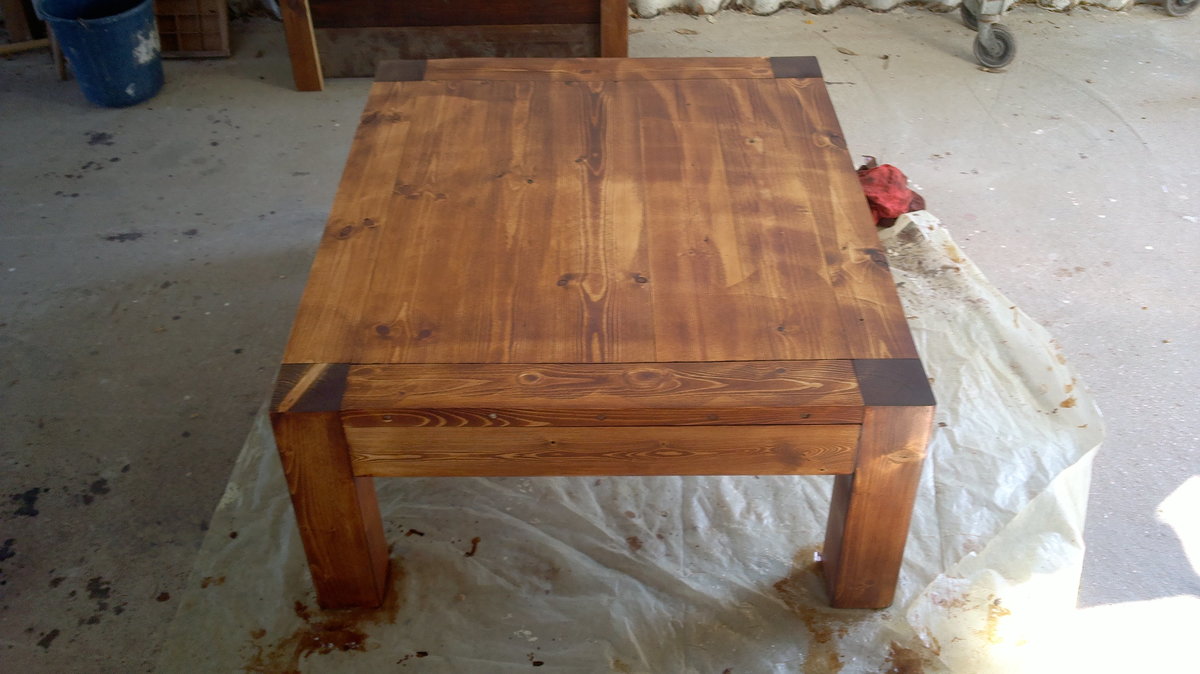
For the finish, I sand everything down completely working my way up to 220 grit. I used Minwax Golden Pecan with a thin layer using a foam brush. I let that dry completely, without removing the excess. Then I use a cloth and my finger tip with Minwax Red Oak and dip the cloth in my stain, then rub it slowly onto the edges, rounding them out a bit. I go slowly so I can blend it in because I don't want any sharp lines. I also use the darker color to accent some of the knots. My basic idea is that each board has darker ends/edges and is lighter in the middle. This part of the job is the "artistry" - the rest is all pretty straightforward. The poly is the hardest part for me.
By the way, I advertise my work with that coffee table, and I have had a tremendous response to it - in large part due to the finish. Everyone loves the finish.
I got the idea from the 20 second tidy up table here on this site.
What I love about it is that it ties together all the other different wood colors in my living room. You know when you go get a rug with multiple colors or a pattern to tie everything together that would otherwise seem mismatched? THAT is what this finish does for a room. :)
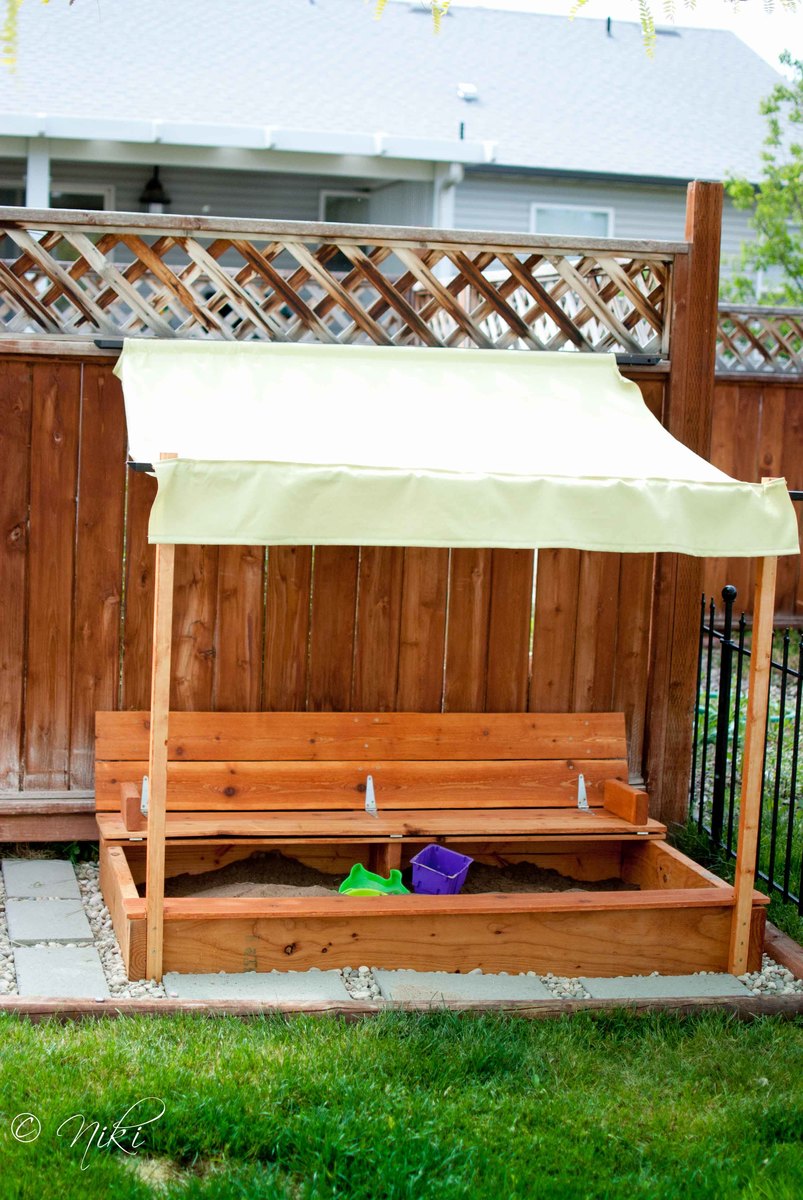
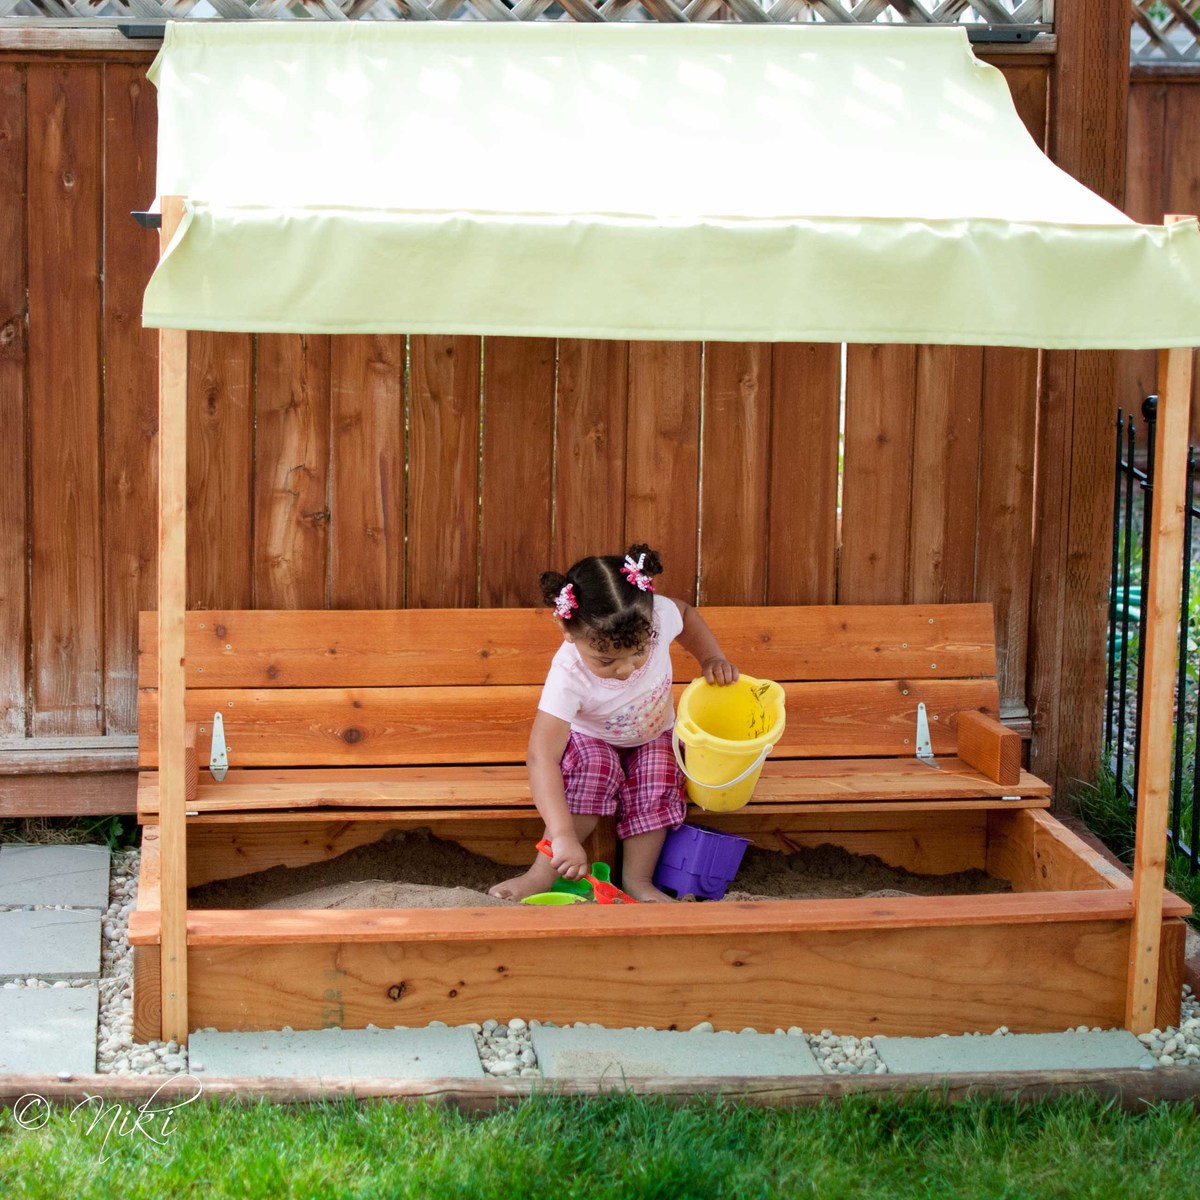
"Cellar? What cellar? We don't have a cellar... Oh, you mean the new sand box! Here, let me get some shade too."
I'm not sure why, but I can never seem to follow plans exactly. I guess that's not entirely true. I CAN follow plans exactly, but I almost never do. Maybe it's some sort of passive rebellion or something, but I usually have to put my own spin on the things that I build. Sometimes it works out in my favor. Sometimes not. This build was a little of both.
I decided to only build one bench in our sand box. This cut down on a lot of supplies. By making it longer a single bench and making it longer, it covers about the same amount of square feet, just in a rectangle instead of a square. When pricing lumber, I noticed that 2x8's were cheaper than 1x8's. So I went with those instead. It can't hurt to beef up the sides a little, right? This required some easy calculations on the cut list. I also decided to use 1x6 fence planks instead of 1x4 whitewood or pine. The fence planks were cheap, and I figured they would look nice in the back yard. They are also naturally pest and rot resistant. They required extra sanding to take the rough off. However, this is one place that I'm thinking the modification didn't work in my favor. The fence planks are not as thick as the whitewood. This combined with the increased length makes the the top pieces feel pretty weak. I put a little support piece under the bench. I'm quite sure the bench would not have held up well without the support.
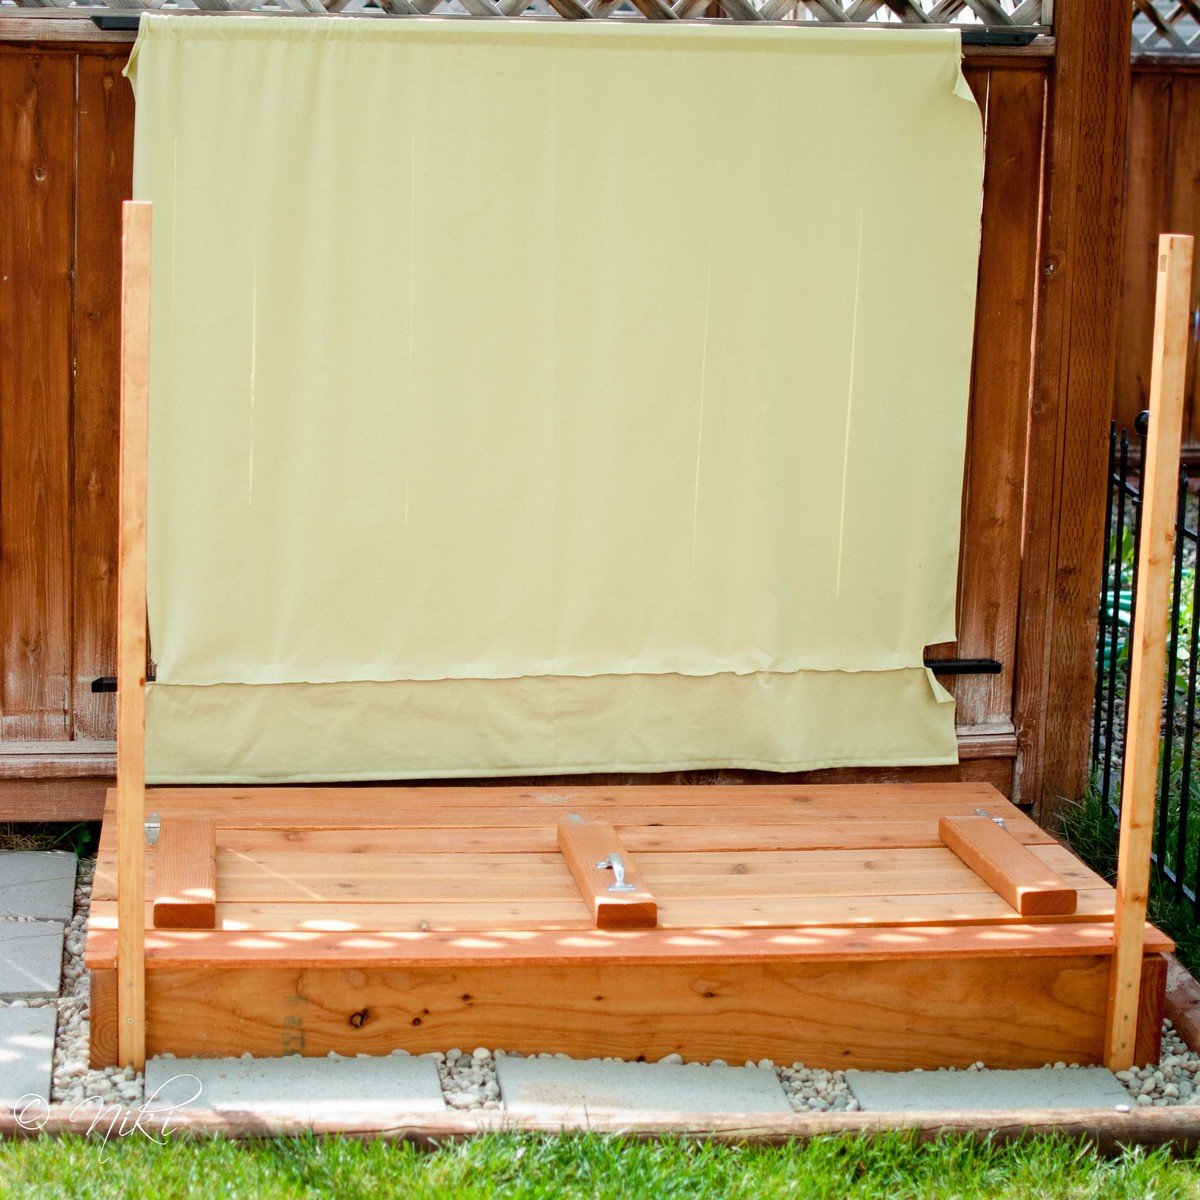
Because this is an outdoor piece, I dry fit everything, and then stained everything before assembling it, to make sure all of the edges were well protected.
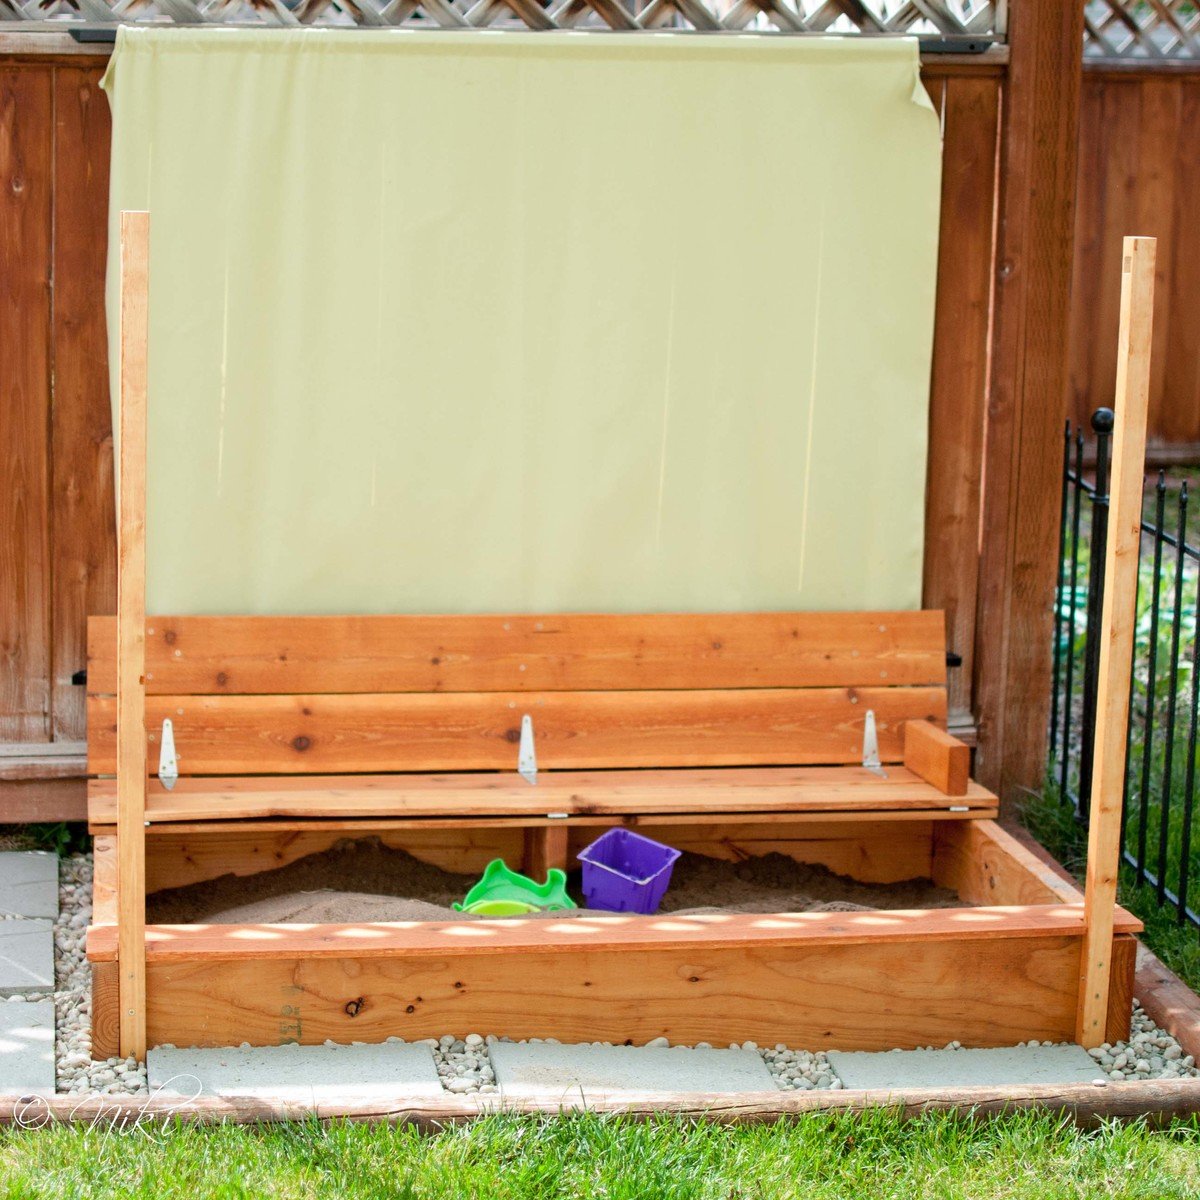
Cost breakdown (not including canopy)
Fence planks $14
2x8x8 $11
hinges $9
handle $2
stain $10


Thu, 03/07/2013 - 08:49
I just love the changes you made to this sandbox! Can you tell me what you used for the construction of the canopy? Thanks!
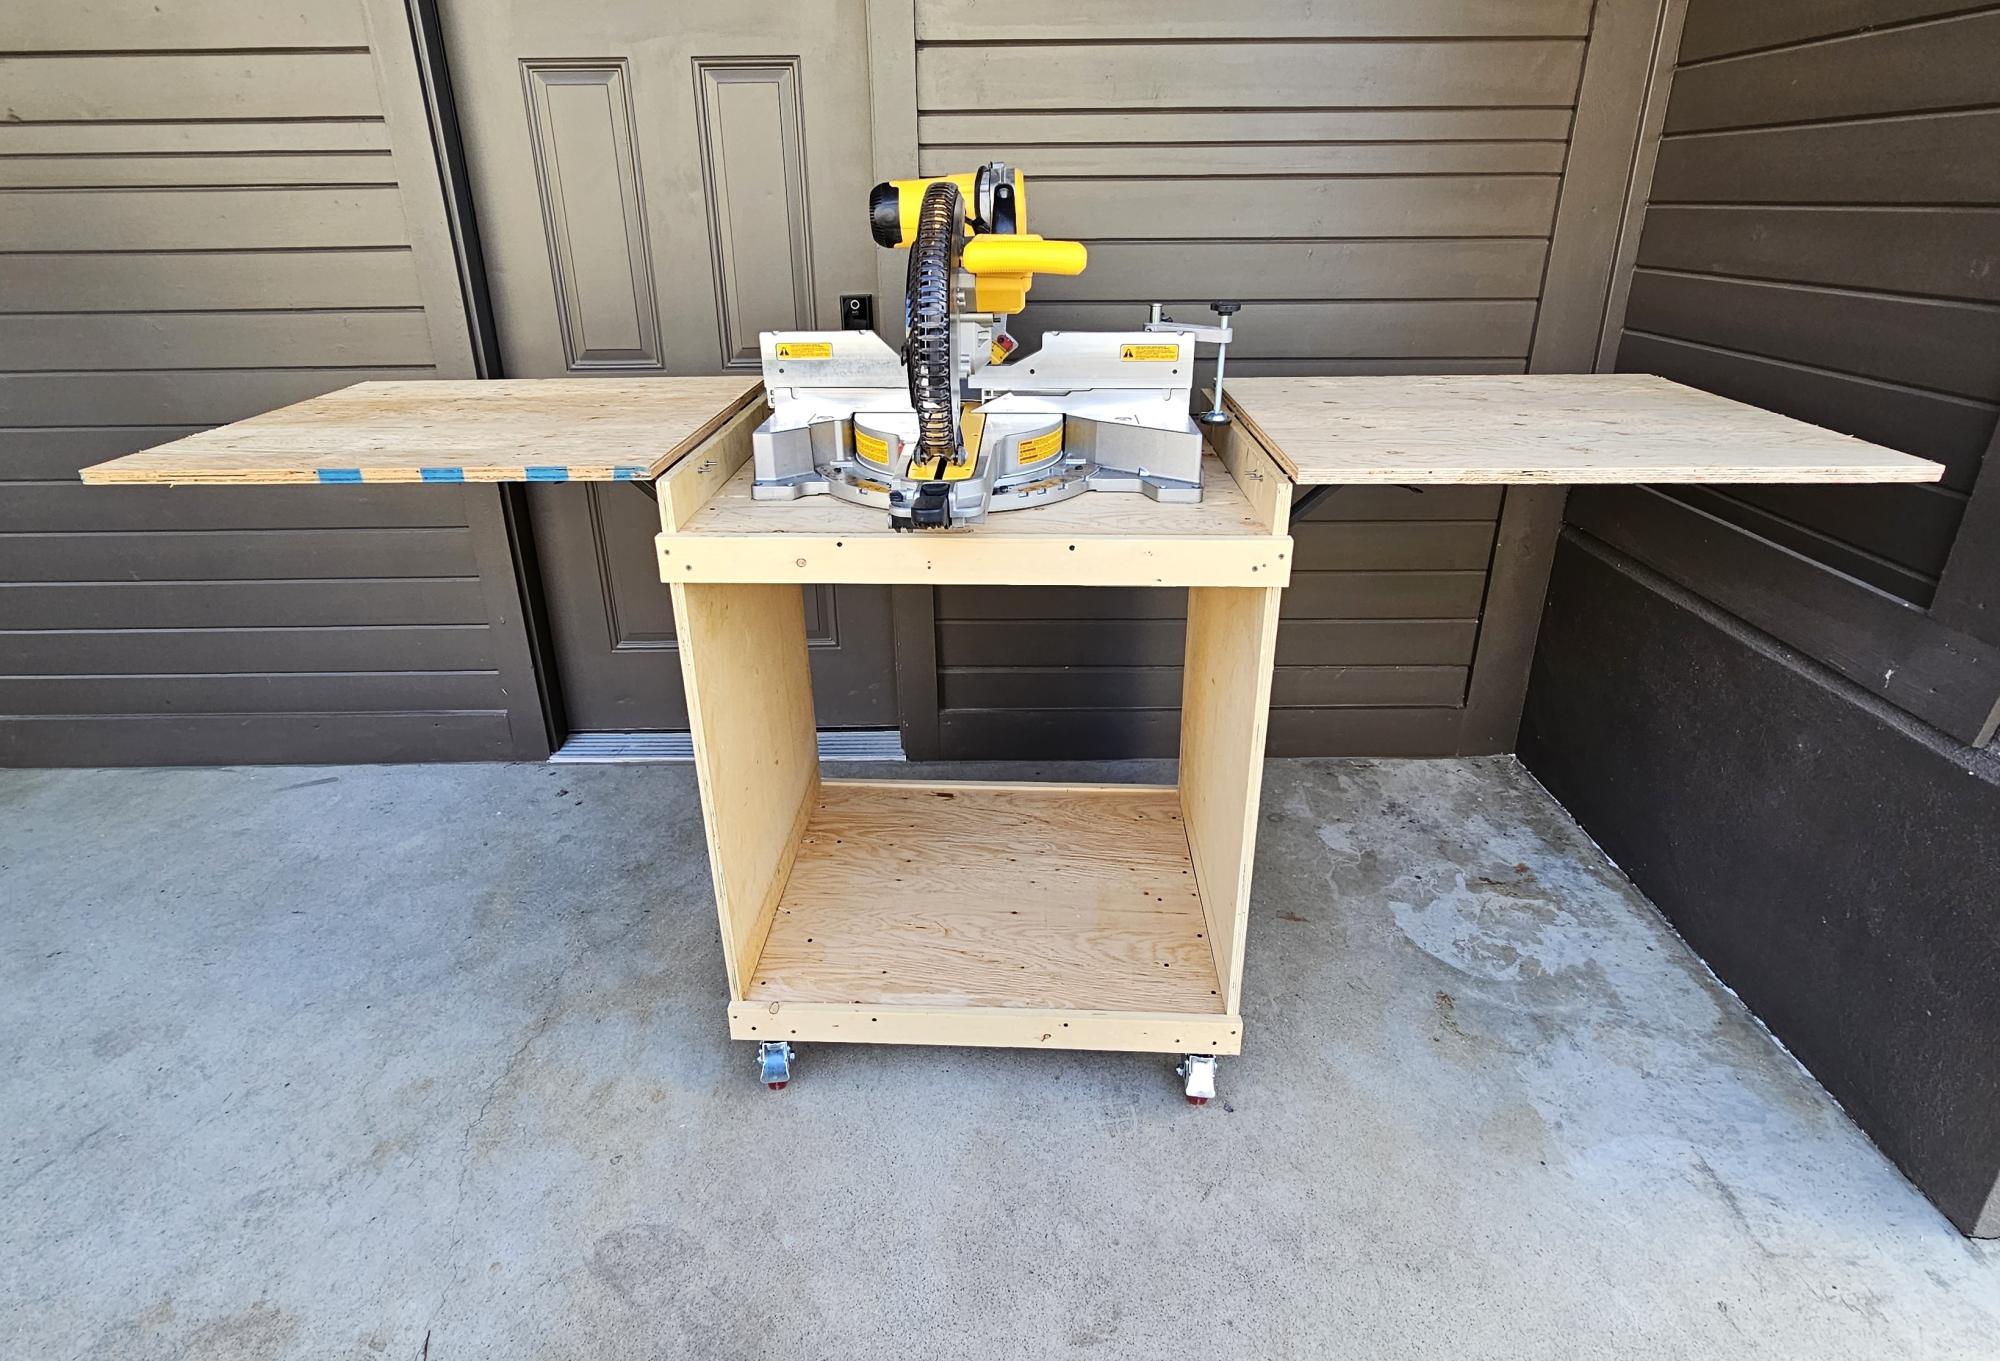
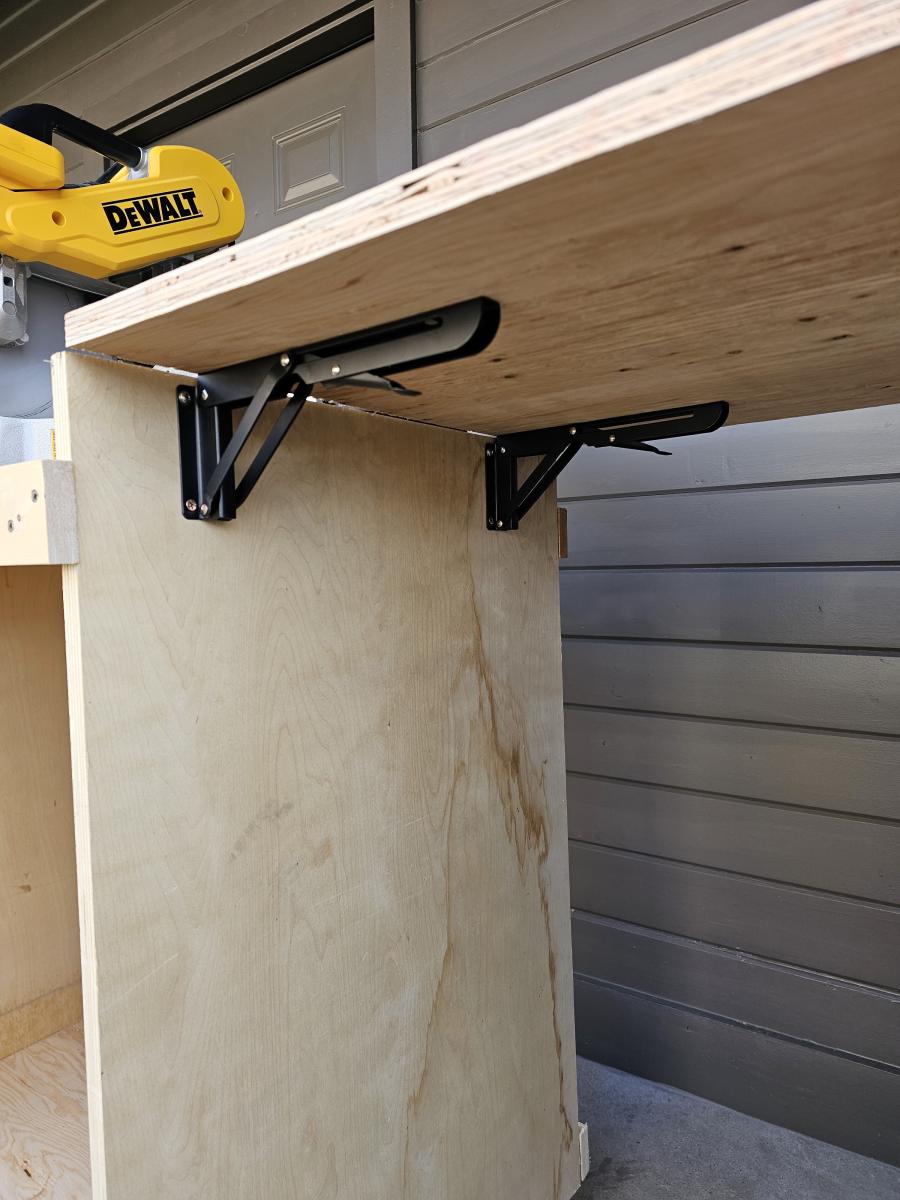
I pretty much followed the plans exactly as provided. The folding brackets I used are supposed to be heavy duty and able to handle up to 100 lbs. per pair of brackets. We'll see how they do. If needed, I might add the 2x2 or 2x4 braces I've seen many others do on here. It's nice to finally have my mitre saw off of my workbench.
These are the brackets and wheels I used.
https://www.amazon.ca/gp/product/B08PVFJ87Y/ref=ppx_yo_dt_b_asin_title_…
https://www.amazon.ca/gp/product/B093FQVV8P/ref=ppx_yo_dt_b_asin_title_…
This project was so easy and fun to make. Love the way the instructions are laid out.
David Van Dyk
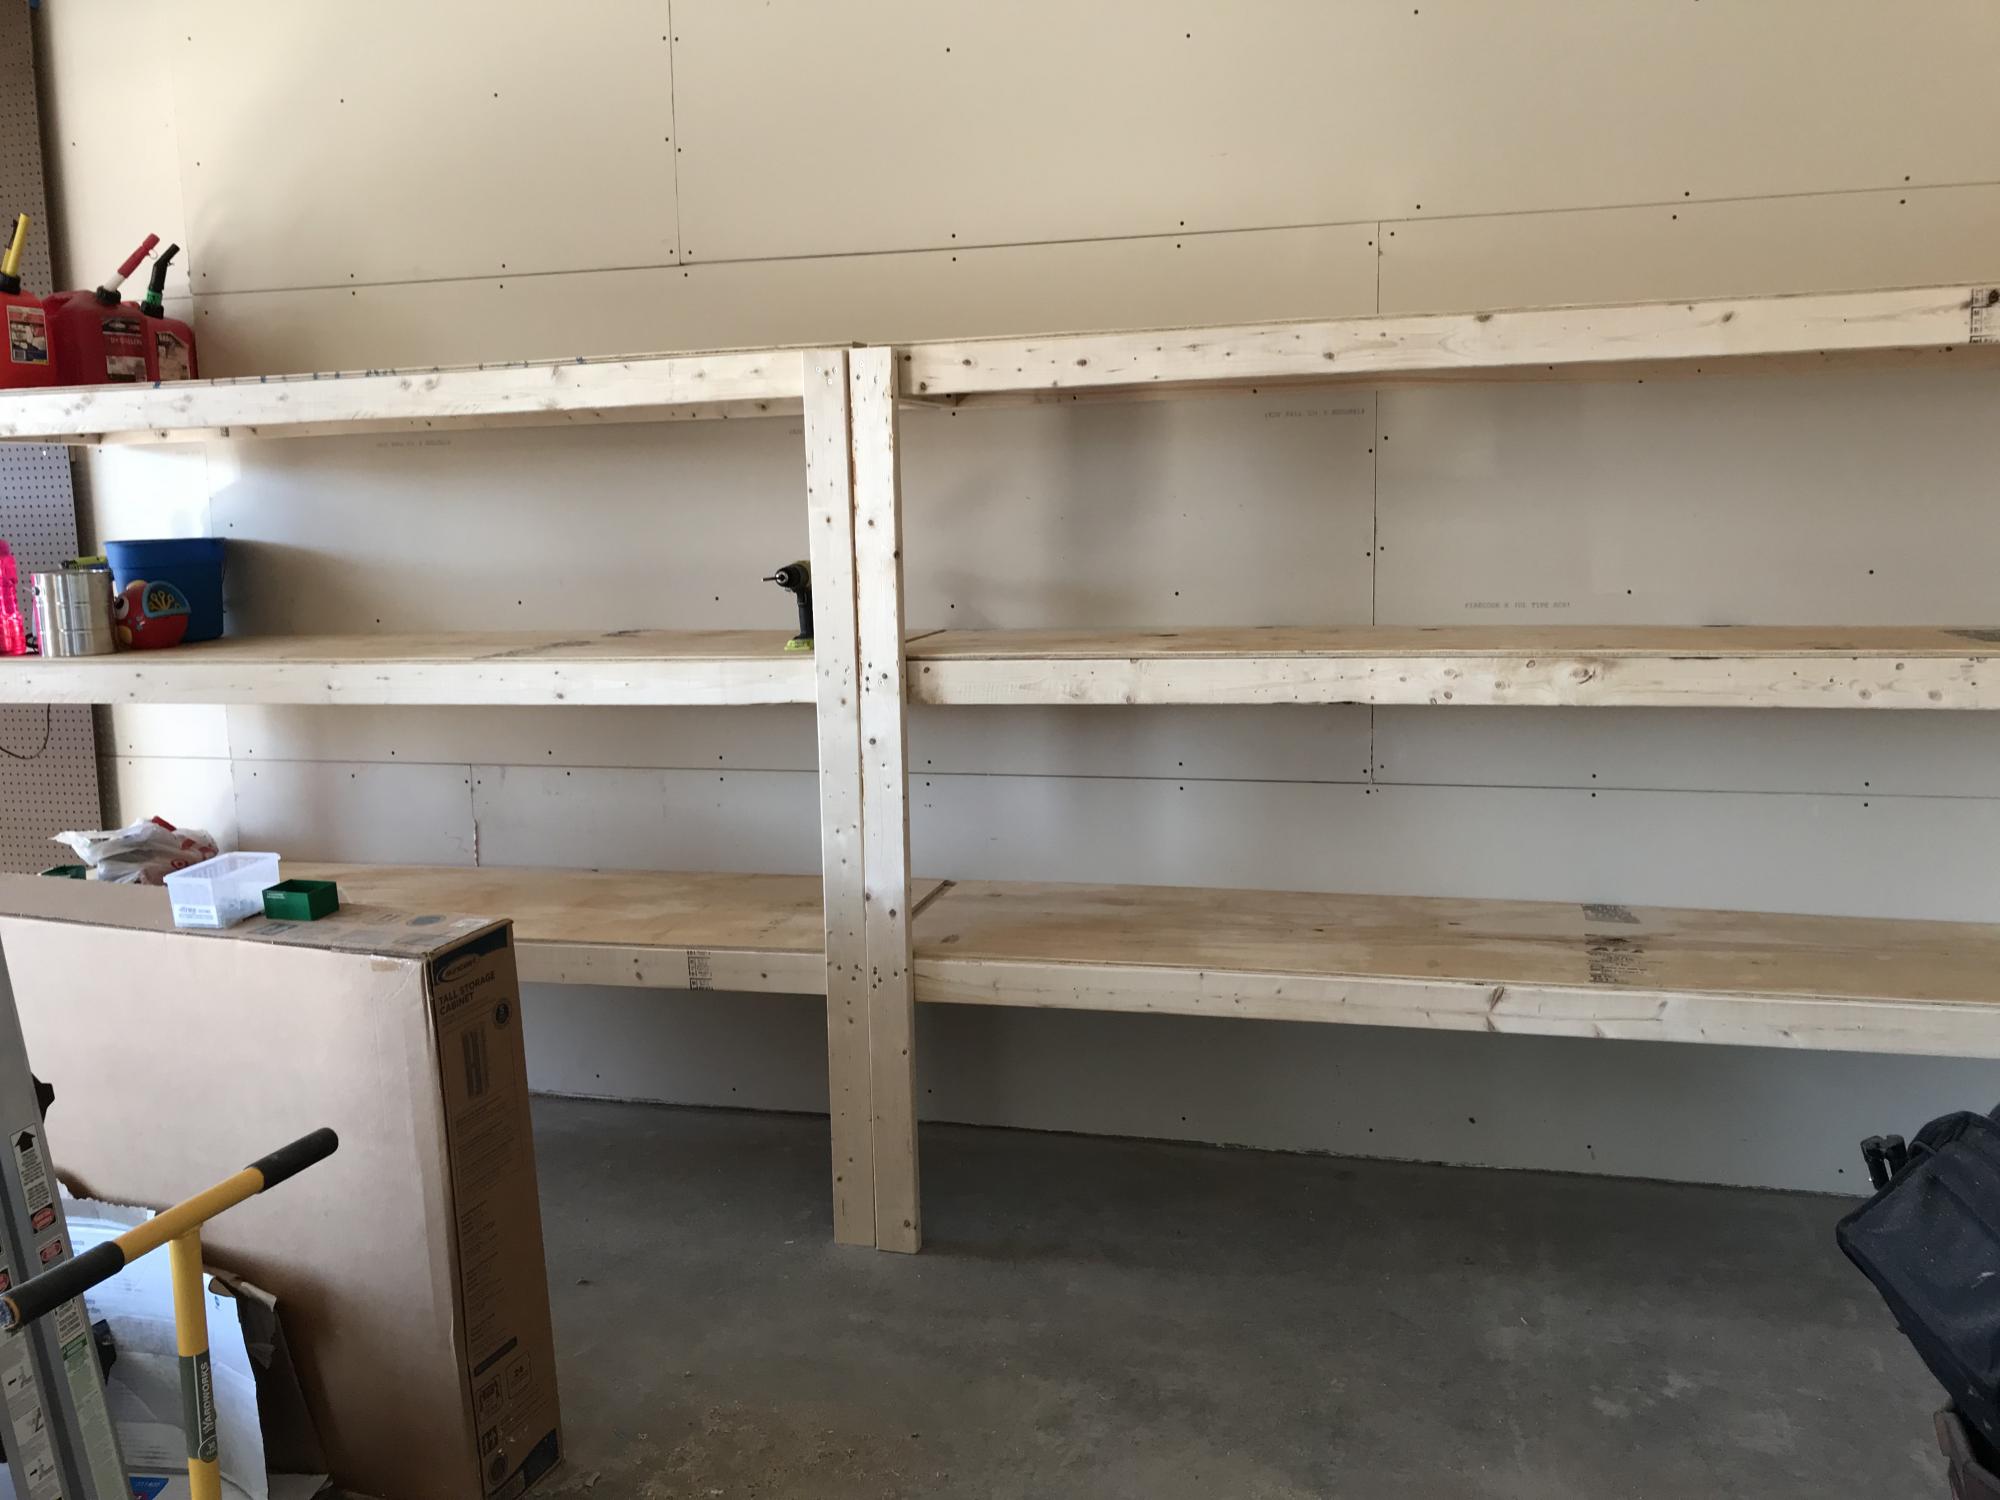
Easy, quick garage shelves!
This took a lot of time and money but I like the way it looks. We have 4 kitchen cabinets and one drawer and no room for more so storage is tight.

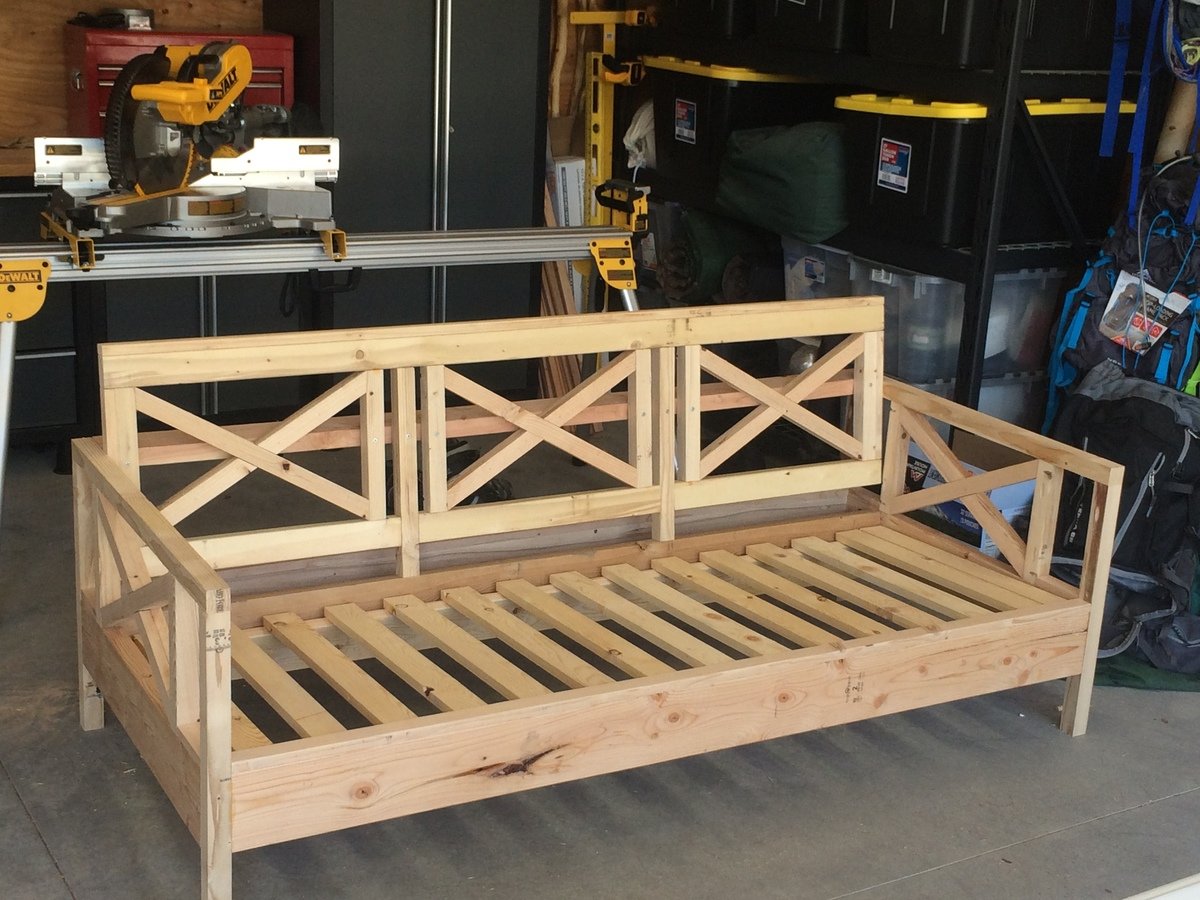
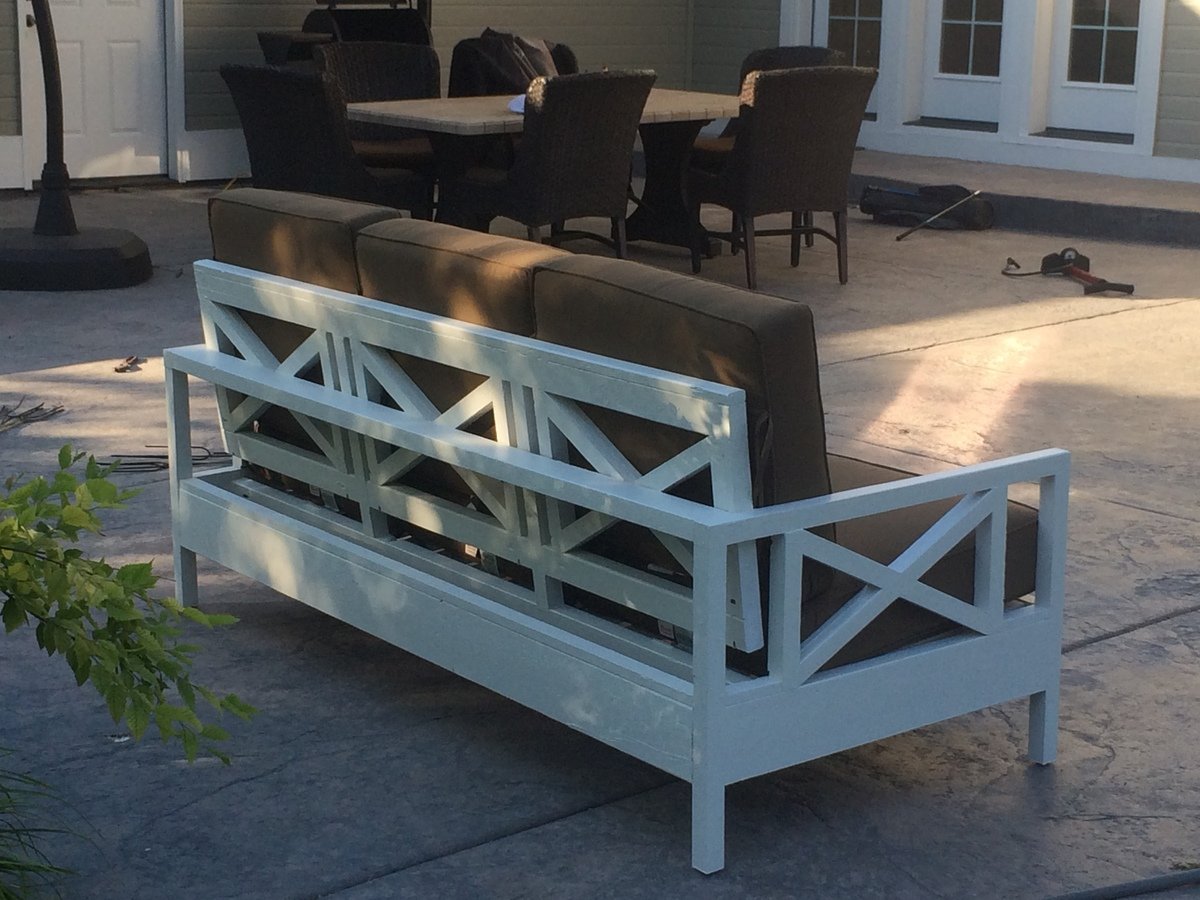
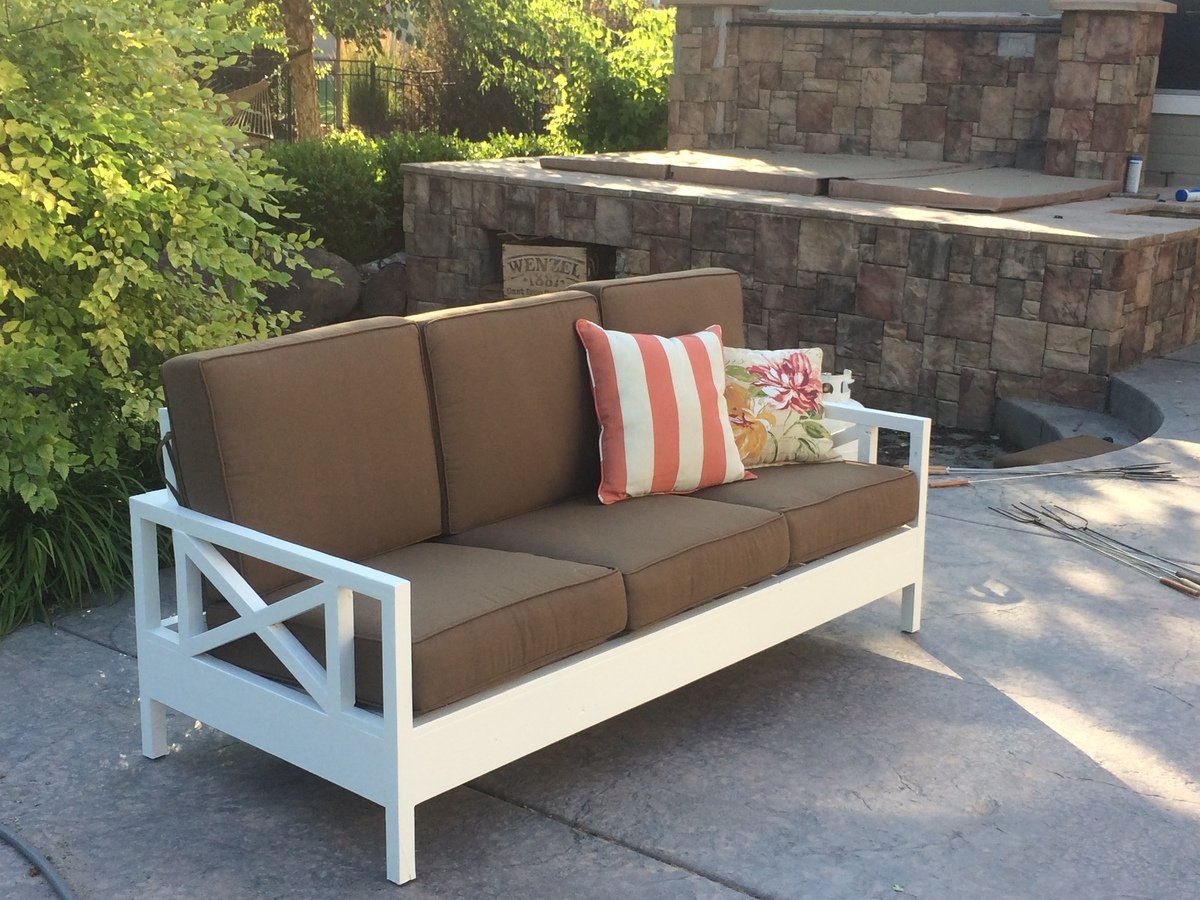
My wife loves the X pattern of the Weatherly Sofa, but wanted the tilted back from the Simple White Outdoor Sofa. This was our best of both worlds effort!
Tue, 06/11/2019 - 05:25
Can you share where you got your cushions please?
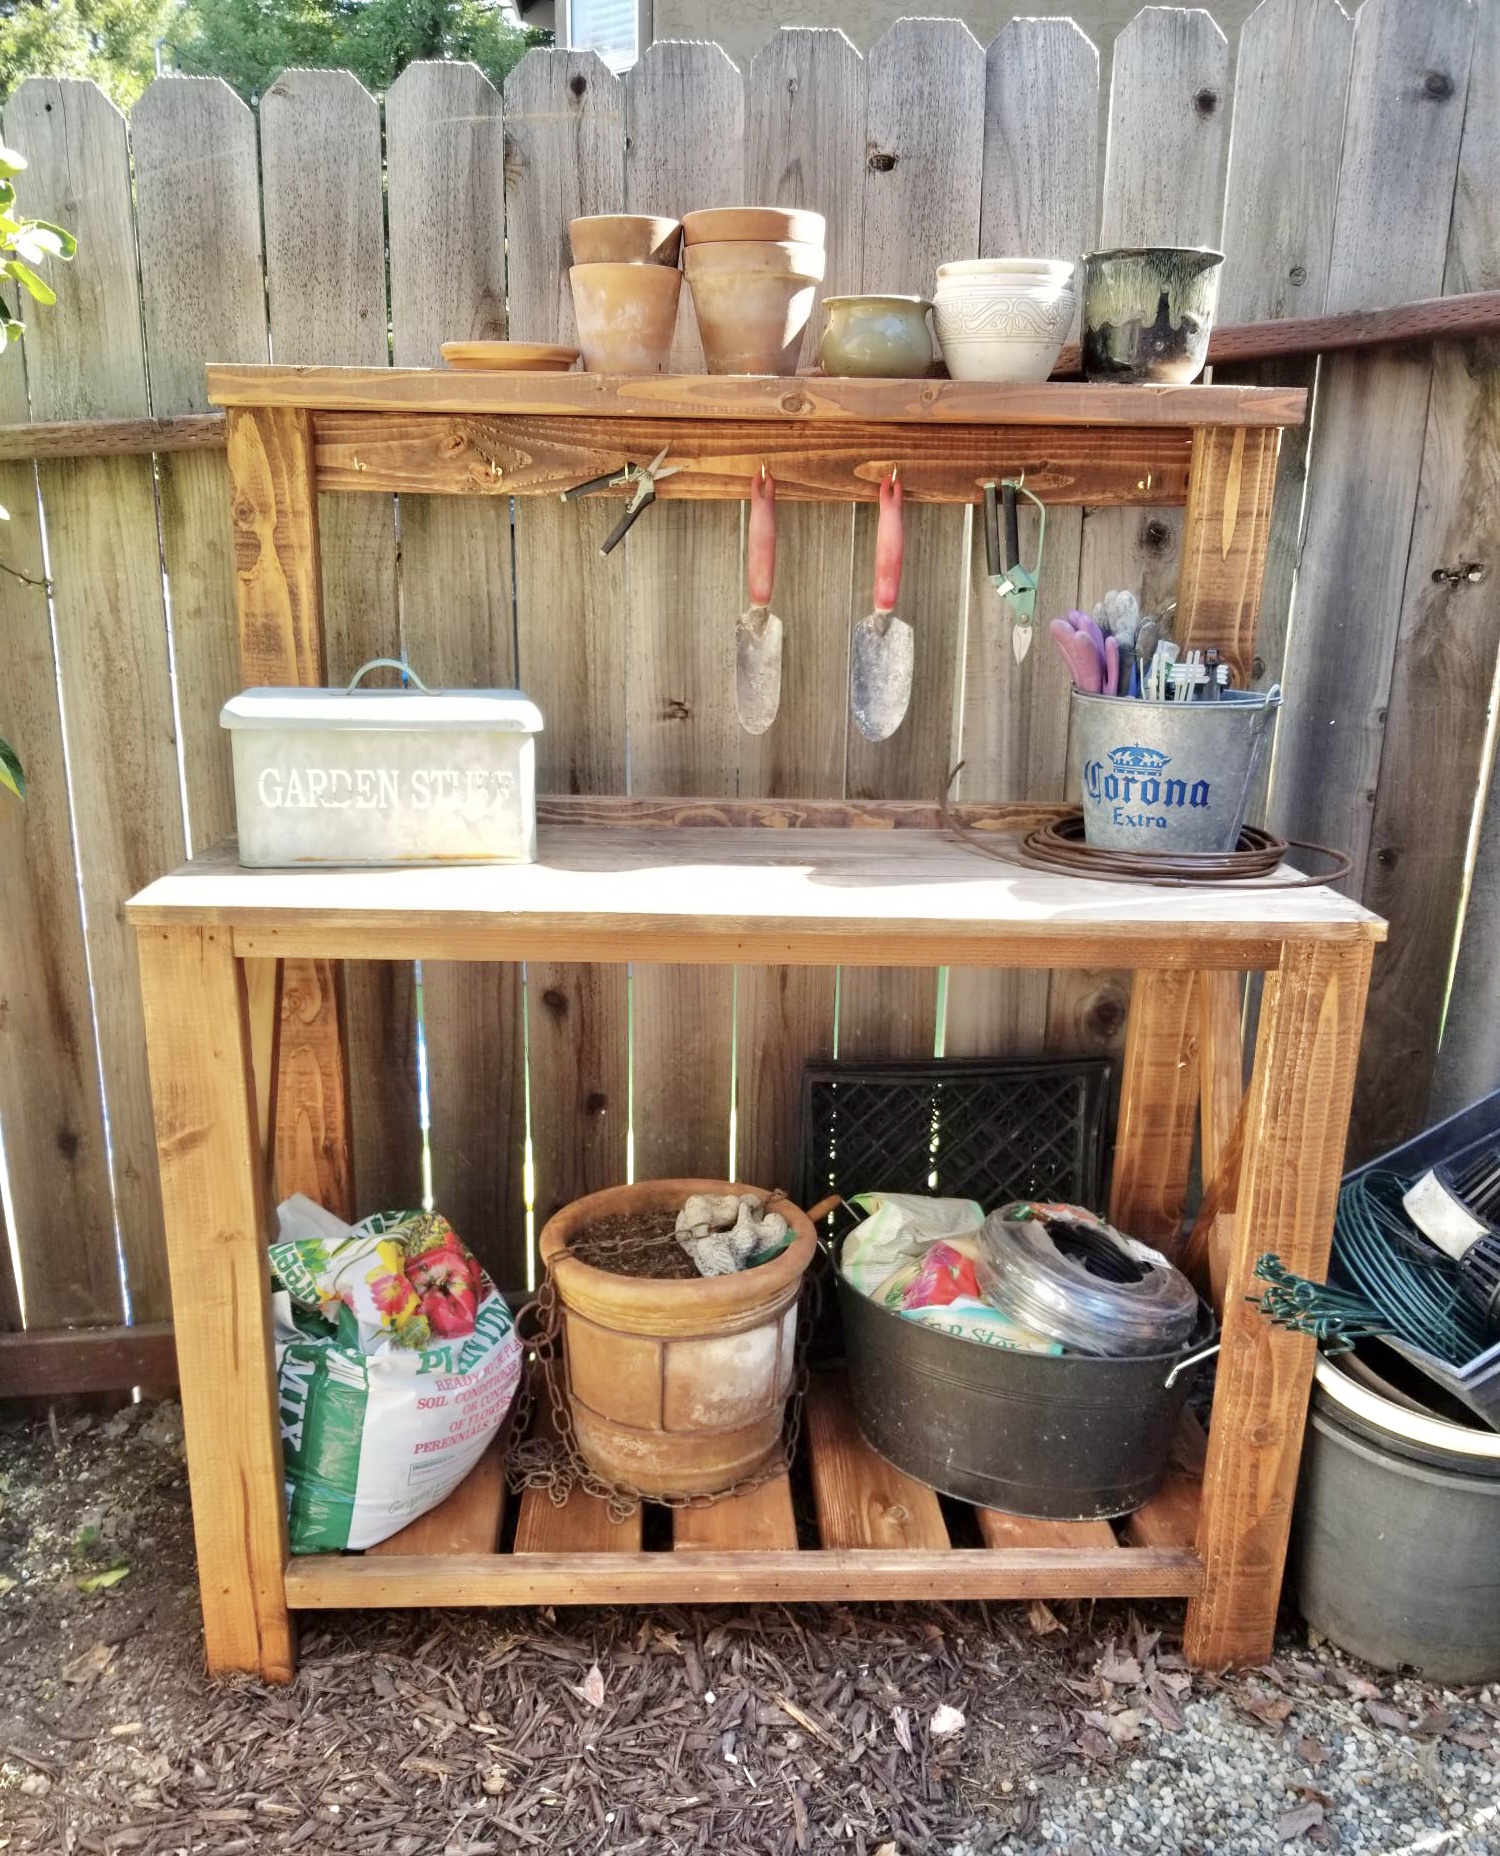
My honey built this farmhouse potting bench in a few hours. I needed it to store all the junk that was laying on the ground. It's so cute!
Easy build. Great and sturdy results.
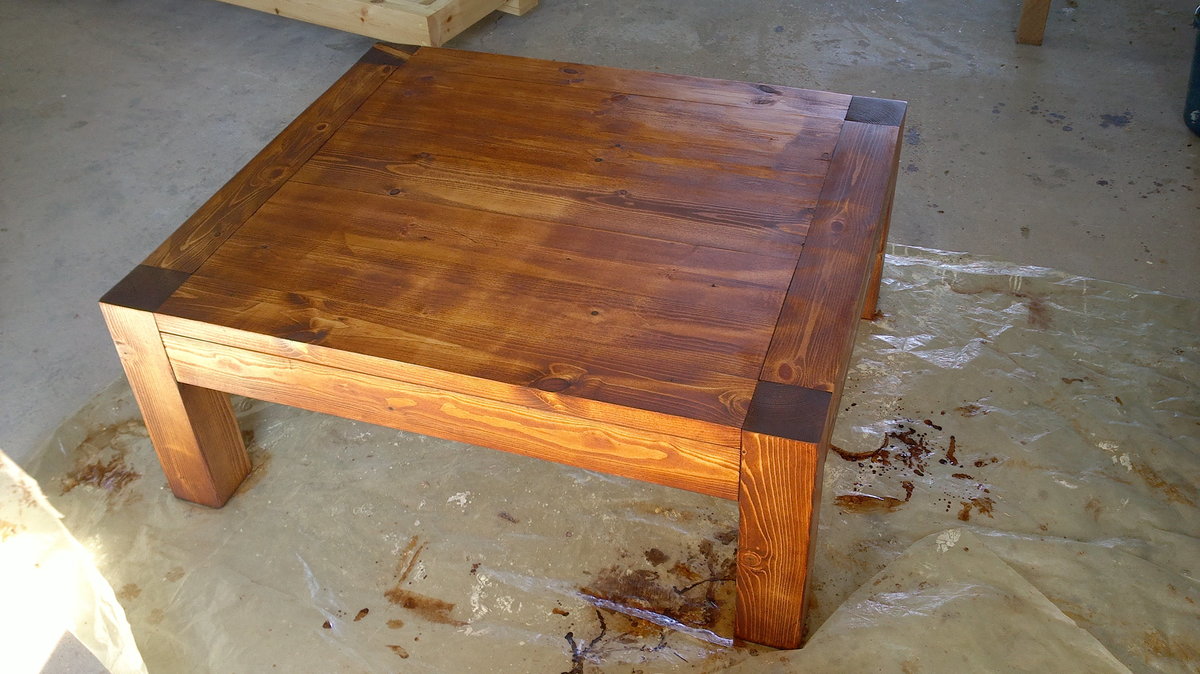
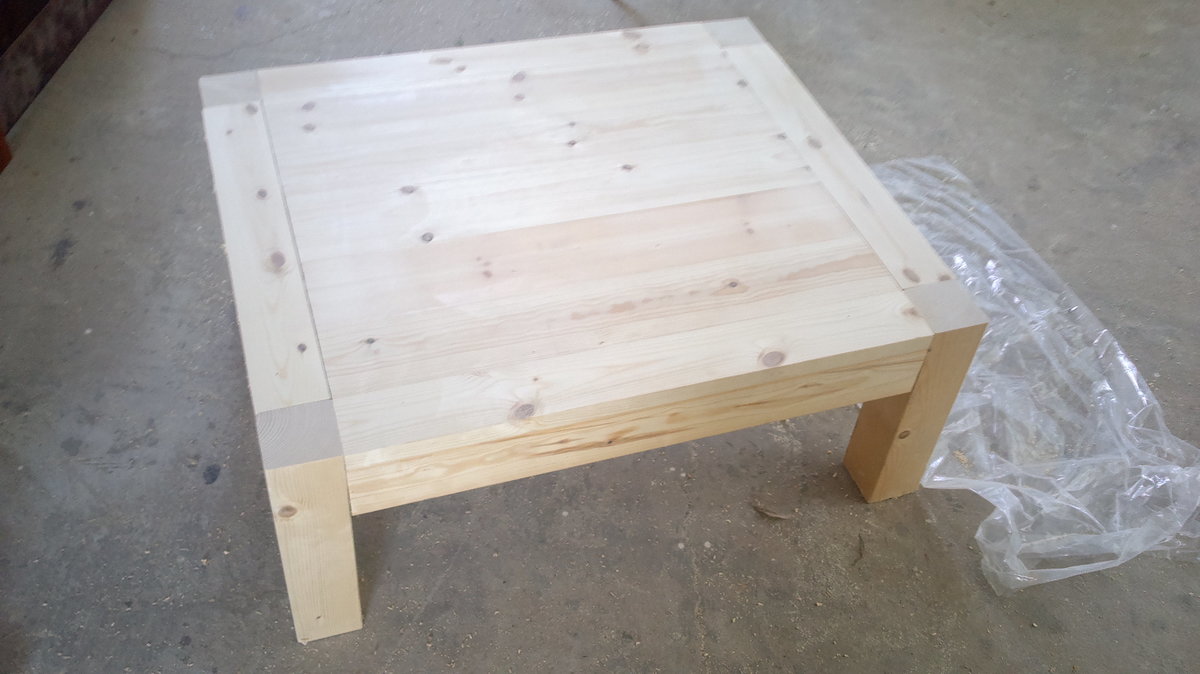
Great build for beginners and for some learning experience with a Kreg Jig. Table looks great and bulky.
Sun, 08/11/2013 - 21:15
I was wondering the same thing myself about the 4x4's. Where I live the treated ones are about $7 and the untreated about $30. Also I have heard that you may have trouble staining or painting your treated 4x4's. I want to make a coffee table from one of your plans but I do not want to spend that much just on a 4x4. :/ Beautiful table though!