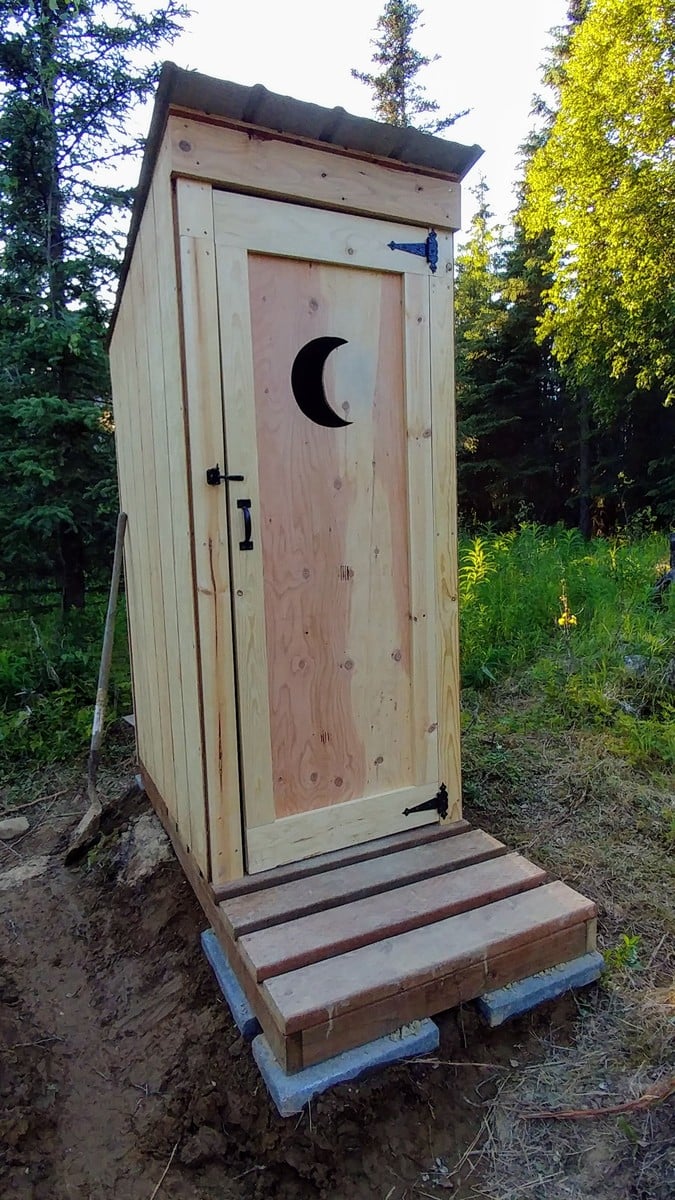
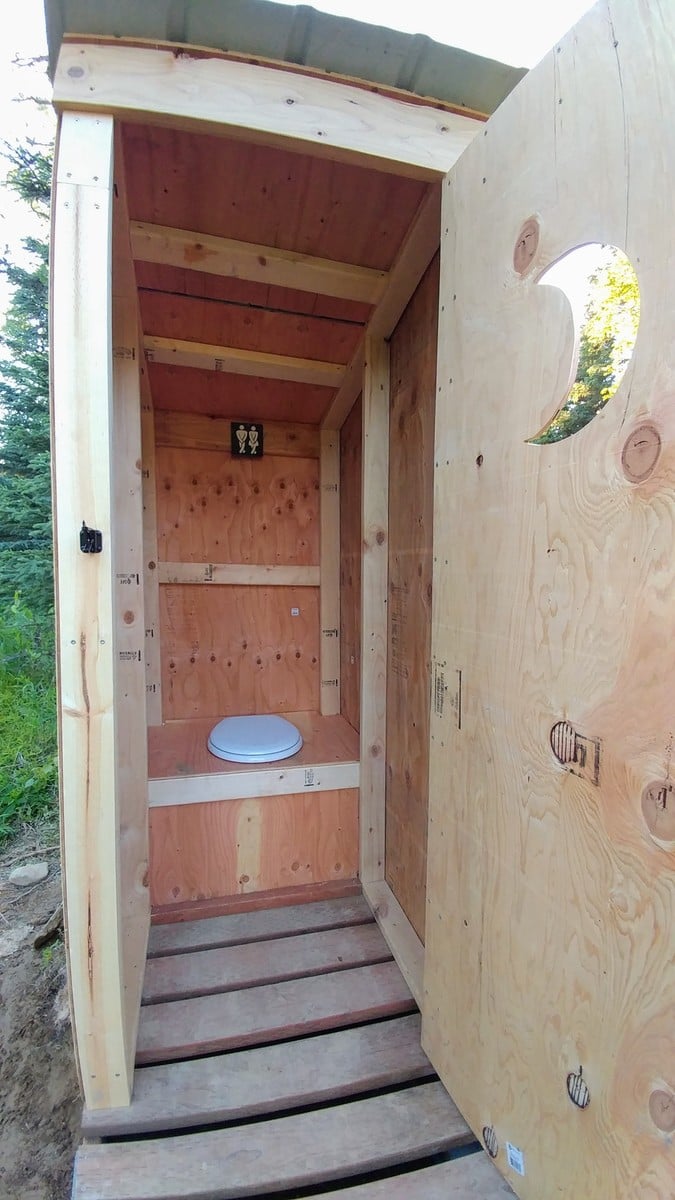
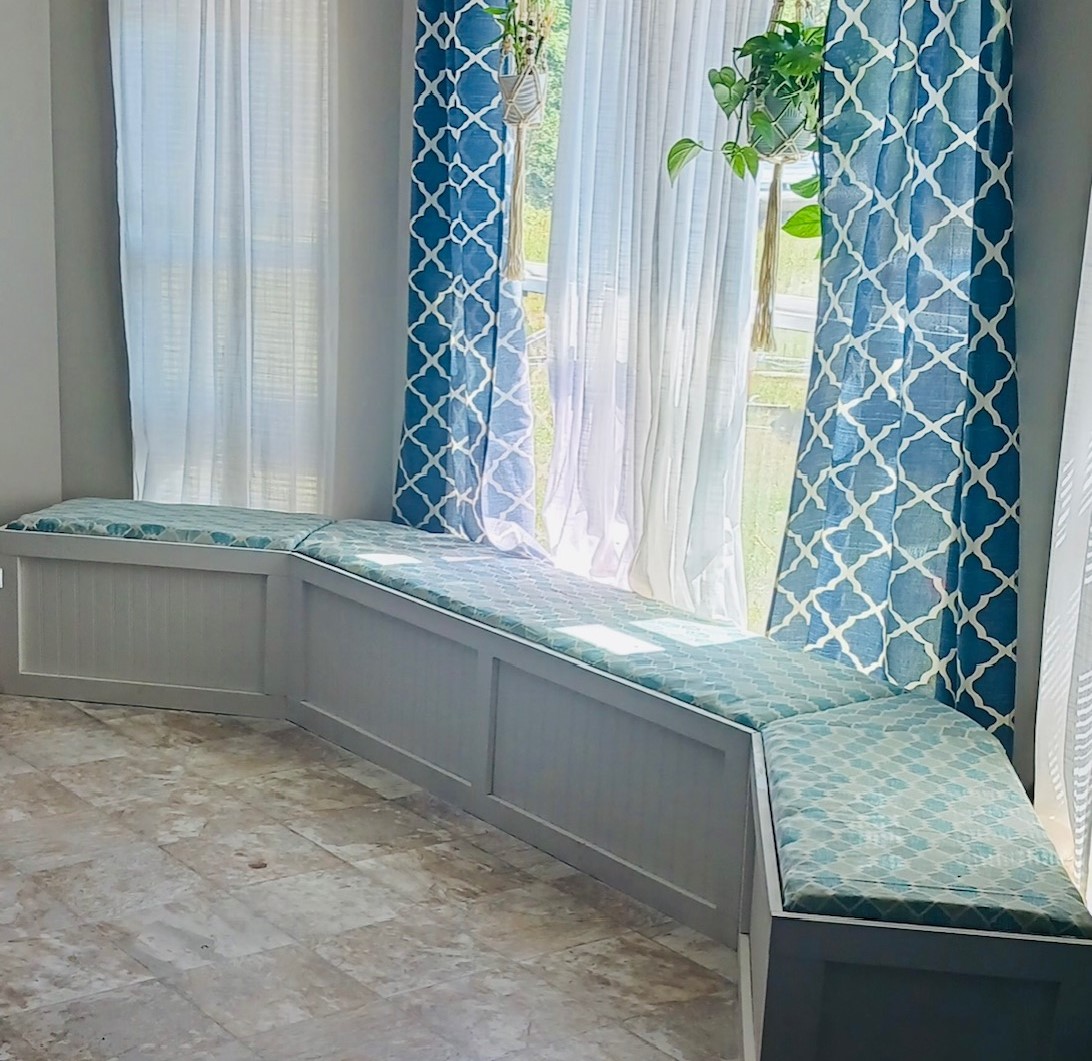
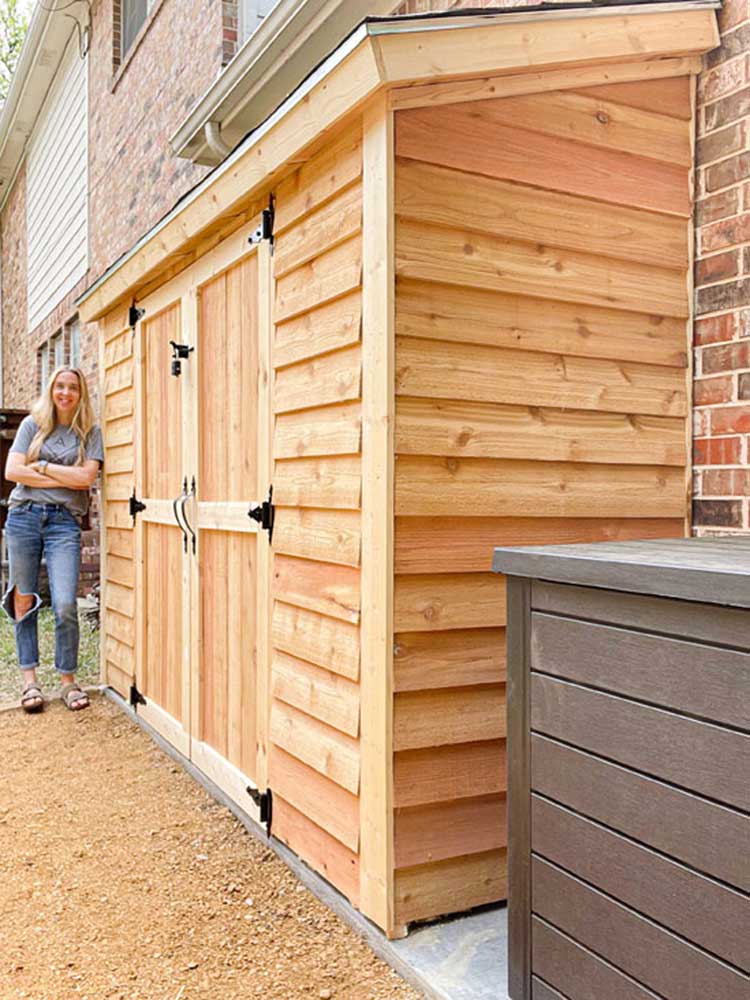
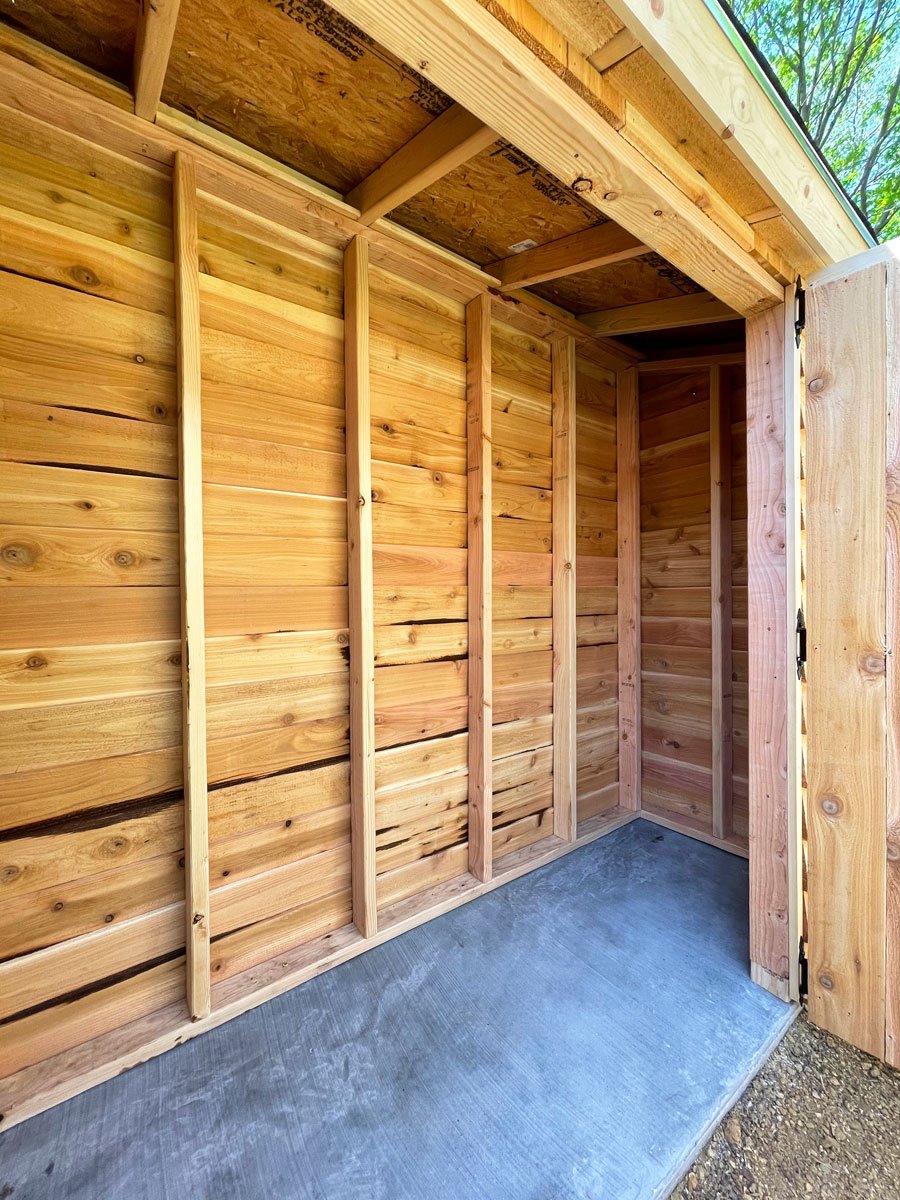
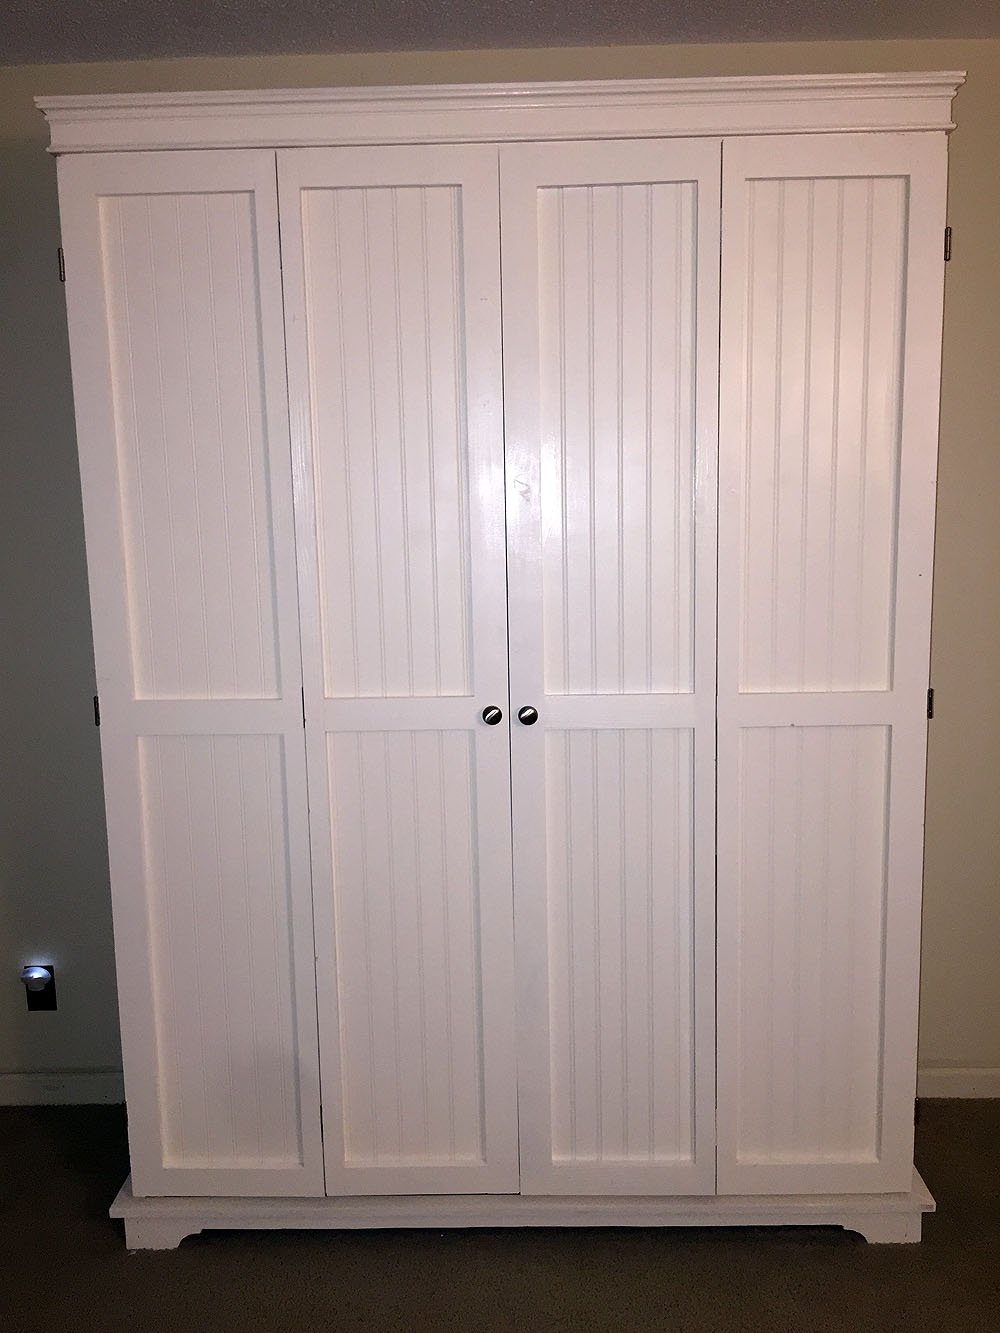
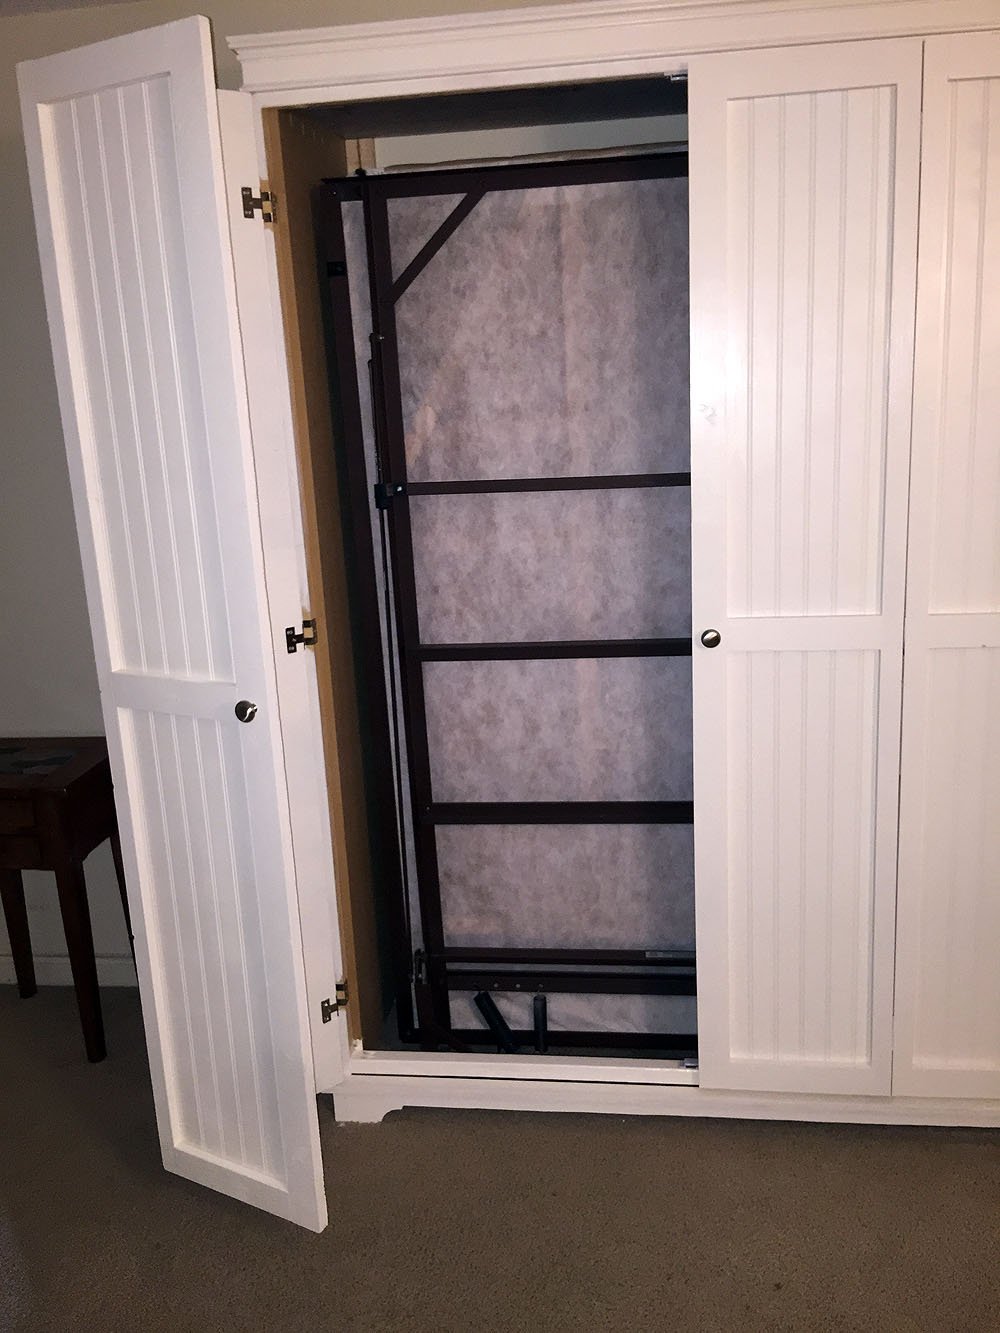
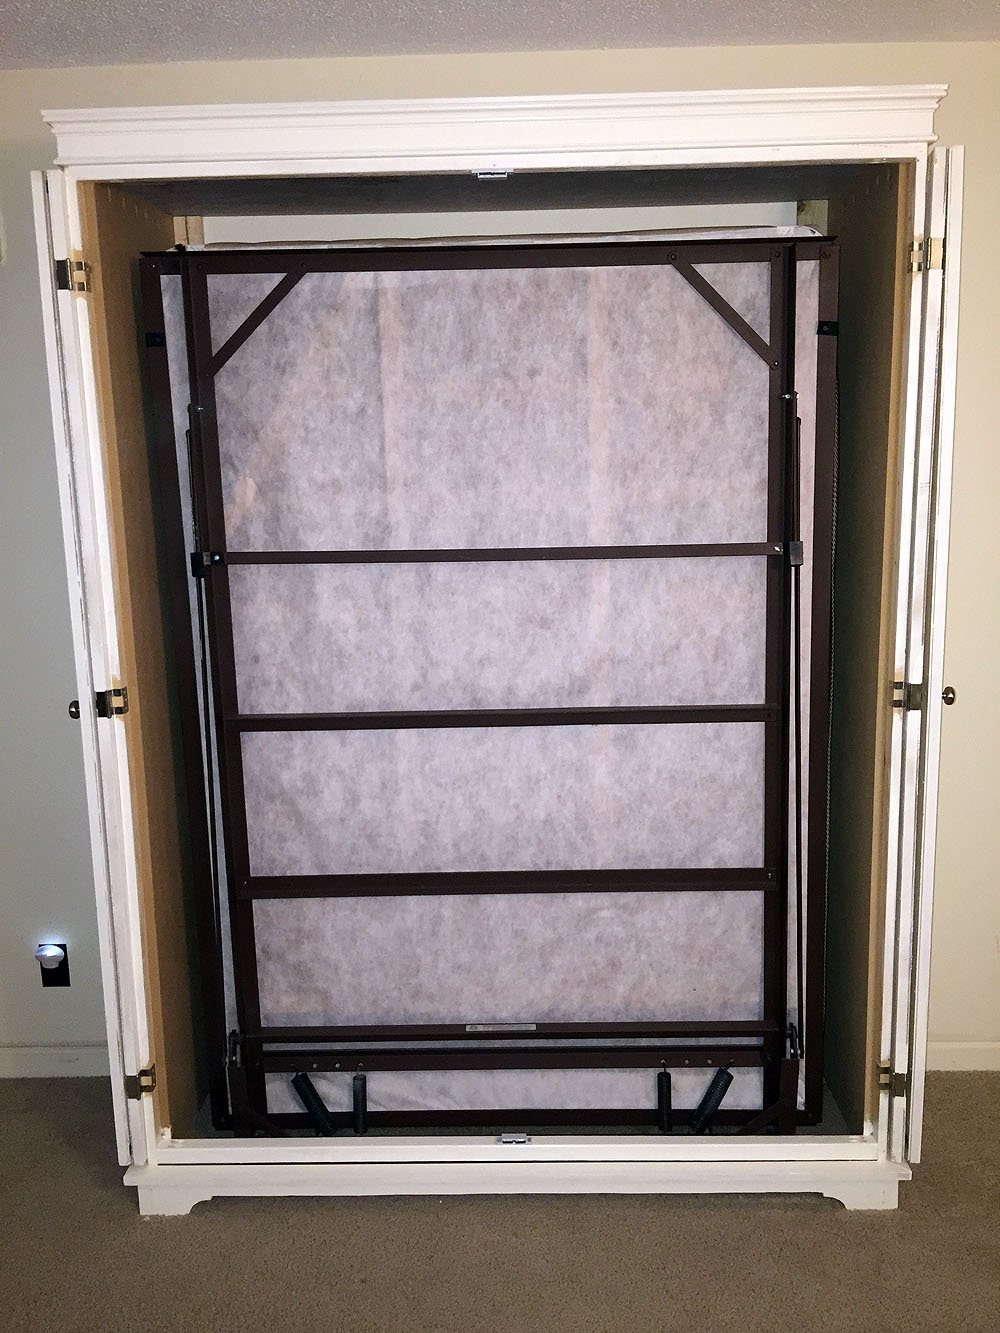
Community Brag Posts

Board and Batten Fireplace Surround

There was brick above my fireplace. I decided that I needed to lighten it up, but didn't want to necessarily paint the brick. Instead, I decided to panel above the fireplace using a board and batten style. I am so happy with the results! It is lighter and brighter in the room and goes with the style in the rest of the room (walls have board and batten as well).

Built from Plan(s)
Estimated Cost
$50
Estimated Time Investment
Day Project (6-9 Hours)
Finish Used
Painted white ("Linen White")
Recommended Skill Level
Intermediate

Comments

Patio Table w/Built in Beer/Wine Cooler

Submitted by RoyBoy on Sat, 05/18/2013 - 06:58

After seeing the patio table with beer/wine cooler, I wanted to build this for my brother and wife who recently bought a house. I asked them if they were interested and of course they said yes. I modified the original plans by adding a 2x4 on each side of the cooler to make the table wider. I also made the legs out of 4x4 vs the 2x4s that were originally called for. I used redwood and then stained it and used a varnish for the final coating. I probably wouldn't use the varnish again for an outdoor table, because it looks like it should be an indoor table vs outdoor. Overall, I'm pleased with the results and the best part about it, I get to enjoy it every time I go over for a BBQ.

Estimated Cost
$225-250
Estimated Time Investment
Week Long Project (20 Hours or More)
Finish Used
Olympic Redwood Naturaltone Toner Exterior Stain
Cabot Spar Varnish Semi-Gloss
Recommended Skill Level
Beginner

Comments

Msharp1211

Wed, 07/03/2013 - 13:04

Awesome table, do you happen to have the measurements you used. I'd like to make the same table but I need the lumber yard to make the cuts.

DIY Kids Art Table

I'm so excited Ana created plans for this table!  When I first came across it on Pottery Barn Kids it was love at first sight. :D  I built it over the weekend for my little toddler.  Unfortunately, he's too short for it, but he'll grow into soon enough. :)  (I secretly wished it was an art table appropriate for my height!)

It cost me about $75 to build.  I splurged and bought select pine boards for the project.  The art table was also my submission for September's Fab Furniture Flippin' Contest.  September's sponsor is General Finishes and the theme was geometry!

Now, I just need to build matching seats! I love the little stools Ana built; maybe I'll do something sorta like that. :)  


Thank you Ana for inspiring me to build!


Built from Plan(s)
Estimated Cost
$75
Estimated Time Investment
Weekend Project (10-20 Hours)
Finish Used
General Finishes Milk Paint (Snow White), Acrylic craft paints for the geometric pattern, ECOS Paints Woodshield in Pine Needles for the cubby stain, and ECOS Paints Gloss Varnish
Recommended Skill Level
Beginner

Comments

Two Sizes from One Set of Plans

Submitted by Anonymous (not verified) on Wed, 08/10/2022 - 19:45

We followed Ana's plans for the large project bench. We altered the plans to make a bench for our compound miter saw with the saw platform level with the project bench.

Built from Plan(s)

Comments

Patio couches

Submitted by Anonymous (not verified) on Thu, 04/27/2023 - 19:14

This project was fun to build with hubby said the shopping list and the cut list was perfect! Love all your designs! King bed is next!

Comments

Seasonal And Holiday

Wall Shelves Ledges for Children's Books

Using Ana's Ten Dollar Ledges project, we created these shelves for our children's rooms. They were so easy to make and paint and hang. We absolutely love them and so do the kids! Our shelves were 32" long to fit in a particular spot. The shelves also cost a little more than the price listed in the plans. Perhaps my husband bought a higher grade of wood. I'm not sure, but it was worth it regardless. You can see more of our kids' rooms and our old house renovations at our blog Lovely Chaos.

Built from Plan(s)
Estimated Cost
$80
Estimated Time Investment
Weekend Project (10-20 Hours)
Recommended Skill Level
Beginner

Cedar Fence Board Planter Box

Submitted by iowachap on Sat, 03/15/2014 - 19:40

Using Ana's 10 dollar raised garden planter box idea, I made my own using the cedar fence boards and then used 2 x 3 x 8 studs for the L corner supports and mid center support along with top rail. This photo is the first 3, I will have a total of 6 boxes. Will post more as I progress.

Estimated Cost
20 to 25 dollars per box
Estimated Time Investment
Afternoon Project (3-6 Hours)
Finish Used
I used 6 fence boards, 2 for each side of the 6' long runs, and 1 for each short 3' section cut in half.

I got the 6' x 5 1/2 " x 5/8 " cedar fence boards at the orange box

I used 2 x 3 x 8 boards for the corners the middle support and the top rail. I got these at the blue box

I used 2 " and 2 1/2" exterior star bit screws.

NOTE: I pre drilled holes in the fence boards and screwed all the boards to the L corner sections from the inside out, so the screws are on the inside of the box, they did not poke through the 2 x 3 boards.

Instead of trying to measure how far off the side of the board I needed to go to match the vertical 2 x 3 boards, I just cut 10 11 inch long 2 x3 sections, and then used the 2 1/2" screws and made 4 L corner pieces the shorter side I screwed the short 3 foot length fence boards too, once I had both my short sections screwed to the L corner sections, I then stood one up and screwed 2 of the 6' length boards to the L corner section. Then the other side.

Once all 4 walls were done, I would then measure 3' in the middle of the 6' long side runs, and put in an additional 2 x 3 x 11" again screwed from the inside of the box out.

Now that all the 2 x 3 x 11" L corners and side support sections were connected to the fence boards I then cut 76 1/4" 2 x3 boards one for each length run, and then 2 26" 2 x 3 sections that were all cut on 45 degree angle to complete the top rail.
Recommended Skill Level
Starter Project

Playhouse

We built this playhouse for our daughter's 6th birthday. She absolutely loves it! We were looking at purchasing one, but they were way out of our budget. Ana saved the day with these plans :).

Estimated Cost
$320.00
Estimated Time Investment
Weekend Project (10-20 Hours)
Finish Used
We painted the house with white Pittsburg Ultra Exterior Latex paint. The mailbox, door and shutters were all painted with Pink Viburnum Sherwin Williams Satin Exterior paint.
Recommended Skill Level
Intermediate
Seasonal And Holiday

2x4 and 2x6 Chairs and Couch

Submitted by clintusaf on Mon, 05/11/2020 - 16:43

I used the Modern Outdoor Chair from 2x4s and 2x6s plans and slightly modified then to make a 3 seater couch. My cushions(most expensive part) were 24 in x 24 in and purchased from Lowes for $40 per seat. The couch is 79 inches in total length. I also dropped the seat down to the lower level to allow more room for my cushion backs to sit further down into the seat.

Estimated Cost
$400
Estimated Time Investment
Weekend Project (10-20 Hours)
Finish Used
Thompsons Waterseal Teak Oil Walnut Semi-Transparent
Recommended Skill Level
Beginner

Playhouse big build

I went a little out of control on the week of the 4th of July - I set out to build a picnic table, 4 sling chairs, a deck and a playhouse - and I did!!!! I owe Ana a great debt of gratitude for these amazing plans and empowering me to do it! I built the picnic table and the sling chairs as I was waiting for primer and paint to dry on the frame, inside and outside of the house. For the shutters - I scrounged around the garage and found some leftover wainscoting, and put a leftover 1x2 on them. The door frame wasn't straight - so I added a piece of leftover trim from my daughters bed I built. My only next step is curtains for the windows. I even moved the full kitchen set I built the kids a few christmas's ago into their. They have only been playing with it for 2 days and I can't drag them out of it!!!

Estimated Cost
$500-$550
Estimated Time Investment
Week Long Project (20 Hours or More)
Finish Used
Primer and paint
Recommended Skill Level
Intermediate
Seasonal And Holiday

Modern Adirondack Chair Set

Submitted by Anonymous (not verified) on Wed, 06/10/2020 - 17:25

I used 5 5/8 fence pickets I had in the scrap box to give the chairs a wider arm rest. I wanted something wide enough to safely hold a paper plate and drinks.
I planned them, routered the edges and put a coat of oil based polyurethane on them.
The table is just something I put together and the top is a 1.5 inch thick 16x16 concrete paver.
If you like the wide arms, use wood glue and clamps, not nails or screws. Saves you from having to fill them and it looks better too.
Enjoy
And thank you Anna for a great build!

Estimated Cost
$60
Estimated Time Investment
Day Project (6-9 Hours)
Finish Used
Exterior paint and oil based polyurethane
Recommended Skill Level
Intermediate
Seasonal And Holiday

Cedar planter boxes

Submitted by JavaJoe on Fri, 06/06/2014 - 20:00

I used the main plan for ideas, but opted to use 3.5 inch pickets instead, which allowed for a smaller planter that wasn't as big. Also chose to miter 1x3s for the top which I think really finishes it off. Sanded everything with a belt sander to 220 grit. Used min wax golden pecan plus three coats of poly inside and out. Finished size was about 17x17. Tile spacers work great to keep the gaps even!

Built from Plan(s)
Estimated Time Investment
Afternoon Project (3-6 Hours)
Finish Used
Min wax golden pecan
Recommended Skill Level
Intermediate

Comments

Narrow Sewing Table

Submitted by WeezyWorks on Tue, 09/11/2012 - 18:06

Ive been looking for a sewing table to fit my space. but found none for less than $500 and they were quite small. I found a post at quiltedcupcake.com that linked me to another blog, linking me here. I modified the plan to be about 2 feet wide and cut a hole to fit my sewing machine. There is a support in the bottom to hold my machine level with the tabletop. When I make this in the future, I will splurge on a fine hardwood. This plan was easy to build and looks great! Just what I was looking for :D

Estimated Cost
$125
Estimated Time Investment
Weekend Project (10-20 Hours)
Finish Used
Dark stain and satin polyurethane
Recommended Skill Level
Beginner

Comments

tommirhea

Fri, 09/14/2012 - 09:45

I'm jealous of your organization! I've had a folding table for my sewing table since I started sewing :(

tommirhea

Sun, 09/16/2012 - 10:11

Now, I've just got to make it! I love to free motion quilt and that would make it easier. With each baby I've had my quilting space has diminished (of course it's worth it) but now I think I will reclaim some space ;)

Nesting Office Station

Submitted by Sb1212 on Tue, 07/14/2020 - 18:38

So loving this nesting office station❤️! We will have a sofa sleeper in the office as well. So we needed a desk that could be moved to the wall when the sofa sleeper is being used by guest. I saw a post from Ana for her Nesting Grill Station and I came up with the idea to make this nesting office station. The cabinet includes a file folder drawer (which is from Ana's mail boss plans), a regular drawer, cabinet doors with shelves. One of the shelves is a pull out shelf for the printer. I think it came together great! Design for nesting desk inspired by these plans: https://www.ana-white.com/woodworking-projects/nesting-grill-station https://www.ana-white.com/woodworking-projects/mail-boss

Estimated Time Investment
Weekend Project (10-20 Hours)
Finish Used
Minwax Golden Pecan
Valspar Signature Ultra White in satin
Recommended Skill Level
Intermediate

Comments

Sb1212

Sat, 10/03/2020 - 08:35

Hi, Thank you! Actually I didn't add wheels to the design since this will be in an office with thick carpeting. I added adjustable metal foot pads to the bottom of the desk.

Kids Nightstand

Submitted by Medickep on Thu, 02/26/2015 - 19:48

Made this from the Owens nightstand plans.  Very simple to build, as long as you have built drawers before!  I painted it to match my sons bed I made for him recantly.  

Built from Plan(s)
Estimated Cost
50$
Estimated Time Investment
Day Project (6-9 Hours)
Finish Used
I used Behr Marquee paint, which advertises one coat on any surface. It didn't even require a primer!!
Recommended Skill Level
Beginner

DIY Murphy Wall Bed

Submitted by Dstor22 on Sun, 03/15/2015 - 07:05

Just finished up my Murphy Bed project. Hope you like.

Estimated Cost
280.00
Estimated Time Investment
Weekend Project (10-20 Hours)
Finish Used
Weathered Oak Stain
Recommended Skill Level
Intermediate

Comments

Double Pedestal Farmhouse Table (8 feet)

Built from the Triple Pedestal Farmhouse Table plans. Had to size down the plans a little bit to fit into my dining room. Created three pedestal legs but only ended up using two on the final table. Took about 16 hours from start to finish. All of the wood is pine except for the top, which is Poplar. Made a couple of mistakes along the way but am very happy with the way everything turned out. Feel free to ask questions and I will do my best to answer them. Happy Building!

Built from Plan(s)
Estimated Cost
$175
Estimated Time Investment
Weekend Project (10-20 Hours)
Finish Used
English Chestnut. Stained once and waited 7 minutes to wipe off. Two coats of Clear Satin Polyurethane.
Recommended Skill Level
Intermediate

Comments

Chicken Run with Turkey House

Submitted by vendo on Wed, 10/13/2021 - 10:03

My daughter helped me build this enclosure. We used Ana's chicken run plan, but just made it taller so we could walk in easily. We added an overhang to store food and pellets under, for the supports we used Ana's easy shelves angle support plan, and finally we used the playhouse base plan for the base of turkeys house. All plans used are linked below. We ran the chicken wire out under the structure and still need to bring in some large rocks or pavers, but so far no issues with predators. Turkey was getting too big to fit in the smaller coop, so we decided to have fun with his house and used cedar fence pickets and some treated 2x4's, built a box and jig sawed the shape of a turkey. As you can see in the first photo the ladder for turkey wasn't big enough, all the other chickens were in his house, lol. So I beefed up the ladder and he happily can put himself up at night now:) Overall a super successful project, I wasn't sure what to do with the top and just at that point, the neighbor walked over and offered the metal, talk about a huge win and the perfect solution! We attached the run to the previous smaller structure and now they have so much more room and are laying like crazy:) Finally, I think this would make a great dog kennel as well...

Ladder shelf

Submitted by lazyLiz on Thu, 05/10/2012 - 13:43

Since I used hardwood (red oak) I have to modify the plan and eliminate the sides of the shelves. Modifications and measurement is on the additional photo. Thanks again Ana, you're the best!

Built from Plan(s)
Estimated Cost
$30-$50
Estimated Time Investment
Afternoon Project (3-6 Hours)
Finish Used
minwax red oak and poly
Recommended Skill Level
Beginner

Comments

Super Easy, Super Awesome! Thank you Ana & Ashley

Submitted by jhavinga on Tue, 03/18/2014 - 09:24

Loved this Coffee Table and wanted to suprise the wife for christmas, so being my first project I got started! had no idea what I was doing but they were great instructions, and the KREG JIG is AMAZING. altered the plans a bit to make it a rectangular coffee table (added 12 inches) instead of square to fit our living room better. Now to tackle the next project!

Built from Plan(s)
Estimated Cost
$200
Estimated Time Investment
Weekend Project (10-20 Hours)
Finish Used
Used 2 different stains to get a brown/gray finish. just one coat of each!
Minwax Weathered Oak & Minwax Special Oak.
Recommended Skill Level
Beginner

Comments

MichelleC

Wed, 03/19/2014 - 07:39

I absolutely LOVE the finish on this, thank for sharing!!! For the estimated cost you put $100, is that without including the cost of the turned legs? Did you get the legs through Osborne? I think I NEED to make this coffee table and use that finish!

jhavinga

Wed, 03/19/2014 - 09:02

Now that you brought it to my attention you are absolutely right, I completely forgot about the cost of the legs. including the cost of those, it does come to $200 dollars, ill change that. I also did get the legs from Osbourne. As for the finish yes do it! I am really happy with how it turned out :) thanks again and let me know when your coffee table is done so i can check it out!

Cheers,
Justin

Mandybeck

Wed, 08/27/2014 - 21:35

This is absolutely beautiful!!!! Quick question... You said you used weathered oak and special oak for the stain. Did you mean special walnut? I can't seem to find special oak! Thanks!!!

usmcjeff7489

Fri, 07/17/2015 - 12:59

Being as yours is much lighter (and i like it more than the darker). Did you use the wood conditioner and how long did you leave the stain on for? it almost looks like once it was on you were wiping it off. Love it well done :)

Also, do any of you guys use the paste wax when finished? I was thinking about following the stain with some poly to seal it. any suggestions?

Back