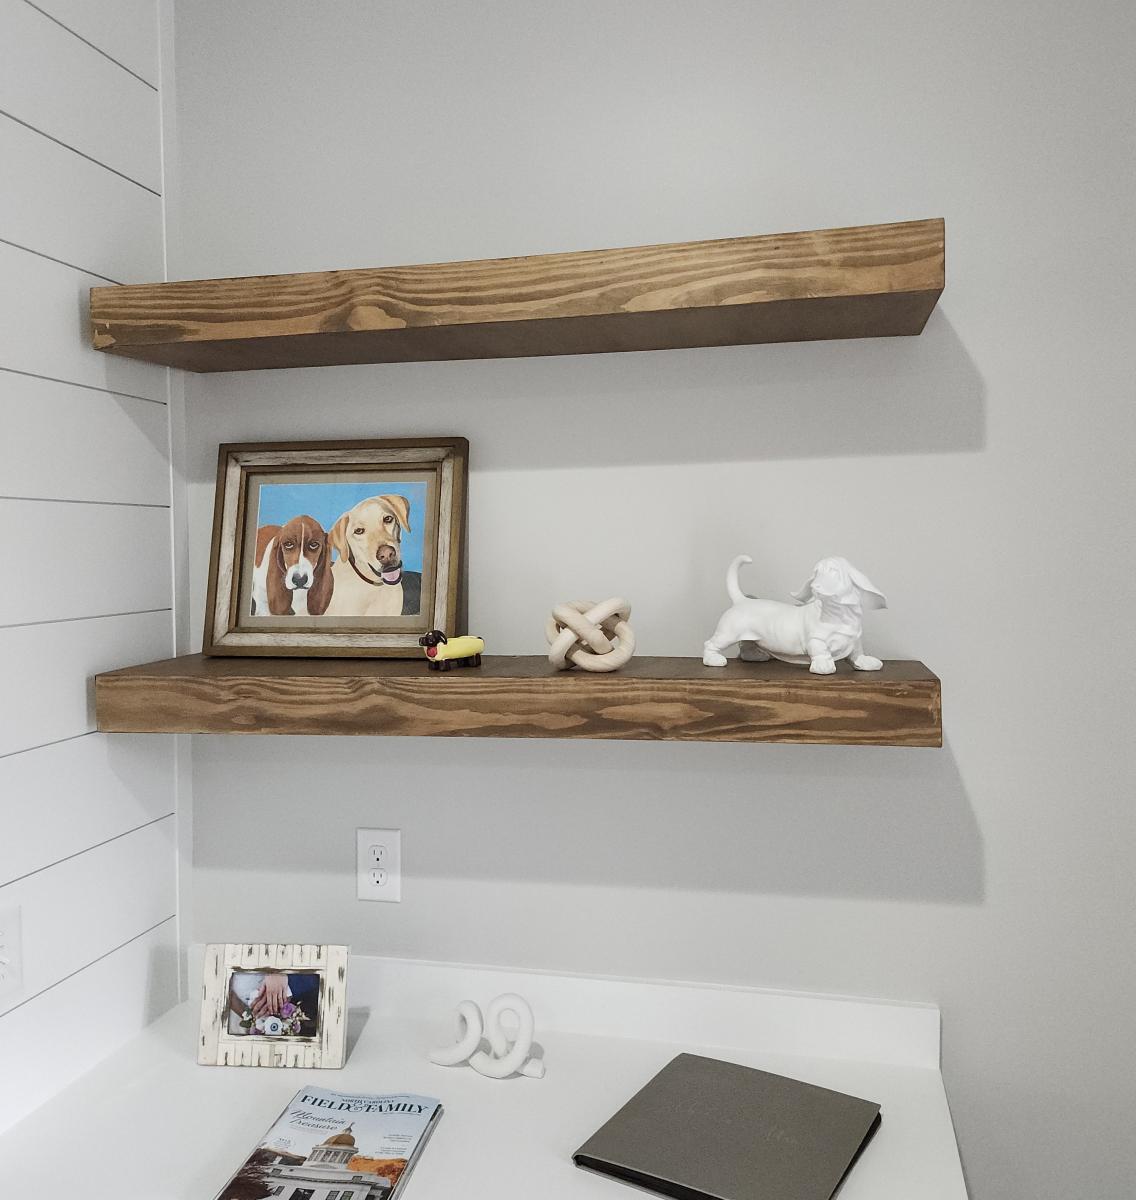
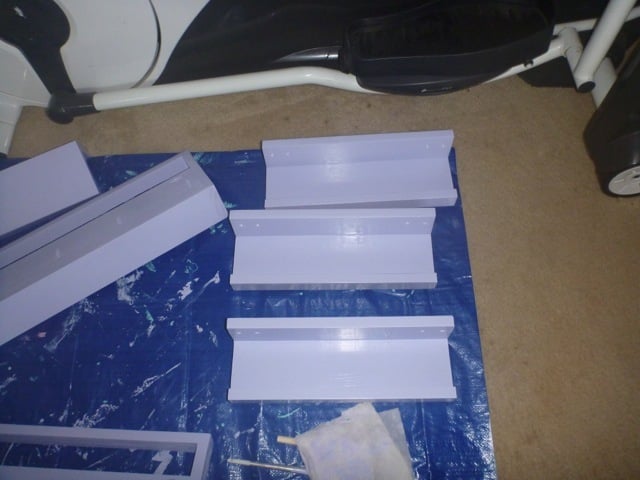
DIY Wood Floating Shelves
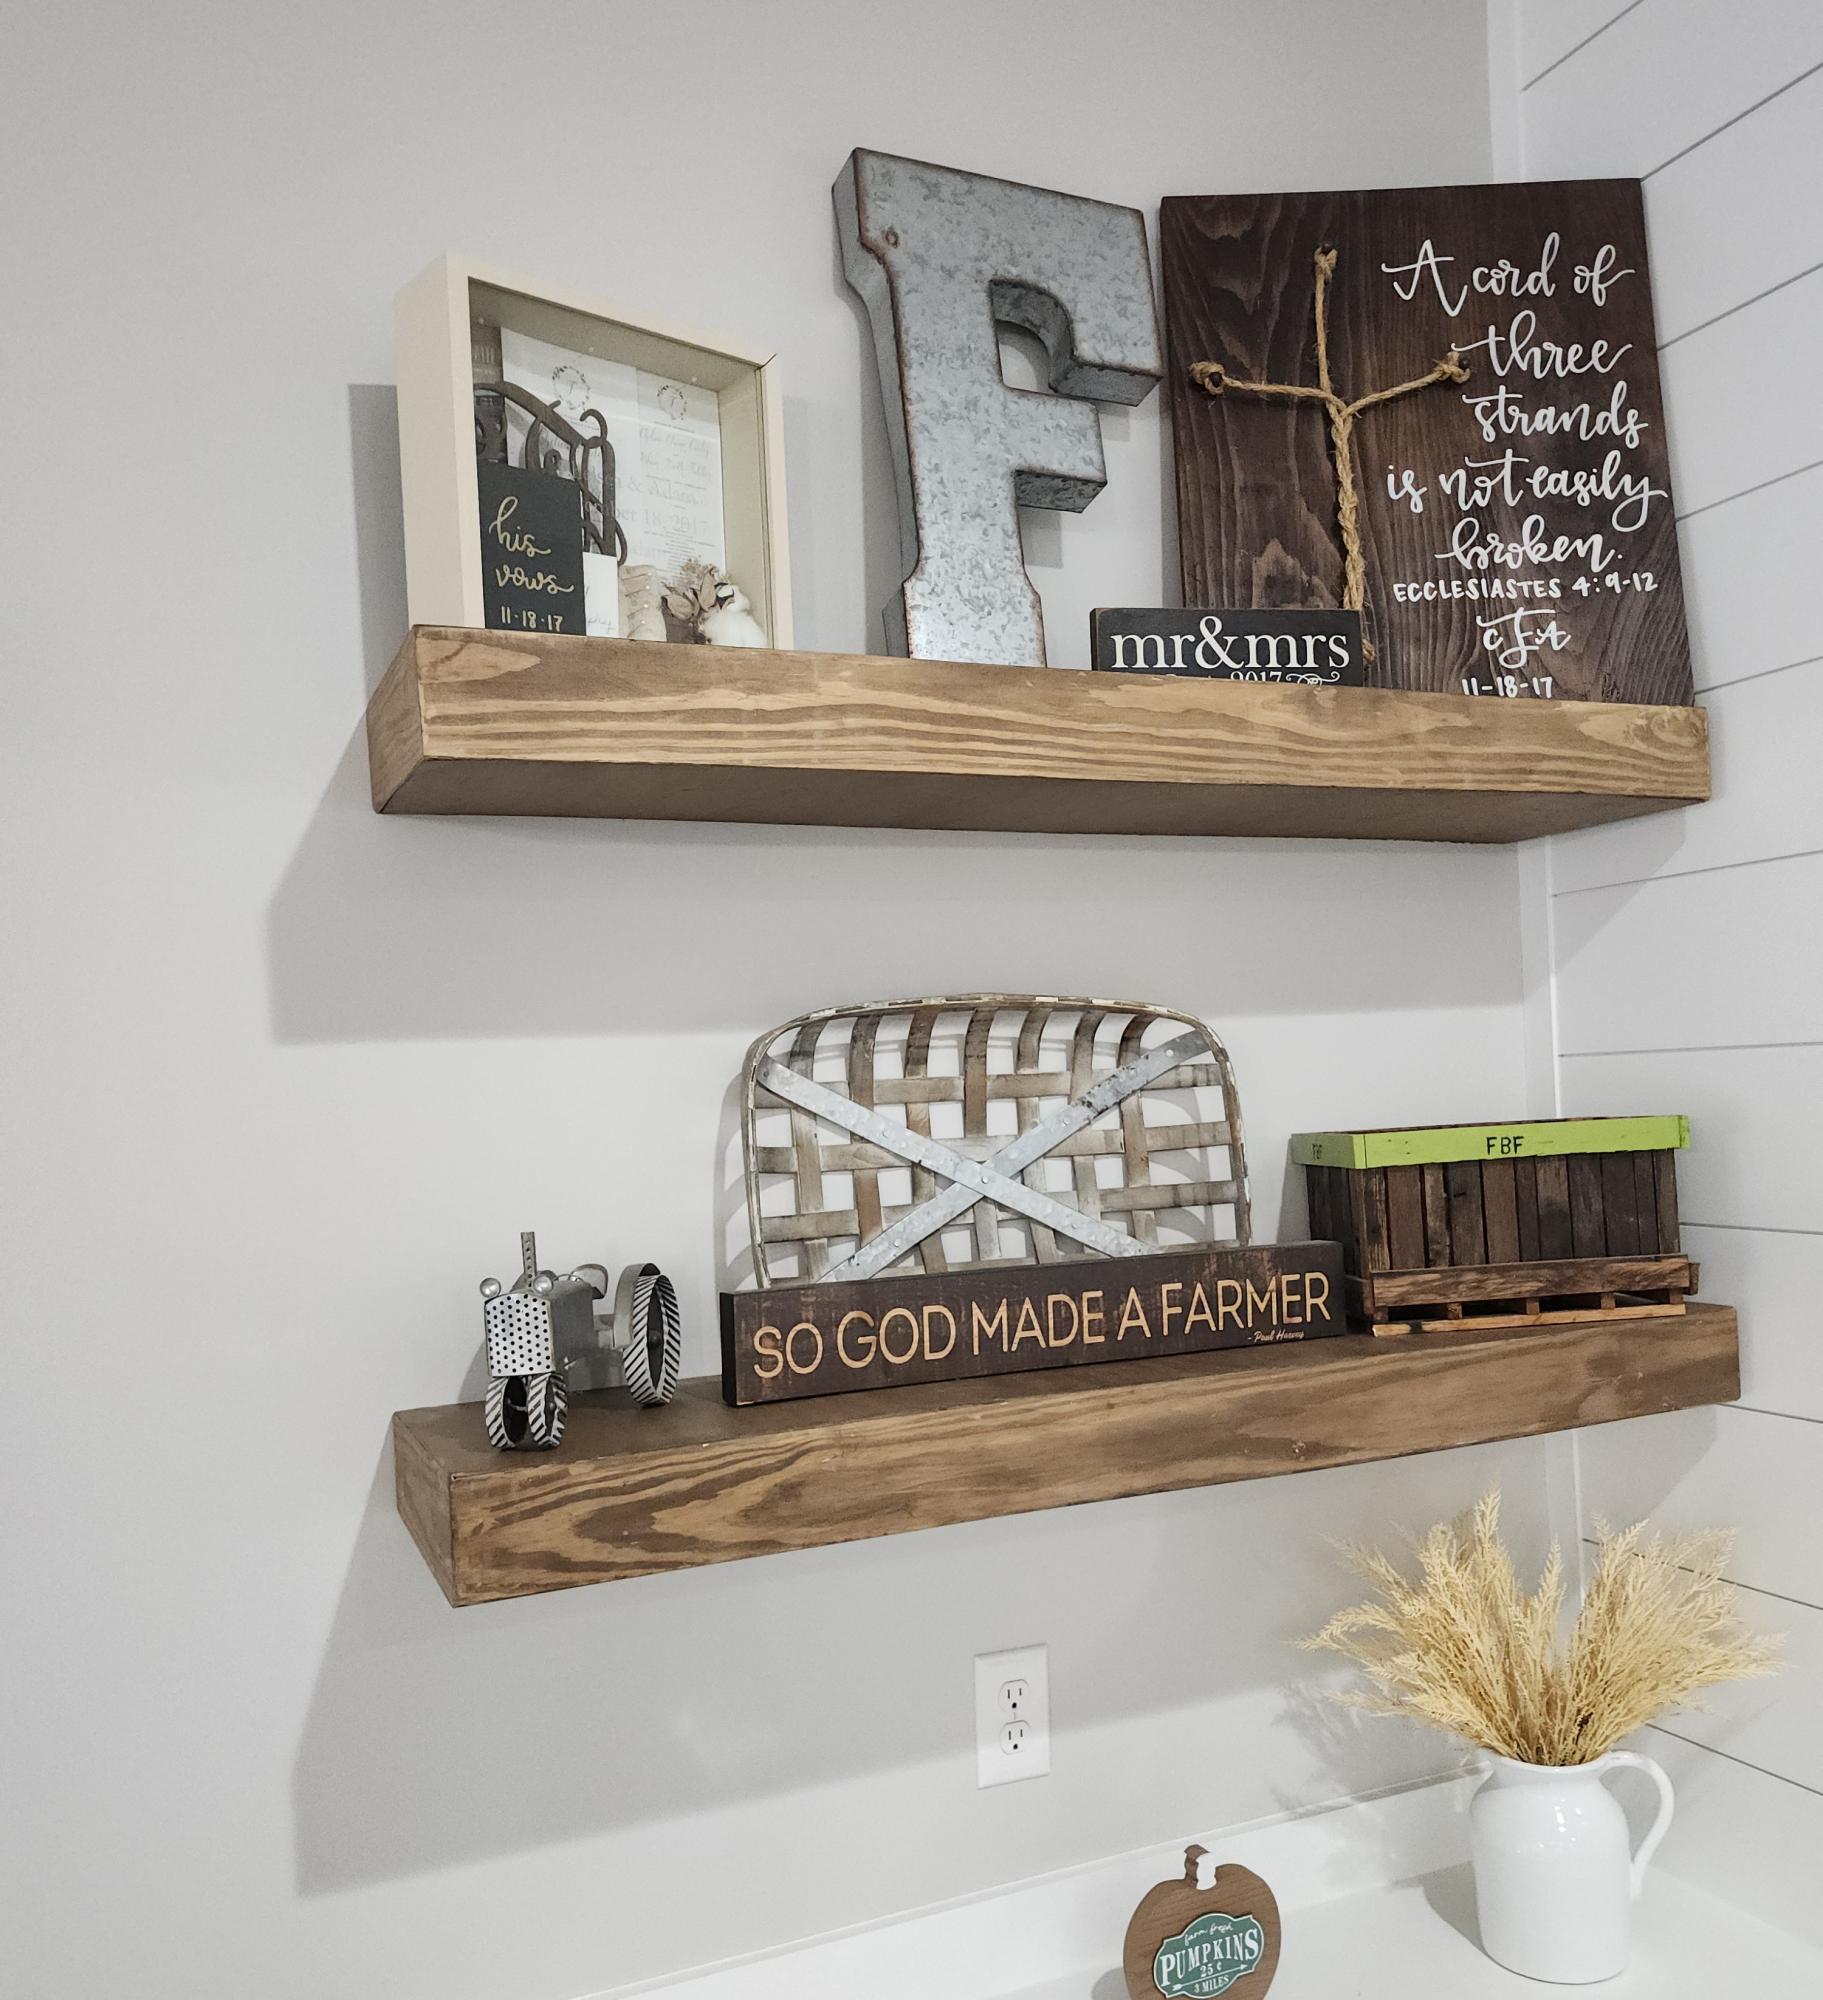
Floating shelves, used the plans Ana had with a few adjustments. - Sheila
Built from Plan(s)
Floating shelves, used the plans Ana had with a few adjustments. - Sheila
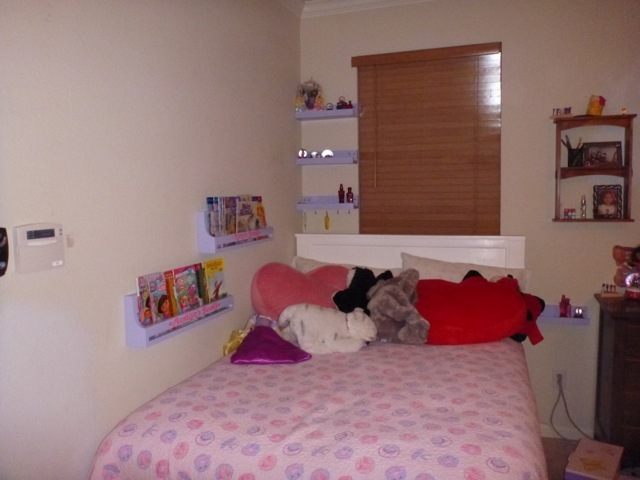
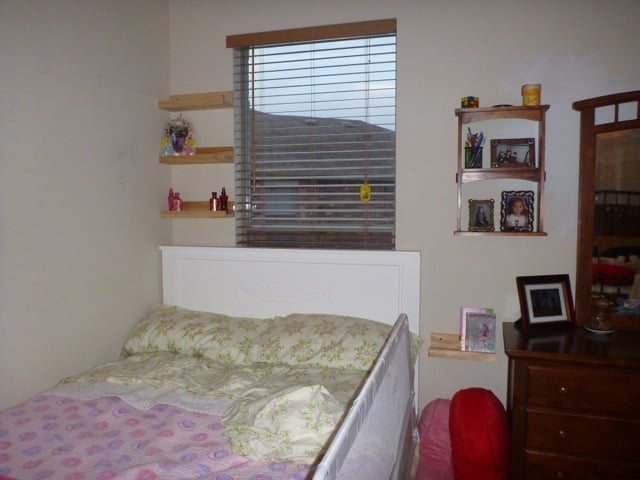
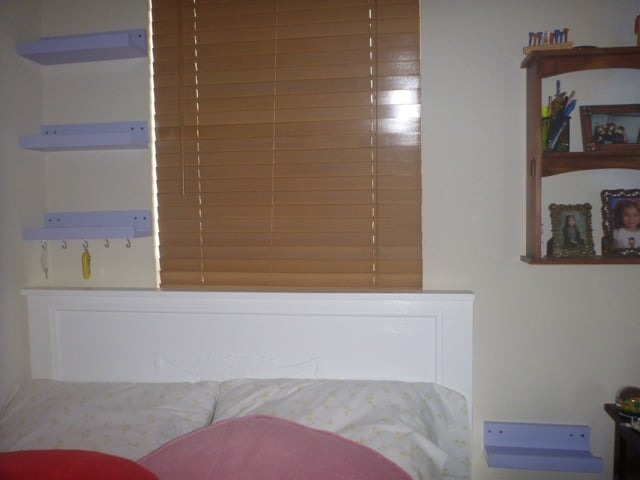
Here are a few of the ten dollar ledges we added around the girls bed. We had no room for tables so we thought we would give this a try. It's working beautifully. We hung the ledges in studs and they are standing up to constant use perfectly. The girls have space for their most cherished nik naks and a drink in case they wake thirsty in the night. We couldn't be more pleased. Now I'm seeing the possibility for ledges in every room.

Thu, 03/22/2012 - 00:34
nice post,thanks for sharing! BTW,check out my new android 4.0 tablet newfreeshipping.
Mon, 04/23/2012 - 22:14
It is nice that you posted something like this [url=http://www.pandawill.com/twilight-turtle-night-star-constellation-p3557… ] Twilight Turtle [/url] and I am quite lucky to read it. Thanks for posting this!
Mon, 10/22/2012 - 03:56
I like all your post. I will keep visiting this blog very often.
Tue, 06/26/2012 - 20:01
Your knowledge of this subject comes through clearly in this article. I love to read this kind of articles, I hope you will update it. Thank you for sharing it with me.
http://www.sbwire.com/press-releases/how-to-get-your-ex-back/magic-of-m…
Thu, 04/19/2012 - 19:01
If converting existing floor space into a half-bathroom, such a renovation can cost as little as a few thousand dollars, making the addition of a powder room one of the few home improvement projects where the value added to the home exceeds the cost of the renovation.water damage Pearland tx
Fri, 04/20/2012 - 02:14
You can also use vinegar to remove heat stains on stainless steel cutlery and pans, or remove streaks and heat stains by rubbing with club soda or olive oil.Basement water Atlanta GA
Sat, 04/21/2012 - 00:28
Before you go to use it...if it's been sitting for awhile...give it a good shake. As you can see in this picture...it does tend to separate a bit. But after a quick shake it's good to go. To use: spray on stains as you normally would. I usually let mine "soak in" for a few minutes at least. Then launder as usual.water damage Temecula CA
Mon, 04/23/2012 - 22:11
It is nice that you posted something like this [url=http://www.pandawill.com/mini-led-lcd-projection-clock-digital-keyring-…] Projection clock [/url] and I am quite lucky to read it. Thanks for posting this!
Fri, 04/27/2012 - 10:11
I have no experience to build a site like you said on this page. I need to learn to create a site and develop it, perhaps using new versions of Drupal could improve and make my blog more often visited by Internet users.water damage restoration Raleigh Durham NC
Fri, 04/27/2012 - 10:13
It is very fascinating, You’re a very professional blogger. I’ve joined your feed and look ahead to in search of more of your excellent post.water damage restoration Raleigh Durham NC
Fri, 05/11/2012 - 07:40
This blog is really very interesting and easy to understand the information provided in it. It is very nice to view this blog and it's nice to see the best information cited here.Water damage Lafayette LA
Fri, 05/18/2012 - 19:54
I used to be more than happy to seek out this internet-site.I wanted to thanks in your time for this glorious read!! I positively enjoying each little bit of it and I have you bookmarked to check out new stuff you weblog post. Water Damage Anaheim CA
Fri, 06/01/2012 - 04:59
Quite insightful submit. Never believed that it was this simple after all. I had spent a very good deal of my time looking for someone to explain this subject clearly and you're the only one that ever did that. Kudos to you! Keep it up. Water extraction Lakeline OH
Sun, 06/17/2012 - 20:37
I'm so excited that I have found this your post because I have been searching for some information about it almost three hours. You helped me a lot indeed and reading this your article I have found many new and useful information about this subject. Paint Contractor Glendale AZ
Mon, 06/25/2012 - 03:45
Your knowledge of this subject comes through clearly in this article. I love to read this kind of articles, I hope you will update it. Thank you for sharing it with me.
http://www.hcgrevival.com/
Wed, 06/27/2012 - 04:10
Sometimes it is so hard to find good and useful posts out there when doing research. Now I will send it to my colleagues as well. Thank you for being one of them.
http://www.reklama-internete.com/
Fri, 06/29/2012 - 01:15
Thanks for this exciting post. It is well written and has some great content. Do you have any others that I can go to about this subject?
http://www.californiahealthinsurancenow.com/Kaiser_Permanente.html
Tue, 07/03/2012 - 05:21
This information very useful! I've been looking for books of this nature for a way too long. I'm just glad that I found yours. Looking forward for your next post. water damage restoration Raleigh Durham NC
Tue, 07/10/2012 - 15:35
This is great stuff. Very handy these ledges are. lets see how many more can be added.
Nice, Thanks
Mon, 07/16/2012 - 22:55
The program is designed under the same model as new homes built for Habitat families where the veteran will repay the zero interest loan necessary for these repairs, which is then deposited into a revolving fund to assist additional families in need of decent housing. Mold Inspection Covington LA
Thu, 07/19/2012 - 04:32
I hope people listen, too, but I'll be surprised if they do. In all the years I've been in the business, we're still fighting the same battle we were when I first started - most folks want the lowest ... Water Damage Restoration Colorado Springs CO
Wed, 08/01/2012 - 22:13
If you're involved in a head-on crash, the windshield must stay in place to keep you inside the car and to keep flying debris out. If the windshield flies out, so too may you or your kids. Improperly installed windshields can easily be dislodged during a crash. Architectural Engineer NYC
Thu, 08/02/2012 - 03:41
This blog is really amazing due to its unique and outstanding post.
Fri, 08/17/2012 - 06:48
You have to put efforts in home maintenance to make sure everything is in right condition. If any part of your house needs repairing then have it repaired immediately. If you neglect the problem for too long then it might become even more complicated. Masonry contractor West Hartford CT
Mon, 09/03/2012 - 02:11
The girls have space for their most cherished nik naks and a drink in case they wake thirsty in the night. We couldn't be more pleased. Now I'm seeing the possibility for ledges in every room. http://www.genericviagratab.com/
Sat, 09/29/2012 - 09:29
I am very enjoyed for this site. Its year informative topic. It help me very much to solve Some Problems. Its so fantastic and Opportunity are working style so speedy.
Outdoor Lighting Batavia IL
Tue, 11/20/2012 - 00:17
This is represented partly in the significantly higher frequency and register neutrality of connectives such as tak or totiž when compared with the English so and therefore but primarily by the nature of the mental spaces set up by the Czech lexemes. water damage Anaheim CA
Fri, 11/30/2012 - 03:19
The contemporary strategy is often focused on the development of specific skills and abilities. As a result, it fails to provide with the broader education and, instead of the formation harmonious, balanced personalities, it breeds specialists trained to work in a specific field. This is a good example like the ones http://bestsamplepapers.com does. People prefer more broad basis.
Thu, 02/07/2013 - 02:08
Pretty good post...
I just stumbled upon your website and wanted to say that I have really enjoyed reading your blog posts. Any way I'll be subscribing to your feed and I hope you post again soon.
Thu, 02/14/2013 - 23:45
A lot of interesting things found on your blogs, like the topic! The author thanks and success in the blog. http://bbrencontresexe.com
Fri, 04/12/2013 - 05:55
As a Newbie, I am permanently exploring online for articles that can be of assistance to me. Thank you
http://healthpharma.blogsome.com/

I modified this plan so I could have 4 total work areas. Total Size: 48" x 96"

Tue, 09/08/2020 - 19:42
Is there anyway you can share these plans with me!? I drew out some plans for an identical table but I think my cuts may be off! It would be so helpful.
Fri, 11/06/2020 - 12:47
Is there a full update post with instructions for the table shown?
Tue, 12/20/2022 - 22:03
LOVE this! Just what I'm looking for! Can you tell me what you used for the top?

Used part of the Ultimate Roll Away Workbench with Miter Saw Stand to just build one of the roll-away workbenches to work with my miter saw and table saw. I'm very happy with how it turned out.


Sun, 04/28/2024 - 12:57
Hi, I am planning on getingt a dewalt 10 inch table saw as well. I am wondering what you did to adapt it for extending the rails with the fence? Curious if there were more photos. I would very much like to adapt my station to be similar to yours. Thanks. .
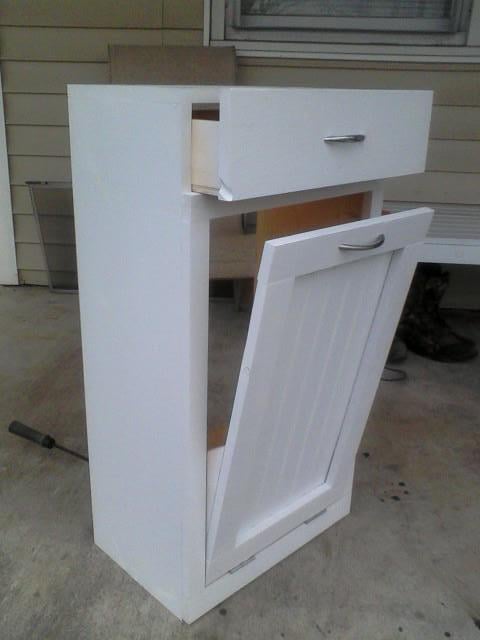
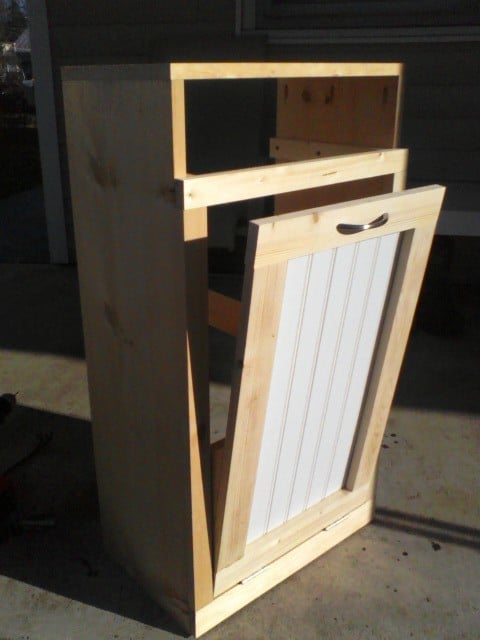
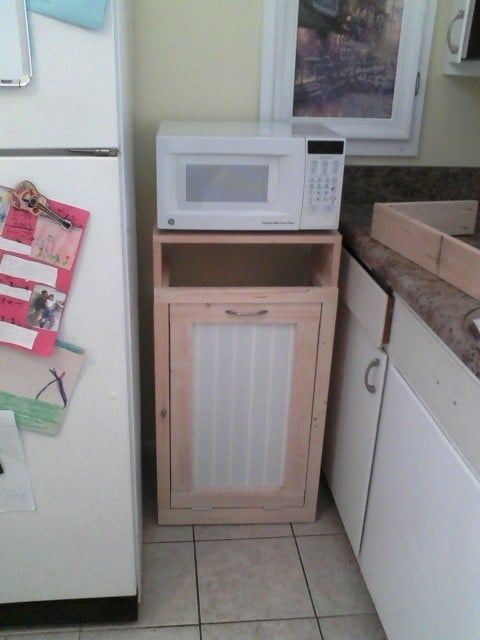
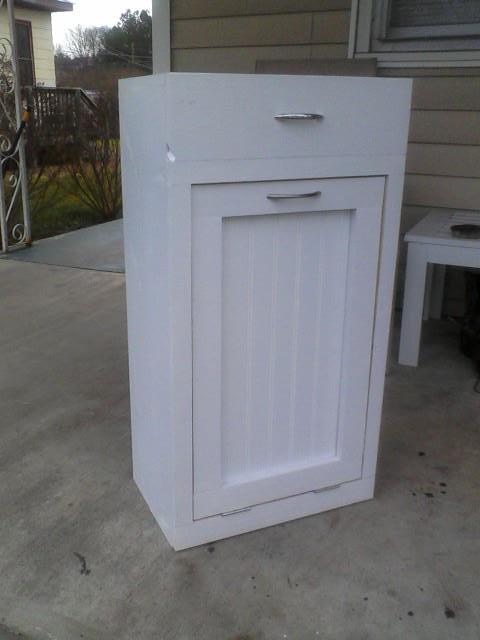
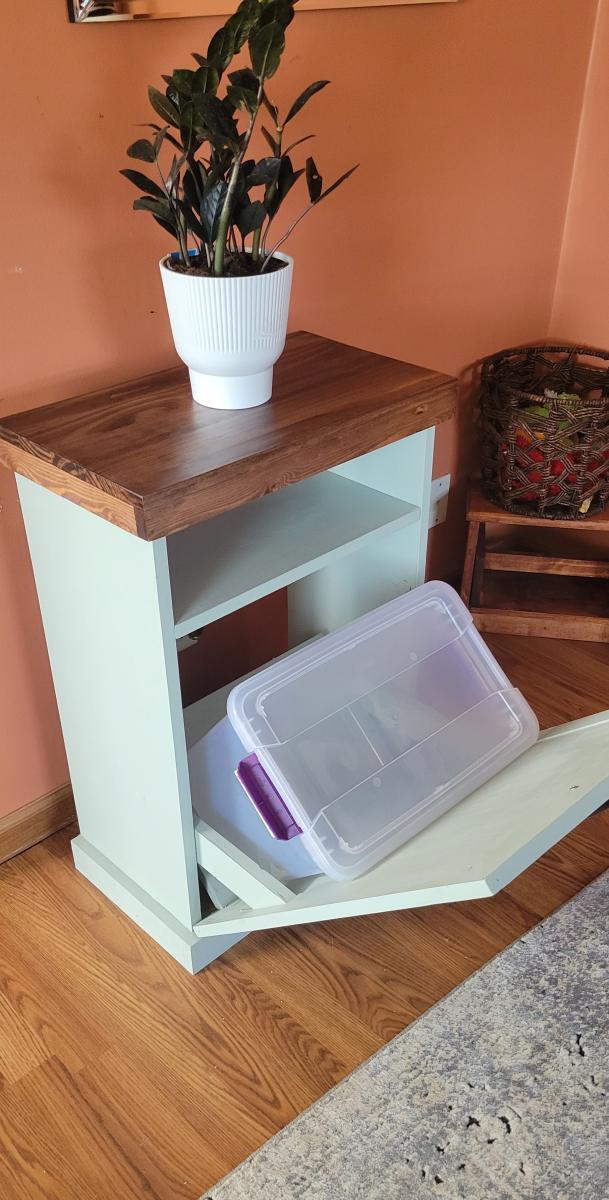
Our large lap dog finally discovered he could easily get whatever he wanted out of the trash, so I built the tilt out bin to help keep him out of trouble. lol. I made it cabinet height so we could move the microwave off the counter, and added a drawer to the extra space to keep garbage bags and such in.
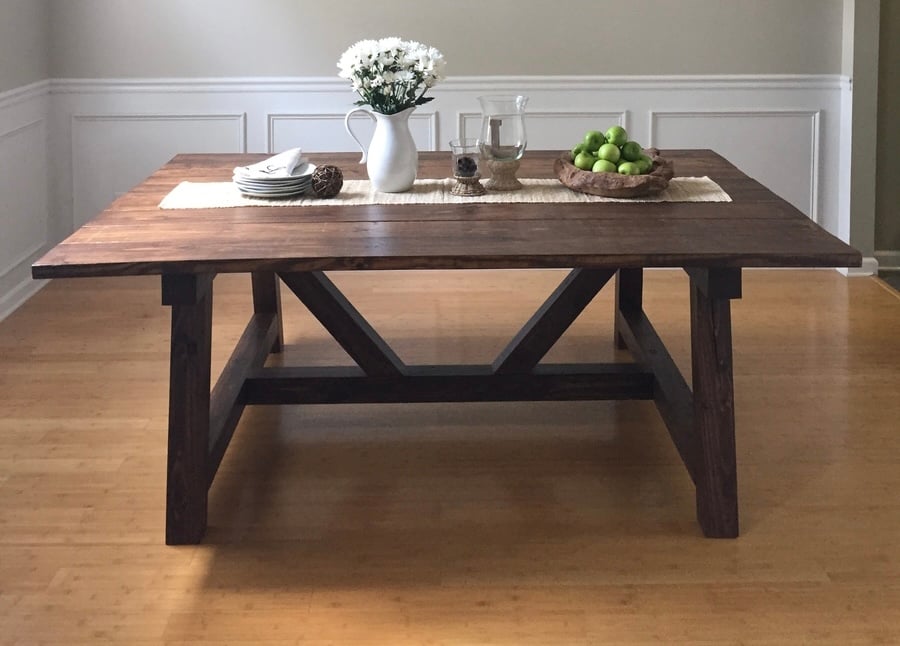
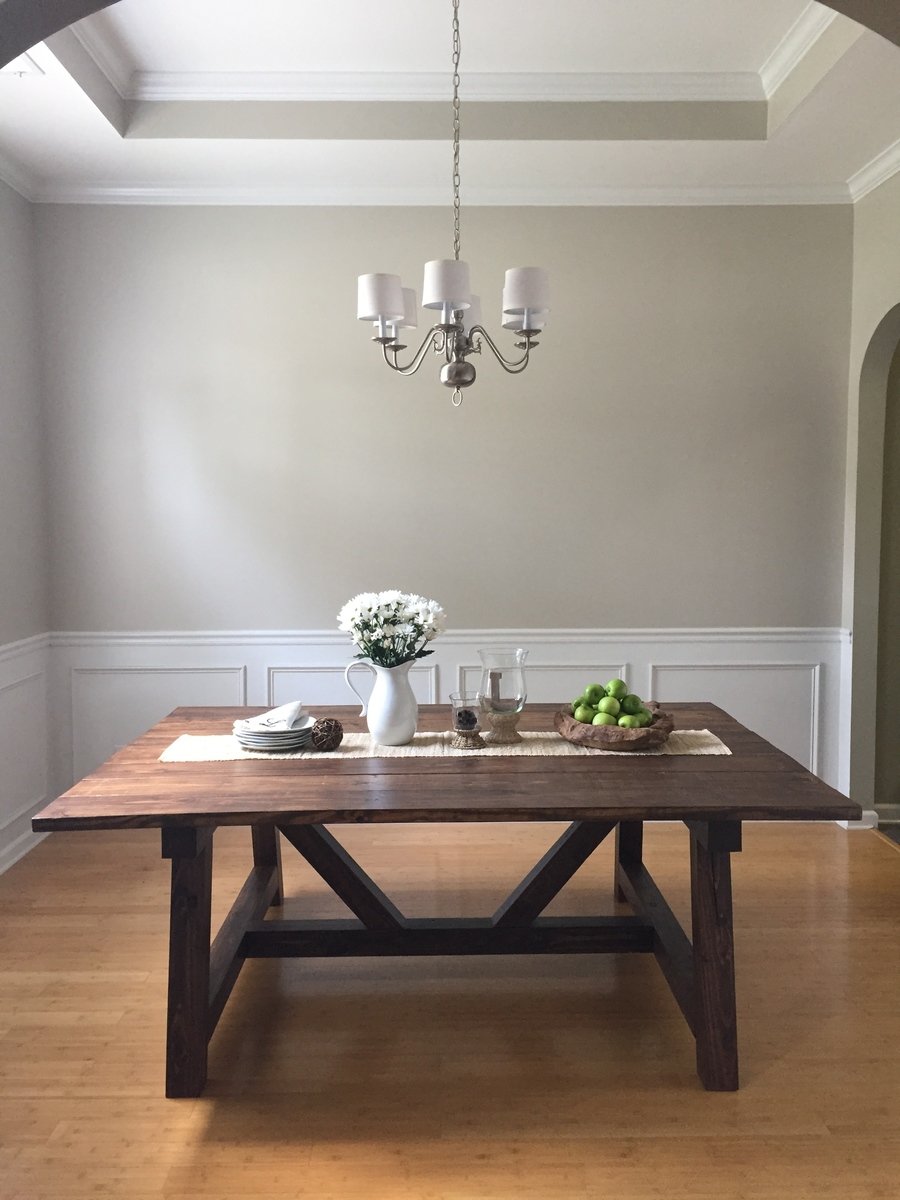
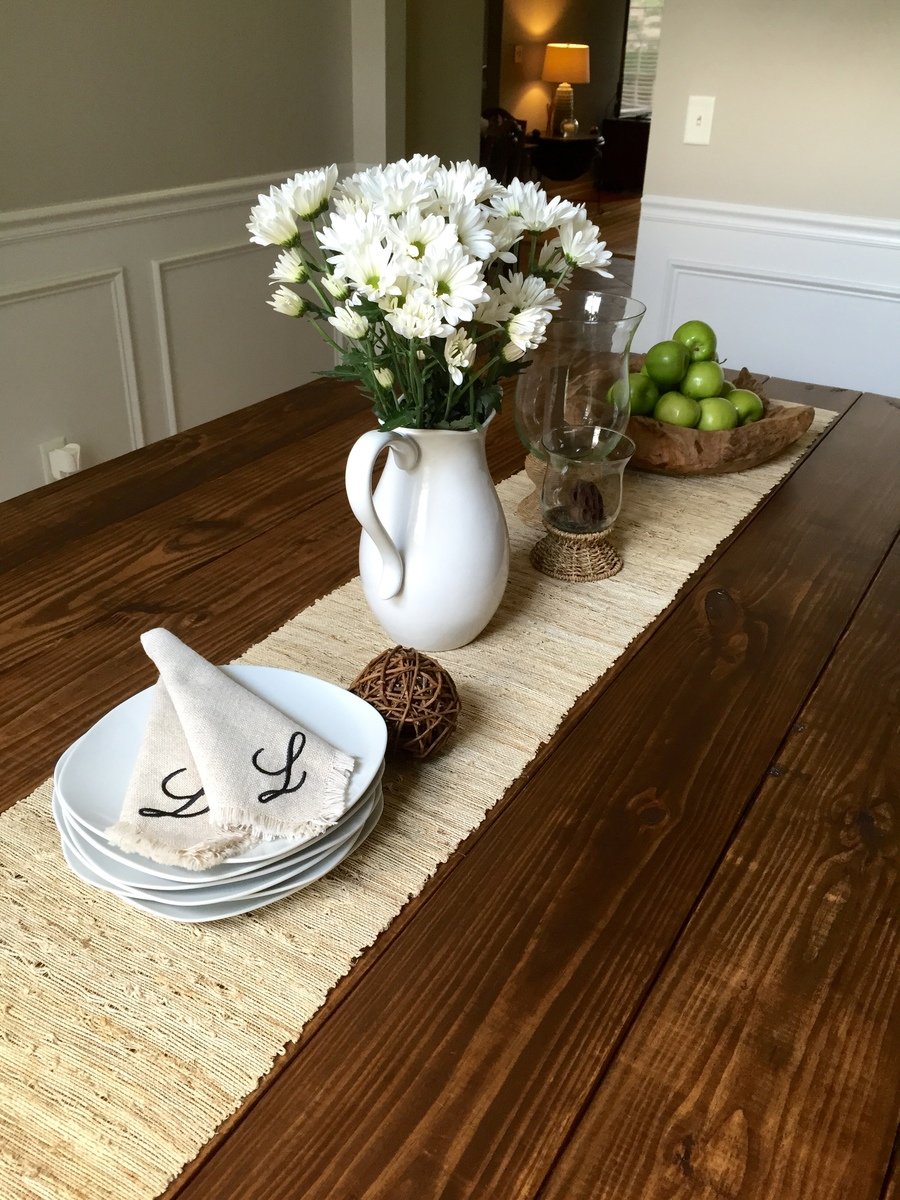
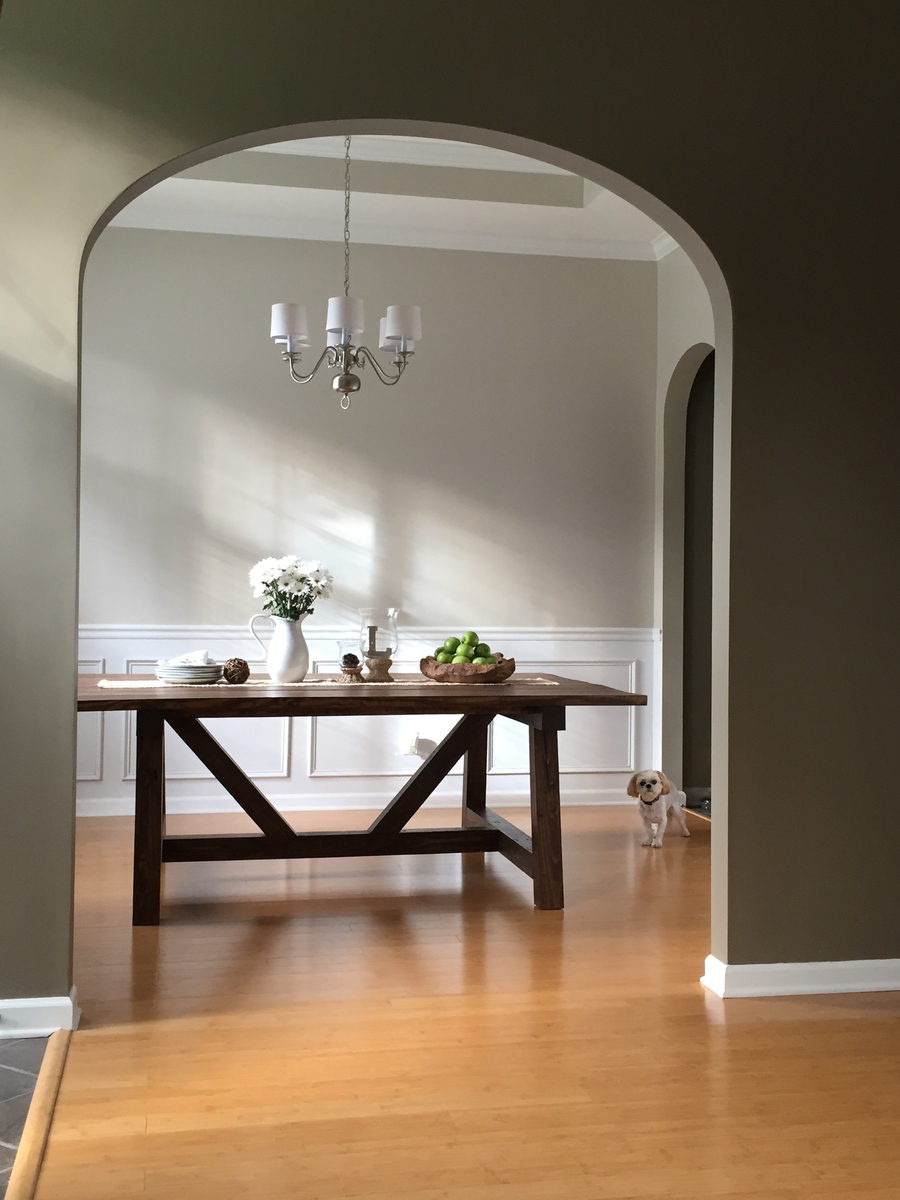
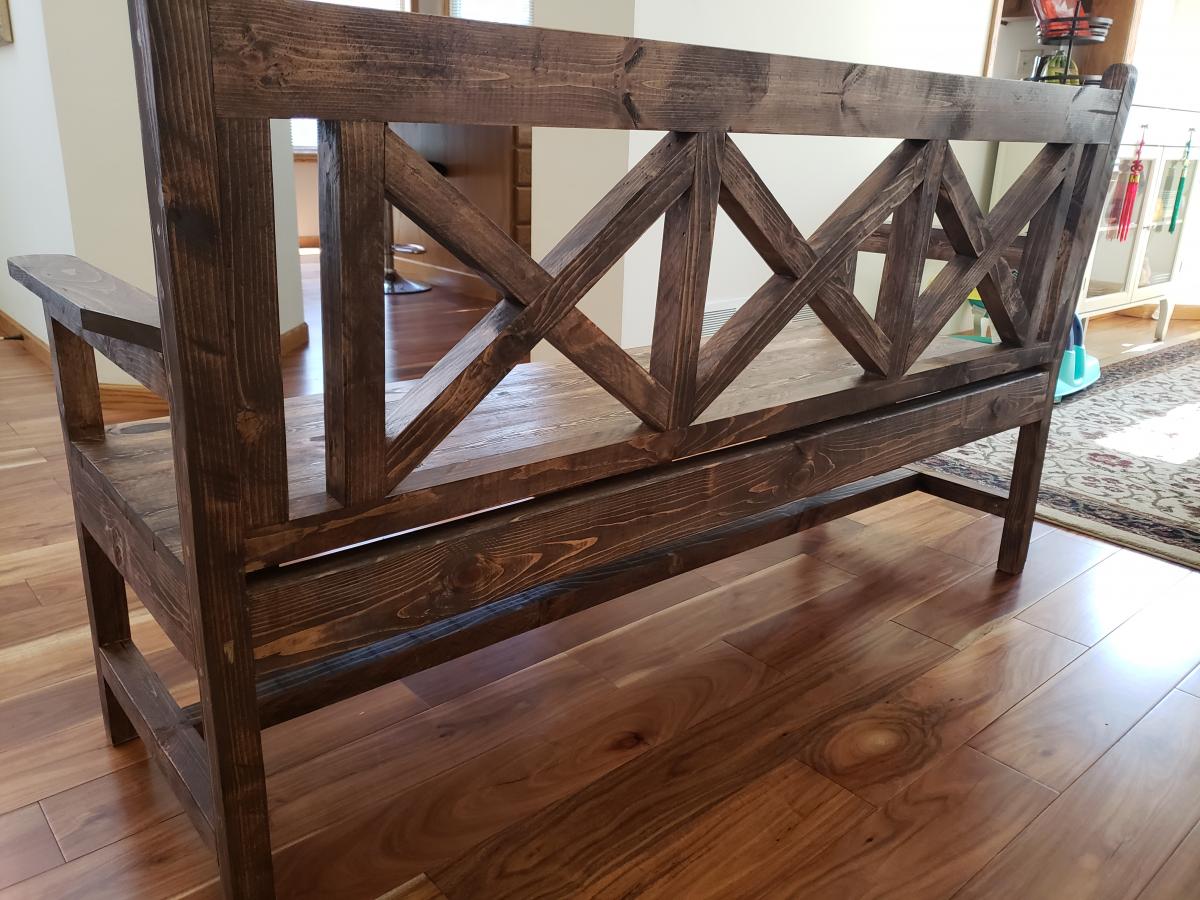
My husband and I moved in to our new house last fall and we needed a dining table that would seat at least 8. We picked this plan from Ana's site because I love the look of the 4x4 beams. I used Adobe Illustrator and my math skills to modify the size and scale to fit our dining room with exact spacing all the way around. We had difficulty finding untreated 4x4 beams but were able to special order some for a reasonable price from a local lumber company. It is more expensive than combing 2x4s but I did not like the pieced together look of the 2x4s. We stained with Rustoleum Dark Walnut and Matte Poly just like the blog post from Ana's site. We also used the Kreg Jig HD which is SO AWESOME! We love the table. Now we just need to decide: chairs vs. benches. I hate to block the beautiful truss design of the base. Its so gorgeous!
Mon, 08/31/2015 - 14:18
I love this table. The finish came out great by the looks. My wife and I are moving into a house soon and I think this is going to be the design for our table as well.
Mon, 09/07/2015 - 06:21
What a beautiful table! Is this table square? We are also looking to build a table to sit 8 and love the look of yours. Could you share your cut list or dimensions?
Mon, 08/29/2016 - 06:08
Thank you for all the kind comments! I did not know that I had gotten any and had not checked back over the past year. The jump drive with my dimensions on it got damaged last year shortly after the build and I lost all of my home decor files including the AI with my cut list and dimensions. I know it had been a while since several of your comments but I will see if my husband can help me measure the table and figure out what the dimensions are and post them on here for you. Happy Woodworking!
Tue, 11/15/2016 - 18:01
This table really looks great! I'm about to start making one and would love to know the dimensions you used. I also noticed that you didnt use the bread boards on either end. How many people does this table fit?
Thanks!
Mon, 02/27/2017 - 08:51
No, we did not use bread boards. It seats 8 with plenty of room.
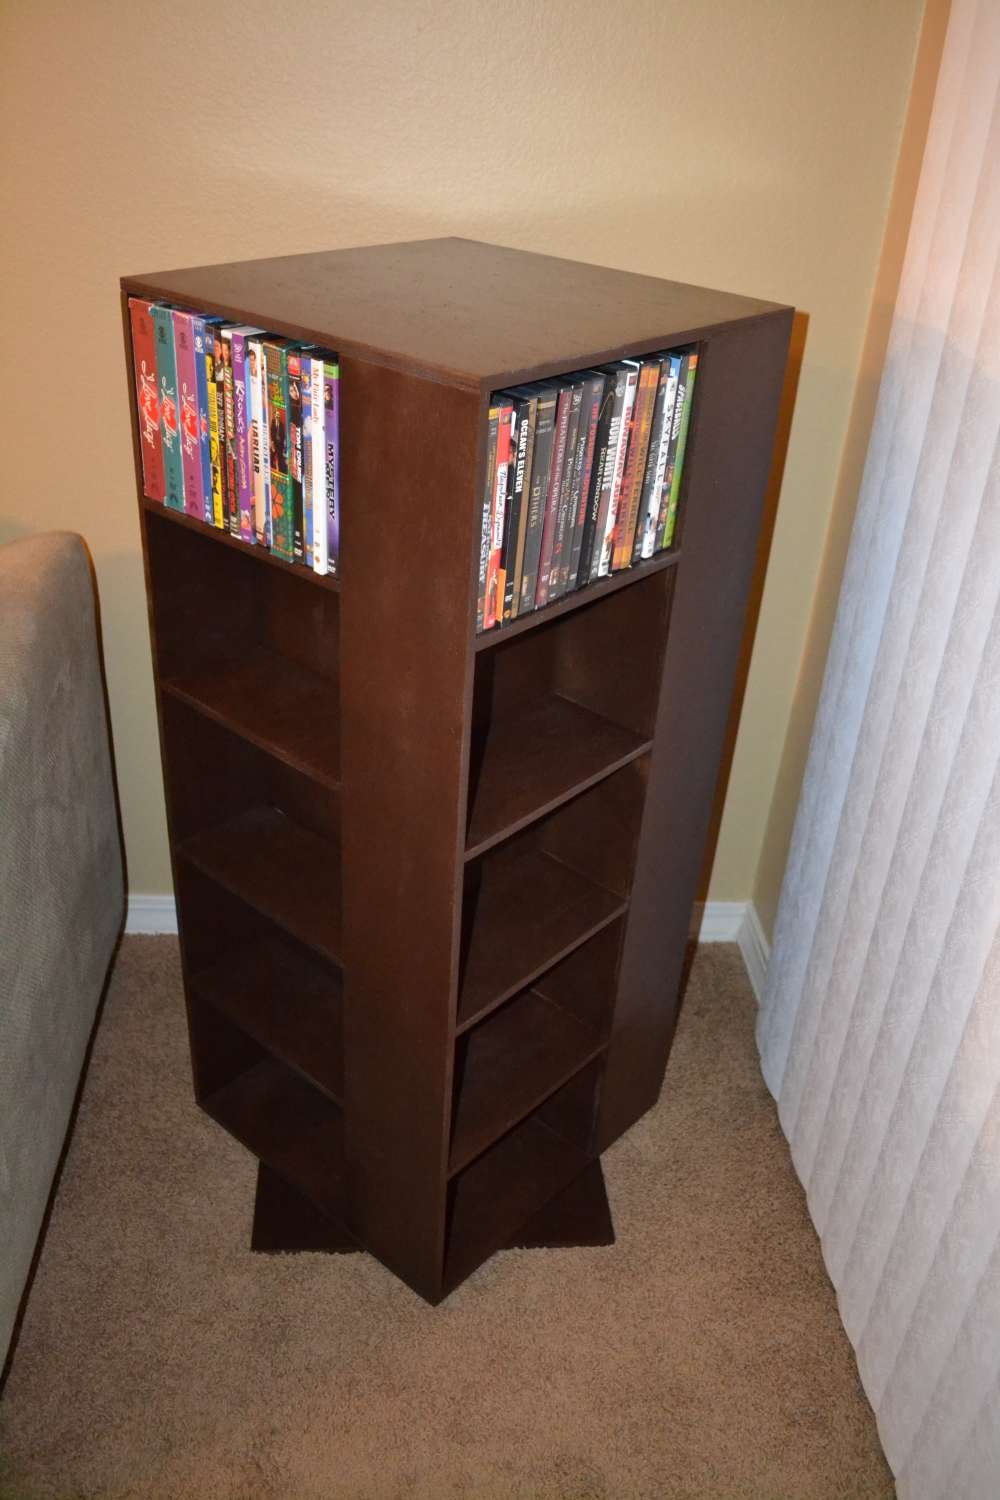
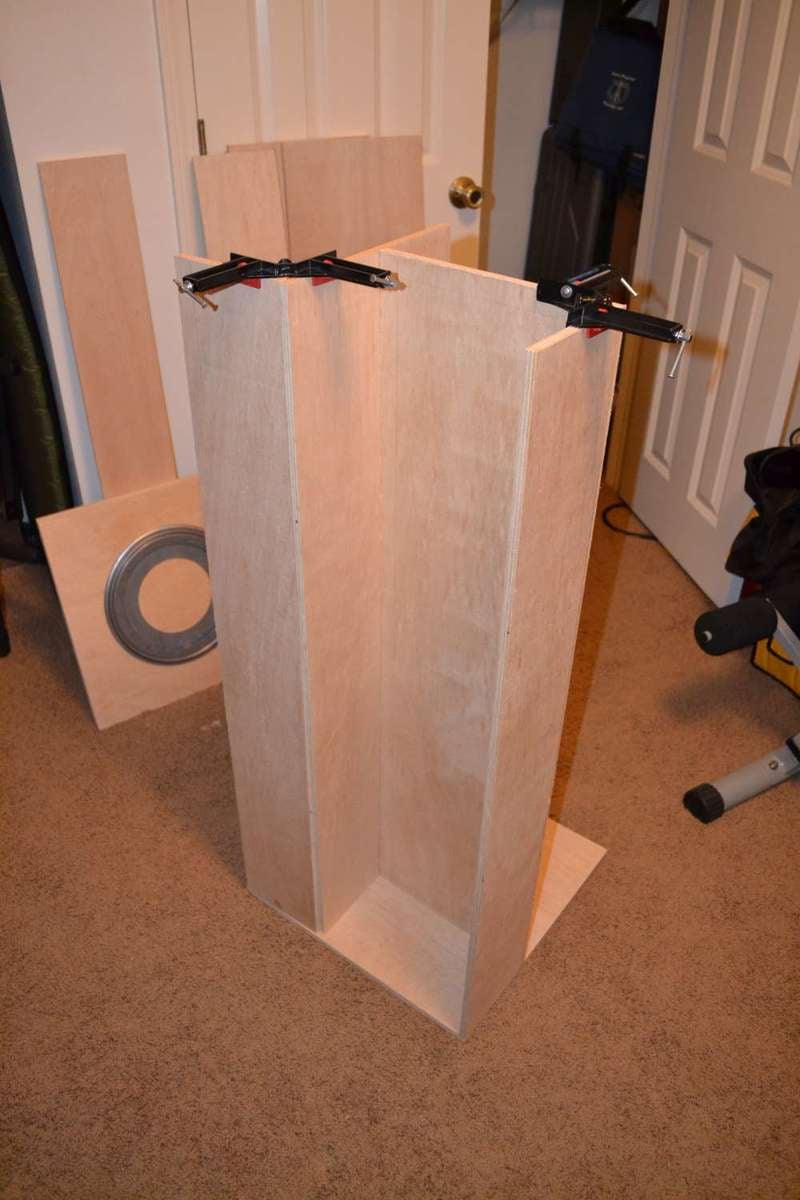
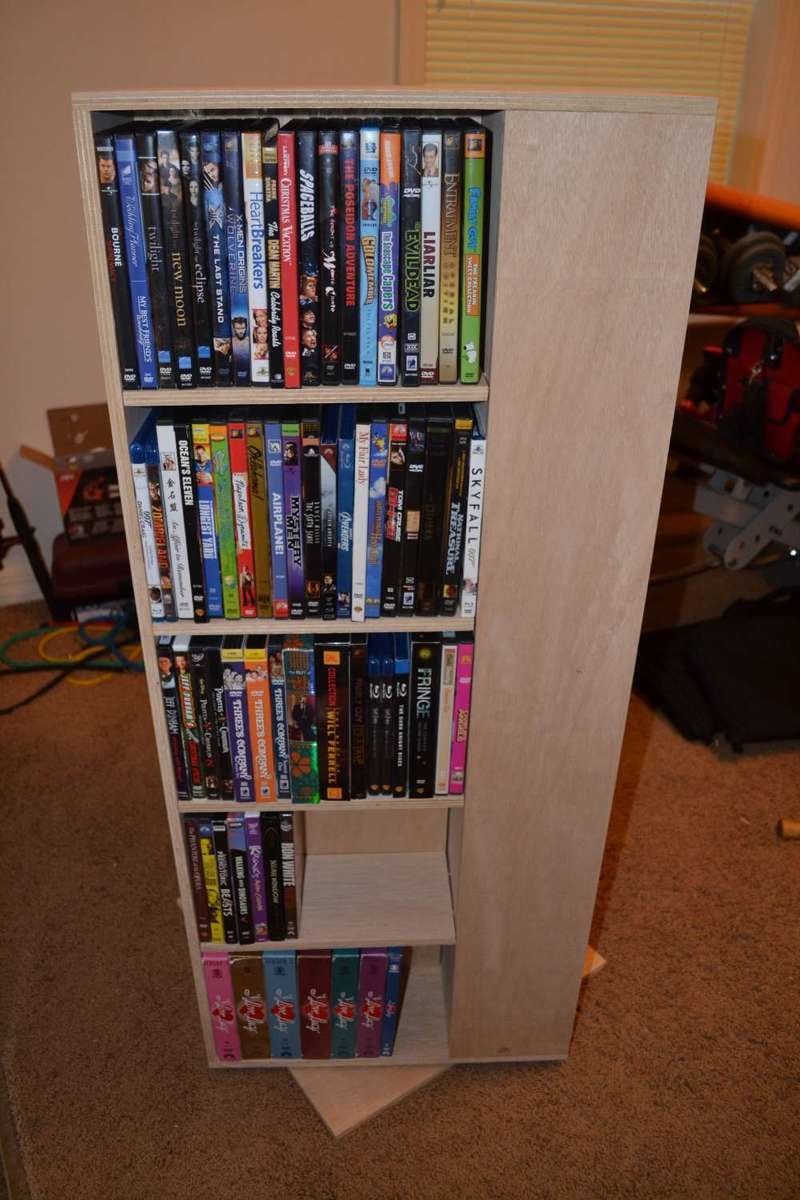
I was looking online for a spinning DVD rack to buy when I stumbled across a picture of a custom built rack. I decided to give it a try and this is the result. This is the first project I've done outside of basic shelves and it was a great learning experience. The overall fit and finish isn't quite where I'd like it to be but overall I think it turned out pretty well. I was able to find a 12" lazy Susan at a hardware store that supports over 300lbs and worked perfectly for this project.
I used pocket holes for the shelves, finishing nails for the top and screws for the bottom and lazy Susan. I also used pocket holes to attach the shelf backs and hid them behind the shelves. One thing I definitely won't use next time is spray paint/enamel. The finish isn't nearly as nice as I wanted and it cost far more than I was expecting.
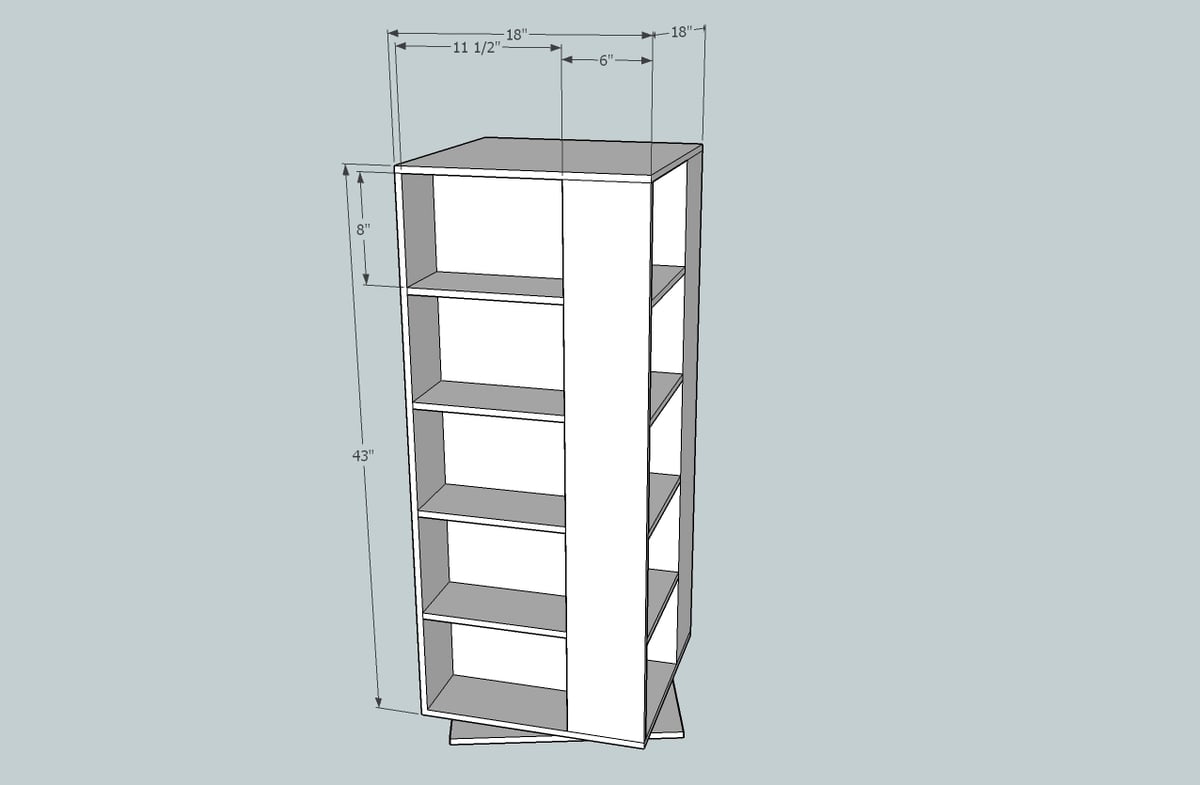
This is also my first time using SketchUp and I'm really impressed with it. I've uploaded a copy of the plans.
Criticism and suggestions are appreciated.
-Dan

Sun, 07/14/2013 - 11:35
I like this spinning DVD unit! Coincidentally, I just finished using spray enamel to redo some cupboard door handles. It's horrible stuff! I ended up sanding it off, and doing it over in flat black. I roughed up the edges with 180 grit to antique them a bit. Looks much better!
Sun, 02/12/2023 - 01:19
Can I get a design drawing for this piece?
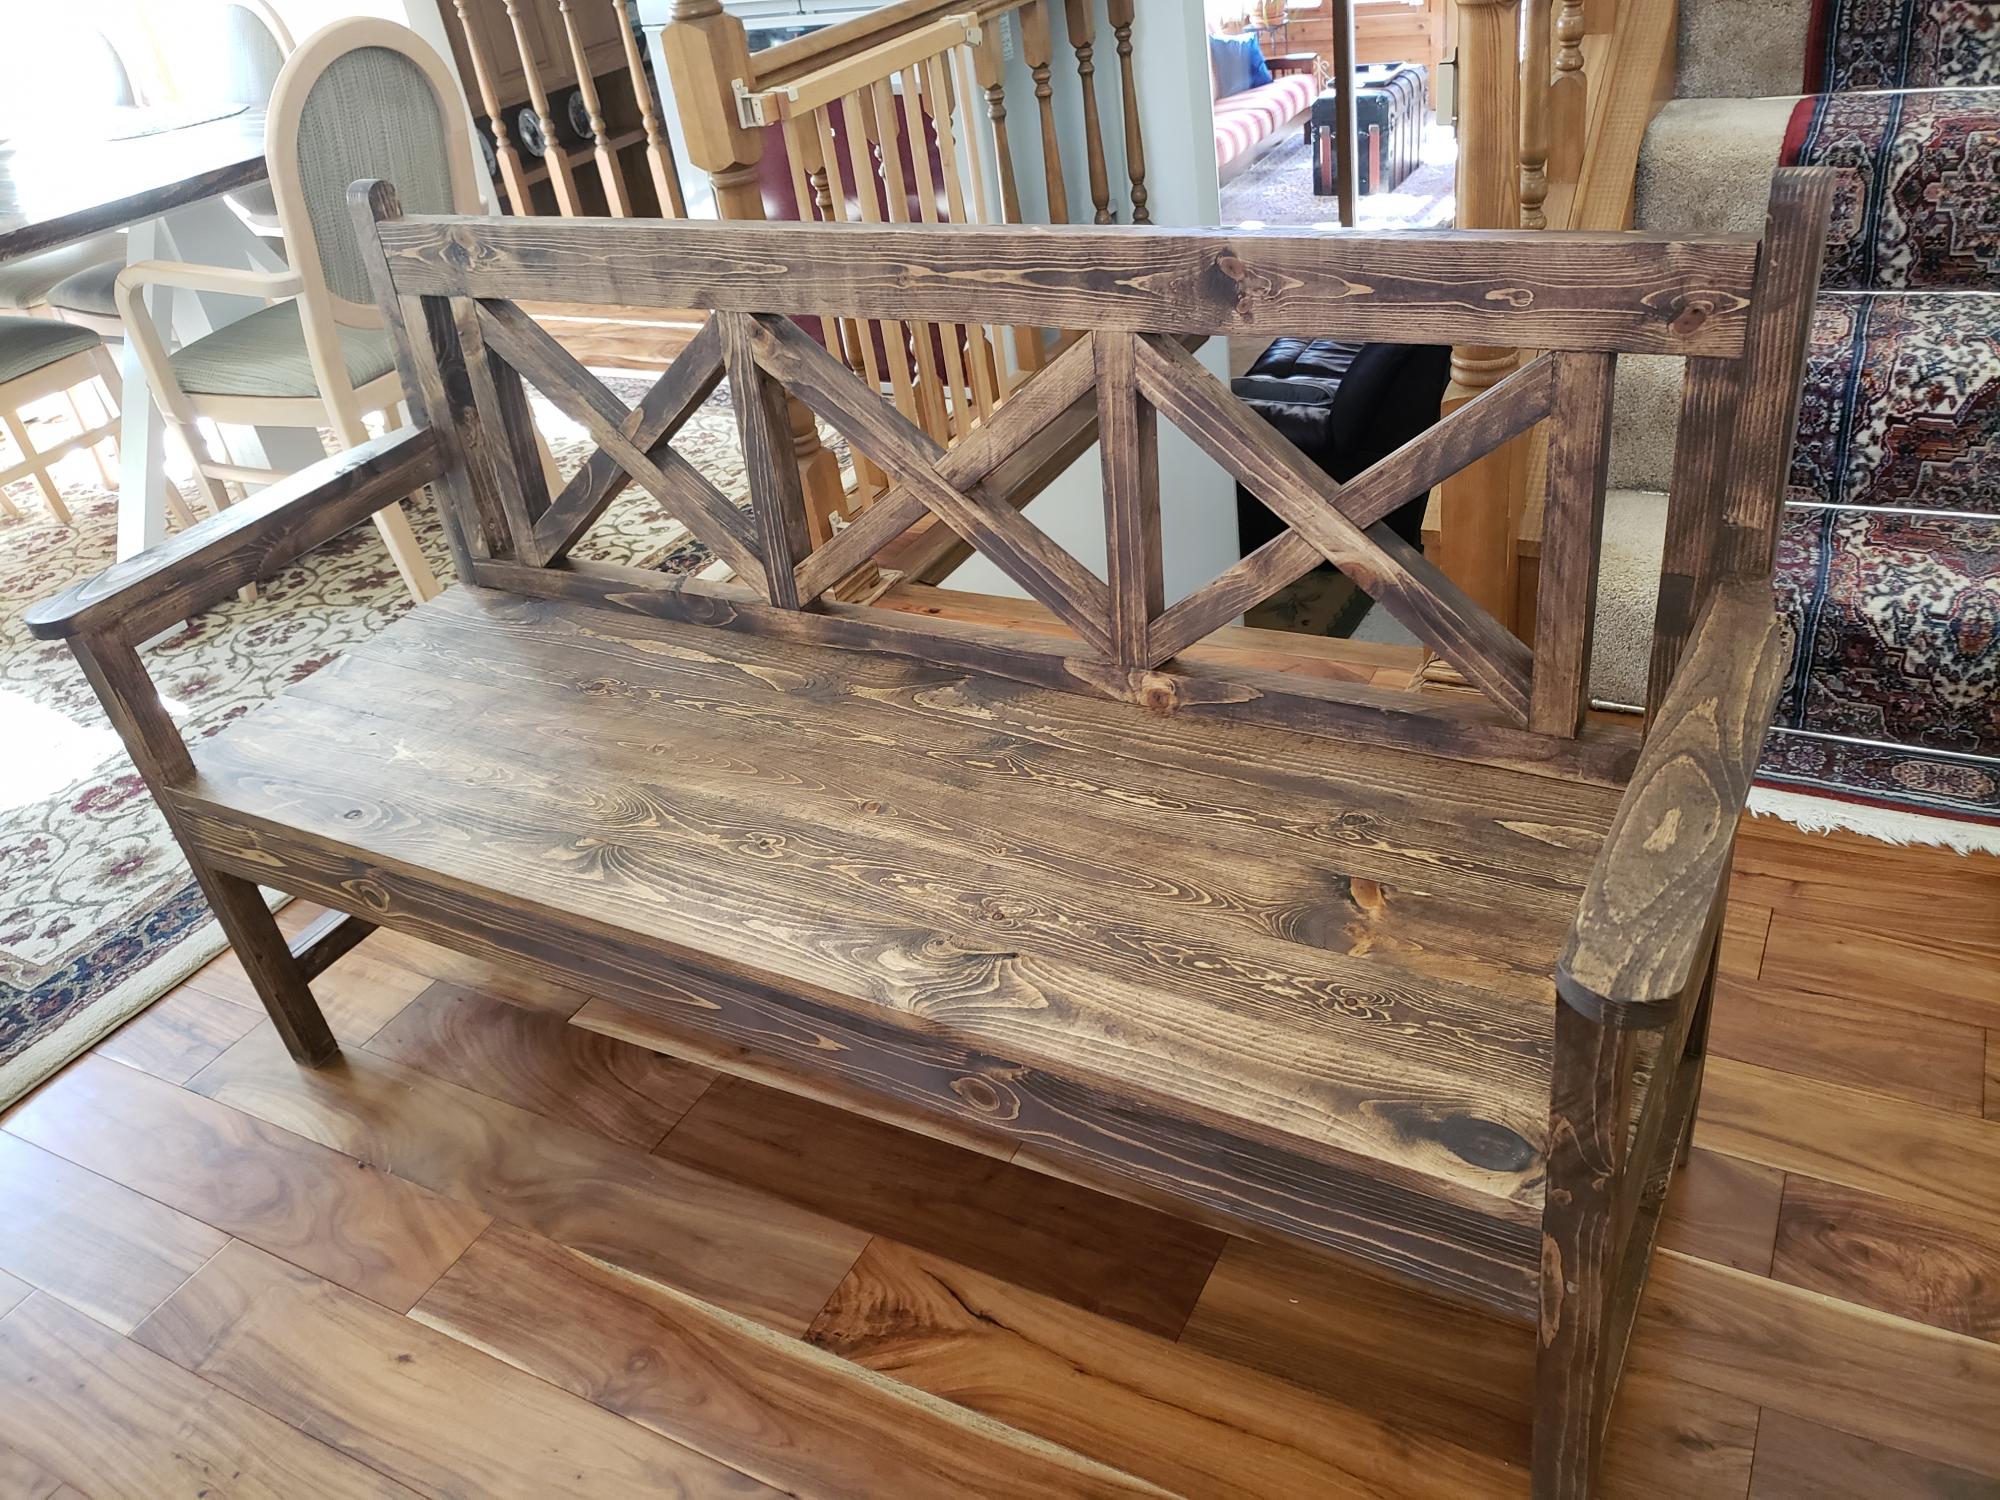
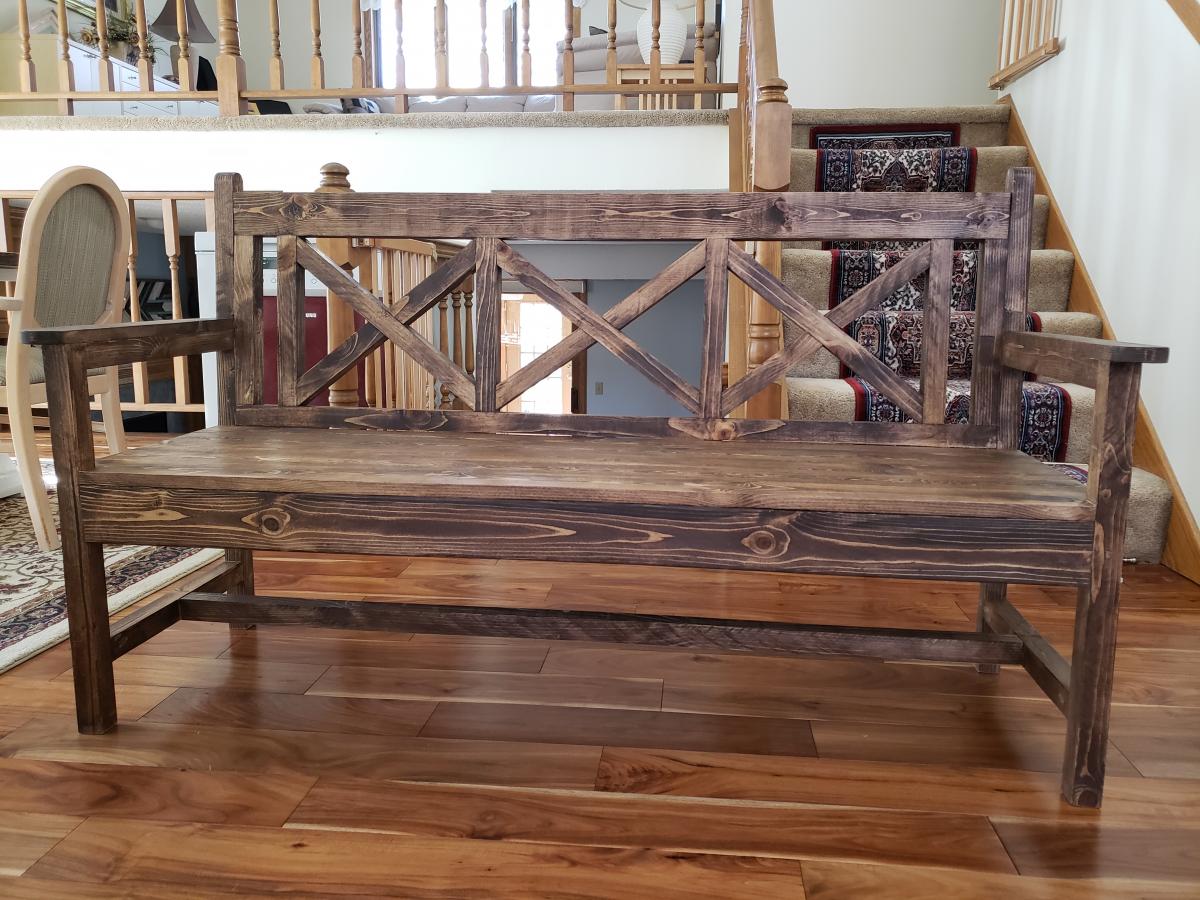
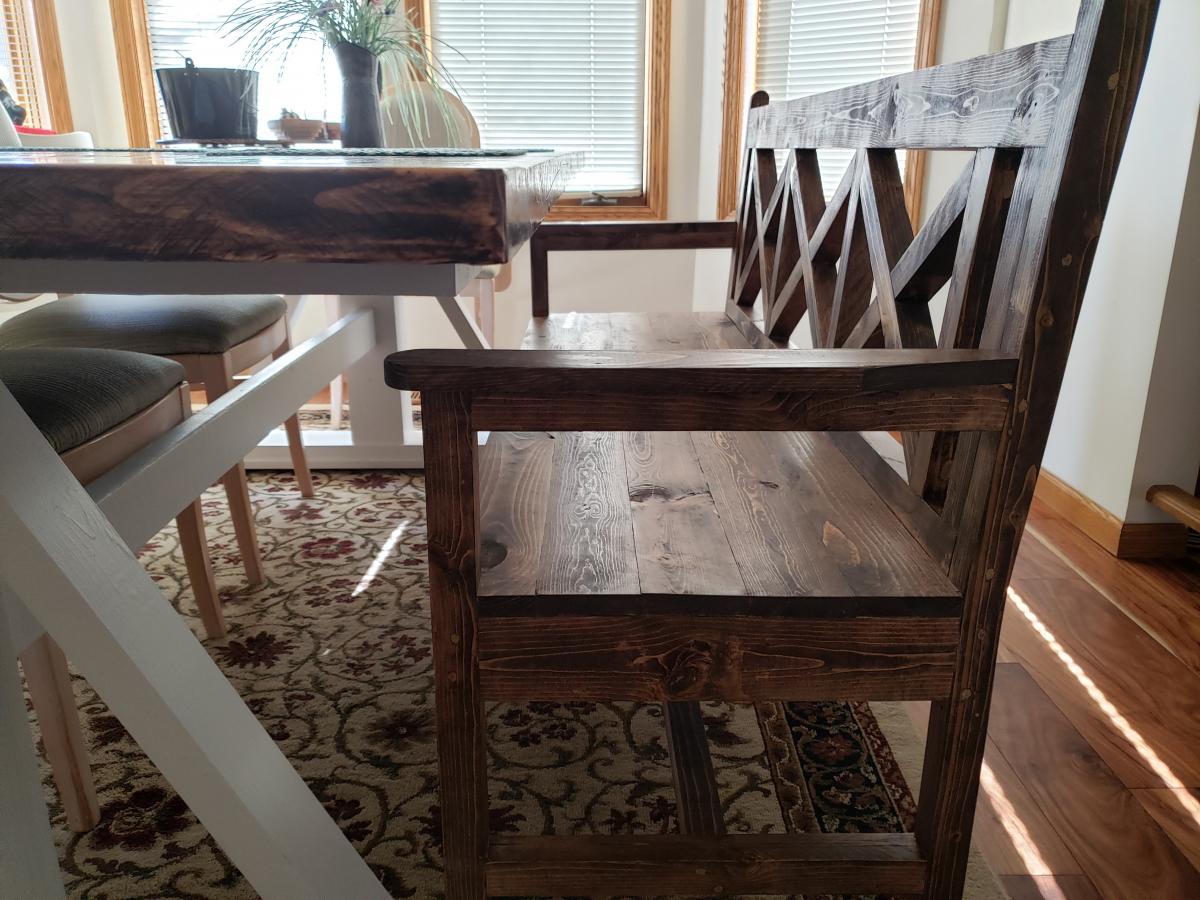
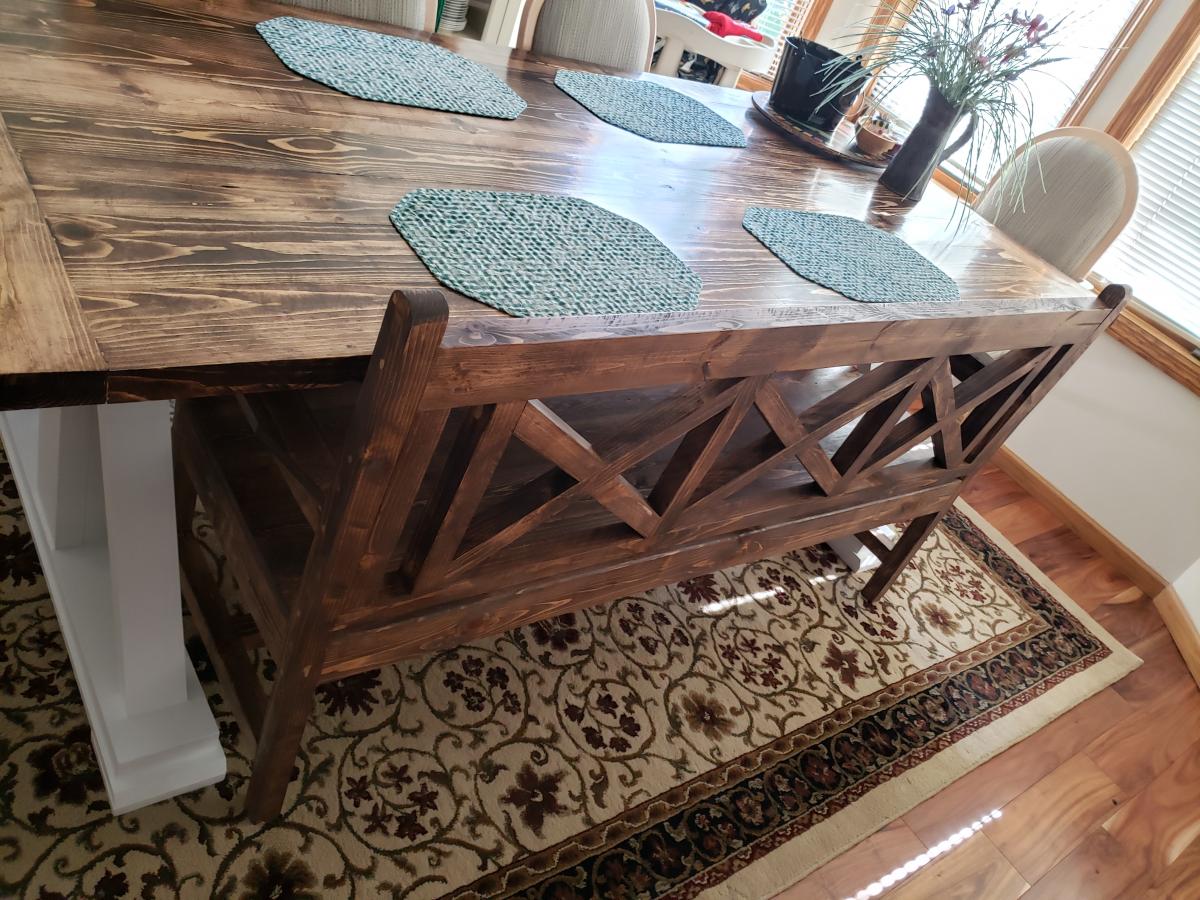
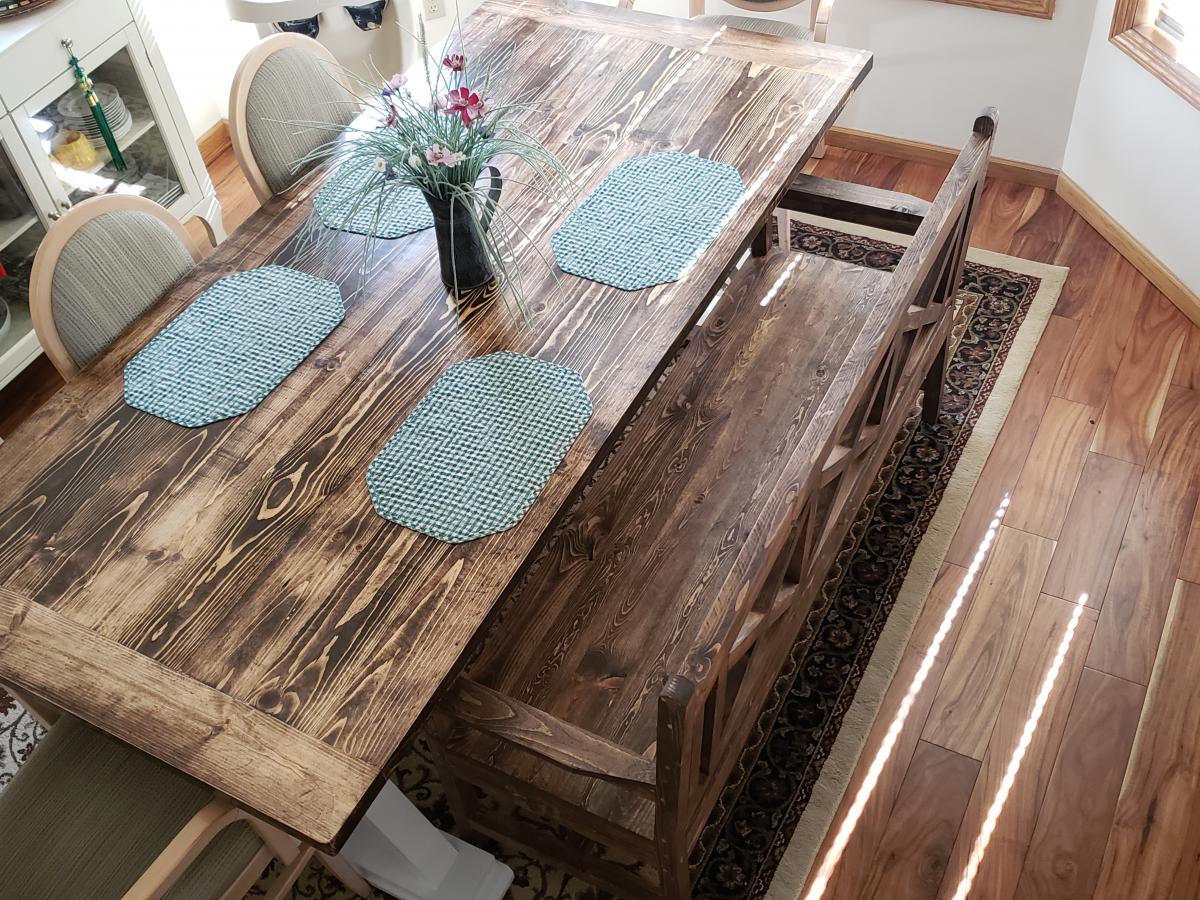
I made this bench for my Farmhouse dining table, modified for 3 seats.
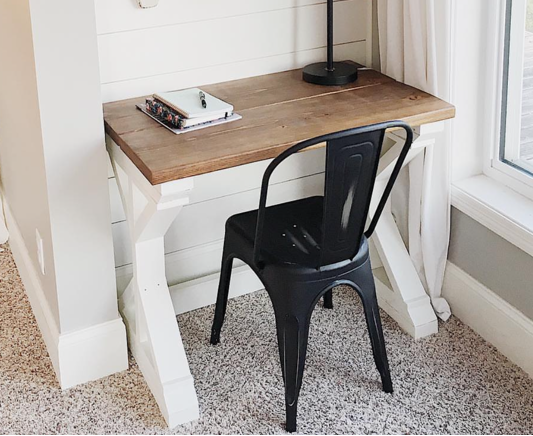
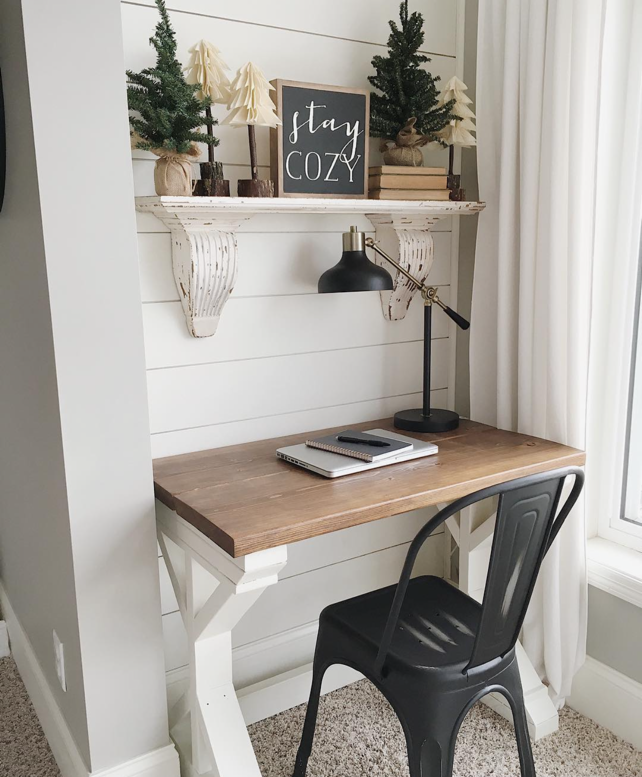
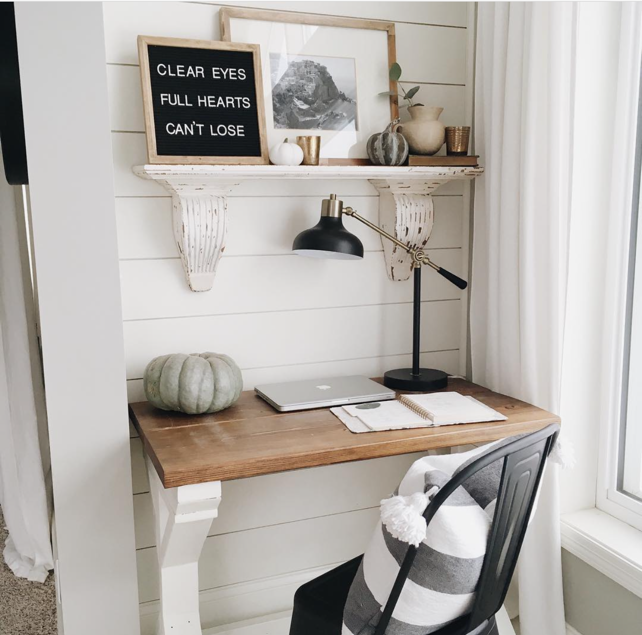
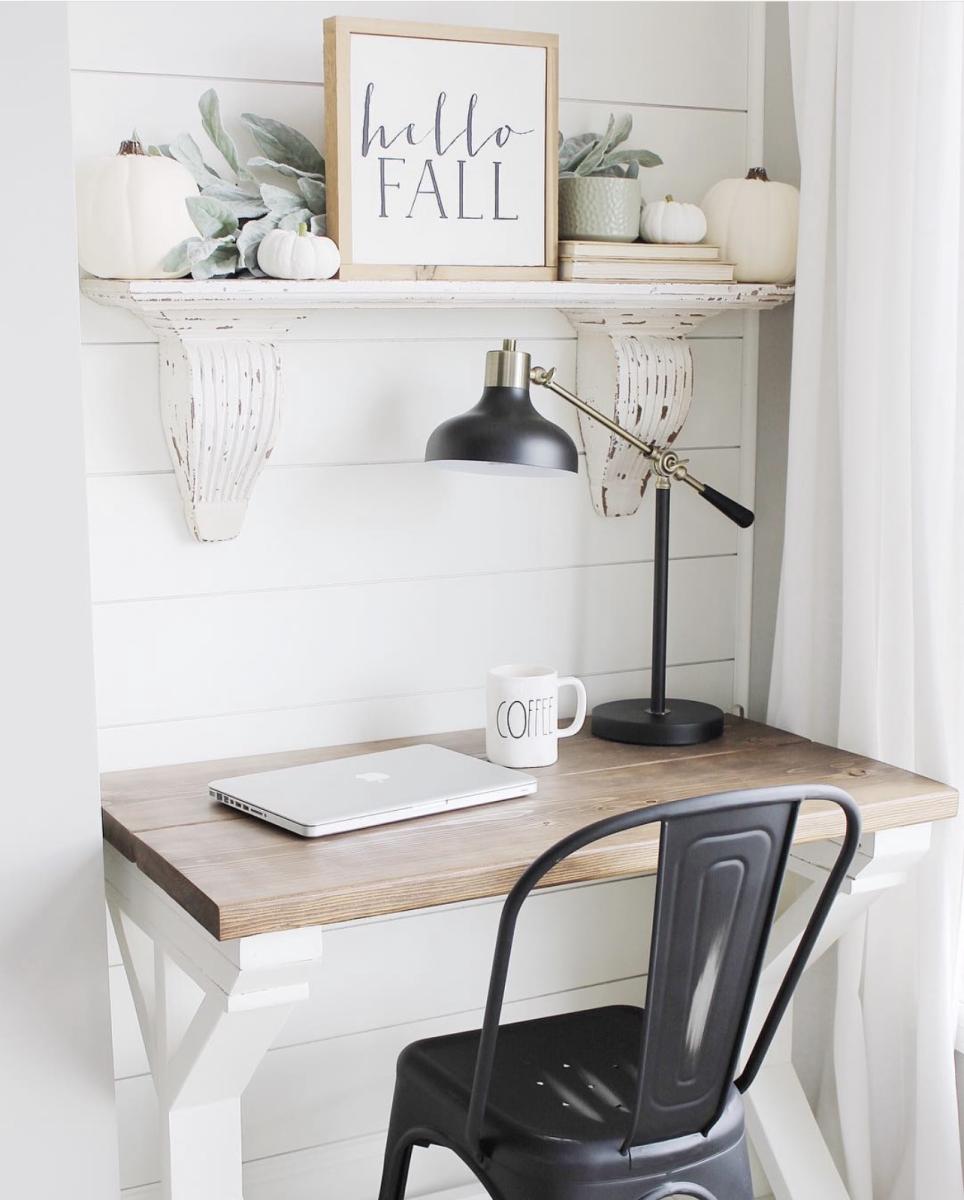
Pretty white farmhouse desk by textured.living.interiors on Instagram

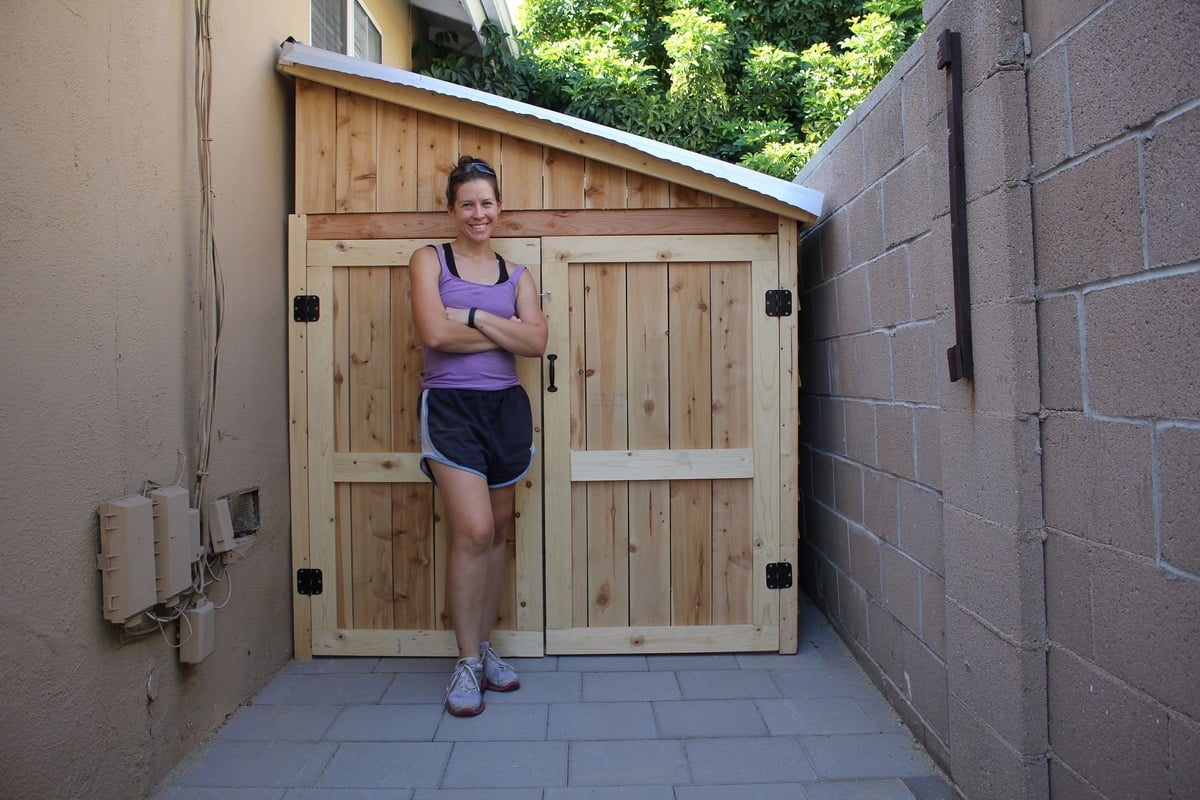
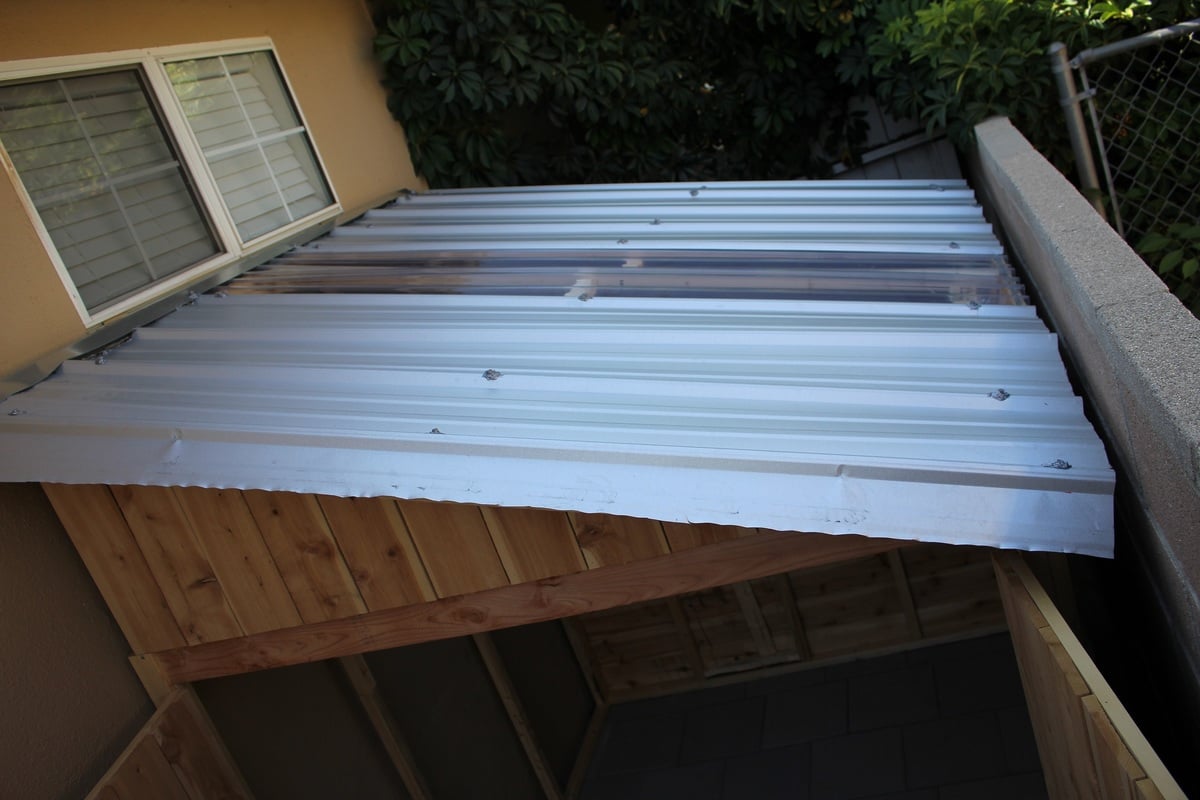
Needed a shed to store bikes and mowers, etc, so I'd have more room in the woodshop : ) I made a lot of modifications to the plan to fit my space and make it much larger. The completed size is 7 foot tall at the peak, 6 feet deep and 5.5 feet wide. I made it as a 3 sided shed, using the wall as the 4th to save on cost, increase air flow, and make the exterior house wall accessible. I also made an egress in the back of the shed in order to get behind the shed if needed.
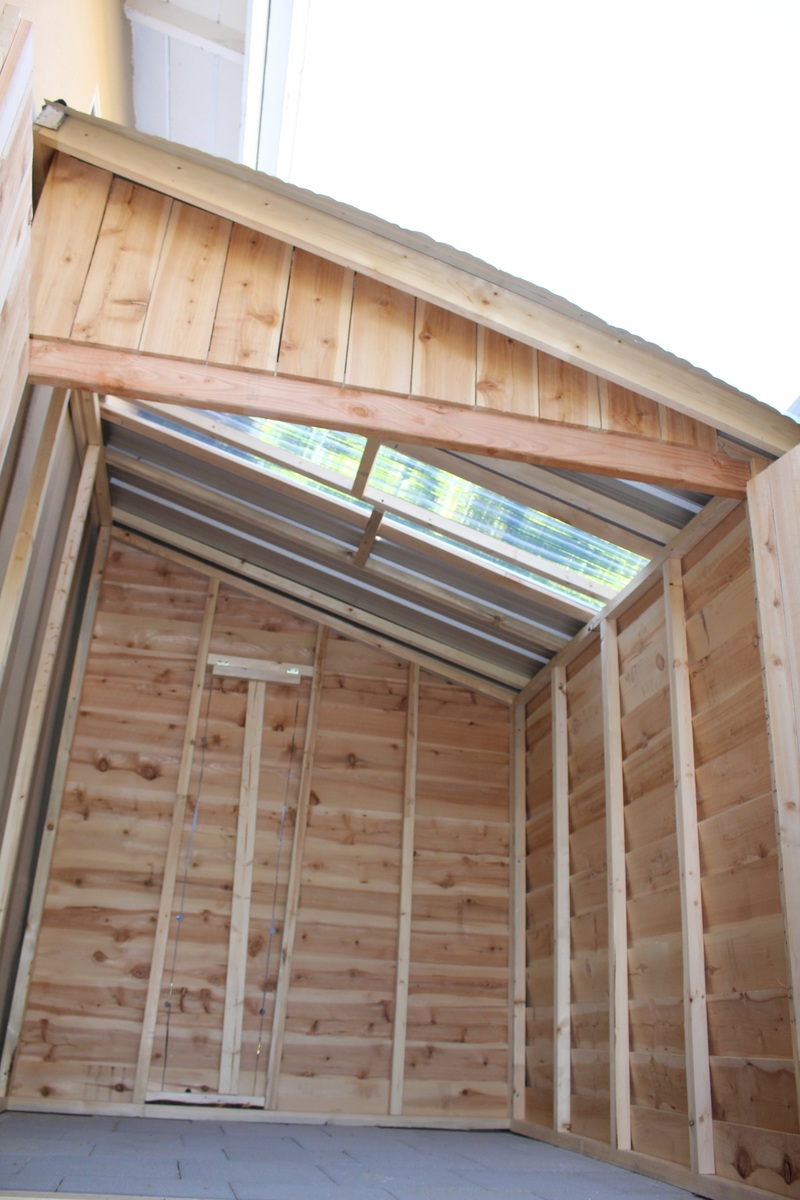
Instead of roofing shingles, I opted for ribbed metal sheets and one clear sheet in the middle to make a skylight, so there would be light in the shed. This is my favorite part of the project. It was a huge pain to attach the roofing from a ladder with very limited access, but it looks great and I love the light coming in. We have very little rain in CA, so I'll have to wait until winter/rainy season in order to test out its waterproofing.
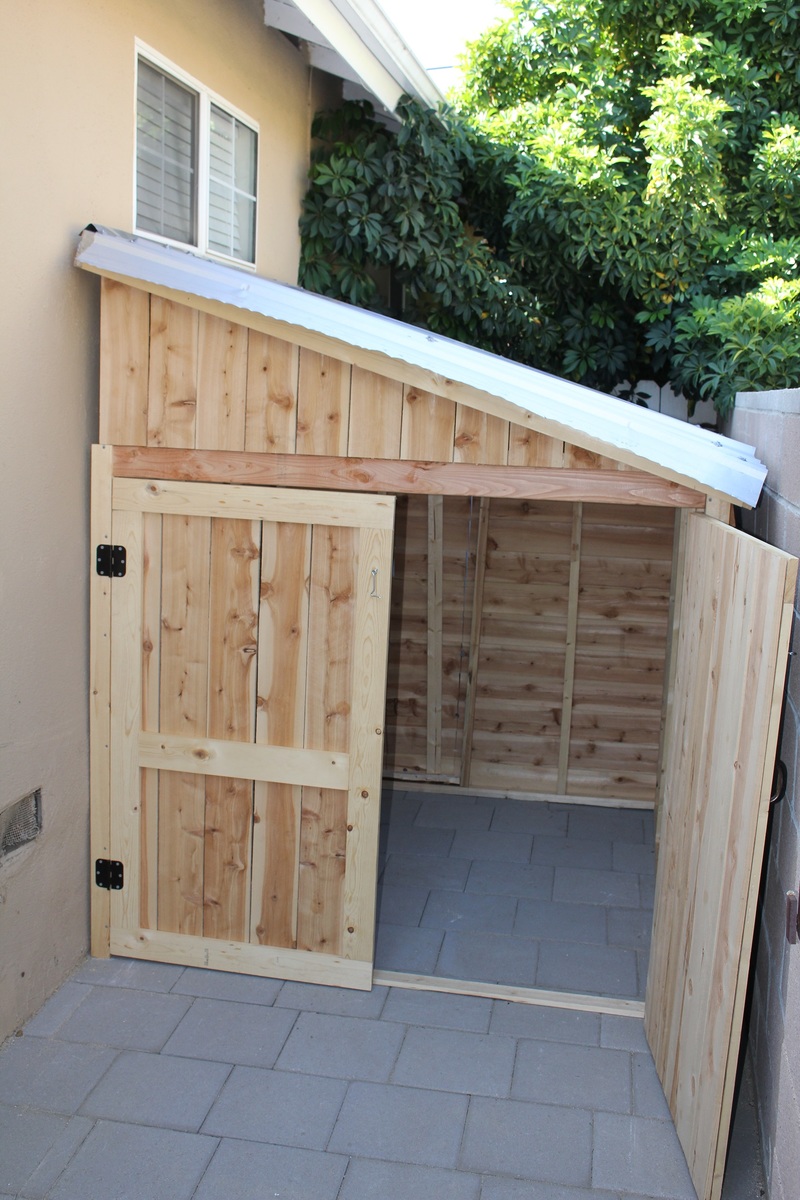
Since the shed sits between the house and the neighbors block wall fence, and I wanted to use as much of the space as I could, I decided to design the shed to have the side wall against the house rather than the back wall, as shown in the plan. This took a large amount of modifications, but with careful planning and measuring, it can be done. This also meant blocking off access to behind the shed, so I cut an egress in the back wall and added hinges so you can lift the back cut out panel, and rest it on a stop block attached to the fence behind it in order to have access. That's what woodworking is about- problem solving. Love it.
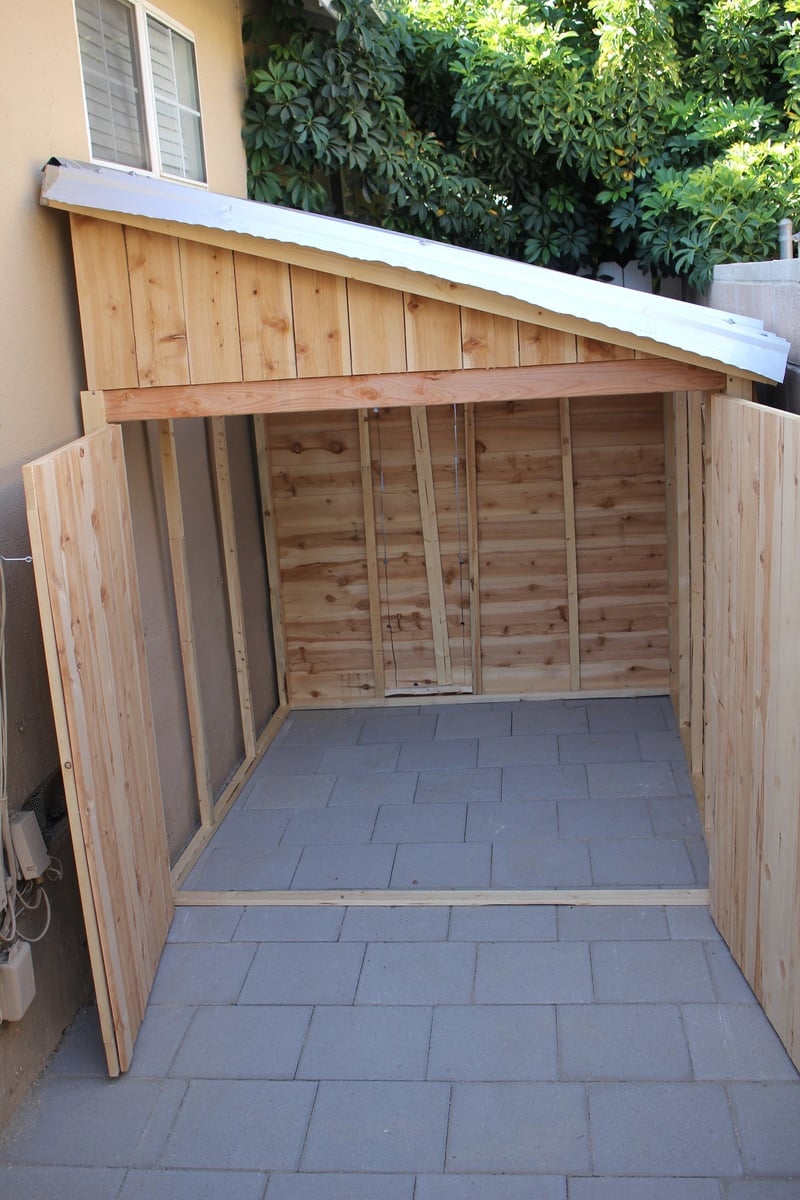
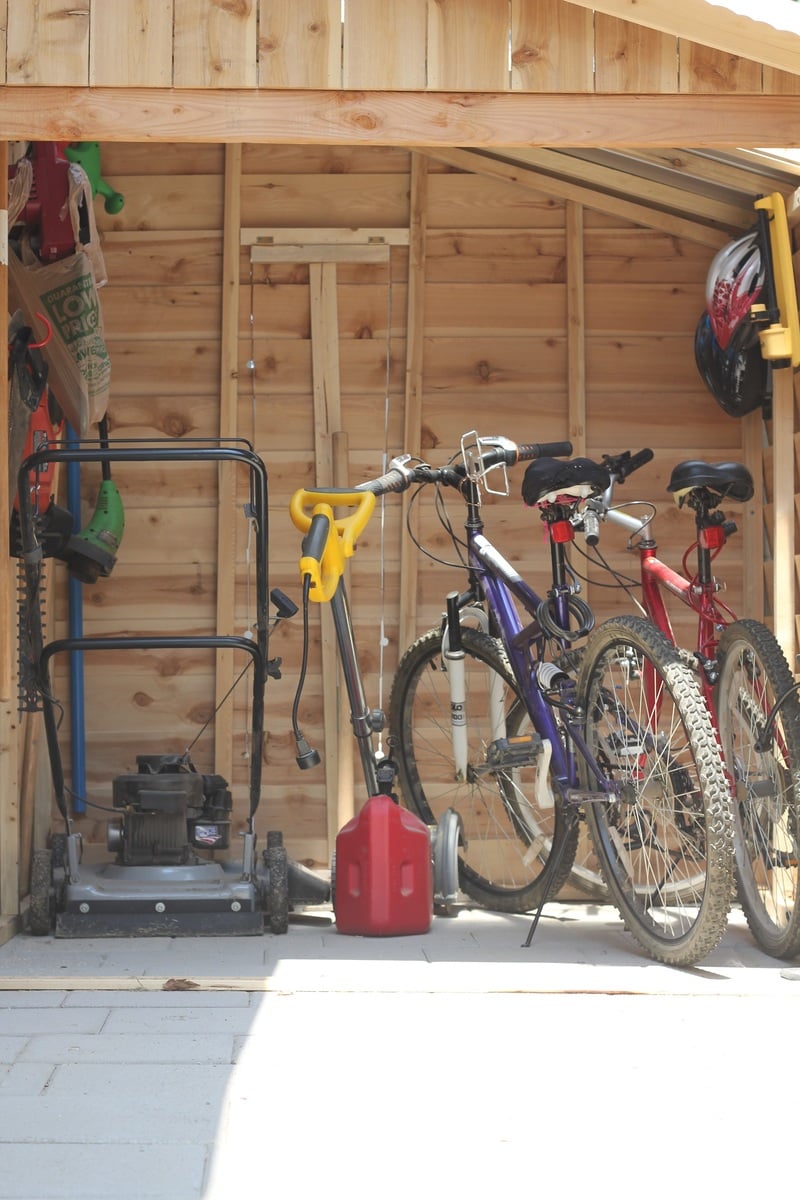
As you can see by the full shed picture, it fits a large amount of stuff- 2 adult bikes, mower, edger, trimmer, chainsaw, hedge trimmer, garden tools, shovels, etc, with plenty of room for more. I now have a free corner in my garage that I've already filled with a DIY rolling workbench and more pegboard space for tool hanging. Woodshop increased space= happy Brittany.
I should also mention that building the frame and adding the pickets was quite a quick and easy job. The hardest and most time consuming part was the roof (I didn't have metal cutting tools), rolling each very heavy wall to the site (I was alone) and the previous 2 weeks in which I built the paver patio the shed sits on. Hard work, but worth it. I love it!
Thu, 08/20/2015 - 05:56
And for under $300! Nice touch with the skylight also. Two thumbs up.

In reply to This is awesome! by Cross35
Thu, 08/20/2015 - 09:42
Thank you! I'm very pleased with how it turned out!
Mon, 04/27/2020 - 10:28
SWEET!!! What a great use of space! That skylight was a brilliant idea. No lights needed to see what you need to get at in there. Well done!
In reply to SWEET!!! What a great use… by carewarner
Mon, 01/25/2021 - 13:15
It has been incredibly useful for storing! One thing about the skylight- Over time the sun has warped it and there is now a hole and crack there. So I wouldn't plan on the clear roofing being a long term solution- I will be replacing it with either thicker clear roofing or 2 layers.
Wed, 05/06/2020 - 13:15
Love the design and space saver idea, brilliant! How can I get the dimensions? Tks
In reply to Love the design and space… by shed man
Mon, 01/25/2021 - 13:25
I just went out and measured- 6' wide and deep, 7' tall at its tallest point, tapering down to about 5' tall. Hope this helps!
In reply to Love this! by V2theicki
Mon, 01/25/2021 - 13:14
I based it off of this plan, but heavily modded it to fit our space. https://www.ana-white.com/woodworking-projects/small-cedar-shed
Hope that helps!
Tue, 06/23/2020 - 20:26
This is exactly what I want to do for the side of my home , I also would love to get the plans for this .
In reply to This is exactly what I want… by ajg1972
Mon, 01/25/2021 - 13:16
I used Ana's plans here, but heavily modded it to fit my space: https://www.ana-white.com/woodworking-projects/small-cedar-shed
Sun, 02/21/2021 - 09:39
Did you use cedar pickets?
And what did you use for the roofing material?
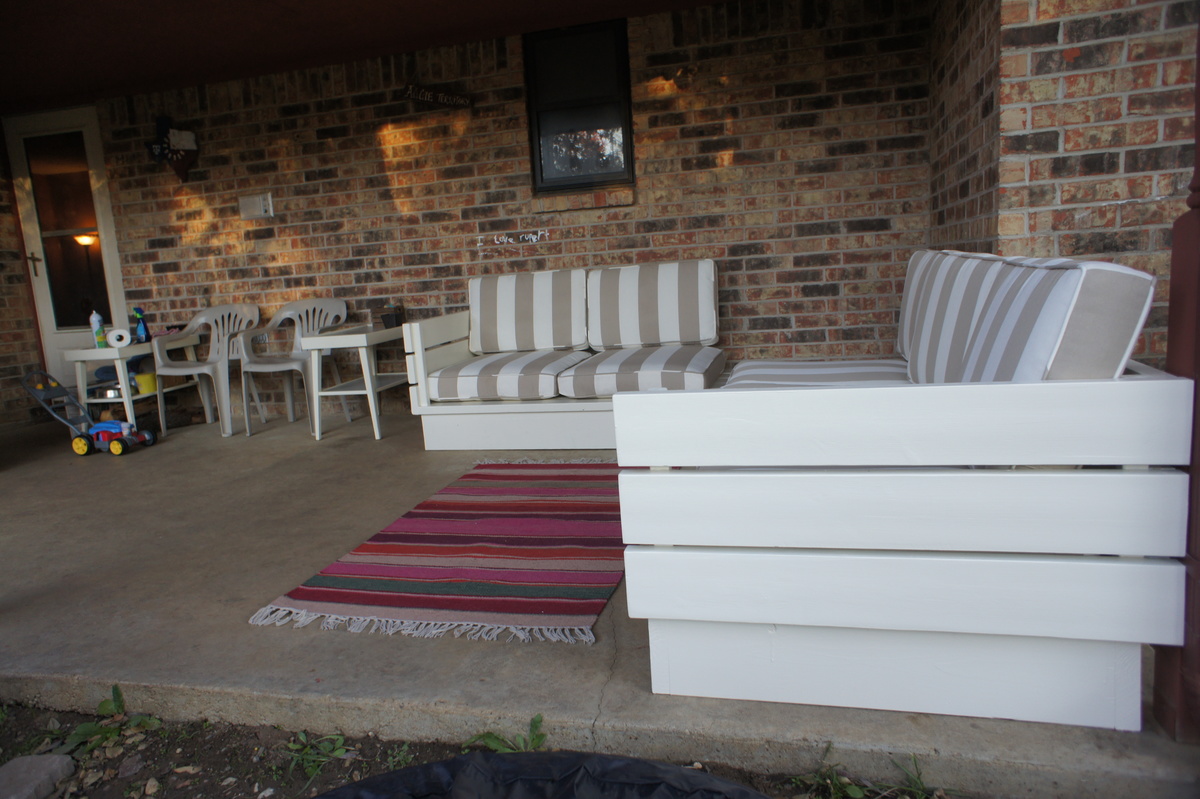
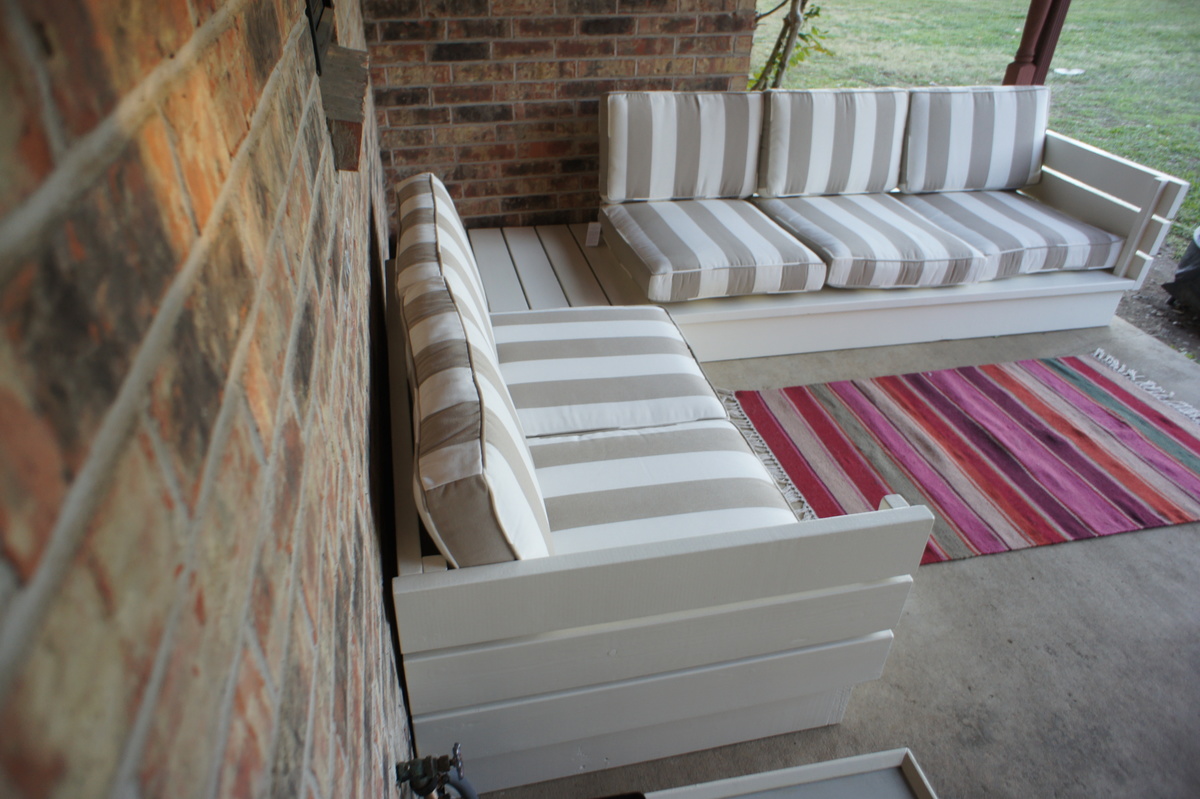
This was my second Ana White project (first was a sandbox). I made a few changes to Ana's plan so that it would better fit my porch. First, I basically flip flopped the plans so that the end table was on part 1. I also altered the length to better fit the cushions I found. Ana's plans were 24" between the 2x2. Mine ended up being 26.5". I also used 2x8's for the base instead of the 2x4 for added height.
The price of outdoor cushions was a big surprise!! We looked into buying outdoor high density foam and making our own cushions, but that seamed to be just as expensive as buying cushions. We also really had a hard time finding large cushions that actually fit this plan. Most cushions are REALLY small for this couch. we found some Pottery Barn cushions online that were on clearance.
It was a fun project and we love the couch!

This was an easy project to complete in an afternoon that does not require any advance woodworking skills


Wed, 11/26/2014 - 12:19
This project looks even better than mine! I love look with paint! Well done!
Wed, 12/10/2014 - 09:41
This is my second completed project with plans and ideas from your website. Thanks for your good work!
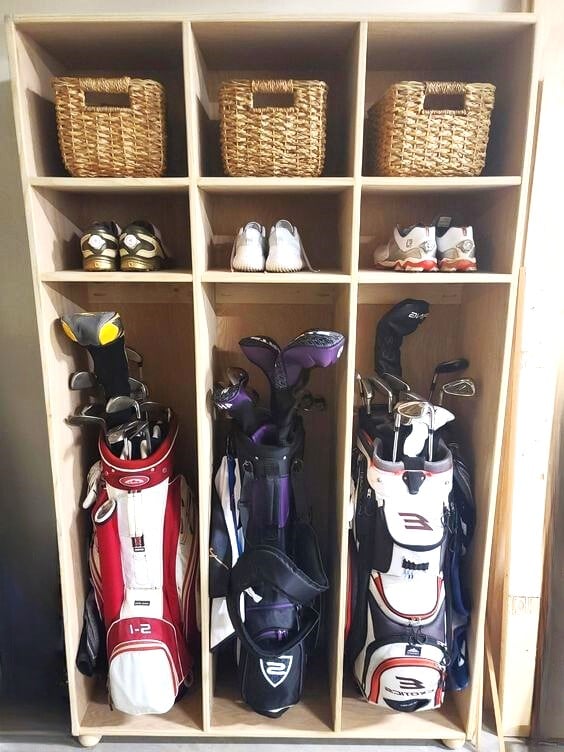
Utilized the plan for the Locker Book Shelf-Full Size and modified it a bit to convert to a golf club locker. Definitely keeps all the clubs, shoes, and accessories organized and eliminates the clutter. My wife loves it, course she added the baskets, which makes it look awesome! Actually this is how I stumbled upon Ana White's website. I was looking high and low for a plan for golf club lockers, and found Ana's website as part of the process. Best google search I've ever done!
Mon, 04/11/2022 - 14:51
WOW, that looks awesome and is the perfect storage solutions for all the golf gear! Thank you for sharing.:)
Made my wife happy!
Mon, 05/06/2019 - 10:22
Hi Mike this is a fantastic project! Just fabulous!
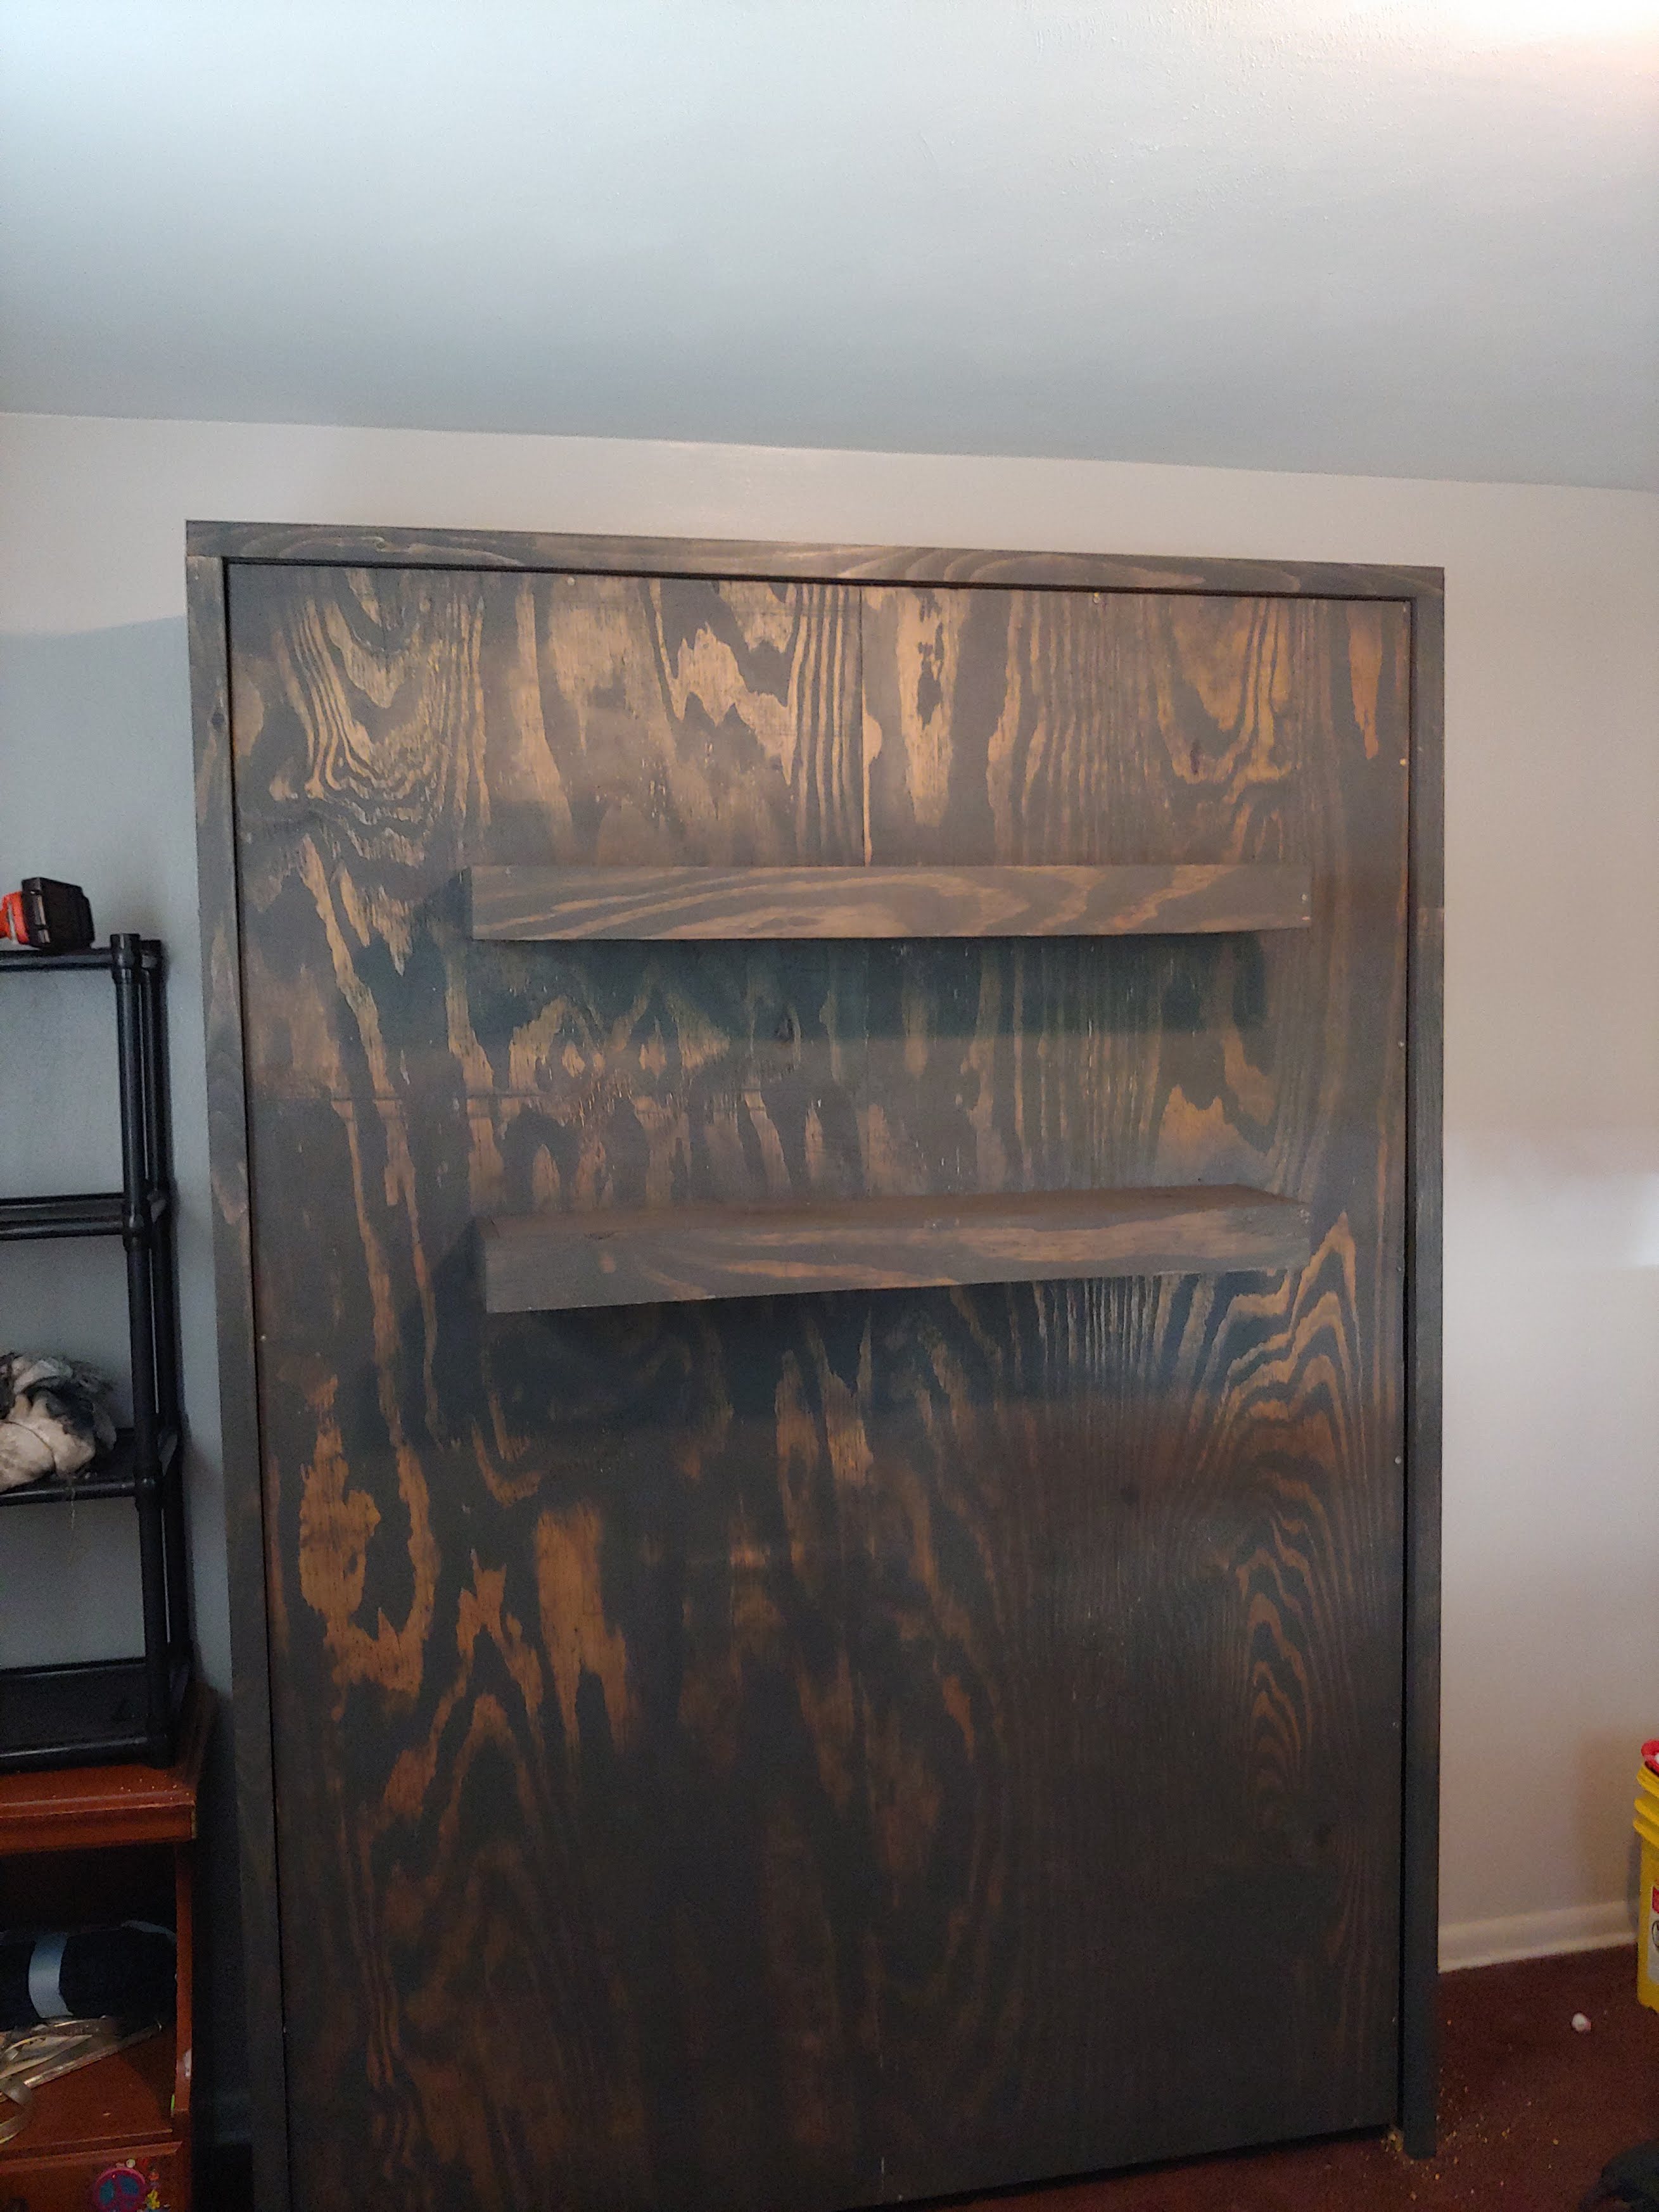
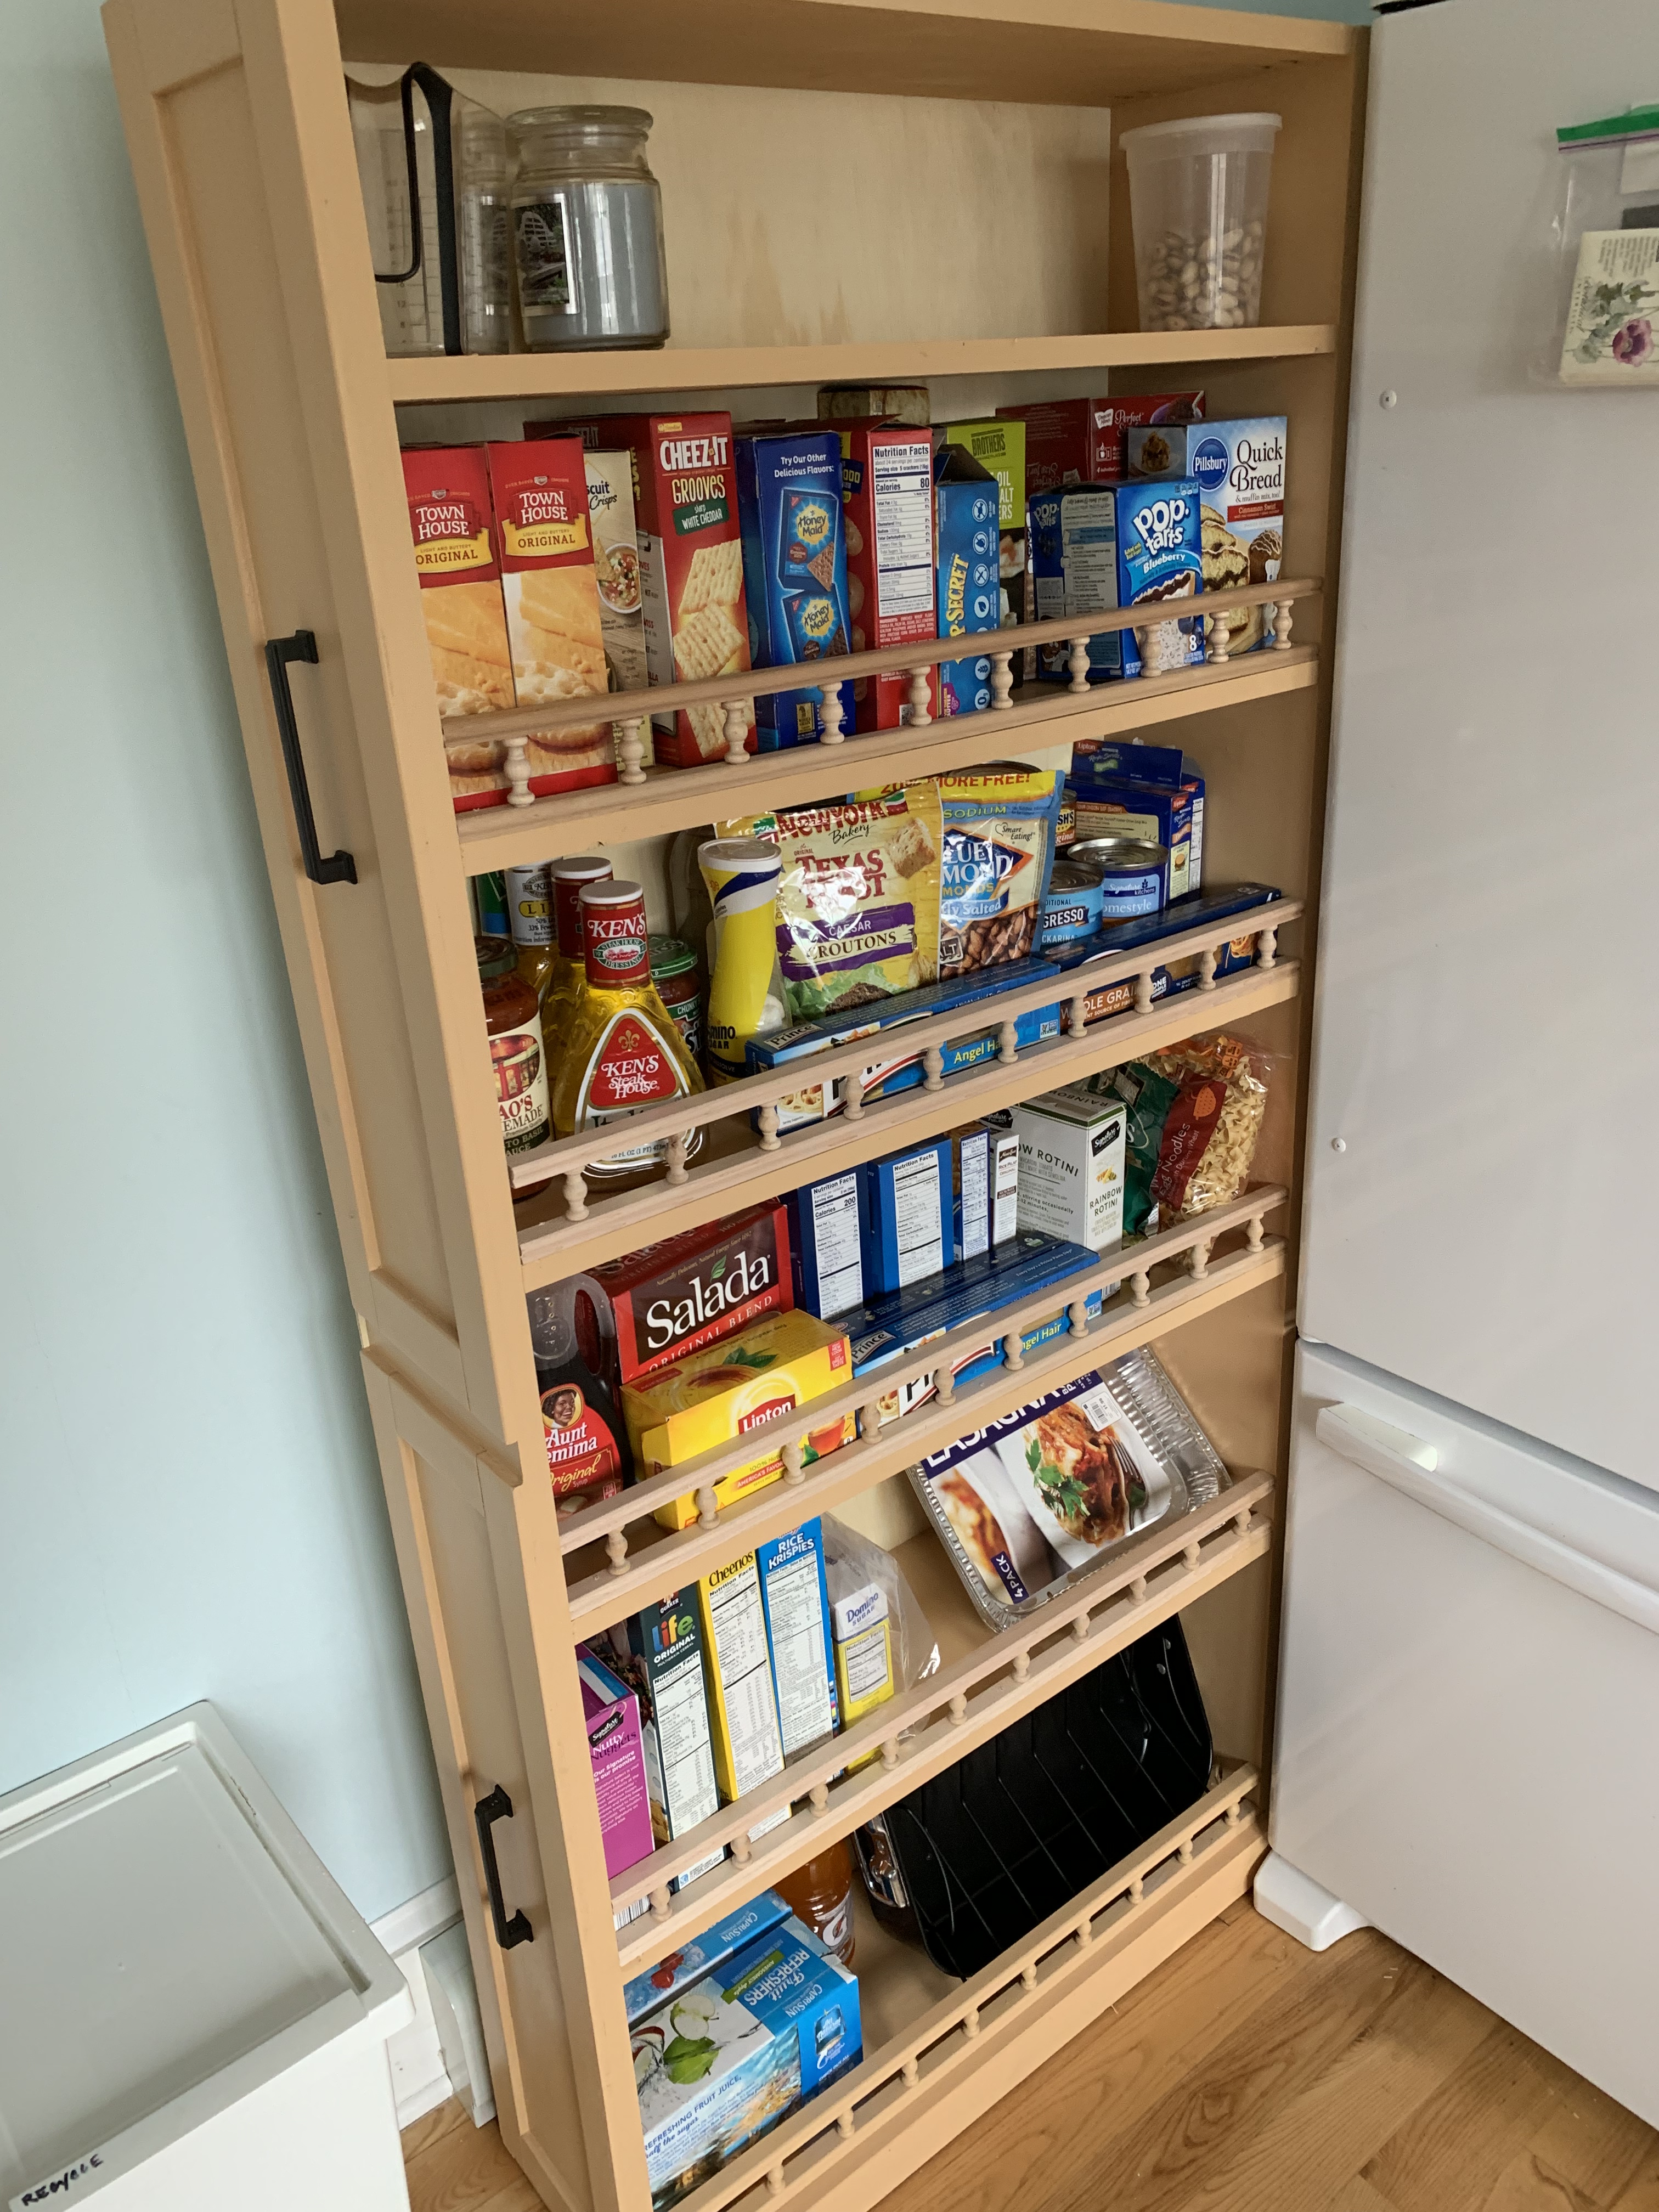
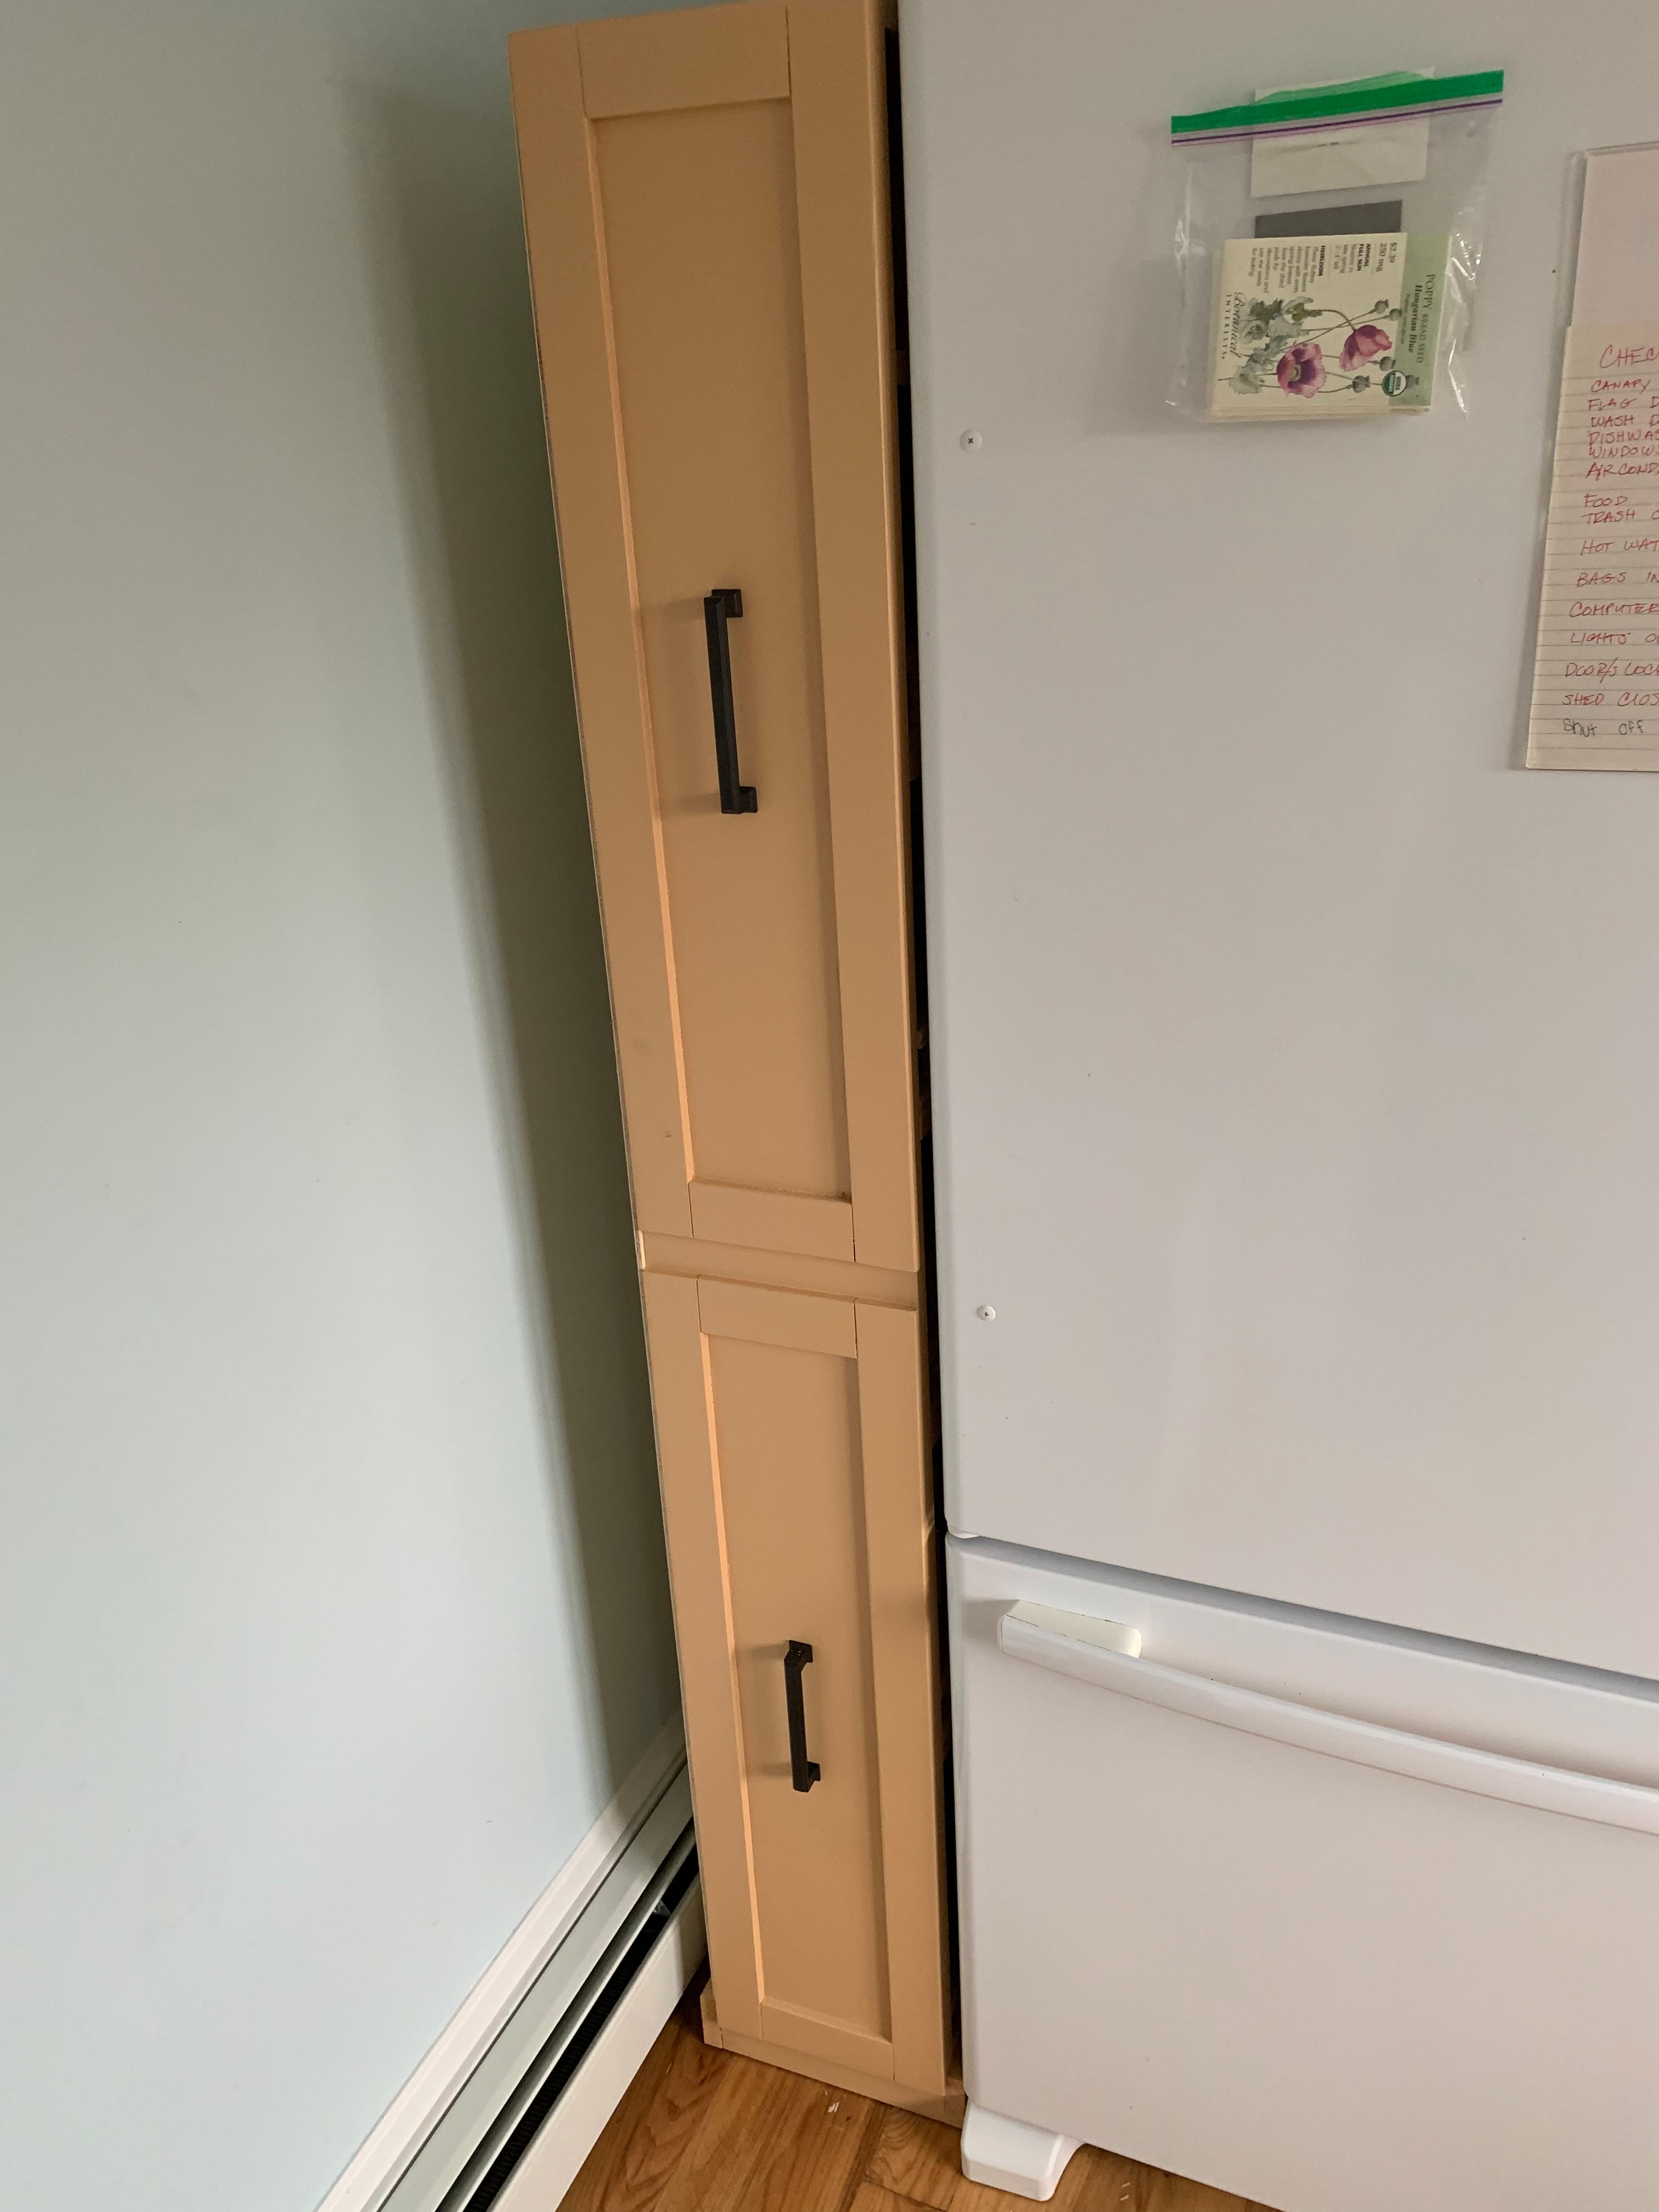
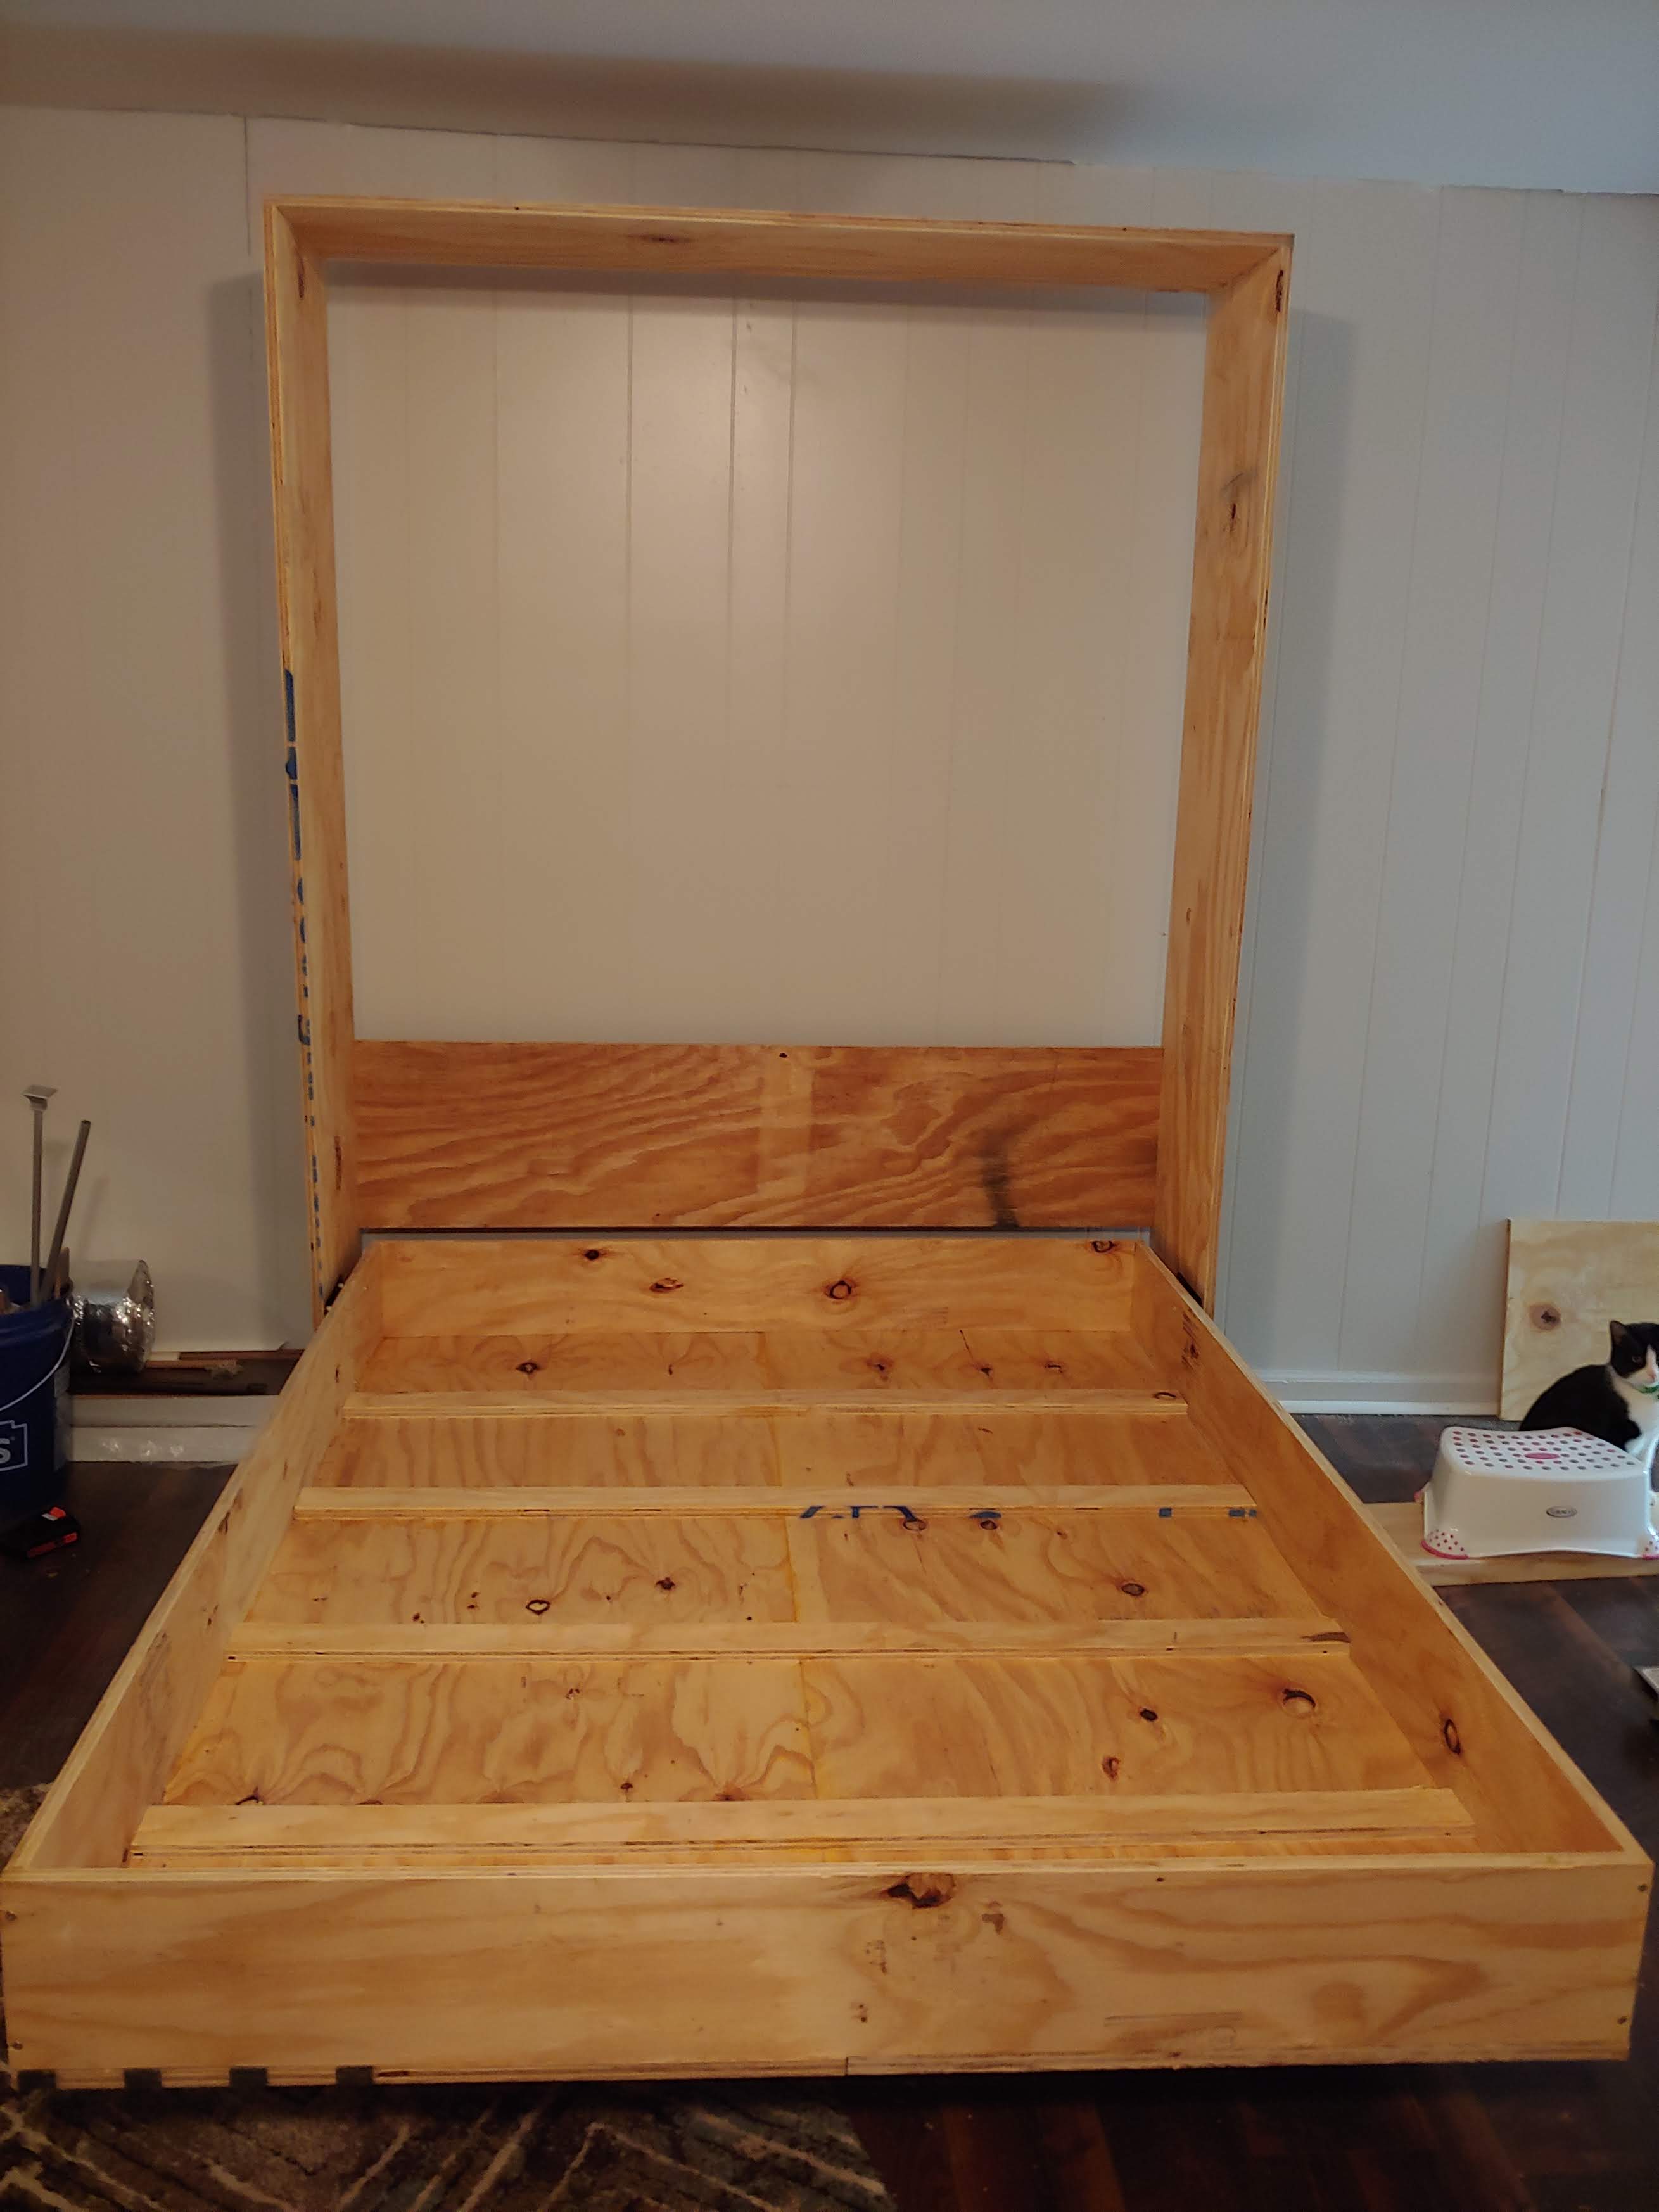
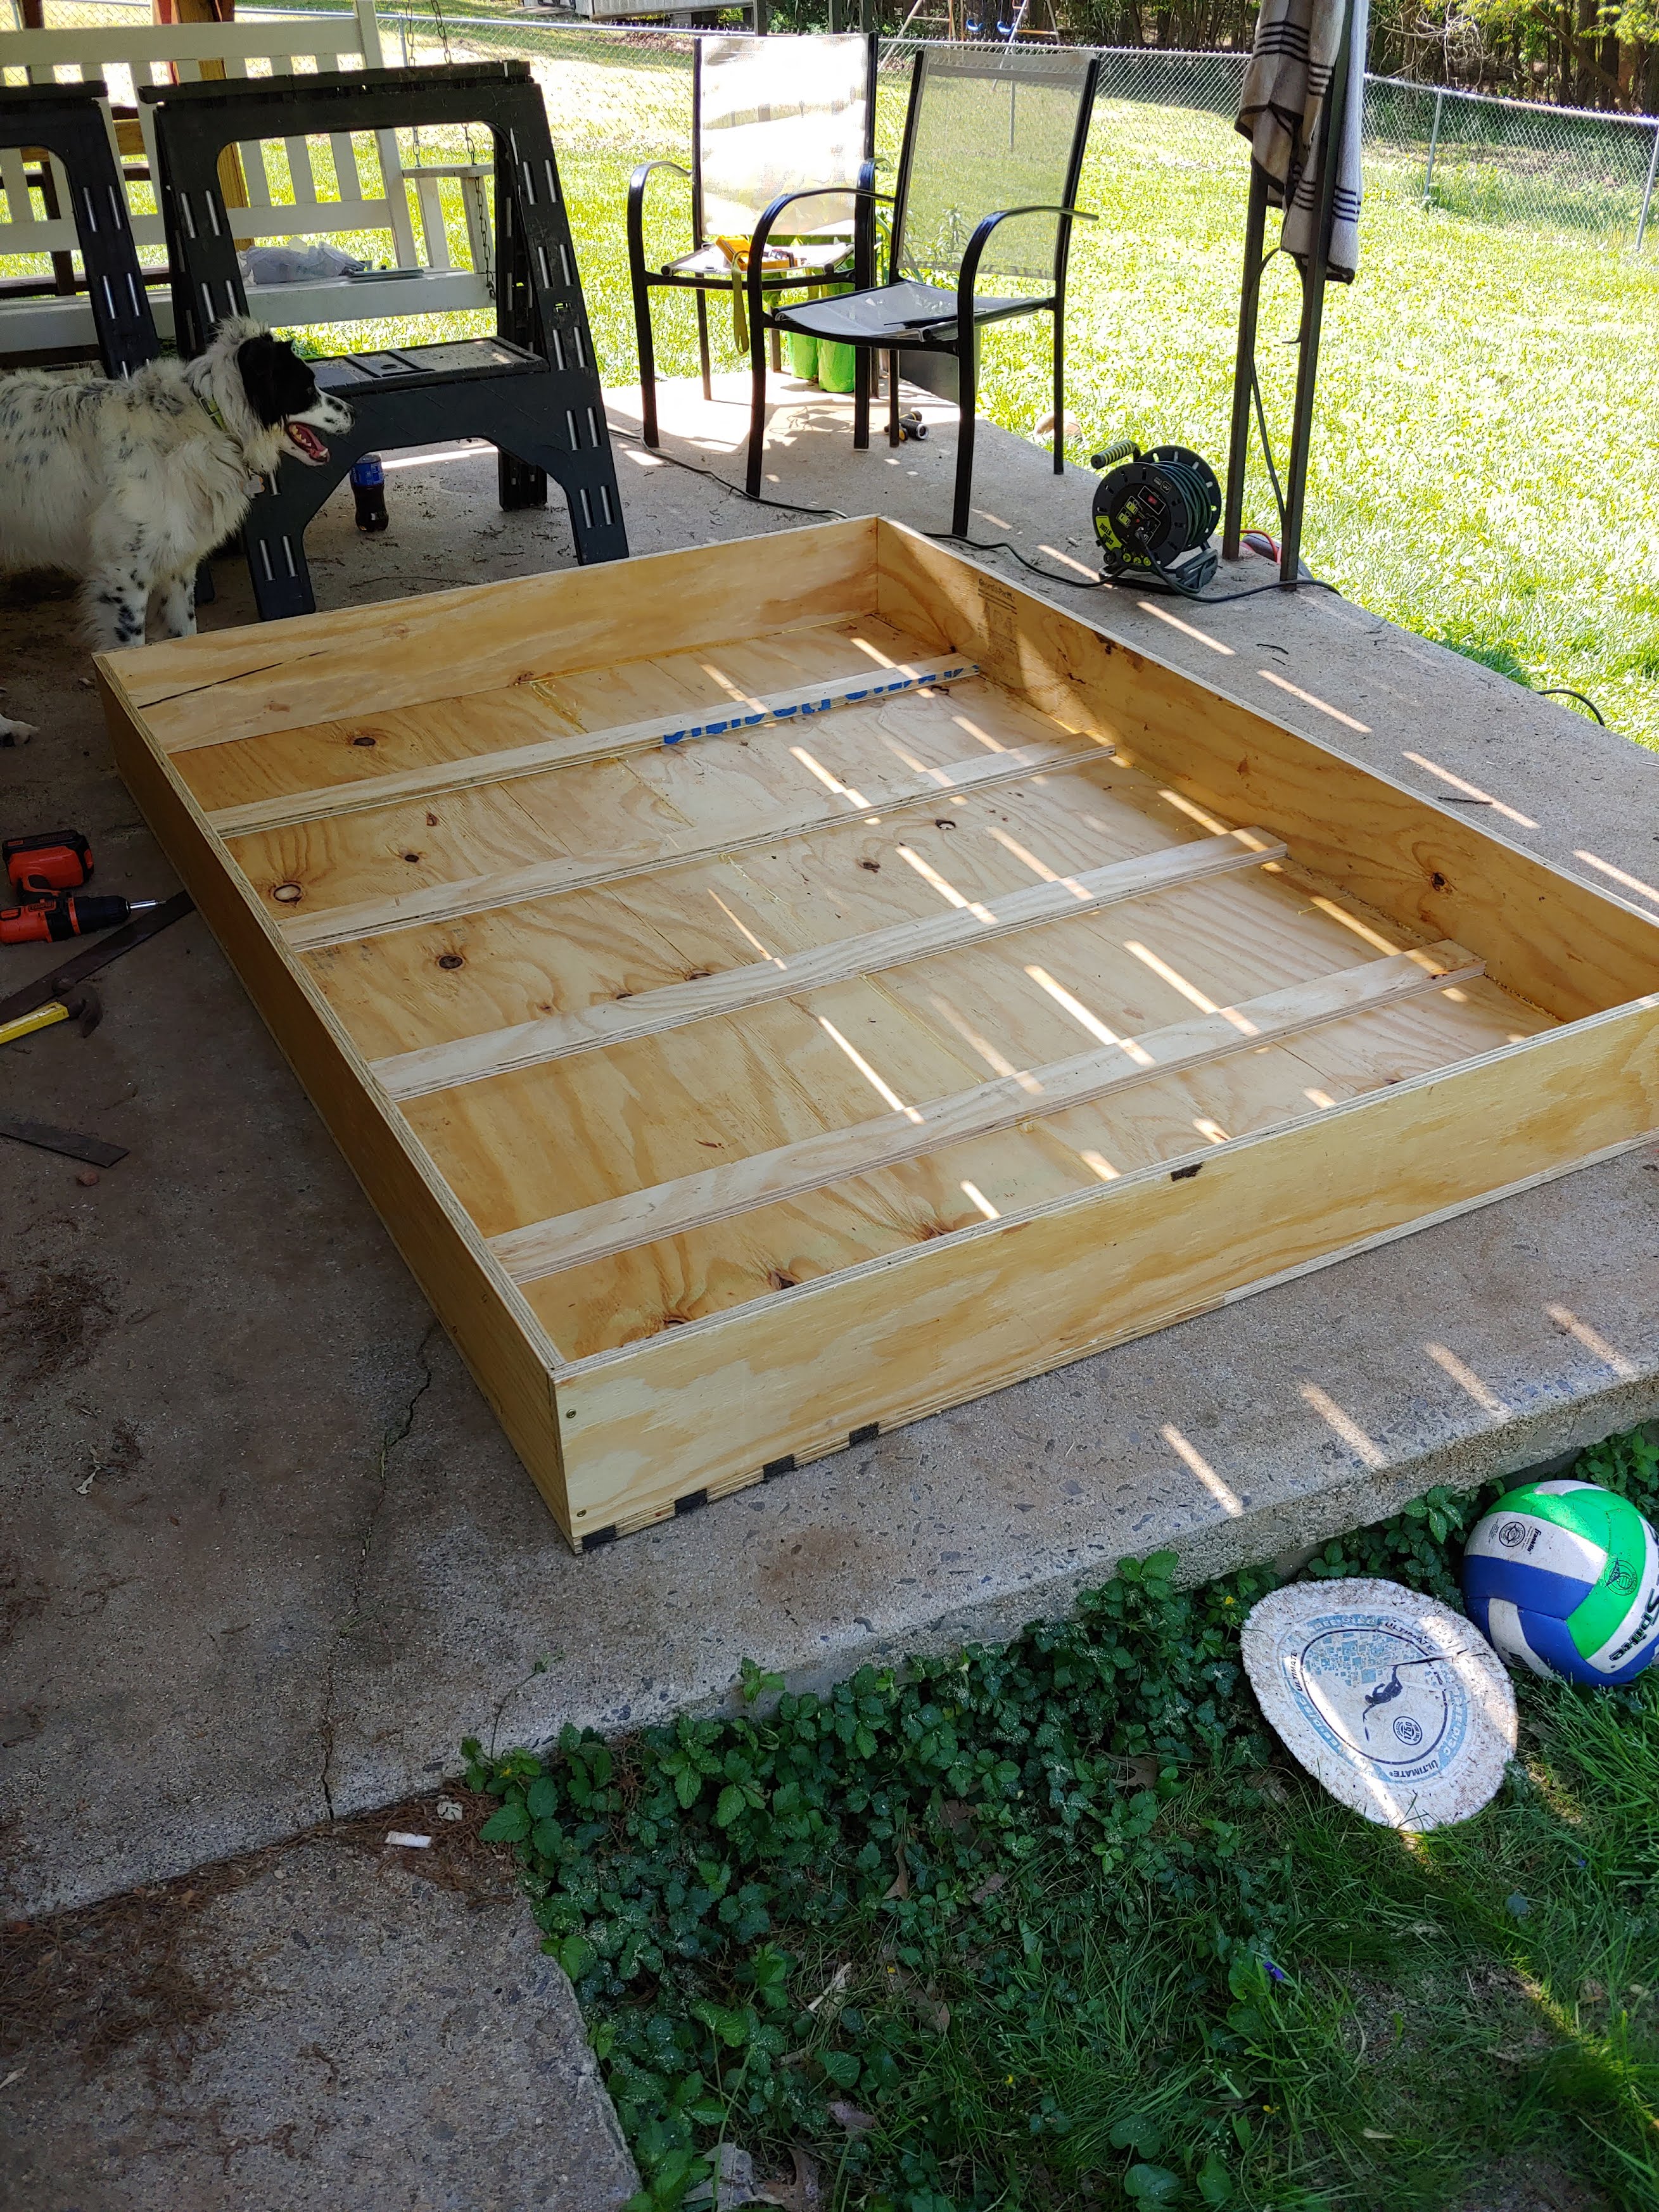
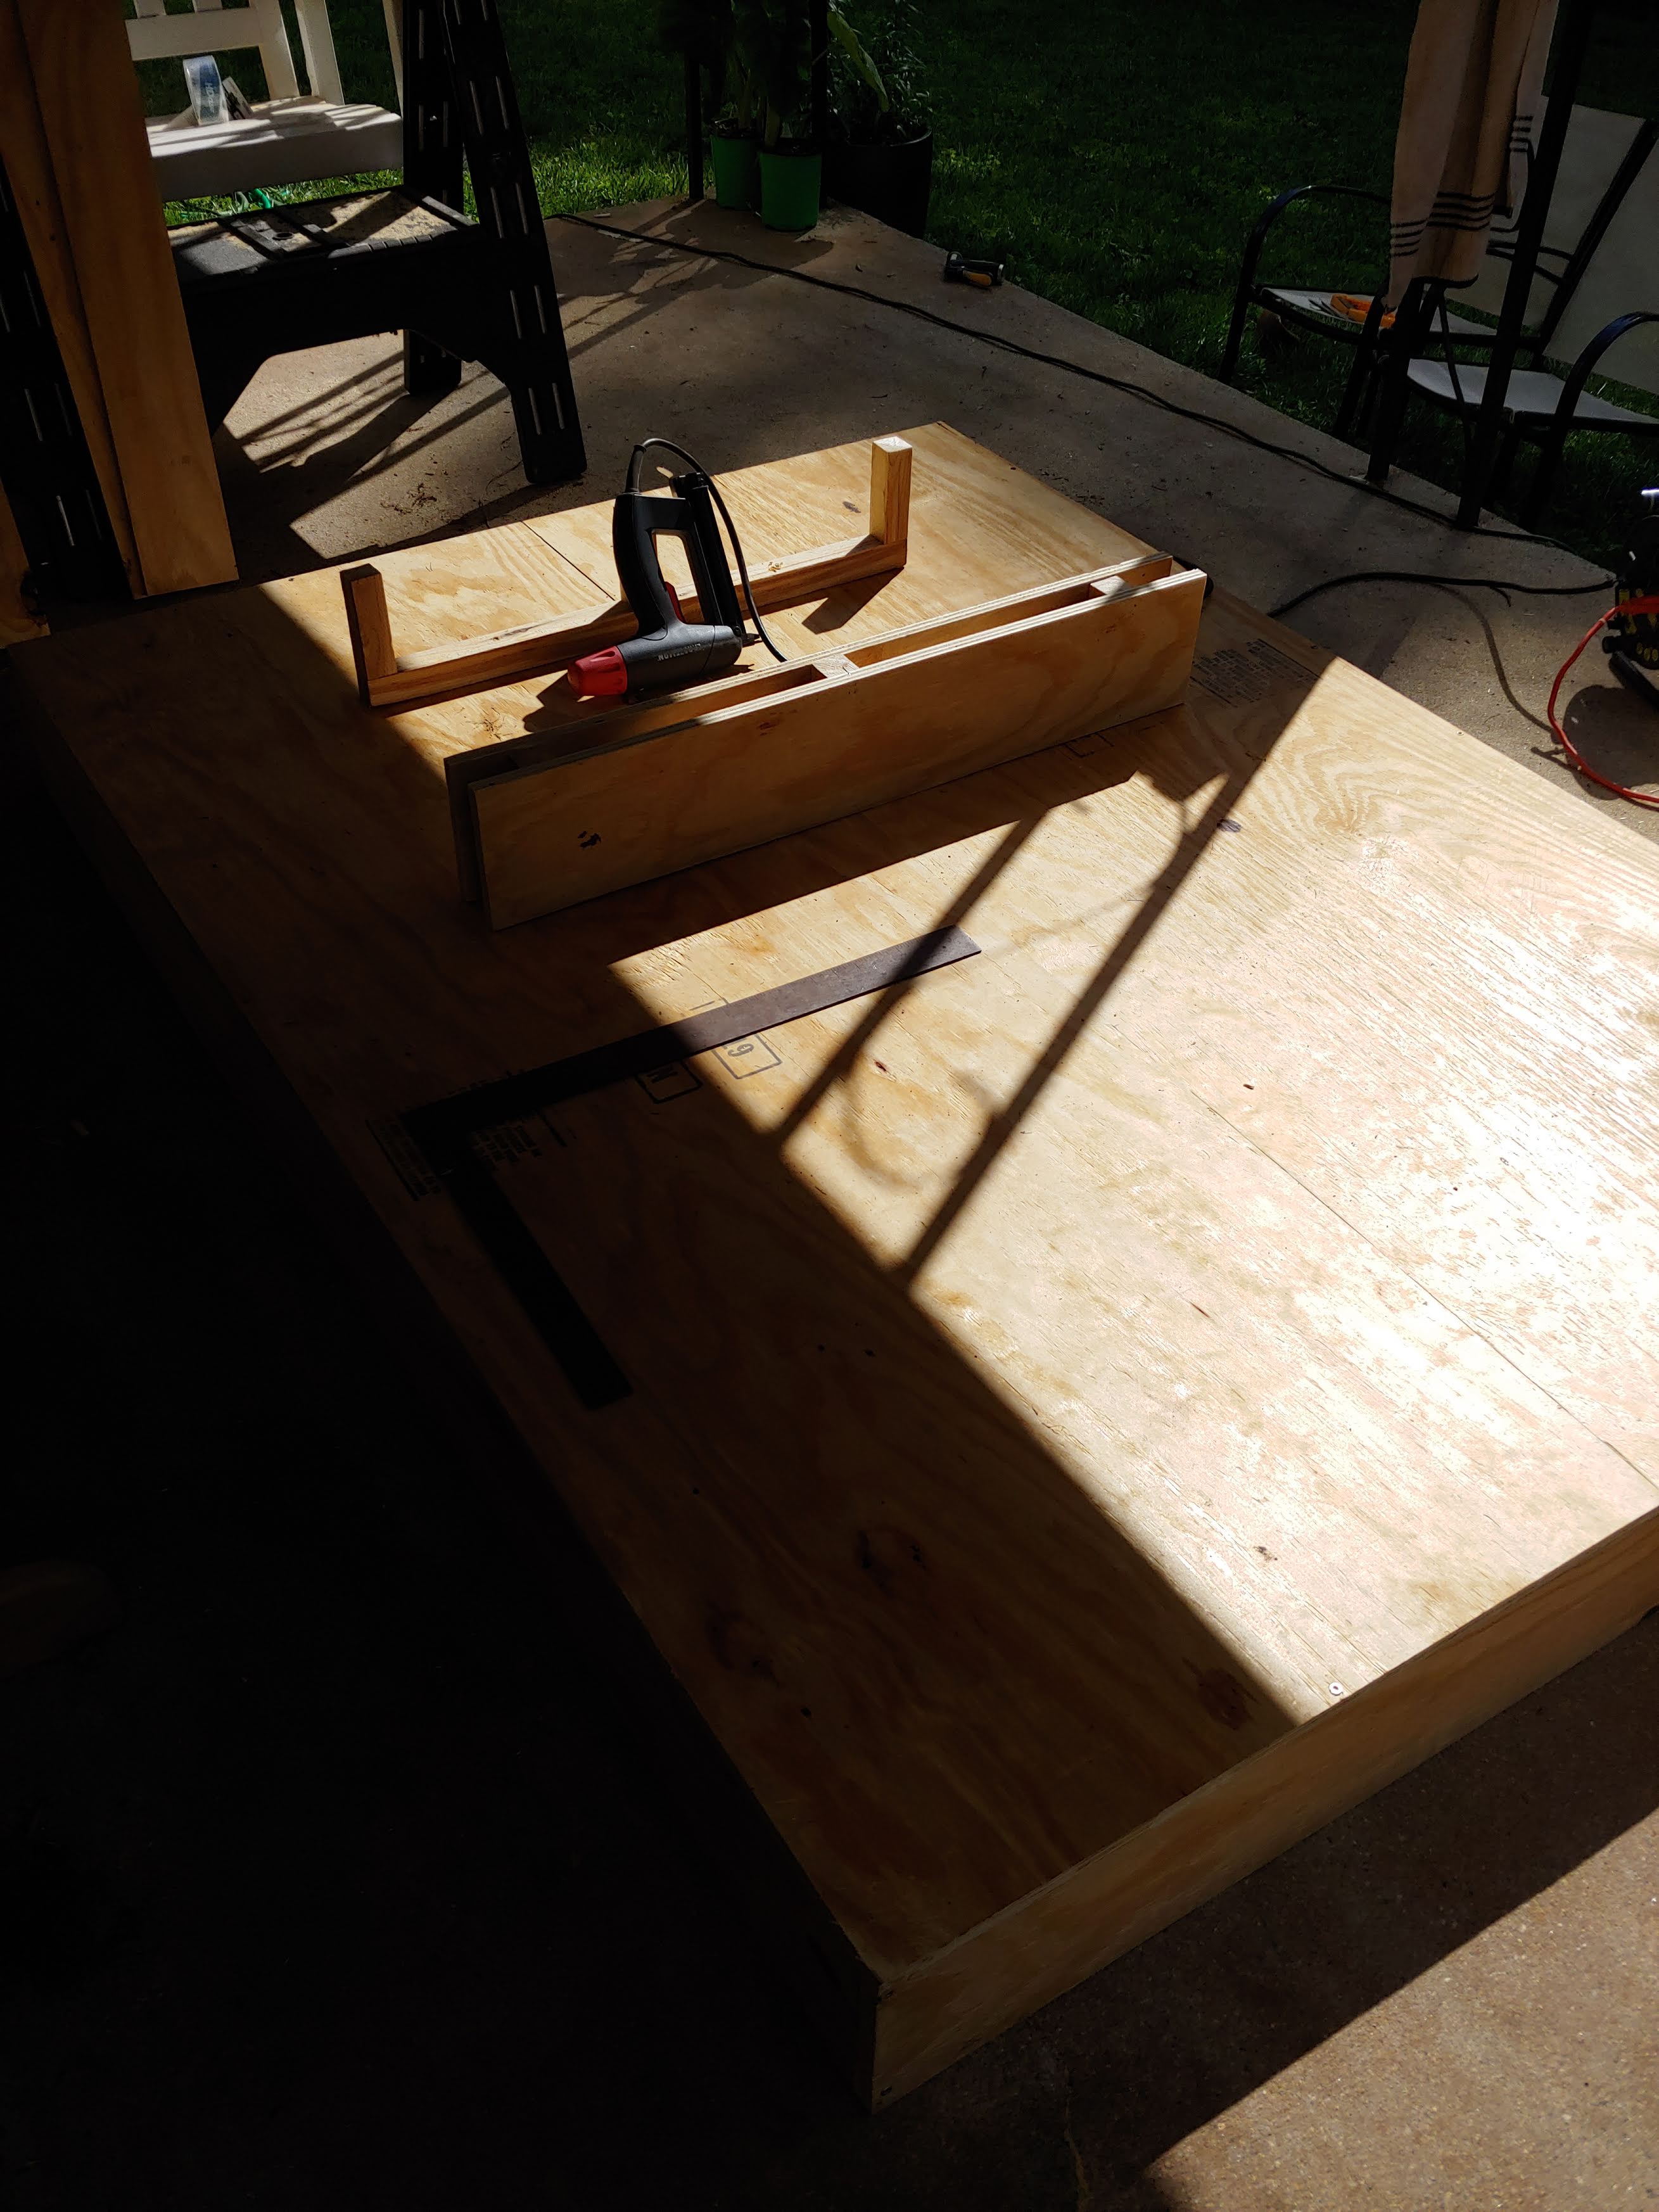
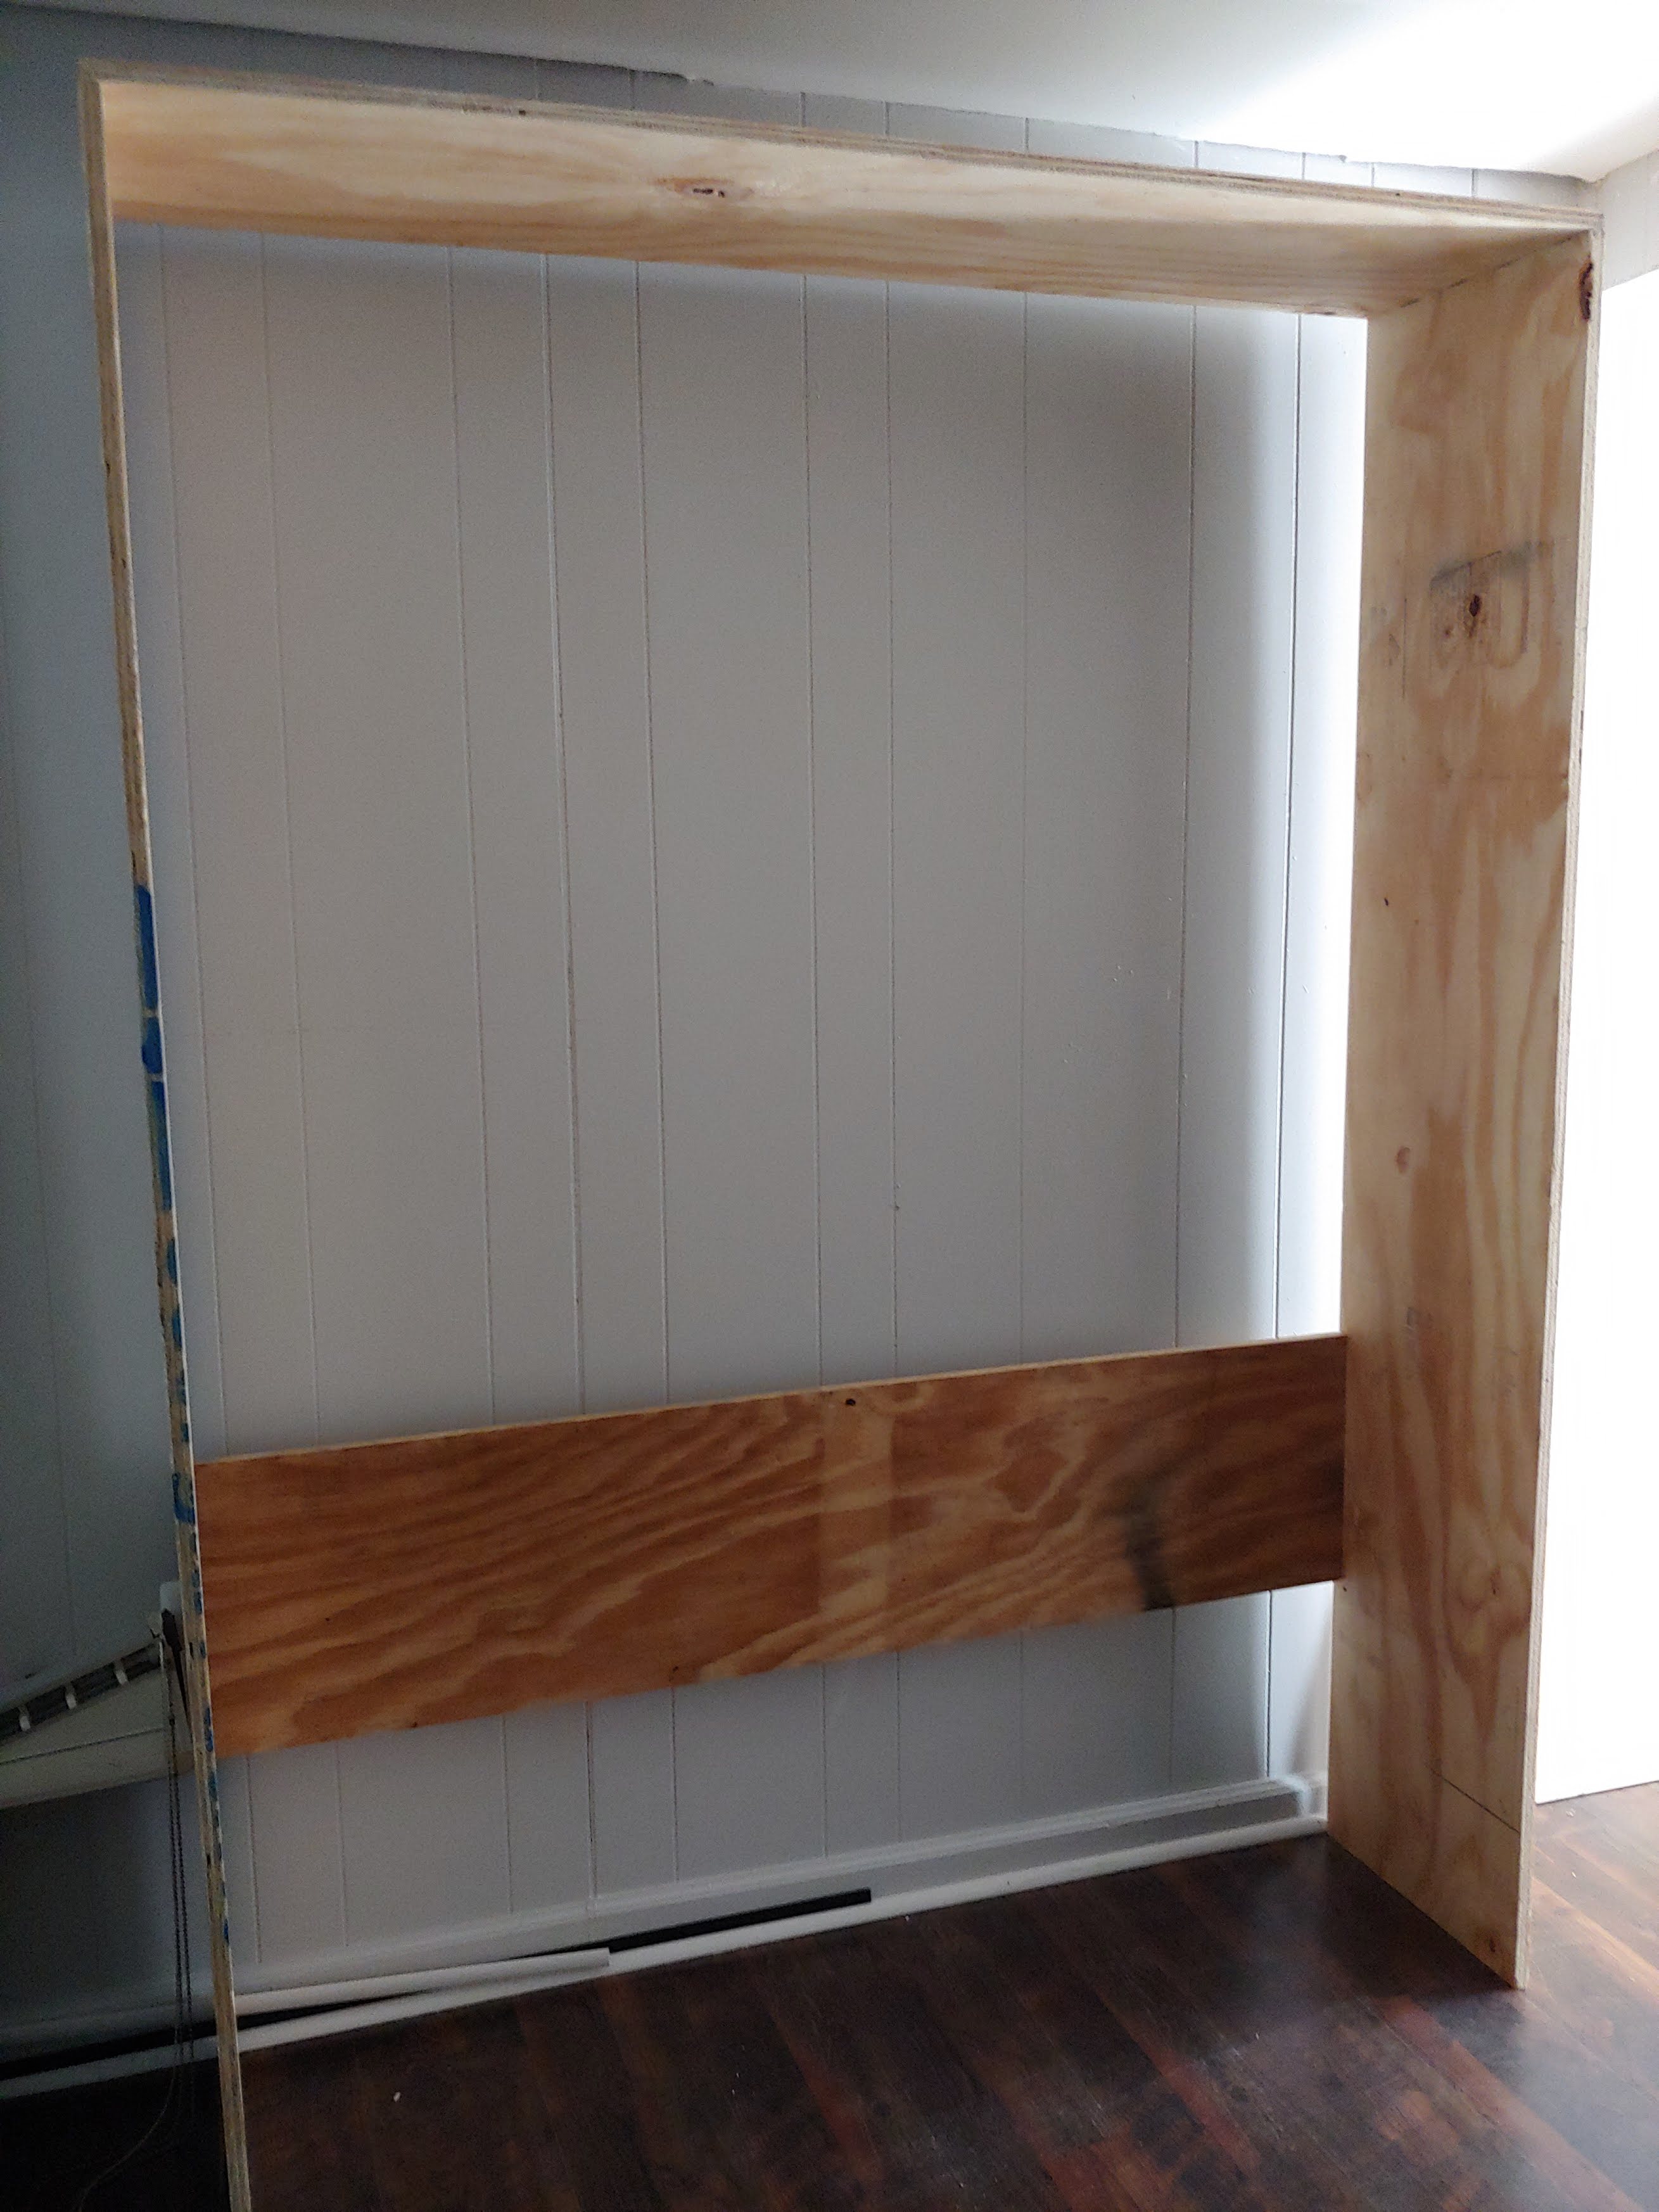
So I've always wanted to build a Murphy bed. And by always I mean since I first came across plans here that made it look so simple. It ended up taking me a while to do because my job has me working 6 days a week so I was only able to work on it for short chunks of time.
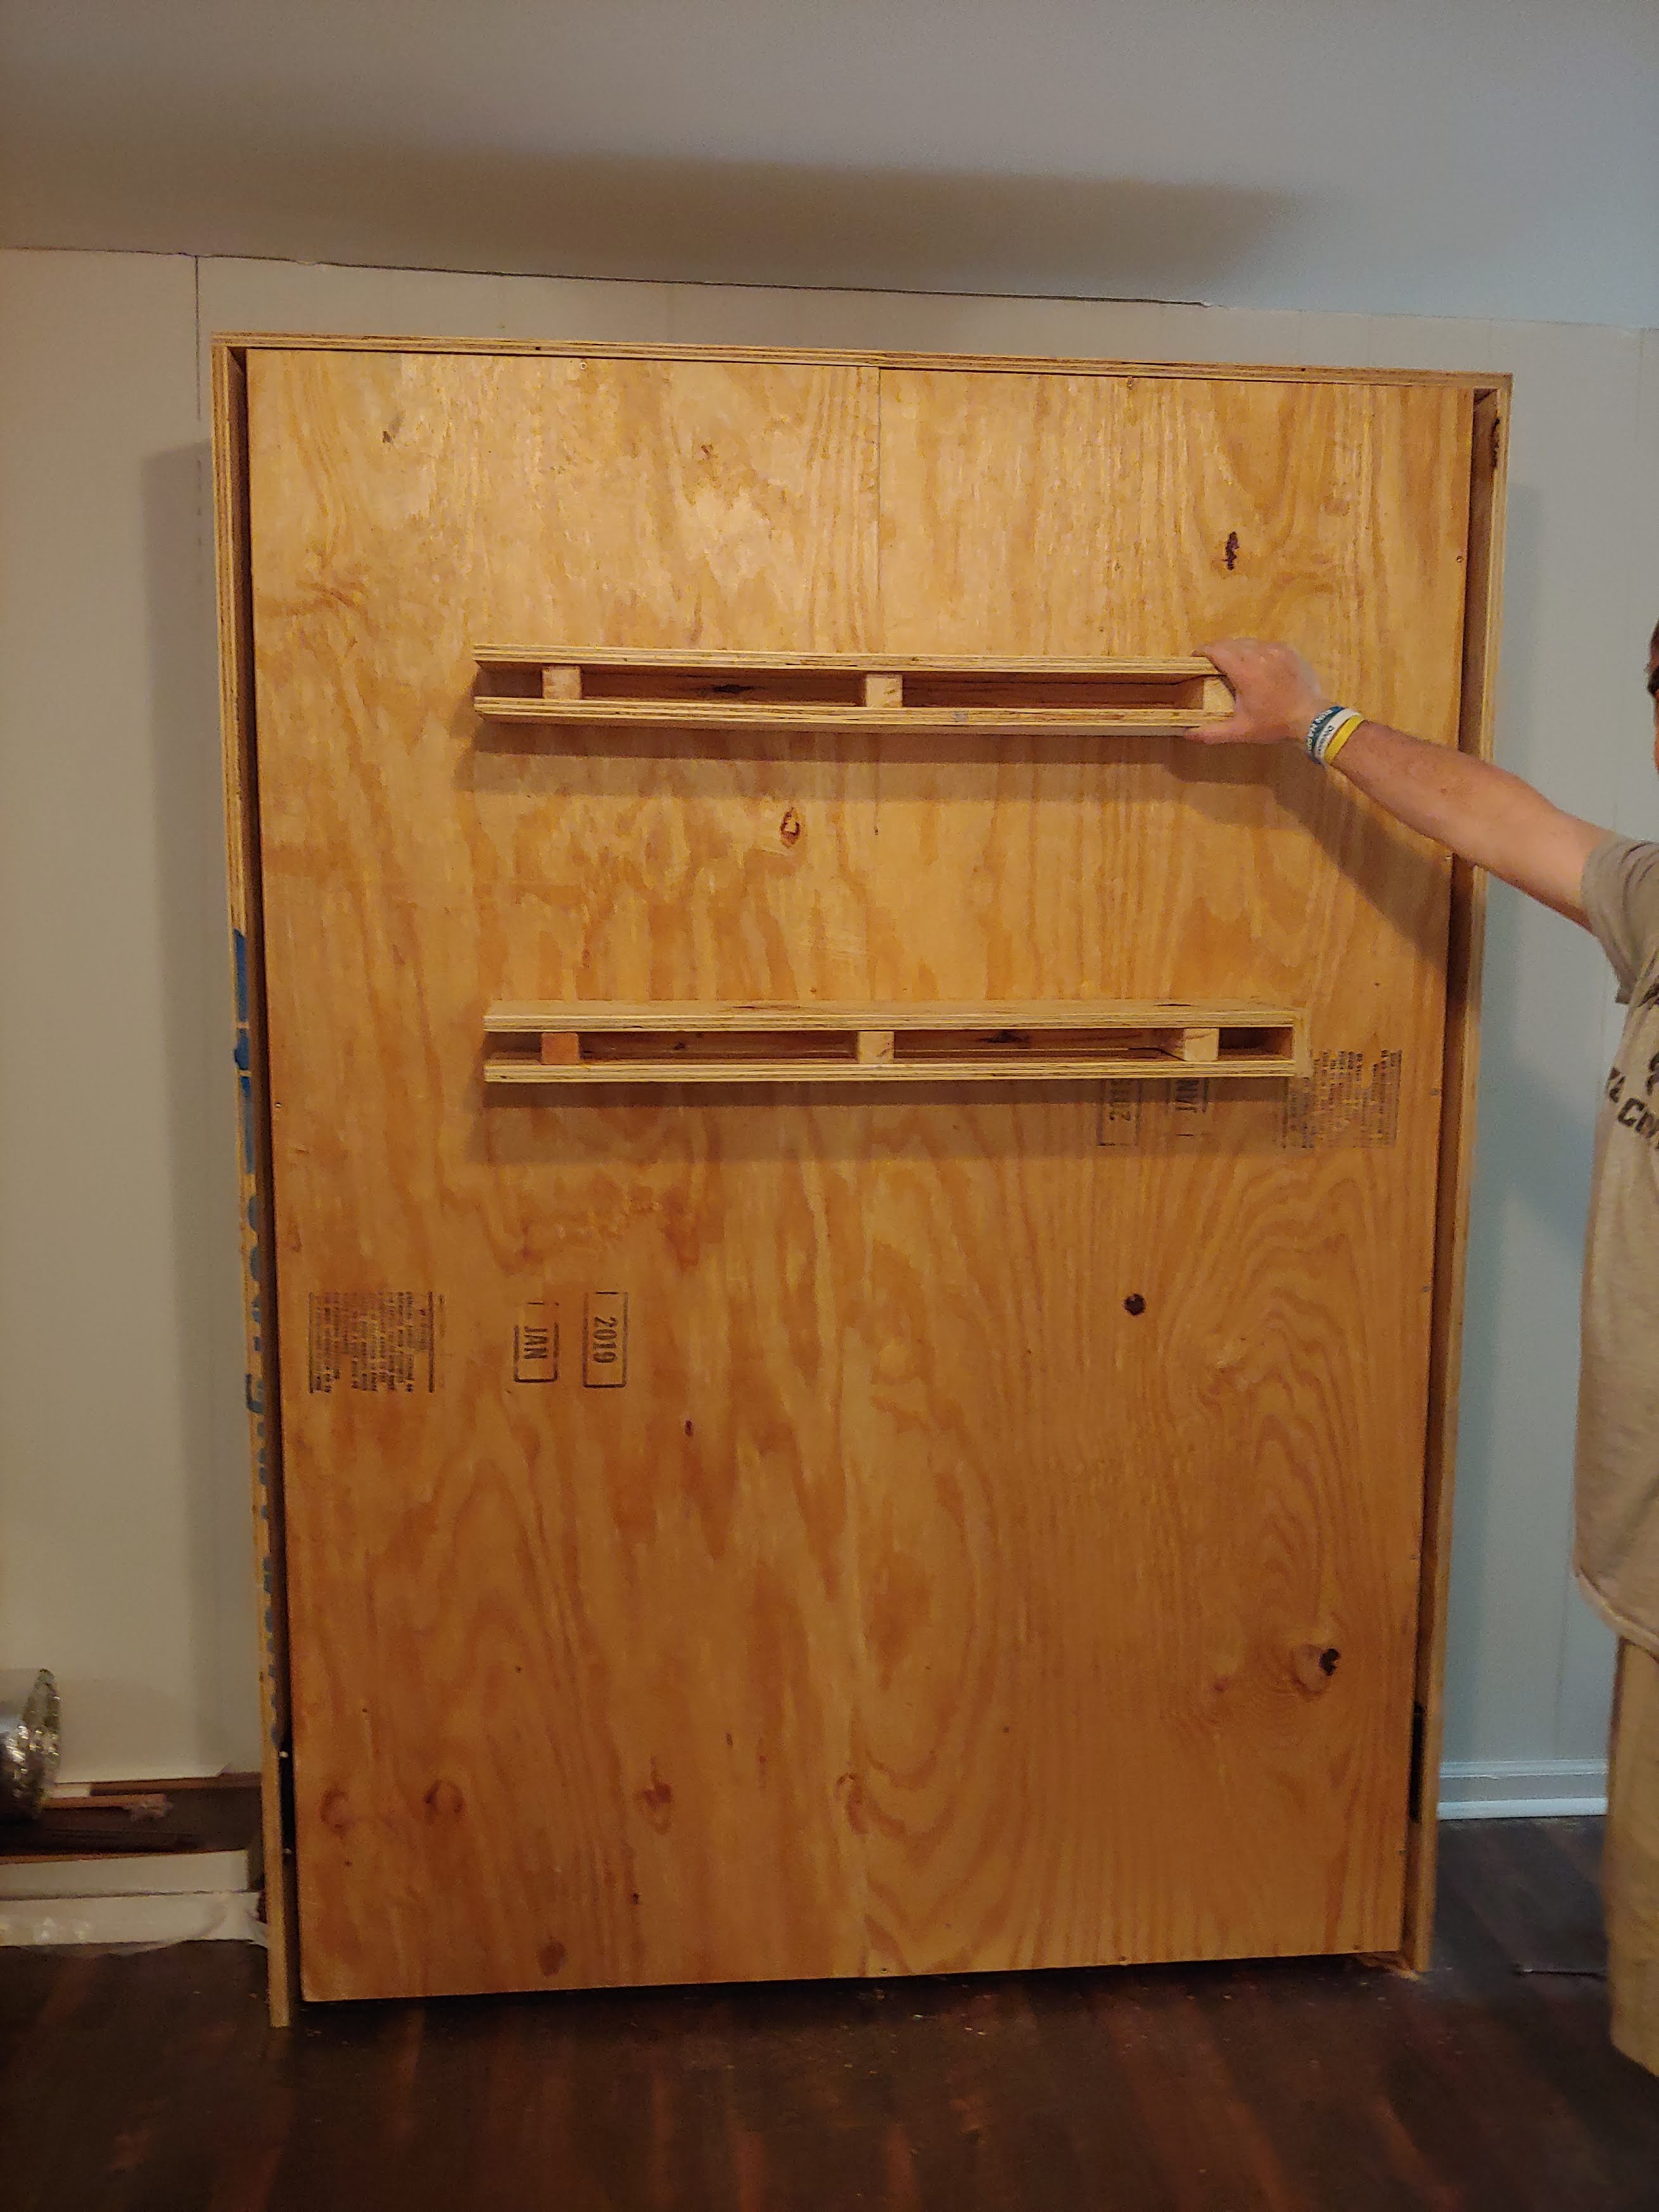
I ended up utilizing a few different plans and mashed them together to build a full size murphy bed. The shelves are the support legs when the bed is down. The "hinge" mechanism are heavy duty 360 degree seat swivels.
All-in-all it turned out WAY better than I expected with only some minor issues throughout the construction process.
Next up is a twin xl Murphy bed with a murphy desk attachment that will serve as a craft table when up.
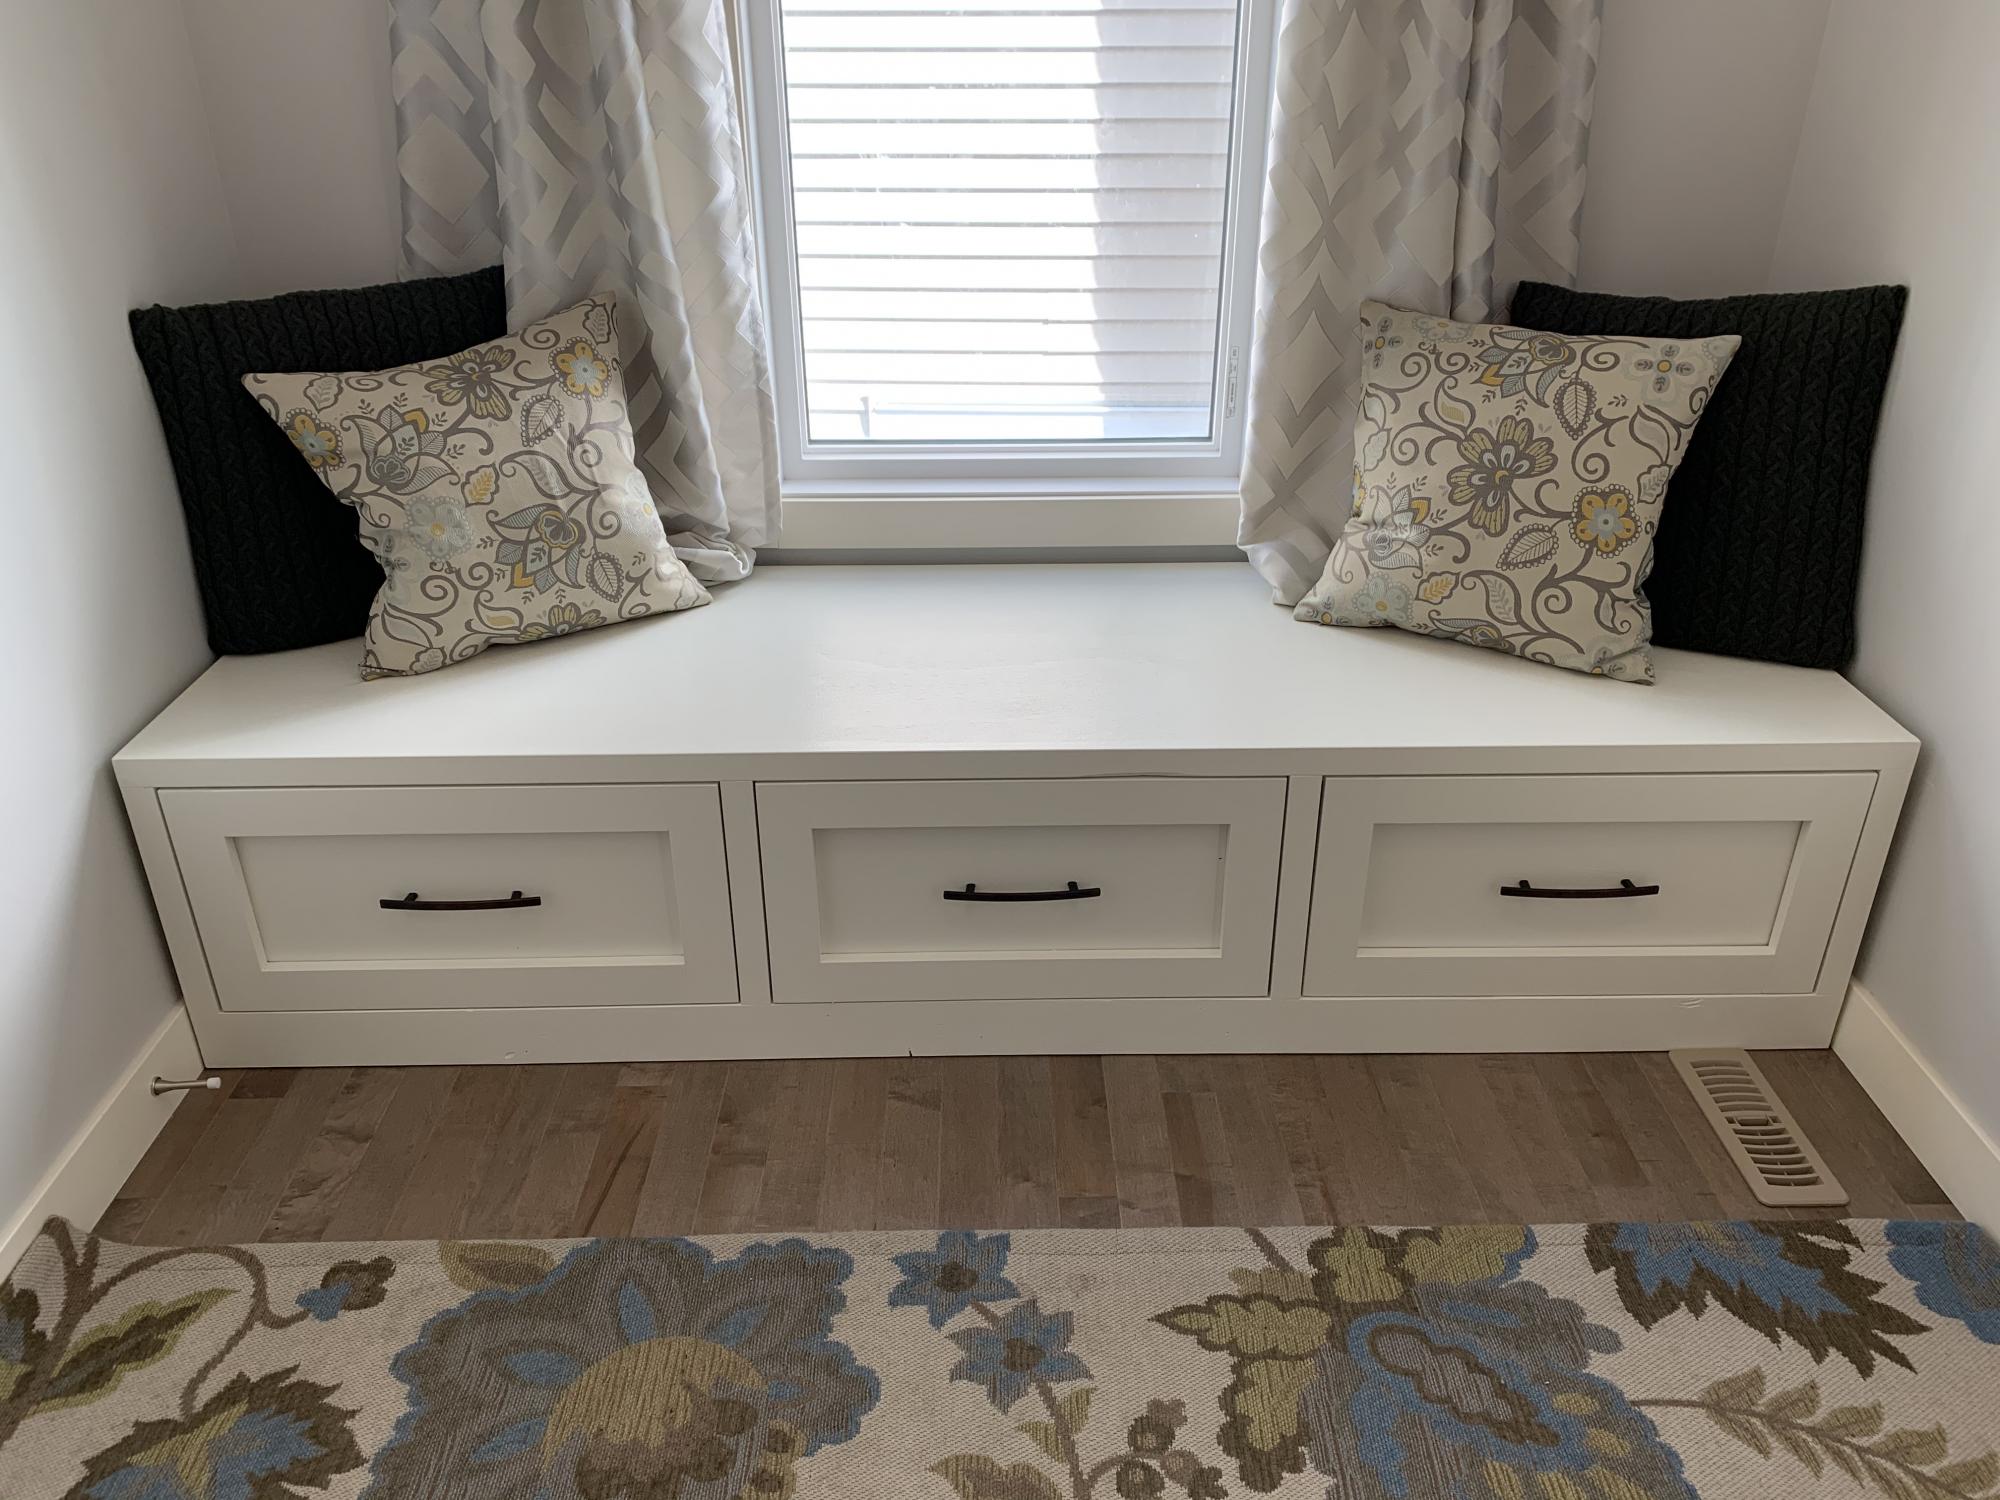
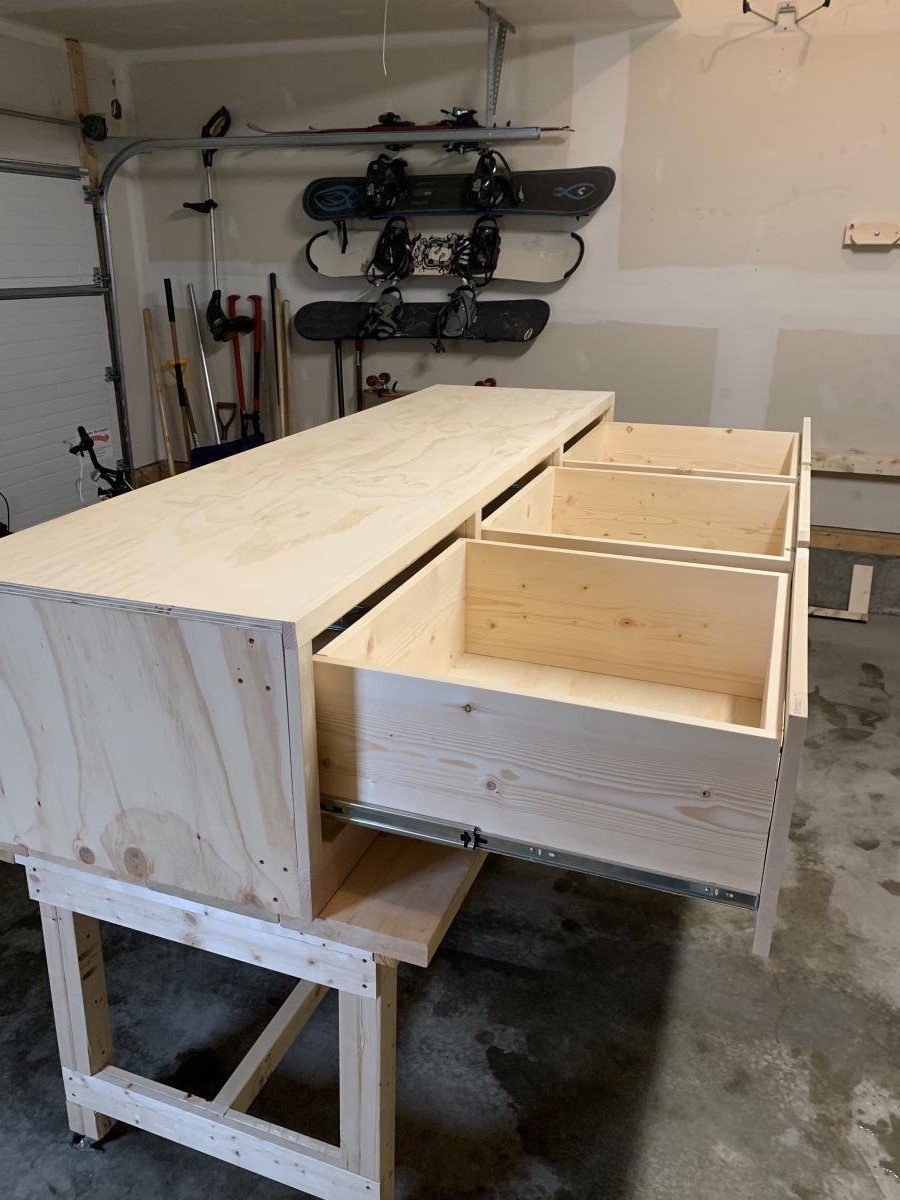
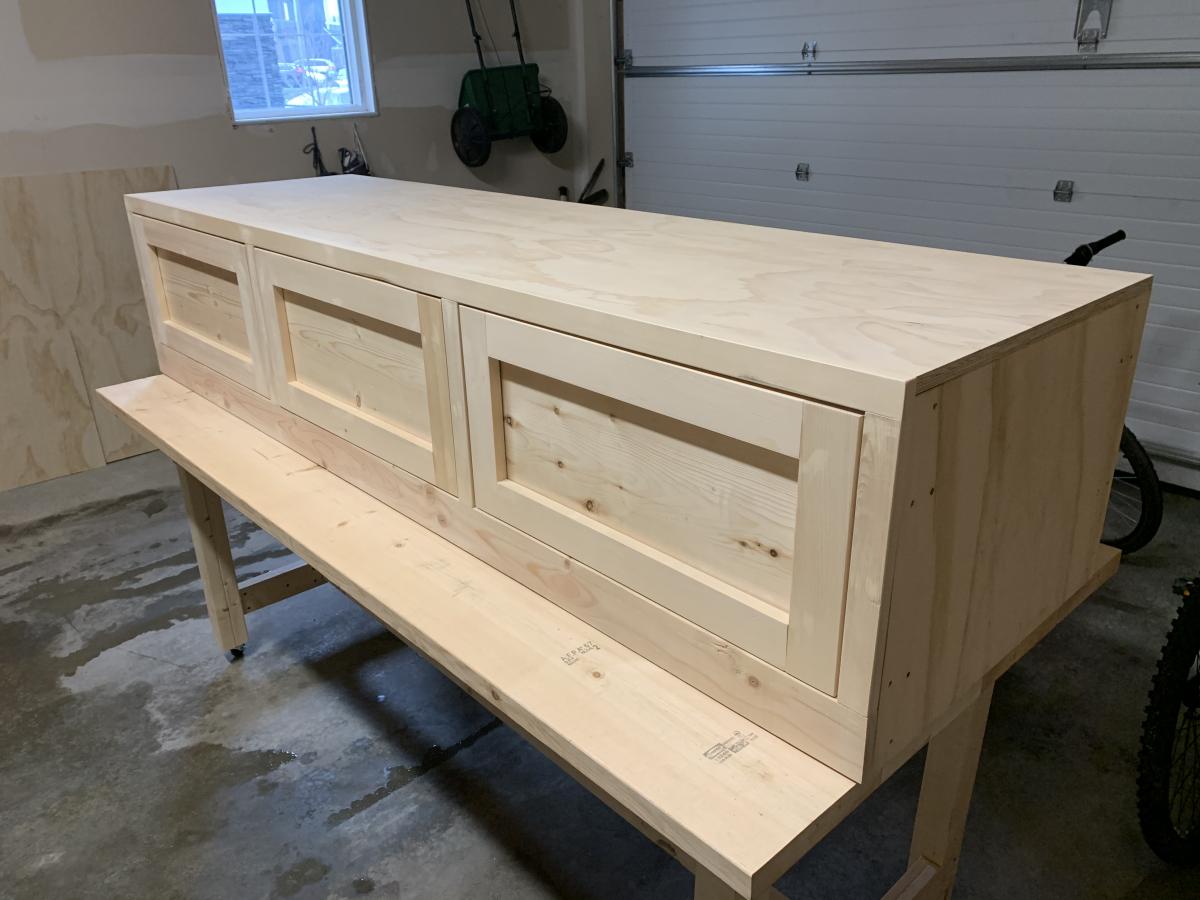
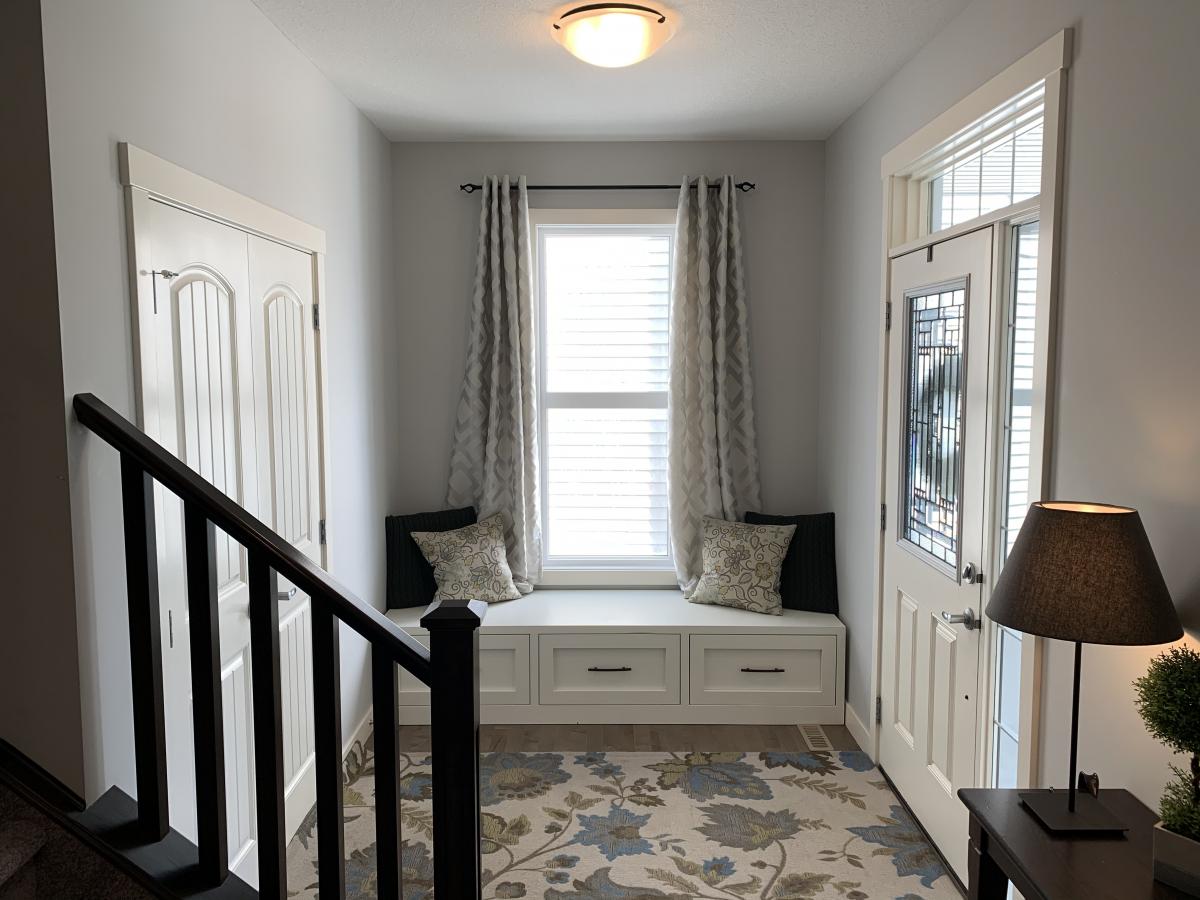
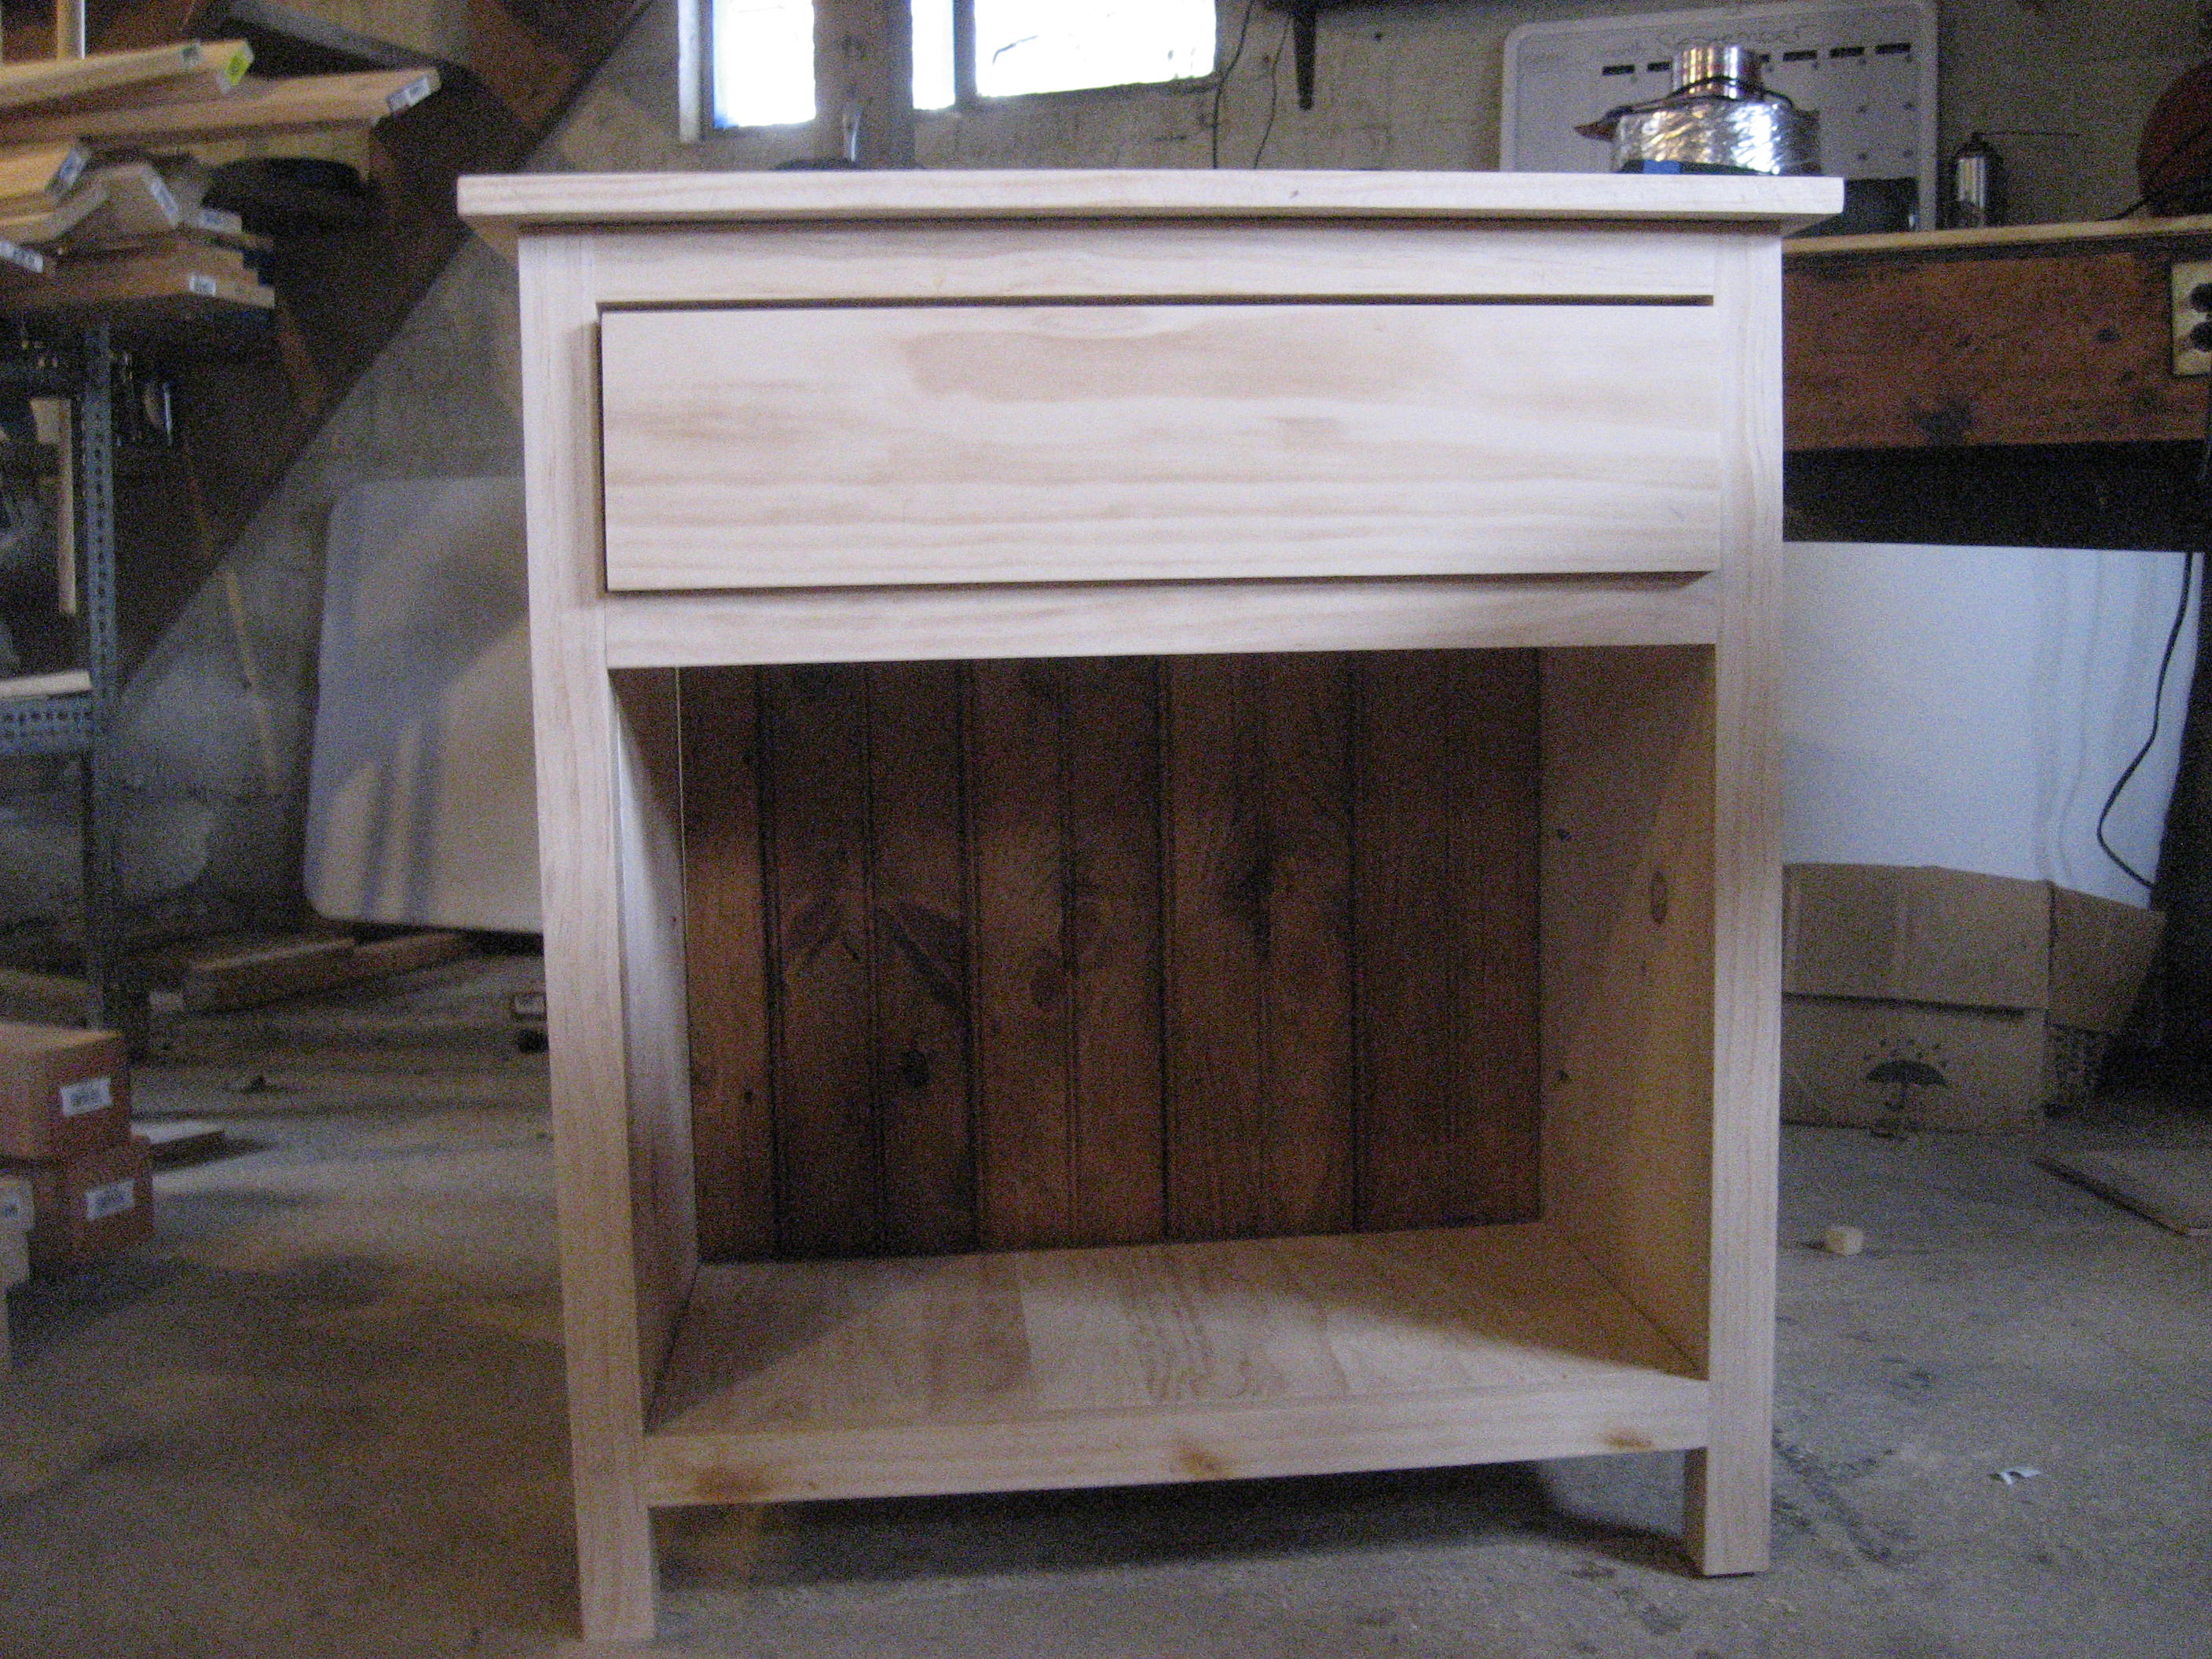
We needed a bench to fill the space in our front entry and provide some storage for seasonal gear. We couldn't find anything to buy that would work for us, so when my wife found these plans, I had to try it! Couldn't be happier with the results. We widened the bench by a foot to 84" to fill the space. Basically, it just made each drawer 4" wider. Everything else was built to plan. The most expensive thing was the soft-close 24" drawer slides (~$100). As soon as you go above that 24" depth, they get pricier! It was also tricky to get the drawers to catch properly on the soft-close mechanisms, but I made sure to take the time to get it right before closing it all in. Now I just open and close the drawers for the pure satisfaction of it! I used premium pine plywood for the top and I find it still doesn't give that smooth finish I like, even after sanding. I think I'll create a new top out of joined knotty pine planks later and just attach it to the top.

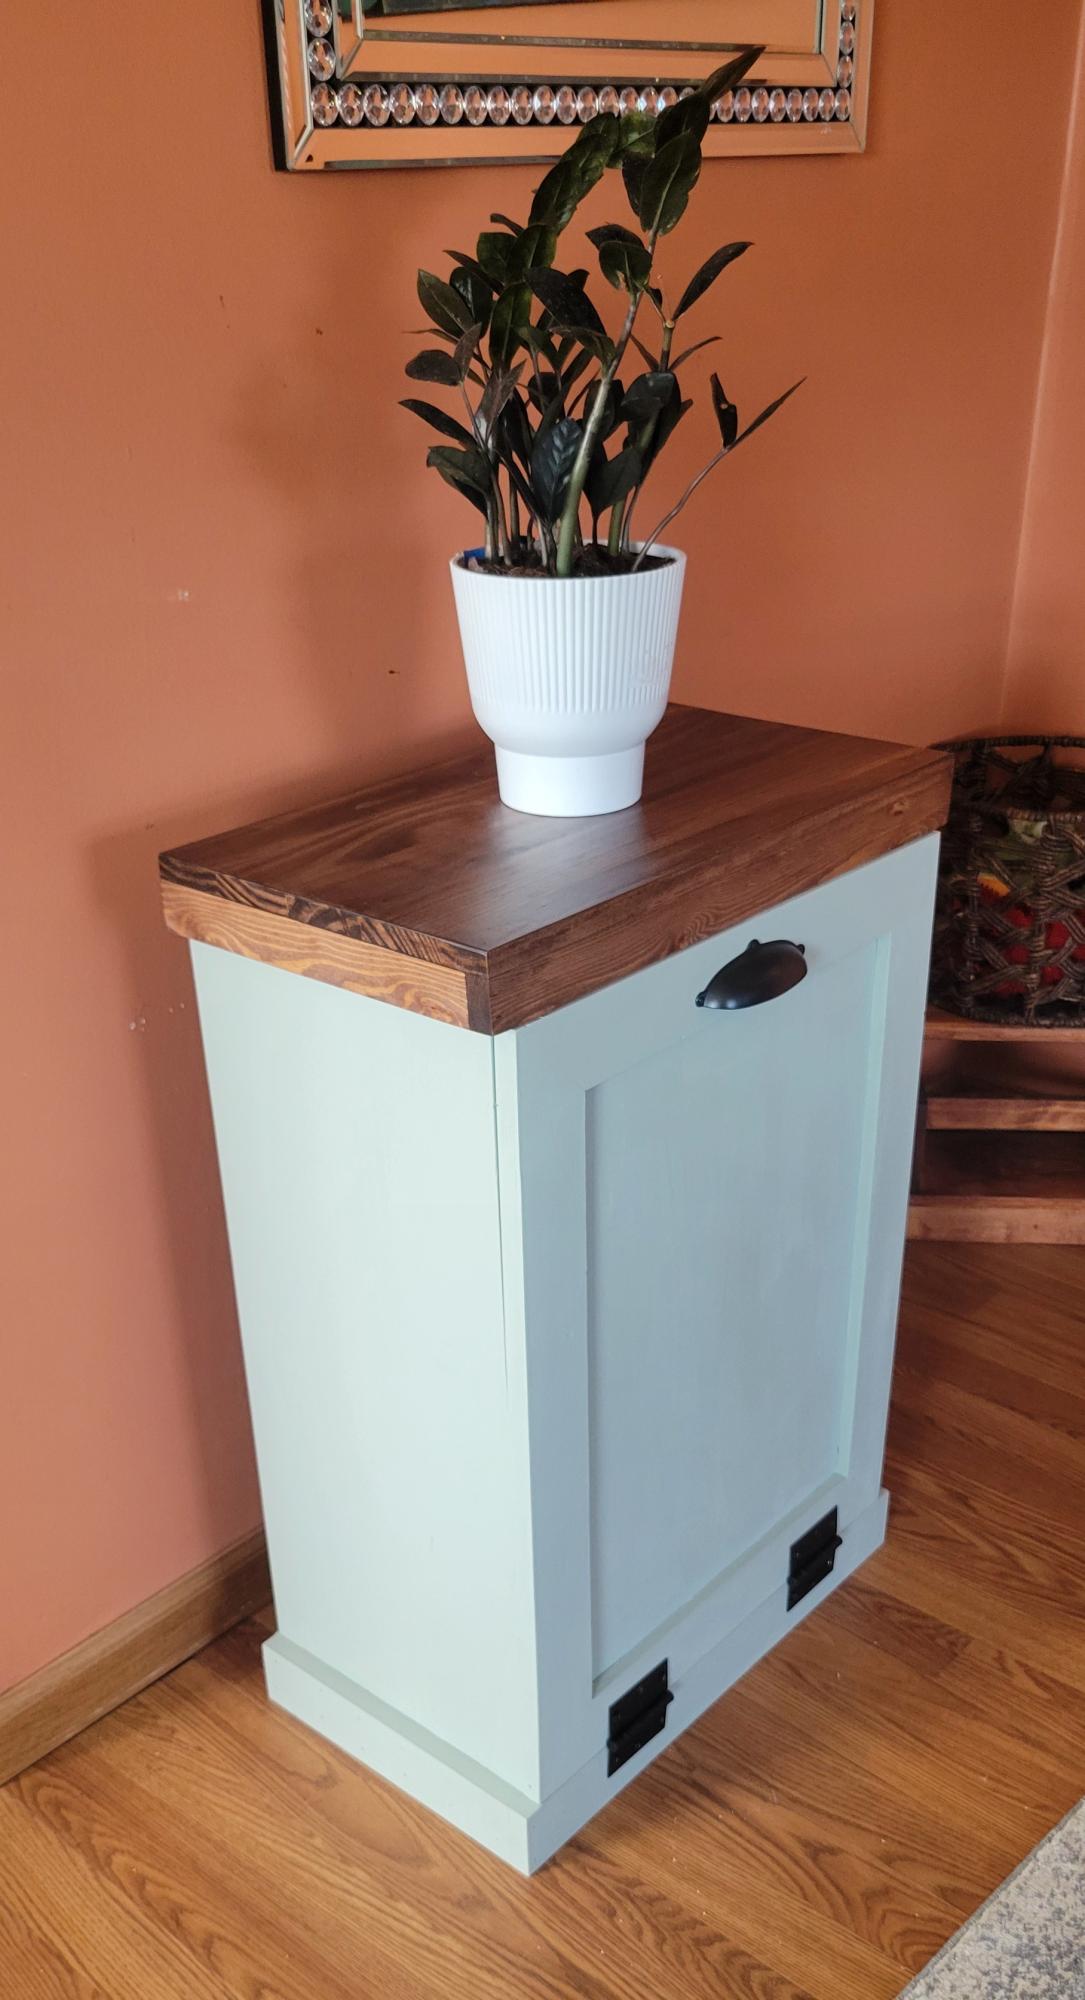
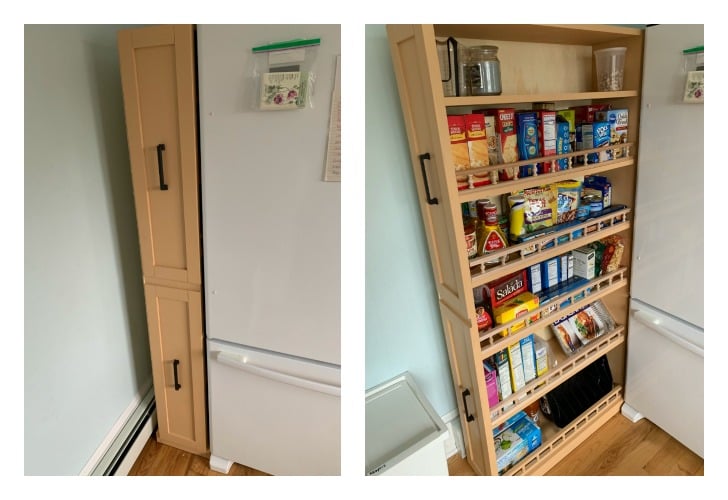
I built this as a prototype for myself because my daughter requested one for her dog food cabinet. We are going to build hers together. I'm excited about that.
Craig Morningstar
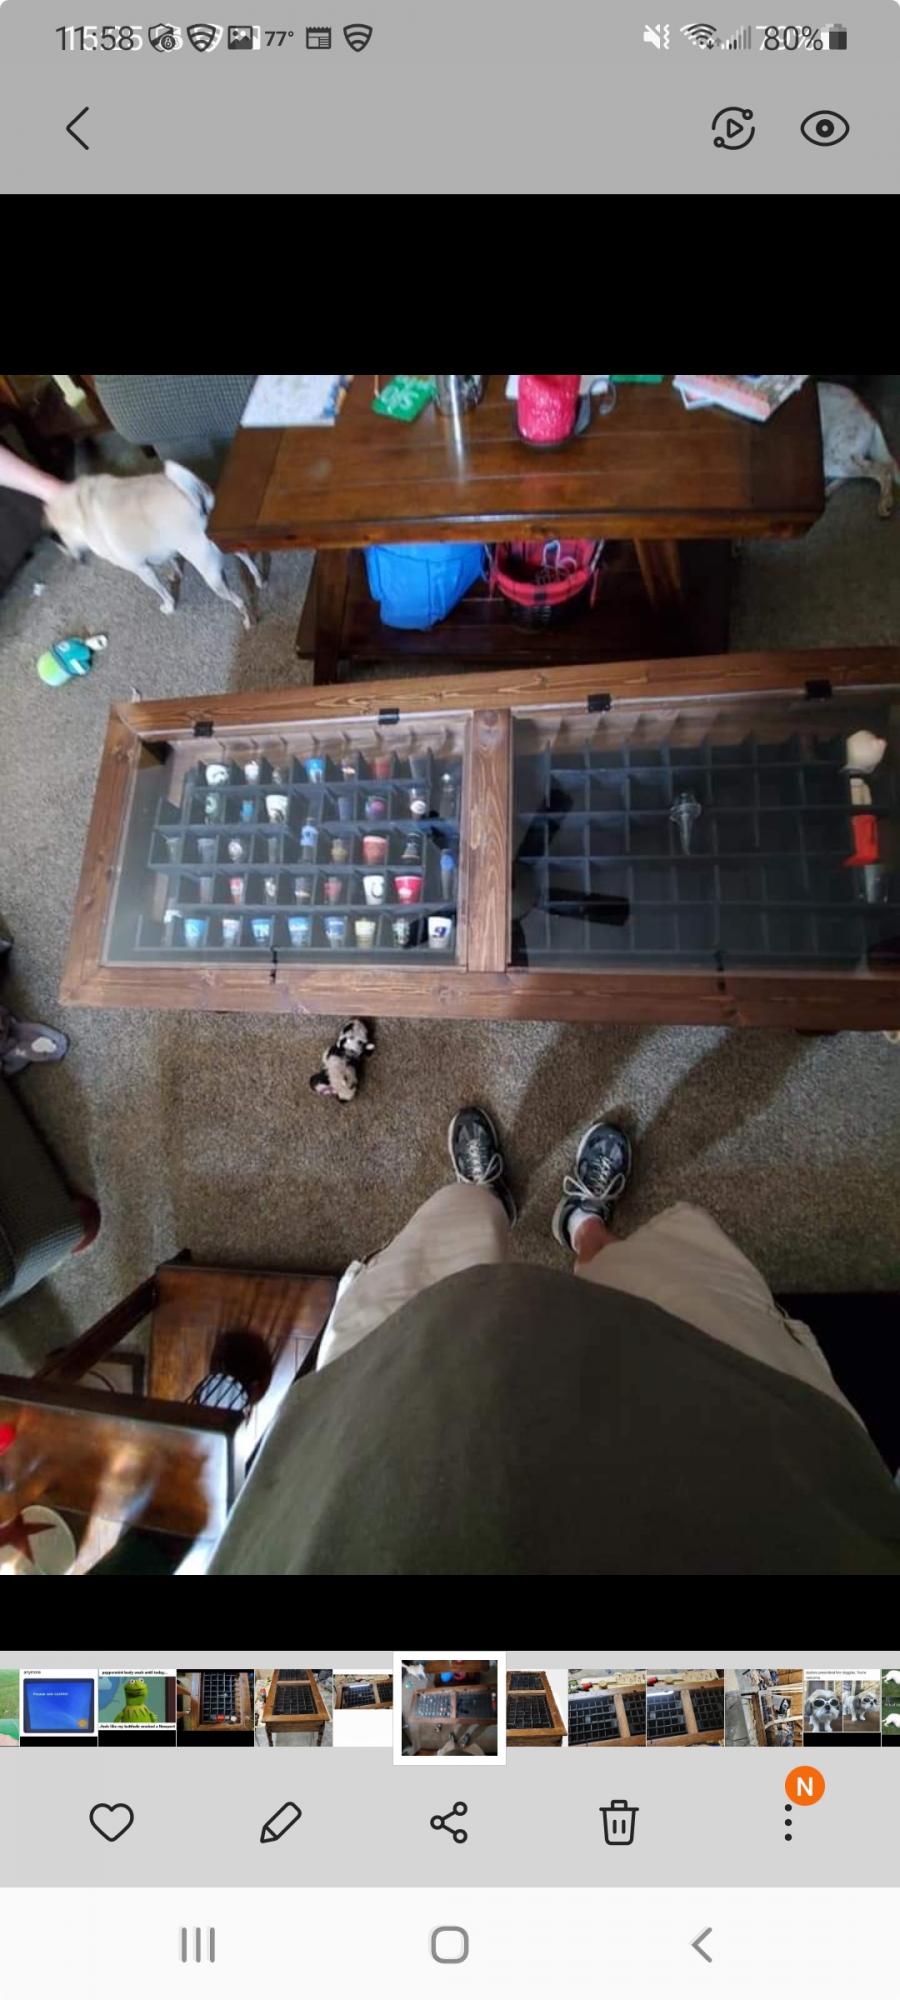
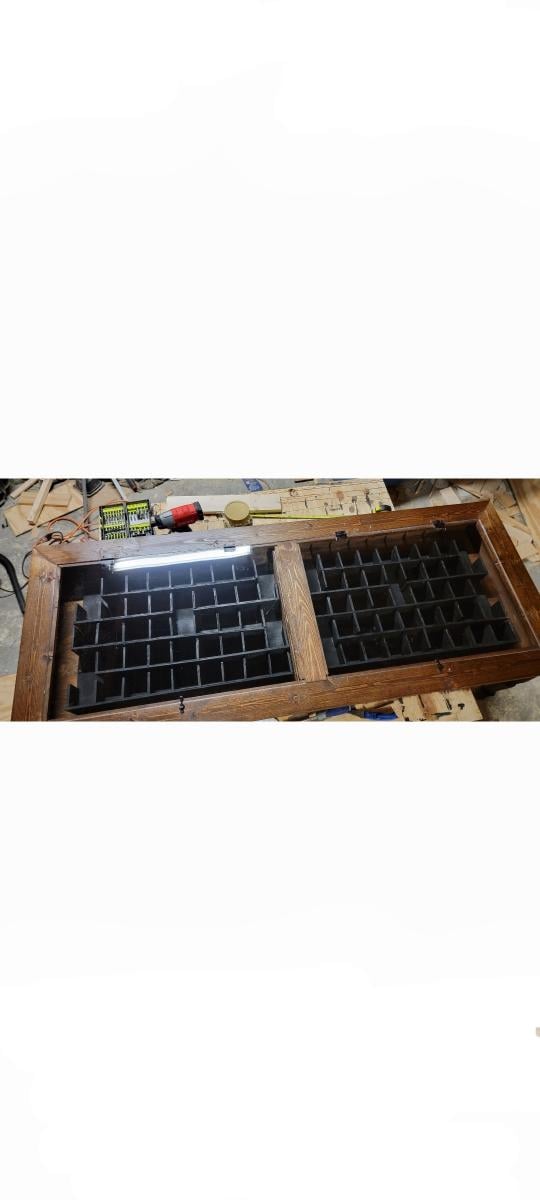
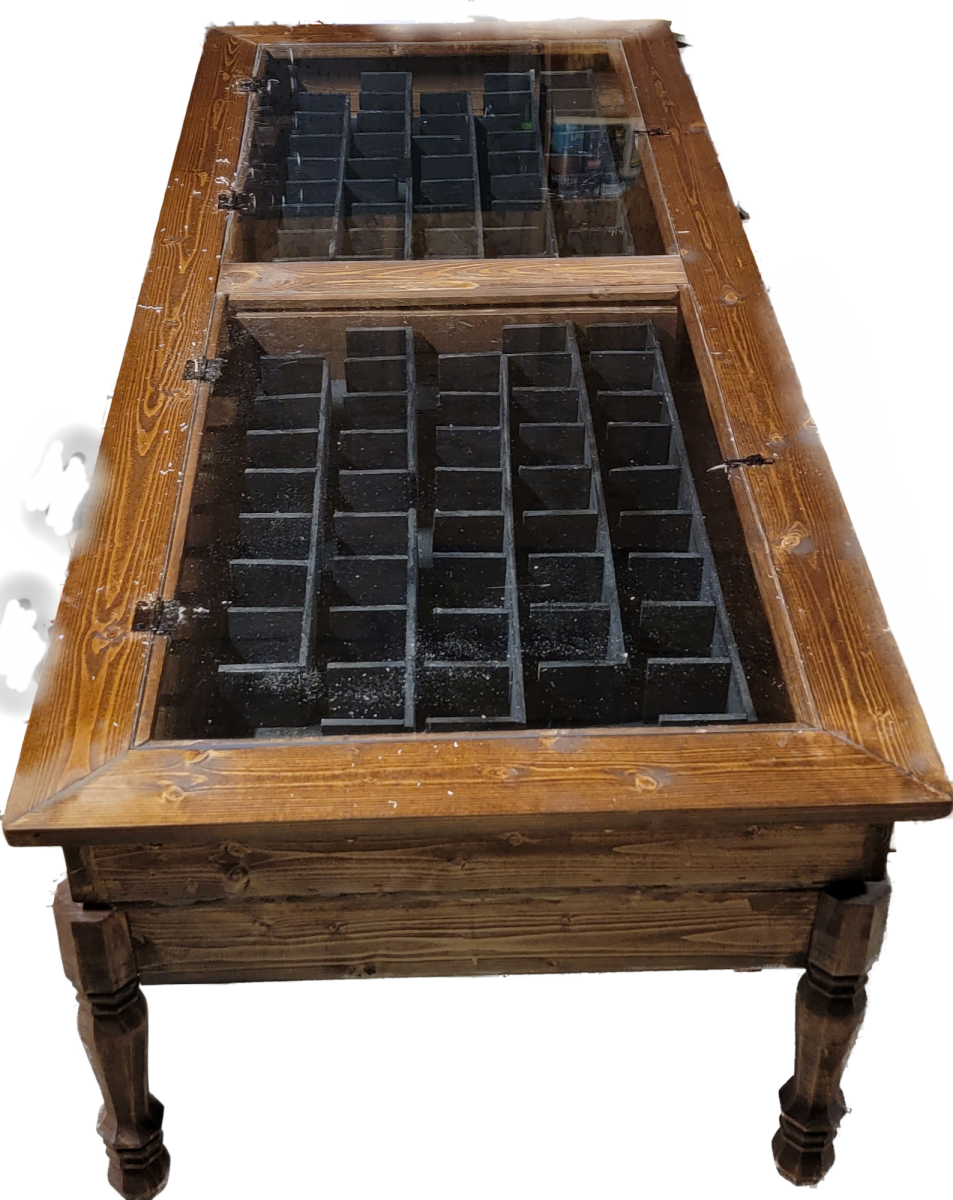
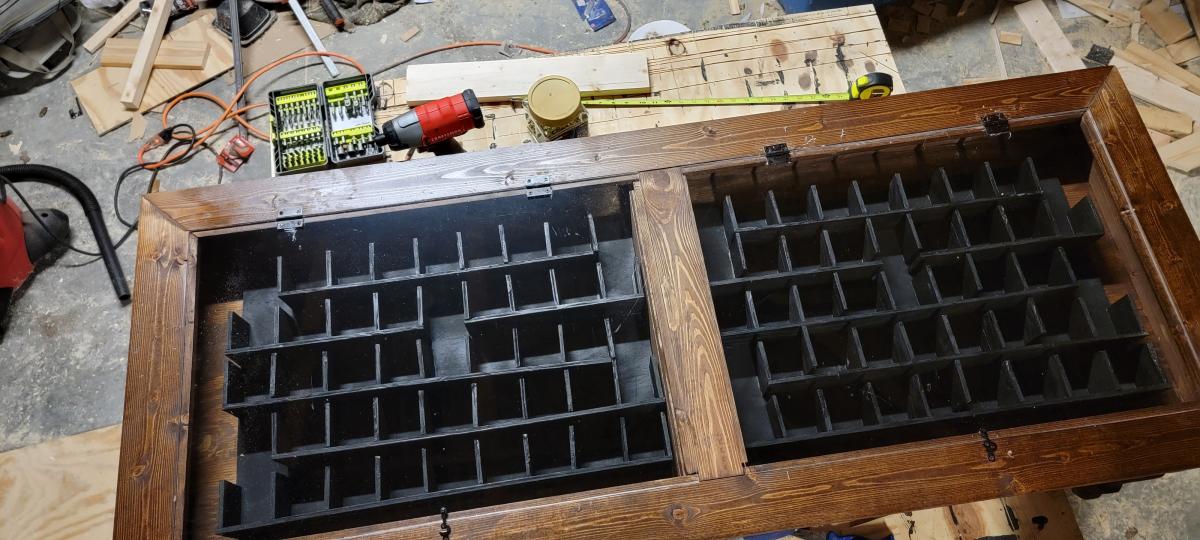
My father-in-law wanted a display case for his shot glasses, but I didn't like the idea of putting that much glass, hanging vertically. So I suggested a coffee table. This is what I came up with. I used 1x4 boards for most of it. ¼" plywood on the bottom, with 2x2 supports underneath, the actual display part is from ½" project panels I had laying around, and the dividers are from ¼" plywood scraps. The legs I picked out from the store (I don't have or need, a lathe). For the top, I used ¼" thick acrylic. I thought about glass, but they have lots of grandkids over all the time, and I didn't want a little hand going through the glass. (Side note on the acrylic, when you cut it, do it by hand, not with a power tool, as the acrylic will heat up and can melt). Other than that, I got a couple hinges and small lock closure for the acrylic, and stained it all. (Sorry for the white background picture, I tried to crop out everything else around the table)
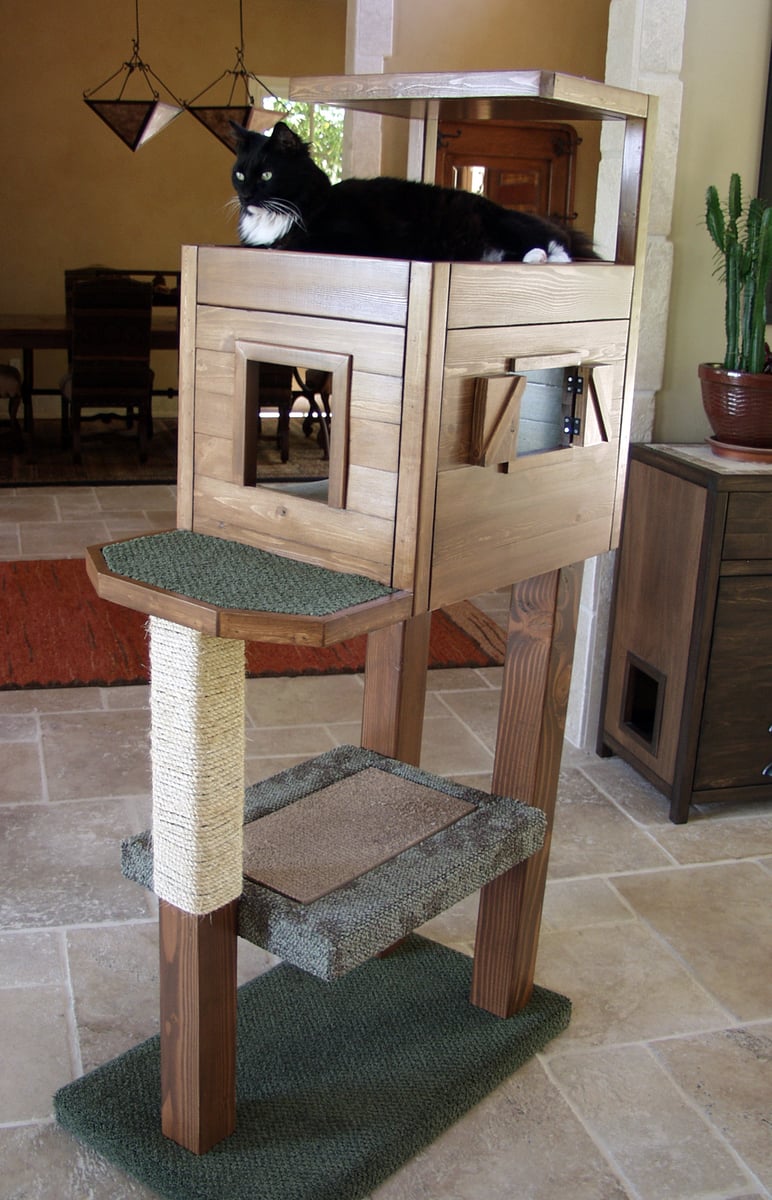
I always wanted a cabin-type cat tree where my cats could crawl in and feel safe, but still have a great view of the birds out of a window. I tried to draw my vision on paper, but that had a hideous result. Learning Google SketchUp (at least the basics) was an absolute necessity. I could never have built this without drawing it in 3D first, and seeing how the boards would connect, etc.
For the scratch pad, I built a frame out of 2x4s on top of plywood, covered it with carpet, and dropped the standard size scratch pad in place. This is the cat's favorite feature. I put barn doors on the window with tiny hinges so that I can close for added privacy. The tree sits against a window so that the back side is totally open. I made cozy zippered cushions for the platforms (that can be taken off and washed). I covered the carpeted areas with spare carpeting.


Fri, 07/12/2013 - 09:36
Would you mind sharing your dimensions for this? It is absolutely beautiful!
Sun, 08/25/2013 - 08:10
Do you have the plans somewhere? I really want to build this (even got the okay from the hubby!) but I don't think I could do it without some serious guidelines...

Fri, 08/30/2013 - 15:55
First, sorry for the late notice; I just happened to look and saw the comments/questions.
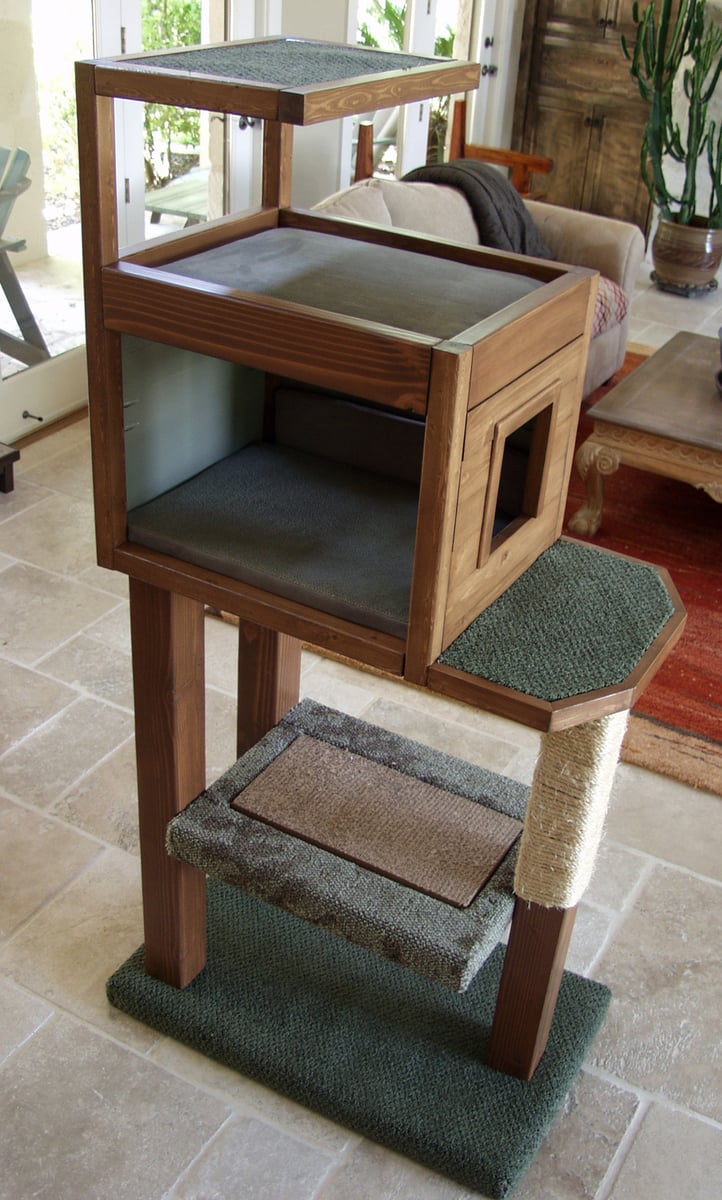
I don't have plans...all I have is a google sketchup diagram that I created as a guideline for my construction (which is included in the photos), which is not to scale. Actual measurements are:
* Base (green carpeted base): 33.5" x 19"
* 4x4 legs: 35" tall
* 'Mezzanine' scratch pad level: 22" x 17.5"
* Mid-level base: 18" x 32"
* Enclosed cabin: 18.25" x 22.5" x 17" high
* Highest point: 56"
This has turned out to be a fantastic hit with the cats. They use all 5 levels, but the scratch pad and cabin are their favorite spots. If you need anything else or additional pics, please contact me.
Fri, 08/30/2013 - 18:15
Thanks for the dimensions, Joni! I'm trying to learn SketchUp so I can draw up my own plans, also. If I can't figure it out, I'll hand it off to my 12 year old, who is a pro at it (go figure). I know my cats will love it if I can manage to get it built!
Fri, 09/27/2013 - 10:15
I used your pictures and diagram Joni and made one for my friend for her cats! I used 2x4's for the cabin which makes this thing so heavy but so sturdy! It holds my 60 lb child without budging... here's a pic of it almost done. My friend was not finished wrapping the posts with sisel rope though.
https://www.facebook.com/stephanie.brooks1975#!/photo.php?fbid=10151788…
Thu, 10/31/2013 - 14:30
Bhoppy -- I looked at your cat tree on facebook. It's awesome! The sturdiness of it shocked me too. And I was initially worried that my cats might knock it down!!
The worst part of building it was getting that lower scratch pad level on straight with the 3 posts. I'd never want to do that again!
Thanks for sharing, Joni
Fri, 01/02/2015 - 01:18
Funny, almost every time I'm looking for ideas or inspiration when I want to build something, I end up back on this site. I was searching for pictures of cat trees and this was the only one that made me say "Holy crap, that's EXACTLY what I want!" My cat will love it!
Mon, 04/27/2020 - 20:41
Not sure if anyone is still around to see this, but I fell in love with this tree the second I saw it. Wondering if anyone created a detailed plan and might have it handy or possibly a detailed sketchup and wouldn't mind sharing the save file?
In the event nobody has either... I'm planning on having someone else build this for me as I don't have the tools nor skill to do it myself. I have a few questions:
1. The tree base/platform, what's a good recommended thickness?
2. The platform for the scratchpad... is there any certain reason it's so much thicker compared to the other platforms?
Thanks.
Sun, 09/12/2021 - 11:51
Reverse engineering this project, using just 2x4s. None of the photos show the undersides. How are the plywood pillow bases attached for the top and bottom of the cabin? and the base of the top viewing platform?
Sun, 09/12/2021 - 16:42
There are no Minwax water based stain colors with those names that I can find.
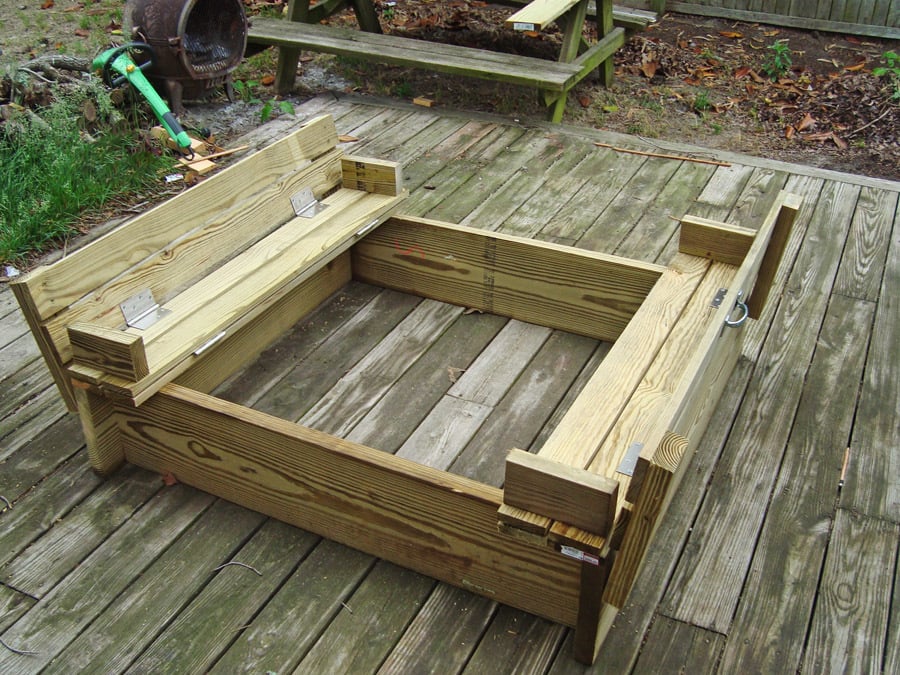
This is a fun project even for beginners. If you have an interest in building a sandbox, and have some tools, I'm sure you can make this easy enough!
I used 2" X 10" wood for my sides instead of the 1" as the plans call for. This gives extra strength and more depth. When you use 2" wood, you will have to turn your 1 X 4's the other way to match the 47½" width, because with the added width of the 2 side boards, your new width is now 49¼". It's not difficult, you just have to match your 1 X 4 X 47½ boards to the proper width. It will turn out fine, they just won't match the plans or pics of those using 1 X 8's for sides.
Sorry, I'm delivering this to my grandson's house for his birthday present, so no sand, but use landscaping cloth under this sandbox, then fill with sand.
One other thing, I'm toying with the idea of matching the angle the backrest is at and re-cut new pieces of 7½" arm rests. I think that may look a little better than the rectangle blocks.
My added pics are as follows:
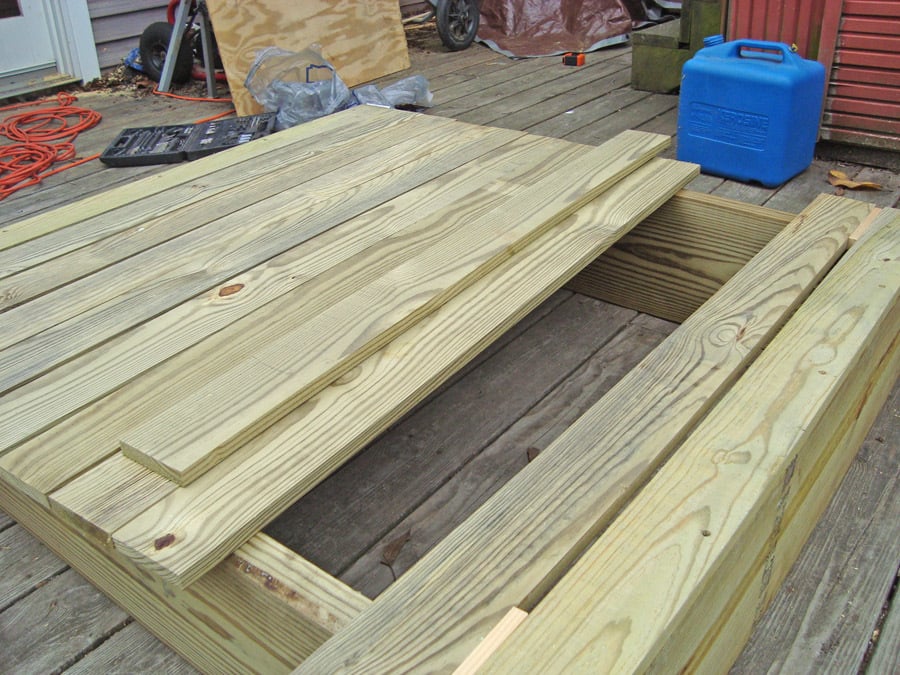
1. The side boards all cut, and sizing up the frame.
2. All other boards are cut; I laid them out for fit before screwing the pieces together.
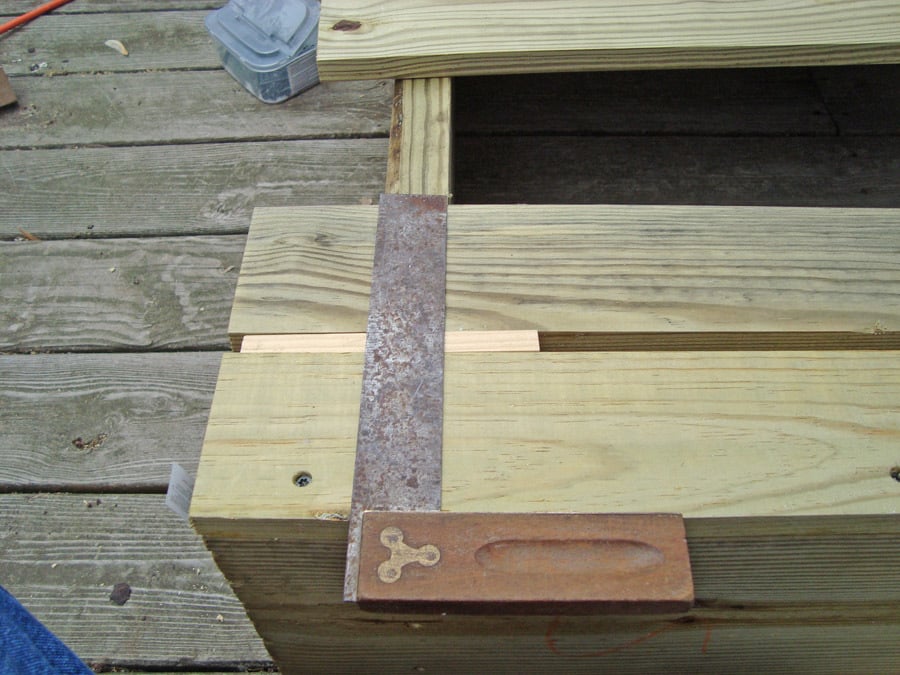
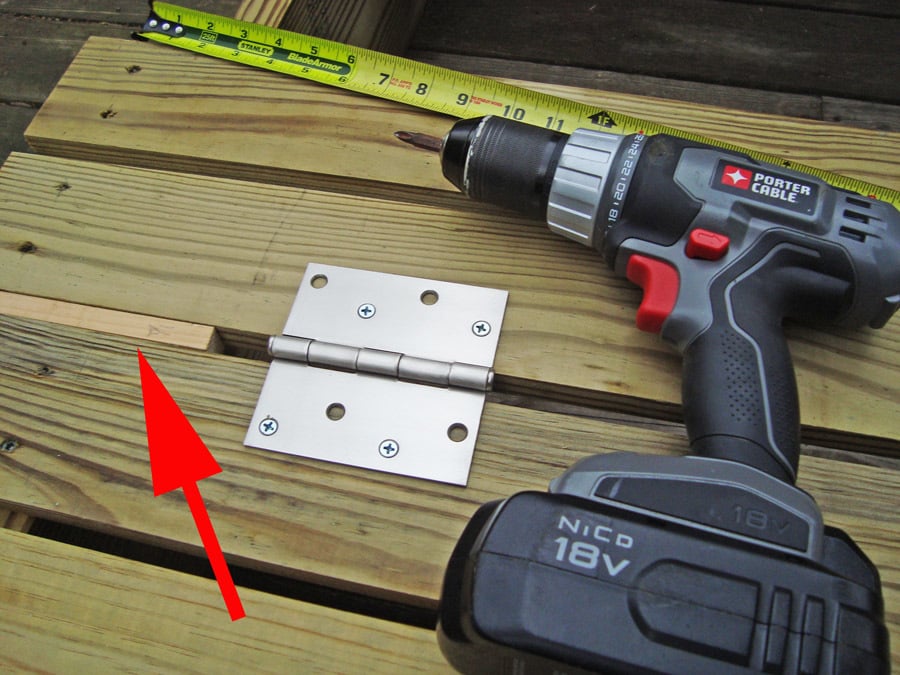
3. Using a square will help you keep everything at the correct angles. Also note in this picture and the next where I used two ½" pieces of wood I ripped to keep the ½" spacing uniform. Just rip any wood to the ½" width, make 2 pieces and butt against the next board on both sides, then screw them down. Makes it VERY easy to keep a uniform gap.
4. This picture shows me using the same "spacer" when putting the hinges in place. The red arrow points to the wood spacer.
5. The first bench is complete, and working fine!!
With the wood I used in my project, I used 2½" self tapping deck screws for the frame and attaching the 1X4's to the frame; I used 2" galvanized for attaching the 1X4's to any 2X4's; and for the hinges, I used ¾" wood screws. Using these sizes prevented the screws from coming through the other side.
I bought everything needed in this project at Lowe's and it was under $90 in costs; this is all the lumber (upgrading to 2 X 10's), hinges, screws, and handles.


Wed, 05/09/2012 - 16:25
I was just going to tell you how to add a brag blog when I saw that you'd already done so! YAY! Your sandbox looks awesome! You guys are all making me wish I had a tolerable yard to put a full-sized box in!!!
In reply to Yay, you figured it out! by Lady Goats
Thu, 05/10/2012 - 13:49
Yeah, you made the plans easy to follow. It was a lot of fun. I spanned it over 2 days, but still was only around 4 hours of work.
I'm considering cutting the "arm rests" at an angle to match the slope of the back rest. I may play with that this weekend.
Thanks for all the help!
Also, what did you use to make the sketch type pics for the plans? I know you mentioned something about not knowing how to put the hindges on them. If I can help, I can probably do it for you in PhotoShop.... Just let me know.
Thanks again!
Loral
In reply to Yeah, you made the plans easy by Loral
Thu, 05/10/2012 - 14:07
And didn't even think of putting the pics in PS to add the hinges. DUH! Thanks for the idea! ;-)
What do you mean about angling the armrests? So they sit right on the back, instead of the gap?
Thu, 05/10/2012 - 15:42
Something like this:
http://www.loraljohnson.com/sandbox/NewArmRests.jpg
I cut these at a 10º angle on both ends and 8" long.
Now, how did you make the "plans" images?? :)
Loral
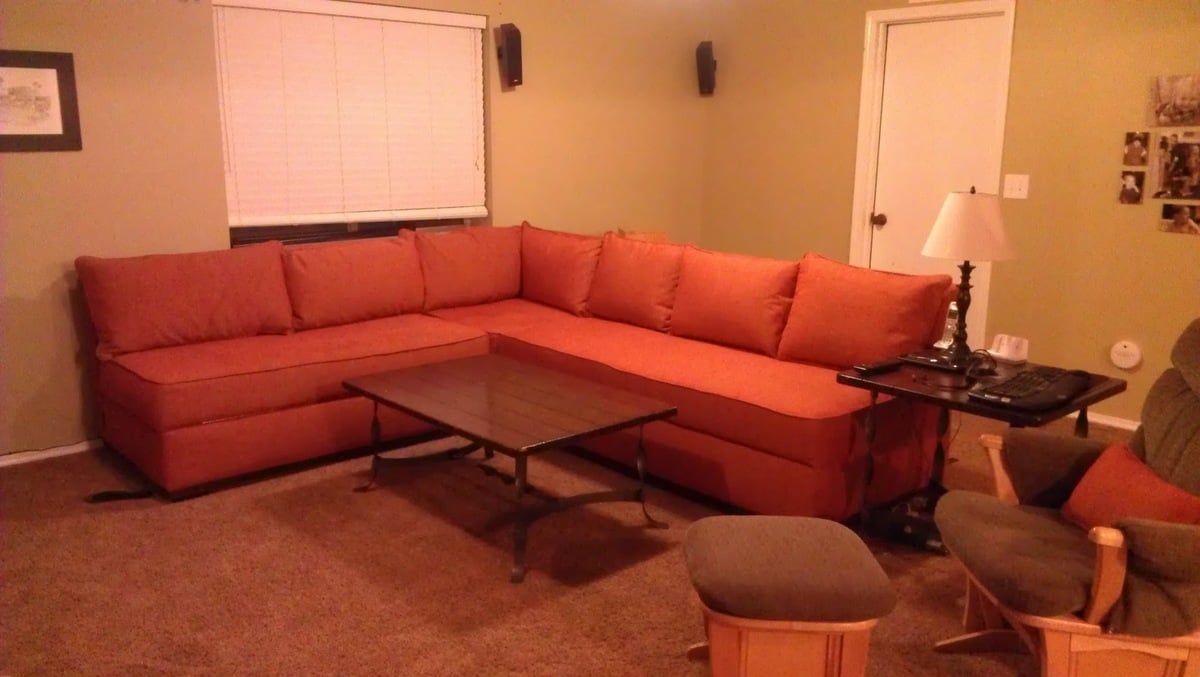
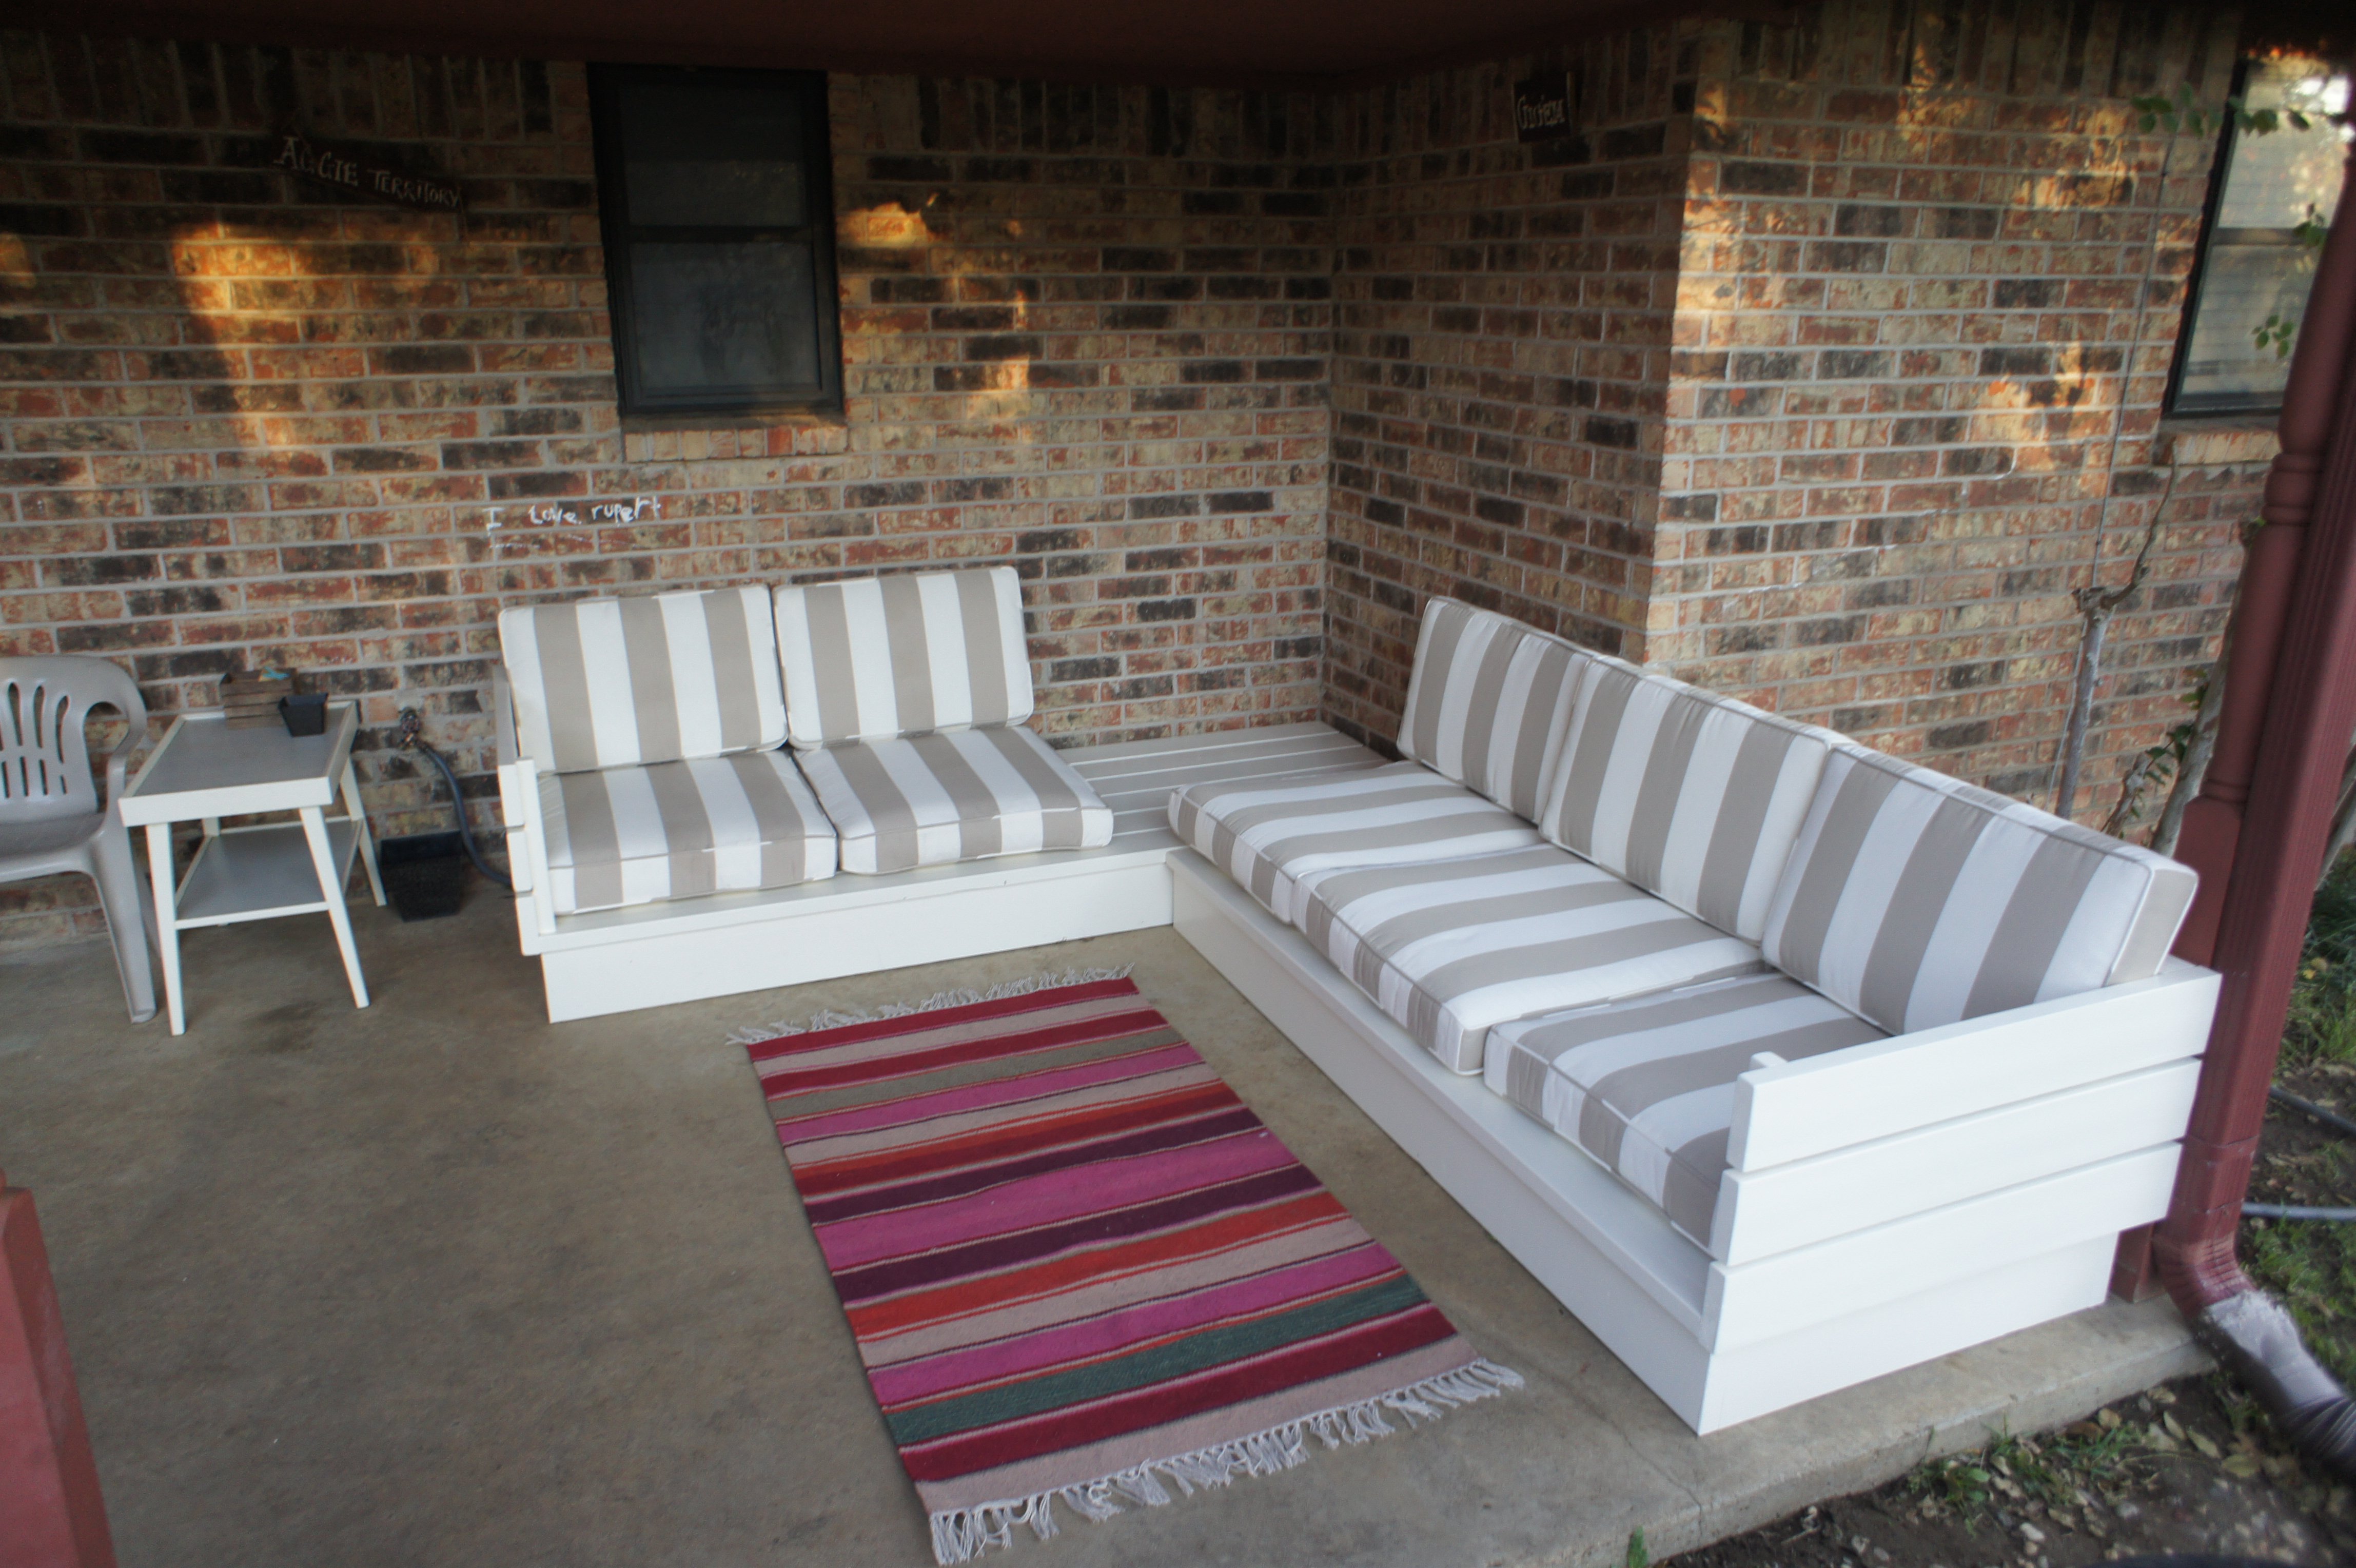
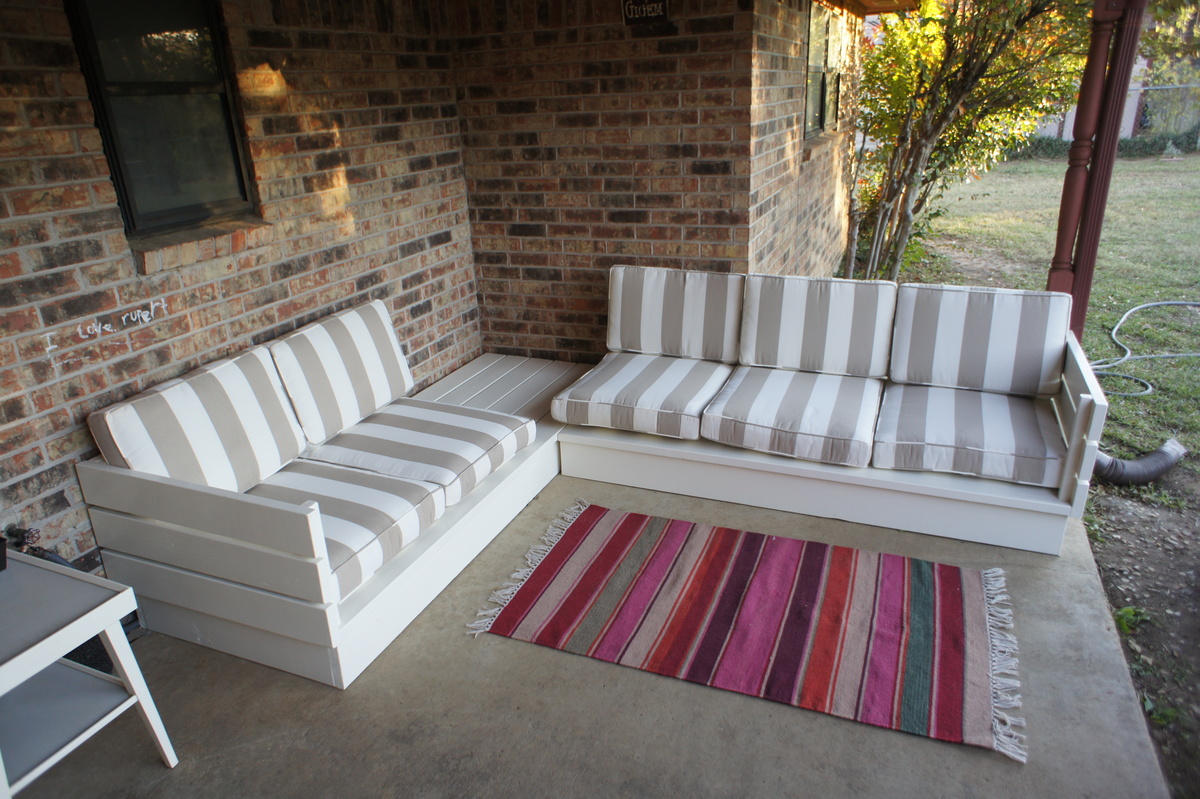
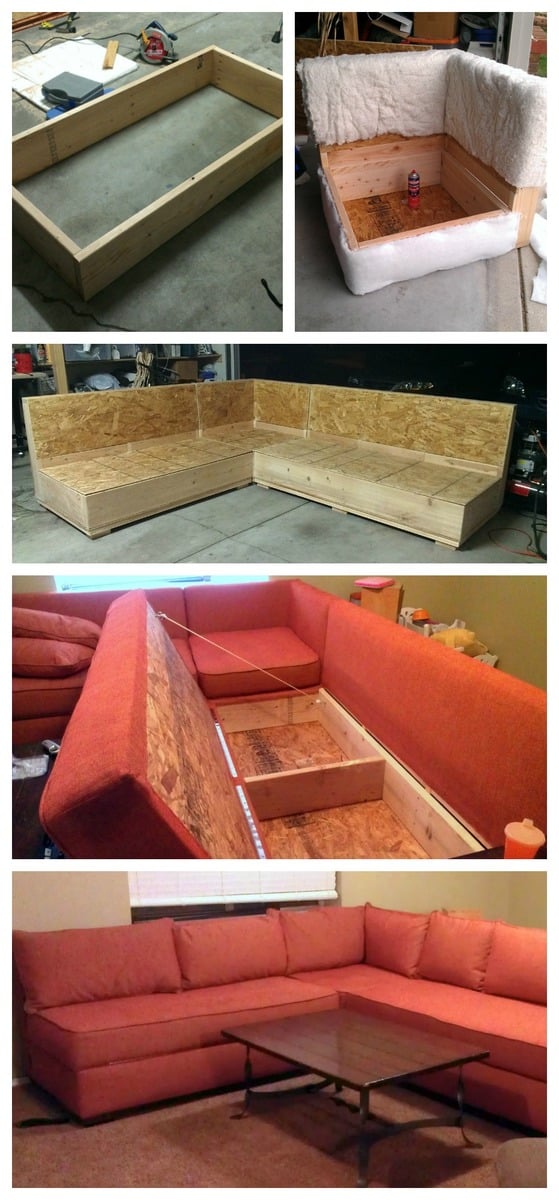
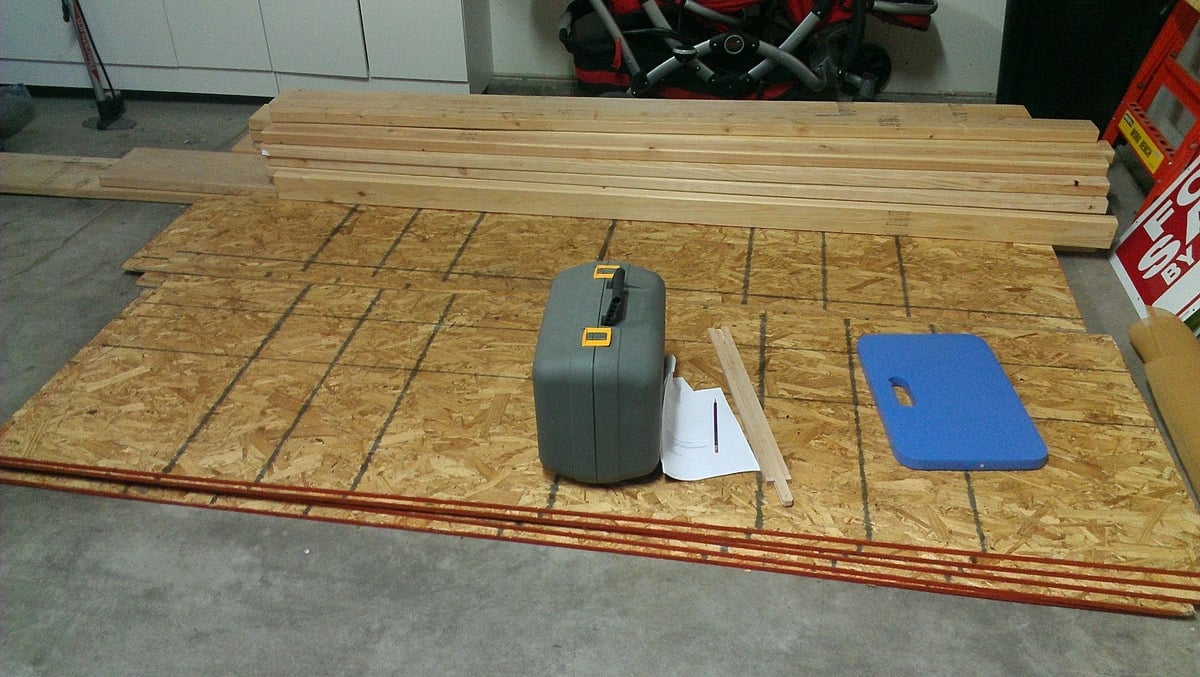
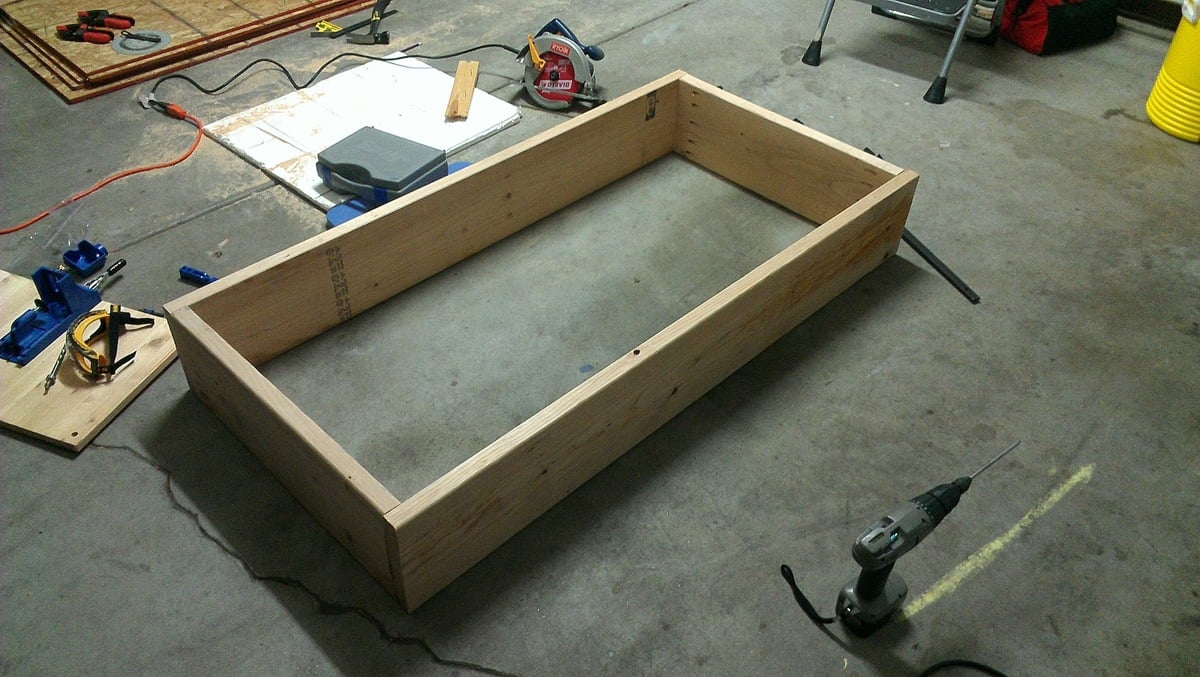
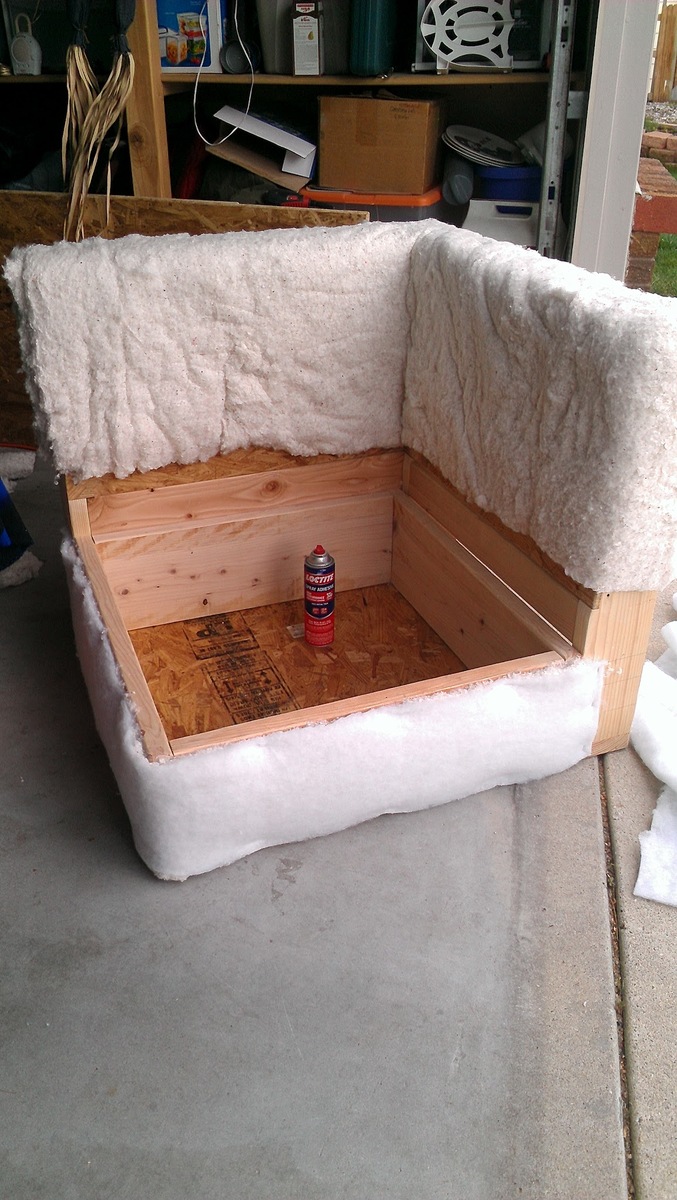
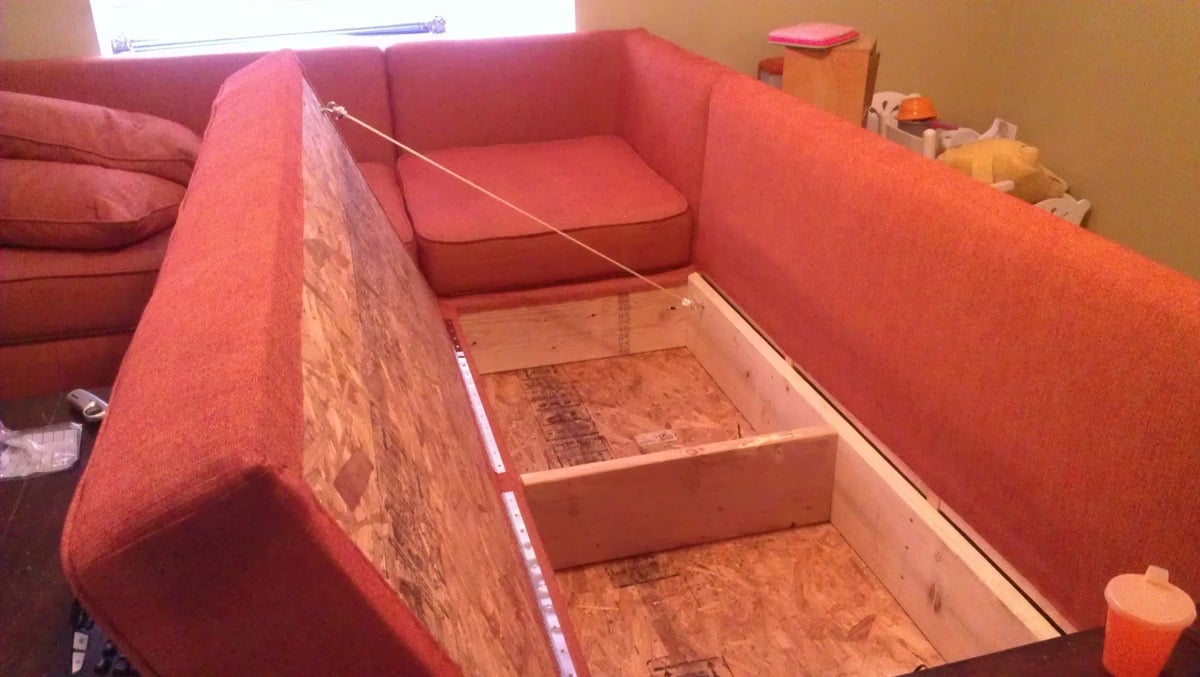
Basically I took Ana's plan and tweaked it to create a diy sofa, a love seat, and a corner piece to make a sectional. All 3 pieces have the same basic design and function (they all have a storage compartment), although the corner piece, because of its placement and the thickness of the seating cushions, doesn't open unless the couch is opened first. We purchased custom cut, 6" thick foam cushions for the seats (we bought the XL-38 foam from https://www.buyfoam.com/, but if we had to do it again, we'd go with the XL-28 as the 38 is VERY firm). We also used upholstery fabric instead of a paint drop-cloth to cover the couches. The foam and upholstery fabric upped the overall cost significantly. Other changes from Ana's plan, I used 15/32" OSB because the 1/4" plywood just felt too flimsy (I'm a large guy). I also added I bolts to the underside of the seat before the foam and upholstery so I could add a stress relief rope to prevent the kids from opening the top and dropping it and ripping out the hinges. I used piano hinges as they seemed to me to provide the most support. Finally, I ended up using 1x2s for the base trim since I couldn't find any 2x2s that were straight and finish-ready, then I added router detailing to provide some visual interest. I used 3" pieces of 4x6 for the feet and added matching router detail. Additionally, I used T-Nuts and bolts to make the feet and base trim completely removable.

Mon, 08/17/2020 - 07:46
It is superb blog and i really appreciate your blog. It is because i always like the informative blogs. You did a great job and thanks for sharing.I am impressed by your post. It contains very informative data and i gain a lot information from it. It is very useful for me. Thanks for sharing and keep on sharing that type of posts.The Mobile App Developer Dubai provides good service you visit here site https://www.mistersaad.com/


