Community Brag Posts

Rhyan Console table

This is my second project. It went really well. I wanted to do something different with the handles so I used an old bicycle chain that I took it apart to make the handles.

Built from Plan(s)
Estimated Cost
$70.00
Estimated Time Investment
Day Project (6-9 Hours)
Finish Used
Drawer handles are made from old bicycle chain. Made it solid by applying epoxy to make them stiff
Recommended Skill Level
Intermediate
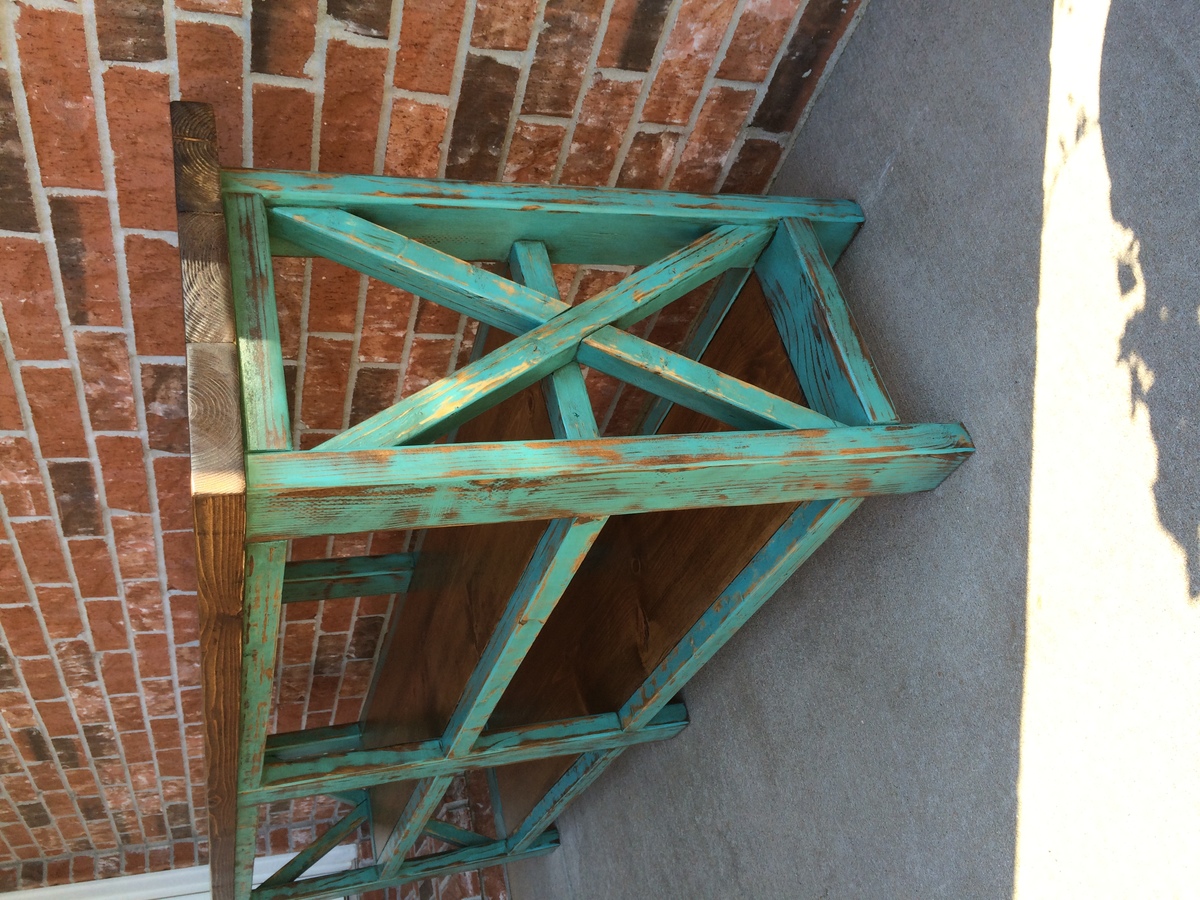
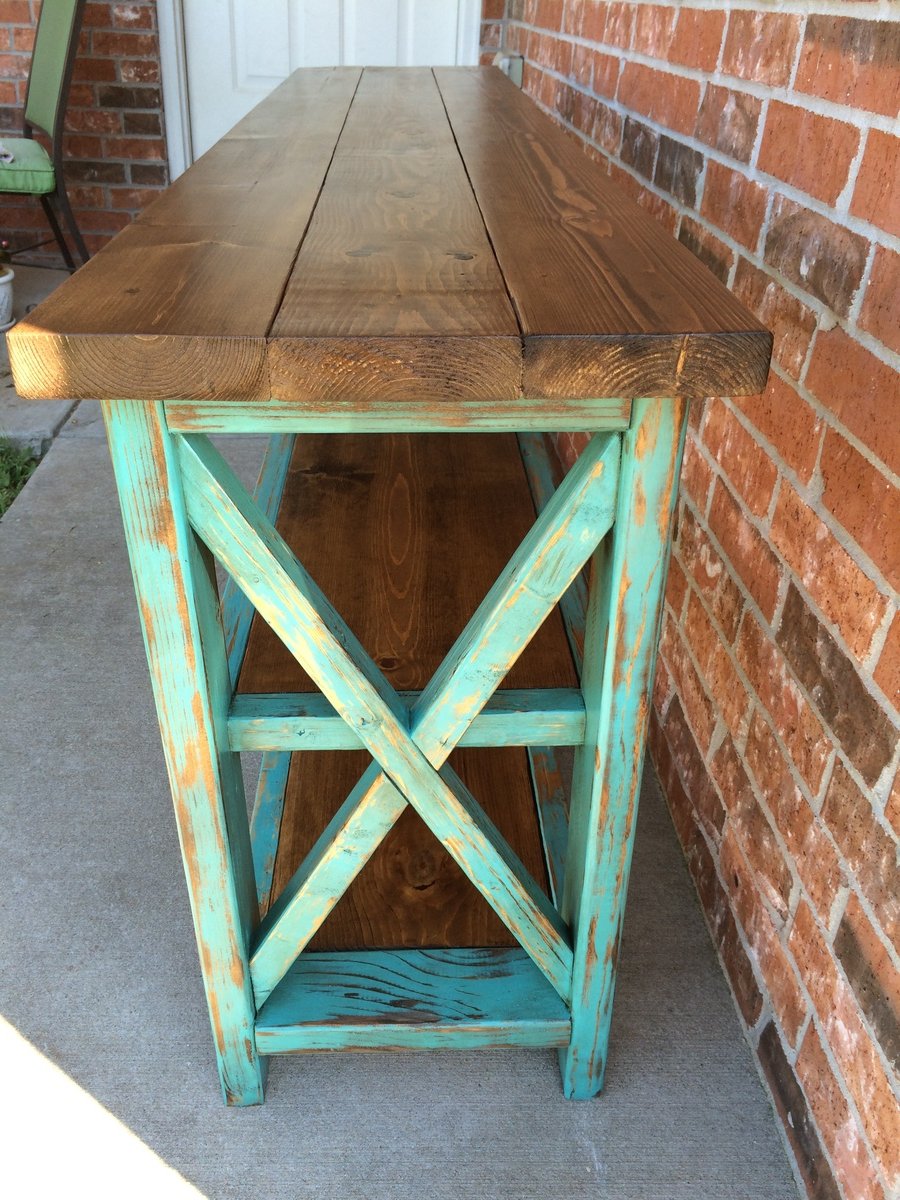
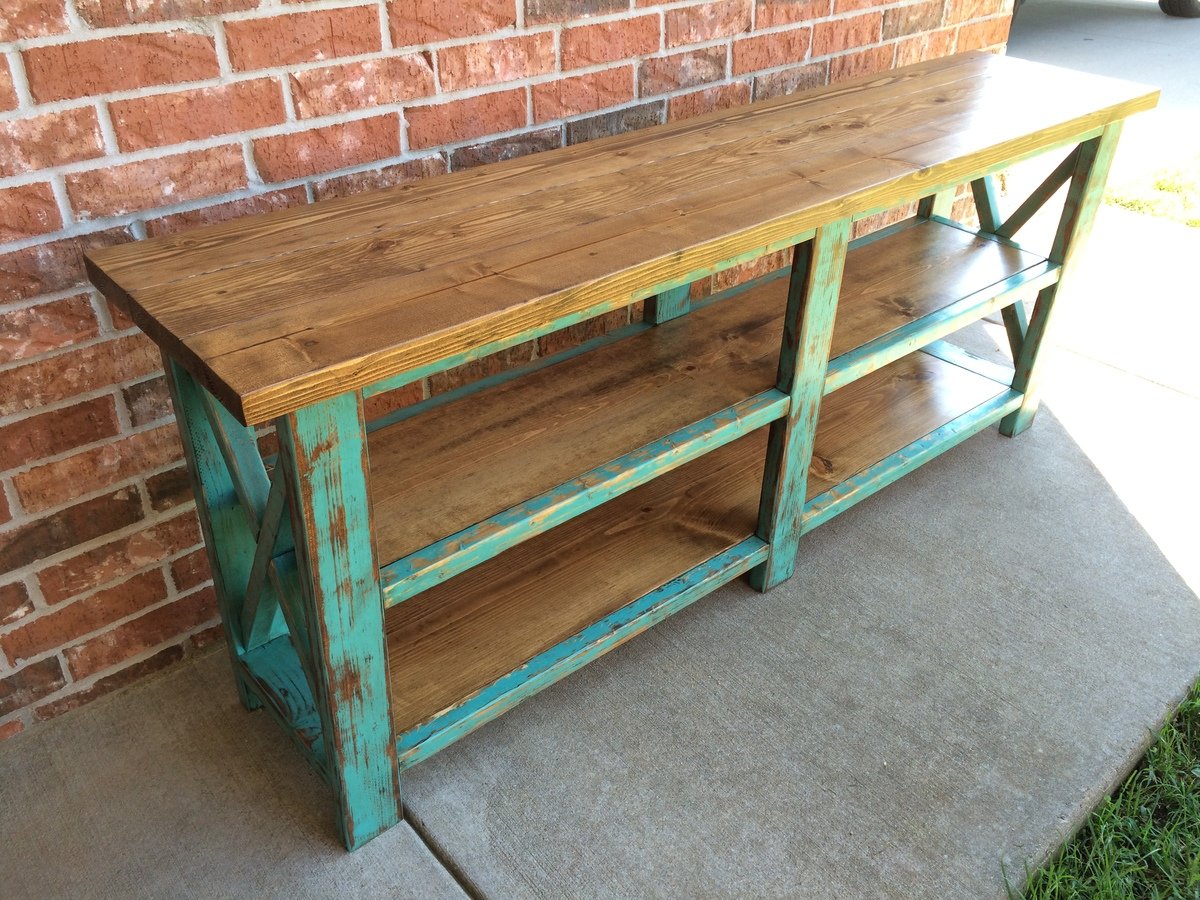
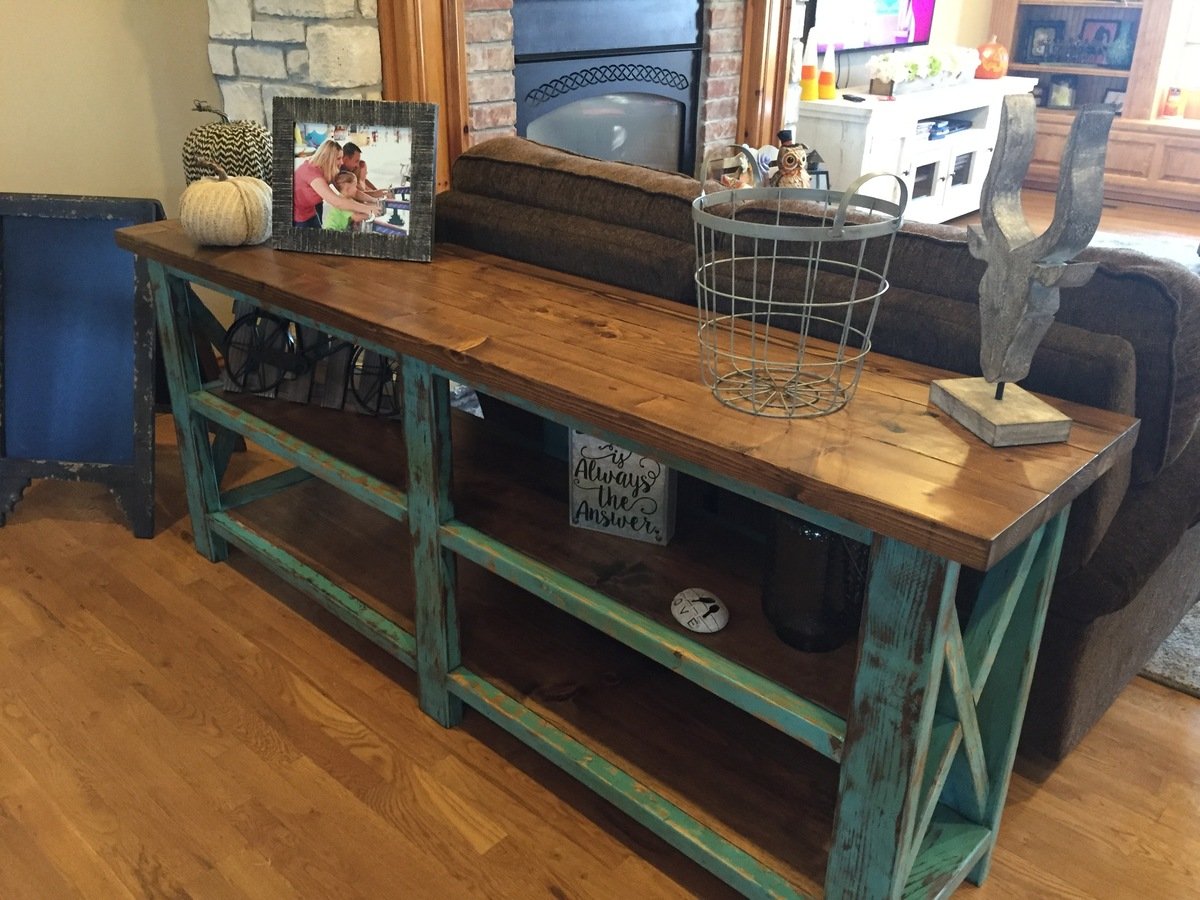
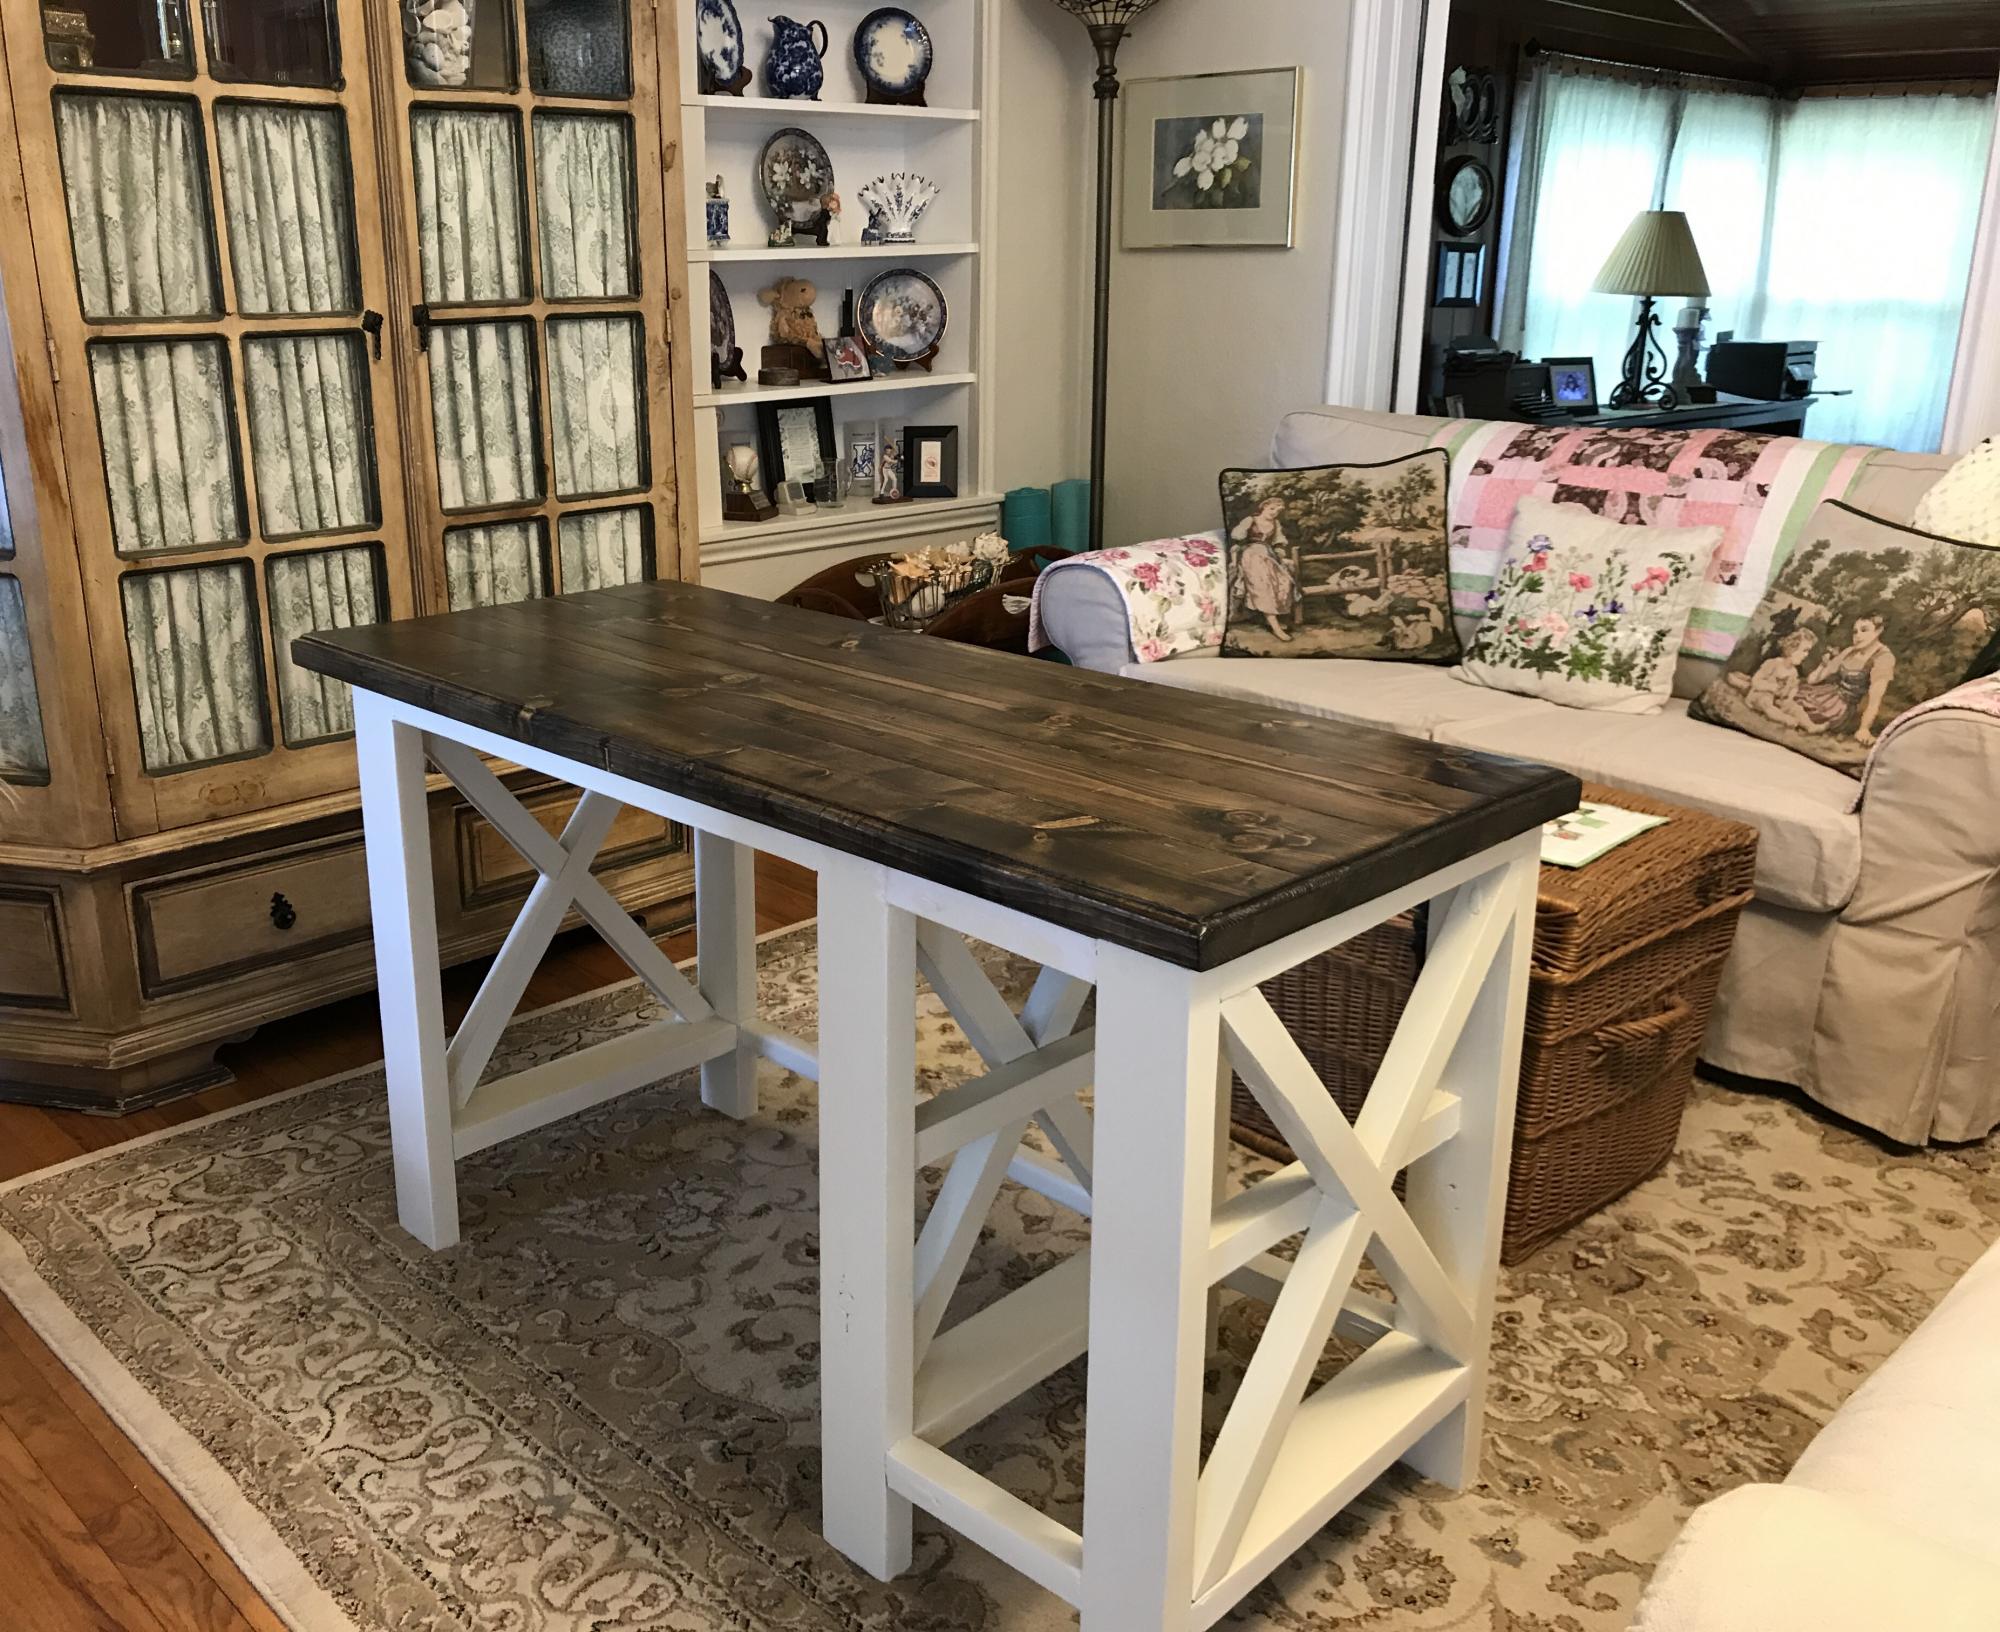
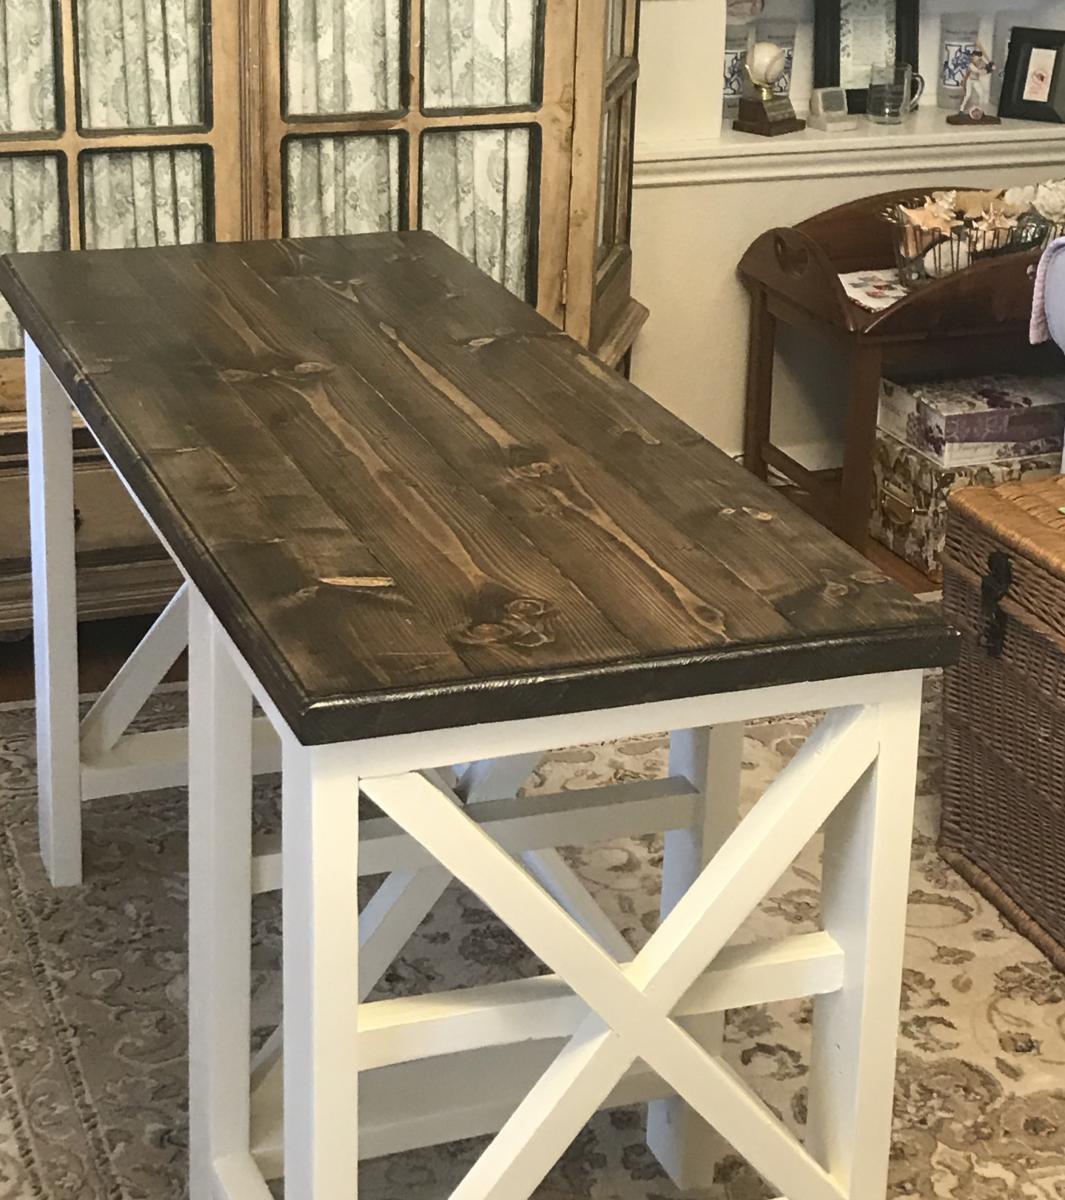
Rustic X Console Table
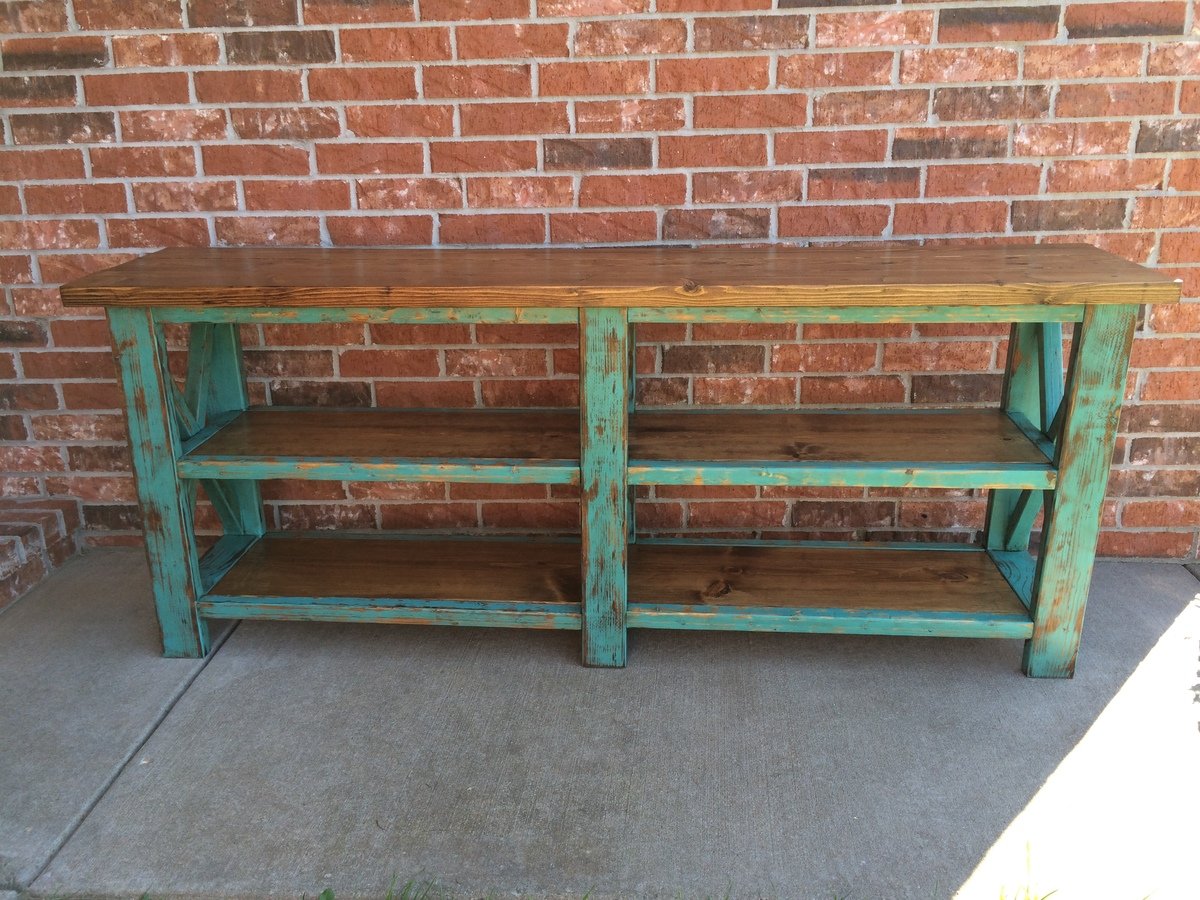
I built this table for a friend. It was fairly easy! The only problem I encounted was getting the 2x2 trim pieces flush with the legs while building the frames. When I just laid them on the floor they would sink in further than the legs. So I made sure to check their positioning and hold them in place with one hand while drilling in the screw with the other hand. It was a fun build and I would definitely build it again!
Built from Plan(s)
Estimated Cost
$100
Estimated Time Investment
Weekend Project (10-20 Hours)
Finish Used
I painted the sides, trim and legs with HGTV Sherwin Williams Pursuit of Teal in flat. Sanded down with orbital sander with 220 grit. Then I used Minwax pre-stain wood conditioner on the top, and two bottom shelves. Then I used Minwax stain in Provincial over all. I let it set for about 5-7 minutes before wiping off. I sealed it all with 3 coats of Polycrylic in satin, sanding between coats with 400 grit.
Recommended Skill Level
Intermediate
Comments

Sat, 09/24/2016 - 10:37
This finish is absolutely
This finish is absolutely amazing! Great job, what a lucky friend!

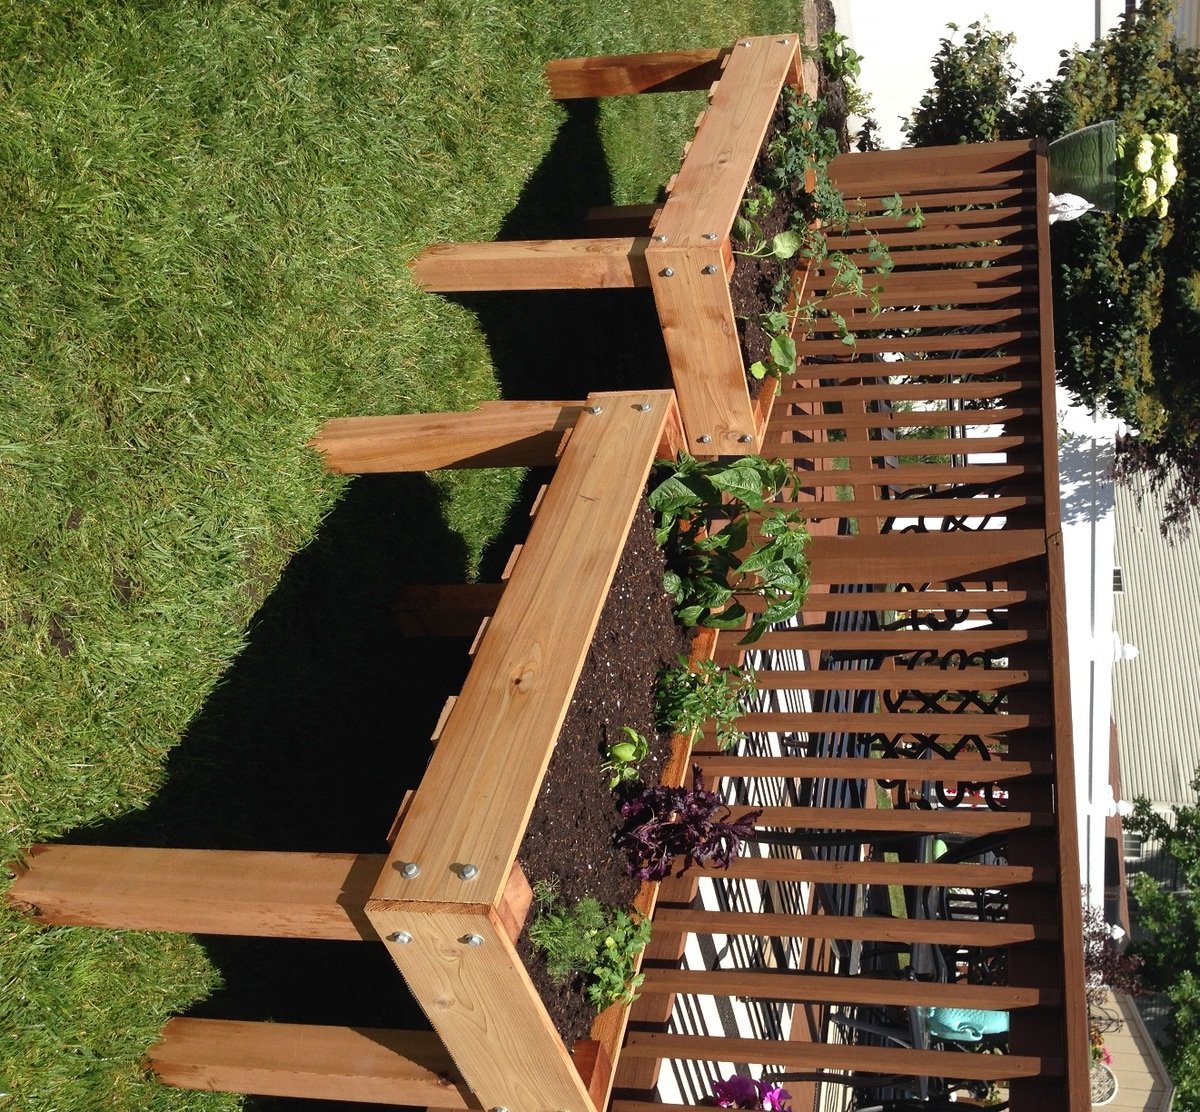
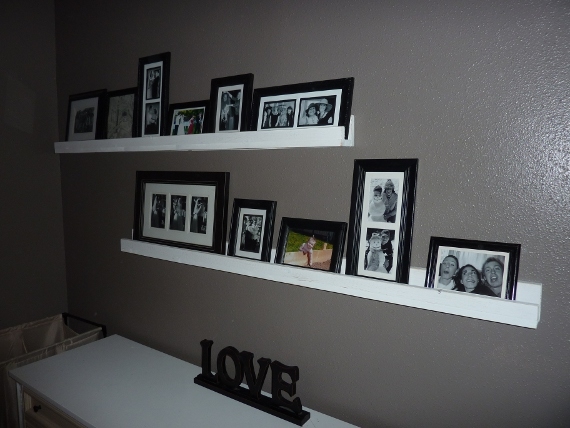
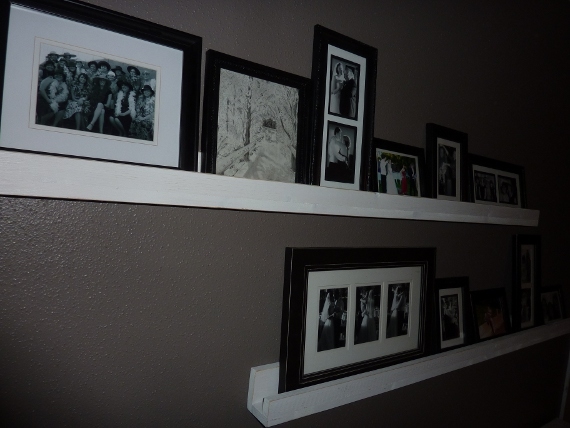
Ten Dollar Picture ledges
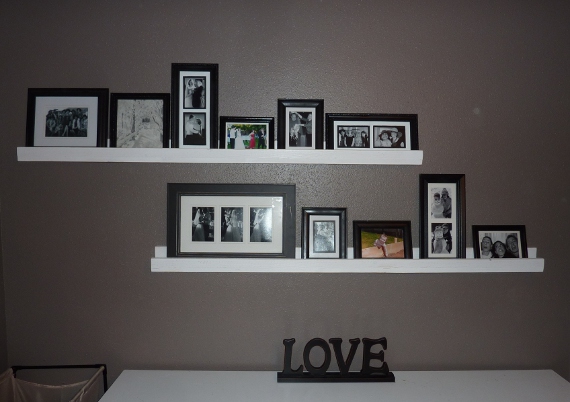
I LOVE how these turned out. So simple...but a huge statement in our room!
I used the other half of the 8ft pieces I used to make the book ledges in our daughter's room.
Now I am starting on some for the living room!!
Built from Plan(s)
Estimated Cost
$12
Estimated Time Investment
An Hour or Two (0-2 Hours)
Finish Used
Just a thin coat of whitewash and sanded the edges back to bare wood.
Recommended Skill Level
Starter Project

Sweet Pea Bunk Bed with adjusted design

My daughter found the Sweet Pea bed on the Ana White site. She asked if I would build one for the girls. And, of course, I agreed. I had to resove one big issue... Building the bed in my basement workshop and moving it to her 1920 vintage house where tight turns presented barriers to getting into the stairwell and up to the 2nd floor. My solution was to build the upper and lower bed separately. The front, back and sides of each bed are assembled with threaded bolts, washer and wing nuts. The top bunk bolts to the bottom bunk. The pergola and roof facade also are bolted on. The stairs are two separate pieces that bolt together.
Built from Plan(s)
Estimated Cost
$400
Estimated Time Investment
Week Long Project (20 Hours or More)
Finish Used
Interior paint... Pink, White, Blue, Green
Recommended Skill Level
Intermediate
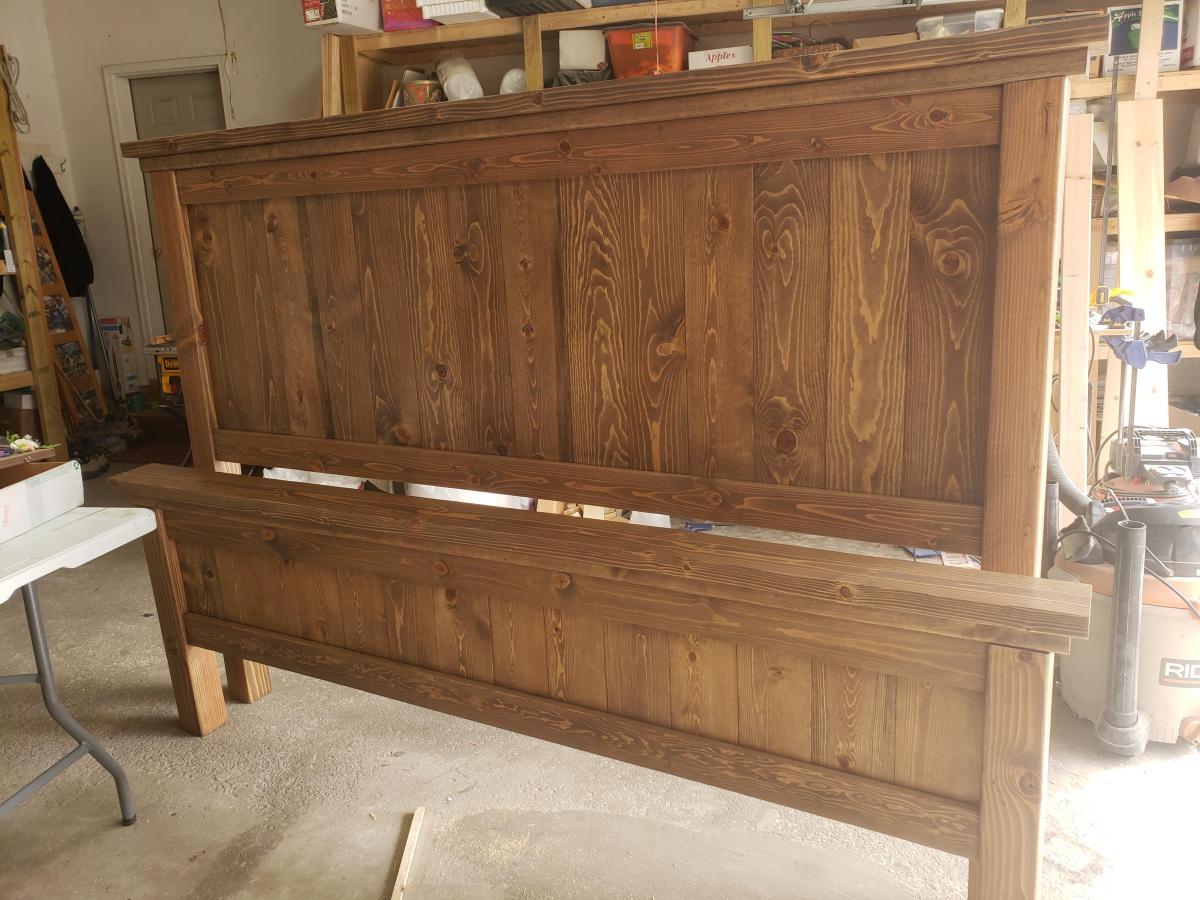
My jumbo king bed
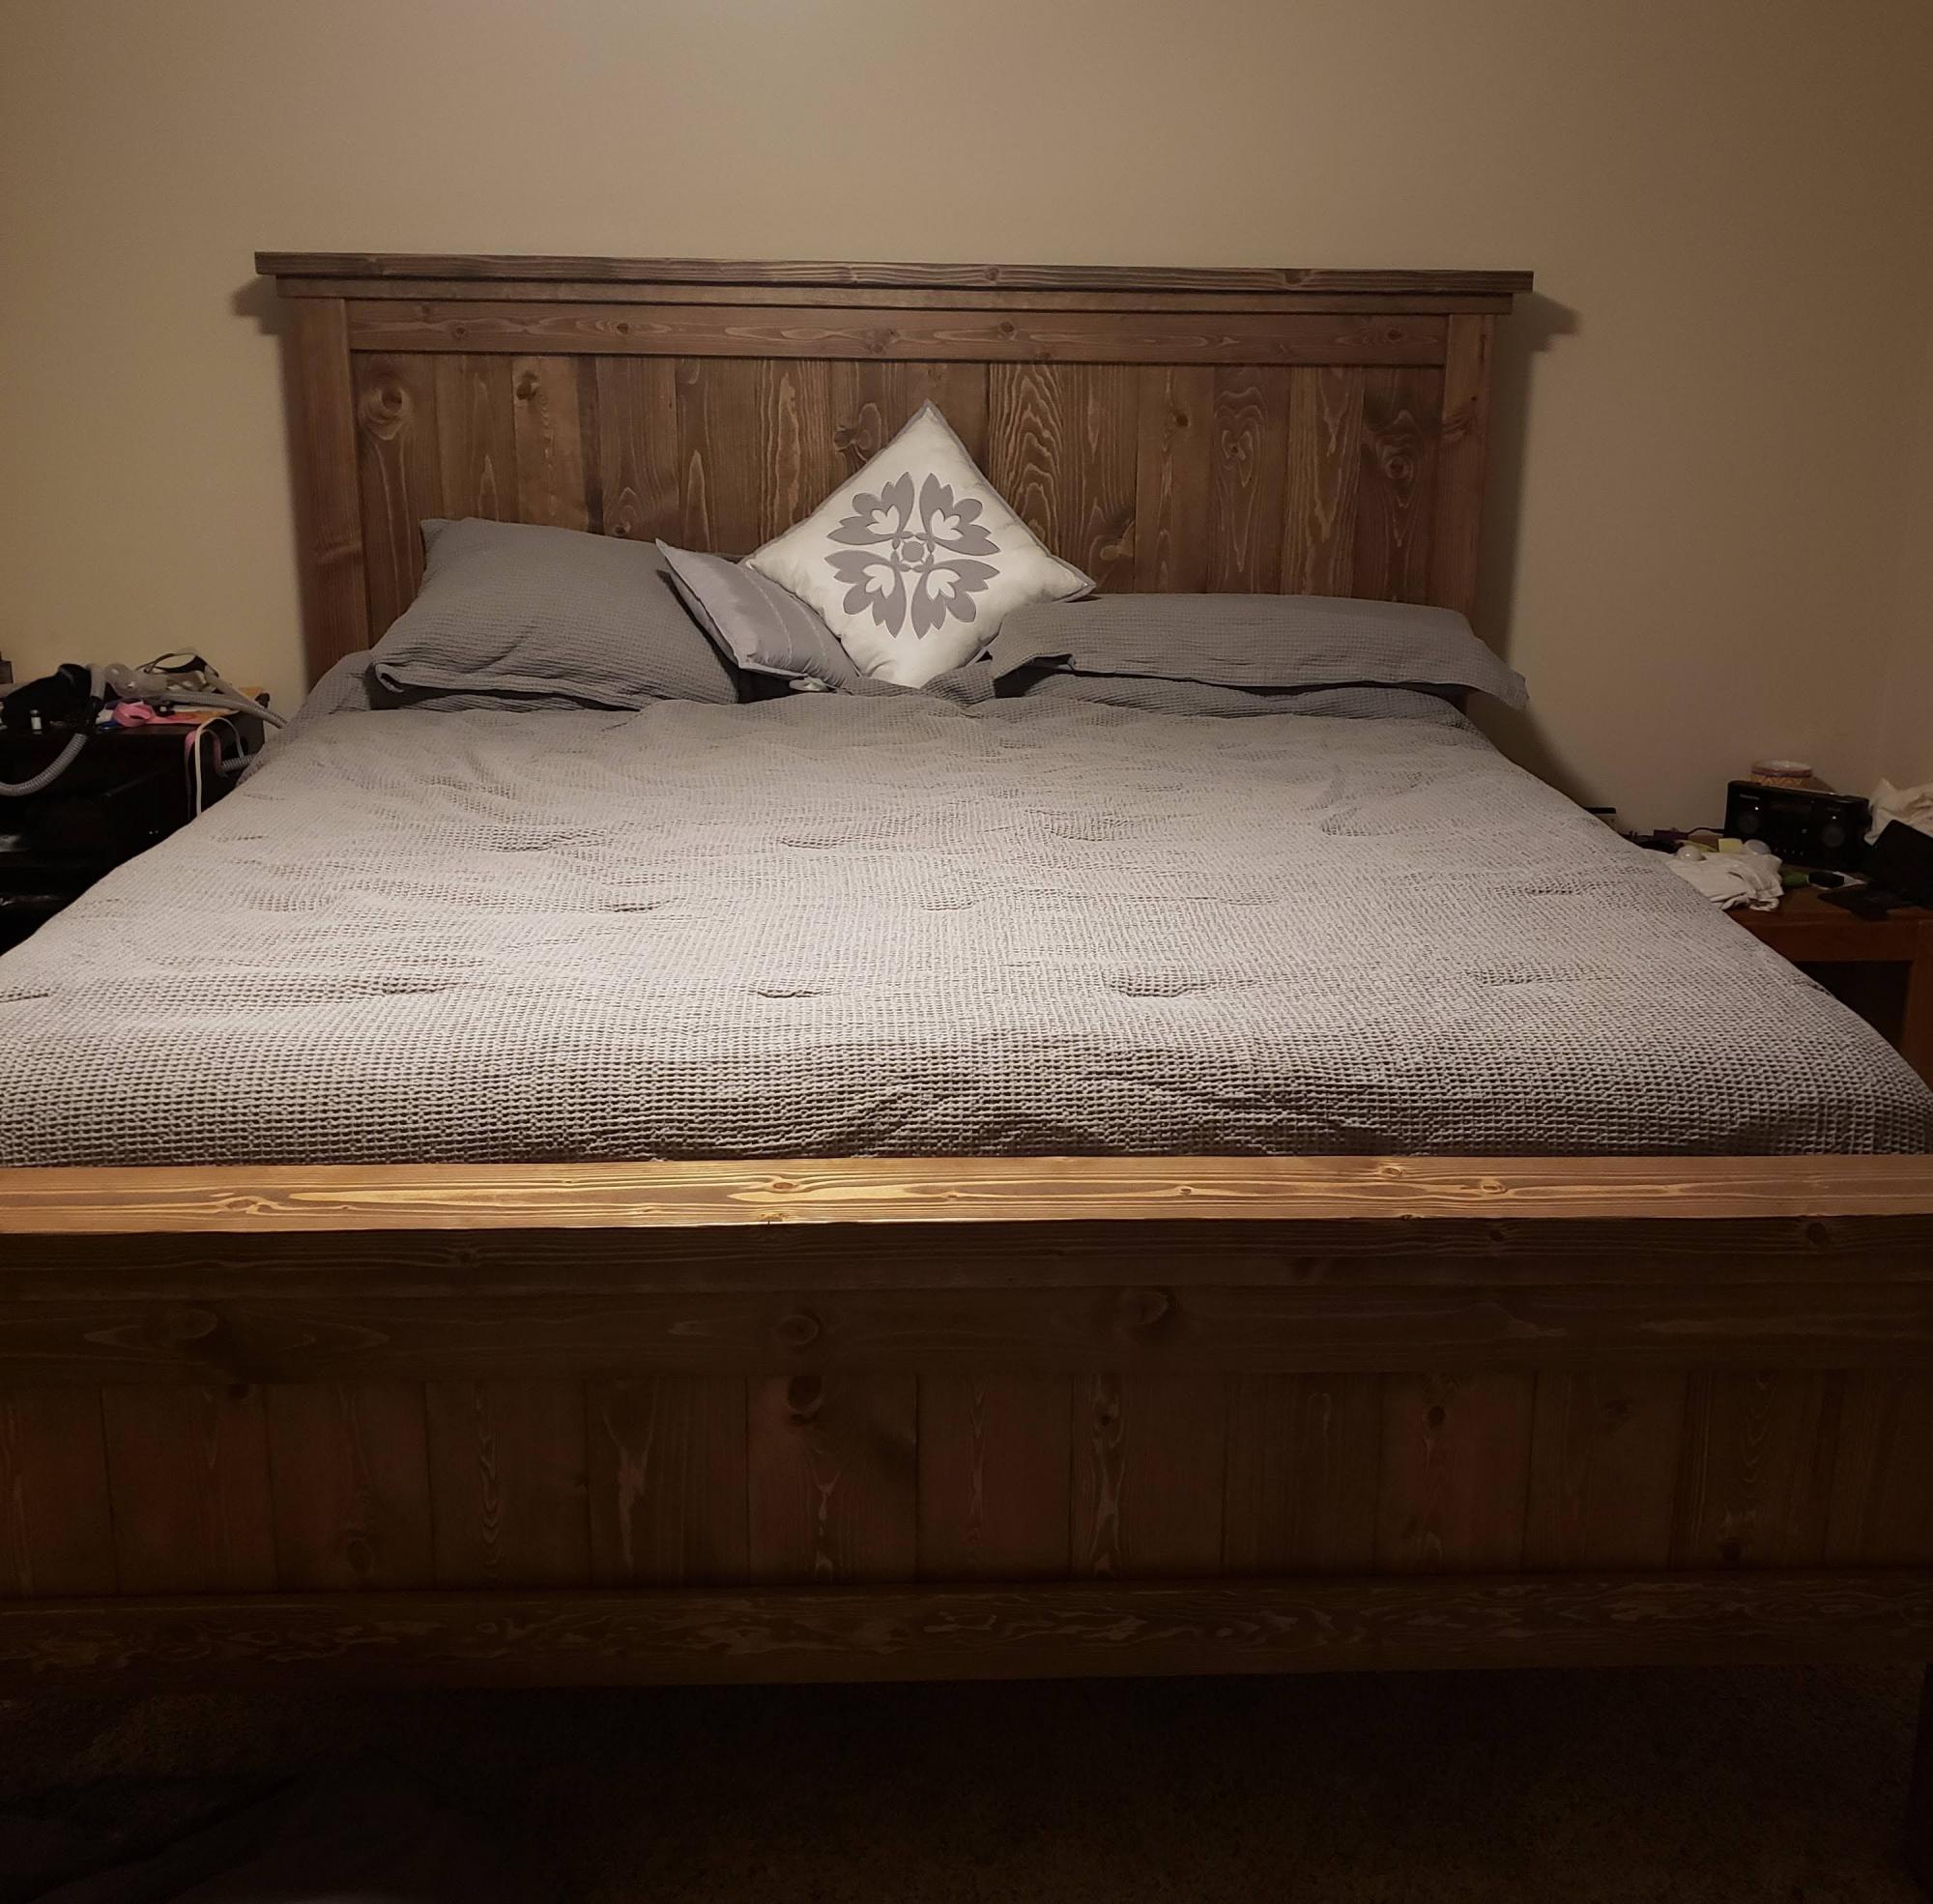
I used Ana's updated farmhouse king bed plans, but I added a few extra inches to the height because I thought it looked low....I may have added a couple inches to much lol. Good thing we're tall in this house
Built from Plan(s)
Finish Used
First stained with a coat of special walnut, then a coat of Weathered oak
Recommended Skill Level
Beginner
Outdoor Wood Chairs

From Greece. Thanx Ana!
Built from Plan(s)
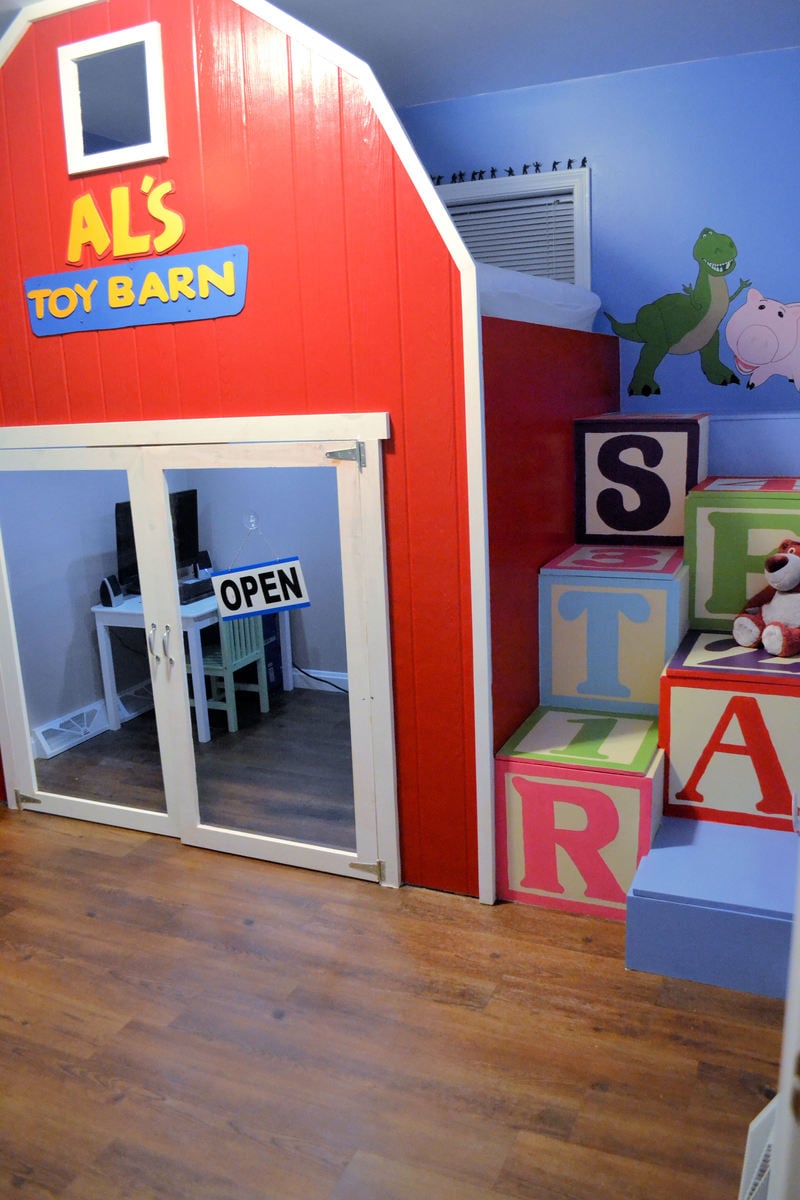
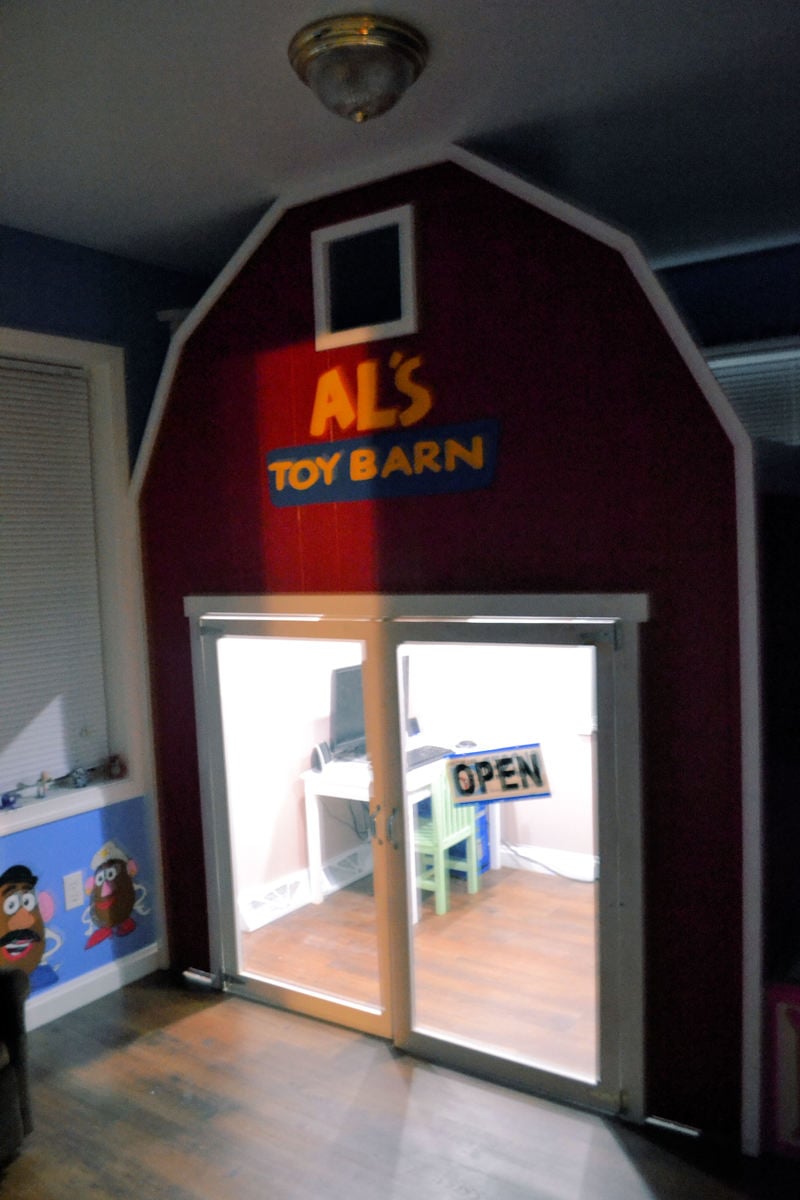
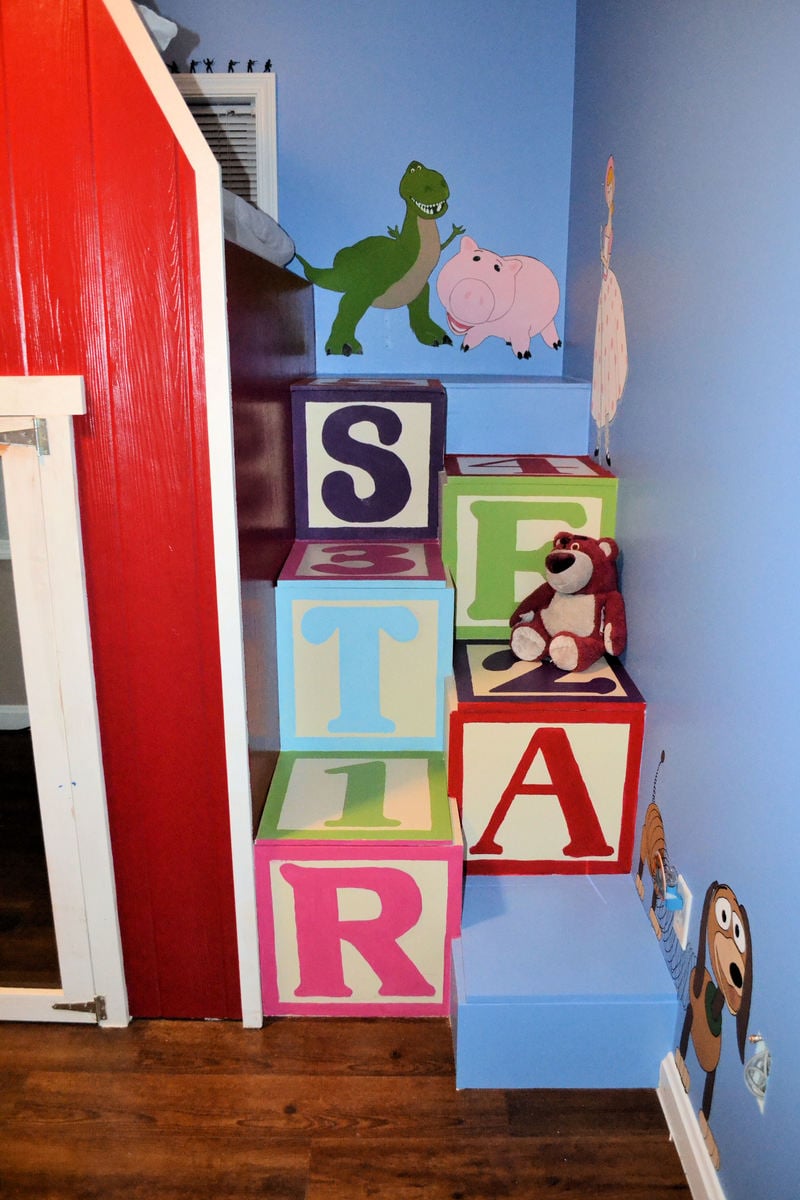
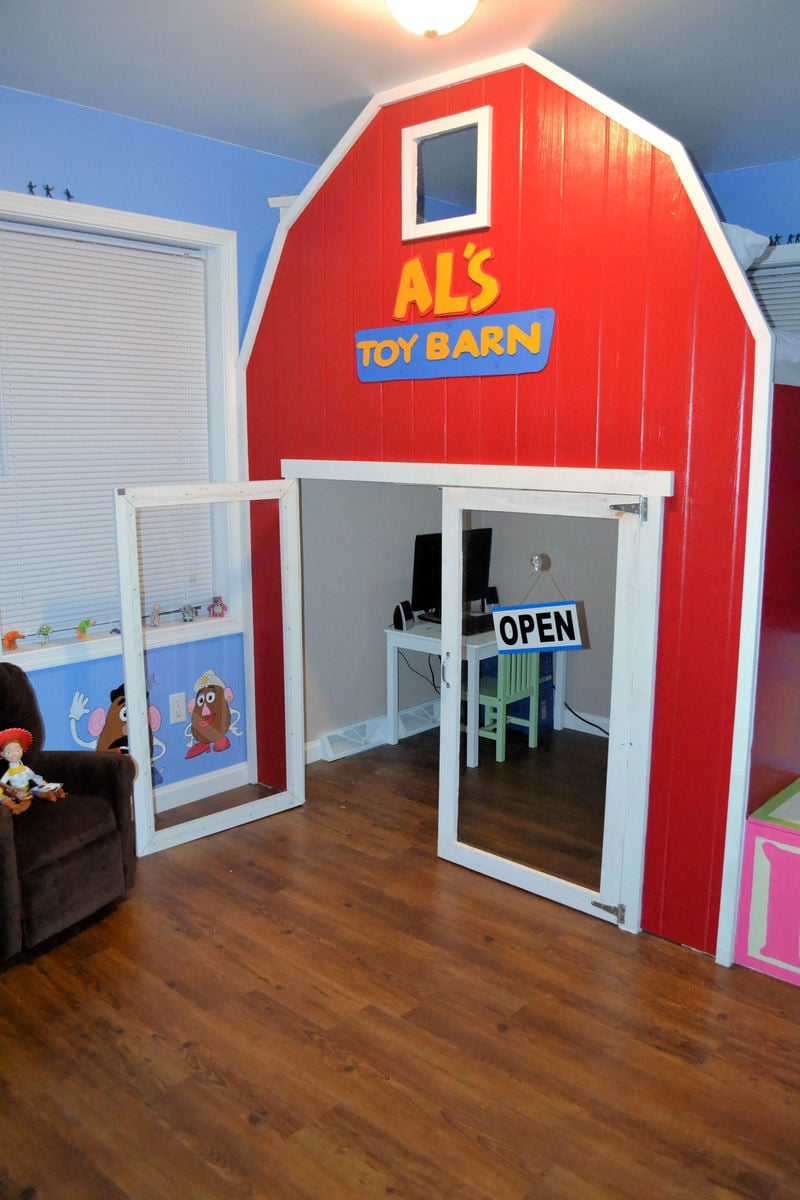
Toy Story 2 Loft Bed
This was a big project to tackle. I'm not very good at modifying building plans, so my husband was frustrated during the beginning of this build. But we are very happy with the way it turned out.
The hardest part of the build was the steps. We modified them to look like blocks, so getting the dimensions equal was tough. We also made it a full size bed so that there was more room under the bed.
We used plexiglass for the doors and LED lighting under the bed.
Built from Plan(s)
Estimated Cost
Lots of time, $300-$500
Estimated Time Investment
Week Long Project (20 Hours or More)
Recommended Skill Level
Intermediate
Comments
Sat, 09/01/2012 - 08:52
Love the stairs!
Maybe I can build something like this for my grandson when he gets older.
Sat, 09/01/2012 - 11:47
I love it!!! Very cool. We
I love it!!! Very cool. We just started a Toy Story room for my son who will be 3 next month. He would love this.

Rustic-Bohemian end table

After 3 years staring at the empty space beneath my dining room window, I decided it was time for a buffet end table. I went to Pintrist for some ideas and found this awesome design by Ana White.
I decided to modify the dimensions and do a multi-stain pattern to give the table a more bohemian look.
Here's a link to the step by step instructions:
http://rusticcedar.blogspot.com


Estimated Cost
$150.00
Estimated Time Investment
Week Long Project (20 Hours or More)
Finish Used
Puritan Pine Miniwax - One of my favorites - a classic
Colonial Maple Miniwax - A soft, woodsy stain
Summer Oak Rustoleum - A very light, subtle stain
Driftwood Rustoleum - My new favorite stain - very modern
Dark Walnut Rustoleum - Should always have this handy
Mineral Green Rustoleum - A little too light, but okay here
Colonial Maple Miniwax - A soft, woodsy stain
Summer Oak Rustoleum - A very light, subtle stain
Driftwood Rustoleum - My new favorite stain - very modern
Dark Walnut Rustoleum - Should always have this handy
Mineral Green Rustoleum - A little too light, but okay here
Recommended Skill Level
Beginner
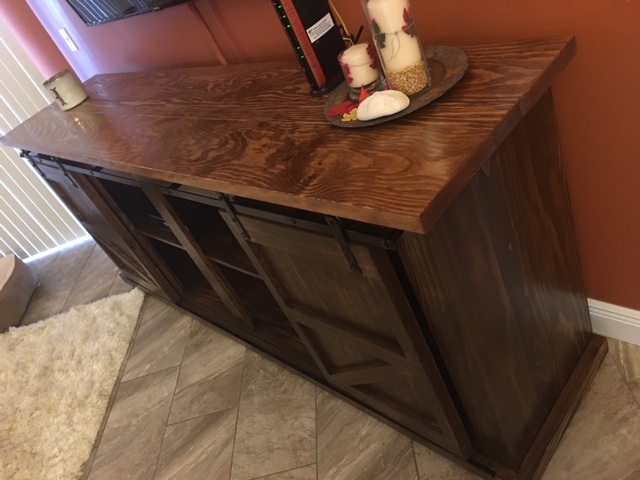
Another great project !!

Using the 'Grandy Sliding Door Console' plans we were able to build this amazing piece of furnitire. Altered the plans slightly and made it work for us!
Estimated Time Investment
Week Long Project (20 Hours or More)
Finish Used
Dark Walnut Stain with semi-gloss poly coat
Recommended Skill Level
Intermediate
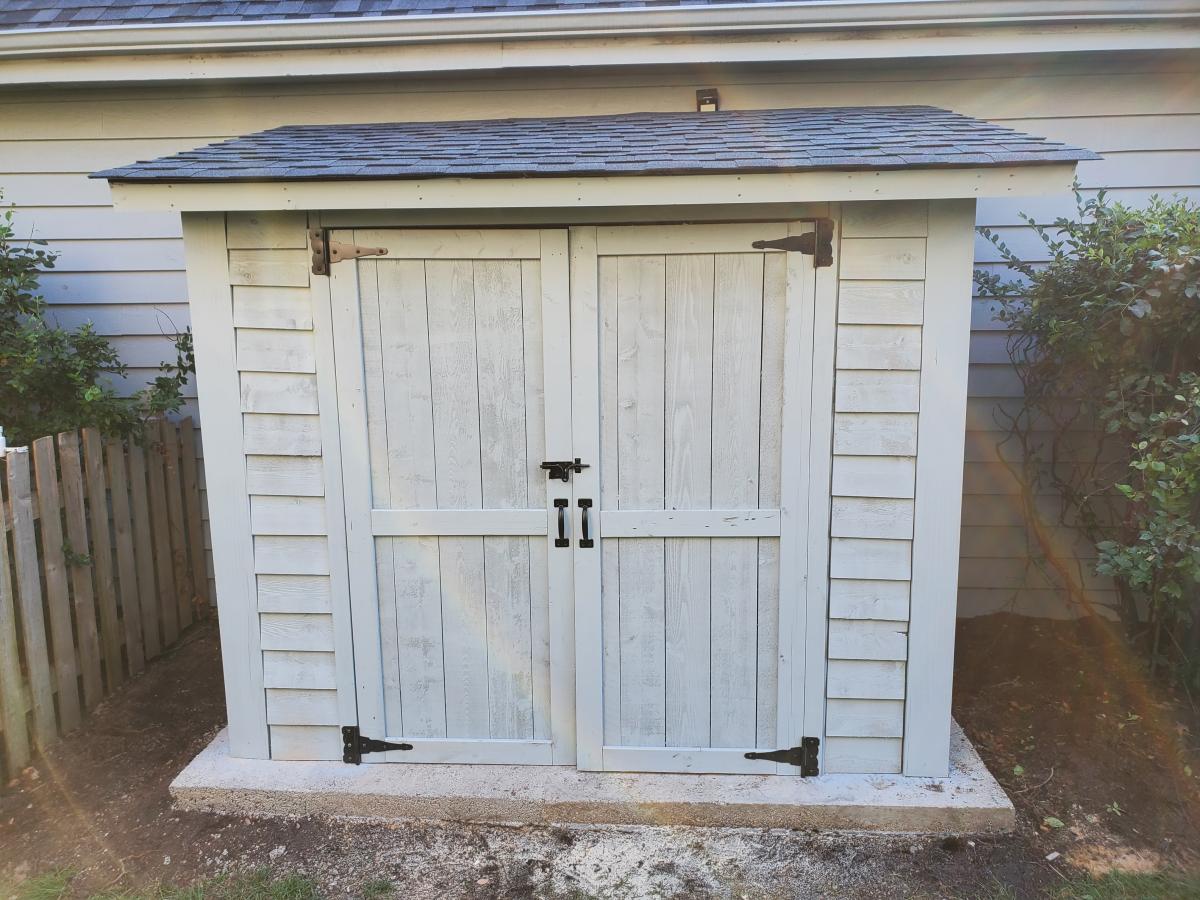
Eric's Cedar Shed!!
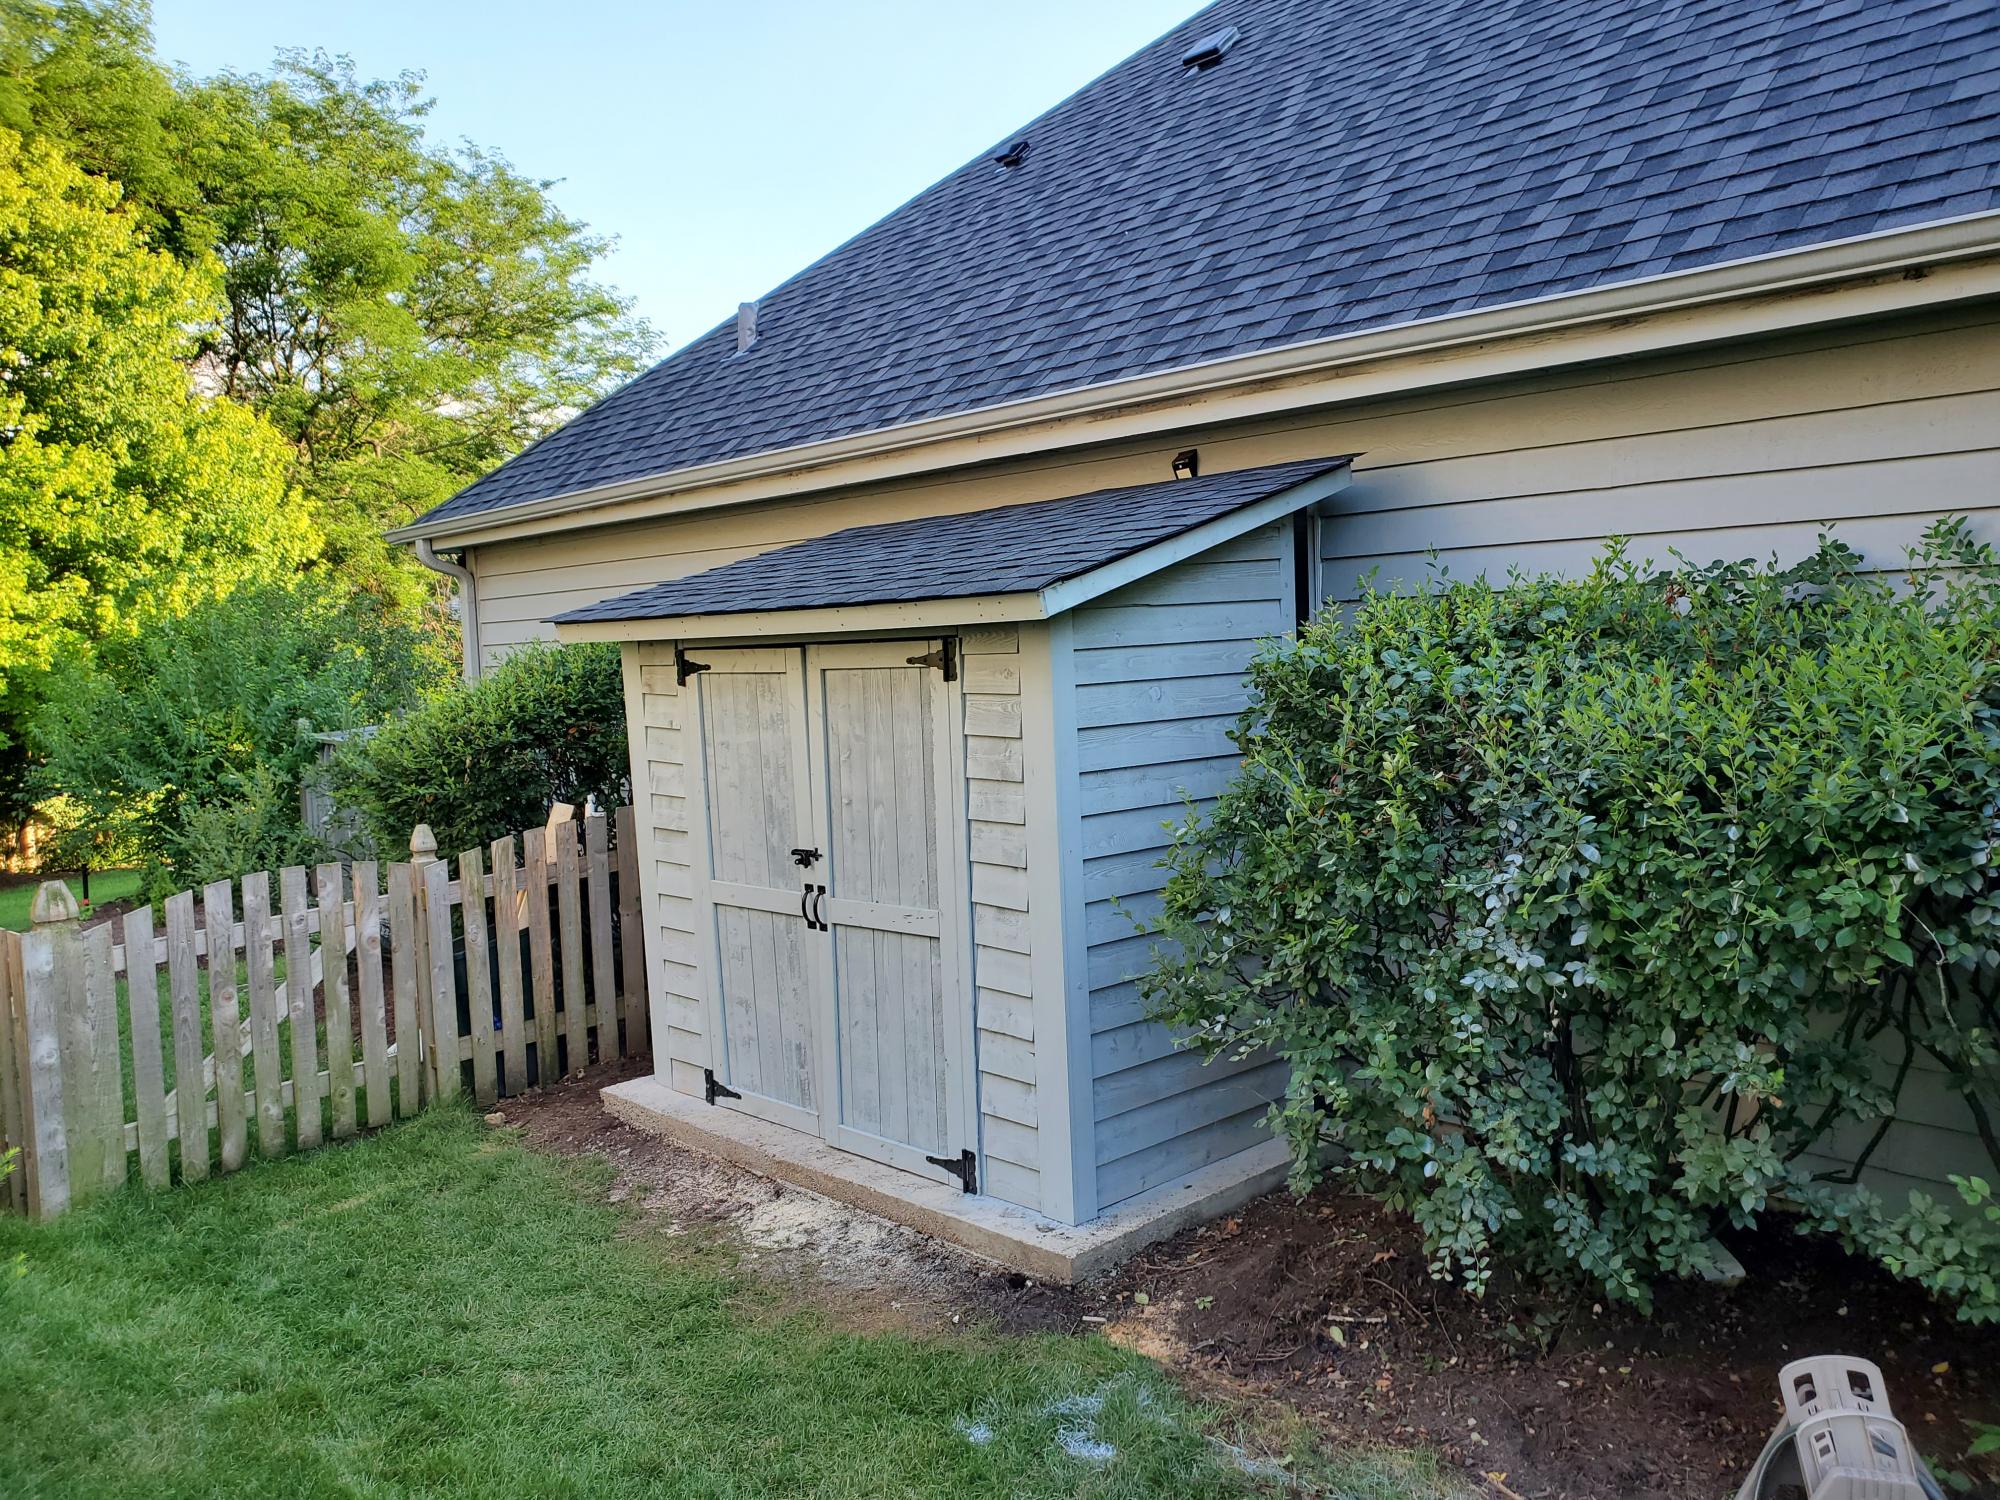
Thank you for the plans, shed turned out great! My association required me to match the siding color, roof color, and anchor to a concrete slab. So I poured 25 bags of 80lbs concrete to make a 9x5 slab. Redid the plans for an 8x4 shed, built the frame with 2x4s and not 2x2's, installed flashing, ice/water shield + felt + matching shingles since I'm near Chicago, and used a flexio finishing sprayer to paint the shed. Saved some $ by using 2 Redwood Grain Fiber siding panels for $22 each at HD.
All in all very happy with my shed and all my dangerous yard tools and woodworking tools can be put away from my toddler.
Built from Plan(s)
Estimated Cost
400
Estimated Time Investment
Weekend Project (10-20 Hours)
Finish Used
Behr Premium Plus exterior paint
Recommended Skill Level
Intermediate
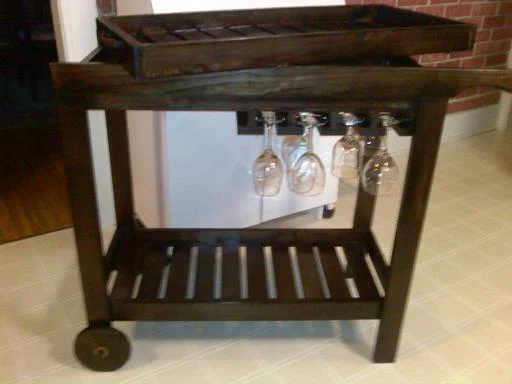
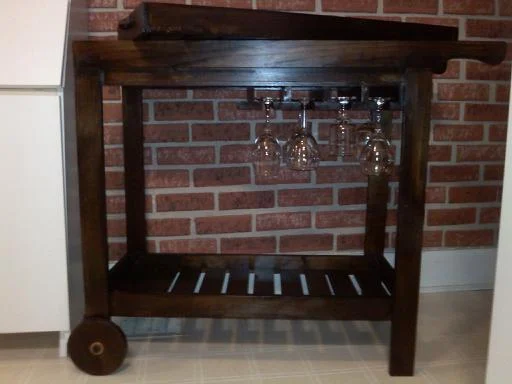
Rolling Bar Cart

This was my second project using plans on this site and I loved it - I made this for a friend's daughter who was moving into her own apartment. She and her girlfriends loved it too! It was very easy and quick to build. Wheels took a bit of time and effort!
This was a real hit and I'd love to make more, if I had room at my house I'd make one for myself!
Built from Plan(s)
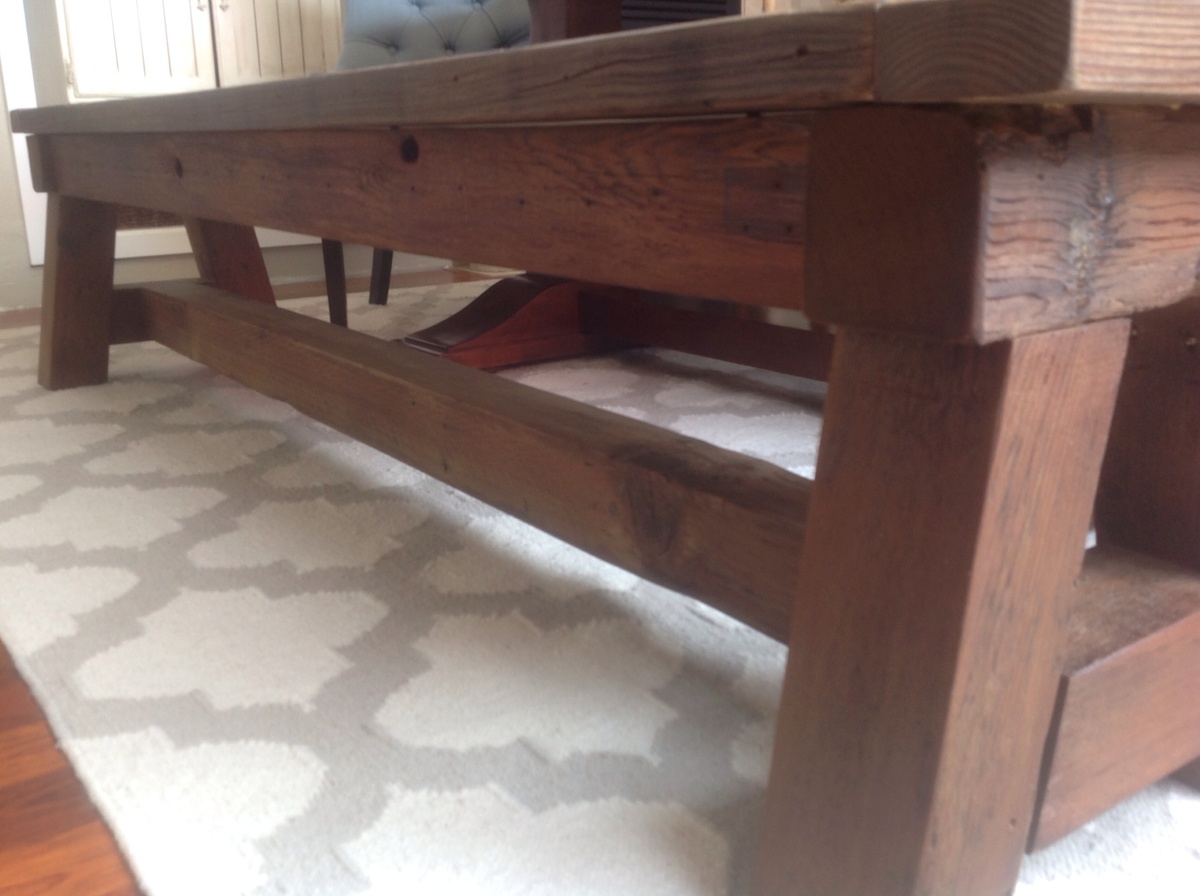
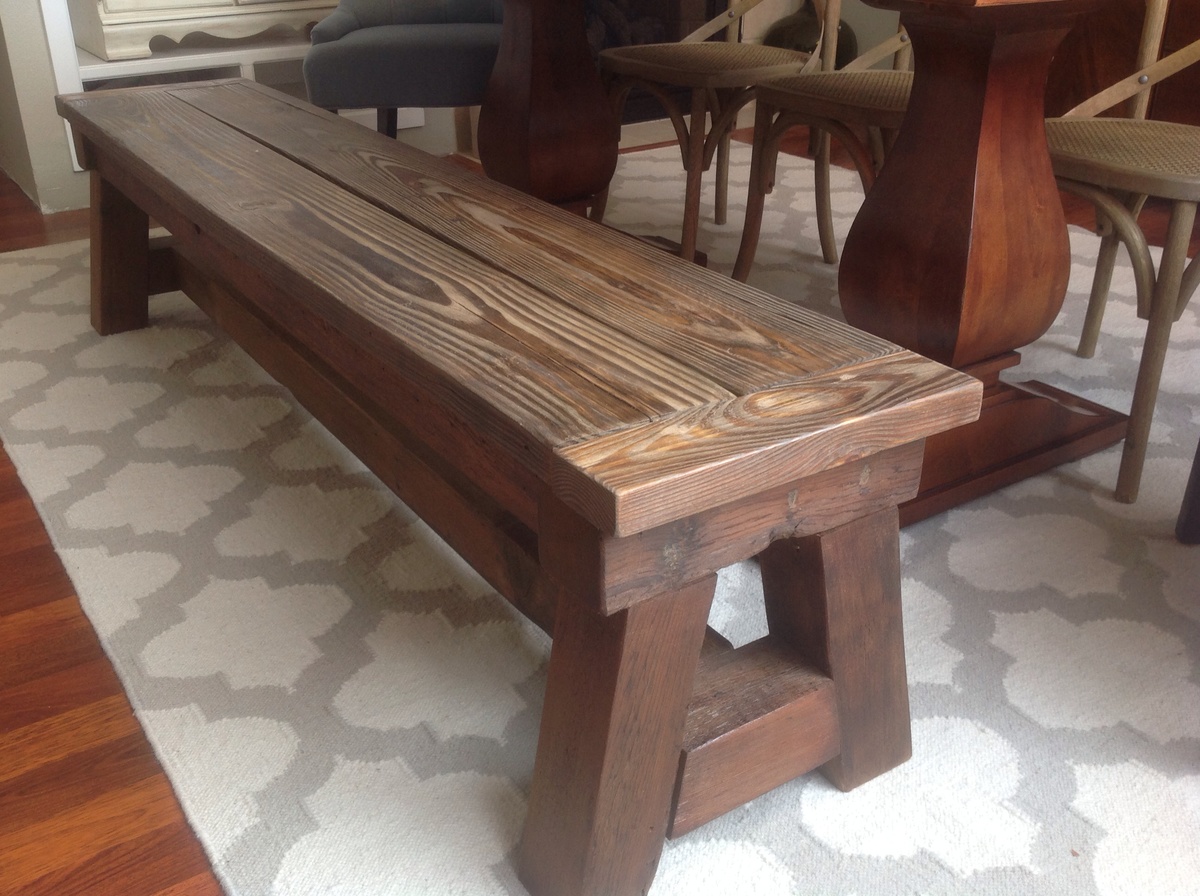
Dining Table 4x4 Truss Bench
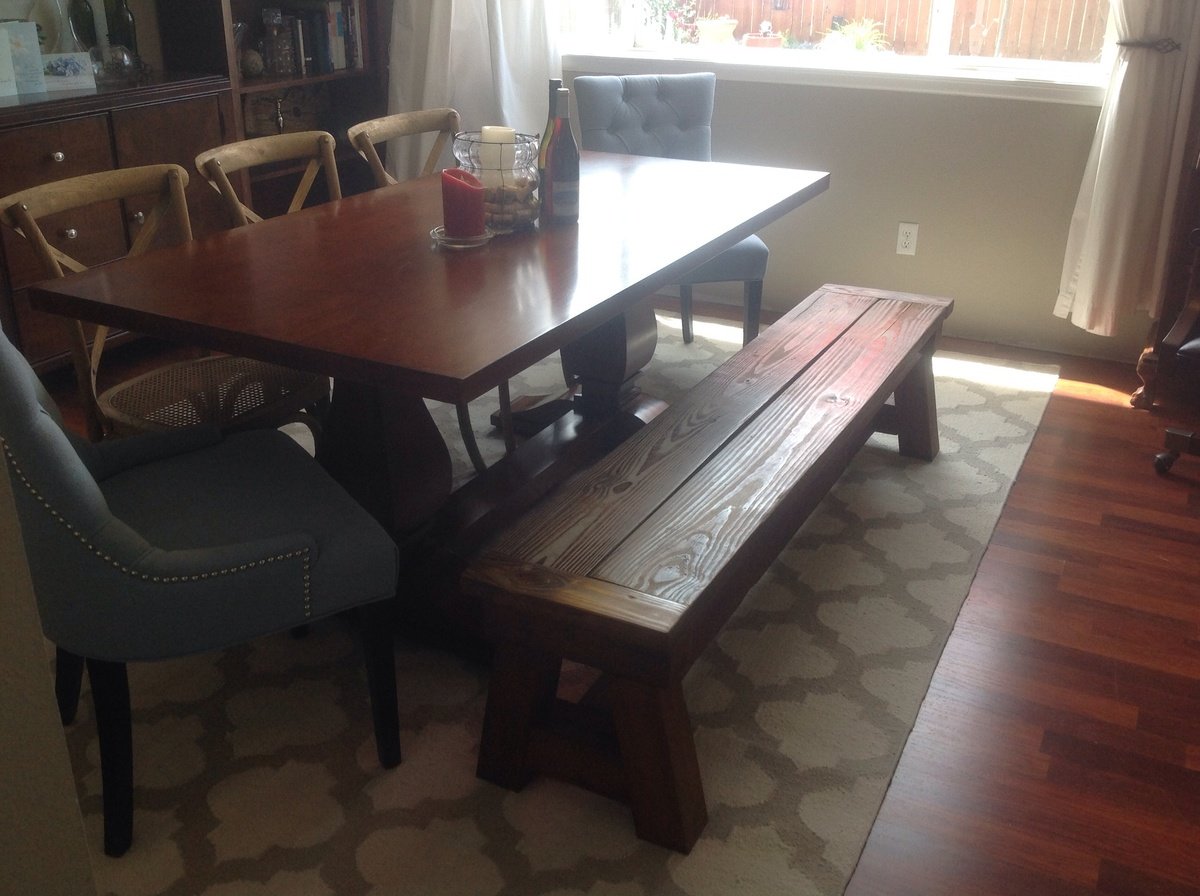
Using the 4x4 Truss Bench plan (http://ana-white.com/2013/10/plans/4x4-truss-benches), we built this bench using entirely reclaimed lumber. (We had removed an old patio and part of a fence.) We already had all of the lumber, screws, etc. so the only cost to us for this project was the cost of the stain.
We modified the plan slightly, using 2x4s on the ends.
My husband is obsessed with decking screws. Thus the entire bench is held together with 2 1/2 inch decking screws. (Unfortunately, we purchased our Kreg Jig a day following the completion of this project.)
Because the lumber was very old and weathered, there is a lot of character to the wood. There were some incredibly soft spots which made sanding a challenge, and some of the boards were somewhat warped. However, we still really like the way it turned out.
I sanded (and sanded and sanded) using 60 grit, then 80... then 120... then 220. I filled the screw holes with wood filler (and sanded again). I then conditioned the wood with Minwax pre-stain wood conditioner. I used Minwax Early American oil based stain on the entire project. I then went over the top only with Minwax Weathered Oak. After about 36 hours of drying time, I used 2 coats of Minwax Fast-Drying clear semi-gloss polyurethane.
This bench is a beast! I'm sure it weighs over 75 pounds. It is extremely solid, and quite beautiful in our dining room. The plans were easy to follow, and the whole thing went together fairly quickly. (It would have been completed even more quickly had we had our Kreg Jig at the time. Lesson learned.)

Built from Plan(s)
Estimated Cost
$10
Estimated Time Investment
Day Project (6-9 Hours)
Finish Used
I sanded (and sanded and sanded) using 60 grit, then 80... then 120... then 220. I filled the screw holes with wood filler (and sanded again). I then conditioned the wood with Minwax pre-stain wood conditioner. I used Minwax Early American oil based stain on the entire project. I then went over the top only with Minwax Weathered Oak. After about 36 hours of drying time, I used 2 coats of Minwax Fast-Drying clear semi-gloss polyurethane.
Recommended Skill Level
Beginner
My farmhouse bed with storage
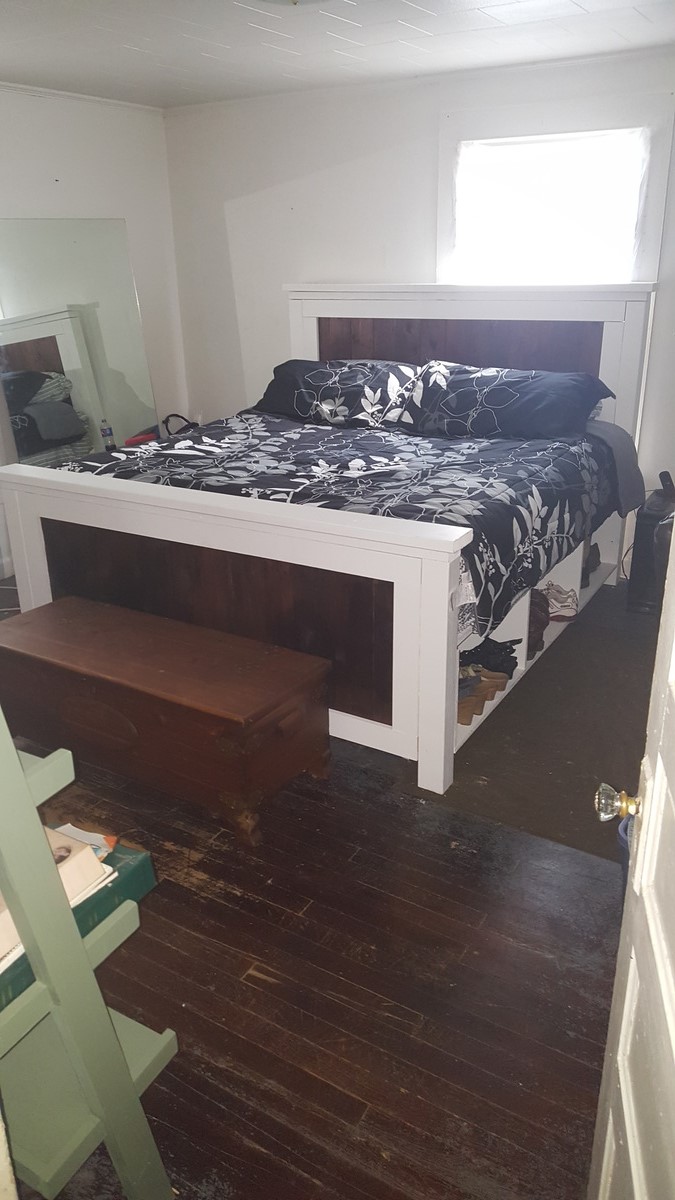
This is my king size farmhouse bed with storage. I also changed the height of the footboard to be even with my mattress.
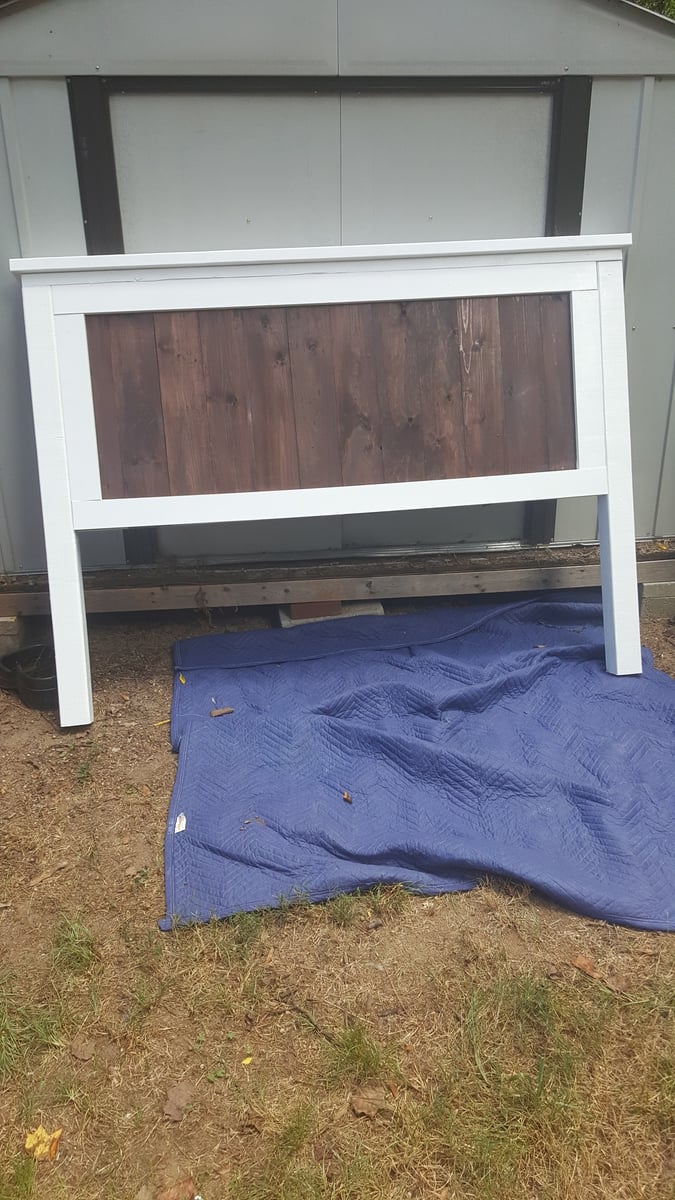
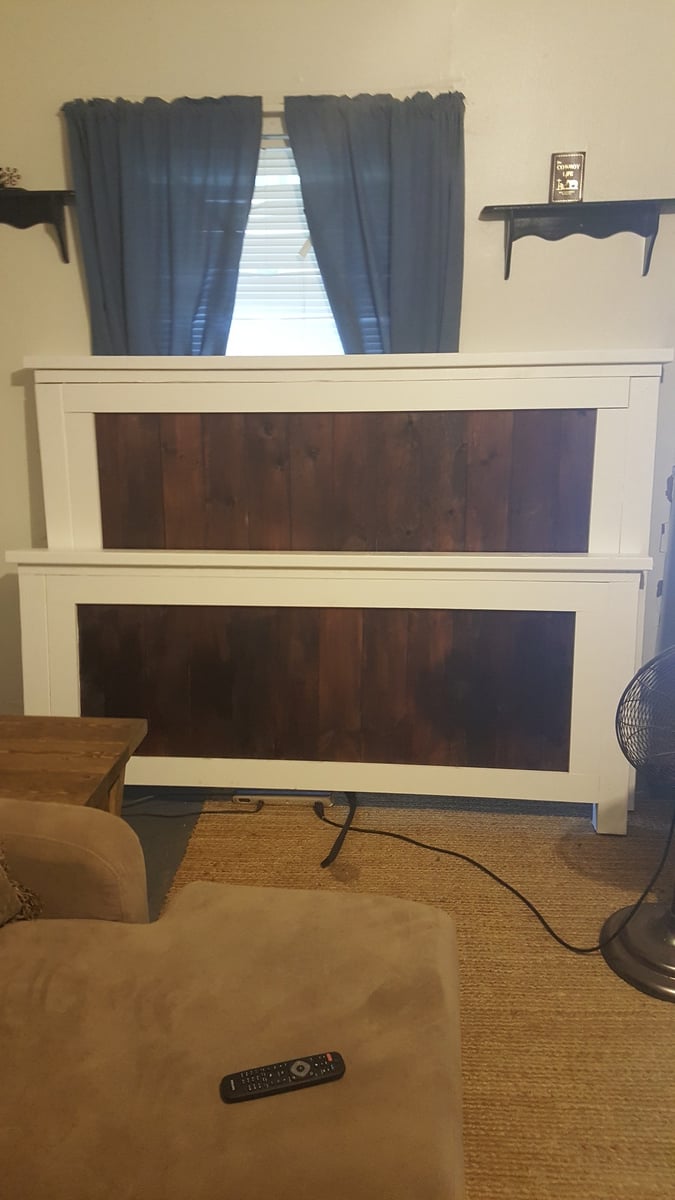

Built from Plan(s)
Estimated Time Investment
Week Long Project (20 Hours or More)
Finish Used
Ultra white paint and mahogany stain
Recommended Skill Level
Intermediate
Covid X Desk
X style desk with 2 shelves. Painted antique white with expresso stained top.
Built from Plan(s)
Estimated Cost
50
Estimated Time Investment
Week Long Project (20 Hours or More)
Finish Used
Varathane Expresso for the top. Antique white for the base.
Recommended Skill Level
Beginner
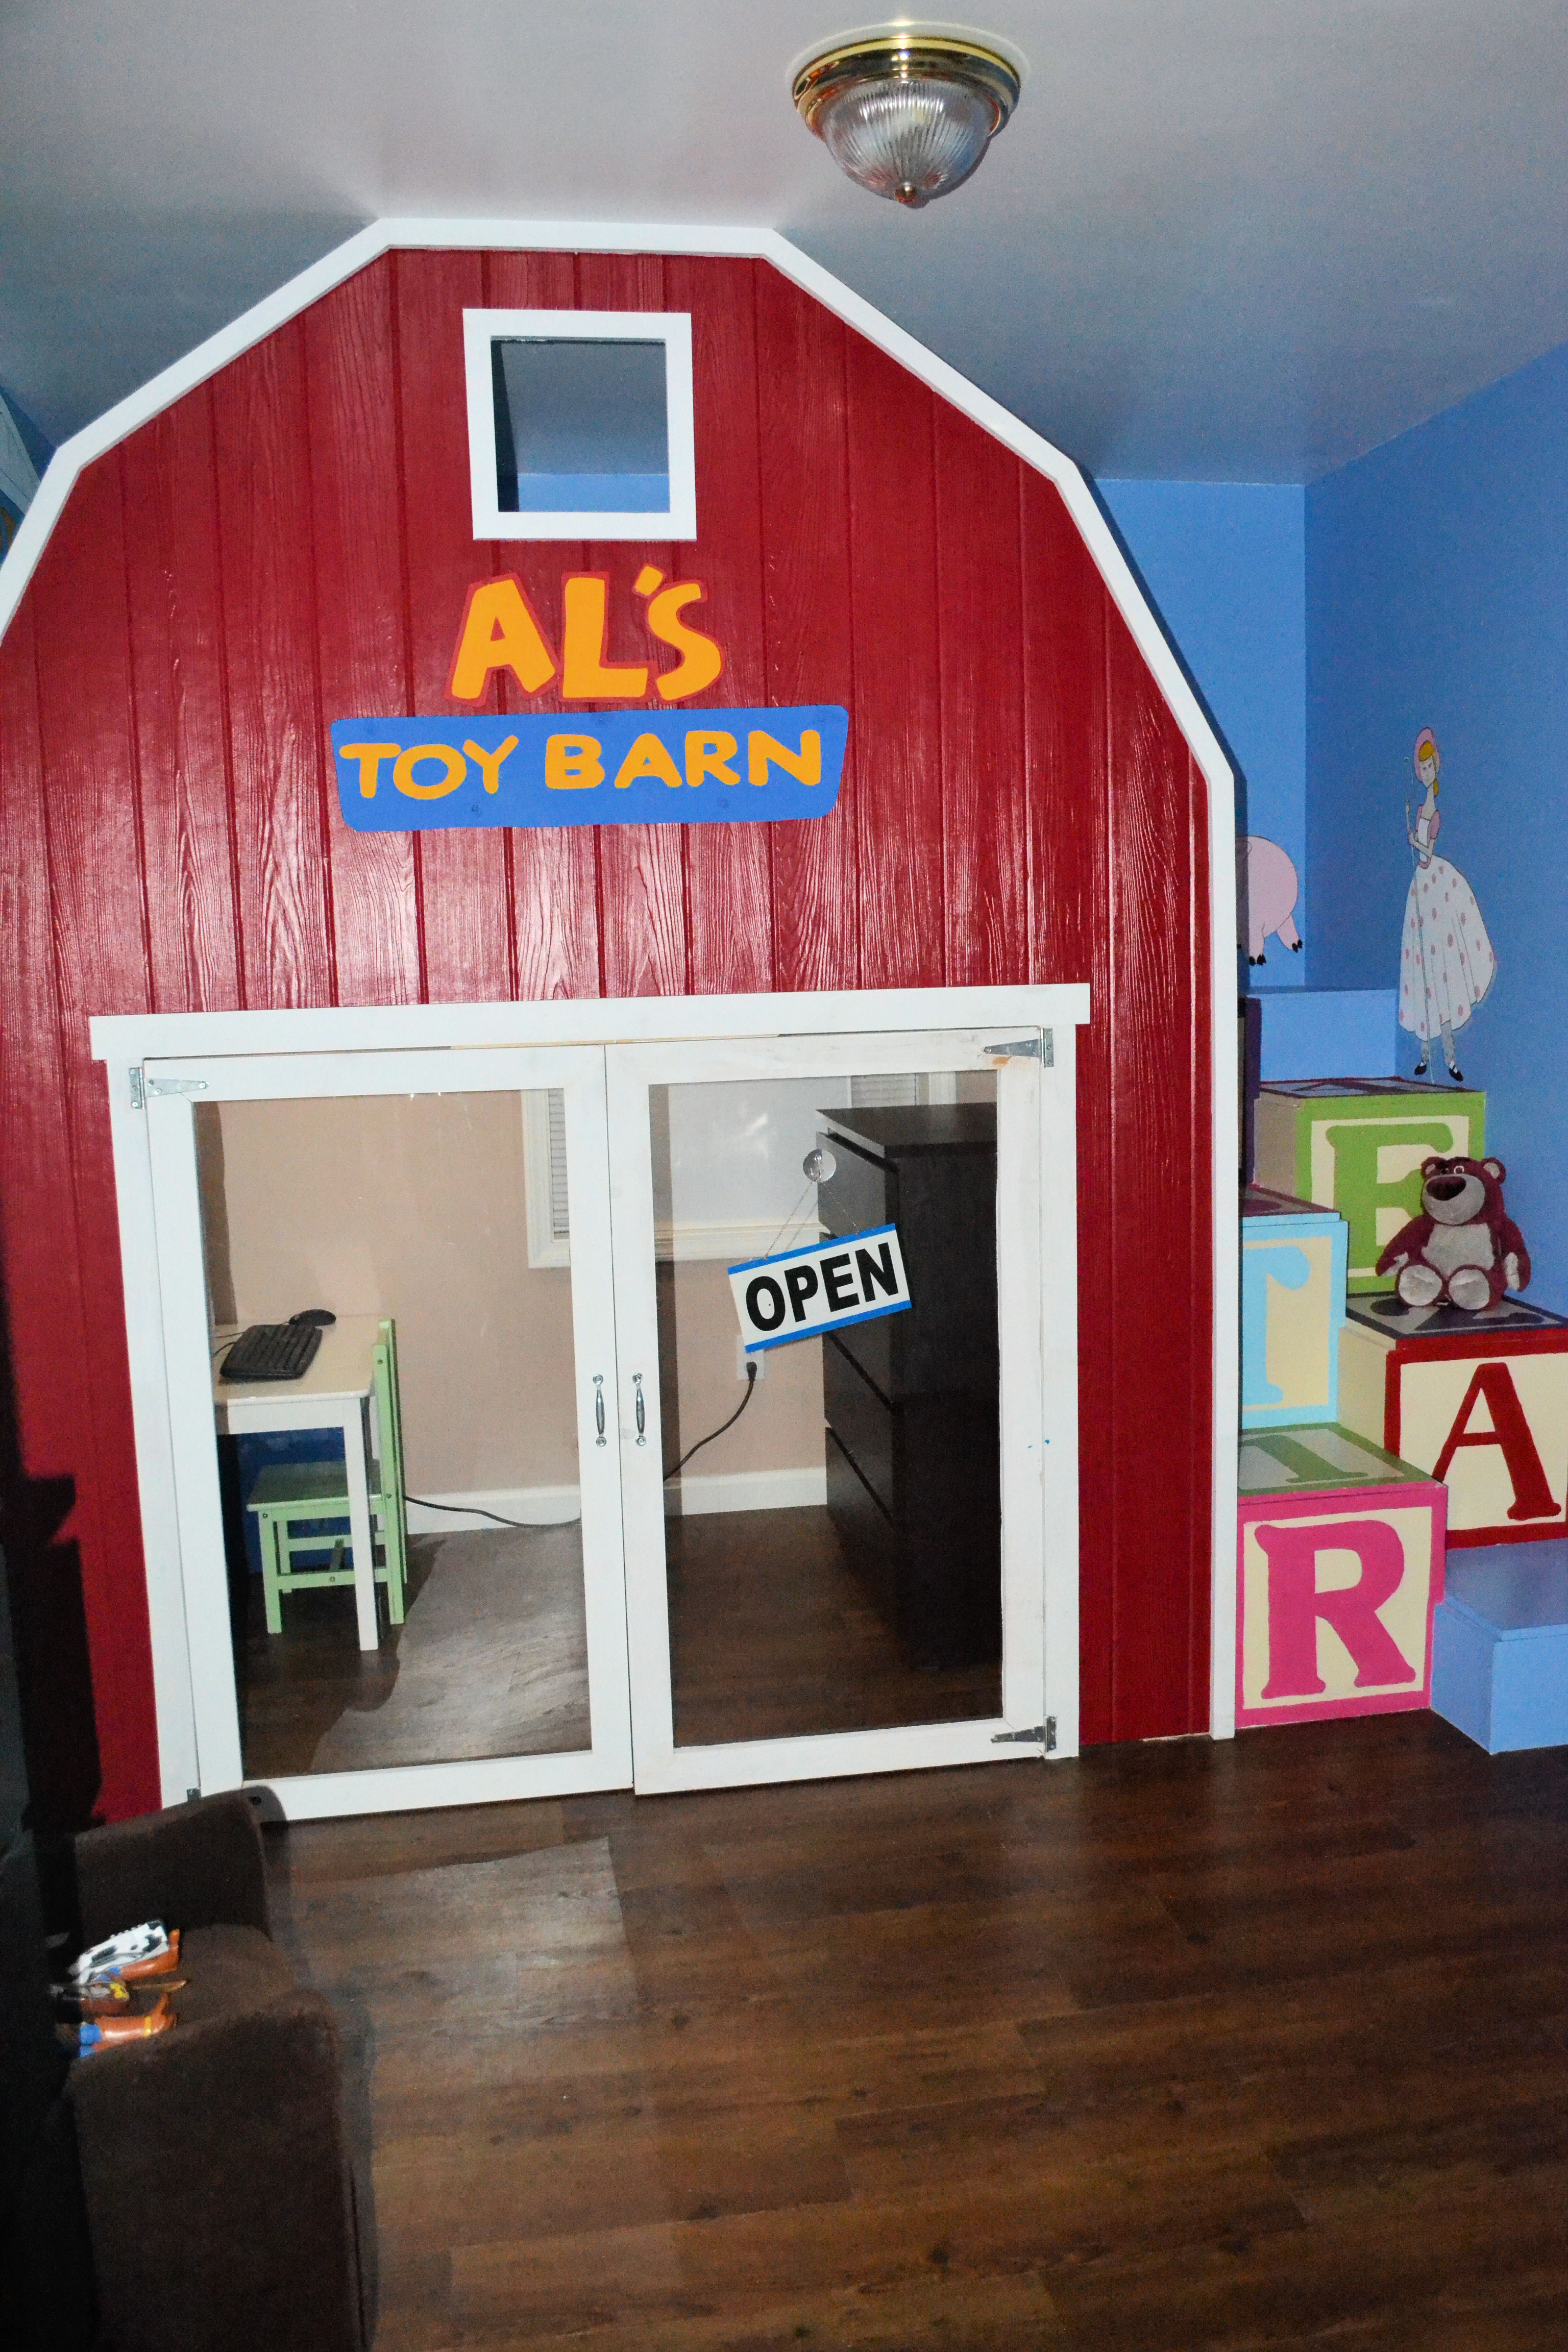
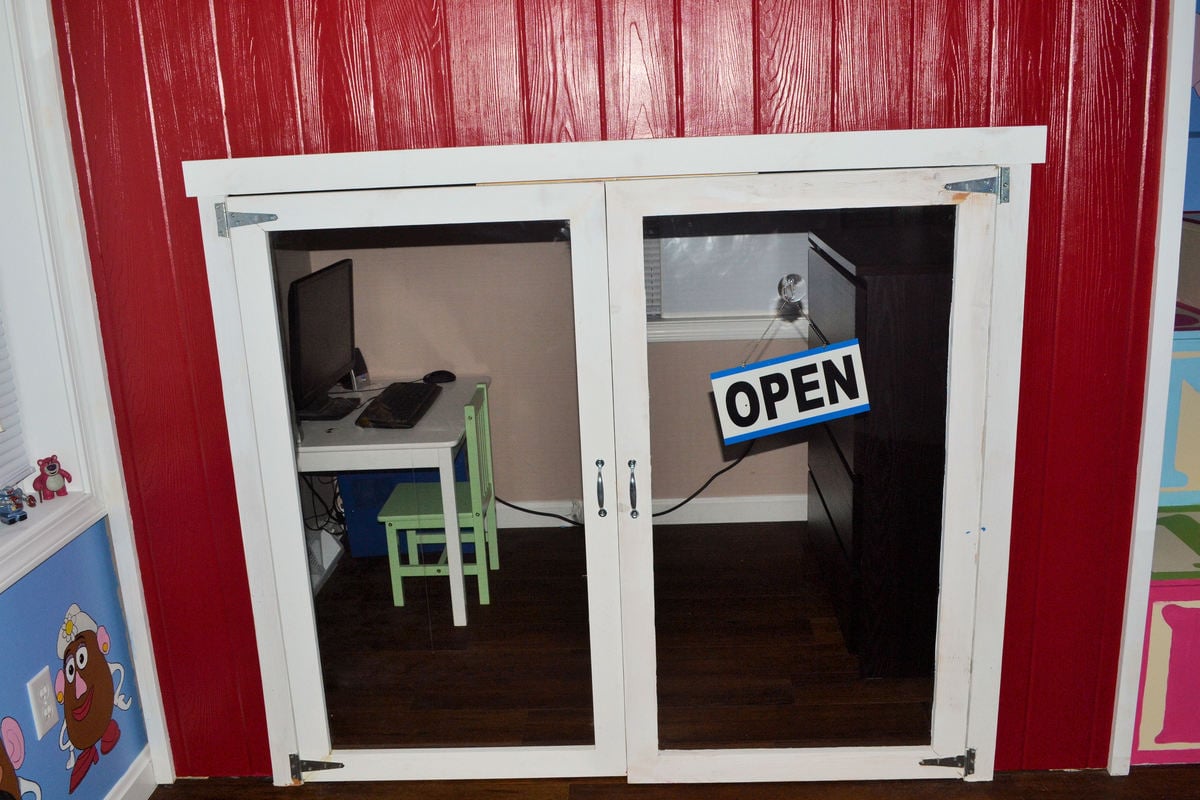
Loft Playhouse Shared Bedroom

I adapted your plans for the indoor playhouse to make a bridge between my daughters’ beds with a landing for their dolls and favorite dresses. Lots of fun painting and used leftover lattice and posts to brighten it up!
Built from Plan(s)
Collapsible luggage rack

To build:
2 x 4s
1 1/4" dowel rods - x3
2 1/2" wood screws screws
1 1/2" PVC pipe (for spacers) - cut at 3/8" thick - x2
Needed:
Hole saw kit
powerful 3/8" drill or 1/2" drill
Jig saw
Miter saw
sandpaper
wood filler
paint


Estimated Cost
$20 each
Estimated Time Investment
Afternoon Project (3-6 Hours)
Finish Used
White enamel semi-gloss
Recommended Skill Level
Beginner
Comments
Janettx
Mon, 09/20/2021 - 13:24
Nice job!!! I'm still using…
Nice job!!! I'm still using mine. I ended up putting 12"x12" pavers under each leg to extend their life. After the 2nd year now we get bumper crop out of ours each season.