Tryde Console
![](/sites/default/files/Table%201_2.jpg)
Built a breakfast table using the plans from the Tryde console table (just increased the height of the legs). Fits perfectly in the nook in our kitchen, built it on a sunday afternoon, then just needed a day or two to stain and poly.
Used the DIY Plans but my son wanted the shelves to match the desktop. Very happy with result
We don't have a Kreg Jig, so we combined the original Farmhouse Table plan (with the 2x2 supports) with the dimensions of the Updated Farmhouse Table plan. We had to adjust the size of the benches to accommodate the shorter table.
The finished product is great, but keep in mind it's pretty heavy! We built the legs and top separately in our basement and assembled them in the dining room.
The chair is going to be used by my daughter in dance class. She will be sitting on the back and doing an arabesque on the seat. Because of this we added extra support to the back to make it wide enought to sit on. We also added extra support to the frame of the chair to make it sturdier. It also makes the bottom heavier, So the chair is less likely to tip it over.
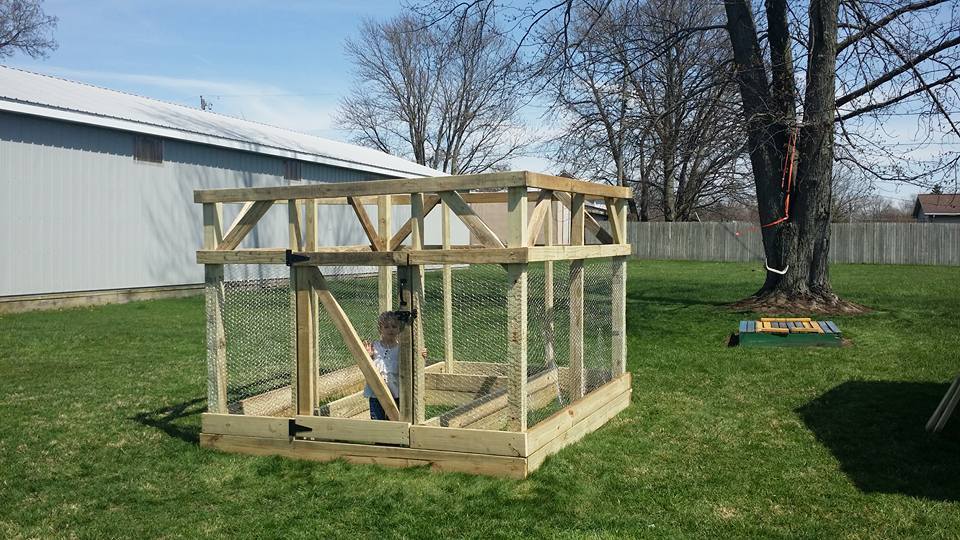
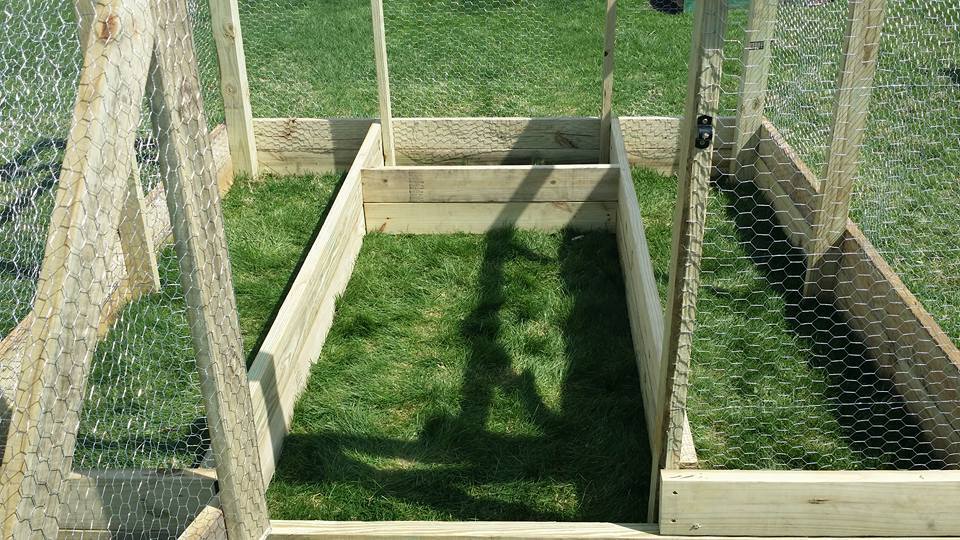
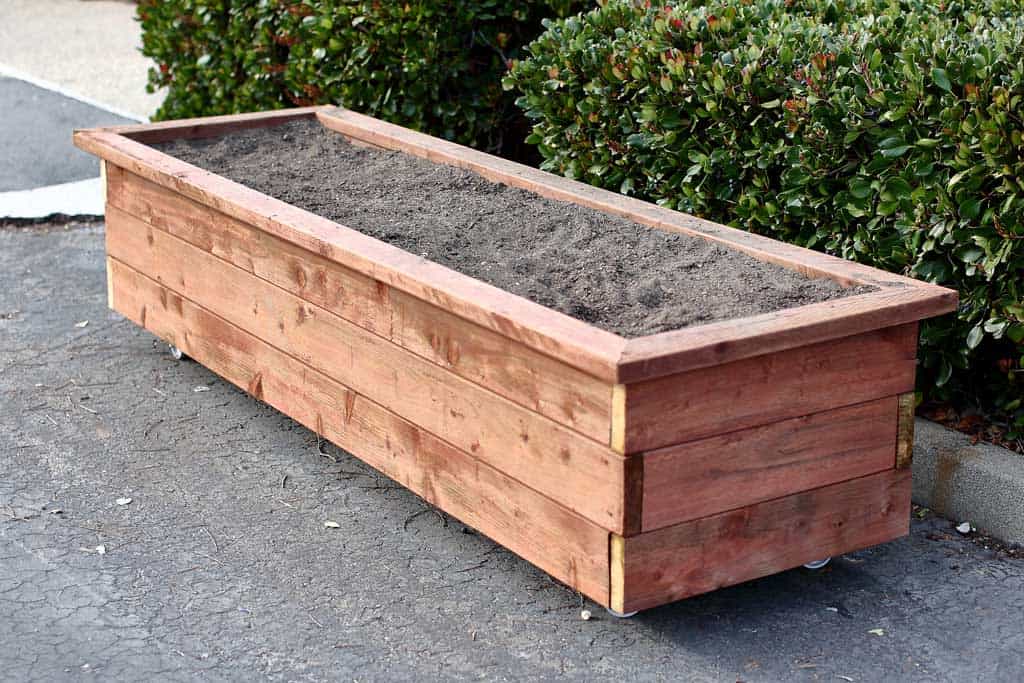
Have you ever wondered how to get your kids to eat more vegetables? If you get them involved in growing their own plants, they tend to take a much bigger interest in eating their leafy greens. But before planting, you need to get a planter and fill it with dirt. To save money, why not build your own DIY Planter Box on wheels? You could even have kids help you, just like we did with a school that our kids go to. Follow this simple plan that I’ve made with step-by-step instructions on how to build it.
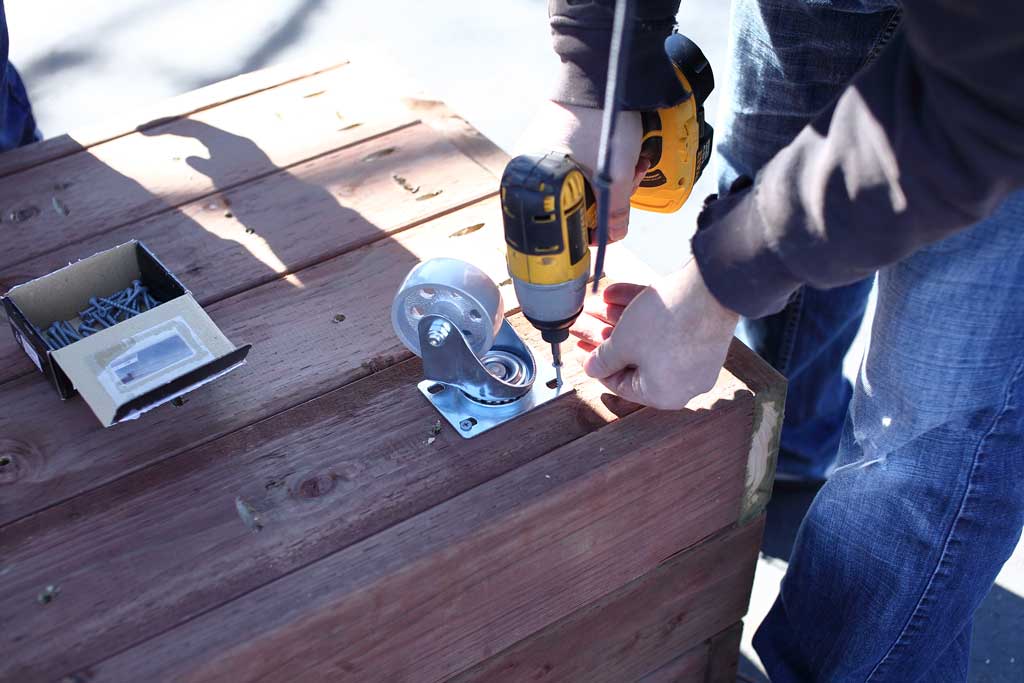
We were asked to build a project for two classes, so we decided to build a couple of planters that will allow them to grow their own vegetables. I pre-cut the boards and drilled the pocket holes at home. Then as a class, we assembled the planters together and filled them with dirt. It was a fun project to build as a class and to see kids get hands-on experience, building something out of wood.
See my website for additional pictures and how I've built it, TheDIYPlan.com
I loved Patrick's Jelly Cabinet, so I figured I would tackle one on my own. I used the oxidized finish that I saw on a different project on this blog, and it is quickly becoming my favorite finish. I added some cabinet hardware of course, and it all came together quite nicely from the plans given.
Approximate cost was $85 for lumber and another $10 for hardware. It took me a few days, as I just worked on it here and there.
Thanks for any comments or suggestions!
PC27615
Fri, 03/08/2013 - 19:52
That's a creative way to finish your project! Thank you for posting! The cabinet looks amazing!
These are fun little shelves that I made with left over wood from larger projects. We have split loyalties in our house that's why we made both Toronto and Detroit. Lol! It's a really simple project that ends up looking great.
Using the plans for the adirondack chairs we made a super comfy double seater from recycled sofa arms and pallet wood, put an extra diagonal support leg in the middle. Thank you for making these plans available!
We followed the links below to create our bed frame and headboard. The last link had some good tips that helped us. My big contribution: Use bolts to fasten everything together. Taking careful measurements I created a track for for the 2x4 spacer. This makes setup of the spacer incredibly easy. Then I put all three benches together and drilled 3/8 holes and used 3/8 bolts, washers, and wingnuts to fasten. This makes everything easy to setup and take down. http://ana-white.com/2010/03/plans-reclaimed-wood-look-headboard-king-s…
Great table which serves as our everyday table, easily fits 6 people
Fri, 01/16/2015 - 17:46
Looks like you did a very nice job. Could you post more pics? would love to see them.
Mon, 01/19/2015 - 17:10
Wow this is beautiful! You did a fantastic job...thanks for sharing!
In the plans of selling our home and move from Indiana to Washington, I visited Ana's website I was able to build this easy, simple attractive outdoor furniture to give a little "Curb Appeal" Besides the couchs, I made a corner table. The cushions are made for chairs and the pillows are cheap pillows with new covers that my wife made. Sad thing about this is I hate to leave. I will just have to make another set some day?
This was my first project ever. My goal was to finish it before my husband came home. The self tapping screws were wonderful to use. My husband thought I bought it. He was very impressed and proud of my new hobby. I cannot wait to build the planters next. Thank you Ana for the video and plans. It is amazing what you can do with great directions.
We needed a way to confine the dogs in one room when not supervised to protect our new living room furniture. I wasn't willing to pay the price it would cost for a gate large enough (if I could even find one), so I started the hunt for a plan. I couldn't find exactly what I wanted so I took ideas from several and this is the result. This folds into itself and against the pass thru bar when not in use.
Wed, 01/21/2015 - 06:21
Could you give a description on how you did it and your measurements. I'm looking to build several to keep the pups out of certain areas. Thanks.
I built the farmhouse console table over the course of 3 weekends. A relatively easy build, the pocket hole were the most time consuming. Its made mostly of Douglas Fir, and pine for the 2x2's. It's a heavy piece, it weighs about 250 lbs - ish. But the wife loves it, as it will be going in our kitchen.
My husband and I wanted modern version of the Kentwood Night Stand. We had to modify the cut list a bit to change up the dimensions for what we wanted for our space.
This is the second of two bathroom cubbies from Ana's book. I did the first one as in the book. I decided I wanted a different look for the second one. I also wanted to try out some different finishing techniques. This unit features Annie Sloan chalk paint in Aubusson Blue over Behr Pure Premium white as a base. The shelves are finished in Minwax espresso. The whole thing was rubbed down with Minwax finishing paste wax. I am really happy with the overall look and feel of the piece.
Tue, 01/27/2015 - 15:14
Wow I love the finish on this! It looks beautiful!
Spent my time home from work building this for the cabin this summer. will be using coushions from ikea that are water and uv resistant as well as double sealed with removable covers for washing.