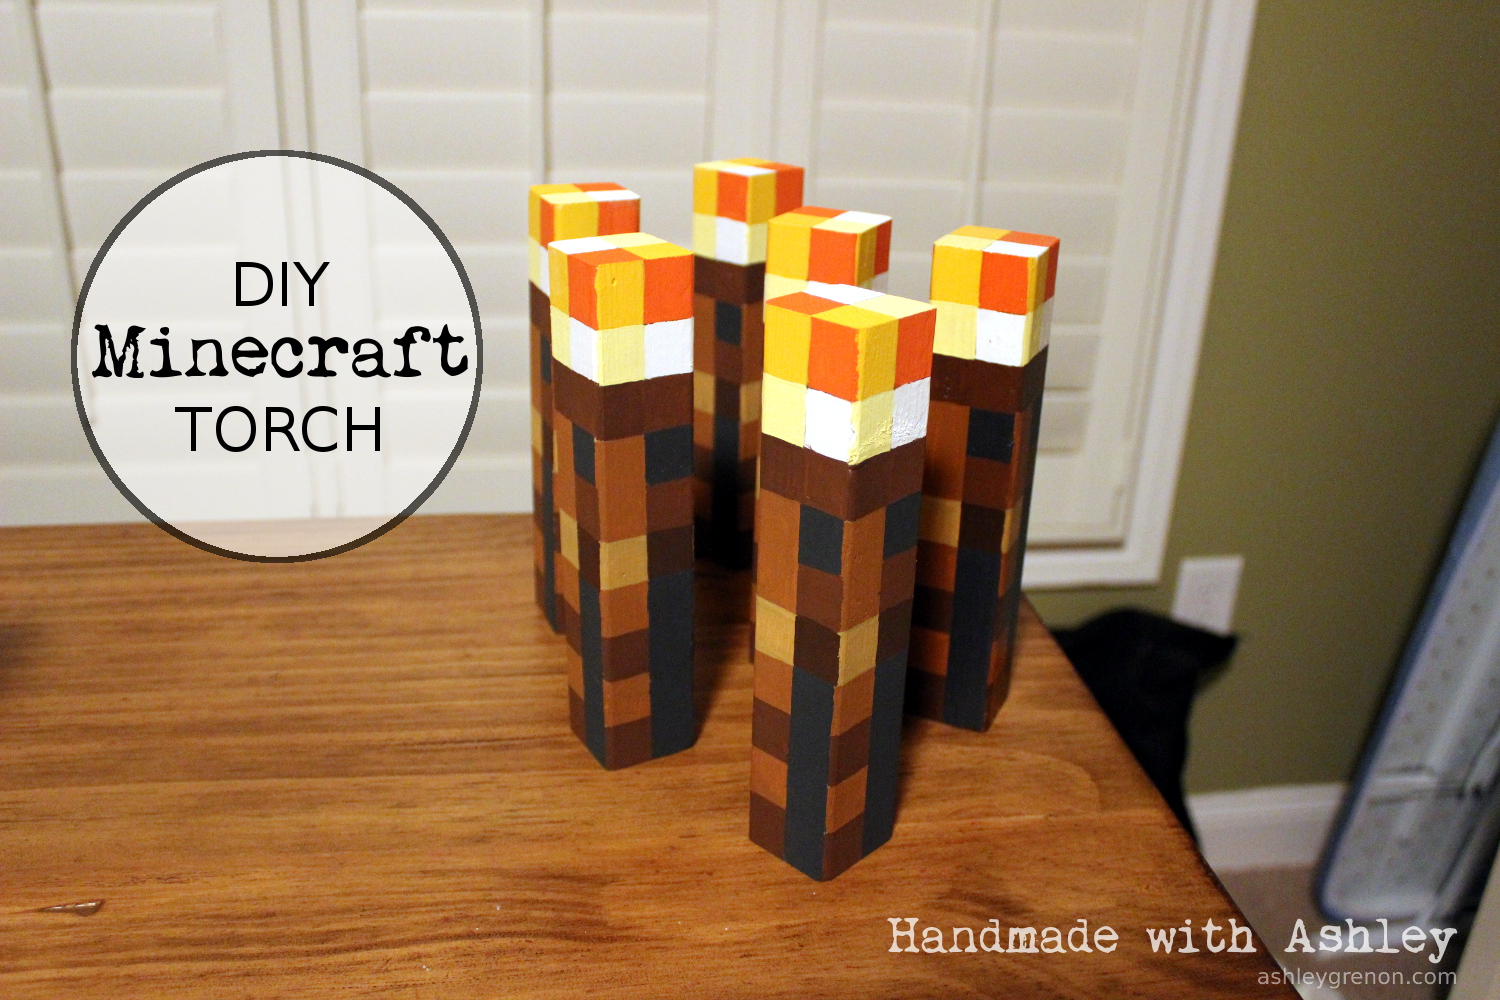
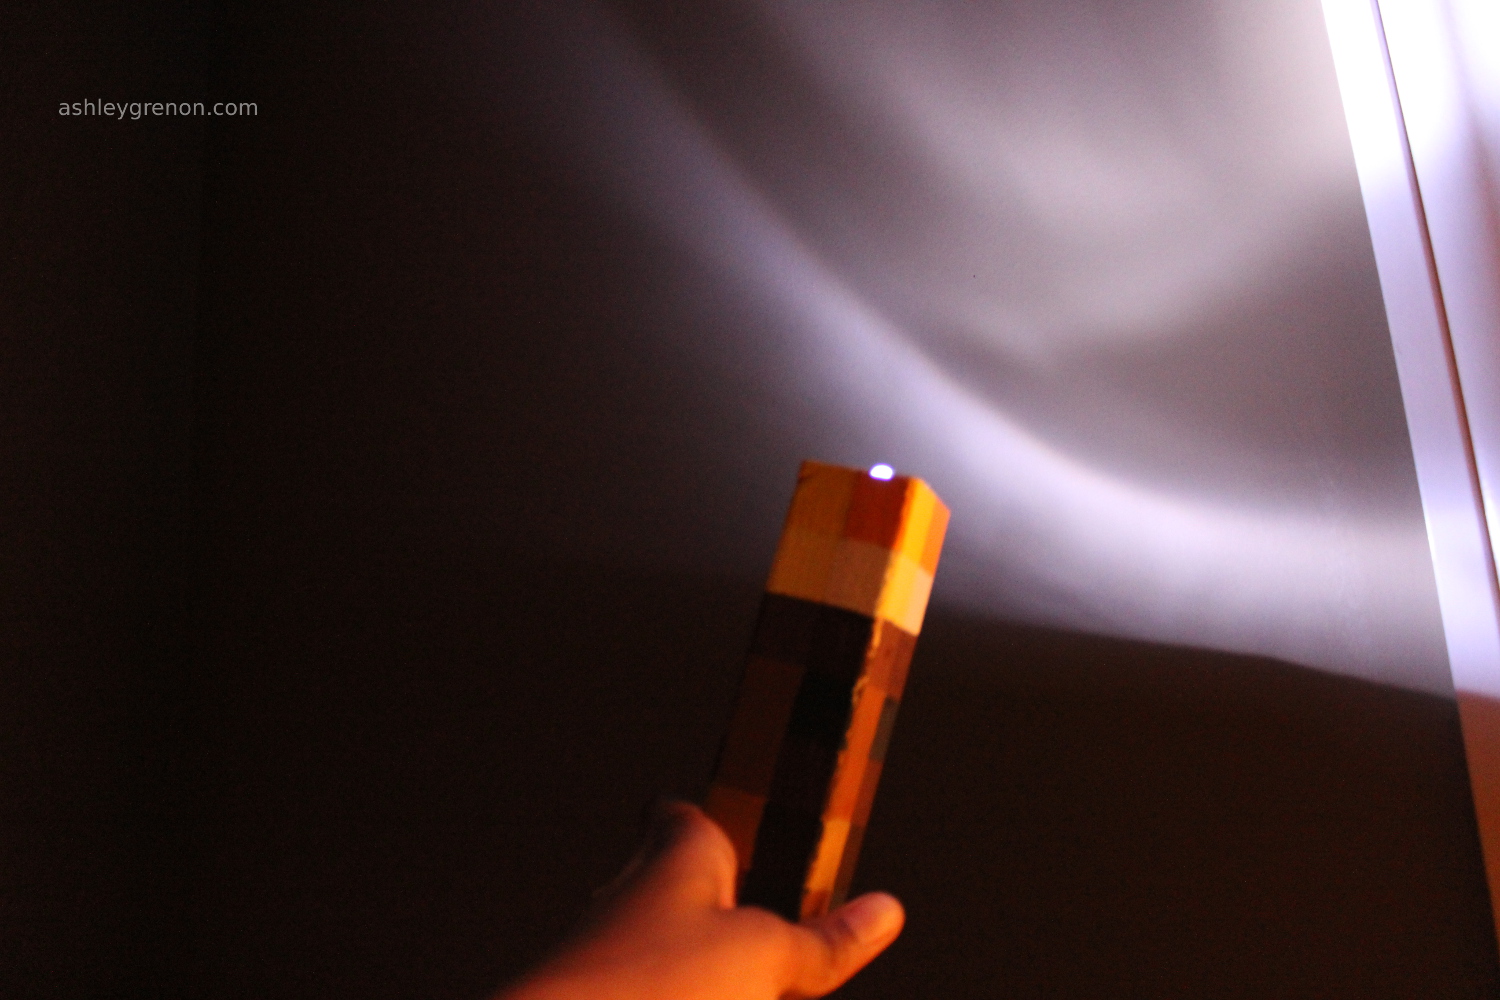
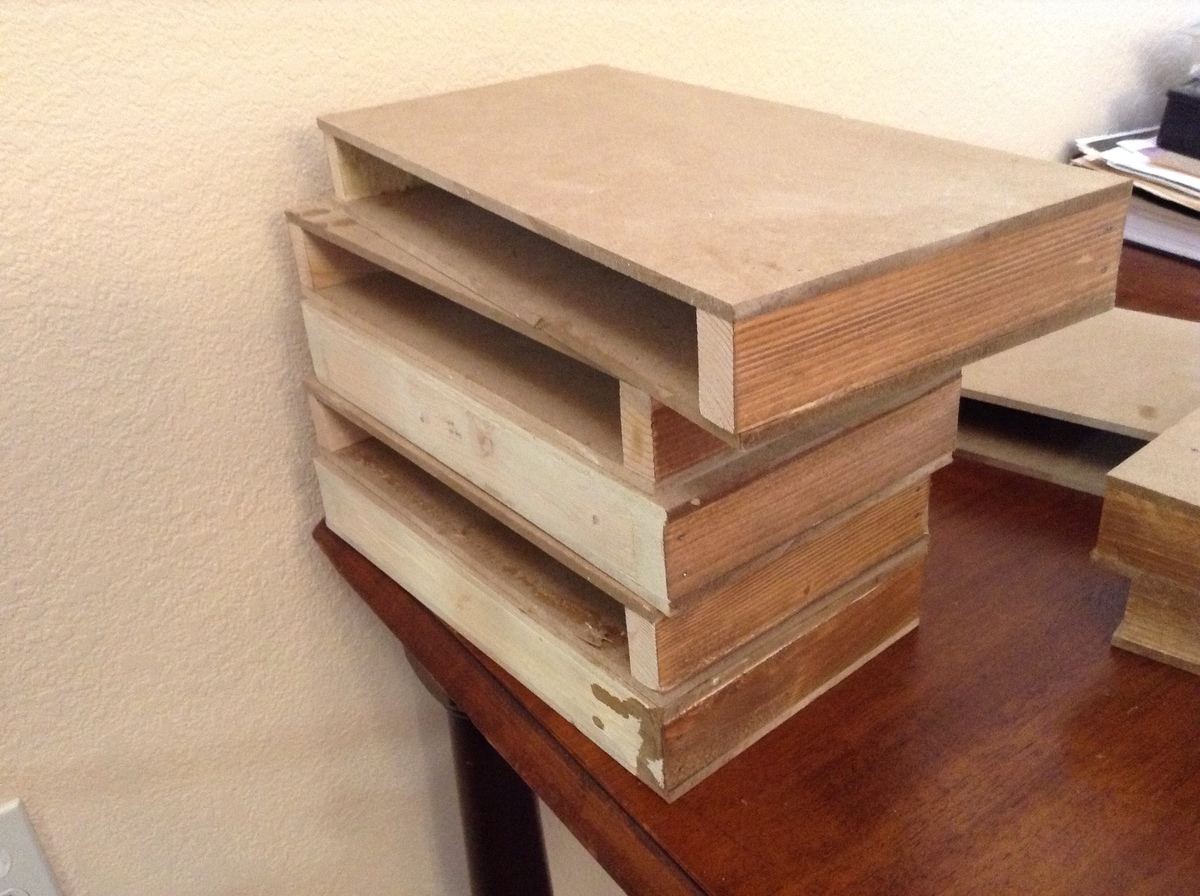
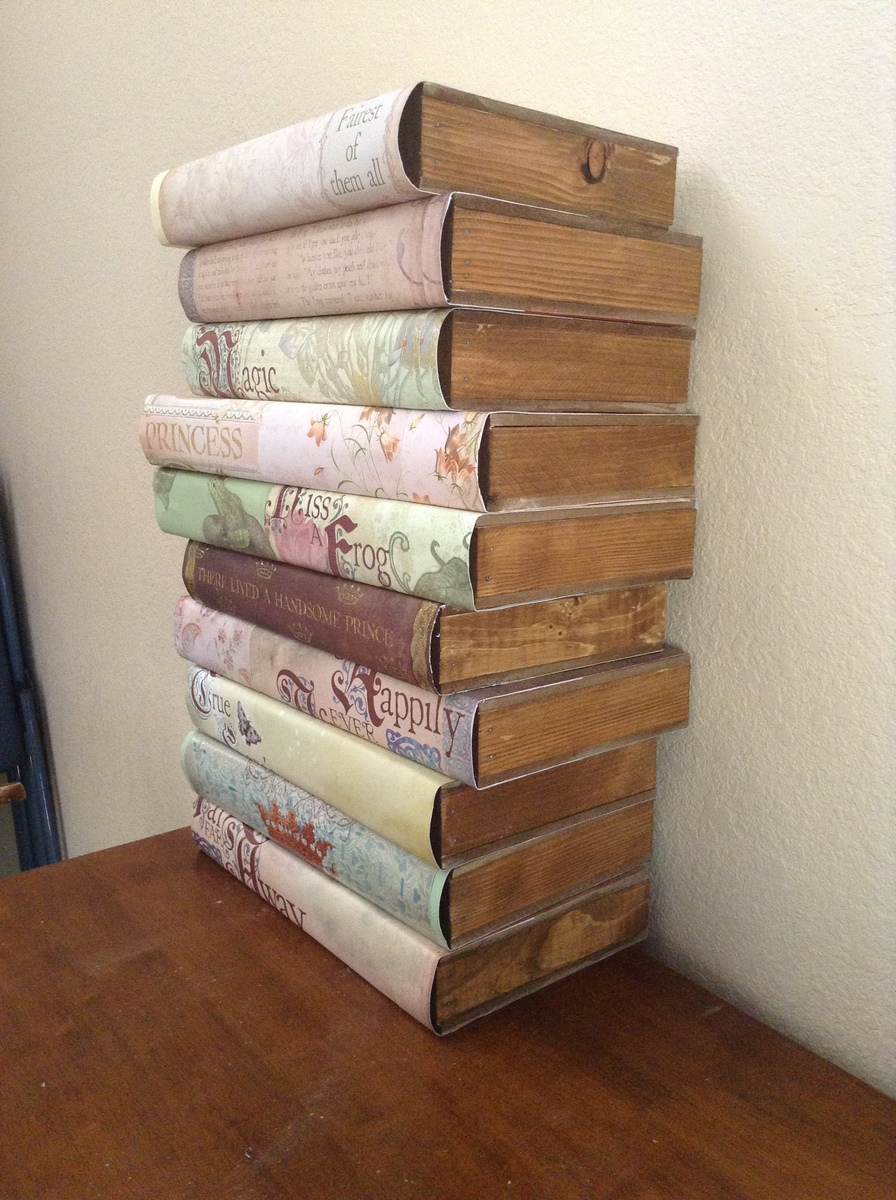
Floating "Book" Shelves
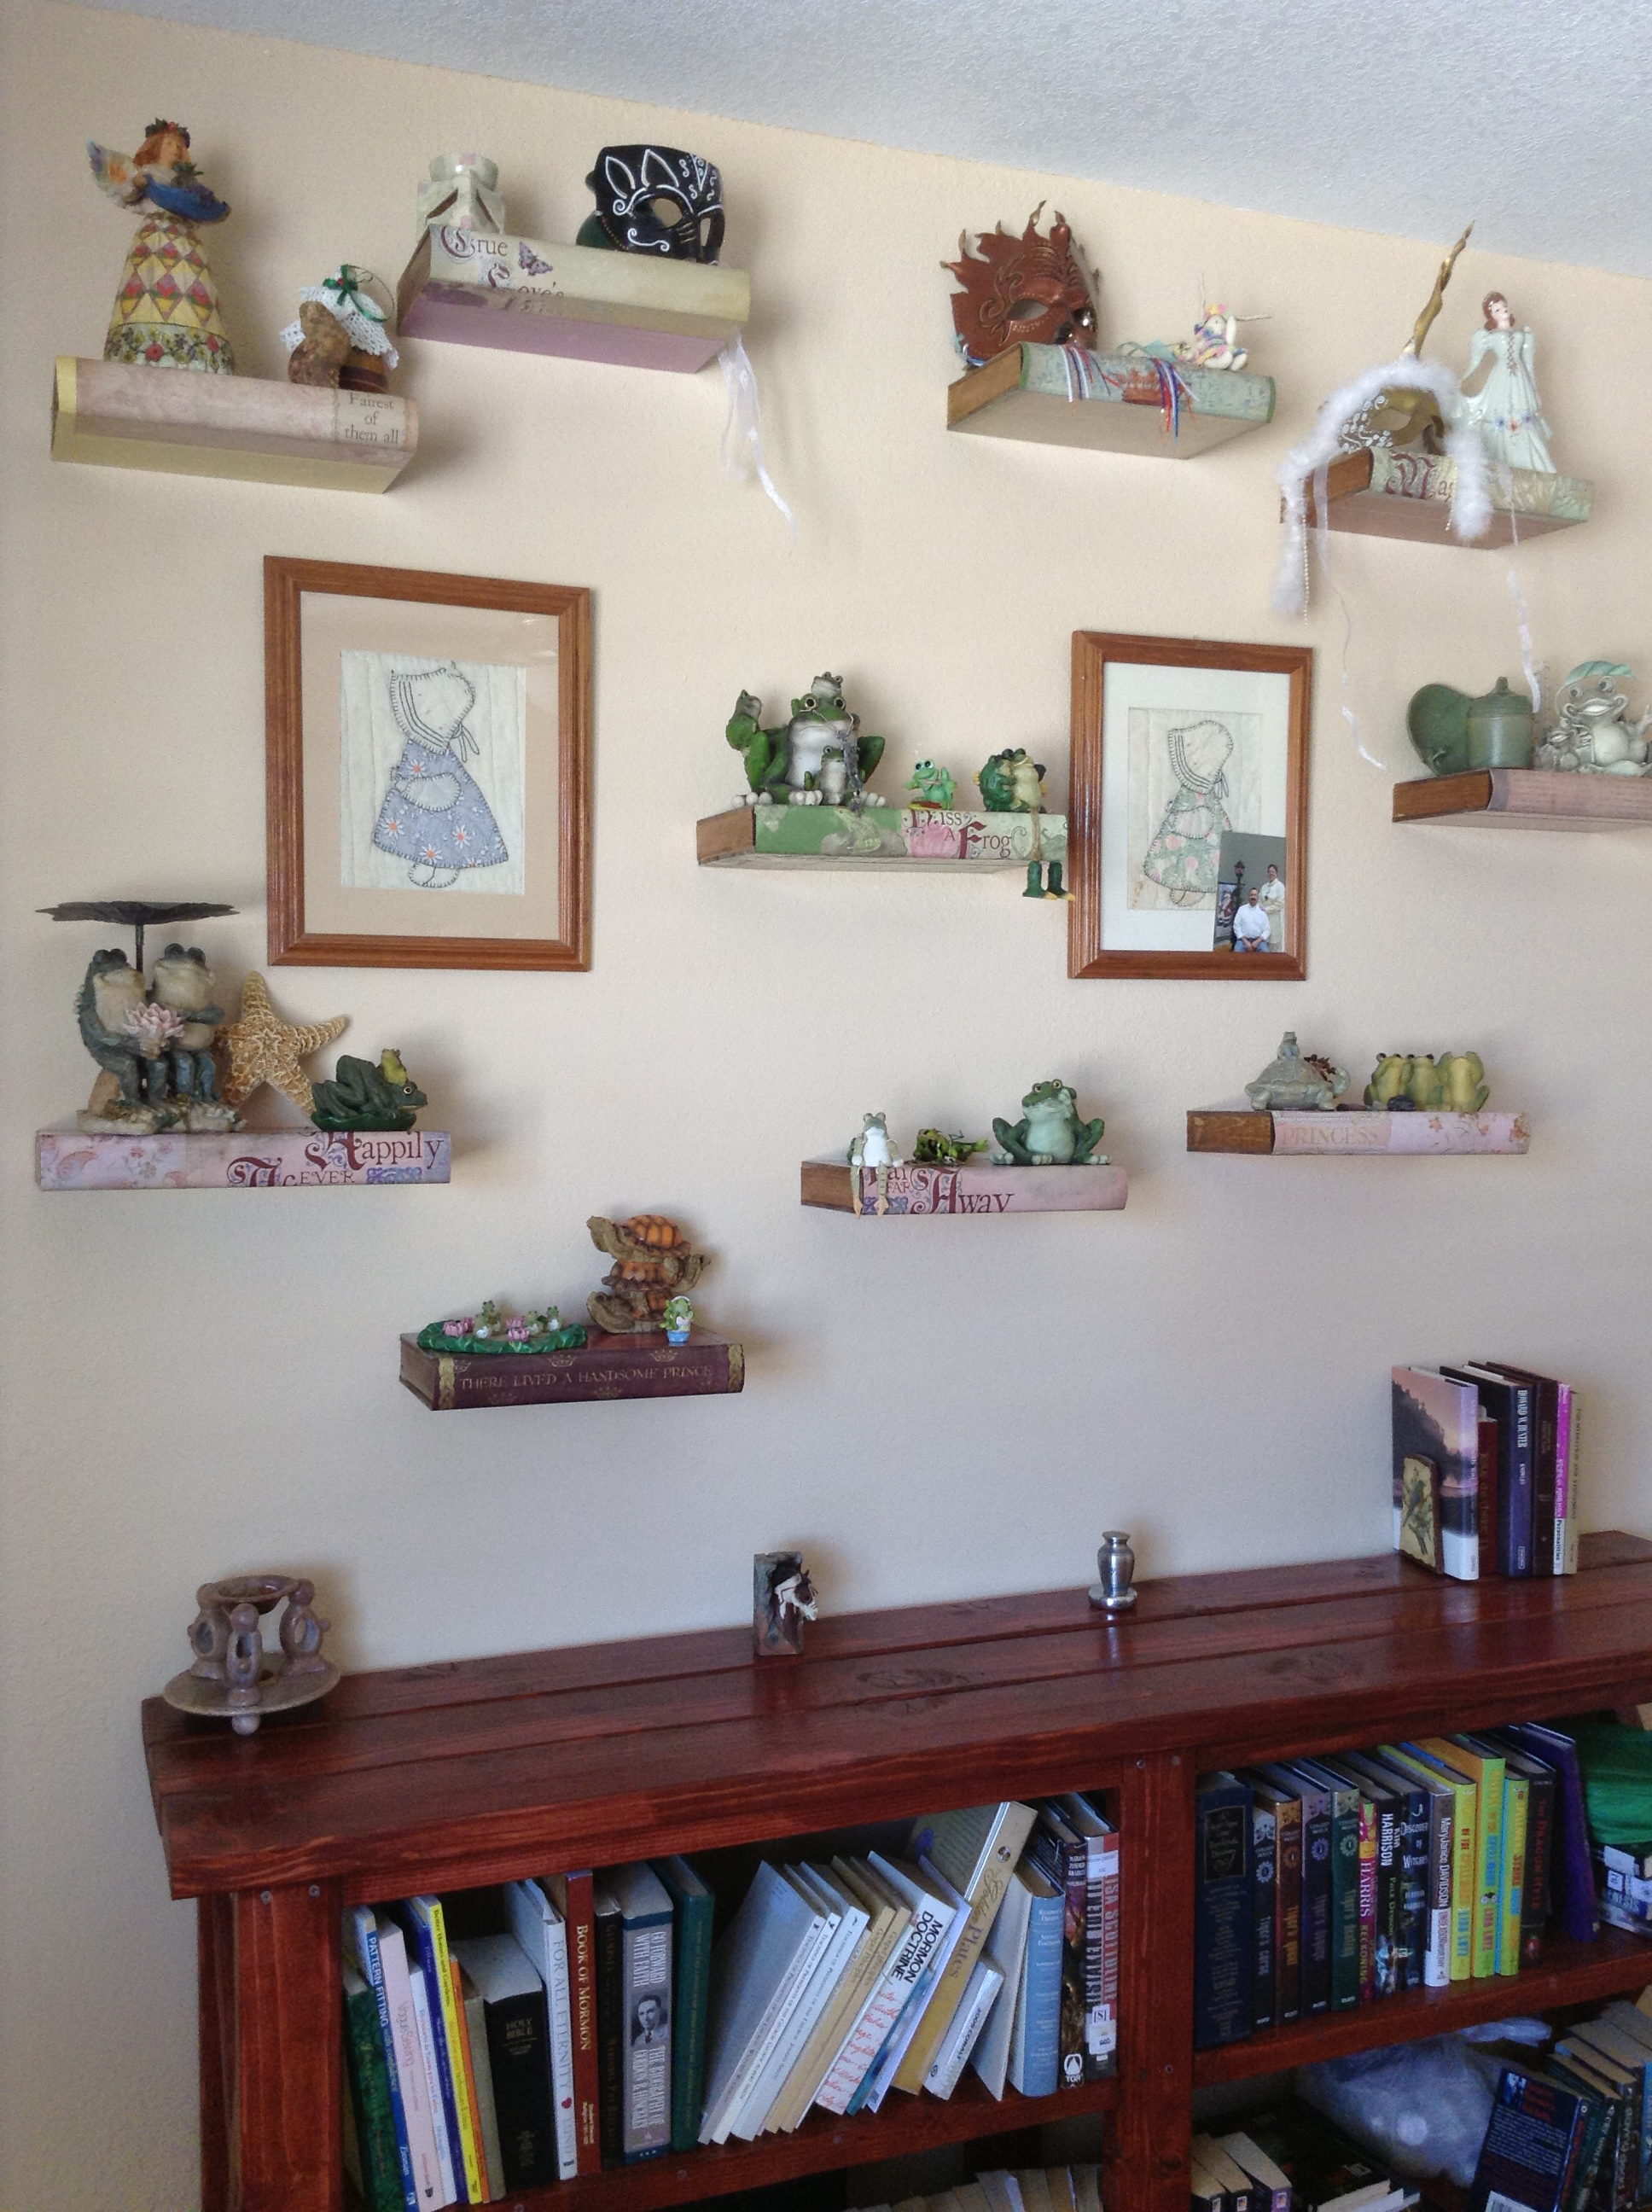
I wanted to make floating shelves. As I was making them, I got the idea to decorate them like books.

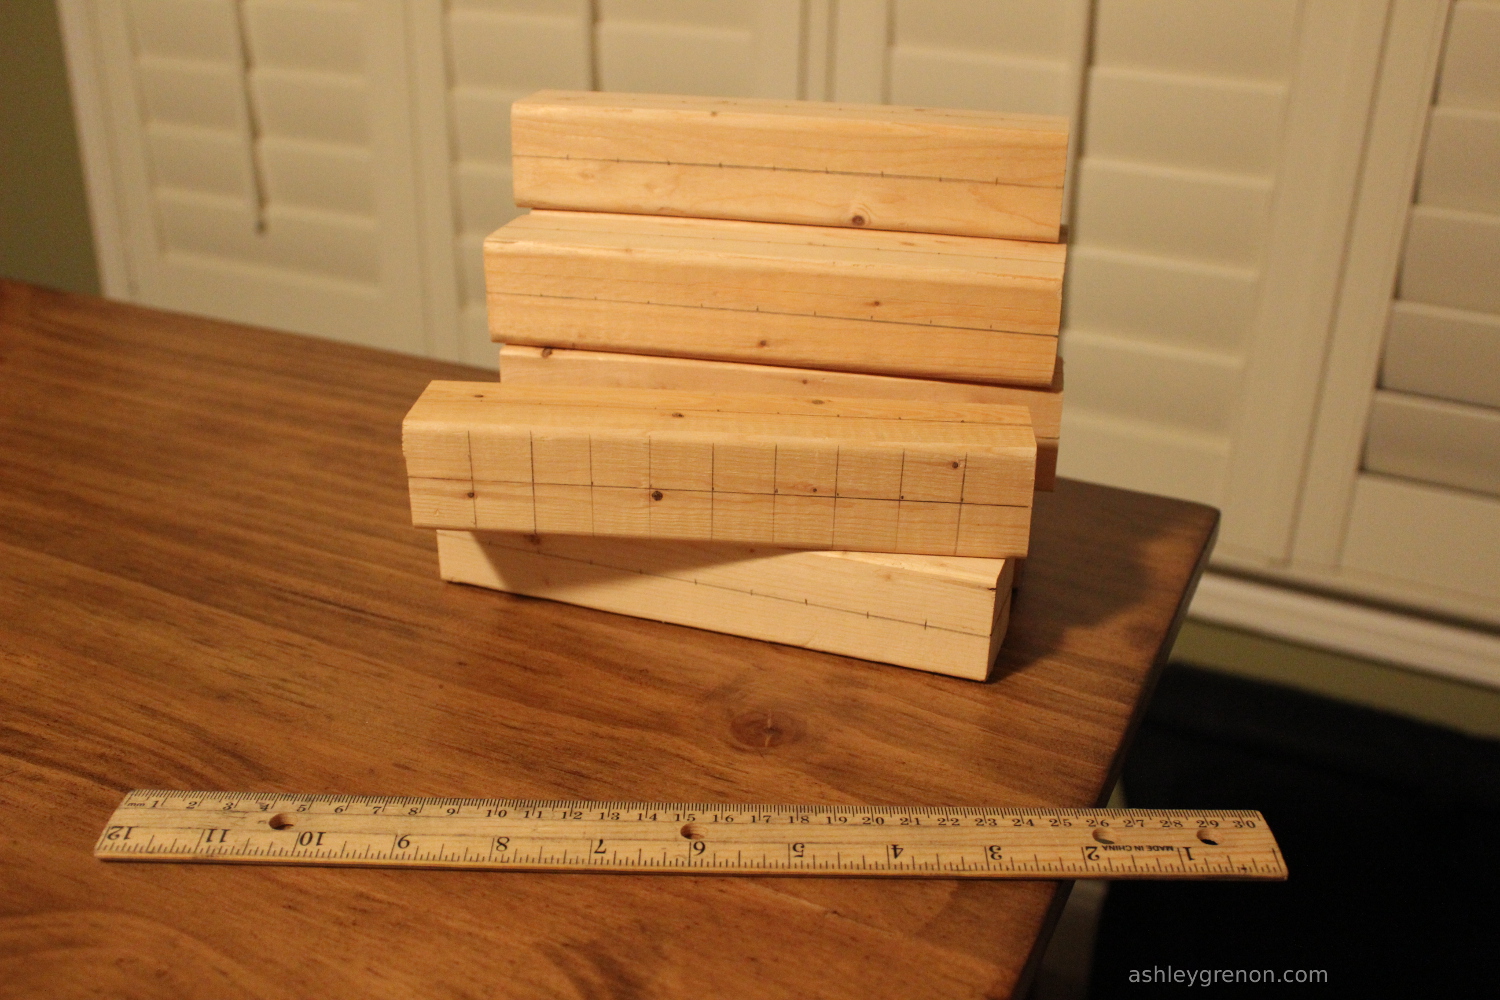
Estimated Time Investment
Weekend Project (10-20 Hours)
Finish Used
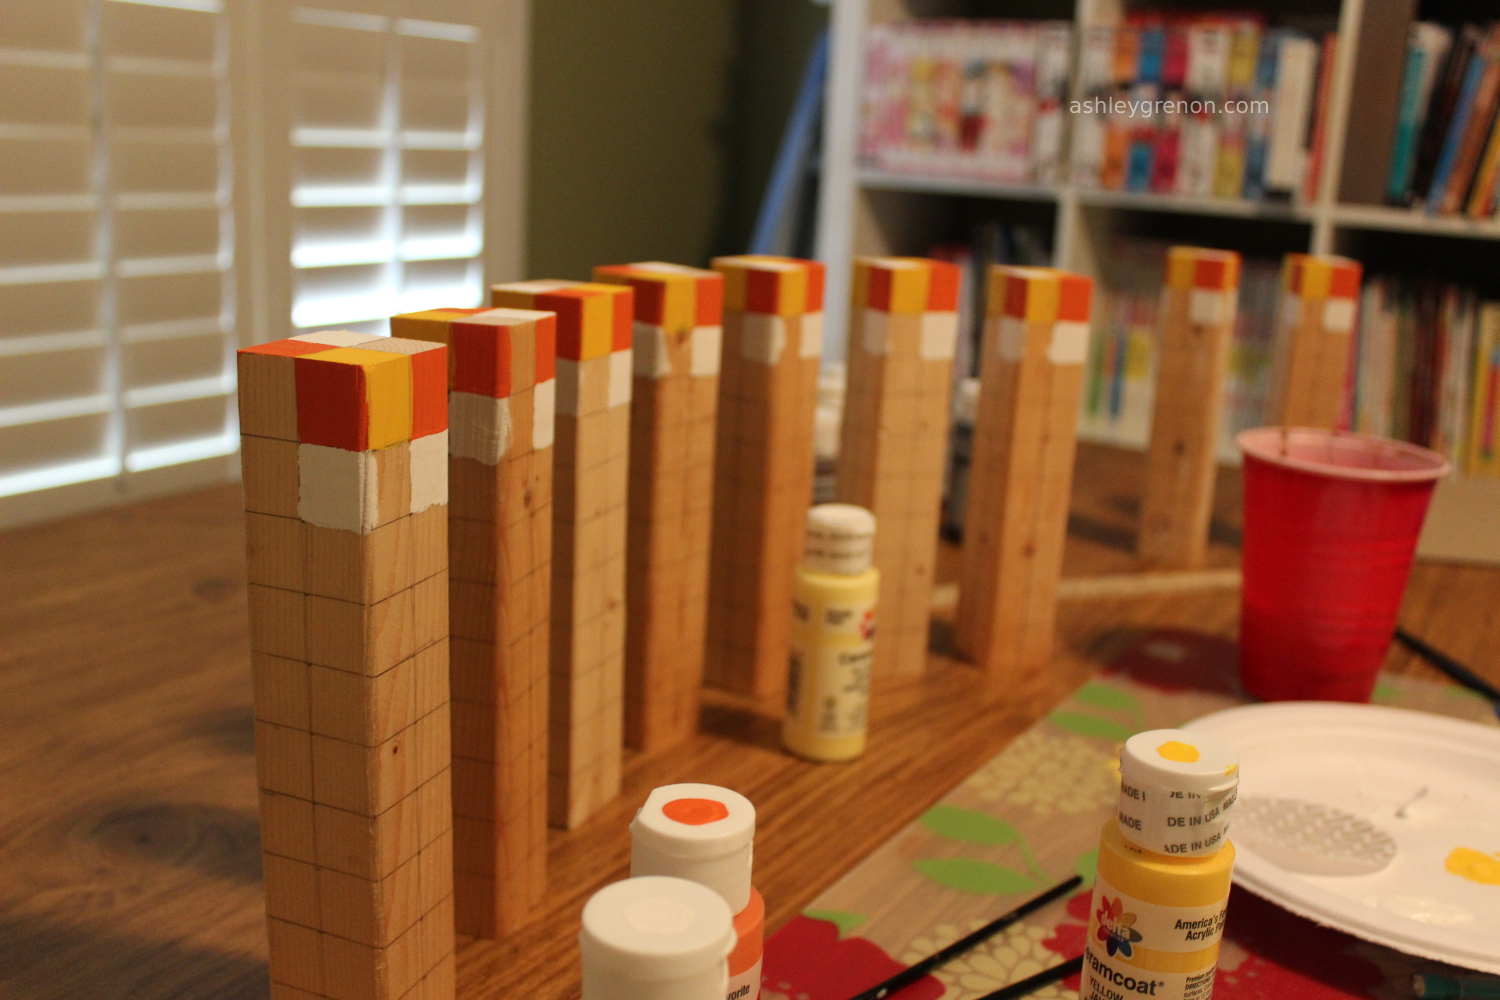
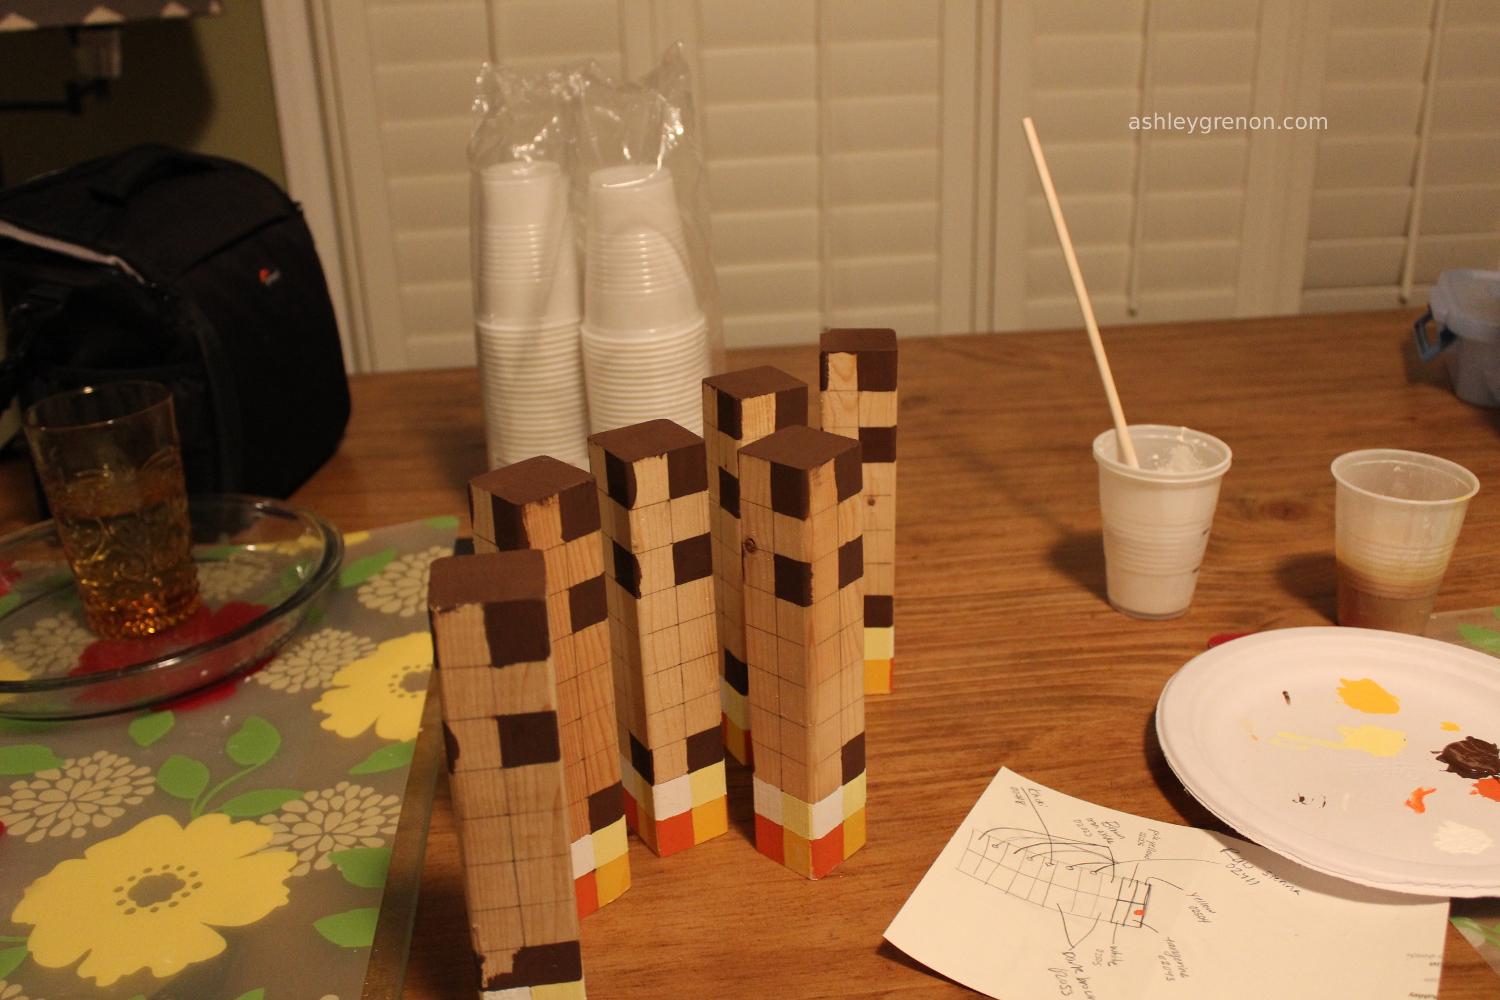
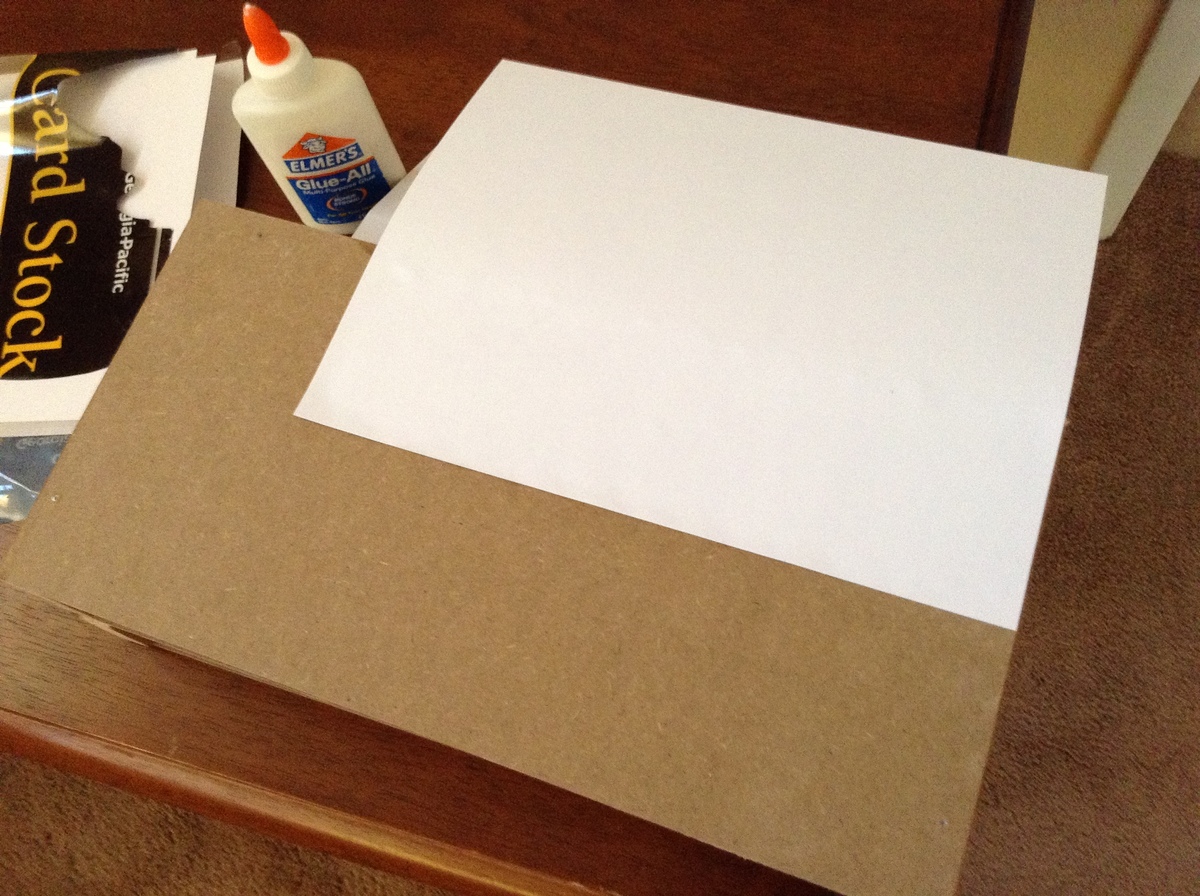
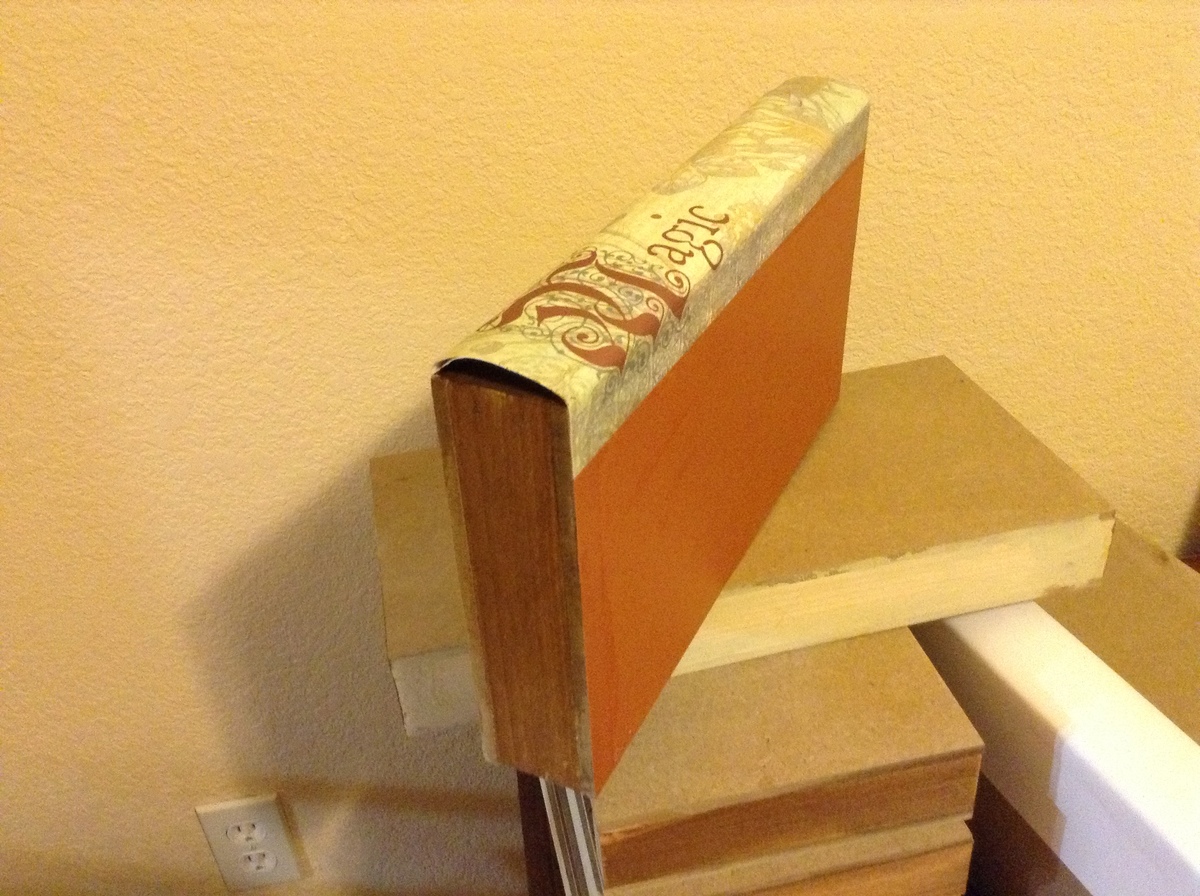
To decorate I used card paper to round one side and covered it with scrap book paper. I used three coats of shellac for protection.
Recommended Skill Level
Beginner