Community Brag Posts
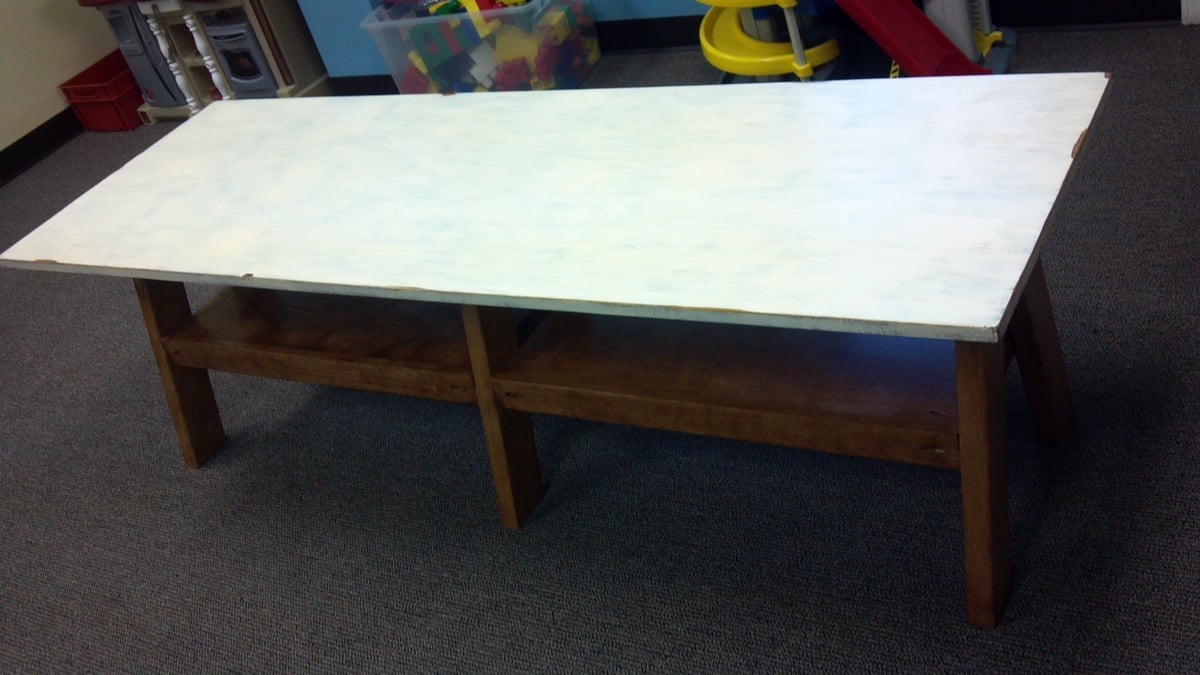
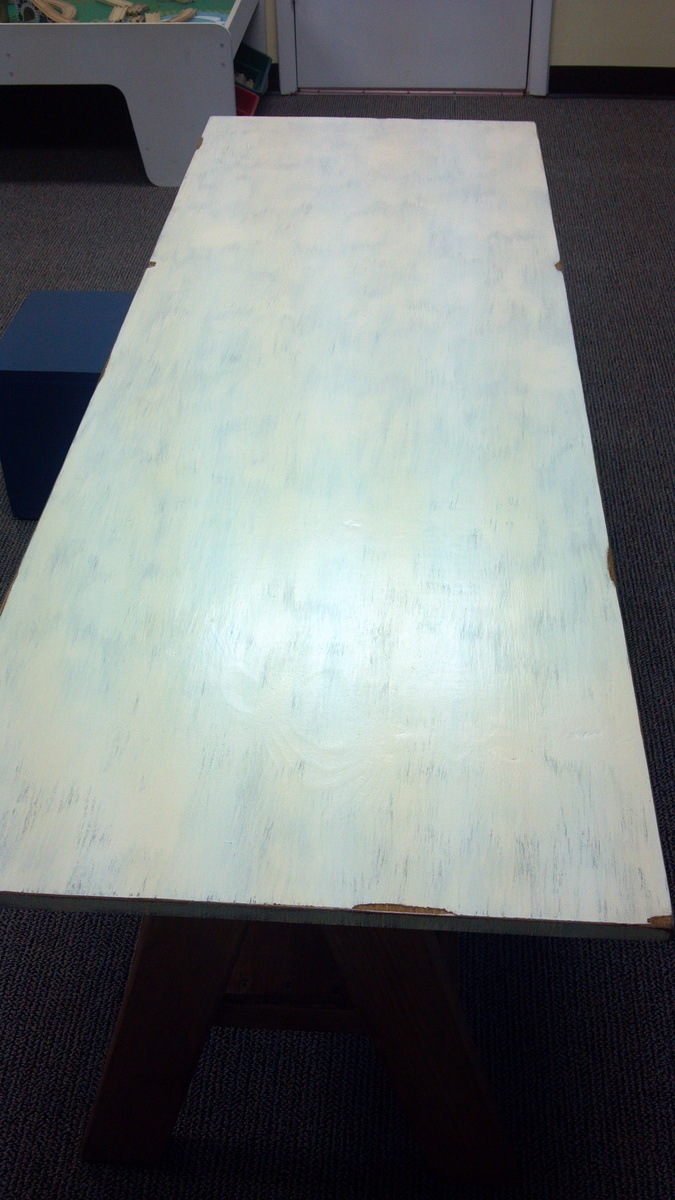
Indoor Playhouse
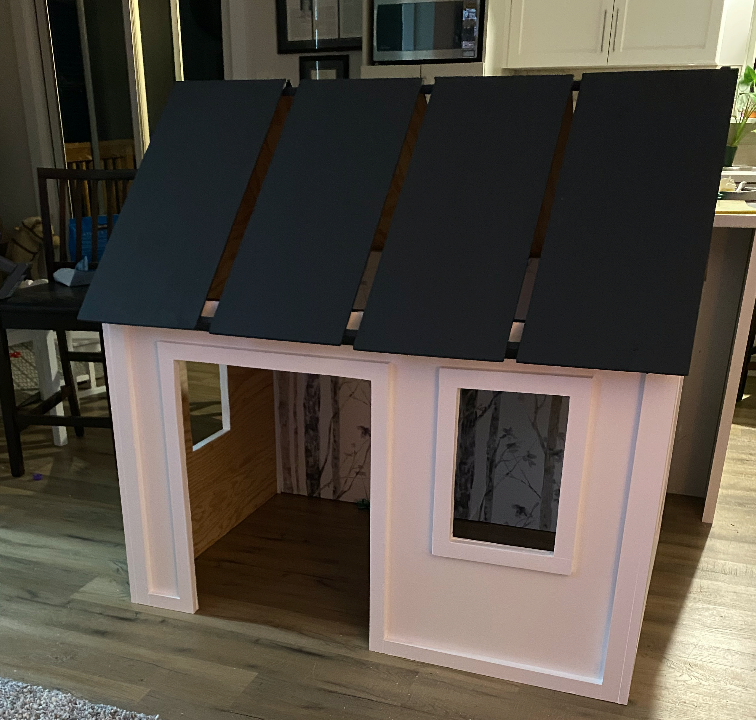
I rushed to get this done for christmas for my son and daughter between working 60 hours a week and spending time with them and ALOT of painting help from my elves (husband and brother), we got it done! They were so excited to see what Santa brought.
Comments
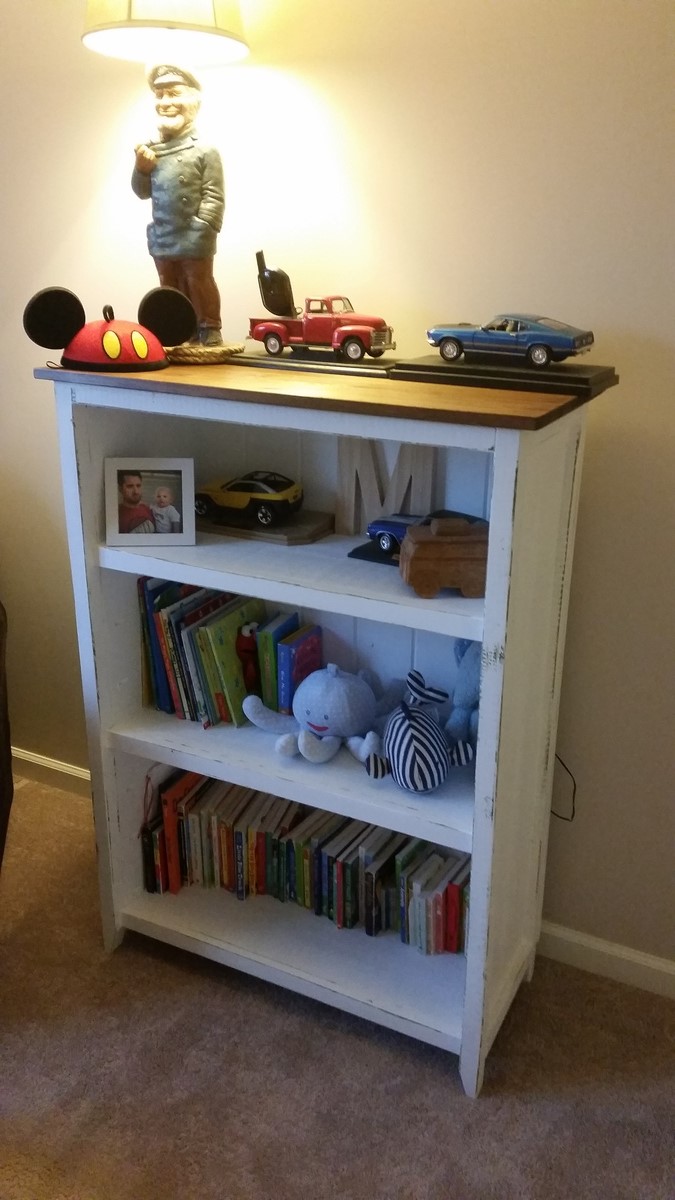
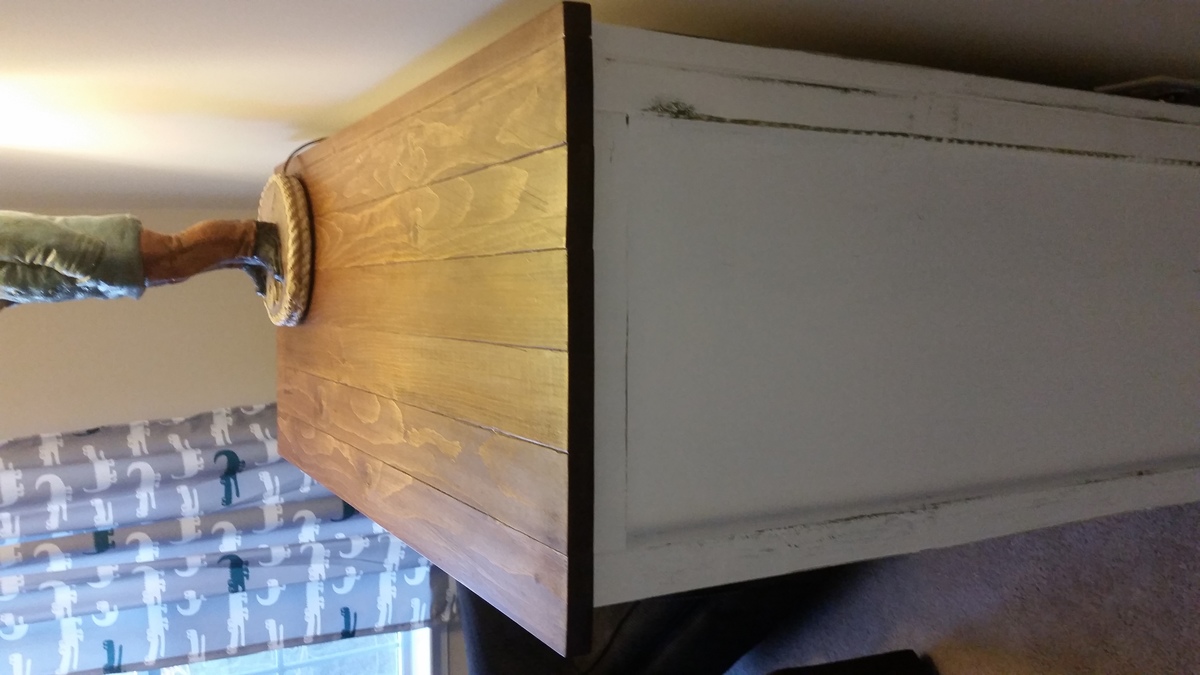
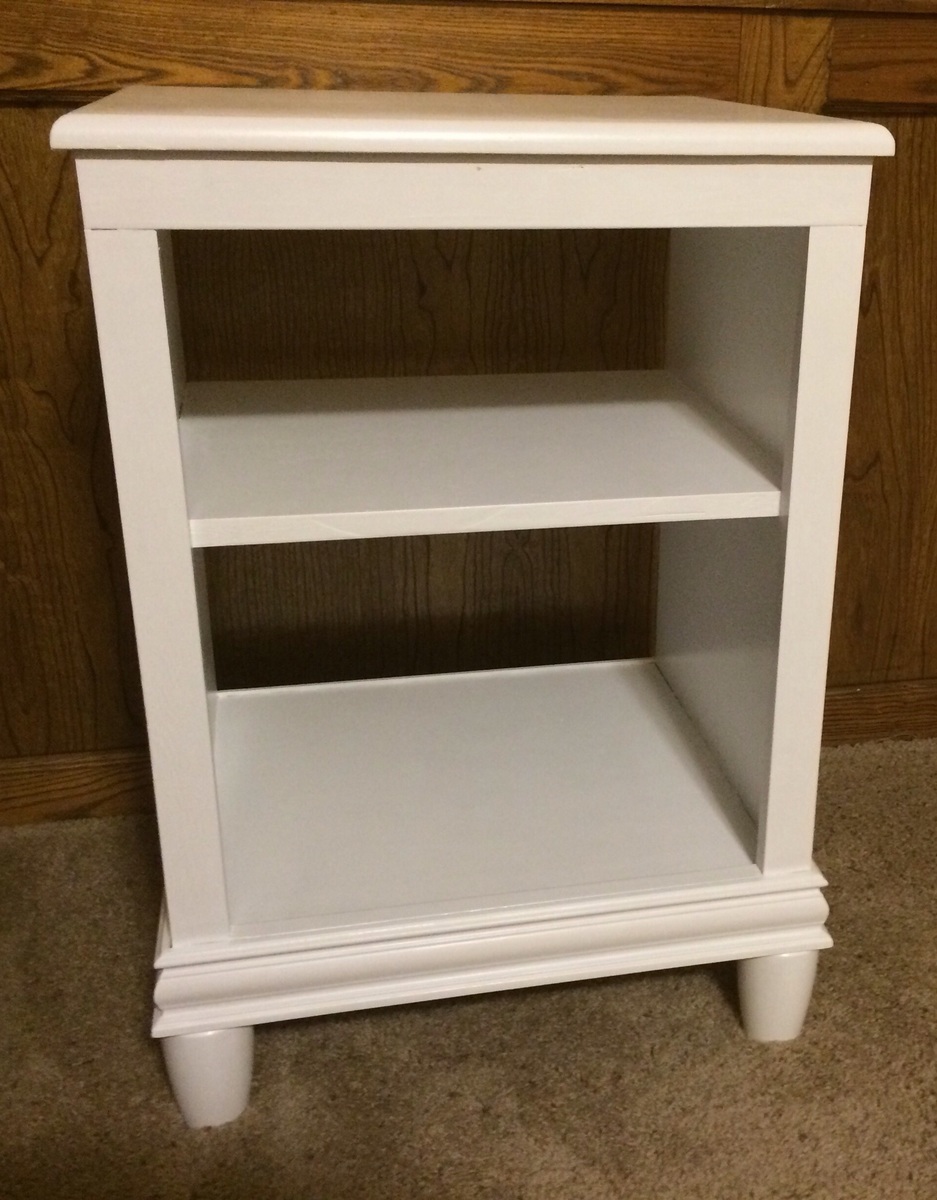
Rustic End Table
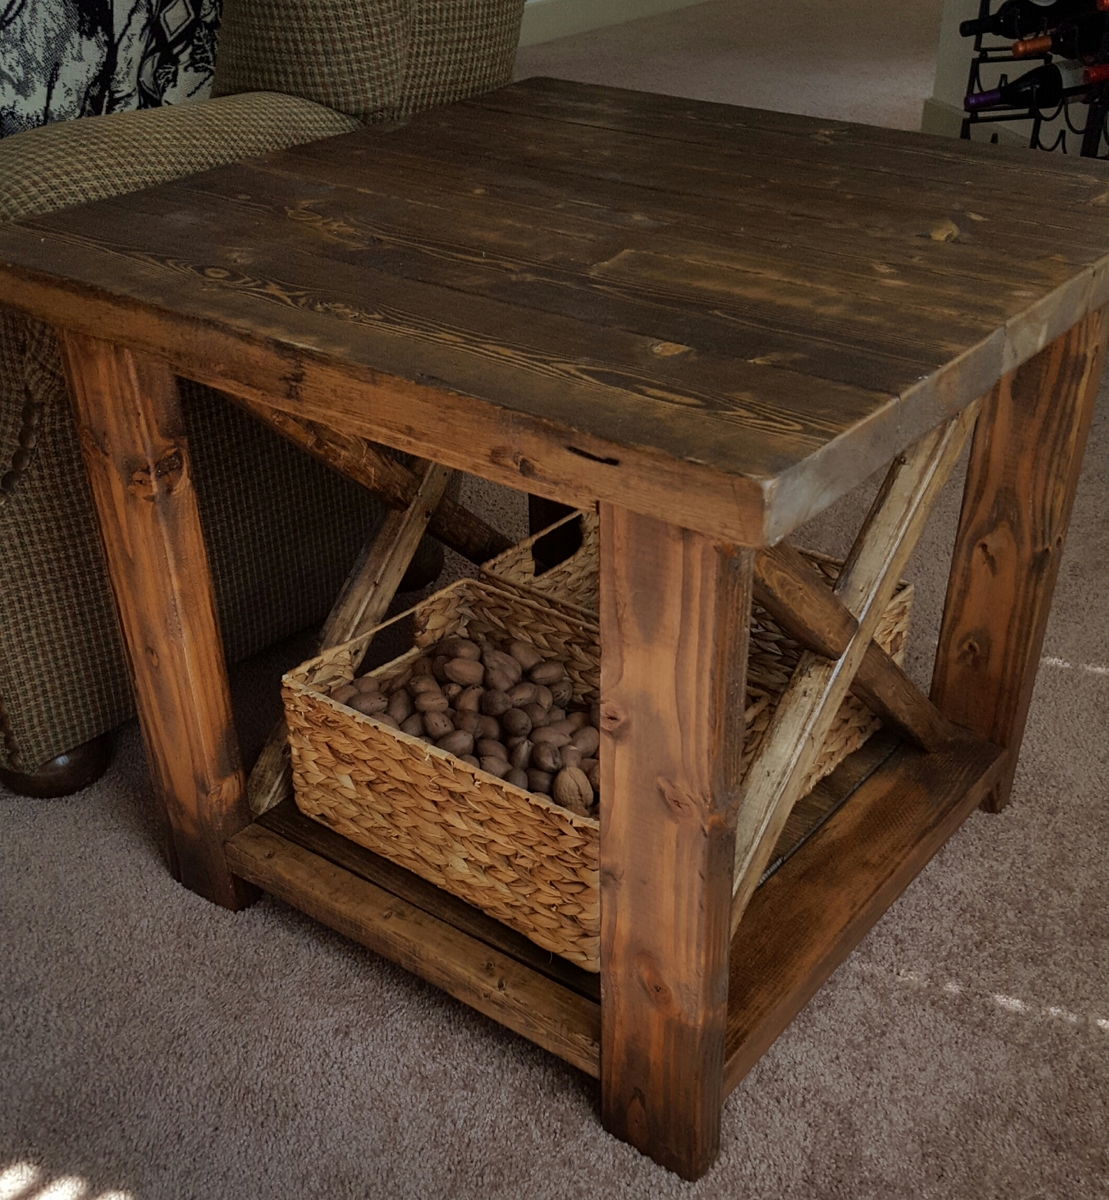
Since everyone else is making them, I had to jump on the bandwagon. Typical end table, but I left off the metal trim (for now at least) and used a wire brush on the top boards to eat away at the wood and raise the grain. It gives it tremendous texture and really makes it look more like old reclaimed lumber.
Estimated Cost
$30
Estimated Time Investment
Afternoon Project (3-6 Hours)
Finish Used
Minwax Special Walnut with a layer of poly on top
Recommended Skill Level
Beginner
Toy Chest
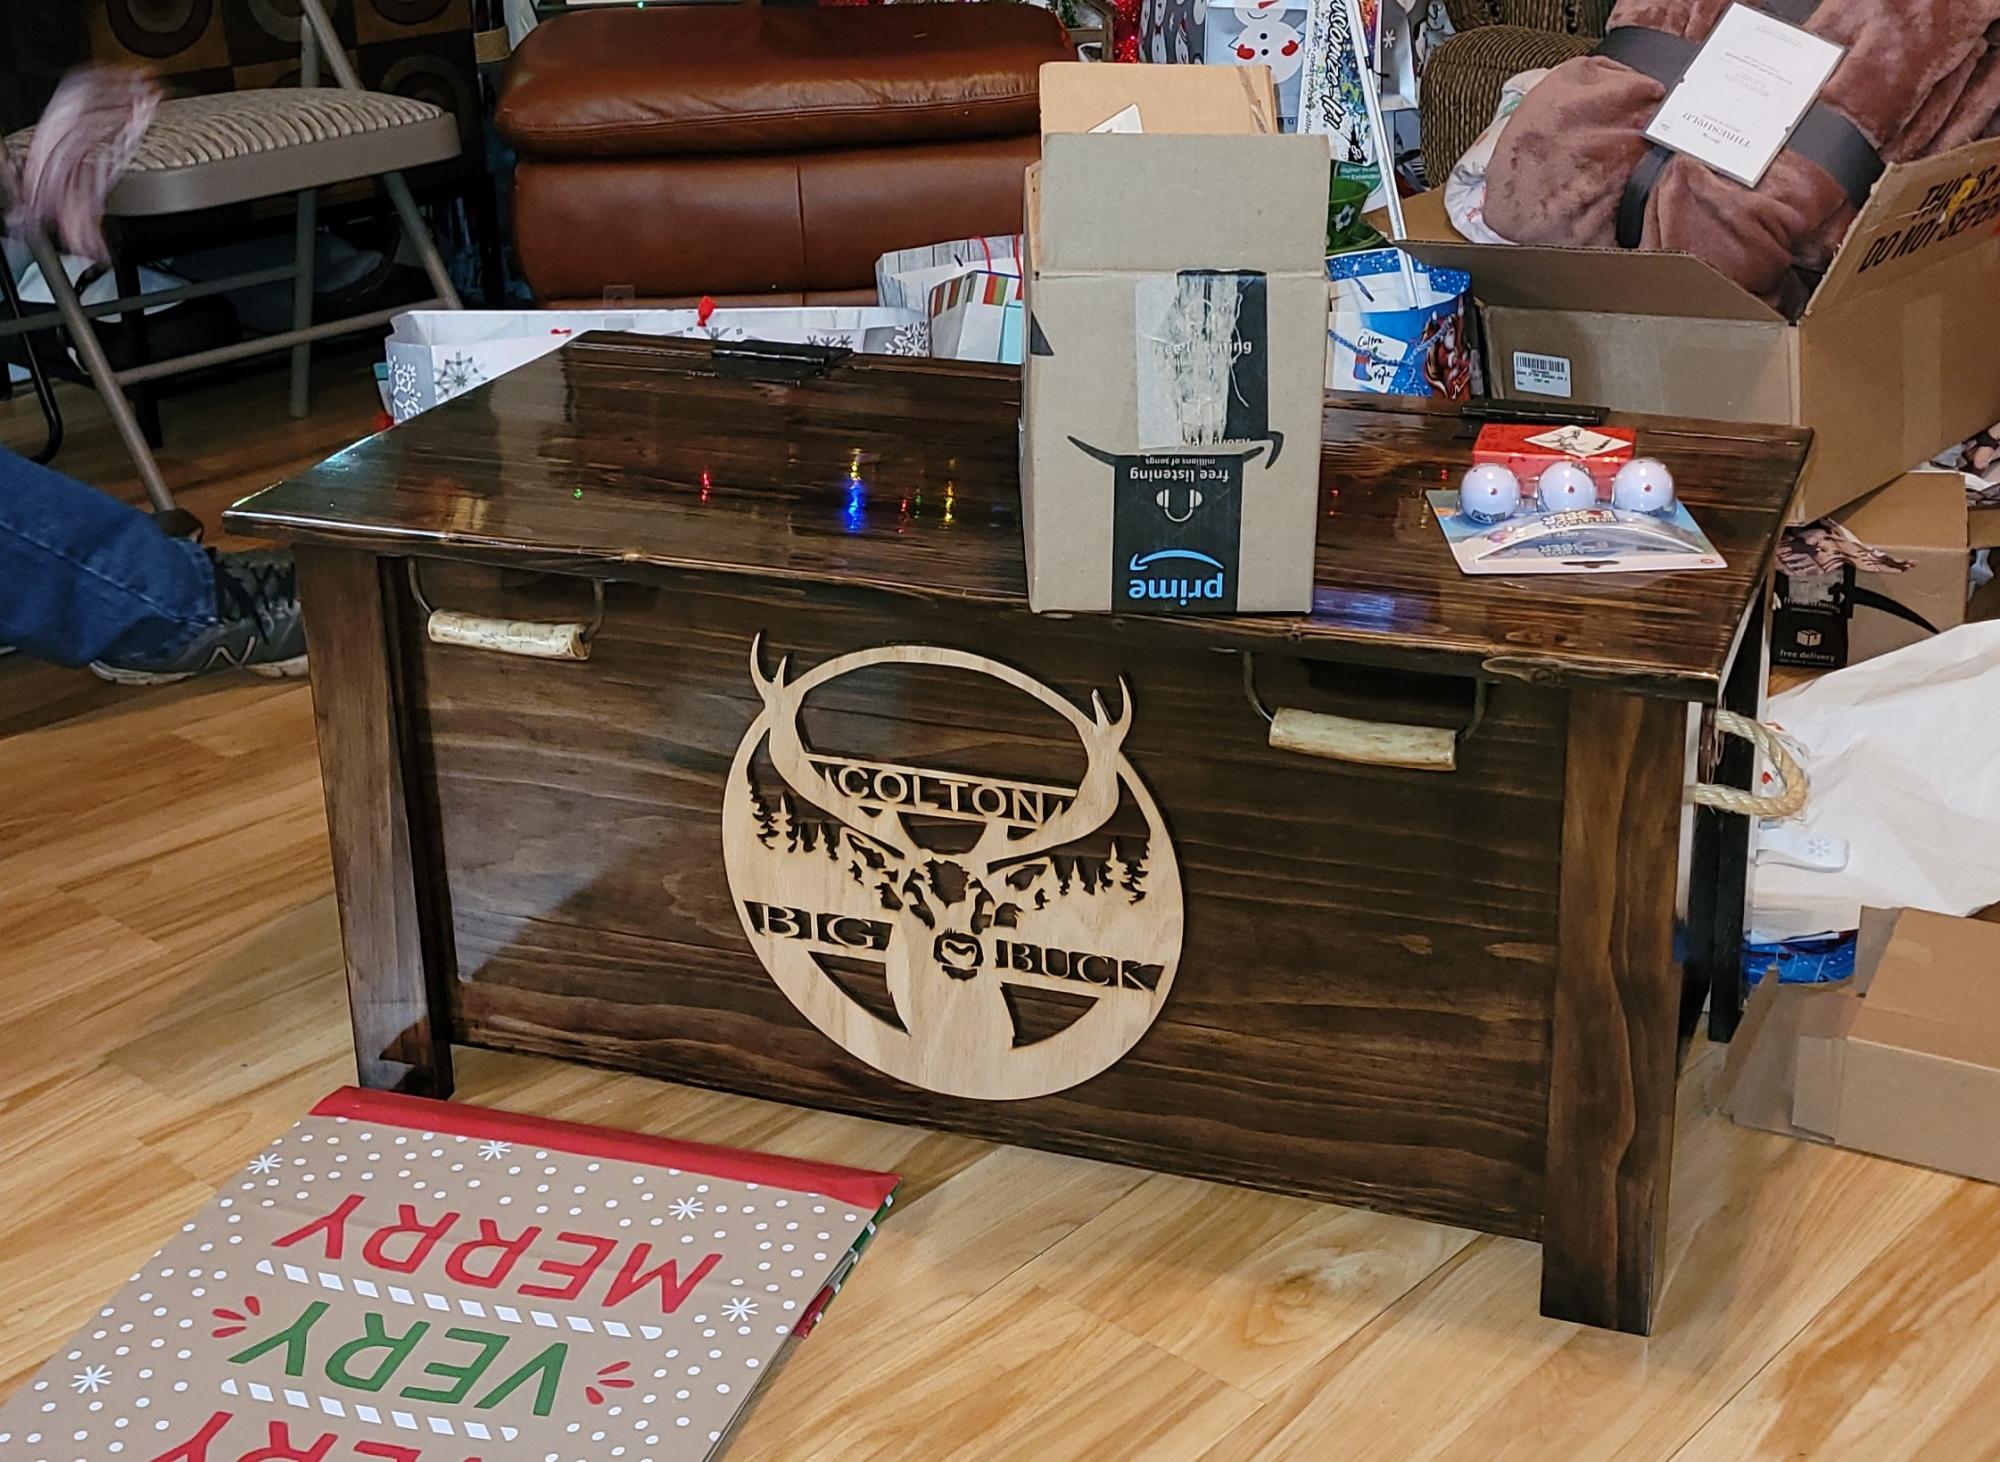
Built this for my grandson for christmas. First woodworking project I've done.
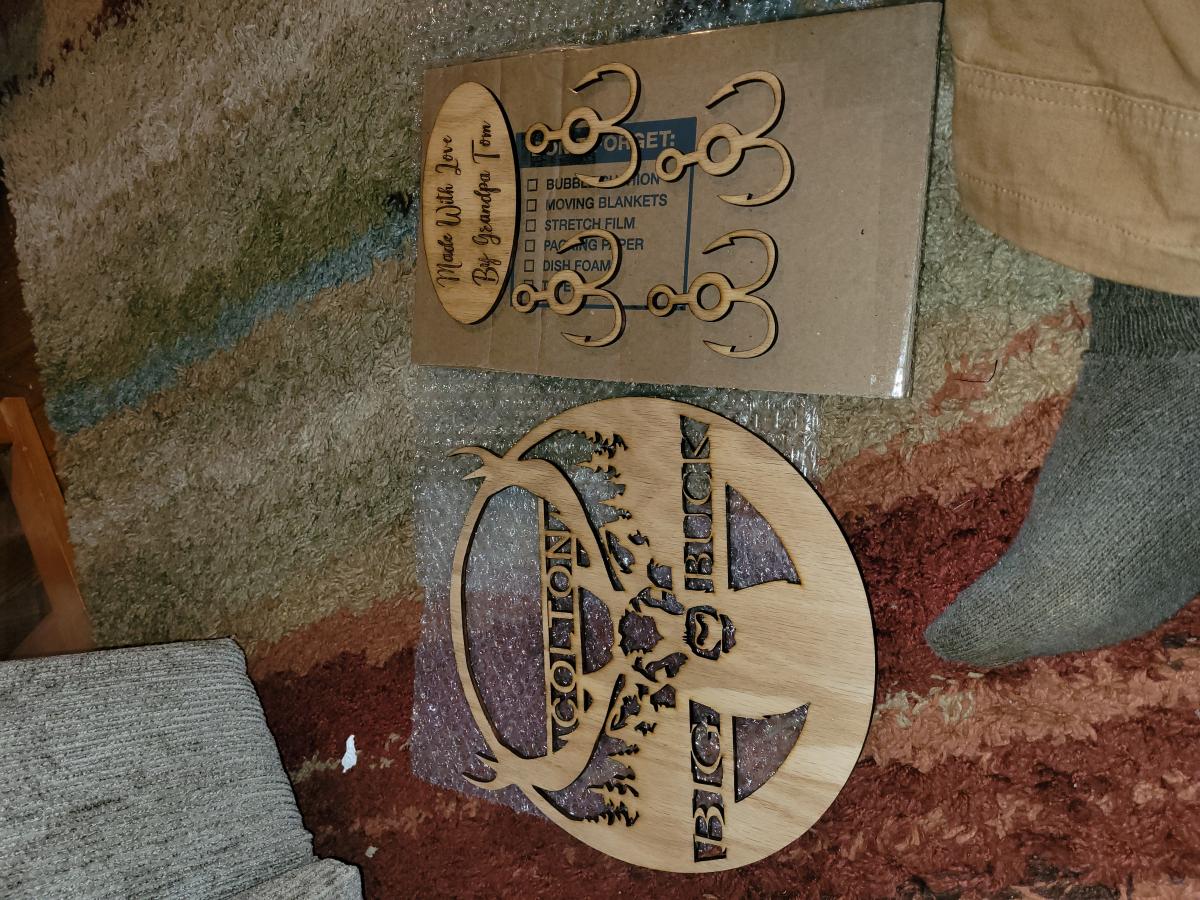
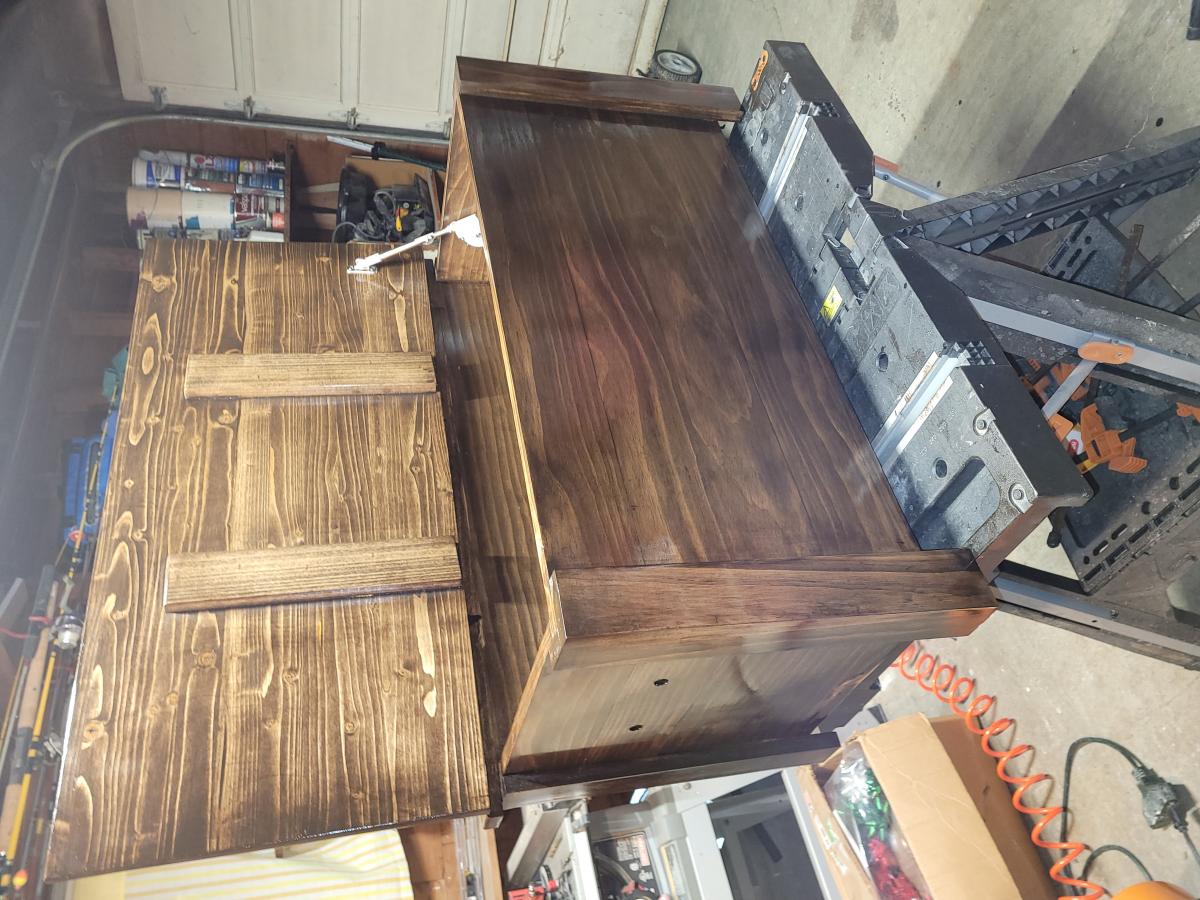
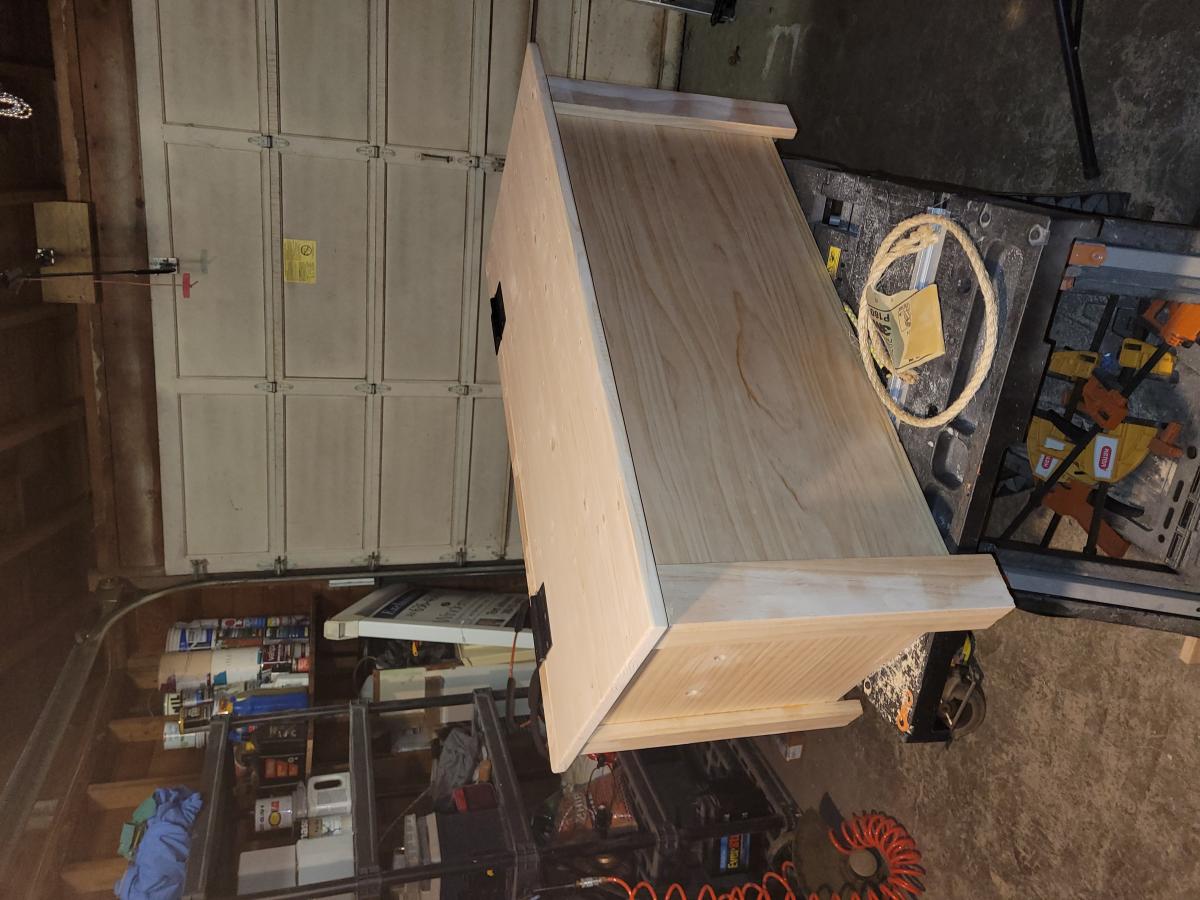
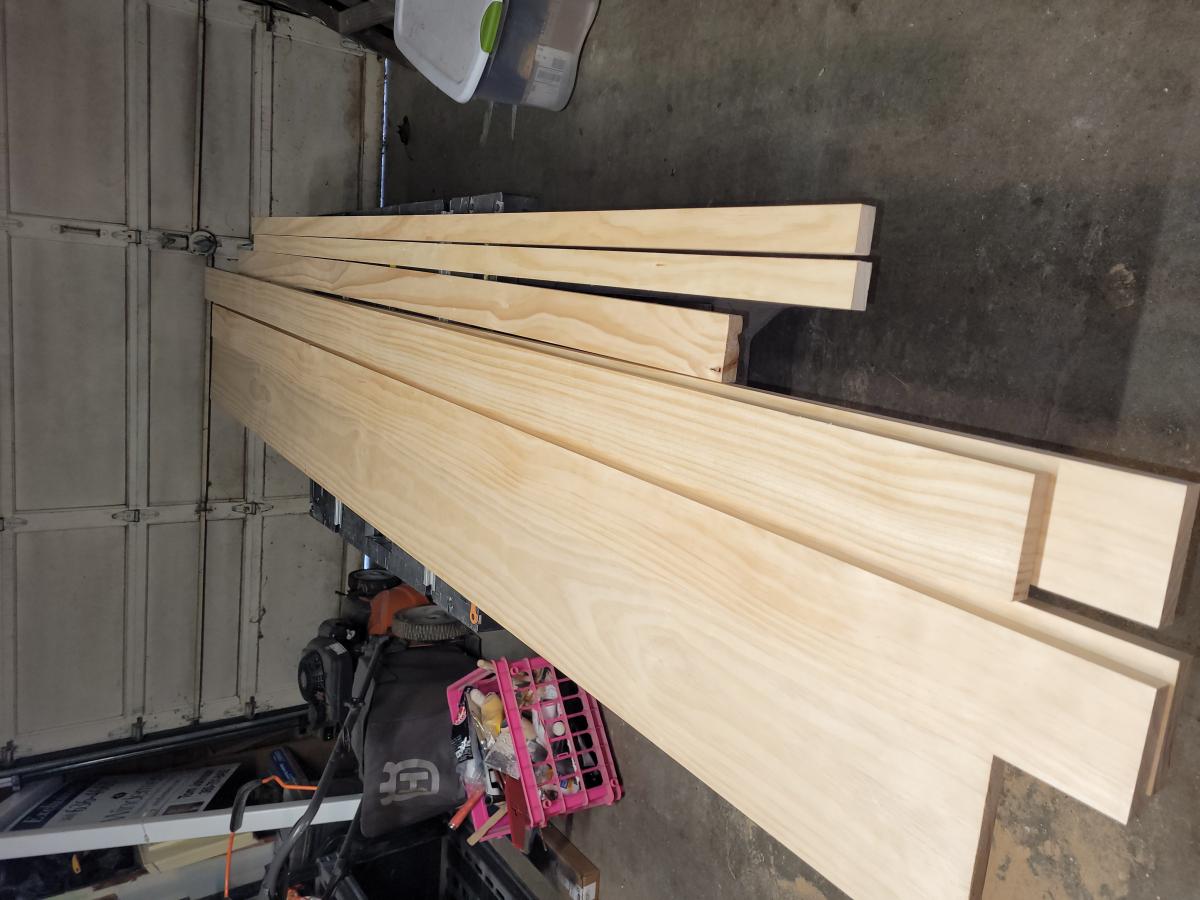
Built from Plan(s)
Estimated Cost
$160
Estimated Time Investment
Weekend Project (10-20 Hours)
Finish Used
Polyurethane
Recommended Skill Level
Beginner
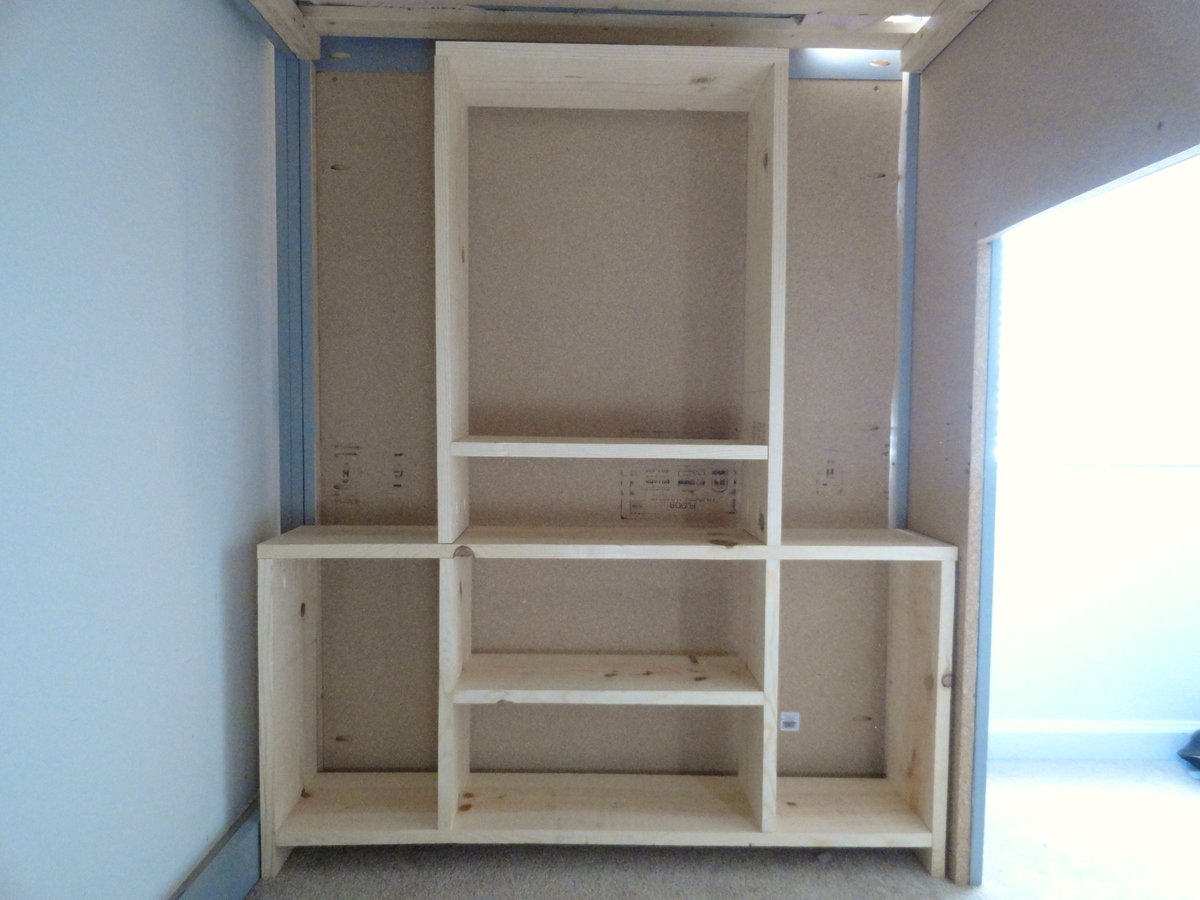
Mini Media Wall
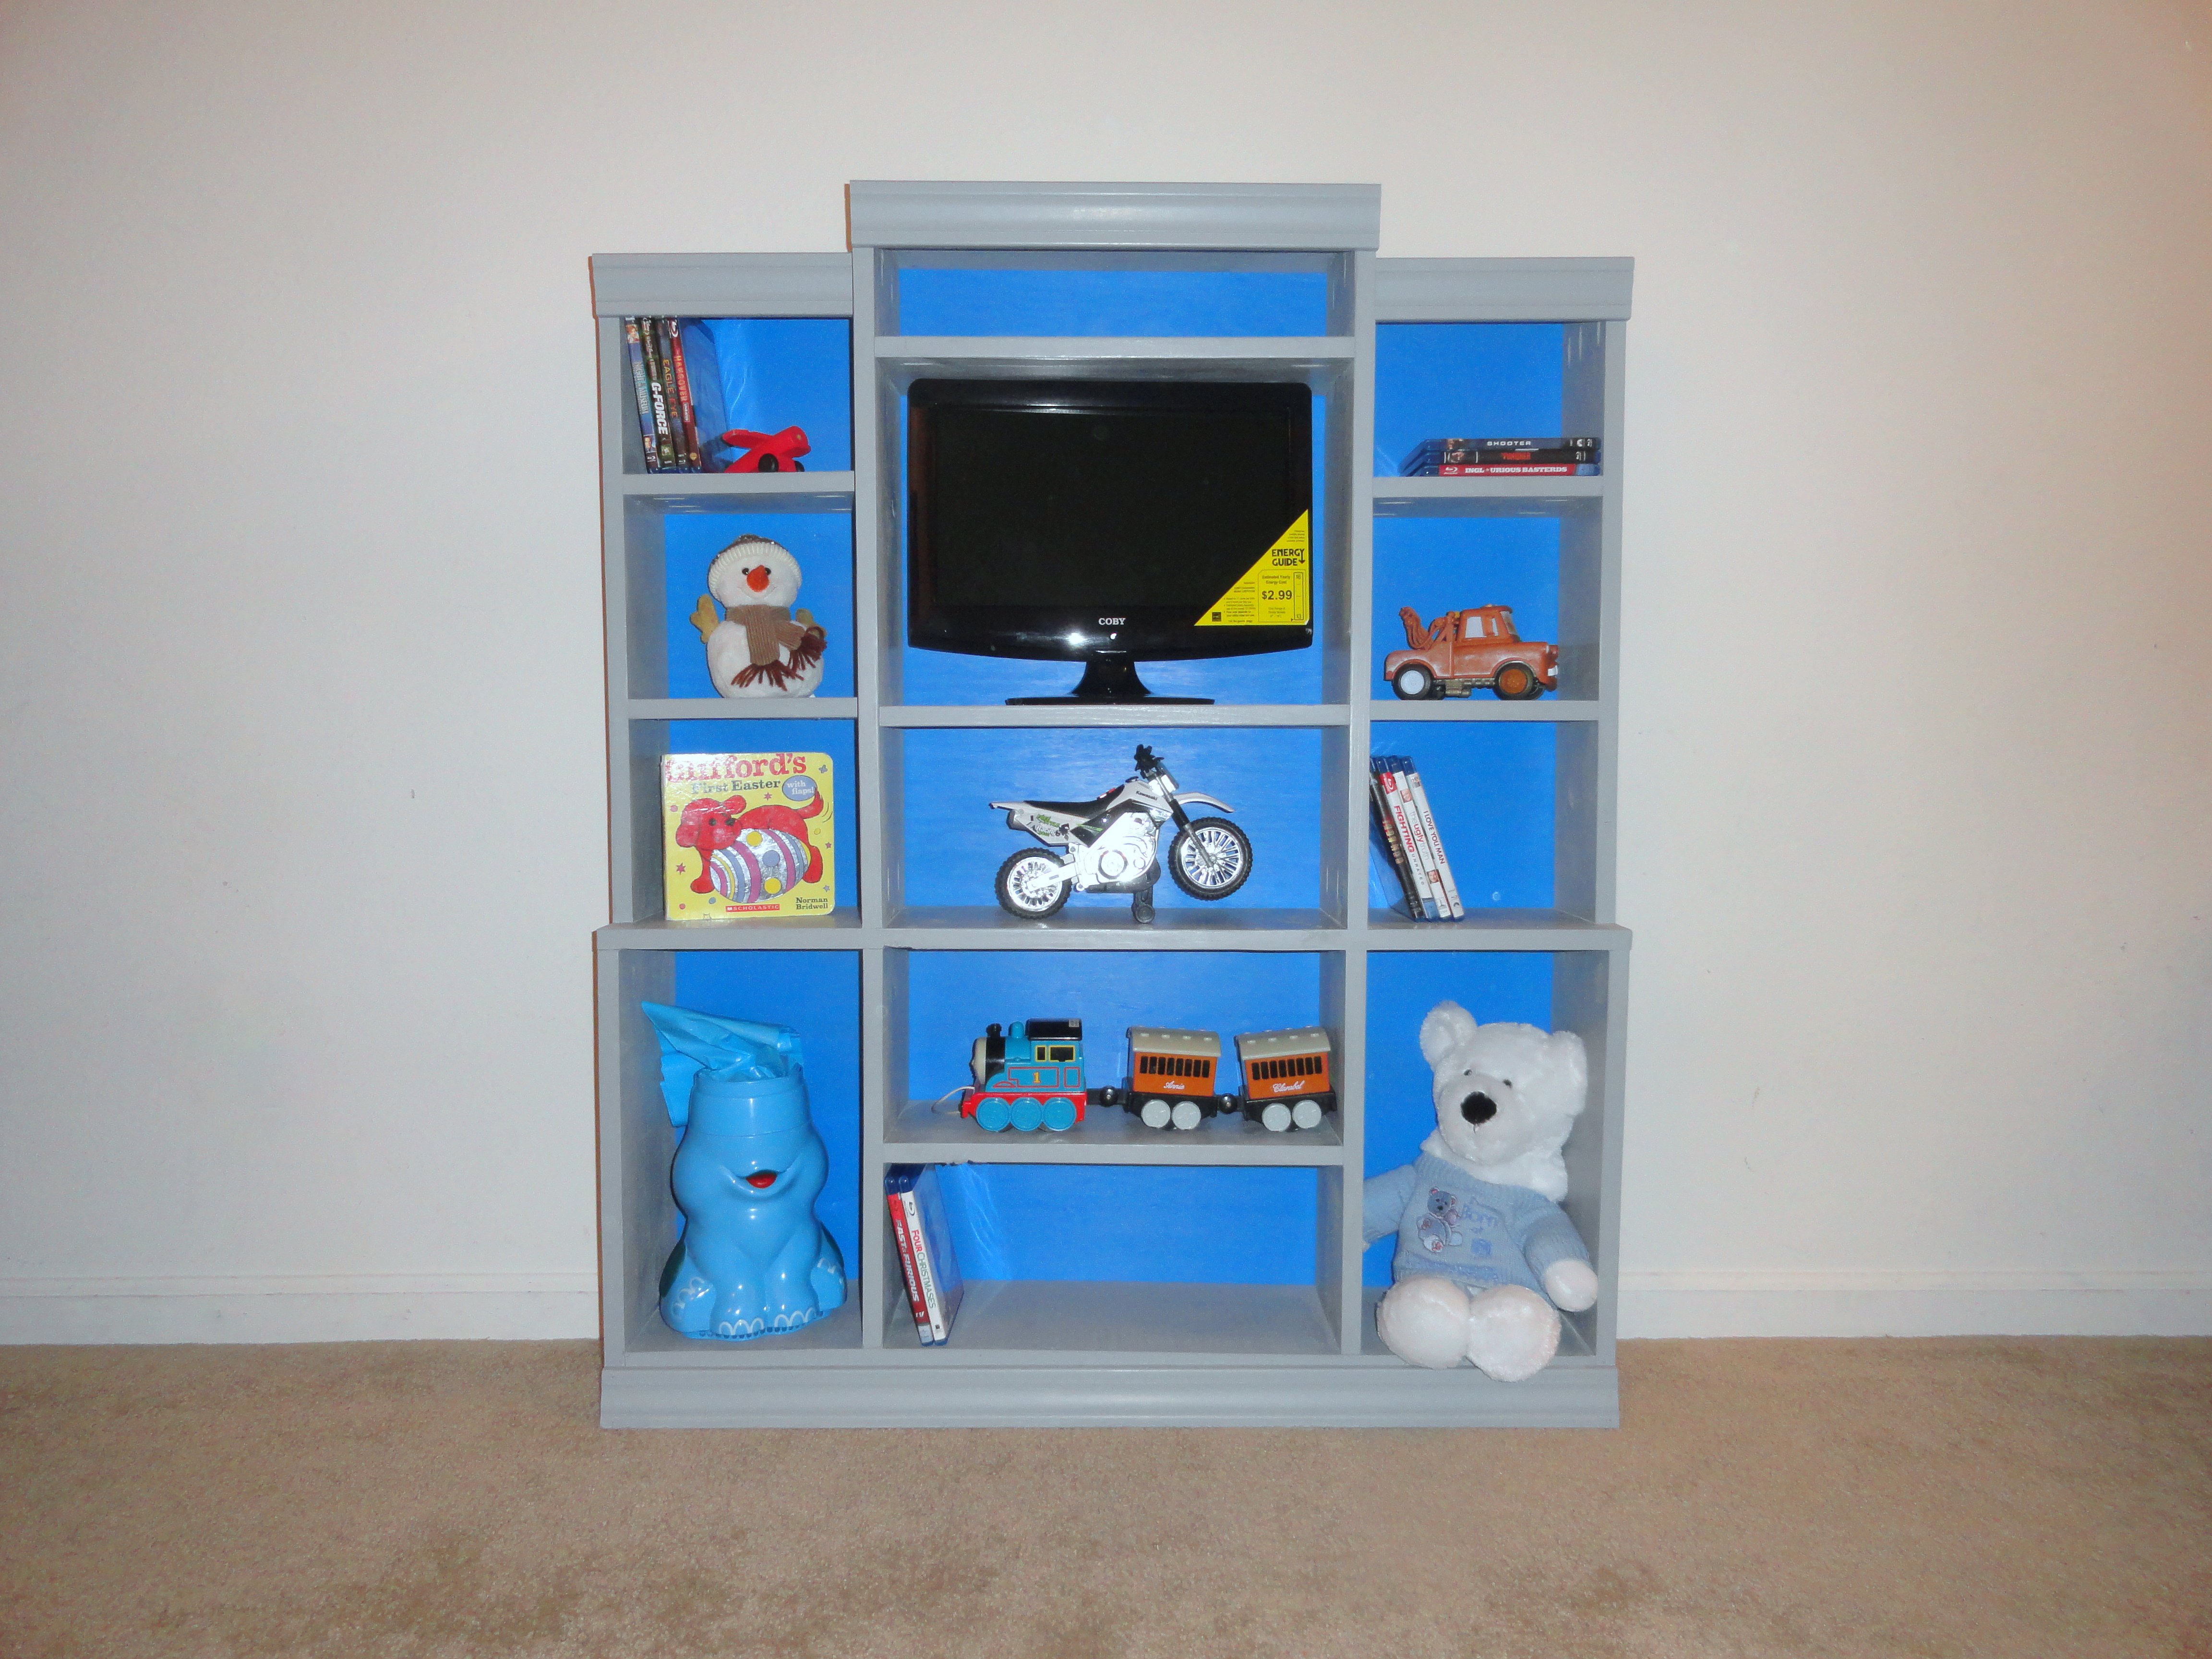
I changed the size of this to fit underneath my sons playhouse loft bed. It fits perfectly in the space between the door and wall of the bed. Put a kids leather chair in there and now he has his own personal man cave :)
Built from Plan(s)
Estimated Time Investment
Afternoon Project (3-6 Hours)
Recommended Skill Level
Beginner
My first build
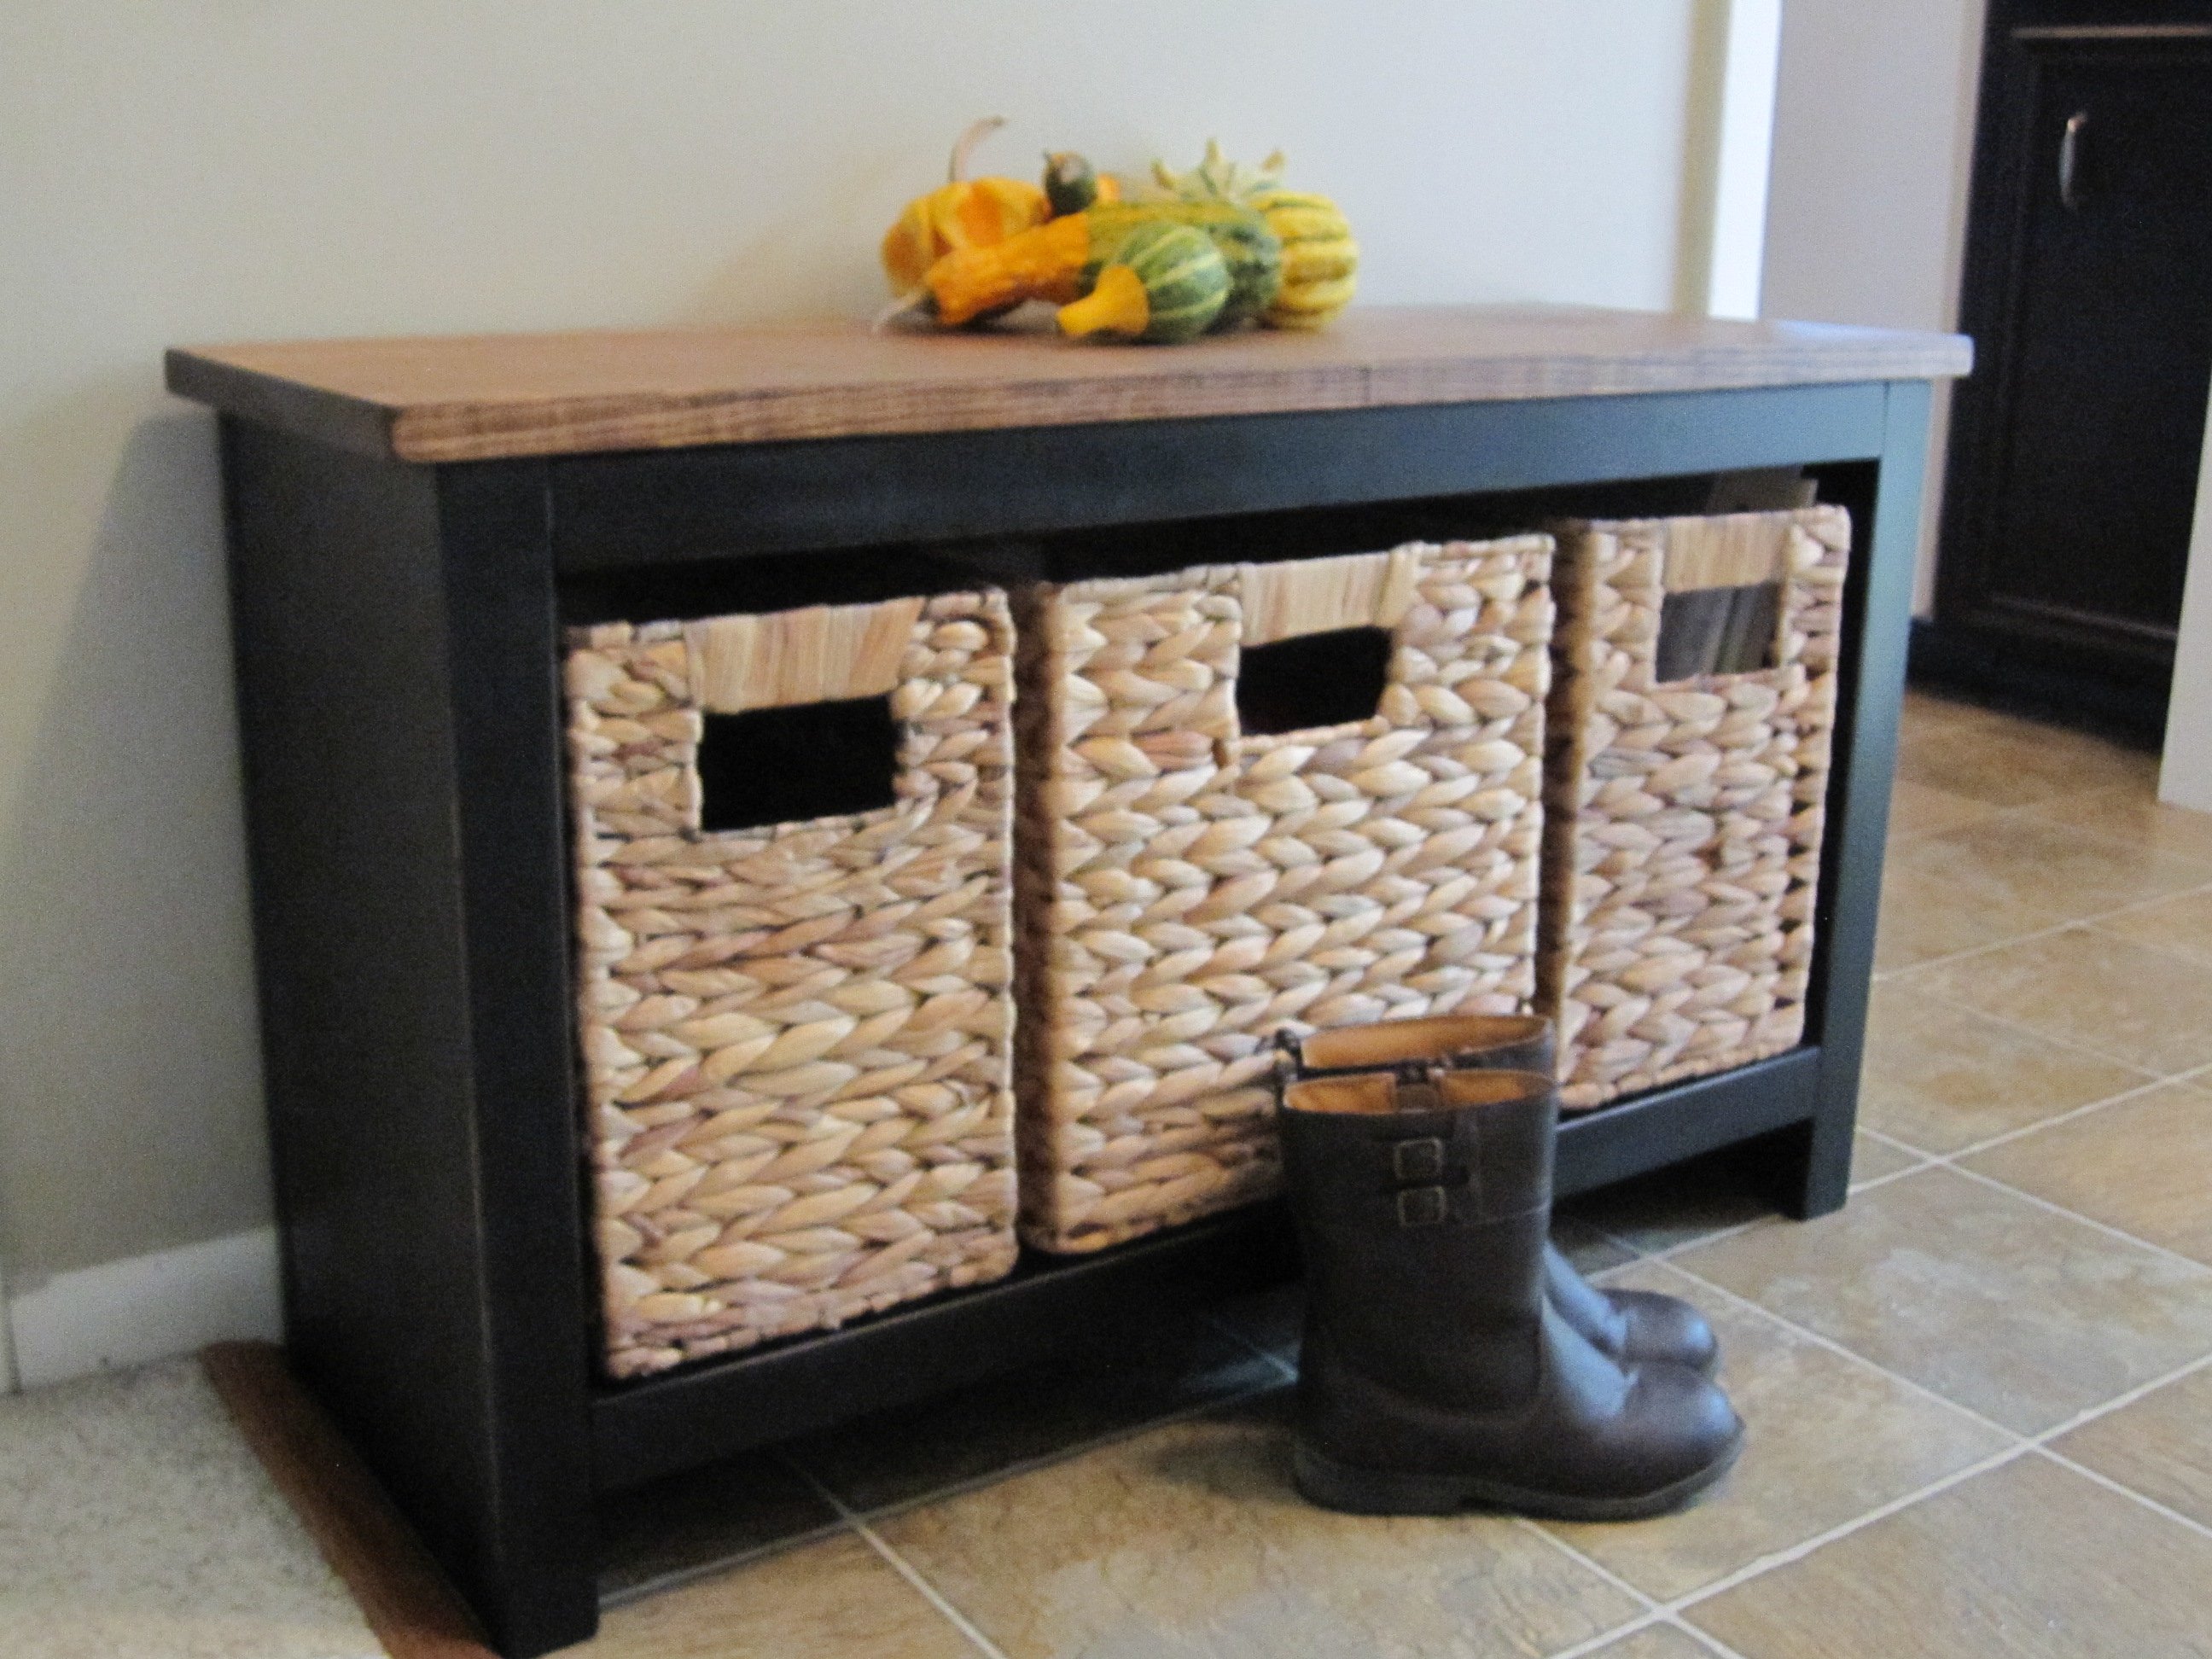
After following Ana and a couple other talented ladies I decided to get a Kreg and take some action! I made a few adjustments to the size and I used pocket screws to put this together. It is solid! Found the baskets at Lowes and fell in love. It was super easy and my husband couldn't believe I put it together so fast. I has added much needed storage to the front door and we just love it.
Built from Plan(s)
Estimated Cost
$70 total
Baskets were $45!
Baskets were $45!
Estimated Time Investment
An Hour or Two (0-2 Hours)
Finish Used
Flat black spray paint
Minwax dark walnut stain
Wood conditioner to seal
Minwax dark walnut stain
Wood conditioner to seal
Recommended Skill Level
Starter Project
Comments

Sun, 12/07/2014 - 17:48
Awesome build!
This looks super! You did a great job and it looks beautifully constructed. Congrats! The finish is lovely. :)

Tue, 12/09/2014 - 06:57
Beautiful Piece!
It looks like something right out of a trendy (and expensive) home store! Love the baskets and color choice.

Tue, 12/09/2014 - 07:03
Very nice. Looks professional
Very nice. Looks professional. Contemporary, yet minimalistic.
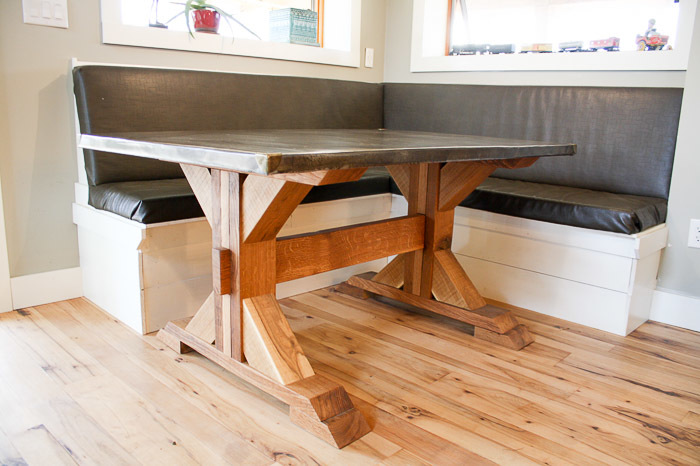
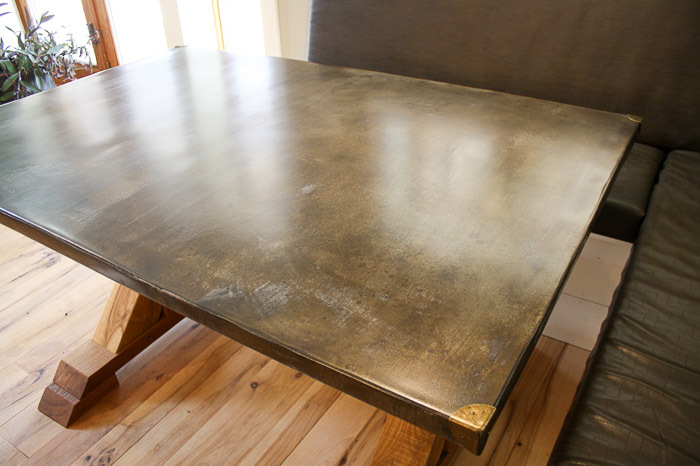
X-base farmhouse table with zinc top
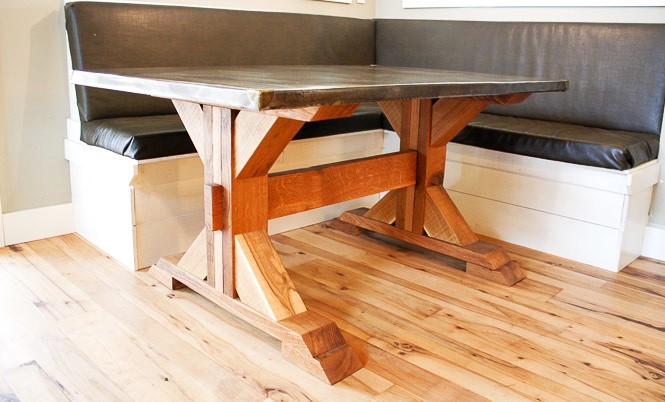
We used leftover white oak from the railing in our house, so our cost was just the zinc top, which we got from Rotometals. Total cost was around $200, all said and done.
Built from Plan(s)
Estimated Cost
$200
Estimated Time Investment
Weekend Project (10-20 Hours)
Finish Used
Rubio Monocoat
Recommended Skill Level
Intermediate
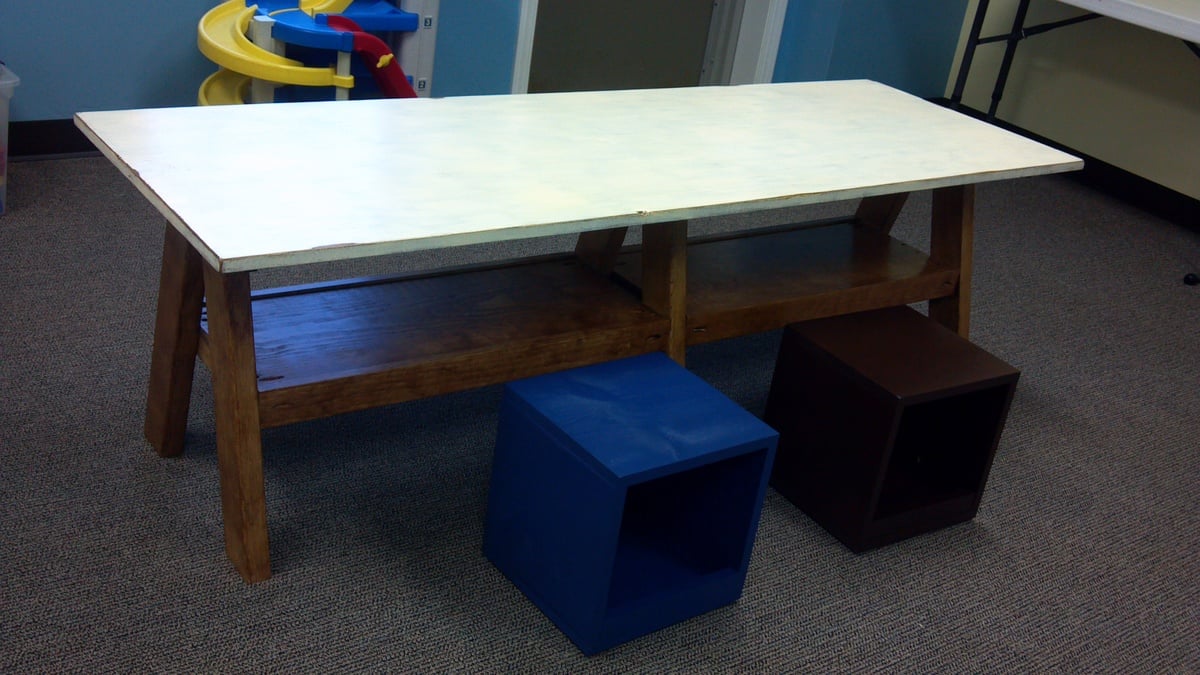
Entryway & Coffeetable
This was my first time making a project with plans from the site. They were easy to follow and modify to my sizes. I am extremely happy.
The cost of wood is higher due to the pandemic, however. A 2x4 was nearly $5.50 in Ohio.
Built from Plan(s)
Estimated Cost
$120
Estimated Time Investment
Afternoon Project (3-6 Hours)
Finish Used
Gray stain, applied with a foam brush.
Recommended Skill Level
Beginner
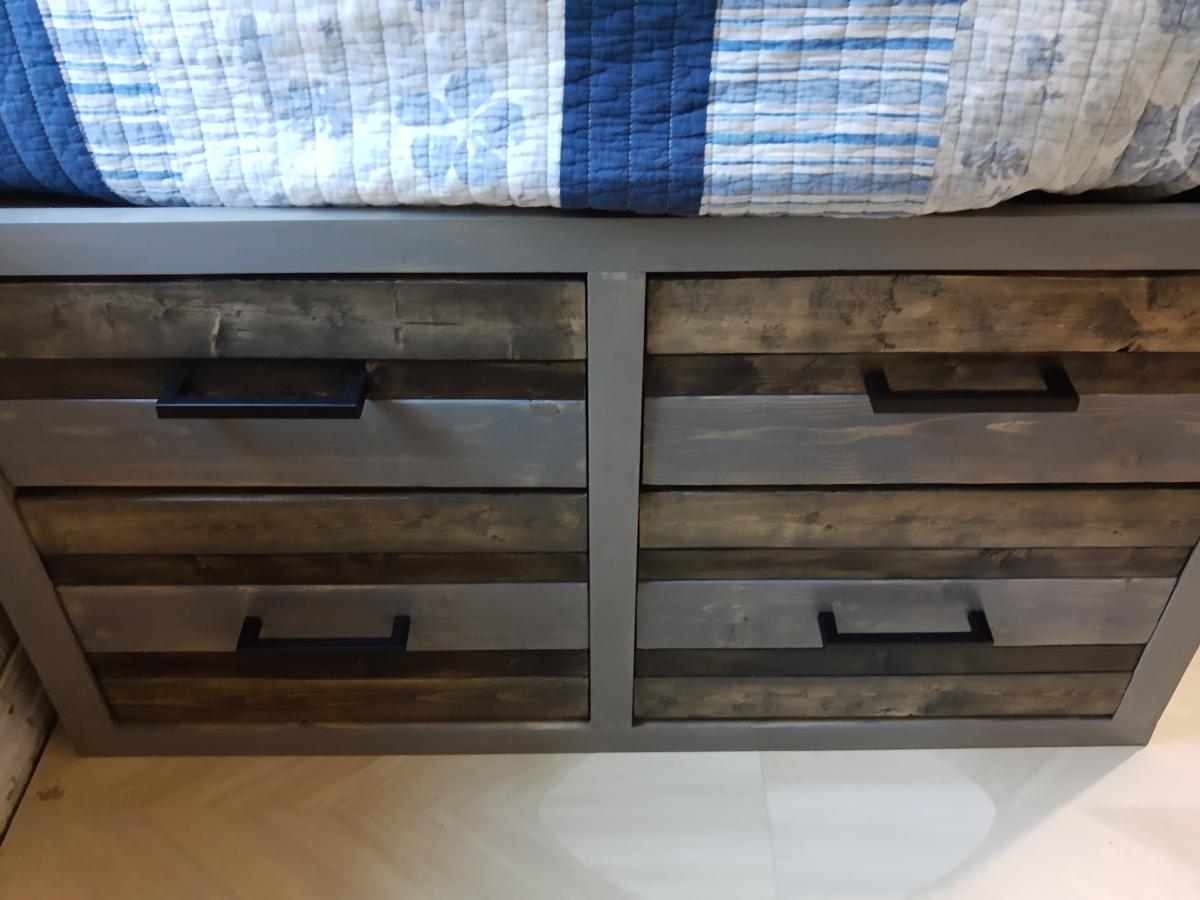
Kentwood Twin Bed
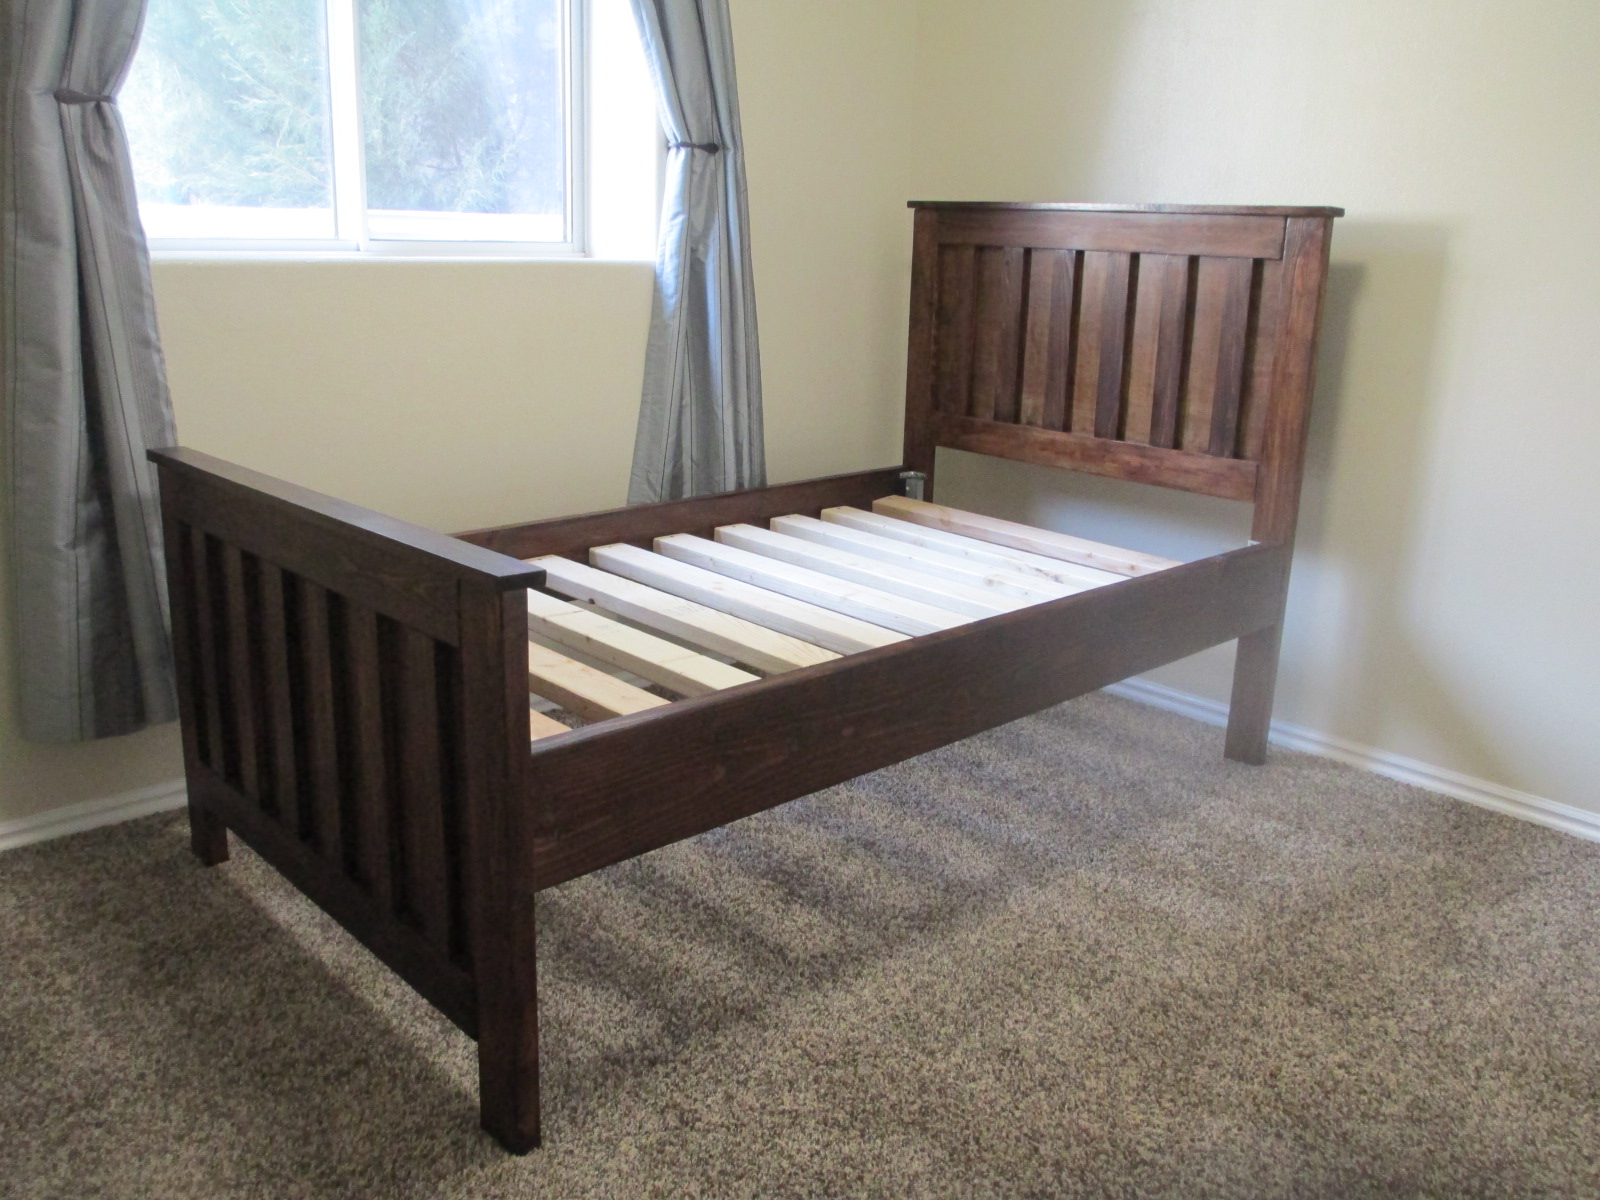
My husband and I built this bed for my sister-in-law for Christmas. It took us about a week of working an hour or so a day on it. Most of that time was staining. The actually assembly took about 2 hours.
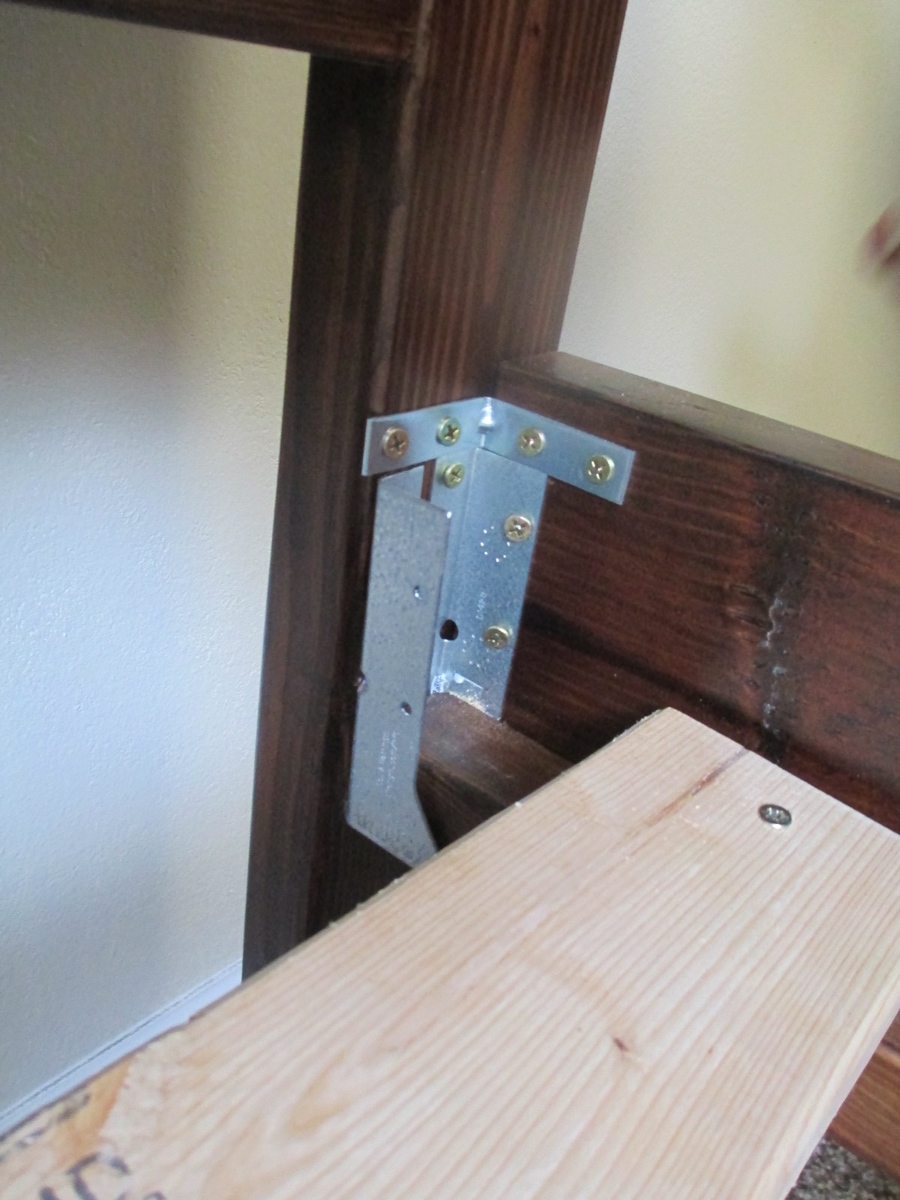
I included a picture of how we attach the siderails to the headboard/footboard. We use a bracket that the 1x2 slides into. It is screwed to both the siderail and the headboard with 1 1/4" screws. We also attach a small L bracket to each corner with helps remove any wiggle that was there previously. It really makes the bed much more stable by adding those little L brackets. Again, we used 1 1/4" screws to attach them.
Built from Plan(s)
Estimated Cost
$110-$120 (price includes wood, stain and hardware)
Estimated Time Investment
Week Long Project (20 Hours or More)
Finish Used
Sanded well
1 coat of pre-conditioner
1 coat of Minwax early american
2 coats of Minwax Mission Oak with Polyurethane, Satin
Steel Wool after each coat of the stain with poly
1 coat of pre-conditioner
1 coat of Minwax early american
2 coats of Minwax Mission Oak with Polyurethane, Satin
Steel Wool after each coat of the stain with poly
Recommended Skill Level
Beginner
Comments
Wed, 12/10/2014 - 13:55
Bed Details
I had some trouble with the submission of my form and now it's not allowing me to edit so I'll write the details in the comments.
The assembly took about 2 hours but we worked on the bed about a week due to the many coats of stain etc.
Here's how we finished the bed:
1 coat of Minwax pre conditioner
1 coat of Minwax Early American
2 coats of Minwax Mission Oak stain with poly, satin
Steel wool the project after each coat of stain with poly
I included a picture of the hardware we use to attach the side rails to the bed. The big bracket holds the side rails up. The little "L" bracket in each corner makes it so the bed doesn't wiggle or move. This is our 4th bed to build and we have found this set-up to make a very secure, sturdy bed.
Wed, 12/10/2014 - 14:01
Bed Details
I had some trouble with the submission of my form and now it's not allowing me to edit so I'll write the details in the comments.
The assembly took about 2 hours but we worked on the bed about a week due to the many coats of stain etc.
Here's how we finished the bed:
1 coat of Minwax pre conditioner
1 coat of Minwax Early American
2 coats of Minwax Mission Oak stain with poly, satin
Steel wool the project after each coat of stain with poly
I included a picture of the hardware we use to attach the side rails to the bed. The big bracket holds the side rails up. The little "L" bracket in each corner makes it so the bed doesn't wiggle or move. This is our 4th bed to build and we have found this set-up to make a very secure, sturdy bed.
Classic Storage Bed, adapted
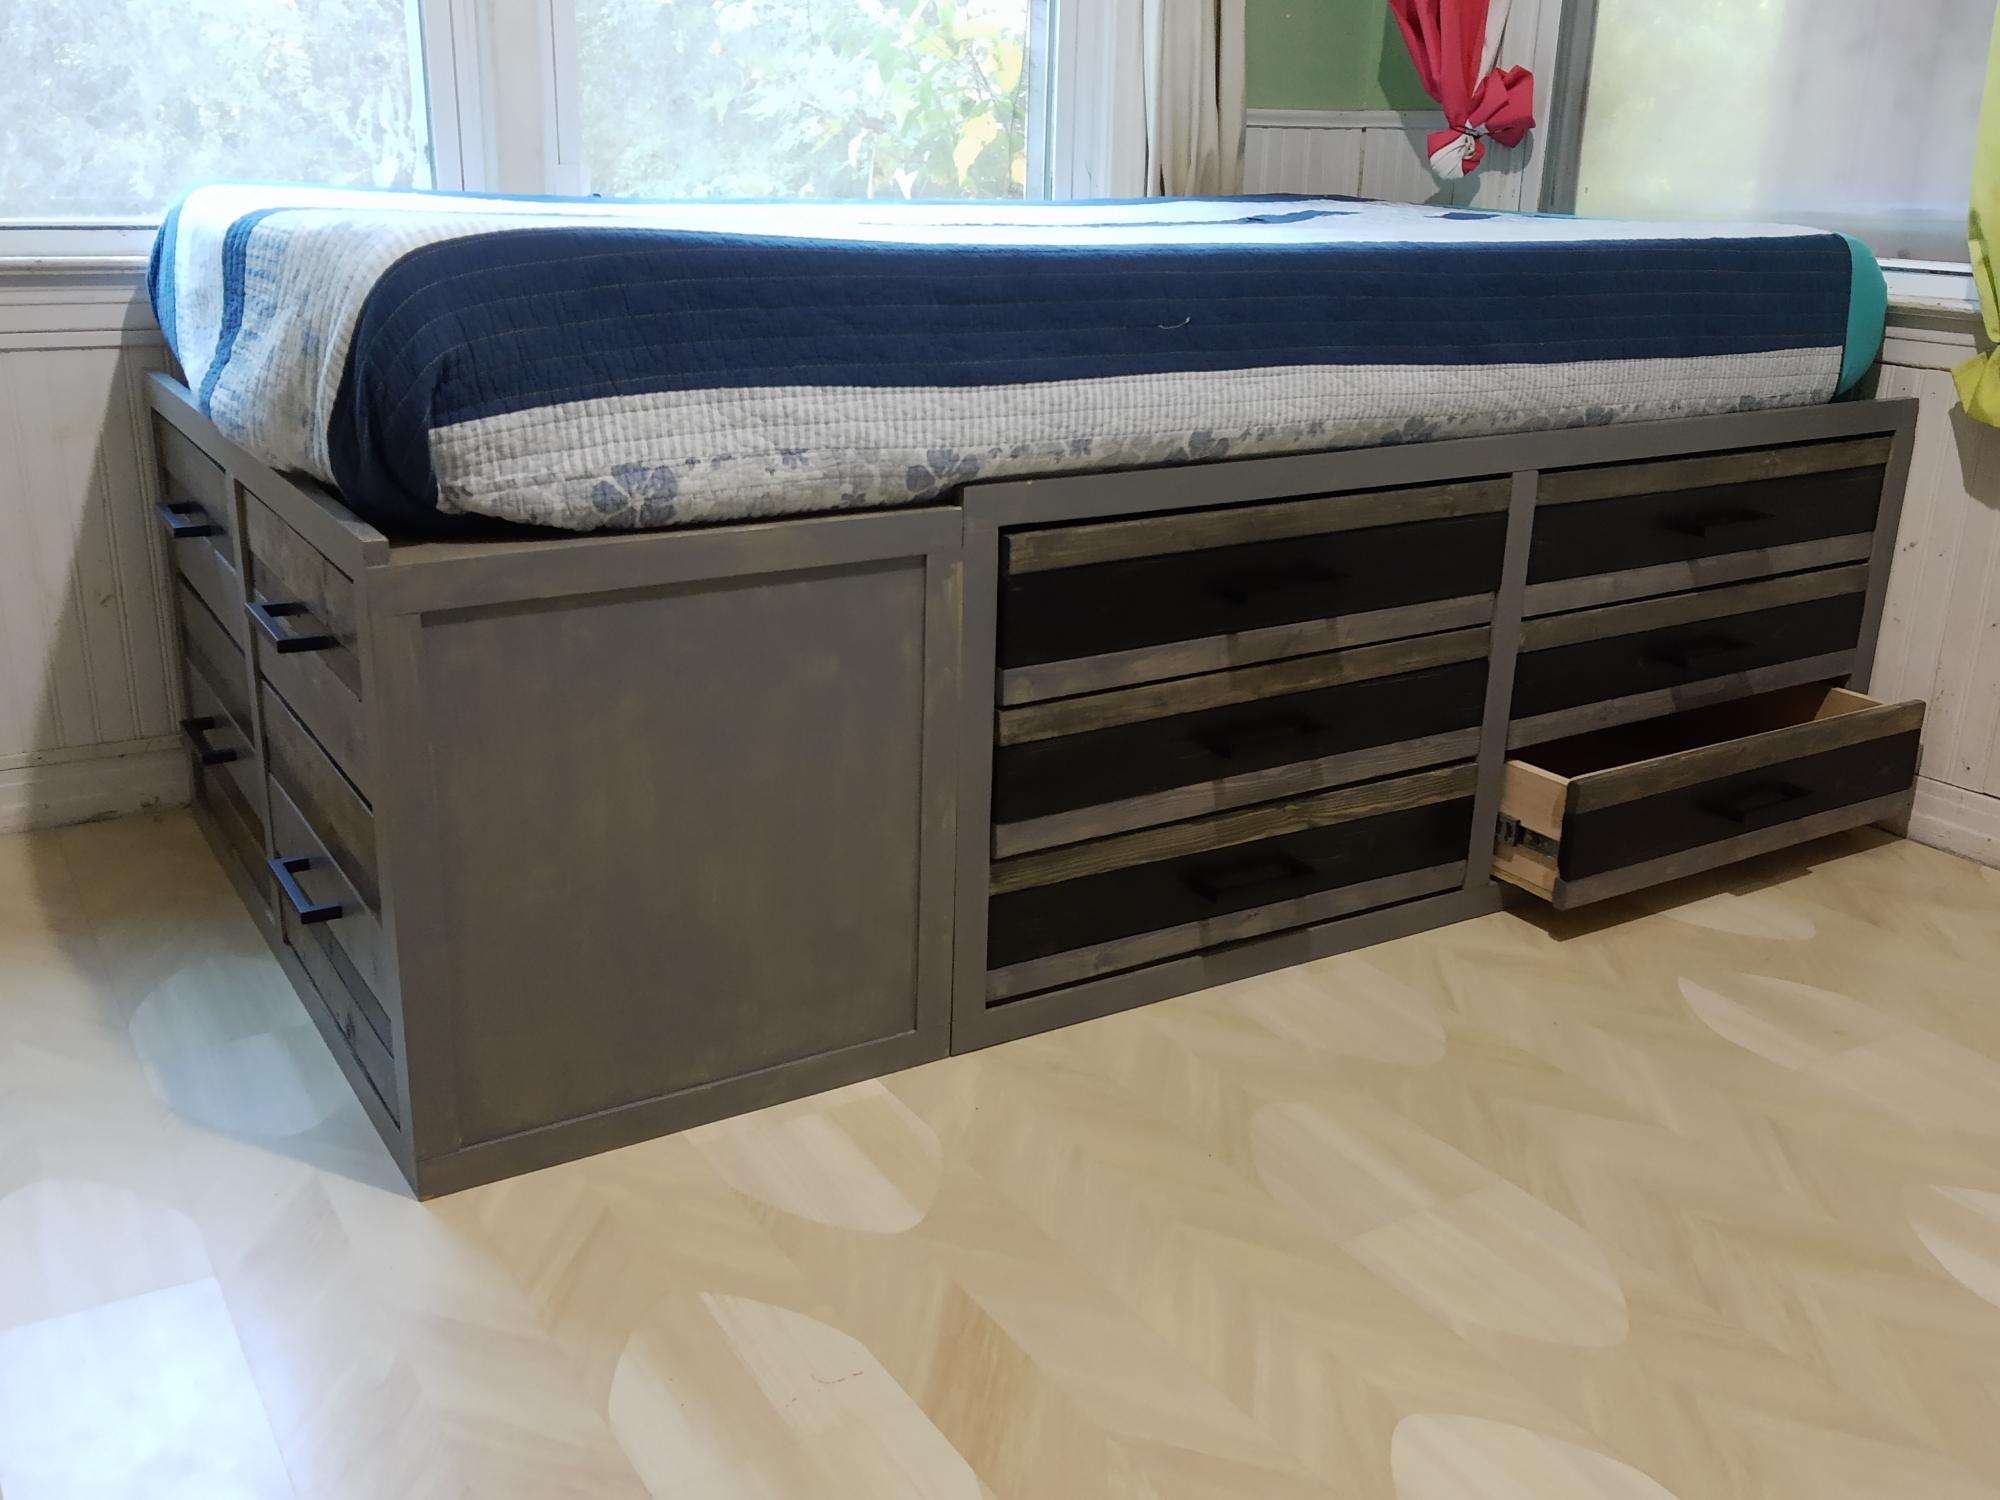
I doubled the height of the Classic Storage Bed to create 6 side drawers and 4 bottom doors for my daughter's twin bed. She lives the extra storage in her small bedroom. Thanks for the inspiration!
Built from Plan(s)
Estimated Time Investment
Week Long Project (20 Hours or More)
Comments
Junk Drawer No More
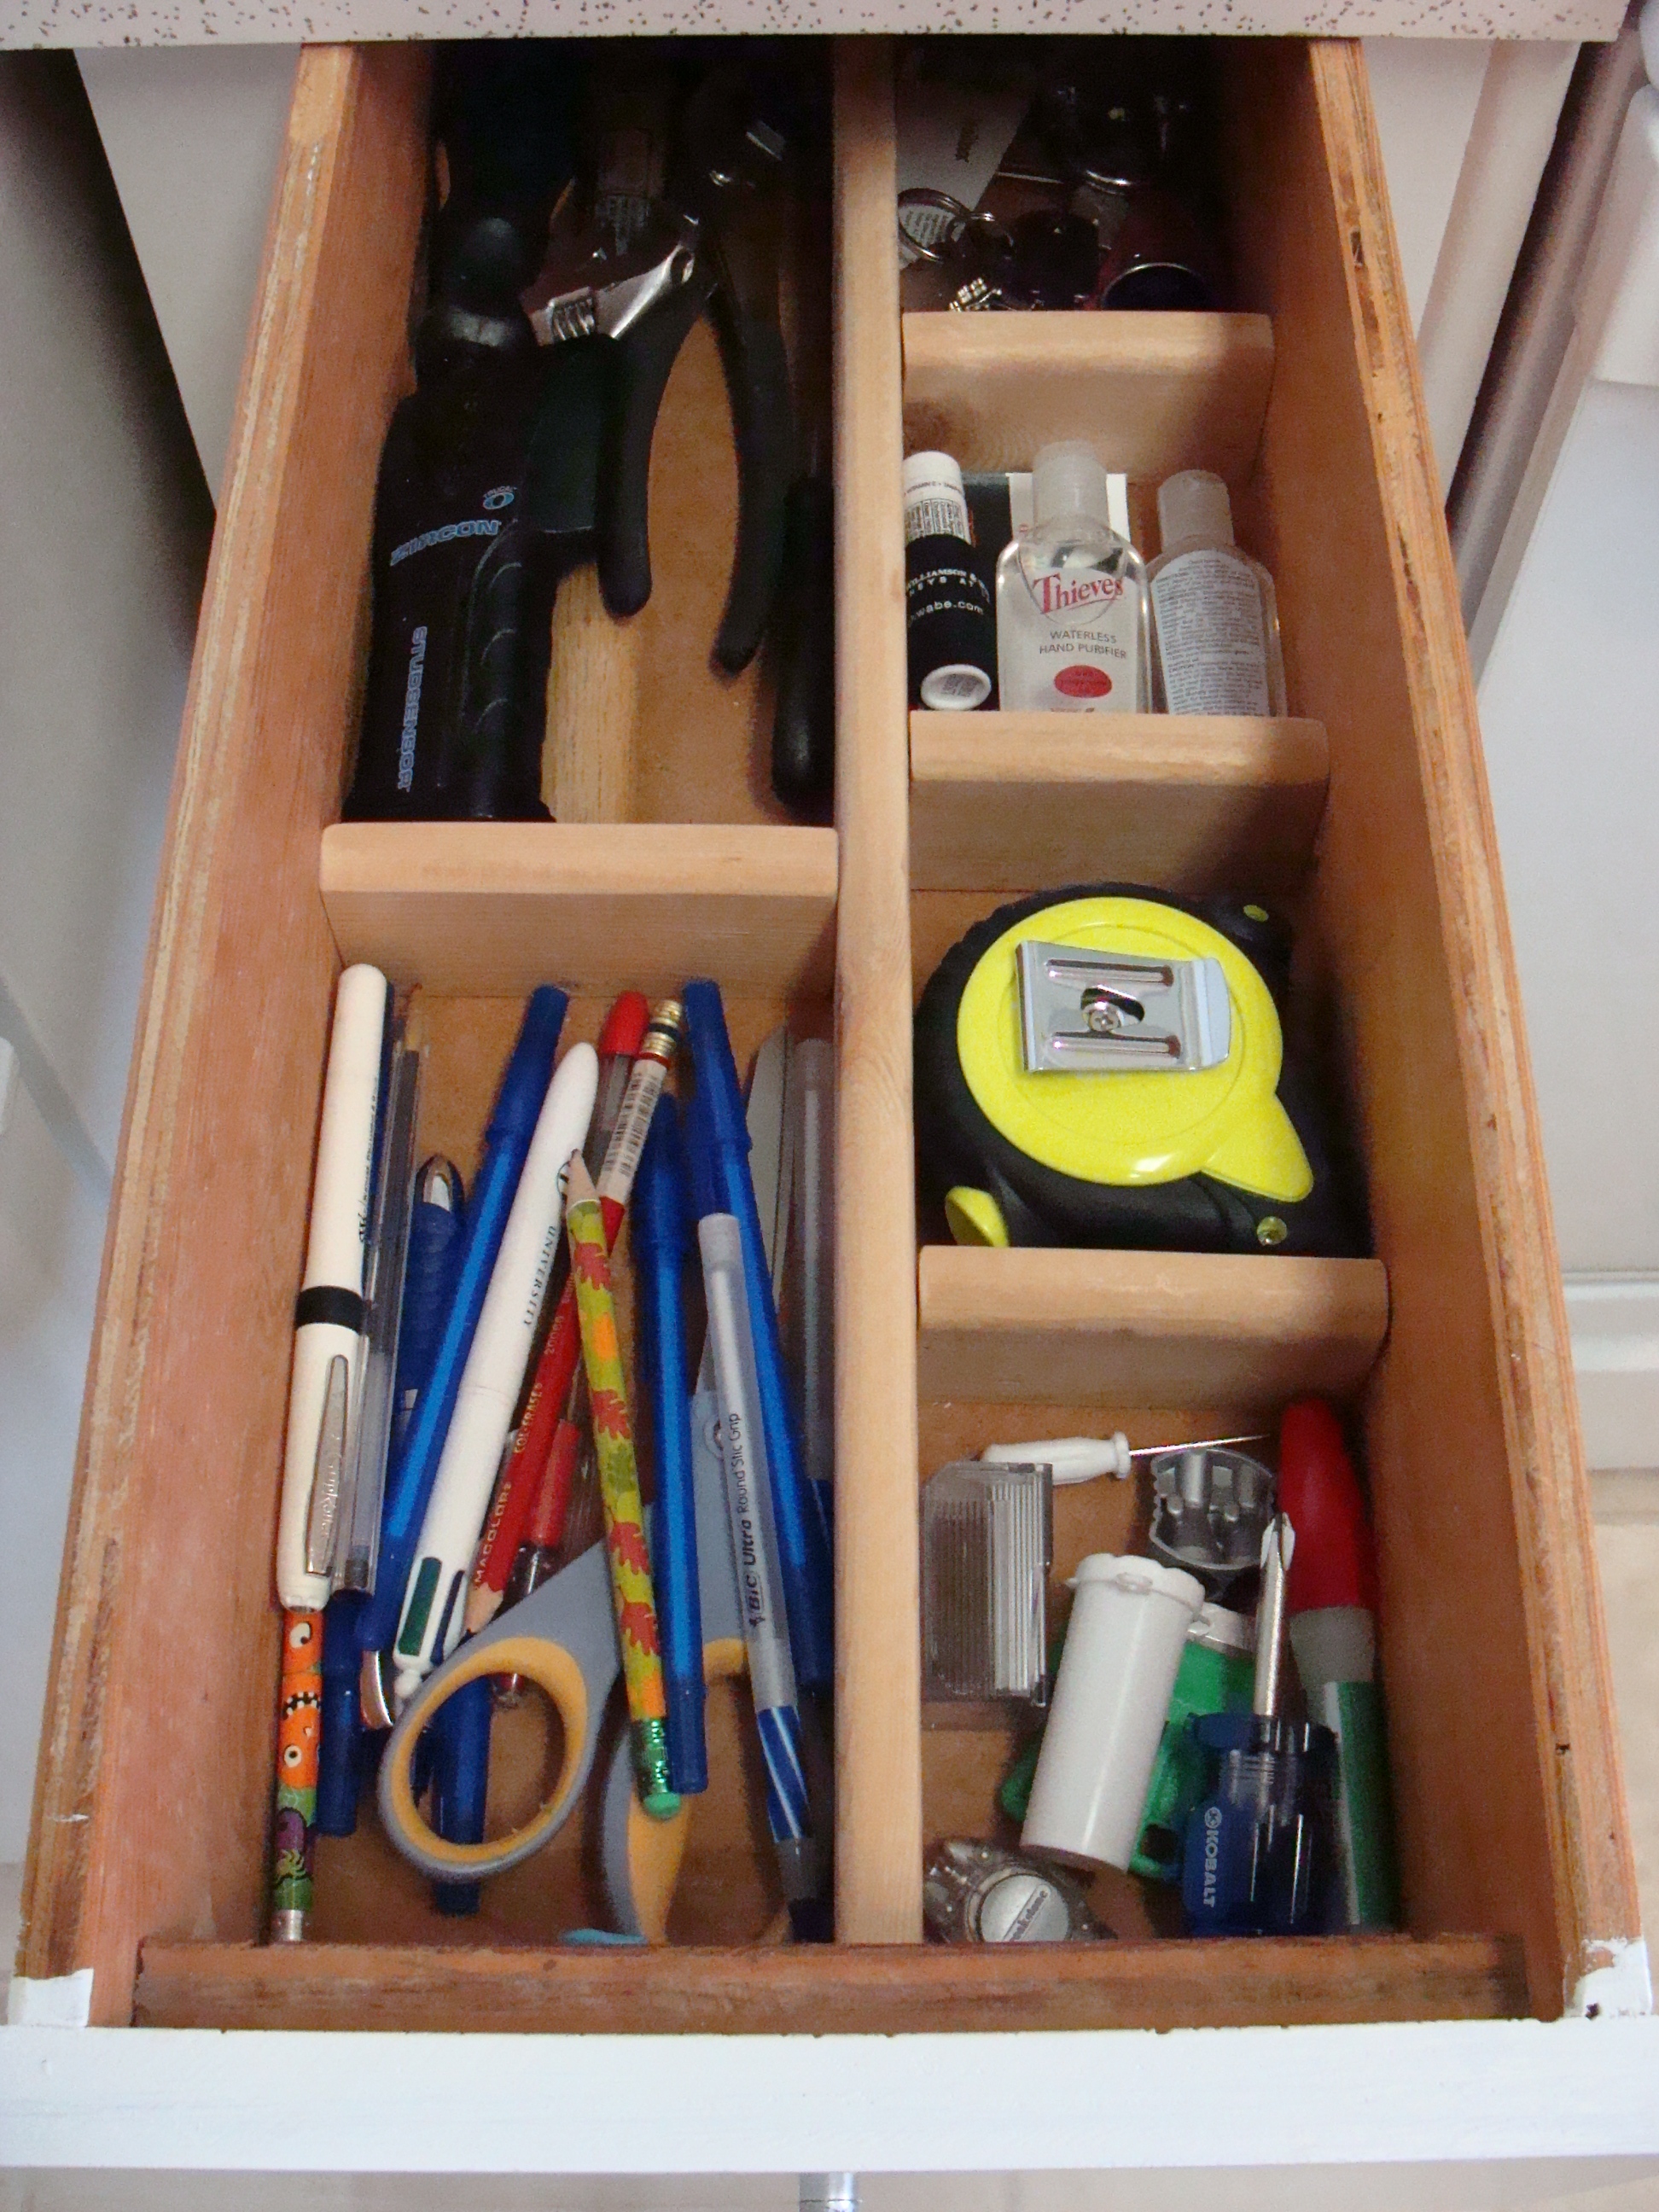
I finally got tired of my junk drawer being messy, so I took 10 minutes today and a piece of scrap wood and made this drawer divider. I even have a dedicated cubby for my tape measure!
Built from Plan(s)
Estimated Cost
nothing
Finish Used
I left it unfinished.
Recommended Skill Level
Starter Project
Kid storage chairs
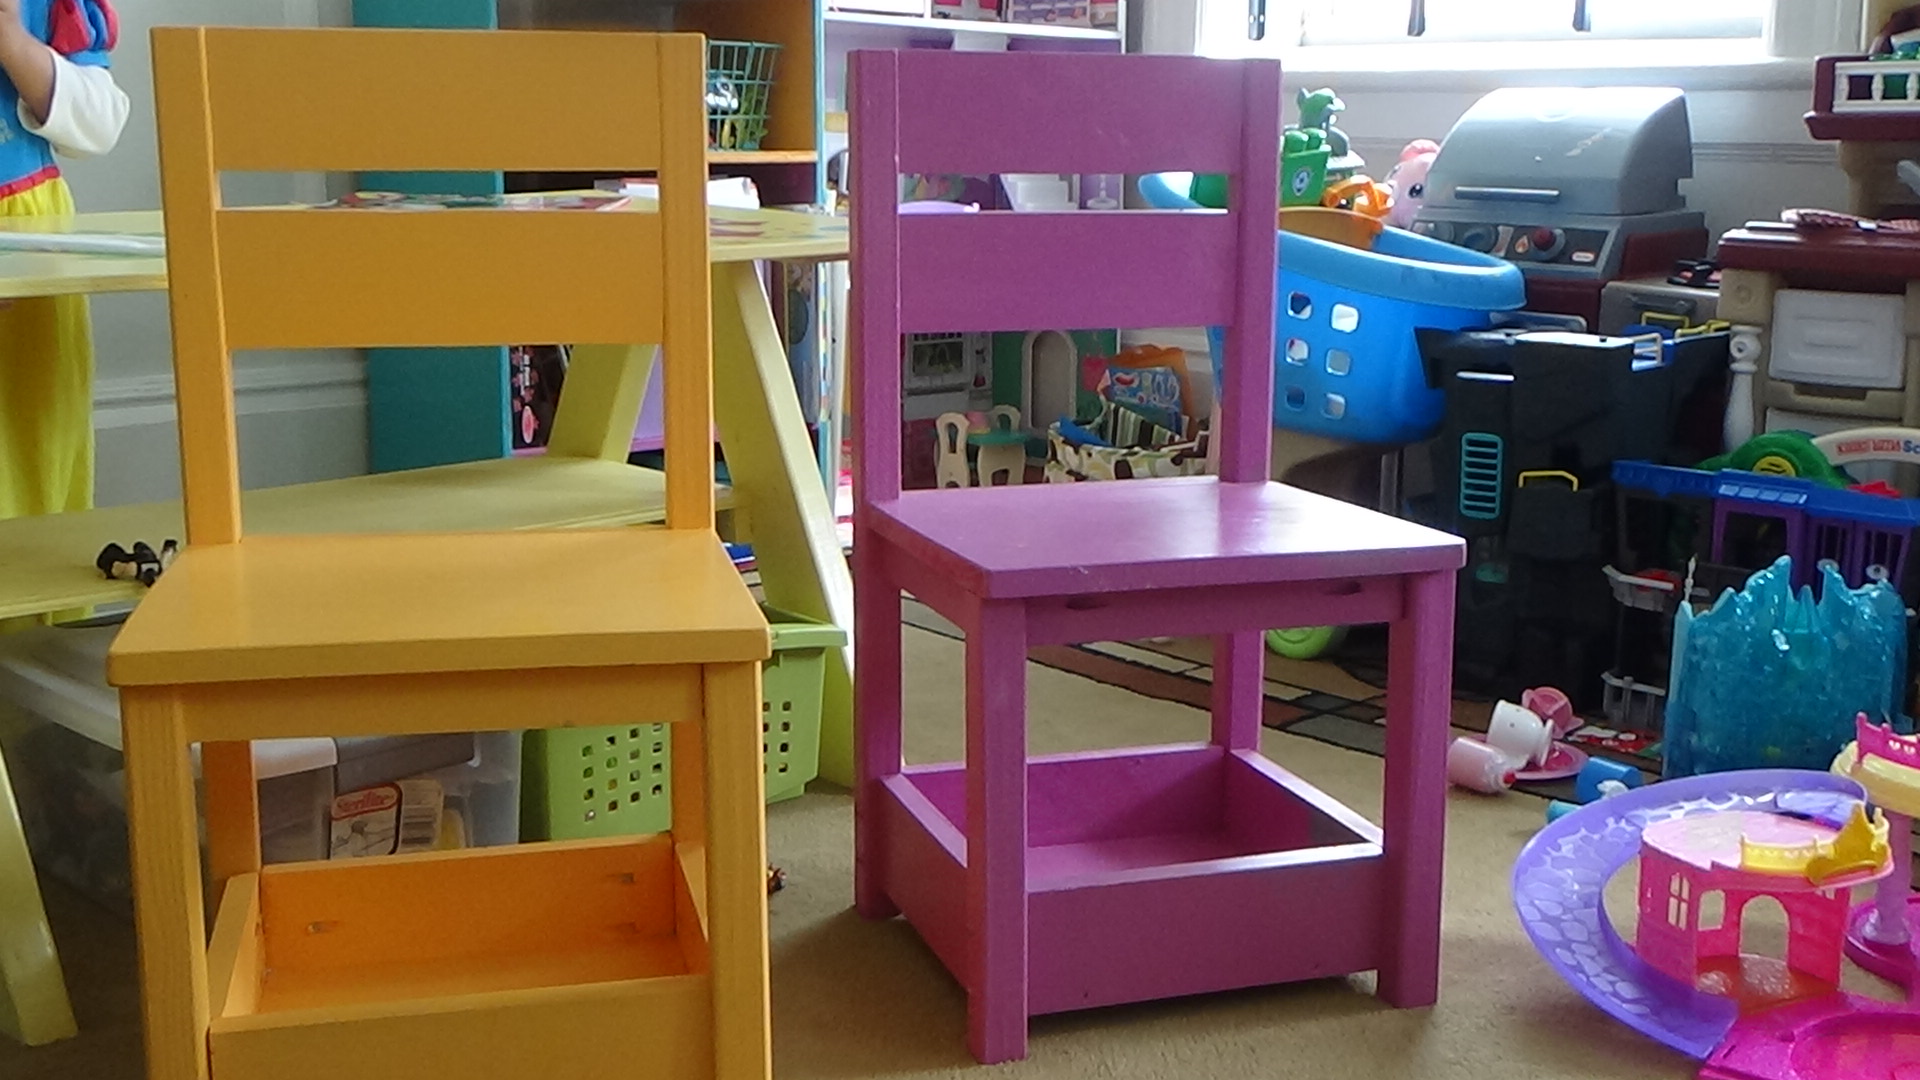
I followed Anna White's plan to build this chairs. My kids love them. Thanks for the free plan. It took me a while to finished it because they were my first project.
Built from Plan(s)
Estimated Cost
about 30 to 40 for two chairs.
Estimated Time Investment
Weekend Project (10-20 Hours)
Finish Used
simi gross paint self primer.
Recommended Skill Level
Beginner
Pot holder
Working off your idea. Added another holder. There will be a bottom drawer for bigger stuff.
Built from Plan(s)
Finish Used
Will be painted
Recommended Skill Level
Starter Project
Farmhouse Dining Table
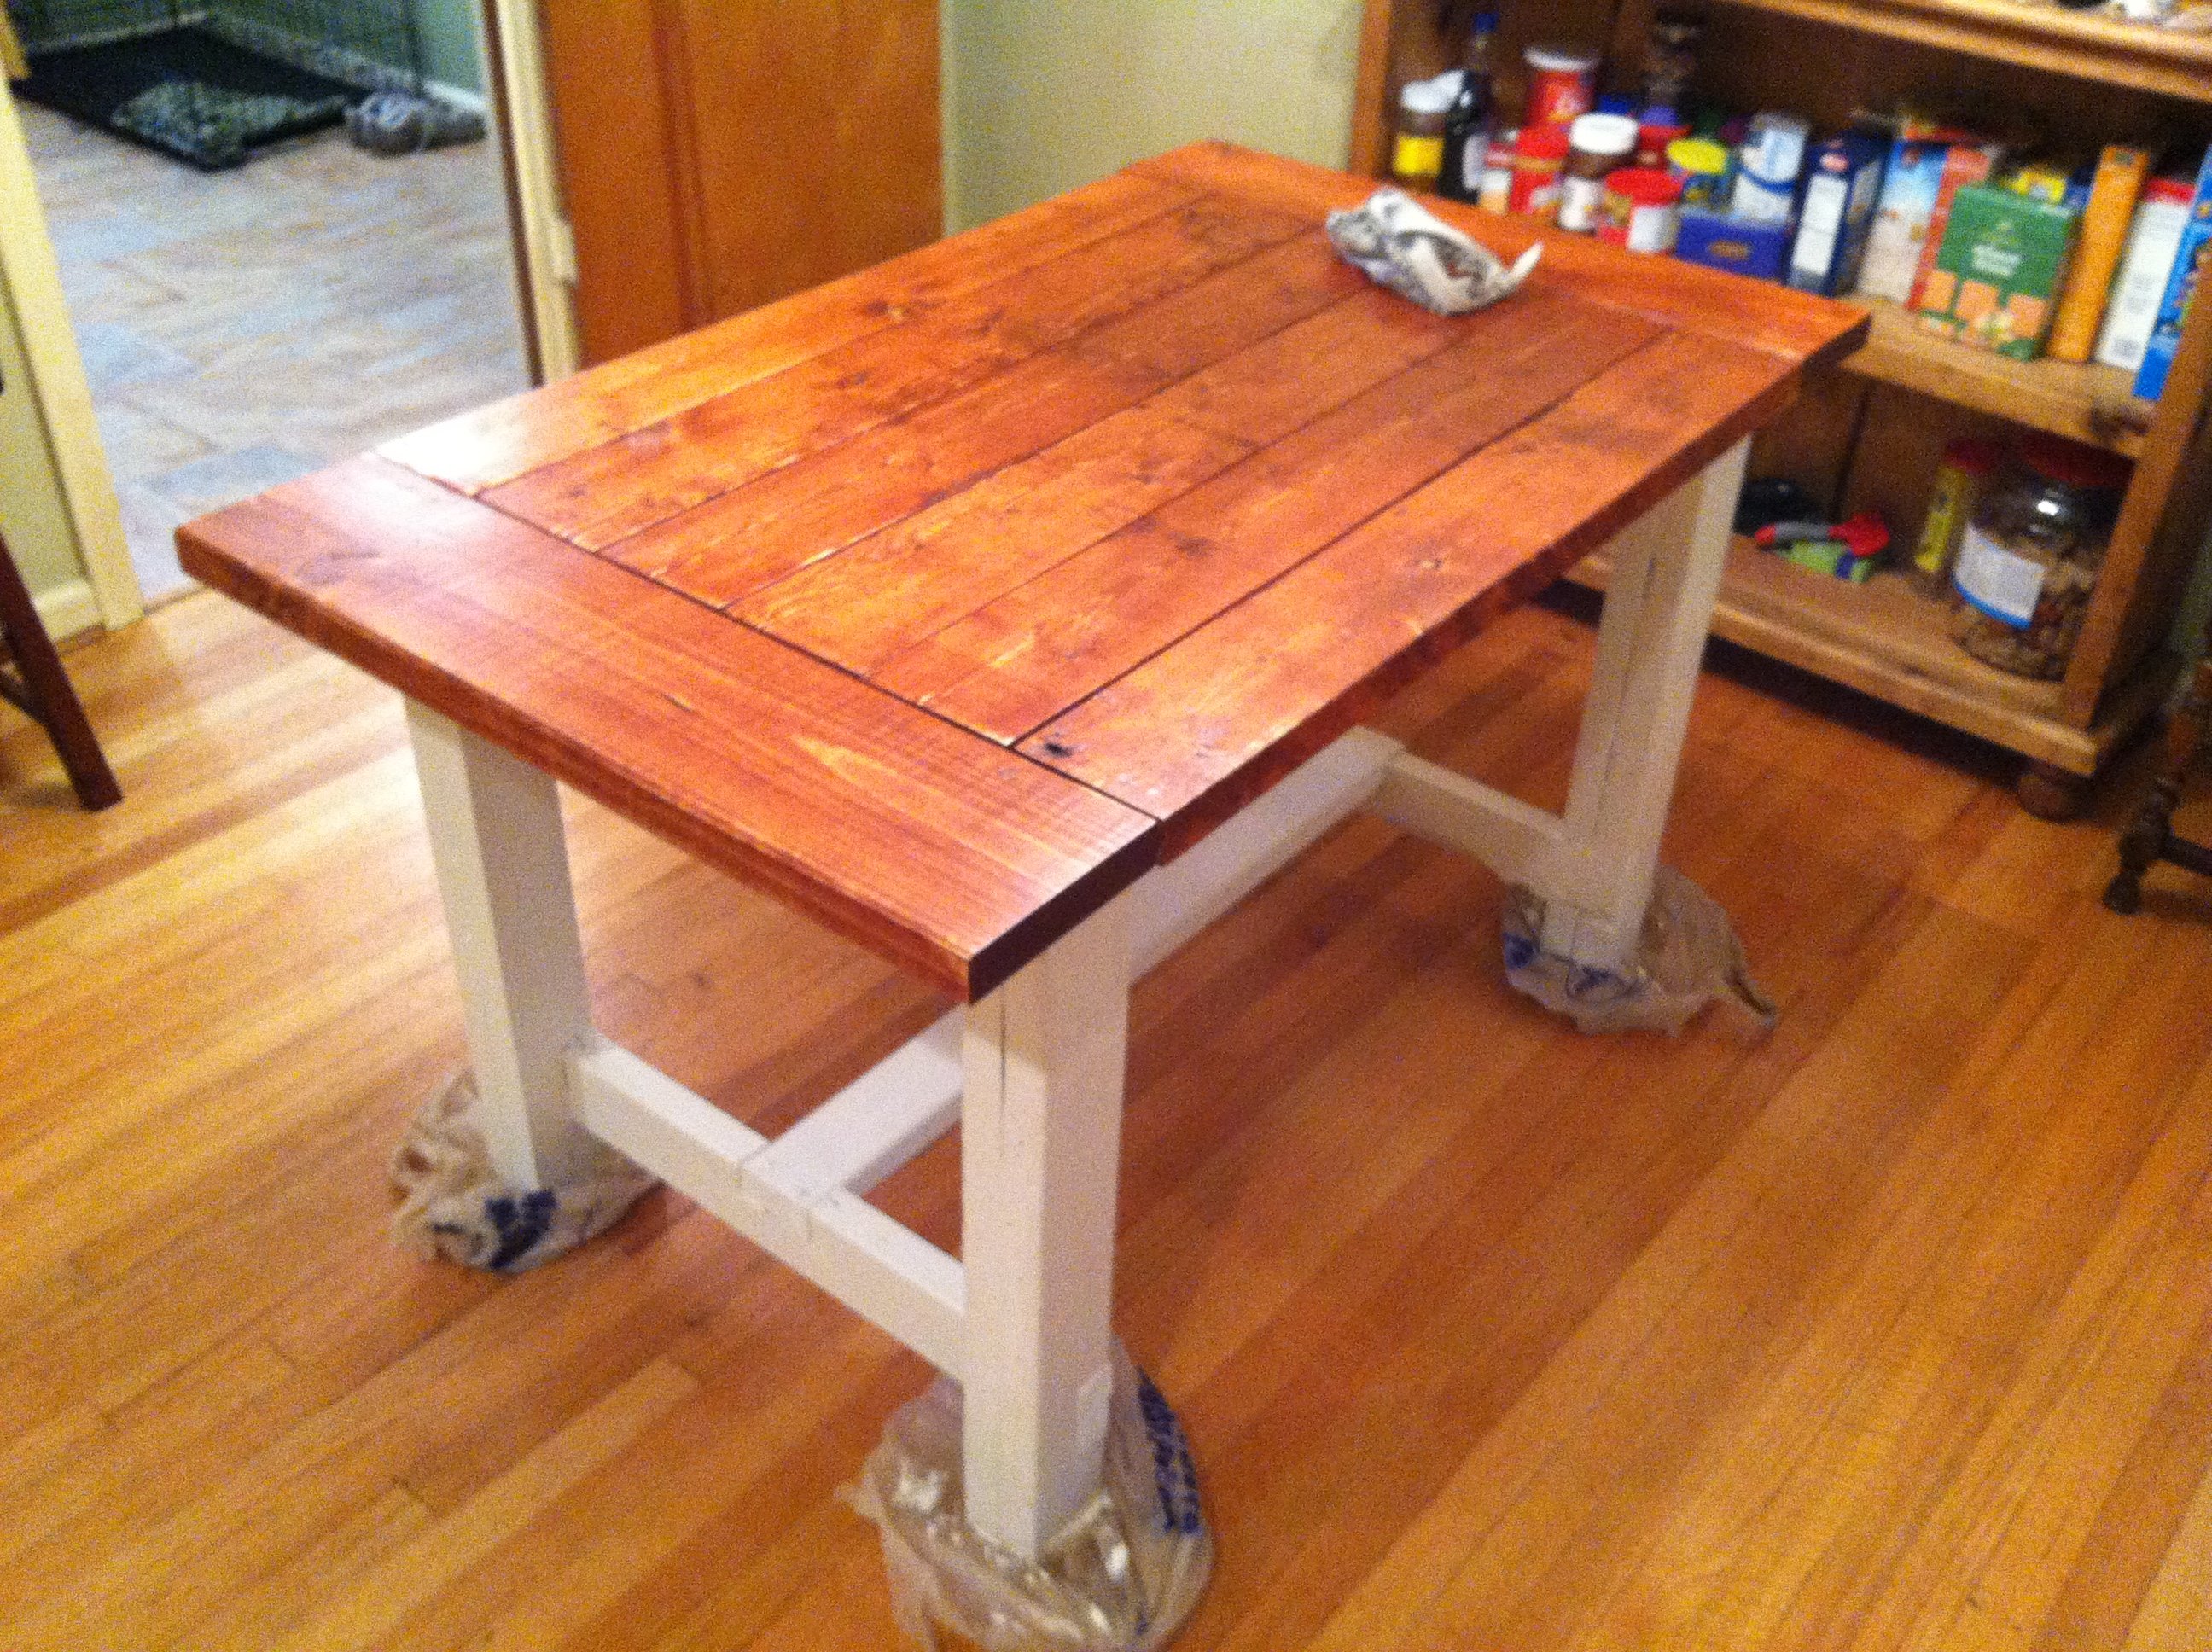
Using the plans provide, I simply changed the measurements needed for my dining room. A really fun build and a great looking end product!
Built from Plan(s)
Estimated Time Investment
Weekend Project (10-20 Hours)
Finish Used
Gunstock Stain with Minwax Satin Polyurethane finish; Behr paint (Bone Folder) on legs
Recommended Skill Level
Intermediate
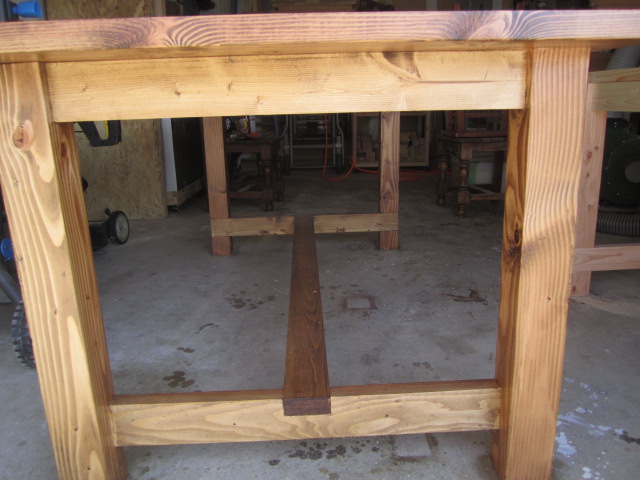
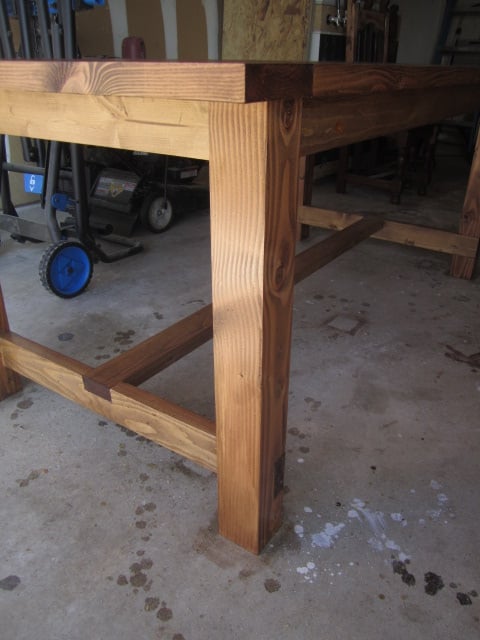
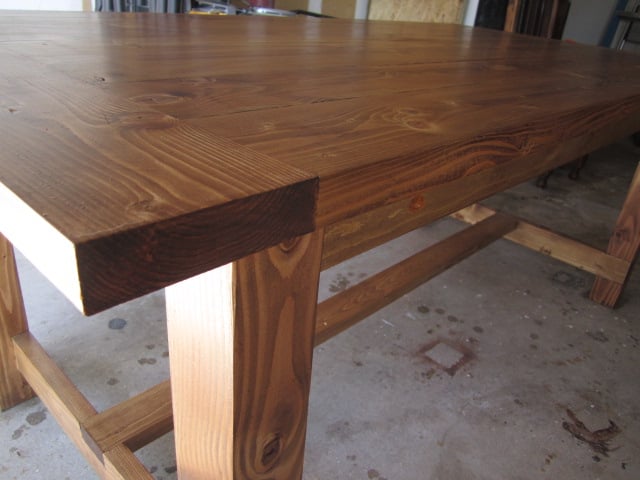
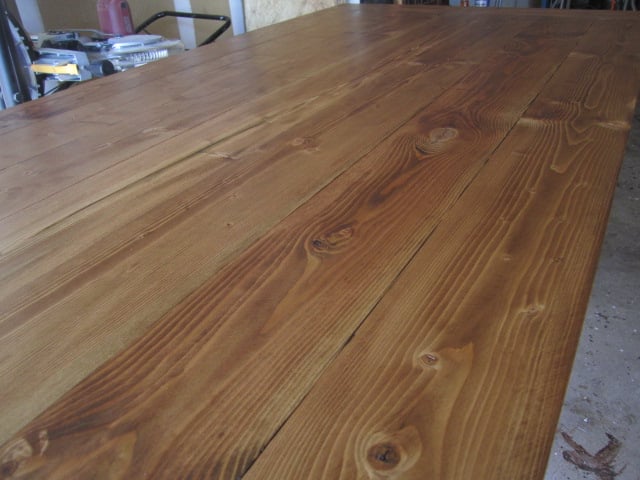
FARMHOUSE TABLE
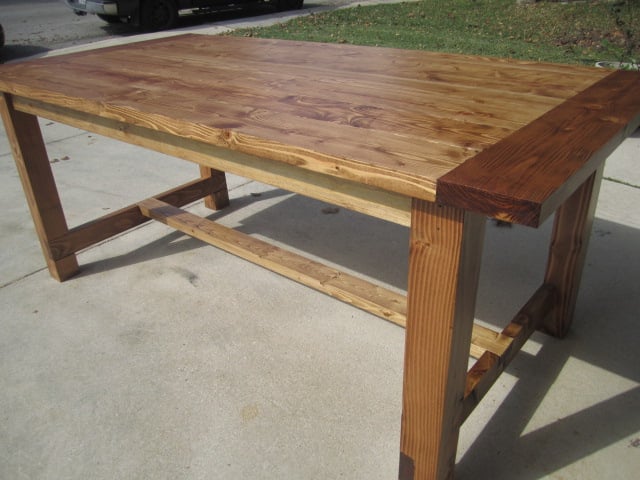
All the boards are ran through a jointer and planer making each board squared.
No rounded ends.
Stain conditioner used.
Finish - Minwax Early American
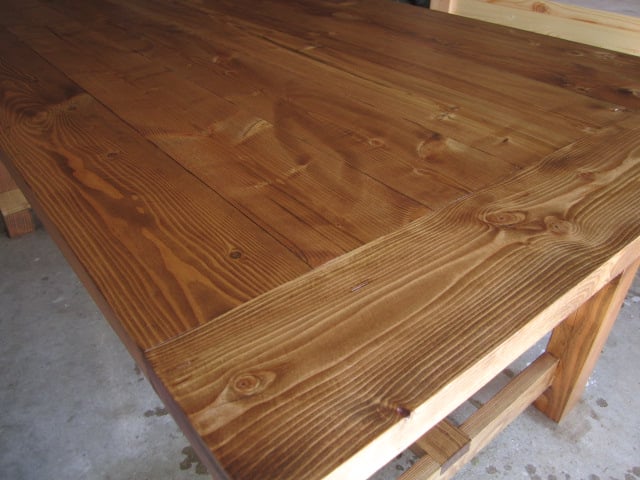
Built from Plan(s)
Estimated Cost
$85
Estimated Time Investment
Weekend Project (10-20 Hours)
Recommended Skill Level
Beginner
Cedar Toy Box
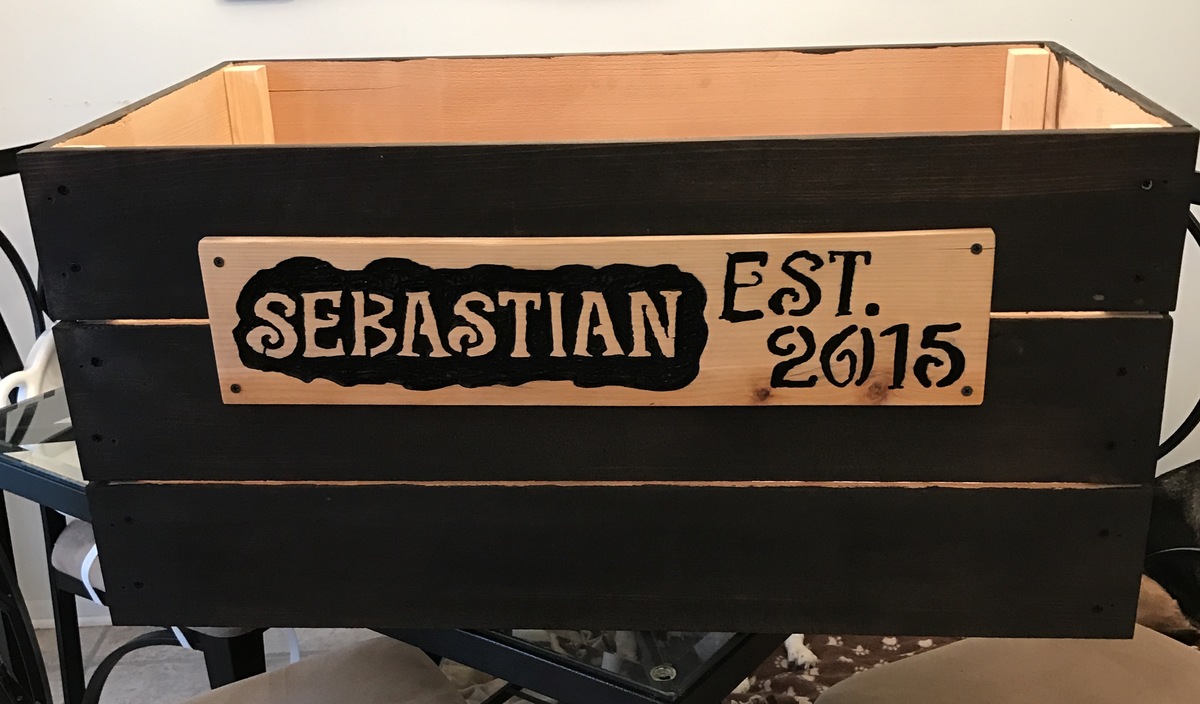
I wanted an easy toy box made from pallets. I came across the plans for the Simple Cedar Wooden Toy Box and decided it would be easier to but a few lengths of cedar fencing than to tear apart a bunch of pallets.
I omitted the feet and rope handles and opted for a carved wooden sign for personalization. I thought it was going to be too small, but soon realized it is a decent sized box.
I used Minwax Jacobean stain and am very happy with the end result.
Built from Plan(s)
Estimated Cost
$30
Estimated Time Investment
Afternoon Project (3-6 Hours)
Finish Used
Minwax Jacobean
Recommended Skill Level
Starter Project
Hemnes Linen Cabinet
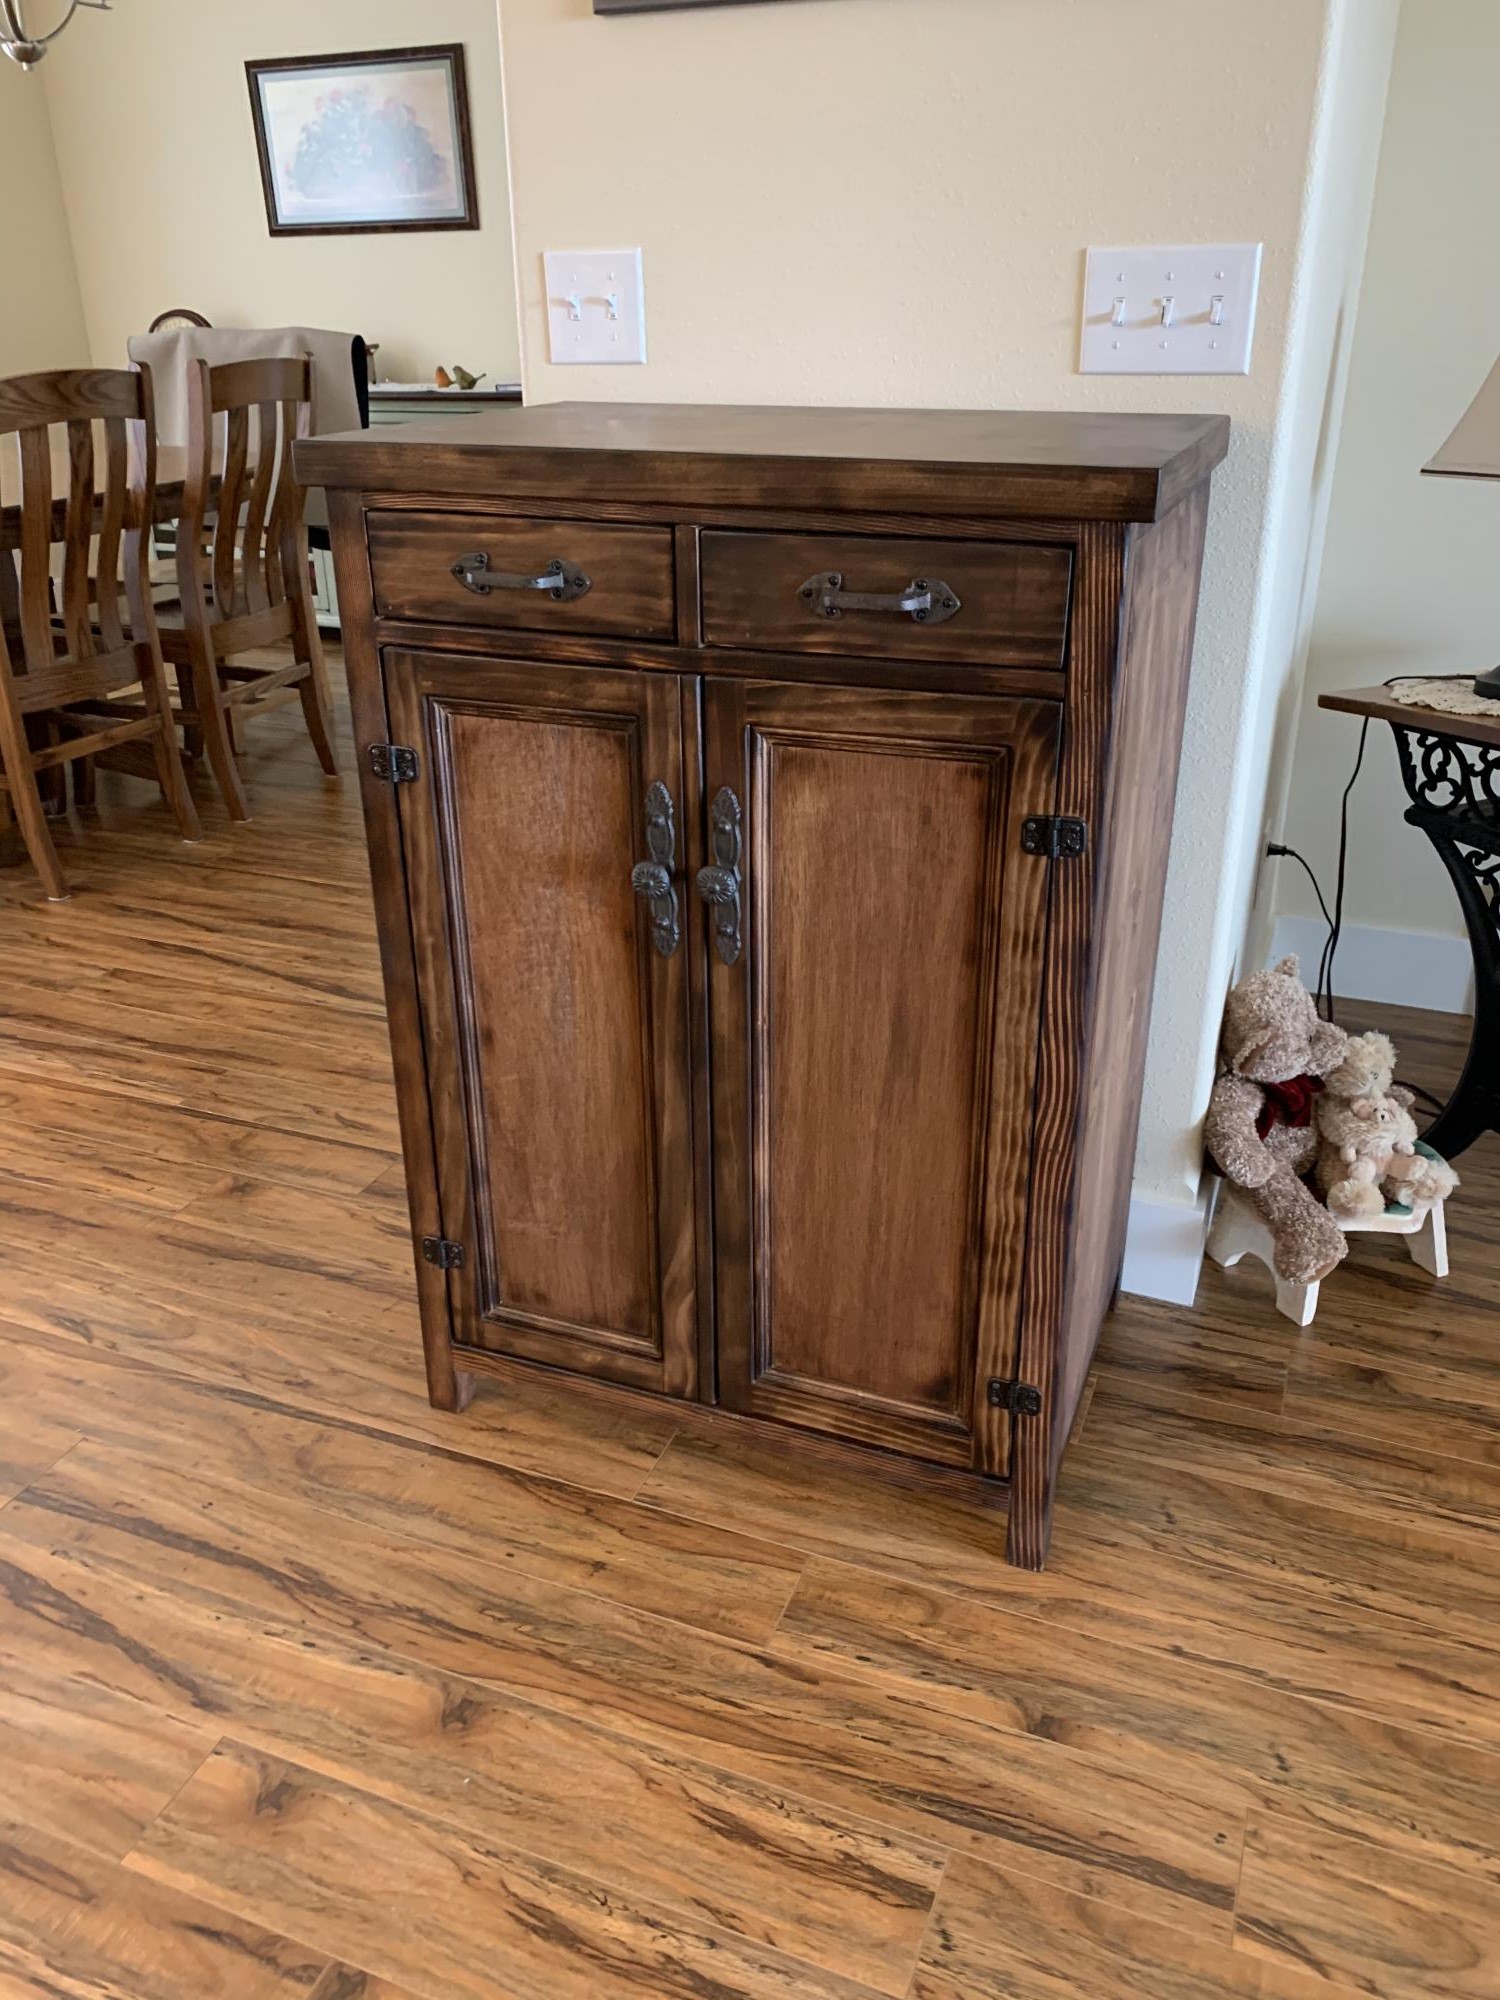
I modified the Hemnes Linen Cabinet plans to fit this space. Instead of painting, I burned and stained the cabinet before applying polyurethane.
Estimated Cost
$300
Estimated Time Investment
Weekend Project (10-20 Hours)
Finish Used
Burned and stained wood with polyurethane. I used a blow torch on the edges for the burned look.
Recommended Skill Level
Advanced
Comments
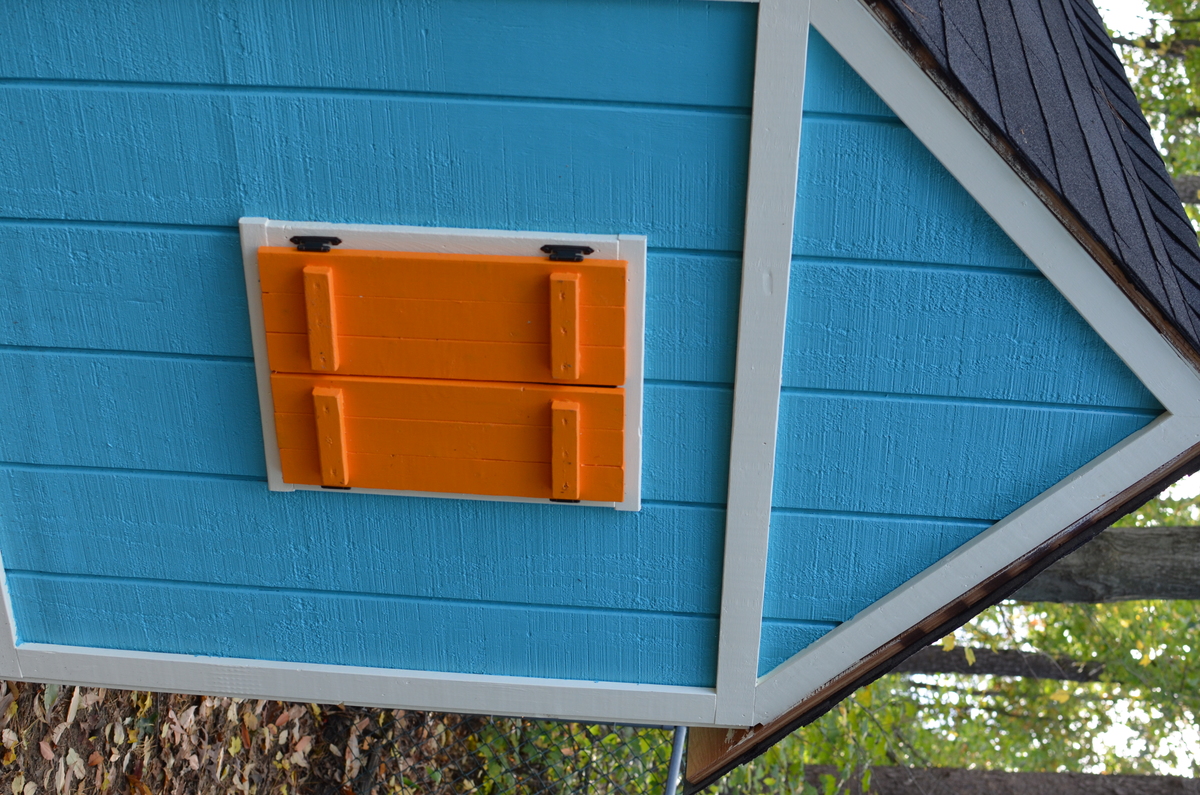
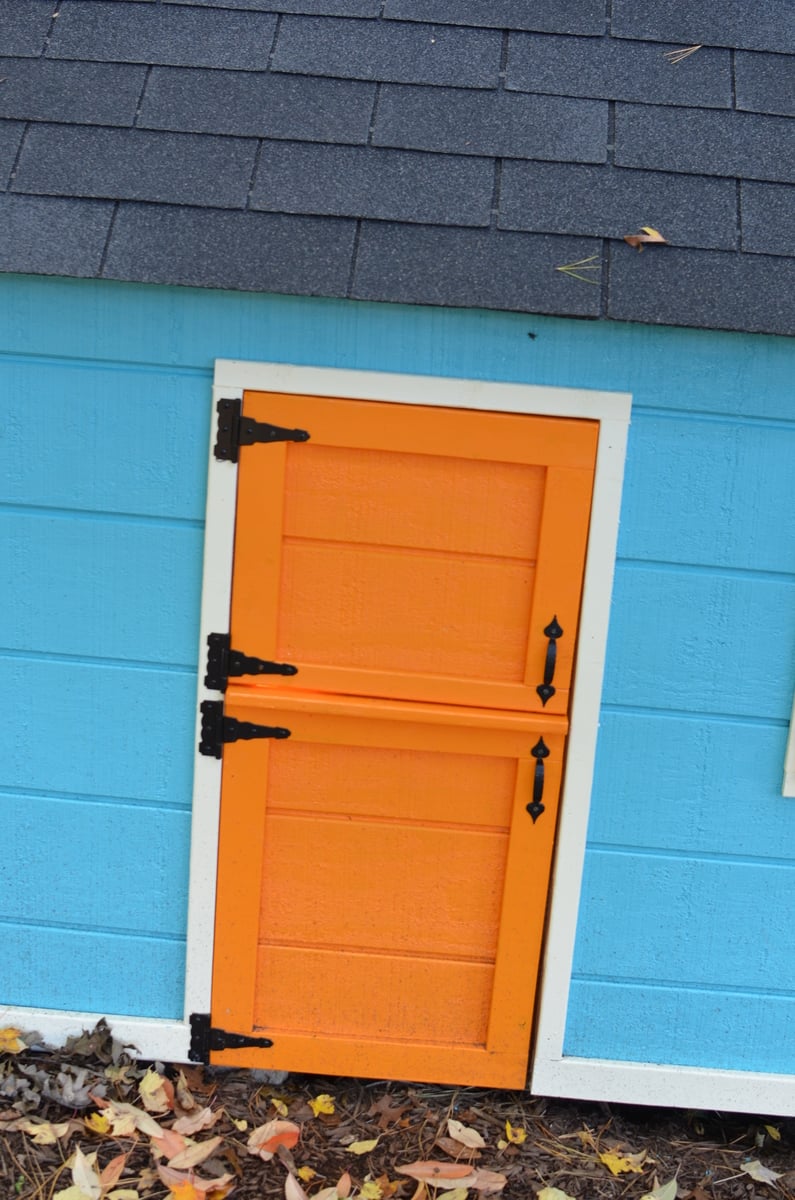
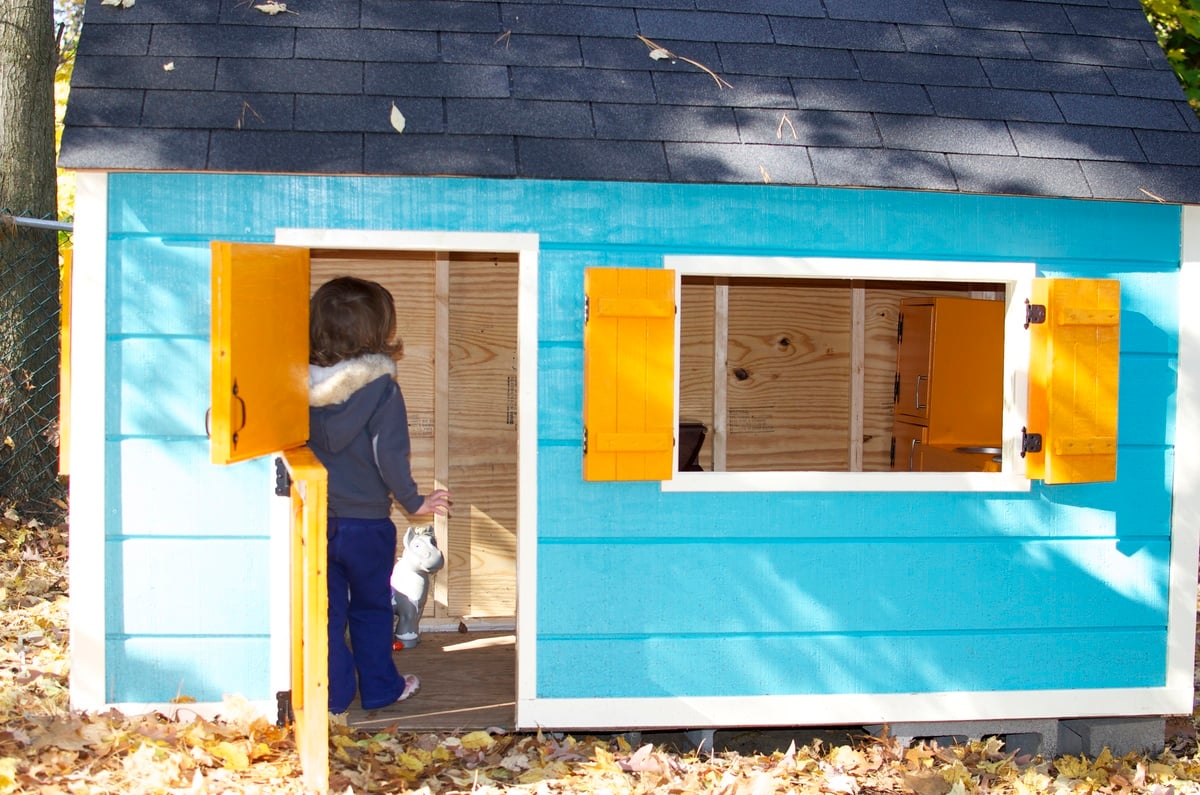
Playhouse
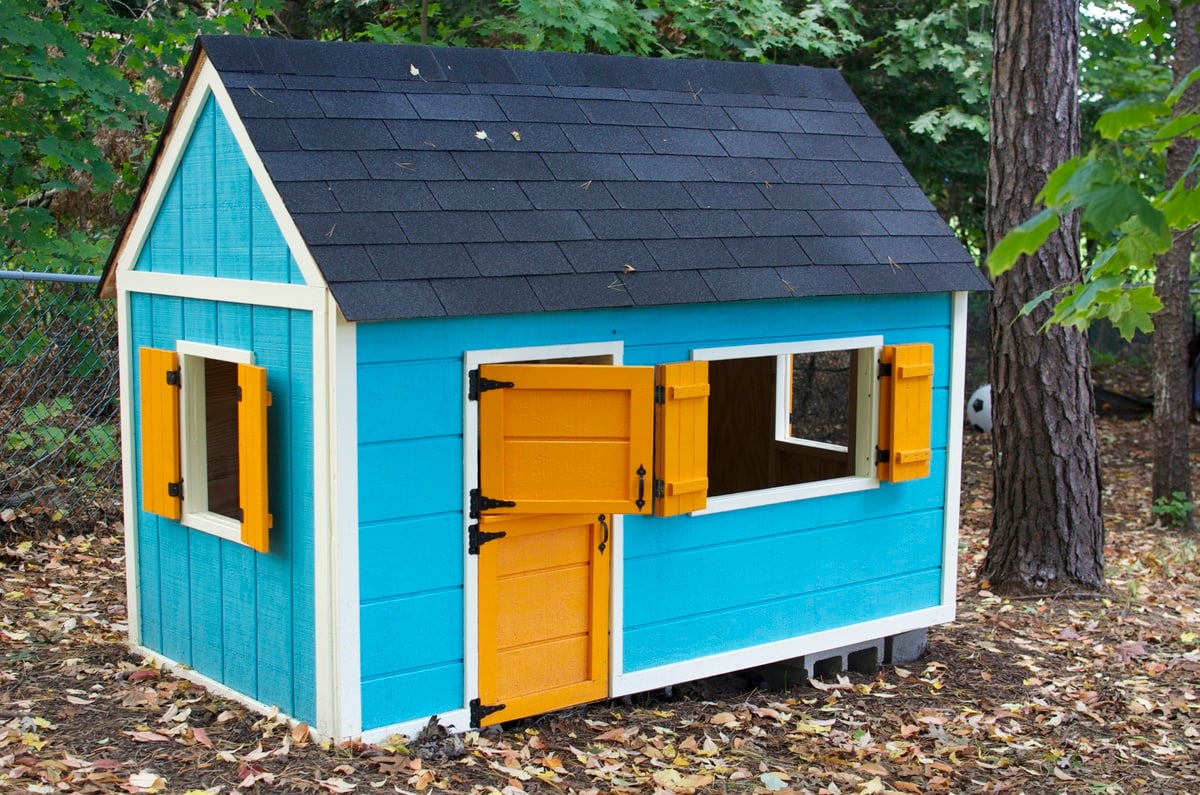
Olivia's Playhouse, built by mommy and daddy, though she did "help." Super-thankful to Ana for her awesome plans and making all this possible for our Little One. Modified the door to make it "barn style" which opens top/bottom. In the spring, plan on adding a small front porch/deck and railing.
Built from Plan(s)
Estimated Time Investment
Weekend Project (10-20 Hours)
Recommended Skill Level
Beginner
Comments

Mon, 03/23/2015 - 13:15
Super Cute Details!
Loving all the little details! Great job, thanks for sharing!
Sat, 05/14/2016 - 08:02
Shutters for playhouse
I love your playhouse. Would you happen to have the dimensions for the shutters? They look amazing! [email protected]
Sat, 05/14/2016 - 08:02
Shutters for playhouse
I love your playhouse. Would you happen to have the dimensions for the shutters? They look amazing! [email protected]
Sat, 05/14/2016 - 08:02
Shutters for playhouse
I love your playhouse. Would you happen to have the dimensions for the shutters? They look amazing! [email protected]
Sat, 05/14/2016 - 08:02
Shutters for playhouse
I love your playhouse. Would you happen to have the dimensions for the shutters? They look amazing! [email protected]
Sat, 05/14/2016 - 08:03
Shutters for playhouse
I love your playhouse. Would you happen to have the dimensions for the shutters? They look amazing! [email protected]