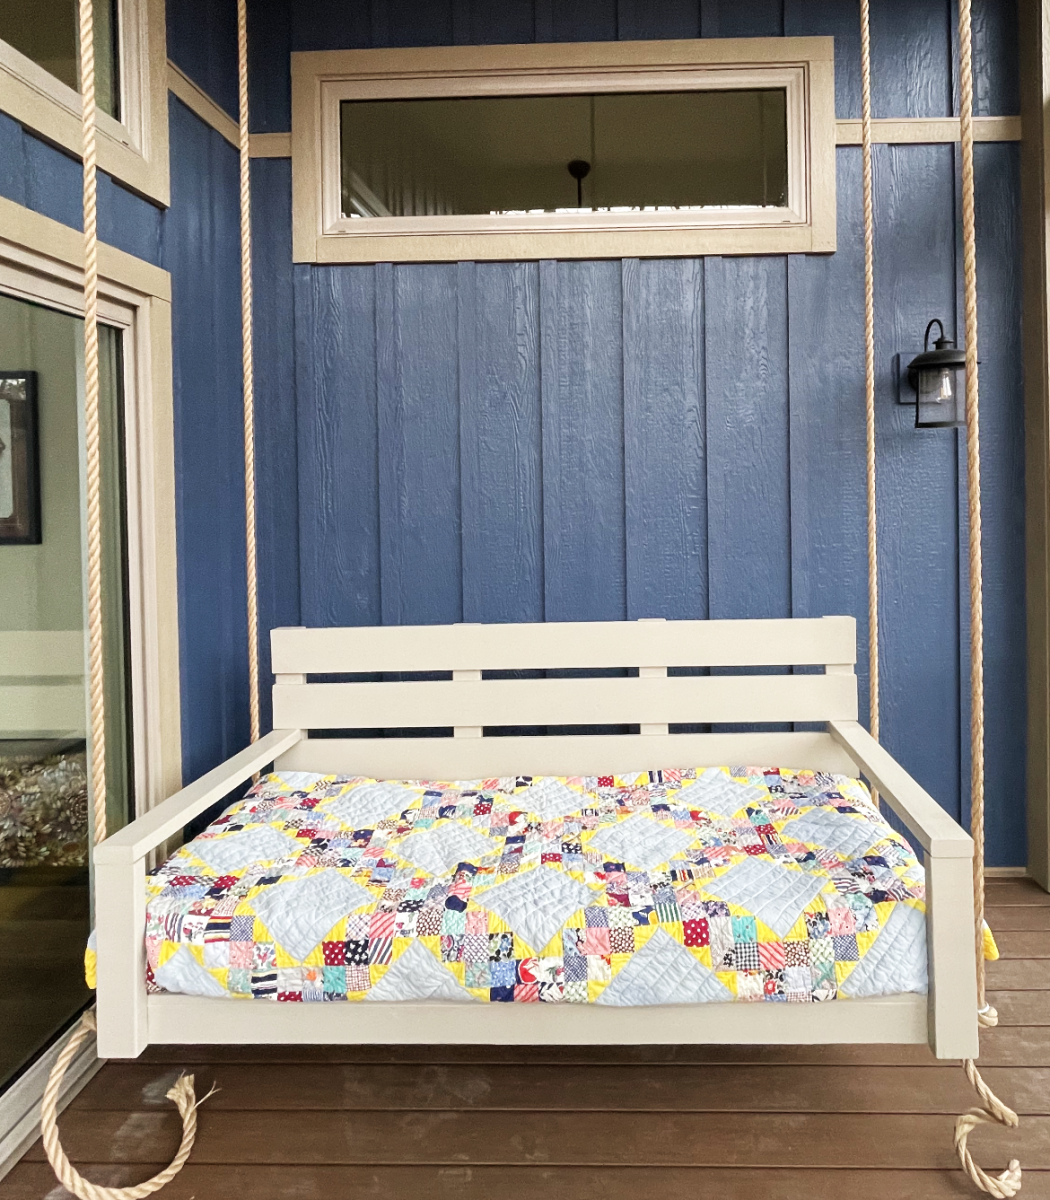
DIY Mattress Size Porch Swing
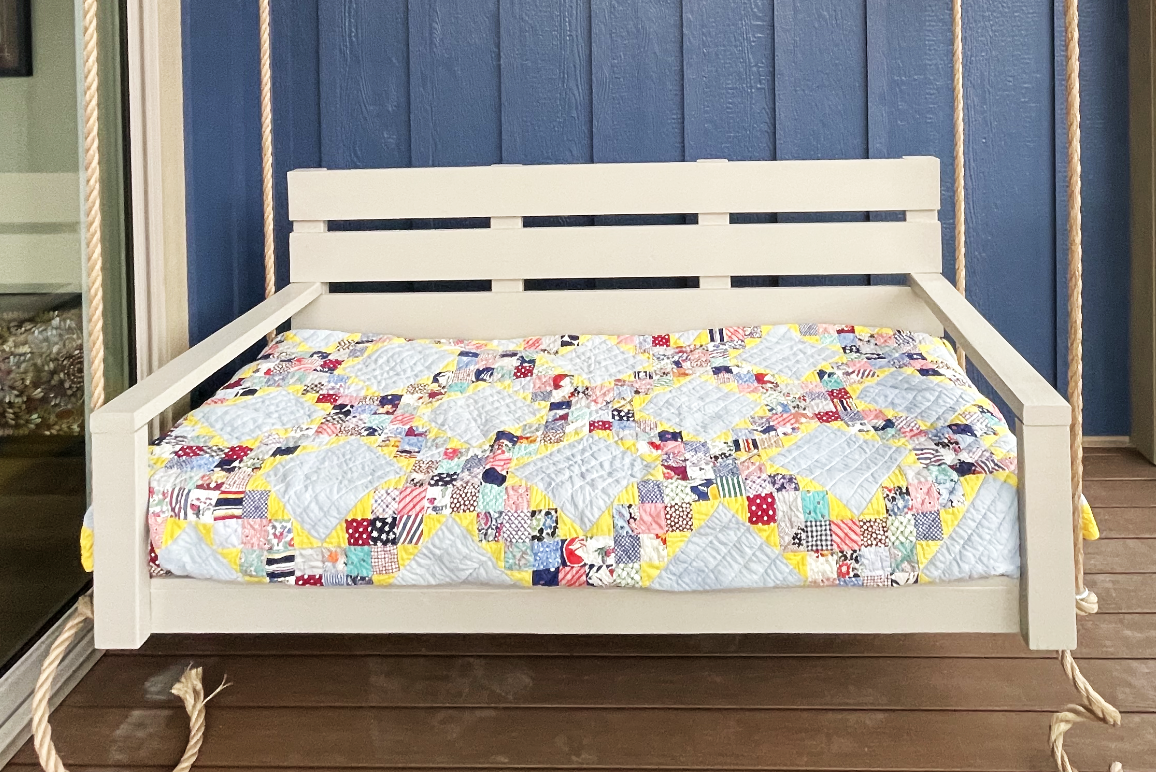
I altered the plans to fit a twin mattress. It’s a bonus sleeping area on the porch. My second project. I’m a 69 year old female and enjoying the building.
Lou Ann
Built from Plan(s)
I altered the plans to fit a twin mattress. It’s a bonus sleeping area on the porch. My second project. I’m a 69 year old female and enjoying the building.
Lou Ann
We build this bunk bed from the Rustic Modern Bunk Bed plans. We finished it with one coat of primer and one coat of Dunn Edwards Swiss Coffee. This project was made easier with a Dewalt 12'' sliding compound miter saw, Kreg K4, and a speed square for every aspect of the project.
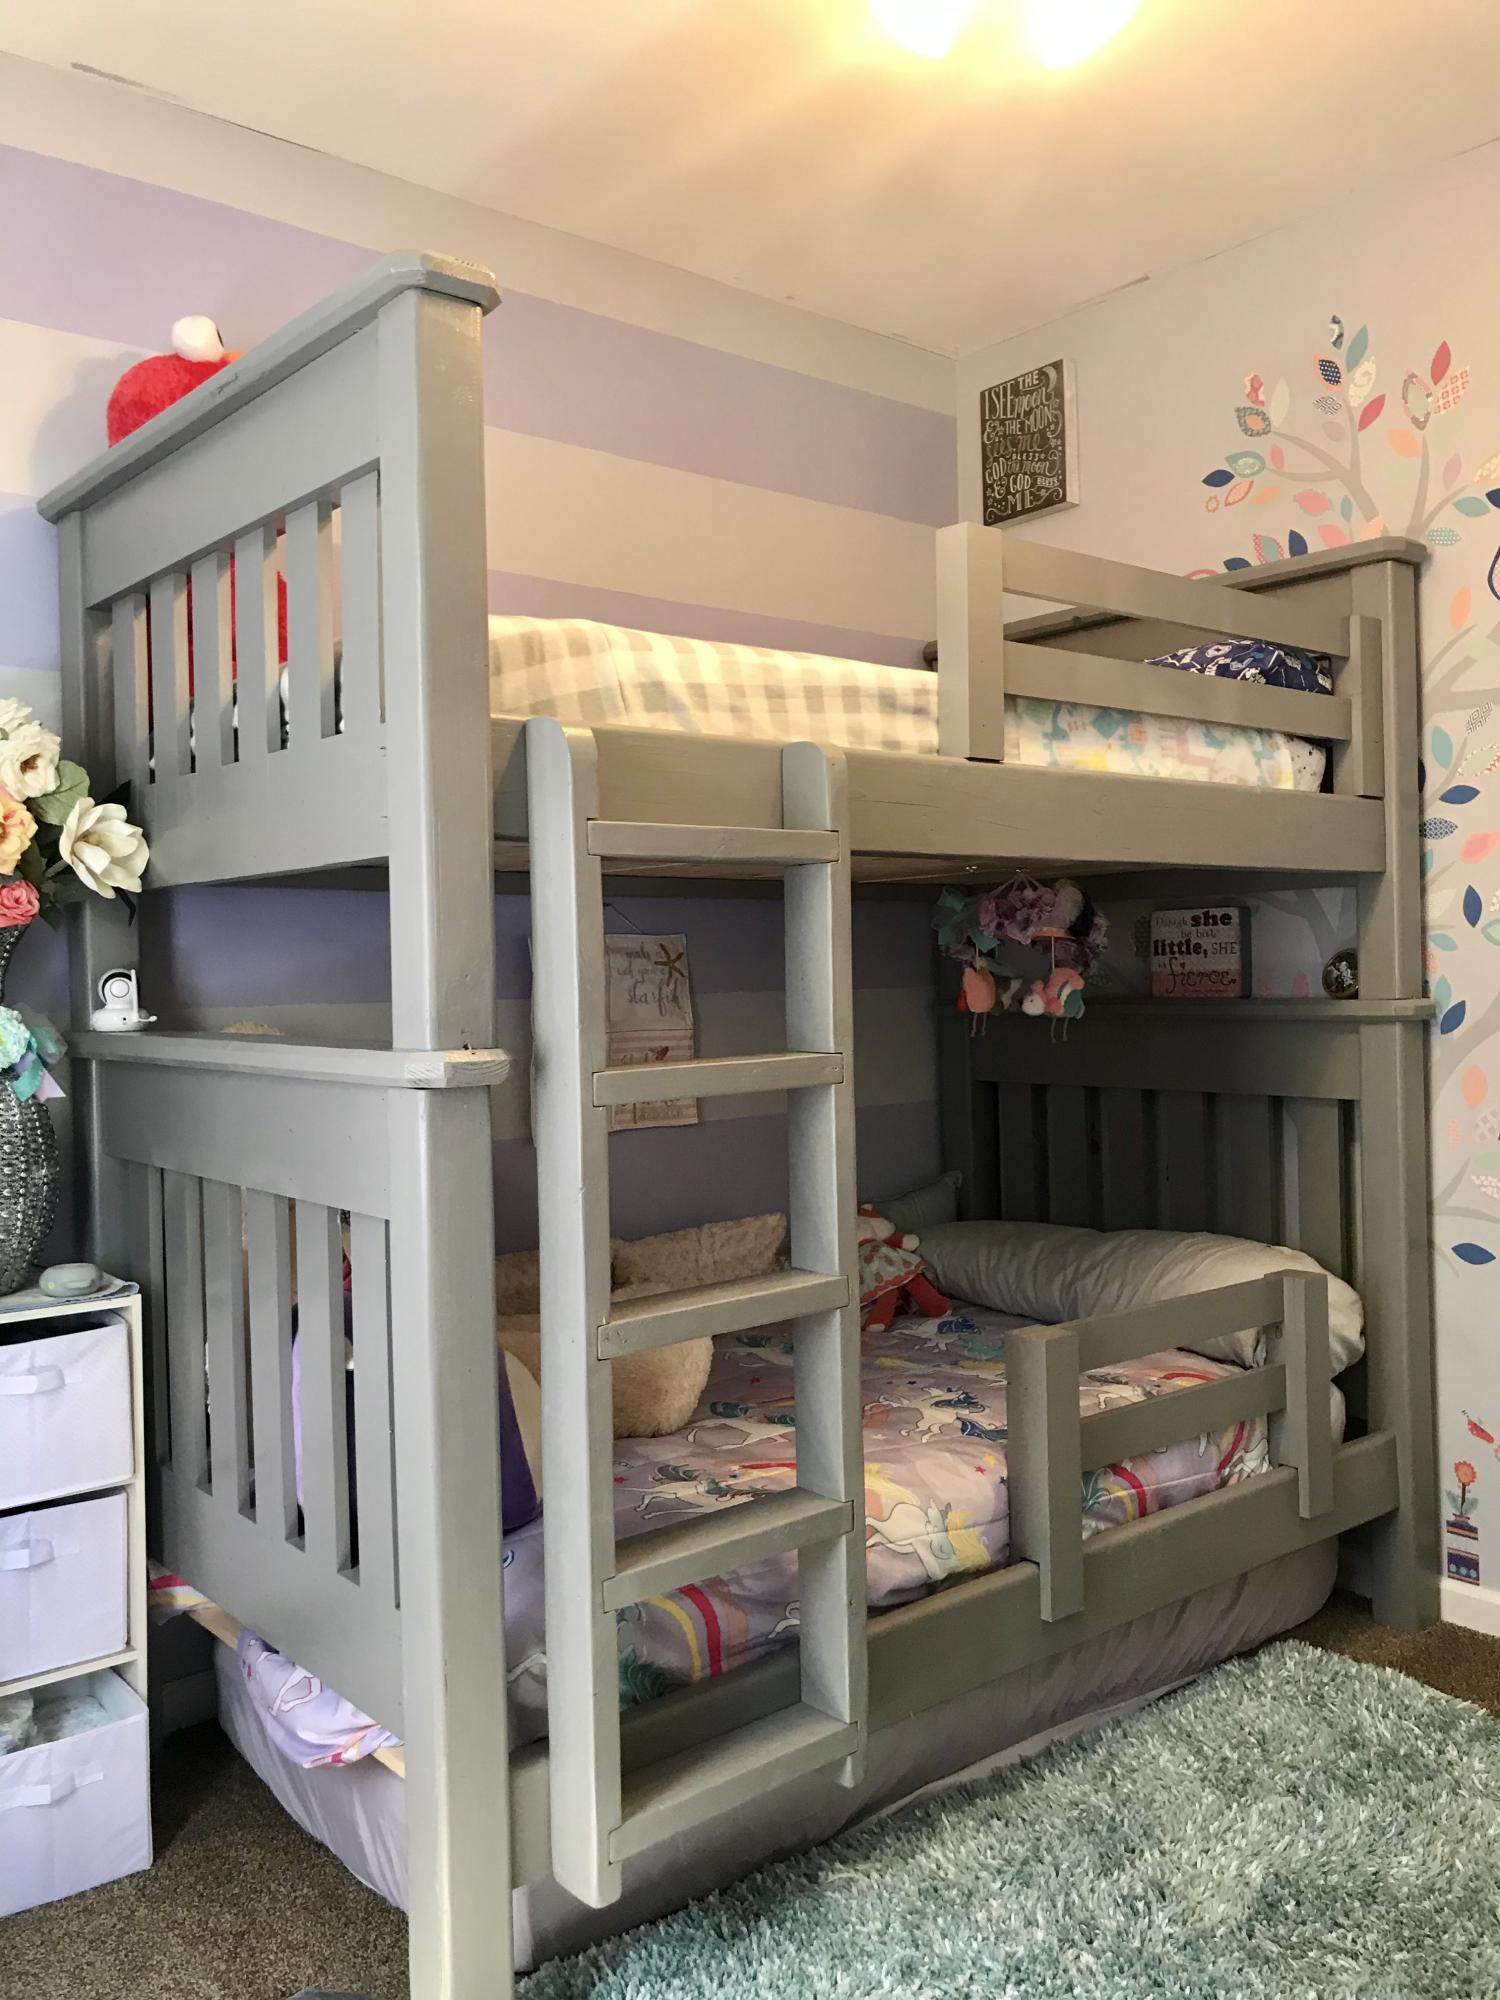
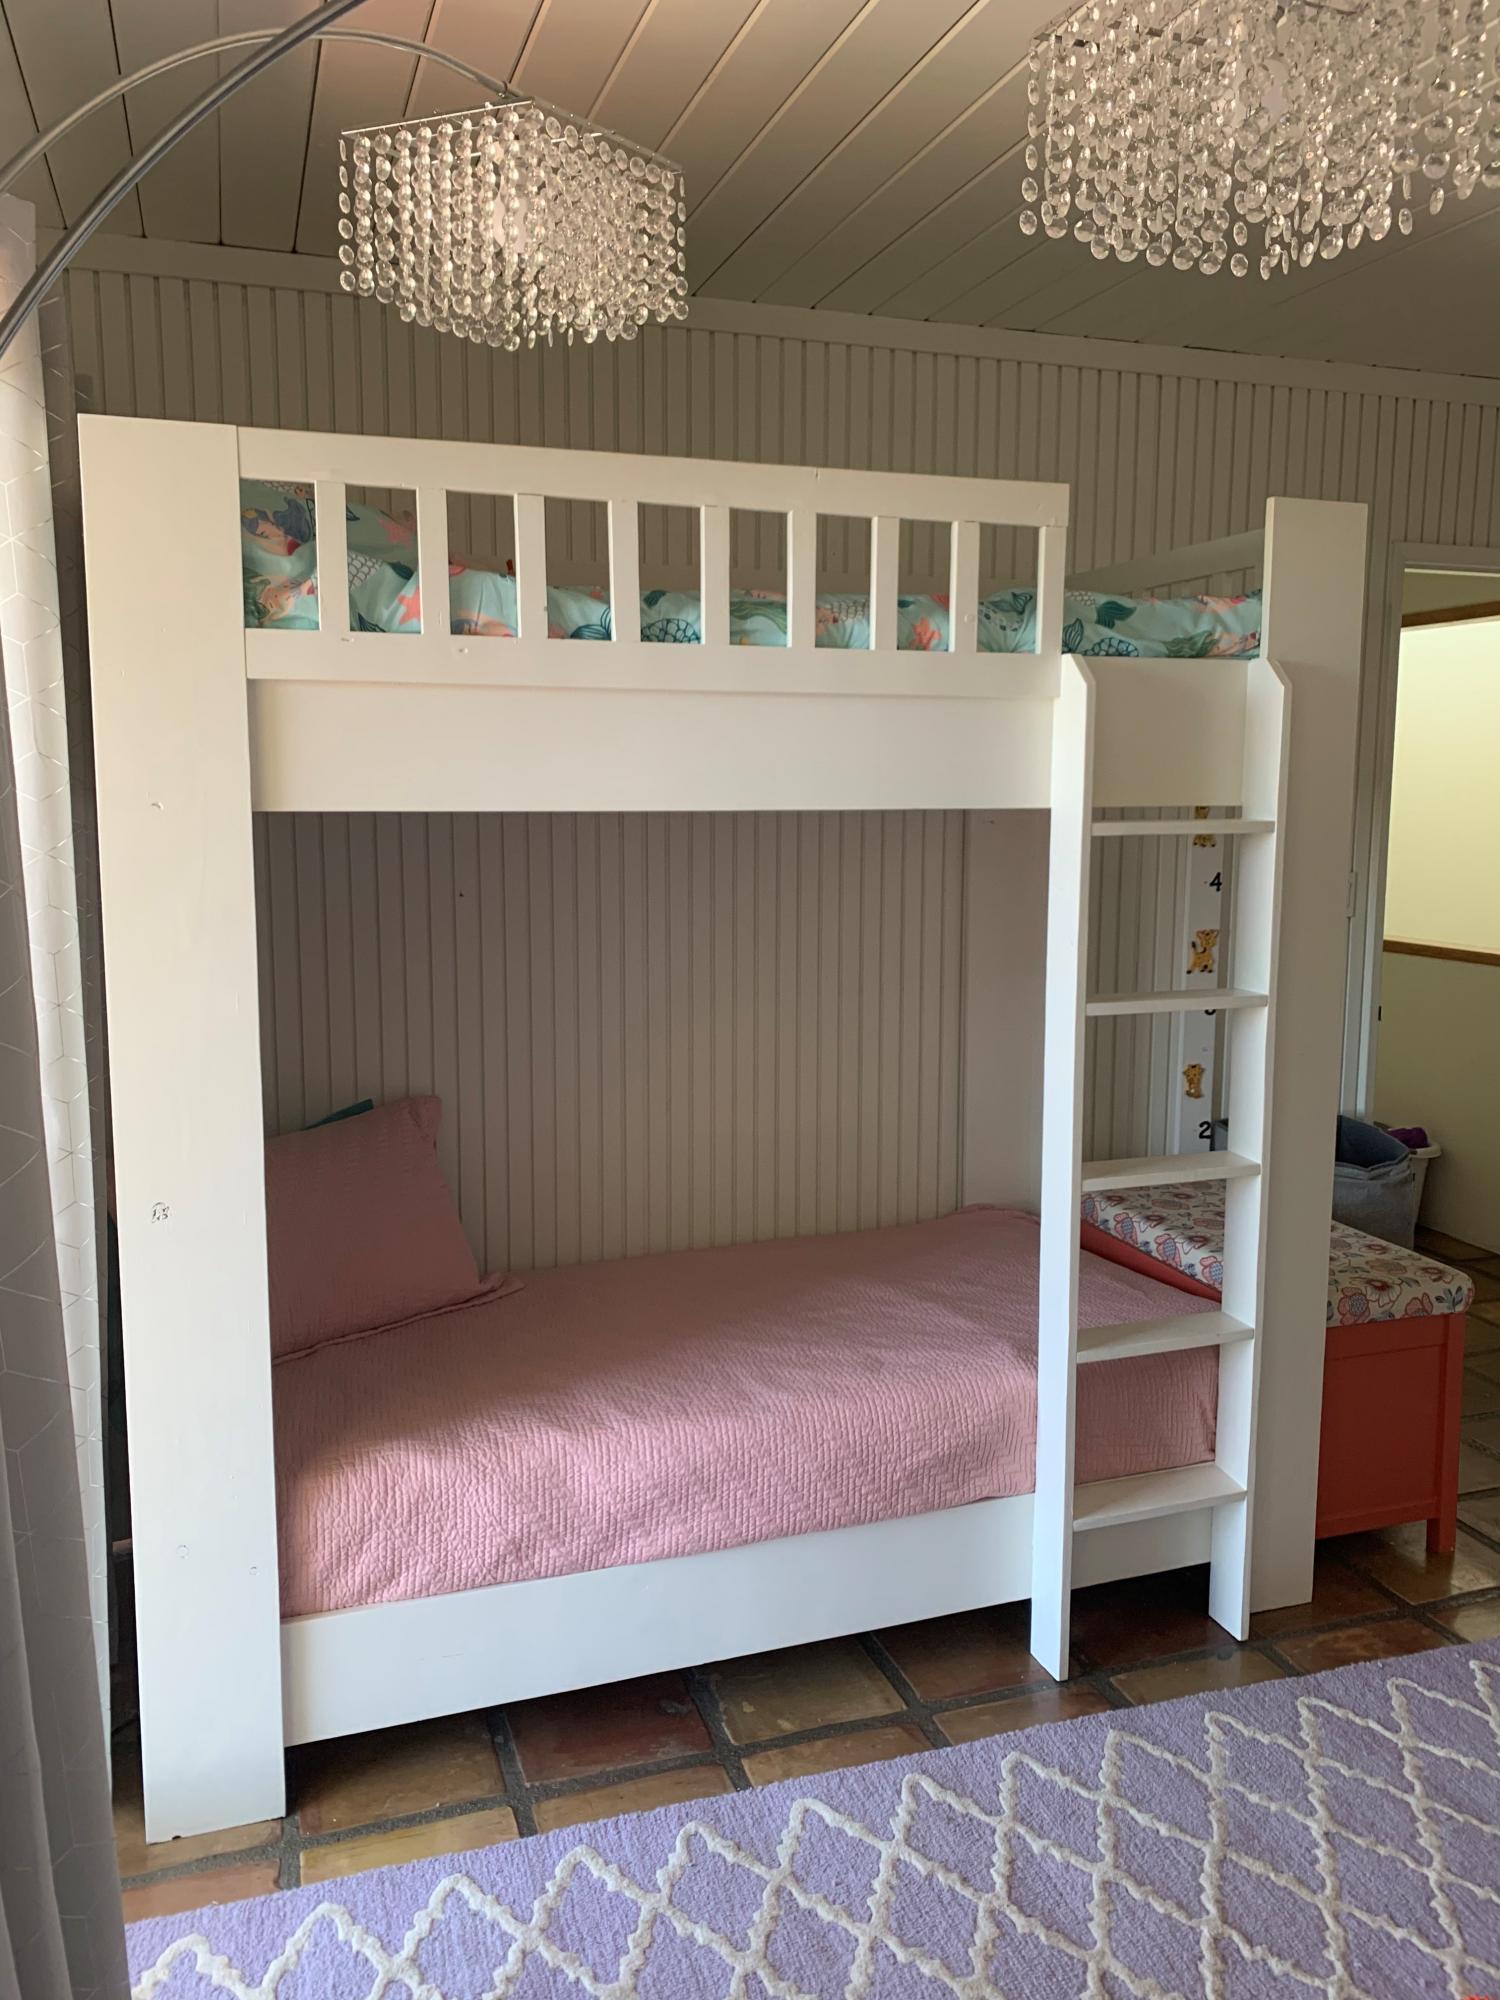
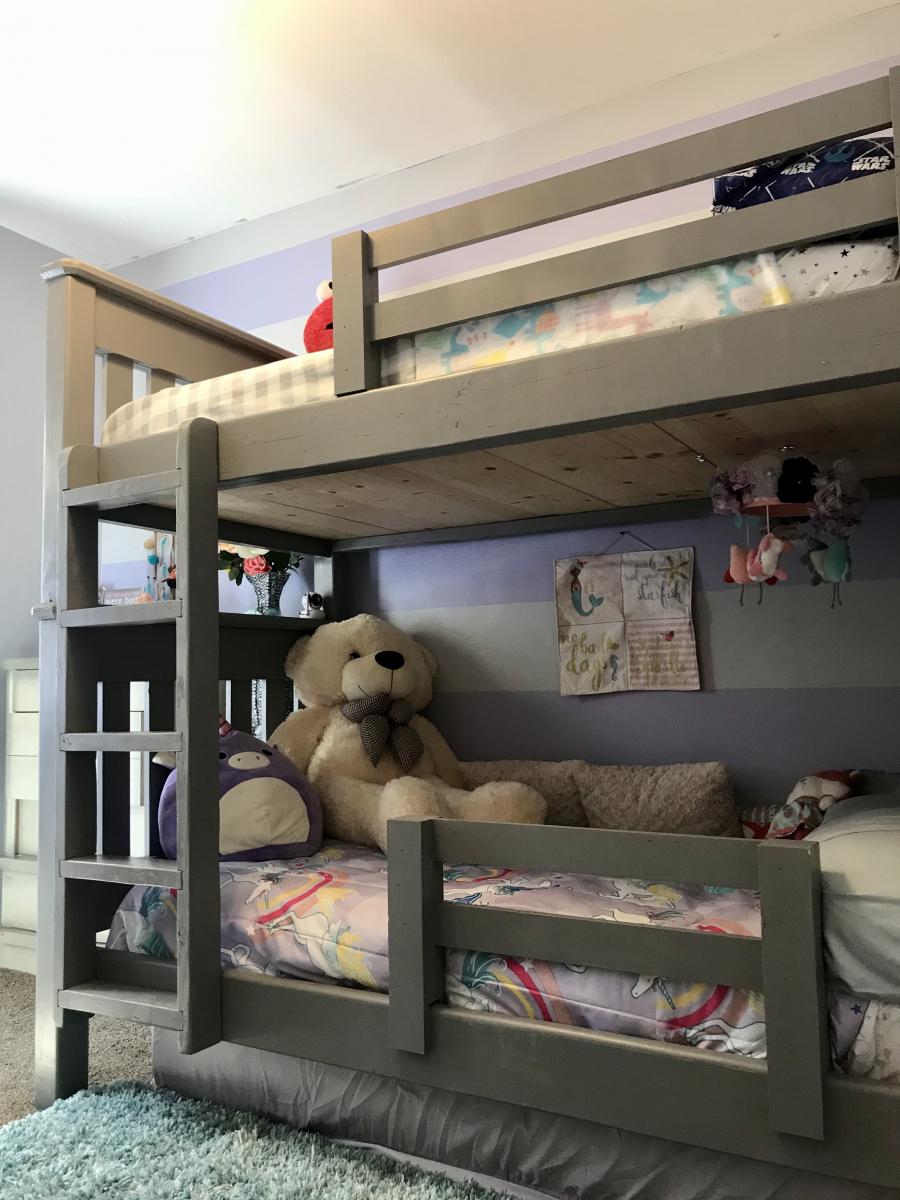
Built mostly from the Simple Bunk Bed plans on this site with a couple of modifications. Namely: made a vertical ladder, used Rockler Bed rail fasteners, increased bed height to fit 3rd twin mattress underneath for when my moms visits, and made a removable bottom safety rail that slides on when my daughter goes to sleep. Overall it was a fun project to do and they kids are really enjoying it.
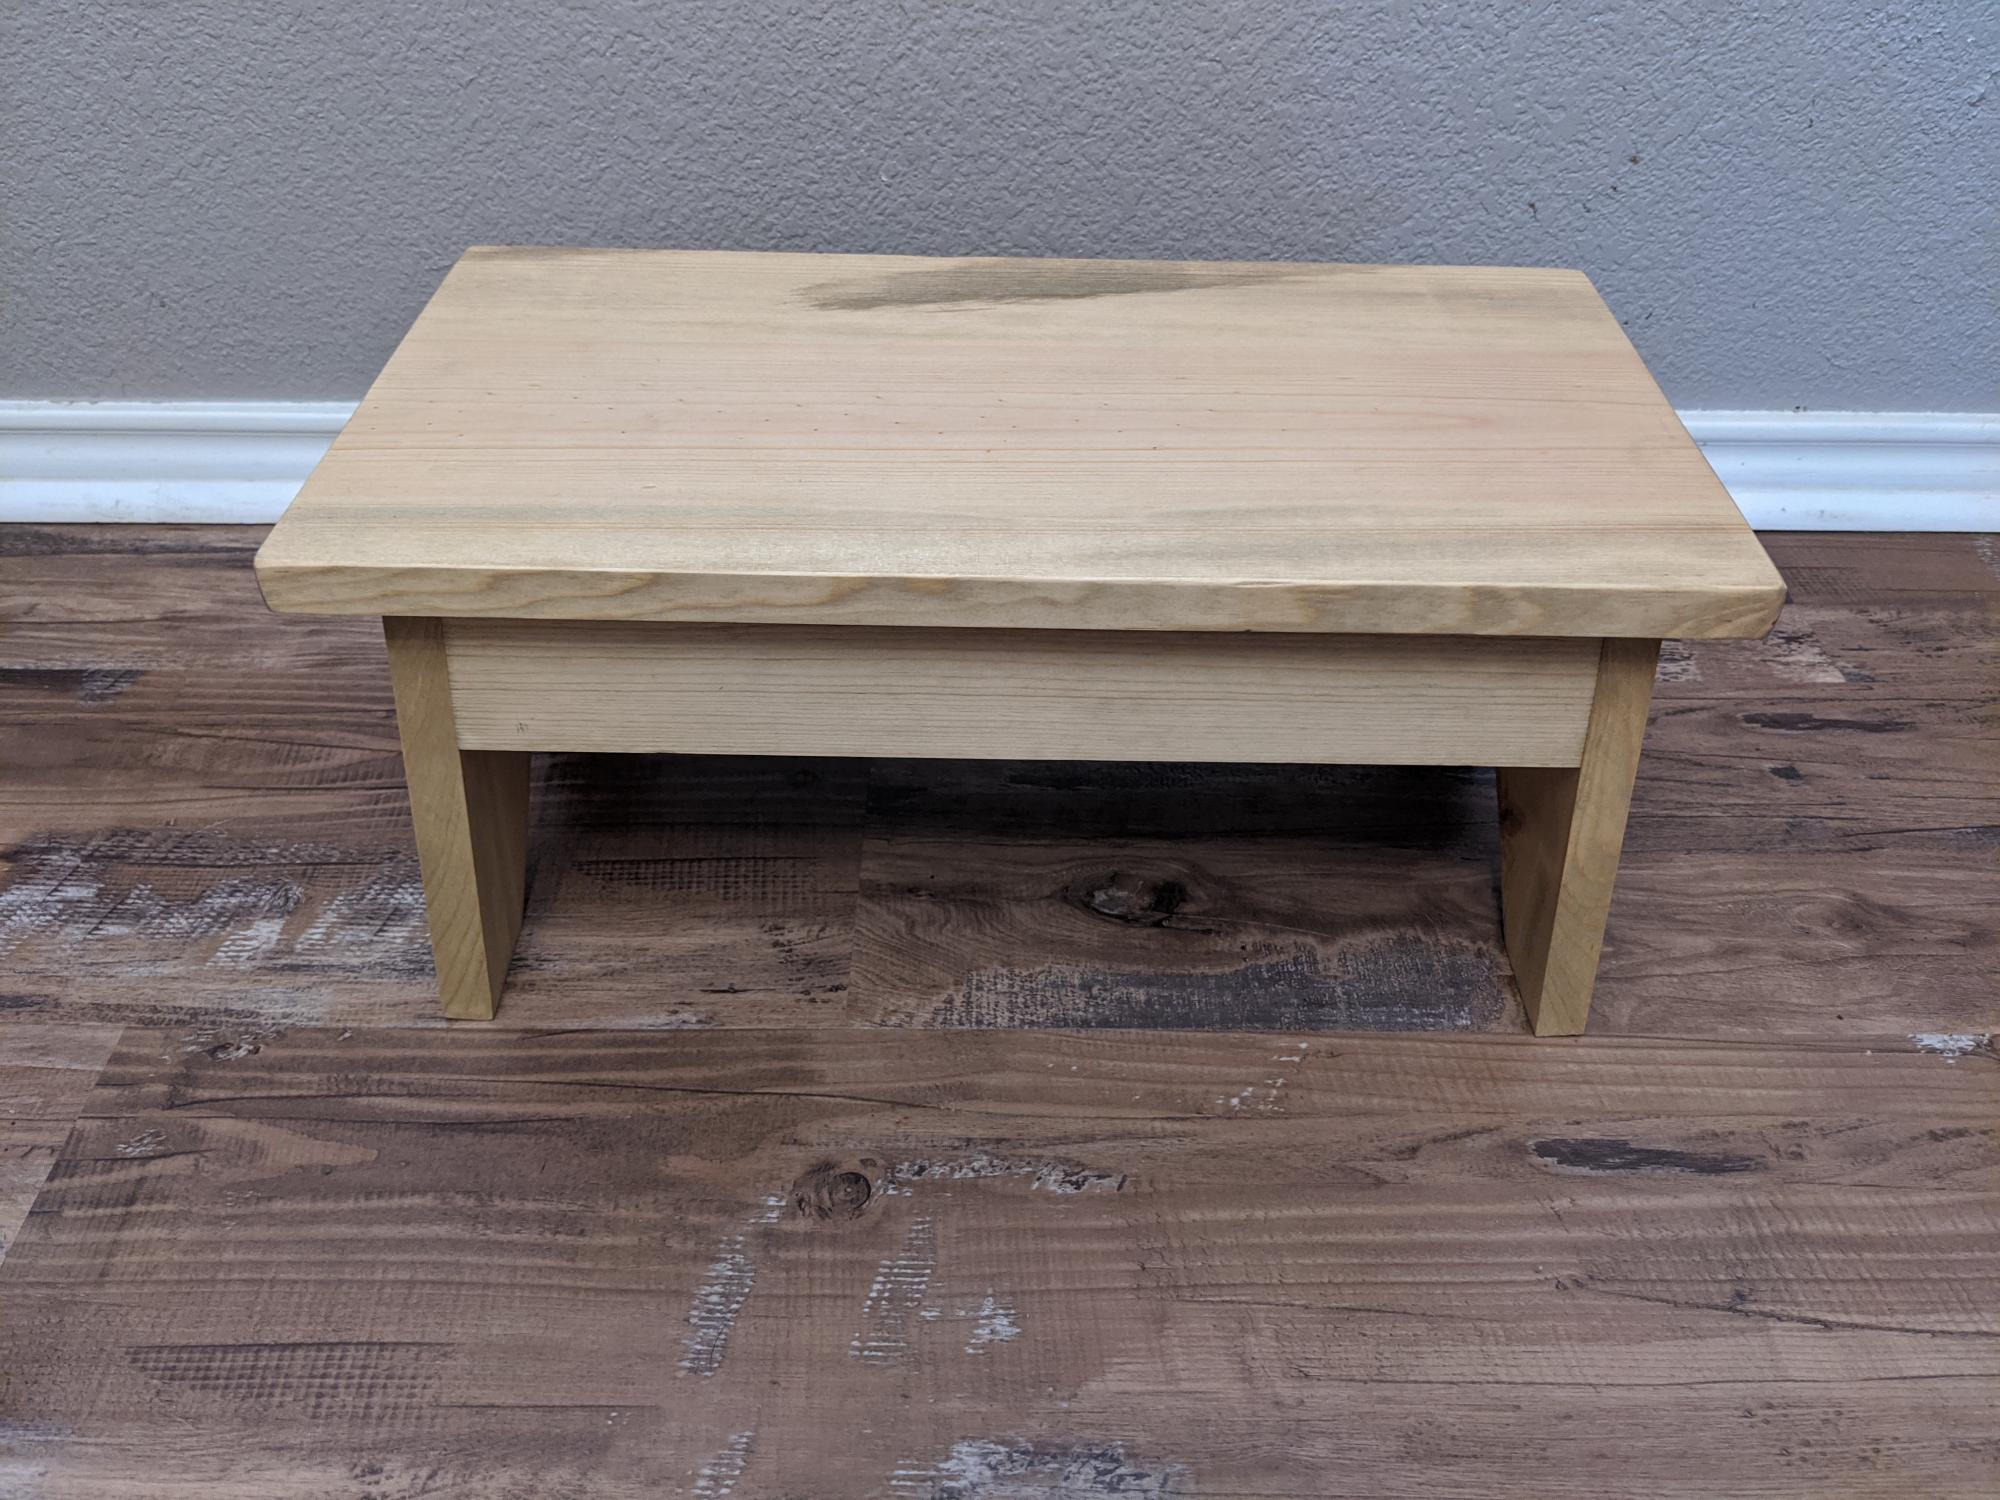
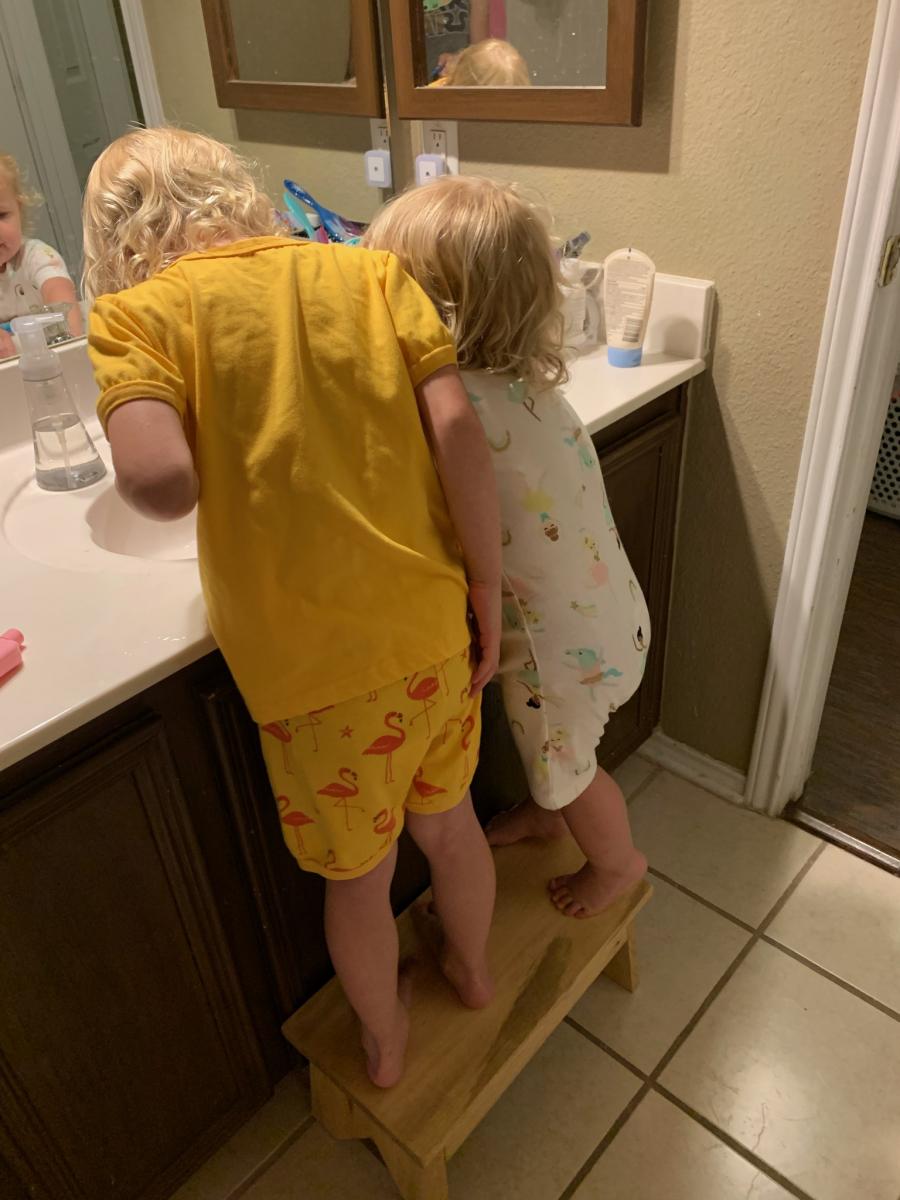
One of my coworkers asked me to build a new stool for her girls. I used the simple stool plans and she loves it.
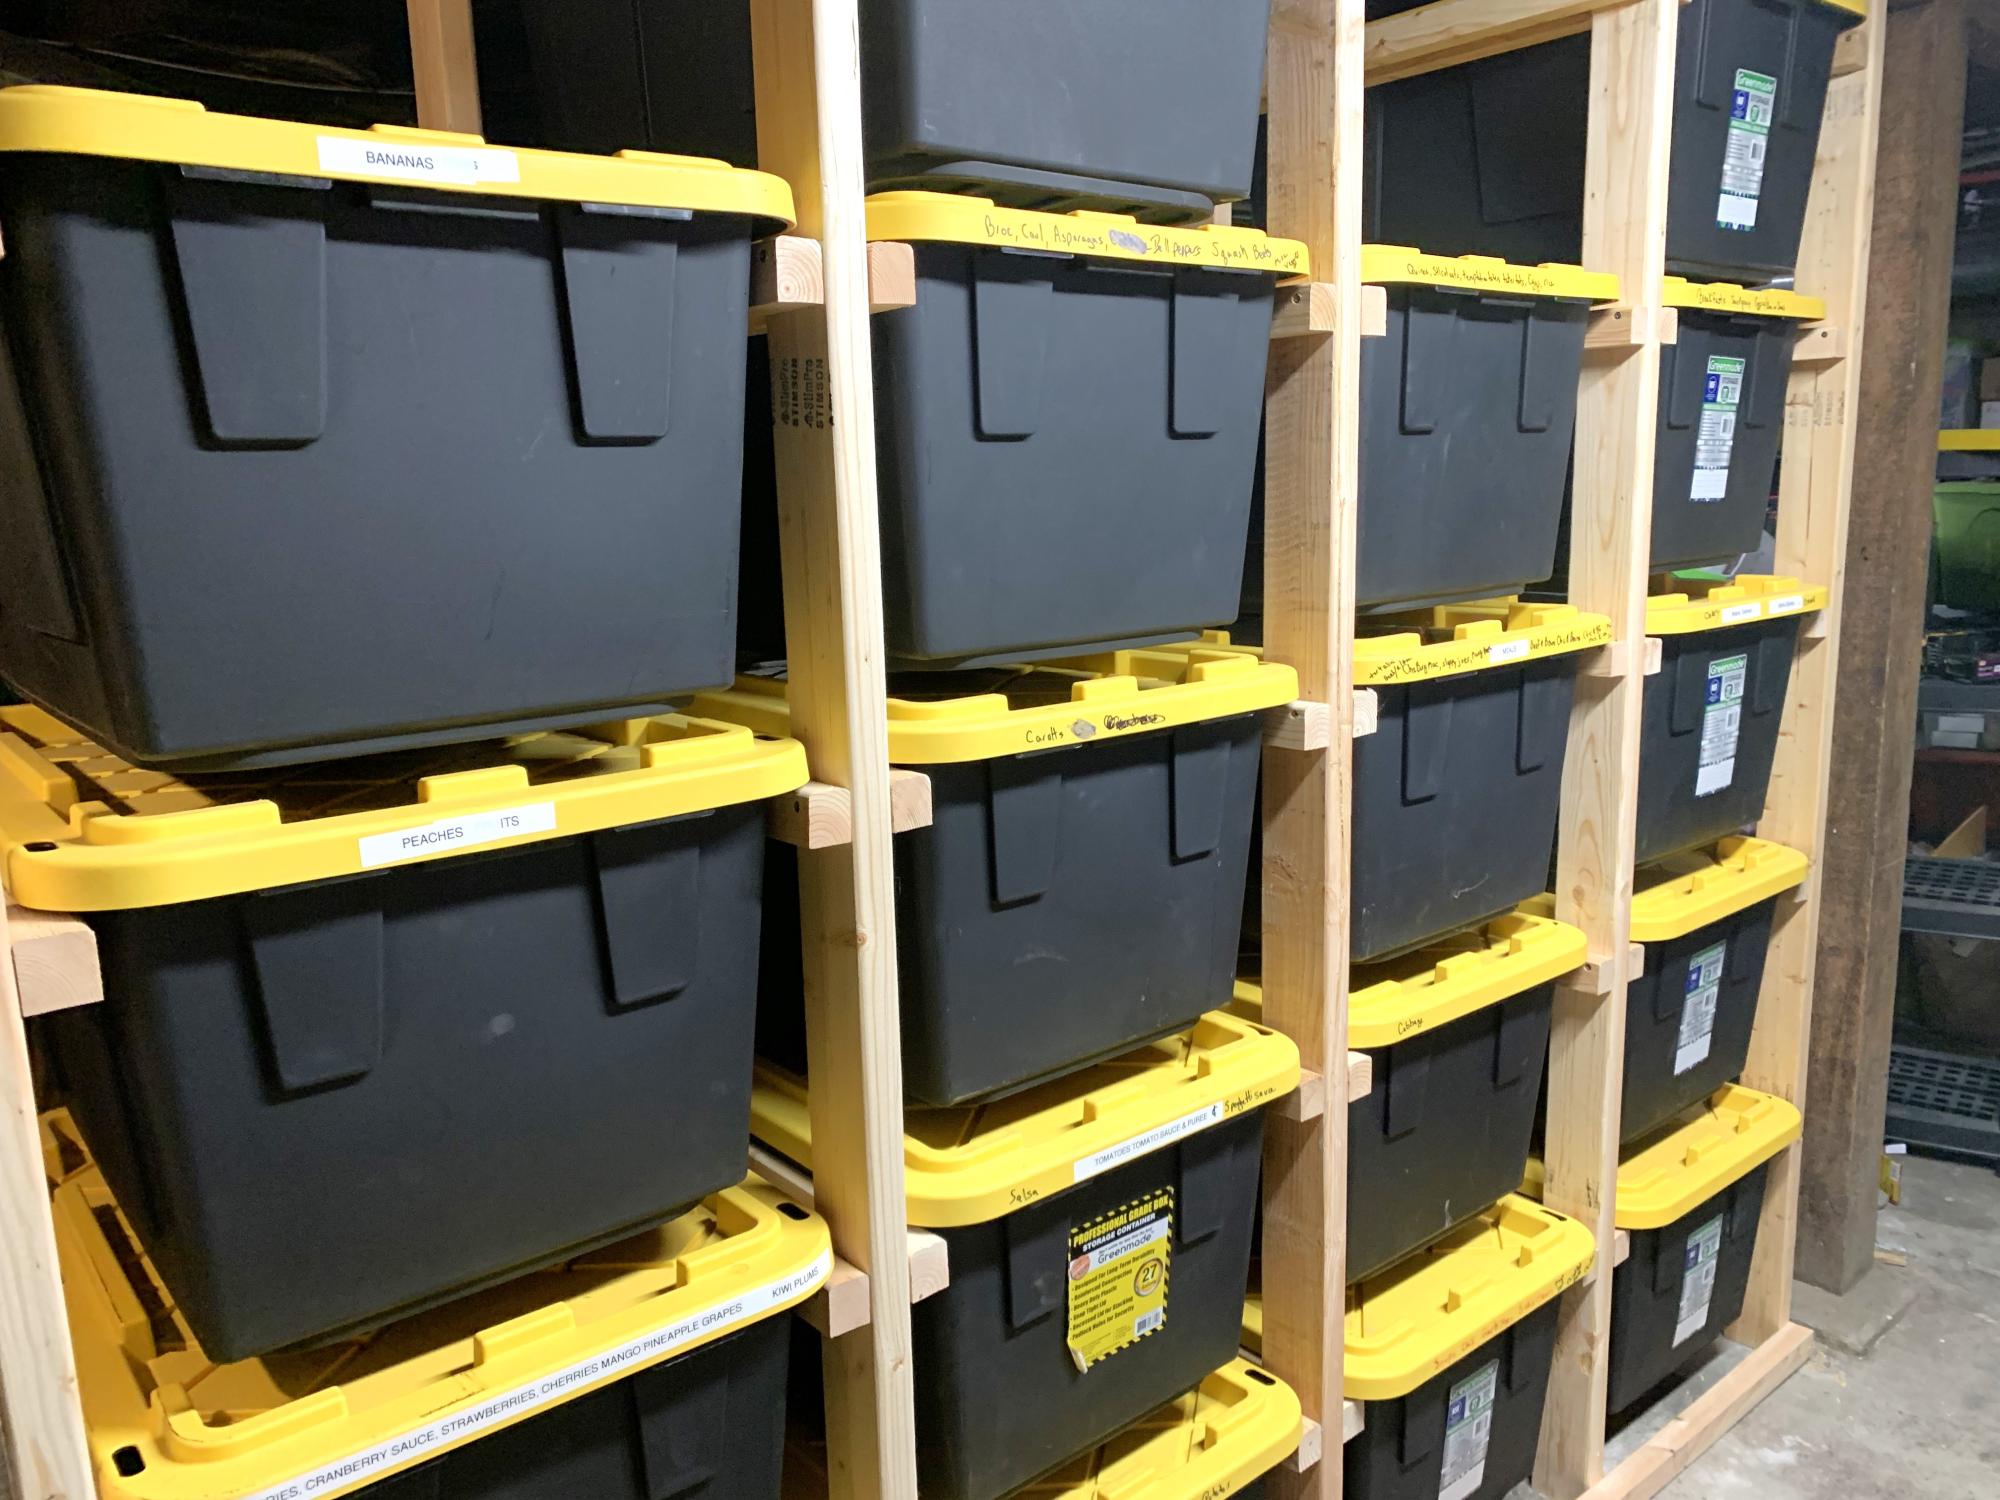
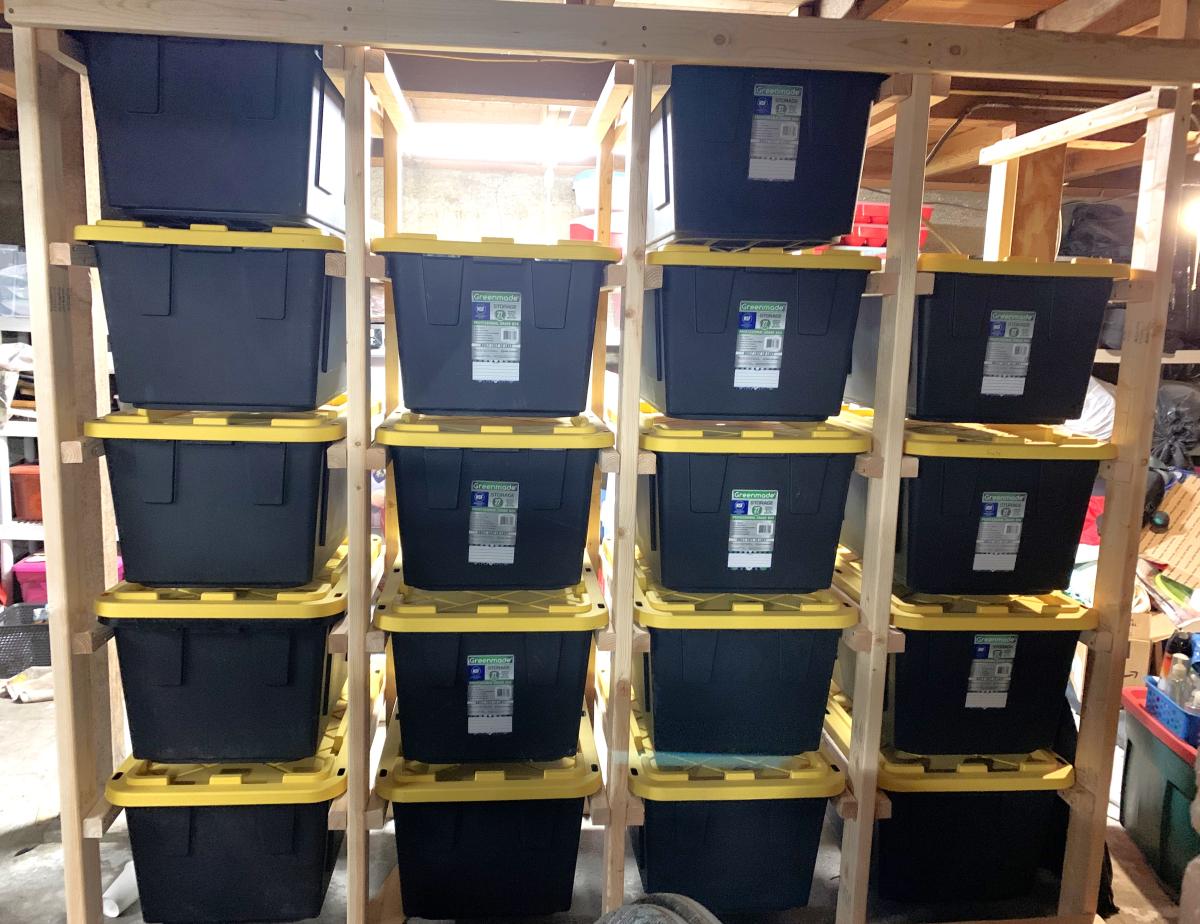
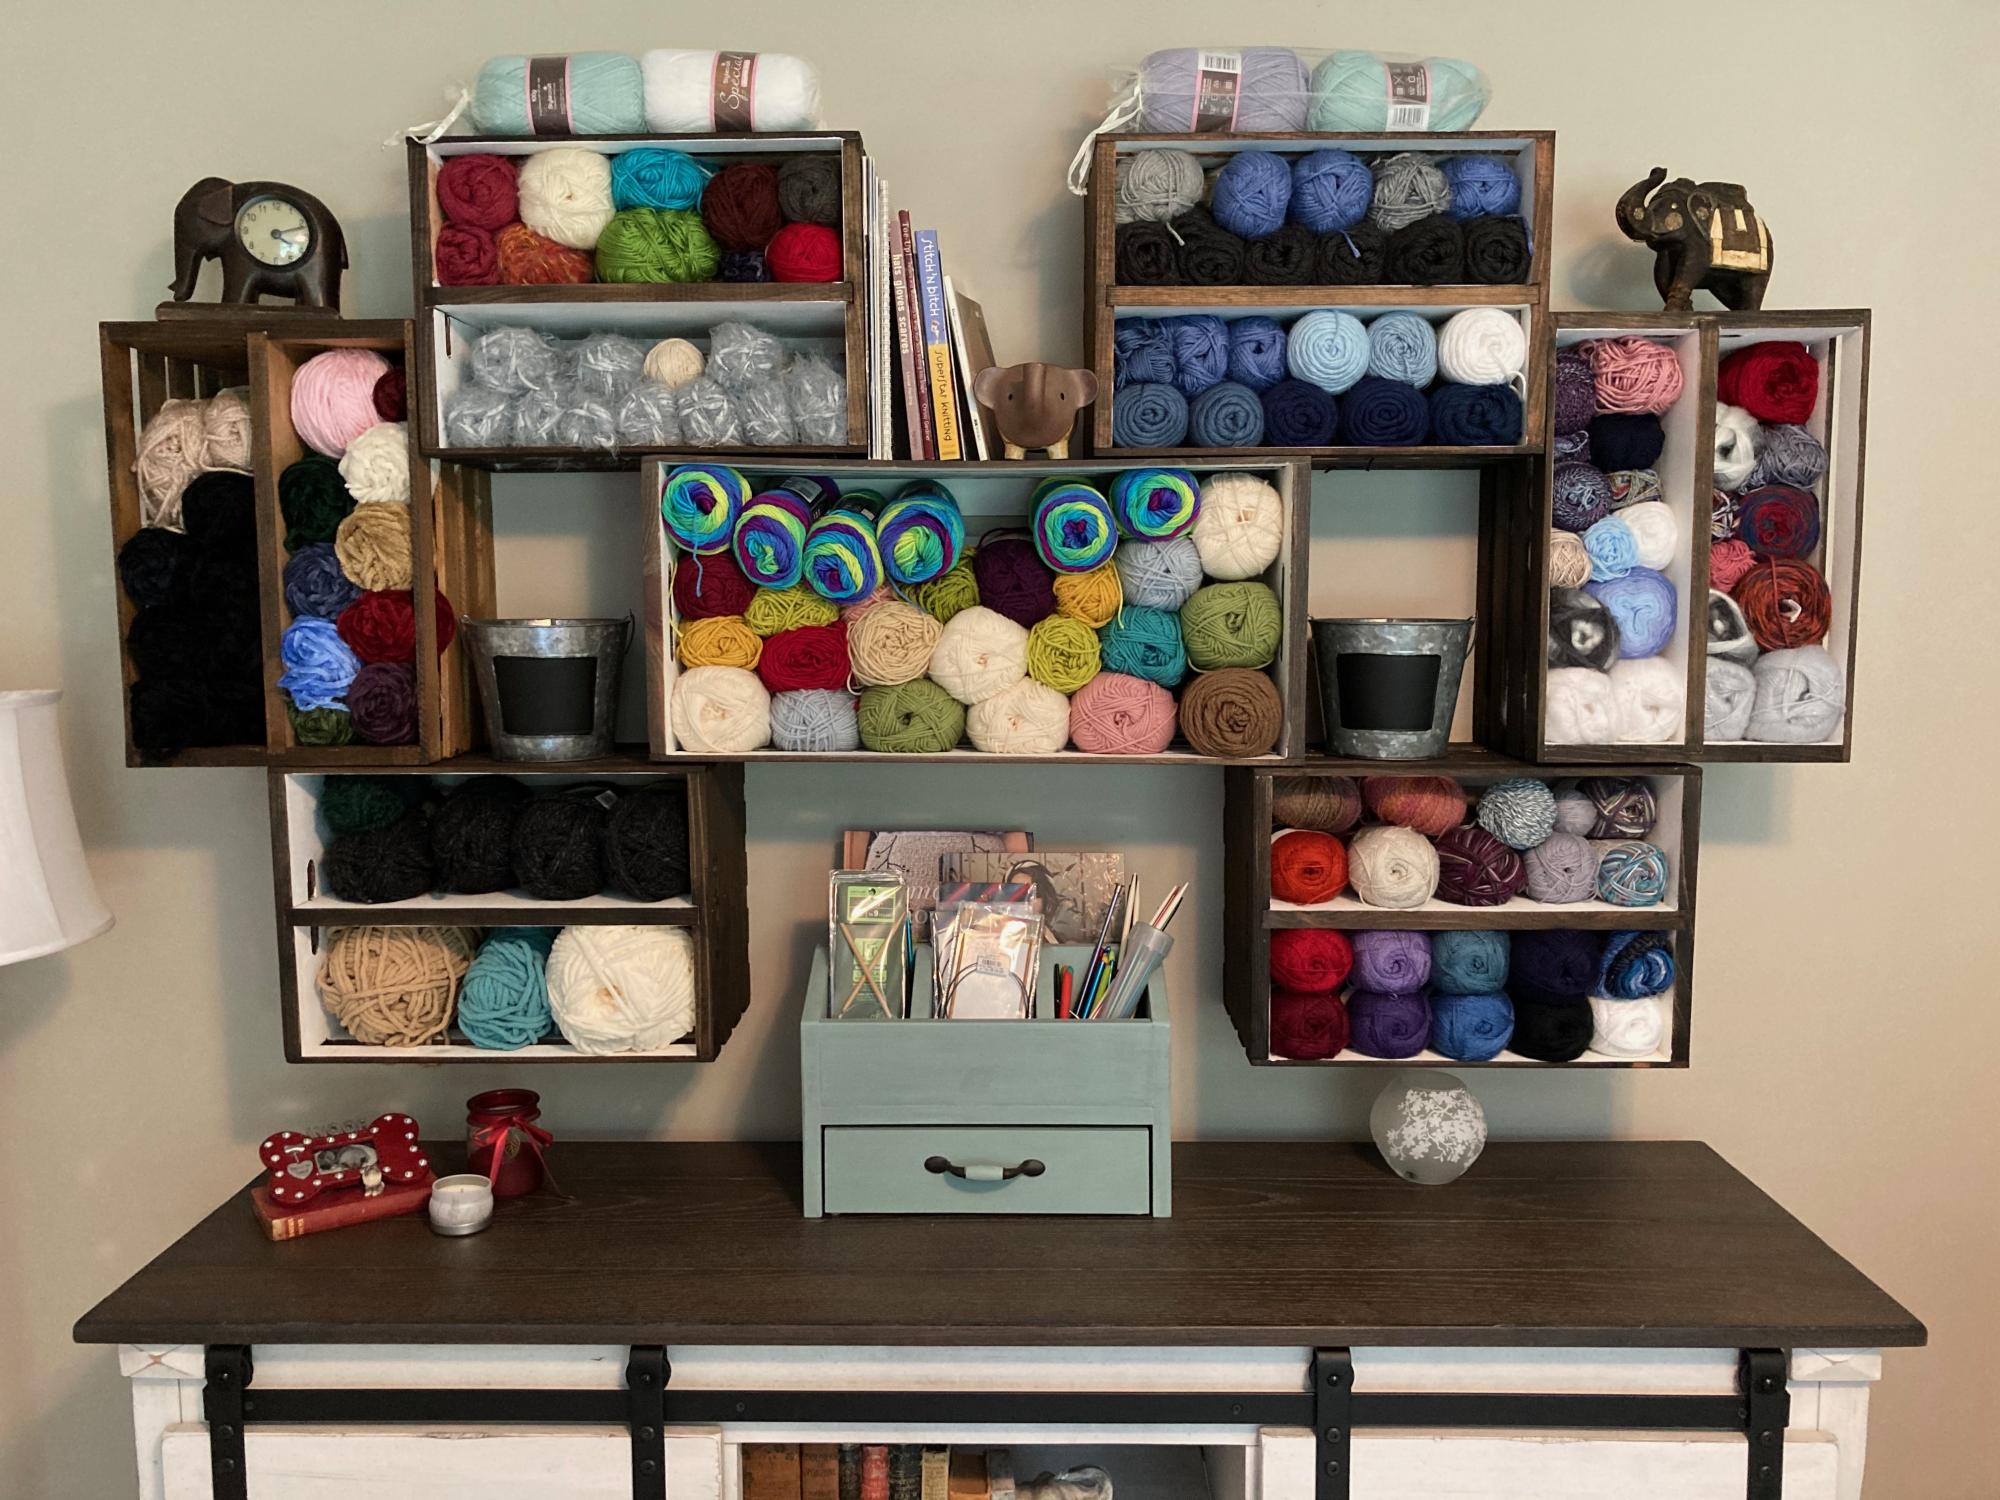
storage for totes - can be made to accommodate any size totes - just adjust the measurements basically it is "ladders " 2x4s for legs 2x2s for "runs" 2x4s across the bottom & top this is in a basement with short ceilings so if you have a taller space you can go taller or you can go shorter.
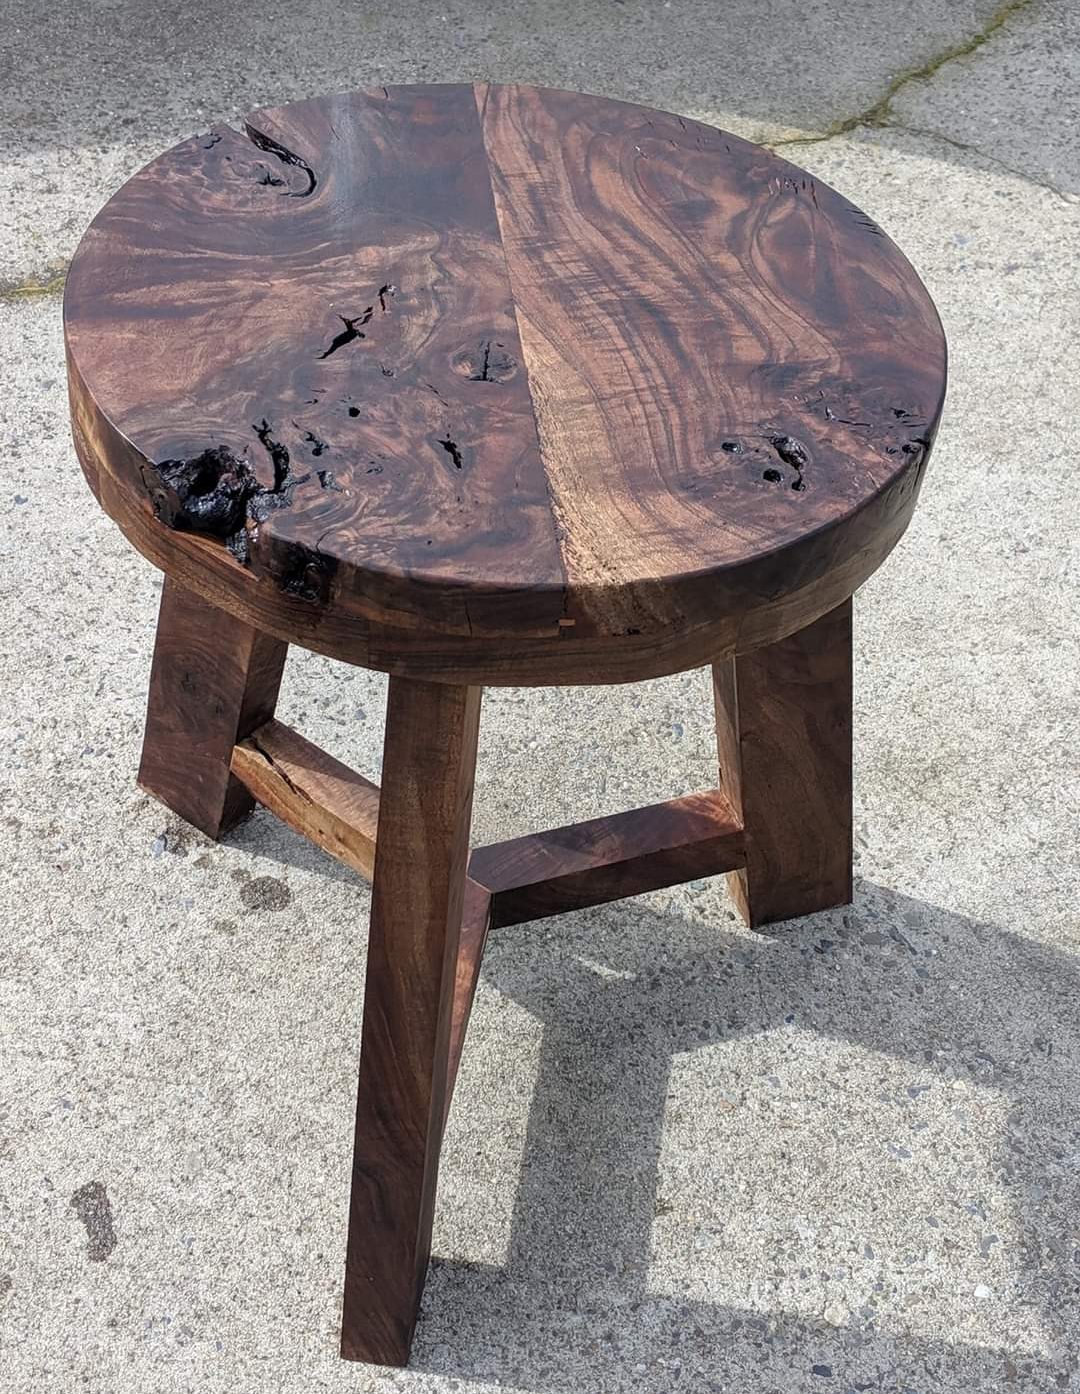
This thing is a beast ! I made the top way thicker than I should have but I love it.
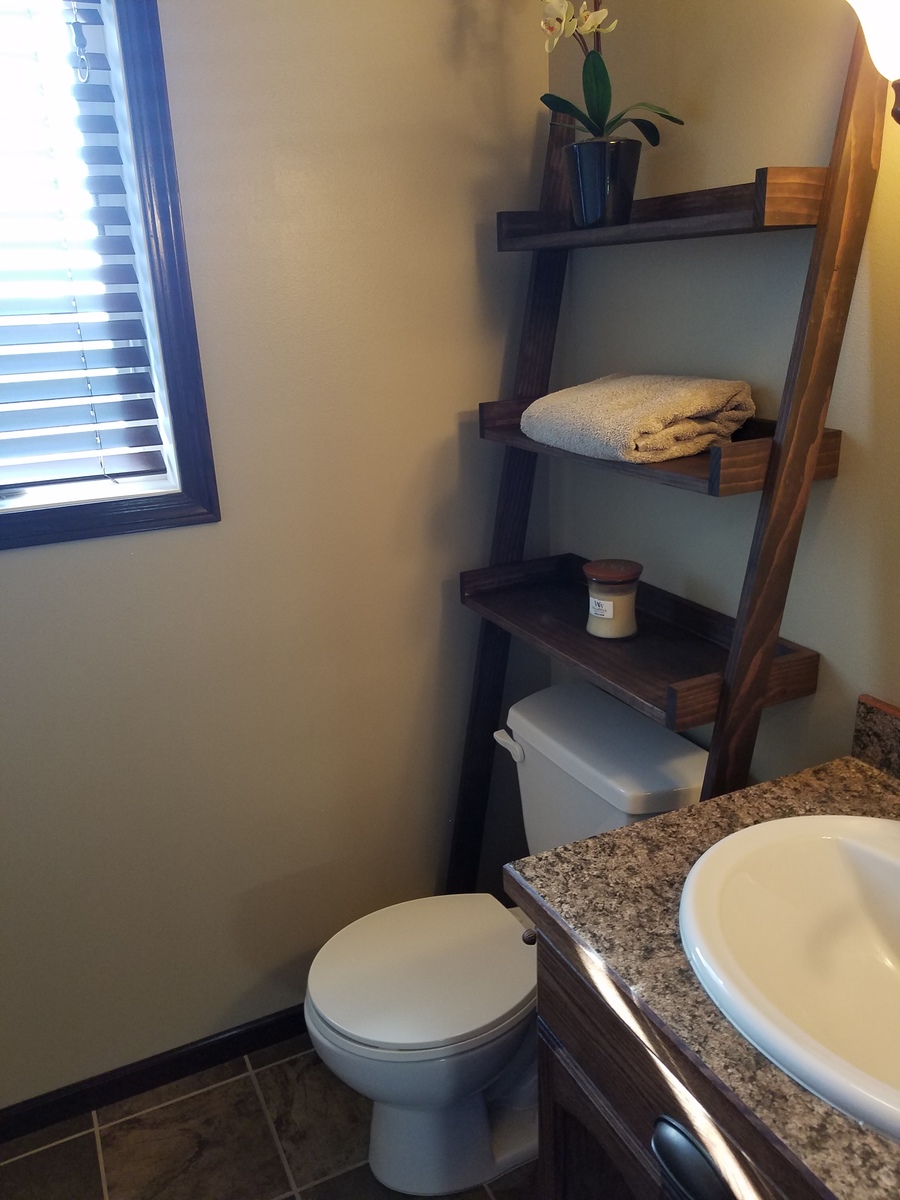
Thanks for the great plan Ana! Super cute addition to our bathroom!
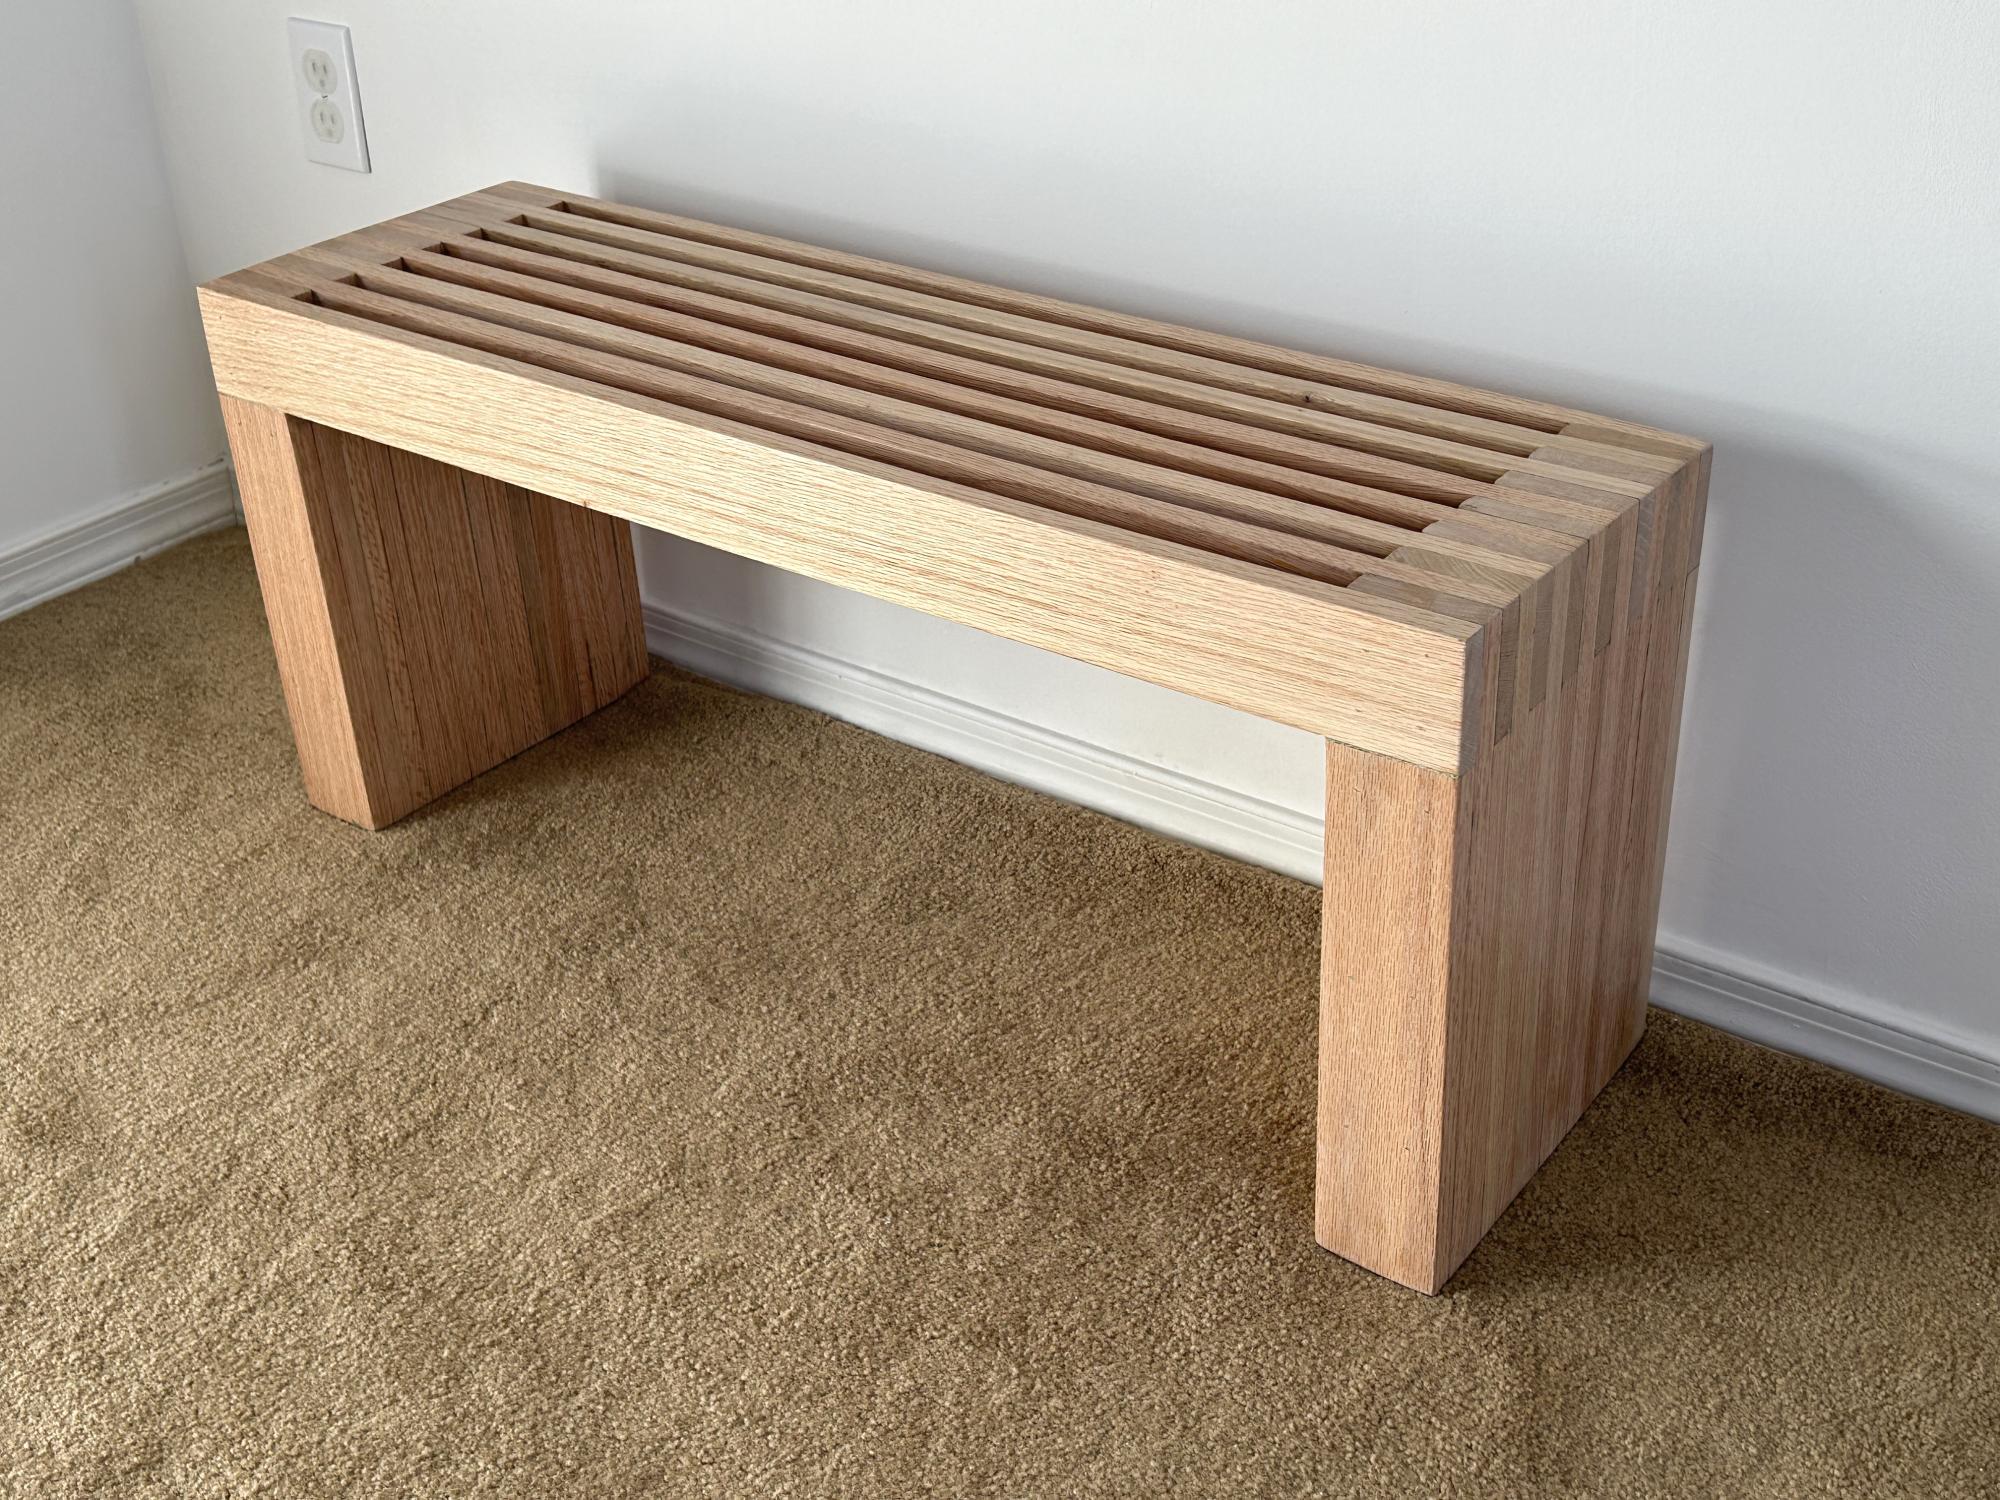
I turned some old oak shelves that I got from an estate sale into a 3' wide Scandinavian slat bench.
Pat Besong
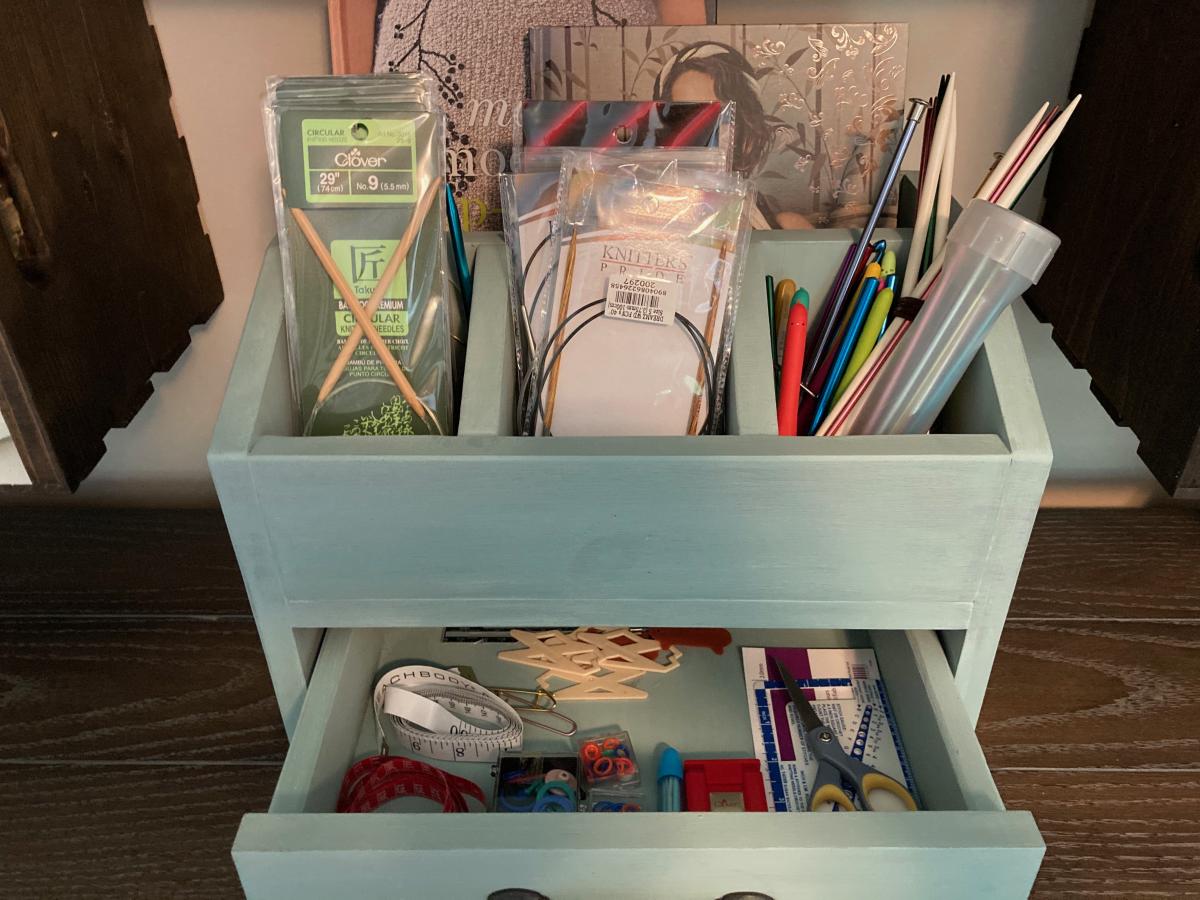
I used Ana and Jaime's desk organizer plans to build this, but I'm using it in my craft room instead for my needles/hooks/small accessories. This plan was part of Ana's Handbuilt Holiday plans found here: https://ana-white.com/woodworking-projects/desktop-office-or-vanity-bea…
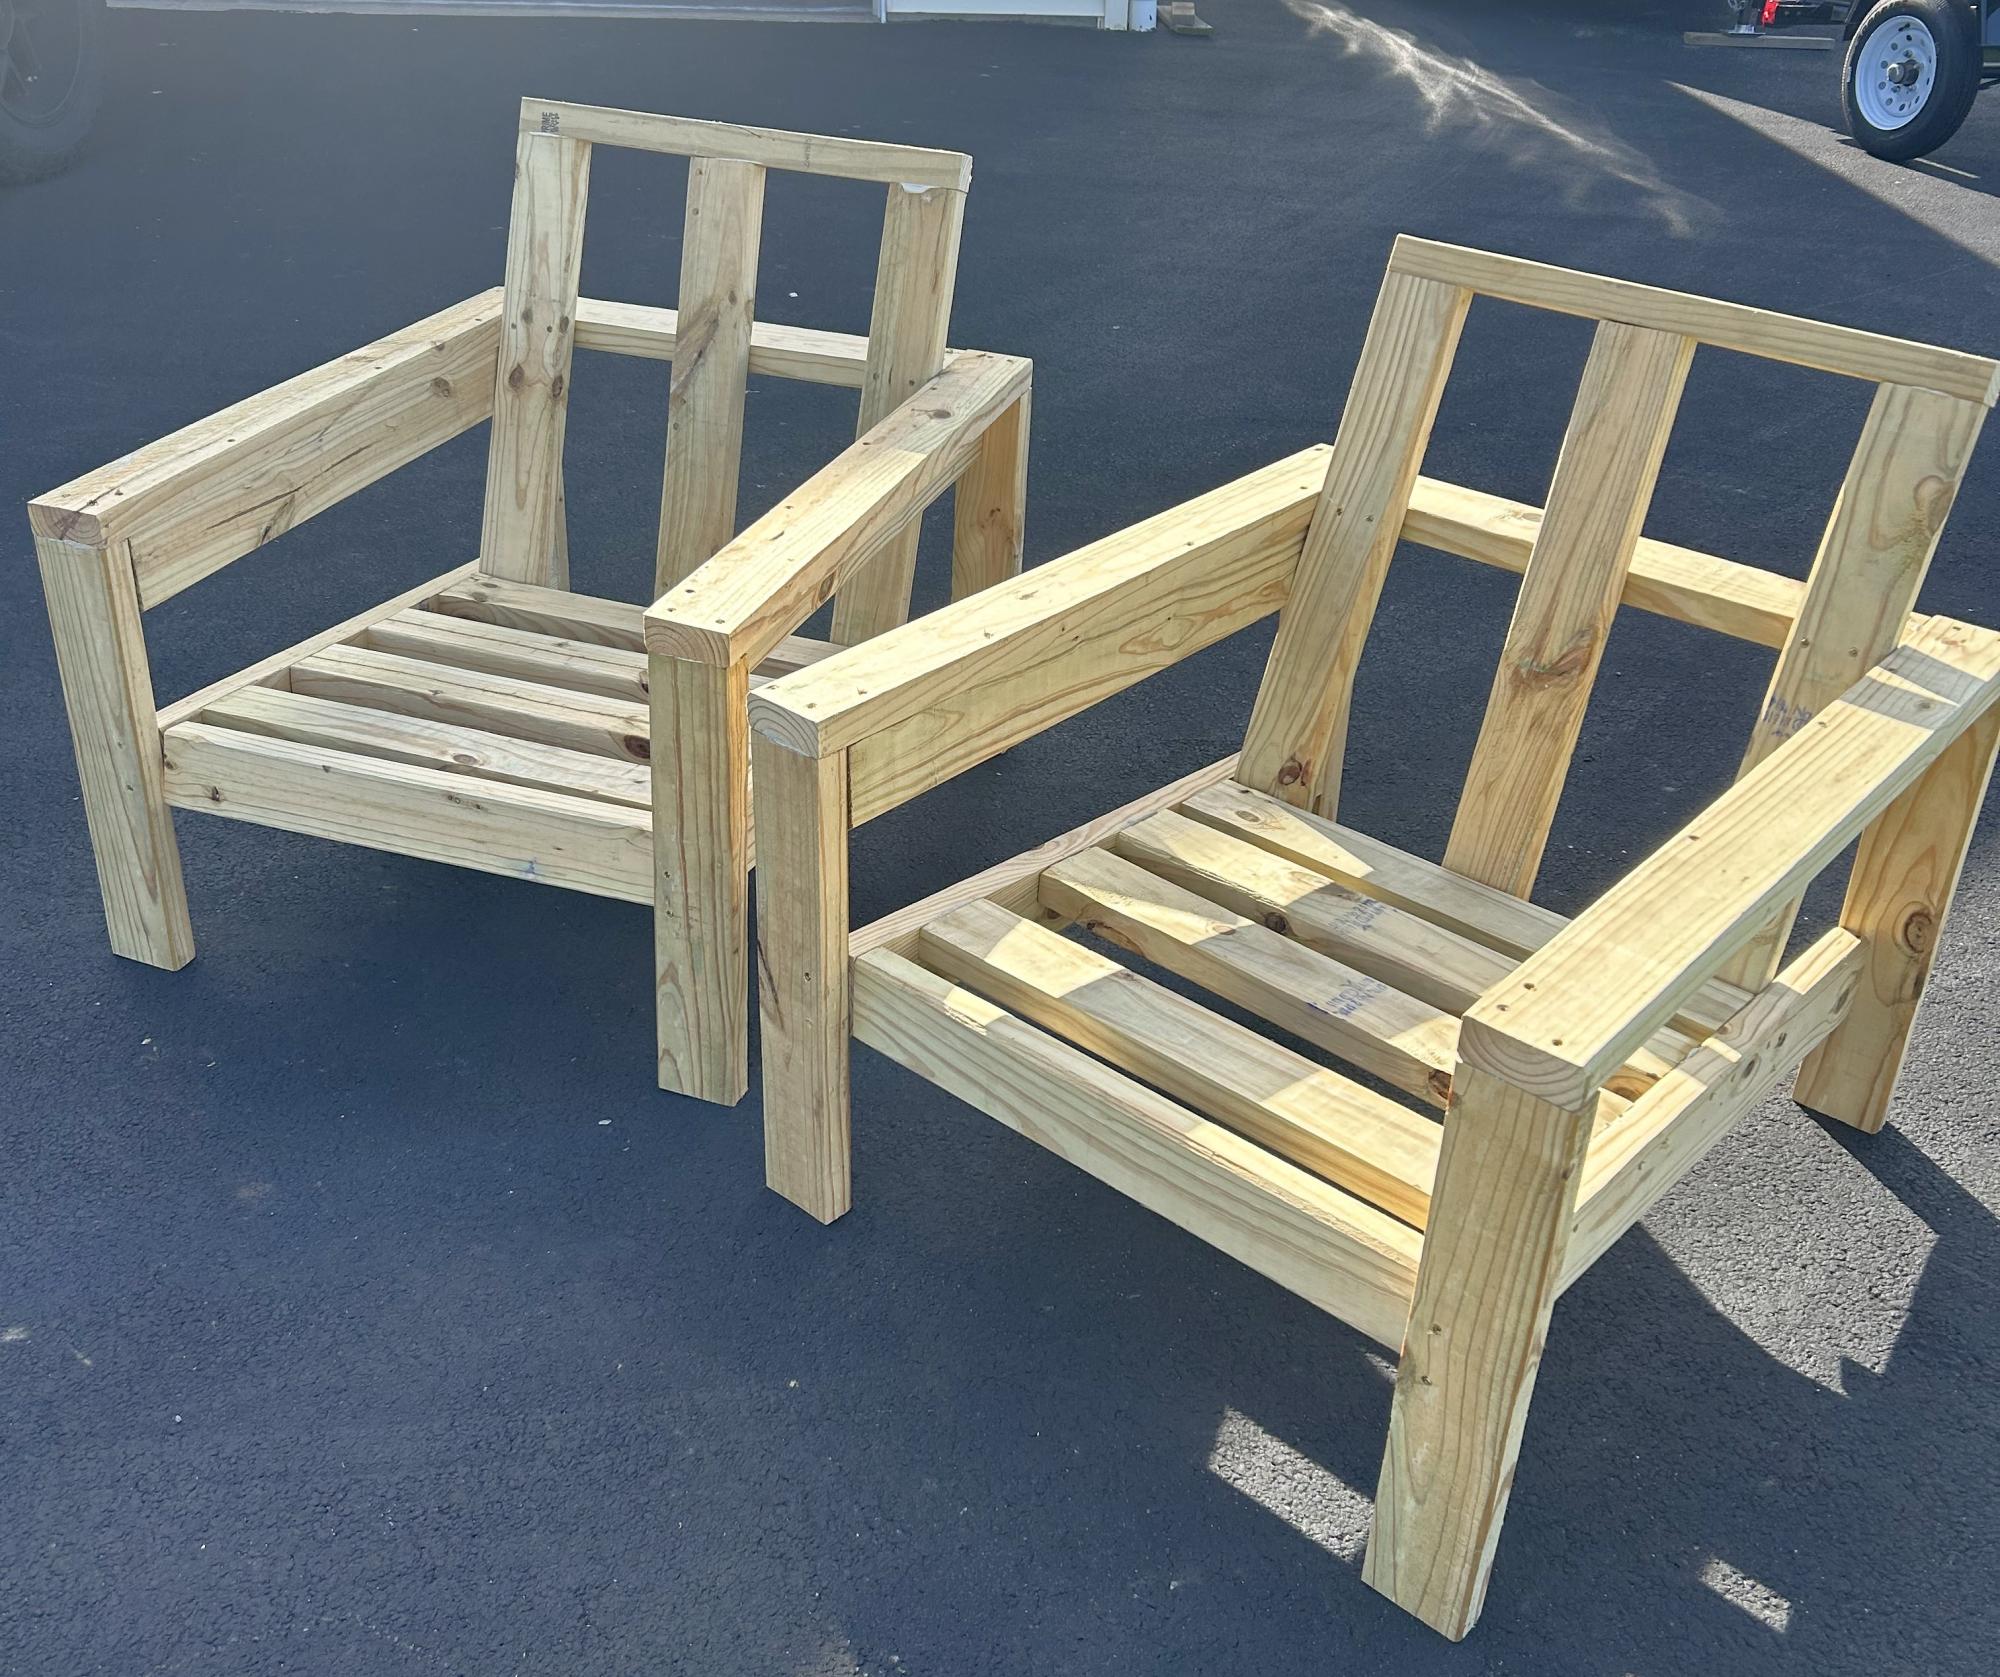
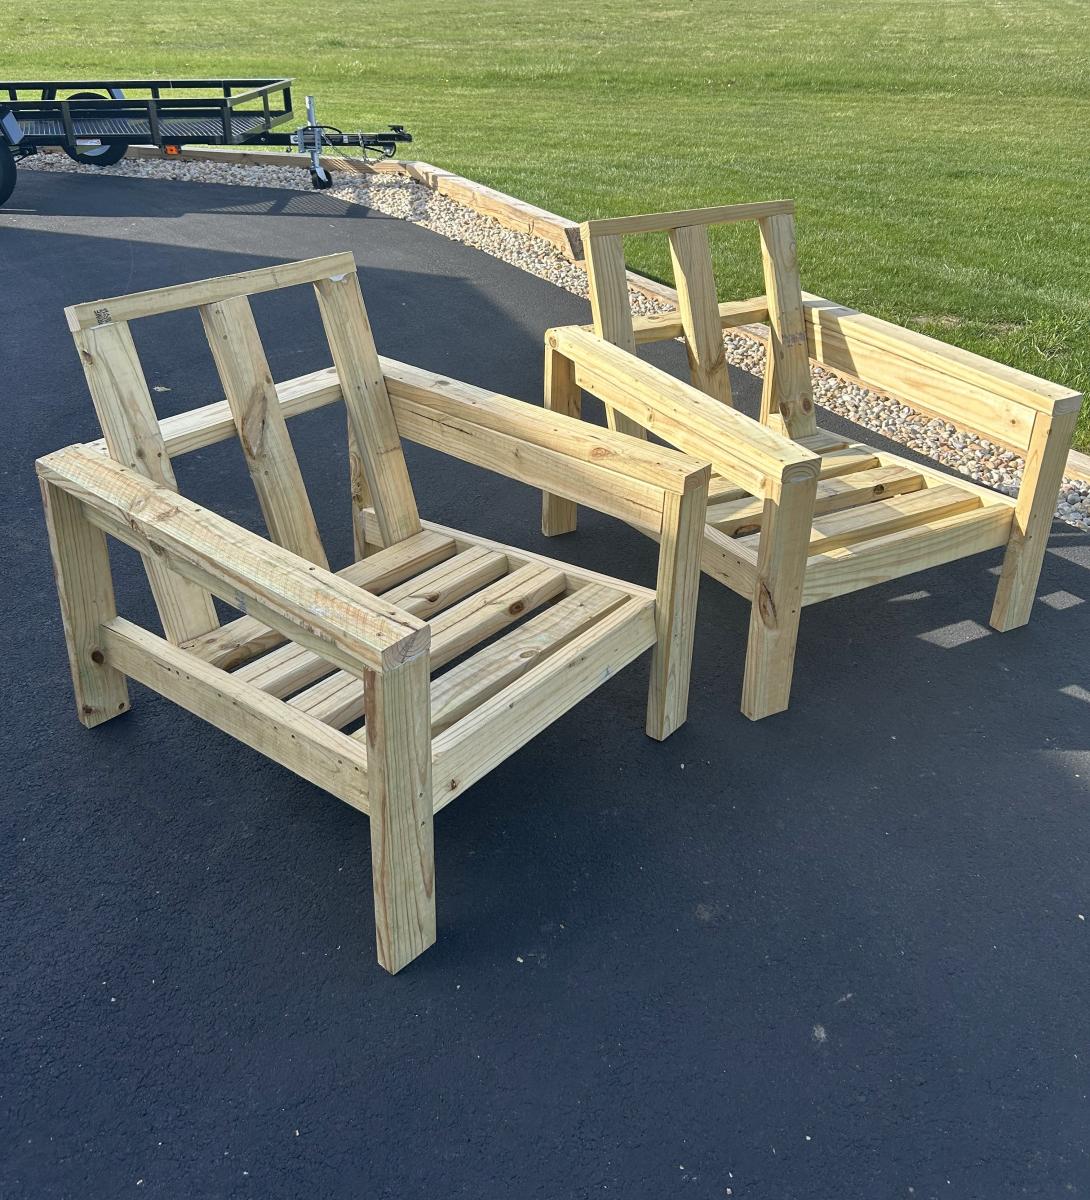
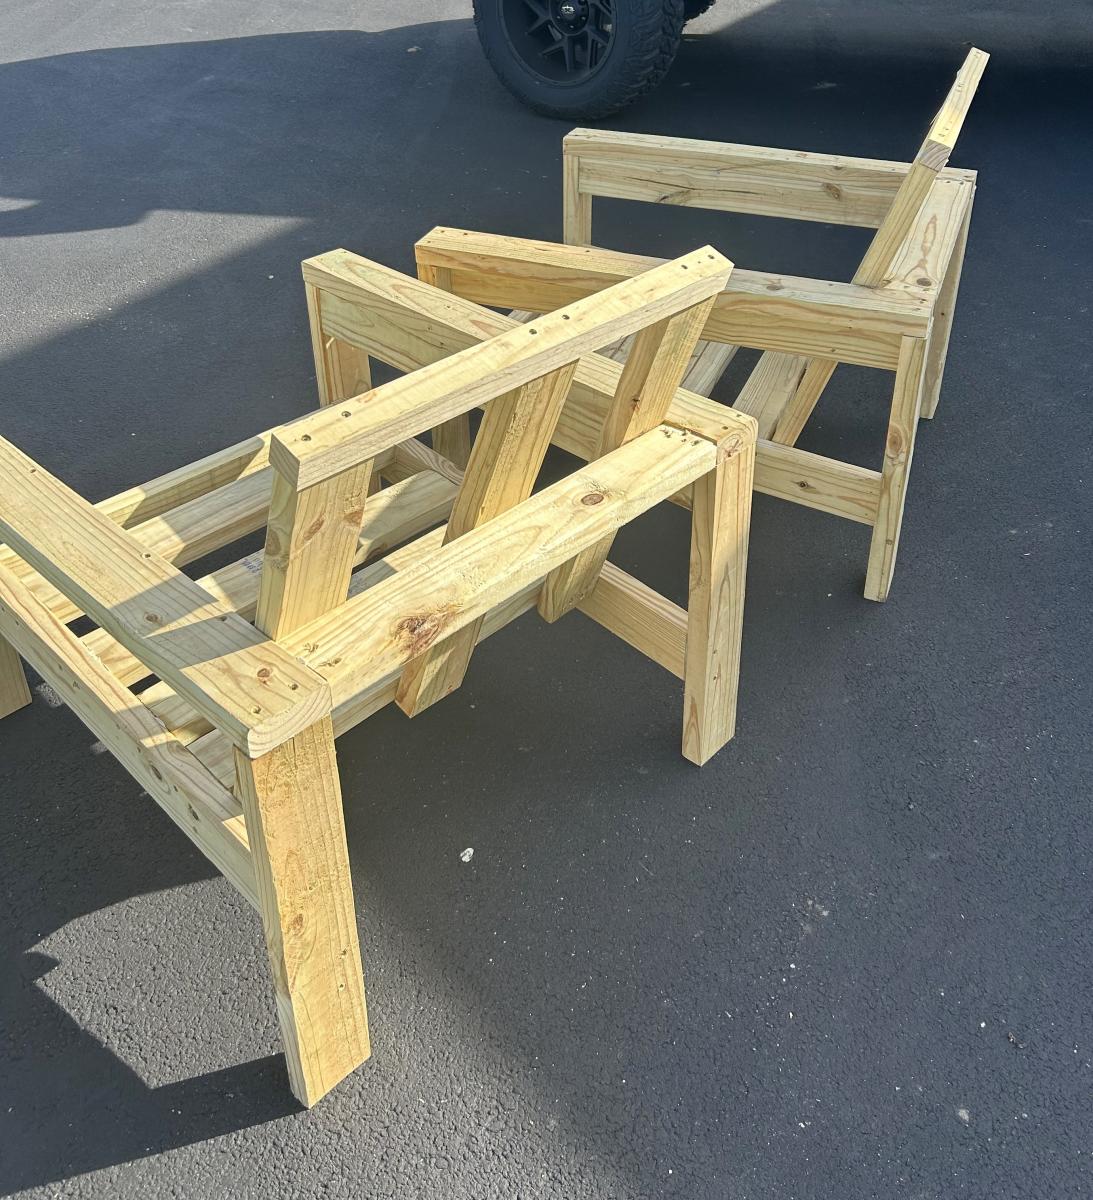
Made these two in about 3 hours. Instead of wood glue I used construction adhesive. Now to sand and stain then add cushions.
Richard Wilson - Kirkland, IL
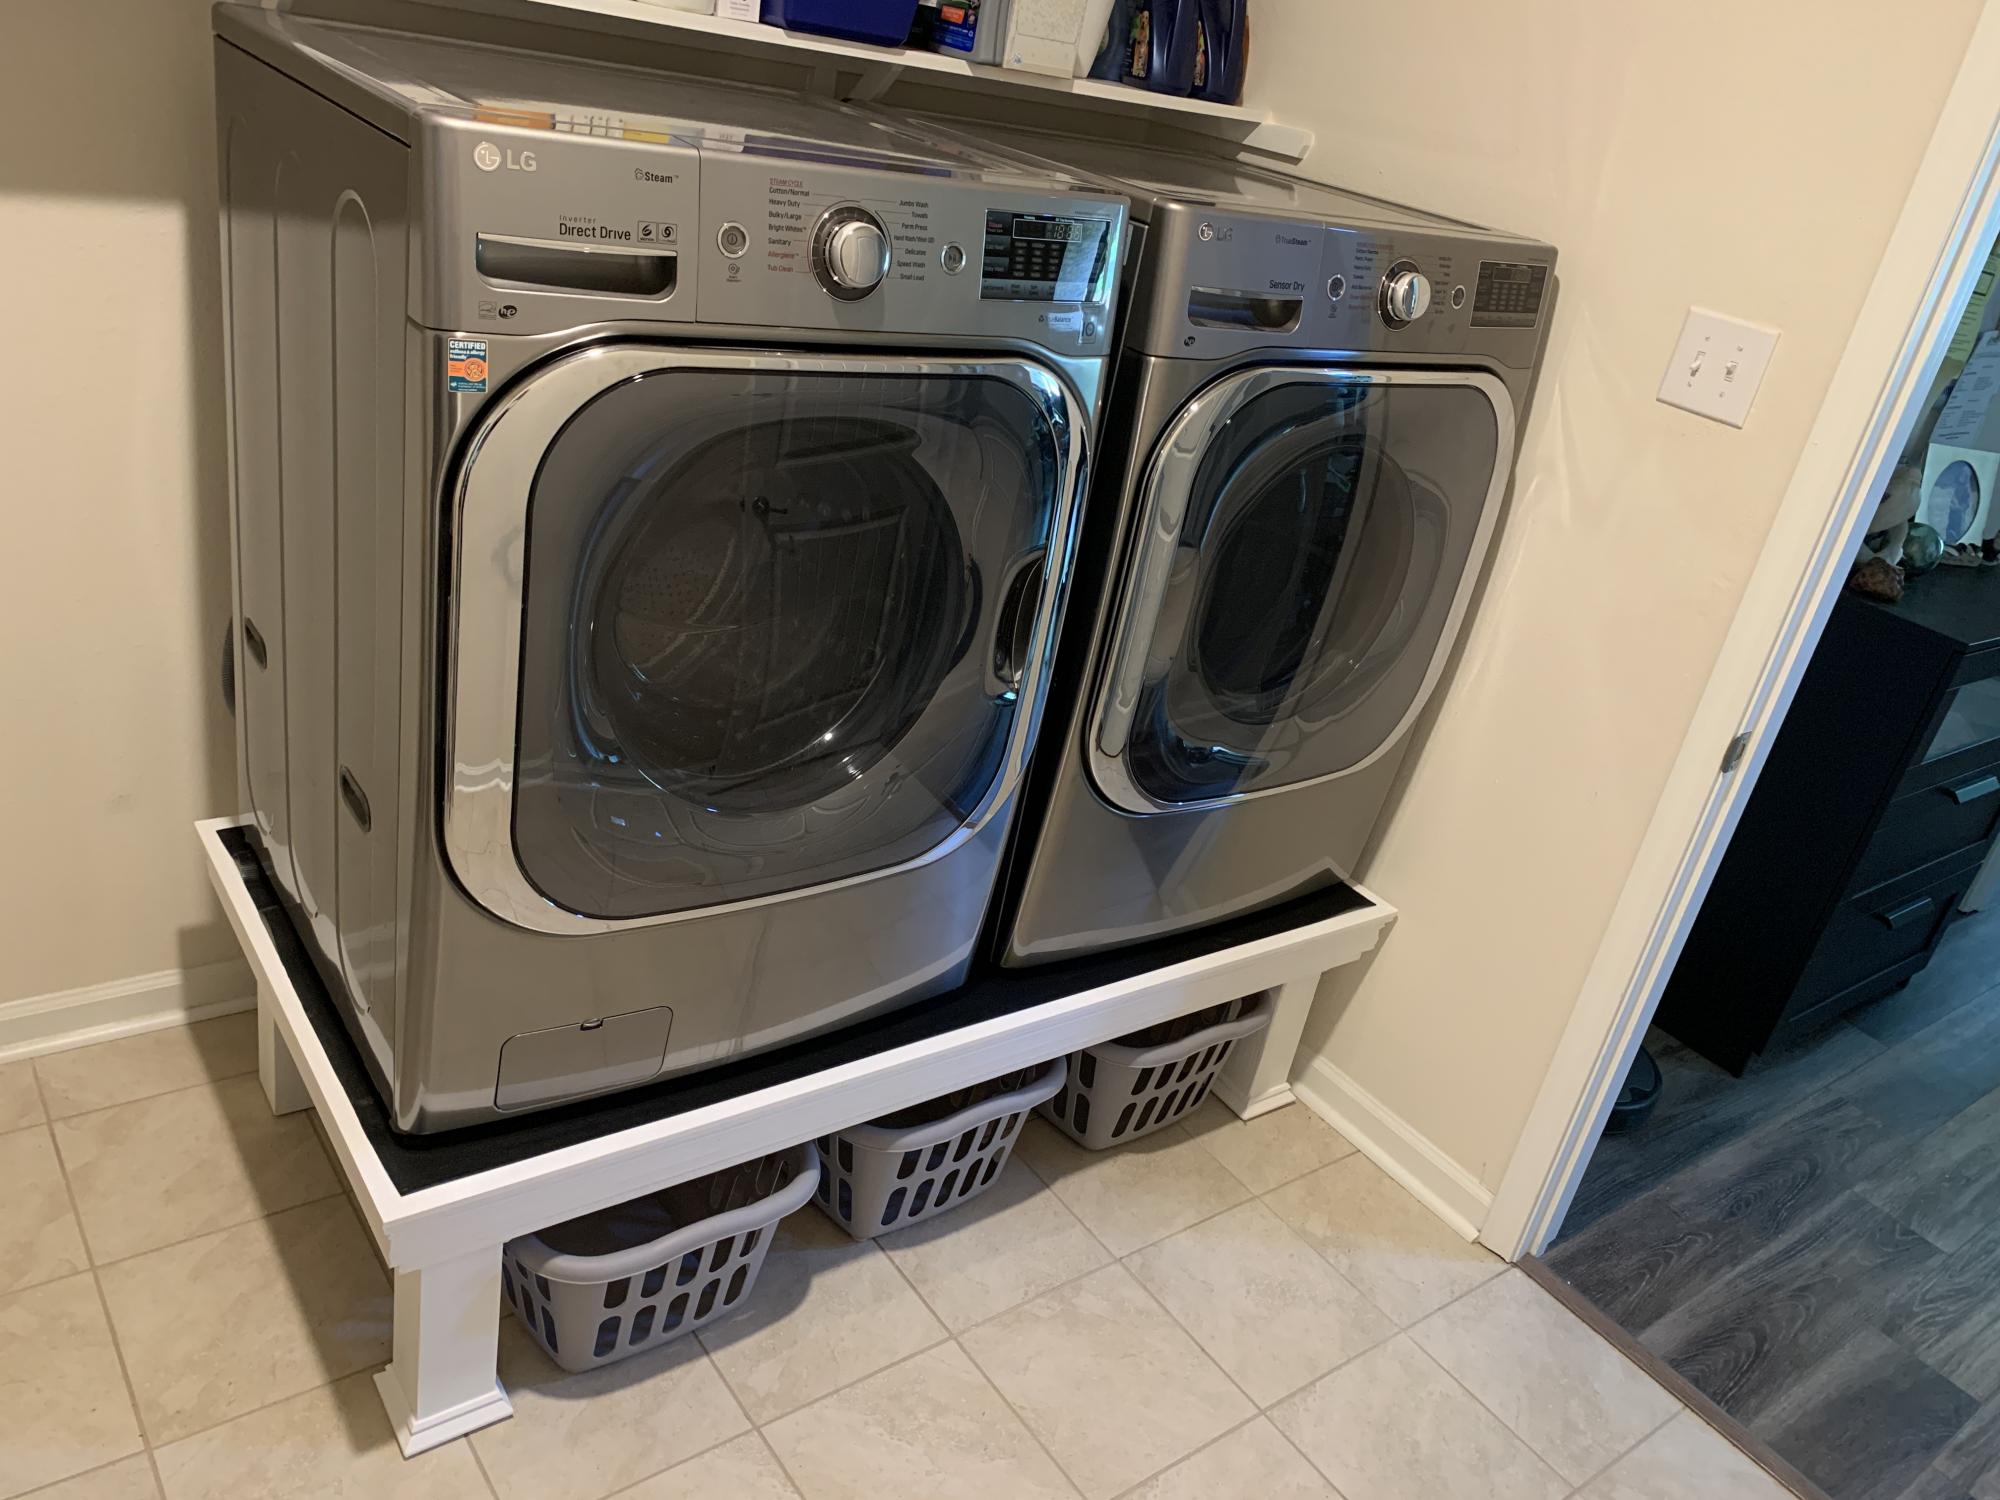
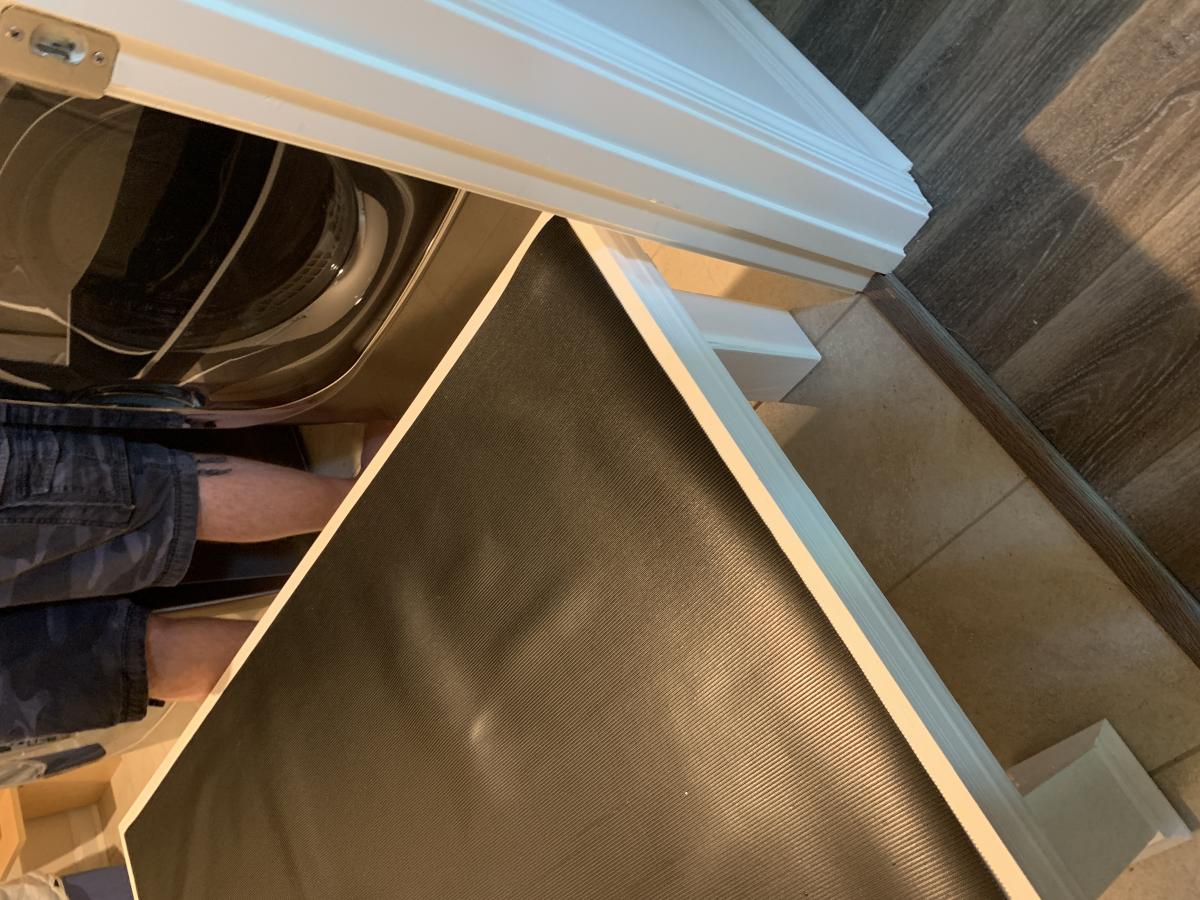
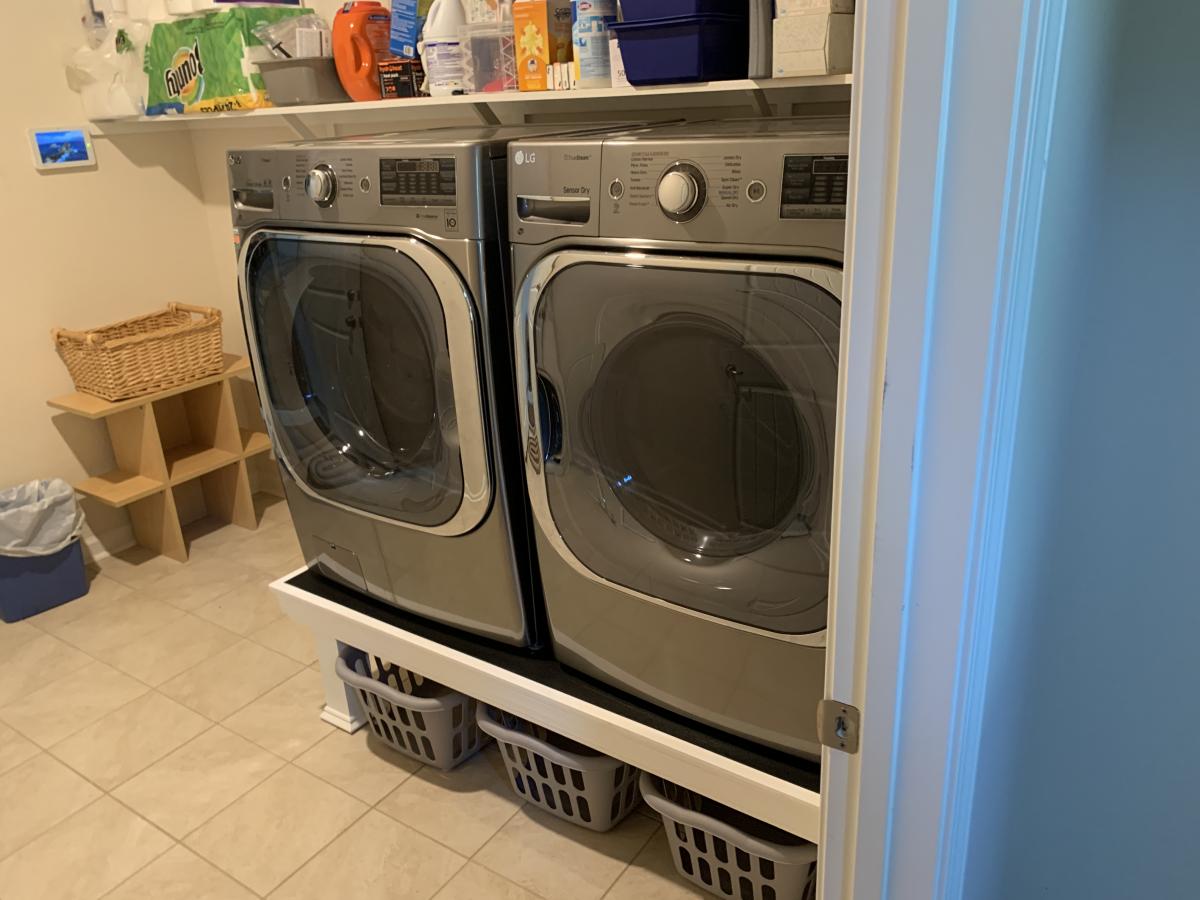
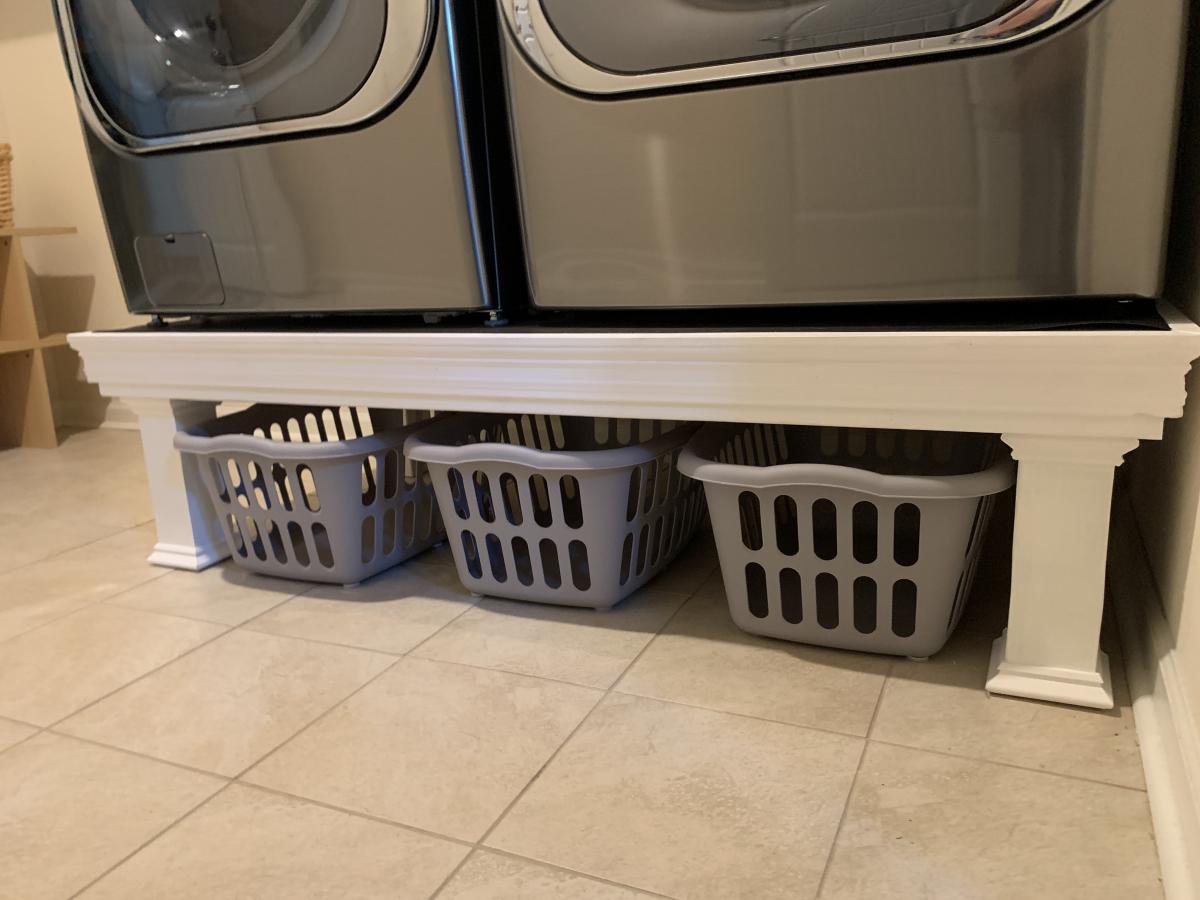
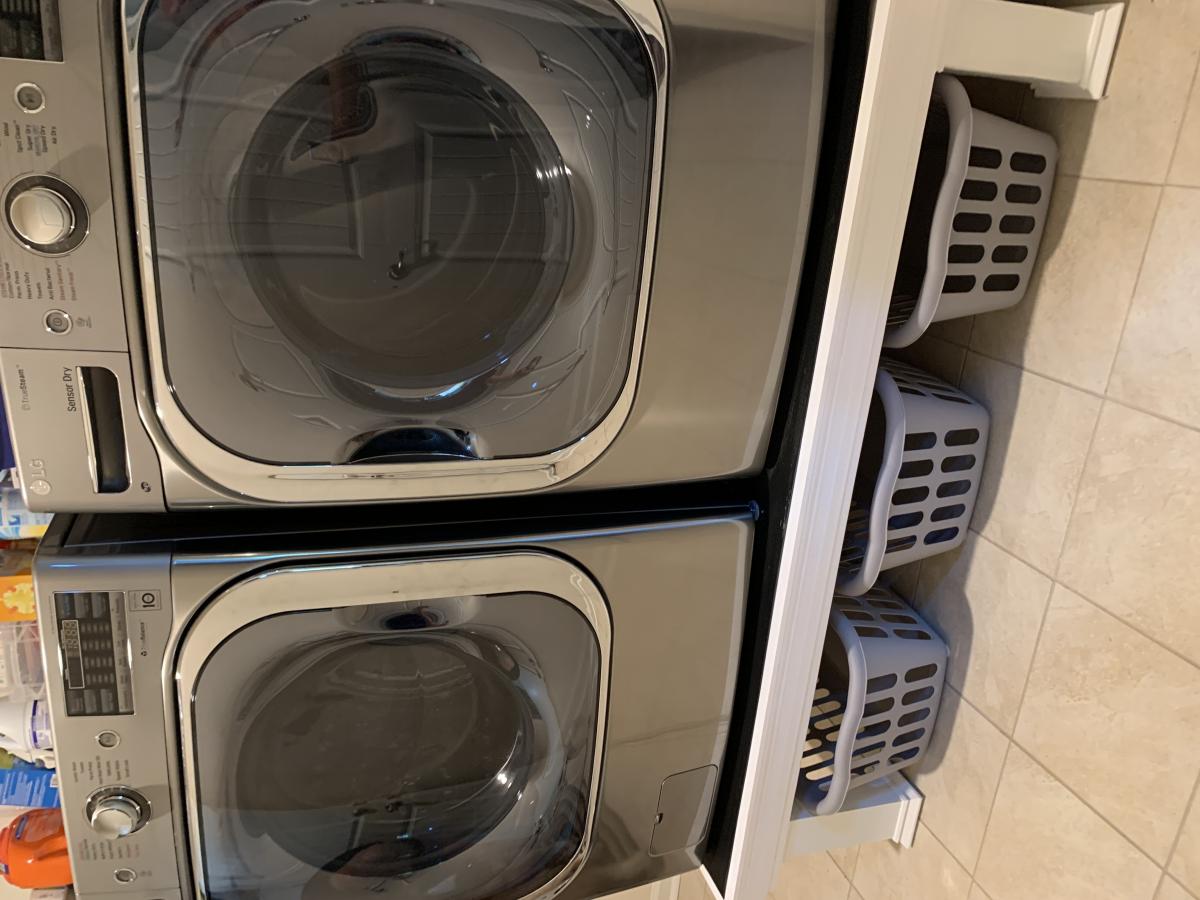
This was quick build. First time for us using trim, so we wasted a few feet getting the angles right. We attached the legs directly to the frame, and did not use the metal brackets. We also did not build the floor frame. We measured how high/wide the laundry baskets ($3/piece at Target!) were, and made it to fit them. We added a piece of rubber mat to the top (bought at Lowe's). A few weeks later we helped our daughter and son in law build one for their new house!

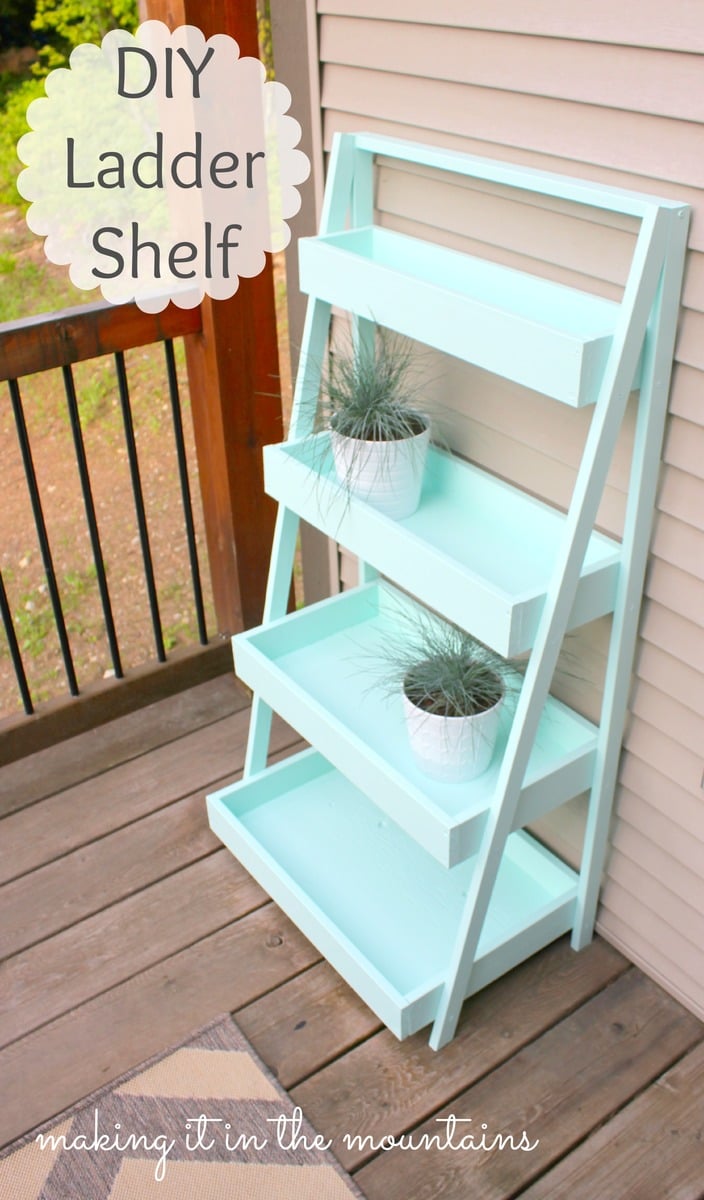
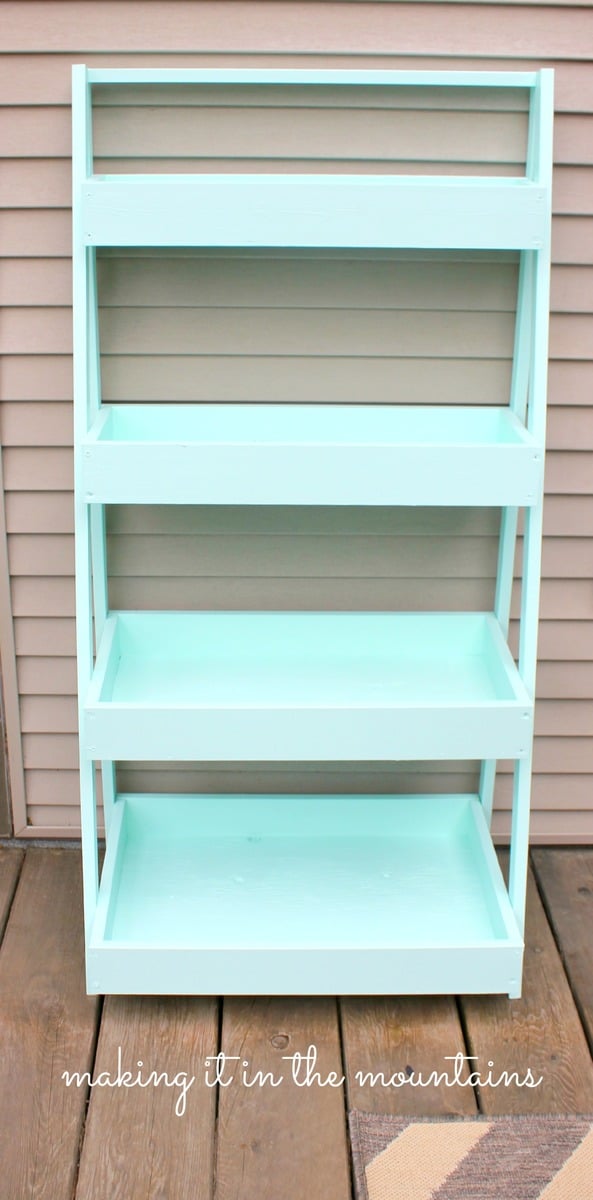
DIY Ladder Shelf to use as a plant stand on our courtyard deck.
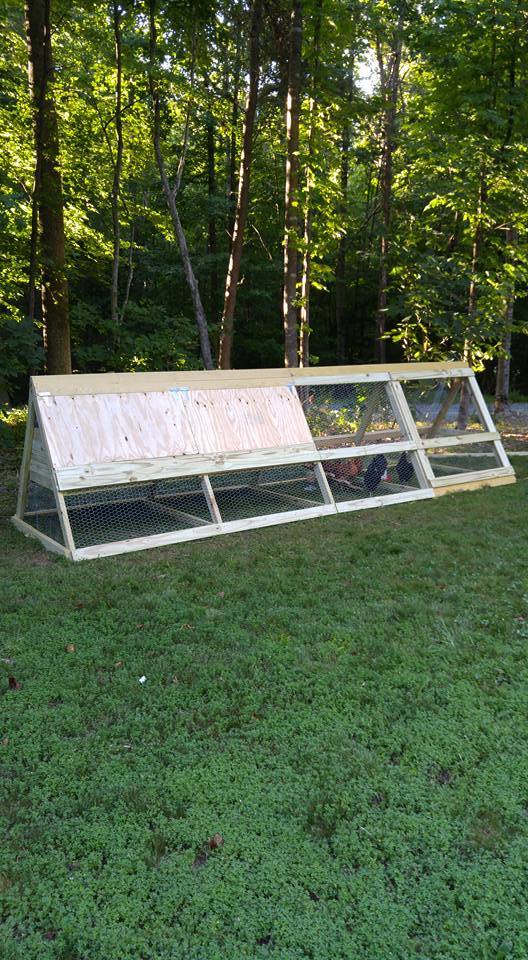
We wanted our chickens to have plenty of room for when we ere not home and could not let them free range in the yard. One of the six was a rooster-- and long story-- but we don't have him any more-- so 5 chickens now enjoy this coop/run. It cost about $300 in supplies. It is 16 feet long.

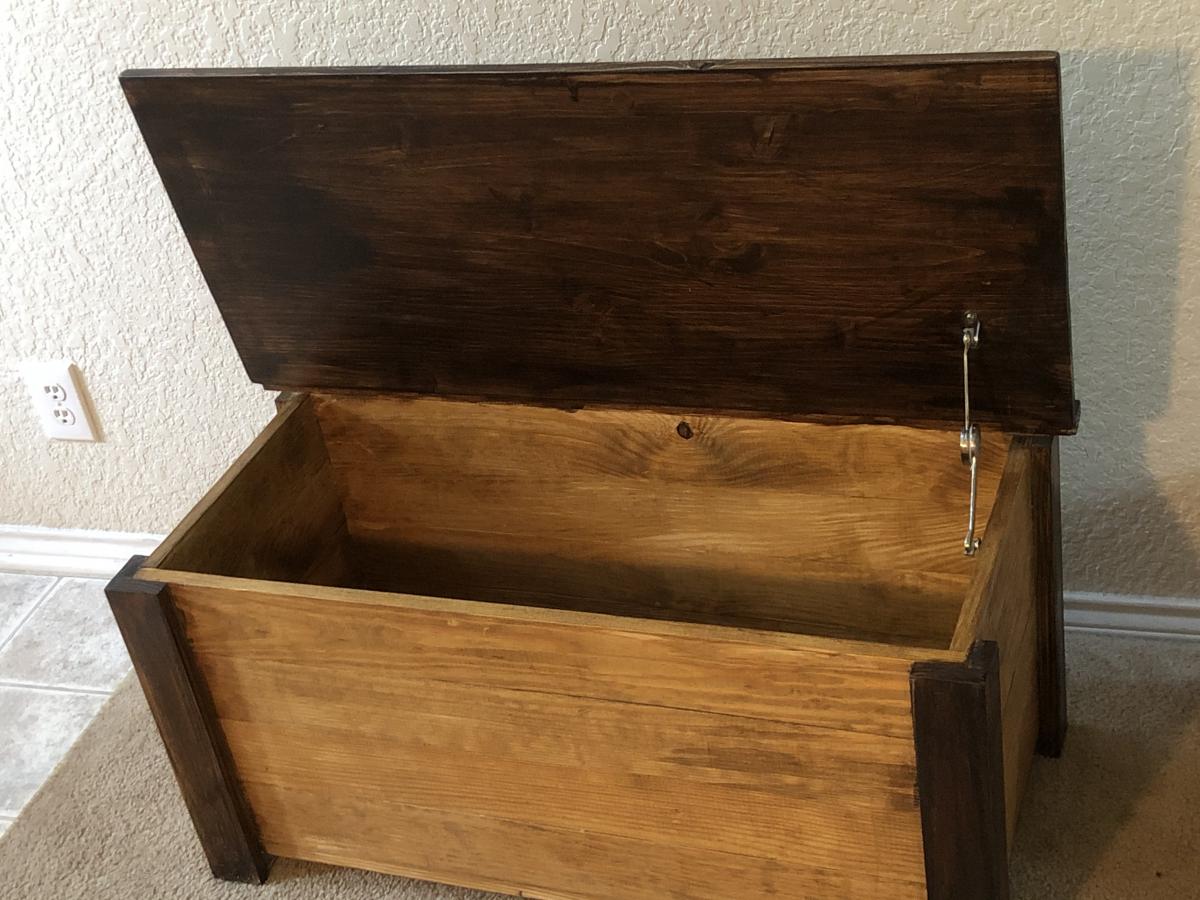
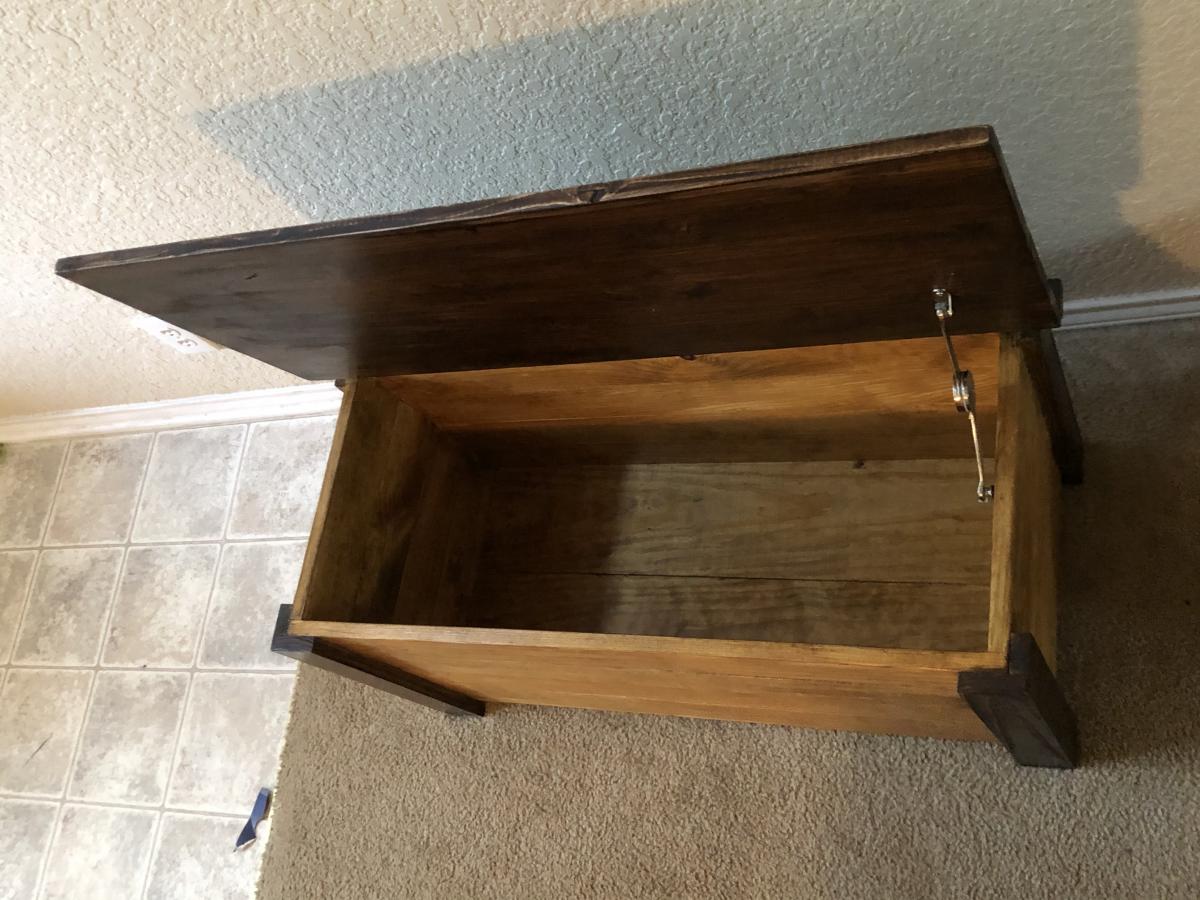
Worked the farmhouse style toy box with two colors of stain. Try and square this up BEFORE you add all the sides. I made that rookie mistake and was 1/8” off; not a huge deal overall but it made for a super snug fit when I put the bottom board in. Overall, super sturdy and I like how it turned out.
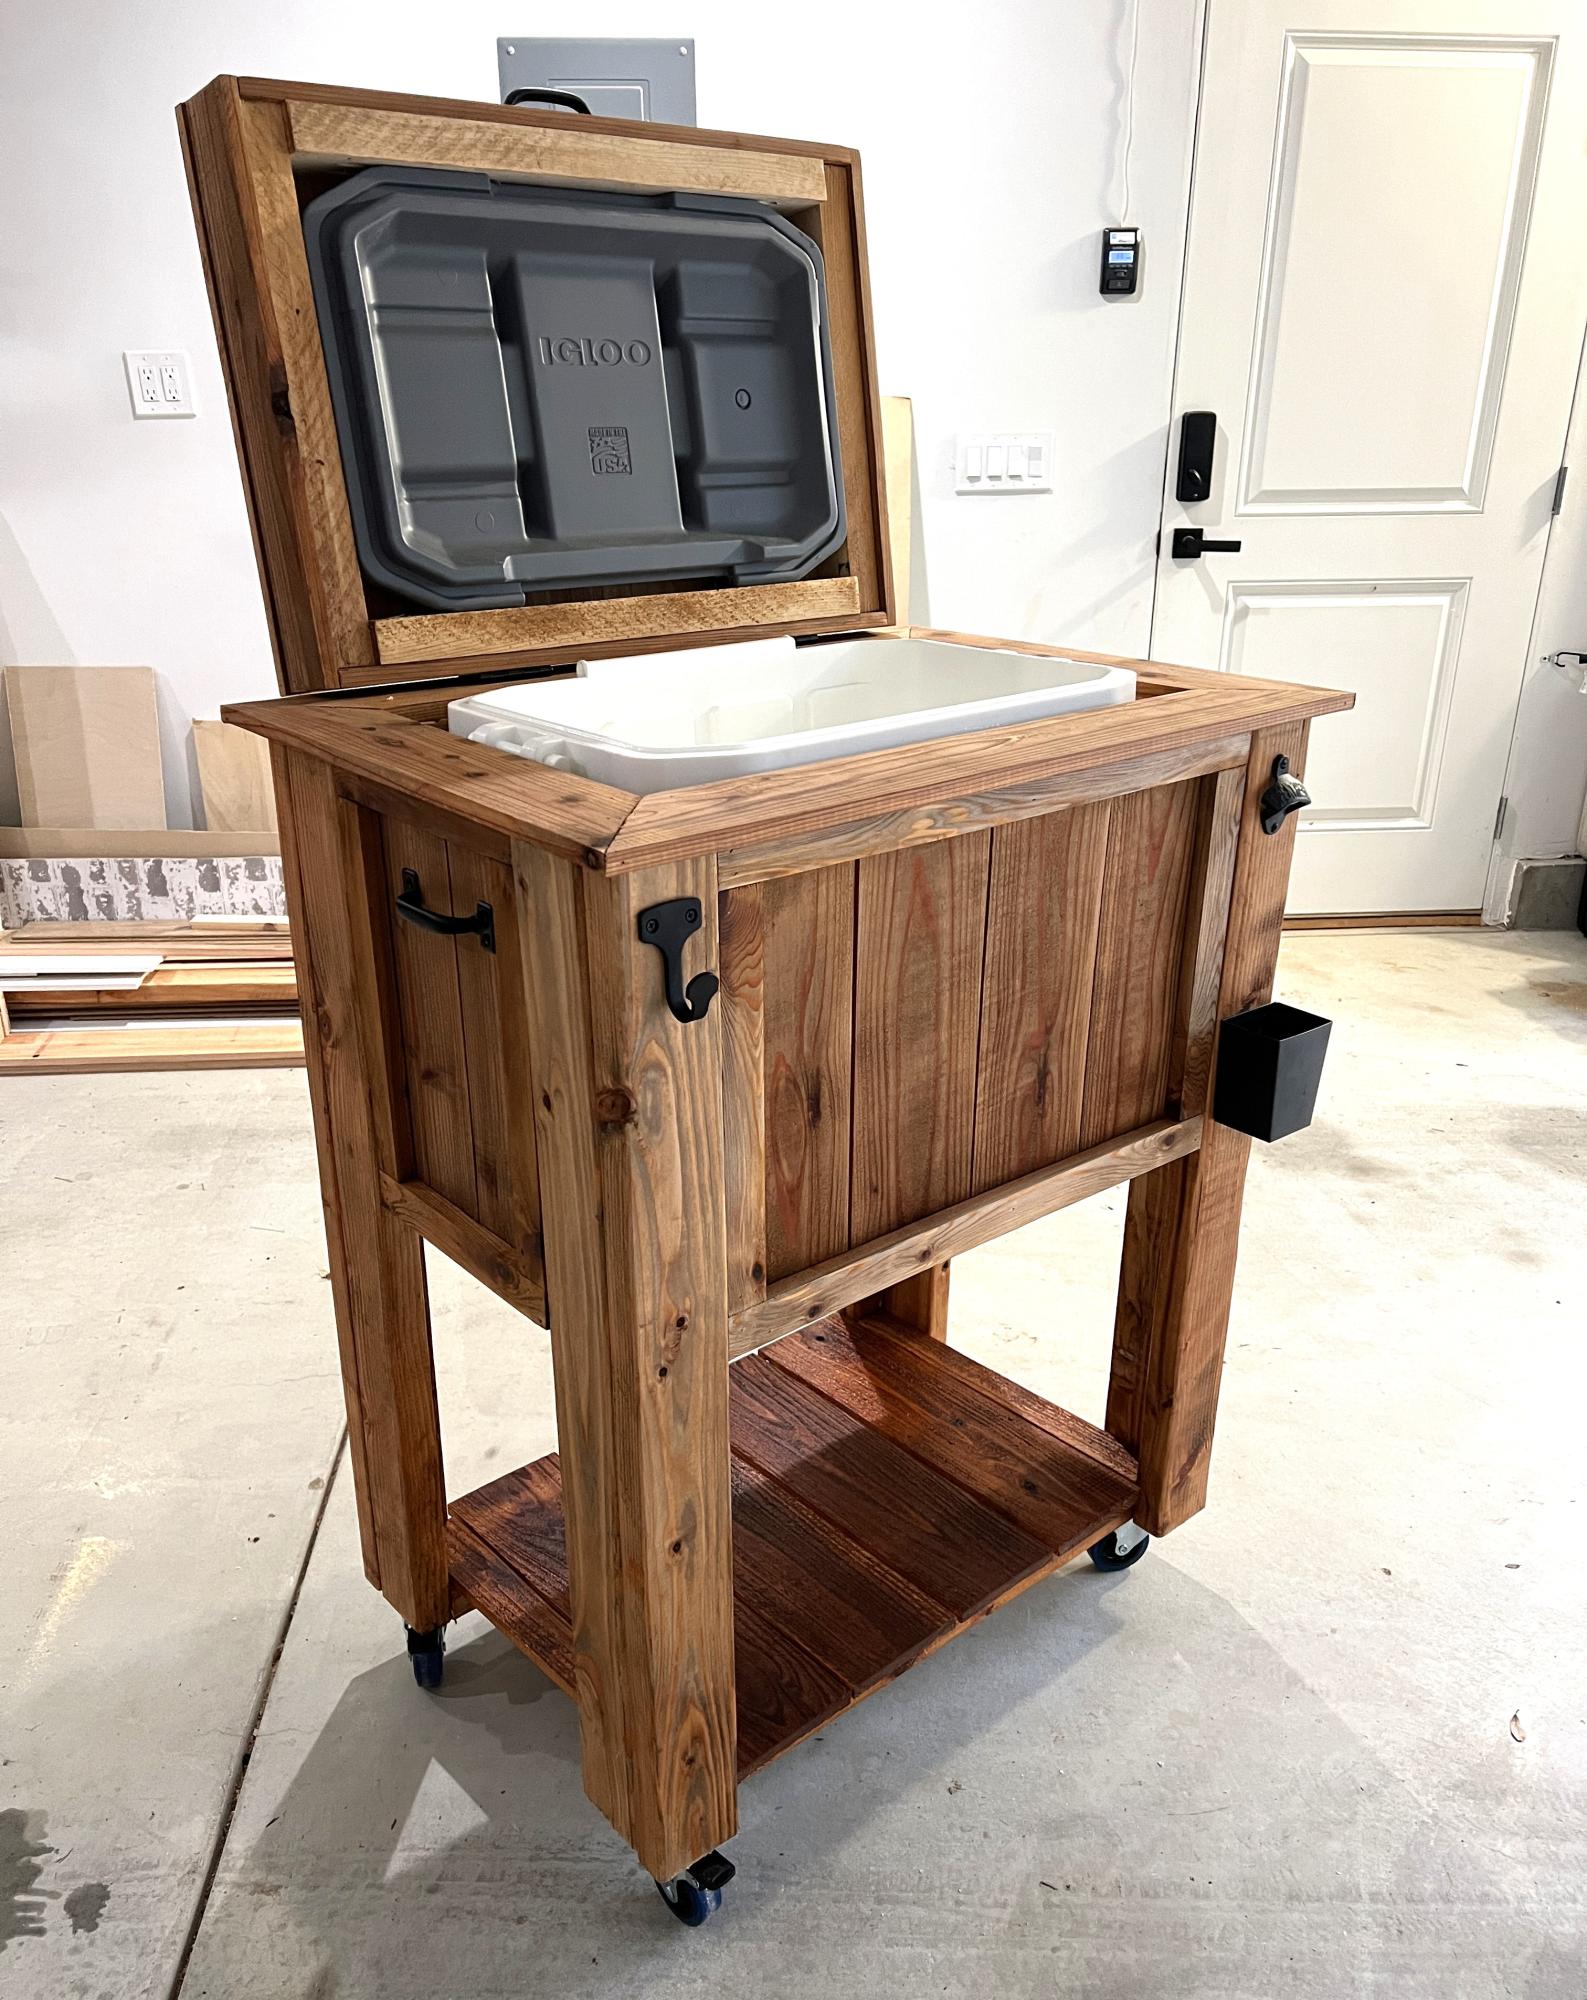
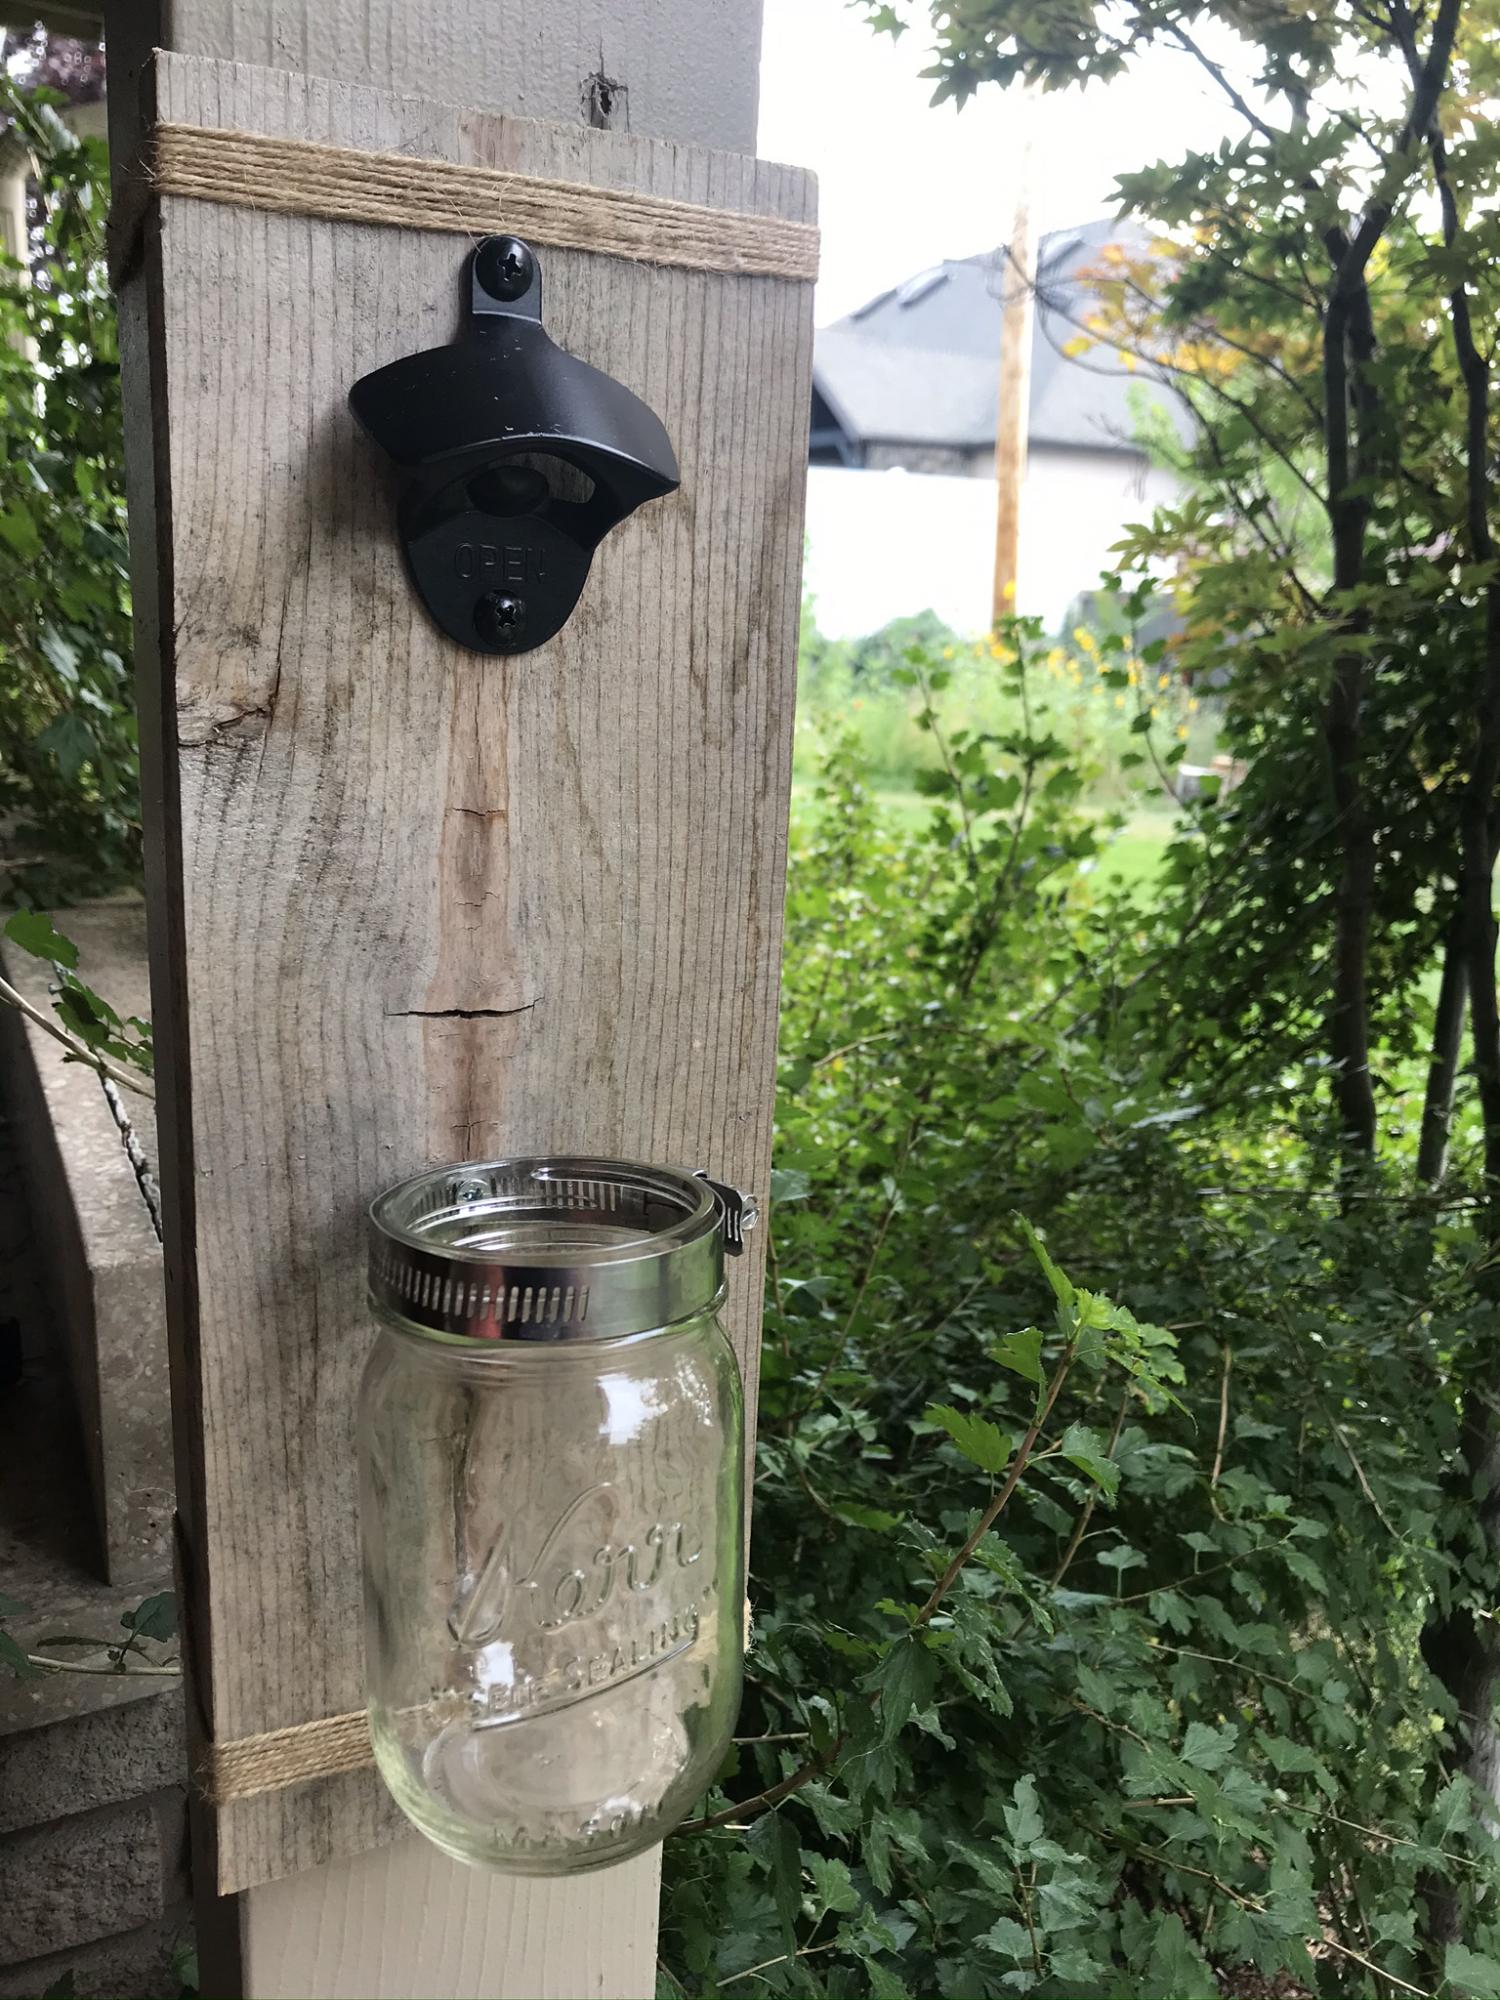
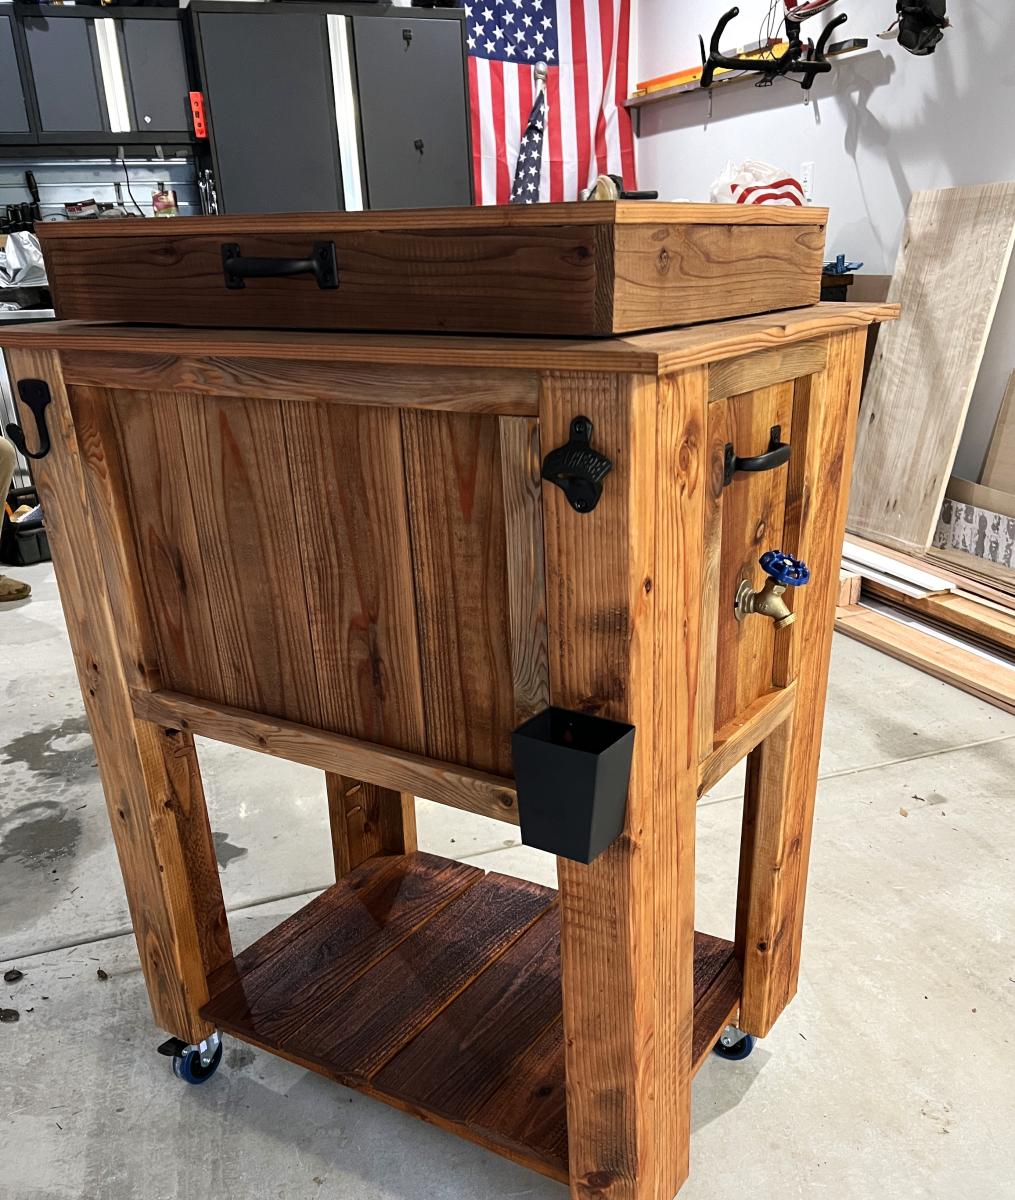
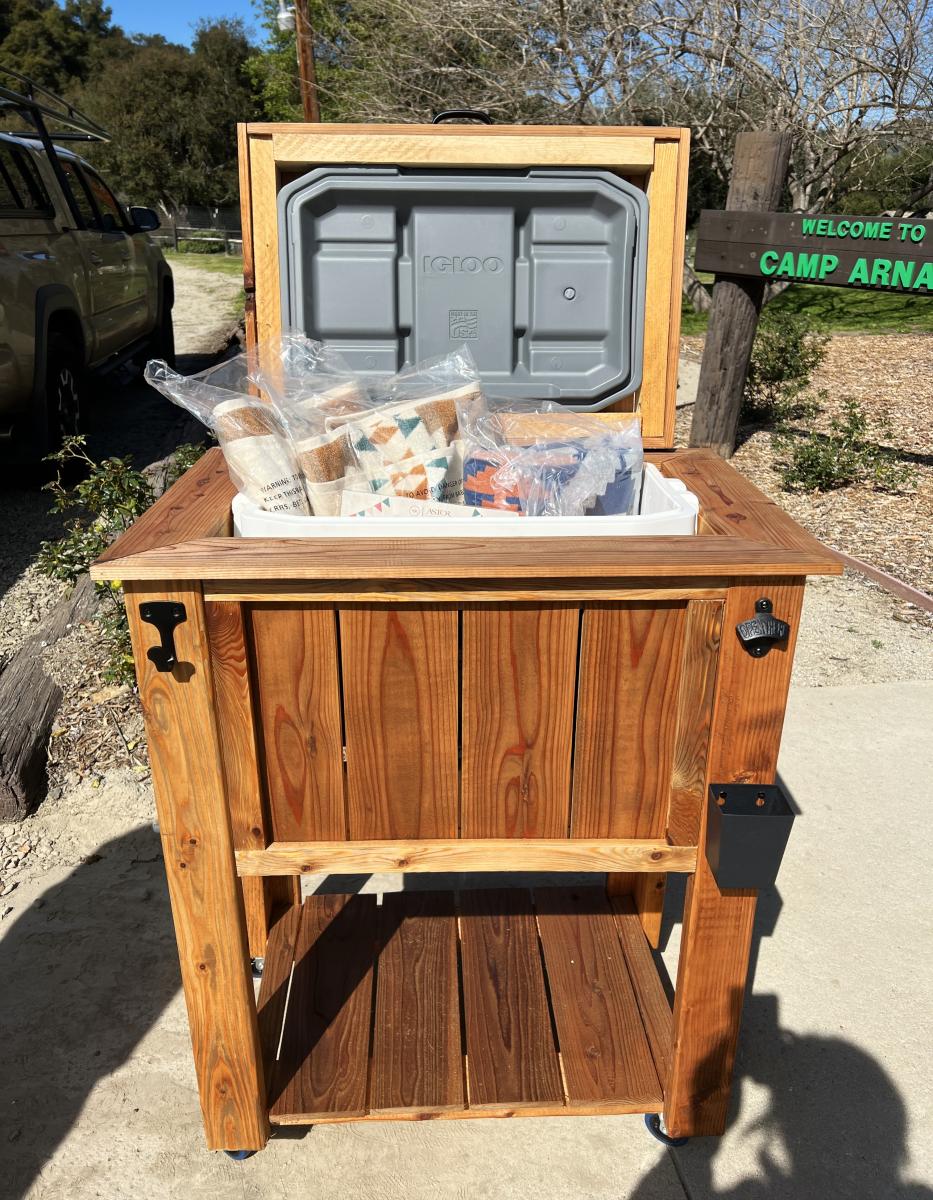
I made this Ice Chest Cart for my son’s schools silent auction. It features a spigot for drainage, bottle opener, hook for a bar towel and I also set it on castors so it can be easily moved.
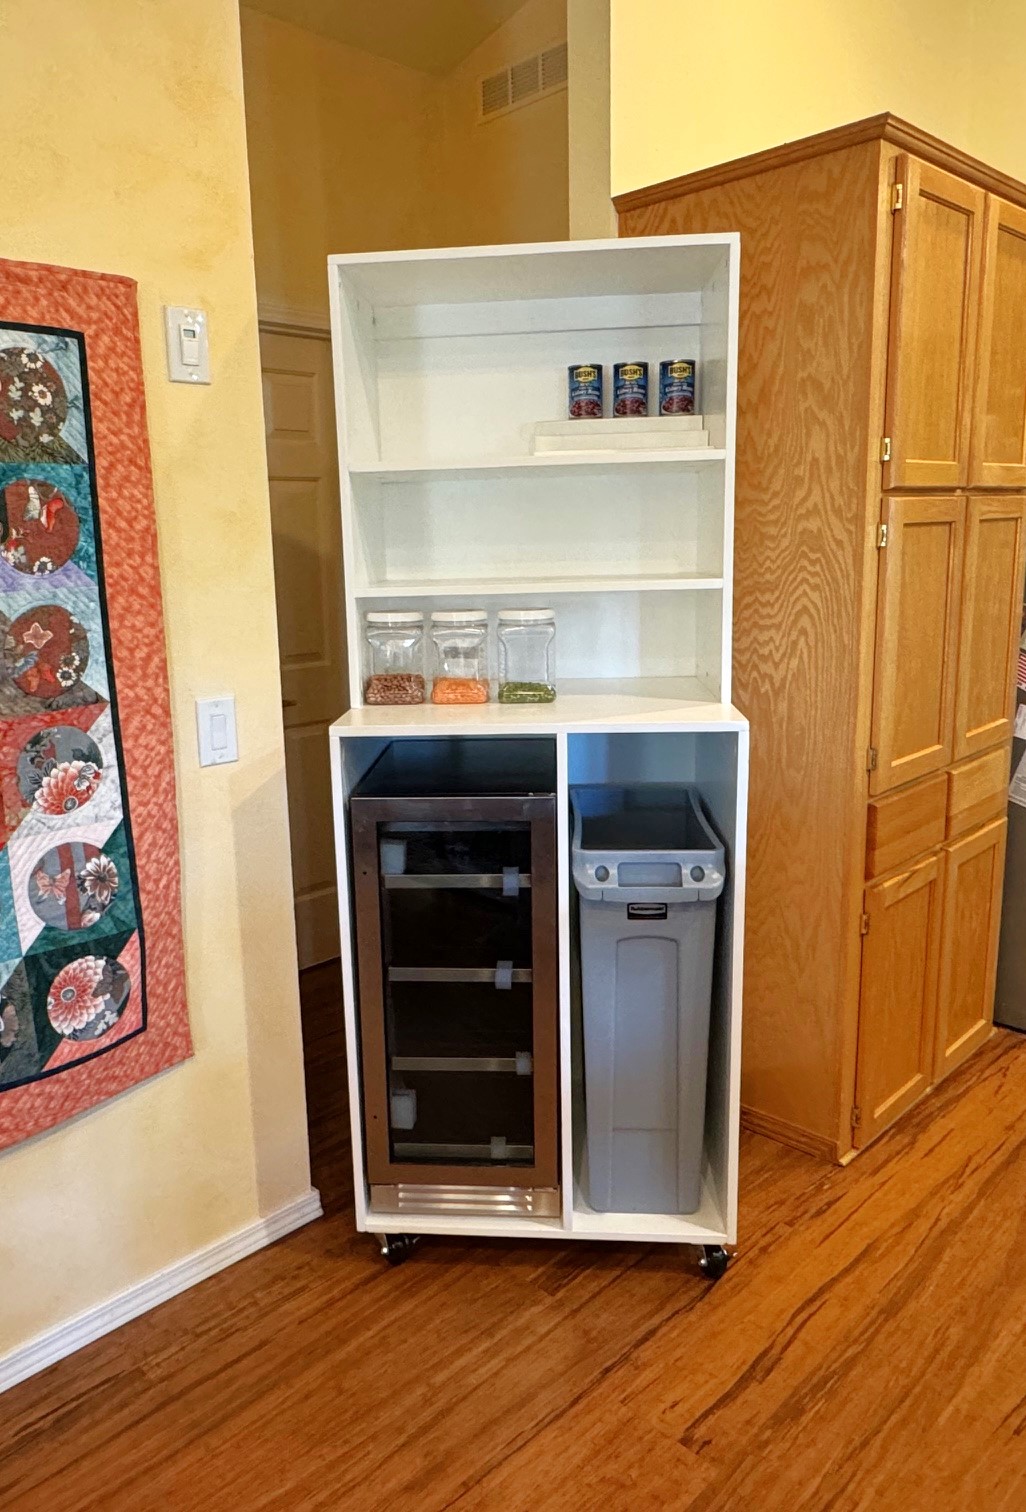
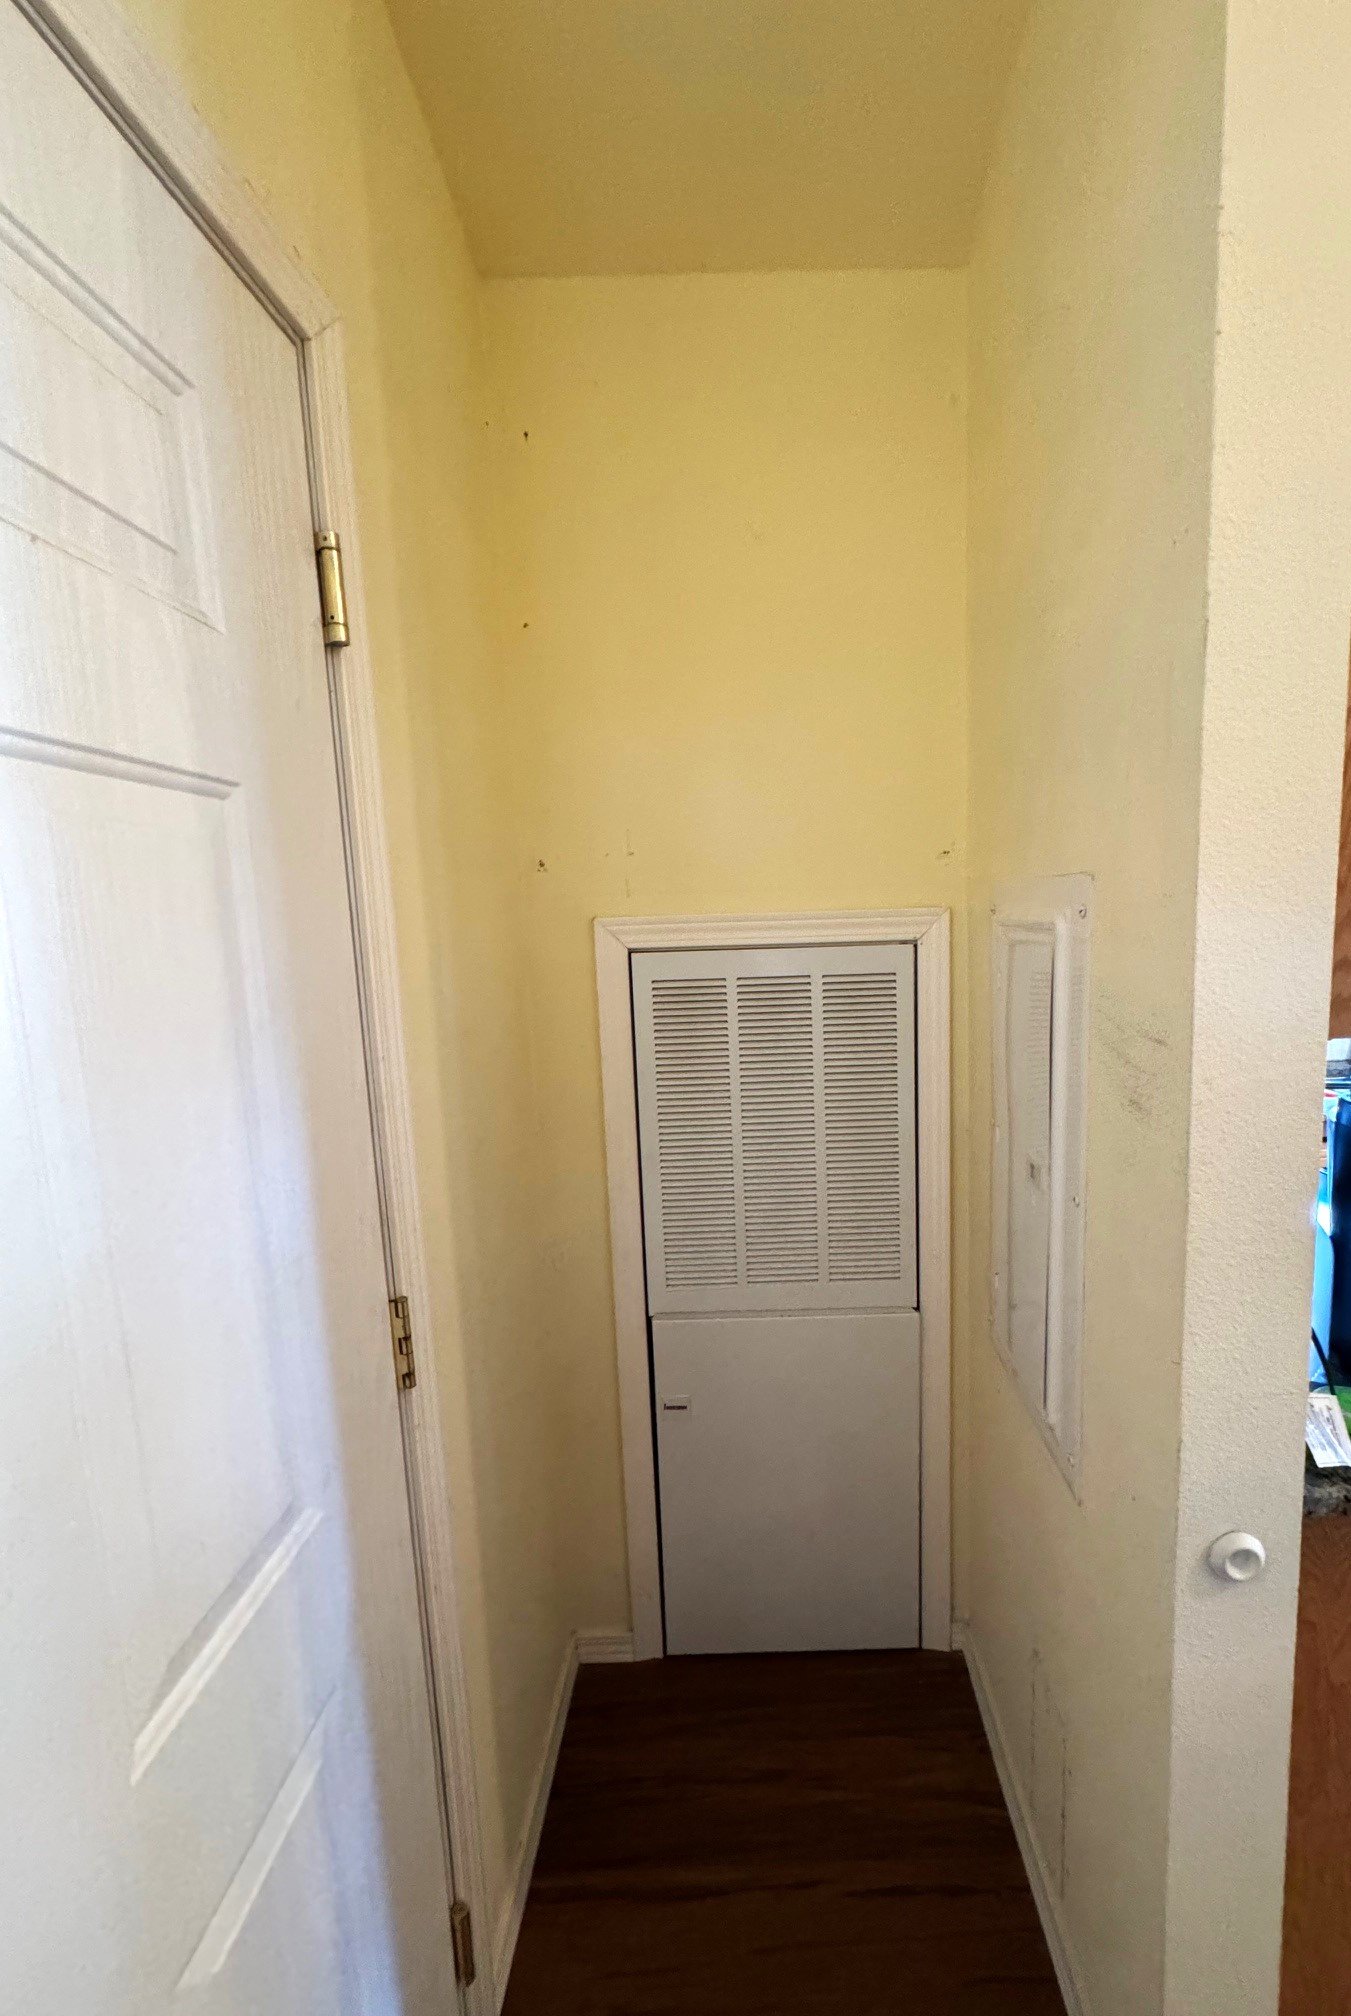
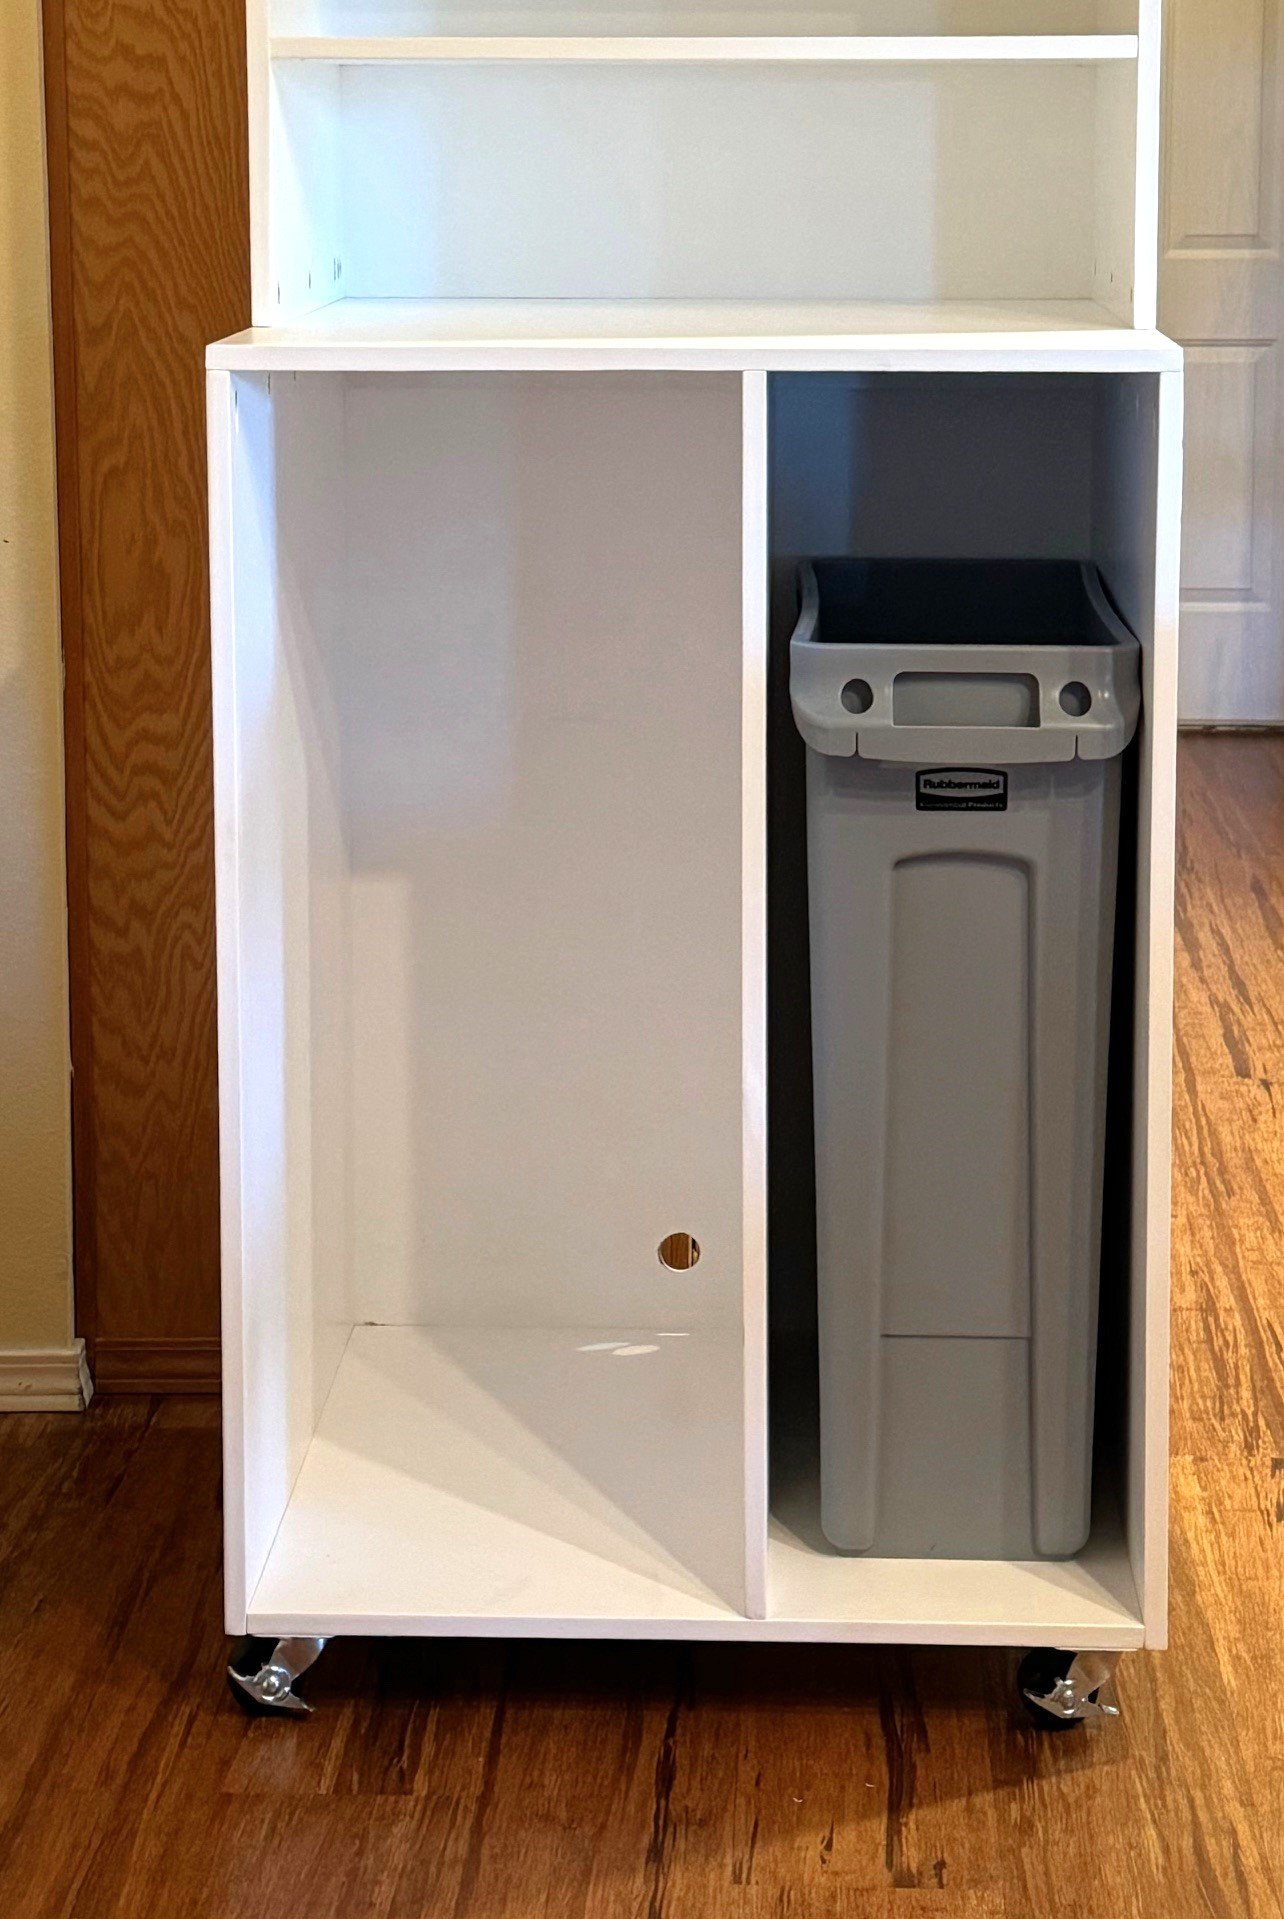
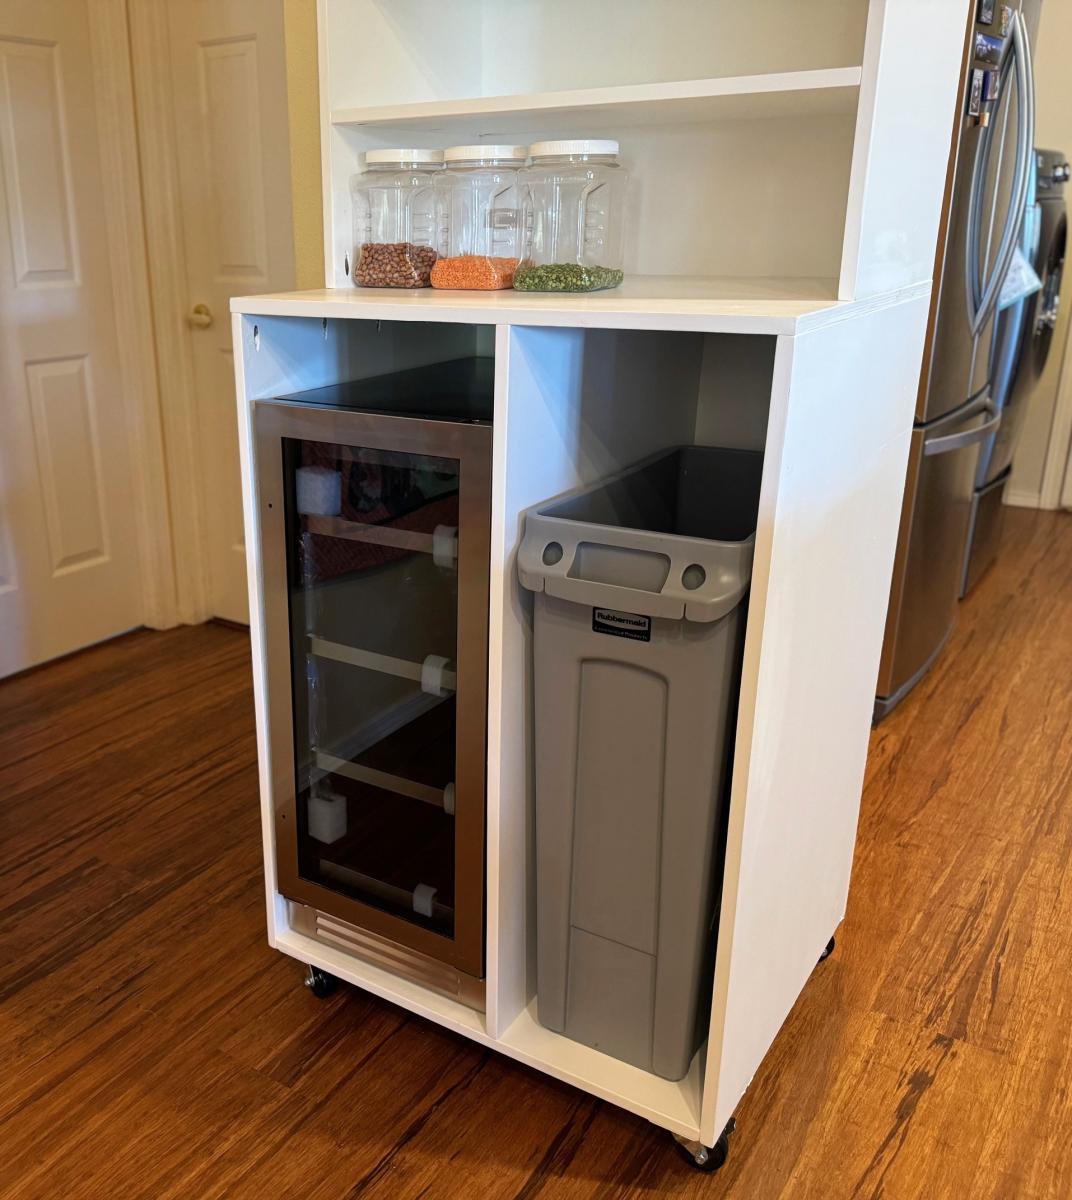
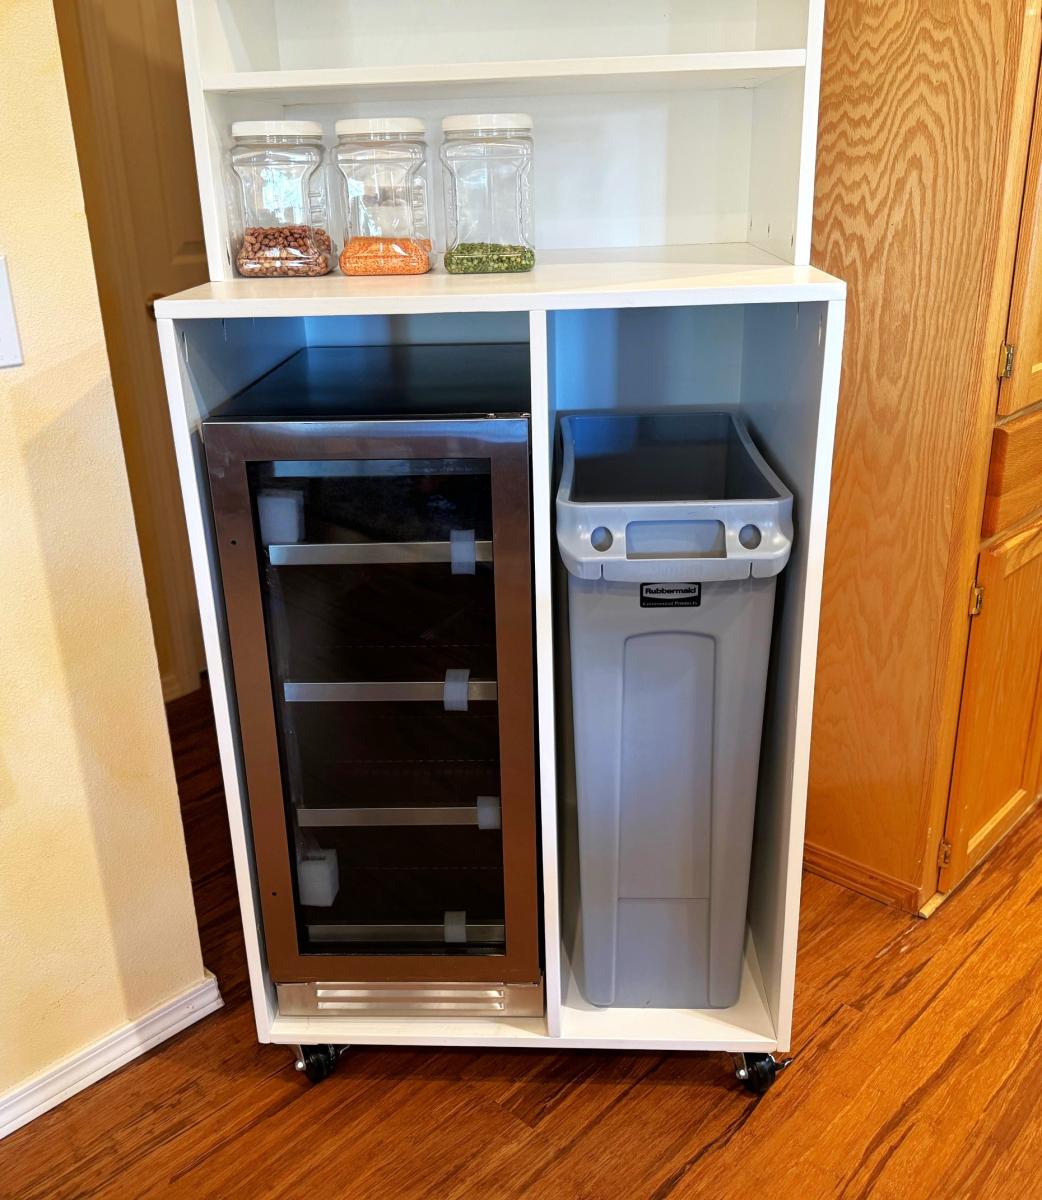
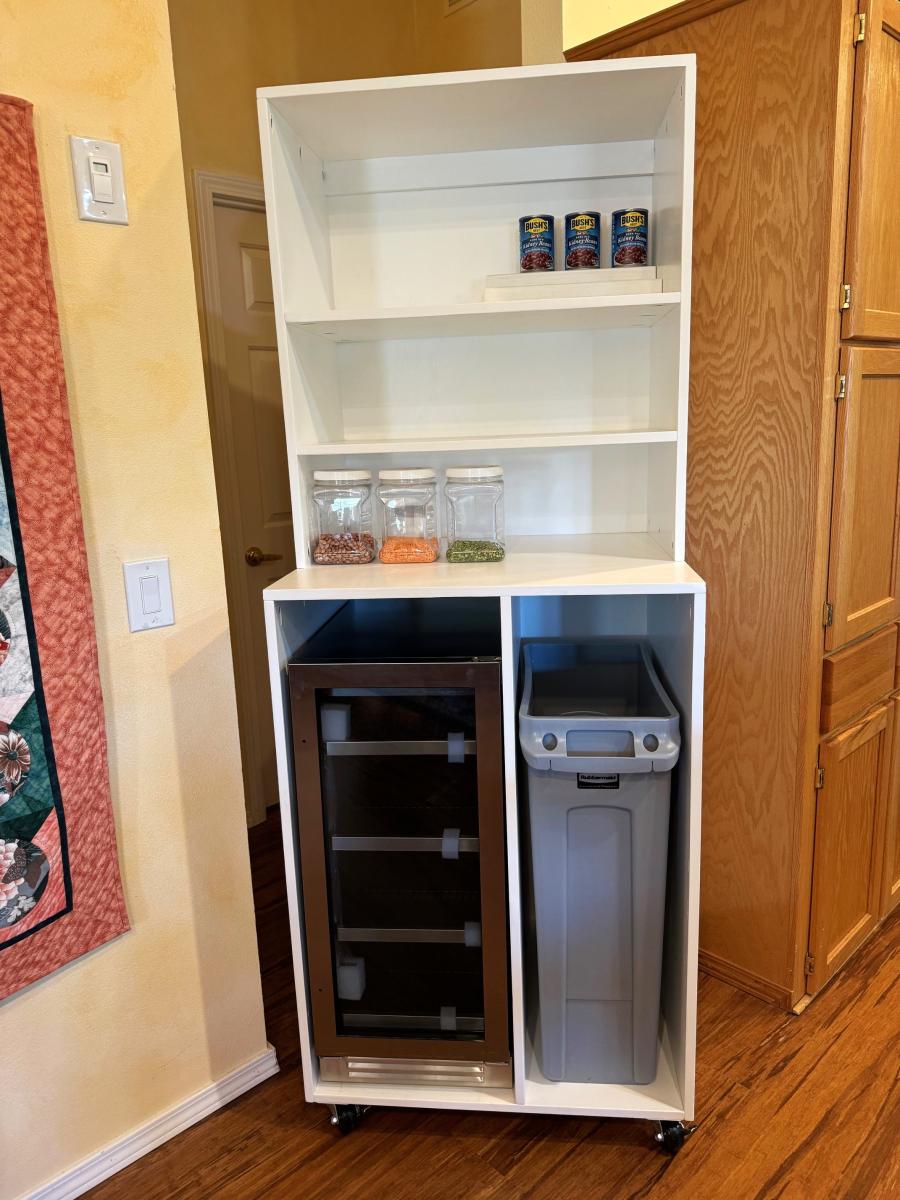
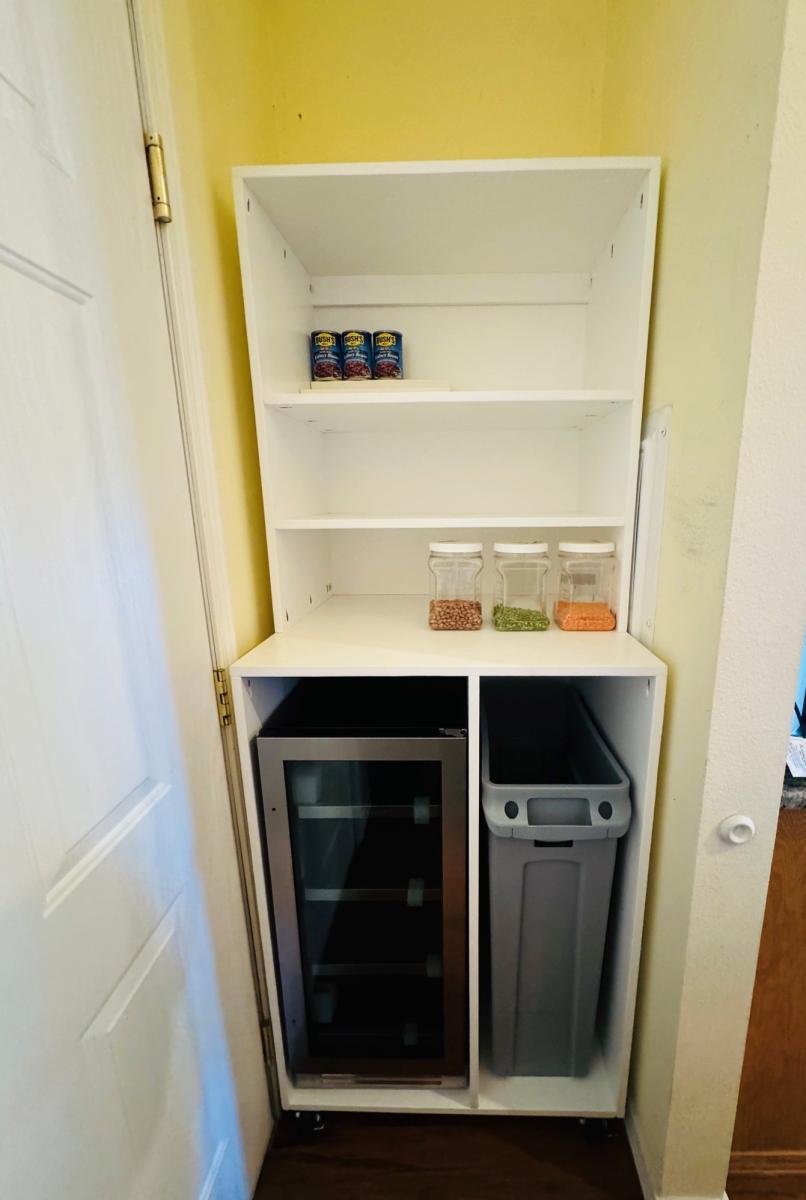
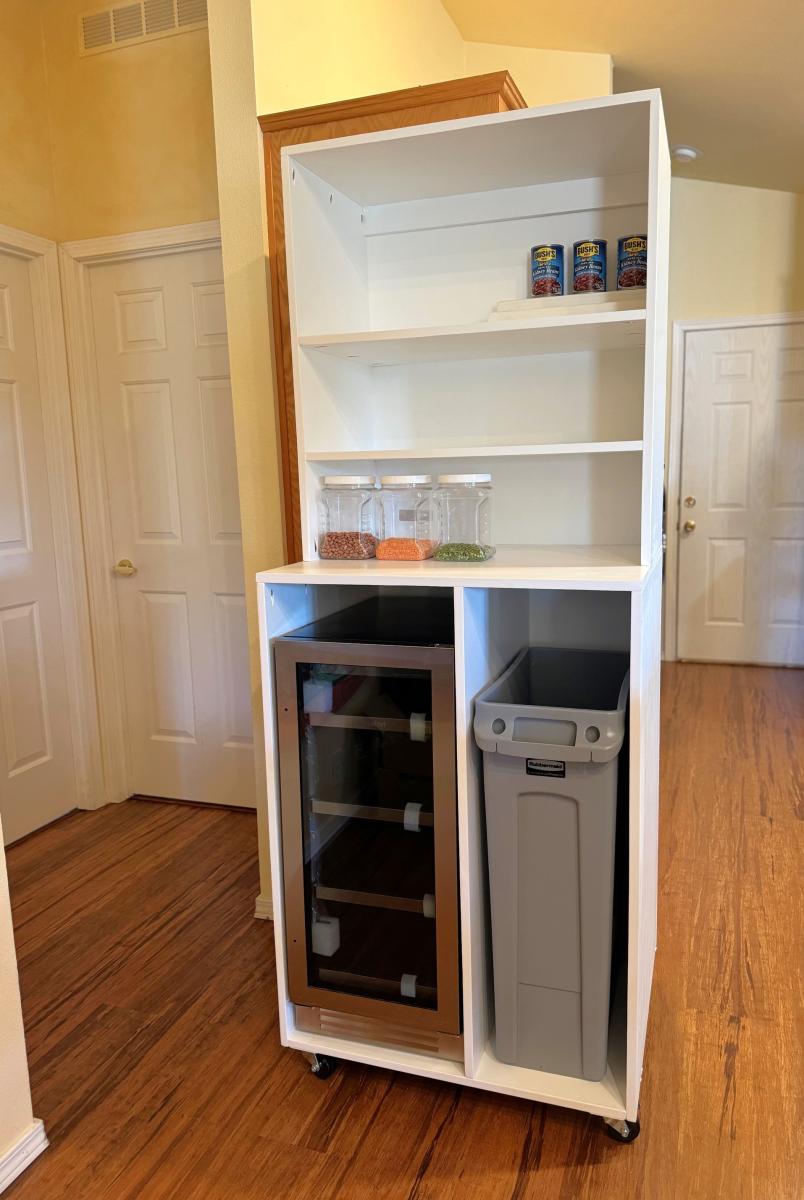
My dad and other mother asked me to build them a rolling pantry to house a fridge, recycle, canned good organizer and sized to fit their existing dry food containers. Using Ana's free design tool, I was able to incorporate all of their asks making this little alcove much more functional! It took some figuring finding the perfect fridge and recycle bin that would fit the space. I left room at the top of the recycle so there would be plenty of room for larger recycle items. The heavy duty casters allow this unit to be moved around easily if needed. I built this in 2 pieces with pocket holes, added edgebanding to the front and added a hole for the power cord placement.

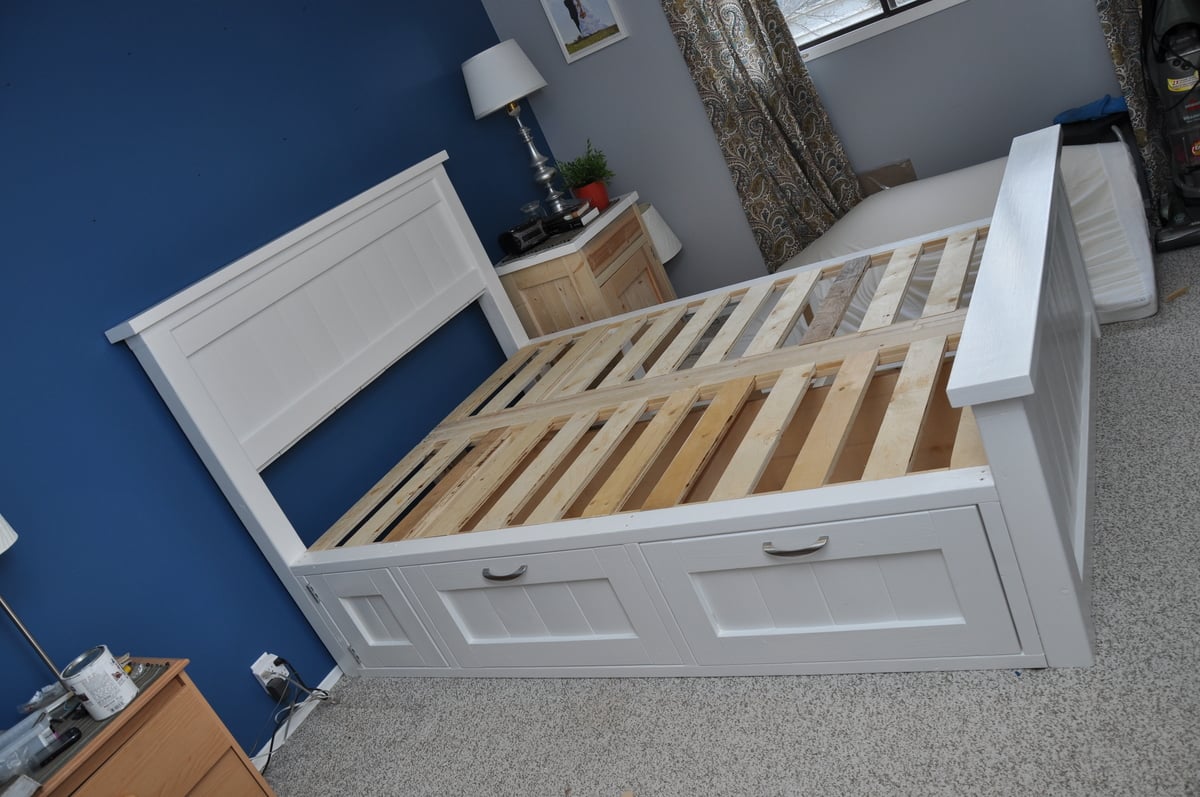
I had to come on here to thank you all for inspiring me to build this bed! The thought of building such a big piece of furniture never really occurred to me until I saw the Farmhouse queen plans, which really got the gears turning.
I wanted to add some storage to the bed, though, and so I kept looking at other projects on this site. I don't know which plans are all combined into this one, but you can see the one side table in some of the pictures which is based on a hutch plan here, and the concepts there are used in the drawer fronts on the bed. I still plan to build a matching side table for this side of the bed and also a dresser unit to complete the bedroom set.
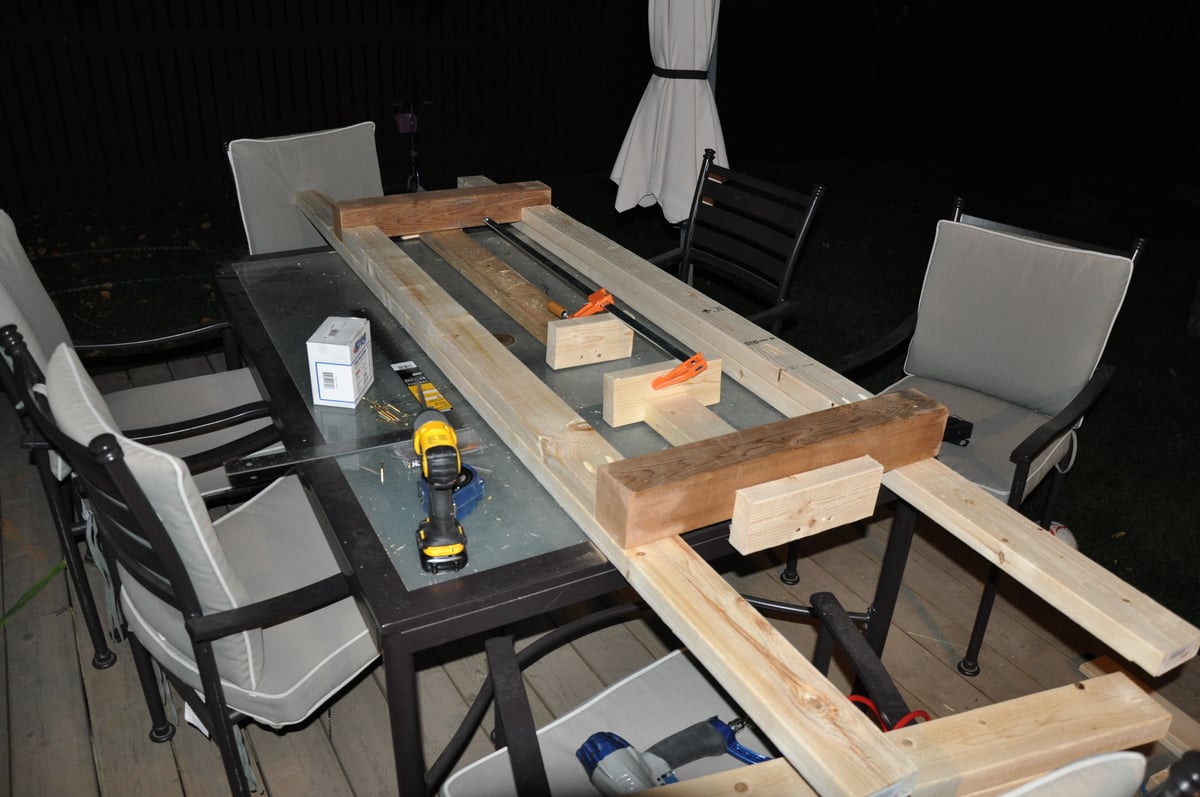
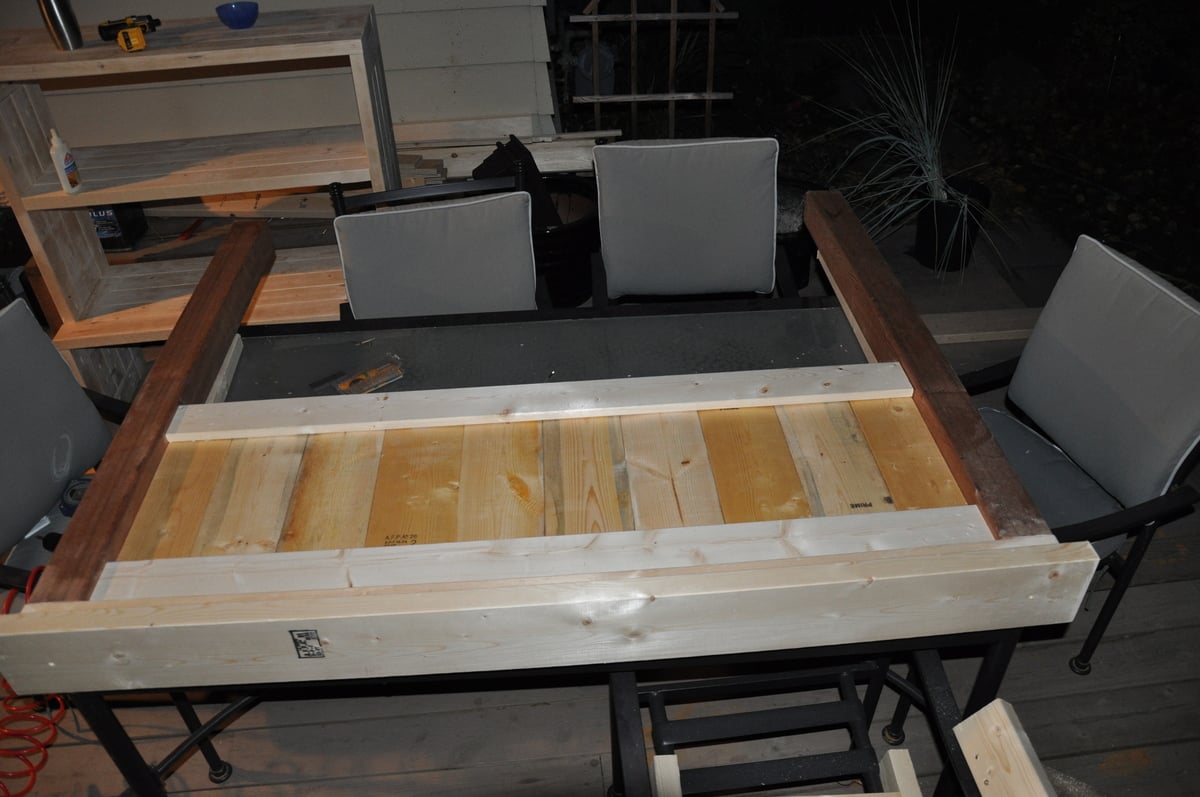
This entire project was built on my deck as I don't have a garage. Started at the end of September and working by flood light on nights where I could find the time. It was finally moved inside to paint. The bed is built into four sections for disassembly - headboard, footboard, and a base section that is split in half with knockdown fasteners. The headboard and footboard are also attached with knockdowns, so the entire bed comes apart with an allen key.
The cost was incredibly low. My biggest cringe costs were for the 4x4 posts, which I had to buy in cedar, and the birch 3/4" plywood for the drawers. All in costs are still under $200, though I did own a Kreg system which got used a fair amount.
I did modify the footboard / headboard construction since I had the Kreg system. Rather than using a 1x4 backing board with 1x verticals and a 1x4 front board, I used a Kreg'ed 2x4 as the backing board, flush to the 4x4 post... no 4 1/2" screws required! The 1x verticals were then glued and nailed onto the 2x4s, and the 1x4 front board was glued and nailed to it.
The drawers are huge! 29" wide x 26" deep x 14" tall (more or less). Also, they are positioned so that when a side table is placed beside the bed the drawers can still open. The panel at the head of the bed is a door with a magnetic catch. I think of that area as 'deep storage' as you would have to move a side table to get in there. The door is there to get there if you want to though.
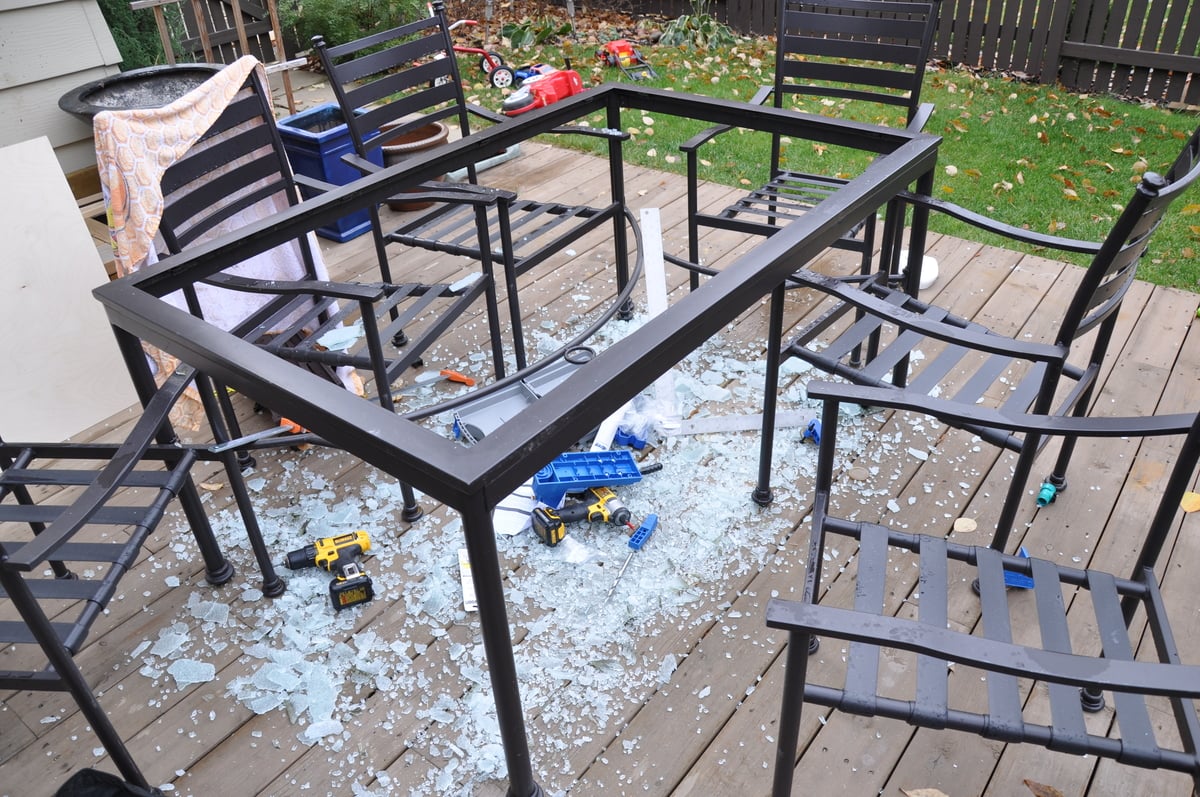
One cost not accounted for... my 'work bench' patio table sustained an injury. I still maintain I did not drop anything onto it. In fact, I was using a tape measure to measure a drawer length when the glass shattered out from under the piece I was measuring. It was cold in the morning, so maybe that had something to do with it. But now I just have to add 'fix patio table' to the project list.
Thanks again!
Mark
Tue, 10/23/2012 - 19:04
I can't wait until we have time to build a farmhouse storage bed. Yours looks great!.
Sun, 01/06/2013 - 19:35
Very smart placement of the drawers - I too am aspiring to build this some day and wondered about a fix on that - do I just store things in that drawer I rarely want to get at? No, I like your idea better. Beautiful job on the bed - it looks nice.
Sun, 11/10/2013 - 17:49
This is exactly what I'm looking for. I love the drawers. Would you be willing to share more on how you did those, vs the plywood boxes in the plans?
Thu, 03/20/2014 - 11:40
Sorry for taking so long to reply to your question! I missed it.
I don't have any pictures / details on how it was done, but I can explain it. The front face is built as a 2x4 surround with 1x6 inset boards. I then put a dado in the bottom side 1/4" up from the bottom.
I then made a drawer box from 5/8" plywood, kreg jigged to the front face. A 1/4" piece of plywood was used as the drawer bottom, and inset into the front face of the drawer.
This all sounds a bit difficult and confusing, but it isn't. Maybe I should take some pictures. Let me know if you'd like to see them.
Wed, 07/30/2014 - 10:55
Great build! I'd love to see some more photos of the drawer surround/frame with the drawers out. Is it all 2x3 stud construction? Any problems with warping or the drawer slides not square/plum?
Thu, 10/16/2014 - 10:22
Racking my brains out trying to figure out how you laid those slats across the top of the drawers... If you wouldn't mind posting a few more pics, I would really appreciate it. My daughter wants this for her birthday.
Thanks!
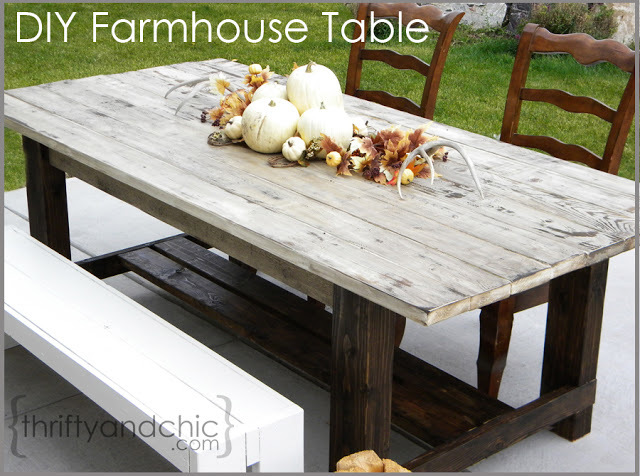
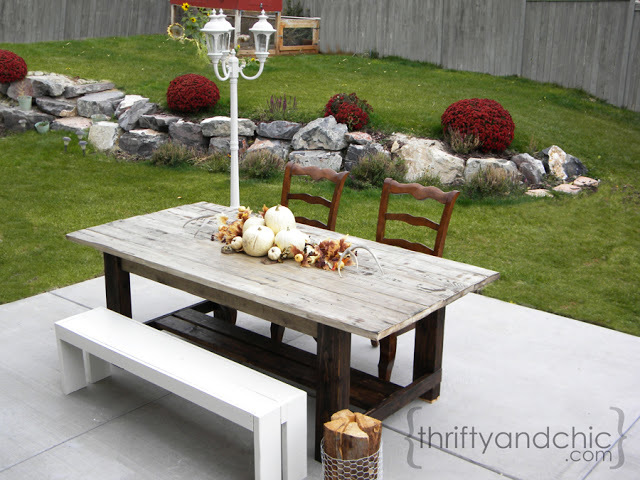
I've been wanting to build an outdoor farmhouse table for quite some time. Getting it to look old with new materials was the idea.Using notches to hold part of the base and experimenting with finishes got the 'rustic' look. I took a few ideas from the Gaby Kitchen Island and implemented my own; it turned out to be a great weekend project!

Fri, 10/26/2012 - 23:43
Love the table, especially the finish you used, it looks amazing. just have a question about if it is waterproof...i know it is an outdoor table, but is it protected by a veranda or is it completely exposed to the elements. i want to make one but am hesitant as it will be completely outside! Thanku!
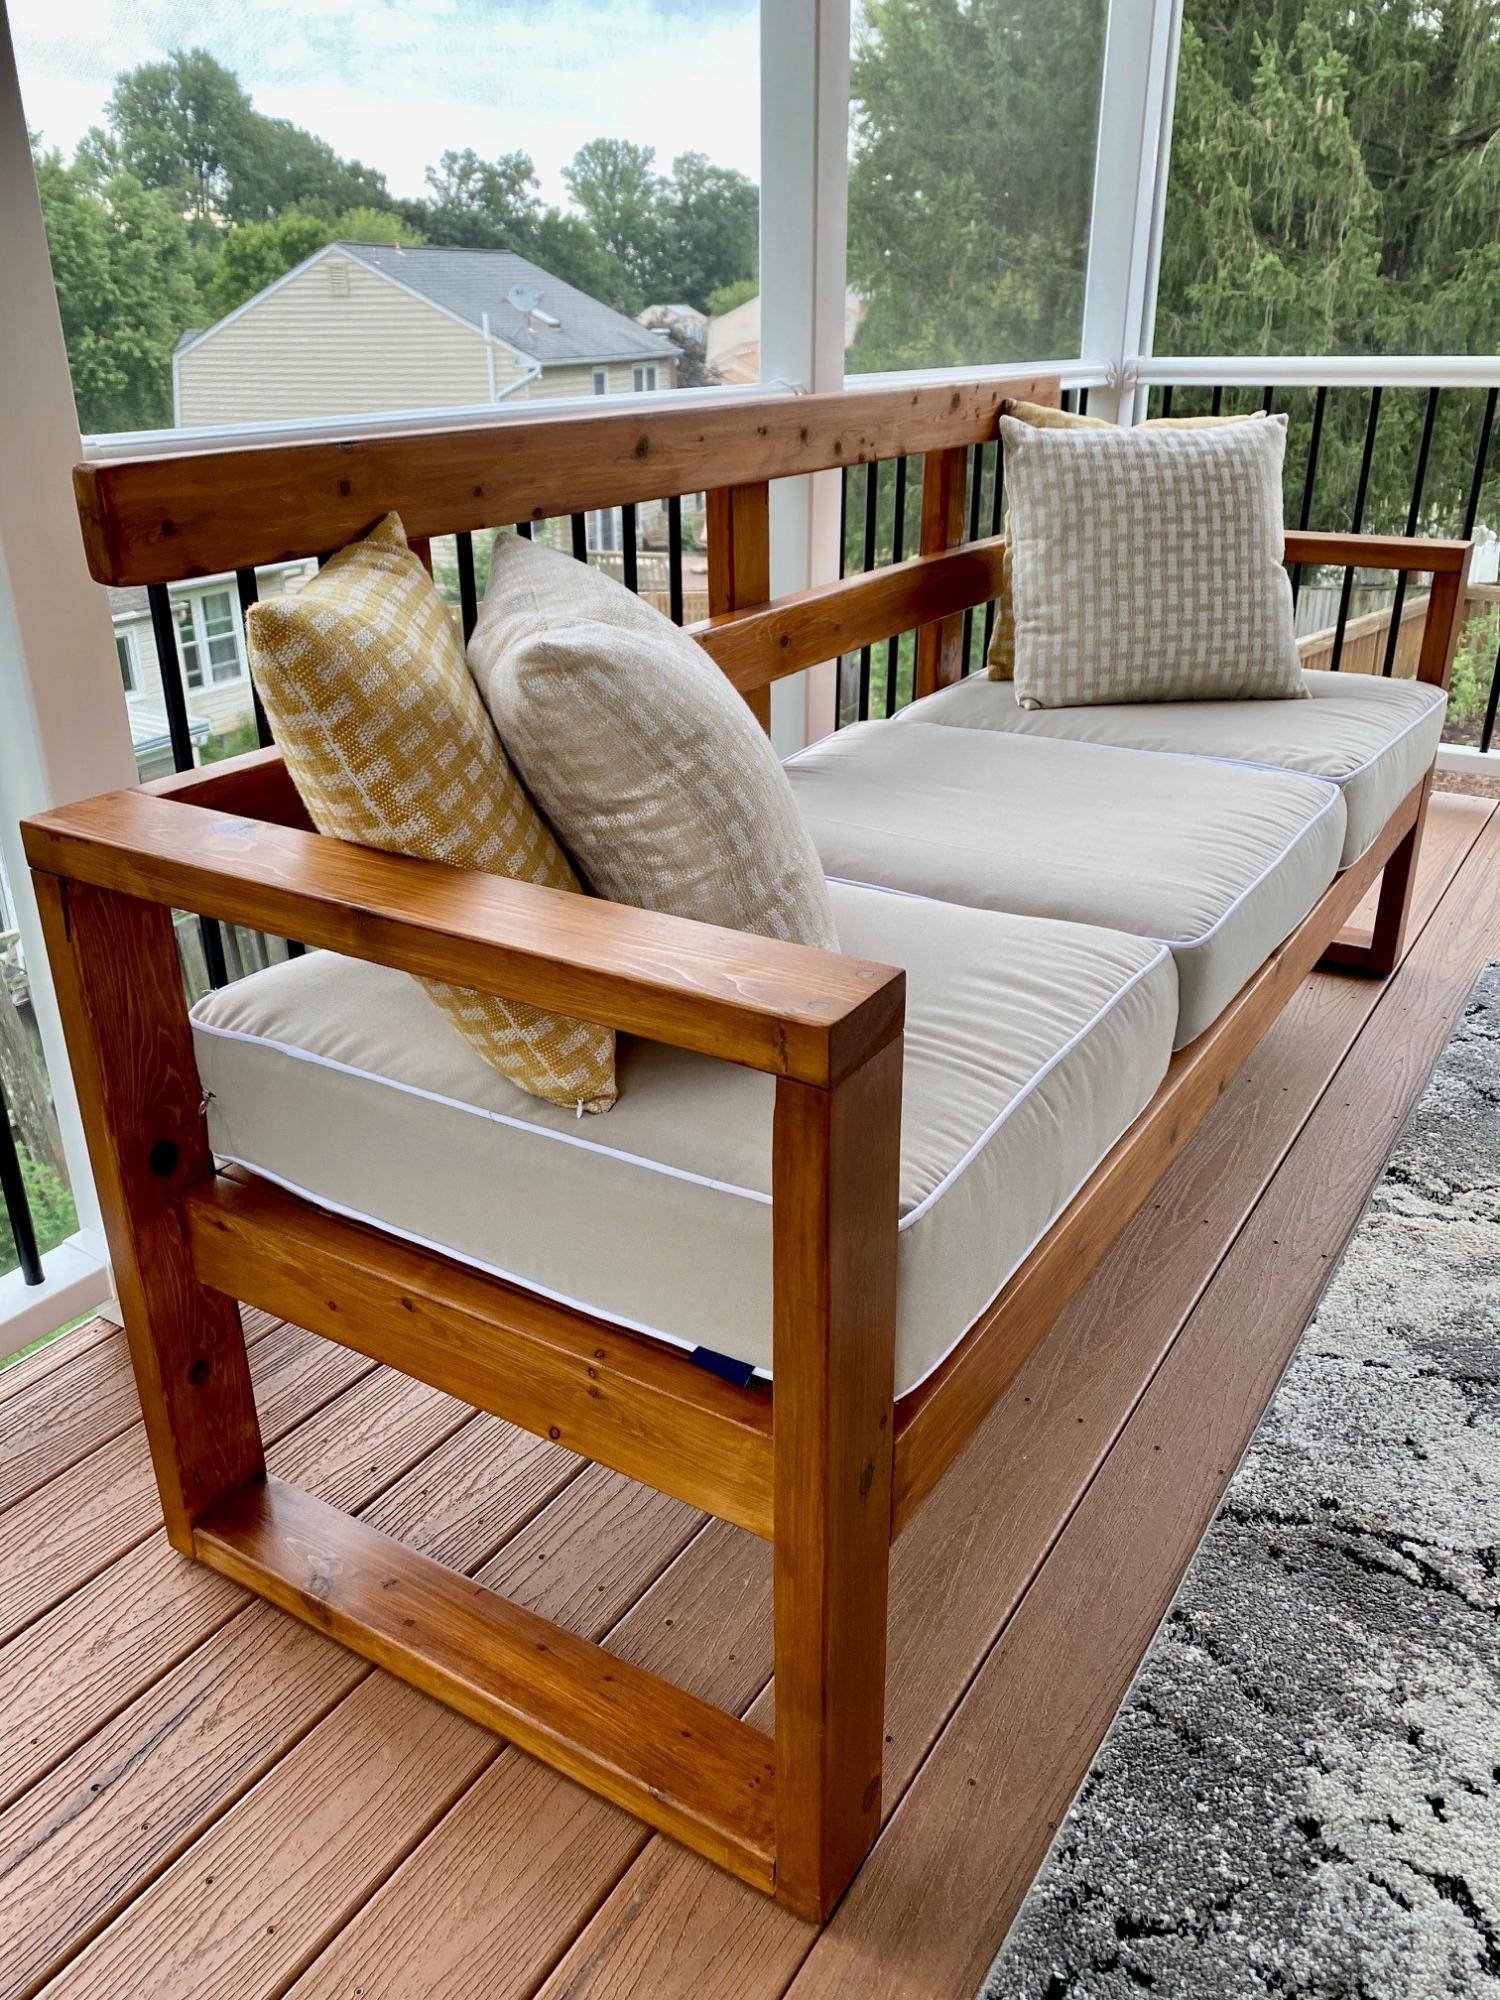
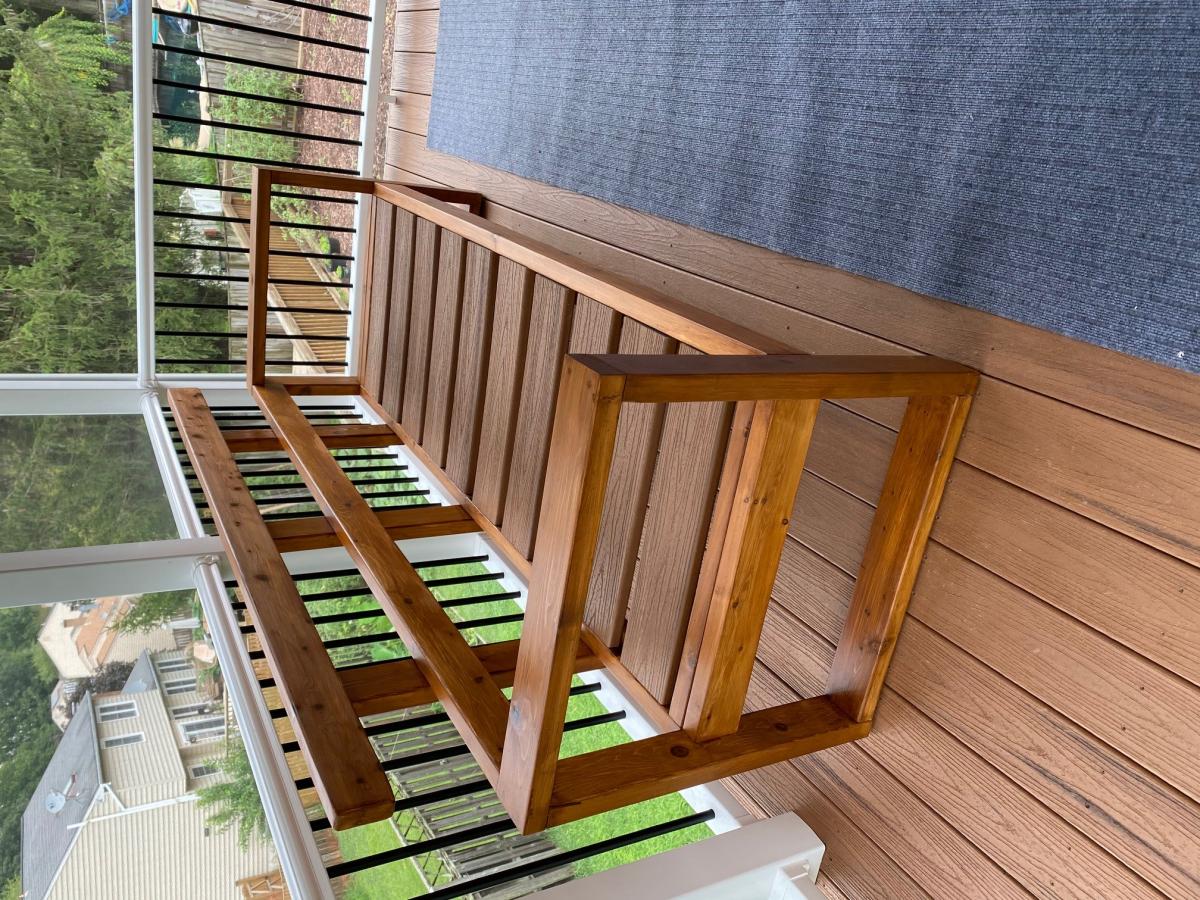
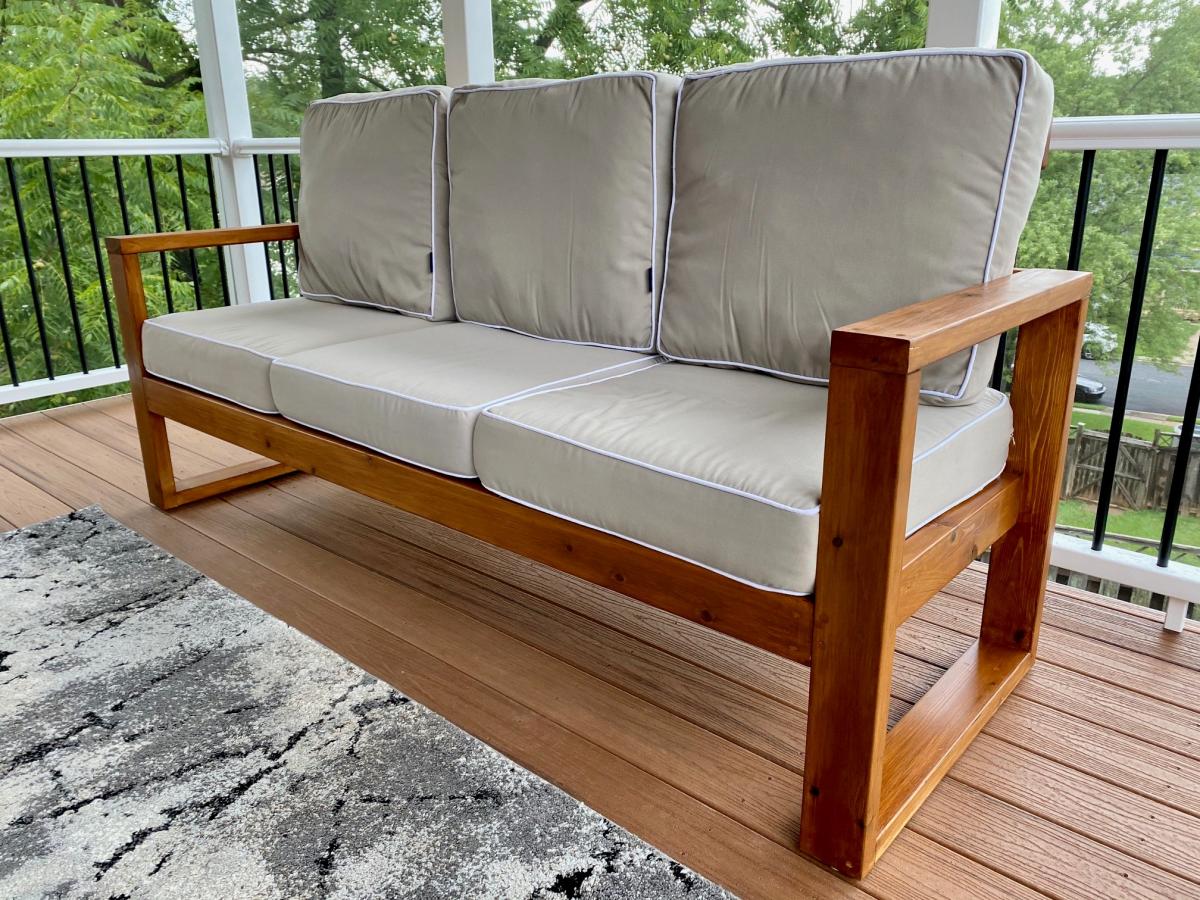
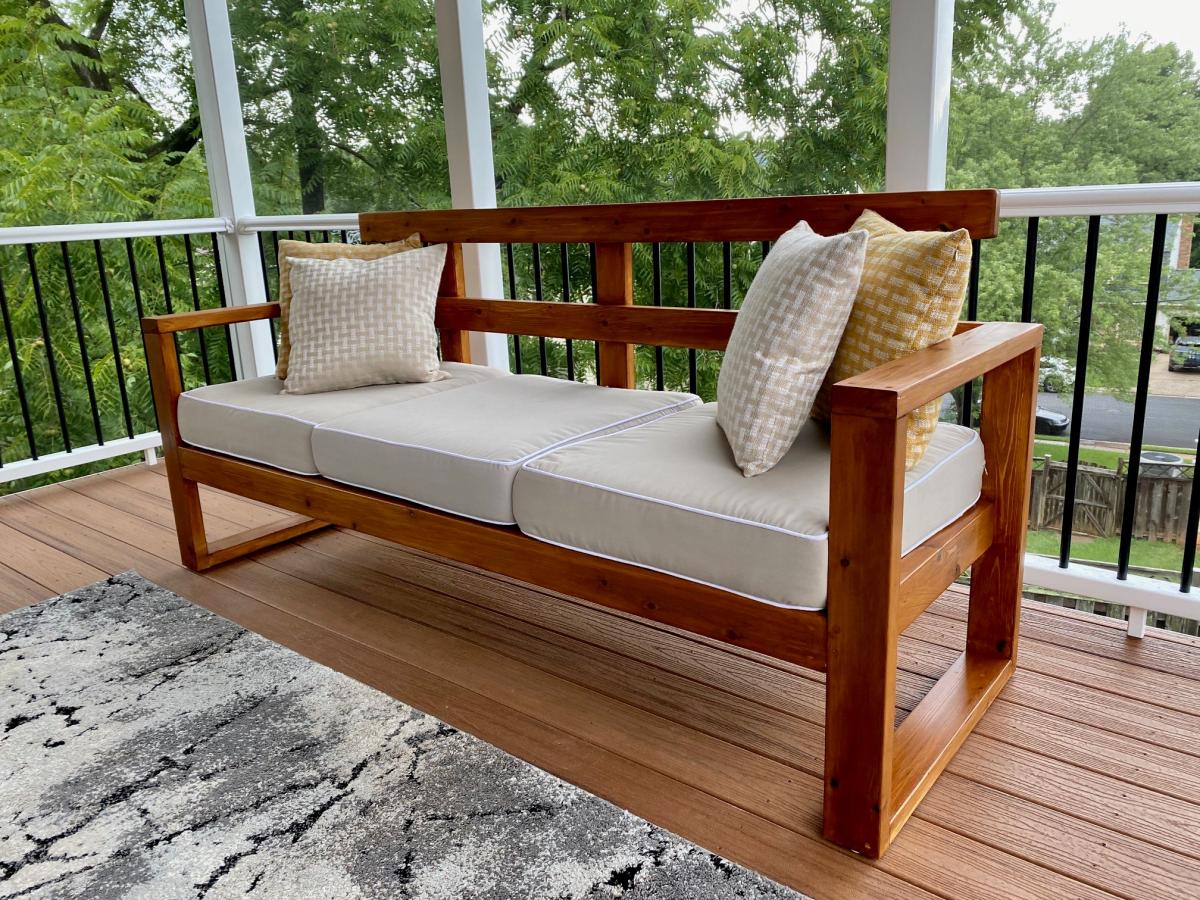
Built this beautiful Sofa from Ana White's Plan, had to modify a bit as I had left over small pieces of trex from my Deck , and the back rest cushions were higher.