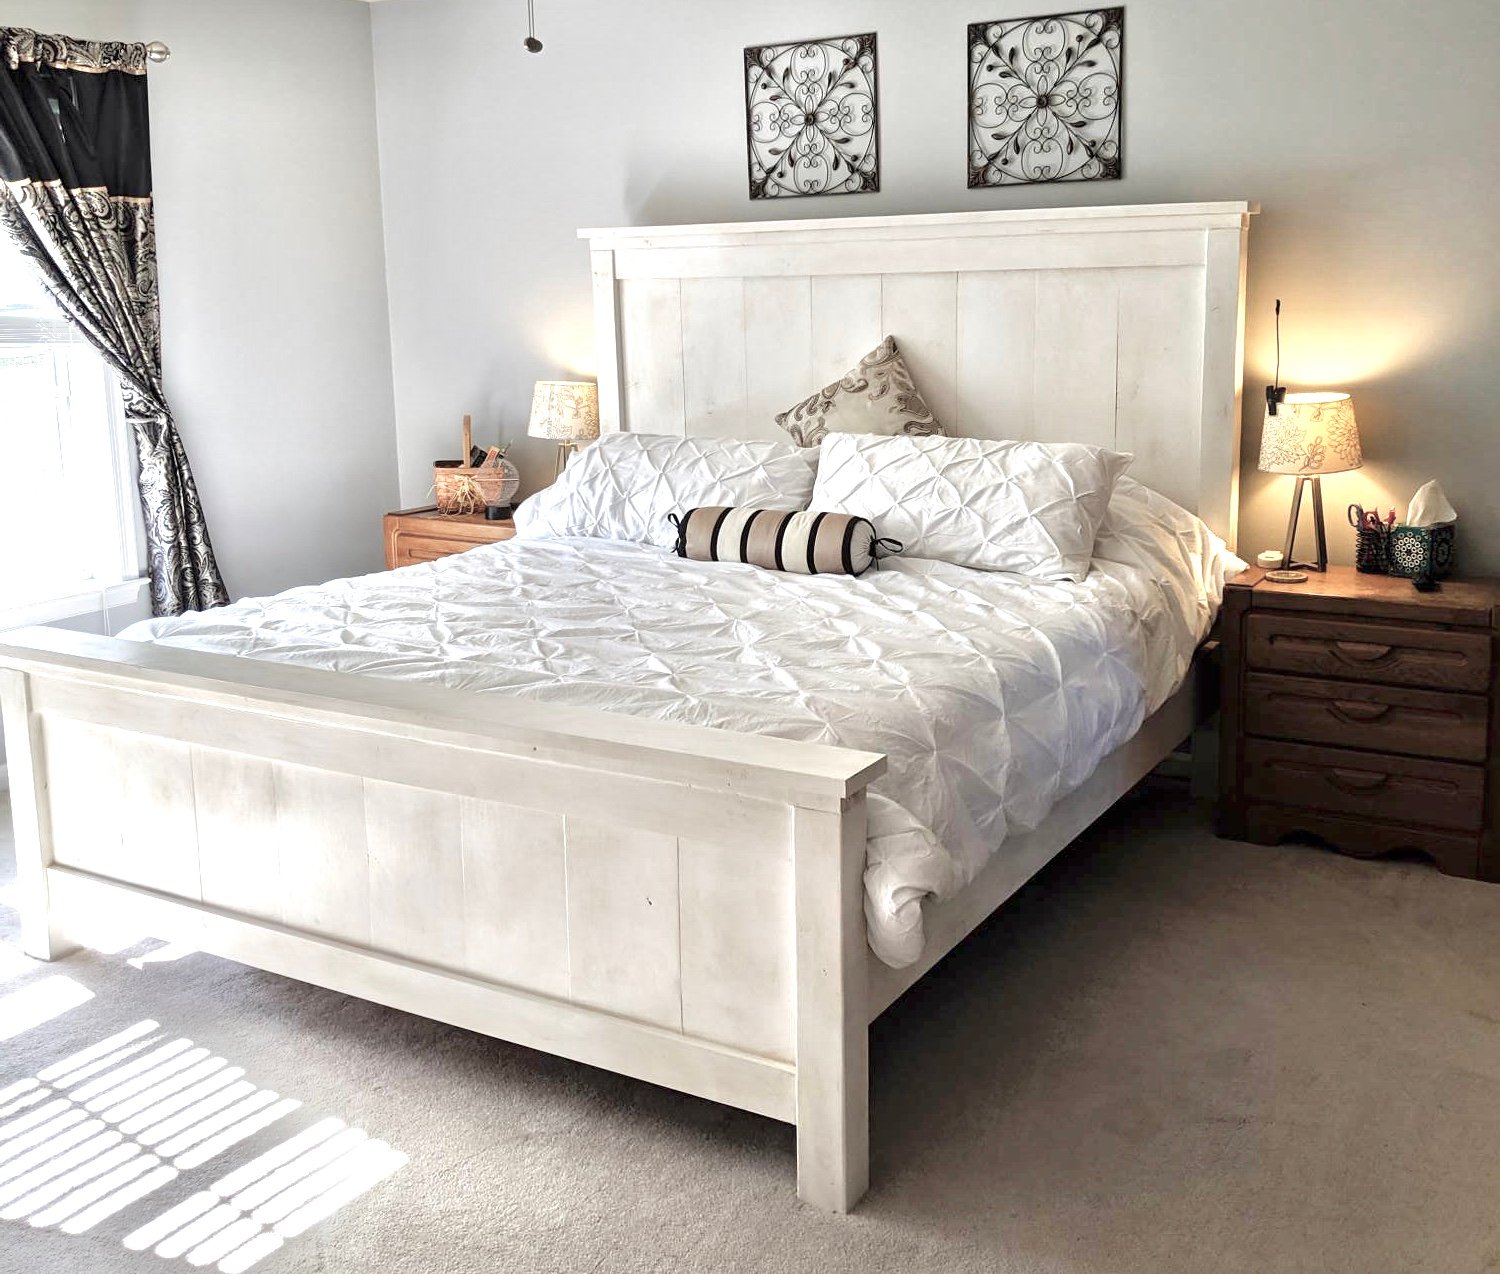
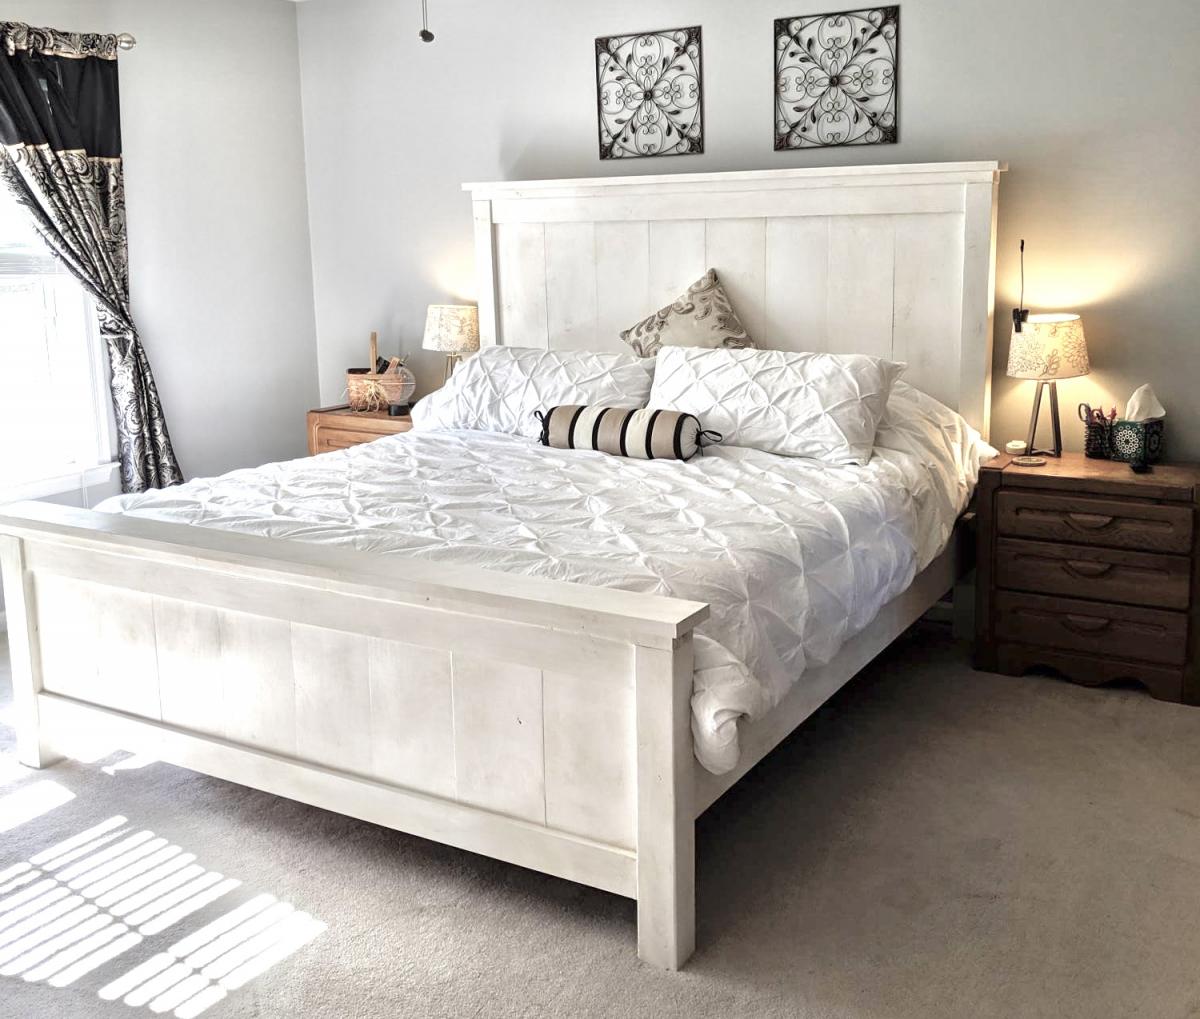
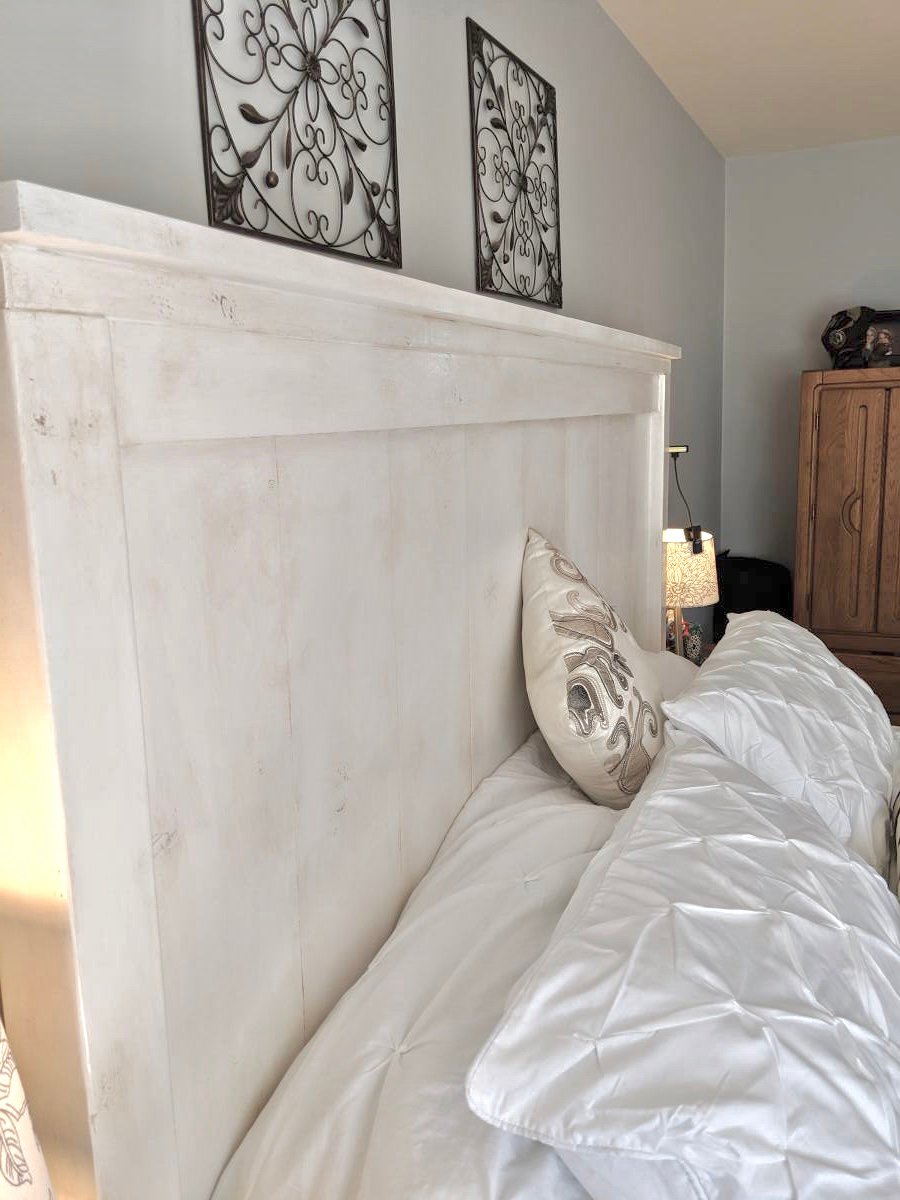
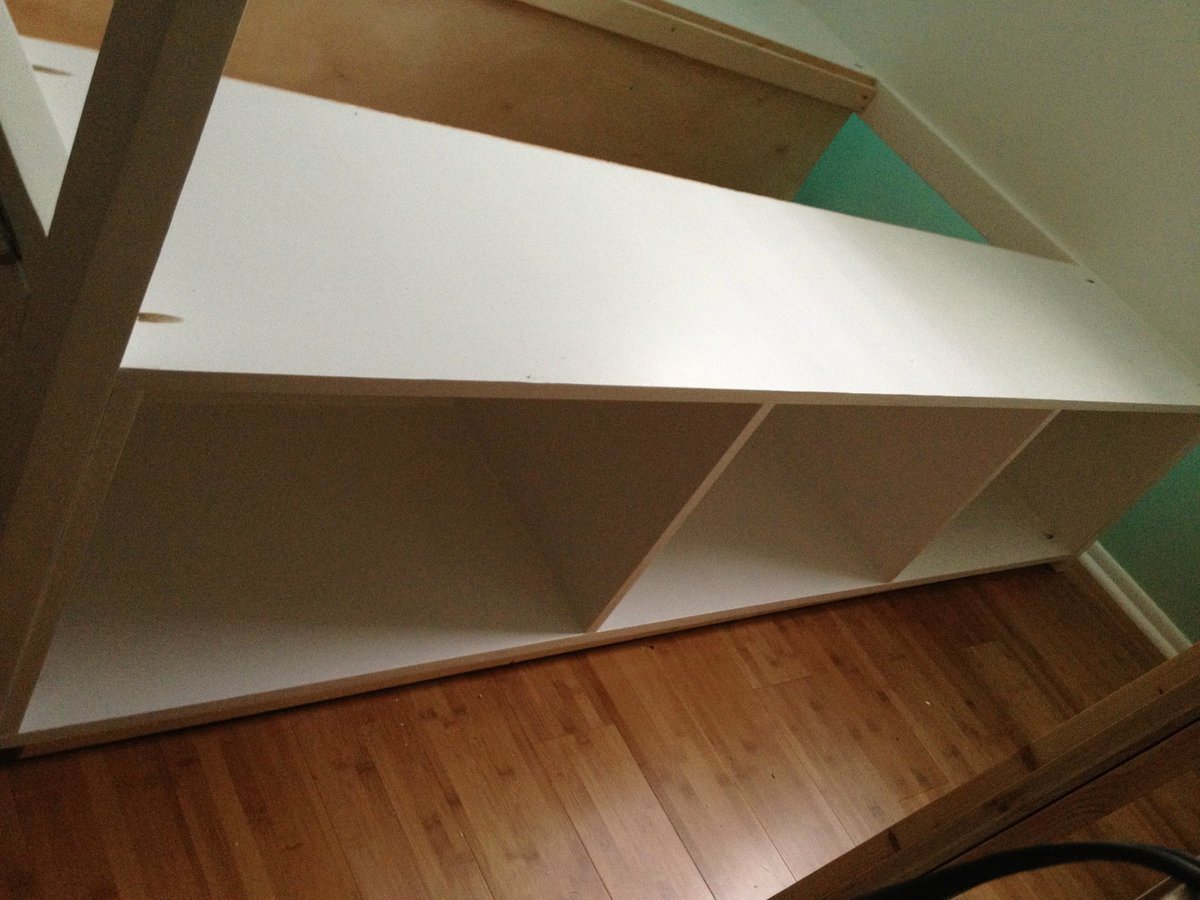
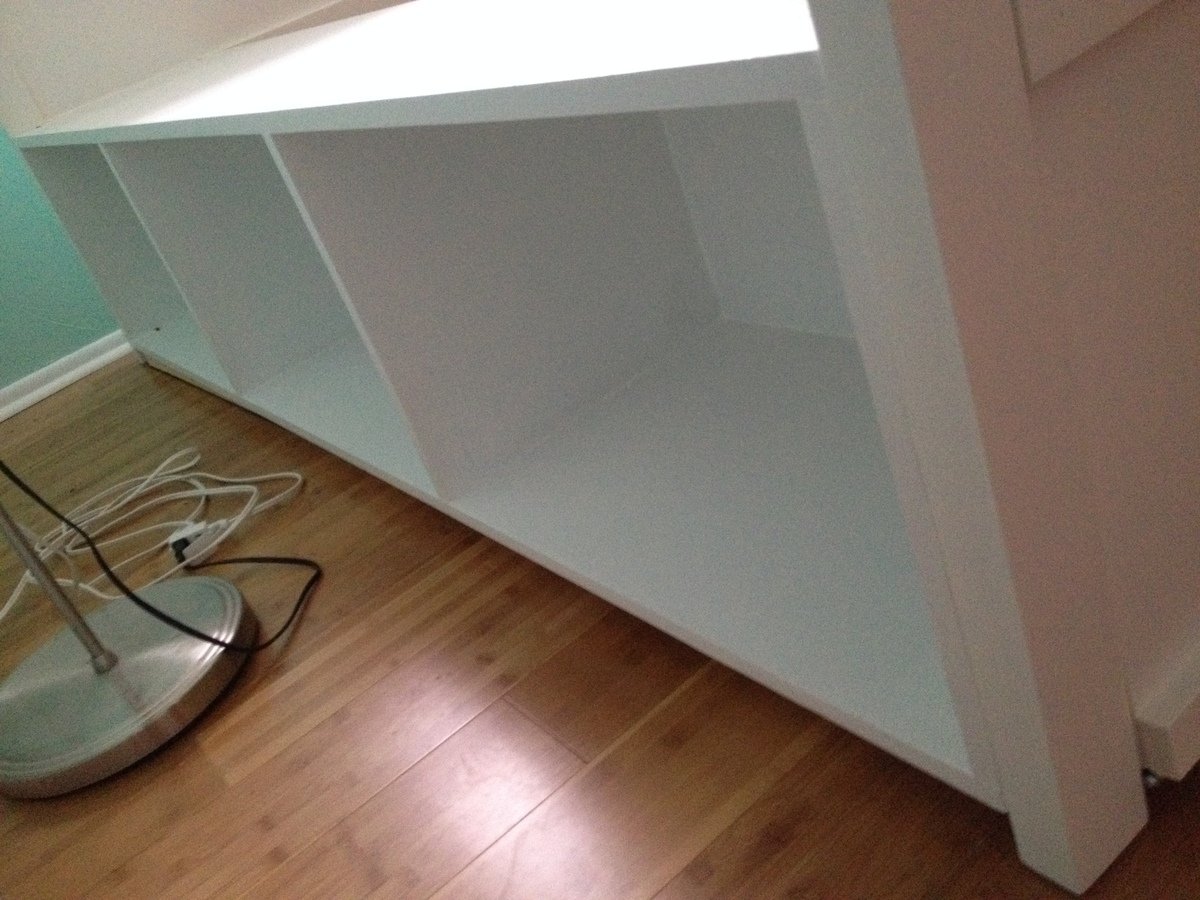
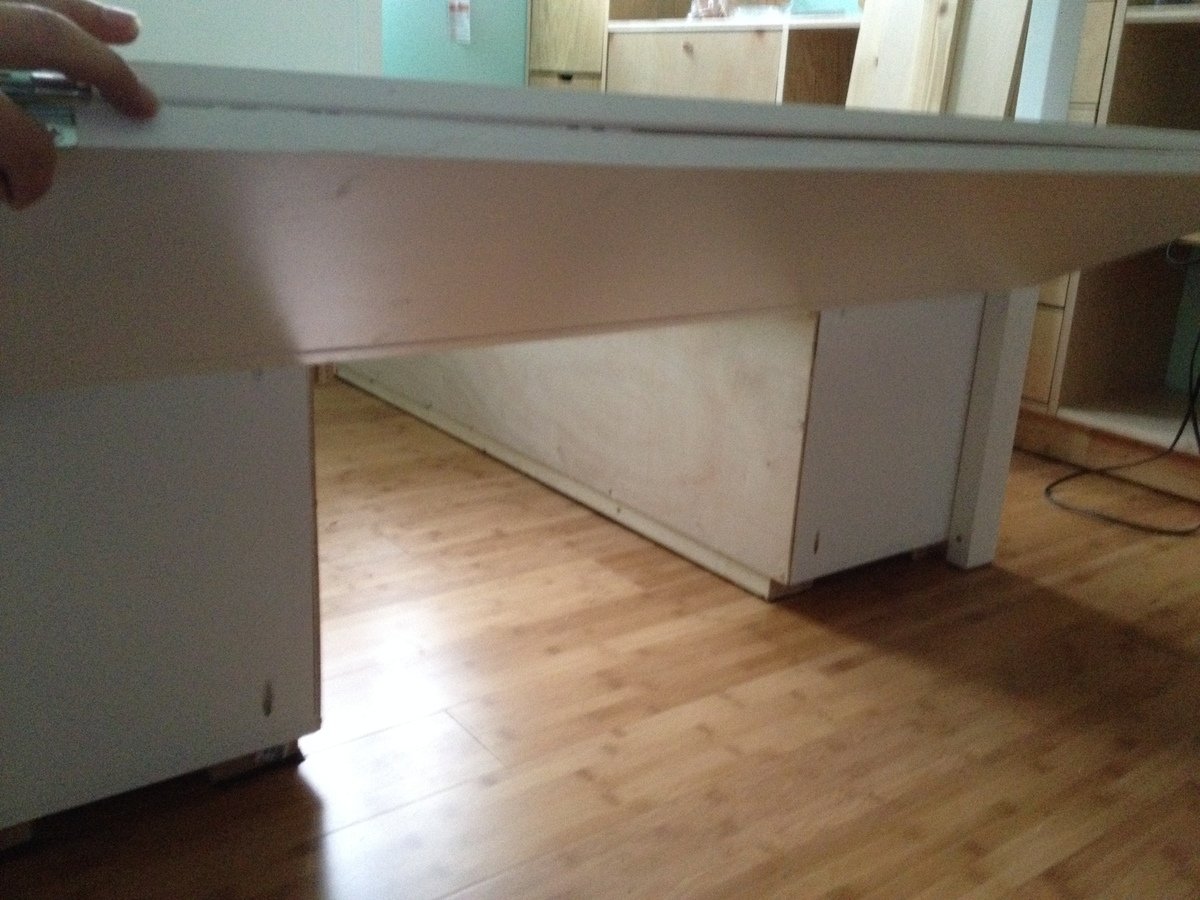
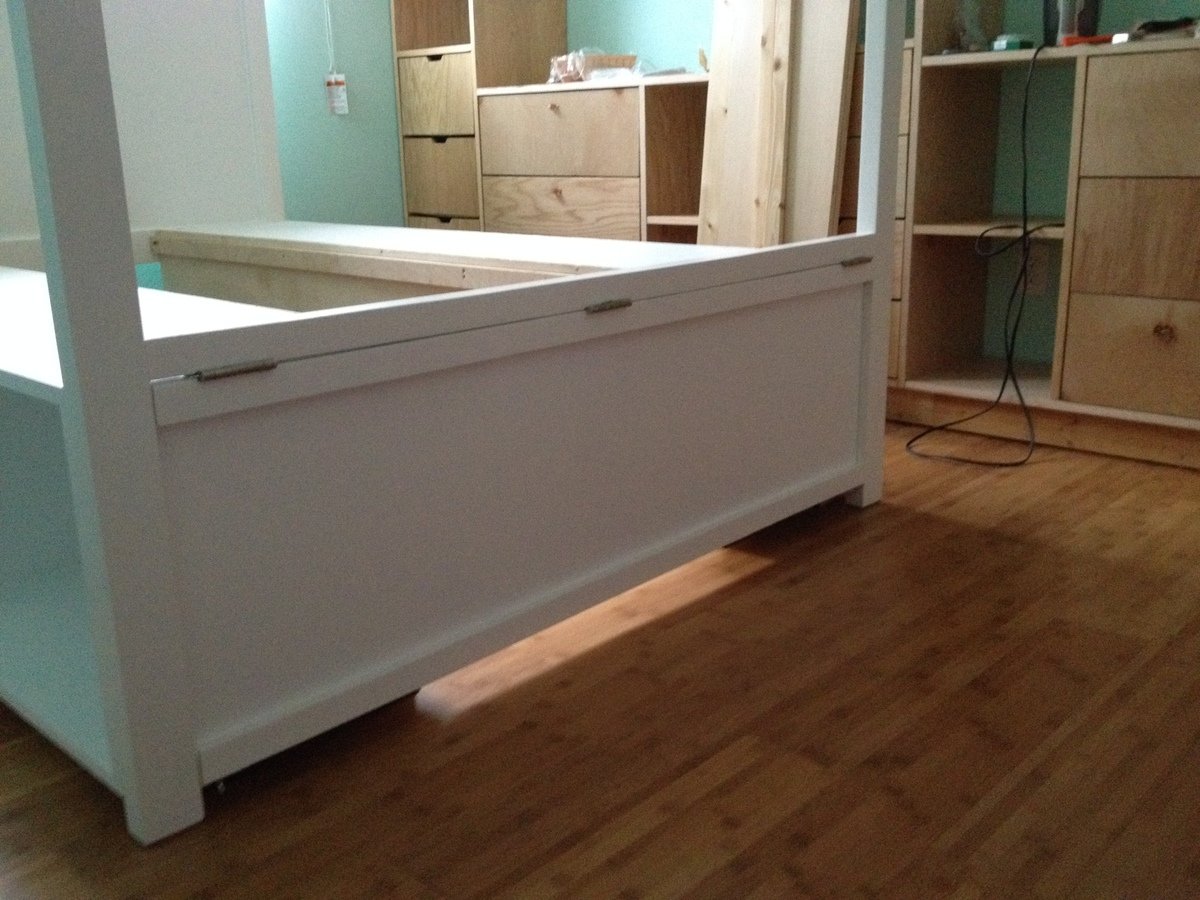
Community Brag Posts

Canopy Storage Bed

Submitted by arkep on Fri, 12/06/2013 - 12:29

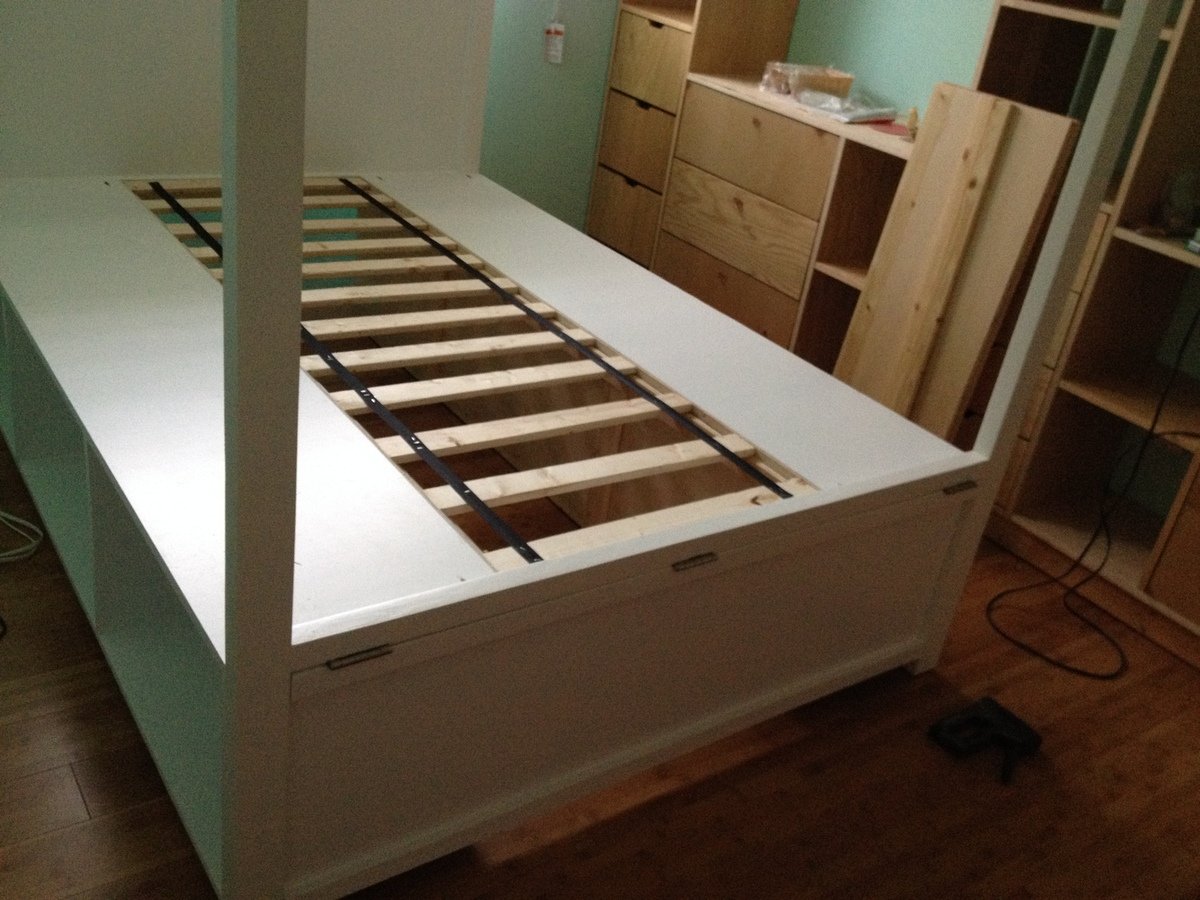
I combined the full-sized Hannah canopy bed plans with the Farmhouse Storage Bed with hinged footboard by birdandsoap here: http://ana-white.com/2011/07/farmhouse-storage-bed-hinged-footboard . Decided not to taper the ends of the 2x3s. There's so much storage underneath!

Estimated Time Investment
Week Long Project (20 Hours or More)
Finish Used
2 coats primer, 2 coats Olympic Premium in Satin Ultra White.
Recommended Skill Level
Intermediate

King Bed Frame for adjustable base

Submitted by Anonymous (not verified) on Tue, 10/08/2019 - 05:50

I could not find a frame which would accommodate my new adjustable king base. Modified Anna's plans by increasing the height of the headboard and footboard. Finished with chalk paint and antique finish for a rustic look. Side rails attached with mortises to allow for moving bed in 4 pieces if needed. Love my new bed

Estimated Cost
$300
Estimated Time Investment
Weekend Project (10-20 Hours)
Finish Used
Chalk paint (purchased from Habitat for Humanity re-store) using recycled paint. Finished with three coats of Annie Sloan wax
Recommended Skill Level
Intermediate

Comments

khowe791

Sat, 11/30/2019 - 03:31

Hi! We are making this headboard this weekend. We want to increase the headboard height and footboard as well. Do you happen to know the cut measurements or how you adjusted the height of the 1x6 (or 1x8 as others used) to make it work? Yours looks perfect! Thank you in advance for any feedback! 

Under Cabinet Spice Rack

Submitted by Anonymous (not verified) on Mon, 09/11/2023 - 13:06

I needed to clear out a shelf in my cabinet and add a spice rack so I could actually see everything. This came out perfect! Made of Oak and stained with classic oak. Very simple to build and hung with pocket screws

James Breadbox

Built from Plan(s)

Childrens table and chairs

We built Two children's table and 8 stackable chairs for one of our daycare's. It took a lot of work but once we figured out the first chair it was a breeze for the other 7.

Estimated Cost
$30
Estimated Time Investment
Week Long Project (20 Hours or More)
Finish Used
We stained the wood in a Cherry Stain and finished with multiple coats of Poly.
Recommended Skill Level
Beginner

Comments

timh

Sat, 02/08/2014 - 15:54

Awesome! I built one for our homeschool and it works great. Yours look very nice.

Pottery Barn benchwright farmhouse dining table

Submitted by Nathan1342 on Sat, 05/19/2012 - 21:57

UPDATE: For everyone that was asking to see additional photos, I have uploaded them all to flickr. Here is the link: HERE Since doing this table I have built probably 15 more just like this one and developed a much better process then in the pictures above.  If you have any questions or want to chat about it further shoot me a comment or email at [email protected].

I had originally seen this table on the Pottery Barn website. My wife and I really liked it but couldn't afford to pay the $1200 bucks after tax and shipping. it didn't look to difficult to build so I decided to give it a shot. The wood for the top of the table was almost 3in thick 4.5in wide and 51in long. It was wood from an old pallet that was used to transport a very large air handler. Very heavy dense wood. Since the lengths were only 51 inches I opted to put 2 horizontal pieces on either side to extend the total length to approx 70in. I was inspired by the plans for the benchwright table that I saw on this site but chose to deviate from the plans on here to make it as close to the real thing as possible. I also happen to have access to very thick pieces of hardwood. The only thing I had to buy at lowes were the legs. The legs are 4x4 Douglas fir posts. The top pieces were all glued and screwed together. The ends were also done this way but had a very large lag bolt that held them together to match the pottery barn table. This was originally very rough wood so anything to help get the warp out was used. The legs are set at a 10 degree angle and the table stand 30 in tall. The hardest part of this table was finding the turnbuckle and the threaded rods so it could officially be 99% like the pottery barn table. I also had no idea how hard it was to find left hand threaded anything. I ended up finding everything I need at McMaster.com and my local Fastenal store. To make the brackets that went on either side of the rods i simply bought a piece of 1/8 sheet metal at my local Home depot and cut it to size. They also sold hammered brown paint which gave the metal a worked old look. Once this was all constructed I used two heavy coats of wood conditioner to seal the wood. This was the key to getting the color I wanted. It tells you on the can not to let the wood conditioner dry on the wood but if it does, when you apply the stain you get a 100% consistent color. Worked wonders. It almost felt like I was cheating. I used a water based condition and stained it with rustoleums "dark walnut" stain. Finished it with 5 coats of minwax semi gloss. I only did 5 coats because I was brushing it on and had trouble getting the bubbles out of it. In the final picture it looks much shinier then it is in person. The last picture of when it was still in my garage is a better indication of the final finish. I have a boat load of additional picture, so if you have any questions or want to see more pictures of how it was constructed, shoot me a message. Thanks!

Estimated Cost
300
Estimated Time Investment
Week Long Project (20 Hours or More)
Finish Used
Minwax Semi-gloss
Rustoleum Dark Walnut Stain
Minwax water based wood conditioner
Recommended Skill Level
Intermediate

Comments

Bunnie1978

Sun, 05/20/2012 - 08:16

I've had trouble with bubbles too... I have two pieces of advice for your next bubble-free project...
1. Get a sprayer. Seriously.
2. If you don't get a sprayer, use the foam pad-brushes for your final layer of poly. Put the last layer on thick and use the largest side of the brush (the side) and lay it down over the wood and drag it slowly accross with the whole large surface on the wood. If it is soaked in poly it will lay it down smooth with little if any bubbles, keep the surface you're working on flat, and after you've finished that, just make sure you clean up any edges where the poly may have dripped down. Last step, when it's almost dry, use 600 grit sandpaper to VERY lightly smooth out any little bumbs, which will come off more like paste than dust. But really, you should just get a sprayer. :)

In reply to by Bunnie1978

Nathan1342

Sun, 05/20/2012 - 17:42

Hey Bunnie,

Thanks for the tips! I completely agree with you about the sprayer. I do actually have a sprayer but didn't want to get the garage covered in over spray. Maybe one of these days I will get ambitious and apply another coat. :)

Bunnie1978

Sun, 05/20/2012 - 19:22

My whole living room is covered in overspray right now... just got a sprayer and used it for the first time this weekend. LOL. I don't have a garage.

SawgrassHomeGirl

Sun, 05/20/2012 - 09:35

This is awesome! Can you give more direction as to which specific items you got at mcmaster.com and Fastenal?

Also, how did you attach the sheet metal pieces? If you have any more pictures of the underside (frame) of the table, I'd love to see them!

Thank you very much, and again, this is spectacular. We want to try to build this, too.

Great job!

Cindy from Indiana (not verified)

Sun, 05/20/2012 - 10:38

Love it! This project turned out great and I love how you tracked down the hardware - that finishes it off perfectly!

Like SawgrassHomeGirl, I'm wondering what the actual names of the items are that you tracked down. I went and paged through the McMaster and Fastenal sites, but since I'm completely unfamiliar with mechanical doodads I'm not even sure which categories to look under.

Fantastic job! Thanks for posting this!

Nathan1342

Sun, 05/20/2012 - 18:13

Thank you for the nice comments. This was my first official project so I am happy that it turned out well!

Sure! I'd be happy to know the names of the hardware items. At Mcmaster.com the turnbuckle I purchased was Item number 30045T44 . It is about 6in long and seemed to fit nicely with the length of the table. the rods were just simply threaded rods which I purchased at fastenal since we have a few of their stores in town. The rods come in 6 ft pieces so I didn't want to have to pay the shipping. If you don't have a Fastenal near by here are the item numbers for the rods; 90322A220 -right hand threaded rod and 95625A160 - left hand threads. They are a bit more expensive at mcmaster though.

The biggest thing I was worried about was that the entire rod had threads on it so I was worried that it would look odd. But after getting it painted you don't even notice that it isn't just a solid pipe.

Sawgrass: shoot me your email address and I'll send you some more pictures. This site only allows me to post 5 additional photos. But to elaborate on the frame and the metal pieces, I didn't' really build a frame for it. You can essentially break it down into two pieces: Top and the legs. Instead of building a frame and screwing the pieces down on it, I opted to screw each of the pieces together using a Kreg tool and also glue them. the wood was heavy enough to support everything without an elaborate internal structure. The two end pieces help keep things from warping. The only reinforcement I did for the top was to take 3 2x4's and screw them horizontally on the underside. You will be able to see all of this in the pictures. As for the metal pieces, i drilled 5 holes in each piece. 4 holes for the screws that hold it to the leg region and one half inch hole in the middle for the rod to go through. I have a bunch of close ups of this process so you should be able to get a very good idea of how things work. Overall I tried to keep everything as simple as possible.

Thanks for all the interest and if anyone has anymore questions please don't hesitate to ask!

Cindy from Indiana (not verified)

Tue, 05/22/2012 - 09:01

Thank you so much for taking the time to answer our questions! You did a fantastic job on this table and I am adding it to my ever-growing list of projects to do!

Now I'm off to find that hardware. :-)

Thanks, again!

lillylamp

Fri, 11/08/2013 - 06:33

My e-mail is [email protected]
My husband is making this table for Thanksgiving dinner. We are expecting 14 people so he is making the table a total of 12 feet long! Any input or pictures will be greatly appreciated!
Lisa and Gary Peters
Angola, IN

aclisto

Fri, 09/05/2014 - 14:53

Could you send me the more pictures link?  Great job!  goldmoon8(@)hotmail(dot)com

Destiny (not verified)

Tue, 05/22/2012 - 16:58

So i wanna build this table this summer, could you shoot me some more pictures of the designs and actual steps for building it. i absolutely love it, and i hope mine comes out as good as yours!

Robert (not verified)

Sat, 05/26/2012 - 13:13

This has been on my to do list for a while now, but I haven't been able to work out the hardware details like you did. I would love to get some more pictures especially of the underside and of your rod to stretcher connection. Thanks again and you did an amazing job!

Bulldog1Jack

Fri, 04/25/2014 - 18:43

Nathan,
Can you send me the link for the other photos...table is awesome.
Thanks
John

Aubrey (not verified)

Sat, 05/26/2012 - 17:54

I love this table! I am new to this site and to building, but I want this to be my first project. Could you possibly email me the detailed pics and plans also so I can get started? :) Thanks so much!

ajmccallister

Tue, 05/29/2012 - 18:41

I am really inspired by the table you built. It looks like you built your legs with 4x4s. Did you drill through them to get the notch on the outside or did you do something else just to get the look? Great work!

Nathan1342

Tue, 05/29/2012 - 20:58

Hi Aj,

Yes, I did use 4x4's for the legs. It was much easier this way, did a great job achieving the heavy look I was interested in and was the closest I could come to the pottery barn table. To answer you question, no I did not drill through. I attached the 2x4 cross member with 2 leg screws from the outside of the 4x4 leg. I then cut a small piece of the 2x4 and nailed it over the lag screw holes to simulate the 2x4 cross member coming through. It looks just like I cut a hole and the whole thing is coming through. I get asked how I did it by people that see it in person because it doesn't look like a separate piece is just nailed on.

If you look at IMAG0306 and IMAG0308 on flickr you can see what it looks like without them on and if you look at the bottom left hand corner of the picture you can see the pieces that have been cut and not put on yet.

Sara (not verified)

Mon, 06/11/2012 - 06:48

Your table is gorgeous! I'm curious how much this cost for you to build (lumber and finish materials) and how much of an increase in cost do you think it would be if you had to purchase all the lumber?

In reply to by Sara (not verified)

Nathan1342

Mon, 06/11/2012 - 11:01

The Lower portion was probably about $200. The biggest expense was the threaded rods and the turnbuckle. The rods were about $30 each and the turnbuckle after shippping was about $20. The wood for the lefts and cross members were purchased at my local lowes so they were pretty cheap. As for the top, its hard to say since wood prices vary quite a bit between types and thickness. If you were to buy wood like I used you would probably have to visit a sawmill and see if you could get rough cut wood that is at least 2.5 inches thick. I would estimate $300 give or take. If you follow the plans that ana has setup for the top you don't necessarily need to get wood that is that thick. You can achieve close to the same look but just using 3/4 in pieces. I think if you look very closely at the pottery barn pictures, they do not use 100% solid wood either. But I wanted the heavy look and the solid appearance. So total you are probably looking at $500-$600. Hope this helps!

Curt (not verified)

Wed, 06/20/2012 - 11:28

Great job Nathan - I appreciate your workmanship on the table. You've answered one of my questions regarding the look of the cross member protuding thru the leg - slick idea. My other question - why all the large round holes in the bottom of the table? By the way, the dowel effect that you accomplished really pops. I too like the looks of the thicker boards. Thanks for posting an interesting and comprehensive article. Curt

In reply to by Curt (not verified)

Nathan1342

Thu, 06/21/2012 - 13:06

Those holes in the bottom of the table were there when the wood was salvaged. This was a pallet so they had it bolted together with large lag bolts. The bolts had large washers inset into the wood. The bolts were secured on the underside of the wood and went through every piece. Luckily, they were consistent and only bolted from one side.

Thanks!

Sara (not verified)

Tue, 07/10/2012 - 06:36

Thank you, Nathan, that really helps! Did I mention your table is beautiful?

leabea28

Fri, 08/03/2012 - 12:53

Hi Nathan,

Awesome table. I just hope I can find some 3" thick lumber without breaking the bank! It looks like you attached the legs by putting 2 bolts through the legs into the small apron on the short ends of the table. It also looks like you might have also put in some pocket holes on the inside of the legs, going straight down into the underneath of the table boards. Is that right? I am just wondering how sturdy it is, since it's such a heavy table.

Thanks!

Lea

In reply to by leabea28

Nathan1342

Mon, 08/06/2012 - 11:43

Yes, you are correct. I attached the legs with 2, 6inch lag bolts. I pre-drilled them at the correct angle (which I eye balled) and ratcheted them in. I was a little worried about them being sturdy enough so I went ahead and made a few pocket holes and secured it that was also. The legs overall are very sturdy. The table probably weights 150-200lbs and I was able to pick up one side of it only holding onto one leg. Table doesn't wobble at all. The cross member holding the legs together also helped pull everything together.

Thanks for the question! Feel free to ask any others!

Nathan

JenFarrell (not verified)

Sun, 08/12/2012 - 18:17

Fantastic table! Thanks for posting all the instructions and places to buy hardware. My husband and I can't wait to try this!

JenFarrell (not verified)

Sun, 08/12/2012 - 18:19

Fantastic table! Thanks for posting all the instructions and places to buy hardware. My husband and I can't wait to try this!

3RaysofSunshine

Fri, 08/24/2012 - 09:33

Nice work! I made bench seats in this style - maybe I'll post pics sometime too! I saw in your description that you used thick wood to be more like the original... just wanted to let you know that I have seen the "original" and yours is much better! Pottery barn does NOT use solid 3" wood for the top. If you look closely at the pics in their online catalog you can even tell... they use thin planks with a side piece to make them look thick. The only hefty piece is on the very end .

Also, I wanted to mention that I have had great luck with wipe-on polyurethane... never any bubbles. Just be sure to use lint free cloths and lots of thin layers.

Again, nice work!

3RaysofSunshine

Fri, 08/24/2012 - 10:05

I apply with a cloth. It takes many coats but they are so thin they dry fast. In between coats, I wet sand with 1000 grit wet/dry sandpaper. After towel drying, I run my hand across the surface. You'll feel any spots you missed. Then use a tack cloth to pick up any dust (there's always some...) I get a perfect finish using this method. I'm sure spraying is great too... I just like not having another piece of equipment to clean!

My last project (a patio table) I had run out of the wipe-on poly and decided to use something else - whatever I had on hand. Grr! Not nearly as nice looking so I'm doing it over. I'll post pictures of a few projects as soon as I can figure out how.

greenebeansmom (not verified)

Sun, 11/18/2012 - 21:15

Why cant my husband make stuff......booooooooo! Wonderful table I am so jealous lol.

Shannan with an A

Tue, 04/16/2013 - 16:34

Before I clicked on your brag photo, I really thought it WAS a Pottery Barn table posted for comparison! Wow, that is beautiful!!!

Nathan1342

Thu, 05/02/2013 - 15:04

Hey Lea,

It was only 1/8 in thick metal so a simple jig saw with a metal bit worked great. Wear eye protection though. It shoots off all sorts of hot metal bits. To drill the holes I just used a power drill with a metal bit. Make sure you drill 100% straight or the bit will bind and jerk the drill right out of your hand. Ideally, a drillpress would work much better since I nearly broke my wrist on the second large hole.

Let me know if you have any other questions!

Thanks,

tcoche

Sat, 06/01/2013 - 20:36

The table looks awesome man! Love it. I just got done building the benchright table to Ana Whites plan, see mine here http://ana-white.com/2013/05/farmhouse-benchright-table-build-0

I just ordered the left hand threaded rod, right hand threaded rod and turnbuckle from McMaster.com...total cost for all 3 was 22 bucks. Here are the McMaster part numbers:
90036A033- left hand rod
98841A033- right hand rod
30045T44- galvanized turnbuckle

I'll hopefully get the rods and turnbuckle this week so I can totally complete this project.

Again, awesome job nathan!!!

CoreyOrvold

Sat, 07/13/2013 - 22:28

What a great table. We plan on starting ours soon but are having trouble find large bolts for the table top sides. What size did you use and where did you find them?

Modern Outdoor Chair from 2x4s and 2x6s with high backs.

Submitted by ihoppoet on Thu, 03/26/2020 - 23:02

I built these chairs with the plans Ana White shared on this site, they are sturdy and beautiful, but they are also heavy. Heavy is what I wanted though.

I used water putty for the screws and other blemishes, then I primed and painted them. when the Homedepot pillows arrived my wife decided she wanted higher backs, I used an idea shared on here, but that back used 2 2x6s, when I tried that I felt they were too high, so I altered it to one, and found they look and feel a lot better. the angle of the back is 15 degrees from 90 or 105 degrees.  I will be altering the loveseat plans to build a concrete top bbq coffee table to use with the chairs. 

Estimated Cost
$500
Estimated Time Investment
Week Long Project (20 Hours or More)
Finish Used
Exterior primer and paint.
Recommended Skill Level
Beginner

Flag Pole Planter

I wanted a place for a flag pole, but I didn't want to put one in the ground or screw into my siding, so I modified the cedar planter to hold a flag pole. It was a fun project!  Check out more here!

Built from Plan(s)
Estimated Cost
$40 plus flag pole
Estimated Time Investment
Afternoon Project (3-6 Hours)
Finish Used
White Exterior Paint
Recommended Skill Level
Intermediate

Dining room set (with Classic Chairs made Simple)

Submitted by Anonymous (not verified) on Mon, 07/18/2016 - 10:16

This was my first attempt at making furniture...but it turned out GREAT!  My fiance was about to buy a VERY similar dining room set for $1300 before I stopped her and insisted that I could build it myself, finish it to match our kitchen/dining room, and save a TON of money!

Built from Plan(s)
Estimated Cost
$350 total
Estimated Time Investment
Week Long Project (20 Hours or More)
Finish Used
Minwax Expresso Stain plus 2 coats of Minwax Polycrylic on table top and seats
Minwax Classic Black Polyshades on frame
Recommended Skill Level
Beginner

Comments

Farmhouse End Tables from Ana's Book!

Submitted by ksmith311 on Fri, 04/25/2014 - 10:48

I made two of these farmhouse end tables for a friend/client. She wanted them to be very light gray when painted. I went to the blue store to get some paint mixed and waited... and waited.. and waited... and couldn't find anyone for the paint section. So I eventually just mixed it myself. It does have a bit of a bluish hint to it but I think they are very pretty.

These were a fun build and probably the best drawers we have ever made but we did have to use wooden guides on the inside to be sure it will close perfectly.

I hope she loves them!

Built from Plan(s)
Estimated Cost
100 for two
Estimated Time Investment
Weekend Project (10-20 Hours)
Finish Used
light gray paint
Recommended Skill Level
Intermediate

outdoor patio furniture

Well this was first project my hubby and I tackled together. He actually let me use the power tools. The plans were great! Loved having a shopping list! I made the cushion s myself. I have to say, I wish I had made the couch and chairs the size of cushions available at Lowes . AFt e r you buy foam batting fabric and chording I found set at lowes for a lot less but I am so happy how it all turned out . Thks for providing plNz!

Estimated Cost
500 with cushions
Estimated Time Investment
Day Project (6-9 Hours)
Finish Used
Non transparent stain.Olympic elite stain an sealant n one
Recommended Skill Level
Beginner

Comments

charitydtrull

Sun, 05/24/2020 - 14:45

I can't find the plans for these pieces. I found the one using 2x4, but these pieces look like they use 2x2. Can someone tell me where to get the plans?
Thank you,

Seasonal And Holiday

Folding Work Bench

Submitted by Anonymous (not verified) on Tue, 08/11/2020 - 16:03

First build.

The plans and cut list were a tad off but I made a saw guide a cut it down from 36 to 24 after assembled.

I had HD do all my cuts but have since done my own!

Built from Plan(s)
Estimated Cost
Not sure bought tools, wood and hardware at same time ($160)
Estimated Time Investment
Afternoon Project (3-6 Hours)
Finish Used
None
Recommended Skill Level
Beginner

Garden Tool Storage

Submitted by meisterx on Sun, 08/30/2020 - 12:20

Super easy and useful project. I made mine 8 ft. long because my studs are on 24 in. centers and I had a lot of tools to hang. It was fun building it and even more fun getting all those tools and things off the floor.

Built from Plan(s)
Estimated Cost
$13.00
Estimated Time Investment
An Hour or Two (0-2 Hours)
Finish Used
None
Recommended Skill Level
Starter Project

Comments

My attempt at the Benchmark Media Console

Submitted by Anonymous (not verified) on Mon, 01/02/2017 - 11:05

Had oak from my family farm that made up the top and trimwork. Purchased oak board for the legs. Sides and middle/bottom shelf from maple plywood. Decided against the flip down doors. Wasn't happy with he fit of the main doors due to a little off-kilter craftsmanship on my part, so will probably leave it open and add crates / some shelves the same height as the top row giving like 6", 6", and 11" or so.

Built from Plan(s)
Estimated Cost
$225 due to cost of Oak board (had to buy entire board $120, but have 5ft uncut left) and Maple plywood ($60), and used TransTint Vintage Maple dye instead of stain.
Estimated Time Investment
Week Long Project (20 Hours or More)
Finish Used
TransTint Vintage Maple dye mixed with water (about 1oz for a large mason jar) and Spray on Poly in Clear Satin. Wiped on dye liberally, wiped off excess as I went.
Recommended Skill Level
Intermediate

Tilt Out Trash Bin

This was my first project using an Ana White plan....Modified it a bit...quite happy with how it came out...it was very low cost to make and a lot of fun.

Estimated Time Investment
Weekend Project (10-20 Hours)
Finish Used
Varathane Stain....Spring Oak
Recommended Skill Level
Beginner

Rolling grill cart table

Submitted by kmatt55 on Sat, 10/18/2014 - 19:13

I made the countertop with 2 plywood boards screwed together and topped the stainless steel with heavy duty adhesive.  I adjusted the plans a little to accommodate my space.  Thanks for the plans!  It was a fun build!

Built from Plan(s)
Estimated Cost
$100
Estimated Time Investment
Day Project (6-9 Hours)
Finish Used
Glossy black exterior paint
Recommended Skill Level
Beginner

Kitchen Island with pallet wood

Submitted by Anonymous (not verified) on Sat, 01/23/2021 - 19:35

After following Ana Whit and other bloggers for a long time i figured my skills were at a level to try an advanced build like the Kitchen Island.. But i also wanted to challenge myself even more and was determined to make it from as much reclaimed wood as i could, mainly pallet wood.
With a lot of modifications to make it work i think I got a good result from these plans.

While i used as much reclaimed wood as i could, i still needed some clean 2x4's , 2x2's

Built from Plan(s)
Estimated Cost
$50
Estimated Time Investment
Week Long Project (20 Hours or More)
Finish Used
I burned the top and used a cup wire brush on an angle grinder to get the effect of barn wood. then a couple coats of lacquer on the top. And a spray finish of polyacrylic for everything else.
chalk pain ( linin) to do the White wash
Recommended Skill Level
Advanced

Outdoor sofa

Submitted by Julisib on Sun, 06/06/2021 - 06:39

Thanks a lot for the free plans. We enjoy out new deck !

Comments

Seasonal And Holiday
Back